

A tear or a hole in a favorite piece of clothing doesn’t have to be an ending. Instead, think of it as an invitation—a chance to collaborate with the garment’s history and add a new layer to its story with needle and thread.
Visible mending is more than just a repair; it’s an act of care that transforms a flaw into a feature. By choosing botanical motifs—leaves, vines, and flowers—you are stitching life back into the fabric, turning a moment of damage into an opportunity for beauty.
These ideas are here to show you how to move beyond a simple patch. You will learn to integrate your stitches with the fabric, play with texture and dimension, and choose designs that don’t just cover a hole, but elevate the entire piece into something personal, resilient, and uniquely yours.
1. Render Monstera Leaves with Thread Painting

Transform a large tear in denim with a structured patch featuring thread-painted Monstera leaves.
Use a long-and-short stitch to blend at least three shades of green, moving from dark to light to create realistic highlights and shadows on each leaf segment.
This technique turns a simple repair into a piece of wearable art, giving the fabric a new focal point.
For the patch itself, choose a sturdy, non-stretch cotton canvas and back it with iron-on adhesive before stitching it to the jeans for maximum durability.
This method ensures your intricate work is supported and the patch lays flat against the denim, preventing puckering over time.
2. Embrace Subtle Elegance with Tone-on-Tone Stitching
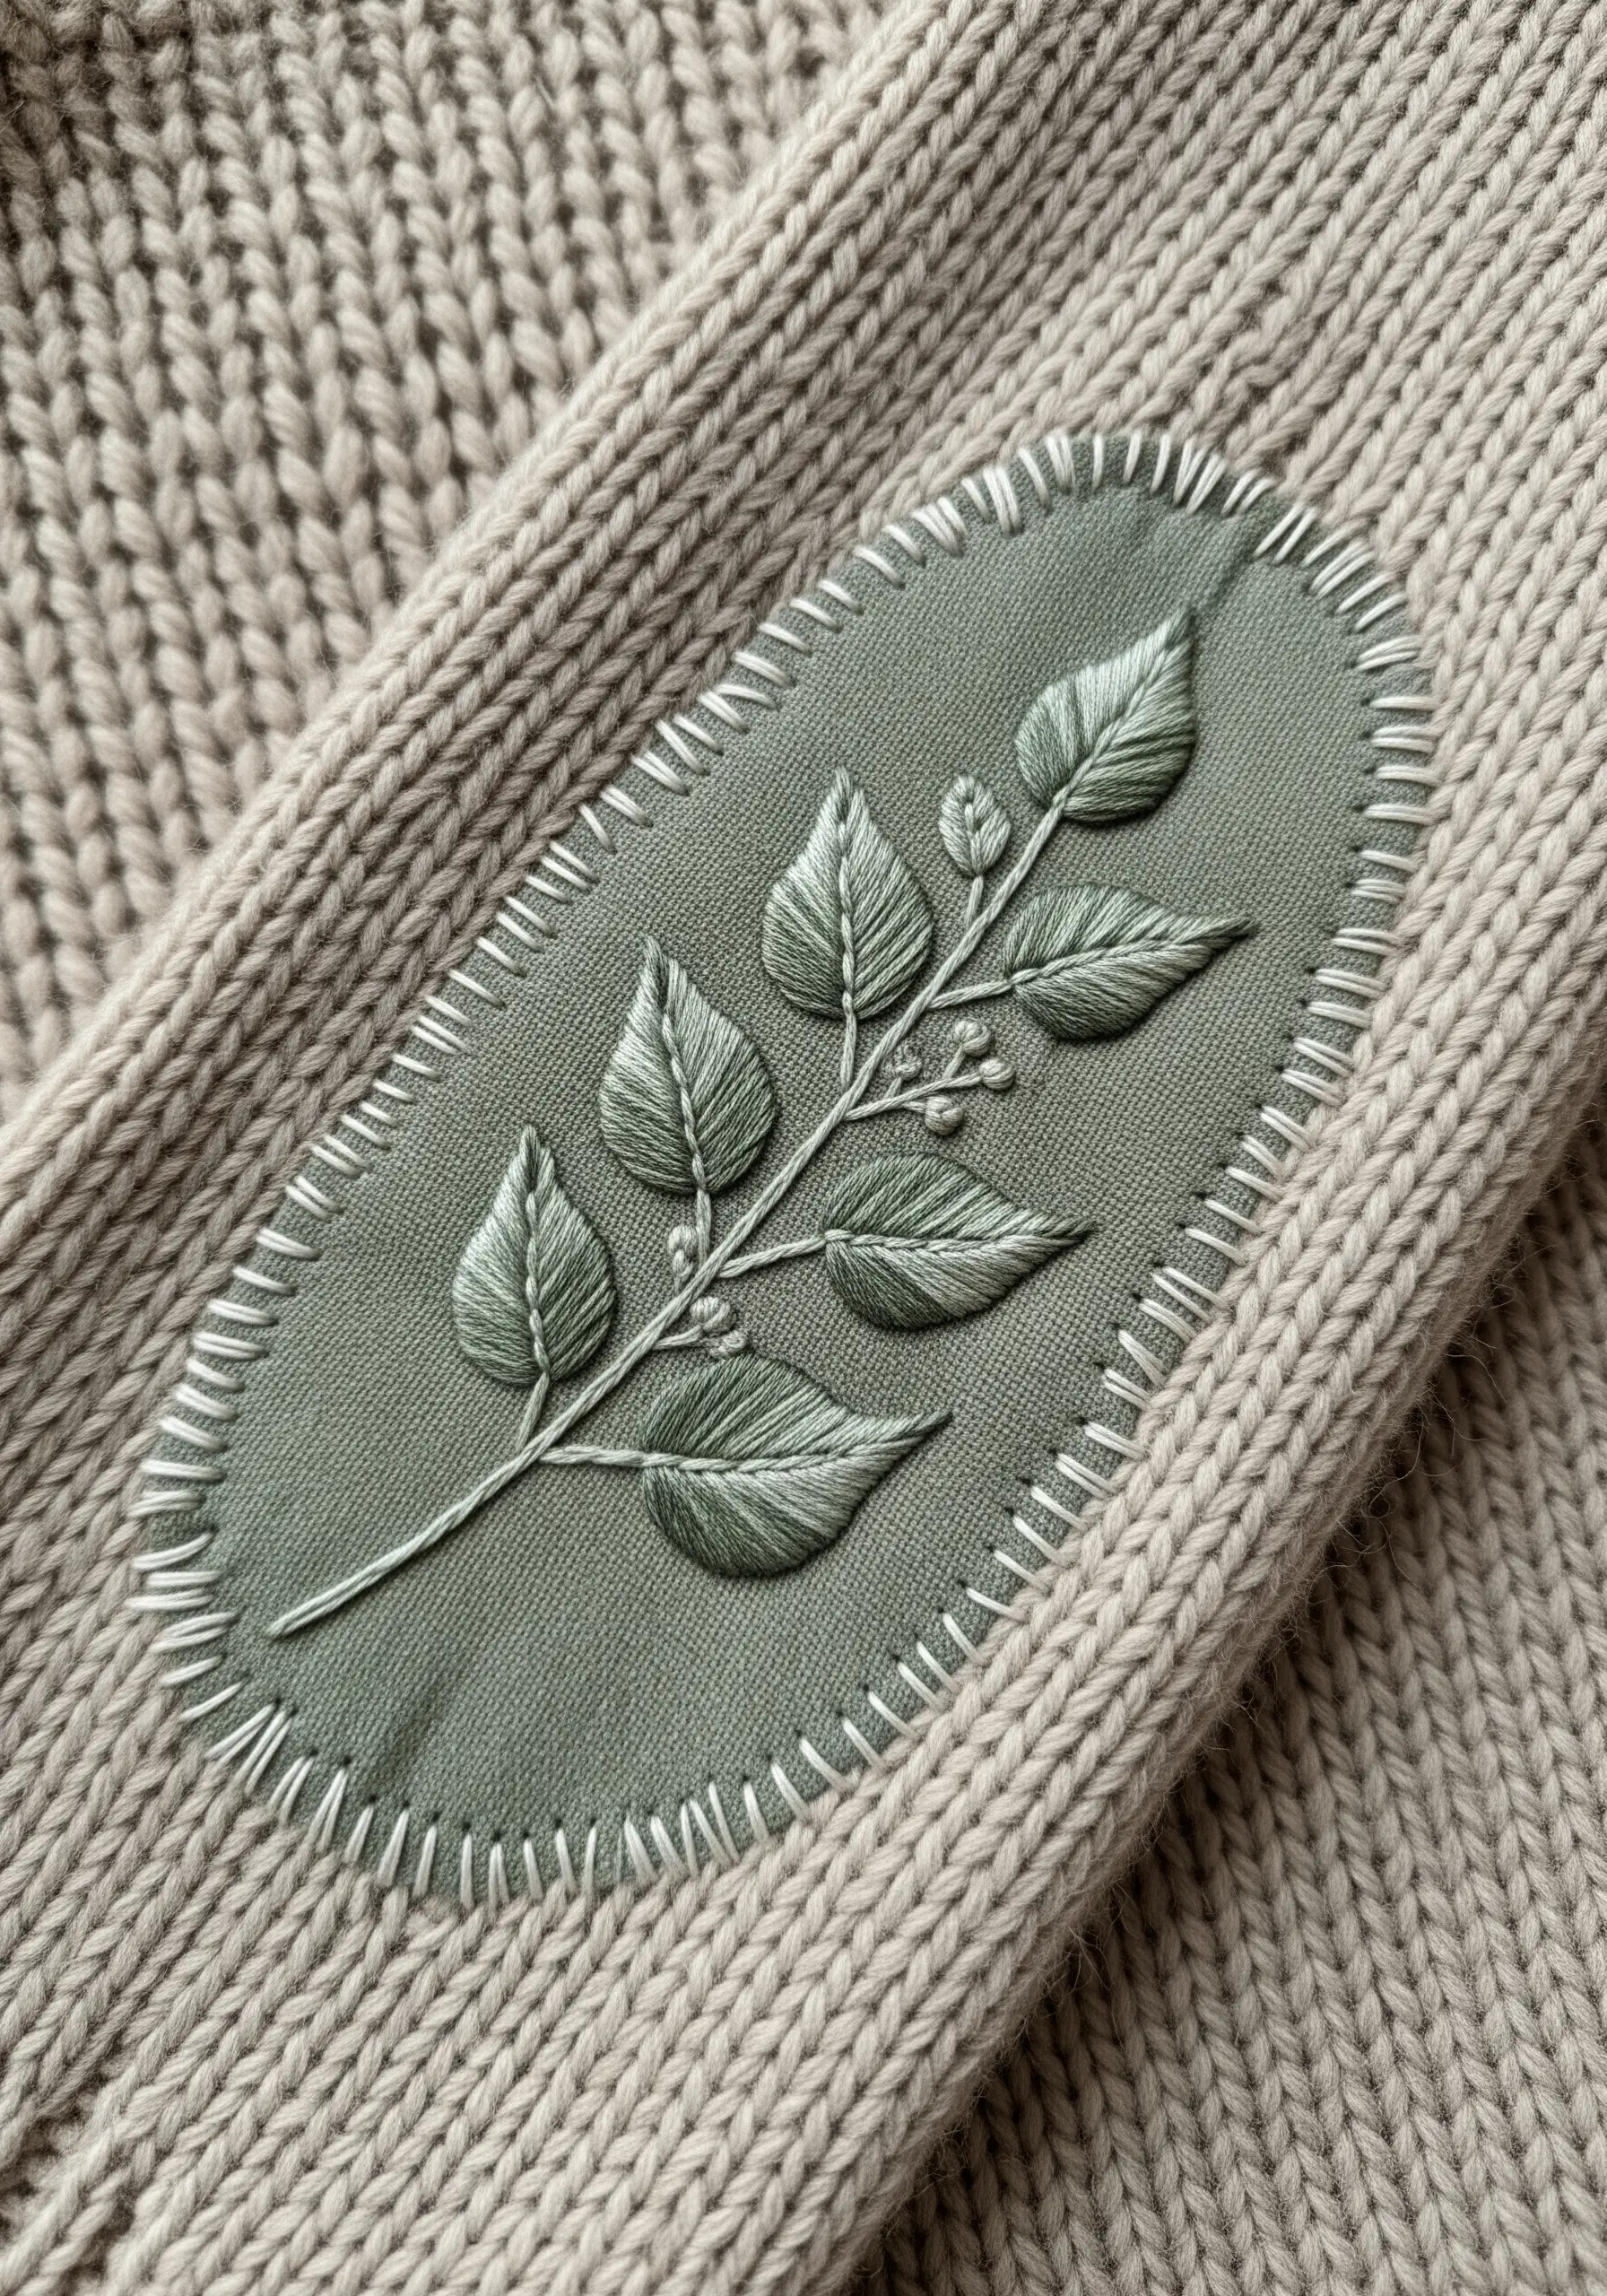
For a sophisticated repair on knitwear, stitch a botanical motif using thread that closely matches the patch fabric.
This tone-on-tone embroidery technique creates texture and detail that feels integrated and high-end, rather than calling attention to the mend.
Use a fishbone stitch for the leaves to create a defined central vein and gentle dimension.
Secure the patch to the sweater with a simple, visible running stitch in a contrasting color, like ivory or white, to frame the design and add a delicate handmade touch.
3. Let Ivy Climb Beyond the Patch
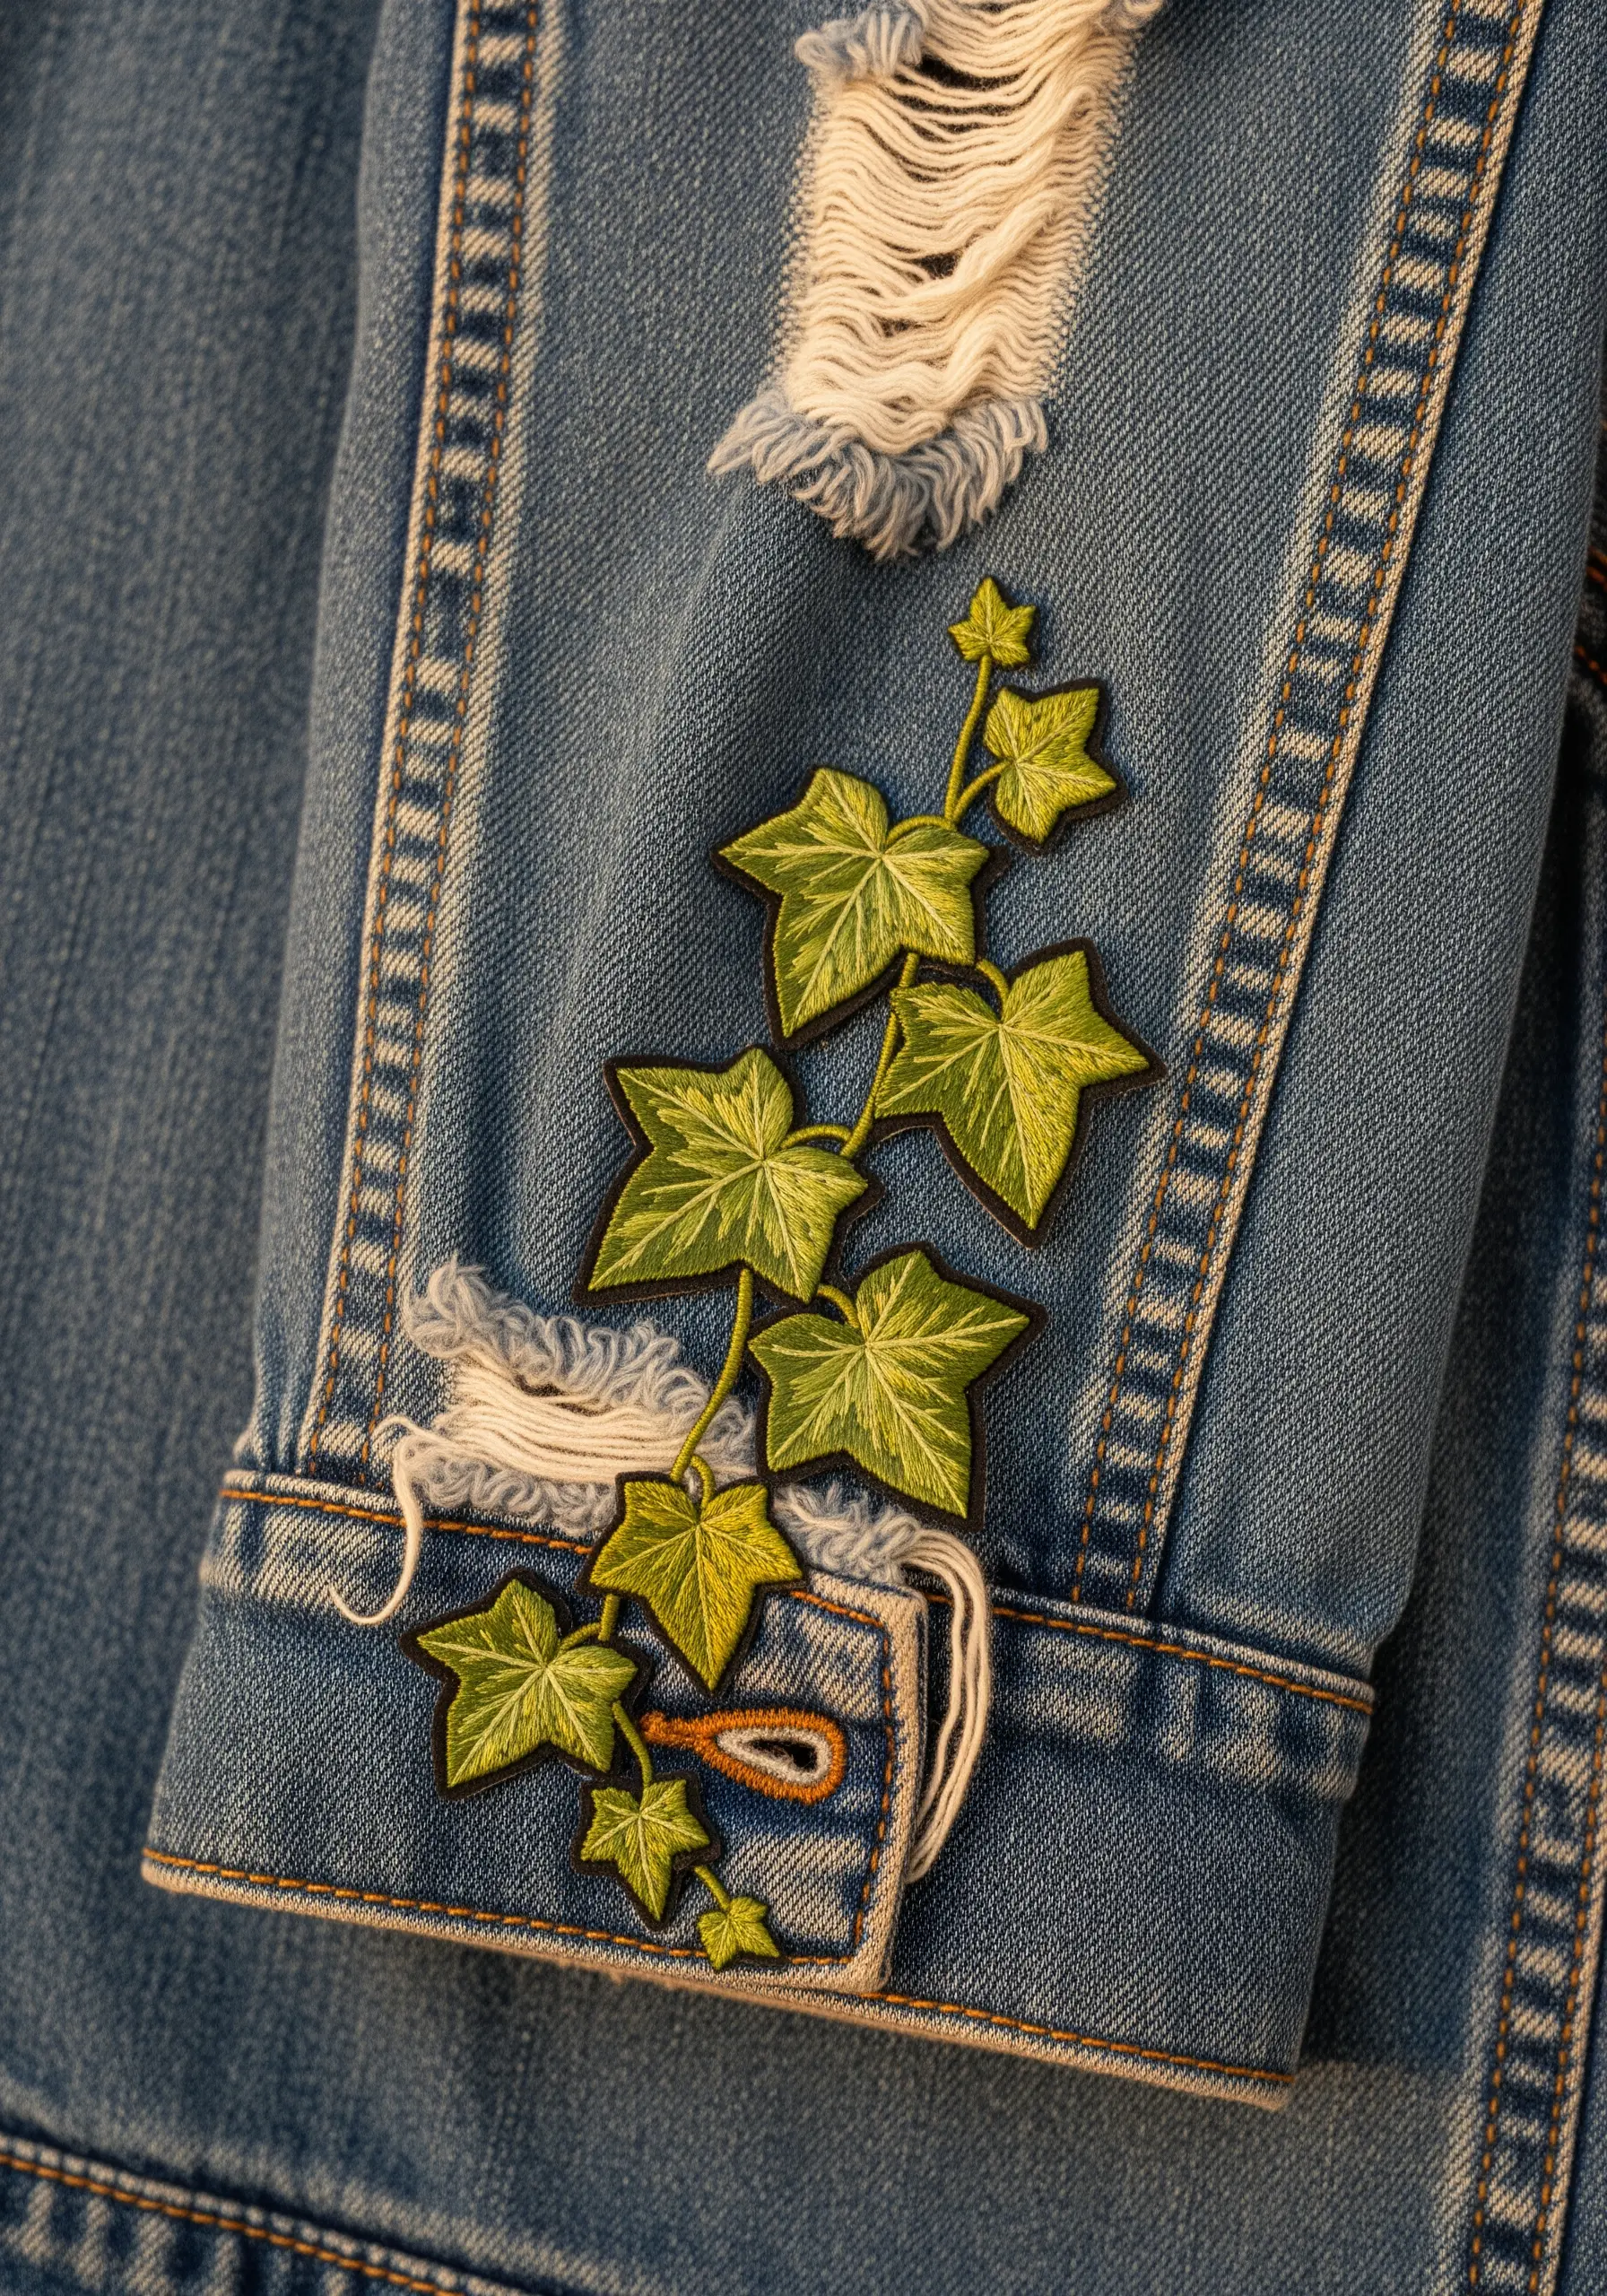
Make your repair feel alive by letting an embroidered ivy vine creep beyond the patch’s edge and onto the garment itself.
First, create and attach the main patch to cover the damaged area on a denim cuff or seam.
Then, extend the stem and add a few extra leaves directly onto the denim, stitching over seams and plackets to fully integrate the design.
This dynamic placement transforms a simple patch into an organic embellishment that appears to be growing right out of the clothing’s structure.
4. Create a Woodland Scene to Cover Irregular Damage

When a single motif isn’t enough to cover an awkward snag or multiple small holes, design a miniature woodland scene.
Combine elements like ferns, mushrooms, and moss to create a composition that flows naturally over the damaged area.
Use a fishbone stitch or fly stitch for the ferns to add lush texture, and a padded satin stitch for the mushroom caps to give them a rounded, 3D appearance.
This approach turns a flaw into a feature, offering a narrative element that is far more engaging than a simple circle or square patch.
5. Stage a Botanical Surprise from a Pocket
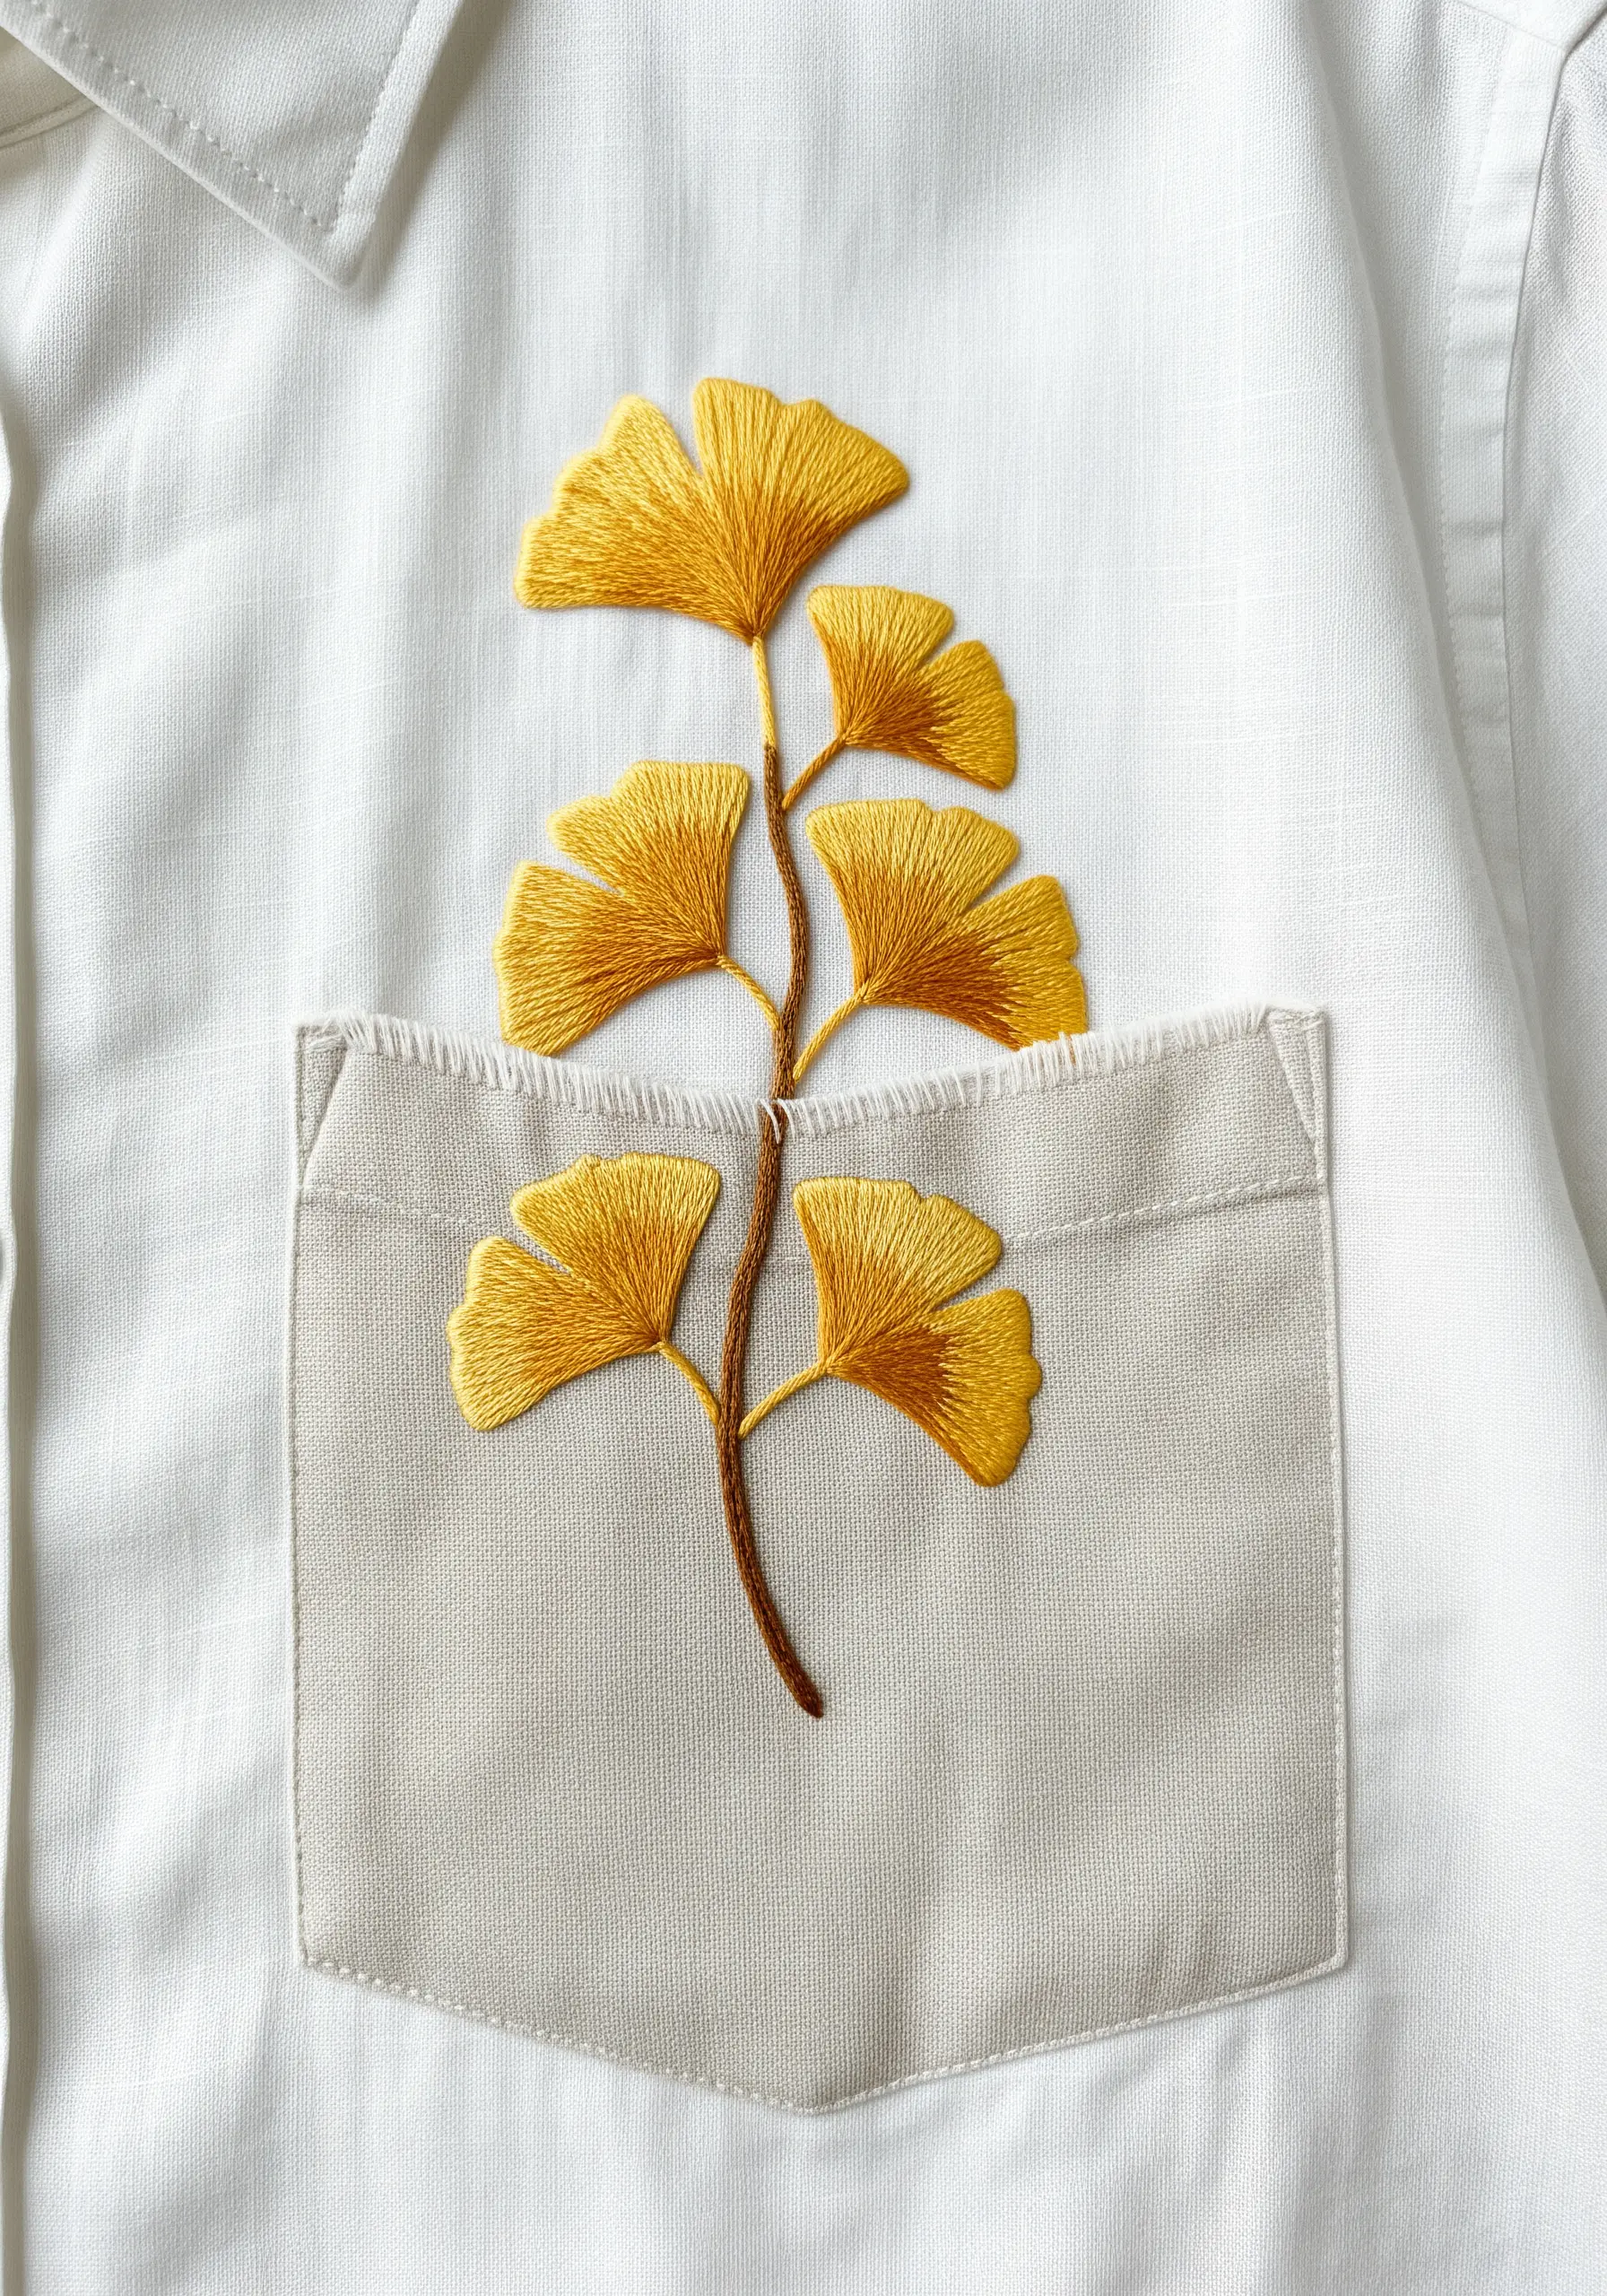
Add a playful touch to a shirt by having a botanical stem emerge from the top of a pocket.
This technique allows you to use the pocket itself as the patch, either by replacing it entirely or stitching over it.
For the fan-shaped ginkgo leaves, use a satin stitch with threads radiating from the base to the outer edge, which mimics their natural growth pattern.
Using a slightly different shade or fabric for the pocket creates a subtle frame that makes the vibrant embroidery pop.
6. Complement Corduroy with Bold Outlines

When patching a textured fabric like corduroy, your embroidery needs to be bold enough to stand out against the fabric’s ribs.
Use a thick satin stitch border around each leaf and acorn to create a clean, graphic edge that won’t get lost in the texture.
Fill the leaves with a directional satin stitch to add a subtle sheen, and use a woven wheel stitch for the acorn caps to introduce a contrasting, nubby texture.
This ensures your design is both visually and texturally distinct from the base garment.
7. Capture Movement with Floating Dandelion Seeds
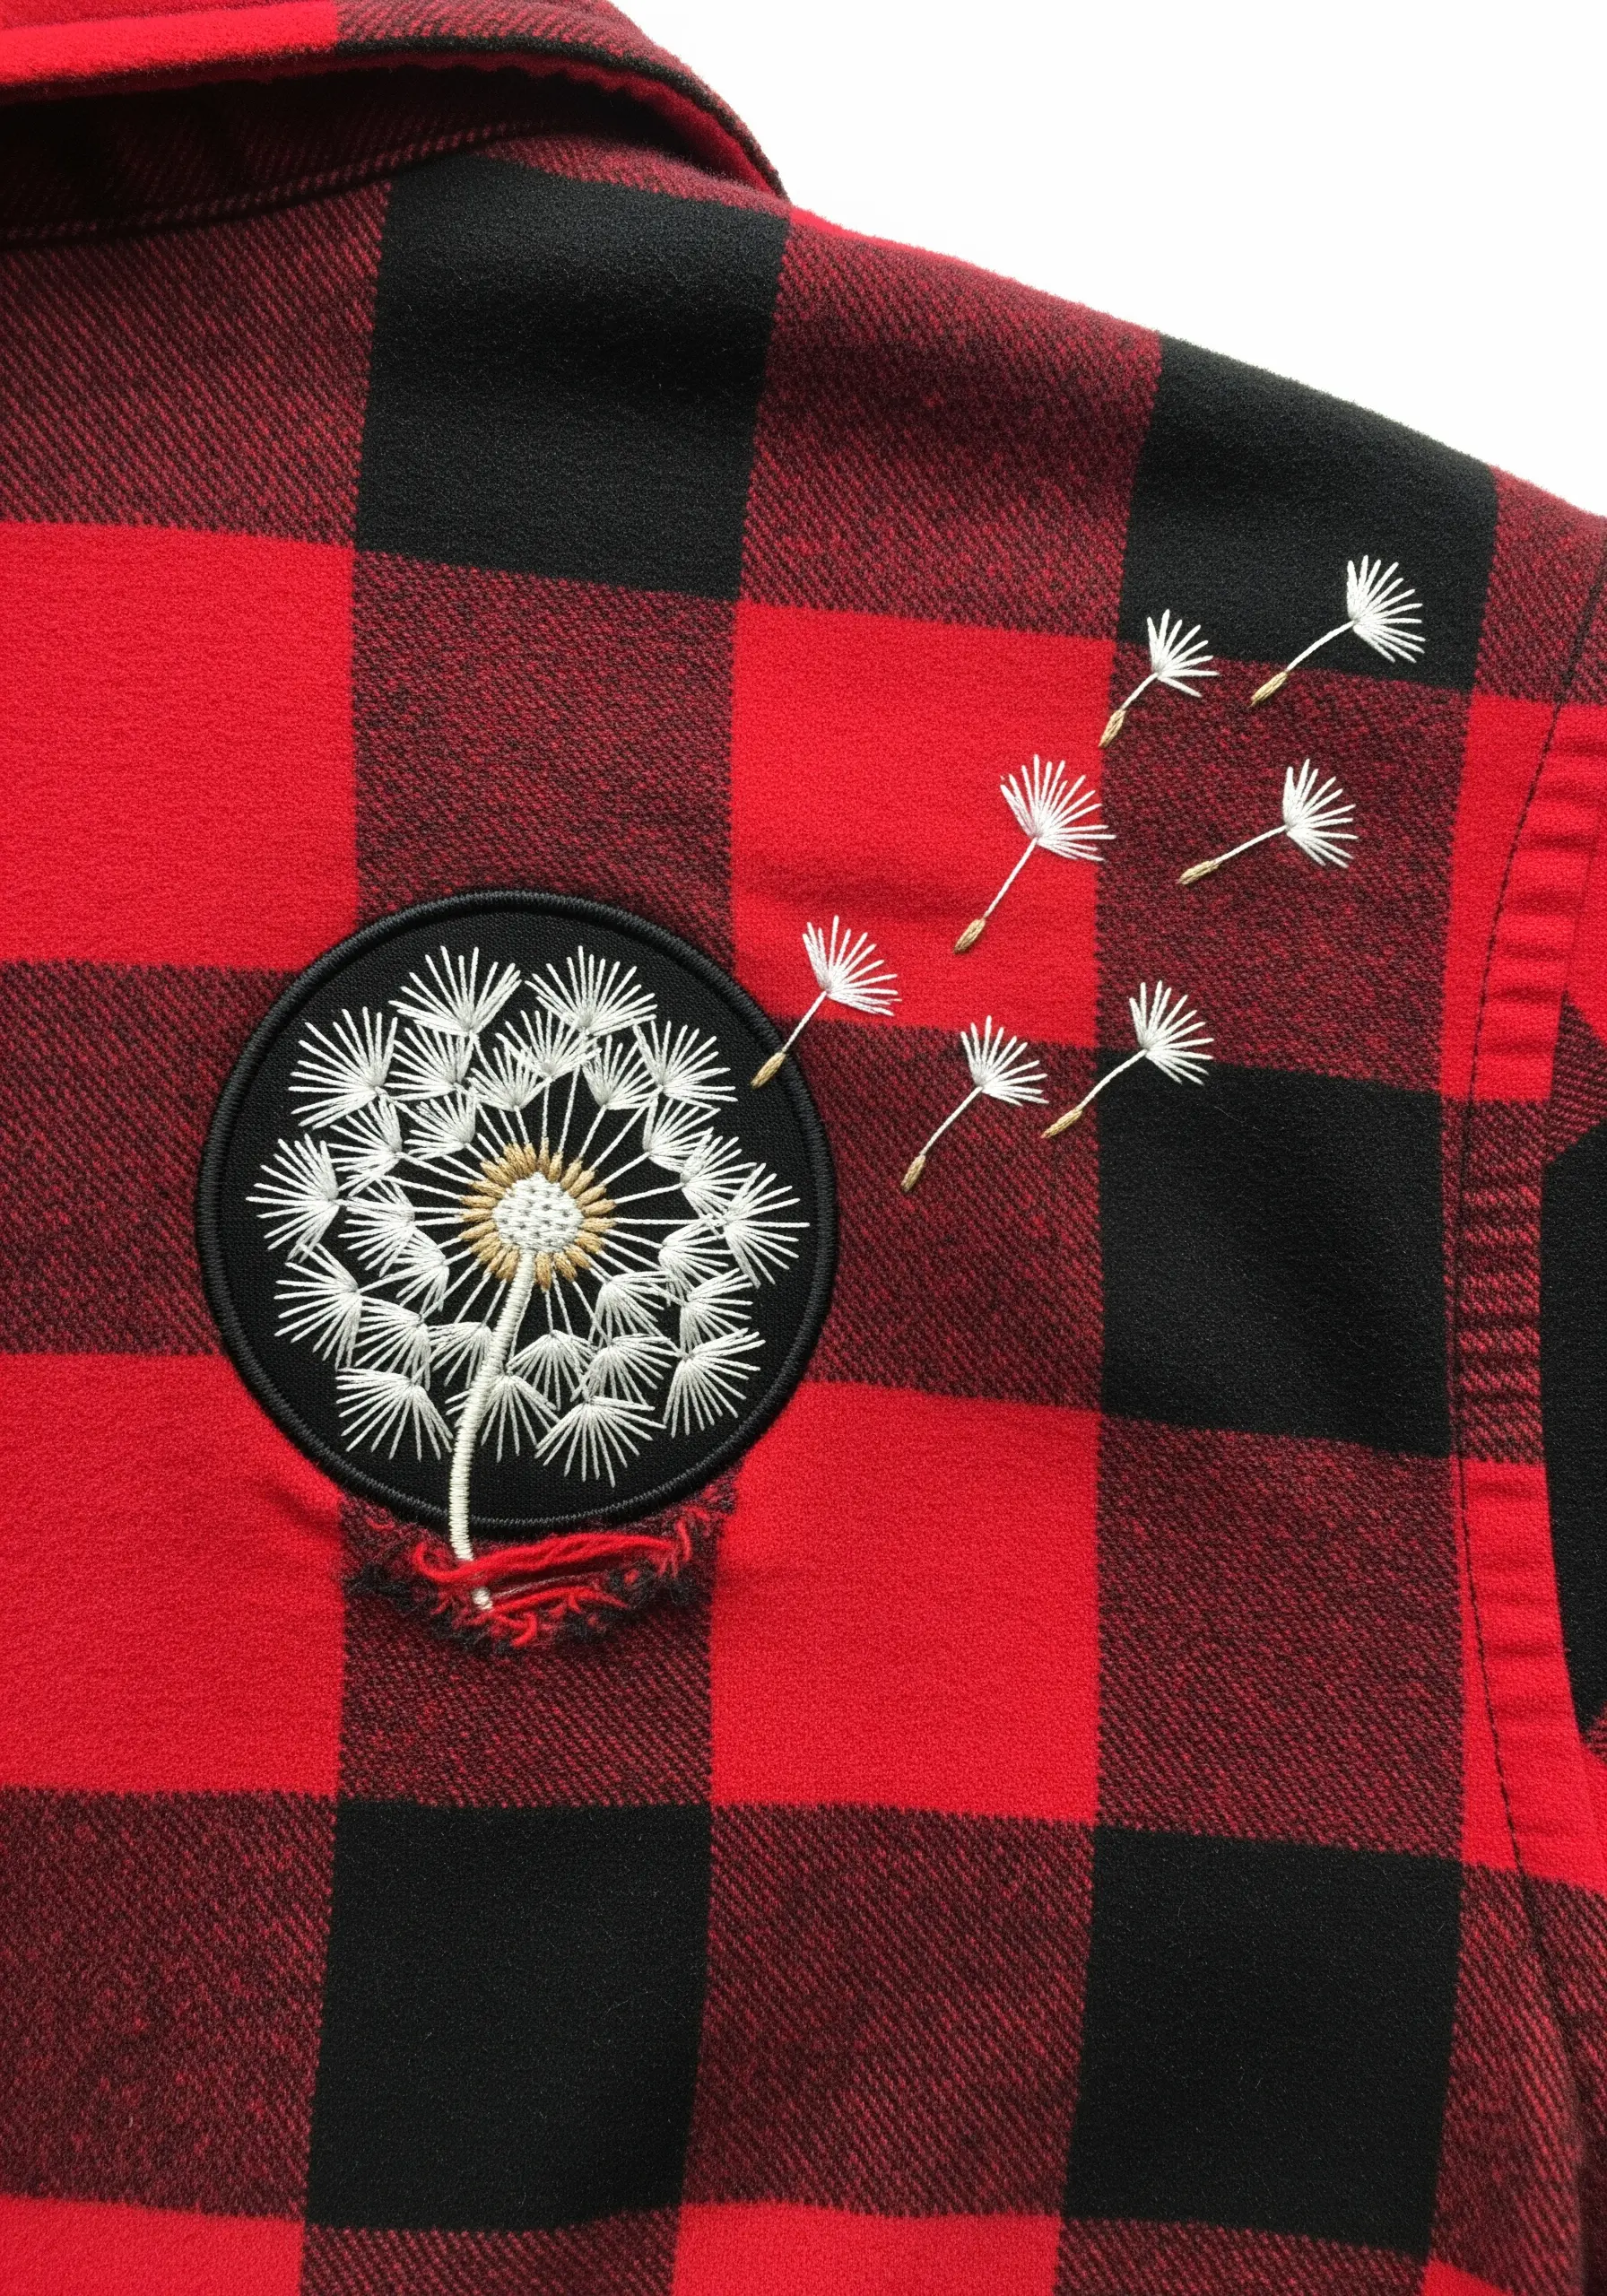
Give your patch a sense of delicacy and motion by extending the design beyond its borders.
First, create a circular patch with the main dandelion head, using straight stitches for the seed filaments and French knots for the center.
Then, stitch a few individual seeds directly onto the garment, as if they are blowing away in the wind.
This technique beautifully integrates the patch with the clothing and draws the eye across the fabric, making the repair feel light and whimsical.
8. Use Raw-Edge Patches for a Soft, Rustic Feel
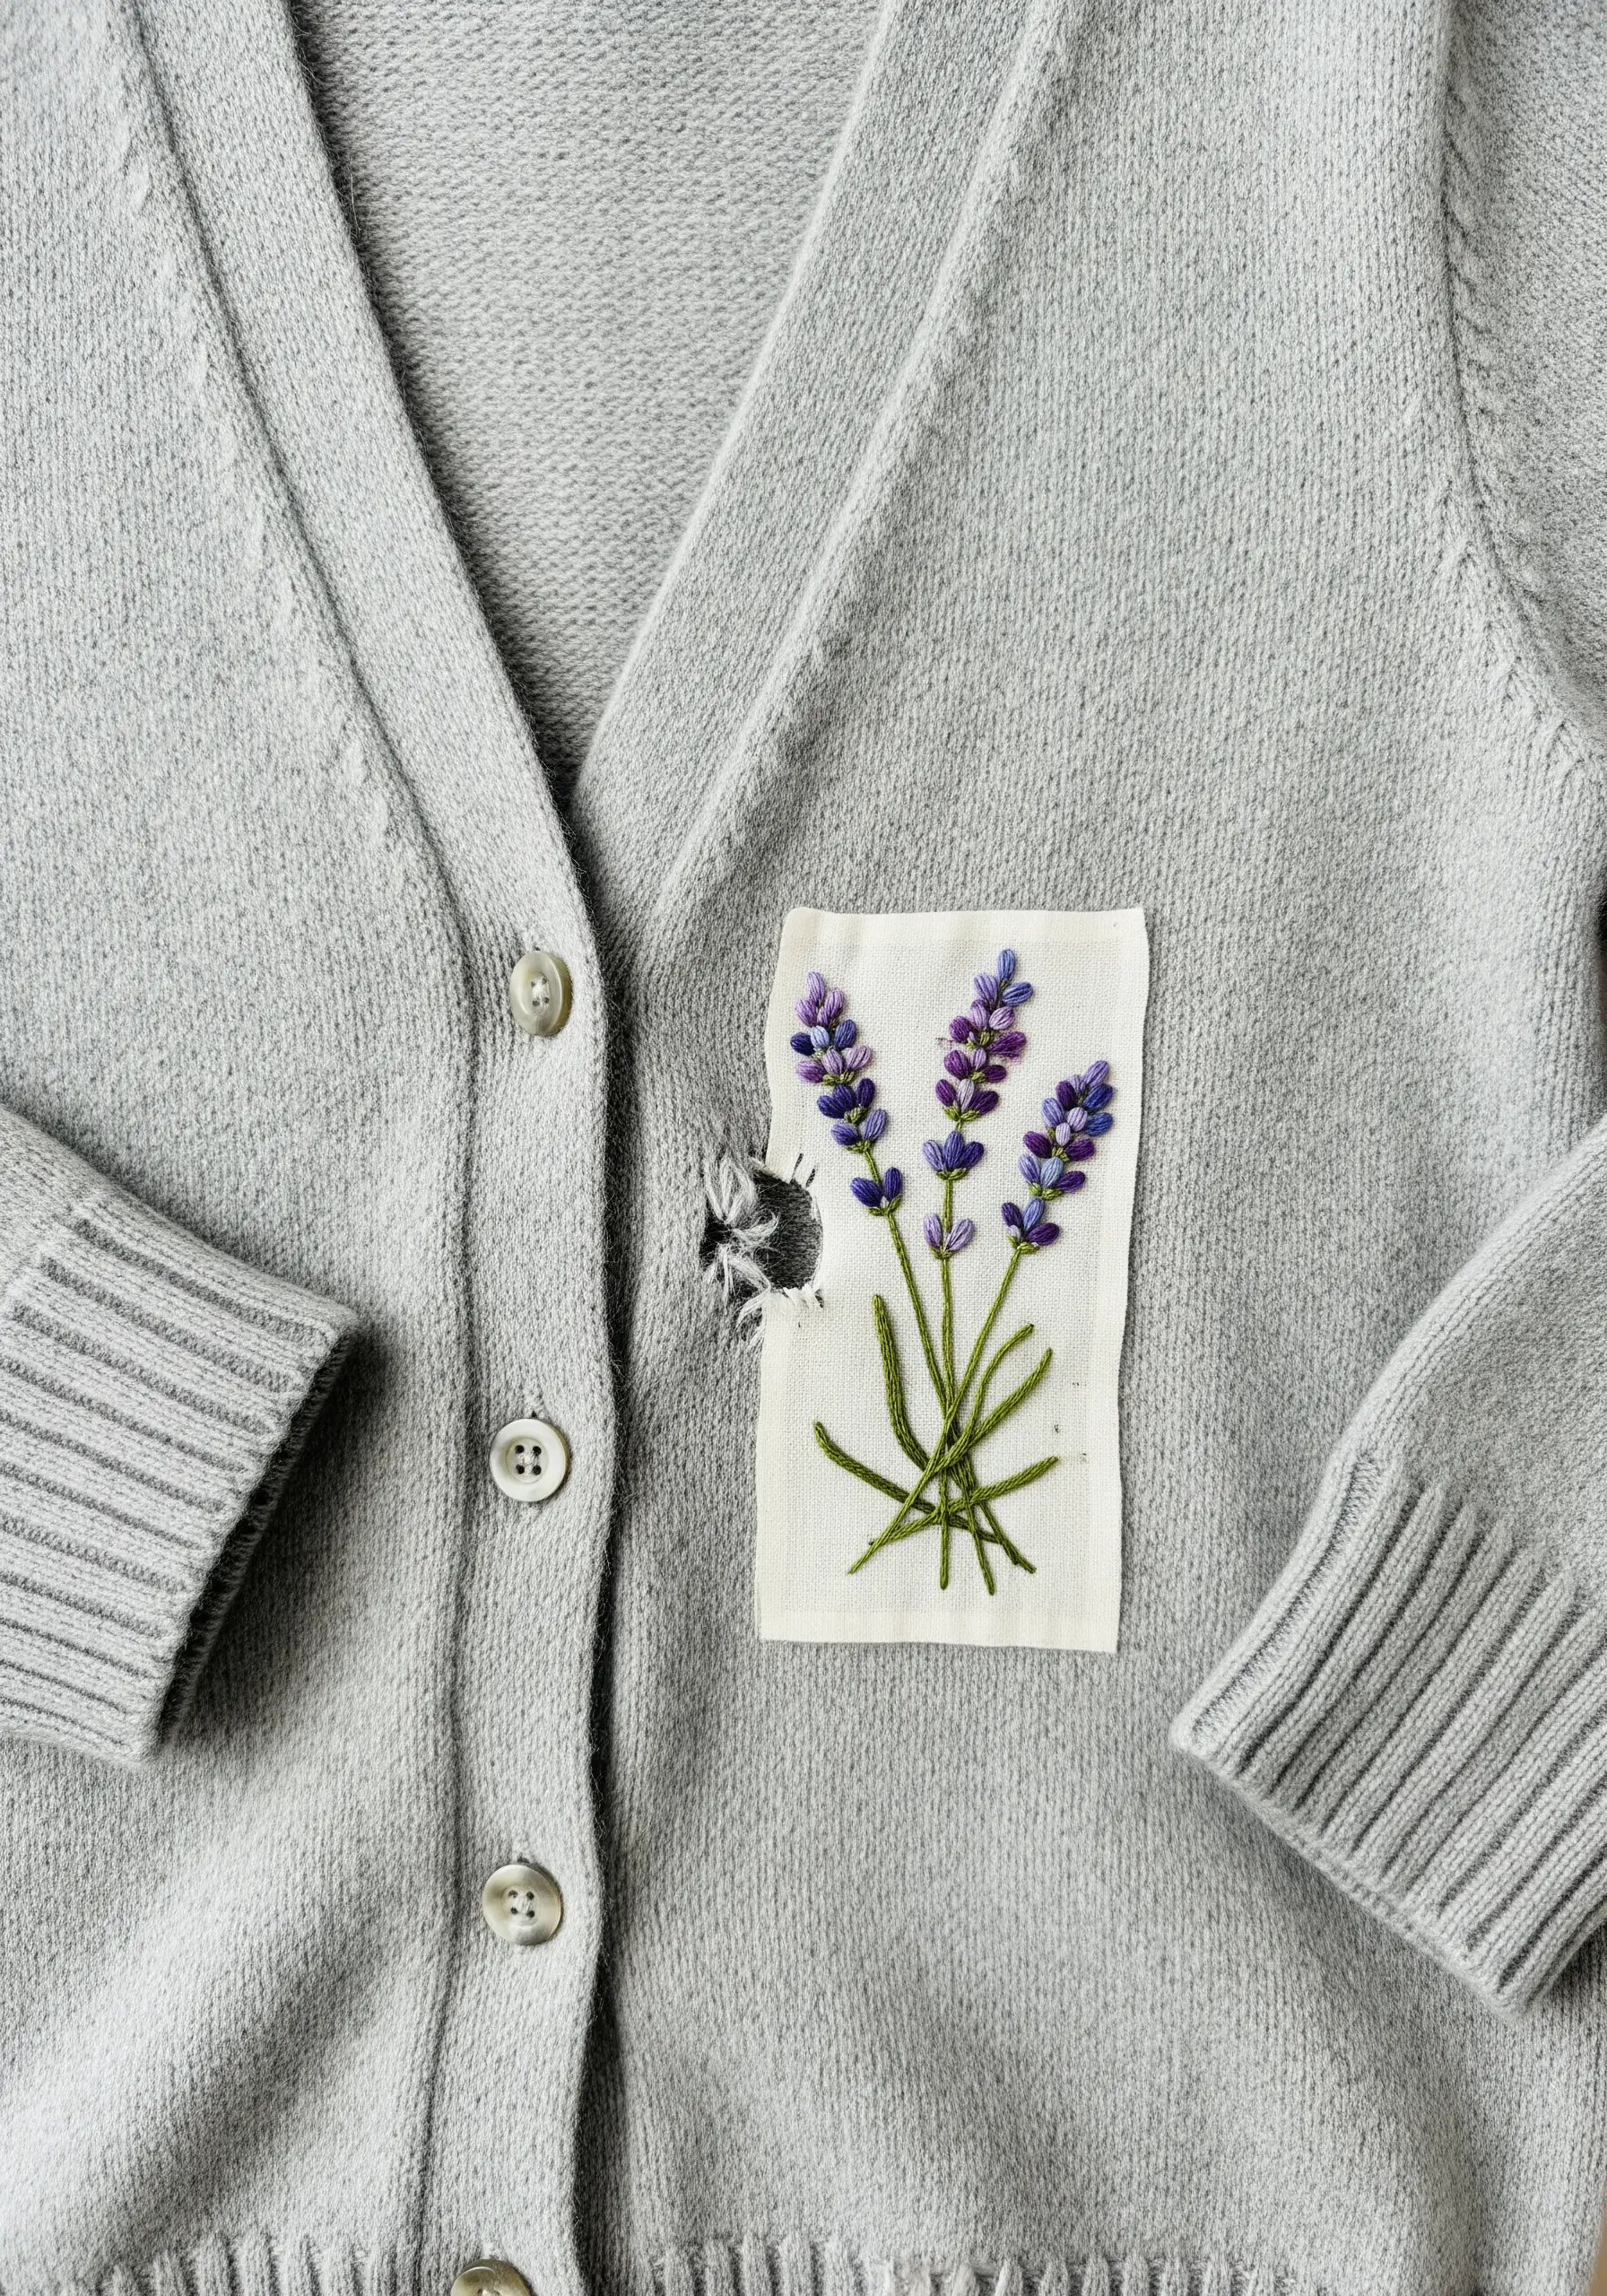
For delicate garments like cashmere or merino wool cardigans, a heavy, bordered patch can feel too stiff.
Instead, opt for a lightweight linen or cotton patch with a raw, slightly frayed edge.
Embroider your design—like these delicate lavender sprigs—before attaching the patch with a few discreet tacking stitches hidden within the embroidery itself.
This method provides coverage for a hole while maintaining the softness and drape of the original garment.
9. Make a Statement with High-Contrast Botanicals
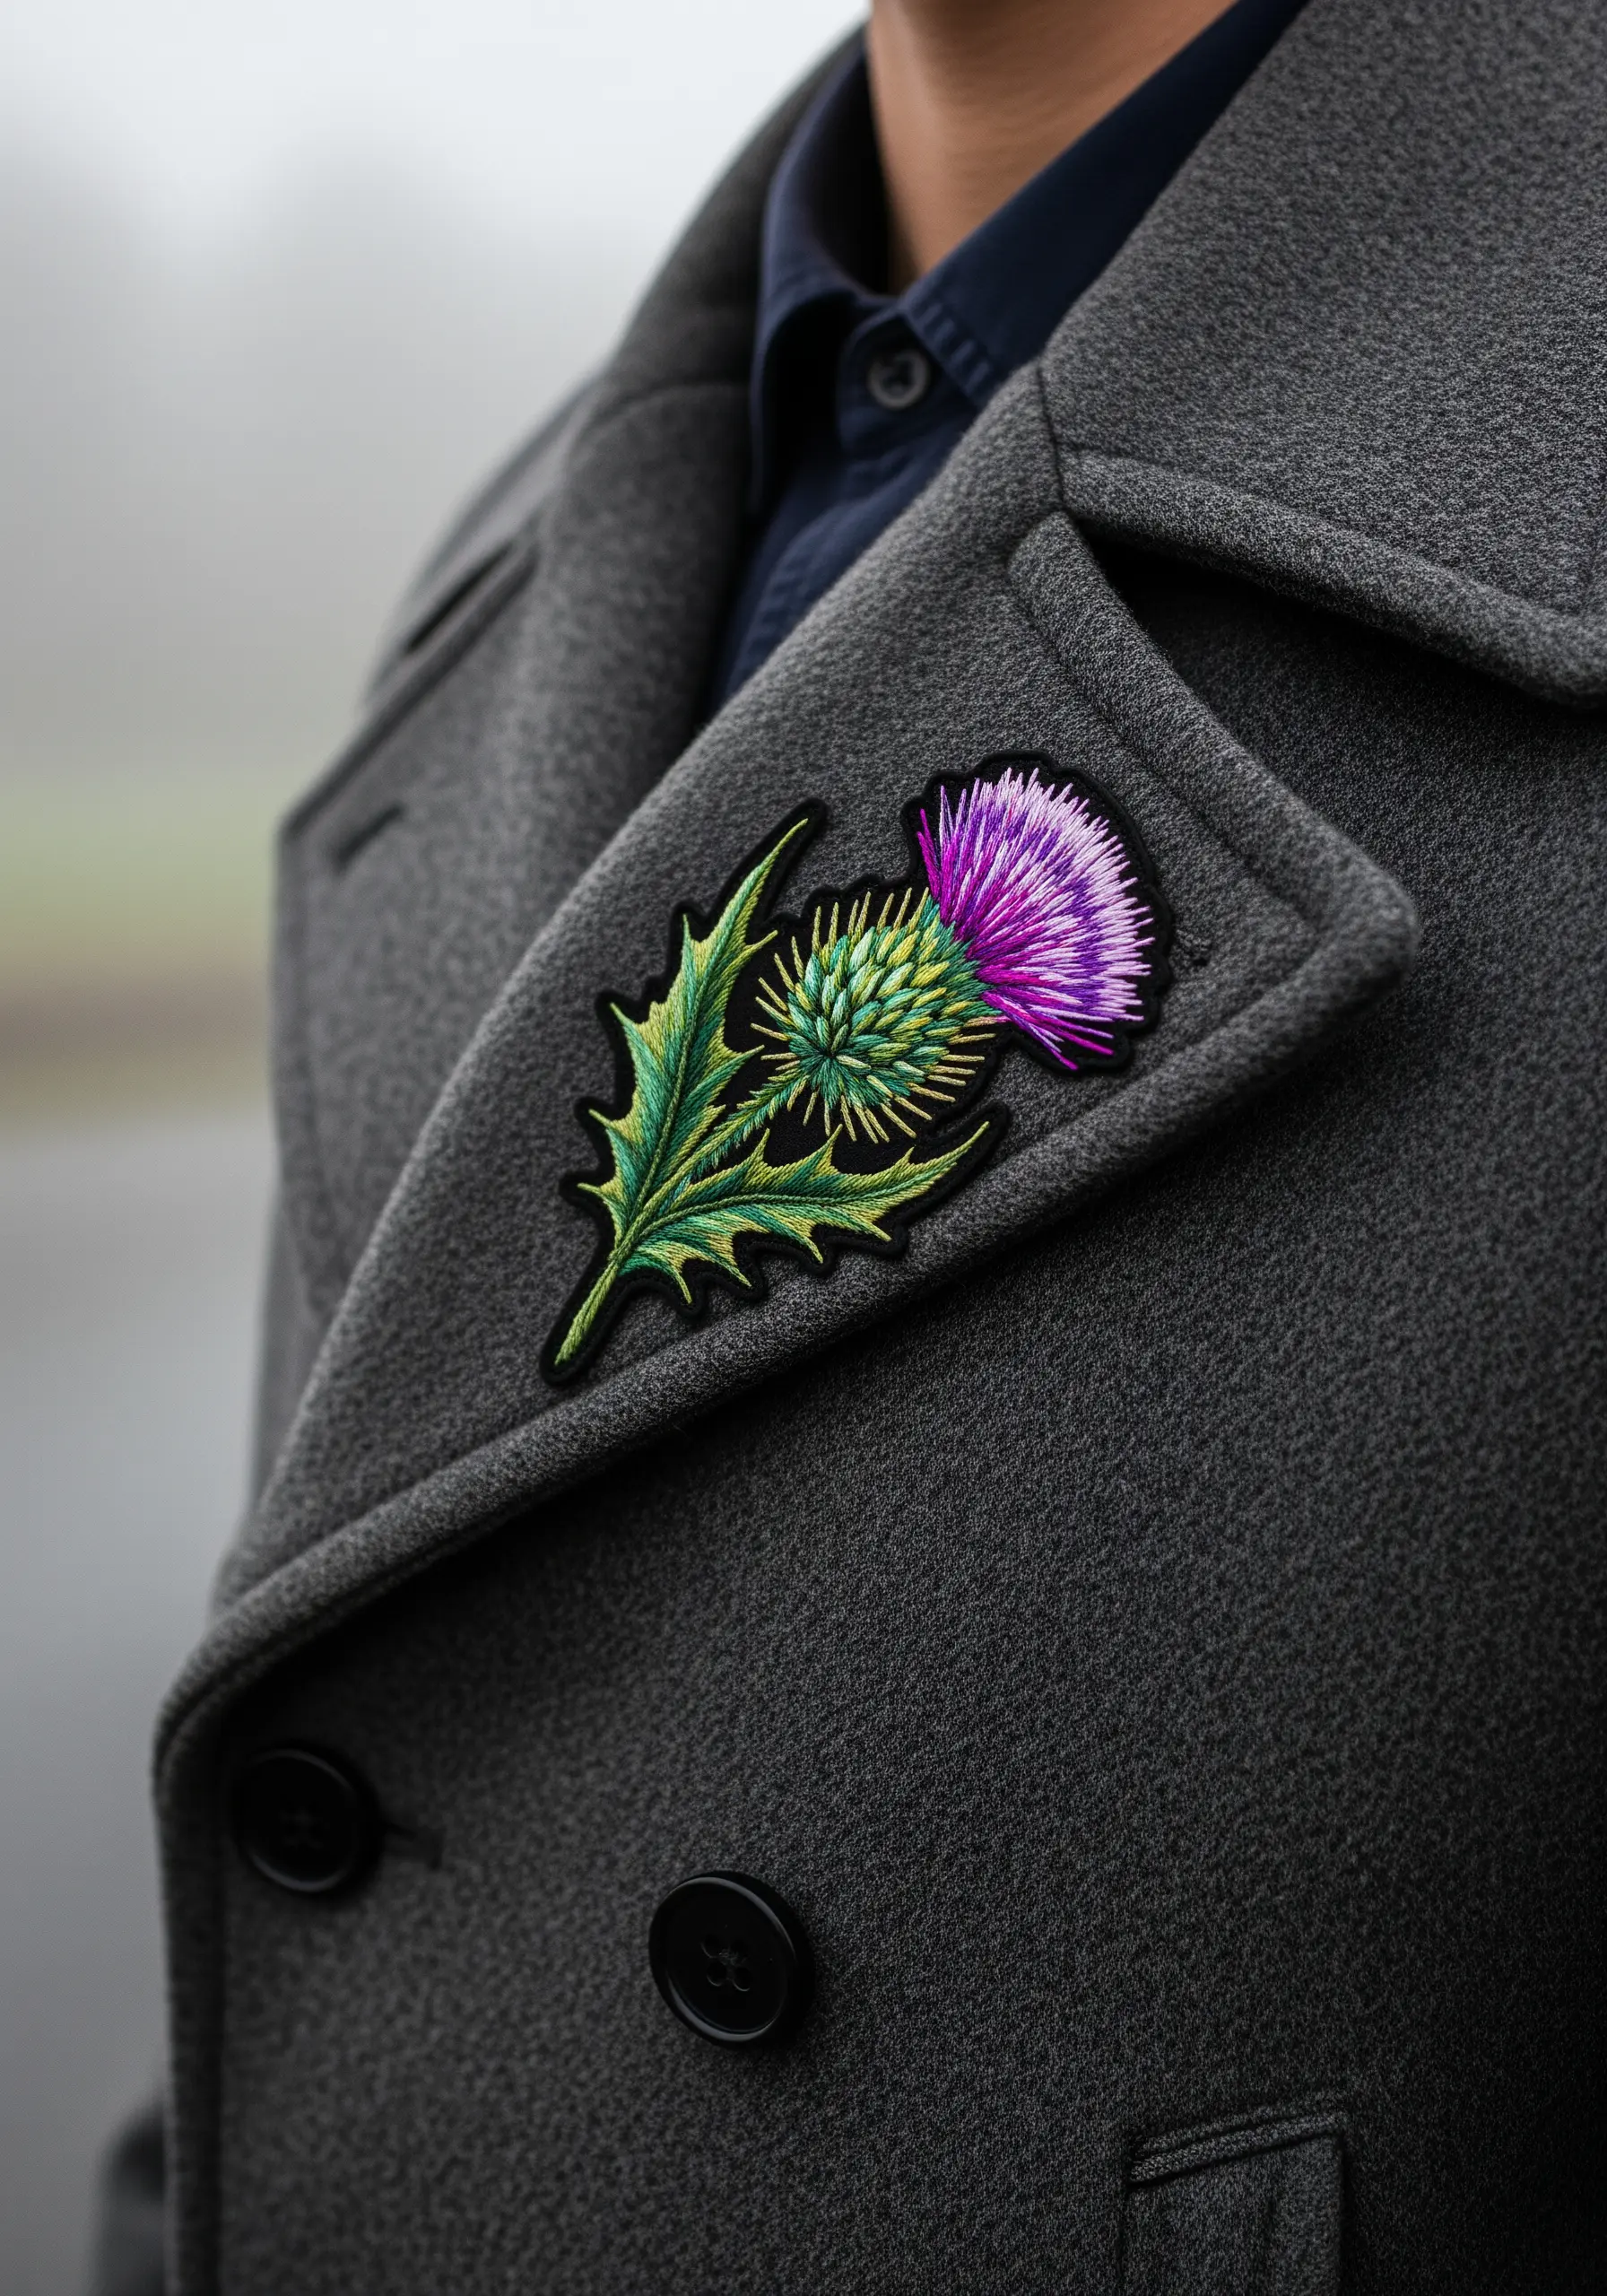
Turn a repair into a bold accessory by choosing a motif and color palette that create high contrast against the base fabric.
On a dark wool coat, a vibrant Scottish thistle stitched in electric purple and sharp greens becomes a striking focal point, almost like a brooch.
Use a dense long-and-short stitch for the flower head to create a fluffy, realistic texture, and a sharp split stitch for the prickly leaves to define their edges.
This approach celebrates the repair, transforming it into a confident style statement.
10. Design Elongated Patches for Vertical Repairs

For long snags or tears along a pant leg, a standard circular patch won’t work. Design a vertical patch that complements the garment’s lines.
An olive branch is the perfect motif, as its natural shape is elegant and linear.
Use a padded satin stitch for the olives to give them a plump, three-dimensional quality that catches the light.
This turns an awkward repair into a graceful, custom detail that elongates and flatters the silhouette.
11. Integrate 3D Objects for a Tactile Surprise
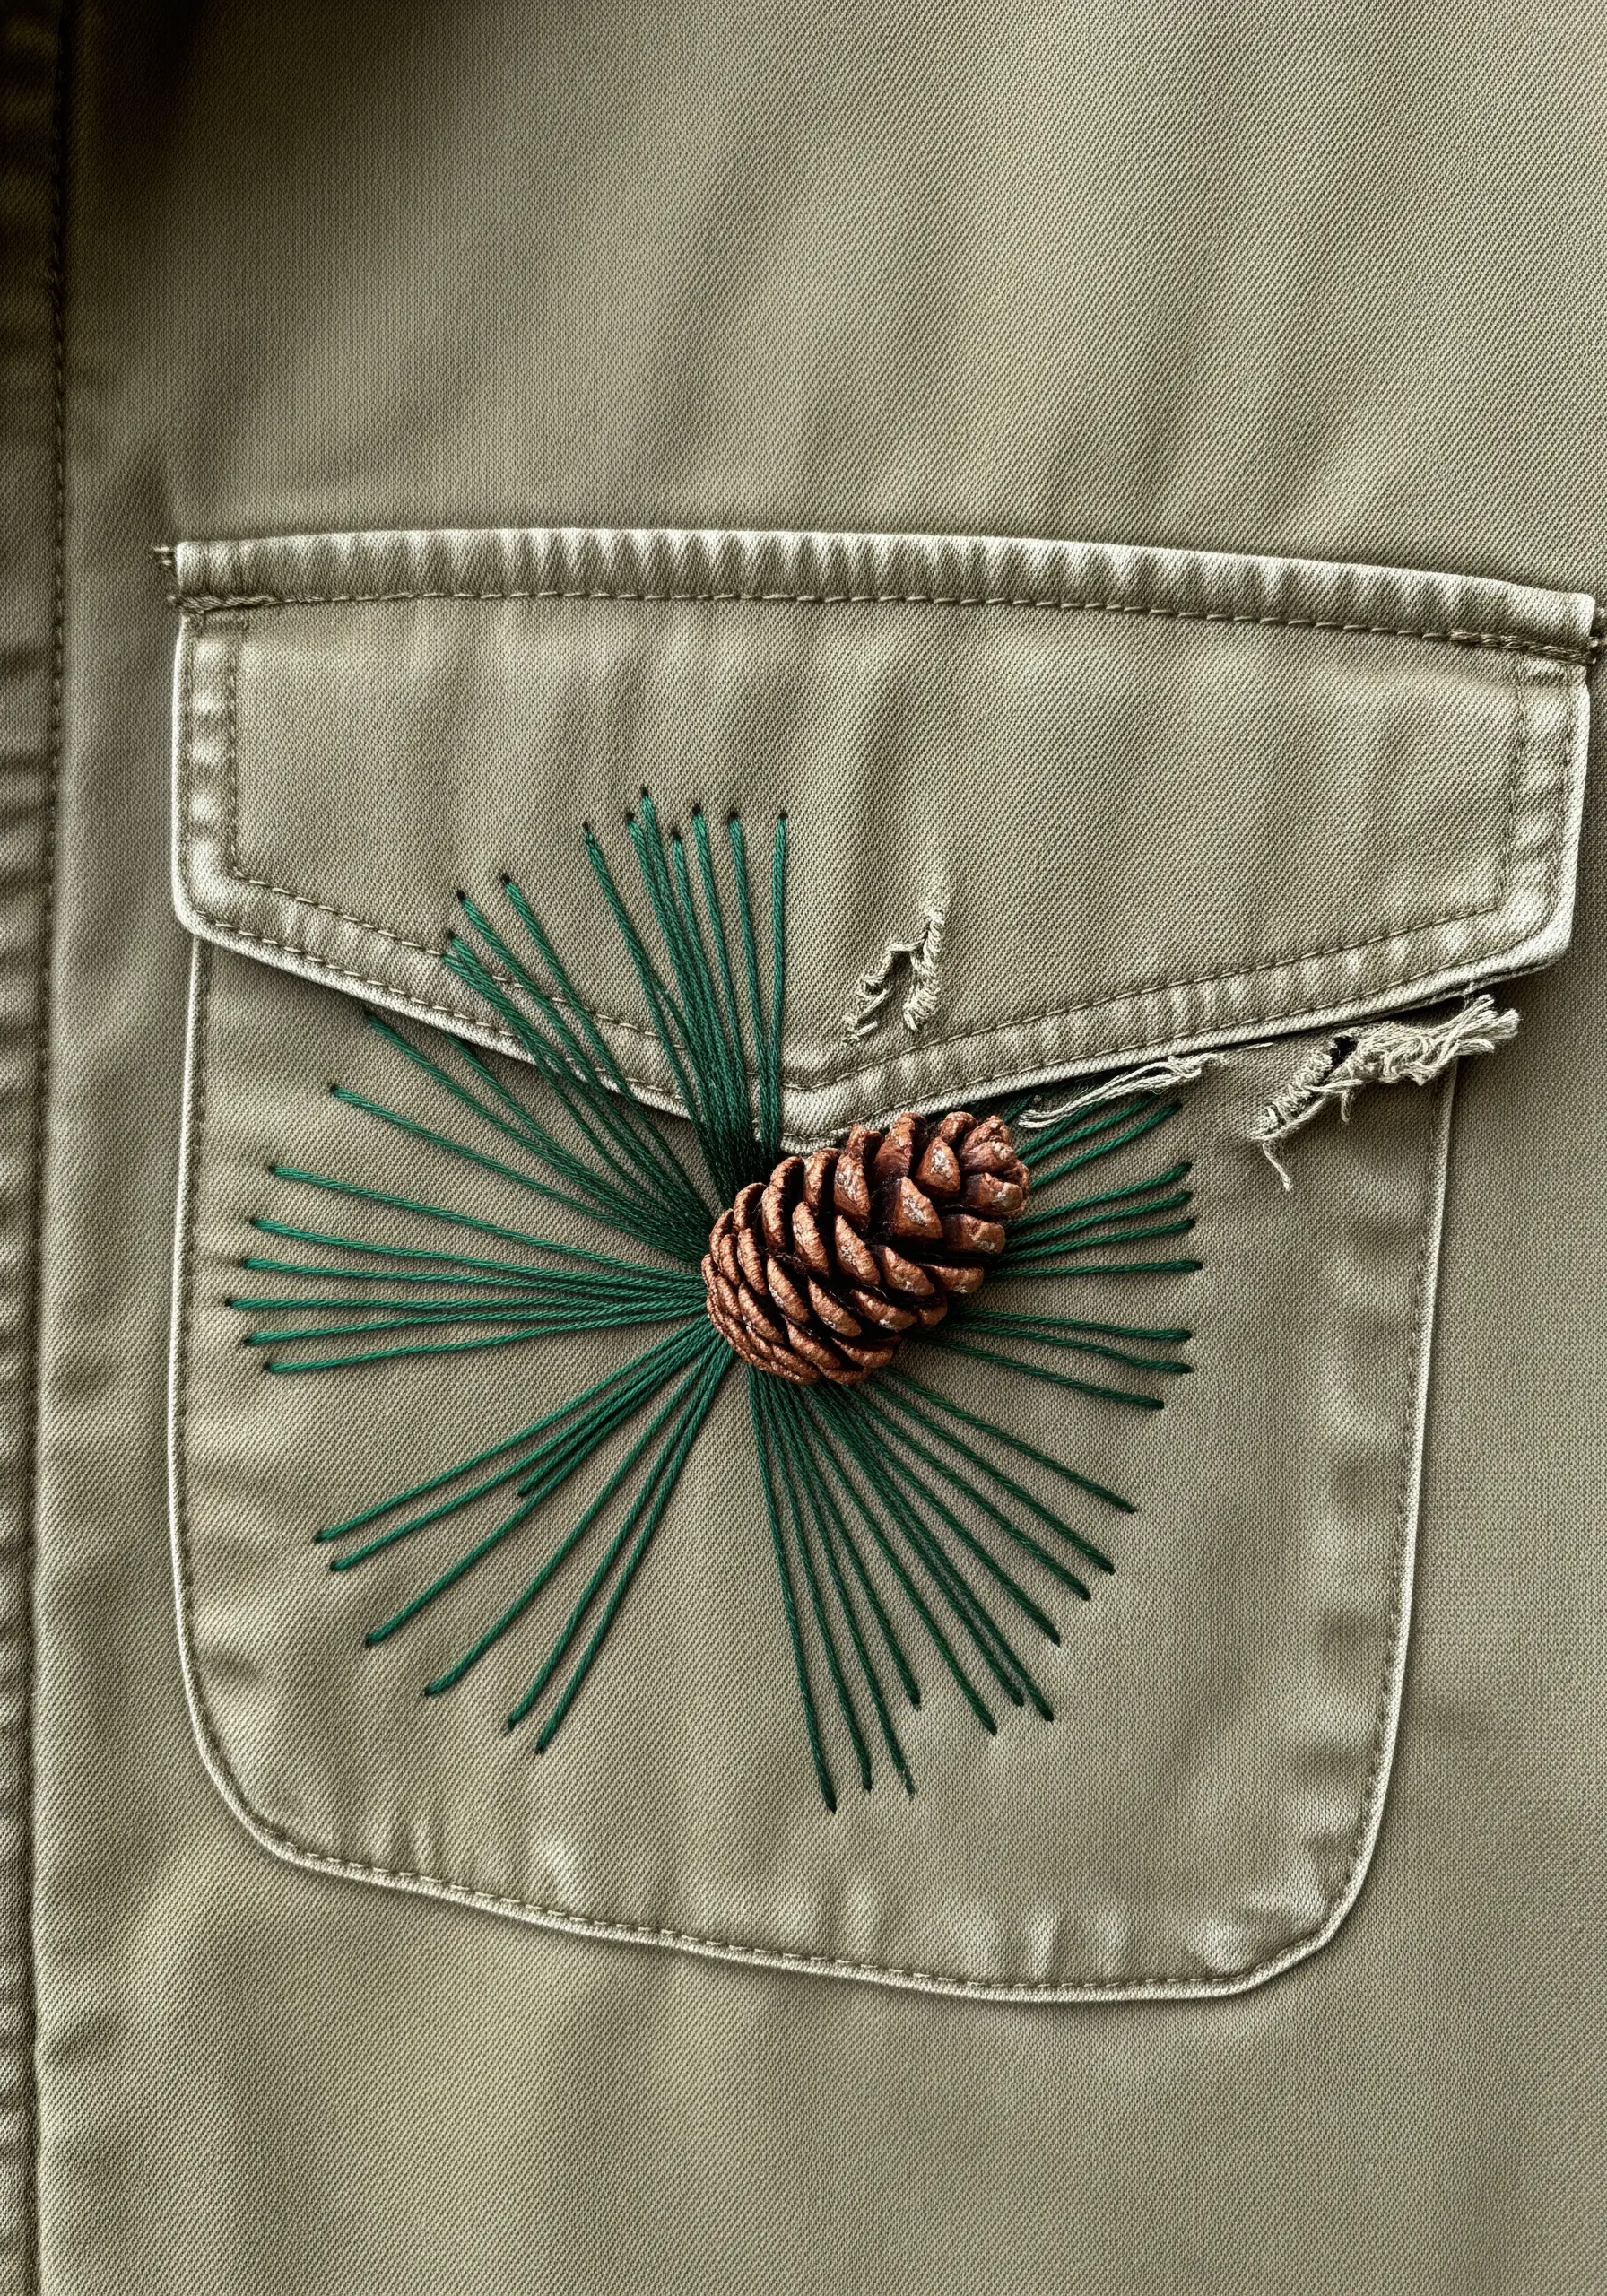
Elevate your mending by incorporating a small, three-dimensional object into your botanical design.
Here, a tiny, real pinecone is stitched securely in the center of radiating pine needles, creating a stunning mixed-media effect.
Use long, straight stitches for the needles, varying their length slightly for a more natural look.
This technique transforms the patch into a multi-sensory piece of art, inviting both sight and touch, and shows how you can stitch natural textures like a pro.
12. Deconstruct Fabric for an Artistic Frame

Instead of a clean-edged patch, create a deconstructed frame for your embroidery by using a frayed strip of the same garment fabric.
Carefully cut a strip from a hidden area like the hem, fray the edges, and stitch it down before adding your botanical motif.
A simple vine with detached chain stitch leaves is all you need to complete this intentionally undone, artistic look.
This method is perfect for adding a touch of modern, edgy style to a simple chambray or denim shirt.
13. Build Dimension with Layered Stitches
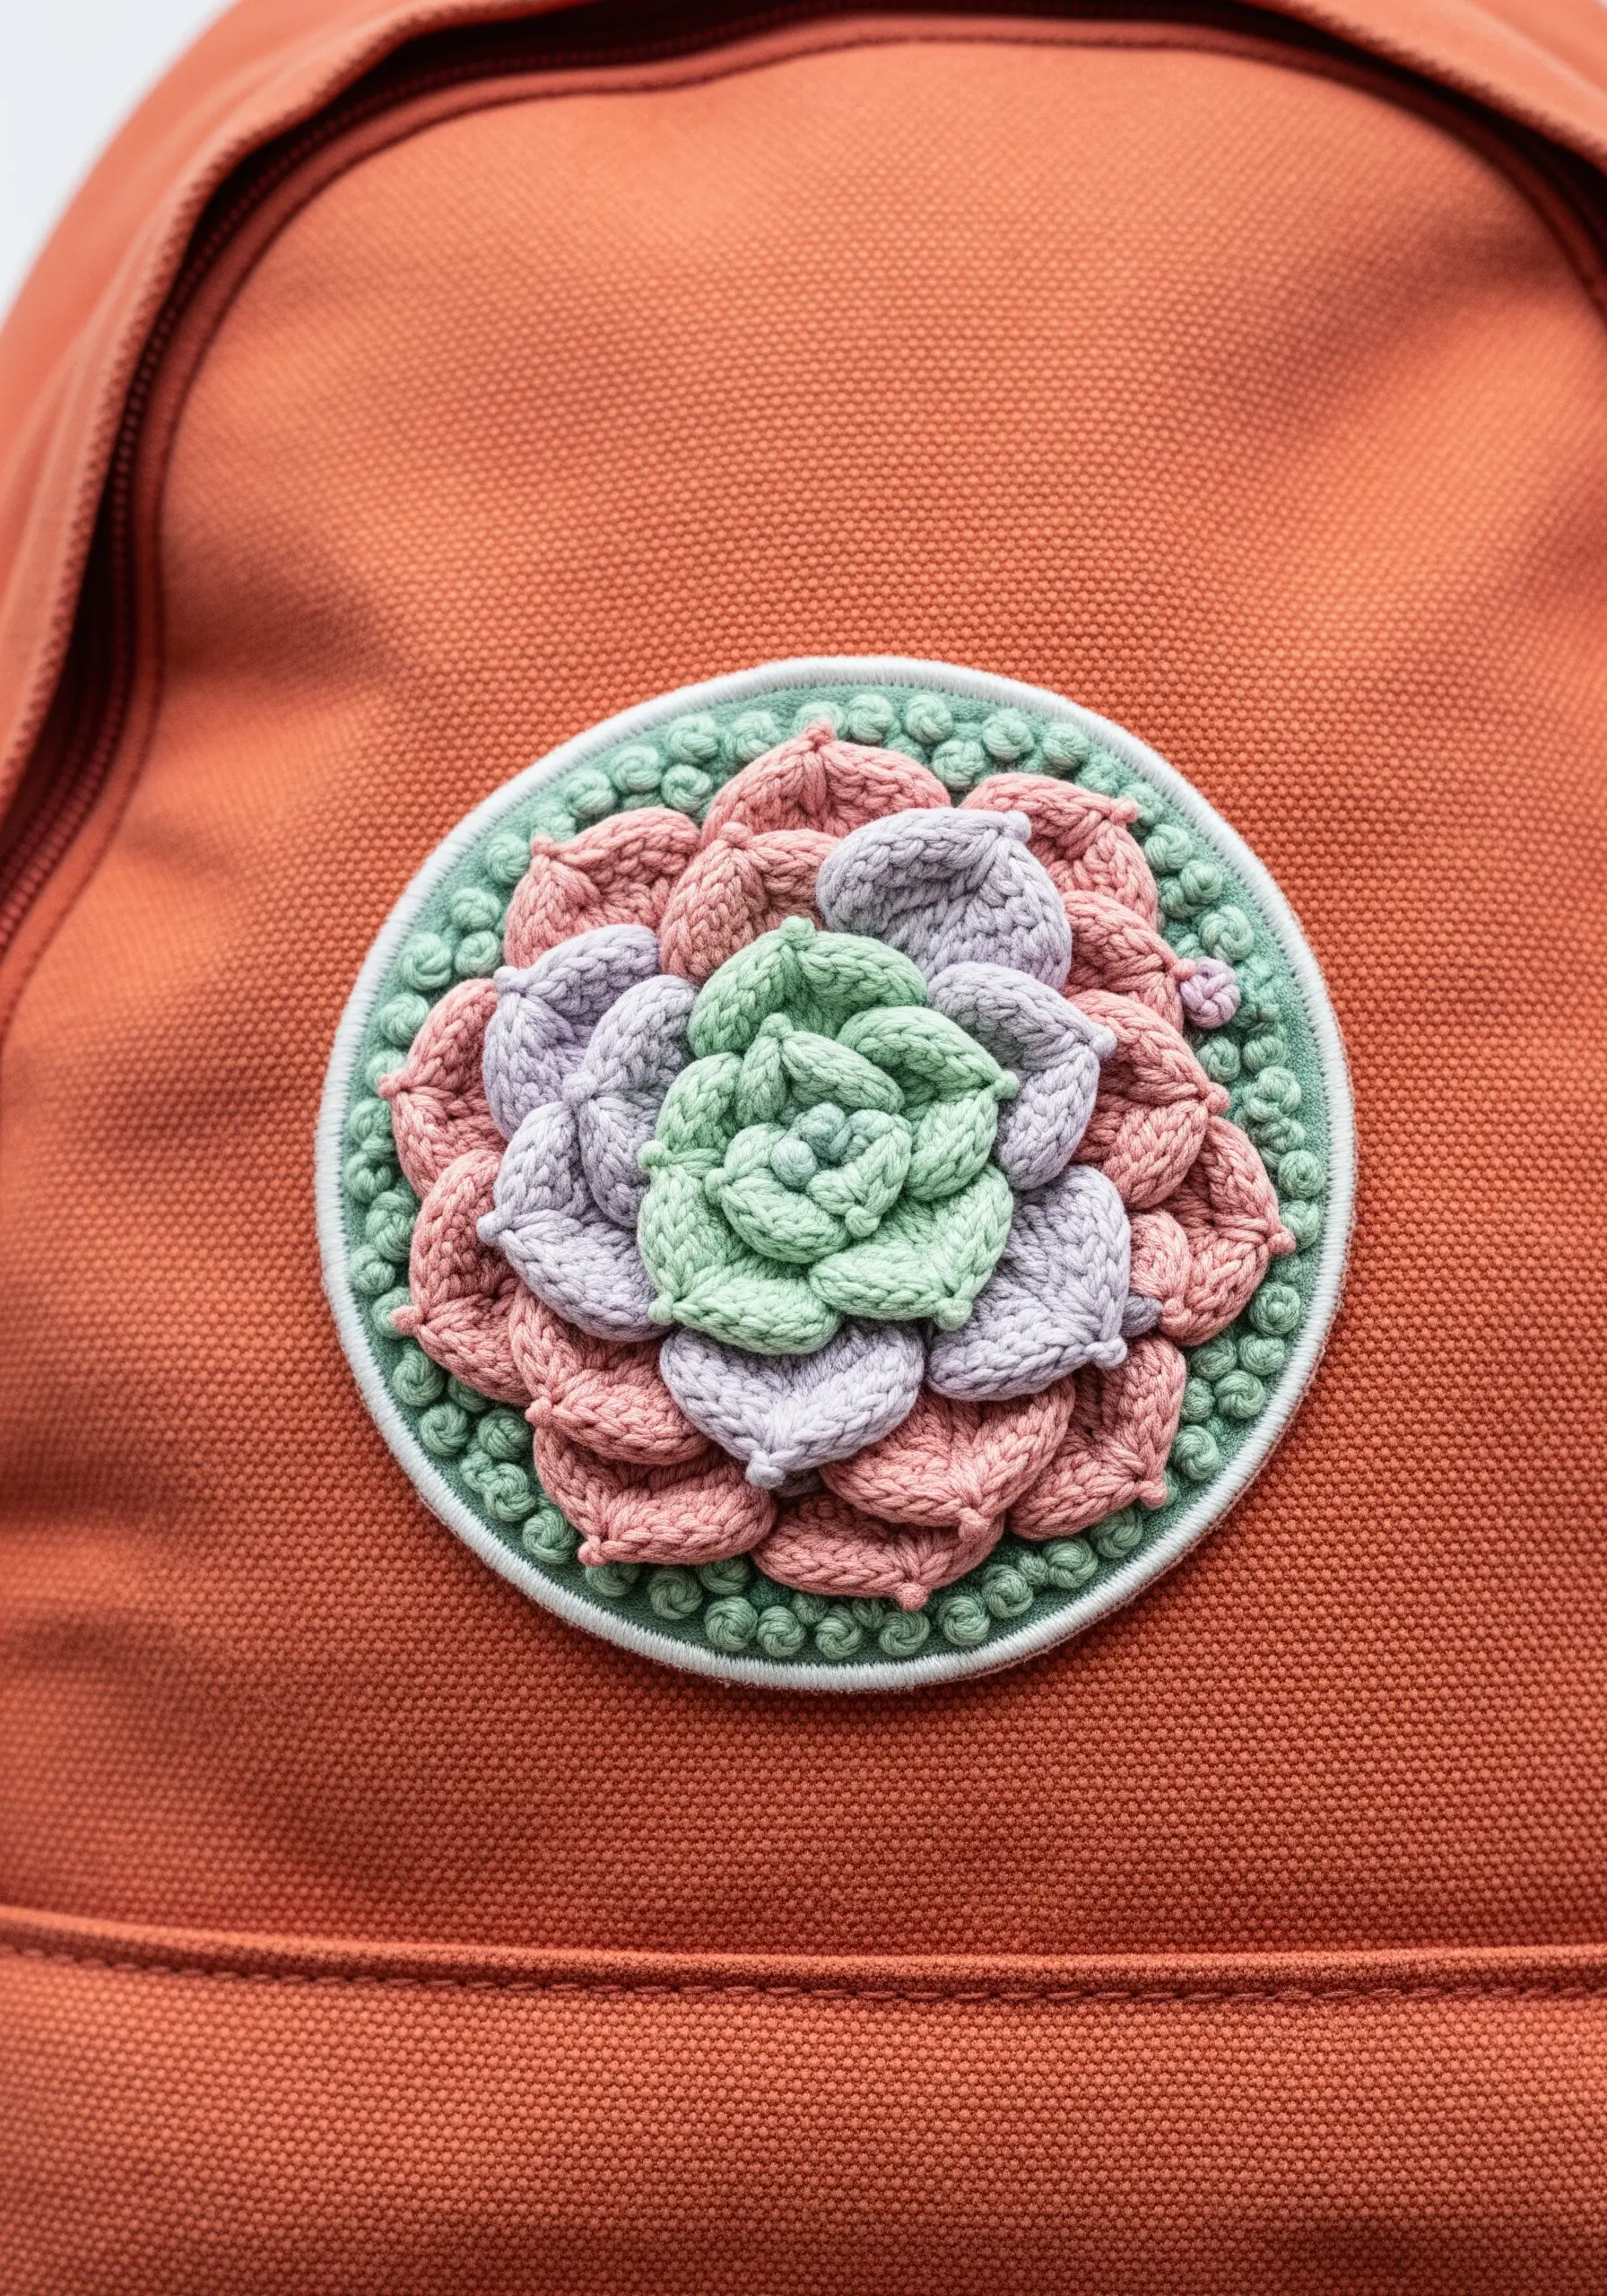
Capture the dense, layered structure of a succulent by using dimensional stitches.
Create the petals using cast-on stitches or detached buttonhole stitches, working from the outside in and layering each round slightly over the last.
This 3D floral embroidery technique results in a highly tactile, sculptural patch that stands out, especially on a sturdy fabric like the canvas of a backpack.
A simple border of couched thread provides a clean finish to the dimensional design.
14. Achieve Graphic Polish with Felt Appliqué

For a clean, modern patch on stretchy fabrics like jersey, use felt as a stable base for your embroidery.
Cut your shape from the felt, complete your satin-stitched clover, and then carefully trim the felt around the finished embroidery, leaving a narrow border.
Appliqué this onto the t-shirt with a neat whip stitch. The felt prevents the jersey from stretching or puckering under the dense stitches, ensuring a perfectly smooth and professional finish.
15. Trace Nature’s Details with a Single Thread

Create a strikingly delicate design by replicating the intricate veins of a skeleton leaf.
Work on a dark, solid-colored fabric for maximum impact, and use a single strand of white or metallic silver thread.
Use a tiny backstitch or split stitch to trace the delicate network of veins, focusing on precision and patience.
This monochrome design transforms a simple patch into a piece of fine art, celebrating the quiet beauty of natural structures.
16. Integrate the Hole into Your Design
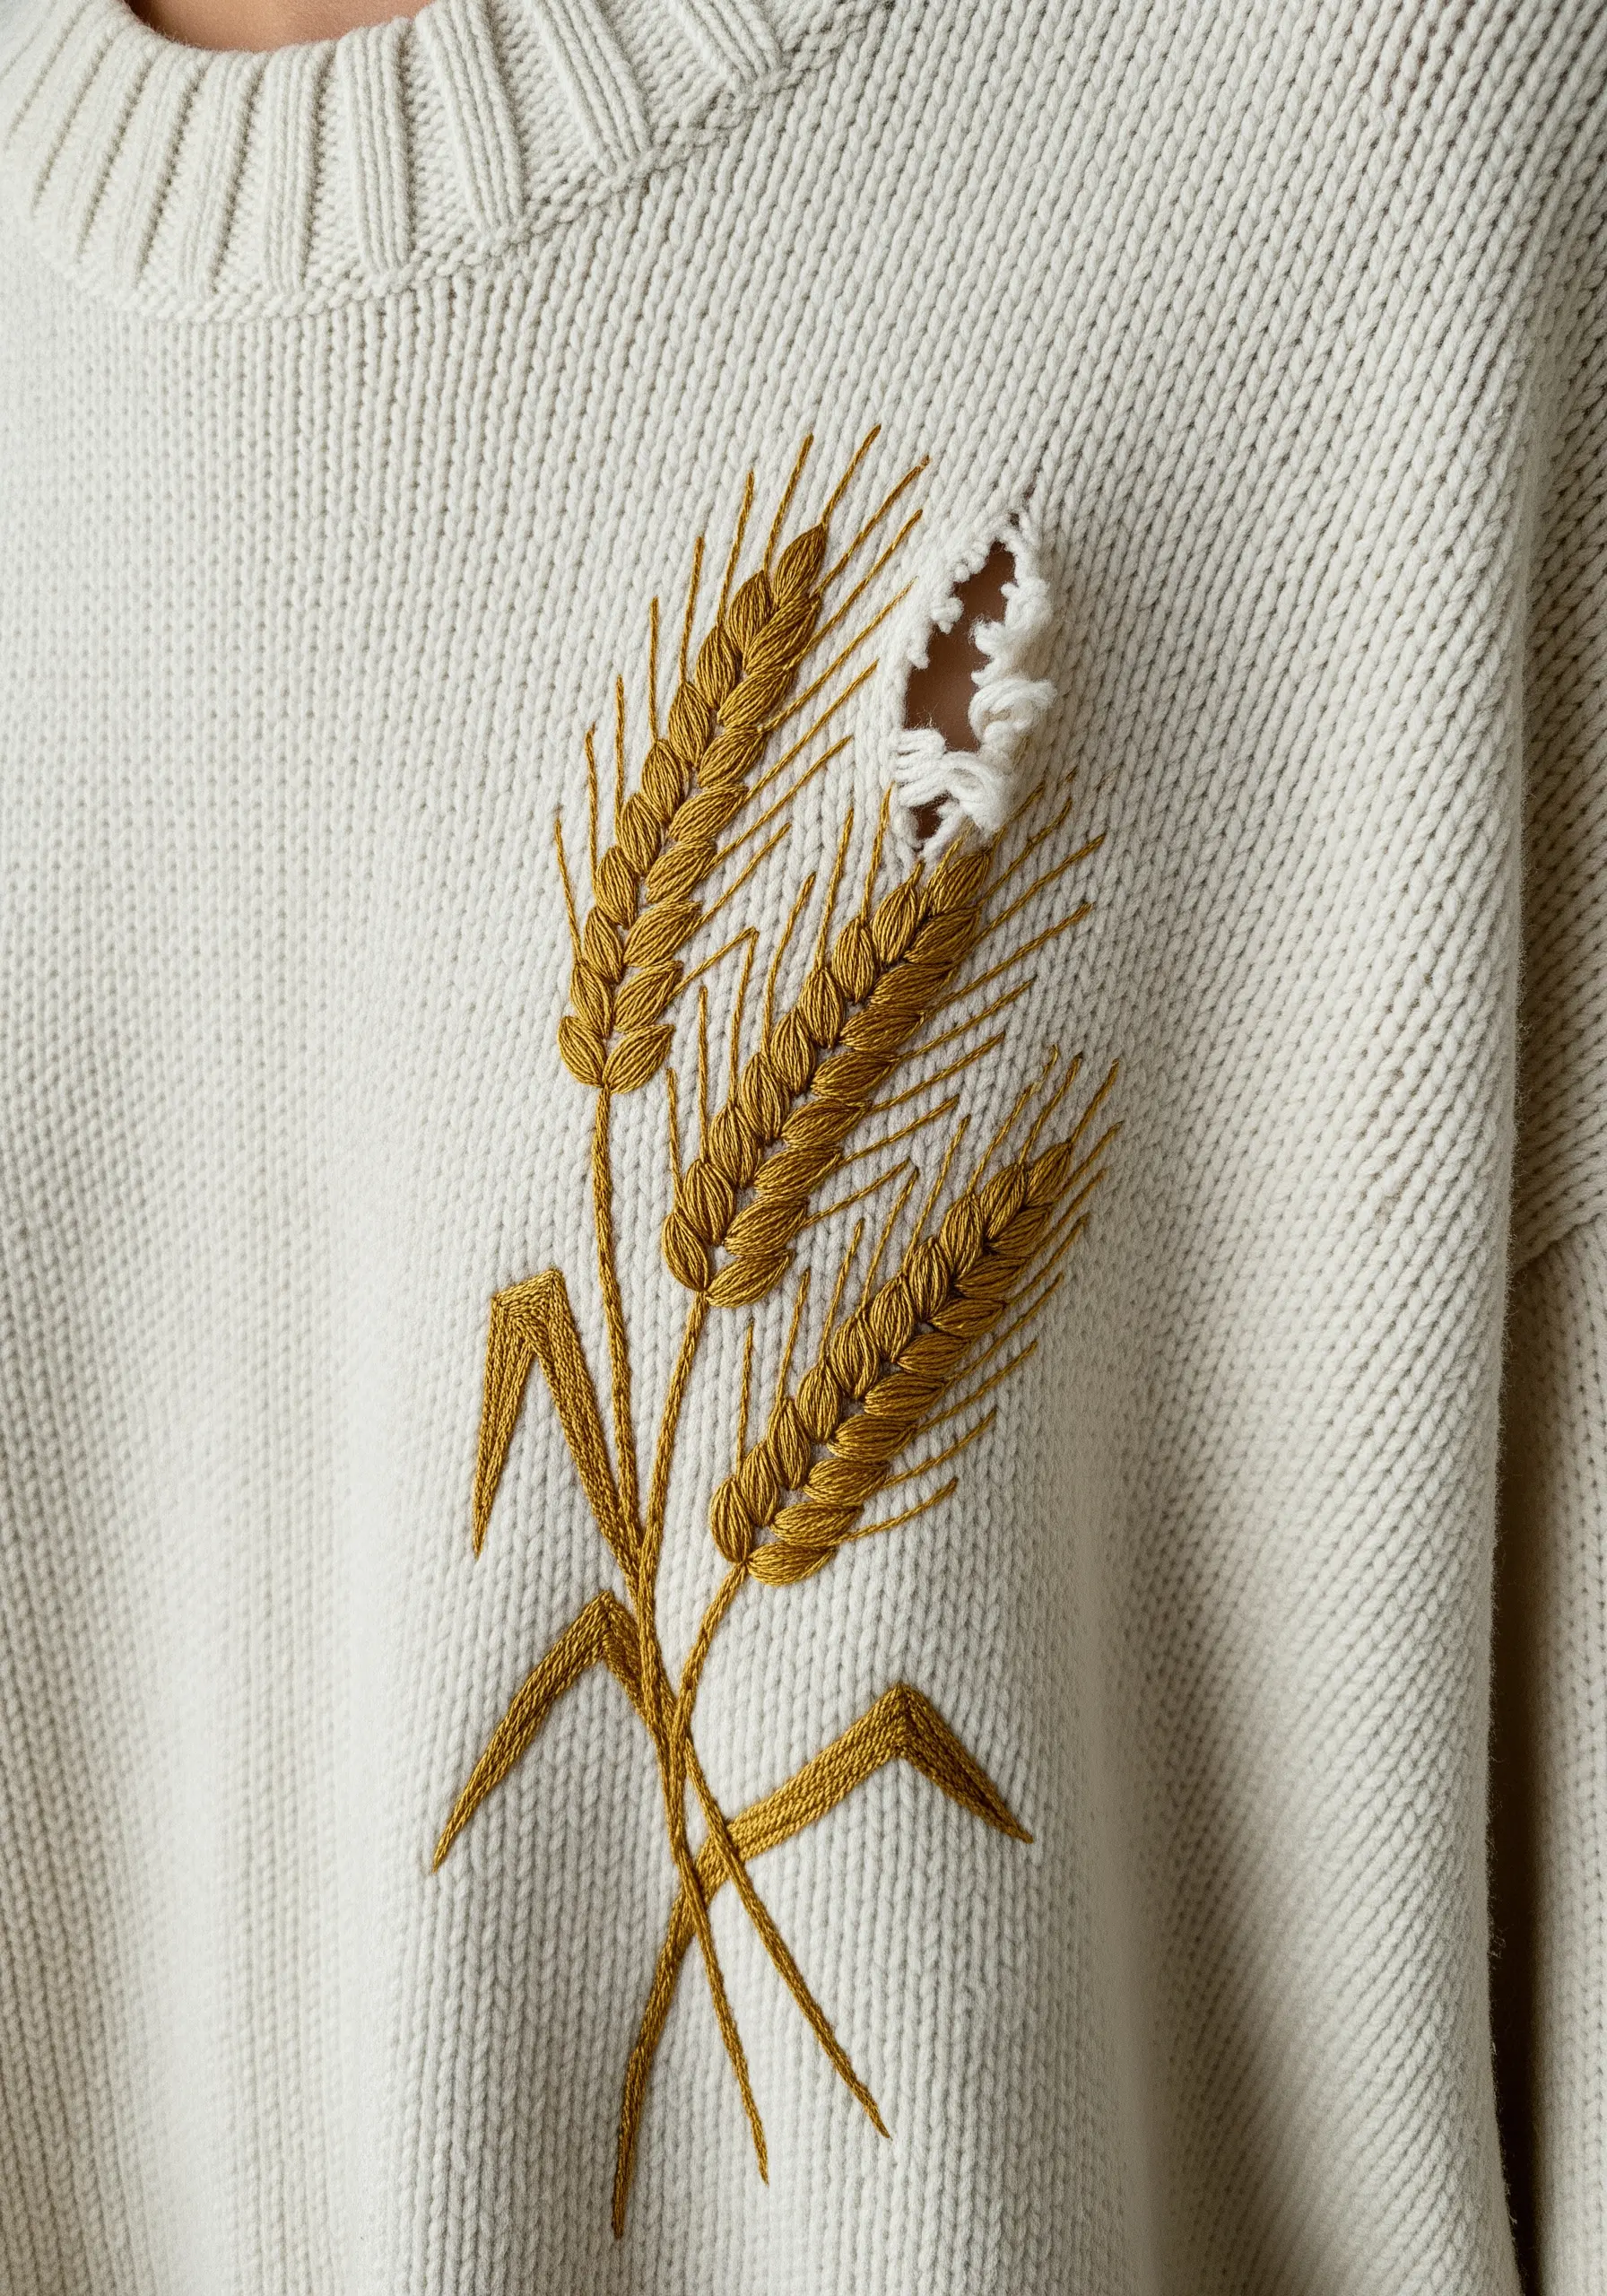
Instead of just covering a hole, make it an intentional part of your embroidery.
Position your design so the tear becomes a feature—here, the hole acts as a textural break in a stalk of wheat.
Surround the hole with stabilizing stitches (like a small circle of backstitches) before you begin the main embroidery to prevent further fraying.
This clever approach doesn’t just mend the garment; it gives the imperfection a new purpose and a central role in the art.
17. Use Negative Space for a Modern Graphic Leaf
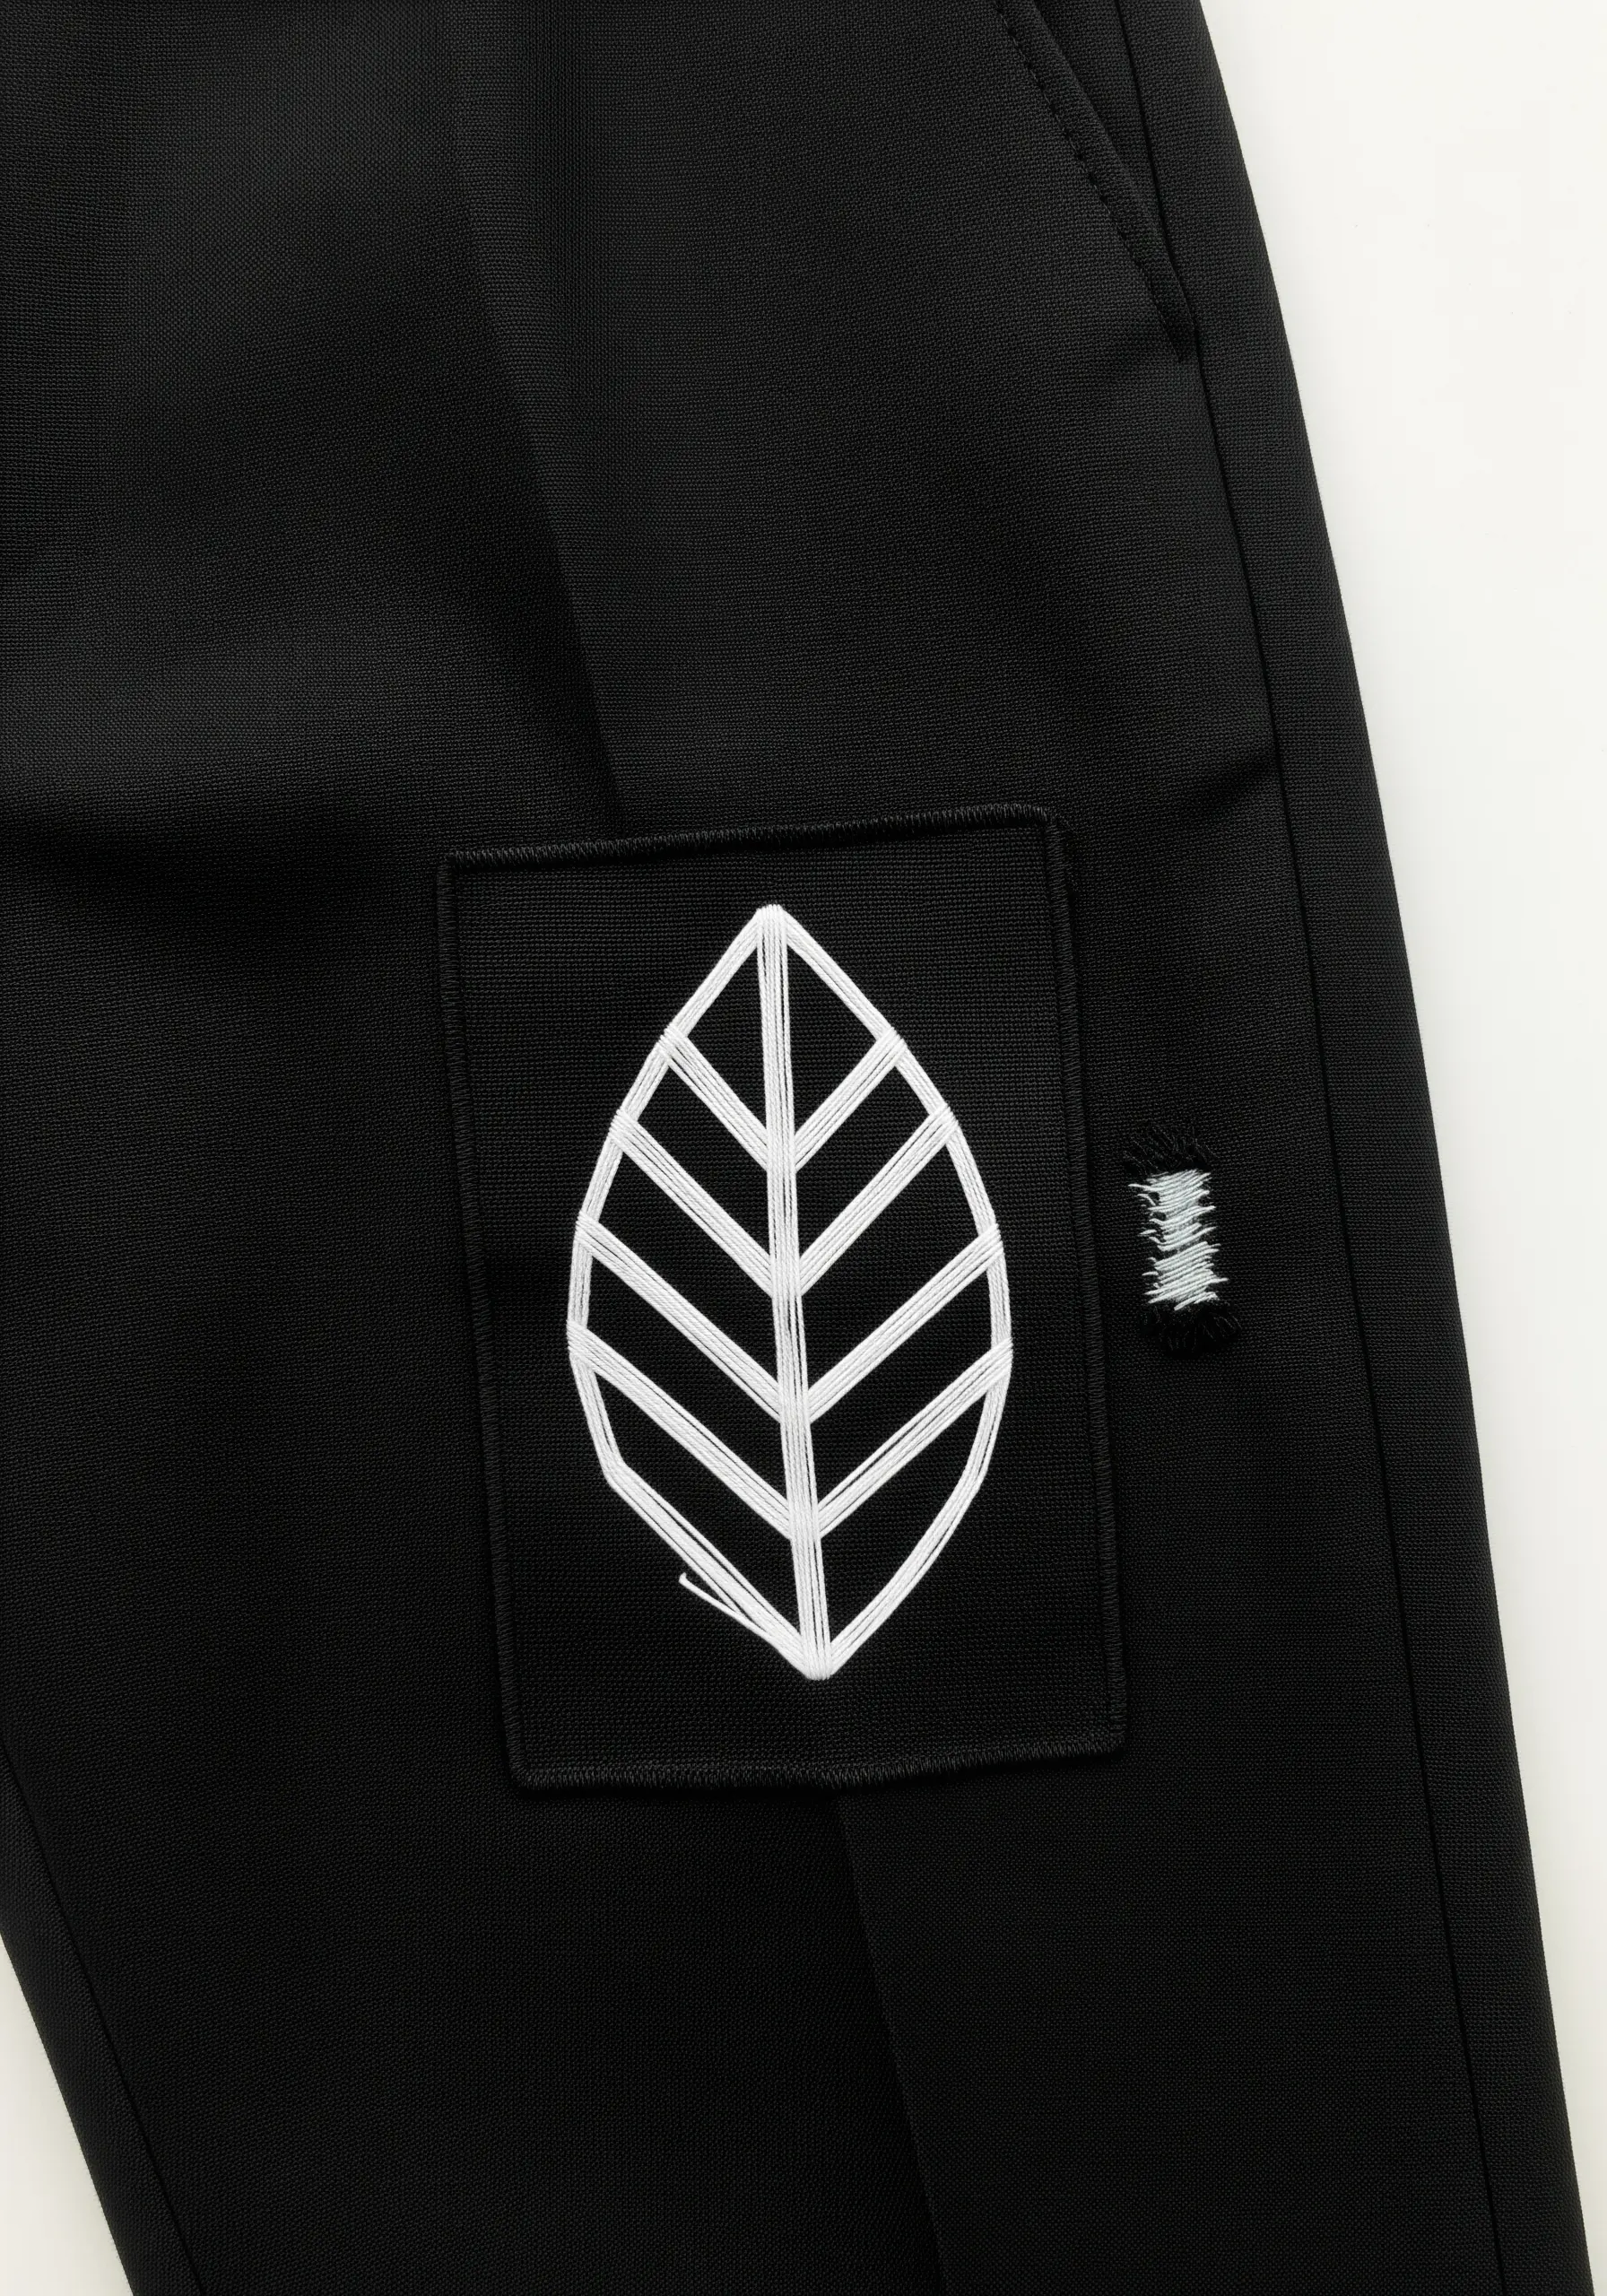
Create a bold, contemporary patch by focusing on negative space and clean lines.
On a black fabric patch, stitch the outline and veins of a leaf in a stark white thread, leaving the leaf’s body unfilled.
Use a thick thread or multiple strands and lay them down with a couching stitch for perfectly smooth, clean lines that don’t sink into the fabric.
This high-contrast, minimalist approach feels modern and intentional, perfect for repairing sportswear or technical fabrics.
18. Create a Textured Emblem with Turkey Work
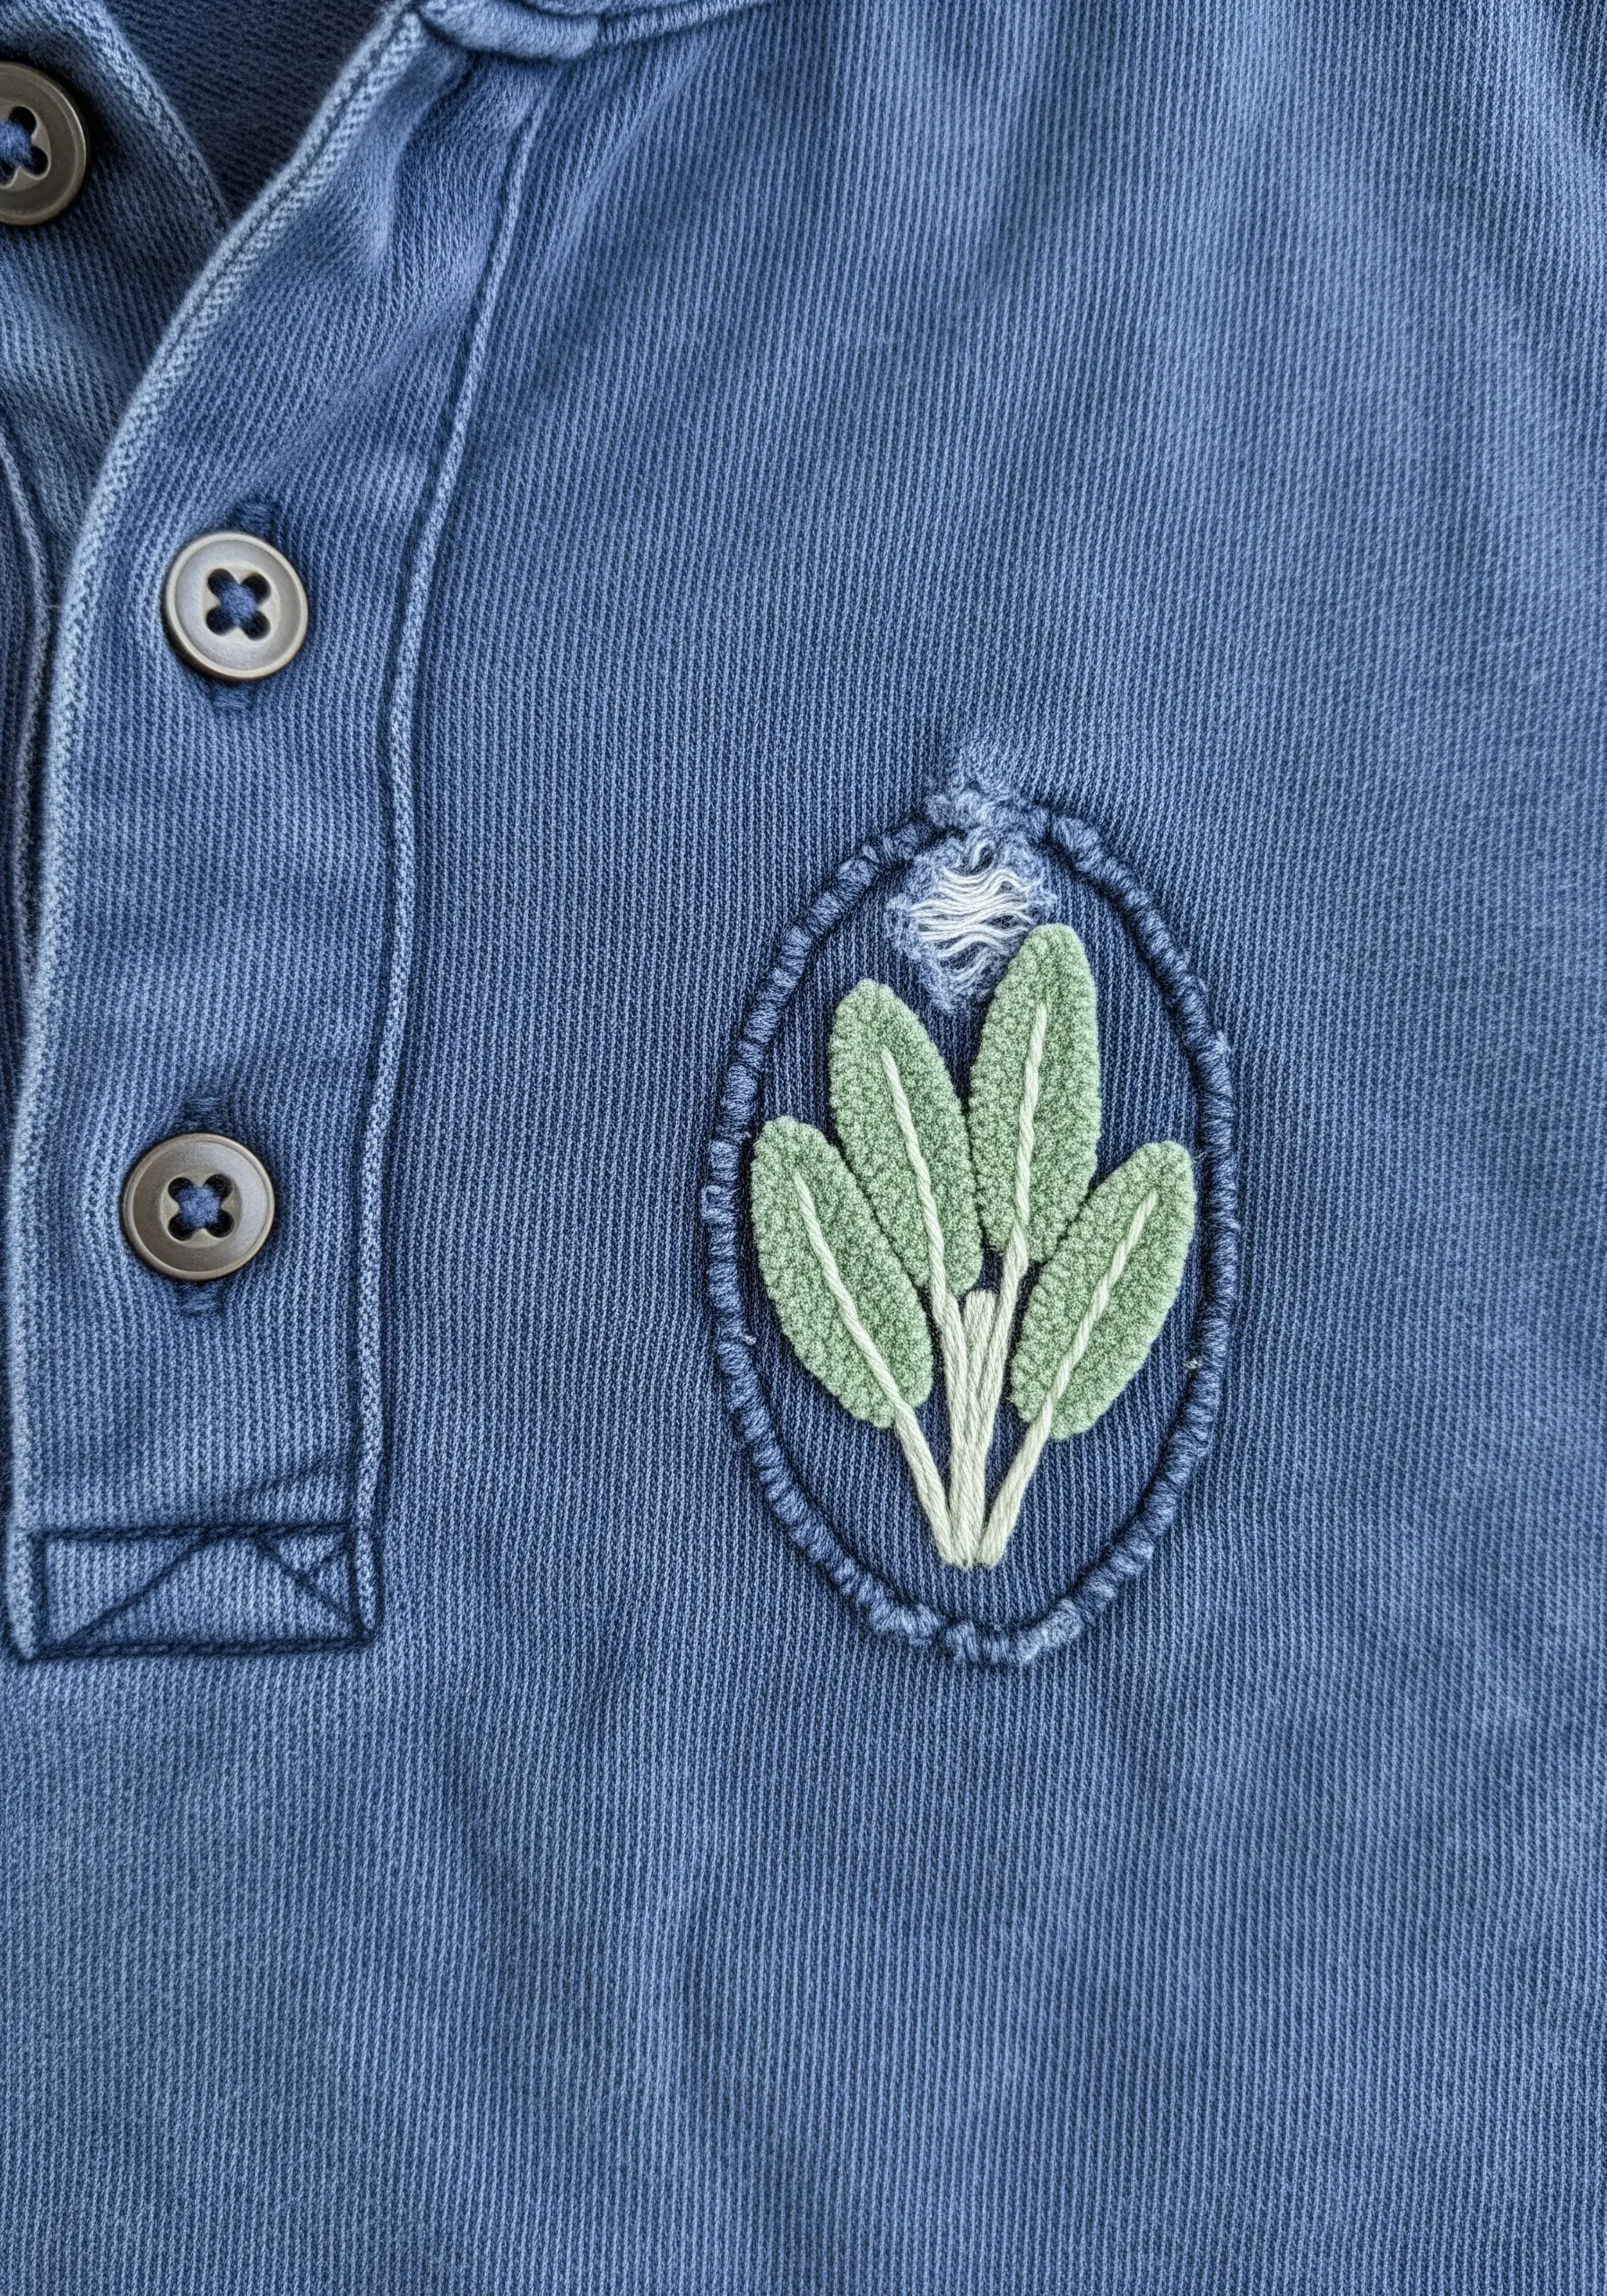
Mimic the soft, fuzzy texture of sage leaves by using the turkey work stitch.
Create loops of thread and then carefully snip and trim them to create a plush, velvety pile.
Combine this with a simple split stitch for the stems and a couched border to contain the fluffy texture within a neat oval emblem.
This technique adds a unique tactile quality to your repair, making it perfect for covering snags on textured fabrics like piqué cotton.
19. Go Large-Scale for Maximum Impact
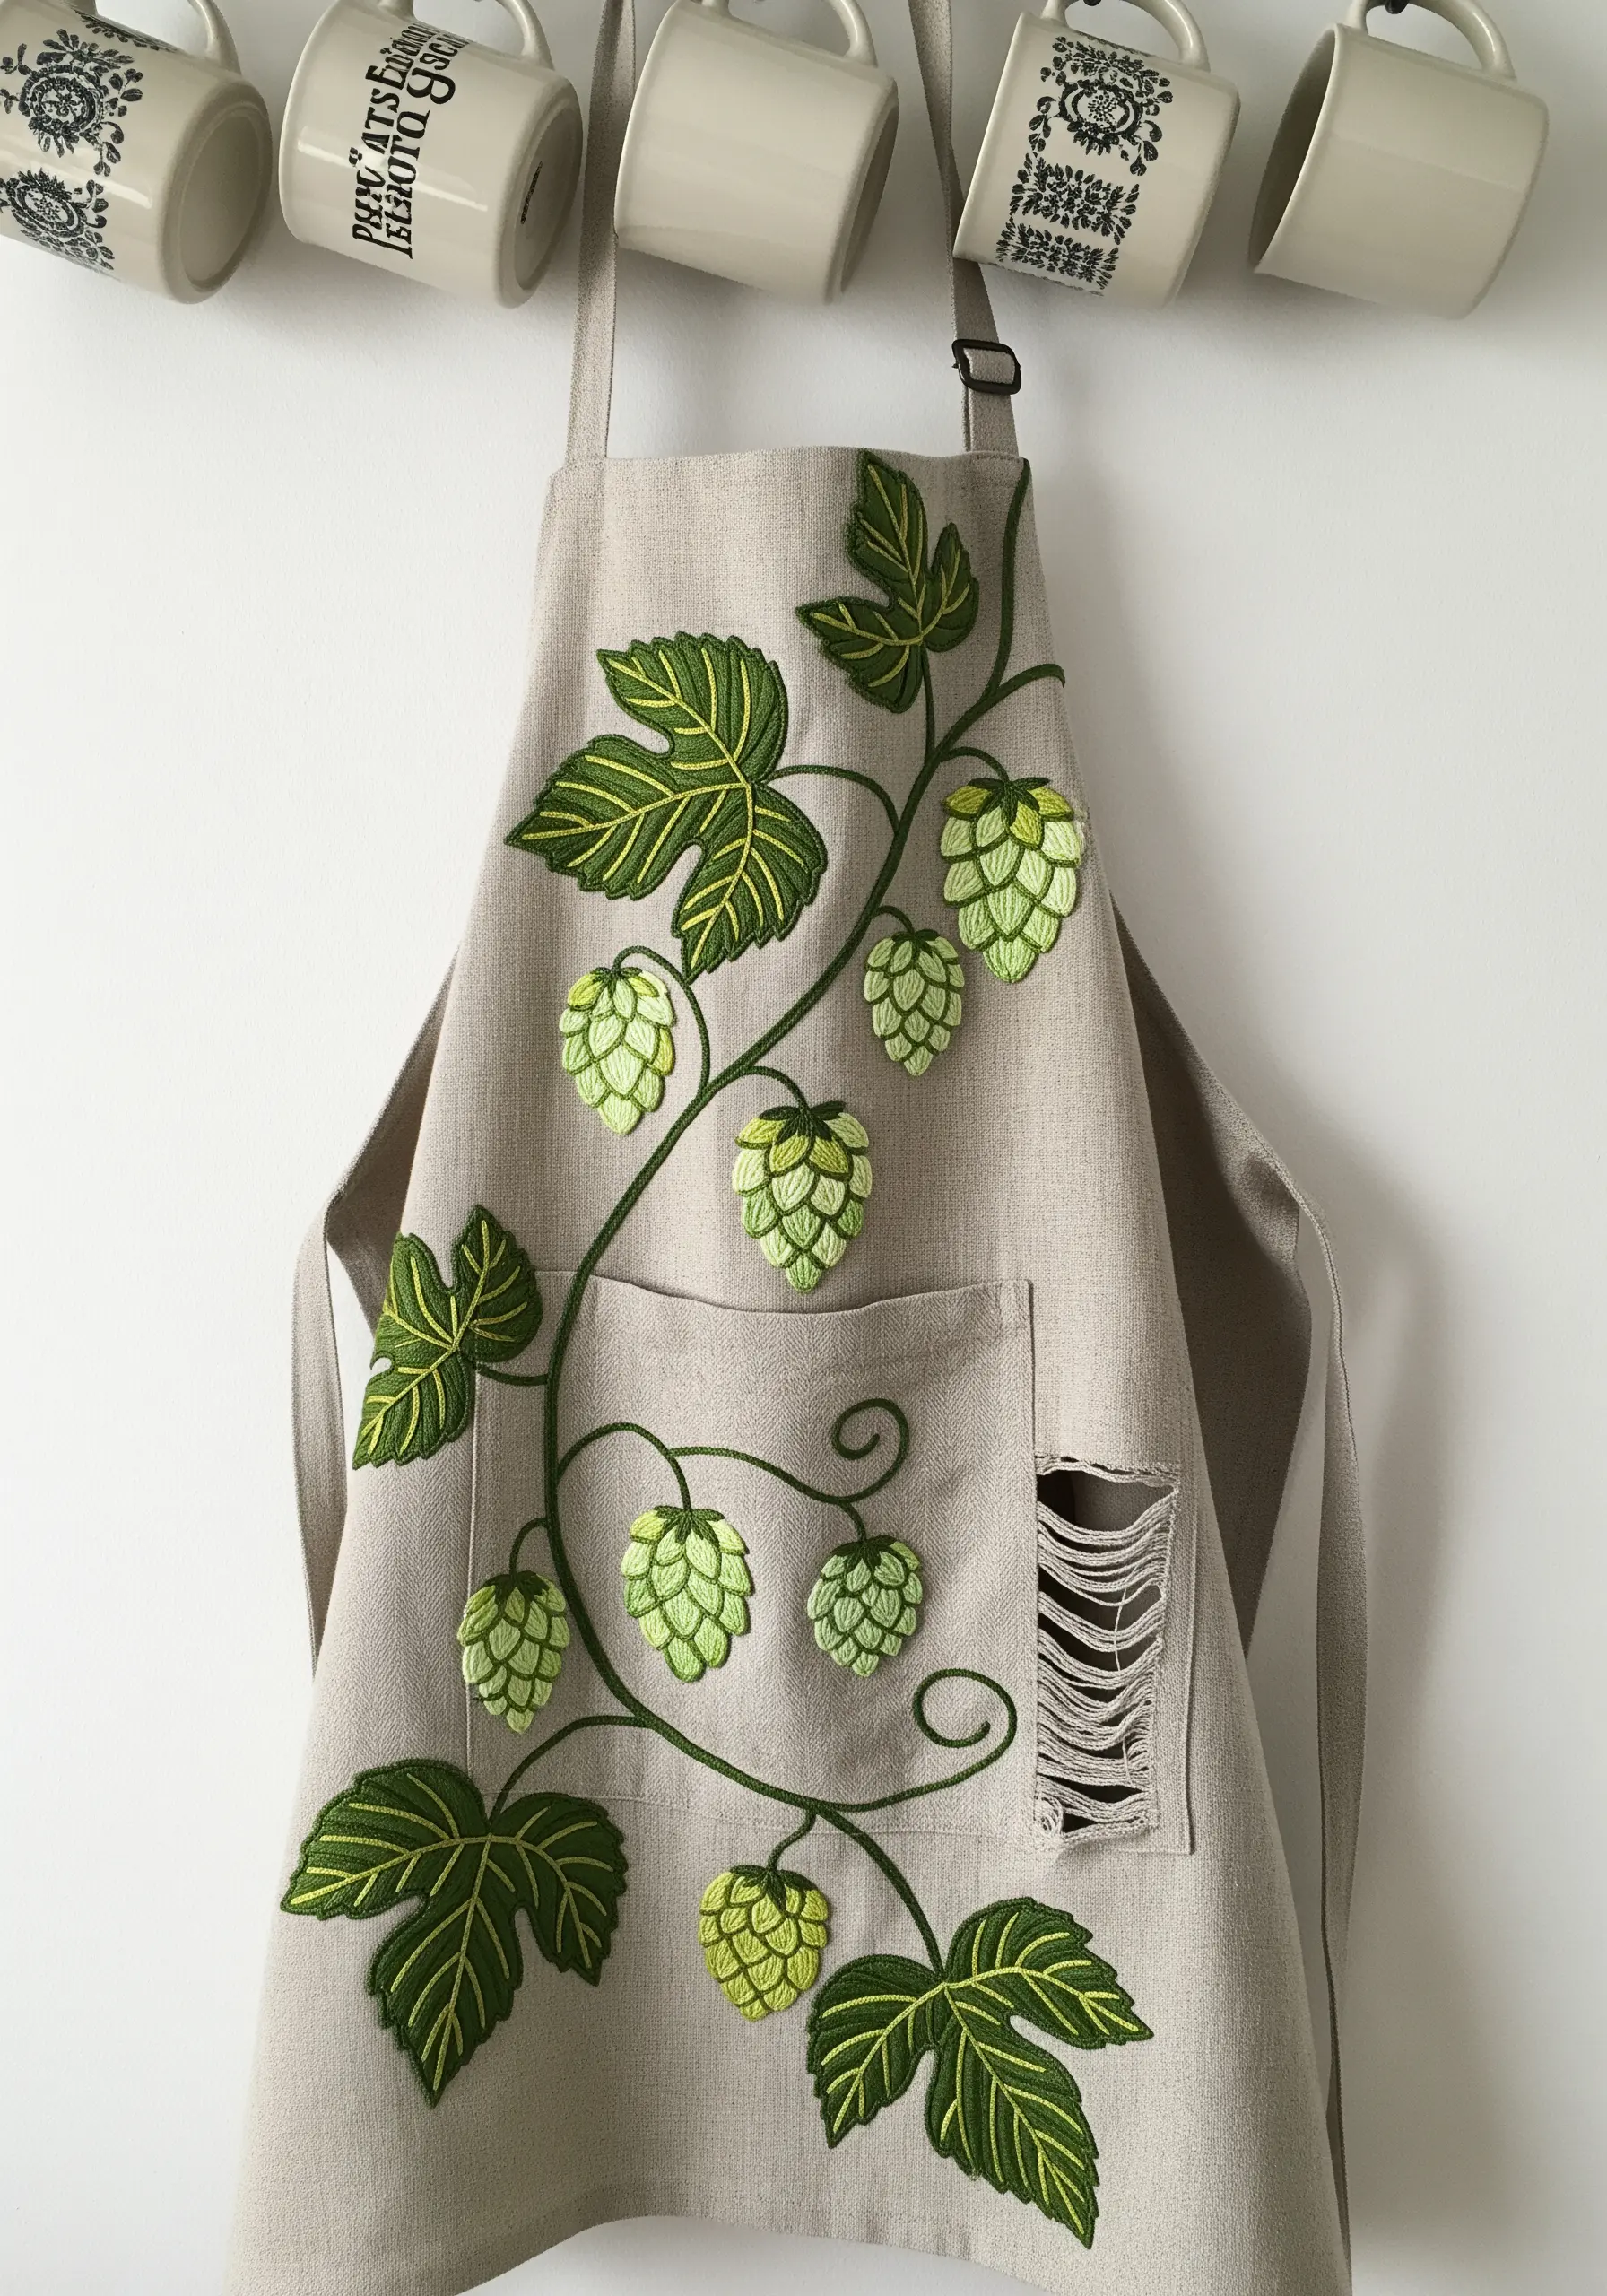
Don’t be afraid to let your repair take over a garment. For a large damaged area on an apron or jacket, a sprawling botanical design is the perfect solution.
A climbing hop vine allows you to connect smaller patched areas with wandering stems, creating one cohesive piece of art.
Use a woven picot stitch to give the hop cones their characteristic dimension and texture, making them stand out against the flatter satin-stitched leaves.
This turns a significant repair into the garment’s defining feature.
20. Float Delicate Stitches on Sheer Fabric
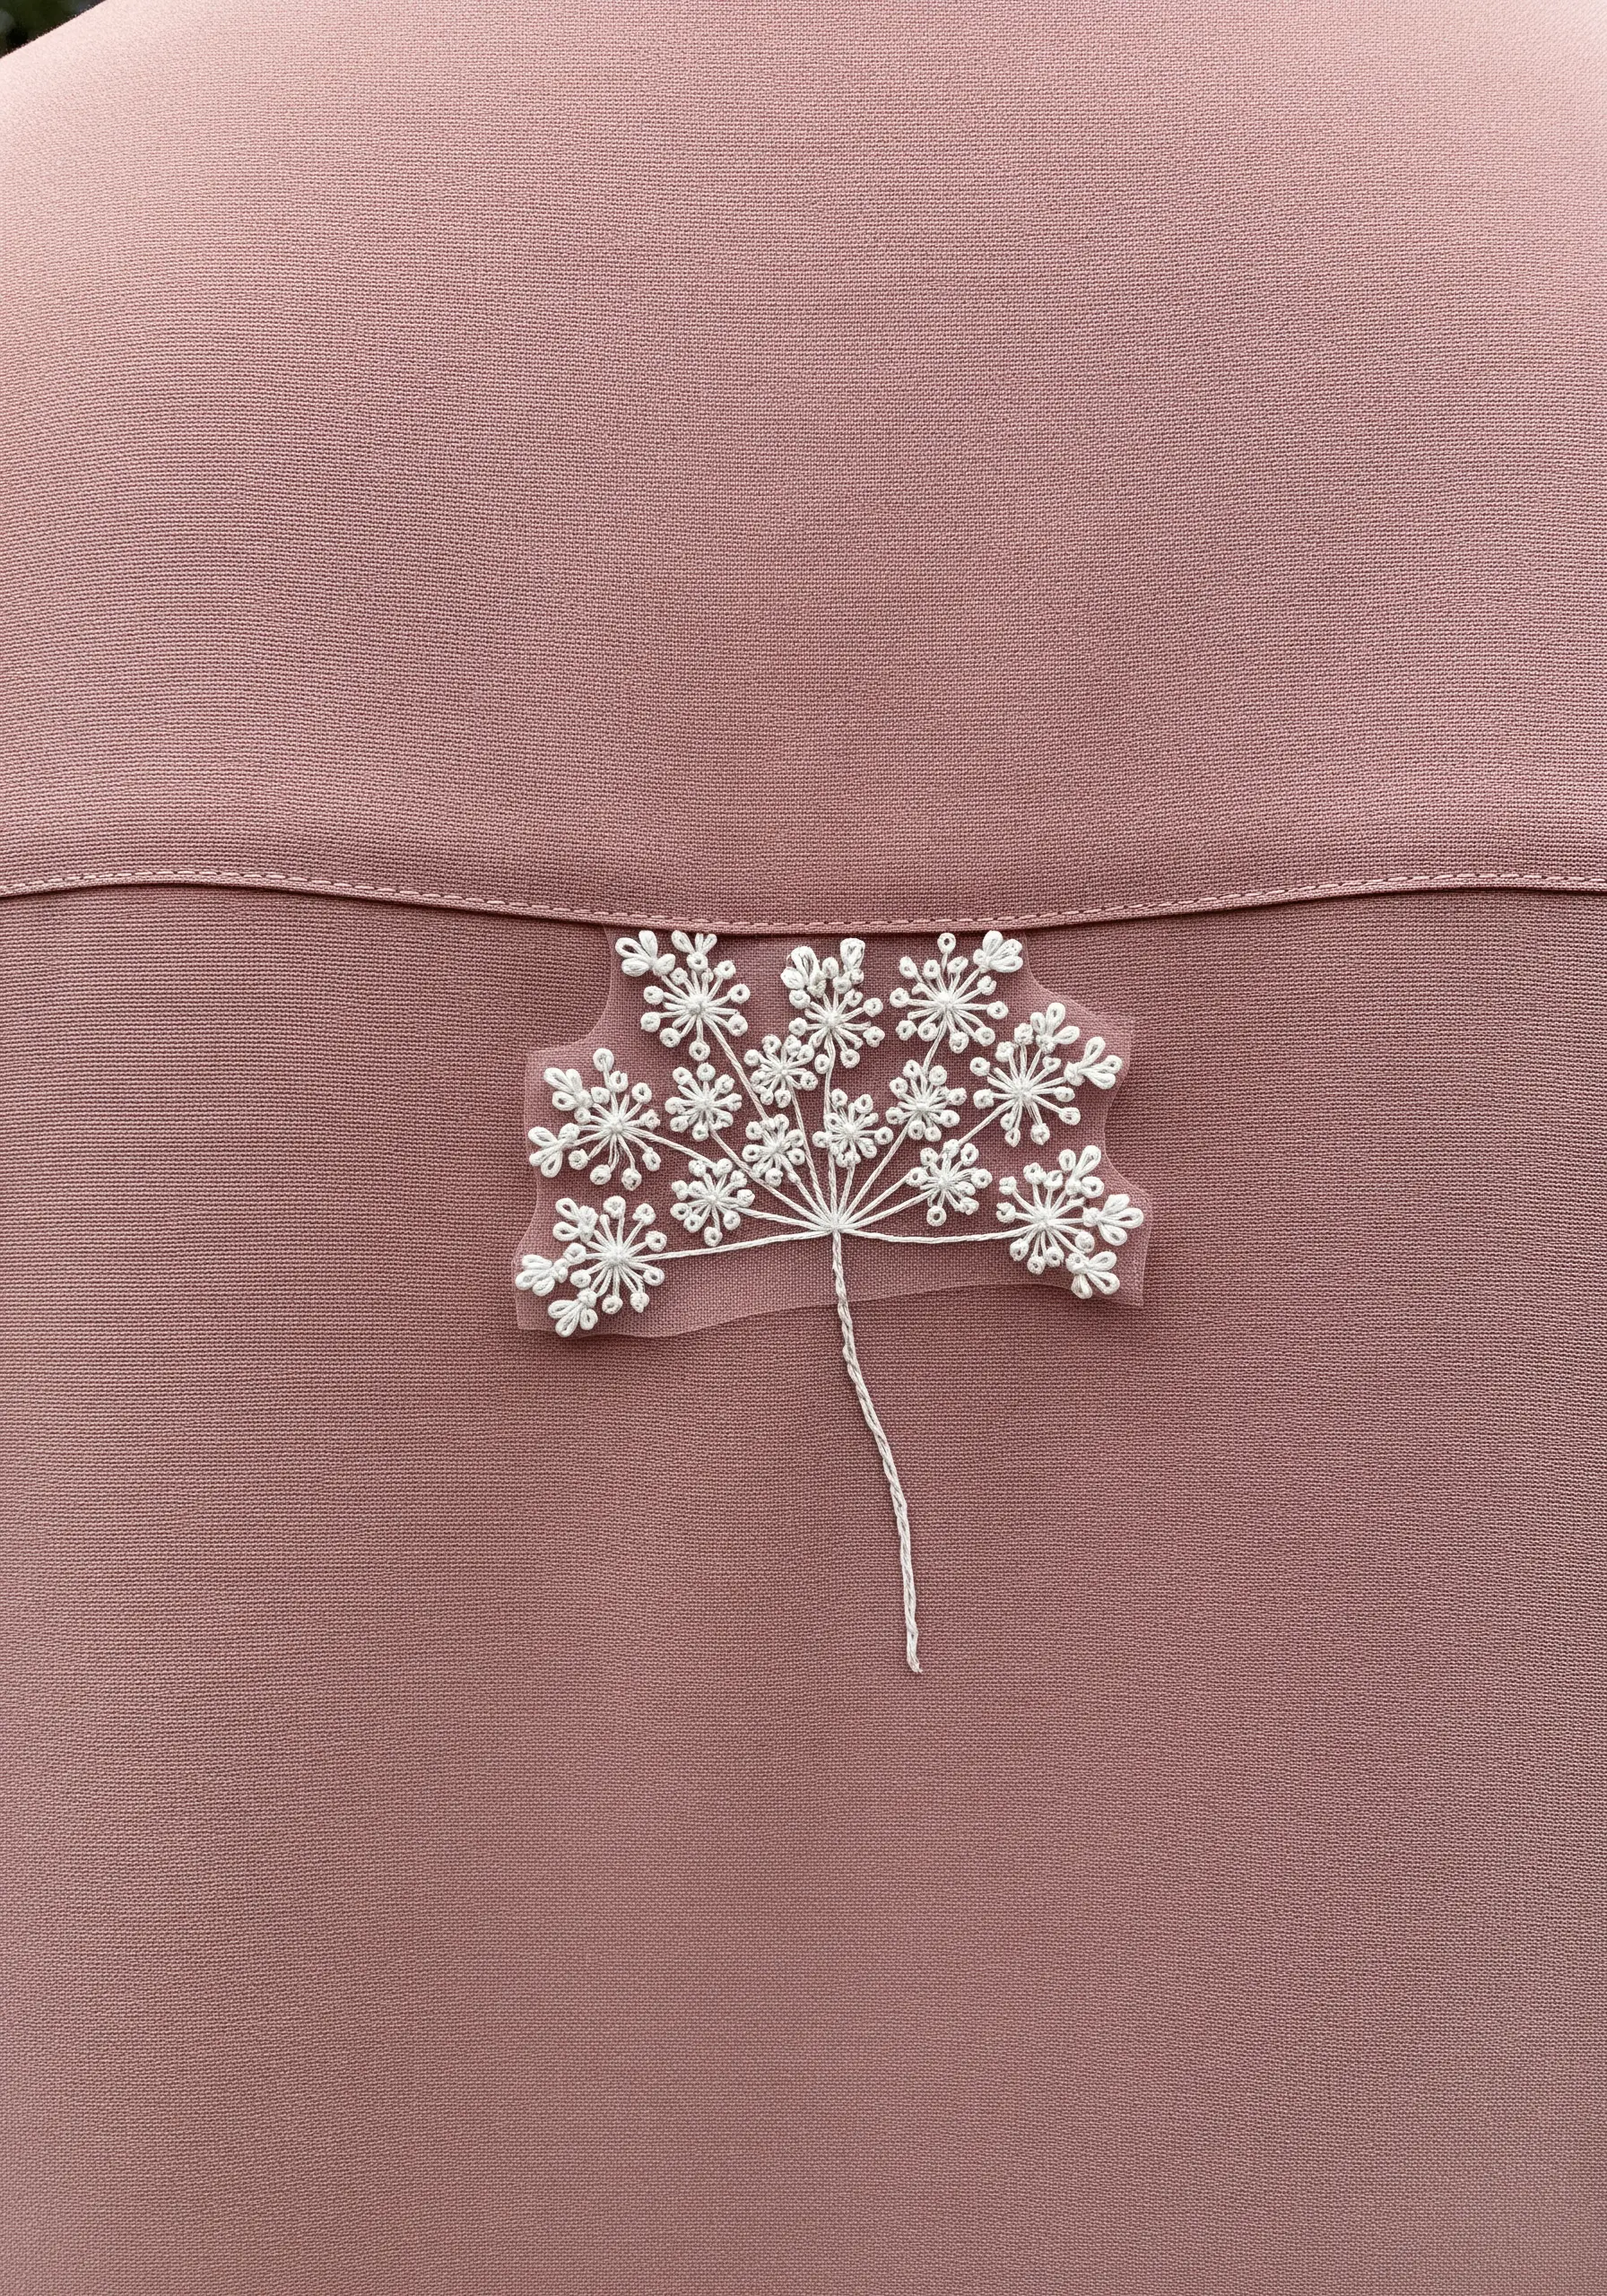
For a truly ethereal patch, use a sheer fabric like tulle or organza as your base.
This creates the illusion that the embroidery is floating directly on the garment.
Stitch a delicate flower like Queen Anne’s Lace using tiny French knots and detached chain stitches in a fine white thread.
Carefully trim the excess organza around the motif before attaching it with tiny, nearly invisible stitches. This technique is perfect for repairing fine or lightweight fabrics without adding bulk.
21. Map Growth with Abstract Tree Rings

For a circular hole, an embroidered tree ring is a conceptually perfect and visually stunning solution.
Use a whipped backstitch or stem stitch to create concentric circles, varying the thread colors from dark browns to pale tans to mimic the natural variations in wood grain.
You can even add a tiny, sprouting branch to symbolize renewal and new growth.
This abstract botanical design turns a simple darn into a meaningful meditation on repair and resilience.


