
There is a special kind of magic in translating the delicate beauty of a pressed flower into thread, especially when you share that process with a child. It’s more than just a craft project; it’s a way to slow down, observe the details of nature, and create a lasting memory together.
These projects are designed to do just that. They move beyond simple patterns to teach you how to capture the essence of a flower—the graceful curve of a petal, the texture of a leaf, the vibrant gradient of color as it reaches for the sun.
Here, you’ll find techniques that are both accessible for young hands and satisfying for your own artistic spirit. Forget perfection. Instead, focus on the joy of making something beautiful and tangible, a small piece of nature you can hold onto long after the season has passed.
1. Mastering Pansy Petal Gradients
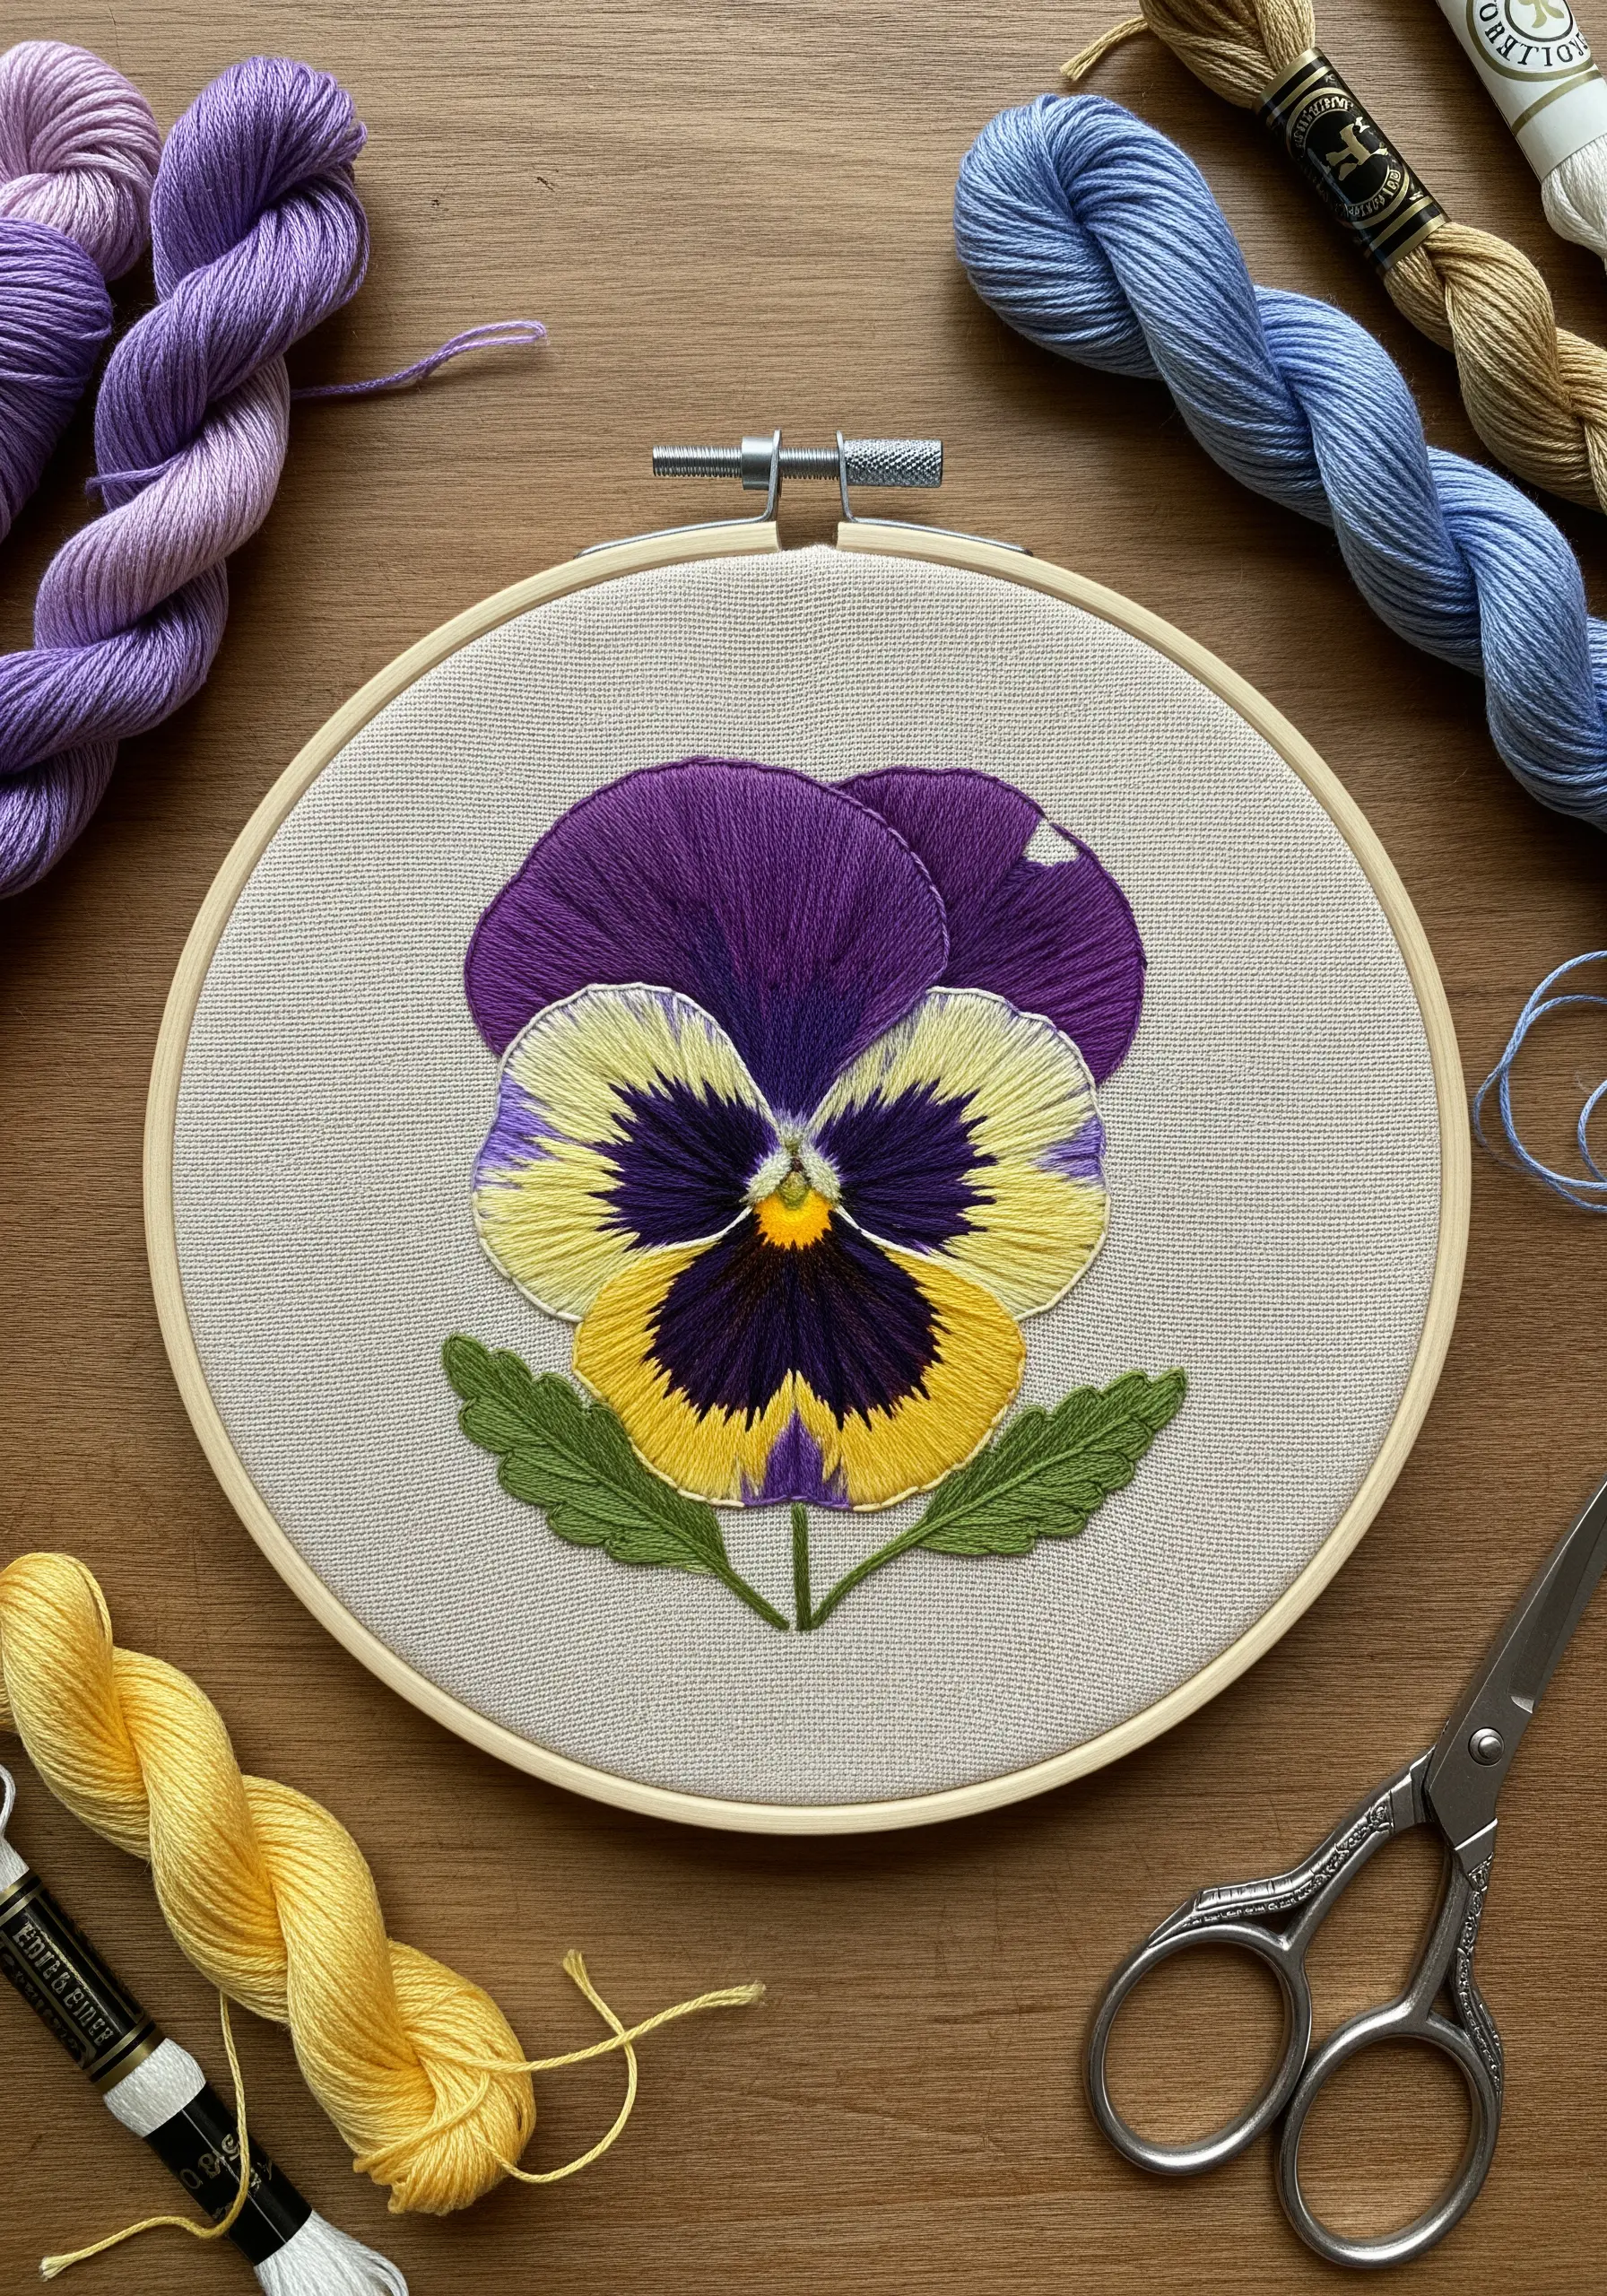
To achieve the pansy’s velvety, blended petals, use the long-and-short stitch technique.
Work with a single strand of embroidery floss to create a smooth, paint-like transition between the deep violet, pale yellow, and rich gold.
Always direct your stitches outward from the flower’s center, following the natural curve of the petal—this simple step adds realism and dimension.
For the dark veins, use a single strand of black or dark purple to add delicate, sharp lines with tiny straight stitches.
2. Creating a Wildflower Meadow on a Tote Bag
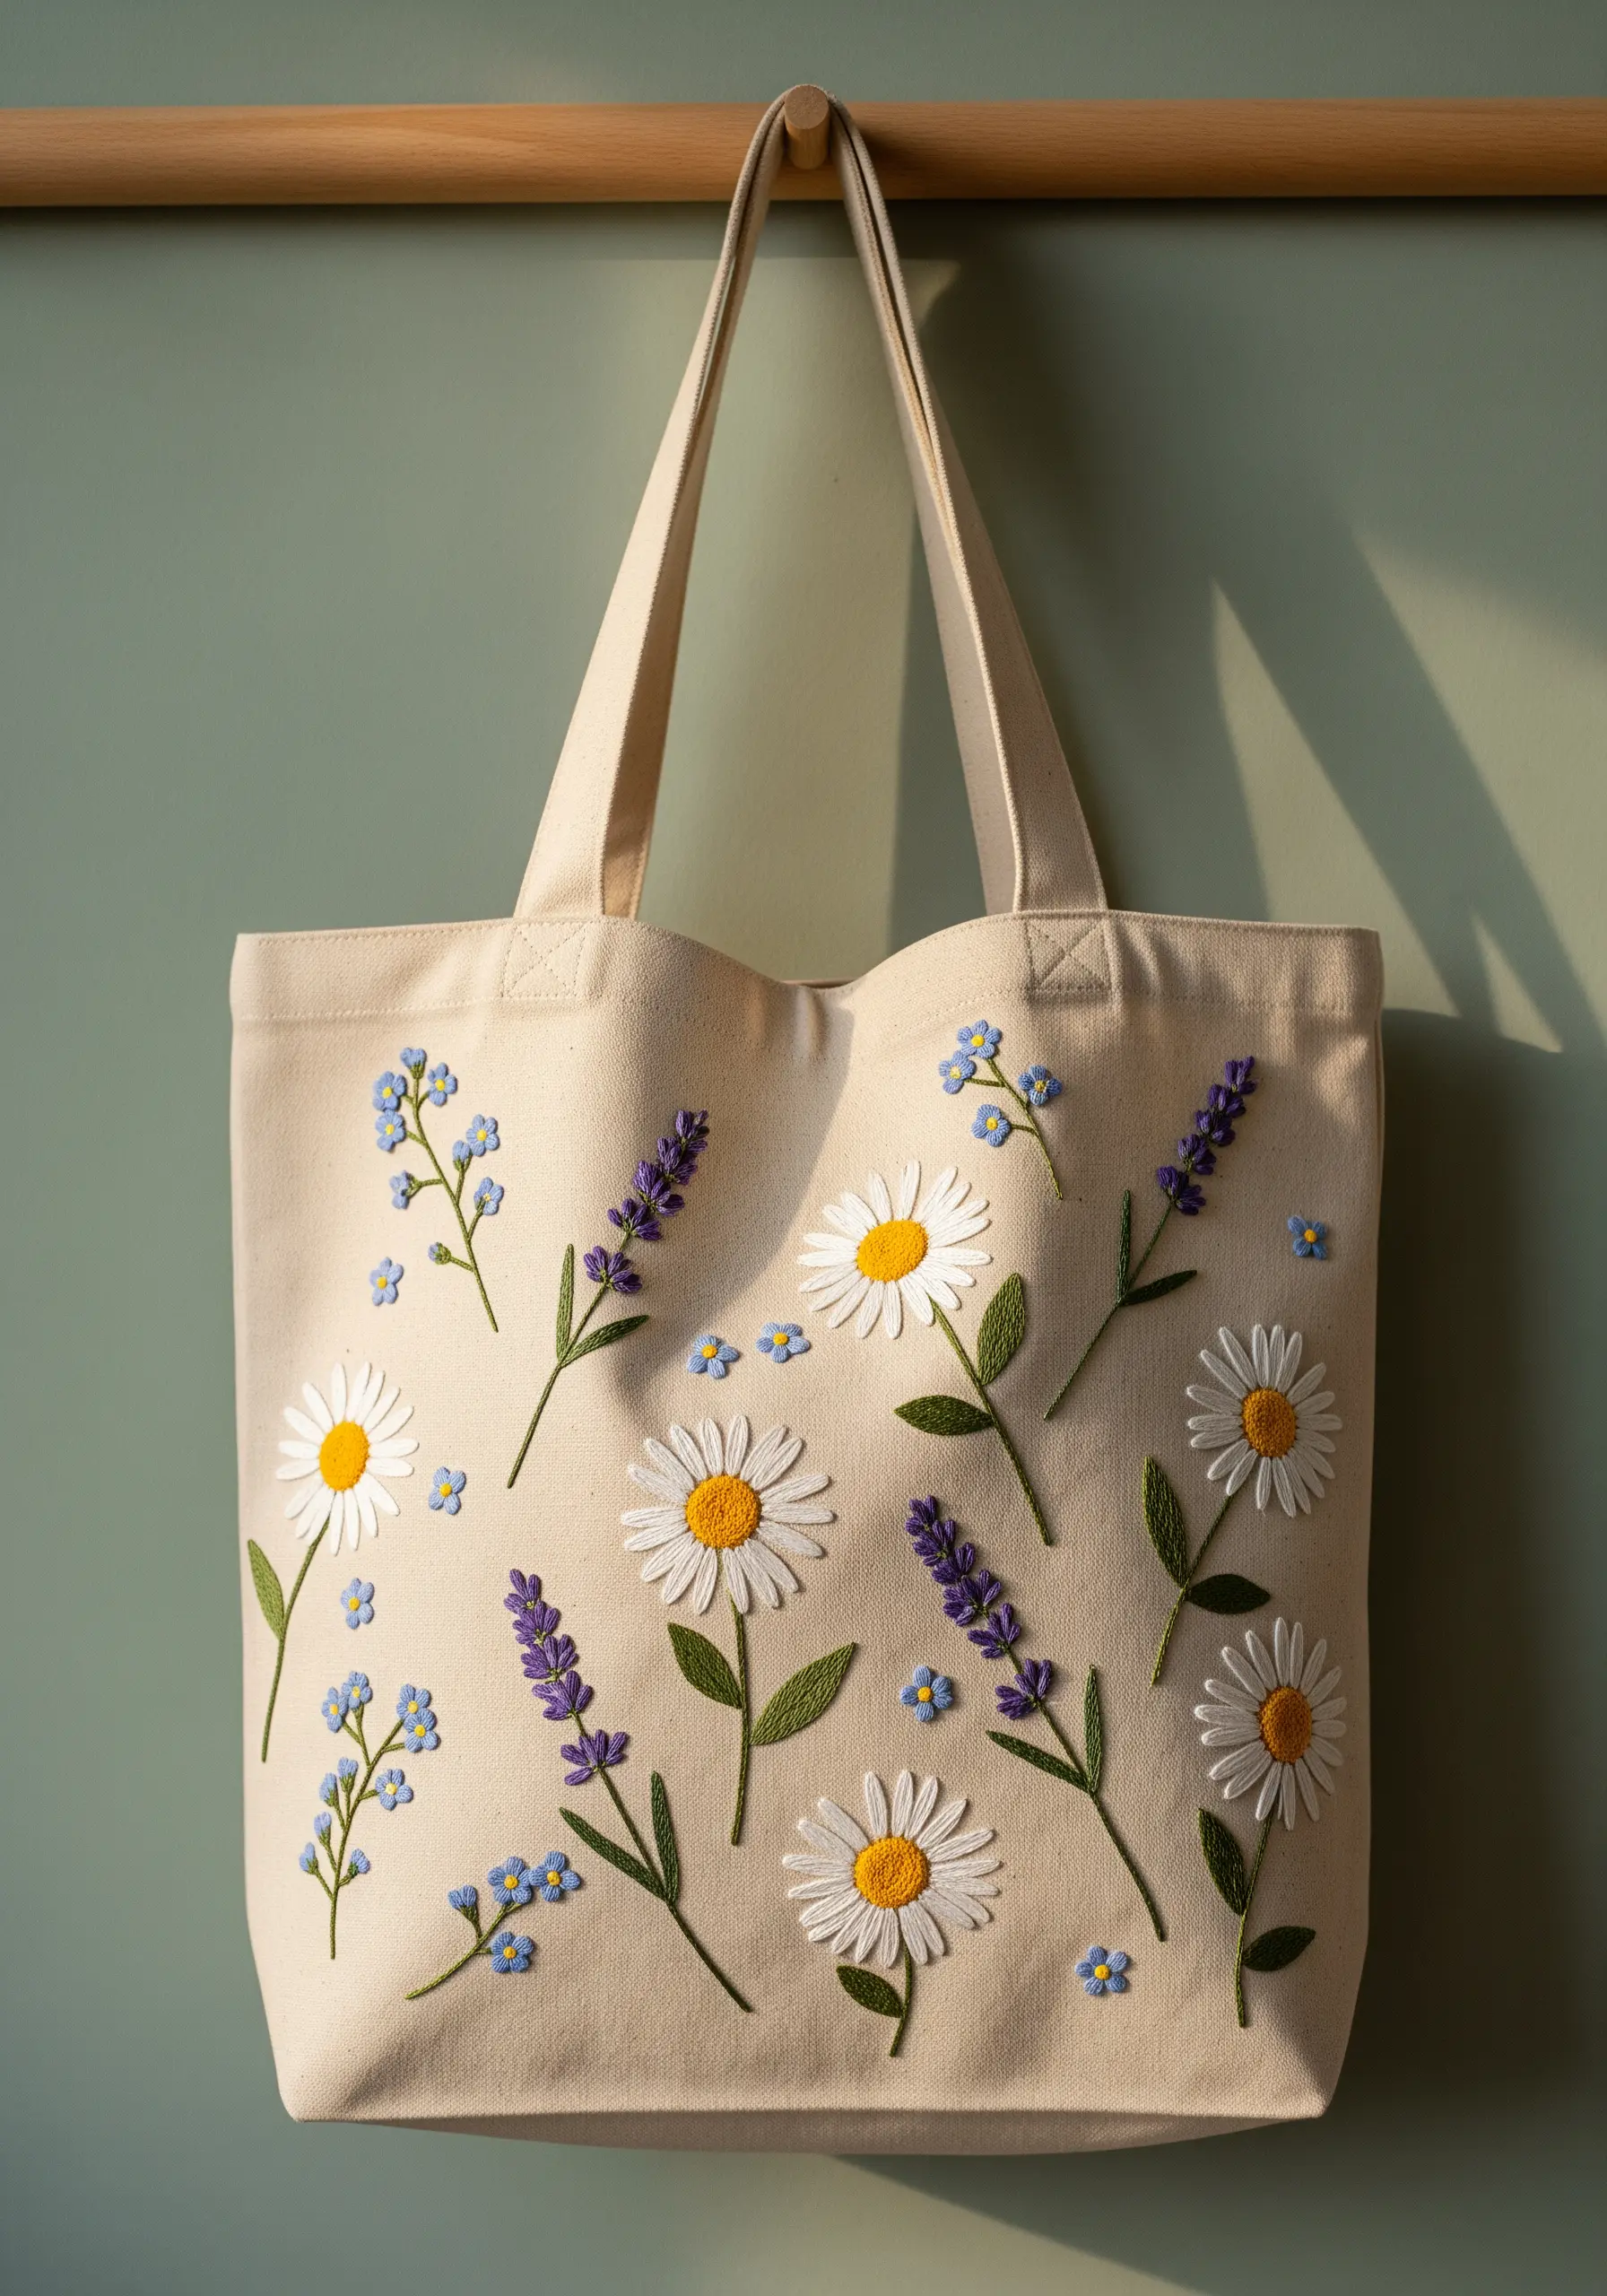
Arrange your daisies, lavender, and forget-me-nots in a scattered, asymmetrical pattern to mimic how they grow in nature.
Vary your stitch textures to create depth: use a smooth satin stitch for the daisy petals, raised French knots for the lavender buds, and tiny colonial knots for the centers of the forget-me-nots.
This combination of textures makes the floral embroidery ideas feel more dynamic and less flat against the canvas tote.
Use a lightweight, tear-away stabilizer inside the bag while you stitch to prevent the fabric from puckering and keep your stitches even.
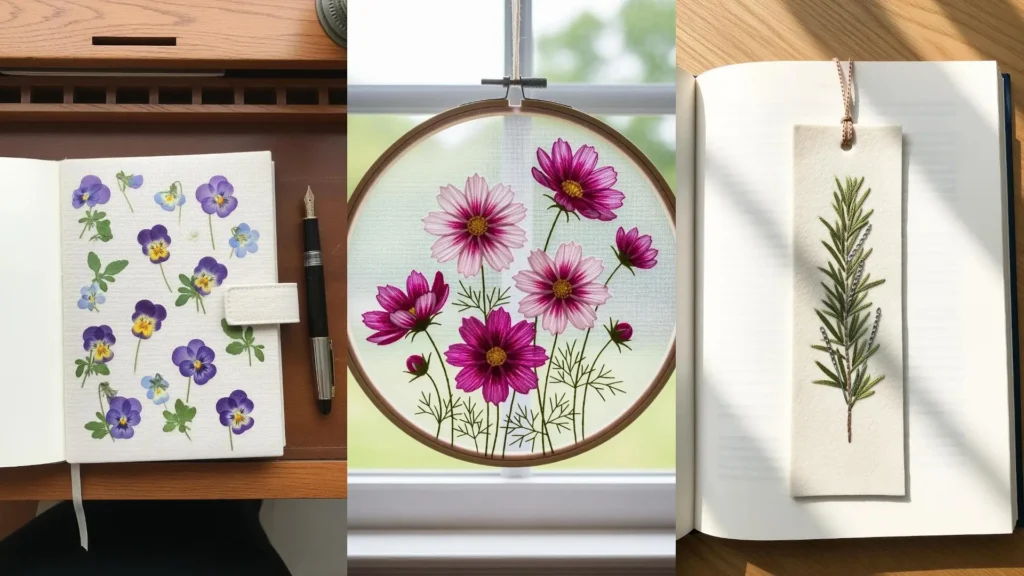
3. Embroidering a Botanical Bookmark on Cardstock
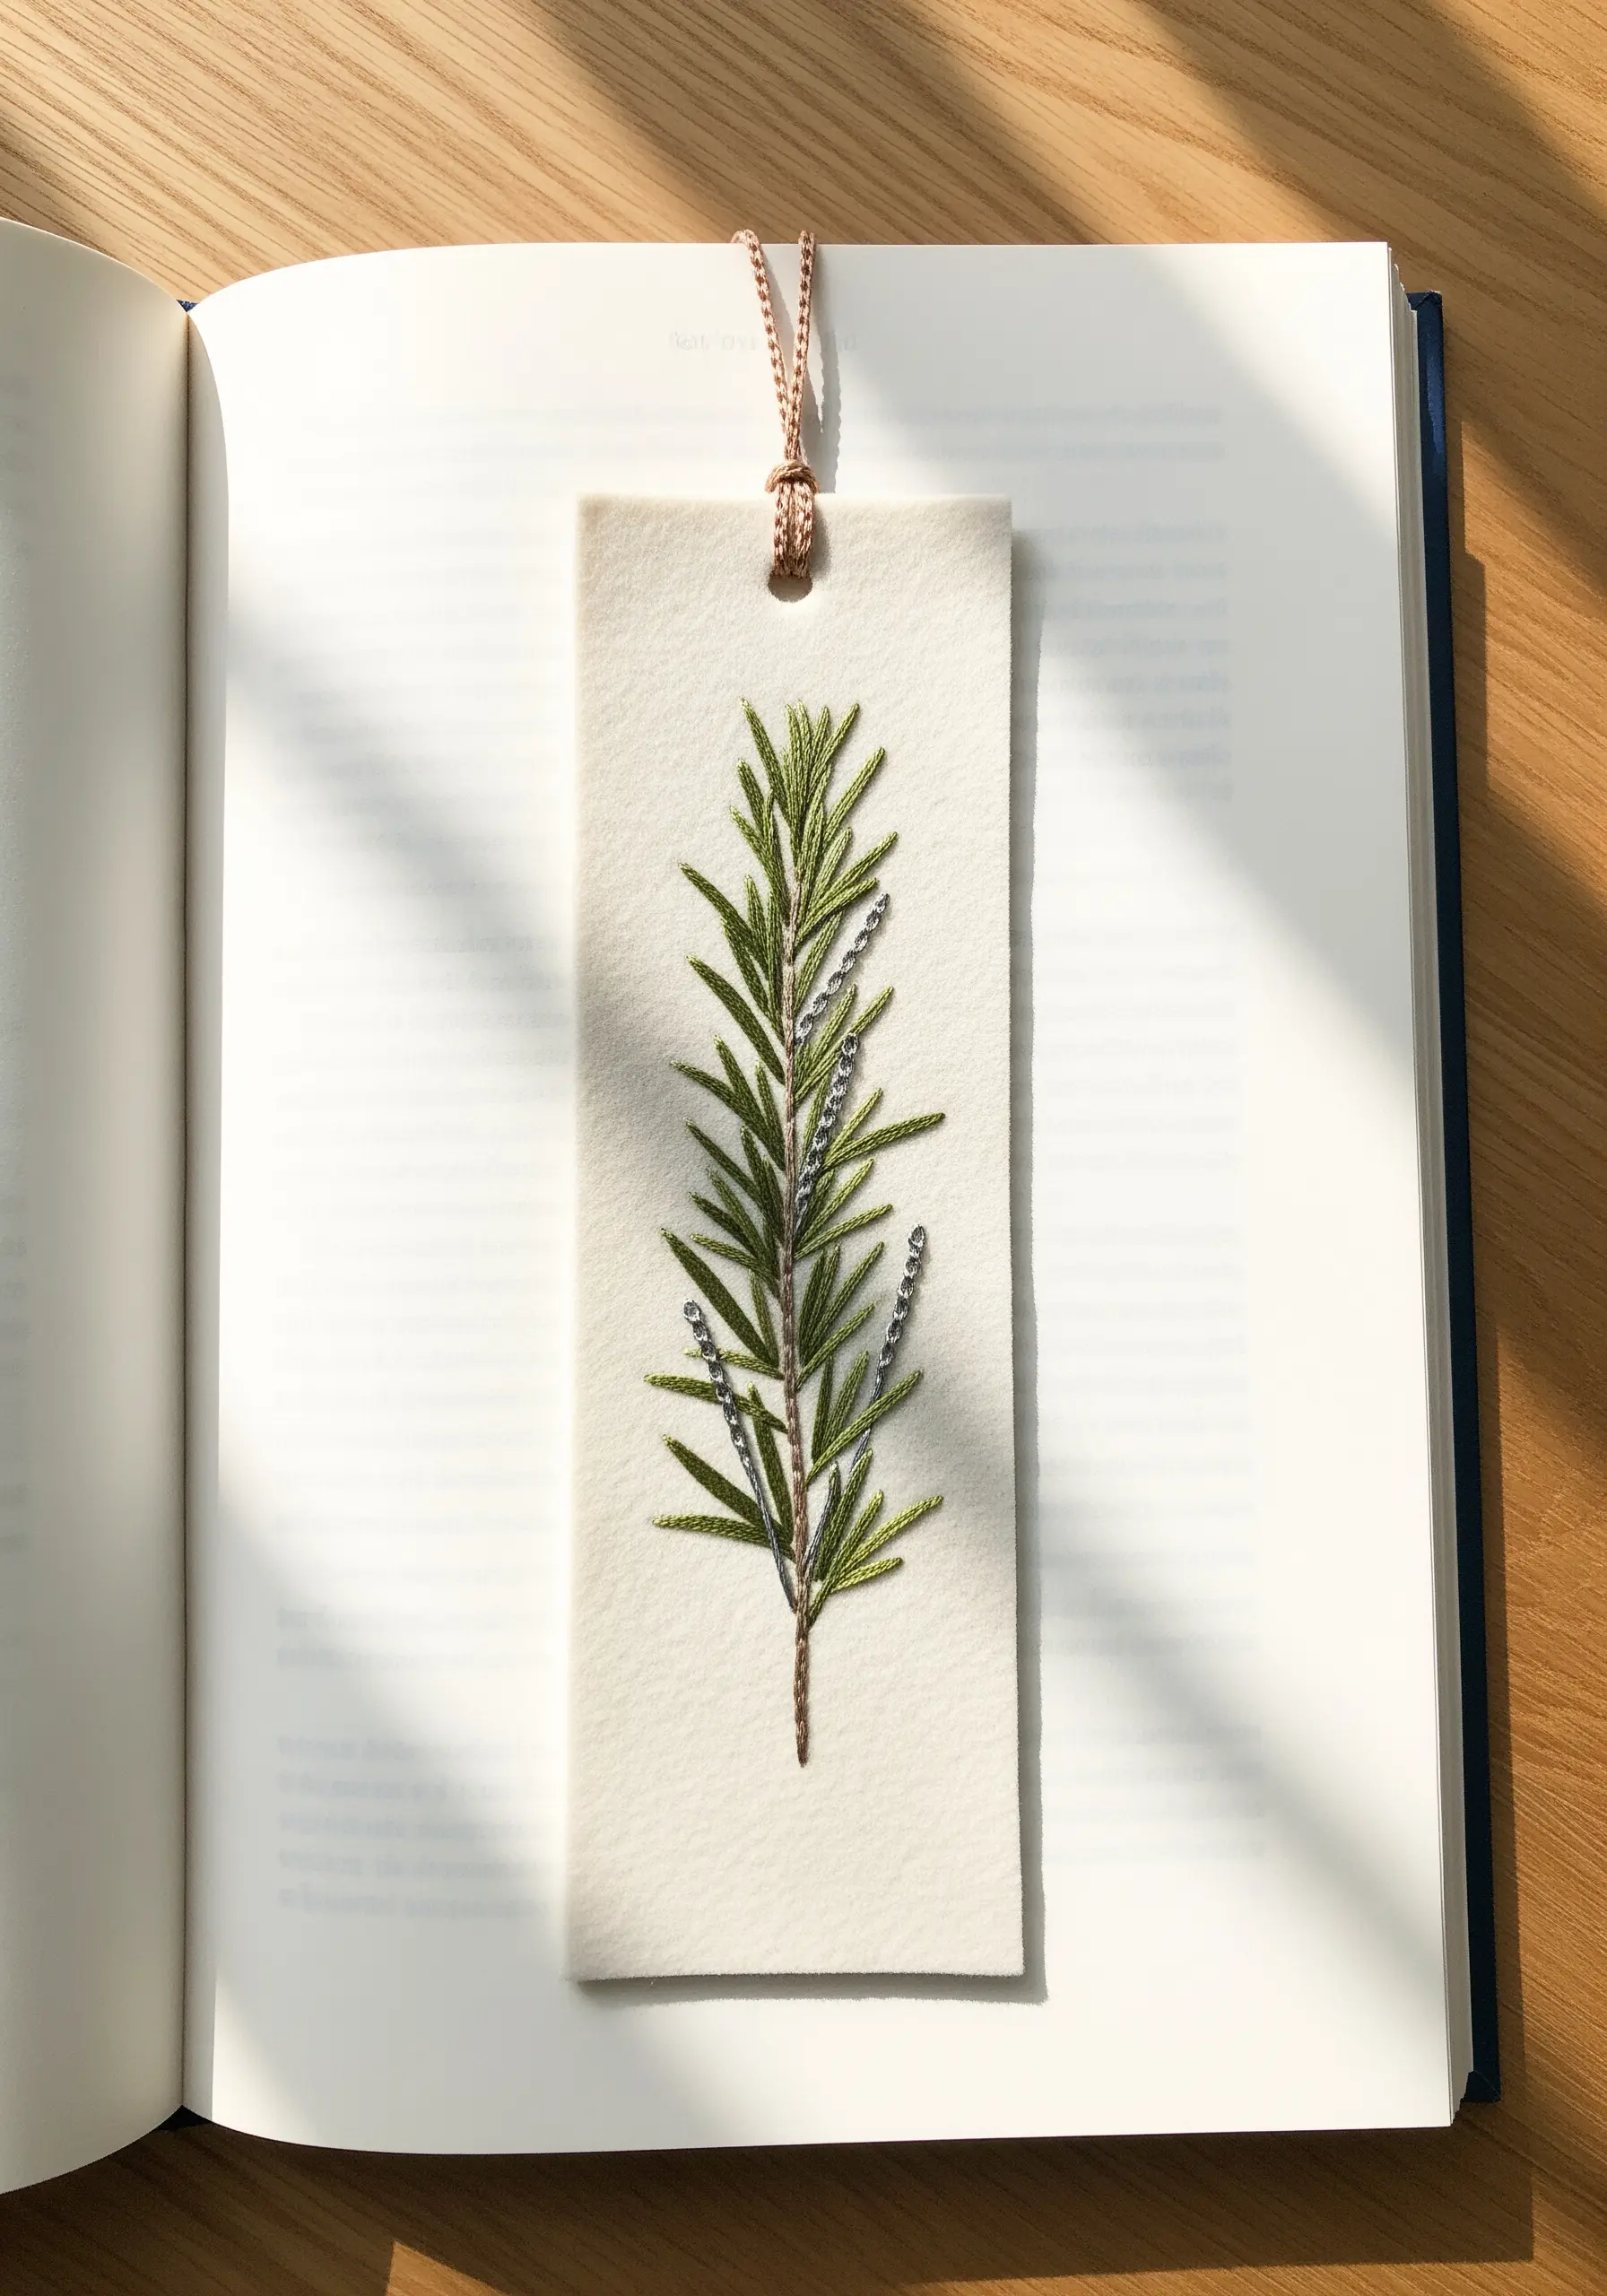
Stitching on paper or thick felt creates a wonderfully sturdy bookmark that doesn’t require a hoop.
Gently pre-pierce the stitching holes along your design with a sharp needle before you begin; this prevents the paper from tearing and makes it easier for smaller hands to pass the thread through.
Use a simple backstitch for the rosemary stem and detached chain stitches (lazy daisies) for the needles to create a quick yet elegant design.
This is one of those unique fabric projects you can gift in under a day, making it perfect for a spontaneous crafting session.
4. Designing a Symmetrical Fern Mandala
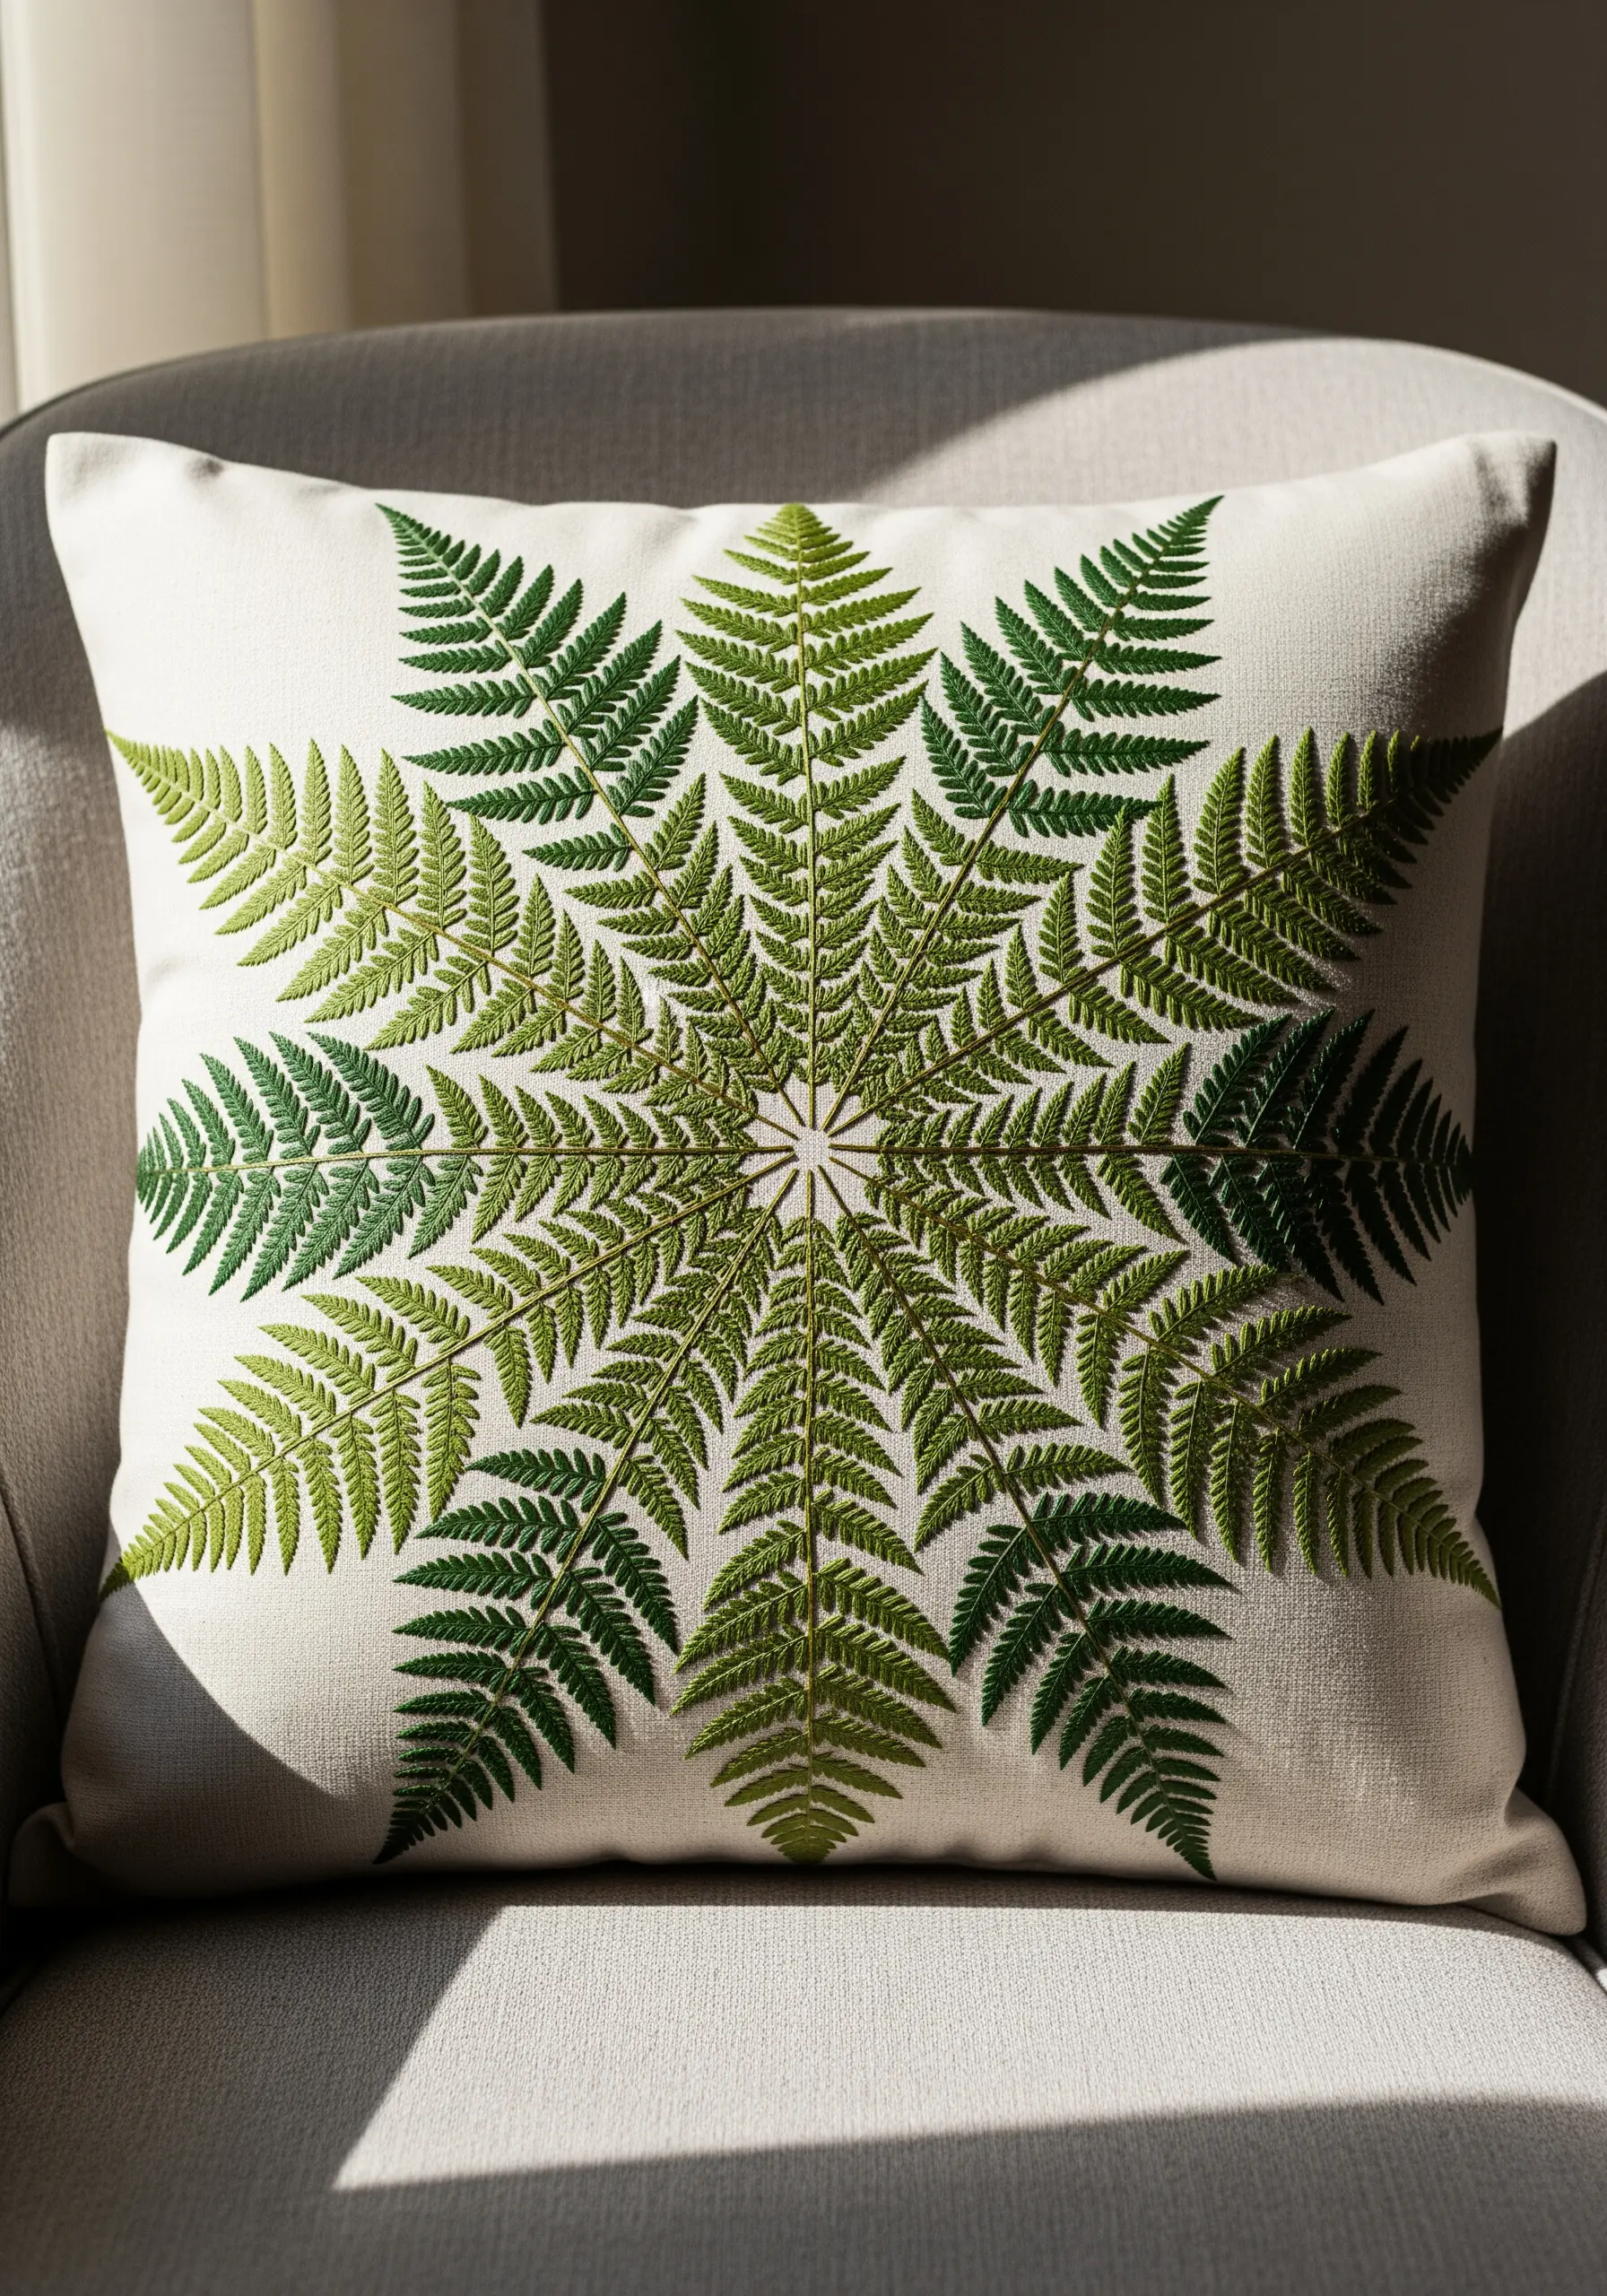
The beauty of this design lies in its perfect symmetry, which you can achieve by lightly drawing guidelines that radiate from a central point.
Use a fishbone stitch for each individual fern leaf; this technique automatically creates the central vein and gives the foliage a natural, layered appearance.
Create a subtle ombré effect by using three or four shades of green, transitioning from the lightest at the center to the darkest at the outer edge.
This radial pattern transforms a simple botanical into stunning embroidered pillow covers that feel both organic and geometric.
5. Crafting an Autumn Leaf Specimen Banner
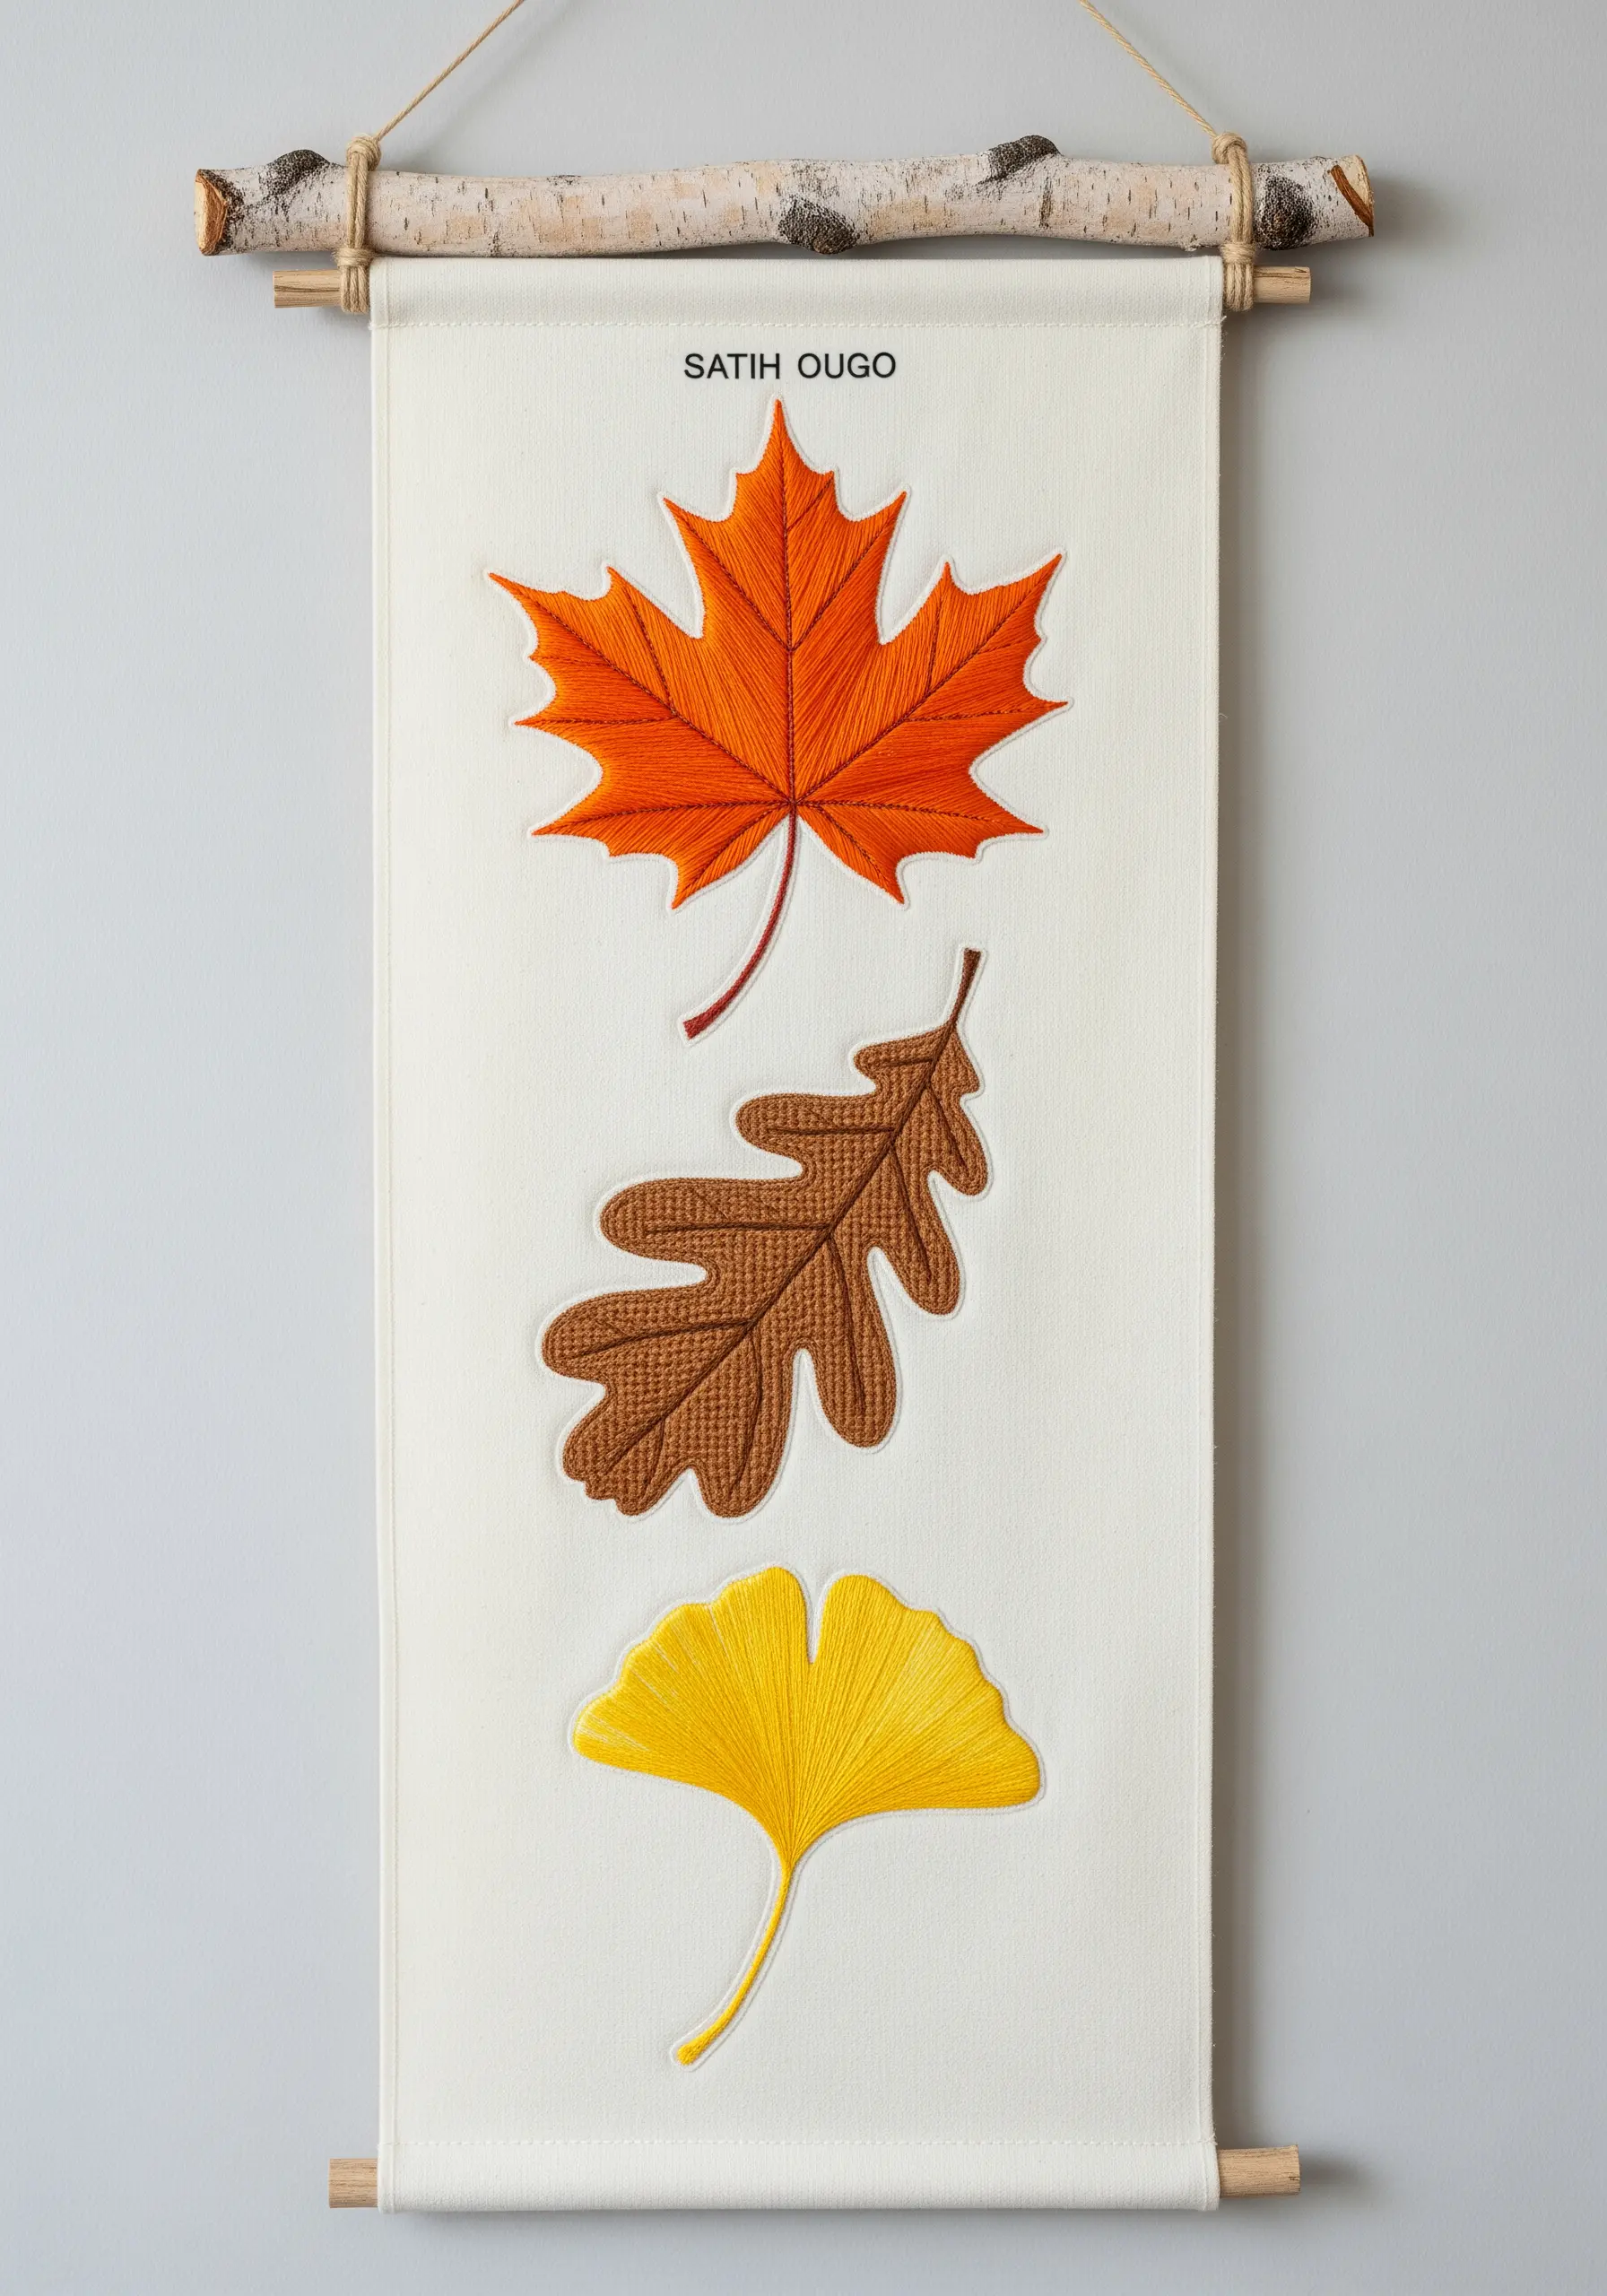
To create the bold, solid look of these leaves, fill each shape with a dense, flat satin stitch.
For a clean, reflective sheen, ensure all your satin stitches lie parallel to one another—this uniformity is what gives the surface its smooth, professional finish.
Before you begin, outline each leaf with a split stitch using a matching thread color. This raised edge provides a perfect guide and helps keep your satin stitches neat.
These embroidery wall hoops that turn blank spaces into stunning focal points can be adapted into a banner for a sophisticated seasonal display.
6. Adding Whimsical Dandelion Seeds to Denim
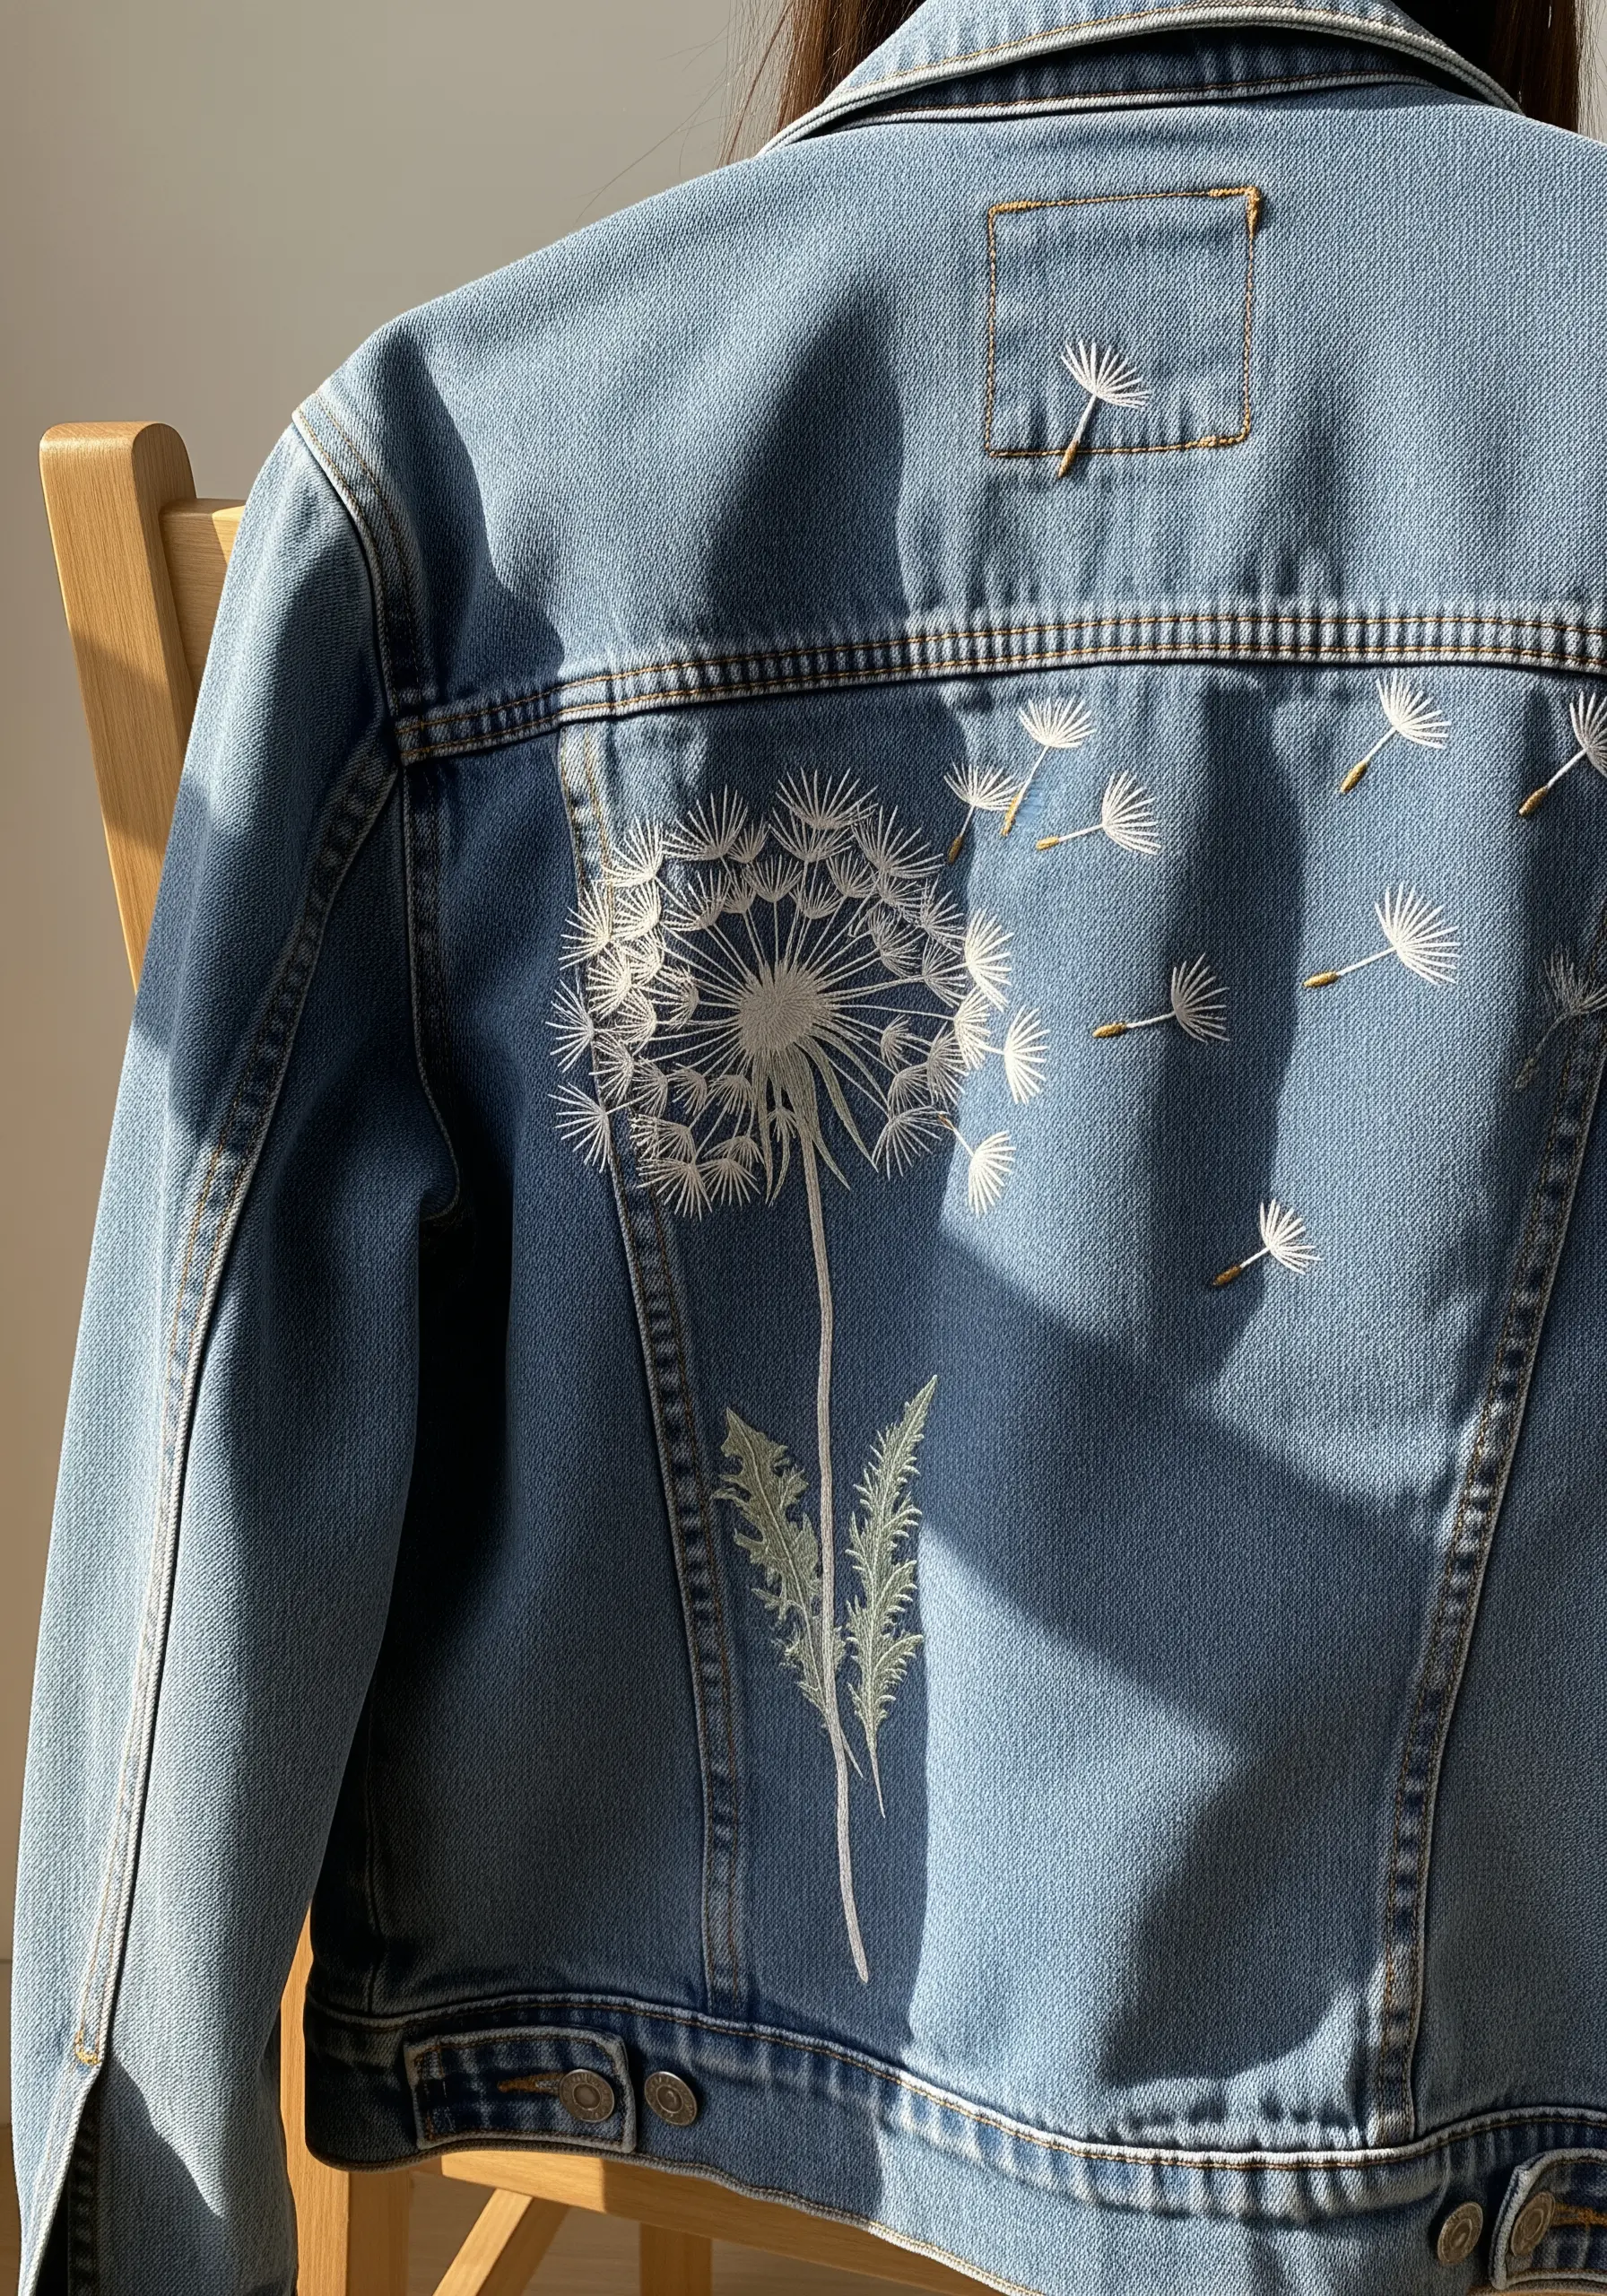
When embroidering on denim, use a medium-weight stabilizer on the reverse side to support your stitches and prevent the fabric from stretching.
For the dandelion seeds, use single straight stitches with one or two strands of white floss to create a delicate, windswept effect.
The contrast between the fine, airy threads and the sturdy denim is what makes this design so visually appealing.
These are the kinds of easy stitches that bring your plain denim jackets to life, adding a touch of magic to everyday wear.
7. Stitching a Culinary Herb Coaster Set
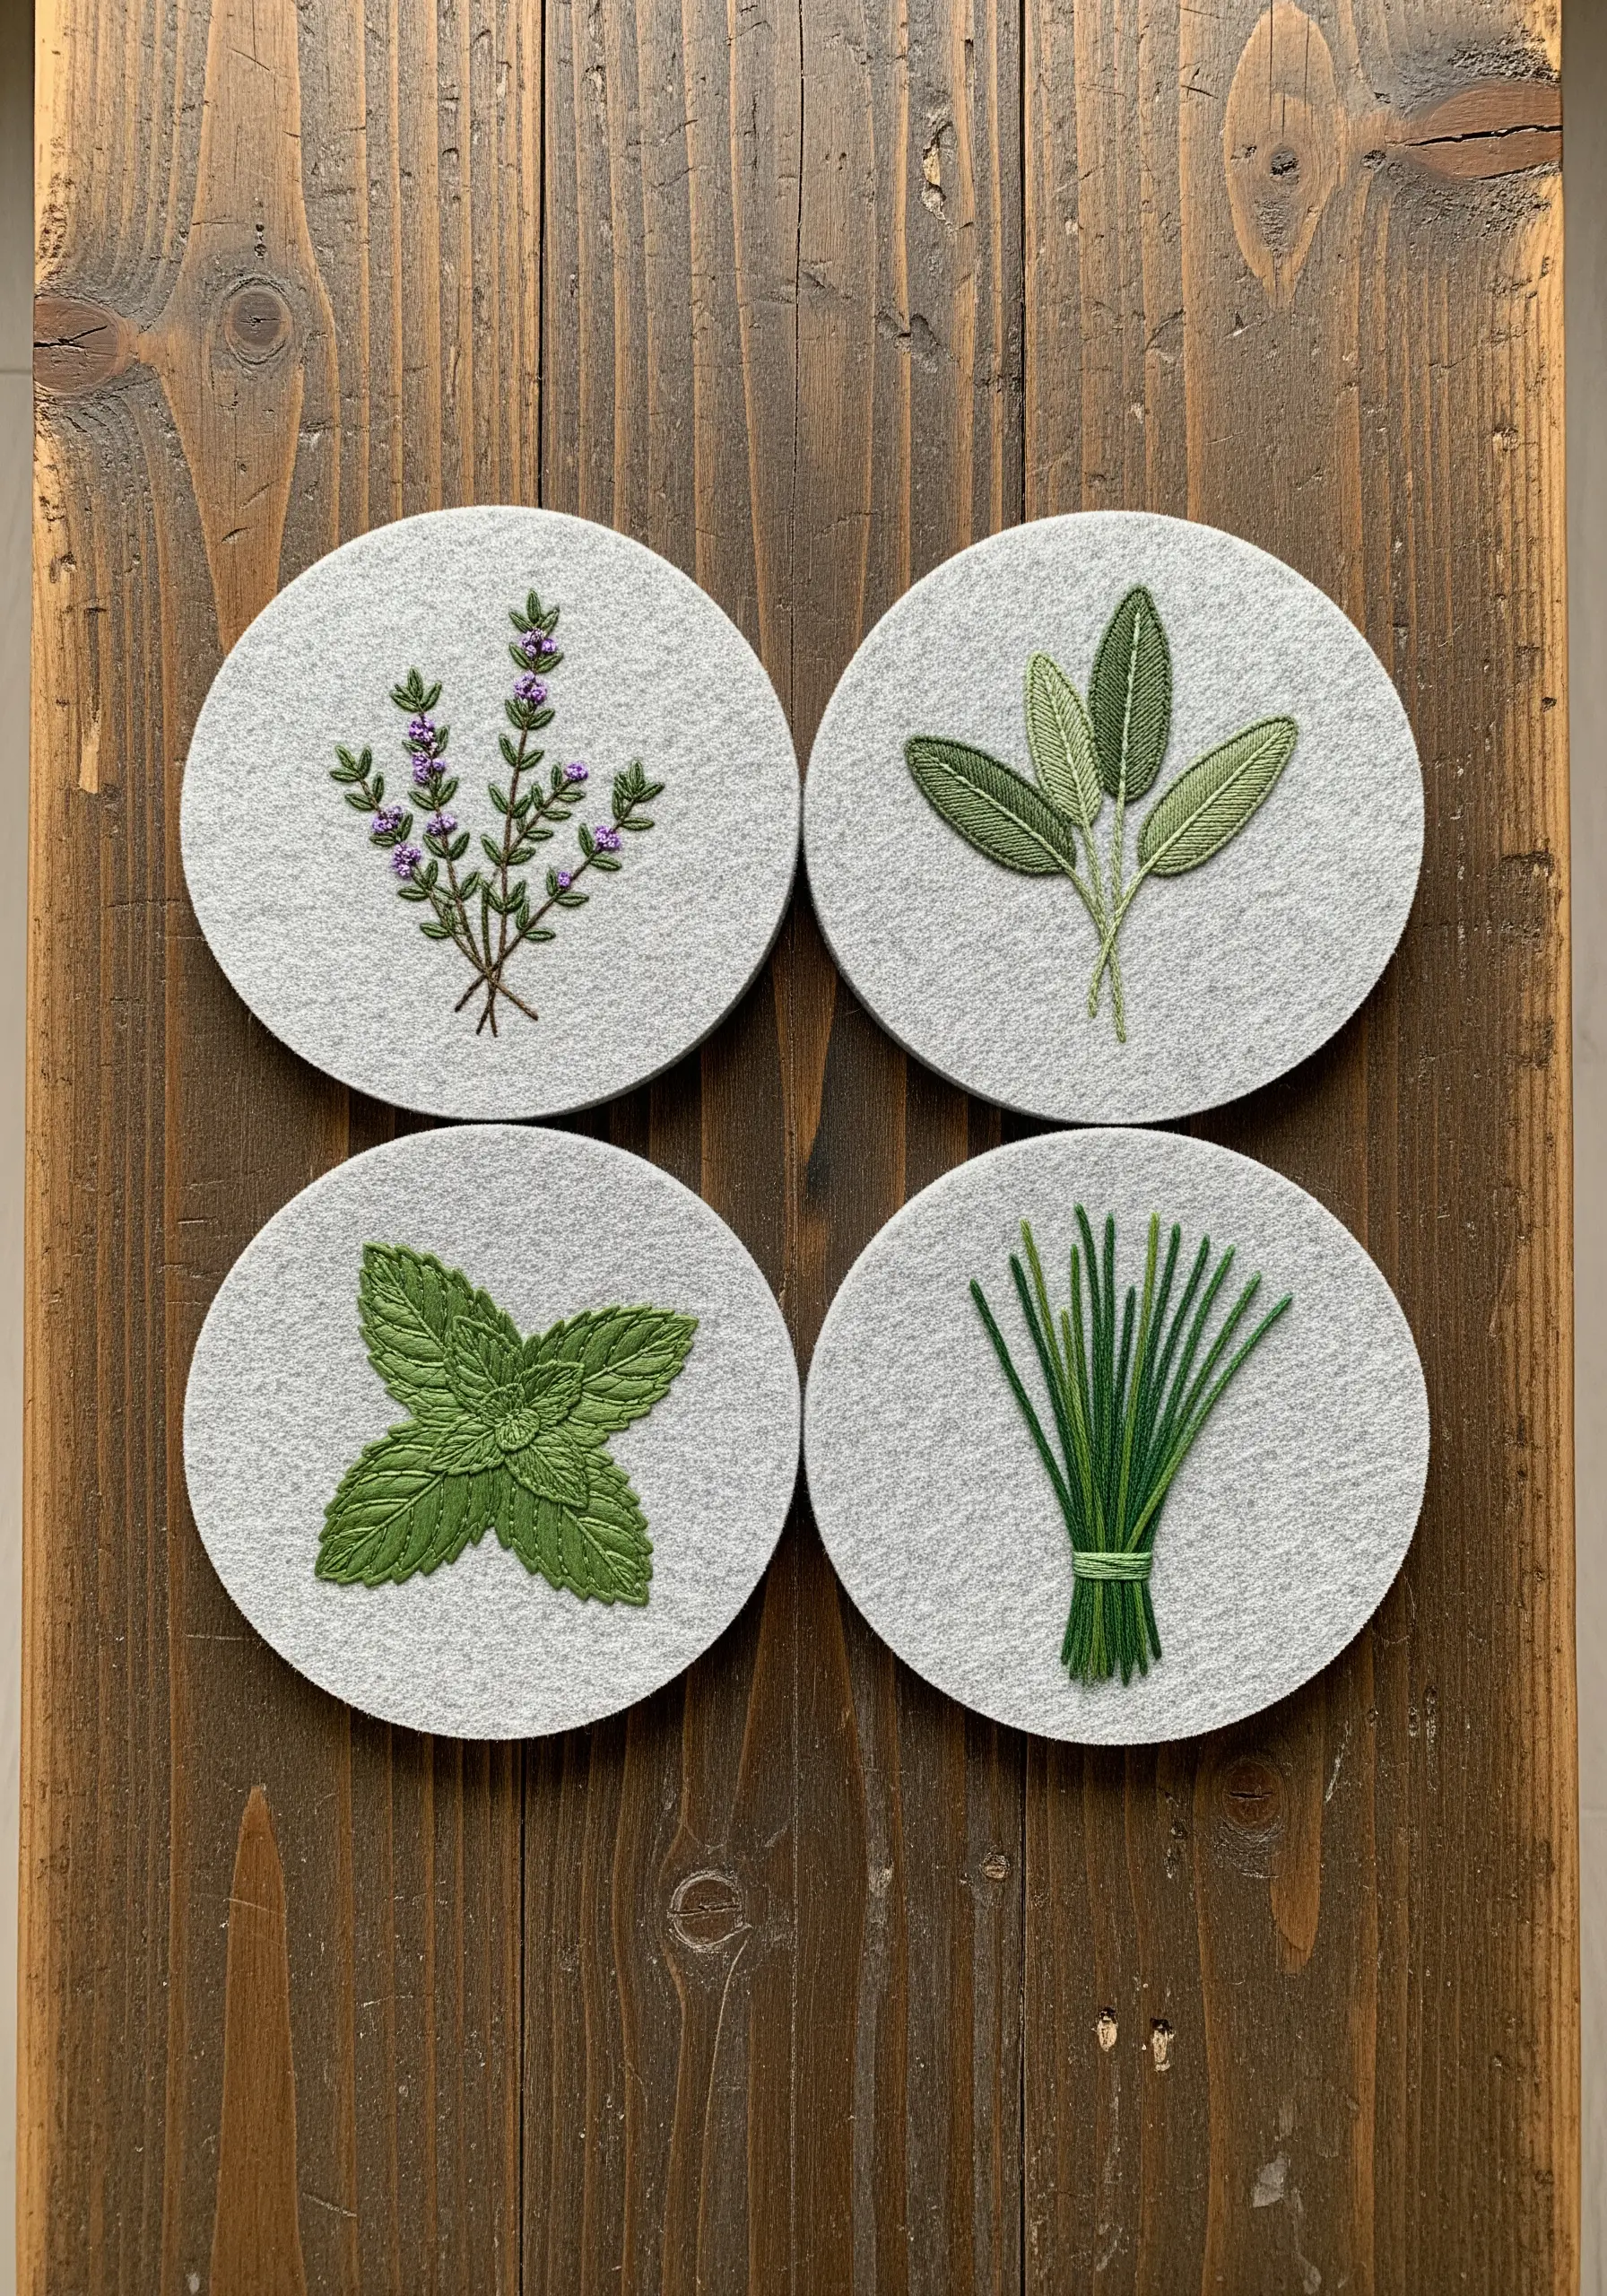
Choose a thick, non-woven felt for your coasters; its stable surface won’t fray and is incredibly forgiving for beginner stitchers.
Assign a simple stitch to each herb: stem stitch for sage veins, French knots for thyme flowers, and straight stitches for chives.
This approach allows you to focus on mastering one or two techniques per coaster, building confidence with each piece.
A curated set makes for wonderful DIY embroidery projects for friends who love unique keepsakes they can actually use.
8. Creating Floating Florals on Sheer Tulle
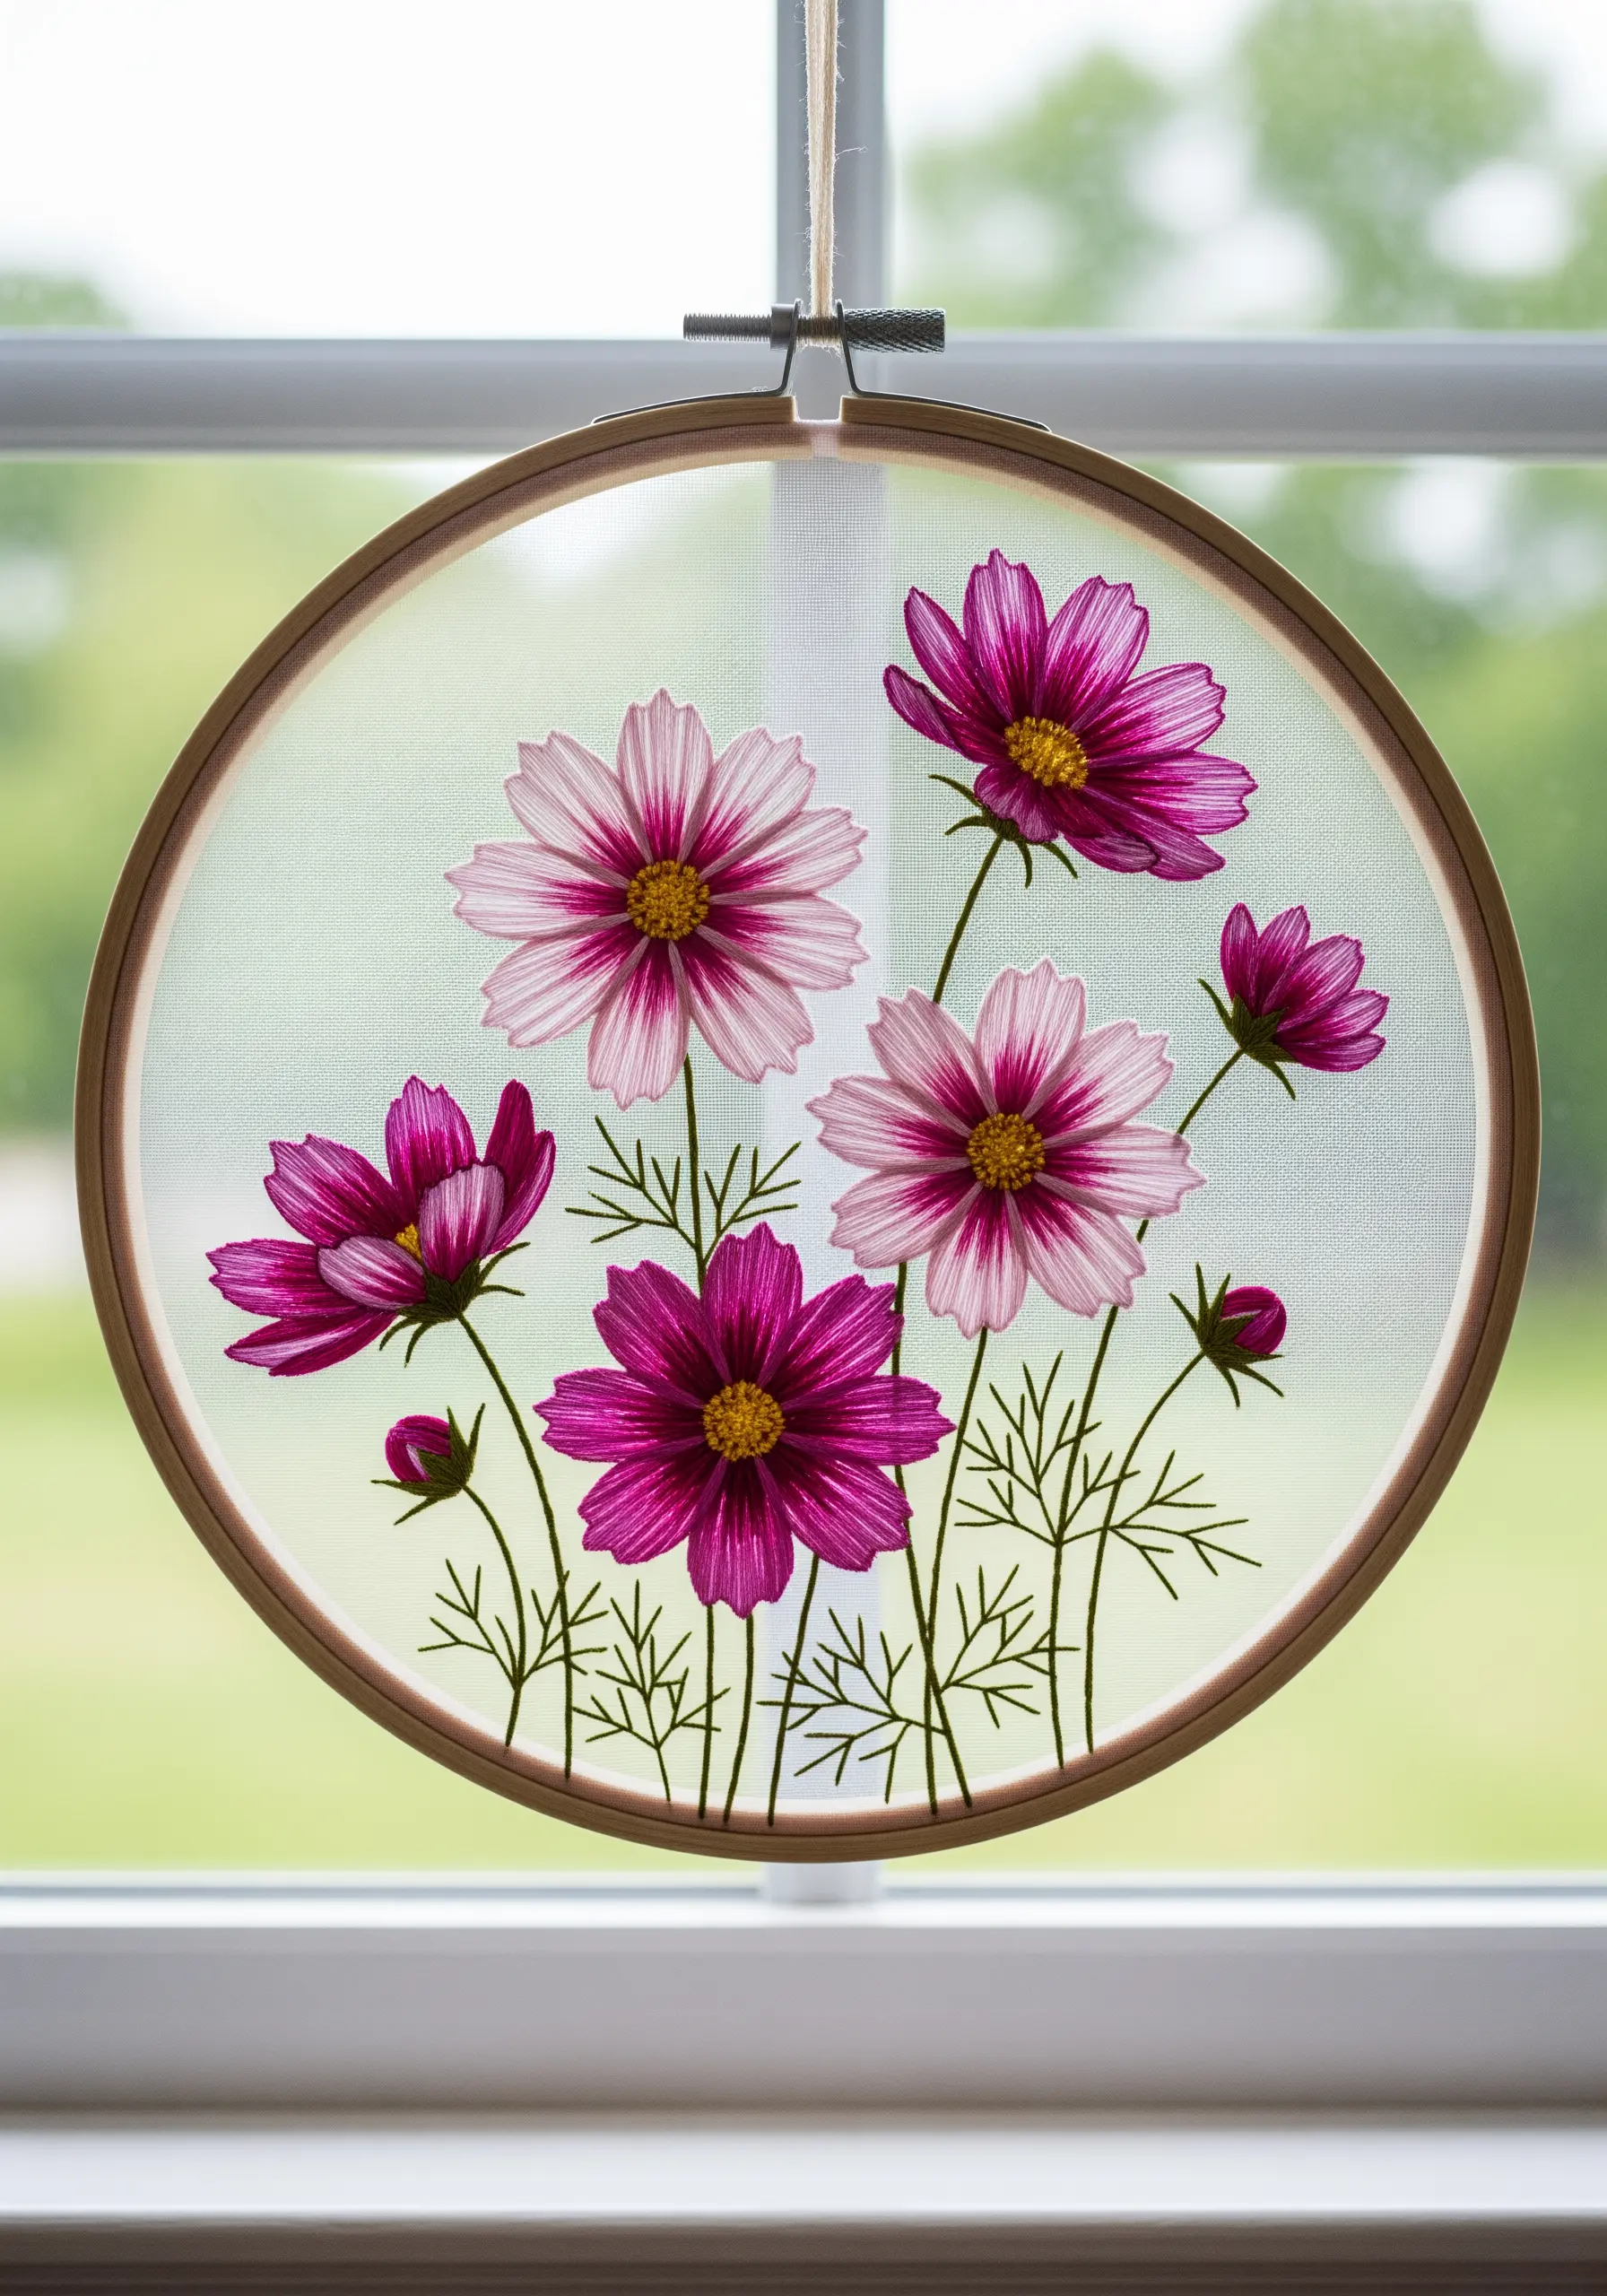
To embroider on a delicate fabric like tulle or organza, hoop it with a layer of water-soluble stabilizer.
The stabilizer provides the tension you need to stitch without tearing the fabric, and it dissolves completely in water afterward, leaving only your ‘floating’ stitches.
This technique creates an ethereal, pressed-flower effect, especially when hung in a window where light can pass through the threads.
It’s one of the most beautiful fabric collage embroidery projects using sheer fabrics for dreamy effects, transforming thread into something truly magical.
9. Embellishing a Pouch with Scattered Forget-Me-Nots
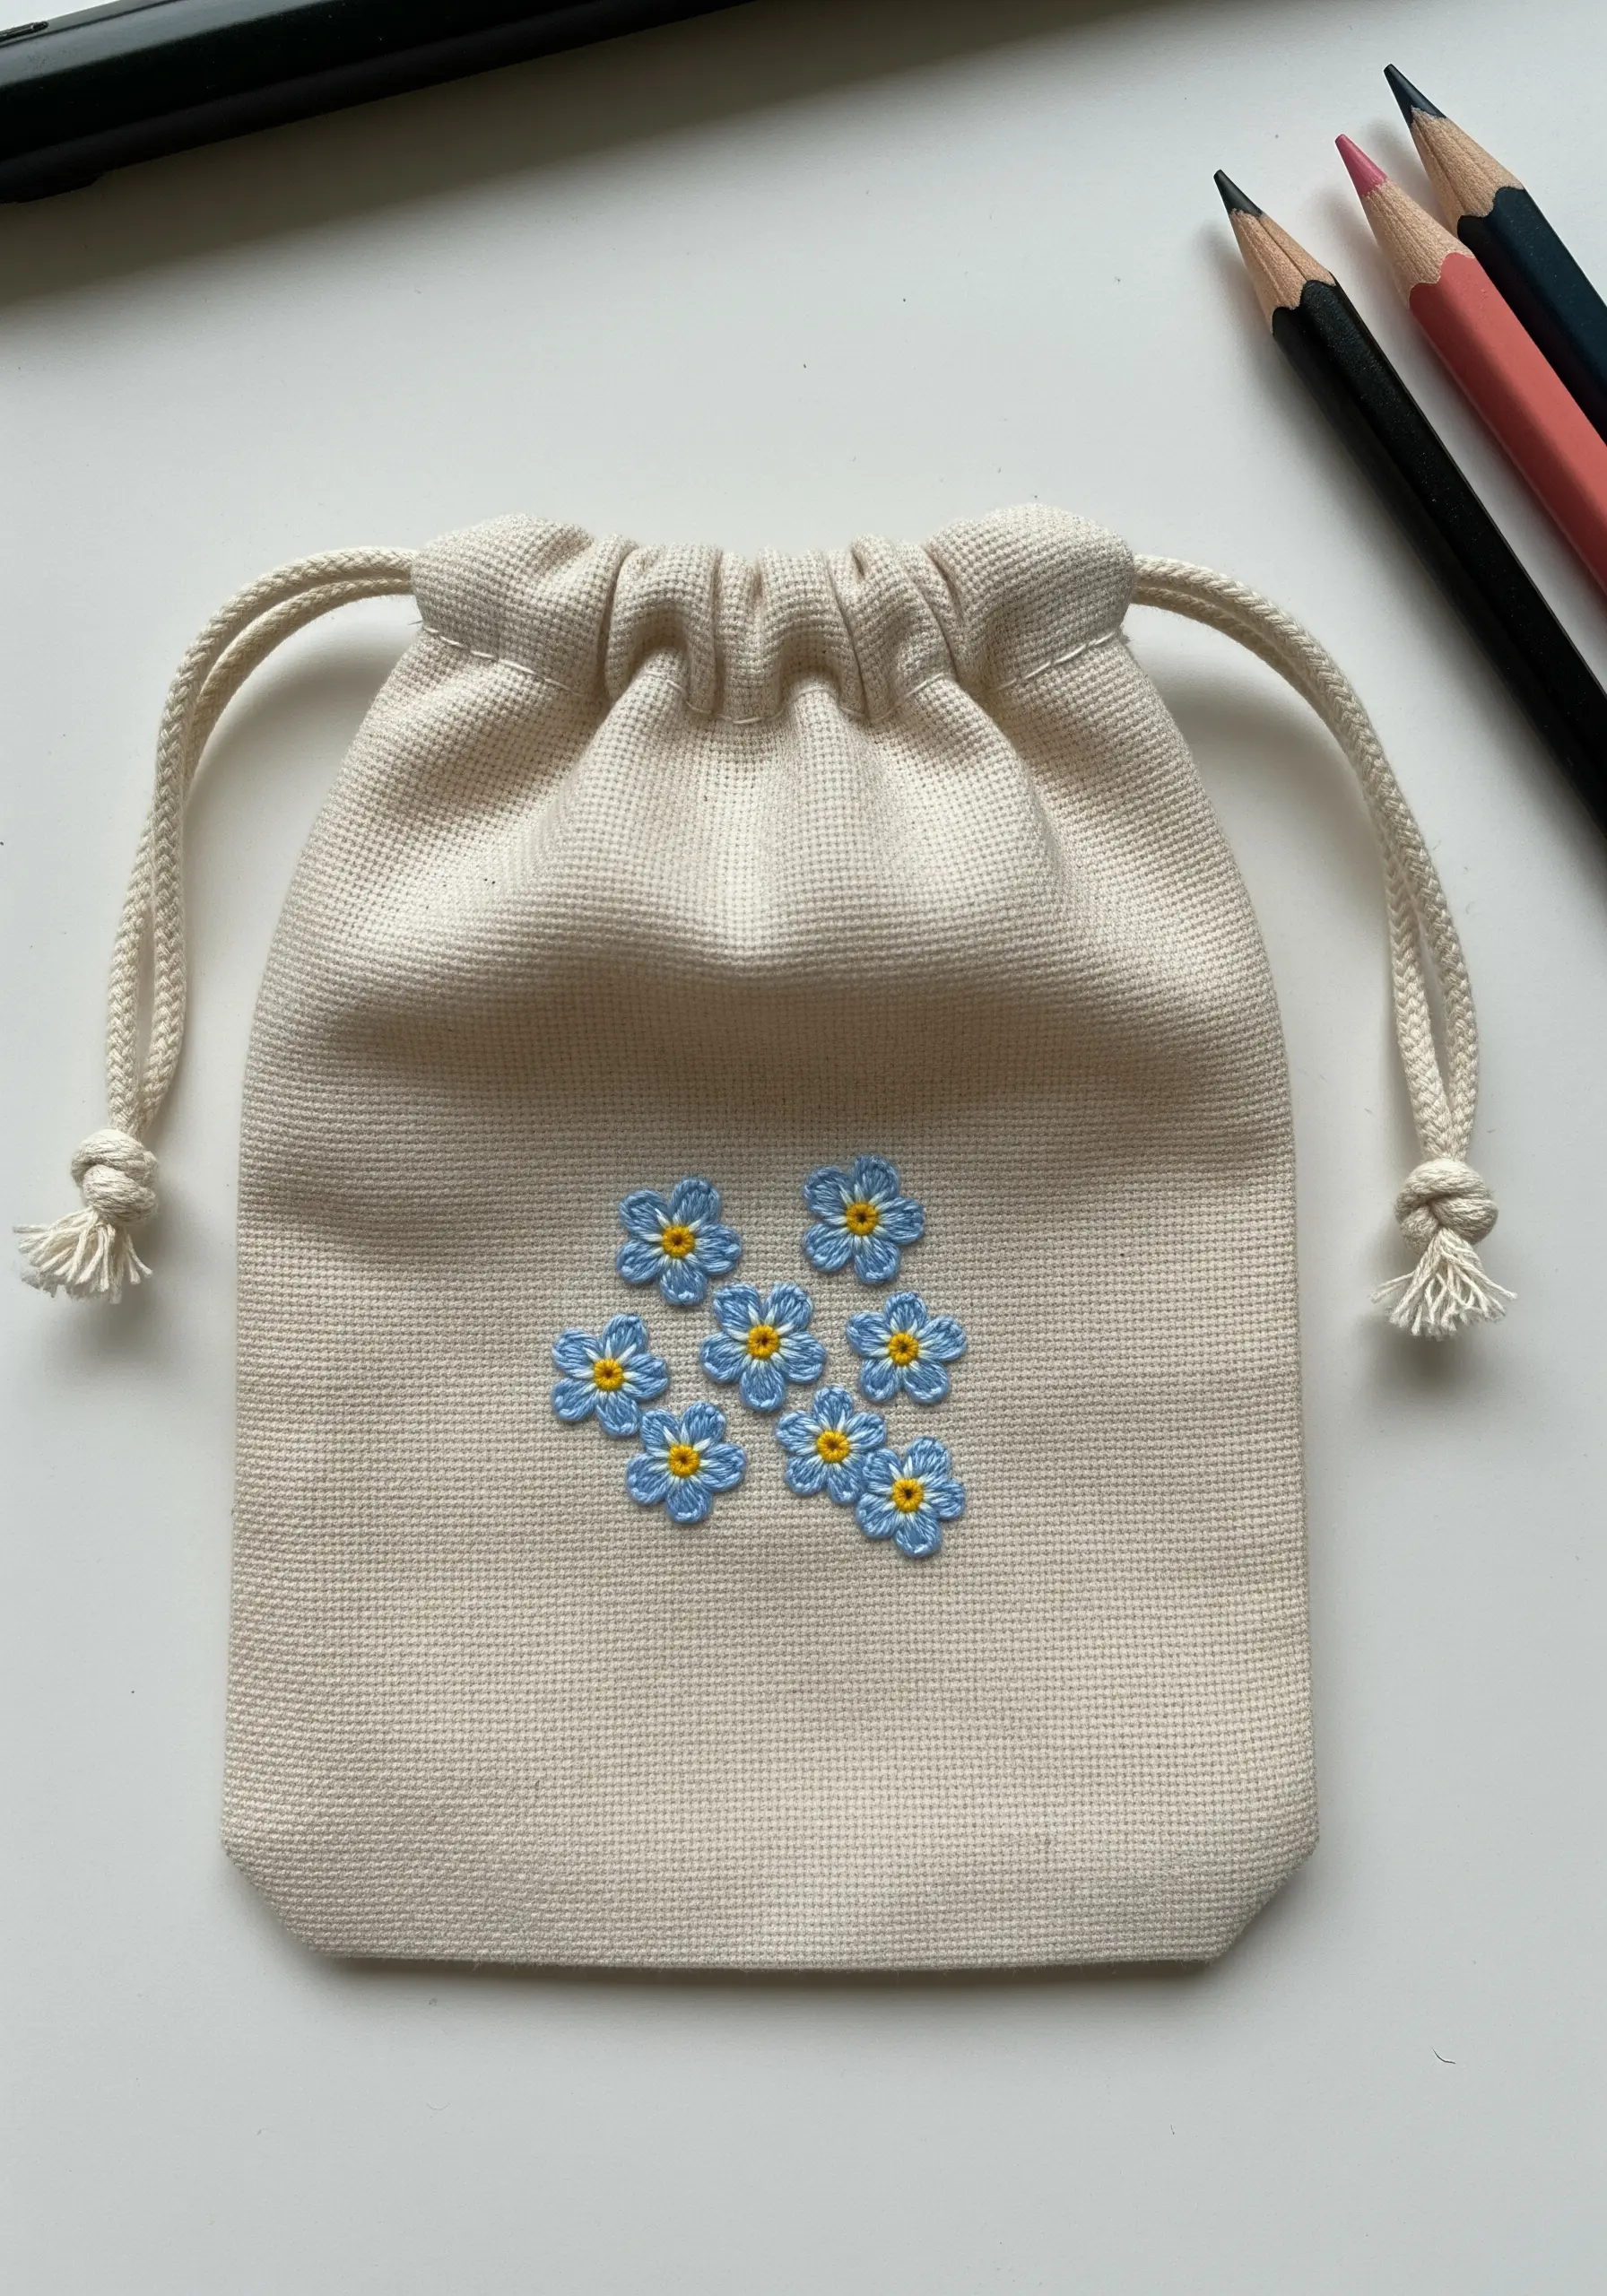
The forget-me-not is one of the easiest and most satisfying flowers to stitch, making it perfect for a project with kids.
Create each petal with a single detached chain stitch (or lazy daisy stitch) arranged in a circle of five.
Add a single yellow French knot in the center to complete the flower. This simple, two-step process yields instantly recognizable results.
These tiny embroidery details that make fabric crafts pop can be scattered across any surface for a touch of handmade charm.
10. Designing a Large-Scale Wildflower Wall Tapestry
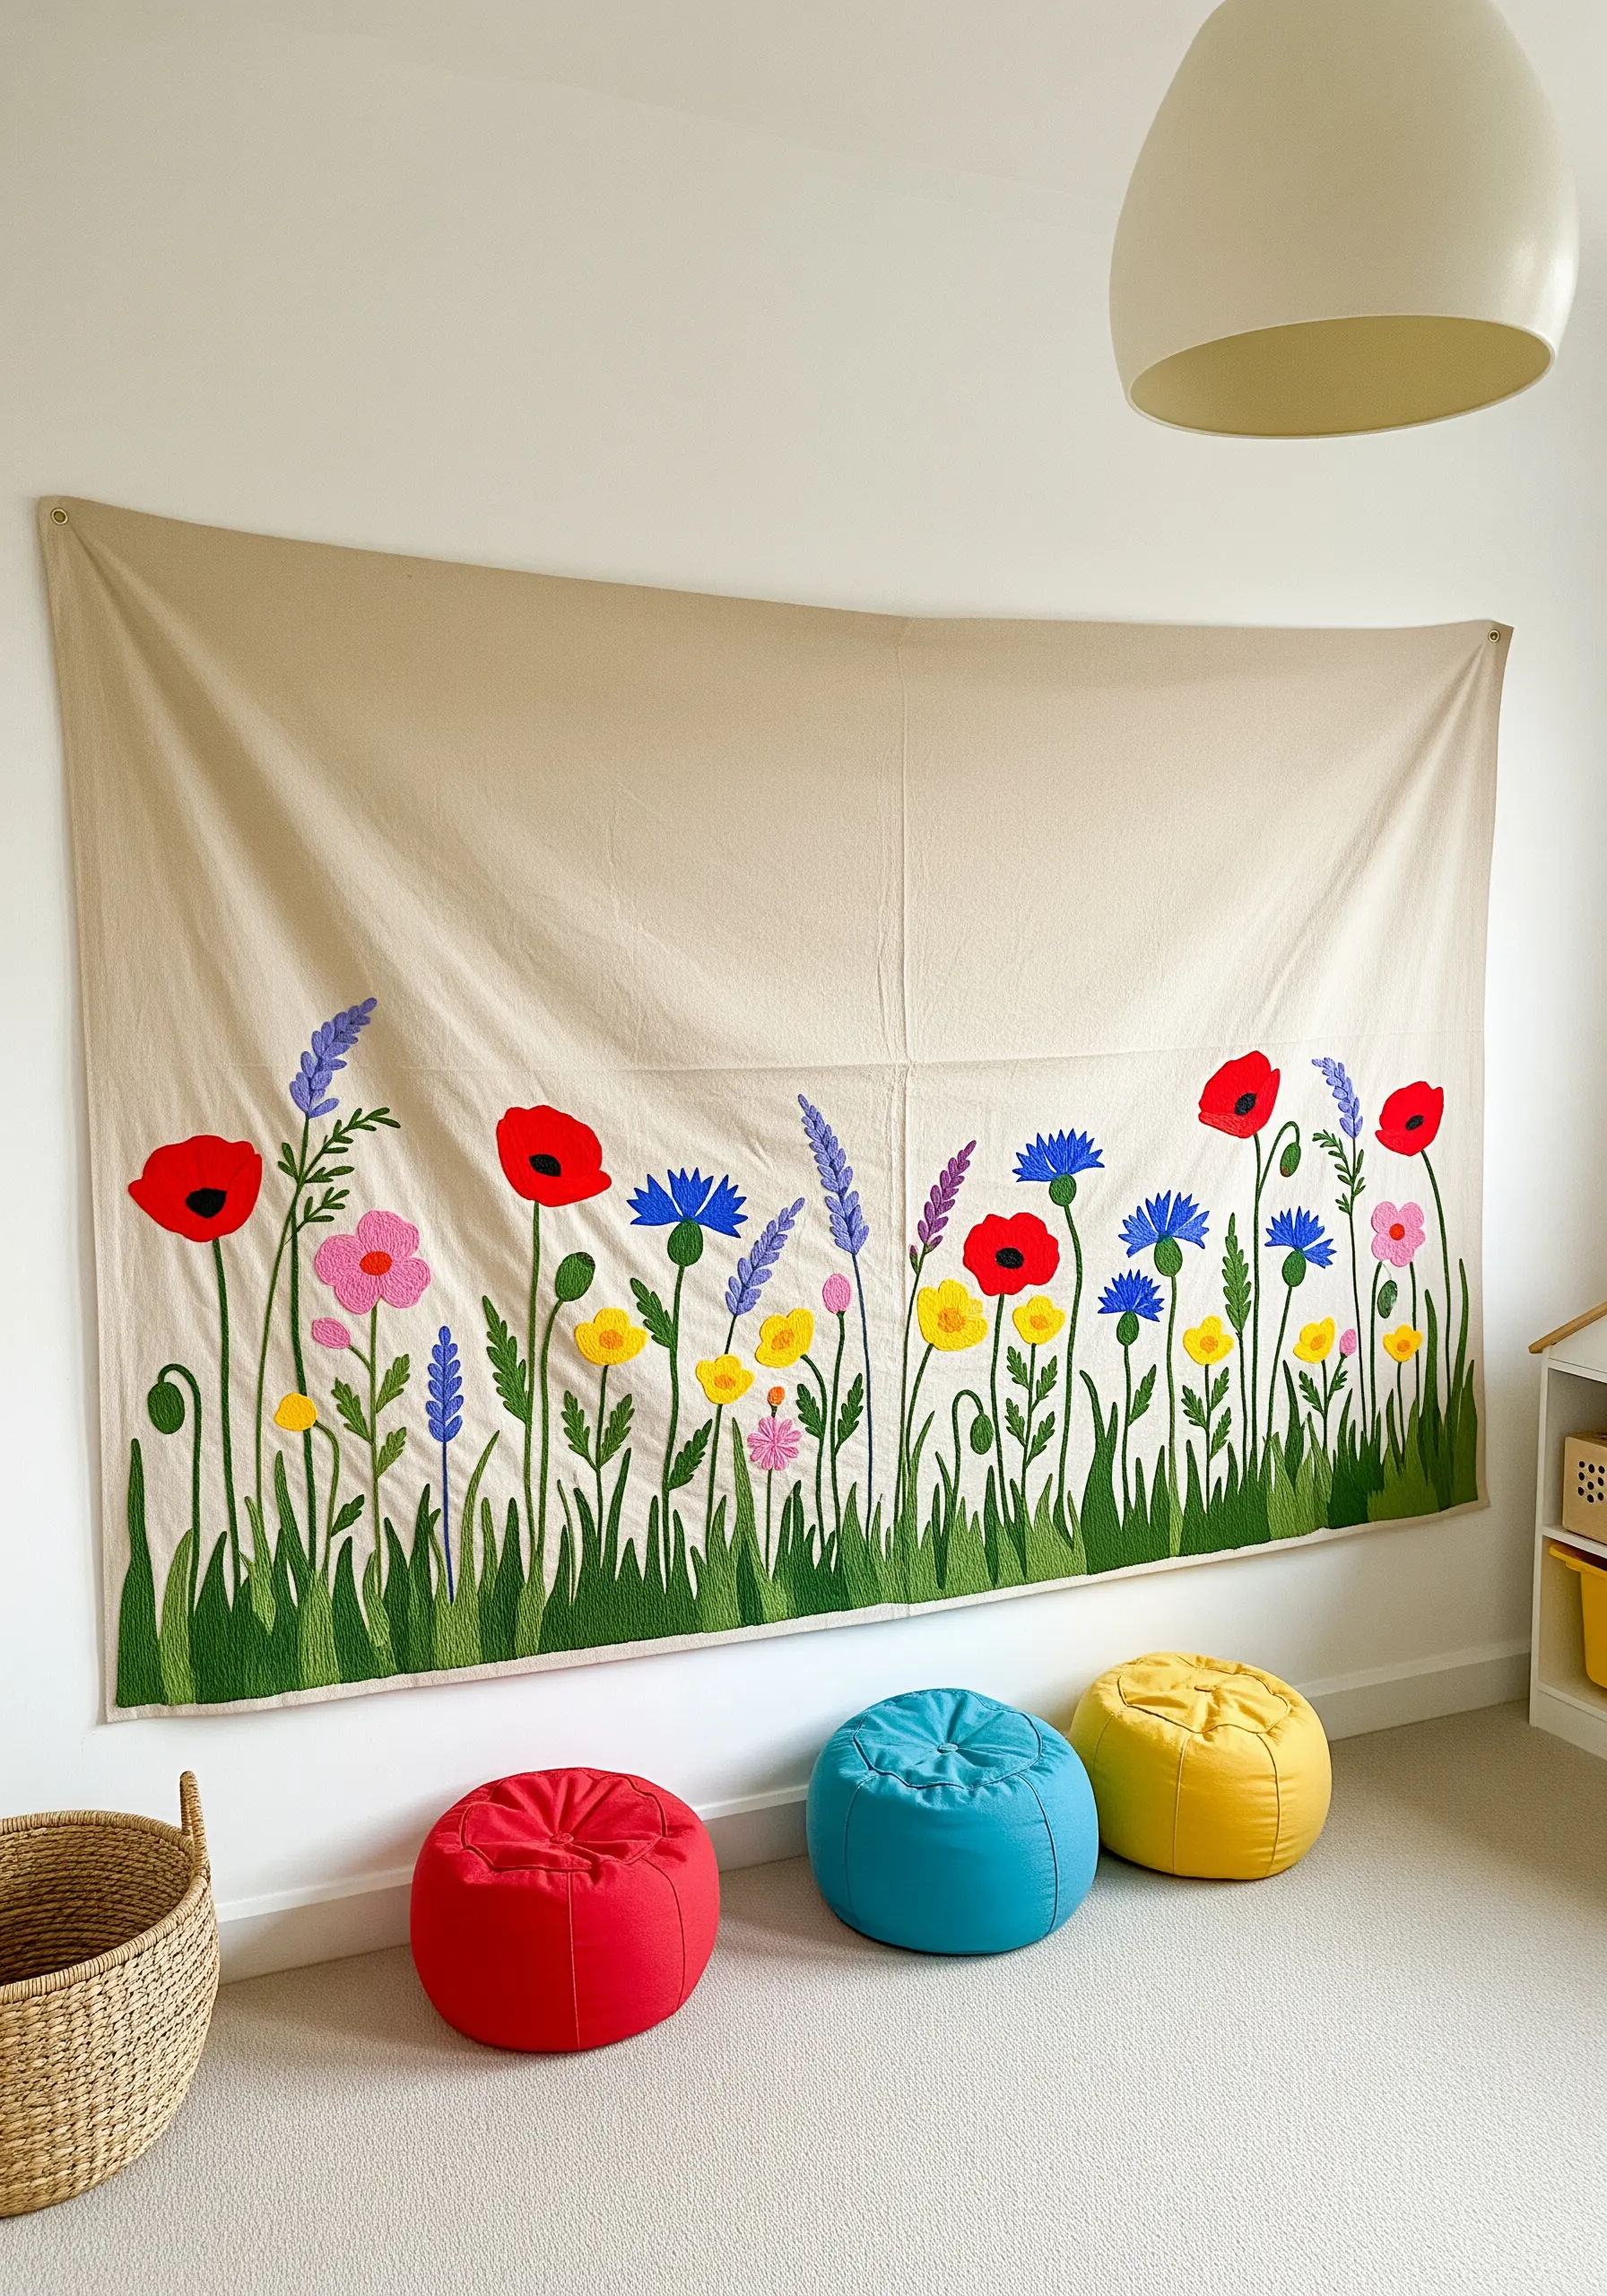
For a project of this scale, combine felt appliqué with embroidery to cover large areas efficiently while adding wonderful texture.
First, cut your primary flower and leaf shapes from colorful felt and secure them to the canvas background with a few small stitches or fabric glue.
Then, go back in with embroidery floss to add finer details like stems, petal veins, and flower centers.
This mixed-media approach allows you to create large-scale embroidery tapestries that become the focal point of any home without the time commitment of filling the entire area with stitches.
11. How to Create Your Own Botanical Iron-On Patches
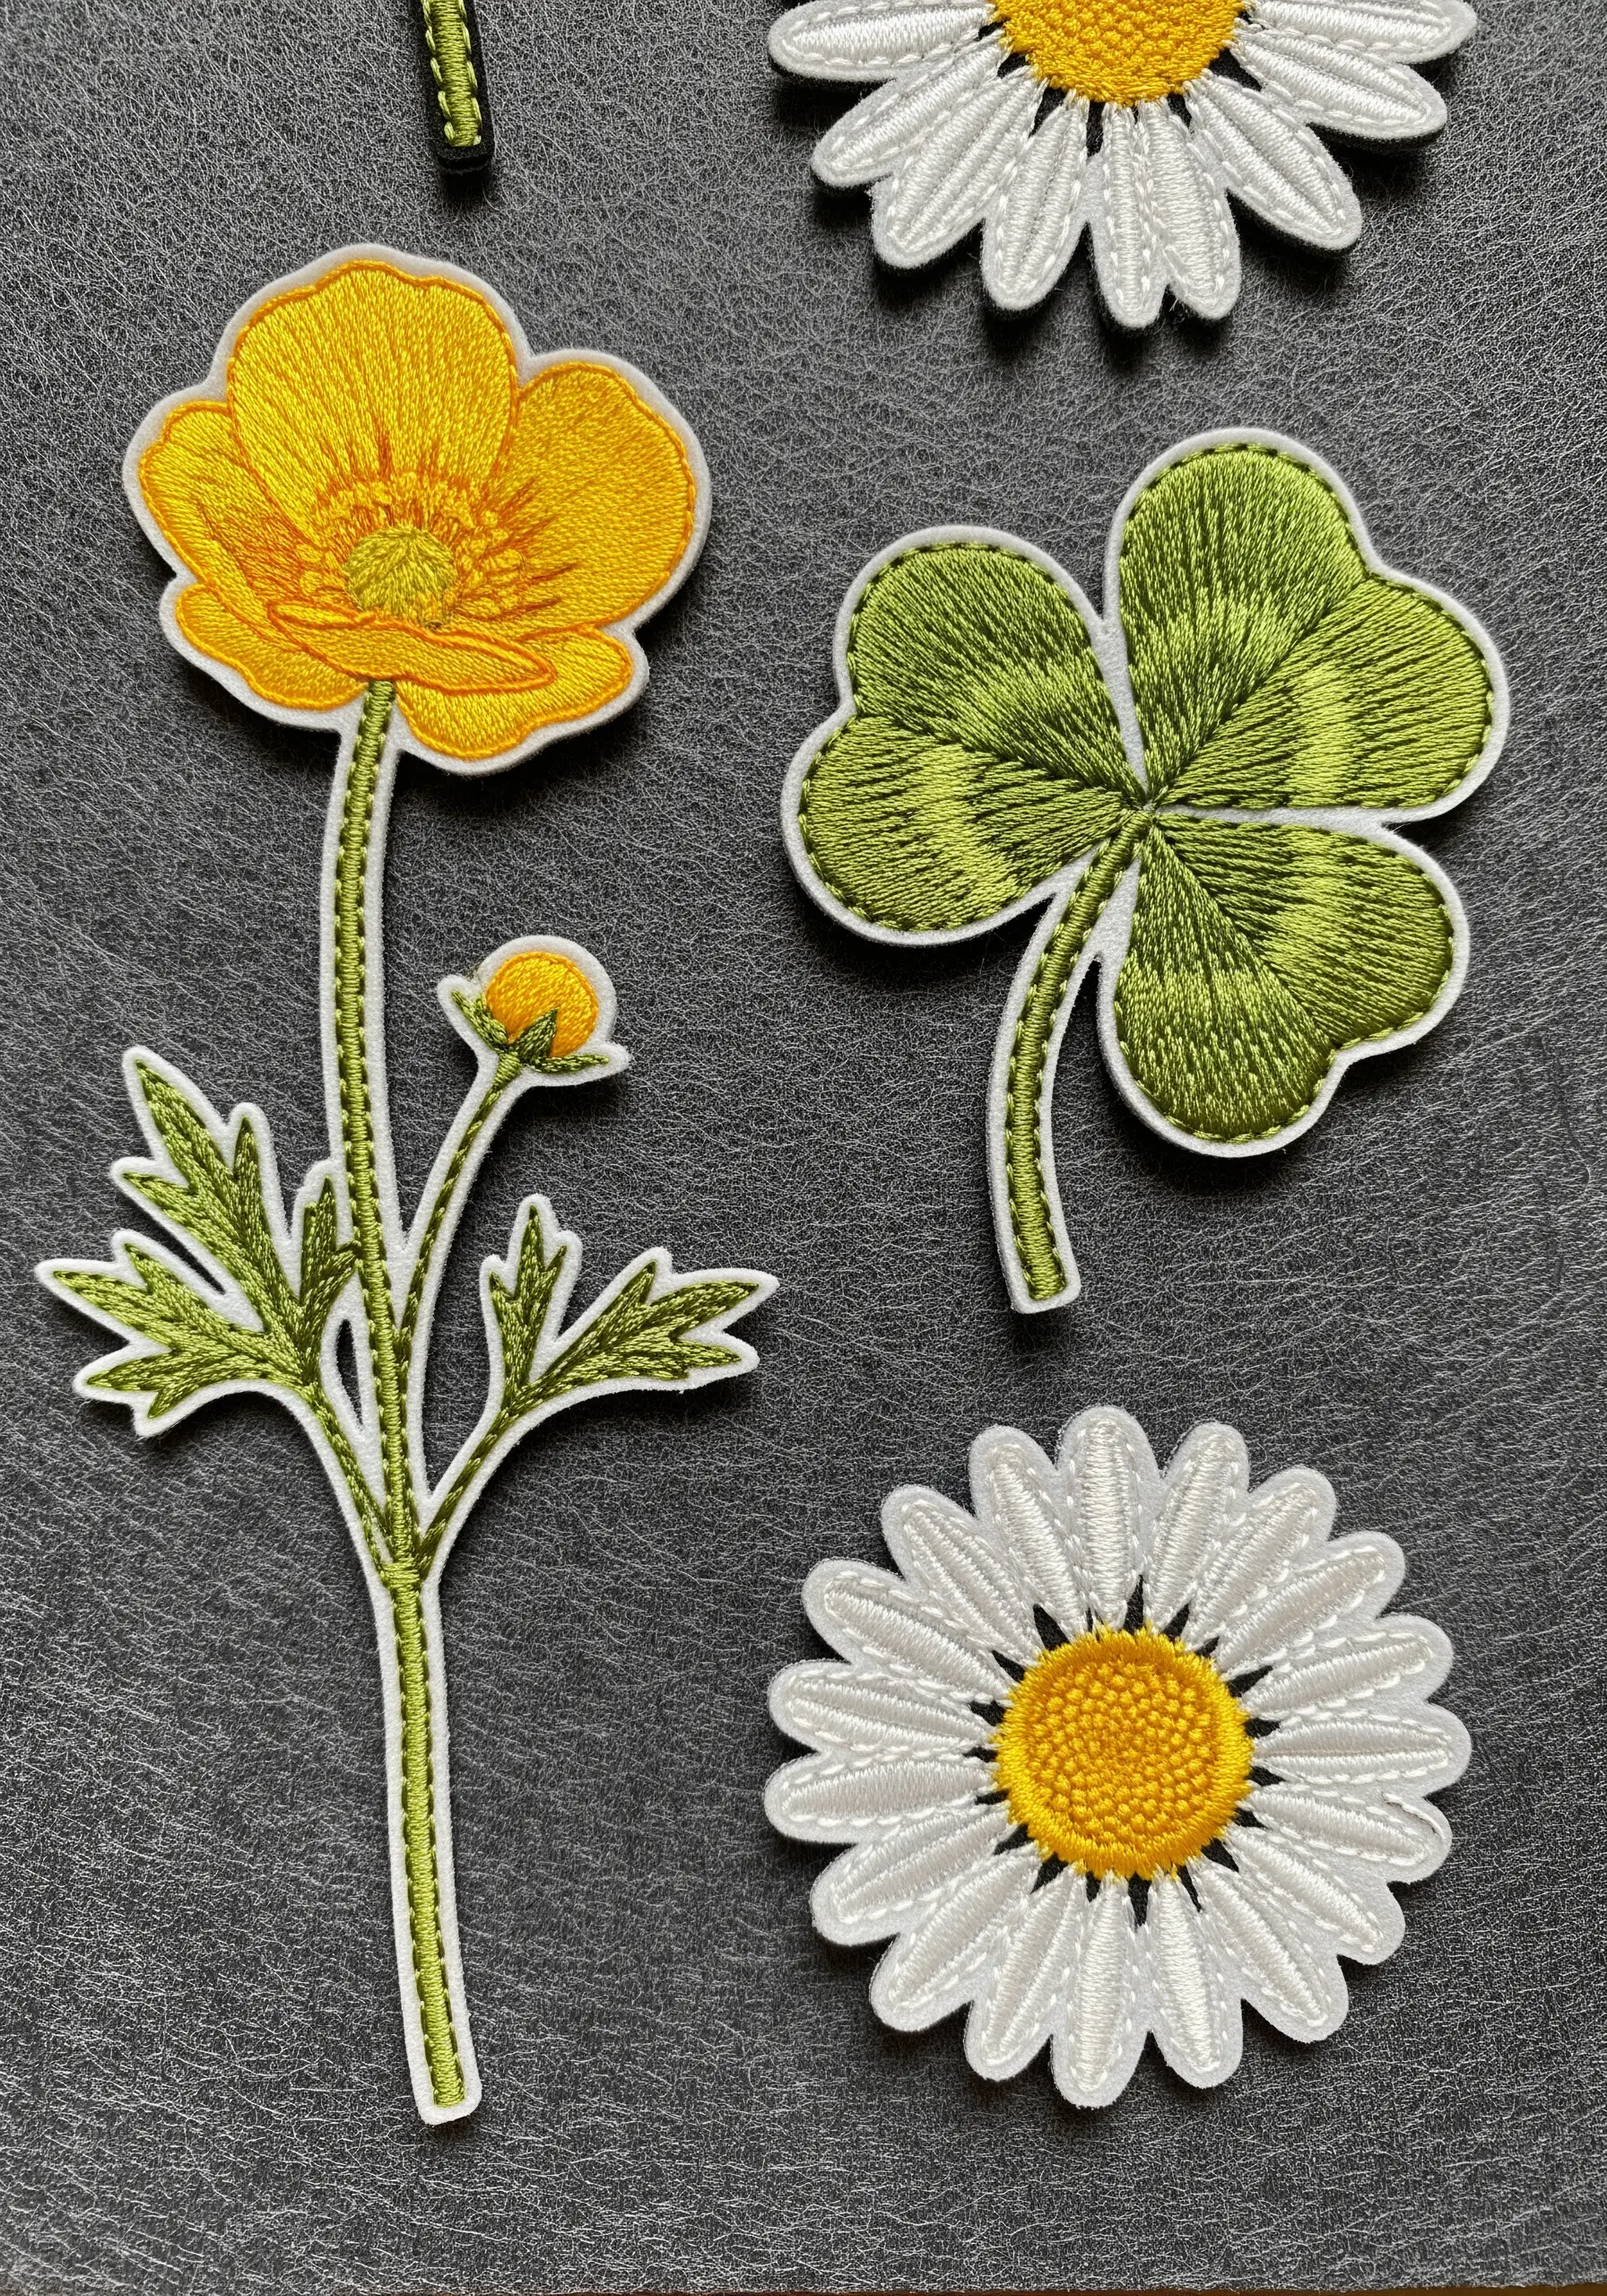
Start by stitching your design onto a sturdy piece of felt or canvas that is larger than your final patch.
Once the embroidery is finished, create a clean, defined border using a tight satin stitch around the entire design.
Carefully trim the excess fabric right up to the edge of your satin-stitched border. Finally, apply a sheet of iron-on adhesive to the back.
This is a fantastic way to create botanical patch ideas to repair clothes with leafy beauty or simply to personalize jackets and bags.
12. Stitching a Cascading Ivy Vine Table Runner
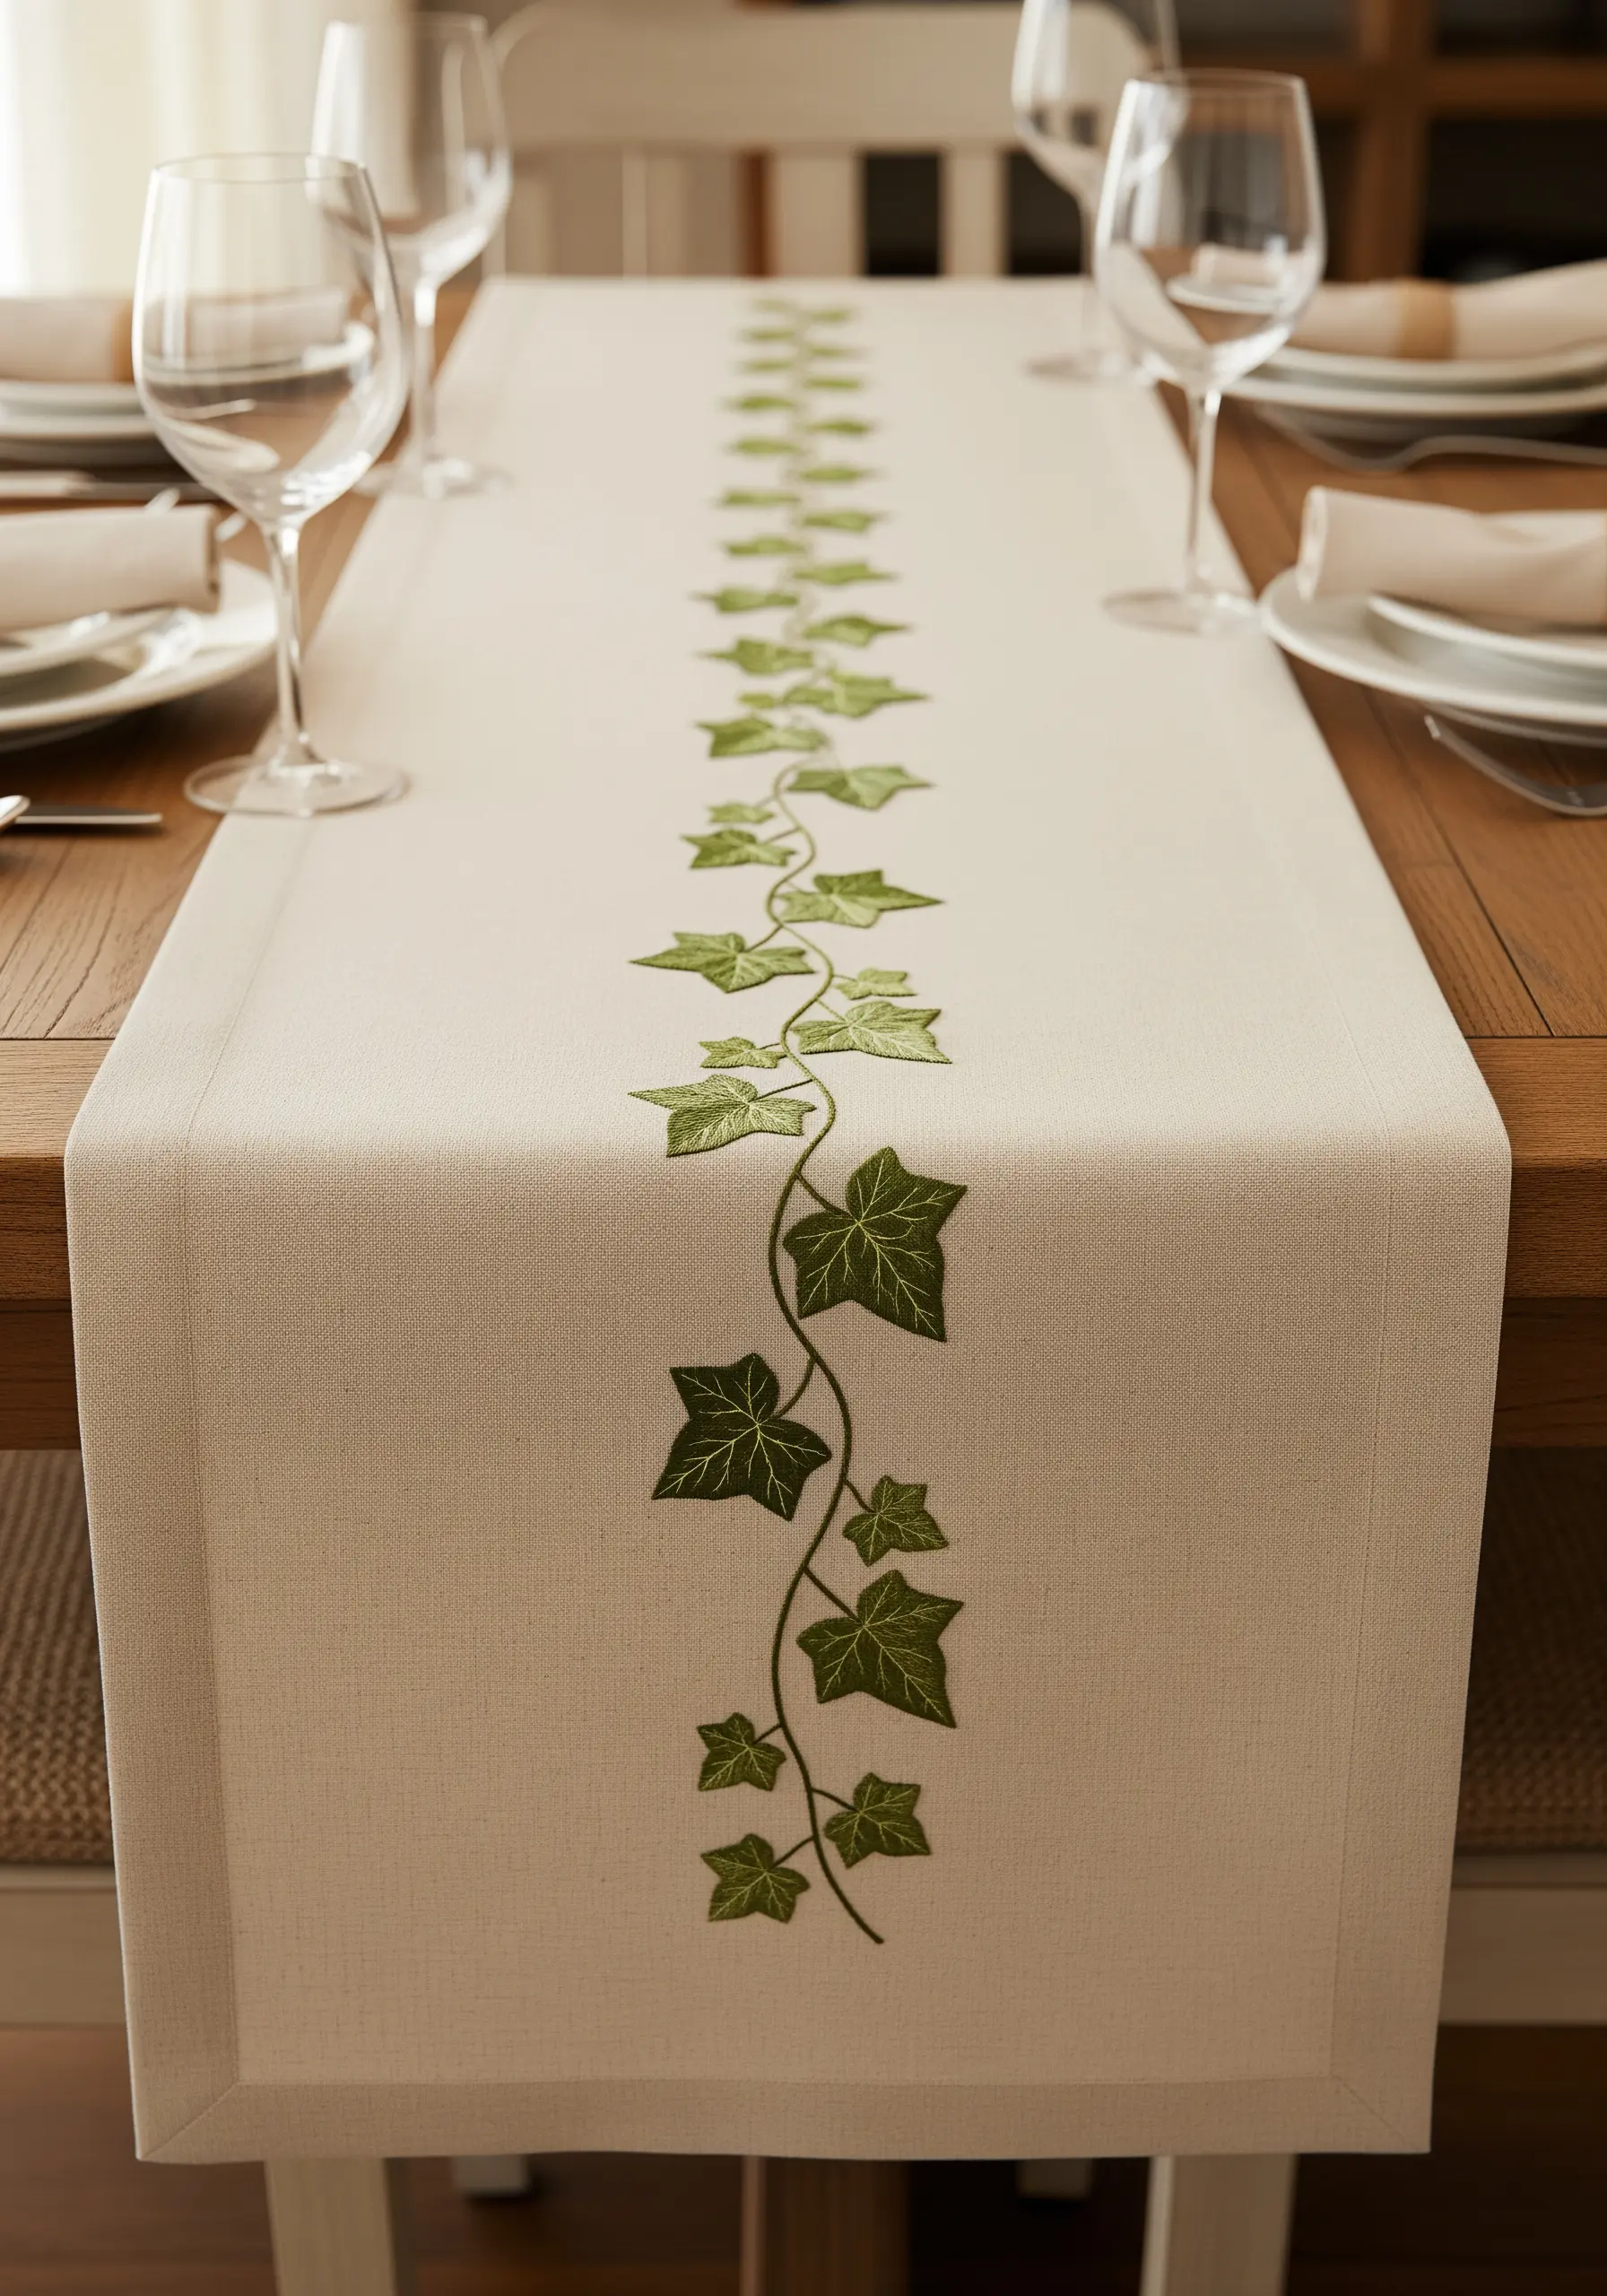
To create a natural, flowing vine, avoid making it perfectly straight. Introduce gentle curves and vary the size and angle of the leaves as you go.
Use a fishbone stitch for the ivy leaves. This stitch creates a beautiful, built-in central vein that adds a touch of realism with minimal effort.
Use two or three shades of green floss, alternating them randomly for different leaves to give the vine more visual depth.
This technique elevates simple table linen embroidery motifs that instantly transform a plain dining table into a luxury statement.
13. Capturing Delicate Queen Anne’s Lace in White Thread
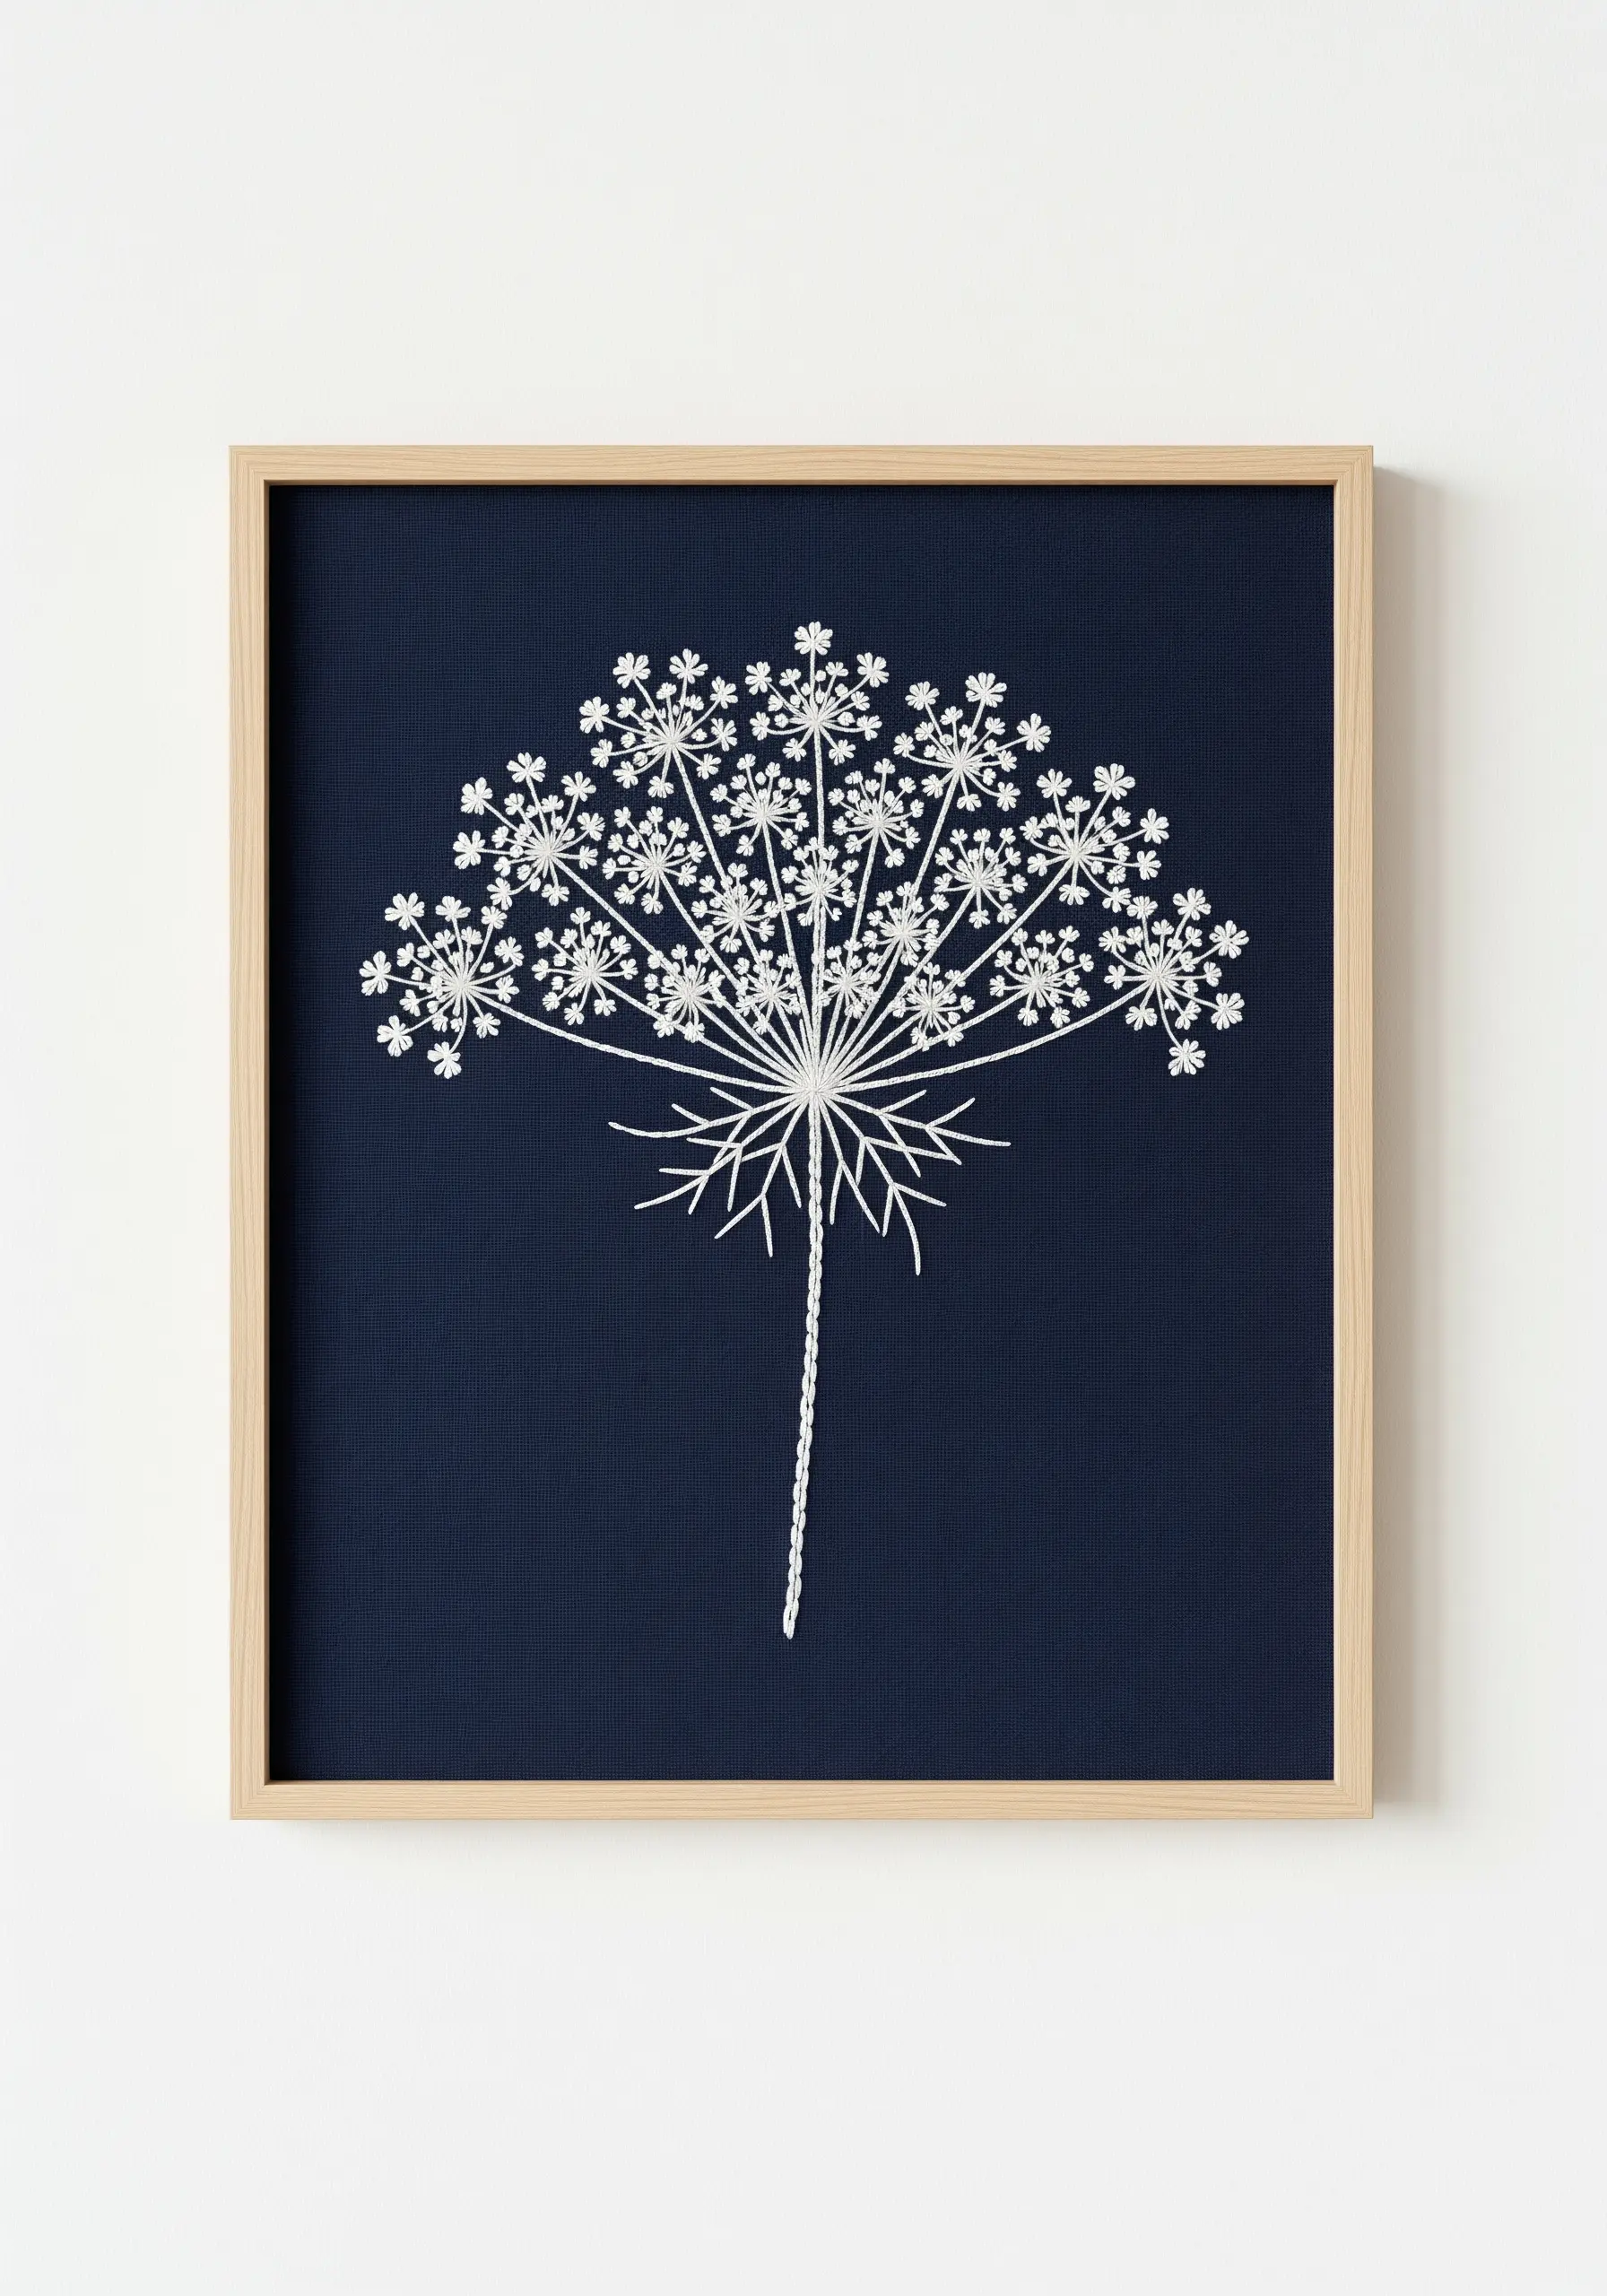
The key to this design’s success is high contrast. Use a single strand of bright white or cream thread on a dark navy or black linen background.
Form the intricate flower clusters with tiny, strategically placed French knots or colonial knots.
Keep the stems and structural lines incredibly fine by using a simple backstitch with only one strand of floss. This emphasizes the plant’s delicate, almost skeletal structure.
This is a perfect example of minimalist line art nature embroidery for modern home walls.
14. Personalizing a Journal with a Pansy Scatter Print
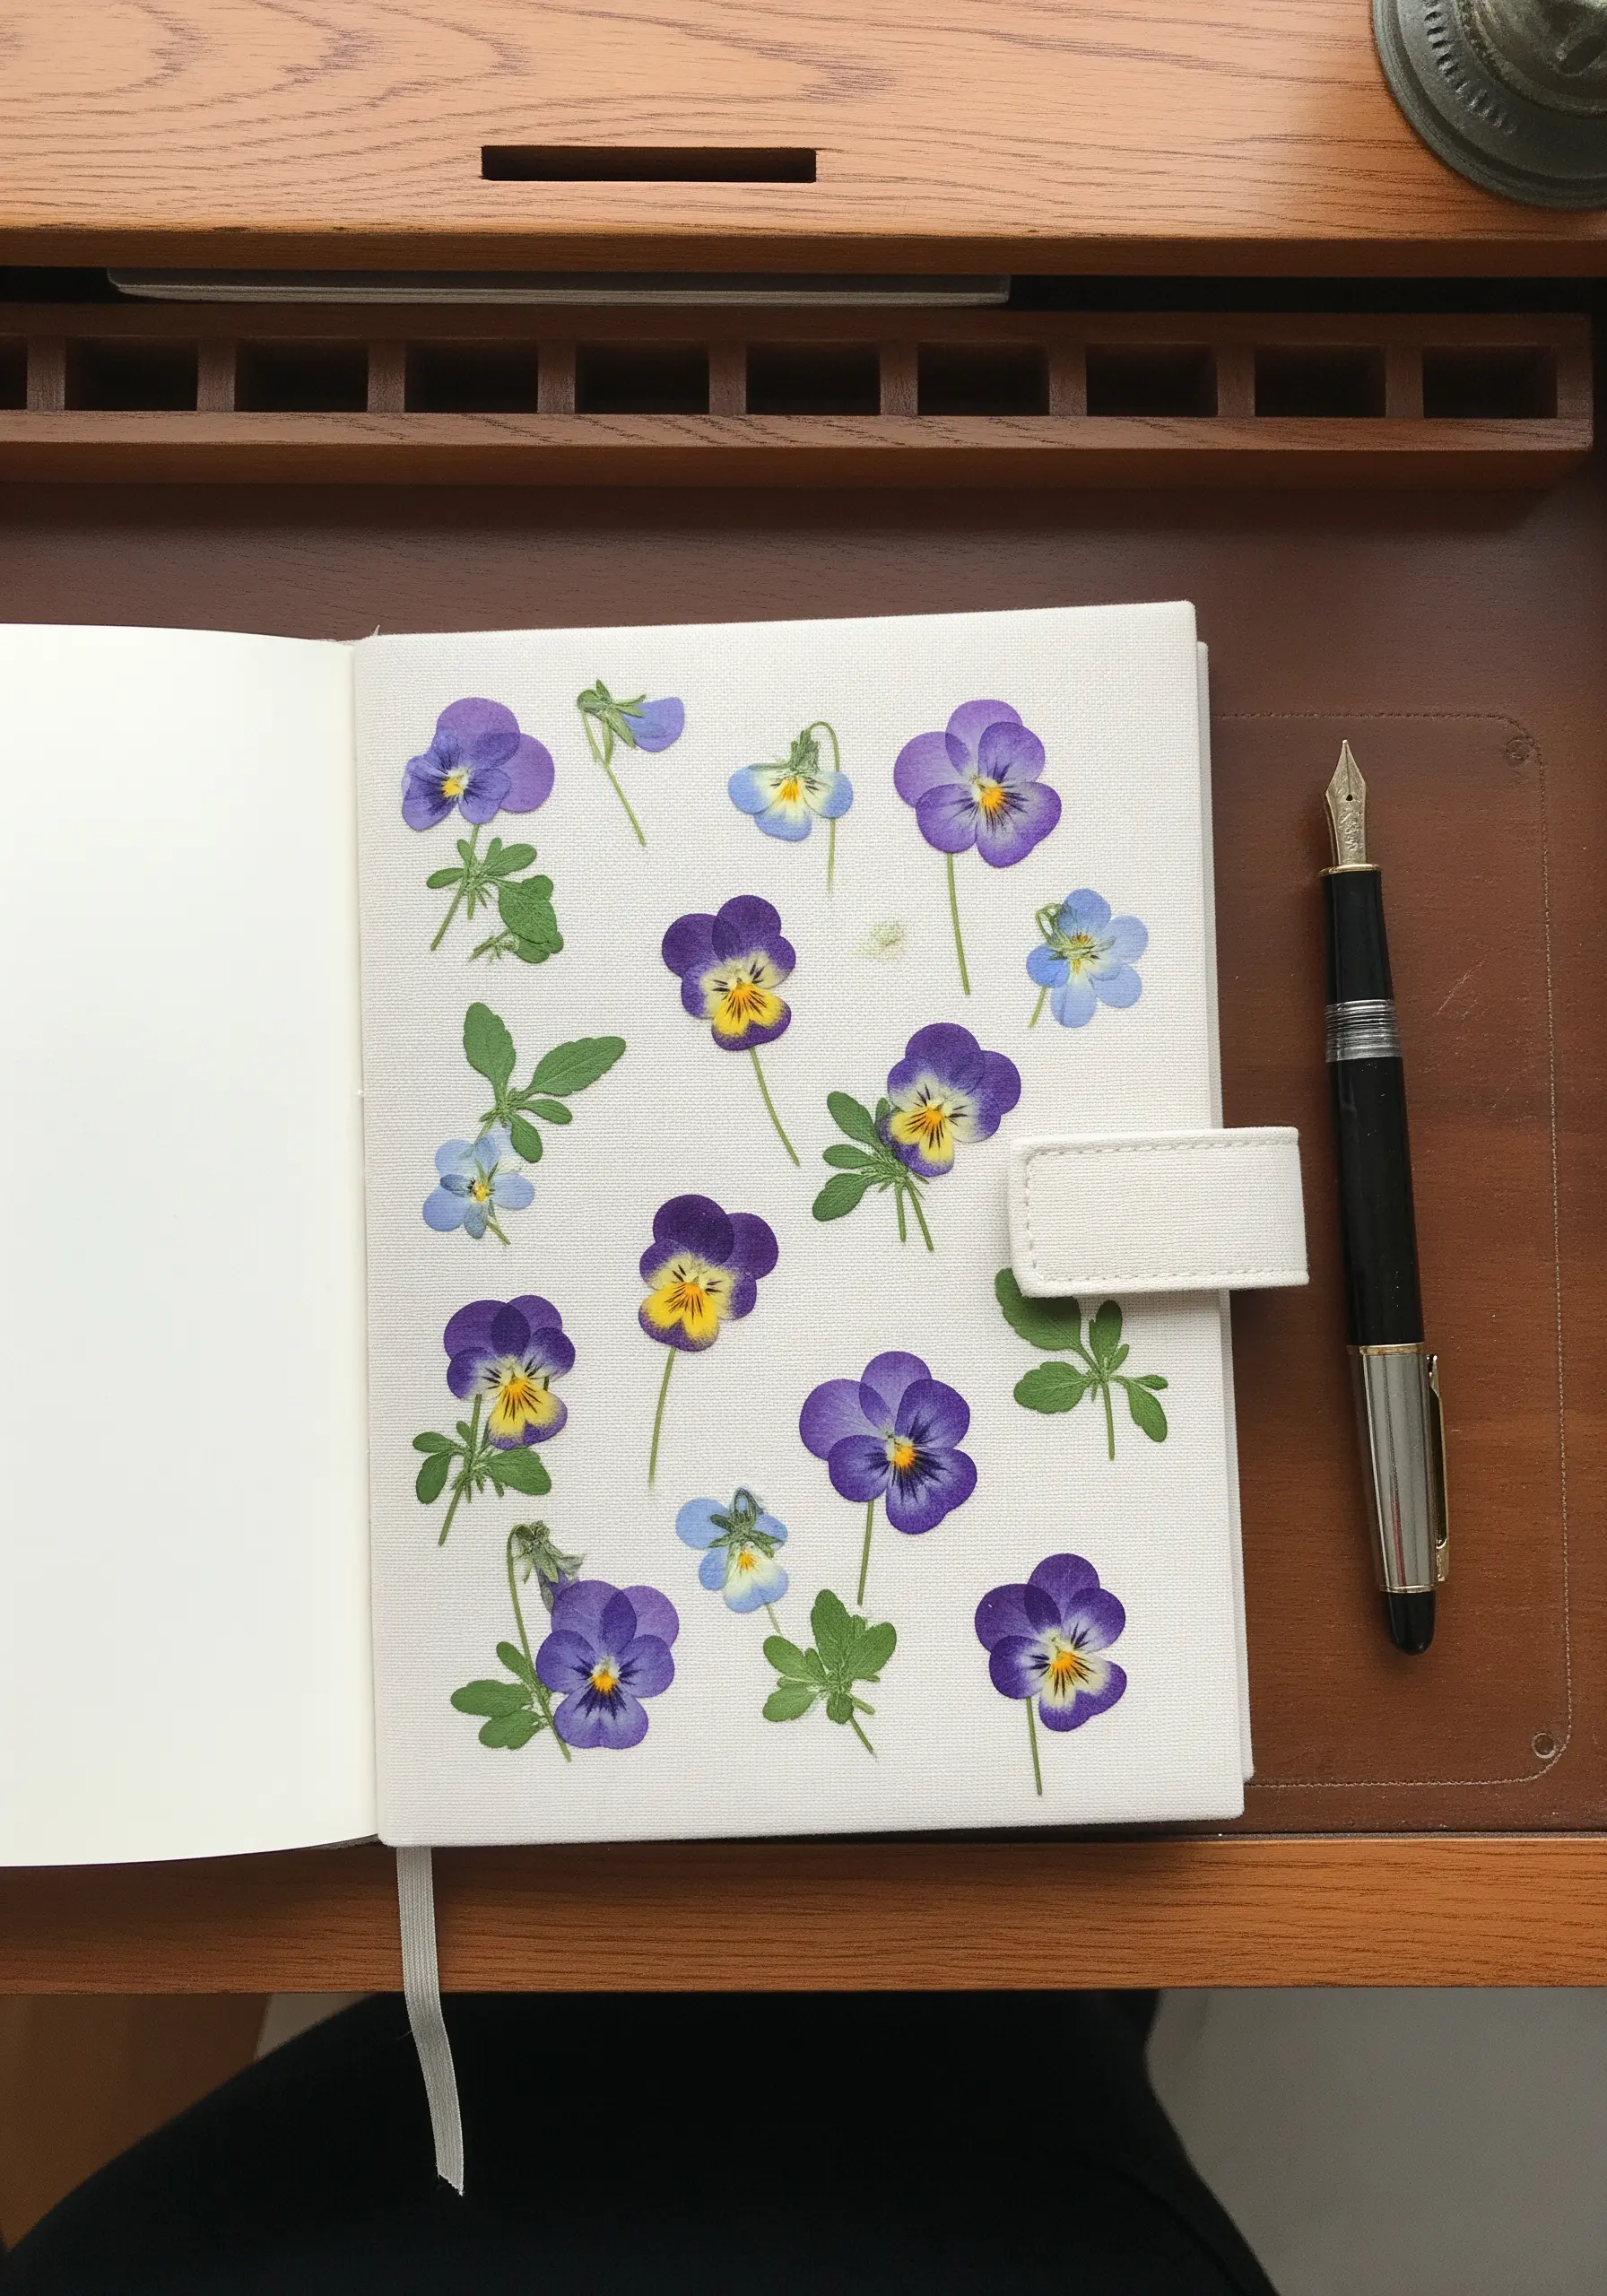
Embellish a pre-made fabric journal cover by scattering small, simple floral motifs instead of stitching one large, central design.
Simplify the pansy by using just two or three colors and filling the petals with a basic satin stitch. This makes the design quick and easy to replicate.
Vary the orientation and colors of the flowers to create a playful, dynamic pattern that feels like a custom-printed fabric.
These are the kinds of quick stitch inspirations to beautify your notebooks and journals and make them uniquely yours.
15. Stitching a Radiant Sunflower Suncatcher
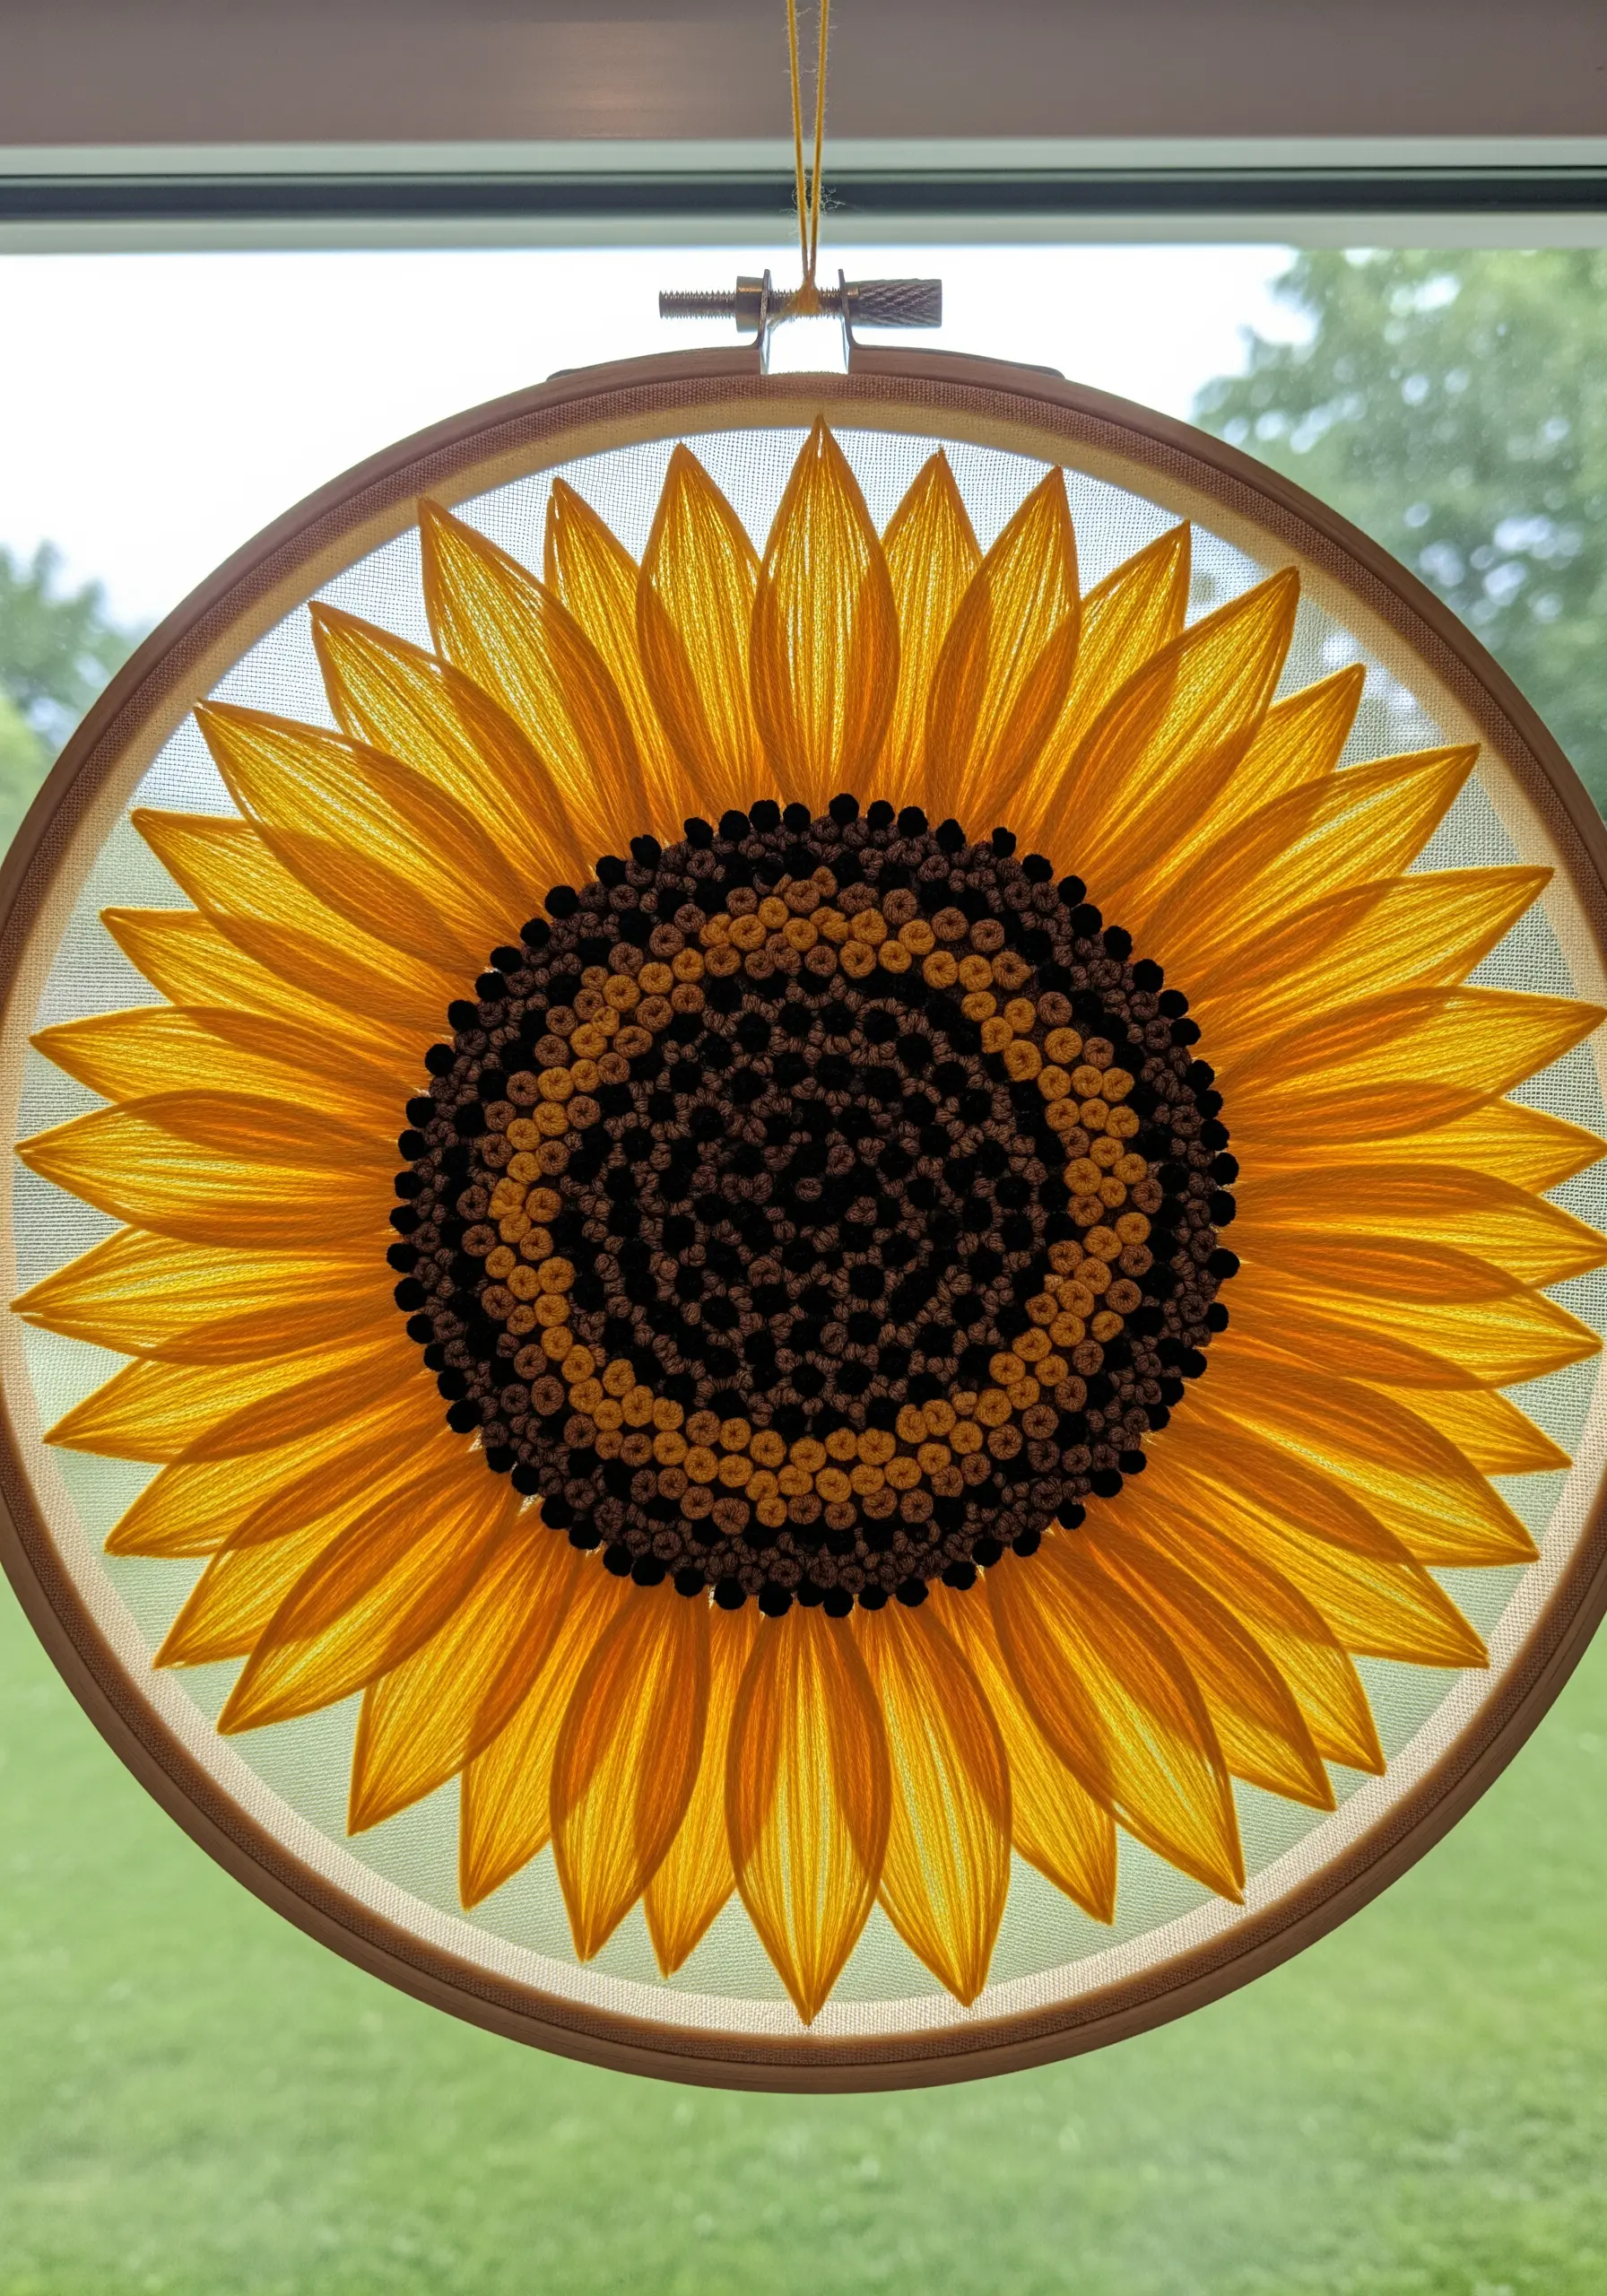
When stitching a dense design on tulle, you must use a water-soluble stabilizer to prevent the fabric from distorting under the weight of the thread.
Layer your long-and-short stitches in the petals to build up saturated color. The light will catch these layers differently, creating a beautiful, glowing effect.
For the center, use a dense field of French knots in shades of brown and gold to replicate the texture of the seeds.
These sunflower-inspired embroidery crafts that bring warm rustic charm to your kitchen decor look stunning in a window.
16. Crafting a Stitched Autumn Leaf Garland
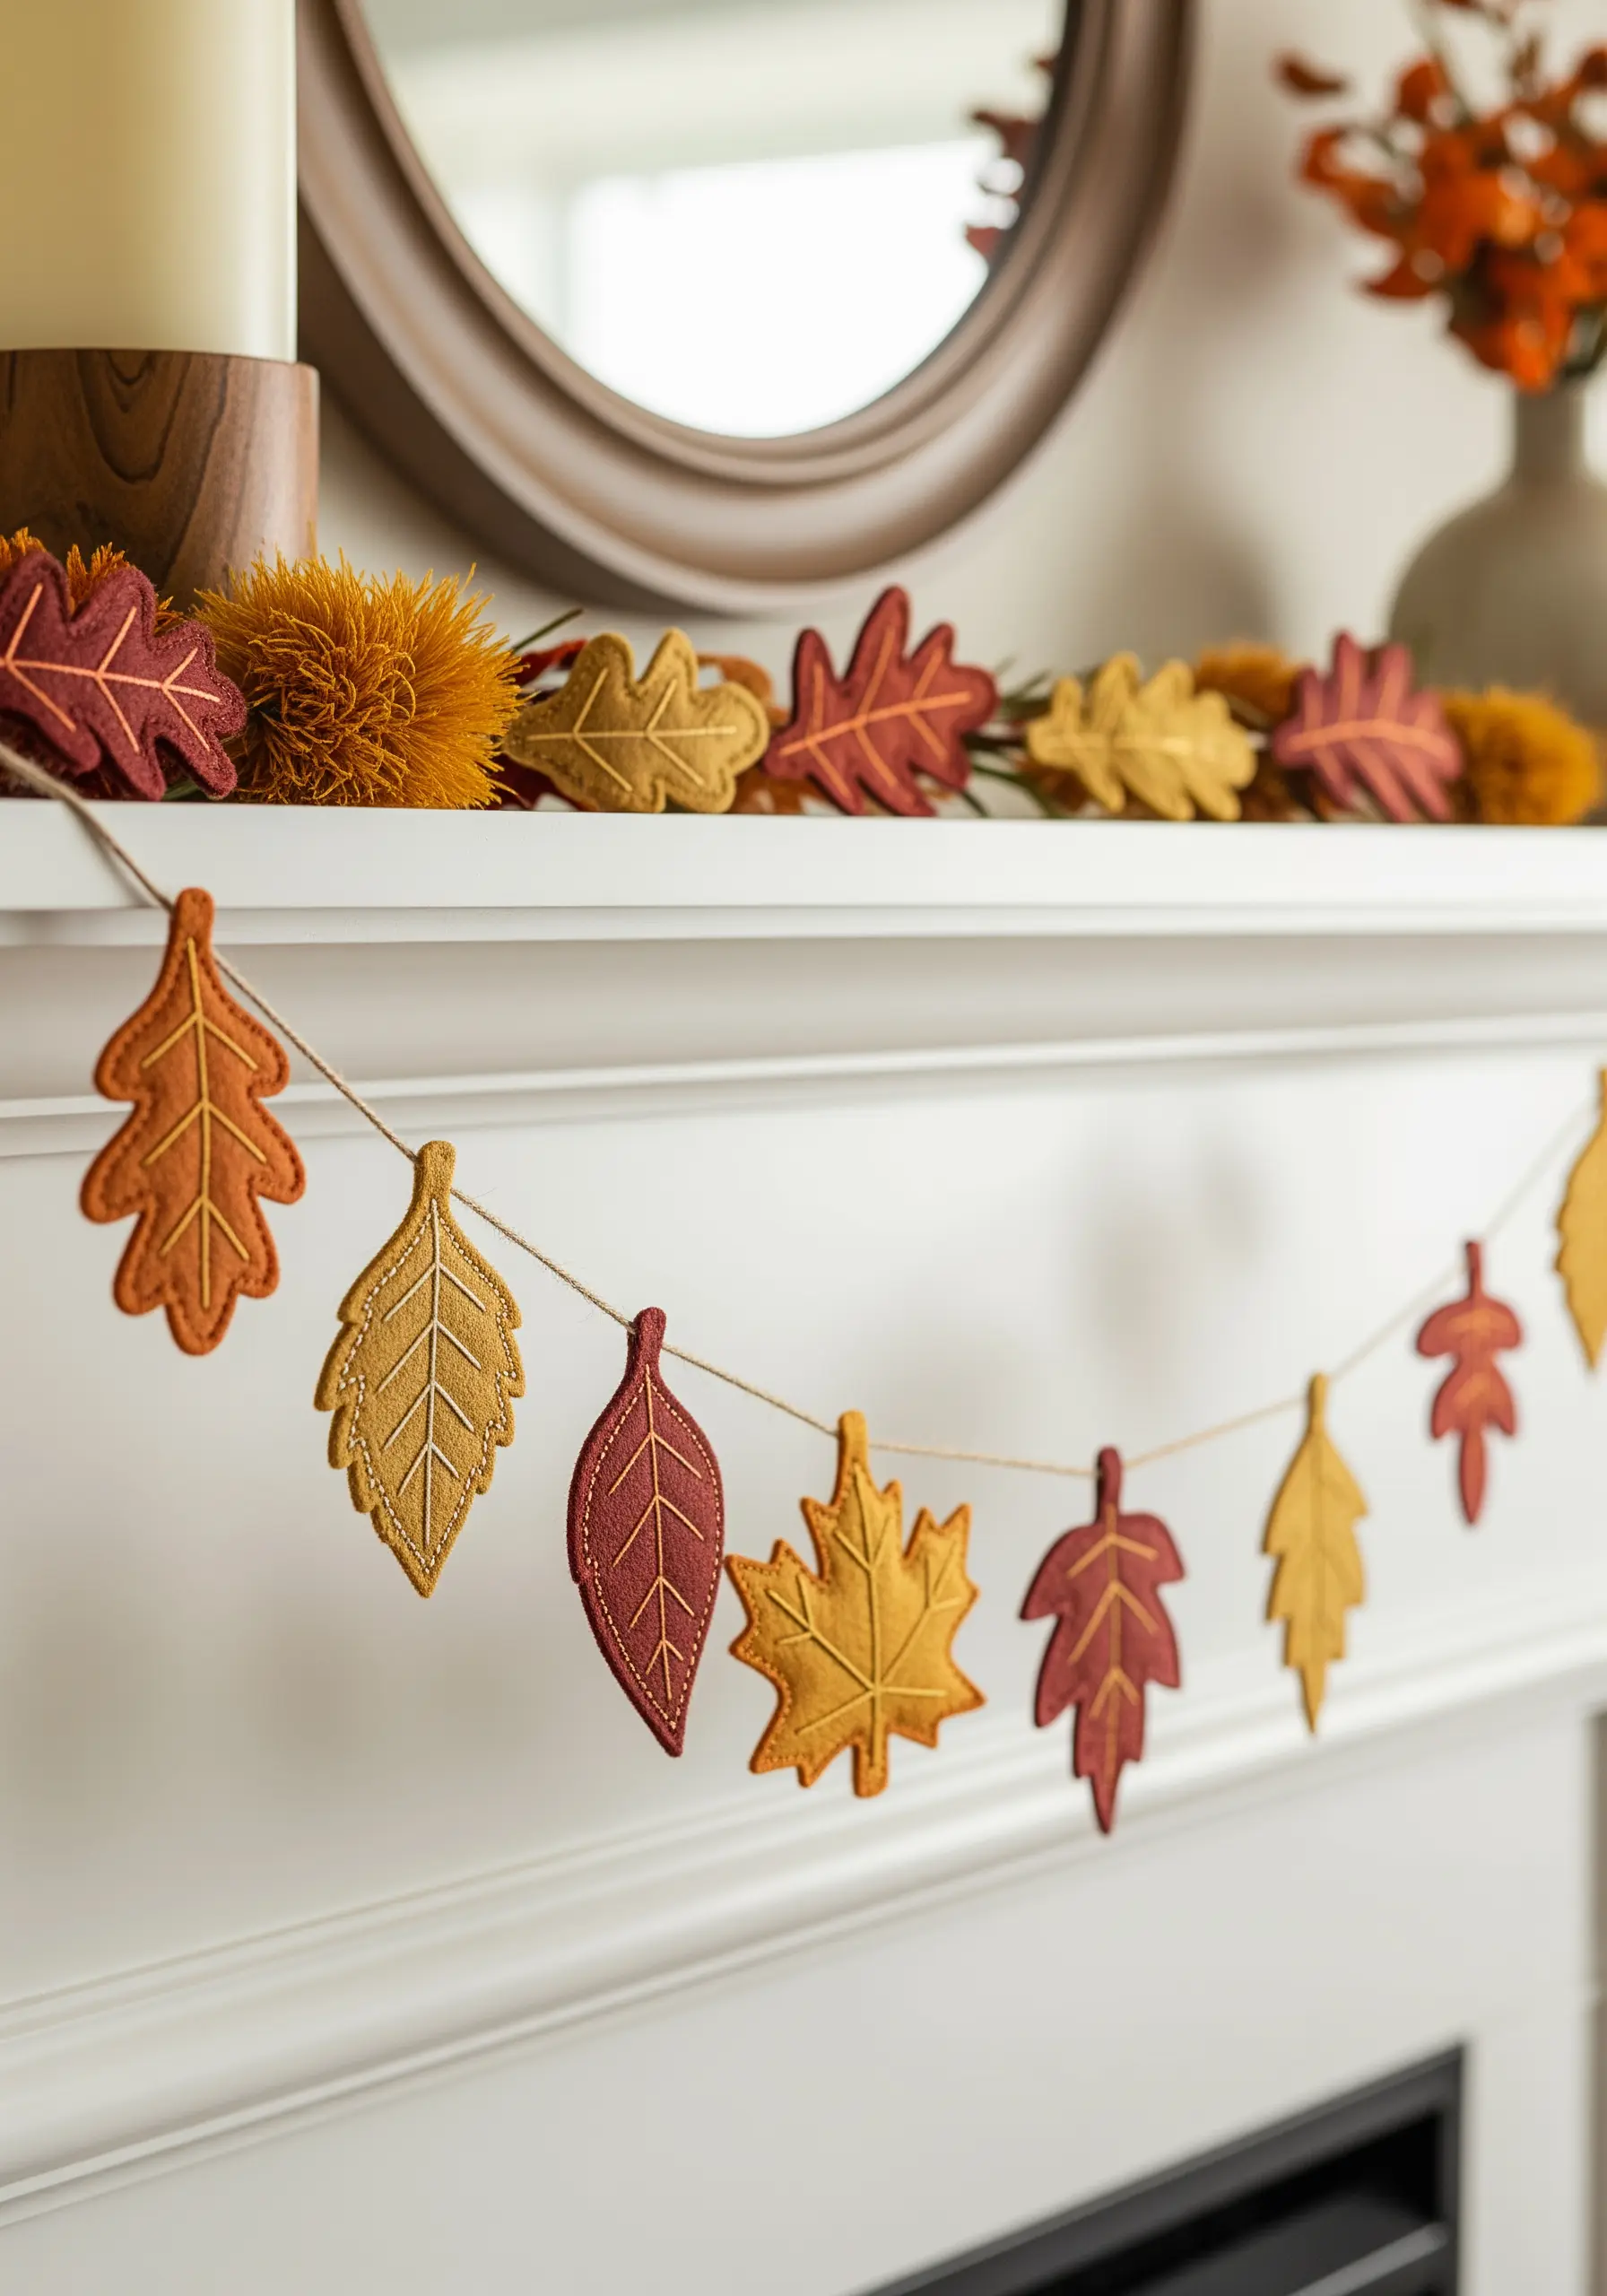
To create these sturdy, three-dimensional leaves, embroider your design on a single piece of felt.
Once finished, place it on top of a matching blank piece of felt and carefully cut both layers out at the same time, leaving a slight border around your stitching.
You can either glue the two layers together or add a simple running stitch around the edge to secure them.
This method produces durable, double-sided ornaments perfect for festive season embroidery wall hangings to transform your holiday decor.
17. Building a Dimensional Poppy Field with Felt Appliqué
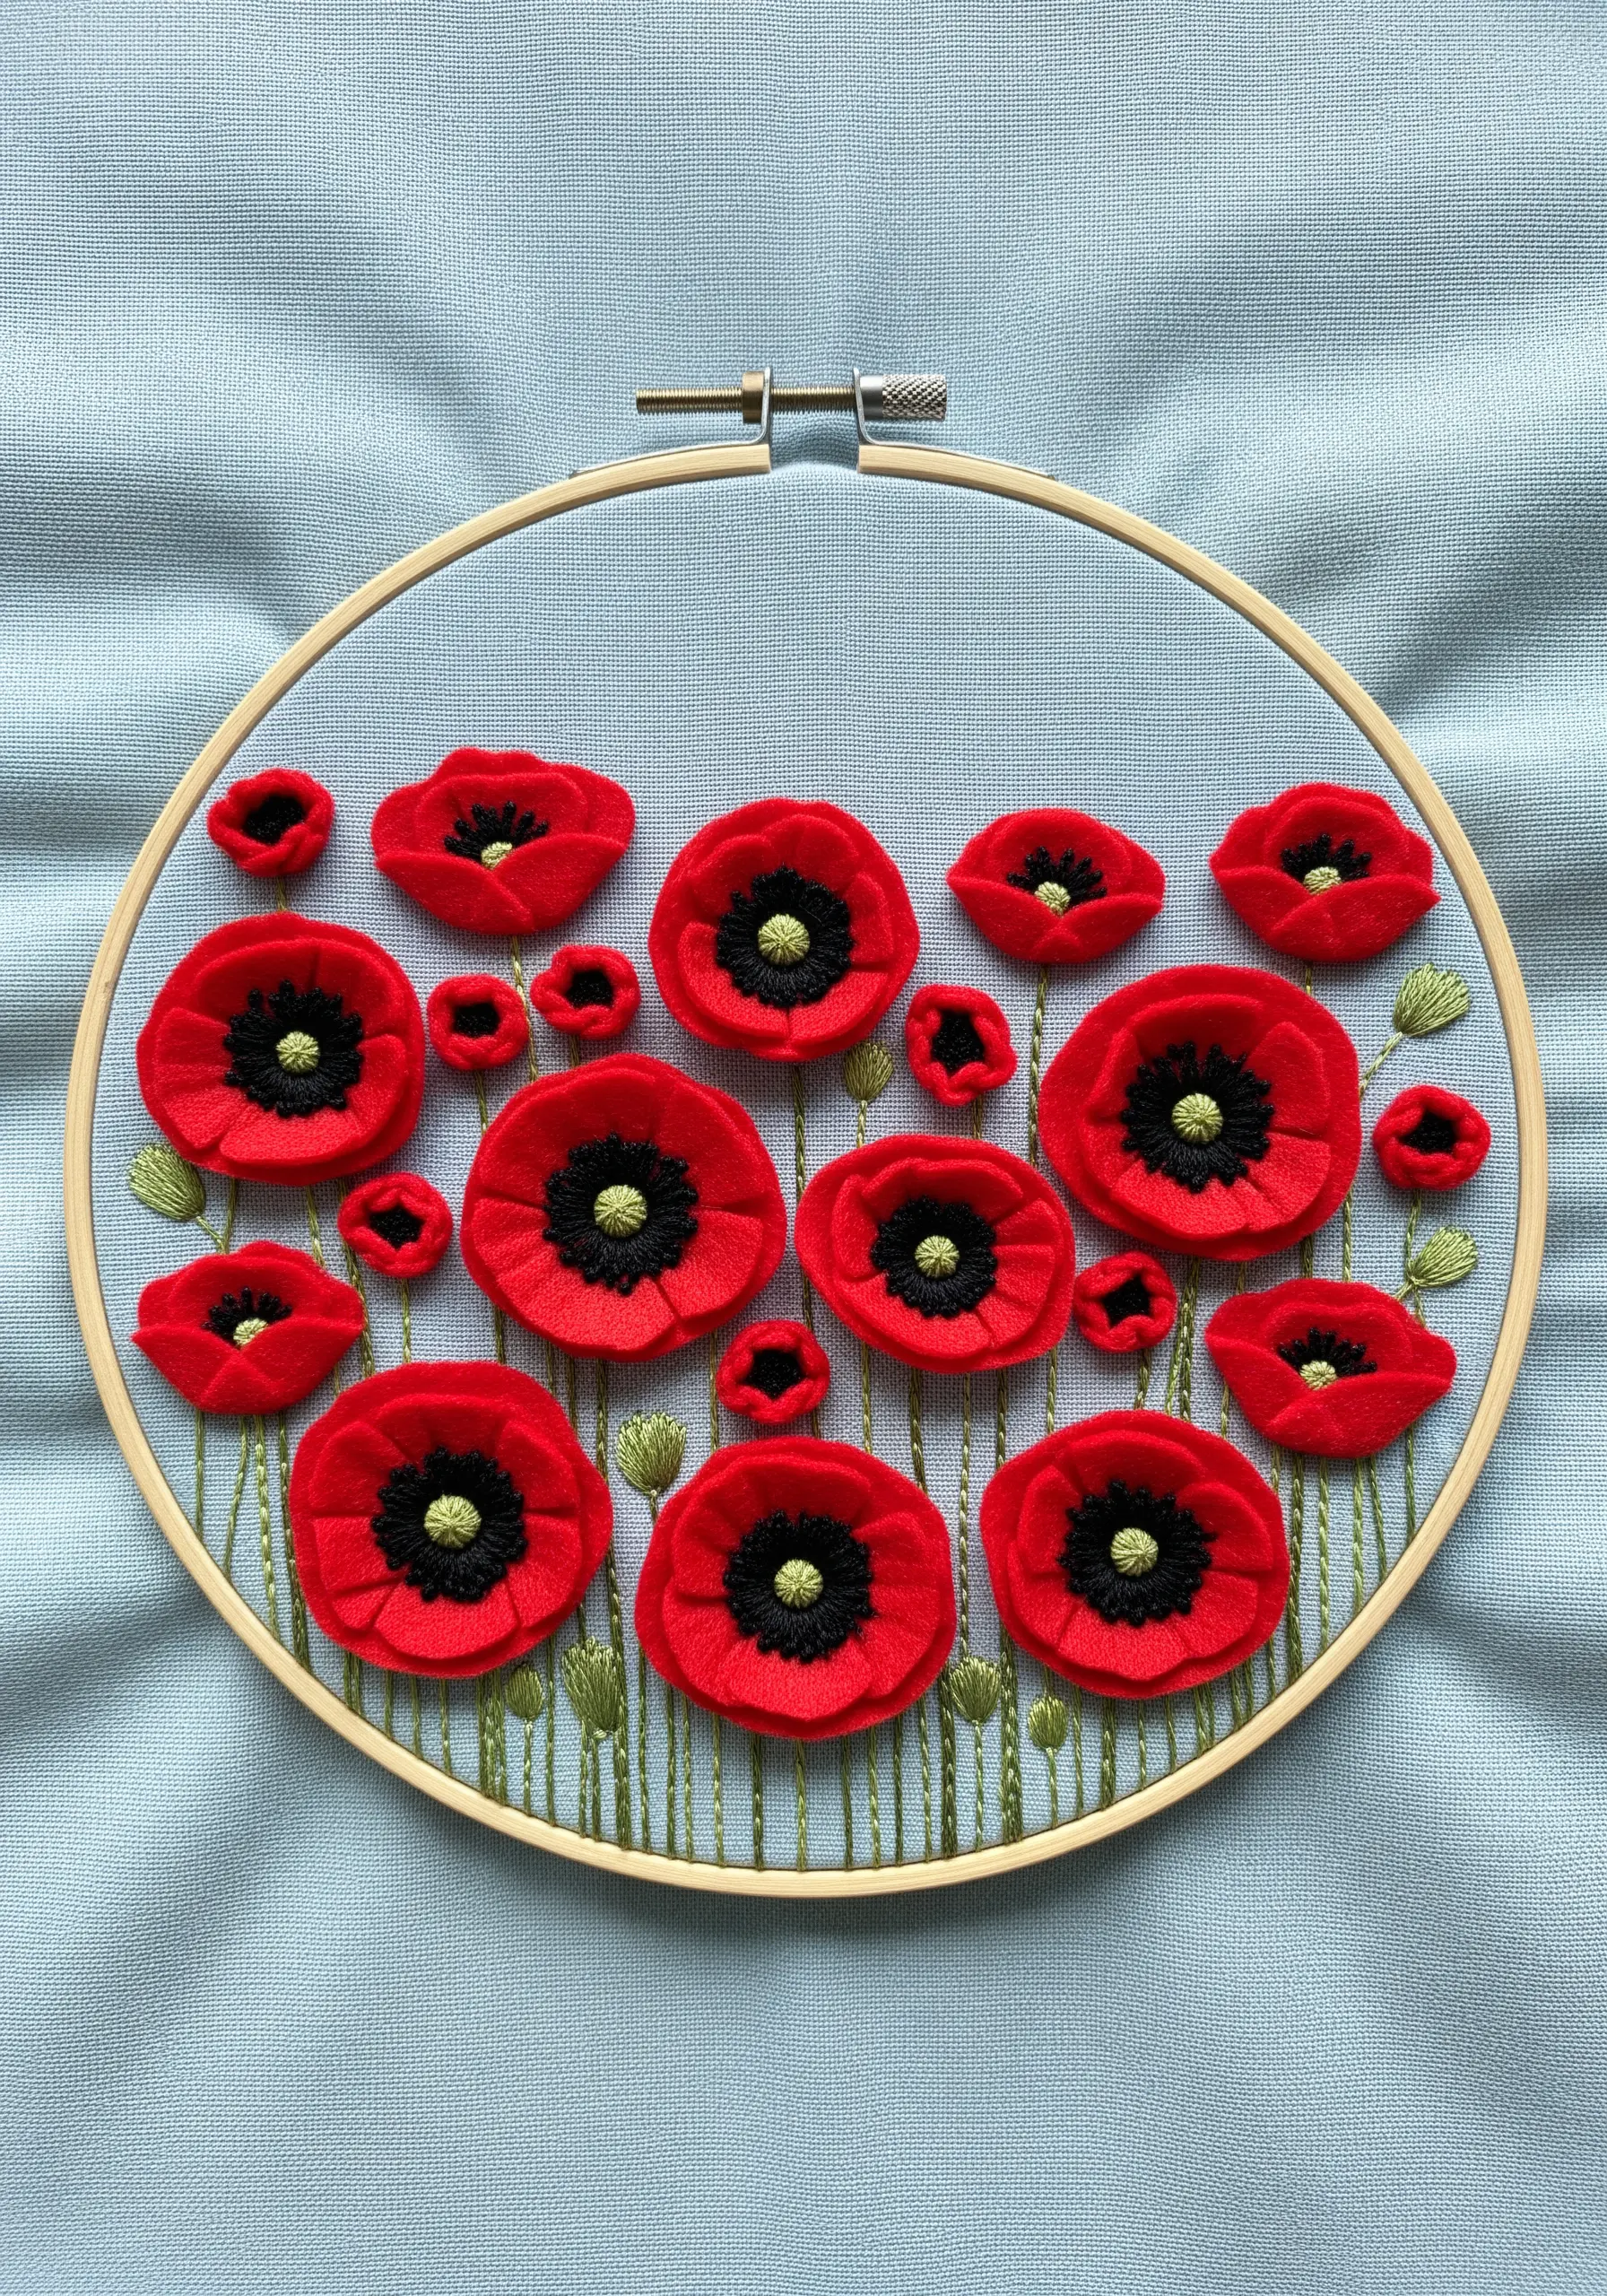
Achieve a stunning 3D effect by layering felt pieces instead of relying solely on thread.
For each poppy, cut two slightly offset red felt petal shapes and layer them over a black felt circle for the center.
Secure the layers with a few simple stitches in the middle, then add texture with green and black French knots.
This is a wonderful way to explore ways to combine embroidery and mixed media for home decor masterpieces, creating art that has both visual and tactile depth.


