

When you sit down to stitch, are you looking for more than just a pattern to follow? You’re searching for that moment when the thread, fabric, and your own intention come together to create something that feels truly alive. The dance between a detailed butterfly wing and a simple wildflower petal is the perfect place to find it.
This collection is about elevating your technique, not just giving you new subjects. We’ll explore how a simple change in stitch direction can mimic the shimmer of a wing, how a padded stitch can give a leaf a soft, plump feel, and how a bold, empty space can say more than a thousand stitches ever could.
These are not just ideas; they are invitations to look closer. To understand how thread can become paint, how texture can tell a story, and how your next project can be your most intentional, polished, and expressive piece yet. Let’s begin.
1. Achieve Realistic Wings with Thread Painting
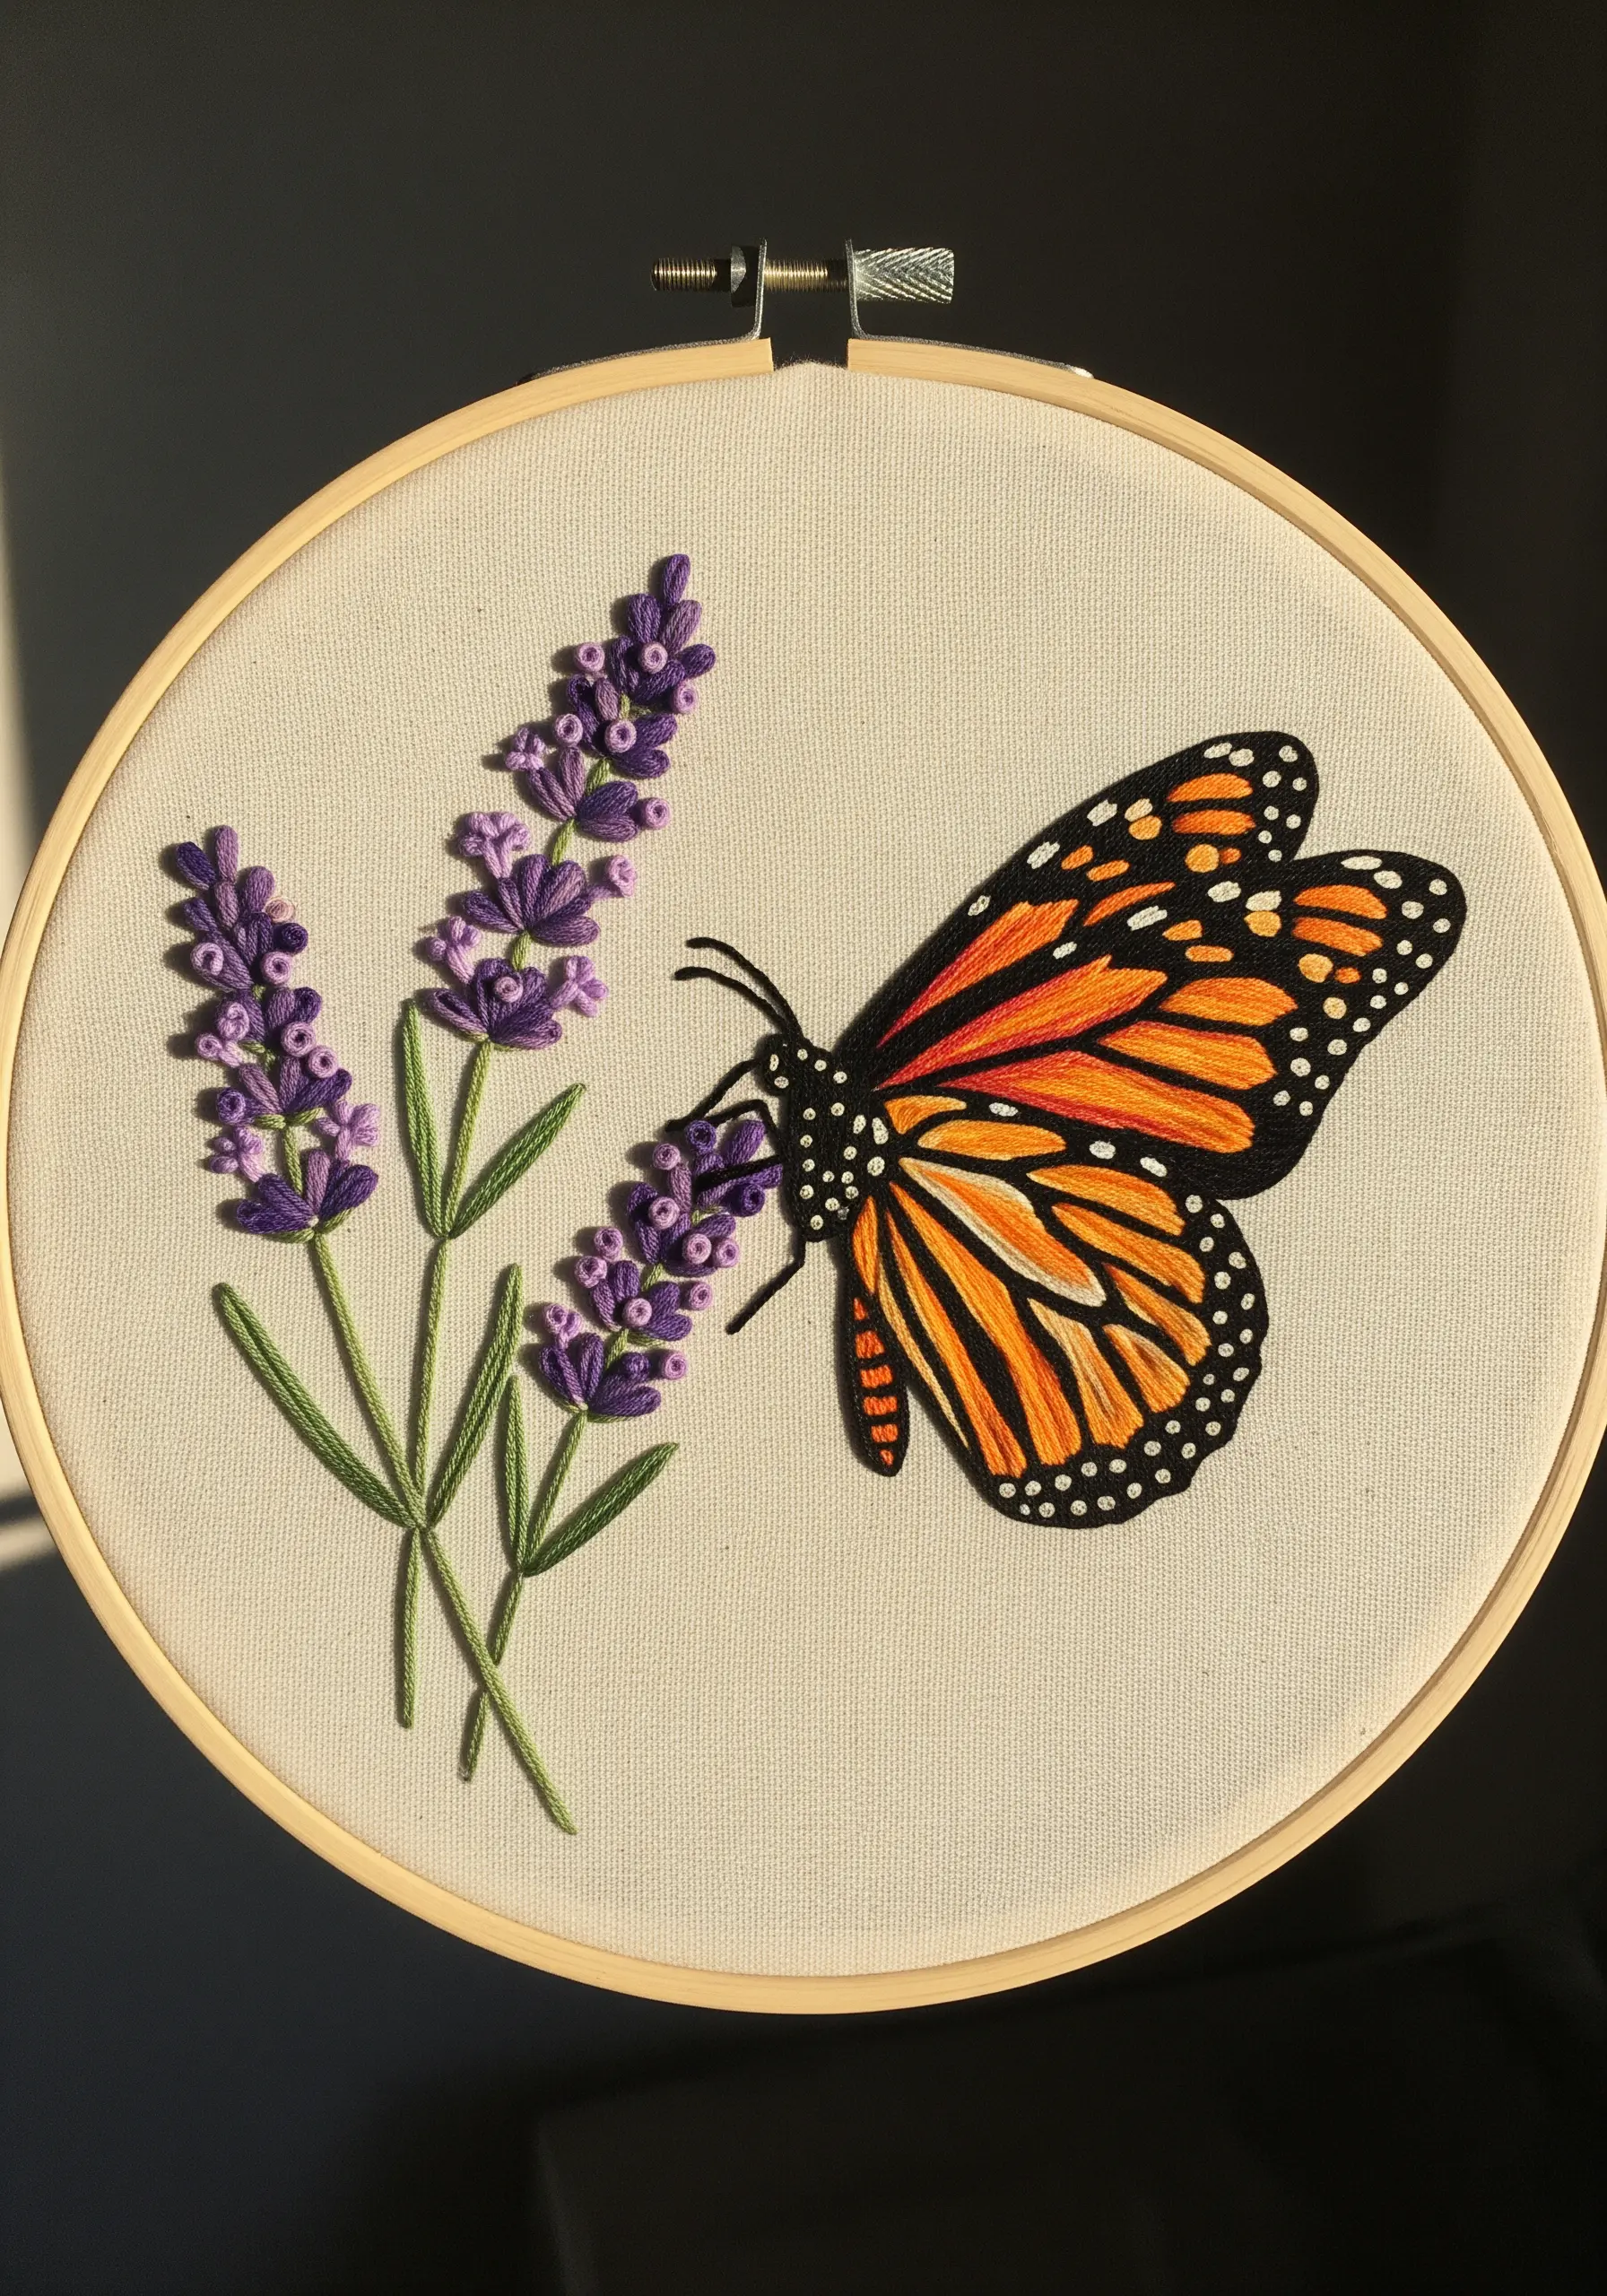
To create the Monarch’s vibrant, blended wing color, use the long-and-short stitch technique with a single strand of floss.
Start with your lightest orange, then gradually introduce darker orange and red threads, angling your stitches to follow the direction of the wing’s veins.
This creates a seamless gradient that mimics nature, offering far more realism than a solid satin stitch.
Contrast this smooth texture with clusters of French knots for the lavender, which adds depth and a tactile quality to the composition.
2. Add Modern Drama with Abstract Thread Drips
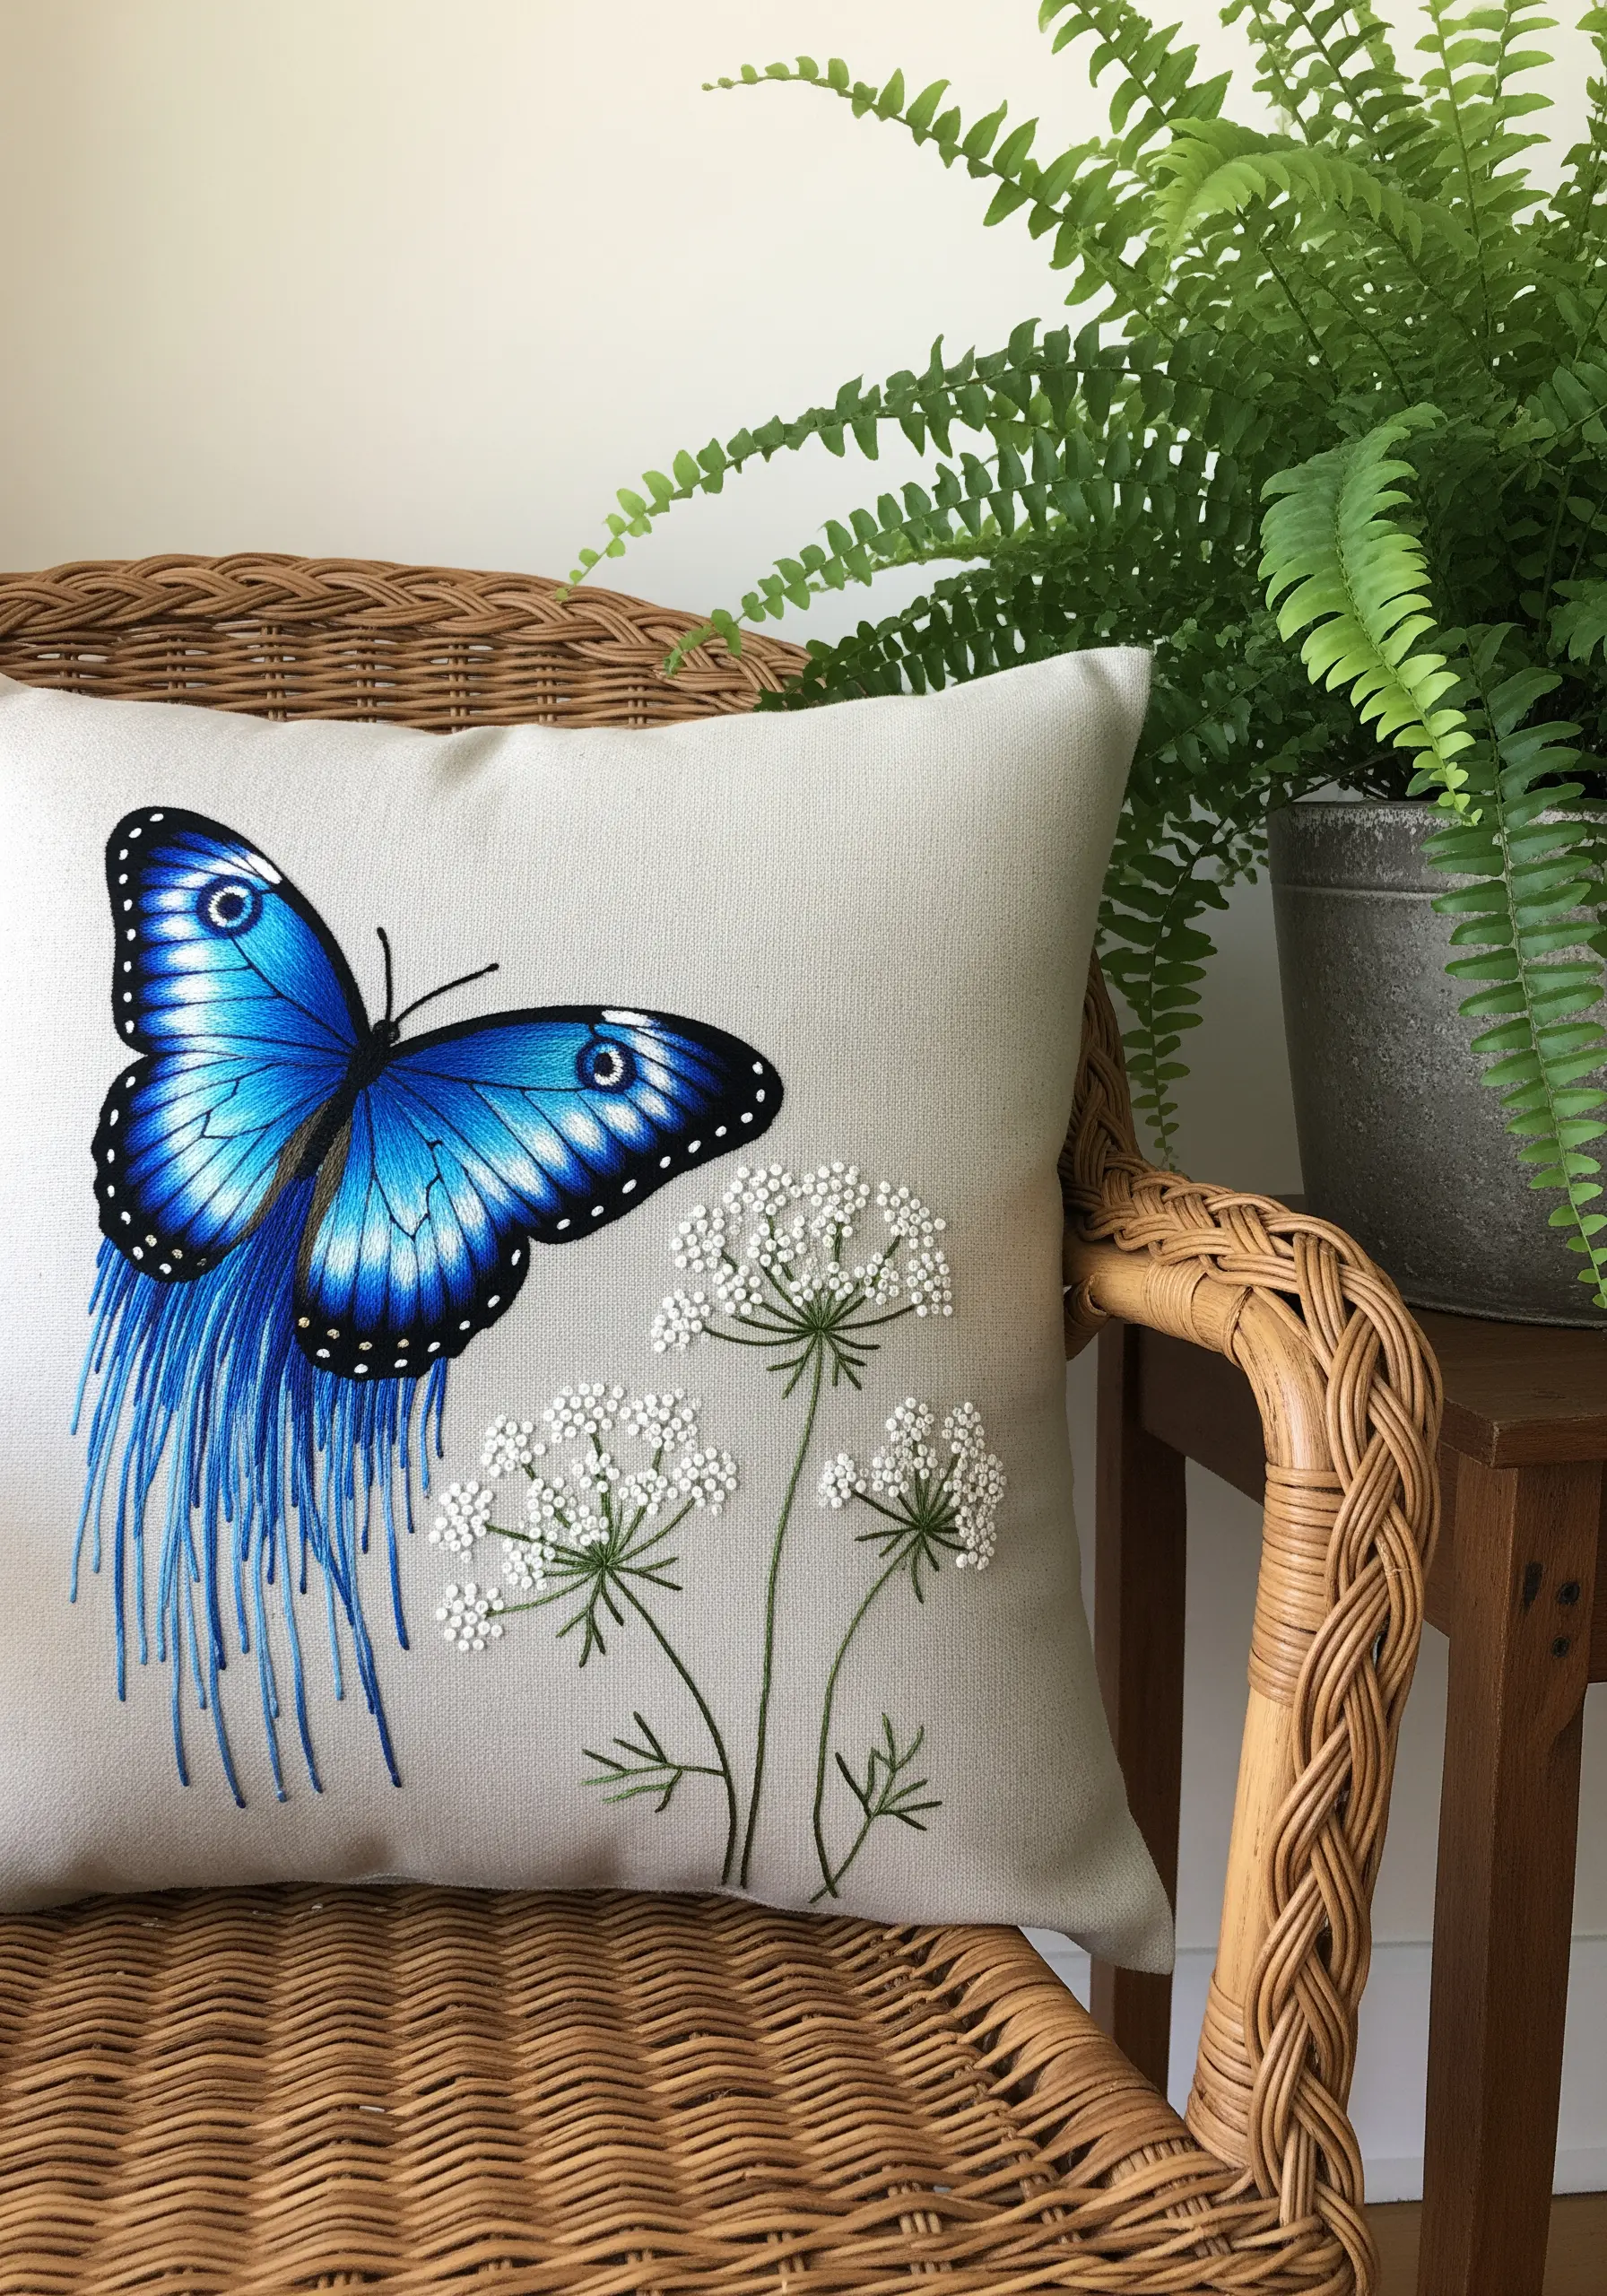
Introduce a contemporary, graphic element to a classic subject by extending your stitches beyond the butterfly’s wing.
Use long, single straight stitches in varying lengths to create a fringe or drip effect, suggesting motion and energy.
Maintain even tension to ensure the threads lie flat and straight without pulling the fabric.
This technique contrasts beautifully with the delicate texture of the tiny French knots on the Queen Anne’s Lace, balancing realism with abstract art.
3. Balance Hyper-Detail with Simplified Botanicals
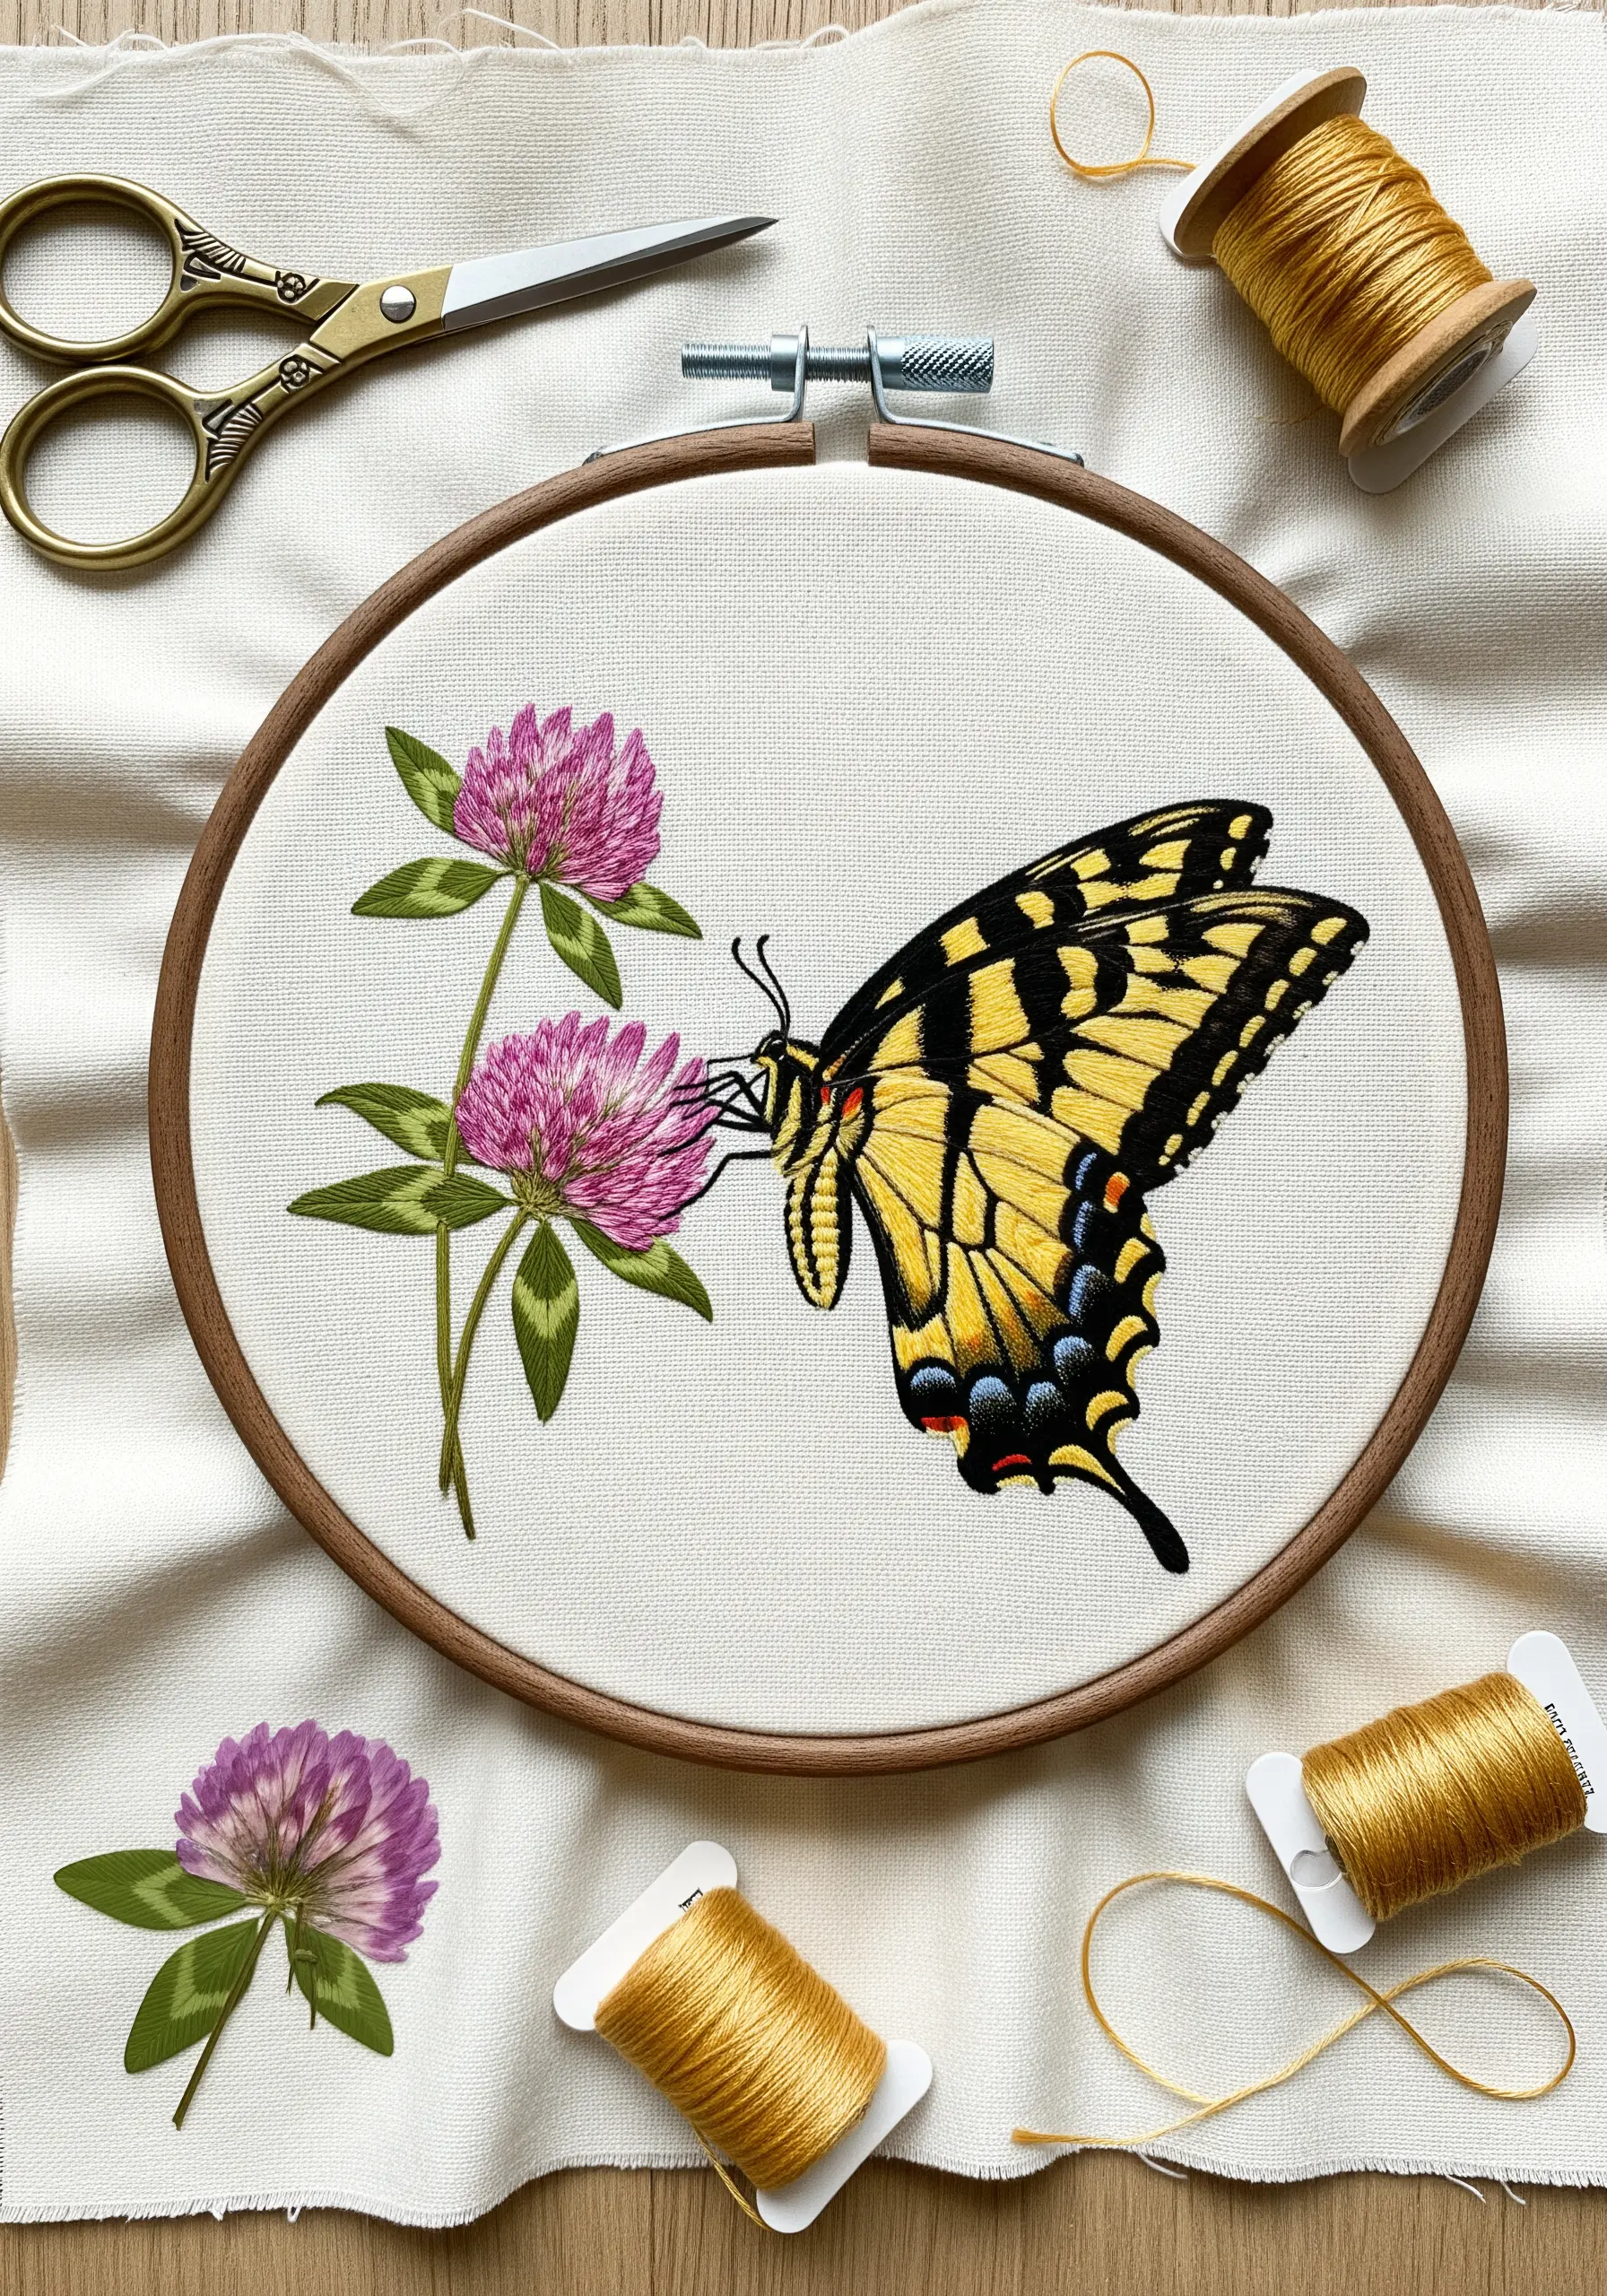
Make your butterfly the undeniable focal point by rendering it in hyper-realistic detail while keeping the surrounding florals simple.
Use a single strand of floss and precise long-and-short stitches for the butterfly’s intricate wing patterns.
For the clover blossoms, switch to three strands and use a fishbone or satin stitch for a softer, quicker fill.
This contrast in detail and thread weight naturally draws the eye to your most complex work, creating a balanced and professional composition.
4. Master Asymmetry and Negative Space
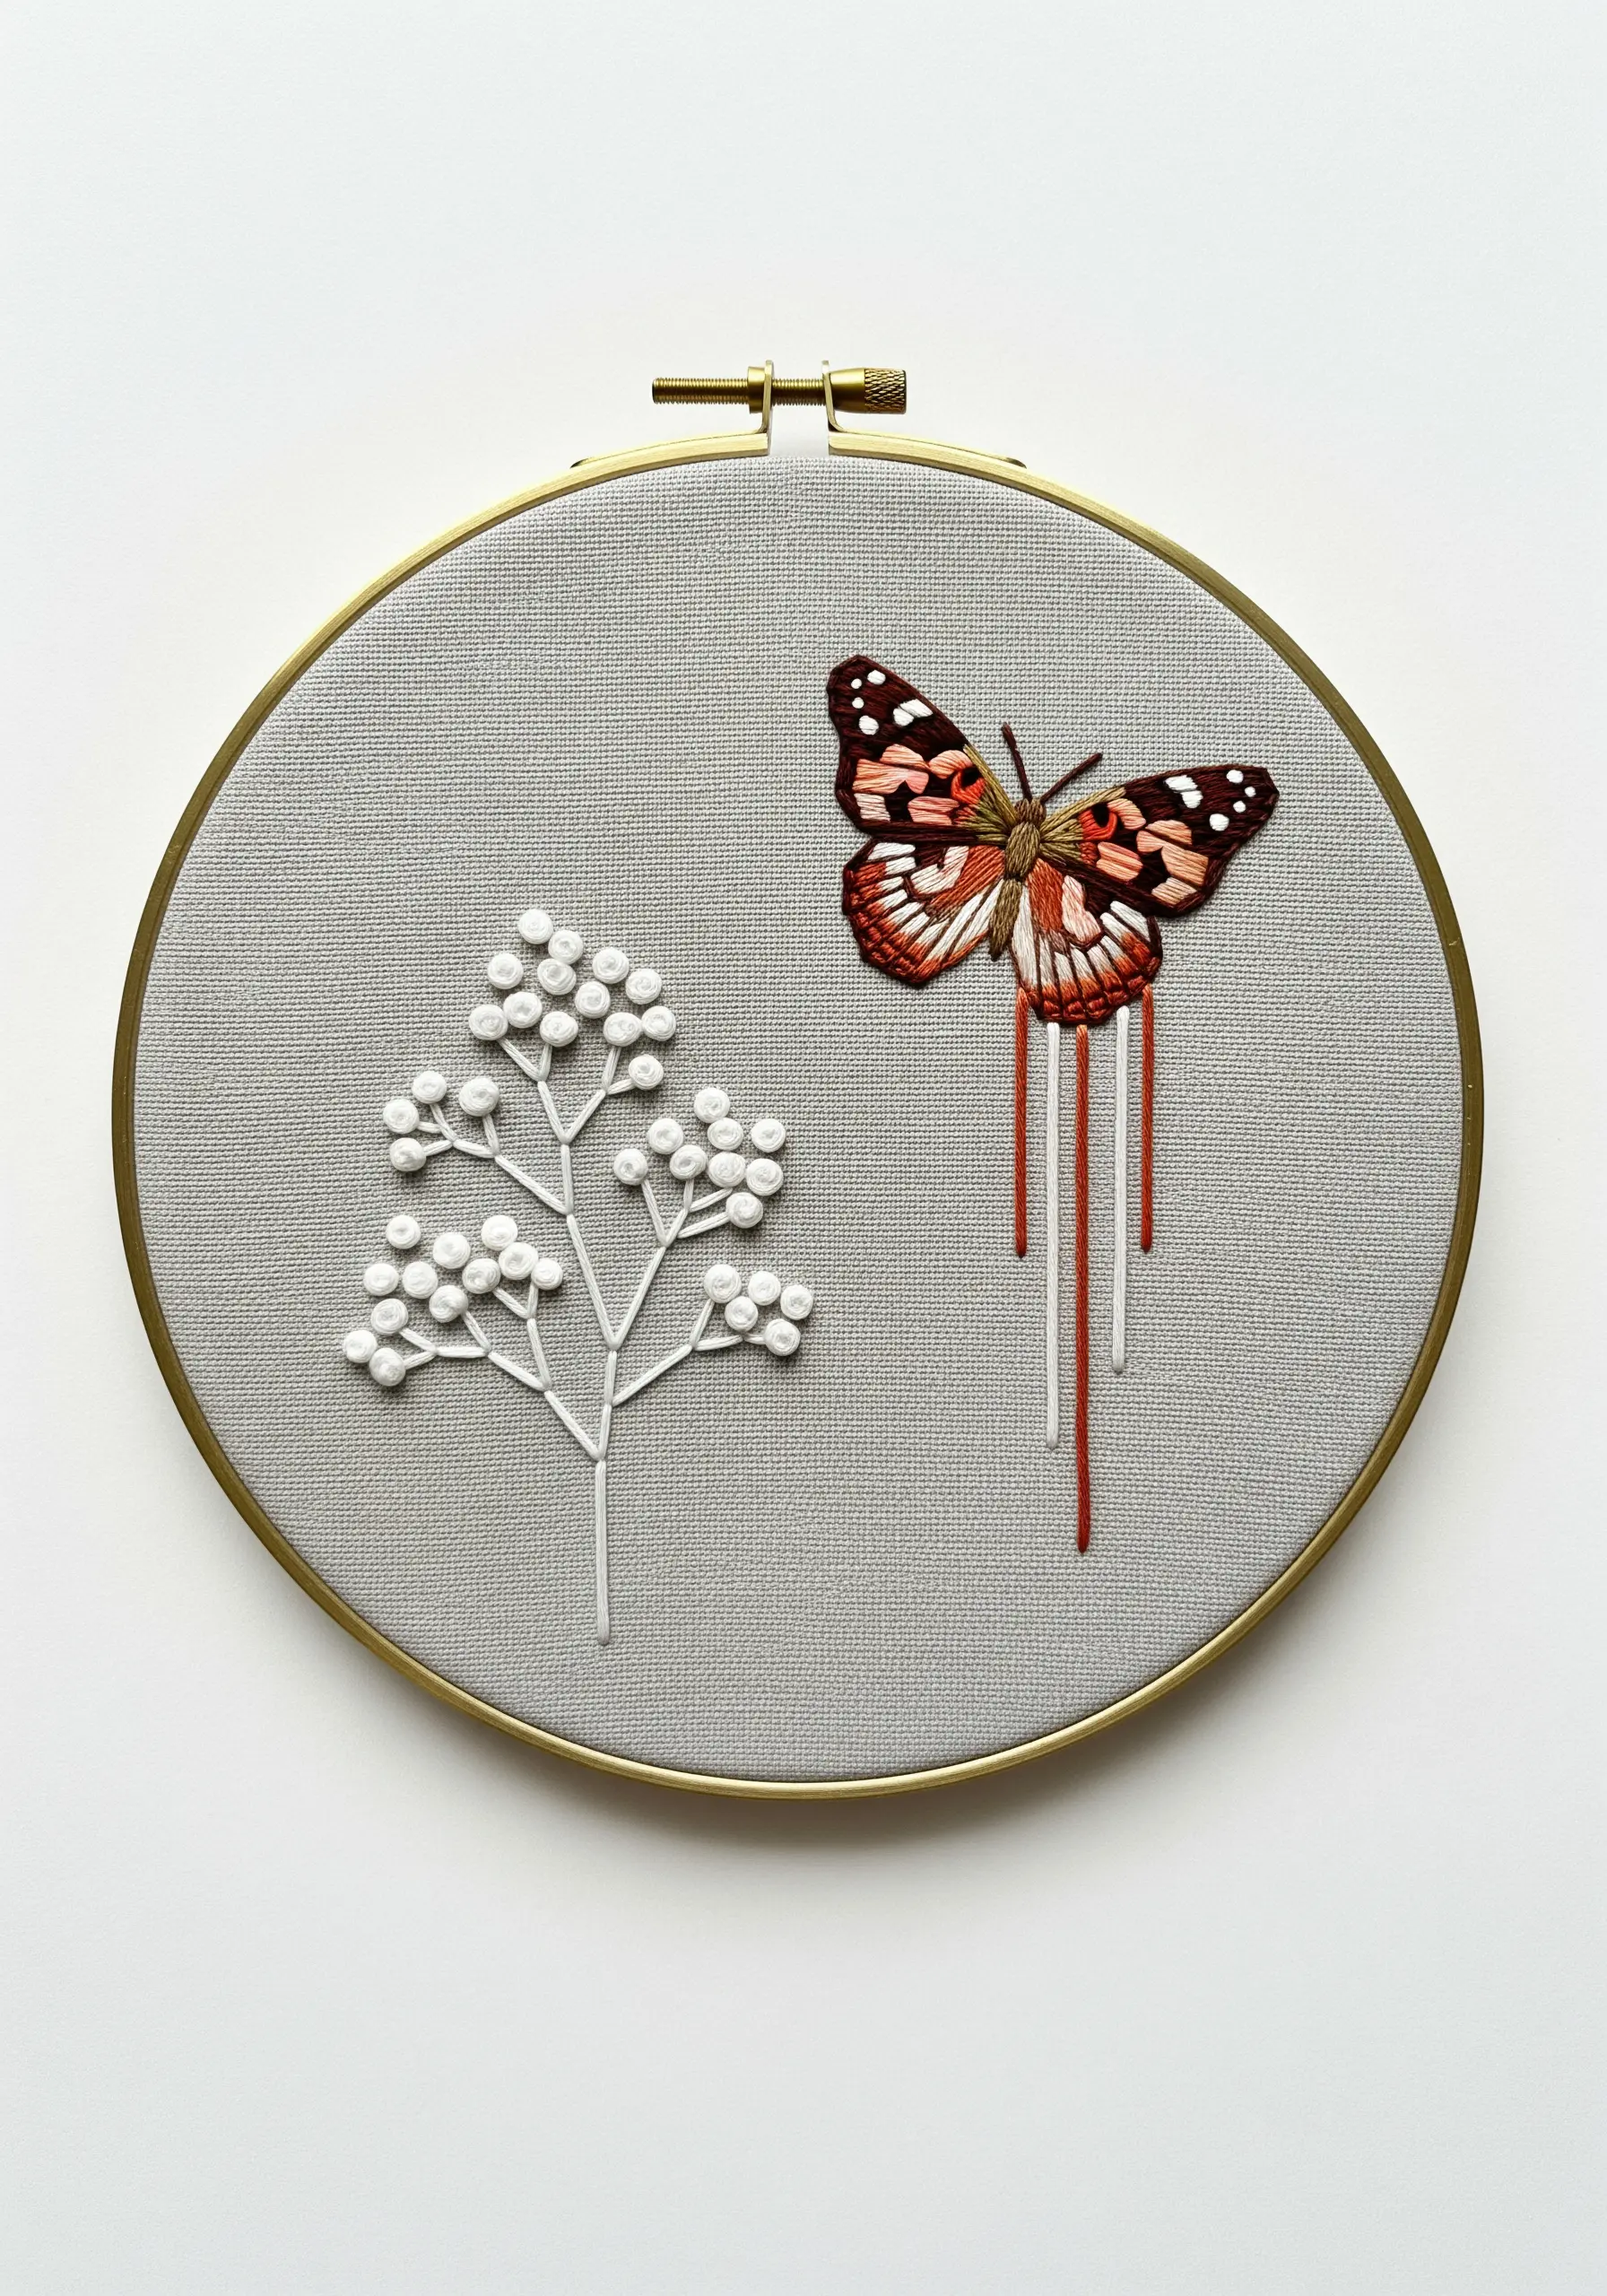
Create a dynamic and modern composition by placing your elements off-center, leaving plenty of open space.
This use of negative space gives the motifs room to breathe and directs the viewer’s eye intentionally.
Pair a detailed butterfly with a minimalist botanical outline, using padded satin stitch for the white berries to give them subtle dimension.
The quiet grey fabric enhances this effect, making the warm tones of the butterfly and the white of the branch appear more vivid.
5. Create an Ethereal Glow on Dark Fabric

Stitching with light threads on a dark background creates a stunning, high-contrast effect that makes your work luminous.
Choose a tightly woven fabric like navy cotton or linen and use a light-colored transfer pen that will show up clearly.
To create the magical sparkle, add a few scattered seed stitches using a single strand of light blue metallic or variegated thread.
This subtle accent catches the light and brings an ethereal quality to the entire piece.
6. Layer a Dense Meadow on Apparel
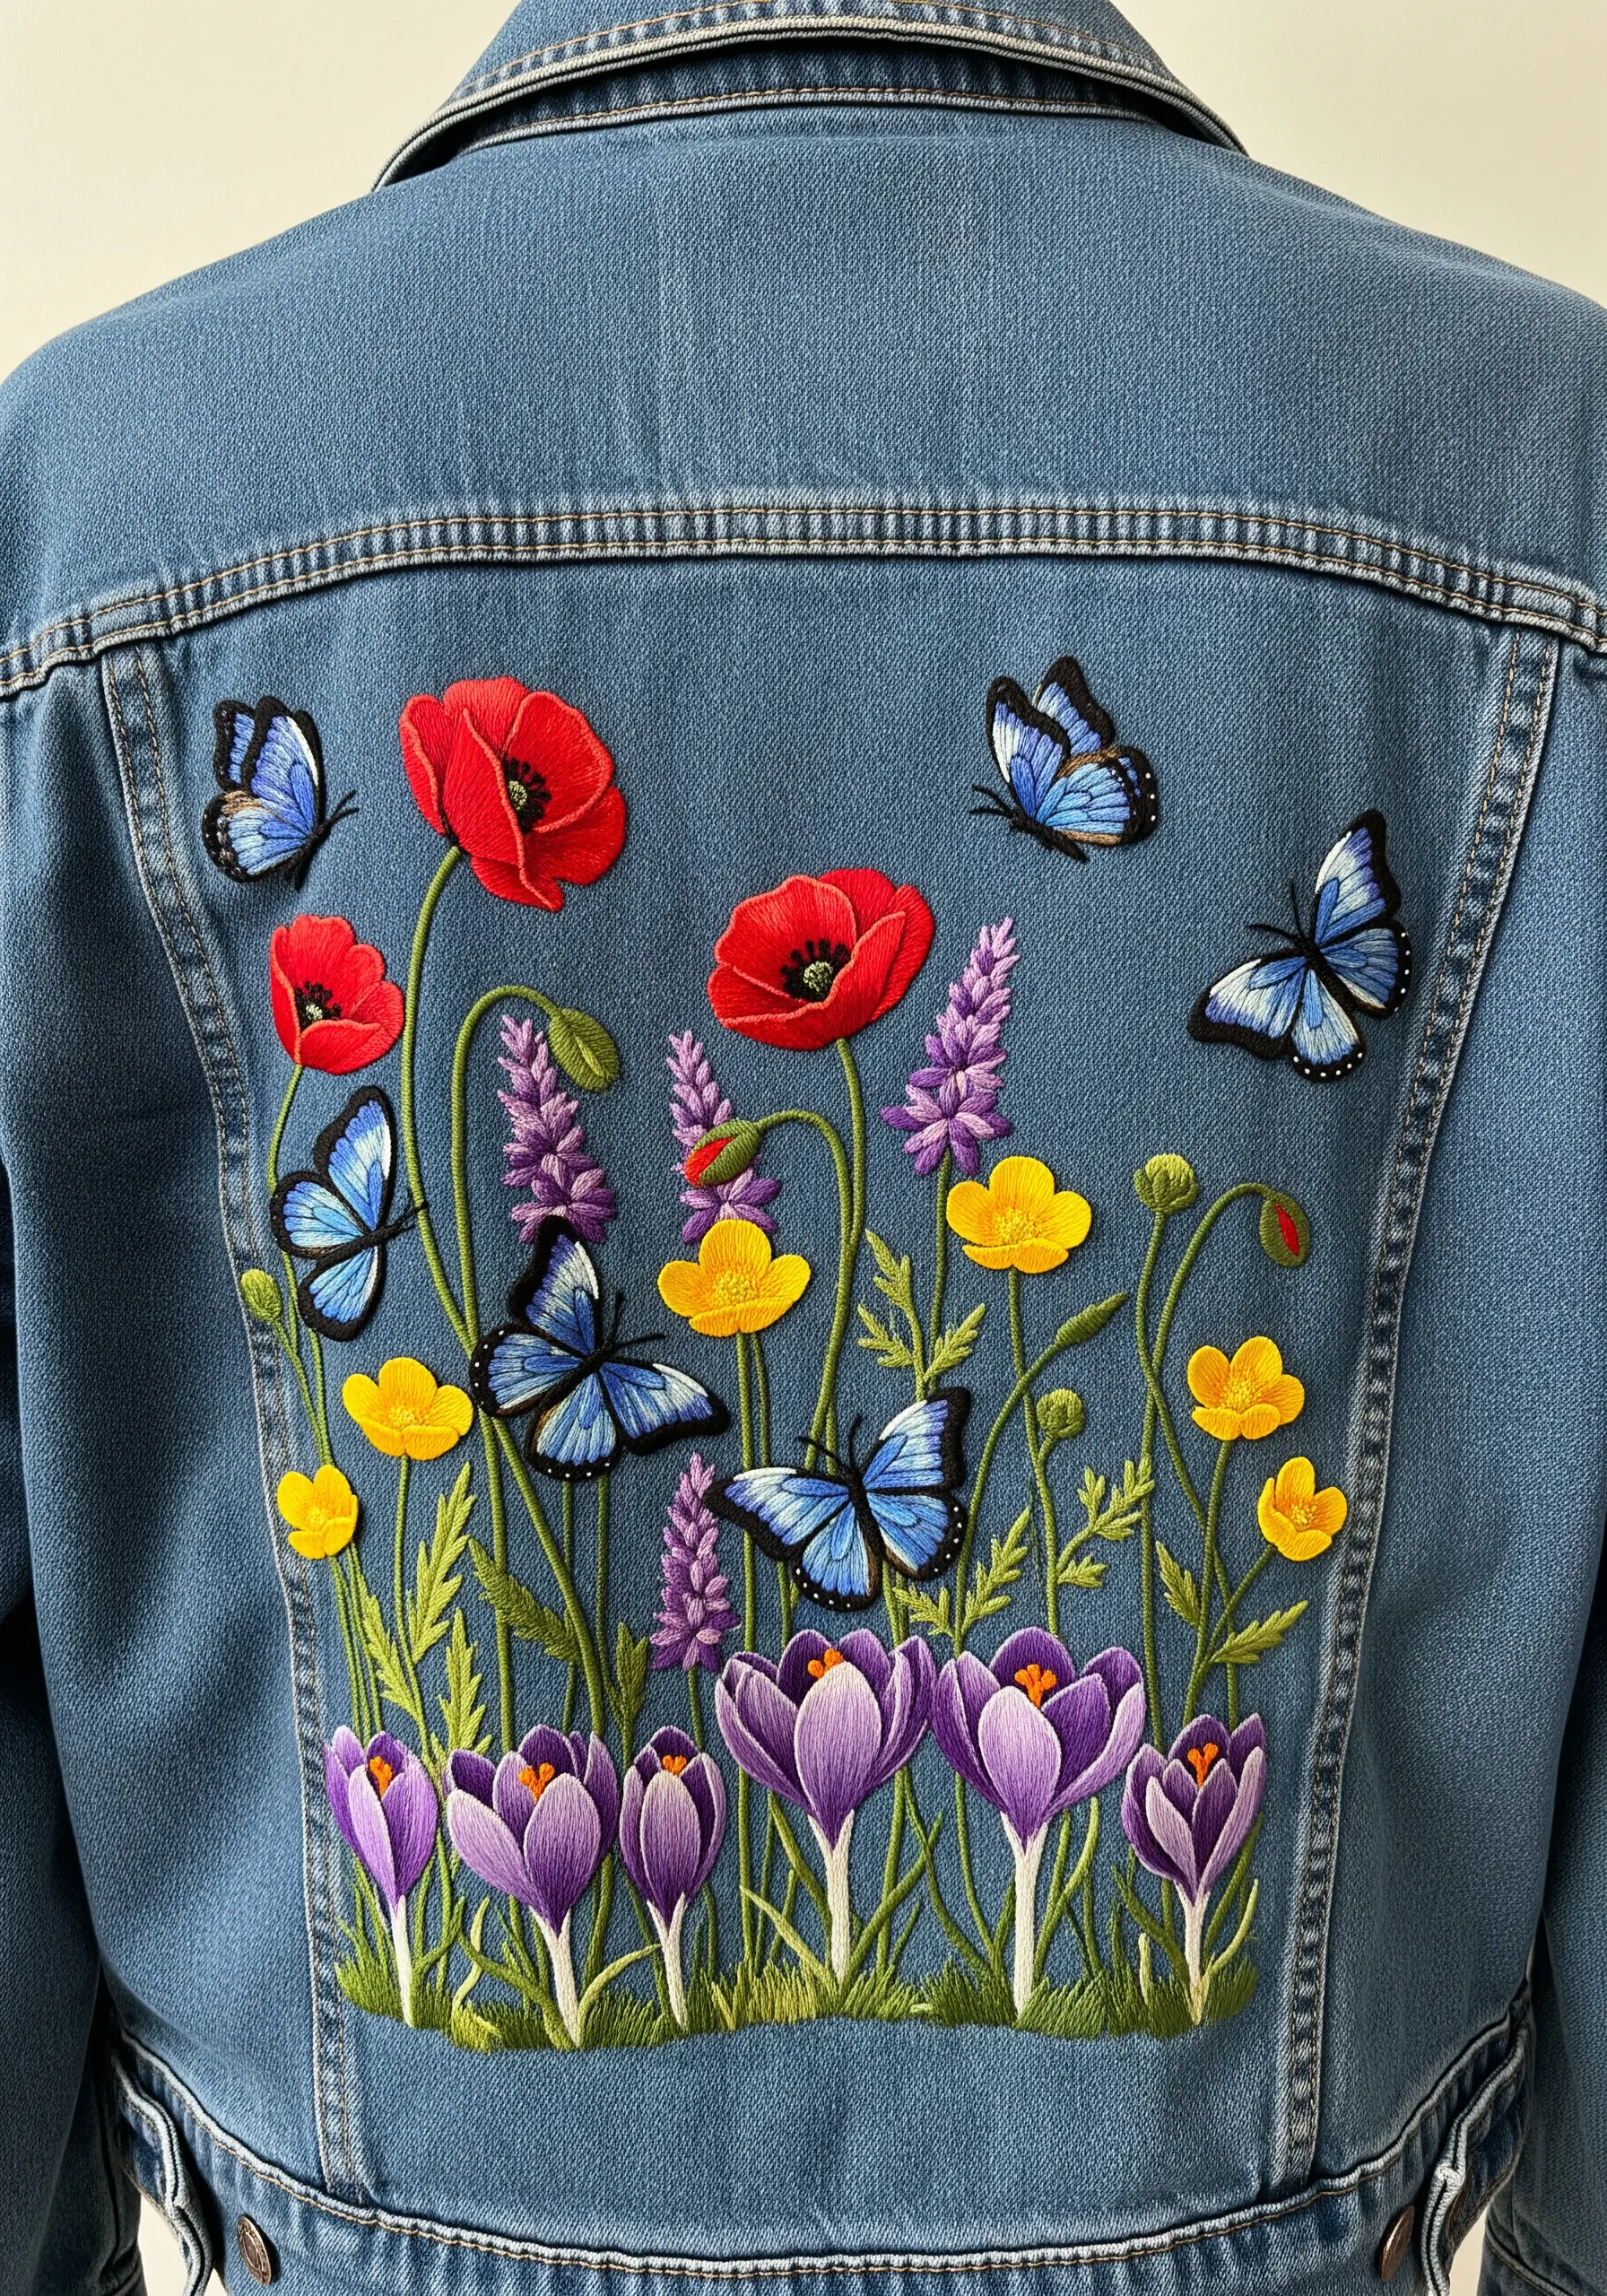
To build a lush, garden scene on denim, think in layers. Start by stitching the elements furthest in the background—like tall stems—and work your way forward.
Slightly overlap flowers and leaves to create a sense of density and depth, just as they would grow in nature.
Use a heavy-duty needle and a sticky, soluble stabilizer on the inside of the jacket to support your stitches and prevent the fabric from puckering.
This foundation ensures your art will last through wear and washing. It’s how you can turn your old clothes into art that endures.
7. Integrate a Butterfly into a Botanical Wreath
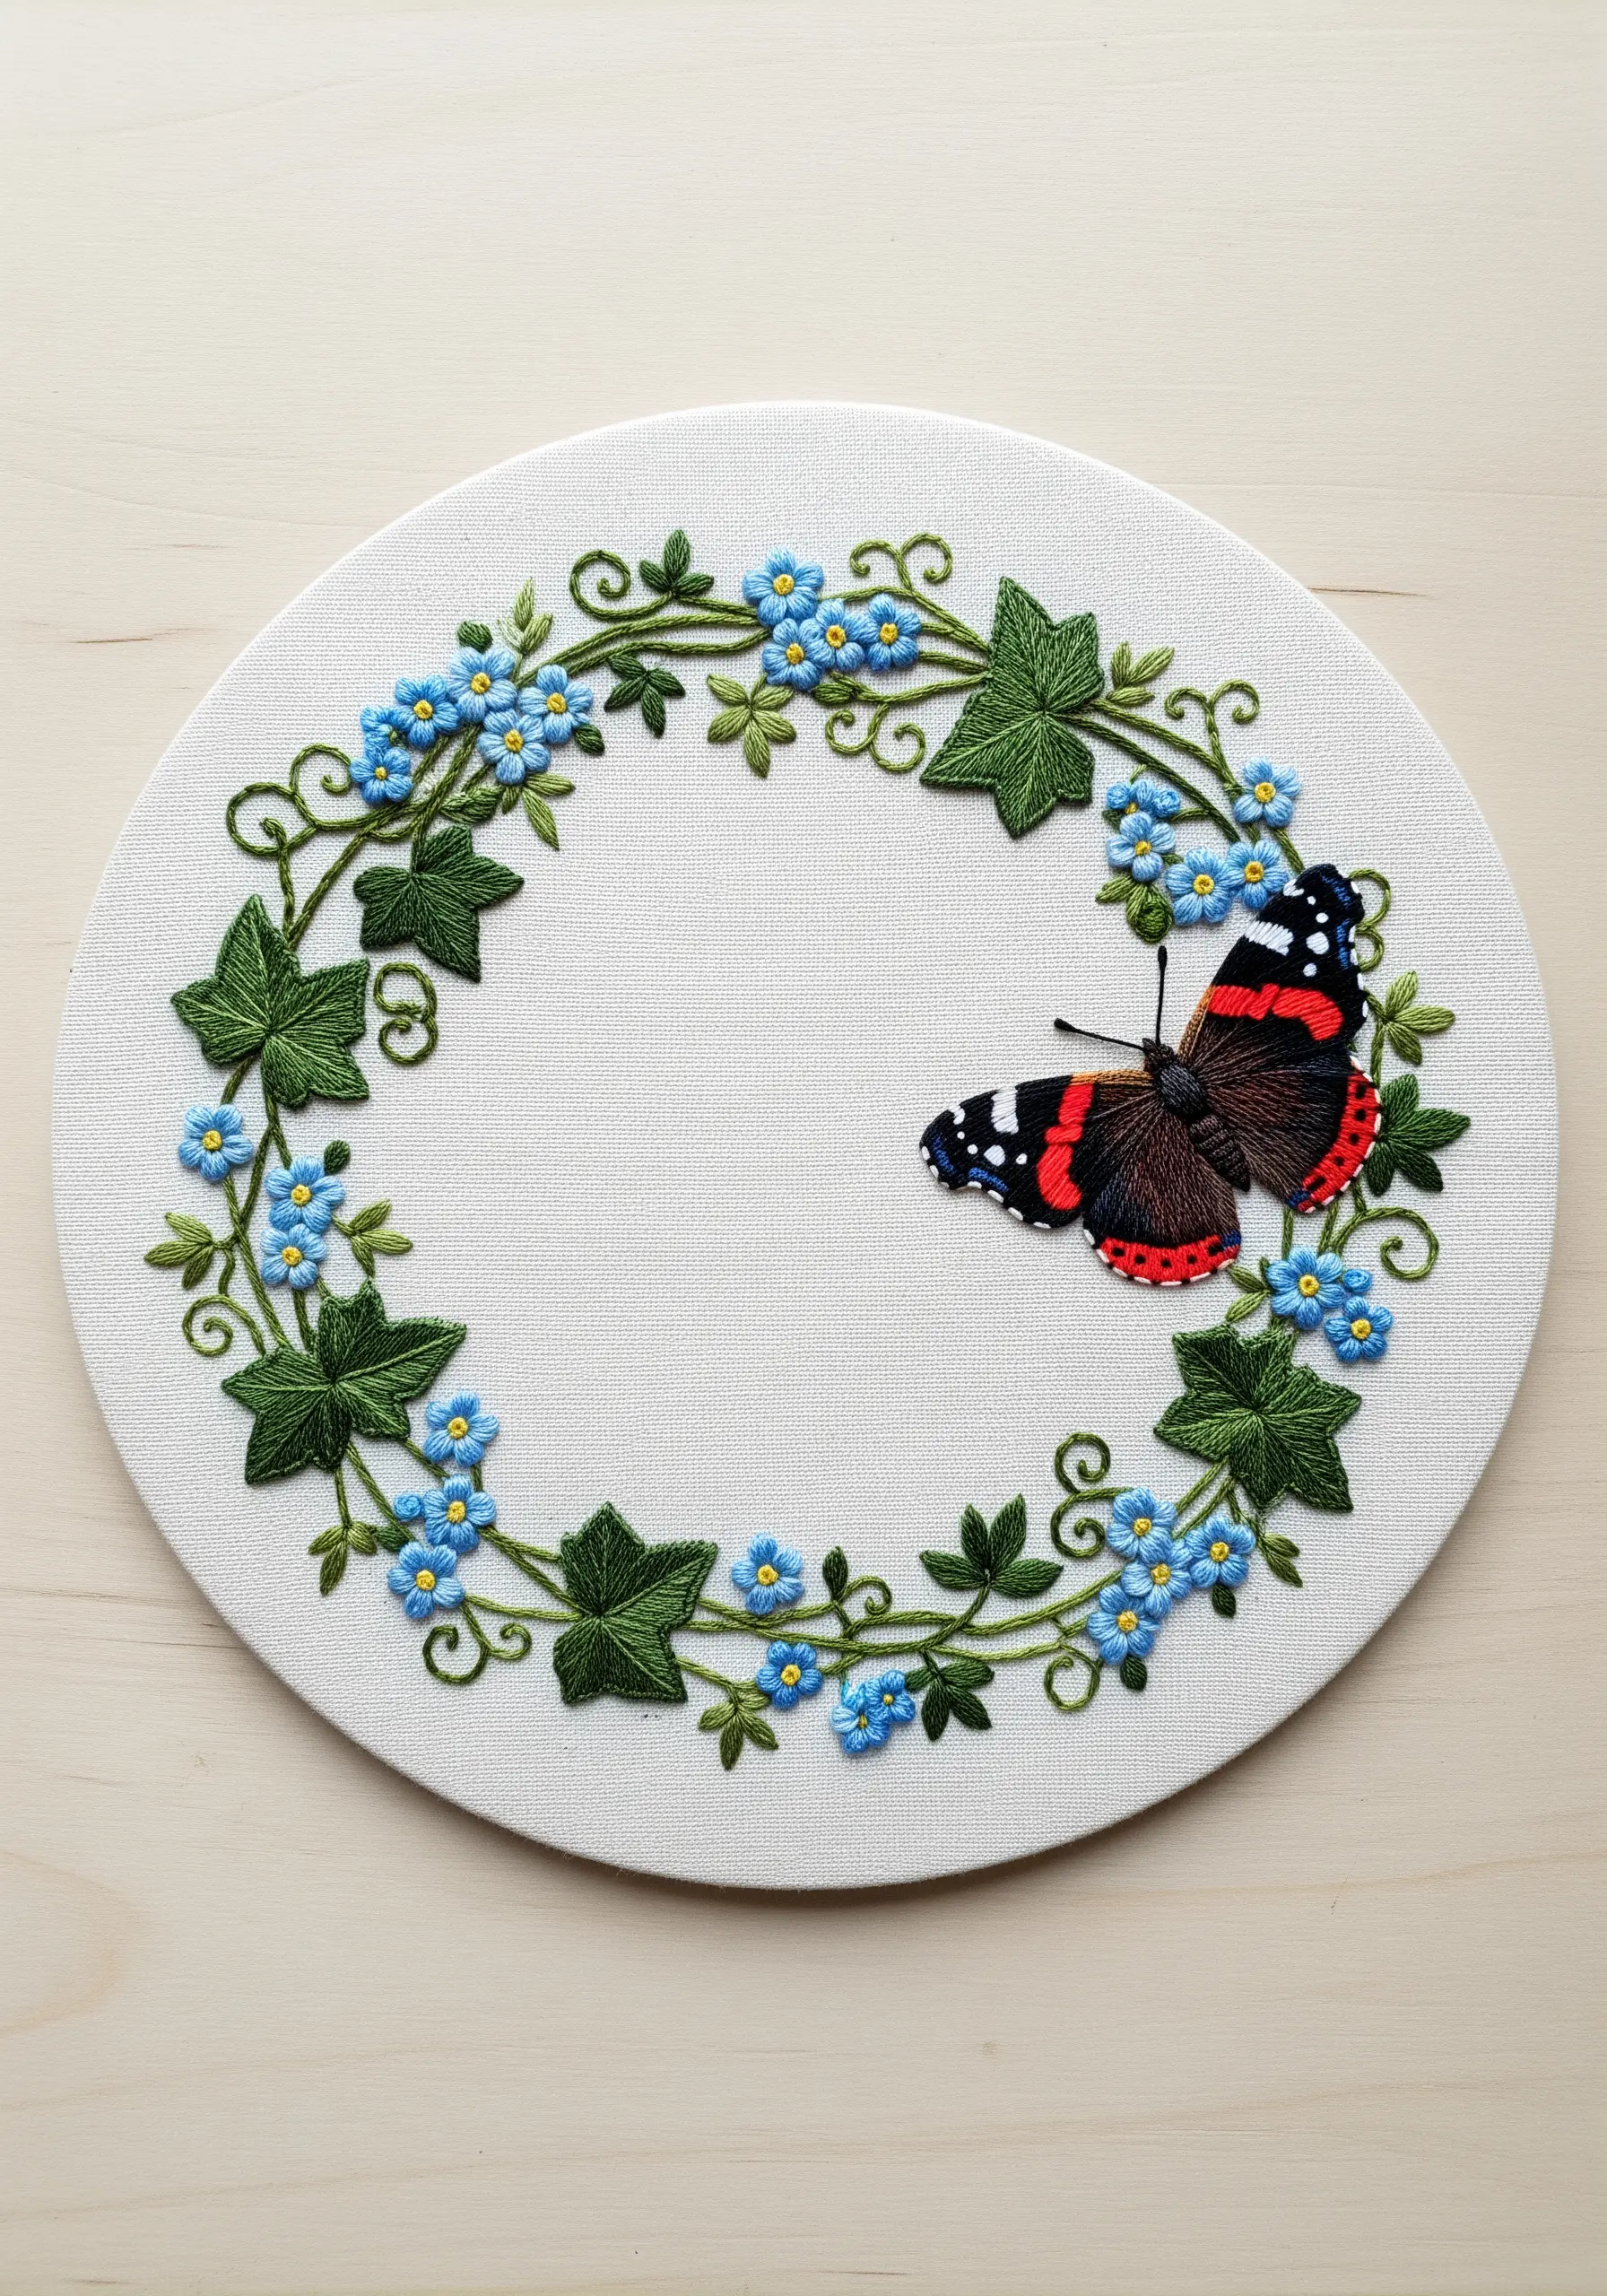
For a dynamic composition, position your butterfly so that it slightly breaks the circular boundary of the wreath.
This makes the scene feel more alive, as if the butterfly has just landed.
Keep the wreath elements rhythmically consistent—for instance, use fishbone stitch for all the leaves and French knots for all the flowers.
This creates a cohesive frame that allows the more complex, thread-painted butterfly to become the clear focal point.
8. Capture Nature’s Textures with Varied Stitches
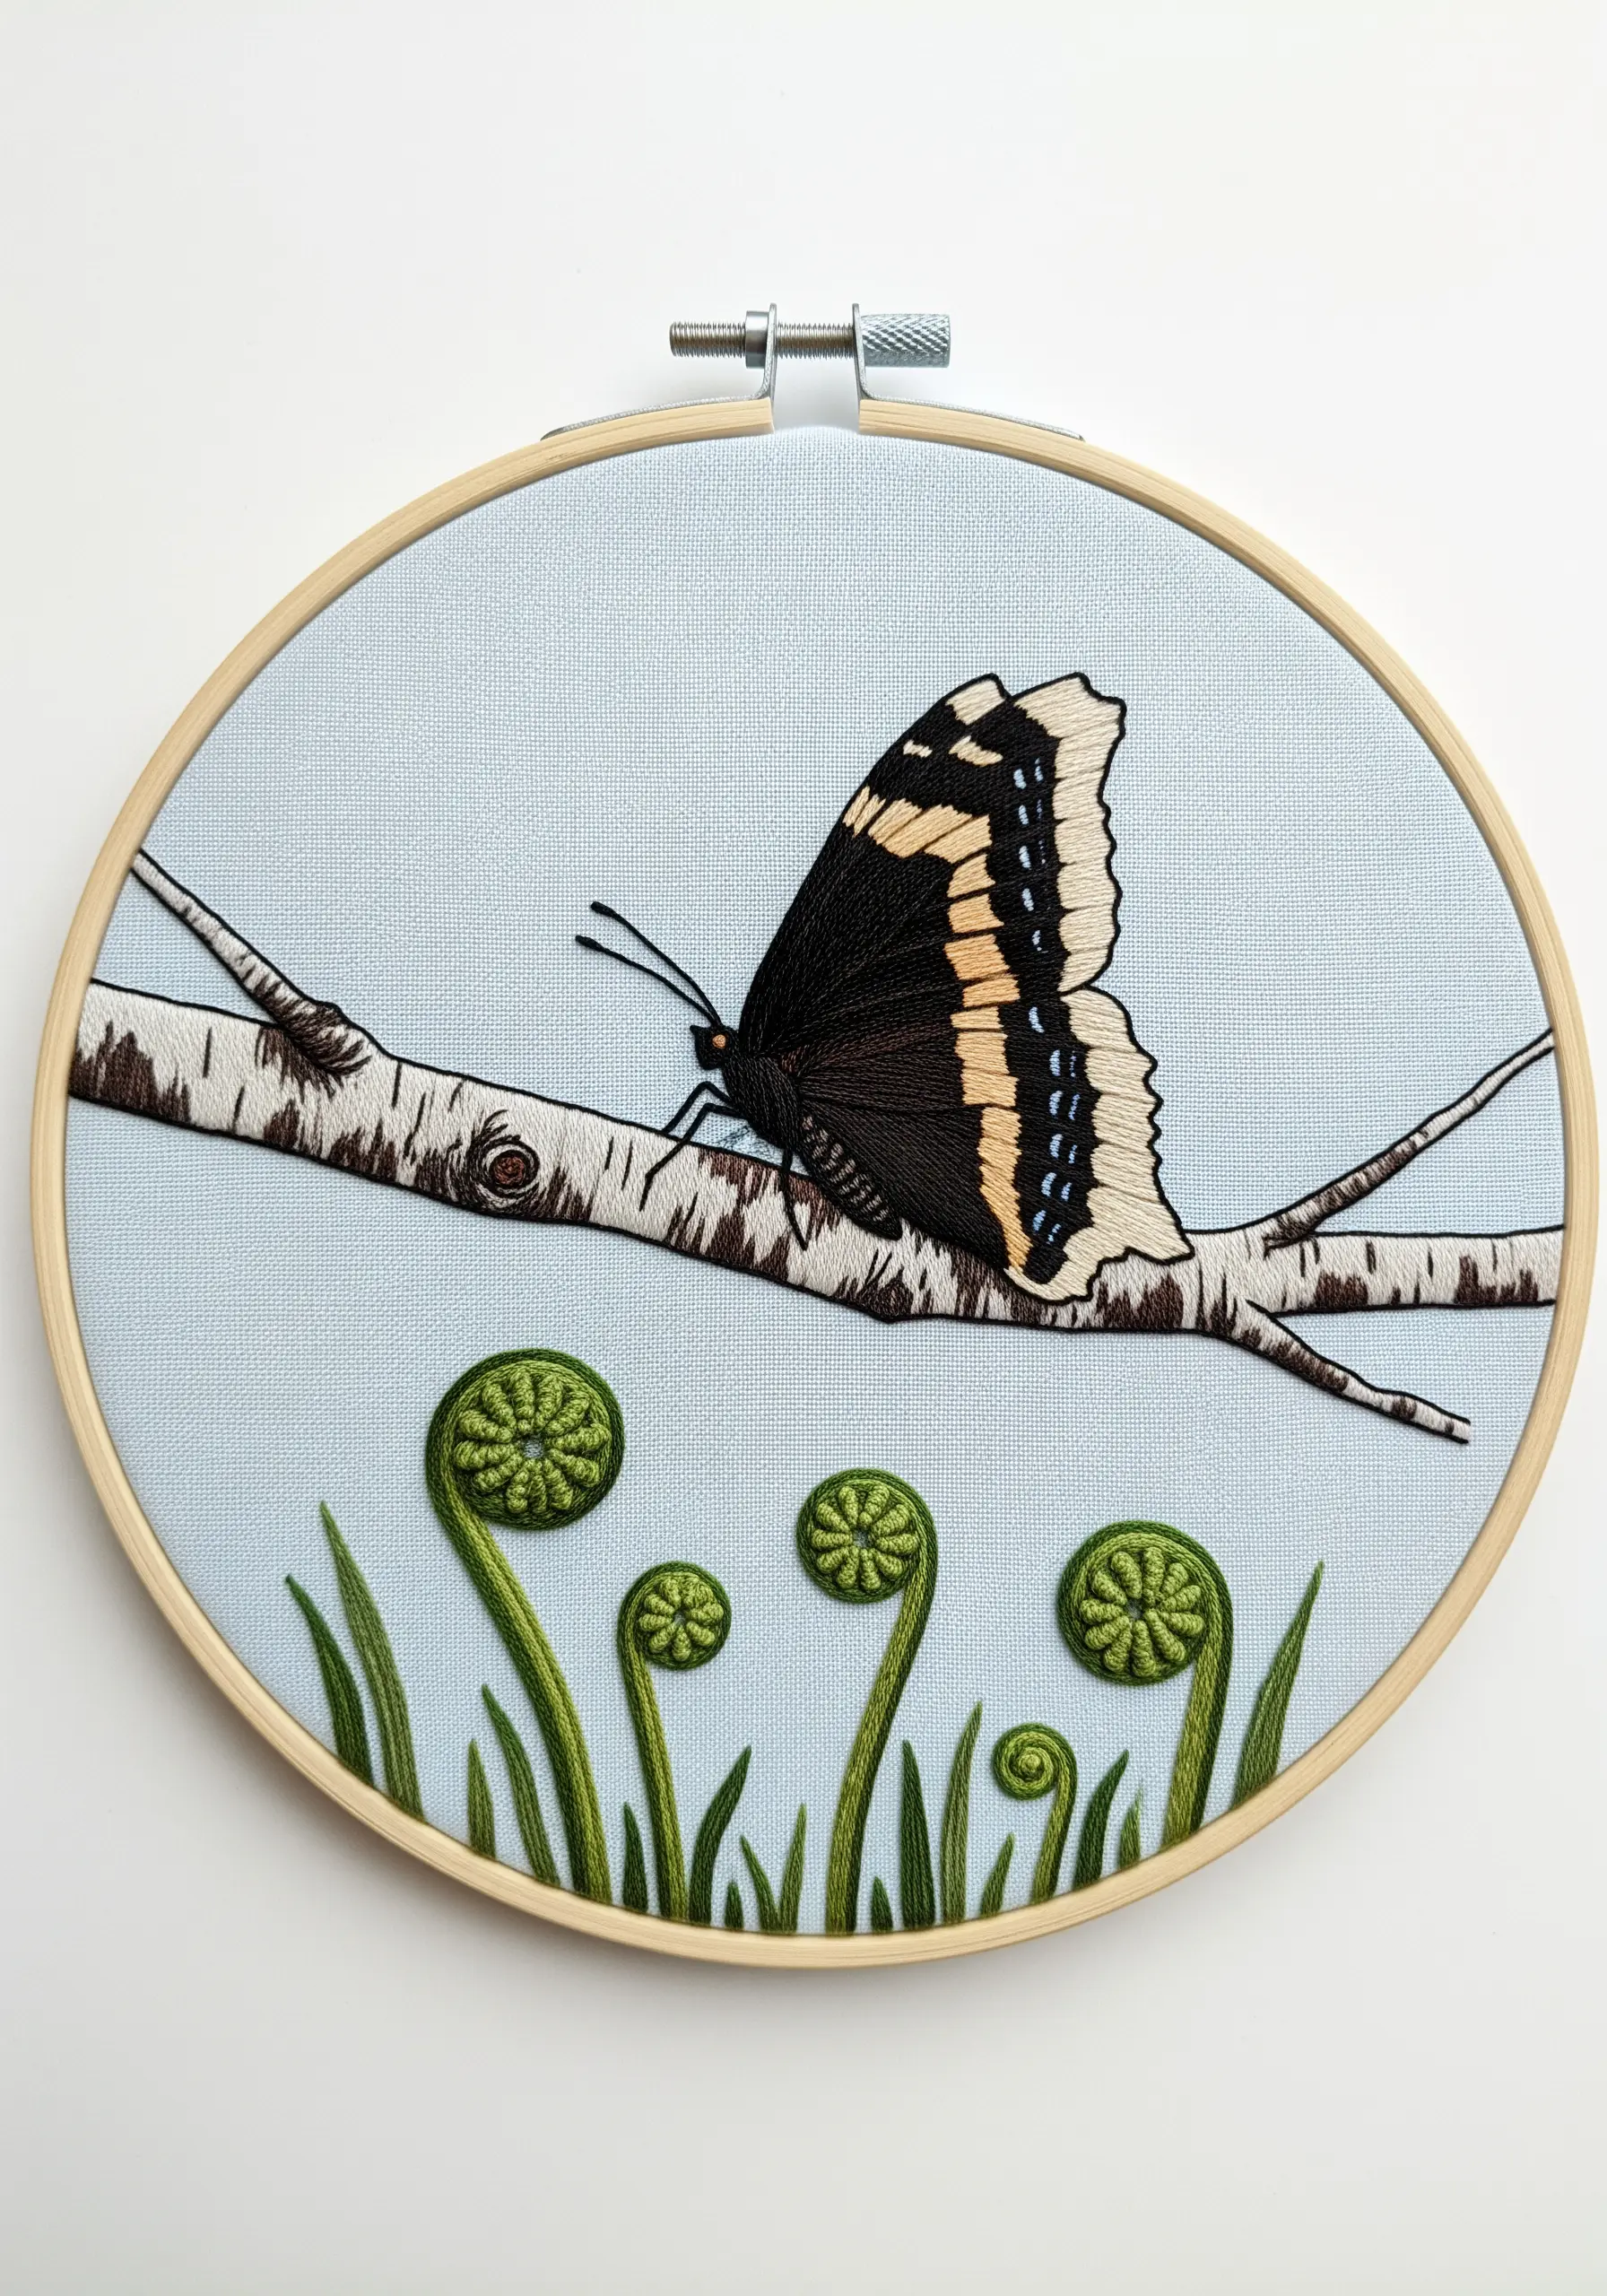
This composition is an excellent study in texture. Replicate the feel of birch bark by using short, uneven satin stitches in white and grey, accented with tiny horizontal black stitches.
The coiled fern fiddleheads are perfect for dimensional bullion knots, which mimic their spiral shape perfectly.
Contrast these tactile elements with the smooth, thread-painted fill of the butterfly’s wings, creating a piece that is as interesting to touch as it is to see.
These are the nature texture embroidery hacks that elevate your work.
9. Tell a Story with Dimensional Embroidery
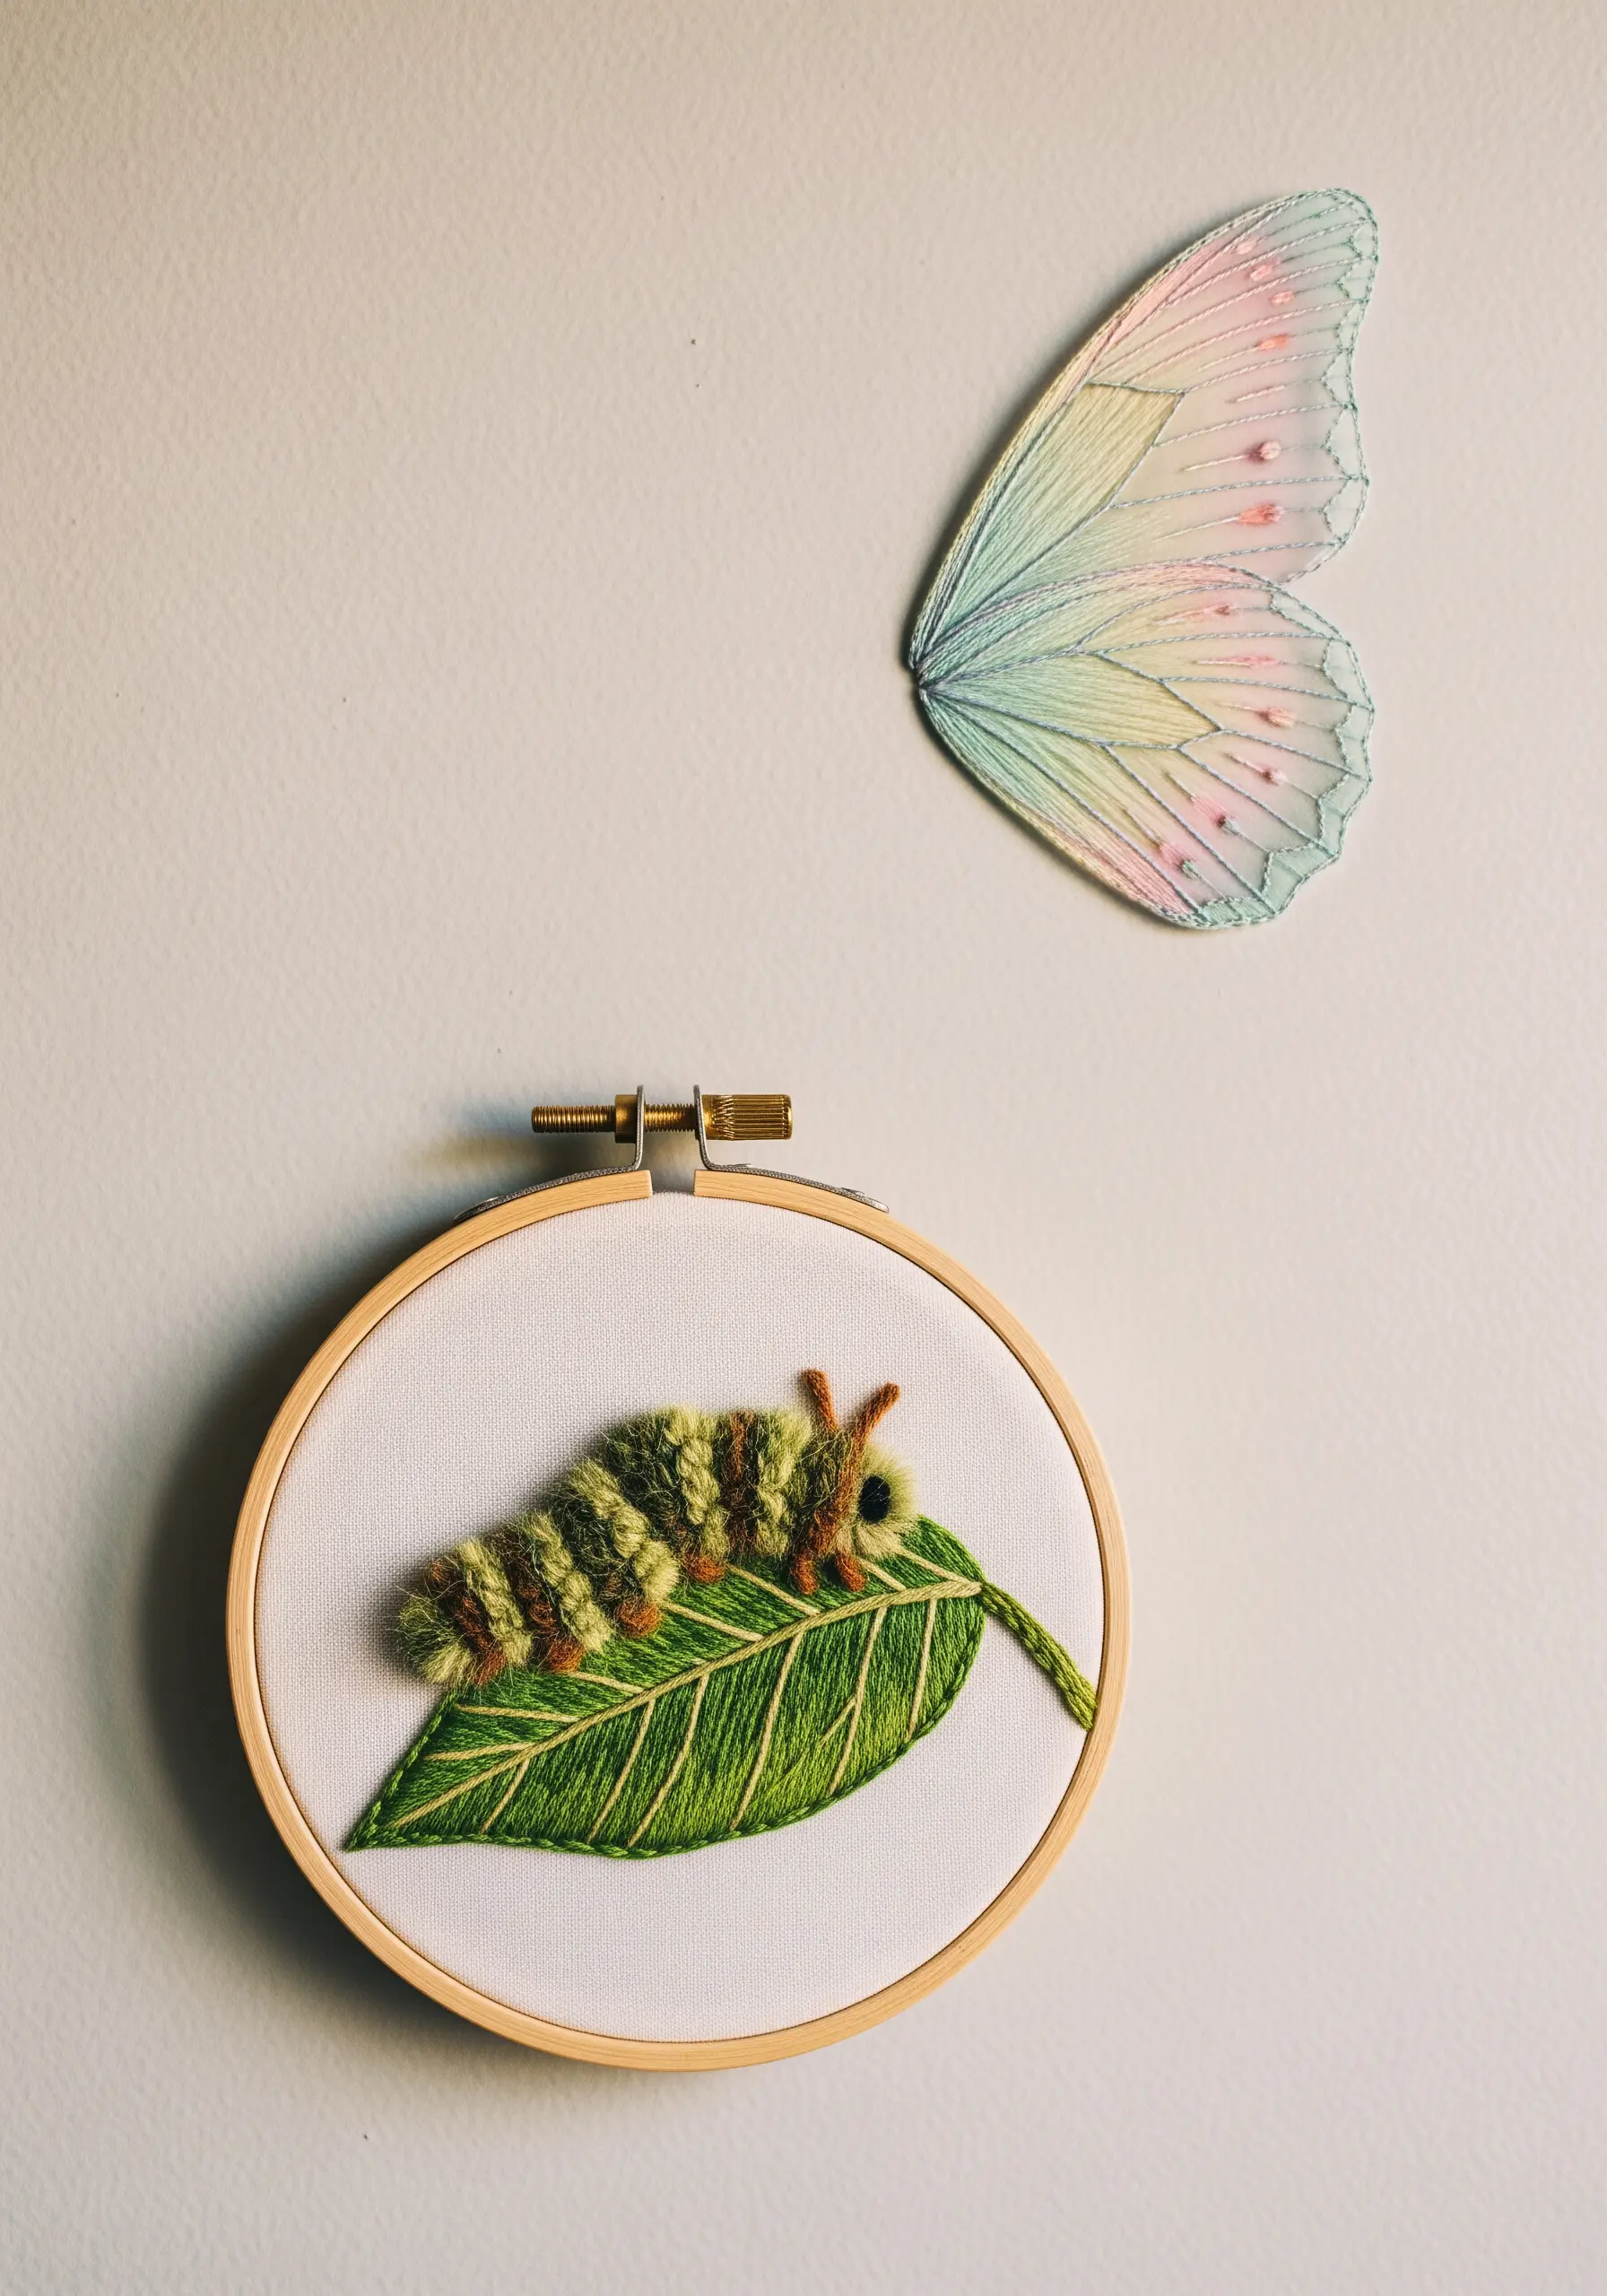
Evoke the narrative of transformation through texture and form. Create the caterpillar’s fuzzy body using the turkey work stitch, leaving loops of thread that you can later trim to create a soft, 3D pile.
For the detached wing, stitch it on a piece of water-soluble stabilizer. Once you rinse the stabilizer away, you are left with a delicate, free-standing thread element.
Placing these two elements near each other tells a powerful story without needing to stitch the entire lifecycle.
10. Create Dynamic Movement with Overlapping Forms
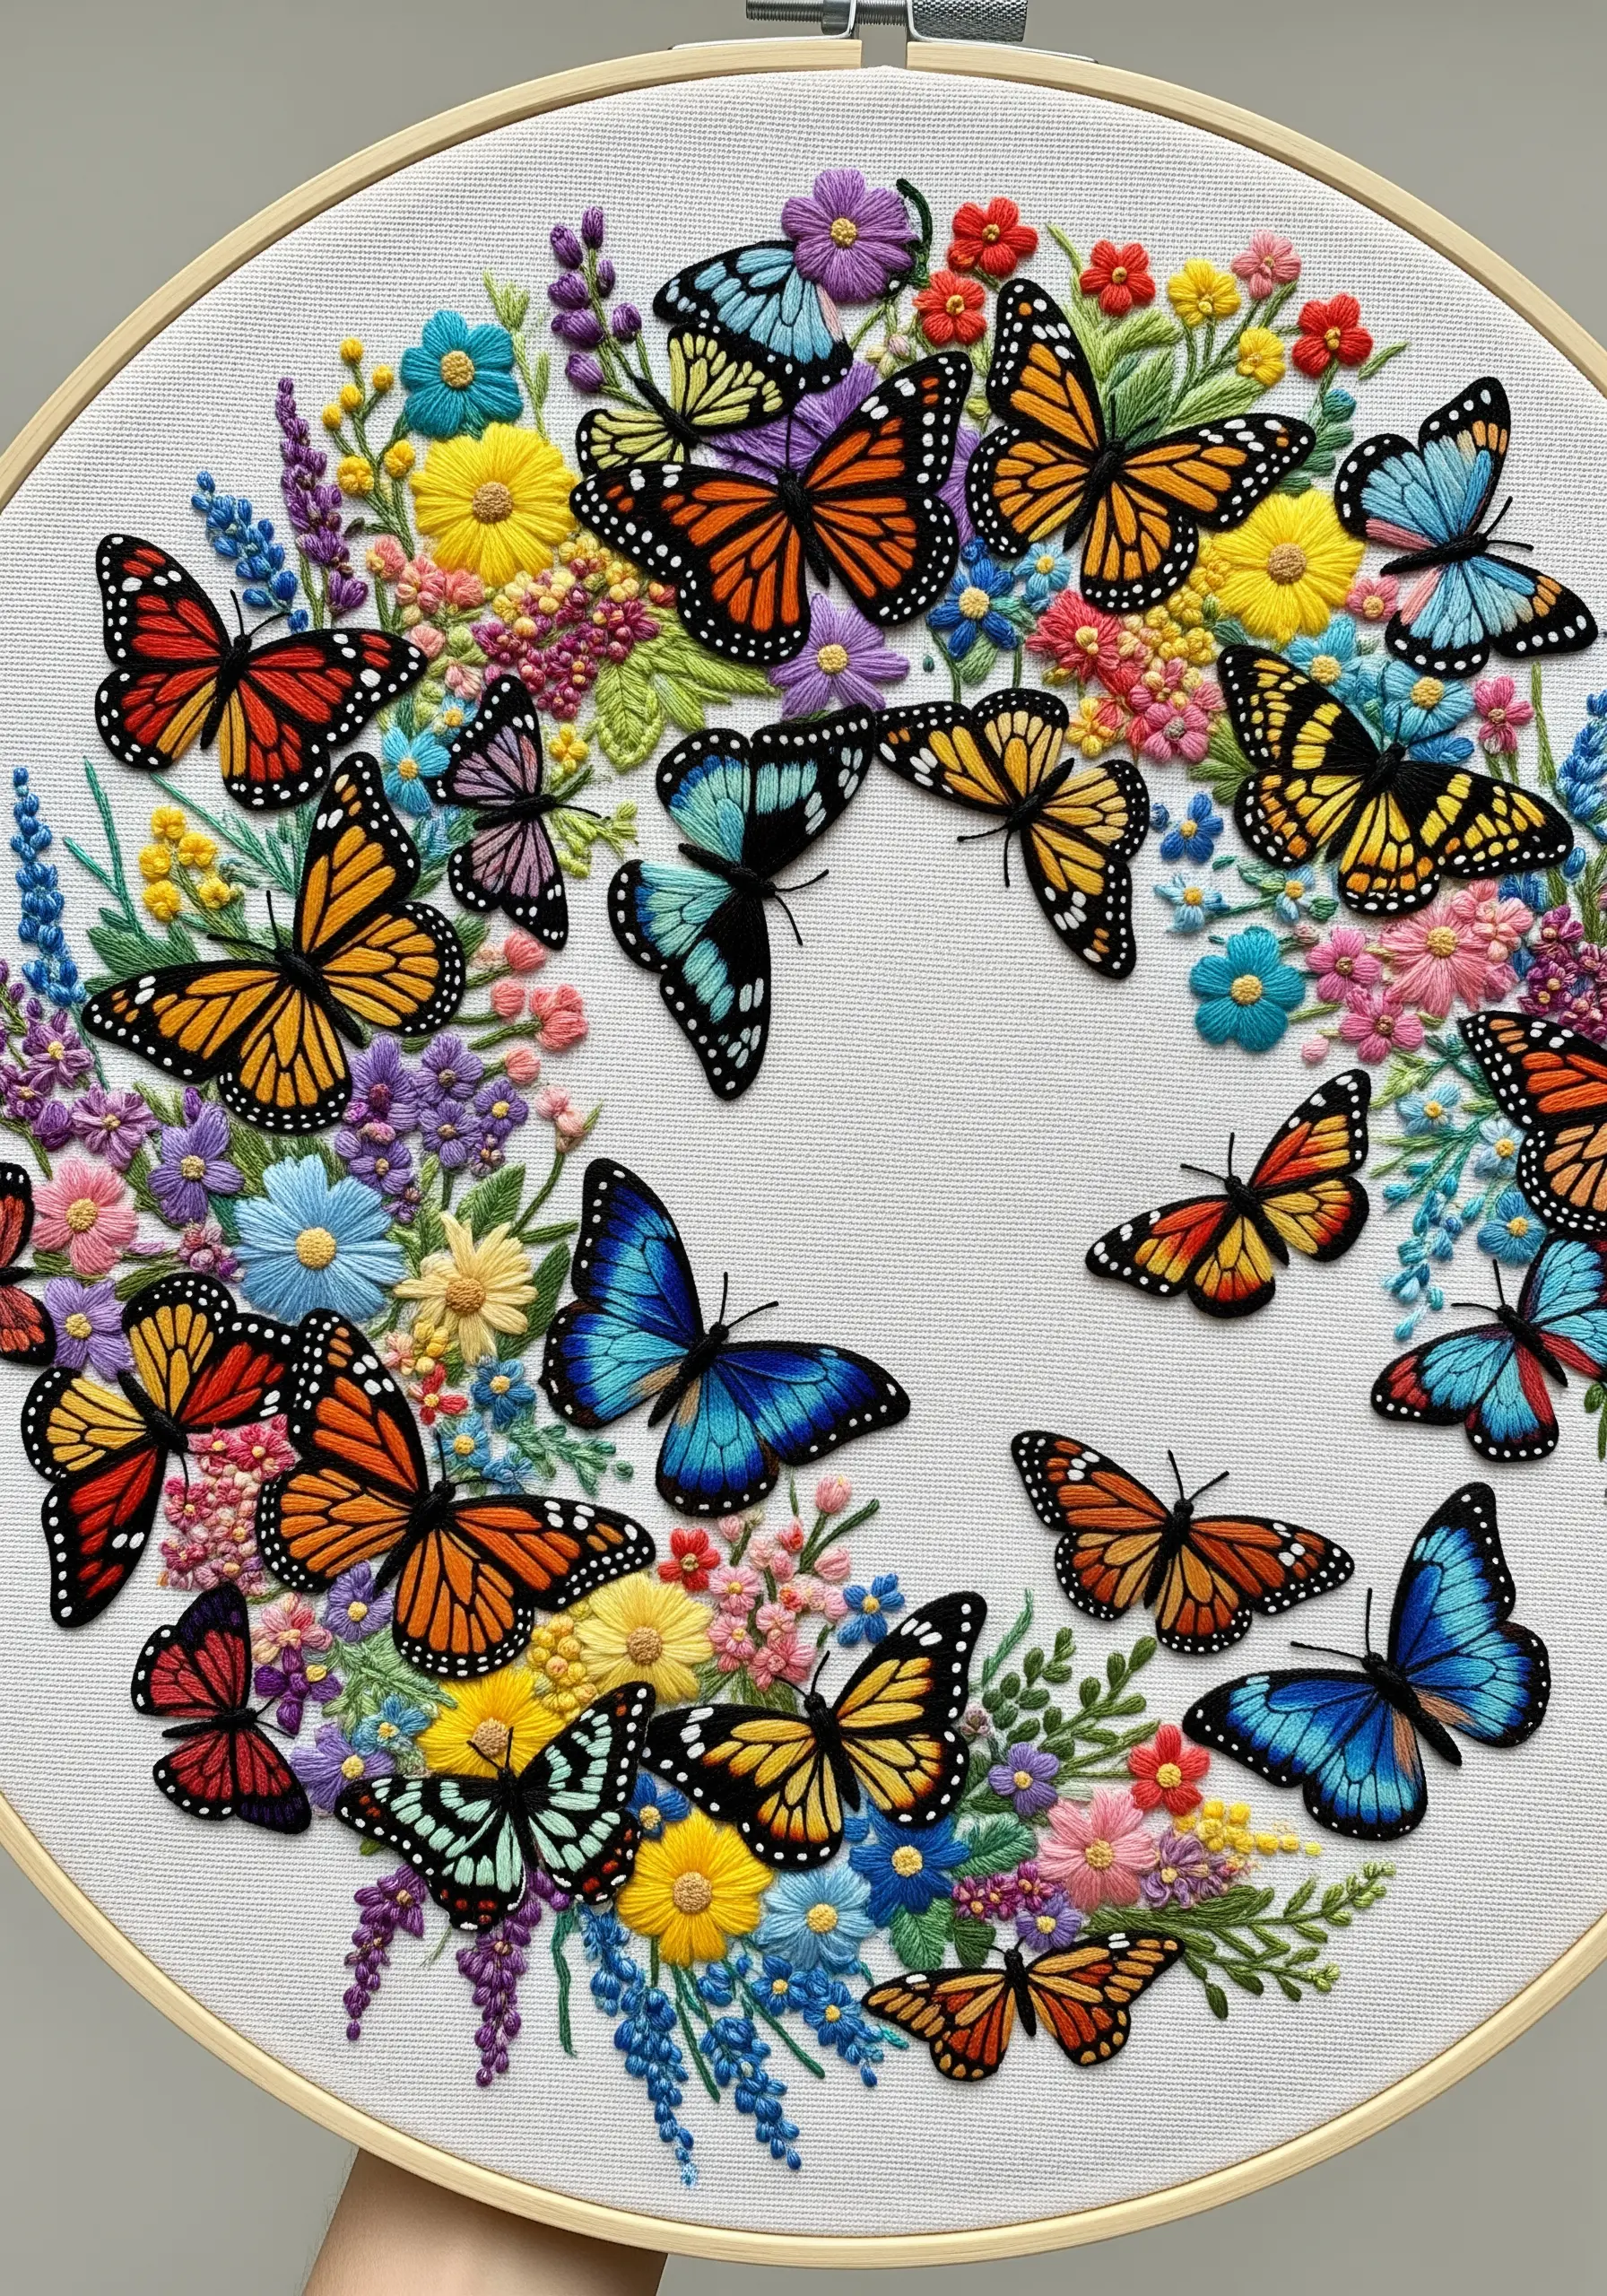
To give a dense scene of butterflies a sense of vibrant motion, you must create depth through layering and scale.
Vary the sizes of the butterflies—some larger and in the foreground, others smaller and partially obscured in the background.
For a true 3D effect, use stumpwork: embroider the foreground butterflies on a separate piece of fabric with a thin wire outline, cut them out, and then stitch them onto your main piece. This makes them literally pop off the fabric.
11. Stitch Ethereal Wings on Sheer Organza
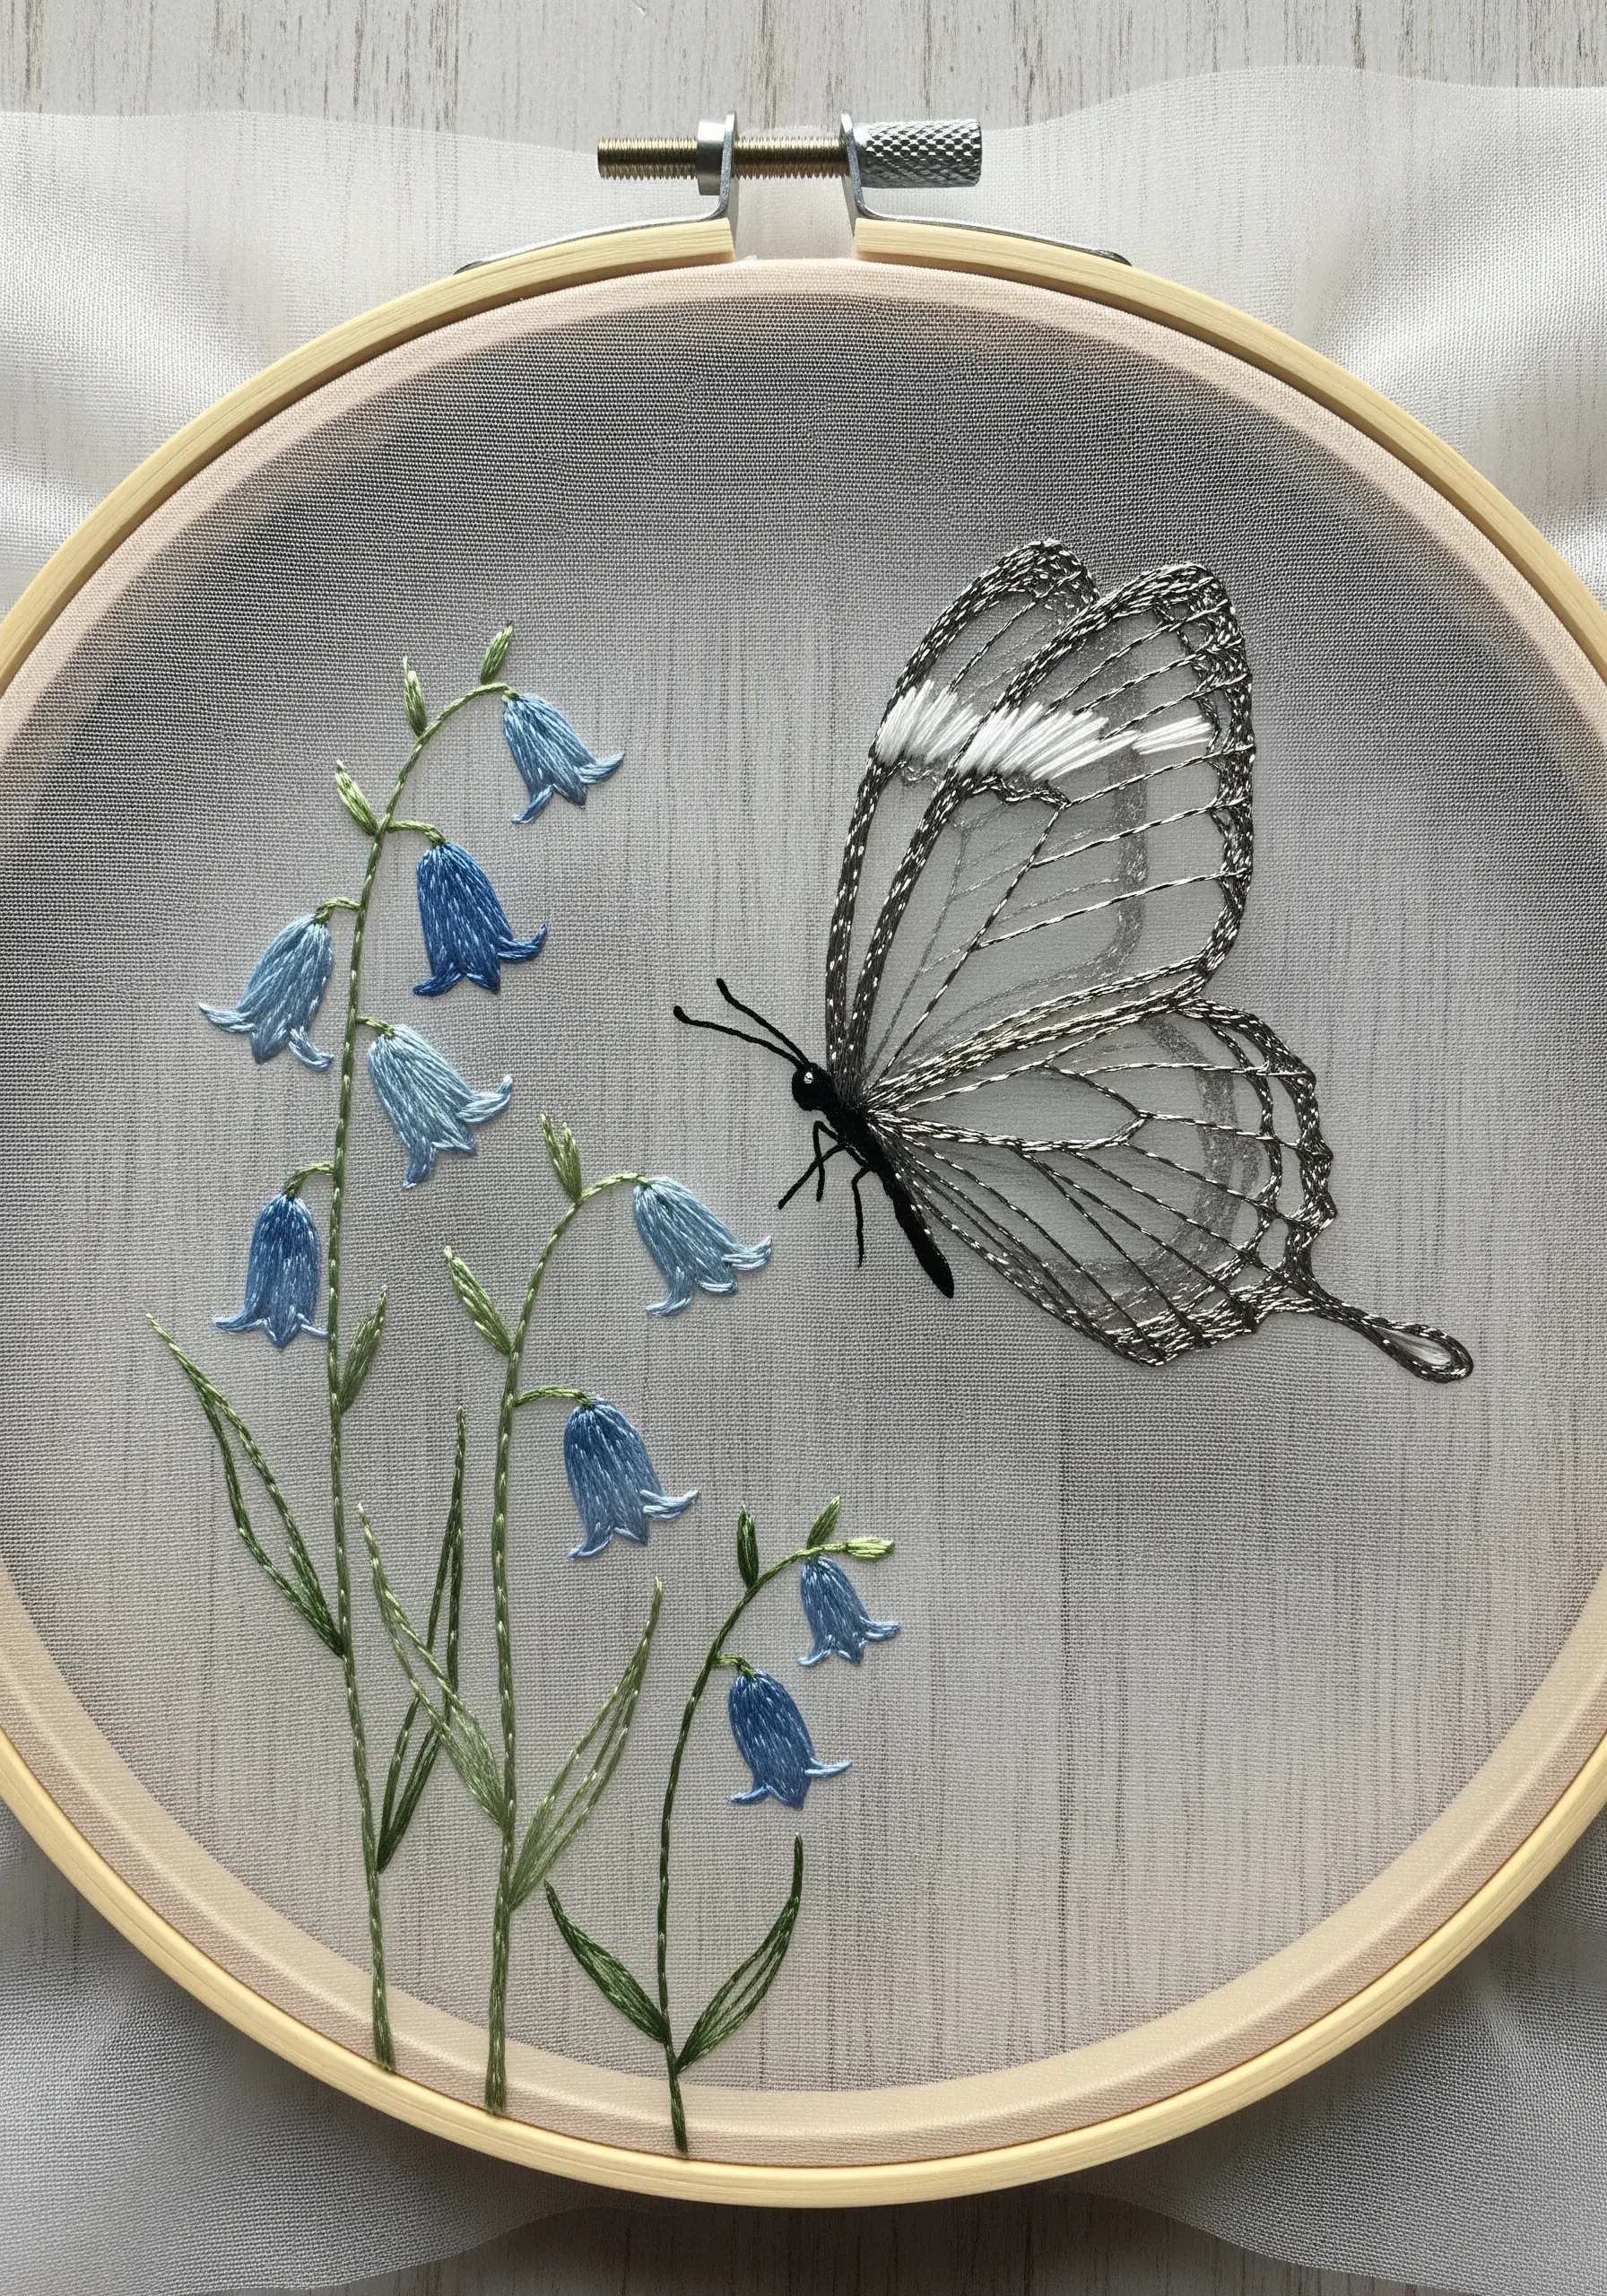
Working on organza fabric allows you to create incredible illusions of transparency and light.
To prevent puckering, always use a stabilizer—a water-soluble one is perfect as it will disappear completely.
For a glasswing butterfly effect, use a single strand of silver or grey thread to outline the wings and stitch the veins. Leave the wing panels empty to let the sheer fabric create the illusion of glass.
12. Design for Durability on Functional Linens
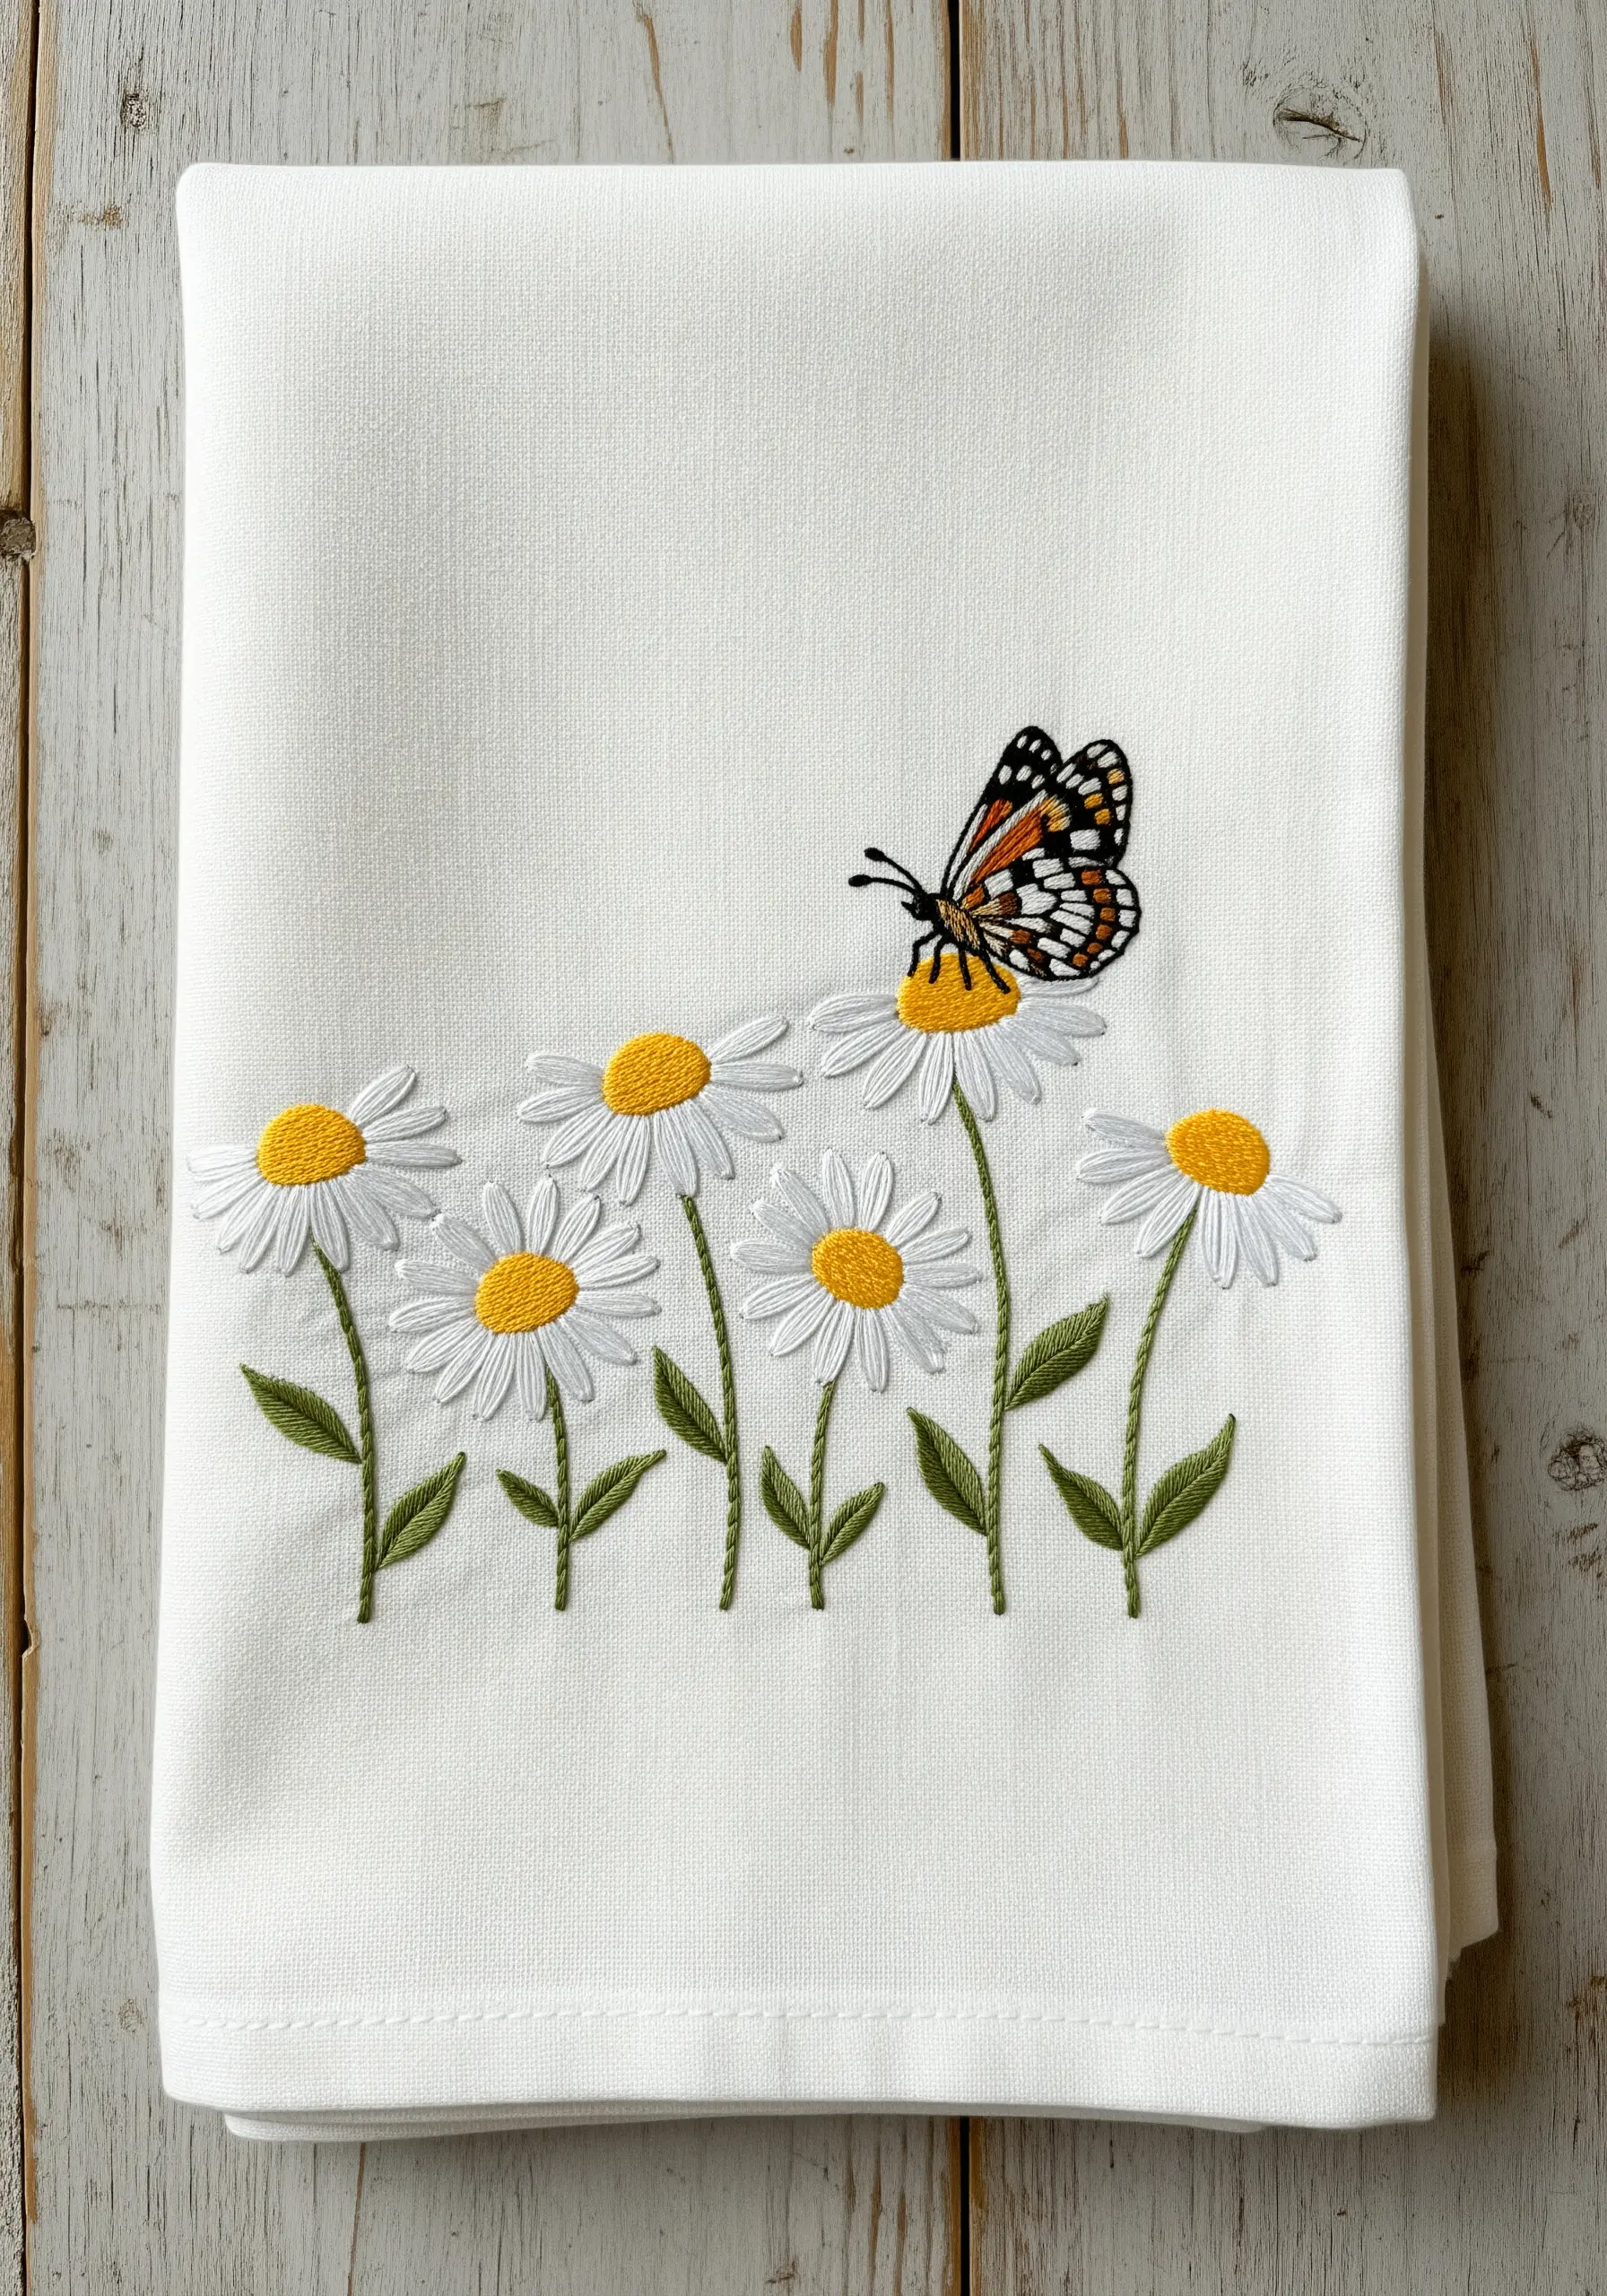
When embroidering items that will be frequently used and washed, like kitchen towels, stitch choice is crucial for longevity.
Opt for sturdy, flat stitches like satin stitch for the daisy petals and tight French knots for the centers. These are less likely to snag than looped or raised stitches.
Always secure your thread tails meticulously on the back to prevent unraveling. A simple, elegant design along the bottom border adds charm without interfering with the towel’s function.
13. Use Black Fabric to Create Atmospheric Contrast
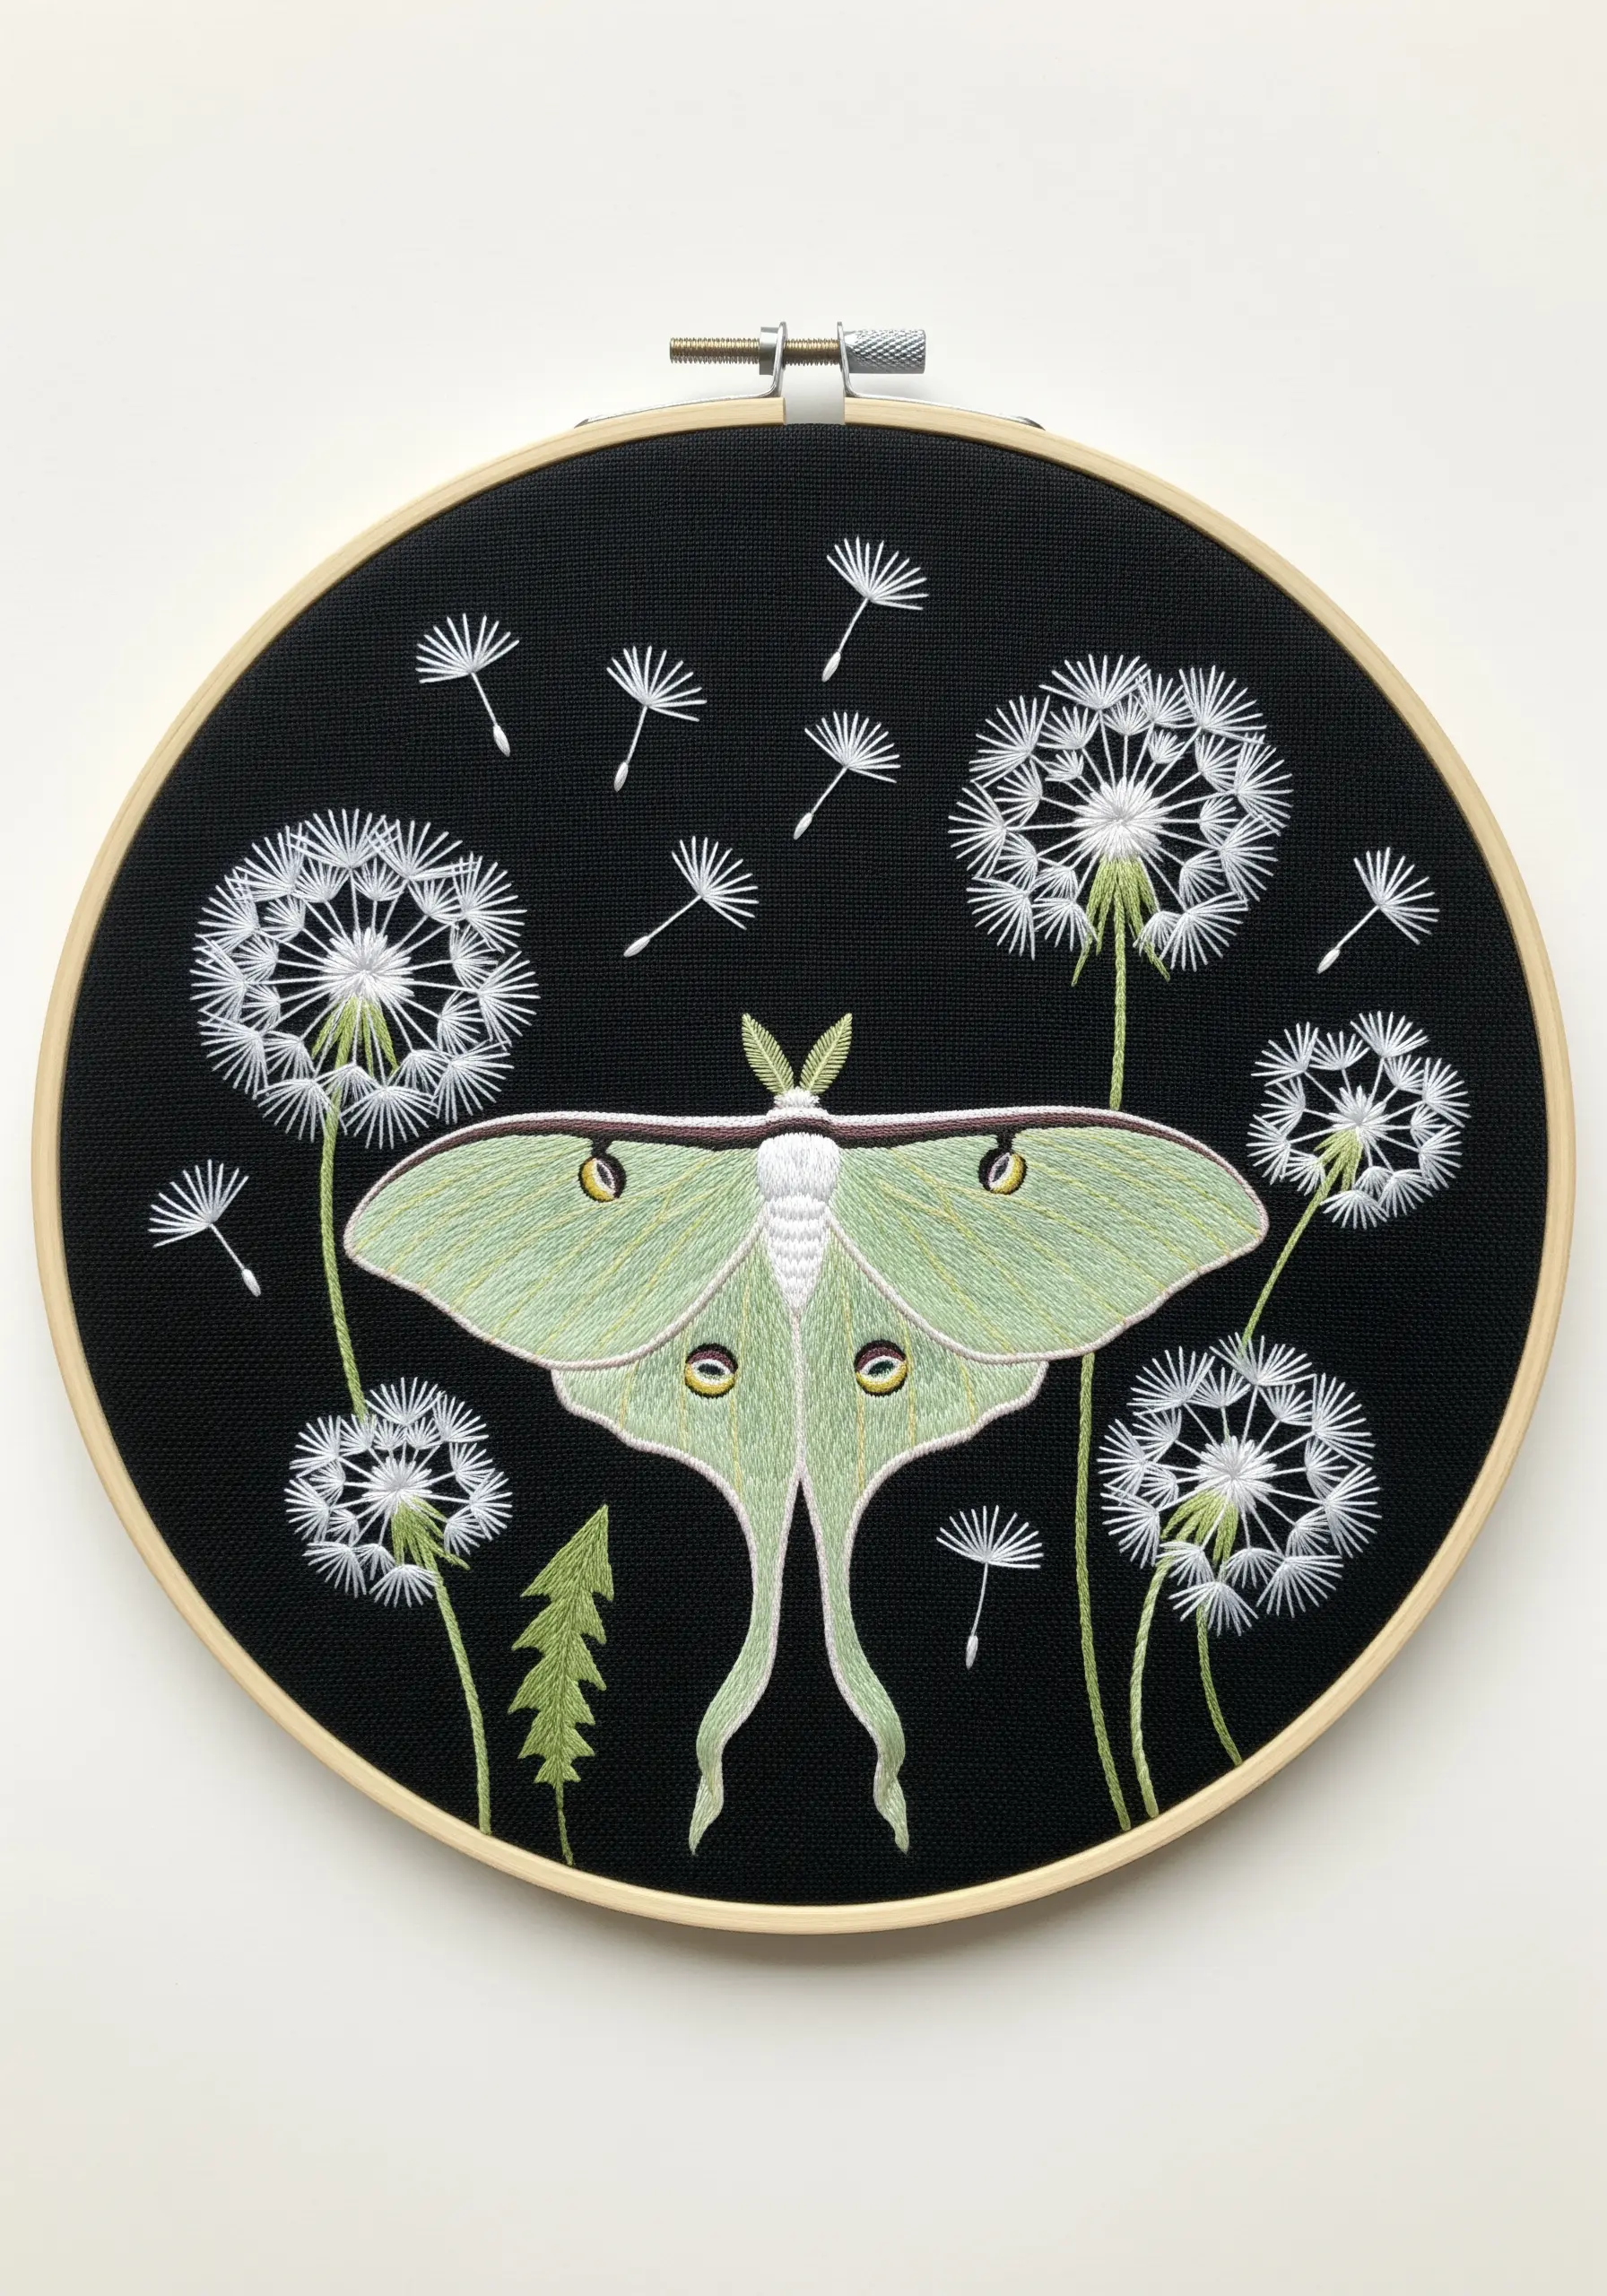
Let your fabric do the heavy lifting in this dramatic composition. The black background becomes the night sky, making your light-colored threads appear to glow.
Create the floating dandelion seeds with single, delicate straight stitches scattered across the empty space. This creates a wonderful sense of movement and quiet.
The pale green of the Luna Moth becomes intensely luminous against the dark backdrop, making it the undeniable star of the piece.
14. Embellish a Journal with Raised Textures
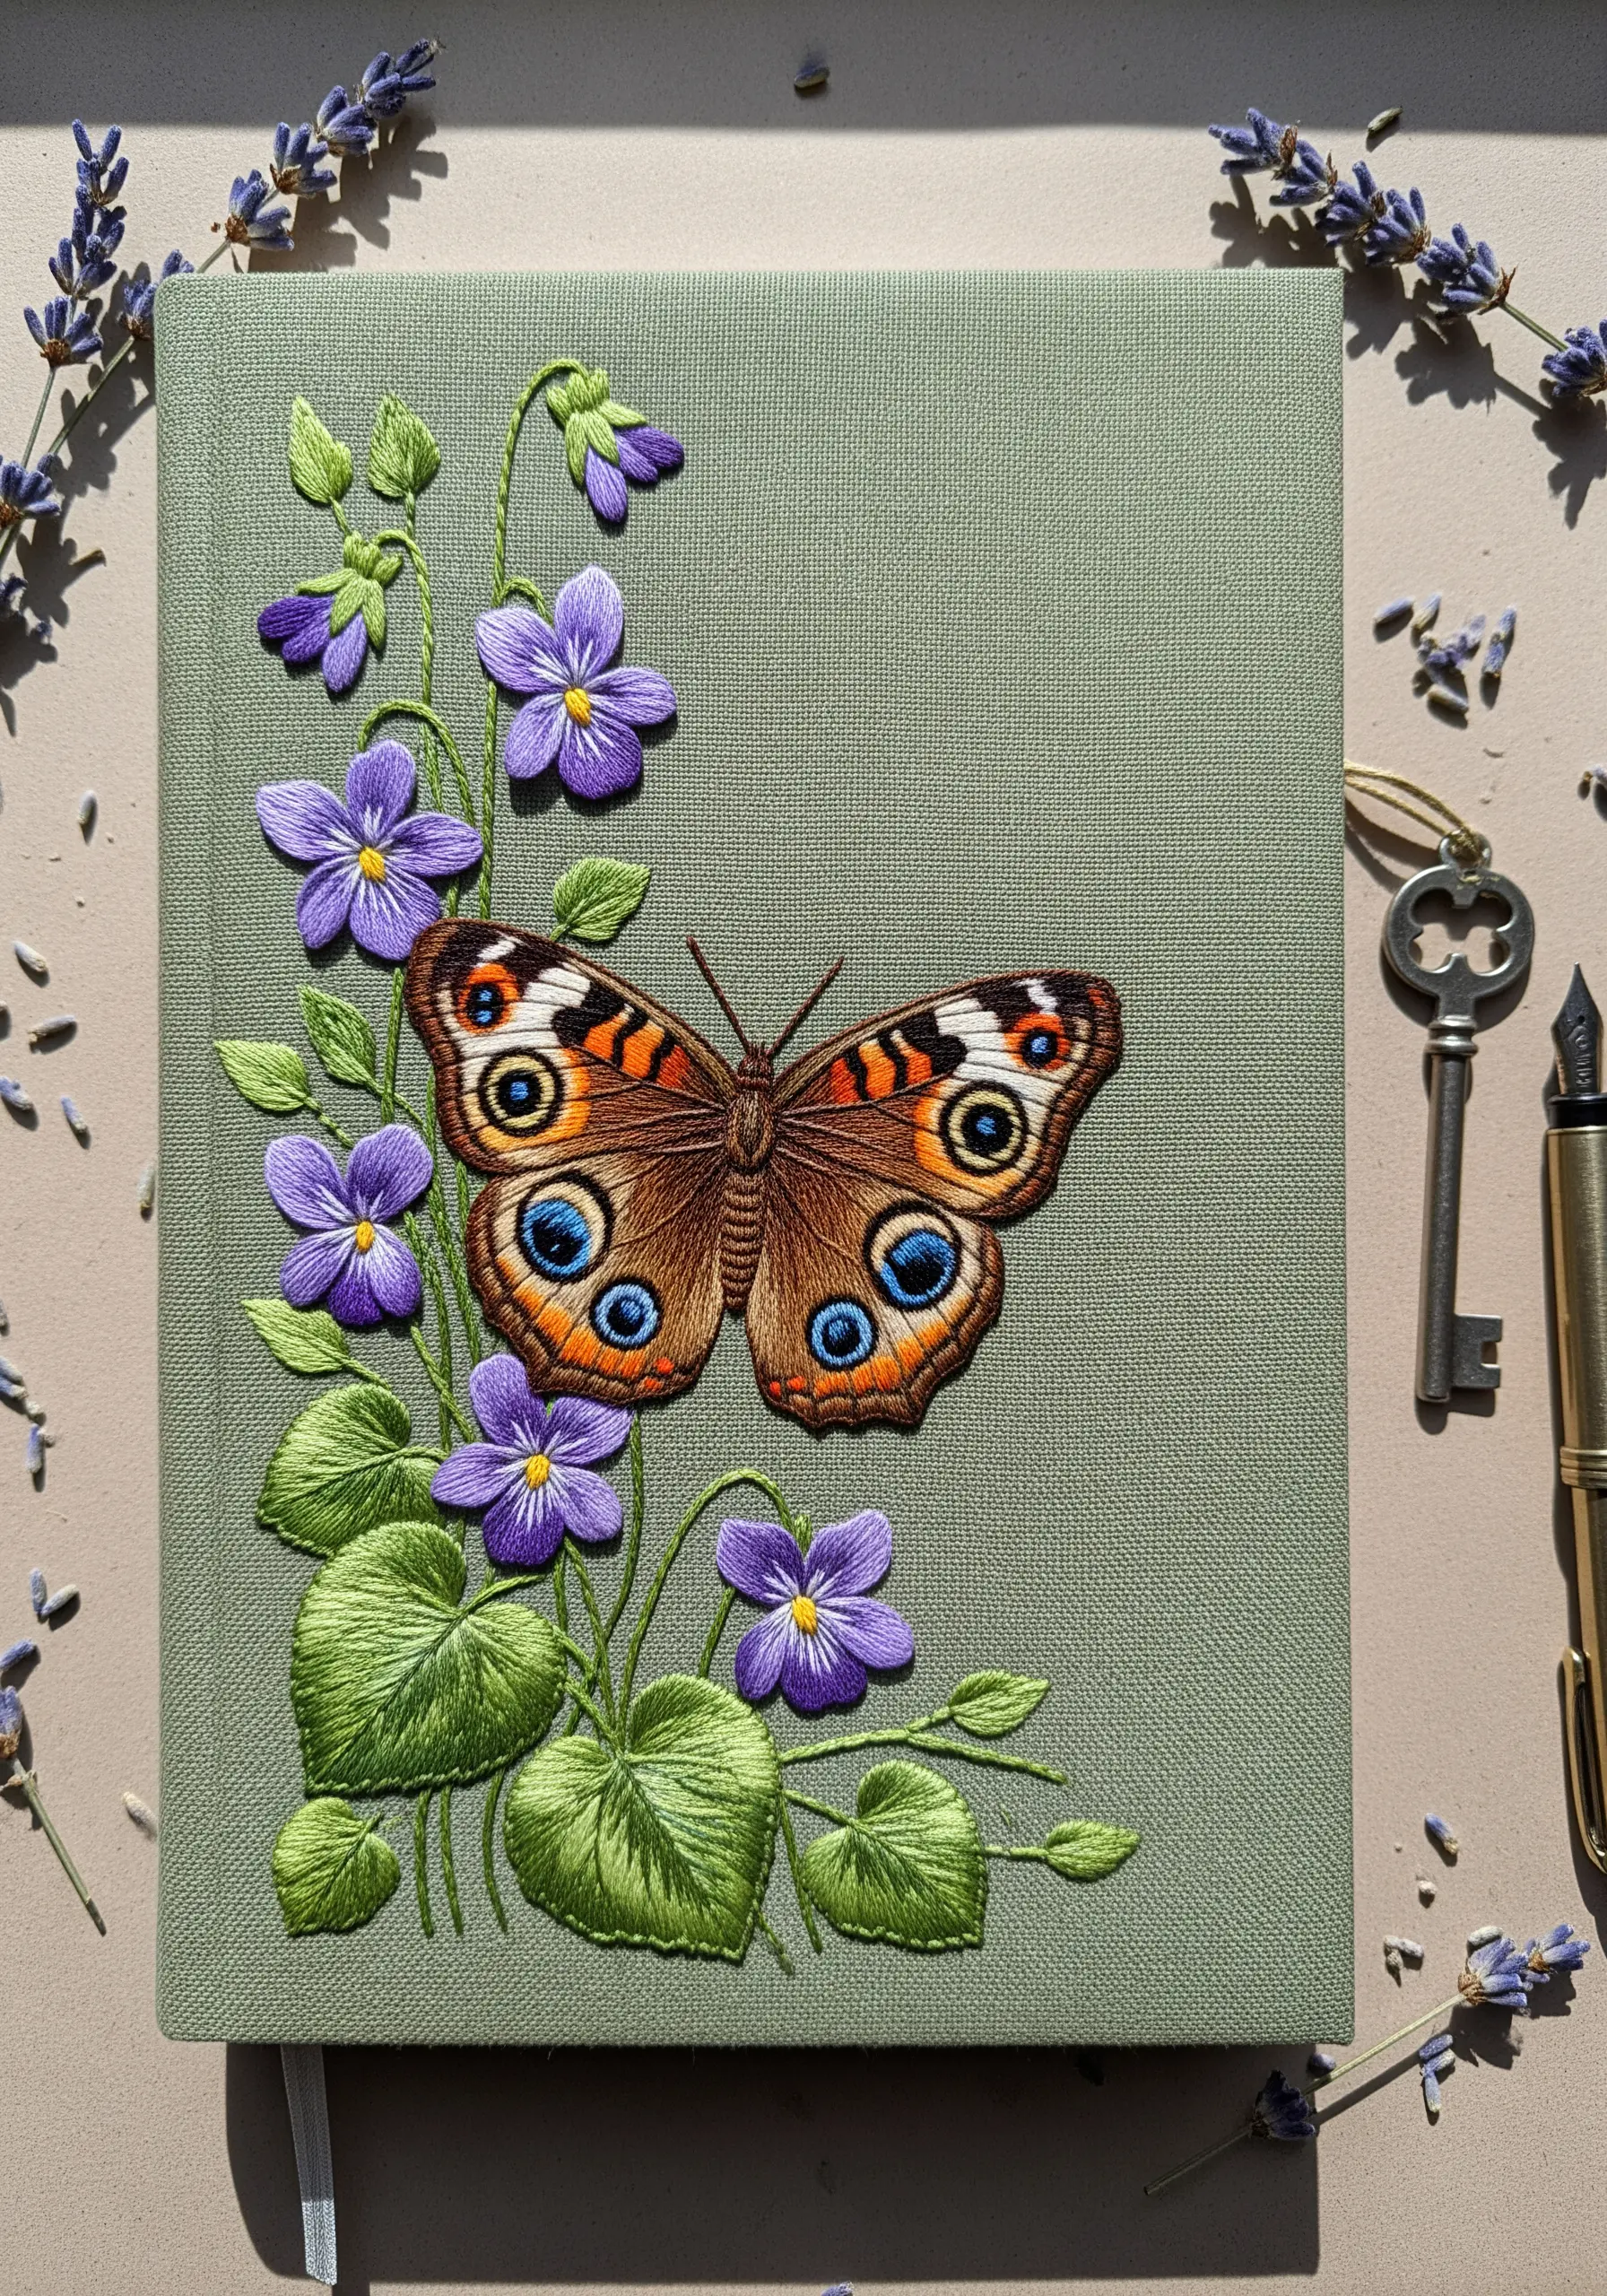
Transform a simple fabric-covered notebook into a cherished object. To stitch on a hard-backed item, use a strong needle and a thimble to protect your fingers.
Give the butterfly’s “eyespots” lifelike dimension by using padded satin stitch—fill the shape with seed stitches first, then cover it with smooth satin stitches.
This small detail elevates the entire piece, making it a tactile delight. You can personalize journals and daily planners with this focused approach.
15. Achieve Photorealism with a Single Thread

This incredible level of detail is possible when you switch to using just a single strand of embroidery floss.
Working with one strand allows you to blend colors with the precision of a paintbrush, creating the soft gradients and sharp markings of the butterfly’s wings.
For the thistle’s spiky base, use layered, straight stitches. For its fluffy top, use unwound floss or turkey work trimmed short to create a texture you can almost feel.
Explore more realistic animal insect embroidery patterns to hone this skill.
16. Find Elegance in Minimalist Line Art
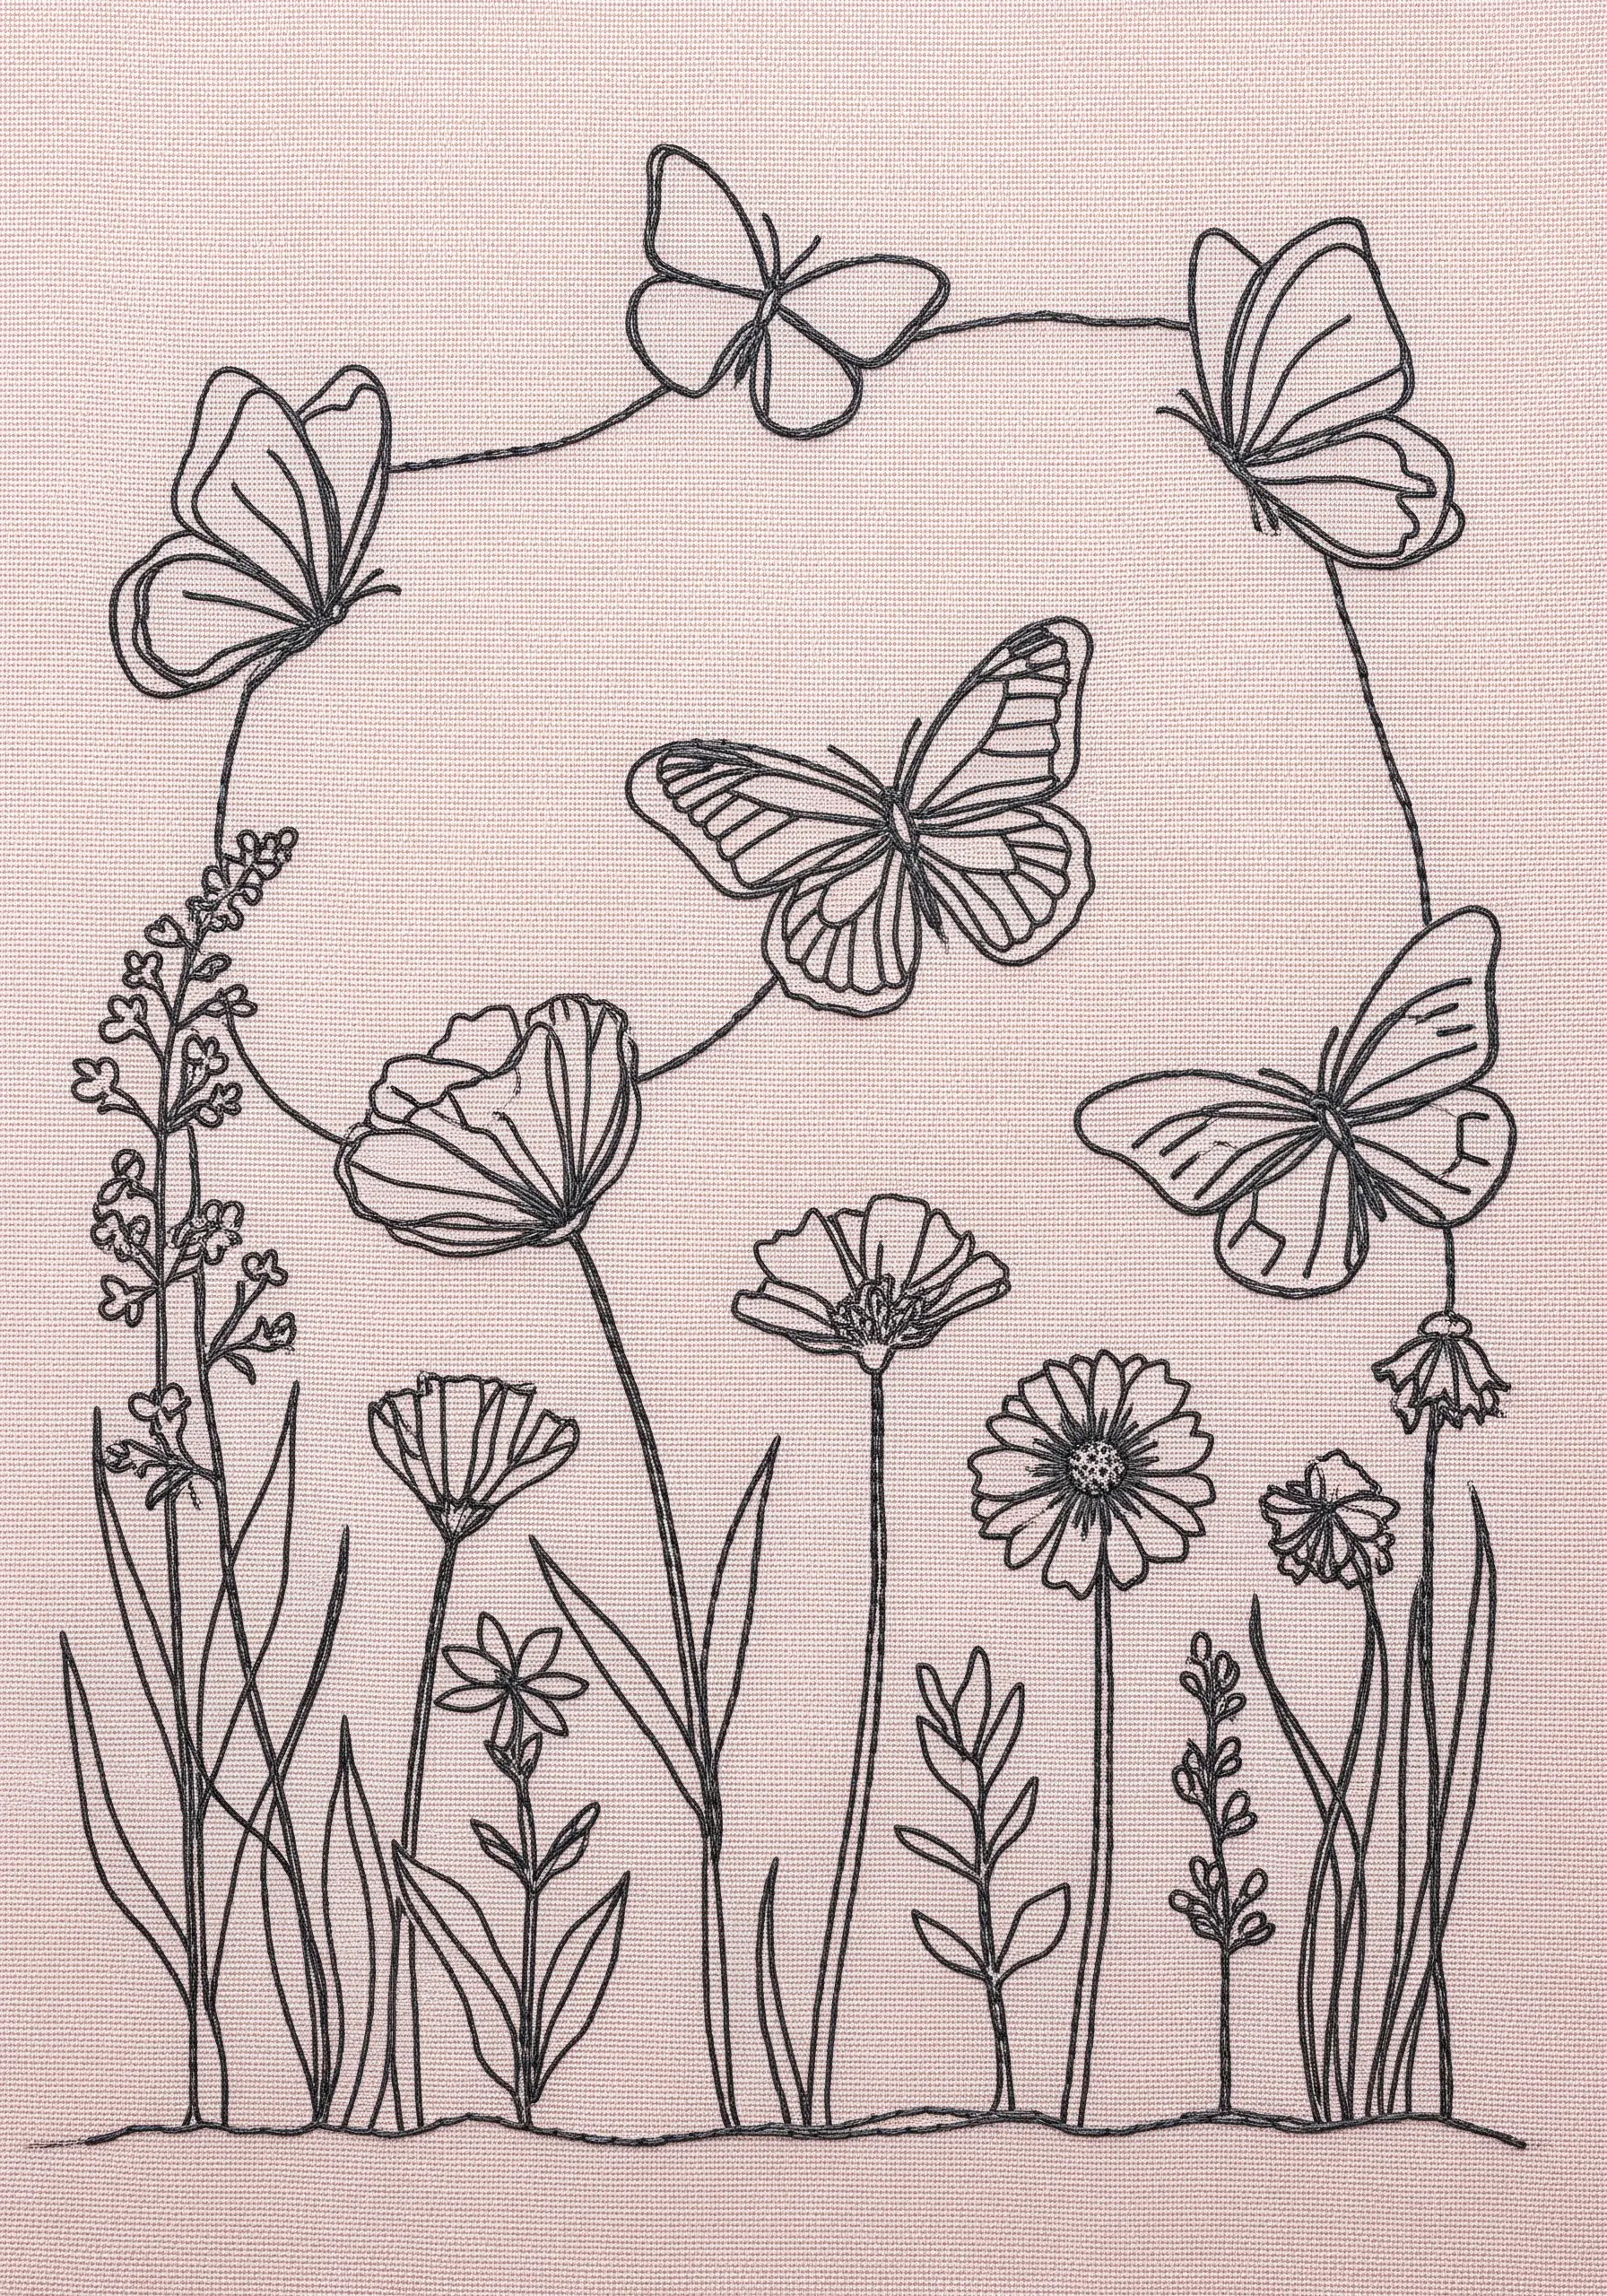
A design does not need to be complex to be beautiful. This piece relies entirely on the quality and grace of a single line.
Use a consistent backstitch or stem stitch to create a clean, unbroken contour. Focus on achieving smooth curves and even stitch lengths—this is where the artistry lies.
Using a single dark thread on a light, textured fabric creates a sophisticated, modern aesthetic that is both calming to stitch and to view.
This style is perfect for applying to textiles, as these minimalist line art embroidery patterns show.
17. Compose a Garden with Layered Perspective
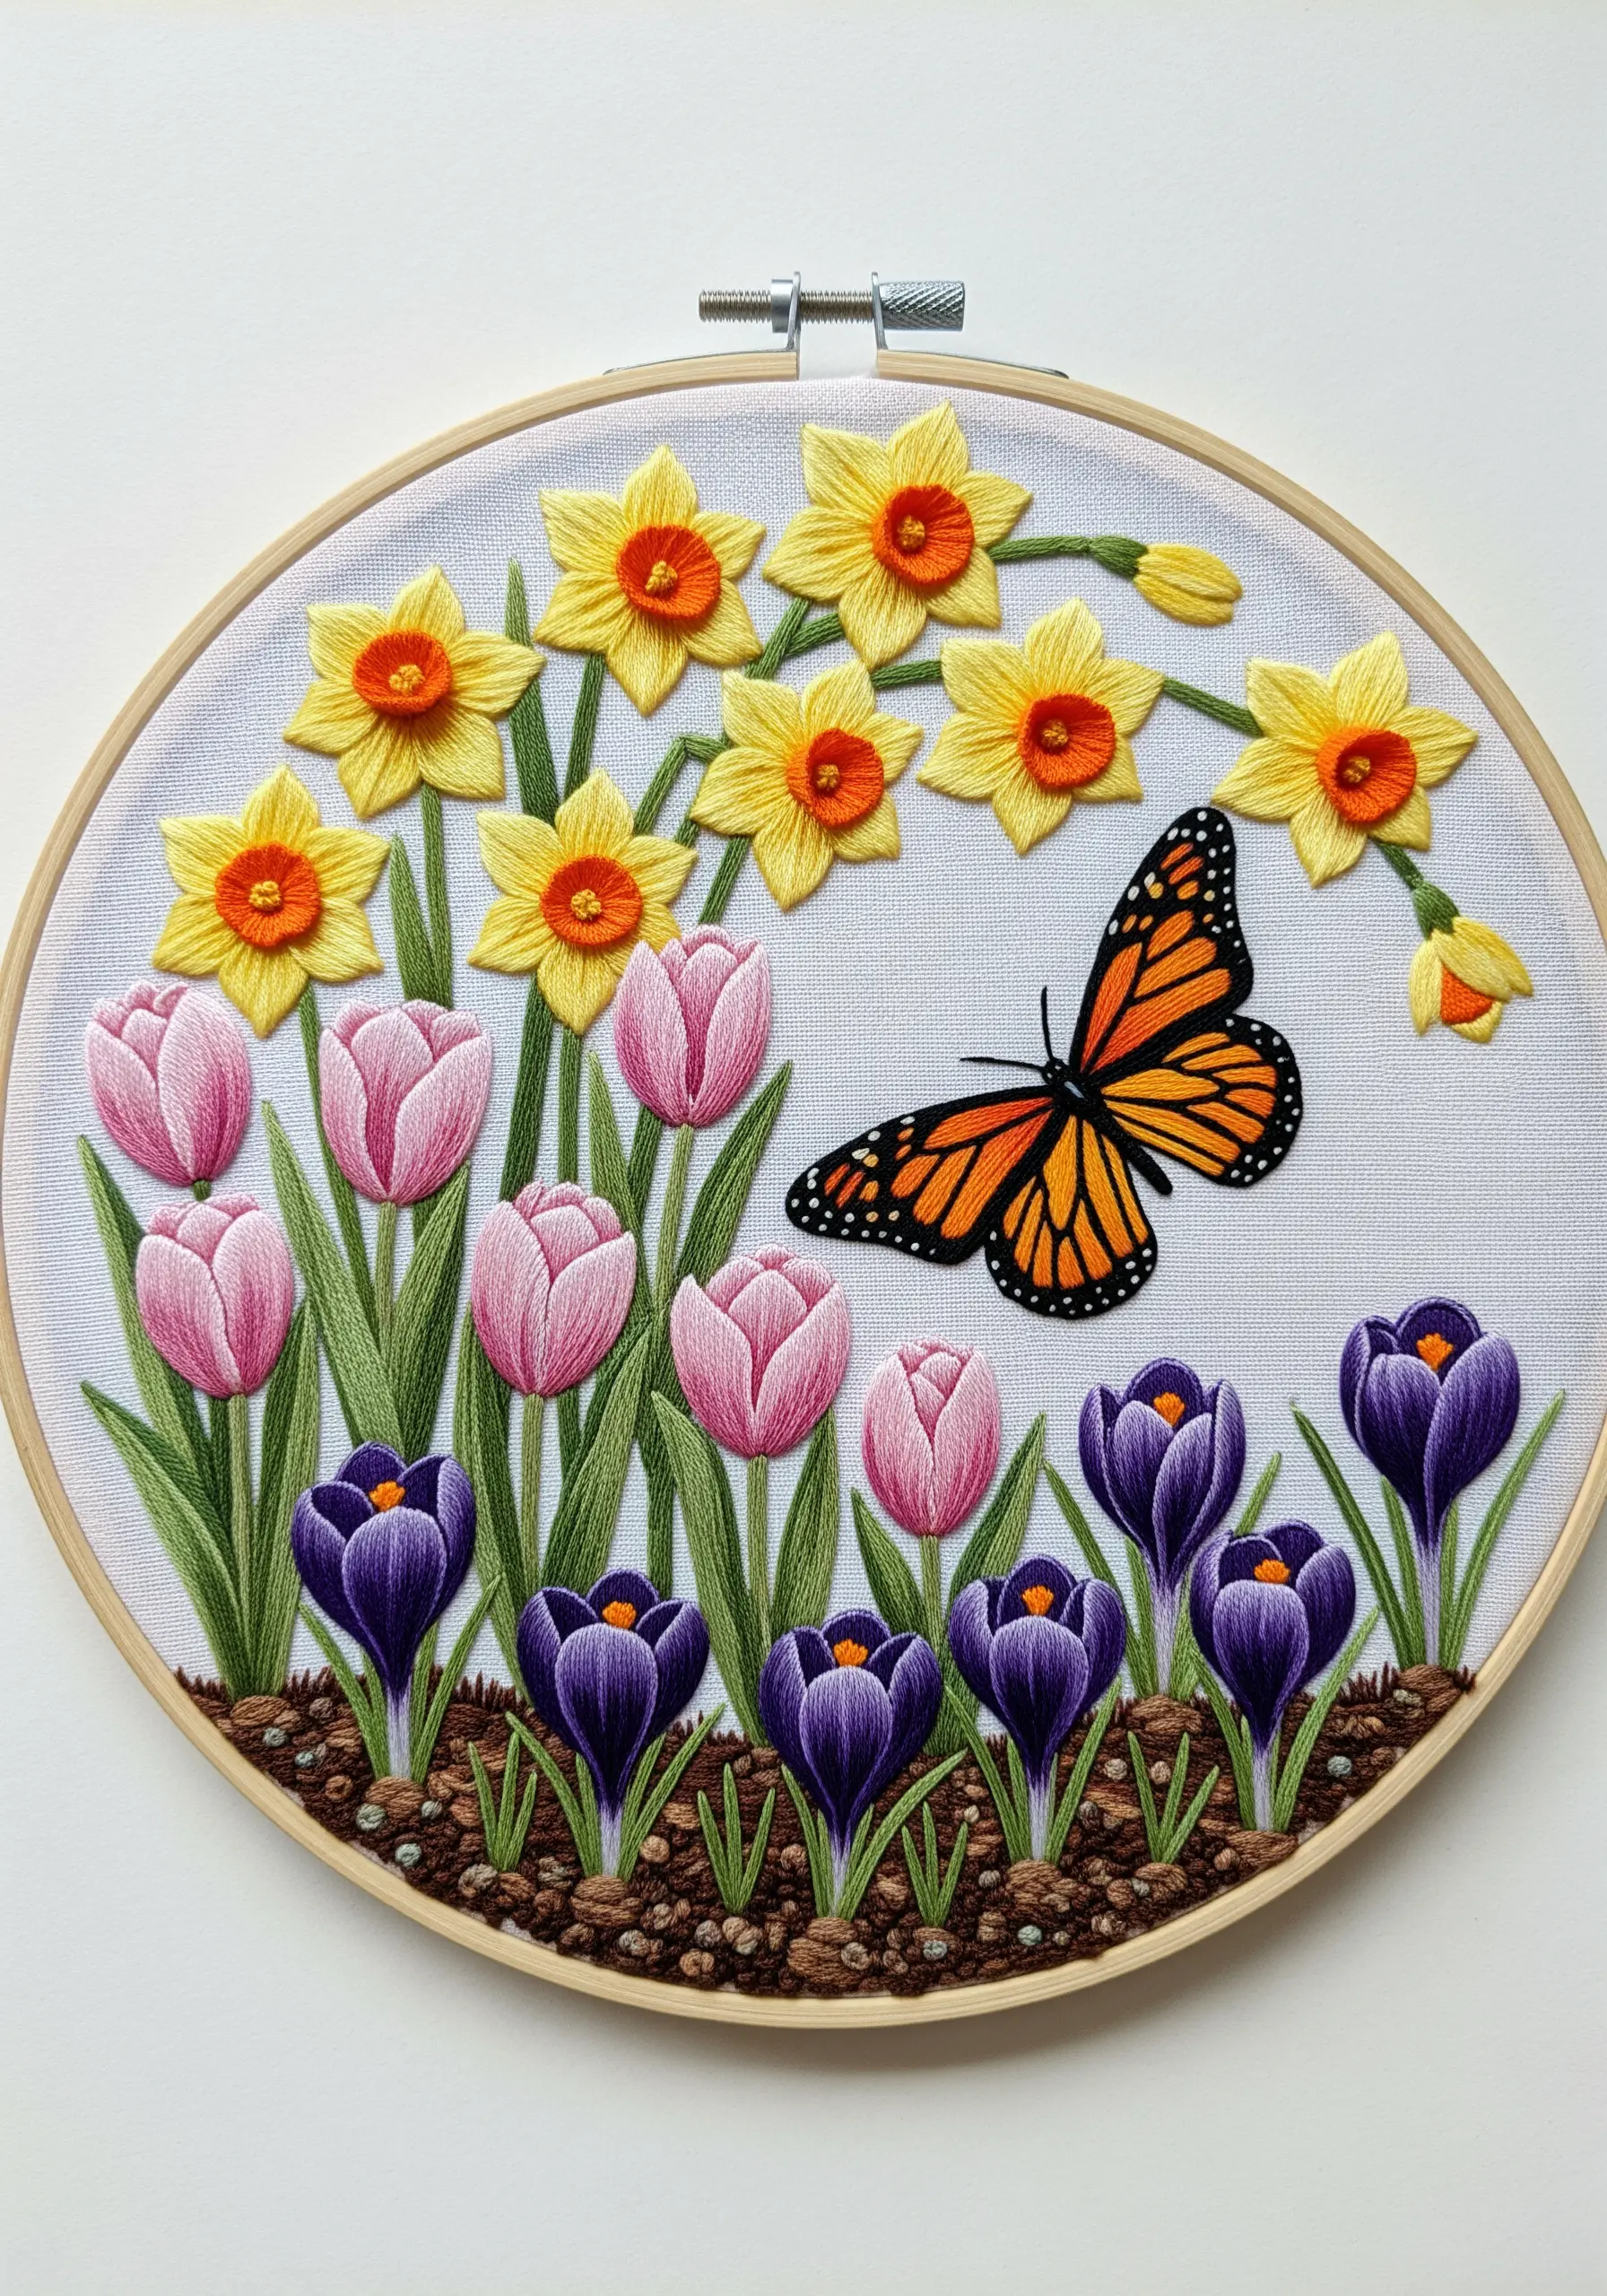
To create the illusion of a full spring garden bed, arrange your flowers in distinct rows, using layering to build depth.
Place taller flowers like daffodils at the back and shorter ones like crocuses and tulips in the front rows.
Create a rich, textured soil base using a dense field of French knots in various shades of brown. This grounds the scene and makes the bright floral colors pop even more.
18. Create Floral Form with Textural Stitches
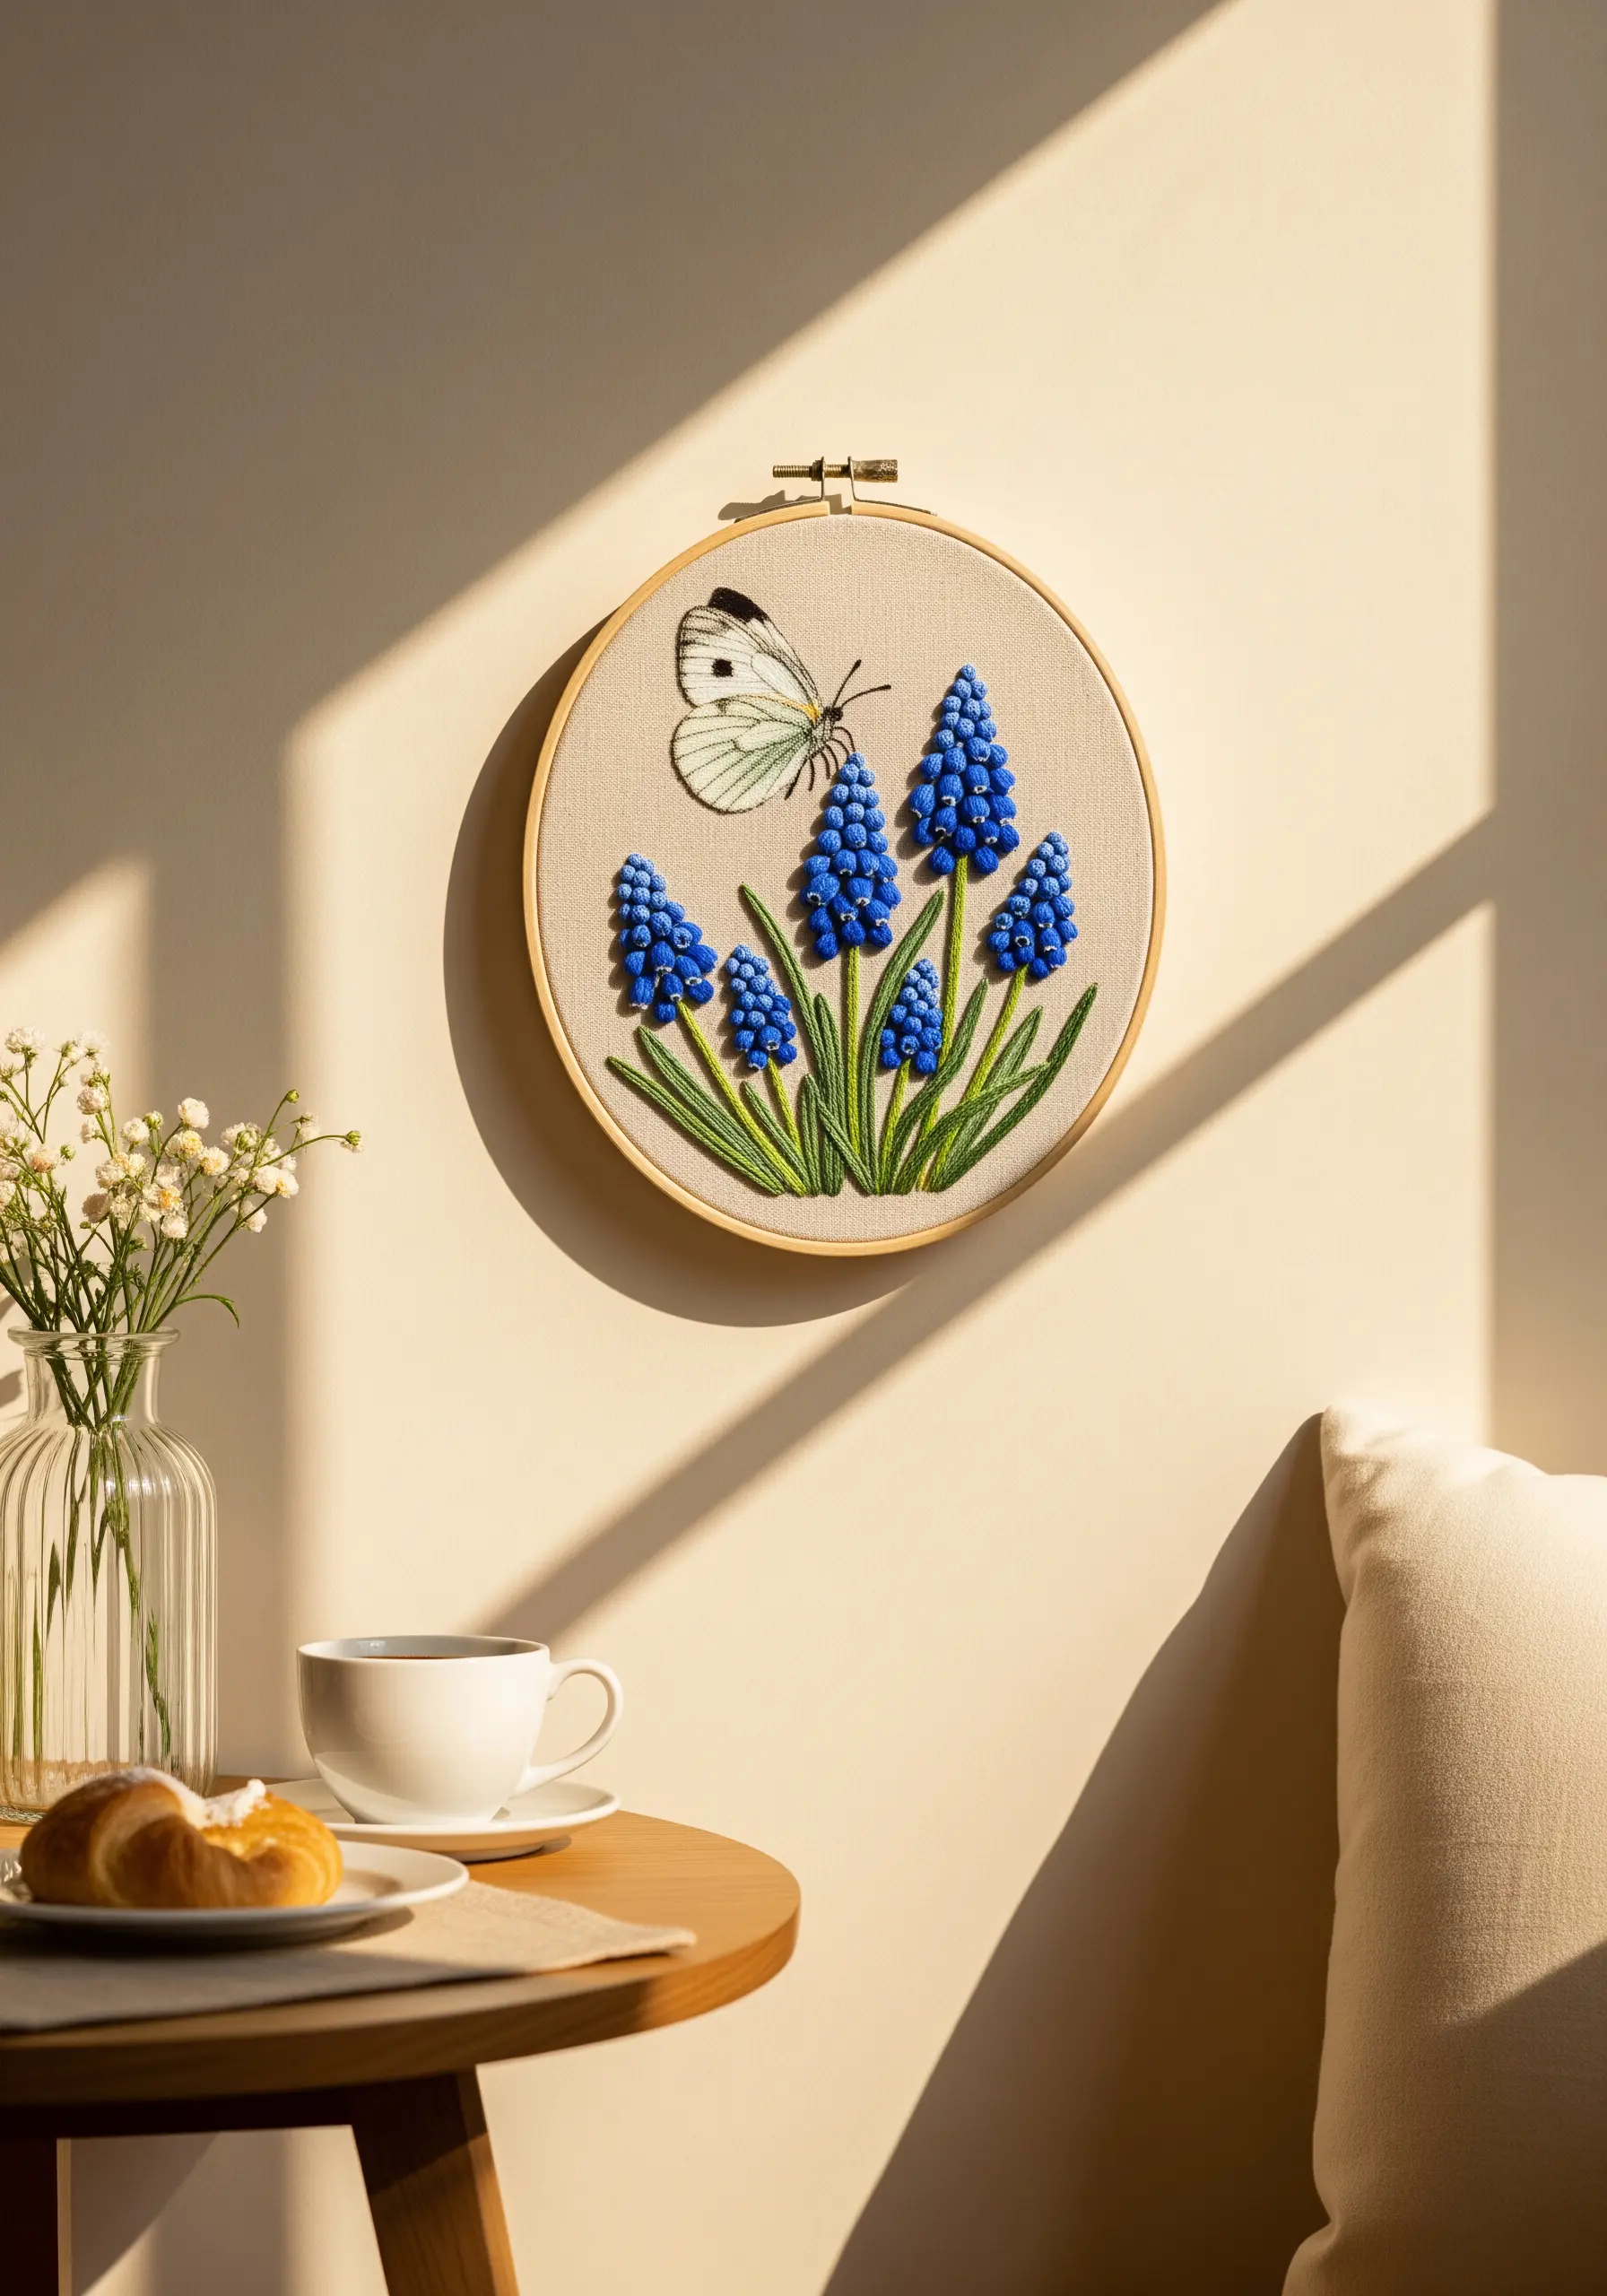
Bring your flowers to life by choosing stitches that mimic their natural form. Grape hyacinths are the perfect subject for dense clusters of French knots or tiny bullion knots.
This technique instantly gives the blossoms a raised, three-dimensional quality that invites touch.
Contrast this heavy texture with the smooth satin stitch of the leaves and the delicate fill of the Cabbage White butterfly for a balanced and engaging design.
19. Design a Classic Botanical Specimen Plate
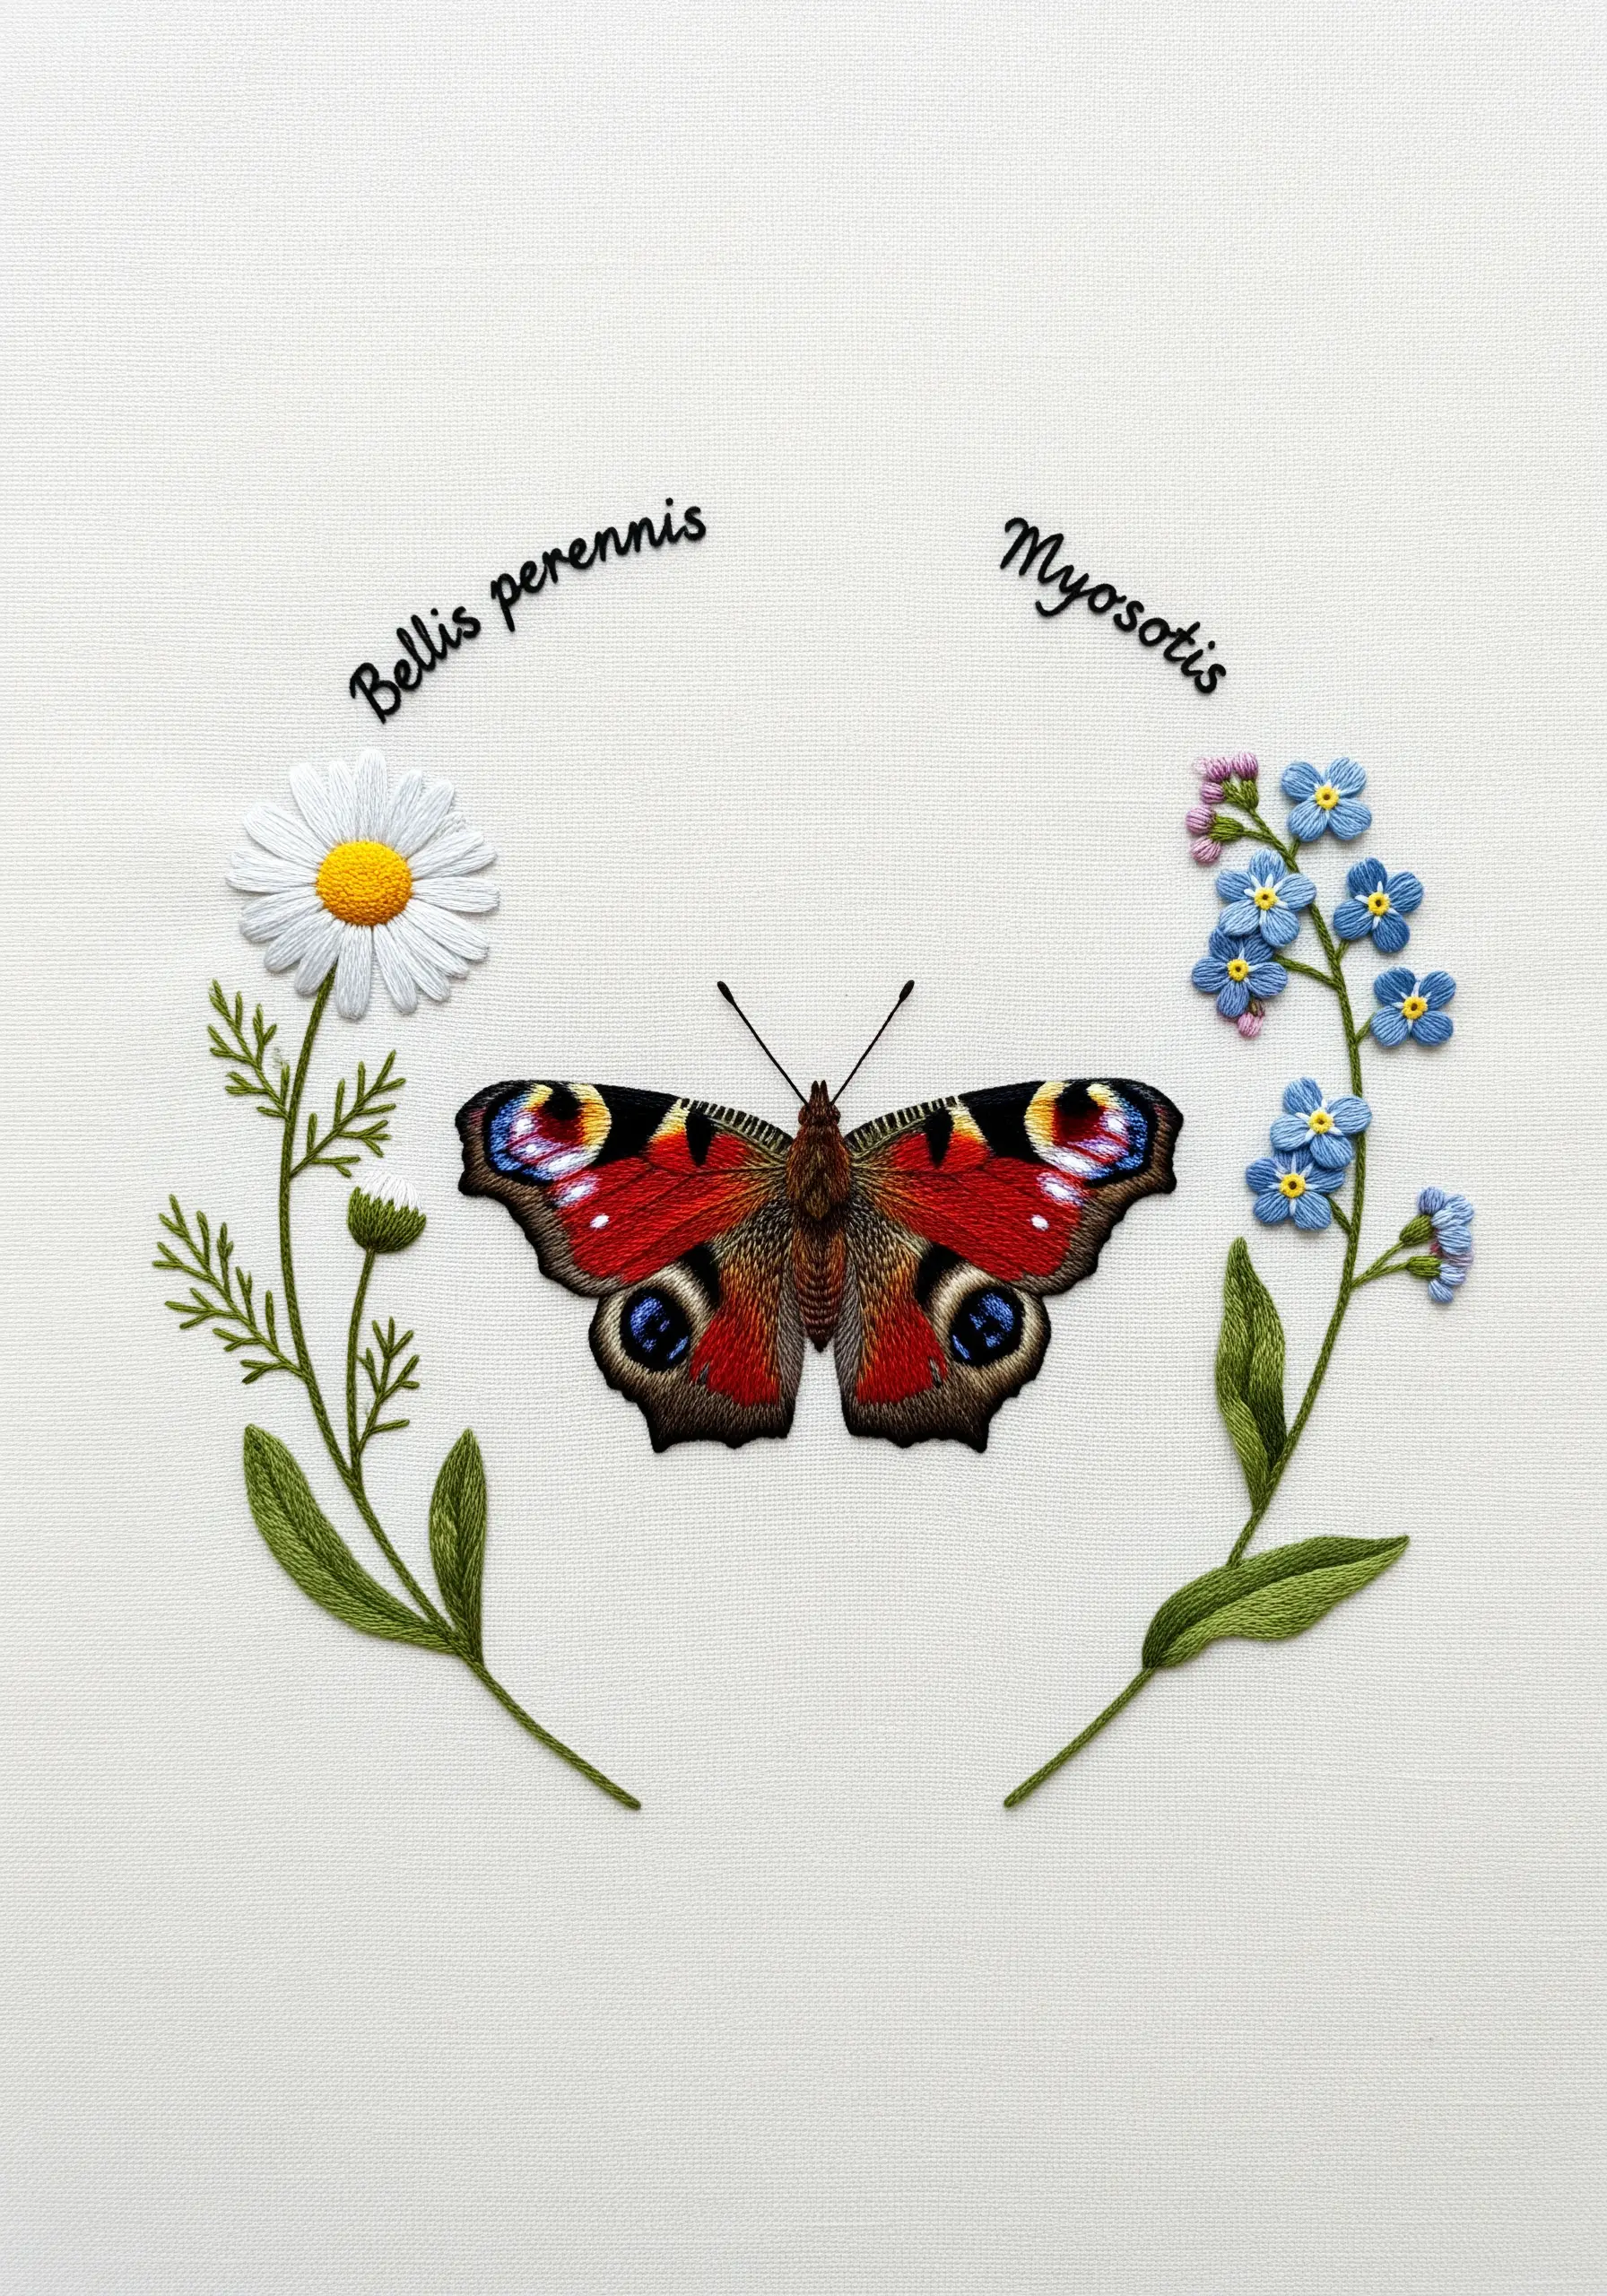
Emulate the elegant style of a vintage scientific illustration by isolating your subjects against a clean, white background.
Stitch your central butterfly with meticulous detail, then flank it with two different, perfectly rendered floral specimens.
Complete the classic look by adding the plants’ scientific names in a delicate, cursive backstitch. This transforms your embroidery hoop into a timeless piece of naturalist art.
20. Stitch Dramatic Silhouettes over a Painted Sky

Combine the softness of paint with the sharpness of thread in this striking mixed-media piece.
Start by creating a sunset gradient on your fabric using watercolor or thinned acrylic paint. Let it dry completely before hooping.
Then, using a dark-colored floss, stitch the silhouettes of the butterfly and lavender with a simple backstitch. The stark contrast between the painted background and the crisp black lines creates a breathtaking effect.
You can find more ideas in our guide to DIY mixed media embroidery projects.
21. Capture Complex Flowers by Stitching Petal by Petal
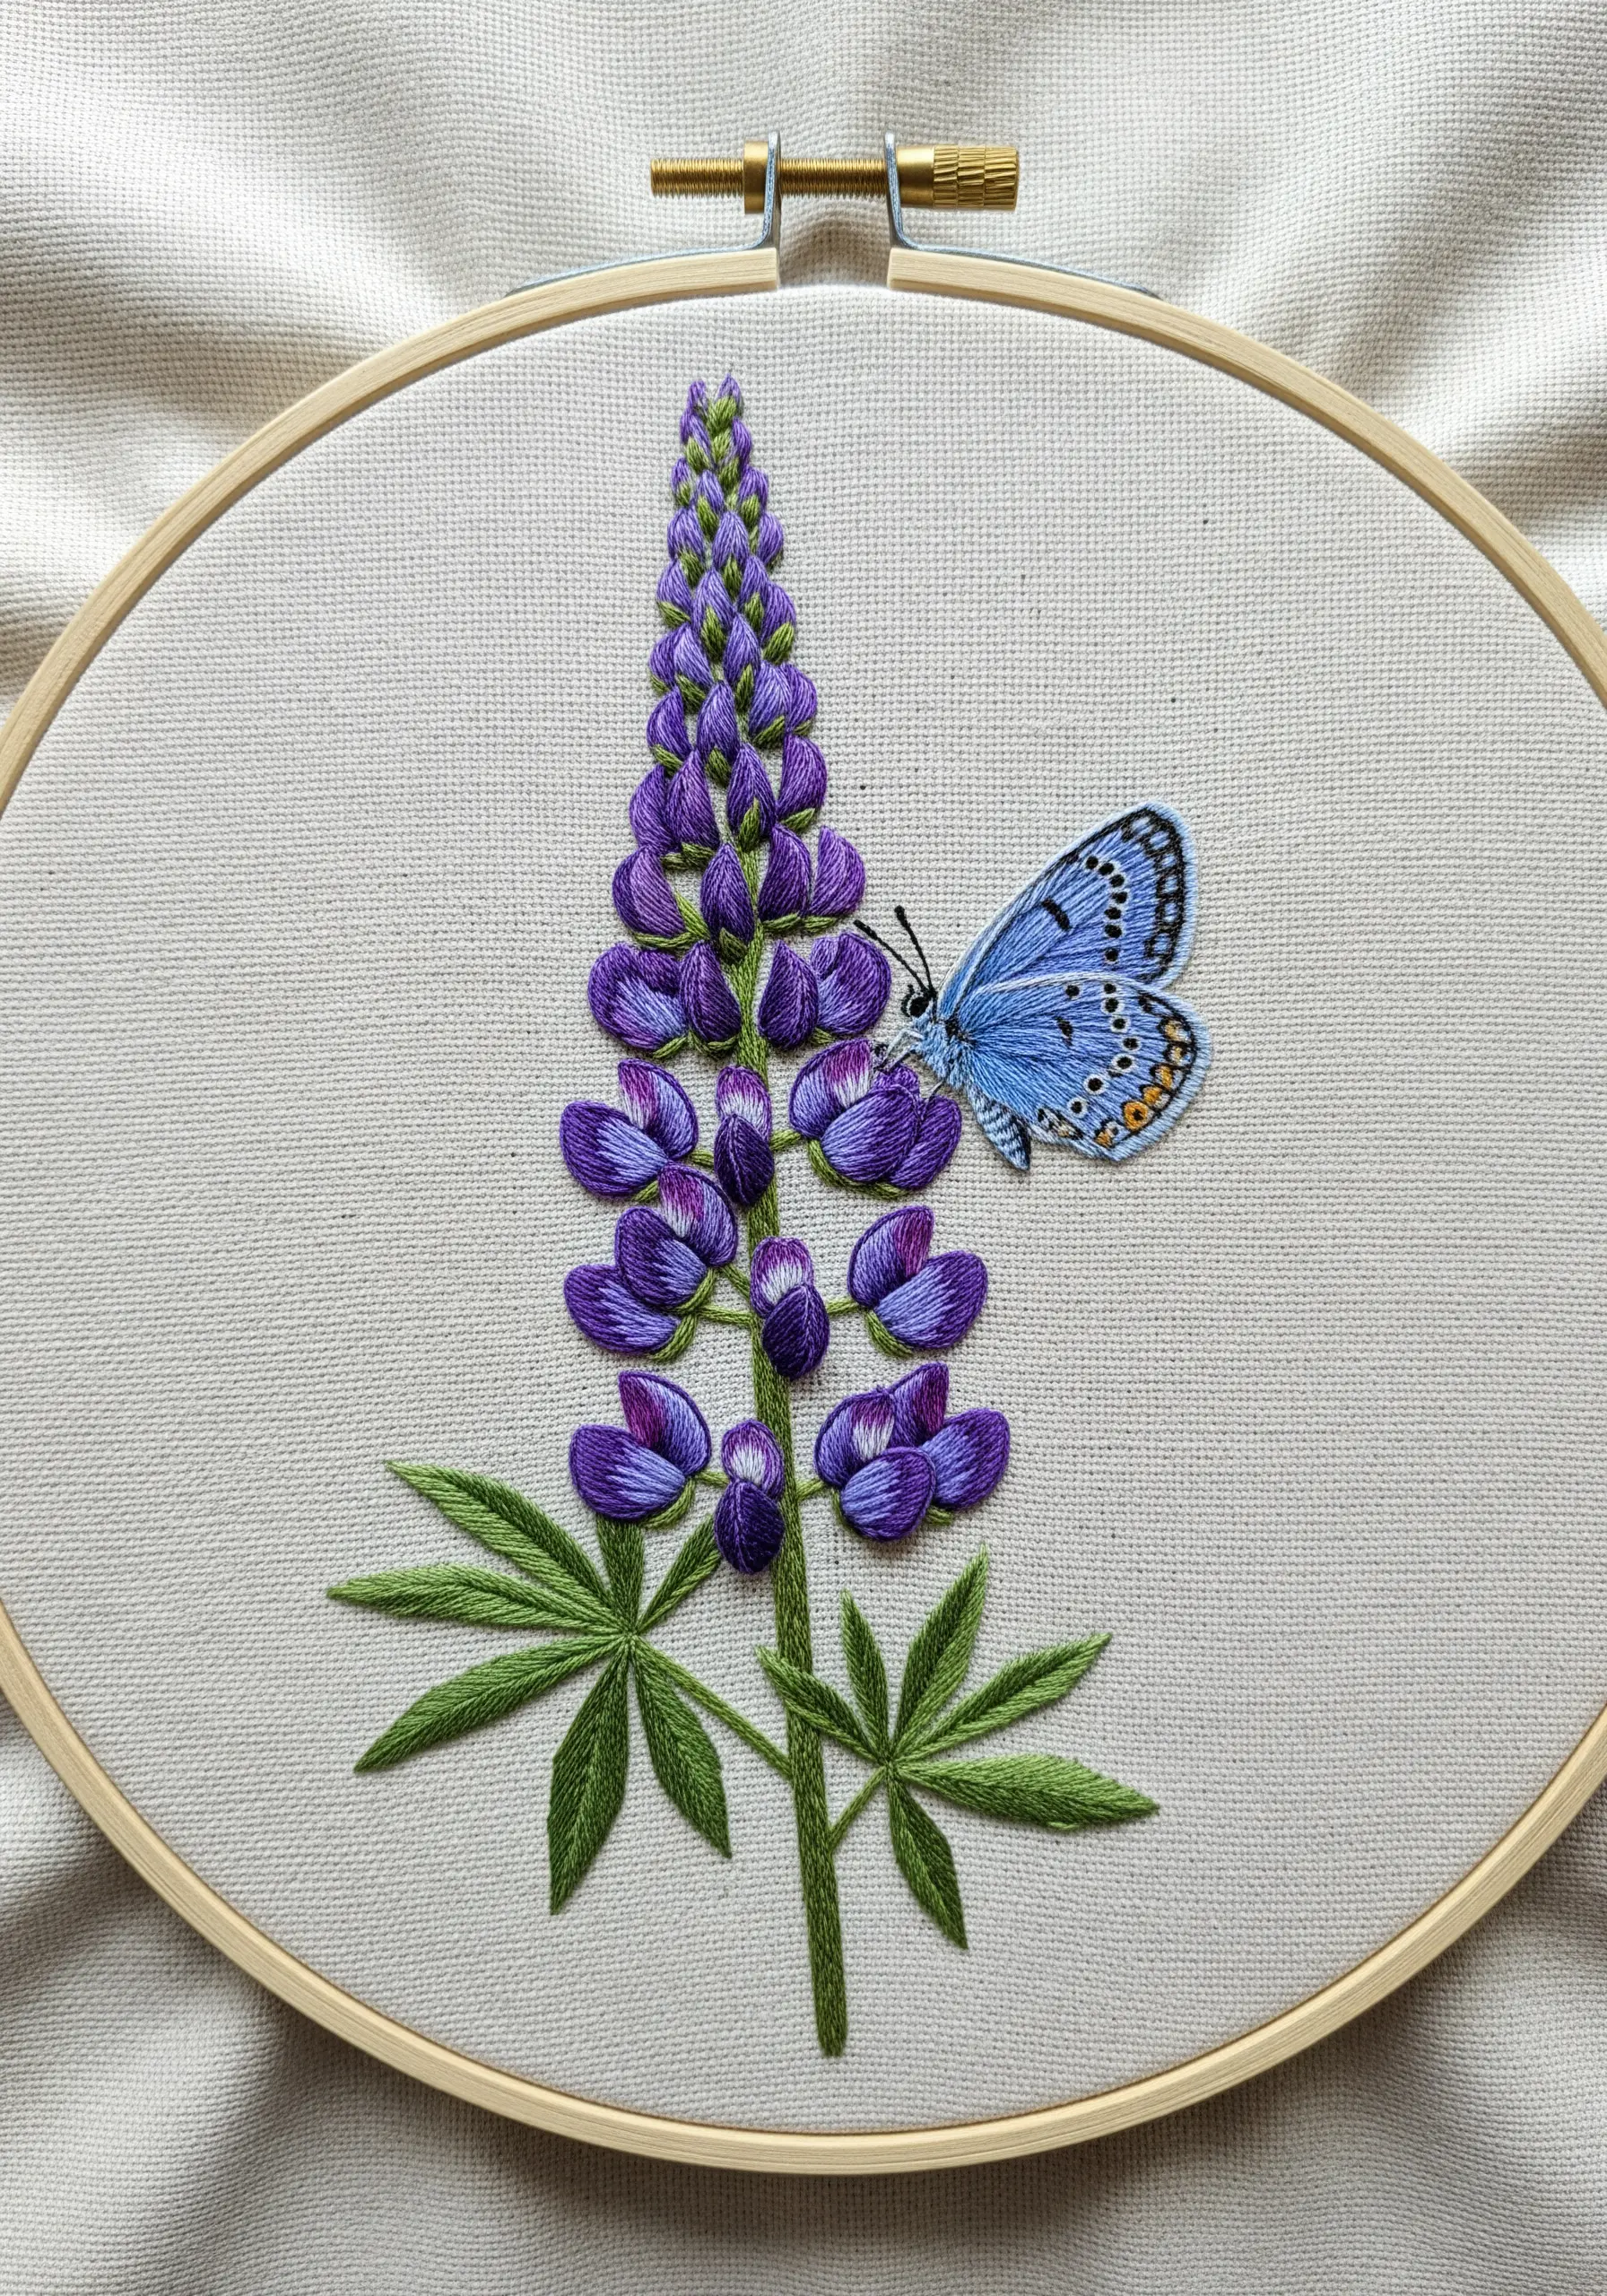
To tackle a complex flower like a lupine without feeling overwhelmed, break it down into its simplest components: the individual petals.
Stitch each small petal using a padded satin stitch to give it a distinct, plump shape. Using two or three slightly different shades of purple will create highlights and shadows, adding a surprising amount of realism.
This methodical approach allows you to build a complex, beautiful form from simple, manageable stitches.
22. Design a Meandering Vine for a Bookmark
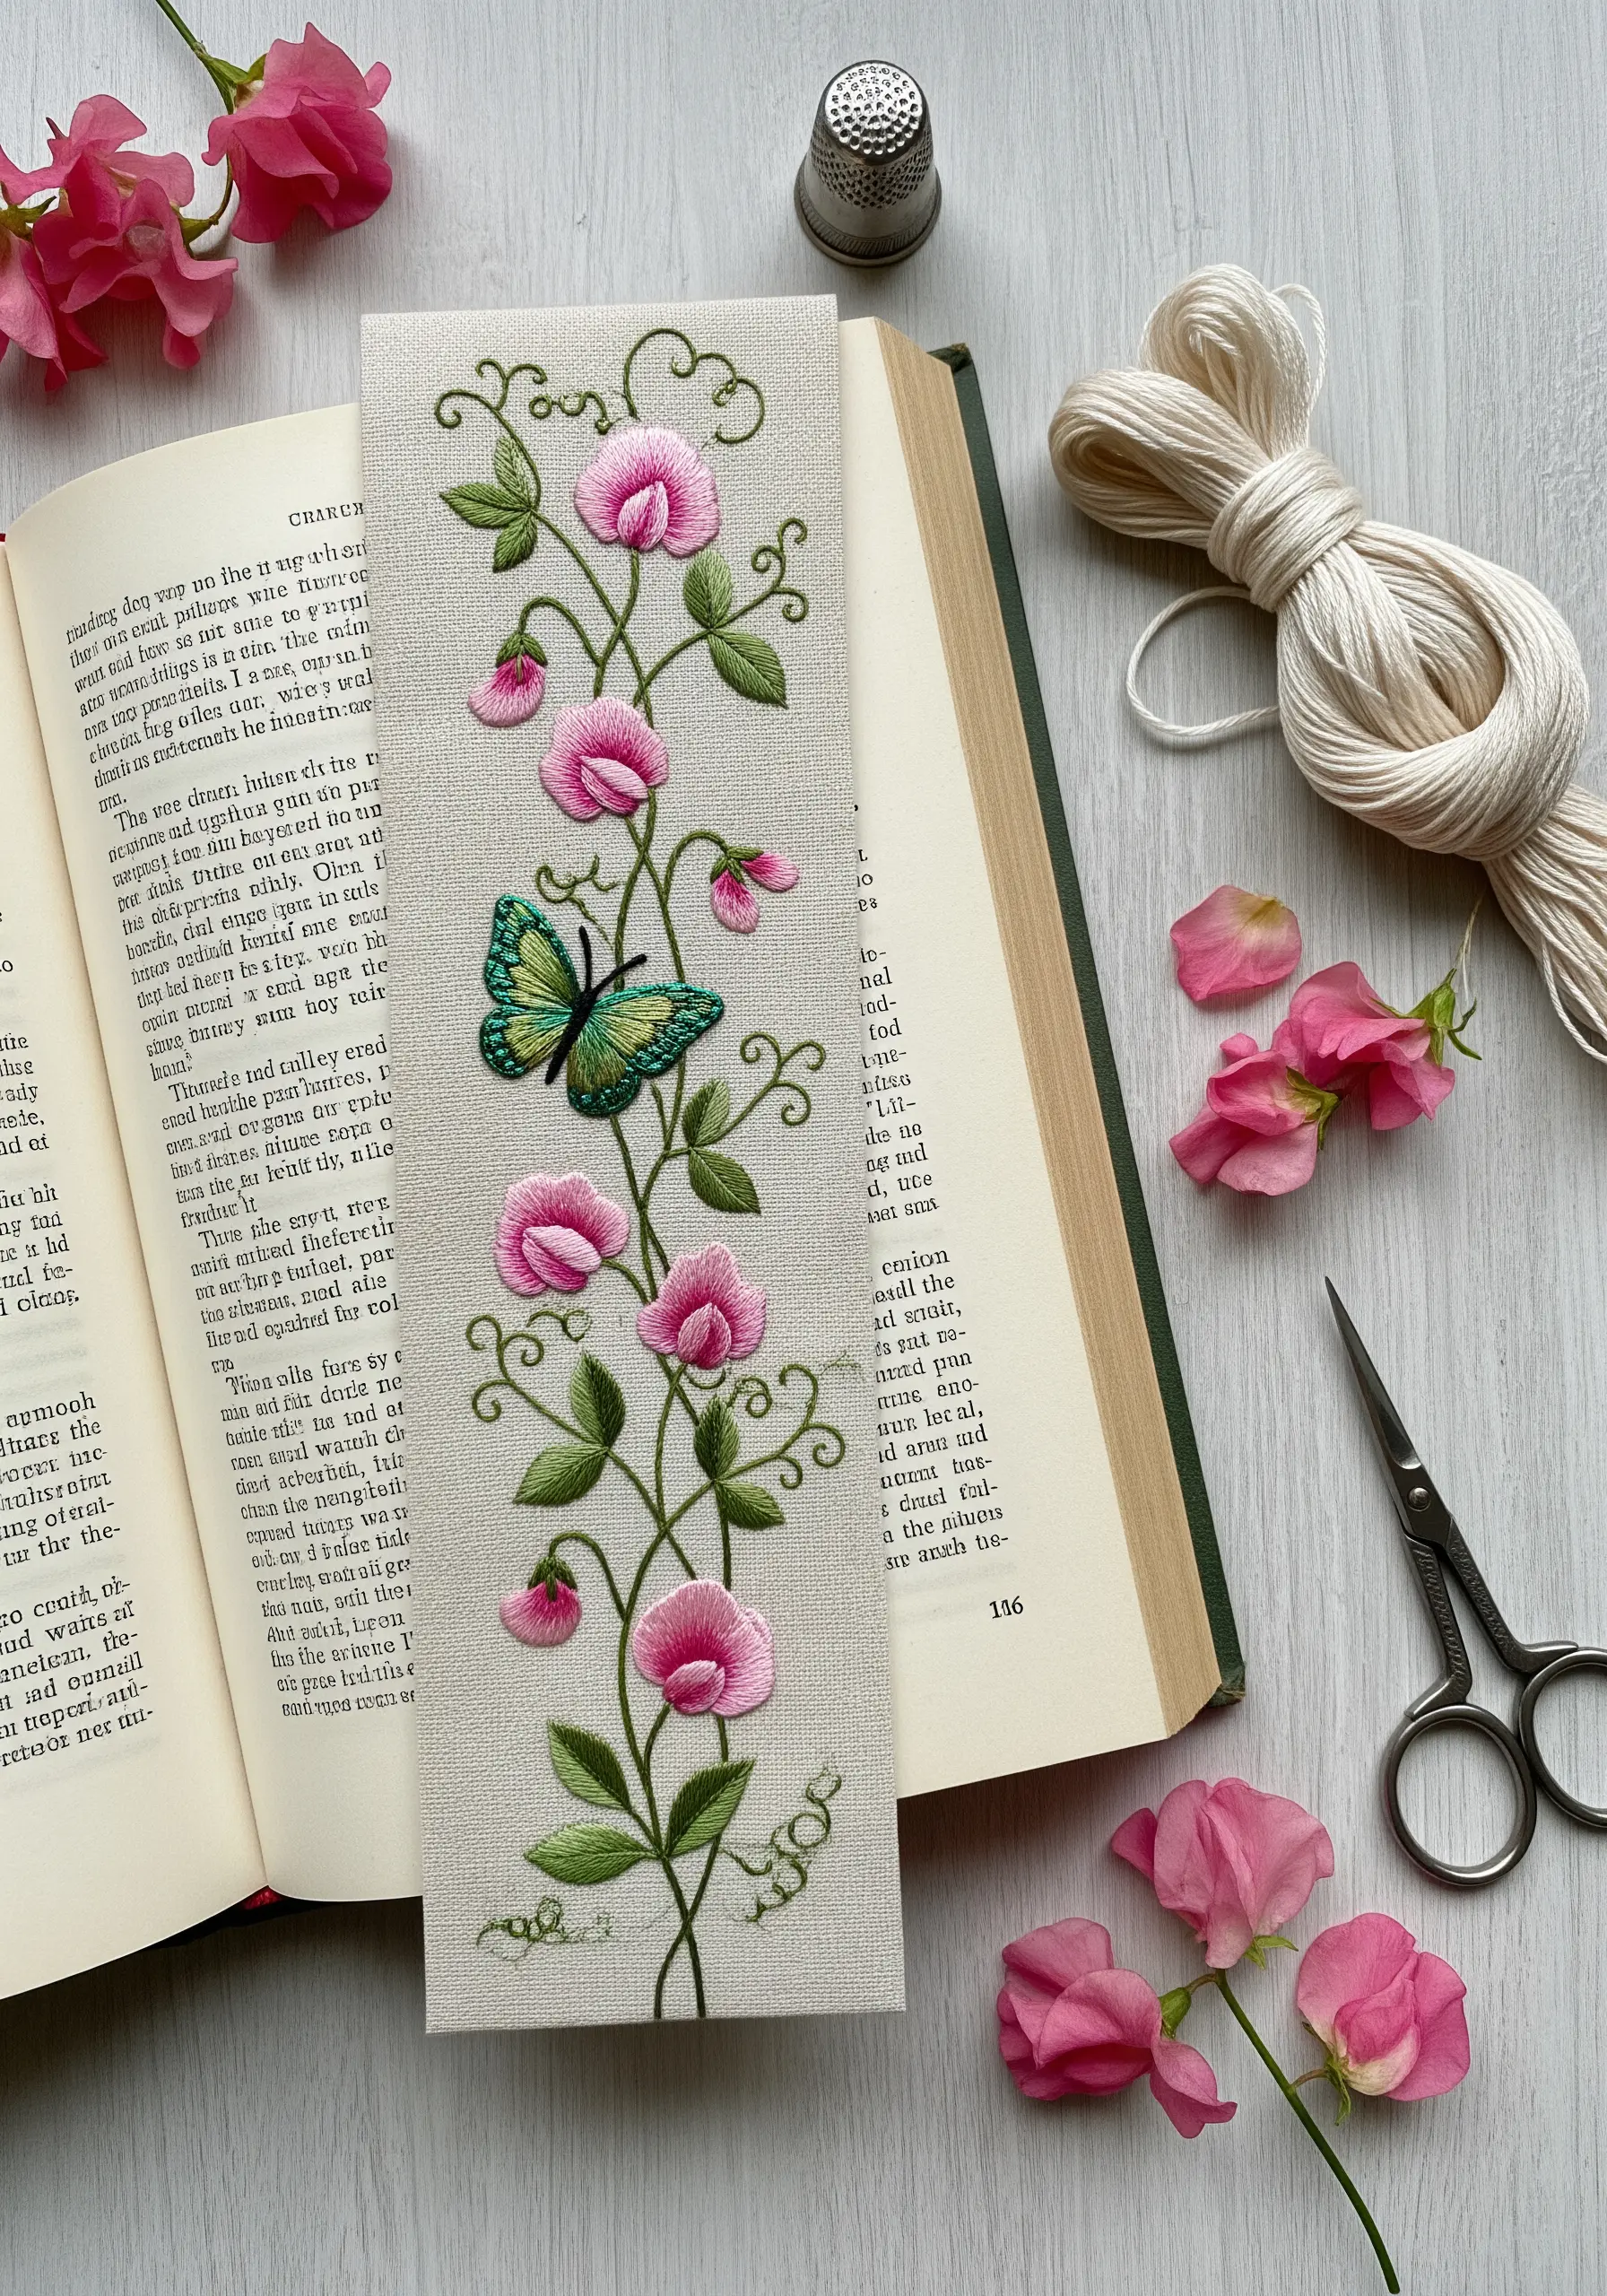
The long, narrow shape of a bookmark is the perfect canvas for a vertical, climbing plant design.
Use a stem stitch for the main vine, as its twisted structure naturally mimics a real stem’s texture and strength.
Scatter delicate flowers and leaves along its length, allowing the vine to curve and wander organically. This creates a graceful sense of movement that guides the eye up the length of the design.
This is one of many small handmade projects that double as thoughtful gifts.
23. Use an Asymmetrical Branch for Large-Scale Wall Art
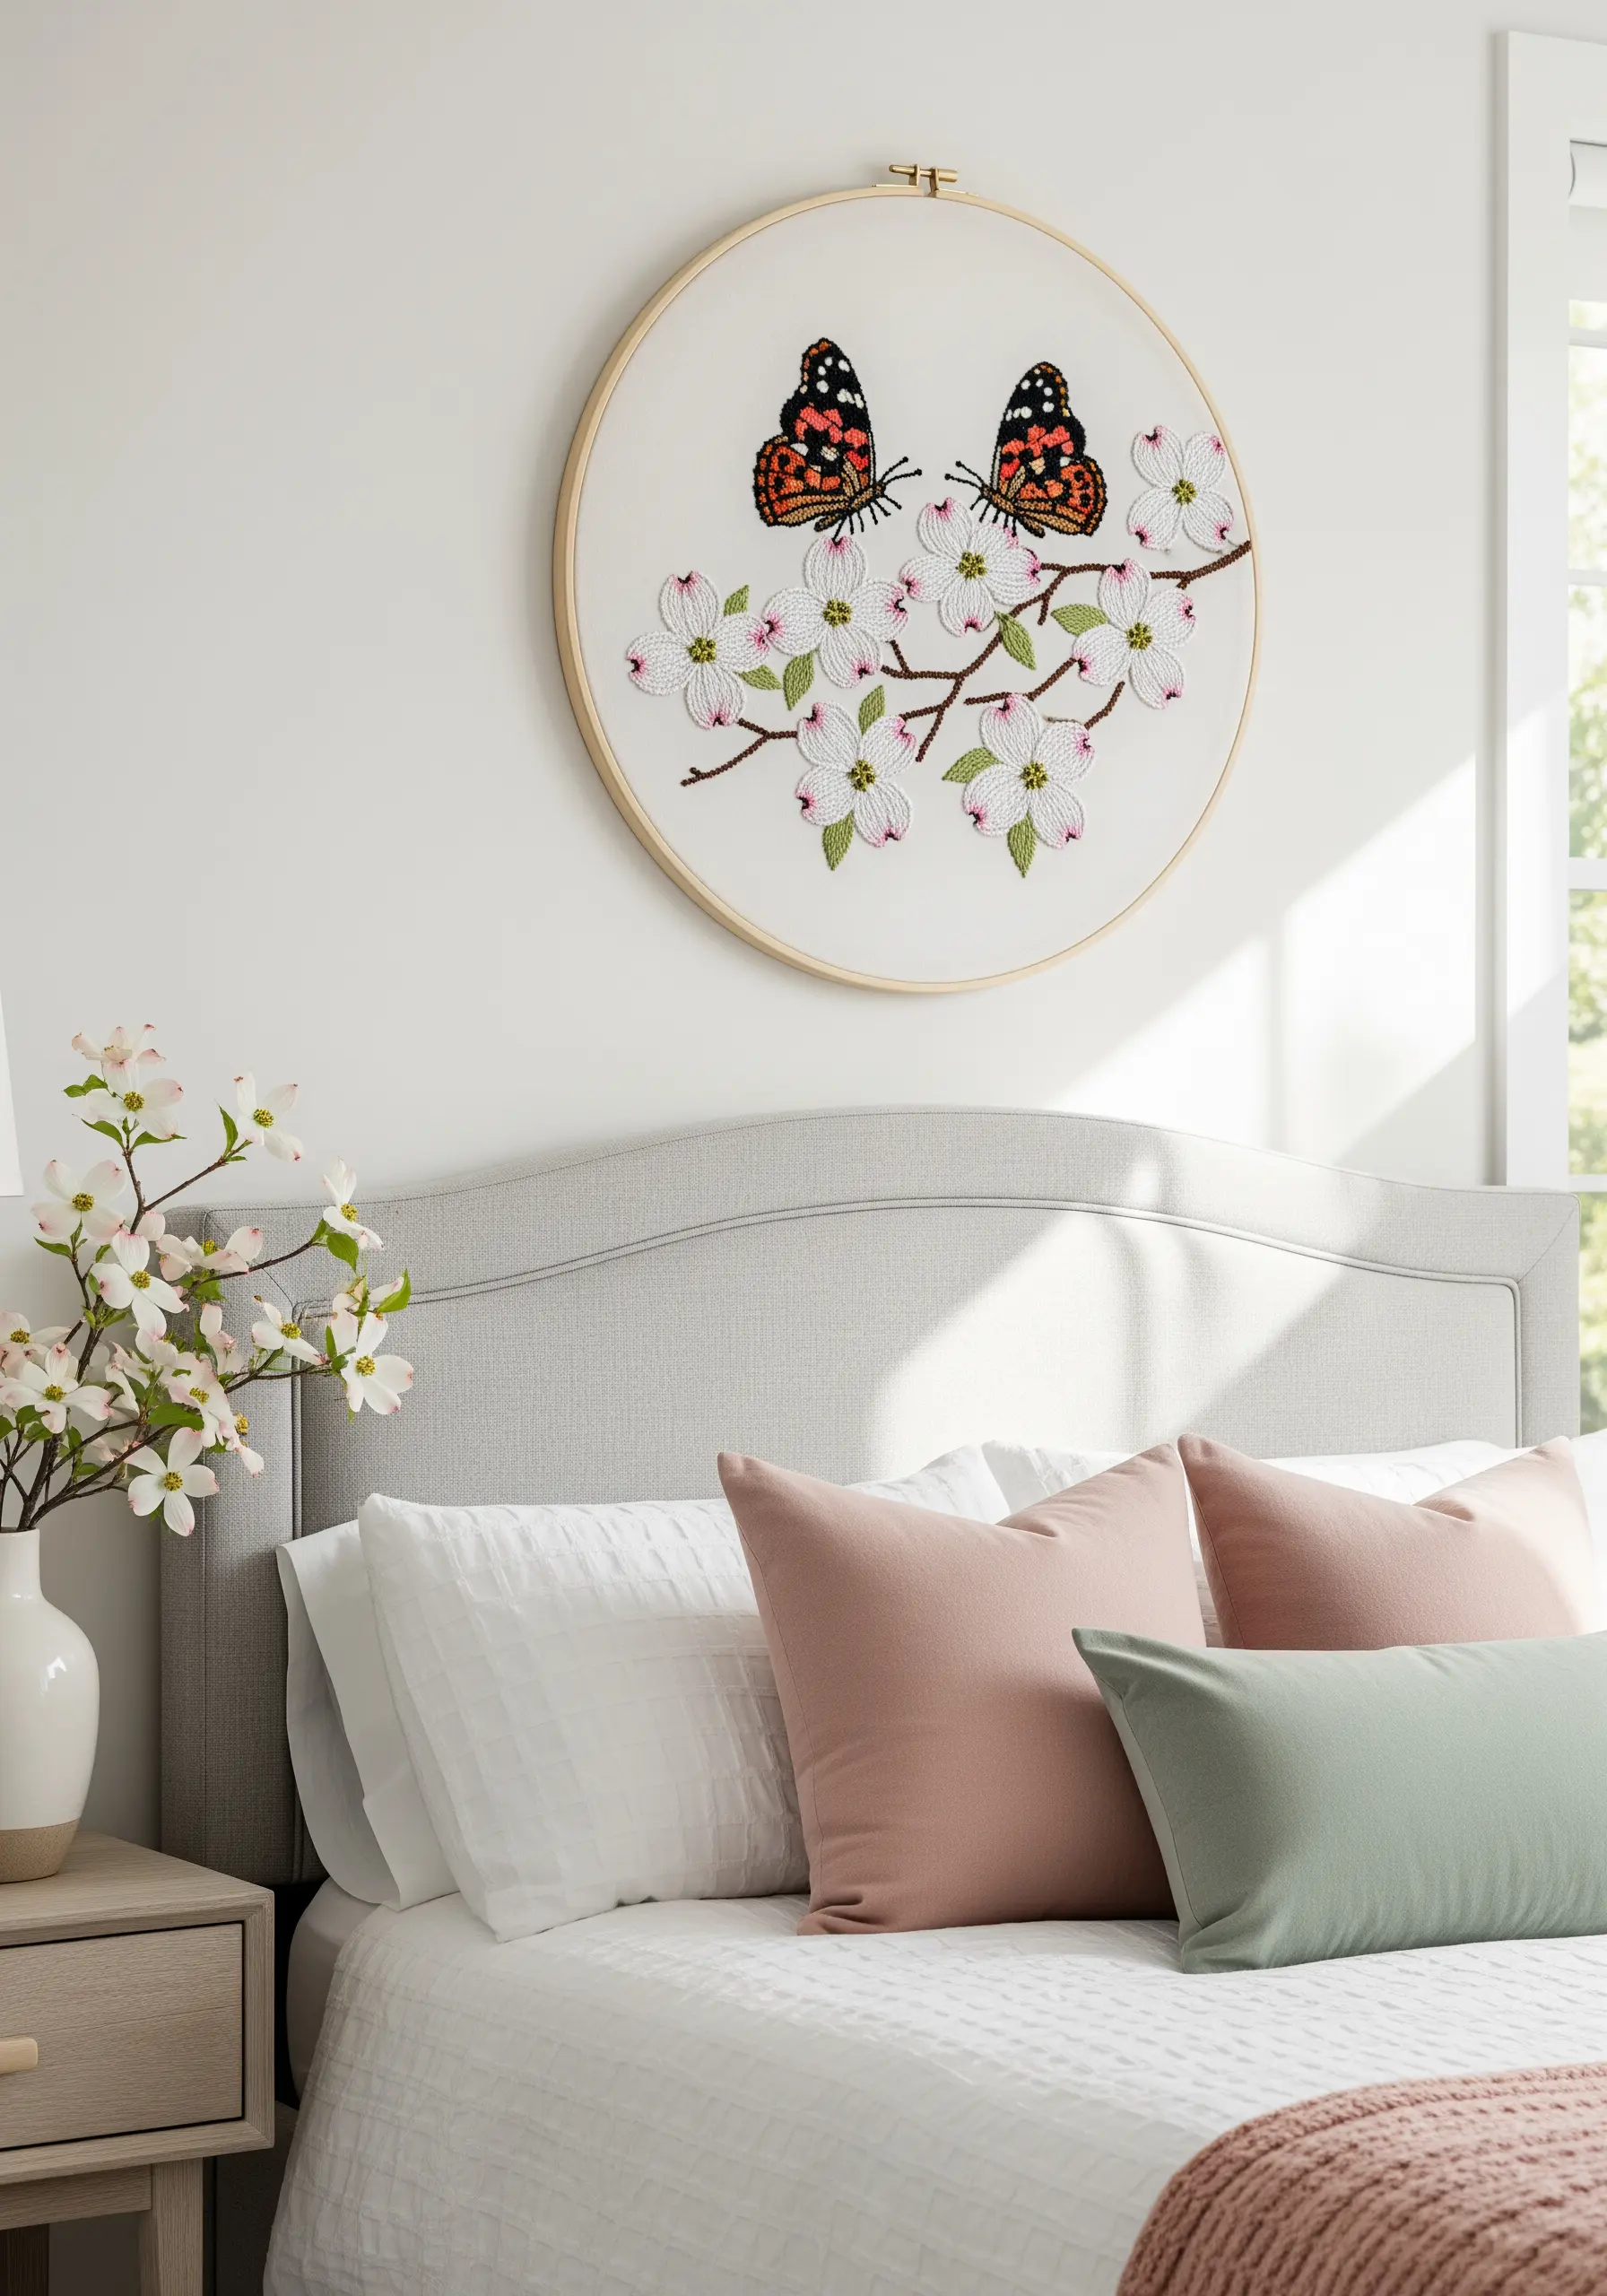
When creating a large piece of hoop art for a wall, an airy, minimal design can have more impact than a dense, full one.
An asymmetrical branch that sweeps across the fabric feels elegant and modern, drawing the eye without overwhelming the space.
Use a delicate long-and-short stitch for the dogwood petals and just a few French knots for the centers. This intentional simplicity transforms your embroidery into a sophisticated piece of decor.
These oversized hoop wall displays can make a stunning statement.
24. Build a Wild Meadow with Varied Stitch Heights
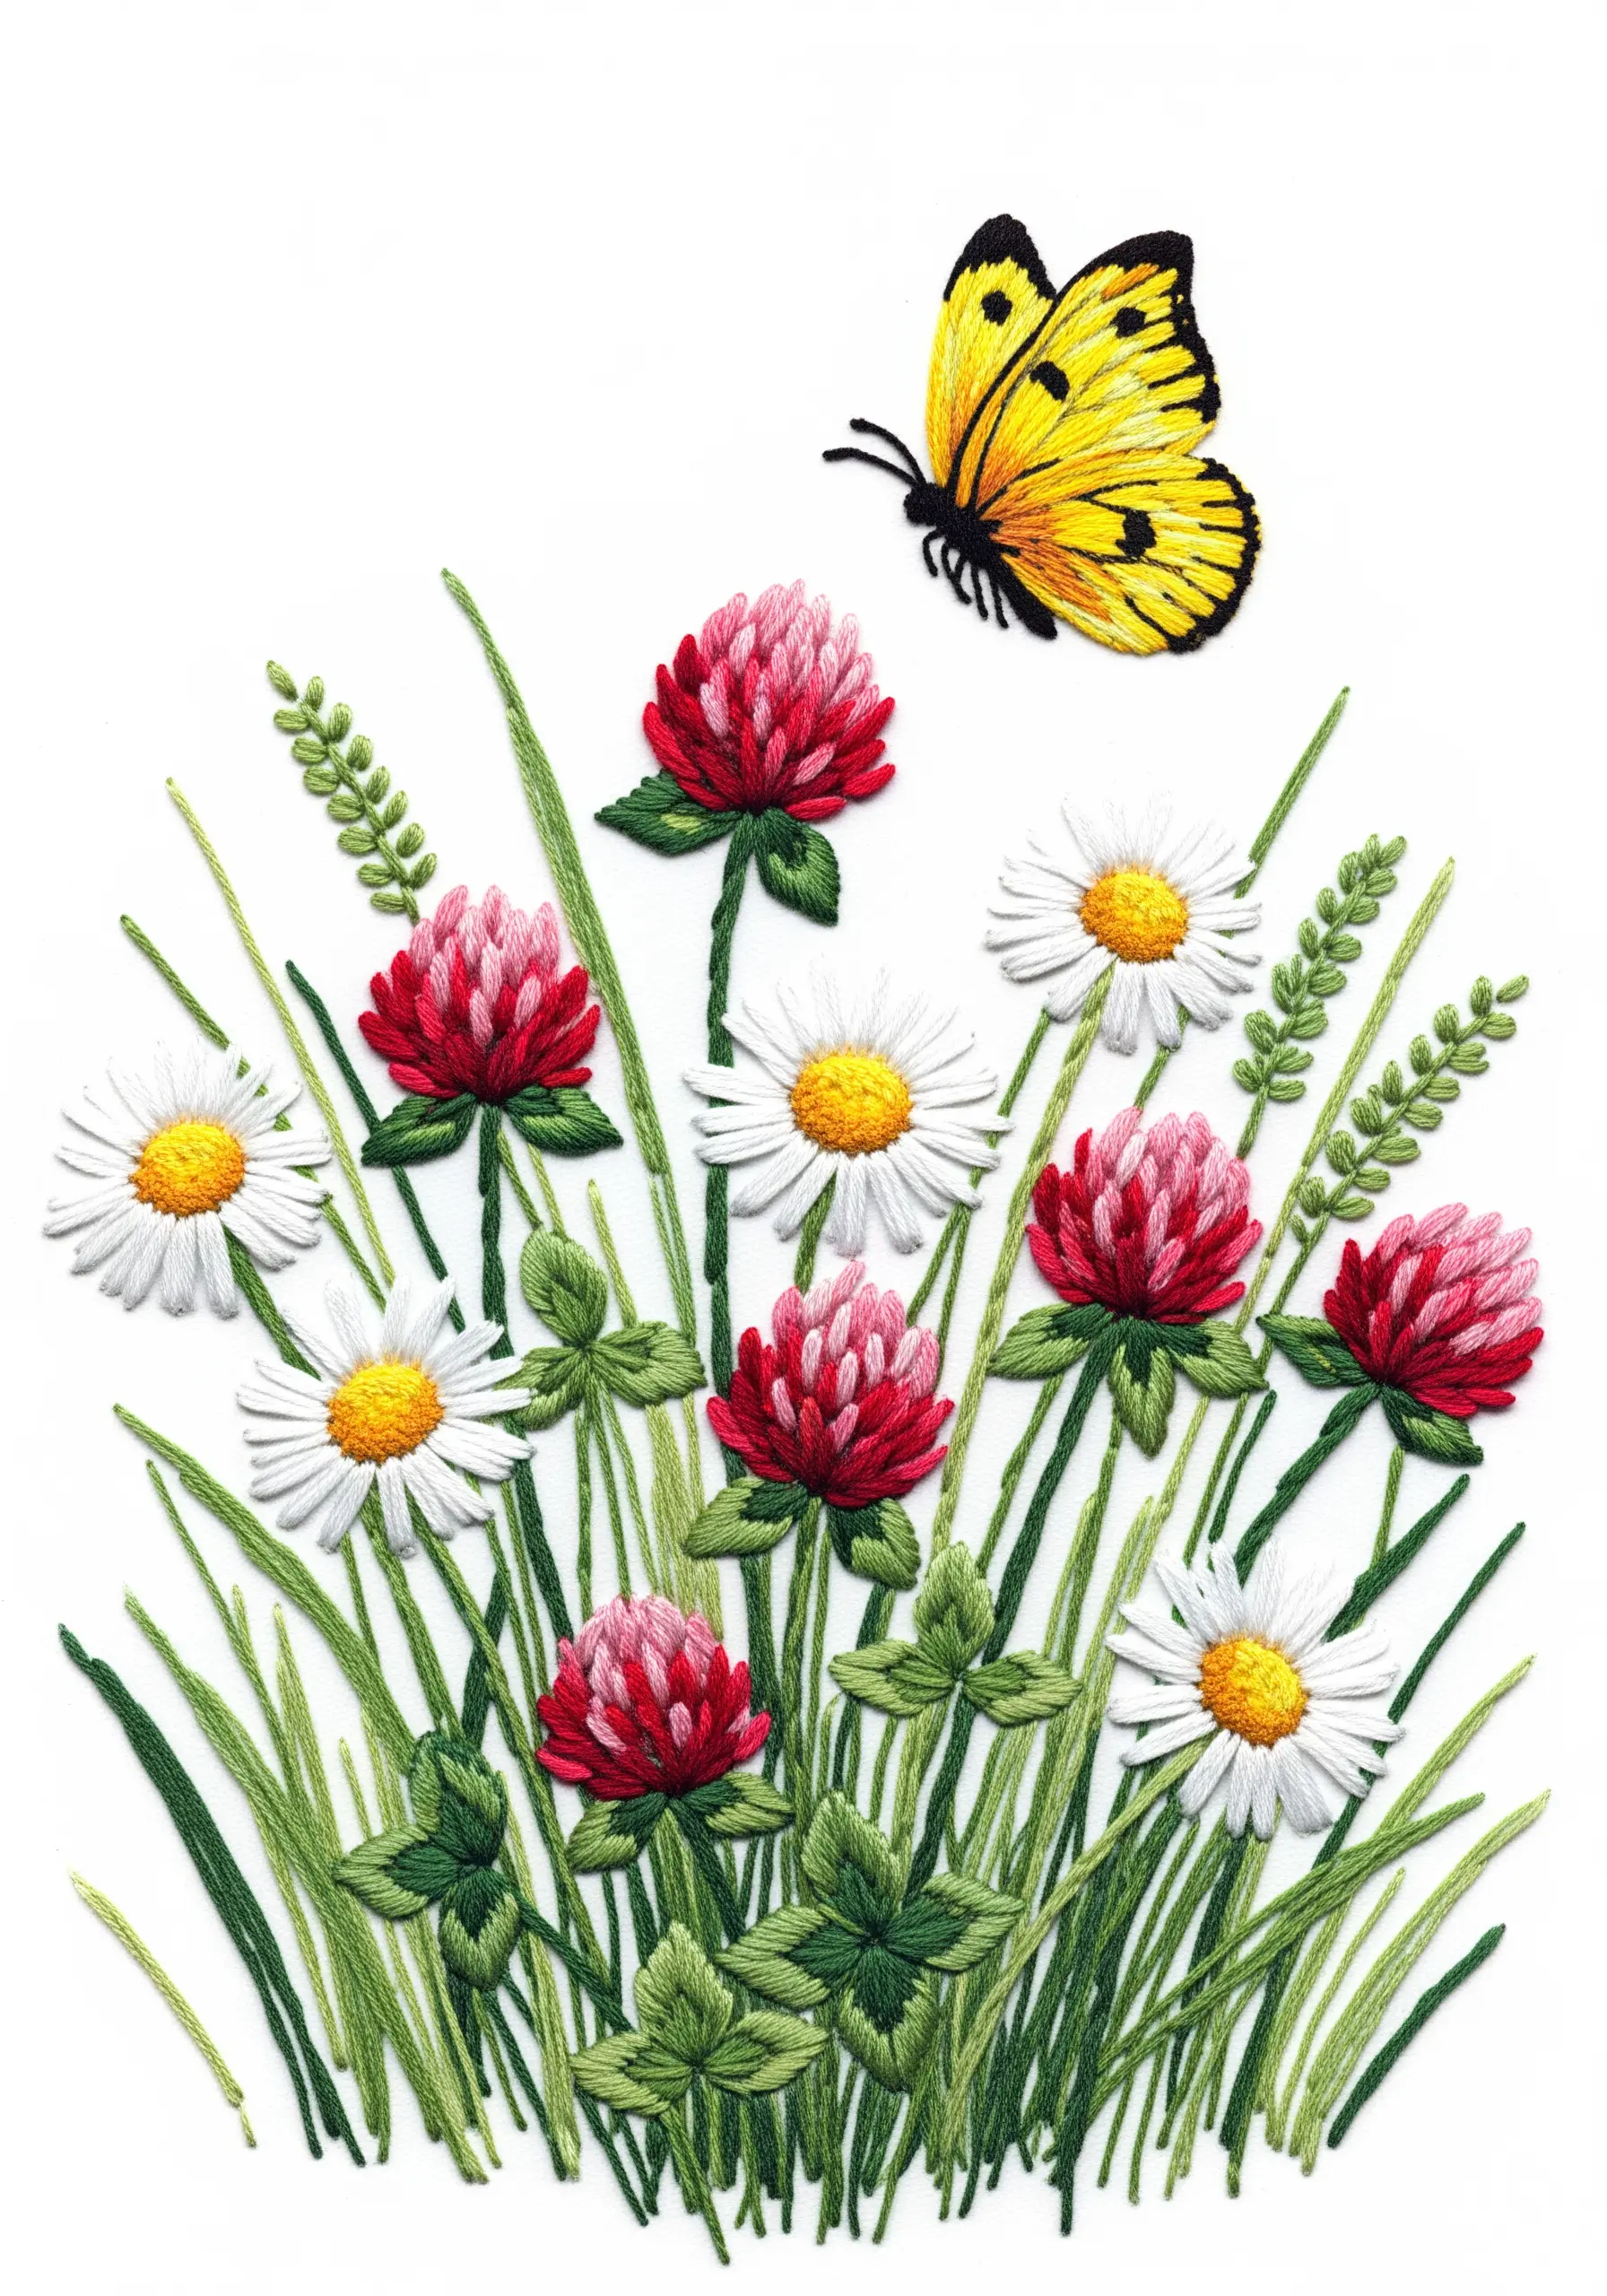
To capture the beautifully chaotic feeling of a wildflower meadow, you must avoid uniformity.
Use a mix of stitches and vary their heights and densities. Create tall blades of grass with single, long straight stitches. Form low clusters of clover with dense French knots. Use lazy daisy stitches for petals, some open and some closed.
Slightly overlapping these different elements is the key to creating a composition that feels natural, lush, and alive.
25. Let a Bold Fabric Color Define Your Palette
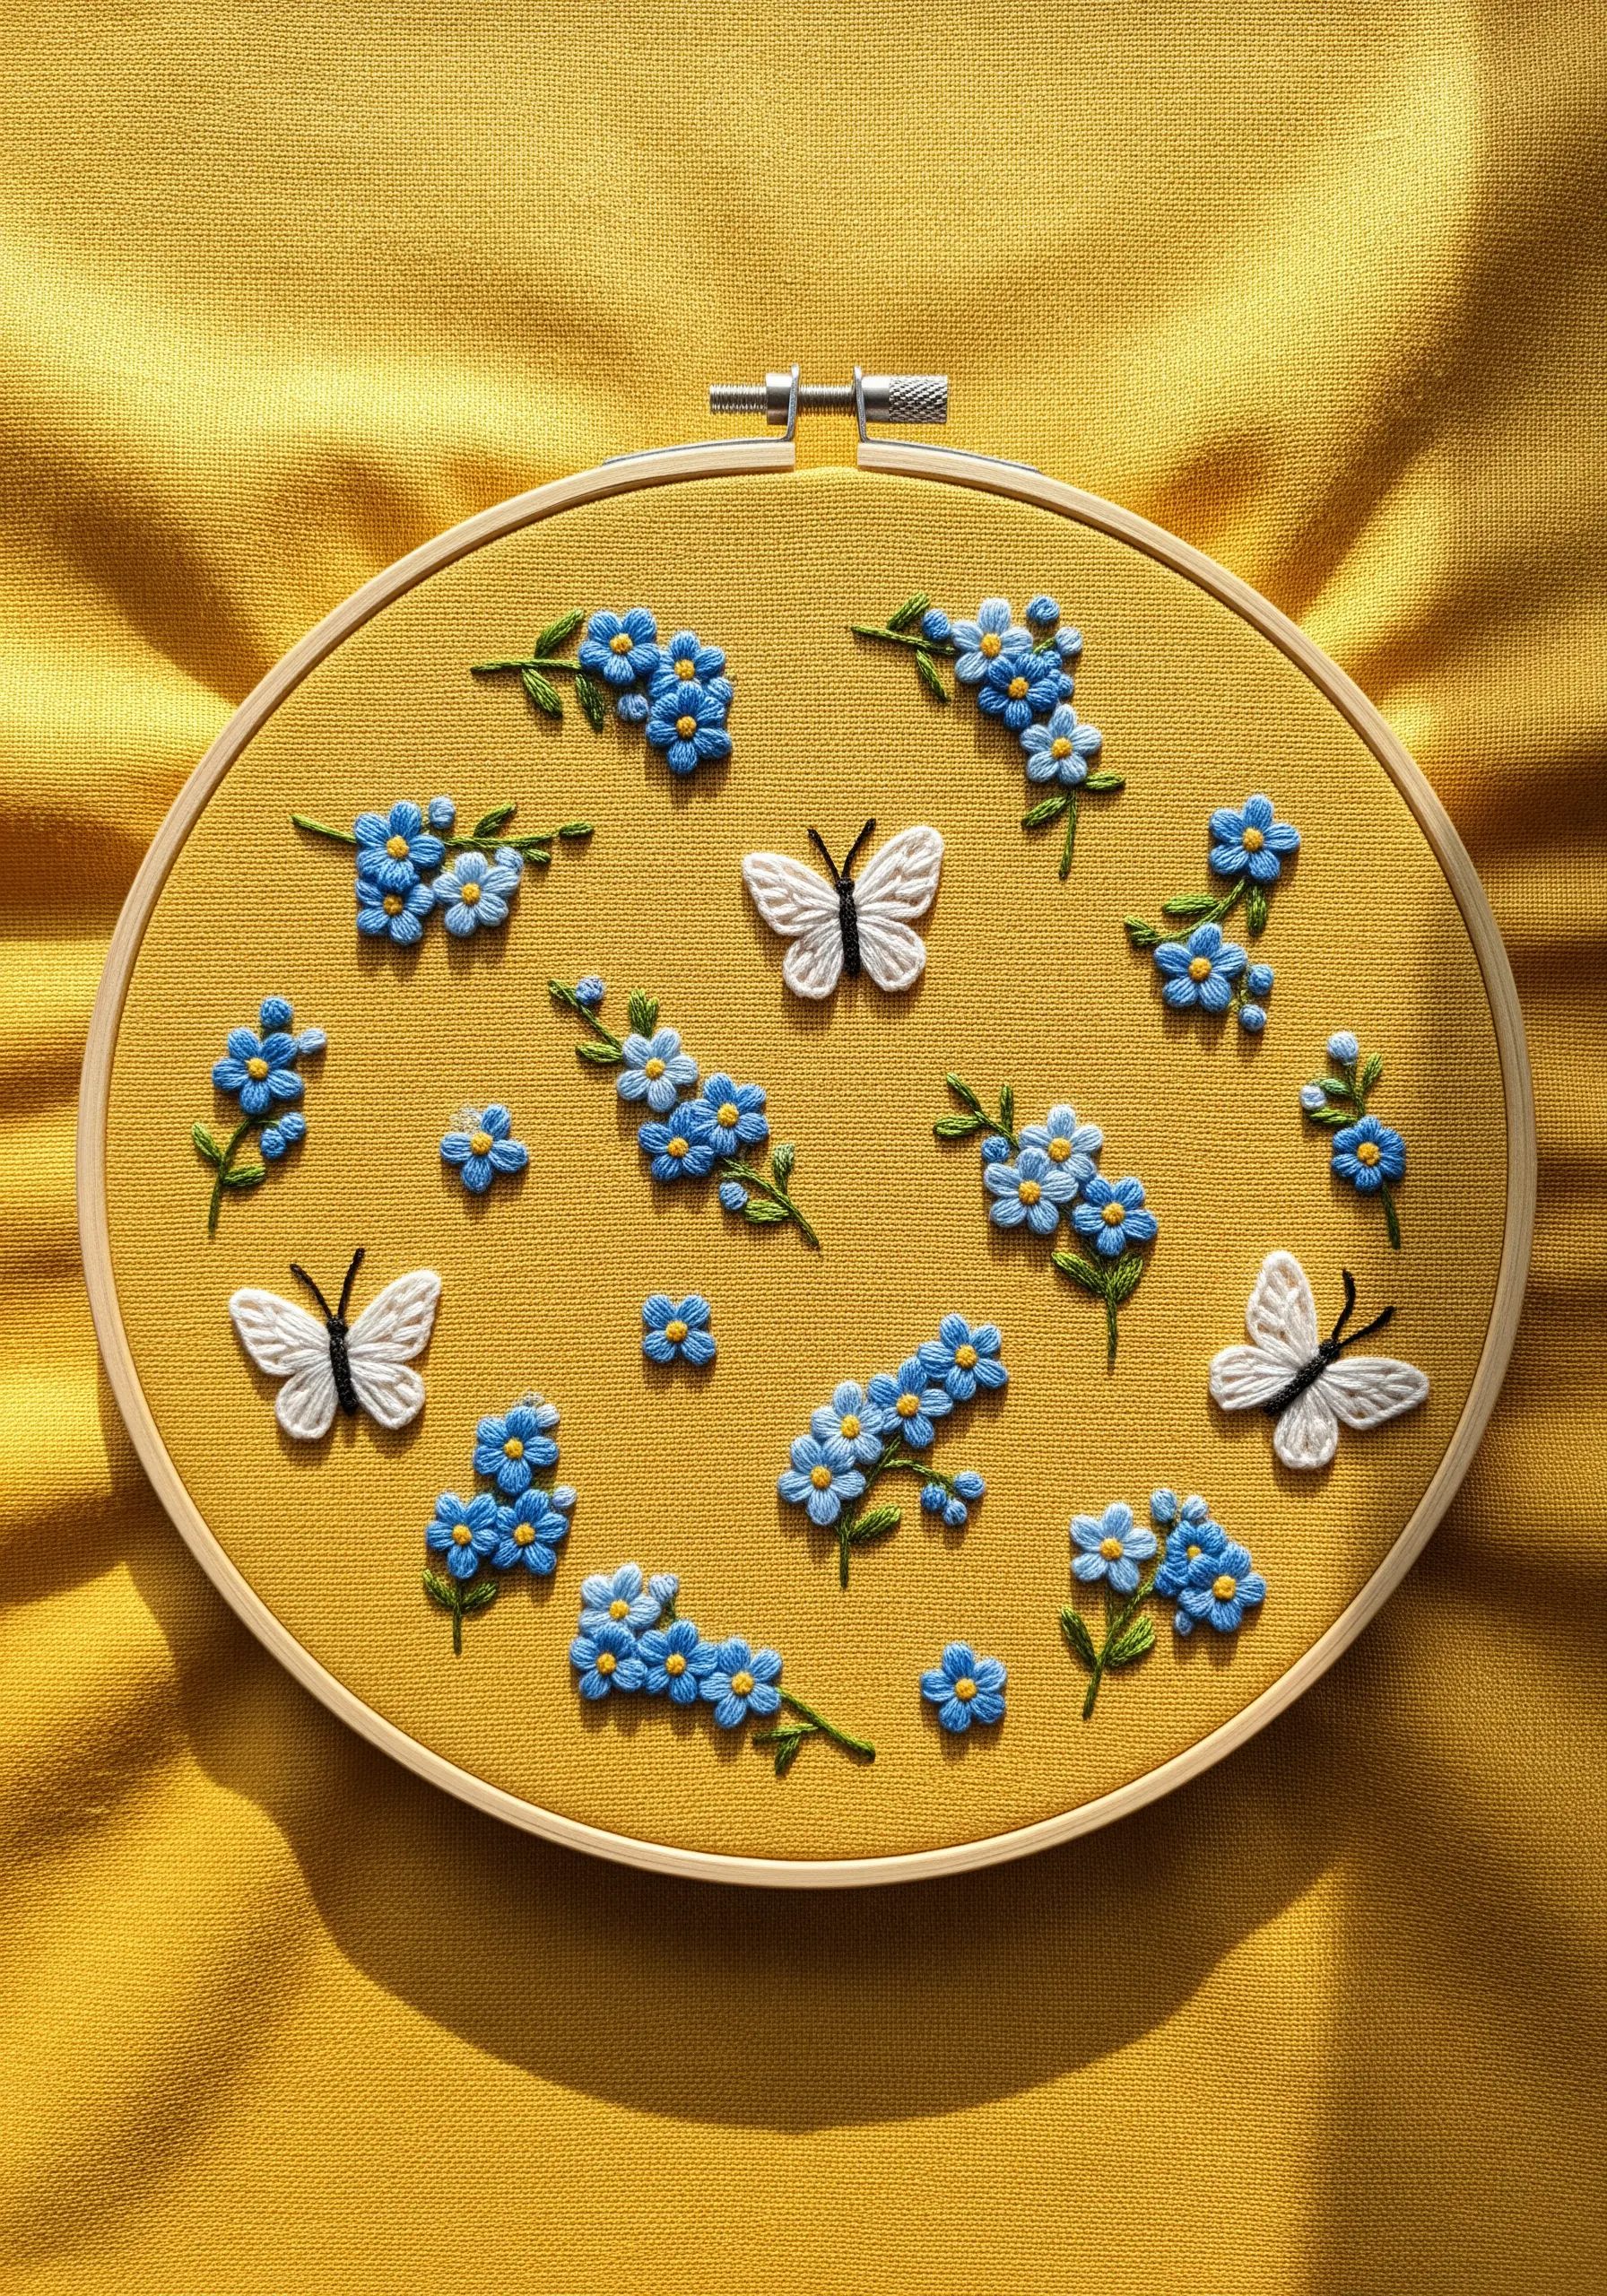
Don’t just stitch *on* your fabric; stitch *with* it. A vibrant background color, like this sunny yellow, becomes an active element in your design.
It provides the warmth and light for the scene, making the complementary blue of the forget-me-nots appear even more intense.
By scattering small motifs across the surface, you allow the bold background to unify the entire piece, creating a joyful and cohesive pattern.
26. Translate Watercolor Washes into Thread

To capture the soft, bleeding edges of a watercolor painting in thread, the long-and-short stitch is your most valuable tool.
Instead of creating hard outlines, allow your fields of color to blend directly into one another. Use several shades for each color area, working with a single strand of floss to achieve the smoothest possible transitions.
This technique transforms your thread into paint, creating a soft, dreamy effect. These watercolor-style embroidery patterns are perfect for this.
27. Achieve Crisp Graphic Edges with an Under-Stitch
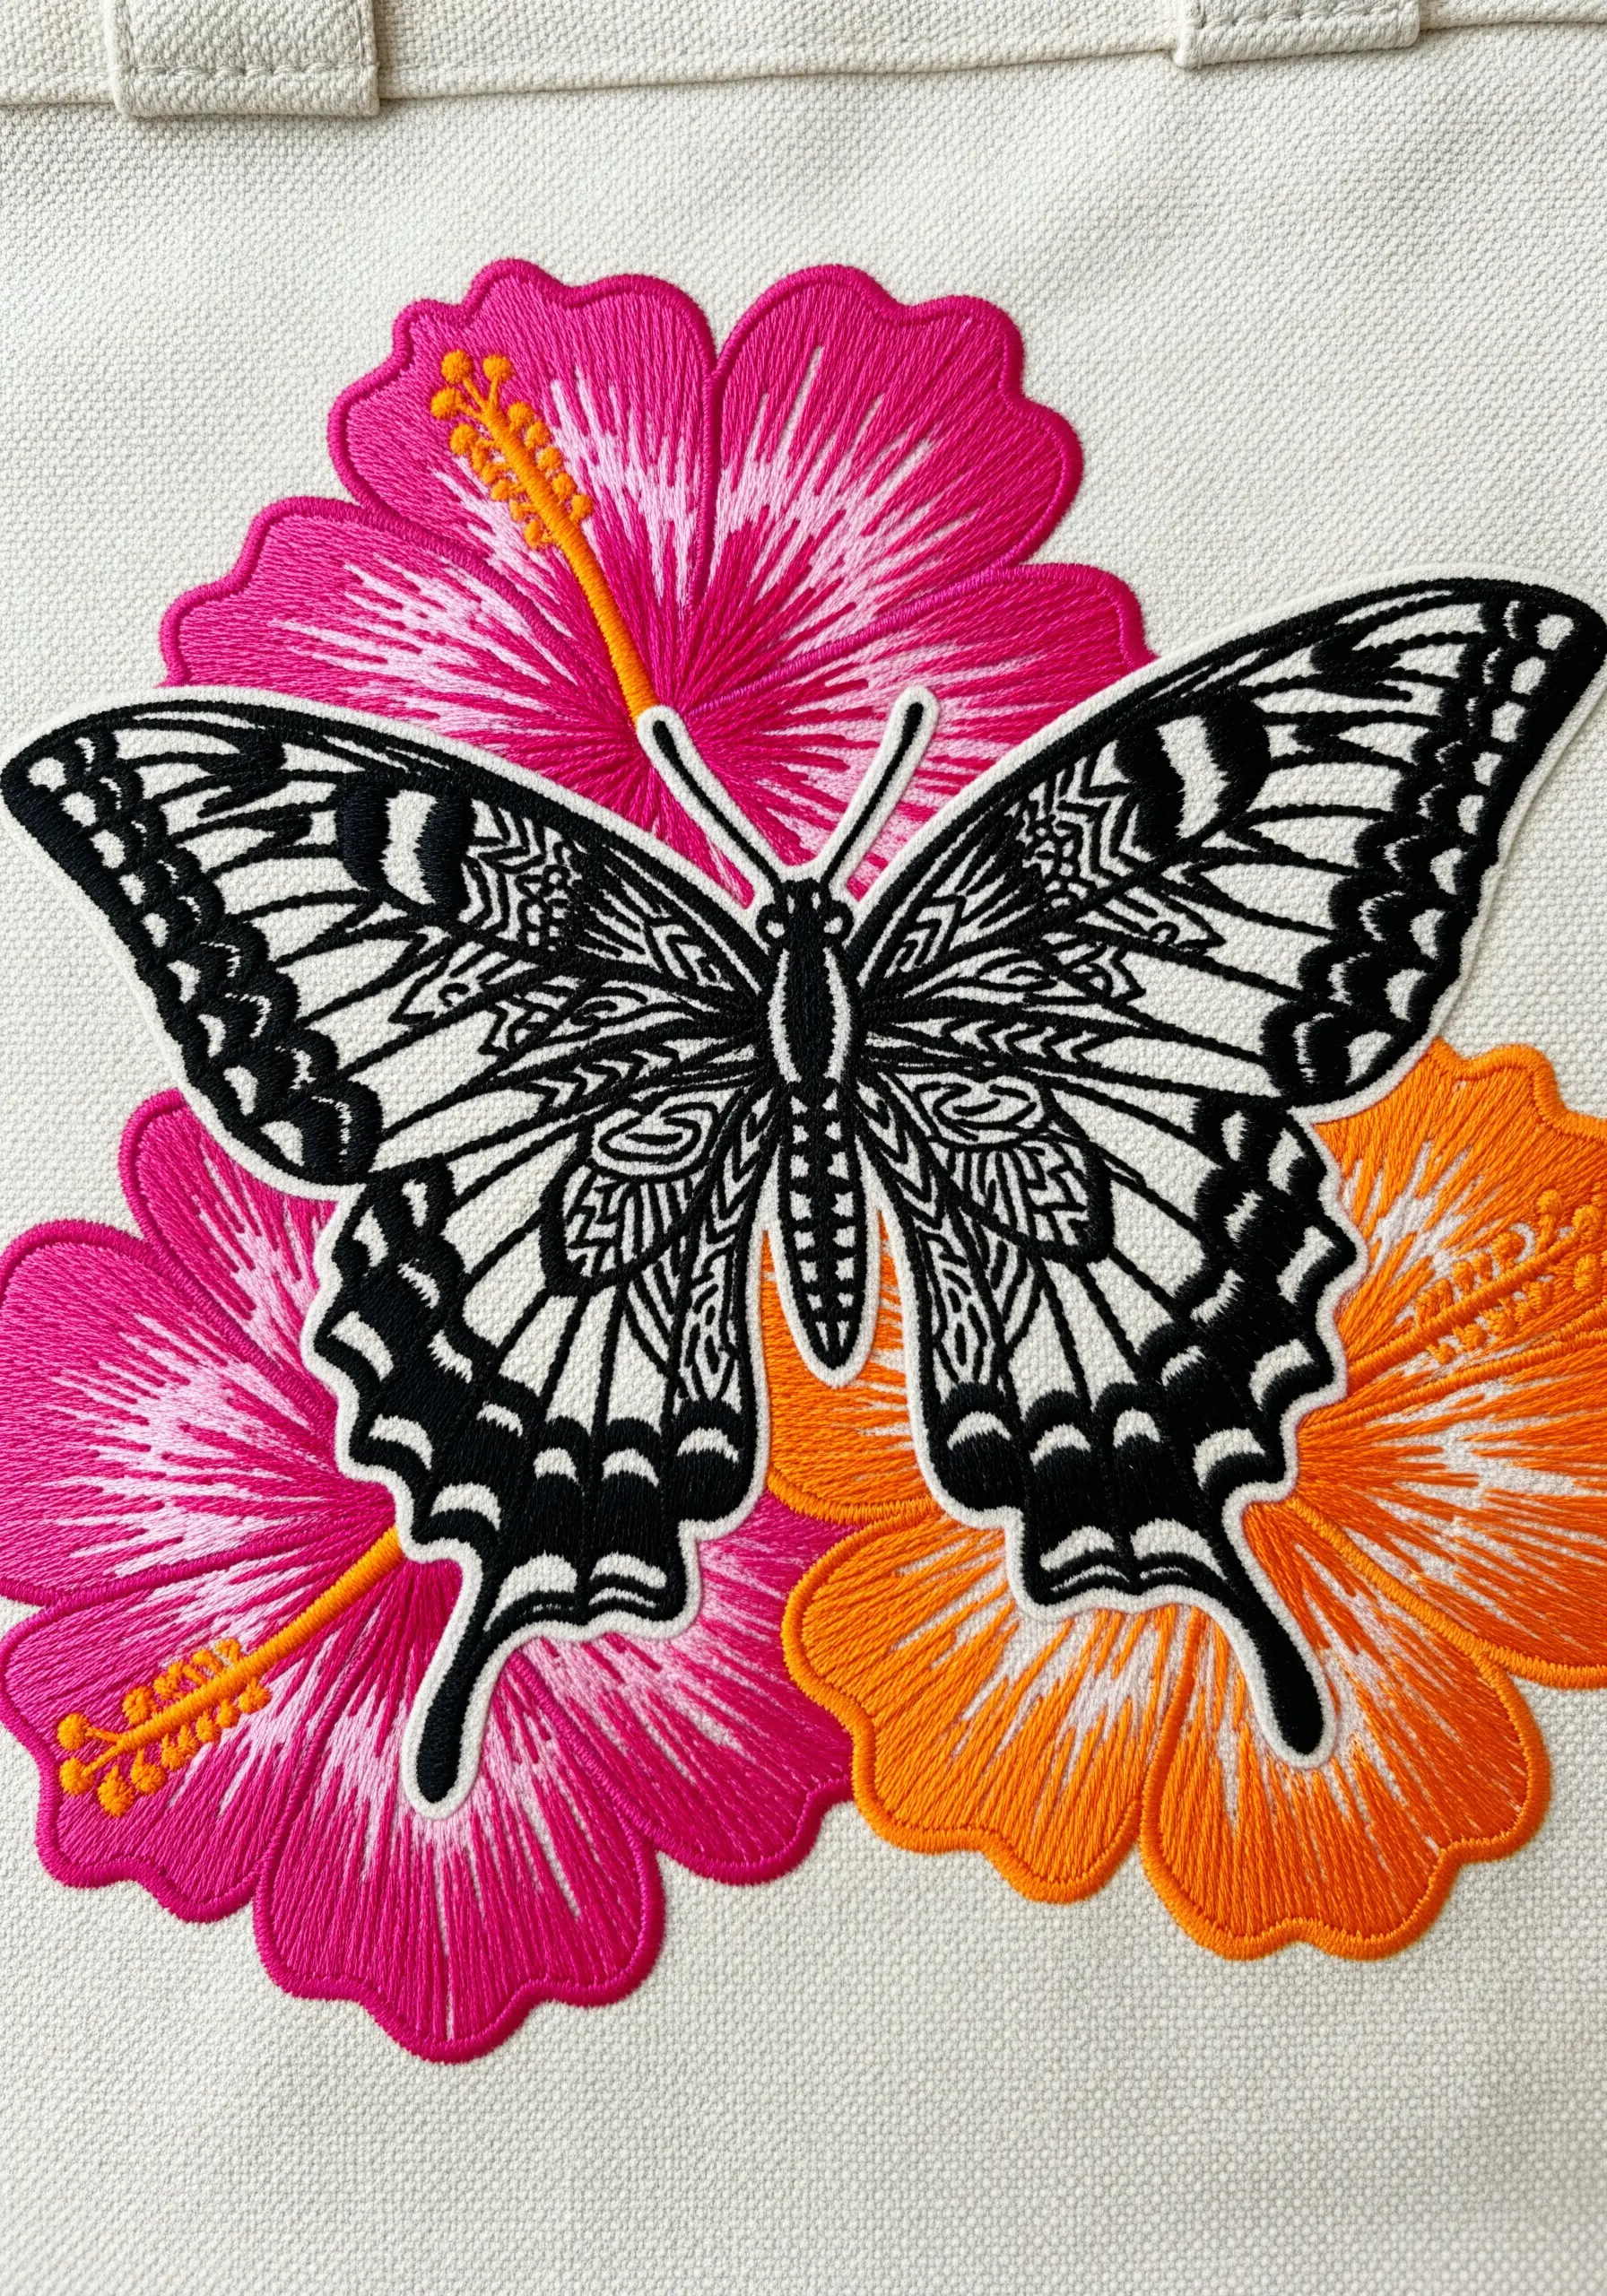
For a bold, graphic style with perfectly clean edges, preparation is everything. Before you begin your satin stitch, outline the entire shape with a tight split stitch or backstitch.
This simple step creates a slightly raised border that acts as a guide for your satin stitches. You can tuck the start and end of each stitch against this edge, resulting in a flawless, sharp finish that looks incredibly professional.
The technique works beautifully for these tropical flower embroidery ideas.
28. Create Soft, Plump Leaves with Padding

Give your eucalyptus leaves a soft, three-dimensional form using the padded satin stitch technique.
First, fill the entire leaf shape with a base layer of small, simple seed stitches. Then, work your final layer of satin stitches over this padding.
The under-layer of thread lifts the satin stitches, creating a subtle, rounded volume that beautifully mimics the plumpness of real eucalyptus leaves. Explore more leaf plant embroidery ideas with this technique.
29. Build Dimensional Flowers with Layered Petals
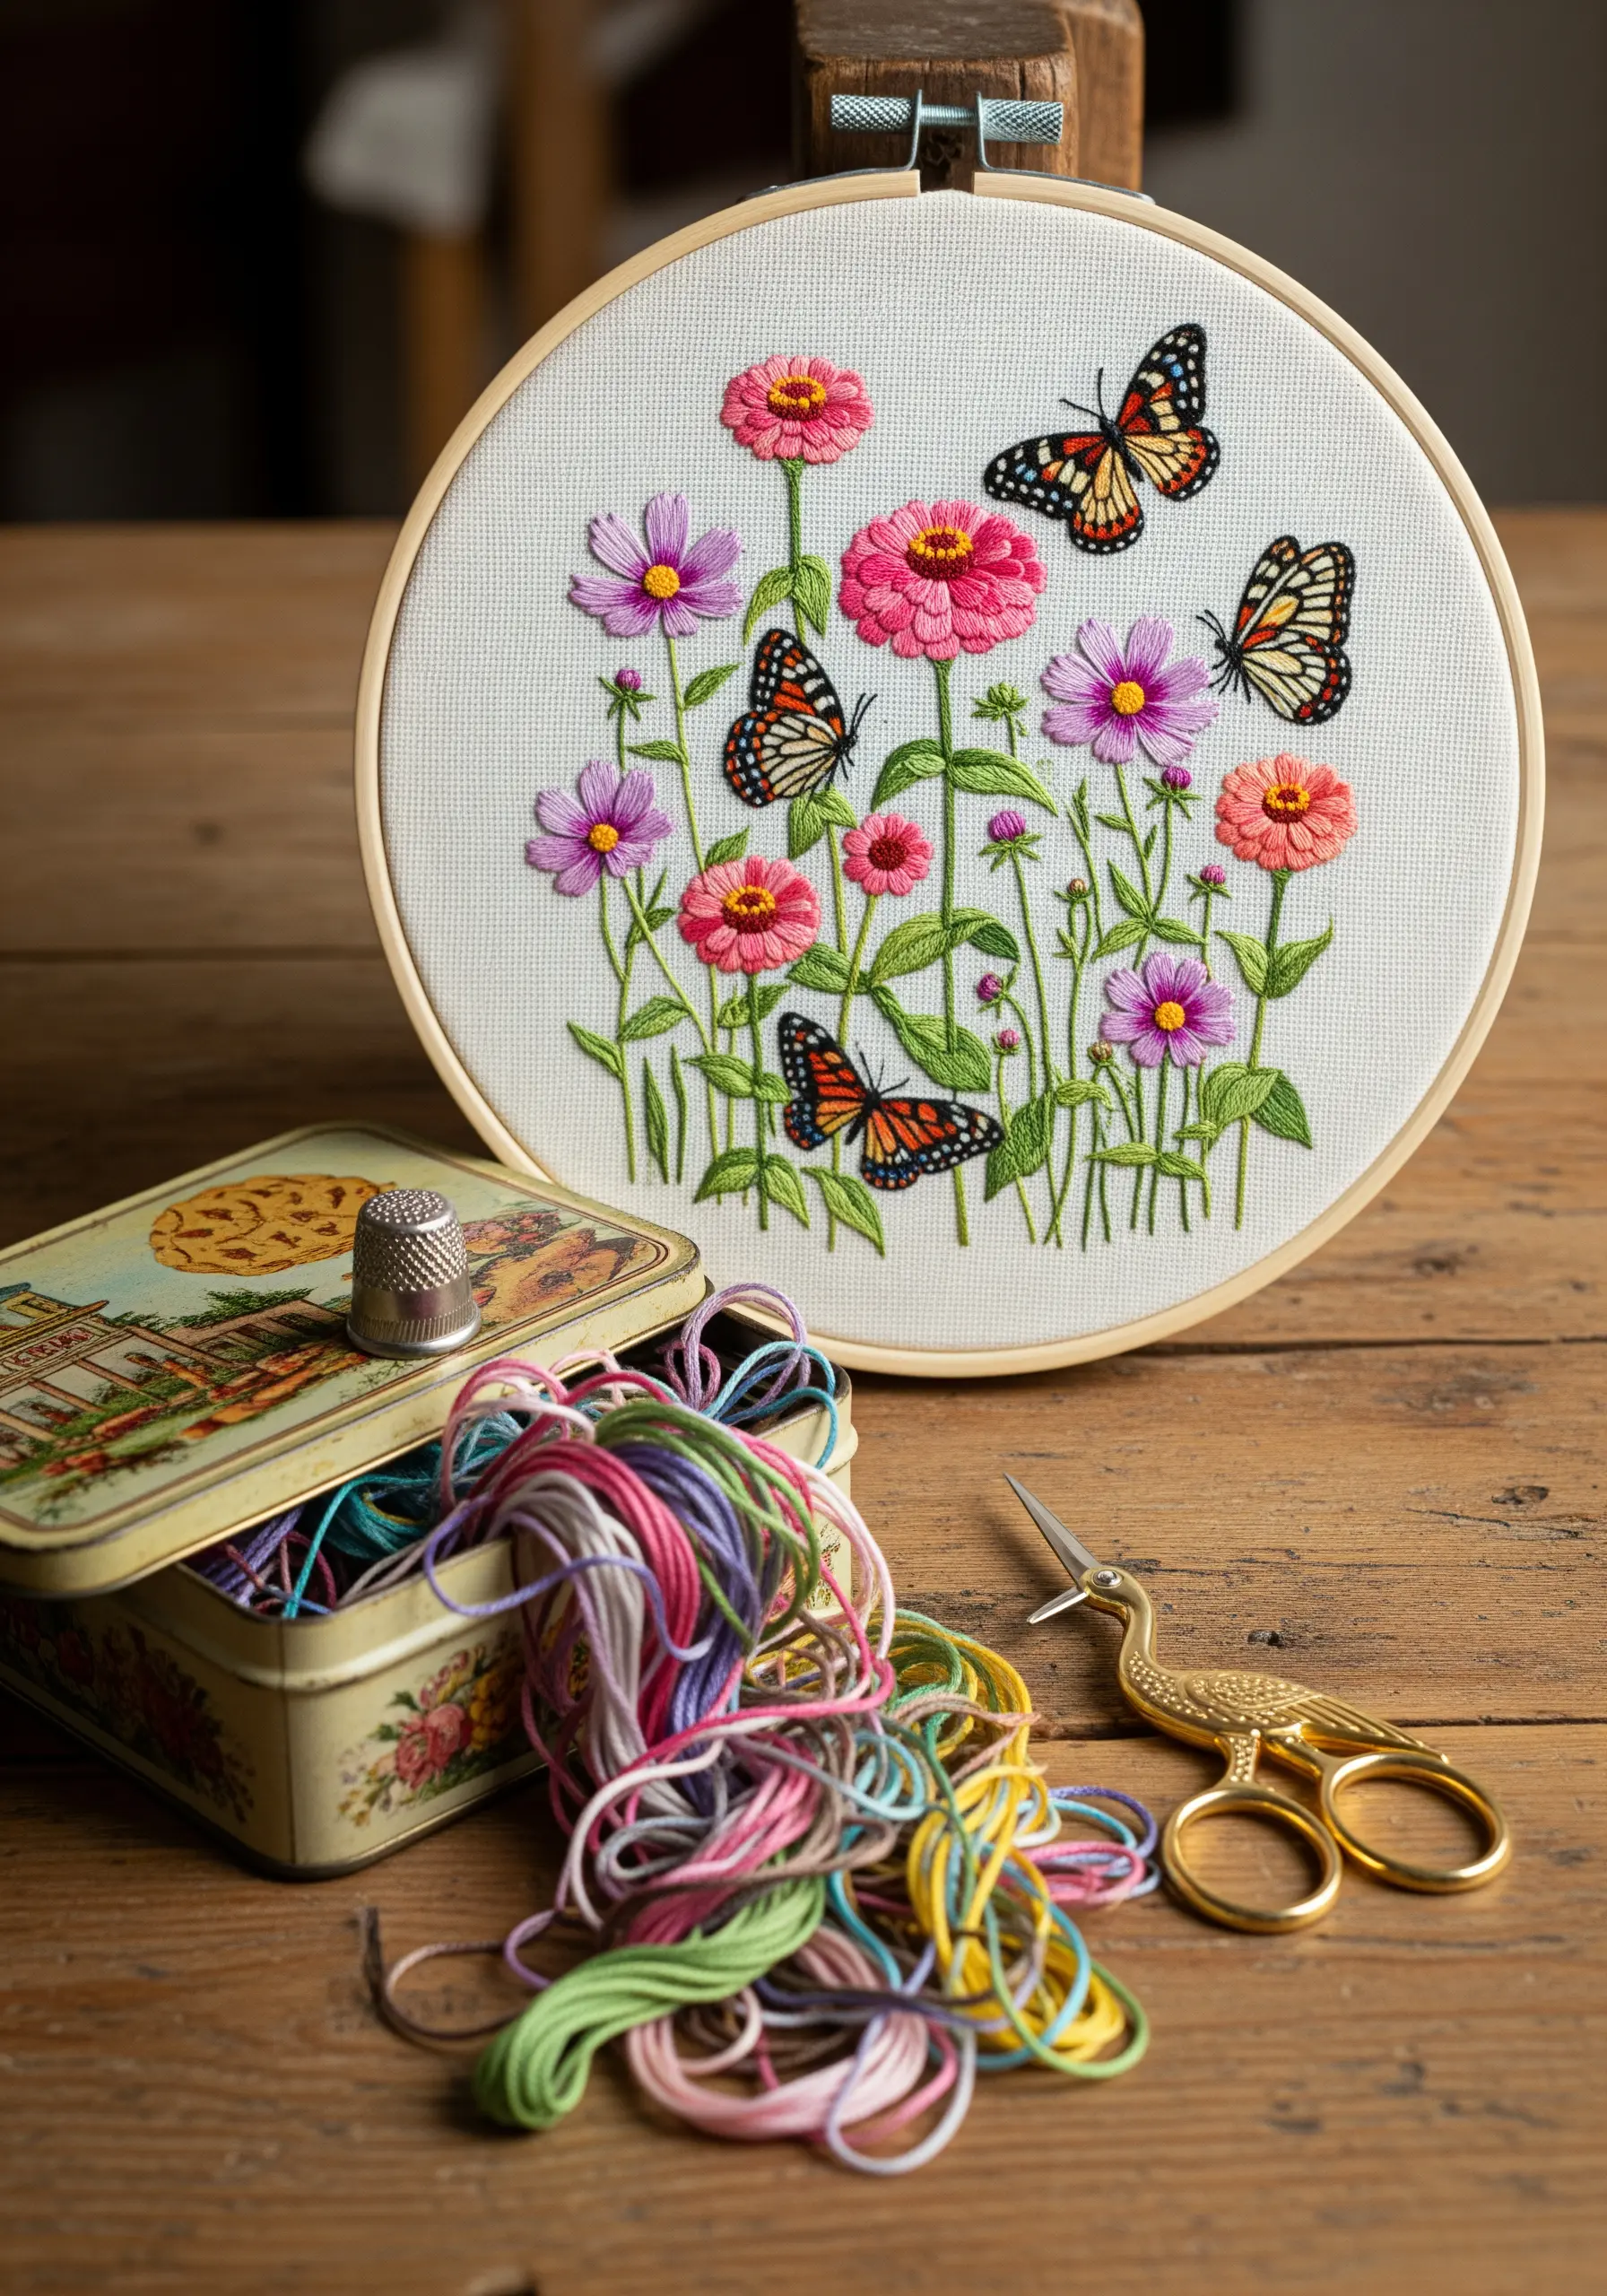
To create multi-petaled flowers like zinnias or cosmos, think like a painter and work in layers from back to front.
Start by stitching the petals that would be in the back. Then, stitch the next layer of petals on top, slightly overlapping the first.
Using long, detached chain stitches (lazy daisies) or layered straight stitches for this technique will build up a flower that has genuine depth and a wonderfully realistic structure.
30. Capture a Narrative Moment of Transformation
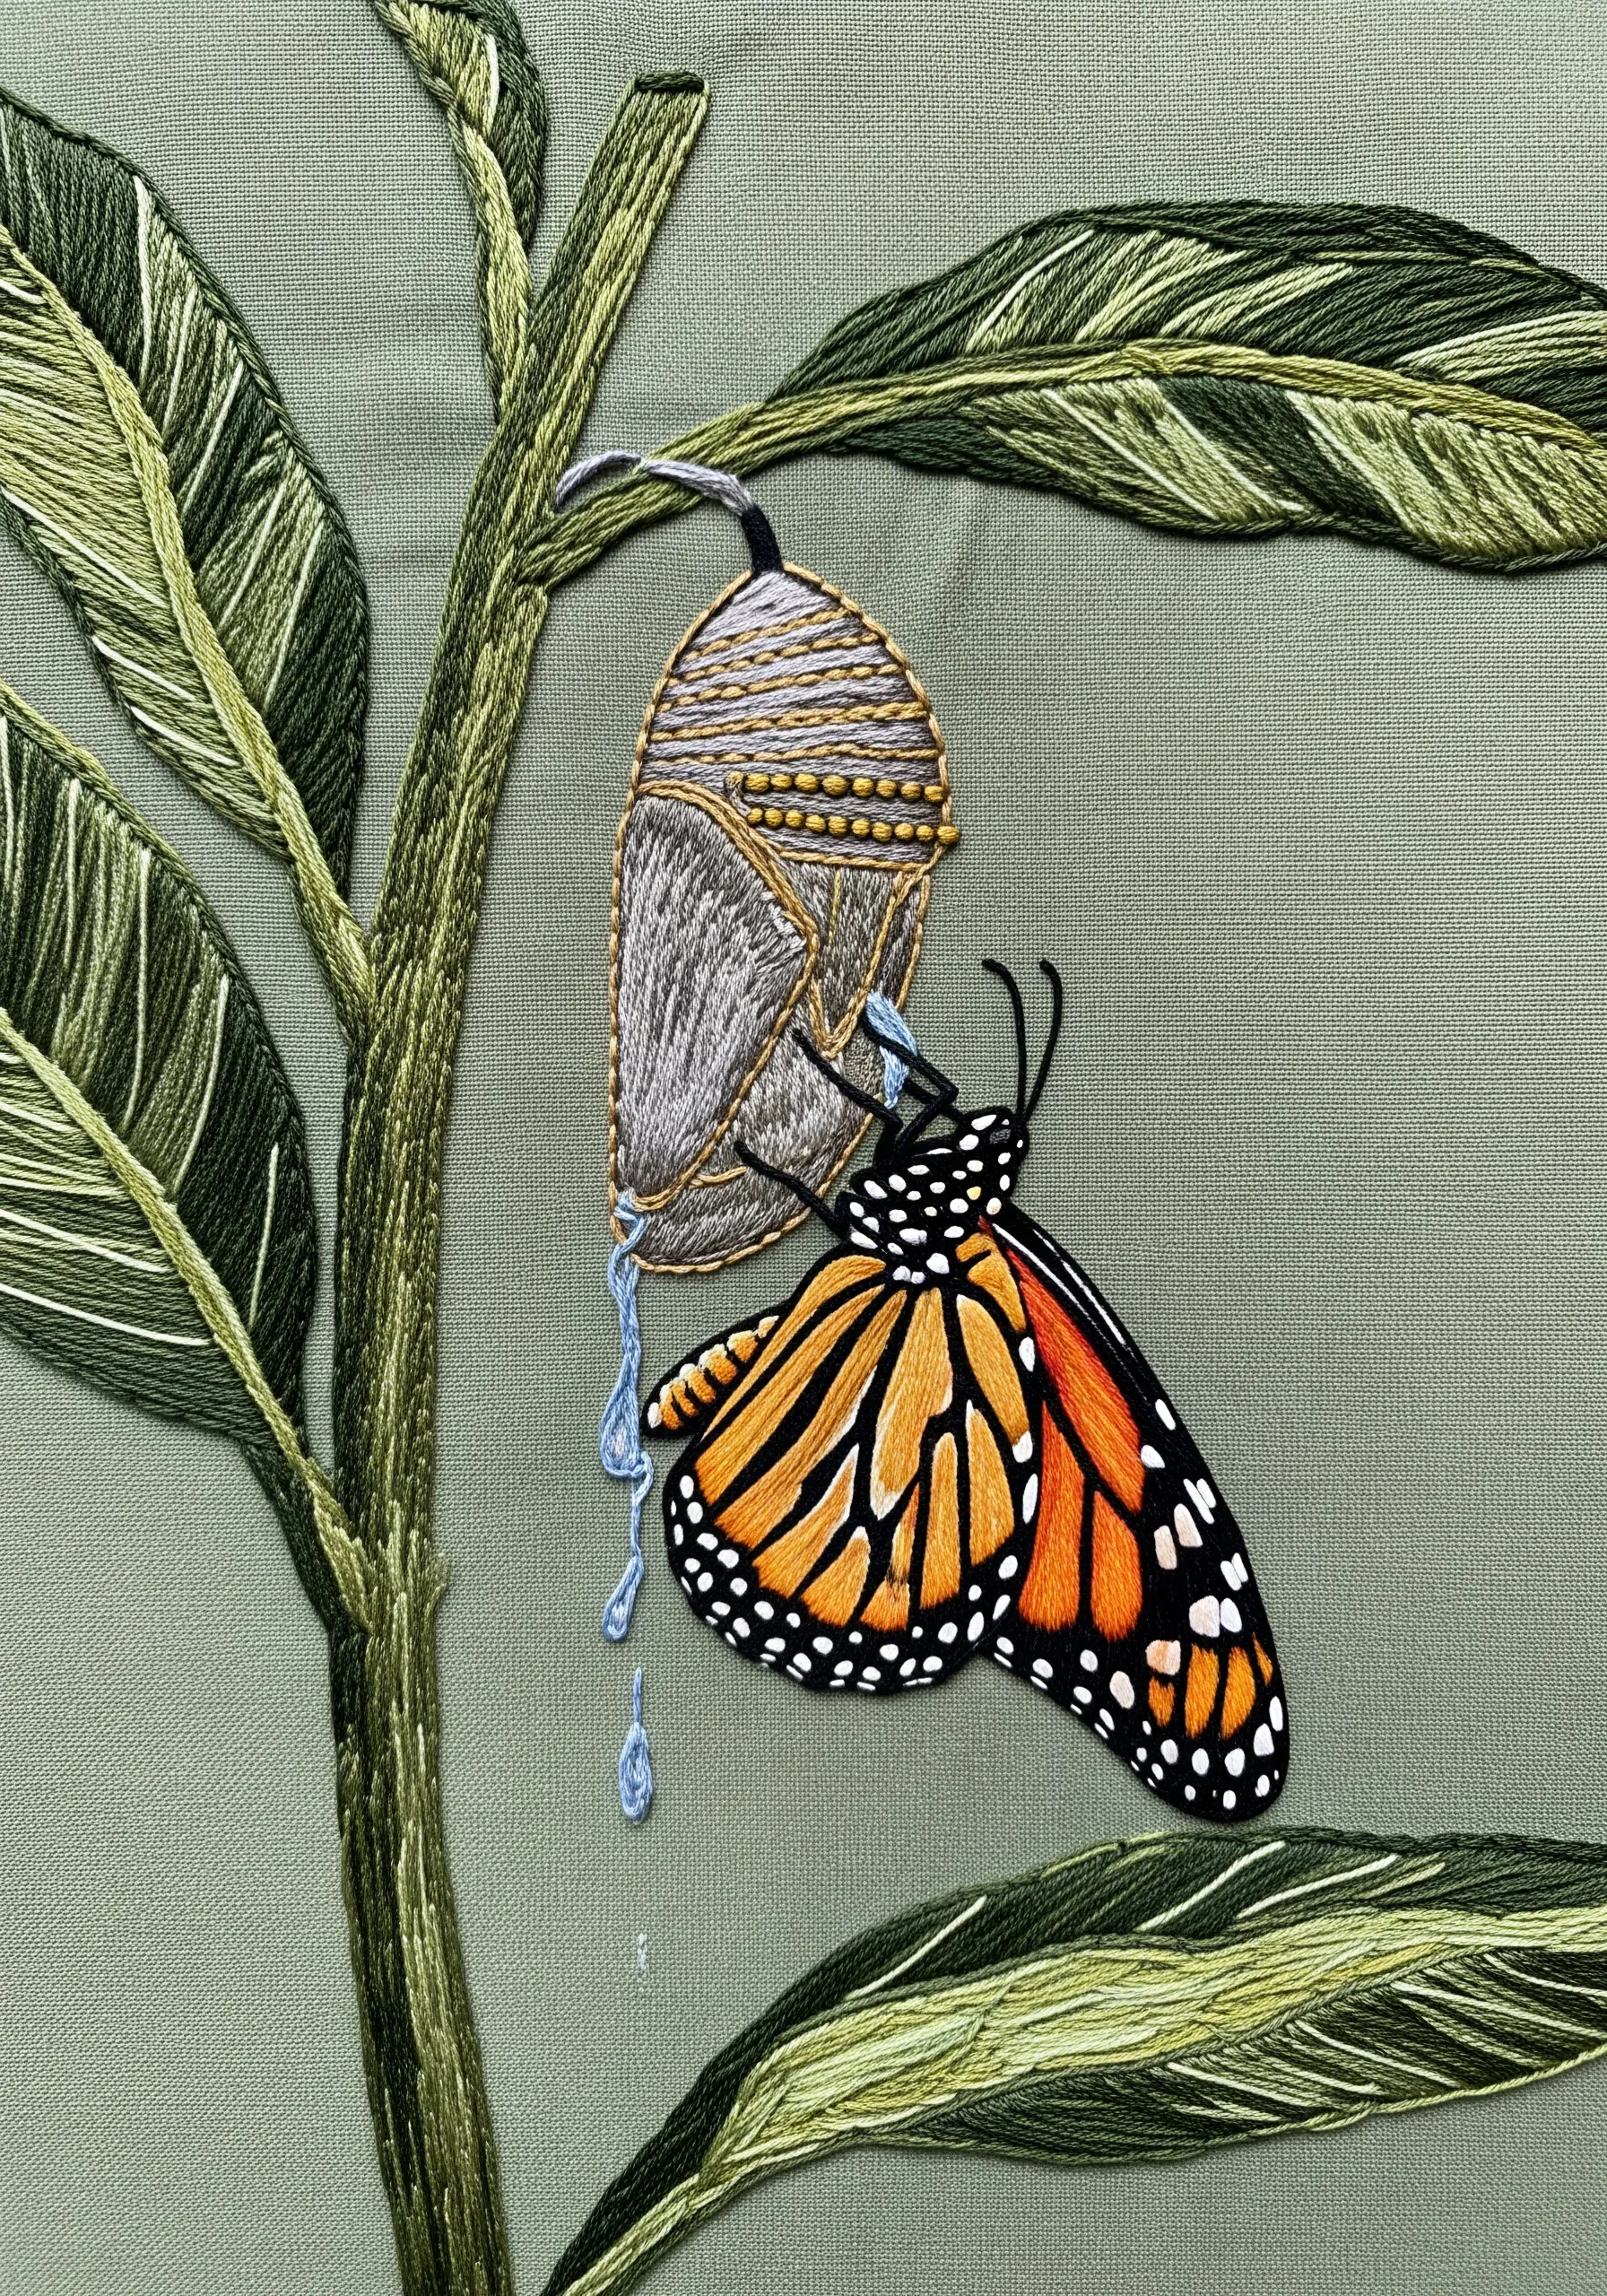
Elevate your embroidery from a simple portrait to a story by capturing a moment of action.
Use a wrapped stitch or couch metallic thread to give the chrysalis a textured, slightly iridescent quality.
Stitch the emergent fluid with a single, delicate strand of light blue thread, anchoring it with a tiny French knot to suggest a droplet. This focus on a specific, fleeting moment makes the entire piece feel dynamic and emotionally resonant.
31. Create Richness with a Monochromatic Palette
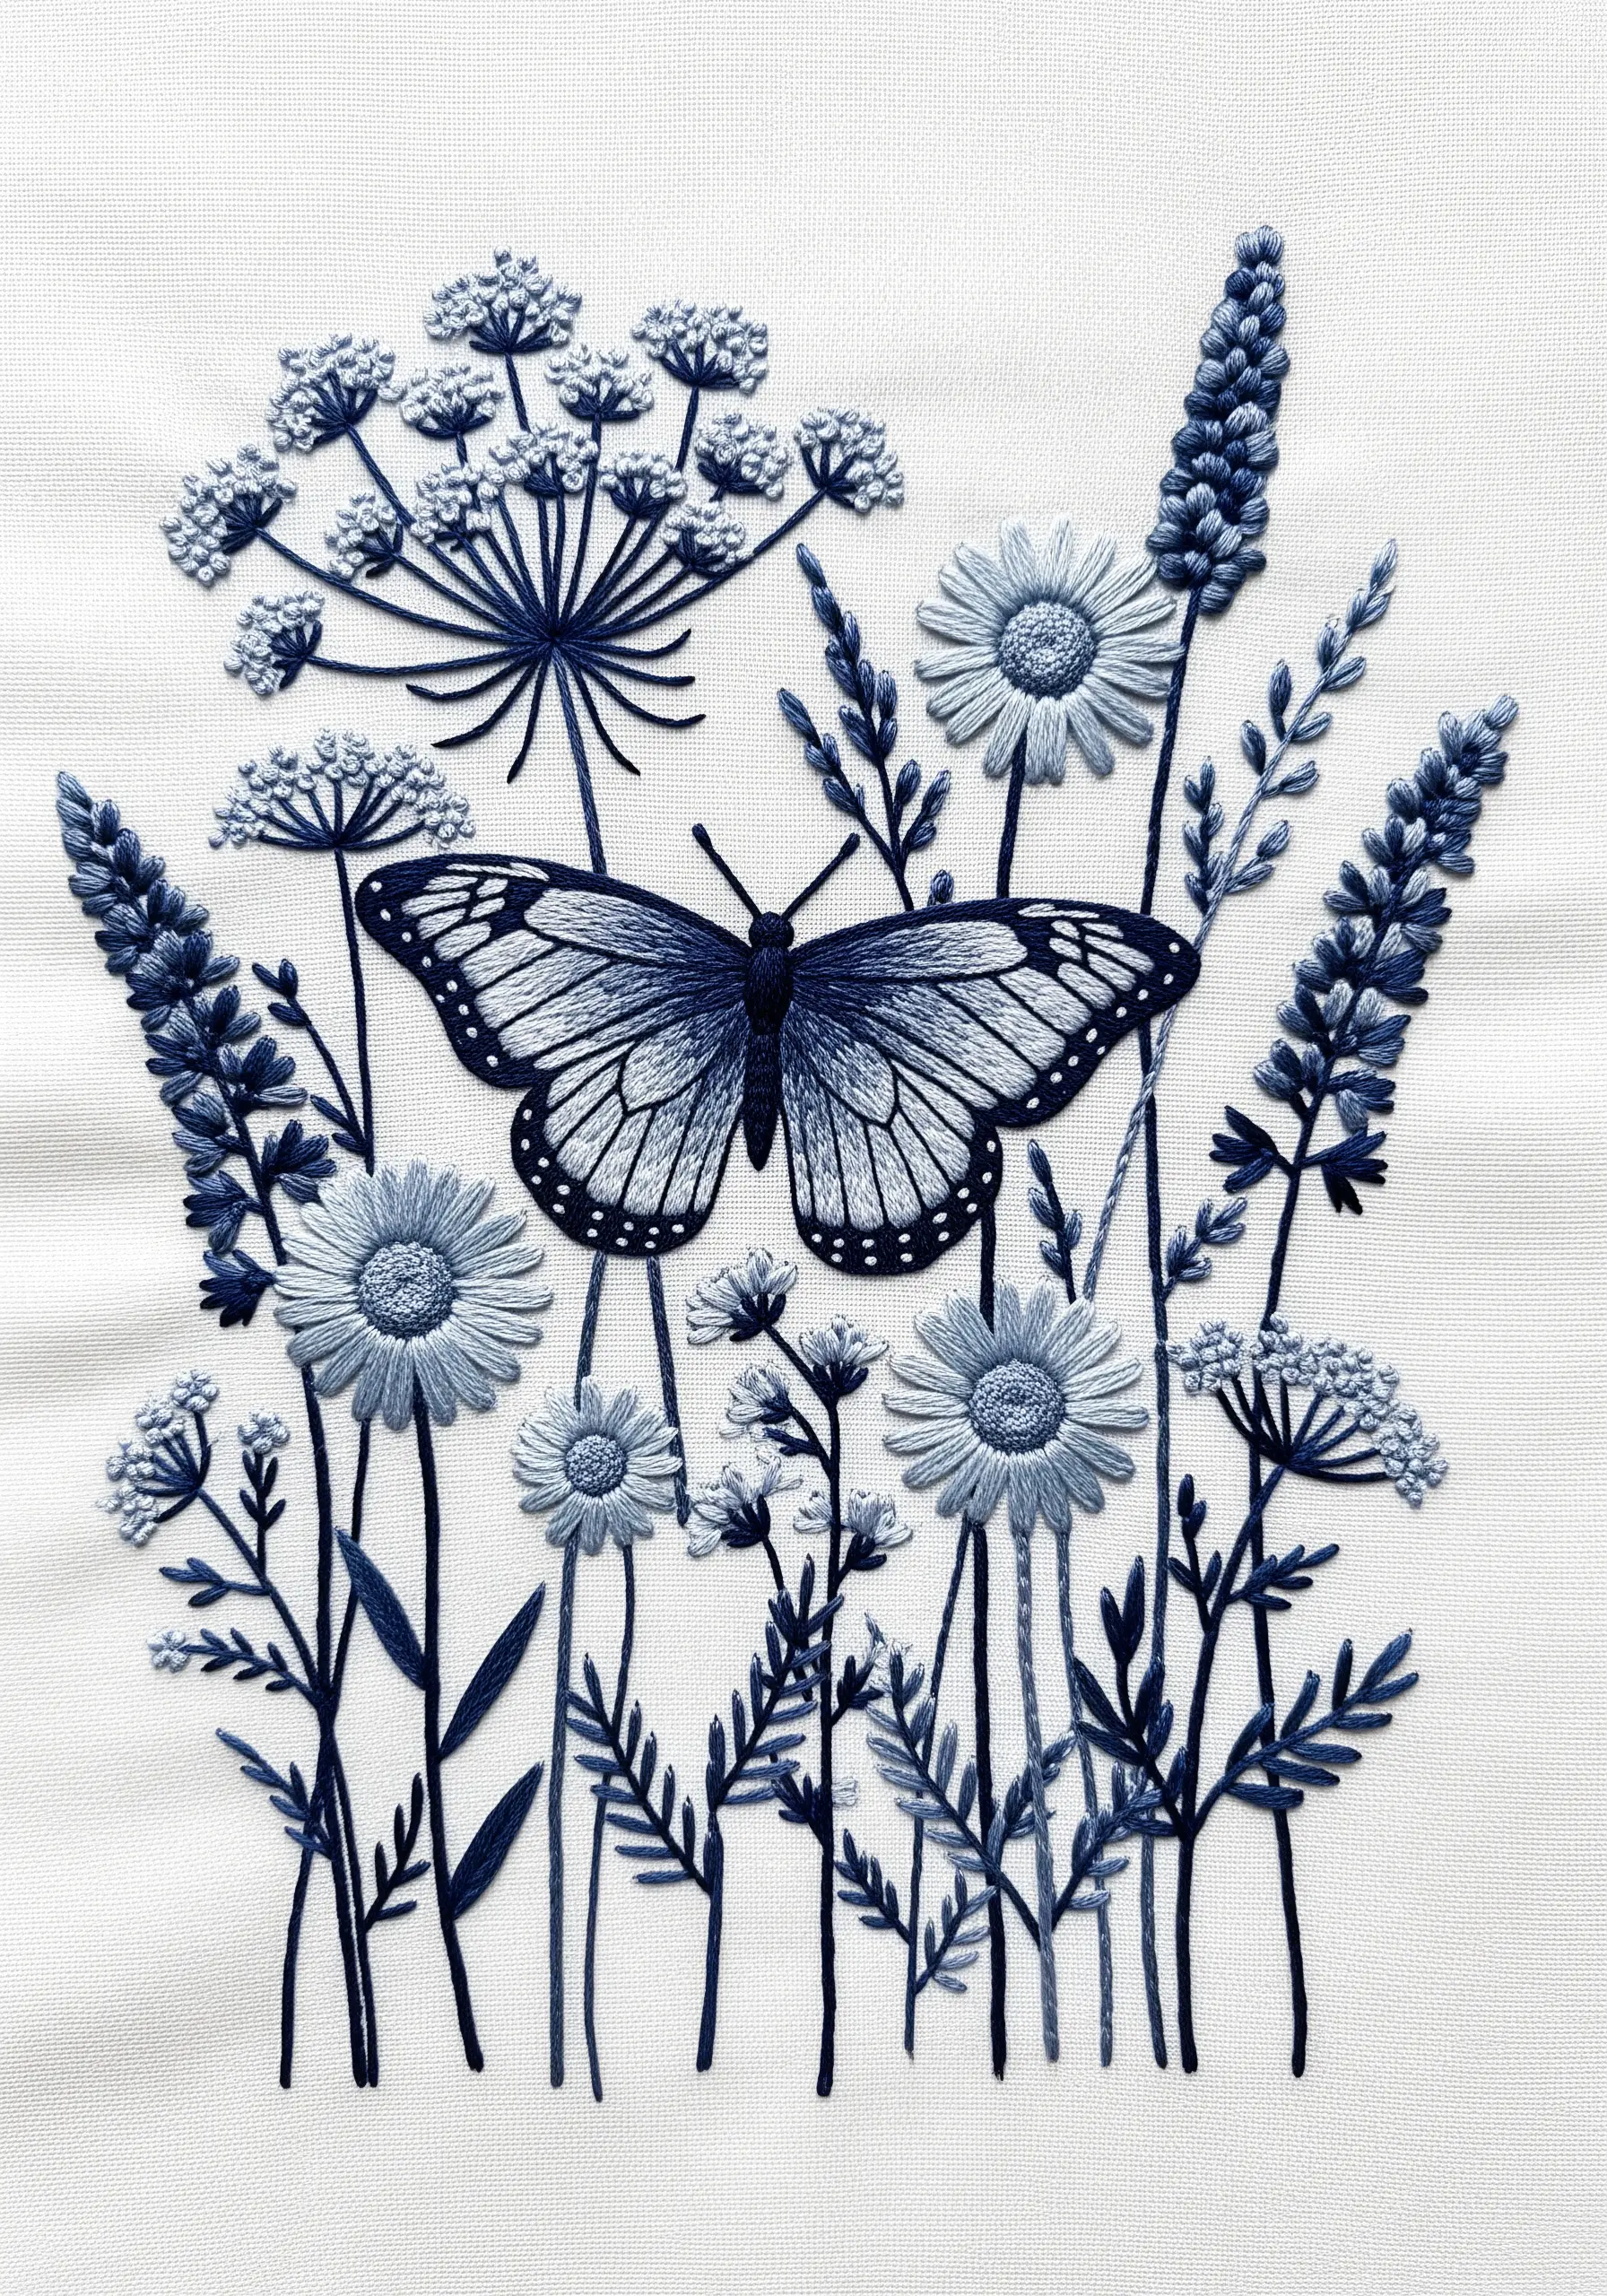
A single-color design can have incredible depth and sophistication if you focus on variations in tone and texture.
Select at least three to four shades of a single color, from very dark to very light. Use these different tones to create highlights and shadows, giving form to your flowers and butterfly.
Incorporate a variety of stitch types—smooth satin stitch, linear stem stitch, and bumpy French knots—to ensure the piece is texturally rich and visually engaging, preventing it from looking flat.
These monochrome floral embroidery ideas show how powerful this approach can be.
32. Add Intrigue with a Cross-Section View

Introduce an unexpected and fascinating element to a classic meadow scene by revealing the world beneath the surface.
Create a dense, earthy texture for the soil using a mix of French knots and seed stitches in various shades of brown.
For the delicate root systems, use a single strand of off-white or light brown thread and a wandering backstitch. This scientific cross-section adds a layer of storytelling that is both educational and artistically unique.
33. Use Delicate Stitches for Heirloom Handkerchiefs
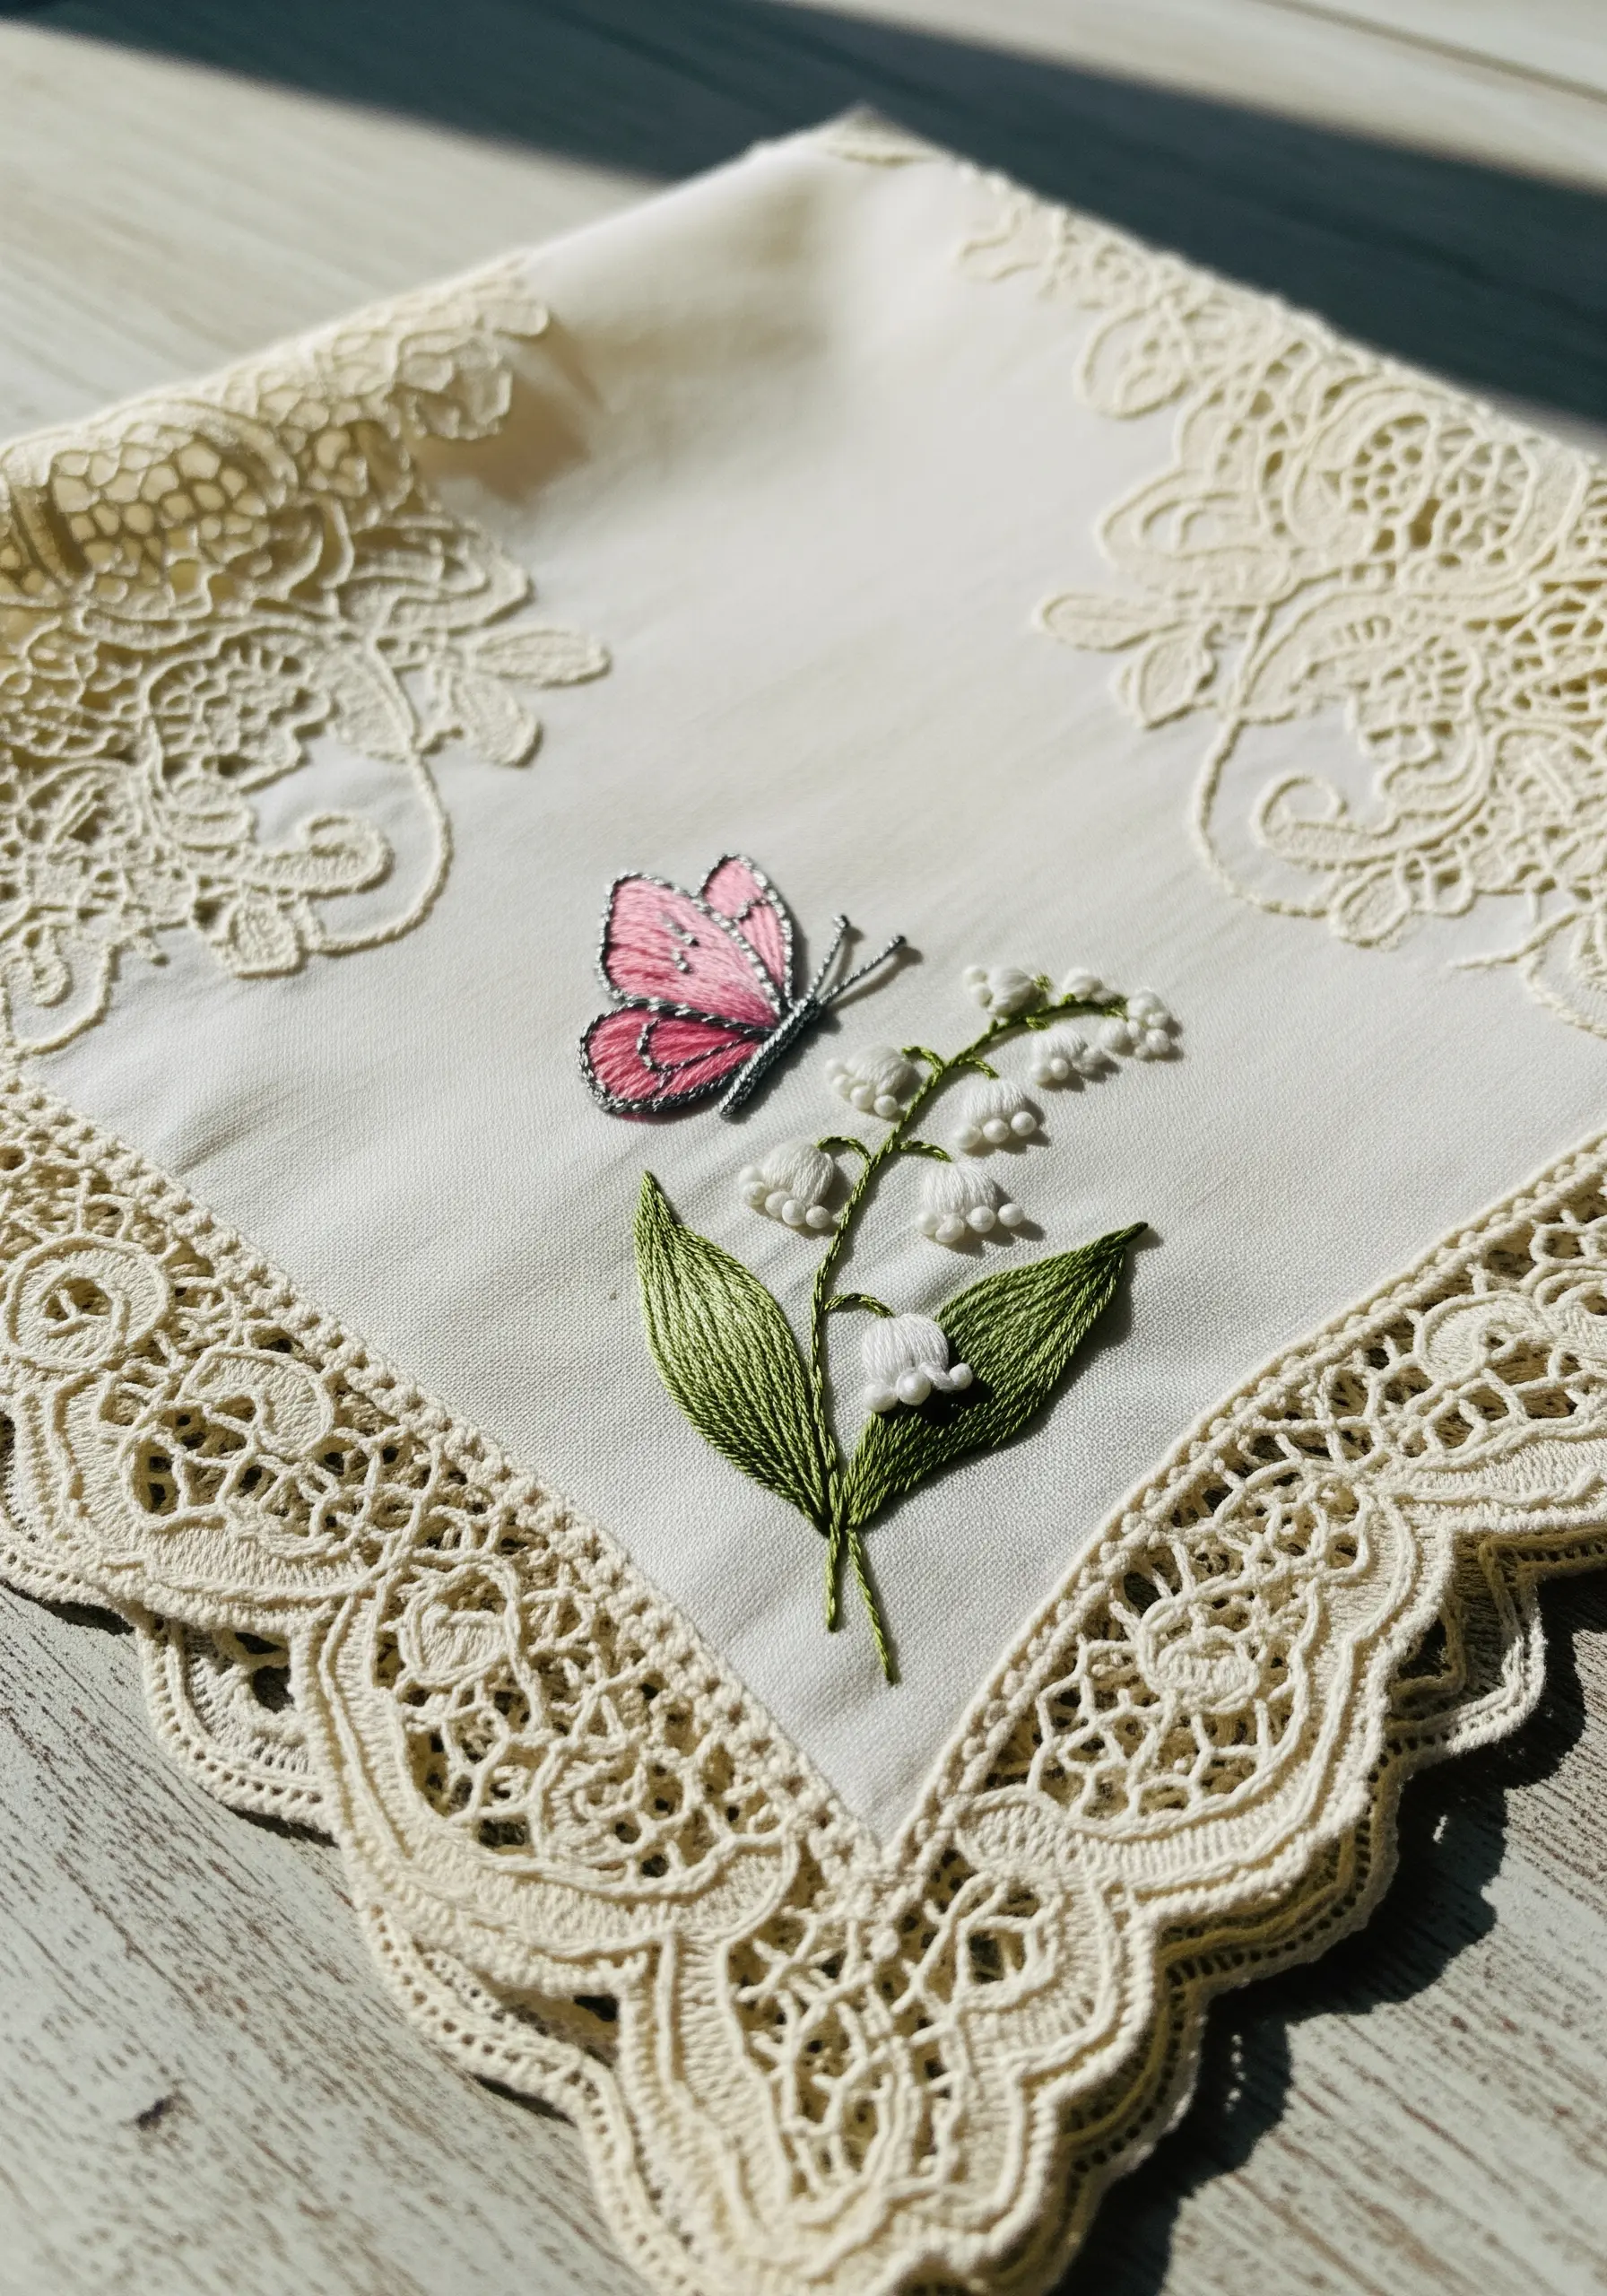
When embroidering on fine, lightweight fabrics like cotton lawn or silk, your tools and techniques must be equally delicate.
Switch to a fine needle (a size 9 or 10) and use only one or two strands of floss to avoid puckering or damaging the delicate weave.
A tiny, beautifully executed motif in a corner adds a touch of personal elegance, turning a simple handkerchief into a potential heirloom. This is especially true for delicate handkerchief corners.


