

Have you ever watched a butterfly and wished you could capture that fleeting, weightless quality in your work? So often, we focus on just filling in the lines, but the real magic of embroidery lies in creating the illusion of life—of texture, light, and movement.
Think of your needle as a brush and your threads as a palette of liquid color. With a few intentional shifts in technique—the direction of a stitch, the blend of two shades, the choice of a background fabric—you can make wings feel like they could flutter right off the hoop.
These patterns are more than just guides; they are invitations to explore the techniques that transform a flat design into a piece of art that breathes. Let’s create something that feels truly alive.
1. Mastering Realistic Wing Gradients
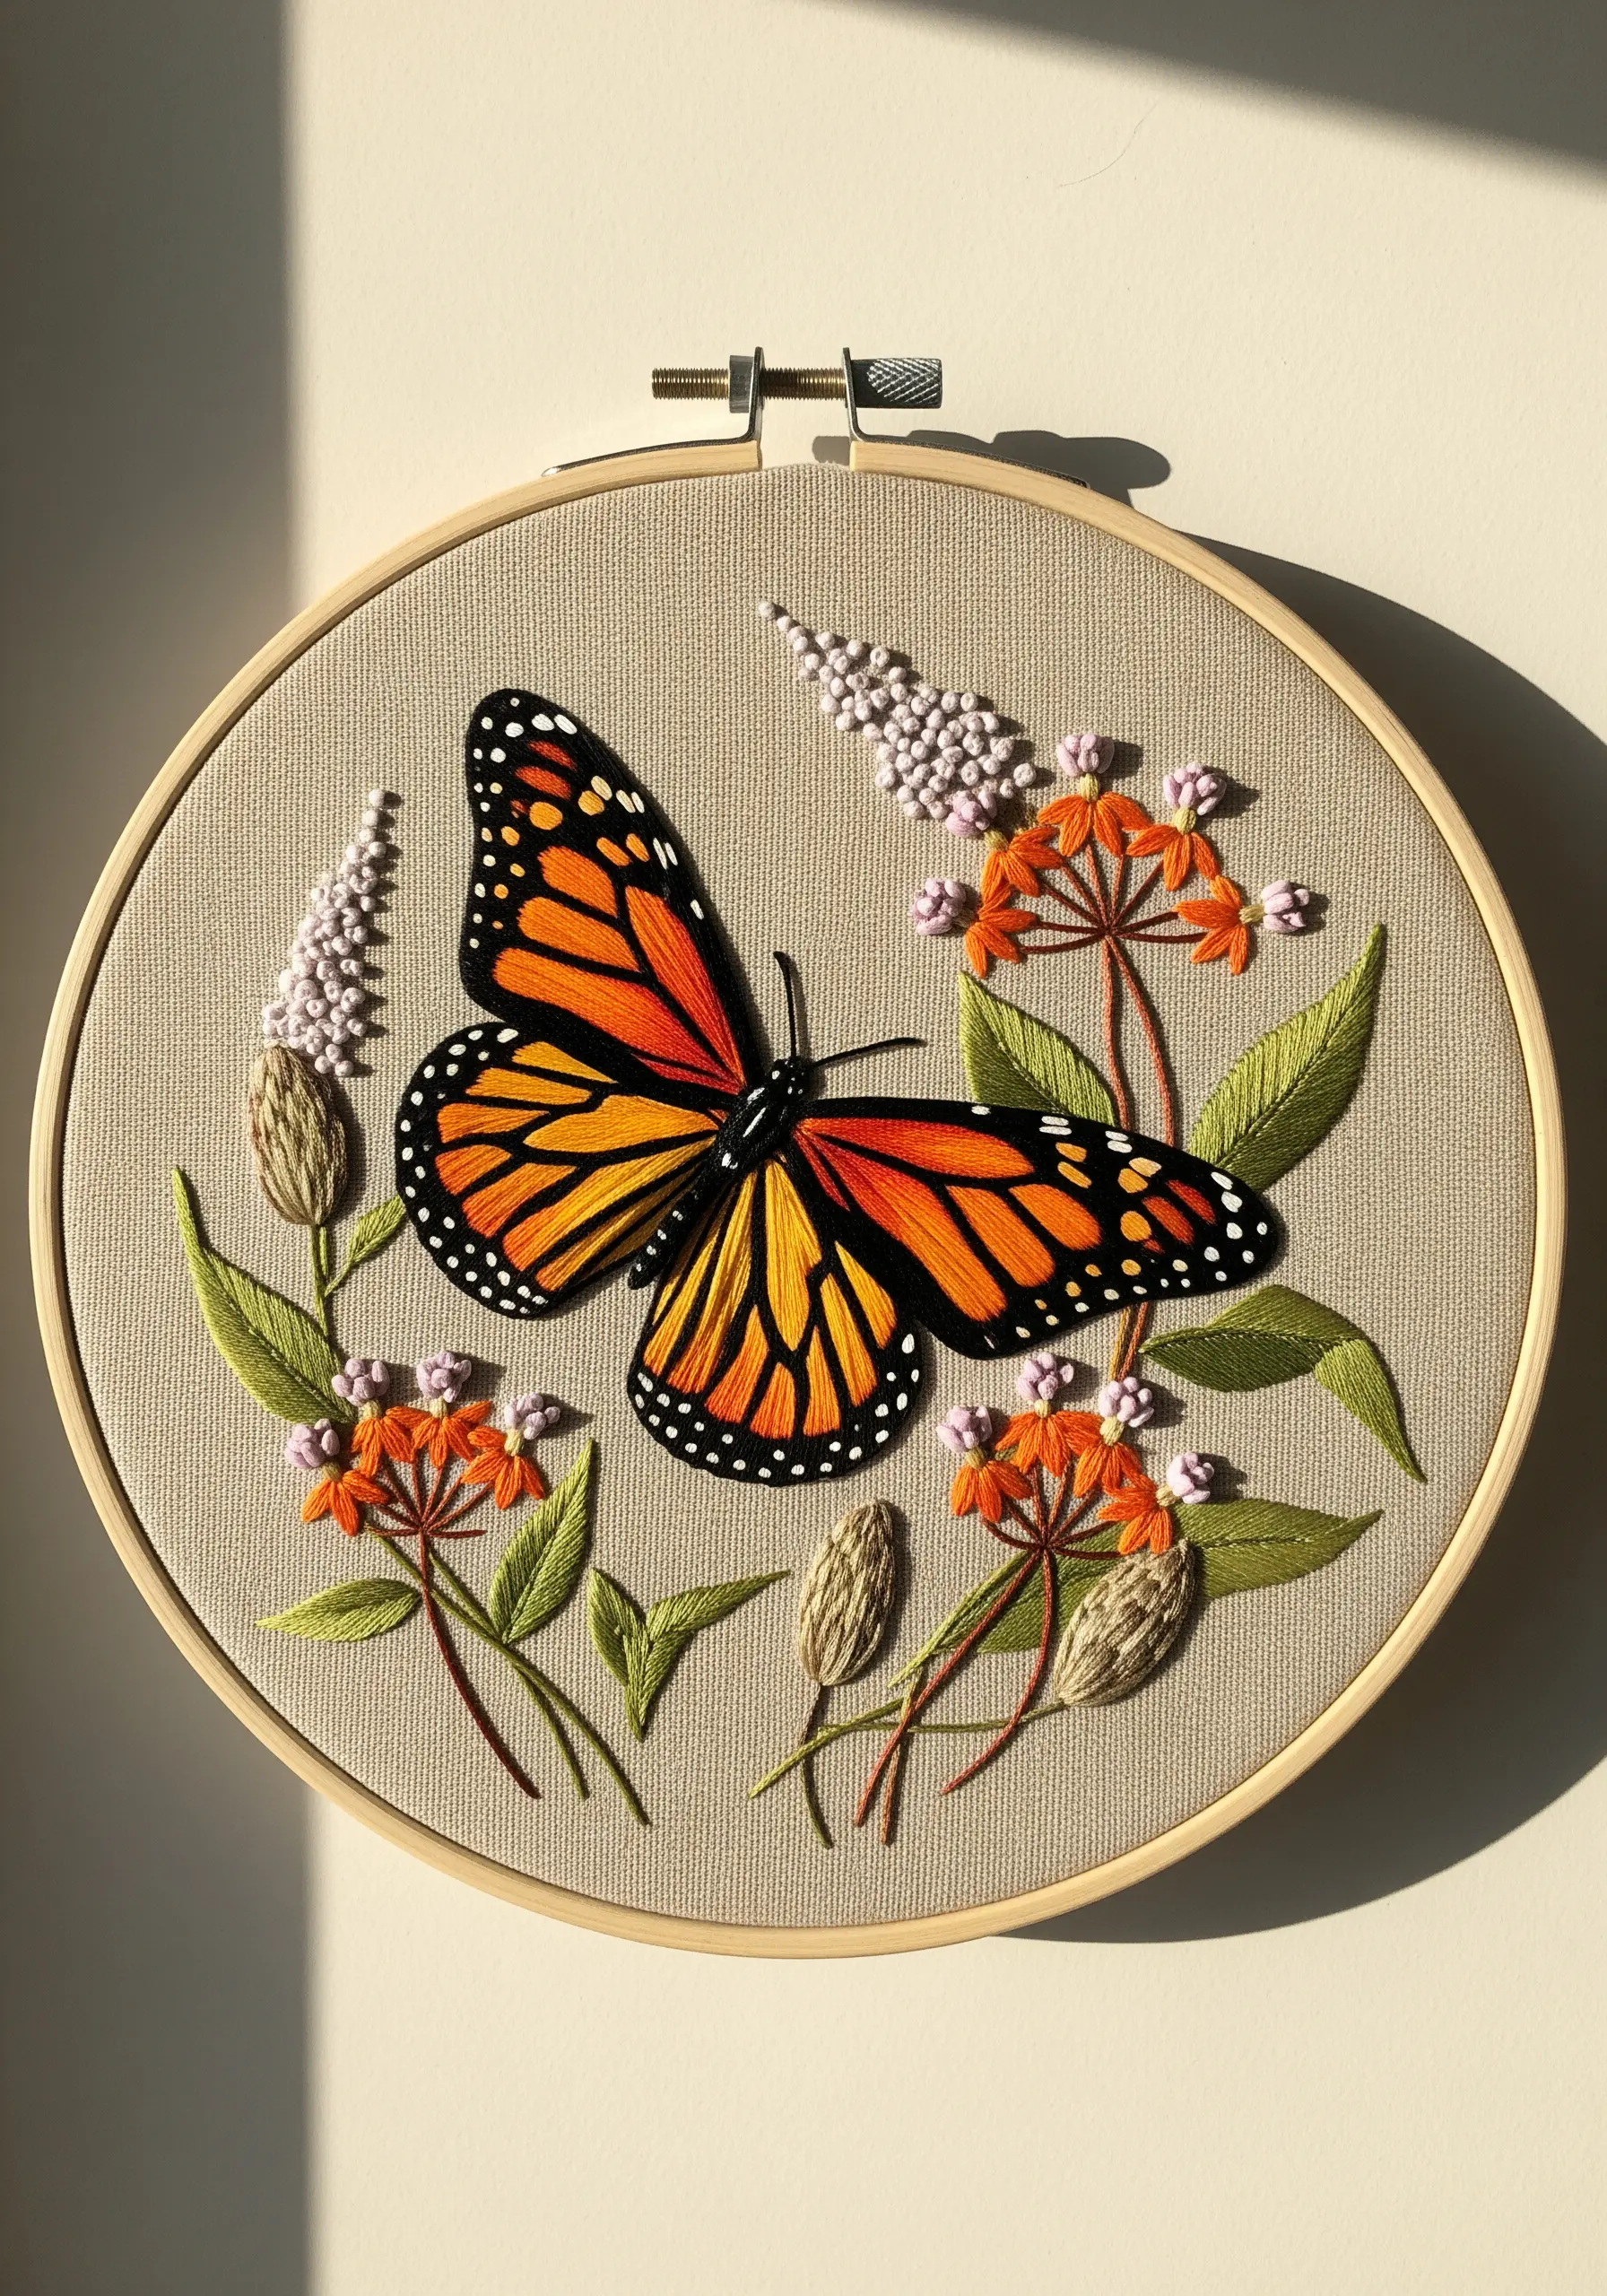
To achieve the lifelike glow of a Monarch’s wings, focus on the long-and-short stitch, also known as thread painting.
Use at least three shades of orange and yellow, blending them seamlessly from the darkest shade near the body to the lightest at the wingtips.
Work with a single strand of floss for the finest detail, especially for the black veins and the crisp white dots, which you can render as tiny French knots for added texture.
The key is to keep your stitches directional, following the natural lines of the wing to create the illusion of light and shadow.
2. High-Contrast Drama on Dark Fabric

Make your stitches luminous by choosing a dark, tightly woven fabric like navy cotton or black linen for your background.
Pale threads, like the mint green and white of this Luna moth, will appear to glow against the deep color, creating immediate visual impact.
For the delicate wing veins, use a single strand of a slightly darker green and a precise split stitch. This technique ensures the lines are sharp and defined without overpowering the soft fill.
Frame the composition with simple white flowers to balance the moth’s scale and enhance the ethereal mood.
3. Creating Iridescence with Directional Stitches

To mimic the shimmer of a Blue Morpho butterfly, your stitch direction is just as important as your color choice.
Use a family of blues, from sky to near-black, and lay your long-and-short stitches at a slight angle, radiating from the body outwards. This catches the light differently across the surface, creating an illusion of iridescence.
Introduce a single strand of black or dark navy into your blending along the edges to define the wing shape and add depth.
This technique turns a flat surface into a dynamic one that changes as the viewer moves.
4. Balancing Detail with Negative Space
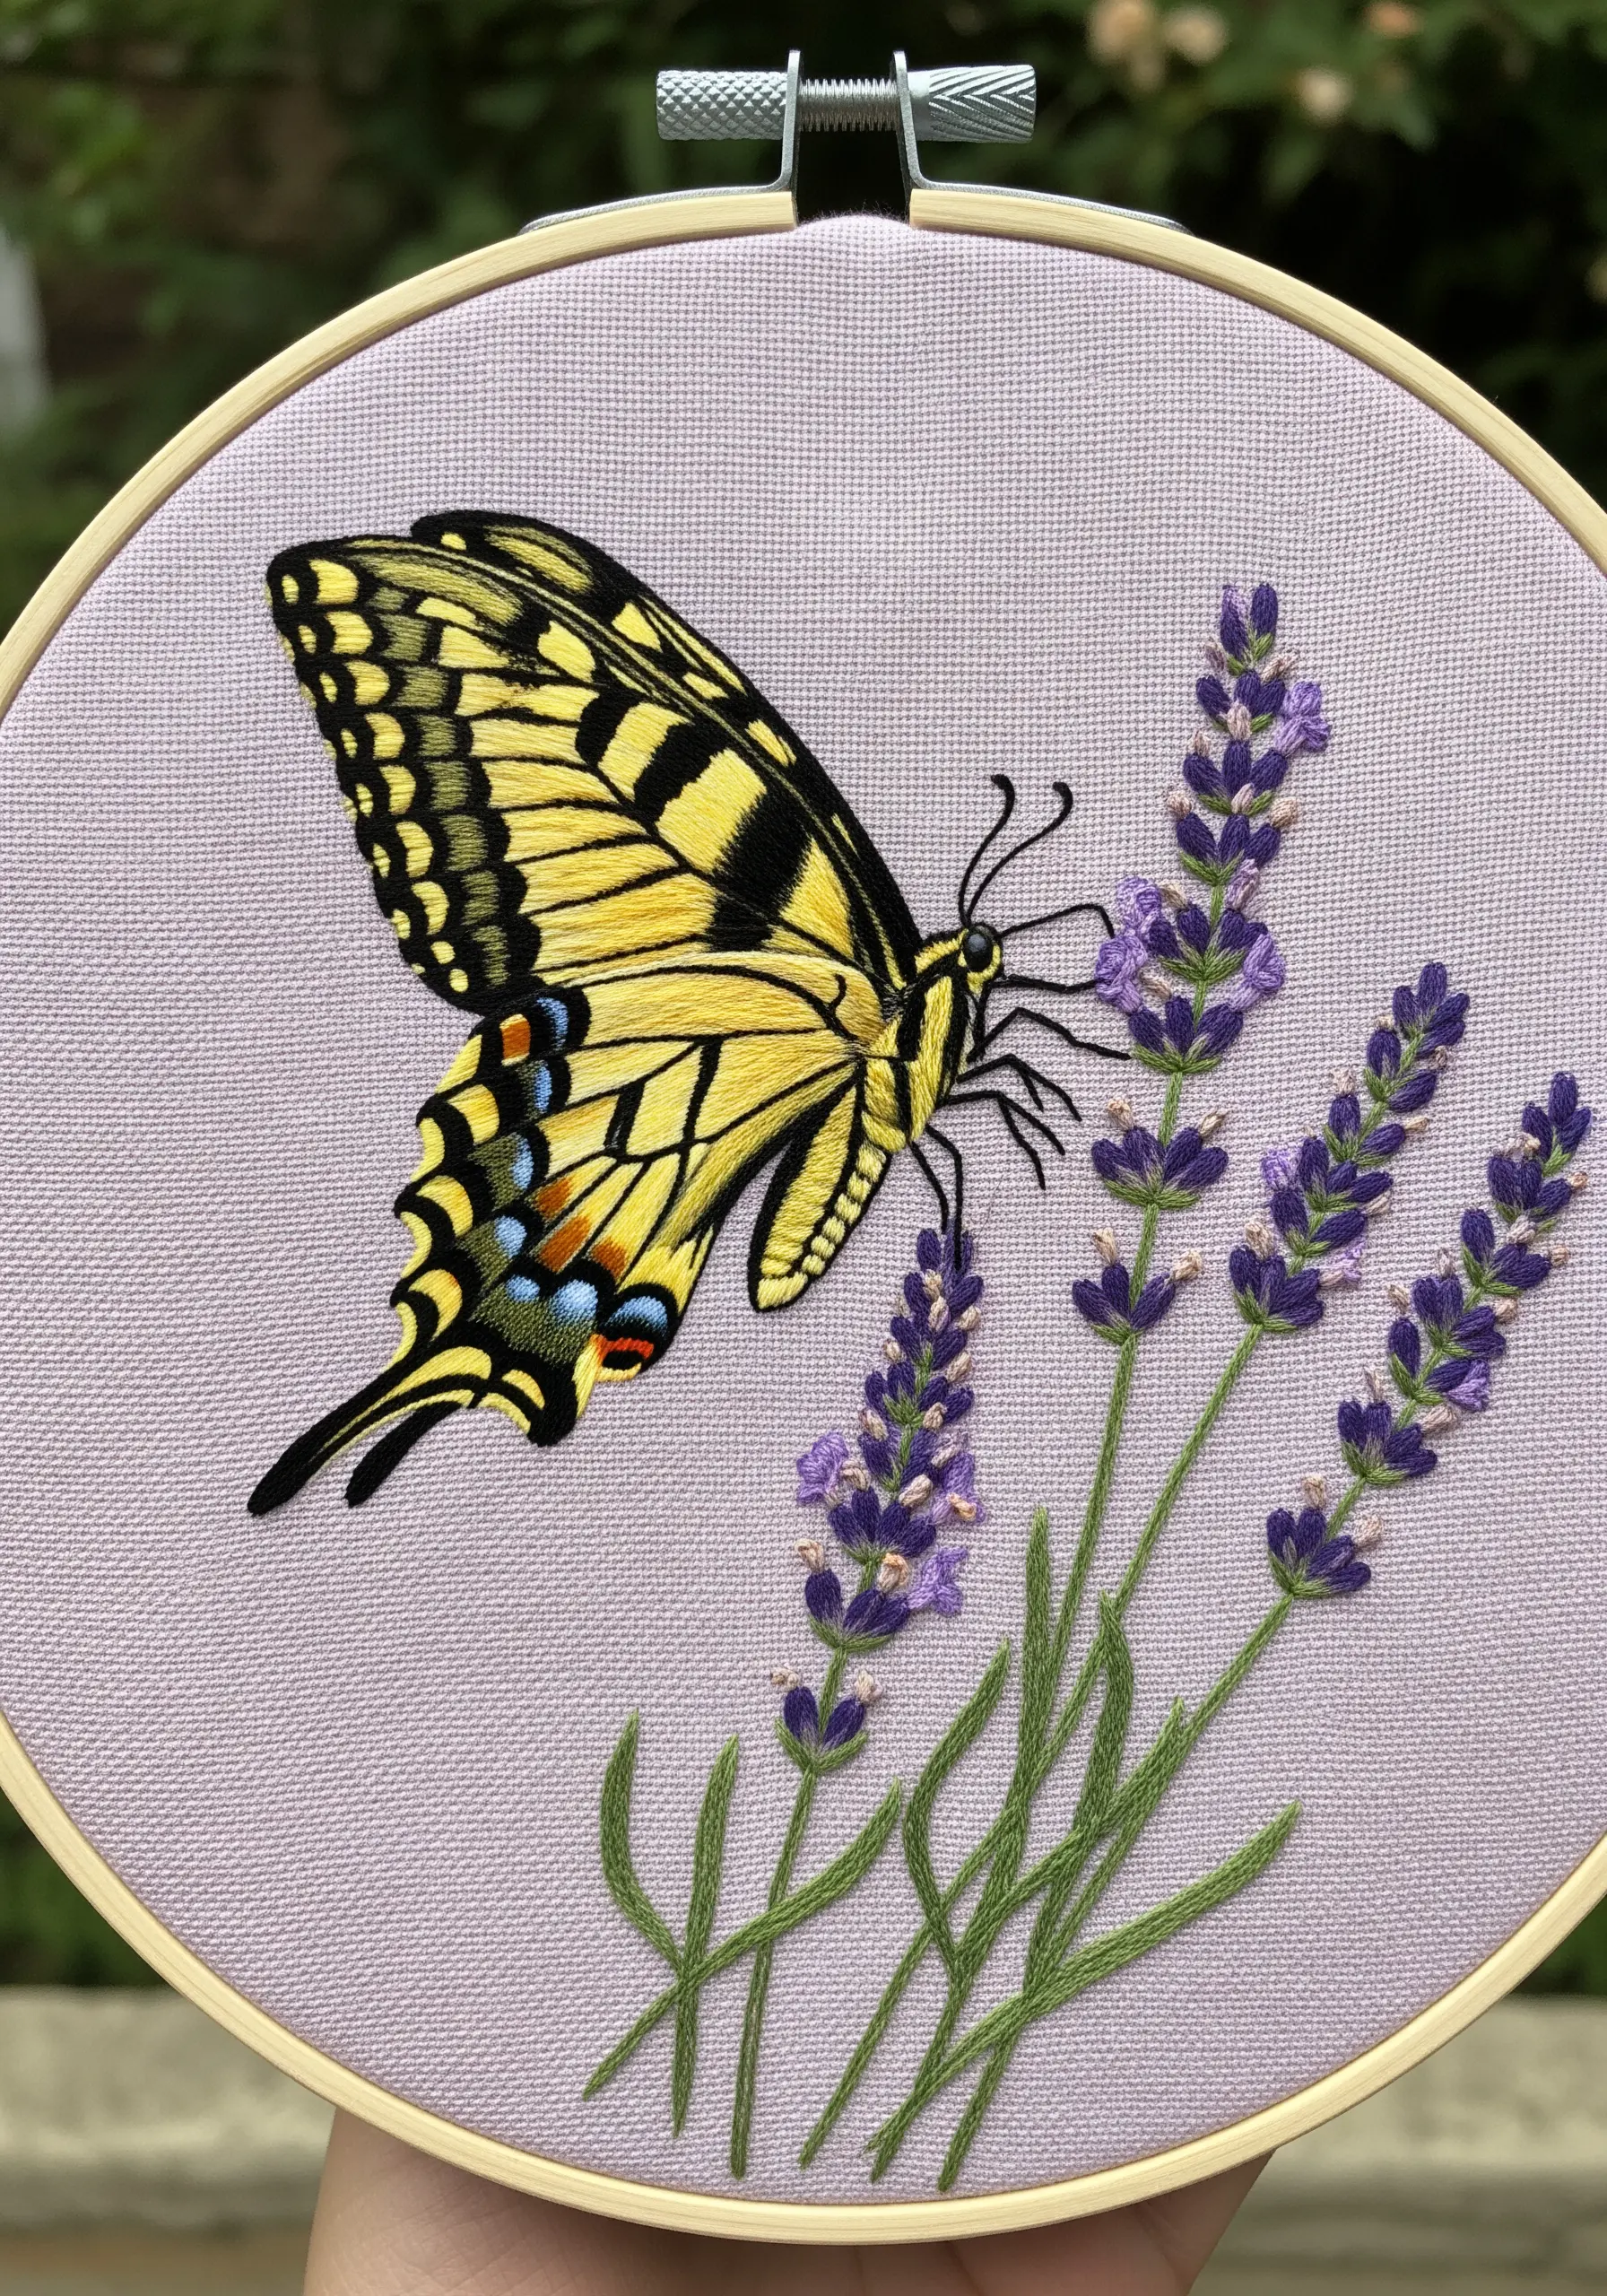
When combining a detailed subject like a butterfly with florals, let the background fabric breathe.
Position your lavender stems diagonally to guide the eye towards the butterfly, but avoid filling the entire hoop.
This use of negative space makes the intricate thread painting of the wings the undeniable focal point.
For the lavender, use bullion knots or layered French knots for the buds, which provides a lovely, textured contrast to the smooth satin stitch of the wings.
5. Crafting a Statement Back Patch
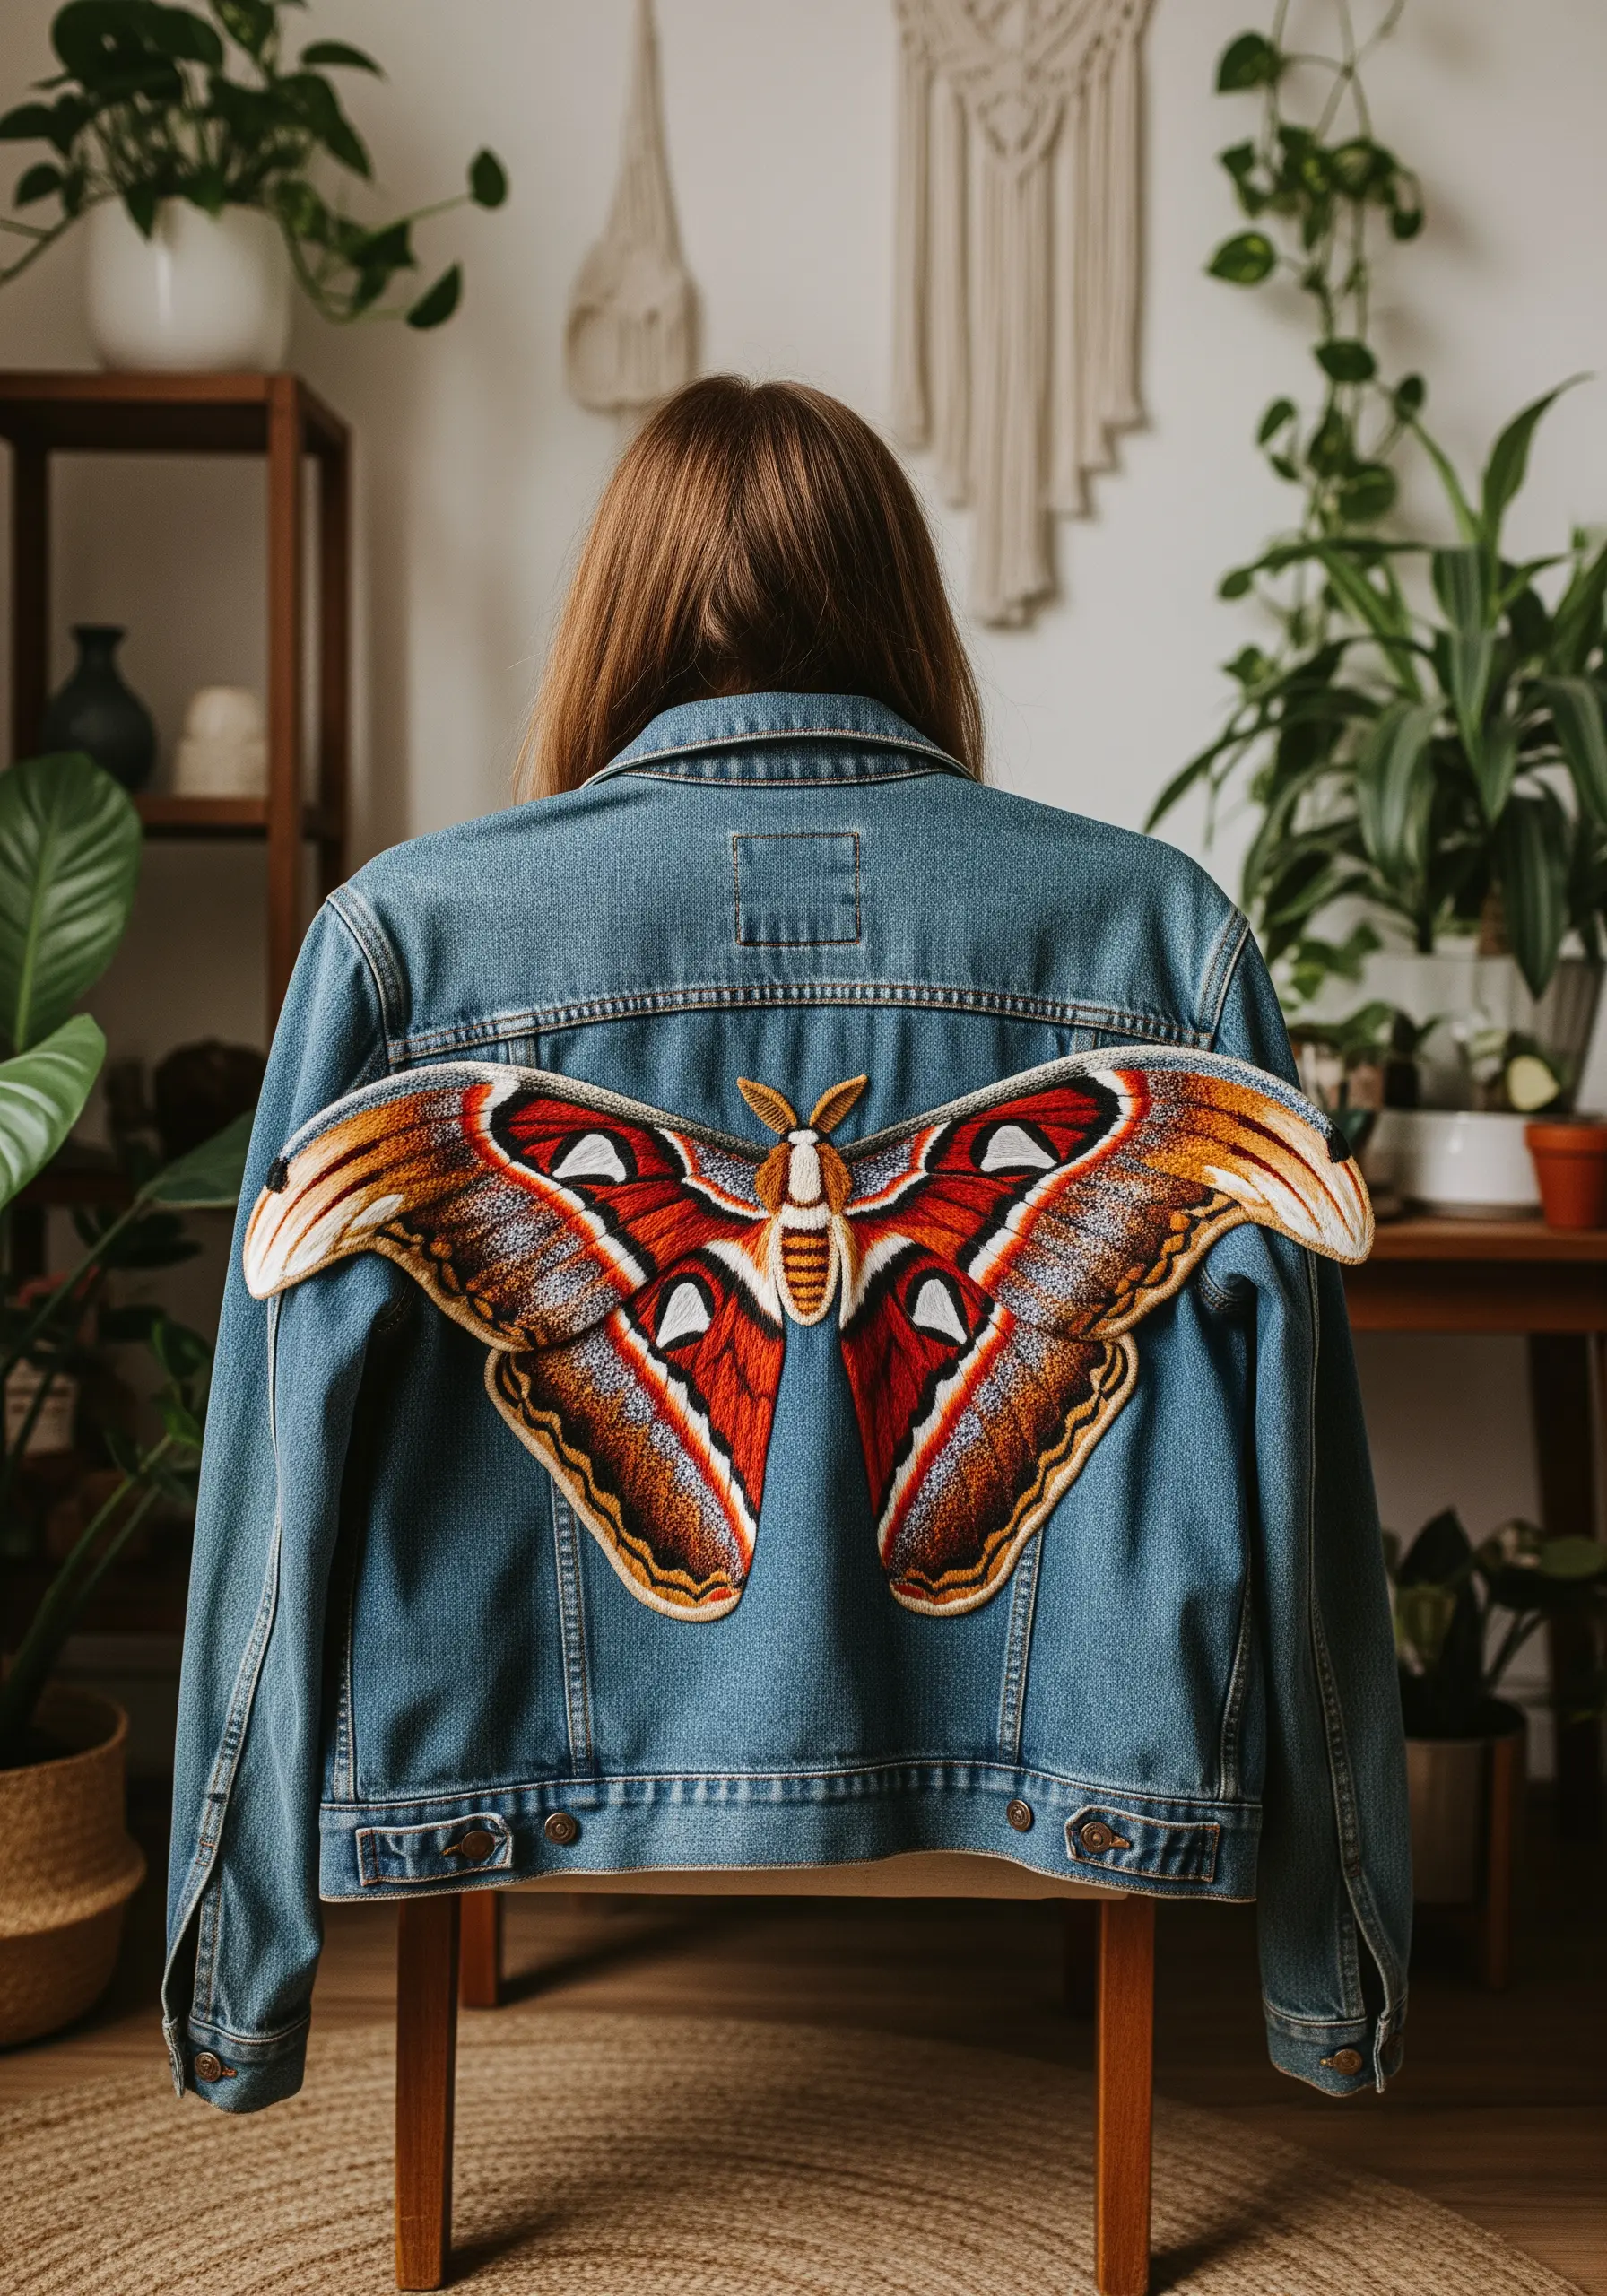
For a large-scale design on a heavy fabric like denim, embroider your moth as a separate patch first.
Work your design on a layer of felt or non-stretch cotton with a heavy-duty stabilizer ironed onto the back.
Once complete, trim the excess fabric, leaving a small border that you can fold under for a clean edge. Then, appliqué the finished patch onto the jacket with a tight, neat whipstitch.
This method prevents puckering on the garment and makes managing a large, dense design much easier.
6. The Illusion of Transparency on Tulle
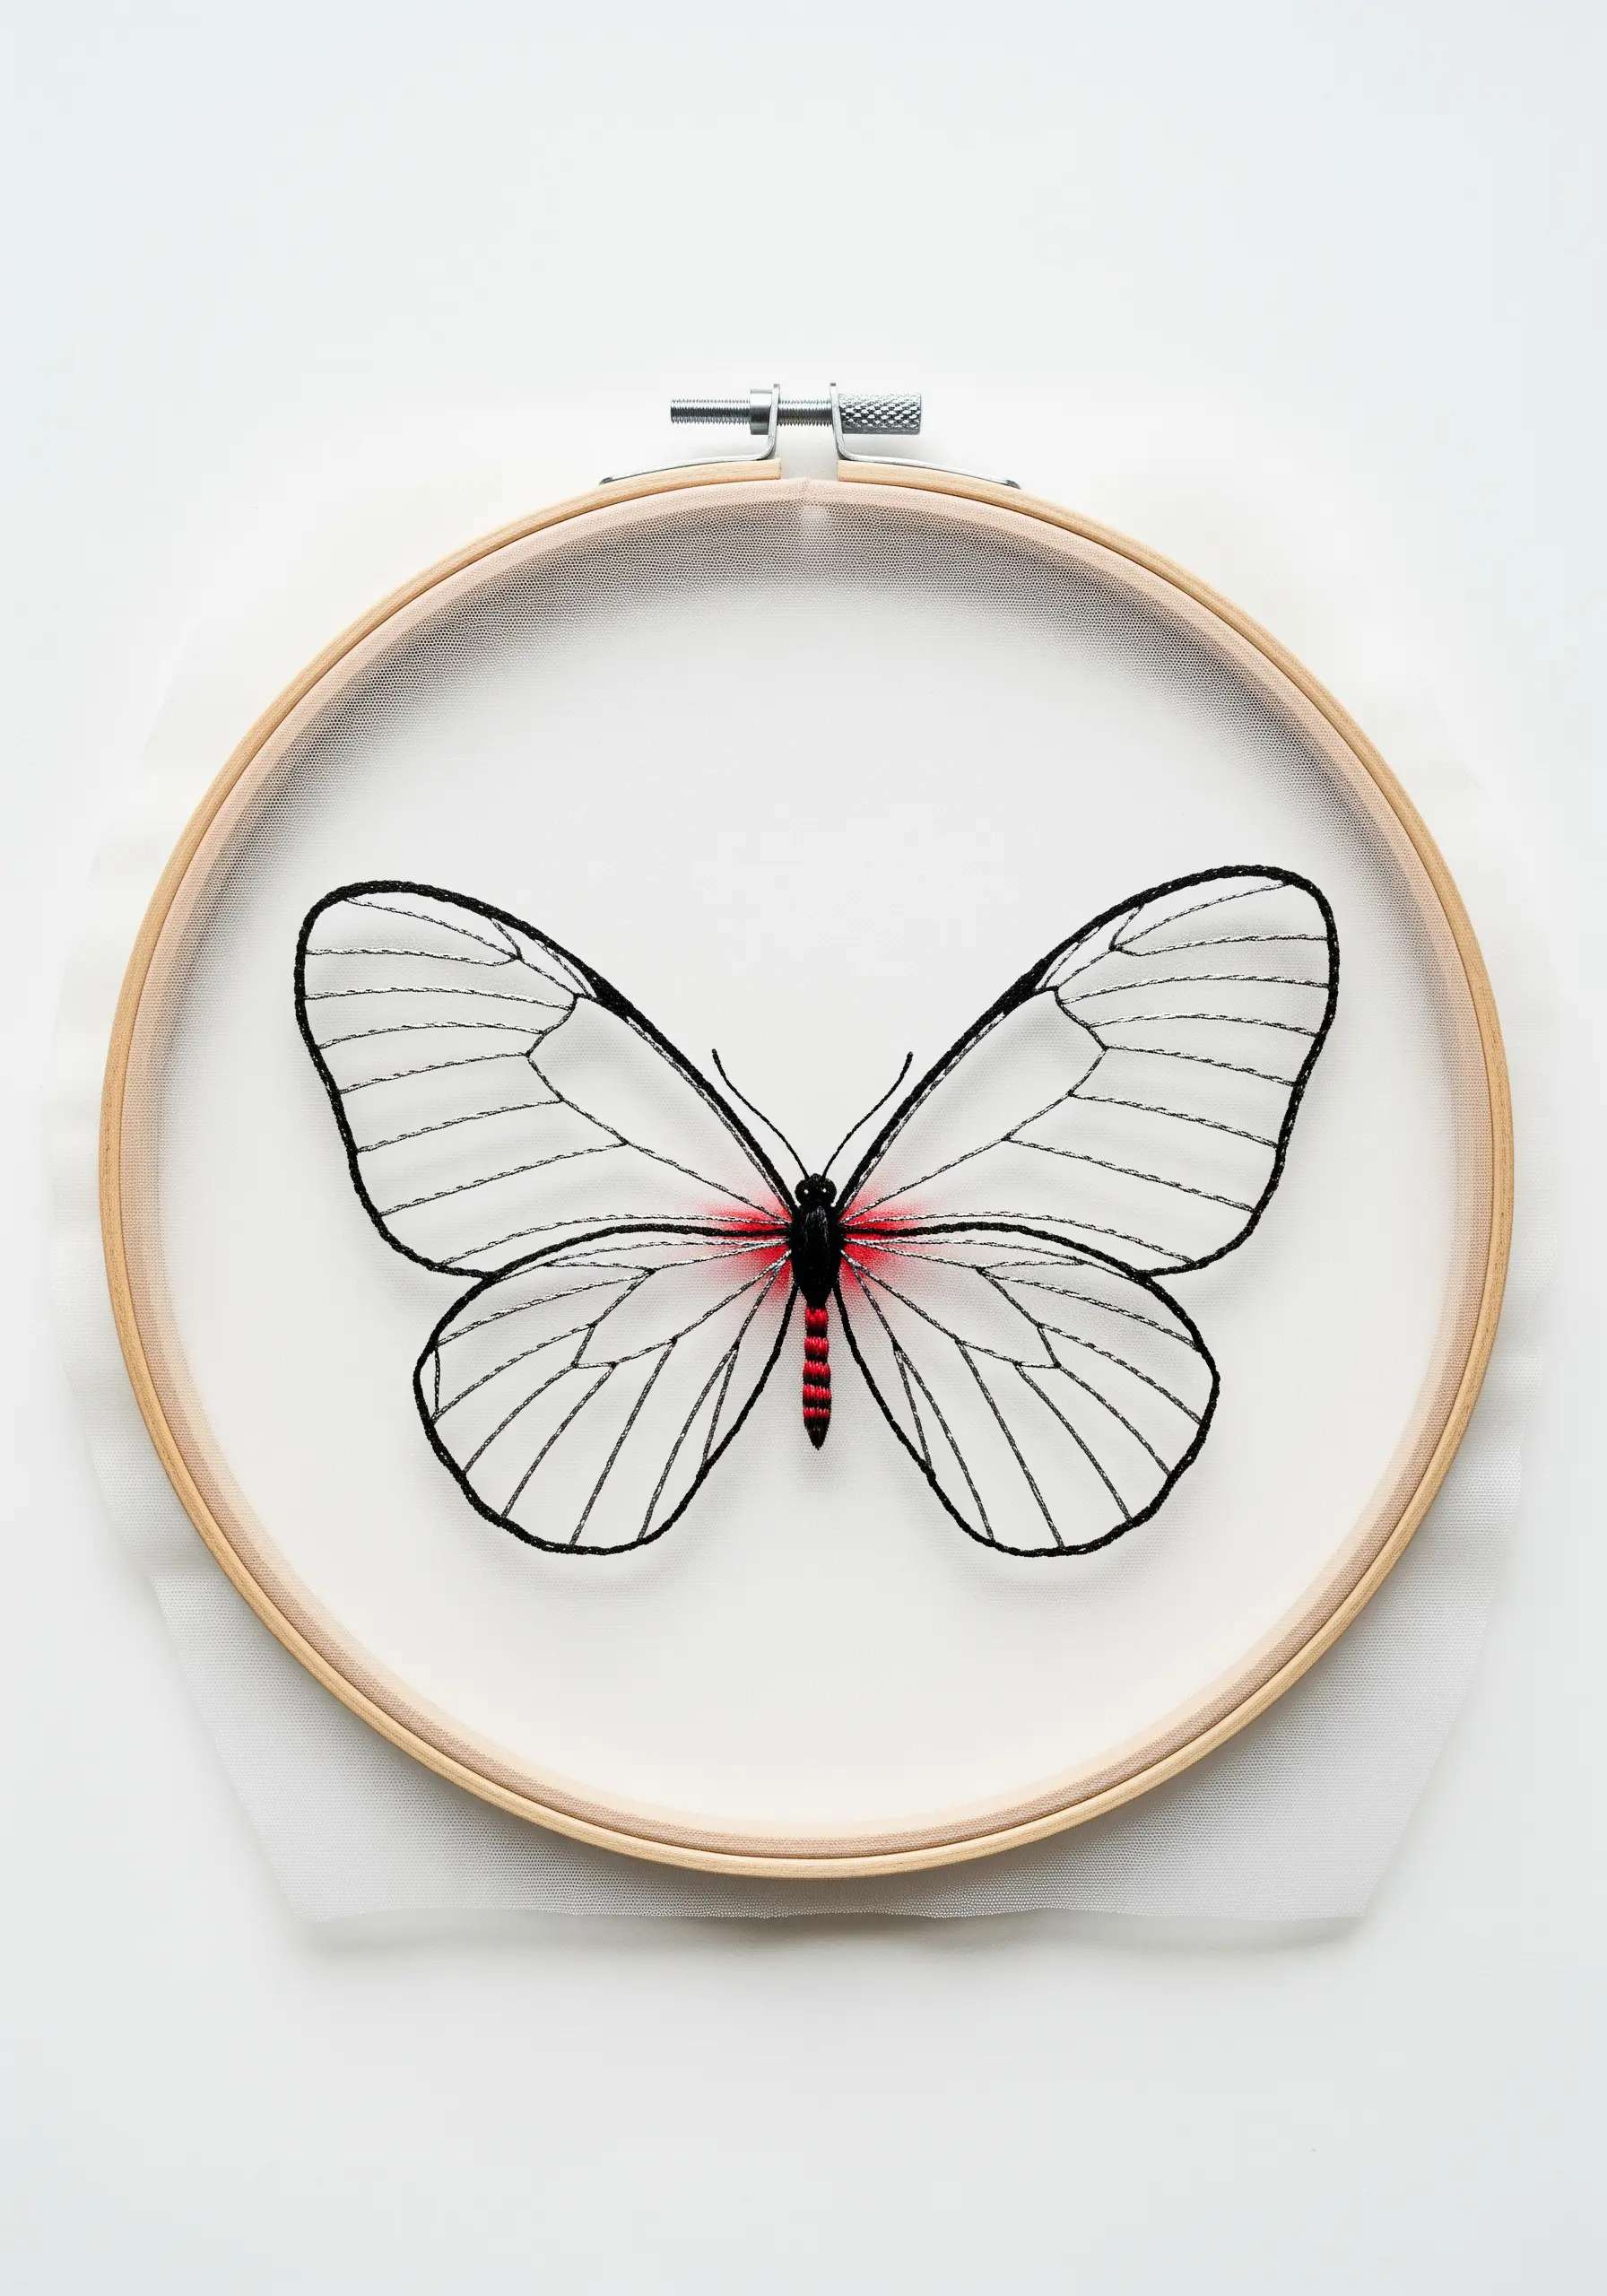
To create ethereal, transparent wings, use organza or tulle as your base fabric, stretched taut in the hoop.
The entire structure relies on the outlines, so use a sturdy, sharp stitch like a whipped backstitch or a tight stem stitch for the black framework.
Use a single strand of floss to keep the lines incredibly fine and delicate. The magic is in what you *don’t* stitch; the empty space becomes the ‘glass’ of the wings.
A small, densely stitched body in a contrasting color anchors the piece and makes the wings feel even more fragile.
7. Vibrant Rainbow Gradients with Thread Painting

Achieving a smooth rainbow transition requires careful color planning. Lay out your floss colors in the order you’ll use them before you even begin stitching.
Work in small sections, using the long-and-short stitch to seamlessly blend one color into the next. Your stitches should be short and staggered, like brickwork, to avoid harsh lines.
For maximum vibrancy, use a full six strands of floss for the fill, but drop down to two strands for the fine black details and outlines to maintain crispness.
8. Achieving Flight with 3D Stumpwork

To make your butterflies literally lift off the fabric, explore the basics of stumpwork.
Stitch each wing individually on a spare piece of fabric, incorporating a fine, flexible wire into the buttonhole stitch along the outer edge.
Once finished, carefully cut each wing from the fabric. The wire will hold its shape perfectly.
Attach the wings to a stitched body on your main fabric, then gently bend them upwards to create breathtaking dimension and movement.
9. Using Metallic Thread for Subtle Impact

Incorporate contemporary metallic thread not for overwhelming shine, but for strategic highlights that catch the light.
In this death’s-head hawkmoth, a touch of gold thread outlines specific segments of the wings and body, adding a hint of luxury and definition.
To make working with metallic floss easier, use shorter lengths of thread and a needle with a larger eye to reduce friction and fraying. A thread conditioner can also work wonders.
This selective use of metallic accents elevates the entire piece without making it look gaudy.
10. Creating Atmosphere with a Cohesive Palette

The choice of your background fabric can transform the mood of your entire piece.
Here, a muted sage green fabric harmonizes beautifully with the warm oranges of the butterflies and the soft pinks of the cosmos flowers, creating a gentle, botanical feel.
When selecting your palette, pull colors from your main subject to use in the supporting elements. The pink in the flowers echoes the subtle blush tones on the butterfly wings, unifying the composition.
Add tiny, scattered French knots in an off-white to suggest pollen or light motes, adding a final touch of magic.
11. Scaling Up for Home Décor

When embroidering a functional item like a pillow, durability is key. Choose a robust fabric like a cotton-linen blend or a lightweight canvas that can withstand use.
For a large, vibrant design, use a full six strands of embroidery floss to ensure your satin stitches have excellent coverage and a bold, graphic quality.
To keep your long satin stitches from snagging, you can couch them down in the center with a single, near-invisible stitch in a matching color. This provides stability without interrupting the smooth finish.
12. The Power of Bold Contrast

Create a design that immediately grabs attention by pairing a limited, high-contrast color palette with a simple background.
The intense black and vibrant red against the neutral gray fabric makes this Cinnabar moth feel graphic and modern.
To achieve the fuzzy texture on the moth’s thorax, use turkey work (or Ghiordes knot) and trim the loops short. This adds a realistic, tactile element that contrasts beautifully with the sleek satin-stitched wings.
This approach proves you don’t need a dozen colors to create a visually powerful piece.
13. Soft Blending for a Delicate Finish
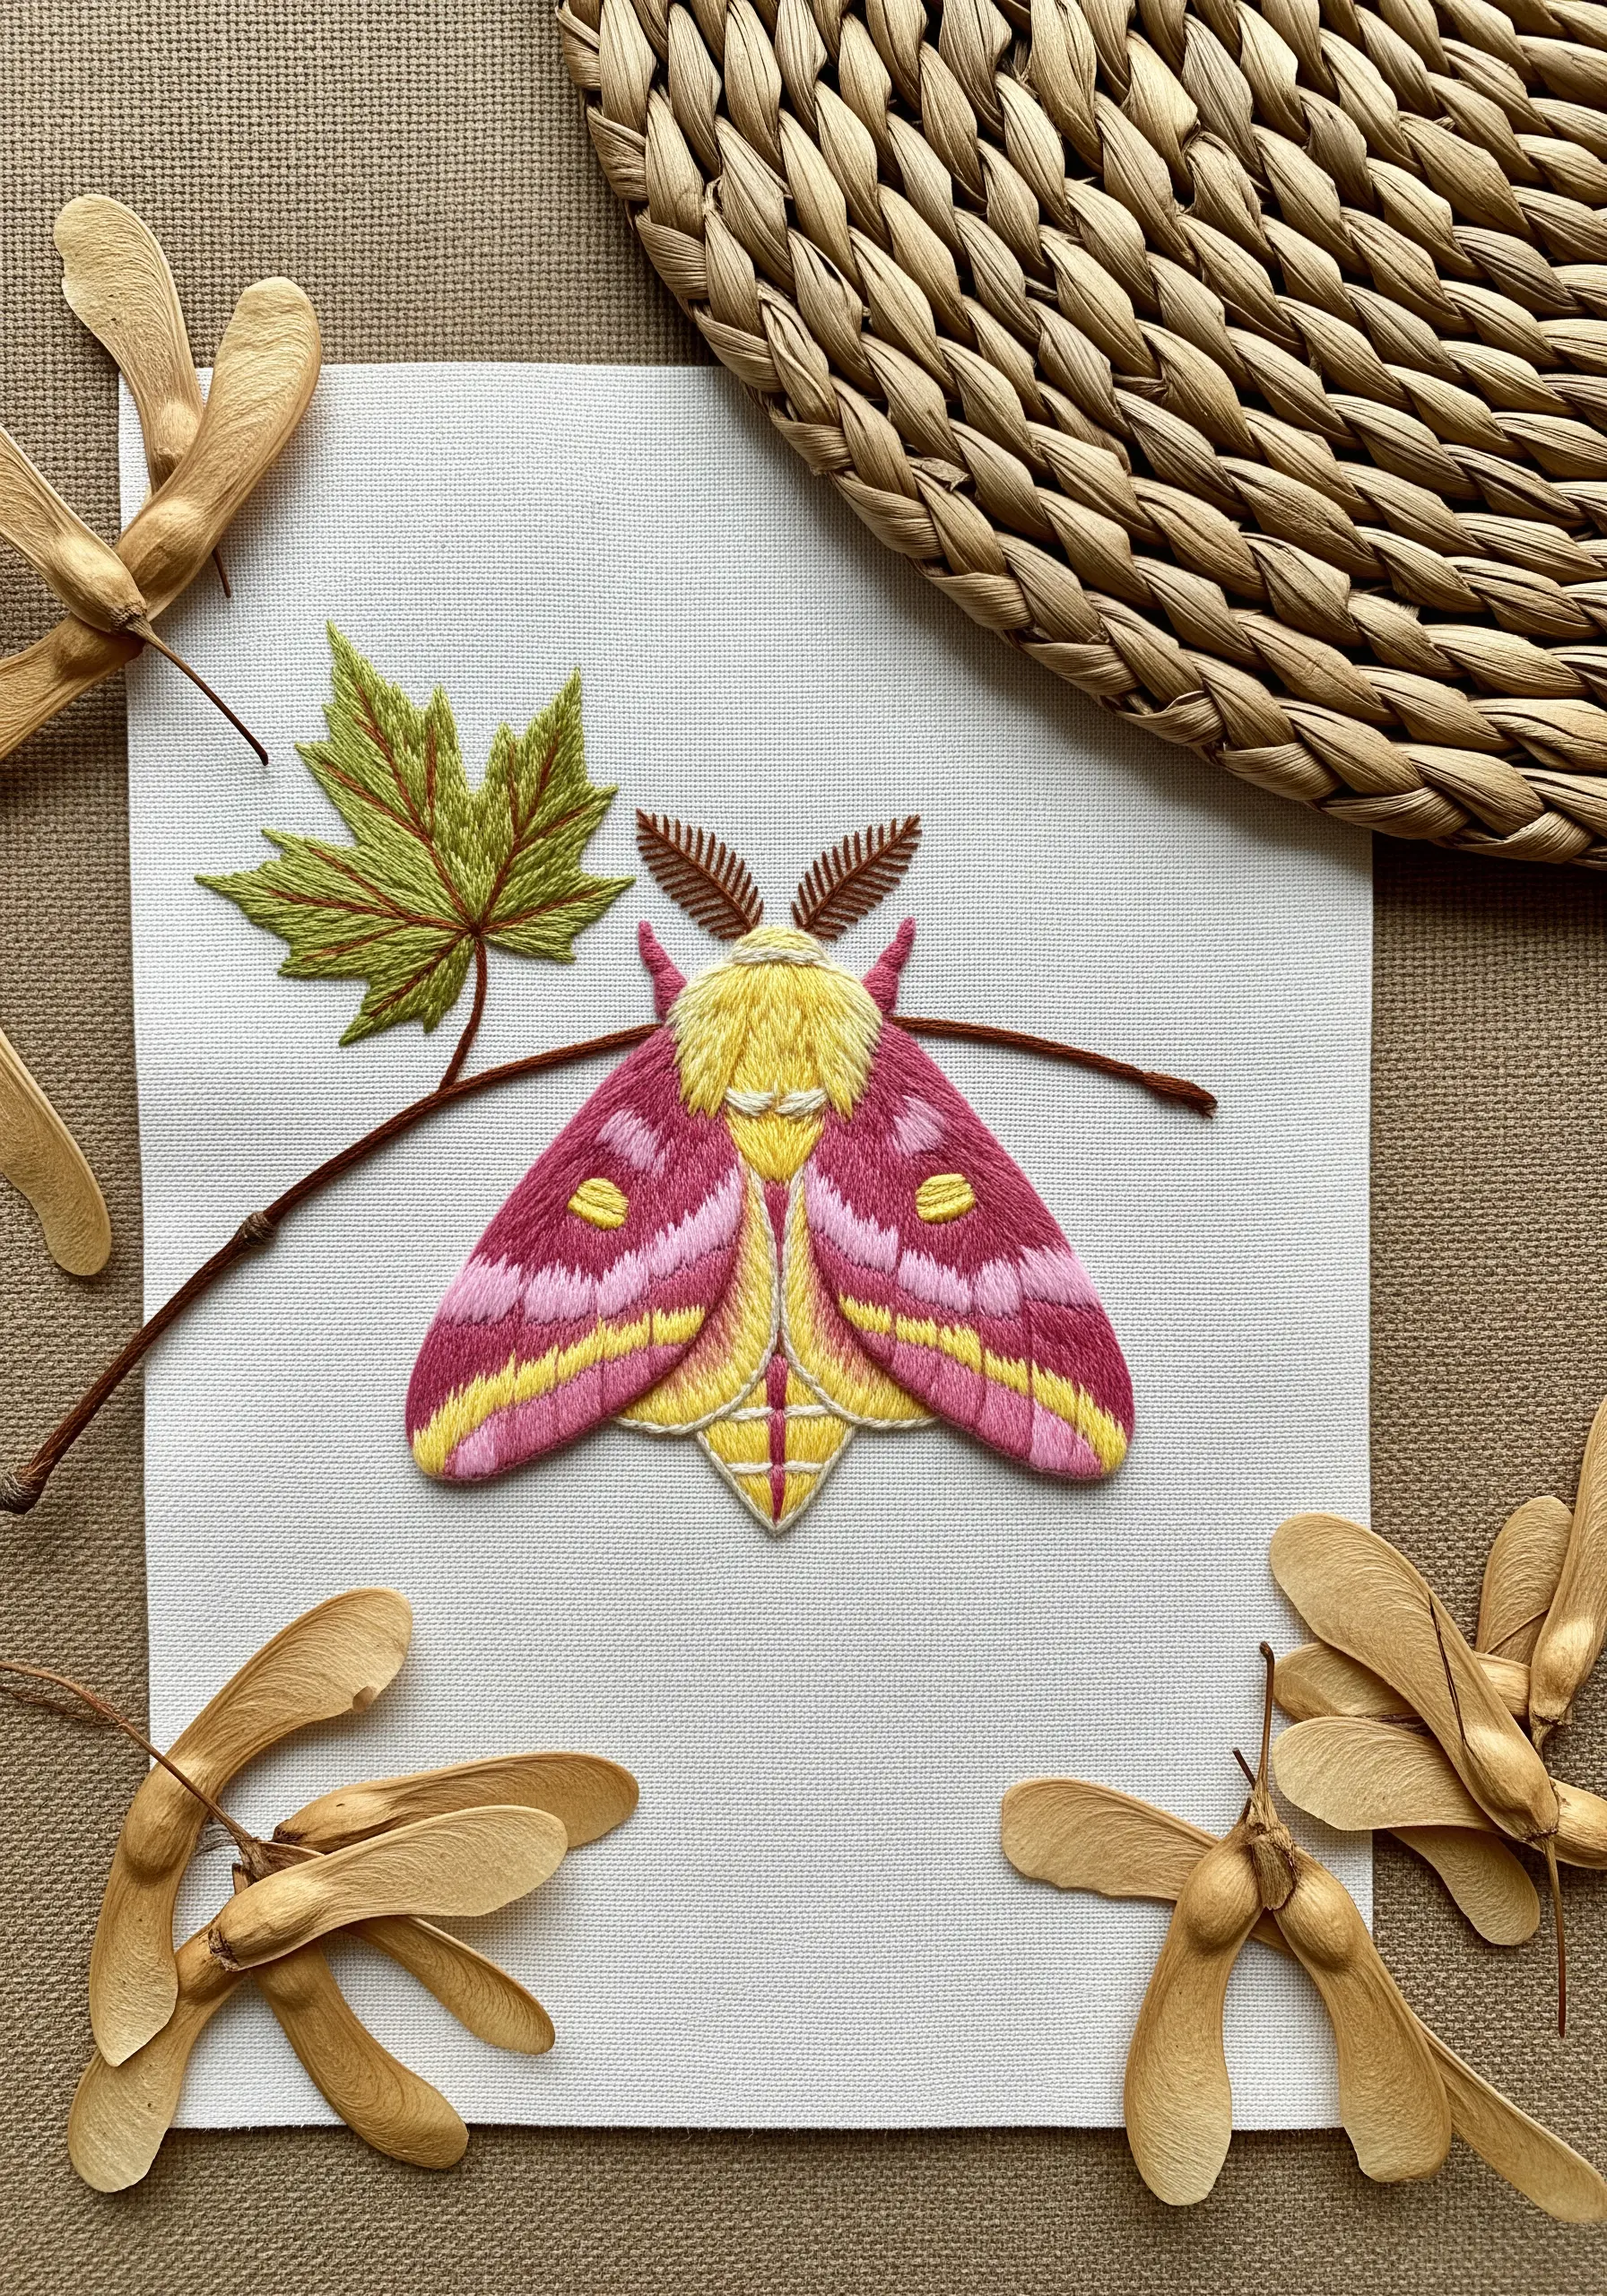
For a moth with a soft, almost watercolour-like appearance, focus on gentle color transitions rather than sharp lines.
The Rosy Maple moth is perfect for this technique. Use long-and-short stitches with single-strand floss, allowing the pink and yellow to blend into one another softly at the edges.
Avoid harsh black outlines. Instead, define shapes with a slightly darker shade of the fill color—for example, a dusty rose to outline the pink sections. This maintains the overall softness of the design.
14. Integrating Your Subject with its Environment
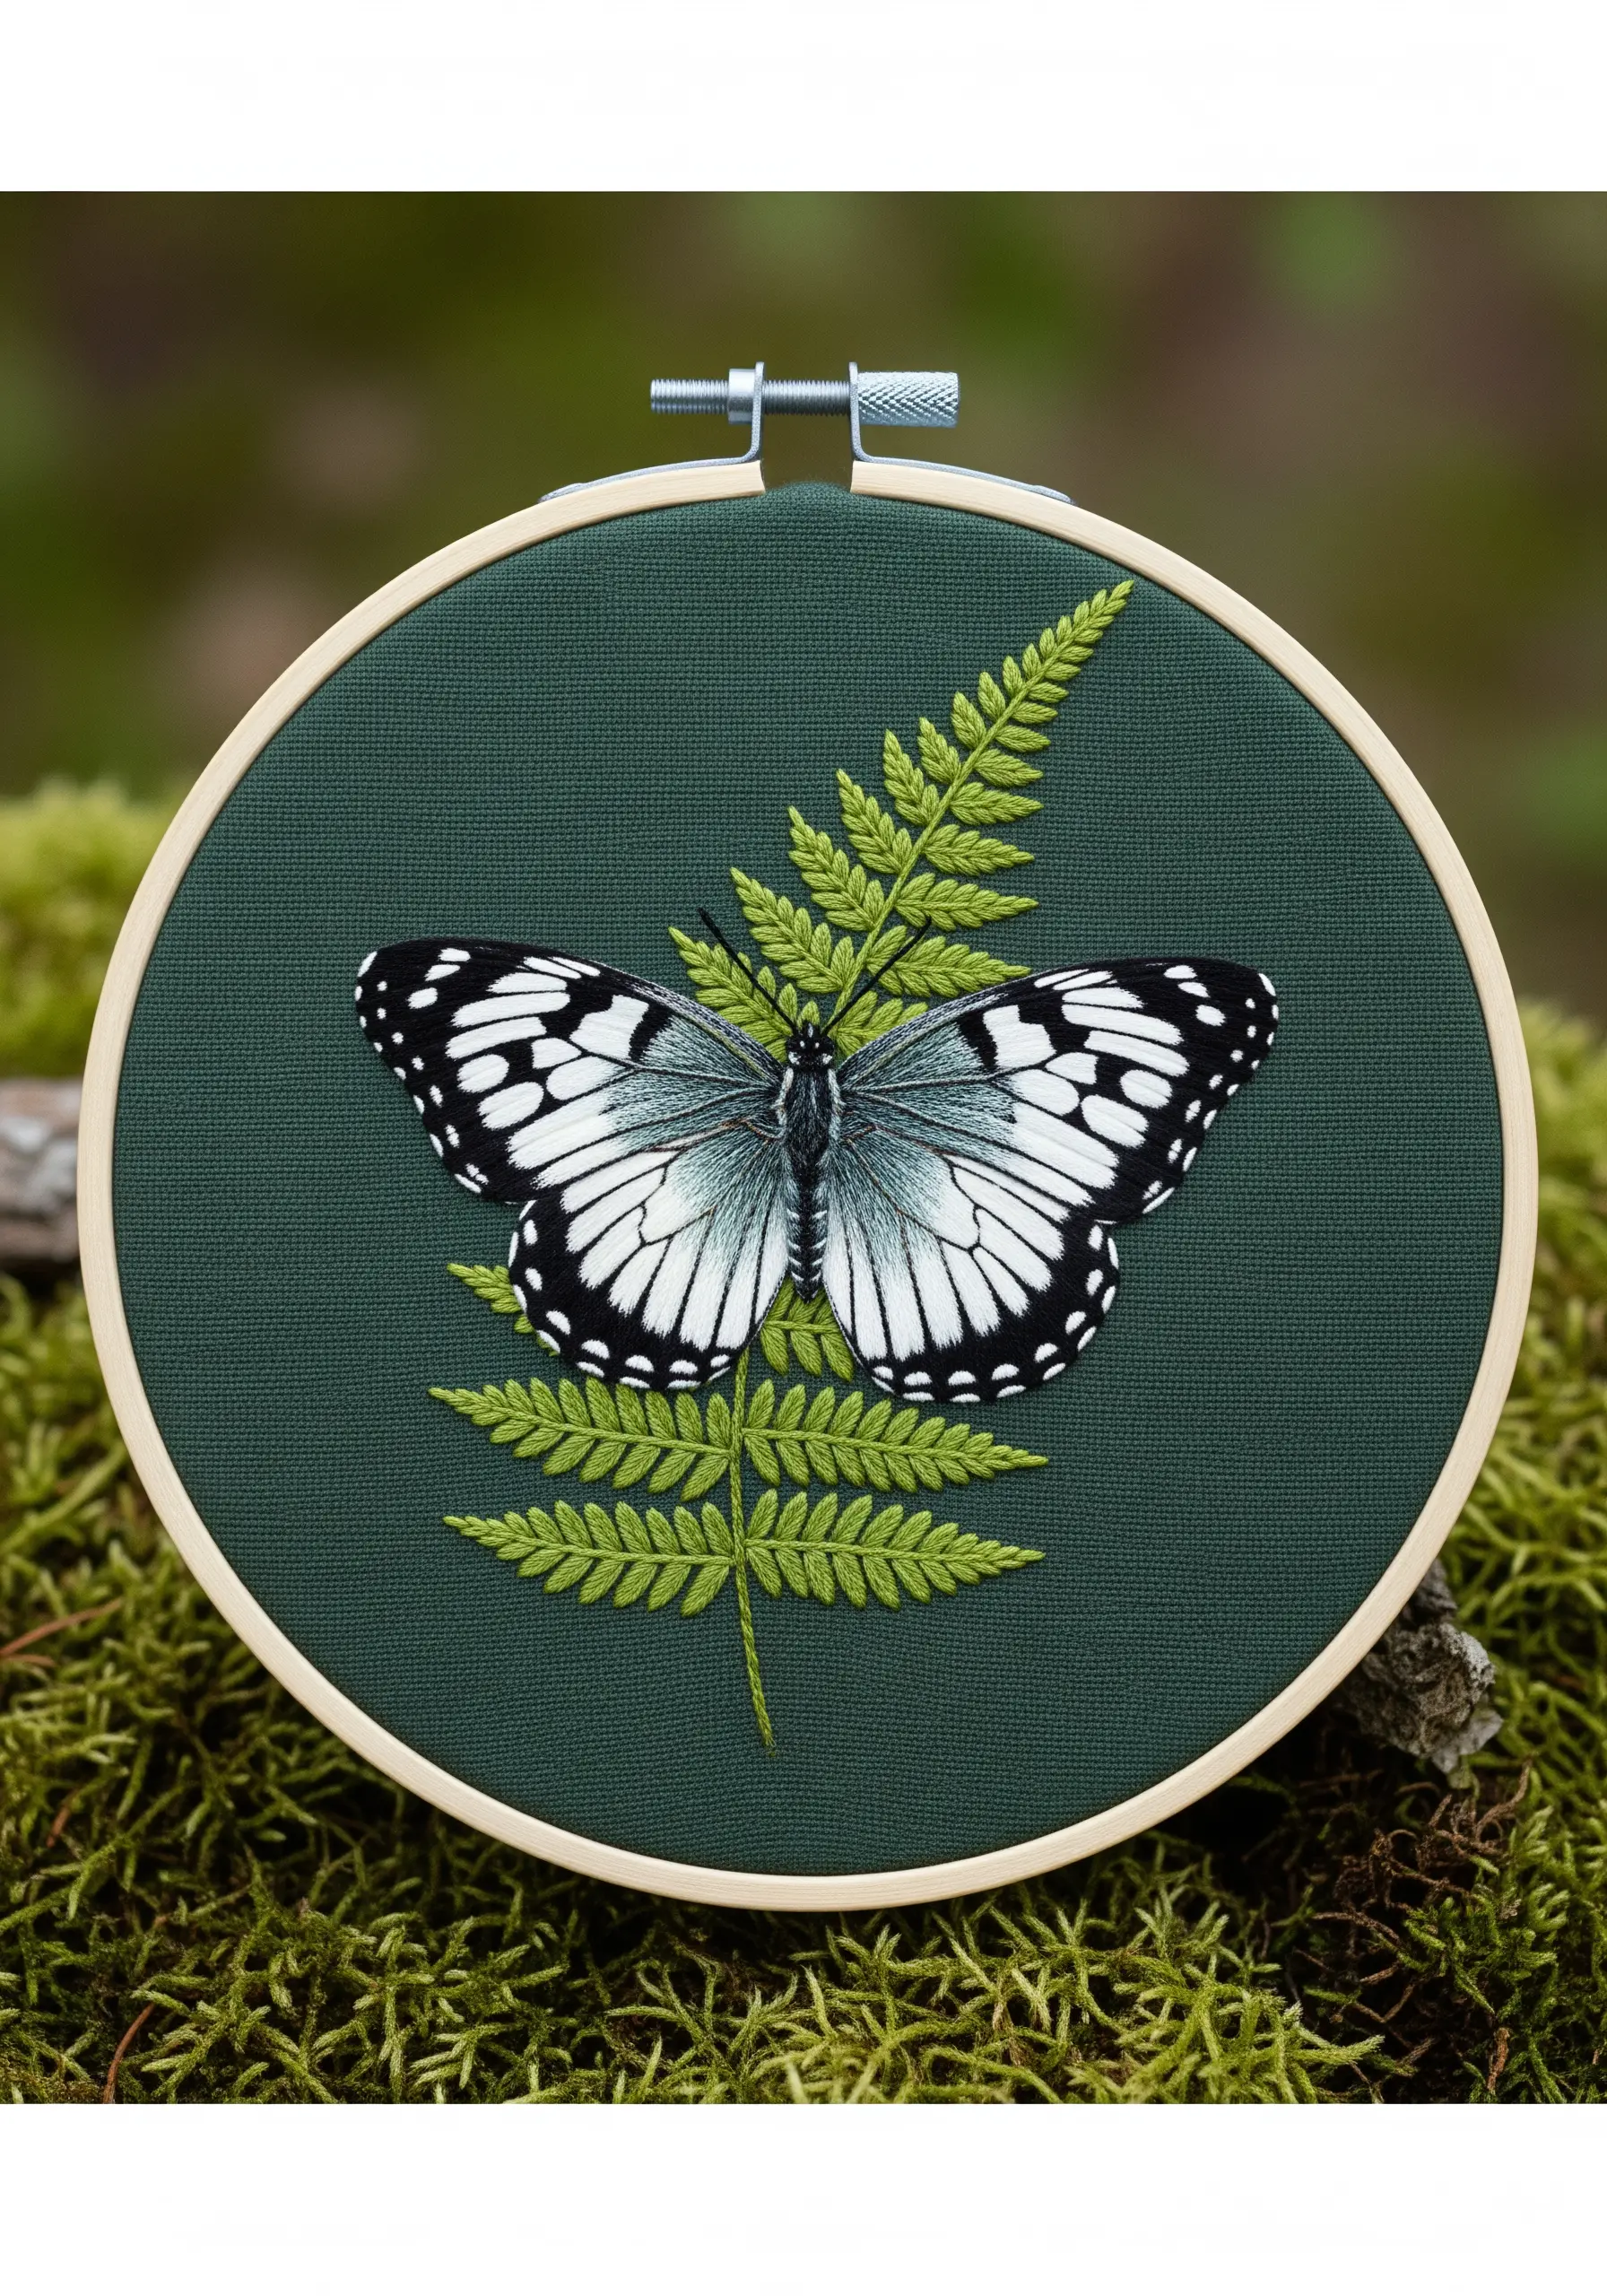
Make your butterfly look truly at home by placing it on a complementary botanical element, like this fern.
Stitch the fern first, using a simple fishbone stitch for the leaves to create a central vein and natural texture.
Then, position the butterfly so its legs appear to be resting on the foliage. This small detail creates a narrative and grounds the subject in its environment.
The deep green fabric enhances the woodland feel and makes the stark white of the butterfly’s wings stand out beautifully.
15. Capturing Sheen with Satin Stitch

The key to a flawless satin stitch is creating a stable foundation. First, outline the entire shape with a split stitch.
Then, fill the shape with your satin stitches, bringing your needle up just outside the split-stitch line and down on the other side. This creates a slightly raised, padded effect and a perfectly crisp edge.
For the smoothest sheen, ensure all your stitches lay parallel and close together, without overlapping. This technique allows the light to reflect evenly across the surface, giving the thread a luxurious, silky finish.
16. Building Complexity with Layered Details
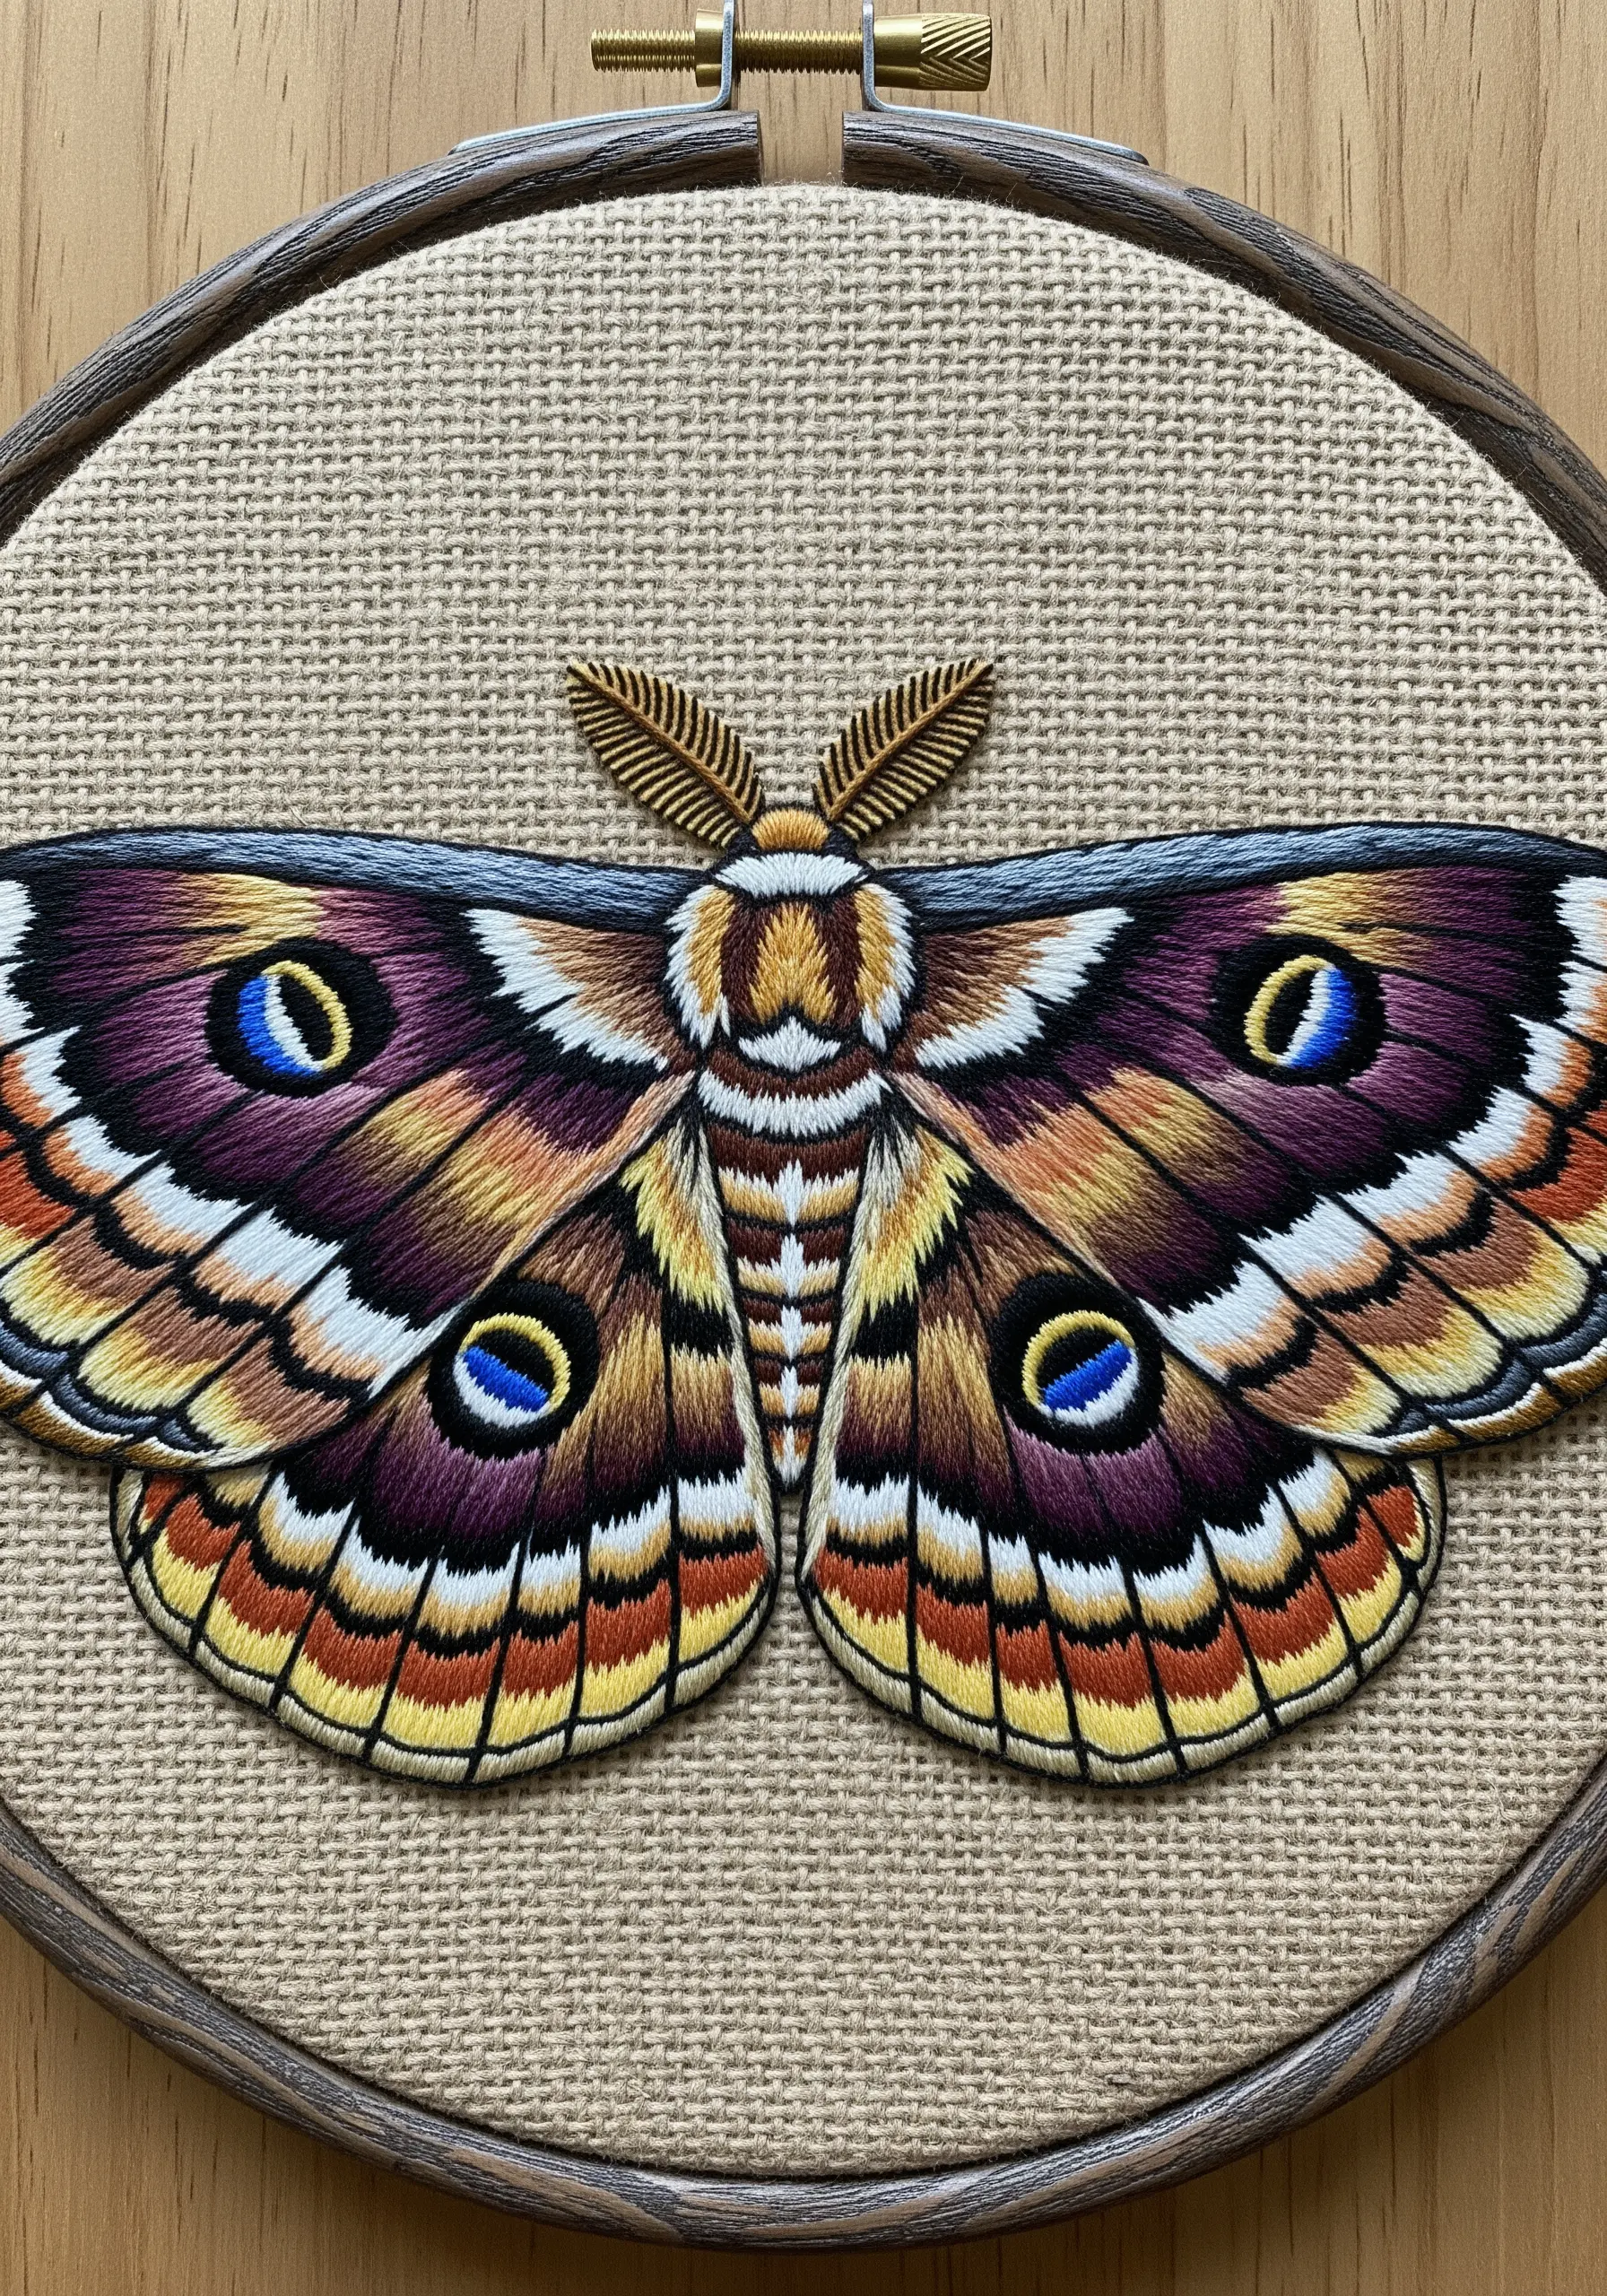
For a highly intricate design like this Emperor moth, work in layers from the background to the foreground.
Start by filling the largest color blocks on the wings. Then, add the smaller details like the bands of color, the eyespots, and finally the fine black outlines.
This layering approach helps you manage complex patterns without getting lost. For the feathery antennae, use a series of detached chain stitches or very small, angled straight stitches to mimic their delicate texture.
17. Creating Elegant, Minimalist Patches

Transform a simple tote into a chic accessory with delicate, scatter-style patches.
Instead of dense satin stitch, use a simple backstitch or stem stitch for the outlines. This minimal line drawing embroidery approach is quick, elegant, and uses very little thread.
Embroider them on a separate piece of canvas, then cut them out leaving a tiny fabric border. Secure them to the tote with an iron-on adhesive, then add a few small, securing stitches around the edge for durability.
This scattered composition feels light, airy, and effortlessly stylish.
18. High-Impact Color on Black Canvas

When working with vibrant, saturated colors like this emerald green, a black background provides the ultimate stage.
The high contrast makes the colors appear even richer and more intense. Before you begin, trace your design with a white or silver water-soluble transfer pen, which will be clearly visible on the dark fabric.
To create the soft, fuzzy texture on the flowers, use a series of straight stitches in a starburst pattern for the petals and tightly packed French knots for the centers.
19. Sculpting with Padded Satin Stitch
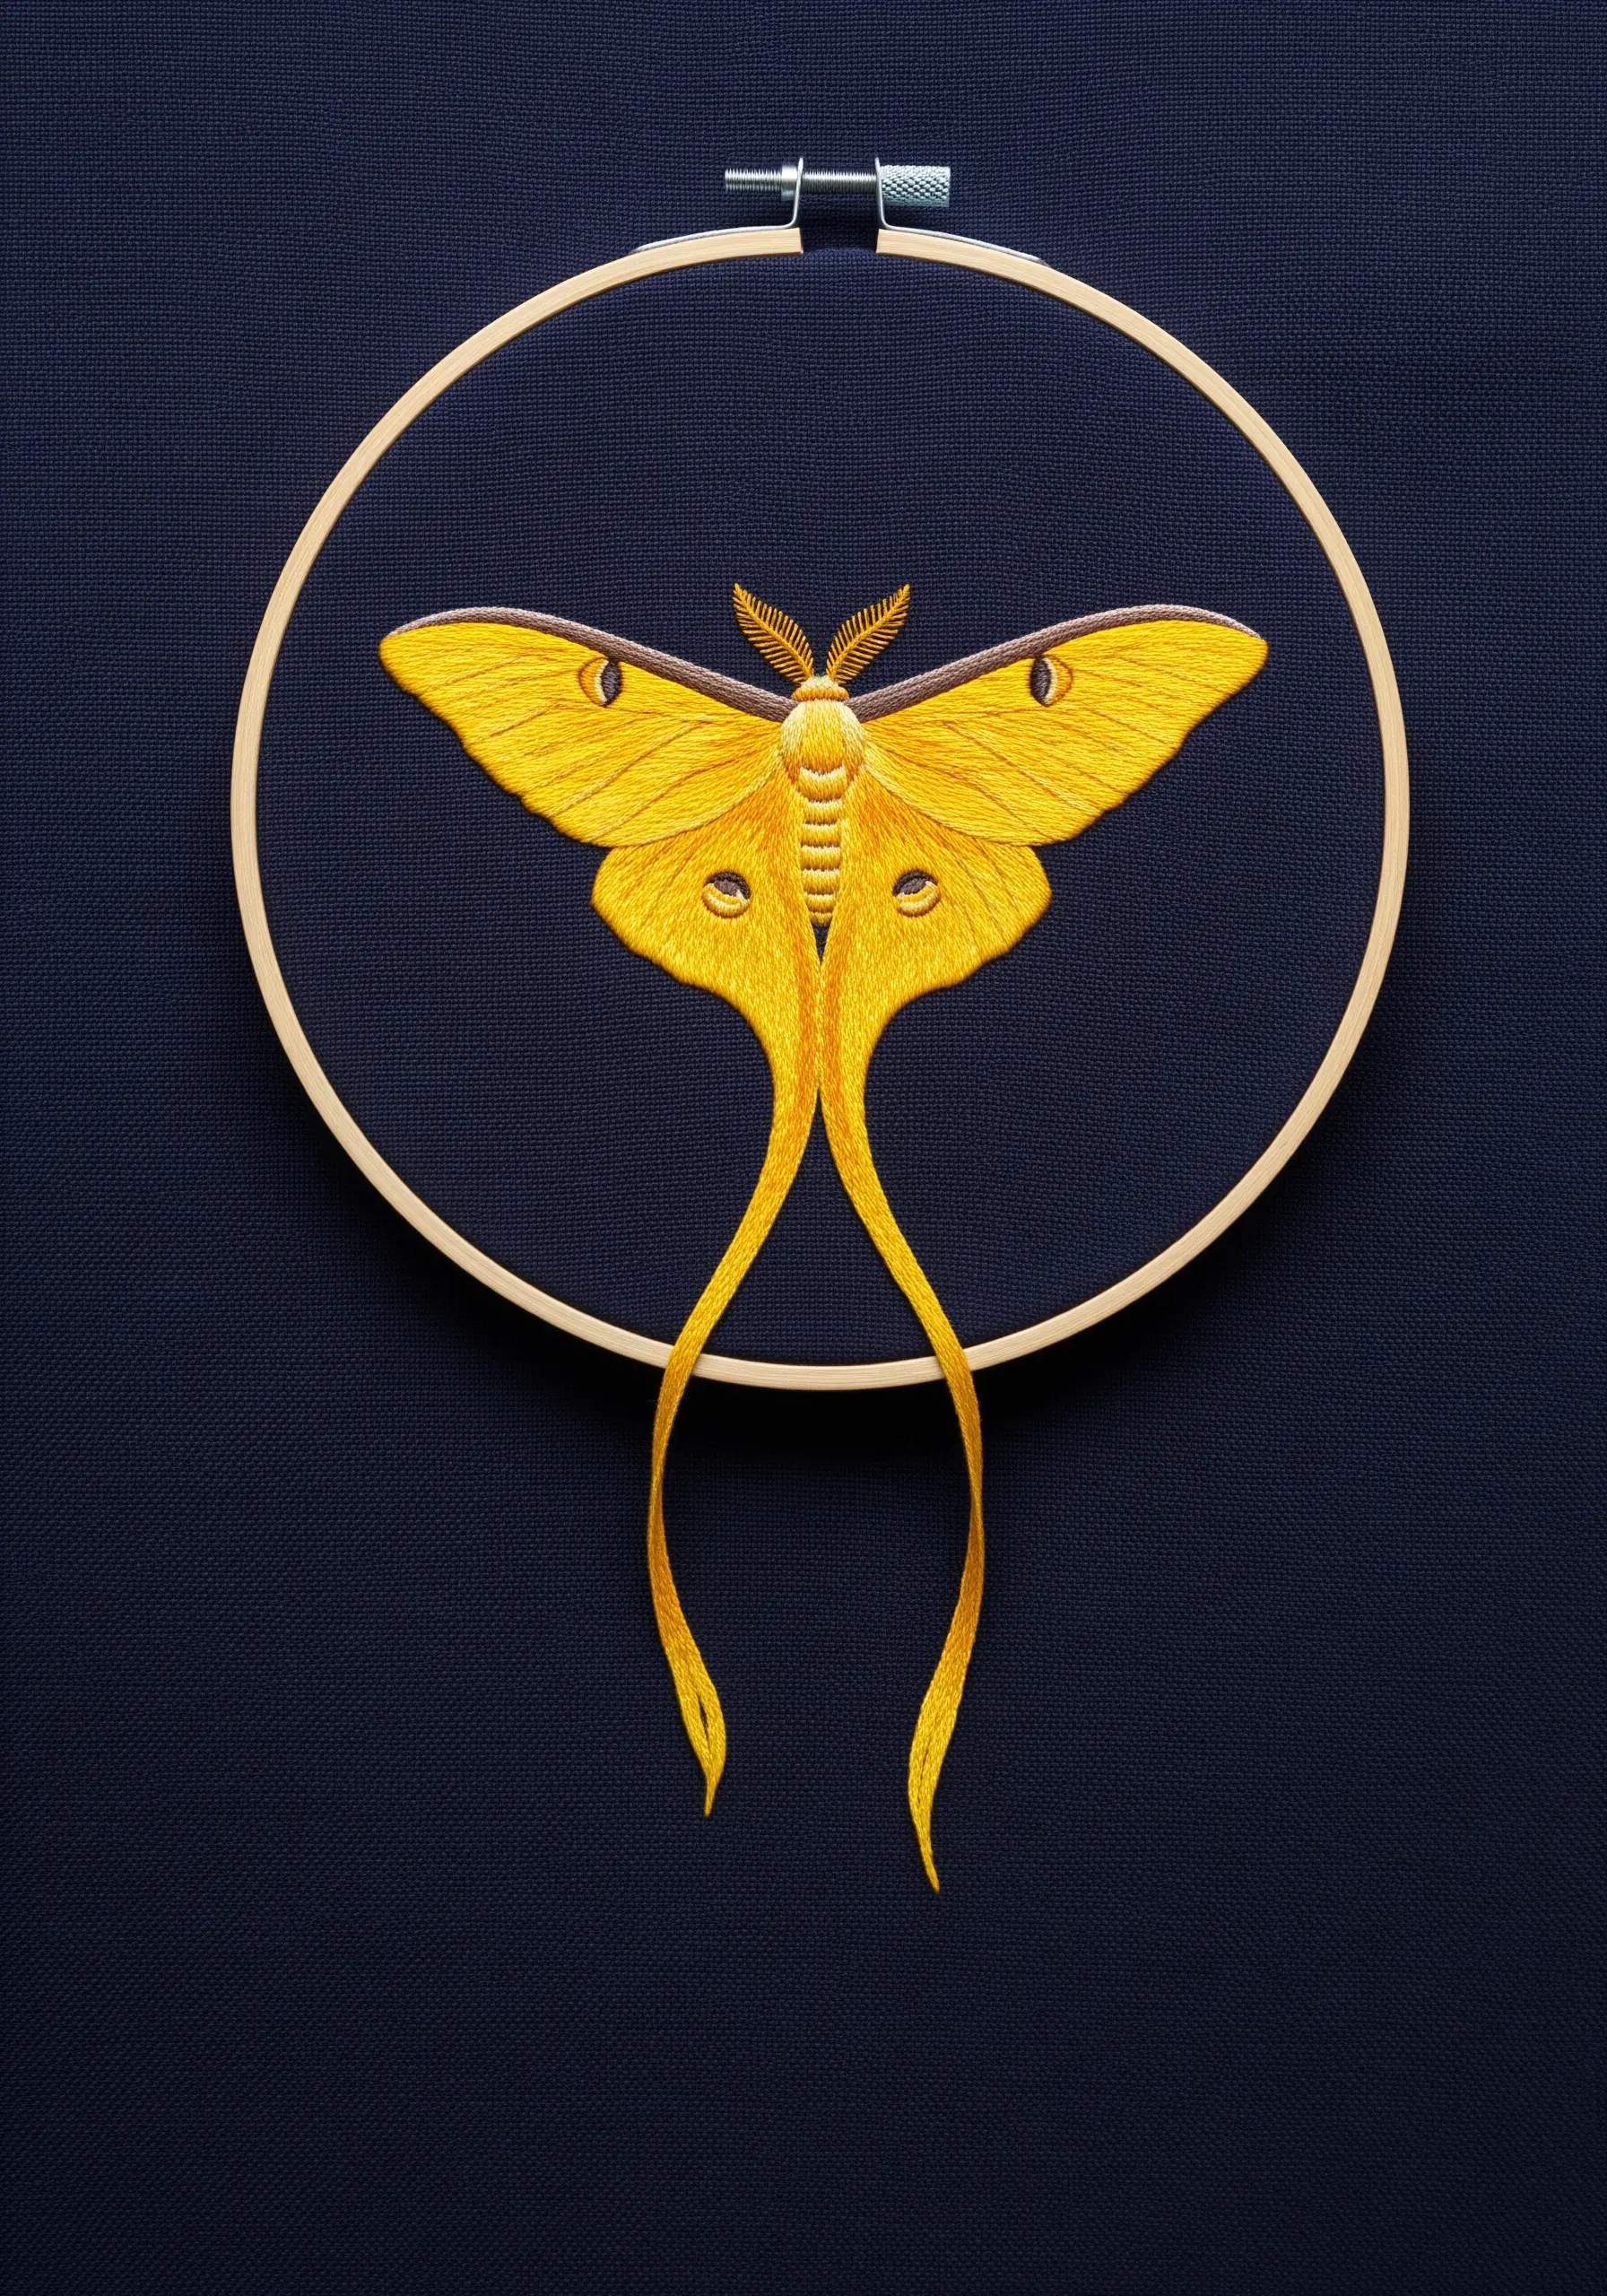
To give your moth’s body and wings a three-dimensional, sculptural quality, use padding.
First, fill the areas you want to raise—like the body and the upper wing sections—with a series of foundation stitches (small, parallel straight stitches or seed stitches).
Then, cover this padding with your final satin stitches, working in the opposite direction. This simple step lifts the embroidery off the surface, creating beautiful highlights and shadows that add realism and depth.
For the long, trailing tails of the Comet moth, embroider them directly onto the fabric, letting them hang freely if your design is unmounted.
20. Curating an Embroidered Specimen Collection
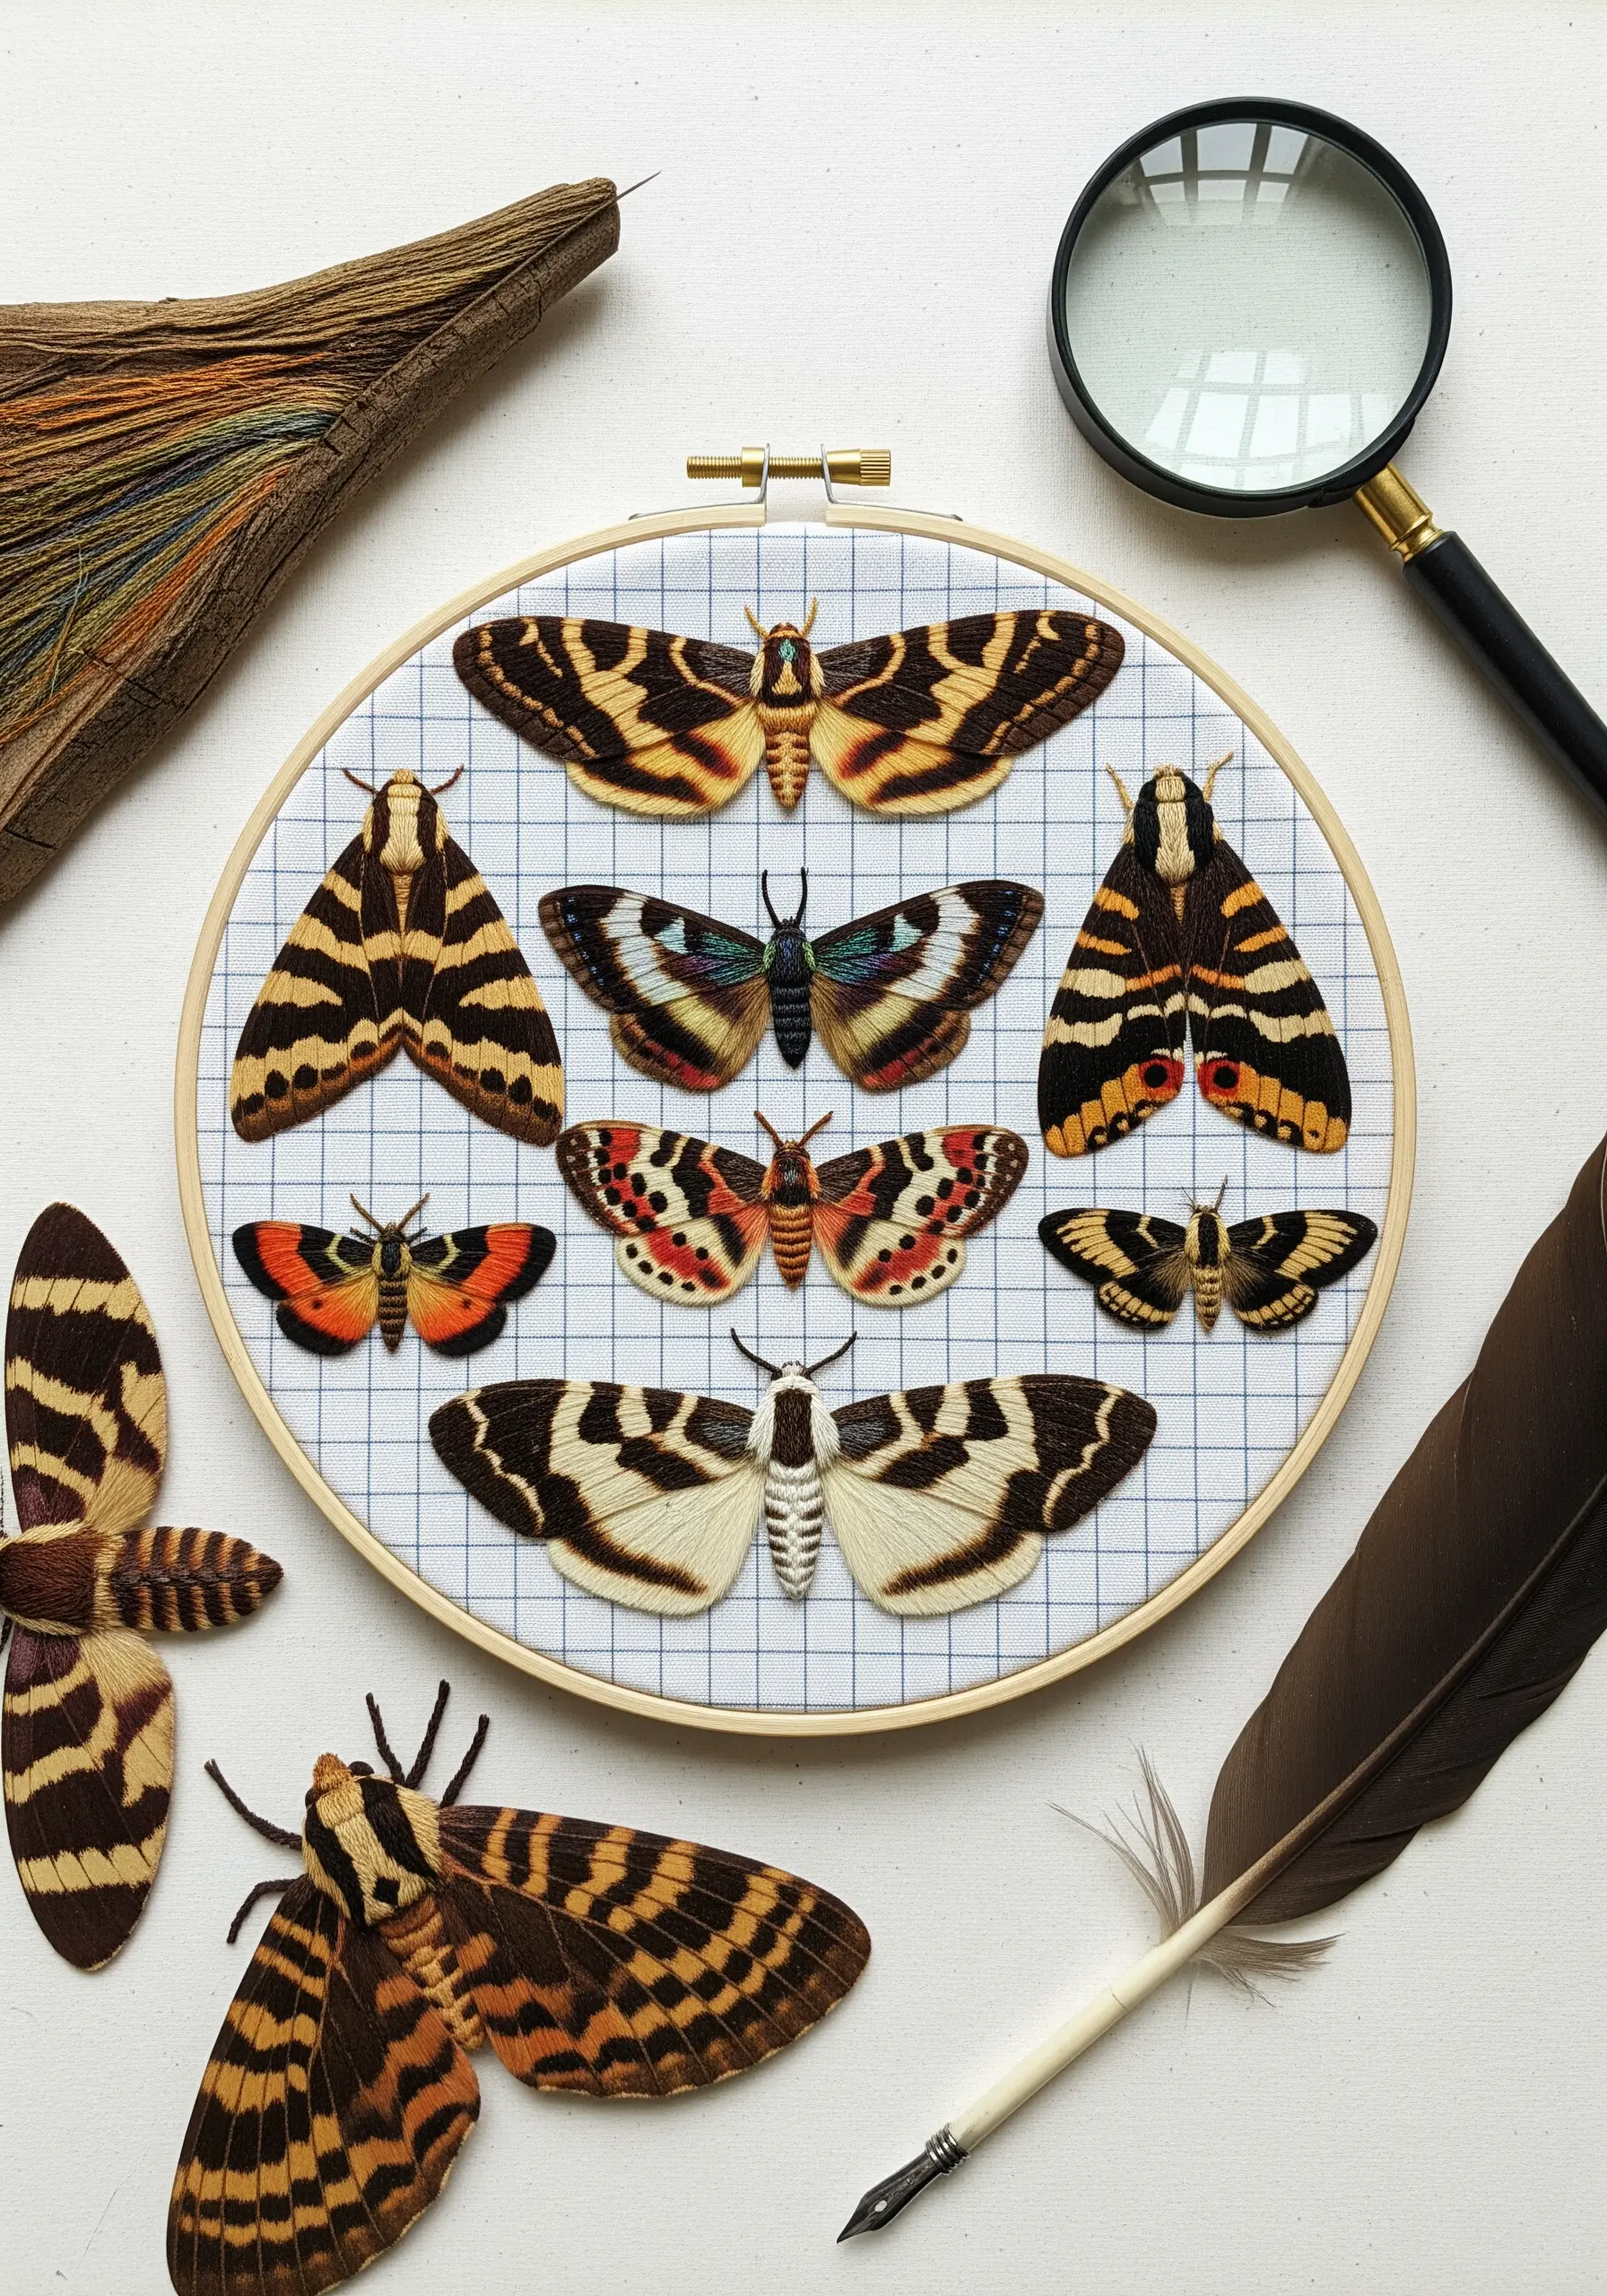
To create a balanced ‘specimen box’ composition, map out your placement before stitching. Arrange your motifs symmetrically for a classic, scientific look.
Using a gridded fabric or a temporary, water-soluble grid pattern is essential for maintaining perfect alignment and uniform spacing.
Focus on capturing the distinct patterns of each species, using single-strand floss to achieve the finest possible detail in a small space.
This type of project is a wonderful way to practice precision and celebrate the diversity of nature’s designs.


