

You have the threads, the fabric, and a desire to create something beautiful. But sometimes, there’s a gap between the vision in your mind and the piece in your hoop. You see other work that looks polished, intentional, and artistic, and you wonder how to bring that same clarity to your own stitches.
Let’s close that gap, not with complicated rules, but with refined techniques you can apply right now. This isn’t about changing your style; it’s about elevating it. We’ll explore how adjusting a stitch direction can create dimension, how a thoughtful color choice can evoke a mood, and how the right frame can turn a simple project into a piece of home decor you’re truly proud of.
Think of this as a quiet conversation about intention. Your hands already know how to stitch. I’m just here to help you guide them with more confidence, turning your creative impulses into cozy, colorful art that truly makes your house feel like a home.
1. Create a Cohesive Seasonal Gallery Wall
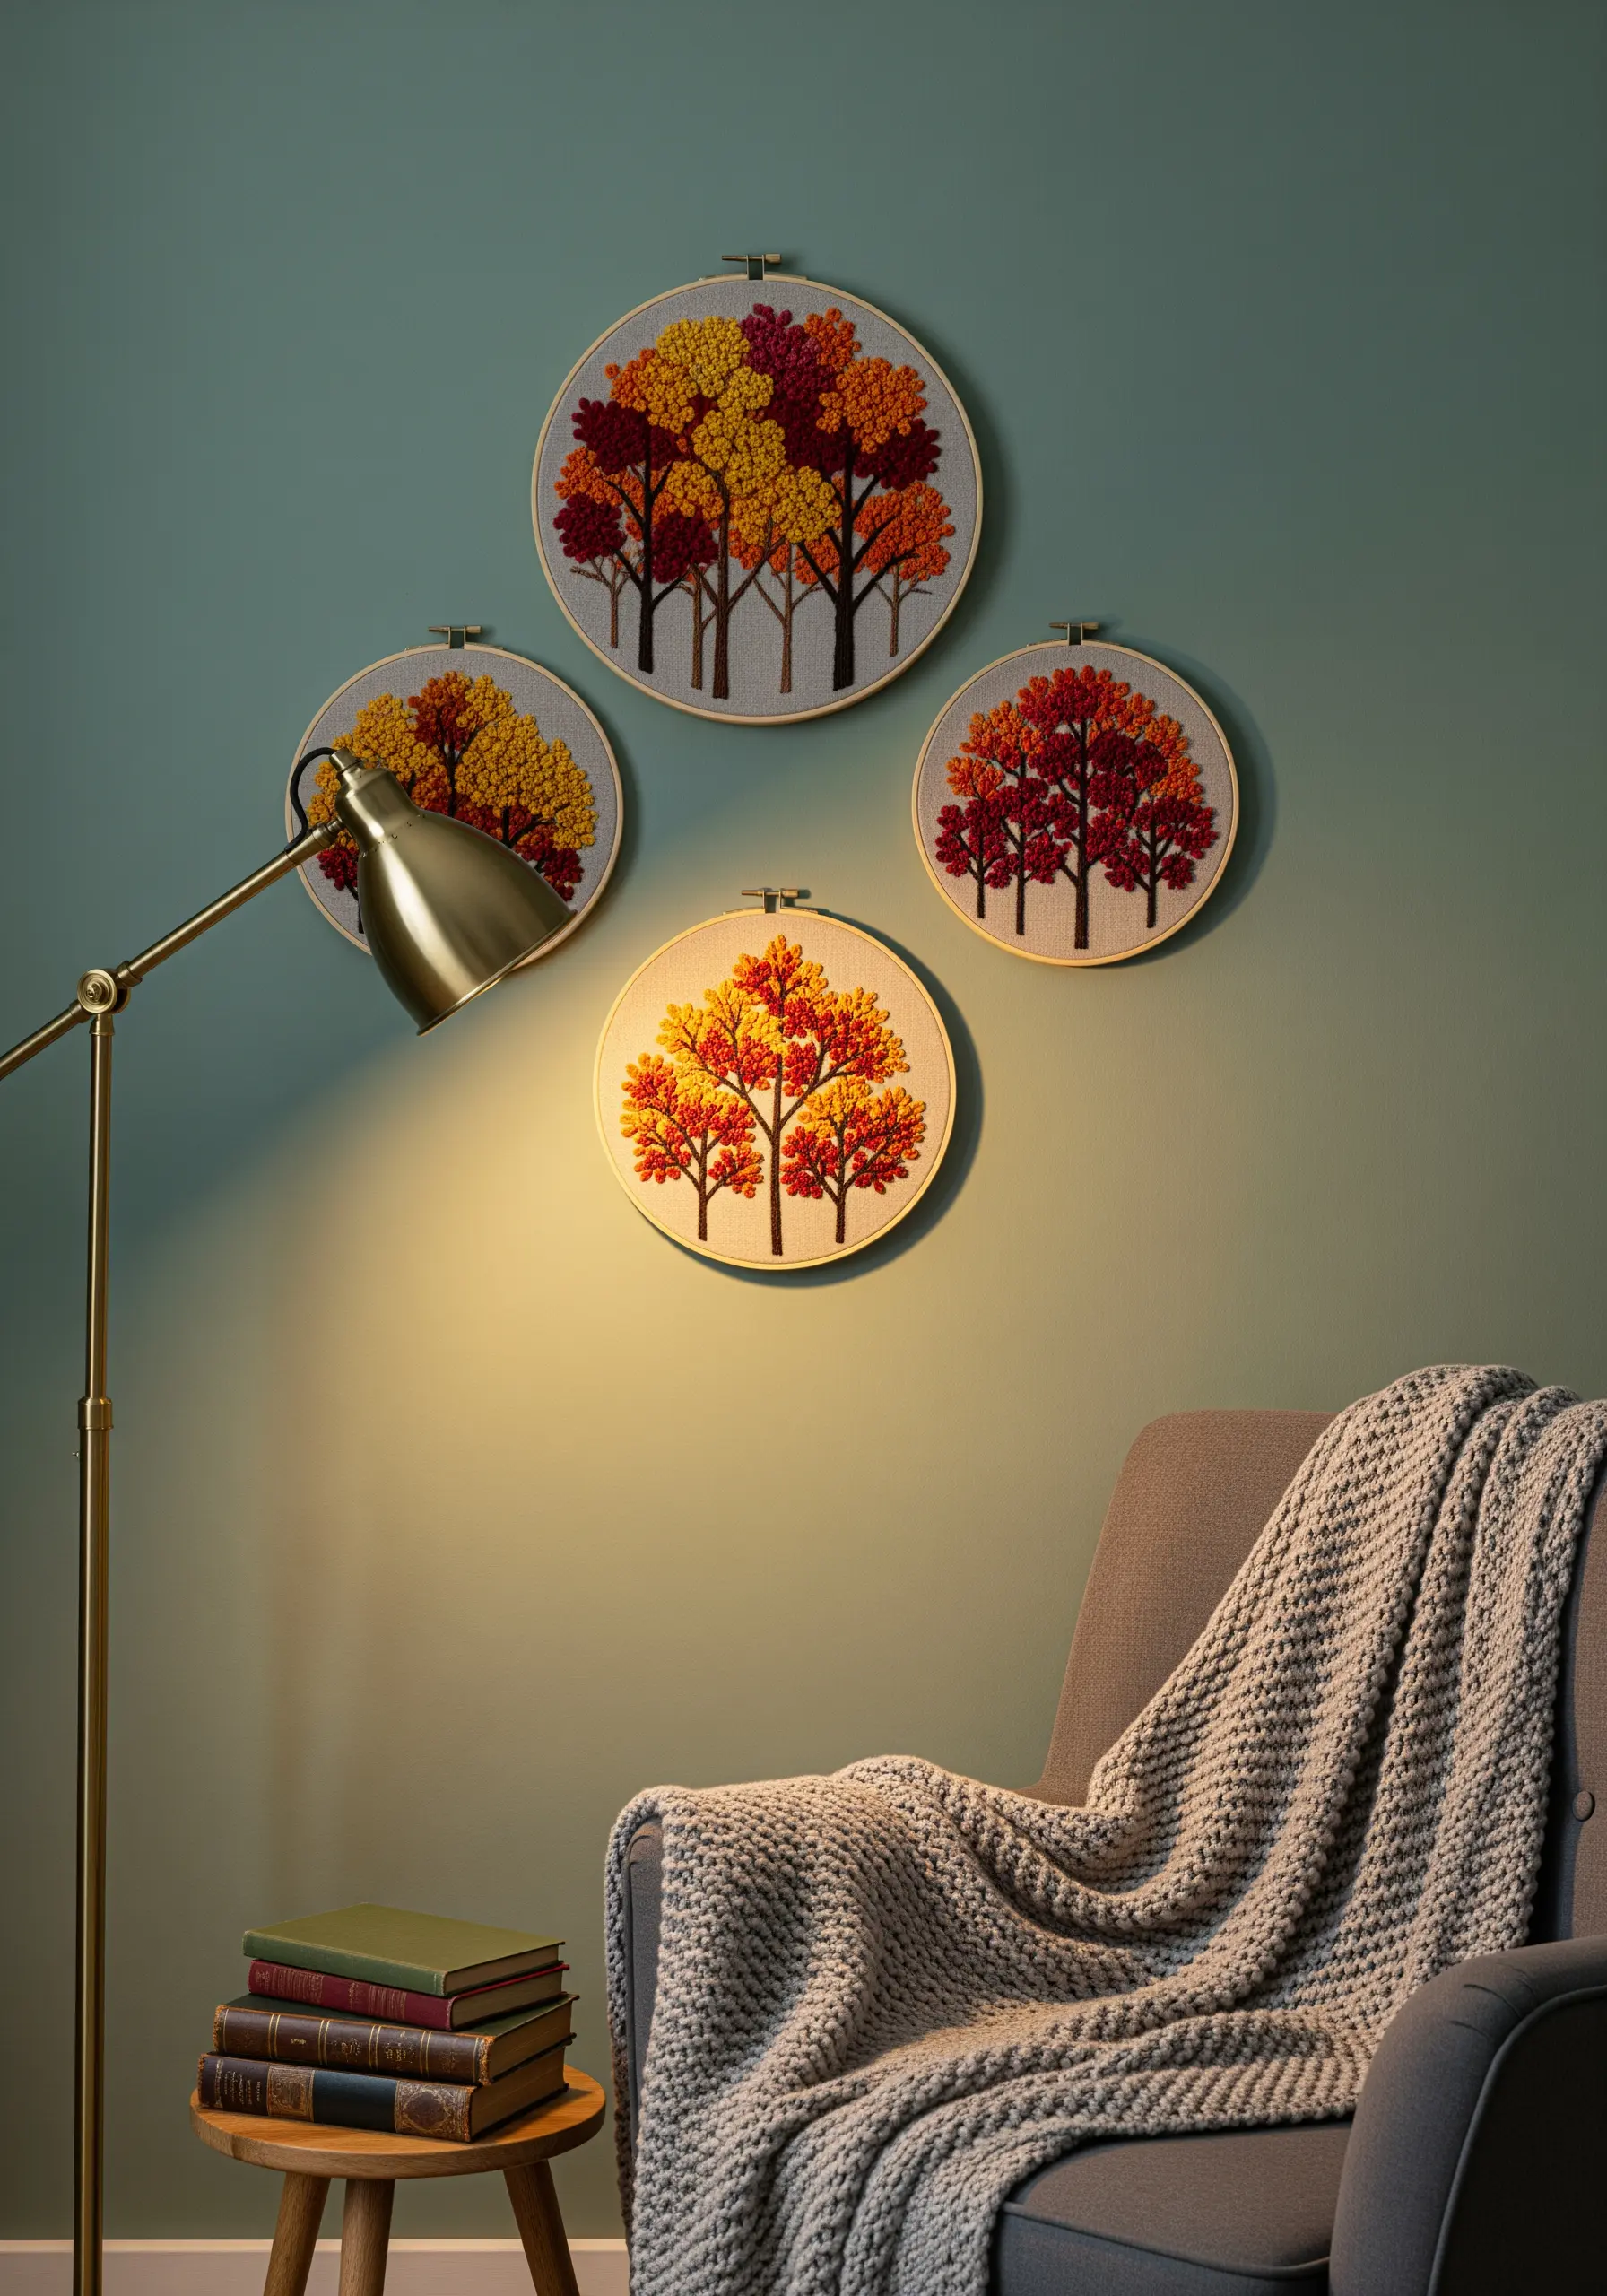
Group multiple hoops to tell a larger story, using a unified theme and color palette for maximum impact.
Select an analogous color scheme—like these warm autumnal reds, oranges, and golds—to ensure the pieces harmonize, even with different compositions.
Create a dense, tactile canopy on each tree using French knots or colonial knots, varying the placement of each color to suggest dappled light.
For the trunks, use a simple split stitch or stem stitch, altering their thickness and arrangement in each hoop to give every piece a unique character within the collection.
This method turns individual projects into a single, intentional art installation.
2. Stitch a Luminous Celestial Masterpiece
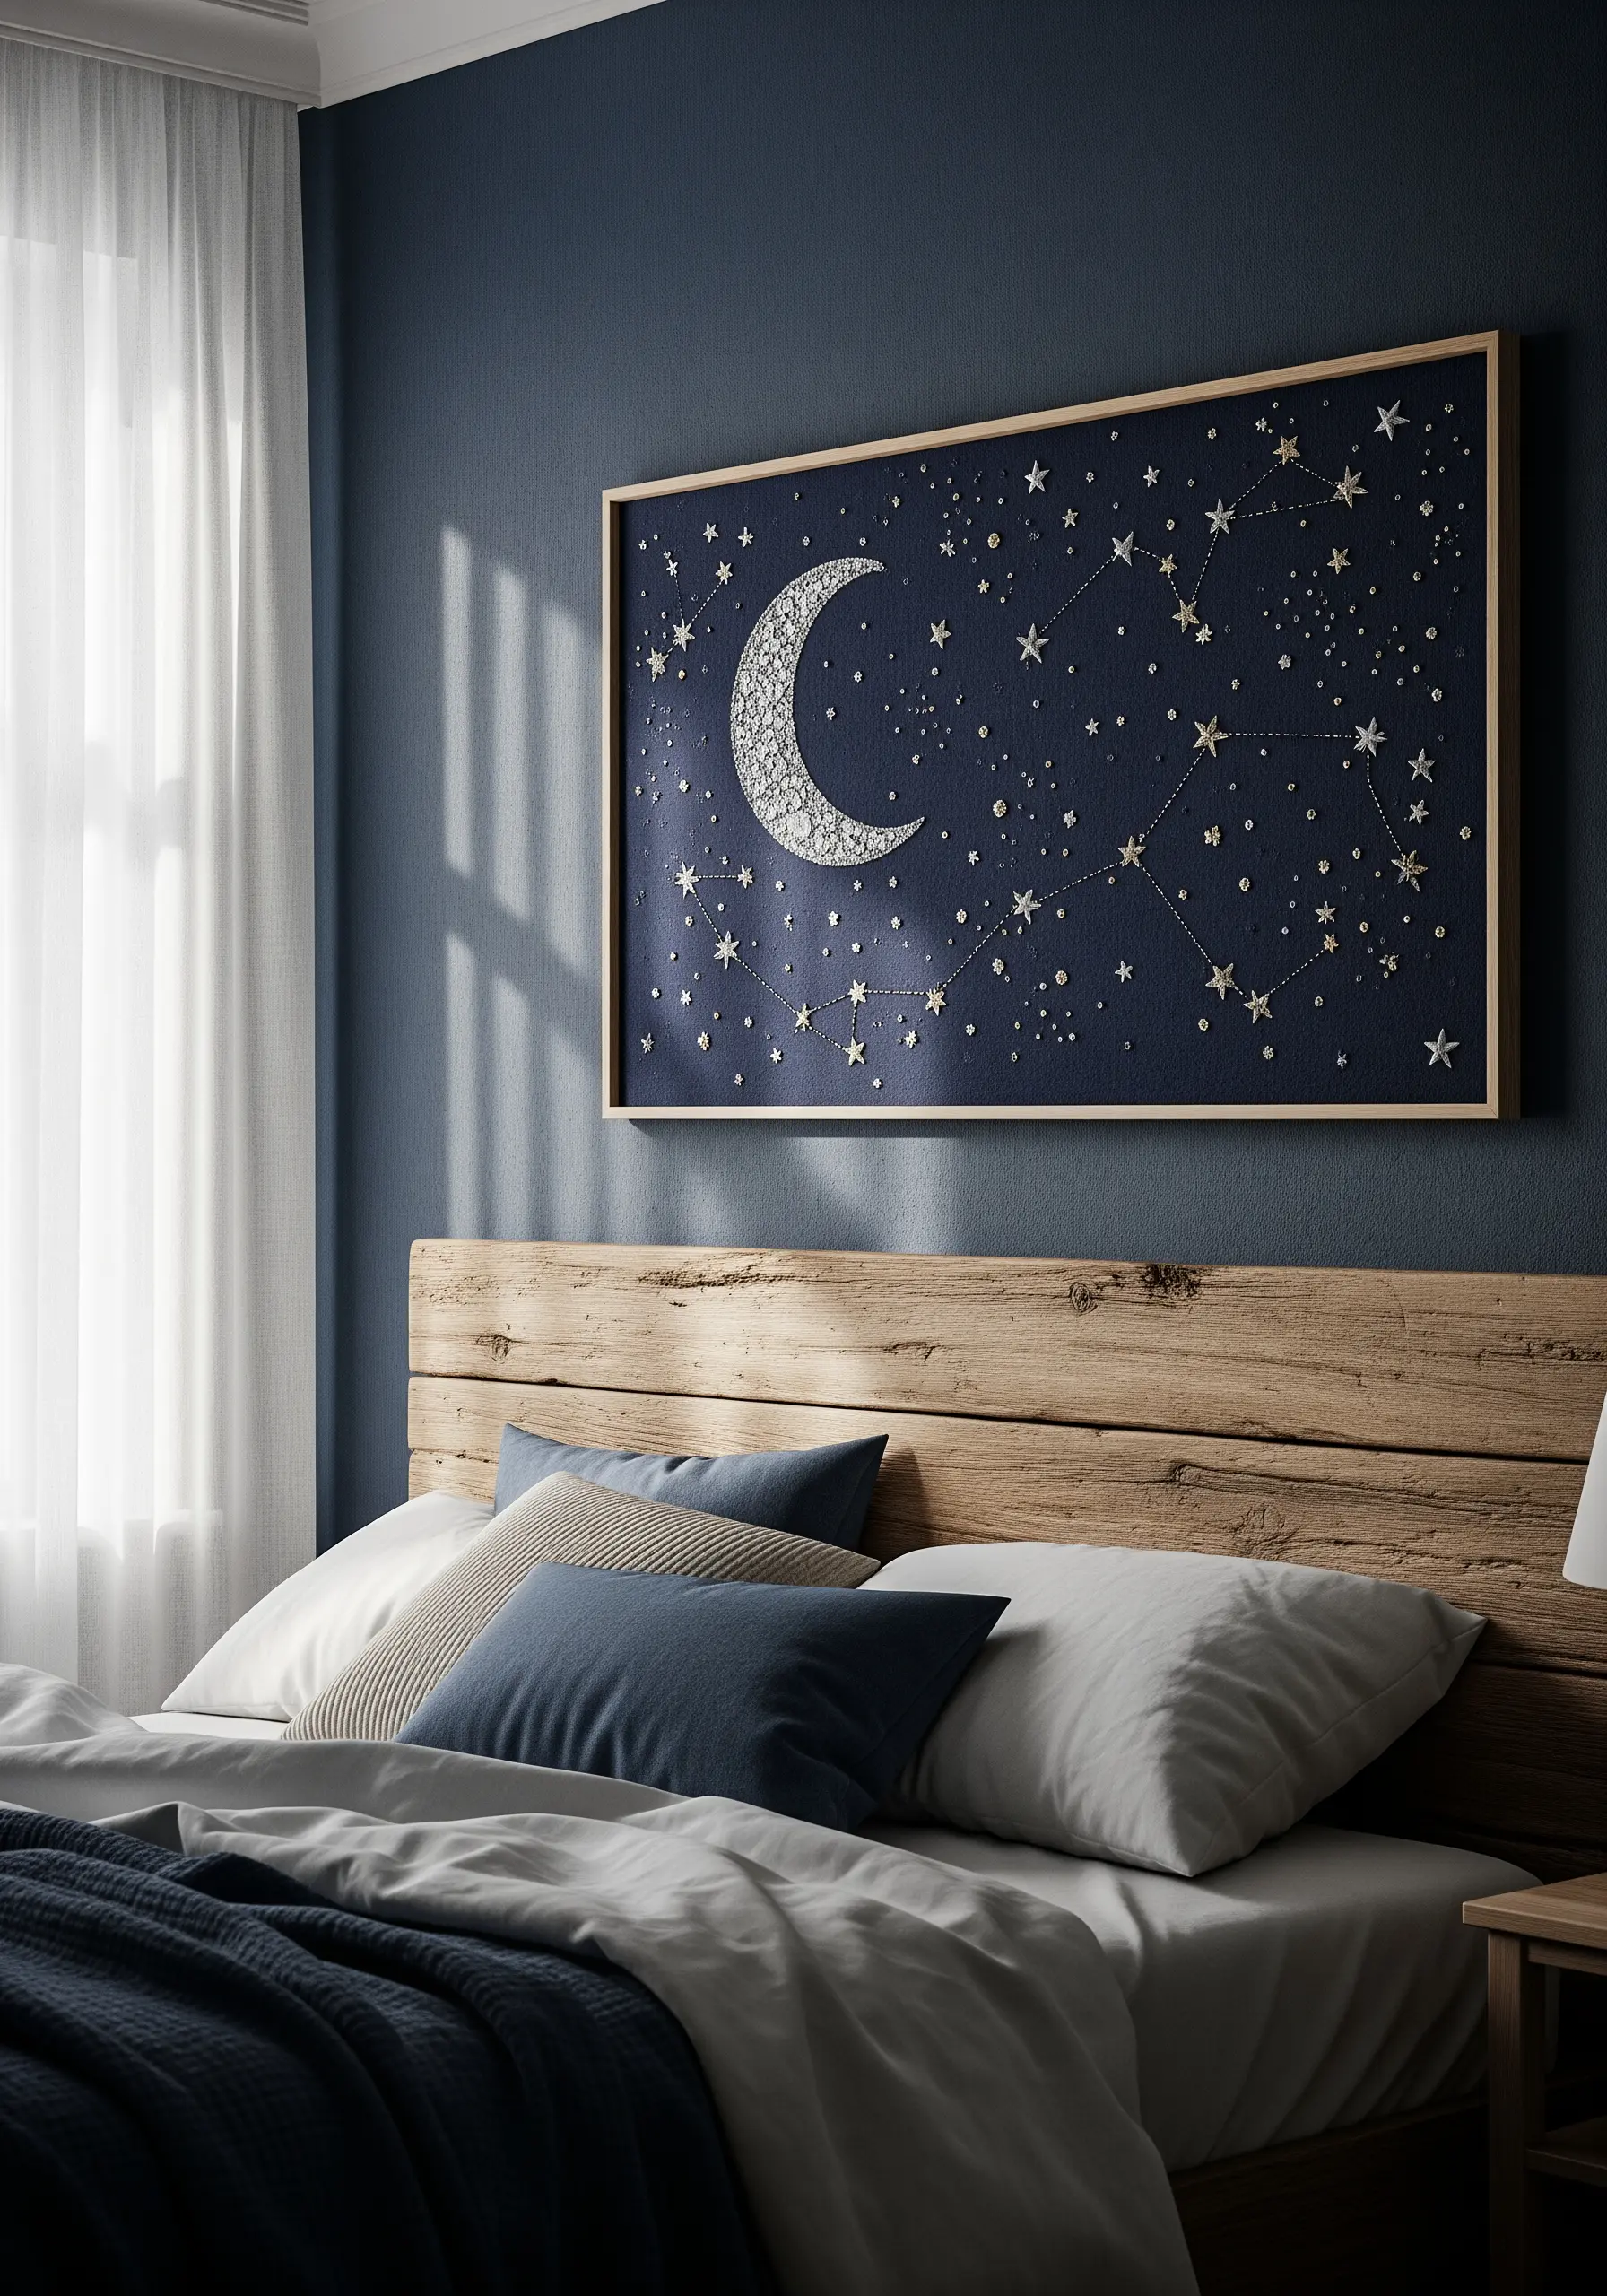
To make your celestial embroidery truly shine, choose a dark, high-quality linen or cotton fabric; the deep background makes metallics and light colors pop.
For the moon, create a raised, textured effect with a padded satin stitch—first lay down a base of straight stitches, then cover them with satin stitches angled in the opposite direction.
Use a single strand of fine metallic thread for the delicate constellation lines, stitching them with a simple backstitch for precision.
Scatter sequins or tiny seed beads among French knot stars to add a subtle, light-catching sparkle that mimics a real night sky.
Framing the piece without glass allows the metallic thread wall decor to retain its shimmer from every angle.
3. Cultivate a Delicate Kitchen Herbarium
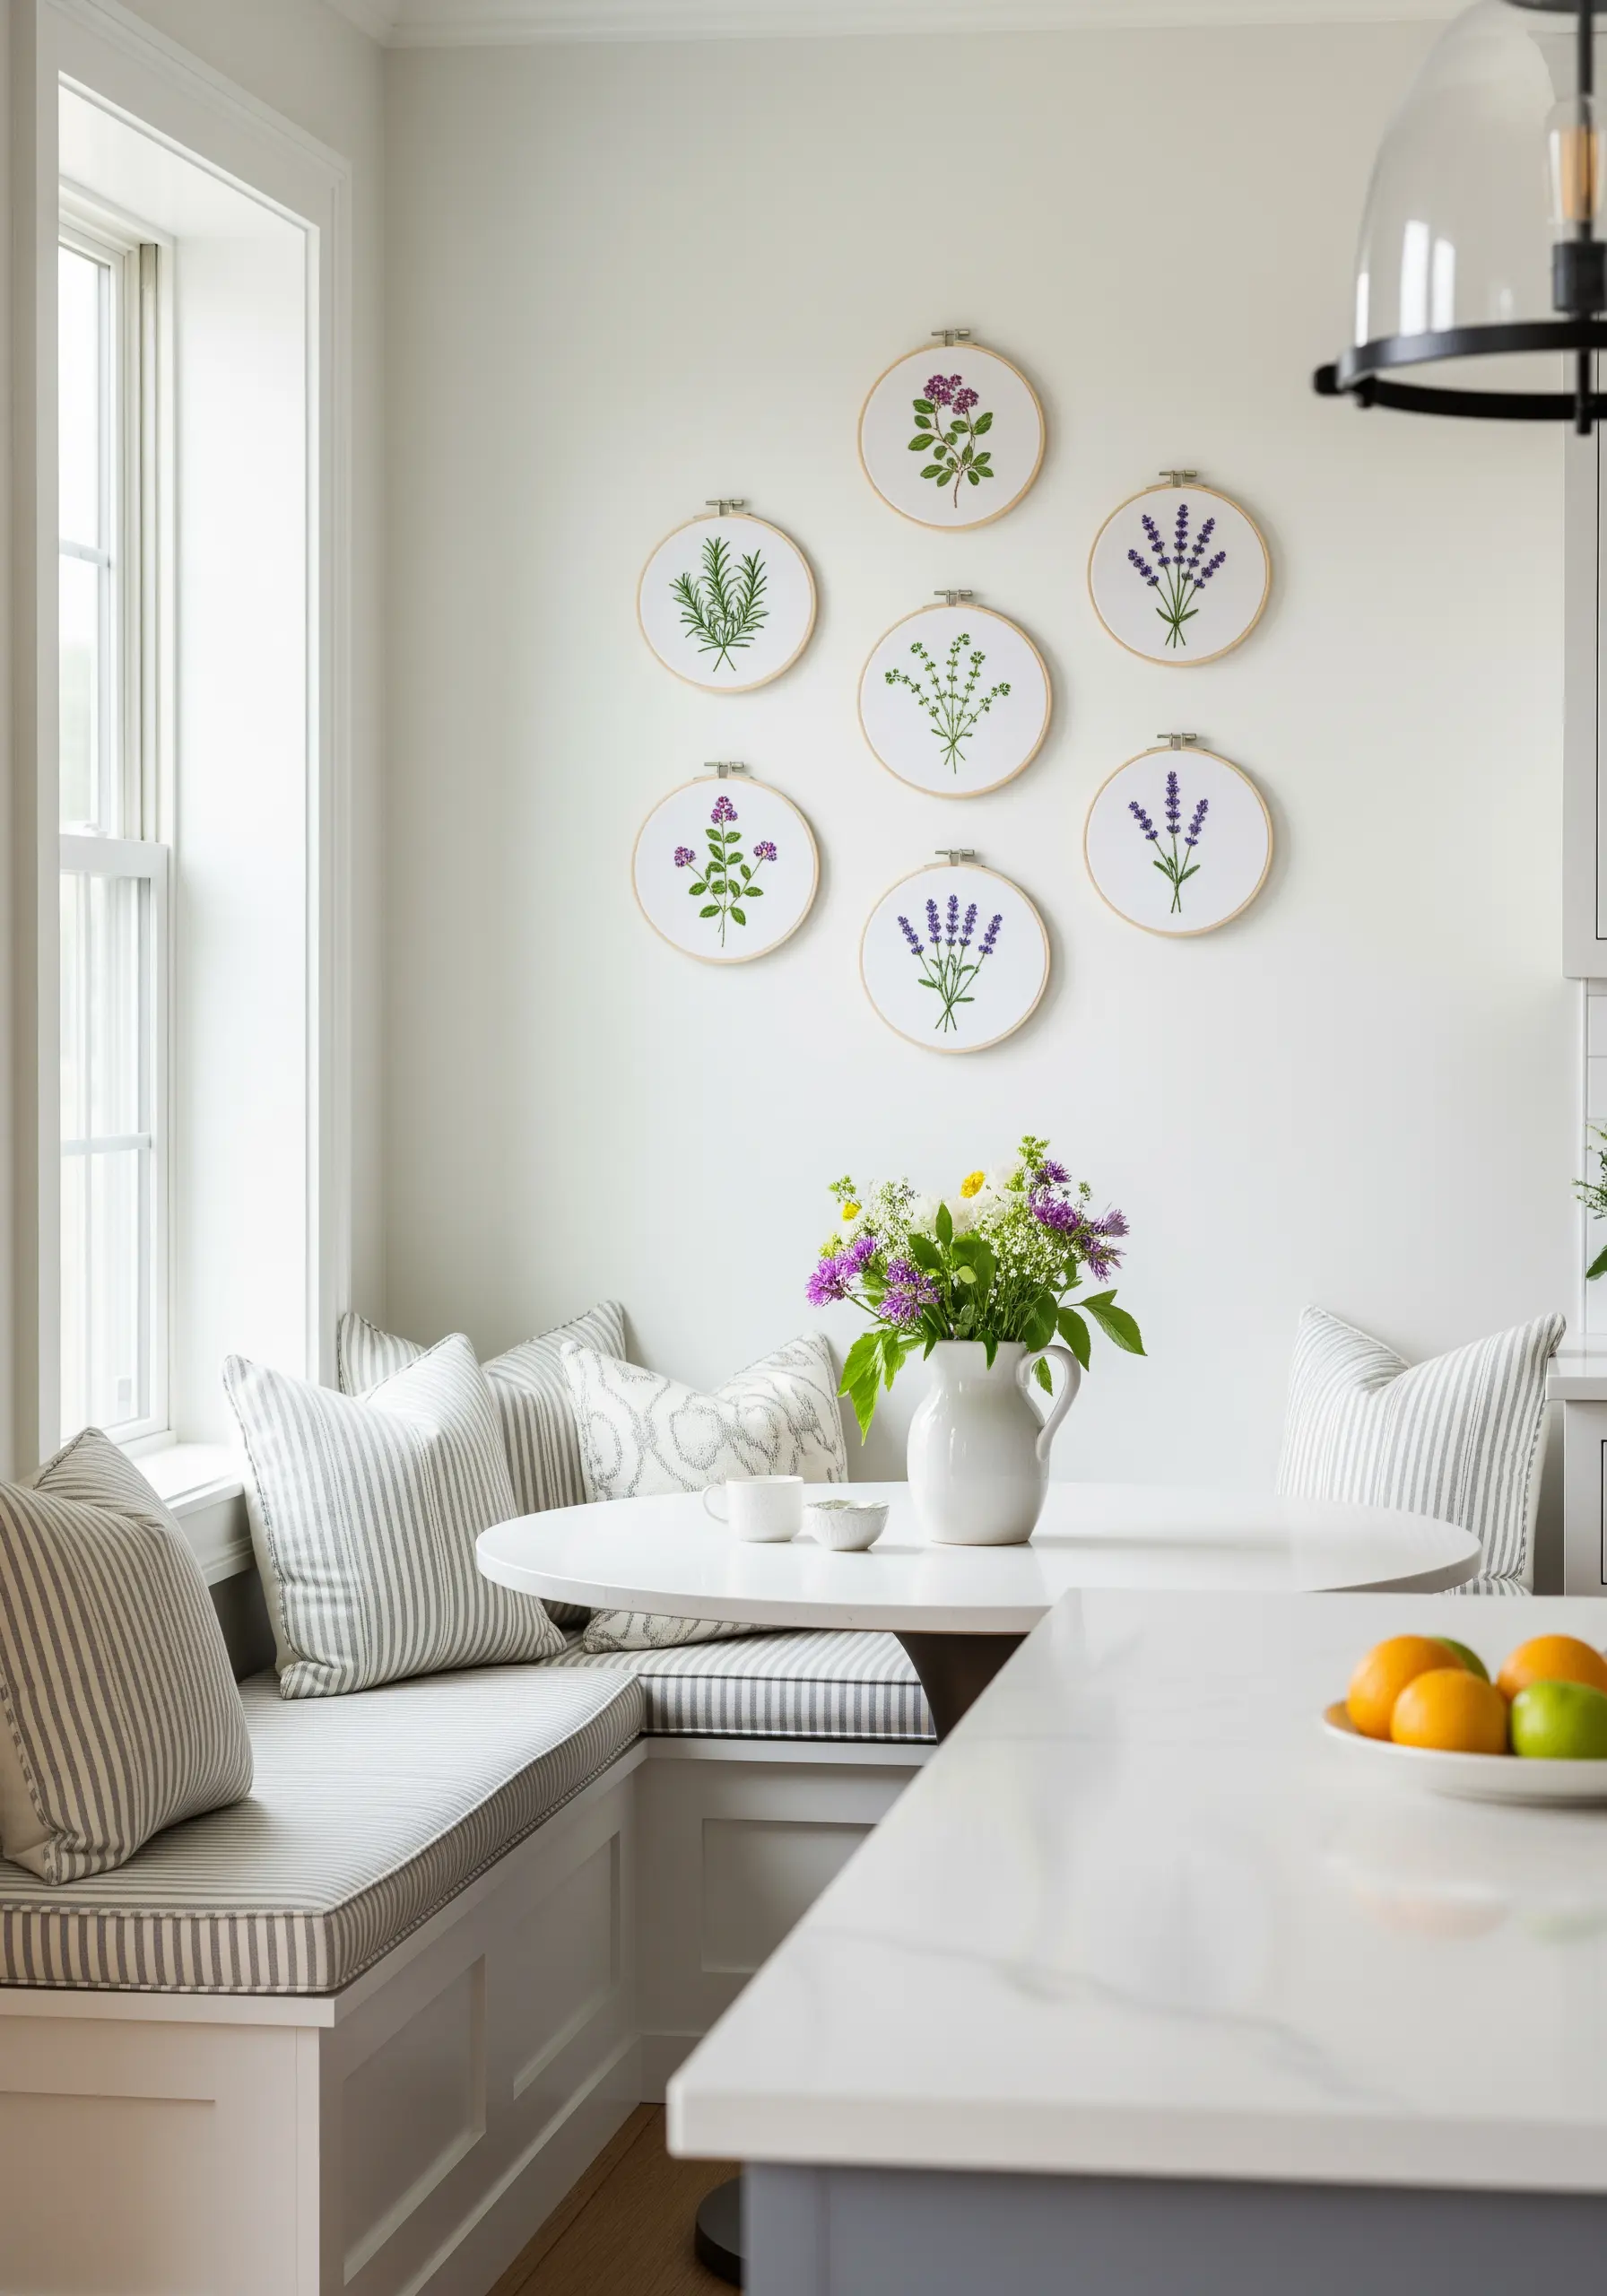
When stitching delicate botanicals, finesse is everything. Use only one or two strands of six-strand floss to achieve fine, elegant lines for stems and leaves.
Trace the gentle curves of the rosemary and lavender stems with a stem stitch, which creates a smooth, rope-like line perfect for organic shapes.
For small petals and buds, the lazy daisy stitch offers a perfect teardrop shape with minimal effort, while tiny French knots can serve as flower centers or seeds.
Arrange the finished hoops in a non-symmetrical cluster to create a relaxed, organic feel that complements the natural subject matter, turning a simple wall into a charming focal point.
4. Build a Three-Dimensional Fairytale Scene
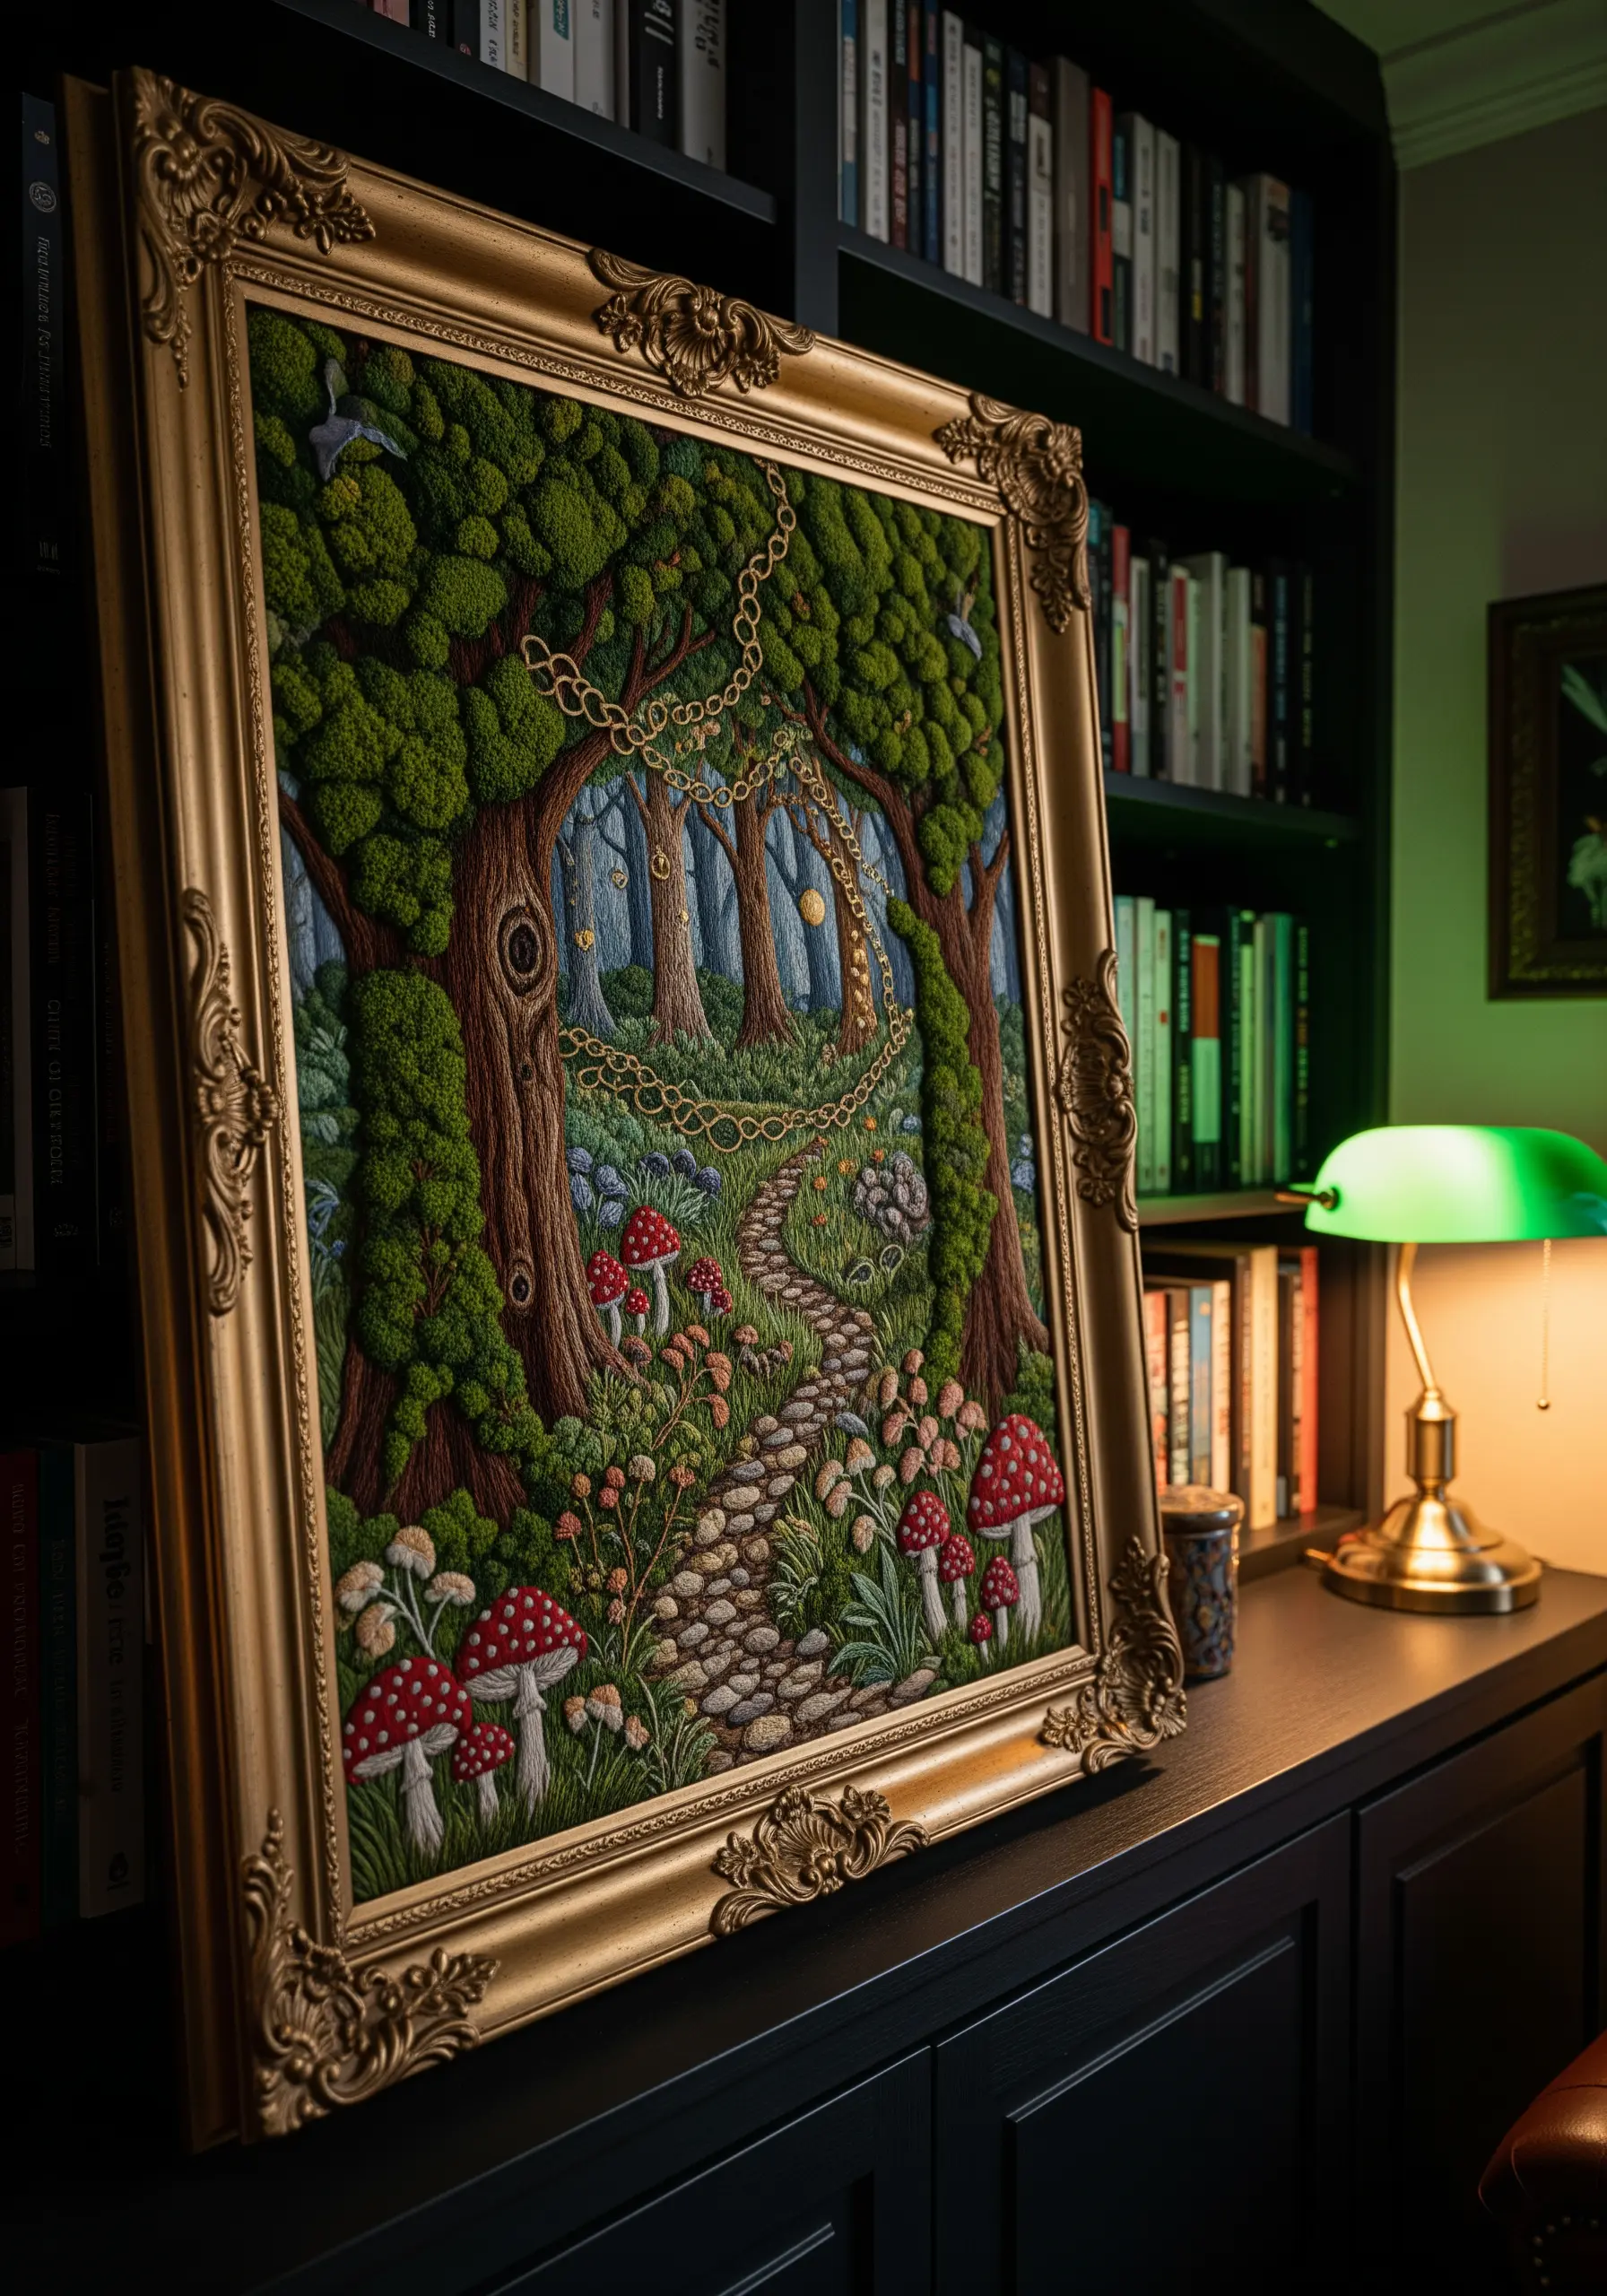
To create immersive depth, layer your stitches to build texture that comes right off the fabric.
Use dense clusters of French and bullion knots in shades of green and brown to form a mossy, raised texture on the tree trunks and forest floor.
For the cobblestone path, use short, straight satin stitches in varying grays and tans, changing the angle of each stitch slightly to mimic the irregularity of real stones.
Introduce mixed-media elements, like a fine gold chain, to add an unexpected touch of magic and dimension to your scene.
This layering transforms a flat image into a tangible, 3D embroidery wall art piece you can almost step into.
5. Frame Your Welcome with a Balanced Wreath
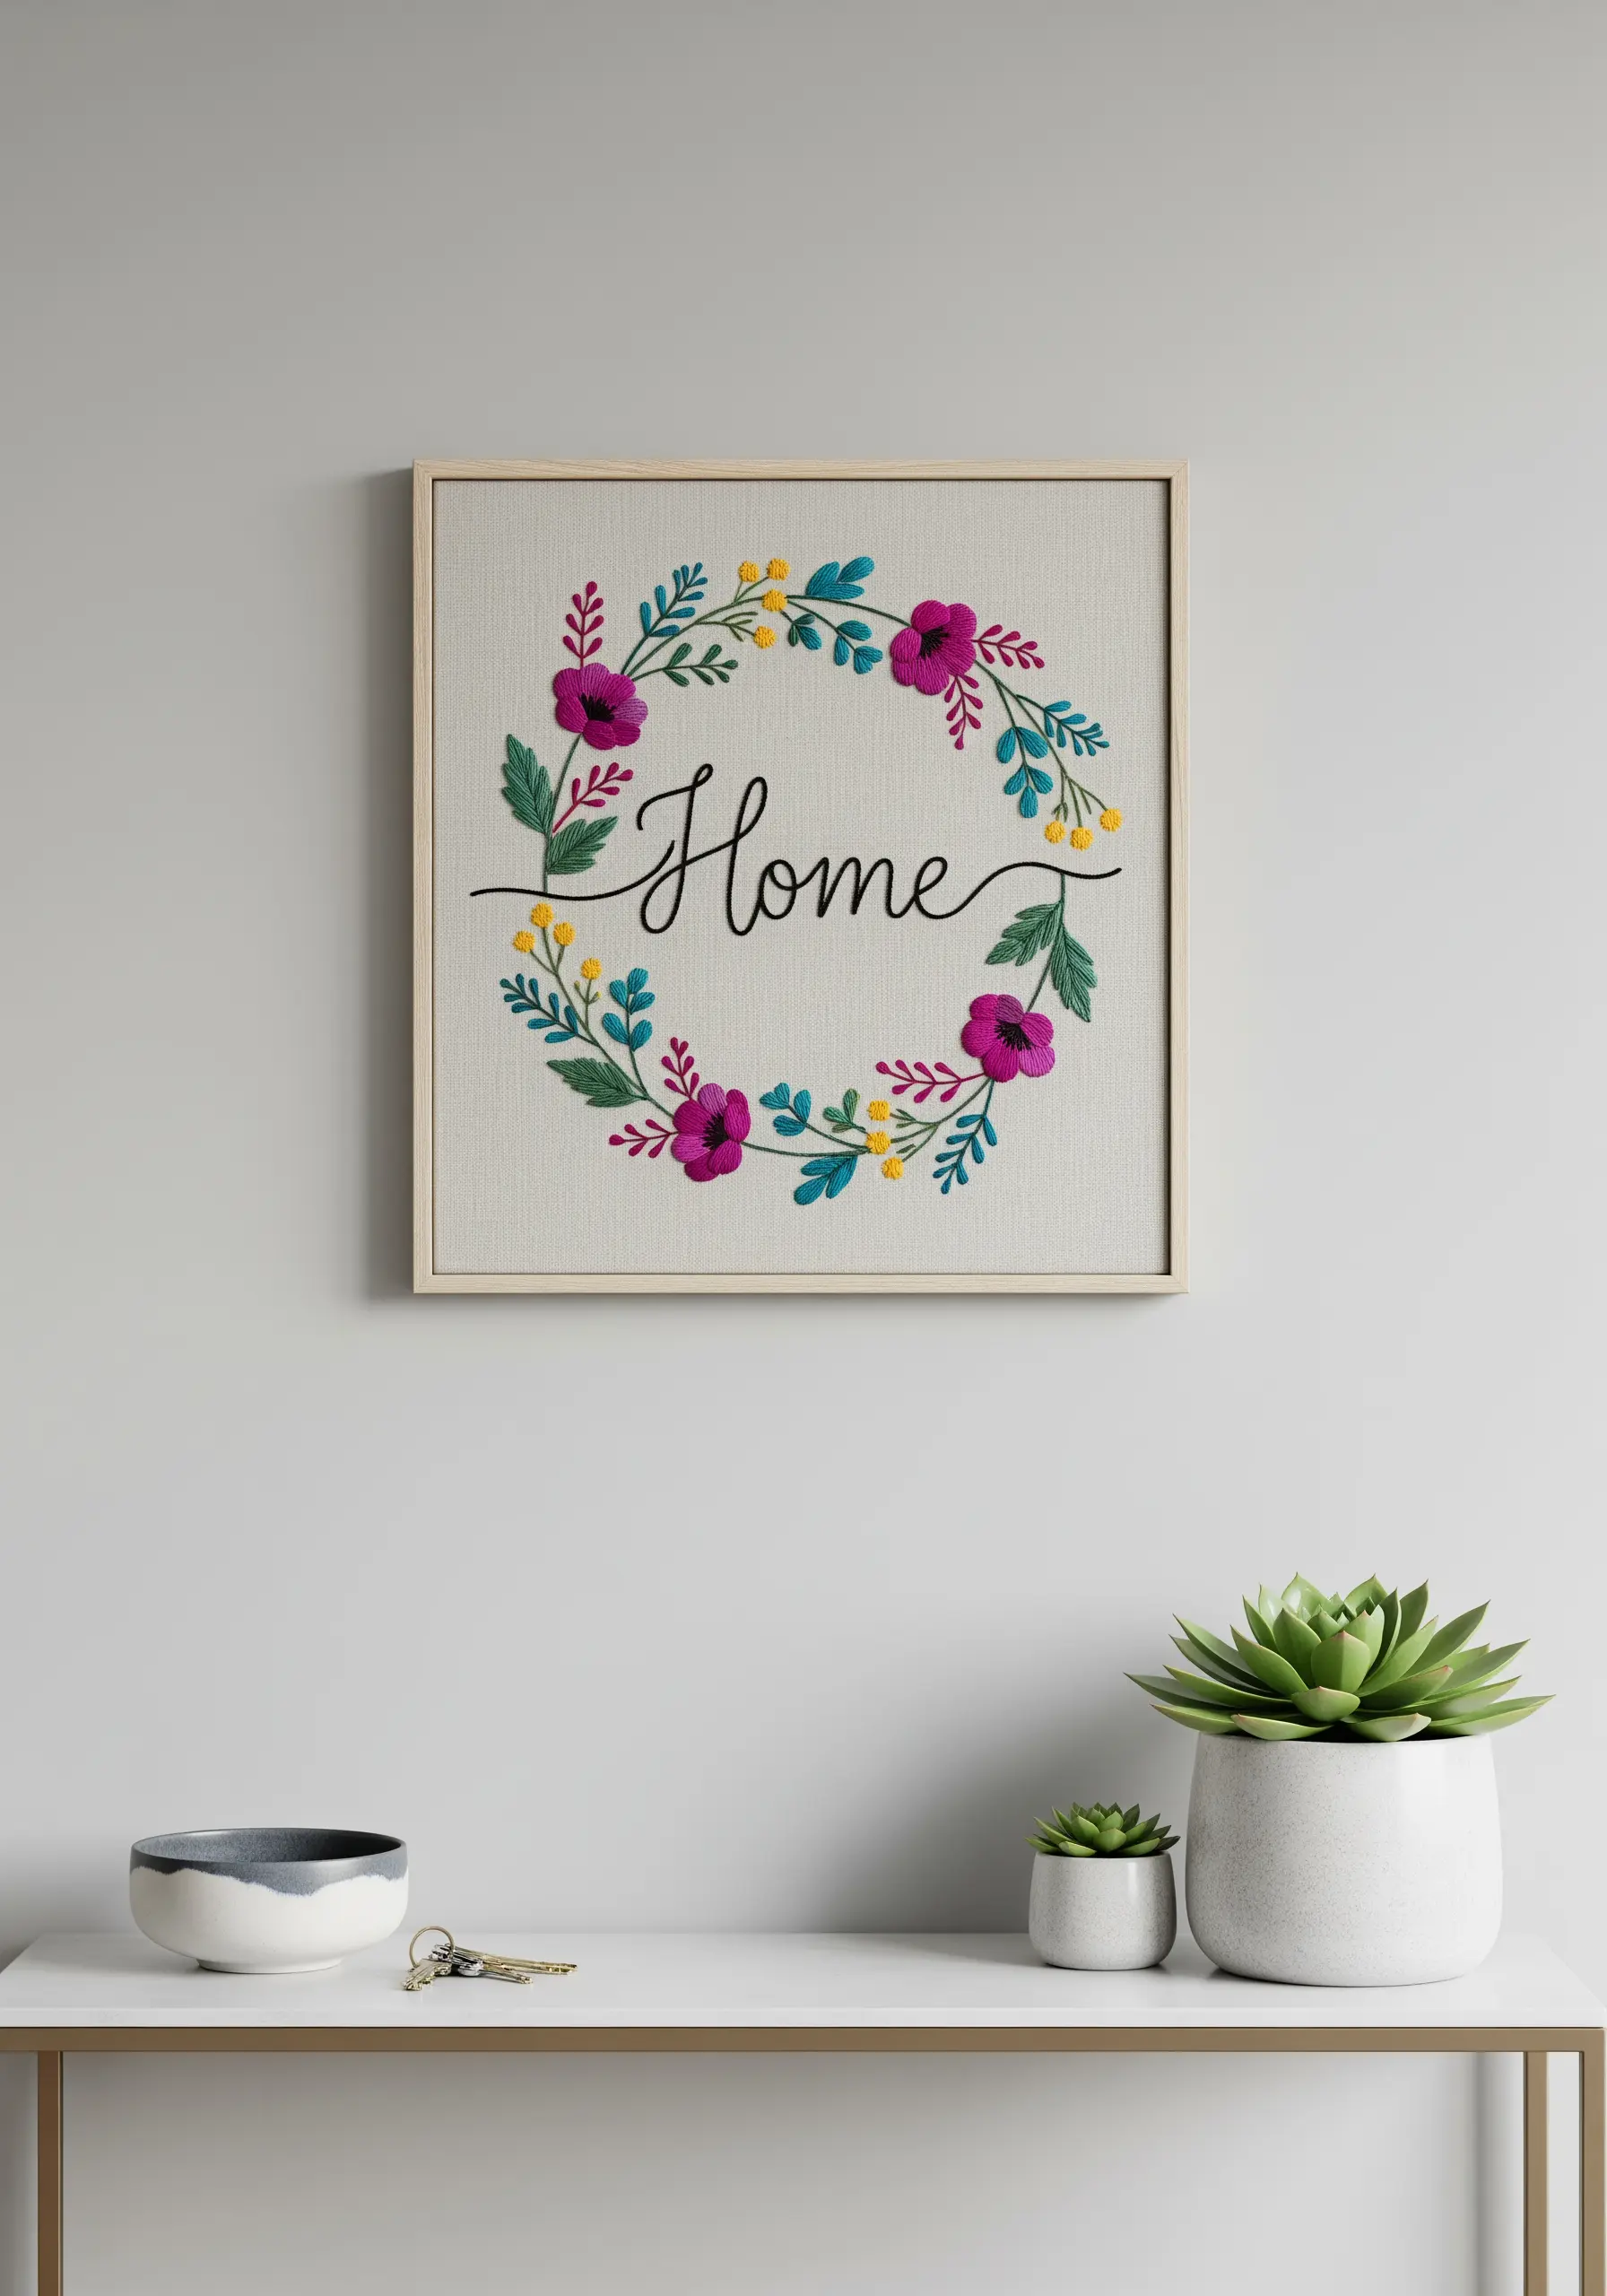
When combining text and florals, prioritize clean lettering. Stitch your word first using a whipped backstitch—it creates a perfectly smooth, solid line that won’t get lost among the flowers.
Choose a vibrant, complementary color palette, like magenta and teal, to make the design feel energetic and modern.
Use a bold satin stitch for the flower petals, ensuring your stitches lie flat and even for a glossy, professional finish. For smaller leaves and accents, a simple fishbone stitch provides texture and shape.
Balance the composition by distributing the larger and smaller floral elements evenly around the wreath, ensuring neither side feels too heavy.
6. Stitch Modern Art with Geometric Precision

To achieve the crisp, clean shapes essential for abstract art, outline each block of color with a split stitch before filling it in.
This simple preparation acts as a raised edge, guiding your needle and ensuring your satin stitches have a perfectly sharp border.
Vary the direction of your satin stitches in adjacent color blocks. This technique subtly manipulates how light reflects off the thread, adding depth and visual interest without changing the color.
Use a full six strands of floss for a dense, opaque fill that looks bold and intentional, turning simple shapes into powerful abstract textile wall art designs.
7. Create a Gentle Menagerie for the Nursery
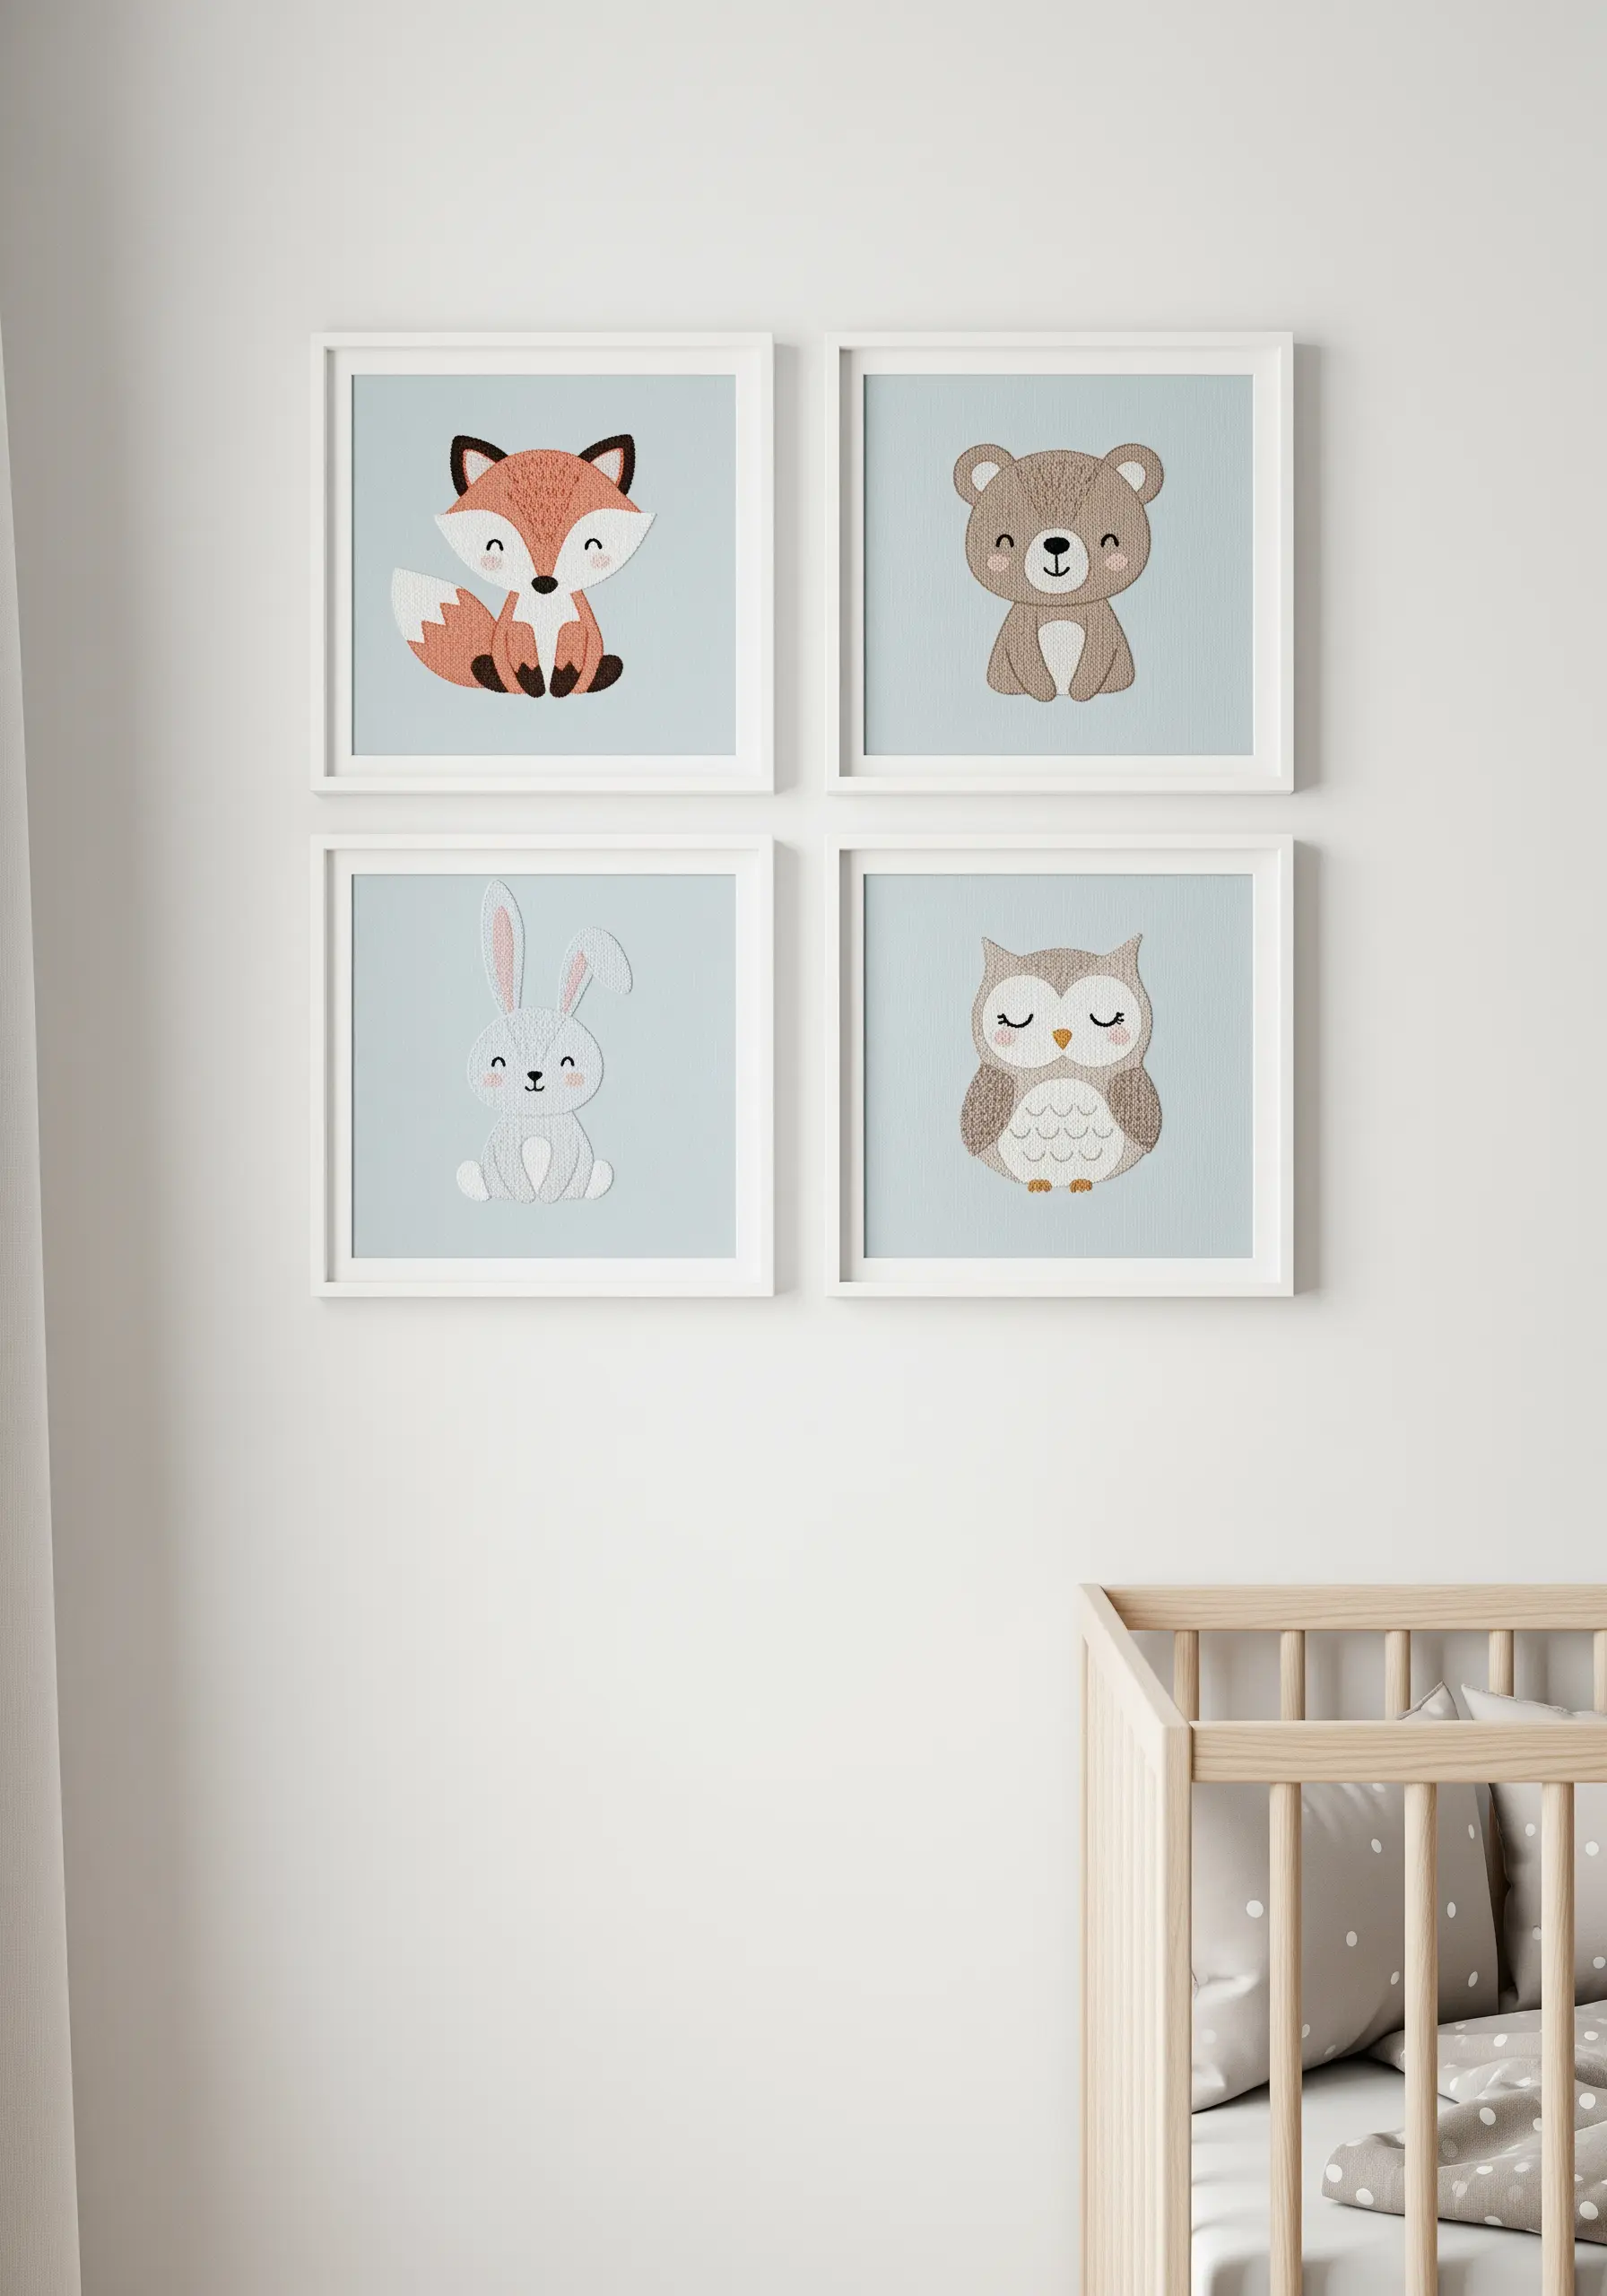
For nursery art, the goal is softness in both color and texture. Select a muted pastel palette and stitch on a gently colored fabric to unify the collection.
Instead of a sharp backstitch for outlines, use a whipped backstitch. This covers the gaps between stitches, resulting in a rounded, more gentle line that suits illustrated characters perfectly.
Fill the shapes with a simple satin stitch, but keep the stitch length relatively short to avoid snagging and maintain a smooth, durable surface.
These sweet and simple nursery stitch art wall ideas create a calm, nurturing atmosphere.
8. Paint a Sunset Meadow Across a Triptych
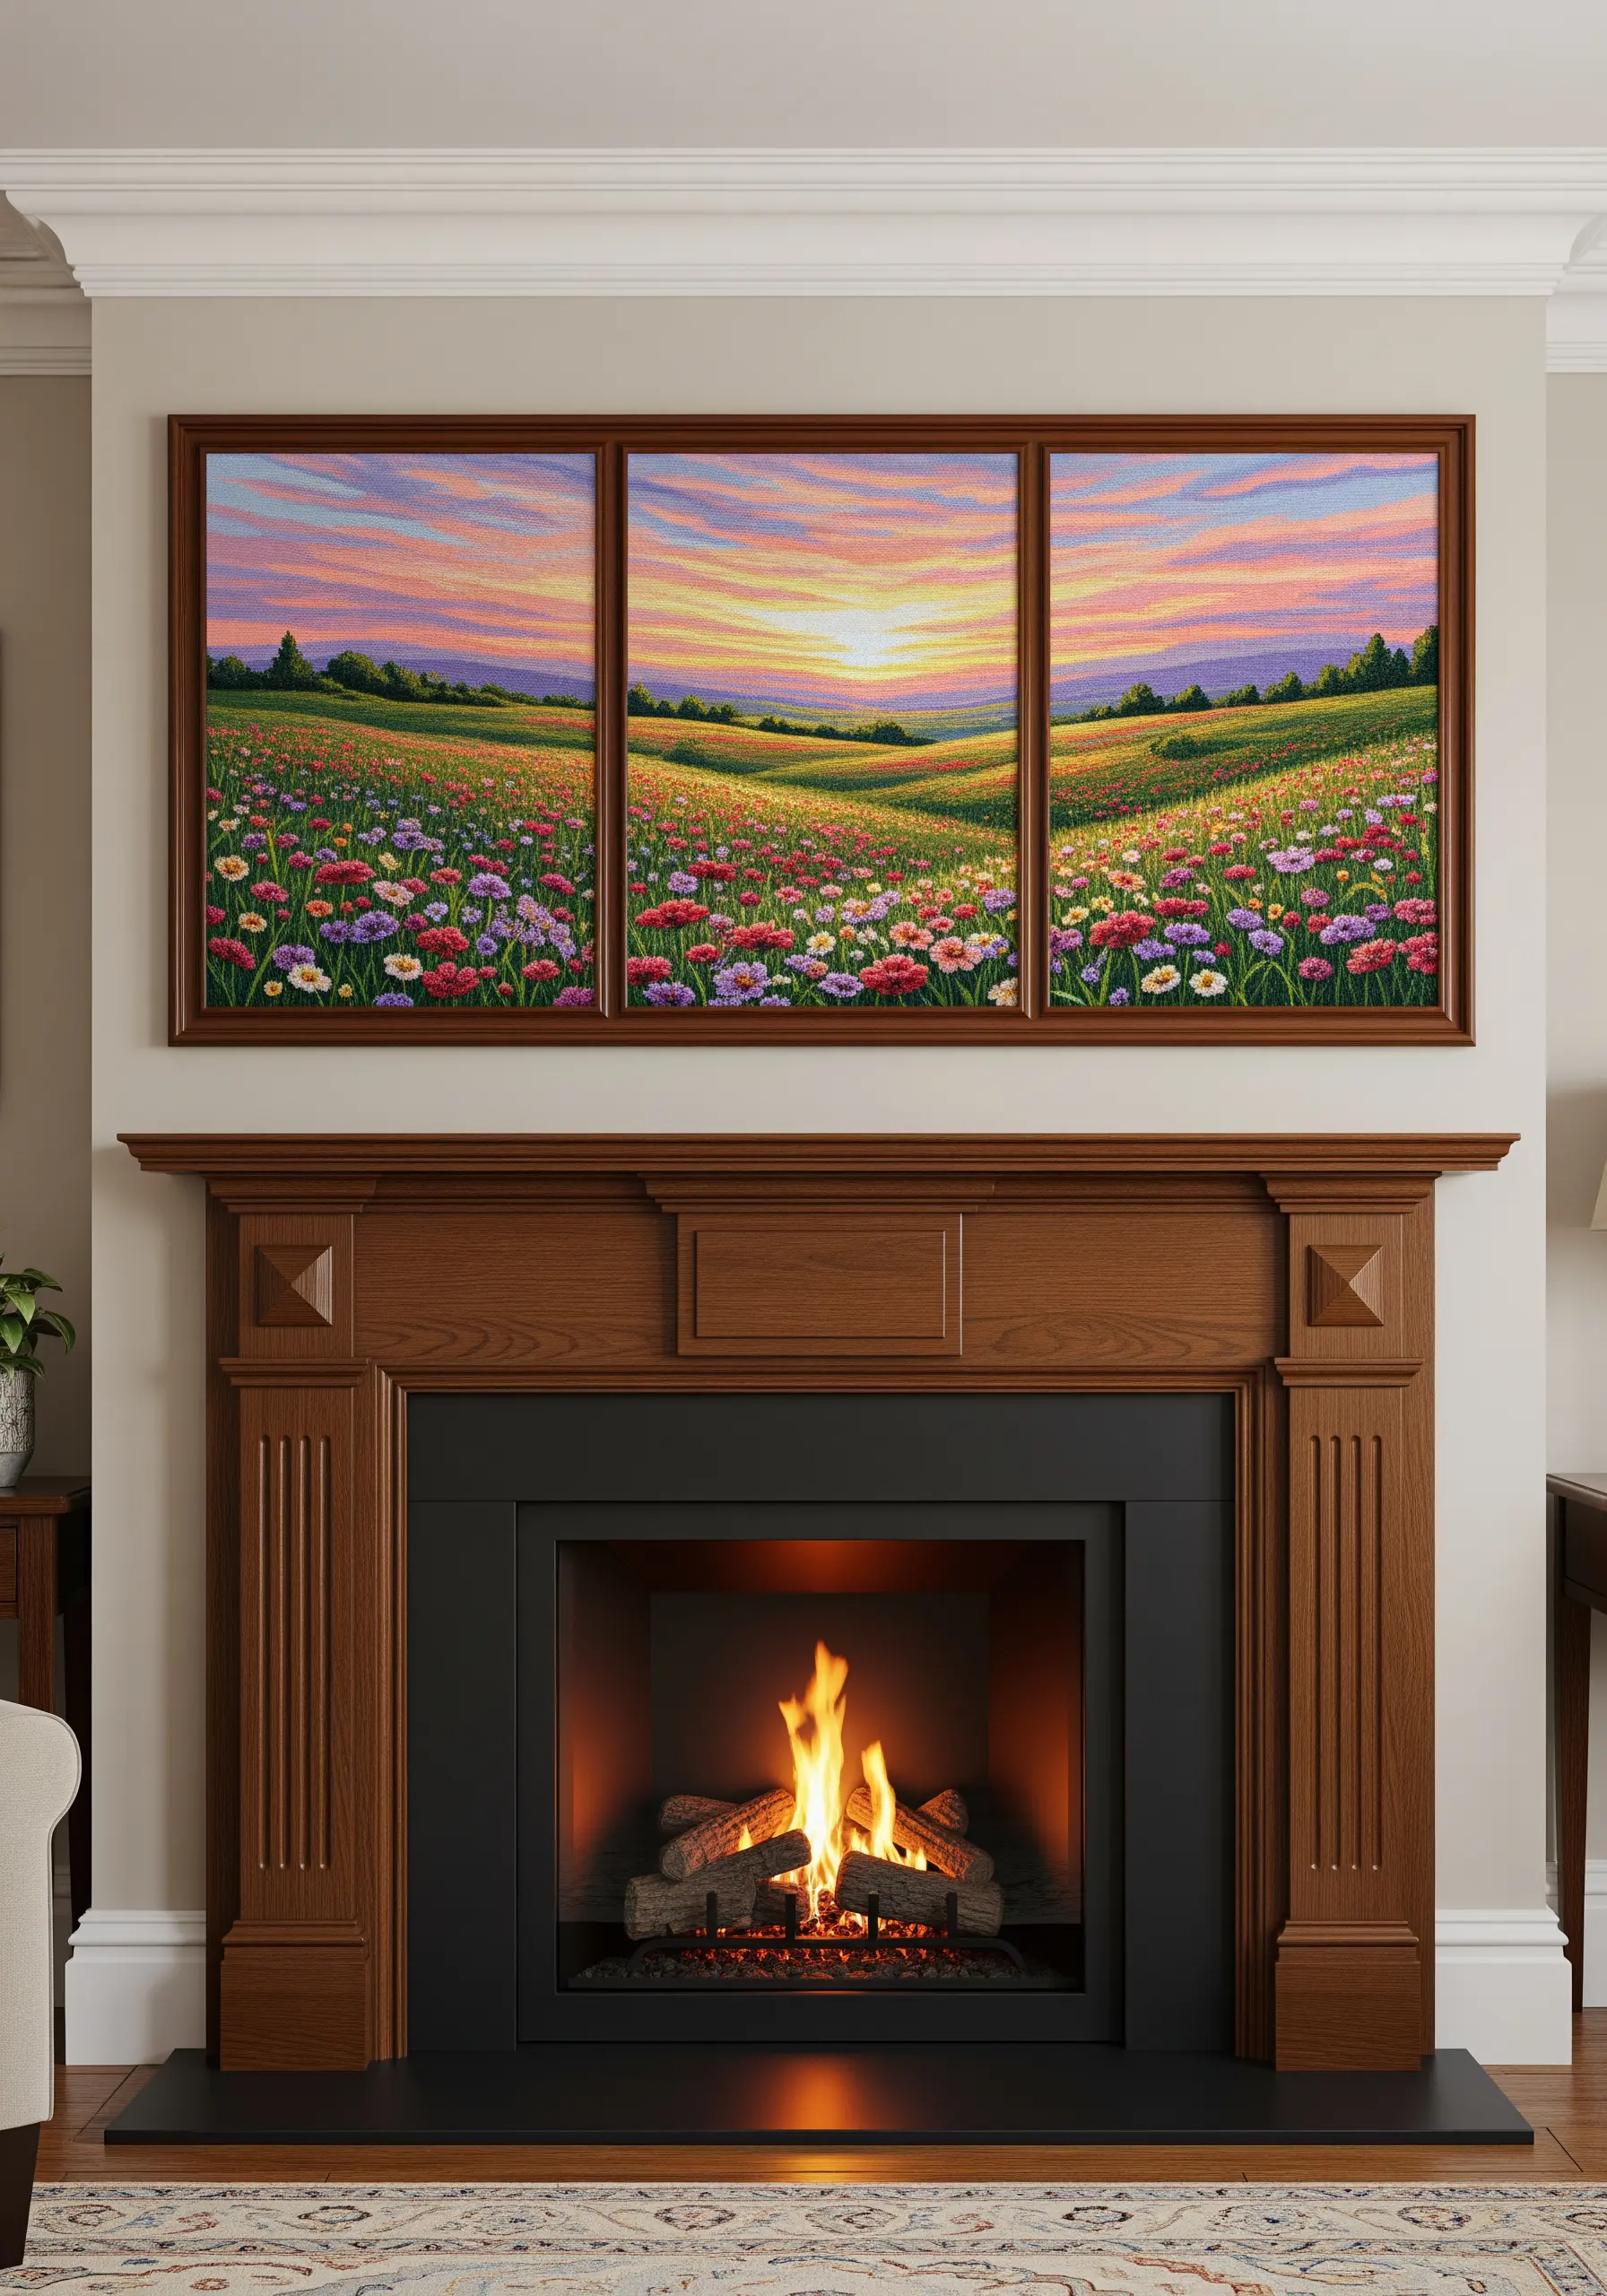
To create a seamless panoramic scene, transfer your entire design onto one large piece of fabric before dividing it visually for your frames.
Use the long-and-short stitch technique to blend the colors of the sky and fields. This ‘thread painting’ method eliminates harsh lines and creates a soft, painterly gradient.
For the foreground flowers, use a combination of French knots, lazy daisy stitches, and straight stitches in a riot of color to suggest a dense, blooming meadow without stitching every single petal.
Mounting the three pieces in a single, connected frame elevates the project from three separate embroideries into one cohesive, statement-making artwork.
9. Display Personality with Crisp Cross-Stitch
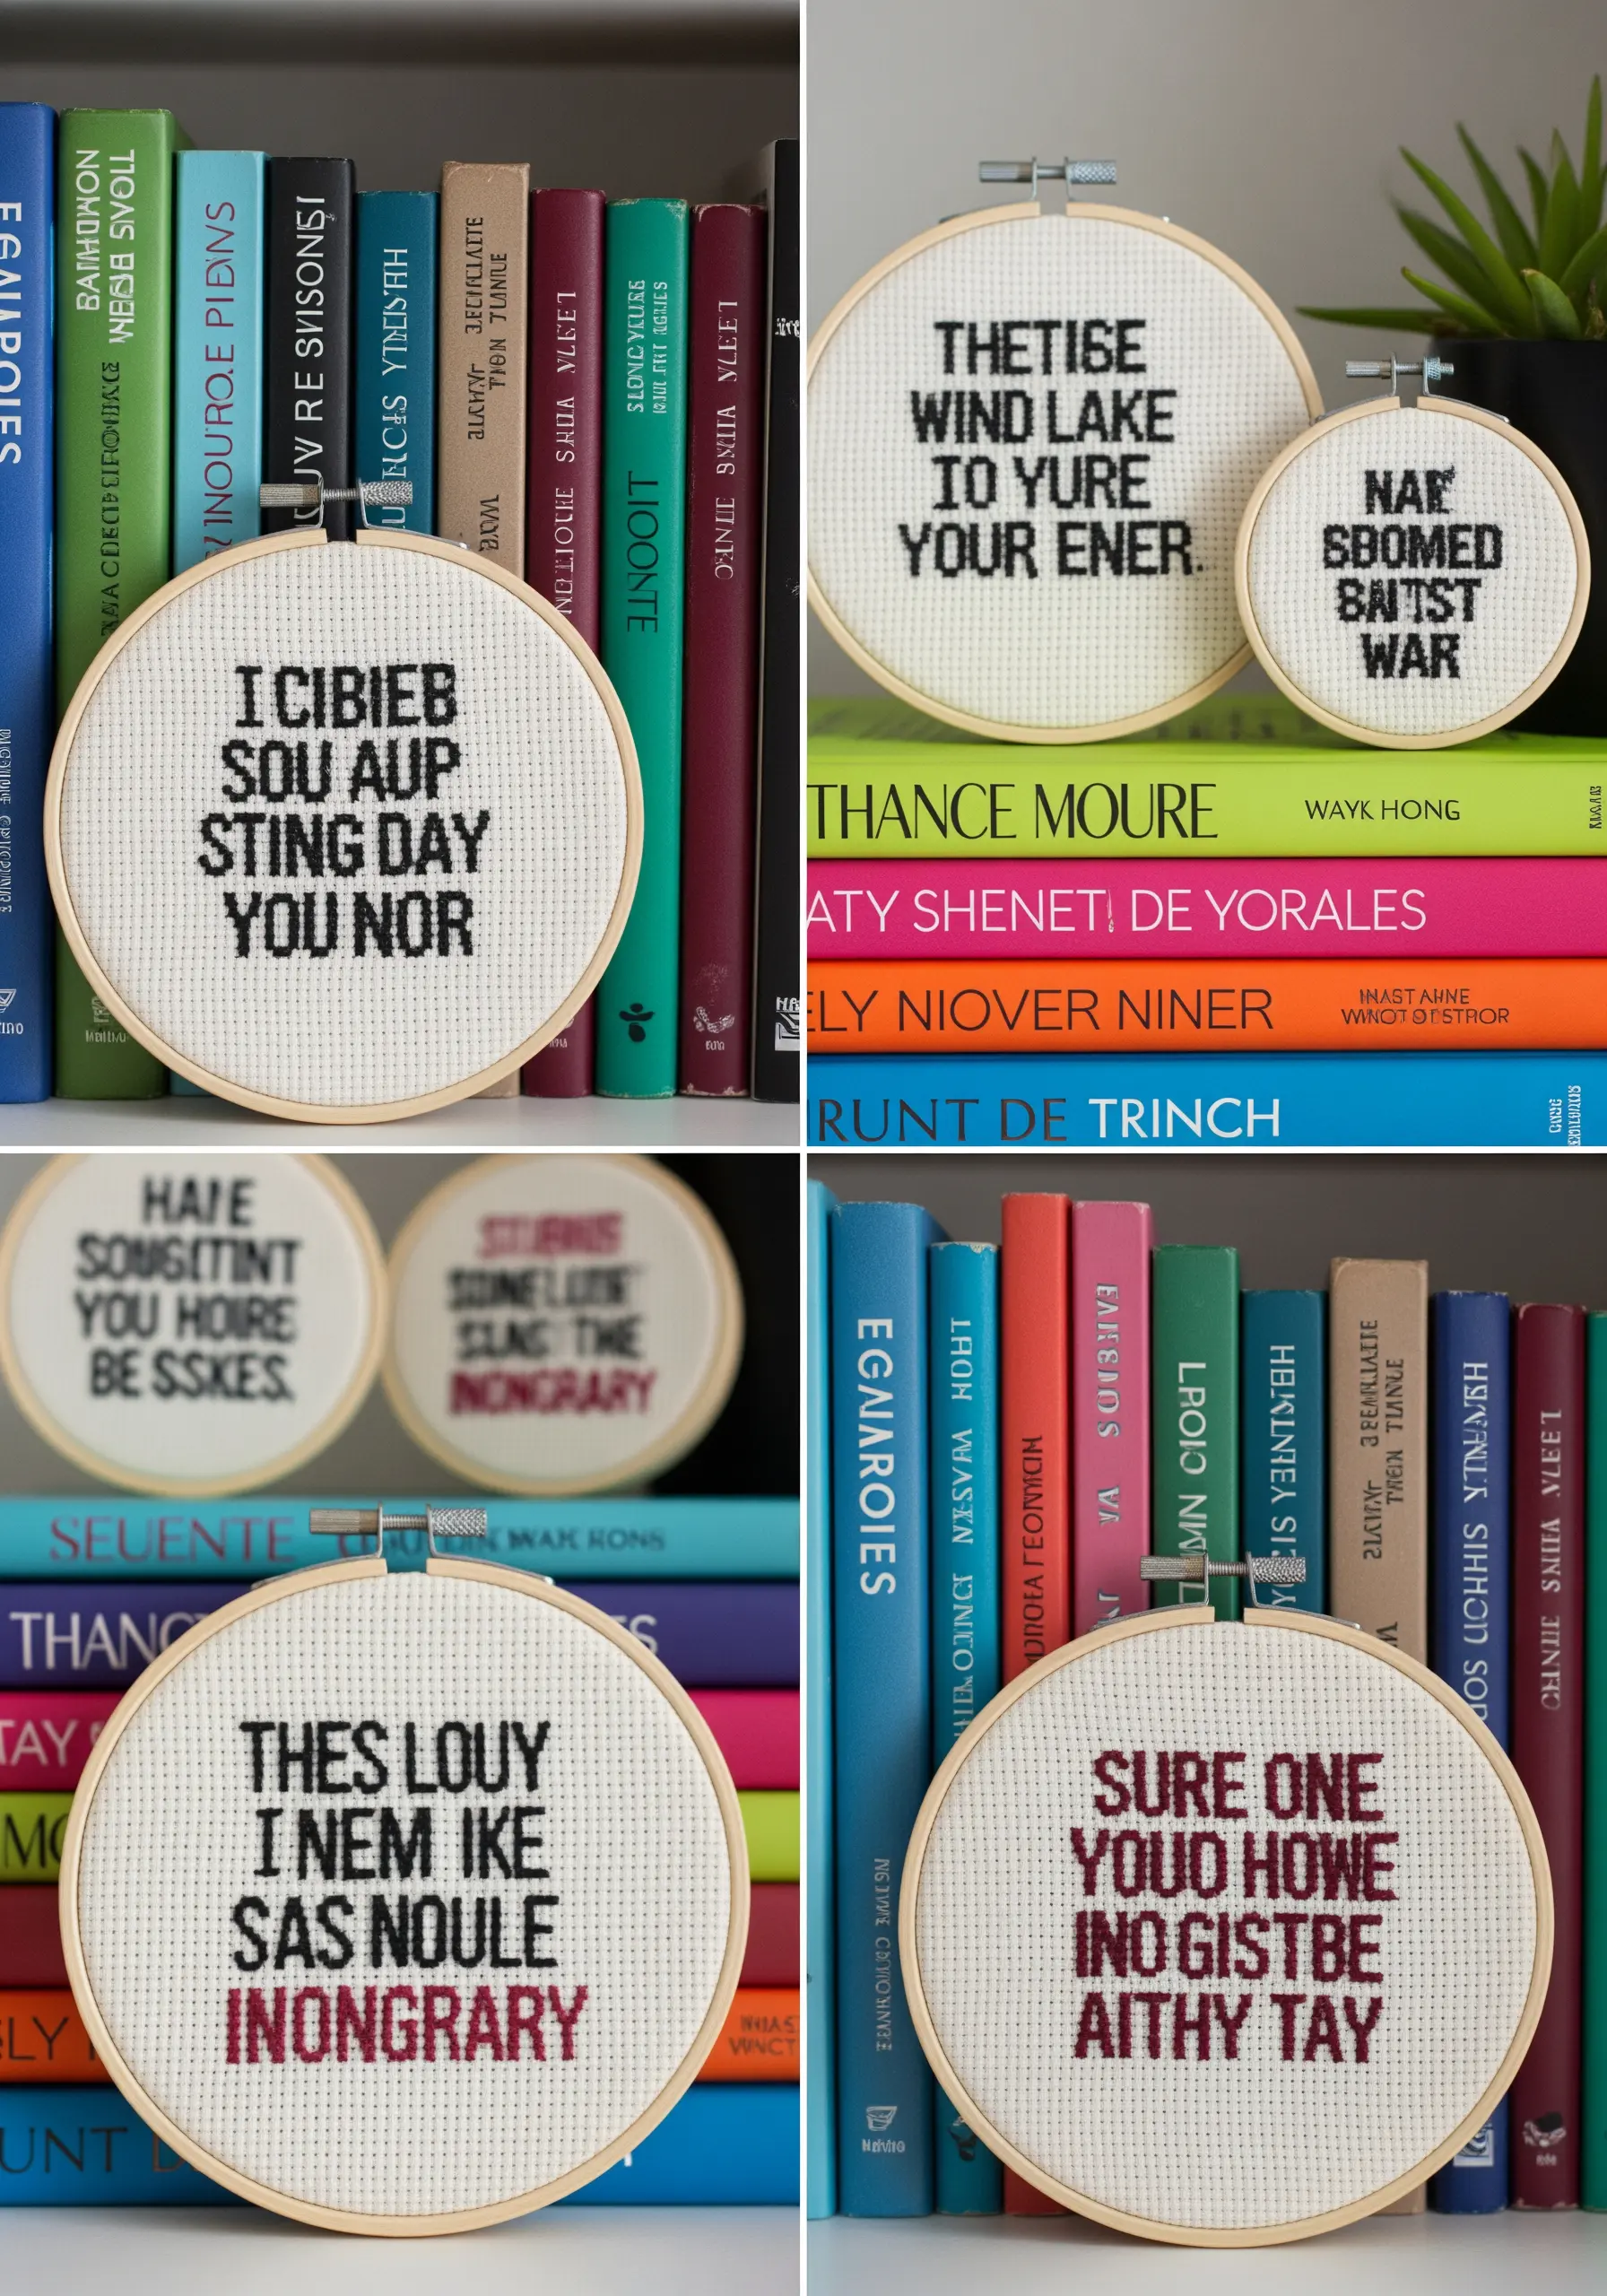
The key to professional-looking cross-stitch is consistency. Ensure every top stitch of your ‘X’ faces the same direction throughout the entire piece.
This small detail creates a uniform texture that reflects light evenly, giving your work a clean, polished appearance.
Choose your fabric count (Aida) based on the desired final size and level of detail. A lower count, like 14, creates larger stitches that are easier to see from a distance.
A simple, bold font makes a statement and is often easier to chart and stitch than intricate scripts, allowing your message to take center stage.
10. Weave a Lush, Large-Scale Botanical Statement
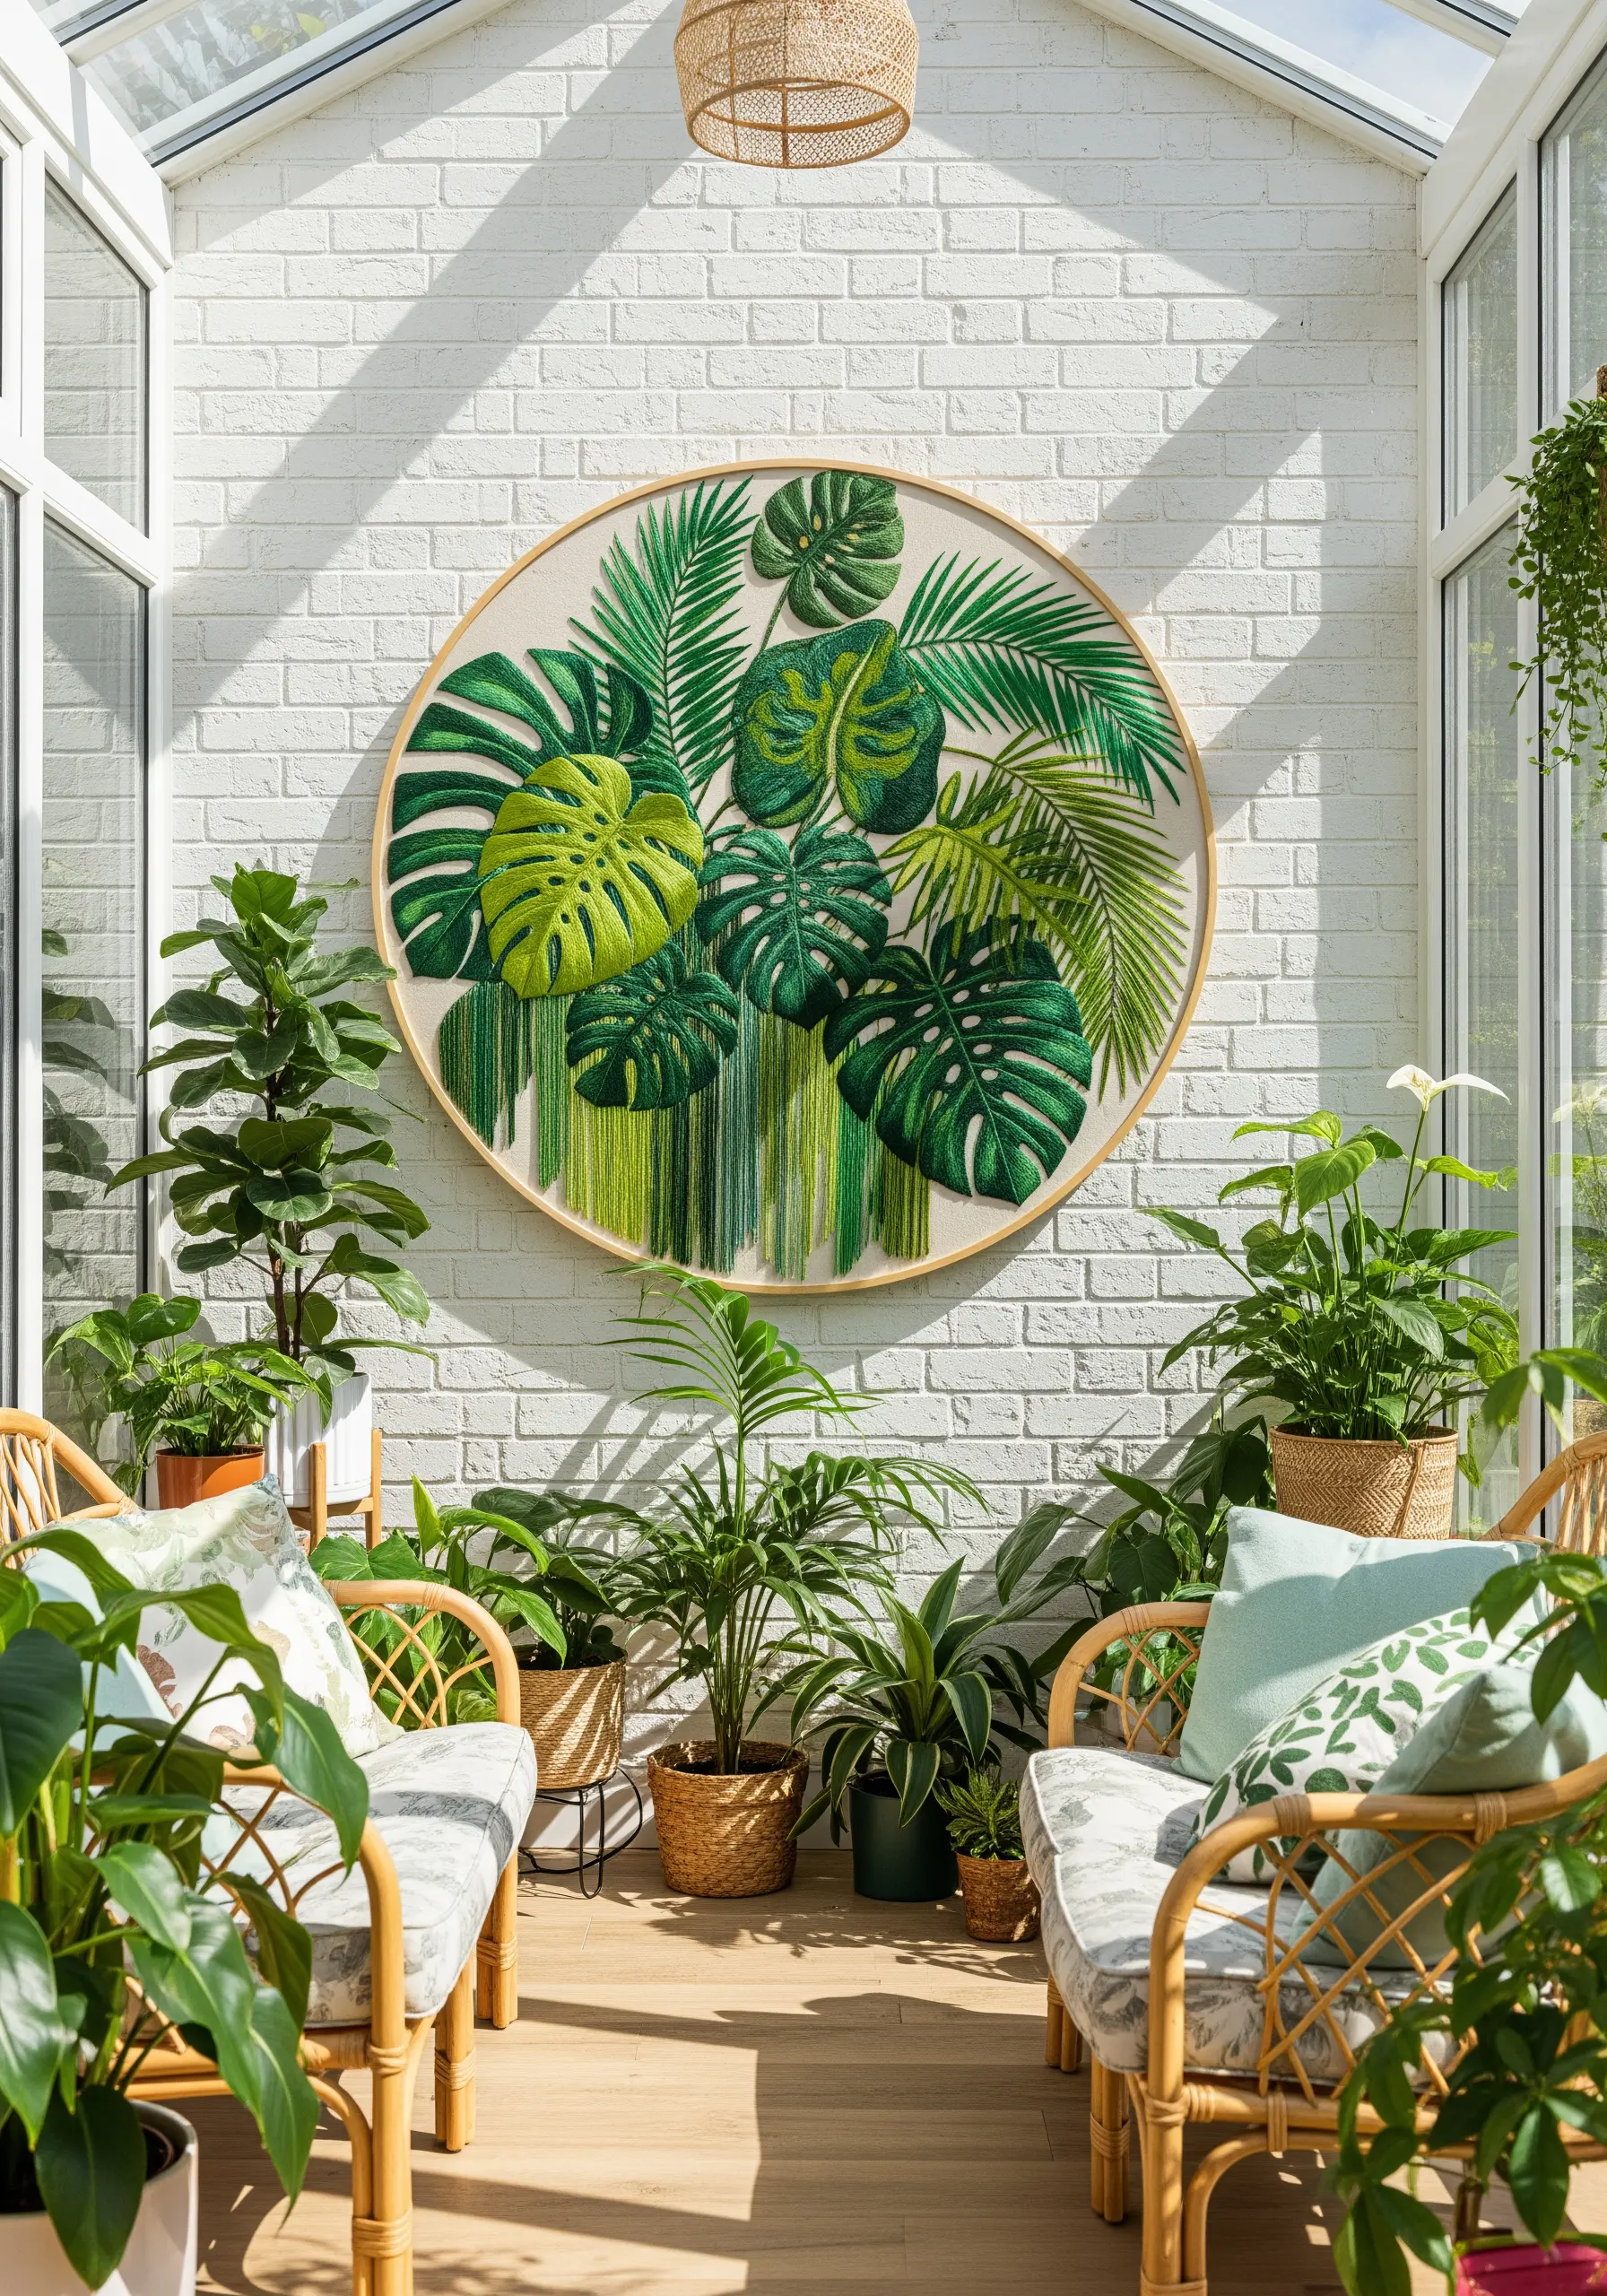
When tackling a large design, break down large filled areas to maintain fabric tension and add detail. Divide each monstera leaf into sections using the natural veins as guides.
Vary the angle of your satin or long-and-short stitches within each section. This technique not only prevents puckering but also creates a subtle, realistic shimmer that mimics a real leaf.
To create the modern fringe effect, leave long tails of thread at the bottom of the design. Secure them at the top with a small tacking stitch on the back to ensure they hang neatly.
These techniques help you manage large, plant-inspired embroidery patterns with professional results.
11. Capture the Ocean’s Rhythmic Motion
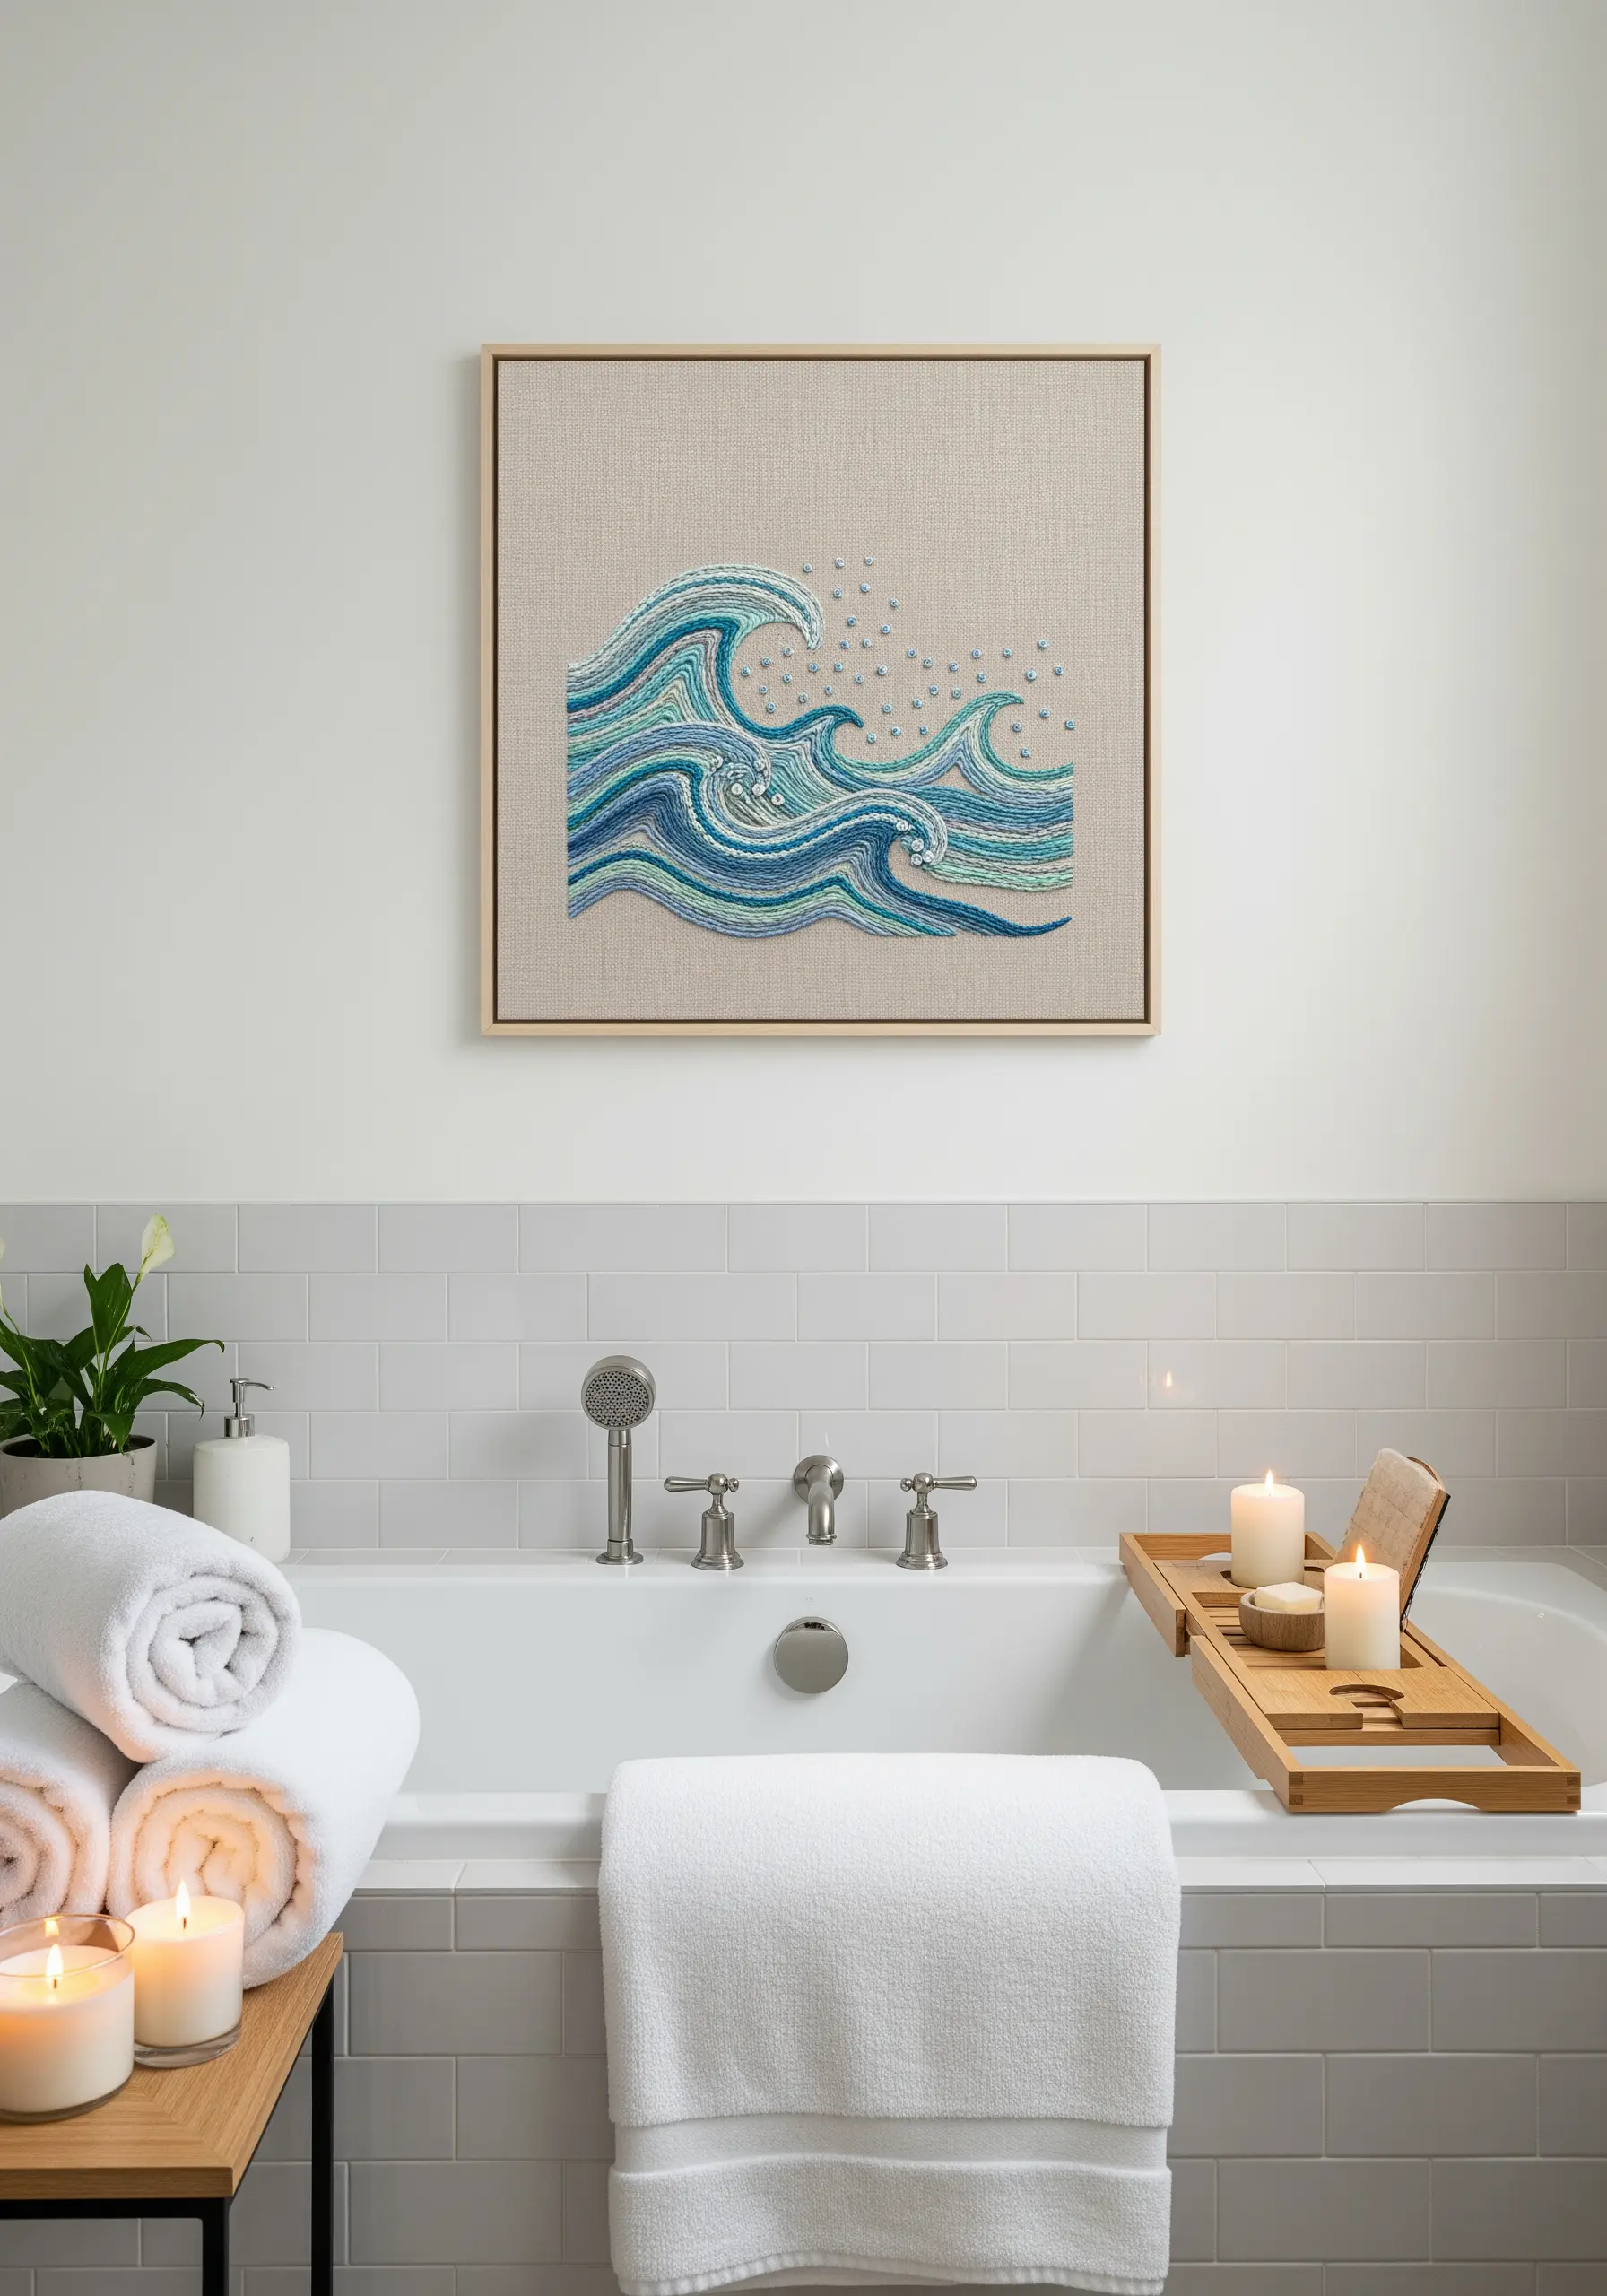
To convey the energy of waves, use stitches that create movement and direction. Outline each crest with a chain stitch or split stitch to define its form.
Fill the body of the waves with directional satin stitches, angling them to follow the water’s natural flow. This enhances the sense of motion.
Create a gradient effect by blending multiple shades of blue, teal, and white. Place darker threads at the bottom of a wave and lighter ones at the crest to build depth.
Use tiny French knots or seed stitches for sea spray, scattering them where the waves break to add a dynamic, frothy texture. These ocean-marine embroidery wall themes bring a sense of calm movement to a space.
12. Render a Photorealistic Still Life in Thread

Achieving realism is all about mastering light and shadow through color blending. The long-and-short stitch is your primary tool for this.
For a rounded object like a tomato, use at least four or five shades of red, from a deep crimson for shadows to a bright white for the highlight. Blend them seamlessly to create the illusion of a curved surface.
Pay close attention to the direction of your stitches. They should follow the contours of the object, wrapping around its form to enhance the three-dimensional effect.
This meticulous technique, known as thread painting, transforms floss into a medium capable of incredible realism.
13. Design a Minimalist Mountain Gallery

The power of minimalism often lies in repetition and subtle variation. Create a series of simple line-art mountains, keeping the design consistent but changing the color palette for each frame.
A simple backstitch or stem stitch is all you need for the outlines. Focus on maintaining a clean, consistent stitch length for a graphic, intentional look.
The negative space is just as important as the stitched lines. Choose a high-quality, textured fabric and allow it to be a key element of the final piece.
Arranging the frames in a vertical column creates a striking visual narrative, proving how effective minimalist hoop art patterns can be.
14. Stitch a Quiet Moment in a Vintage Teacup

For incredibly fine details, like the floral pattern on the teacup, switch to a single strand of embroidery floss. This allows for precision that’s impossible with thicker thread.
To create the delicate, ethereal steam, use a light gray or silver thread in a wandering backstitch or running stitch. Vary the stitch length and curves to make it look like natural vapor.
Choosing an oval hoop or frame enhances the vintage, heirloom quality of the design, setting it apart from standard circular hoops.
This is one of those handmade stitching projects that pair perfectly with tea and a quiet afternoon.
15. Create a Meditative Mandala Masterpiece
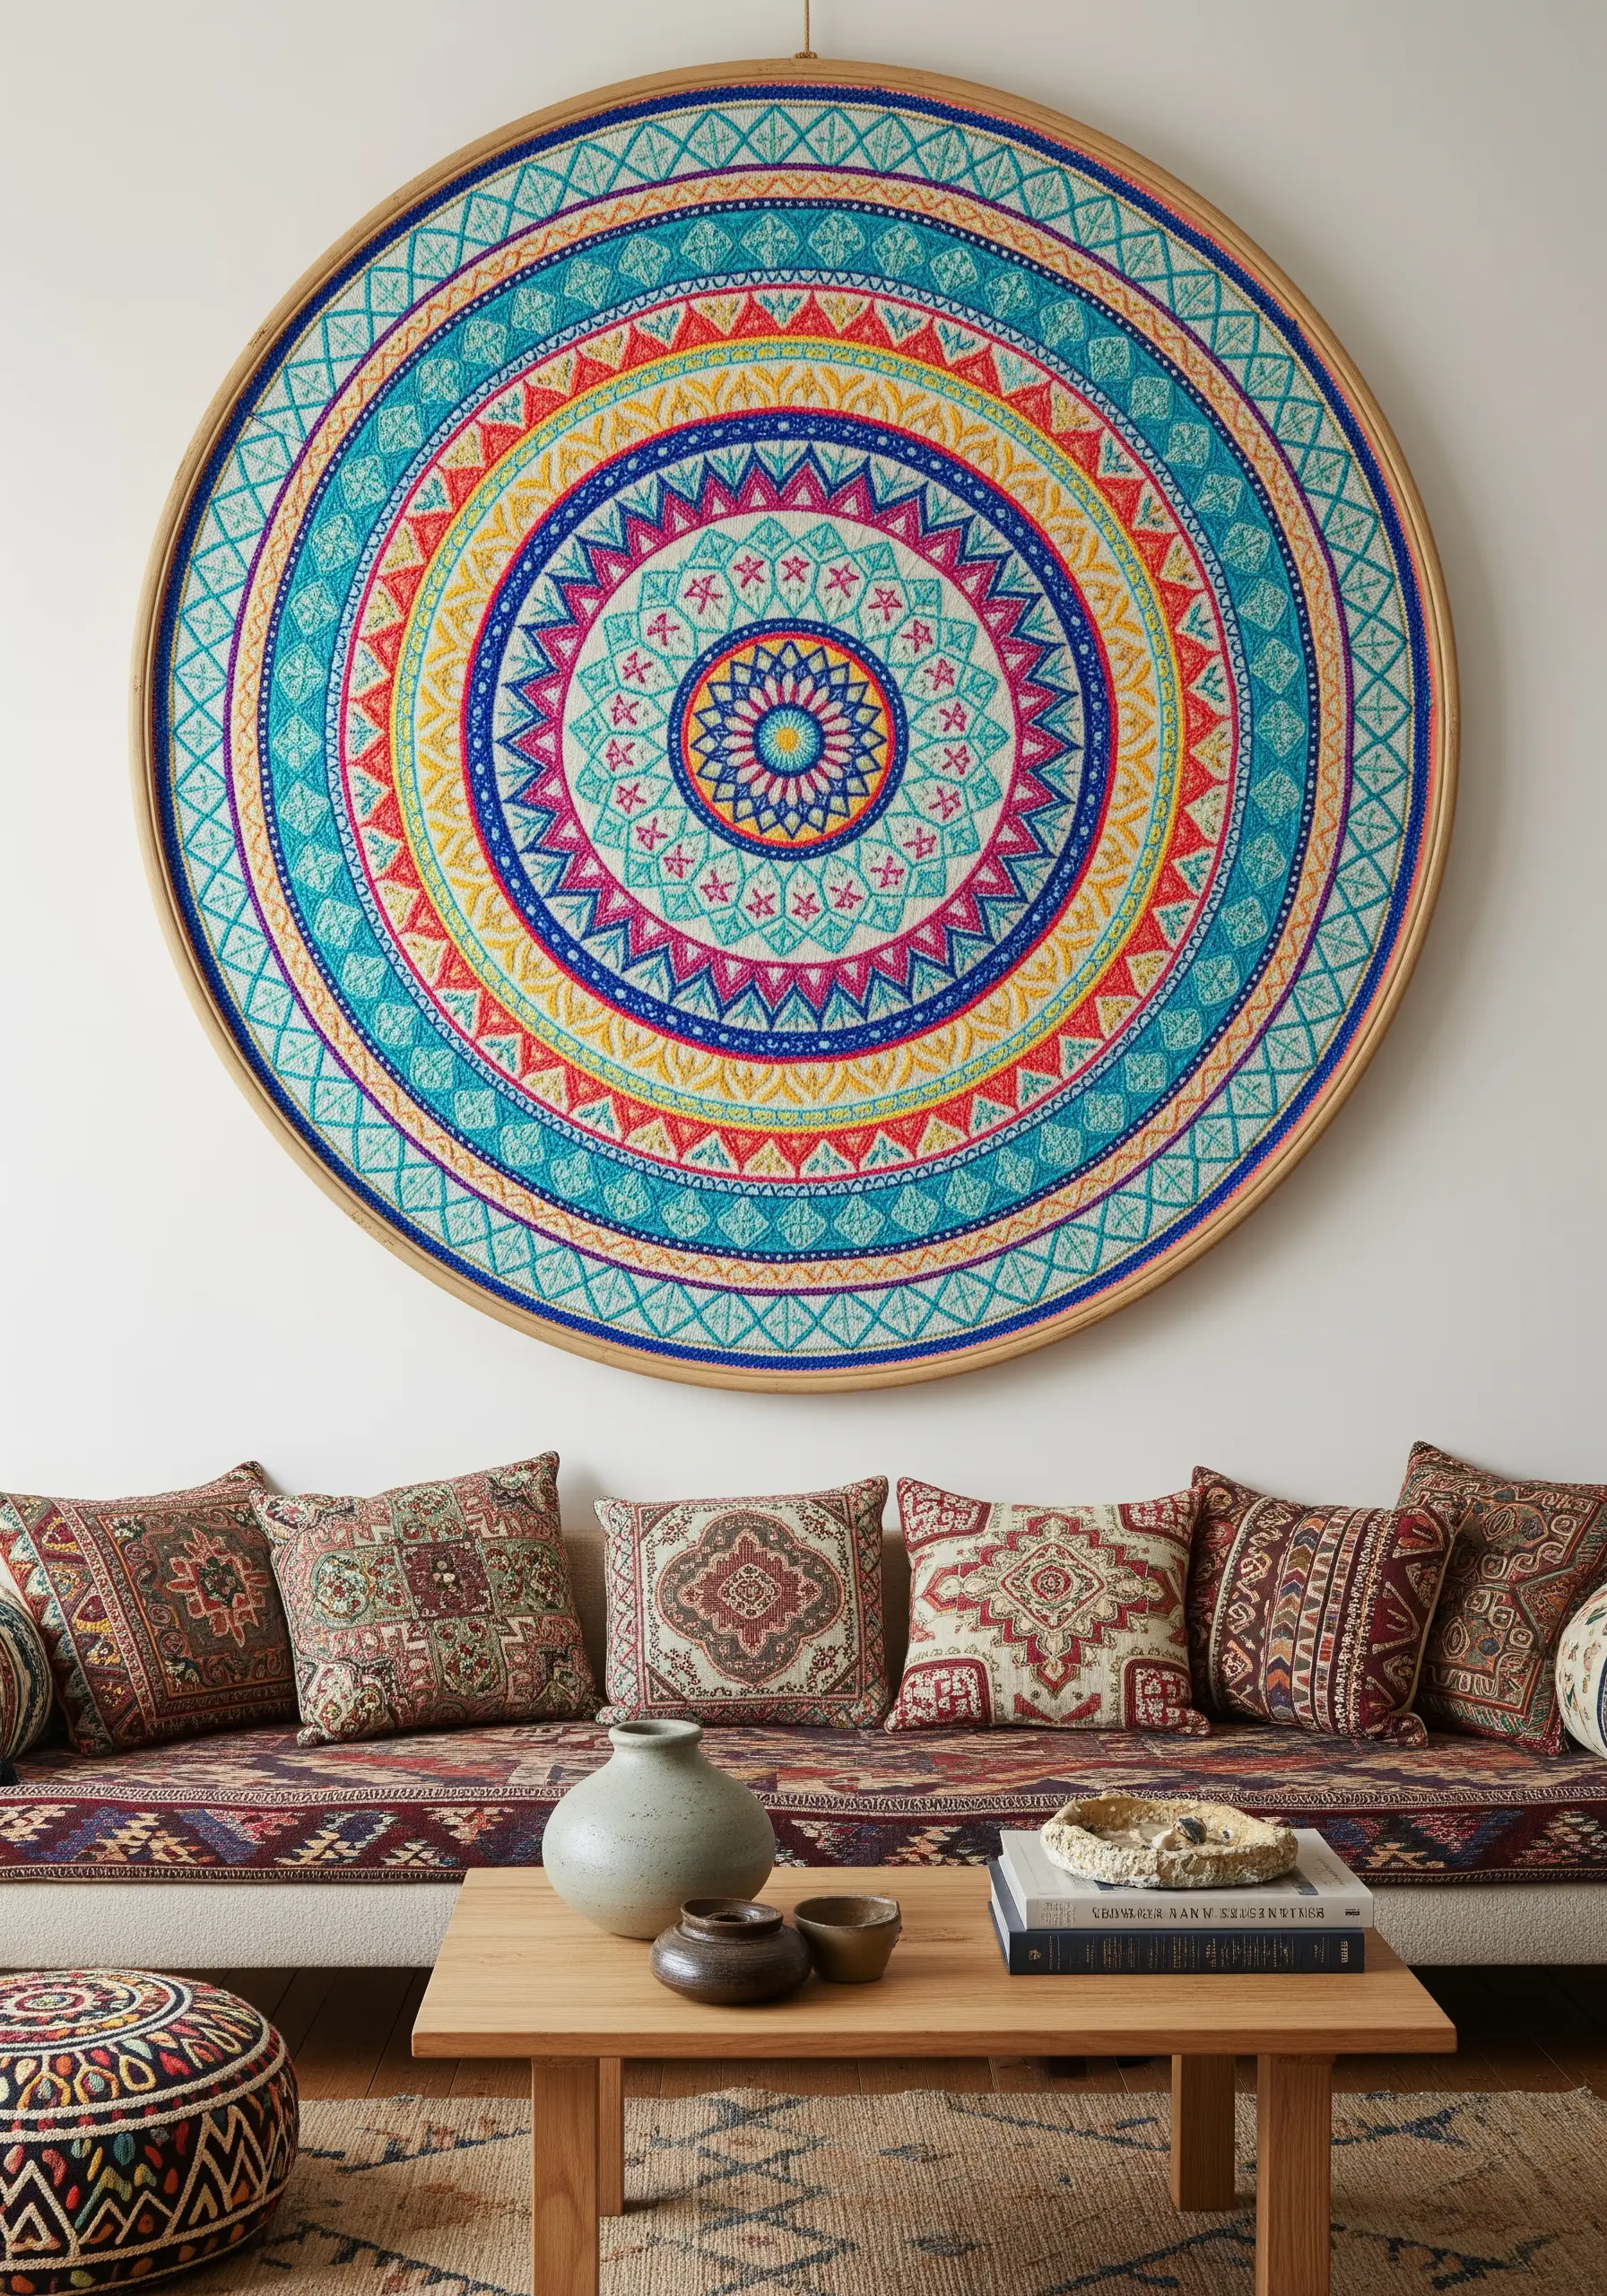
Symmetry is the soul of a mandala. Begin your stitching from the absolute center and work your way outwards, ring by ring, to prevent distortion.
Use a water-soluble fabric pen to transfer your pattern precisely before you begin. For a project this detailed, a clear guide is non-negotiable.
Plan your color palette in advance. Create rhythm and harmony by repeating key colors in different rings of the design, which guides the eye and balances the composition.
Use a variety of simple stitches—like backstitch for lines, satin stitch for small fills, and French knots for texture—to make your modern mandala stitch patterns visually complex and engaging.
16. Evoke a Rustic Winter Scene with Texture
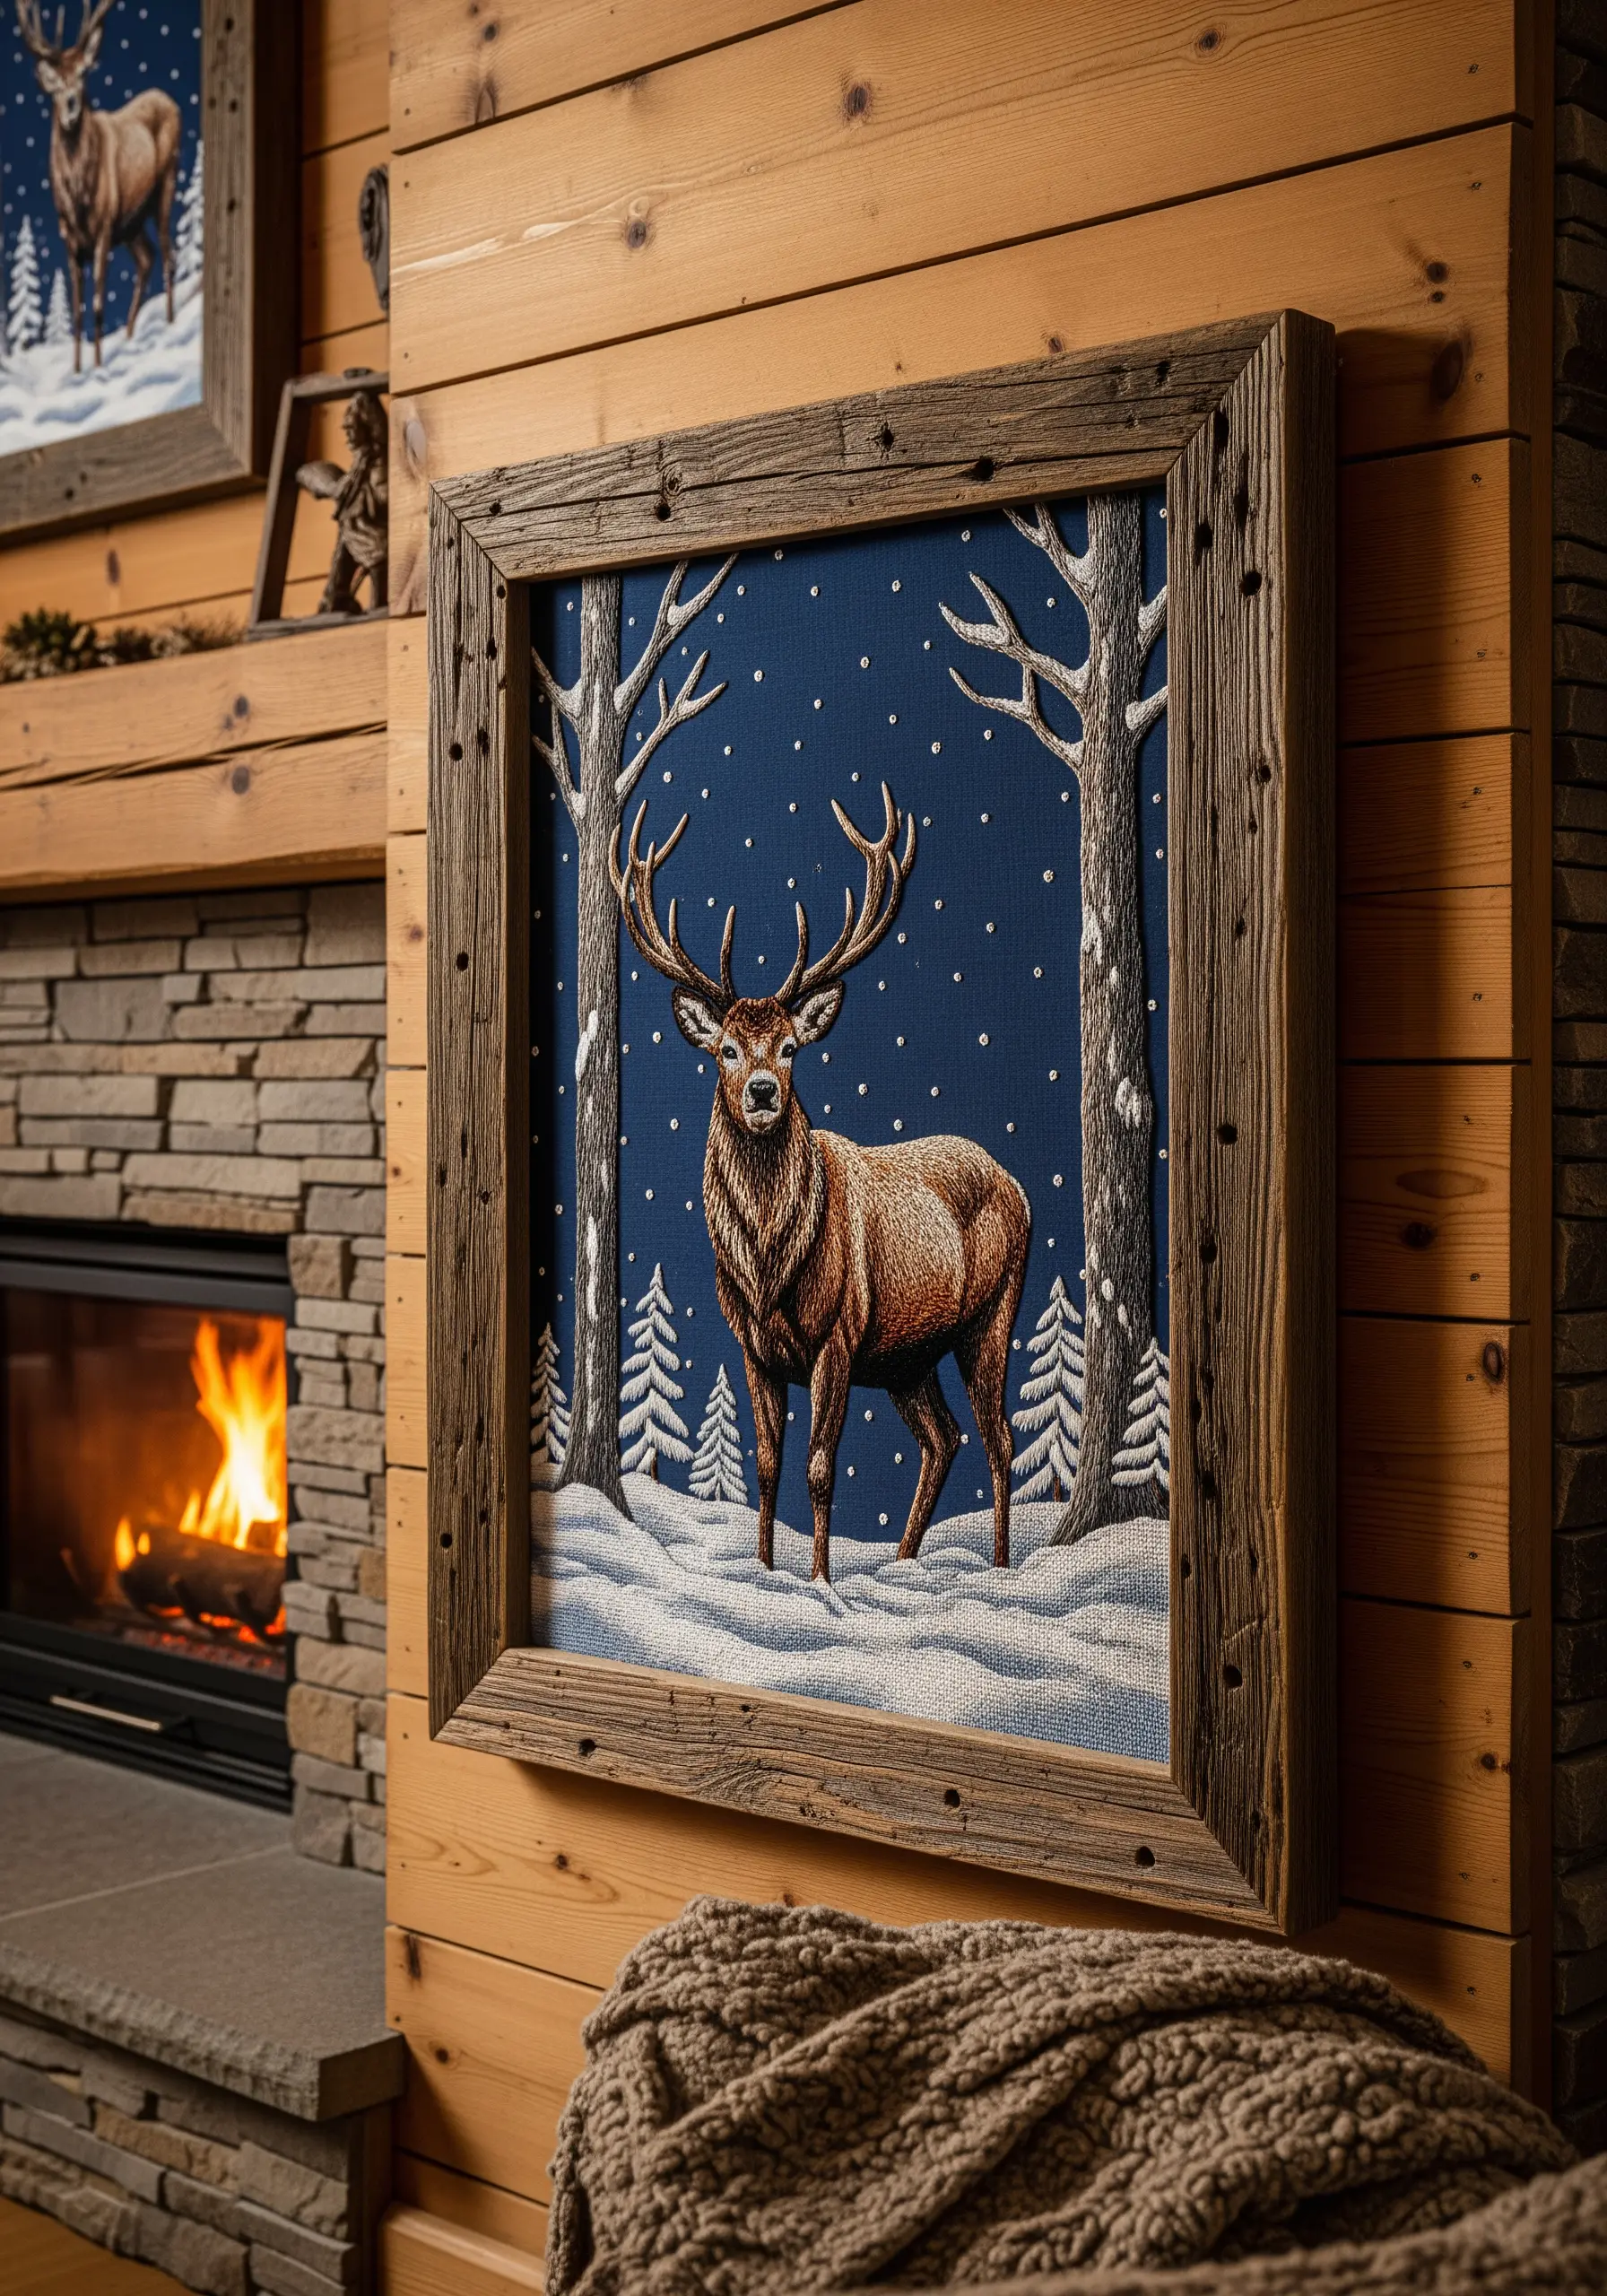
To create a convincing snow effect, use French knots in white or off-white thread. Vary their size slightly and scatter them unevenly for a more natural look of falling snow.
For the deer’s coat, use directional long-and-short stitches with several shades of brown to mimic the texture and color variations of fur.
The ground snow can be worked in a simple satin stitch, but keep the stitches horizontal to suggest a flat, settled blanket of white.
Finishing the piece in a rustic, reclaimed wood frame enhances the cozy, cabin-like atmosphere of the artwork itself.
17. Embrace Minimalist Elegance with Line Art
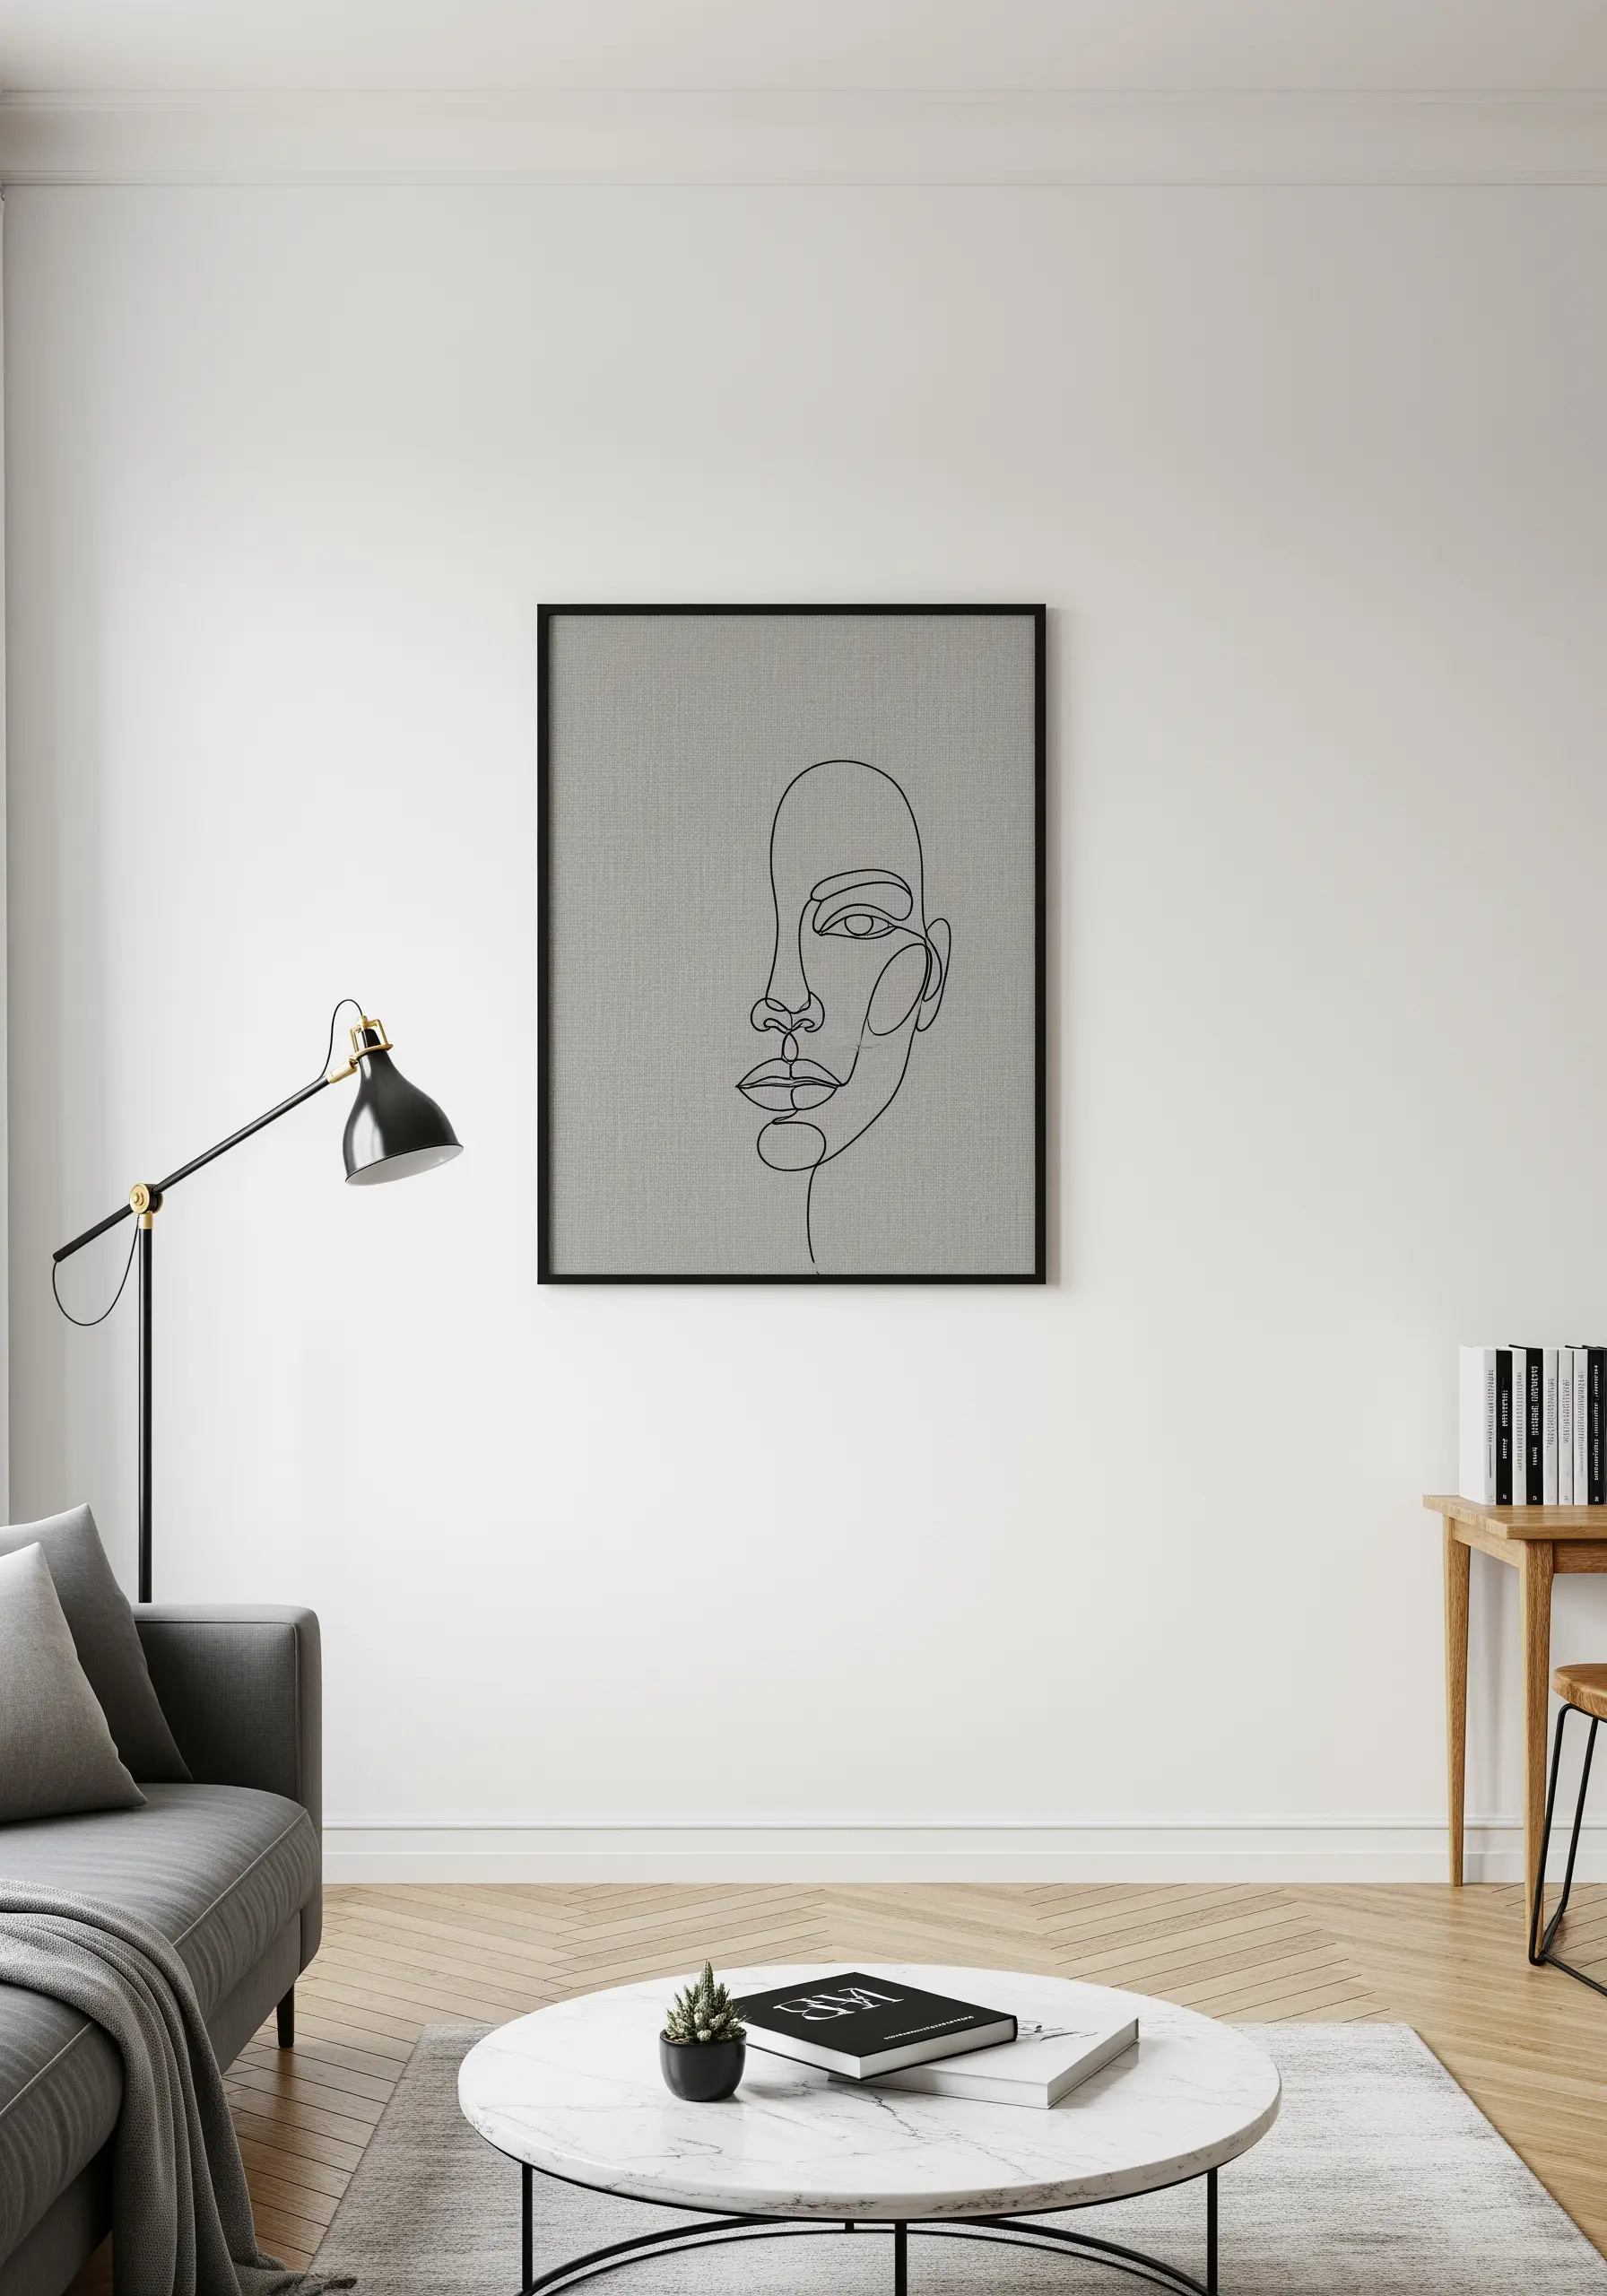
For a continuous line drawing, the goal is a fluid, unbroken line. A stem stitch or a whipped backstitch is ideal, as they both create a smooth, solid line without visible gaps.
Use high contrast to make the design impactful: a dark thread on a light, textured fabric commands attention and emphasizes the purity of the form.
Take your time on the curves. Shorten your stitches slightly as you navigate tight corners to maintain a graceful arc rather than a series of sharp angles.
These modern line art thread designs prove that simplicity often carries the most emotional weight.
18. Stitch a Playful Homage to Your Craft
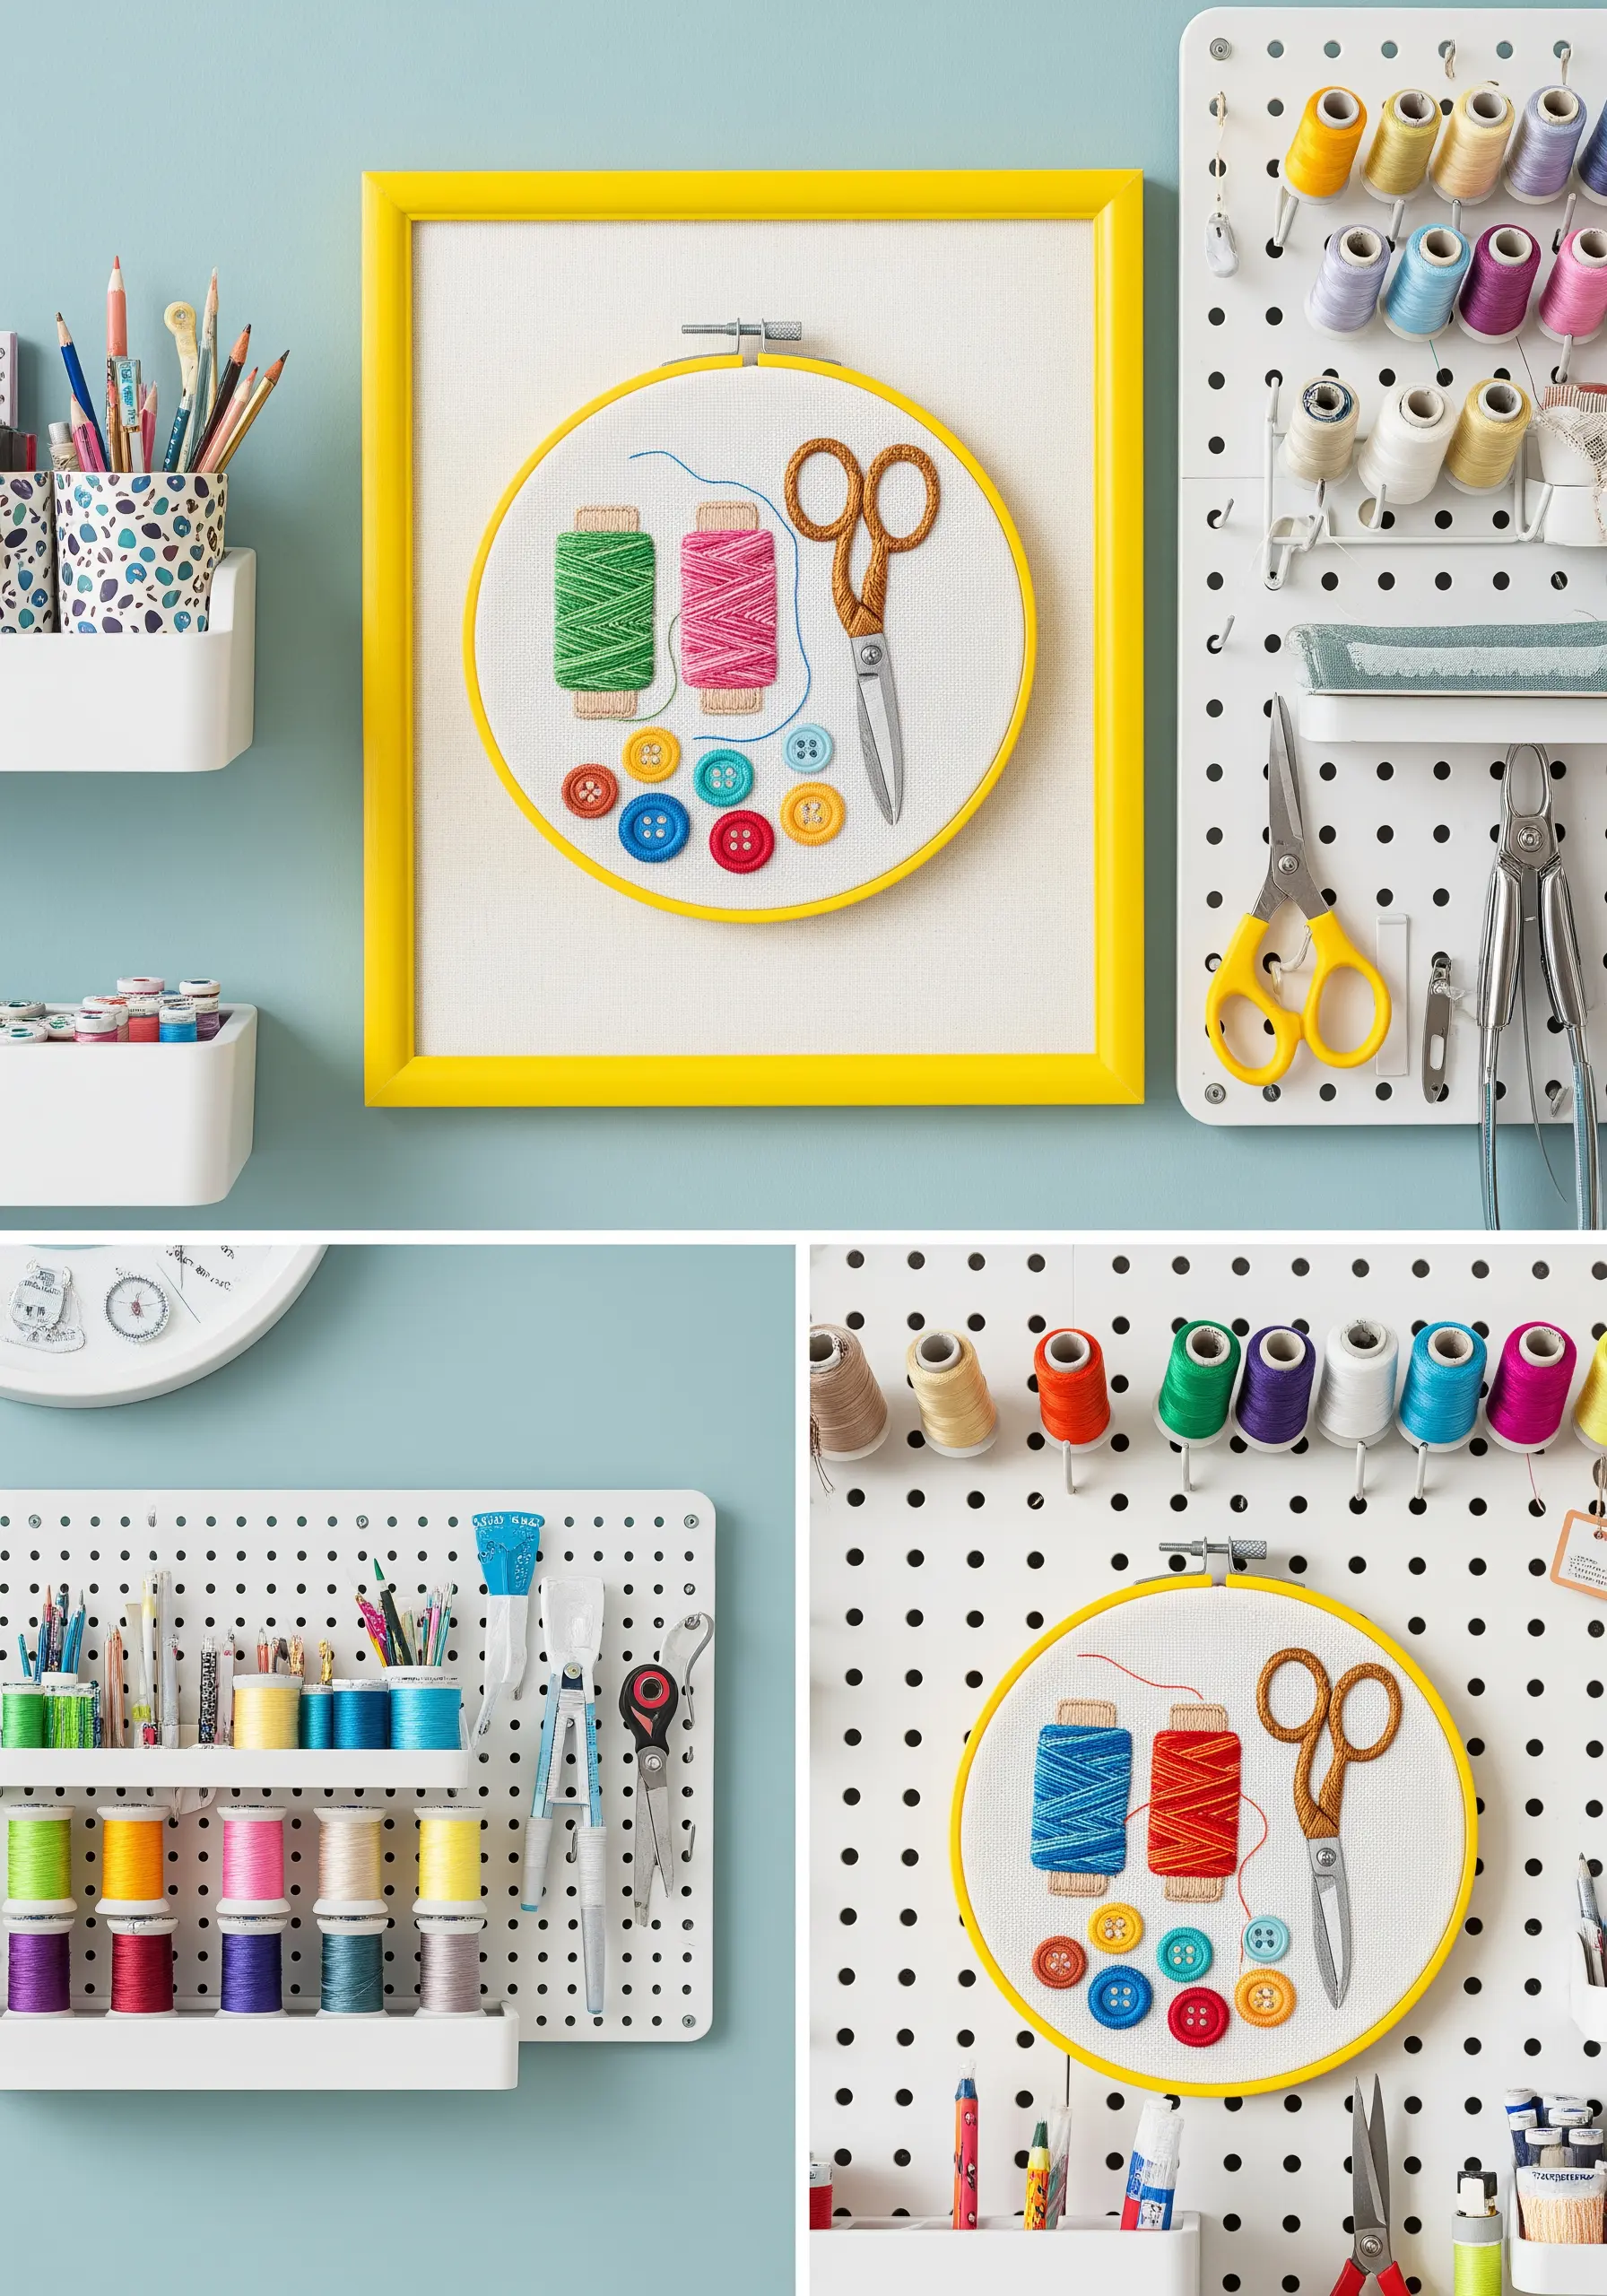
Celebrate your hobby by transforming its tools into art. To create dimensional spools of thread, first stitch a padded satin stitch base, then wrap your floss around it repeatedly until it looks full and realistic.
Don’t be afraid to incorporate mixed media. Stitching real, colorful buttons directly onto your fabric adds an instant layer of texture and playful authenticity.
For sharp objects like scissors, use a metallic silver thread and a precise backstitch to capture the metallic sheen and crisp edges.
A bright, bold frame—like this vibrant yellow—turns a sweet subject into a confident, modern piece of decor.
19. Curate a Blooming Stairway Gallery Wall

Create a dynamic floral installation by varying the scale and composition of each piece. Mix large, single blooms with smaller, delicate sprays.
Maintain visual cohesion by using the same background fabric for every hoop and sticking to a consistent color palette—here, shades of pink, red, and green tie everything together.
Arrange the hoops in an organic, flowing shape that follows the line of the staircase. This makes the gallery feel like it’s growing naturally up the wall.
Such stunning wildflower hoop art projects can transform an overlooked space like a stairwell into a major feature.
20. Capture Vanity Elegance with Delicate Details
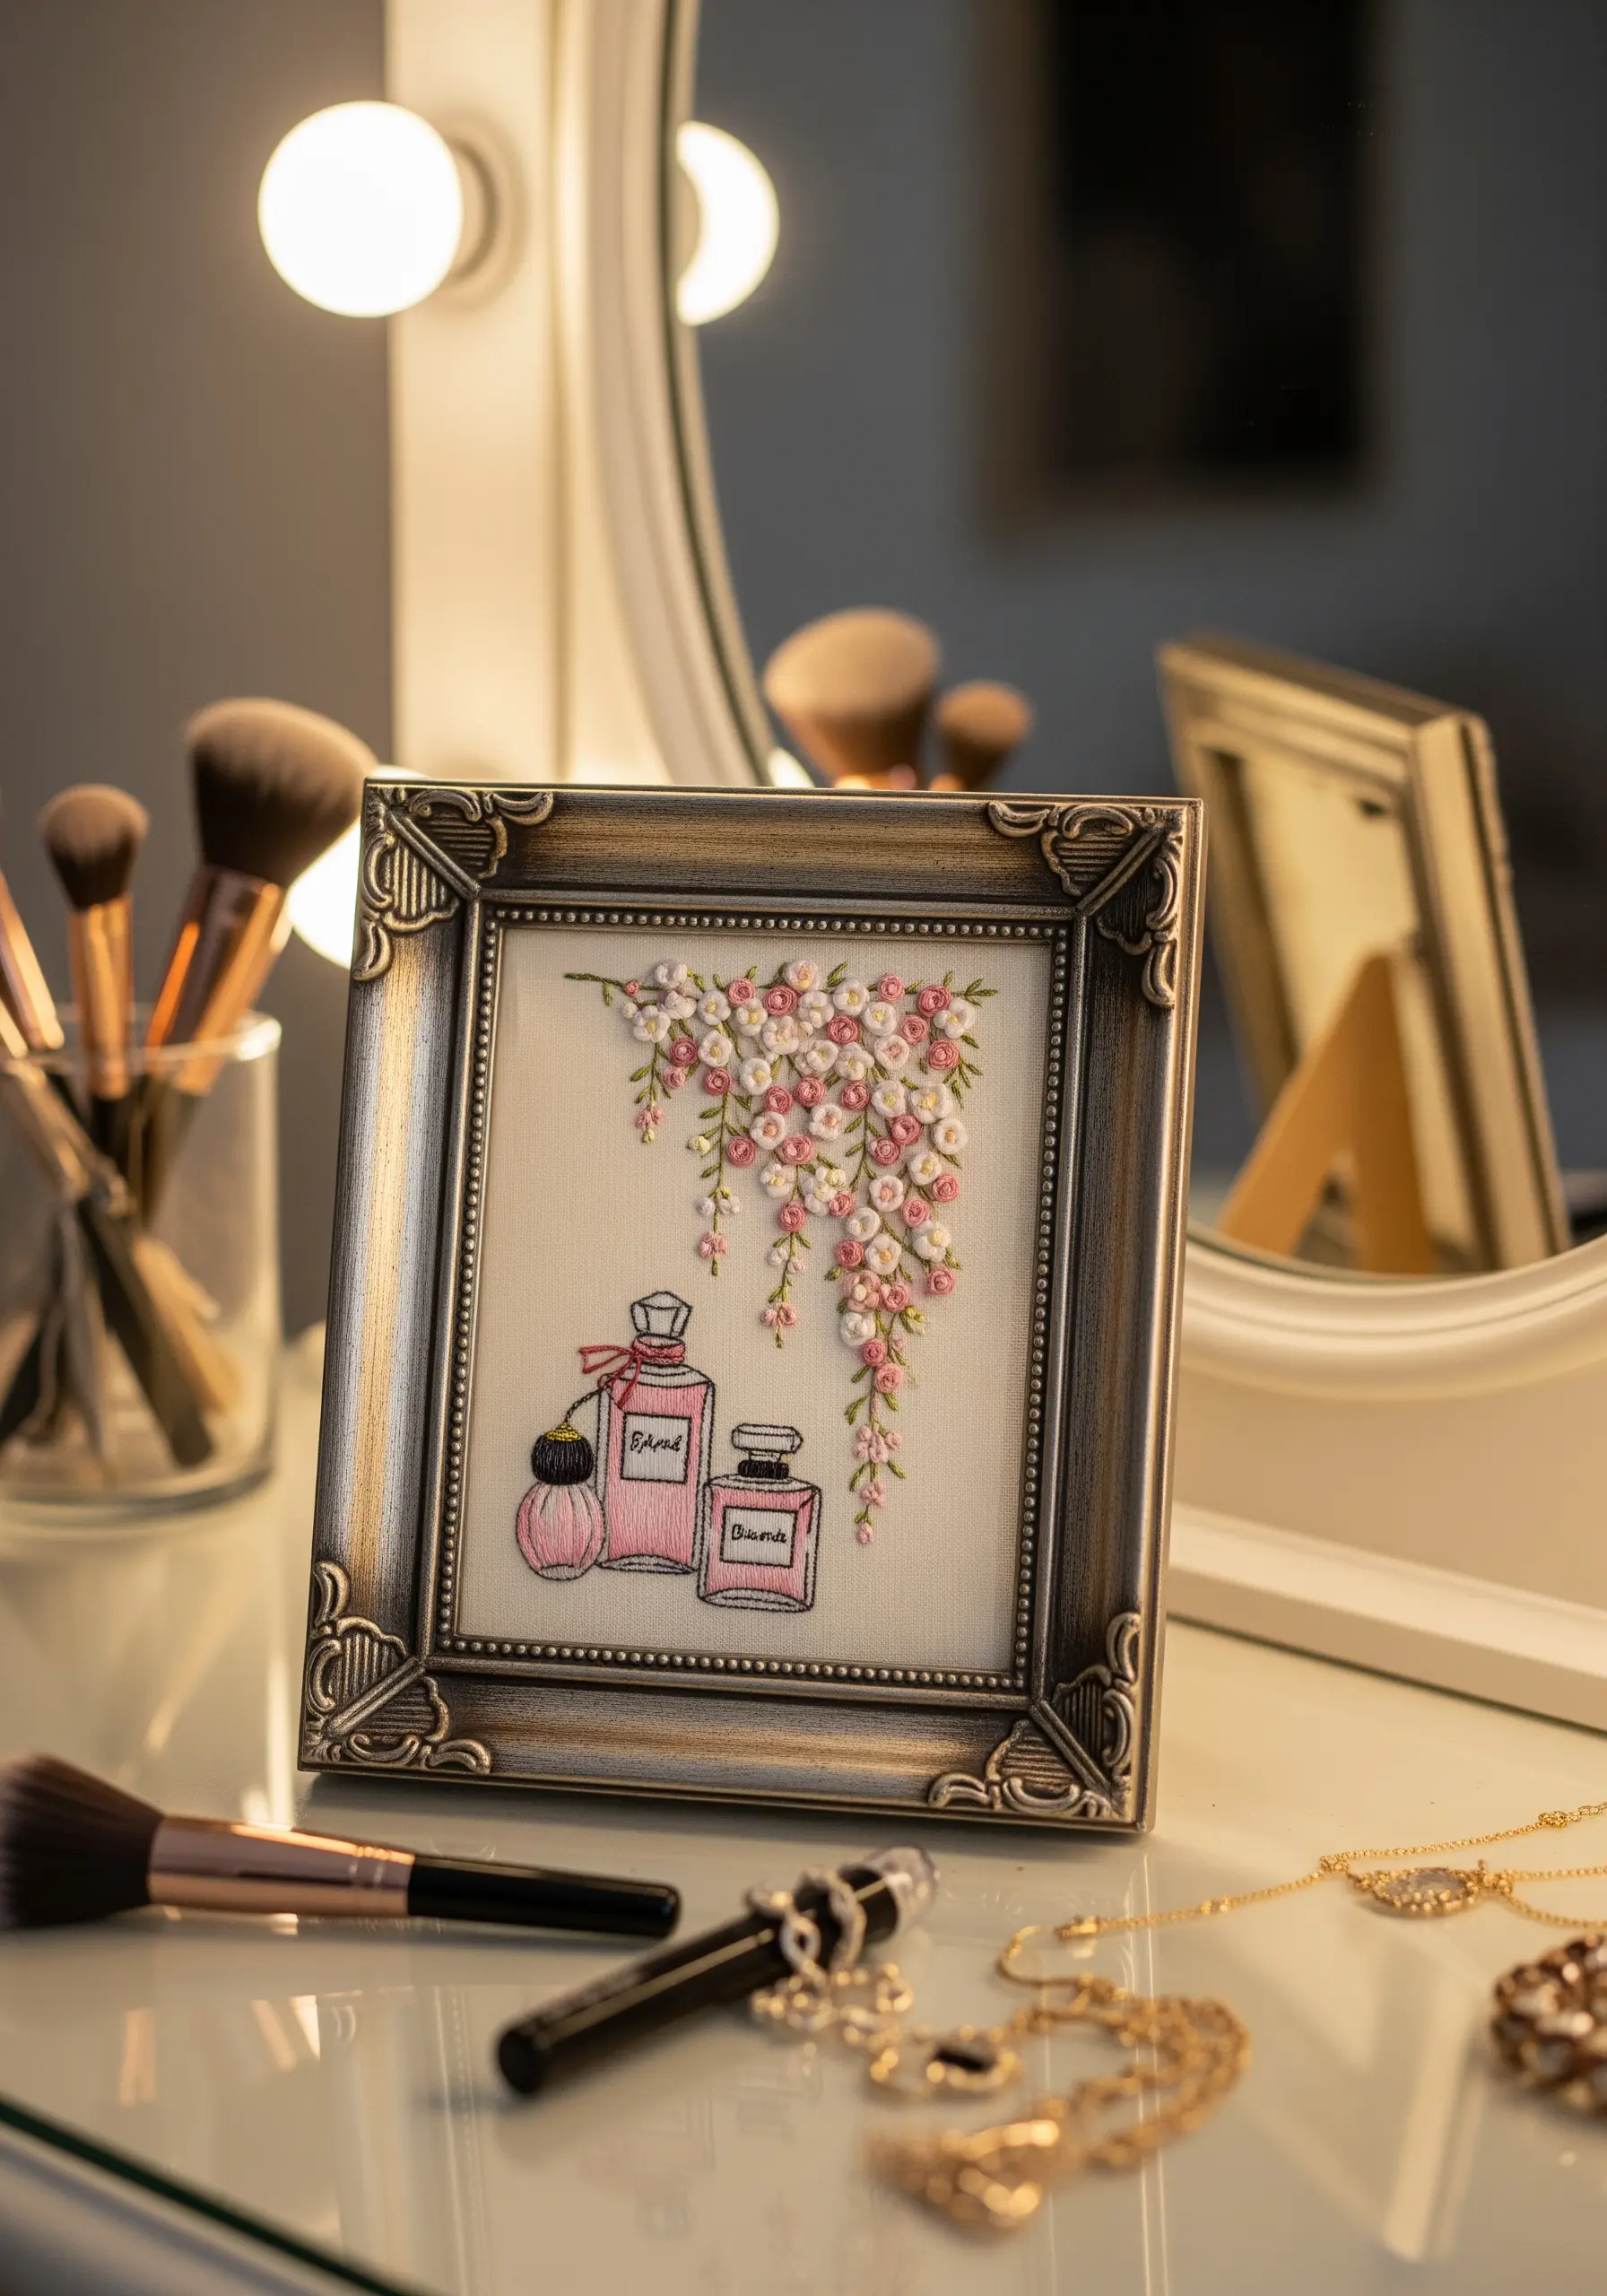
To create lush, cascading flowers, use dimensional stitches like bullion knots for the buds and lazy daisy stitches for the tiny petals. This gives the bouquet a realistic, textured feel.
For the ultra-fine lettering on the perfume bottles, use a single strand of floss and a tiny backstitch. A magnifying light can be your best friend for this level of detail.
Outline the glass bottles with a light gray or silver thread to suggest transparency and reflection, making them look more realistic.
An ornate, vintage-style frame complements the subject matter perfectly, completing the sophisticated and feminine floral micro-embroidery frames‘ aesthetic.
21. Chart a Whimsical World with Textured Fills
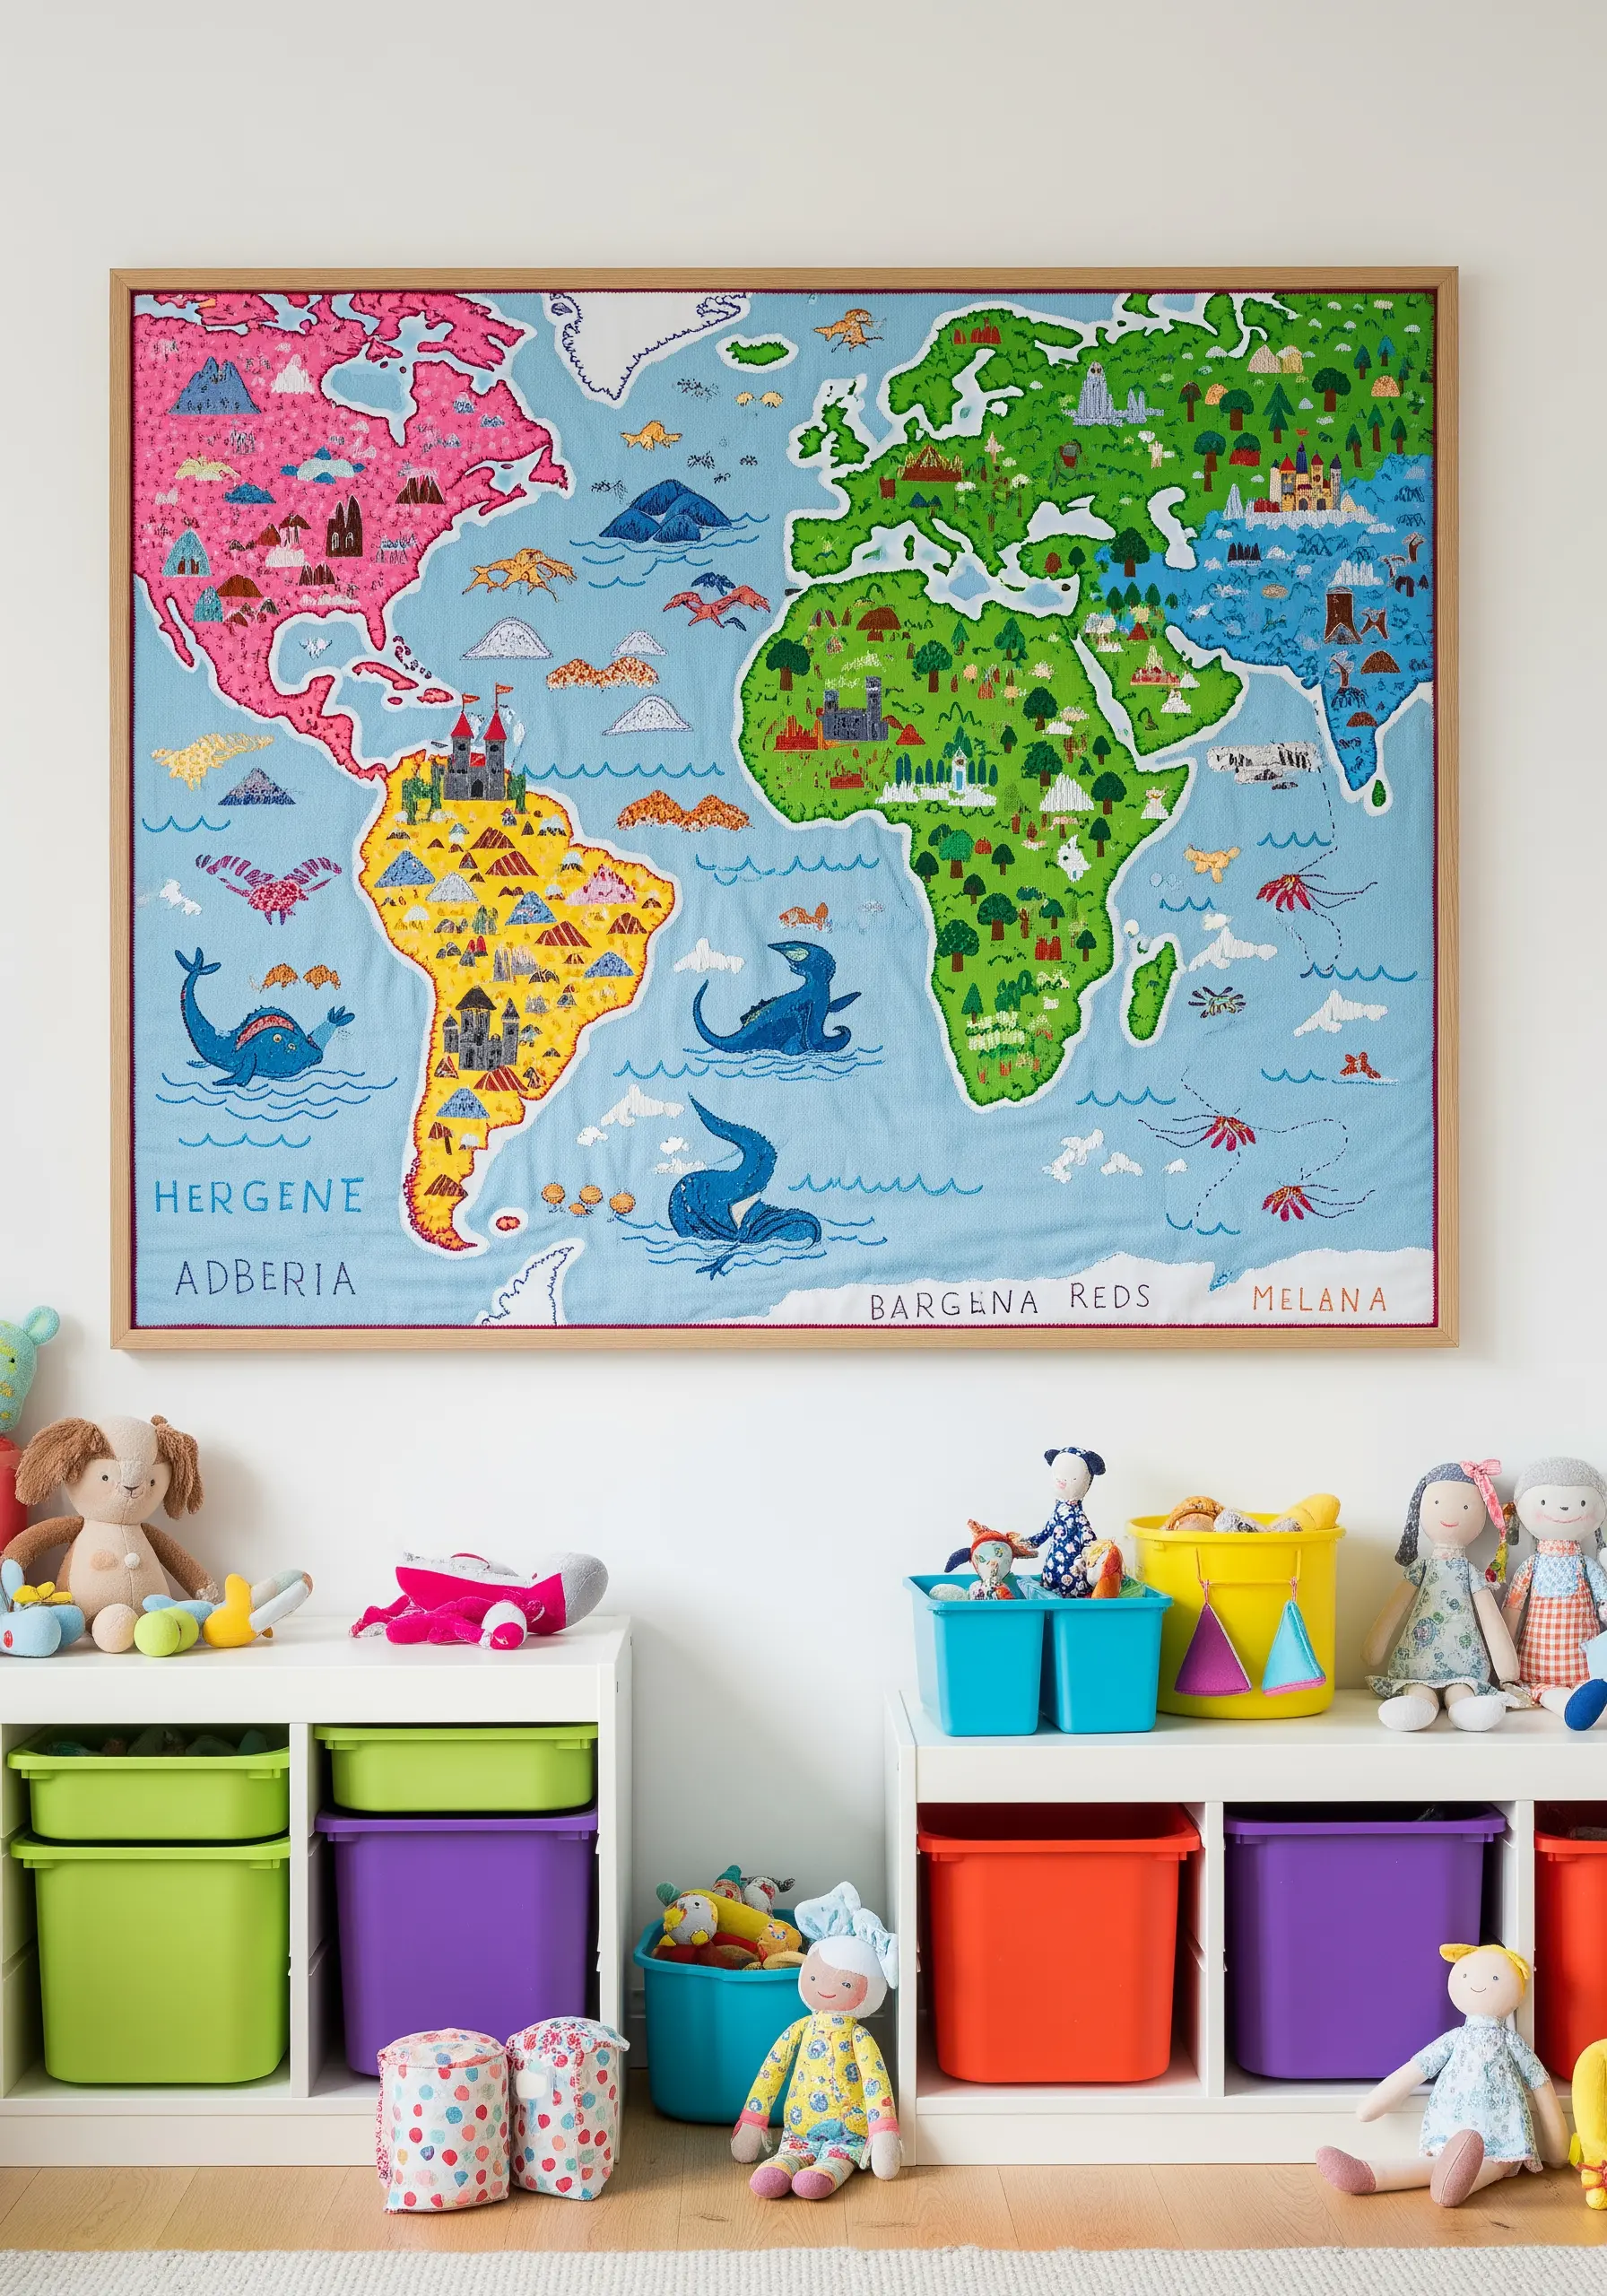
When filling large, solid areas like continents, avoid satin stitch, which can pucker and snag over long distances.
Instead, opt for a textured fill stitch like the seed stitch (tiny straight stitches scattered randomly) or long-and-short stitch. These are more forgiving and create a durable, tapestry-like surface.
Define the coastlines with a contrasting backstitch or chain stitch to make the shapes clear and graphic.
Don’t be afraid to be playful. Adding mythical sea creatures or tiny castles turns a simple map into a storybook adventure, perfect for a child’s room.
22. Stitch a Cozy Scene with Plush Textures
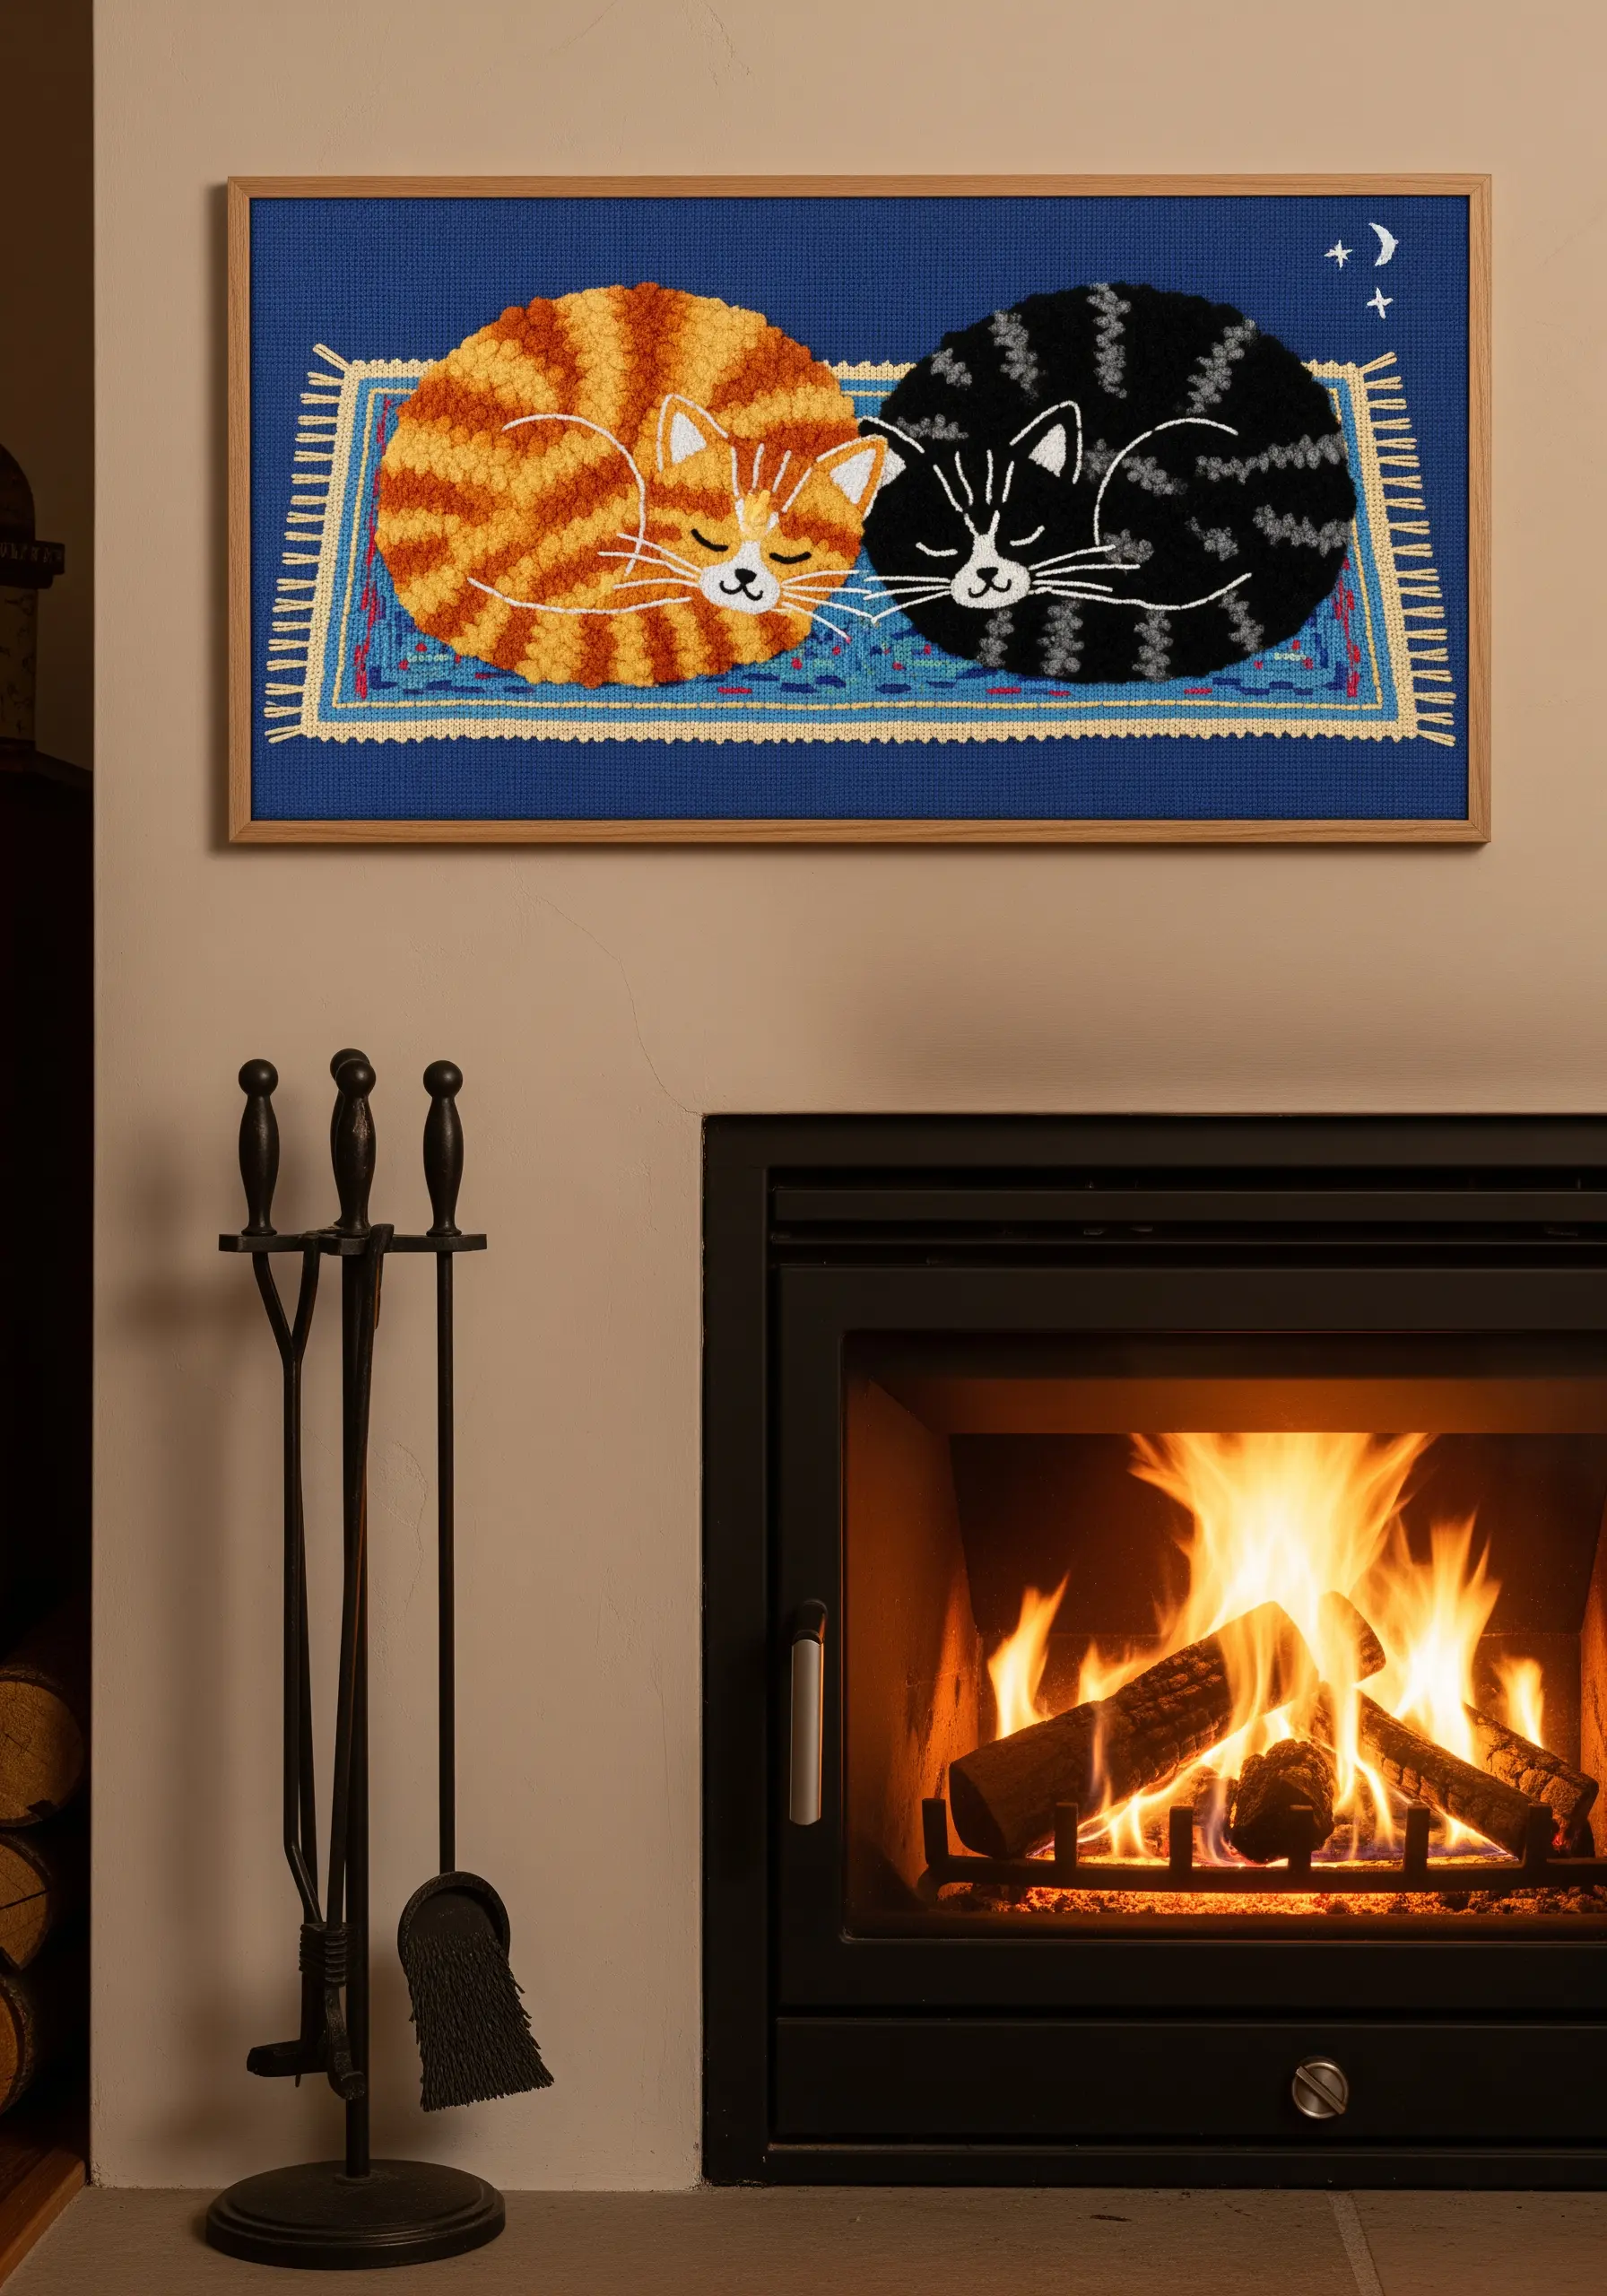
To create a truly tactile, fluffy texture for the sleeping cats, use the turkey work stitch (also known as the Ghiordes knot).
After creating the loops, carefully trim them with sharp scissors to your desired length to create a soft, plush pile that mimics the feel of fur.
For the patterned rug, use simple backstitches or chain stitches in contrasting colors to create a clean geometric base that makes the cats’ texture pop.
These cat & kitten embroidery designs are perfect for adding a touch of cozy warmth above a fireplace.


