

Have you ever felt that your stitches, while neat, are missing a certain something—a story, a sense of place, a deeper intention? You master the backstitch, perfect your satin stitch, yet the finished piece doesn’t quite capture the vision in your mind.
The key to elevating your work often lies not in learning a dozen new complex stitches, but in seeing with new eyes. By looking to the rich visual languages of global cultures, you can borrow principles of pattern, texture, and color that will fundamentally change how you approach the needle and thread.
This isn’t about creating perfect replicas. It’s about understanding why a Moroccan tile feels so balanced, how a Japanese pattern conveys calm, or what gives a Mexican floral its joyful energy. You’ll learn to translate these ideas into your own unique style, turning simple stitches into expressive, meaningful art.
1. Moroccan Zellij: Stitch Sharp Geometric Angles
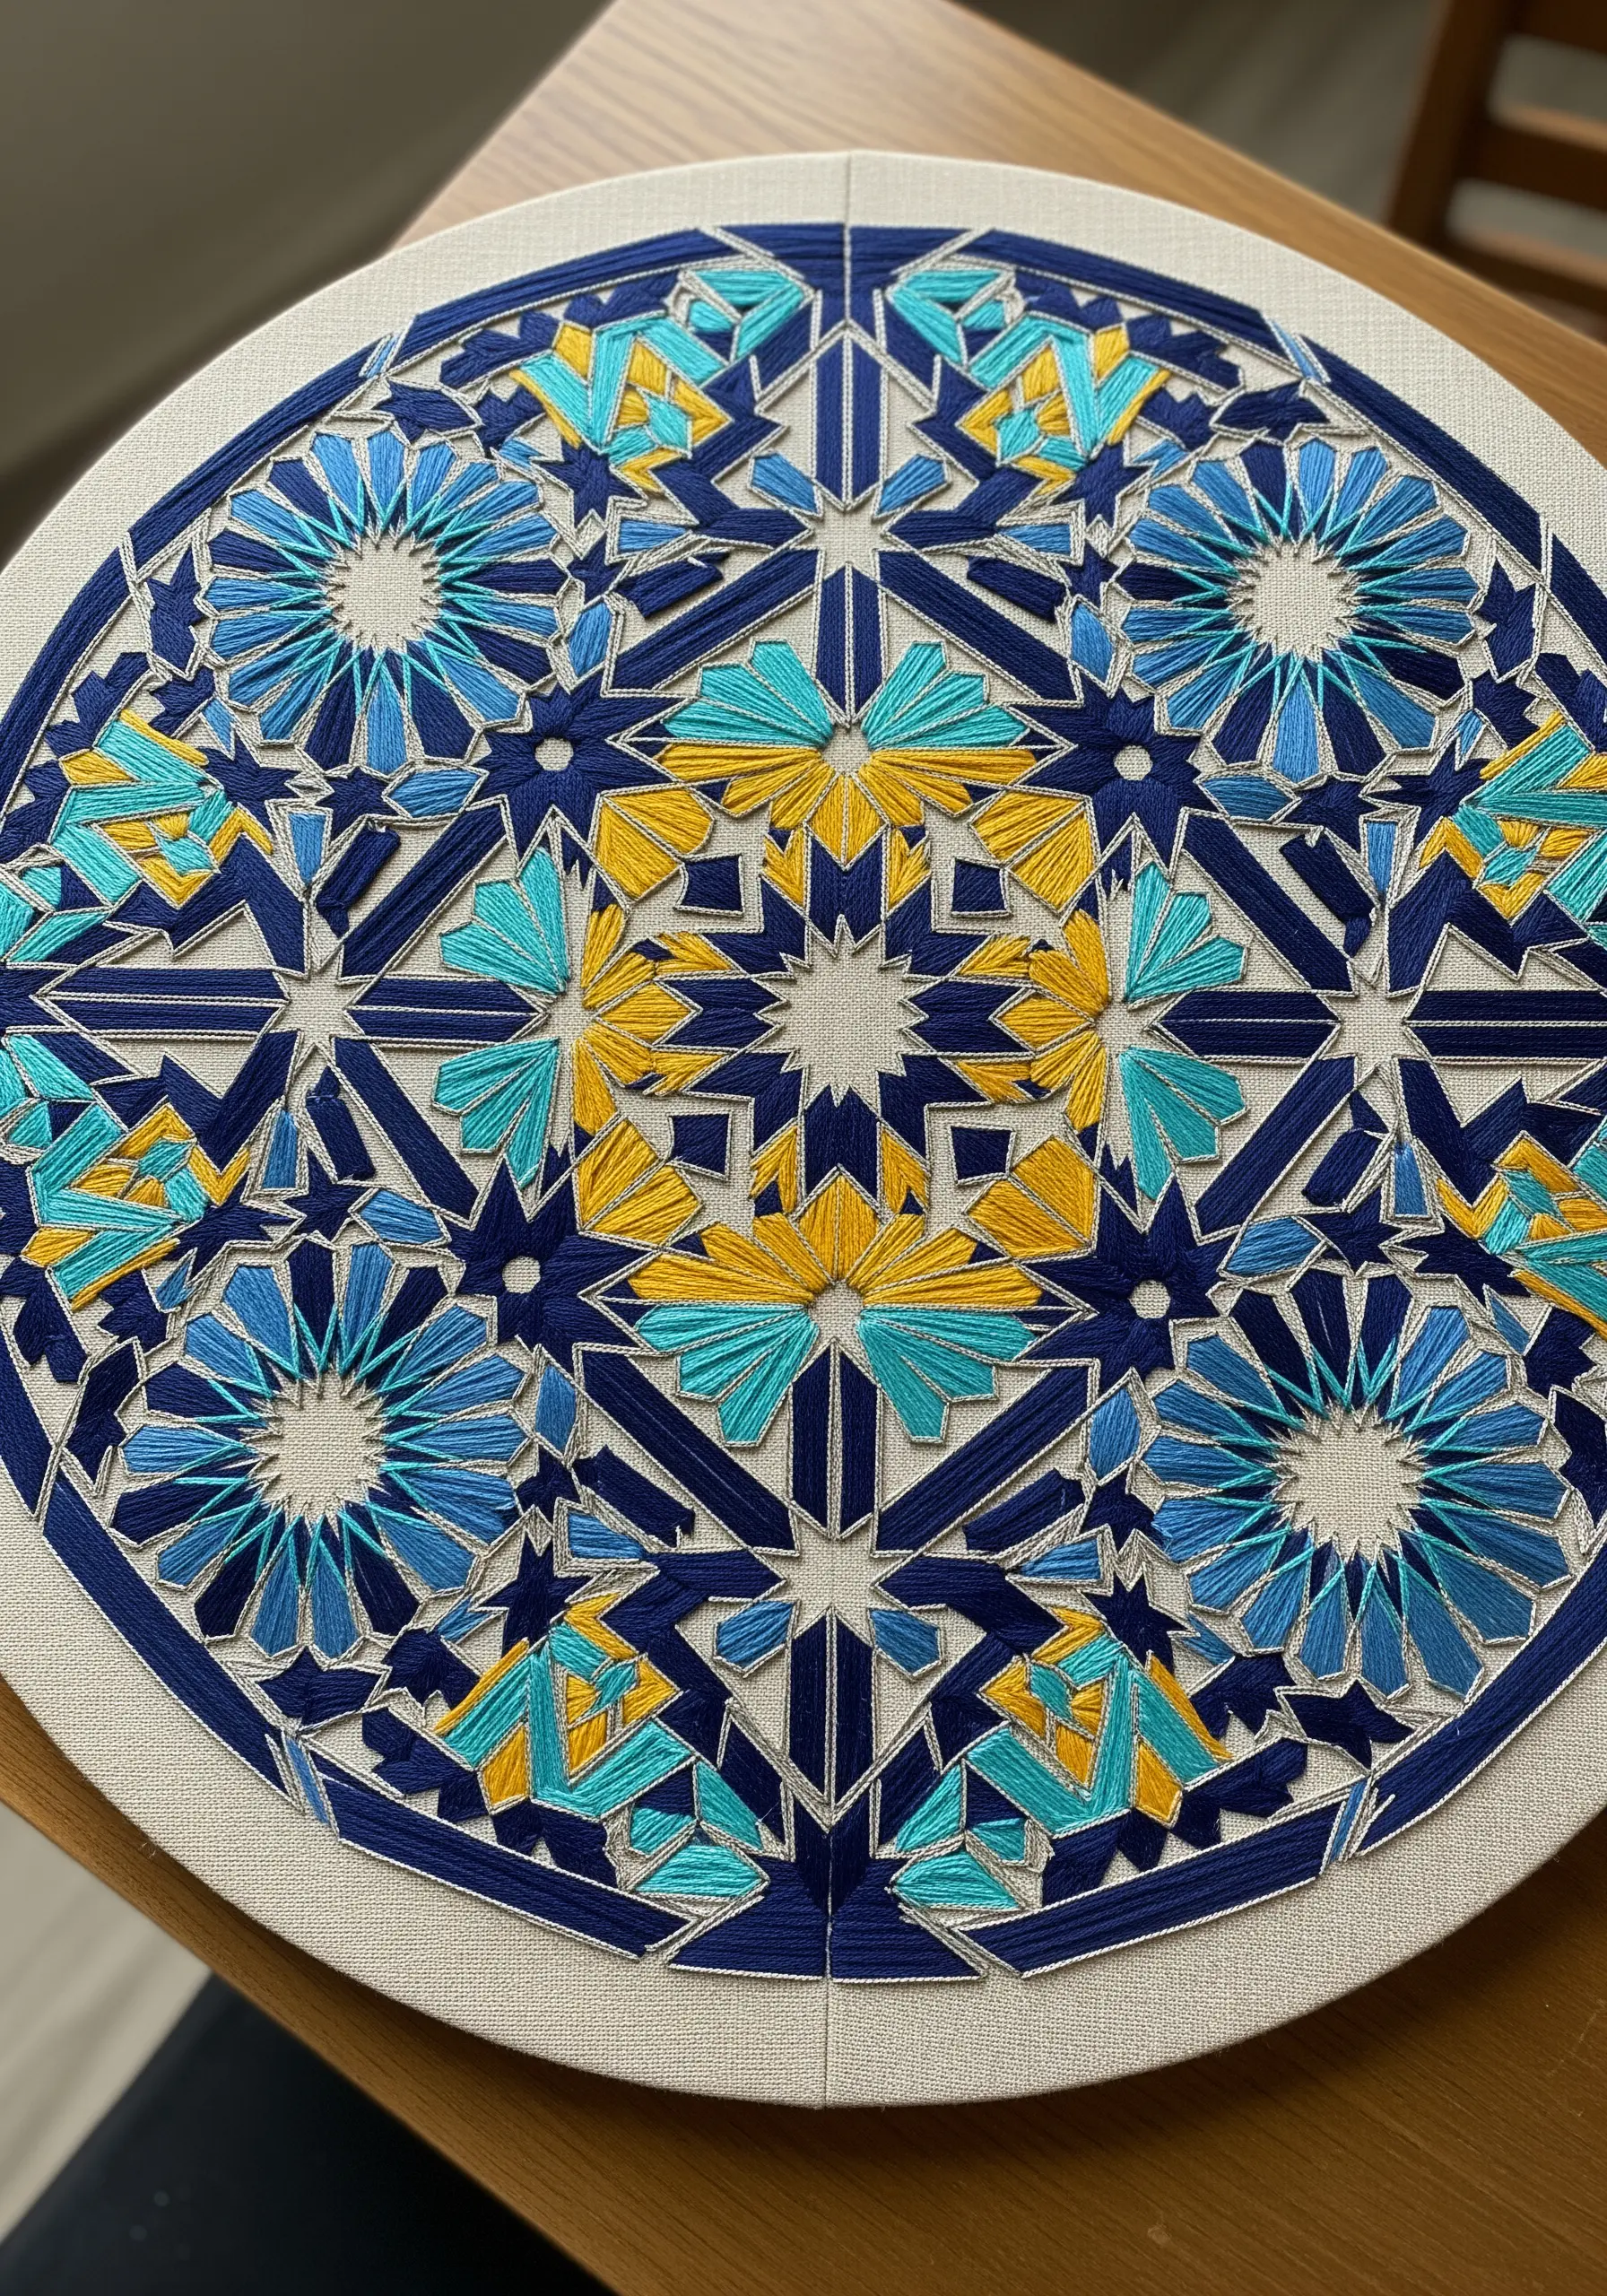
To capture the precision of Moroccan tilework, focus on creating flawless straight lines and sharp corners—a common challenge in threadwork.
Instead of a standard satin stitch that can slacken over long distances, use laid work. First, lay long, parallel stitches across the entire shape. Then, use a second thread to tack them down at regular intervals with tiny, almost invisible couching stitches.
This two-step process ensures your geometric fills remain taut and perfectly straight, mimicking the clean grout lines of zellij tiles. For the outlines, a single, sharp backstitch line will define the shapes with crisp authority.
2. Indian Phulkari: Define Shapes with Bold Outlines
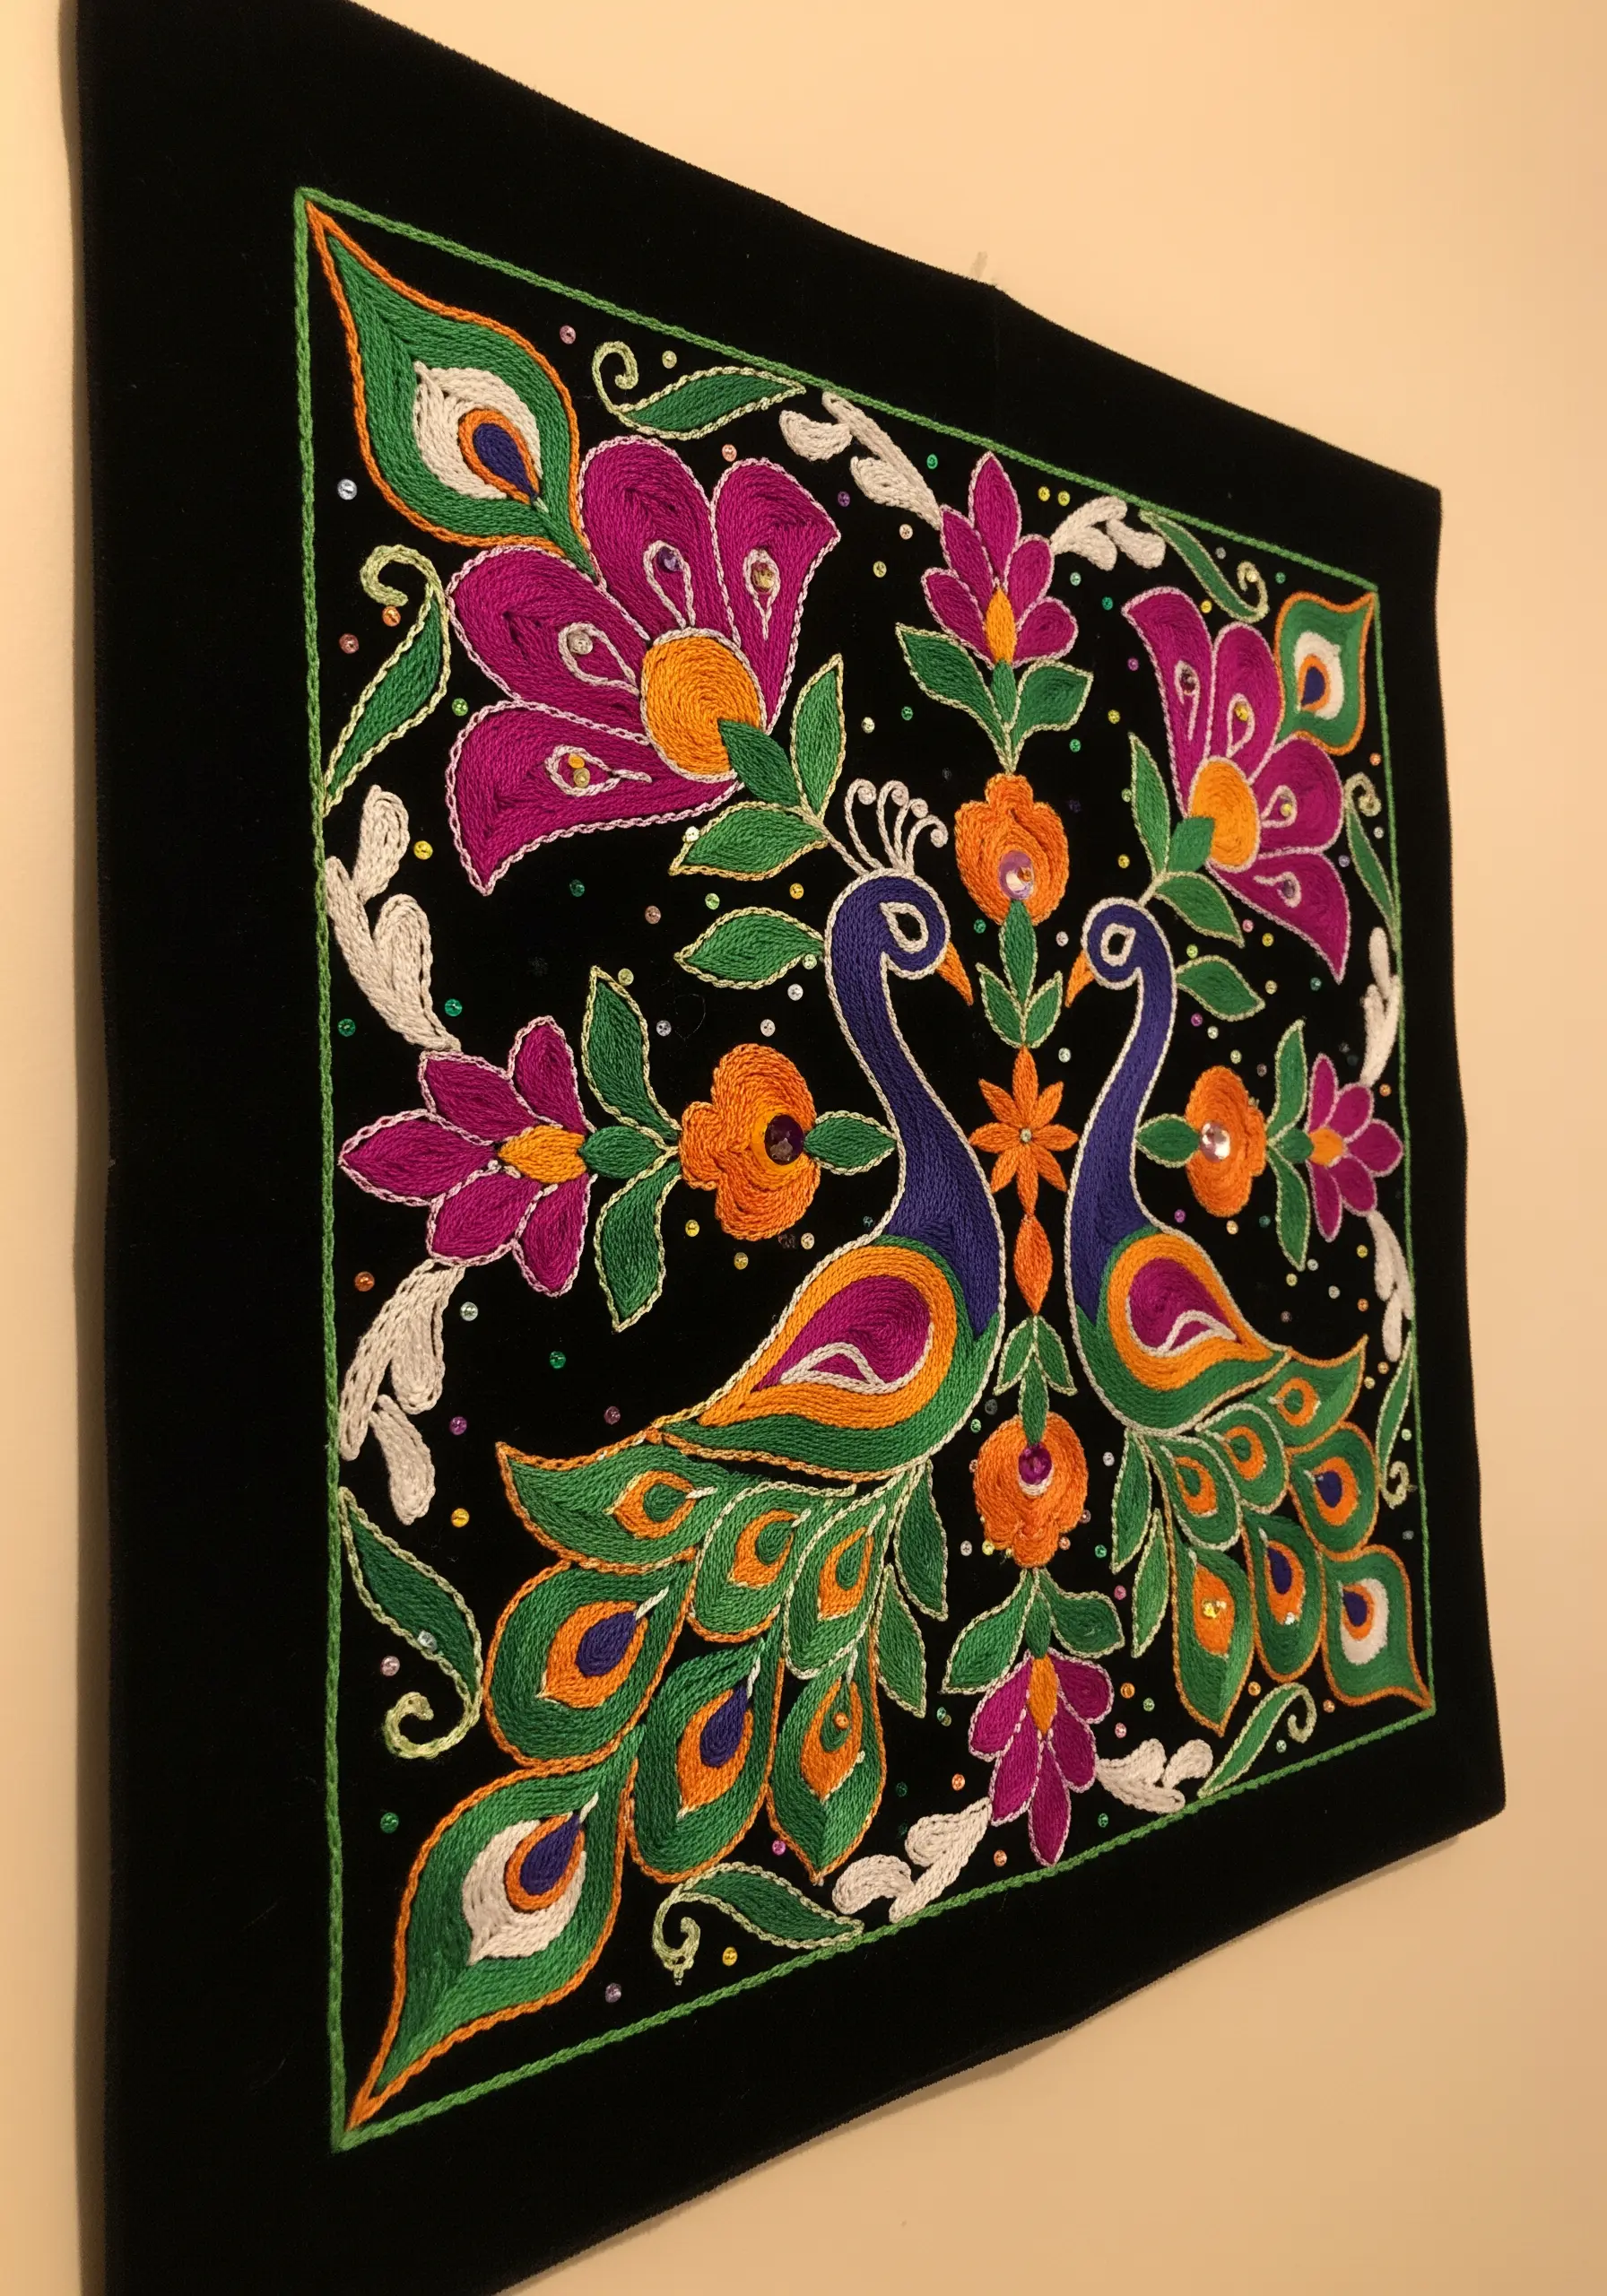
The vibrancy of Indian embroidery often comes from the dynamic interplay between color fills and their outlines.
Before you begin your satin stitch, first work the outline of each shape in a contrasting color using a tight split stitch. This creates a slightly raised ‘wall’ for your satin stitches to rest against, resulting in a much cleaner, more defined edge.
For the peacock feathers, stitch the outline in dark green, then fill with the brighter jewel tones. This simple step elevates the finish from handmade to professionally polished, making each color block pop against the black fabric.
3. Japanese Sashiko: Master Rhythmic Texture
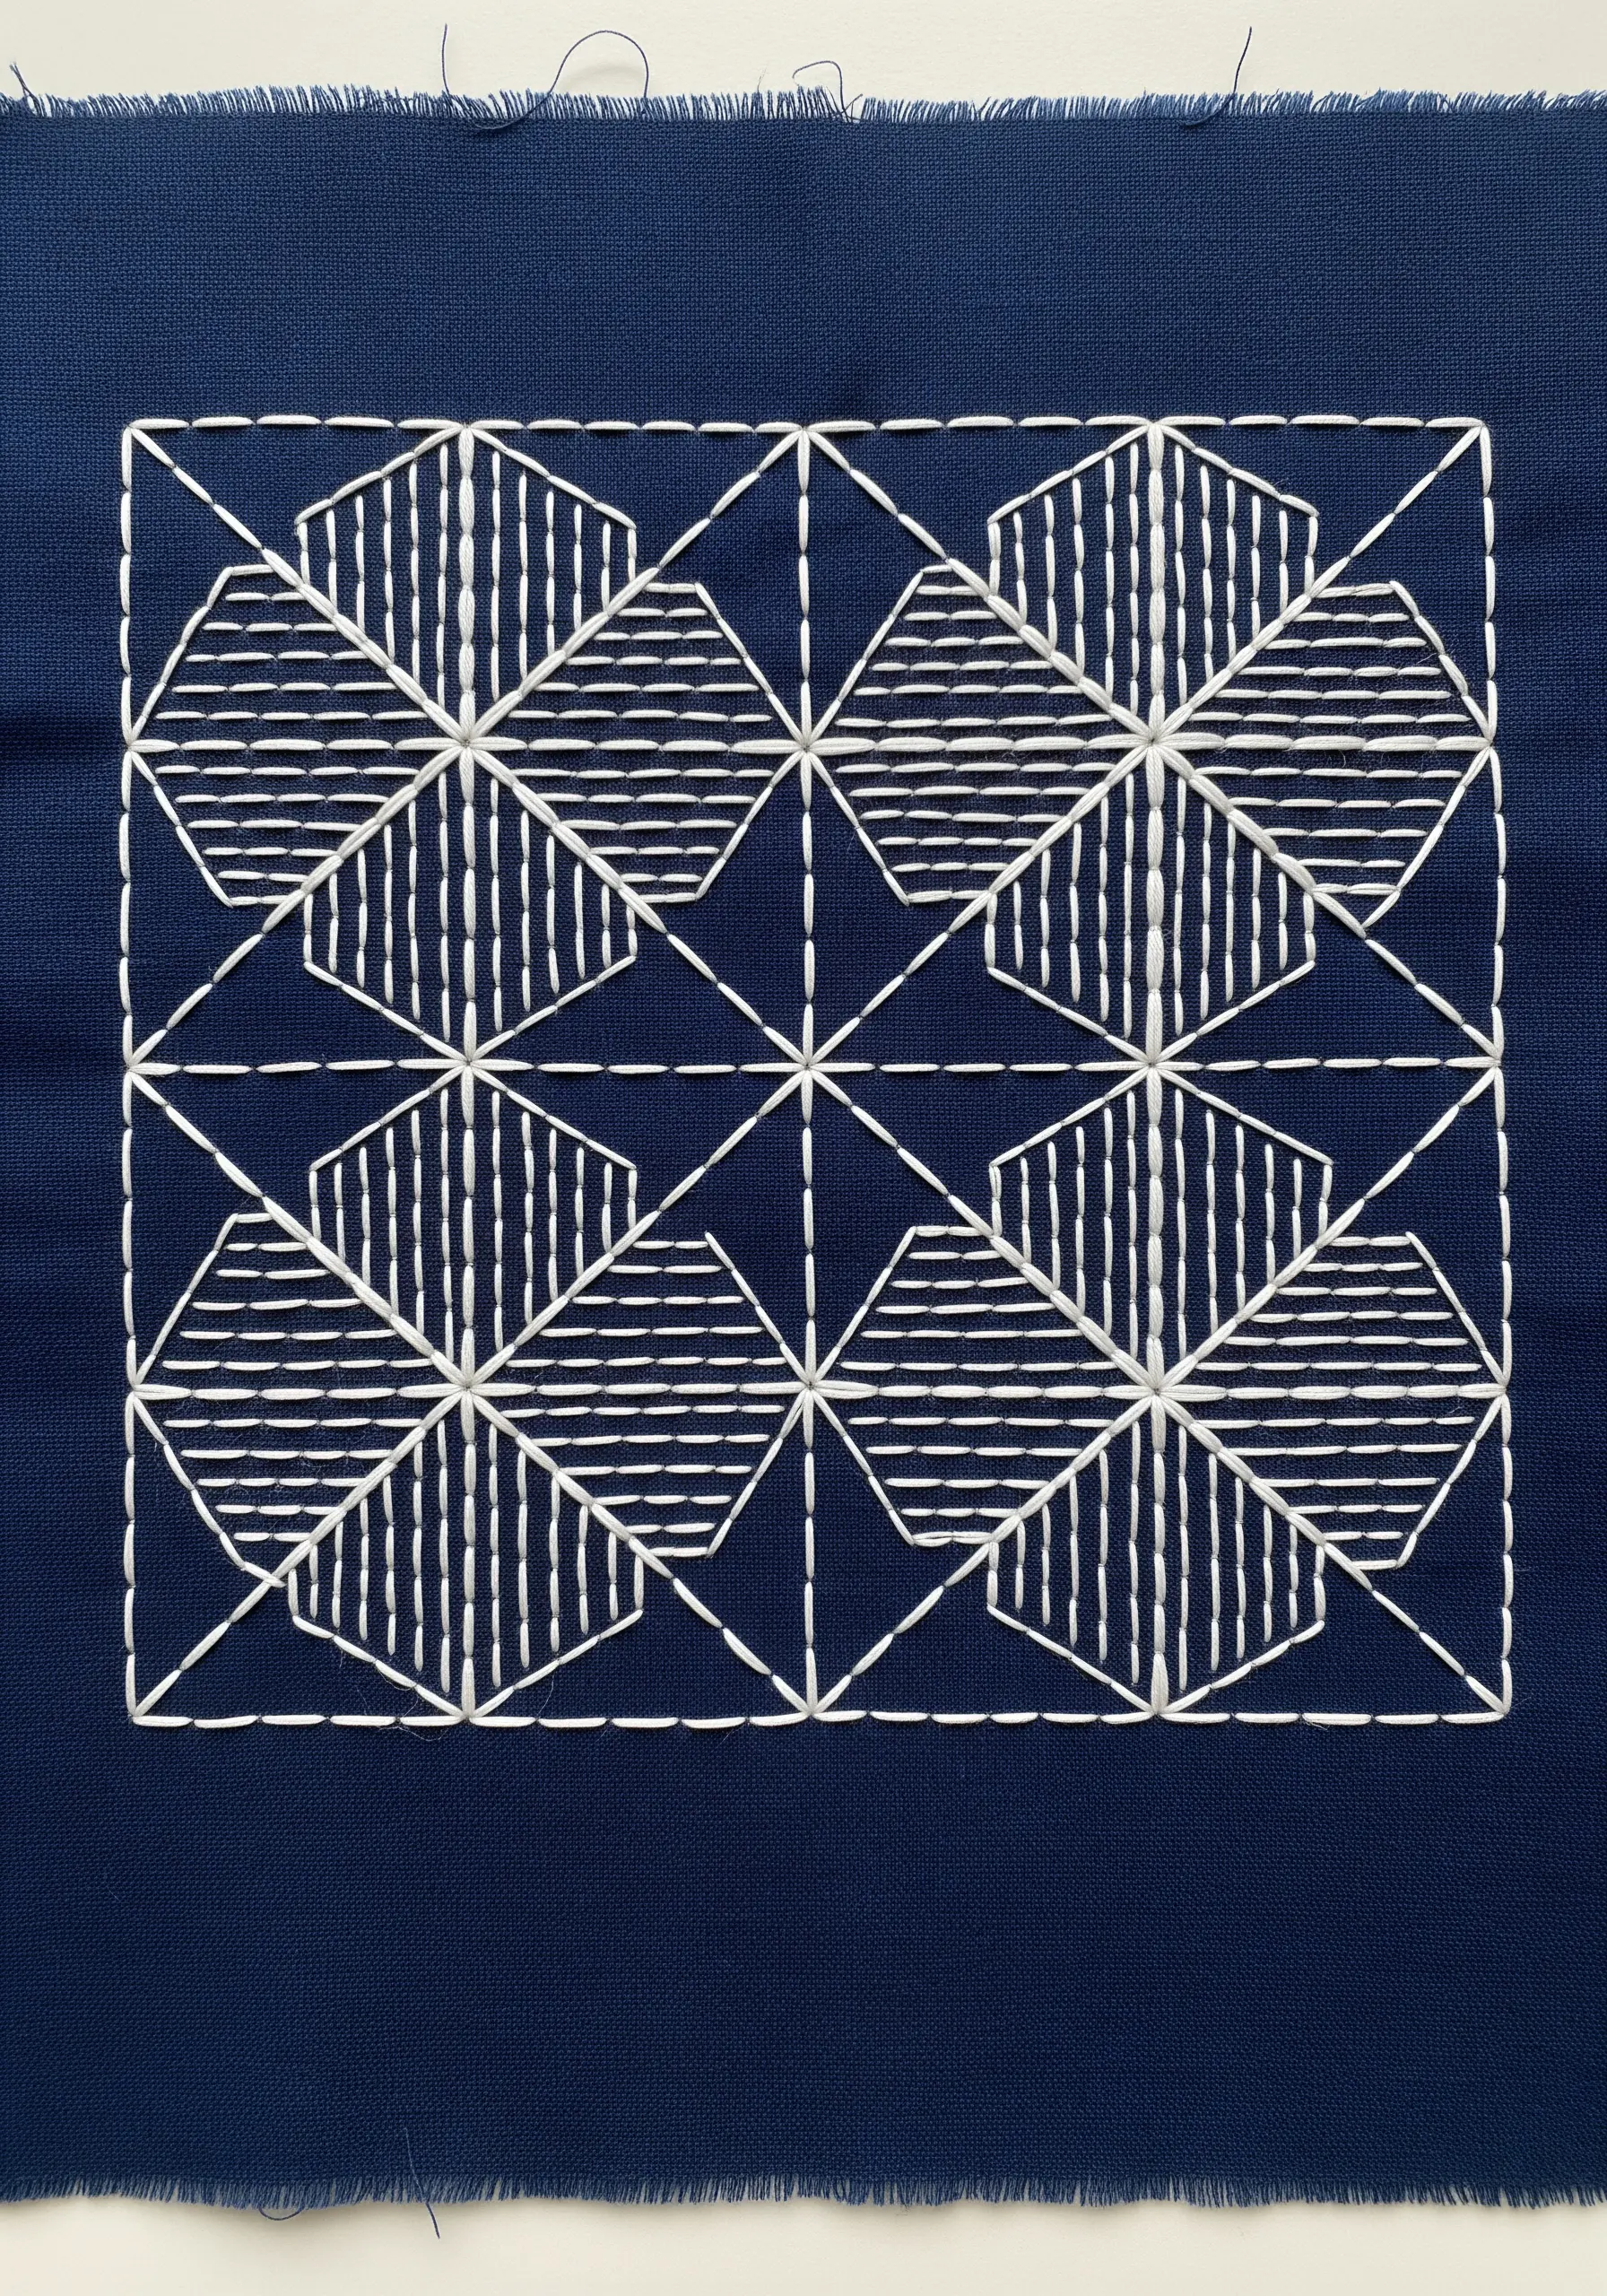
Sashiko is a meditation on consistency, where the beauty lies in the rhythm of the running stitch, not its complexity.
Focus on making each stitch and each gap the same length. The traditional guideline is that the stitch should be the length of a grain of rice. To achieve this, load several stitches onto your needle before pulling it through the fabric—this helps regulate your stitch length automatically.
Use a thicker, matte cotton Sashiko thread, which is specifically designed not to untwist. This creates a textural, graphic quality that a standard six-strand floss cannot replicate, turning a simple stitch into a sophisticated surface design.
4. Mexican Otomi: Fill Space with Textured Stitches
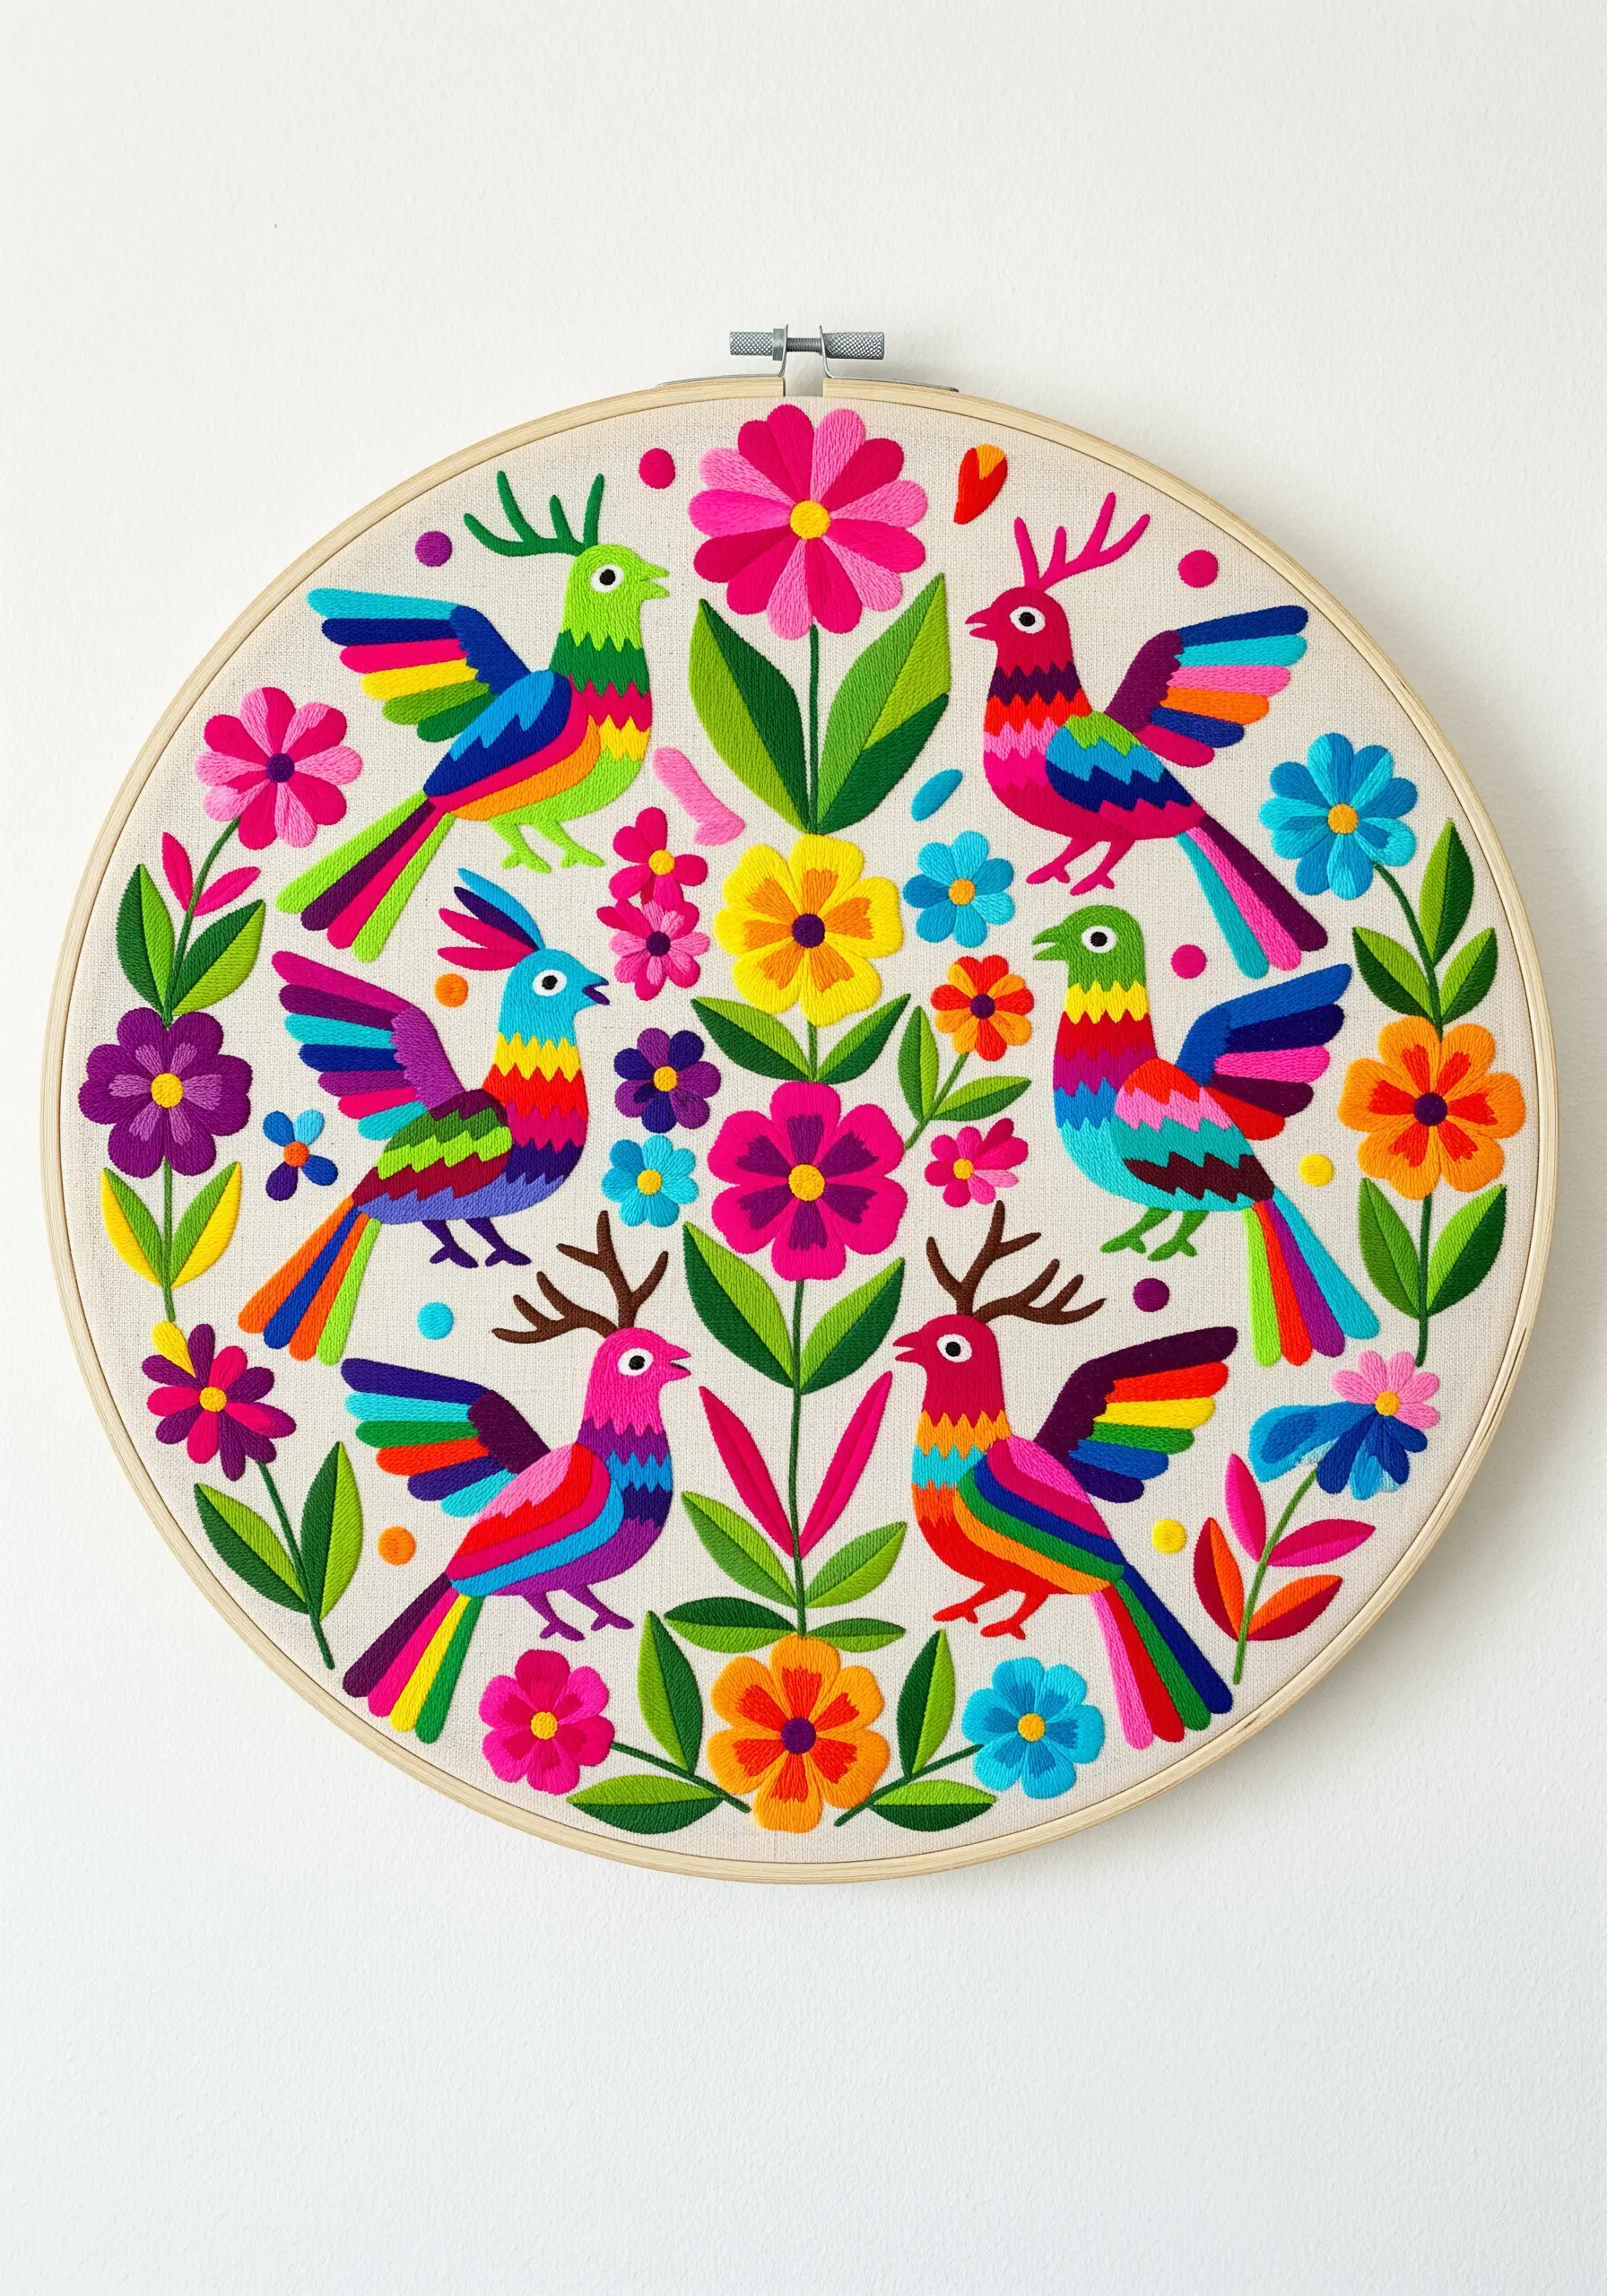
The joyful, flowing look of Otomi embroidery comes from its signature filling technique: a closed herringbone stitch that is both decorative and efficient.
Instead of a flat satin stitch, this angled stitch creates a subtle woven texture that adds movement to the motifs. The key is to keep your stitches close together, almost overlapping, so that no ground fabric shows through.
This method uses less thread than satin stitch and is more forgiving of imperfections, making it perfect for filling large, flowing shapes in your own boho-style embroidery decor. The result is a design that feels both playful and cohesive.
5. Celtic Knotwork: Create 3D Corded Lines
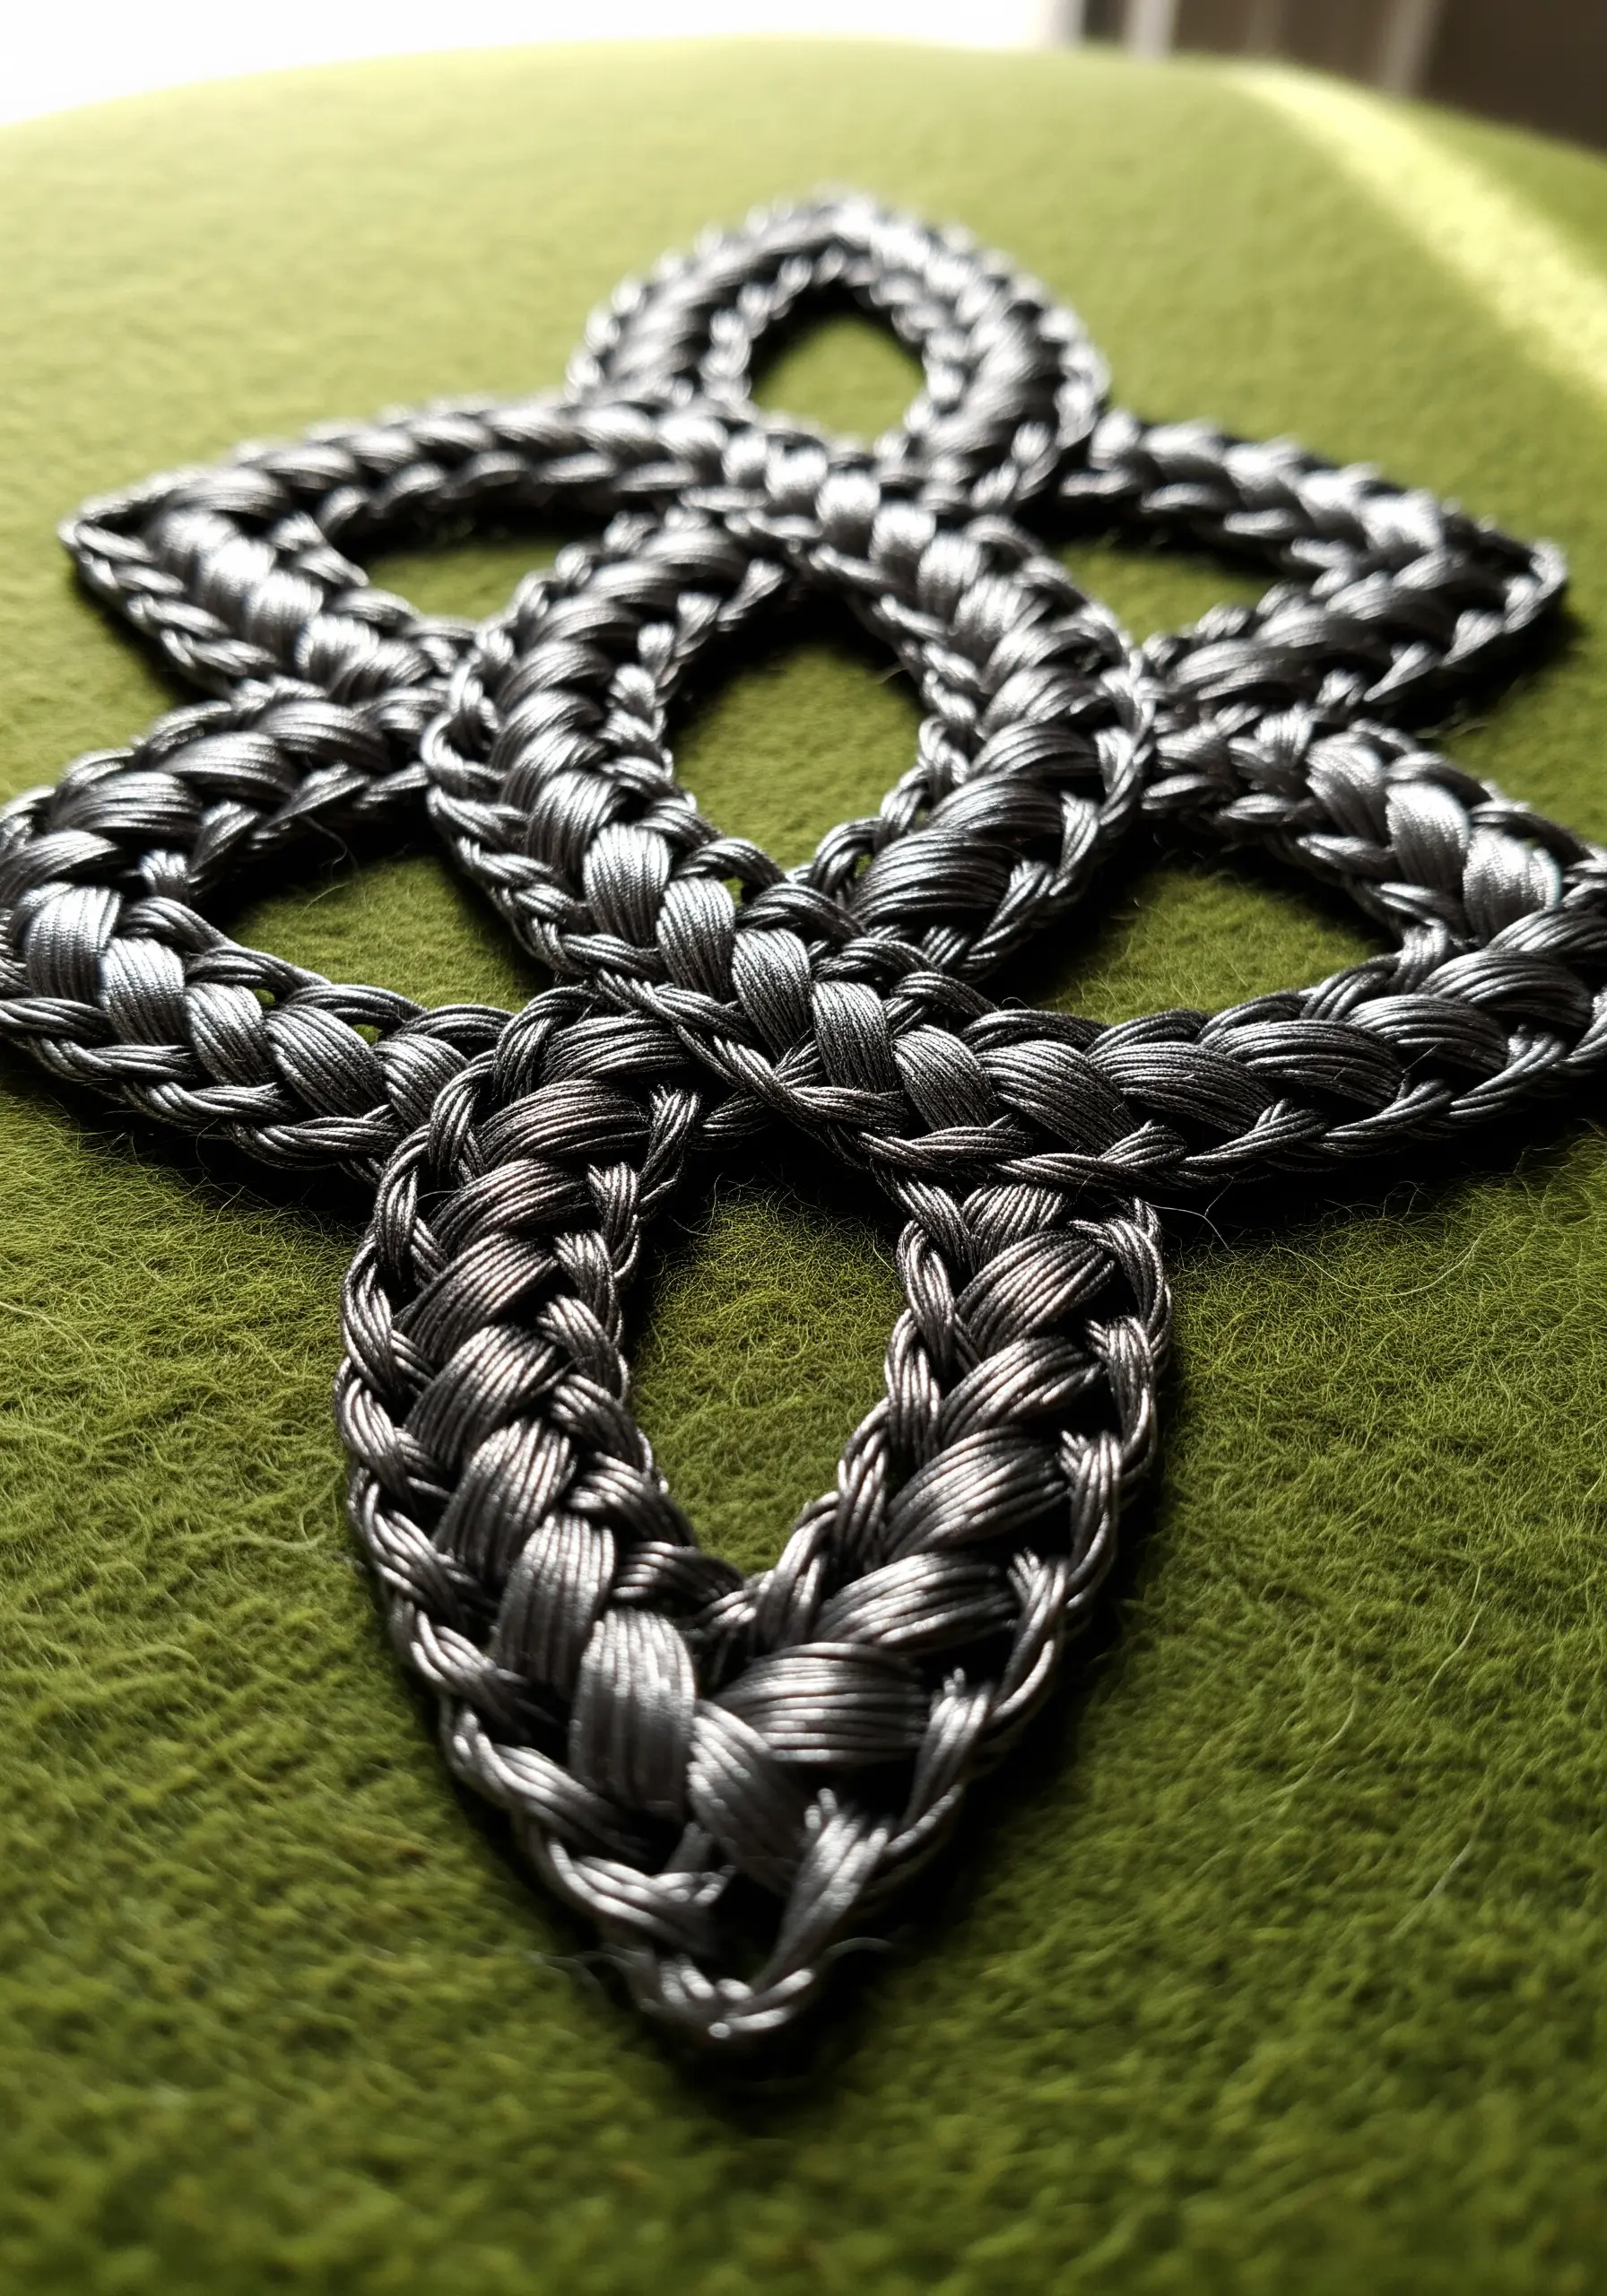
To give Celtic knots their characteristic weight and dimension, your stitches need to look like interwoven cords, not flat lines.
Use a raised stem stitch band. First, lay down a foundation of several parallel straight stitches along the path of the knot. Then, work a dense stem stitch over this padding. This simple addition lifts the thread off the fabric surface, creating a rounded, sculptural effect.
For an even more pronounced braid, use a plaited braid stitch with a thicker thread, like pearl cotton. This technique makes the interwoven nature of the knotwork tactile and visually powerful.
6. Aboriginal Dot Art: Translate Paint into French Knots
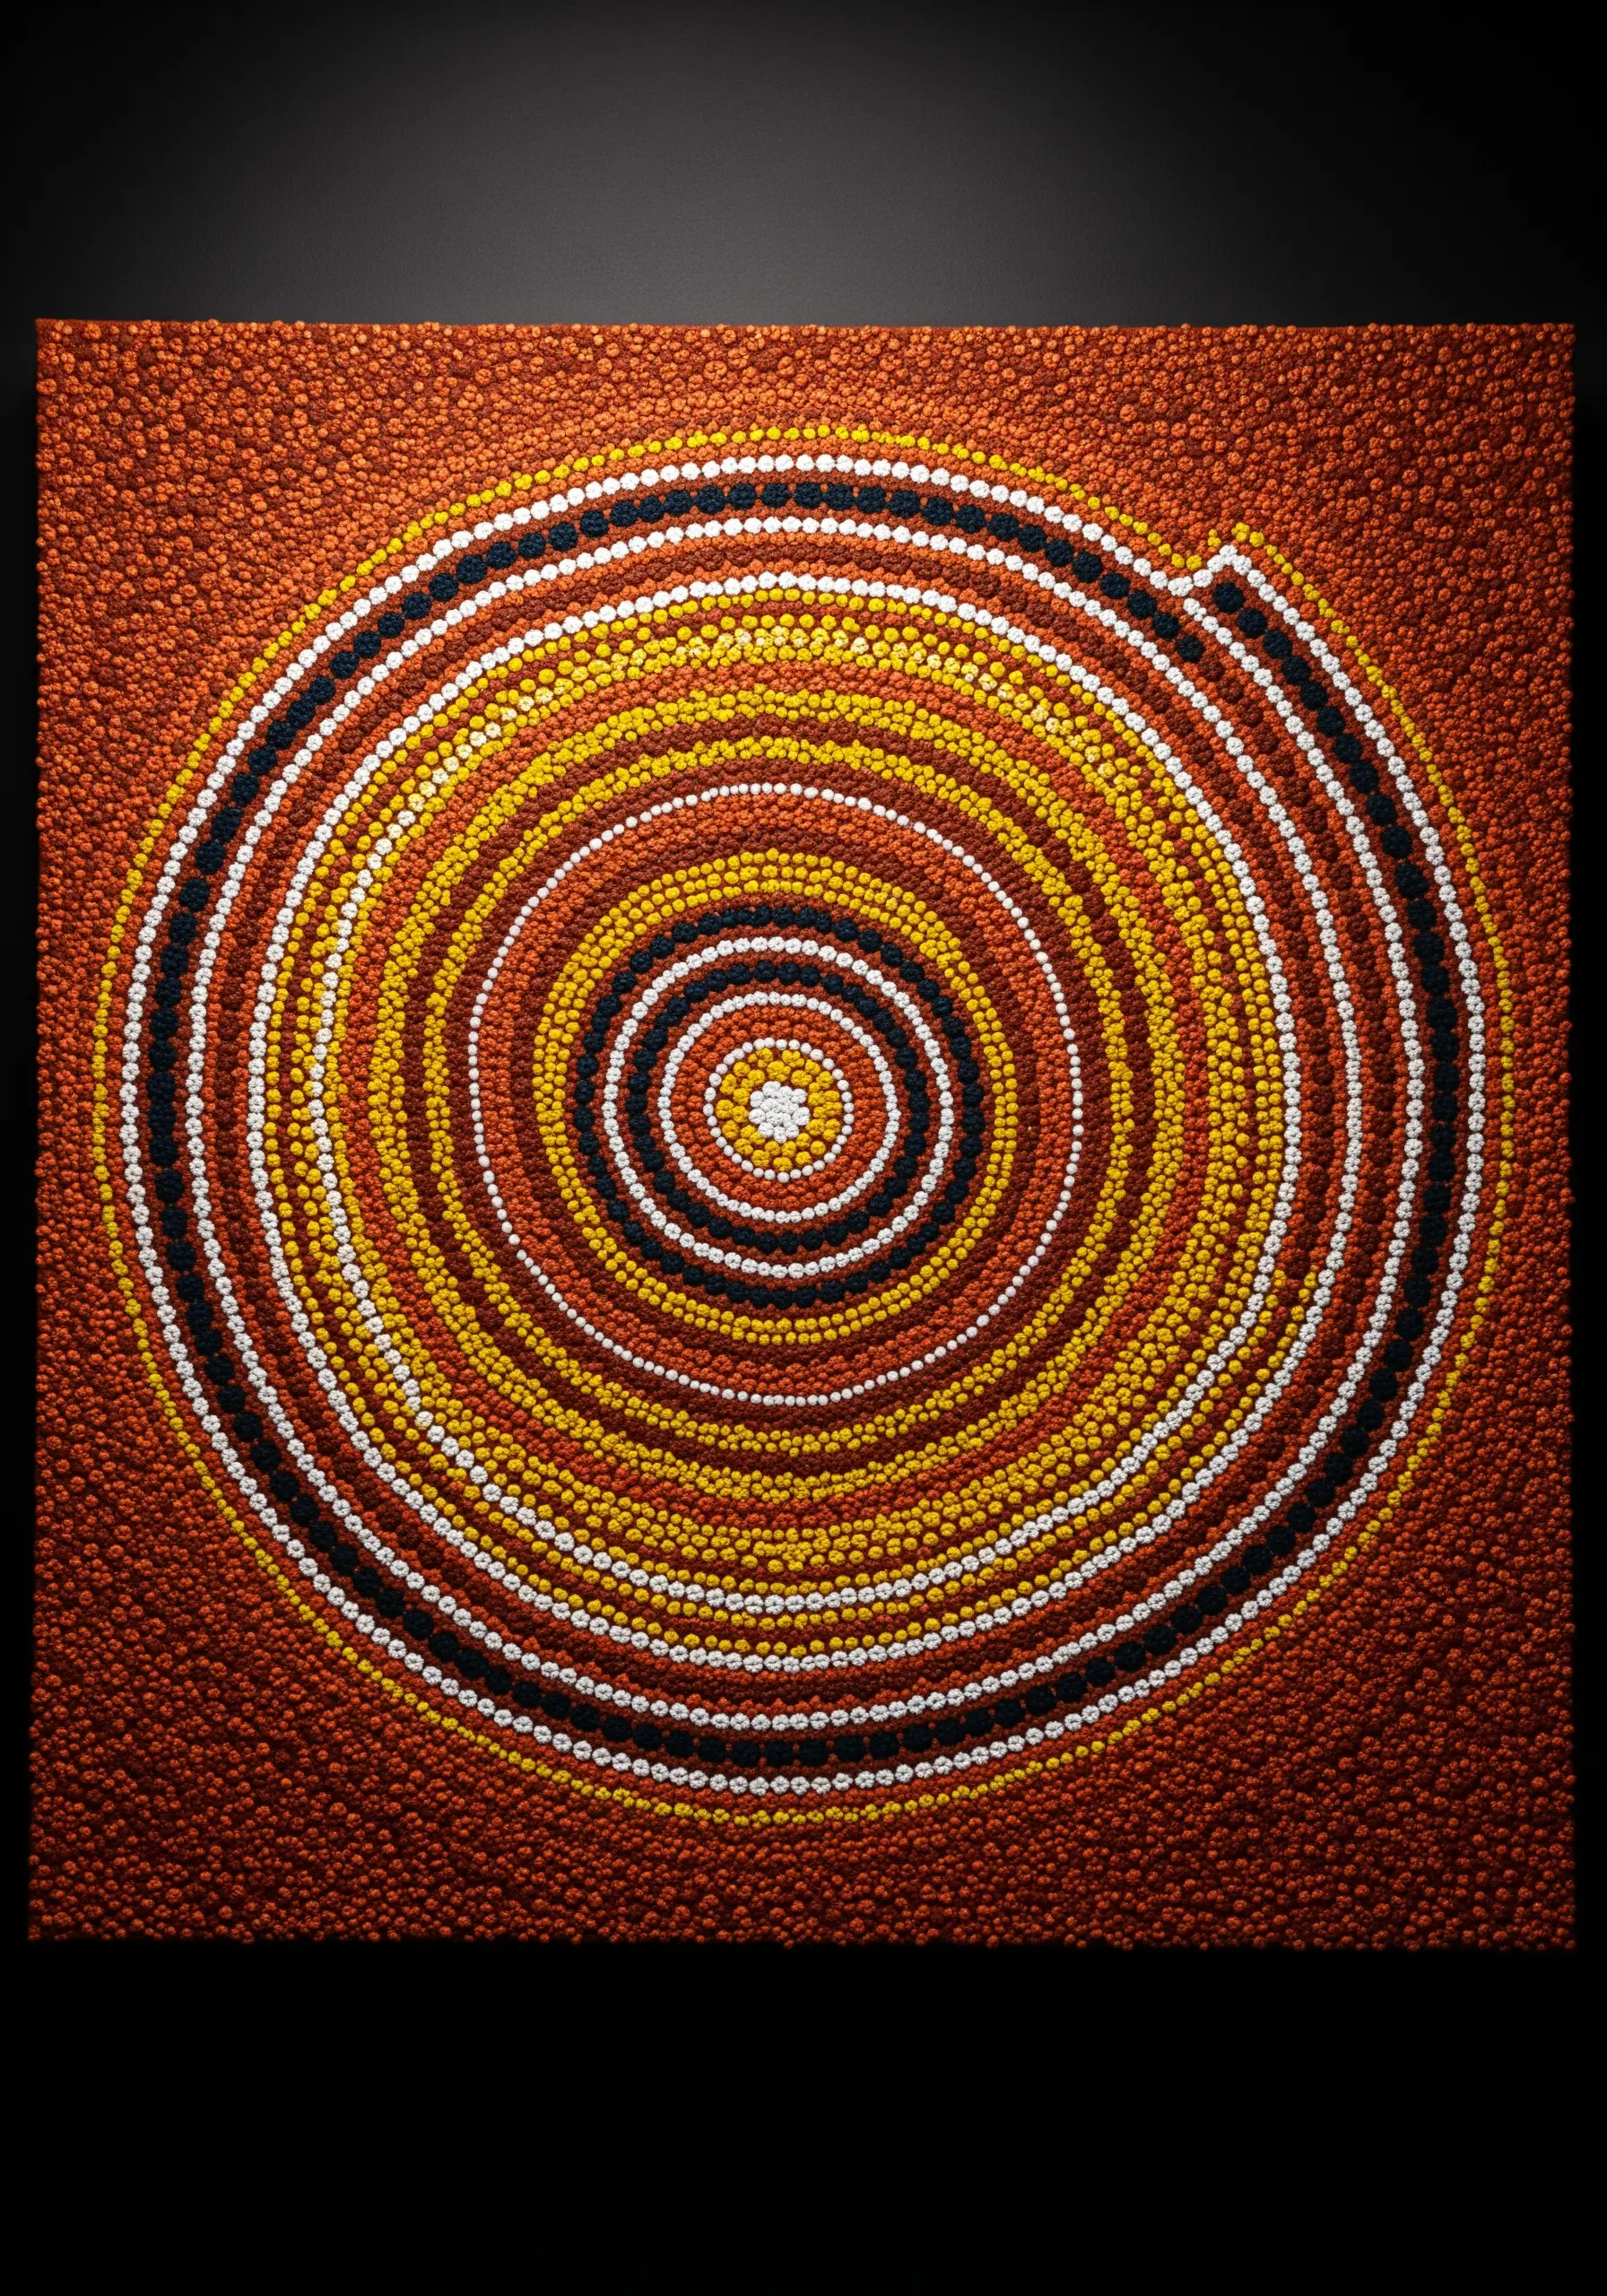
Recreate the hypnotic, textural quality of Aboriginal dot painting by translating painted dots into dimensional French knots.
Vary the size of your knots to create depth and rhythm. Use more strands of floss (e.g., four to six) and wrap the needle two or three times for larger, more prominent dots. For finer details, use only two strands and a single wrap.
Arrange your knots closely to build fields of texture, just as a painter would build layers of dots. This technique is especially effective for creating mandalas or abstract patterns that invite touch.
7. Persian Rug Motifs: Manage Detail with Thread Weight
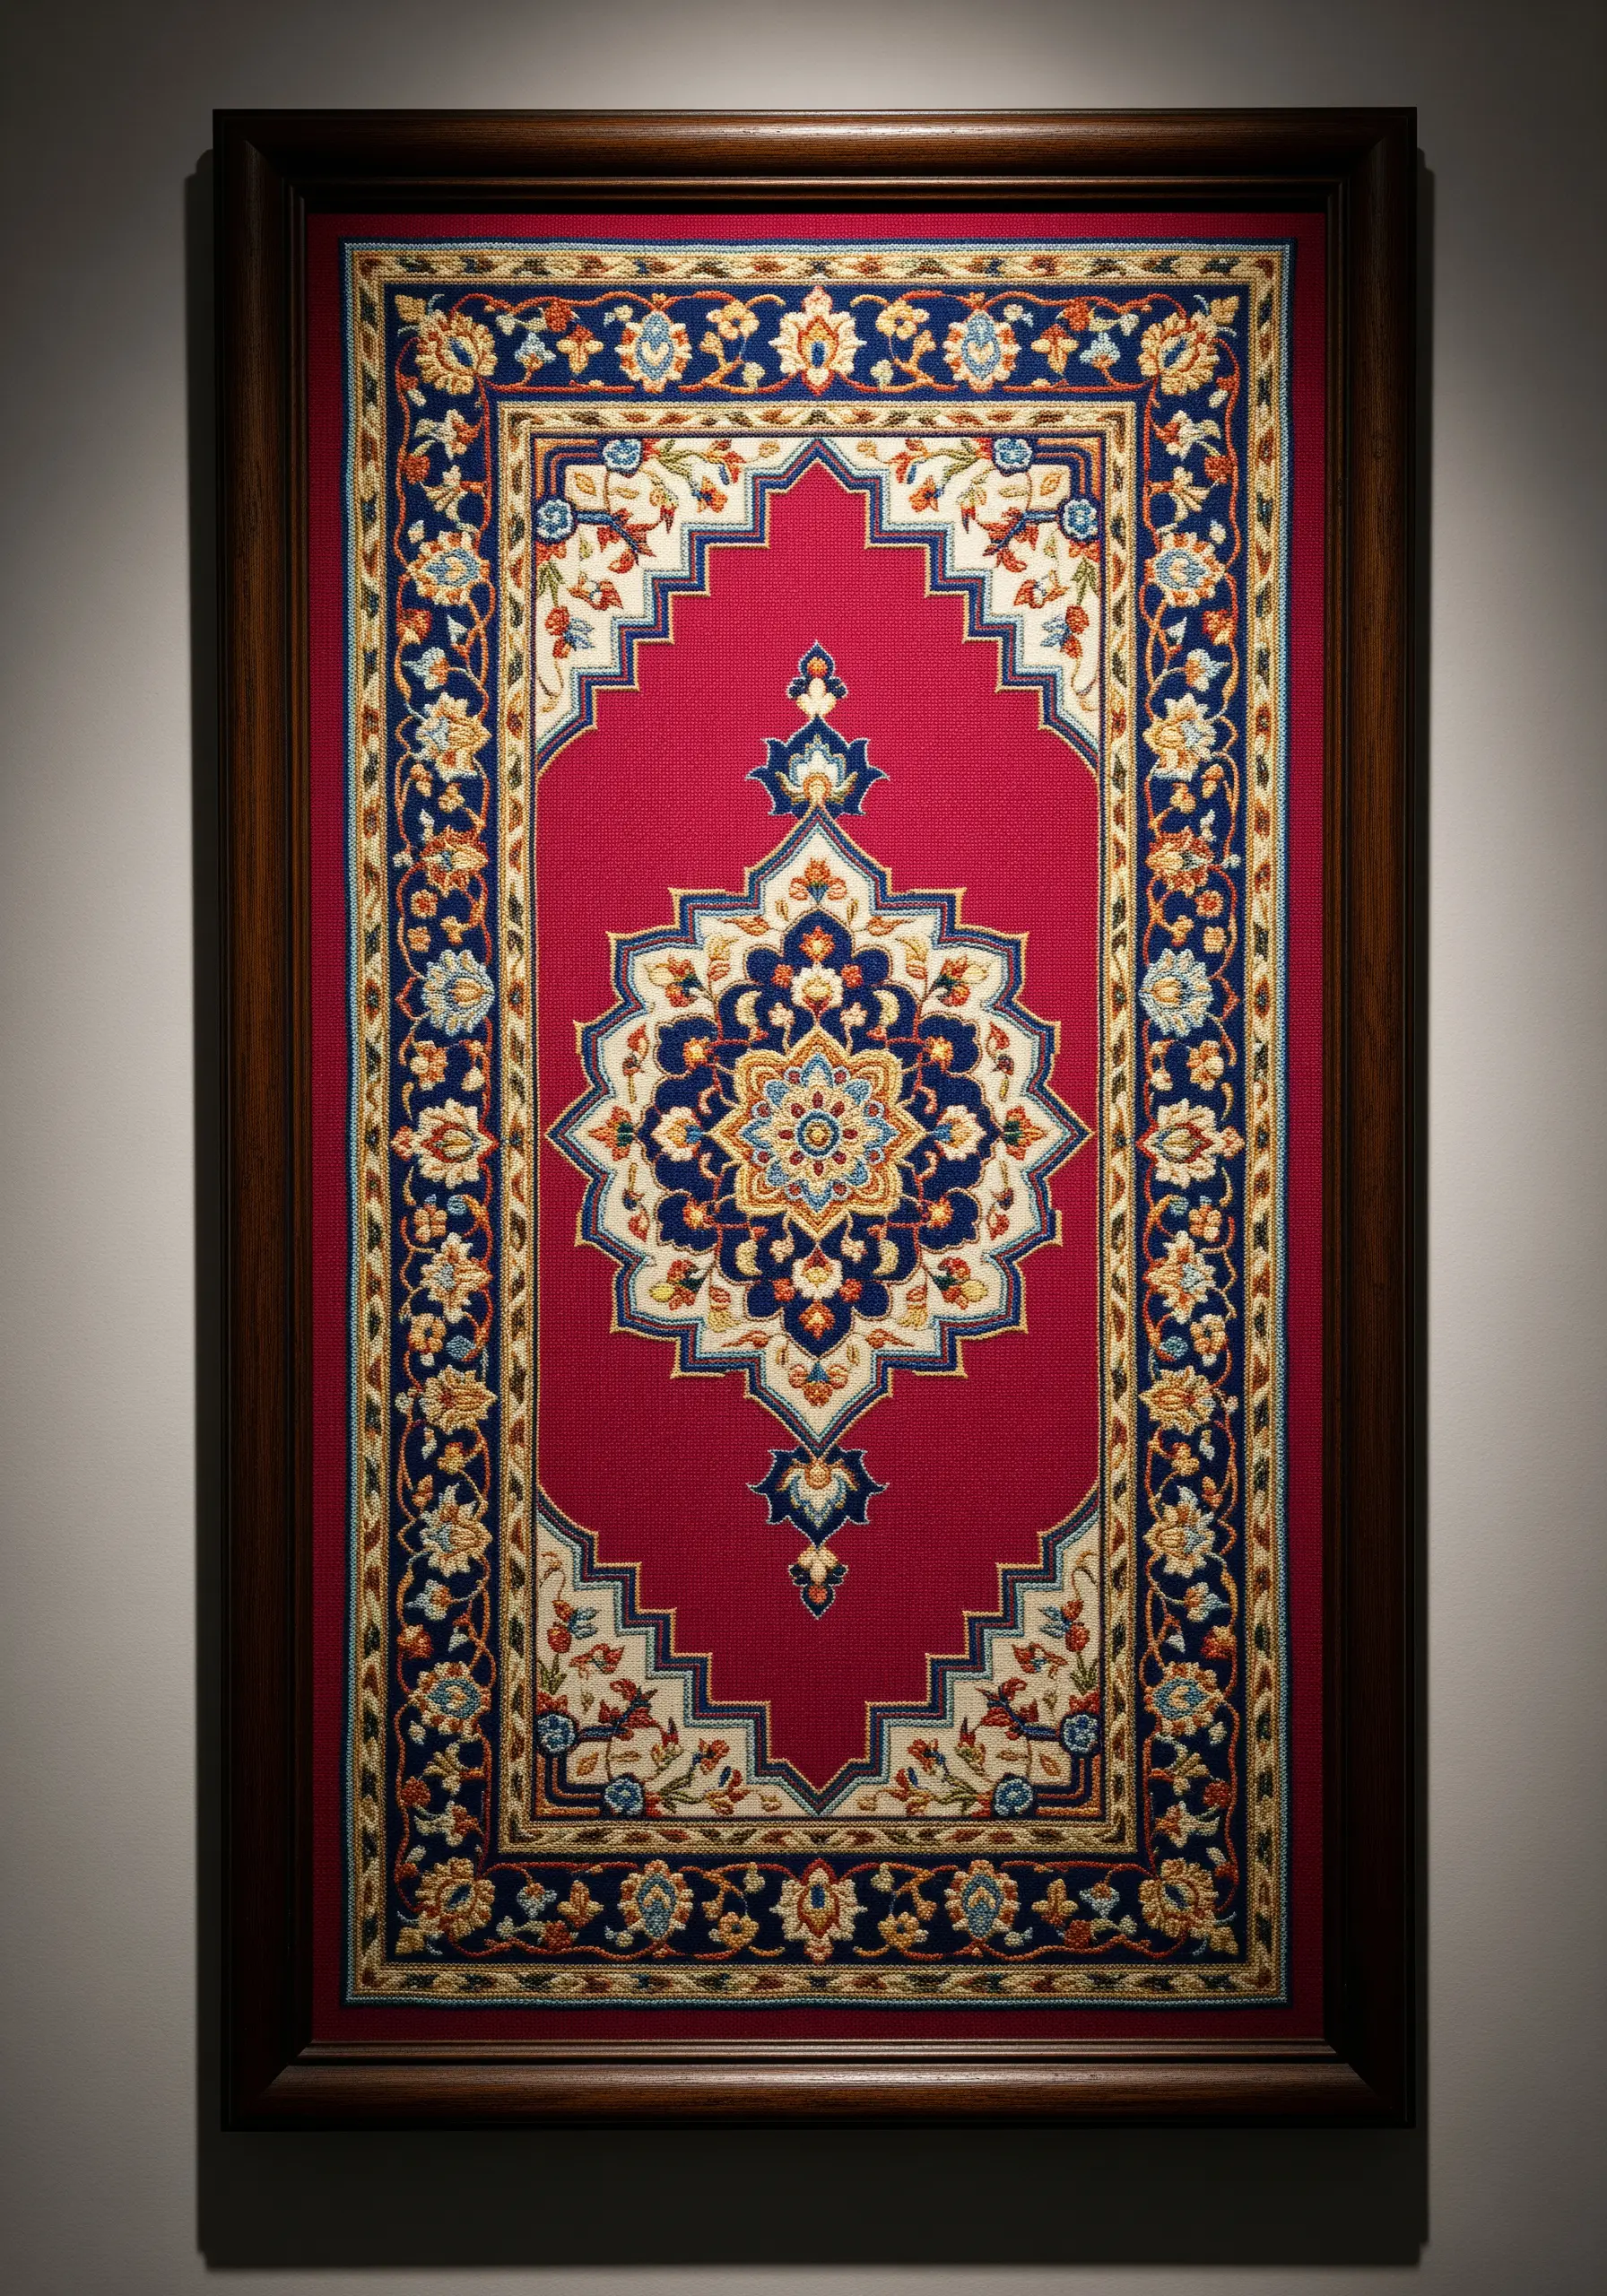
The incredible detail in Persian rug designs can feel intimidating to stitch. The secret is to use thread weight strategically to create a clear visual hierarchy.
For the finest details, like the delicate inner petals of a flower, use a single strand of floss. For secondary elements, use two strands. Reserve a thicker, three-strand stitch for the main outlines that define the entire motif.
This variation in line weight guides the eye through the complexity of the design, ensuring that intricate patterns look detailed and intentional, not messy or crowded.
8. Ghanaian Kente: Weave with Needle and Thread
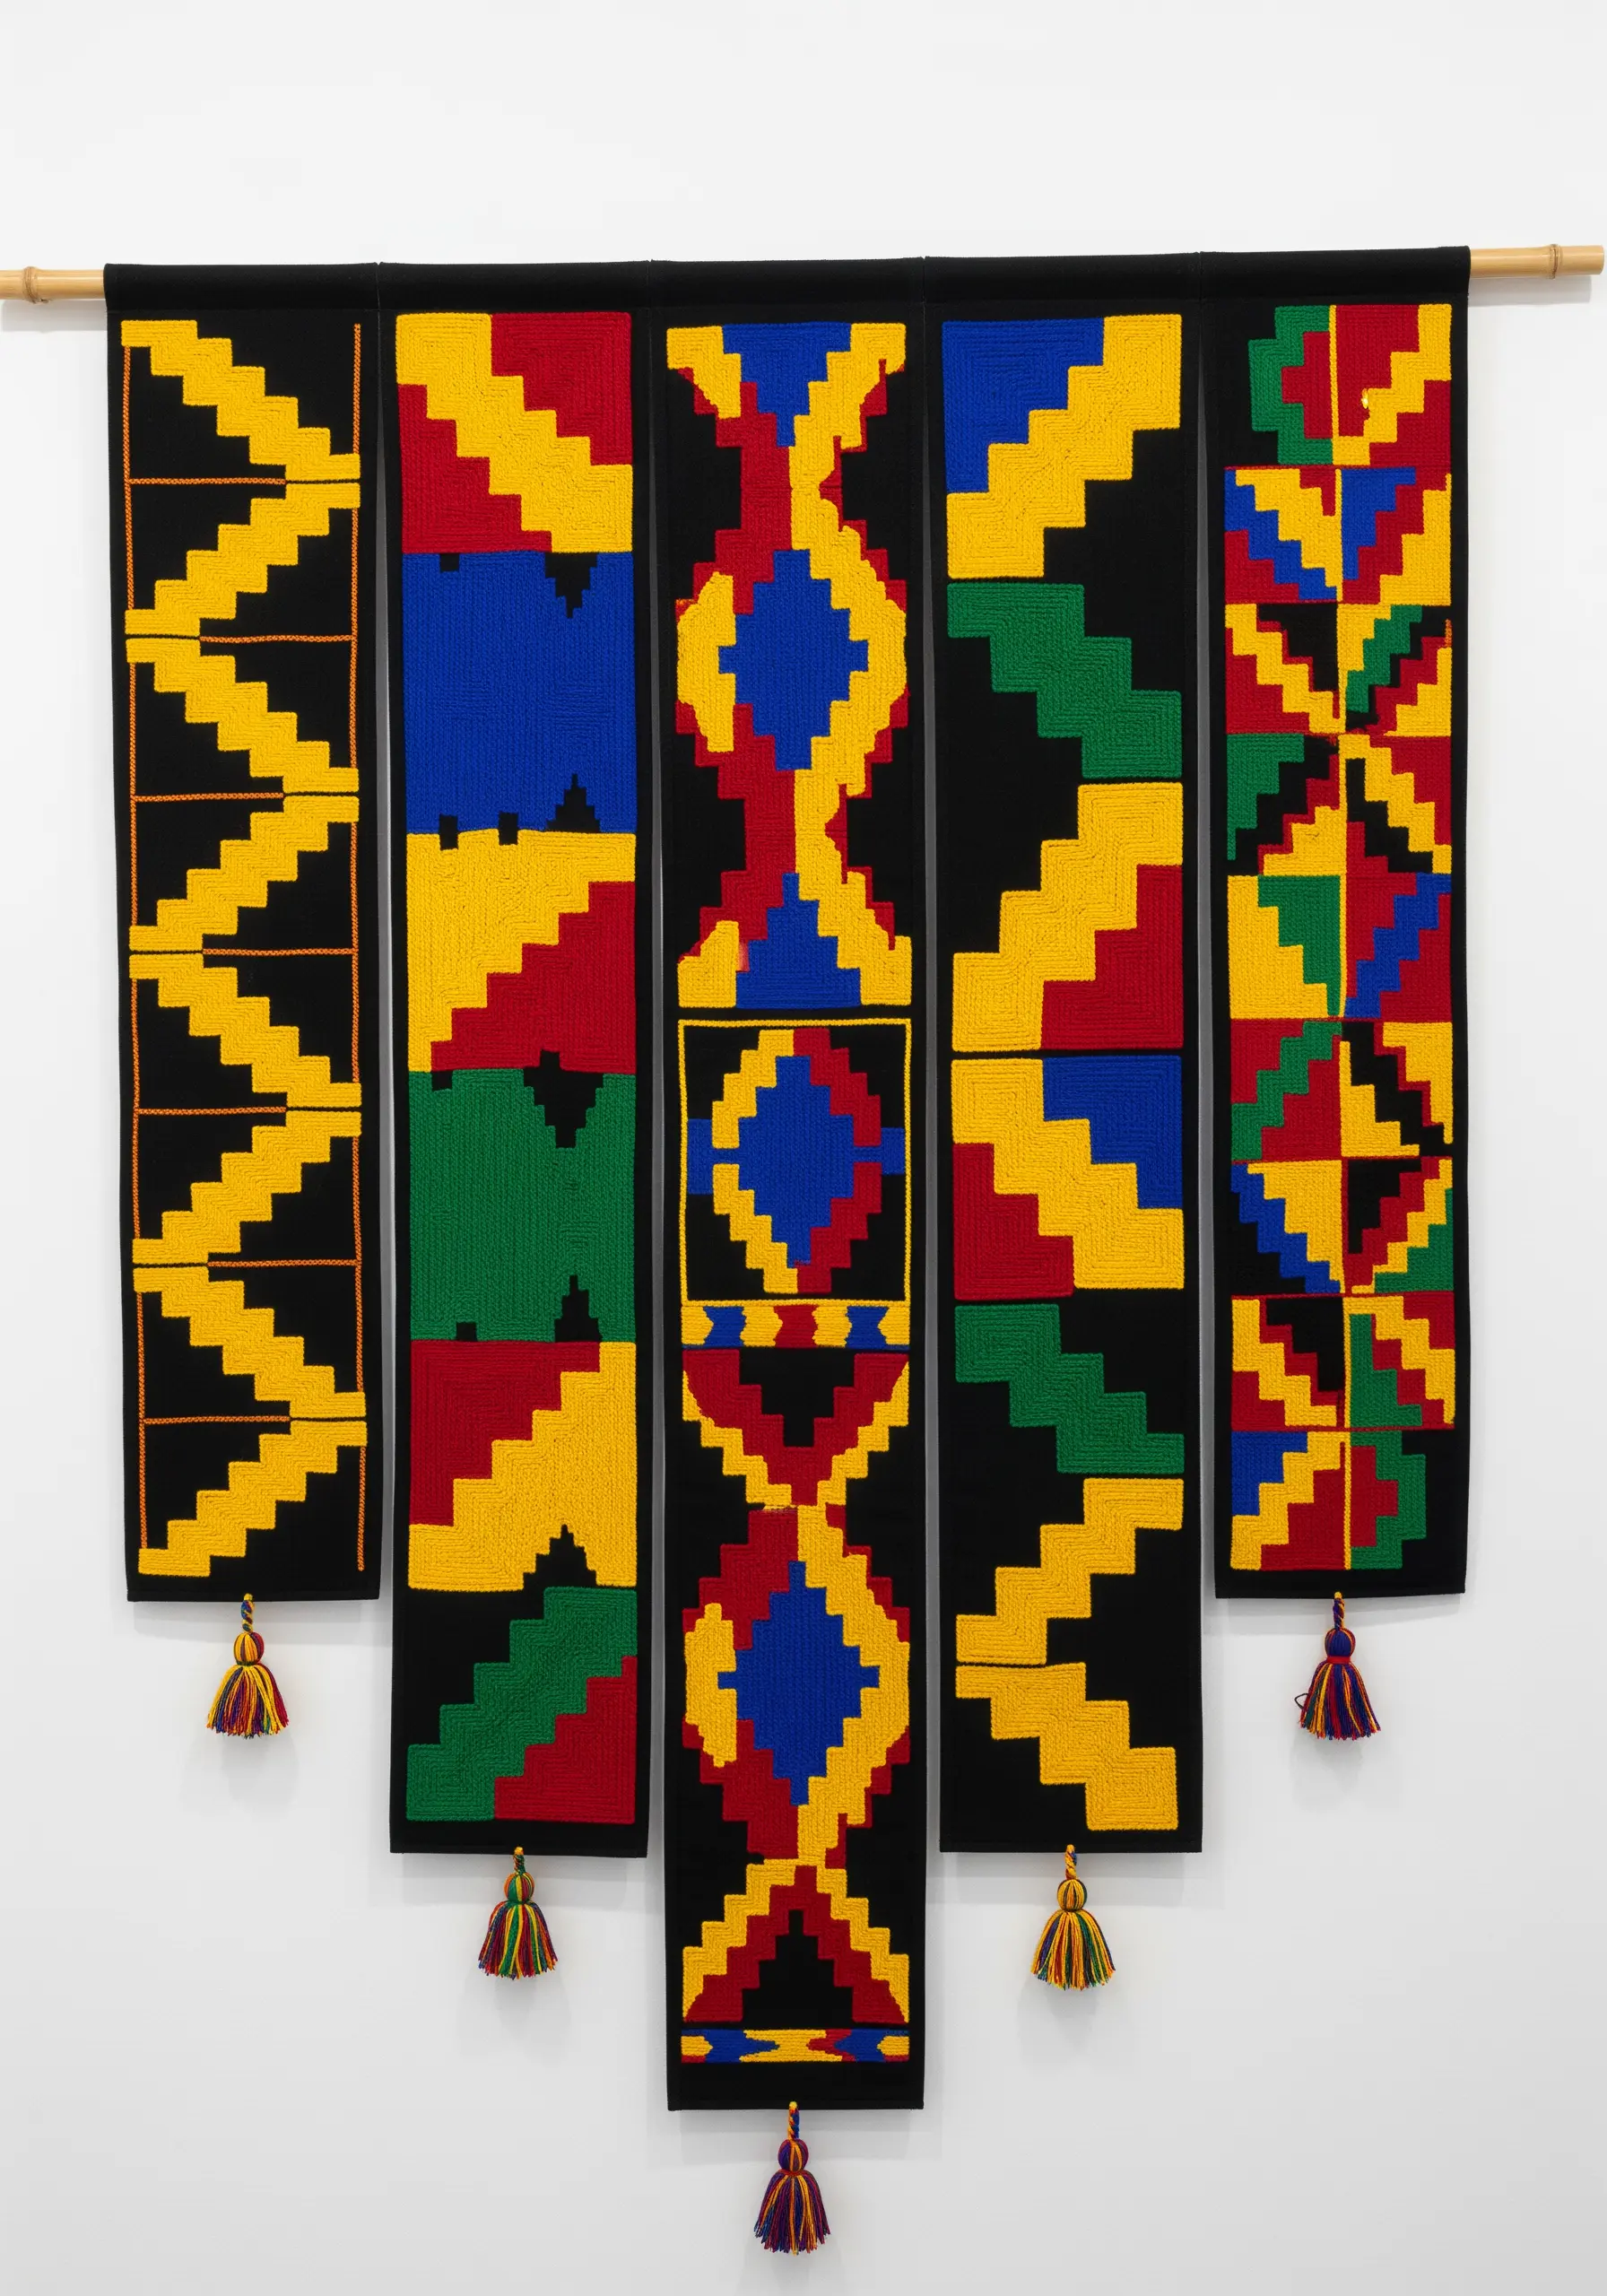
To honor the woven origins of Kente cloth, use filling stitches that mimic the structure of fabric itself.
Instead of a simple satin stitch, fill the bold geometric blocks with a woven wheel stitch (for circles) or a darning stitch (for squares and rectangles). For the darning stitch, you’ll lay down a ‘warp’ of parallel straight stitches and then weave your ‘weft’ thread over and under them.
This approach adds a layer of authentic texture that connects your embroidery to the textile tradition it’s inspired by, making the final piece a rich, multi-layered hand-embroidery textile wall art.
9. Dutch Delftware: Create Depth with a Single Color
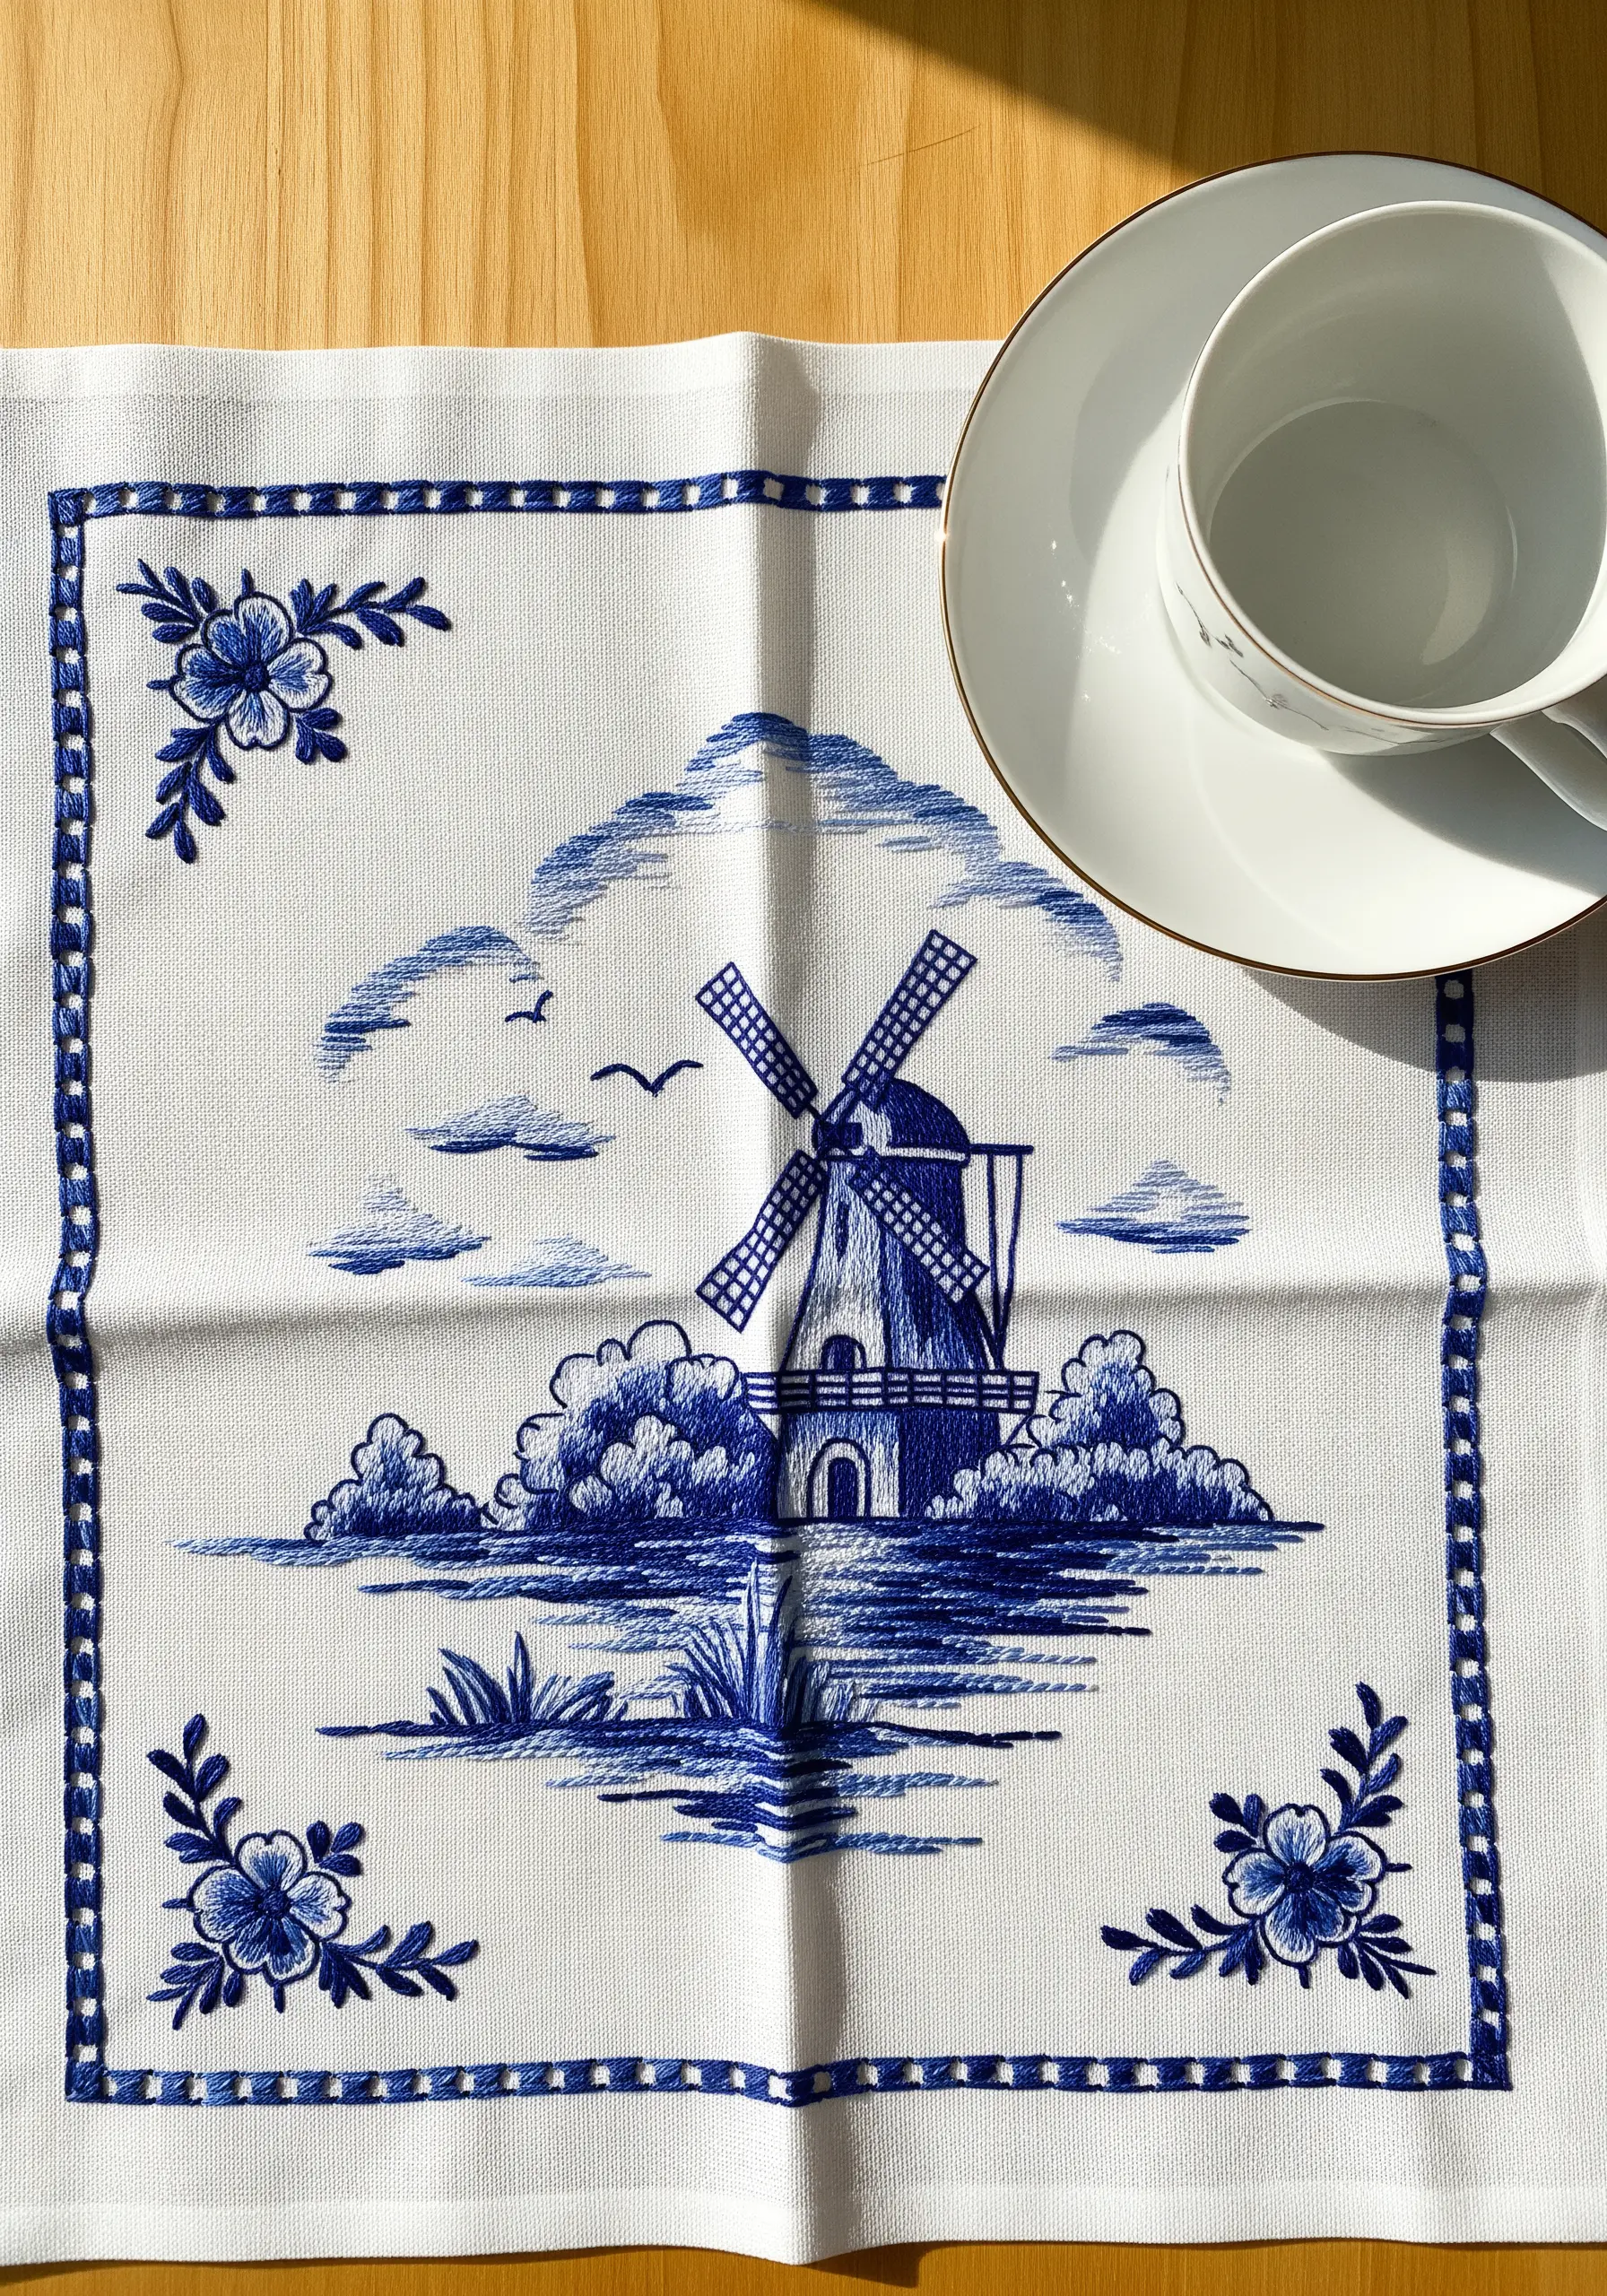
The elegance of Delft Blue pottery lies in its ability to create shading, form, and atmosphere using only one color. You can achieve this in embroidery through strategic stitch direction.
Within a single element, like a cloud or a flower petal, change the angle of your satin stitches. Stitches angled in one direction will catch the light differently than those angled another way, creating the illusion of shadow and highlight without changing your thread.
This technique allows you to sculpt with thread, turning a flat, monochrome design into a piece with surprising depth and movement, perfect for Scandinavian table linen embroidery motifs.
10. Khokhloma Swirls: Couch Metallics for a Gilded Finish
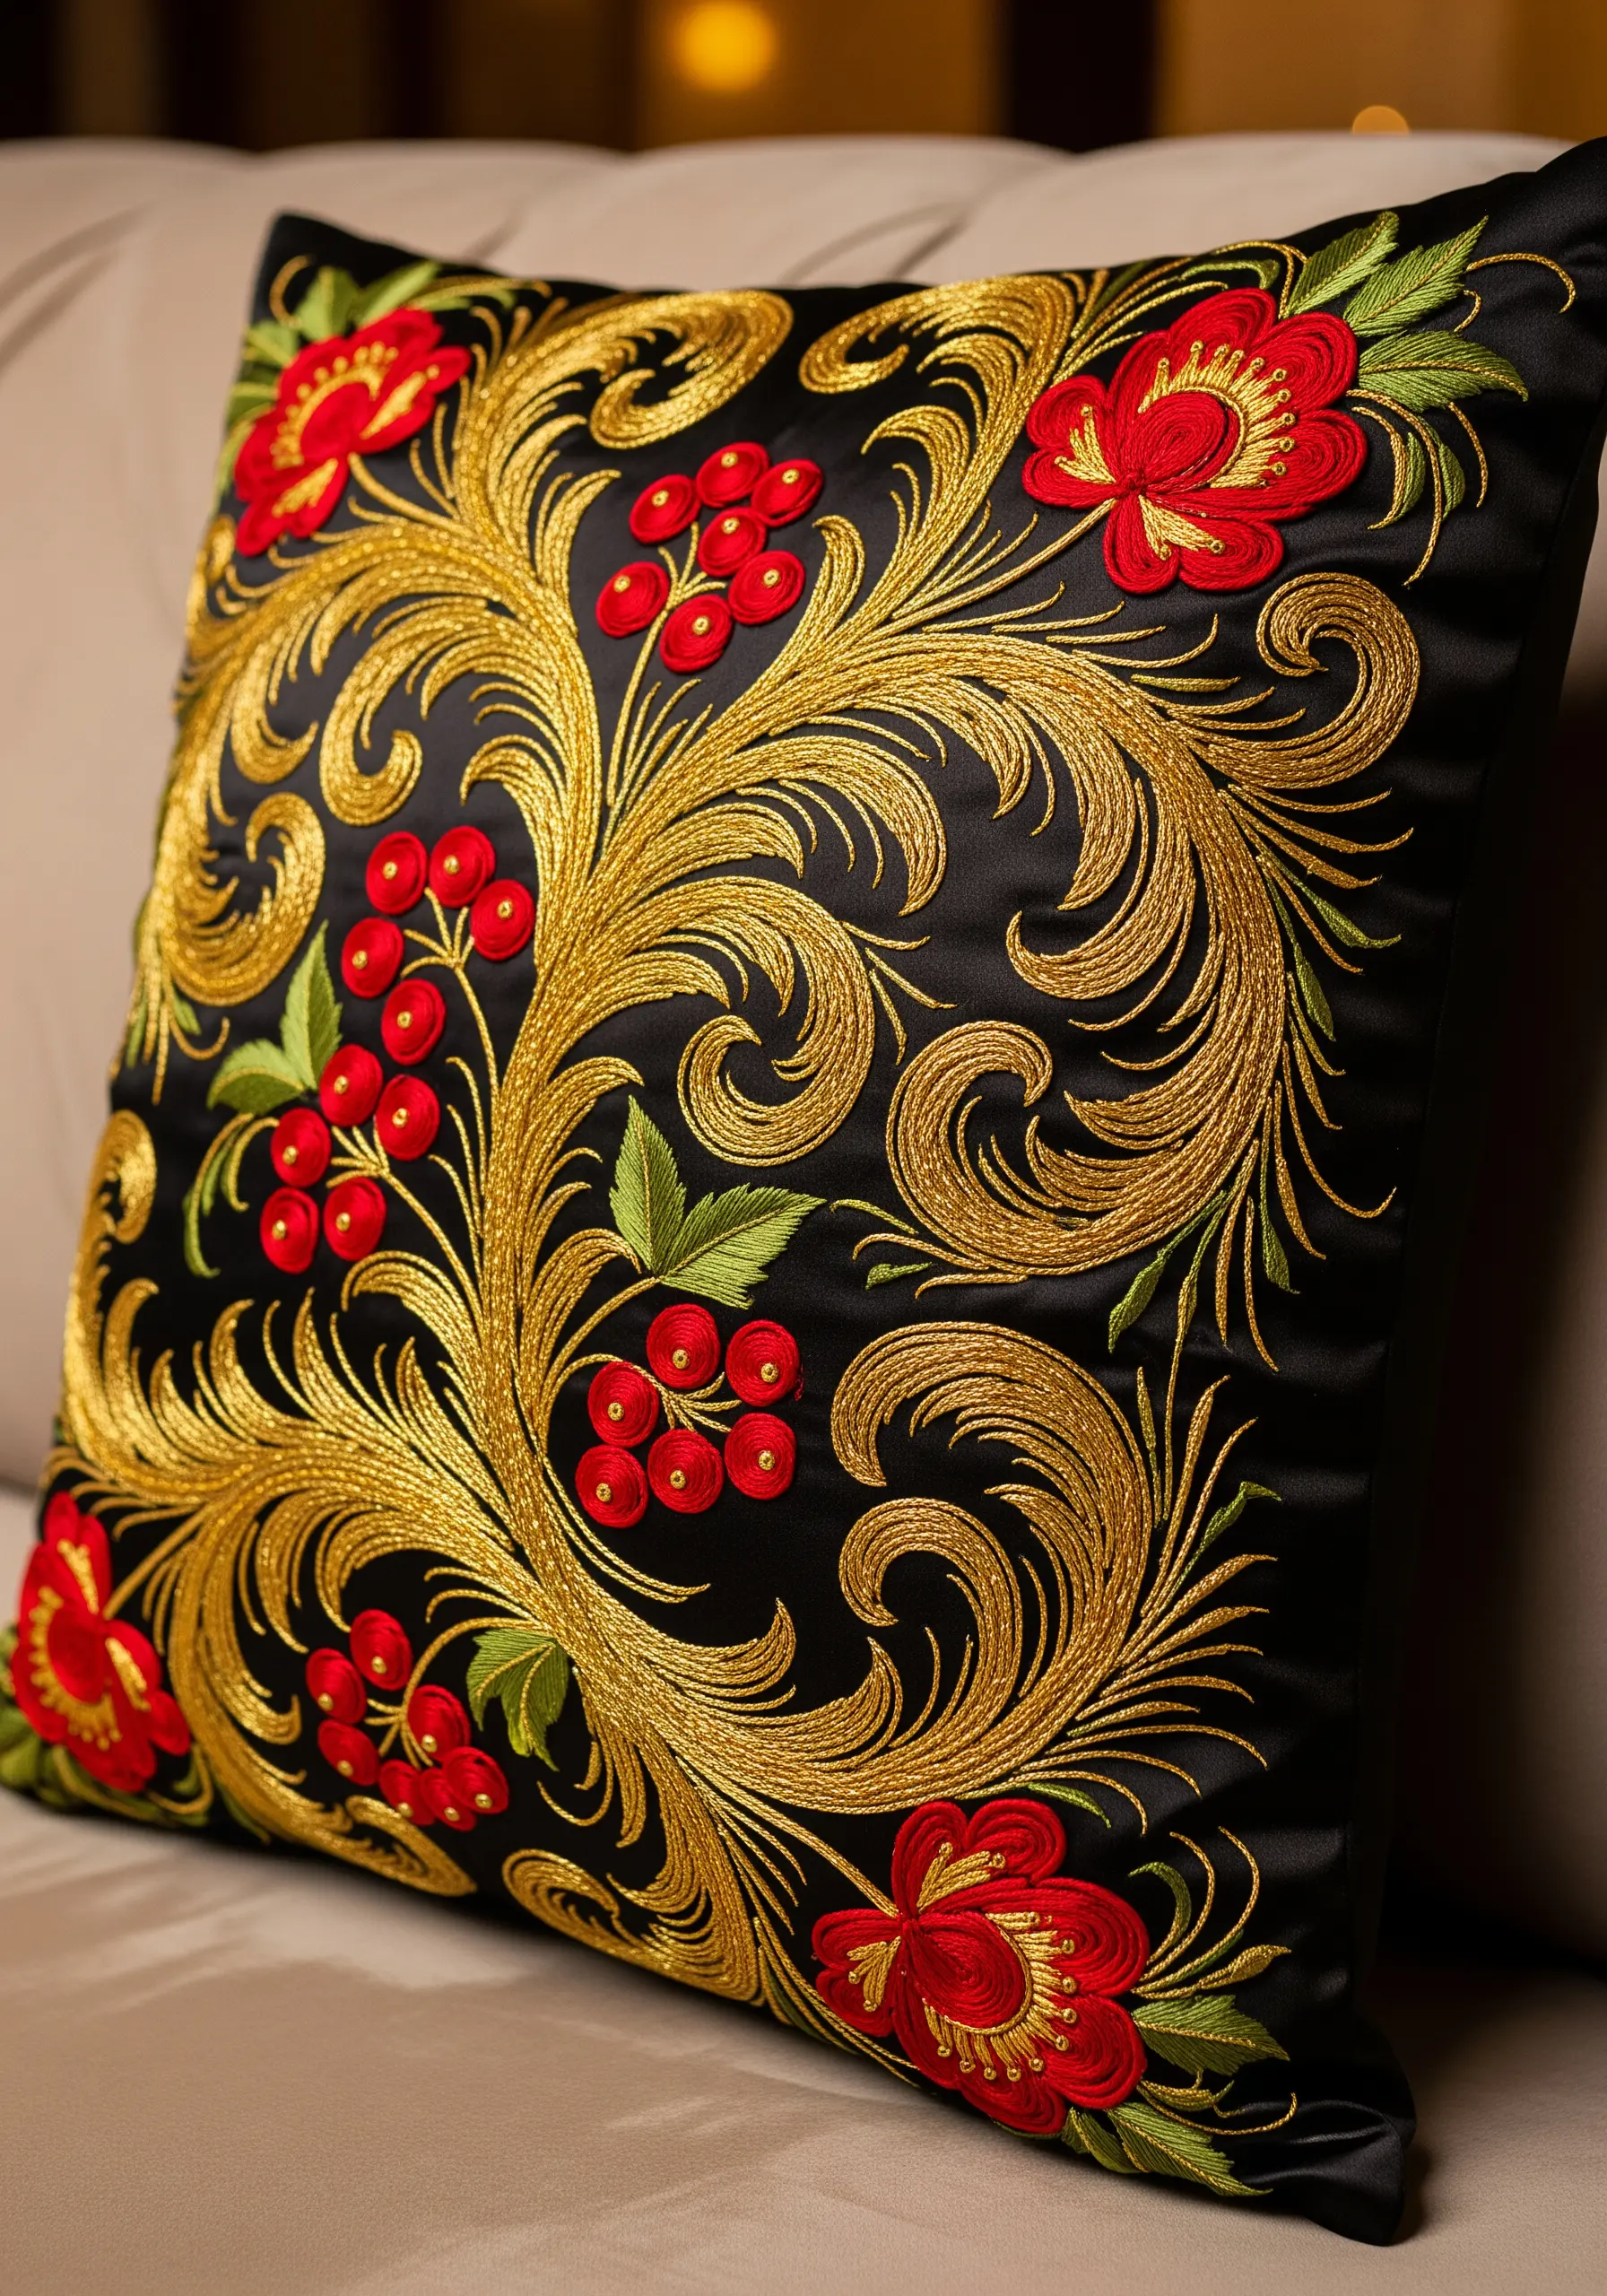
Inspired by Russian Khokhloma painting, achieving a smooth, gilded look with metallic thread can be challenging, as it tends to snag and untwist.
The solution is couching. Lay down your thicker metallic thread along the swirling vine patterns, holding it in place with one hand. With your other hand, use a second, finer thread (in a matching color) to tie it down with tiny, perpendicular stitches every few millimeters.
This method keeps the metallic thread smooth and flat against the fabric, creating a flawless, liquid-gold effect that is impossible to achieve with standard stitching. Use padded satin stitch for the red berries to make them pop.
11. Nordic Rosemaling: Perfect Your Ornamental Curves
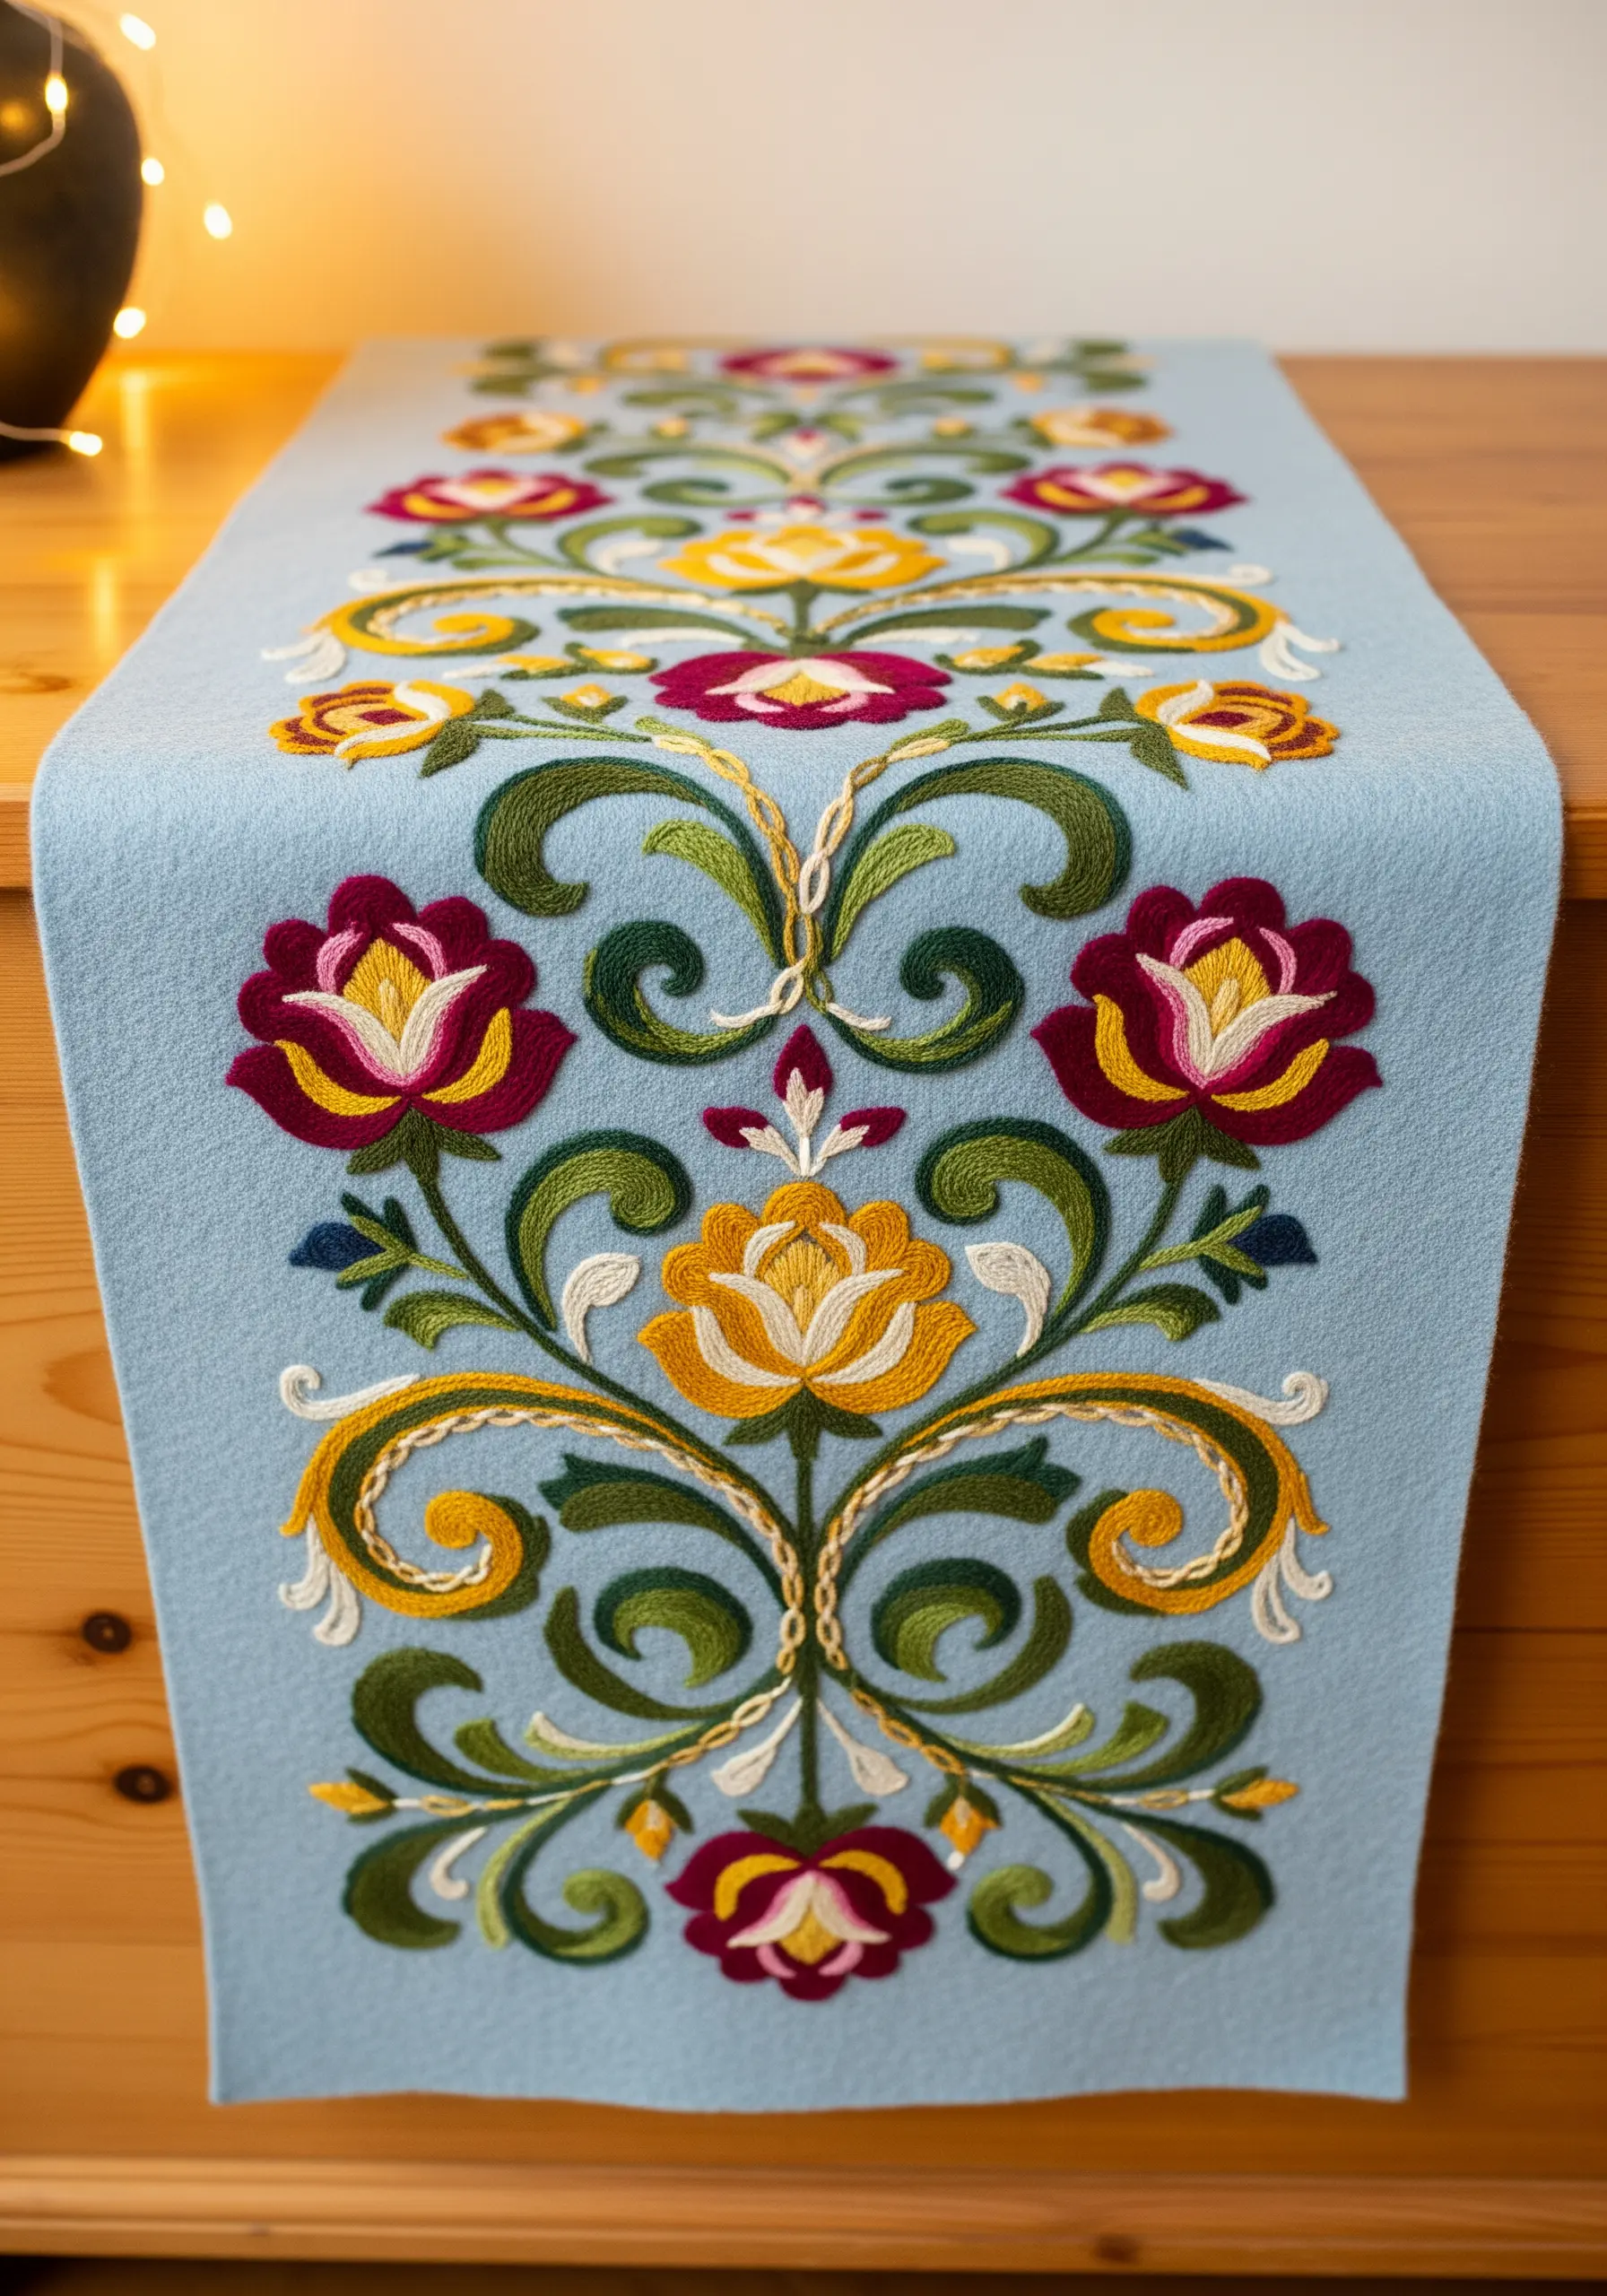
The flowing, symmetrical scrolls of Scandinavian folk art require perfectly smooth, unbroken curves.
To avoid choppy-looking lines, use a whipped backstitch. First, create a standard backstitch line along your curve. Then, take a second, blunt-tipped tapestry needle and weave it under each backstitch without piercing the fabric. This ‘whipping’ action smooths over the segmented look of the backstitch, creating a single, elegant, and continuous line.
This technique is ideal for the S- and C-scrolls that define this style, giving your embroidery a graceful, painted quality for your floral border embroidery ideas.
12. Aztec Sun Stone: Build Textural Layers

To replicate the carved, multi-layered complexity of the Aztec calendar stone, you need to create physical depth with your stitches.
Assign a different stitch or thread thickness to each concentric ring of the design. Use a heavy, couched cord for the outermost rings to establish a strong frame. For the inner details, alternate between flat satin stitches and highly textured French knots or bullion knots.
This variation in height and texture helps delineate the intricate sections, preventing the design from looking flat and busy. It transforms the piece from a simple drawing into a tactile, sculptural map.
13. Turkish Iznik Florals: Blend Colors Like Watercolors
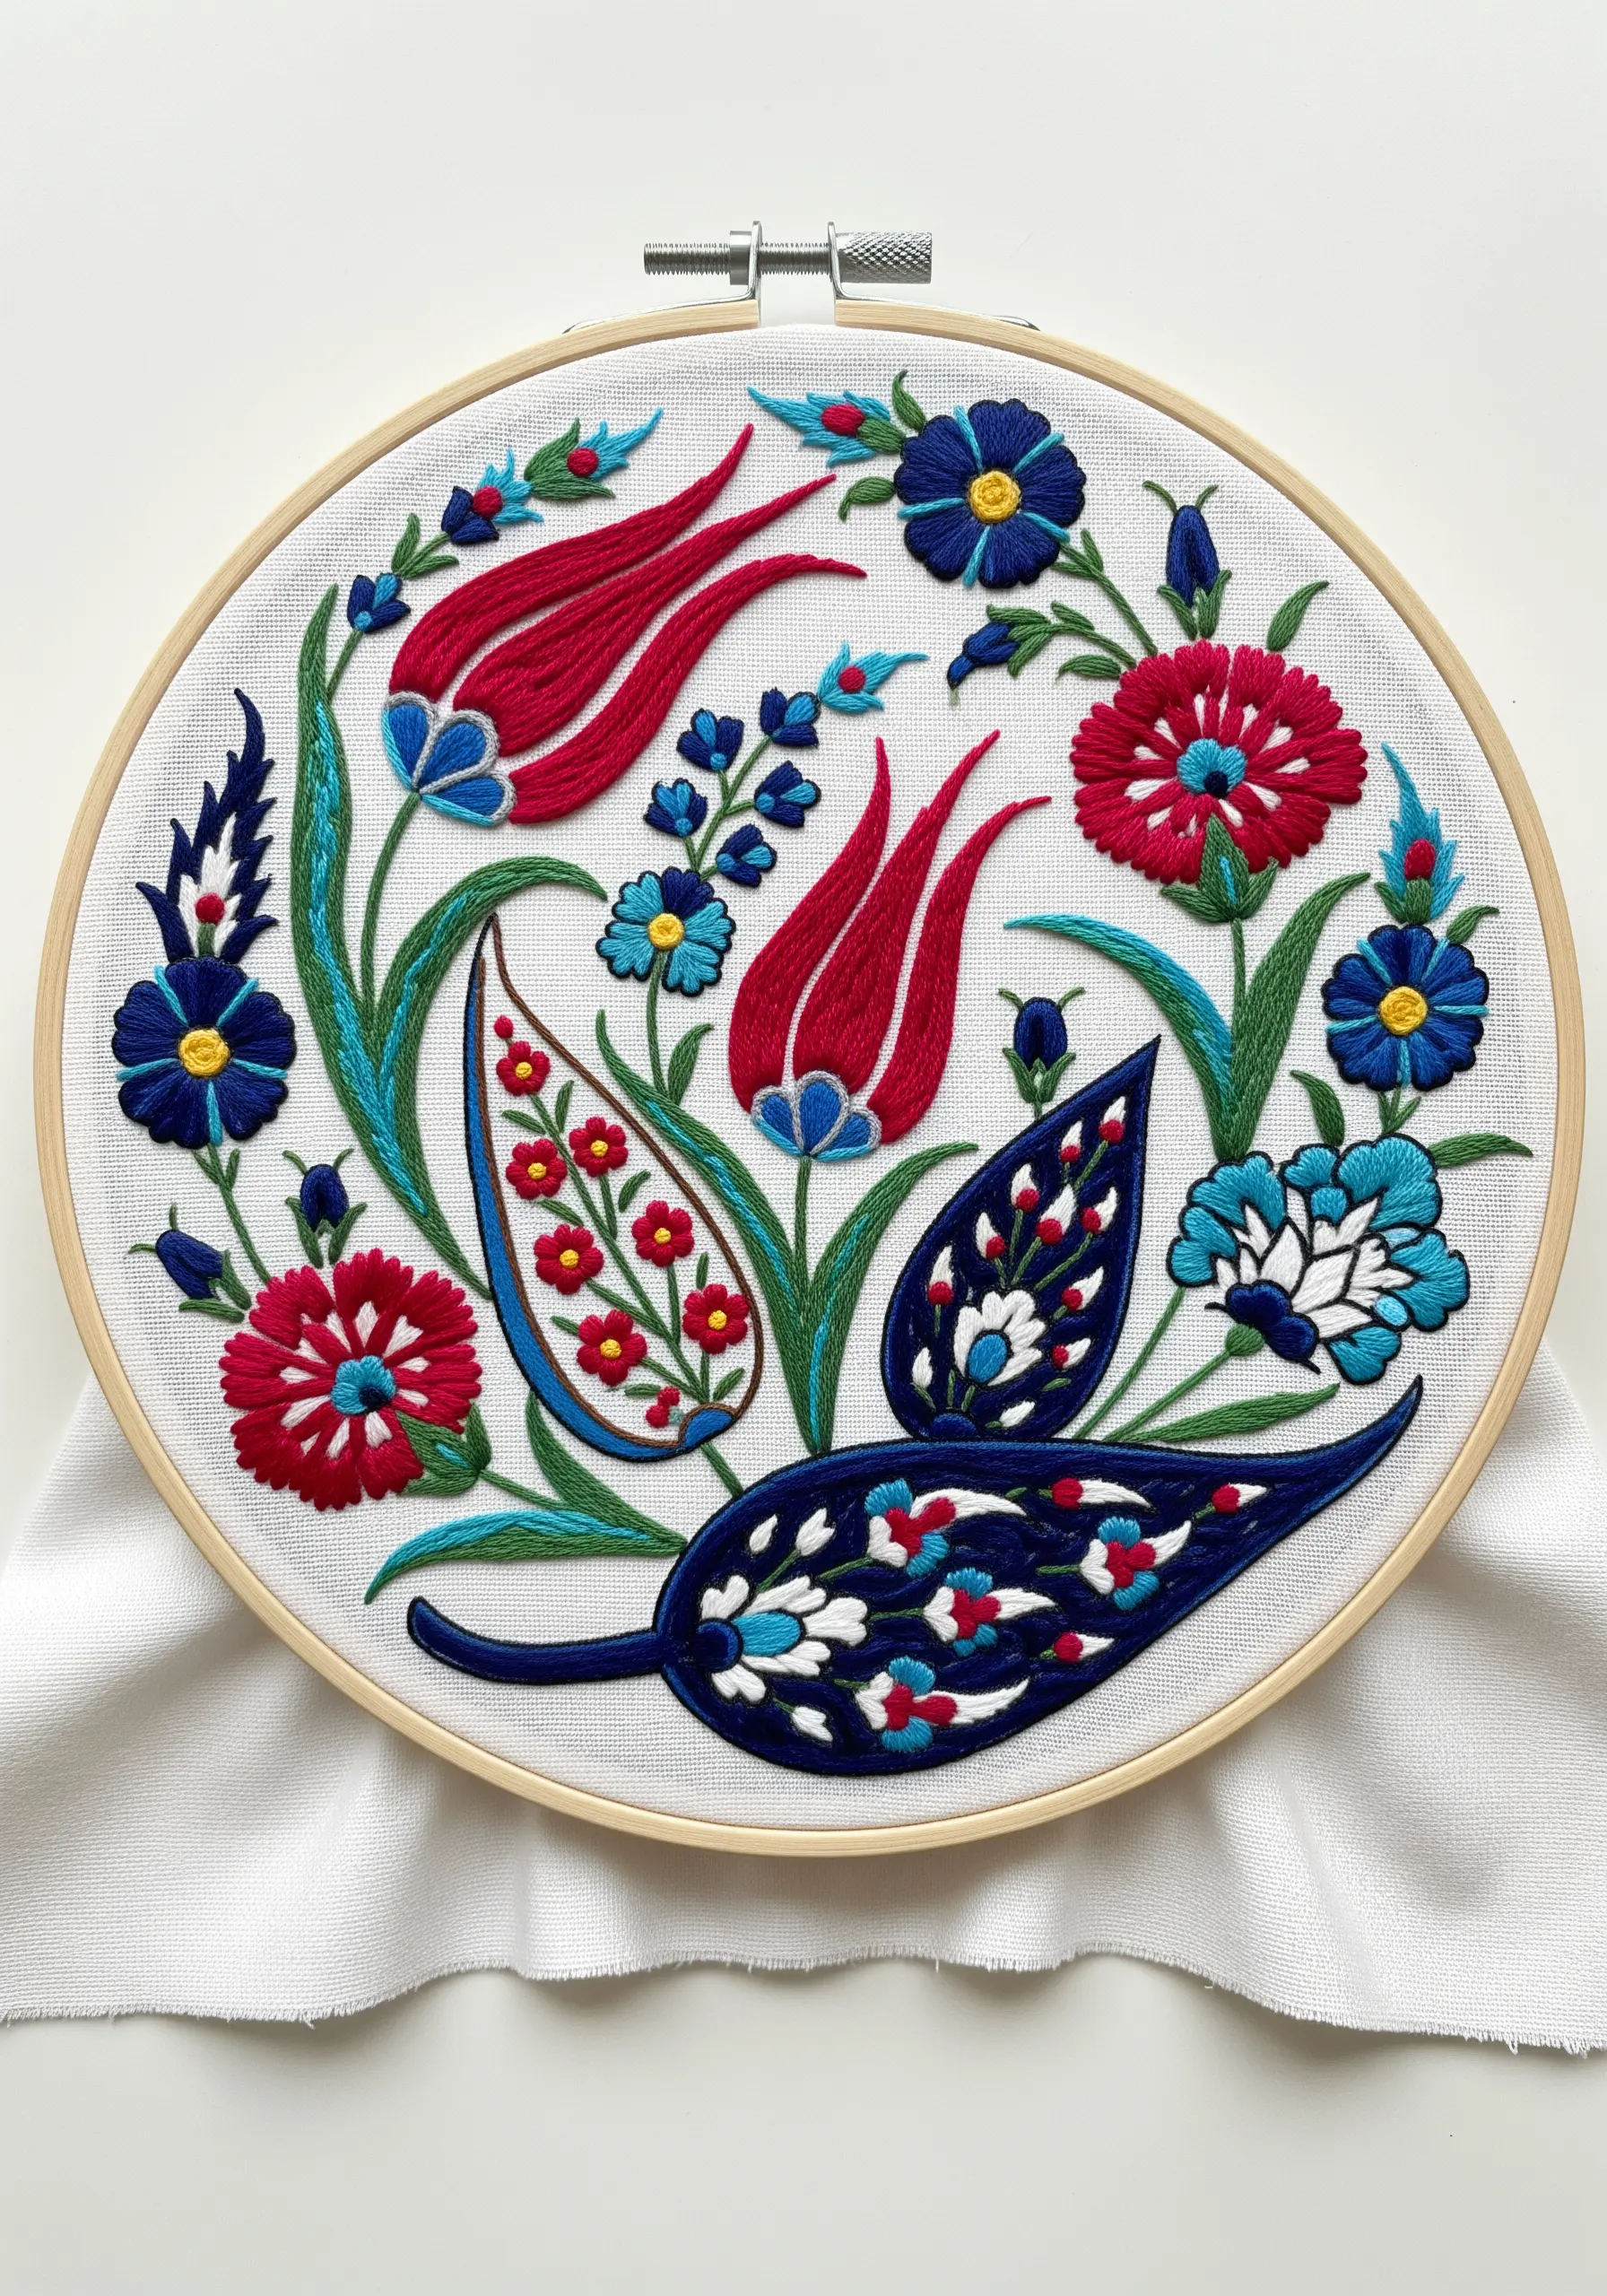
Capture the soft, painterly quality of Turkish Iznik pottery by using the long-and-short stitch to blend your colors seamlessly.
Instead of filling a petal with a single block of color, work your first row of stitches in alternating long and short lengths. Then, bring your second color up through the fabric and nestle the new stitches between the previous ones, creating a soft, natural gradient.
This technique mimics the way pigments bleed together in ceramics, giving your tulips and carnations a luminous, hand-painted feel that satin stitch cannot achieve.
14. Greek Meander: Give Lines Architectural Weight
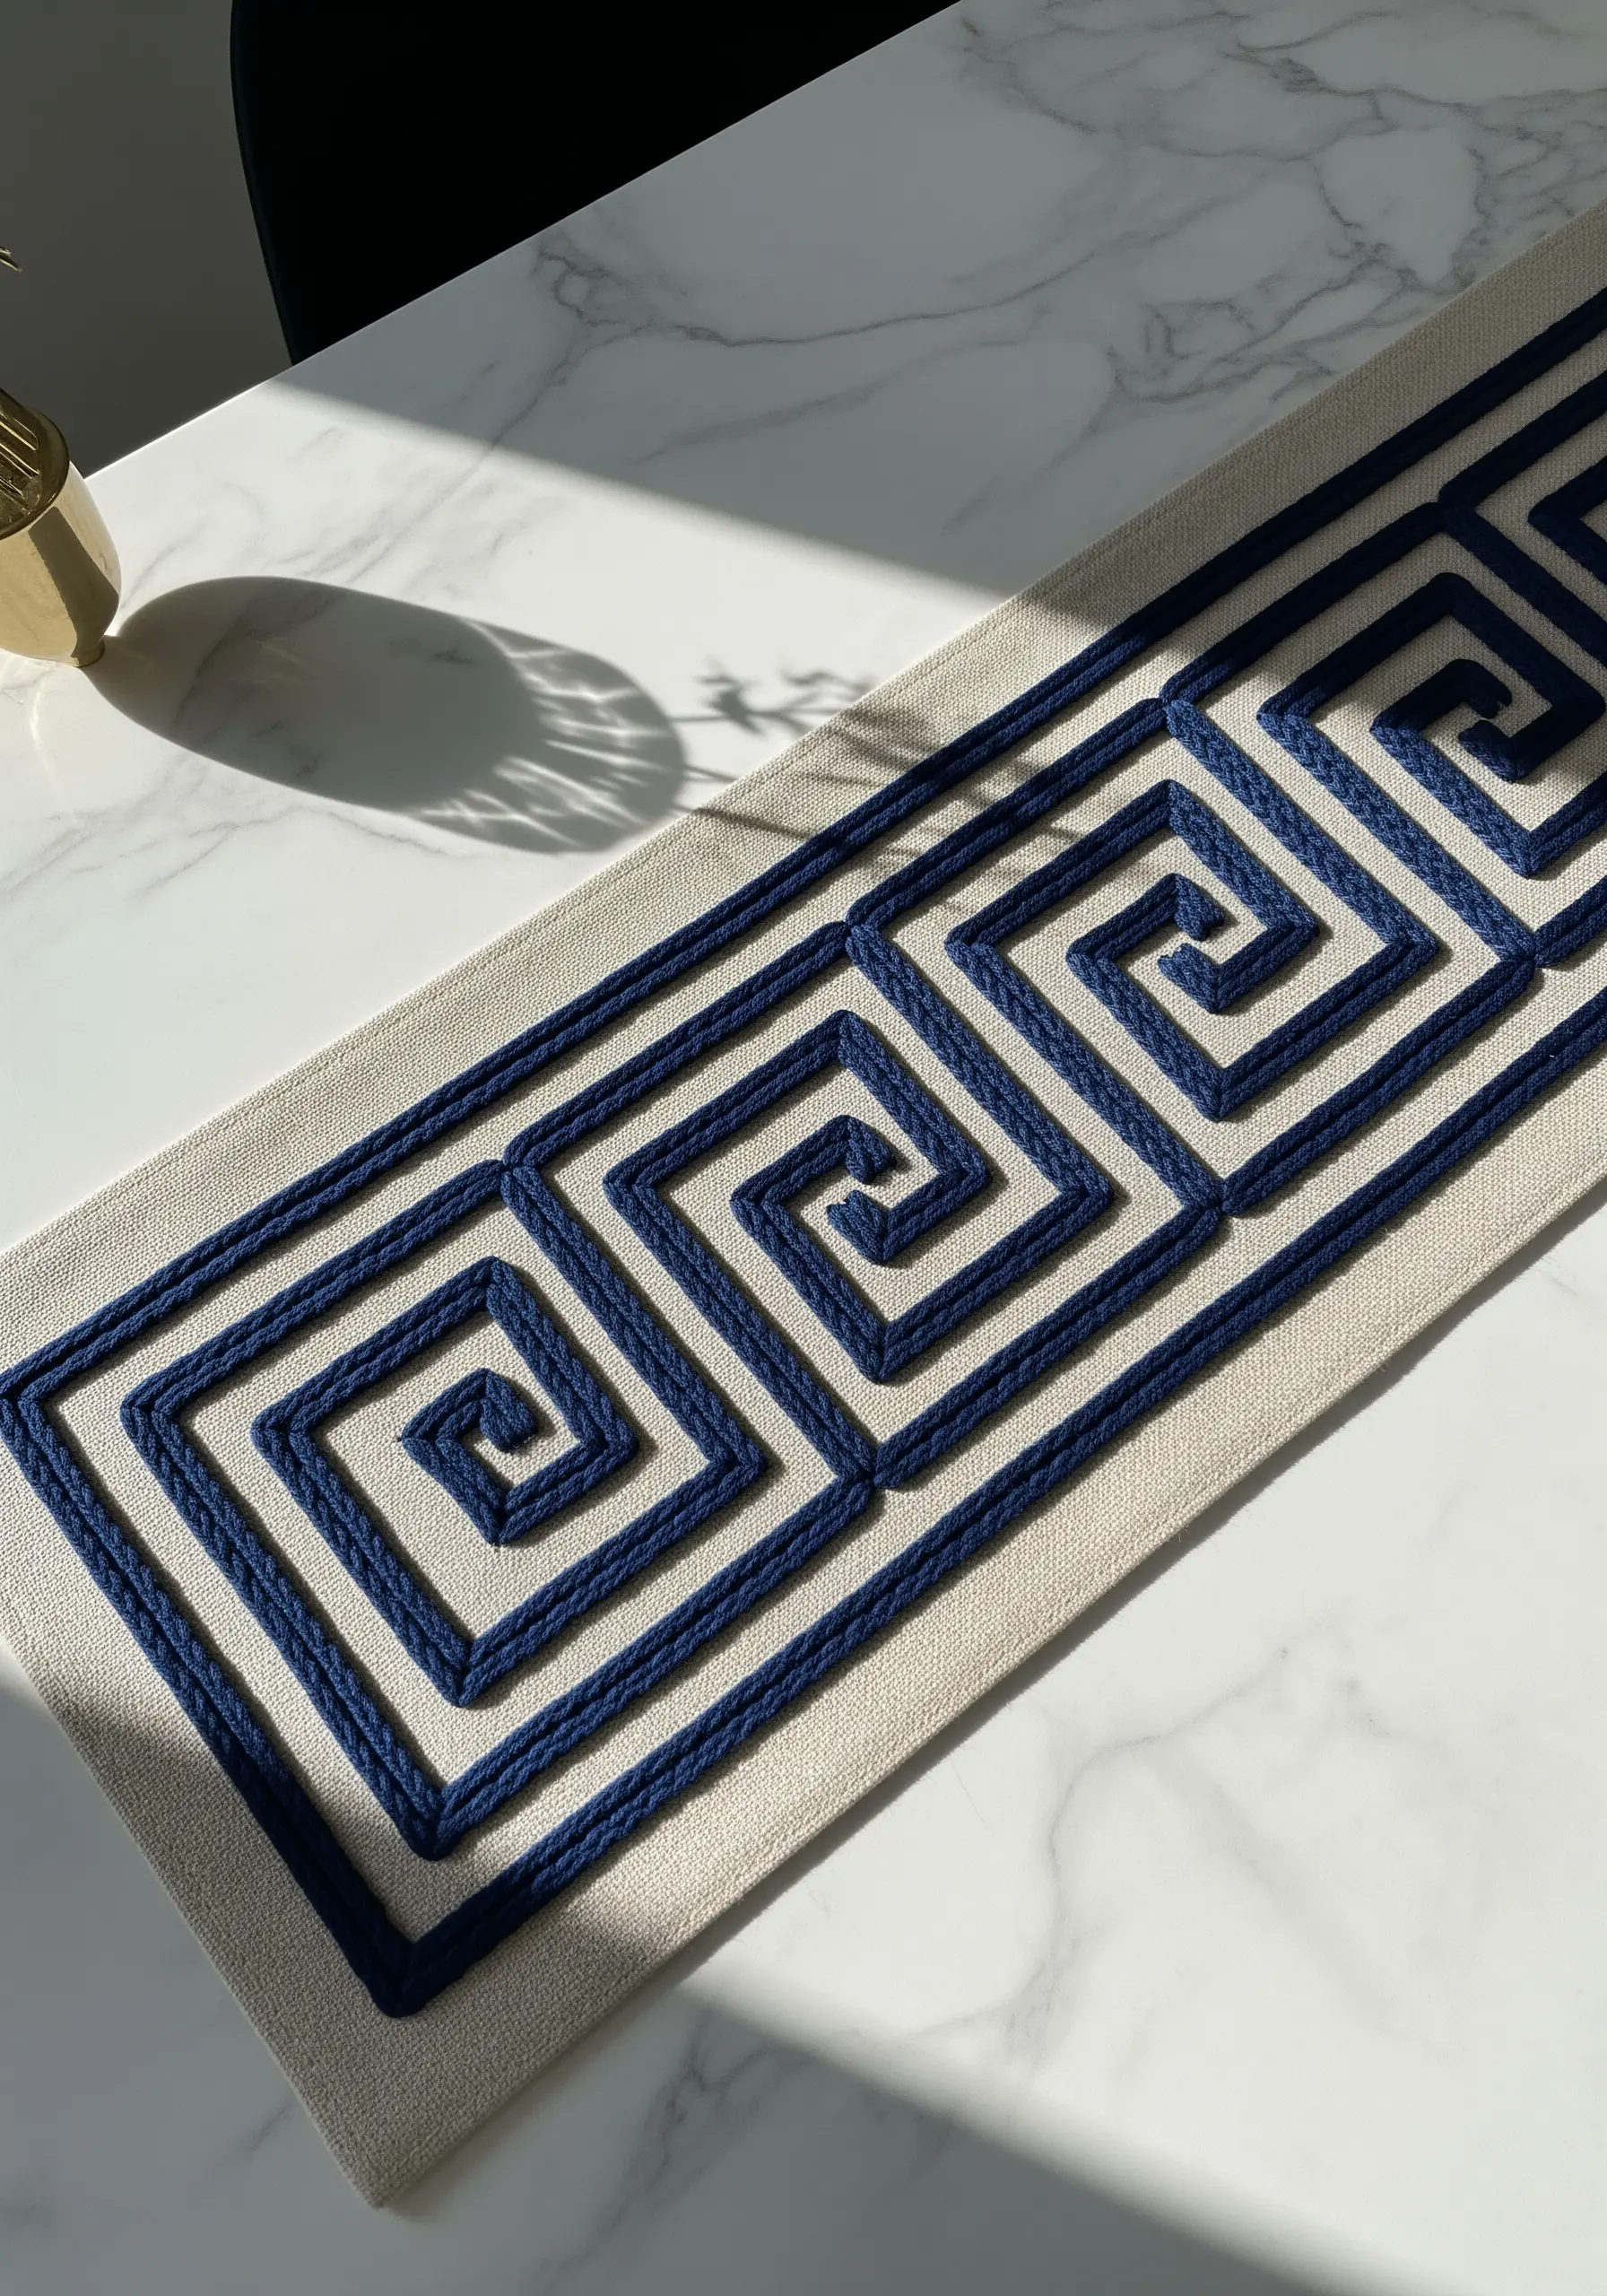
To give the Greek Key, or meander, its proper architectural presence on home decor, it needs to feel substantial and three-dimensional.
Use a heavy, corded stitch like a plaited braid stitch or a thick chain stitch worked with multiple strands of floss or even fine yarn. This immediately gives the line a raised, almost structural quality.
Stitching this motif on a contrasting fabric—like a navy blue cord on a neutral linen runner—emphasizes its graphic power and turns a simple line pattern into a bold, tactile statement piece for modern embroidery ideas to elevate your dining space.
15. Hawaiian Quilting: Use Negative Space as the Subject
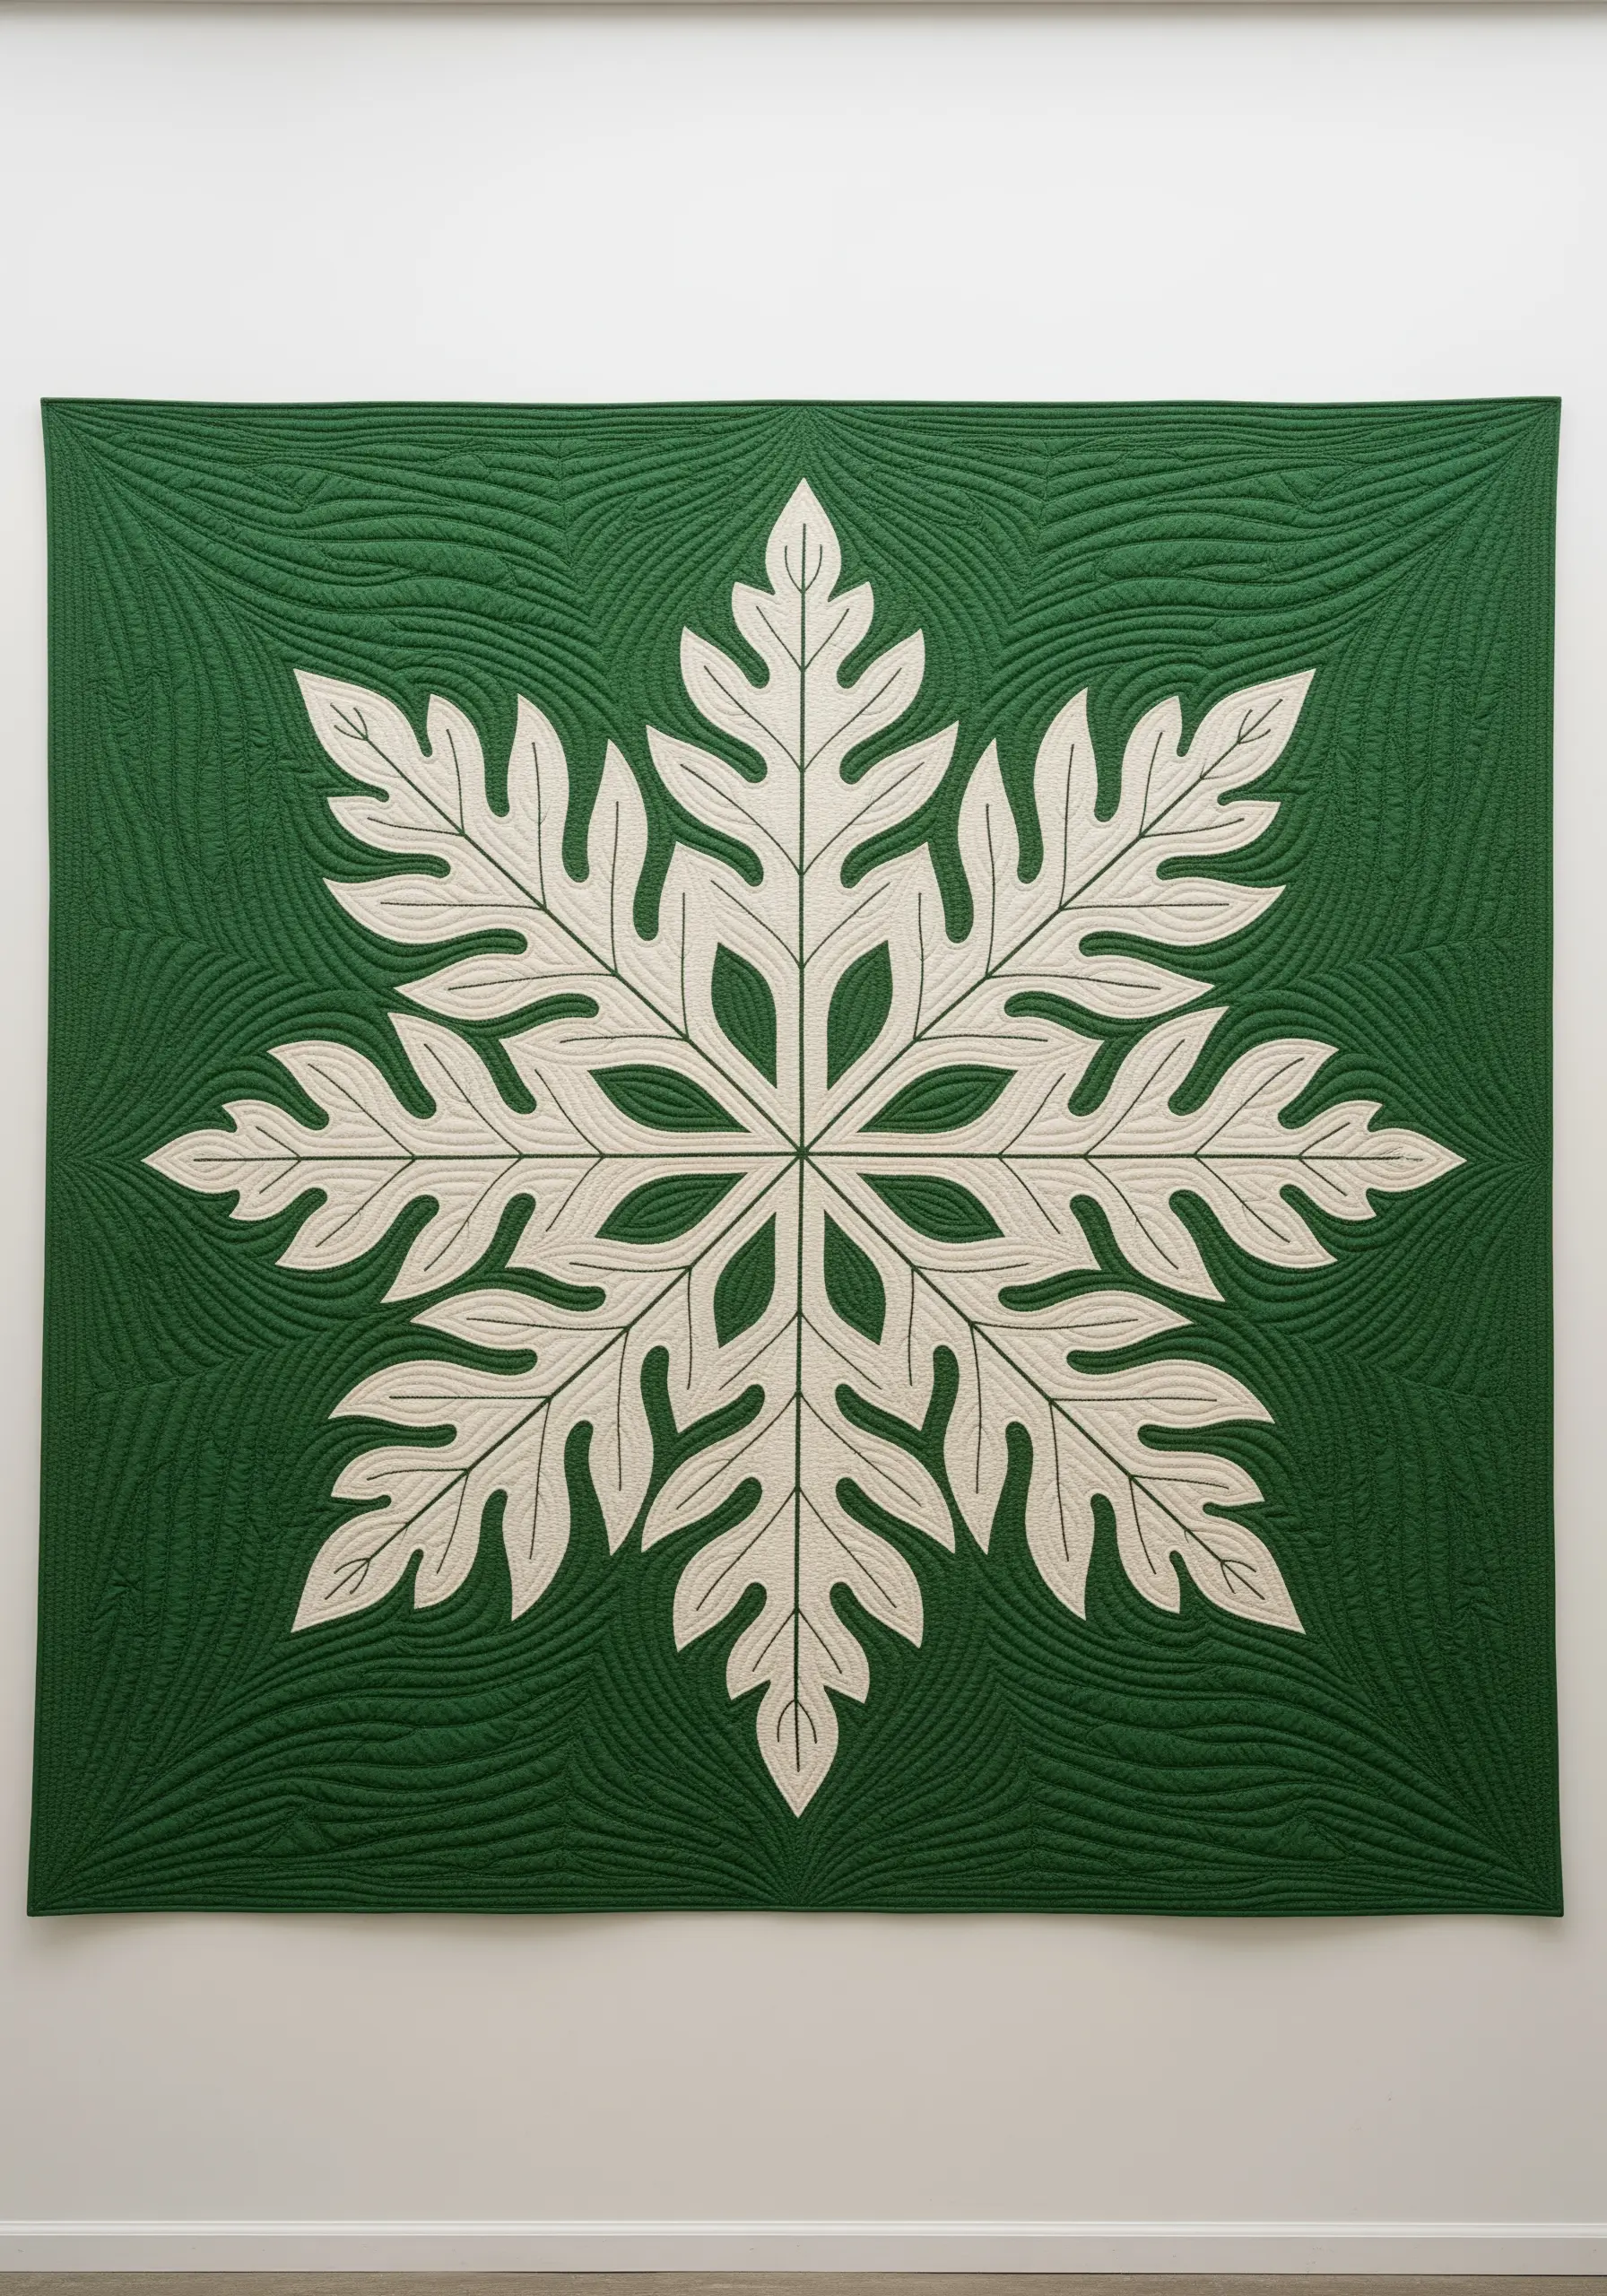
Inspired by the striking simplicity of Hawaiian appliqué quilts, you can create a similar effect by making the background the focus of your stitching.
Trace your central motif, like this breadfruit leaf, onto the fabric. Instead of embroidering the leaf itself, fill the entire background area around it with a dense, textural stitch like the seed stitch or closely packed running stitches that follow the contours of the shape.
This technique, known as negative space embroidery, makes the unstitched motif emerge as the powerful focal point, creating a sophisticated and modern design.
16. Tibetan Mandala: Anchor Your Symmetry from the Center
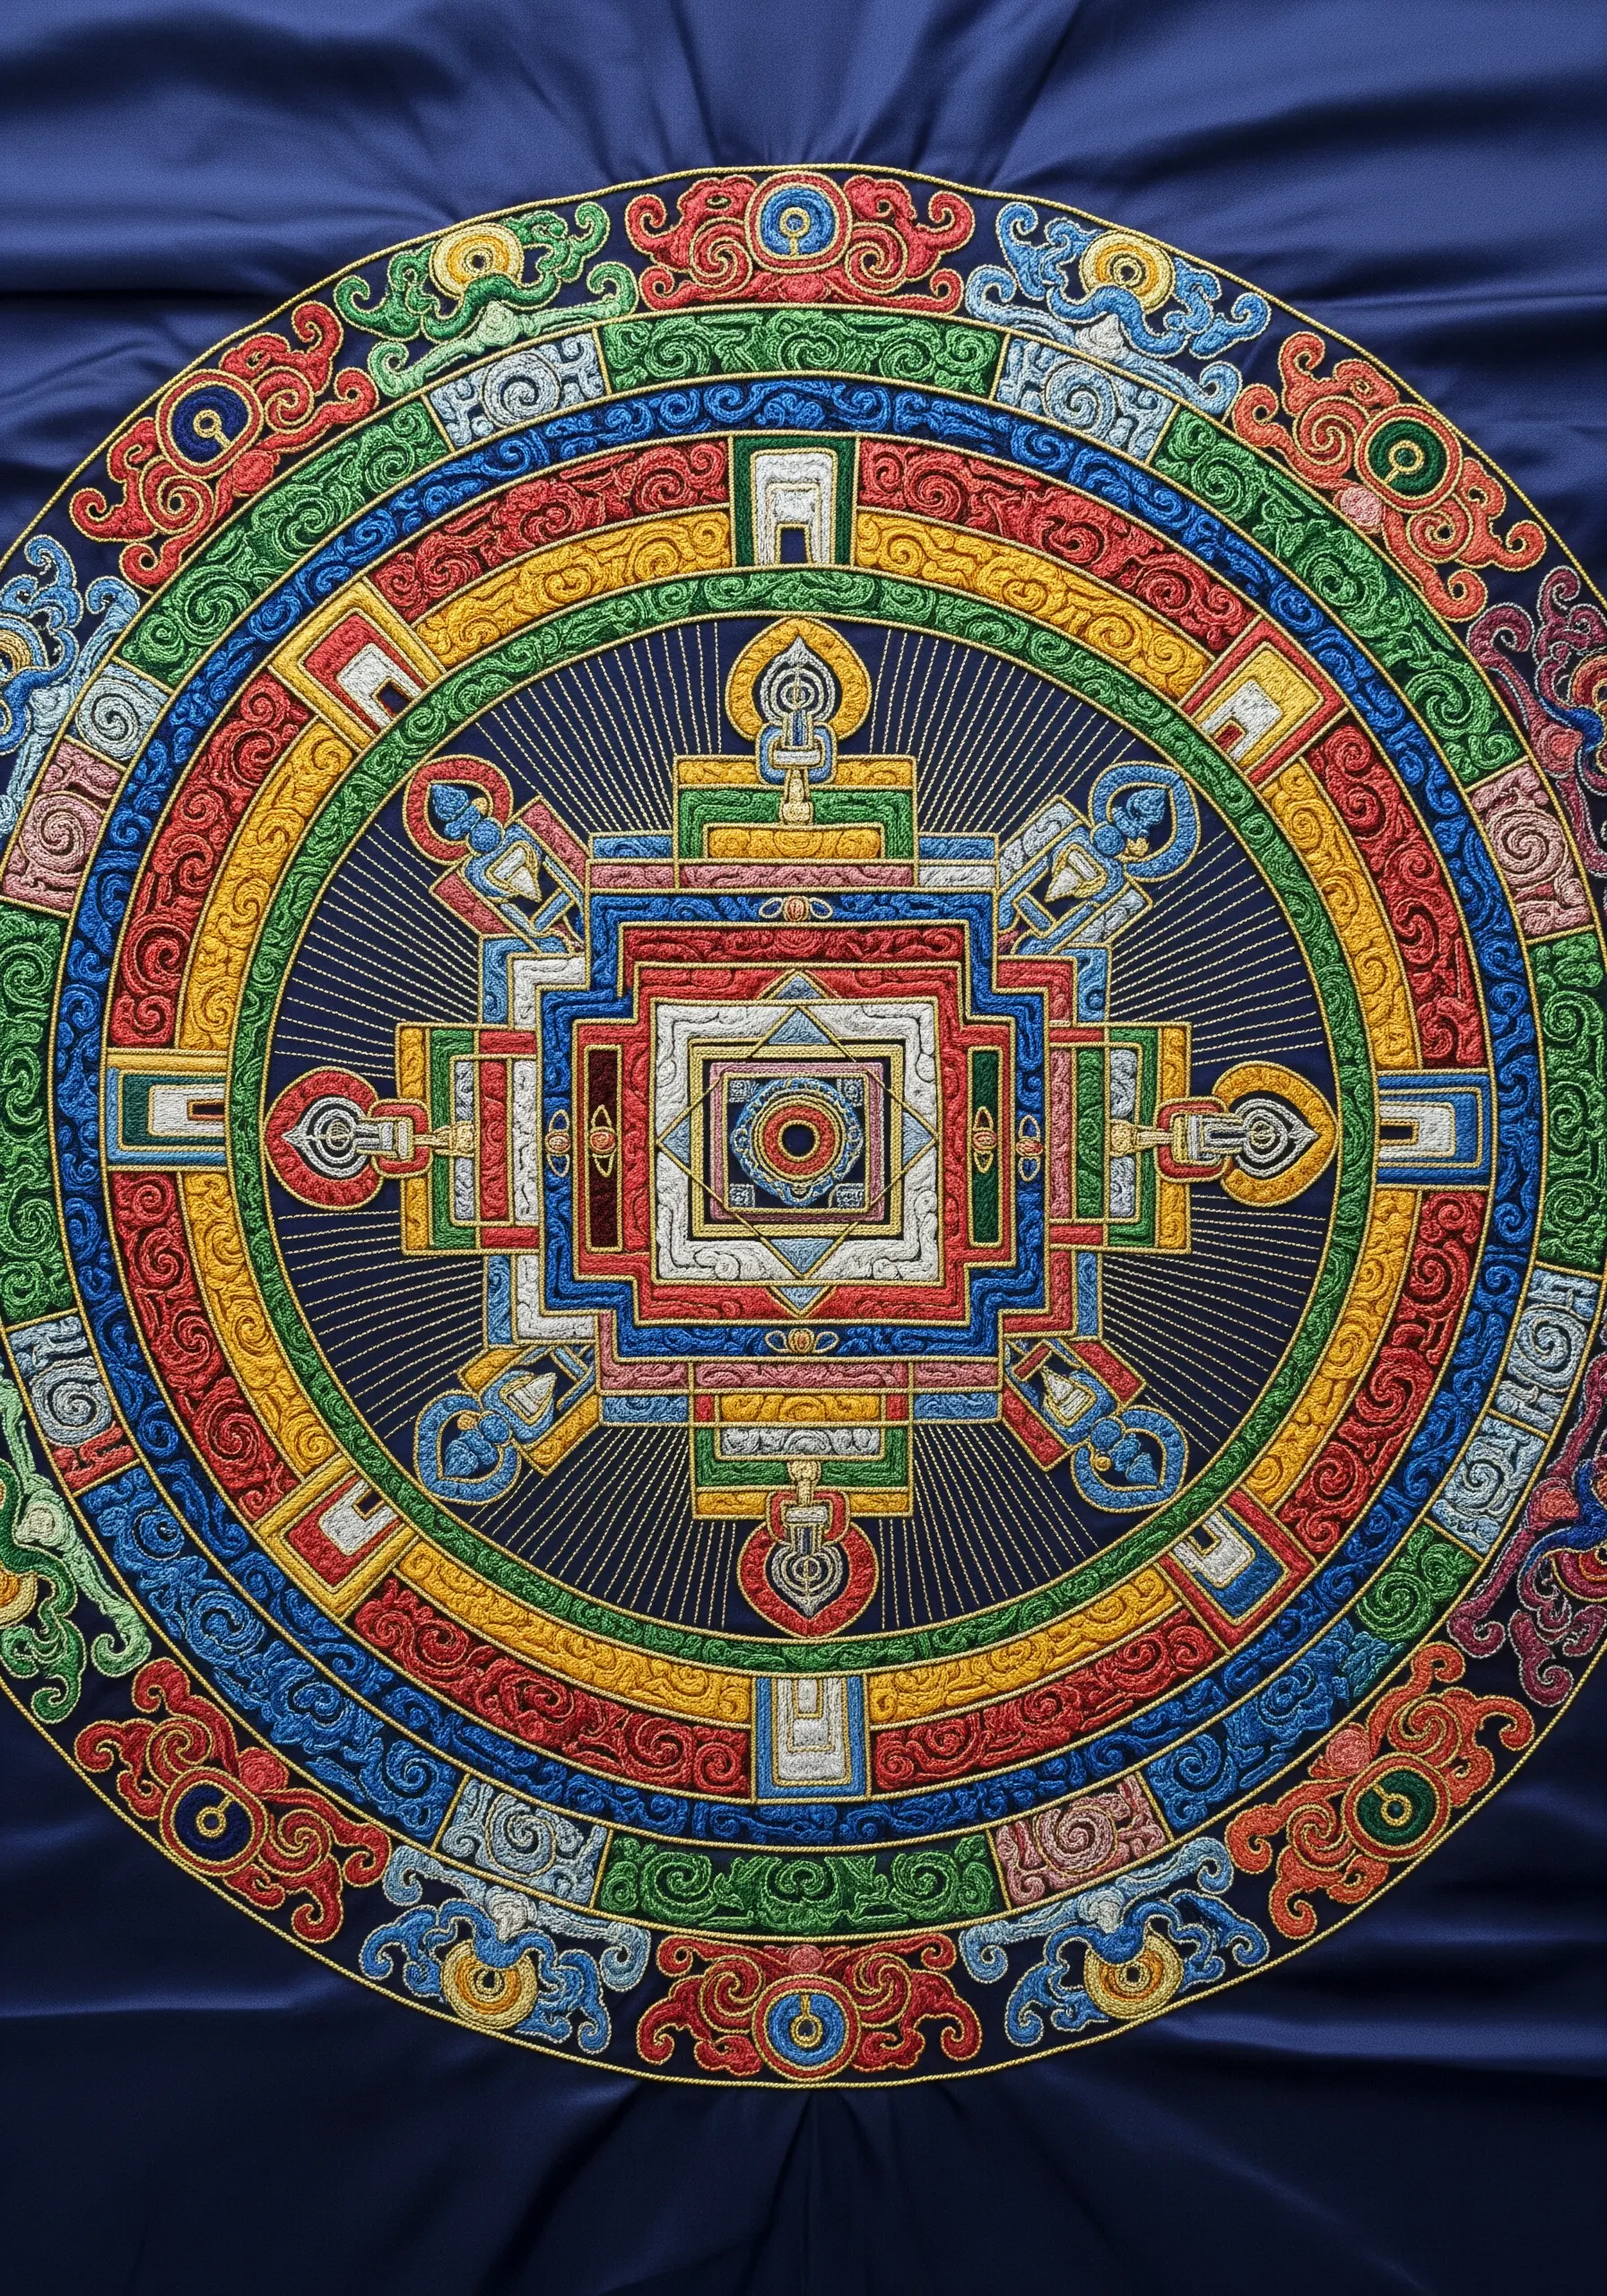
The spiritual and aesthetic power of a mandala lies in its perfect, meditative symmetry. To achieve this in embroidery, always begin your work from the absolute center and radiate outwards.
Working from the inside out prevents fabric distortion and ensures that each concentric circle is perfectly aligned with the last. Lightly draw guidelines with a water-soluble pen to divide your circle into quadrants or eighths, checking your stitch placement against these lines as you go.
This methodical approach is not just a technical step; it becomes part of the mindful practice of creating the mandala itself, resulting in a balanced, harmonious piece.
17. Slavic Cross-Stitch: Curate a Modern Folk Gallery
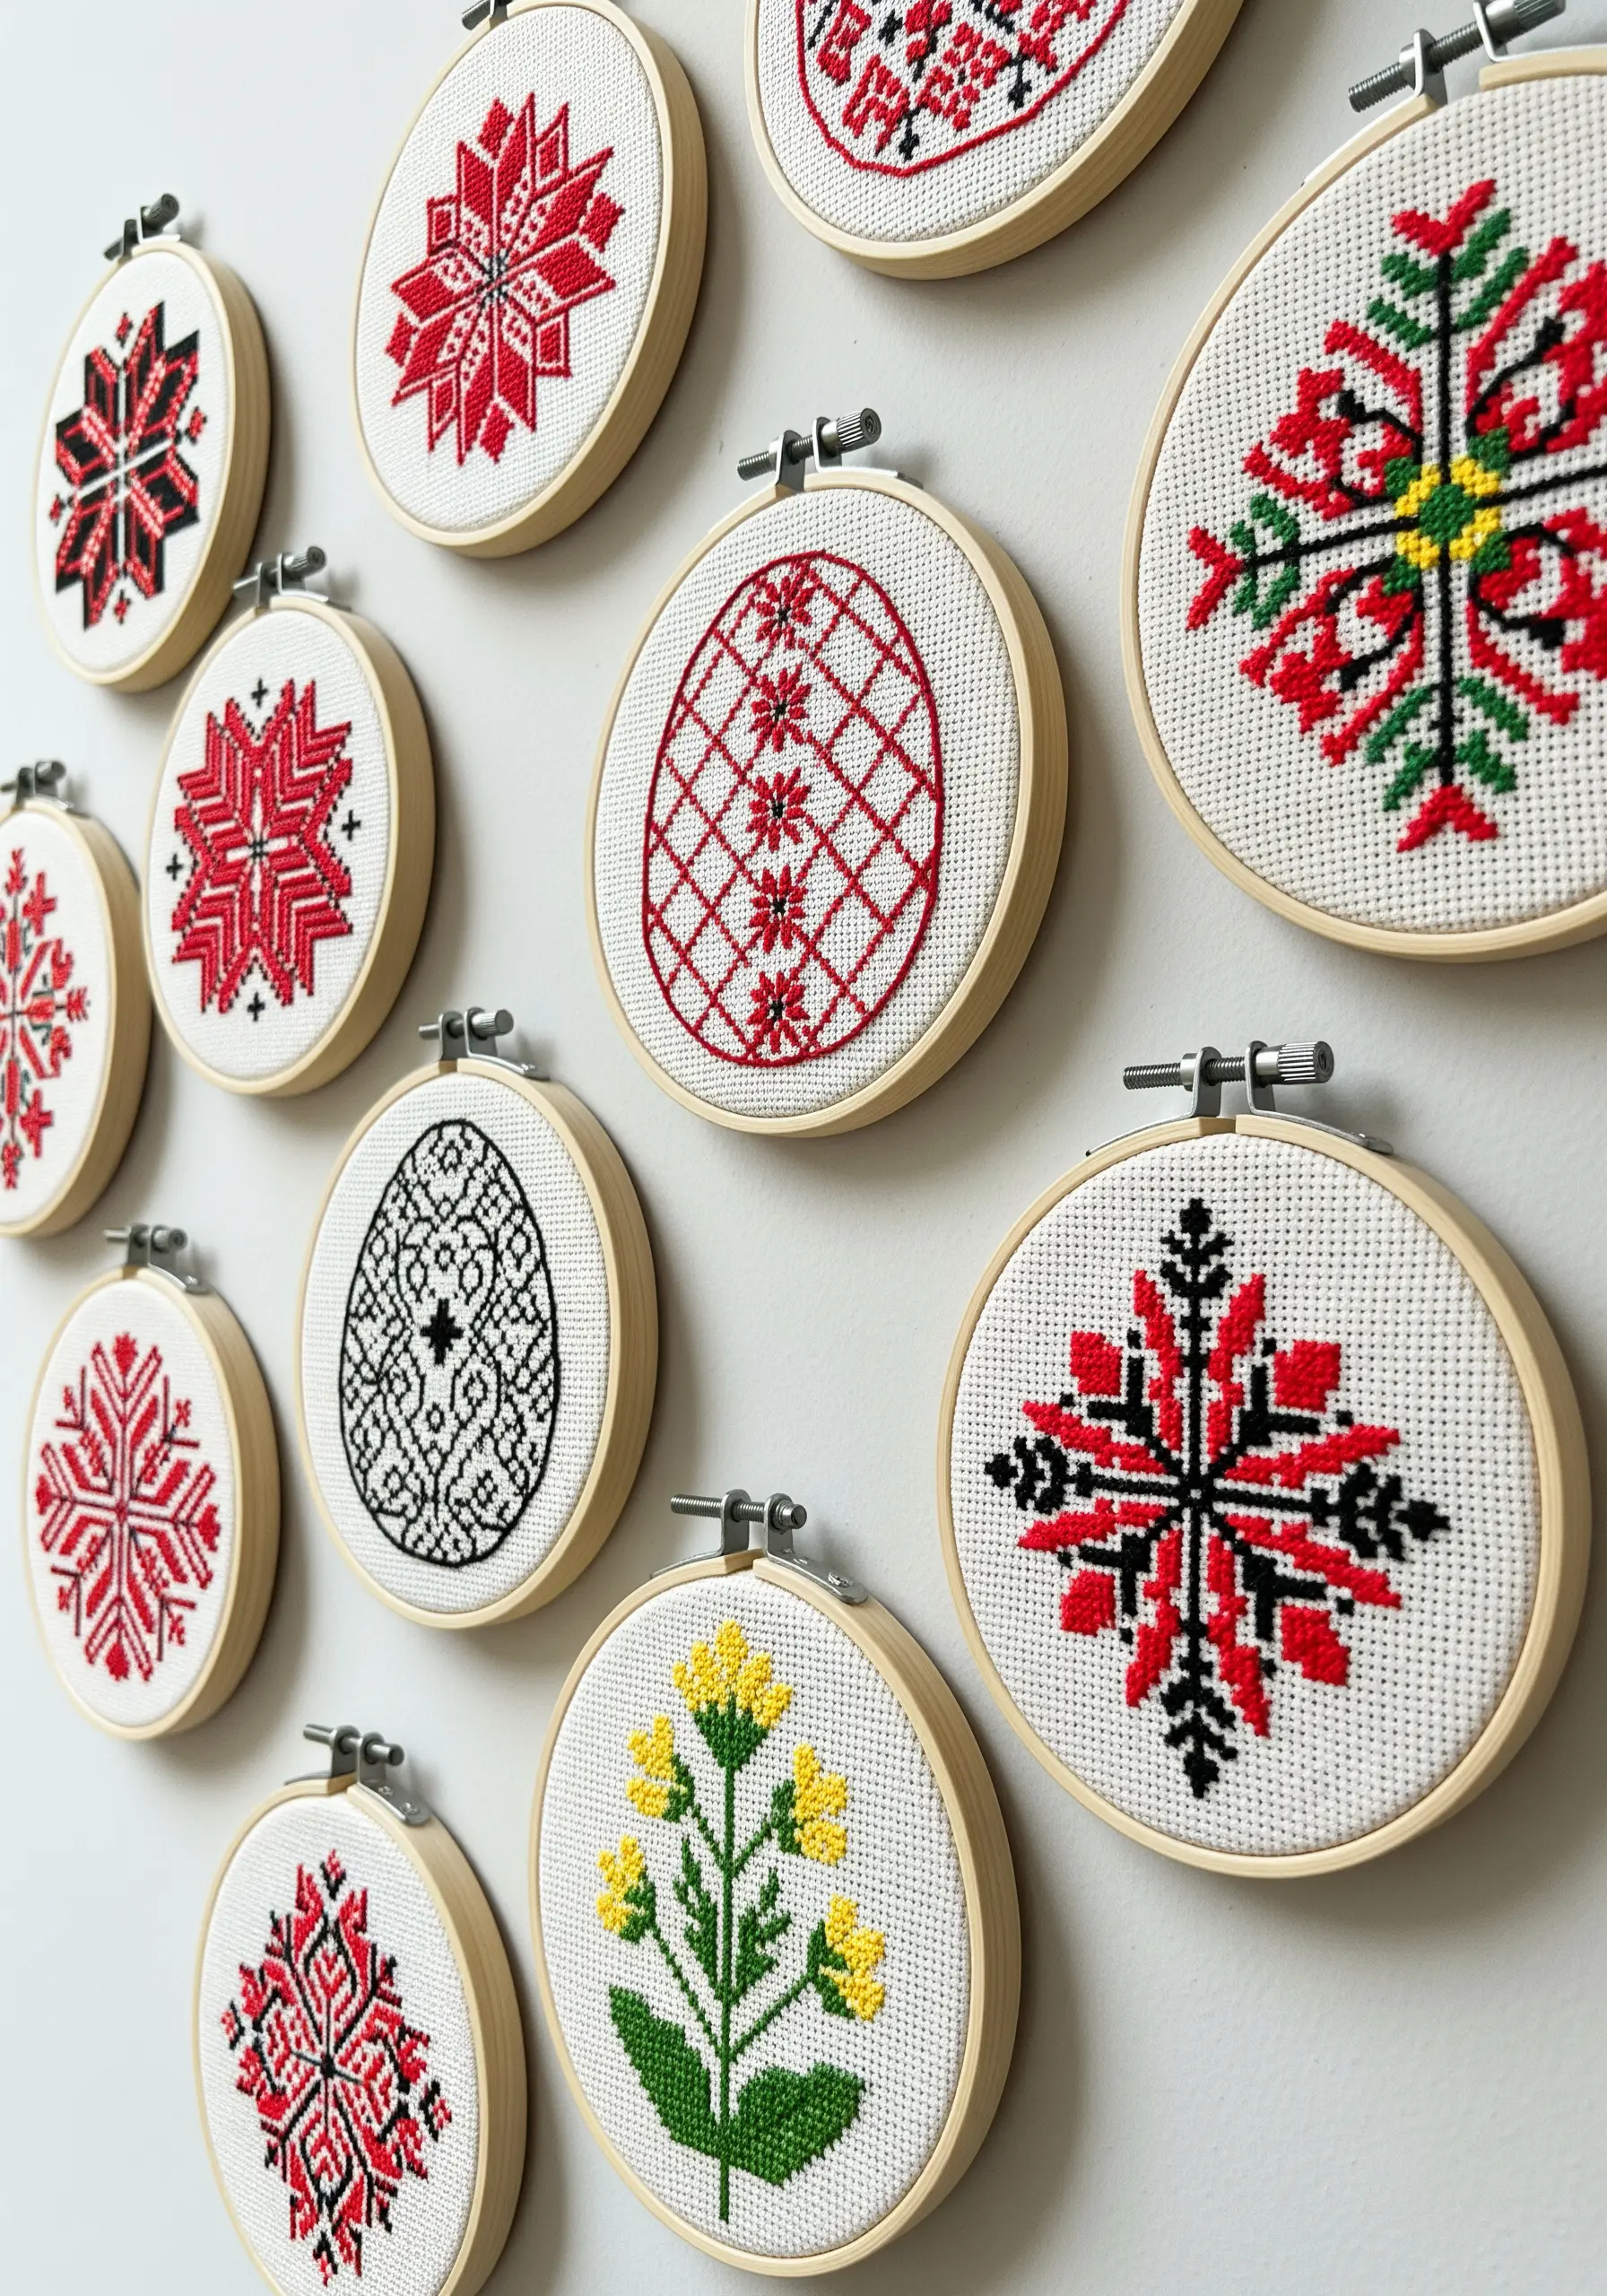
Traditional cross-stitch folk motifs can be given a contemporary voice by changing how you frame and display them.
Instead of one large sampler, stitch individual motifs on small pieces of Aida cloth and display them in a collection of tiny embroidery hoops. This approach turns traditional patterns into a modern, curated gallery wall.
For a flawless finish, ensure the top leg of every single cross-stitch faces the same direction. This tiny detail makes the overall texture uniform and professional, allowing the bold graphic quality of the patterns to shine.
18. Chinese Scroll Painting: Imply Detail, Don’t State It
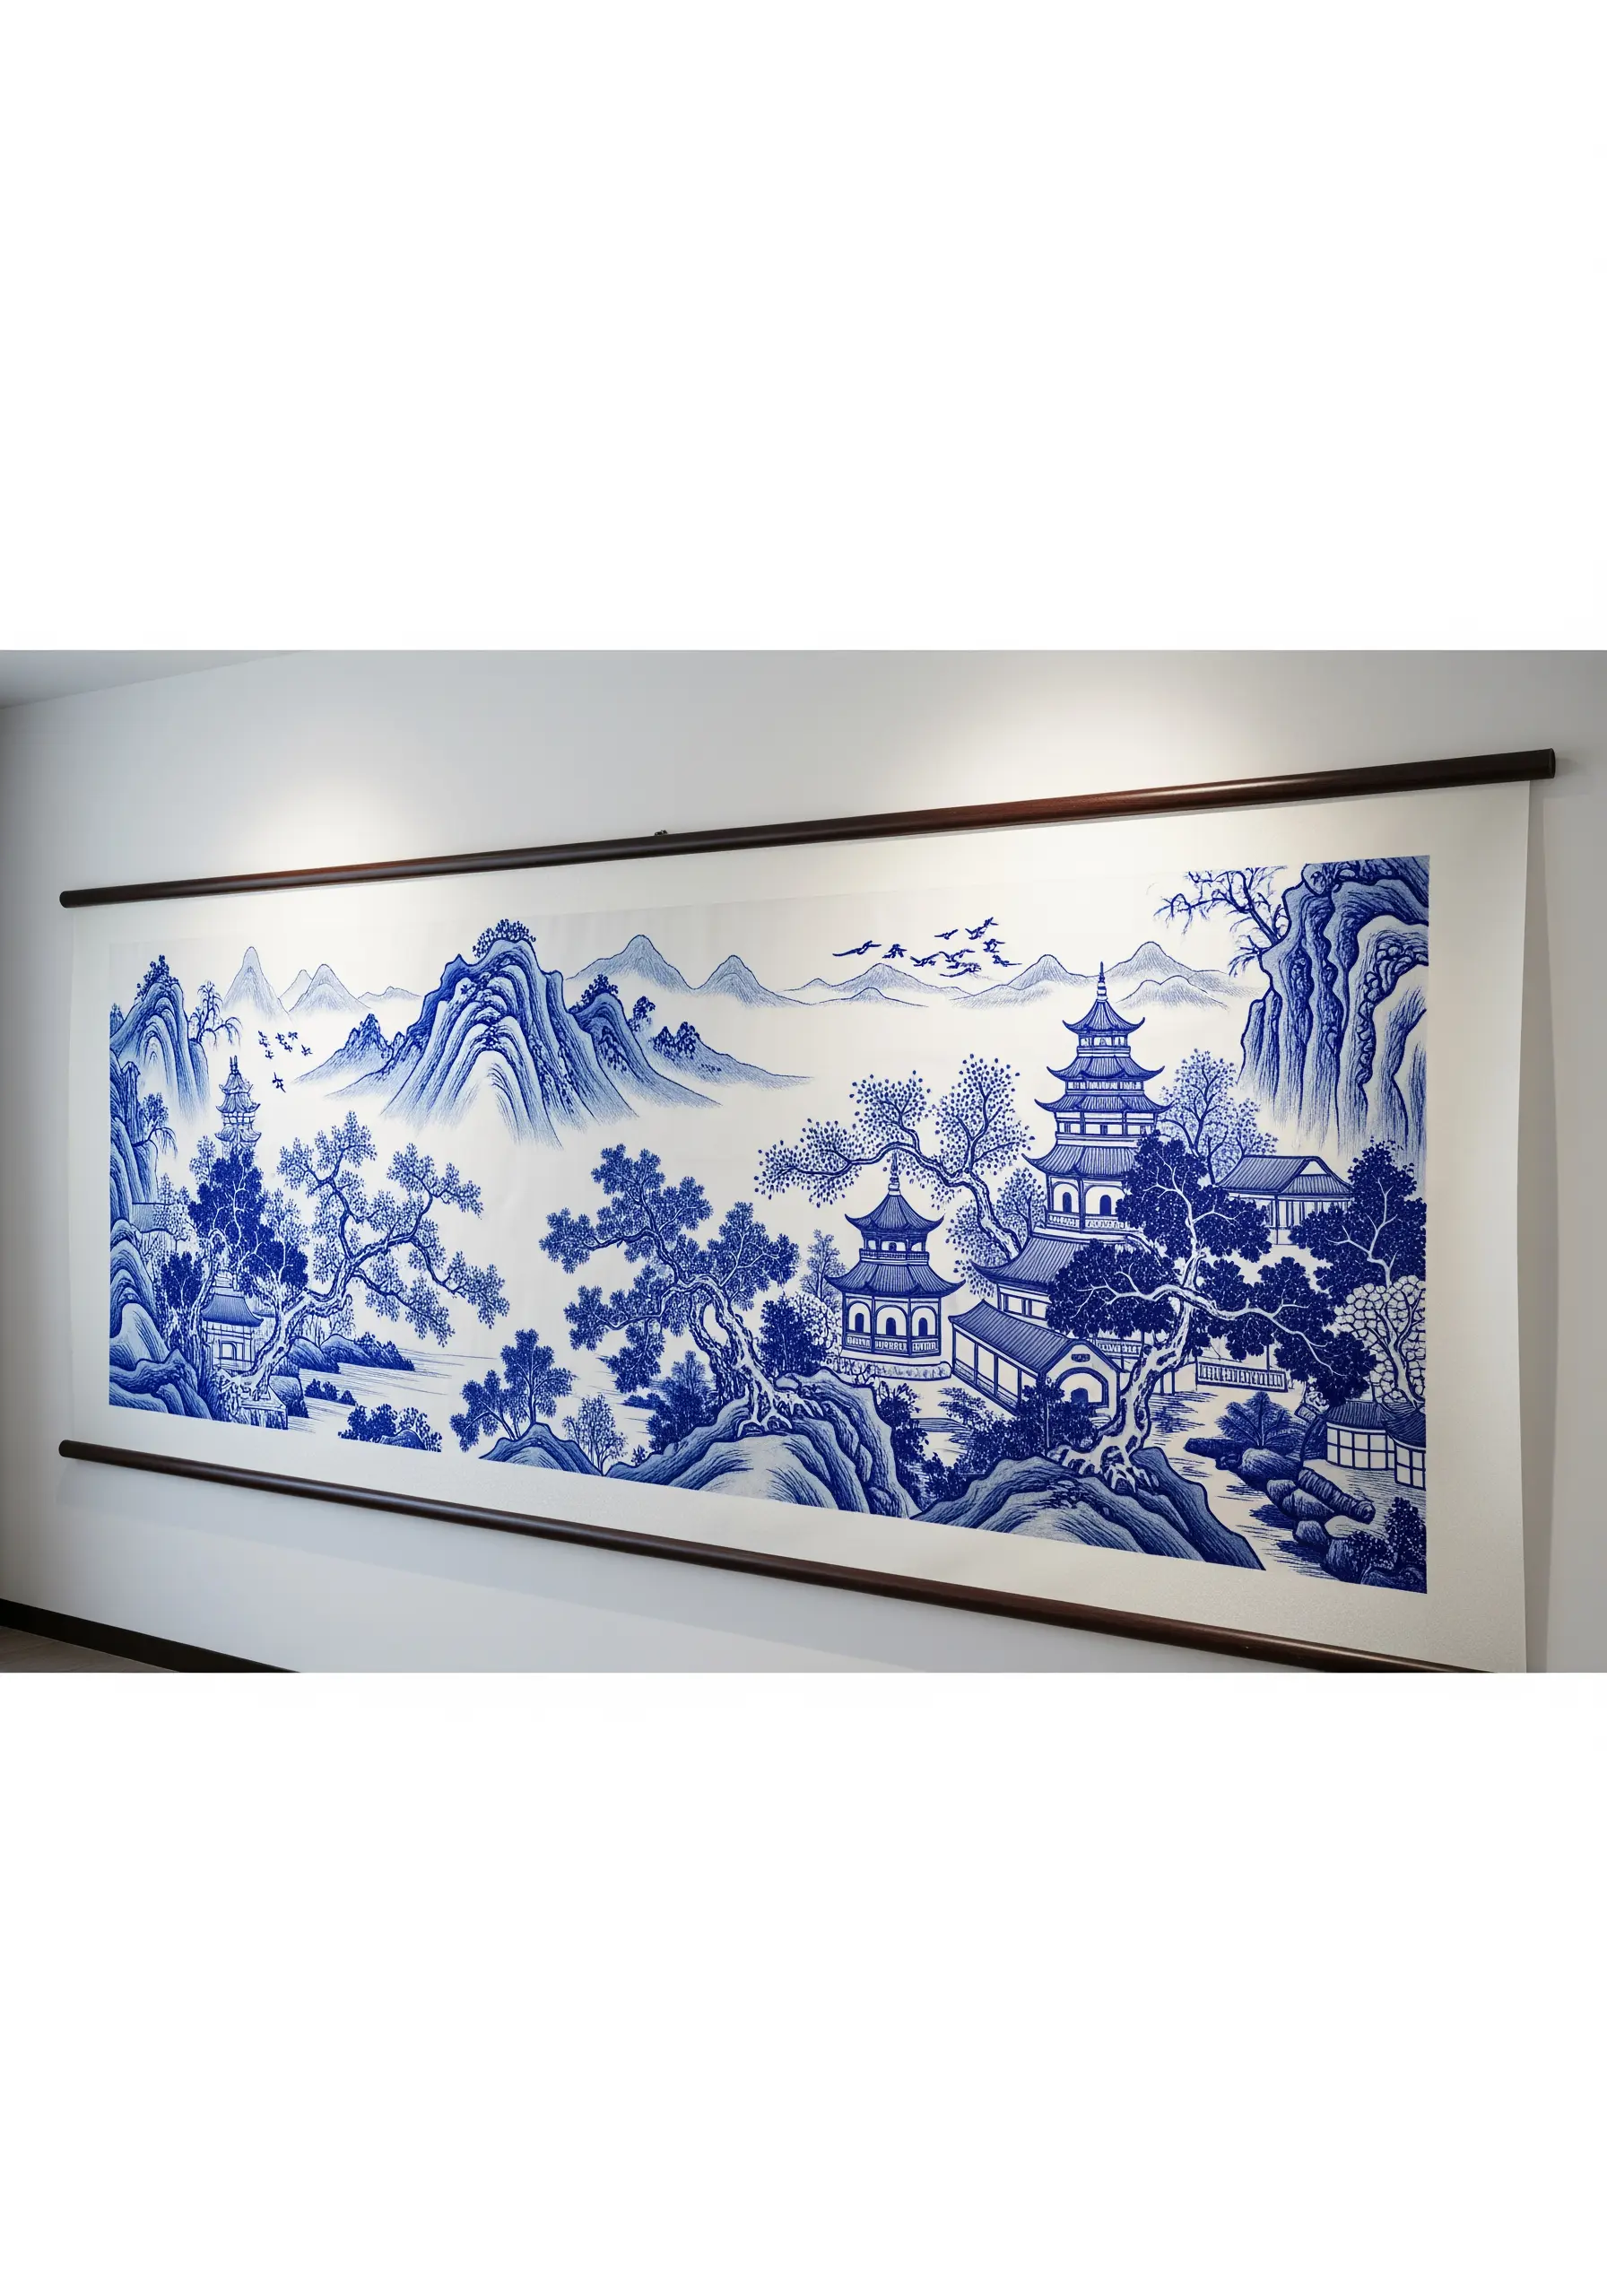
To capture the atmospheric, poetic quality of a Chinese Shan Shui landscape, you must embrace suggestion over statement.
Use a very fine, single strand of thread to suggest form and texture rather than filling it in completely. Use clusters of tiny seed stitches for foliage, sparse running stitches for distant mist, and a simple backstitch for architectural outlines.
The unstitched fabric is just as important as the stitched areas, representing air, water, and space. This minimalist approach allows you to create a vast, serene landscape that feels light and full of breath.
19. Art Nouveau Lines: Stitch with Lustrous Threads
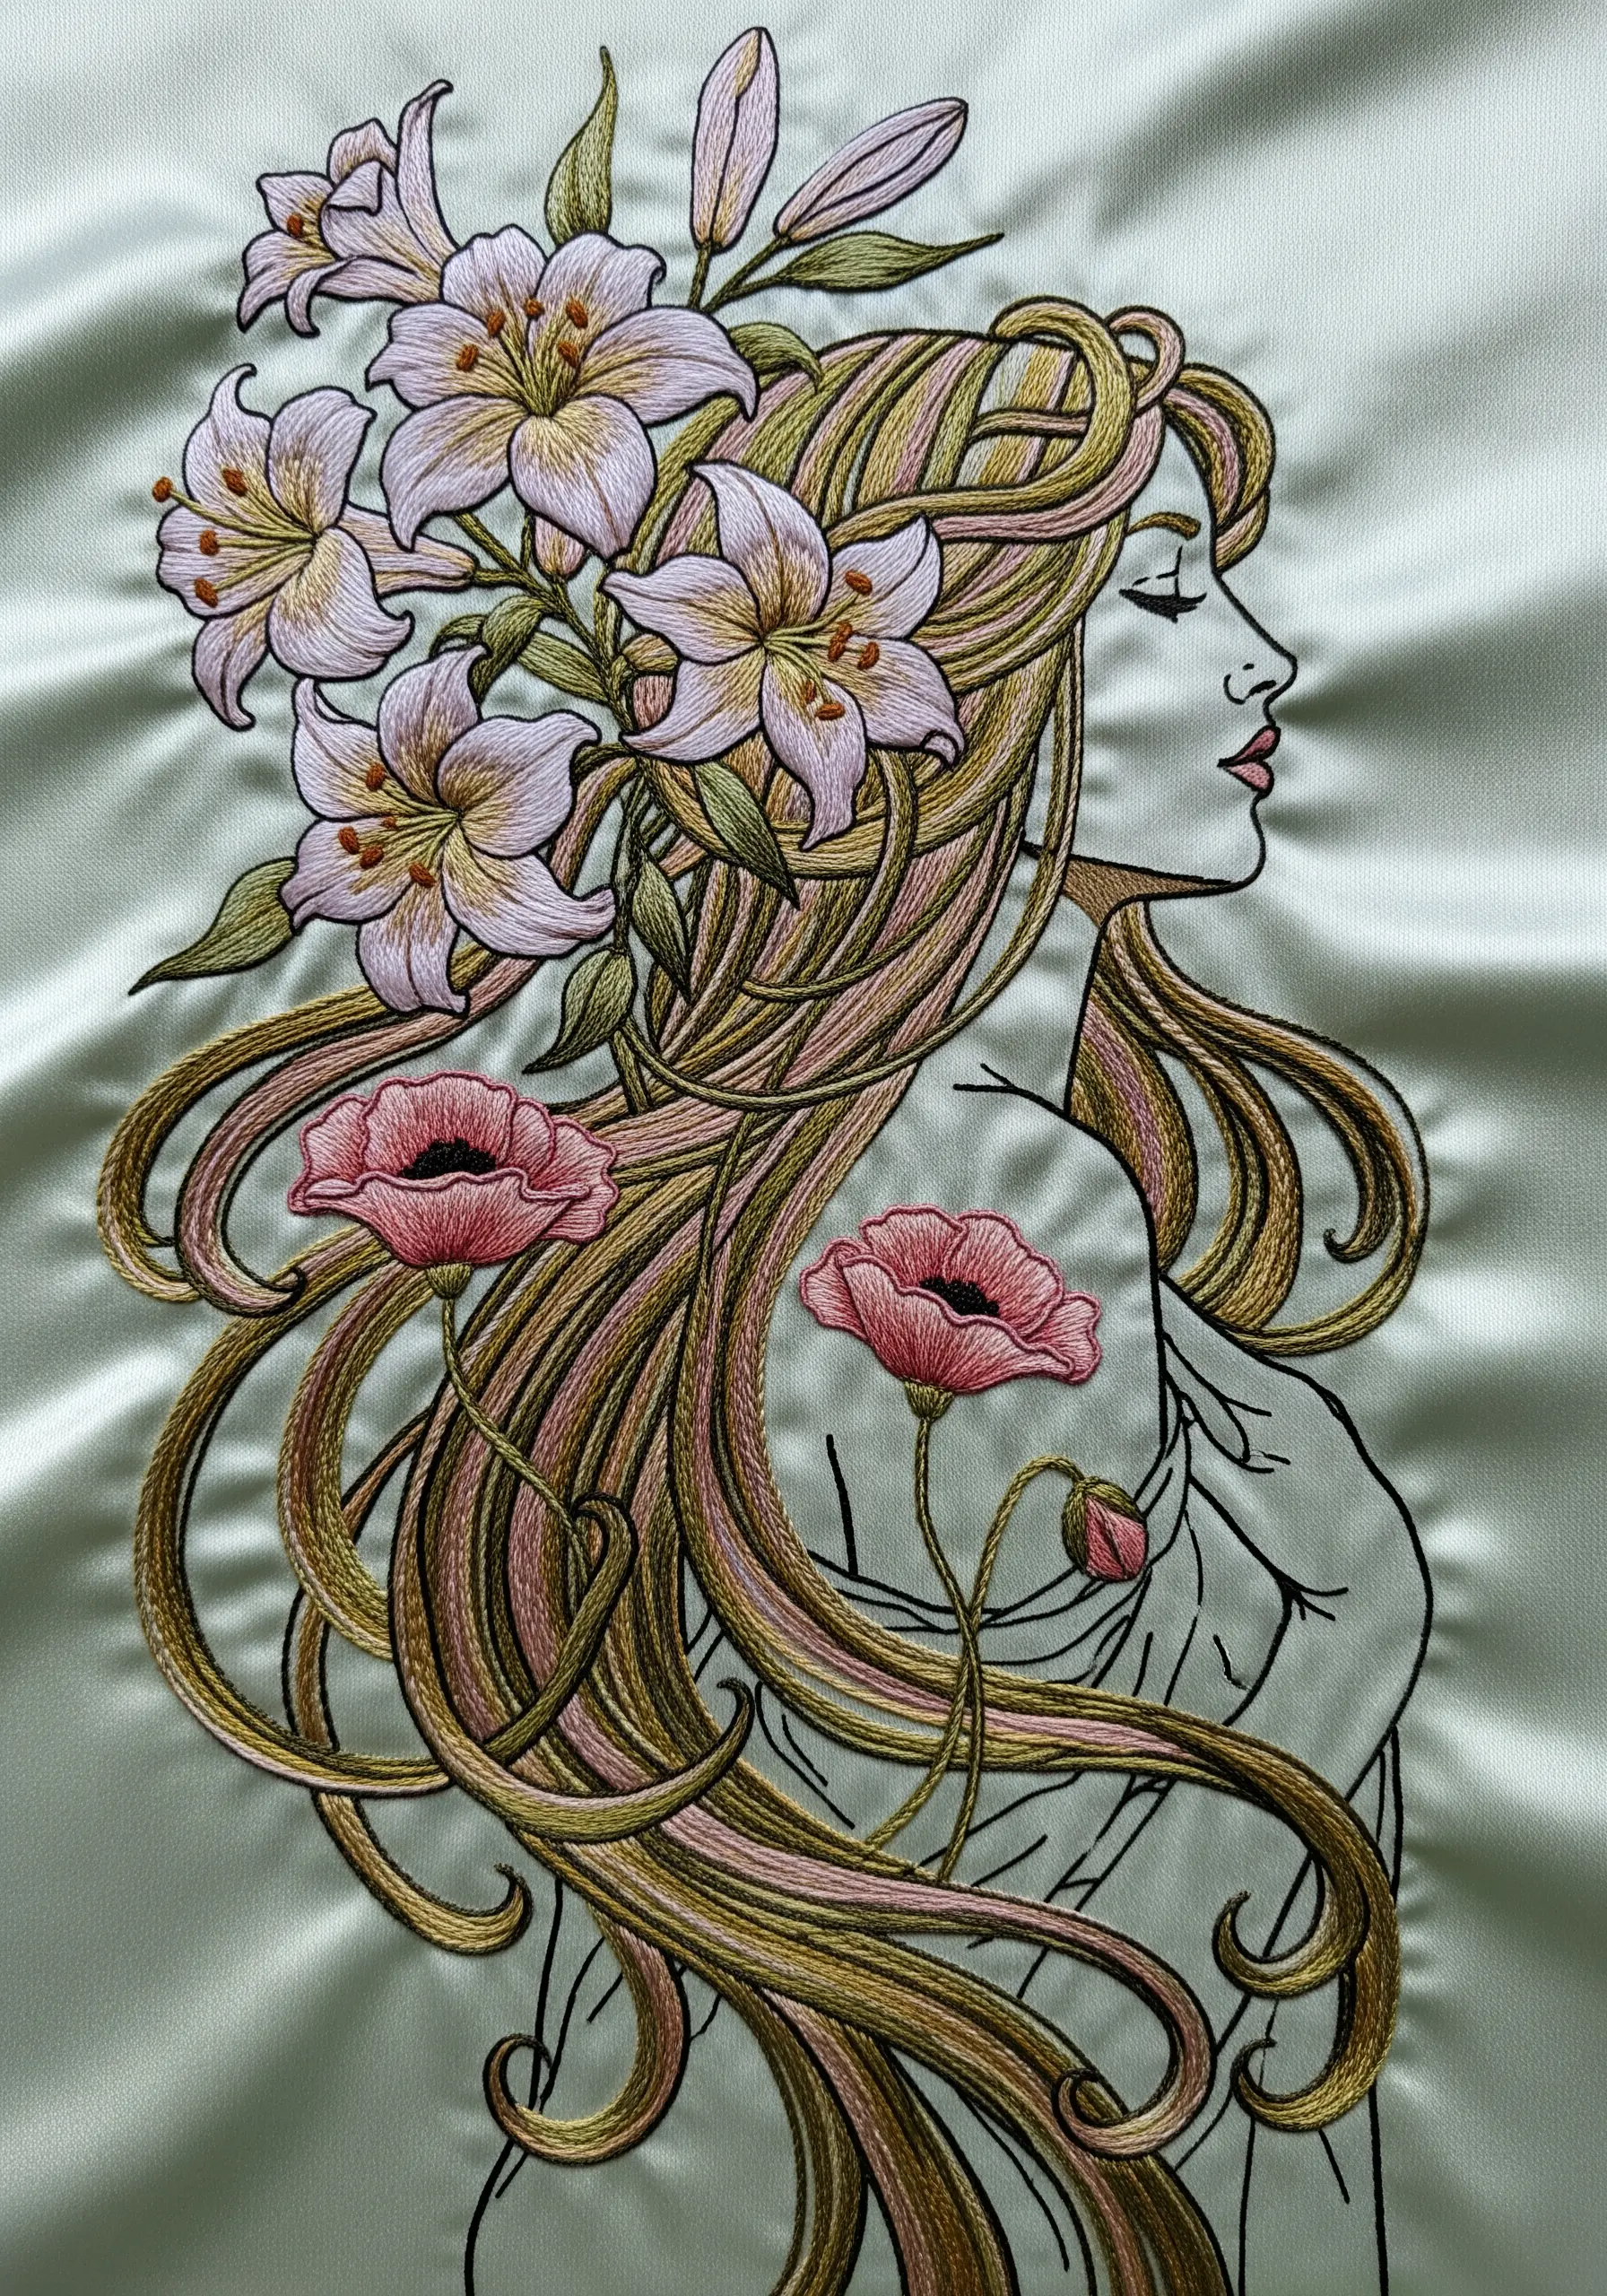
The essence of Art Nouveau is its sinuous, flowing line. To properly capture the elegance of Alphonse Mucha-inspired hair and florals, your thread choice is paramount.
Swap standard cotton floss for a thread with a natural sheen, like silk or rayon. These threads catch the light beautifully, enhancing the graceful curves of your design.
Pair your lustrous thread with a smooth, flowing stitch like a whipped backstitch or a stem stitch. This combination creates unbroken, liquid lines that give the piece its signature organic sensuality, perfect for line art floral crowns and hair motifs.
20. Egyptian Hieroglyphs: Create an Embossed Effect
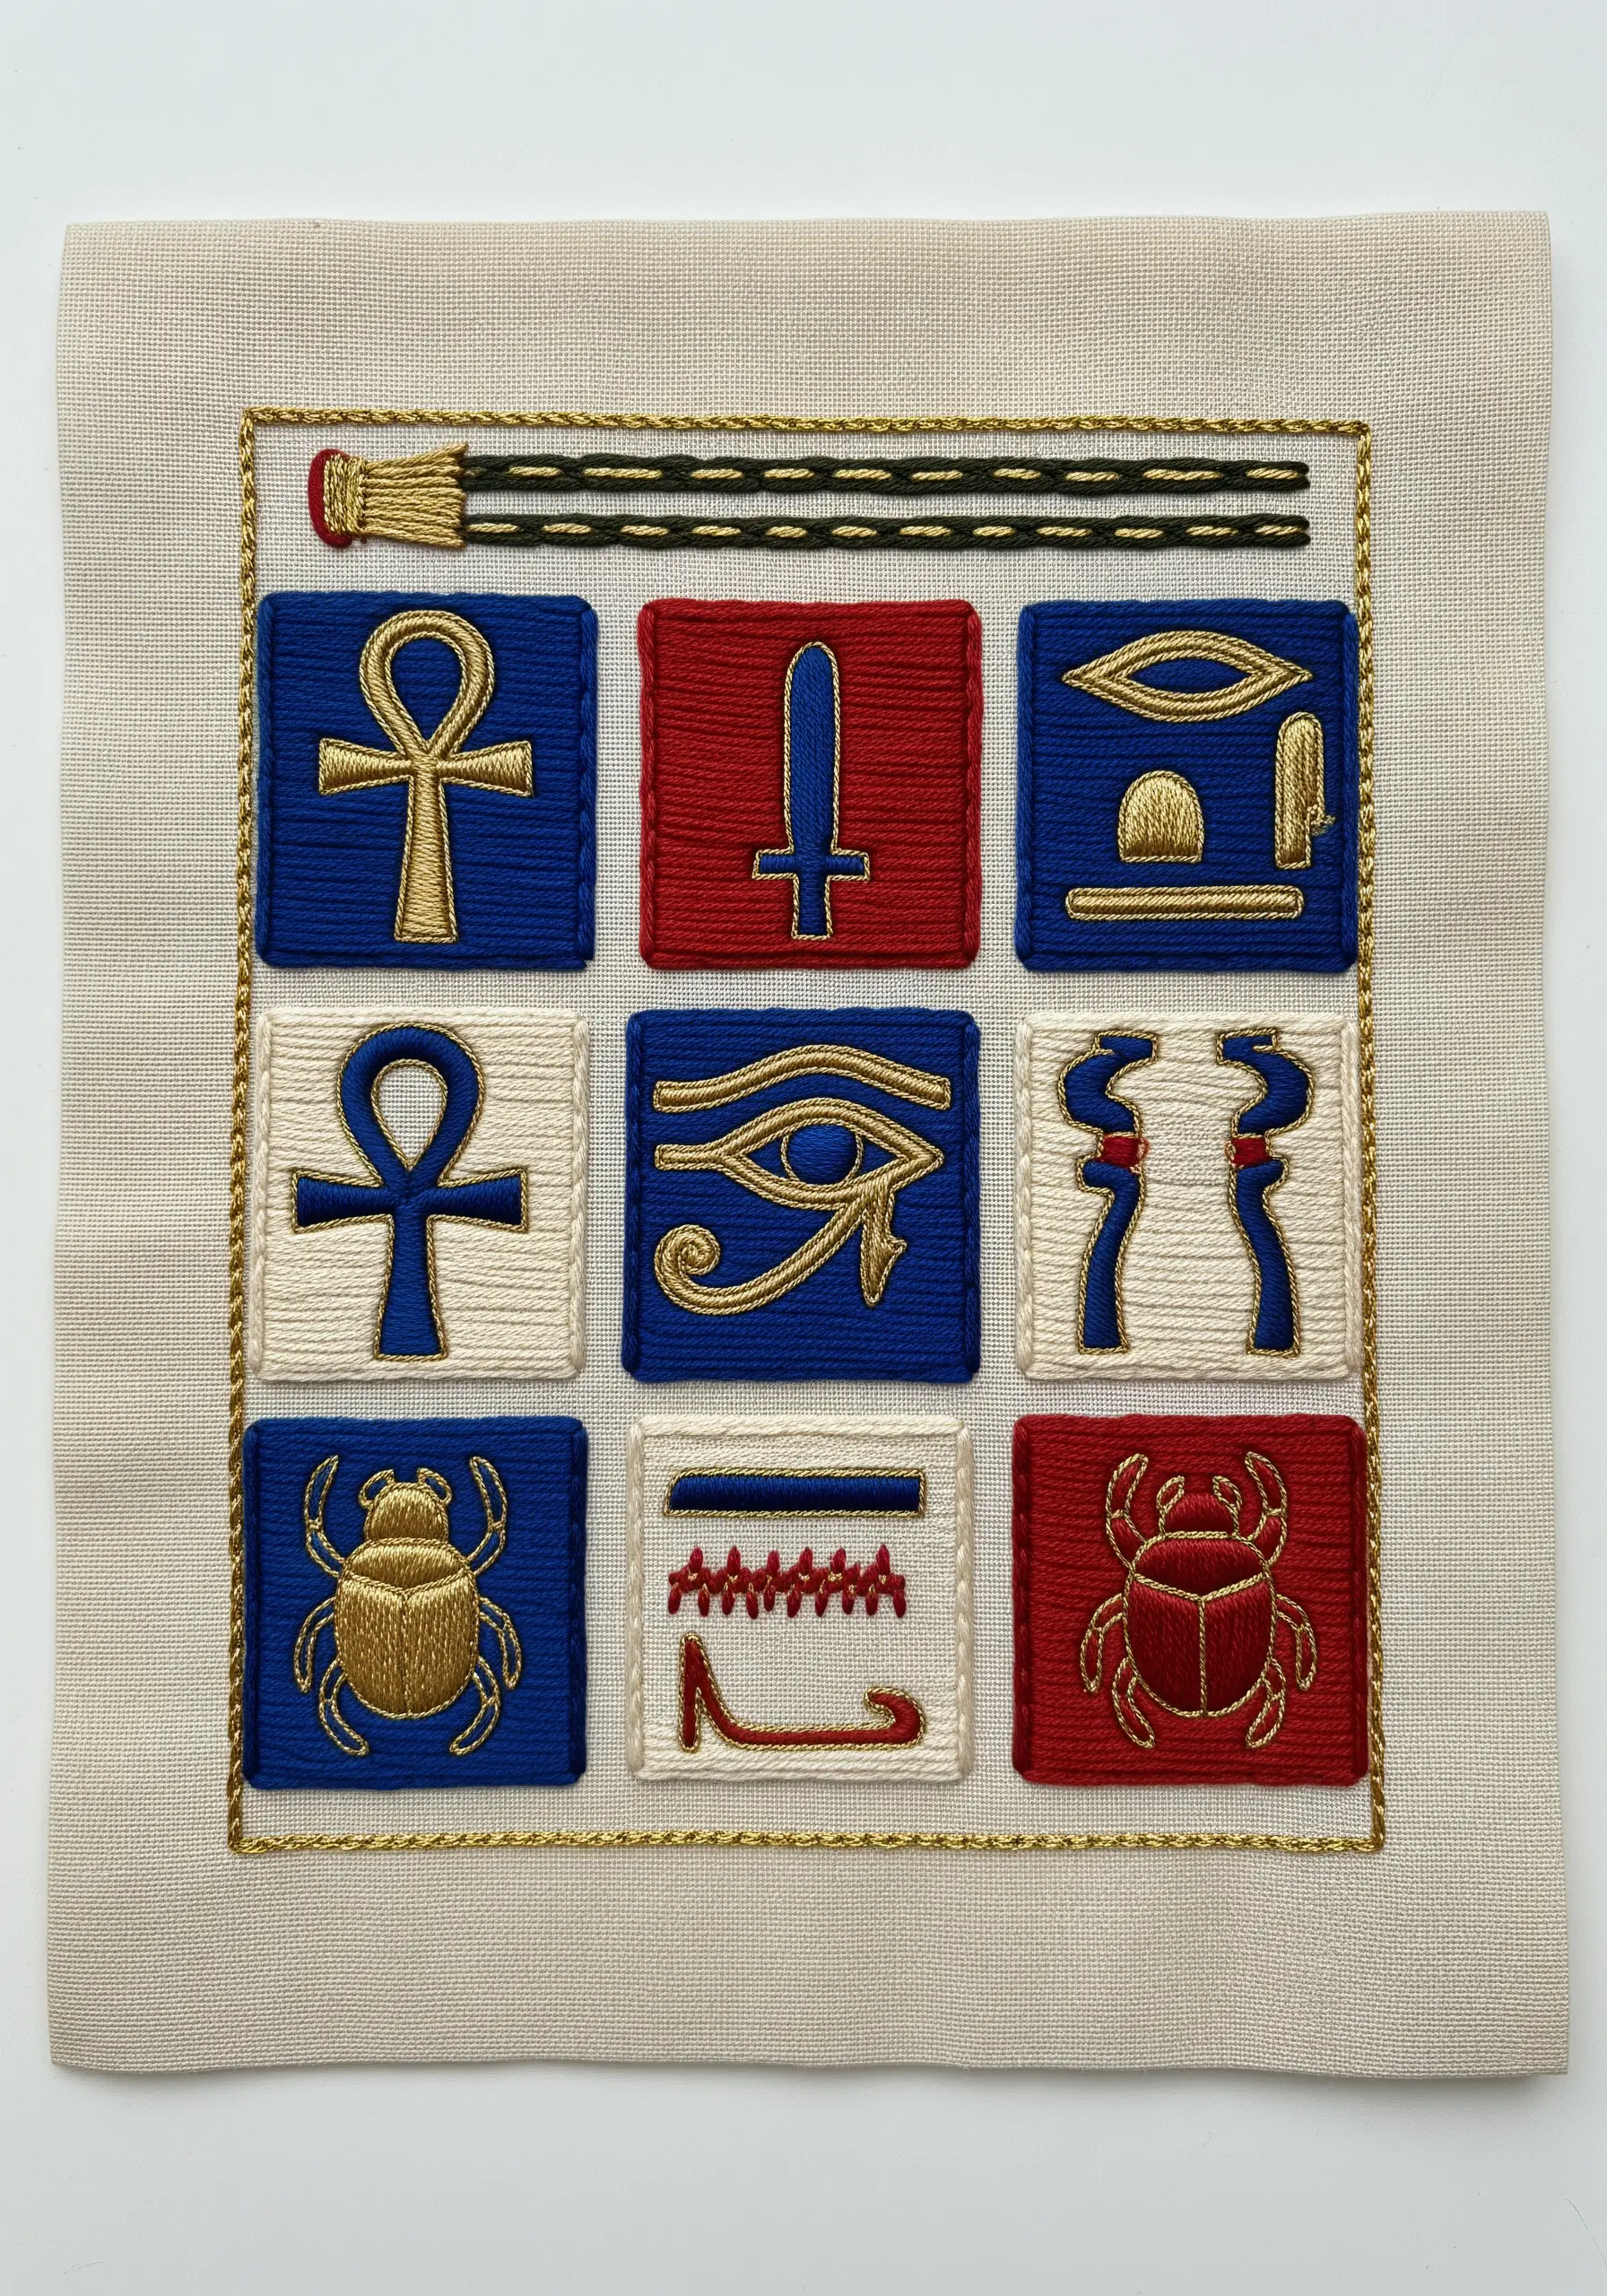
To give ancient Egyptian symbols the gravitas of carved stone reliefs, you need to lift them off the fabric surface.
Use a padded satin stitch. Before stitching the main symbol in your gold or colored thread, create a padded base using several layers of small, underlying stitches (like split stitches) within the shape. Then, work your final satin stitch over this padding.
This technique gives the symbols a raised, 3D quality that creates beautiful shadows and highlights. Using a metallic gold thread enhances this effect, making the hieroglyphs look like inlaid treasures.
21. Nazca Lines: Couch Thick Yarn for Bold Graphics
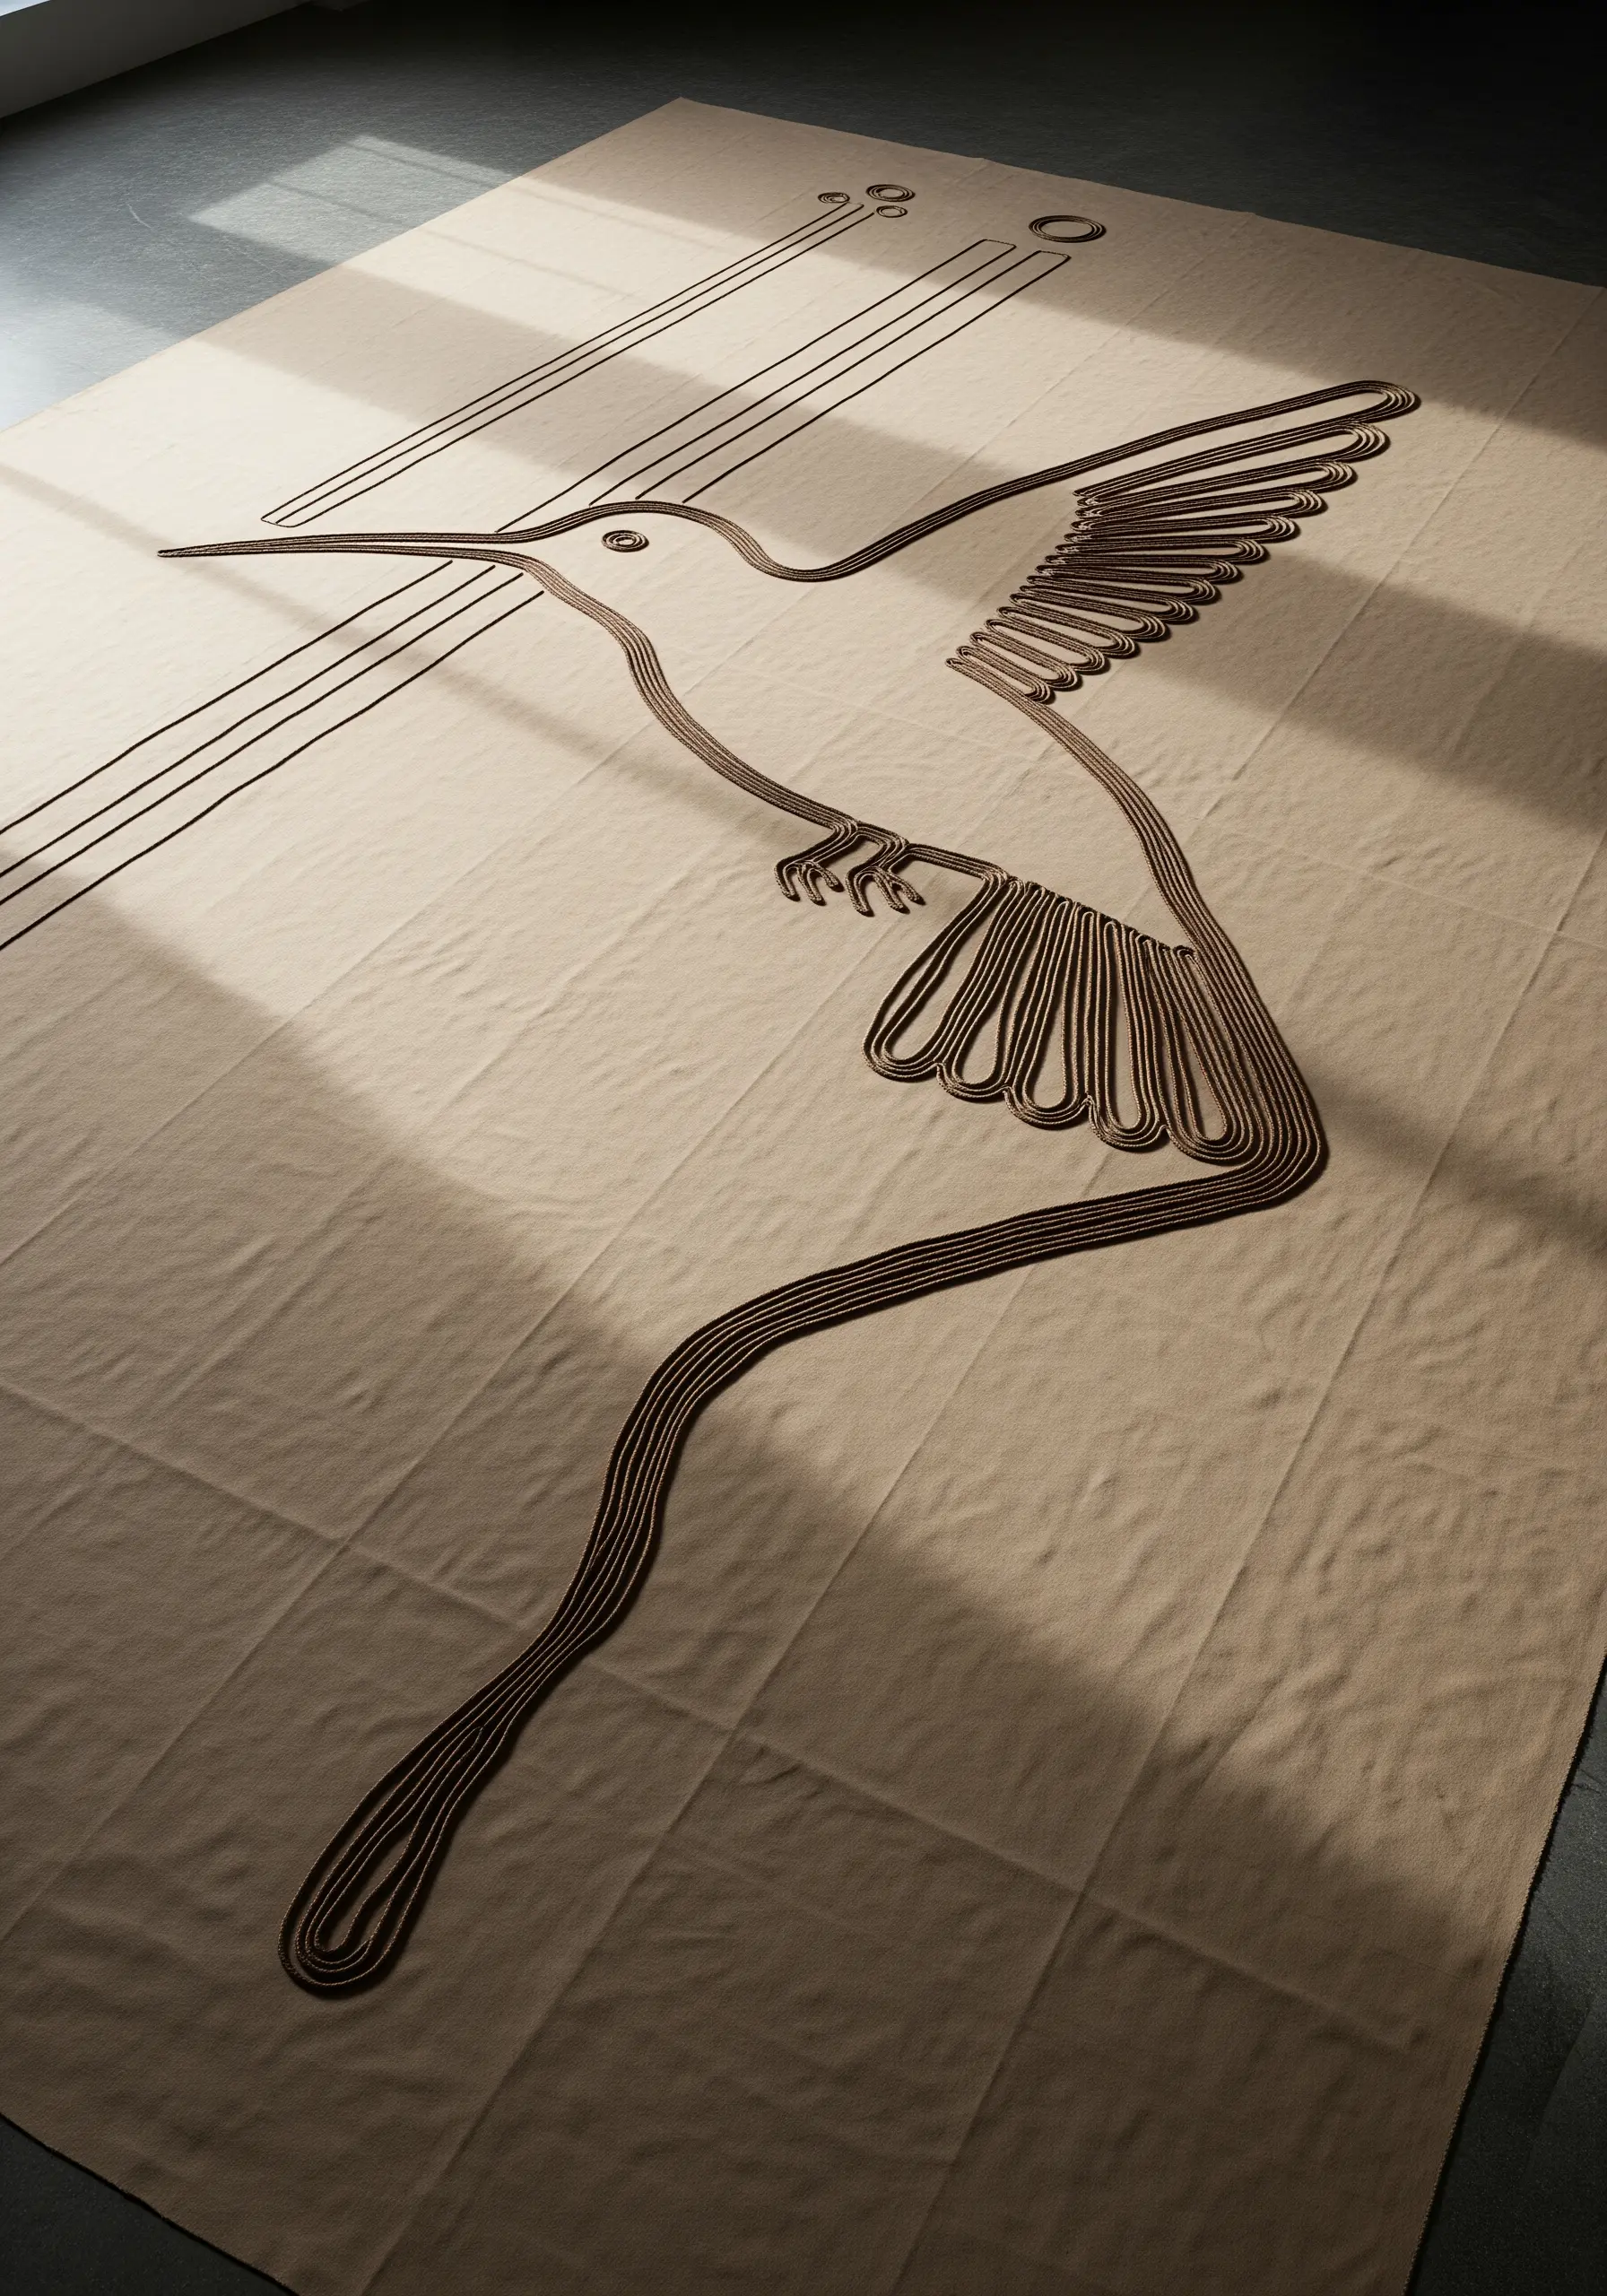
To translate the monumental scale of Peru’s Nazca lines into a textile piece, you need a line with significant visual weight.
Instead of embroidery floss, use a thick fiber like wool yarn or a soft cotton cord. Lay this yarn along your design line and use a standard, six-strand embroidery floss in a matching color to couch it onto your background fabric.
This method allows you to create large-scale, continuous line art that retains its bold, graphic power. It’s perfect for floor cloths, wall hangings, or other large statement pieces.
22. Native American Beadwork: Mimic Texture with Knots
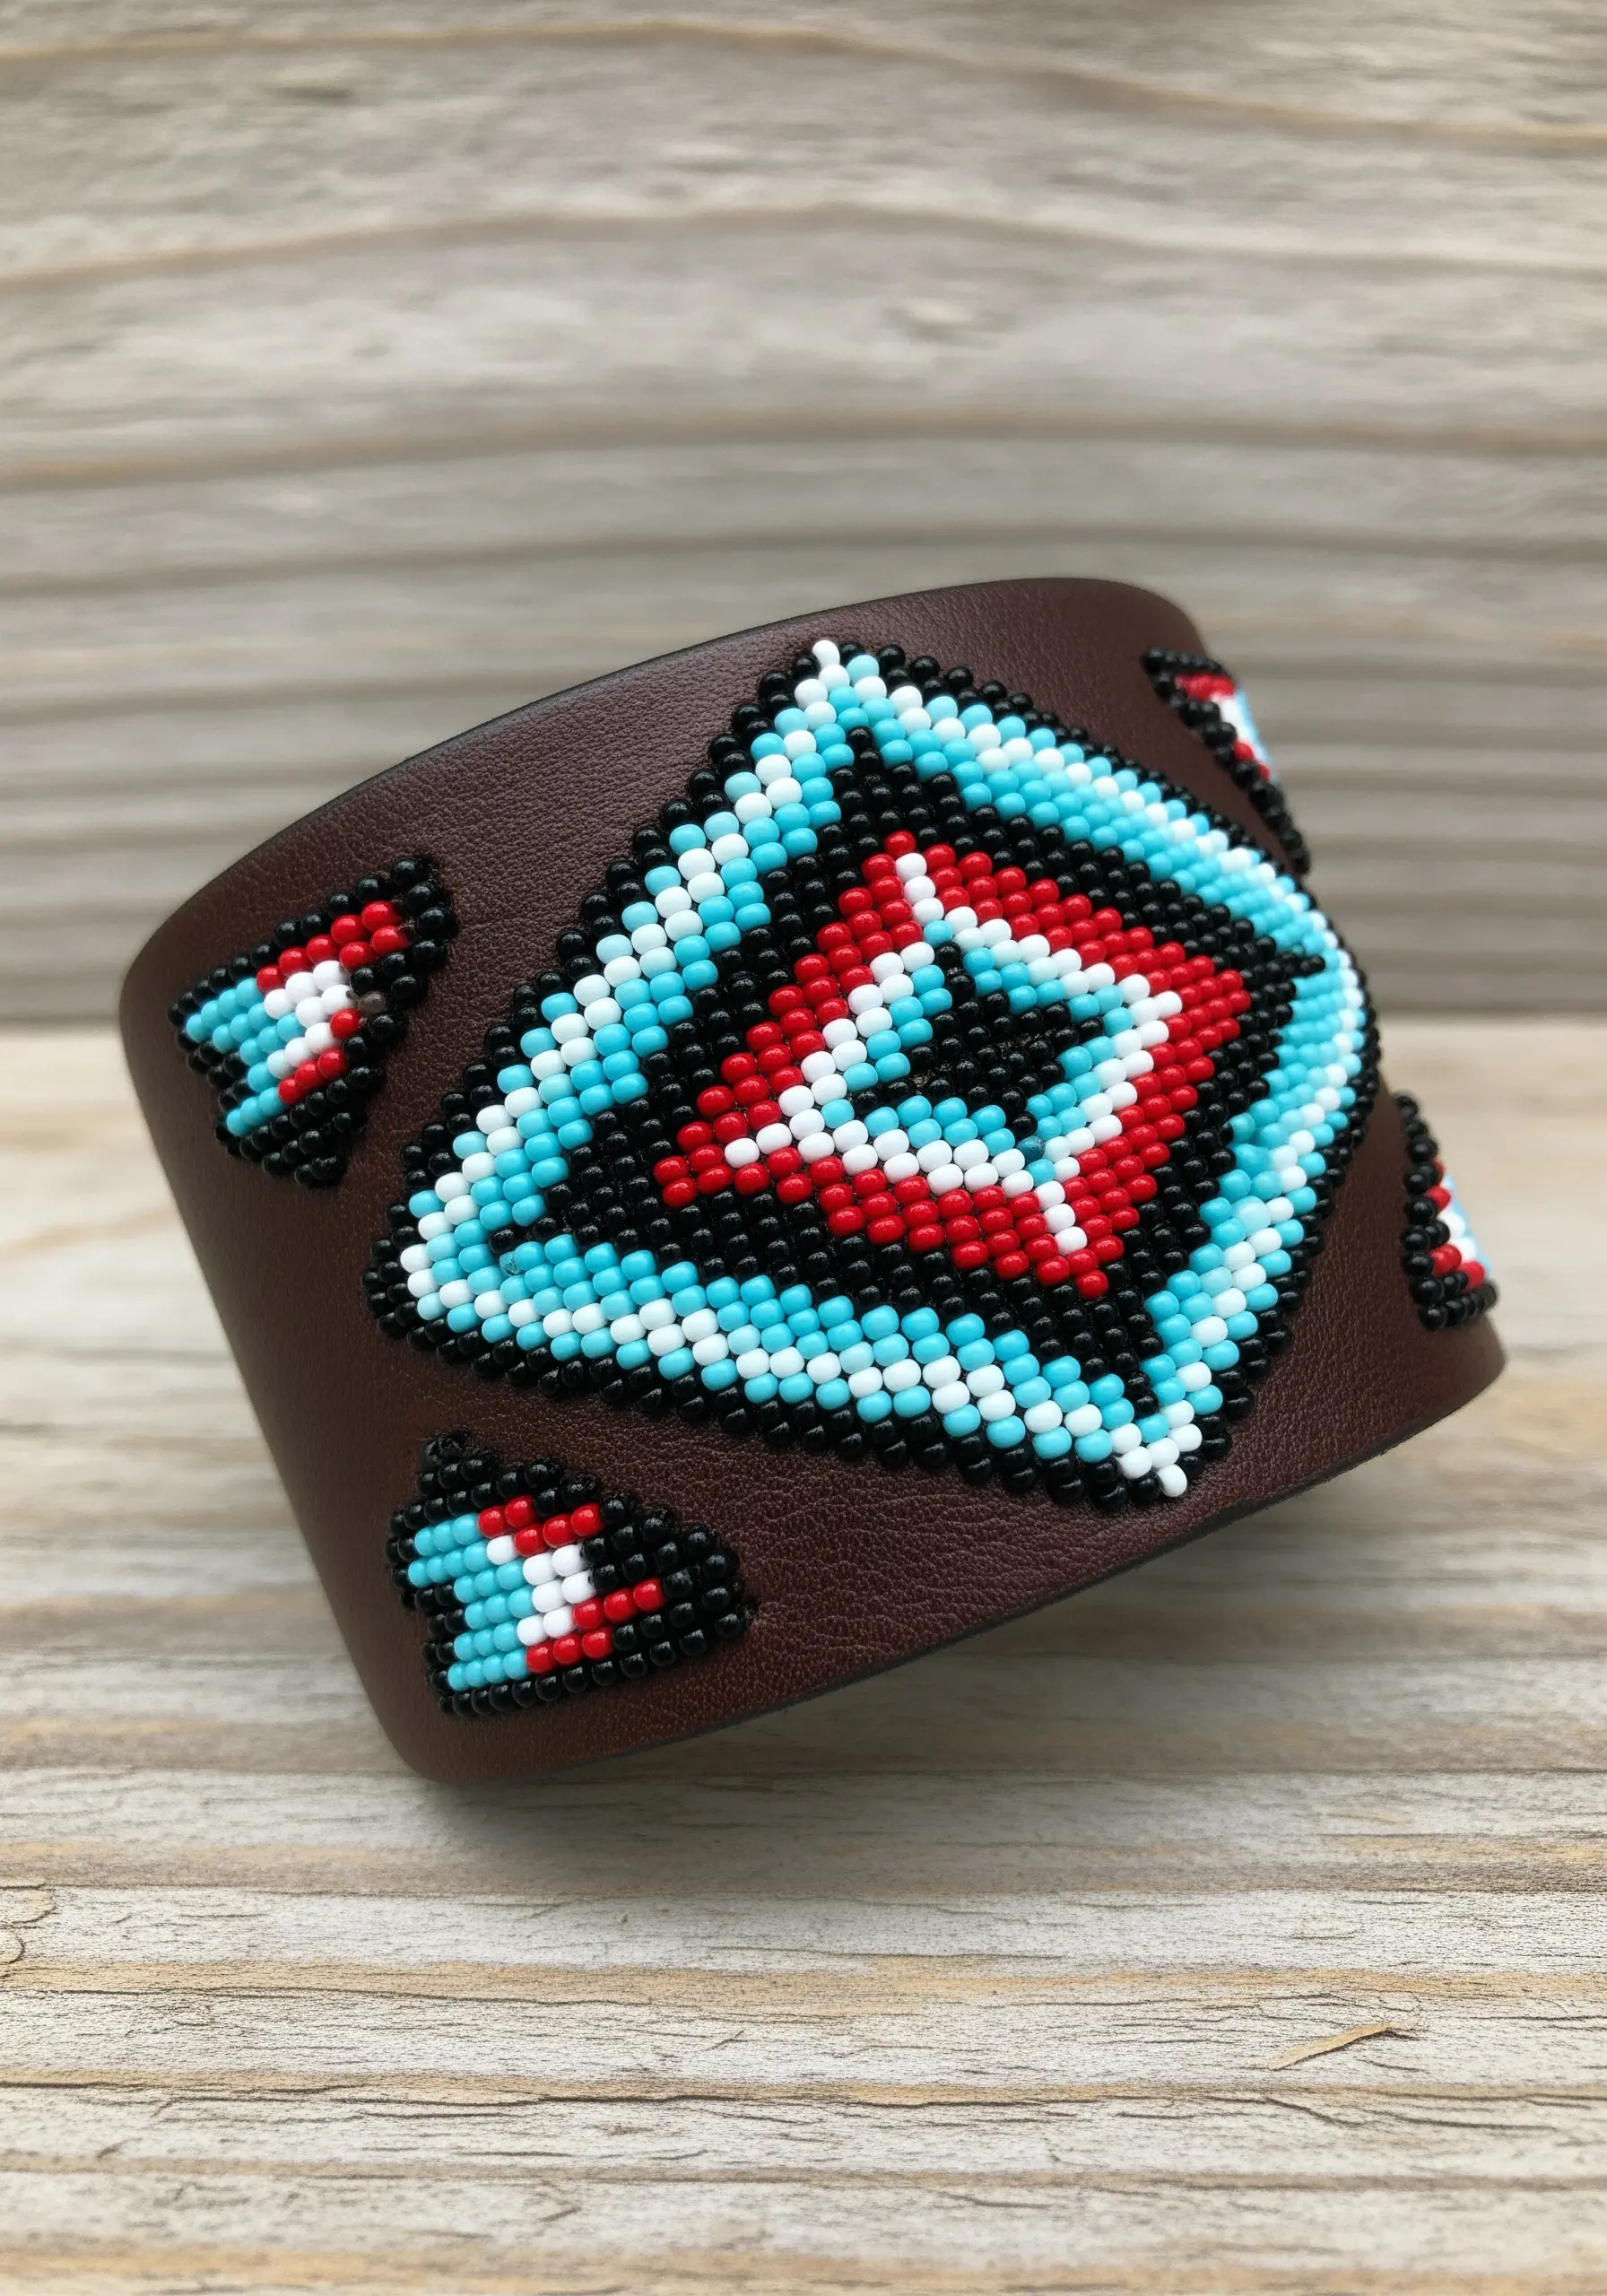
While true beadwork is its own art form, you can emulate its distinctive, pixelated texture using only thread.
Create a grid of tiny, tightly packed French knots. The key to a uniform, bead-like surface is consistency in knot size and placement. Work in neat rows, ensuring each knot touches the next to completely cover the fabric.
Alternatively, the four-sided stitch creates a tiny, raised square that perfectly mimics the look of a seed bead. Both techniques allow you to translate intricate, geometric beadwork patterns into pure embroidery.
23. Japanese Seigaiha Wave: Add Texture with Filler Stitches
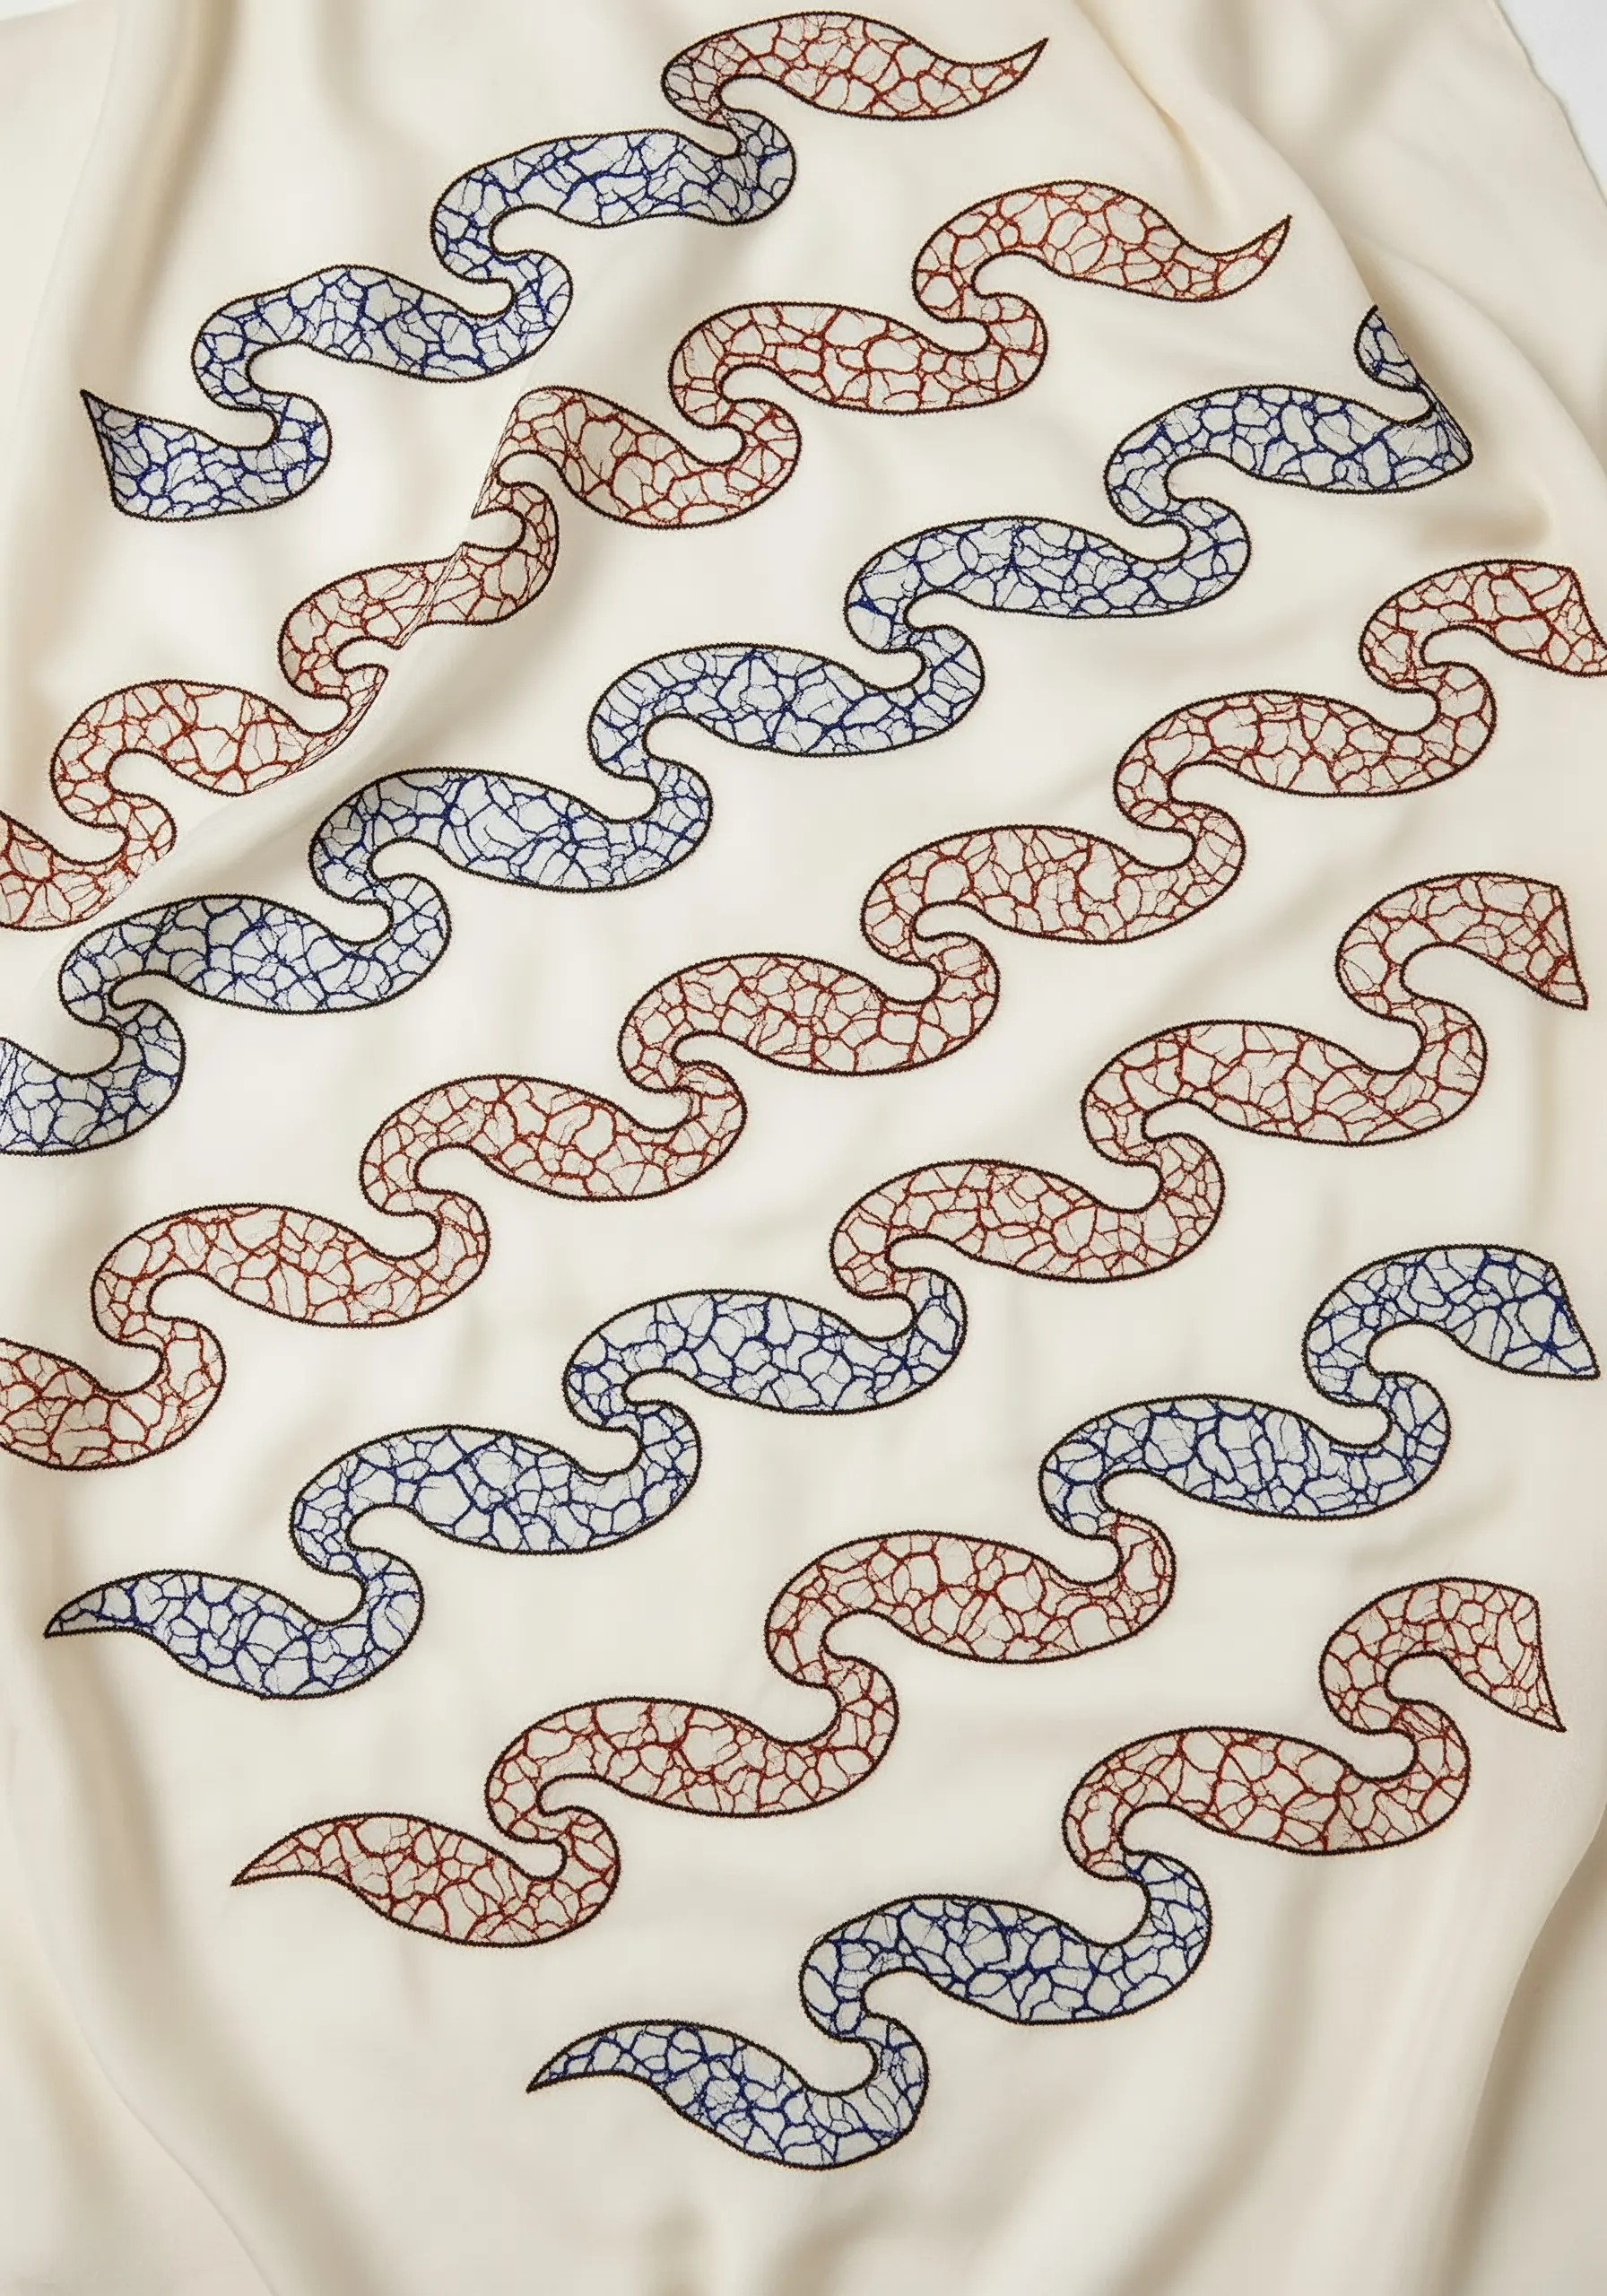
Elevate the simple, elegant Japanese wave pattern by introducing a secondary texture within the scalloped shapes.
First, stitch the clean outlines of the overlapping circles using a simple backstitch or stem stitch. Then, instead of leaving the centers empty, fill them with a contrasting texture. A field of tiny seed stitches or French knots creates a crackled, sand-like effect.
This combination of a smooth outline and a textured fill adds a layer of sophistication, transforming a classic pattern into a more dynamic and tactile piece of art.
24. Polish Wycinanki: Layer Felt and Thread
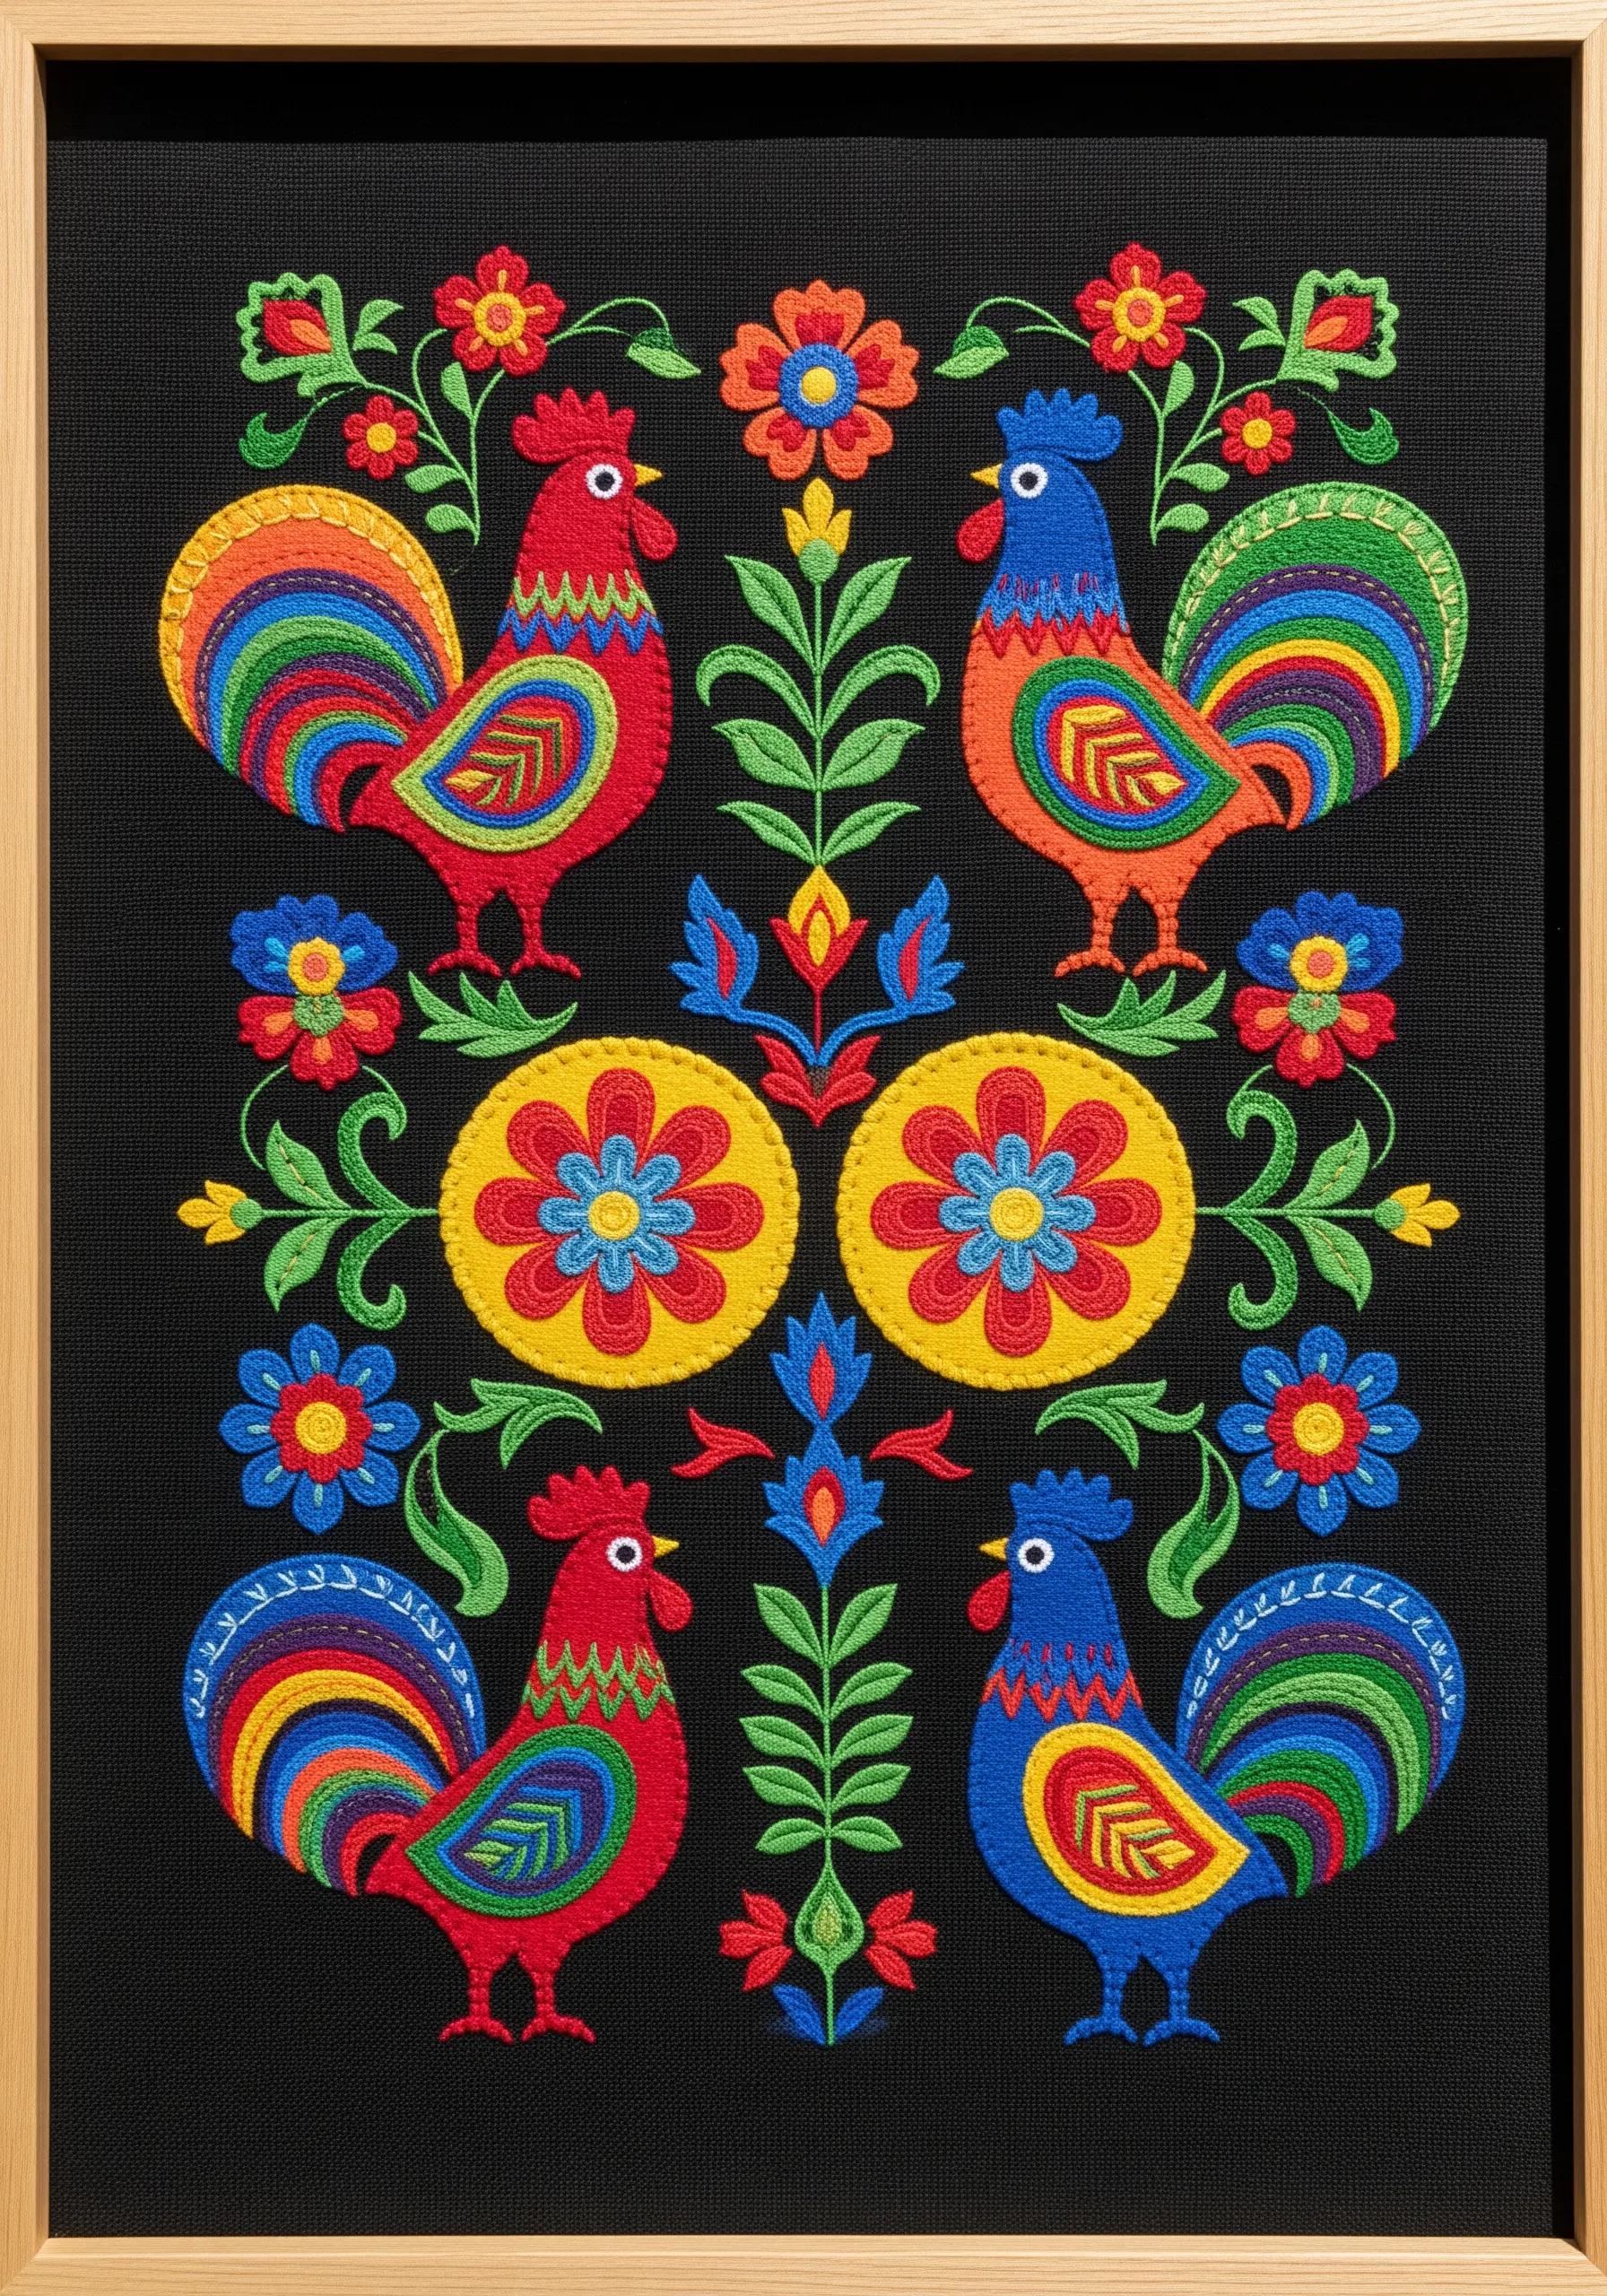
Capture the vibrant, layered spirit of Polish paper cut-outs (Wycinanki) by combining fabric appliqué with embroidery.
Cut your main shapes—the body of the rooster, the center of the flower—from brightly colored felt and stitch them onto your background fabric. Then, use embroidery to add the finer details and to create decorative borders around the felt pieces.
A dense buttonhole stitch around the edge of the felt not only secures it but also mimics the crisp, clean edge of cut paper. This mixed-media approach creates bold, graphic results with incredible dimension.
25. Byzantine Mosaic: Stitch with Light and Direction
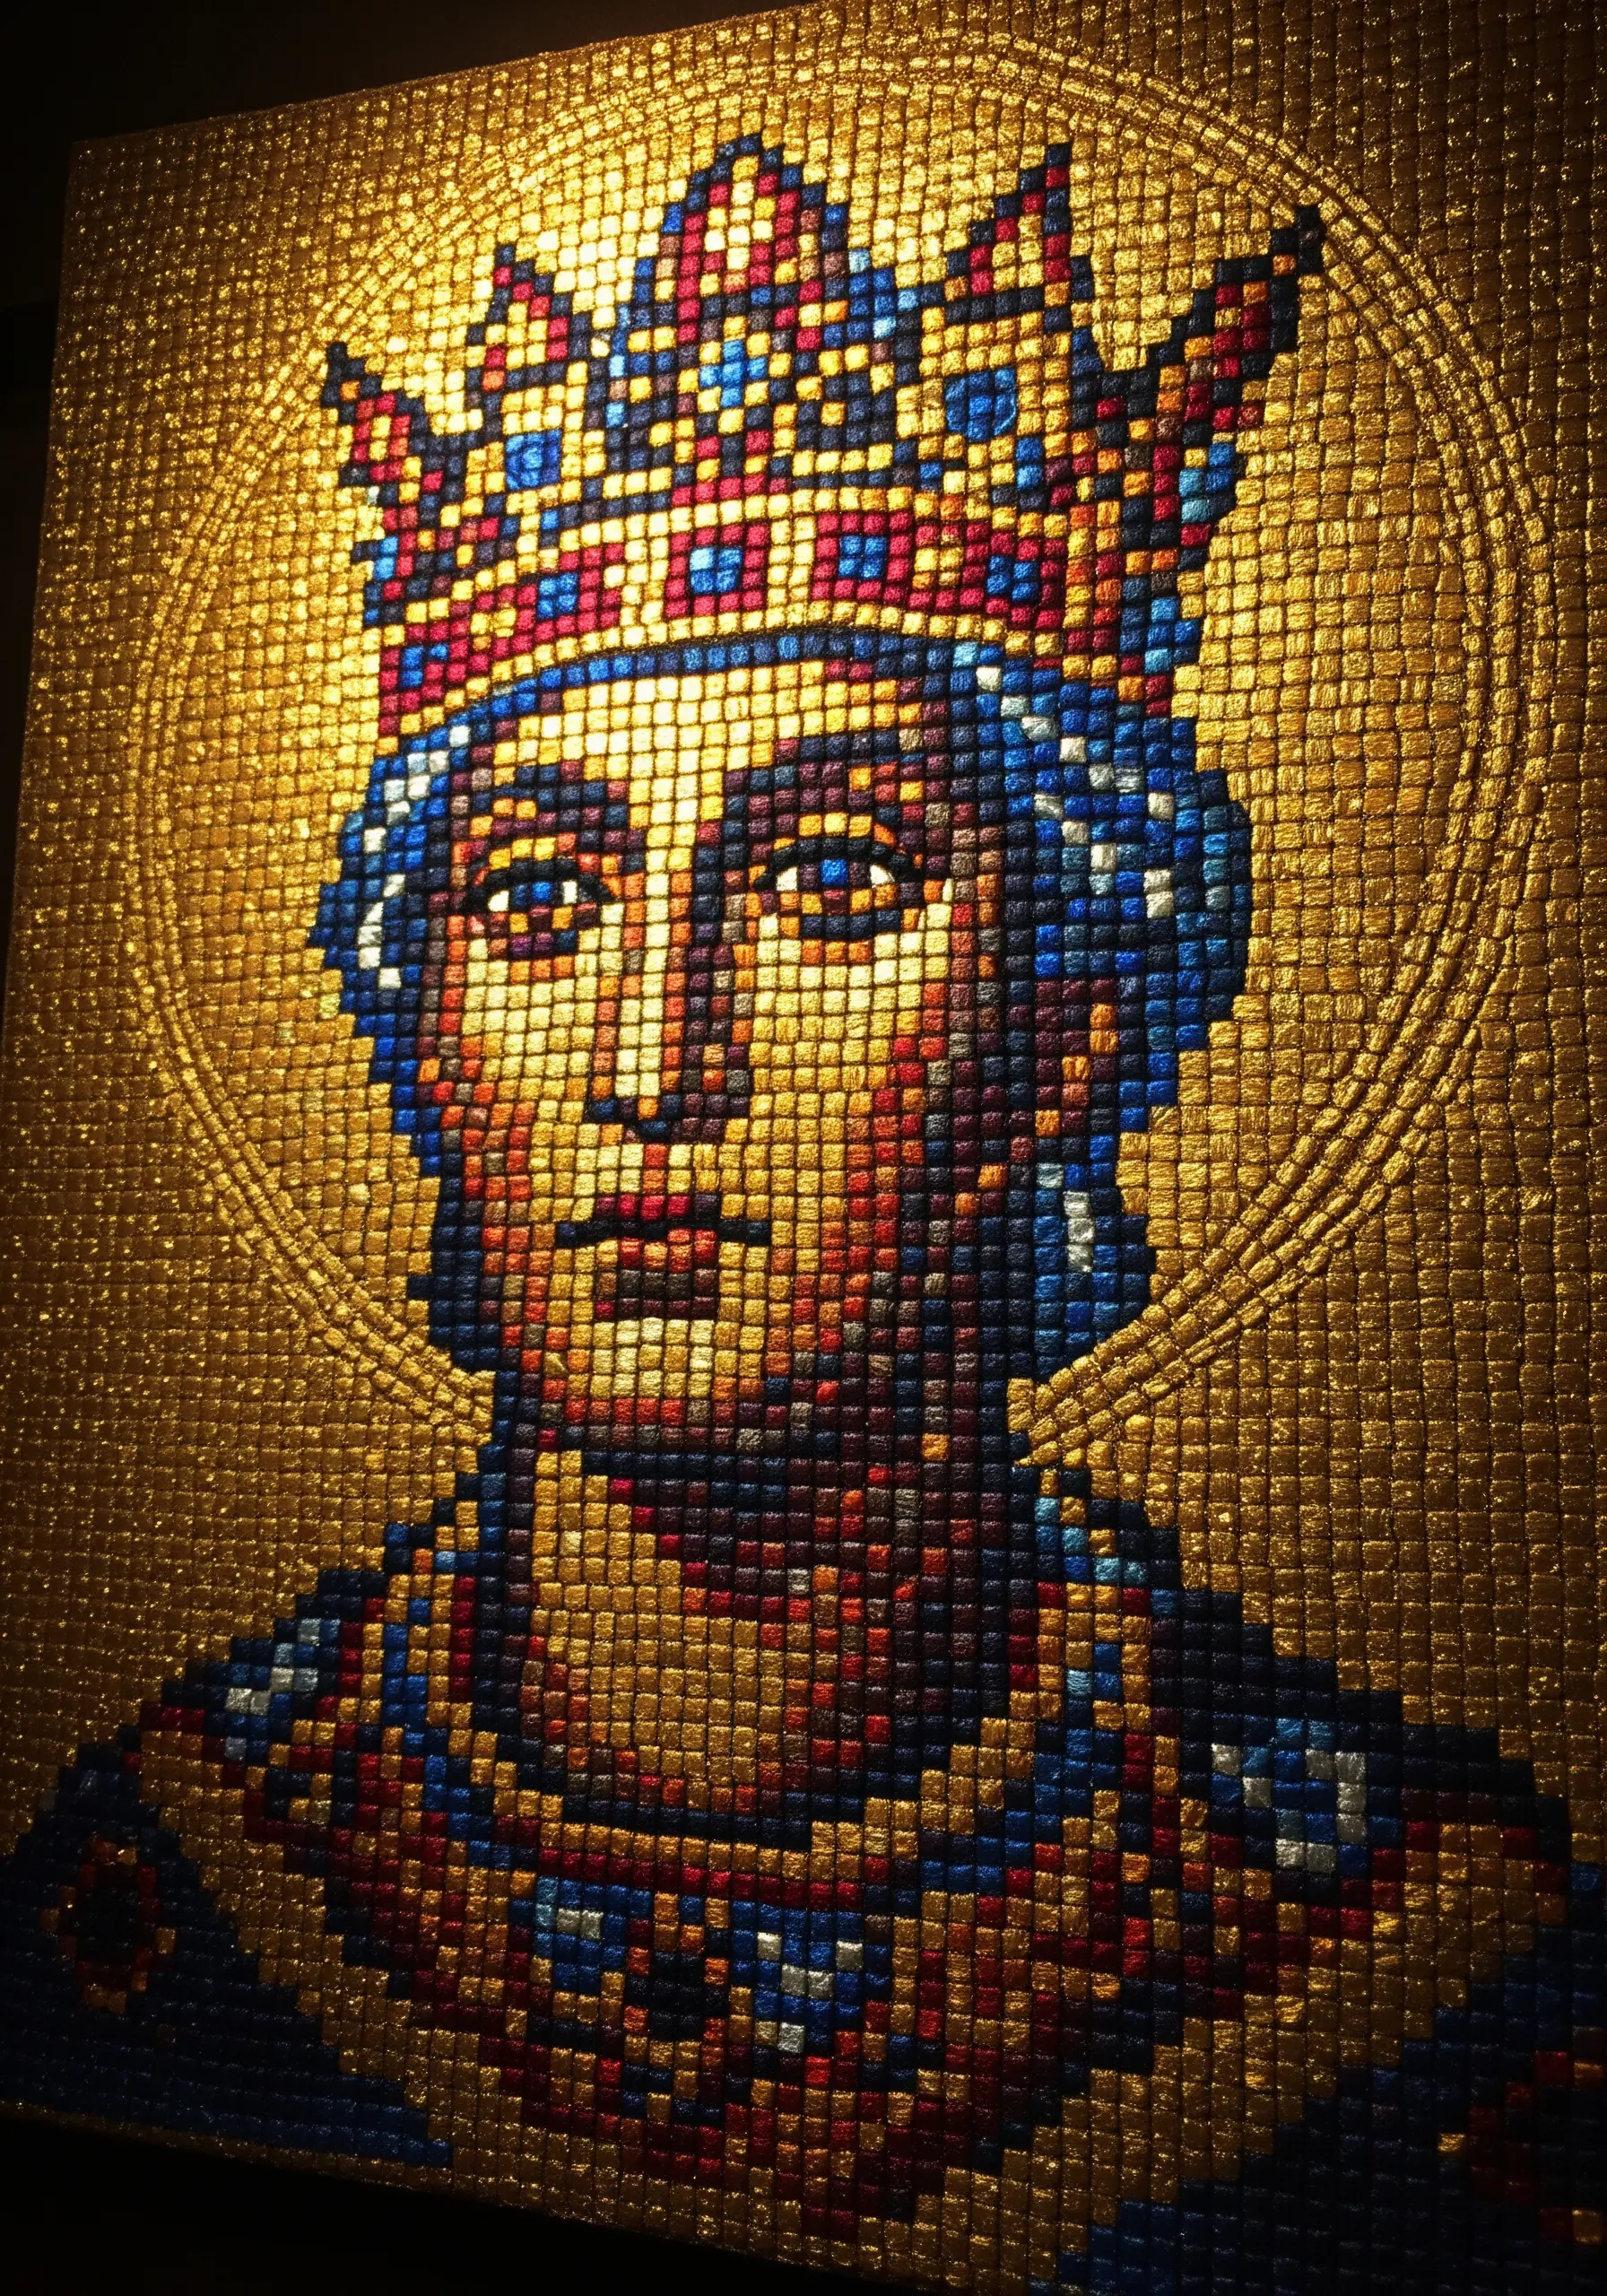
To recreate the shimmering, fragmented light of a Byzantine mosaic, think of each stitch as an individual tile (tessera).
Work your design in tiny blocks of satin stitch. Within each block, keep all the stitches parallel. But for the next block, change the direction of the stitches—for example, from vertical to horizontal, or from a 45-degree angle to a 135-degree angle.
Each block will catch and reflect the light differently, creating a dynamic, shimmering surface. Using a mix of matte cotton and lustrous silk or metallic threads will further enhance this stunning effect.
26. European Damask: Create Pattern with Sheen, Not Color
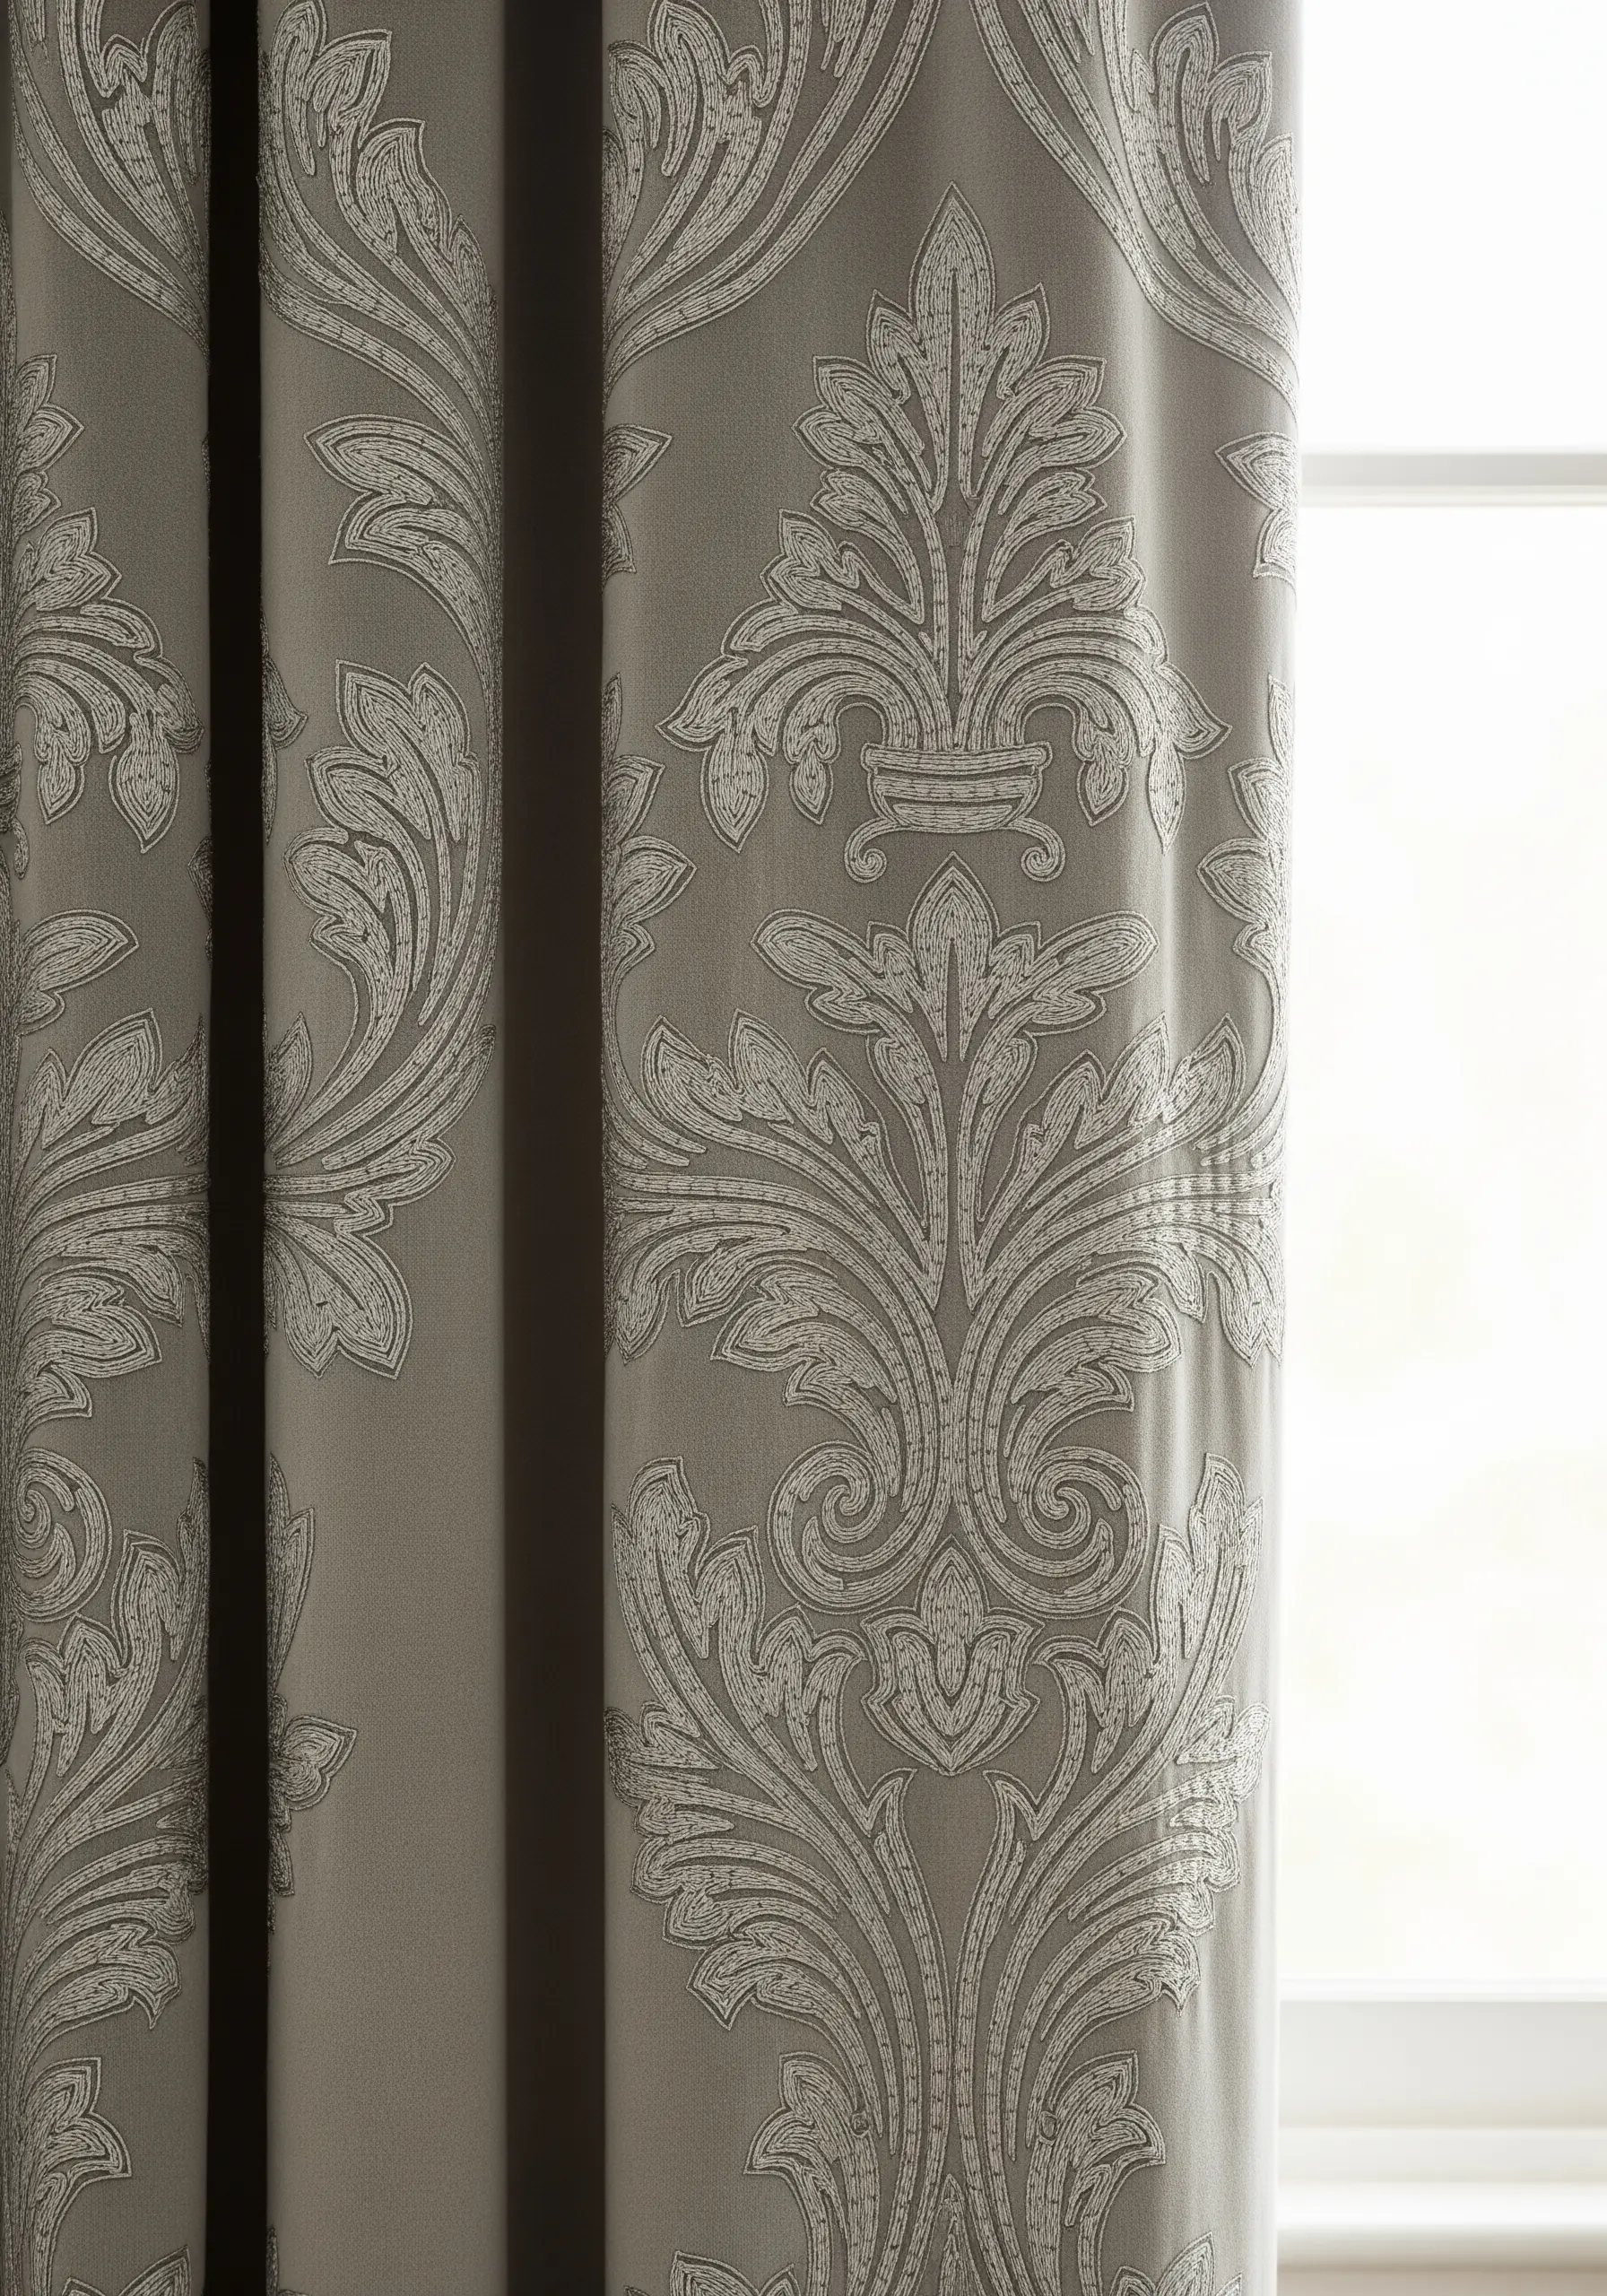
Achieve the subtle, elegant effect of woven Damask fabric by pairing threads with different finishes.
Choose two types of thread in the exact same color: one with a matte finish (like standard cotton floss) and one with a high sheen (like silk, rayon, or satin floss). Use the matte thread to stitch the background and the lustrous thread for the main floral or acanthus leaf motif.
The pattern will appear and disappear as the light hits the fabric, creating a quiet, luxurious effect that is defined by texture and light rather than by contrasting colors.
27. Gothic Rose Window: Stitch Bold ‘Lead’ Lines
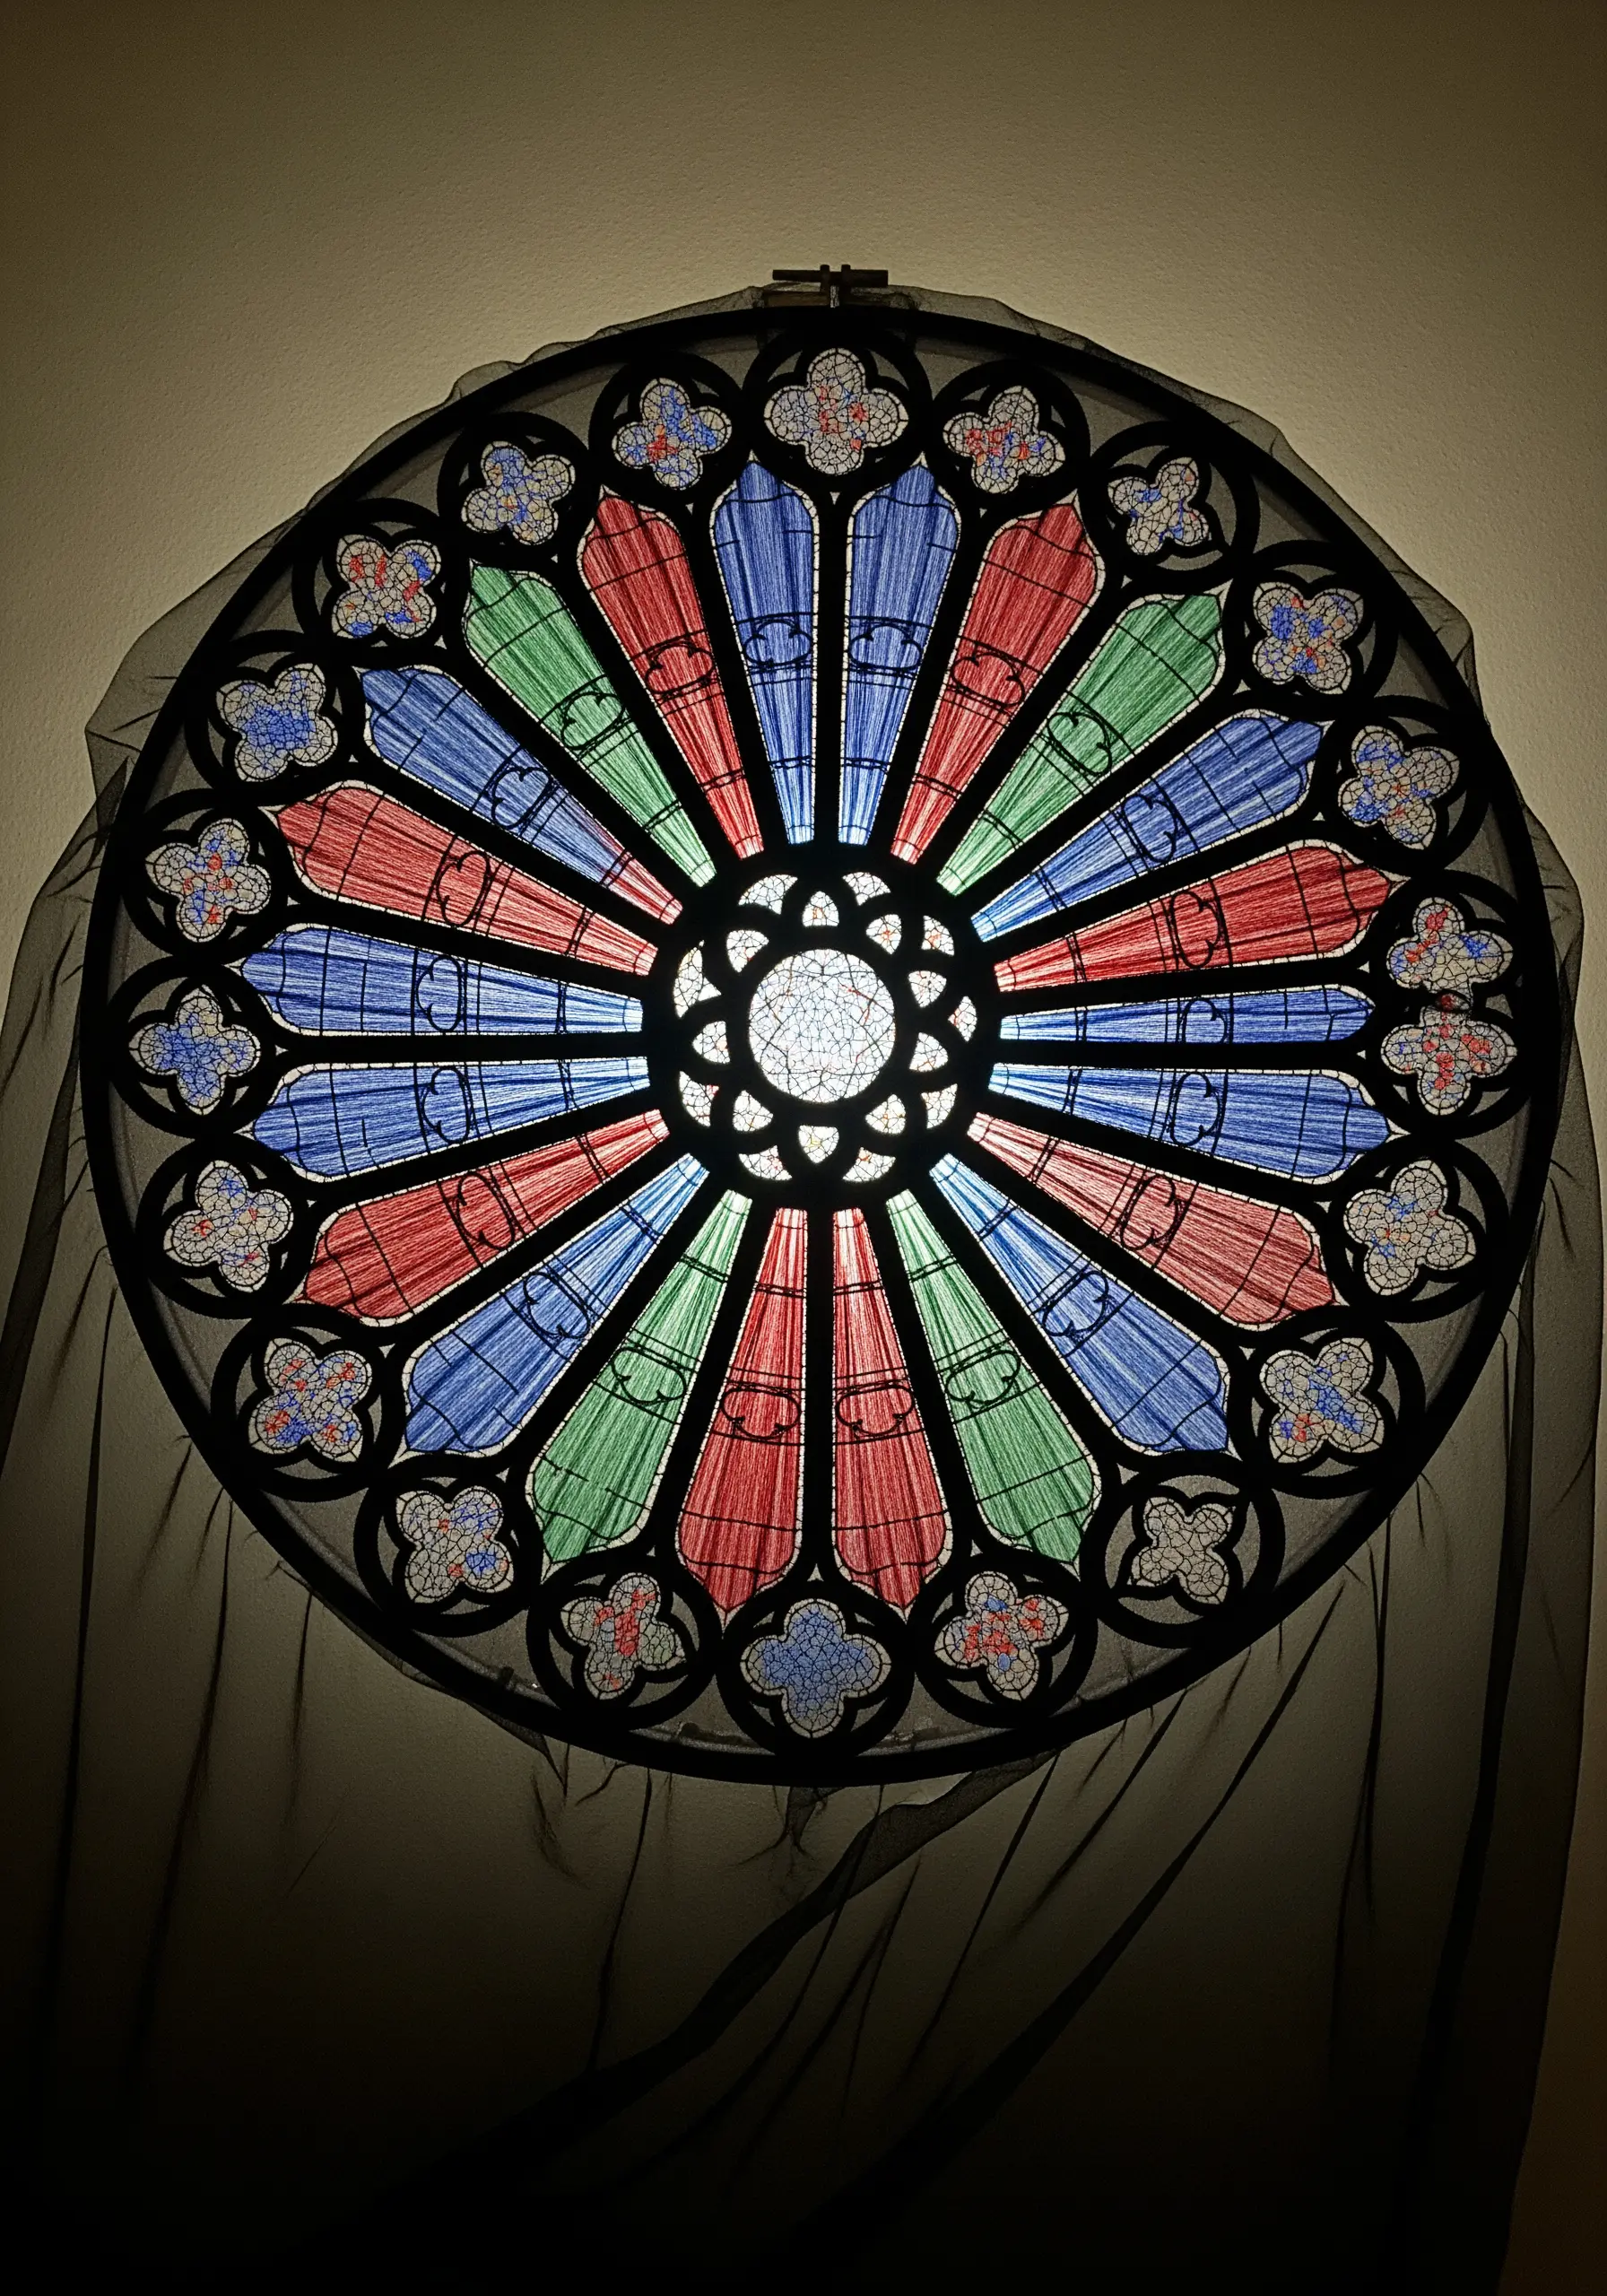
The power of a stained-glass window comes from the contrast between the dark lead lines and the luminous colored glass. Replicate this by giving your outlines dramatic presence.
Use a thick, raised stitch for all the black outlines. A heavy chain stitch using all six strands of floss, or a padded satin stitch, will create the bold, structural ‘leading’ your design needs.
For the colored ‘glass’ sections, fill them with a long-and-short stitch using silk floss. The high sheen of the silk will mimic the way light filters through the glass, making the colors glow against the strong black frame.
28. Haitian Drapo Vodou: Emulate Sequins with Knots
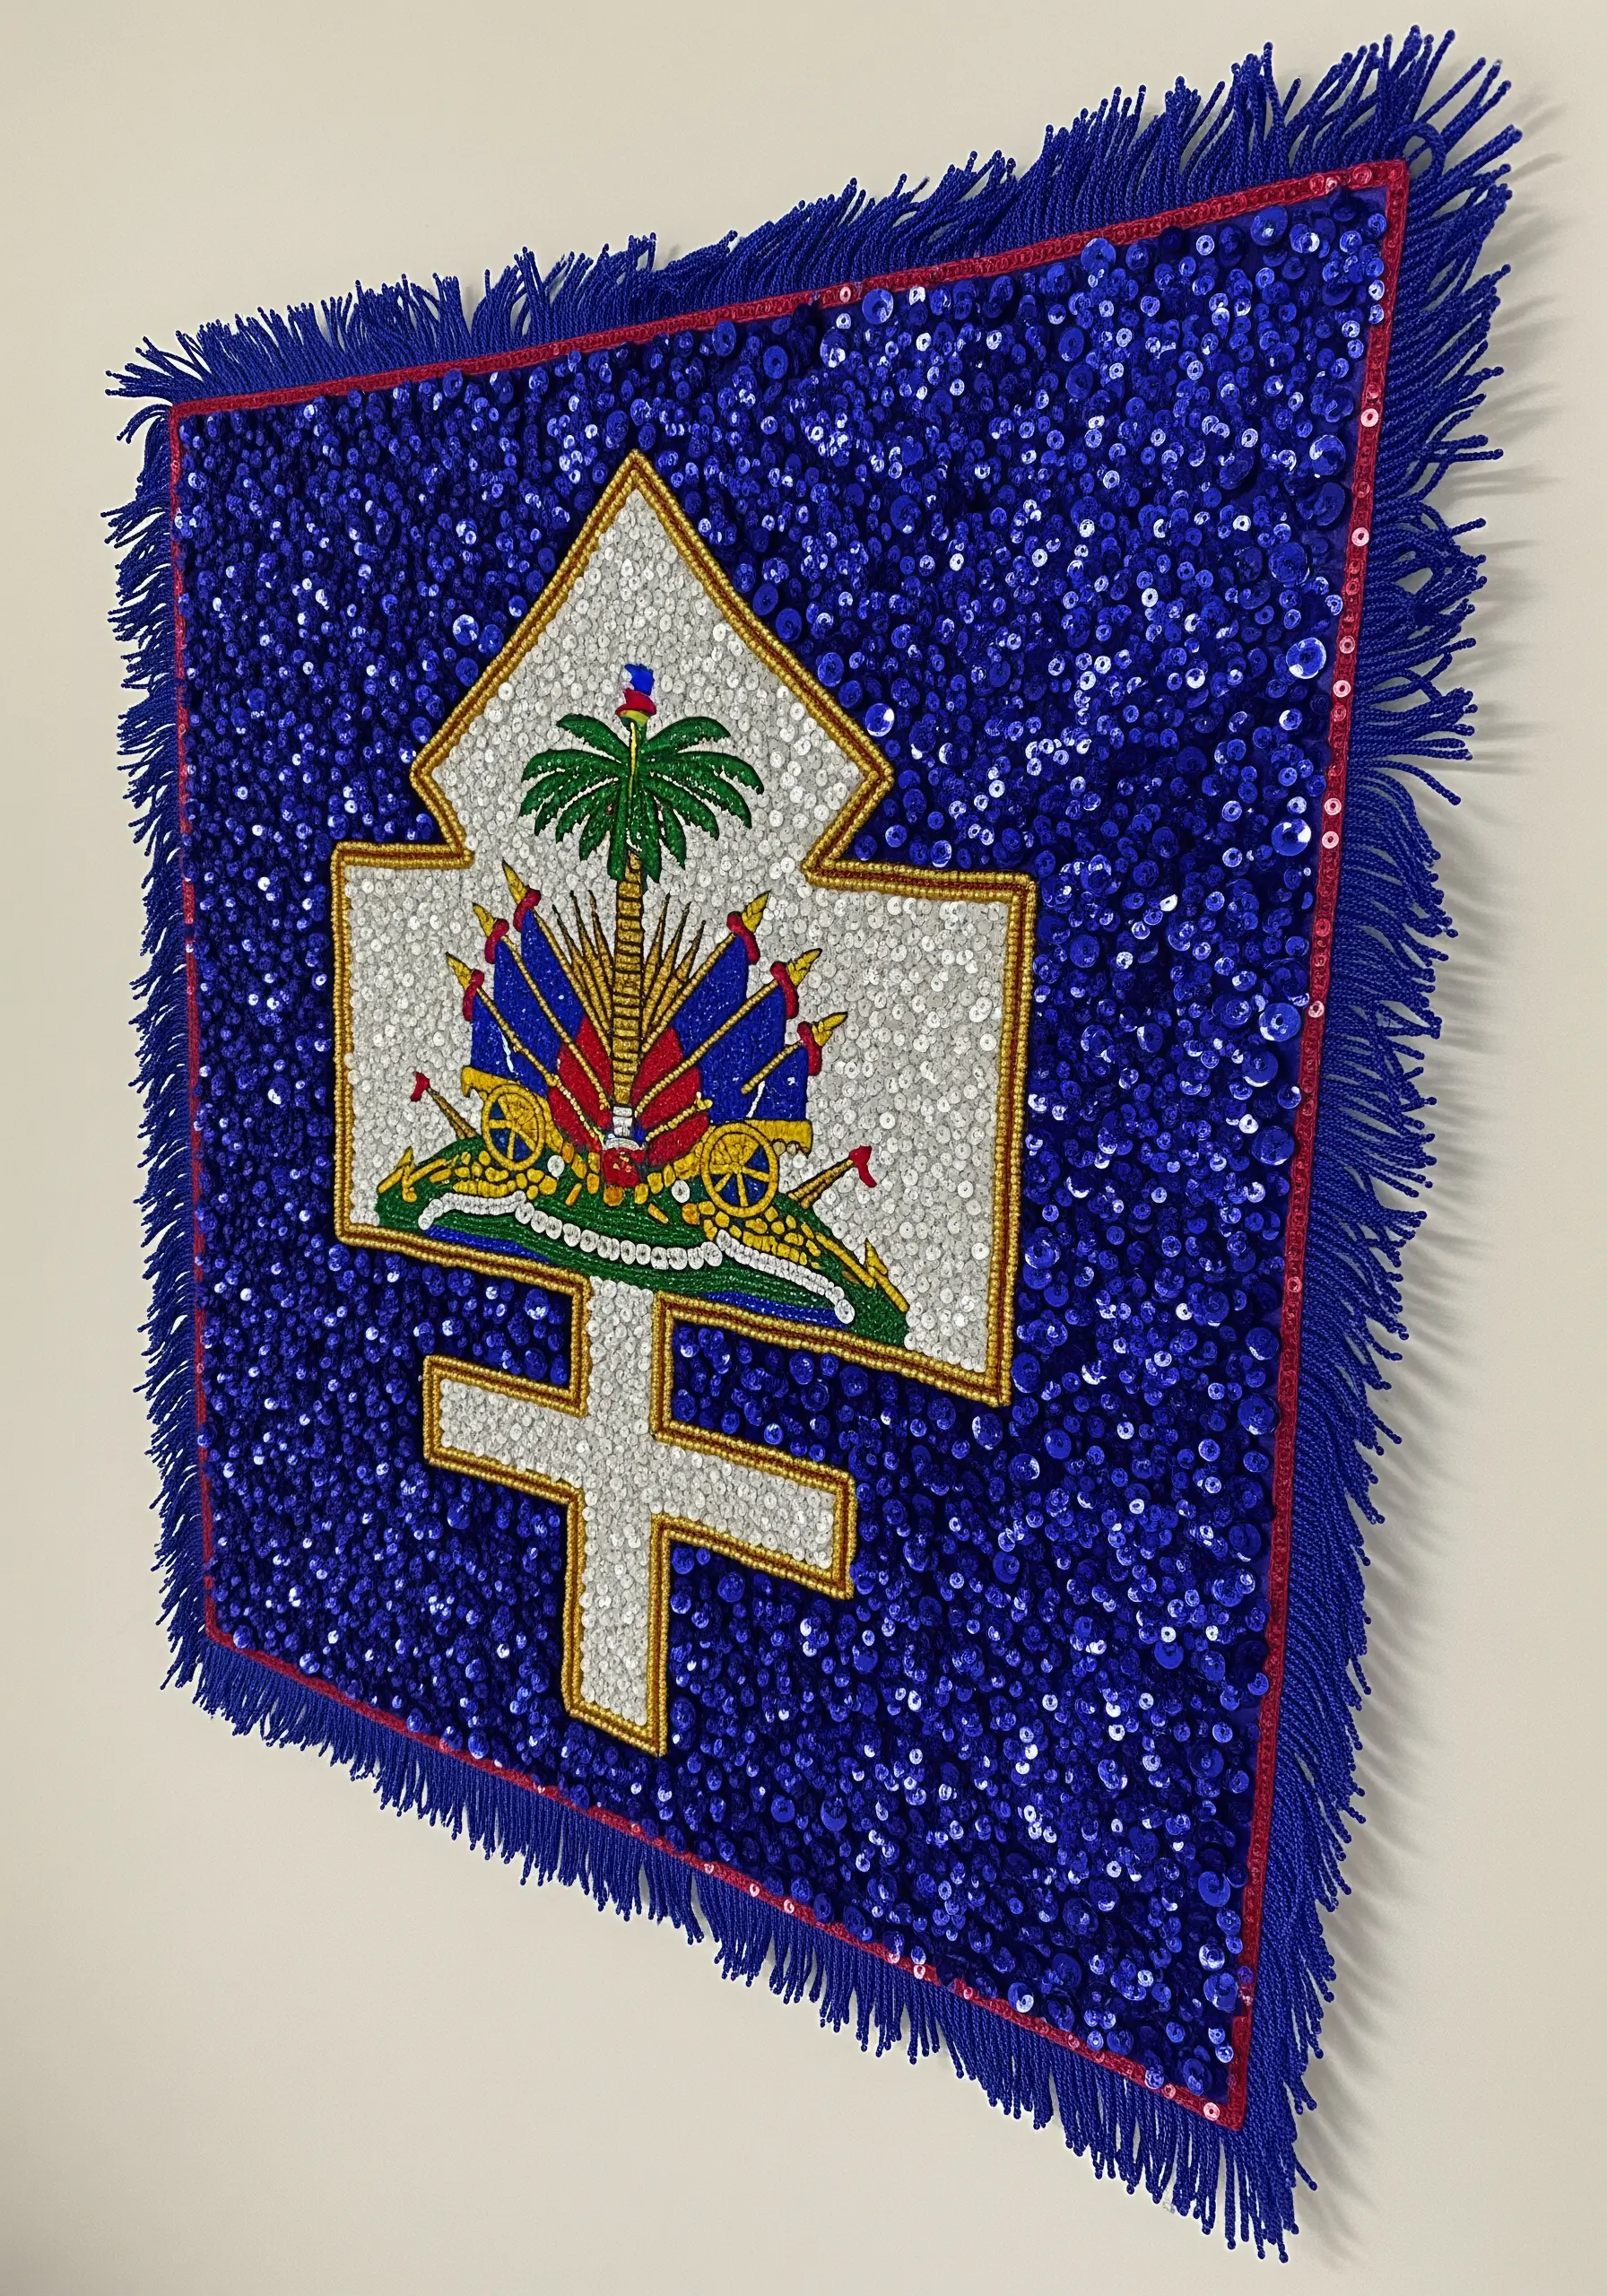
The dazzling, light-reflecting surface of a Haitian Vodou flag can be translated into thread by focusing on creating dense, light-catching texture.
Fill large background areas with tightly packed French knots using a shiny thread, such as rayon, silk, or a metallic blend. This creates a rich, bumpy texture that glitters in a way similar to sequins.
To define the central emblems, appliqué the main shapes using a contrasting fabric (like a white or gold satin) and then outline them with a heavy, couched cord to make them stand out from the textured background.
29. Thai Temple Murals: Master the Art of the Fine Outline
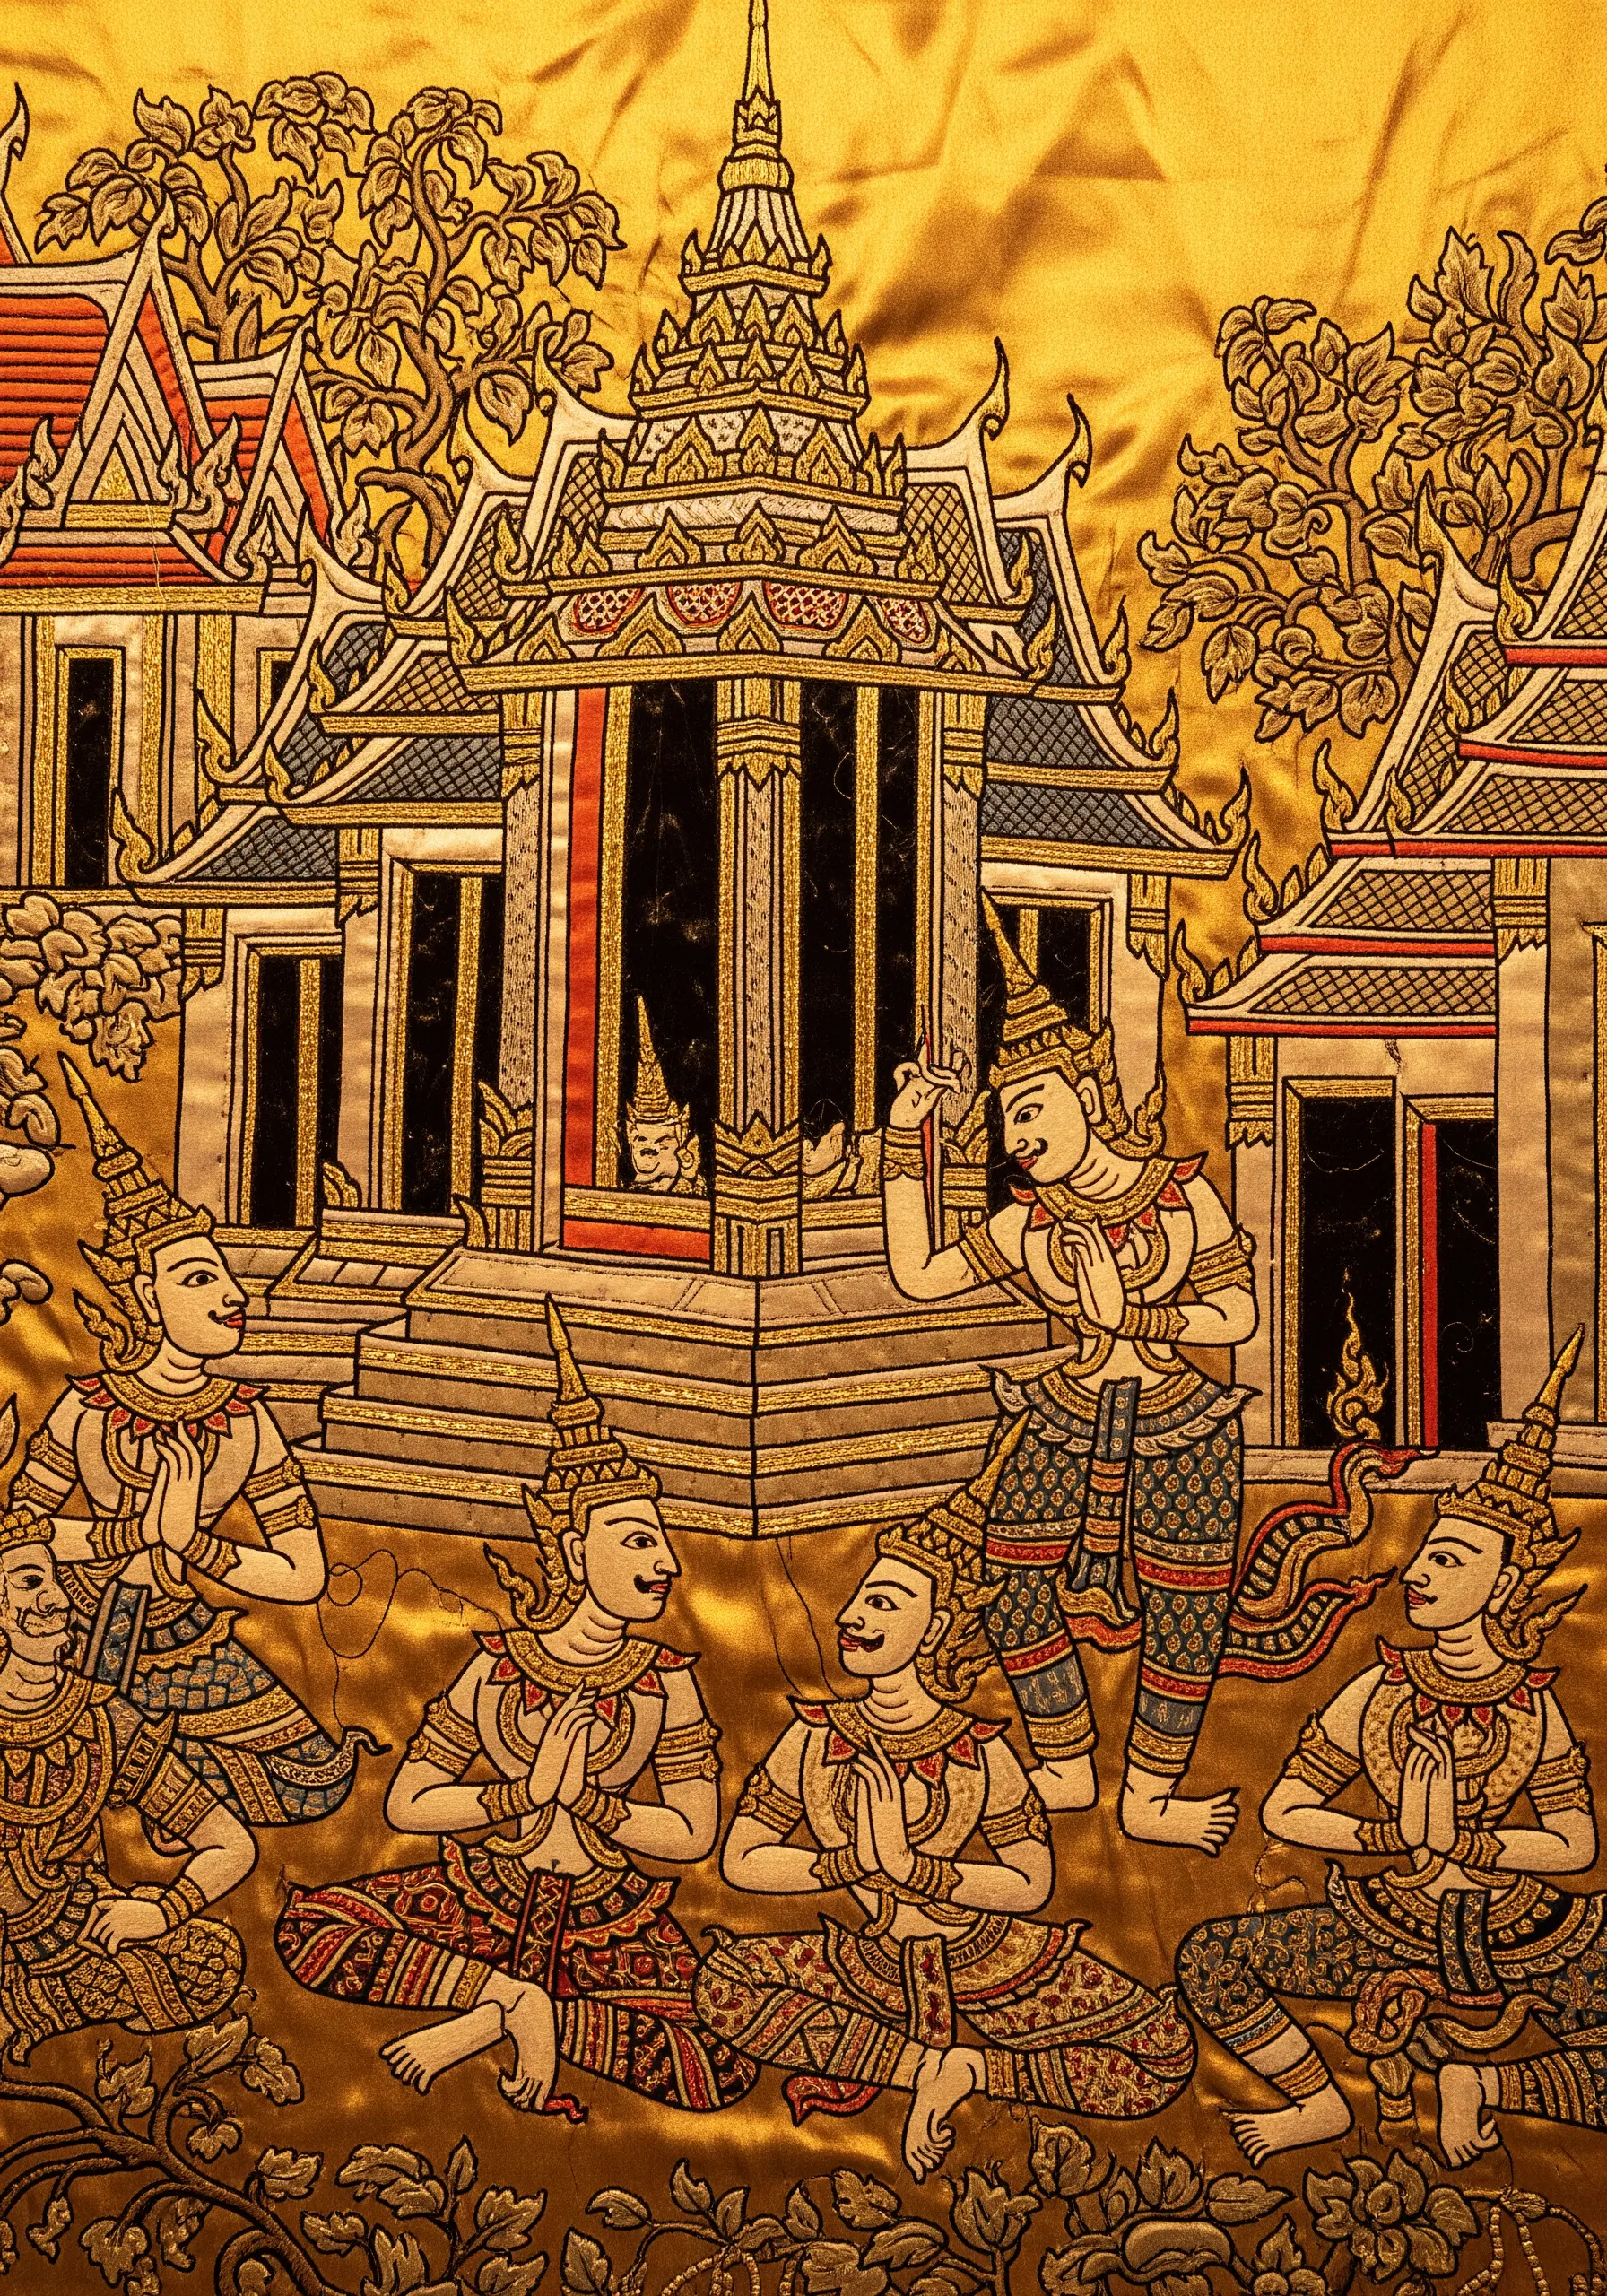
The intricate narrative scenes in Thai art are defined by their exquisitely fine, calligraphic outlines. The key to this look is precision and thread choice.
Use only a single strand of black or dark brown silk thread for all your linework. A split stitch, where the needle comes up through the middle of the previous stitch, will create the sharpest and smoothest continuous line possible.
After you’ve established this delicate framework, you can fill the shapes with color. This ‘outline first’ approach ensures your figures and architectural elements have the crisp, graphic quality that defines the style.


