

Sometimes the most profound upgrade to your embroidery practice isn’t a new pattern, but a new way of seeing. You look at a plain table runner, a simple tea towel, or a pair of curtains and you see not just fabric, but a canvas waiting for a frame. A floral border is more than decoration; it’s a statement of intent. It says, ‘This space, this object, is special’.
But how do you create a border that feels modern, personal, and polished, rather than fussy or dated? The secret lies in the details—the way you blend two shades of thread to create a petal’s shadow, the choice to use a textural French knot instead of a flat seed stitch, or the confidence to leave empty space in your design.
Here, you’ll find techniques that offer visible, tangible improvements. We’ll move beyond just stitches and explore how composition, texture, and color theory can elevate your work. This is about giving you the tools to transform everyday textiles into pieces of quiet, personal artistry.
1. Create a Lavender Frame with Dimensional Stitches

To give your lavender sprigs a lifelike texture, use French knots for the purple blossoms.
Vary the tightness and number of wraps around your needle for each knot—one wrap for smaller buds at the tip and two or three for fuller blooms at the base.
For the delicate greenery, use fern stitch instead of a simple backstitch.
This stitch creates a beautiful, feathery effect that mimics the plant’s natural structure, adding movement and realism to your table runner.
2. Stitch Cascading Wisteria on Sheer Curtains
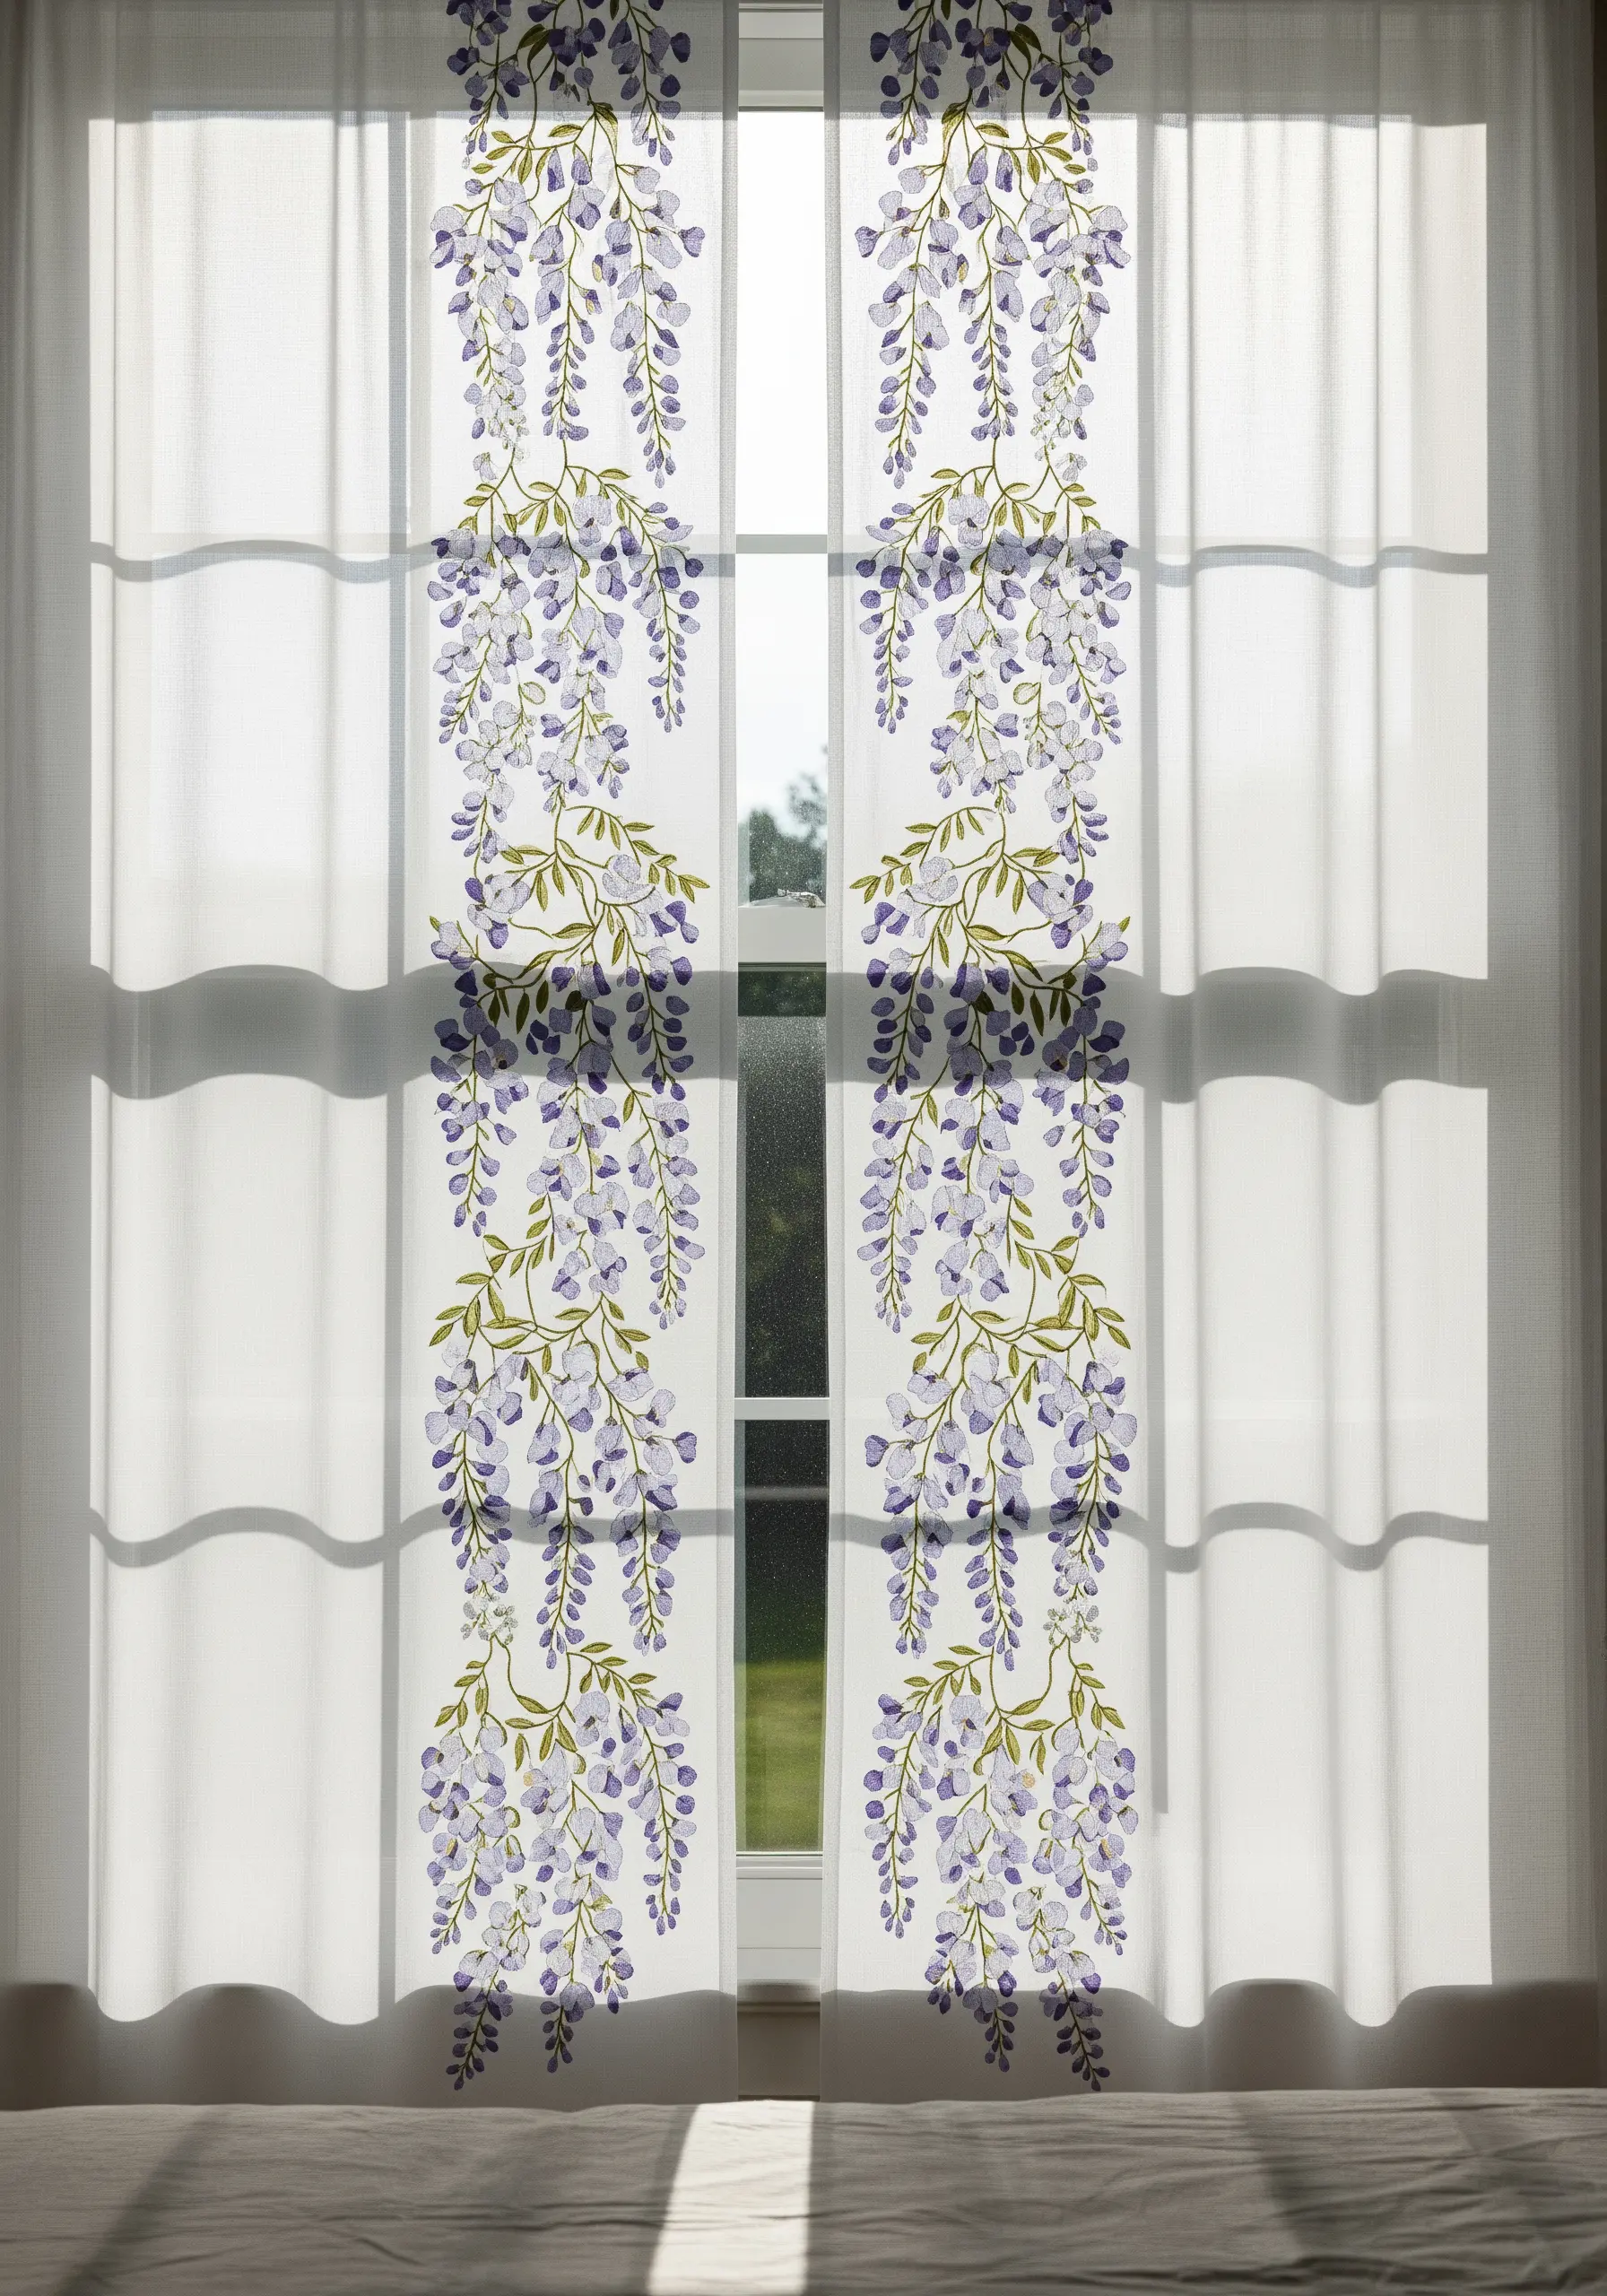
When embroidering on sheer or lightweight fabric, always use a wash-away or tear-away stabilizer to prevent puckering and distortion.
Create the wisteria petals using a simple detached chain stitch (lazy daisy), varying the stitch length to create a natural, clustered look.
Instead of a single shade of purple, blend three tones—a pale lilac, a mid-lavender, and a deep violet—to give the blossoms depth and a subtle, watercolor-like quality.
This layering technique adds sophistication without weighing down the delicate fabric.
3. Master Texture on Waffle Weave Towels

The deep grid of a waffle weave towel can swallow your stitches, so your technique needs to adapt.
Apply a water-soluble stabilizer over the top of your fabric before stitching; this creates a smooth surface and ensures your stitches sit proudly on top.
For the daisy petals, use a padded satin stitch by first laying down a few straight stitches as a base.
This underlay lifts the final satin stitch, giving it a raised, three-dimensional quality that won’t get lost in the towel’s texture.
4. Achieve Metallic Elegance with Ginkgo Leaves

Working with metallic thread requires patience, as it can fray and tangle easily.
Use a shorter length of thread than you normally would (about 12 inches) and stitch slowly.
To create the delicate veins of the ginkgo leaf, use a single strand of metallic floss in a contrasting shade, stitched over the filled satin stitch base.
This layering adds a level of detail that elevates the entire design from simple graphic to intricate art.
5. Build a Woodland Scene with Layered Textures

To create a dynamic woodland border, think in layers—foreground, mid-ground, and background.
Stitch the ferns first using a fishbone stitch for a full, realistic look.
For the mushroom caps, use the long-and-short stitch to blend shades of red and orange seamlessly.
Finally, add a mossy forest floor using dense French knots or turkey work with variegated green thread. This creates an incredibly organic texture that grounds the entire composition.
6. Frame a Modern Motif with Asymmetrical Lines

For a contemporary take on a classic botanical, contain your embroidery within a sharp, geometric shape.
Use a simple backstitch or stem stitch for the outline, keeping your stitch length consistent for a clean, graphic edge.
Inside the frame, stitch your olive branch using a fishbone stitch for the leaves to create a defined central vein.
This contrast between the organic subject and the rigid border feels intentional and modern, perfect for Mediterranean-inspired table linen.
7. Add Dimension with Padded Satin Stitch and Knots

To make elements like berries and pinecones pop, you need to build dimension.
For the red holly berries, use a base of several small satin stitches, then cover them with tight French knots or colonial knots for a perfectly round, raised effect.
The pinecones are achieved with a series of overlapping straight stitches or fly stitches in graduating shades of brown, mimicking the texture of scales.
This gives your holiday-themed table linen a luxurious, handcrafted feel.
8. Paint with Thread for a Vivid Meadow Border

Achieve a painterly effect by using the long-and-short stitch, also known as thread painting.
For the poppy petals, work in concentric rings, blending shades of red, orange, and yellow to create realistic highlights and shadows.
Don’t be afraid to leave some of the fabric showing through; this negative space adds to the airy, illustrative quality of the design.
Pair these bold flowers with delicate, scattered straight stitches for the background foliage to create a sense of depth.
9. Capture Delicate Motion with Dandelions

The magic of this design is in its sense of movement and lightness.
For the dandelion heads, use a combination of straight stitches radiating from a center point, capped with tiny French knots to represent the seeds.
Use a single strand of floss for the floating seeds to give them an almost transparent, weightless quality.
Vary the angle and spacing of the floating seeds to create a convincing illusion of them being carried on a gentle breeze.
10. Complement Satin Fabric with Elegant Cherry Blossoms

Stitching on satin requires a fine, sharp needle to avoid snagging the delicate weave.
Keep your tension gentle but firm to prevent puckering.
For the cherry blossoms, use a pale pink satin stitch for the petals, adding a single French knot in a darker pink or white at the center.
The contrast between the matte thread and the lustrous fabric creates a subtle, sophisticated finish that feels incredibly luxurious, perfect for Japanese-inspired elegance.
11. Create a Harvest Scene on Burlap Curtains

Burlap’s loose weave is a challenge, so use all six strands of your embroidery floss for good coverage.
For the sunflower centers, a technique called couching works beautifully: lay down a spiral of thick brown yarn and tack it in place with single stitches of a thinner thread.
The wheat stalks can be created with a plaited braid stitch, which gives them a woven, three-dimensional texture that stands out against the rustic fabric.
These soft texture embroidery projects add warmth to any room.
12. Define Corners with a Dense Forget-Me-Not Border

To create a crisp, well-defined corner, stitch the elements closest to the miter line first, then work your way outwards.
Each forget-me-not flower is five simple detached chain stitches arranged in a circle, with a single yellow French knot in the middle.
By packing the flowers and leaves tightly together, you create a dense, continuous line of color that gives the border a strong graphic presence and a professional finish.
This is a wonderful way to practice small floral embroidery patterns.
13. Overlap Shapes for a Lush Tropical Feel

The key to a successful monstera design is layering.
Embroider the leaves in the background first, using a slightly darker or cooler shade of green.
Then, stitch the foreground leaves on top, allowing them to overlap naturally. This simple trick creates an immediate sense of depth and lushness.
Use a split stitch for the outlines to keep the edges clean and defined, which is essential for a bold, graphic style like this.
14. Use Thread Blending for Sun-Kissed Lemons

To give your lemons a realistic, rounded appearance, use a long-and-short stitch with three shades of yellow.
Start with the darkest yellow at the bottom, blend into a bright, true yellow for the main body, and finish with a pale yellow or off-white for the highlight where the light hits.
This subtle gradient fools the eye into seeing a three-dimensional shape, making your fruit look plump and juicy on your cafe curtains.
15. Stitch a Botanical Chart for a Refined Tea Towel

Transform a simple tea towel into a piece of art by arranging your herbs in a neat grid, like a vintage botanical illustration.
Use a fine, single strand of floss for the details—the tiny lavender florets, the veins on the sage leaves—to achieve a delicate, scientific look.
A simple whipped backstitch for the border adds a corded, rope-like detail that frames the design and gives it a classic, finished feel, perfect for garden herb embroidery patterns.
16. Create Appliqué-Style Leaves with Satin Stitch
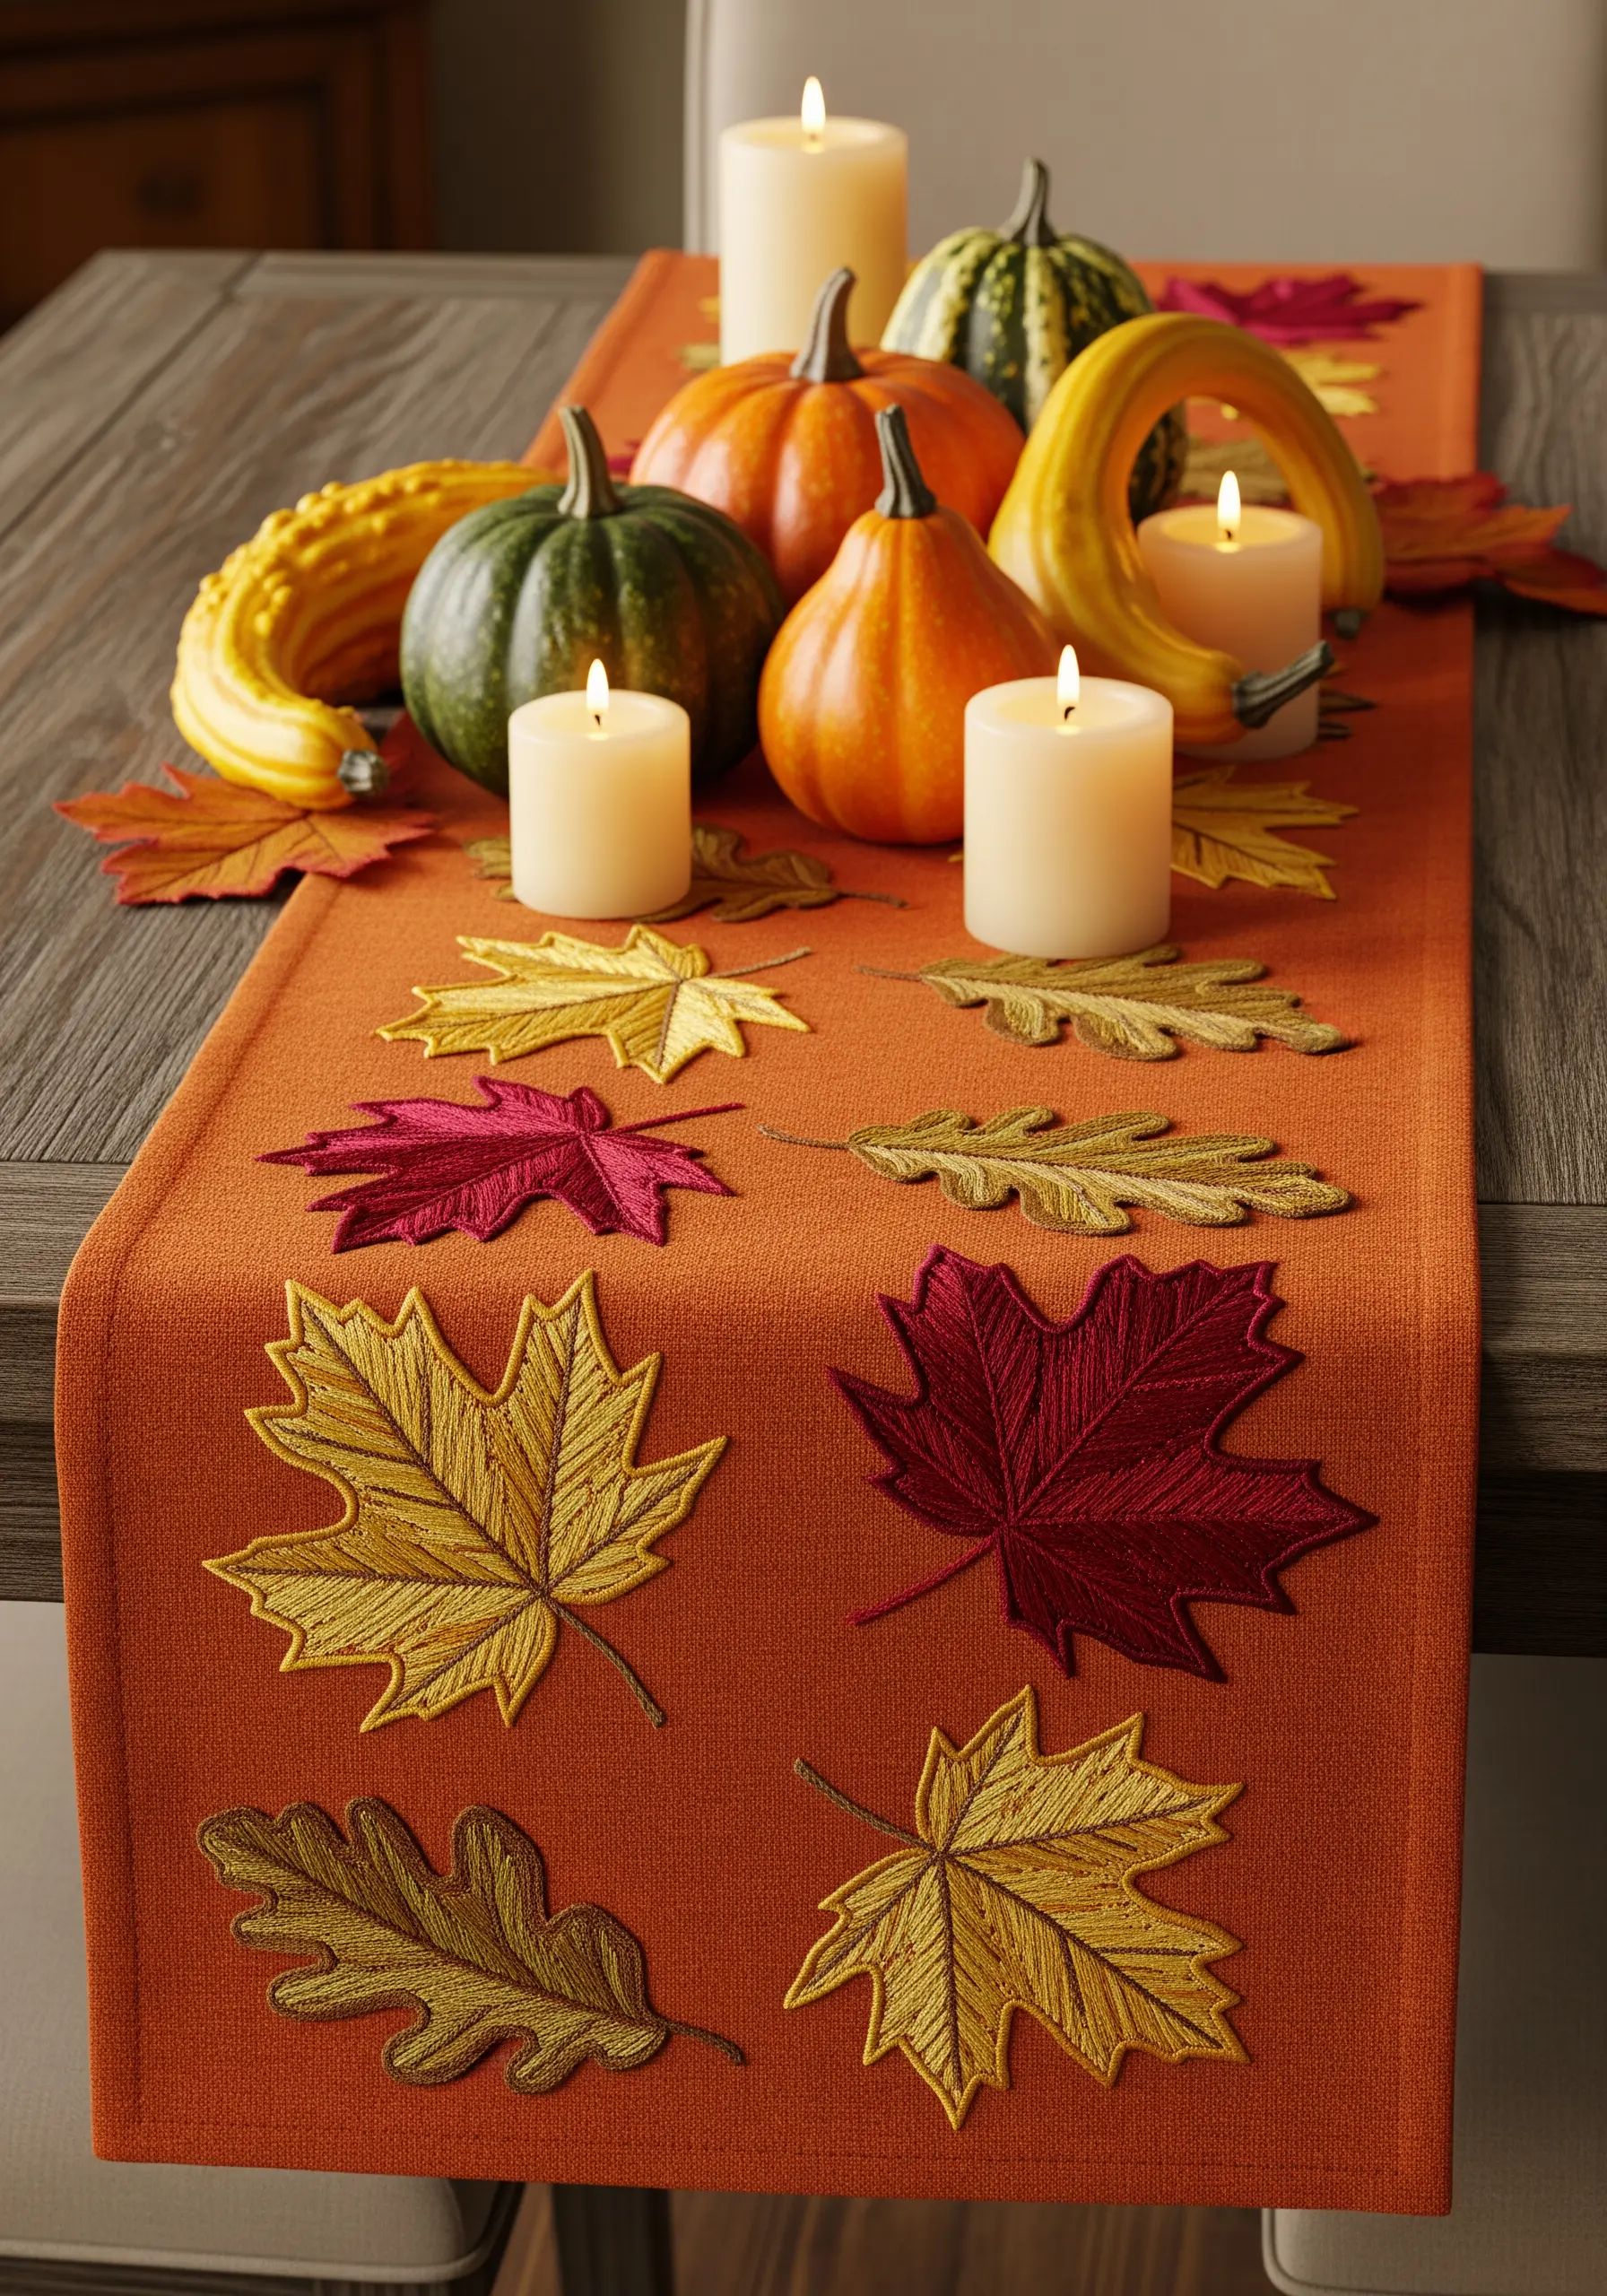
To achieve that clean, patch-like effect for your autumn leaves, outline each shape with a split stitch first.
Then, fill the shape with a dense satin stitch, ensuring your stitches go just over the outline to create a smooth, raised edge.
Work the veins on top using a contrasting color and a simple backstitch. This technique gives the leaves a solid, appliqué-like quality that stands out boldly against the background fabric.
17. Combine Celestial and Botanical Motifs

For a magical, night-garden feel, embroider your floral border in a single color, like white or silver, on a dark, dramatic fabric.
Use a heavier thread, like a pearl cotton or all six strands of floss, to ensure the design stands out against the navy blue.
Incorporate crescent moons and stars using satin stitch and scattered straight stitches.
This creates a cohesive and enchanting narrative, turning simple curtains into a piece of storytelling art. These minimal celestial embroidery wall designs are perfect for bedrooms.
18. Play with Repetition and a Vibrant Palette

A simple, repeating border gains immense impact through bold color choices.
Instead of aiming for realism, choose a graphic, high-contrast palette of red, purple, and yellow.
Focus on executing a perfect padded satin stitch for each tulip head to give them a uniform, slightly bulbous shape.
The clean lines and rhythmic repetition create a cheerful, modern aesthetic that instantly brightens any kitchen.
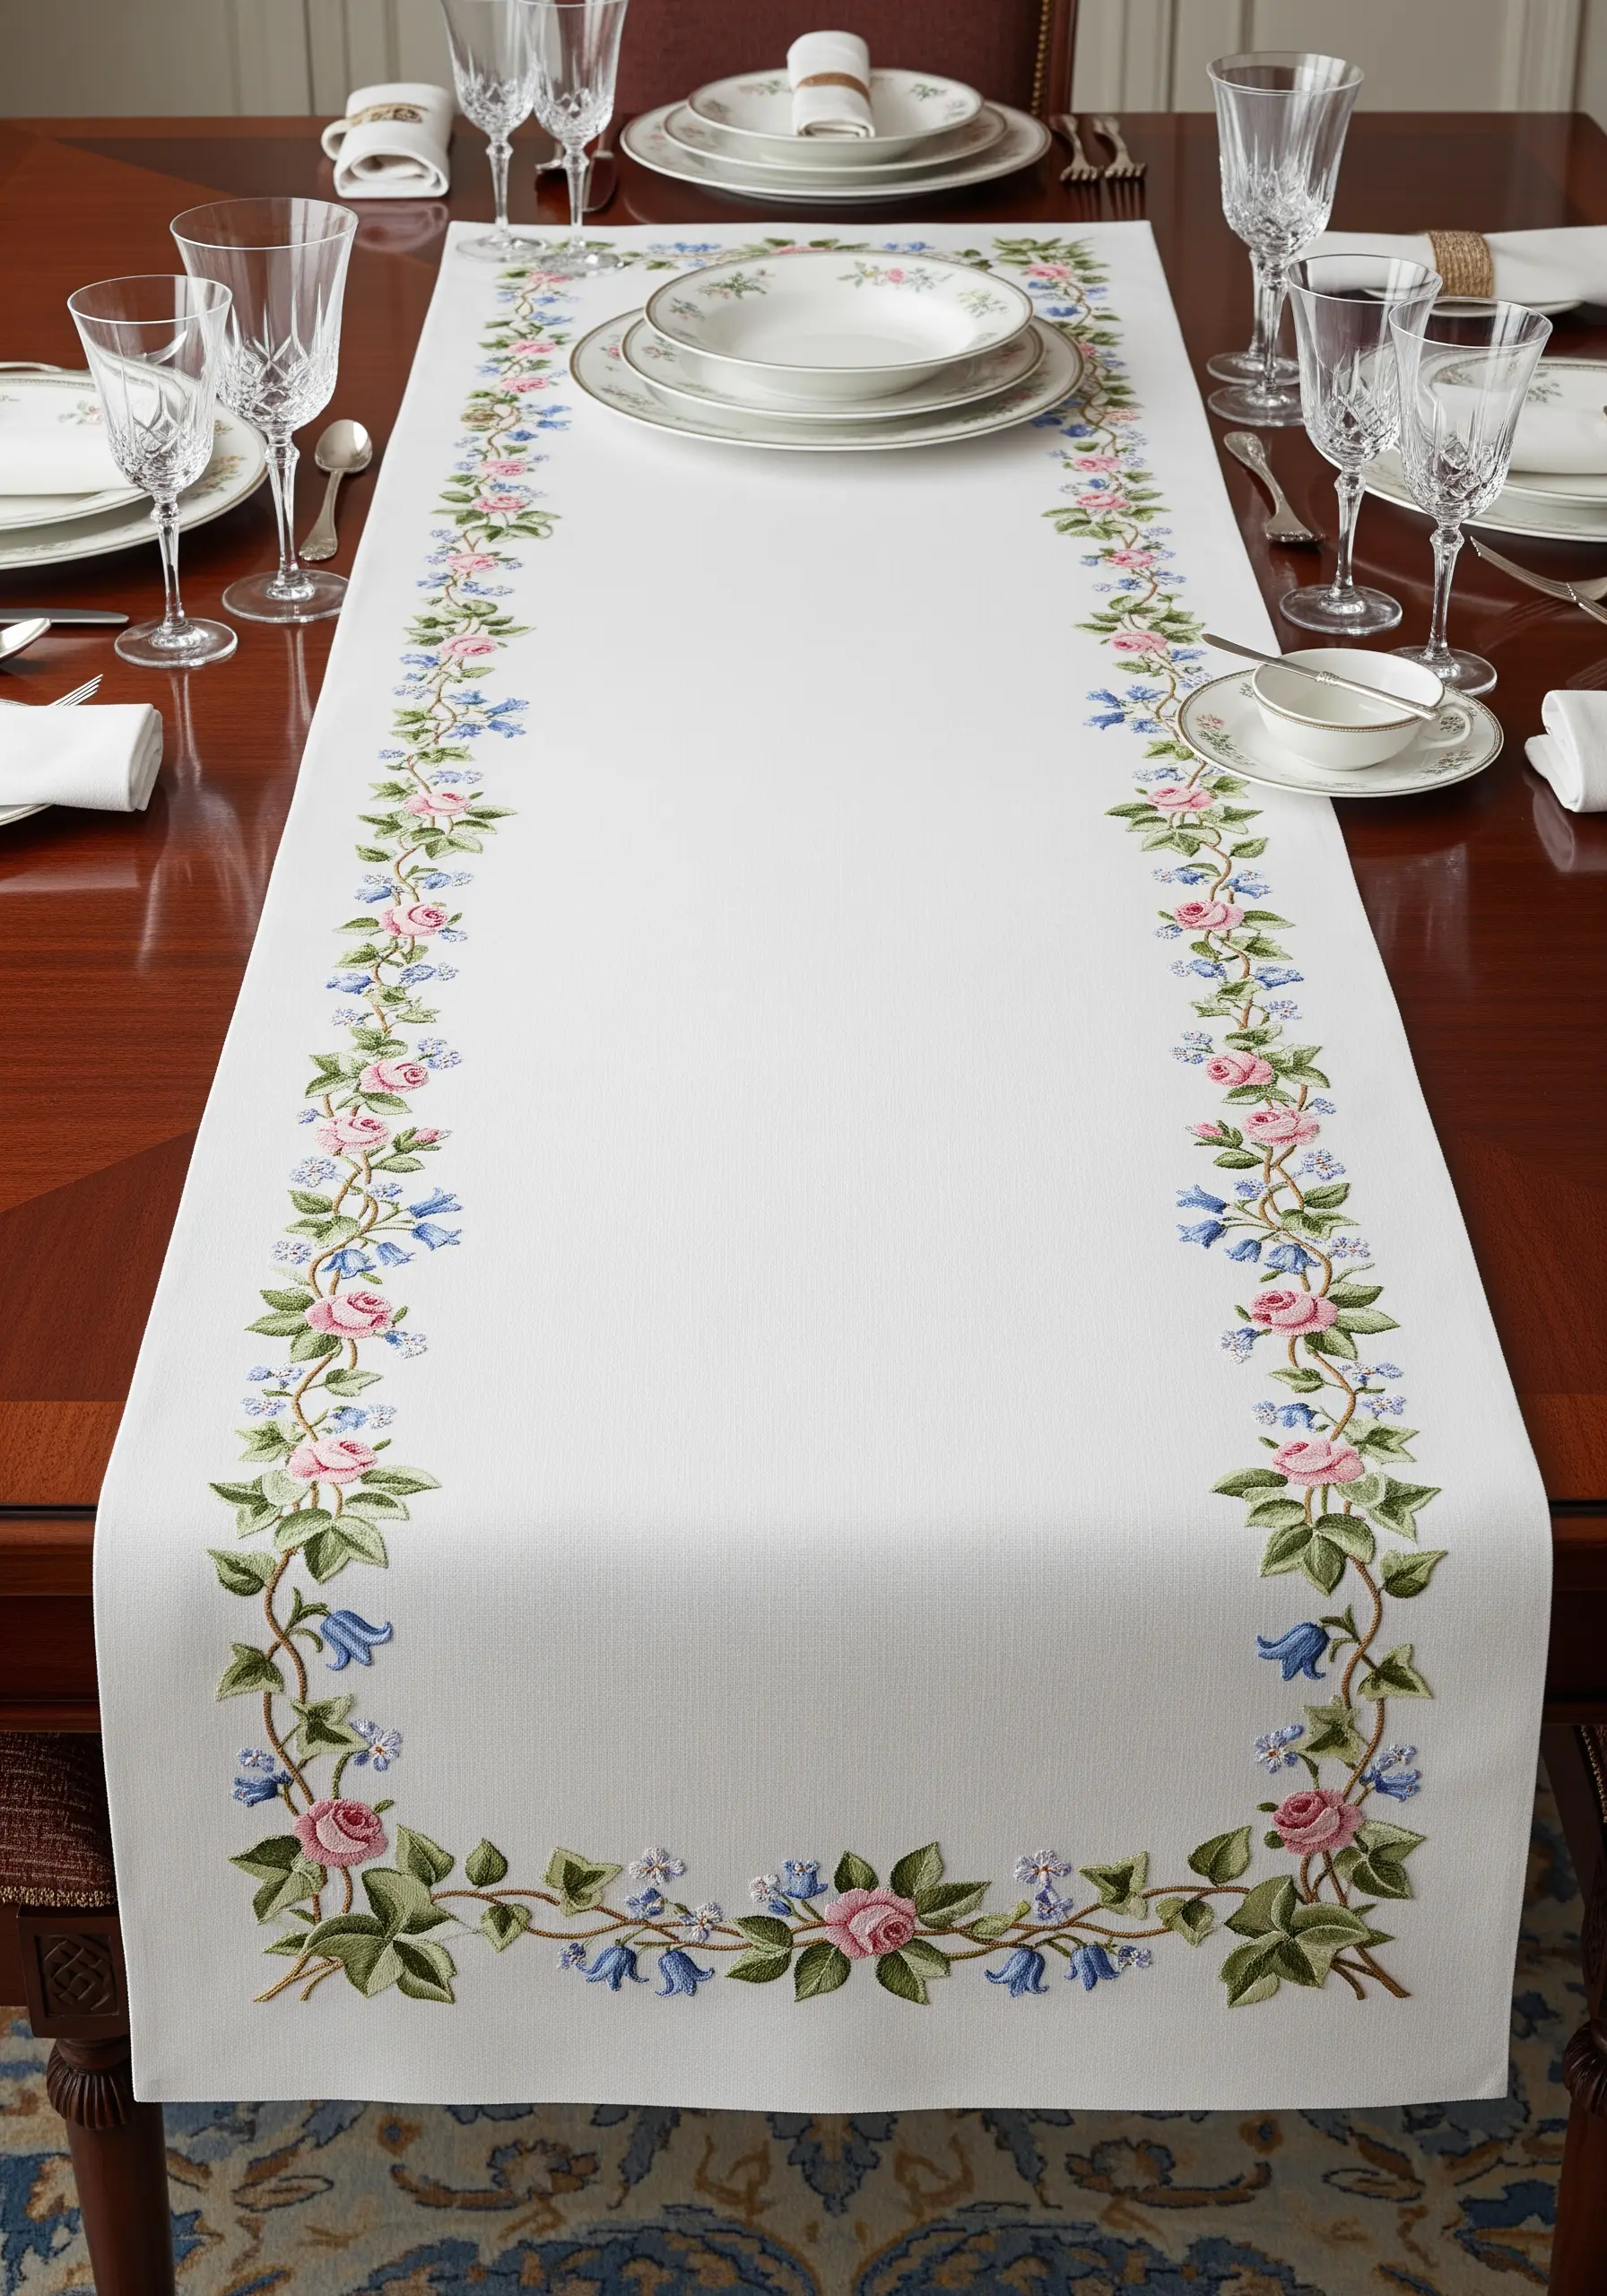
19. Use French Knots for Ethereal Queen Anne’s Lace

The key to realistic Queen Anne’s Lace is capturing its airy, delicate structure.
Use a single strand of green thread for the fine stems, branching them out naturally.
For the flower clusters, use tiny, tightly packed French knots in white and off-white. By varying the density of the knots—more in the center, fewer at the edges—you can create a convincing illusion of the flower’s domed shape.
This is a perfect project for creating heirloom-style table linen.
20. Frame Curtain Edges with a Subtle Eucalyptus Vine

For a design that feels integrated rather than just applied, match your thread color closely to the fabric, using a slightly darker or lighter tone for a subtle contrast.
Use a whipped backstitch for the vine to create a smooth, continuous line.
The eucalyptus leaves can be stitched with a simple fishbone stitch, which creates the central vein and fills the leaf shape in one efficient motion.
This tonal approach adds a touch of bespoke elegance without overwhelming the room.
21. Mix Stitches for a Playful Cactus Border

Showcase a variety of stitches to give each cactus its own unique personality and texture.
Use a smooth satin stitch for an aloe plant, a woven picot stitch for a dimensional succulent, and scattered straight stitches or seed stitches for the prickly spines on a classic cactus.
This approach not only makes the stitching process more engaging but also results in a dynamic, textural border that invites a closer look.
22. Create a Traditional Rose Border with Soft Gradients
For a classic, heirloom-quality design, use long-and-short stitch to blend soft pinks and creams within the rose petals.
Work from the outer edge of each petal inward, using the darkest shade at the base and the lightest at the tip to create a sense of light and shadow.
To keep the design from feeling dated, balance the traditional roses with simpler, more graphic bellflowers in a solid blue, which adds a touch of modern contrast.
23. Design a Narrative Scene with a Forest Border

Elevate a simple border into a story by creating a complete scene.
Use a dark blue appliqué or fabric paint to create the night sky, then embroider stars over it with silver metallic thread.
For the dense forest, layer your trees, stitching the back row in a darker green and the front row in a brighter shade to create perspective.
The moon’s texture can be achieved with a dense pattern of French knots or seed stitches, making it the focal point of your magical landscape.
24. Capture the Details of a Strawberry Vine

Make your strawberries look deliciously real by paying attention to the small details.
After filling the berry with red satin stitch, use a single strand of pale yellow or white to add tiny seed stitches on top.
For the leaves, use a variegated green thread in a fishbone stitch to achieve natural color variation without having to switch your floss.
The playful, curling tendrils, stitched with a simple whipped backstitch, add a sense of movement and life.
25. Make a Dramatic Statement with Peonies on Black

To ensure your colors pop against a black background, choose highly saturated, vibrant threads.
Lay down a base of white stitches in the shape of your petals before you begin adding color. This under-layer acts as a primer, preventing the dark fabric from dulling your pinks and magentas.
Use long-and-short stitch to create the lush, layered look of peony petals, blending from dark to light to create depth. This is a perfect example of wild garden floral embroidery.
26. Stitch a Breezy Wheat Border on Linen Curtains
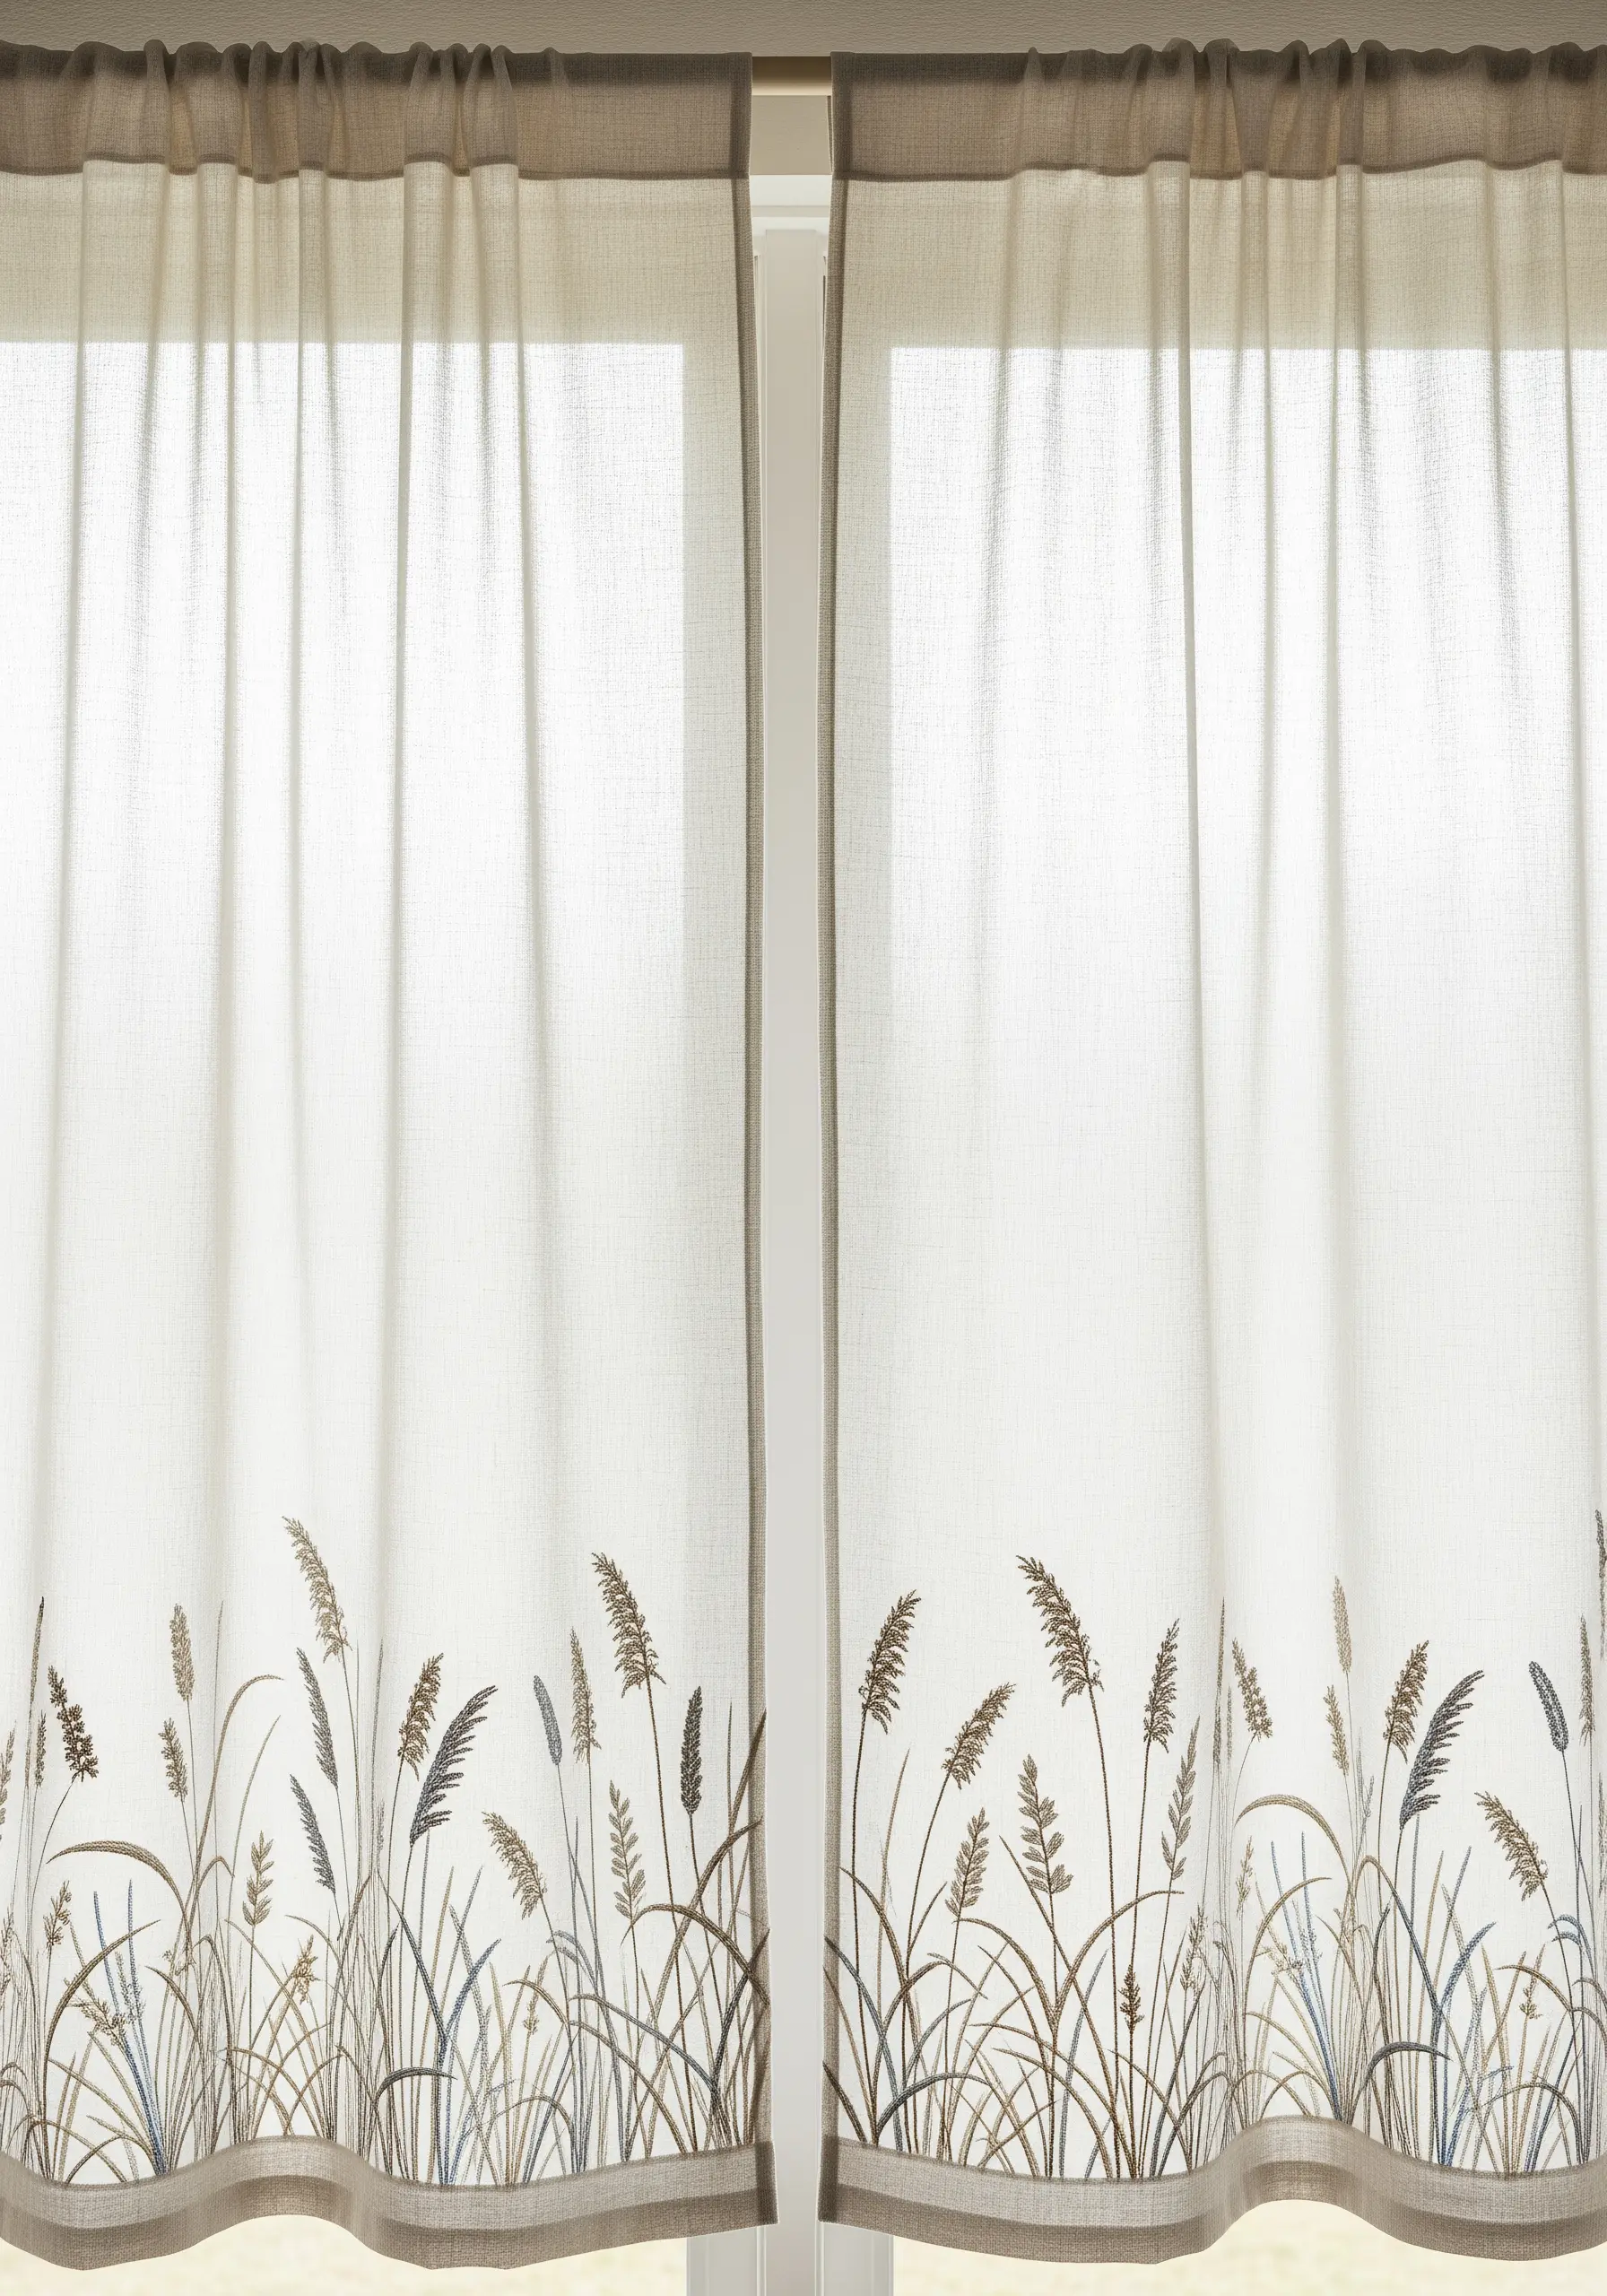
Capture the feeling of a grassy field by using a light touch and subtle colors.
Use a single strand of thread for the blades of grass, varying your stitch direction and length to create a natural, windswept look.
For the wheat stalks, a simple fly stitch or satin stitch works perfectly. By using a palette of muted browns, blues, and beiges, the design feels airy and sophisticated, enhancing the light filtering through the linen rather than blocking it.
27. Embrace Bold Folk Art with Solid Color Blocking

Folk art embroidery celebrates dense color and clear, graphic shapes.
Use a full six strands of embroidery floss to achieve a bold, substantial look.
Before filling each shape with satin stitch, outline it with a split stitch in the same color. This creates a slightly raised, perfectly defined edge that makes your color blocks look incredibly sharp and intentional.
The chain stitch border is a classic folk-art touch that neatly frames the entire piece.
28. Sculpt Dimensional Roses with Woven Wheel Stitch

For stunning, 3D roses that rise off the fabric, master the woven wheel stitch (also known as the spider web rose stitch).
Create a foundation of five straight stitches radiating from a central point, like spokes on a wheel.
Then, weave your thread over and under these spokes, spiraling outwards until the foundation is completely covered. The result is a beautifully textured, sculptural rose that requires no padding.
29. Recreate a Retro Vibe with Graphic Outlines

To achieve a ’70s-inspired graphic look, the outline is everything.
Use a thick, dark thread (like black or dark brown) and a consistent backstitch or stem stitch to define all your shapes.
Fill the shapes with a smooth, even satin stitch in a classic retro palette of orange, avocado green, and brown.
The strong outlines separate the blocks of color, creating a bold, almost cartoonish effect that feels playfully vintage.
30. Blend Colors for Realistic Mushroom Gills

The most challenging part of embroidering mushrooms is often the delicate gills underneath the cap.
Use a series of tightly packed, vertical straight stitches or a long-and-short stitch in a gradient of colors—from a dark cream to a bright yellow—to mimic their texture.
For the unique, pitted texture of the morel mushrooms, use a couching technique with a darker brown thread over a lighter brown satin stitch base to create that distinctive grid-like pattern.
31. Achieve a Damask Effect with Tonal Stitching

Create the illusion of woven damask by embroidering a design in a thread color that is just a few shades different from your fabric.
On a white or silver fabric, use a light grey thread. The low contrast creates a subtle, textural pattern that catches the light beautifully.
Focus on a dense, even satin stitch to fill the baroque-style shapes. The change in texture and sheen between the thread and the fabric is what creates this sophisticated, high-end effect.
32. Complement Gingham with a Delicate Sweet Pea Vine

When embroidering on a patterned fabric like gingham, choose a design with plenty of negative space to prevent it from looking too busy.
A meandering sweet pea vine is perfect, as its delicate stems and scattered blossoms allow the pattern to show through.
Use a light, airy stitch like a detached chain stitch for the petals. This creates a charming, country-kitchen aesthetic that feels both traditional and fresh.
33. Create a Minimalist Landscape with Line Art

For a serene, Japanese-inspired aesthetic, less is more.
Use a single strand of white or off-white thread on a dark indigo fabric to create a high-contrast design.
Stitch the mountain range using a simple backstitch, varying your stitch length to create sharp peaks and gentle slopes.
This is one of the most effective minimal line drawing embroidery ideas for creating a sense of calm and space.
34. Use Satin Stitch to Create a Bold Tropical Border

To make your tropical flowers and leaves look vibrant and solid, focus on the direction of your satin stitches.
For the hibiscus petals, angle your stitches to radiate out from the center, just as they grow in nature. For the large leaves, a fishbone stitch will create a central vein and fill the shape simultaneously.
Using a dense, perfectly executed satin stitch gives the design a clean, almost machine-embroidered precision that makes the colors pop.
35. Embroider with Glow-in-the-Dark Thread

Create a magical effect on your curtains by using glow-in-the-dark embroidery floss.
Use a simple satin stitch to create the glowing abdomen of each firefly. During the day, it will look like a simple, charming insect design.
At night, the charged thread will emit a soft glow, transforming your window into a dusky summer meadow.
This technique works best on sheer curtains, allowing the light to pass through and create an ethereal effect. It’s one of the most stunning modern neon on black thread art ideas you can try.


