There comes a moment in every stitcher’s journey when you want your work to feel like more than just thread on fabric. You’re ready to create pieces that have depth, texture, and a touch of the unexpected—art that tells a richer story. This is where mixed media truly shines, not as a complex skill to be mastered, but as a gentle invitation to play.
These projects are designed to be finished in an afternoon, reminding you that artistic growth doesn’t require a huge commitment of time. It’s about seeing the potential in a scrap of paper, a wash of watercolor, or a pressed leaf. It’s about understanding how a simple running stitch can bind together disparate elements into something beautiful and cohesive.
Consider this your permission slip to experiment. Forget the rules for a moment and focus on the feeling of thread pulling through paper, the contrast of a soft felt against a sharp stitch, or the shimmer of gold leaf next to matte floss. Choose one idea that speaks to you, gather your materials, and see how a little creative layering can completely transform your embroidery.
1. Watercolor Washes for Atmospheric Florals

Begin by applying a soft wash of watercolor directly onto your stretched fabric, allowing colors to bleed into a gentle gradient.
Ensure the fabric is completely dry before you start stitching; this prevents your thread from wicking the paint and keeps your lines crisp.
This technique creates a dreamy, atmospheric background that adds depth and emotion to simple line stitches and satin-stitched florals.
Use a single thread for delicate outlines and a fuller six-strand floss for the central woven wheel roses, creating a beautiful contrast in texture against the soft paint.
2. Layered Paper & Fabric for Topographical Texture

Create a miniature landscape by layering torn pieces of textured paper and fabric onto heavy cardstock.
The torn edges provide a more organic, natural feel than cut lines, mimicking the roughness of a mountain range.
Use a simple running stitch along the edges to secure the layers and add a charming, hand-drawn quality to the composition.
To avoid tearing, pre-pierce your stitching holes with a fine needle before you begin sewing through the paper layers.
This method of stitching on paper with fabric appliqué adds both visual depth and tactile interest.
3. Metallic Paint Pens for Celestial Details

Instead of relying on tiny, time-consuming French knots, use a fine-tipped metallic silver paint pen to create a field of distant stars.
This adds a subtle, flat shimmer that contrasts beautifully with the raised texture of the embroidered constellation.
For the main stars, a simple star stitch or a few straight stitches radiating from a central point is all you need for definition.
The combination of smooth metallic ink and lustrous thread gives the piece a polished, multi-dimensional finish on dark cardstock.
4. Thread Overlays on Photographic Prints

Transform a simple black-and-white photograph by stitching a bold, colorful element directly over the image.
Mount the photo on a sturdy backing like foam core or heavy cardstock to provide support and prevent buckling.
Use a thick thread, like pearl cotton or all six strands of embroidery floss, to create radiating straight stitches that command attention.
The key is maintaining even tension—not too tight to warp the paper, not too loose to sag—for a crisp, graphic effect that contrasts with the soft photo.
5. Appliqué Patches for Journal Covers

Elevate a plain notebook with a dimensional appliqué patch, combining two or more fabric patterns for a collage effect.
First, iron fusible webbing onto the back of your fabric pieces; this allows you to position and secure them without pins before you stitch.
Outline your appliqué with a tight, clean backstitch or split stitch using a contrasting thread color to make the design pop.
This technique creates a durable, raised design that turns a simple journal into one of your favorite cottagecore floral patches.
6. Stitching on Natural, Pressed Botanicals

Embrace the textures of nature by stitching directly onto a dried, pressed leaf.
To make the leaf sturdy enough for stitching, press it until completely dry and flat, then consider sealing it with a matte spray varnish.
Use a very fine, sharp needle to carefully pre-pierce holes along the leaf’s veins before passing thread through.
A few scattered seed stitches in a complementary color are enough to highlight the leaf’s natural beauty without overpowering it.
These hand-embroidery leaf patterns celebrate imperfections and organic forms.
7. Variegated Thread Wrapping on Cardstock

Create vibrant geometric patterns on gift tags or cards by wrapping variegated thread around the cardstock.
The magic of this technique comes from the thread itself; its shifting colors produce a dynamic, multi-toned effect with minimal effort.
Secure the wrapped sections on the back with a small piece of tape or a dab of glue.
For the chevron patterns, use a couching stitch—laying down the thread and tacking it in place with smaller, perpendicular stitches—for perfect angles.
8. Painted Canvas as a Bold Backdrop

Use opaque acrylic paint to create a vibrant, color-blocked background for your embroidery.
Paint the fabric while it’s stretched in the hoop and let it dry completely; the paint will stiffen the cloth, providing a stable, canvas-like surface for your stitches.
This method allows you to create sharp horizons and saturated sunset gradients that would be difficult to achieve with thread alone.
The embroidery then becomes a textural highlight, like the French knot flower and spiky cactus needles, emerging from a flat, graphic world.
9. Felt Appliqué with Glimmering Metallics

Combine the soft, matte texture of felt with the high shine of metallic thread for a striking visual contrast.
Cut your felt cloud shape and use a simple blanket stitch to attach it to the cardstock base, giving it a soft, pillowy edge.
When stitching with metallic floss, use shorter thread lengths and a thread conditioner to prevent it from tangling and fraying.
The straight-stitch raindrops in silver and blue create a sense of movement, while the teardrop shapes add a touch of playful elegance.
10. Gold Leaf Accents on Stitched Paper

Introduce a touch of luxury to your paper embroidery by adding flecks of gold leaf.
Complete all your stitching first, as the needle can tear or dislodge the delicate gold leaf.
Apply a small amount of gilding adhesive with a fine brush where you want the accents, wait for it to become tacky, then press the gold leaf on gently.
This technique works best for abstract or celestial designs, where the random placement of gold flakes adds a radiant, unpredictable shimmer.
11. Stumpwork Details on Botanical Illustrations

Bring a vintage botanical print to life by adding a single, three-dimensional embroidered element.
Create the bee’s fuzzy body using a padded satin stitch over a few foundation stitches to give it a raised, realistic shape.
For the delicate wings, stitch an outline on a sheer fabric like organza, cut it out carefully, and attach it to the paper for a translucent effect.
This selective stitching technique tricks the eye, making the entire illustration feel more dynamic and alive.
12. Monograms with Patterned Appliqué Fill

Personalize a piece by using a vibrant, patterned fabric as the fill for an initial or monogram.
Trace your letter onto fusible webbing, iron it onto your chosen fabric, and cut it out before applying it to your base cloth.
A precise, dense satin stitch outline in a dark, contrasting color provides a clean border that makes the letterform sharp and legible.
This method allows you to incorporate meaningful patterns or colors into your design, making it a perfect idea for mini monogram embroidery frames.
13. Stitched Highlights on a Painted Scene

Create a dynamic underwater scene by painting the background first and then adding embroidery as the focal point.
Use acrylic paints on canvas fabric, blending blues and greens for watery depth before transferring your embroidery design.
Once the paint is dry, use stitches to add texture and detail that paint cannot replicate, like the sharp scales on the fish or the bubbly air pockets.
Finishing the piece in an unusual frame, like this porthole, completes the narrative and turns it into a unique piece of art.
14. Minimalist Stitching on Fine Stationery

Transform a simple piece of cardstock into elegant stationery with a delicate, minimalist design.
For the dandelion, use a cluster of French knots for the textured center and straight stitches for the main seed heads.
Create the illusion of windblown seeds with single, detached chain stitches, using only one strand of floss to achieve a light, airy feel.
This less-is-more approach is perfect for handmade cards or as one of your inspiring pressed flower art projects, where the negative space is just as important as the stitching.
15. Torn Paper Collage with Stitch as Line

Build a charming, rustic landscape using layers of torn, textured paper to represent rolling hills.
The act of tearing the paper, rather than cutting it, introduces a soft, organic quality to the scene.
Use embroidery thread not just for decoration, but as a key structural element—the blanket-stitched fences both secure the paper layers and define the fields.
Dense clusters of French knots for the sheep provide a wonderful textural pop, making them feel soft and woolly against the flat paper.
16. Fabric and Felt Collage for Functional Art

Create a set of vibrant, personalized coasters by combining fabric collage with simple embroidery.
Start with a felt circle as your base—it’s stable and easy to stitch through—and then add a decorative patterned fabric border.
Stitch your central design through all the fabric layers before mounting the piece onto a cork square.
A thin coat of clear sealant (like Mod Podge) over the finished embroidery will protect it from moisture and spills, making your art functional.
17. Hand-Stitched Felt and Bead Mobiles

Construct a whimsical nursery mobile using felt, stuffing, beads, and embroidery floss.
Cut two identical shapes for each element, stitch them together along the edge with a decorative blanket stitch, and add a small amount of stuffing before closing.
Embroider details onto the felt pieces before you sew them together—it’s much easier to work on a flat surface.
Incorporate beads and metallic threads as raindrops or celestial accents to catch the light and add a touch of magic, perfect for embroidered nursery decor.
18. Impasto Painting with Thread Impressions

Explore extreme texture by combining thick acrylic modeling paste with chaotic stitching.
Spread a generous, uneven layer of paste onto a canvas board and let it dry completely to form a rigid, sculptural surface.
Use a strong needle and thimble to push thread through the dried paste, creating a web of colorful lines that sit both on top of and within the texture.
This highly experimental technique creates a piece that is as much a sculpture as it is an embroidery, focusing purely on color and form.
19. Thread as Line Art Over Paper Collage

Use paper collage to create a rich, layered background, then employ thread as a bold outline to define your subject.
Arrange strips of patterned paper, like sheet music or washi tape, to form the backdrop for your design.
Instead of filling the bird shape with stitches, use a thick thread or yarn to outline it, tacking it down with a couching stitch for a clean, graphic line.
This technique from our creative collage art ideas lets the background show through, integrating the thread and paper into a single, cohesive piece.
20. Satin Stitch Shading on a Watercolor Base

Combine the softness of a watercolor wash with the dense texture of satin stitch for a piece that glows with color.
Paint a simple watercolor circle on heavy paper as a backdrop for your embroidered motif.
Work your satin stitches in sections, following the shape of the lemon slice and changing the angle slightly to mimic natural segments.
Outlining each segment with a single strand of a lighter color before filling it in can help you achieve a cleaner, more defined edge.
21. Delicate Backstitching on Translucent Vellum

Stitching on vellum paper creates a beautifully delicate, ethereal effect perfect for botanical line art.
Because vellum is fragile, avoid using a standard embroidery hoop which can cause creasing and tearing.
Instead, gently tape your vellum sheet to a piece of cardstock for stability while you stitch.
Use a fine, sharp needle and only one or two strands of floss, keeping your tension light and even to prevent puckering. The result is a piece that feels as light as a sketch.
22. Patchwork Appliqué with Couched Yarn

Create a charming patchwork effect by combining colorful fabric scraps with a bold, textural outline.
Arrange your fabric pieces to form the shape of the balloon, then use a strong yarn or cord to define the sections.
Secure the yarn using a couching stitch—a technique where you lay the thick yarn on the surface and tack it down with a thinner, matching thread.
This method provides a clean, raised line that neatly contains the busy patterns, making the entire composition feel cohesive and intentional.
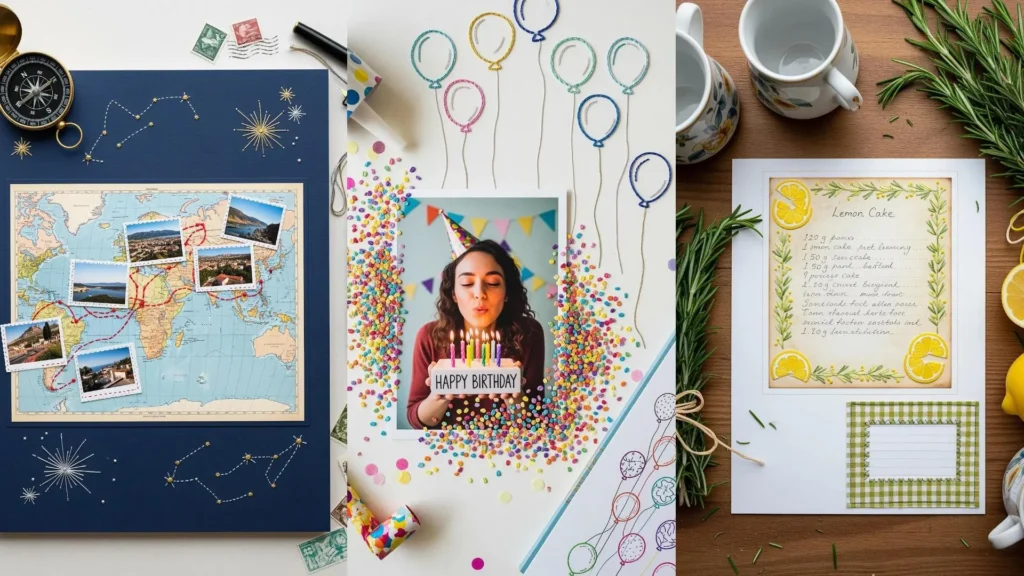
23. 3D Stumpwork on Functional Paper Goods

Add an unexpected, three-dimensional detail to recipe cards or notebooks with simple stumpwork techniques.
Create the rosemary leaves using detached cast-on stitches or long bullion knots to make them stand up from the paper.
The straight-stitched stem acts as an anchor for the more complex stitches, giving the sprig a realistic structure.
Incorporating real objects, like the sewing pins, is a playful mixed-media twist that elevates a simple botanical stitch into a clever piece of art.
24. Sculptural Stitches and Beading for a Succulent Garden

Move beyond flat embroidery by using highly textural stitches to create a sculptural garden scene.
Woven wheel stitches are perfect for creating lush, rosette-shaped succulents, while cast-on stitches form the spiky, aloe-like plants.
Incorporate real sand or tiny beads at the base to add another layer of texture and realism to your landscape.
This project is one of many embroidery projects inspired by textures that allows you to build a tactile world within your hoop.
25. Enhancing Appliqué with Colored Pencils

Add depth and shading to your fabric appliqué by incorporating colored pencils or fabric markers.
After ironing your fabric appliqué piece onto the base, use colored pencils to lightly add shadows and fine details, like the gills under the mushroom cap.
Heat-set the pencil markings with a dry iron to make them permanent before you begin any stitching.
Finish by adding small embroidered details, like the flowers and grass, to blend the illustrated and stitched elements seamlessly.
26. Directional Fill Stitching for Surface Texture

Create a dynamic, textured surface by filling a shape with directional long-and-short stitches rather than a flat satin stitch.
Vary the length and angle of your stitches to give the moon a cratered, uneven surface that catches the light differently.
Incorporate a few strands of metallic silver thread randomly throughout the fill to add a subtle, celestial glimmer.
The combination of textural stitching, metallic accents, and tiny silver beads for stars creates a piece with immense depth and visual interest.
27. A Sampler Grid for Mixed-Media Exploration

If you’re unsure where to start, create a sampler grid to experiment with different material combinations in a low-pressure format.
Divide a piece of fabric or cardstock into squares and challenge yourself to fill each one with a unique pairing: watercolor and thread, paper and stitch, fabric and ink.
This exercise frees you from the need to create a perfect, finished picture and instead focuses on the joy of discovery.
It’s an ideal way to build your visual vocabulary and find the techniques you enjoy most, much like nature-themed embroidery samplers.