
You have mastered the hoop, refined your French knots, and organized your floss by color code. But sometimes, fabric feels like a limitation. You are looking for a way to add crisp structure, unexpected texture, and modern depth to your work without investing in an entirely new studio setup.
Integrating paper techniques into your embroidery practice changes the physics of your art. Paper offers a rigidity that fabric lacks, allowing for architectural shapes, negative space tension, and mixed-media layering that holds its own weight. It transforms a soft craft into something sculptural and tactile.
The following ideas are not just crafts; they are design principles applied to thread and paper. From reinforcing vintage photos to weaving structural lattices, these techniques will help you break out of the 2D hoop and create work that feels curated, intentional, and deeply artistic.
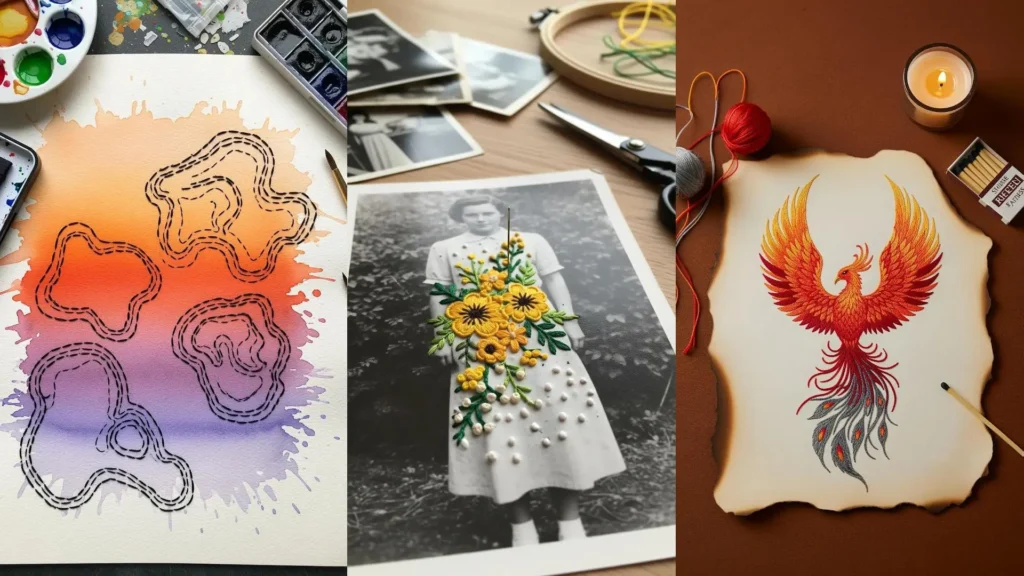
1. Layering torn edges for atmospheric depth

Stop trying to stitch every background detail and let paper do the heavy lifting for you.
By layering torn watercolor paper in gradients of blue, you create an instant atmospheric perspective that thread alone often struggles to achieve.
Use a simple running stitch along the ridge of each “mountain” to secure the layers; this adds texture without overwhelming the clean paper edges.
This technique is a perfect base for landscape embroidery wall pieces that turn fabric into painted scenery.
2. Woven lattice structures for geometric dimension

If you struggle with keeping large geometric shapes rigid, build a paper lattice first.
Weaving contrasting paper strips creates a physical grid that you can then anchor with heavy yarn or floss.
This approach transforms a flat surface into a structural object, offering a stability that fabric often lacks.
It is an excellent method for creating abstract geometric hoops perfect for minimalist home decor lovers.
3. Distressed surfaces for organic vine motifs
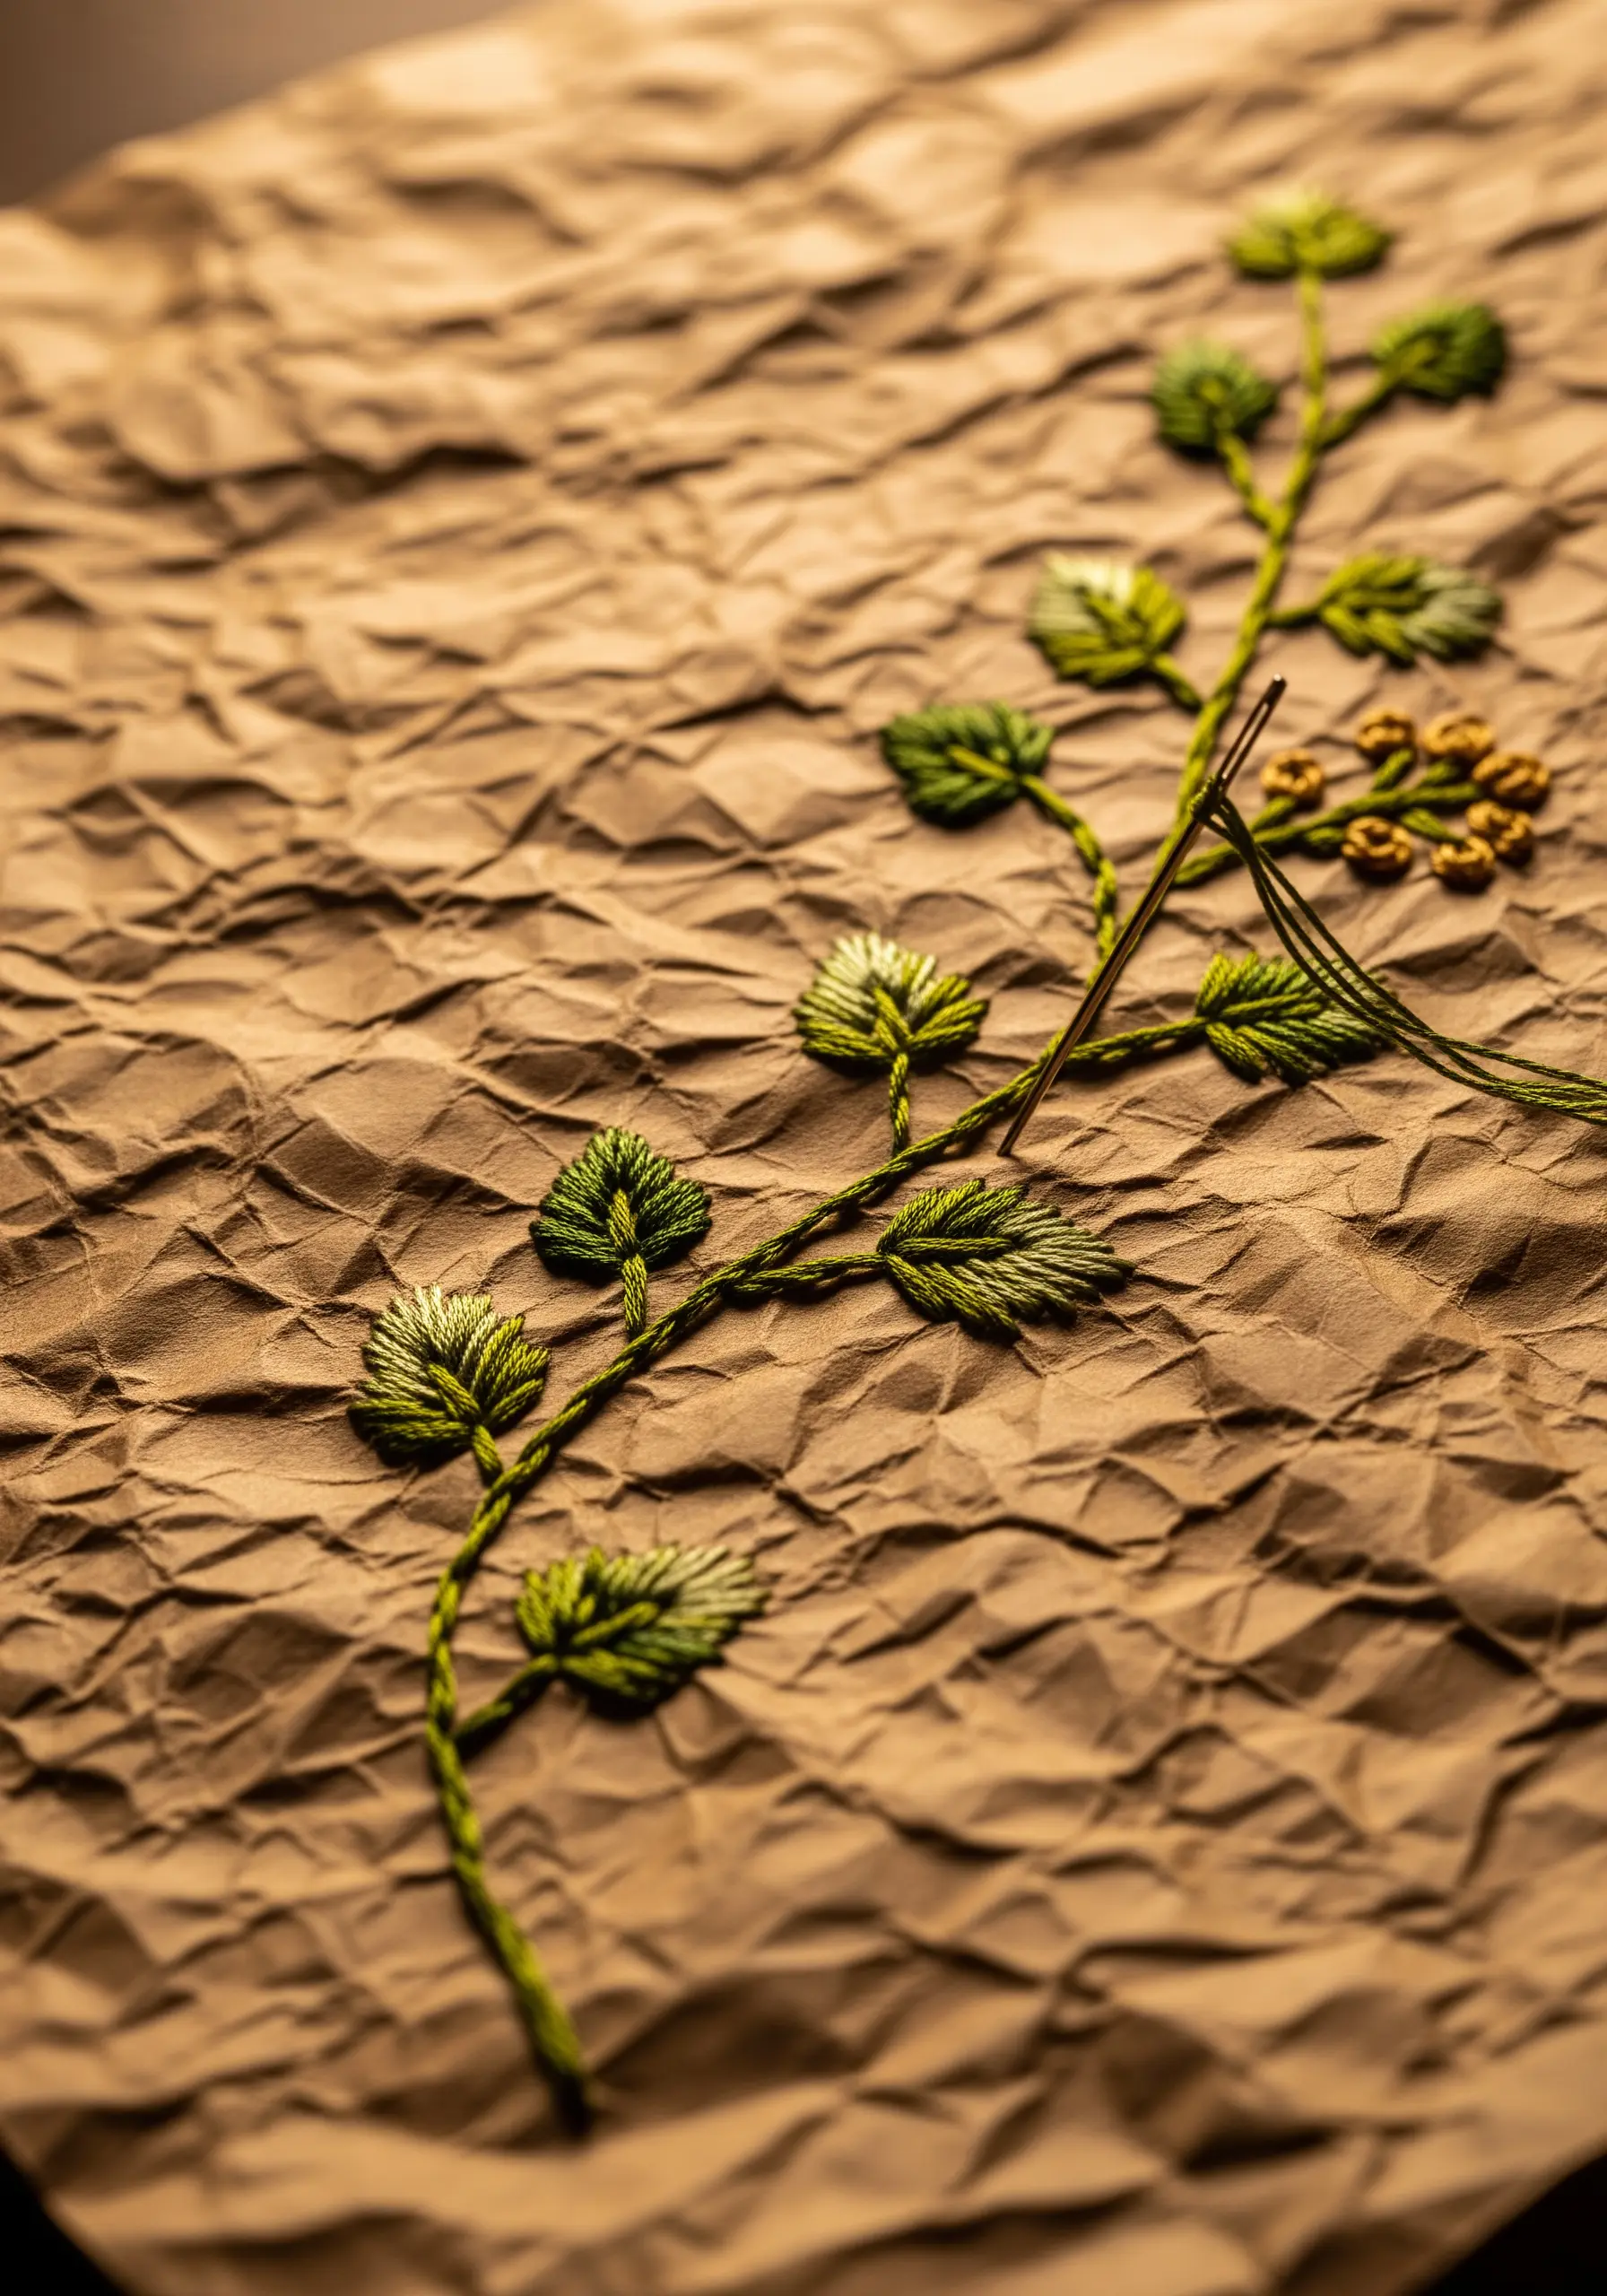
Don’t be afraid to ruin the paper before you begin.
Crinkling brown craft paper creates a leather-like texture that holds detailed botanical stitching beautifully.
Use a sharp size 10 needle to pierce the wrinkles without tearing them, allowing your vine patterns to look like they are growing through the cracks.
This aesthetic works wonderfully if you want to try organic texture embroidery designs that look harder than they are.
4. Embossed boundaries for satin stitch control

Instead of drawing your pattern with ink, try embossing the paper with a stylus first.
The indented channels act as a physical guide for your needle, ensuring your satin stitches remain perfectly contained and elevated.
This technique mimics the look of padded embroidery without the need for complex underlay stitches.
Use this method when designing modern floral stitch ideas that look like real petals when seen up close.
5. Reinforcing vintage ephemera for anatomical art

Stitching on vintage book pages requires a delicate hand and structural support.
Apply a thin layer of fusible interfacing to the back of the page before you start; this prevents the brittle paper from crumbling under thread tension.
Use a vibrant red thread for anatomical motifs to create a striking contrast against the aged, yellowed text.
This is a staple technique for creative ways to stitch your way through mixed media art.
6. High-contrast string art on matte cardstock

Create optical vibration by switching your canvas to black matte cardstock.
Pre-punch your holes with an awl to ensure precision, then weave bright threads in a mandala pattern to build density without bulk.
The black background absorbs light, making your neon or bright threads appear to float in space.
This style is ideal for modern mandala stitch patterns for calm mindful aesthetic daily crafting.
7. Negative space tension with metallic fibers

Turn the absence of paper into the focal point of your design.
Cut a leaf silhouette from cardstock and span the void with gold metallic thread; keep the tension loose enough to avoid warping the frame but tight enough to hold the line.
This creates a delicate, transparent effect that mimics the veins of a skeleton leaf.
It is a sophisticated approach to negative space embroidery techniques that create luxurious minimalist wall art for any home.
8. defining watercolor bleeds with running stitch

Let paint handle the color while thread handles the definition.
Apply a loose watercolor wash and let it dry completely before adding a simple black running stitch to outline the organic shapes.
The contrast between the fluid paint and the rigid, dashed line creates a modern topographical look.
This method allows you to explore abstract thread line art creations that look like modern gallery pieces.
9. Integrating quilled flow with stitched anchors

While quilling is usually glued, stitching the base layer adds durability and texture.
Use thread to tack down the starting points of your paper swirls, integrating the two mediums seamlessly.
The play between the coiled paper edge and the flat paper surface creates a dynamic wave effect.
Perfect for those interested in ocean marine embroidery wall themes perfect for coastal inspired homes.
10. Utilizing corrugated channels for yarn guides

Stop throwing away shipping boxes and start seeing them as textured grids.
The internal flutes of corrugated cardboard provide perfect spacing for needle placement, allowing you to use heavier yarn without damaging the material.
Peeling back the top layer reveals a ribbed surface that grips the yarn, adding an industrial, recycled aesthetic.
This is a brilliant way to experiment with eye-catching yarn wall art projects using only recycled materials.
11. Structural edge stitching for 3D paper forms

Move beyond flat surfaces by assembling 3D paper shapes with thread.
Use a blanket stitch or whip stitch along the folded edges of heavy paper to construct polyhedrons or stars.
The thread acts as the hinge and the decoration, turning a flat sheet into a sculptural object.
This technique relates closely to handmade sculptures that combine modern design with craft.
12. Floral embellishments on monochrome photography

Breathe new life into forgotten images by treating the photo as your fabric.
Pre-poke your holes with a thimble before stitching, as photographic paper is unforgiving of mistakes.
Adding bright yellow french knots and satin stitch leaves creates a stunning juxtaposition of time periods.
This is a core technique for mixed media crafts with embroidery to transform old journals.
13. Chaotic yarn lines over textured acrylics

Combine heavy-body paint texture with the softness of yarn.
Apply a thick layer of acrylic paint (or gesso) to cardstock, scratch into it while wet, and once dry, stitch erratic lines over the top.
The yarn sits on top of the paint ridges, creating a multi-sensory tactile experience.
Use this for abstract thread overlapping patterns that create beautiful color chaos.
14. Geometric precision over organic washes

Balance is key: contrast strict geometry with soft, unpredictable color.
Create a purple watercolor bleed on heavy paper, then overlay a sharp, blackwork-style geometric pattern.
The thread imposes order on the chaos of the watercolor, resulting in a design that feels both engineered and organic.
This style fits perfectly with geometric hoop art designs that make a bold statement on walls.
15. Burnt edges for thematic storytelling
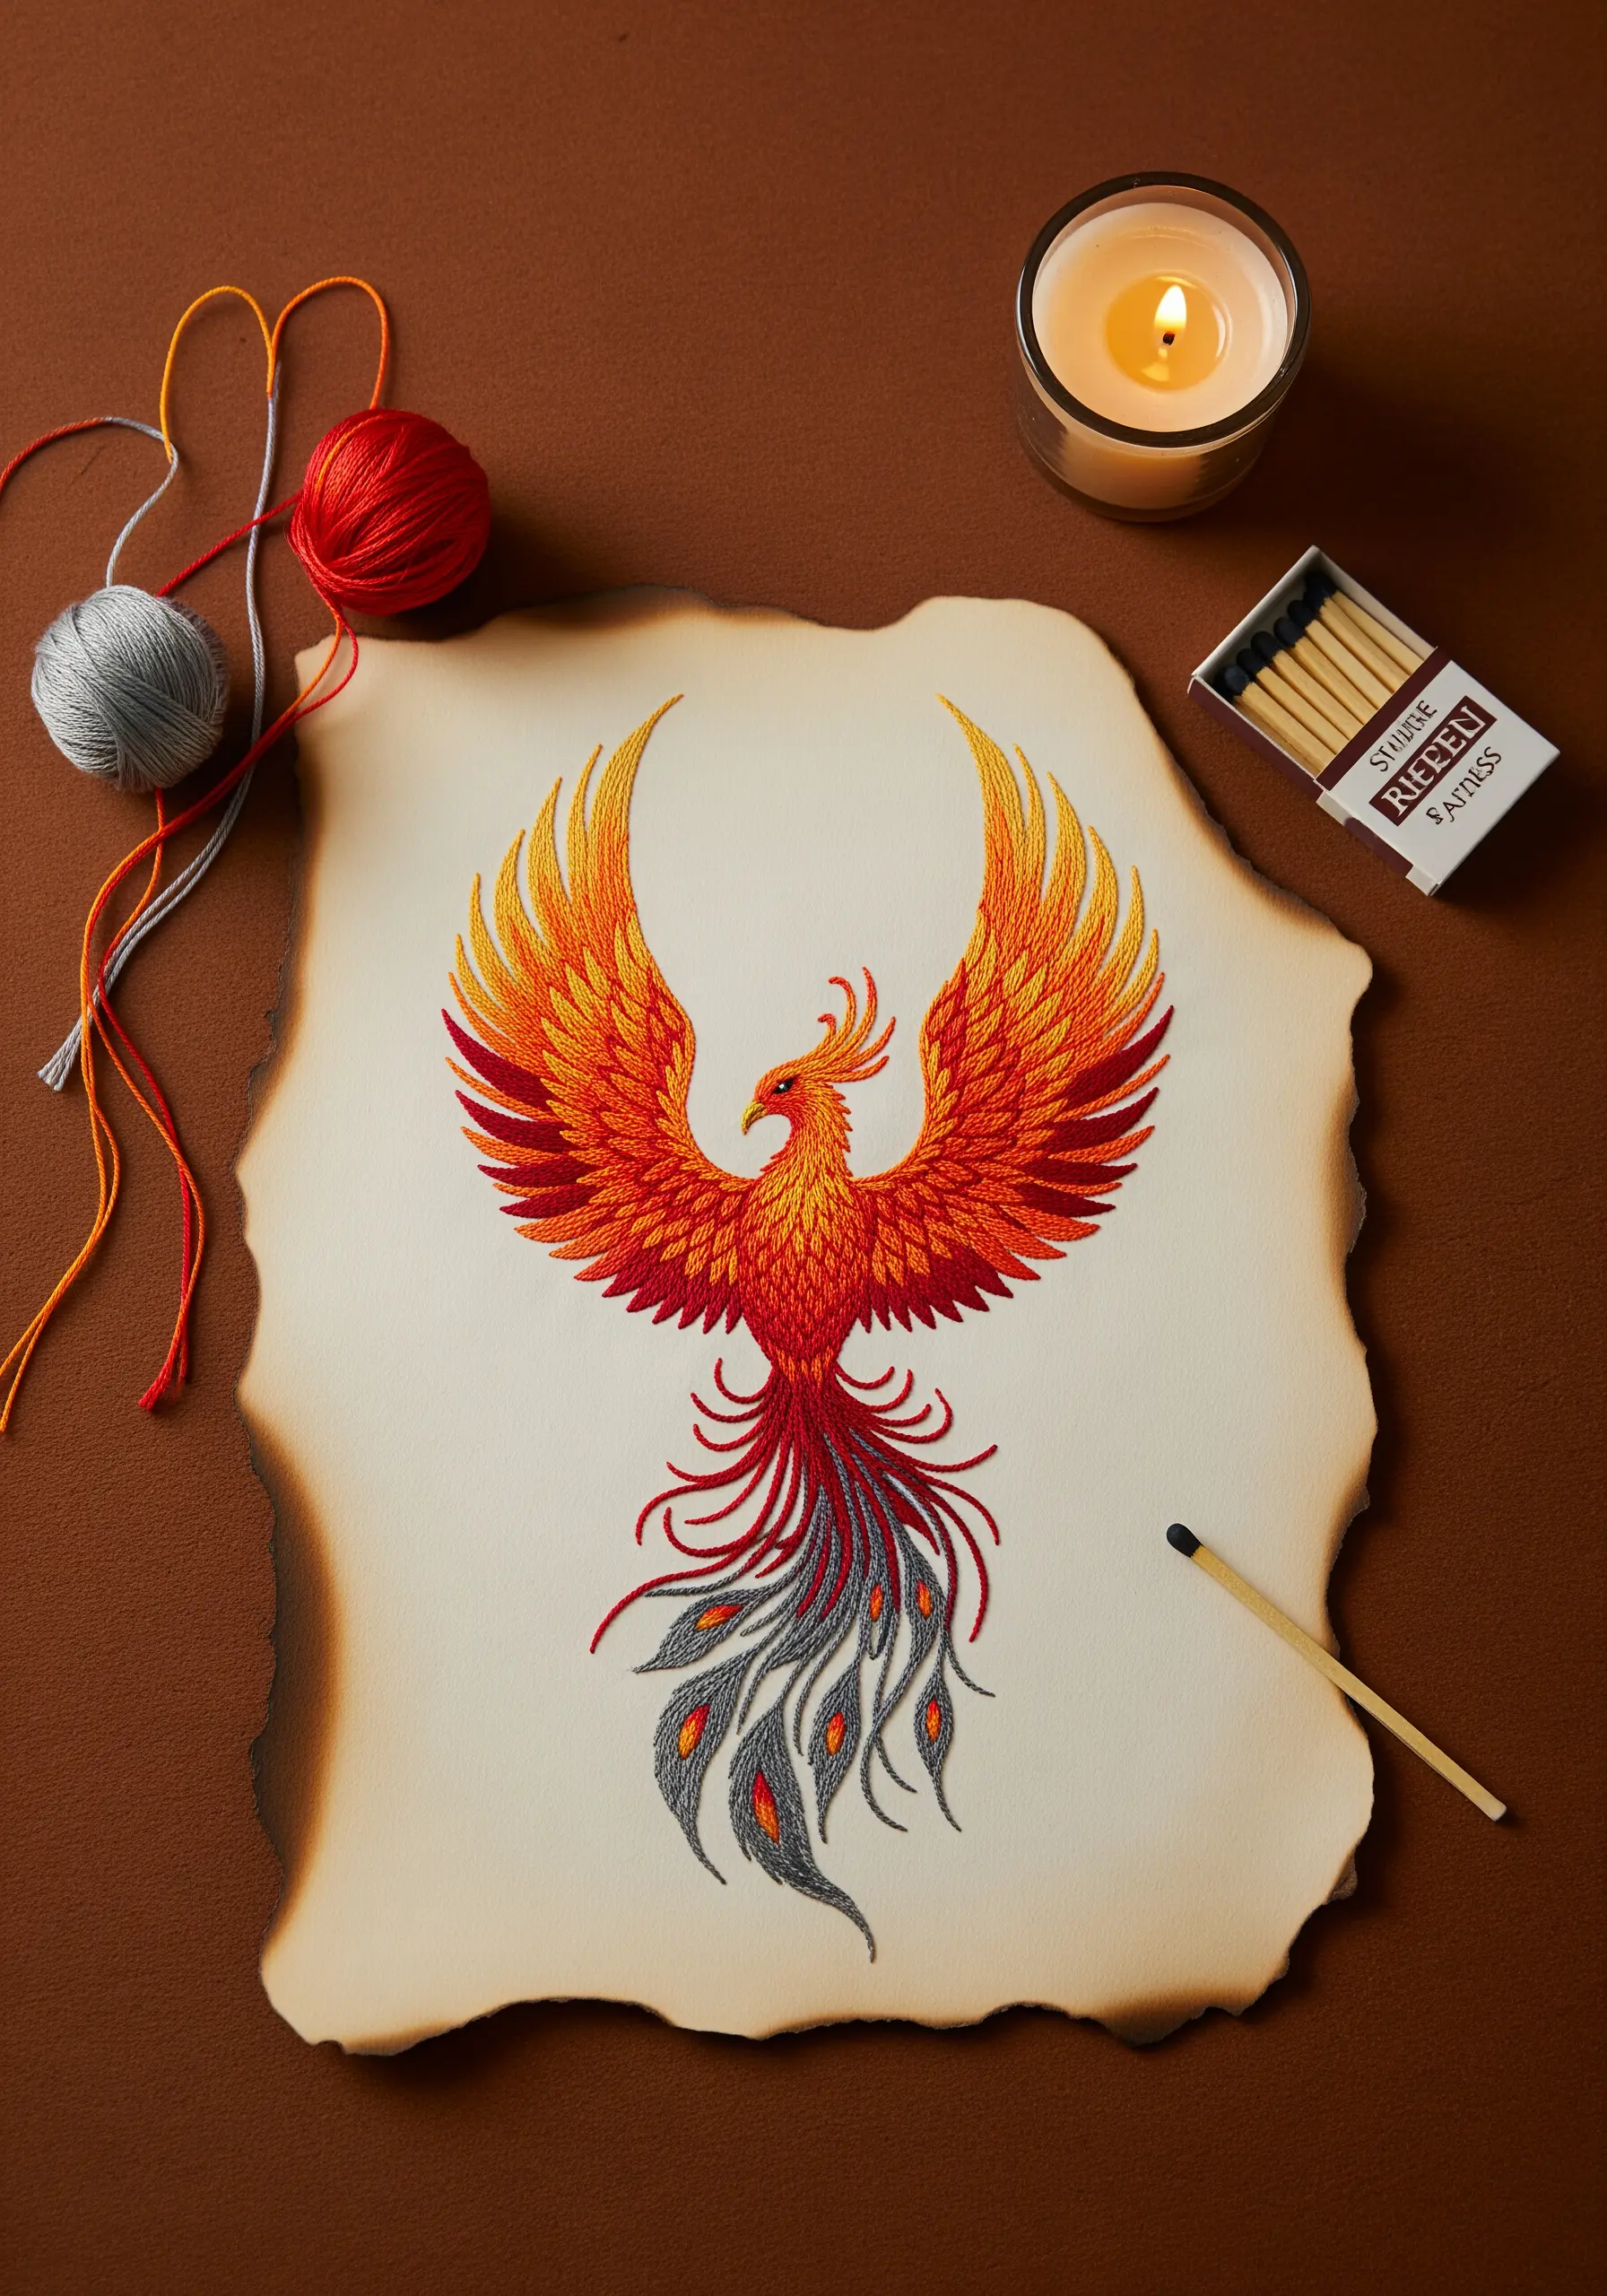
Incorporate the physical state of the paper into your narrative.
Carefully burn the edges of your paper (in a safe environment) to create an antique, survivor aesthetic before stitching a motif like a phoenix.
The charred edge complements warm thread colors like orange and red, enhancing the ‘fire’ theme.
This dramatic effect elevates vintage inspired embroidery wall decor that makes any room feel nostalgic.
16. Washi tape as a decorative stabilizer

Washi tape isn’t just for planners; it reinforces paper for stitching.
Lay down strips of patterned tape and run a backstitch down the center; the tape prevents the thread from tearing through thinner papers.
This adds pattern-on-pattern complexity without adding bulk.
It is a fun addition to collage art inspirations that look like embroidery without using fabric.
17. Split stitch monograms on deckle-edge paper

Handmade paper has a soft, uneven texture that demands a flexible stitch.
Use a split stitch for lettering; it navigates the bumps of the paper pulp better than a backstitch, creating smooth, flowing curves.
The rich texture of the paper negates the need for background filling.
This is the ultimate technique for personalized name initial embroidery ideas.
18. Breaking the gilded surface

There is something satisfying about disrupting a perfect surface.
Apply gold leaf to your cardstock, then stitch chaotic black lines through it; the needle creates tiny fissures in the gold, adding age and character.
This juxtaposition of luxury (gold) and mess (tangled thread) creates high-art drama.
Try this for contemporary metallic thread designs that scream luxury avant garde style.
19. Kinetic pop-up architecture

Embroidery doesn’t have to stay flat; make it move.
Stitch your details onto flat cardstock components first, then assemble them into a pop-up mechanism.
Keep the back of your stitching incredibly neat or cover it with a backing layer so it doesn’t snag when the card closes.
This innovative approach is essential for paper art techniques every embroidery lover needs to try this month.


