
This holiday season, I want you to set aside the pressure for perfection and instead, find the quiet joy in making something with your own hands. Your festive decor doesn’t need to come from a big box store to feel magical; in fact, the most memorable pieces are often the ones infused with your time, care, and creativity.
Think of embroidery not as a complex skill to be mastered, but as a simple, meditative practice. Each stitch is a small, intentional mark. Each color choice is a reflection of your own personal style. These wall hangings are more than just decorations—they are stories told in thread, destined to become the heirlooms your family cherishes year after year.
Here, you won’t find impossible projects. Instead, you’ll discover techniques that elevate your work with surprising ease—a simple shift in stitch direction to create texture, a thoughtful use of negative space for modern appeal, or a touch of metallic thread for a subtle, elegant sparkle. Let’s begin.
1. Master the Art of Thread-Painted Portraiture
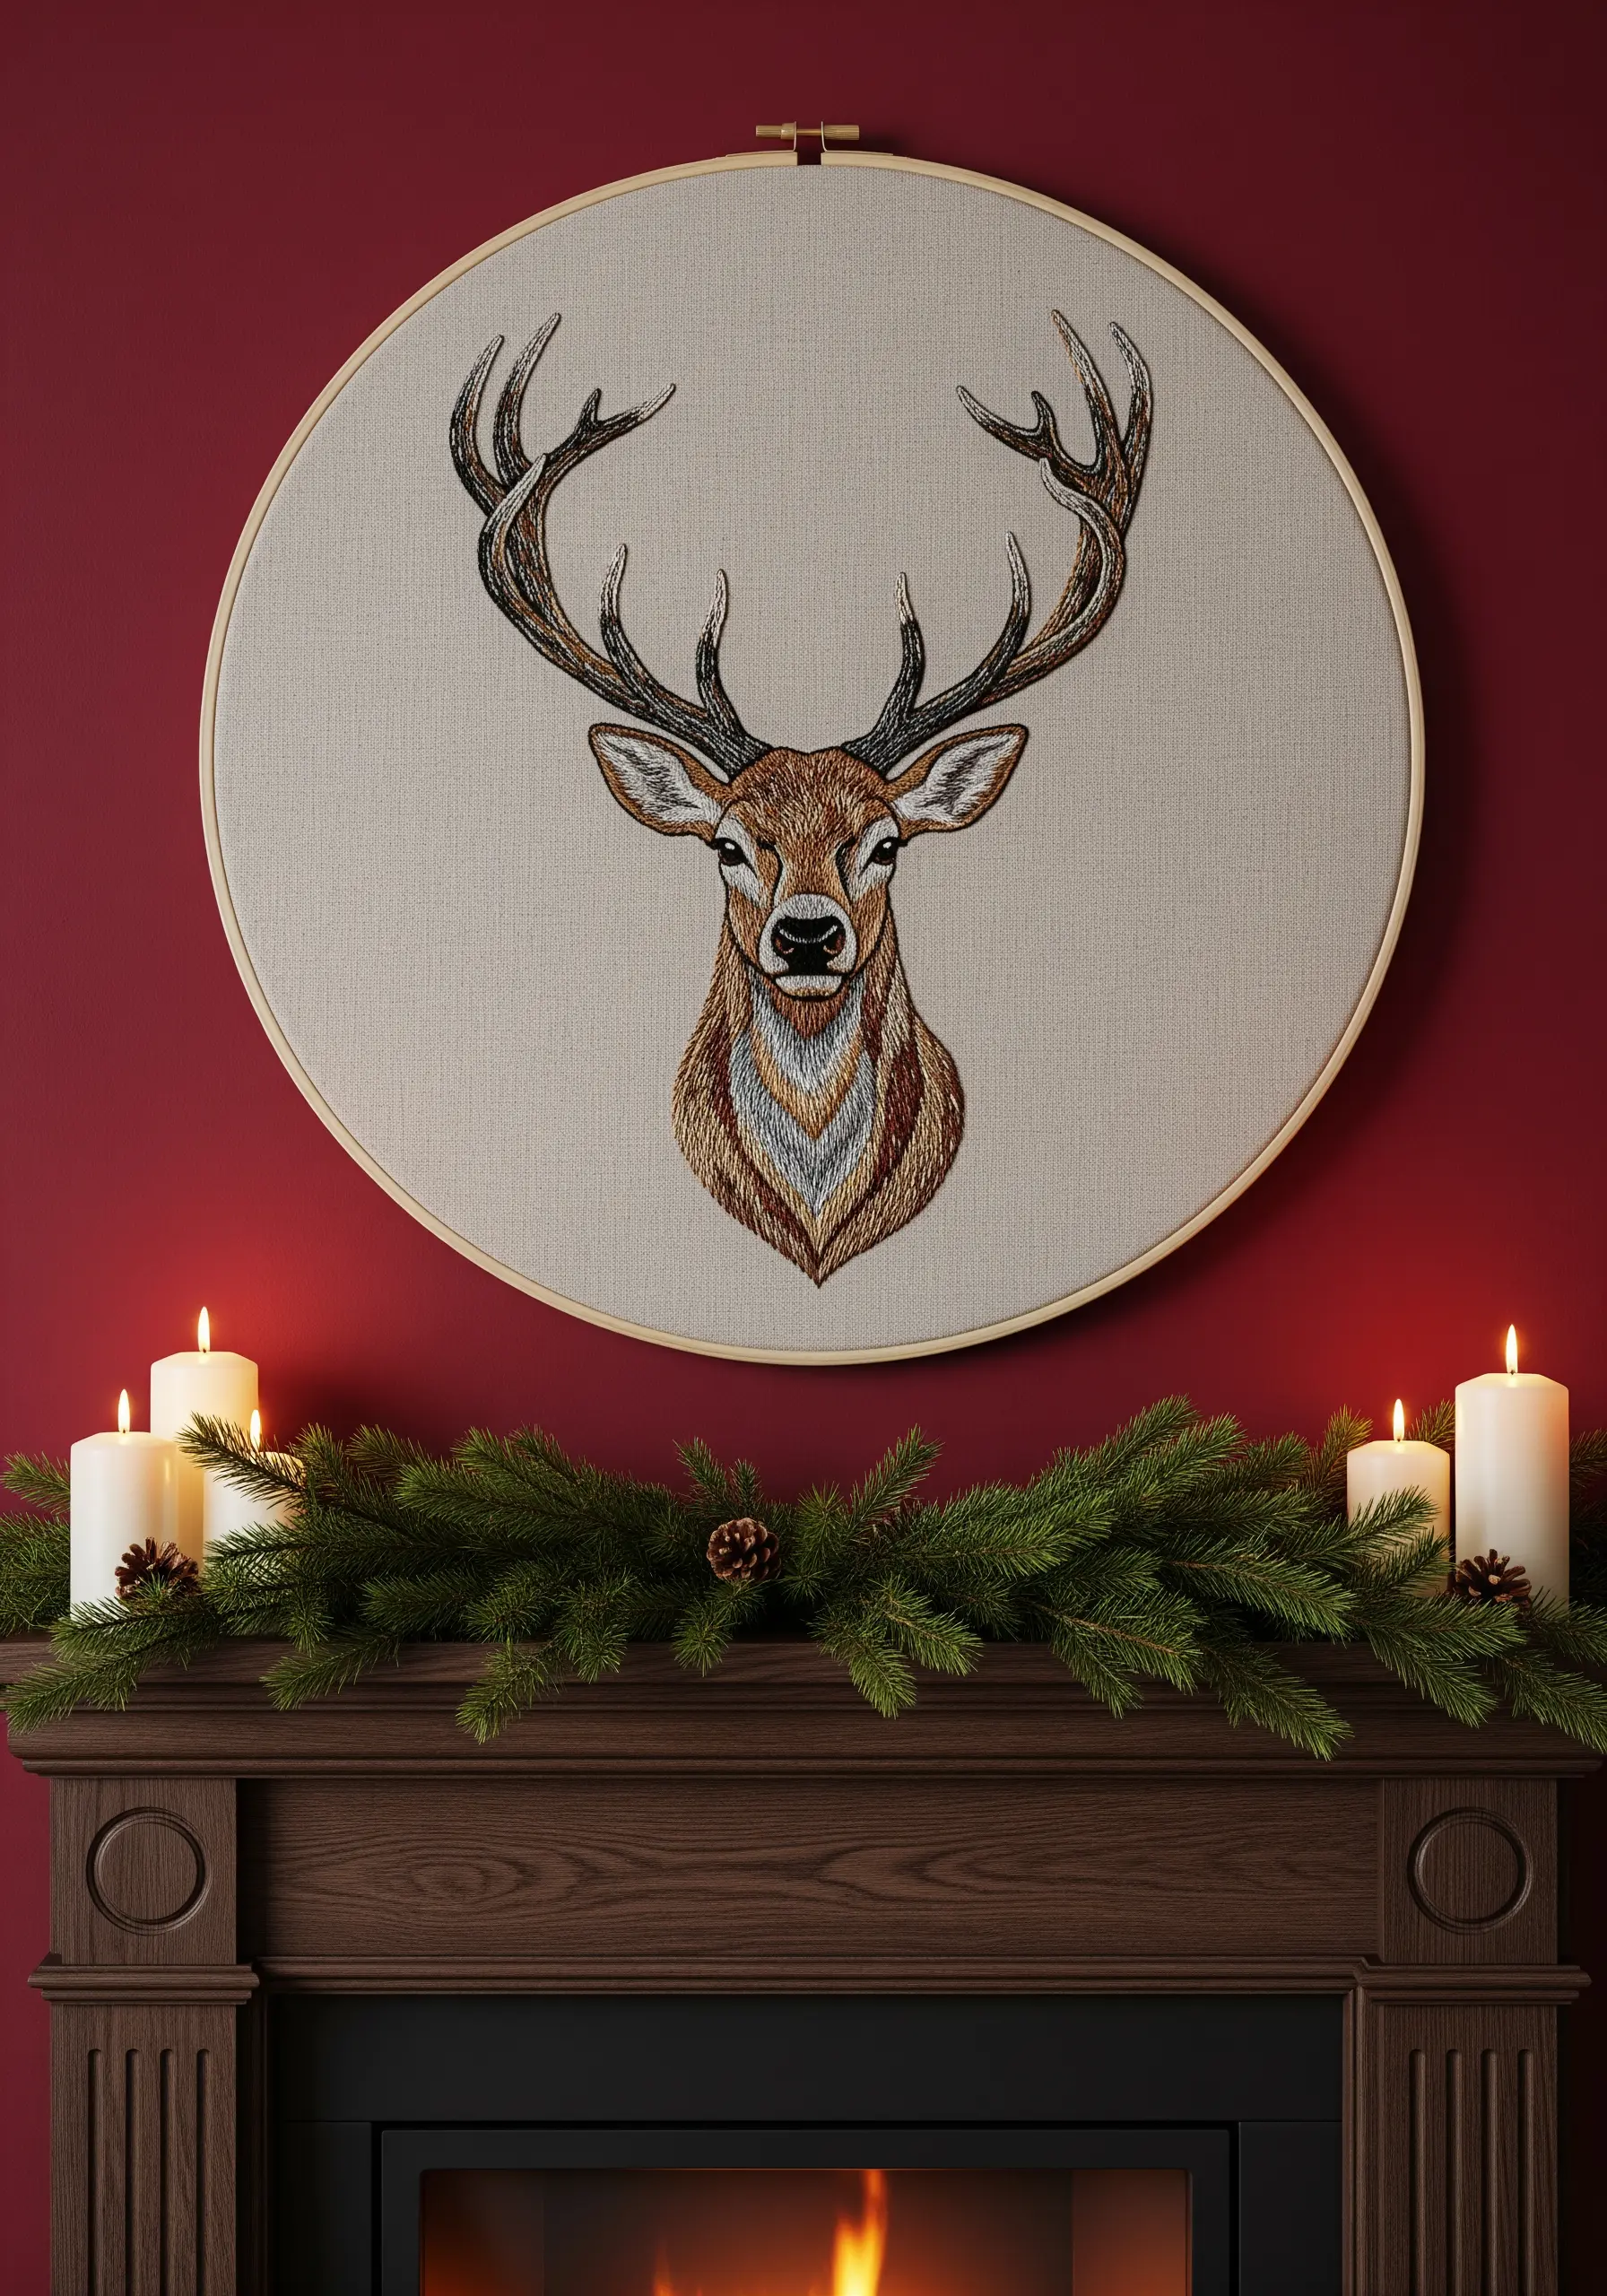
To achieve this stag’s lifelike fur, move beyond basic satin stitch and embrace thread painting with the long-and-short stitch technique.
Use a single strand of floss in varying shades of brown, tan, and cream to blend colors seamlessly, creating depth and realism in the coat.
Work in small sections, following the natural direction of hair growth—shorter stitches around the eyes and muzzle, longer ones down the neck.
This directional stitching is what tricks the eye into seeing texture, transforming a flat image into a dynamic portrait.
2. Curate a Minimalist Triptych with Metallic Accents
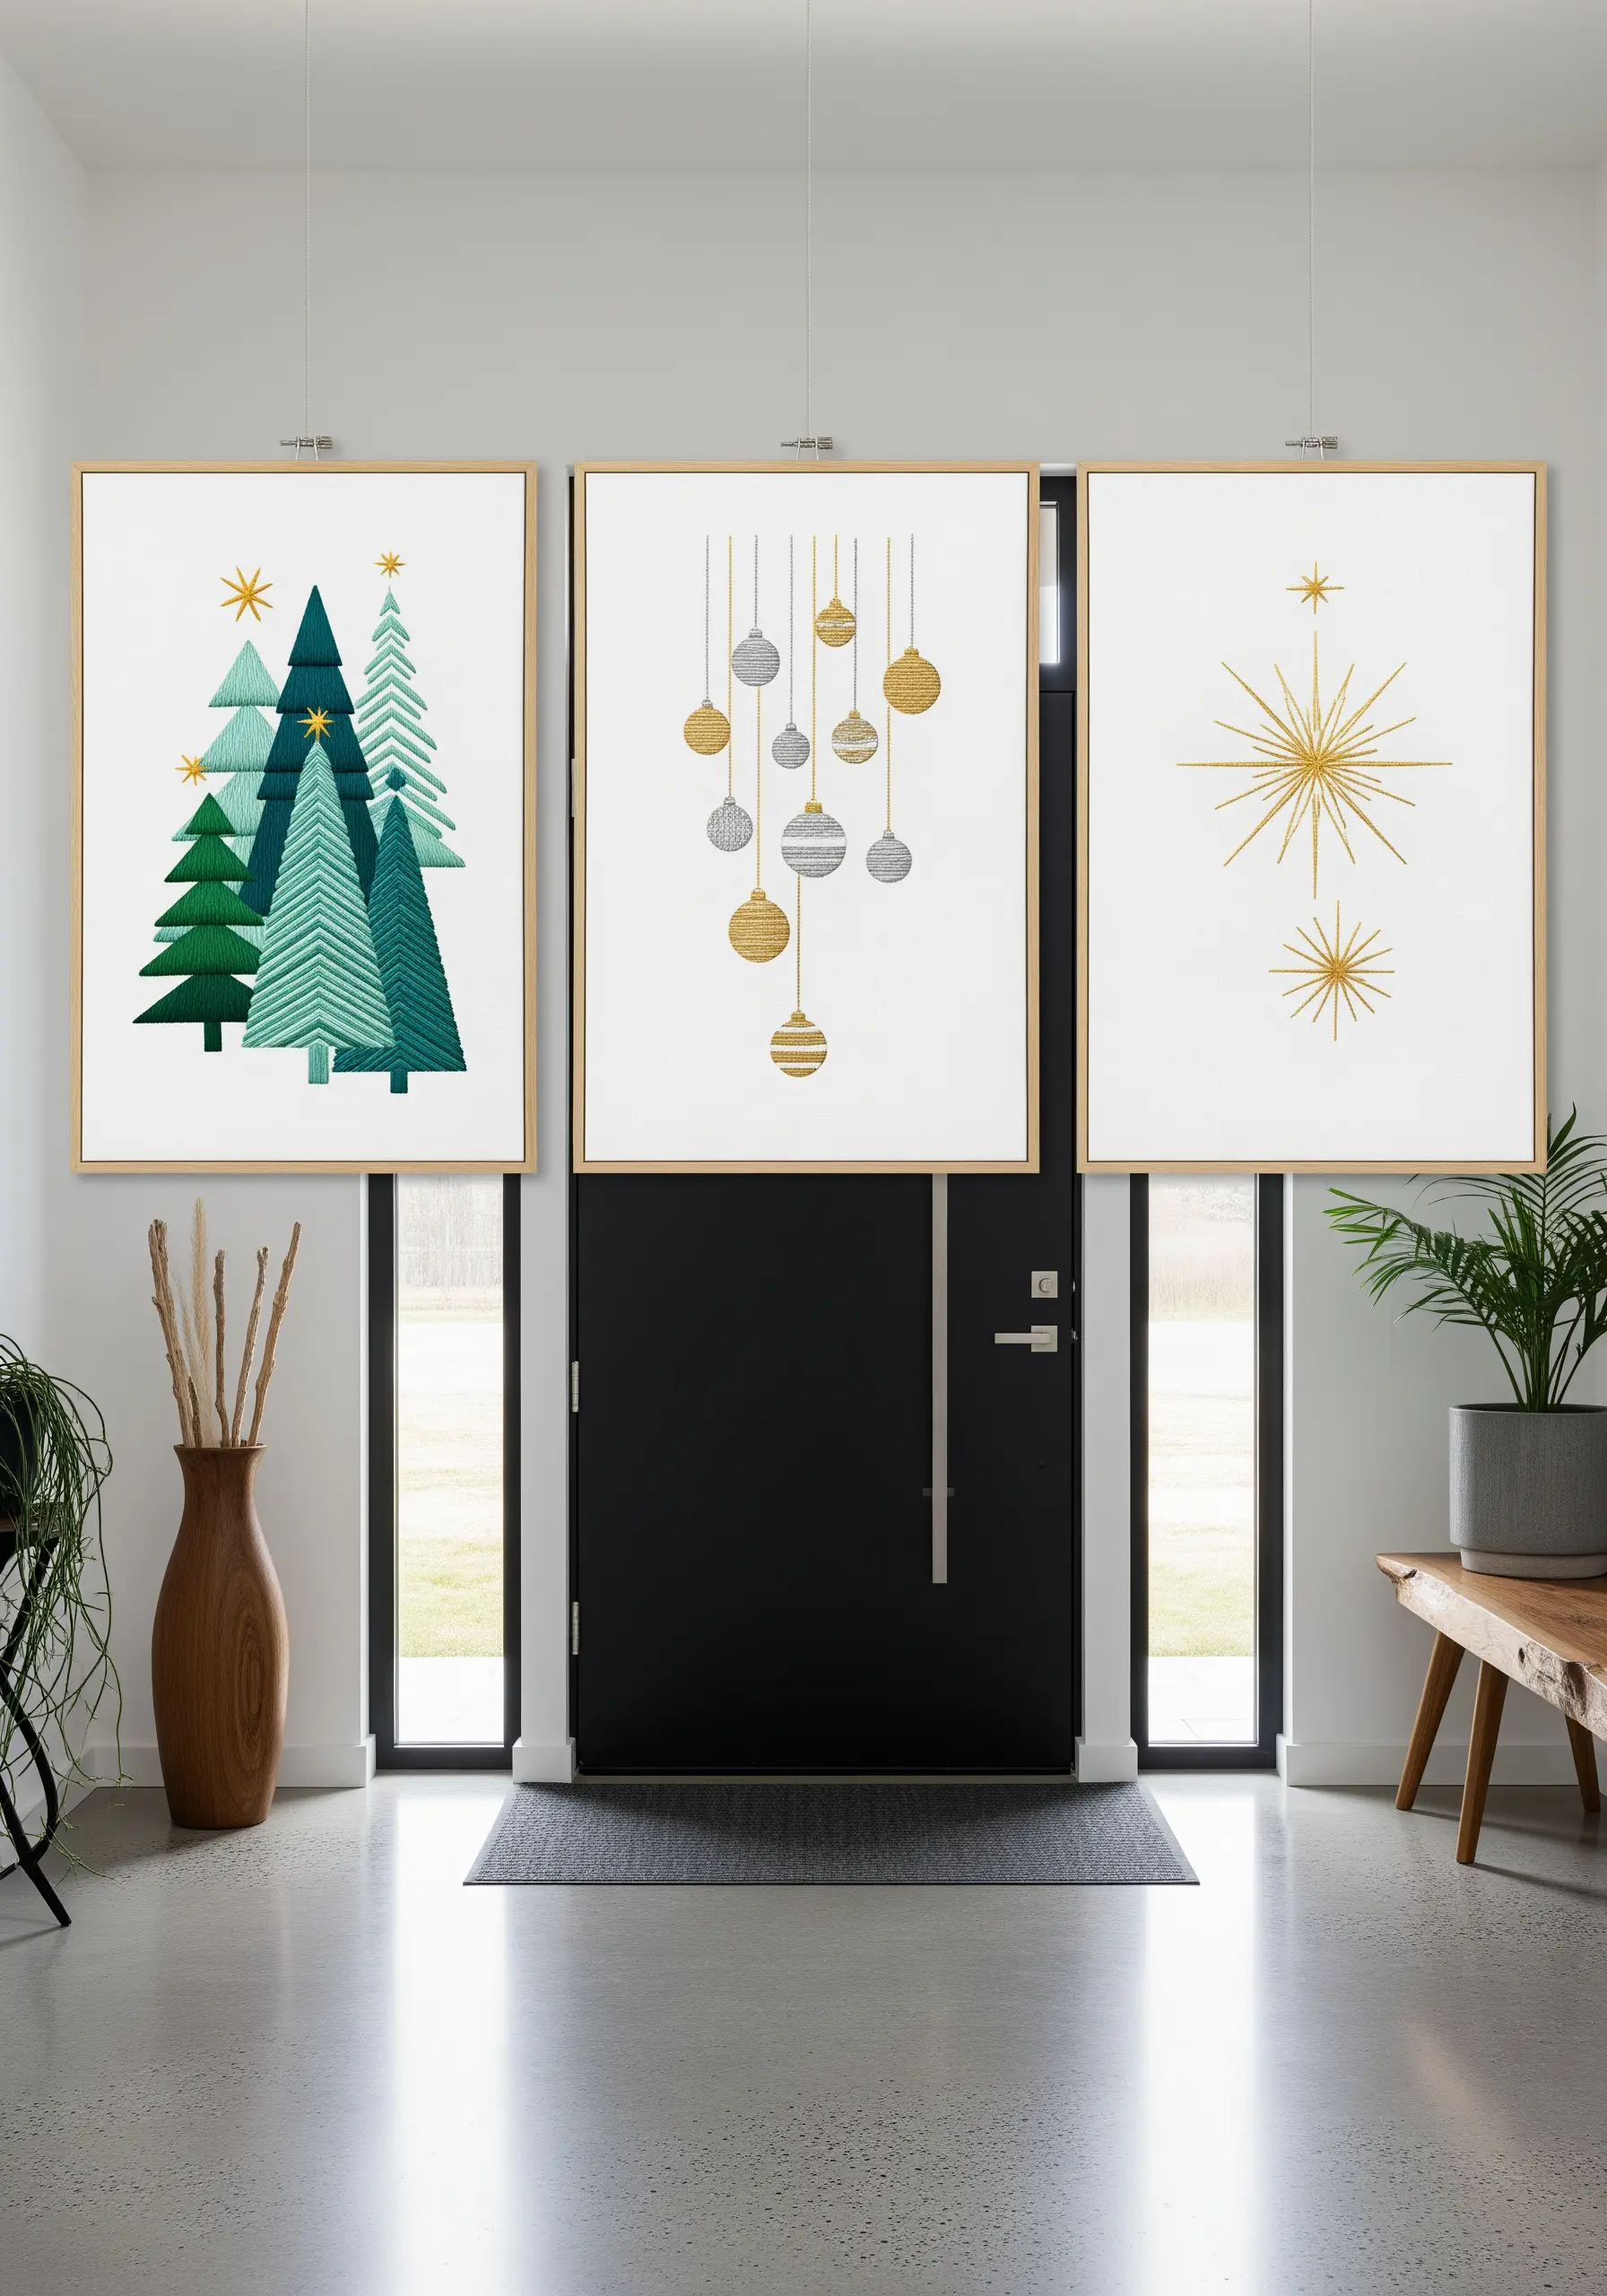
Elevate simple line art by presenting it as a coordinated set of three.
For the crisp geometric trees, use a satin stitch, but alternate the angle of your stitches in each section to create a subtle, light-catching pattern.
Use a high-quality metallic thread for the starbursts and ornaments, outlining them with a sharp backstitch to maintain clean, graphic lines against the stark white fabric.
The negative space is as important as the stitching; this thoughtful composition gives each piece room to breathe and feels intentional, not cluttered.
3. Achieve Bold Dimension with Couching and Yarn
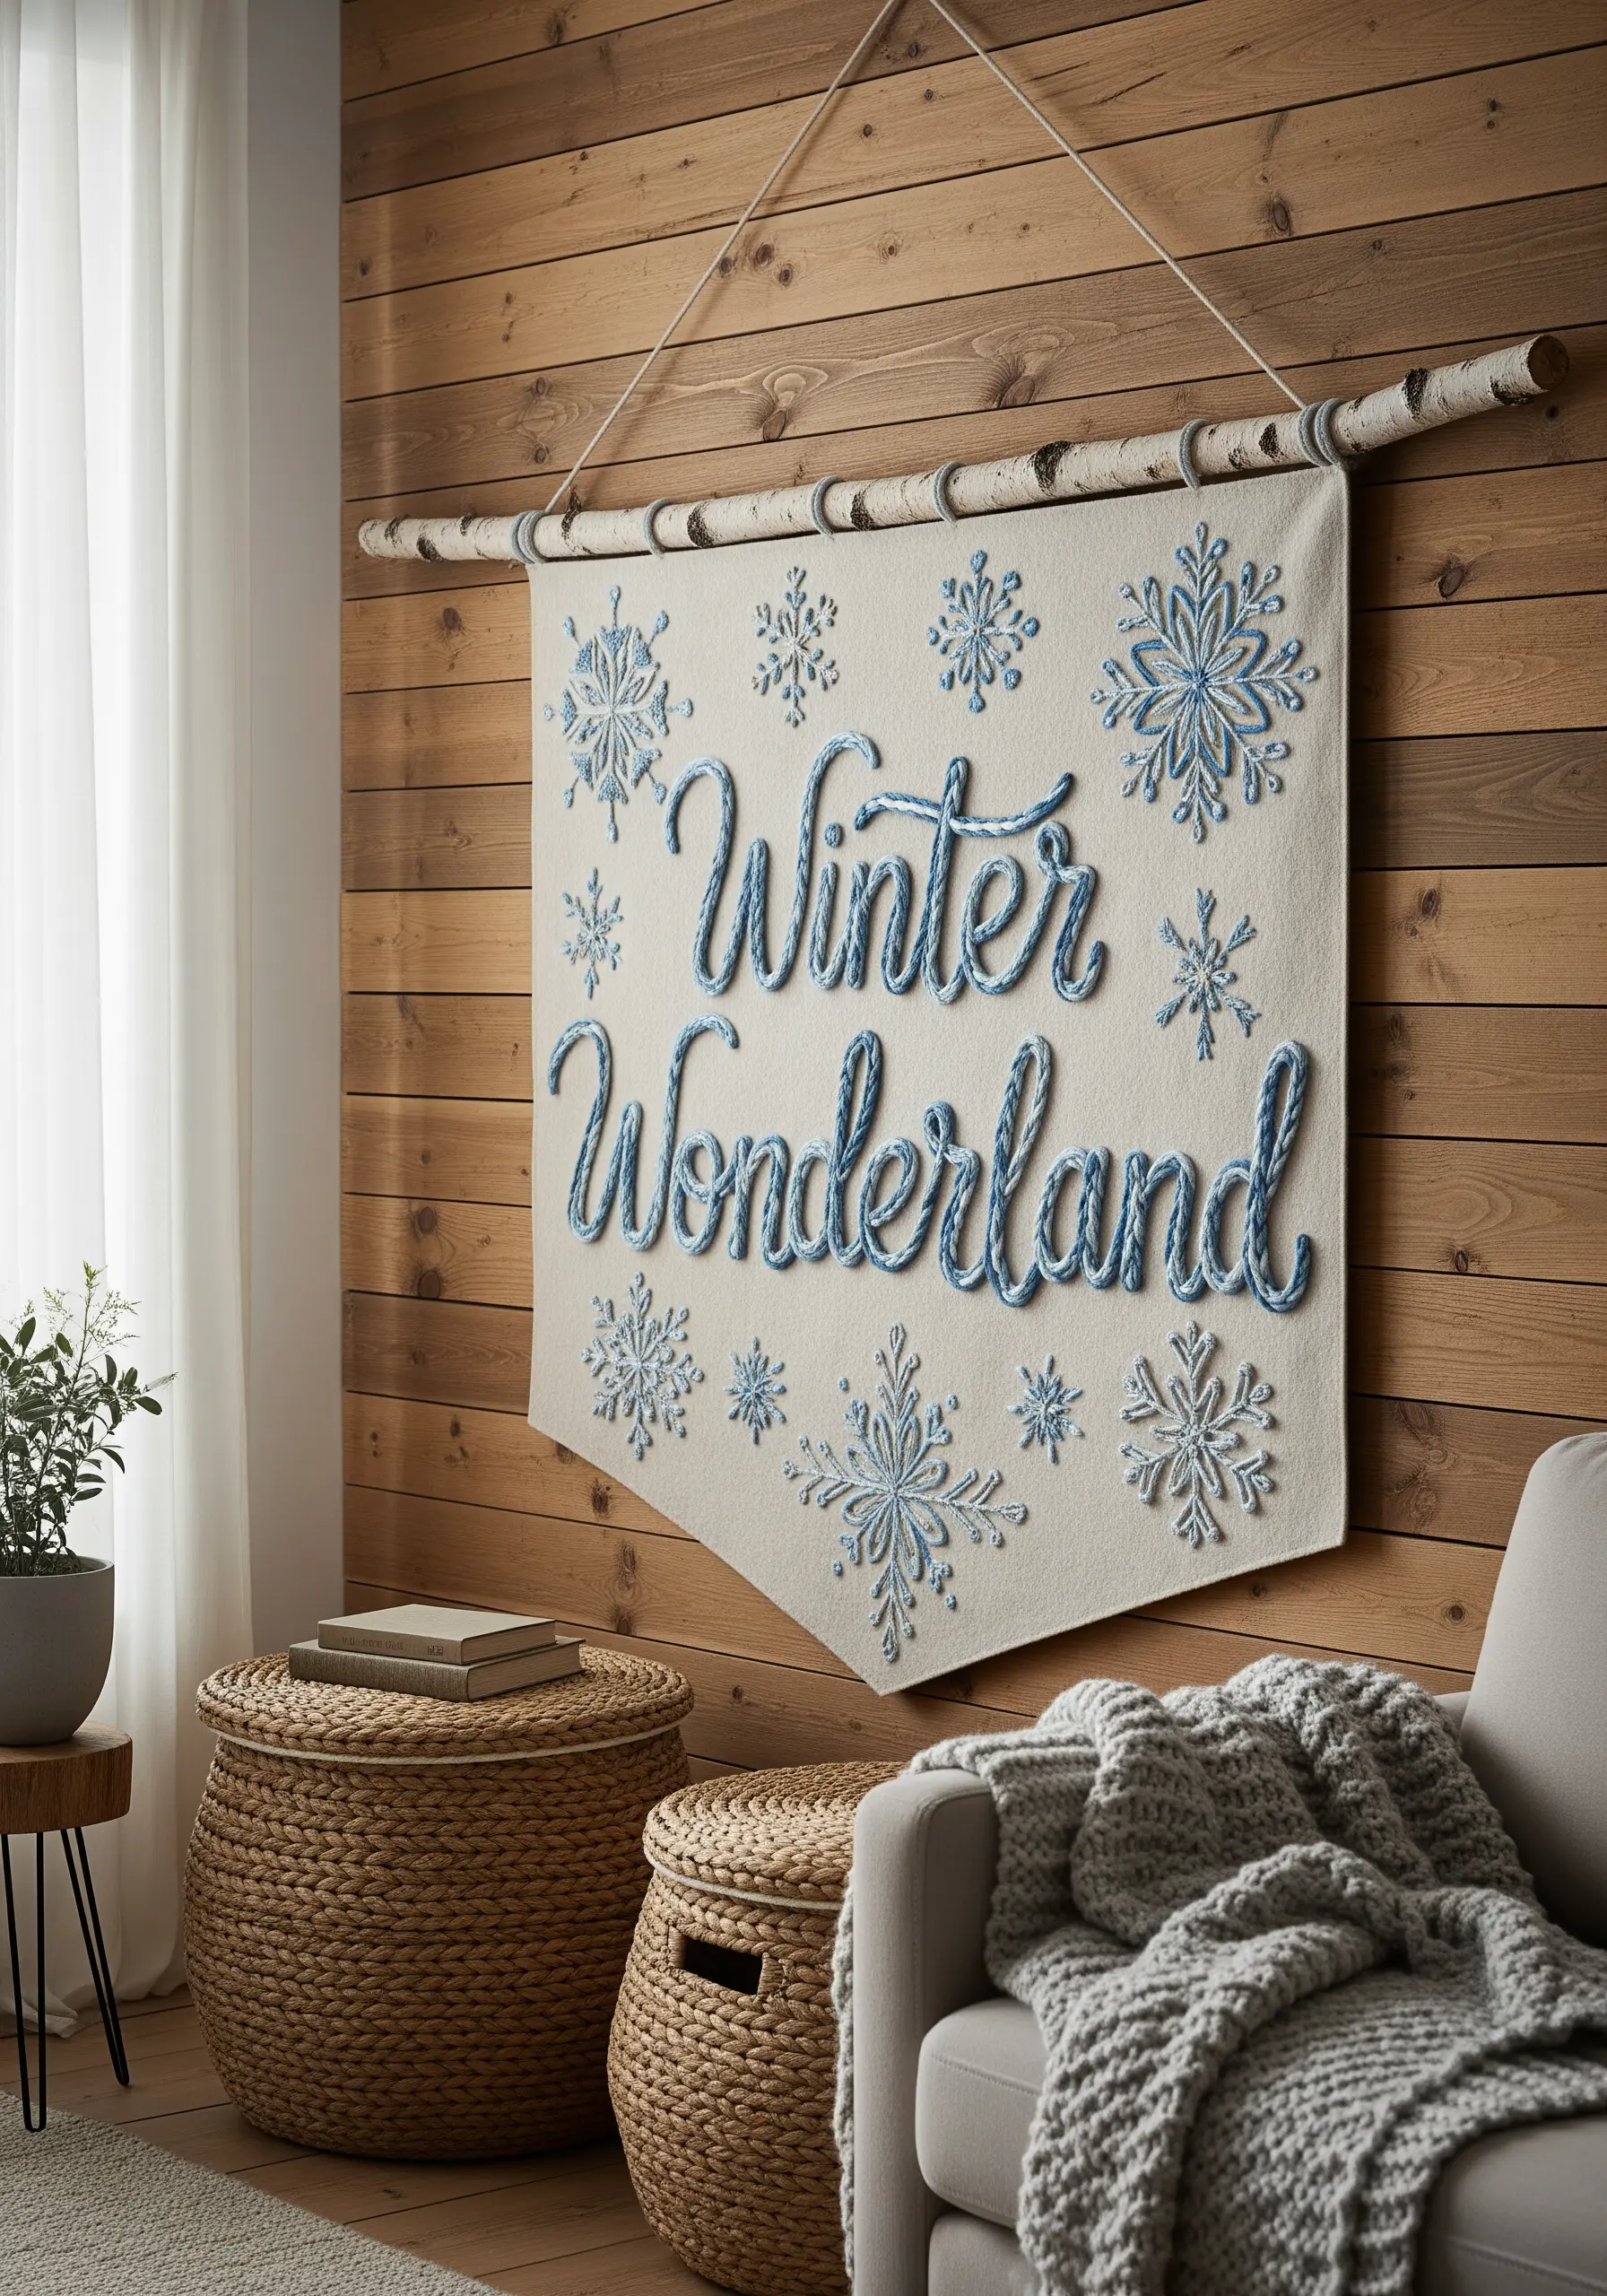
Create typography that literally pops off the fabric by using yarn or thick cord for your lettering.
Instead of trying to stitch *with* the bulky fiber, use the couching technique: lay the yarn along your design line and tack it down with a thinner, matching embroidery floss every quarter-inch.
This method gives you perfect control over curves and sharp corners, resulting in raised, sculptural text.
For the delicate snowflakes, switch back to standard six-strand floss to create a beautiful textural contrast between bold and fine elements.
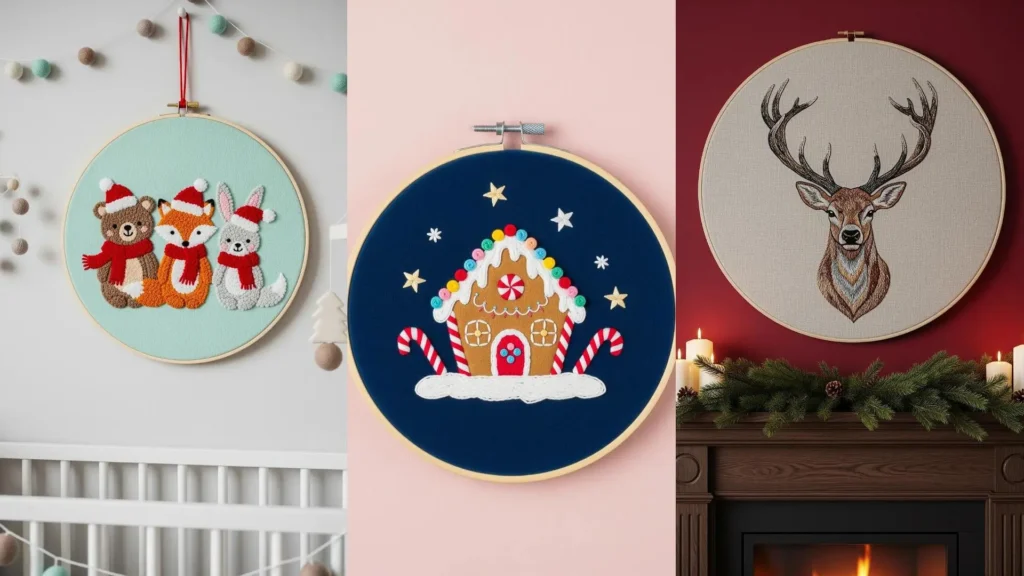
4. Build a Playful Scene with Textured Candy Stitches
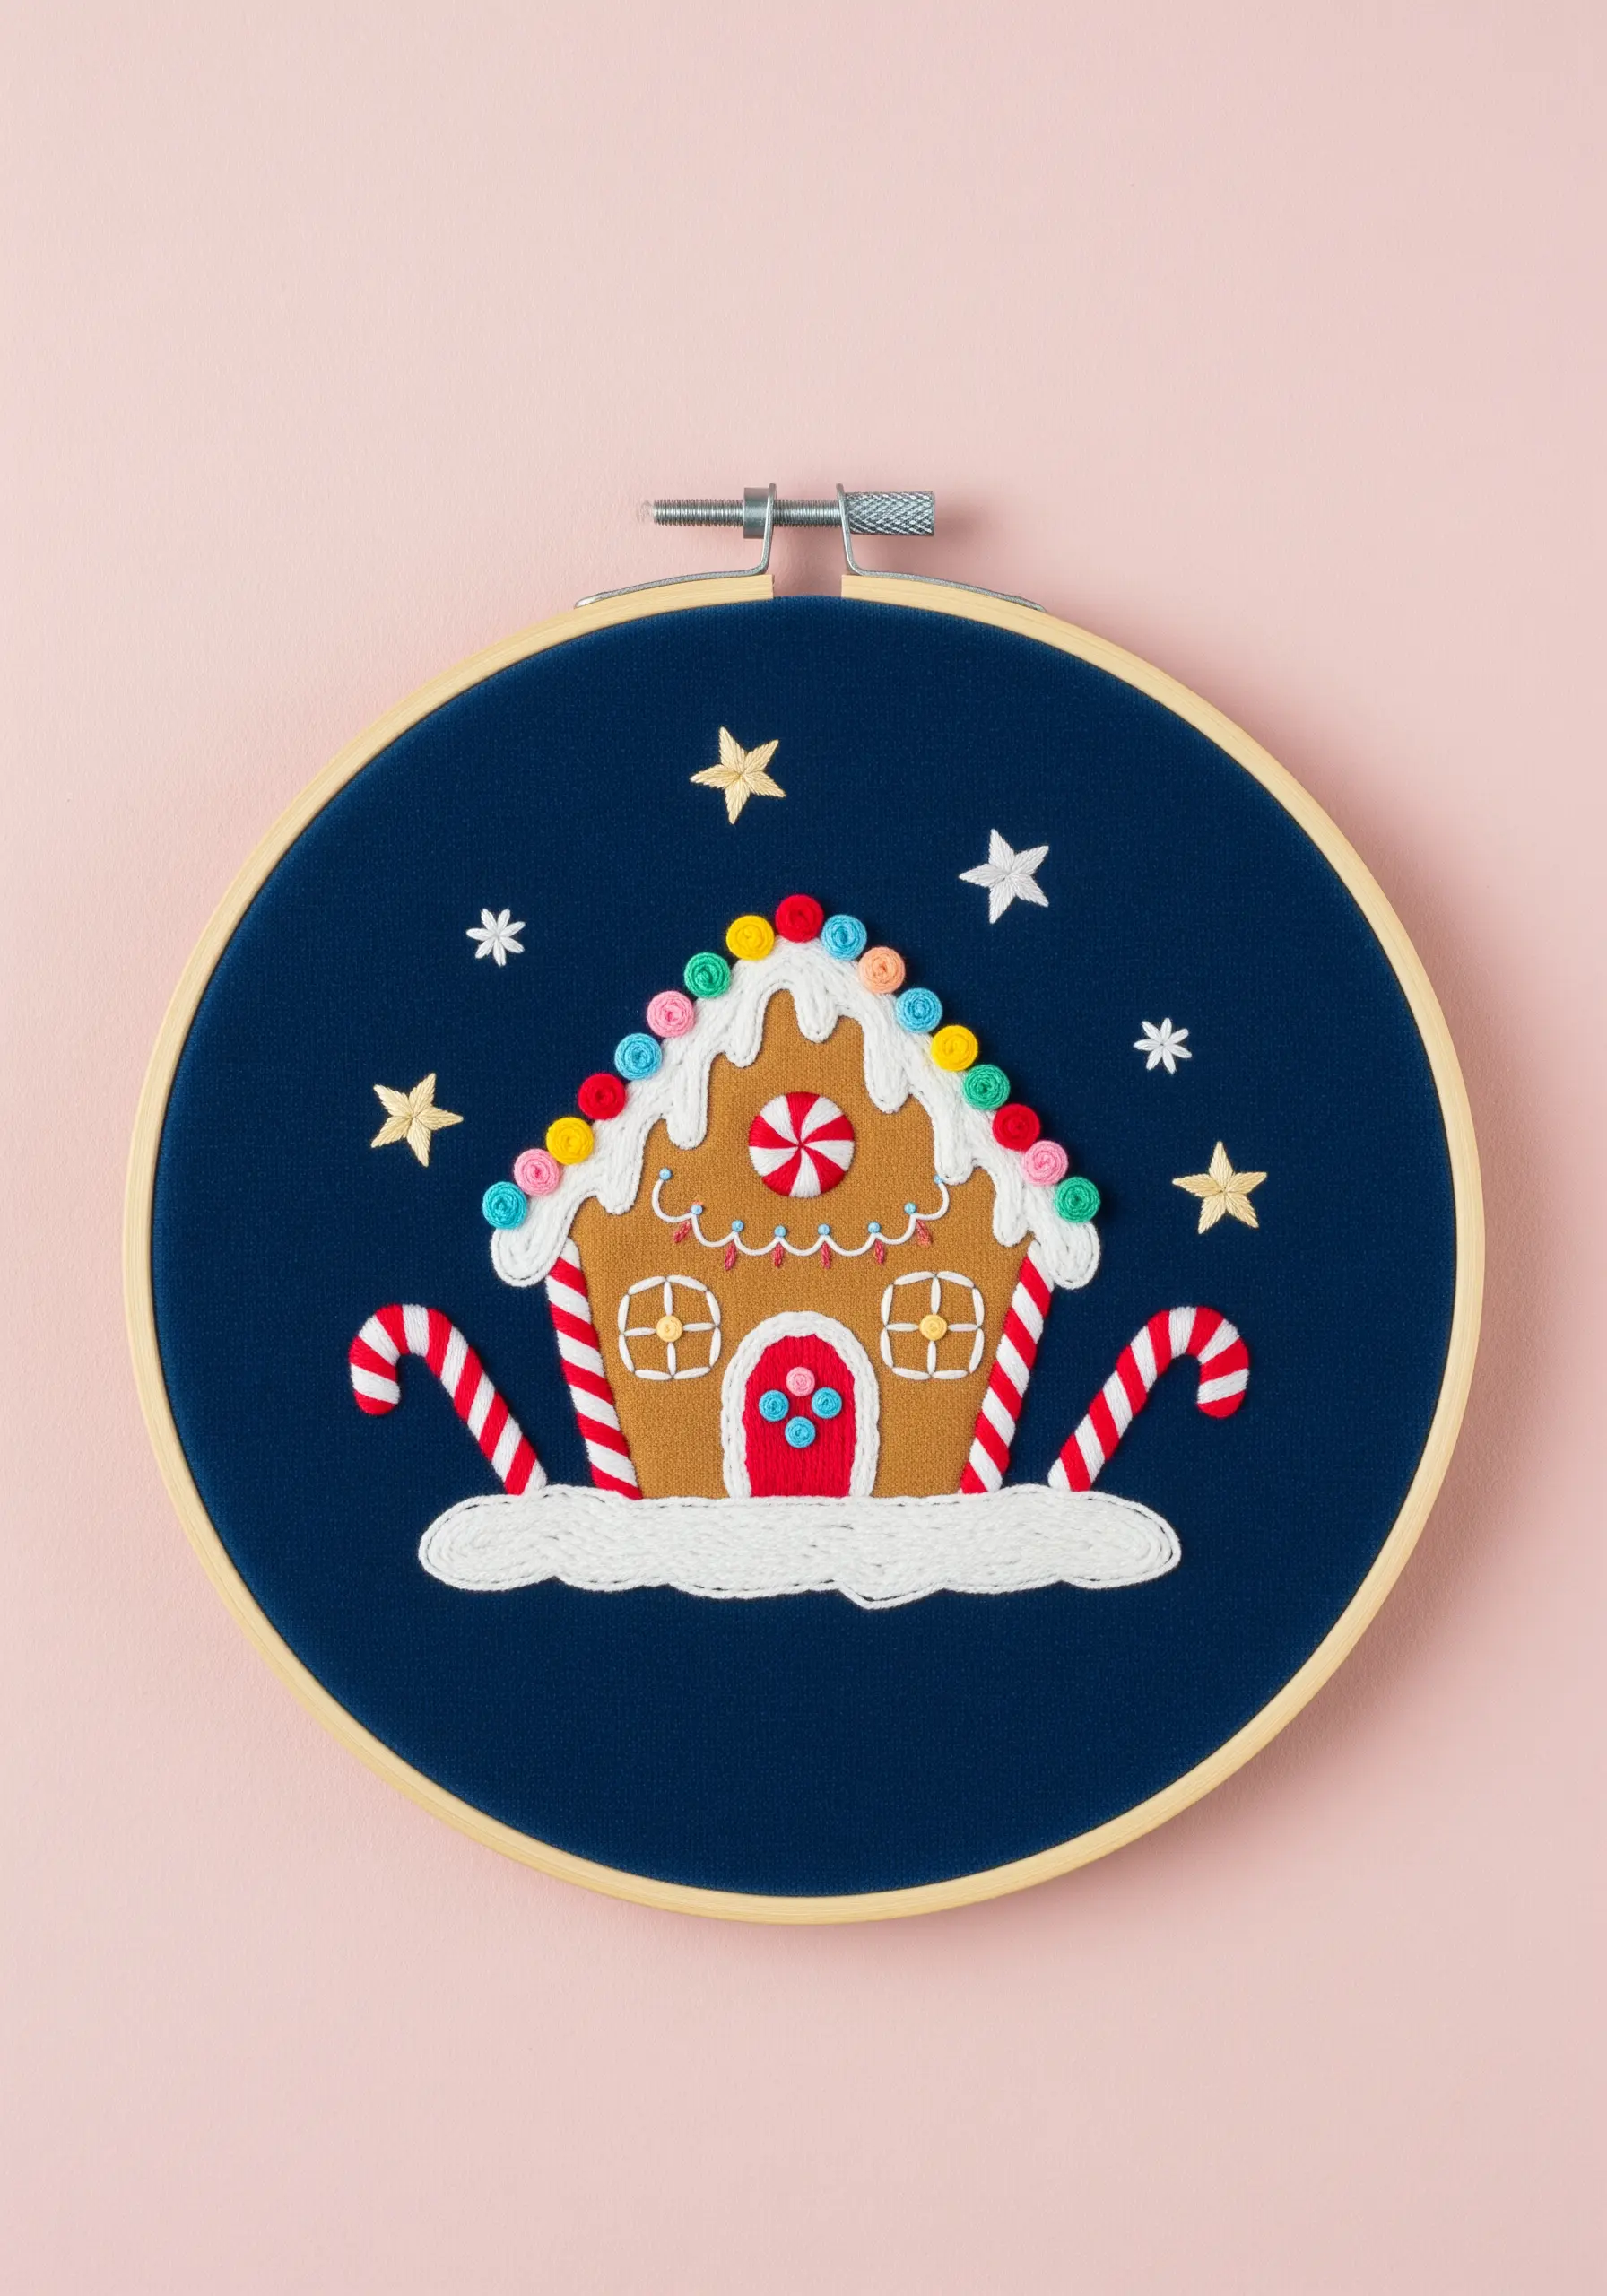
Give your gingerbread house a tactile, whimsical quality by assigning a specific stitch to each candy element.
Use tightly packed French knots in bright colors for the gumdrop roofline, creating a bumpy, sugar-coated texture.
For the candy canes, wrap a white satin stitch bar with red thread—a technique called whipping—to create perfect, clean stripes without color bleed.
Stitching on a dark, solid background like navy blue makes these vibrant, textural details stand out dramatically.
5. Design an Elegant, Large-Scale Botanical Tapestry
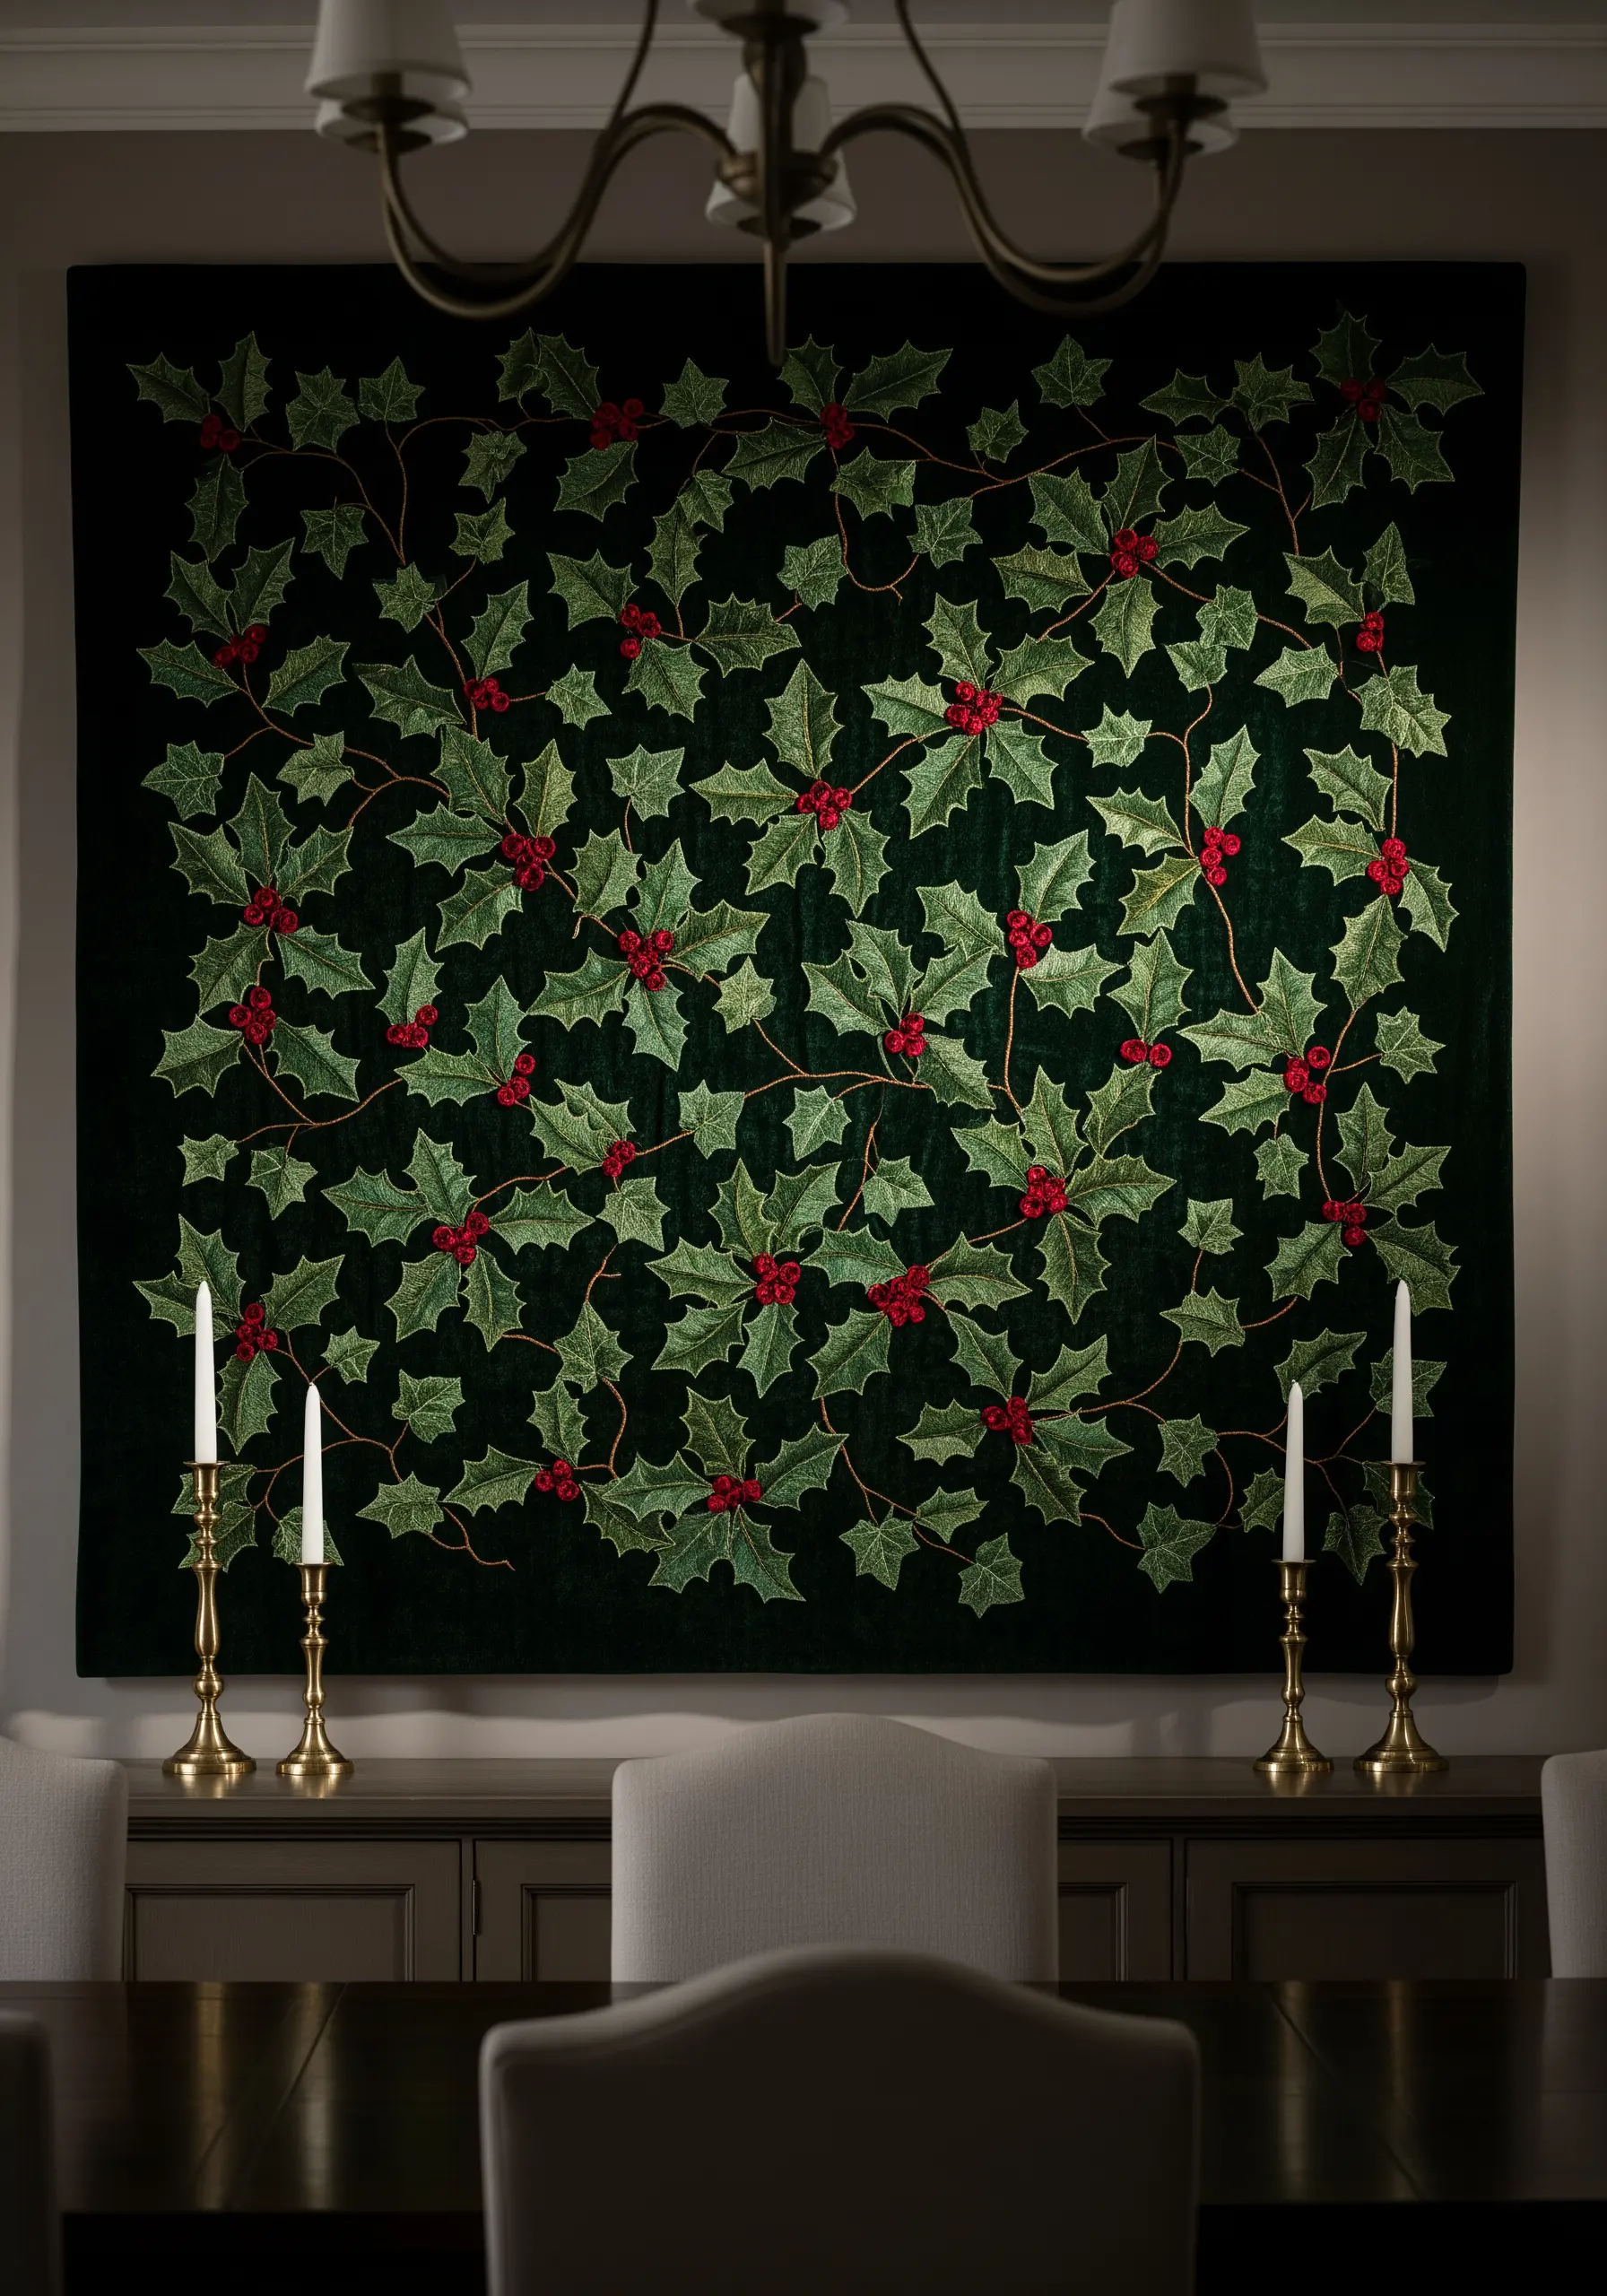
For an ambitious piece like a repeating holly pattern, consistency is key.
Create a reusable stencil for the leaf clusters to ensure uniform shape and spacing across the entire surface.
Use a fishbone stitch for the leaves; it naturally creates the central vein and gives each leaf a defined, organic shape.
Stitch onto a rich fabric like velvet or dark felt—the deep pile absorbs light, making your glossy thread colors appear even more vibrant and luxurious.
6. Frame Your Motifs with Geometric Stitch Borders
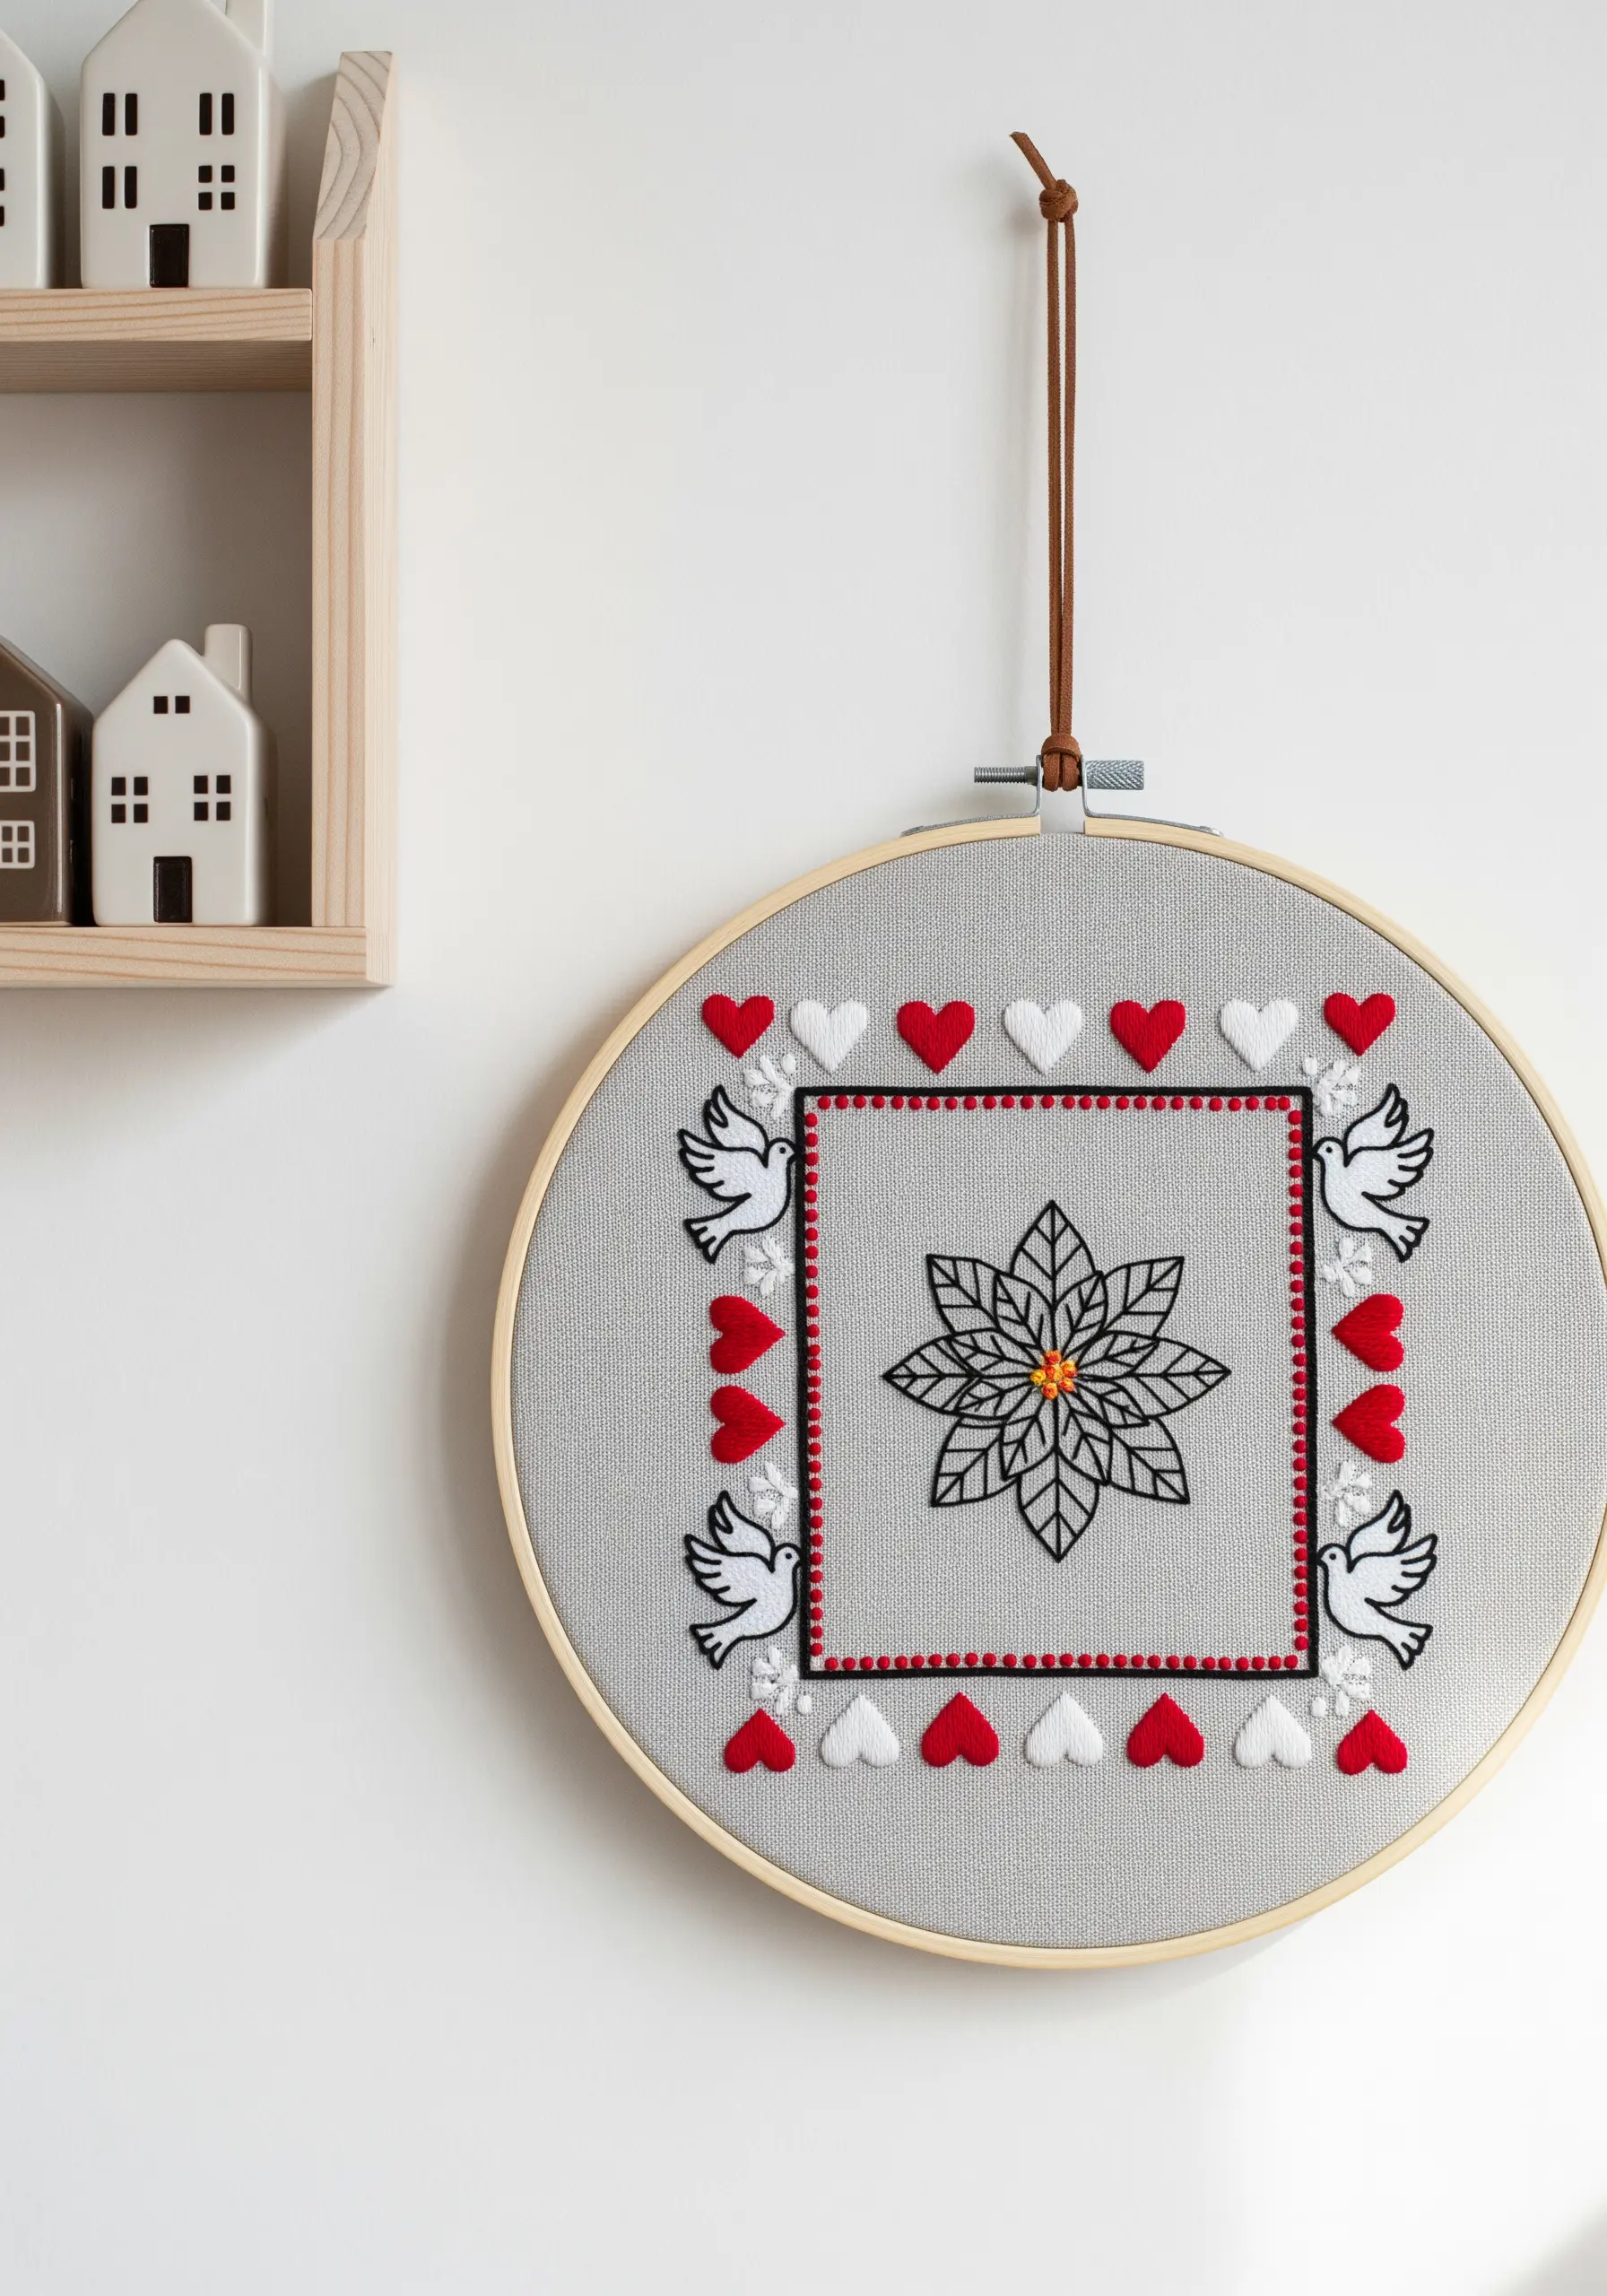
Add structure and a modern folk-art feel to your hoop art by containing your central design within stitched borders.
Use a simple backstitch or running stitch to create the inner square, then build outward with decorative elements.
The padded satin stitch hearts add a soft, dimensional quality that contrasts beautifully with the crisp lines of the central poinsettia.
This compositional technique draws the eye inward and makes a collection of smaller motifs feel like a single, cohesive piece.
7. Compose a Thematic Embroidery Gallery Wall
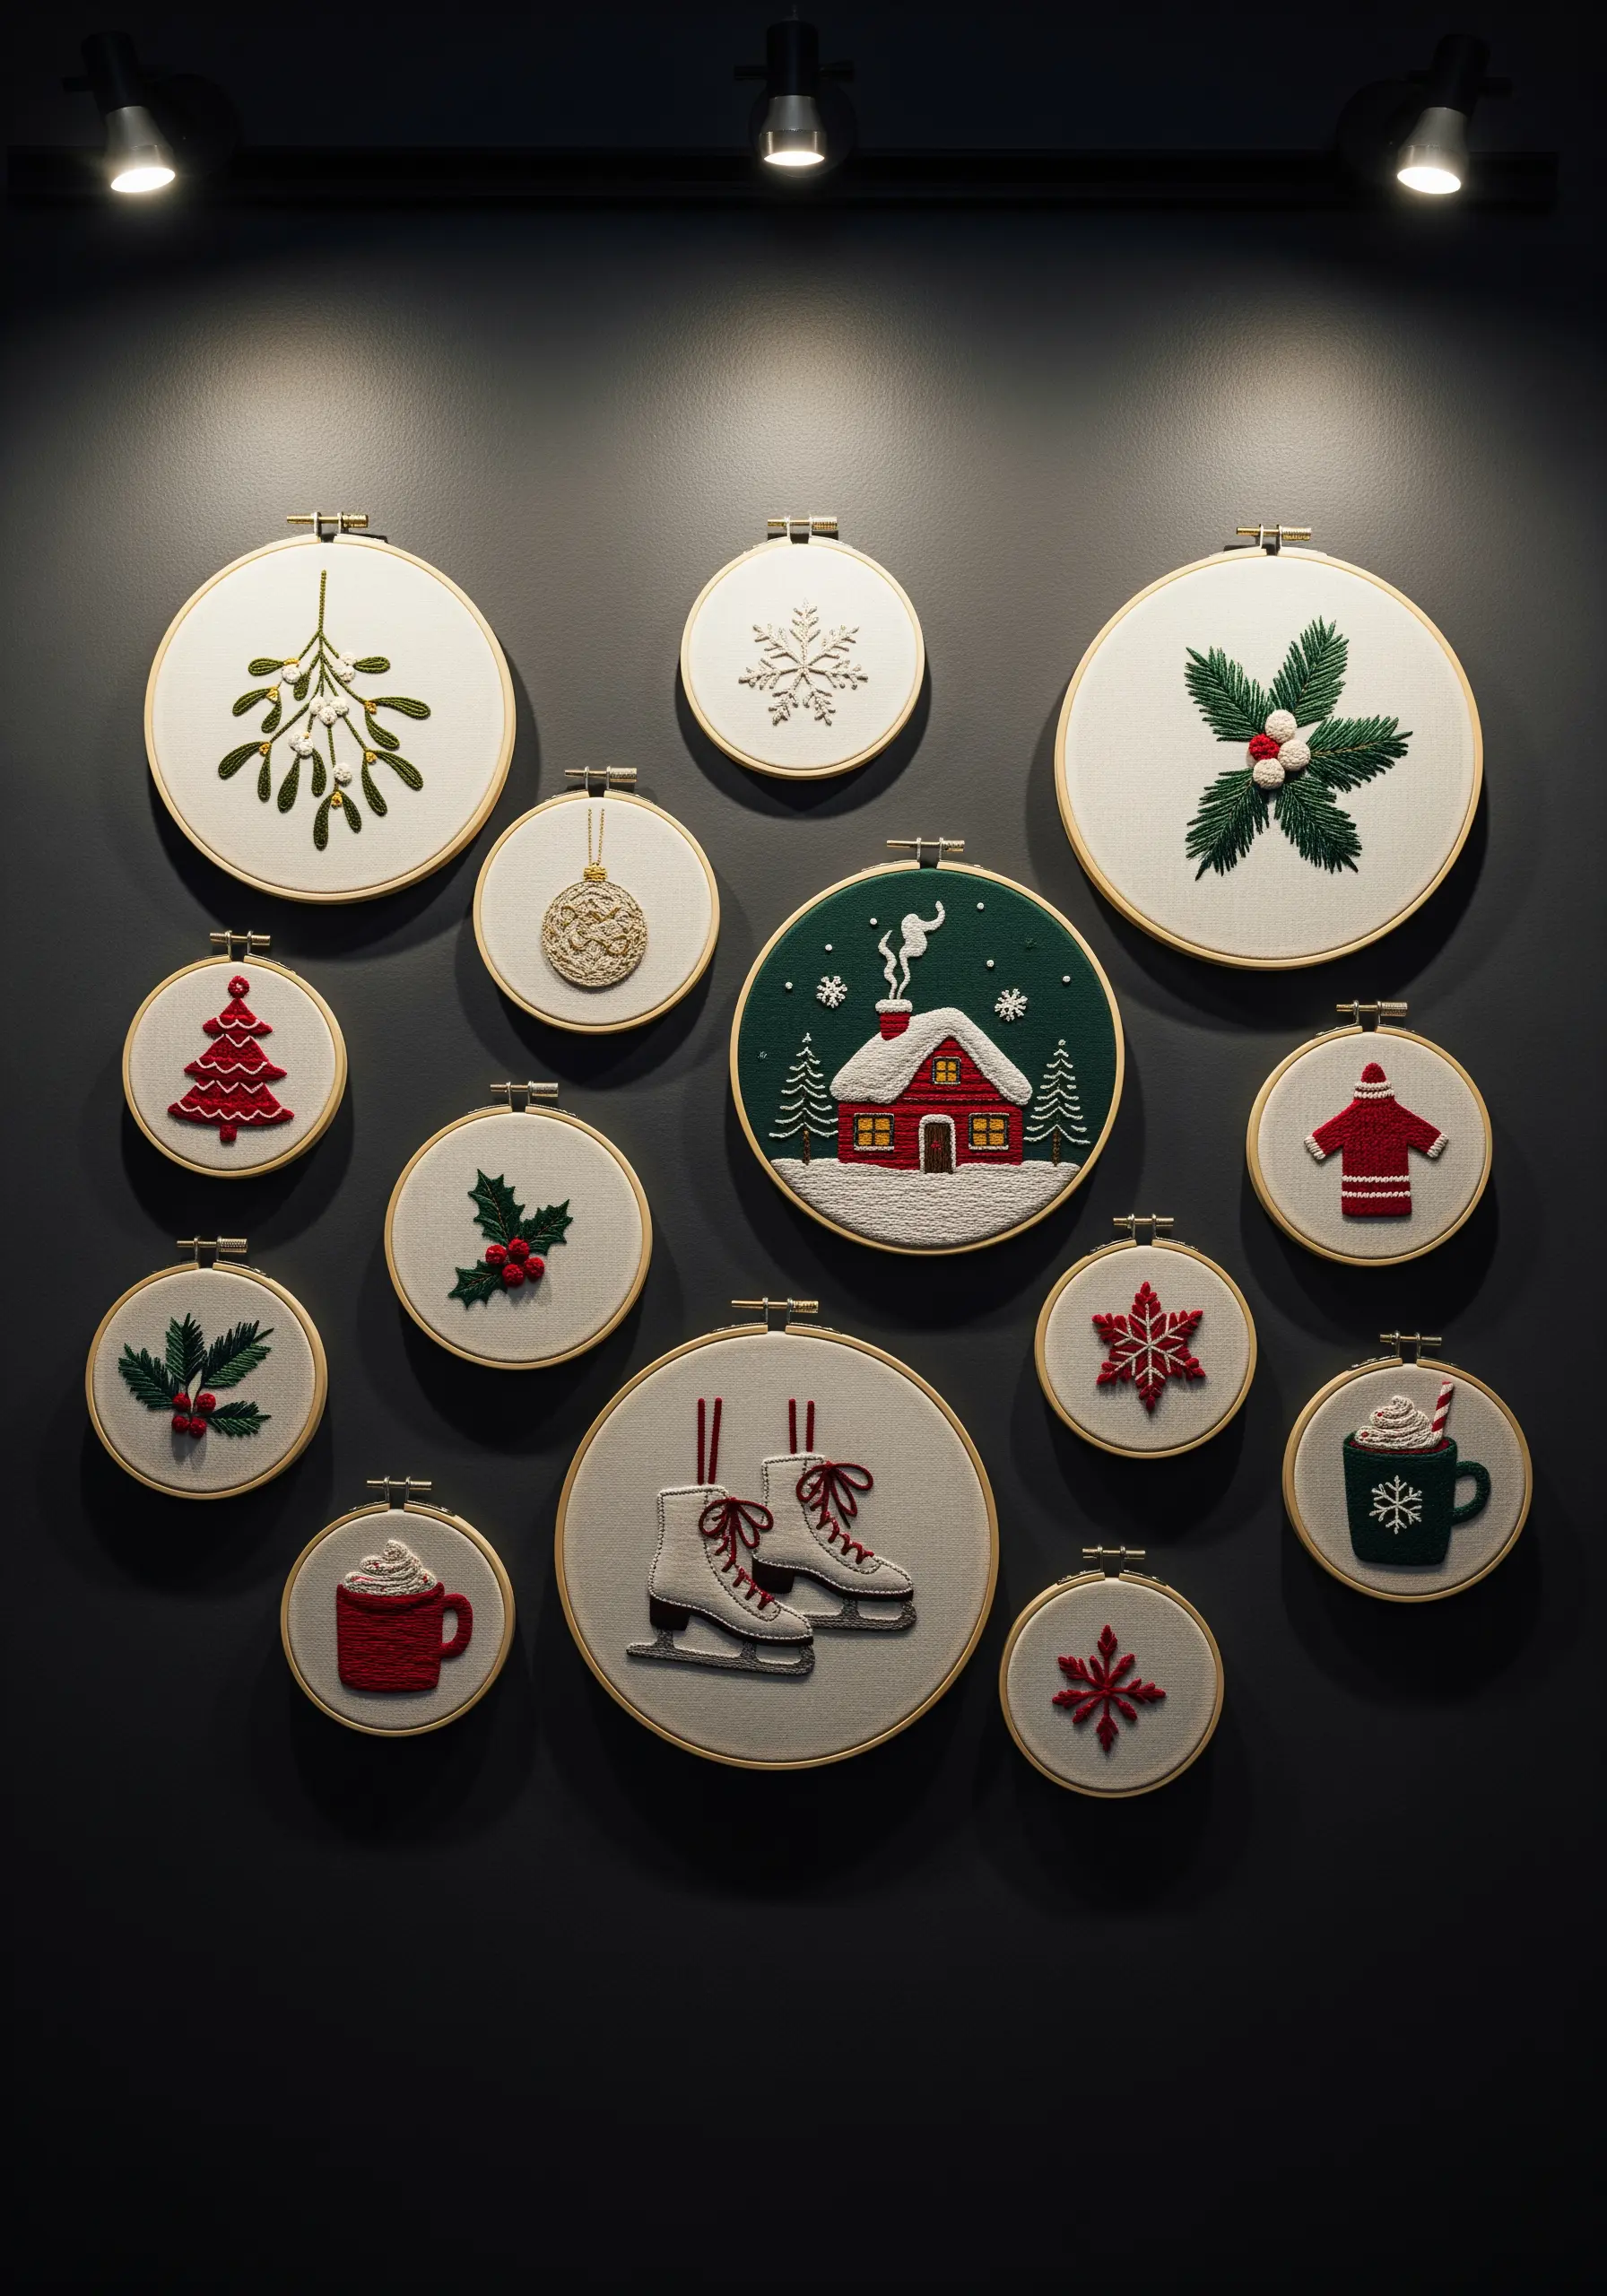
Turn a collection of small hoops into a stunning focal point by curating them with intention.
Choose one larger, more detailed piece—like the snowy cabin—as your anchor, then arrange smaller, simpler motifs around it.
Maintain cohesion by using a consistent color palette (here, classic red, green, and white) and uniform finishing, such as natural wood hoops.
Varying the hoop sizes adds visual interest and rhythm, making your wall hoop art feel dynamic and thoughtfully planned.
8. Combine Appliqué and Embroidery on Rustic Burlap
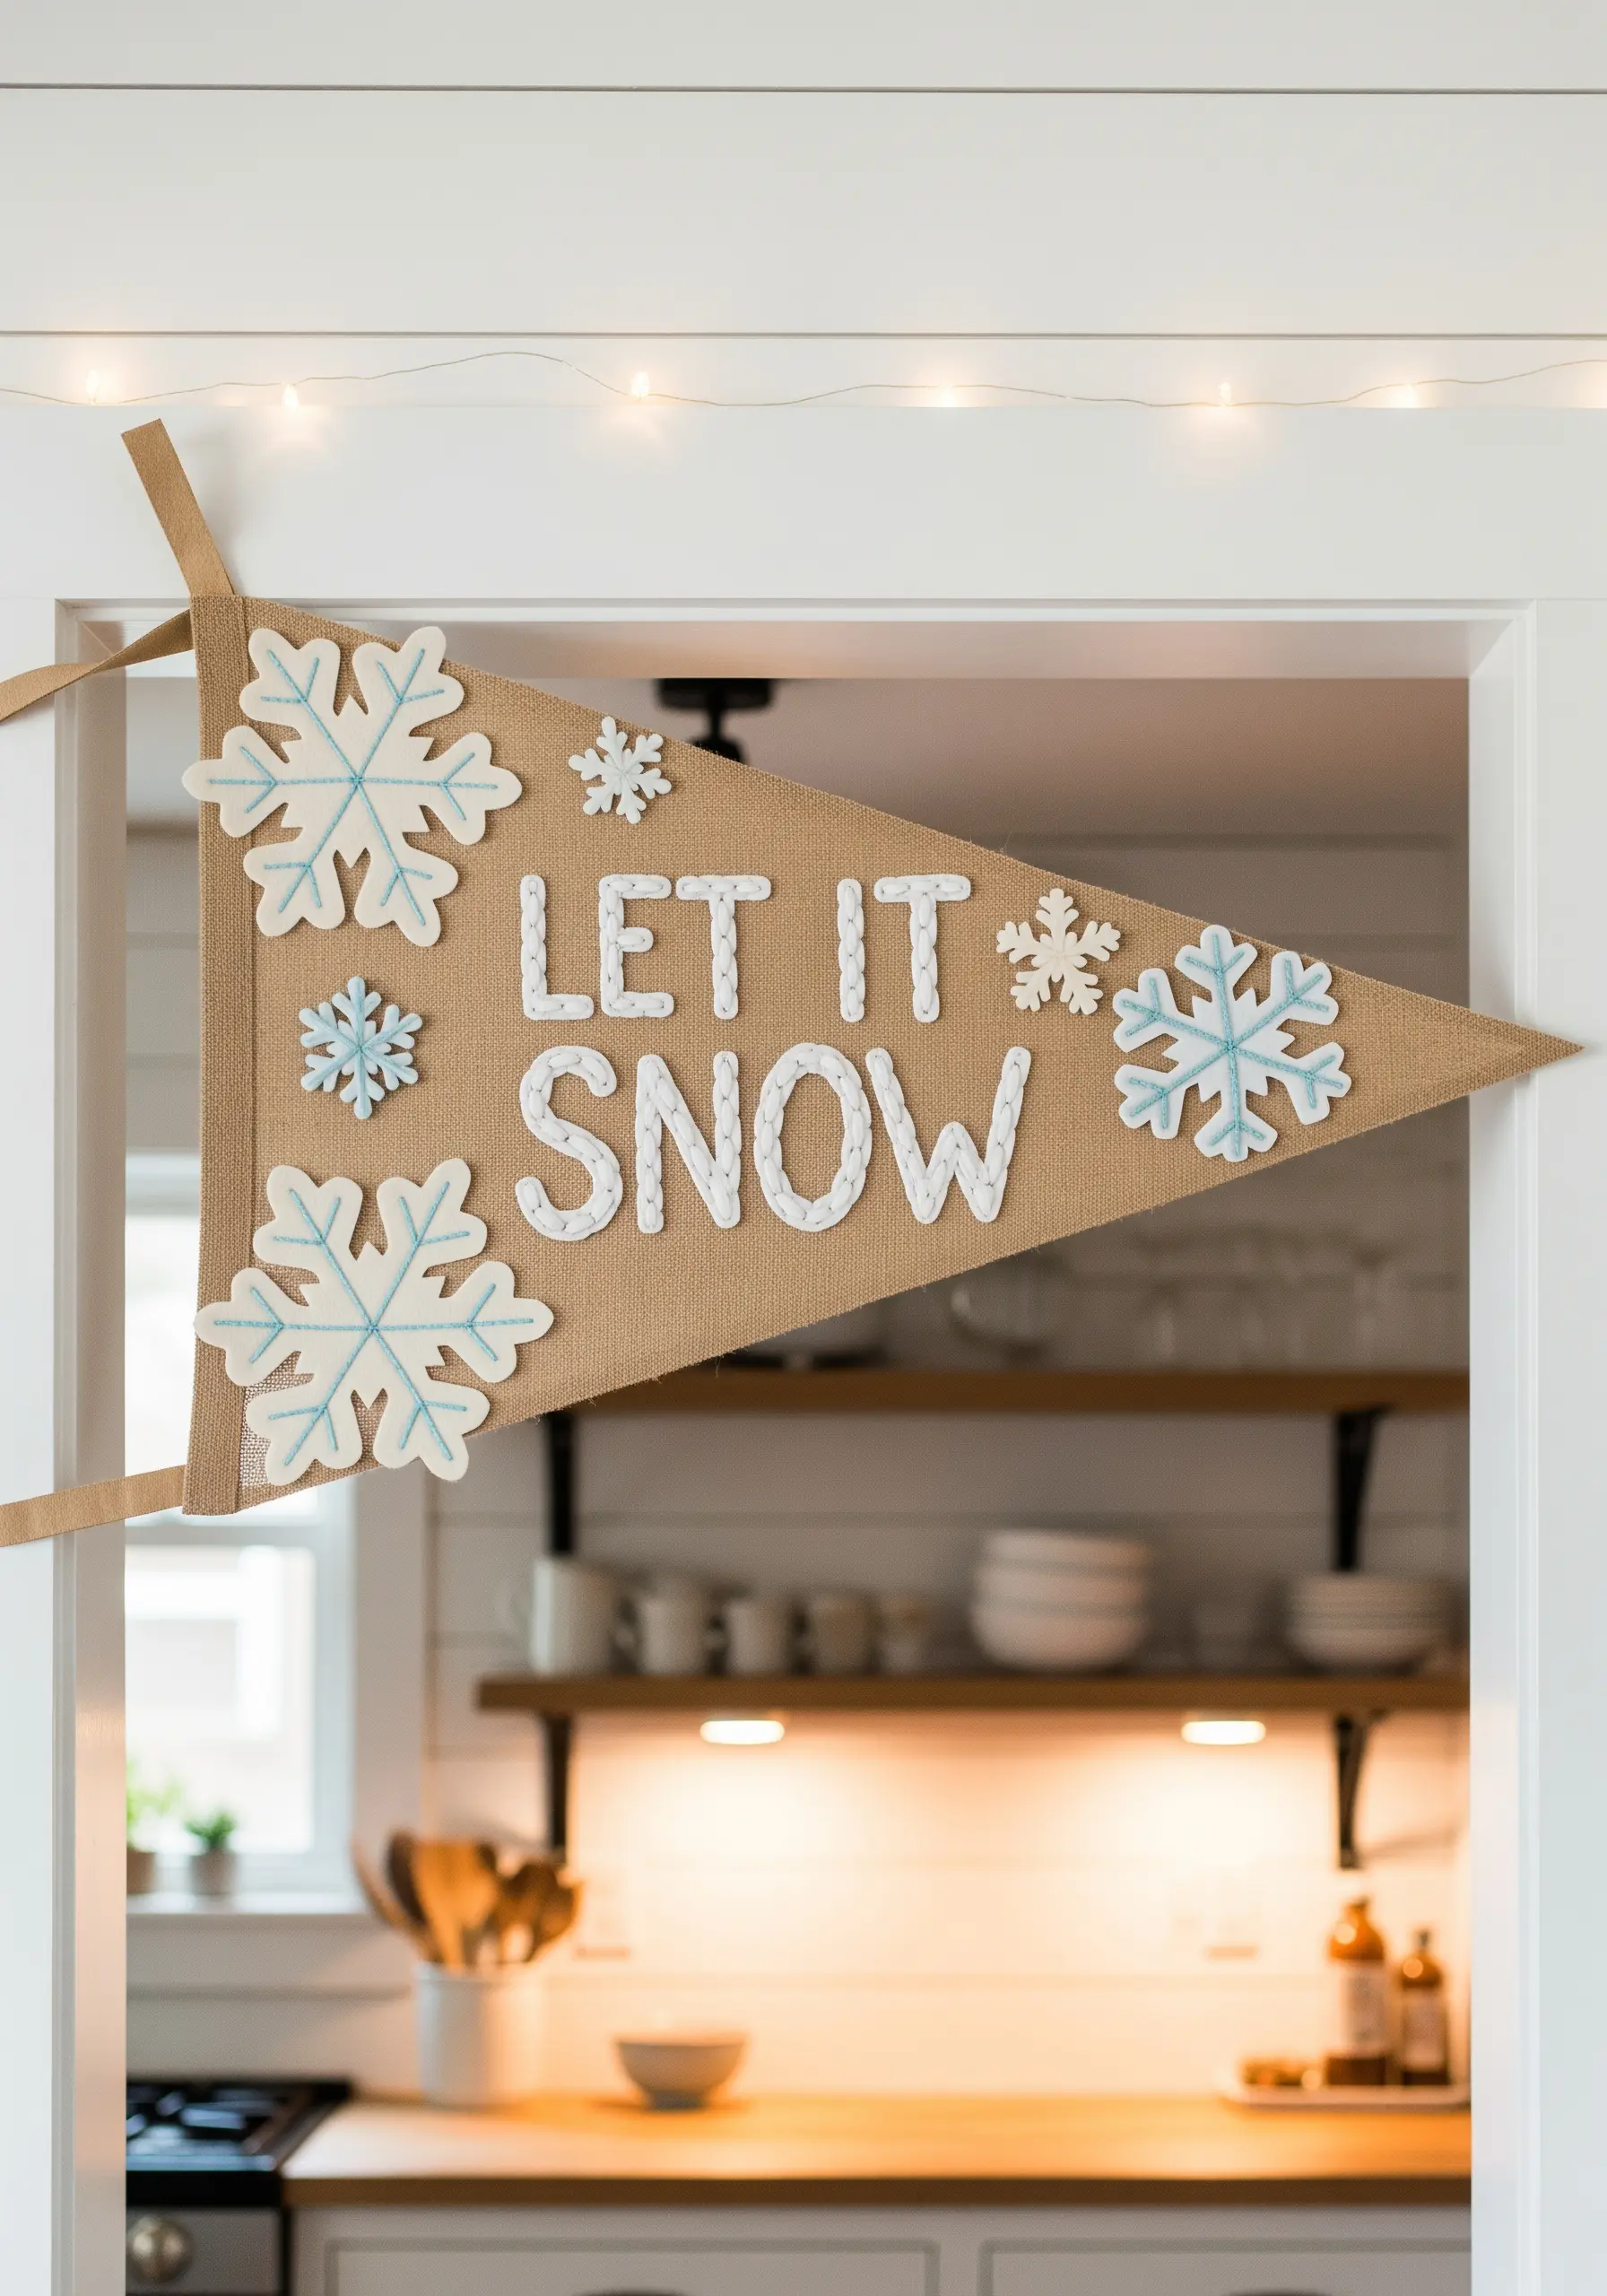
For a charming, rustic aesthetic, use burlap or another open-weave fabric as your base.
Create the letters and snowflakes from felt appliqué first, which provides a solid, smooth surface for your stitches.
Secure the felt shapes with a simple running stitch or blanket stitch around the edges using a contrasting color for a handcrafted feel.
This mixed-media approach adds layers of texture and is much faster for filling large shapes than using thread alone.
9. Create Luminous Texture with Raised Knots and Metallics
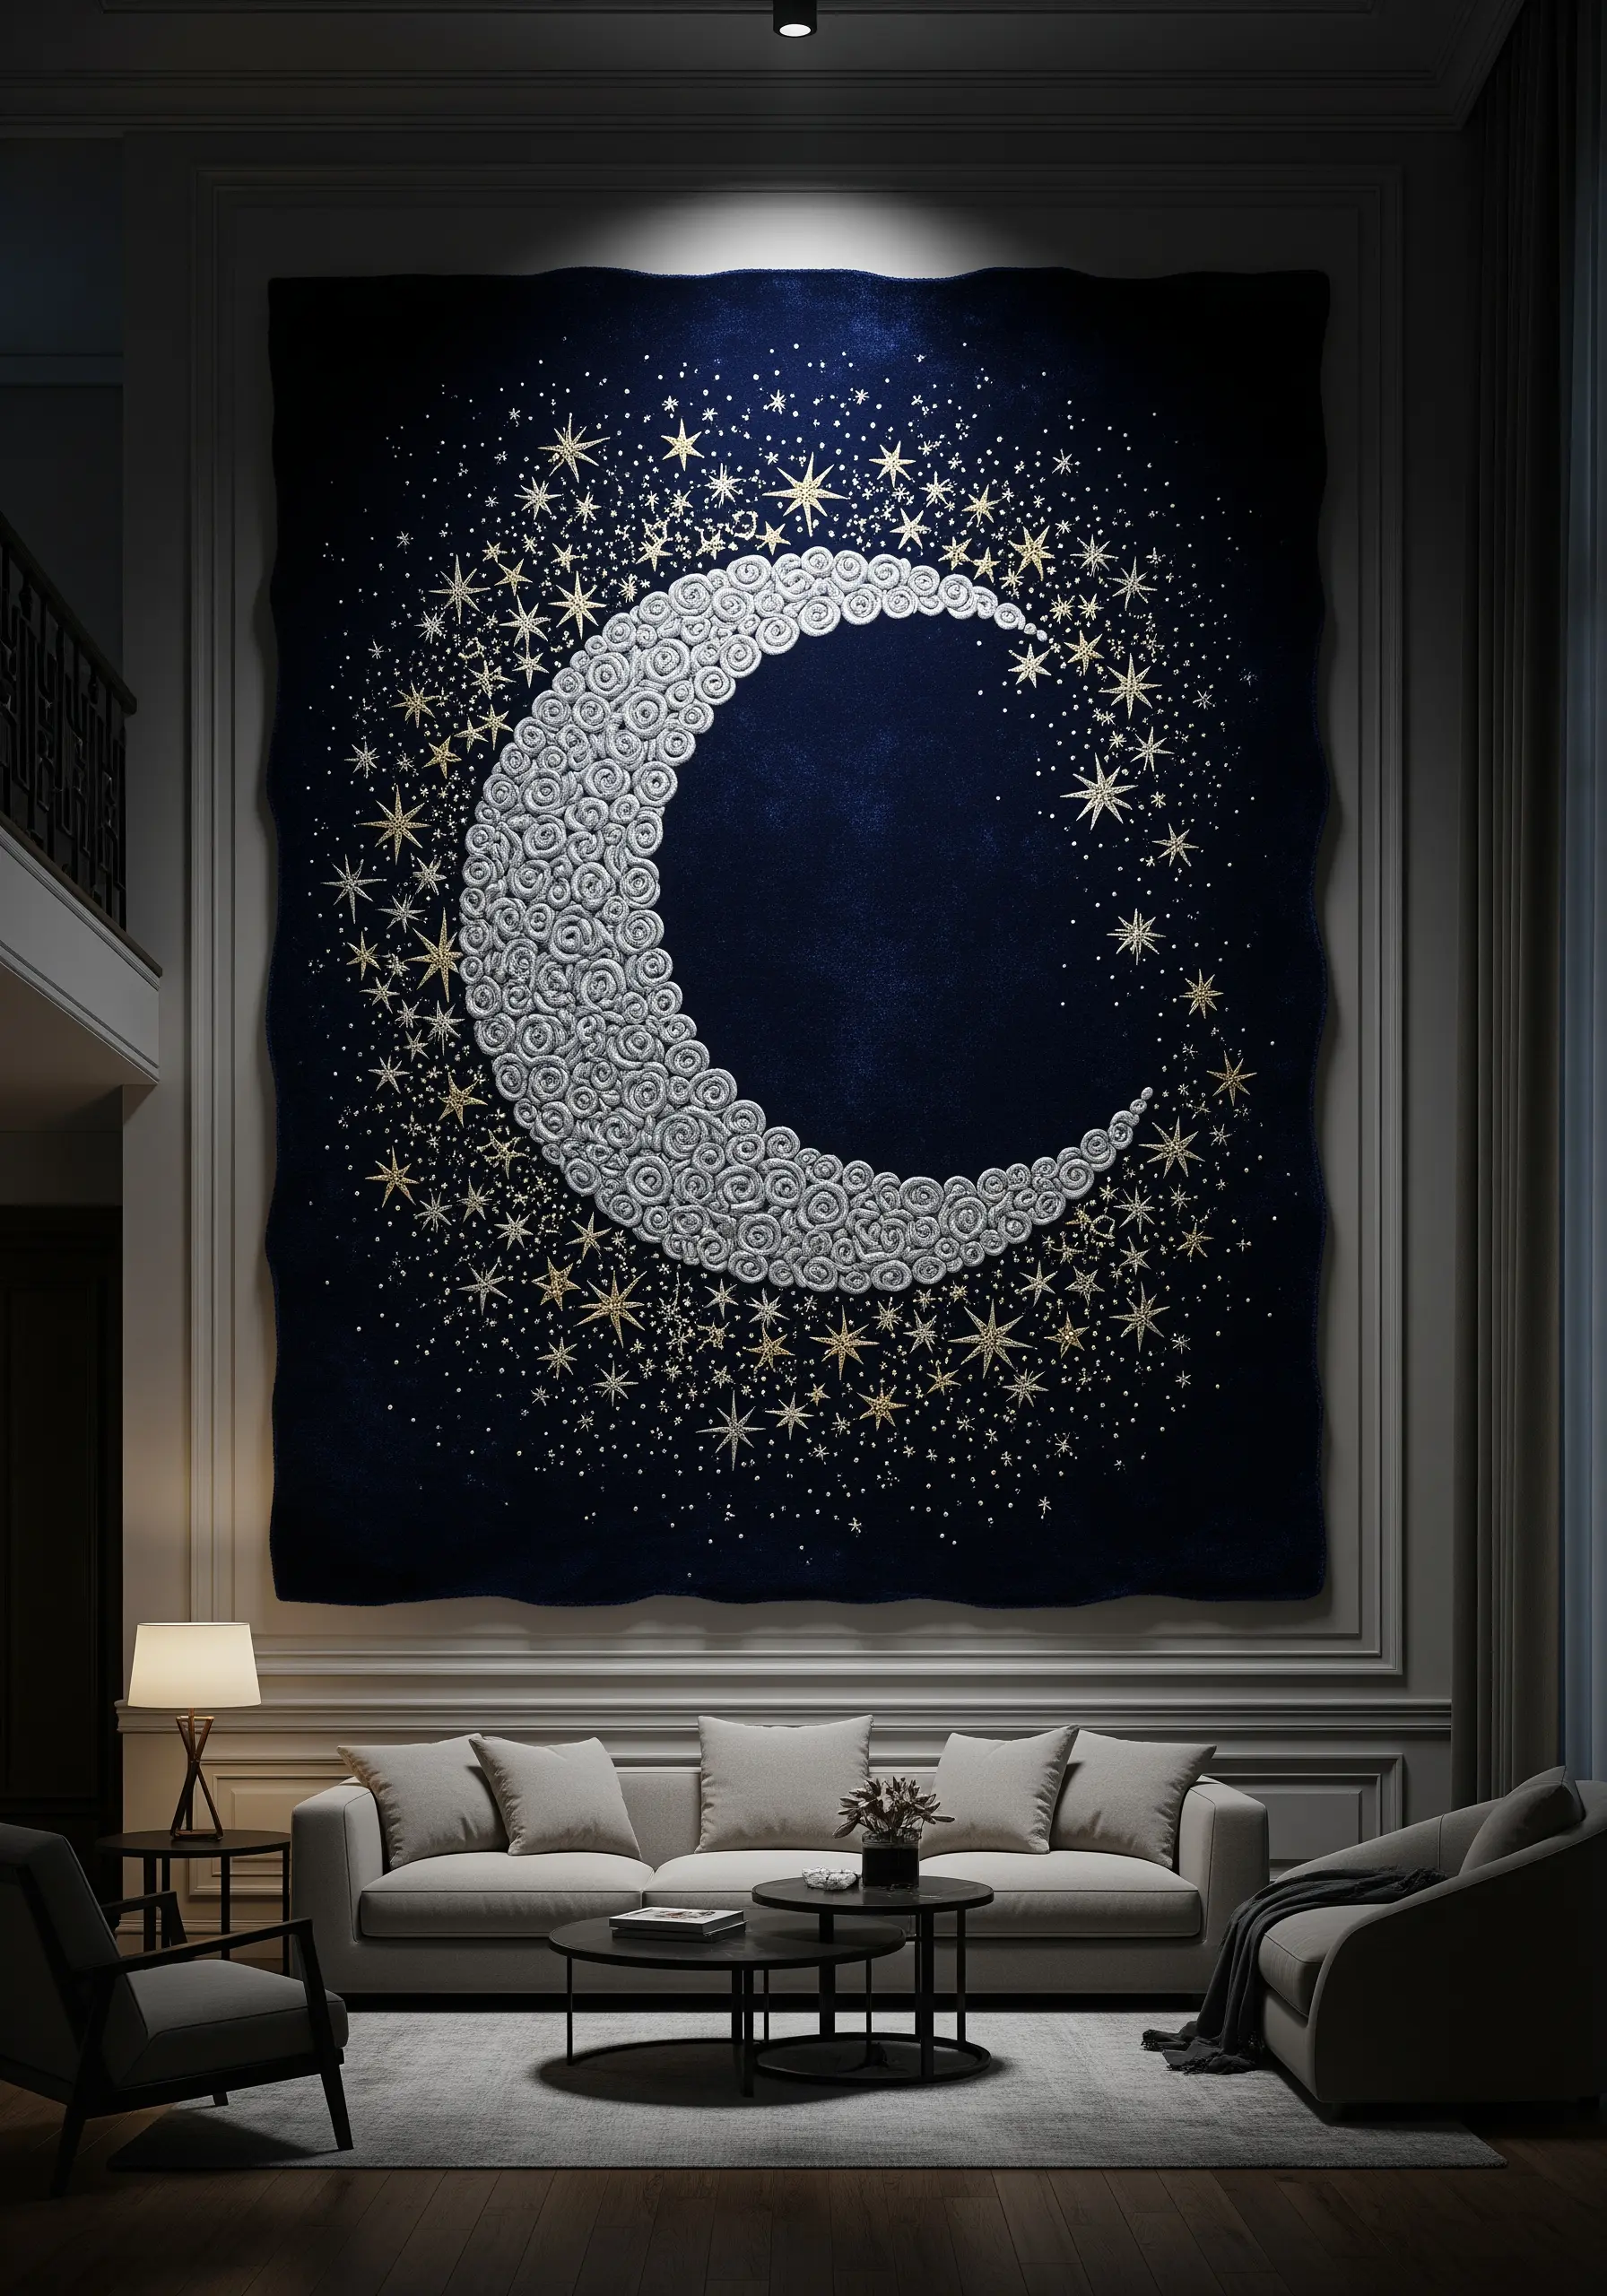
To achieve a celestial design with incredible depth, focus on building texture.
Fill the crescent moon with a dense pattern of colonial knots or French knots using a slightly thicker thread, like pearl cotton, for a raised, bubbly surface that catches the light.
For the surrounding stars, use a fine, shimmering metallic thread and stitch them as simple star stitches or isolated seed stitches.
The contrast between the matte, high-relief moon and the delicate, sparkling stars creates a breathtaking sense of cosmic scale.
10. Construct a 3D Diorama with Layered Organza
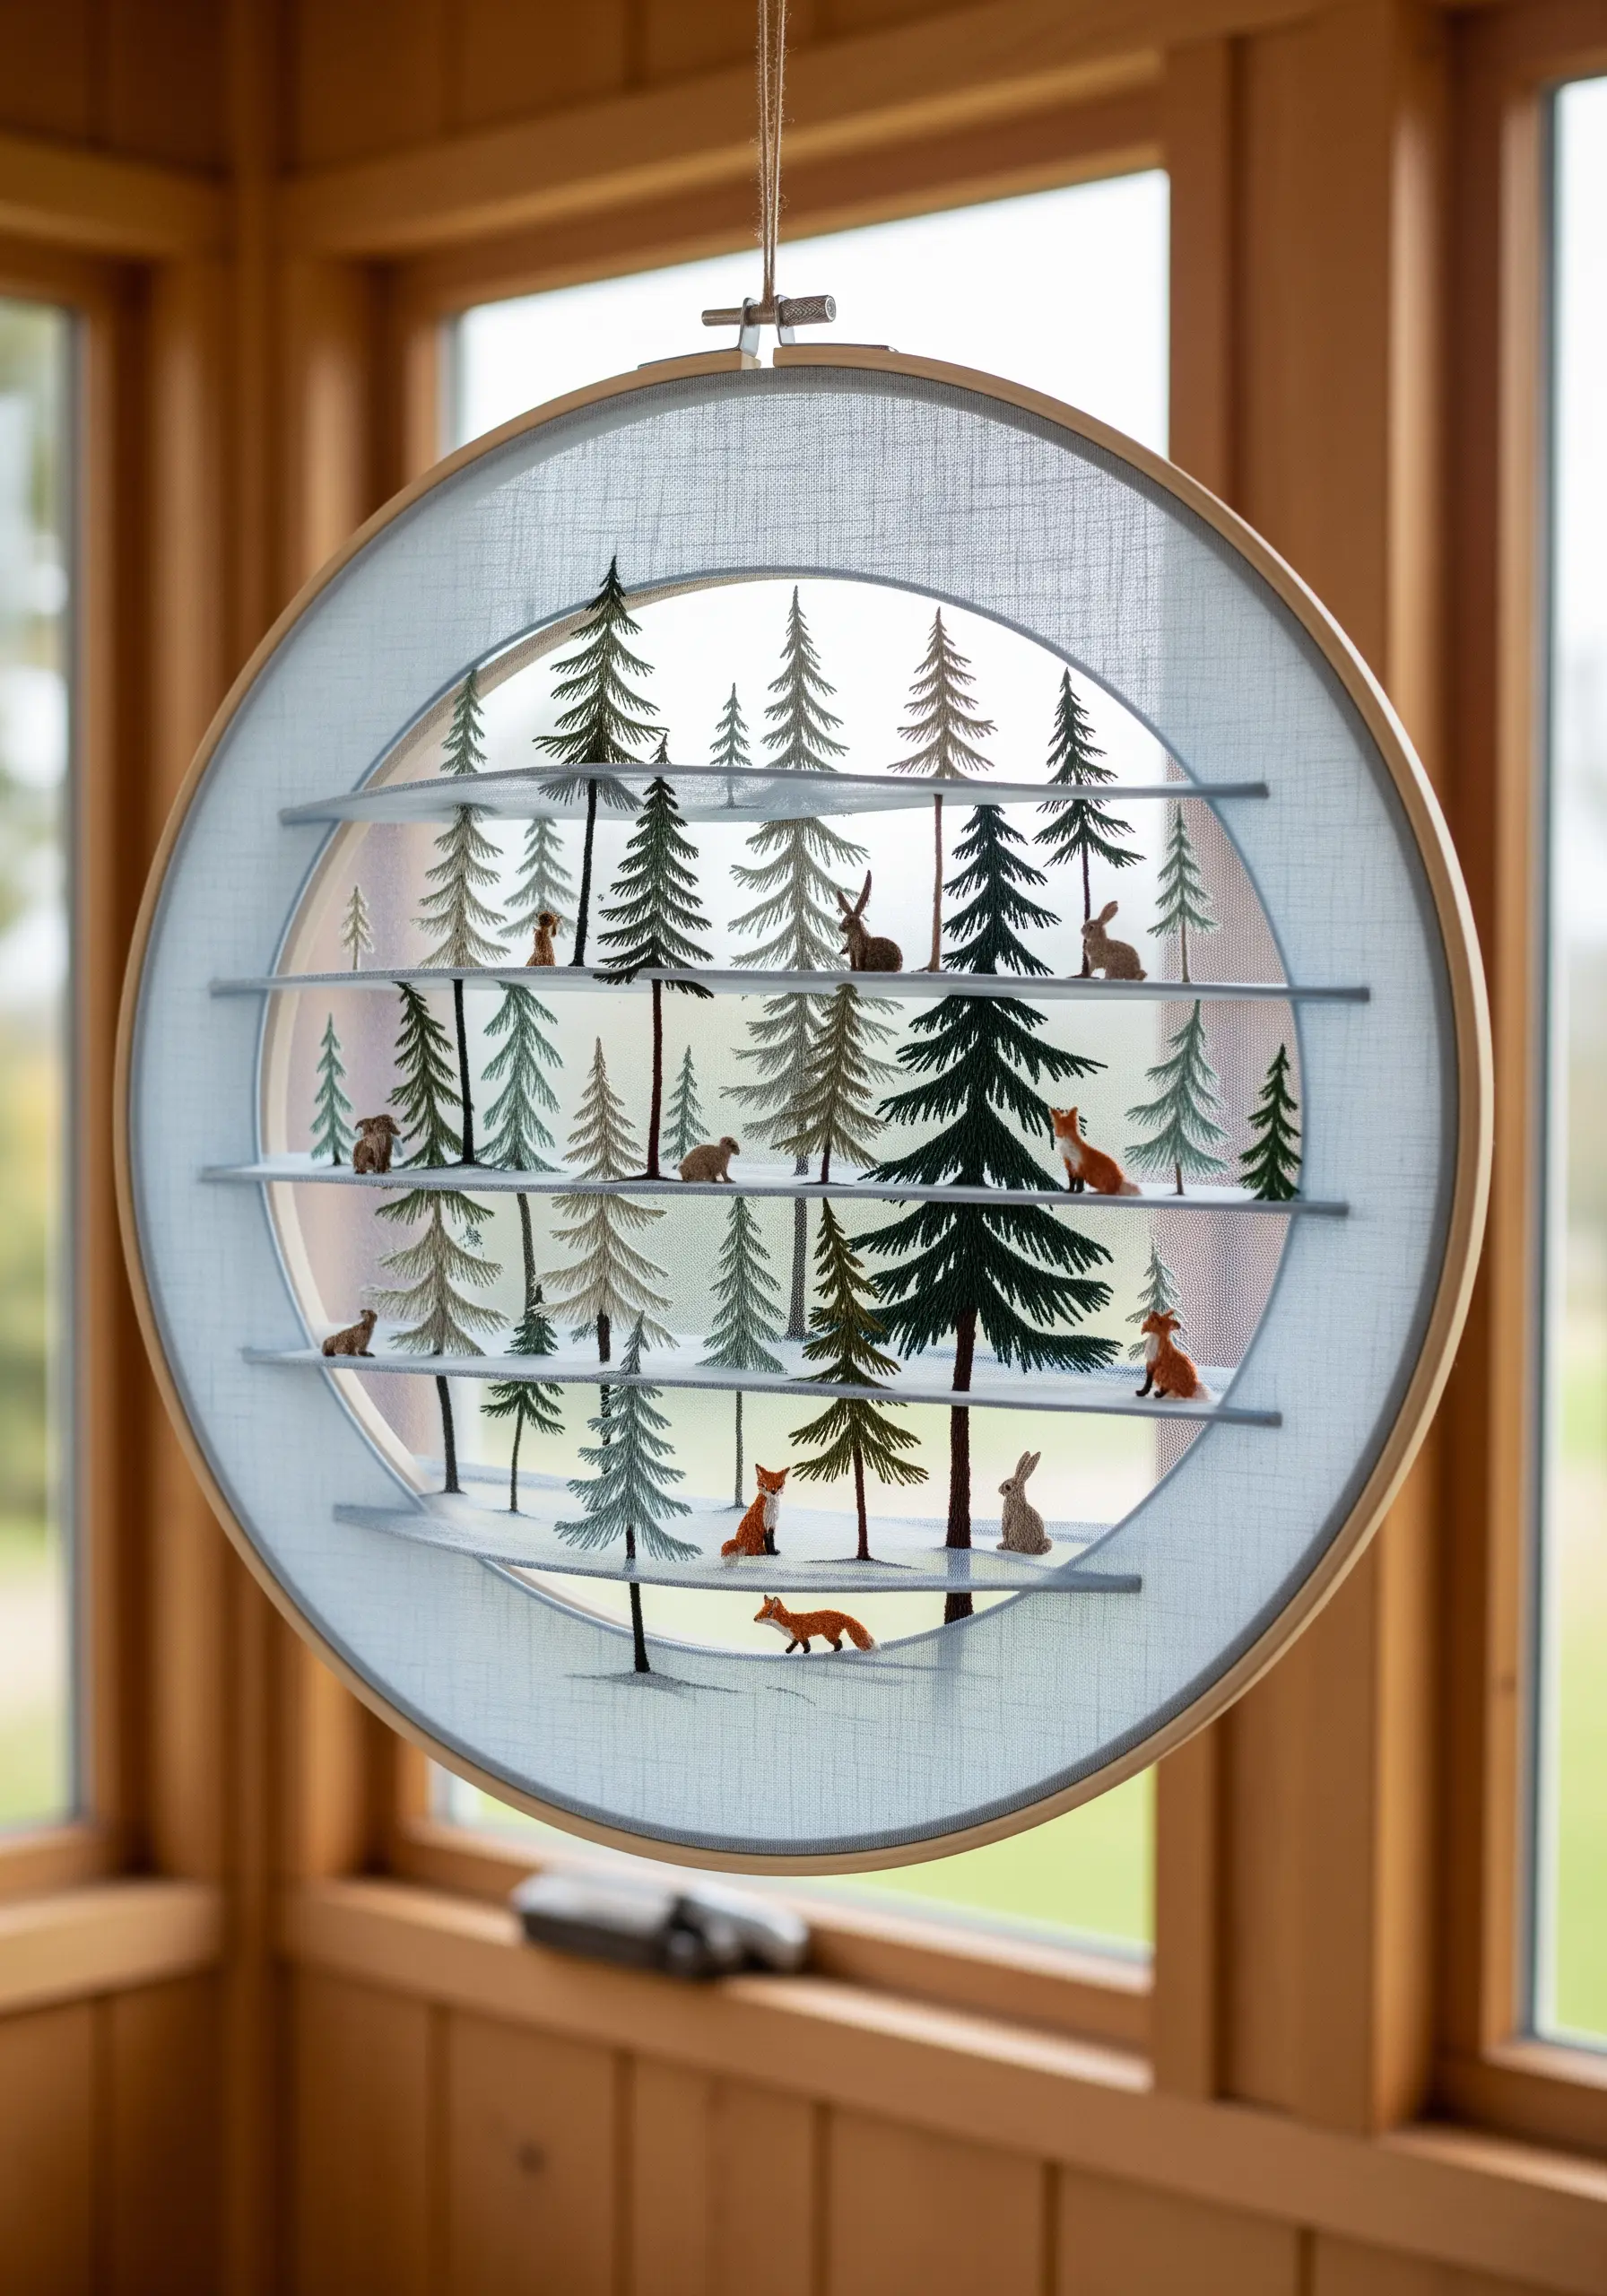
Build a scene with incredible depth by stitching on multiple layers of sheer fabric like organza or tulle.
Stretch each layer of fabric in its own hoop, or create fabric panels suspended within a single deep hoop.
Stitch the foreground elements, like the large pine tree, on the front panel, and place smaller trees and animals on the layers behind it.
When viewed together, this technique creates a stunning parallax effect, where the scene appears to shift and change as you move.
11. Stitch a Delicate Botanical Runner for Your Window
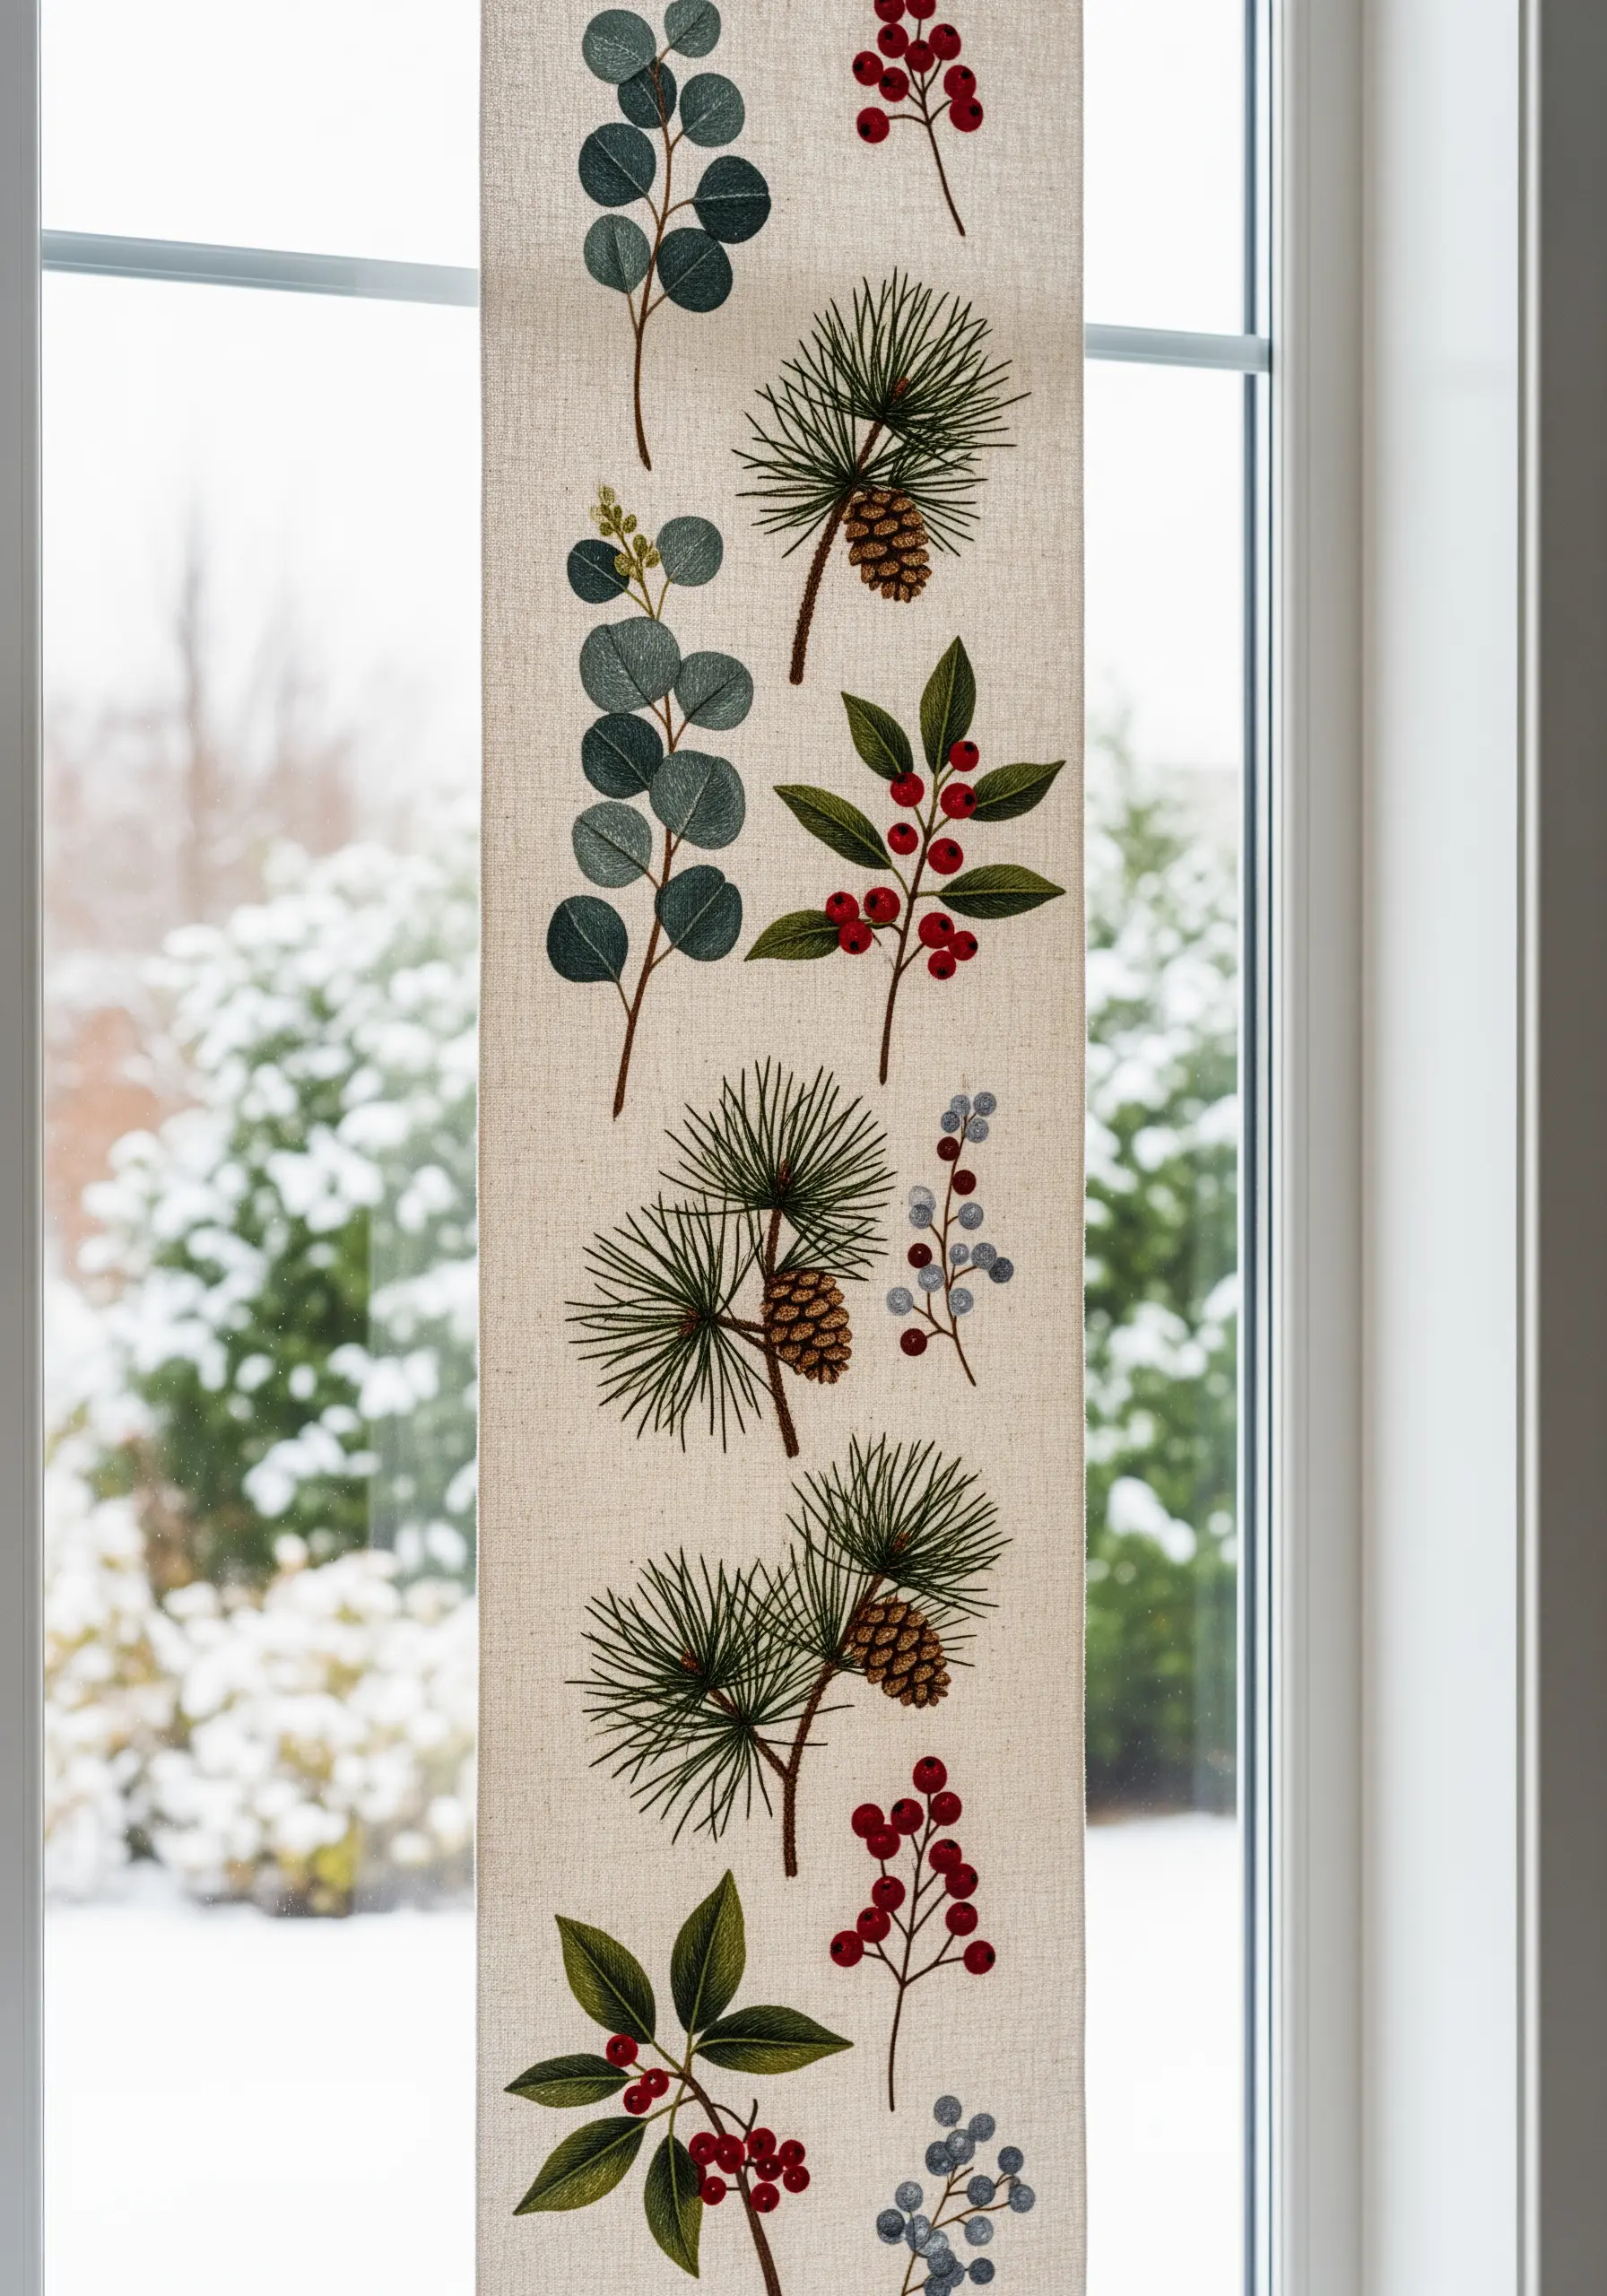
For vertical pieces like a window hanging, design a pattern that flows downwards with balanced negative space.
Use an open-weave linen so light can filter through, making the embroidery almost glow.
Focus on creating realistic botanicals by varying your stitches: fishbone stitch for the eucalyptus leaves, long satin stitches for the pine needles, and clusters of French knots for the berries.
This thoughtful combination of nature-texture embroidery techniques makes the design feel authentic and refined.
12. Embrace Folk-Art Charm with Bold Satin Stitching

Capture a vibrant, storybook aesthetic by using dense, directional satin stitch to fill your shapes.
Don’t be afraid to use bold, unconventional colors—the combination of a teal background with a rainbow-feathered partridge is what makes this piece so joyful.
Outline each color-blocked section with a clean backstitch in a contrasting color, like black or dark brown, to define the shapes and give it a classic, illustrative quality.
This technique turns simple shapes into a rich, tapestry-like work of art.
13. Convey a Message with Minimalist Typography
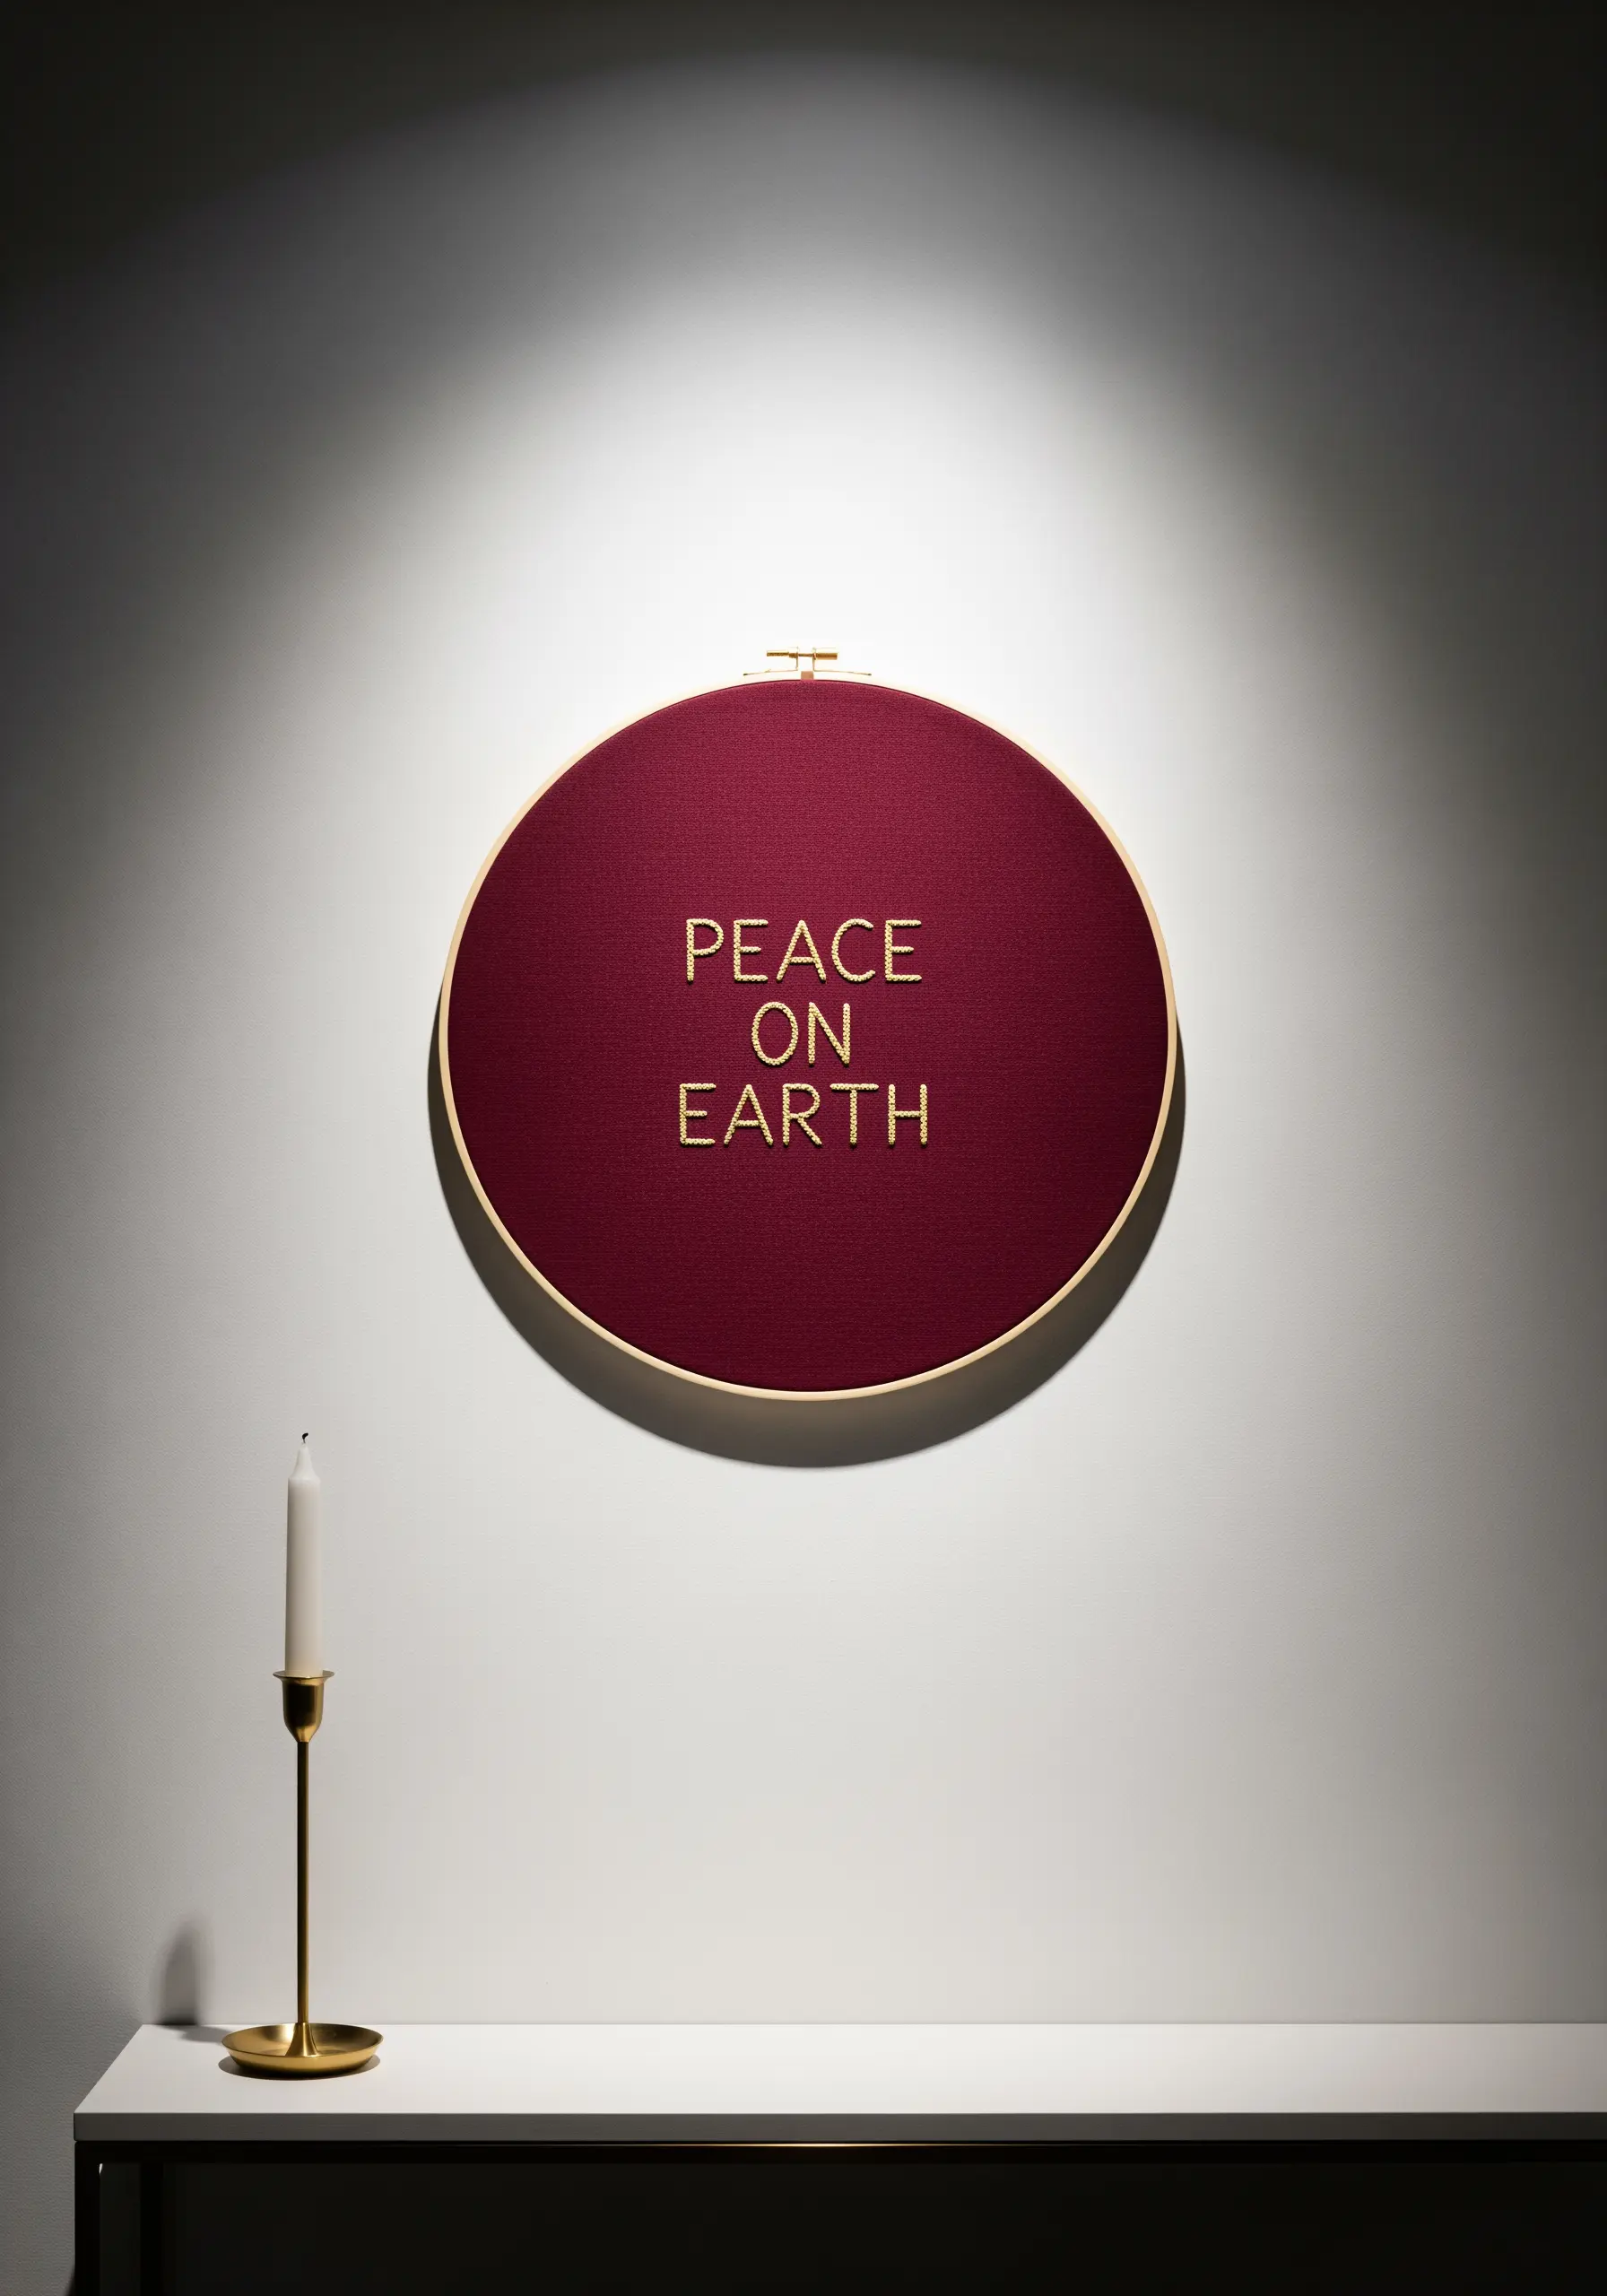
When your design is purely typographic, every detail matters.
Choose a rich, solid-colored fabric like this burgundy linen to serve as a dramatic, uncluttered canvas.
Use a padded satin stitch for the letters: first, create a foundation of small running stitches within the letter shape, then cover it with satin stitches perpendicular to the foundation.
This simple step raises the text slightly, giving it a subtle shadow and a crisp, embossed finish that feels exceptionally elegant.
14. Capture Celebratory Energy with Thread Bursts
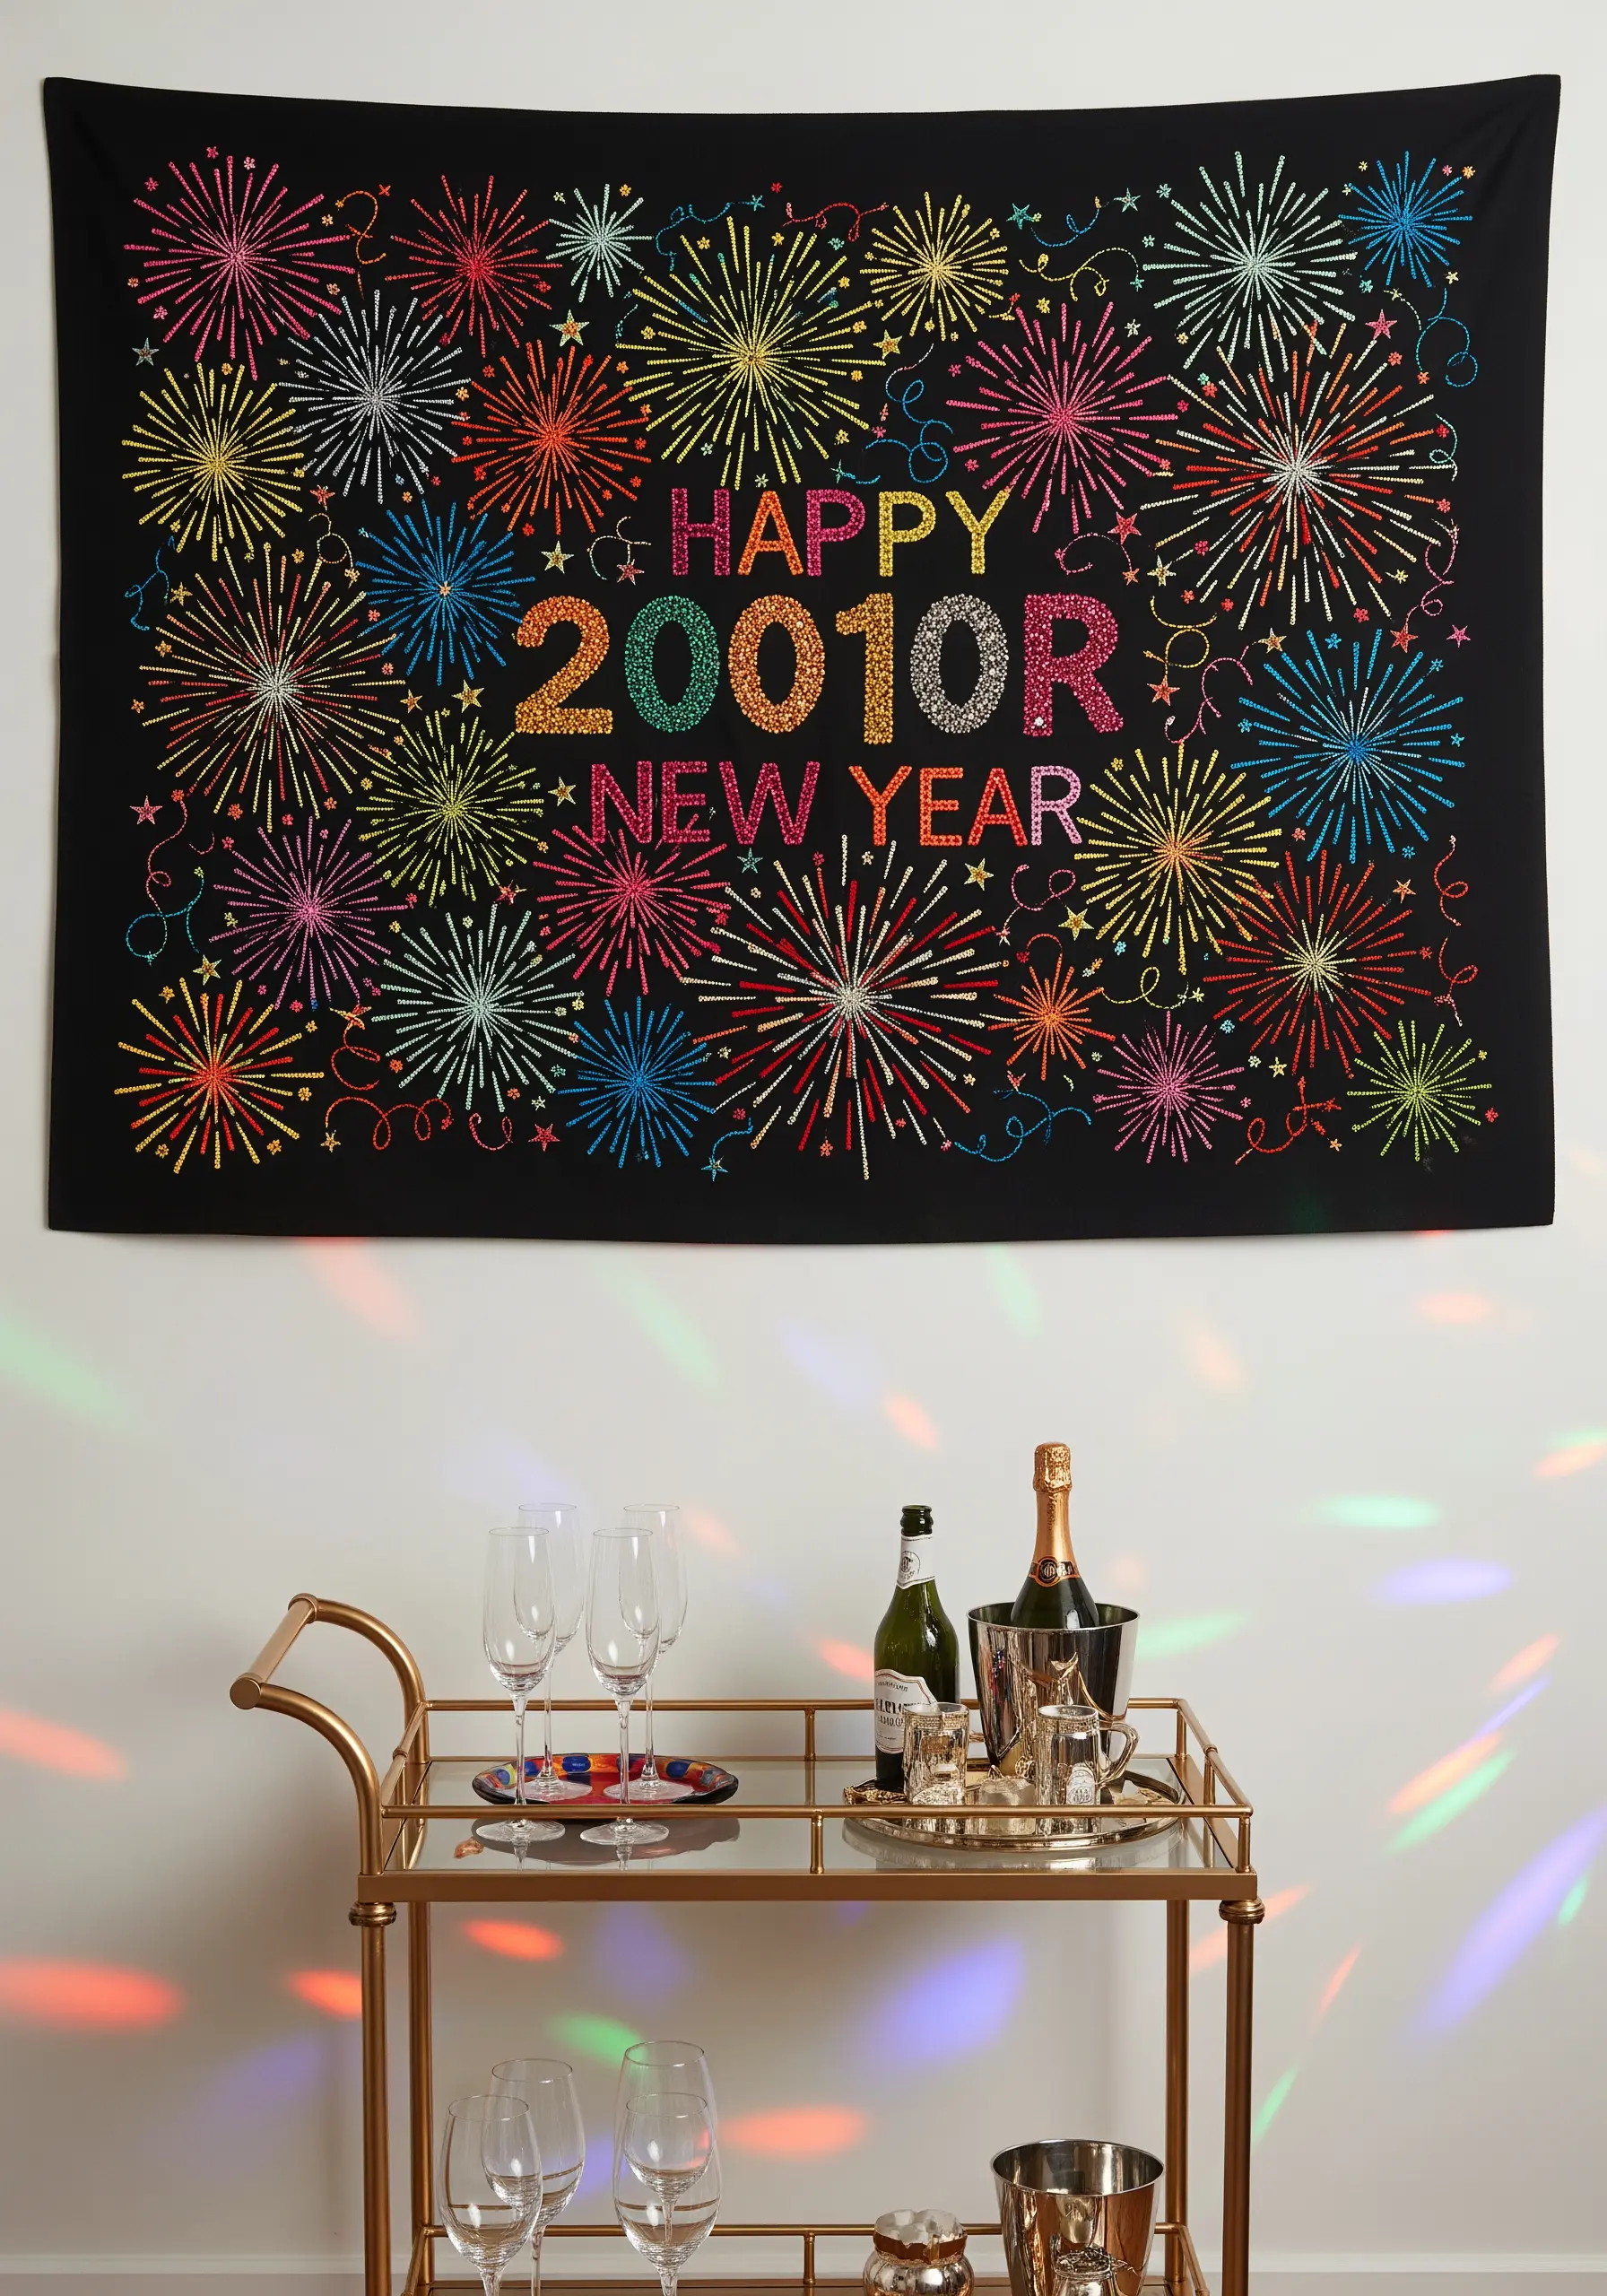
Recreate the explosive energy of fireworks with radiating straight stitches.
Use a variety of thread types—standard cotton floss, shiny rayon, and glittery metallic—to give each burst a unique shimmer and texture.
Instead of making every firework a perfect circle, vary the length and density of your stitches to create organic, asymmetrical shapes.
Anchor the design with bold, appliqué-style lettering to ensure your message stands out amidst the joyful chaos.
15. Sculpt a Winter Landscape with Fiber and Yarn
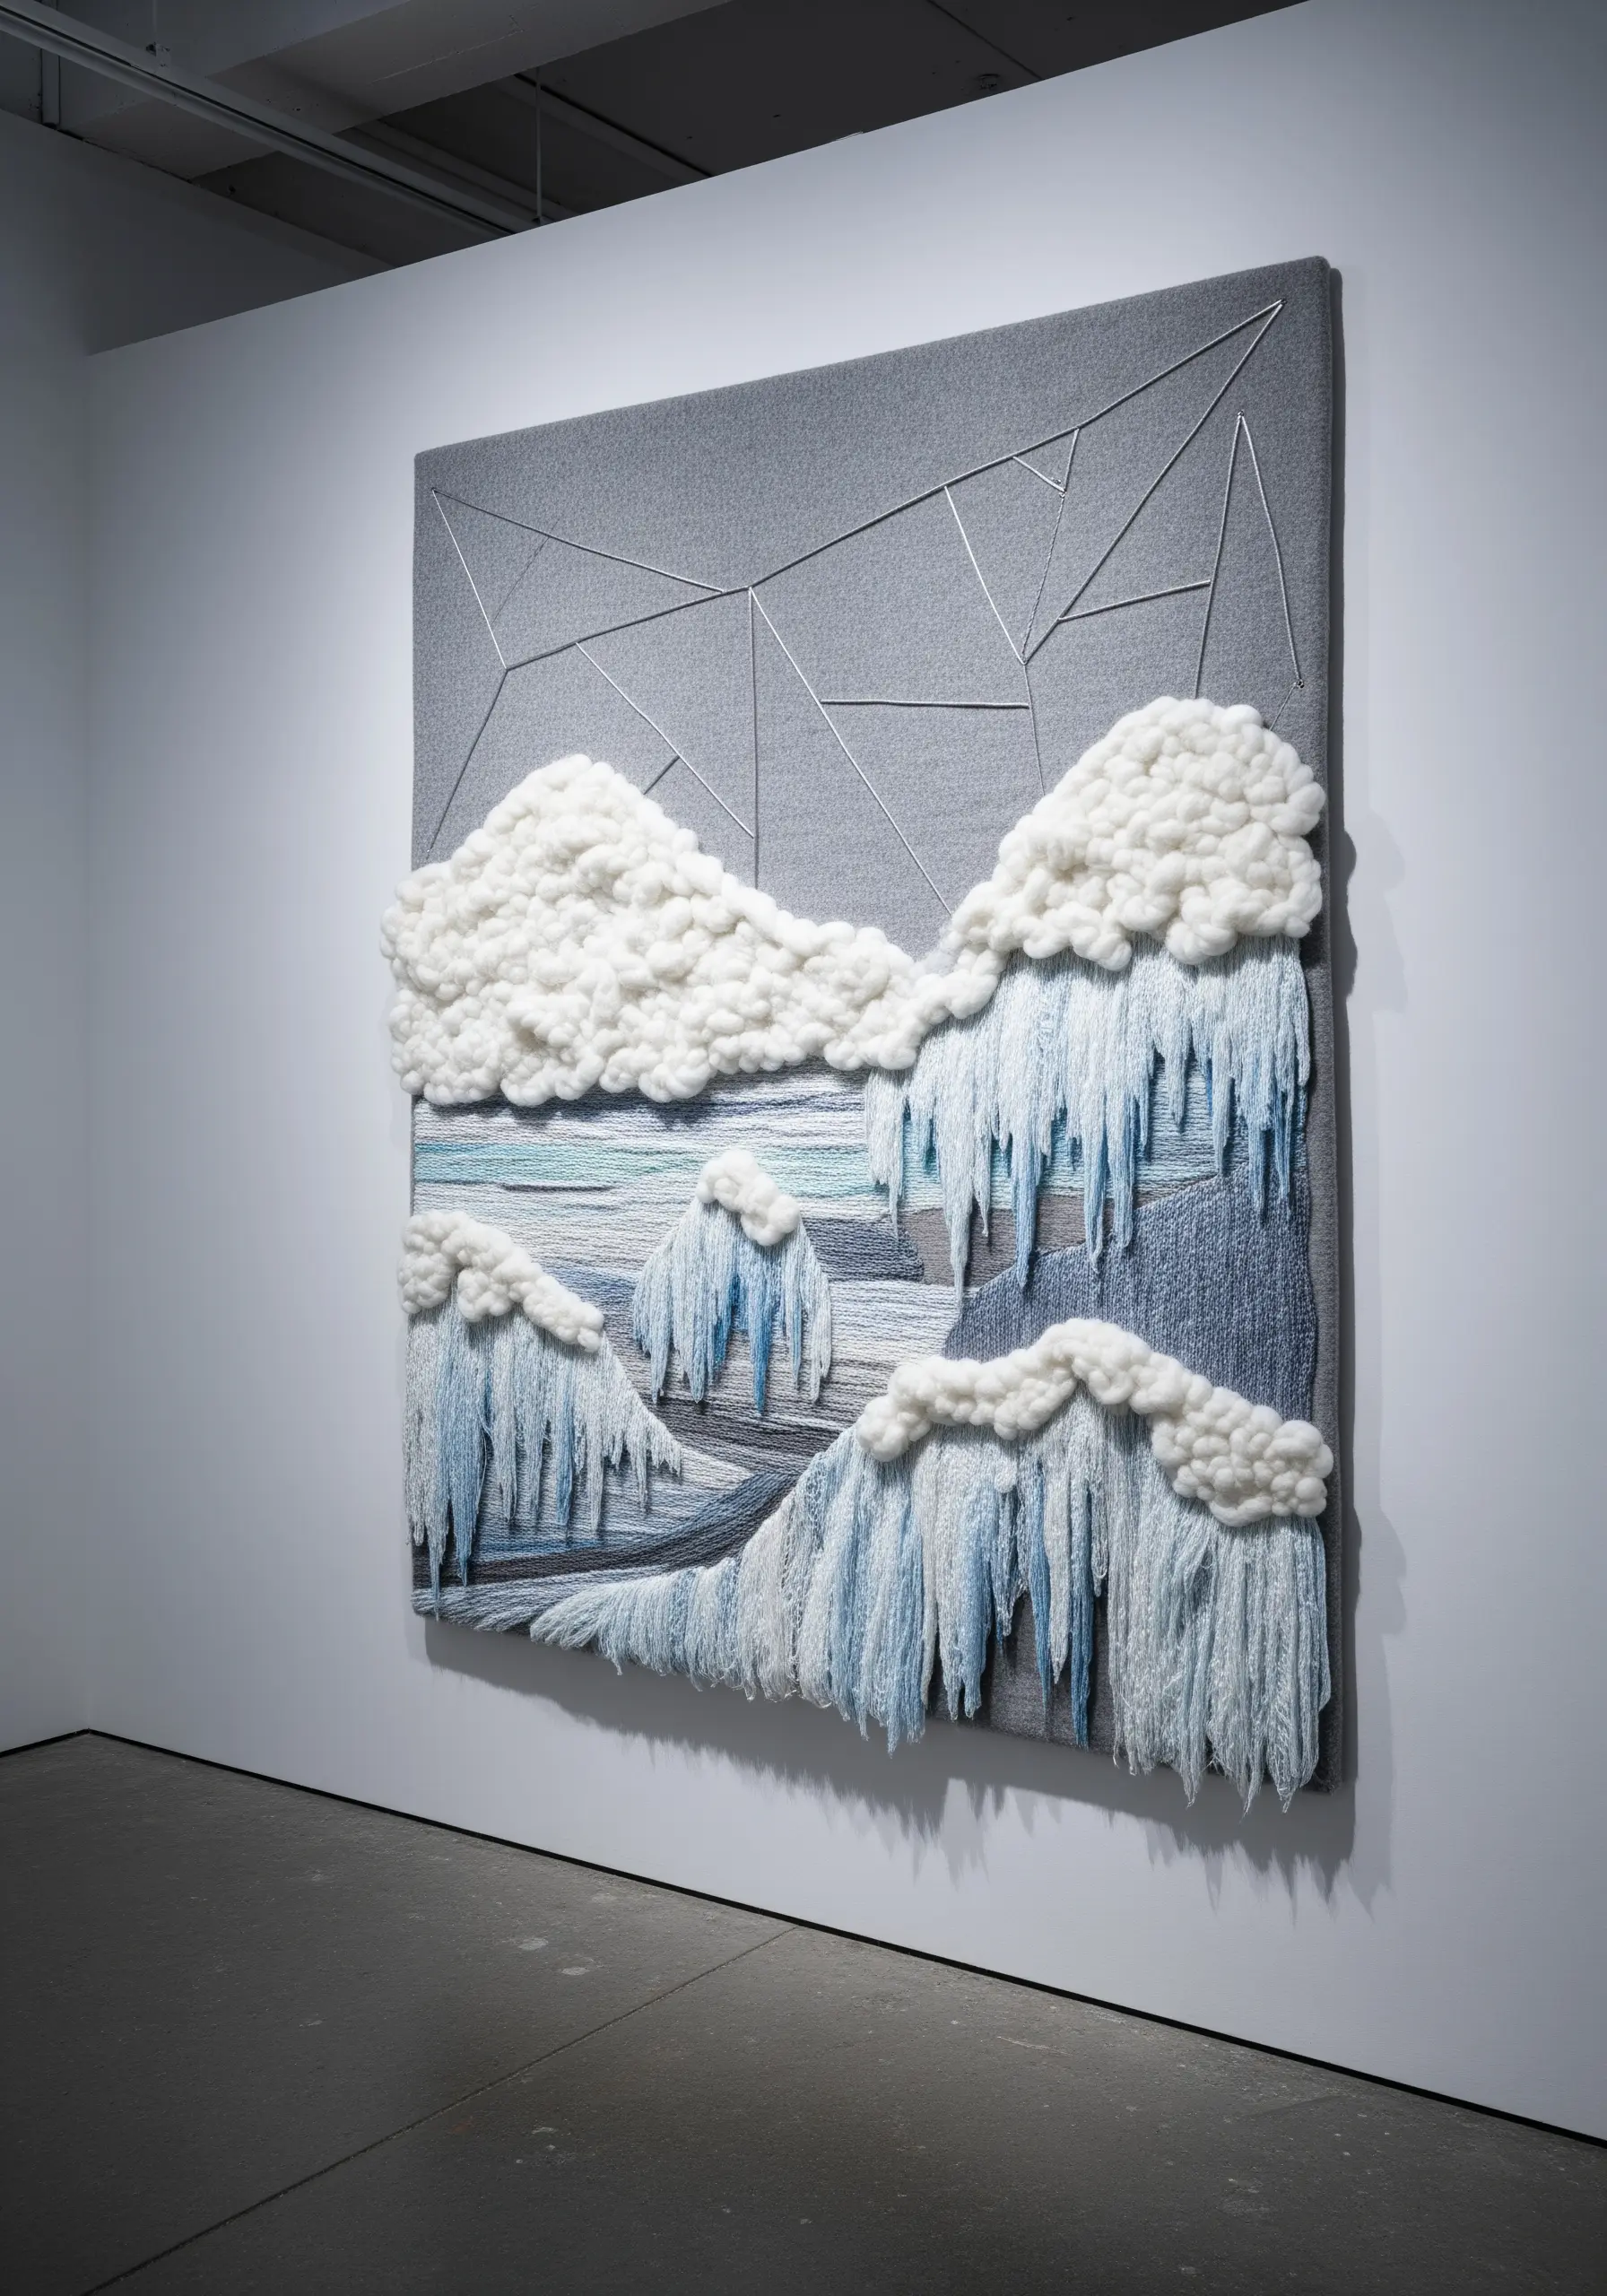
Move beyond thread to create a high-relief landscape with dramatic texture.
Use chunky wool roving or thick yarn for the clouds, securing it with needle felting or couching techniques to build soft, voluminous shapes.
For the icy waterfalls, let your threads hang loose. Secure bundles of variegated blue and white floss at the top, then let them drape down, trimming them at different lengths to create a fringe effect.
This mixed-fiber creation turns your wall hanging into a tactile sculpture.
16. Evoke Nostalgia with a Cross-Stitch Scene
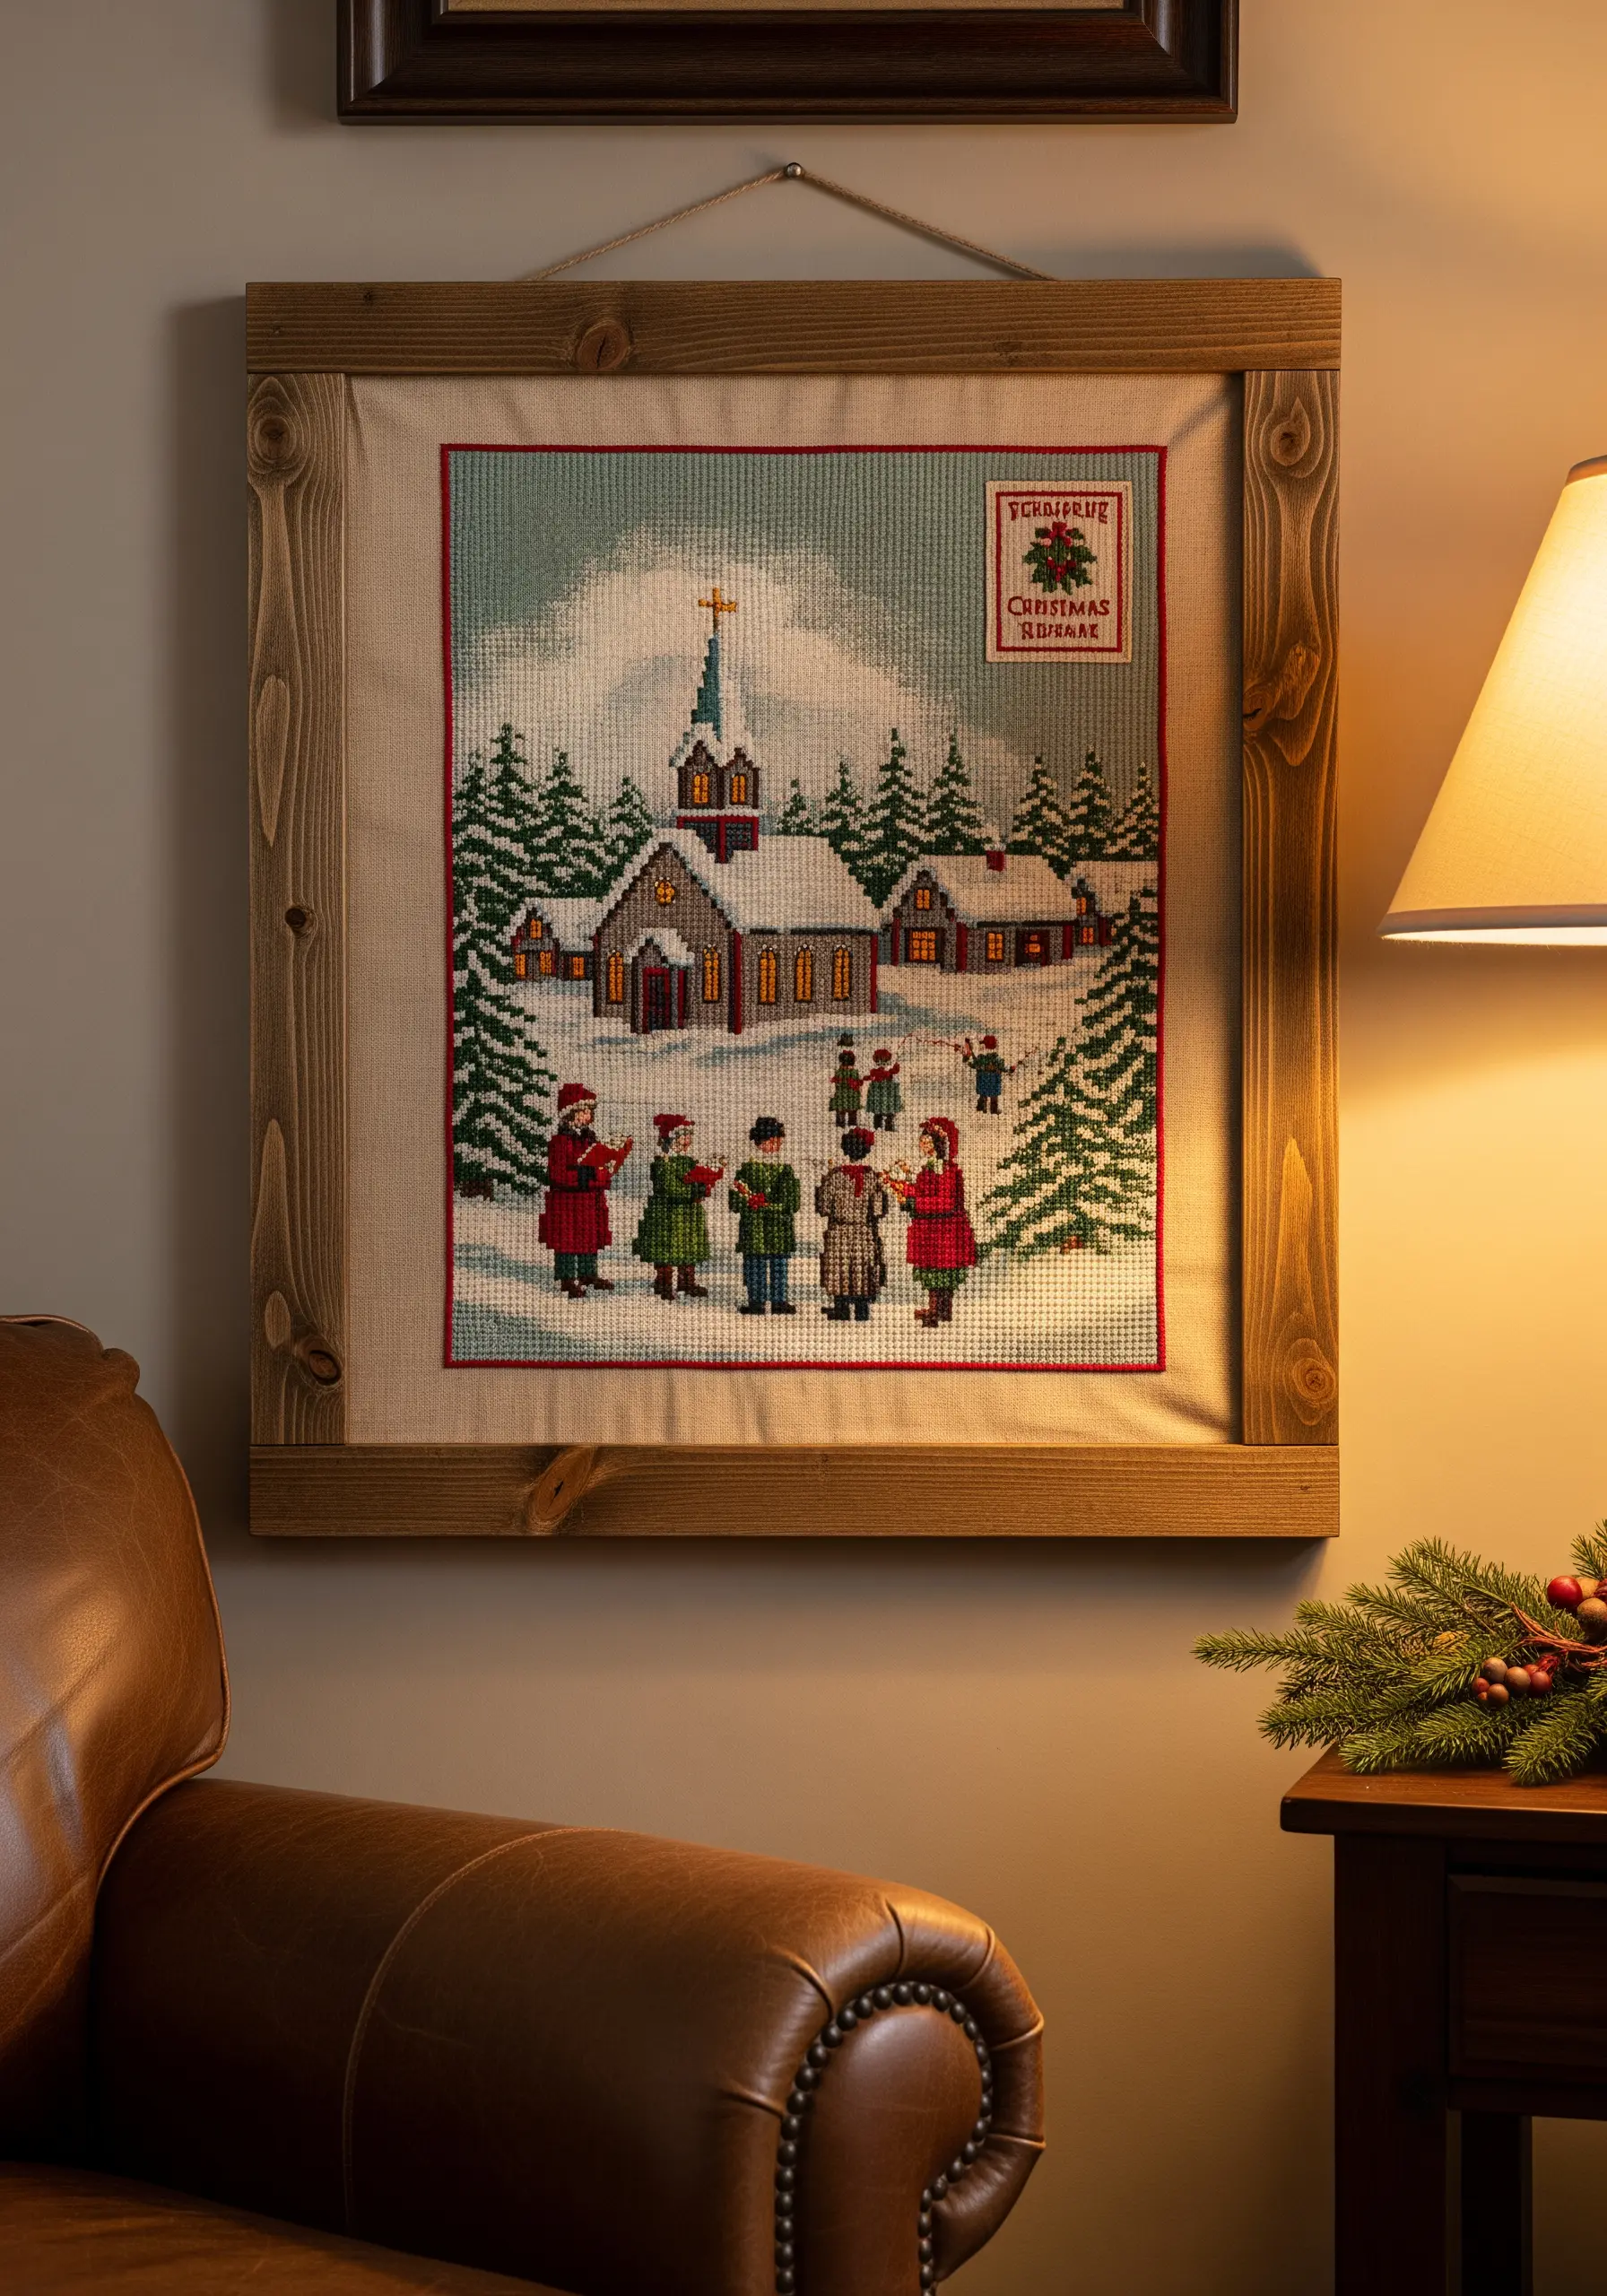
Capture a classic, vintage holiday feel by working your design entirely in cross-stitch.
Choose Aida cloth or an evenweave fabric, as the grid structure ensures your ‘X’ stitches are uniform and neat.
Work with a limited, traditional color palette to enhance the nostalgic quality of the scene.
Mounting the finished piece in a simple, rustic wooden frame complements the handcrafted charm and transforms it into a timeless piece of decor.
17. Add a Regal Glow with Ribbon and Metallic Thread
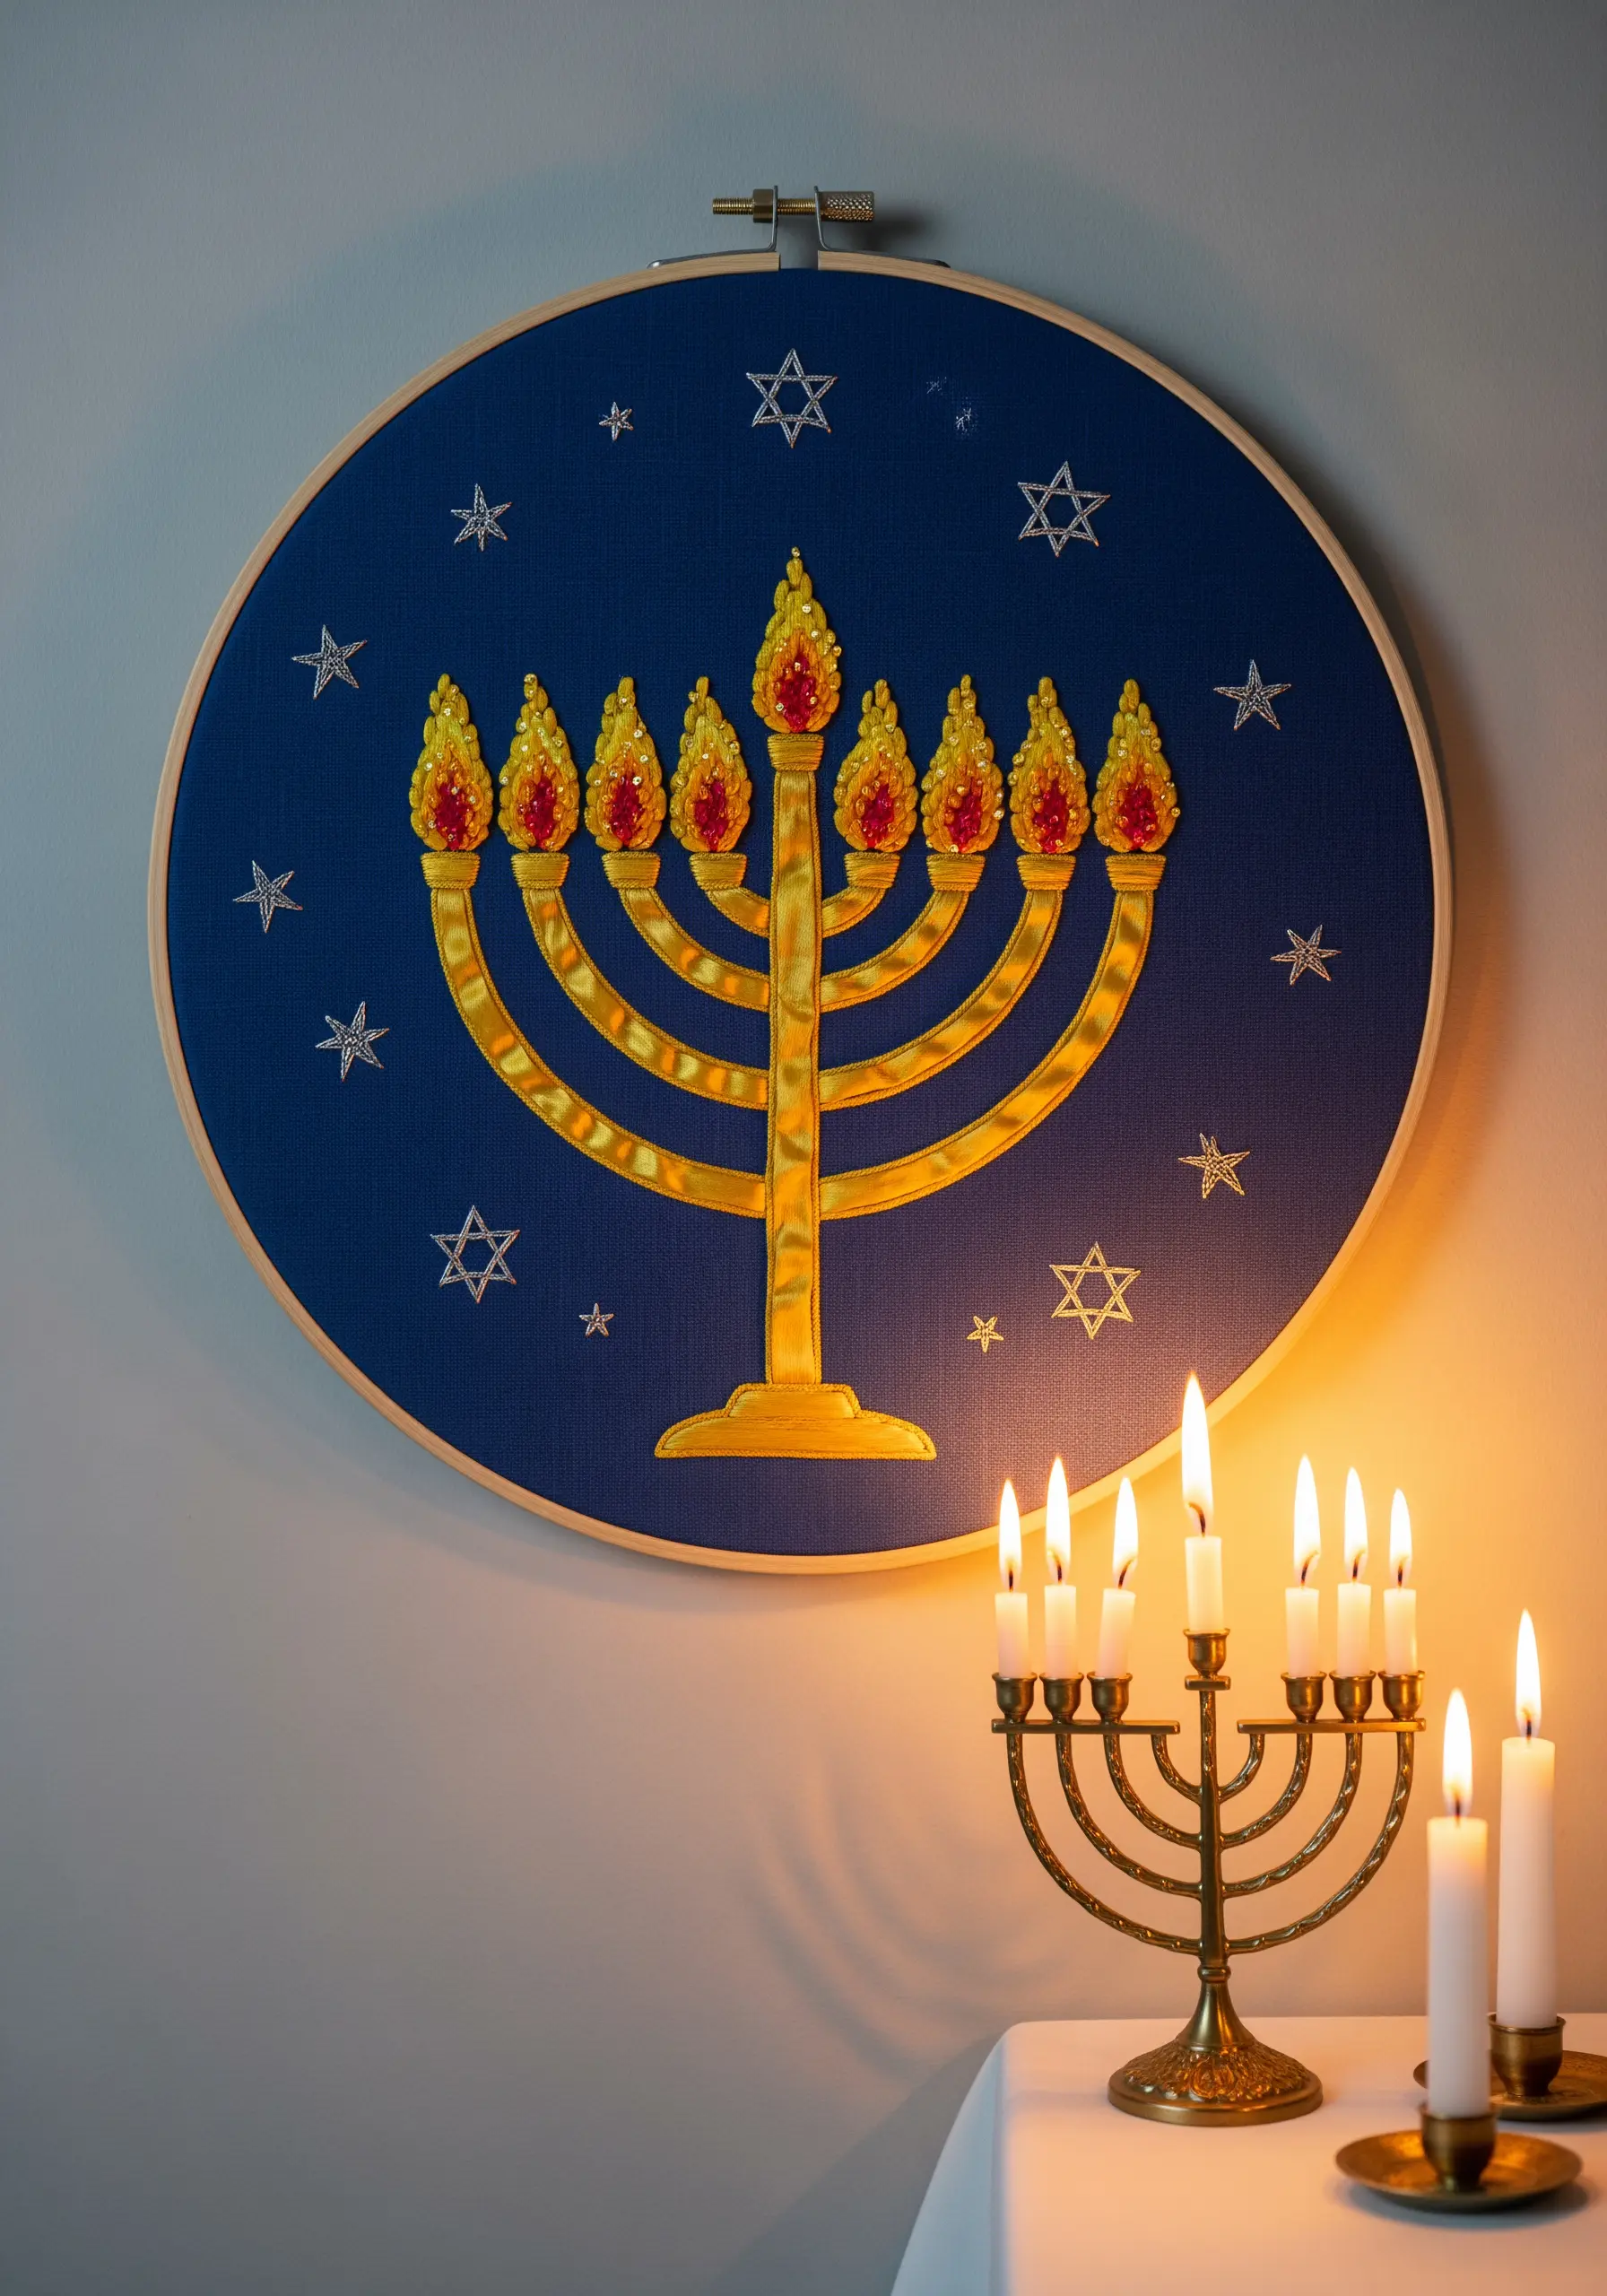
Incorporate silk ribbon embroidery to give elements like flames a unique sheen and dimension.
Use a twisted chain stitch or a simple ribbon stitch to create the candle flames, allowing the ribbon to twist naturally to catch the light from different angles.
For the menorah itself, use a bright gold metallic floss and outline it with a darker shade to create contrast and definition.
The combination of flat metallic thread and dimensional silk ribbon adds a layer of opulence perfect for a celebratory piece.
18. Craft a Statement Wall with Beaded Lettering
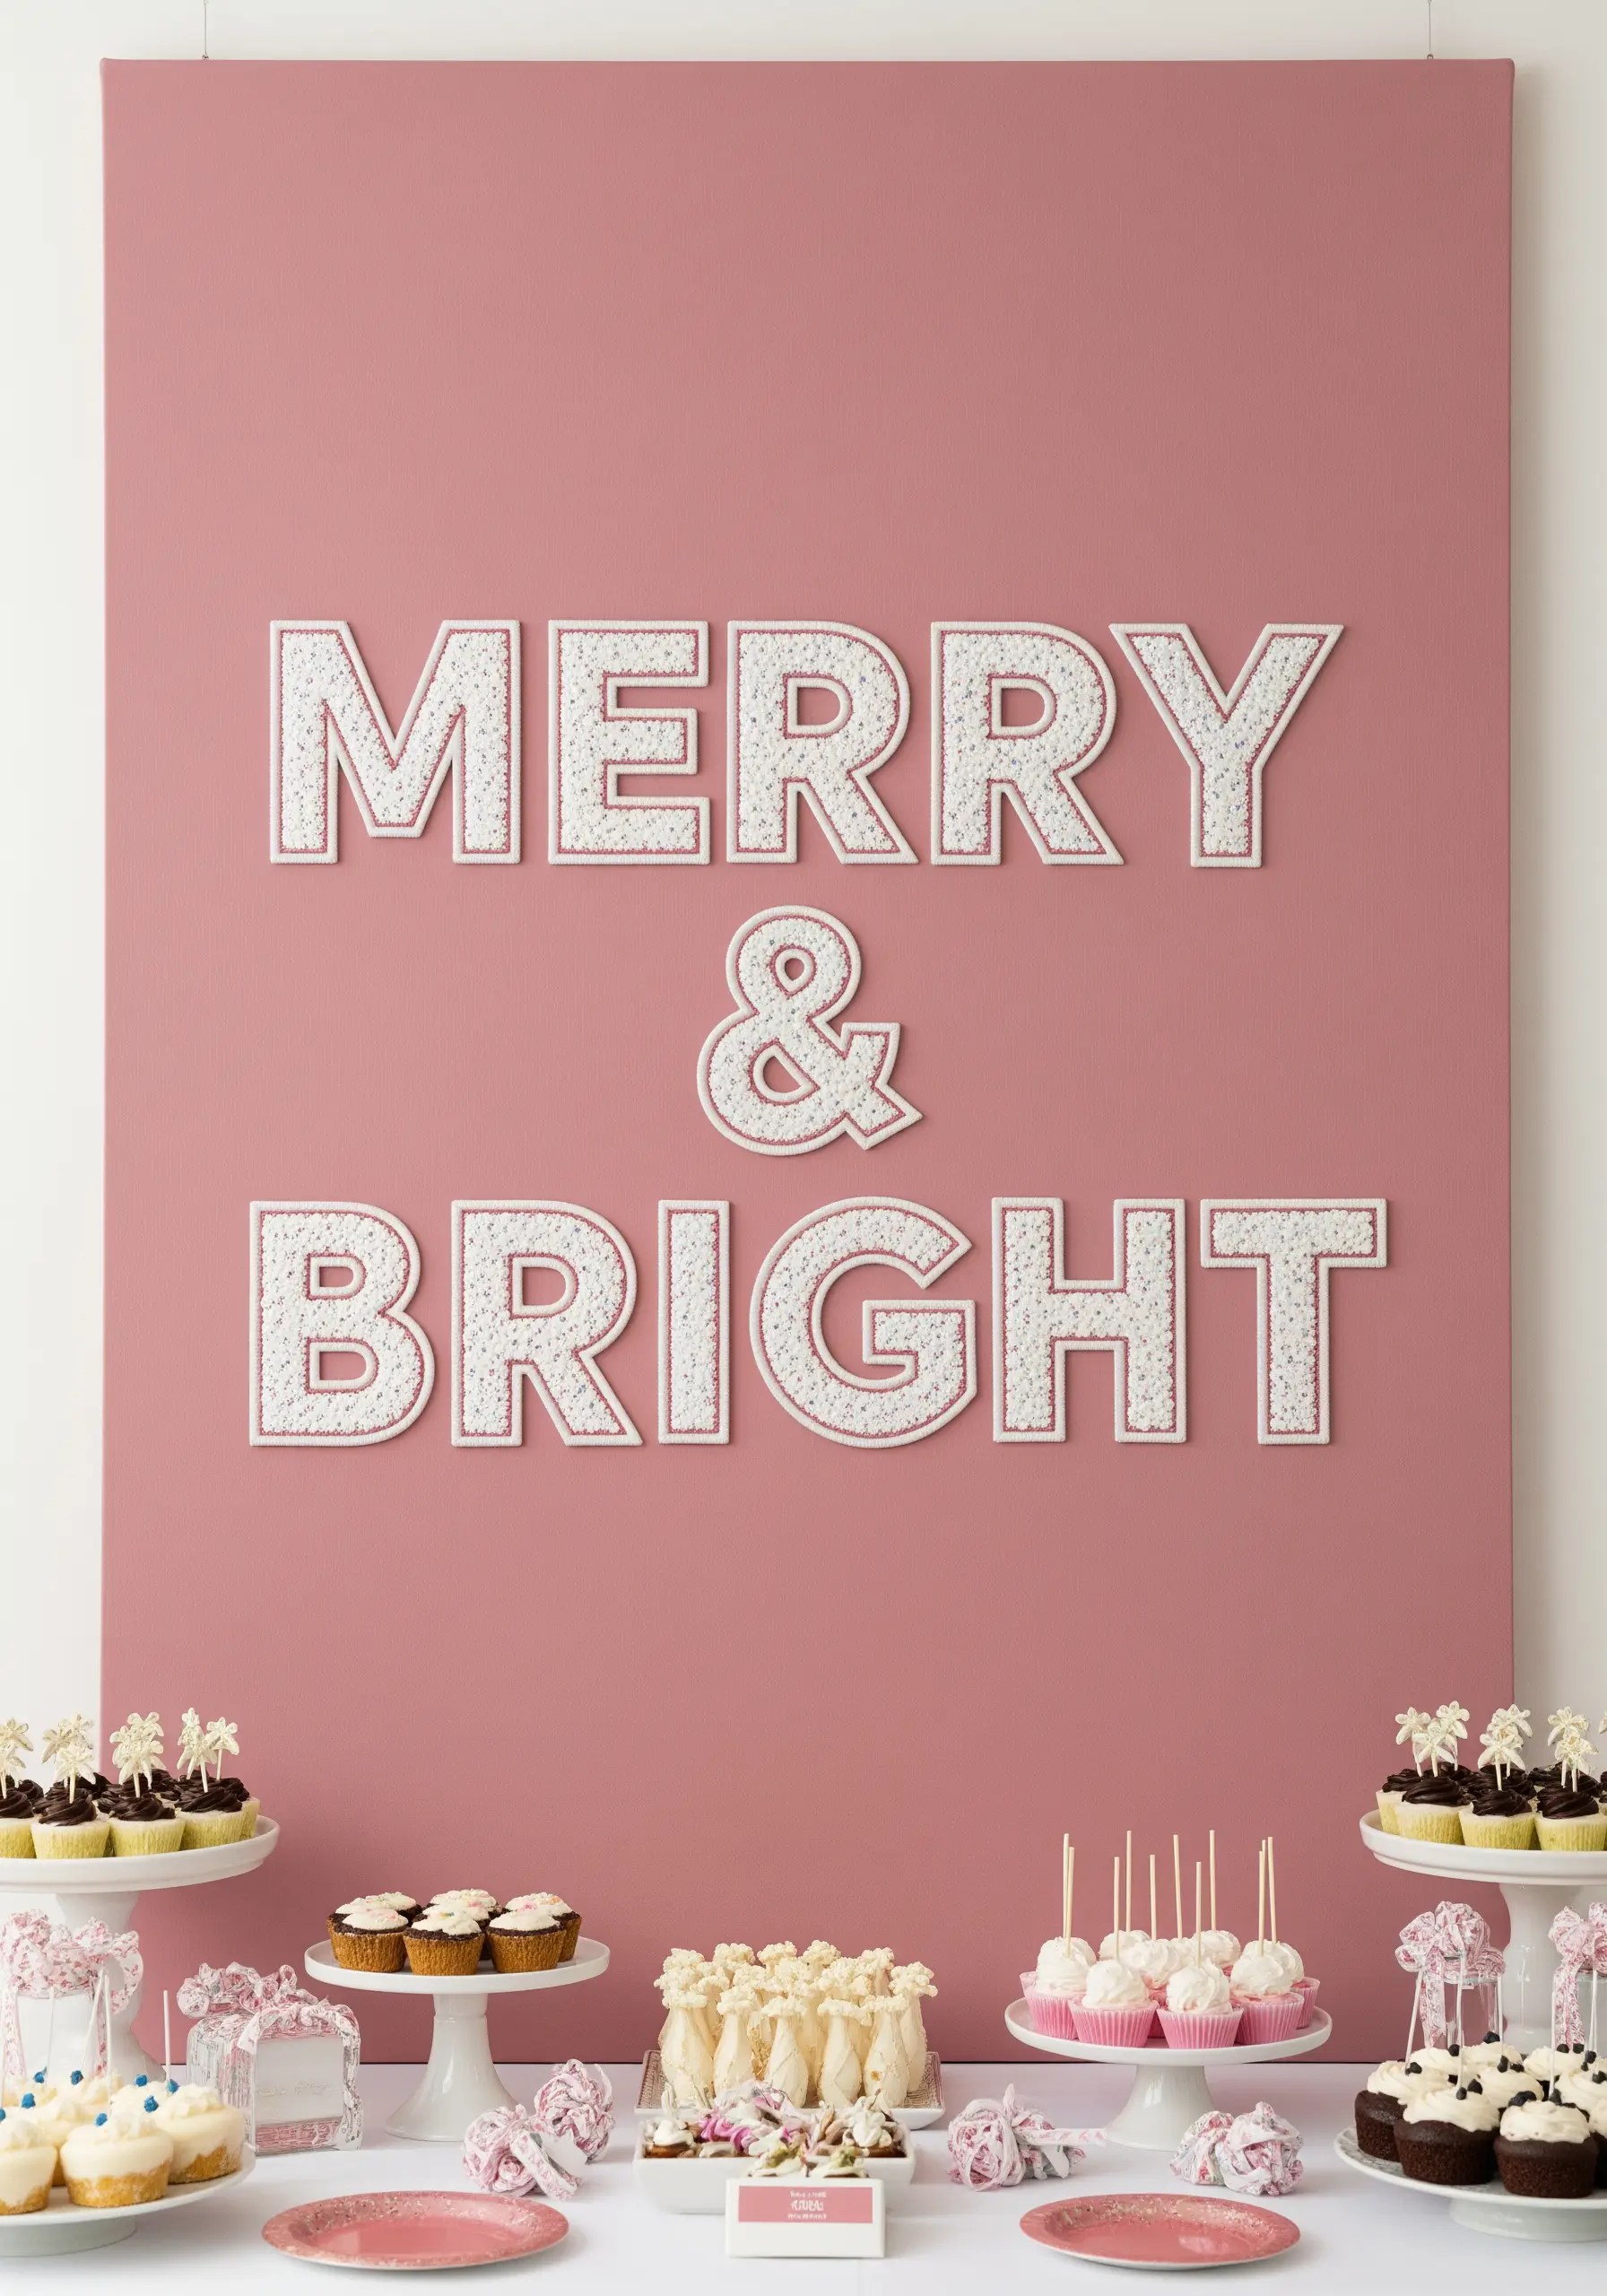
For large-scale text that needs to sparkle, integrate beads into your embroidery.
First, create a padded satin stitch base for each letter using a neutral white or silver floss to give the letters shape and height.
Then, go back over the letters and attach seed beads or small bugle beads using a single strand of matching thread.
This two-step process ensures your letters are perfectly formed and gives them a dense, light-catching texture that is impossible to achieve with thread alone.
19. Create a Soft, Plush Texture with Punch Needle
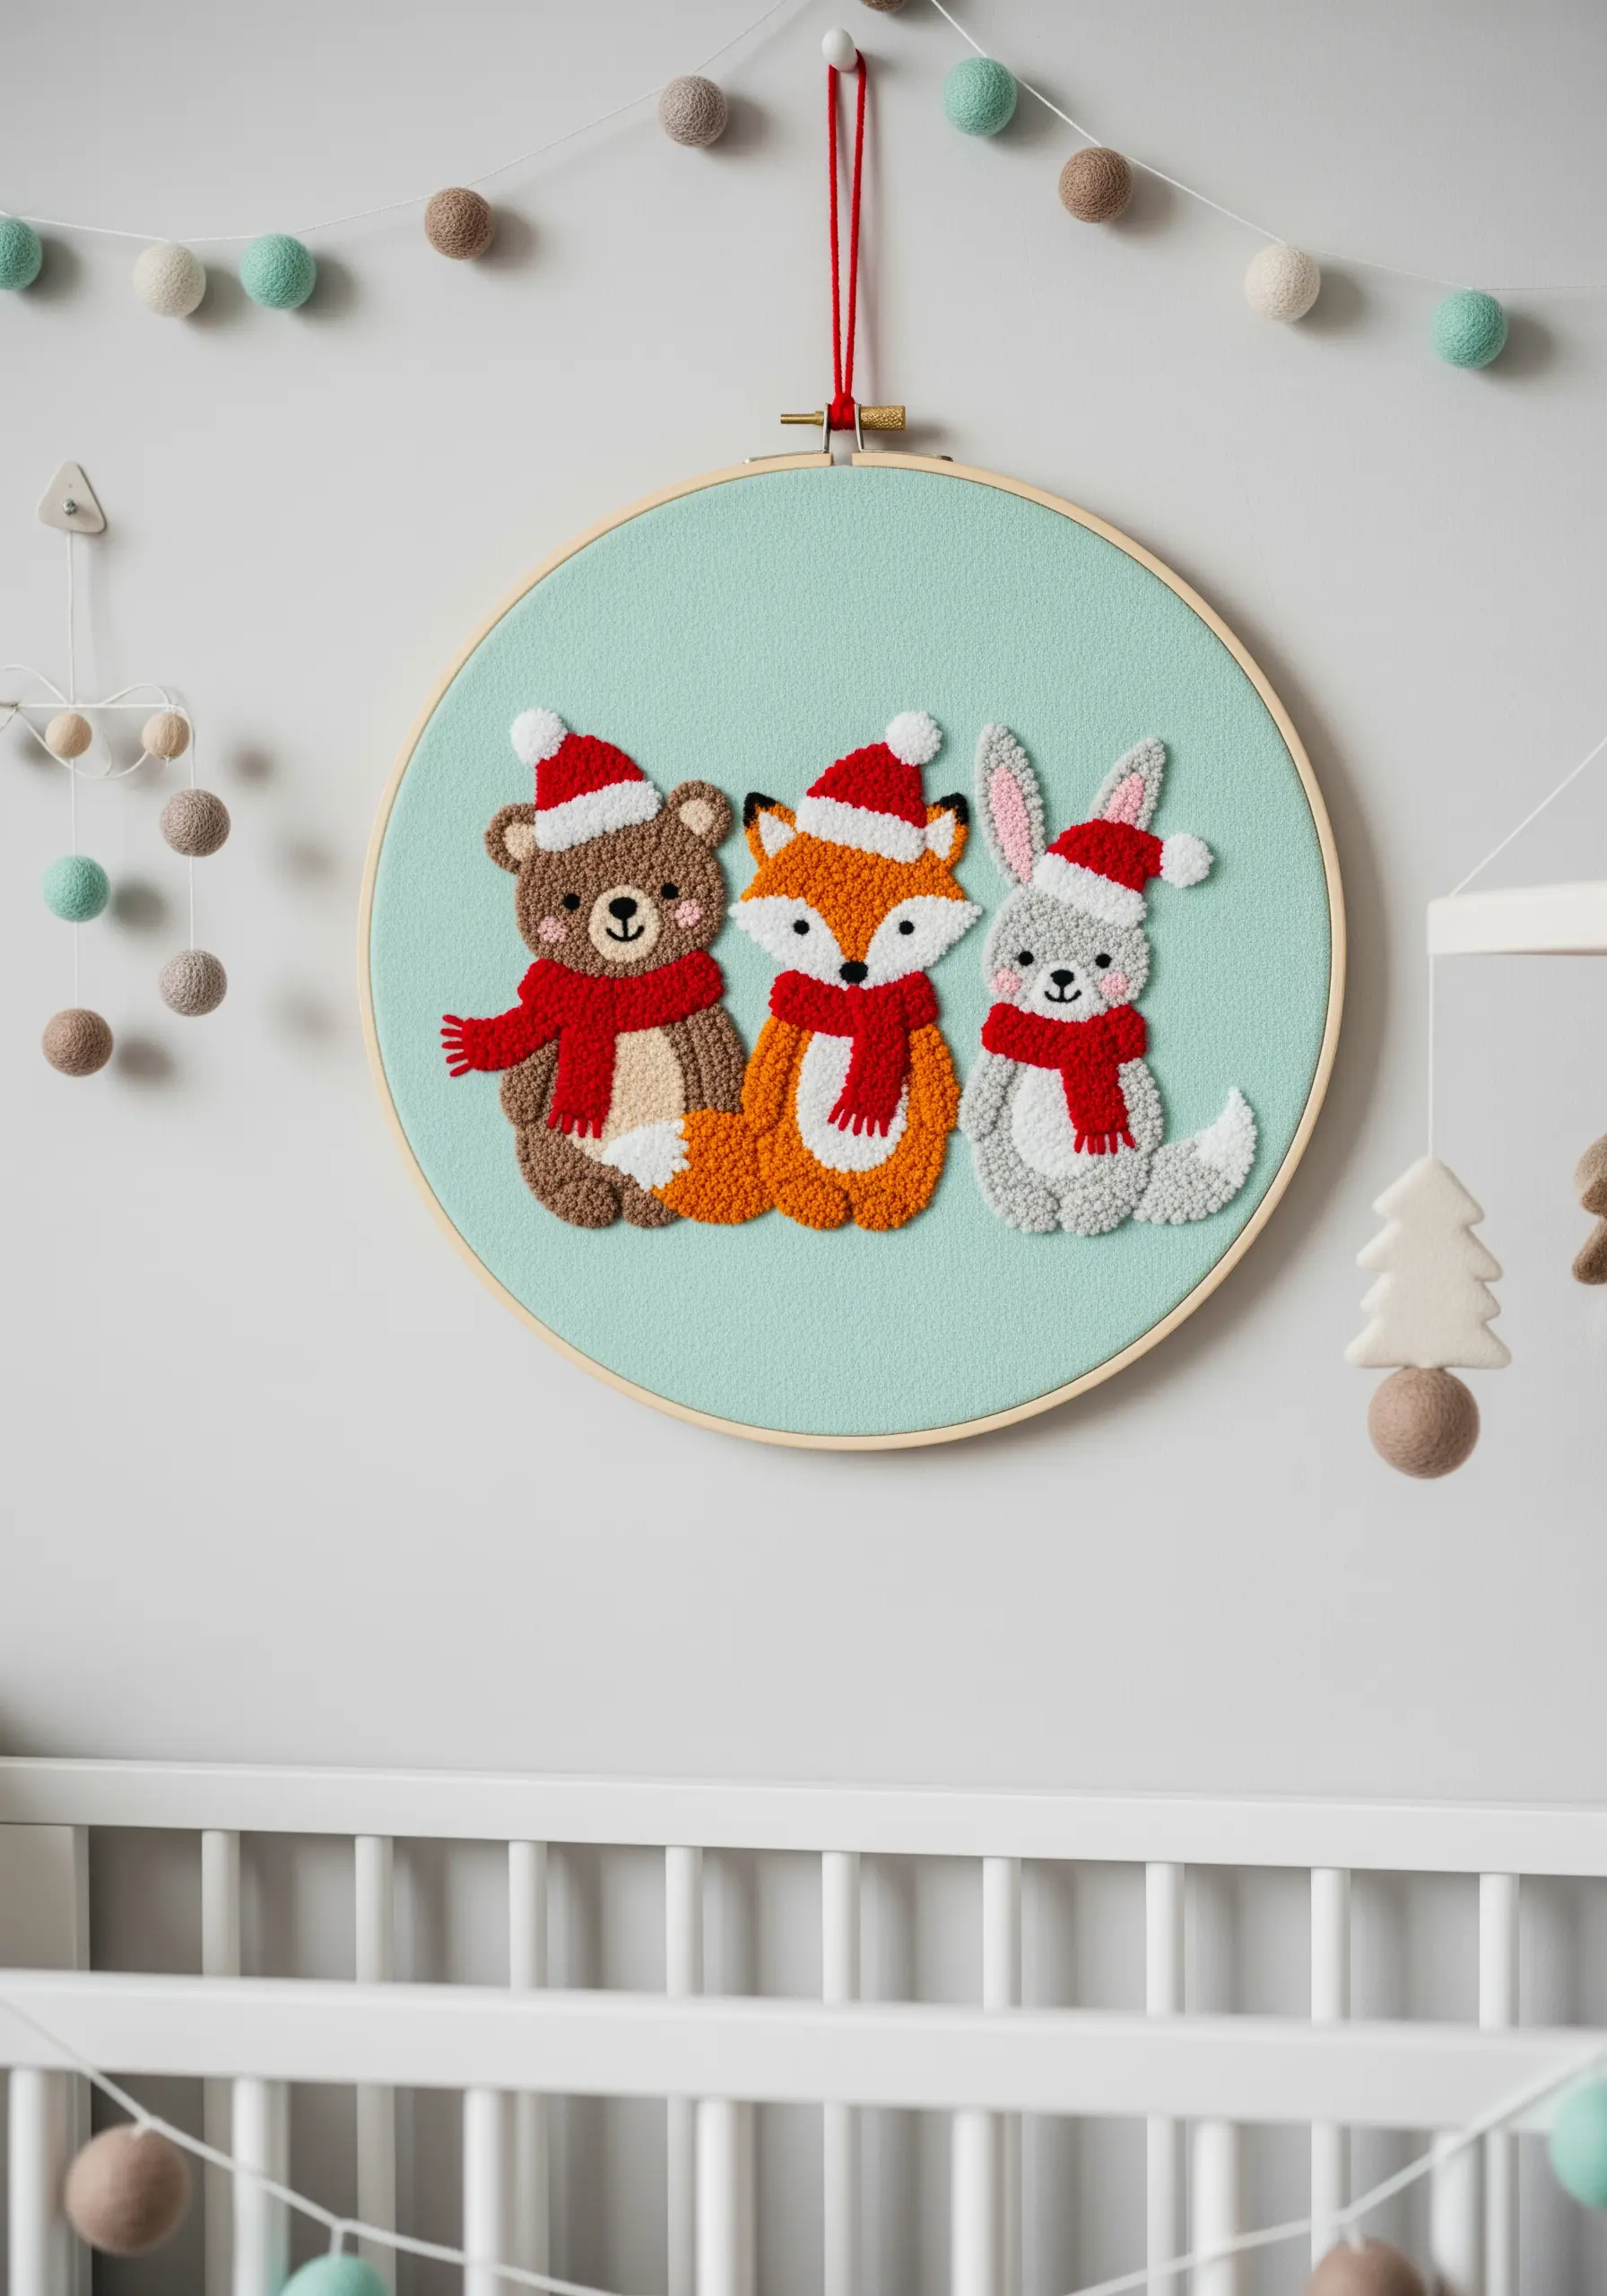
Achieve a soft, carpet-like texture perfect for cuddly woodland creatures by using the punch needle technique.
This method creates loops of yarn or floss on the front of your fabric, resulting in a plush, raised surface.
Outline your shapes with a simple backstitch *after* punching to create clean, defined edges between color sections.
This technique is incredibly fast for filling large areas and is ideal for creating nursery-friendly decor with a soft, touchable finish.
20. Replicate a Stained-Glass Effect with Bold Outlines
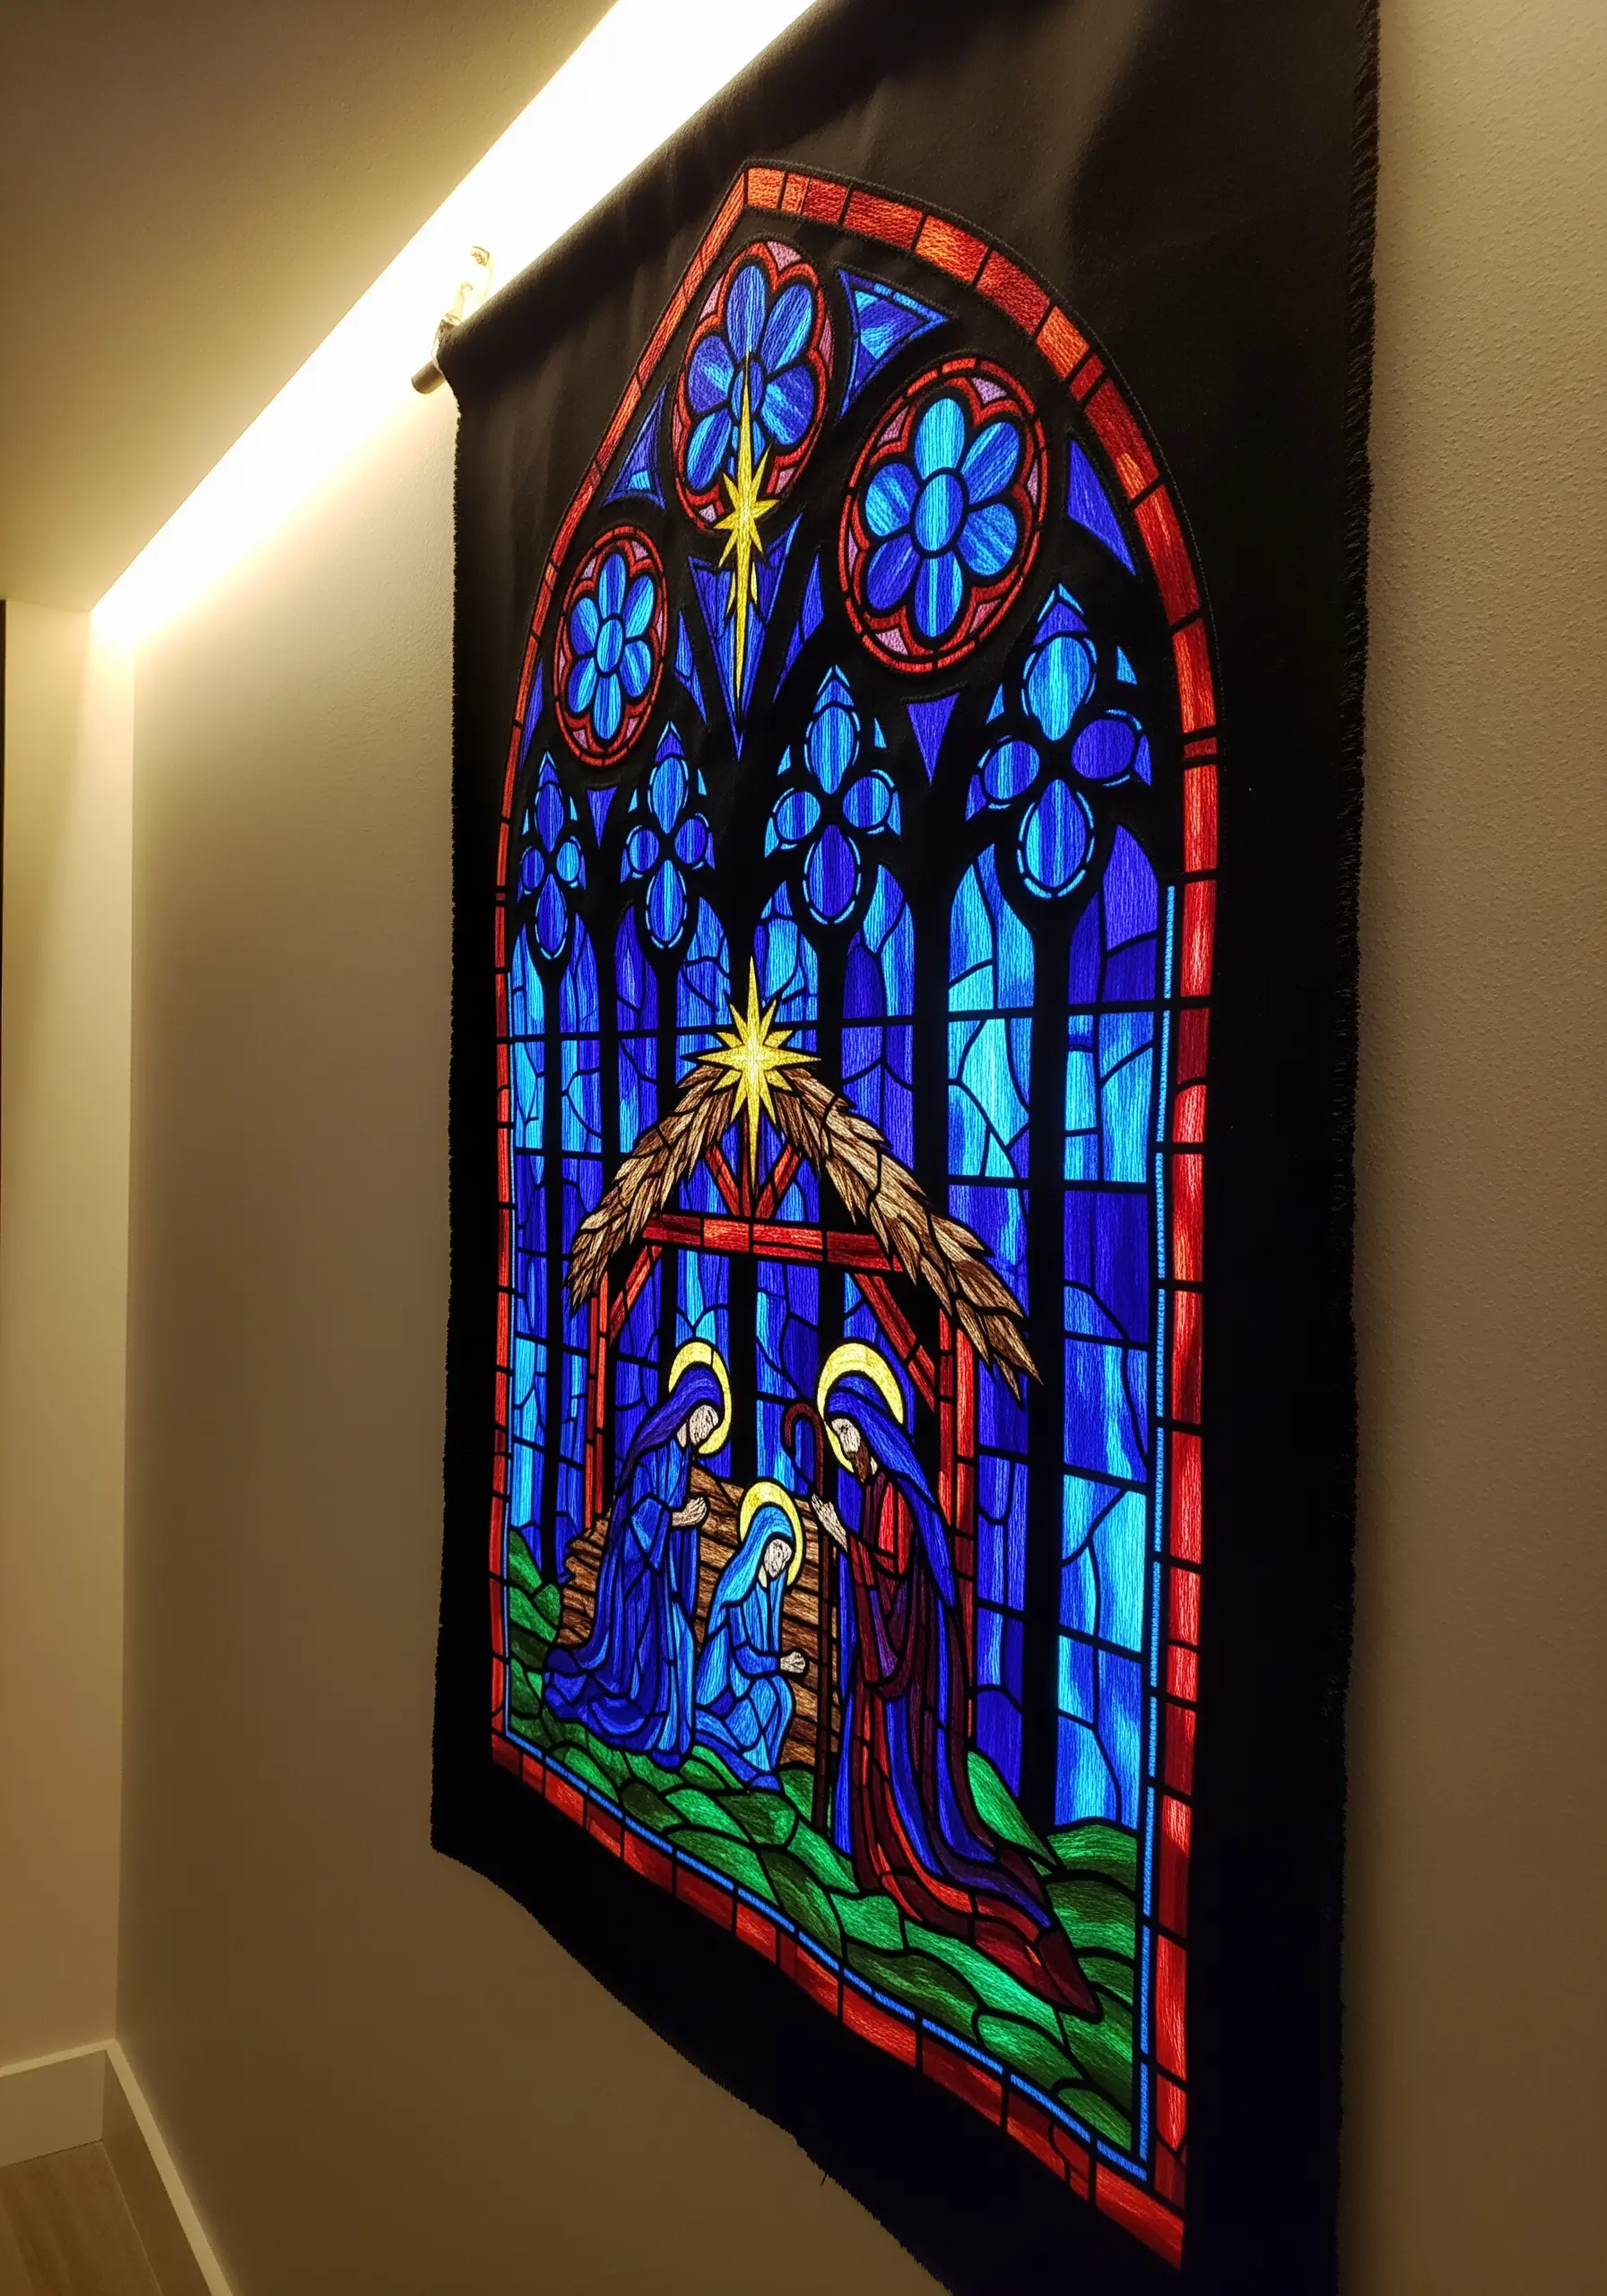
To mimic the look of stained glass, the ‘lead’ lines are the most important element.
Use a thick, bold satin stitch or a whipped backstitch in black thread to create heavy, defining outlines for every shape and color change in your design.
Fill the sections with long, straight satin stitches in jewel tones, keeping all stitches within a section parallel to create a smooth, glass-like pane.
The heavy black outlines will contain the vibrant colors and create that classic, luminous window effect.
21. Construct a Functional Embroidered Advent Calendar
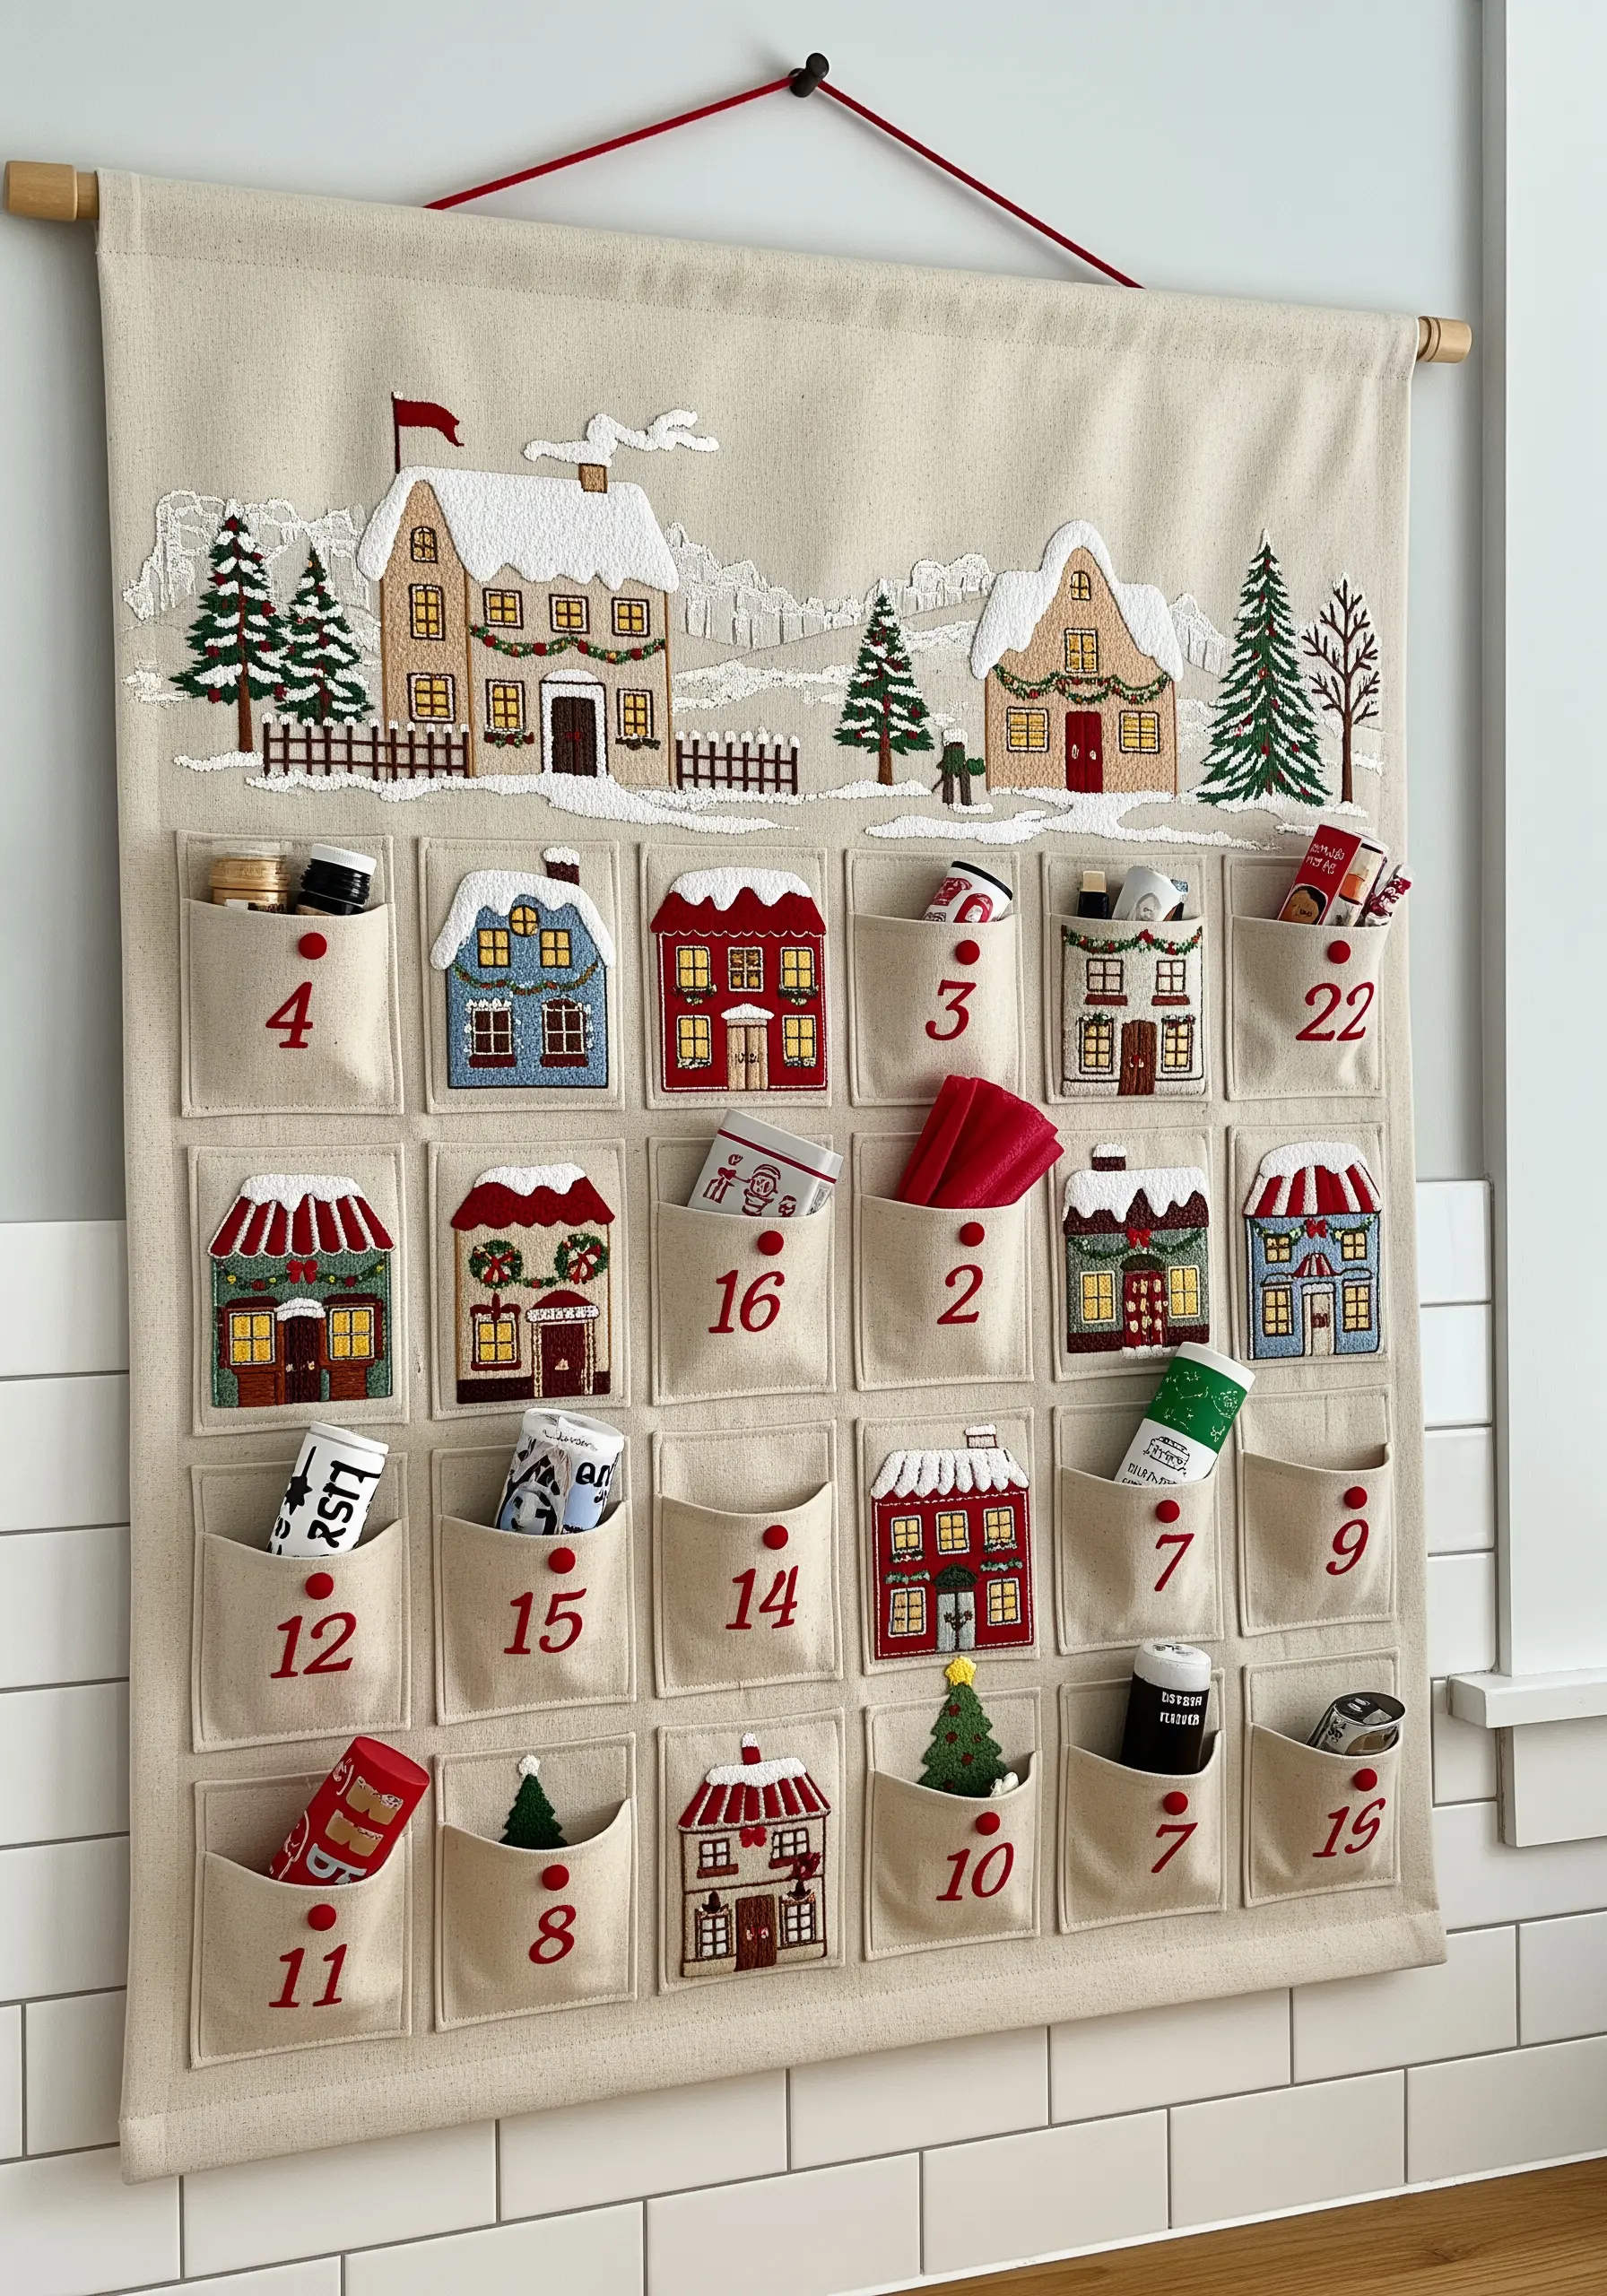
Combine detailed embroidery with practical design to create a beautiful, interactive piece.
Embroider the charming house designs onto the pocket fabric *before* you cut and sew them to the main banner for easier hooping and stitching.
Use a simple backstitch for outlines and a few French knots for wreaths to keep the mini designs clean and quick to execute.
By separating the embroidery and sewing steps, you make this large-scale project feel much more manageable.
22. Dazzle with Opulent Beading and Metallic Thread
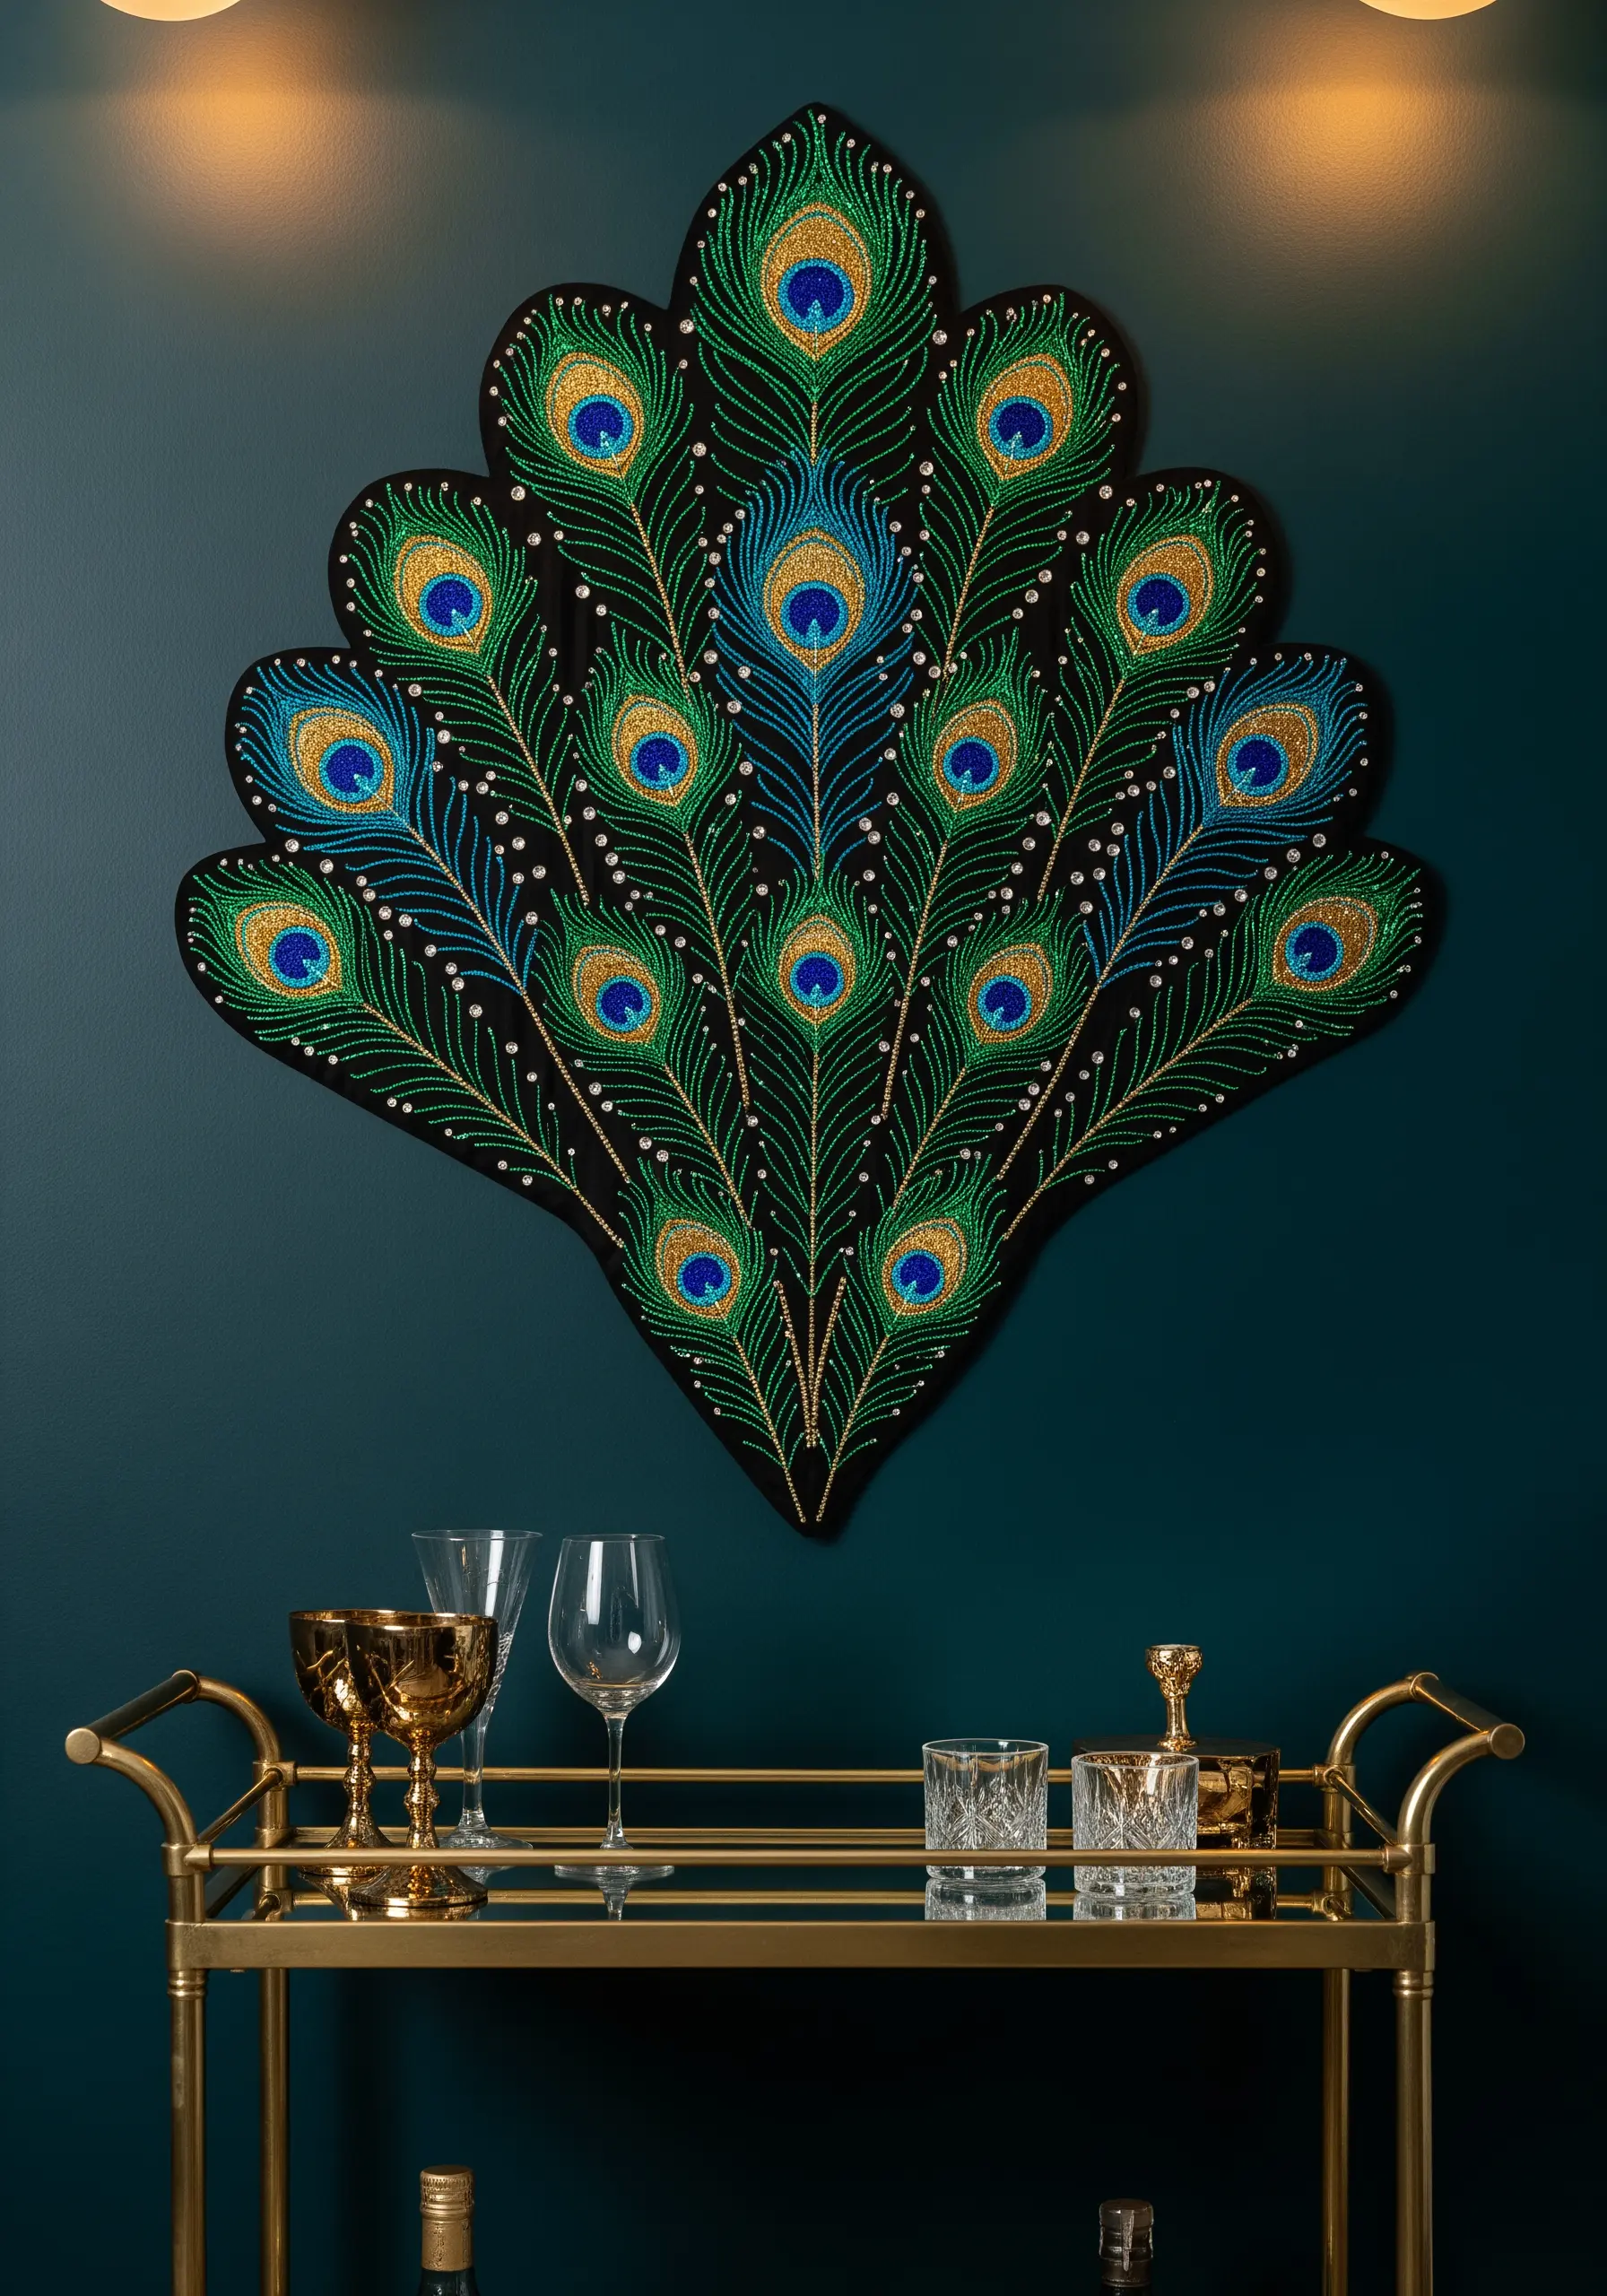
Create a truly luxurious art piece by combining vibrant thread with beadwork and glitter.
Use a satin stitch with variegated green thread for the peacock feathers to create natural color gradients.
Instead of stitching the entire eye of the feather, fill the center with a dense application of seed beads in blues and golds for a jewel-like effect.
A final touch of fine gold metallic thread outlining each feather segment adds a layer of unmatched sparkle and definition.
23. Design a Modern Typographic Art Piece
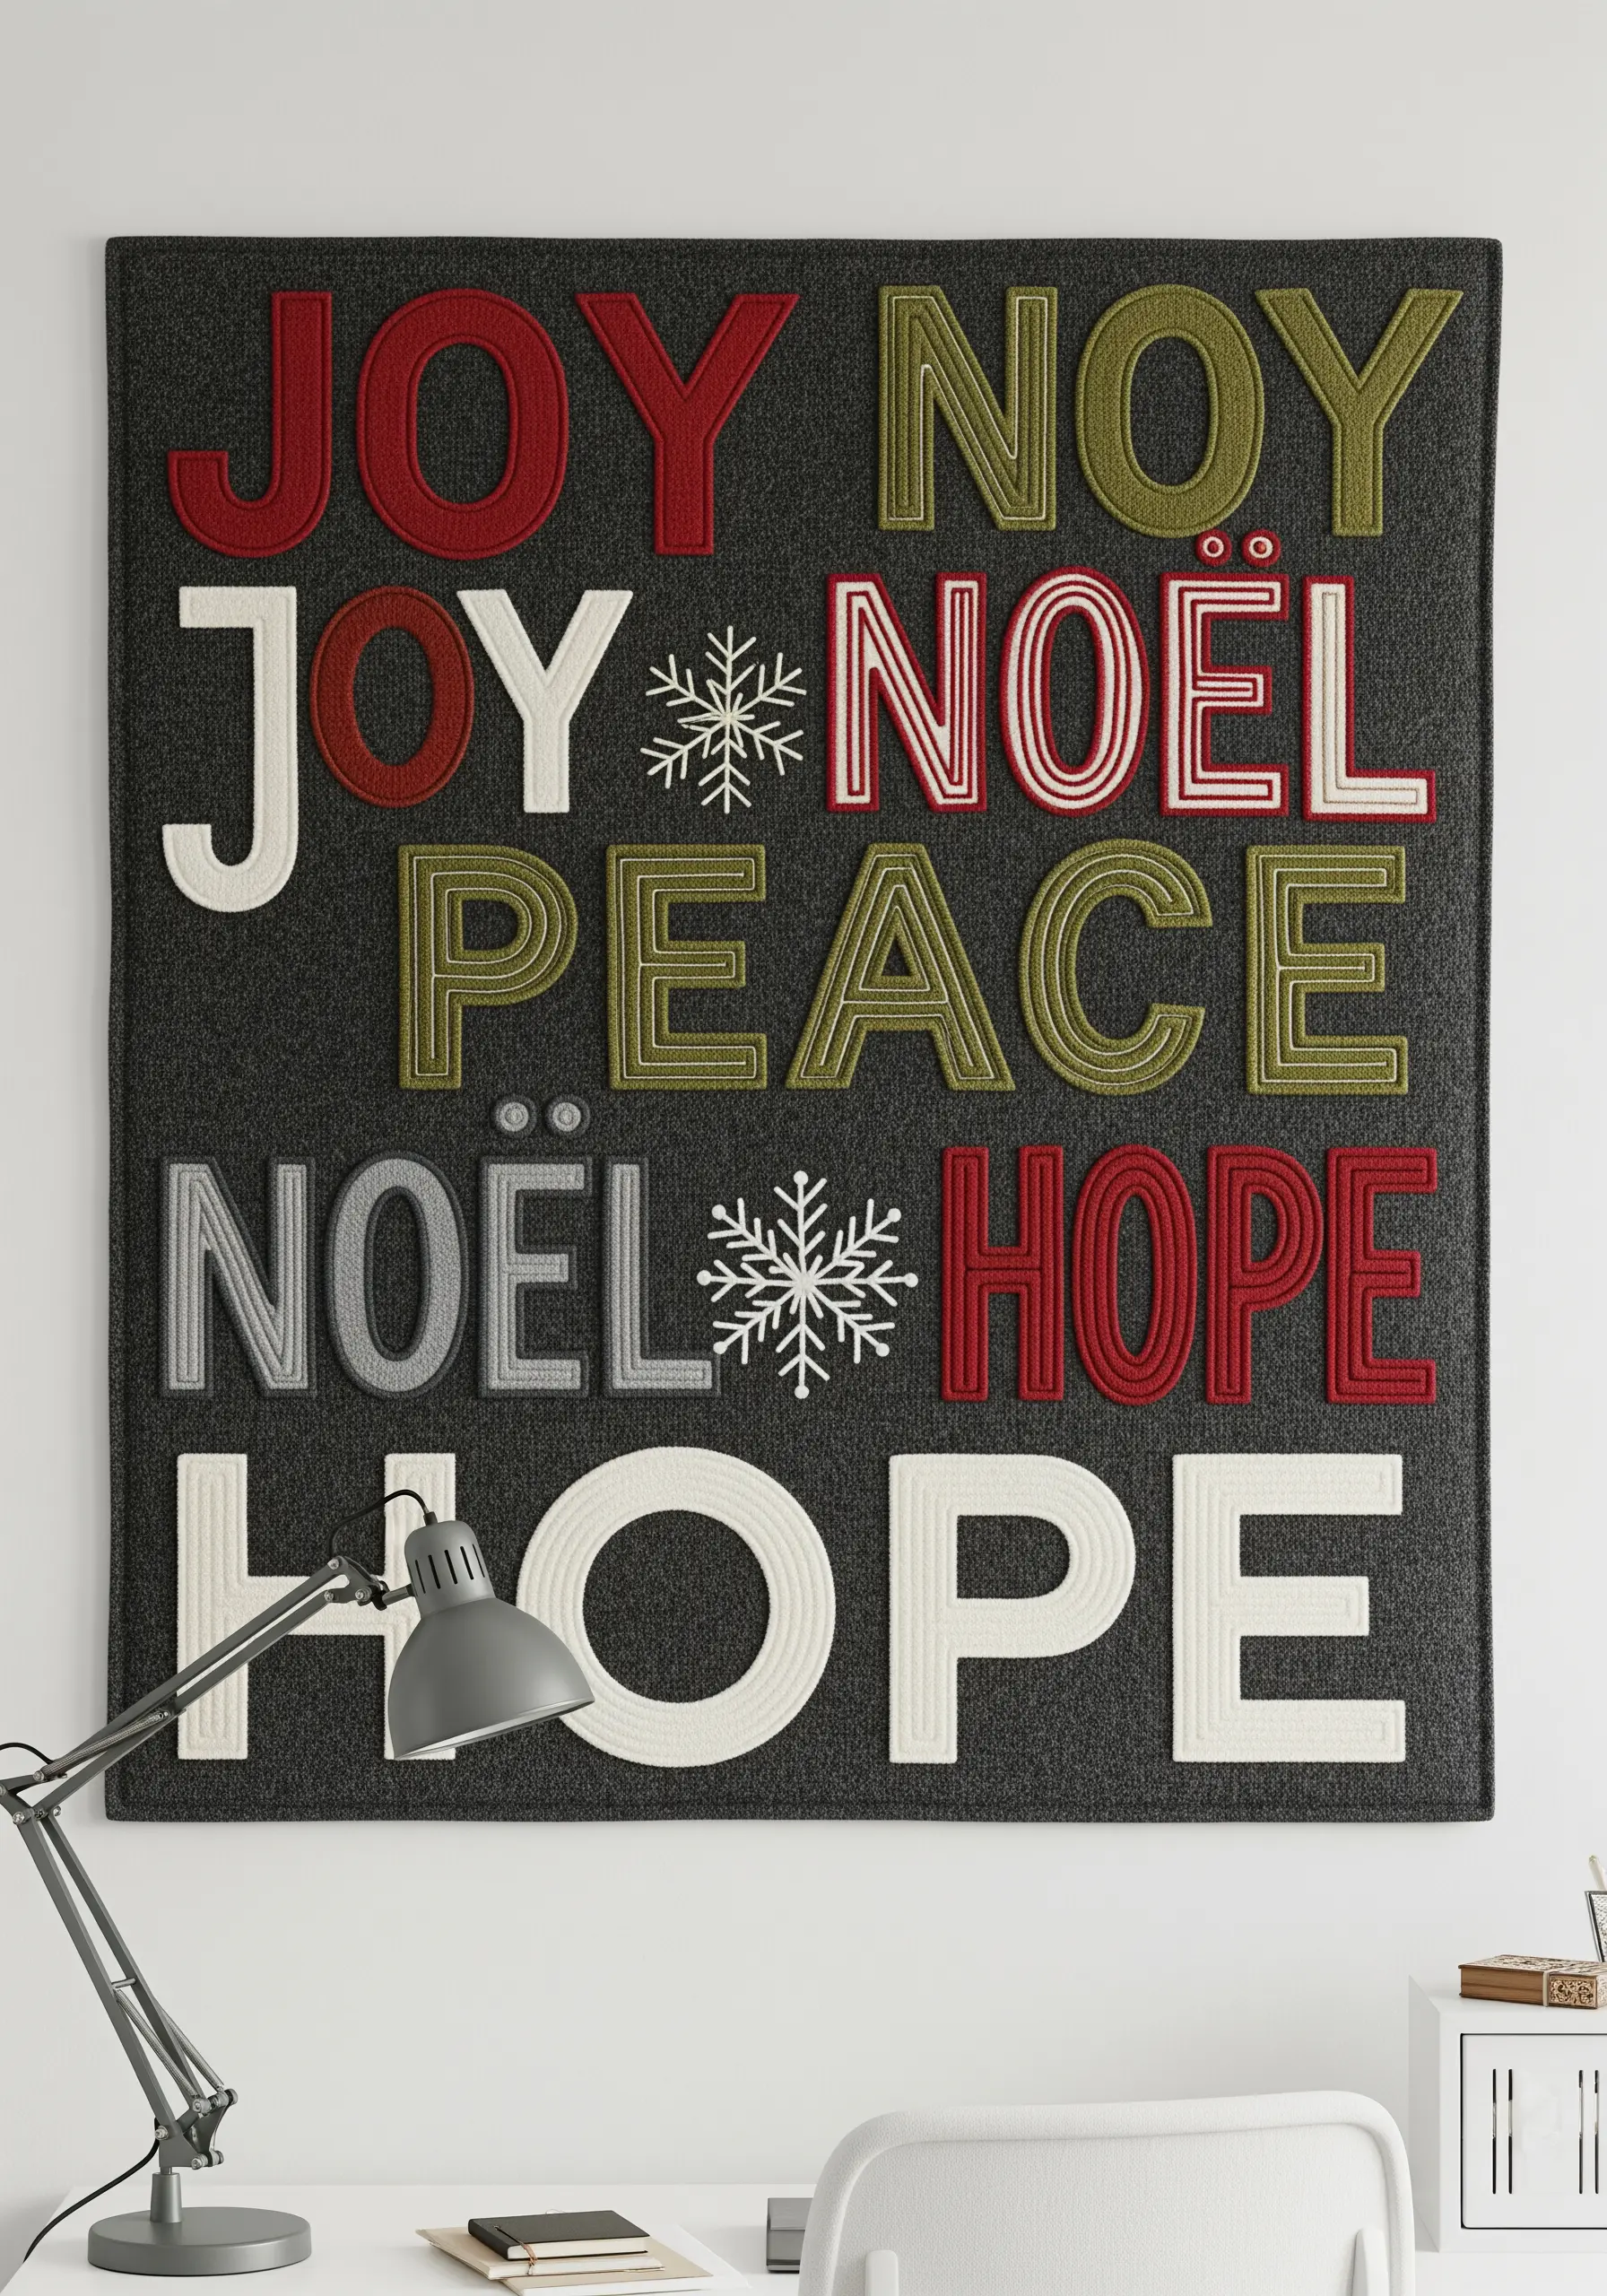
Create a bold, graphic statement by treating letters as design elements.
Use a thick yarn or multiple strands of floss and apply it with a couching stitch to achieve the clean, raised lines.
Vary the colors and fonts to create visual rhythm and hierarchy within the composition.
Adding simple, embroidered motifs like snowflakes breaks up the text and ties the piece to the holiday theme in a subtle, modern way.
24. Craft a Meaningful Family Tree Heirloom
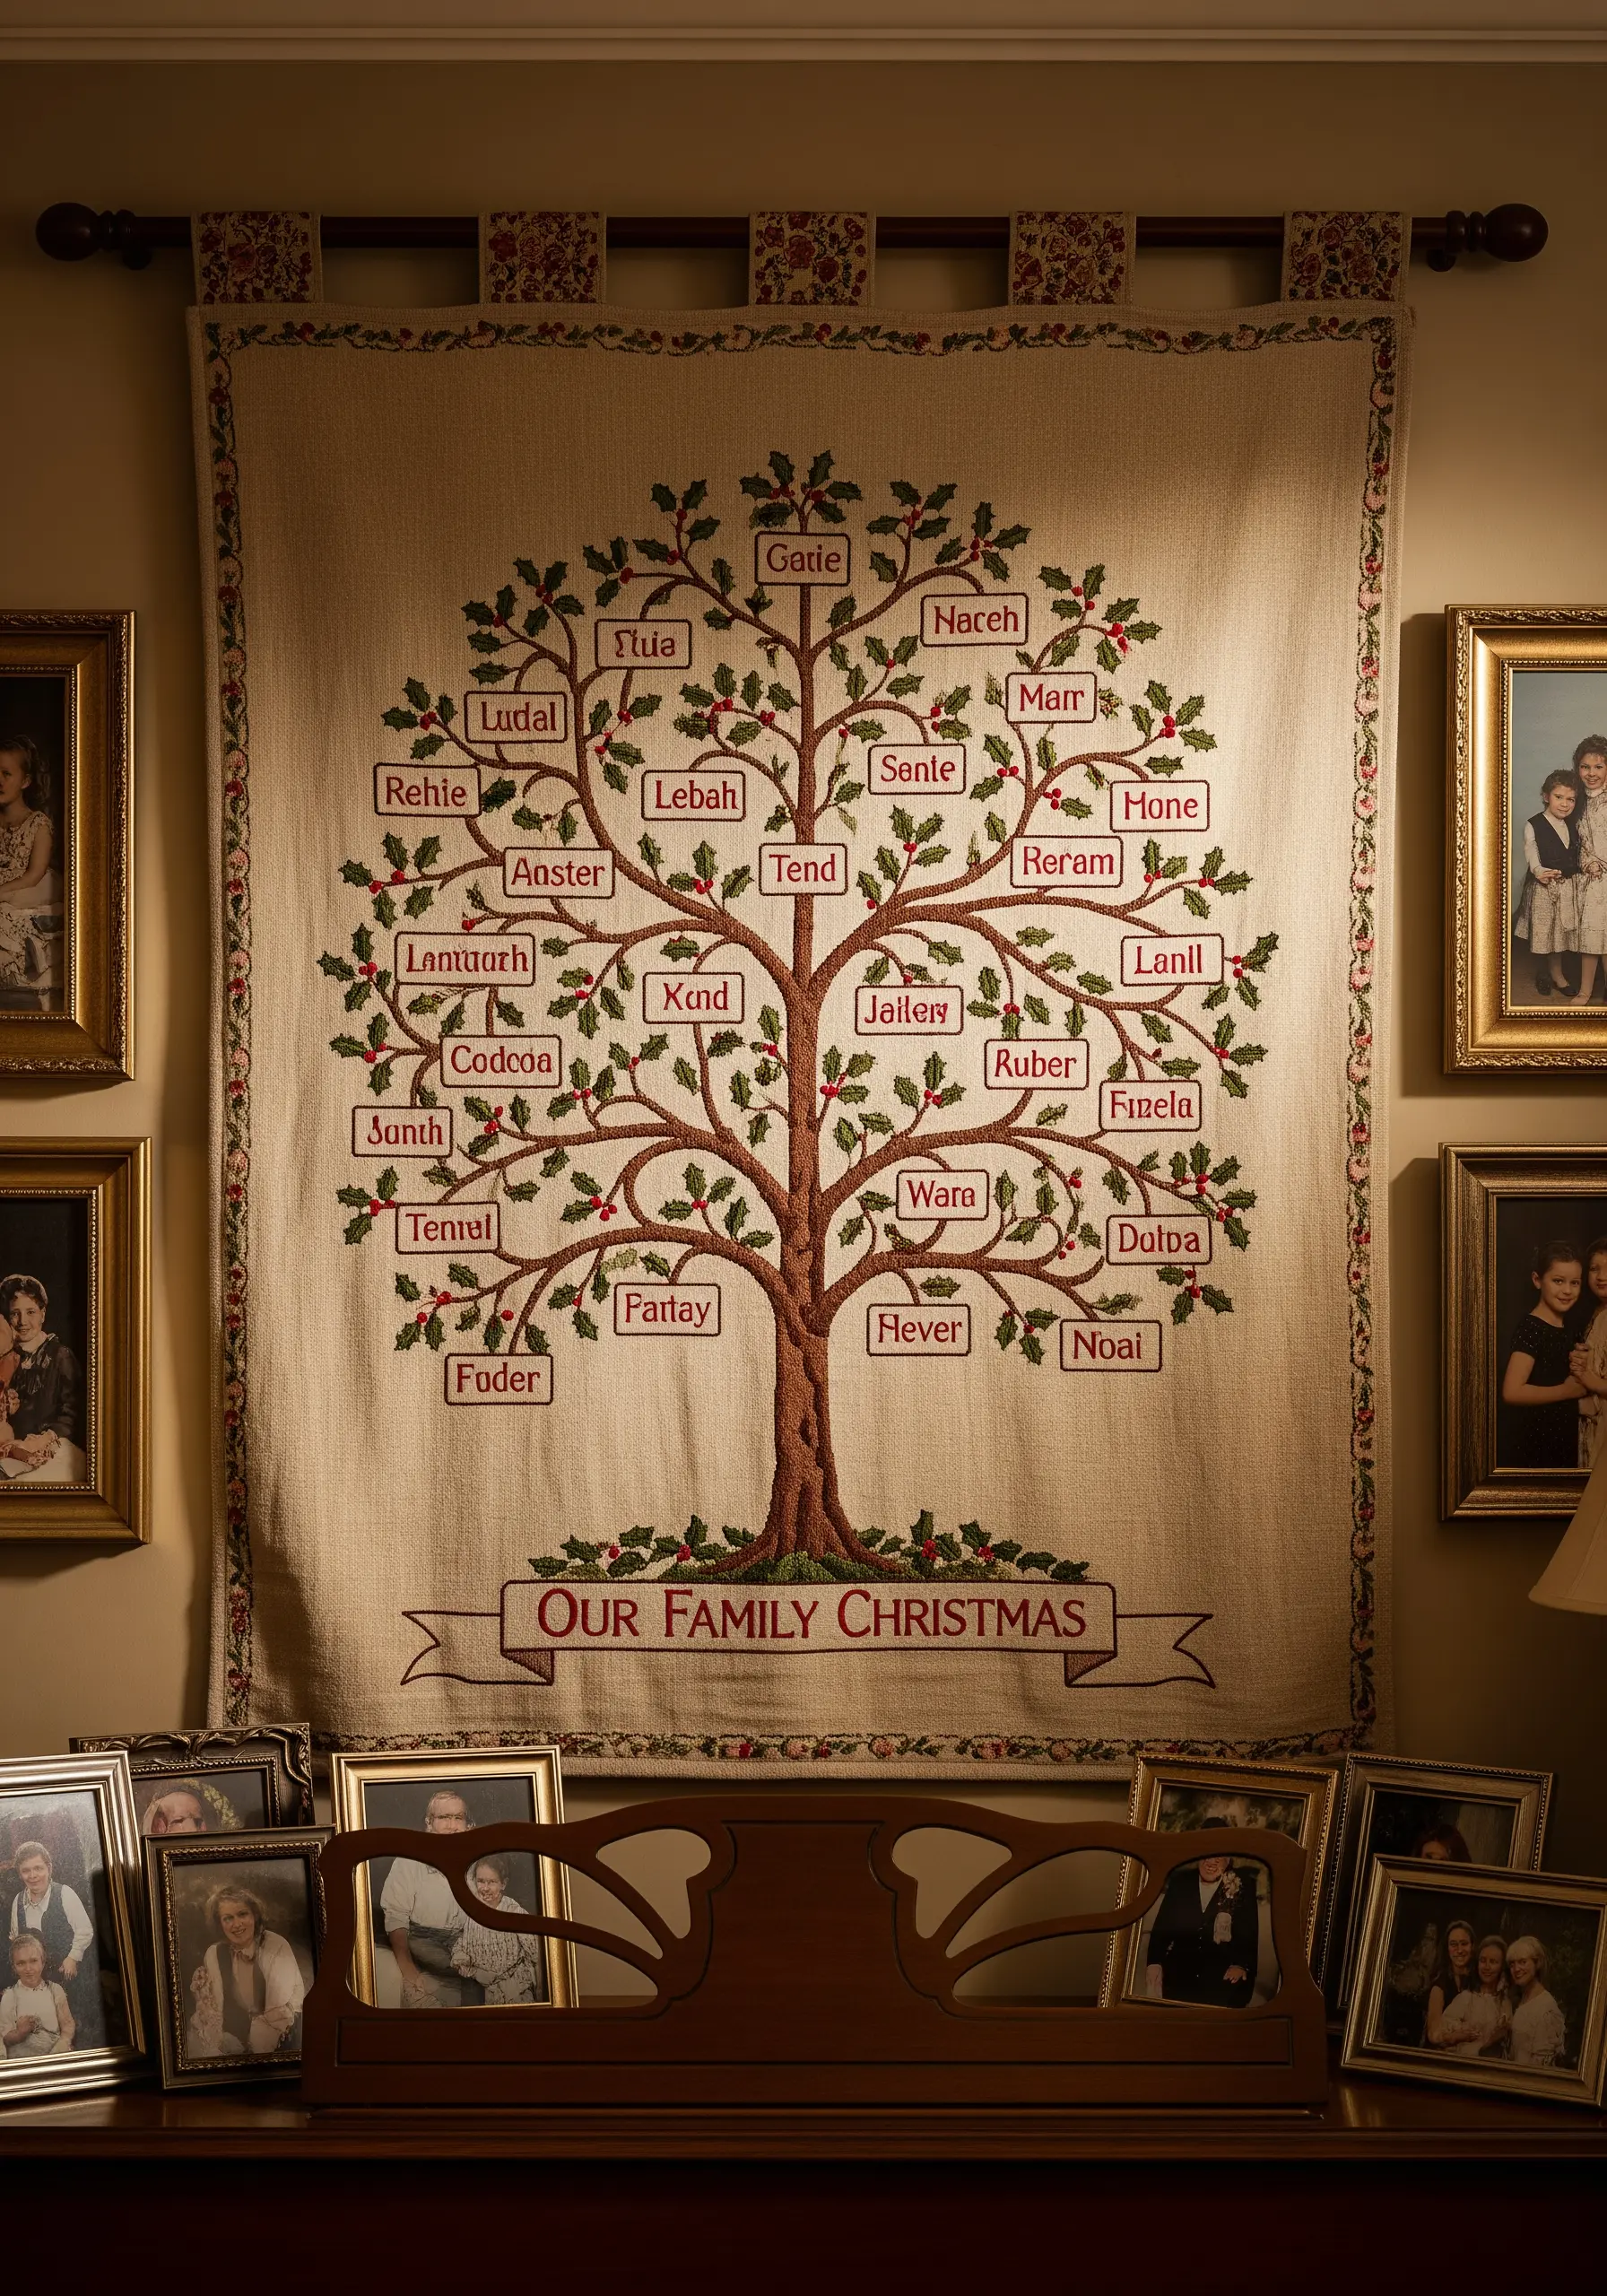
Design a piece that tells a story by integrating text directly into your botanical embroidery.
Use a simple backstitch for the branches and lettering to maintain clarity and ensure the names are legible.
Map out the placement of the name boxes before you begin stitching to ensure the composition is balanced and there’s enough room for everyone.
Adding a simple decorative border frames the entire piece and transforms your family tree into a cherished, formal keepsake.
25. Capture a Rustic Scene with Layered Fills
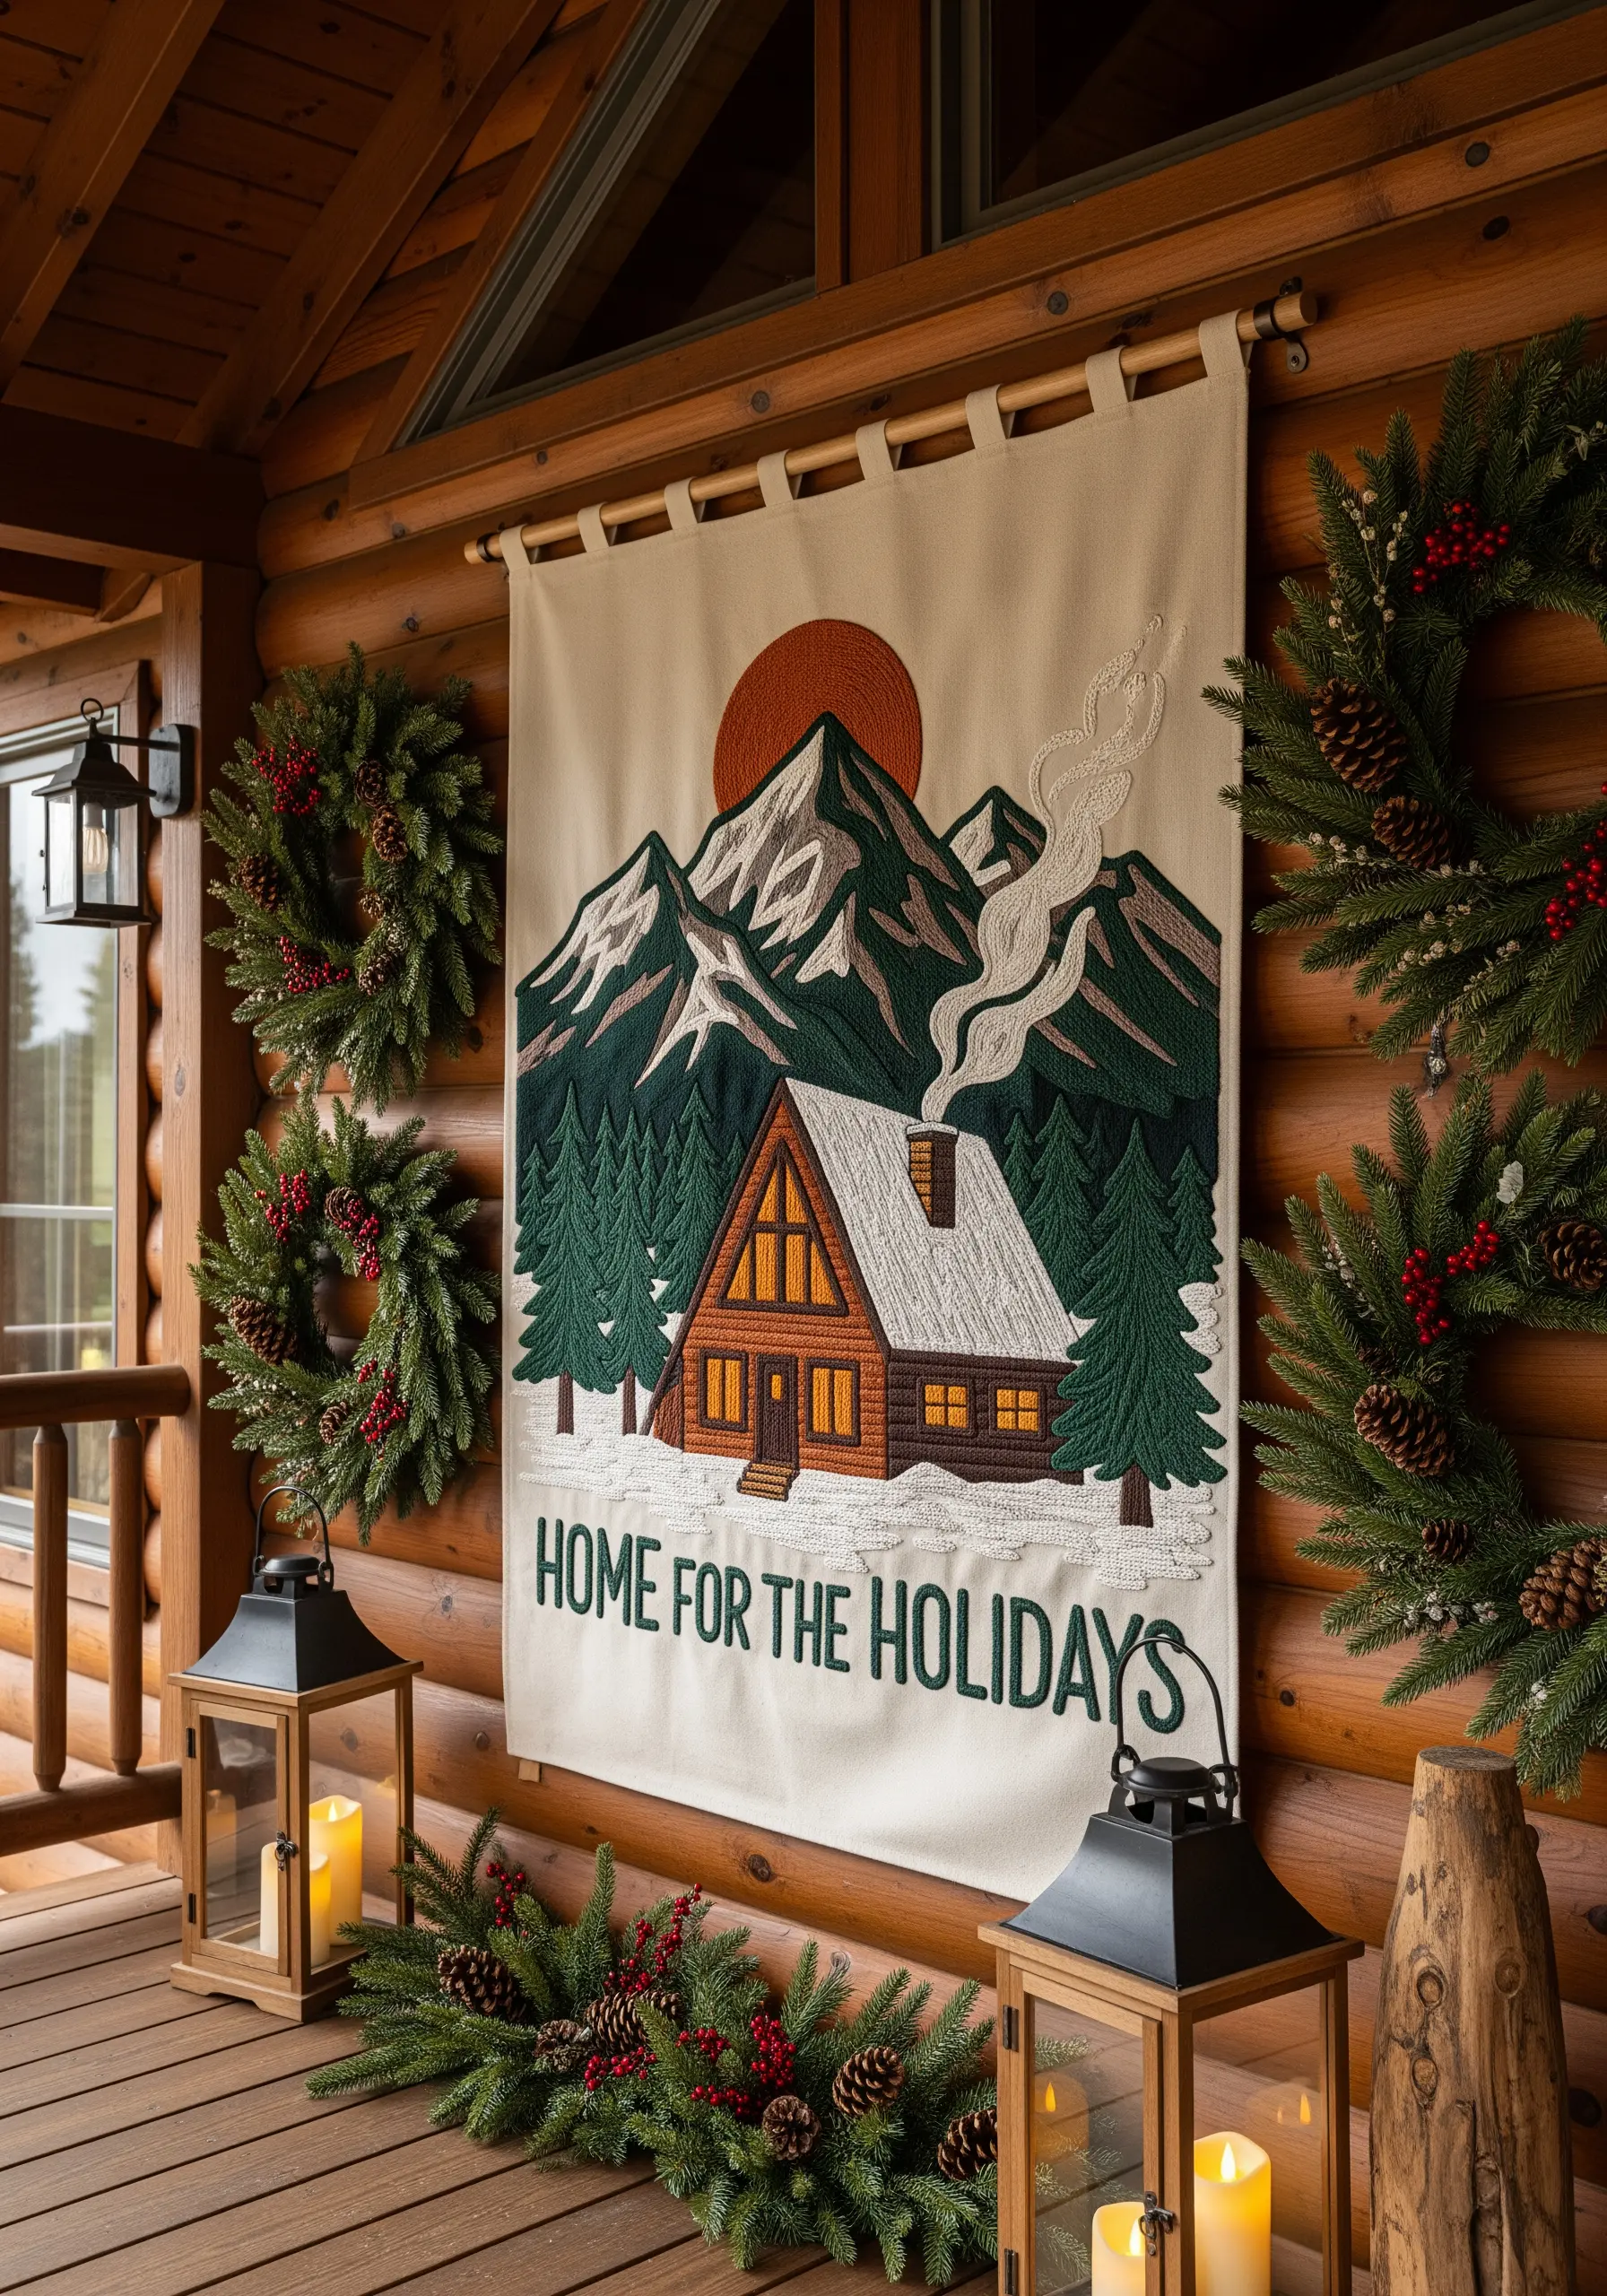
Create a sense of depth in a landscape by layering different fill stitches.
Use a long-and-short stitch for the mountains to create soft, shaded gradients, suggesting distance.
For the foreground elements like the cabin and trees, switch to a flatter, more uniform satin stitch to make them feel closer and more solid.
The swirling stem stitch used for the chimney smoke adds a touch of movement, bringing the entire cozy scene to life.


