
Your collection of thrifted linens—tablecloths with a faint stain, napkins softened by time, forgotten pillowcases—is not a pile of imperfections. It is a canvas of stories, waiting for a new layer of intention. The key to transforming them isn’t just adding stitches, but choosing the right ones and placing them with purpose.
Elevating your embroidery is less about mastering dozens of complex techniques and more about refining a few essential ones. It’s in the subtle shift of a stitch’s direction to catch the light, the choice to use one strand of thread instead of three for delicacy, or the way you balance a dense cluster of knots with quiet, open space.
In these ideas, you will find more than just patterns; you will find the ‘why’ behind each choice. Consider this your guide to turning simple fabrics into meaningful, vintage-chic decor that feels both personal and polished. Let’s begin.
1. The Meadow Border: Composing a Dynamic Wildflower Scene

To create a lively, natural-looking border, avoid uniform placement.
Vary the height and density of your floral stems, allowing some to cluster together while others stand alone.
Use three strands of floss for bold flowers like poppies to make them advance visually, then switch to a single strand for delicate daisies and fillers to create a sense of depth.
This thoughtful composition transforms a static line of flowers into a dynamic, breathing meadow that draws the eye along the length of the fabric.
2. Sculptural Lavender: Building Texture with French Knots

Give your lavender sprigs a realistic, three-dimensional texture by using French knots instead of satin stitch for the buds.
For a natural taper, wrap the thread twice around the needle for the smaller knots at the tip of the stalk, and three times for the fuller, more robust buds at the base.
Pair these textured knots with a clean, sharp split stitch for the stems; the contrast makes the floral element pop beautifully against the smooth linen.
3. Stitching Over Prints: Integrating Embroidery with Existing Patterns
When working on a printed linen, let the existing pattern be your guide rather than fighting it.
Select a motif from the fabric—like the scrollwork here—and use your embroidery to enhance it, creating a rich, layered effect.
Use long-and-short stitch to fill the floral shapes, choosing thread colors that are a few shades more saturated than the print.
This technique makes your embroidery feel intentional and harmoniously integrated with the original textile.
4. Minimalist Herbs: The Elegance of Line Work and Lettering
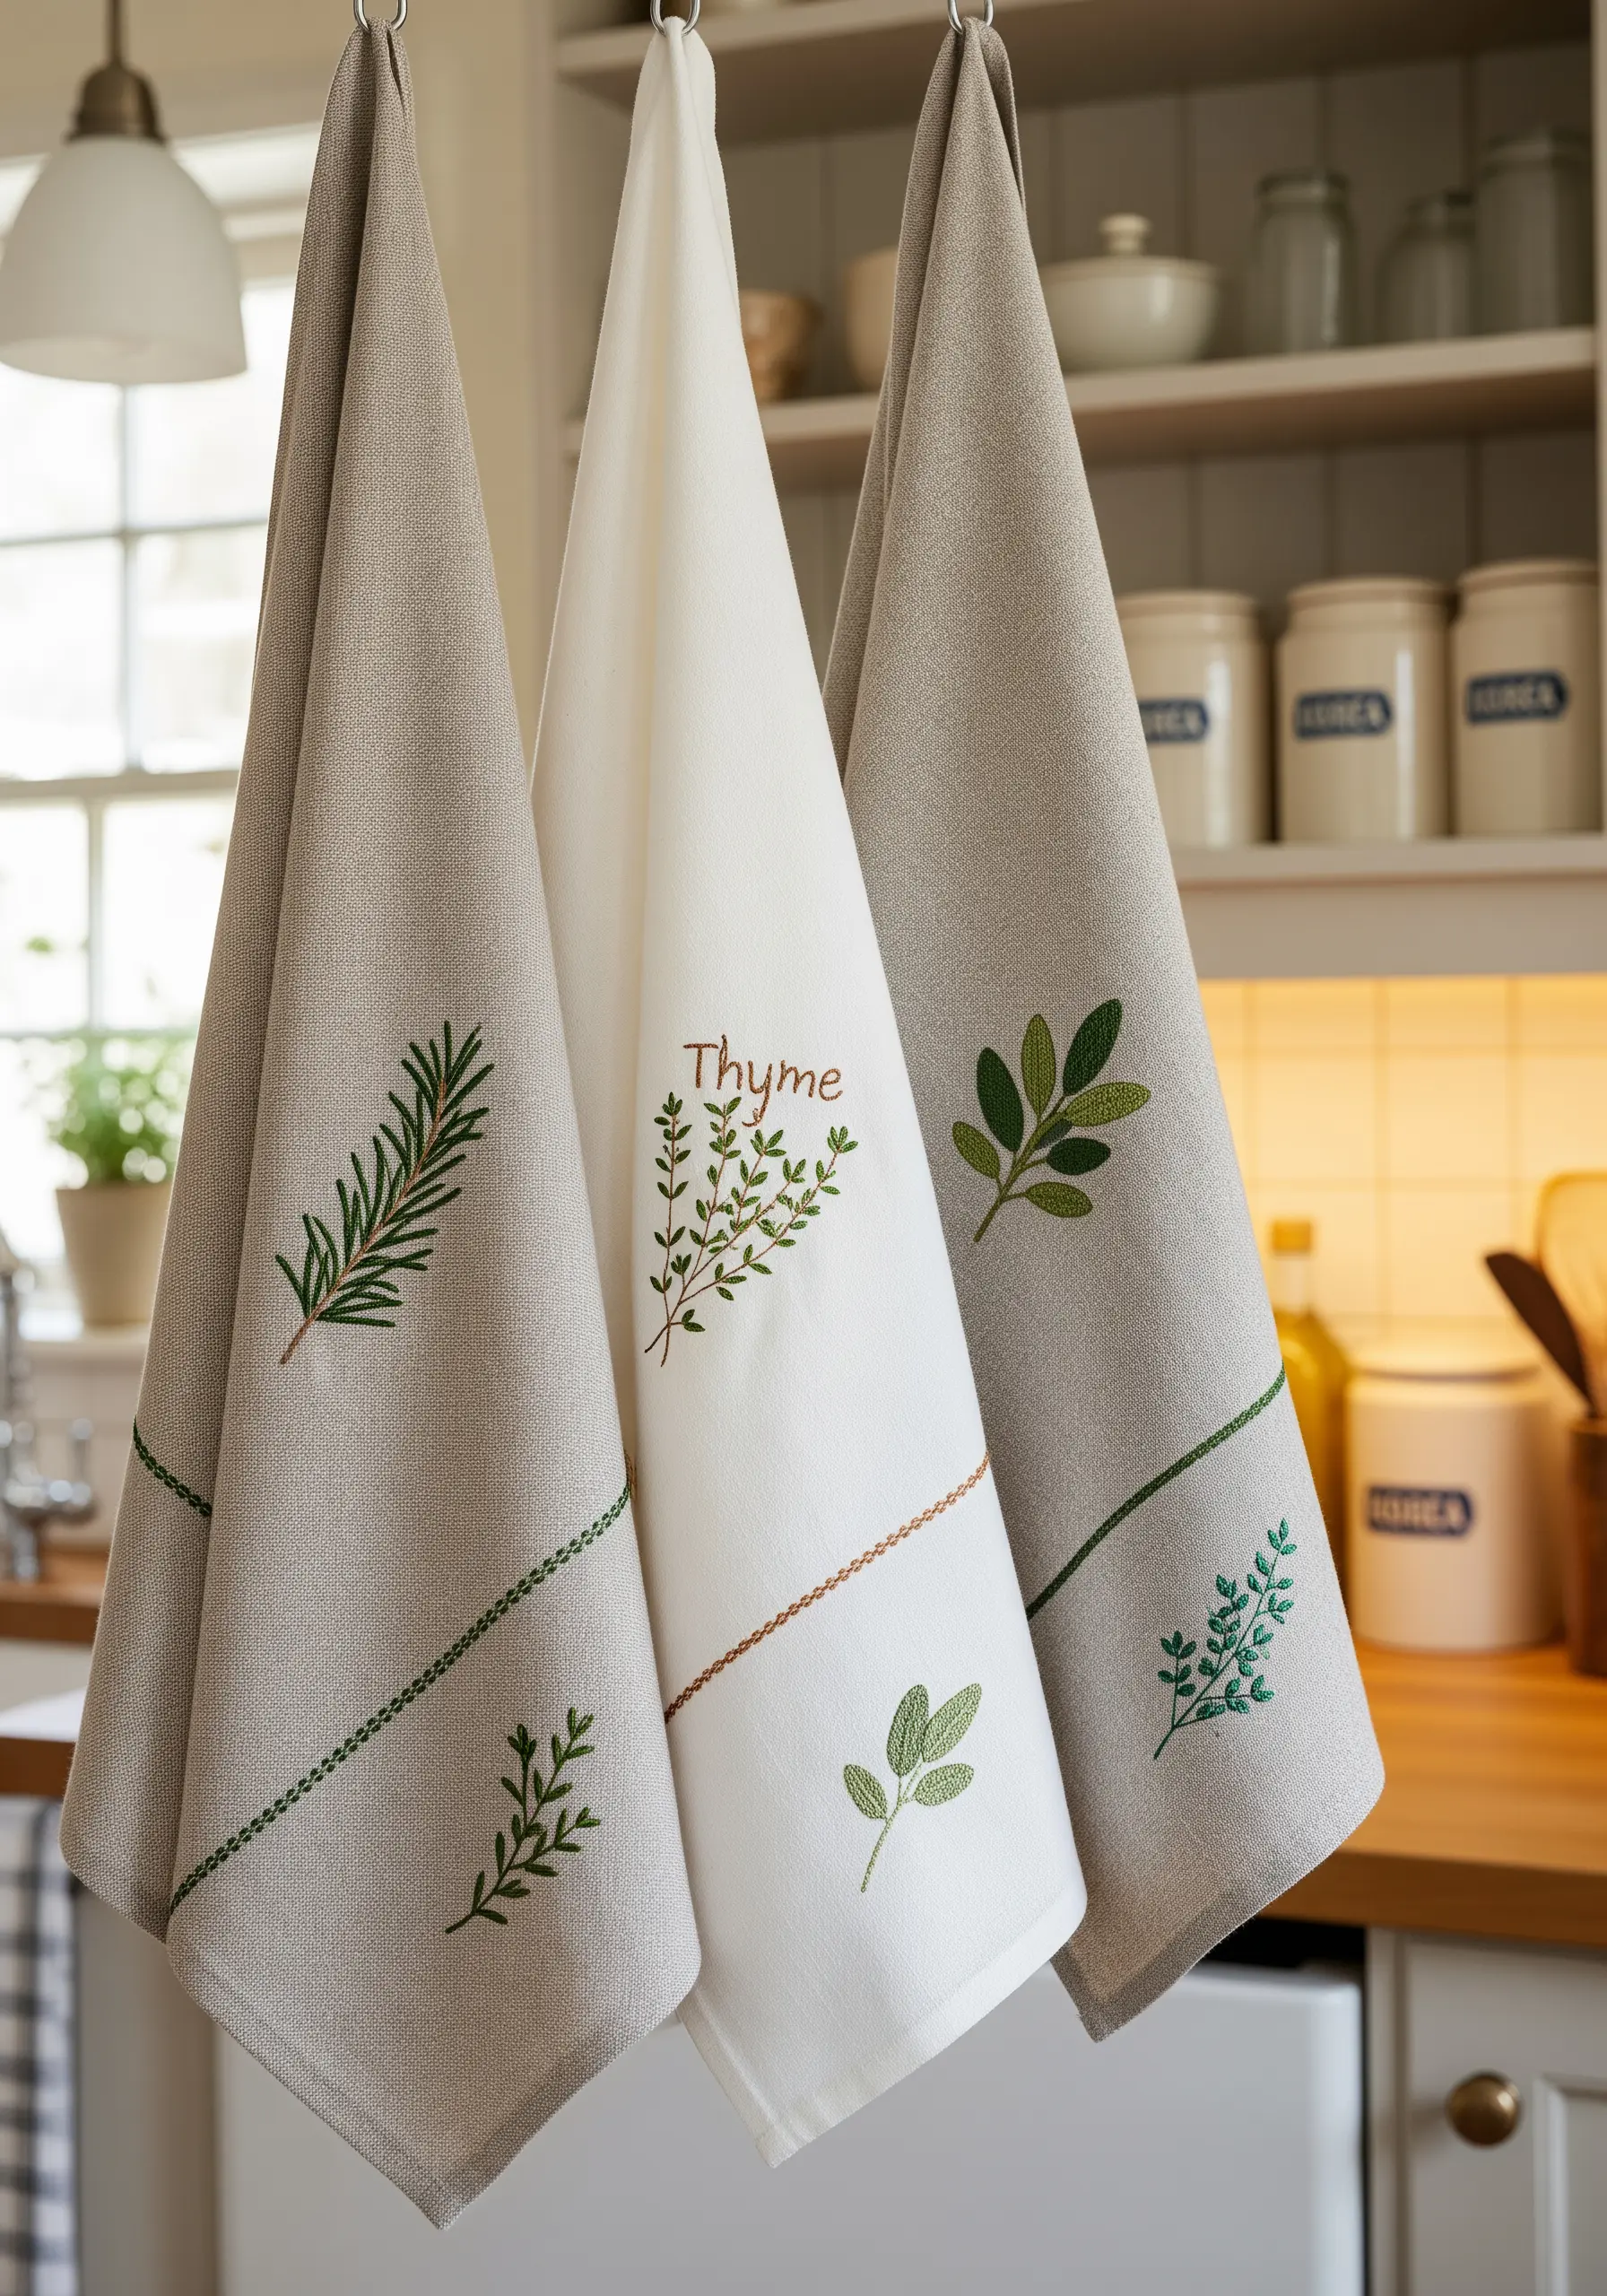
For a clean, modern aesthetic on kitchen towels, focus on the purity of line.
Use a simple backstitch or stem stitch with just two strands of floss to keep the outlines crisp and delicate.
For lettering, a whipped backstitch will give you a slightly raised, cord-like finish that is both legible and elegant.
The negative space around each motif is crucial here—it allows each herb to stand out as a refined botanical illustration.
5. Autumn Cascade: Creating Flow with Directional Satin Stitch

To make embroidered leaves feel like they are tumbling across a table runner, the direction of your satin stitch is everything.
Instead of stitching horizontally, angle your stitches to follow the natural lines and veins of each leaf.
This simple adjustment creates an immediate sense of movement and realism.
Combine this with a gradient color palette from gold to deep burgundy, and scatter a few metallic French knots to mimic the sparkle of a crisp autumn day.
6. Climbing Ivy: A Study in Variegated Thread and Form

Achieve natural, painterly color variations in leaves without constantly changing your thread.
Select a high-quality variegated floss in shades of green and work each leaf completely before moving to the next.
Use a fishbone stitch; the central spine of this stitch perfectly mimics a leaf’s main vein while allowing the thread’s color shifts to create organic highlights and shadows automatically.
This technique is both efficient and incredibly effective for realistic foliage.
7. Thread Painting a Magnolia: Mastering the Long-and-Short Stitch

To achieve the soft, blended gradients of a magnolia petal, work with a single strand of floss and the long-and-short stitch.
Mentally divide each petal into color zones, starting with the darkest shade at the base.
As you introduce a new, lighter color, ensure your stitches interlock with the previous row, splitting the threads below to create a seamless, imperceptible blend.
This approach elevates your work from simple stitching to true floral thread painting techniques, perfect for framing.
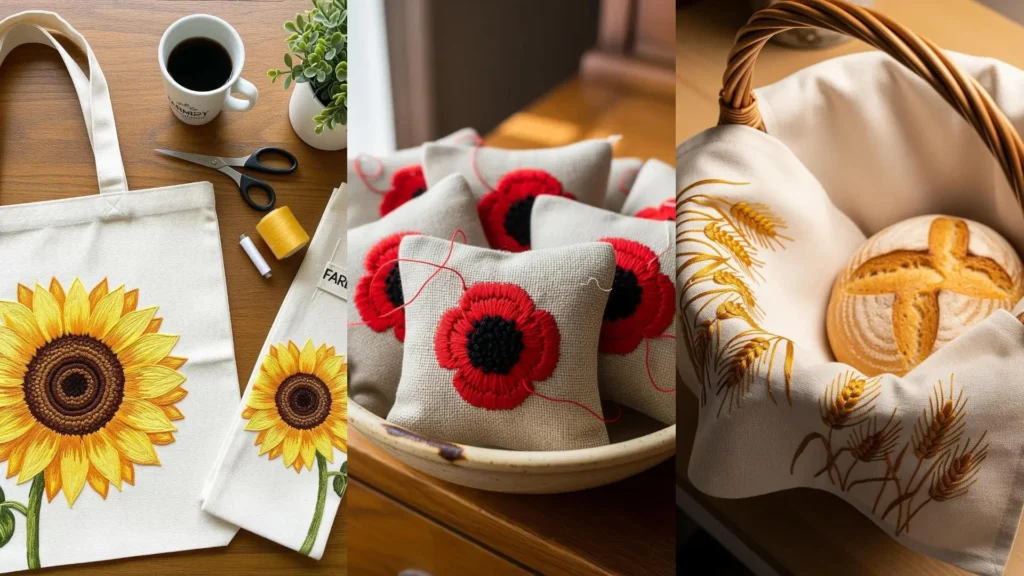
8. High-Impact Sunflower: Layering Stitches for Bold Dimension

For a durable and dimensional sunflower on a high-use item like a tote bag, layering is essential.
First, lay down a solid base of satin stitch for the petals.
Then, add definition and texture by going over this base with sparse, long straight stitches in a slightly darker shade.
For the center, create a dense, seed-like texture by packing two different shades of brown French knots or colonial knots closely together.
9. Dandelion Drift: Capturing Movement with Negative Space

Transform a simple throw blanket by using the unstitched space to tell a story of movement.
Position the dandelion heads near the bottom corner, then scatter the seeds diagonally across the fabric to create a sense of wind.
Use a single detached chain stitch for each seed’s parachute and a tiny straight stitch for the seed itself.
Varying the direction and spacing of the seeds is what makes this composition feel dynamic and alive, turning simple embroidery designs into narrative art.
10. Botanical Silhouettes: The Power of Monochrome on Textured Fabric

When embroidering on a surface that will be backlit, like a lampshade, a high-contrast silhouette is most effective.
Choose a single dark thread color that will stand out against the linen’s texture.
Use a dense fill stitch, such as the fishbone stitch for these ferns, to create a solid, graphic shape.
This ensures the design remains crisp and clear, whether the light is on or off, making it a perfect technique for organic embroidery designs.
11. Asymmetrical Cherry Blossoms: Balancing Delicacy and Space

To give a traditional floral motif a modern update, play with asymmetrical composition.
Place a single cherry blossom branch extending from the corner of a placemat, allowing it to trail off naturally.
This creates visual interest and leaves elegant negative space.
Use a whipped backstitch for the branches to add texture and combine straight stitches with a central French knot for quick, delicate blossoms.
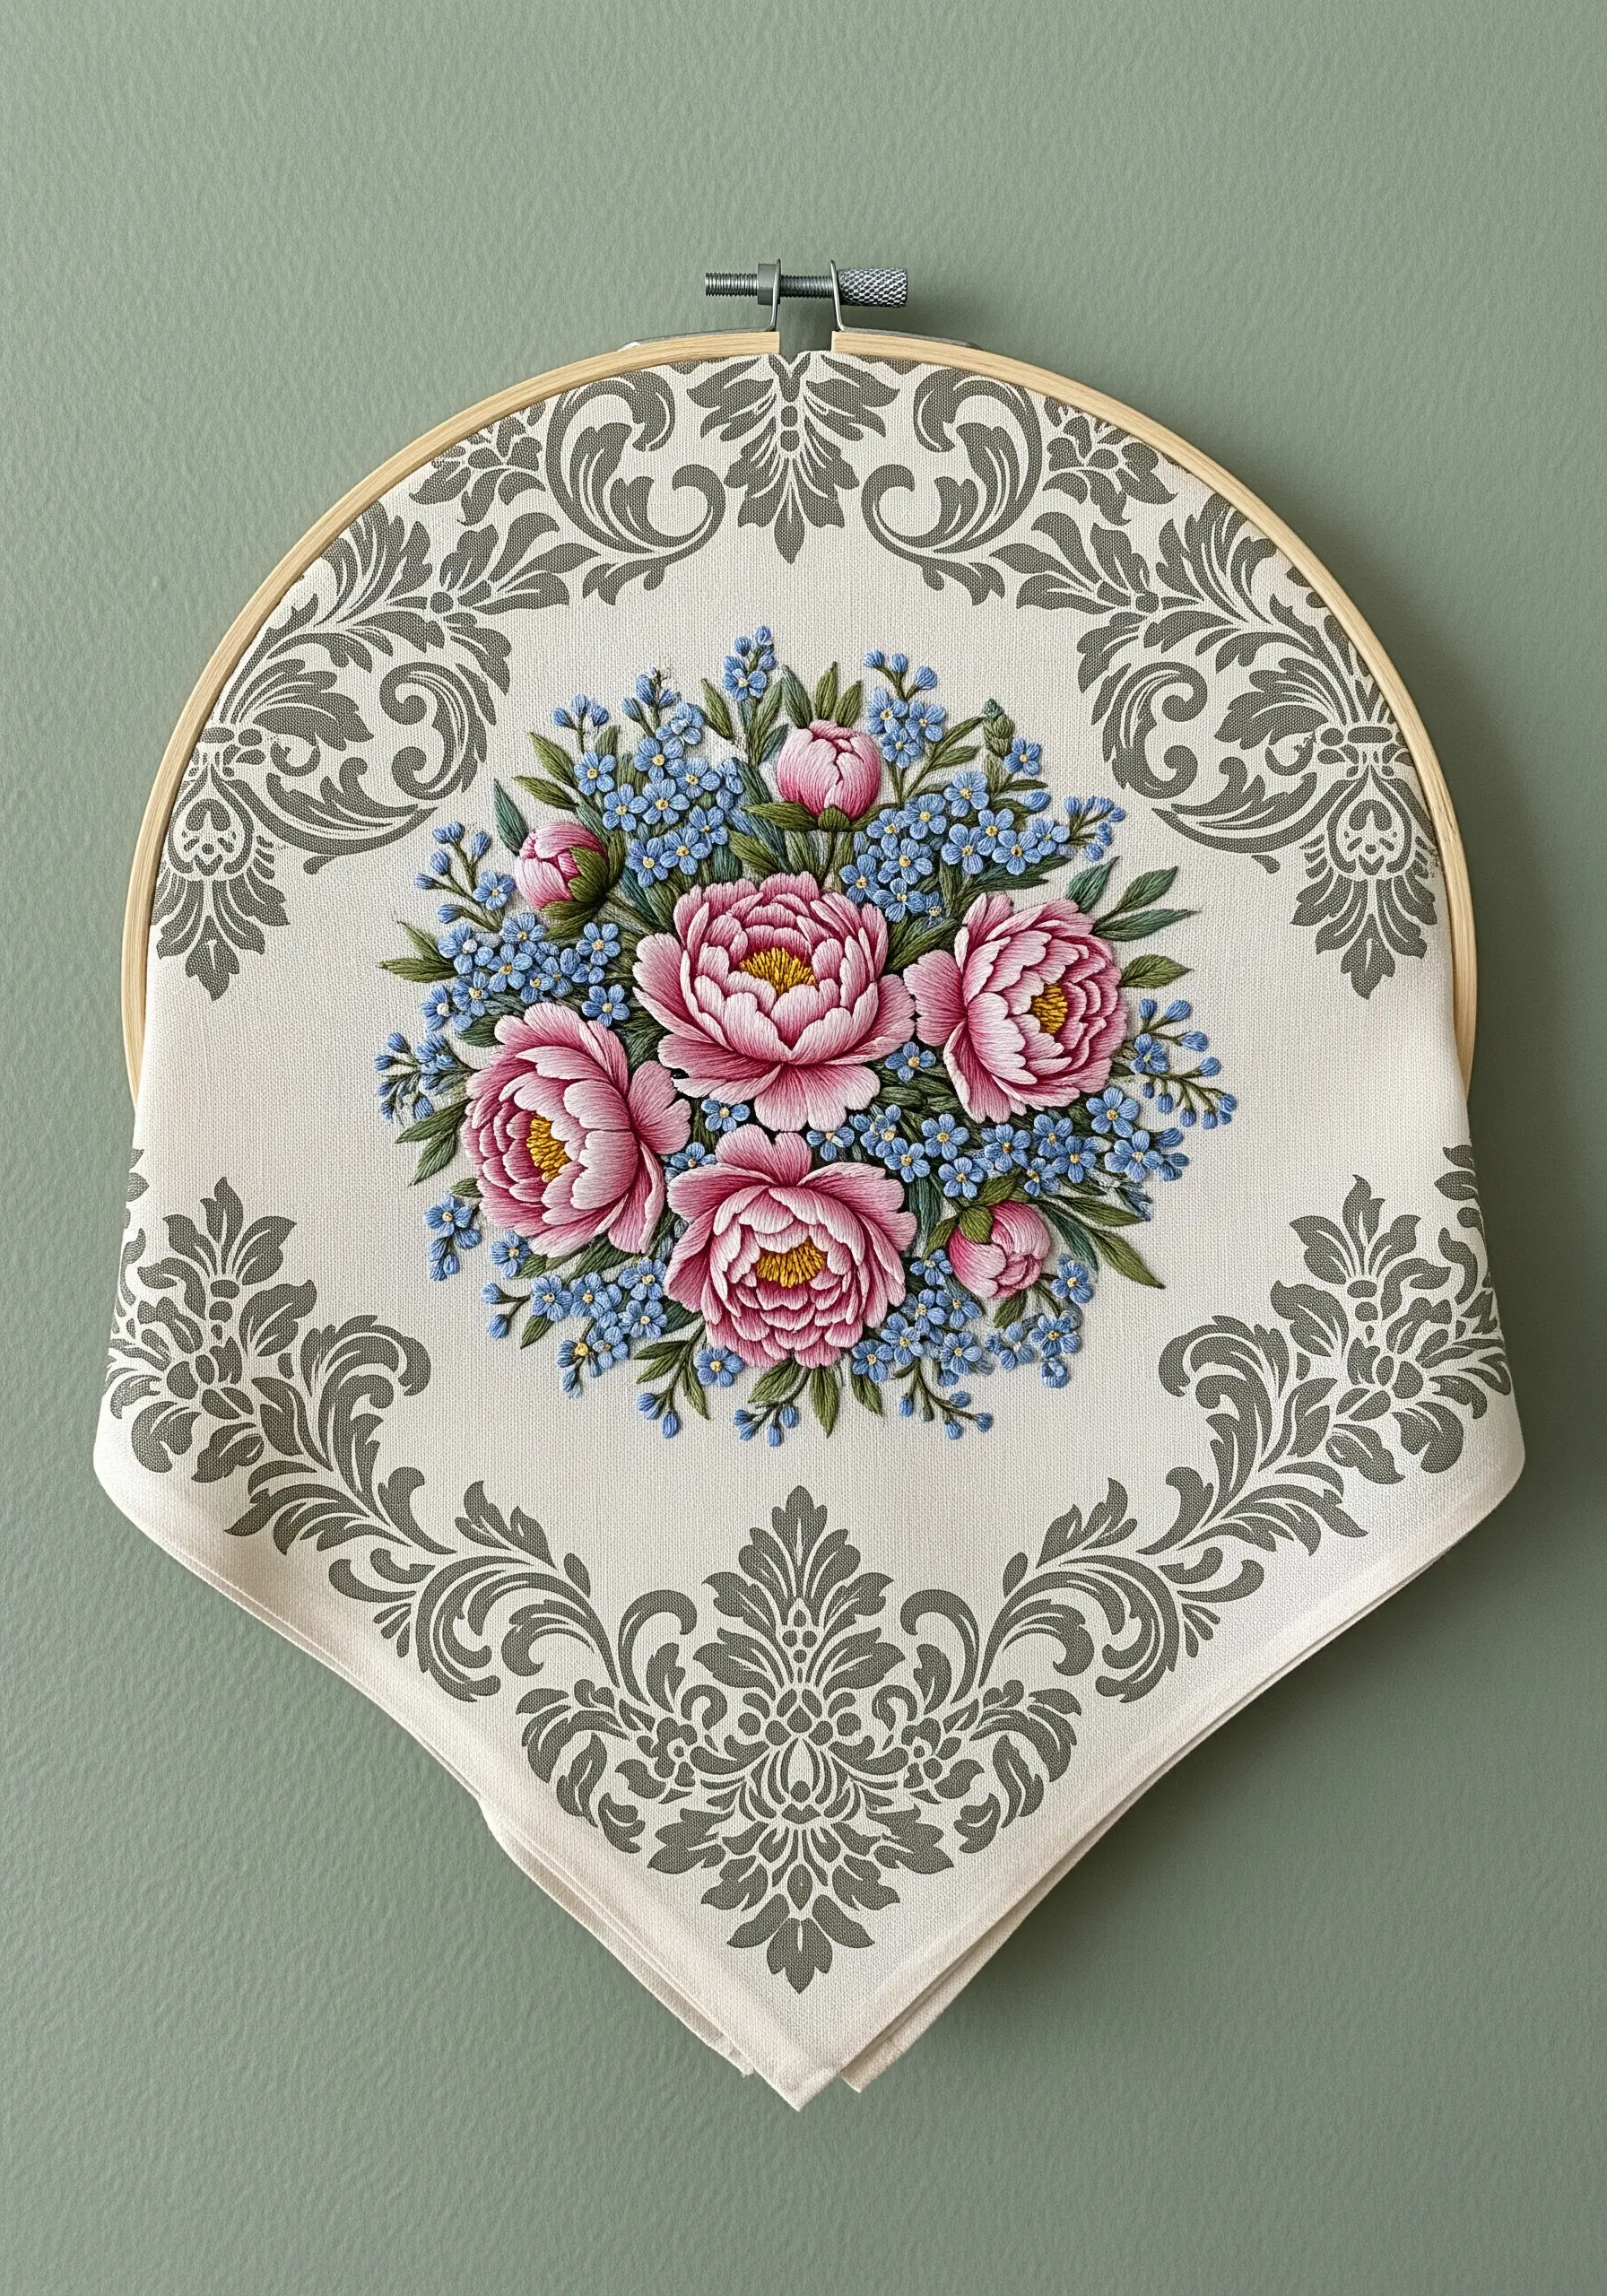
12. Narrative Scene: Layering Details for a Storybook Effect

Create a sense of depth in a detailed scene by adjusting your thread count.
Use three or four strands for foreground elements like the wooden gate to give them weight and presence.
Then, switch to a single, delicate strand for the climbing rose vines and tiny birds in the background.
This simple technical choice tricks the eye, making the scene feel more dimensional and immersive, as if you could step right into it.
13. Miniature Wreath: Concentrated Detail for Small Surfaces

When working on a small scale like a napkin ring, choose stitches that deliver maximum impact with minimal size.
The detached chain stitch (lazy daisy) is perfect for creating uniform daisy petals quickly.
Pair them with tiny, tightly packed French knots for the lavender and flower centers.
By keeping the stitches compact and clean, you can create intricate-looking small embroidery patterns to customize your home decor that feel both delicate and luxurious.
14. Gradient Succulents: Outlining for Graphic Definition
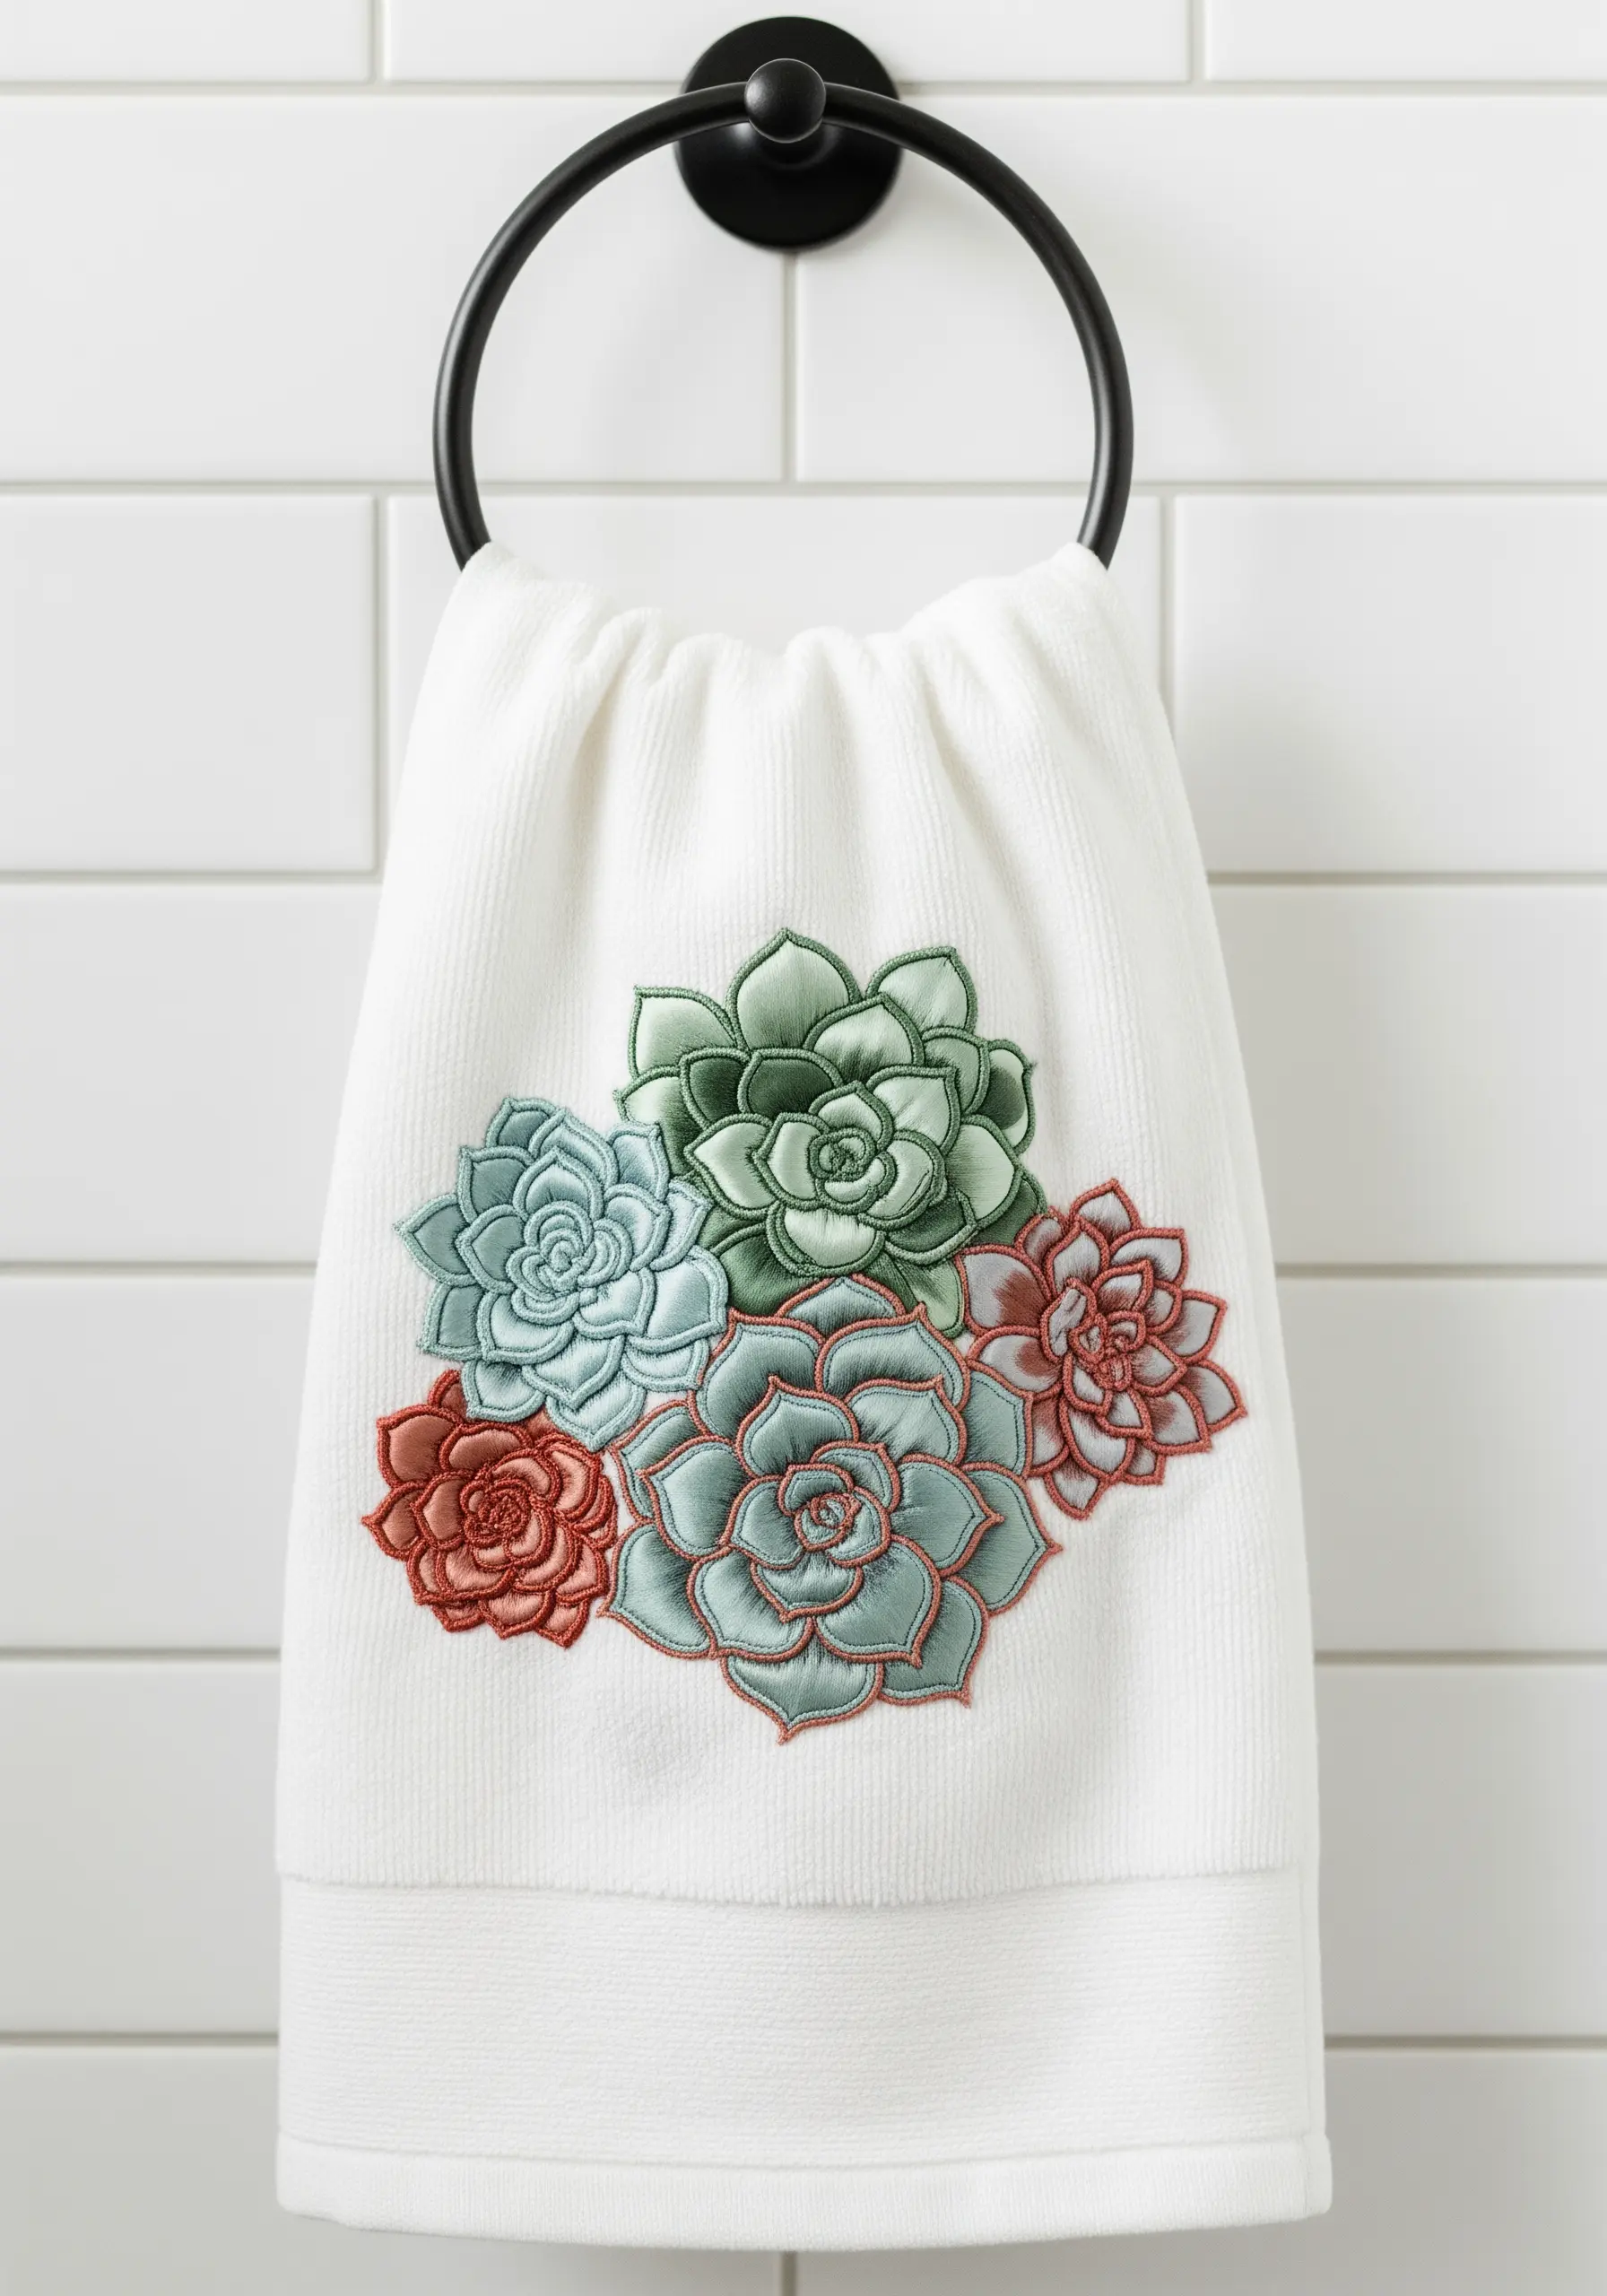
To prevent your satin stitches from getting lost in a textured fabric like a hand towel, a strong outline is your best tool.
First, fill each section of the succulent with a soft satin stitch gradient.
Once filled, go back and outline the entire motif with a darker shade using a clean split stitch or backstitch.
This technique contains the colors, sharpens the edges, and gives the design a bold, graphic quality that stands out beautifully.
15. Bold Poppy Motif: Maximizing Color Contrast and Texture
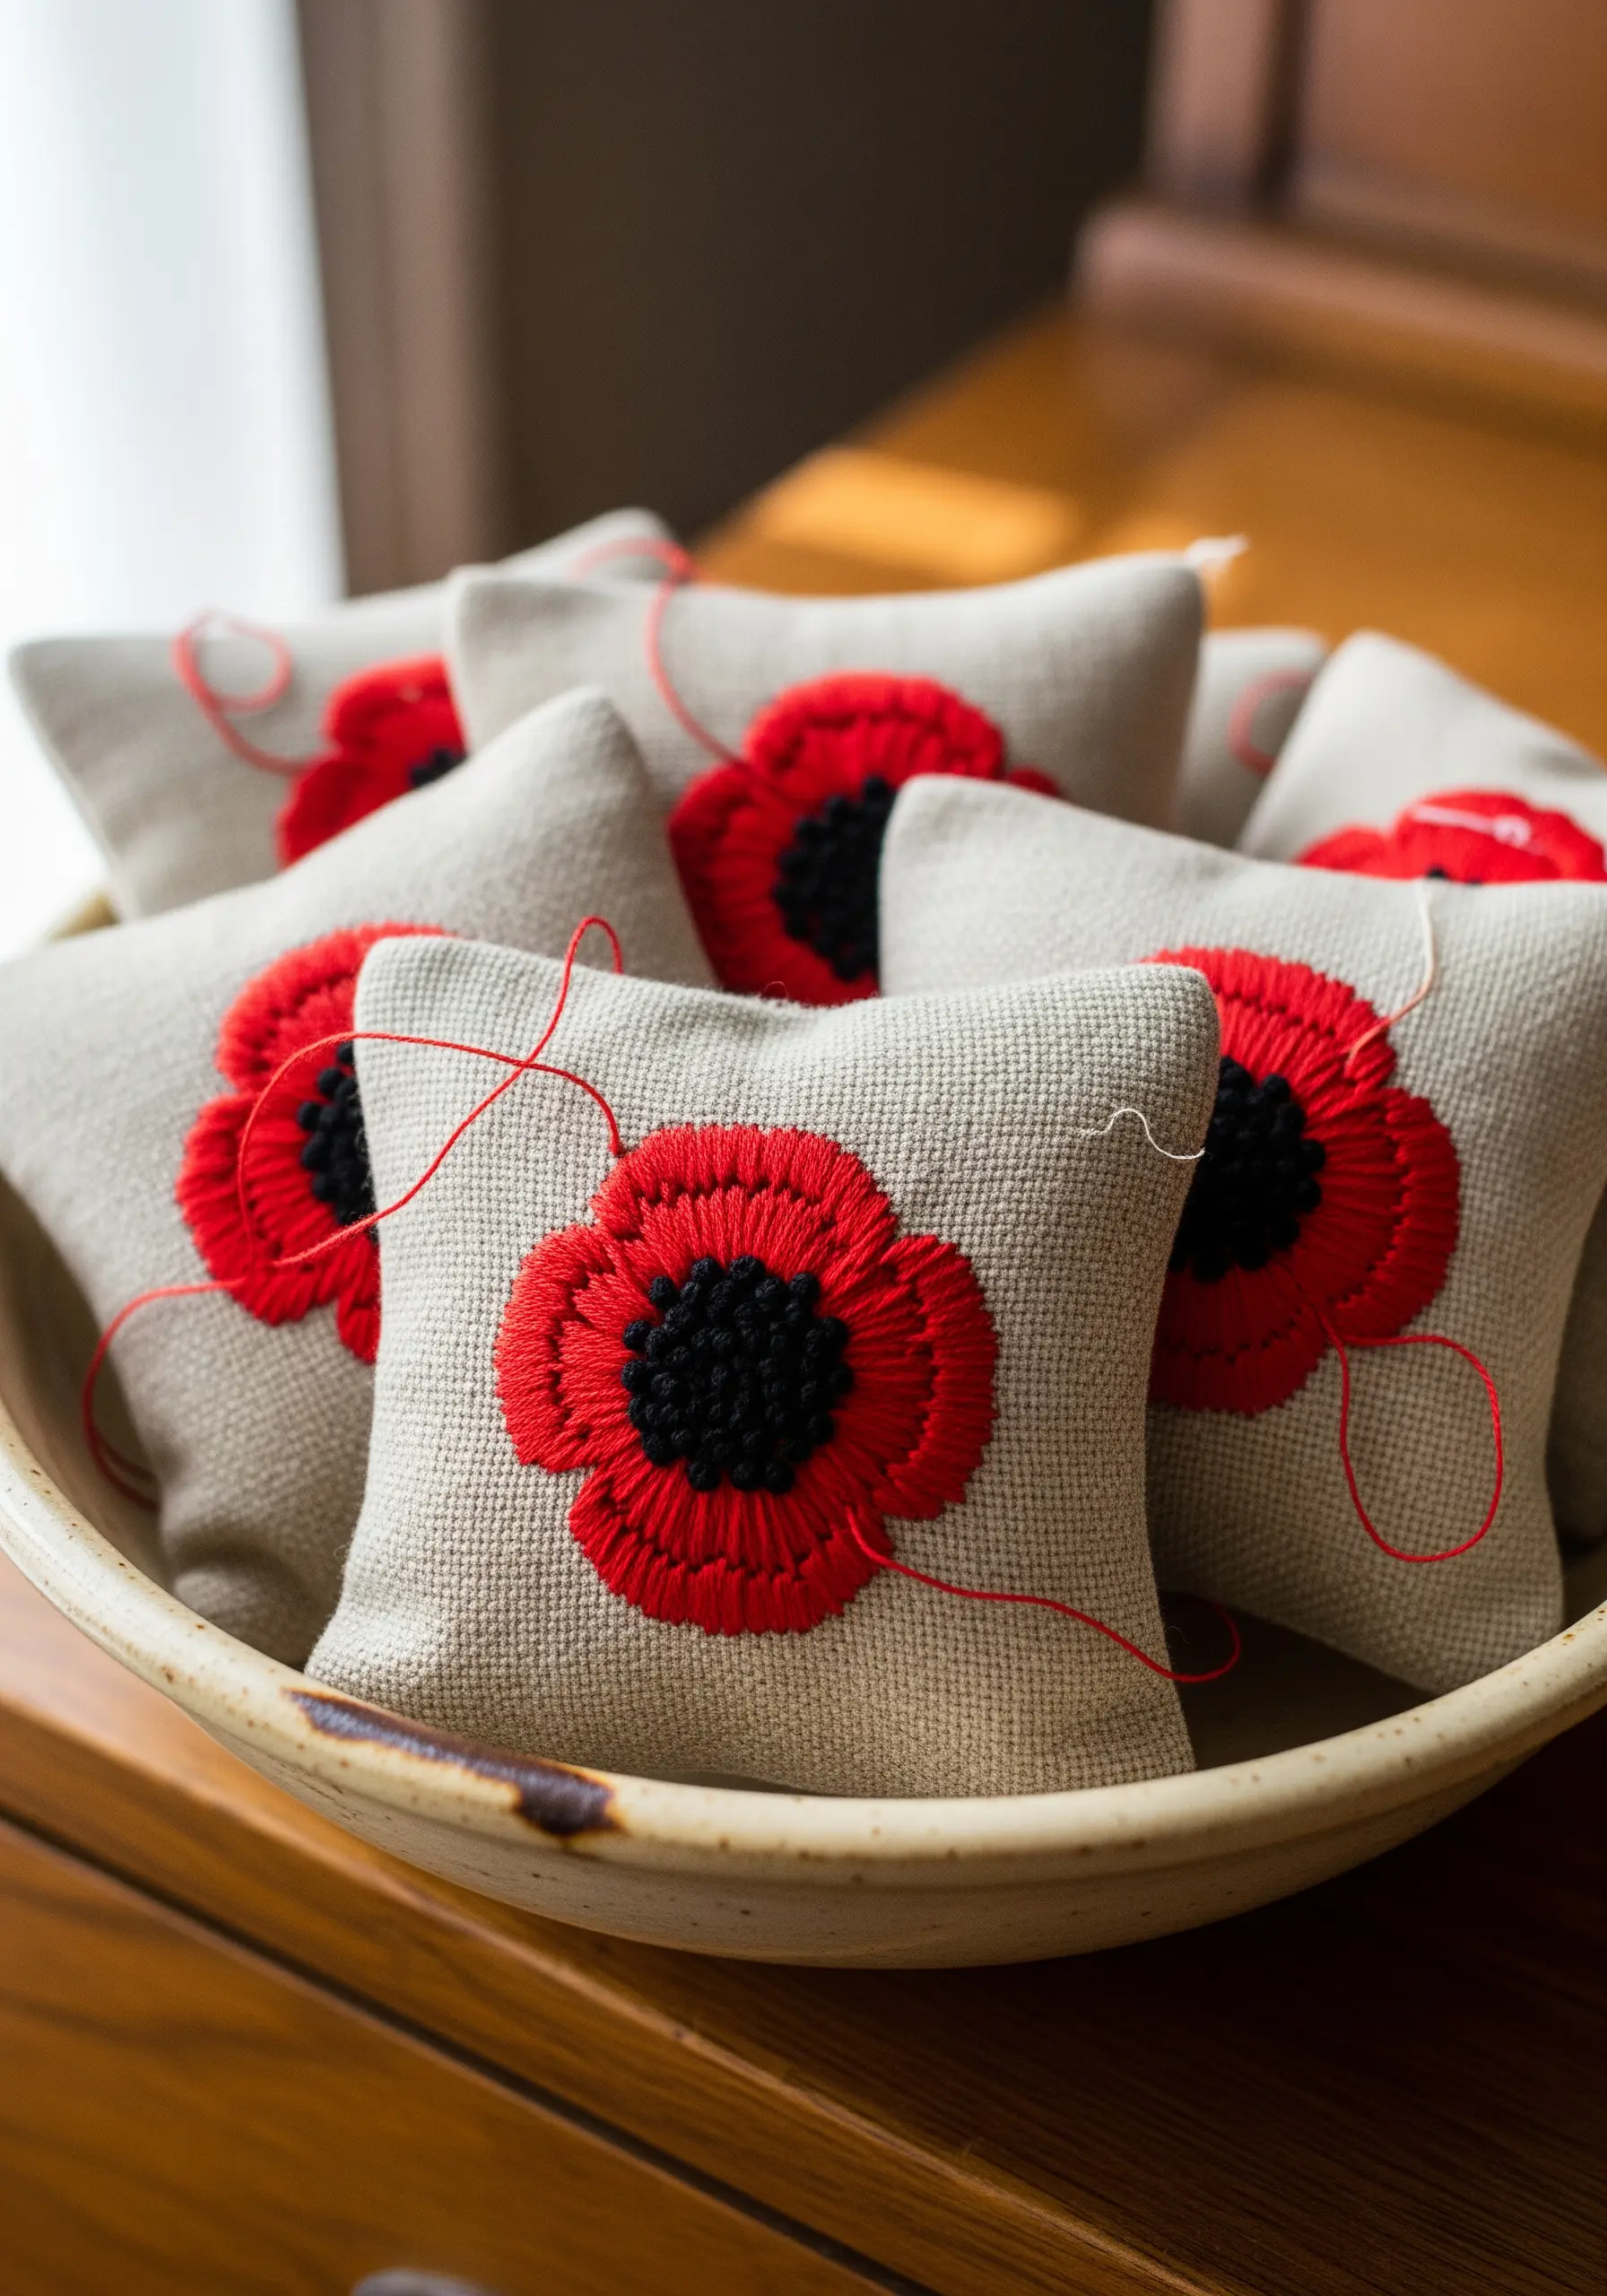
To make a single flower the hero of your design, focus on high contrast and textural variation.
Choose a vibrant, fully saturated red for the poppy petals and fill them with a dense satin stitch, ensuring all stitches radiate from the center for a natural sheen.
For the center, use a cluster of bullion knots in black floss. This highly raised, velvety texture contrasts sharply with the smooth petals, creating a dramatic and tactile focal point.
16. Framed Forget-Me-Nots: A Band of Contained Beauty

Instead of scattering tiny flowers, create a powerful visual impact by concentrating them into a dense, defined band.
This compositional choice turns a simple motif into a sophisticated design element.
For each blossom, use five simple straight stitches arranged in a star shape around a single yellow French knot.
When displayed in a shadow box, this contained arrangement feels like a precious, preserved specimen of your craft.
17. Woodland Pincushion: Sculpting with Padded Satin Stitch

To give your embroidered mushrooms a plump, three-dimensional form, use padded satin stitch.
Before stitching your final layer, create a foundation of small, dense straight stitches within the mushroom cap outline.
Then, work your final satin stitches over this padding at a 90-degree angle.
This technique physically raises the embroidery from the fabric surface, creating realistic volume and soft shadows that bring your nature-inspired embroidery projects to life.
18. Golden Wheat Sheaves: The Sheen of Directional Stitching

Capturing the subtle sheen of wheat is all about controlling how your thread reflects light.
Use a golden-hued floss and fill the wheat heads with a fishbone stitch, keeping the stitches long, tight, and angled slightly upwards and outwards from the central stalk.
This uniformity in stitch direction creates a smooth surface that catches the light beautifully, mimicking the silky, sun-kissed look of a real wheat field.
19. Delicate Queen Anne’s Lace: Creating Texture with Colonial Knots

The airy, delicate clusters of Queen Anne’s Lace can be perfectly replicated using knots.
For a sturdier, more rounded knot that won’t pull through fine linen, choose Colonial knots over French knots.
Group them tightly to form the flower heads, but leave small, intentional gaps between clusters to convey the plant’s signature lightness.
Pair these textured heads with whisper-thin stems made from a single strand of backstitch to complete the ethereal effect.


