

When you stitch for a child, you’re doing more than just making a pattern; you’re creating a little piece of magic they can carry with them. But how do you move beyond simple outlines to craft jungle animals that feel truly alive, full of texture and personality?
The secret isn’t in learning dozens of complicated stitches. It’s in the small, intentional choices you make: the direction you lay your stitches to create the curve of a sloth’s back, the way you use a slightly padded base to make a leaf pop, or how you blend two shades of brown to give a monkey’s fur a soft, realistic depth.
These are the techniques that transform a flat design into a treasured keepsake. Here, you’ll discover how to use thread, texture, and color to give your creations a professional finish and a heartfelt story. Let’s start stitching something they’ll love forever.
1. Create Depth with Padded Satin Stitch

To give your monkey and foliage a raised, three-dimensional effect, use a padded satin stitch technique.
First, fill the shape of the vine or a leaf with a base of small, underlying straight stitches or felt padding.
Then, cover this padding with your final satin stitches, working perpendicular to the base stitches.
This simple layering trick lifts the embroidery off the fabric, creating shadows and a tactile quality that makes the design physically pop, especially against a dark canvas.
2. Master Realistic Fur with Directional Stitching
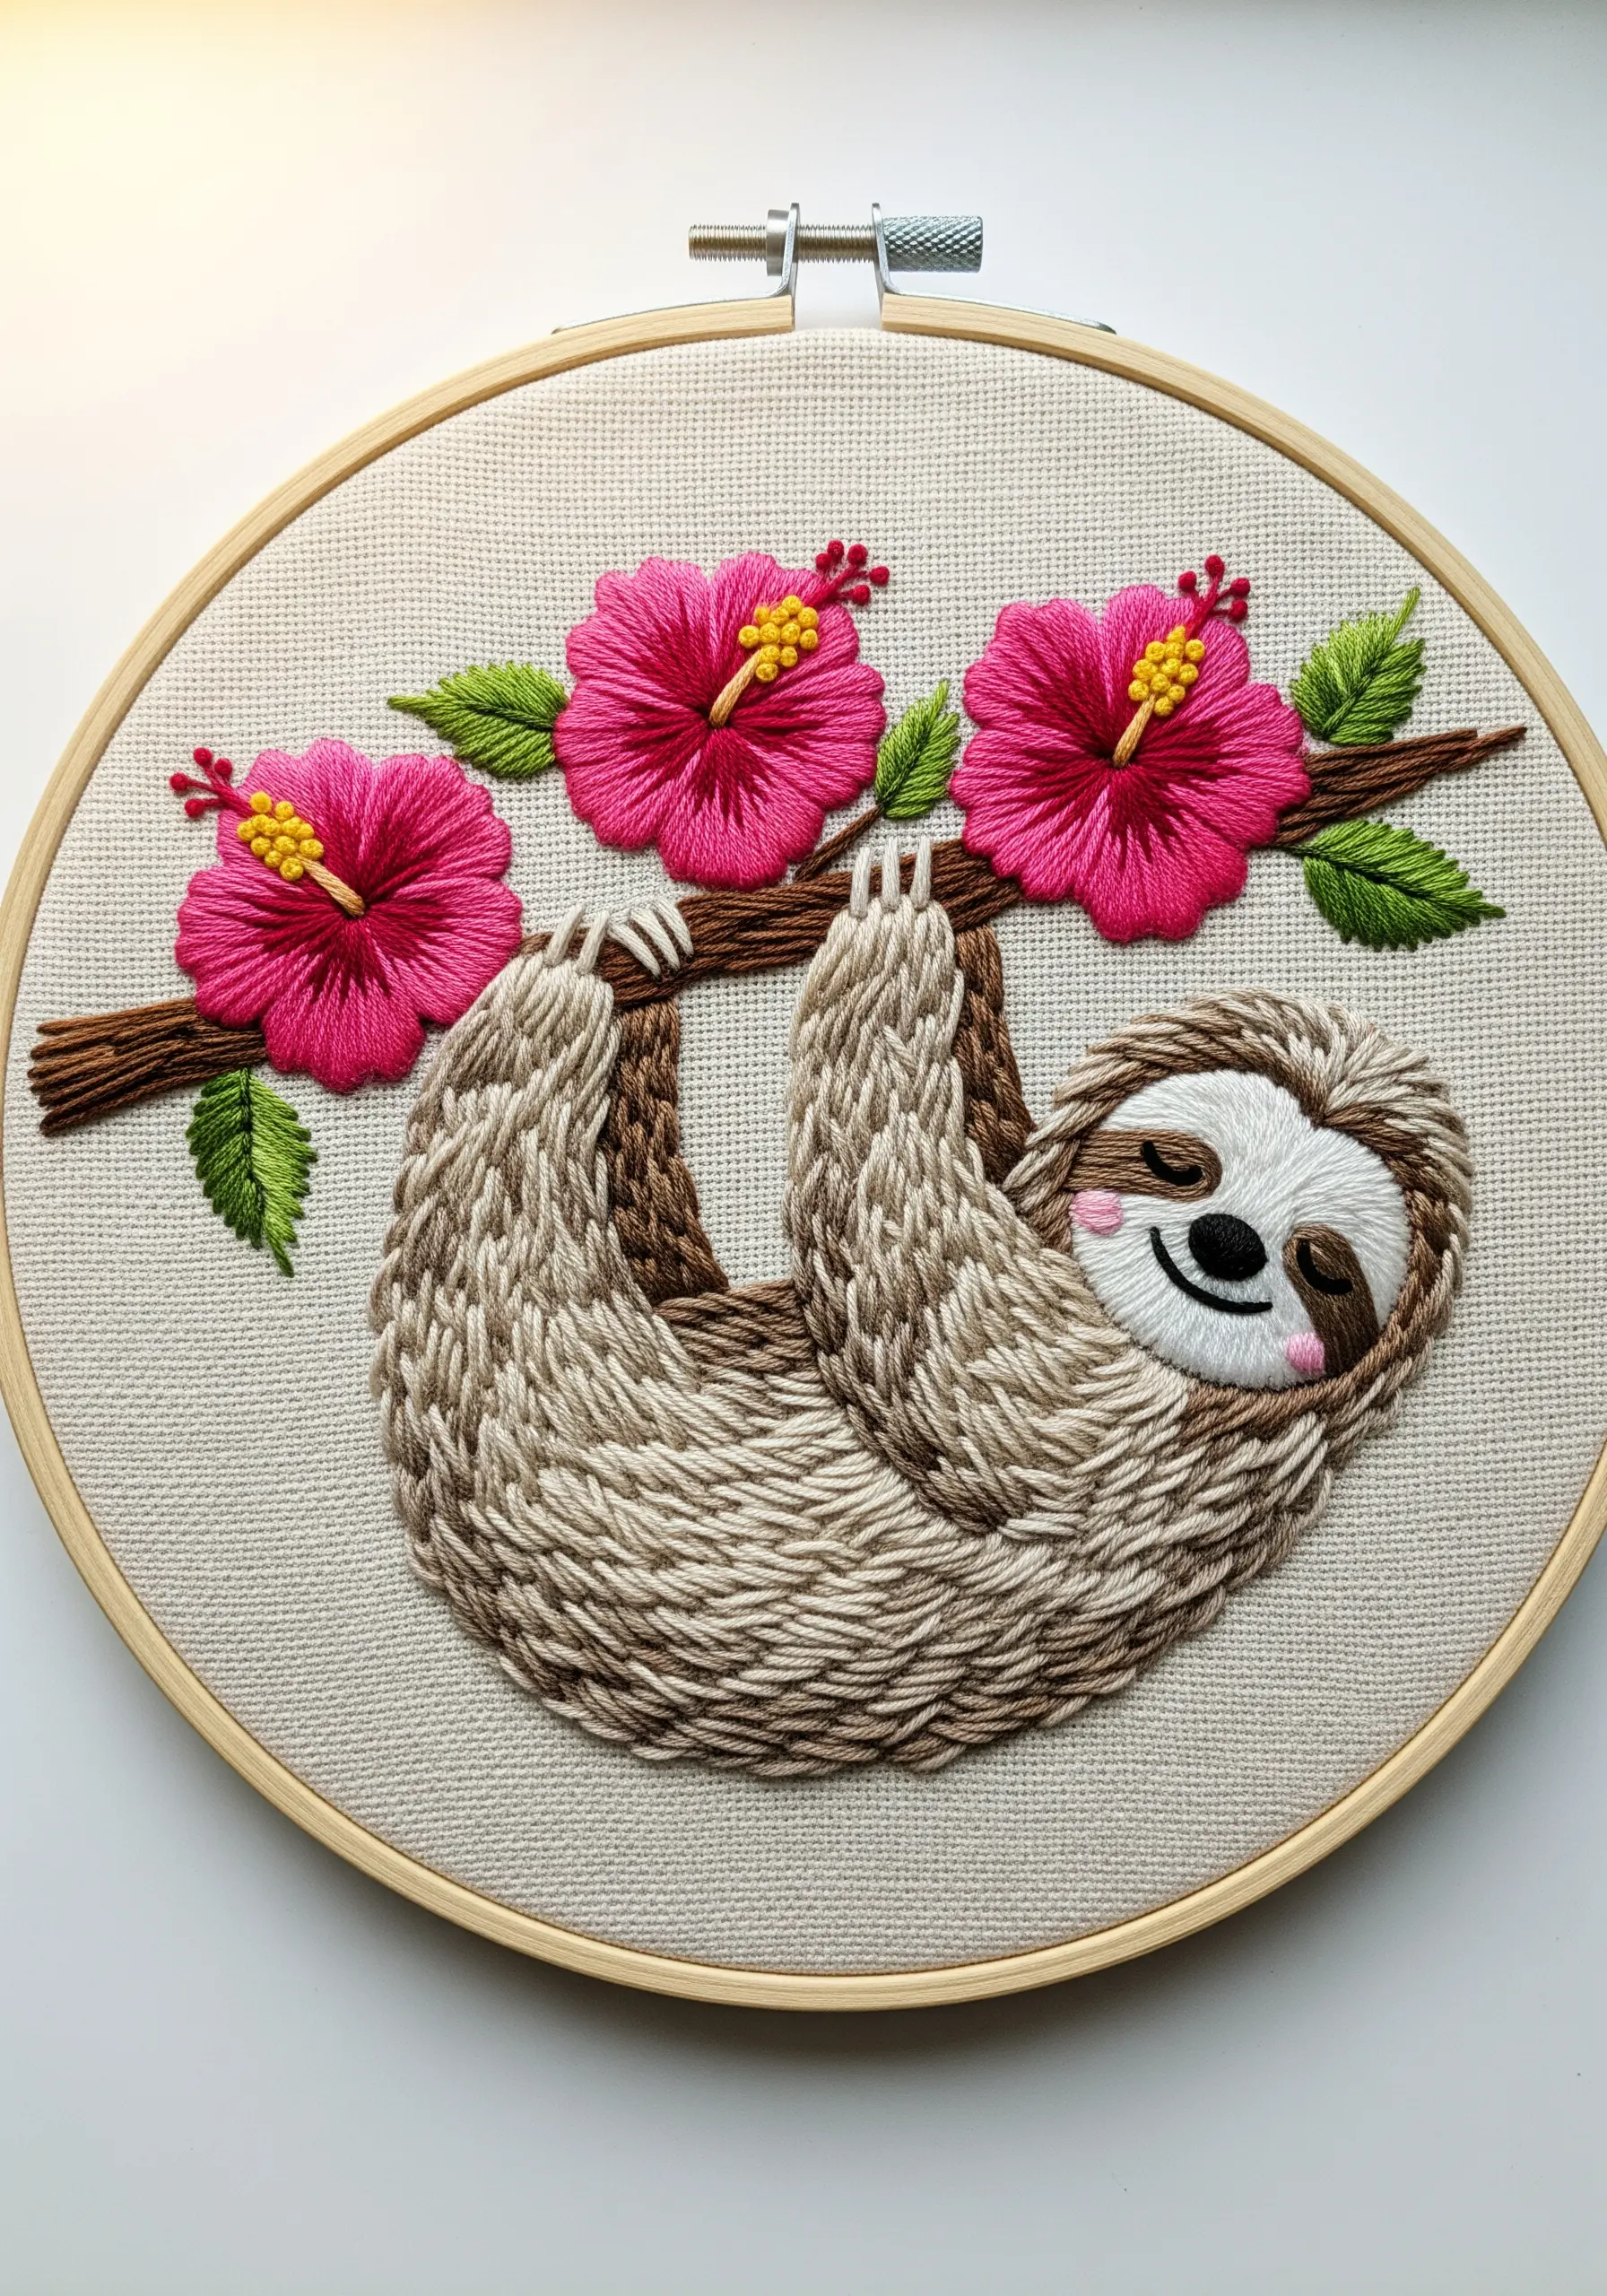
Achieve the soft, dense fur of a sloth by using long-and-short stitch and paying close attention to stitch direction.
Instead of filling the body uniformly, angle your stitches to follow the natural curve of the animal’s back and limbs.
Use a blend of three or four similar shades of brown and beige thread to mimic natural color variations.
This directional approach turns a flat fill into a contoured form that suggests movement and softness, making the animal look truly relaxed.
3. Define Patches with a Bold, Graphic Outline

For patches that need to stand out on a denim jacket or backpack, a thick, clean border is essential.
Create this defined edge by outlining your entire design with a wide, dense satin stitch, sometimes called a merrowed border.
To ensure your outlines are crisp, first lay down a split stitch foundation along the edge before covering it with the final satin stitch.
This technique contains the vibrant colors of the toucan’s beak and creates a durable, professional finish that prevents fraying.
4. Layer Elements for a Dynamic Jungle Scene

Create a sense of depth by physically layering your embroidered elements.
Stitch the tiger first, using thread painting techniques for its expressive face.
For the surrounding monstera leaves, embroider them on a separate piece of tear-away stabilizer or felt, cut them out, and then appliqué them onto your background fabric around the tiger.
This stumpwork-inspired method makes the foliage look like it’s genuinely overlapping, transforming a simple portrait into an immersive scene.
5. Use Variegated Thread for Natural Texture

Instantly add realistic texture to leaves by stitching them with a variegated green floss.
The thread’s subtle color changes do the blending work for you, mimicking the natural light and shadow found on foliage.
Use a simple satin stitch, laying the stitches horizontally across the leaf sections.
The contrast between the multi-toned leaves and the solid, bright colors of the frog’s body makes the entire composition more visually interesting and lifelike.
6. Combine Bold Line Art with Delicate Details
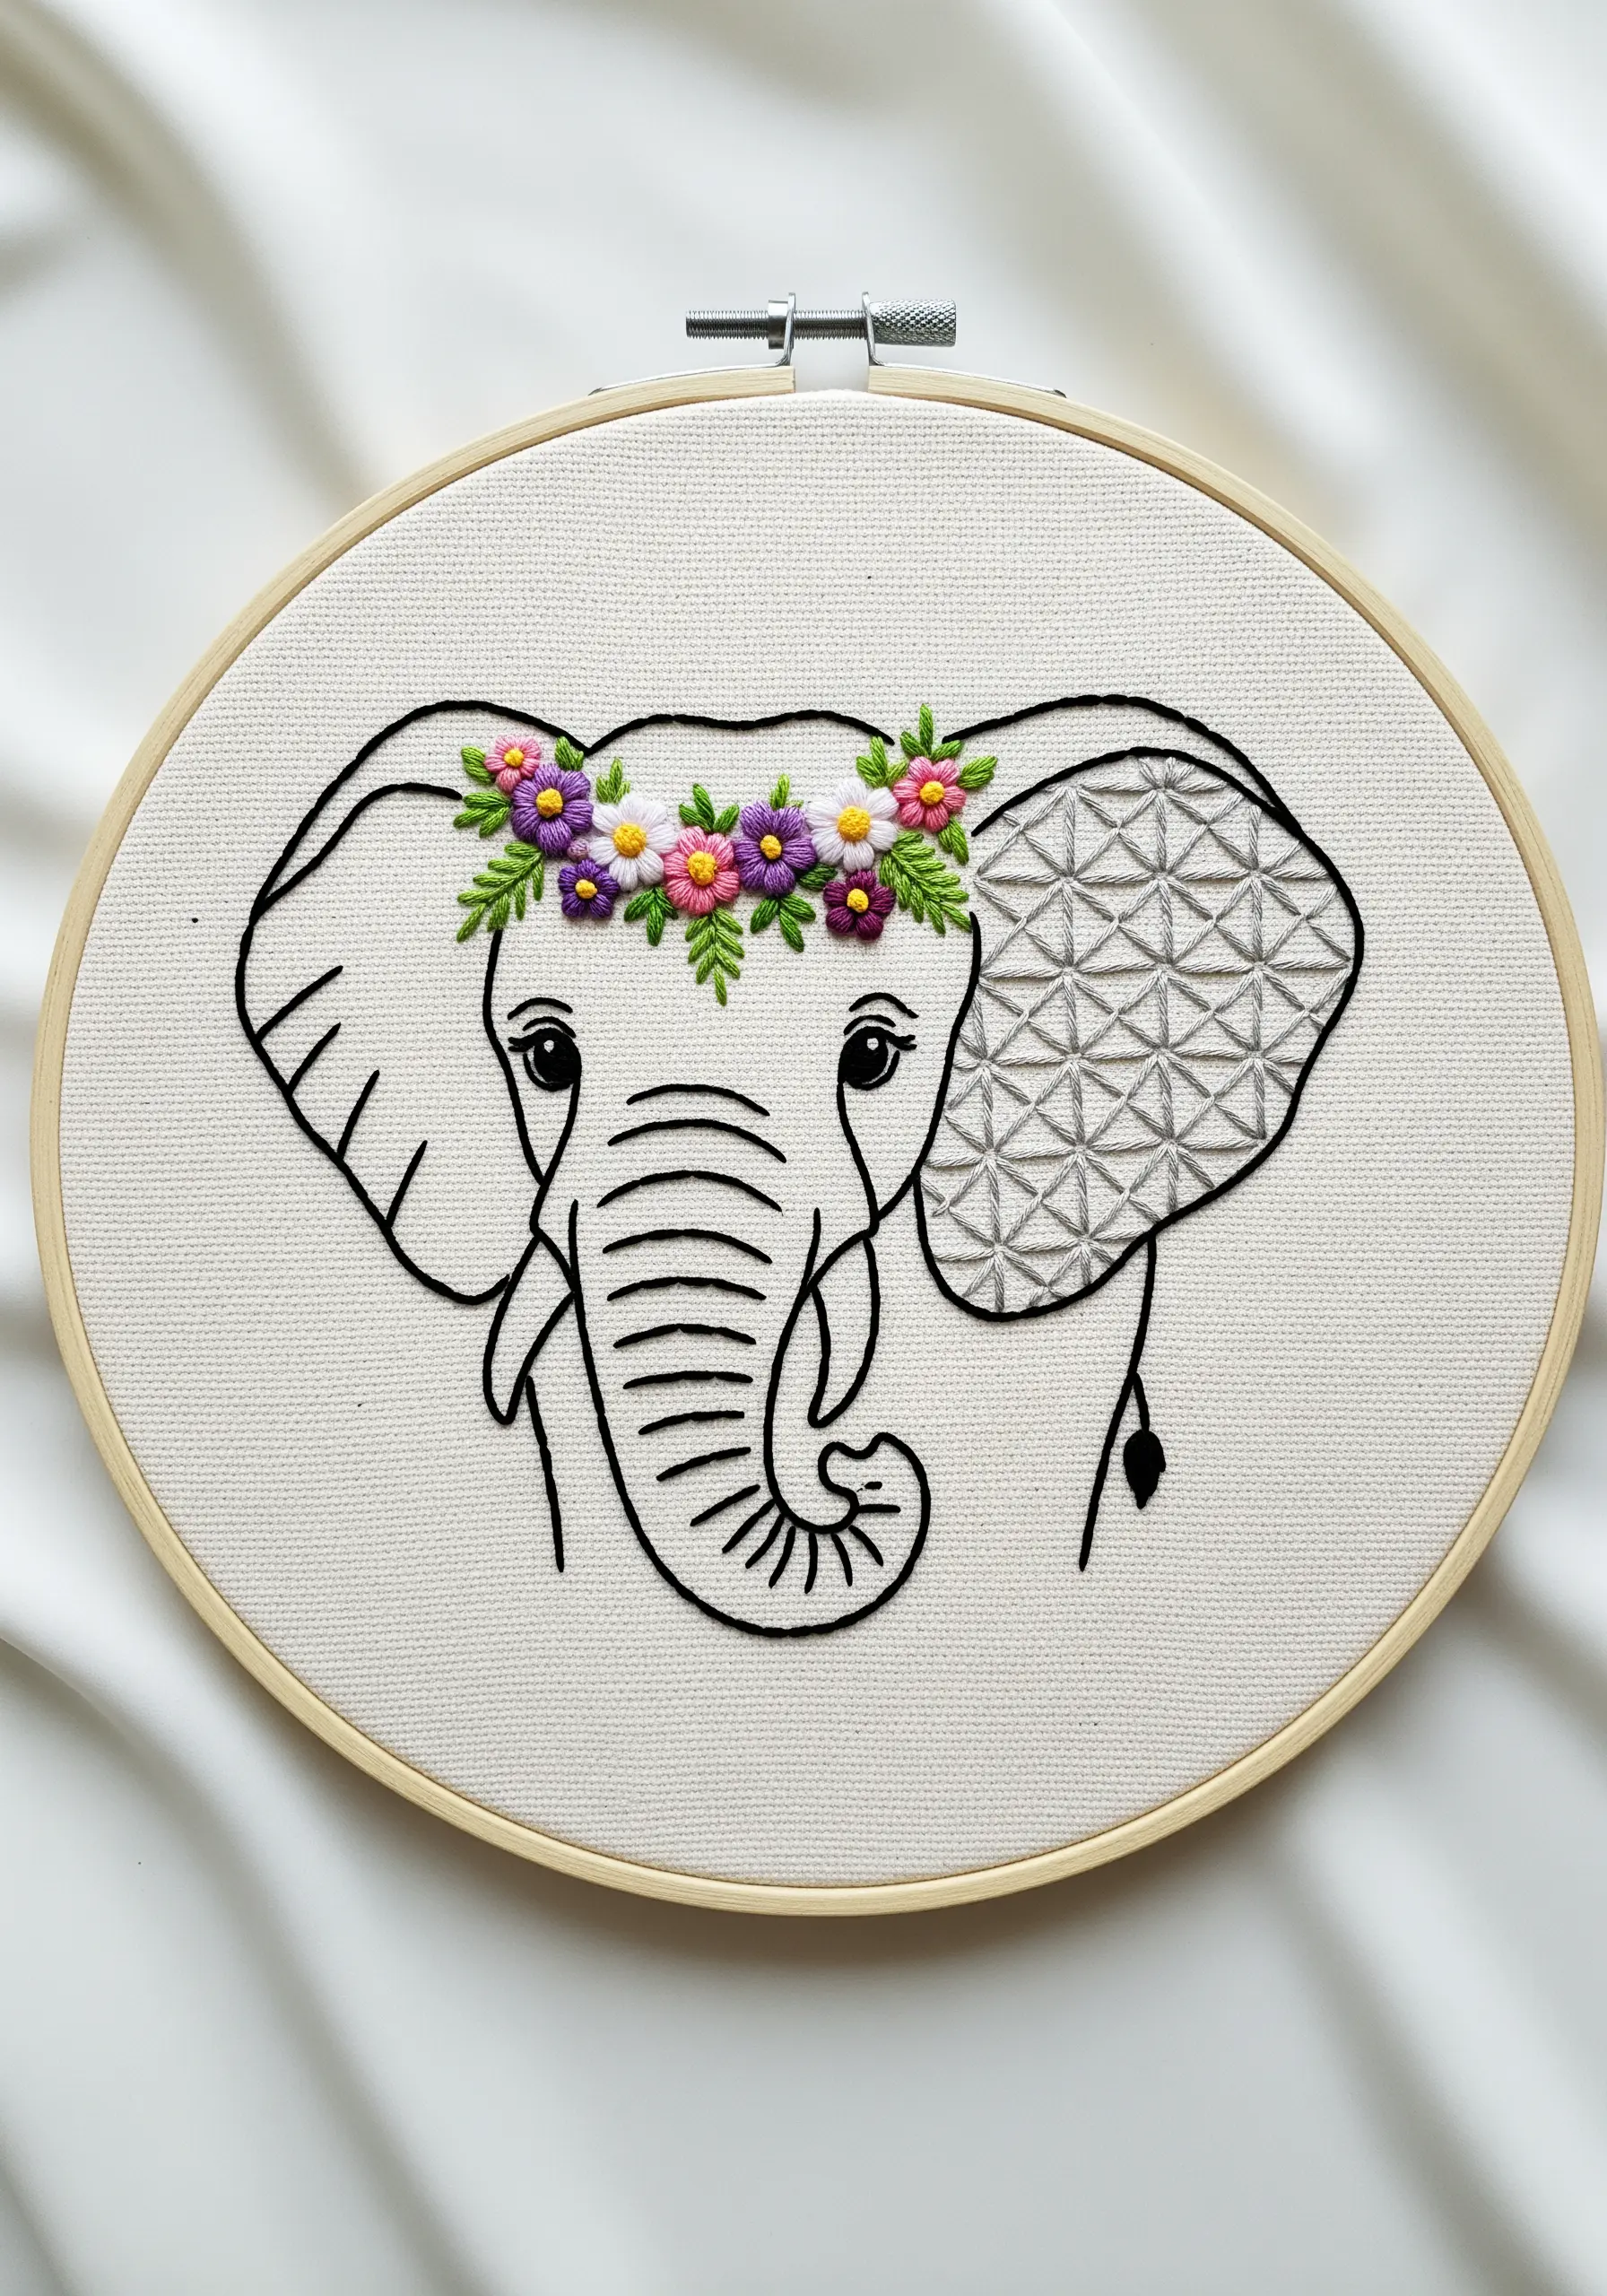
Create a striking modern portrait by balancing clean, graphic outlines with areas of dense, detailed stitching.
Use a simple backstitch or stem stitch with six-strand floss for the elephant’s main features to ensure the lines are bold and clear.
For contrast, fill the ear with a geometric pattern like blackwork or a seed stitch grid.
The tiny floral crown, stitched with bullion knots and French knots, adds a soft, textural focal point that perfectly complements the minimalist line work.
7. Achieve Vibrant Gradients with Thread Painting
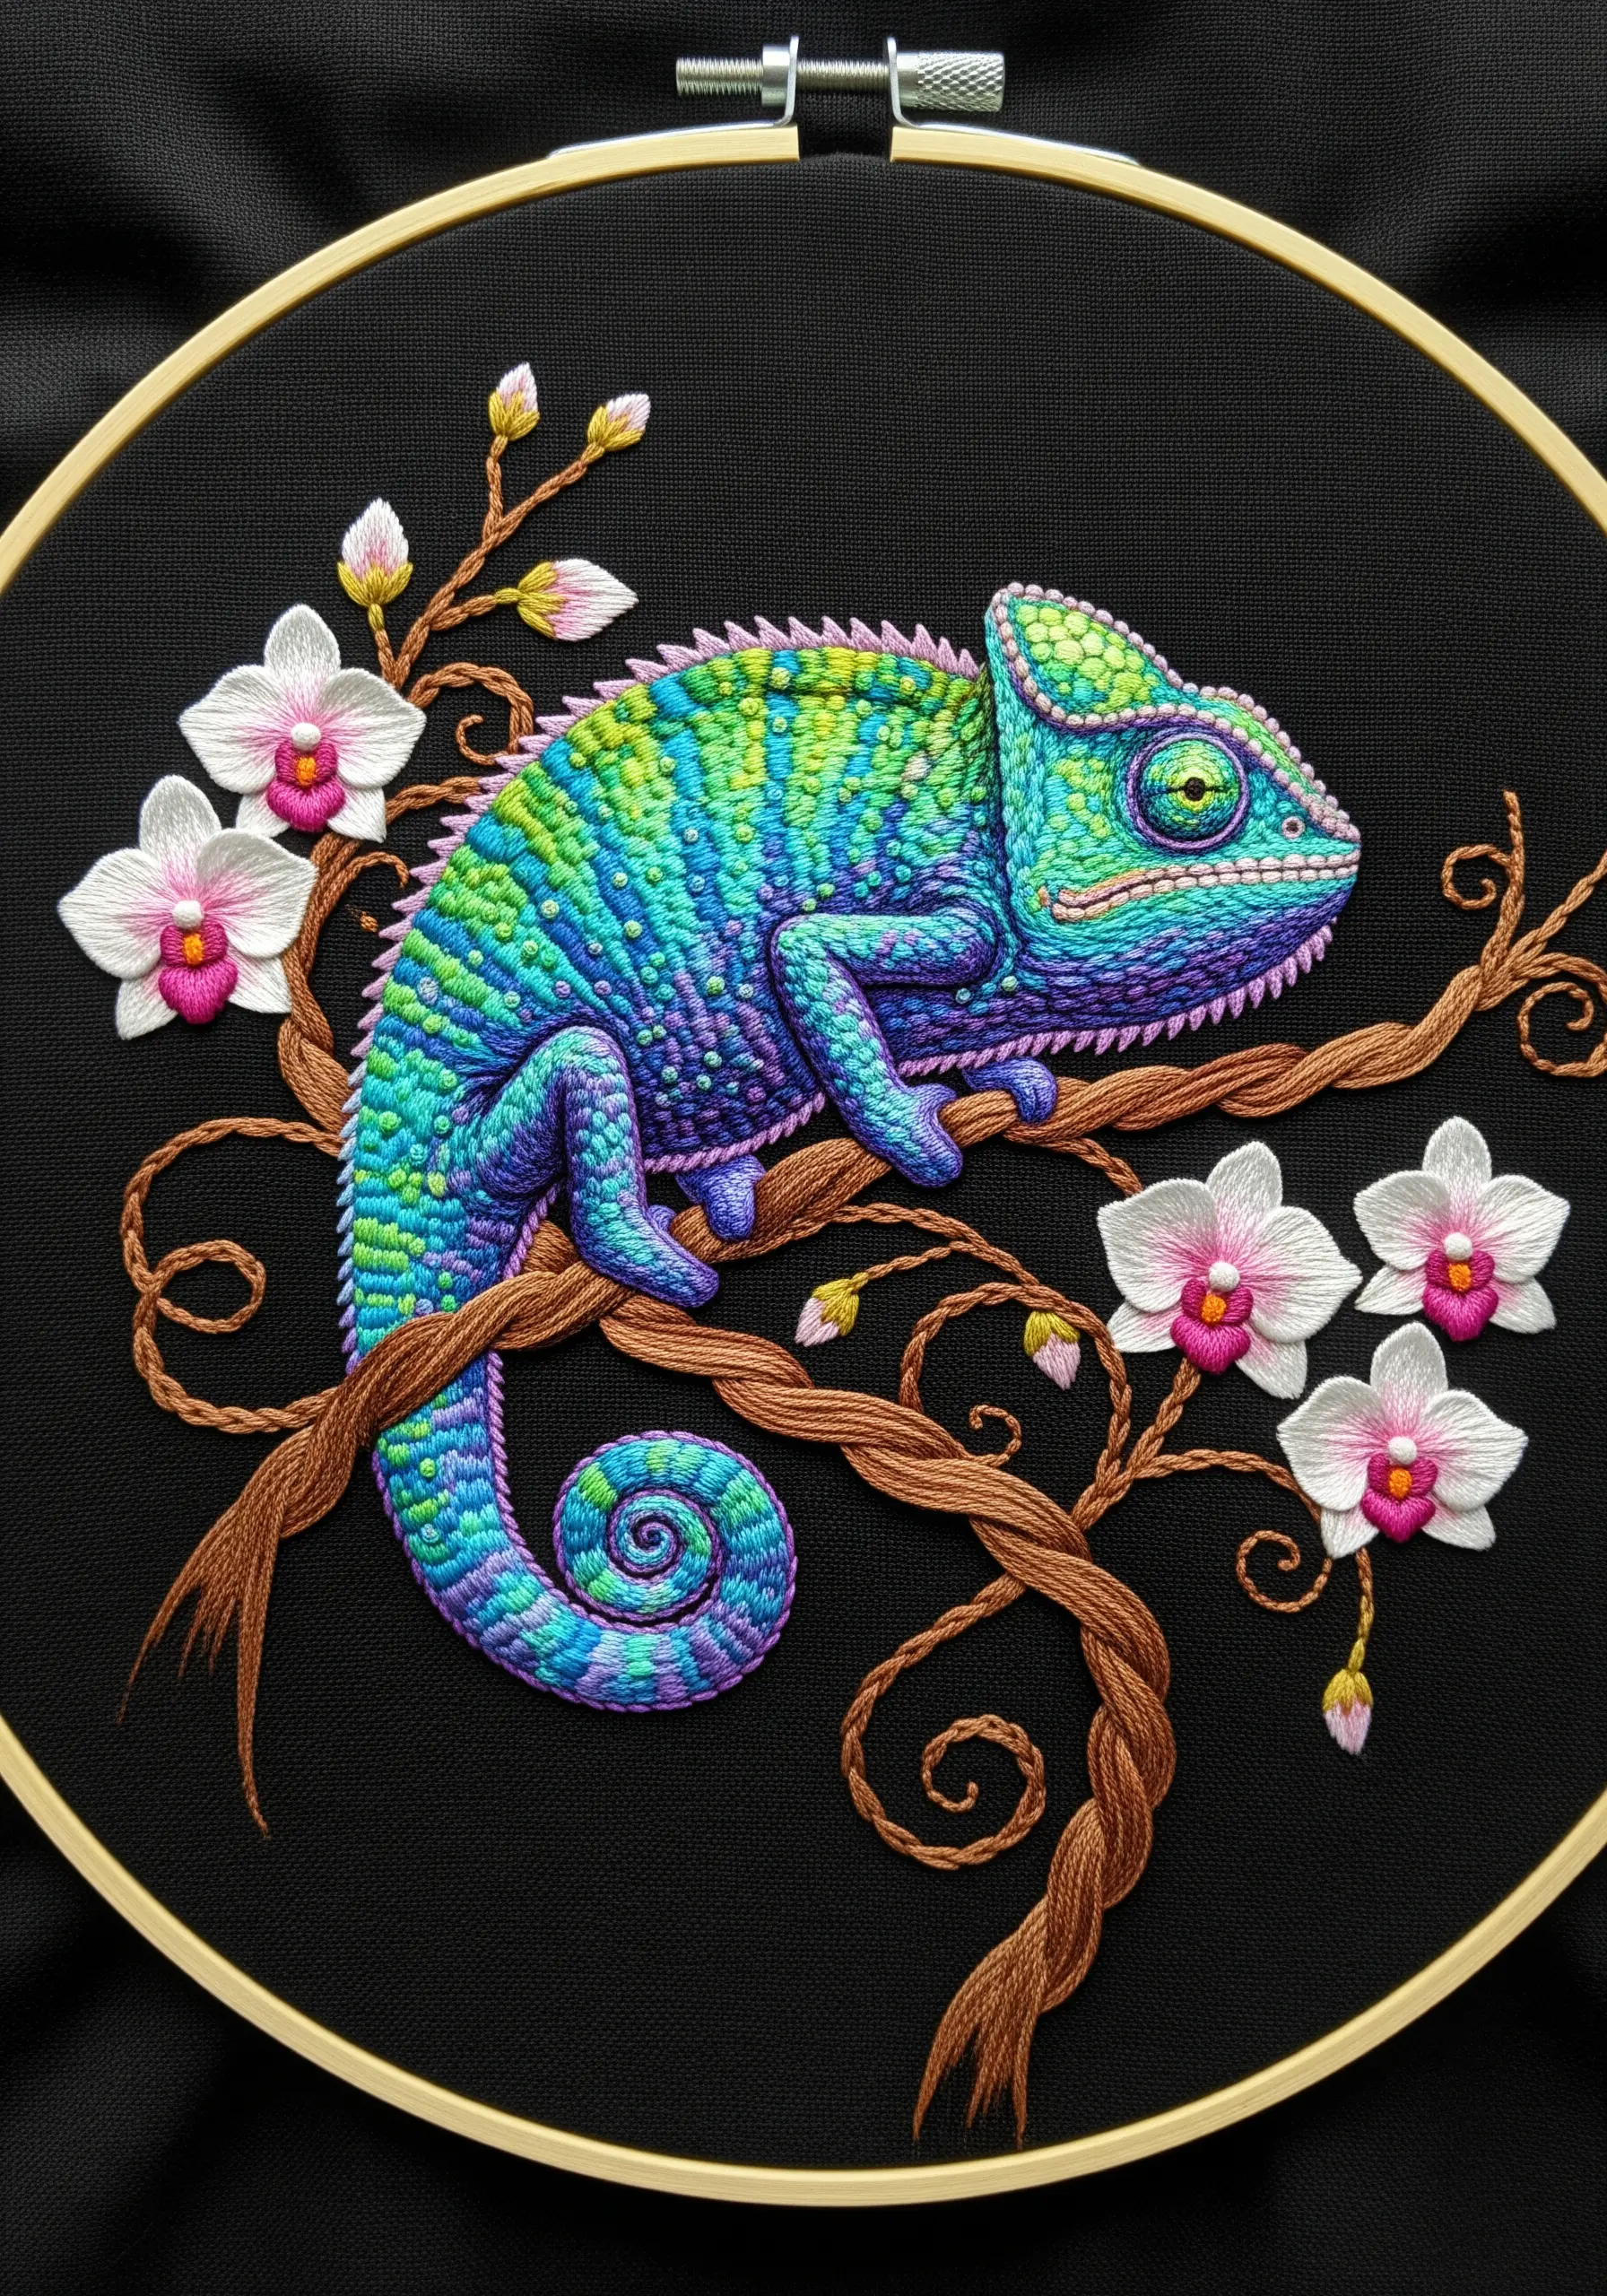
Capture the iridescent skin of a chameleon by mastering smooth color transitions with the long-and-short stitch, also known as thread painting.
Work with a single strand of floss to achieve the finest blending between blues, greens, and purples.
Start with one color, then bring your needle up through the middle of the previous stitches to seamlessly introduce the next shade.
Stitching on black fabric makes these jewel tones appear even more luminous and dramatic, creating a truly stunning effect.
8. Mix Appliqué and Embroidery for a Storybook Scene

Build a playful scene by combining different textile techniques.
Use a piece of light blue felt or cotton for the water, attaching it to your tote bag with a simple running stitch around the edge; this is appliqué.
Embroider the capybara and lily pads directly onto the fabric and felt layers.
A few wavy lines of backstitch on the blue felt create the illusion of ripples, adding movement to your design with minimal effort.
9. Create Impact with Bold Color Blocking

For a large, statement-making patch, focus on clean shapes and bold color blocking.
Each feather section of the macaw is treated as a separate block of color, filled meticulously with satin stitch.
A strong black outline stitched in backstitch or split stitch separates each color, preventing them from blending visually and making the entire design sharp and graphic.
This approach ensures the patch is readable and vibrant, even from a distance.
10. Add a Touch of Luxury with Metallic Thread

Elevate a simple design by incorporating metallic floss for specific details.
Here, the golden diamonds on the snake’s back and the bamboo stalk are stitched with metallic thread, catching the light and creating a focal point.
When working with metallic floss, use a thread conditioner and a slightly larger needle to prevent snagging and breakage.
This selective use of shine adds a sophisticated, almost jewel-like quality to your patch, making it feel more special.
11. Contrast Matte and Metallic Finishes for Drama
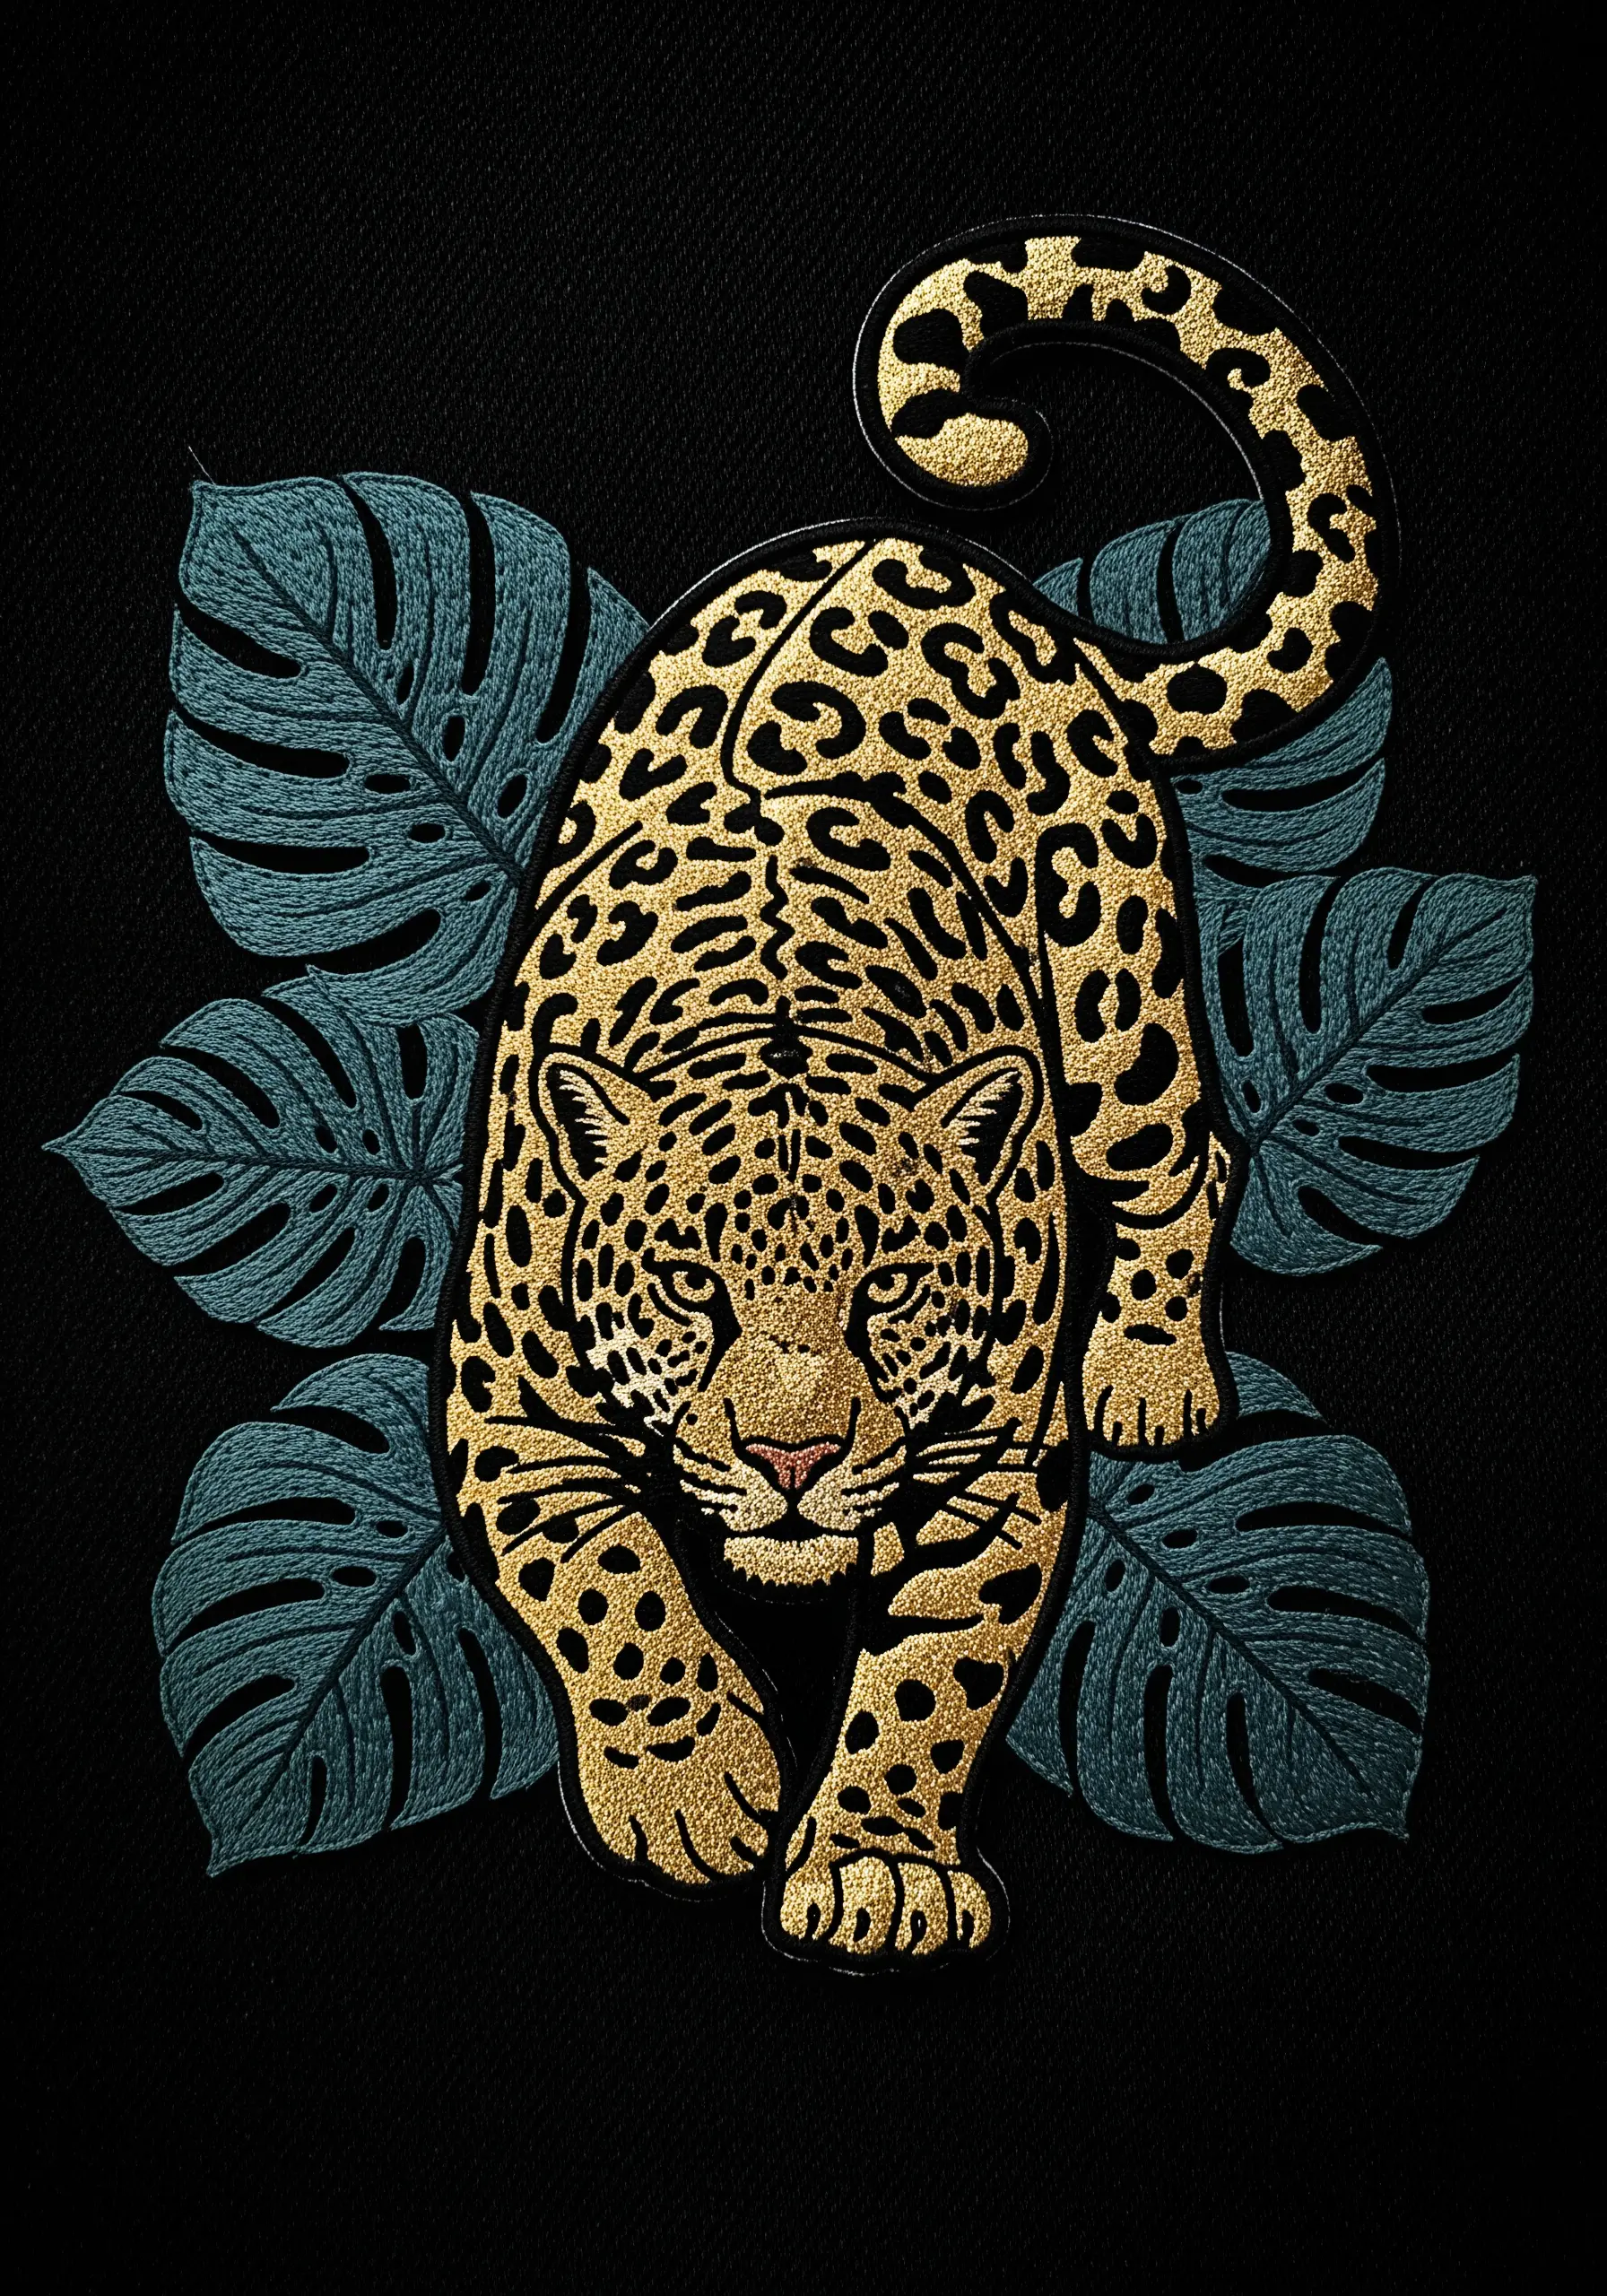
Create a powerful visual effect by pairing shiny metallic thread with matte cotton floss.
The leopard’s body is stitched entirely in a glittering gold thread, making it the undeniable hero of the piece.
In contrast, the background leaves are stitched in a flat, dark teal cotton, which absorbs light and recedes into the background.
This interplay of light-reflecting and light-absorbing textures generates a stunning sense of depth and focus.
12. Design Wearable Art with Micro-Embroidery

Transform a collar or lapel with a tiny, detailed embroidered pin.
For details this small, work with just one or two strands of floss to keep your stitches precise, especially for the hummingbird’s delicate head and beak.
Use metallic thread sparingly for a touch of iridescence on the bird’s throat.
Stitch your design onto felt, then add a stiff backing and a pin clasp to create a piece of wearable art that feels custom-made.
13. Achieve High Contrast for a Graphic Look
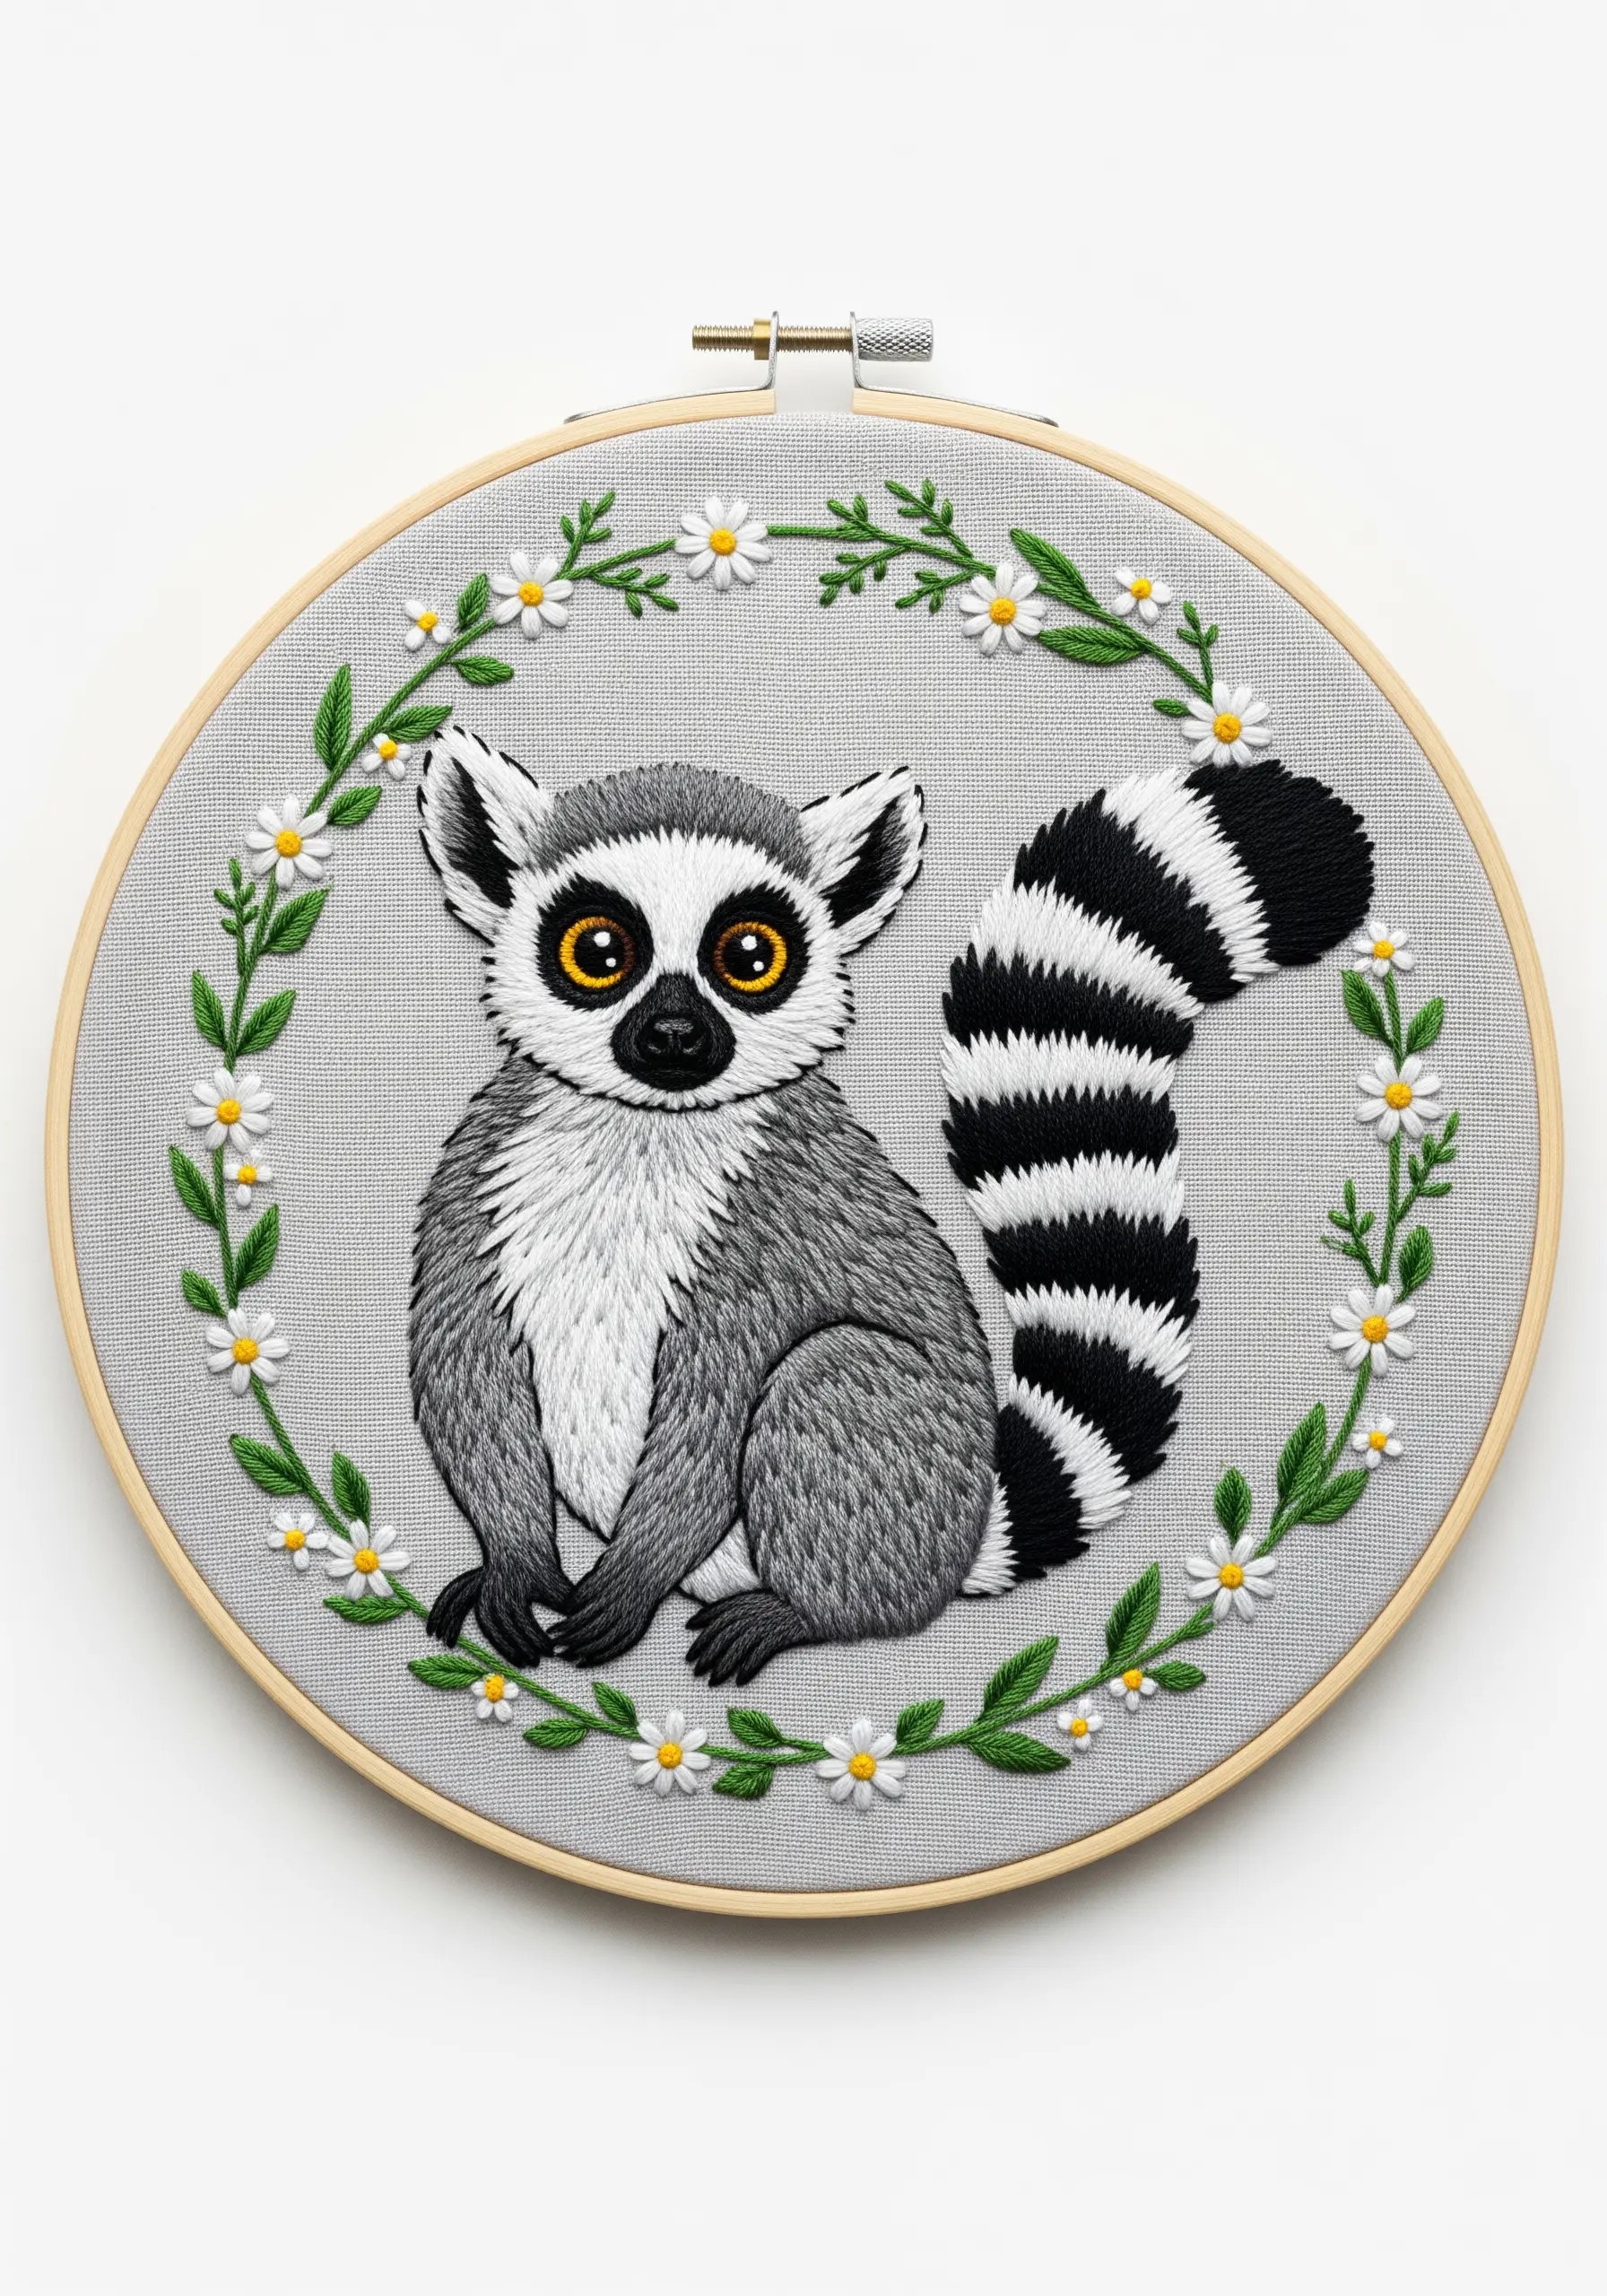
Make your design pop by choosing elements with strong natural contrast, like a lemur’s tail.
Fill each black and white stripe with dense, smooth satin stitches, ensuring each section is cleanly separated from the next.
For the gray fur on the body, switch to a long-and-short stitch to create a softer, more textured appearance.
This juxtaposition of hard graphic lines and soft textural fills makes the design visually dynamic and engaging.
14. Frame Your Motif with a Clean Appliqué Circle

Give your animal portrait a polished, patch-like feel by stitching it onto an appliqué background.
Cut a circle from white felt or cotton fabric and secure it to your main fabric (like this canvas bag) with a neat satin stitch border.
Embroidering your giraffe directly onto this clean white canvas makes the colors appear more vibrant and ensures your motif stands out, no matter the color or pattern of the background material.
15. Amplify Color with a High-Contrast Background
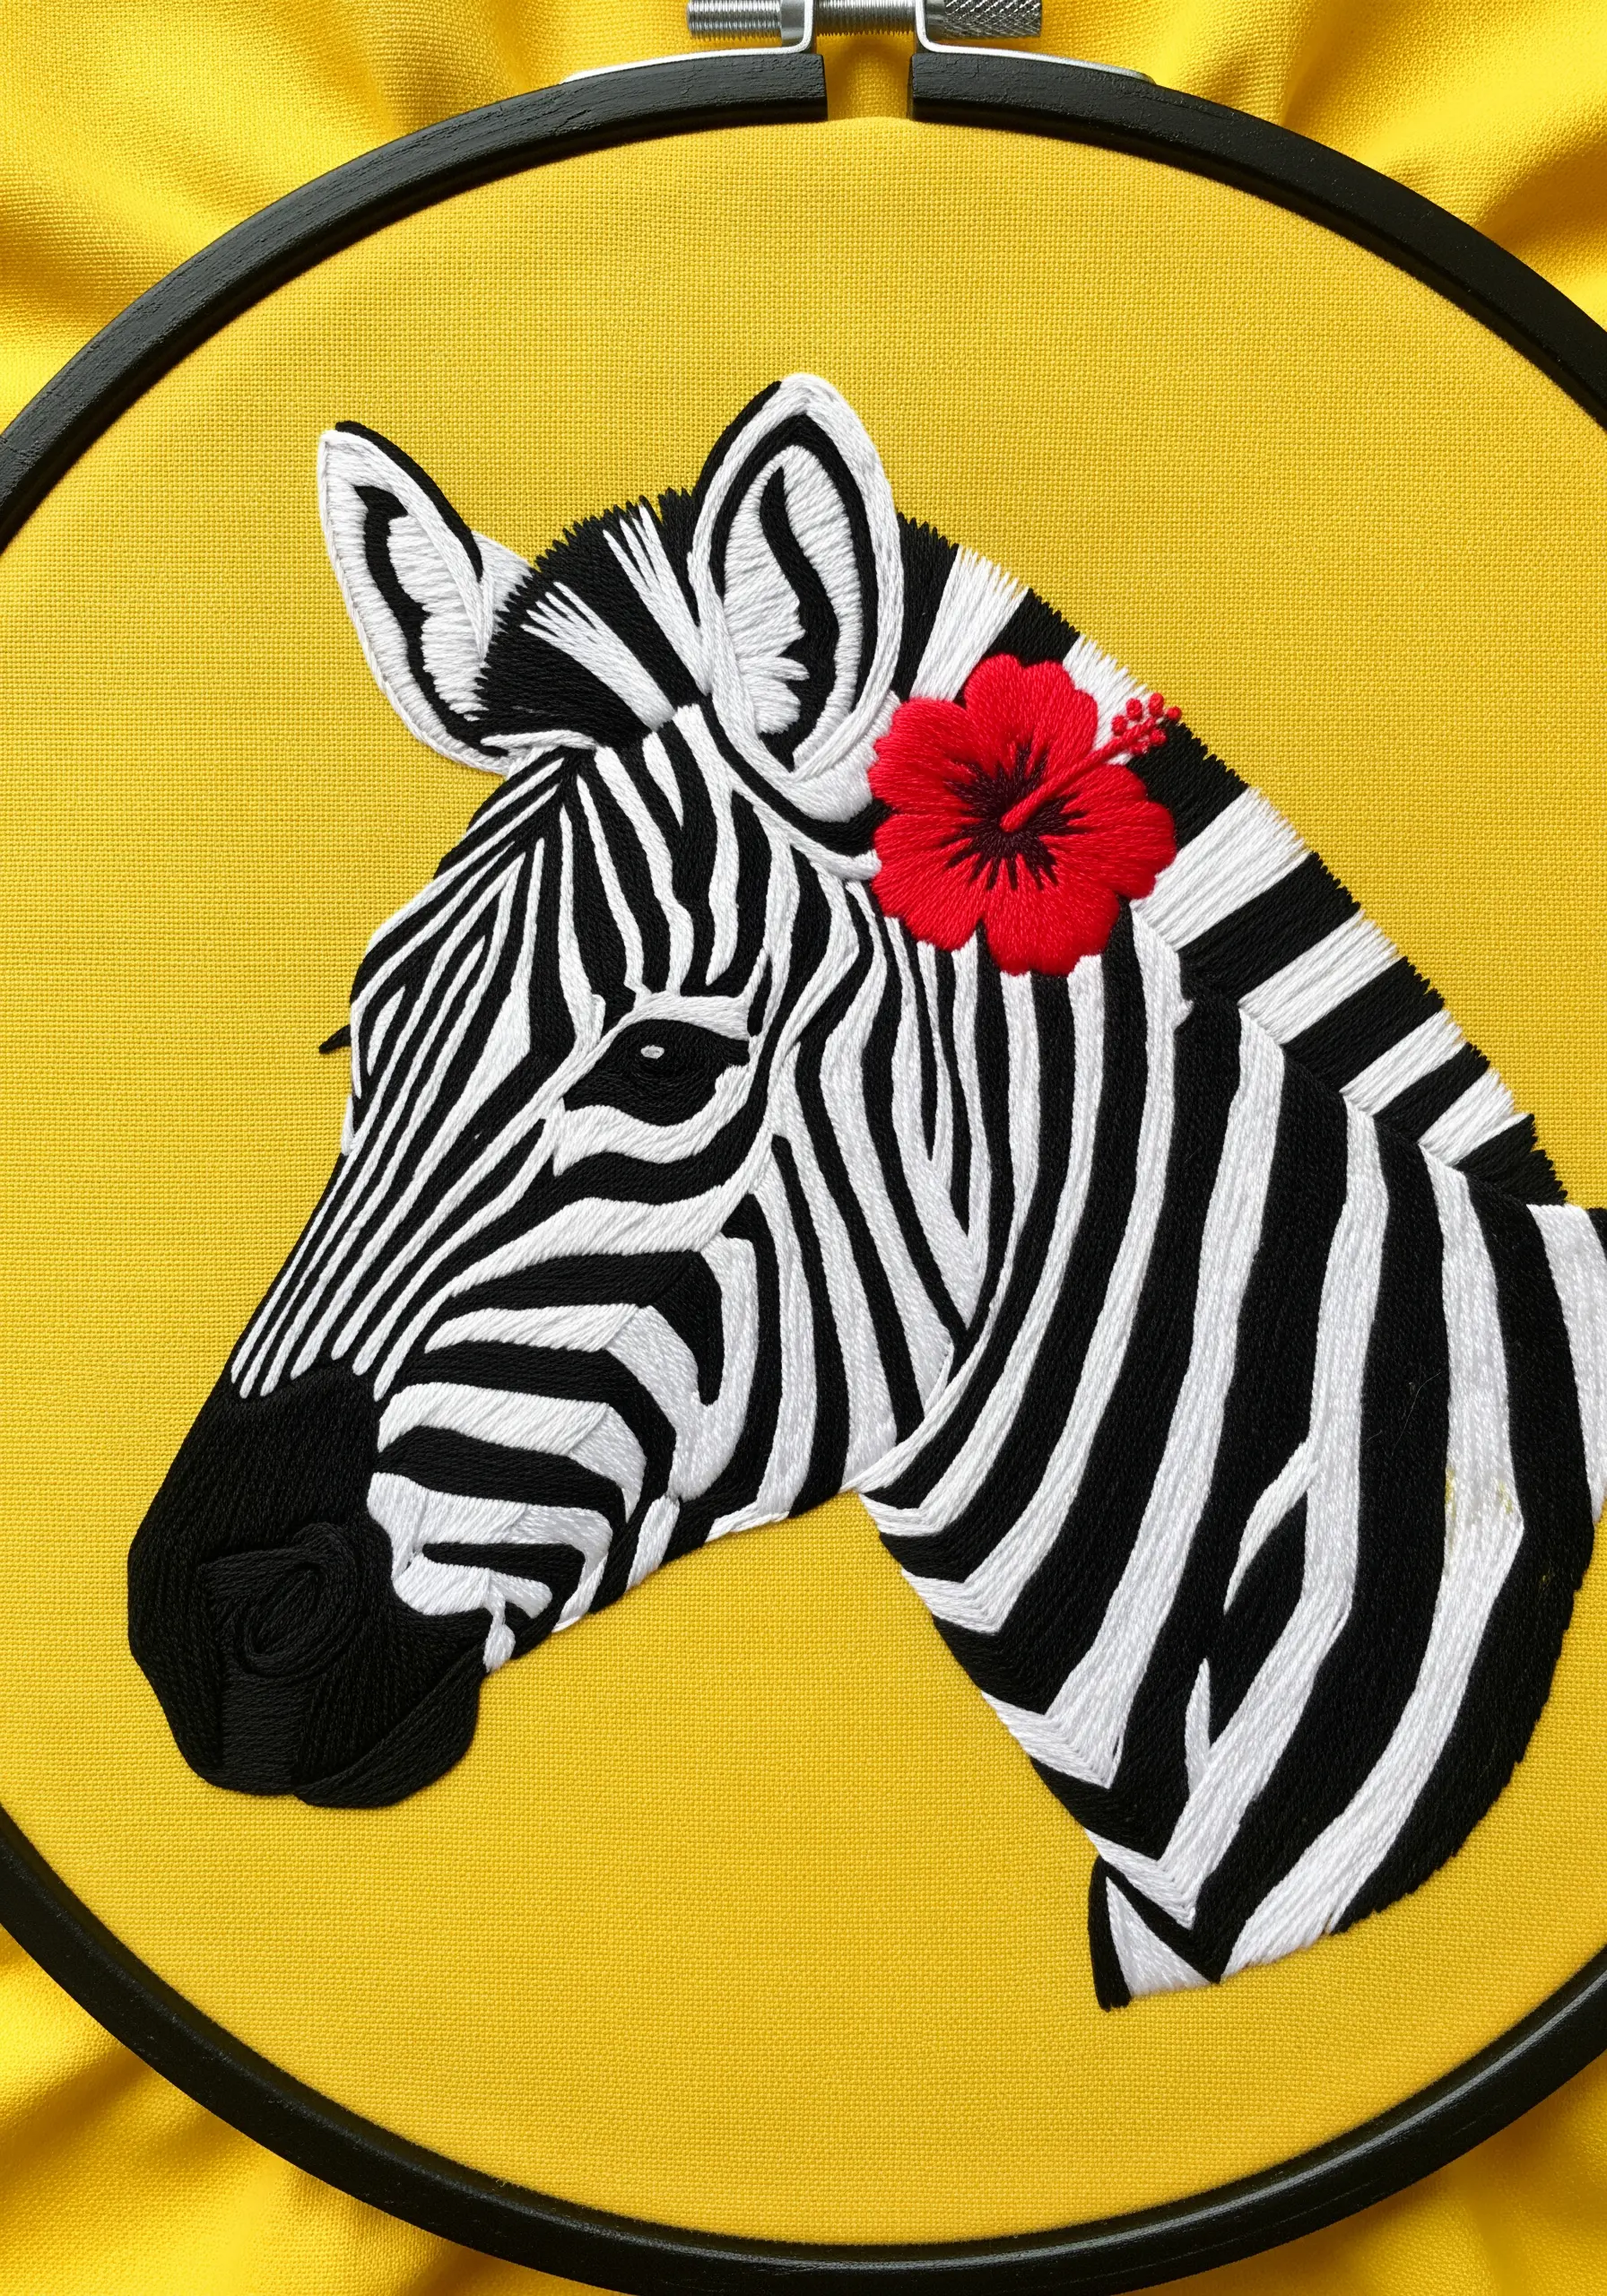
The choice of background fabric can dramatically alter the mood of your piece.
A vibrant, sunny yellow canvas makes the stark black and white of the zebra feel even more graphic and bold.
When filling the stripes, use a vertical satin stitch and keep your stitches tight and uniform to create solid blocks of color.
The single red hibiscus, created with a fishbone stitch, provides a powerful pop of contrast that completes the composition.
16. Add Personality with Simple, Expressive Details

Bring a cartoon character to life with a few well-placed details.
This friendly crocodile’s charm comes from the oversized, triangular white teeth and the simple but effective pink flower on its head.
The flower is made with five detached chain stitches (lazy daisies) for petals and a French knot for the center.
These playful additions transform a basic animal shape into a memorable character perfect for a child’s hat or backpack.
17. Create Atmosphere with a Dark Canvas
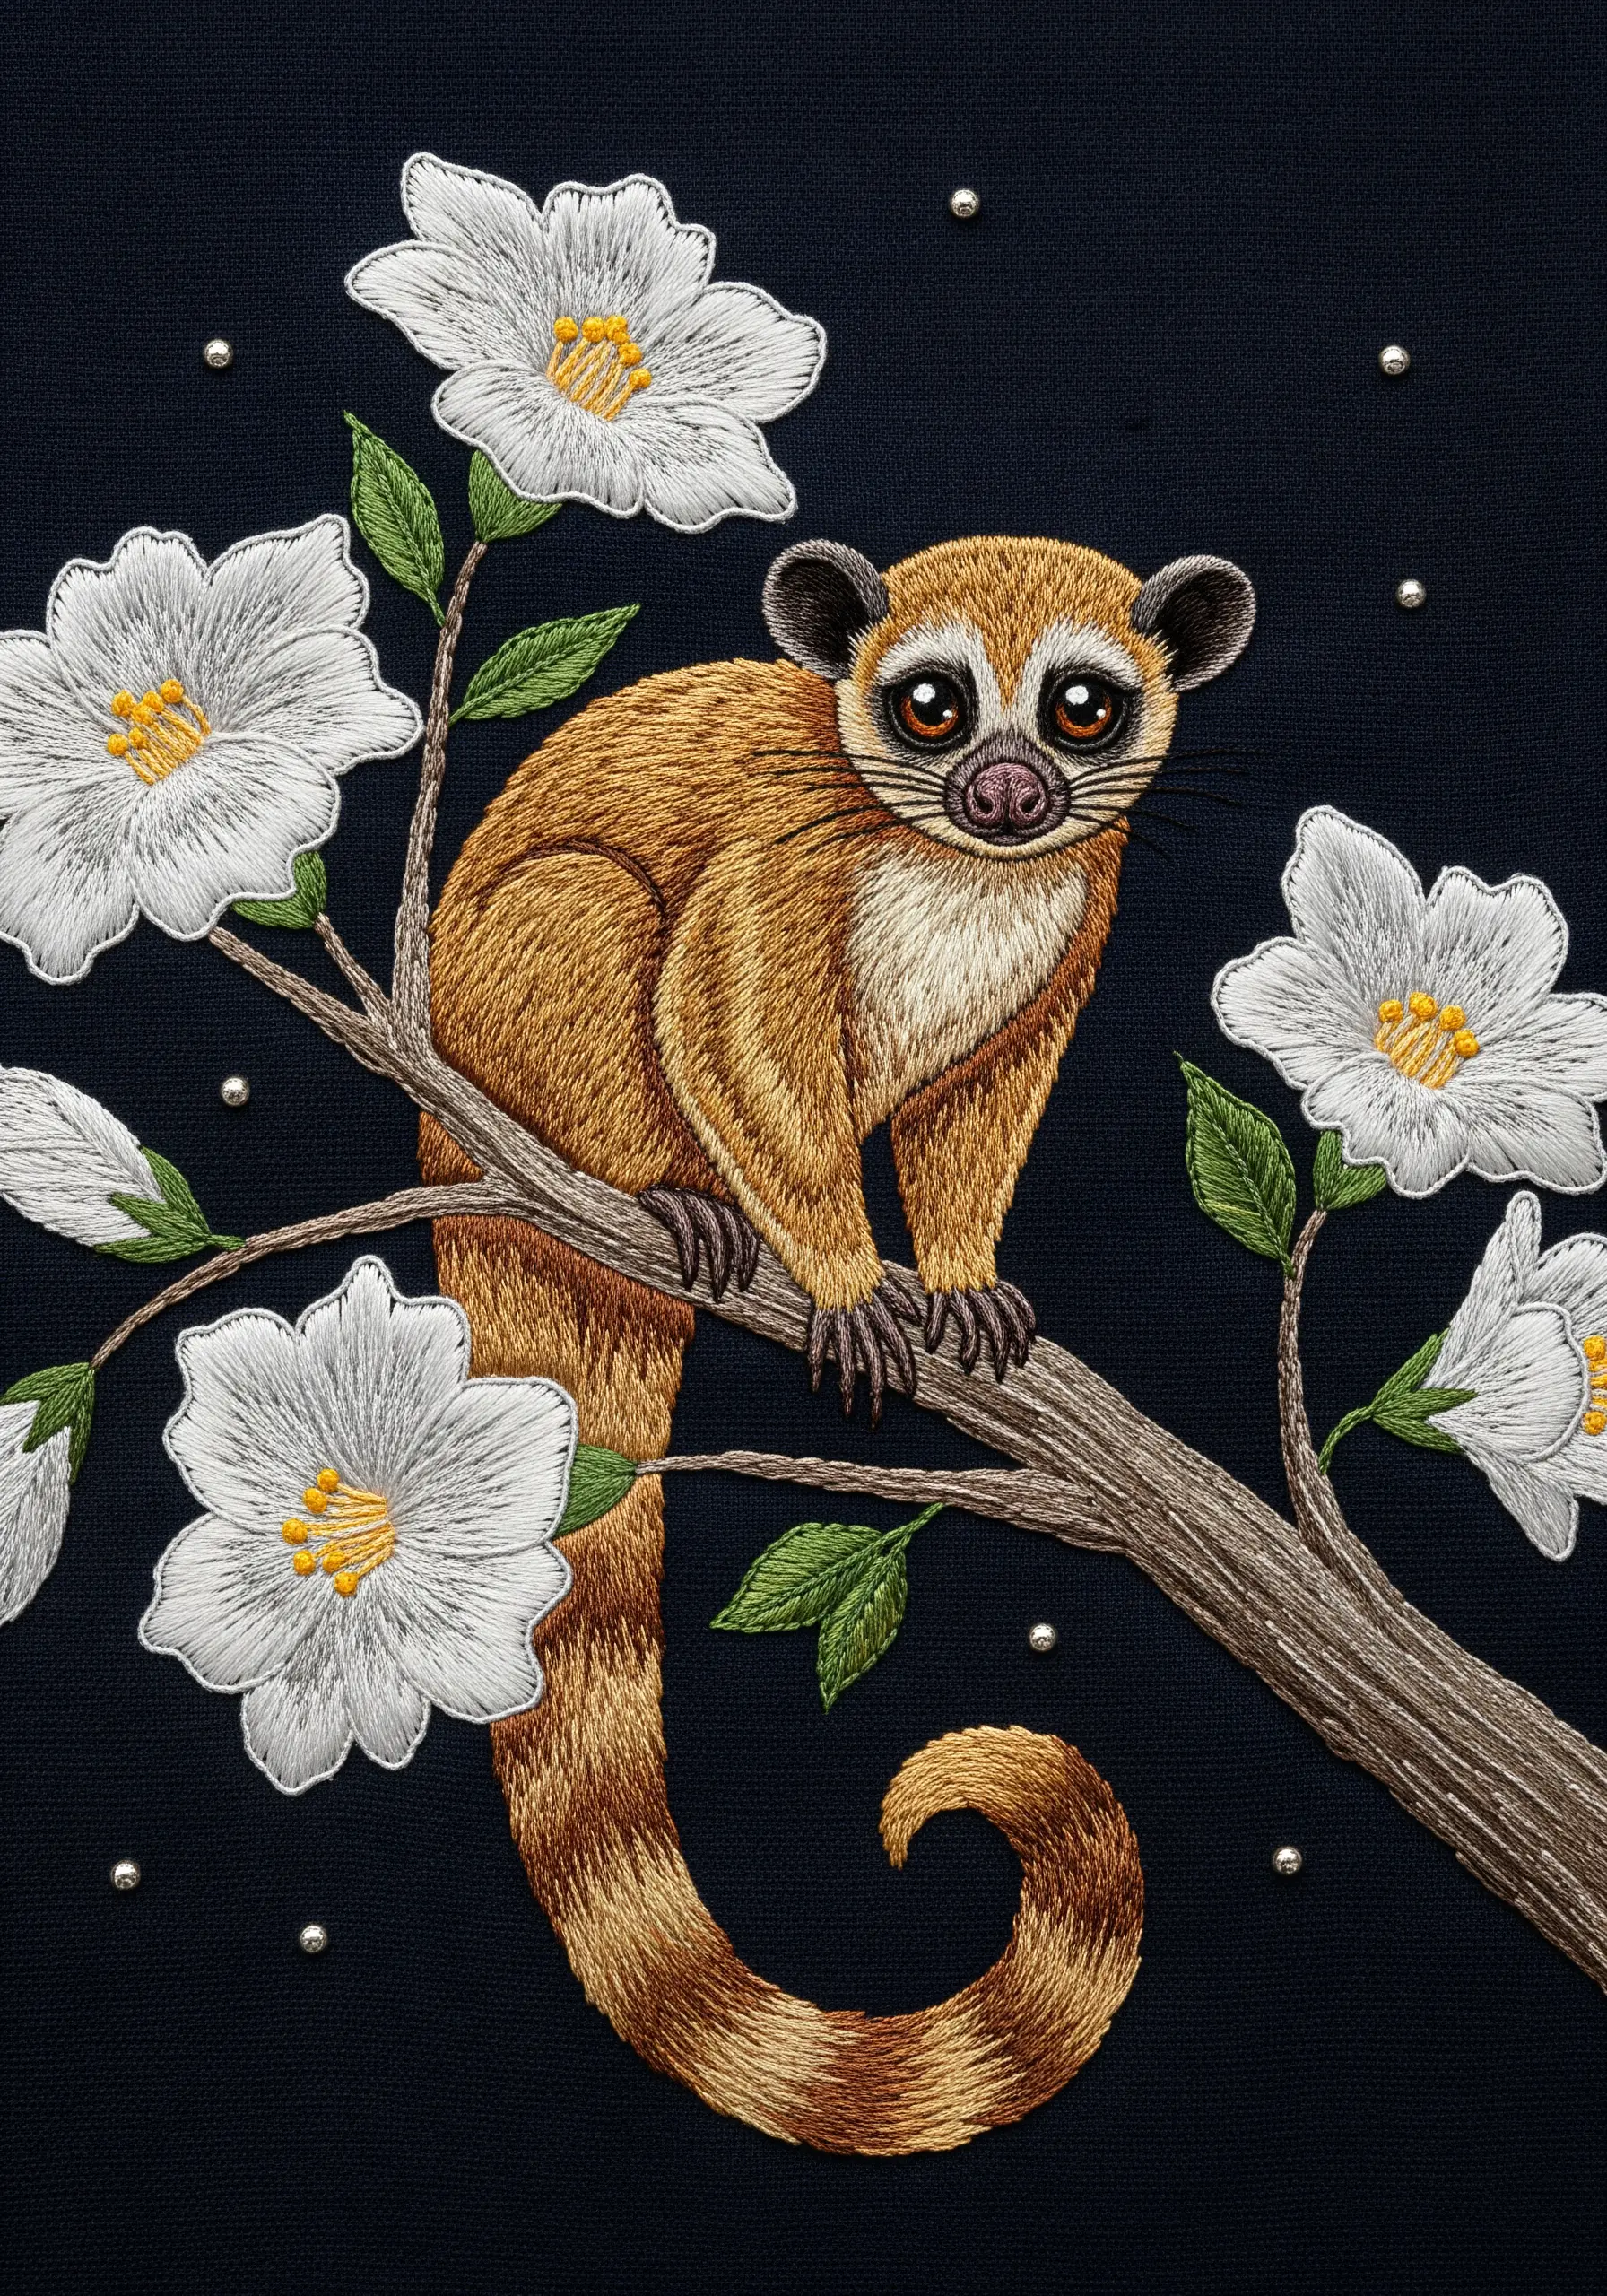
Stitching on dark navy or black fabric creates an instant sense of nighttime atmosphere and makes your colors glow.
The warm, golden-brown fur of this animal appears more luminous against the deep blue background.
To create the soft, out-of-focus white flowers, use a simple satin stitch for the petals and add a few yellow French knots for the center.
A few scattered silver beads or French knots mimic stars, completing the magical, nocturnal scene.
18. Combine Felt Appliqué for Soft, Tactile Layers
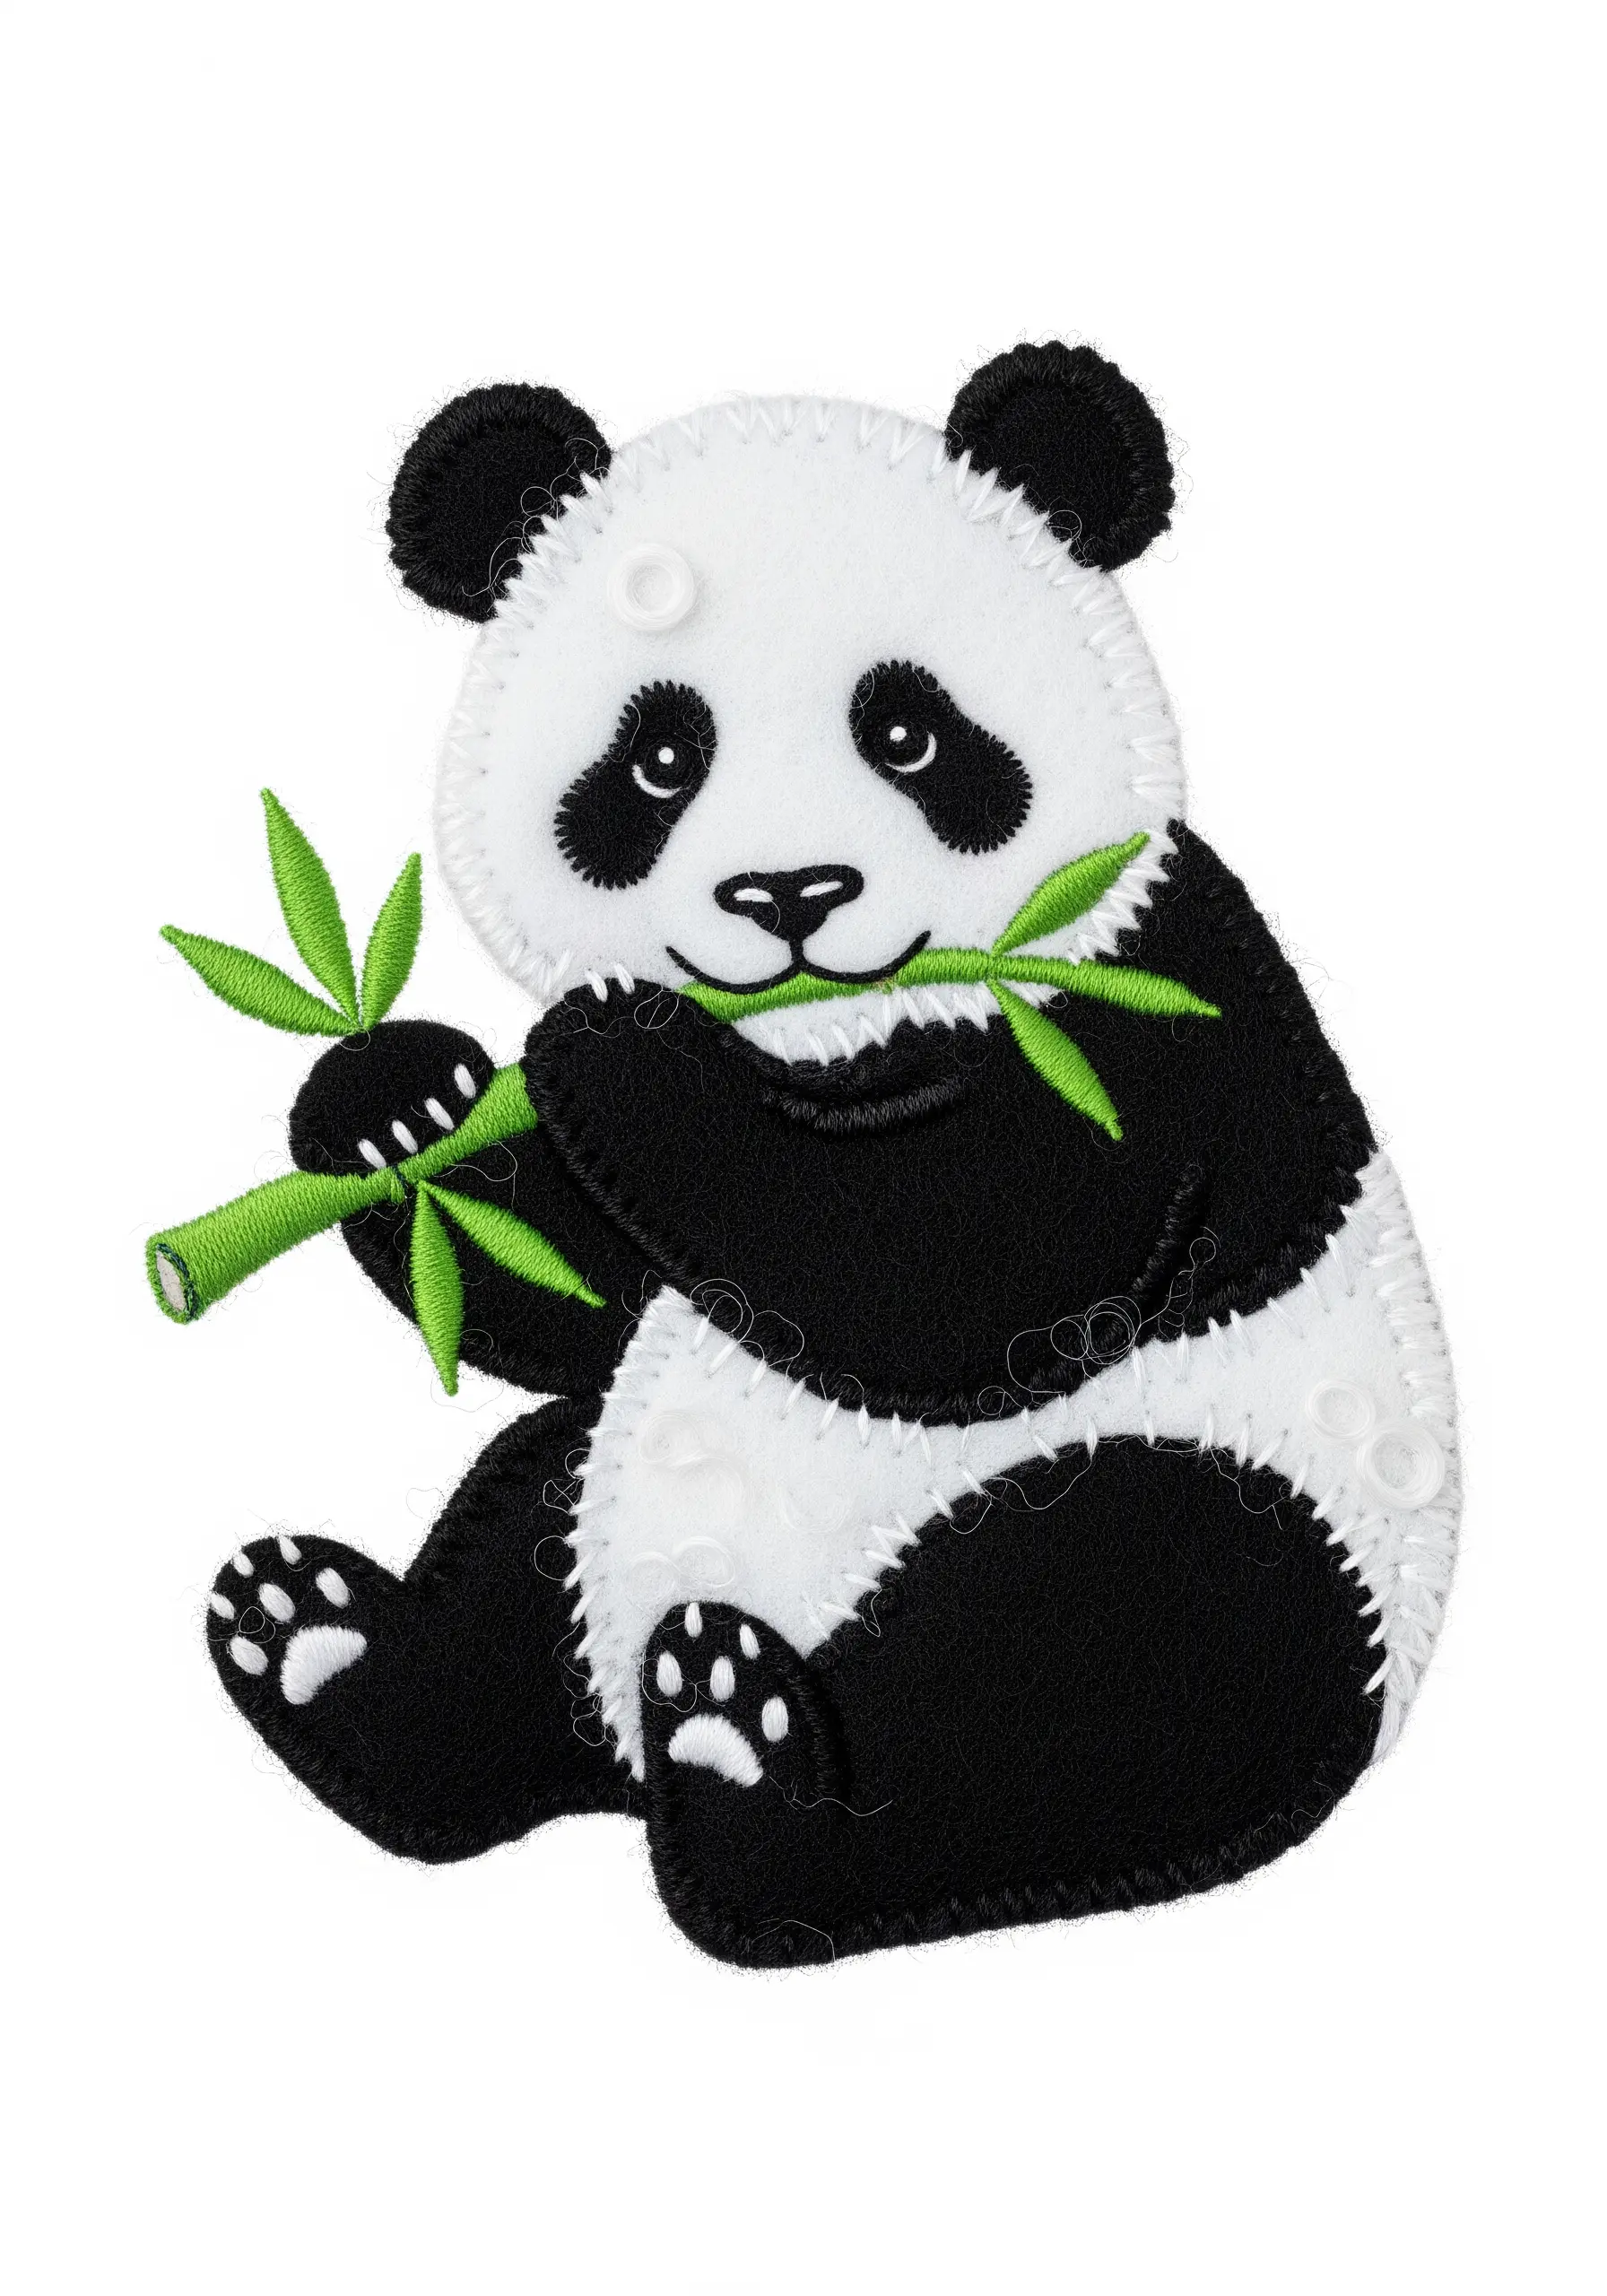
Create a wonderfully soft and touchable patch by using felt as your primary material.
Cut the panda’s body shapes from black and white felt and layer them together.
Use minimal embroidery to add the details: a simple backstitch for the mouth, satin stitch for the nose, and a few anchor stitches to hold the bamboo.
The felt provides the color and texture, making this a quick, satisfying project that’s perfect for kids’ items.
19. Build 3D Texture with Abundant French Knots
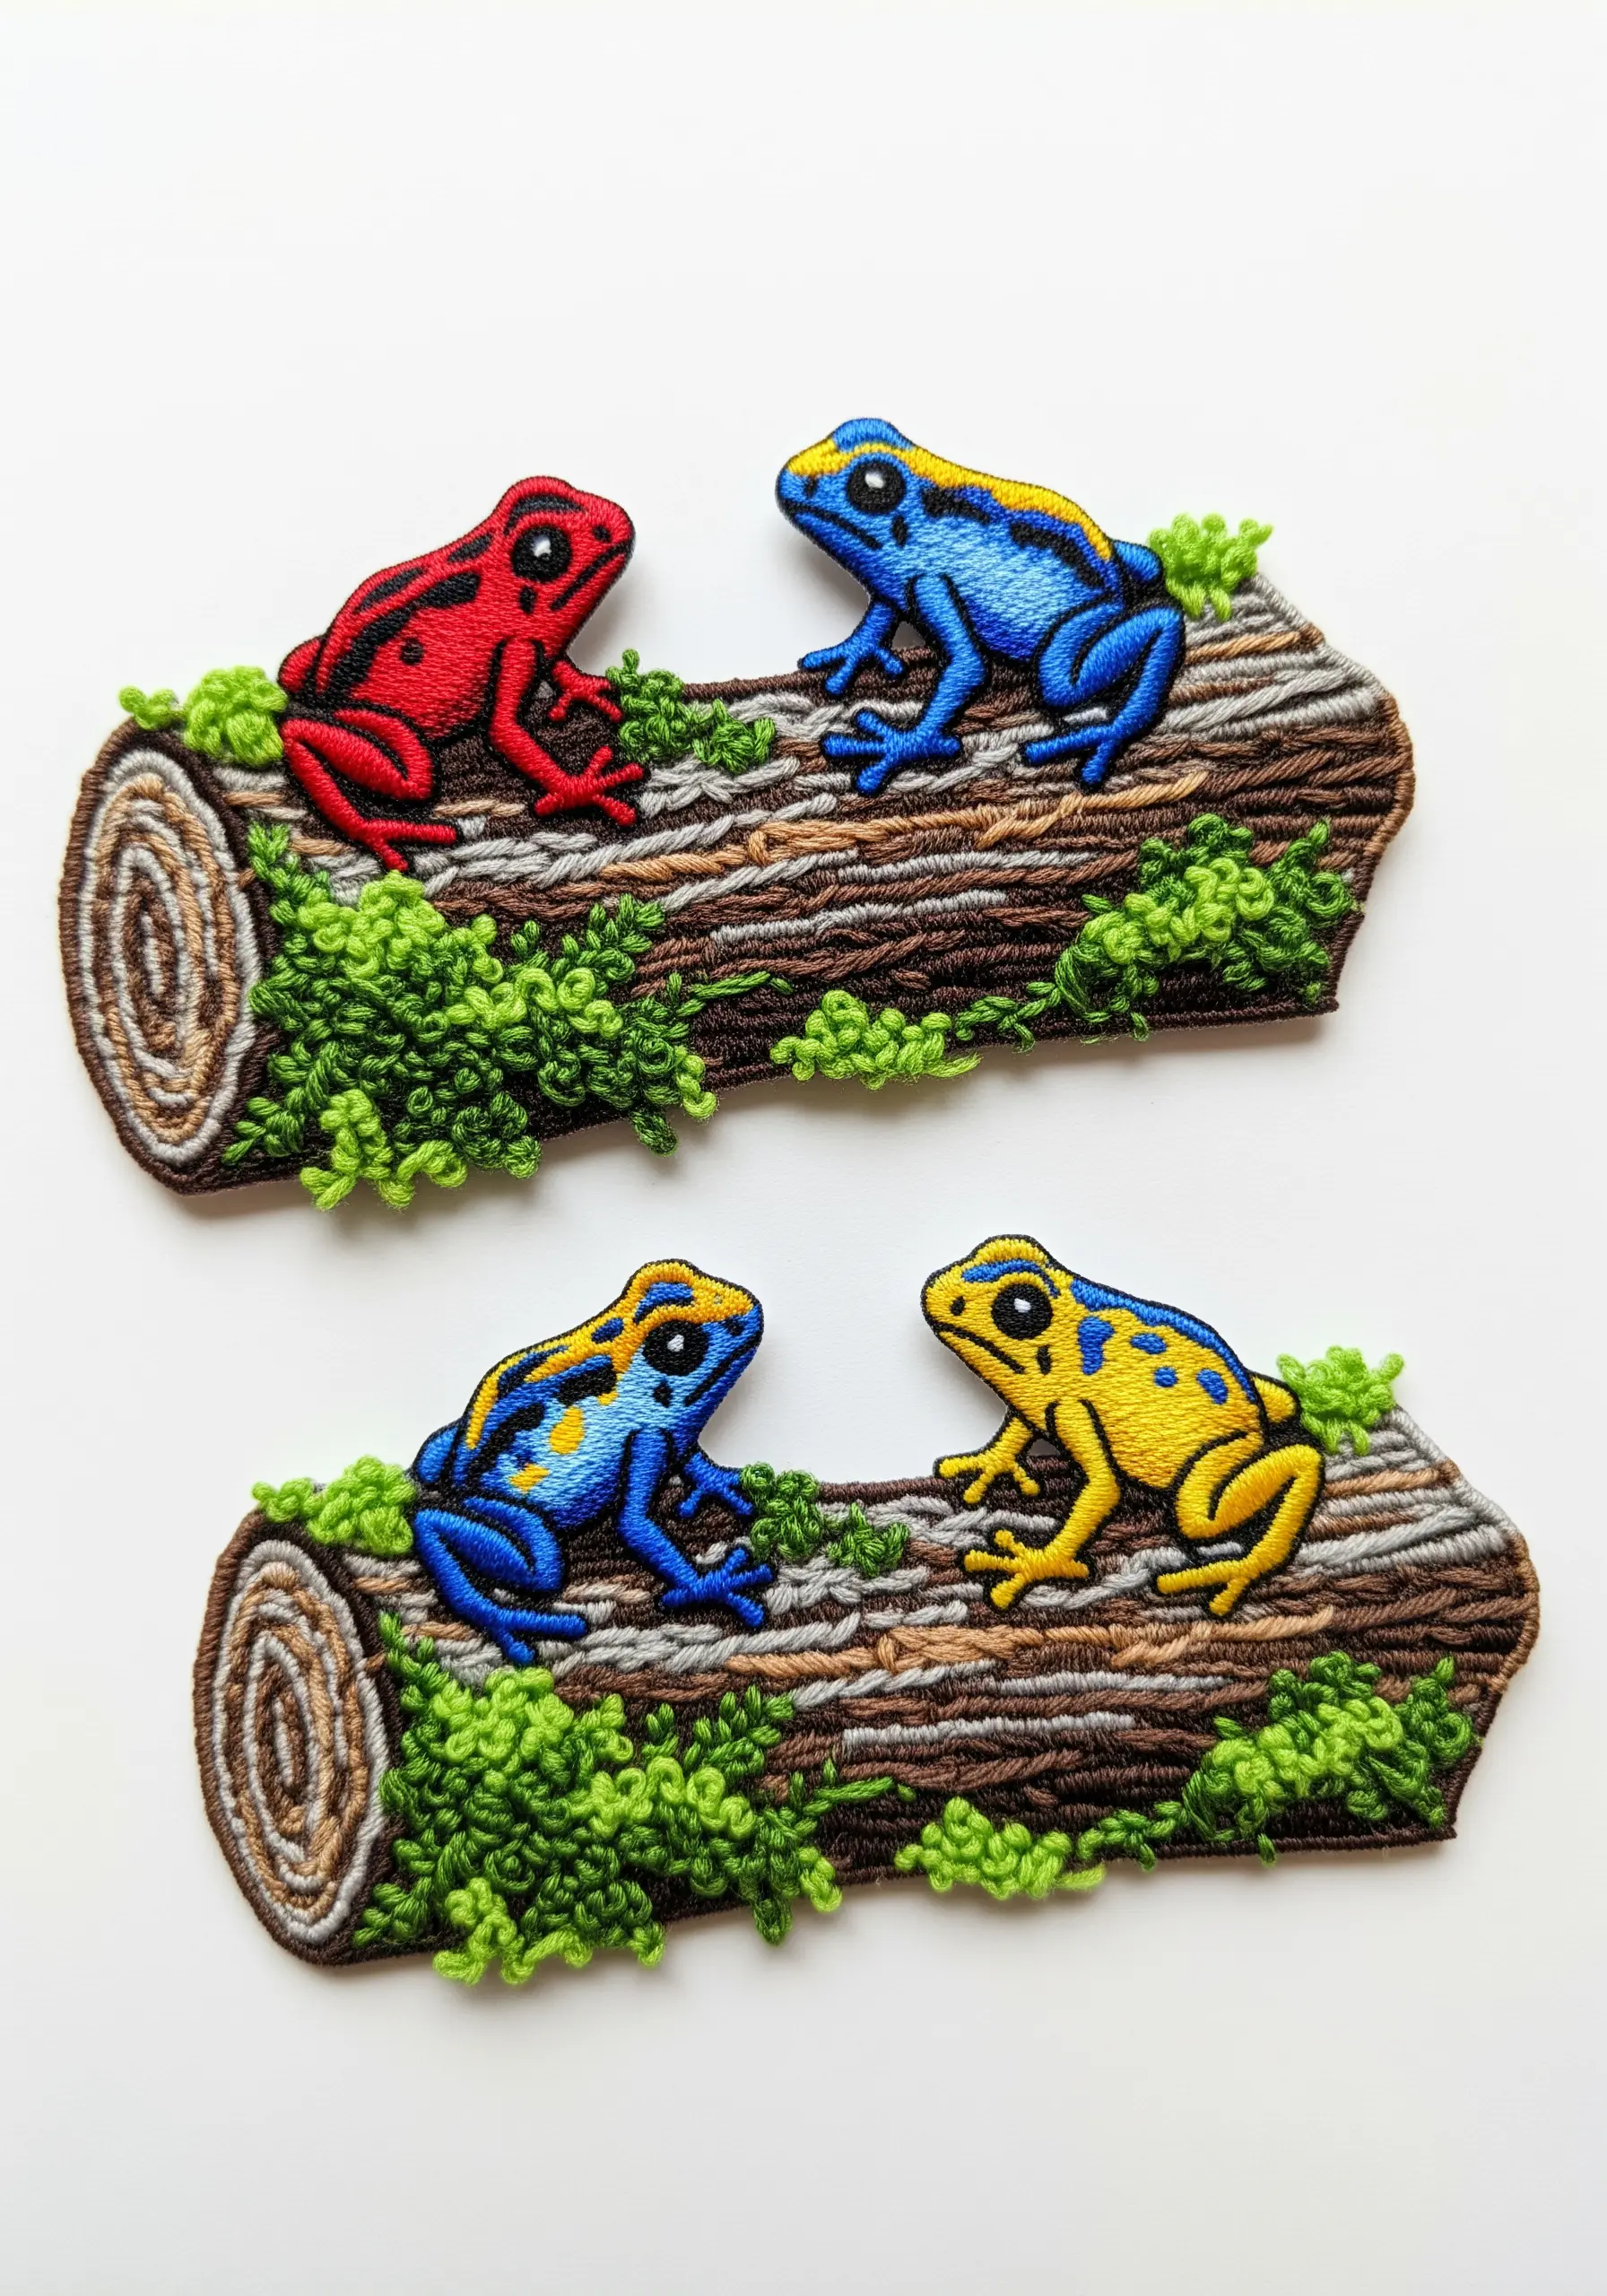
Mimic the texture of lush moss by covering an area with tightly packed French knots.
Use a variegated green thread to give the moss natural-looking color variation without needing to switch your floss.
Vary the number of times you wrap the thread around the needle (once or twice) to create knots of different sizes, enhancing the organic feel.
This highly tactile technique adds incredible dimension and realism to your nature scenes.
20. Radiate Energy with Dynamic Straight Stitches
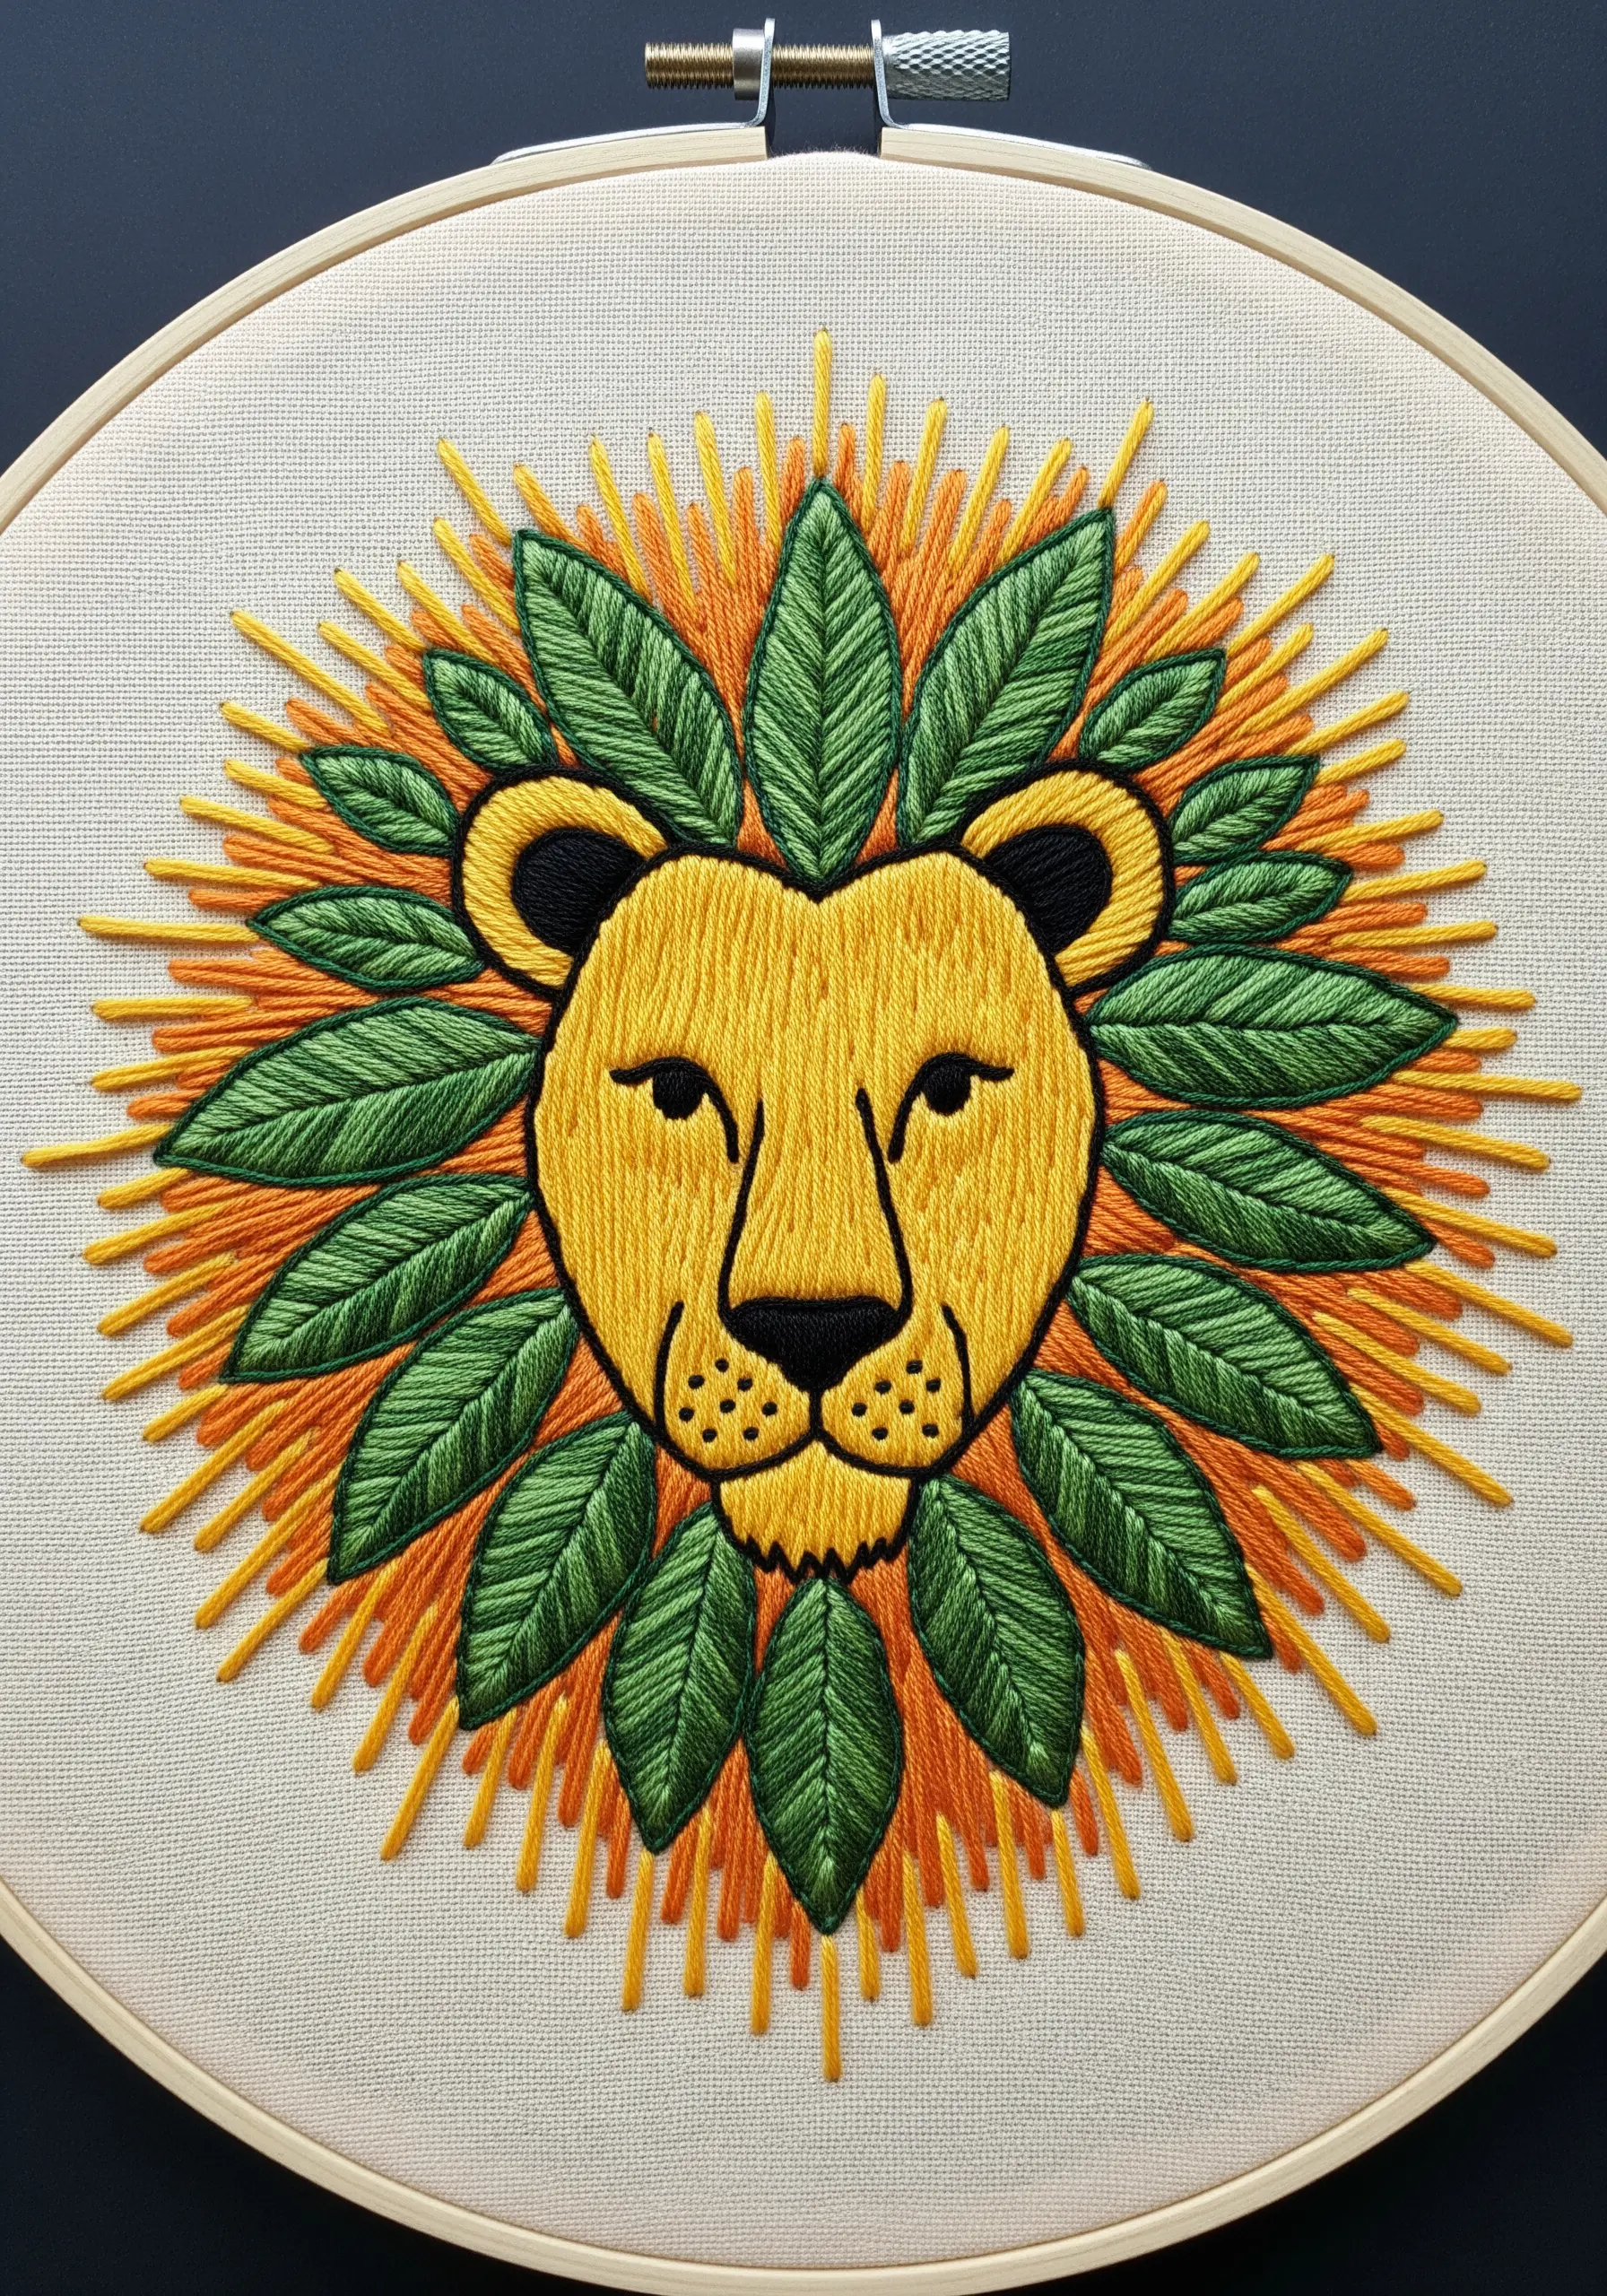
Create a stylized, sunburst mane for a lion using only straight stitches.
Arrange long stitches in a radiating pattern around the lion’s head, varying their length and density to create a sense of crackling energy.
Use a mix of yellow and orange threads for a fiery effect.
The orderly, symmetrical fishbone stitch used for the green leaves provides a calm contrast to the wild energy of the mane, making the whole design feel balanced.
21. Tell a Story with Fabric Collage and Stitch

Combine appliqué with embroidery to create a multi-layered, illustrative scene.
The anteater’s body and the flowers are cut from different fabrics, giving them distinct textures and patterns.
Use a simple running stitch to outline these fabric shapes, which adds a charming, hand-drawn quality.
For the anthill, use dimensional stitches like French knots or bullion knots to build up a highly textured mound, adding depth and a playful detail to the story.
22. Imply Motion with Directional Satin Stitch
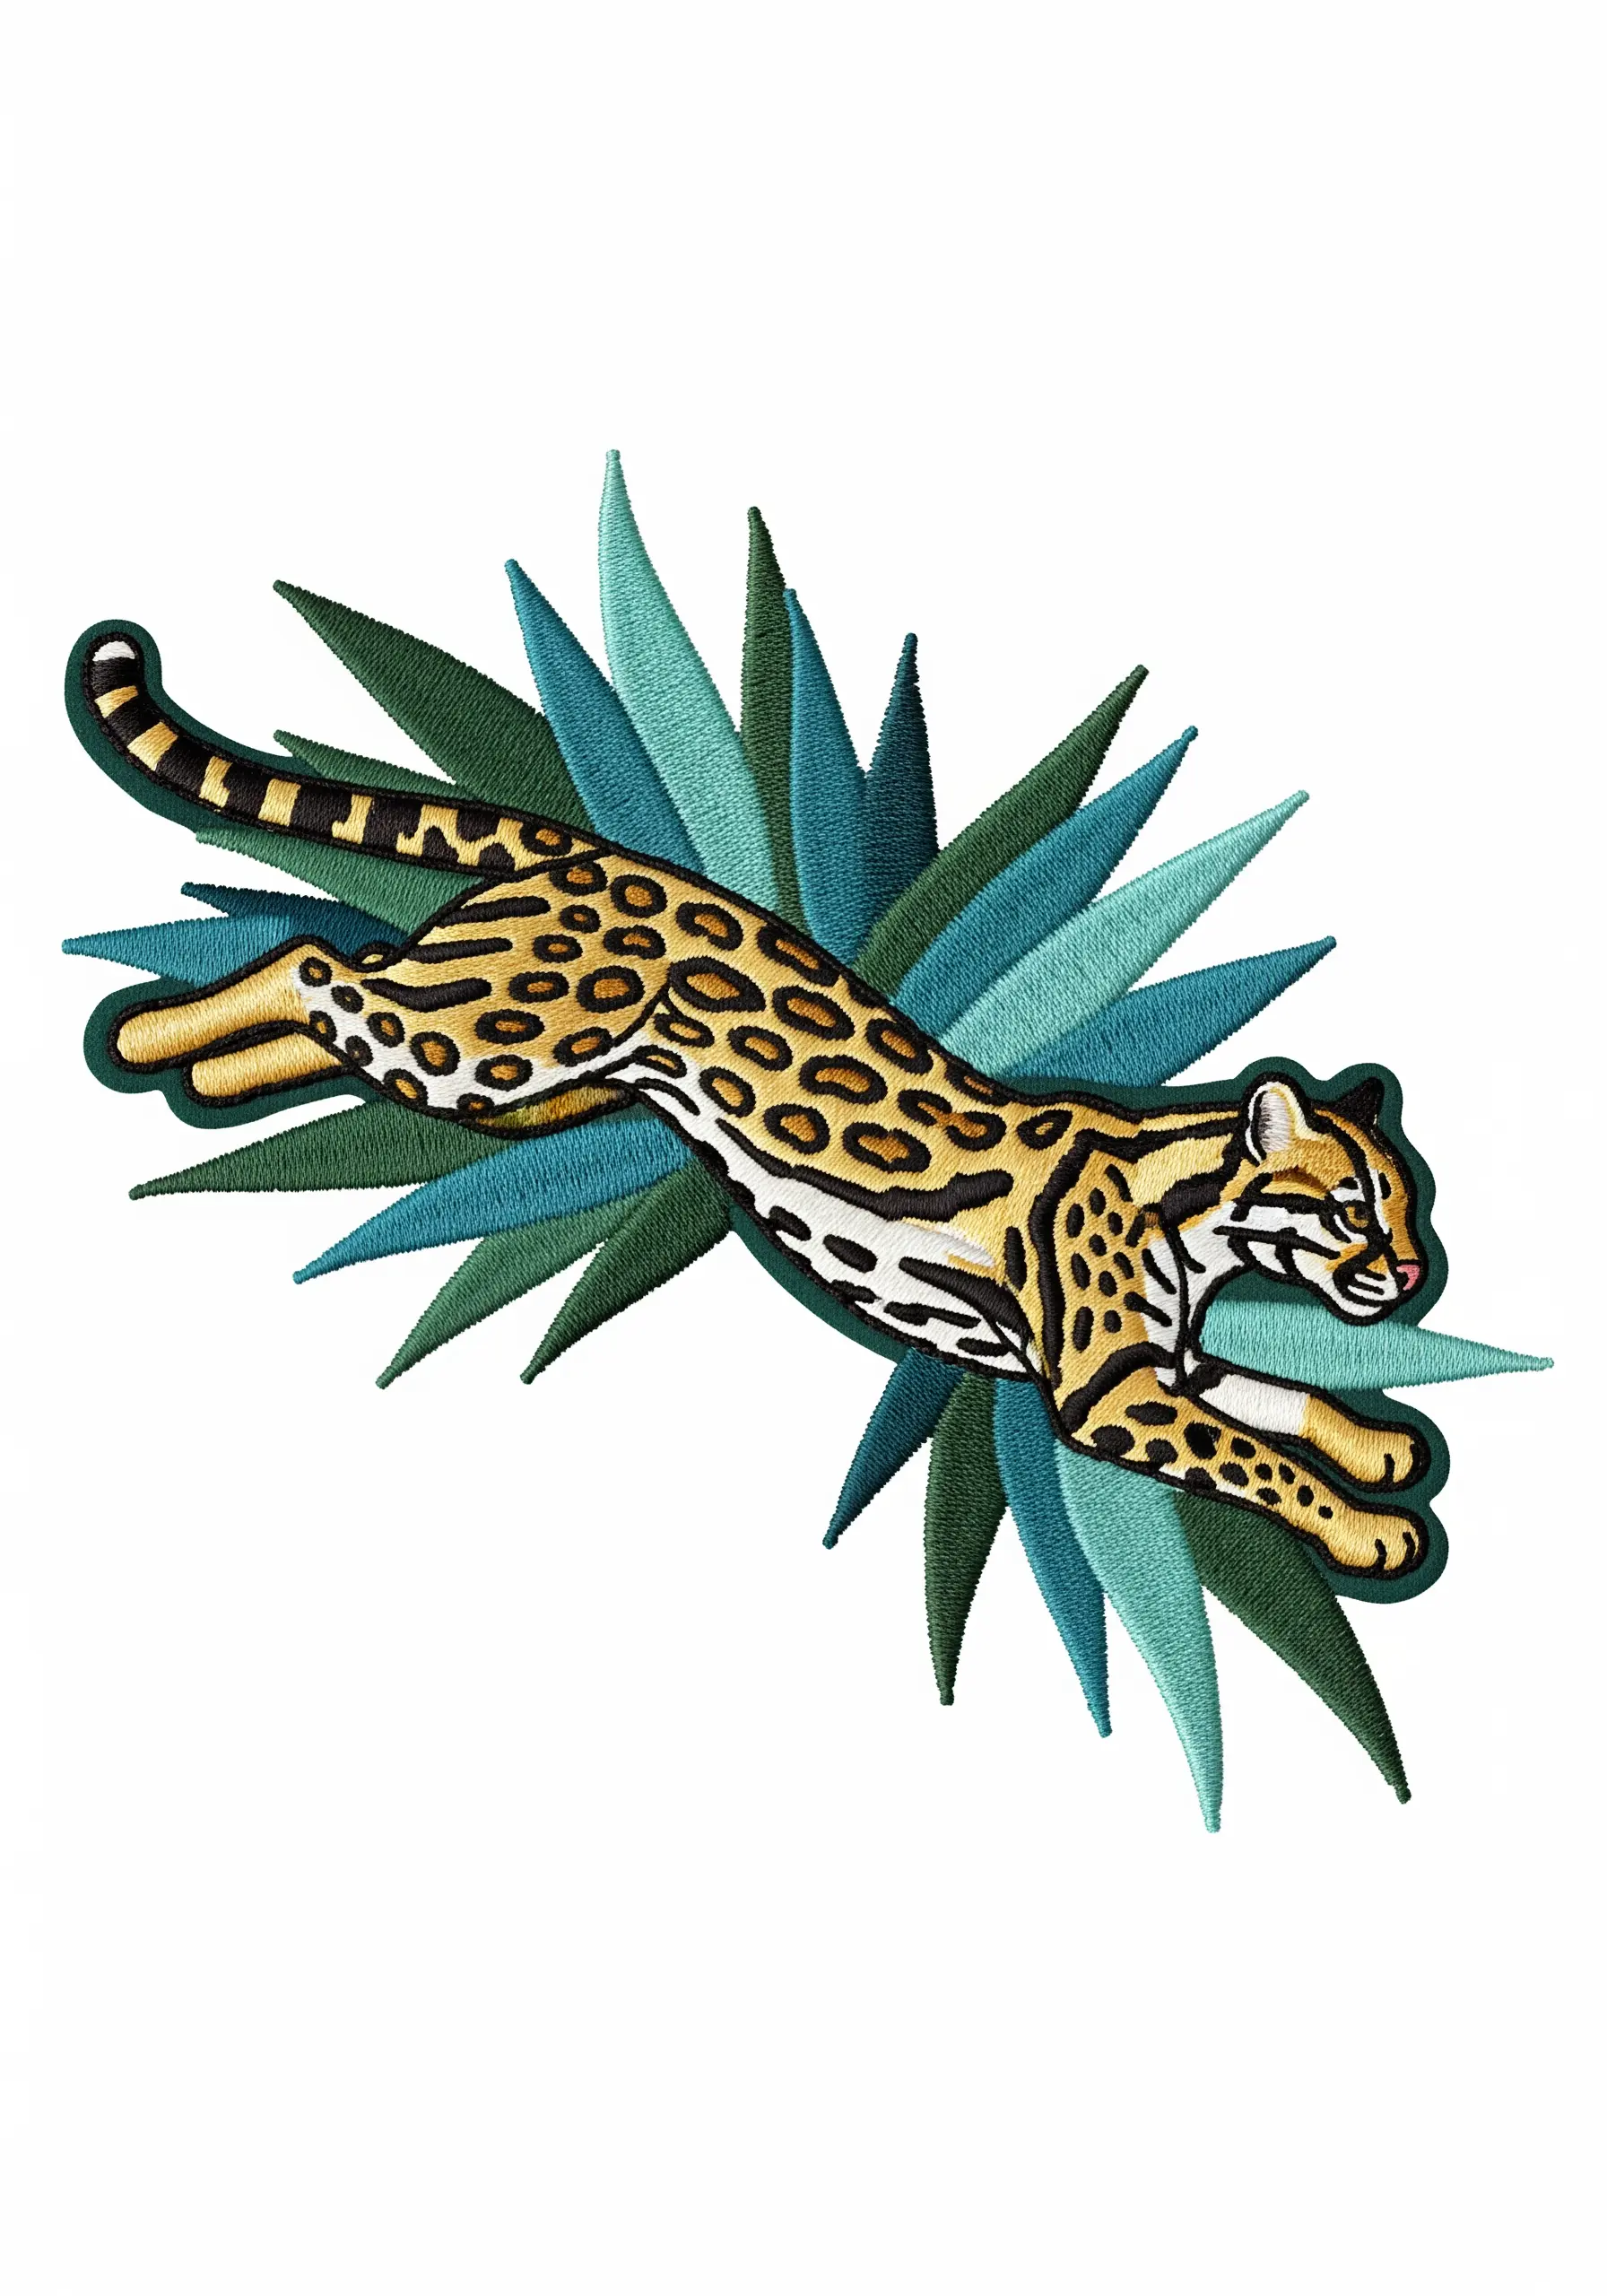
Capture the fluid movement of a leaping ocelot by carefully planning the direction of your satin stitches.
Angle the stitches to follow the curve of the animal’s spine and the muscles in its legs.
This technique, known as directional satin stitch, tricks the eye into seeing form and motion, even in a static design.
The sharp, spiky leaves in the background further enhance this feeling of dynamic energy, contrasting with the animal’s sleek form.
23. Deconstruct Complex Shapes into Simple Stitches
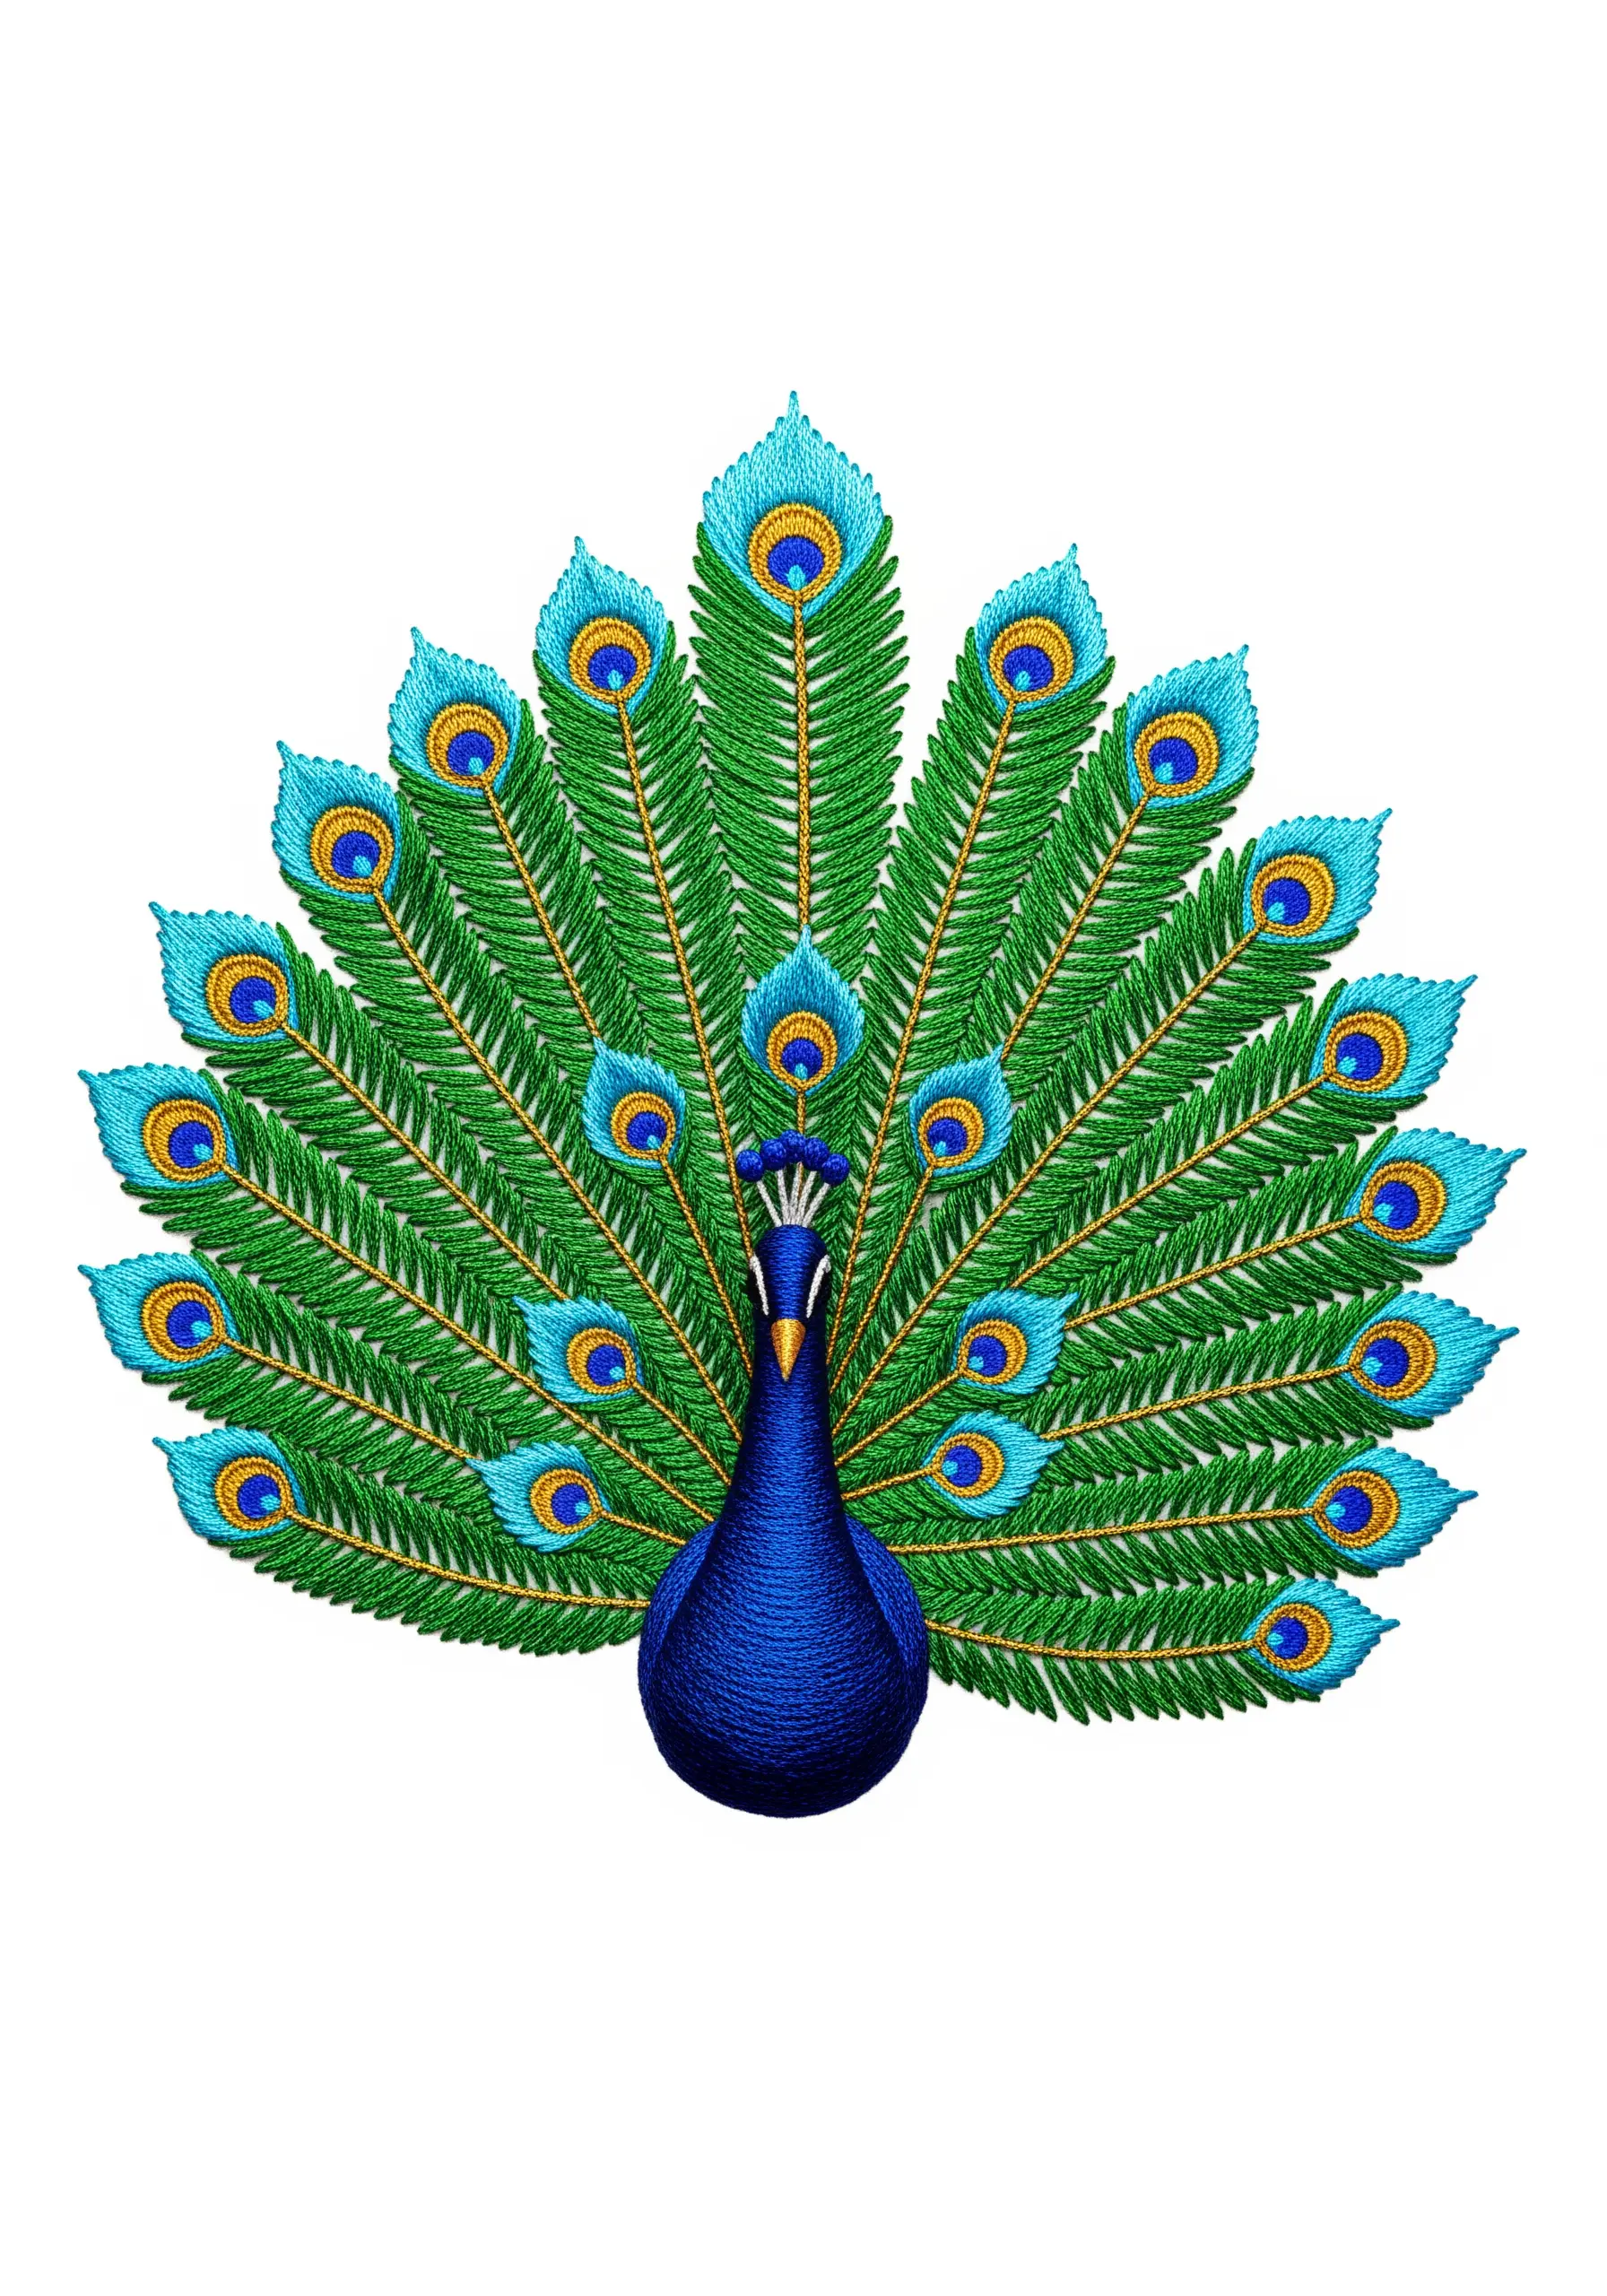
A peacock’s tail may look intimidating, but it’s built from simple, repetitive stitches.
For each feather, use a central stem stitch for the shaft and angled fishbone stitches for the green barbs.
The ‘eye’ of the feather is simply a series of layered satin stitch circles in blue, teal, and gold.
By breaking down a complex object into its basic components, you can tackle even the most detailed designs with confidence.
24. Use Sheen and Stitching for a ‘Wet Look’ Fur

To give the otter’s fur a sleek, just-out-of-the-water appearance, choose your thread and stitch carefully.
Use a thread with a slight sheen, like rayon or a silk blend, instead of matte cotton.
Fill the body with a very neat, directional satin stitch, ensuring all stitches lie flat and parallel to each other.
This smooth, slightly reflective surface mimics the look of wet fur, adding a layer of realism to your design.
25. Create Intricate Patterns with Seed Stitch Fill
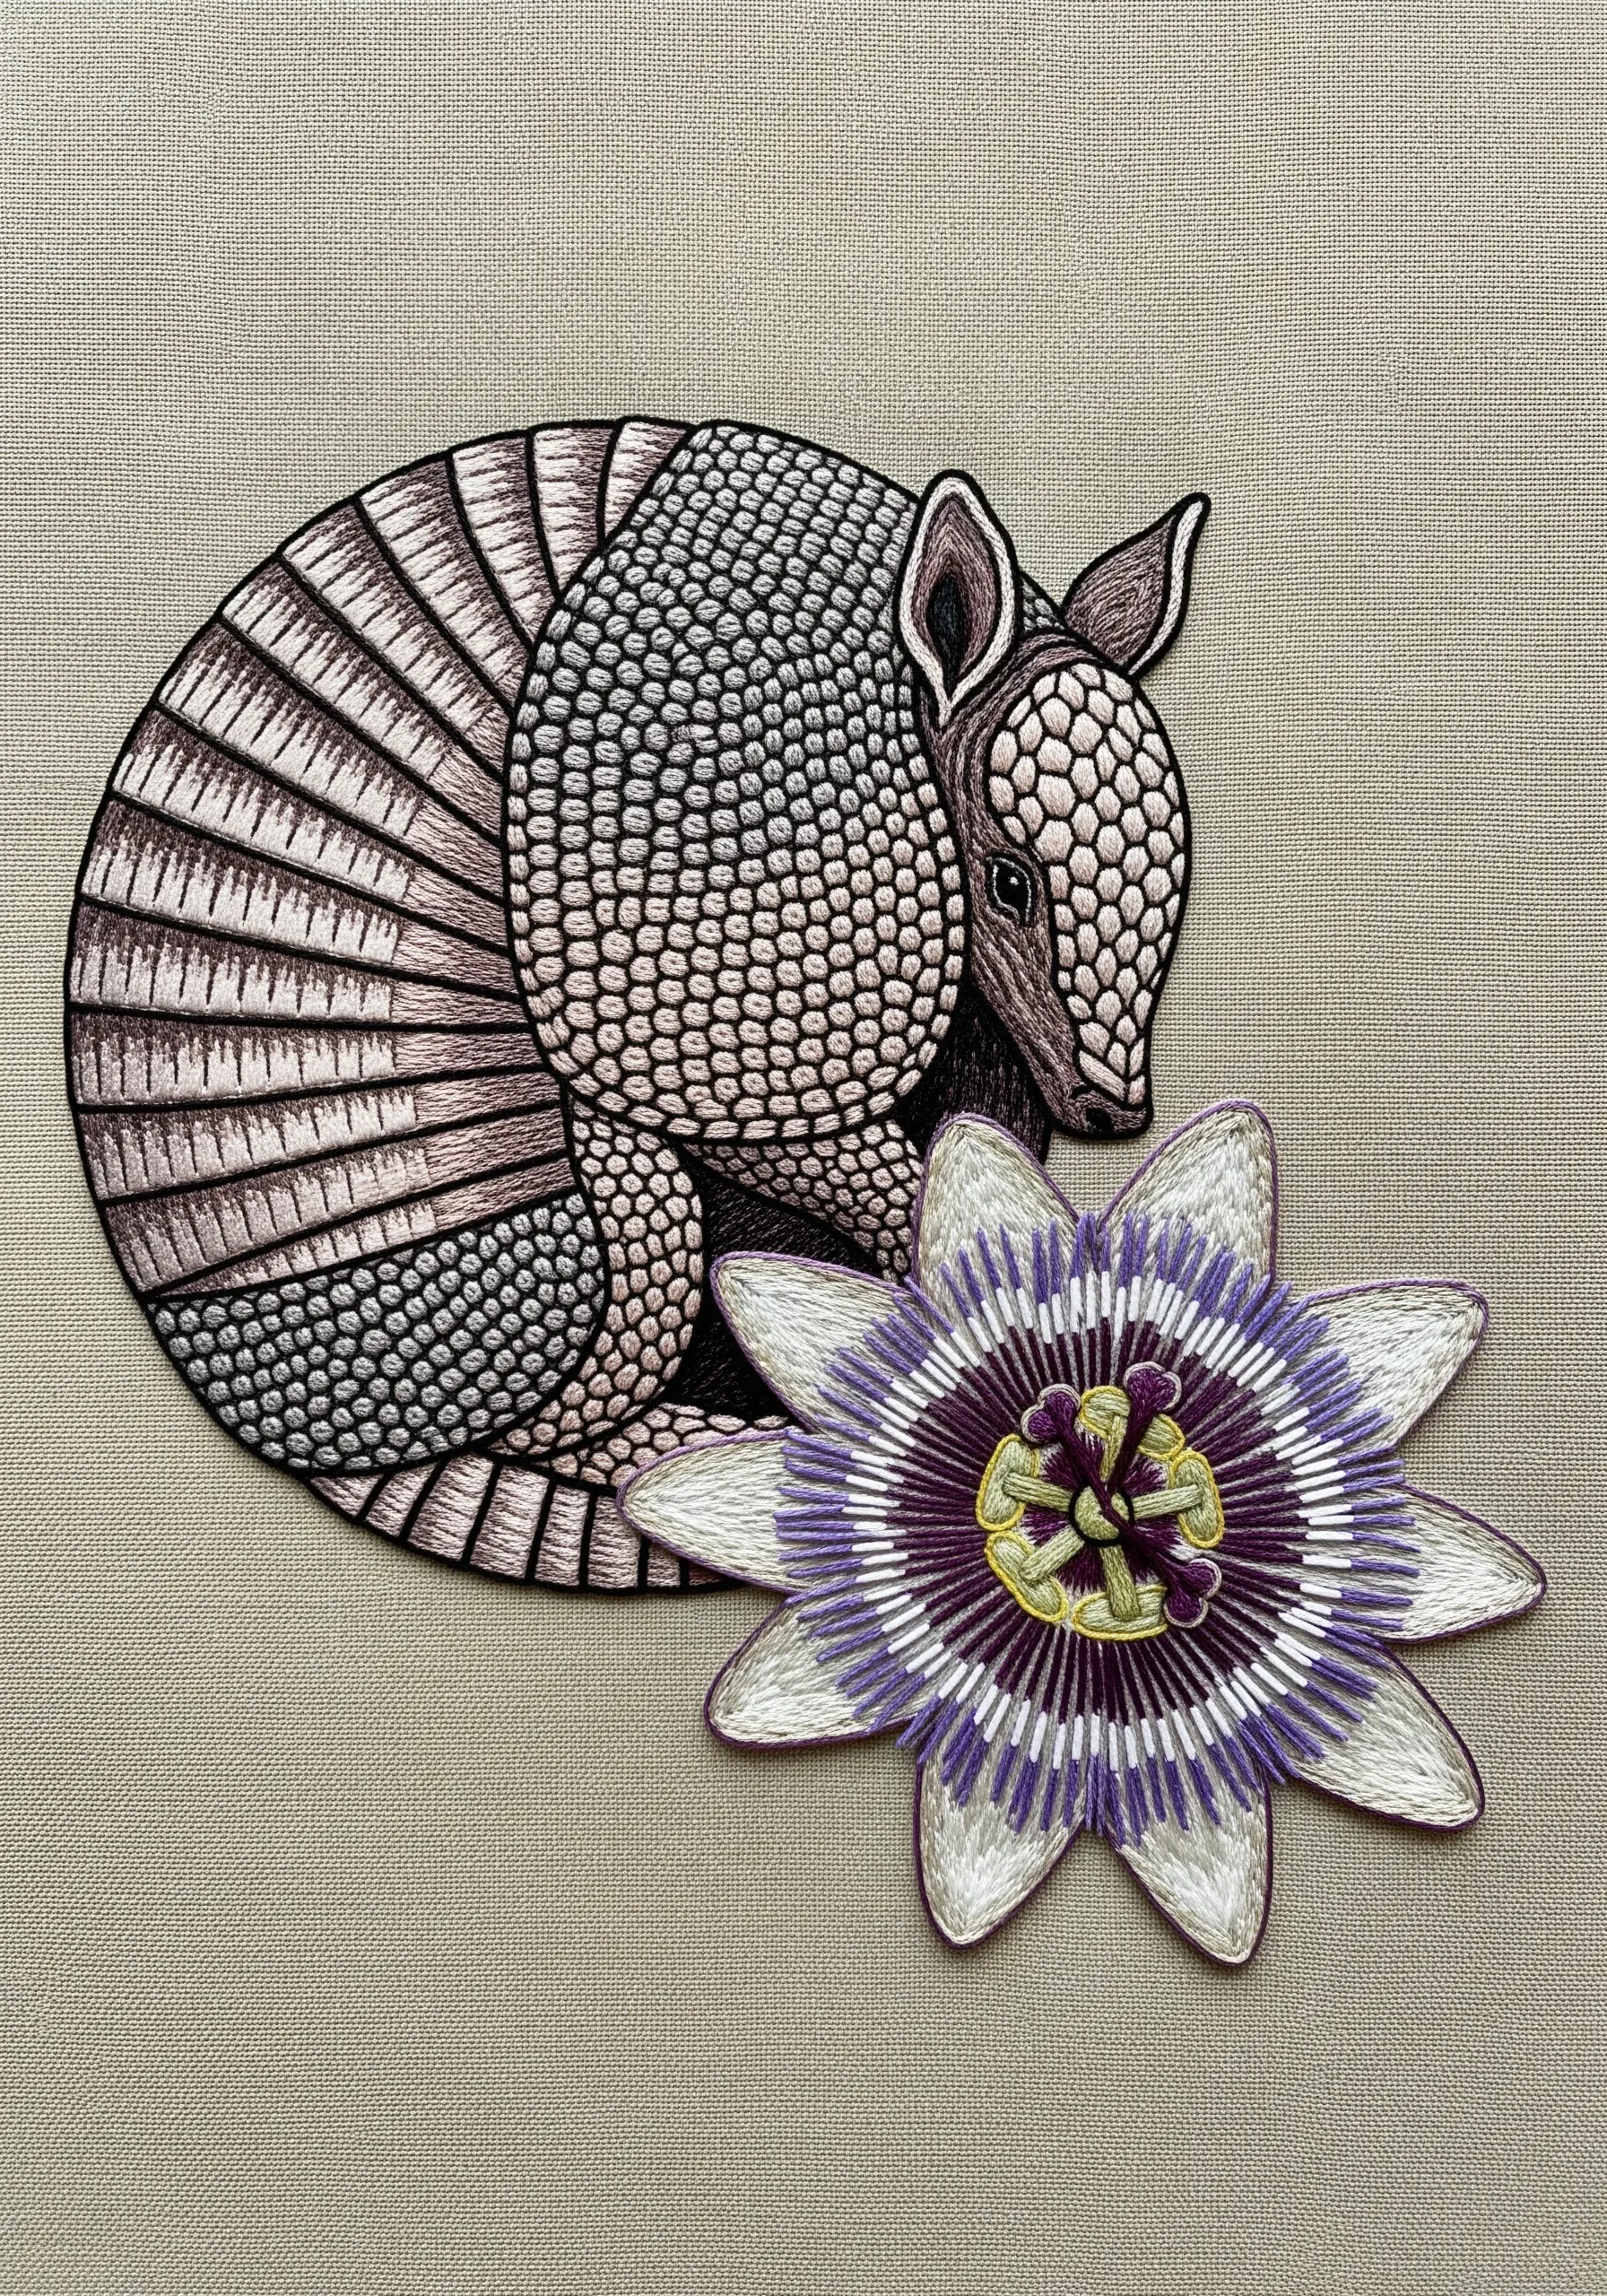
Replicate the unique, tiled texture of an armadillo’s shell using a dense fill of tiny seed stitches.
Work in small, straight stitches, varying their direction randomly within each plate of the shell.
Use a few different shades of gray and pink to create subtle shading and highlight the animal’s curved form.
This meticulous fill technique is a beautiful way to create depth and texture that looks incredibly complex but is based on a very simple stitch.
26. Build Hyperrealistic Fur with Color Layering
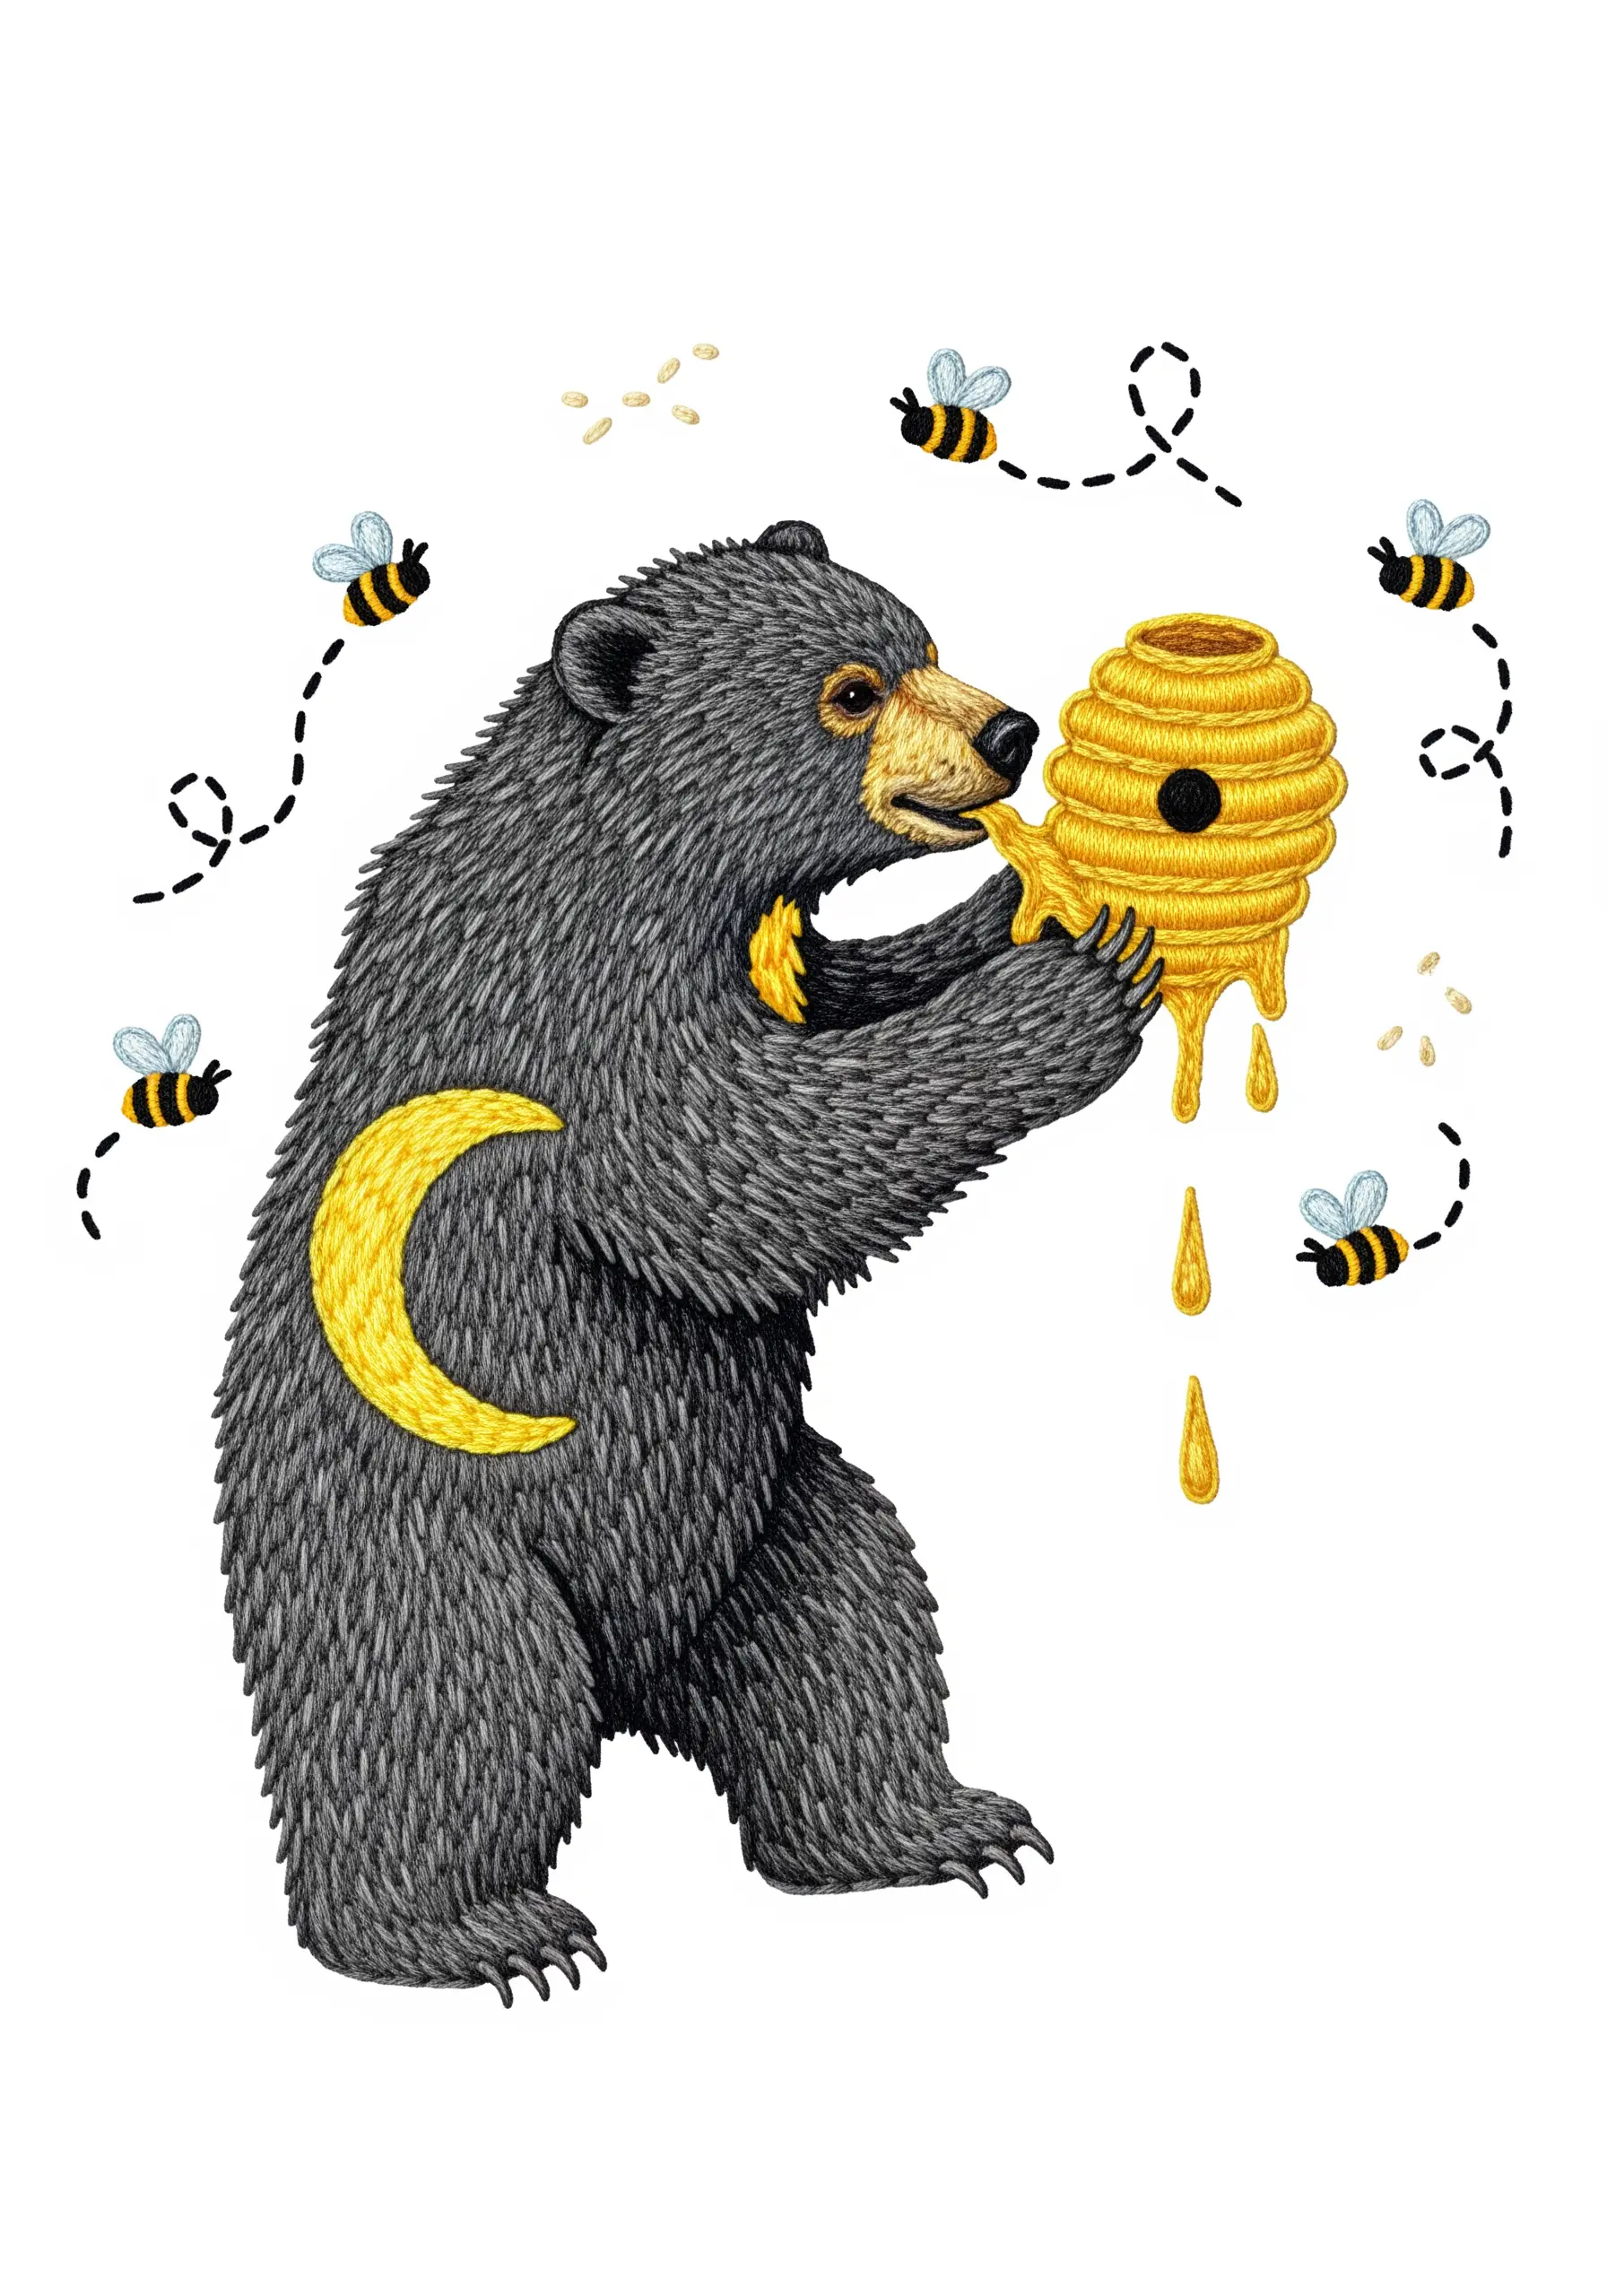
To achieve the deep, soft fur of this bear, you need to think like a painter, layering colors to create dimension.
Using a single strand of floss, fill the entire body with long-and-short stitches.
Start with your darkest shade of gray for the shadows, then gradually introduce lighter grays and even some brown tones for highlights.
This painstaking process of blending and layering is the key to creating fur that looks so real you want to touch it.
27. Explore Abstract Compositions with Familiar Subjects
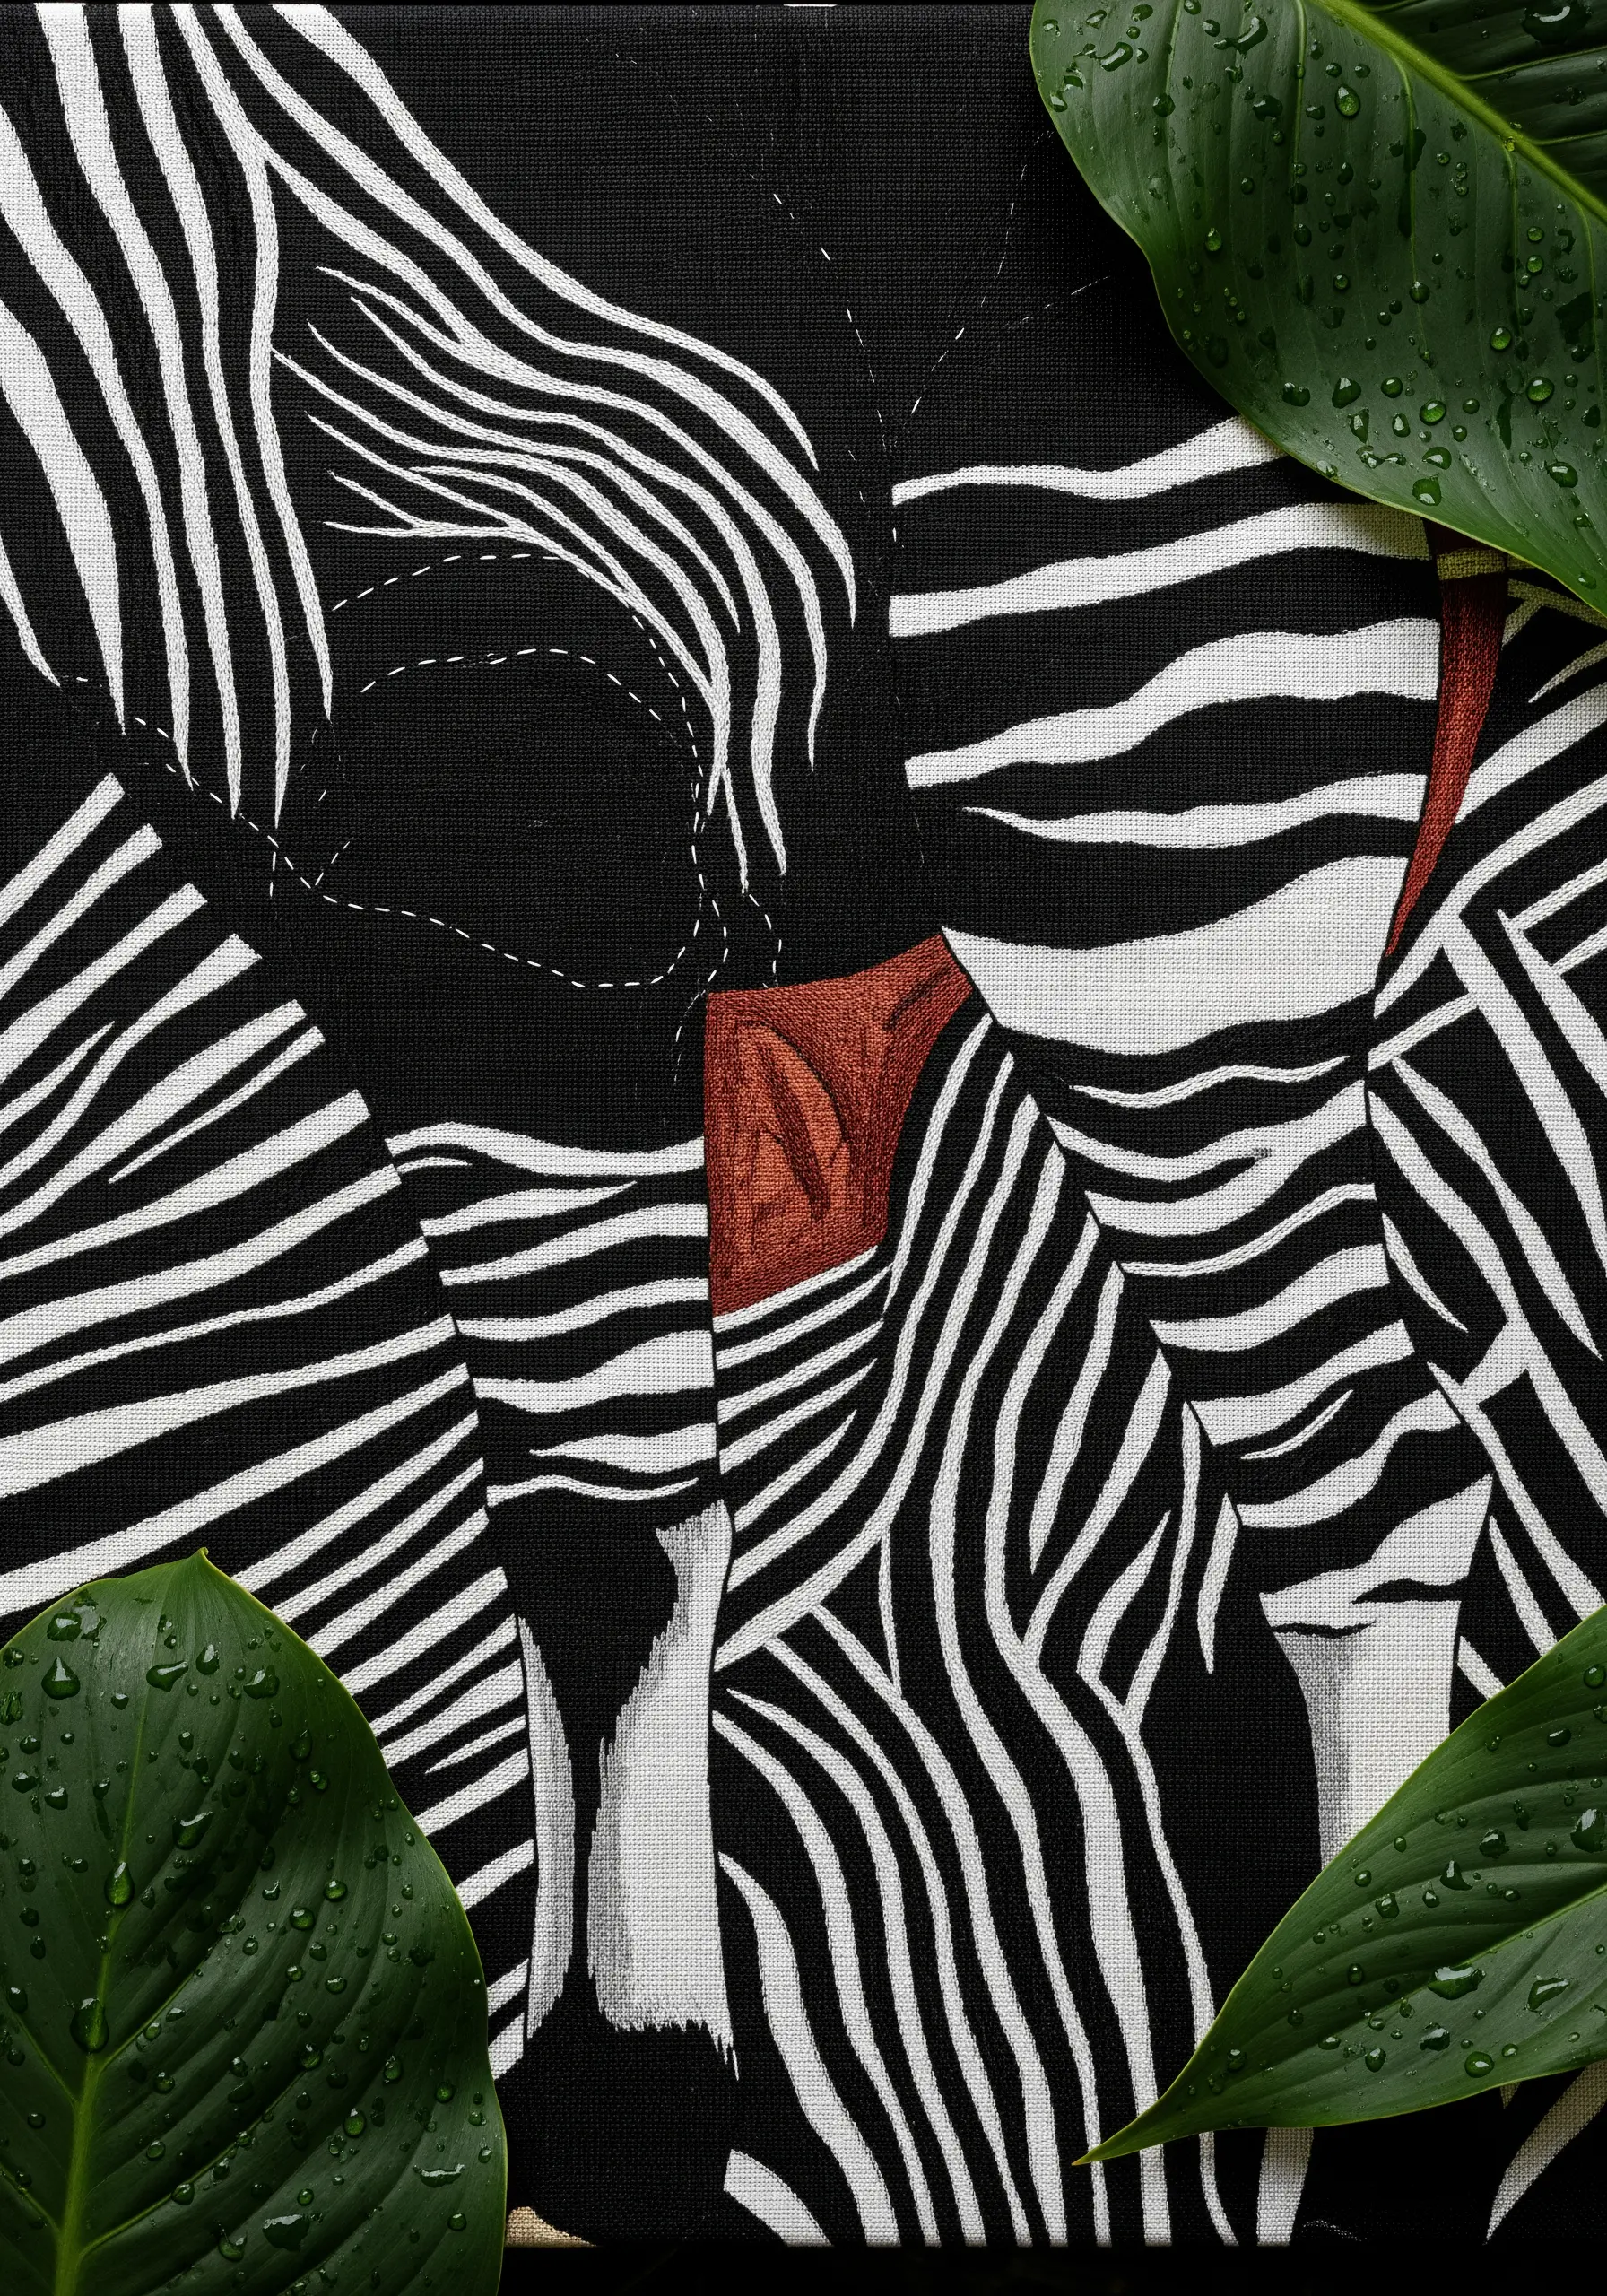
Fragmenting a recognizable pattern, like zebra stripes, creates a compelling abstract design.
Focus on the interplay between the black and white shapes—the negative space is just as important as the stitched areas.
Use a smooth satin stitch to achieve the solid, graphic stripes.
Introducing a single block of a contrasting color, like the terracotta red here, disrupts the pattern and serves as a powerful focal point for the entire piece.
28. Blend Colors to Create a Soft, Painted Effect
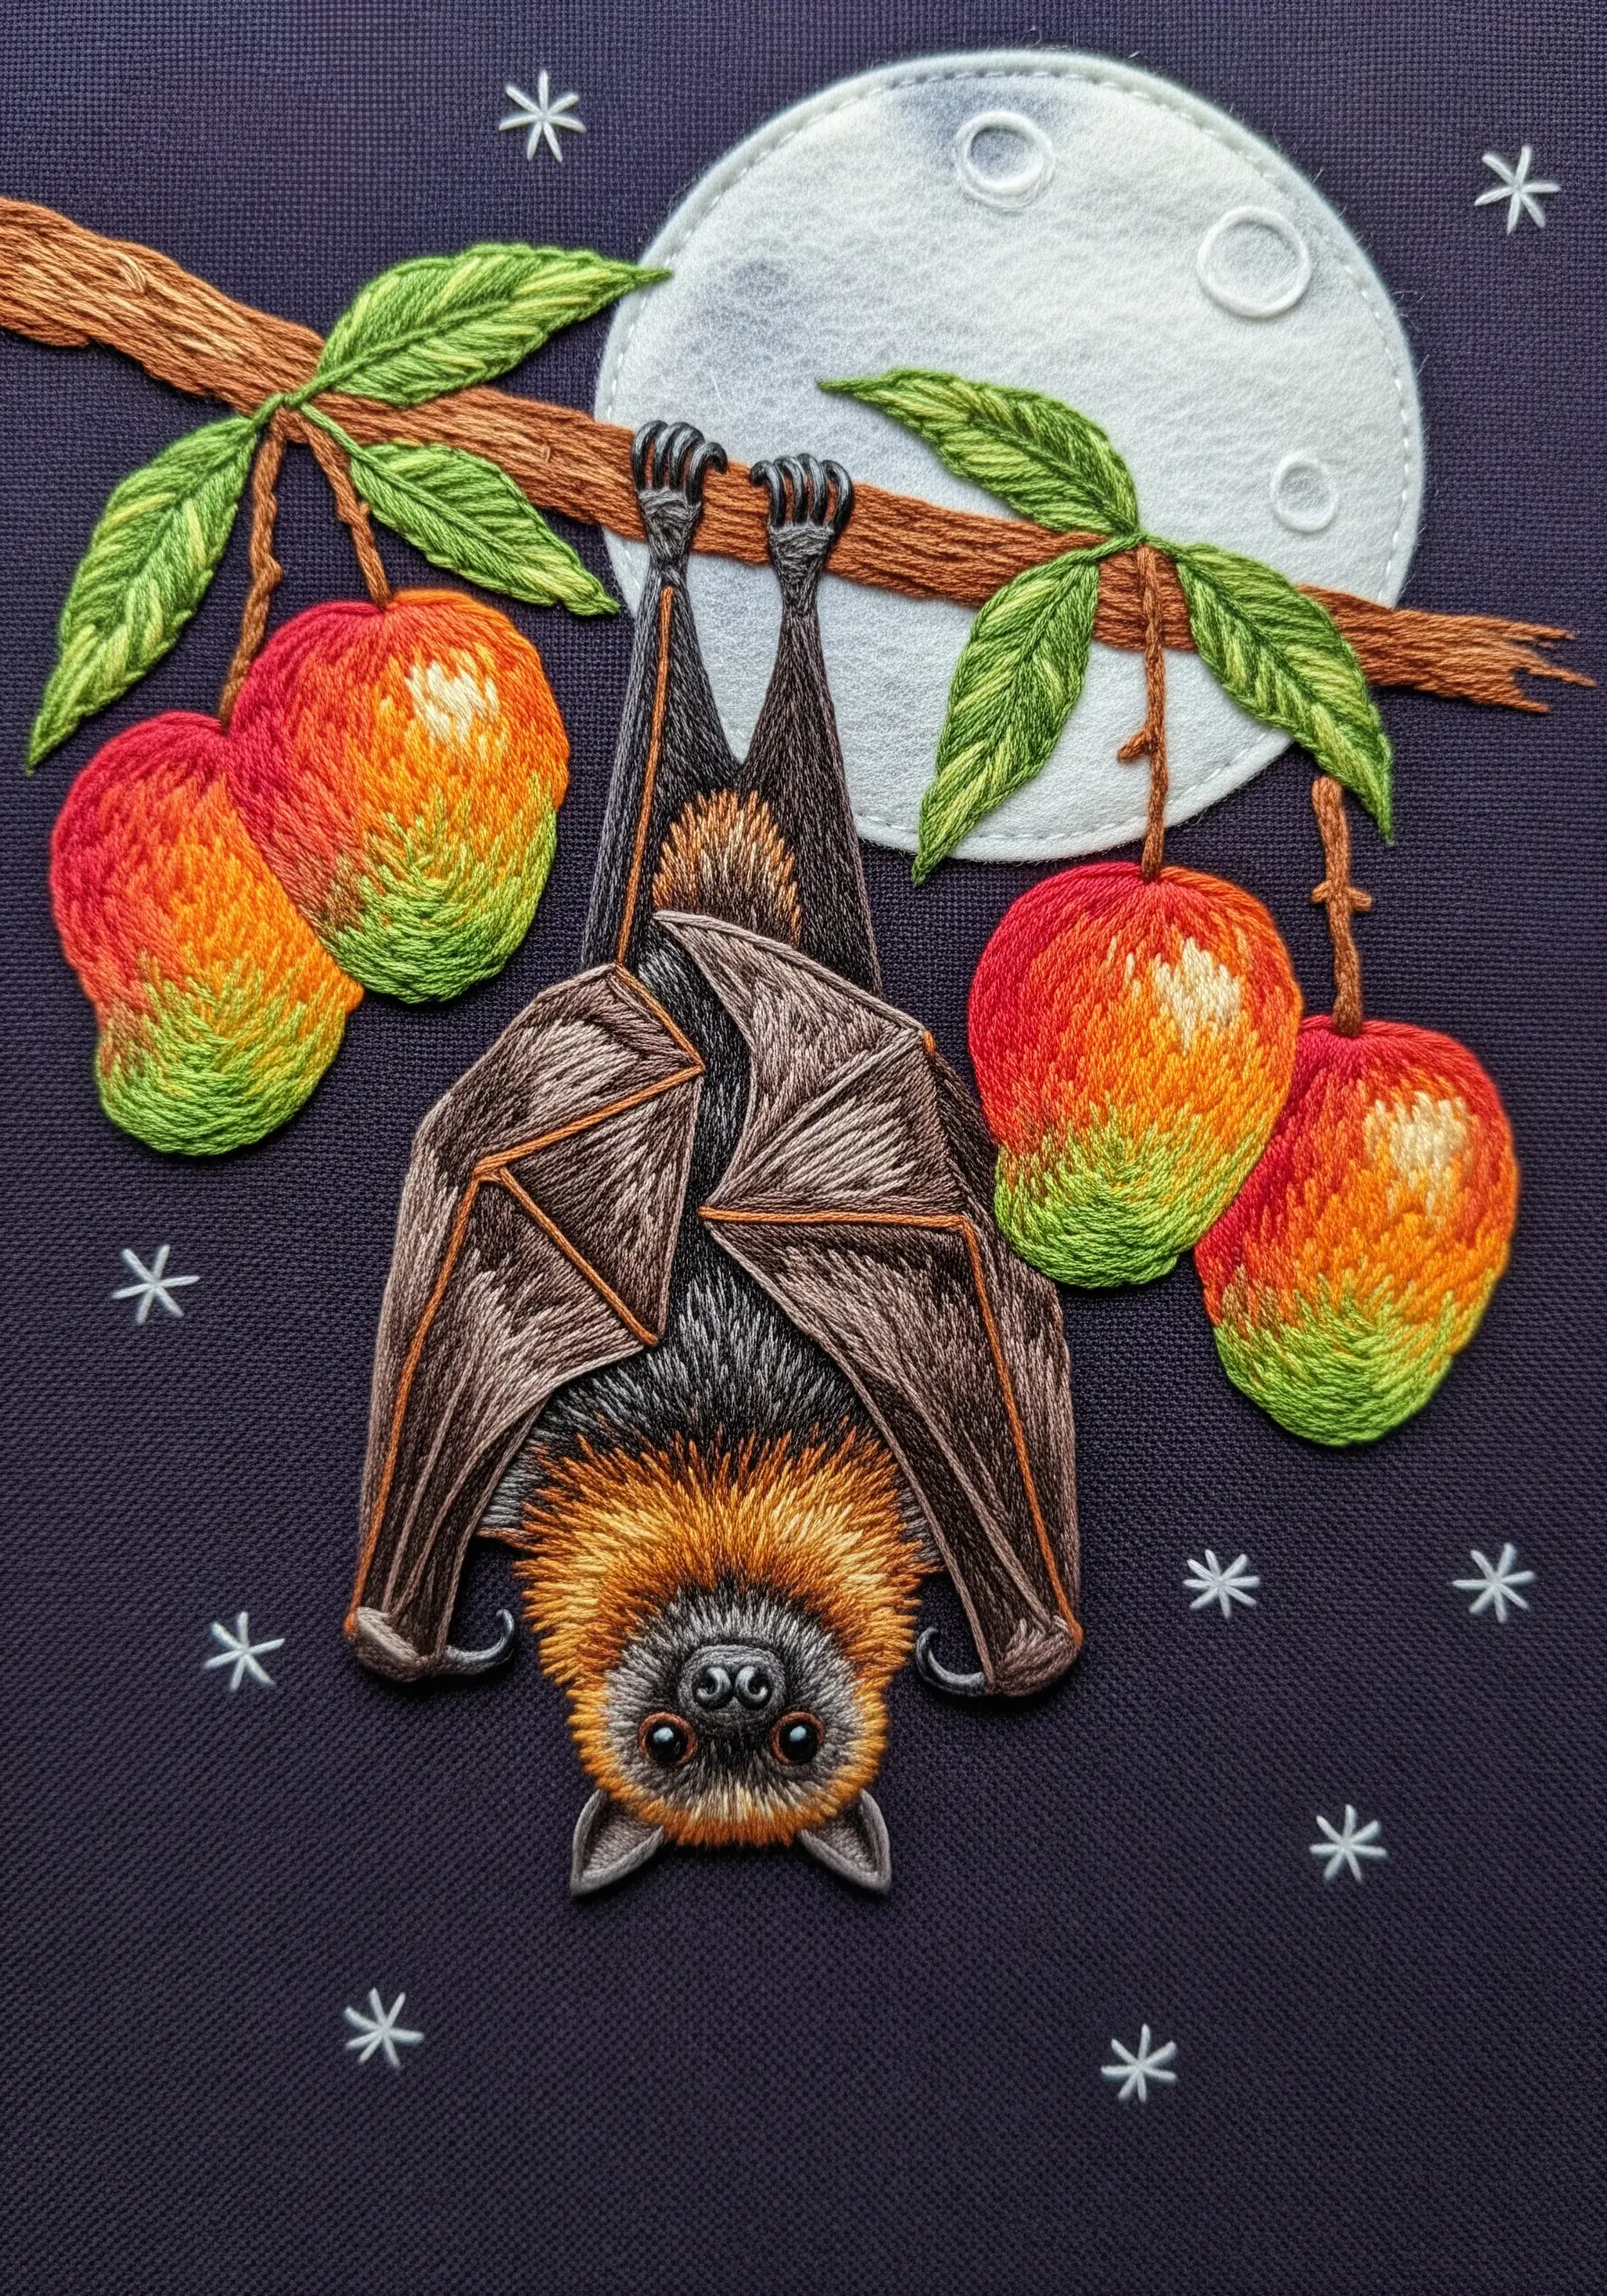
Mimic the look of a soft watercolor painting by blending your thread colors within a single element.
For the hanging fruit, use thread painting to transition smoothly from green to yellow and finally to red.
Keep your stitches short and angled to follow the fruit’s round shape.
This technique gives the fruit a ripe, luminous quality that contrasts beautifully with the dark fur of the bat and the deep navy of the night sky.
29. Convey Sound and Emotion Through Stitch
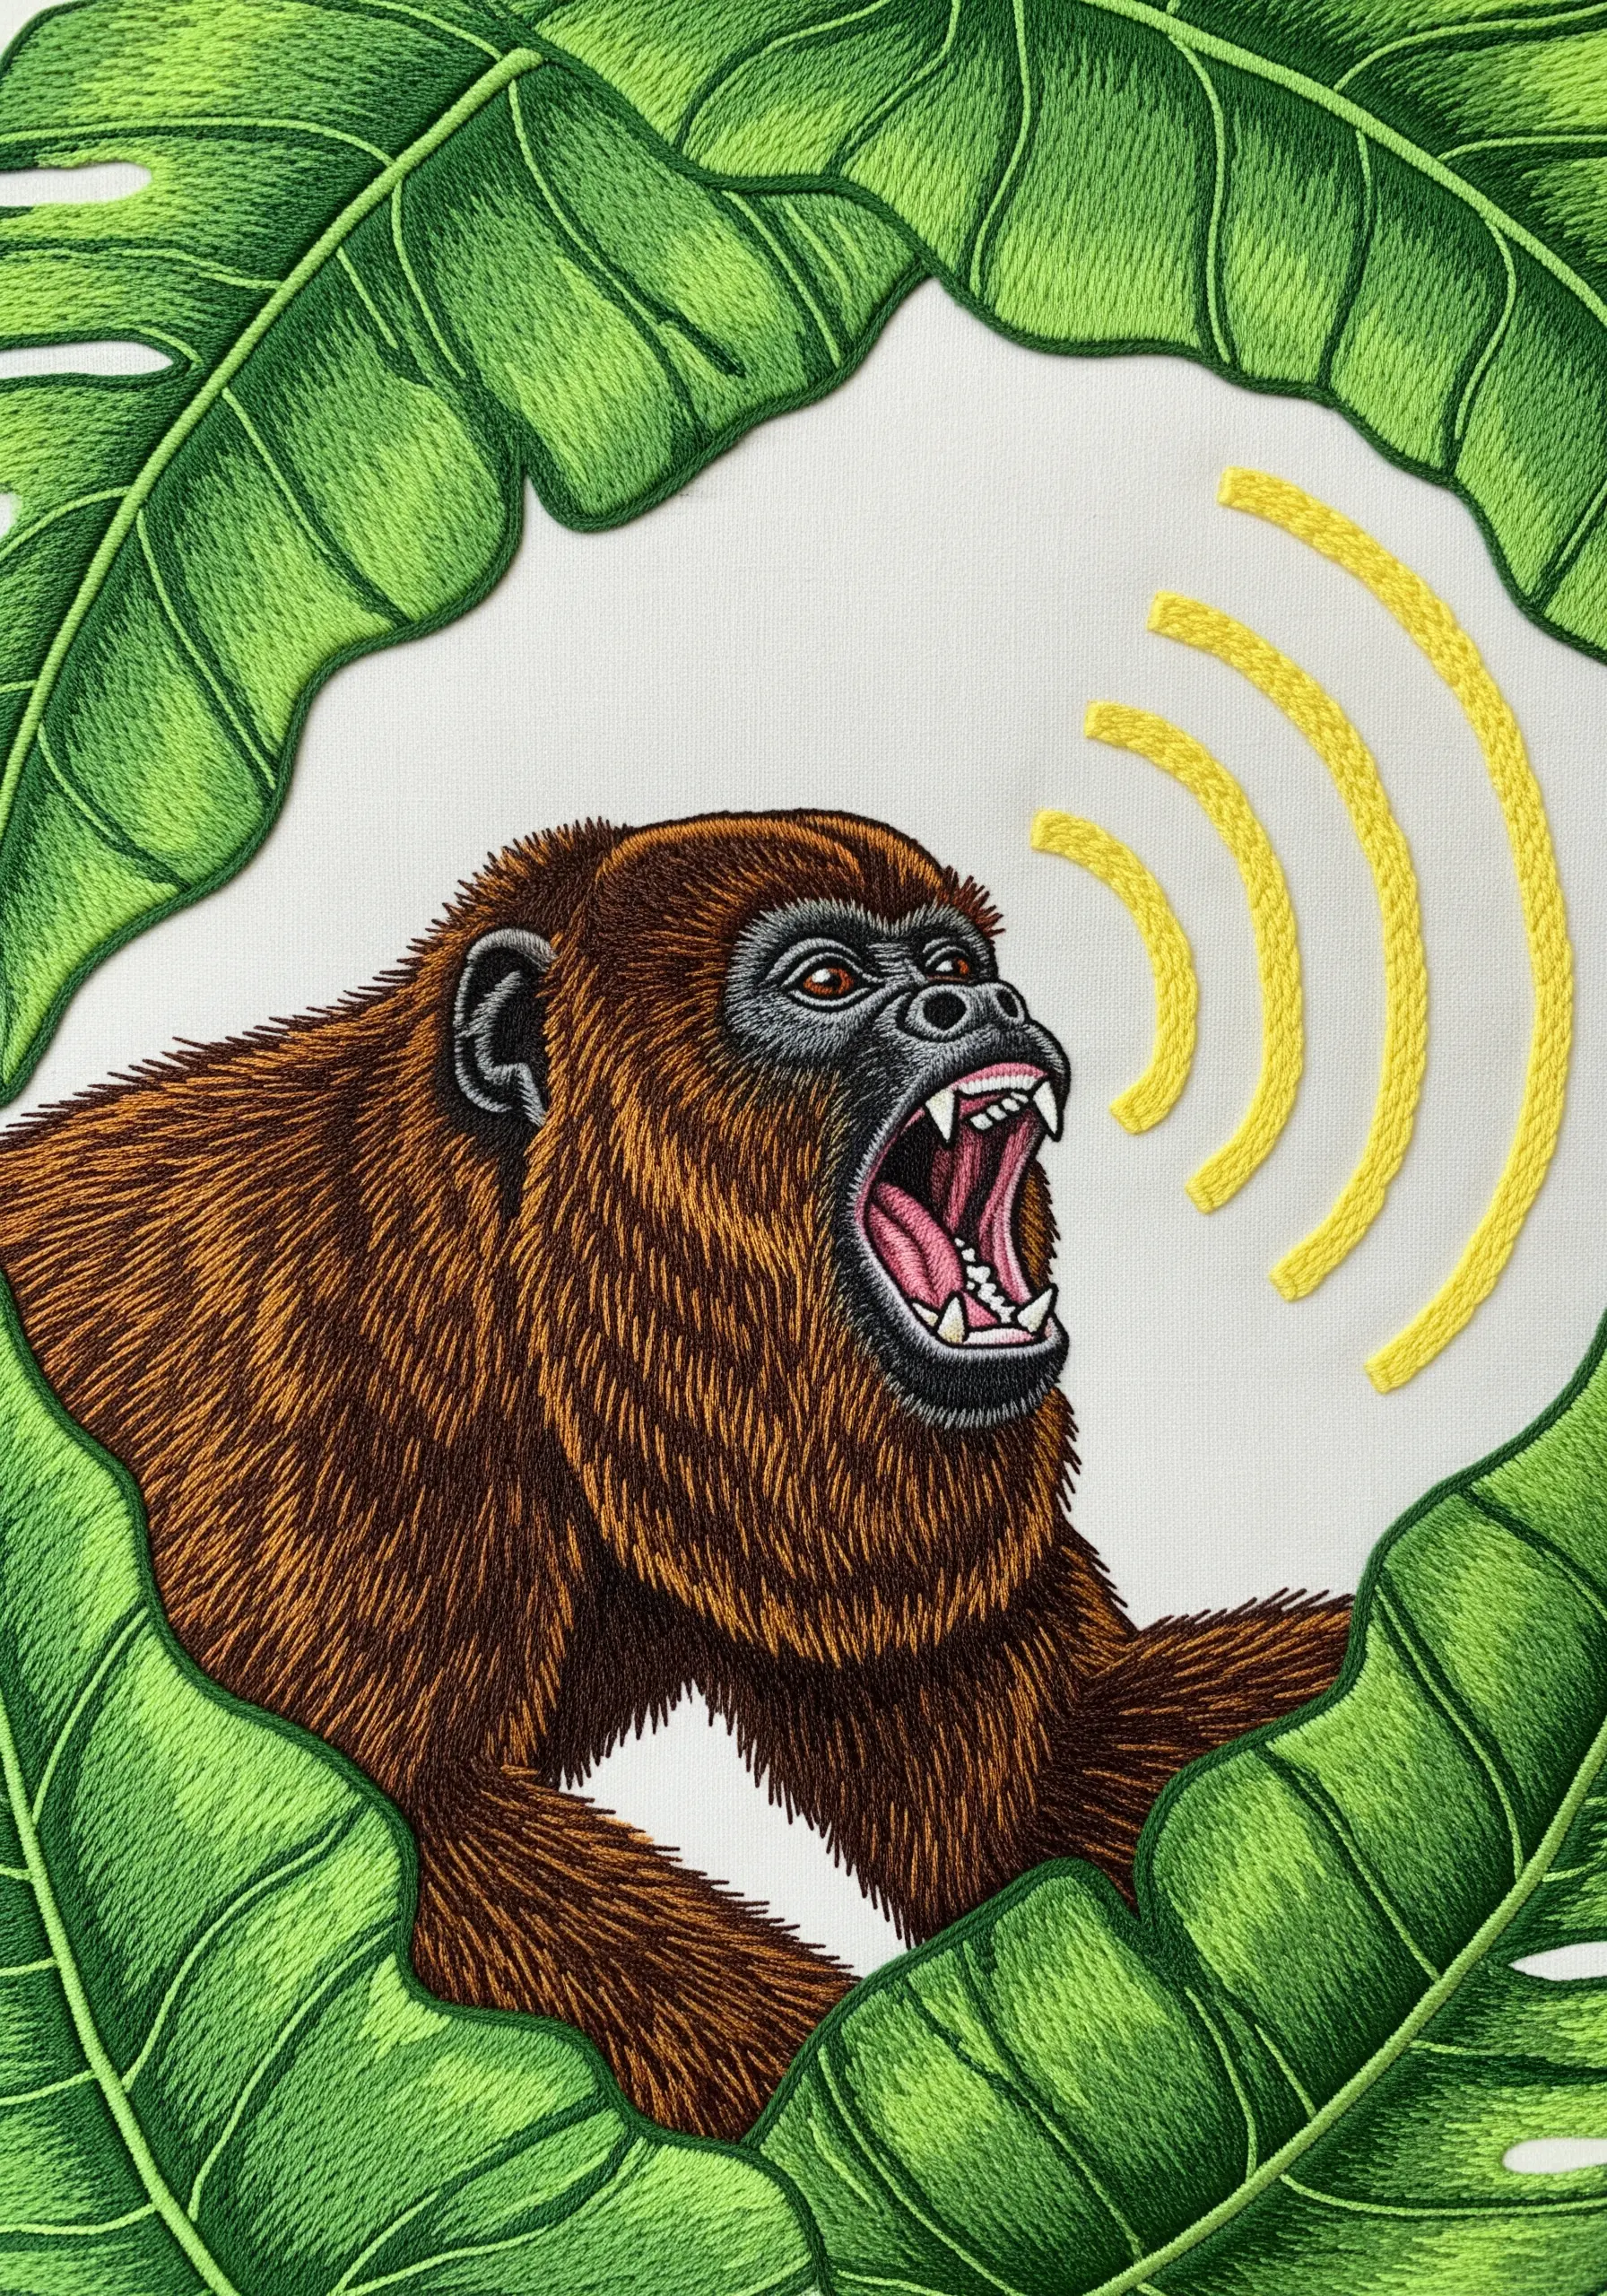
Use stitch choices to add conceptual layers like sound to your work.
The howler monkey’s fur is a dense, textural long-and-short stitch, grounding it in reality.
In contrast, the sound waves are stitched in a simple, graphic chain stitch using a bright, vibrating yellow.
This stylistic difference between the realistic animal and the symbolic sound makes the entire composition more dynamic and tells a richer story.
30. Arrange a Harmonious Multi-Element Composition

When creating a wreath with multiple animals and plants, balance is key to a cohesive design.
Position your largest elements (like the tiger) near the center or bottom to provide an anchor.
Tuck smaller elements, like the monkey and toucan, slightly behind leaves to integrate them into the scene.
Use a consistent style—such as clean outlines and simple satin stitch fills—across all elements to ensure the final piece feels unified rather than cluttered.


