
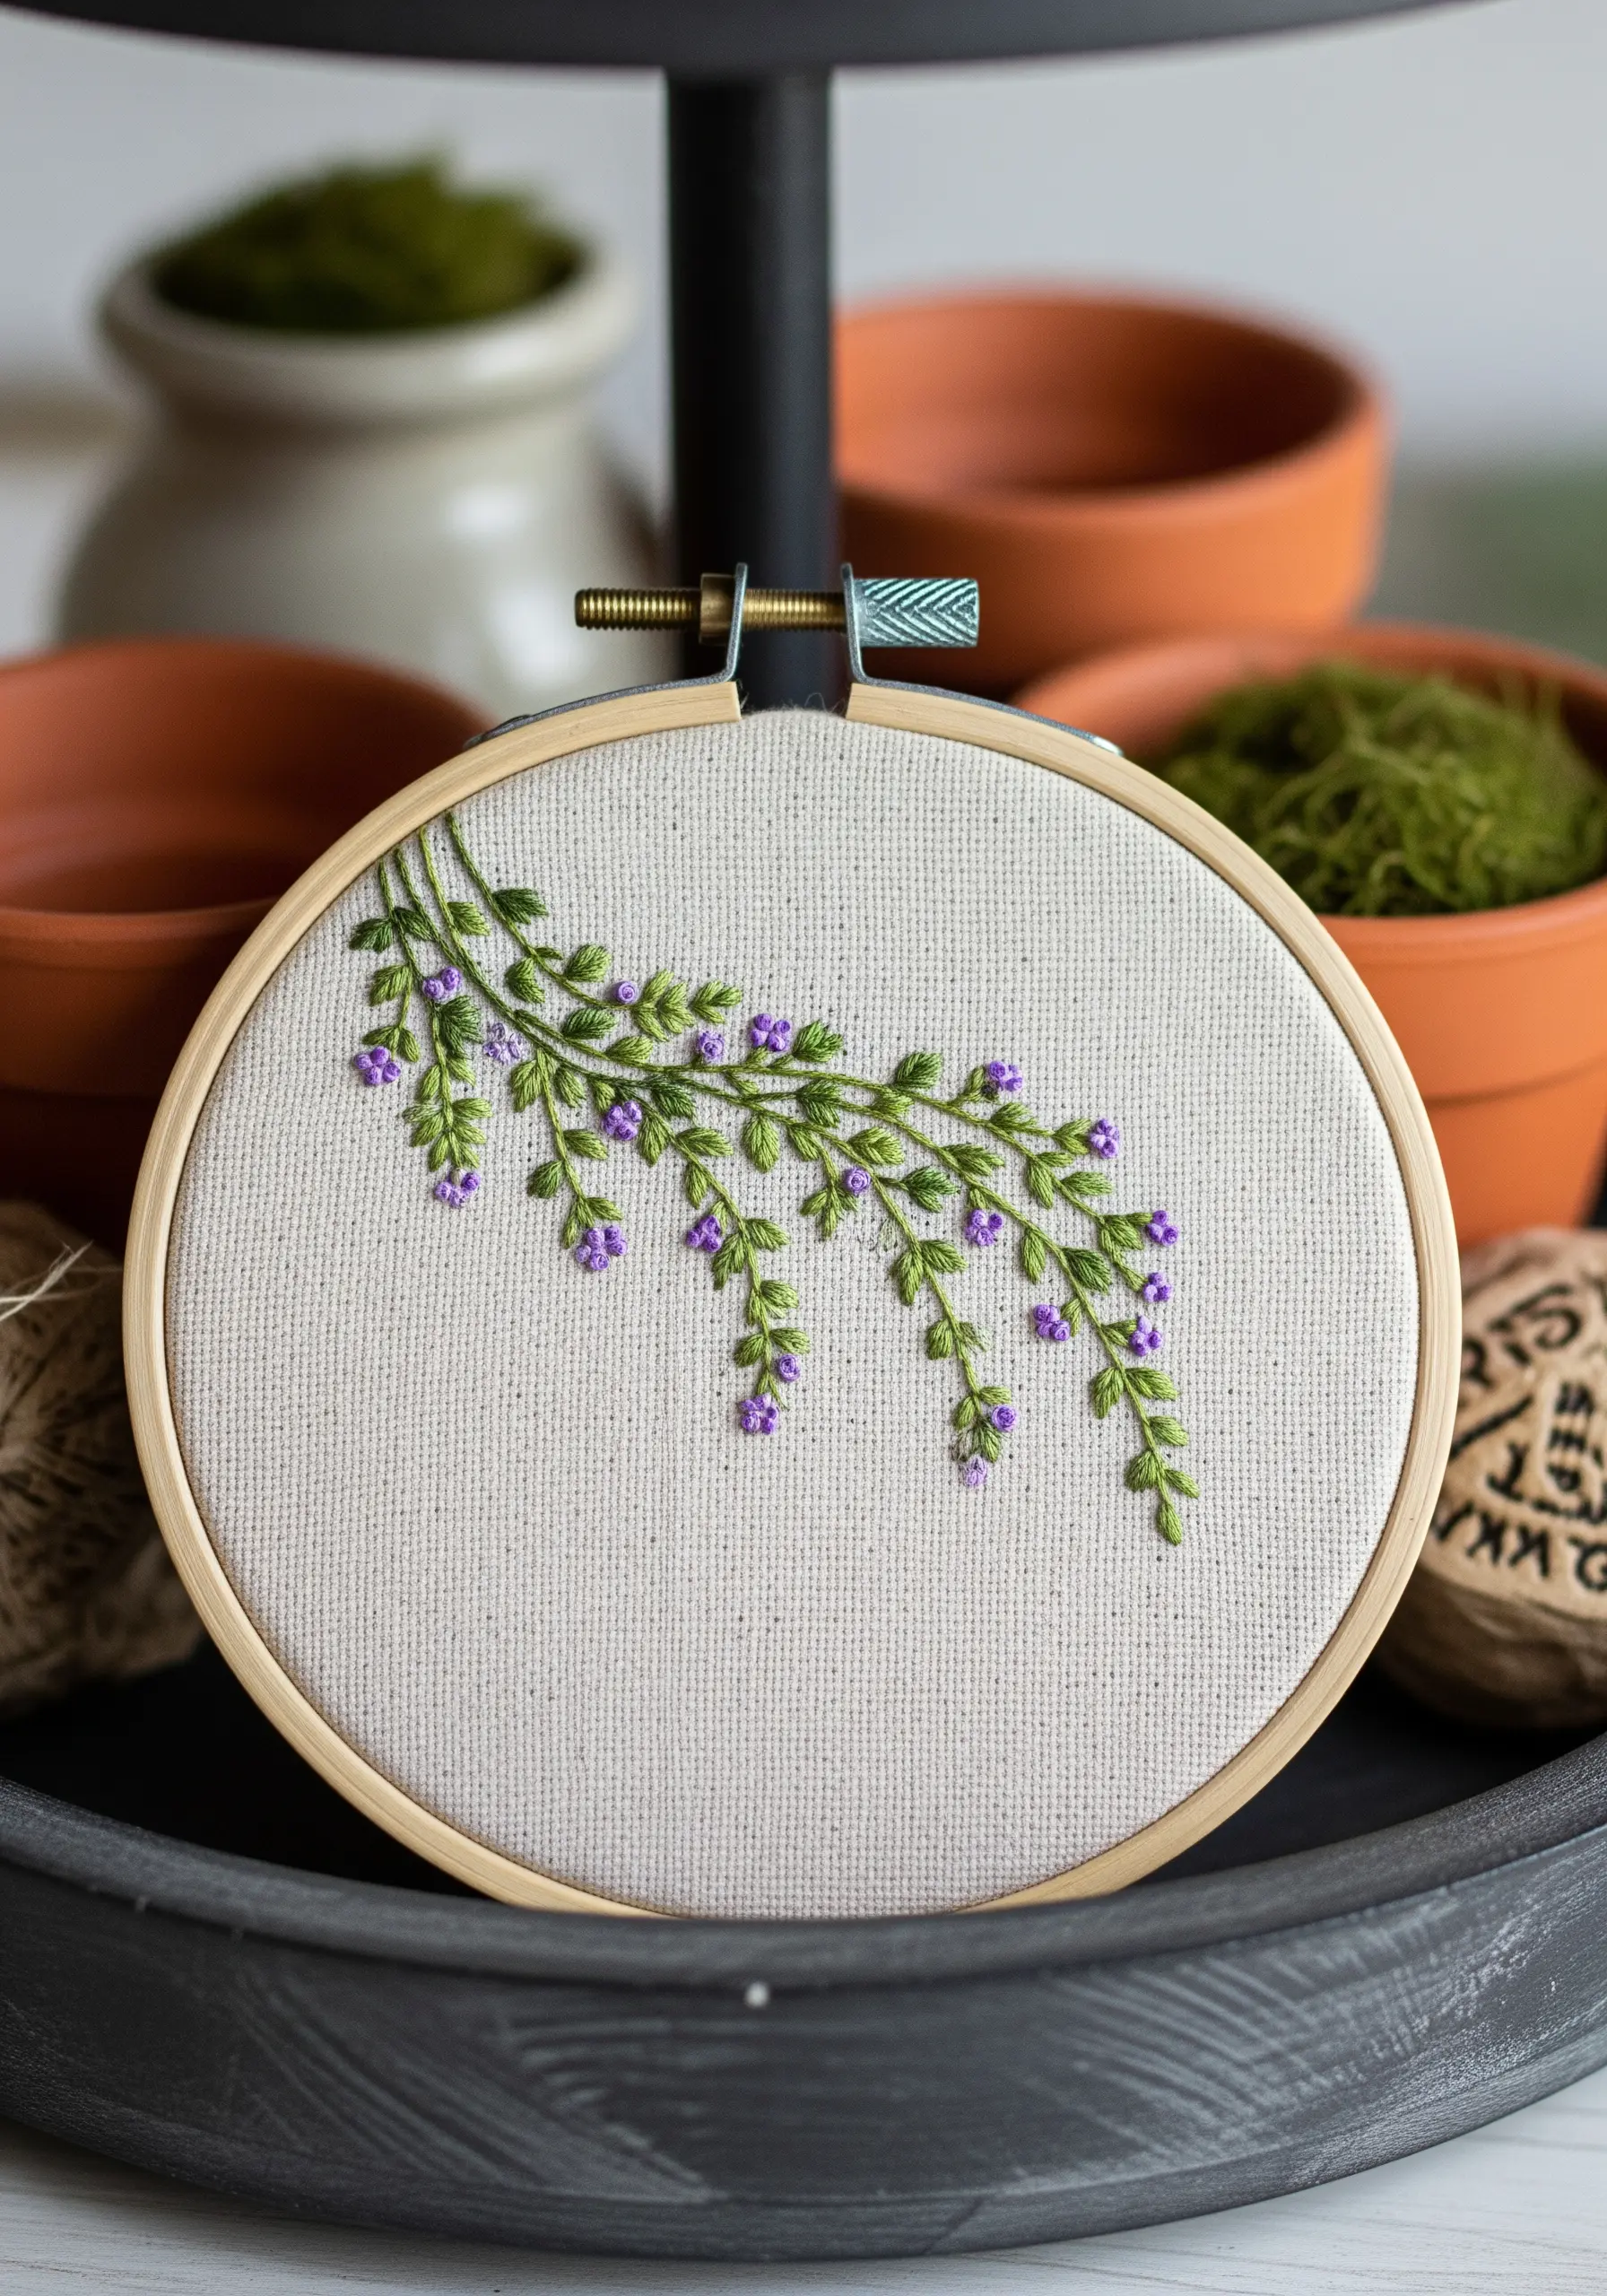
Embroidery is more than just a craft; it’s a quiet practice of turning simple threads into something meaningful. When you stitch a sprig of lavender or a leaf of mint, you’re doing more than just making a picture—you’re capturing a feeling of calm, a scent, a memory.
But perhaps you feel your work could have more polish, more life. The secret isn’t in complex patterns or expensive supplies. It lies in small, intentional choices: the direction of a single stitch, the blending of two similar colors, the contrast of a smooth texture against a knotted one.
Here, you’ll find techniques to give your herbs dimension, to make your leaves look sunlit, and to turn a simple stem into a small work of art. Let these ideas guide your needle, helping you create pieces that feel as healing and beautiful as the plants they represent.
1. Create Depth in Lavender with Layered Knots
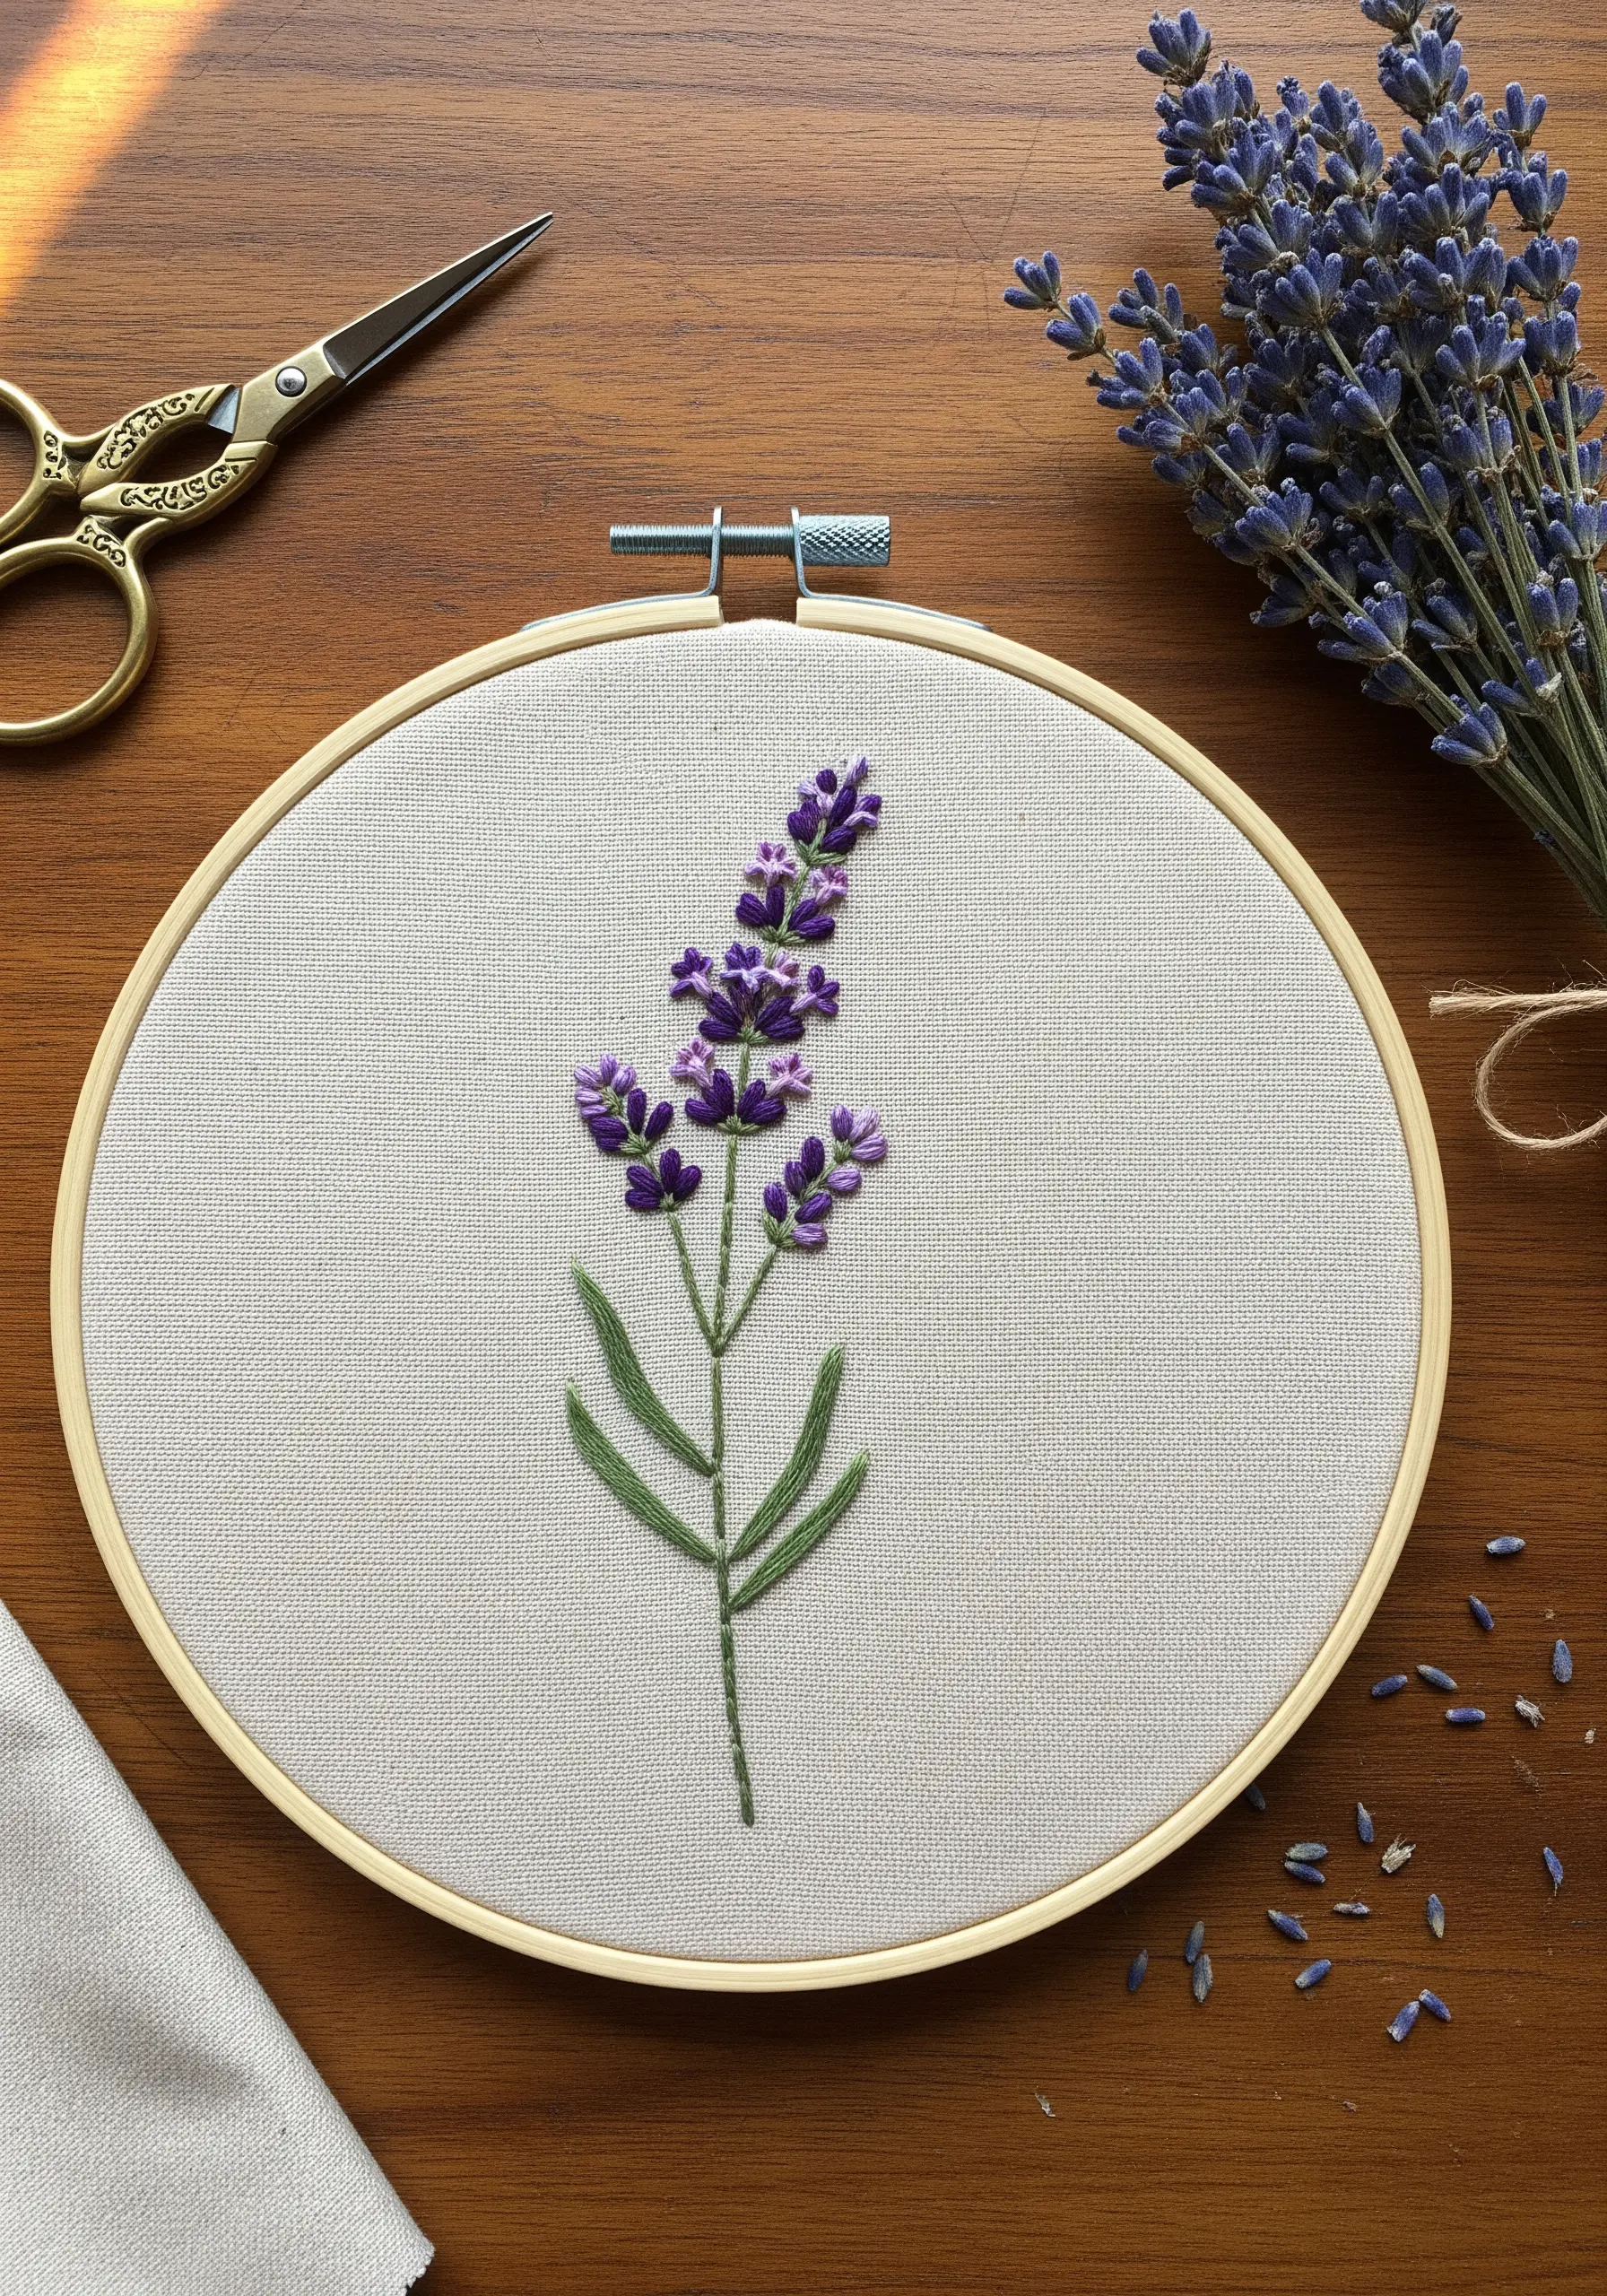
Give your lavender sprigs a realistic, plush texture by replacing simple stitches with dimensional knots.
Use French knots or the slightly more elongated bullion knots for the individual florets, varying the number of wraps to create buds of different sizes.
Cluster these knots tightly at the top and space them out toward the stem to mimic natural growth.
For color, blend three shades of purple—a deep violet for the base, a mid-tone for the body, and a pale lilac for highlights—to give the blossoms depth and prevent them from looking flat.
These delicate lavender stitch ideas are perfect for creating calming art.
2. Capture the Fullness of Mint with Fishbone Stitch
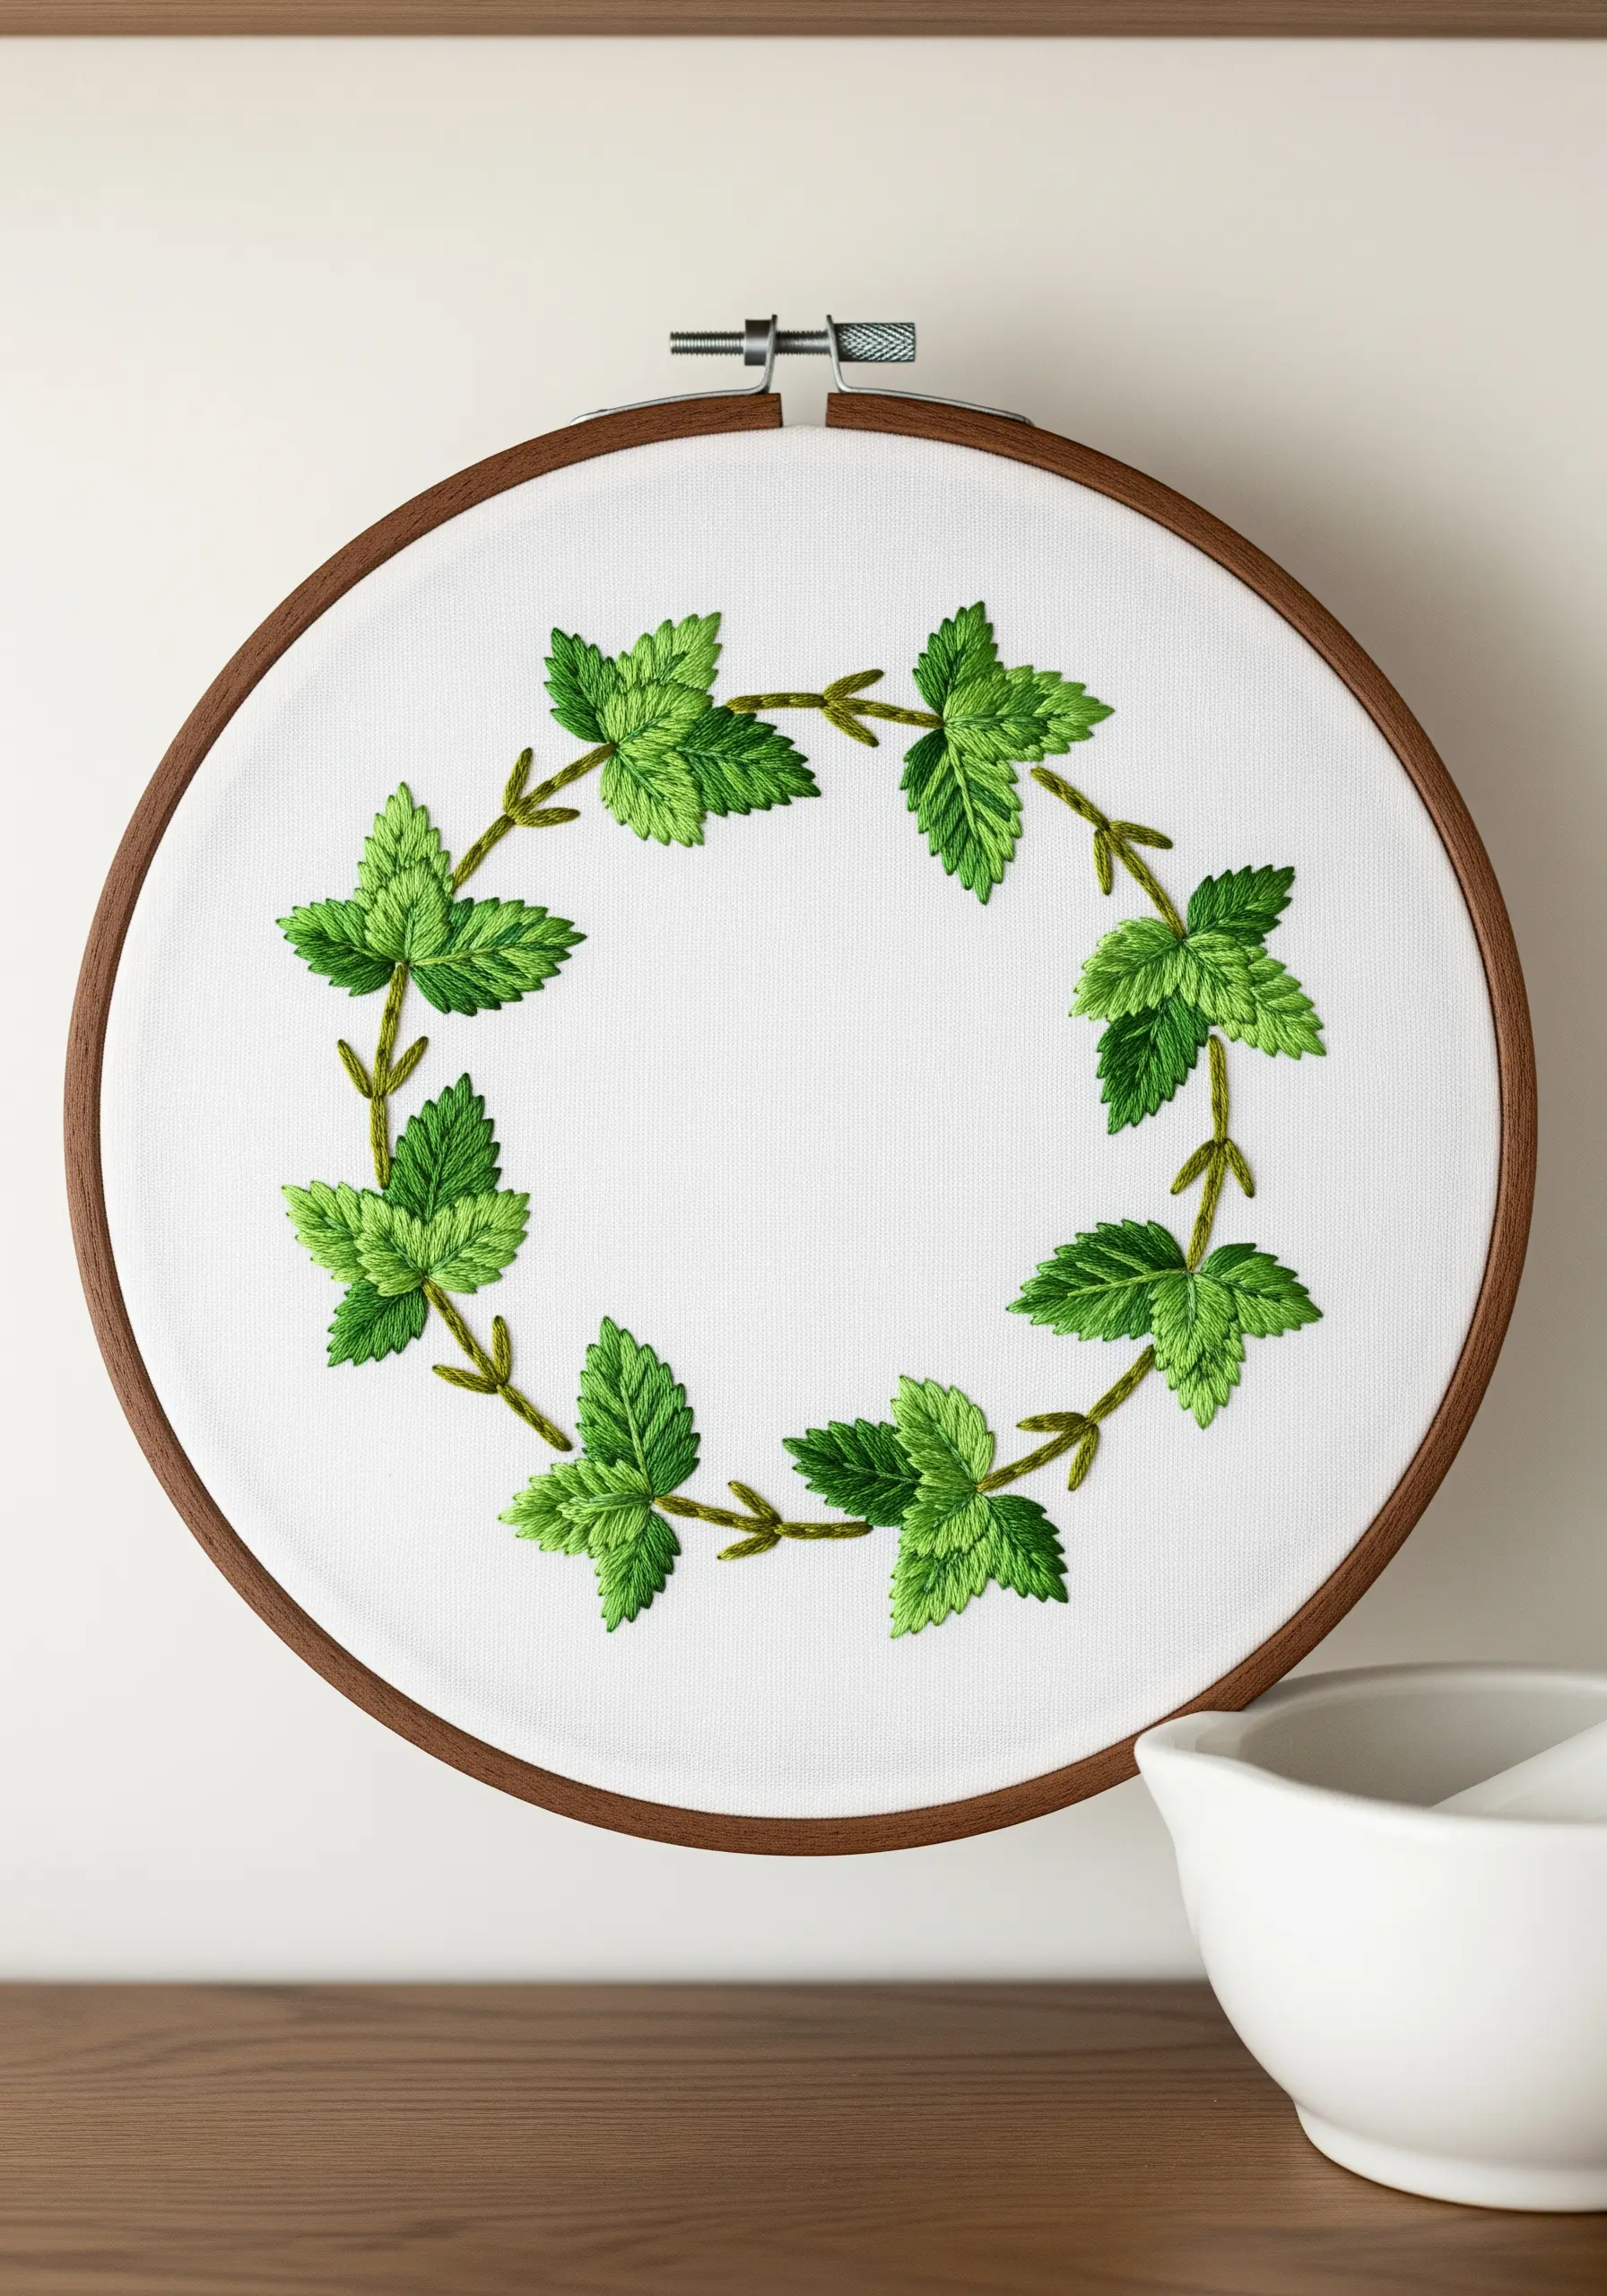
To embroider mint leaves that feel lush and vibrant, the fishbone stitch is your best choice.
This stitch creates a central vein and angled sides in a single, fluid process, perfectly mimicking the structure of a real leaf.
Work with three to four shades of green, stitching individual leaves in different tones to give your wreath a dynamic, sun-dappled appearance.
Angle the leaves in slightly different directions as you build the wreath to create a sense of natural, untamed movement.
3. Replicate Rosemary’s Texture with Varied Straight Stitches
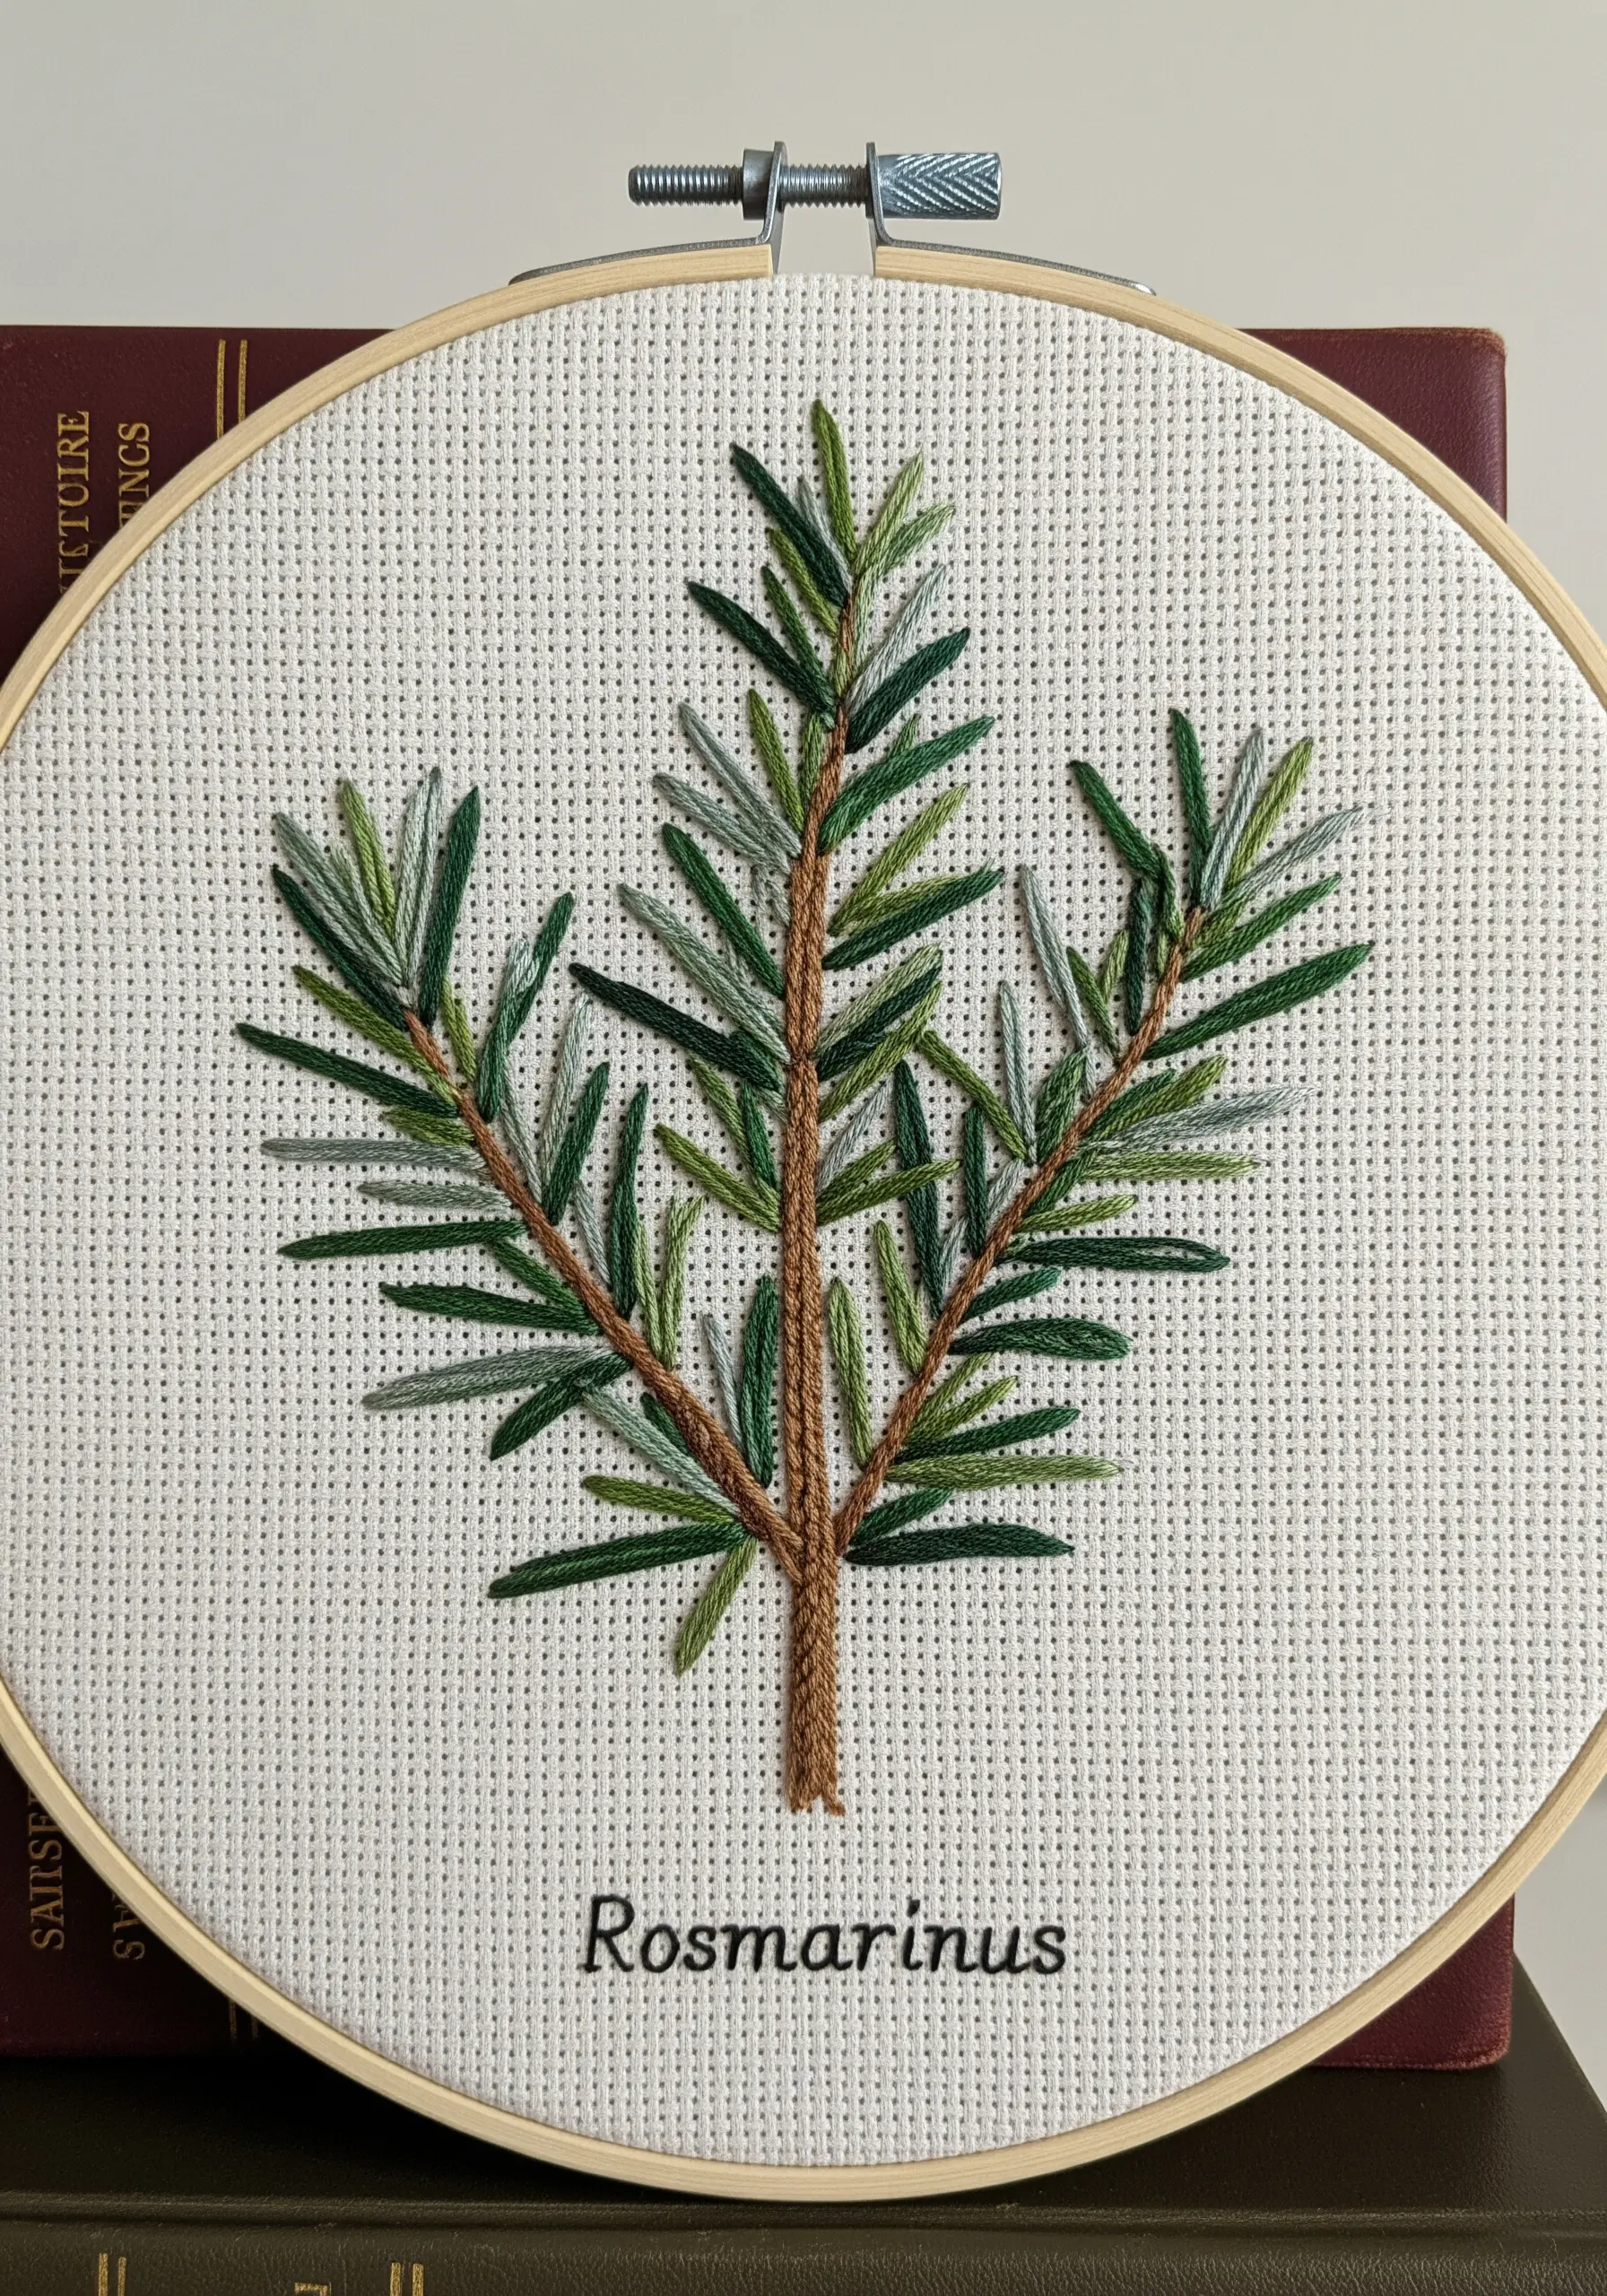
The key to realistic rosemary is capturing its fine, needle-like texture, which is easily achieved with simple straight stitches.
Use two to three strands of floss and work in multiple shades of green and grey-green to replicate the plant’s complex coloring.
Vary the length and angle of each stitch slightly to avoid a uniform, artificial look.
For the woody stem, use a thicker thread or more strands in a brown tone, stitched with a stem stitch or split stitch to give it a solid foundation.
4. Stitch an Airy Chamomile Field on Linens
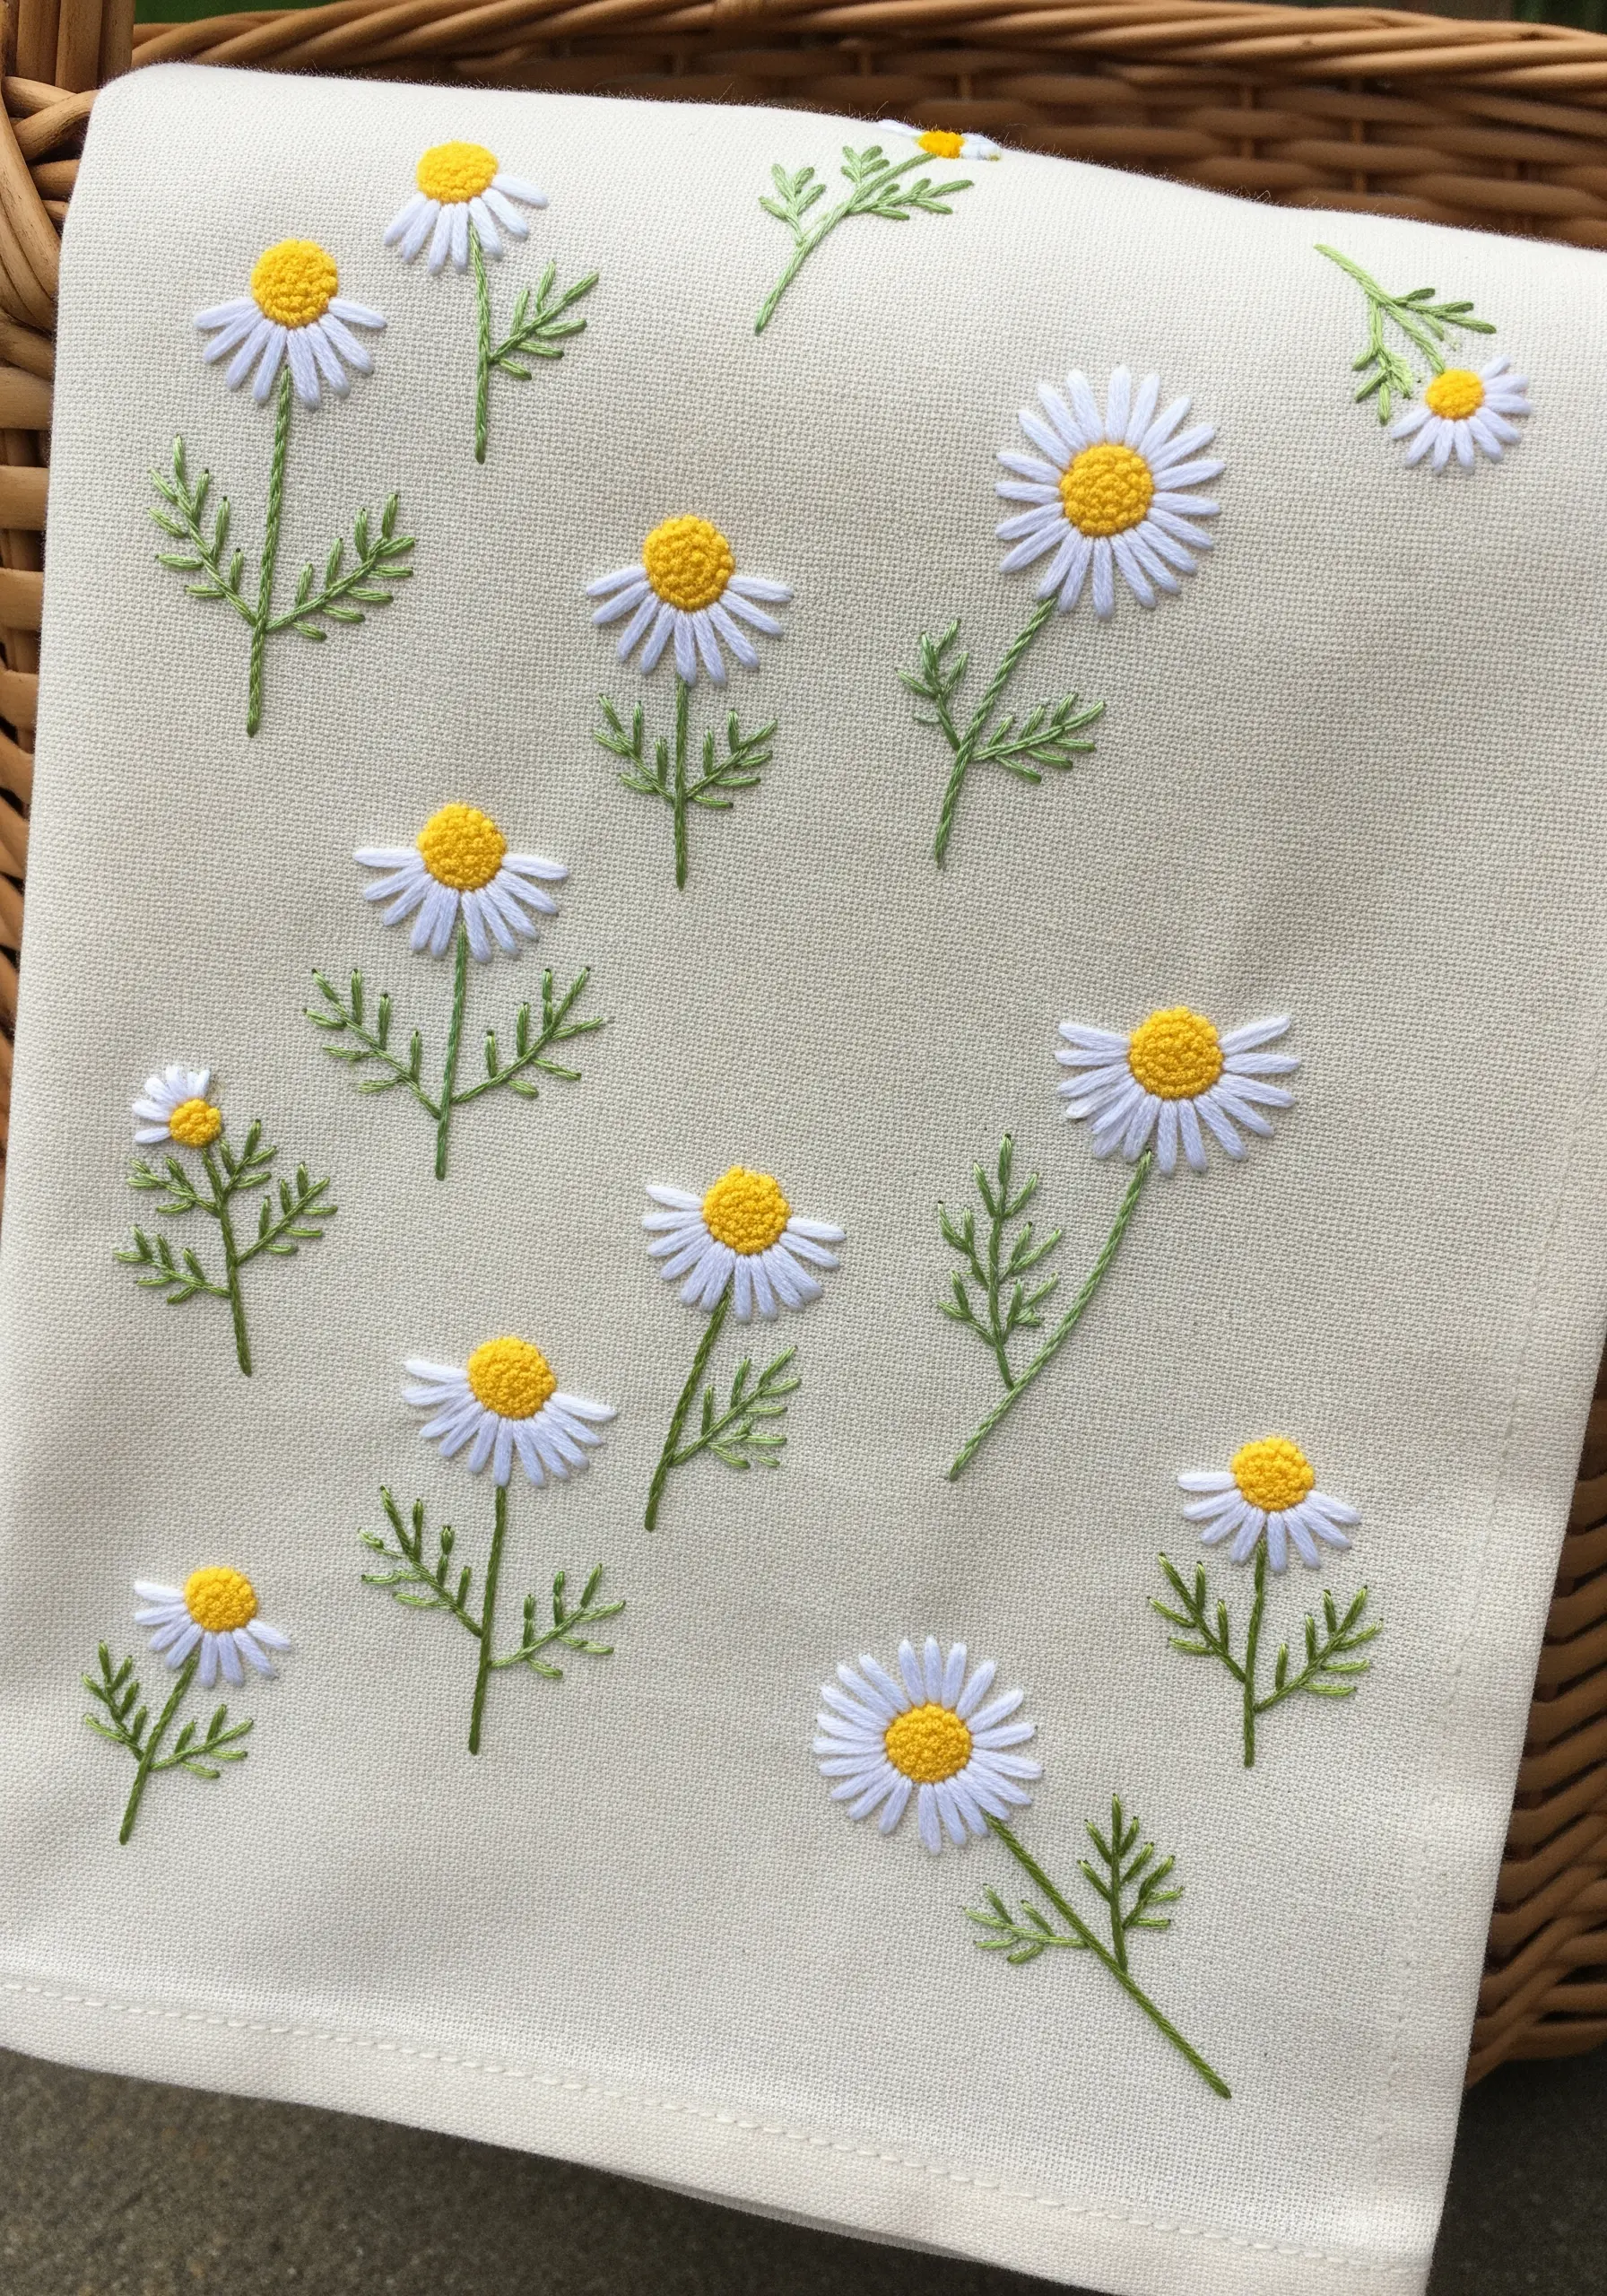
For chamomile, achieve a light, delicate feel by using detached chain stitches (lazy daisies) for the white petals.
This stitch creates a perfect teardrop shape that isn’t overly dense, making it ideal for lighter fabrics like tea towels or pillowcases.
Fill the center with a cluster of tightly packed yellow French knots for a pop of texture.
Scatter the flowers randomly across the fabric, varying the stem height and leaf placement to create the feeling of a natural, wild meadow.
5. Blend Echinacea Petals with Long-and-Short Stitch
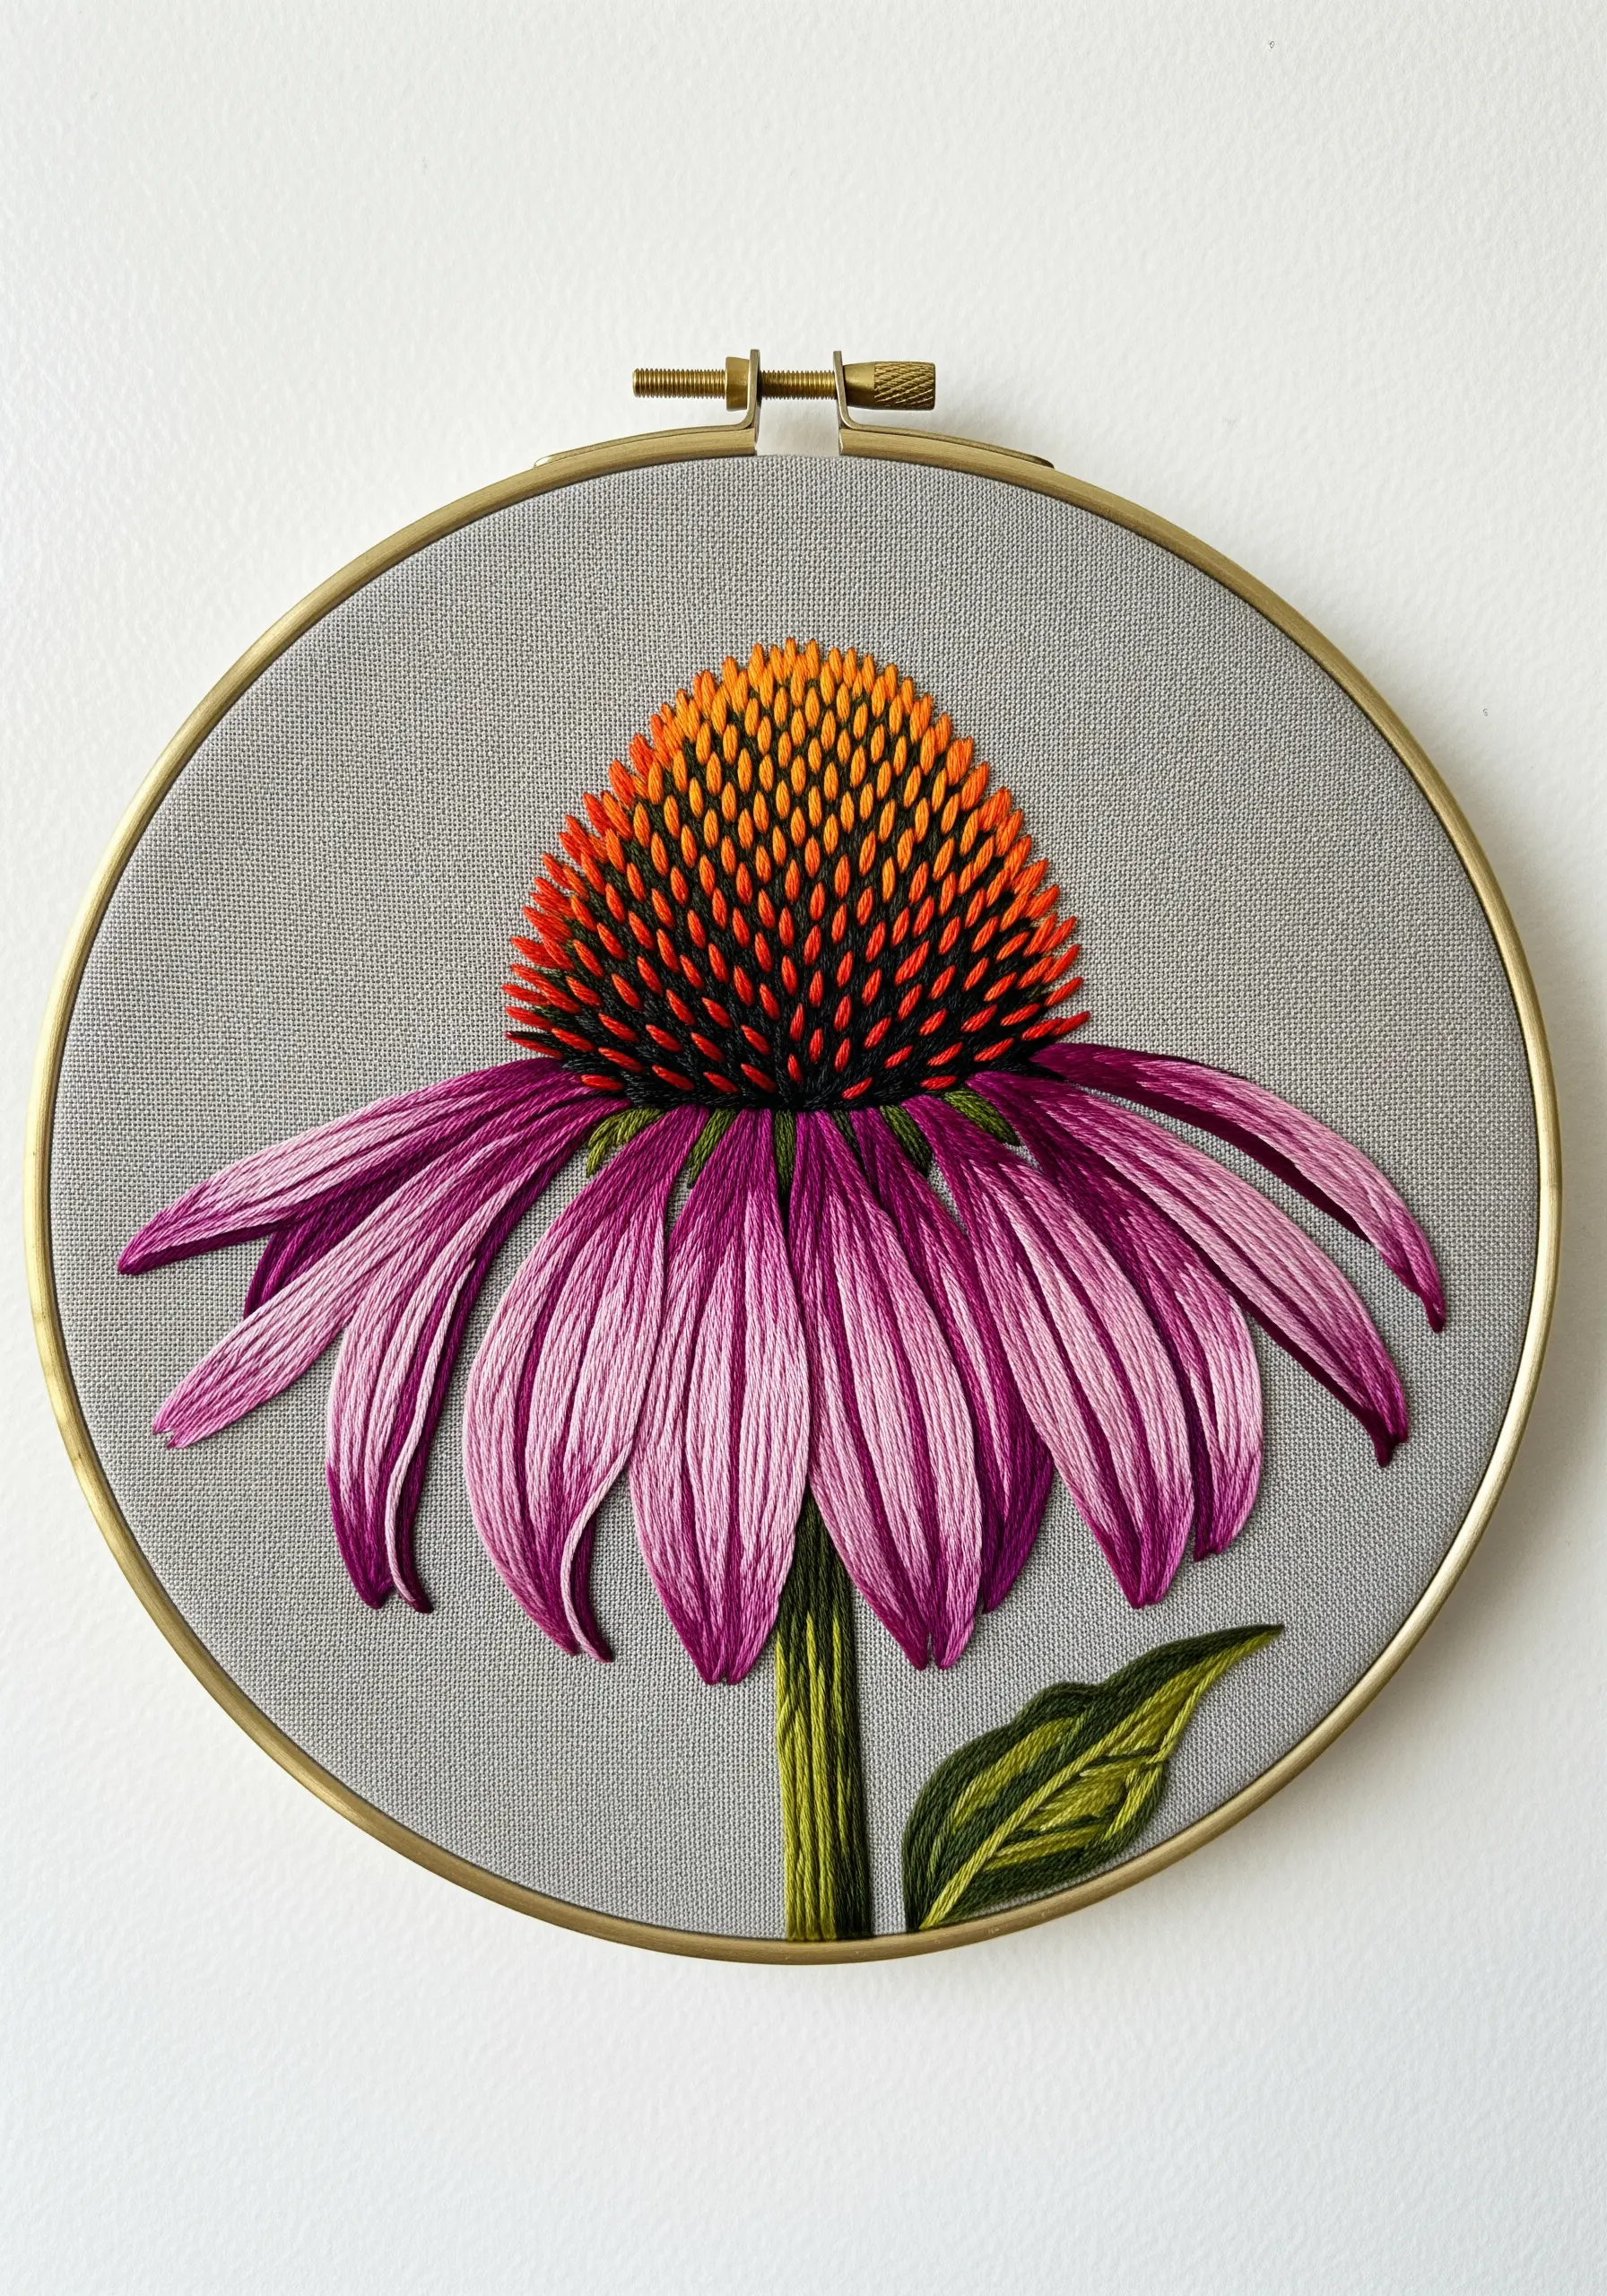
Capture the dramatic beauty of an echinacea bloom by using long-and-short stitch for the drooping petals.
This technique, also known as thread painting, allows you to blend multiple shades of pink and purple seamlessly, creating a soft, painterly gradient.
For the central cone, stitch a dense spiral of French knots, starting with dark brown at the base and transitioning to bright orange and yellow at the top.
This textural contrast between the smooth petals and bumpy cone makes the flower incredibly lifelike. Gradient color floral embroidery ideas like this add instant realism.
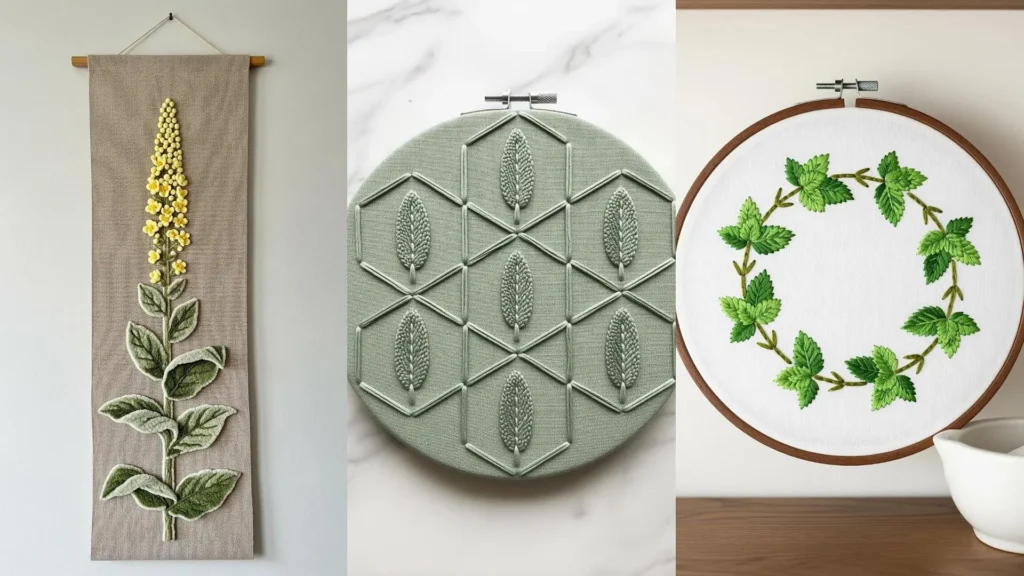
6. Contrast Organic Sage with Geometric Structure
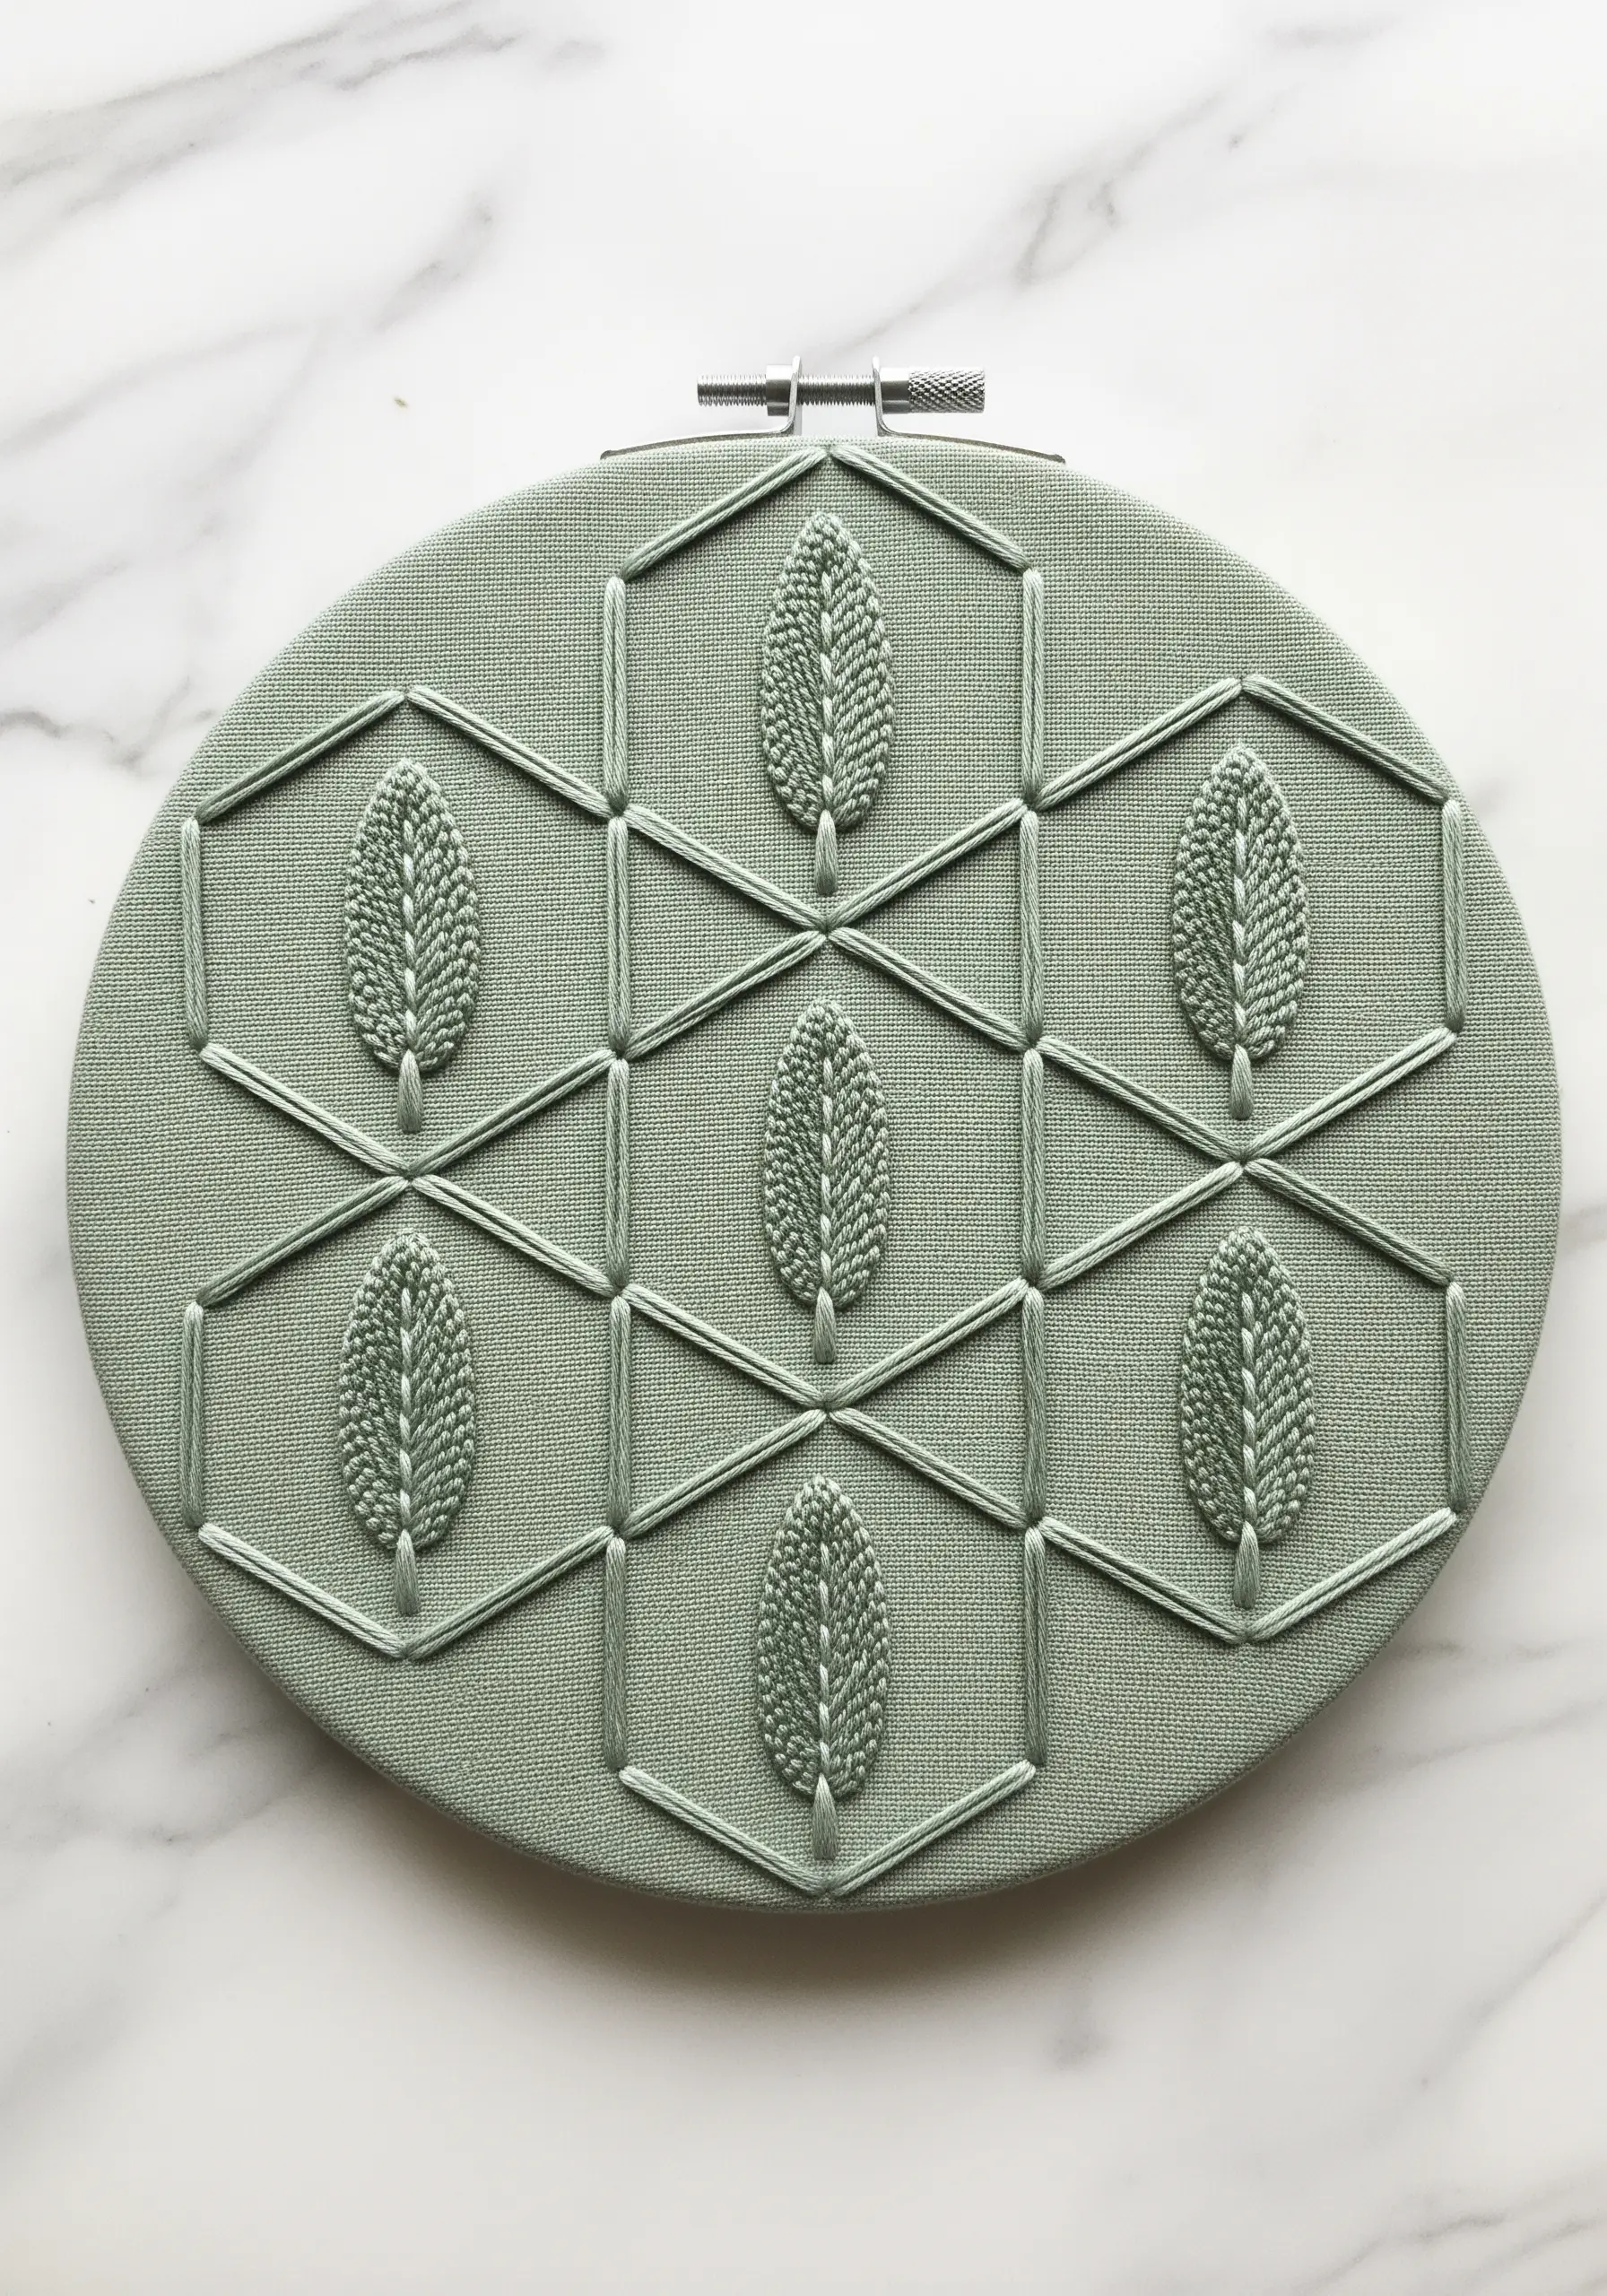
Create a modern, elegant design by juxtaposing the soft shape of sage leaves with a crisp geometric background.
Use a fishbone or satin stitch for the leaves, capturing their gentle curves and central vein.
For the geometric grid, use a simple backstitch with the same color thread to maintain a cohesive, monochrome look.
This pairing of organic and structured forms creates a sophisticated visual tension that elevates a simple botanical into a piece of contemporary art.
7. Detail Delicate Thyme with Miniature Stitches
To portray the tiny scale of a thyme sprig, you must scale down your stitches accordingly.
Use a single strand of floss for the entire design to maintain its delicate appearance.
Create the tiny leaves with single, detached chain stitches, and form the flower clusters with miniature French knots using just one wrap around the needle.
This minimalist approach ensures the design feels light and intricate, accurately reflecting the herb’s fine structure.
8. Make Calendula Pop on a Dark Background
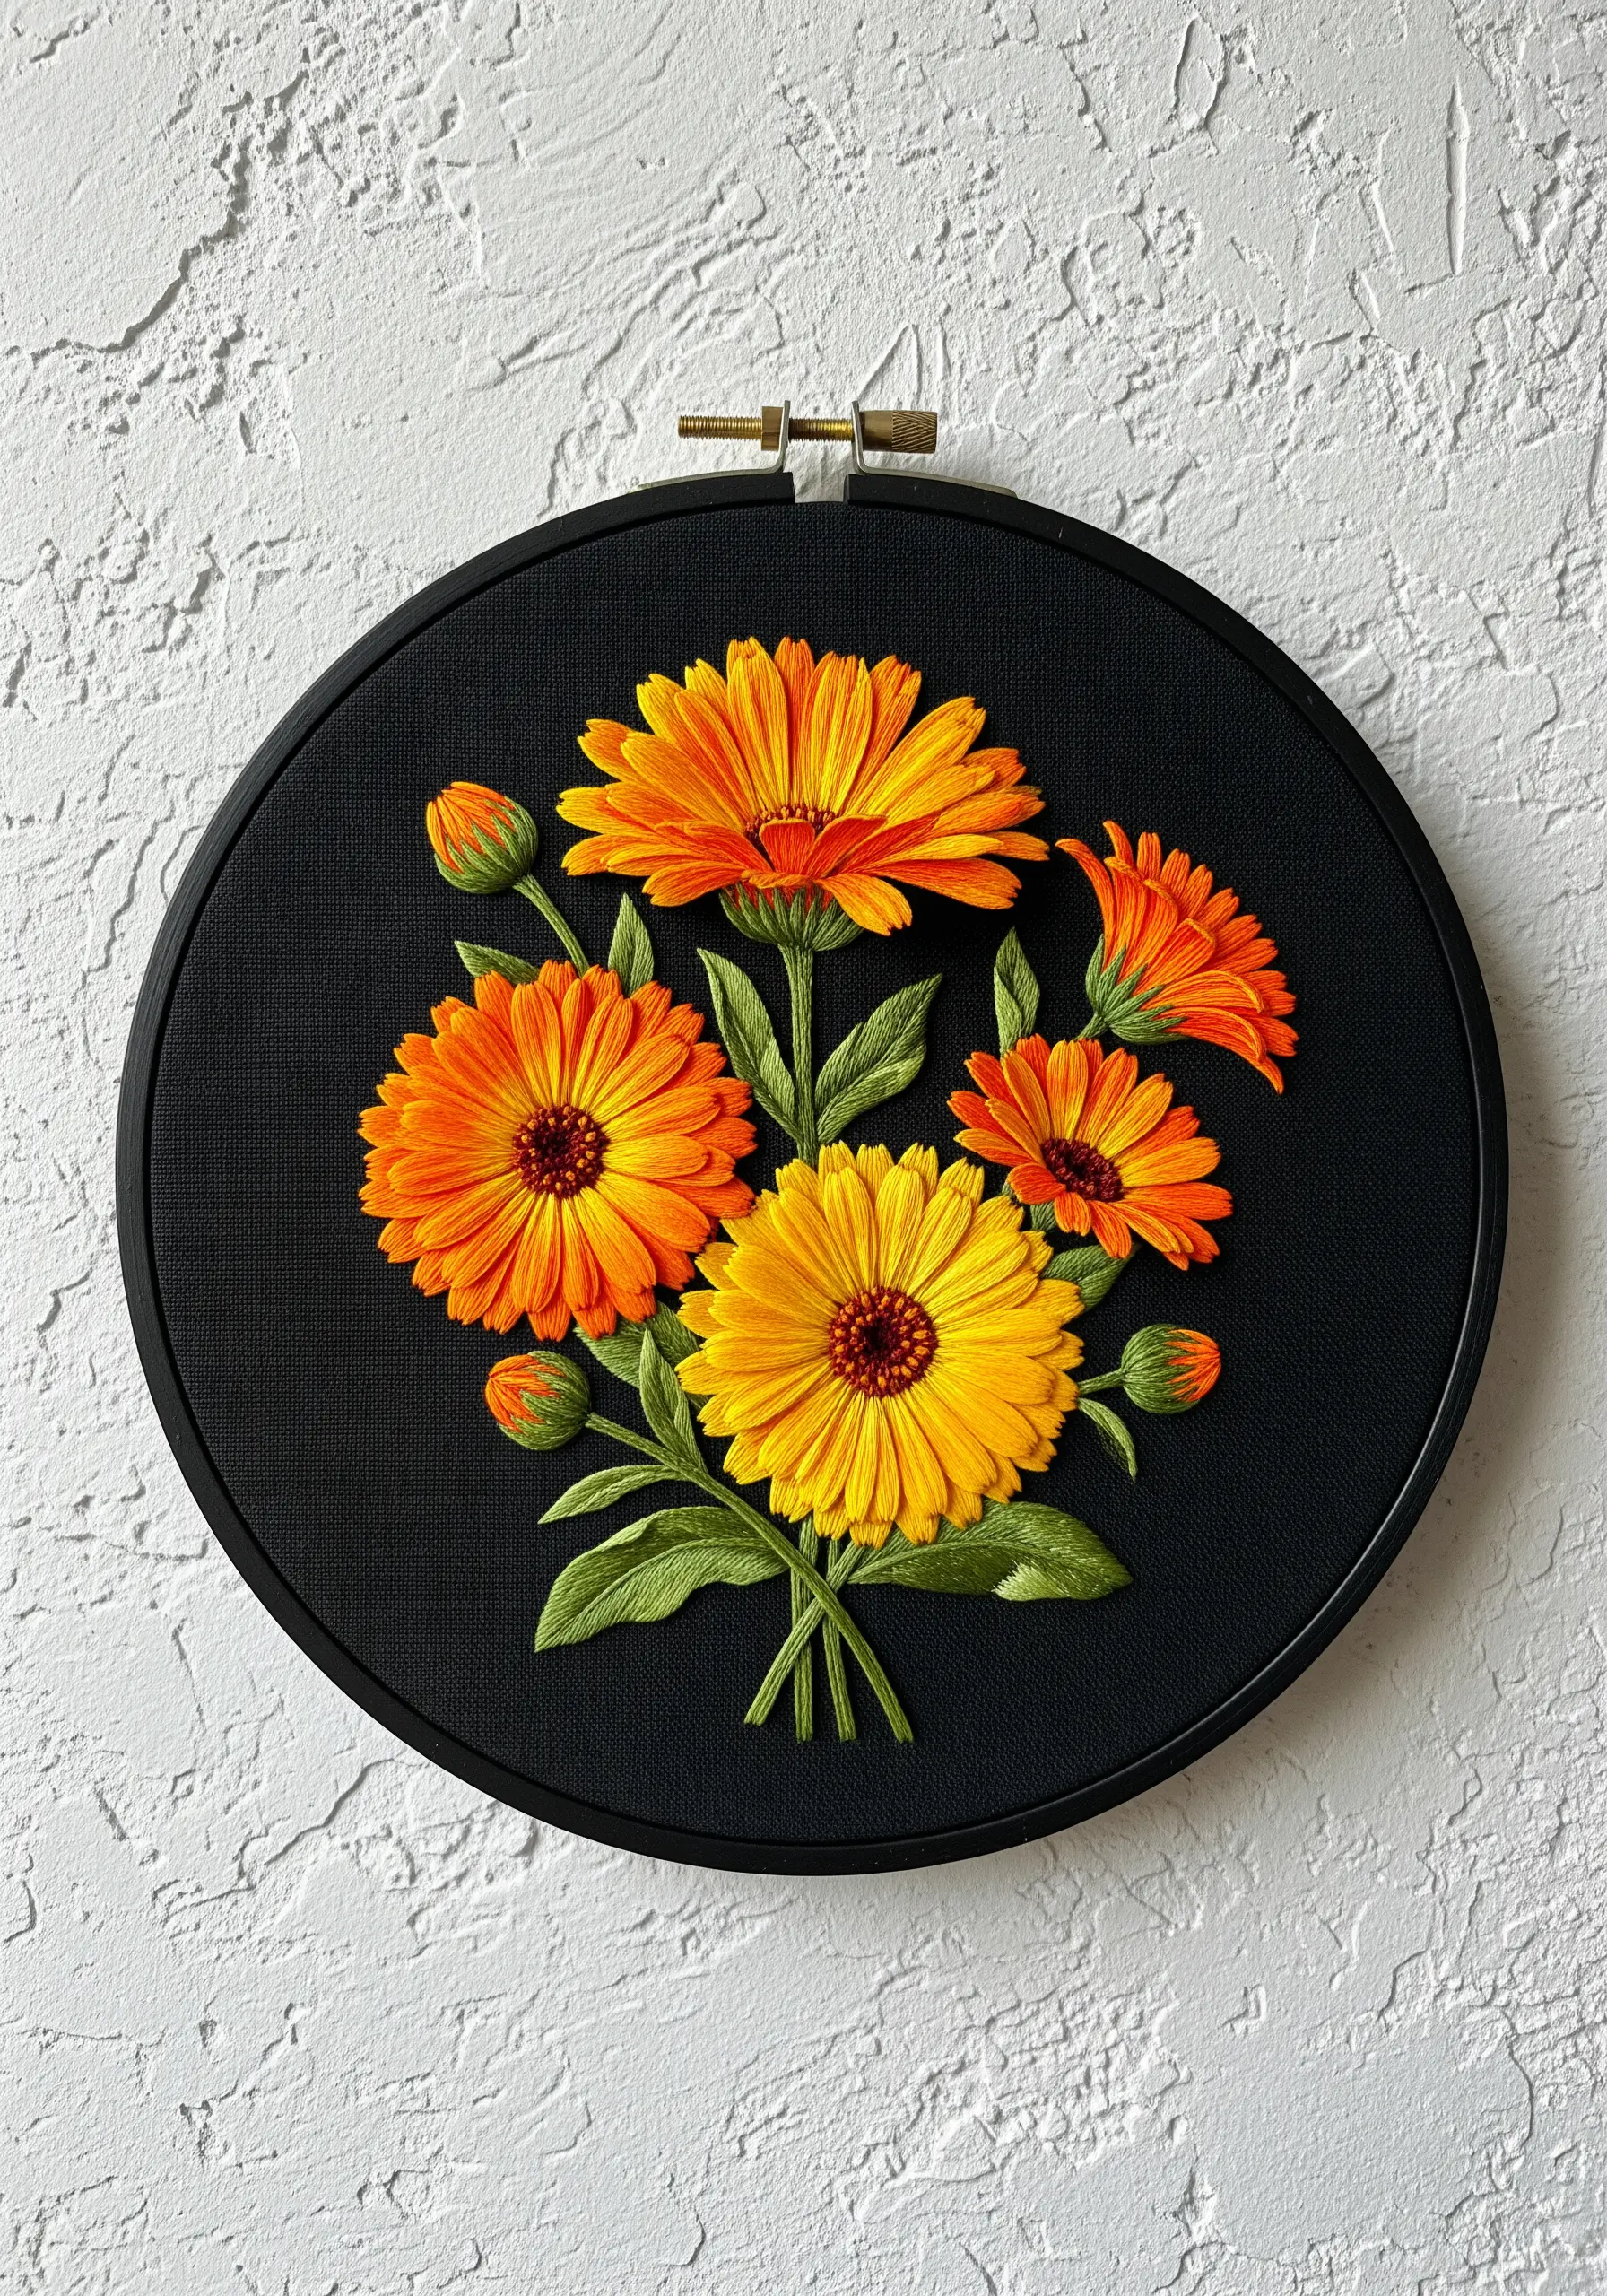
Let the vibrant orange and yellow of calendula shine by stitching it on a black or dark navy fabric.
This high-contrast background makes the colors appear more saturated and luminous.
Use layered long-and-short stitch to fill the petals, blending from a deep orange at the center to a bright yellow at the tips for a fiery, realistic look.
Using dark fabric metallic threads for dramatic contrast can also add a subtle sparkle to the flower centers.
9. Form Yarrow’s Delicate Clusters with French Knots
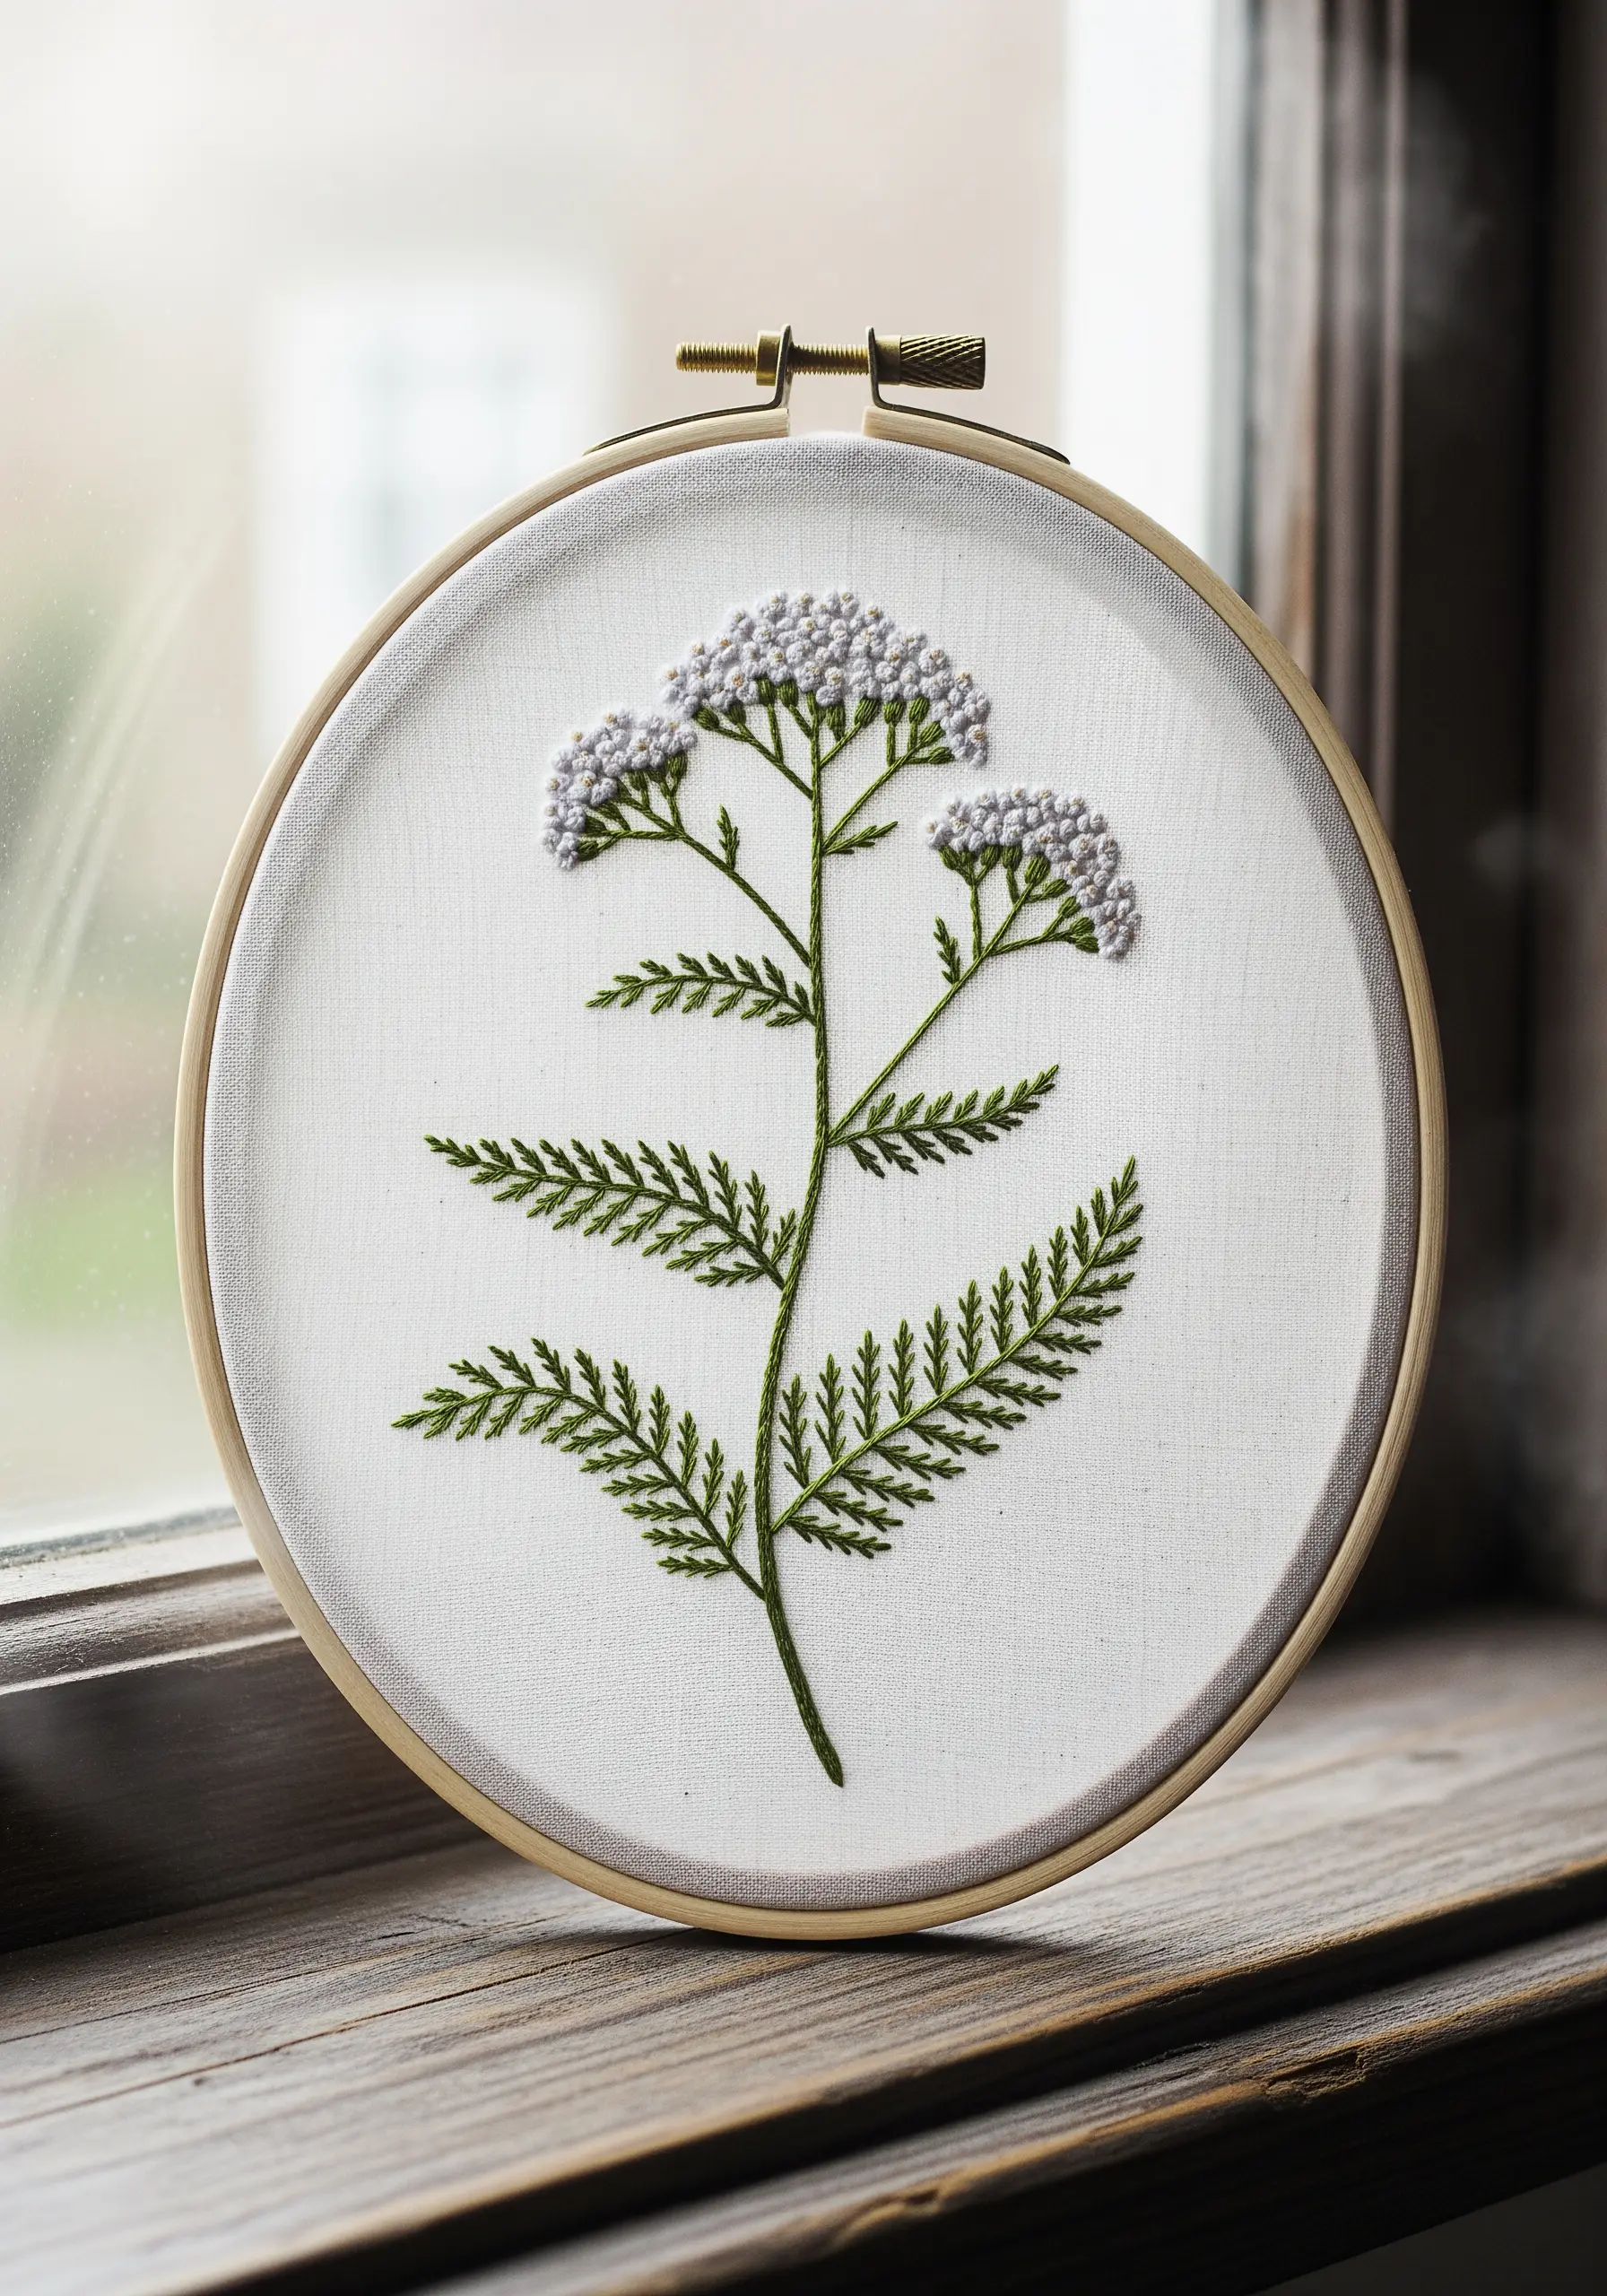
The unique, flat-topped flower heads of yarrow can be beautifully rendered with dense groupings of French knots.
Use a pale grey or off-white thread to create the clusters, varying the tightness of each knot slightly to add texture and dimension.
For the feathery, fern-like leaves, use the fern stitch or fly stitch. These stitches naturally create a central stem with branching leaflets, perfectly capturing the intricate foliage with minimal effort.
10. Stitch Functional Art on a Reusable Tea Bag
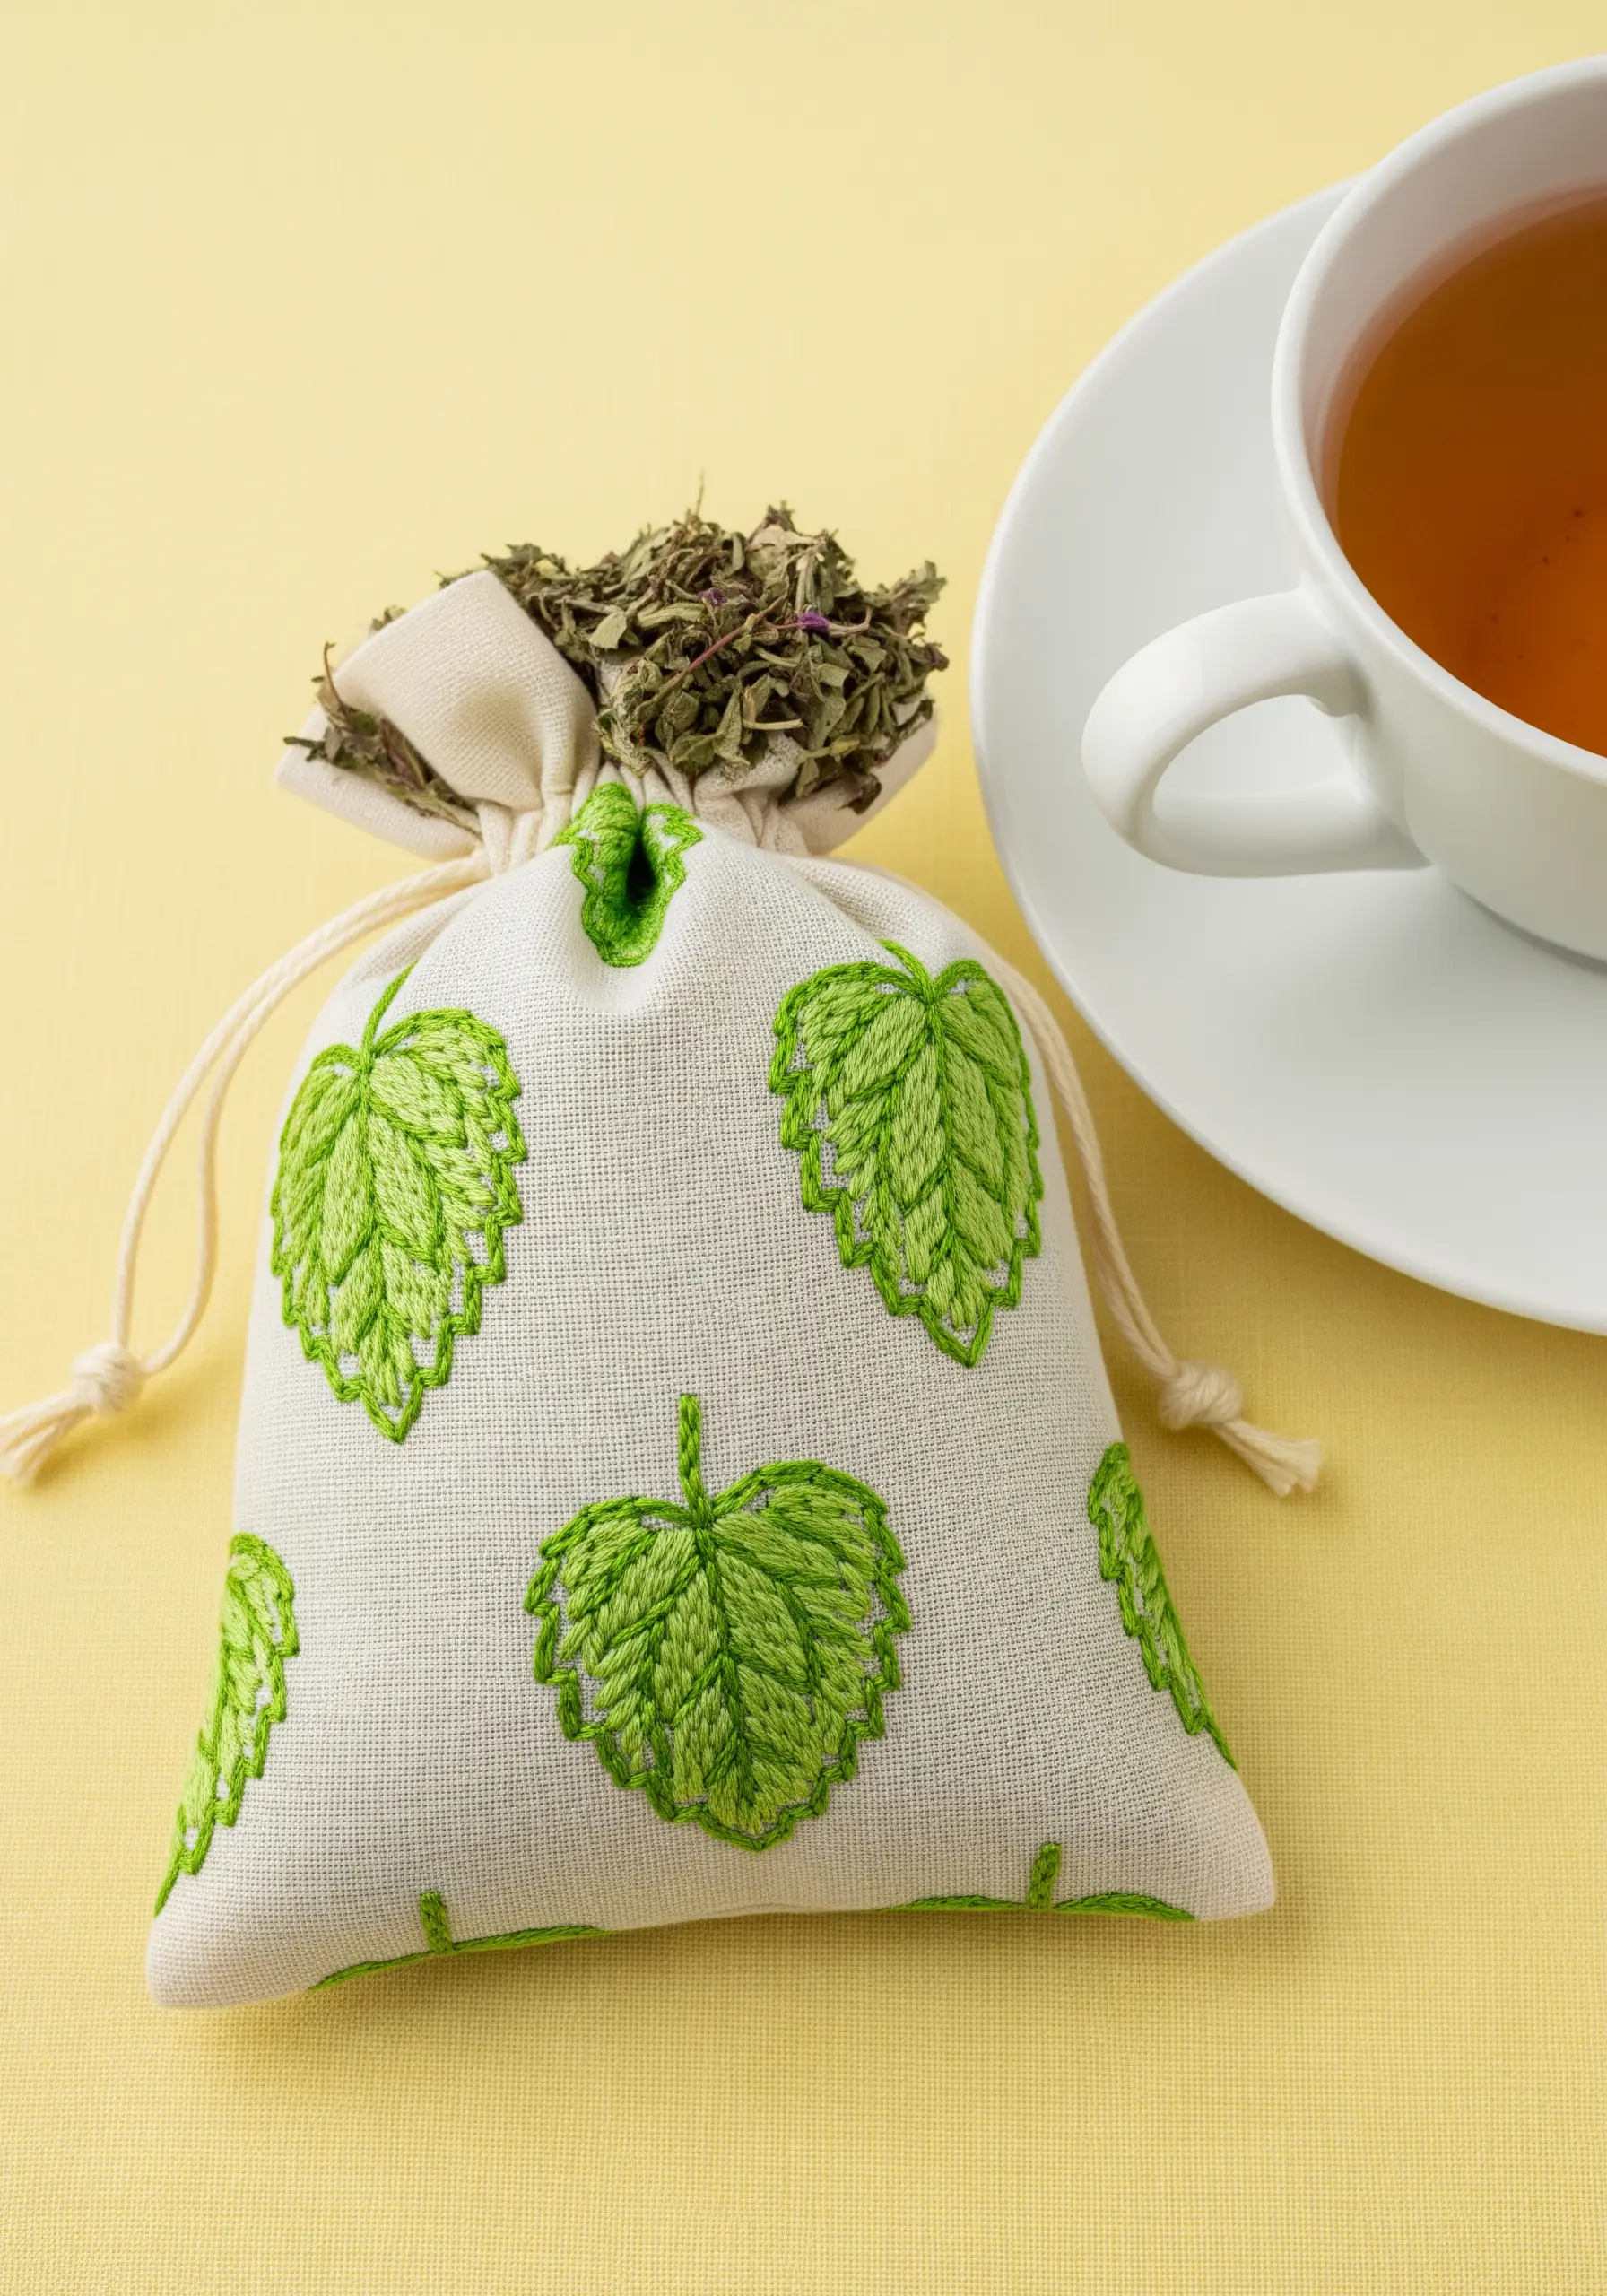
Elevate a simple, functional item like a reusable tea bag with a thoughtful botanical design.
For the hops, use a satin stitch worked in sections to create the overlapping petal-like bracts of the cone.
Outline each section with a single strand of a darker green backstitch to add definition and structure.
This approach adds a beautiful, durable detail that transforms an everyday object into a small piece of personal art.
11. Highlight Valerian’s Delicacy on Muted Fabric
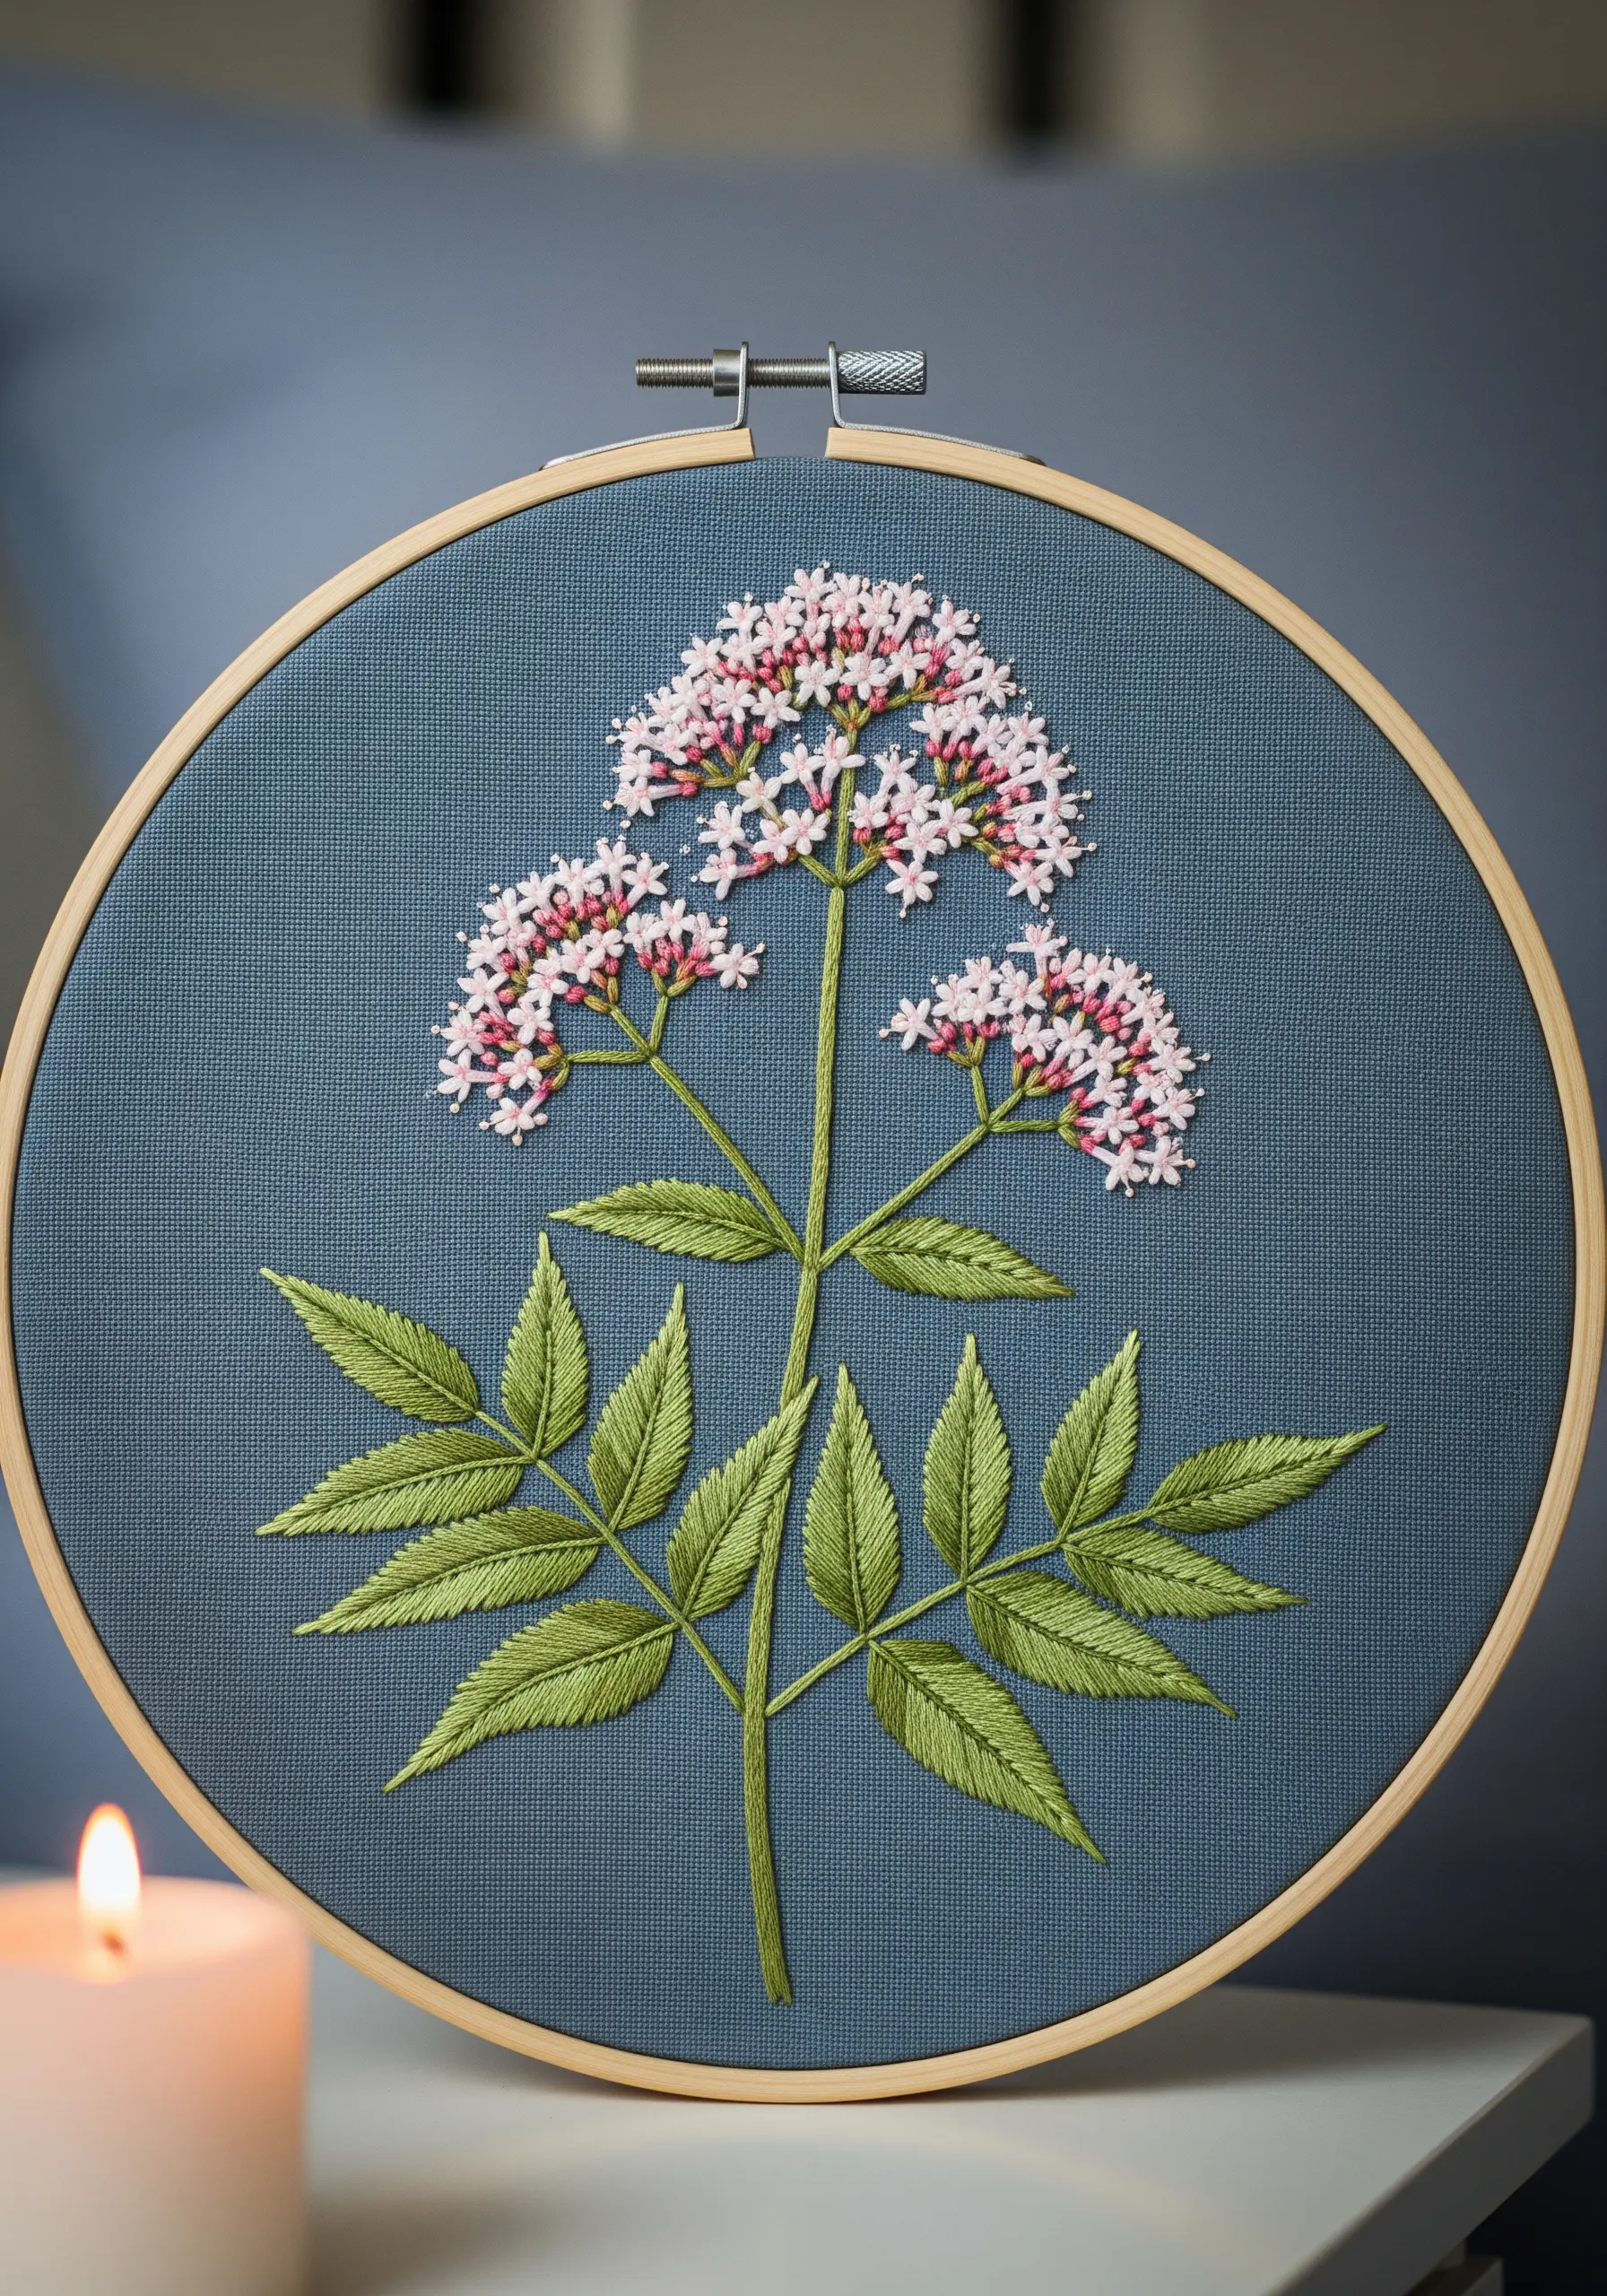
The pale, delicate blossoms of valerian stand out beautifully against a muted, dusky blue or grey fabric.
Create the tiny flowers with a mix of light pink and white French knots and single straight stitches, clustering them together to form the plant’s signature corymbs.
This color combination creates a soft, calming aesthetic that reflects the herb’s therapeutic properties.
Use a smooth satin stitch for the leaves to provide a solid, contrasting texture to the airy blossoms.
12. Balance Outline and Fill in St. John’s Wort
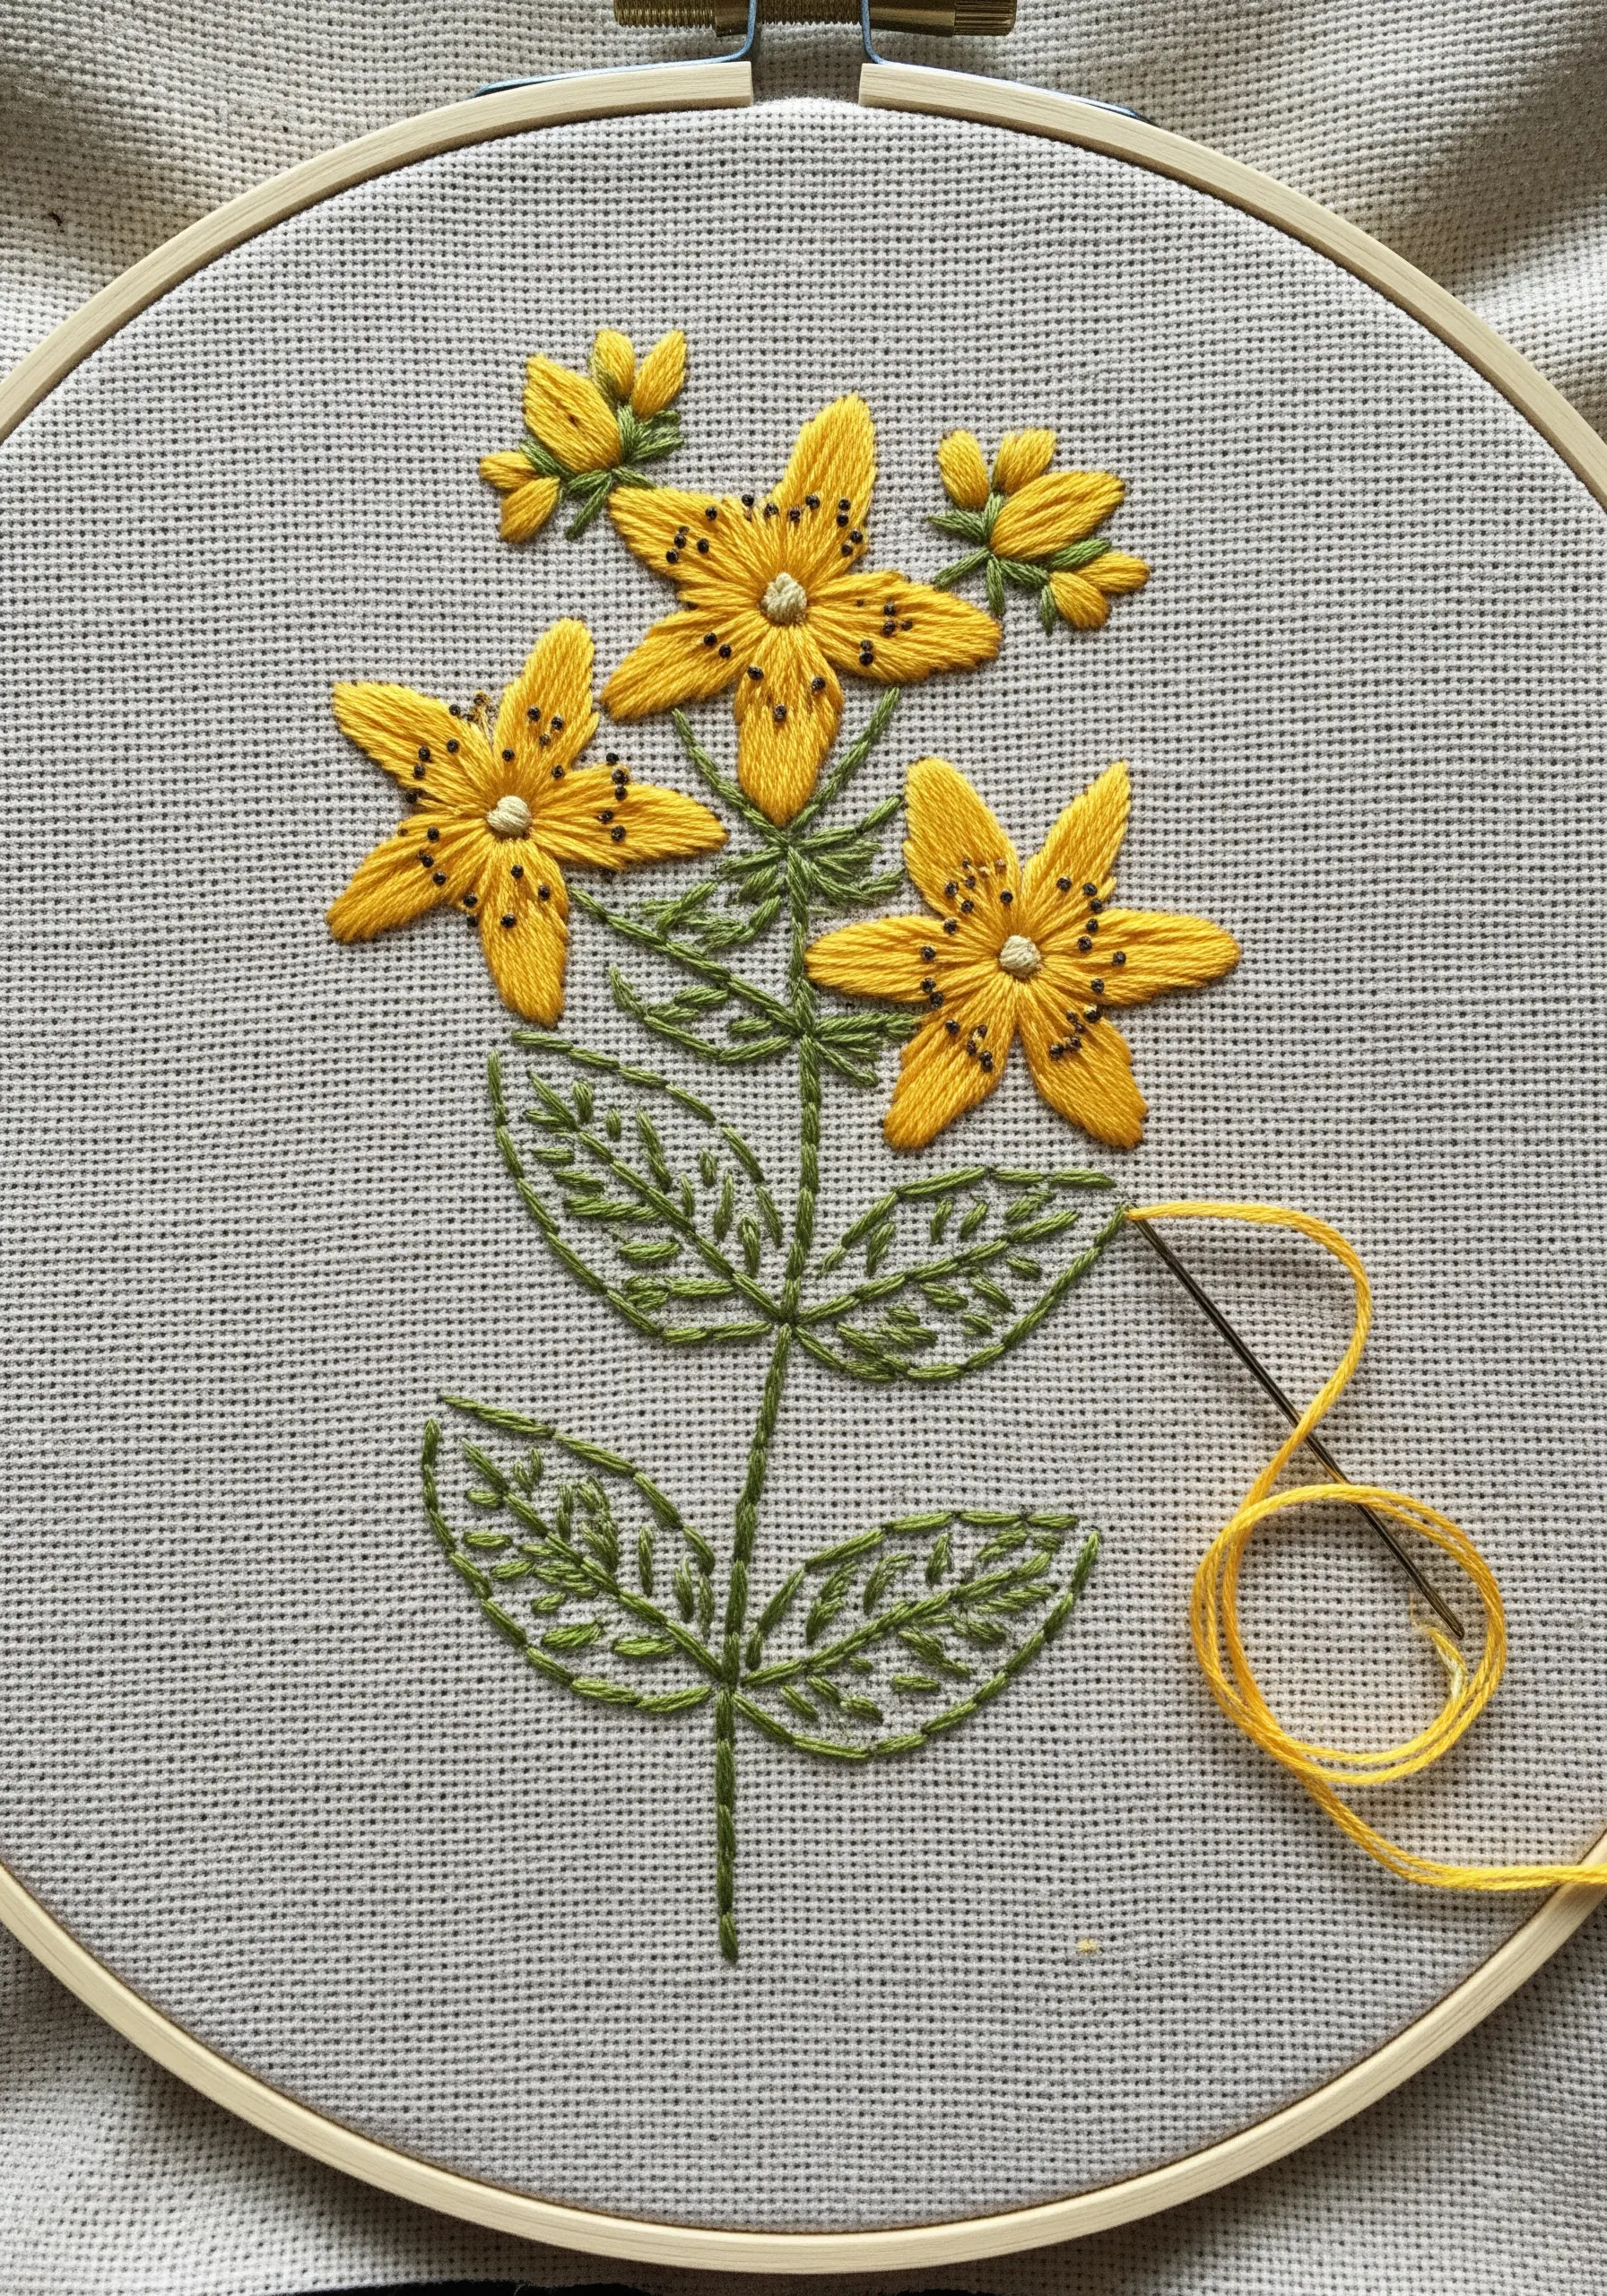
Create visual interest in your St. John’s Wort design by combining filled and outlined elements.
Fill the bright yellow petals with a smooth satin stitch to make them the focal point.
For the leaves, use a simple backstitch outline in a contrasting green thread. This technique keeps the foliage from overpowering the flowers and adds a light, illustrative quality to the piece.
Add a sprinkle of black or dark brown seed stitches in the flower centers to represent the stamen and add a final touch of detail.
13. Explore Mint as an Abstract Composition
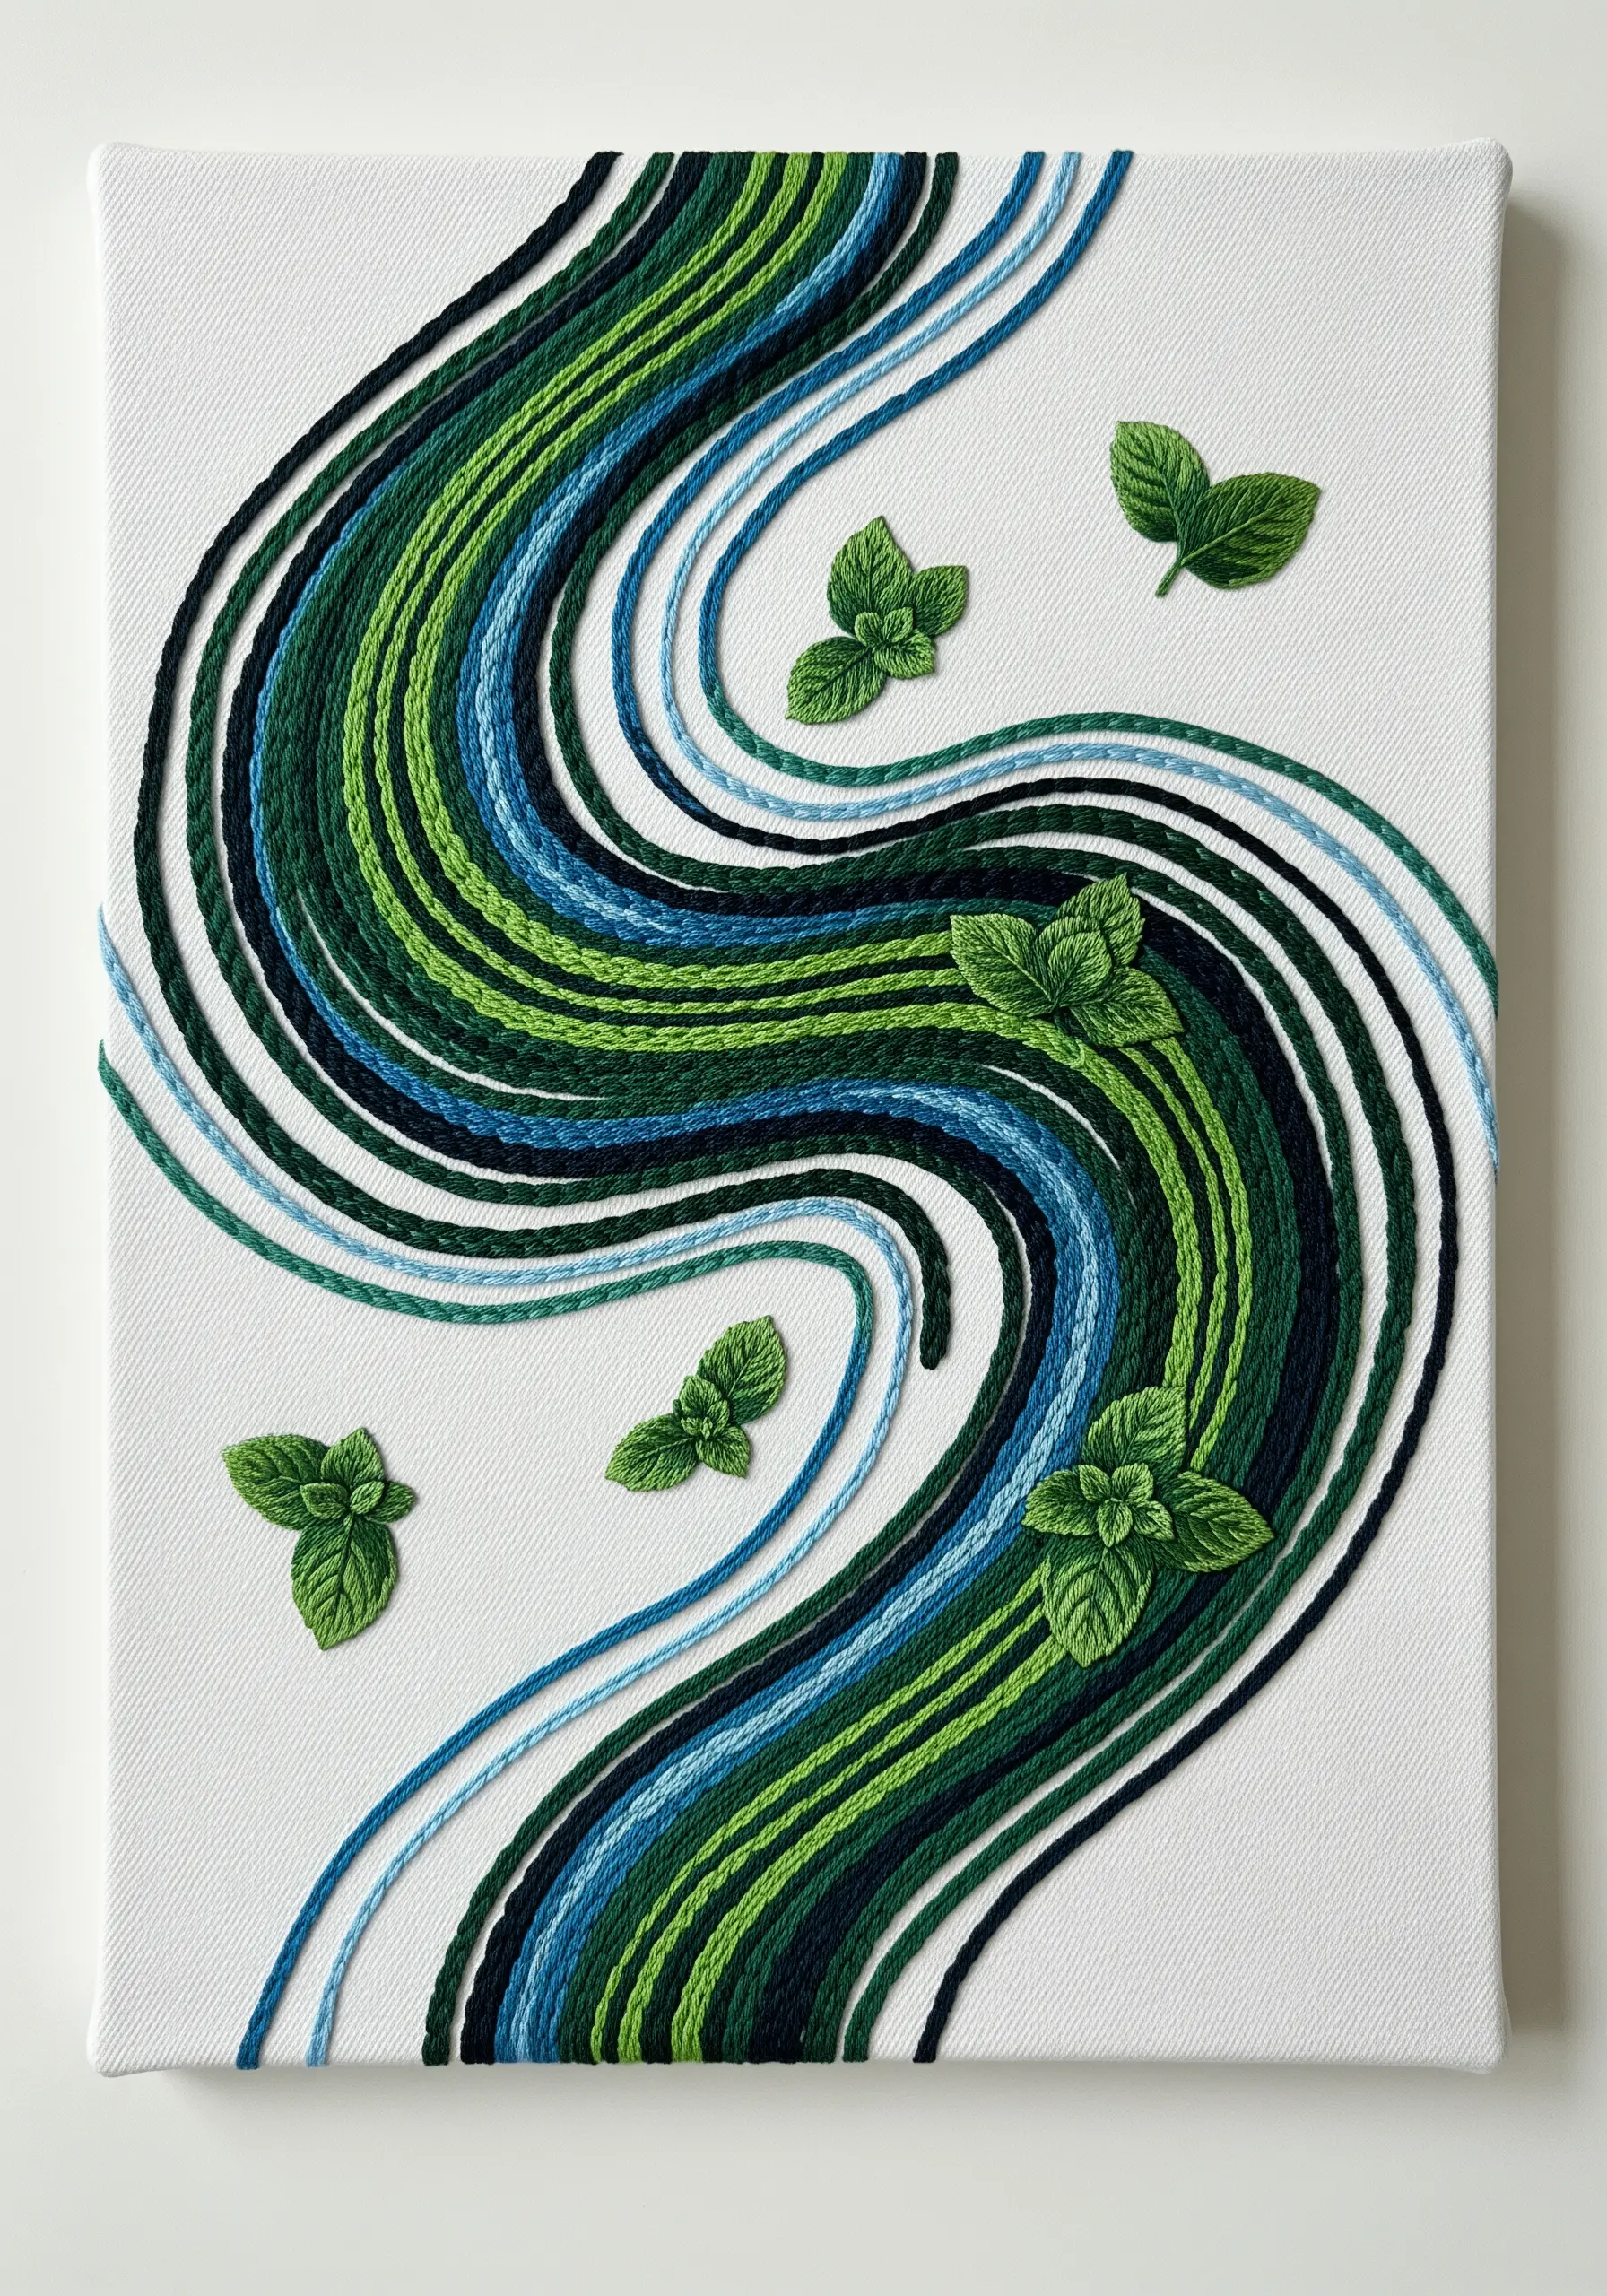
Move beyond literal representation and use the essence of an herb to inspire abstract art.
Couch thick bundles of green and blue embroidery floss onto a canvas to create flowing, river-like lines that evoke the cool, refreshing feel of mint.
Incorporate small, realistically stitched mint leaves as dimensional accents, allowing them to ‘float’ among the abstract waves.
This combination of techniques allows you to abstract thread waves swirls to capture motion and flow, translating a feeling rather than just an image.
14. Simplify Botanicals for a Chic Tote Bag
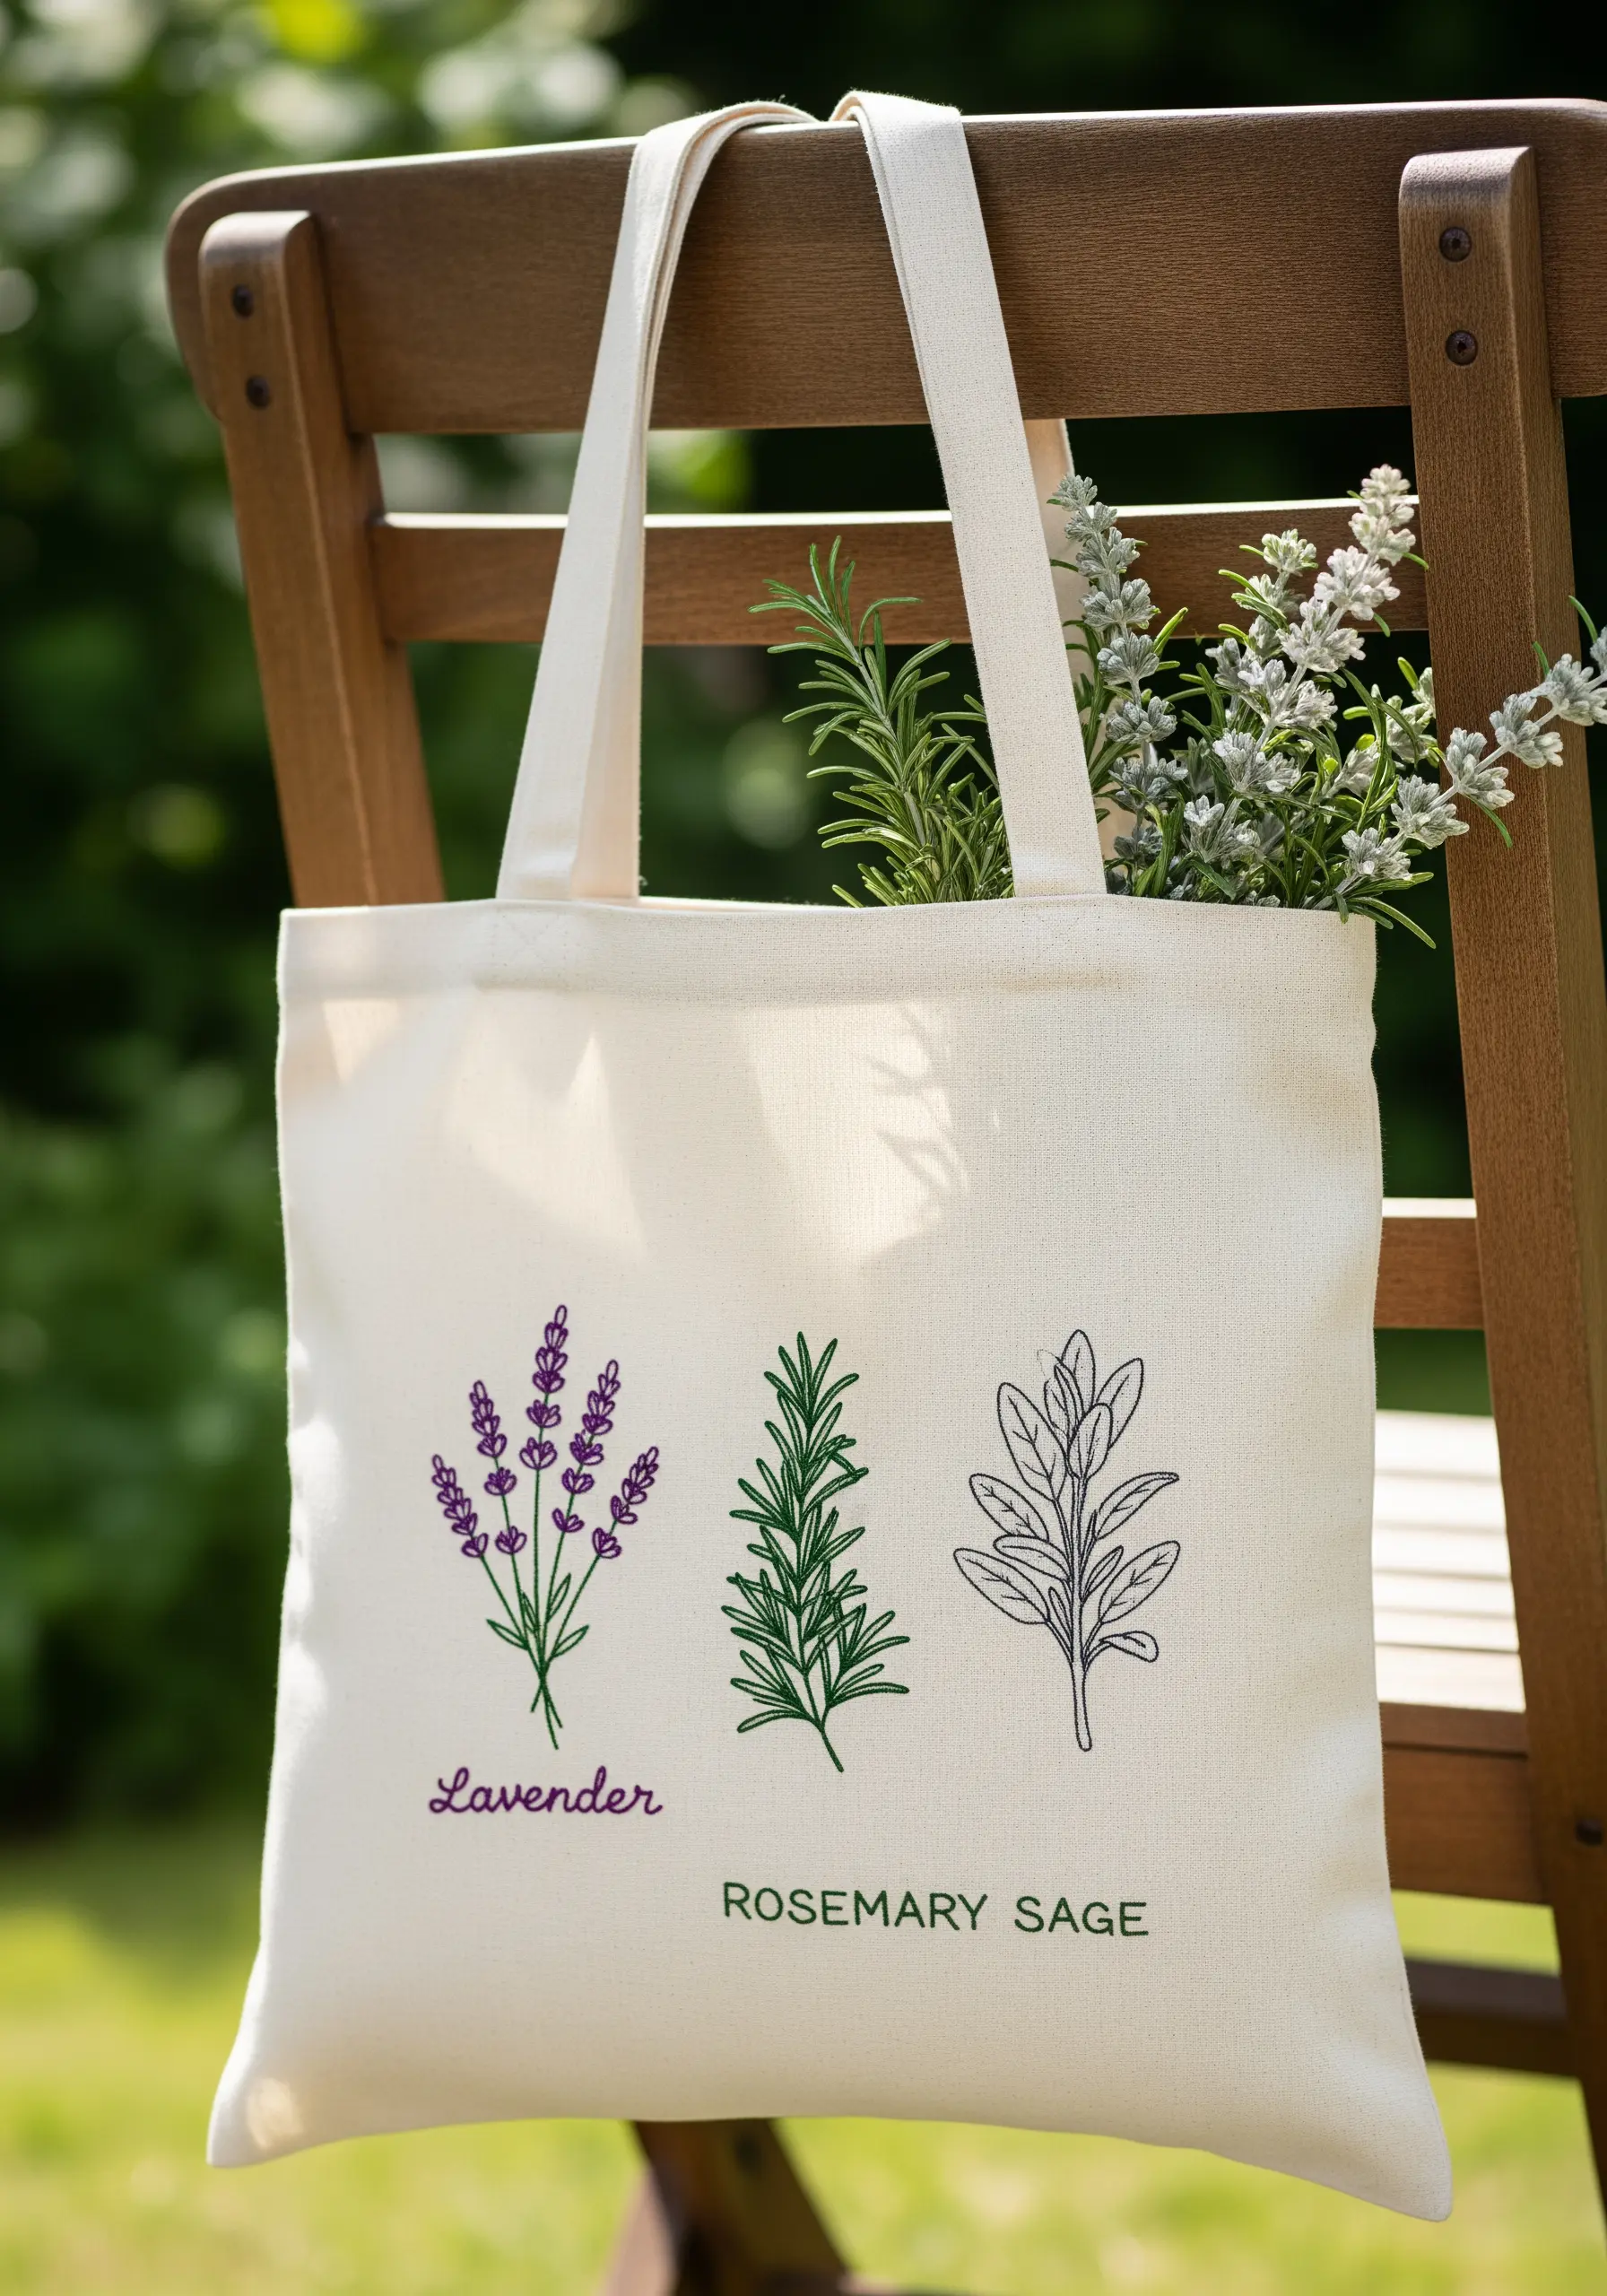
When embellishing an accessory like a tote bag, simplified botanical illustrations offer a modern and stylish look.
Combine different rendering styles for each herb to create a visually engaging trio: use satin stitch to fill the lavender, straight stitches for the textured rosemary, and a clean backstitch for the sage outline.
This mix-and-match approach to minimalist line art embroidery patterns results in a balanced, graphic design that is both sophisticated and easy to stitch.
15. Create Floating Chamomile on Sheer Tulle
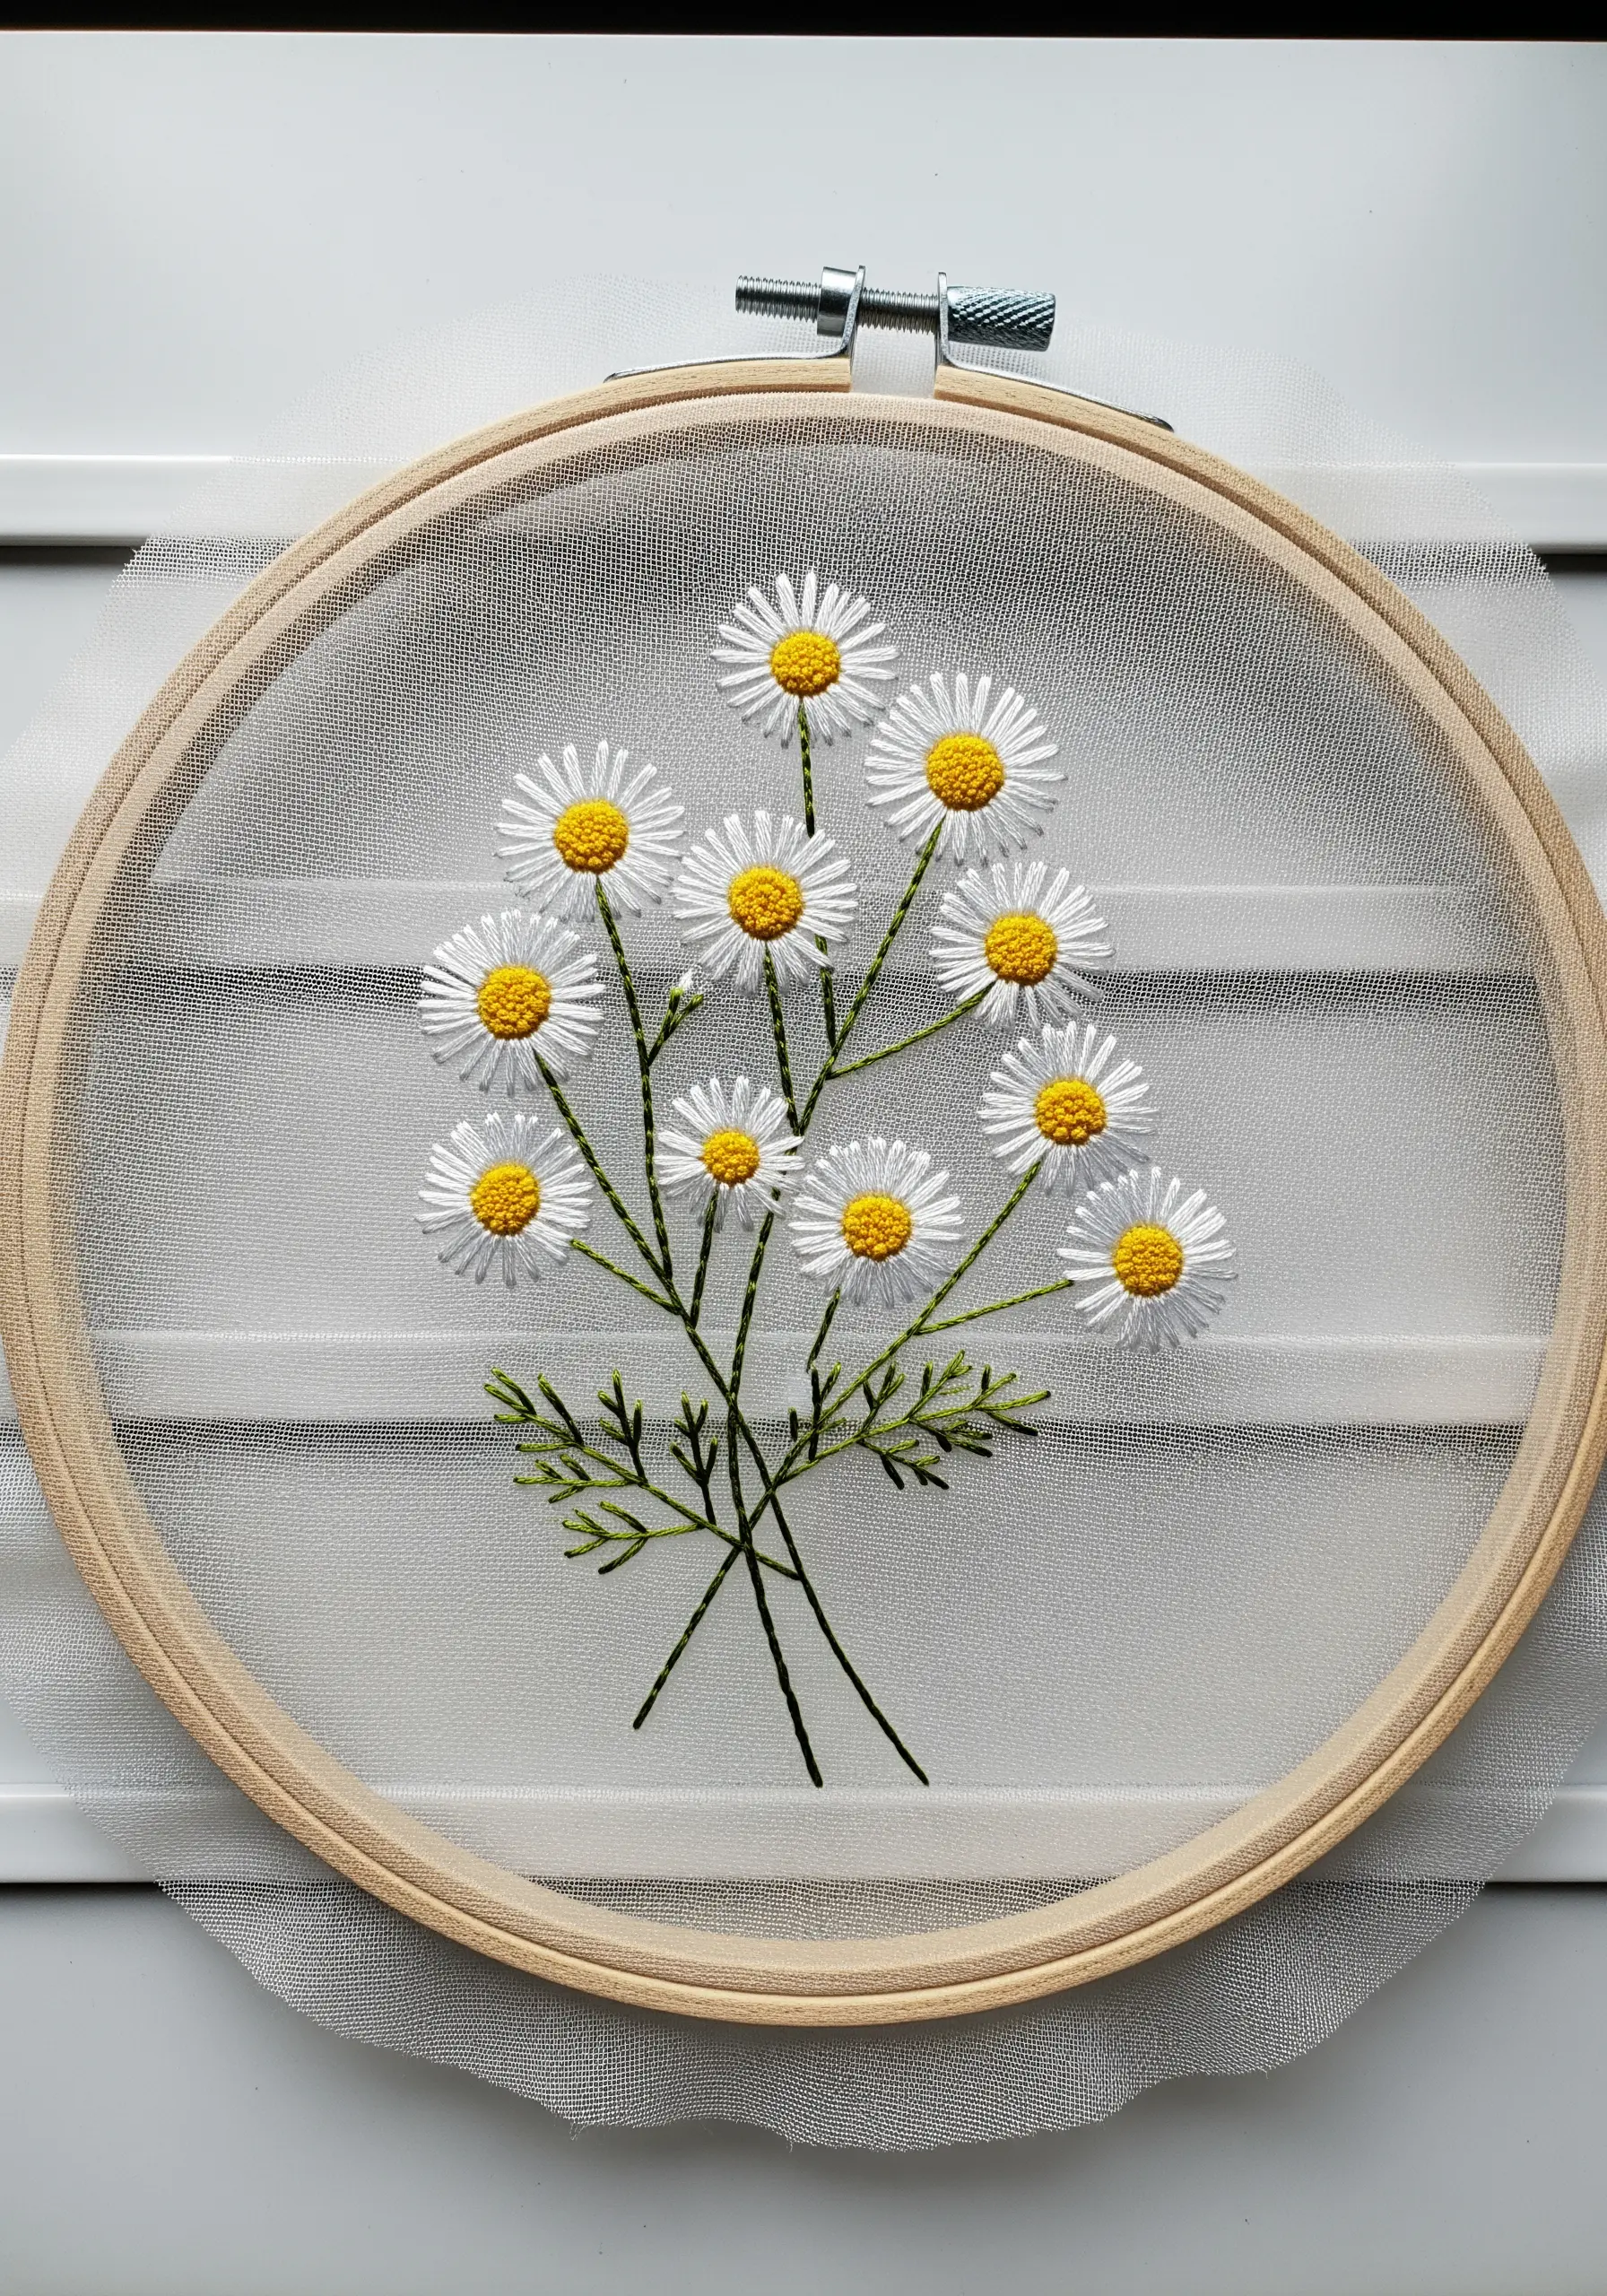
Stitching on a sheer fabric like tulle or organza creates a stunning illusion of floating botanicals.
To achieve this, use a water-soluble or tear-away stabilizer on the back to support your stitches while you work.
Keep your stitches neat on both sides, as the back will be partially visible.
Use a classic satin stitch for the daisy petals and French knots for the centers. Once the stabilizer is removed, the flowers will appear suspended in air, creating a truly magical effect.
16. Capture the Dandelion’s Life Cycle with Texture
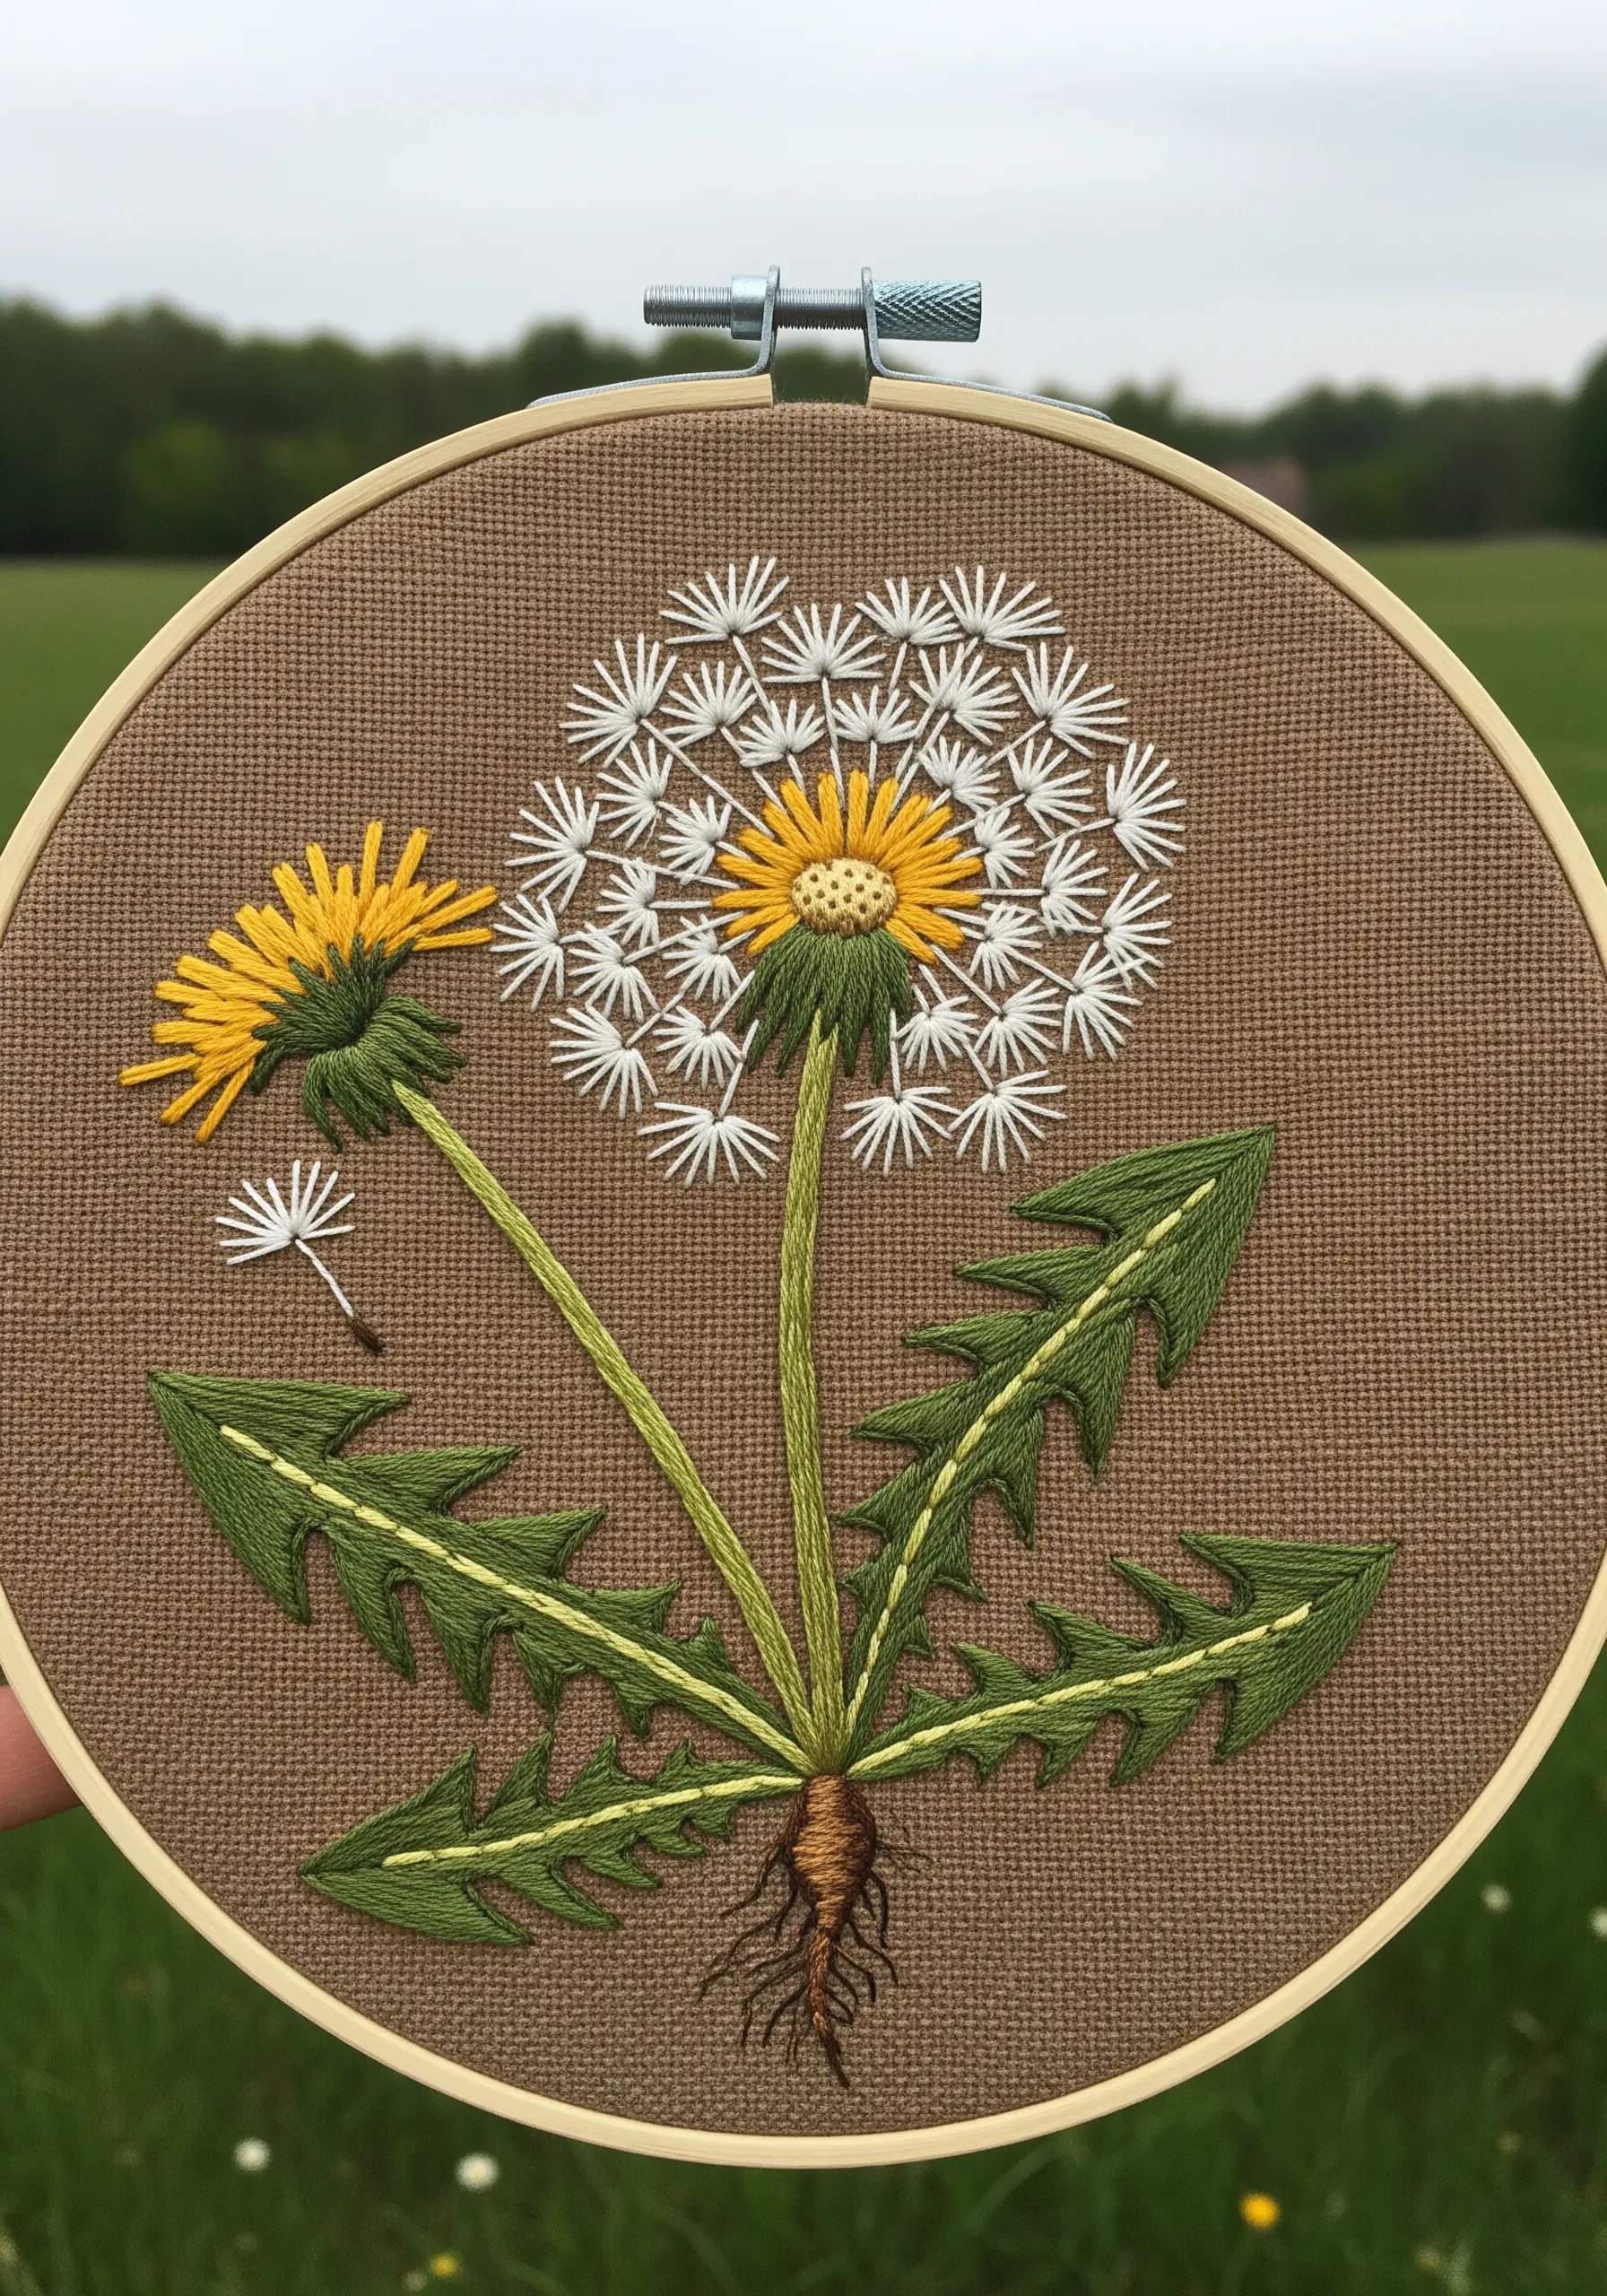
Tell a story in thread by depicting both the flower and the seed head of a dandelion.
Use radiating straight stitches in white and off-white for the fluffy pappus of the seed head, leaving the center open to suggest depth.
Contrast this airy texture with the dense, golden-yellow satin stitch of the flower head.
This textural juxtaposition not only looks beautiful but also captures the transformation of this resilient and useful medicinal plant.
17. Add Edgy Texture to Nettle Leaves
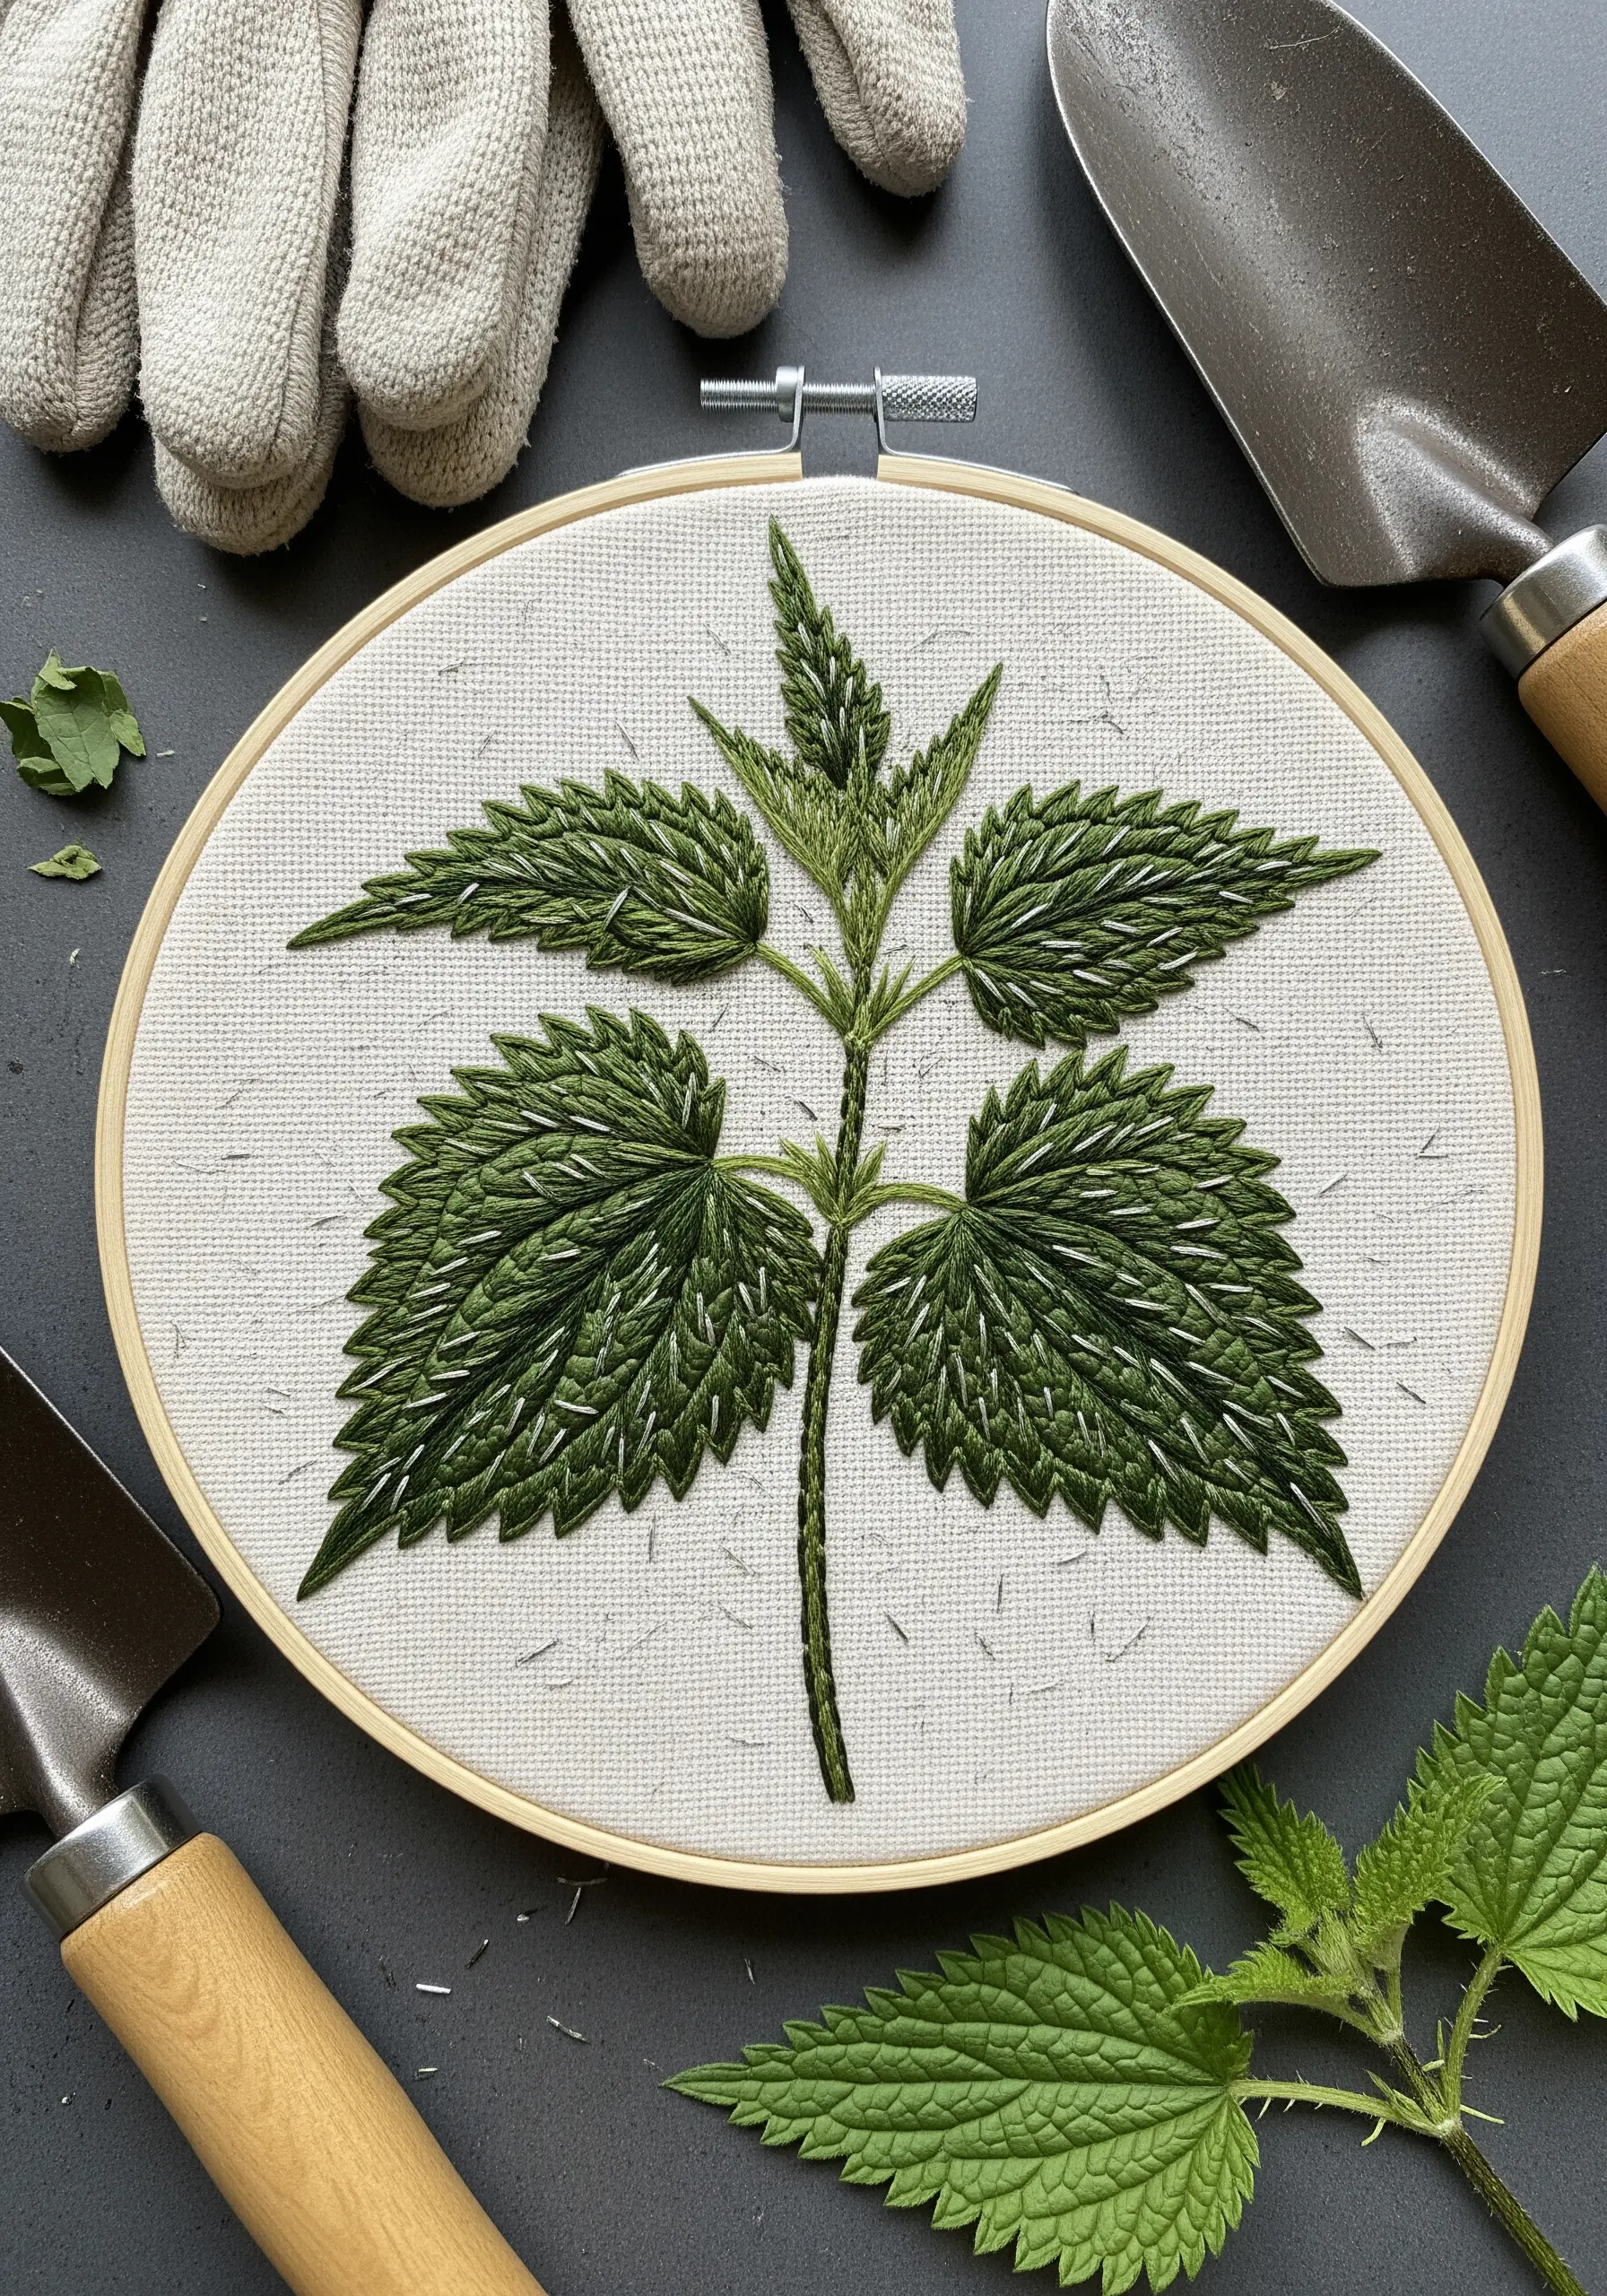
To give your embroidered nettle a realistic, slightly jagged edge, incorporate tiny, precise details.
First, fill the leaf shape using a directional leaf stitch or fishbone stitch to create the central veins and texture.
Then, using a single strand of a slightly lighter green, add tiny straight stitches around the entire perimeter of the leaf.
This final step mimics the plant’s fine ‘stinging’ hairs and gives the design a sharp, lifelike finish that sets it apart.
18. Build Dimensional Mullein with Padded Stitching
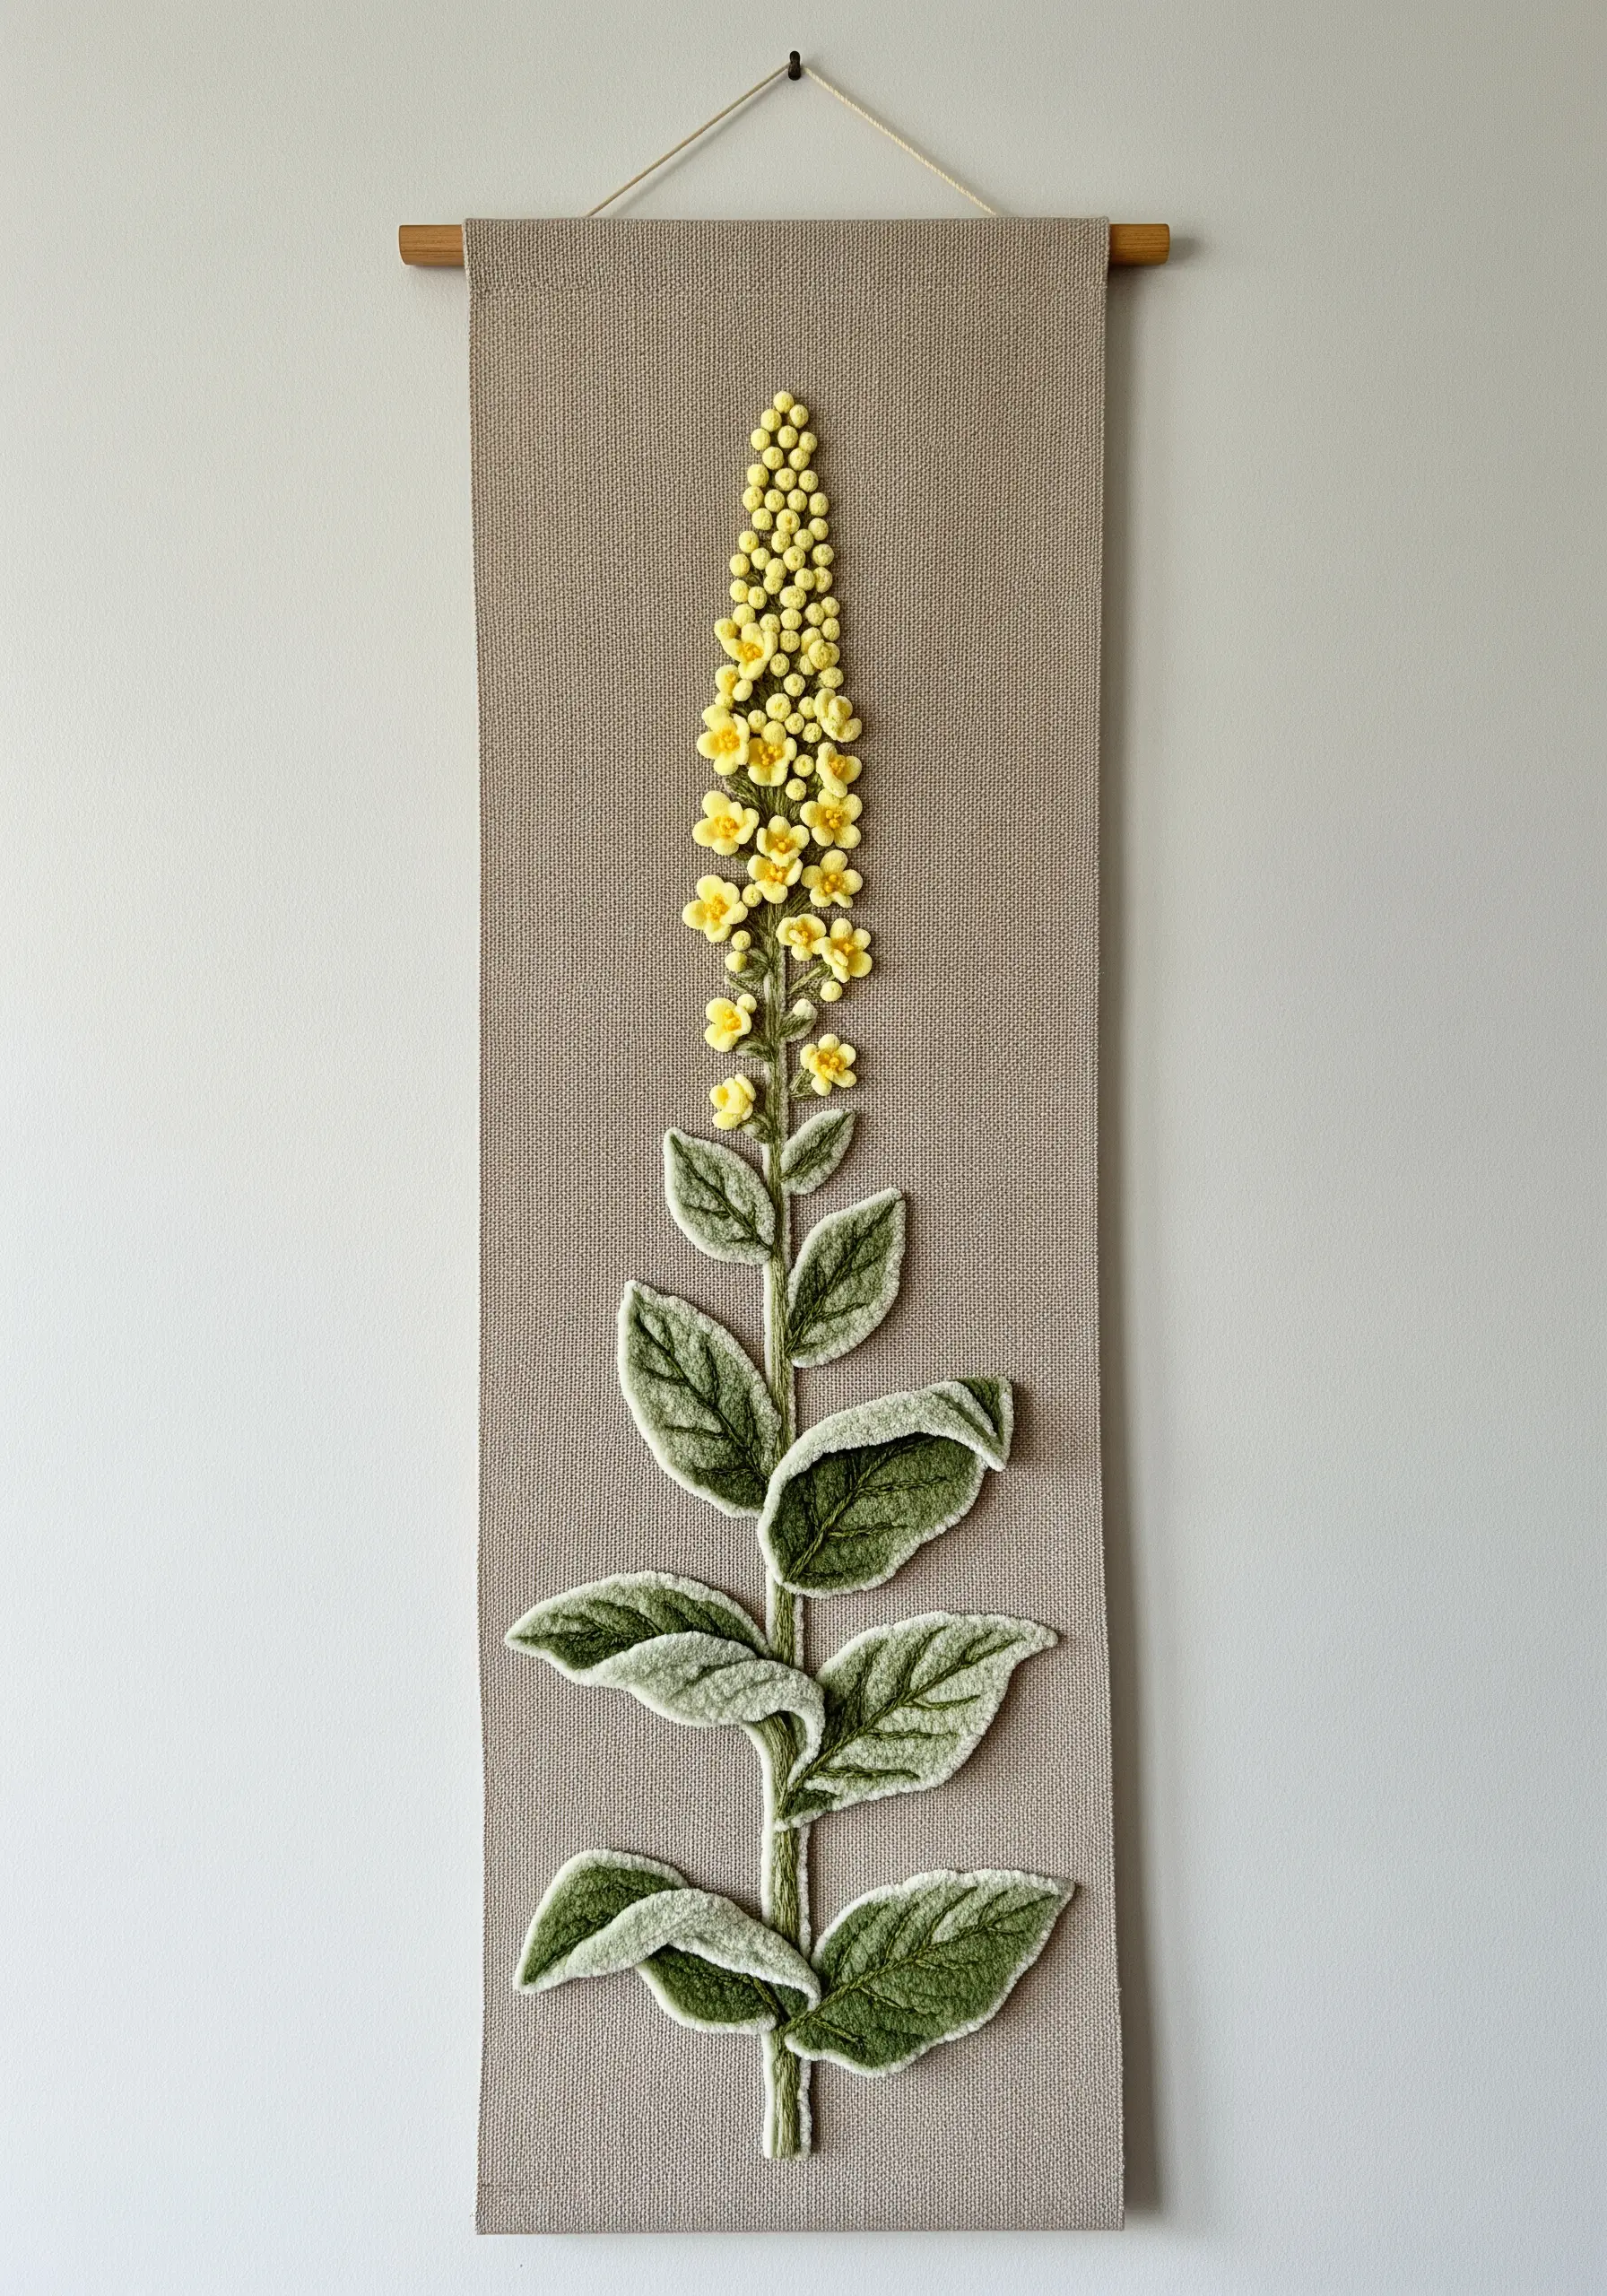
Emulate the thick, fuzzy leaves of the mullein plant by using padded satin stitch.
Before stitching the leaves, lay down a foundation of small running stitches within the leaf shape. Then, work your final satin or long-and-short stitches over this padding.
This simple technique lifts the threads off the fabric surface, creating a soft, three-dimensional effect that you can see and feel.
Use a fuzzy thread like wool or a single strand of mohair to enhance the tactile quality.
19. Design a Durable Hops Motif for an Apron
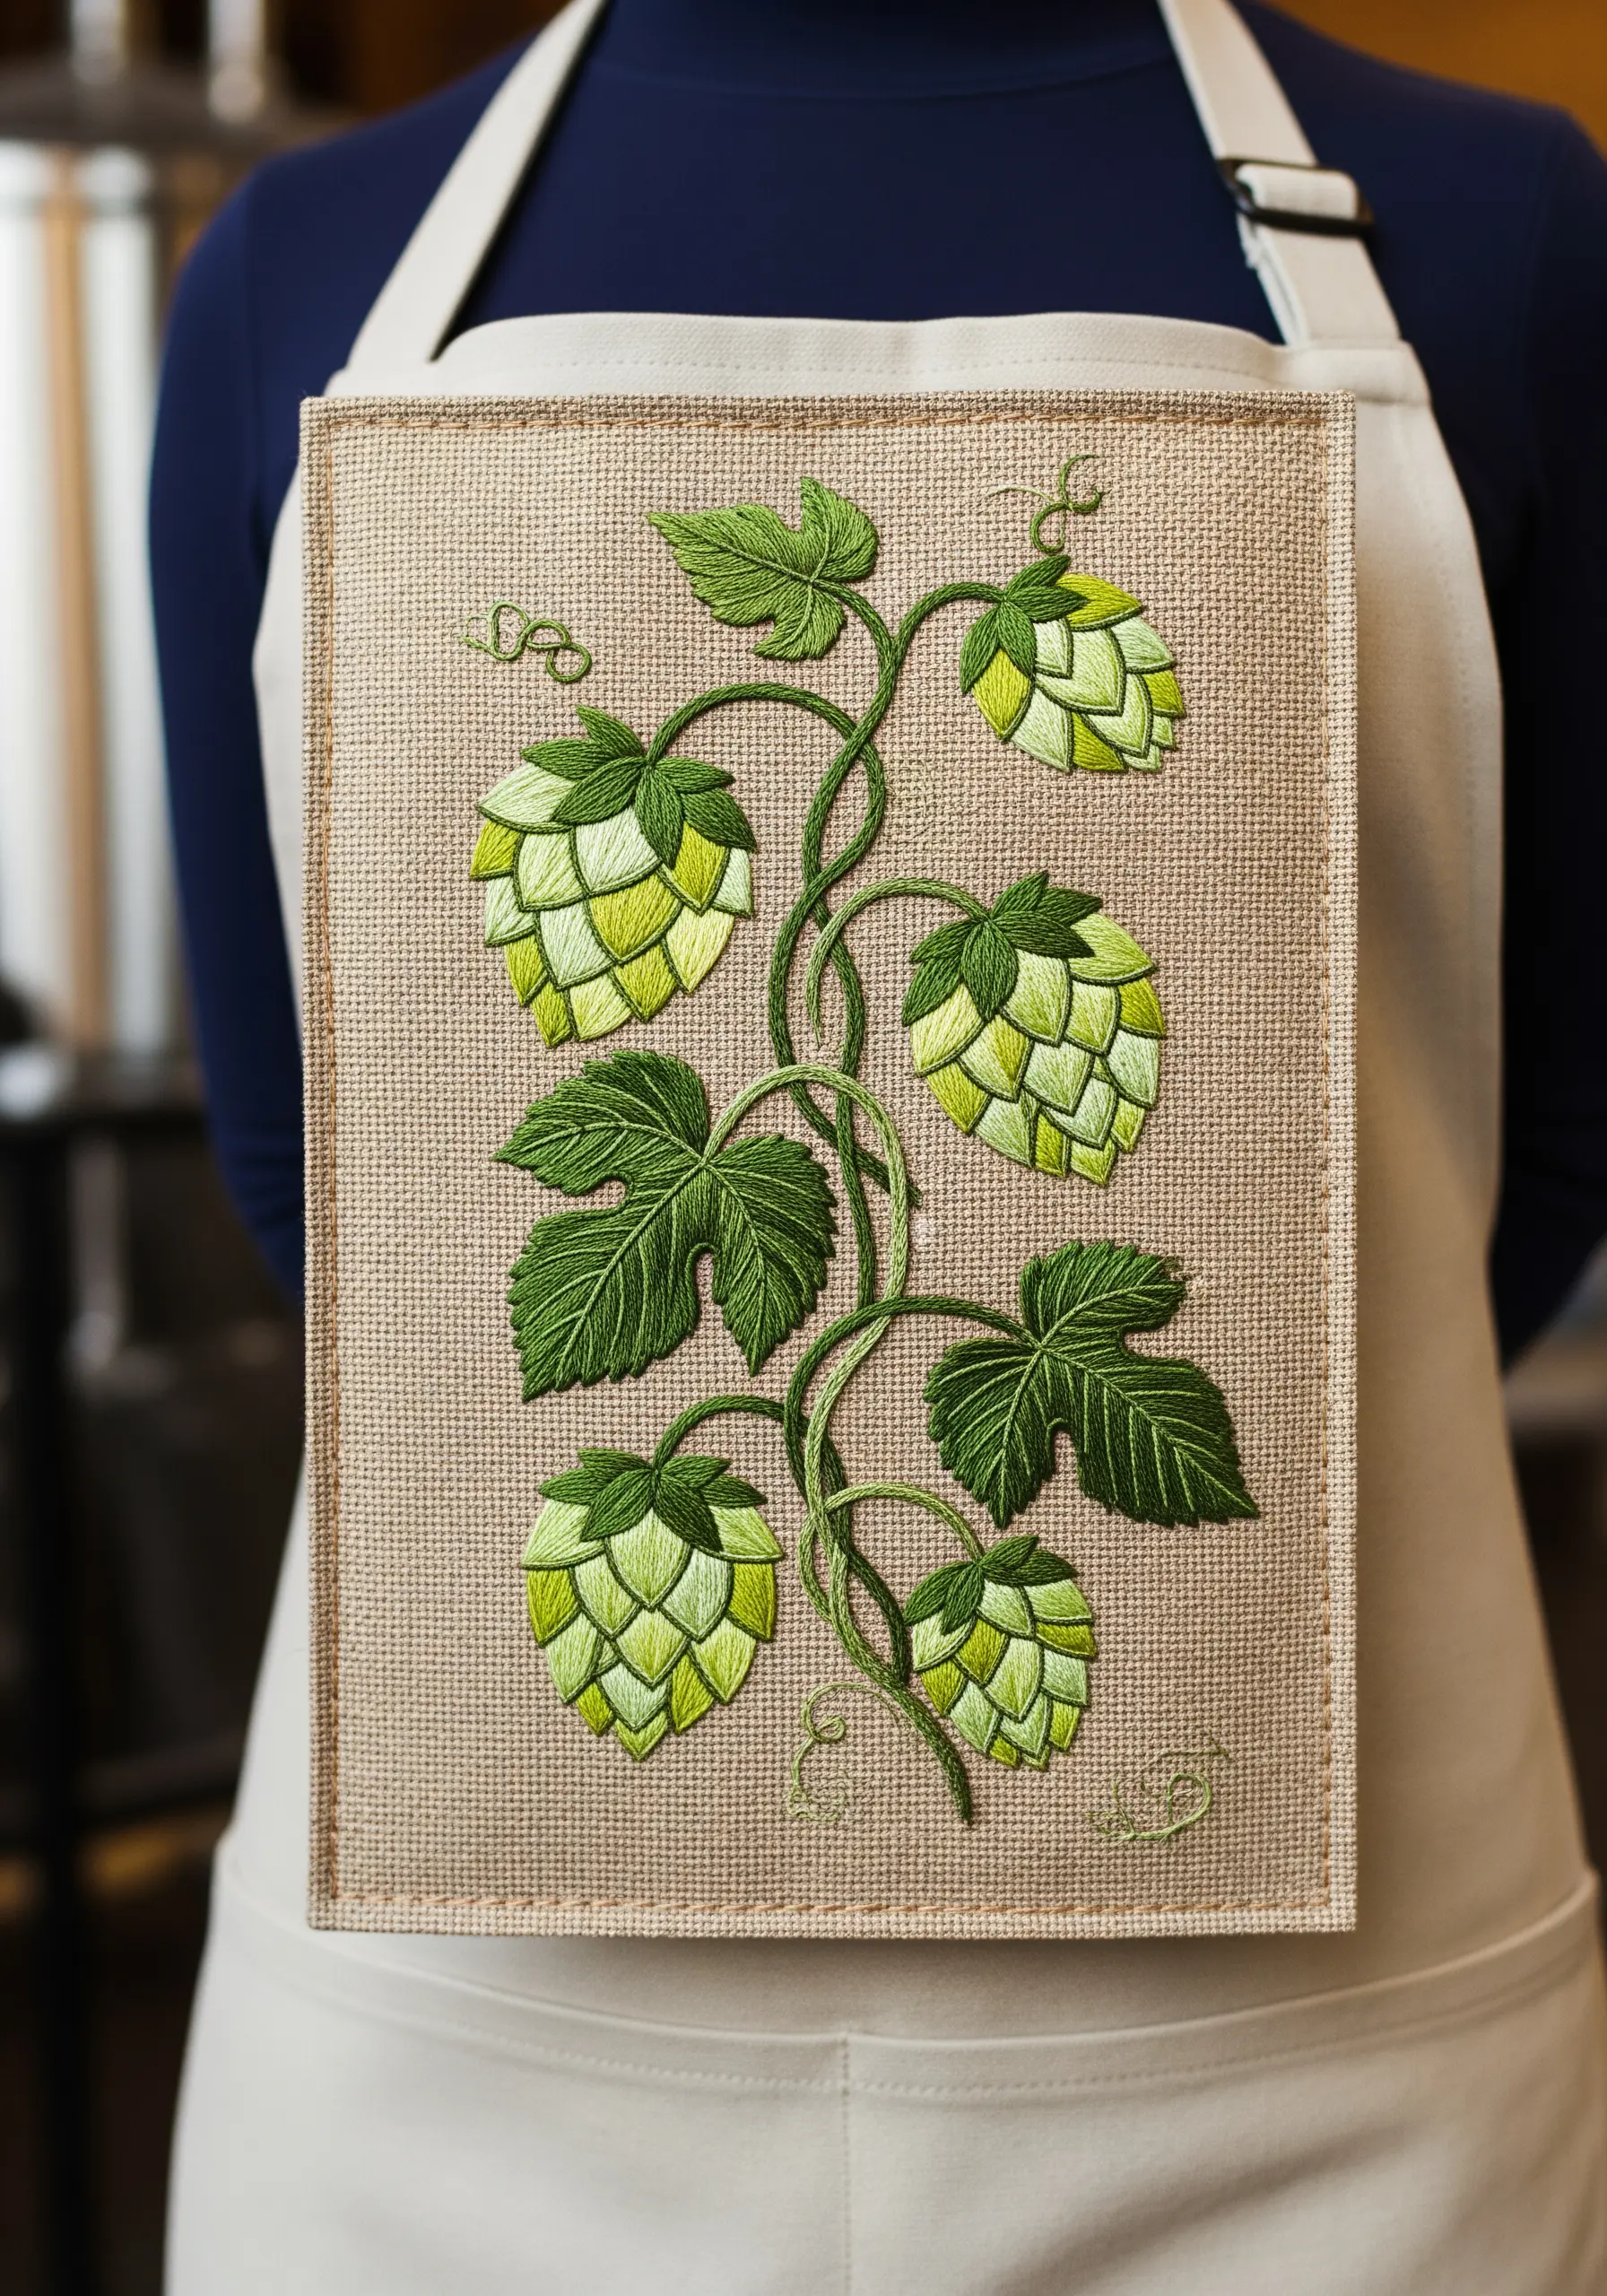
When embroidering on a high-use item like an apron, durability is as important as beauty.
Construct the hop cones using segmented satin stitch, outlining each individual ‘petal’ with a reinforcing split stitch before filling it in.
This outline protects the edges of the satin stitch from snagging and wear.
Choose a high-quality, colorfast cotton floss that can withstand repeated washing, ensuring your beautiful work lasts.
20. Sculpt a Lifelike Ginger Root with Directional Stitches

To capture nature’s textures, like the fibrous skin of ginger, your stitch direction is everything.
Use a split stitch or satin stitch, wrapping your stitches around the curves of each knob of the root to create a rounded, 3D effect.
Incorporate several shades of beige, tan, and cream, using the darker tones in the crevices between sections to create shadows and enhance the sense of volume.
This careful shading and contouring transforms a flat design into a remarkably realistic still life.
21. Illustrate a Cross-Section of Turmeric
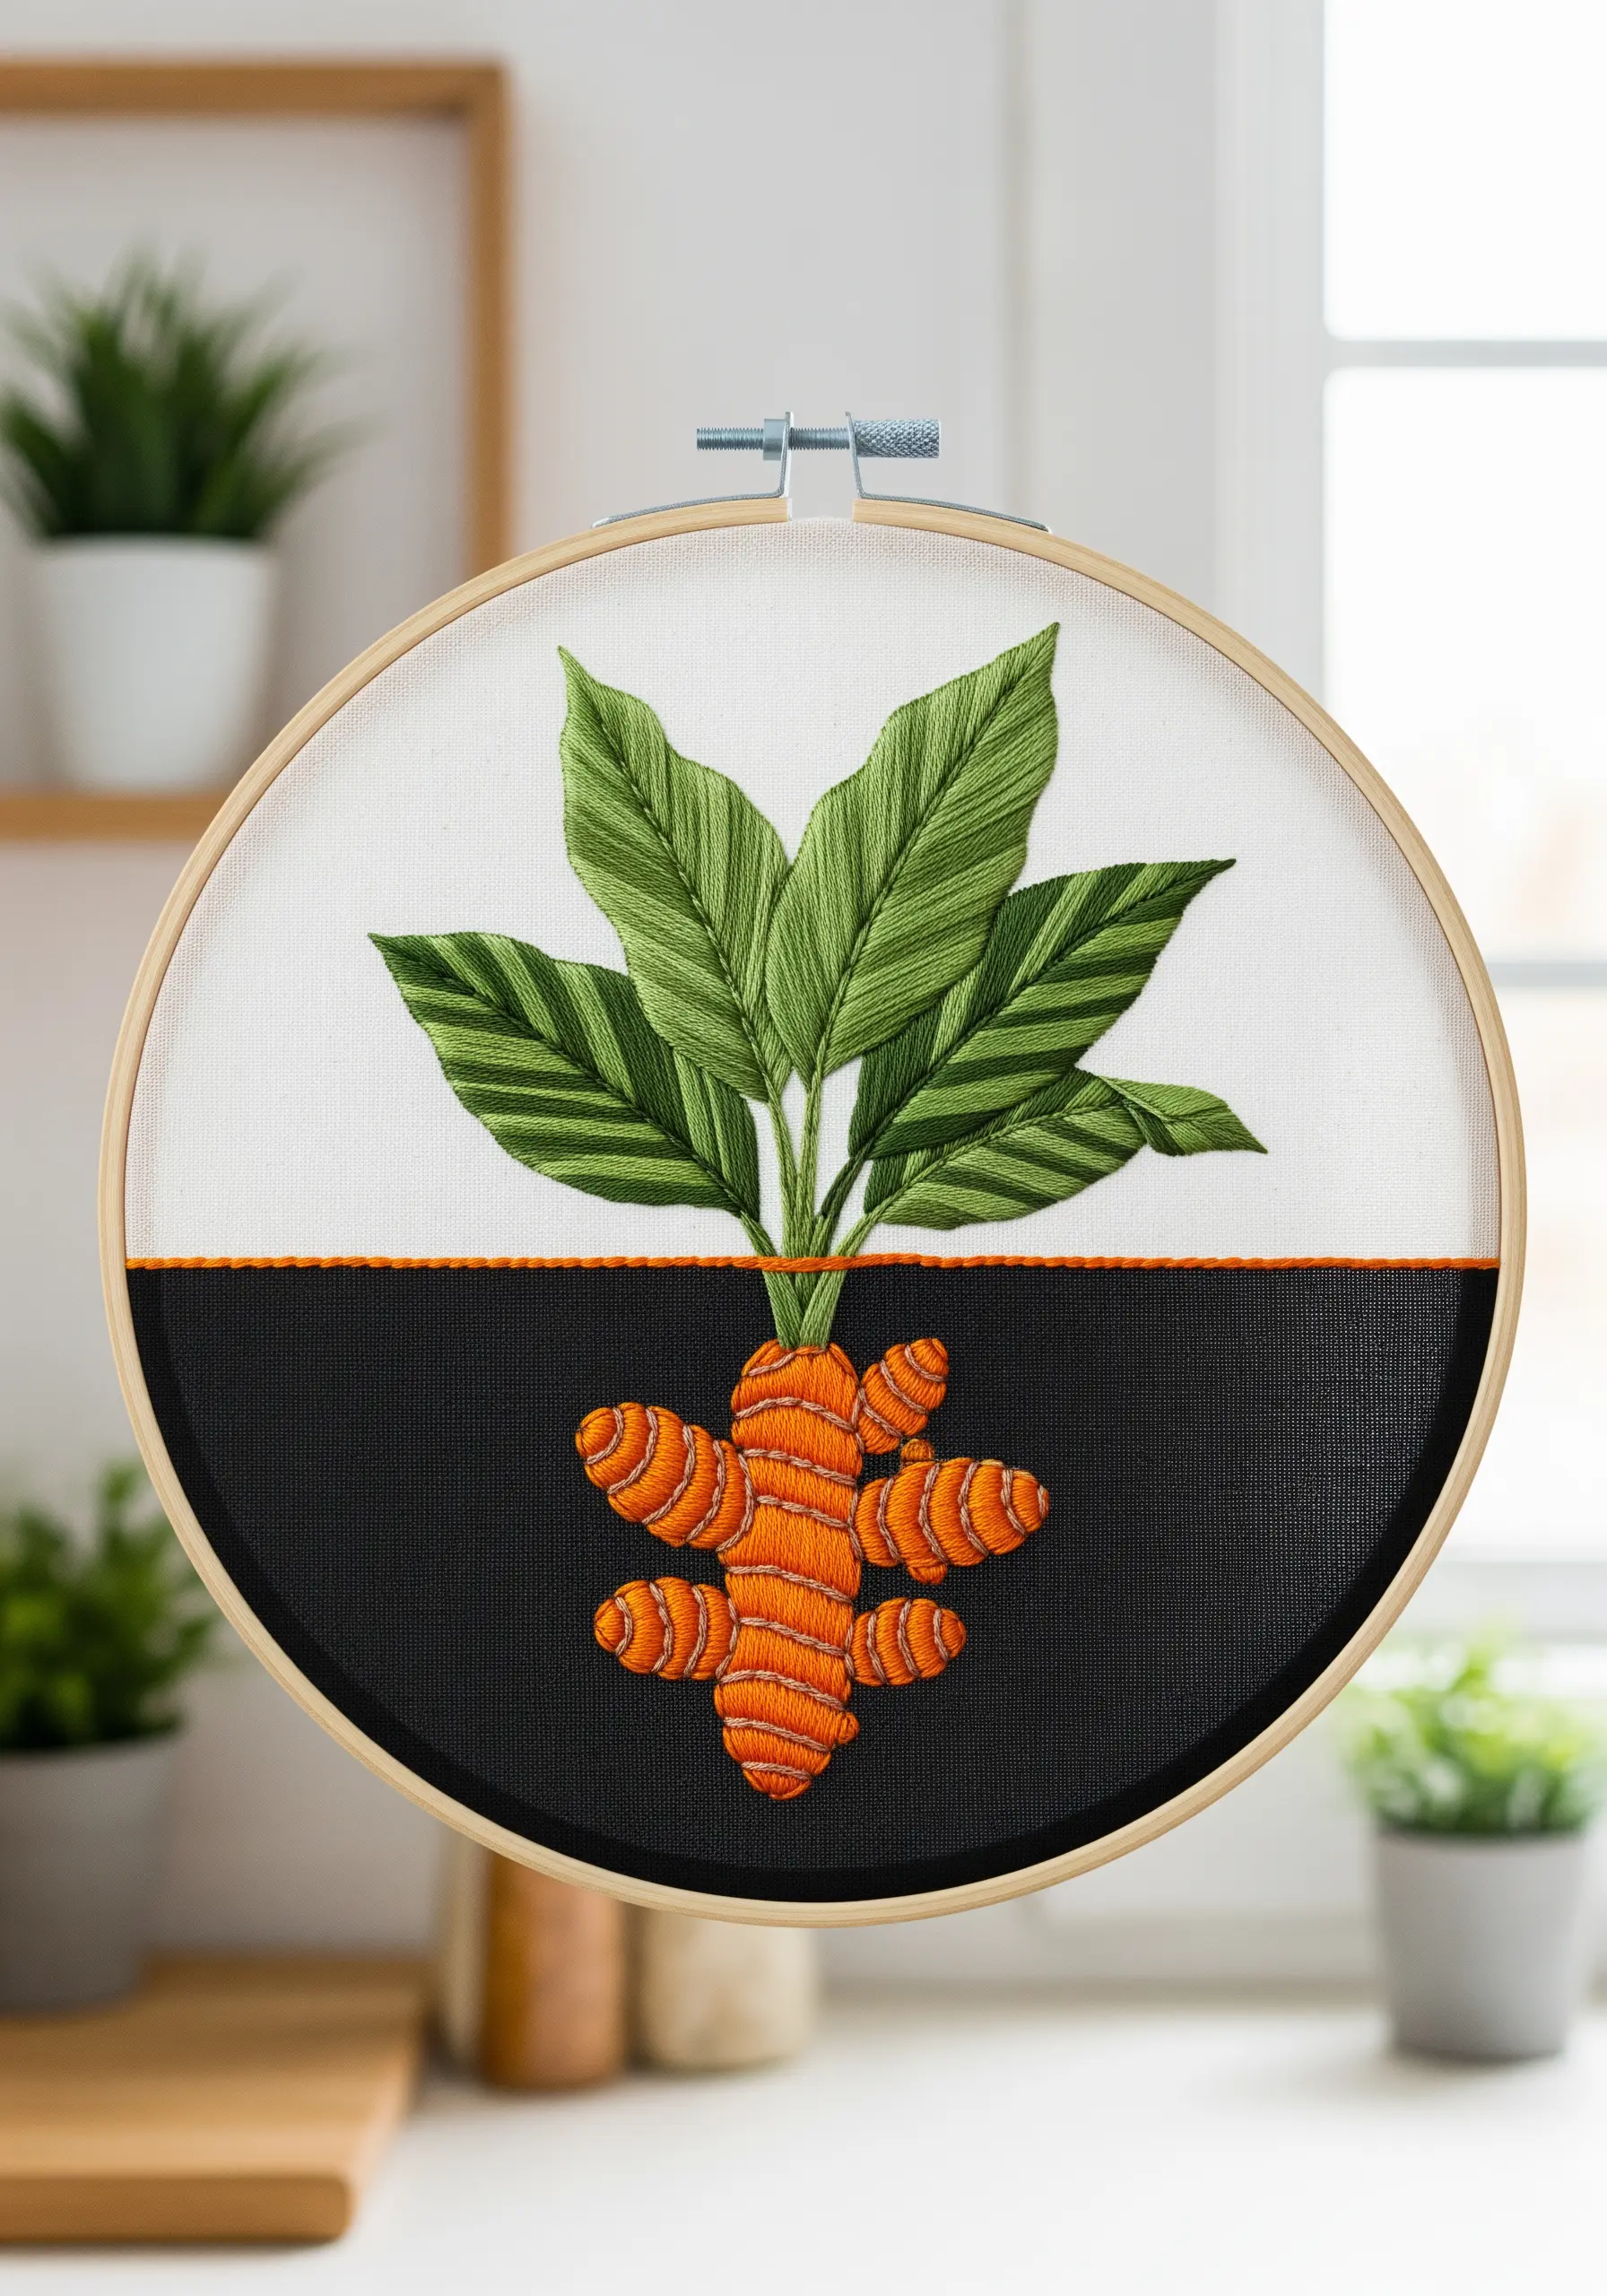
A split-view design is a compelling way to showcase both the root and the leaves of a plant like turmeric.
Create a strong horizon line to divide the underground and above-ground sections.
Use horizontal satin stitches in vibrant oranges for the segmented root below, and vertical long-and-short stitches in lush greens for the leaves above.
This deliberate change in stitch direction creates a powerful visual contrast that makes the composition clear and artistically engaging.
22. Weave a Lavender Field with Perspective
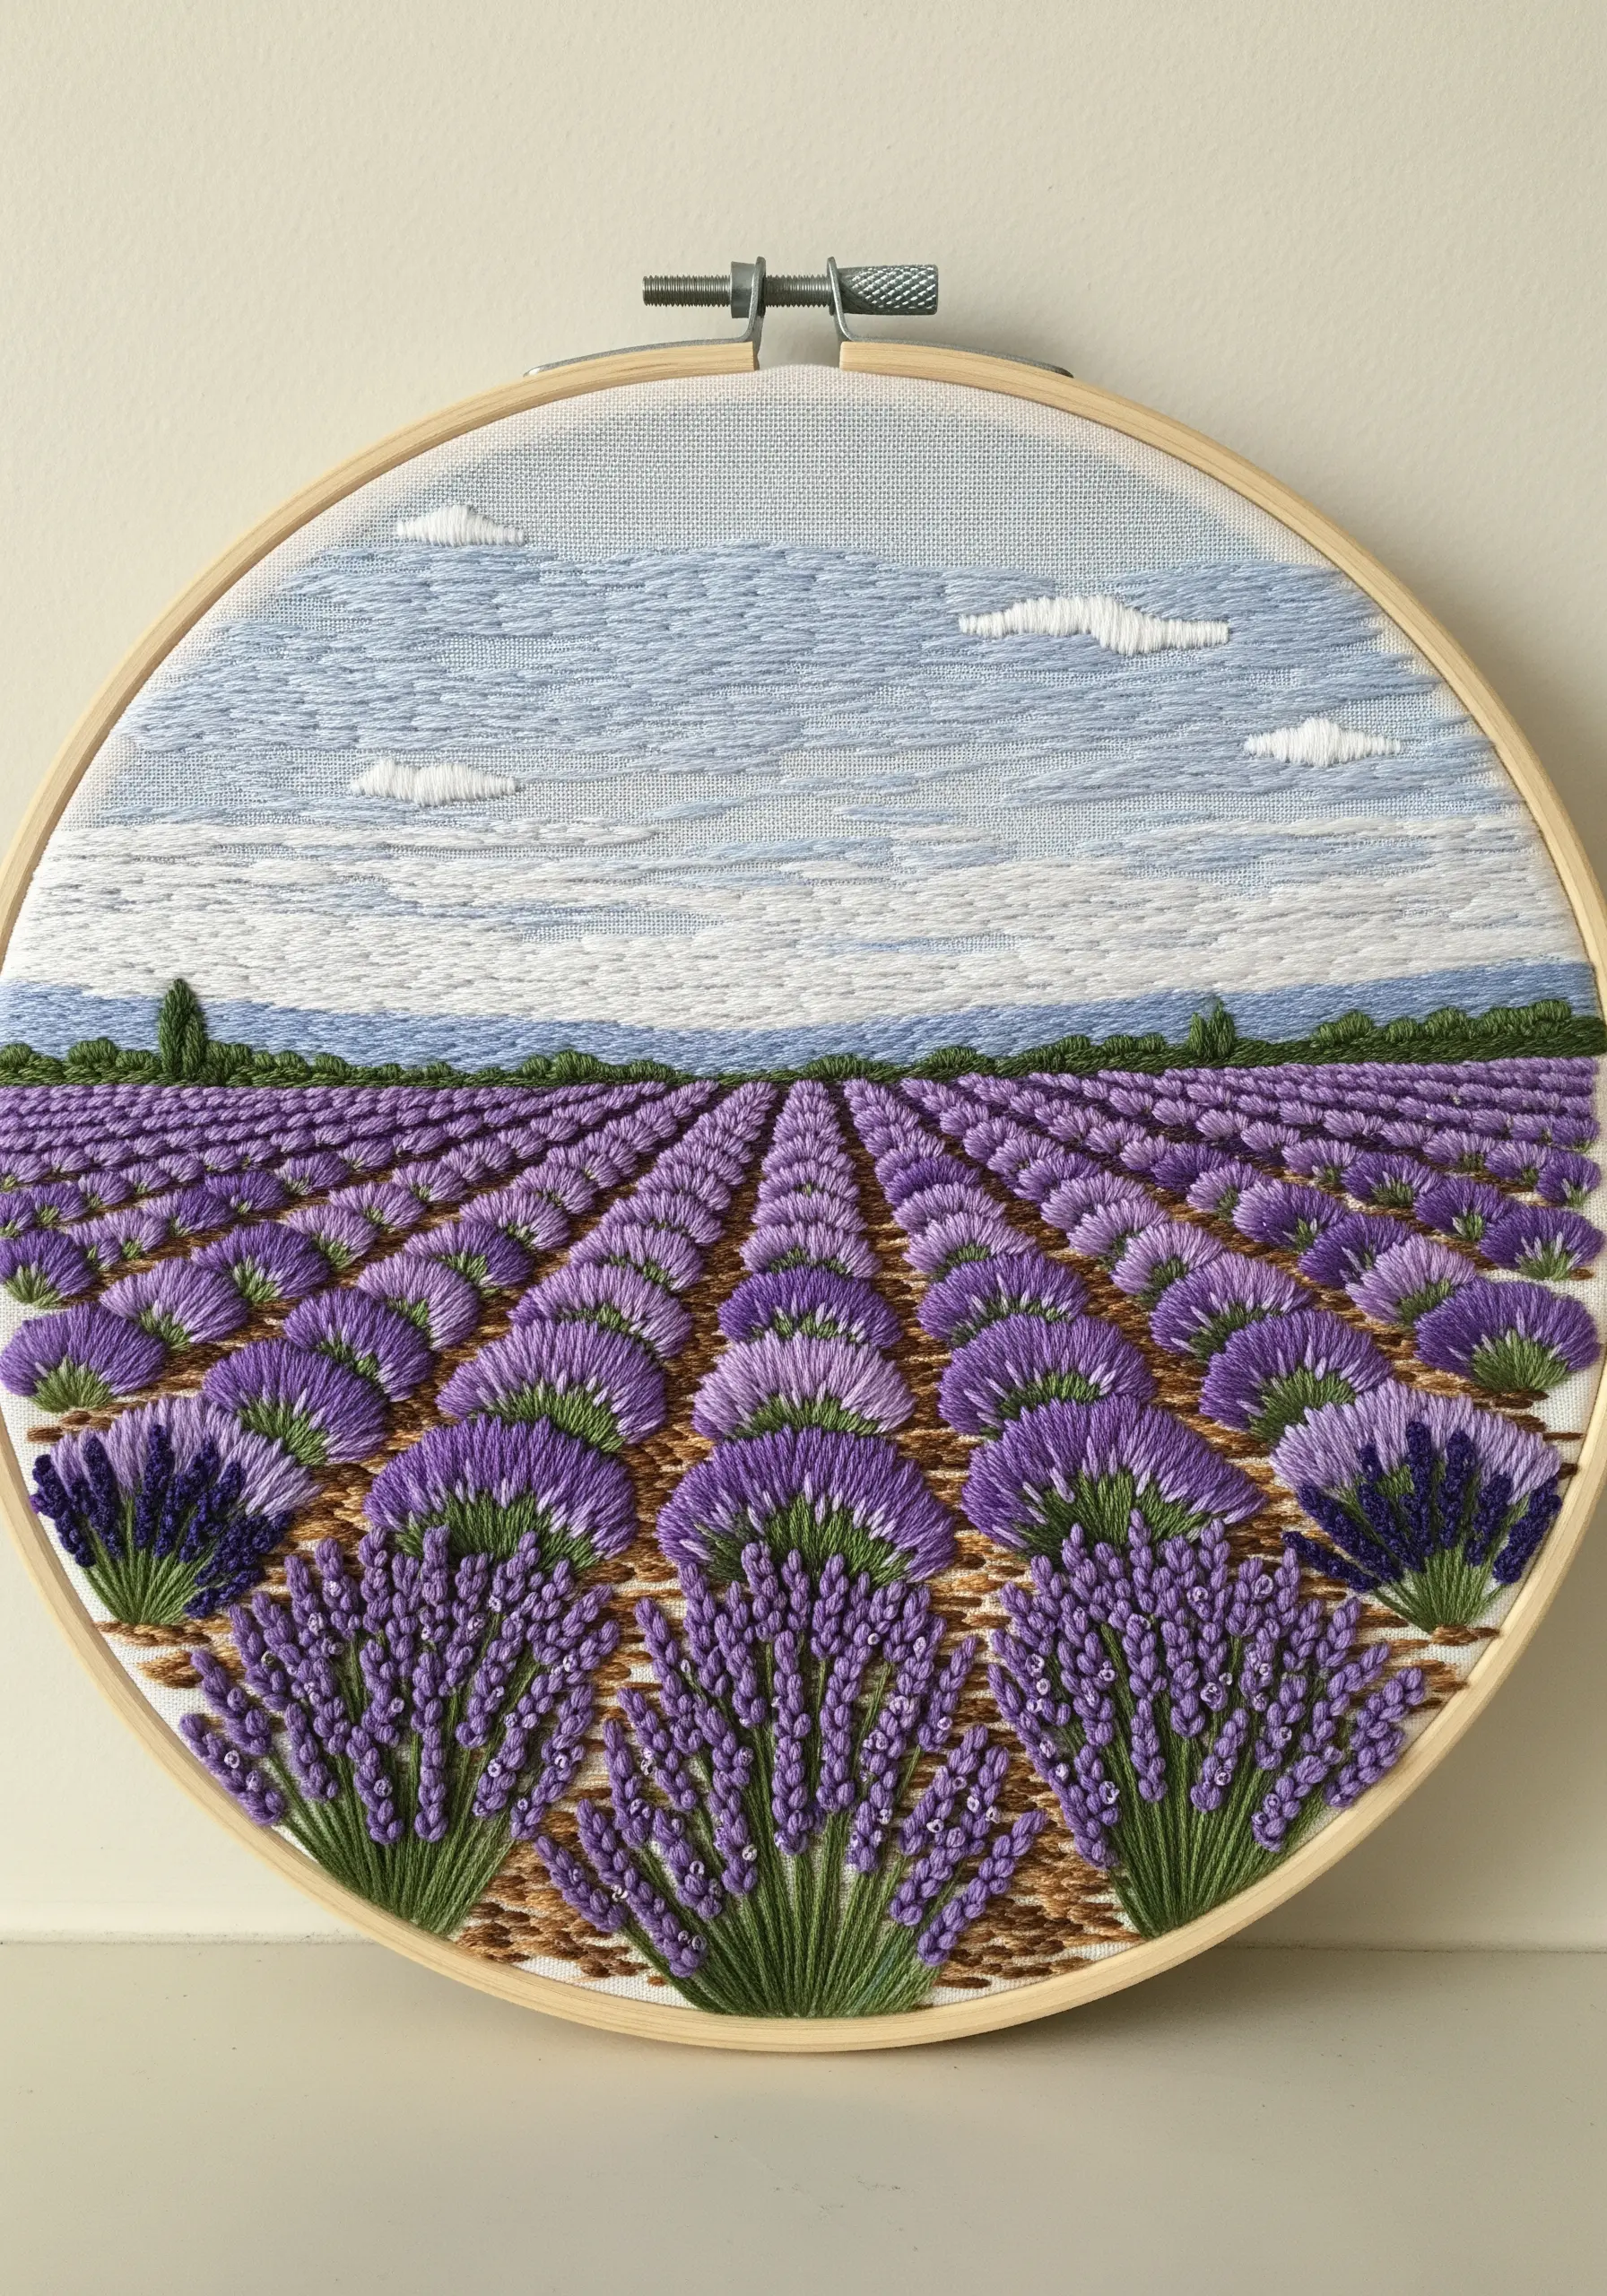
To create the illusion of a vast lavender field, you need to master atmospheric perspective in thread.
For the foreground, use thick, textured French knots in multiple shades of vibrant purple and green.
As you move toward the horizon, gradually reduce the size of your knots and stitches, and switch to cooler, less saturated purples and blues.
This subtle shift in scale and color will make the distant rows recede, giving your 2D embroidery an incredible sense of depth and distance.
23. Create a Dynamic Mint Pattern for a Pillow
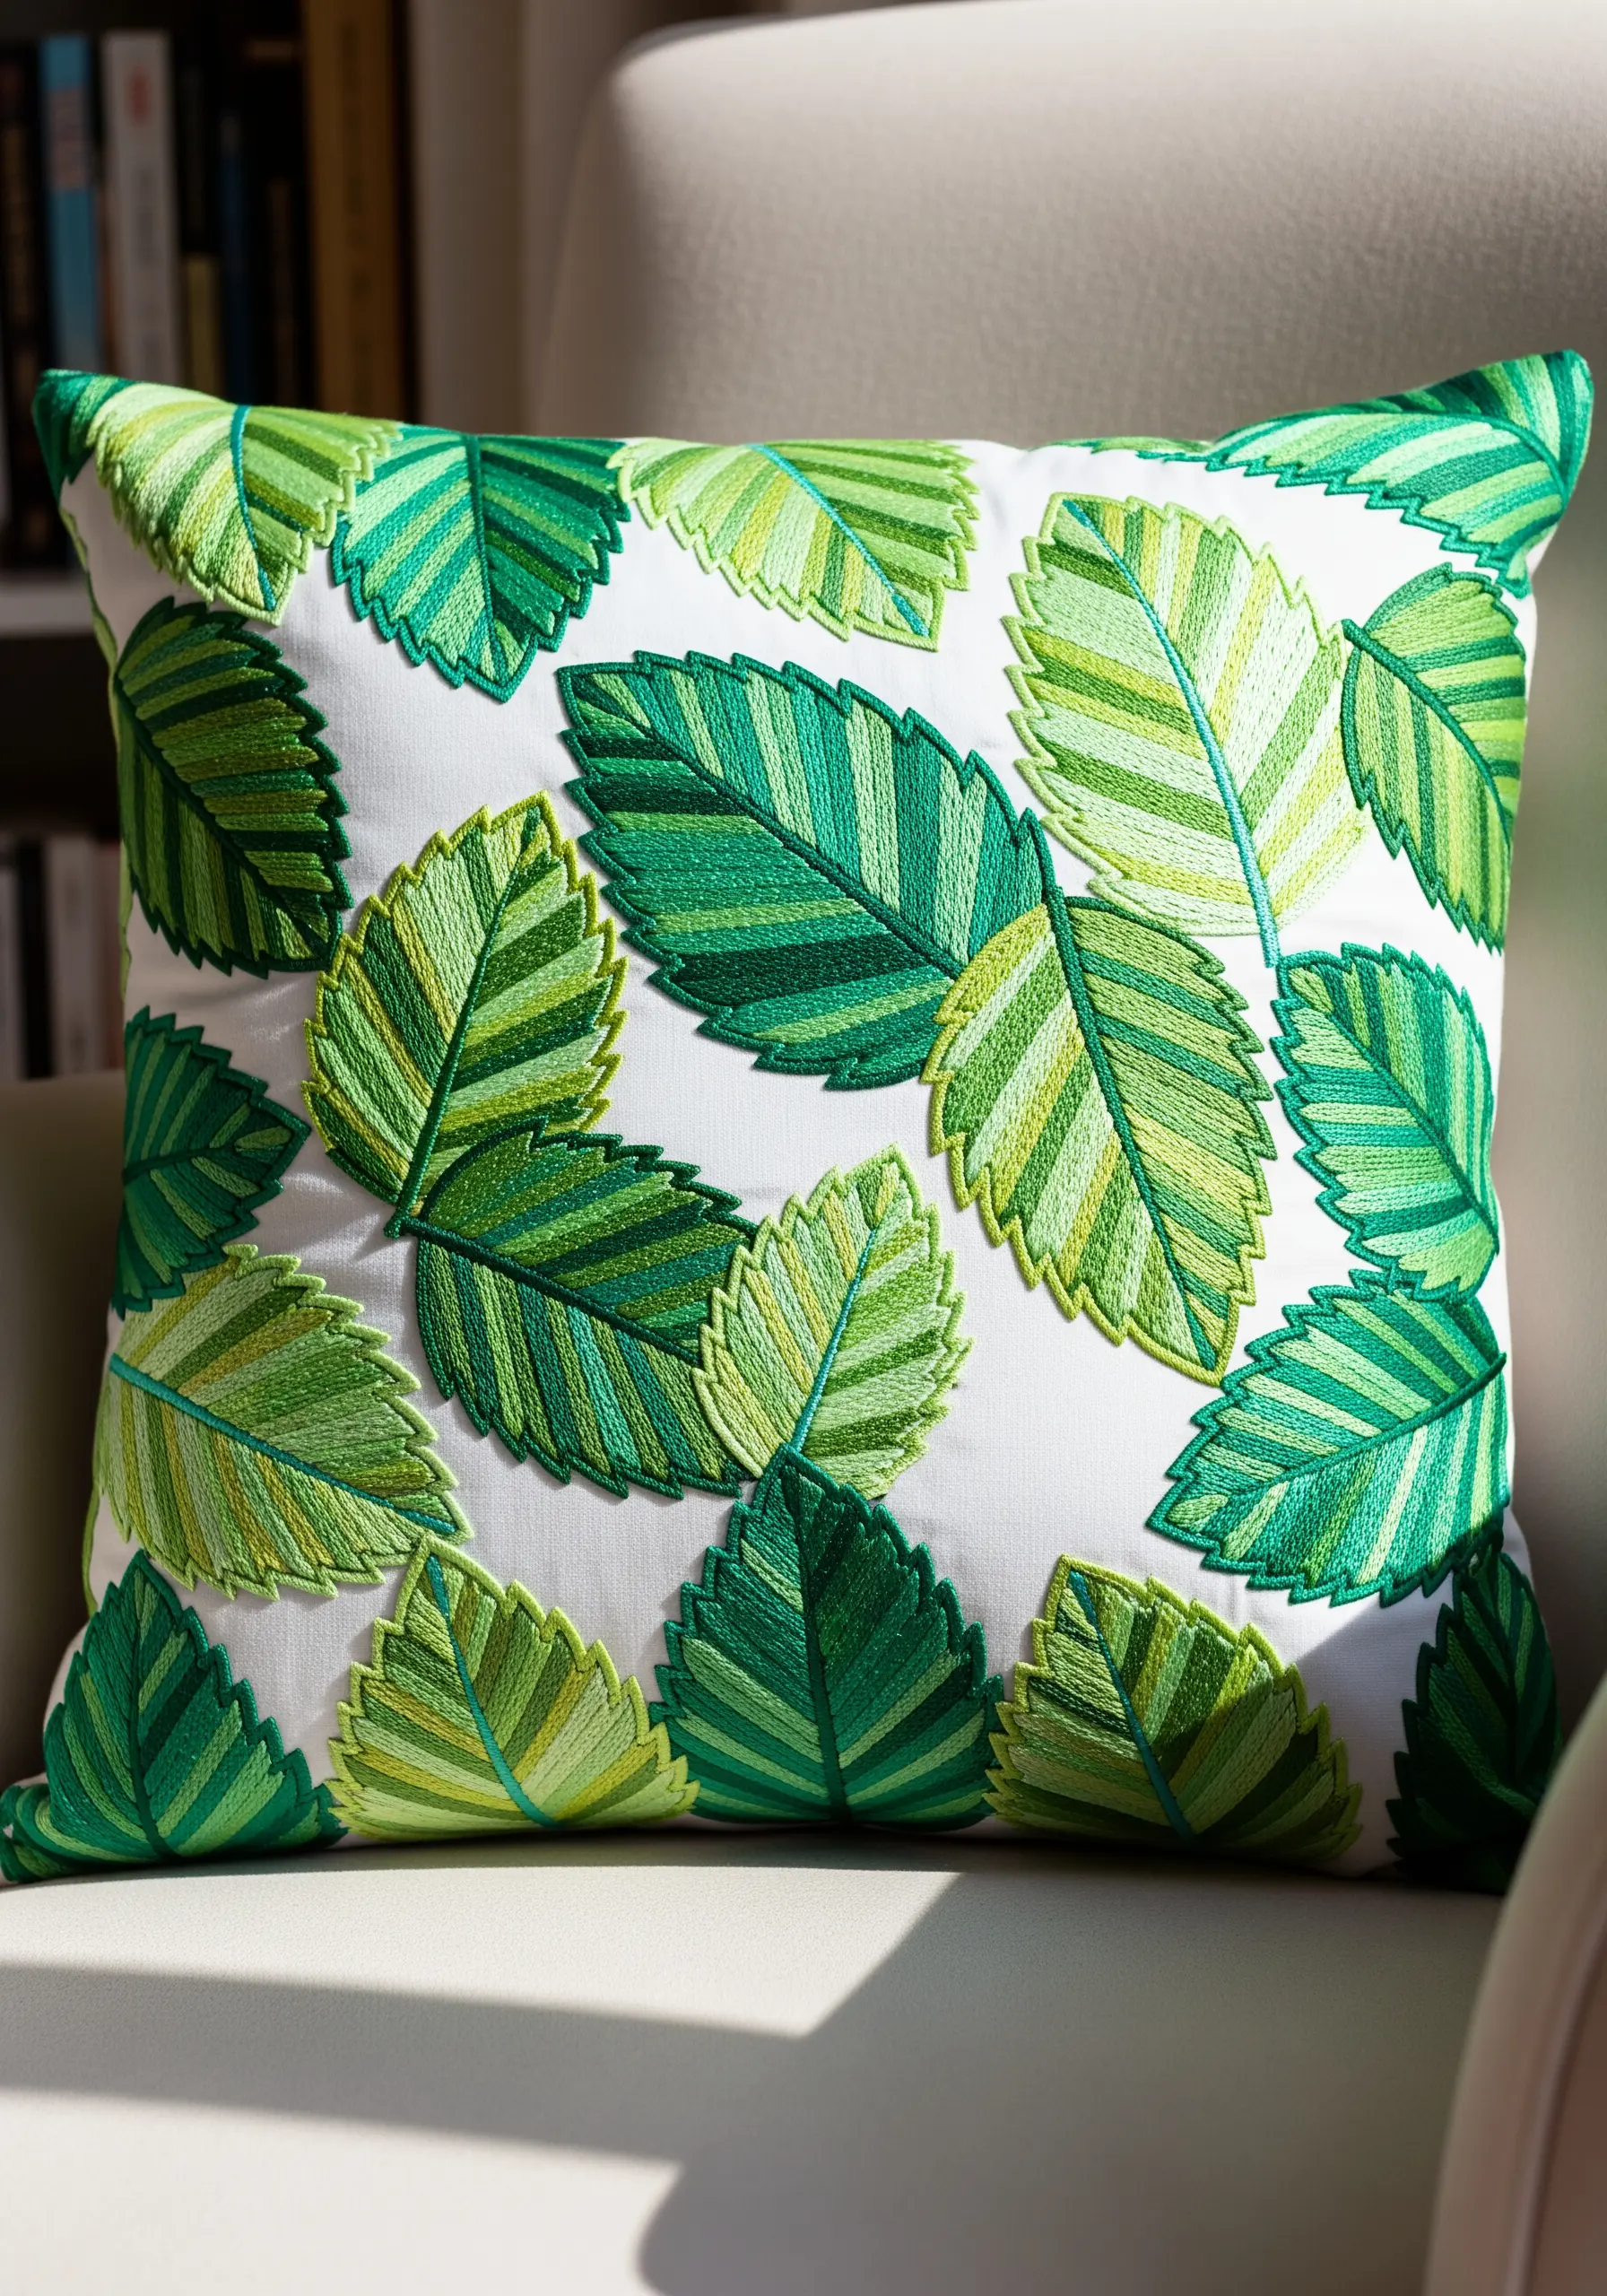
Turn a simple herb into a vibrant, modern textile pattern perfect for a statement pillow.
Use a fishbone or long-and-short stitch to fill each mint leaf, blending two or three green tones within each one for a richer look.
Arrange the leaves in a scattered, overlapping pattern, ensuring they face different directions to create a sense of natural, energetic movement.
Leaf embroidery stitches with varied shading prevent the repeating pattern from feeling flat or static.
24. Add a Refined Rosemary Accent to Linen Napkins
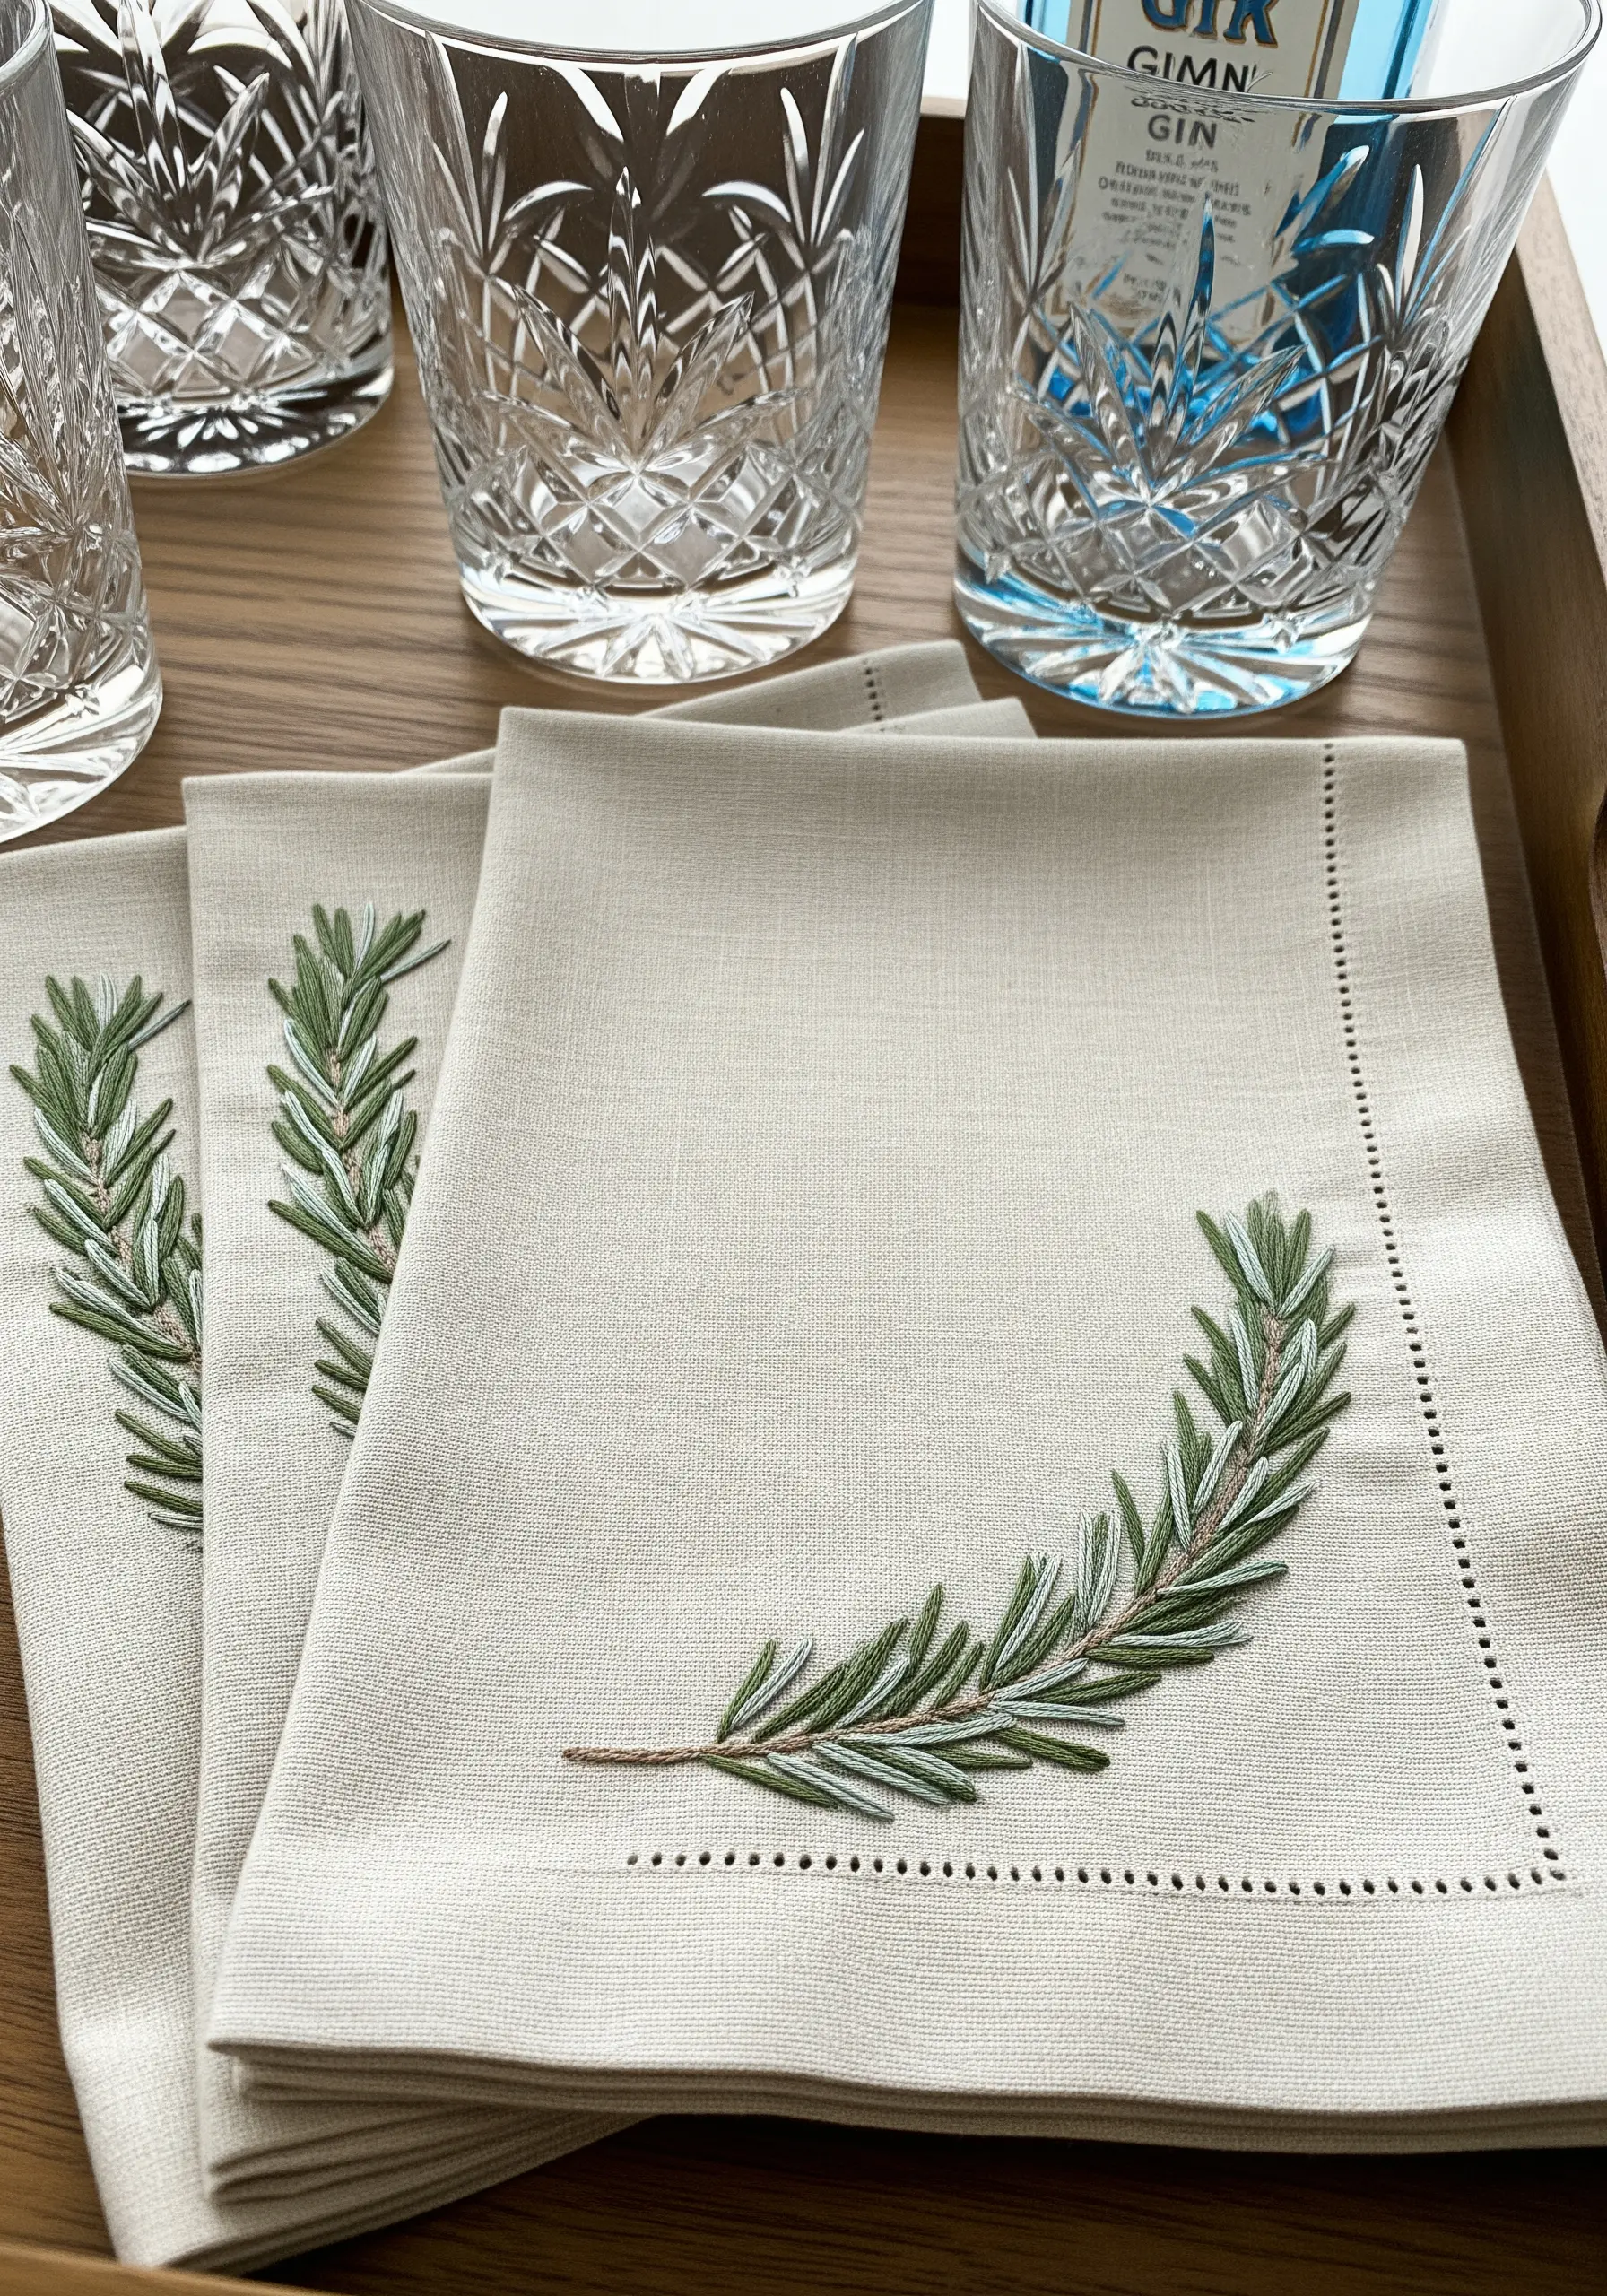
For an understated and elegant touch on table linens, a single sprig of rosemary is perfect.
Stitch on high-quality linen using just two or three strands of floss to keep the design delicate and refined.
Use a fly stitch worked closely together to form the leaves; this creates a beautiful tapered shape with a central vein in one motion.
This minimalist approach adds a touch of handmade luxury without overwhelming the simple beauty of the fabric.
25. Stitch a Cheerful Bouquet on Sturdy Denim
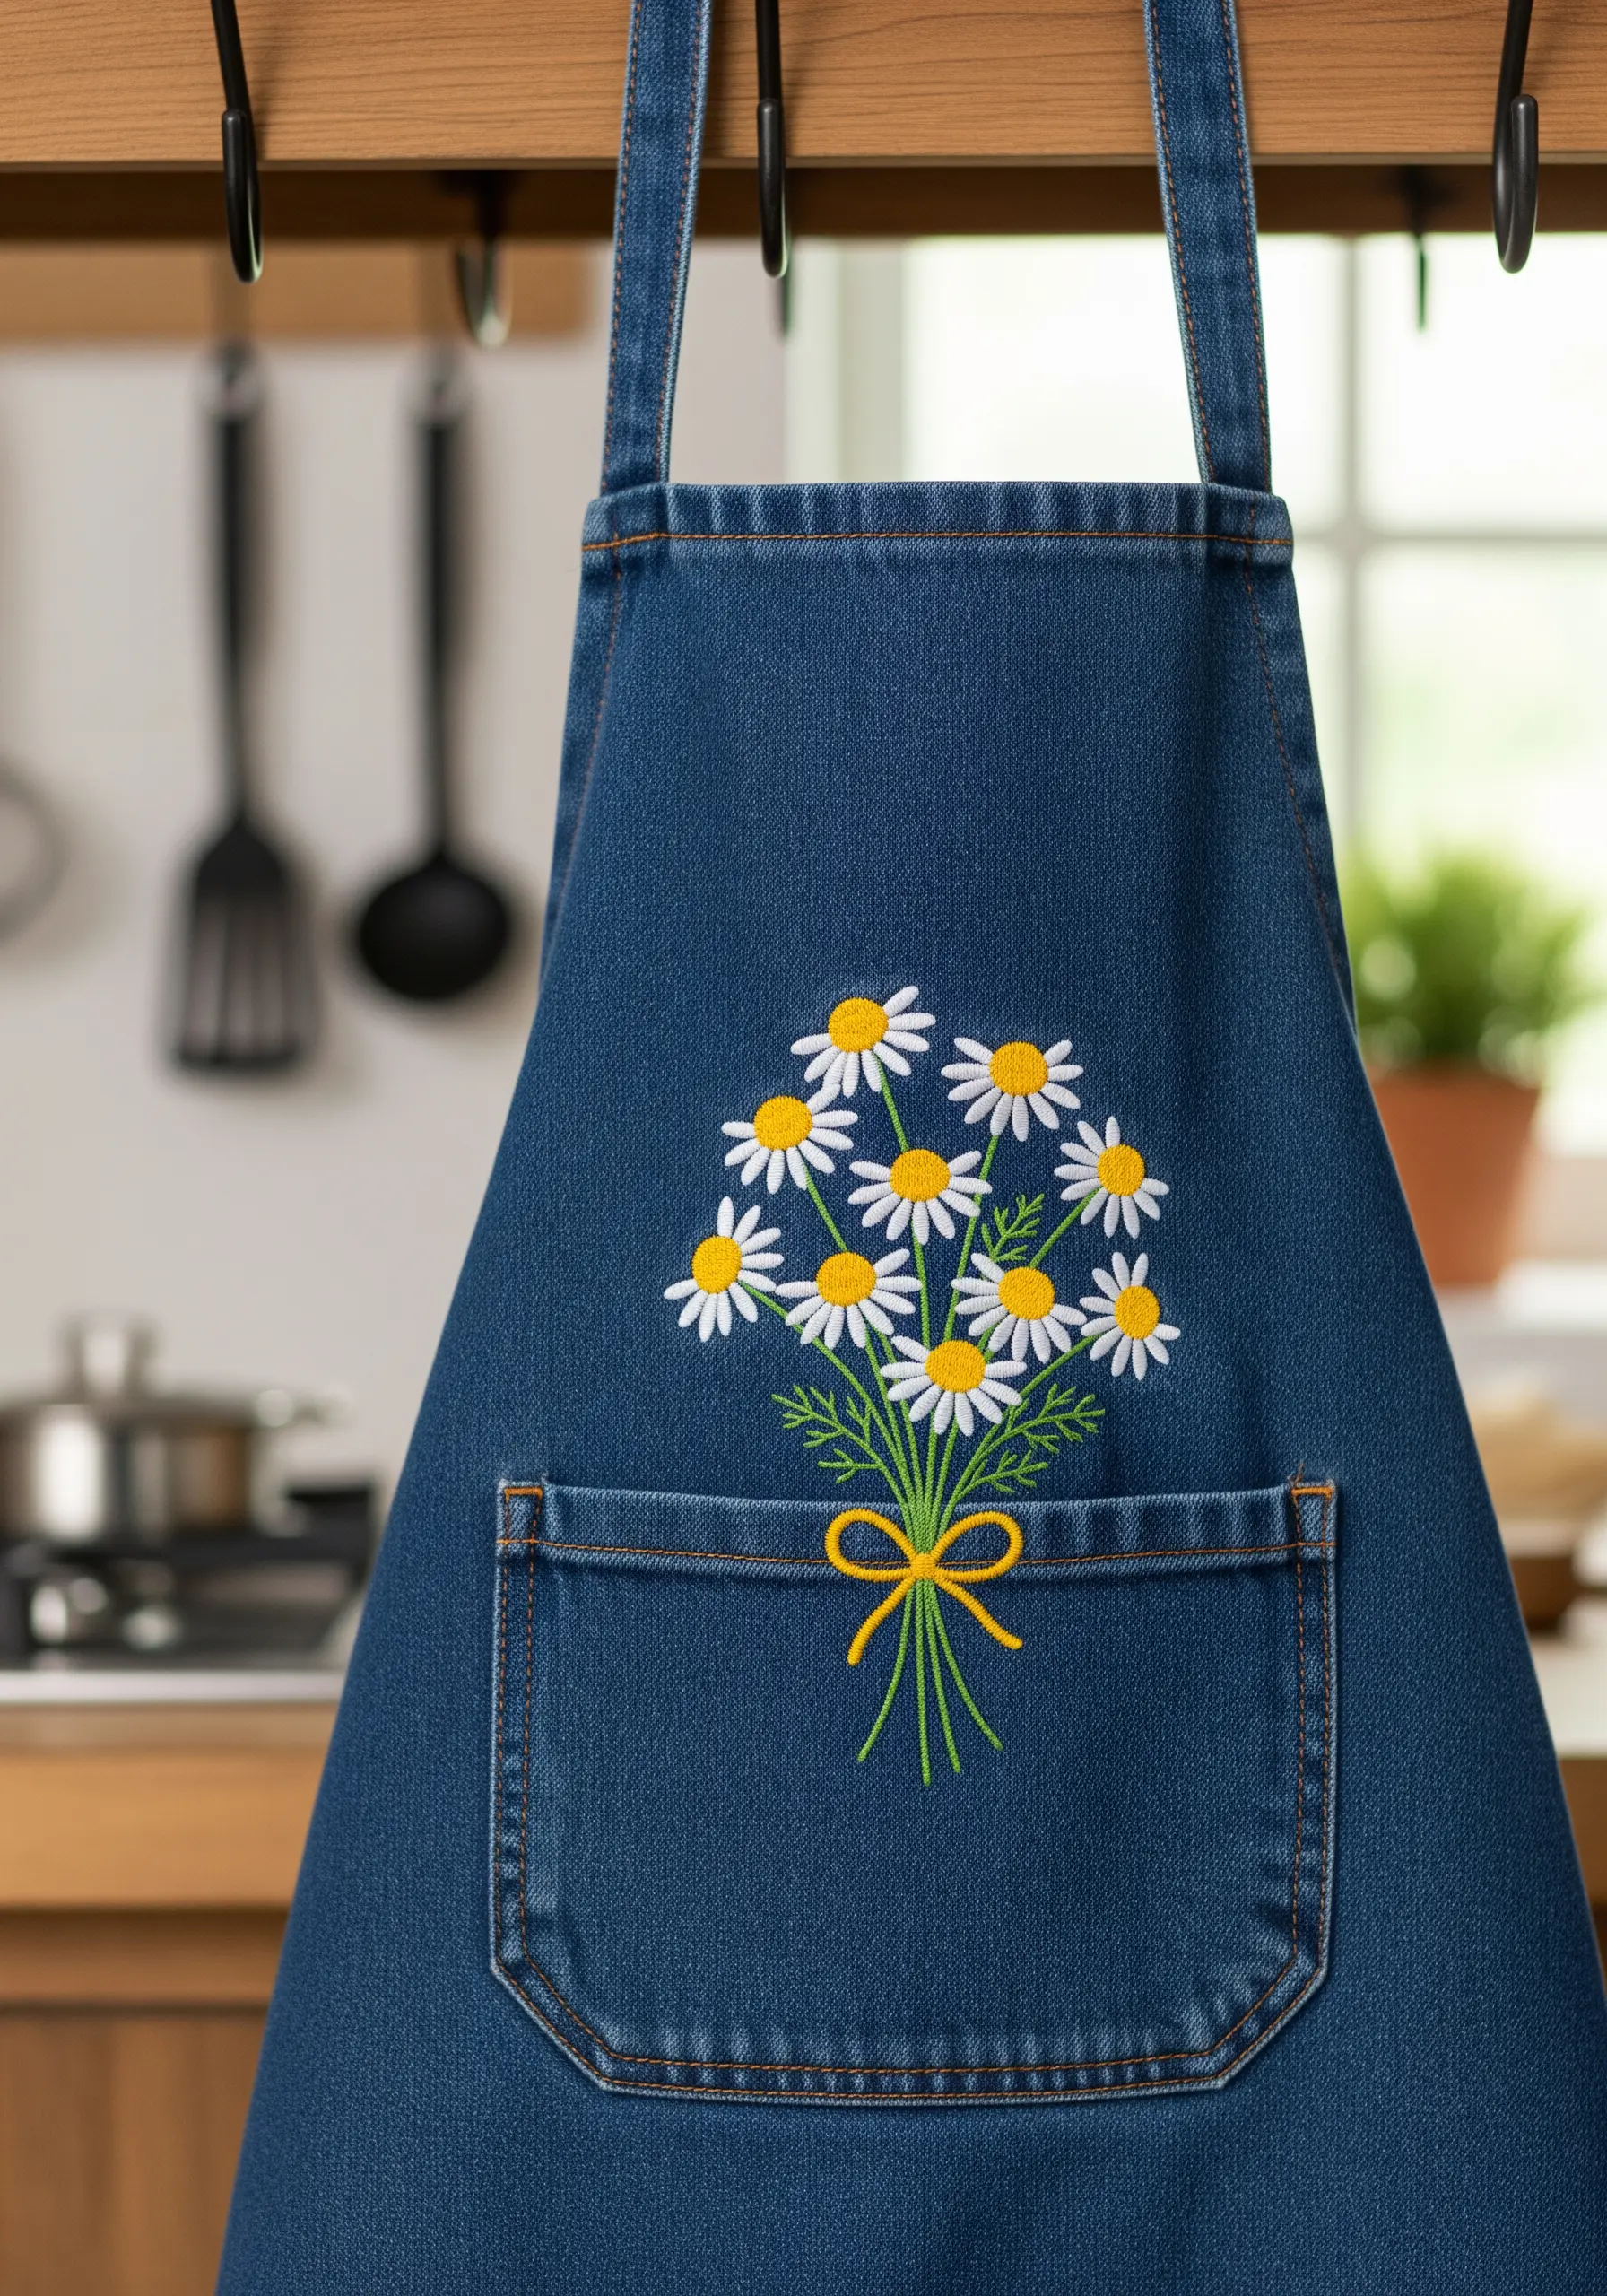
The robust texture of denim provides a wonderful canvas for a bright and cheerful bouquet of chamomile.
The deep blue color makes the white and yellow threads pop, creating a high-impact design.
Use a full six strands of floss for the petals and centers to ensure the embroidery is bold enough to stand out against the heavy twill weave.
A simple satin stitch for the petals works beautifully here, creating a solid, graphic look that complements the casual feel of the denim.
26. Craft a Professional-Looking Sage Patch
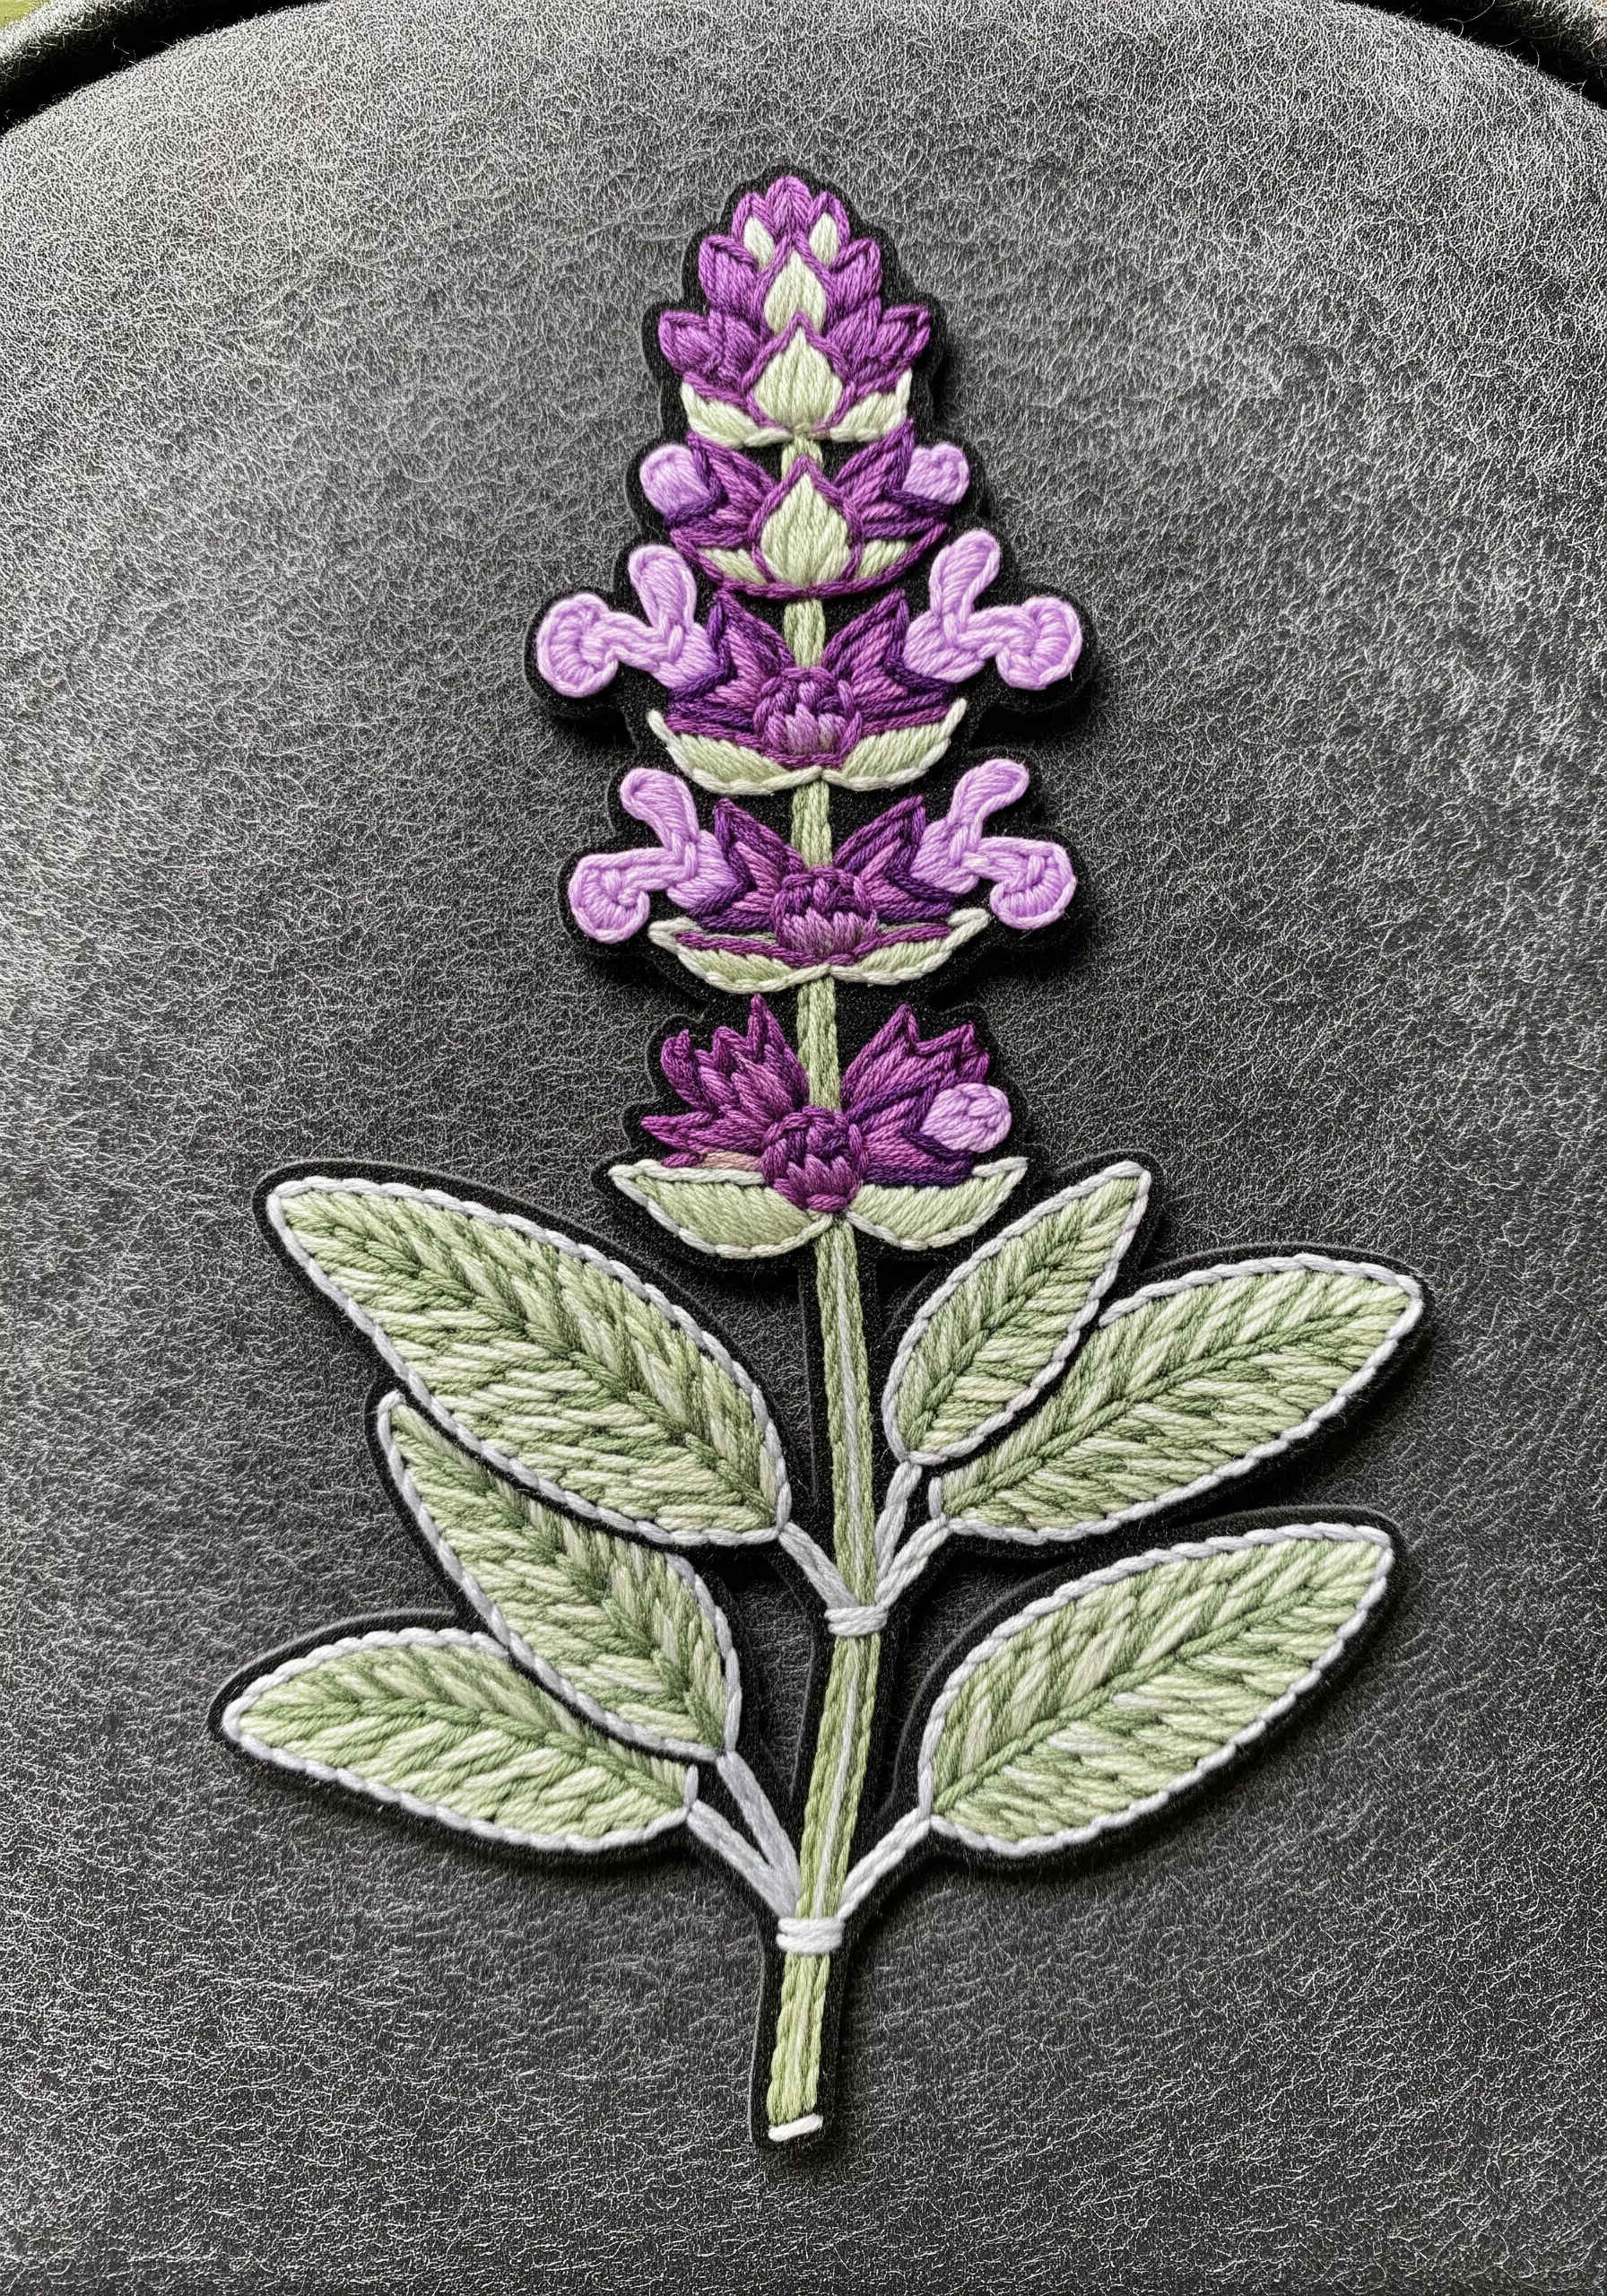
Create a clean, durable patch by stitching your design on a separate piece of felt or canvas and finishing the edges professionally.
After completing your sage embroidery, create a thick border with a dense satin stitch.
Once finished, carefully trim the excess fabric right up to the edge of your stitching. This gives you a crisp, sturdy patch that you can apply to a jacket, bag, or hat.
This technique gives your work a polished, store-bought quality that is perfect for embellishing apparel.
27. Capture an Apothecary Scene with Fine Details
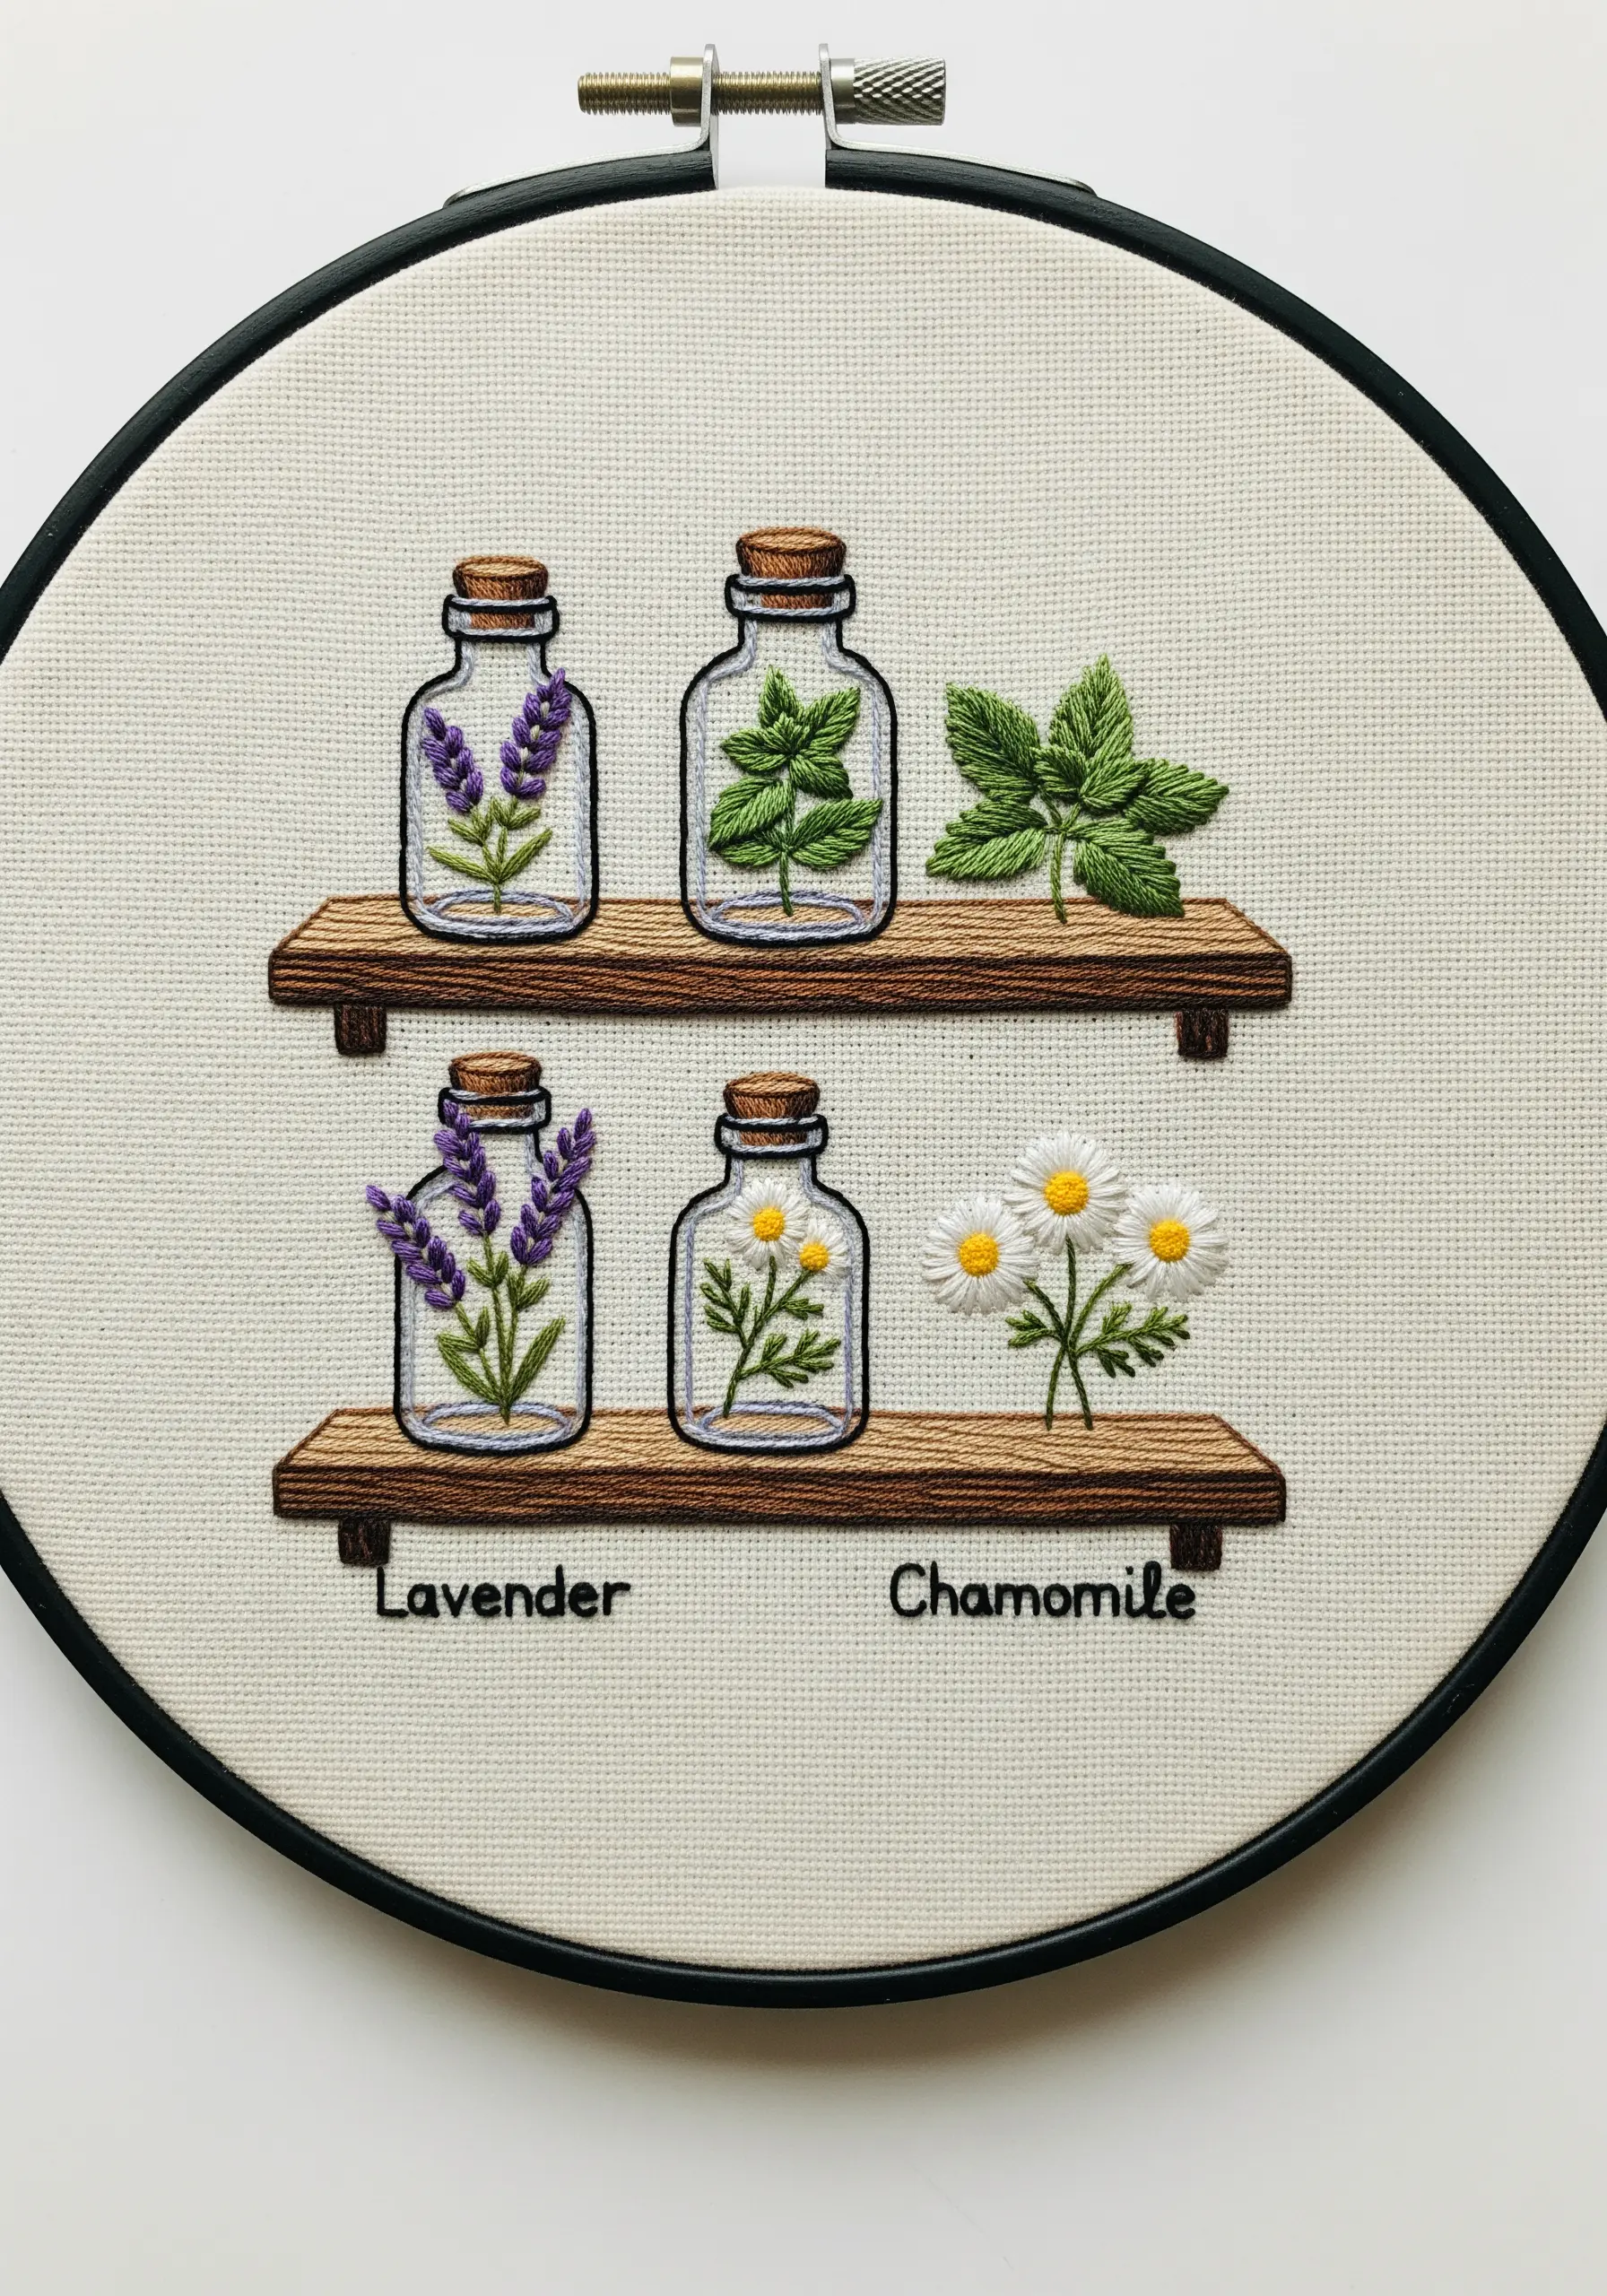
To create a miniature scene with clarity, you must simplify your forms and use minimal thread.
Use a single strand of floss for all outlines, lettering, and fine details to prevent the design from looking bulky or crowded.
Render the glass jars with a simple backstitch outline in a light grey or blue, adding a tiny white straight stitch for a highlight.
This disciplined approach to detail allows you to create a complex and charming scene that remains crisp and readable.
28. Weave a Harmonious Medicinal Herb Mandala
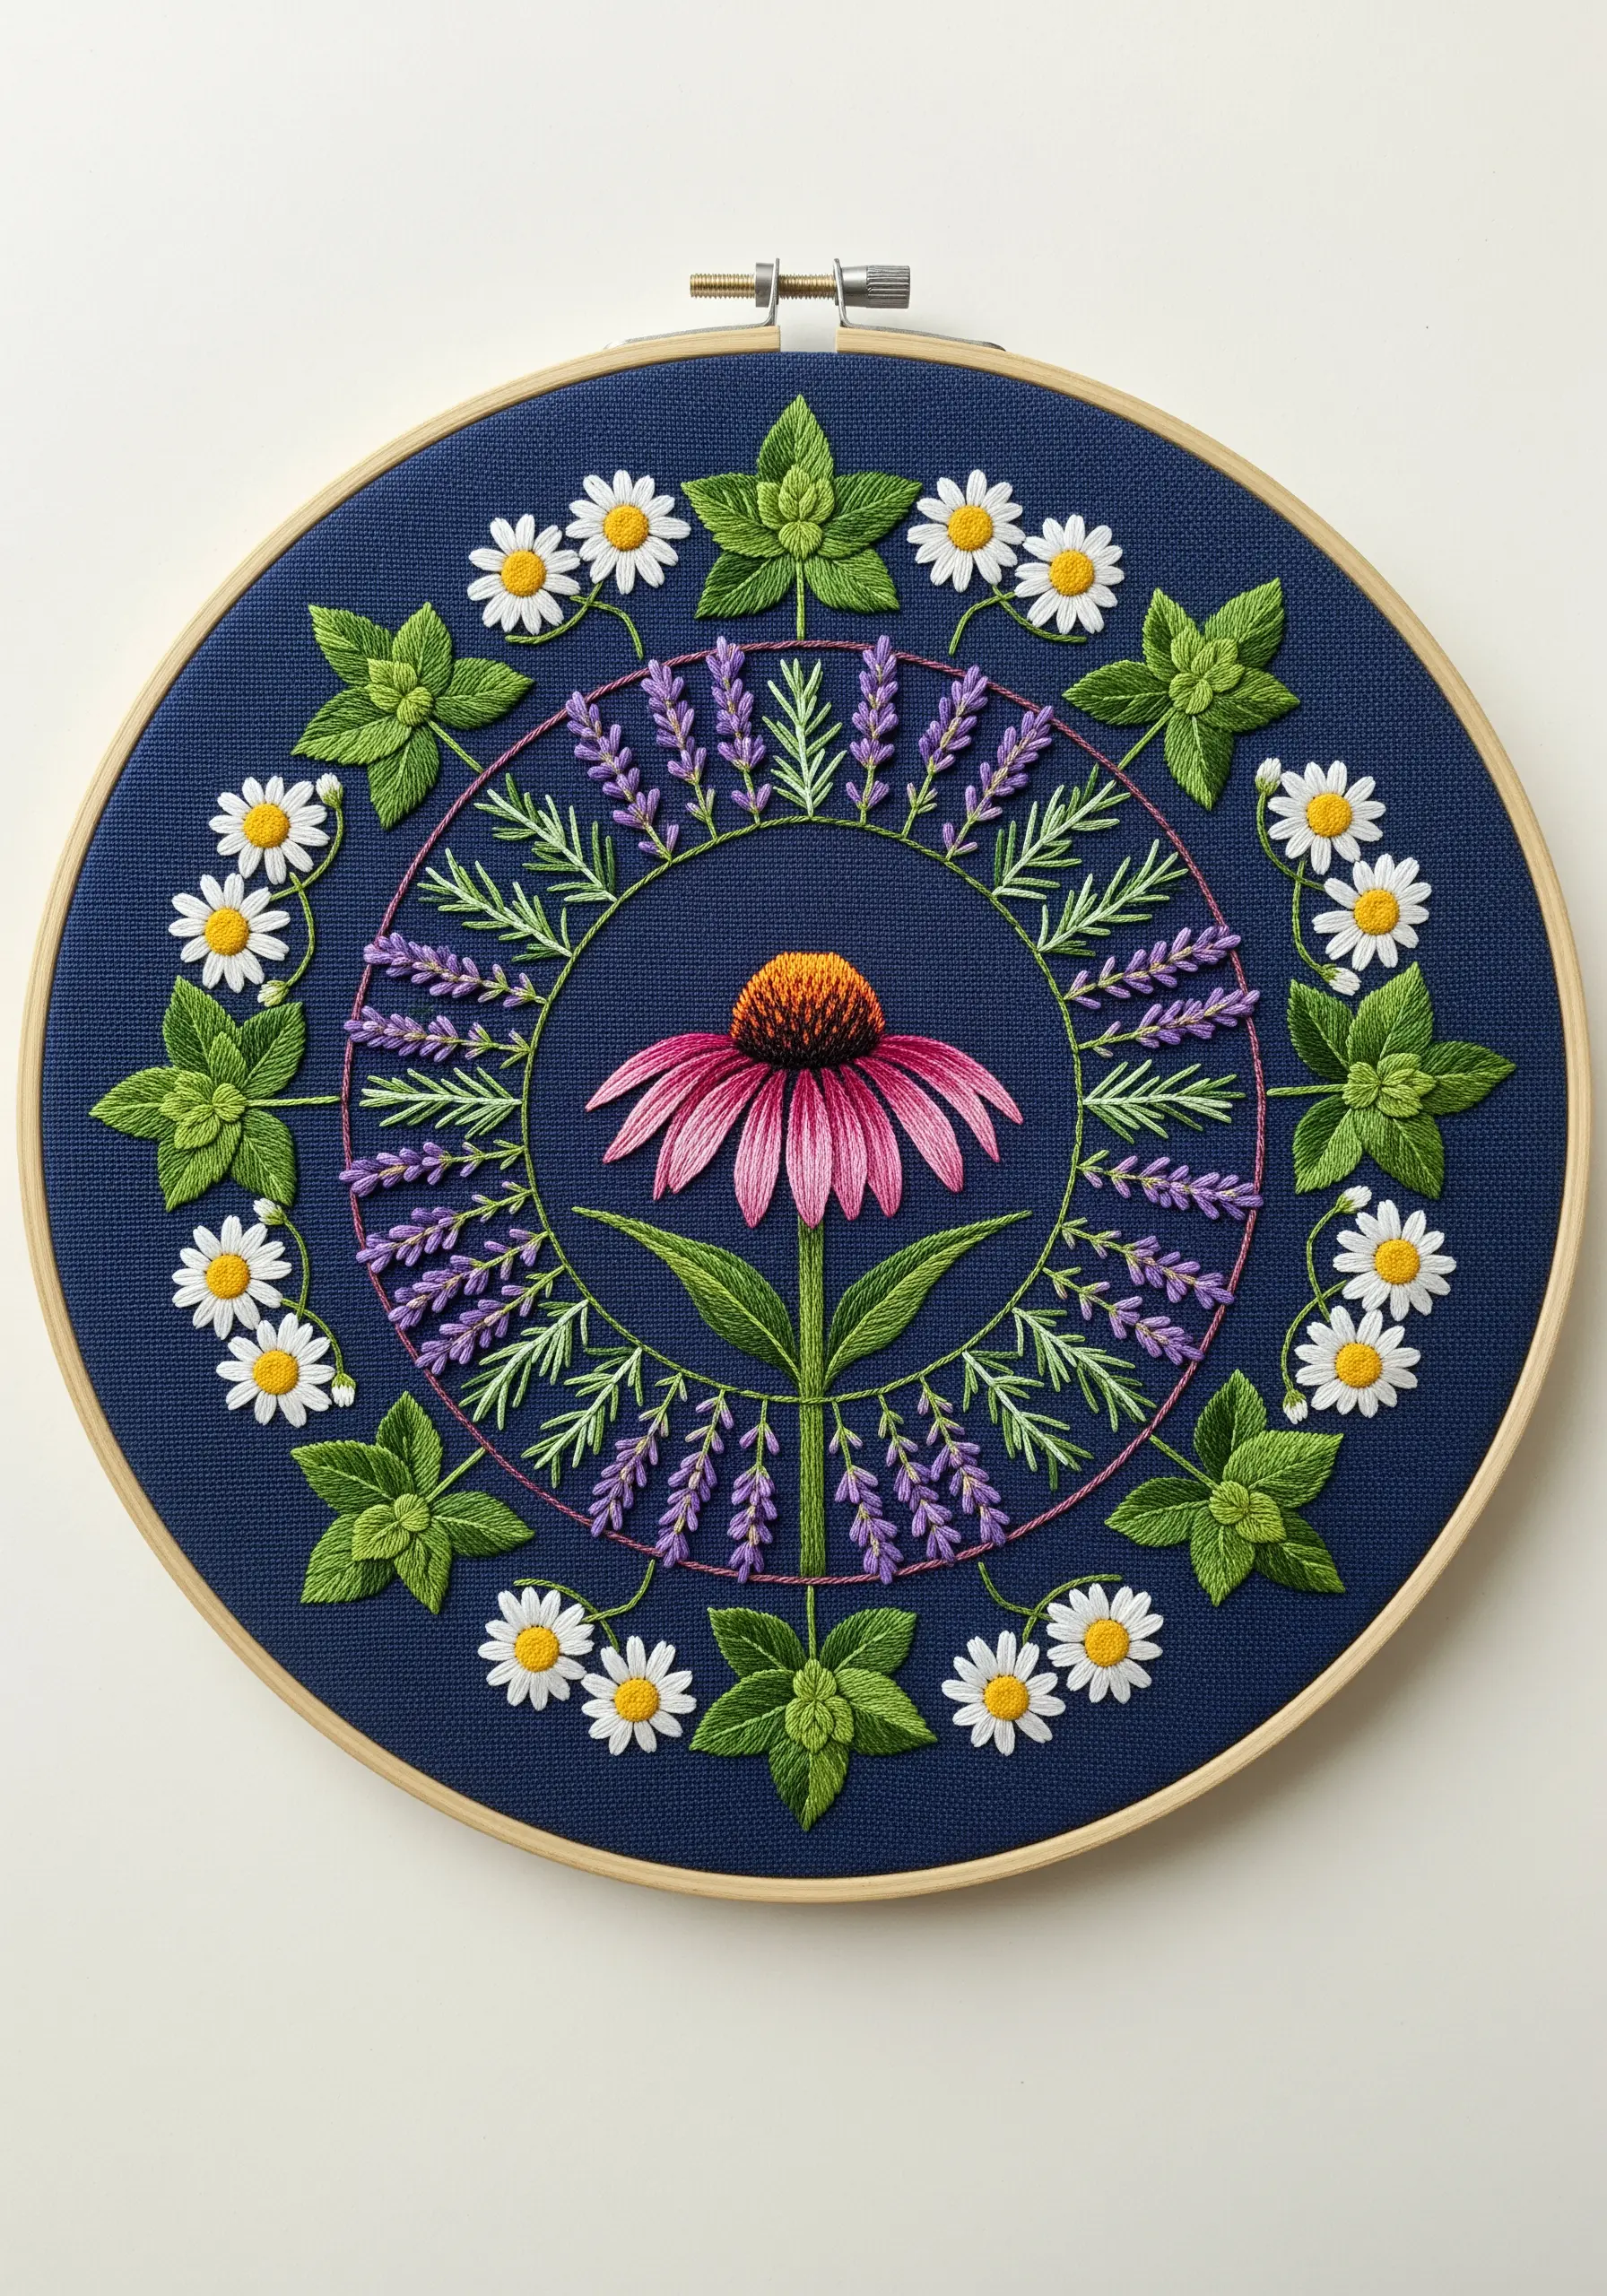
A mandala is the perfect format for celebrating the beauty and harmony of a medicinal herb garden.
Arrange your chosen herbs—lavender, chamomile, mint, rosemary—in a symmetrical, circular pattern around a central focal point, like a vibrant echinacea.
Repeat each plant element at regular intervals to create a sense of rhythm and balance.
These floral mandala embroidery ideas not only result in a beautiful piece of art but also make for a meditative and calming stitching process.


