
You don’t need a sprawling studio or expensive materials to create yarn art that feels intentional and luxurious. Often, the most stunning pieces are born from a simple concept executed with care: the elegant fall of a single cord, the satisfying rhythm of a repeated knot, or the bold contrast of two different textures.
Think of yarn not just as a tool for knitting, but as a sculptural medium. Allow yourself to explore its weight, its texture, and the way it holds a shape. The projects ahead are designed to shift your perspective, showing you how to transform basic yarn and simple frames into modern art that looks far more expensive than it is.
Your hands already know how to work with fiber. Now, it’s about giving them a new language to speak—one of minimalism, balance, and quiet confidence. Let’s begin.
1. Frame an Architectural Arch with Macrame

Build a structured arch using repeating square knots, which create a stable, grid-like texture.
For the two triangular sections, use double half-hitch knots to create clean, diagonal lines that guide the eye downward.
The contrast between the tightly knotted arch and the long, straight fringe creates a sense of architectural balance and softness.
Using a single color of natural cotton cord keeps the focus entirely on the form and texture, giving it a modern, sculptural feel.
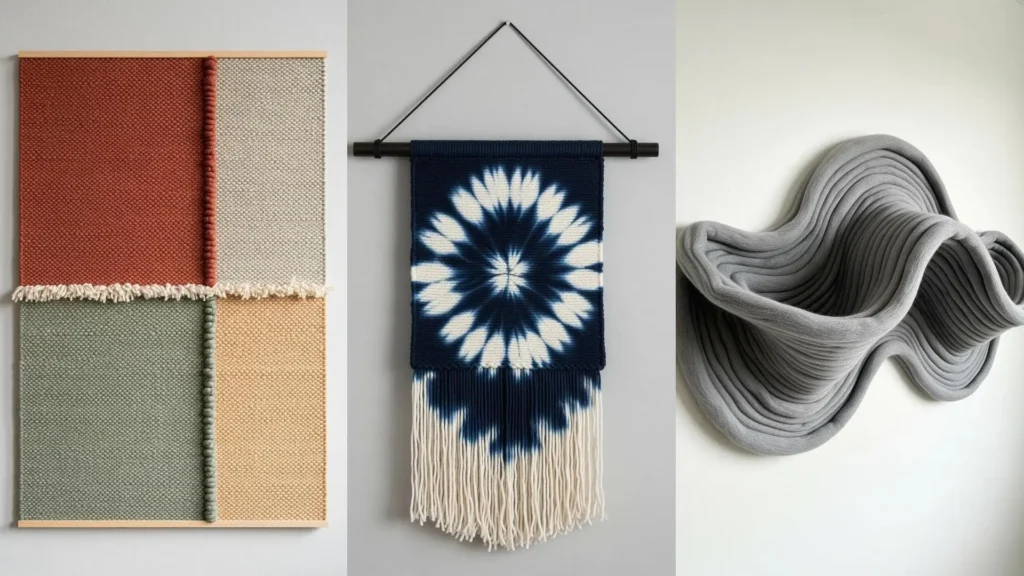
2. Weave a Modernist Color-Block Canvas

Create this high-end look by dividing a simple frame loom into four sections and weaving each with a solid color.
To achieve the clean, textured dividing lines, use a soumak weave—a technique where you wrap the weft yarn around the warp threads to create a raised, braid-like row.
Varying the thickness of your soumak line adds subtle dimension and interest.
Finish by leaving a short, raw fringe on one horizontal axis to break the perfect geometry and add an organic touch.
3. Drape Yarn for a Soft, Minimalist Cascade

Instead of intricate knots, create this elegant drape by simply looping long strands of thick yarn over a dowel and letting gravity do the work.
The centerpiece is formed by gathering a central section of the strands and looping them back over the dowel, creating a soft, cowl-neck effect.
Trim the ends into a gentle, tapering point to give the piece a finished, intentional shape.
This design celebrates the material itself, focusing on the weight and graceful fall of the yarn.
4. Blend Weaving and Roving in a Hoop

Combine two distinct textures for a piece that feels both structured and cloud-like.
Start with a simple, flat tabby weave using a standard-weight gray yarn for the top section.
Then, weave in a thick, unspun wool roving, allowing it to billow and curve organically across the piece.
The circular metal hoop acts as a modern frame, while the asymmetrical fringe adds a final touch of bohemian softness.
This is one of the most effective textured yarn wall art techniques for creating depth.
5. Isolate Geometric Shapes in Shadow Boxes

Transform simple yarn into striking graphic art by stretching it across the inside of deep-set frames.
Choose a neutral, textured background like linen or burlap to add warmth and prevent the yarn from looking flat.
Ensure the yarn is pulled taut to create perfectly straight, sharp lines. The tension is what gives the piece its crisp, minimalist aesthetic.
Arranging three frames in a series—a triptych—turns simple shapes into a cohesive and intentional artistic statement.
These line art geometry-based stitches and concepts work beautifully for home offices.
6. Paint with Texture Using a Gradient

Achieve this dense, pebble-like texture with punch needle loops or a dense field of French knots.
To create a seamless color gradient, choose at least three shades of one color (light, medium, dark) and subtly mix them where they meet.
Work in organic, wavy rows rather than straight lines to make the color transition feel more natural, like a landscape or watercolor wash.
The lack of a border or frame focuses all attention on the rich color and tactile surface.
7. Embrace Organic Texture with Freeform Weaving

Move beyond structured patterns by using a mix of yarn thicknesses, especially chunky roving and thin, rustic twine.
Incorporate classic weaving techniques like tabby weave for flat areas and soumak braids for raised sections, but allow them to be uneven and imperfect.
Use a natural element like a found branch as your loom hanger to enhance the piece’s organic, earthy feel.
The beauty of this style lies in its spontaneity; let the textures guide your design rather than a rigid plan.
8. Define Shapes with Punch Needle Precision

Use a punch needle to create bold, abstract art with clean edges and a satisfyingly uniform texture.
Outline your shapes first with a single line of punches to establish a crisp border, then fill in the interior.
Varying the loop height slightly between sections can add subtle dimension that catches the light differently.
The negative space—the un-punched canvas—is just as important as the colored shapes, giving the composition room to breathe.
9. Sculpt with Unspun Wool Roving

Create a statement piece with almost no tools by focusing on the material itself.
Drape thick, unspun wool roving over a copper or brass rod; the warm metal provides a beautiful contrast to the soft, neutral wool.
The art is in the arrangement—create gentle folds and loops of varying sizes to give the piece a sense of rhythm and volume.
This approach transforms a raw craft material into a simple, stunning handmade sculpture.
10. Draw a Single, Continuous Line with Cord

Create a dynamic, minimalist piece by couching a single, colorful cord onto a large canvas.
Couching involves laying the decorative cord on the fabric’s surface and securing it with small, invisible stitches from behind or with a matching thread from the front.
Plan your meandering path beforehand, lightly tracing it with a pencil to guide your stitching.
The single, unbroken line creates a sense of movement and flow, making a simple concept feel incredibly sophisticated.
11. Design with Negative Space in Weaving

Make the empty spaces in your weaving as important as the woven parts.
This technique, known as open-warp weaving, involves creating shapes with your weft yarn and leaving the vertical warp threads exposed in between.
To create the chunky, cloud-like forms, use a thick, loosely spun yarn and pack it densely.
The contrast between the solid, textured shapes and the delicate, see-through warp creates a beautifully balanced and airy composition.
12. Elevate the Traditional God’s Eye

Modernize the classic Ojo de Dios (God’s Eye) craft with a refined color palette and a contemporary mounting.
The technique is simple: wrap yarn symmetrically around two or more crossed sticks. Precision is key—keep the tension even and the lines perfectly straight.
Mount the finished piece on a larger, asymmetrical wooden cross to give it a modern, gallery-like presence.
A sophisticated, muted color scheme of blues, grays, and cream elevates it from a rustic craft to chic decor.
13. Combine Intricate Knots with an Asymmetric Finish

Create visual energy by pairing structured, symmetrical macrame patterns with a dynamic, angled fringe.
Use a combination of knots—like spiral half-hitches for the coils and square knots for the diamond shapes—to build a richly textured centerpiece.
Instead of a straight or V-shaped fringe, cut the yarn at a sharp, unexpected angle.
This juxtaposition of order and asymmetry makes the piece feel alive and modern.
14. Create a Textural Triptych with Wrapped Dowels

Isolate different yarn textures by dedicating one technique to each dowel.
On one, try a simple, tight wrap. On another, use a thicker, marled yarn for a slightly irregular texture. For the third, use chunky yarn to create a soft, braided or knotted effect.
Displaying them vertically as a set of three turns them from simple experiments into a cohesive piece of minimalist art.
This is one of those minimal DIY embroidery ideas that feels like a professional installation.
15. Build a Statement Piece from Repetition

The power of this piece comes from the simple, satisfying repetition of a single element: the tassel.
To achieve this high-end look, consistency is everything. Make a cardboard template to ensure every tassel is identical in length and thickness.
Arrange them in a neat grid on a clear acrylic rod for a clean, modern look that makes them appear to float.
A monochromatic color scheme keeps the focus on the rhythm and texture created by the grid.
16. Sculpt Raised Forms with Yarn Coiling

Create stunning 3D texture using a simple yarn coiling technique, often used in basketry.
Wrap your primary yarn around a thicker core material (like rope or multiple strands of yarn) and stitch the coils together as you build your circular shapes.
To create the raised, dimensional bumps, simply coil more tightly and build upwards, attaching the new layer to the one beneath it.
Mounting the finished piece in a simple wooden hoop provides a perfect frame for your tactile creation.
17. Weave Bold, Mondrian-Inspired Graphics

Channel the spirit of modern art by weaving with bold, primary colors and strong black lines.
Use tapestry weaving techniques to create clean, sharp edges between your color blocks. Slit tapestry, where you leave a small gap between colors, will give you the crispest lines.
The off-white background acts as a canvas, making the red and blue shapes pop.
This style proves that you don’t need complex patterns to create bold yarn wall art patterns that feel iconic.
18. Achieve a Shibori Effect on the Loom

Create a stunning tie-dye effect by dyeing your warp threads before you begin weaving.
To get this radial pattern, bundle your warp threads, tie them tightly in sections with rubber bands or string (just like traditional tie-dye), and then apply indigo dye.
Once dry, thread the dyed warp onto your loom. As you weave across with a neutral weft (like white or cream), the pattern will emerge.
The rigid structure of the weave contrasts beautifully with the soft, organic nature of the dye.
19. Sculpt a Free-Flowing Fiber Wave

Create an organic, 3D wall sculpture by shaping and securing thick, felted yarn or tubing.
This technique is less about weaving and more about sculpting. Use a flexible but firm inner core (like wire) or simply rely on stitching to hold the soft, flowing curves in place.
The power of the piece lies in its fluid, uninterrupted lines and the shadows it creates on the wall.
Keeping it monochromatic in a soft grey ensures the focus remains on the elegant, wave-like form. This piece is a true example of abstract thread sculpting.
20. Explore Tension with Minimalist Thread Art

Create a sophisticated piece by focusing on the simple beauty of intersecting lines.
Stretch a few strands of dark, fine thread or cord across a light-colored canvas within a deep-set frame.
The key is to vary the angles and create a balanced composition where the lines interact with each other and the surrounding negative space.
The deep frame adds shadow and depth, turning the simple threads into a complex architectural drawing.
21. Use Metal Hoops as a Structural Canvas
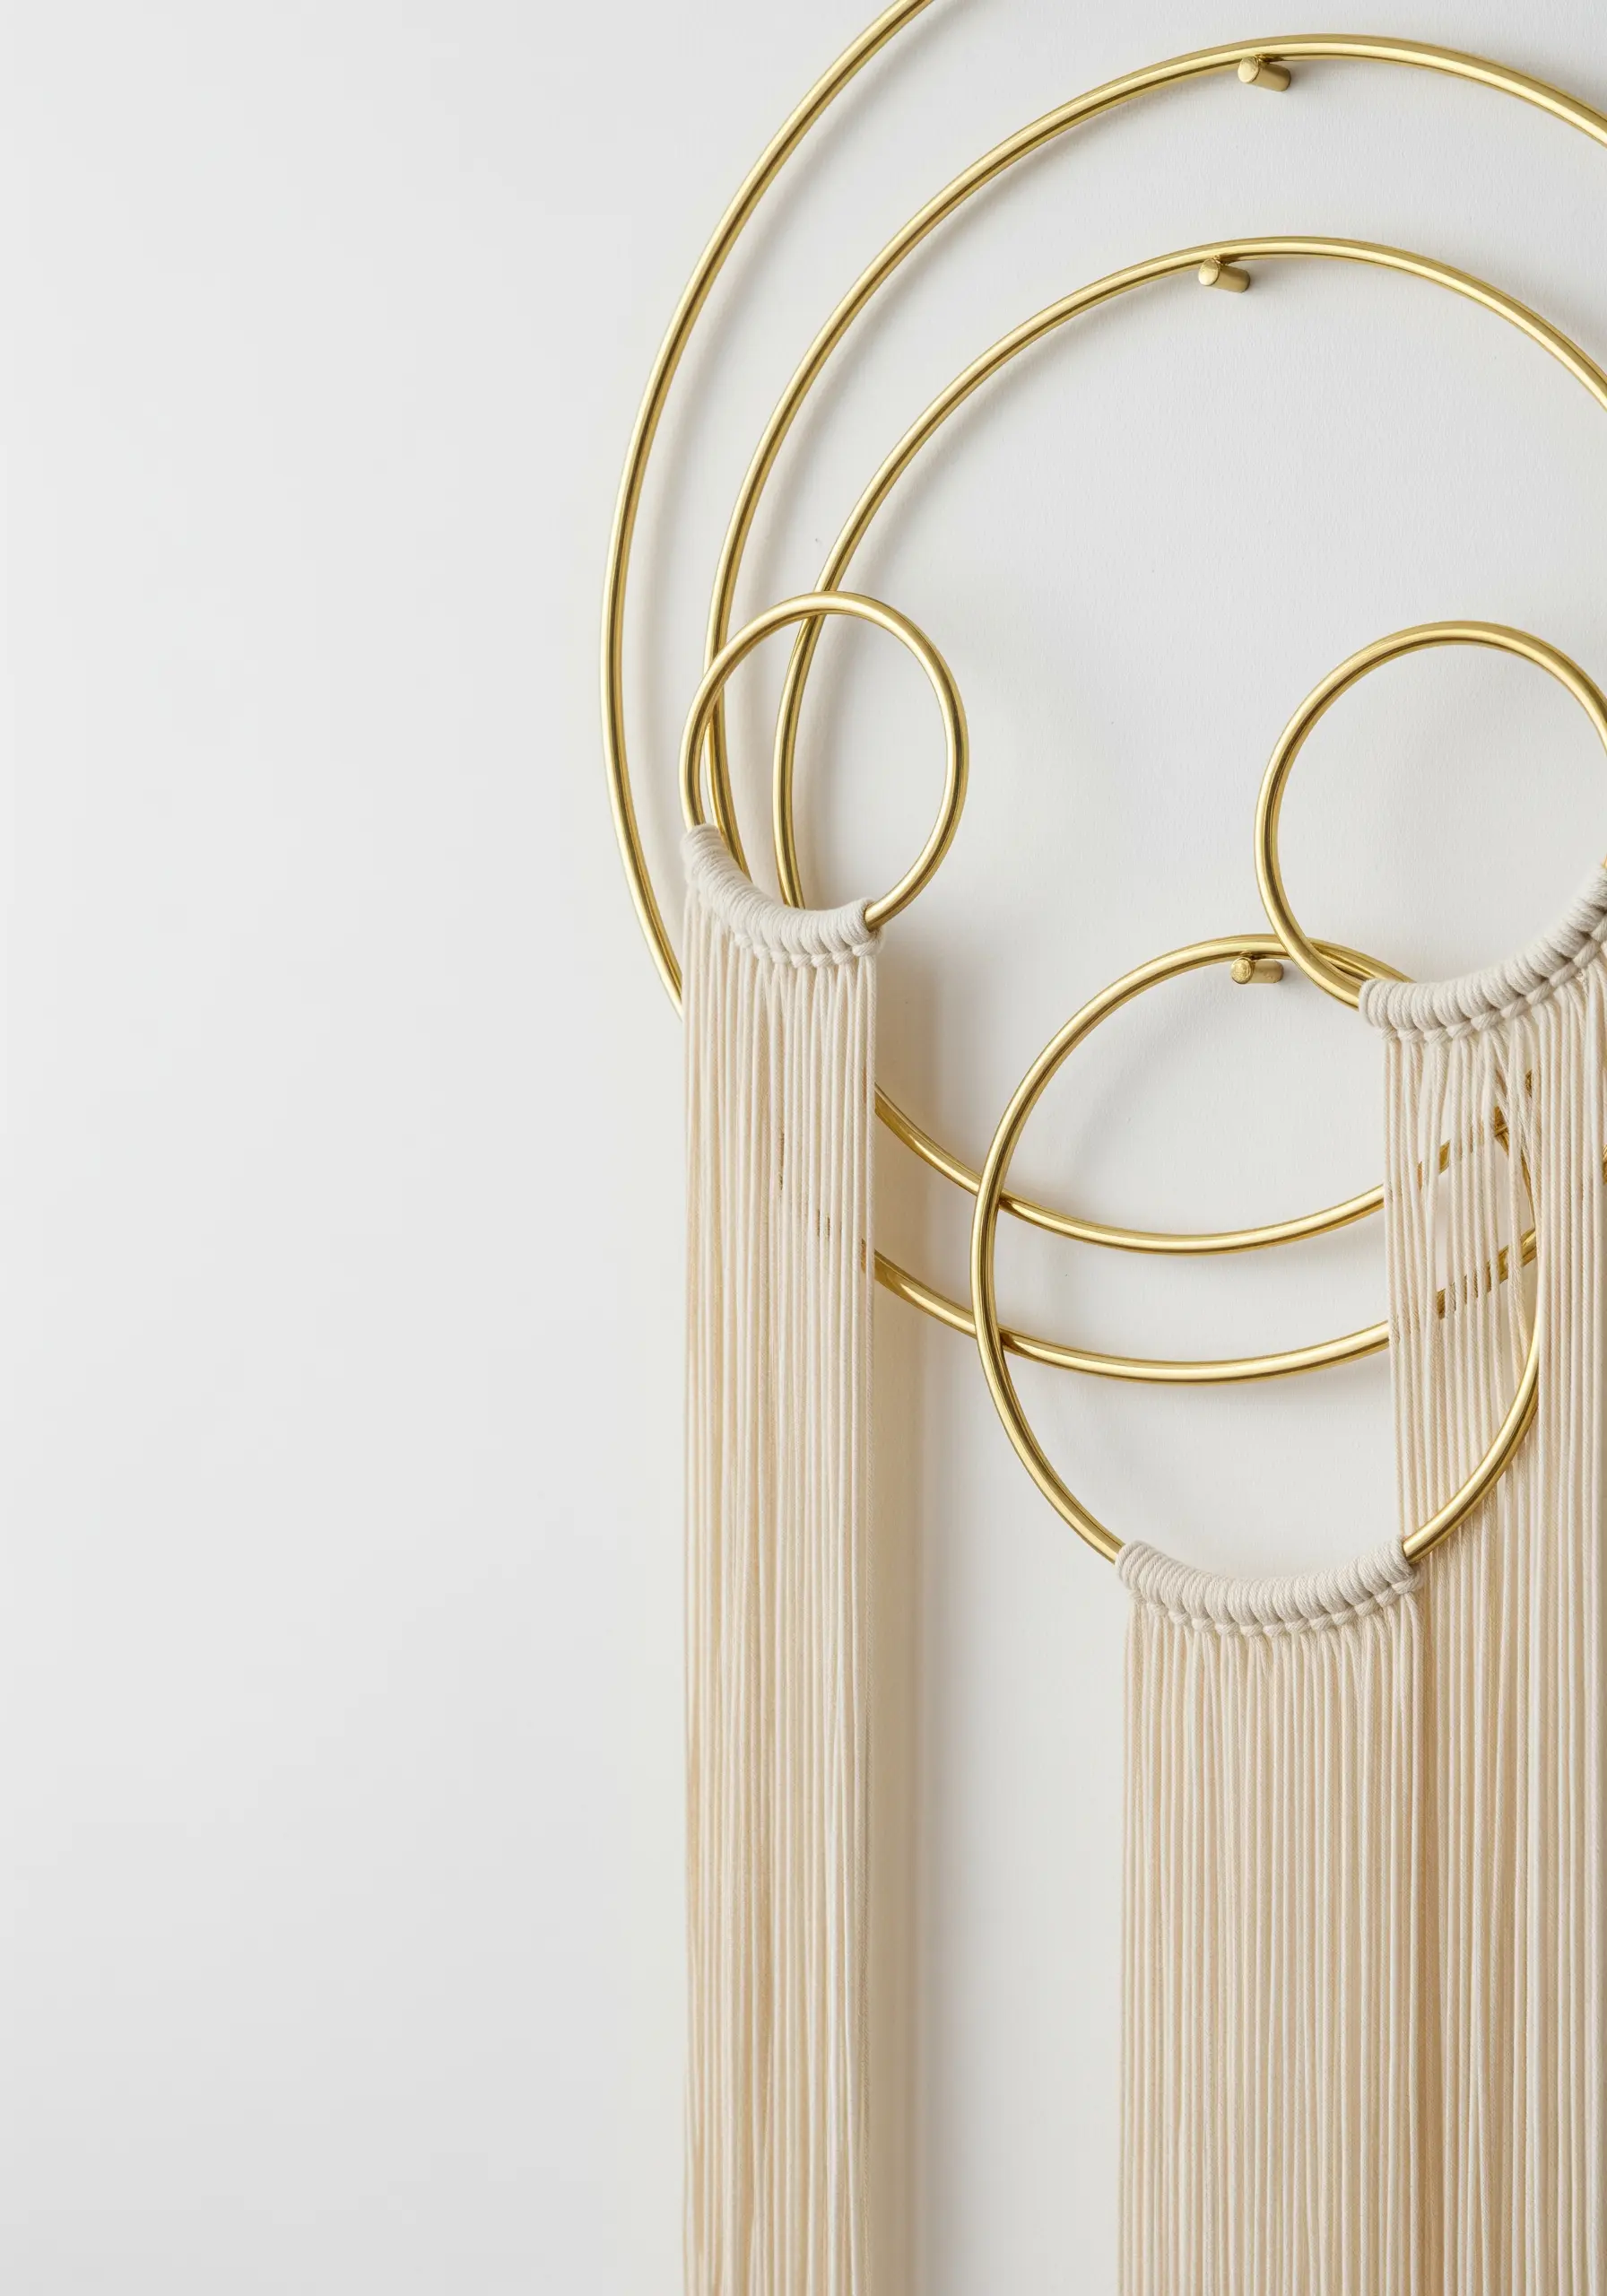
Integrate your frame into the design by using a collection of metal hoops as the foundation for your piece.
Use a simple lark’s head knot to attach yarn to the bottom of each hoop, creating a clean, modern starting point.
The contrast between the rigid, circular brass and the soft, flowing yarn is what gives this piece its elegance.
By leaving most of the metal exposed, the hoops become a key graphic element rather than just a support structure.
22. Juxtapose Soft Braid on a Hard Surface

Create a powerful statement by contrasting textures.
Start with a plain canvas and apply a layer of textured medium, like modeling paste or gesso, creating a rough, plaster-like surface.
Once dry, paint it a stark white. Then, mount a single, chunky black braid diagonally across it.
The extreme contrast between the soft, dark, and smooth braid and the hard, white, and rough background is visually arresting and feels like high-concept art.
23. Form a Grid with Interlocking Knots
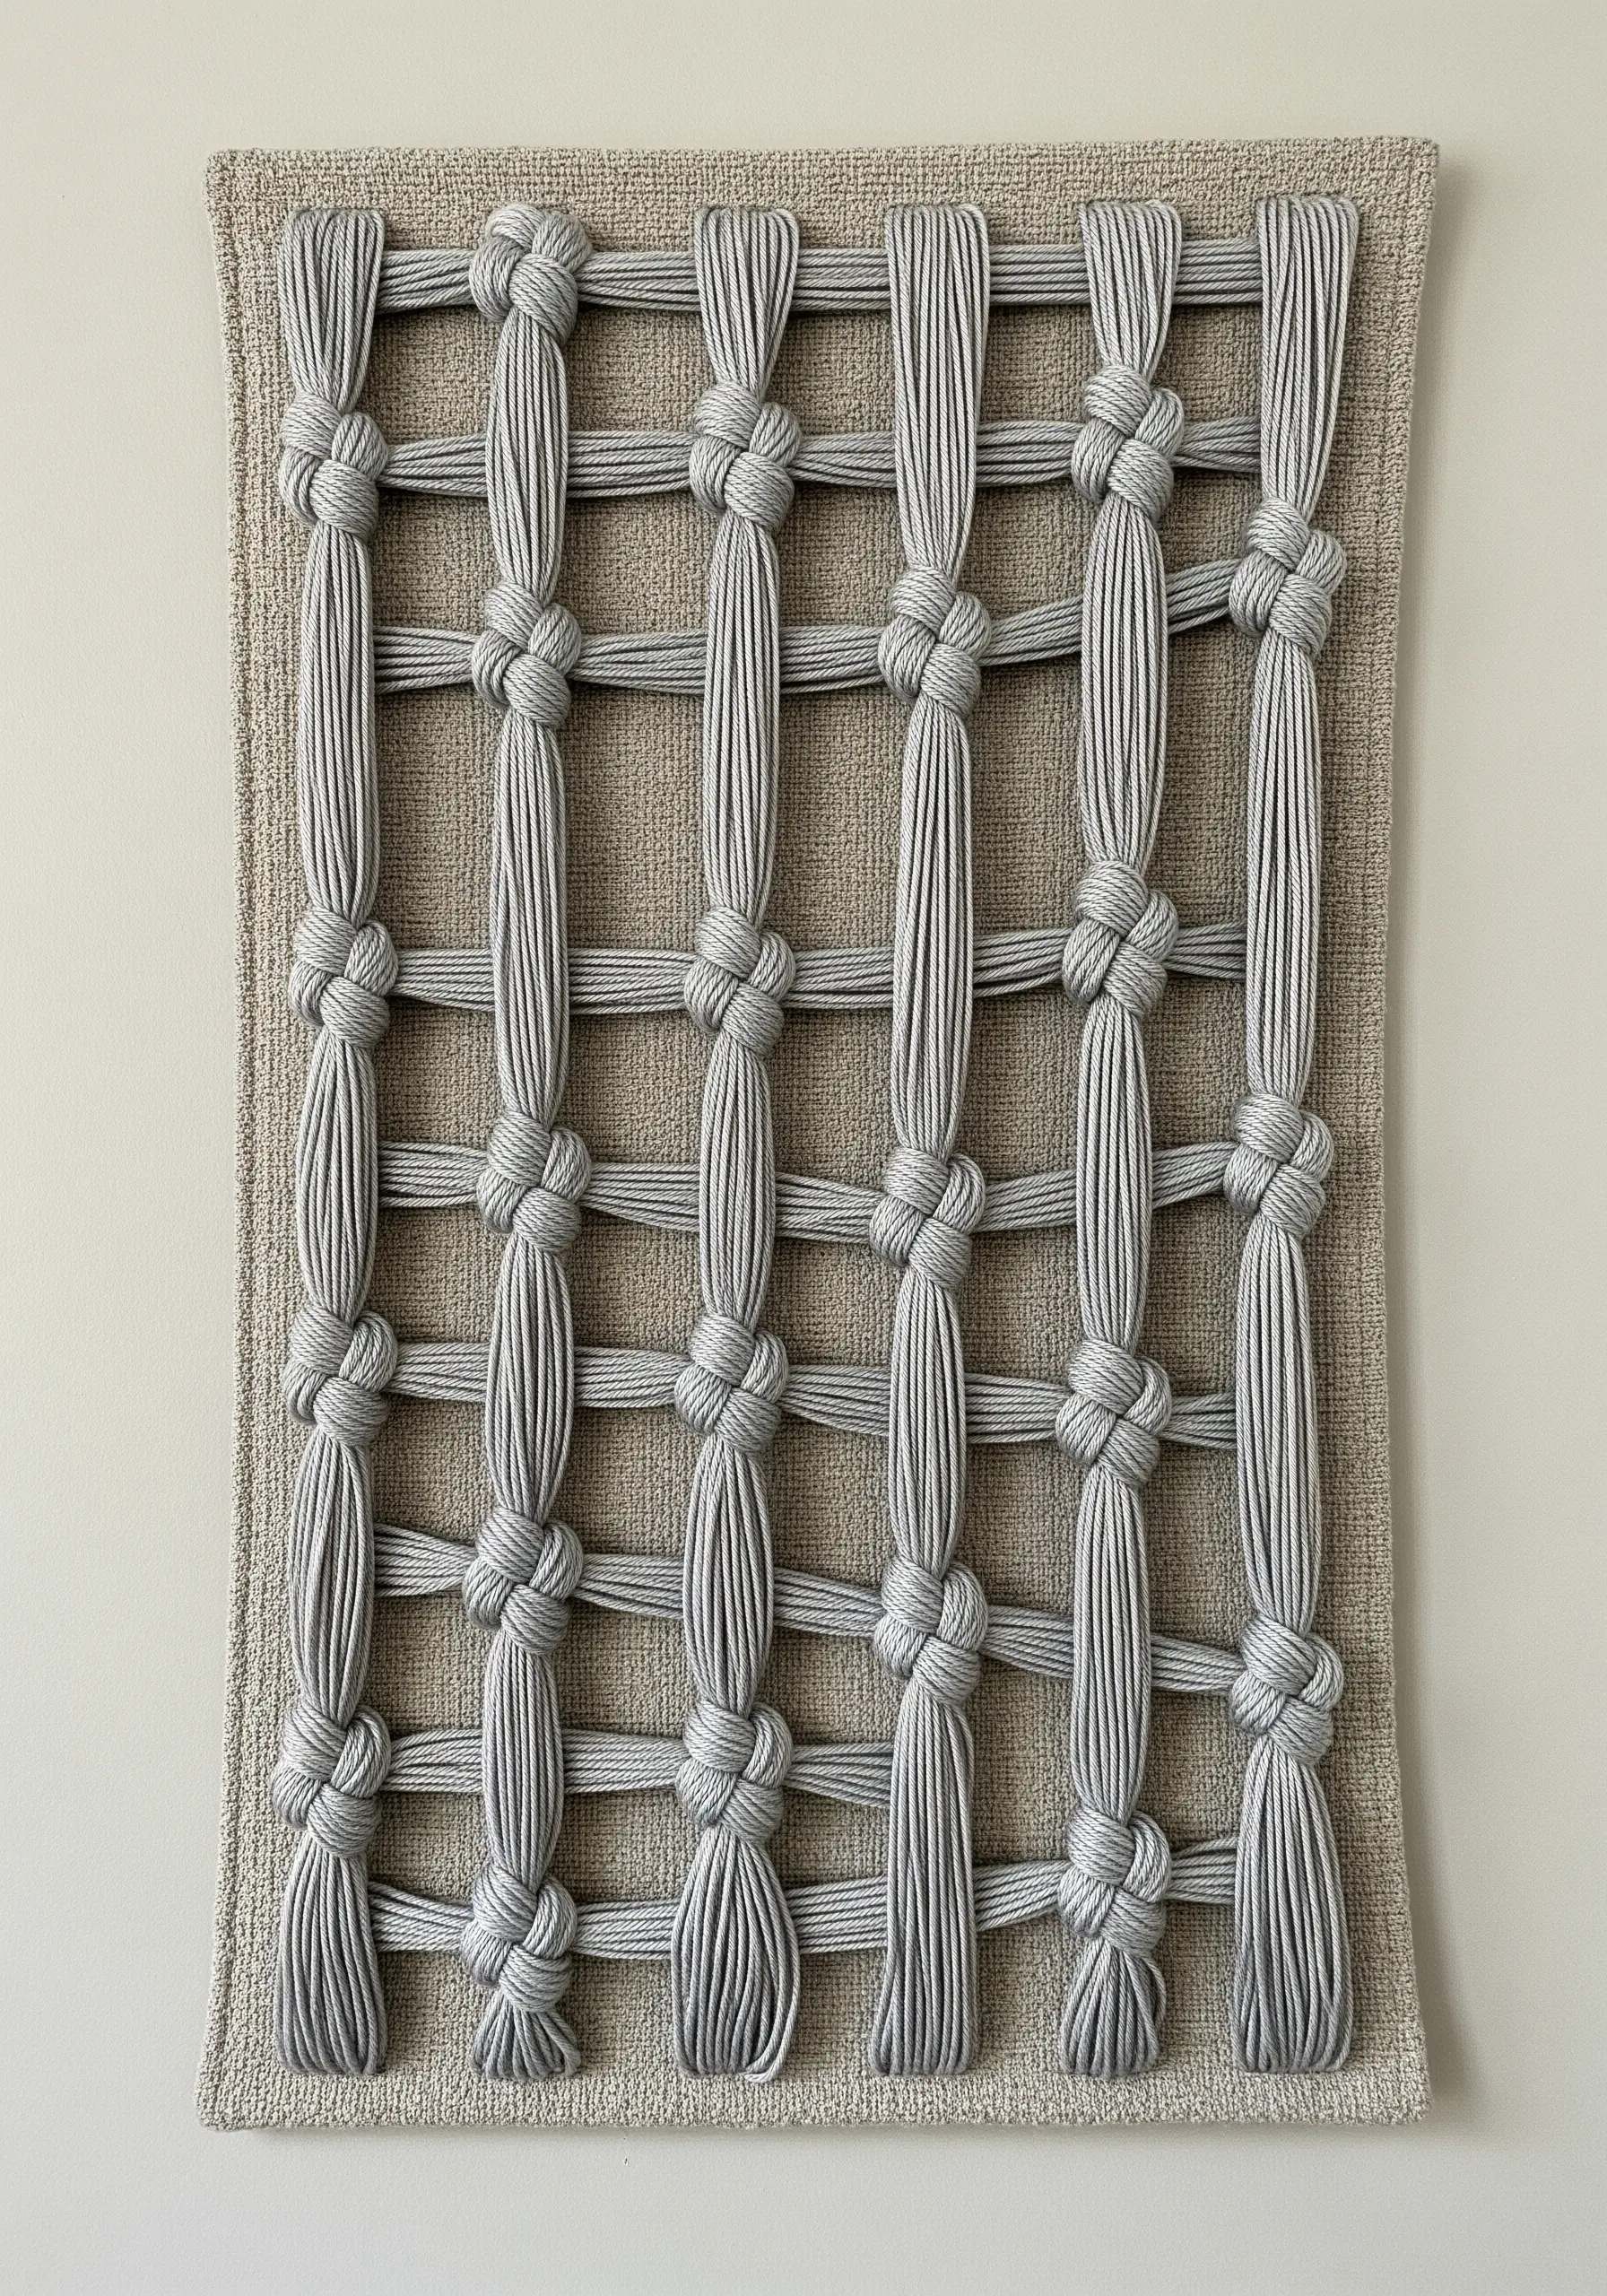
Build a sophisticated, net-like pattern by securing yarn at each intersection with a knot.
First, lay out your vertical and horizontal strands of yarn or cord over a fabric-covered board, securing the ends on the back.
At each point where the cords cross, tie a simple, decorative knot (like a square knot or a simple overhand knot) to create a grid.
This technique creates a piece that is both linear and highly textural, with a satisfying sense of order and rhythm.


