

A city skyline is more than just buildings—it’s a landscape of light, energy, and perspective. Translating that feeling into thread can seem daunting, but it doesn’t require impossibly complex techniques. It simply asks you to see your stitches in a new way.
Instead of just filling a shape, think about how a single thread can represent a beam of light, a reflection on wet pavement, or the soft haze of a distant horizon. Consider how the direction of your satin stitch can mimic the sleek, glass facade of a skyscraper, or how a cluster of French knots can become a vibrant burst of city life against a quiet sky.
In these projects, you’ll discover how to manipulate color, texture, and composition to build not just a place, but a mood. Let’s move beyond simple outlines and start stitching the atmosphere, the glow, and the dynamic spirit of the city.
1. Render Electric Skylines with Neon Thread
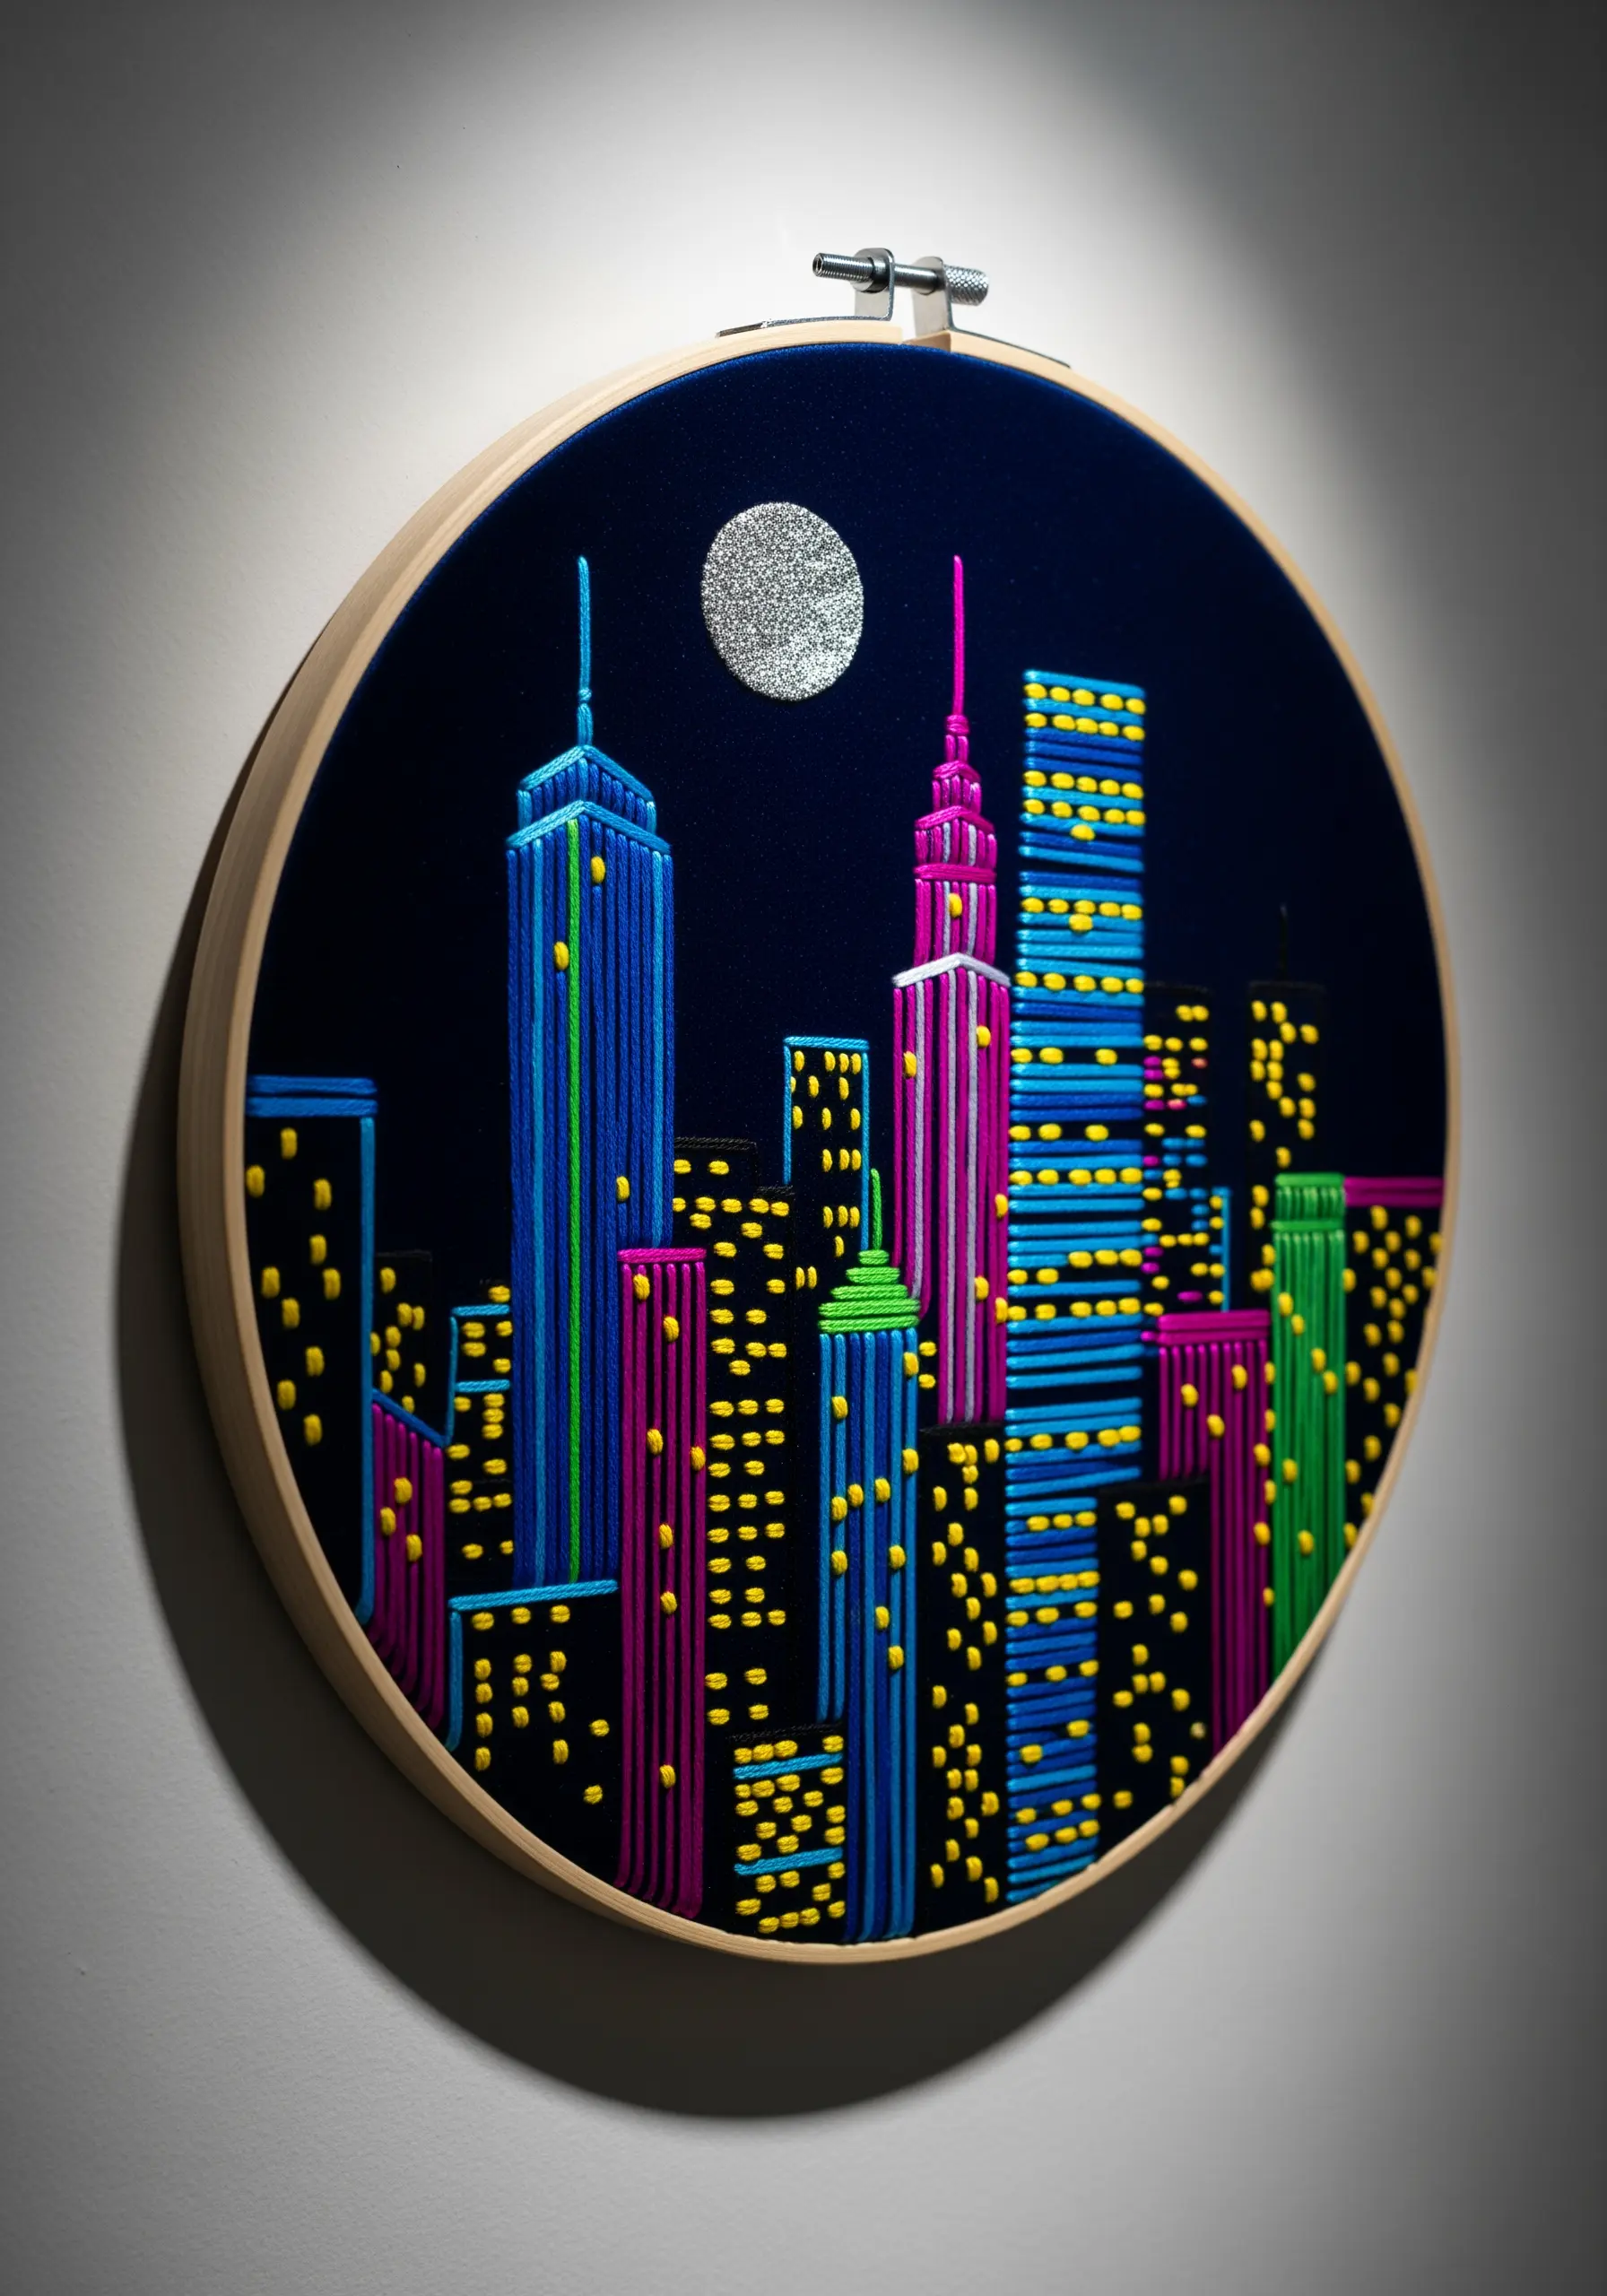
To capture the vibrant energy of a city at night, use high-contrast neon threads against a dark, tightly woven cotton or linen fabric.
Work your buildings in vertical satin stitch, ensuring each stitch lies perfectly parallel to the next.
This uniformity creates a smooth, reflective surface that catches the light, mimicking the sleek glass of modern skyscrapers.
For the moon, create a dense patch of silver French knots or couch a textured metallic yarn in a spiral pattern to contrast with the sharp lines of the city.
2. Paint a Sunset with Long-and-Short Stitch Gradients

For a large-scale textile piece, a realistic sky is essential.
Use a long-and-short stitch to blend your sunset colors seamlessly, working in horizontal bands from orange to purple.
Vary the length of your stitches and overlap the colors just enough to avoid harsh lines, creating a soft, painterly effect.
Mirror these colors in the water’s reflection, but use shorter, choppier horizontal satin stitches to convey the movement of water.
3. Combine Minimalist Lines with Beaded Textures

Elevate a simple line-art cityscape by introducing a contrasting texture.
Stitch your architectural outlines on a stretched canvas using a crisp backstitch with a single, strong color like black or white.
Then, fill a designated area—like the city’s foundation—with densely packed seed beads or pearls.
This technique creates a focal point and adds a sophisticated, three-dimensional quality that thread alone cannot achieve, turning a simple sketch into a piece of modern thread art.
4. Master Directional Stitching on Denim

When embroidering on a heavy fabric like a denim jacket, always use a stick-and-stitch stabilizer to prevent your design from warping.
For a dynamic, futuristic cityscape, use the direction of your satin stitches to define the angles and planes of each building.
Stitch one face of a building vertically and the adjacent face at a slight angle.
This subtle shift in stitch direction manipulates light, creating the illusion of shadow and form without changing your thread color.
5. Design a Cohesive Triptych with Luminous Stitches
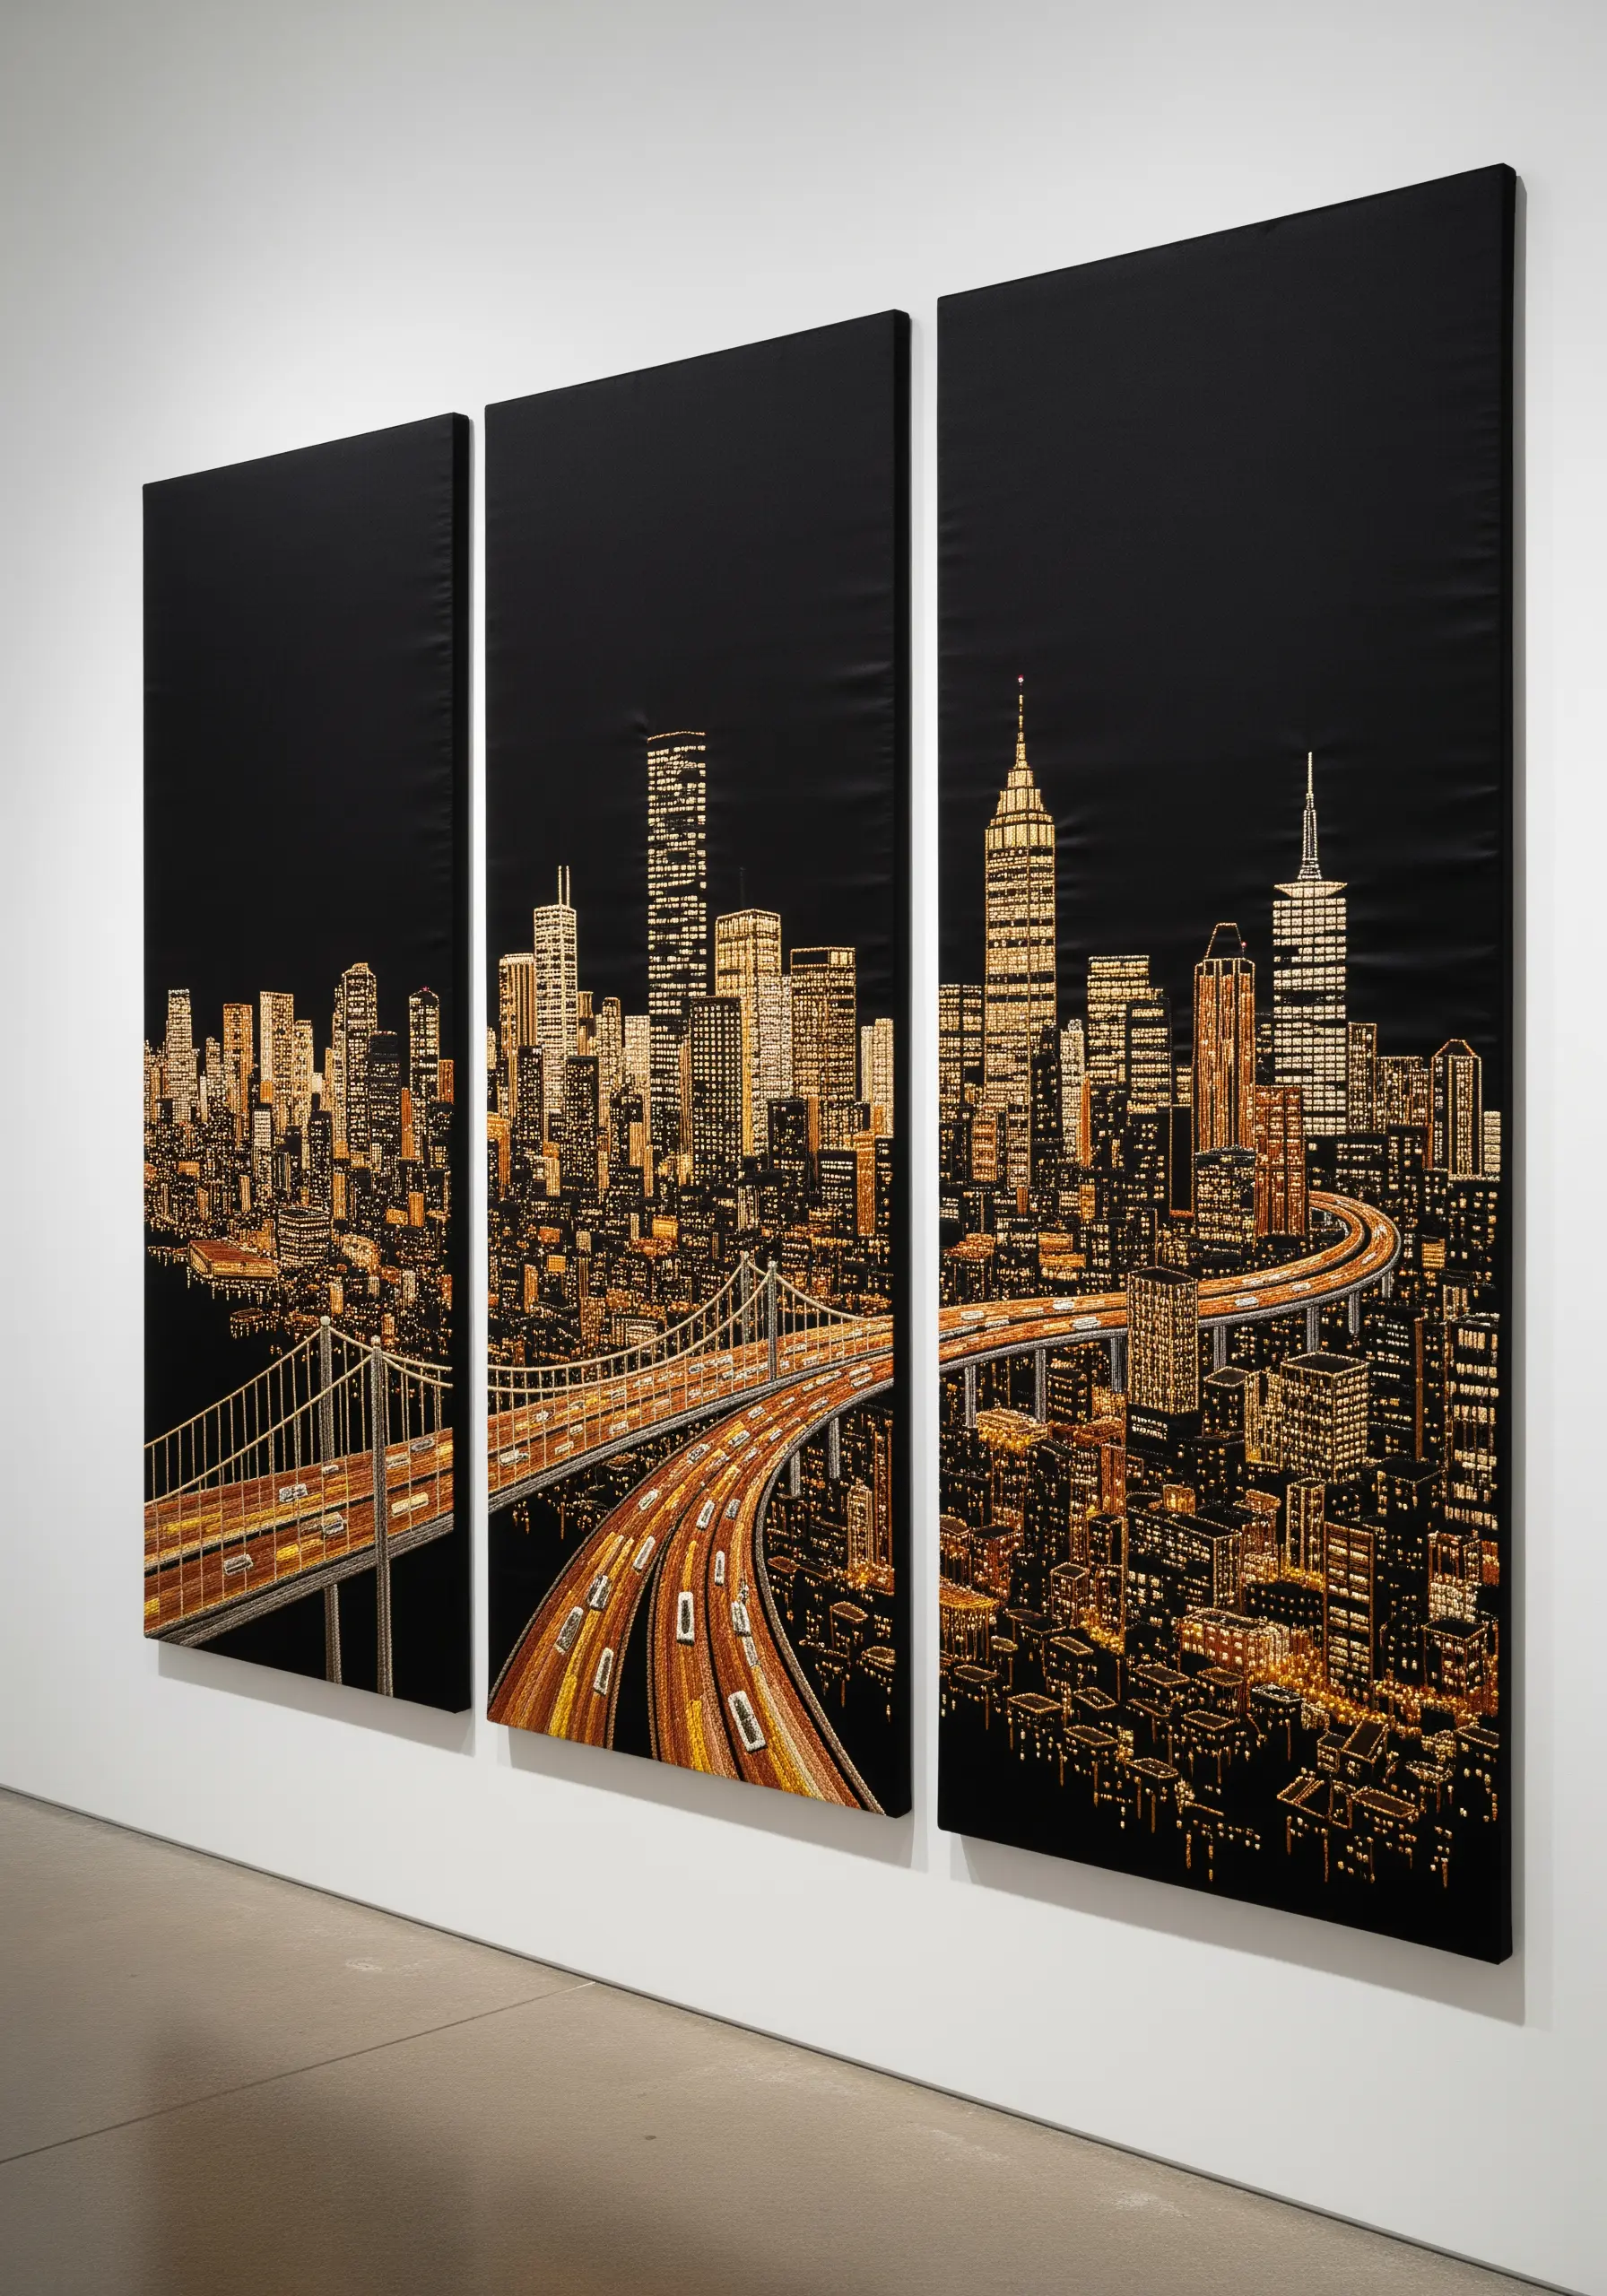
To create the illusion of a million lighted windows, rely on density and color variation rather than complex stitches.
Use tiny, single straight stitches in shades of gold, pale yellow, and off-white.
Cluster them tightly in some areas and scatter them sparsely in others to create depth.
When working across multiple panels, ensure the horizon line and key architectural elements align perfectly to create one seamless, panoramic view.
6. Integrate Thick Paint Textures with Delicate Thread
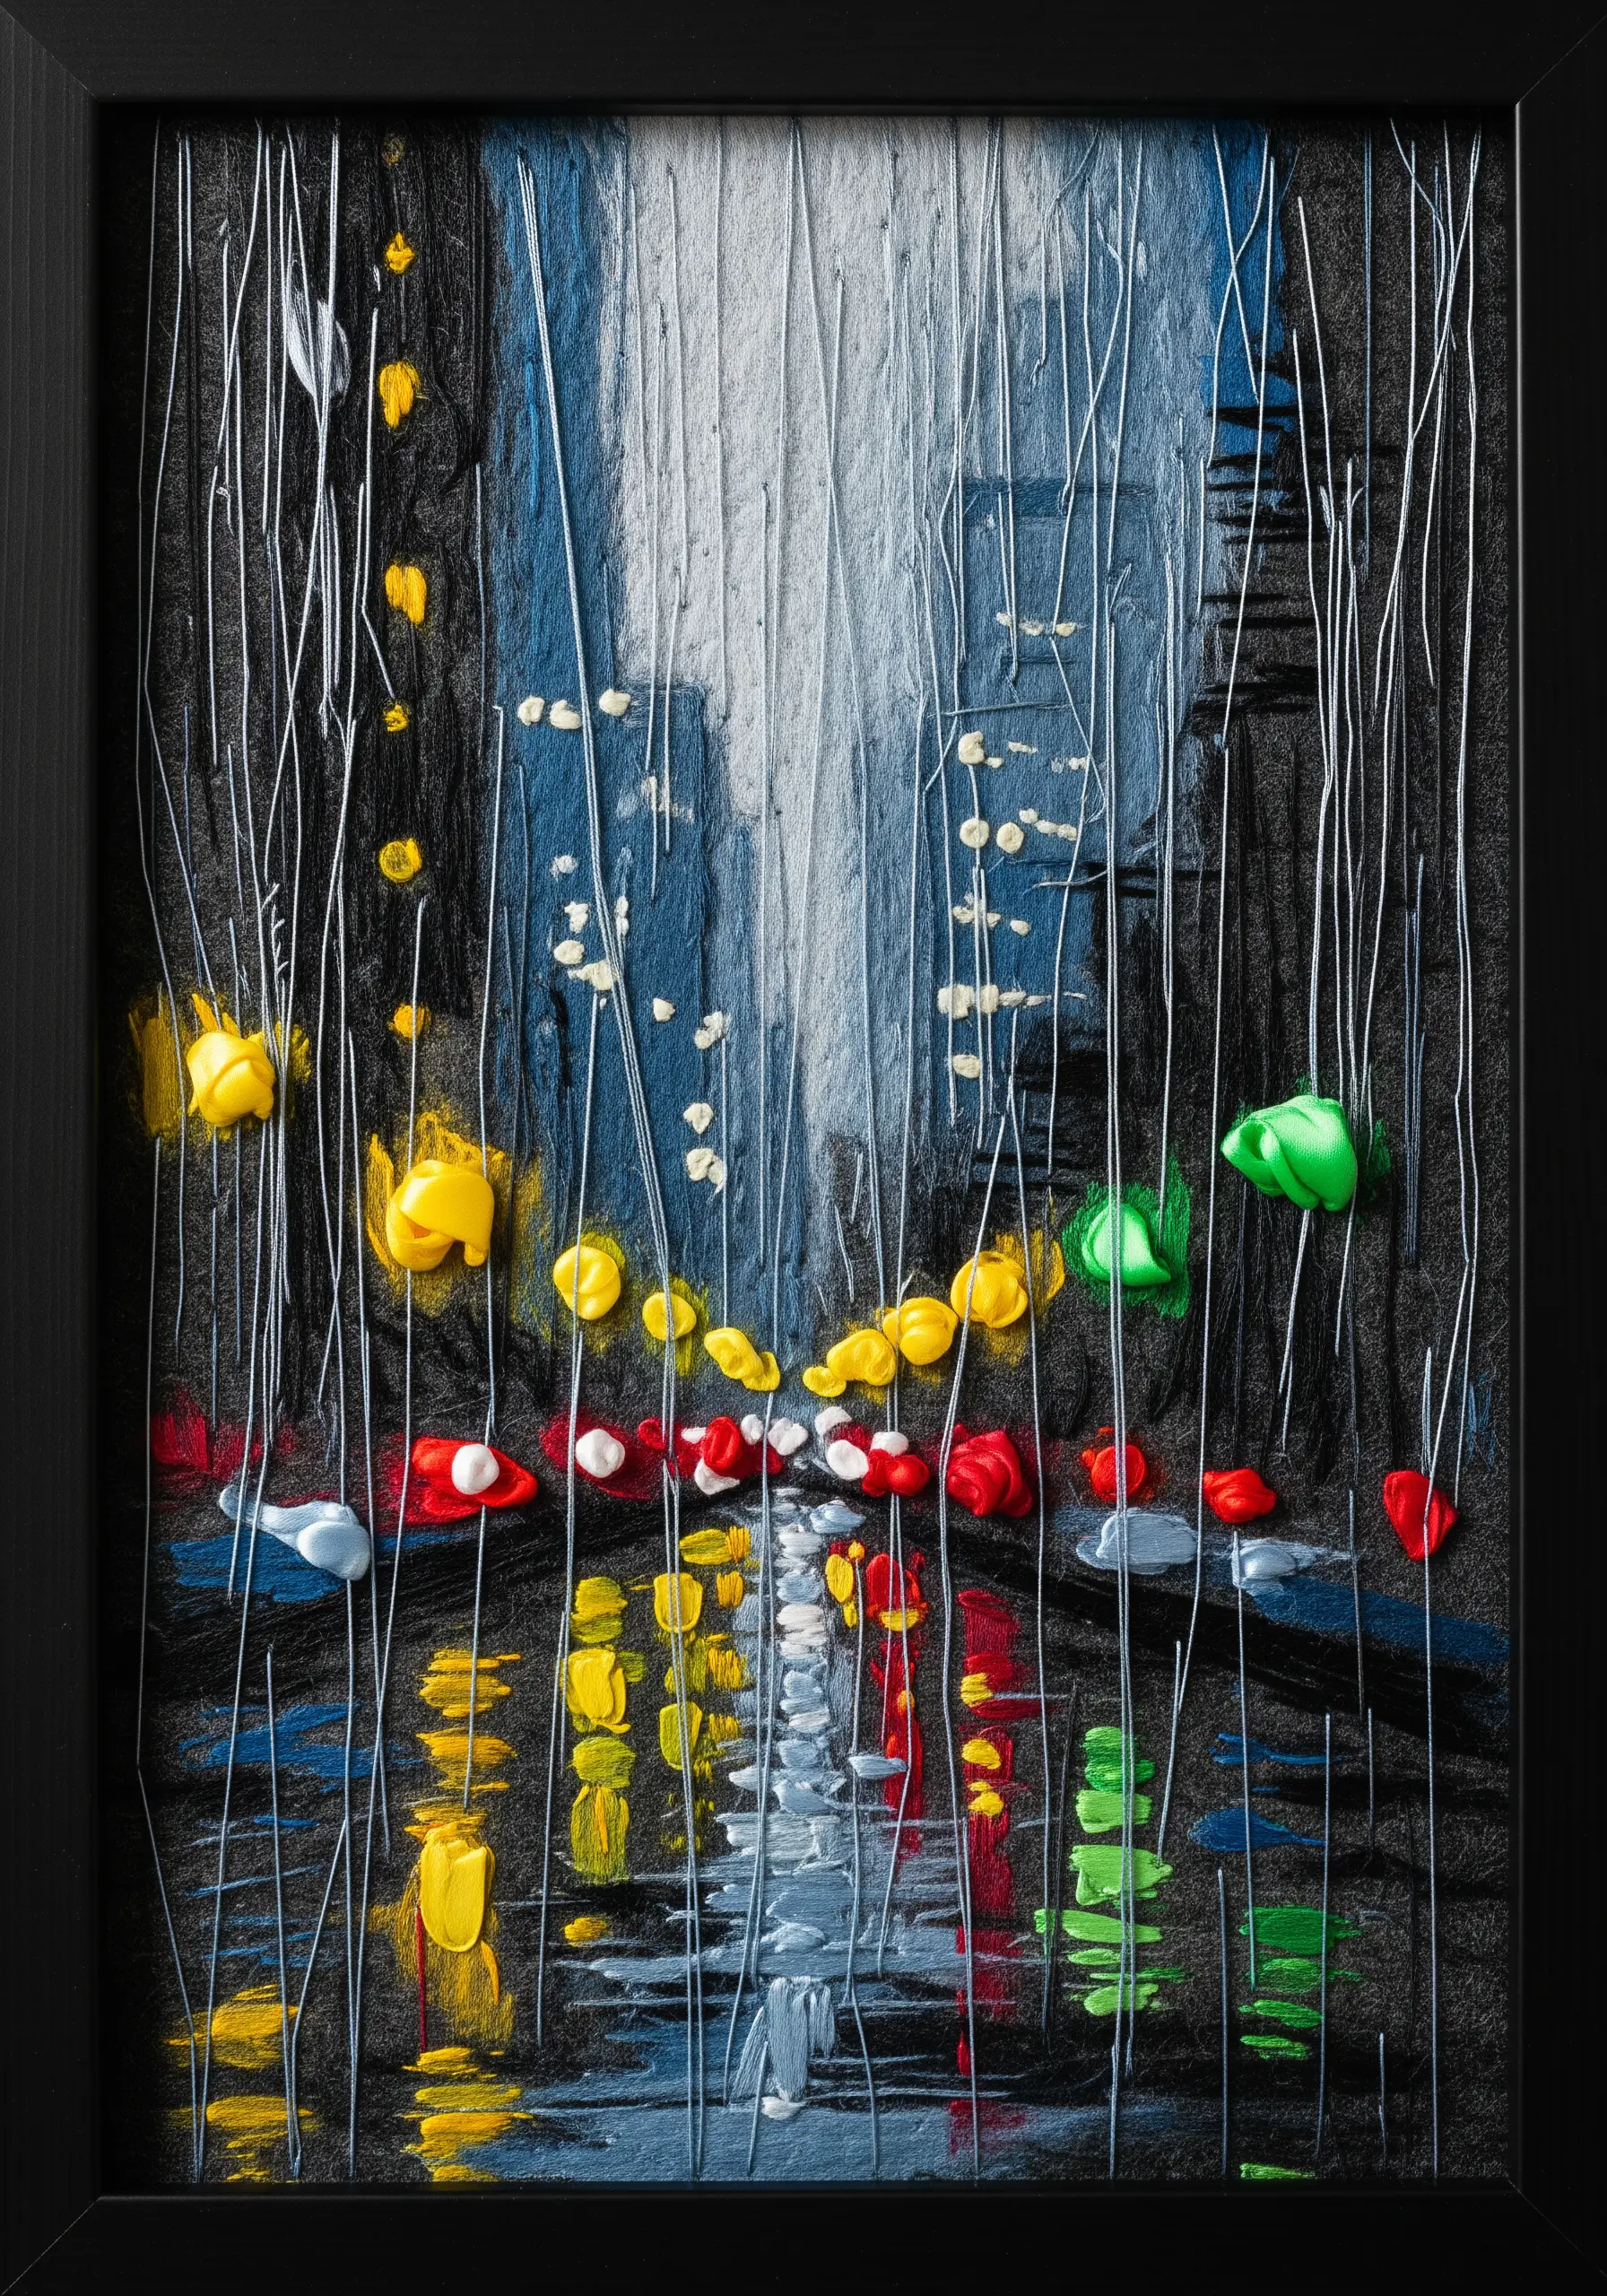
Blur the lines between painting and embroidery by creating a mixed-media piece.
First, apply thick acrylic or fabric paint to your canvas to block in the abstract shapes of buildings and street reflections.
Once the paint is completely dry, use a single strand of high-sheen white or silver thread to add long, straight stitches representing rain.
This contrast between the matte, heavy paint and the delicate, glossy thread creates a powerful sense of atmosphere and texture.
7. Punctuate Clean Outlines with French Knot Accents

Transform a simple blackwork skyline into a charming piece of decor.
Stitch the entire outline with a neat, two-strand backstitch for consistency and strength.
Then, introduce a single, bold accent color.
Place small clusters of French knots at strategic points to represent trees or abstract bursts of color.
This technique, seen here on a cushion, adds just enough detail to draw the eye without overwhelming the minimalist design.
8. Build Dimensionality with Layered Organza
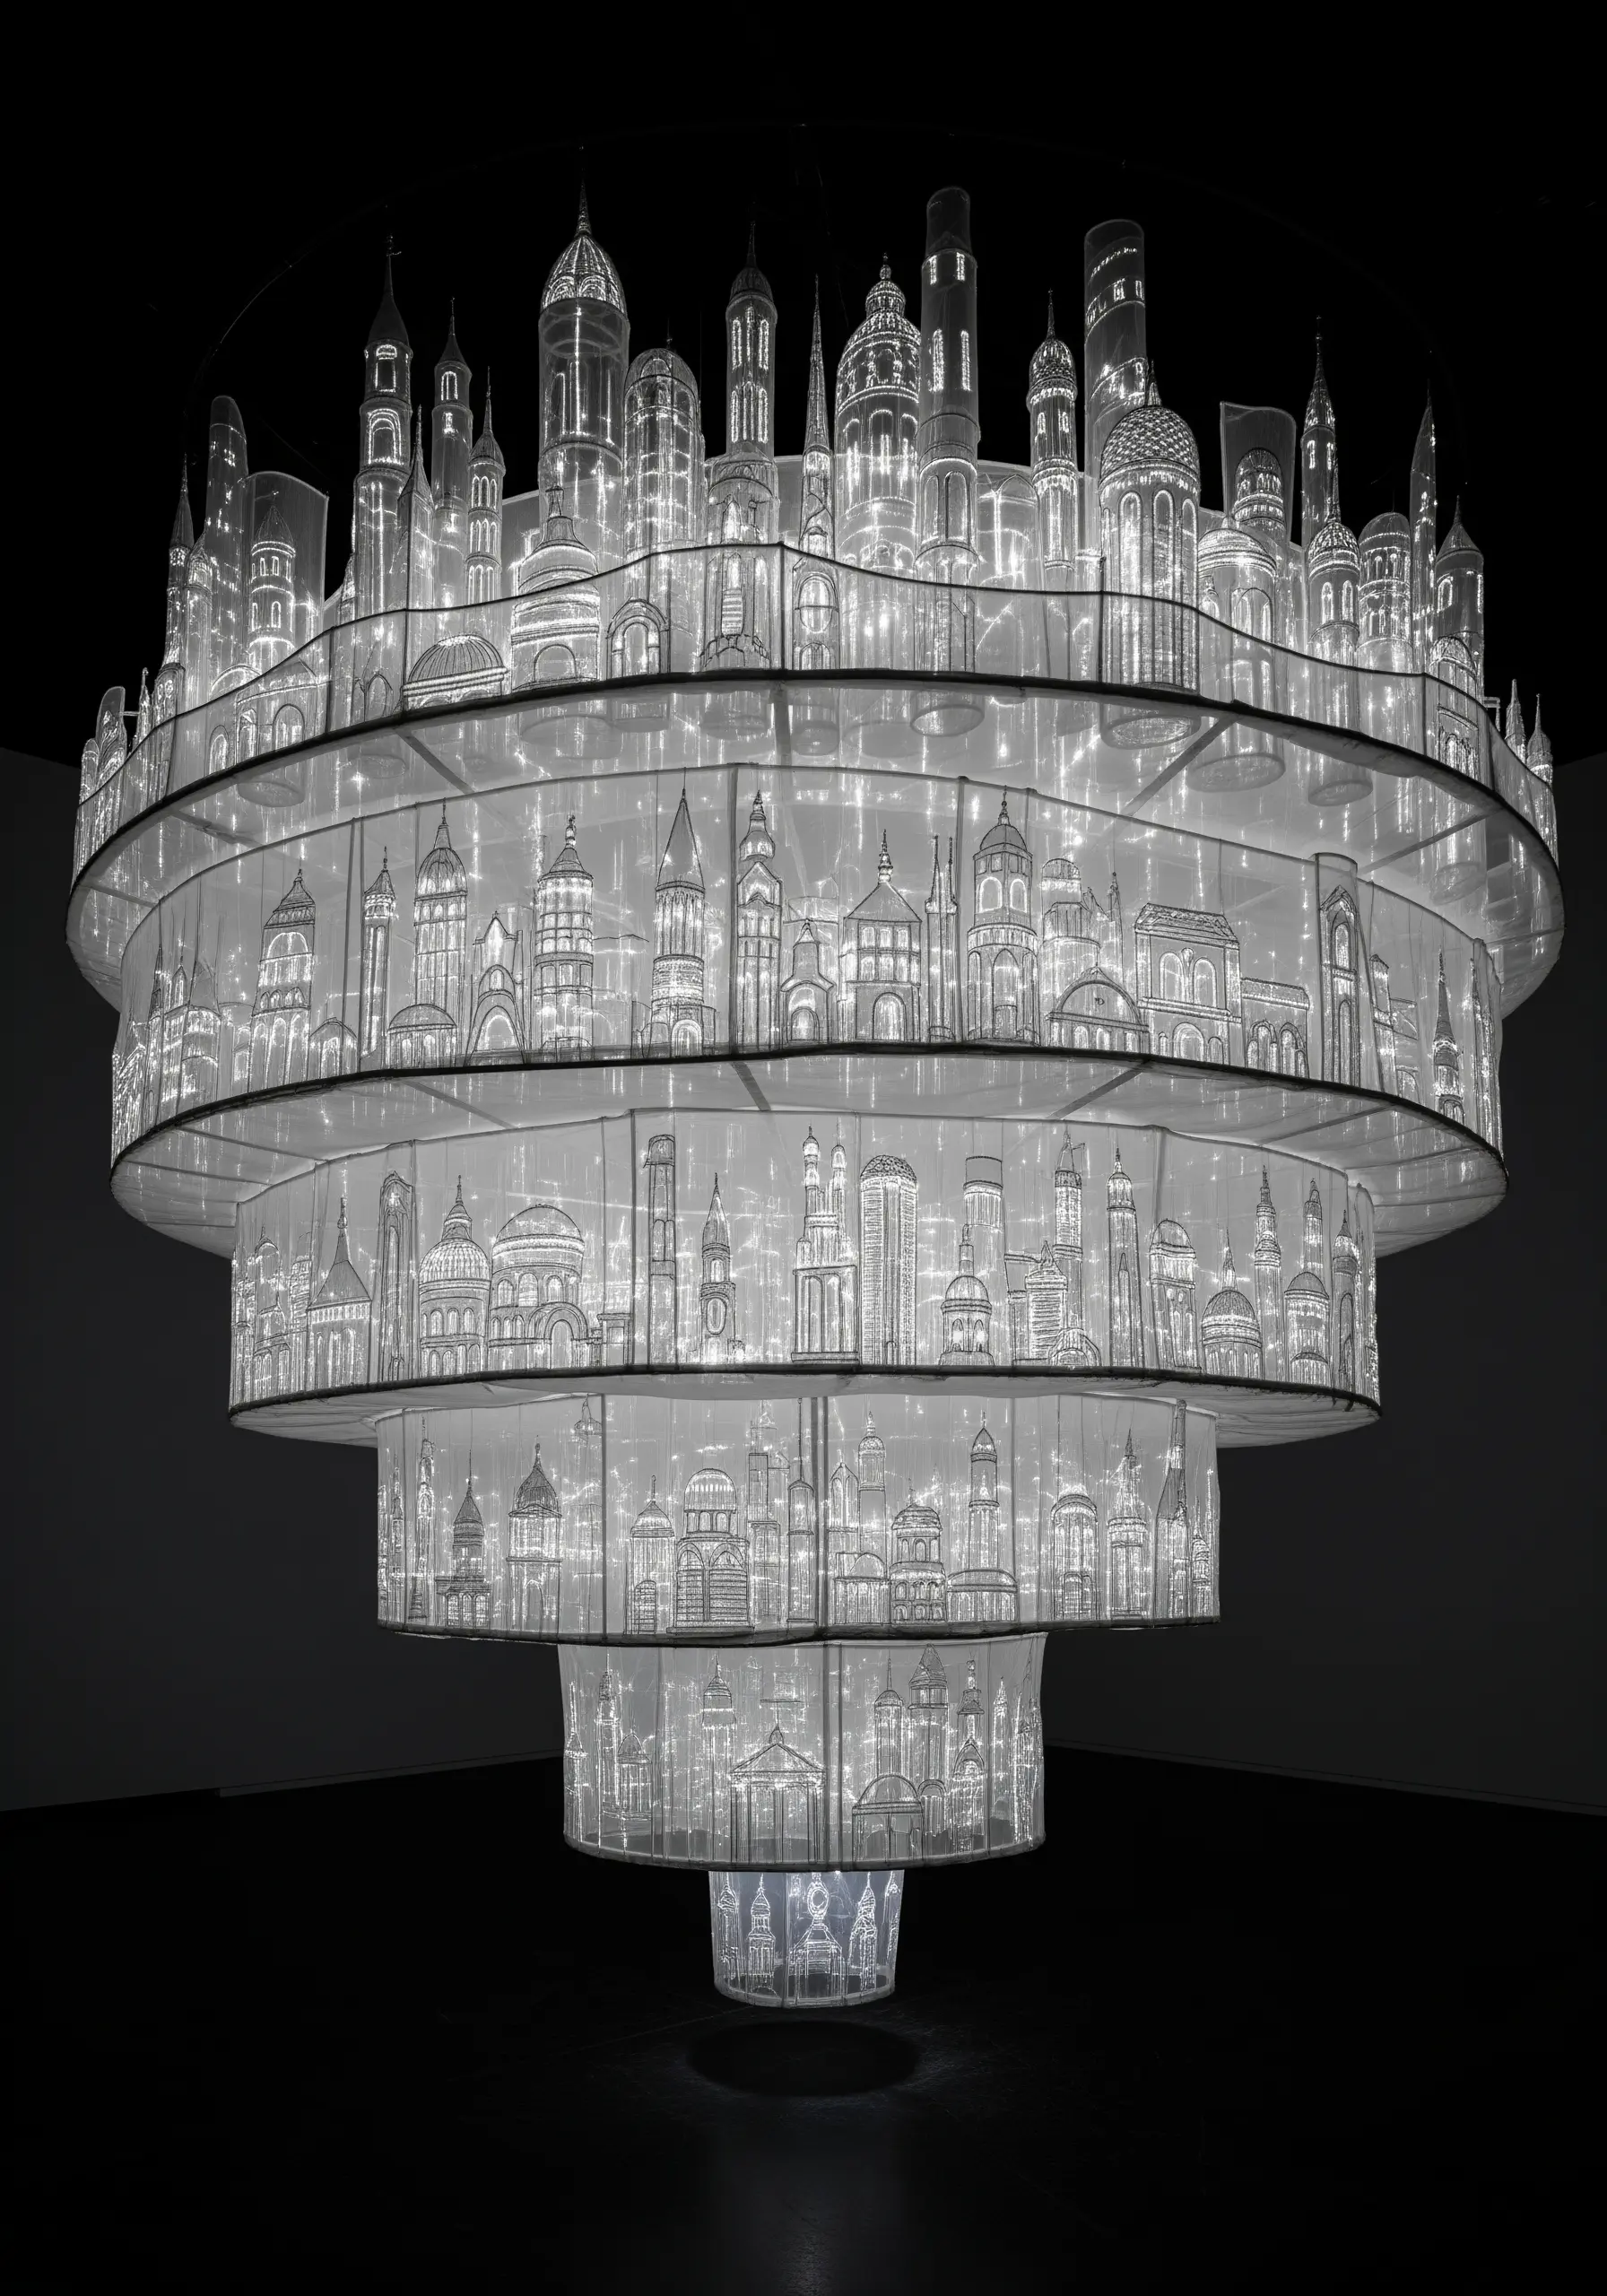
Inspired by sculptural installations, you can create a three-dimensional effect using layers of sheer fabric.
Stretch a base fabric in a deep hoop, then layer two or three pieces of organza over it, each slightly smaller than the last.
Embroider different parts of your cityscape on each layer—foreground buildings on the top layer, and distant spires on the bottom.
The transparency creates an ethereal sense of depth and perspective that a single layer of fabric cannot replicate.
9. Translate a Cityscape into Graphic Line Art
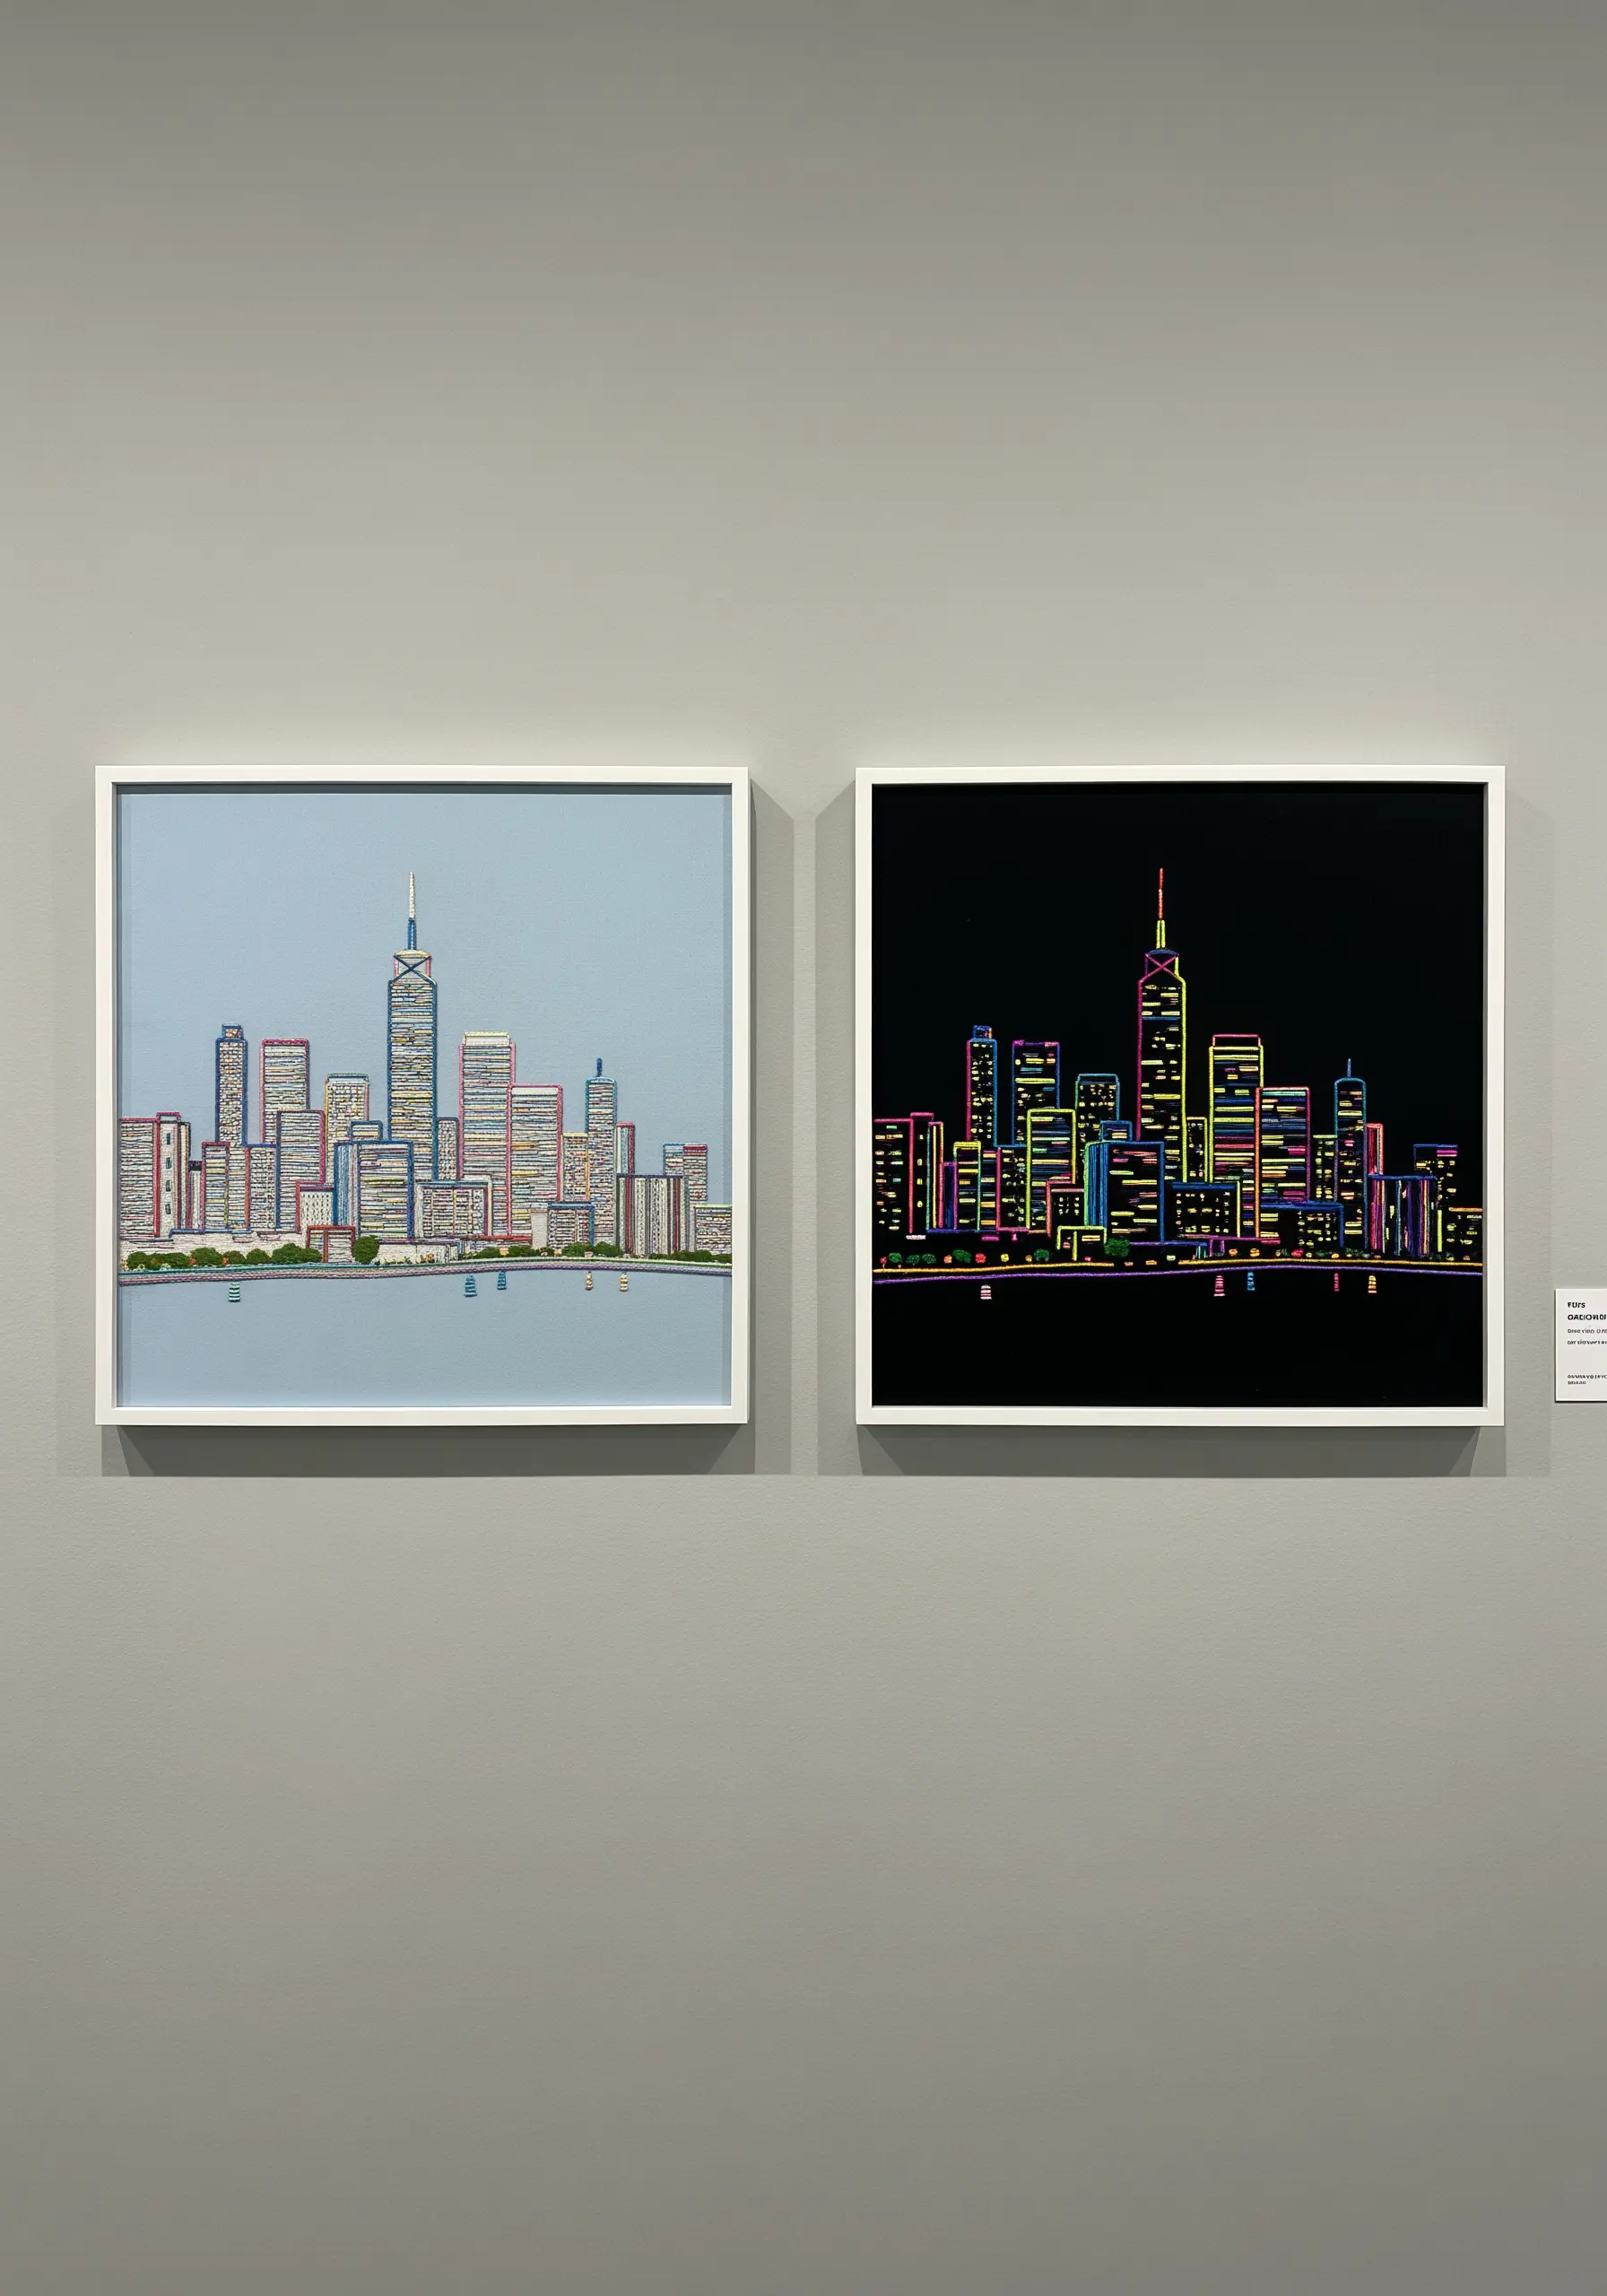
To create a striking neon-on-black effect, simplify your city’s architecture into its most essential lines.
Instead of filling shapes, focus on the outlines.
Use a bright, single-color-per-building approach and a consistent backstitch to achieve a clean, graphic look that recalls vintage arcade games or scratch art.
This method emphasizes form and color over realistic detail, making it a perfect project for a modern interior.
10. Master Metallics for Architectural Sheen
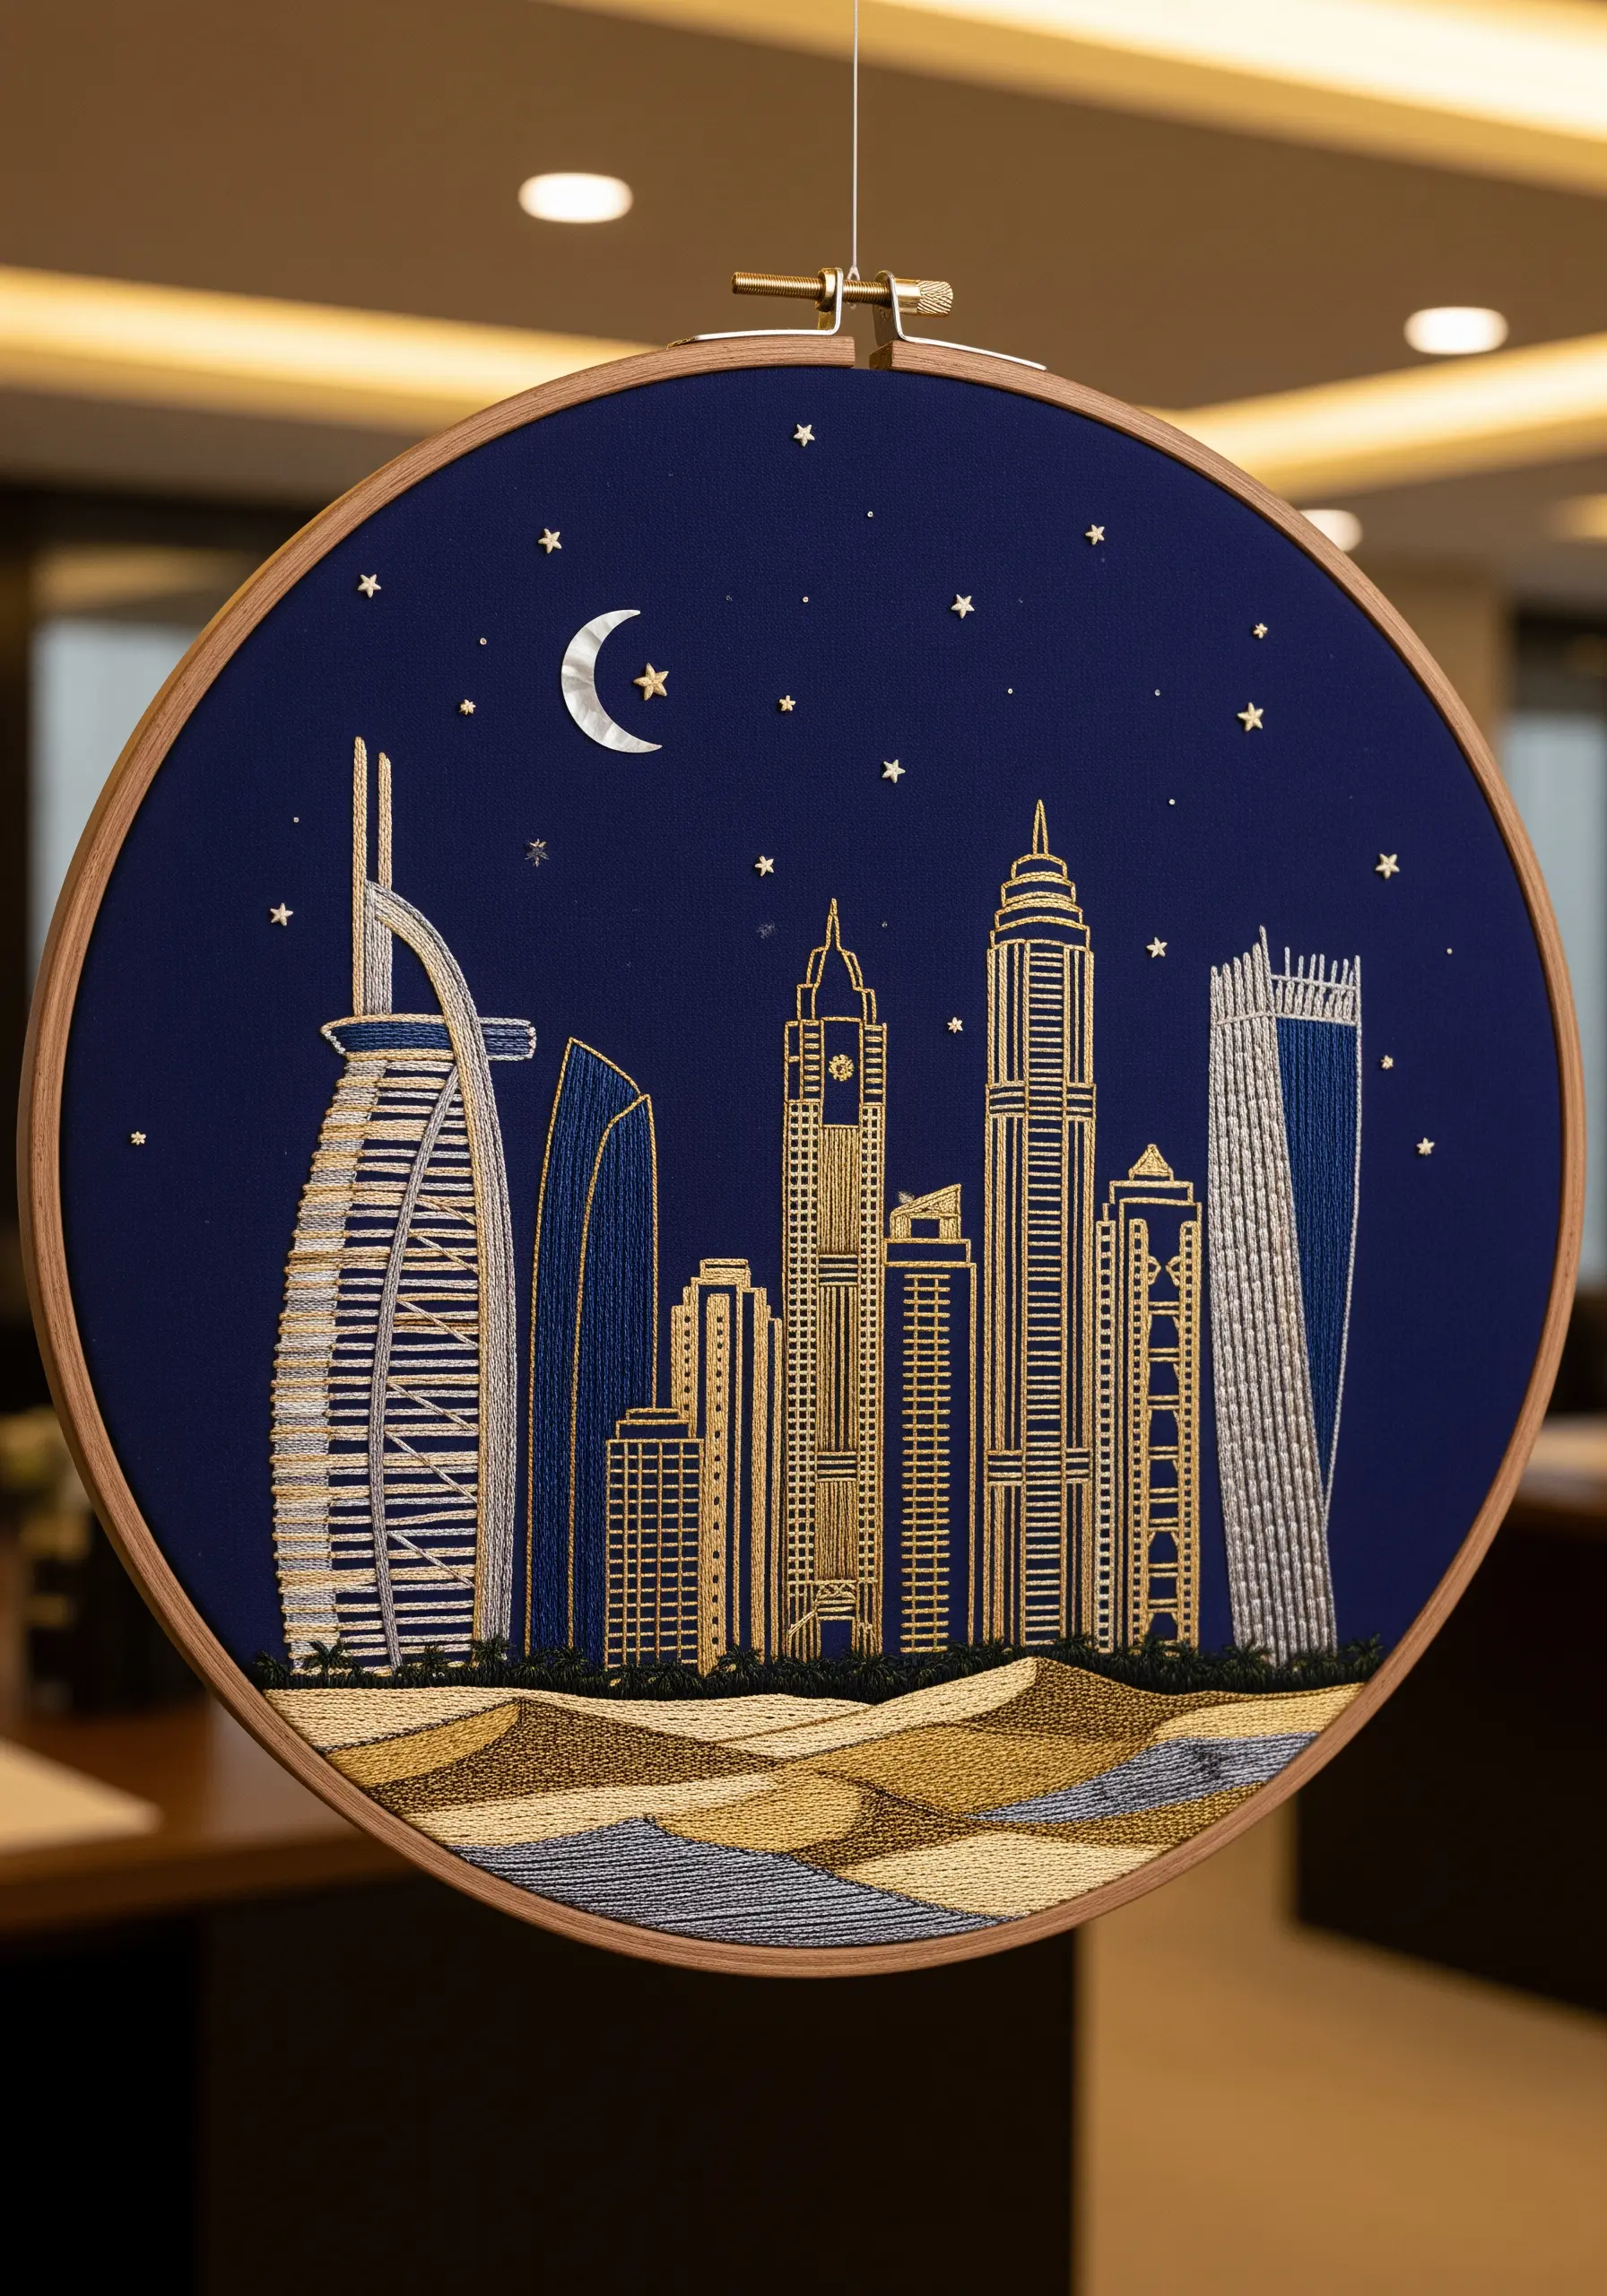
Stitching with metallic thread can be challenging, but it’s perfect for capturing the glimmer of modern architecture.
To prevent fraying, use shorter lengths of thread (no more than 12 inches) and a needle with a larger eye.
Consider a thread conditioner like beeswax to help it glide smoothly.
For the sand dunes, blend metallic gold with matte sand-colored floss in a long-and-short stitch to create a shimmer that feels organic, not harsh.
11. Create Reflections with Erratic Stitching
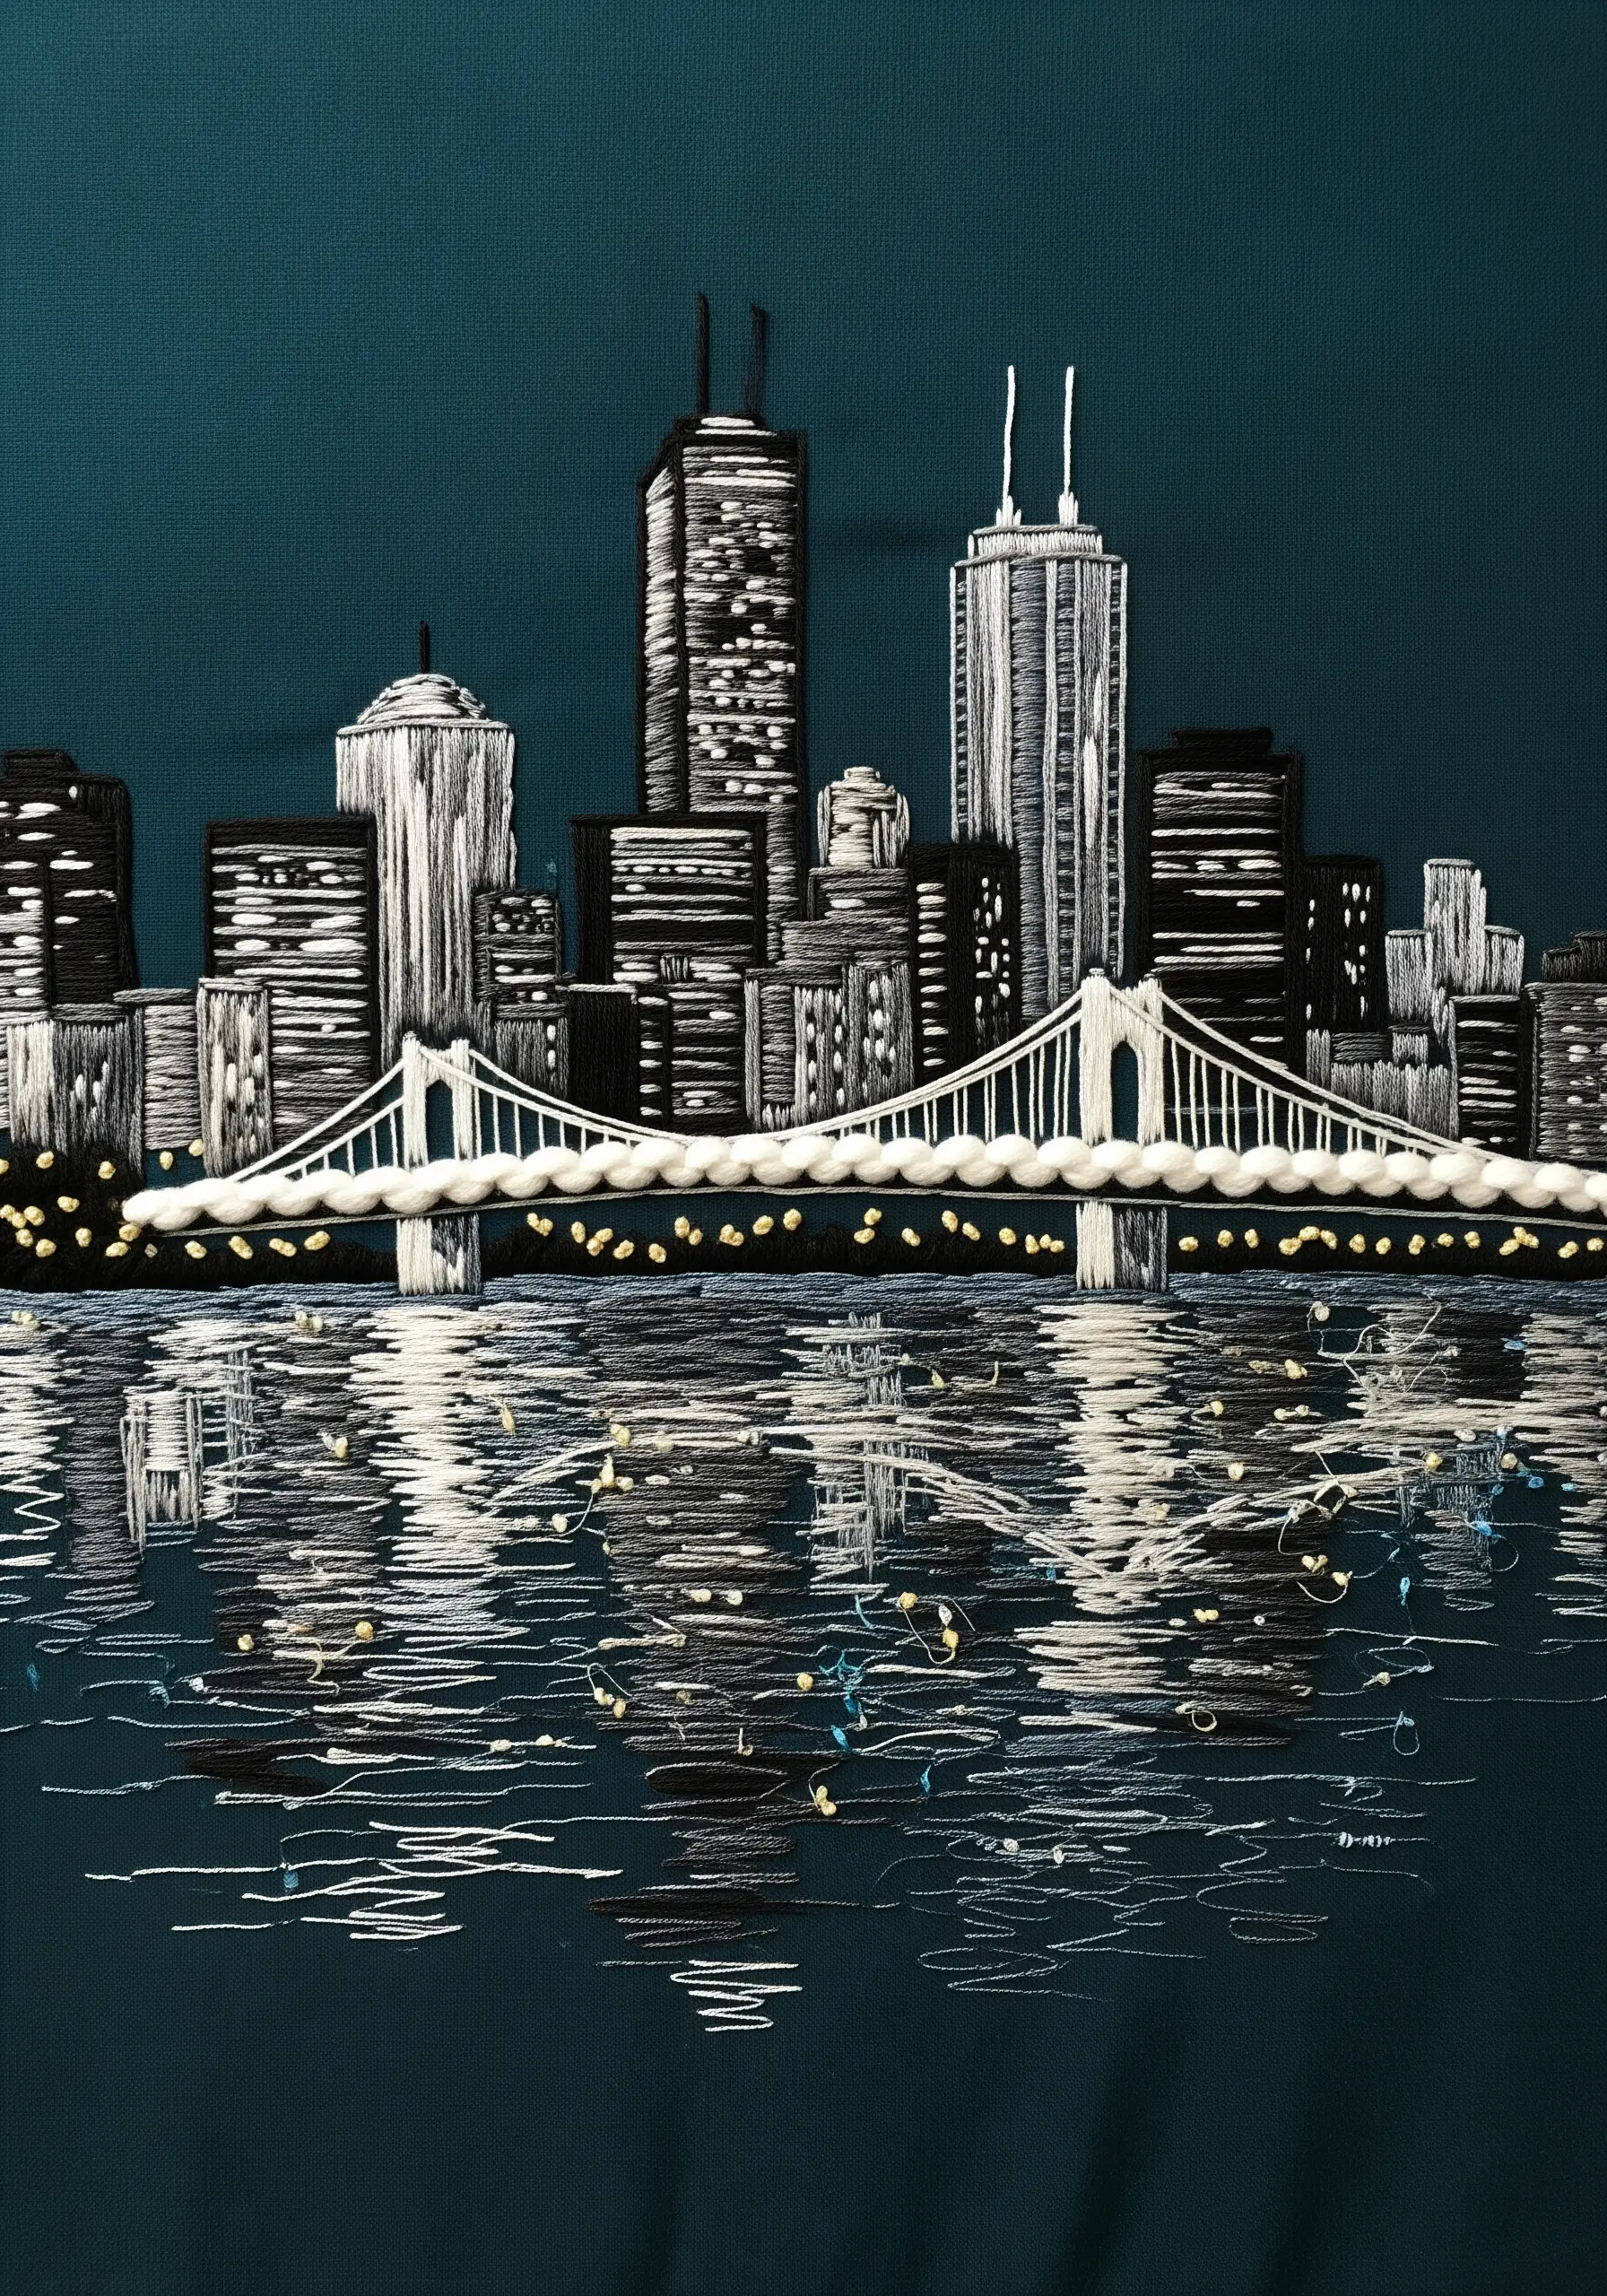
To embroider a believable water reflection, abandon perfect, even stitches.
Use a mix of single-strand white, grey, and light blue threads to create the reflected lights.
Lay down short, scattered straight stitches horizontally, allowing them to overlap and cross at slight angles.
Introduce a few tiny, misplaced stitches of color to mimic the chaotic way light bounces off a moving surface. This imperfection is what makes the effect feel real.
12. Illuminate a Scene with Thread Painting
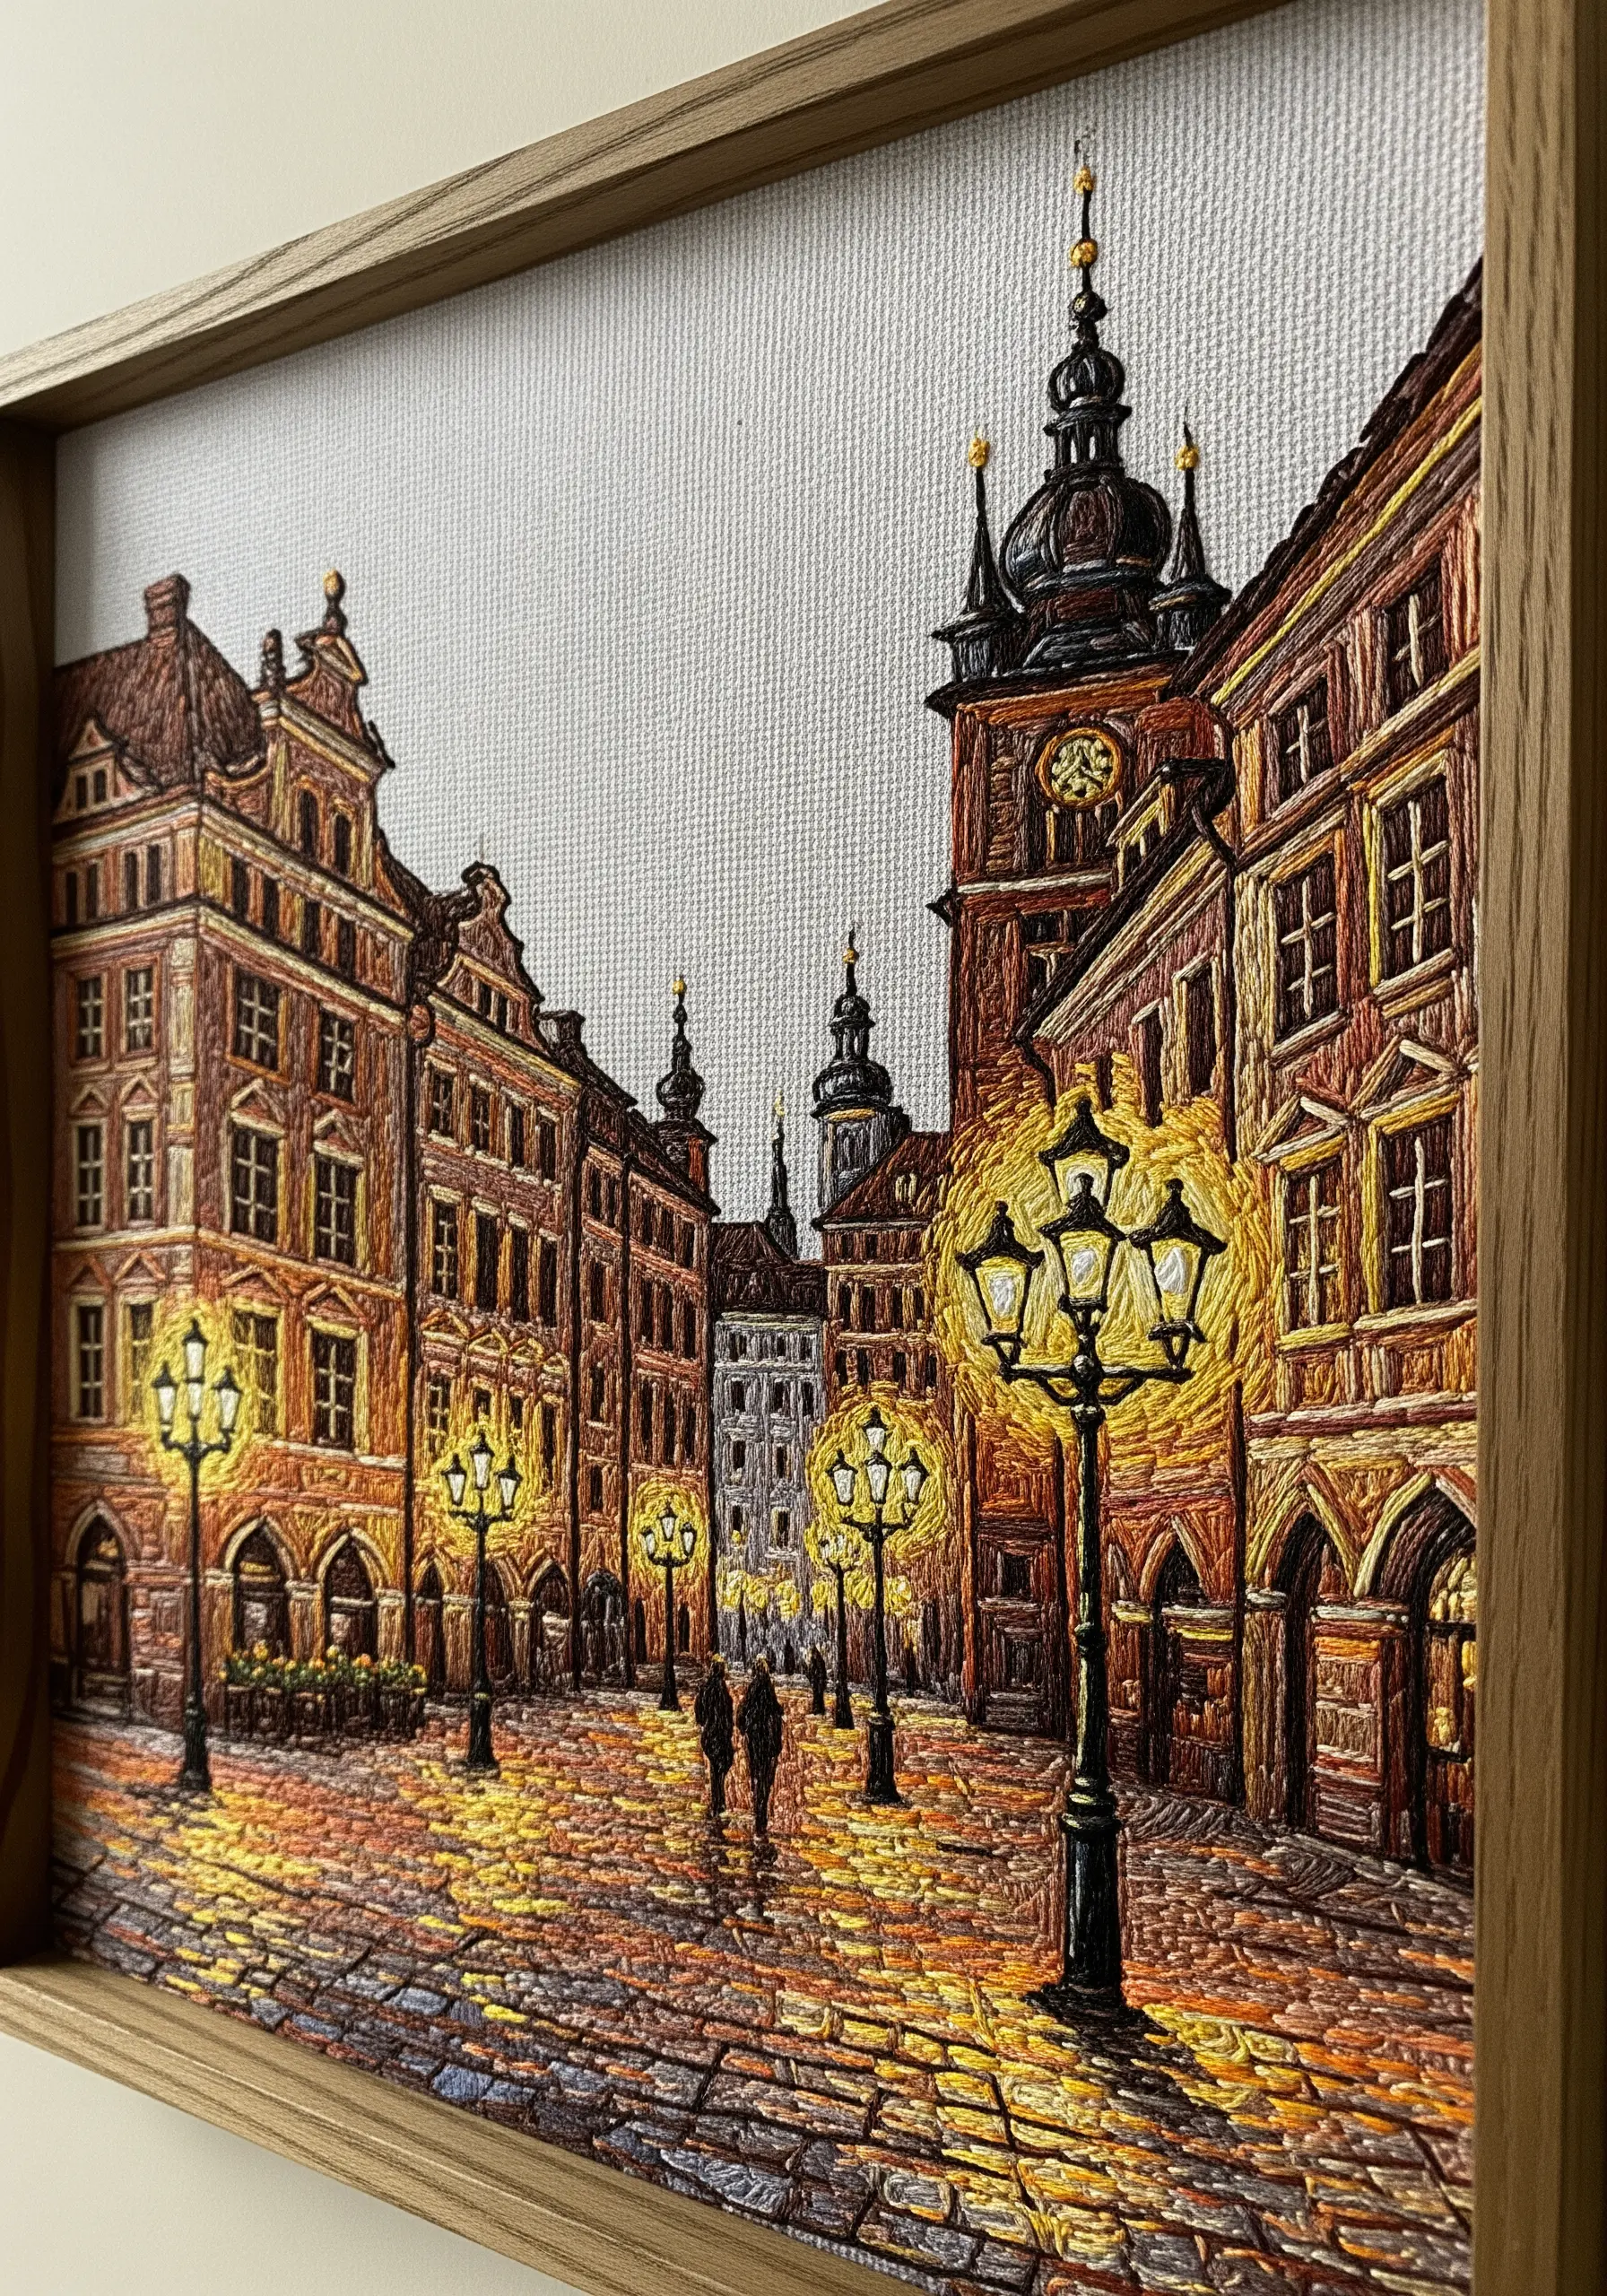
To make your street lamps appear to glow, use a thread painting technique with concentric circles of color.
Start with the brightest white or yellow at the very center, using tiny seed stitches.
Work your way outward with progressively darker shades of yellow and orange, blending each layer into the next with a short satin stitch.
Apply this same logic to the cobblestones, using shades of yellow and brown to show where the light hits the ground.
13. Use Appliqué for Bold, Cartoon-Style Buildings

For a playful and graphic cityscape, combine simple appliqué with embroidery.
Cut your building shapes from brightly colored felt or cotton fabric and affix them to your base fabric (like a tote bag) with a heat-activated adhesive.
Then, secure the edges with a clean, tight satin stitch border in a contrasting color.
This method allows you to create large blocks of solid color quickly and effectively, giving your work a polished, storybook feel.
14. Contrast Dense Knots with Delicate Line Work
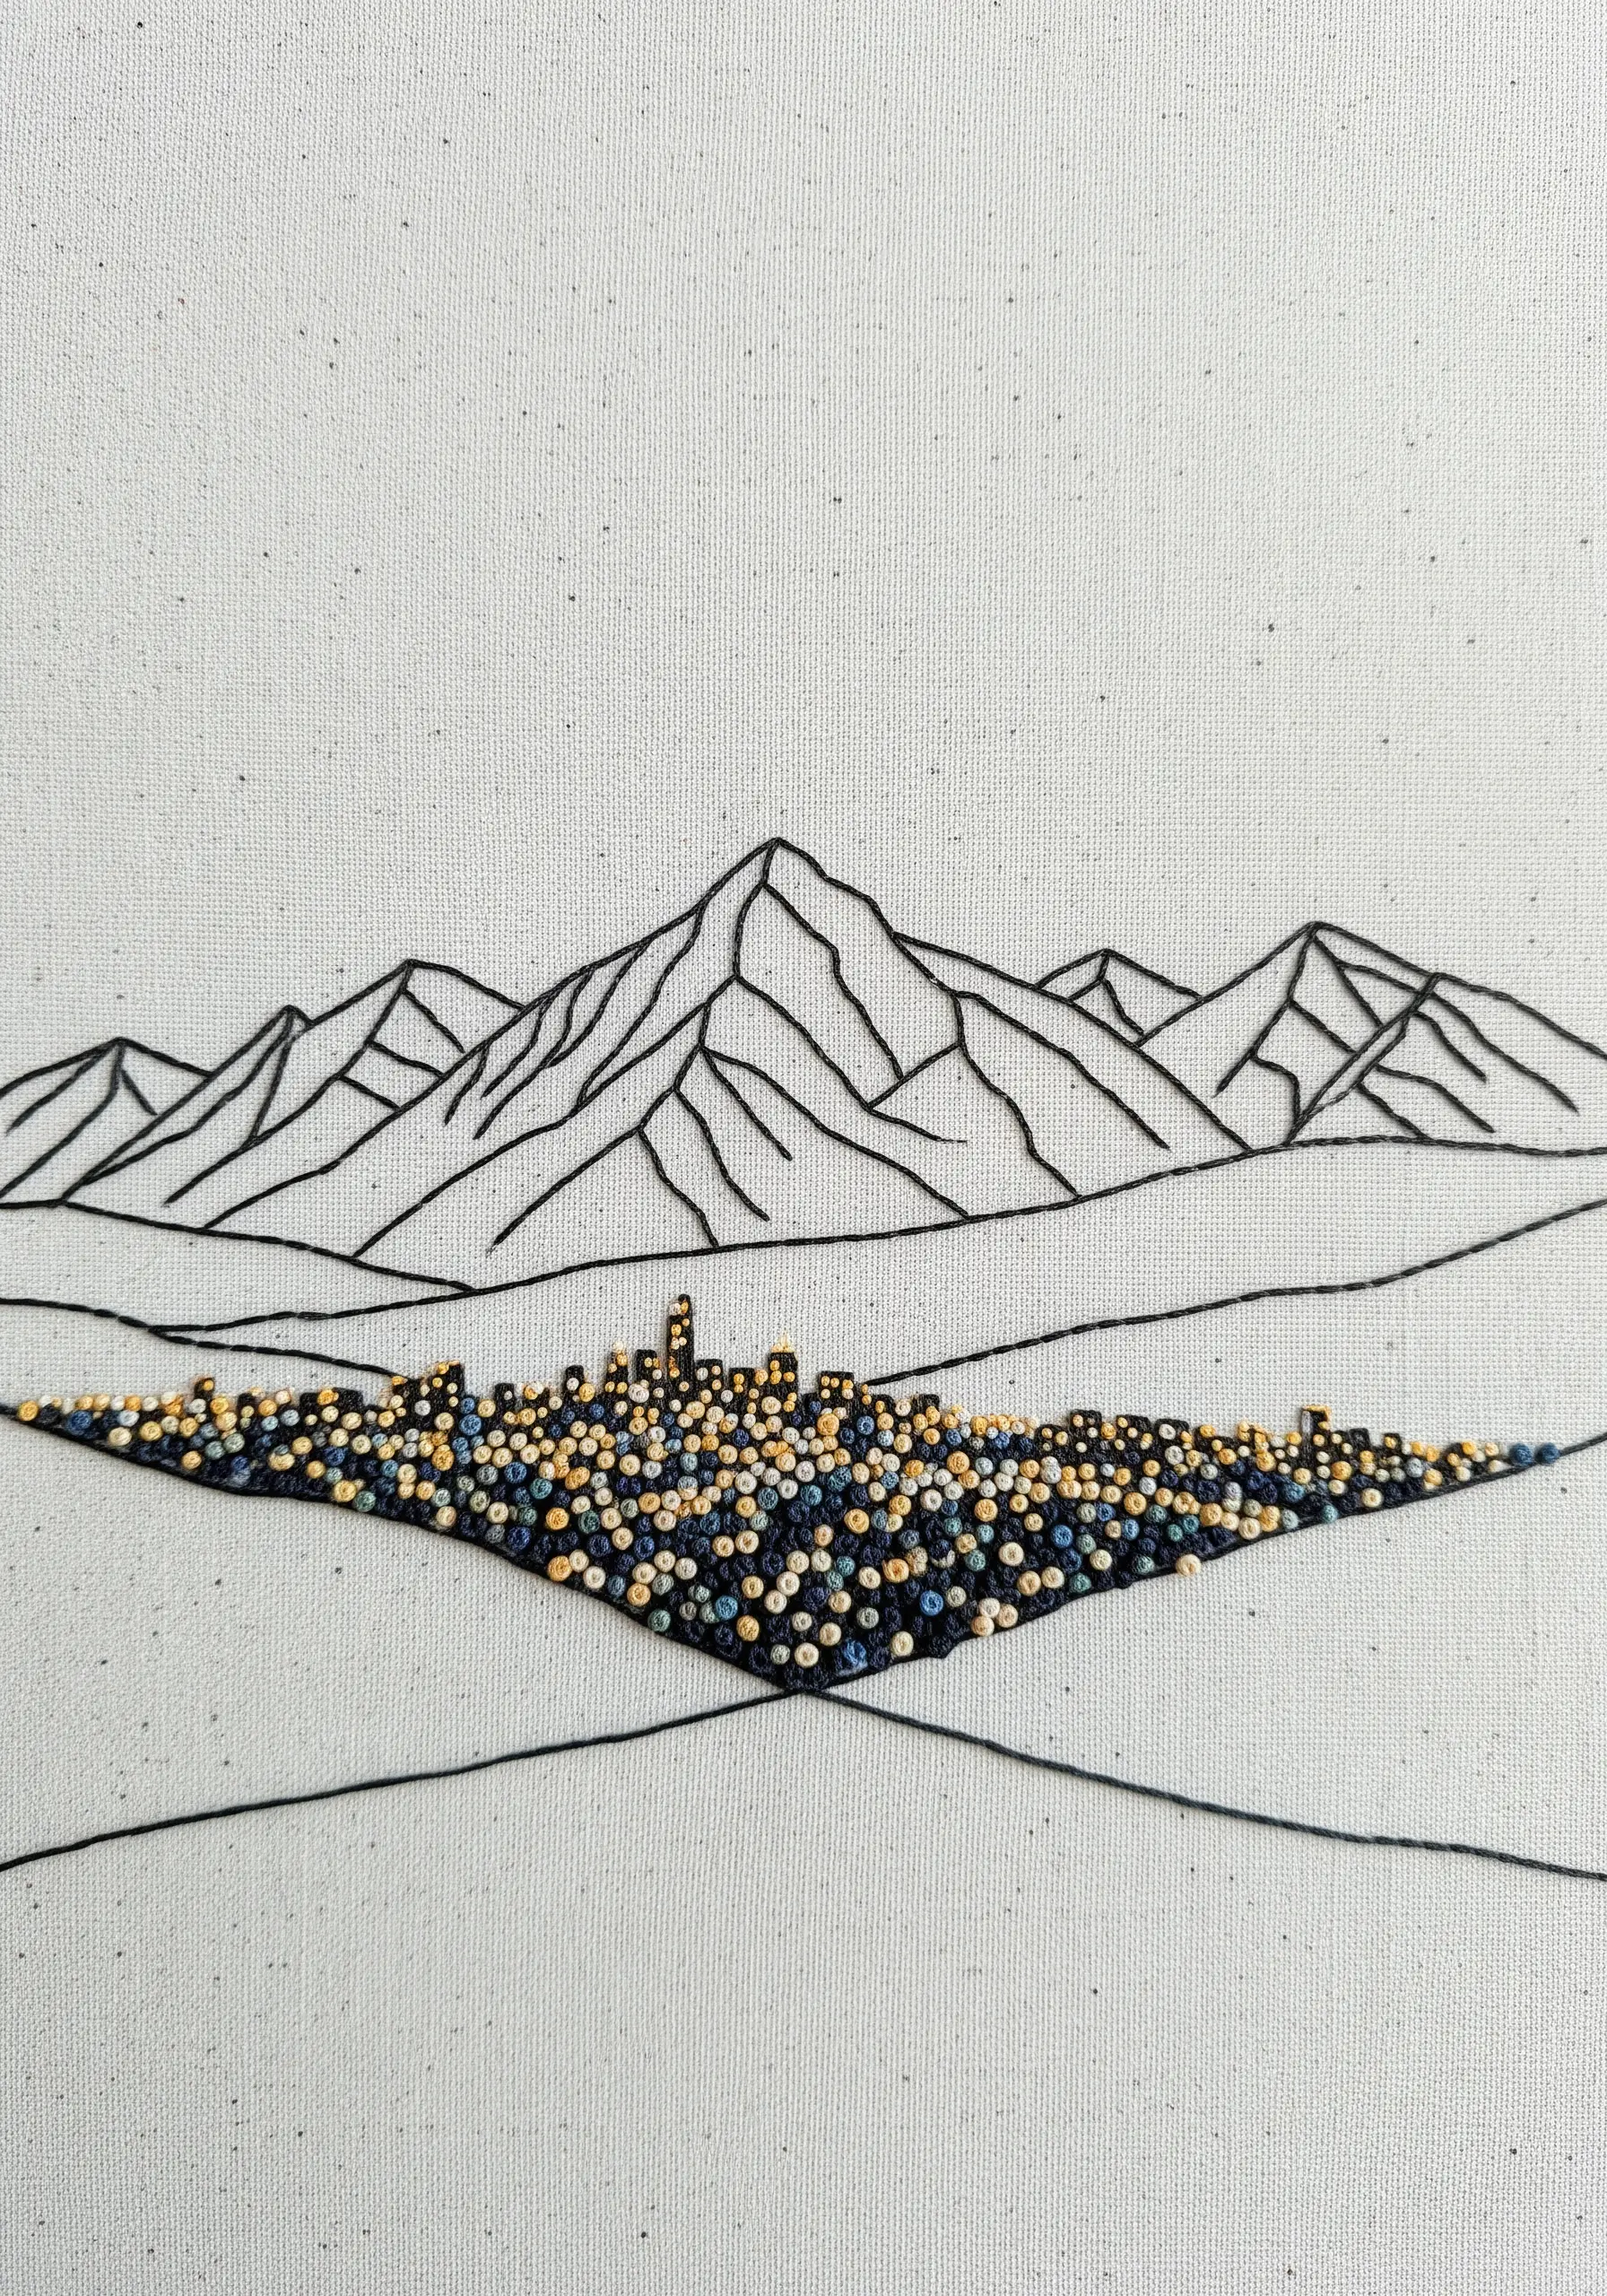
Create a powerful visual contrast by pairing two opposing techniques.
First, render your mountains with a crisp, minimal backstitch, focusing only on the essential contour lines.
For the city nestled in the valley, fill the entire shape with a dense field of French knots in varying colors and sizes.
This juxtaposition of sparse lines and rich texture makes both elements more impactful and turns the piece into an engaging abstract thread sculpture.
15. Define Geometric Planes with Stitch Direction
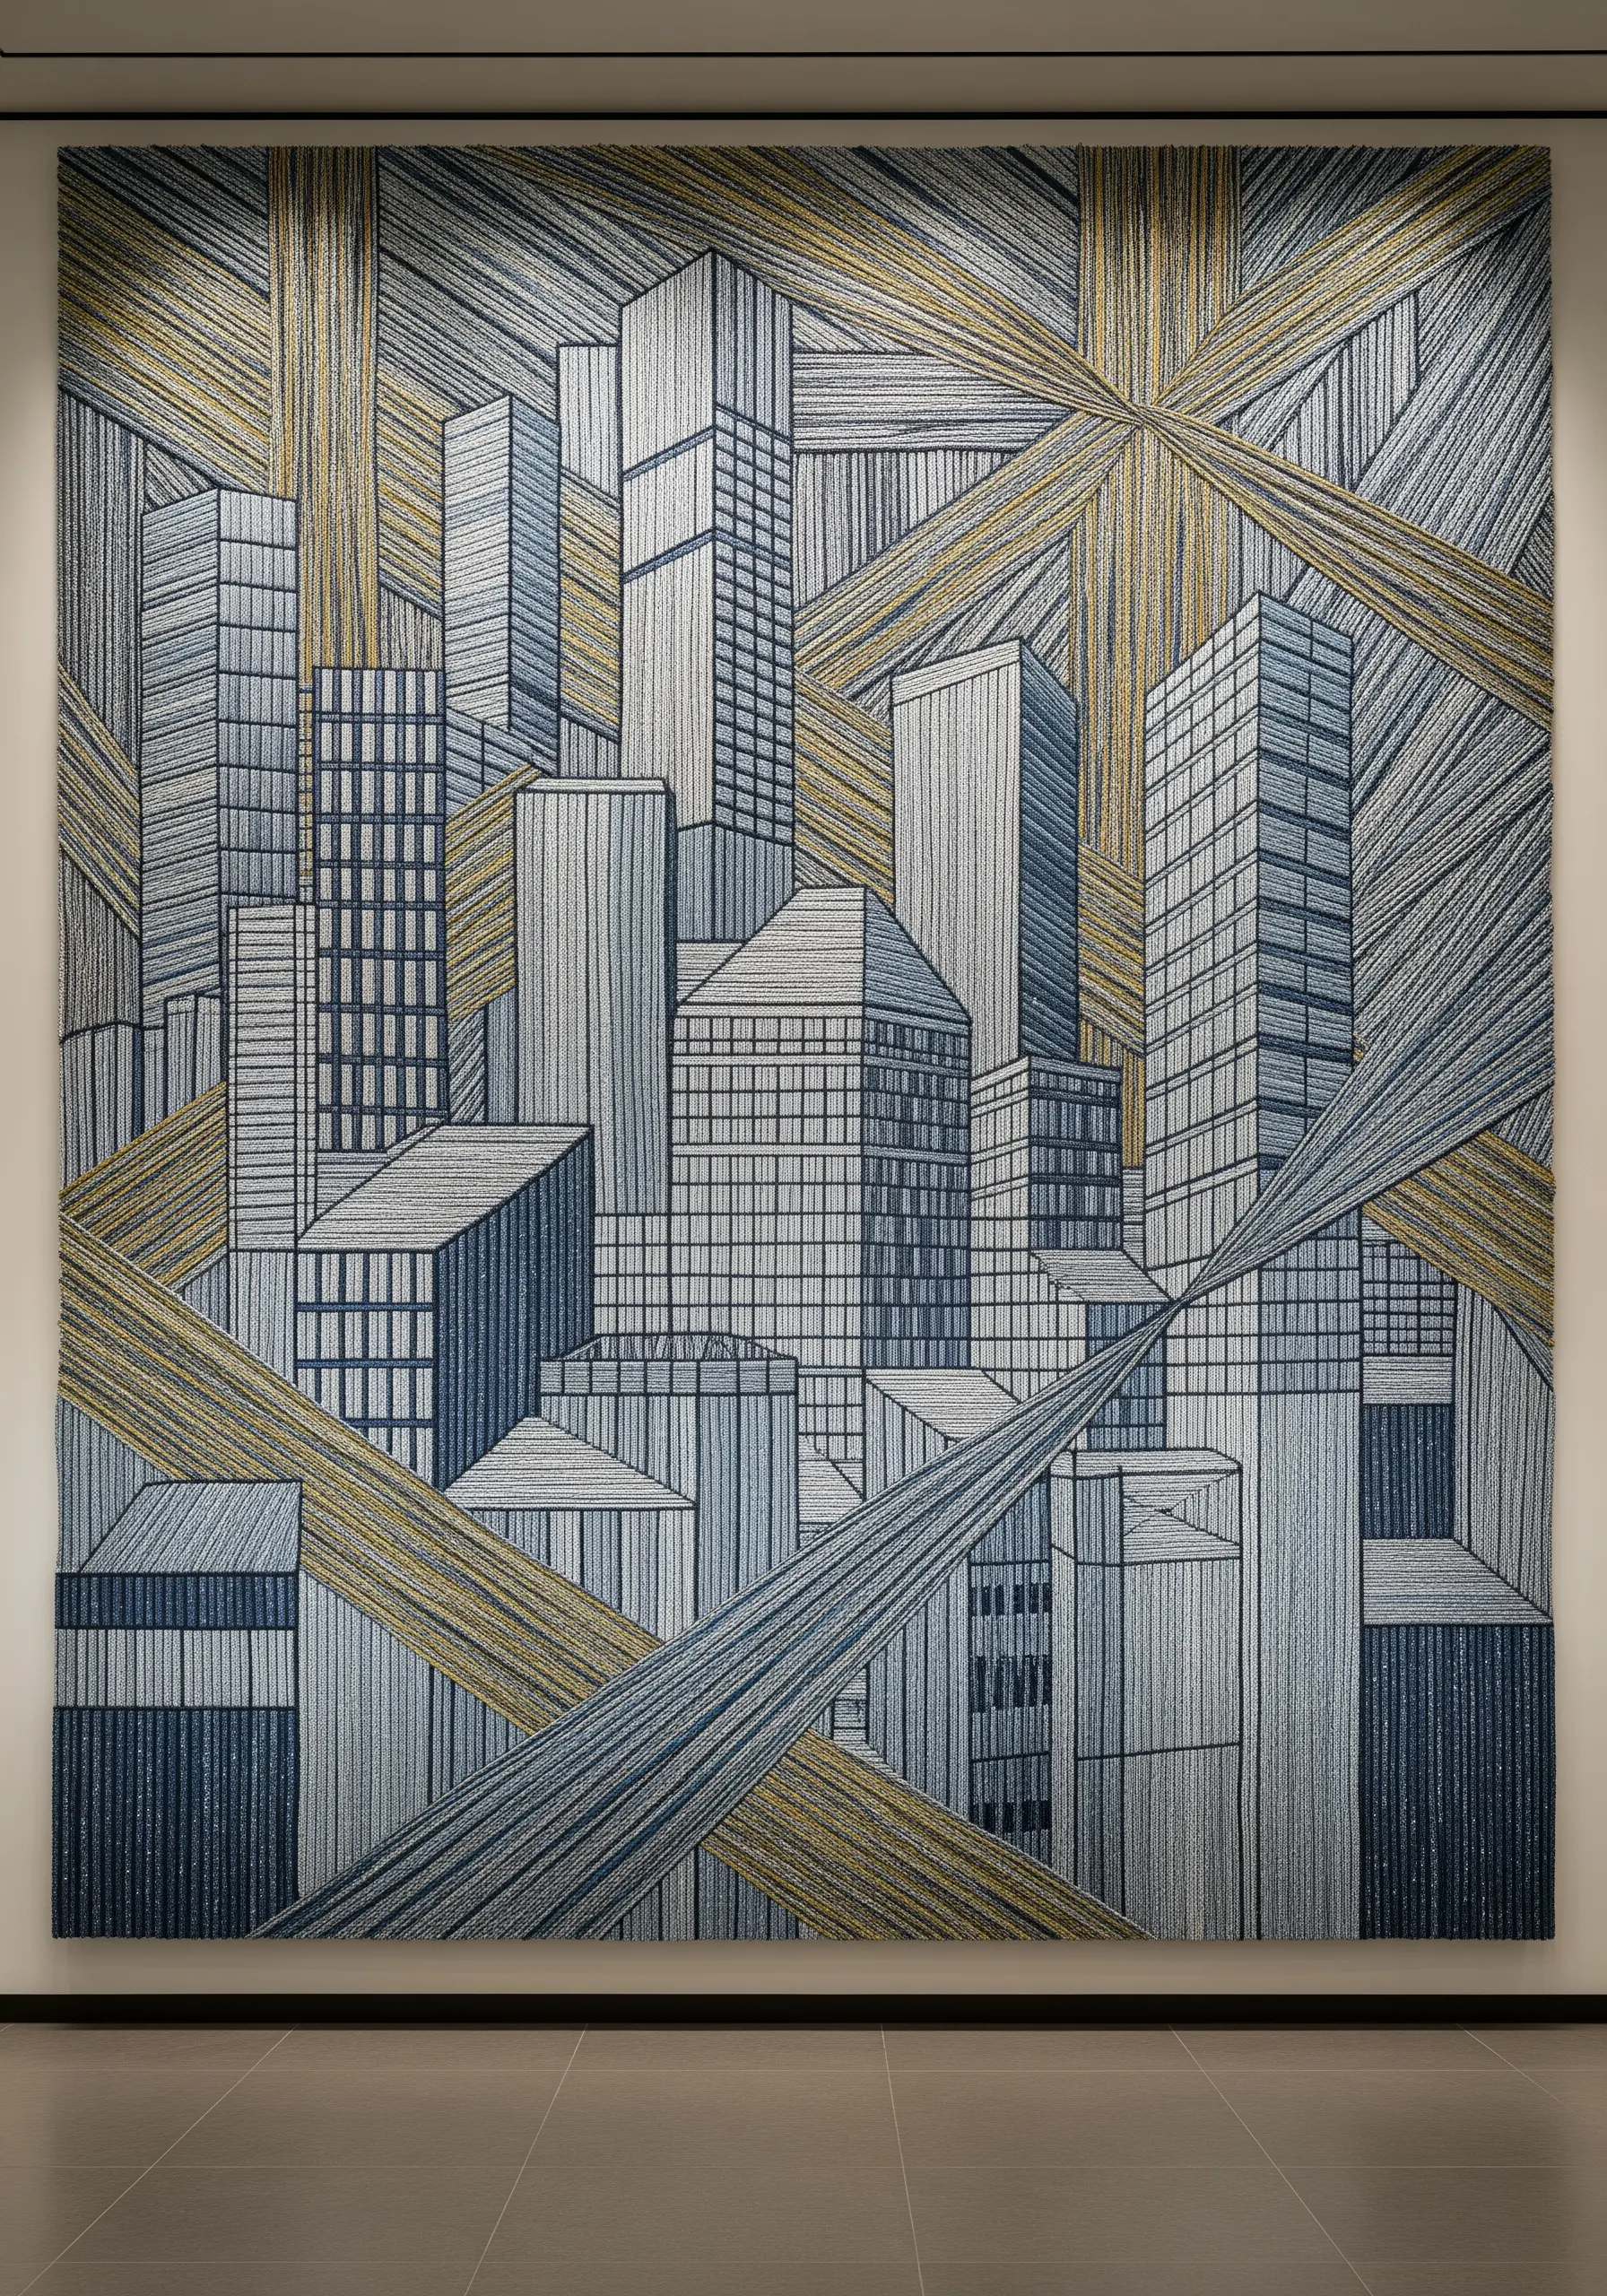
In an abstract or geometric cityscape, stitch direction is your most powerful tool for creating dimension.
Before you begin, draw light pencil lines on your fabric to map out the direction of stitches for each surface of your buildings.
Use vertical stitches for front-facing walls, and angled stitches for sides and rooftops.
Even when using the same color, this technique creates the illusion of light and shadow, giving your 2D design a convincing 3D structure.
16. Replicate City Lights with Reverse Appliqué
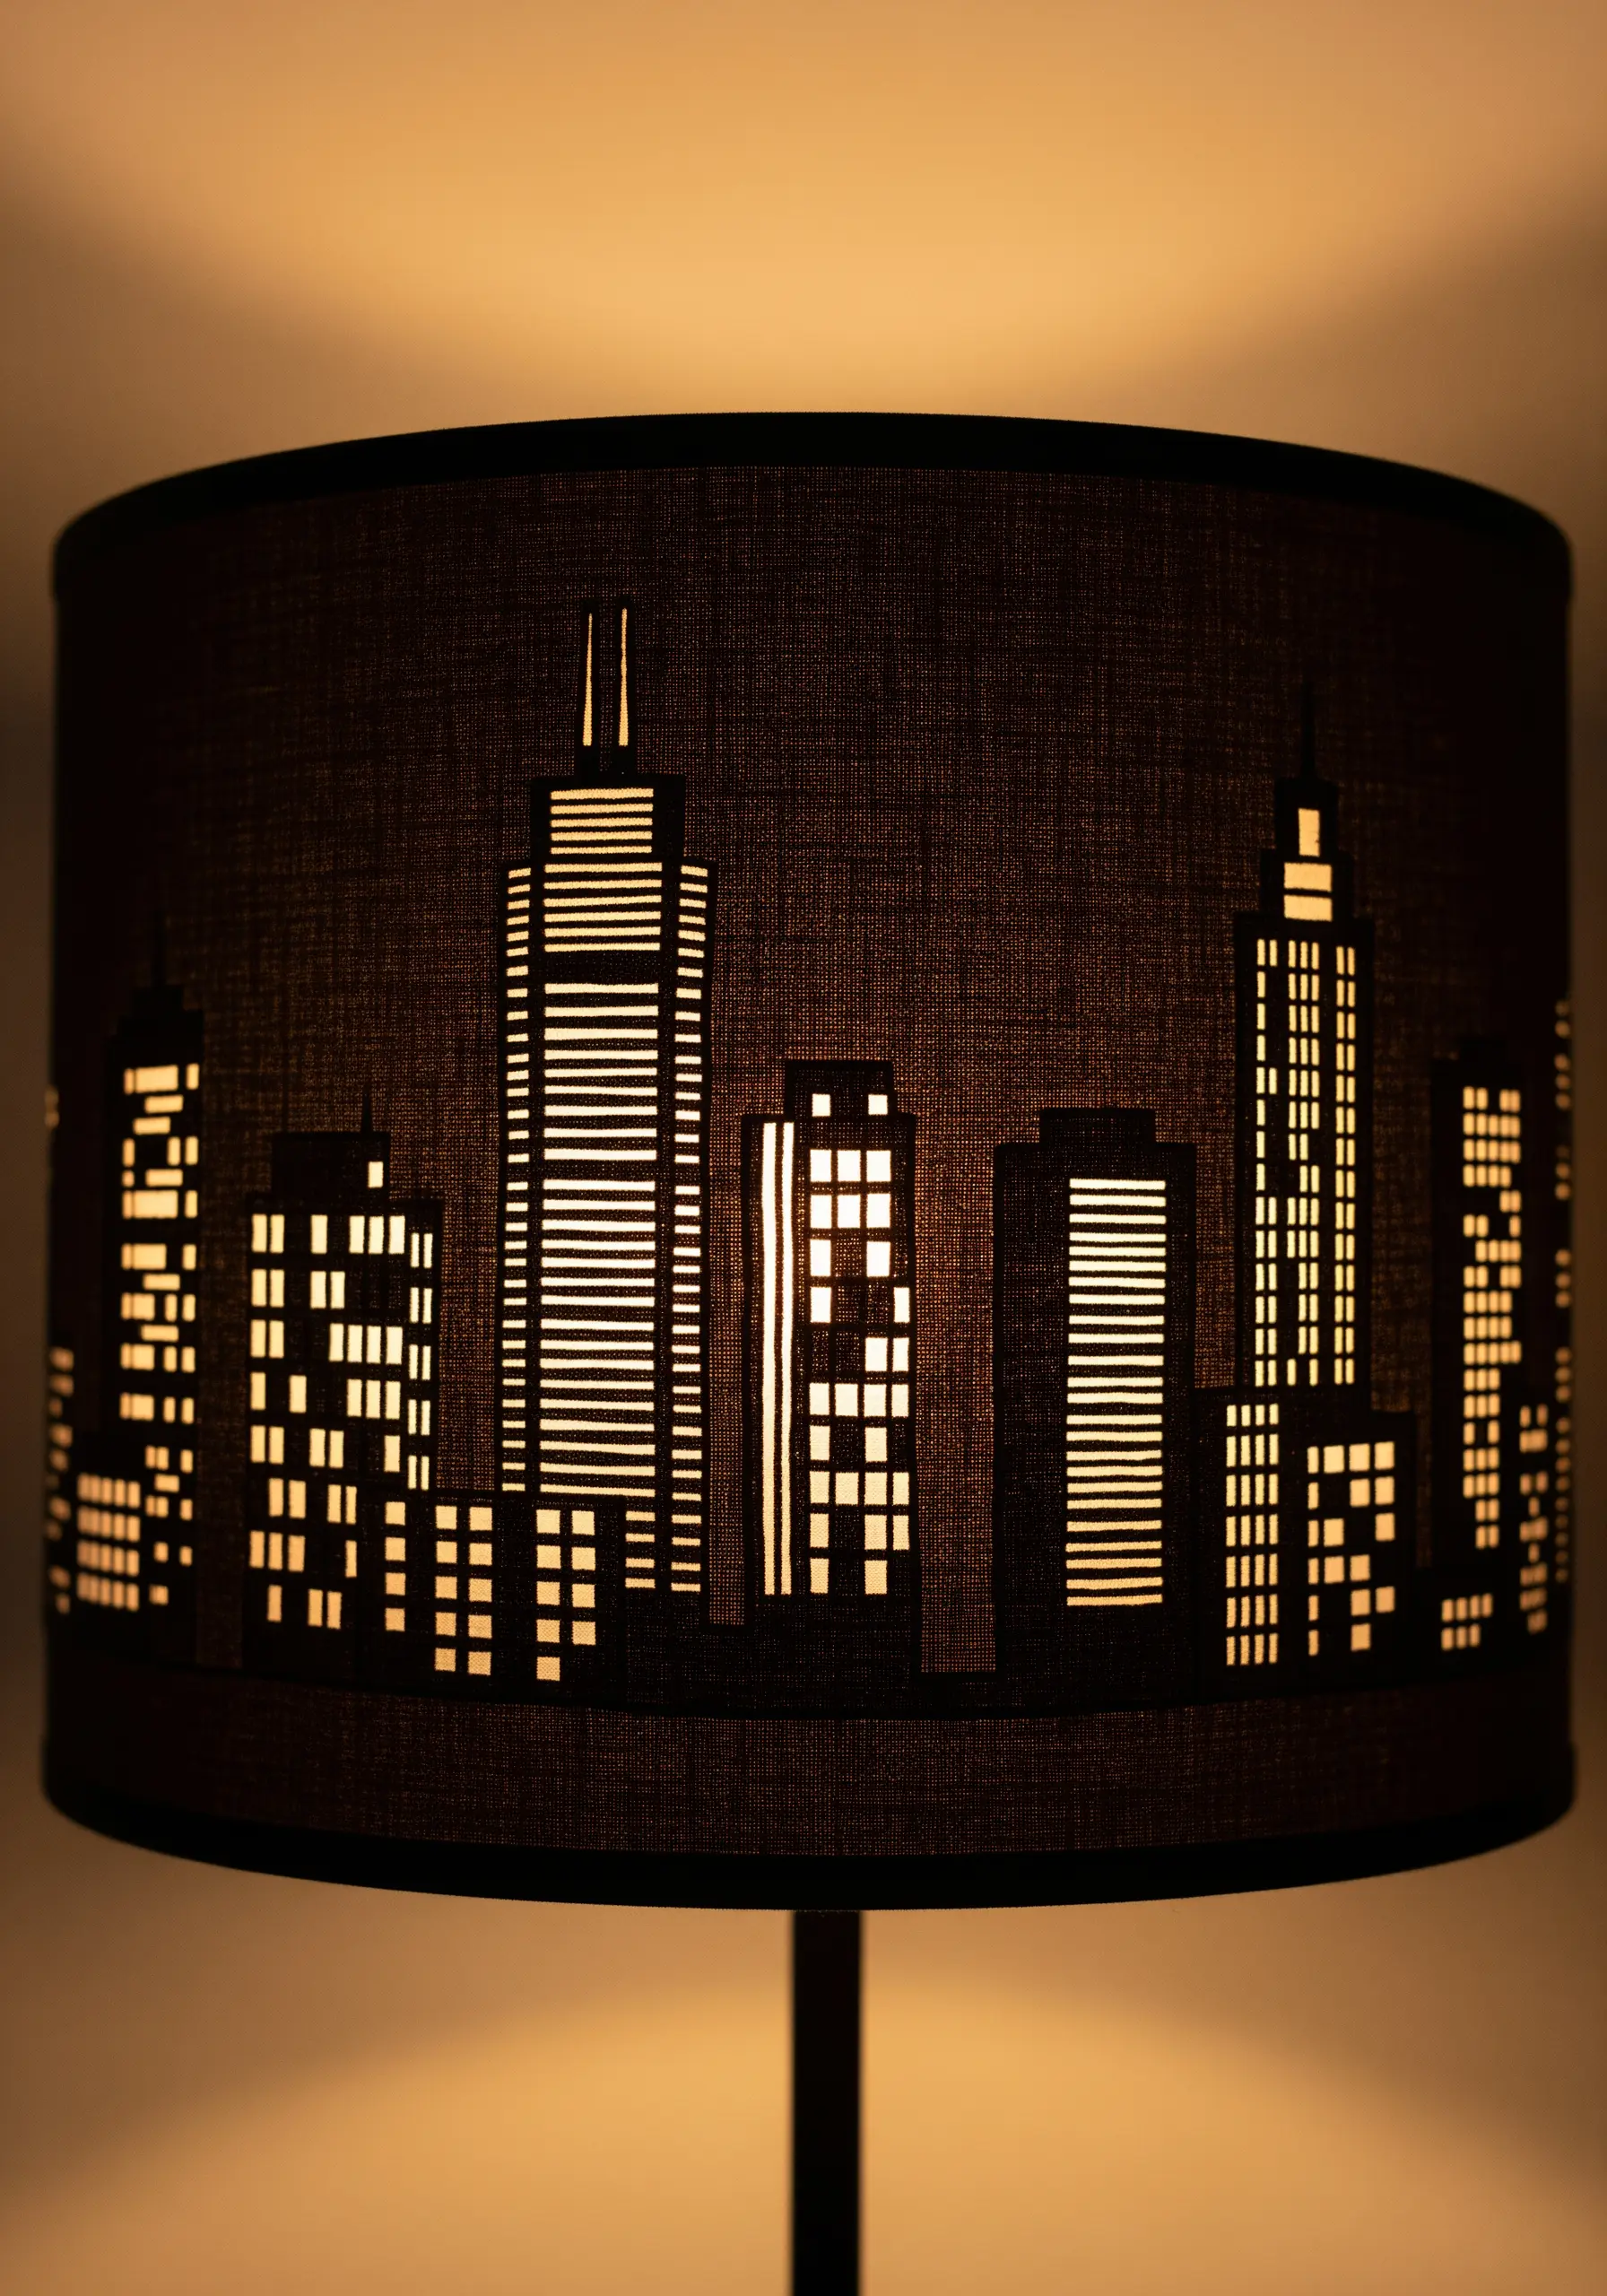
To create a lampshade where the light shines through the design, use a reverse appliqué or cutwork technique.
First, bond a layer of translucent white or yellow fabric behind your dark lampshade material.
Embroider the outlines of your windows with a tight satin stitch.
Using small, sharp scissors, carefully cut away only the top layer of dark fabric from inside the stitched window frames, revealing the light-colored fabric underneath.
17. Stitch Explosive Fireworks with Radiating Lines

Capture the fleeting beauty of fireworks with a combination of simple stitches.
For each burst, start with a central French knot.
From that center, stitch radiating straight stitches of varying lengths and colors.
To add more texture and sparkle, end some of the straight stitches with another small French knot or a detached chain stitch. Use variegated or metallic thread for extra vibrancy against the dark fabric.
18. Weave a Tactile Headboard with Thick Yarn

For a large-format project like a headboard, standard embroidery floss won’t provide enough impact.
Switch to thicker materials like tapestry wool or chunky yarn.
Use techniques like weaving, punch needle, or oversized French knots to build up a highly textured, pixelated cityscape.
The large, soft knots representing the city lights add a three-dimensional, almost sculptural quality that invites touch, creating a truly cozy embroidery project.
19. Develop a Cohesive Set of Miniature Skylines
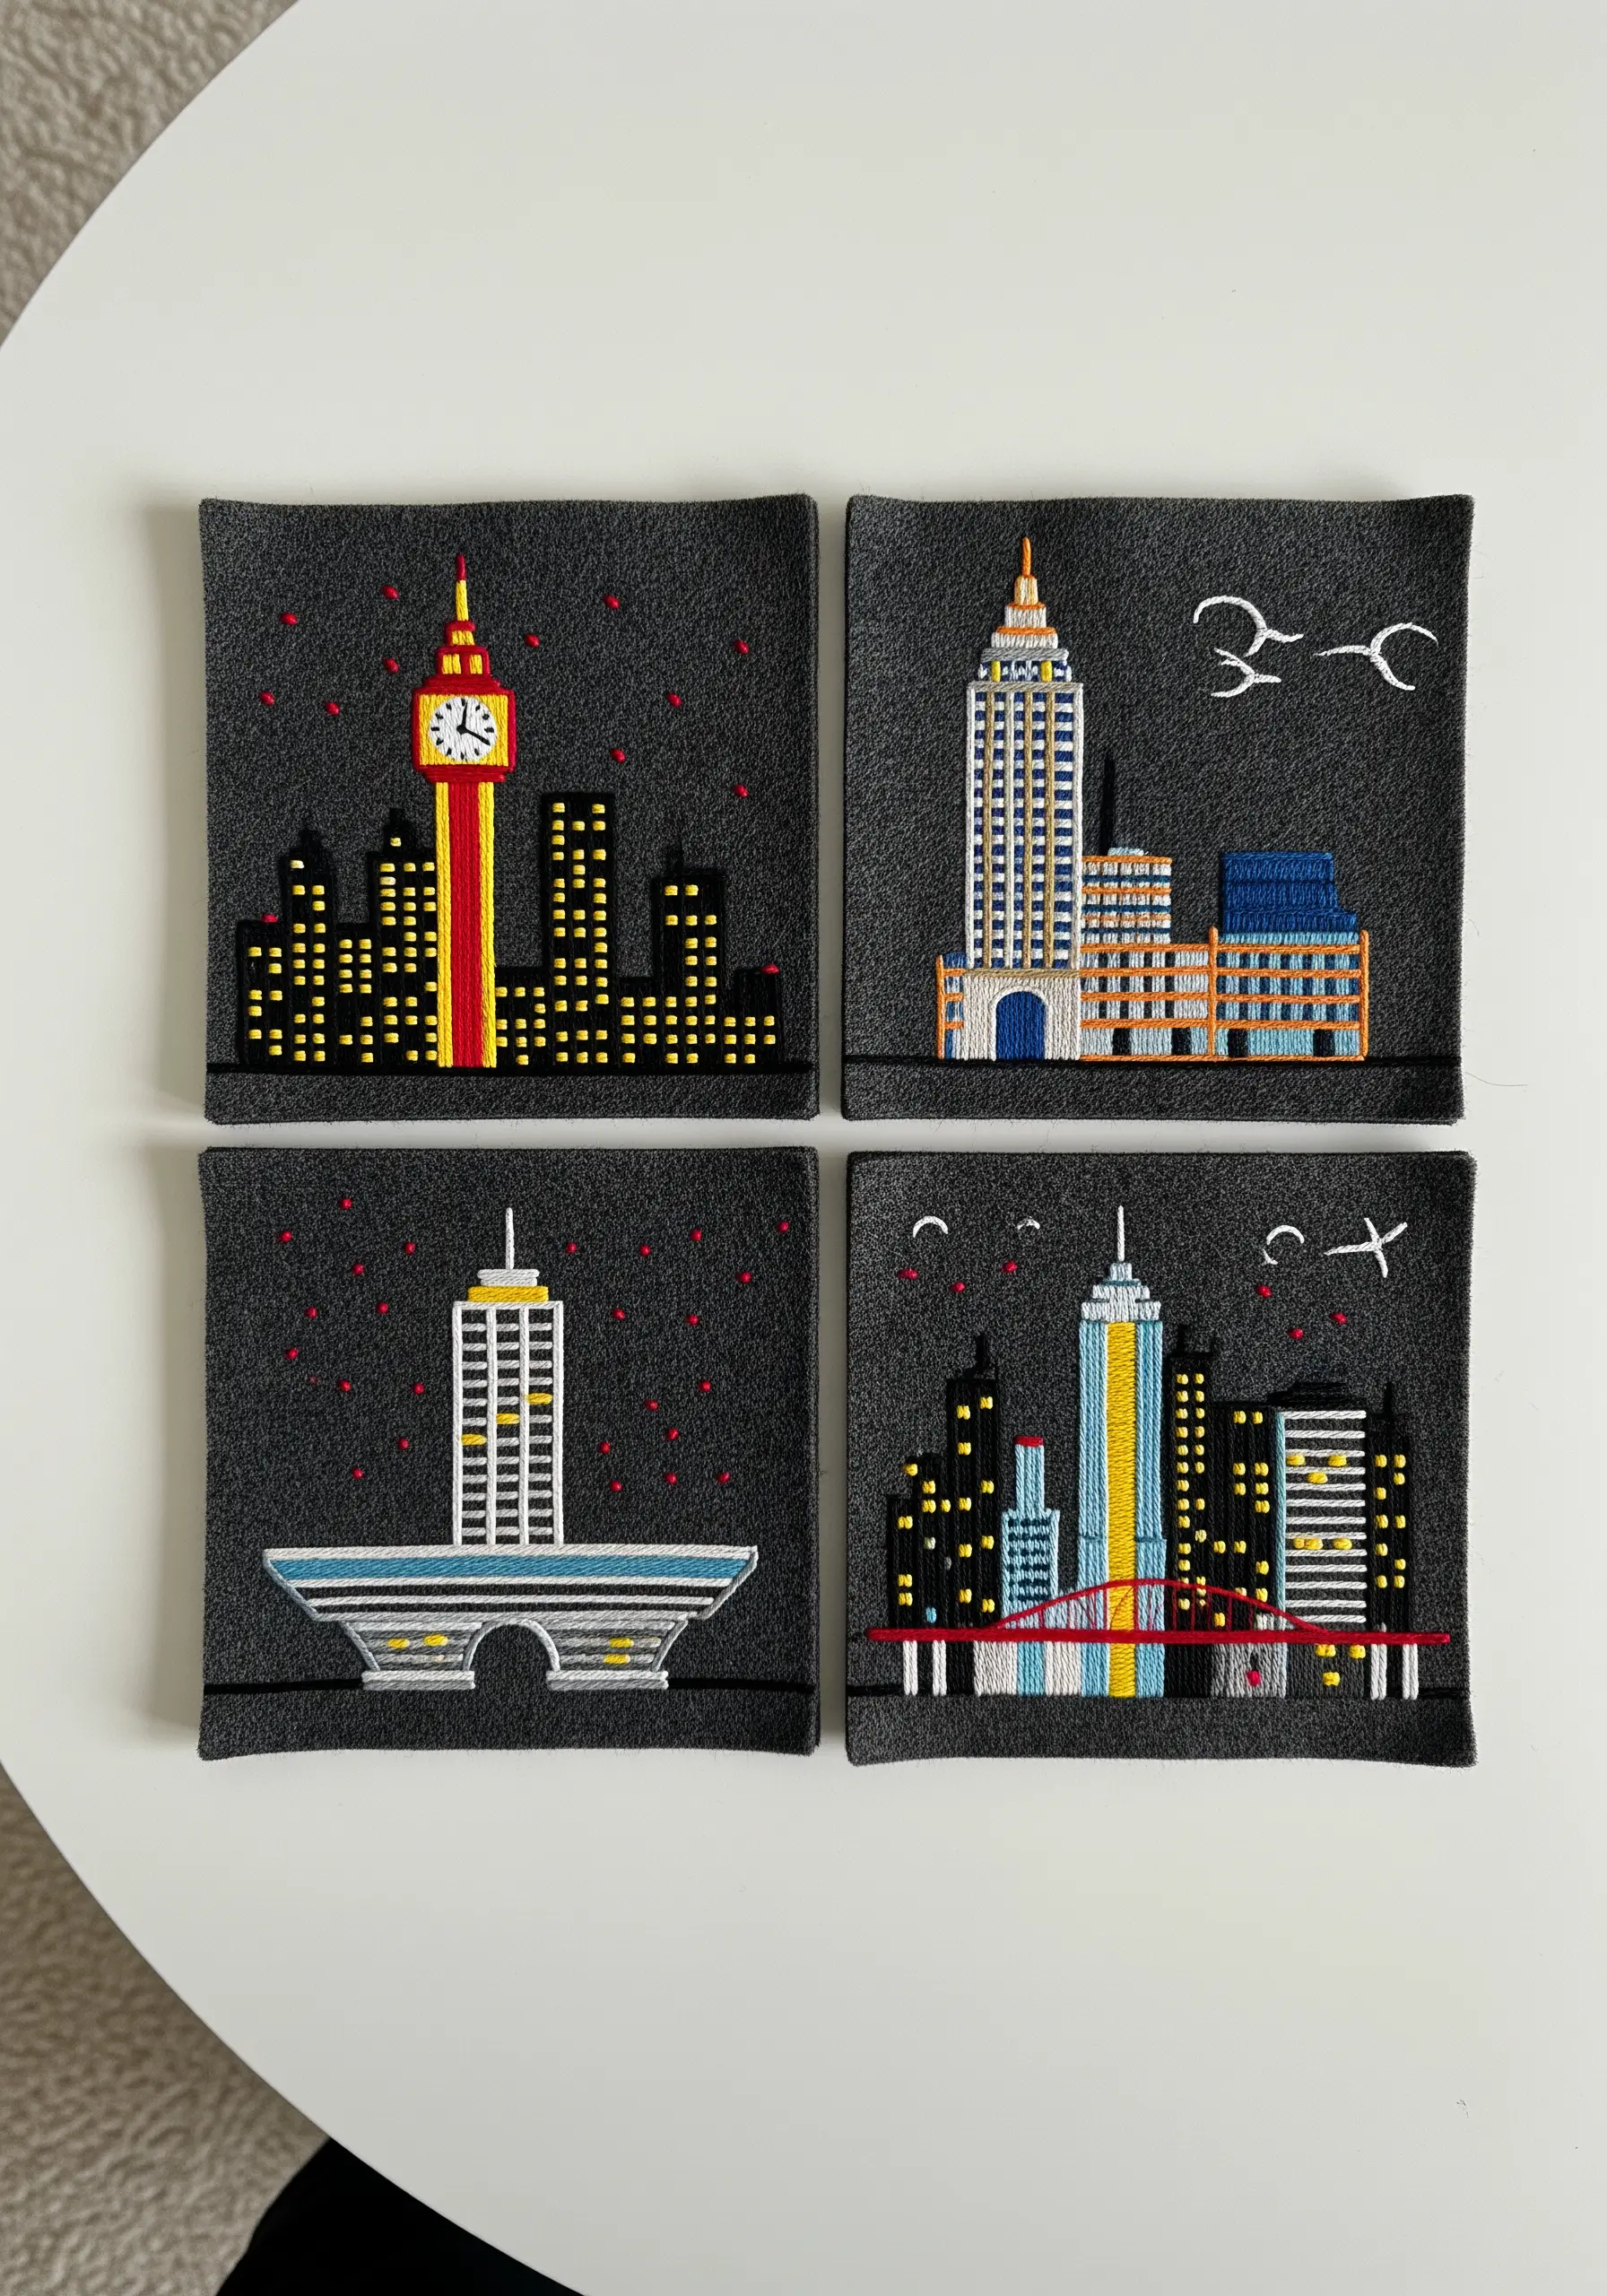
When creating a series of small pieces like coasters, establish a set of design rules to ensure they look unified.
Use a consistent fabric color, a limited color palette of 4-5 threads, and the same core stitches (e.g., satin stitch for buildings, French knots for lights).
By varying the composition and architectural details of each skyline while keeping the visual language the same, you create a collection that is both diverse and harmonious. These are perfect as mini handmade gifts.
20. Achieve Photorealism with a ‘Pixel Stitch’ Approach
To tackle a complex, reflective surface, think of your design as a grid of pixels.
Use single-strand floss and tiny, vertical satin stitches, placing each one like a block of color.
Work in small sections, focusing on accurately replicating the colors you see in your reference photo rather than the objects themselves.
This meticulous, color-by-color approach is the key to blending dozens of shades into a seamless, photorealistic image.
21. Create Dramatic Skies with Needle-Felted Wool

Introduce dramatic texture to your embroidery by incorporating needle felting.
For the stormy cloud, take wisps of grey and black wool roving, arrange them on your fabric, and use a felting needle to repeatedly poke the fibers until they lock into the fabric.
The soft, diffuse texture of the felted wool creates a stunning contrast with the sharp, graphic lines of a woven lightning bolt and the tightly stitched monochrome city below.
22. Integrate LED Lights for an Authentic Glow

Add a literal spark to your work by weaving in a string of micro LED lights.
Complete your embroidery first, but instead of stitching the window lights, use a thick needle or awl to carefully pierce the fabric where you want a light to be.
From the back, gently push each LED bulb through the hole. Secure the thin wires on the back with small stitches or fabric glue, and hide the battery pack behind the frame.
23. Achieve Flawless Satin Stitch on a Hard Surface

To get perfectly crisp edges on a non-traditional surface like a journal cover, preparation is key.
First, outline each color block with a perfectly even split stitch. This creates a raised, stable border for your satin stitches to rest against.
Then, fill in the shape with your satin stitches, making sure the needle enters and exits the fabric just outside the split stitch line. This simple step prevents uneven edges and gives your work a professional finish.
24. Define a Skyline Using Negative Space
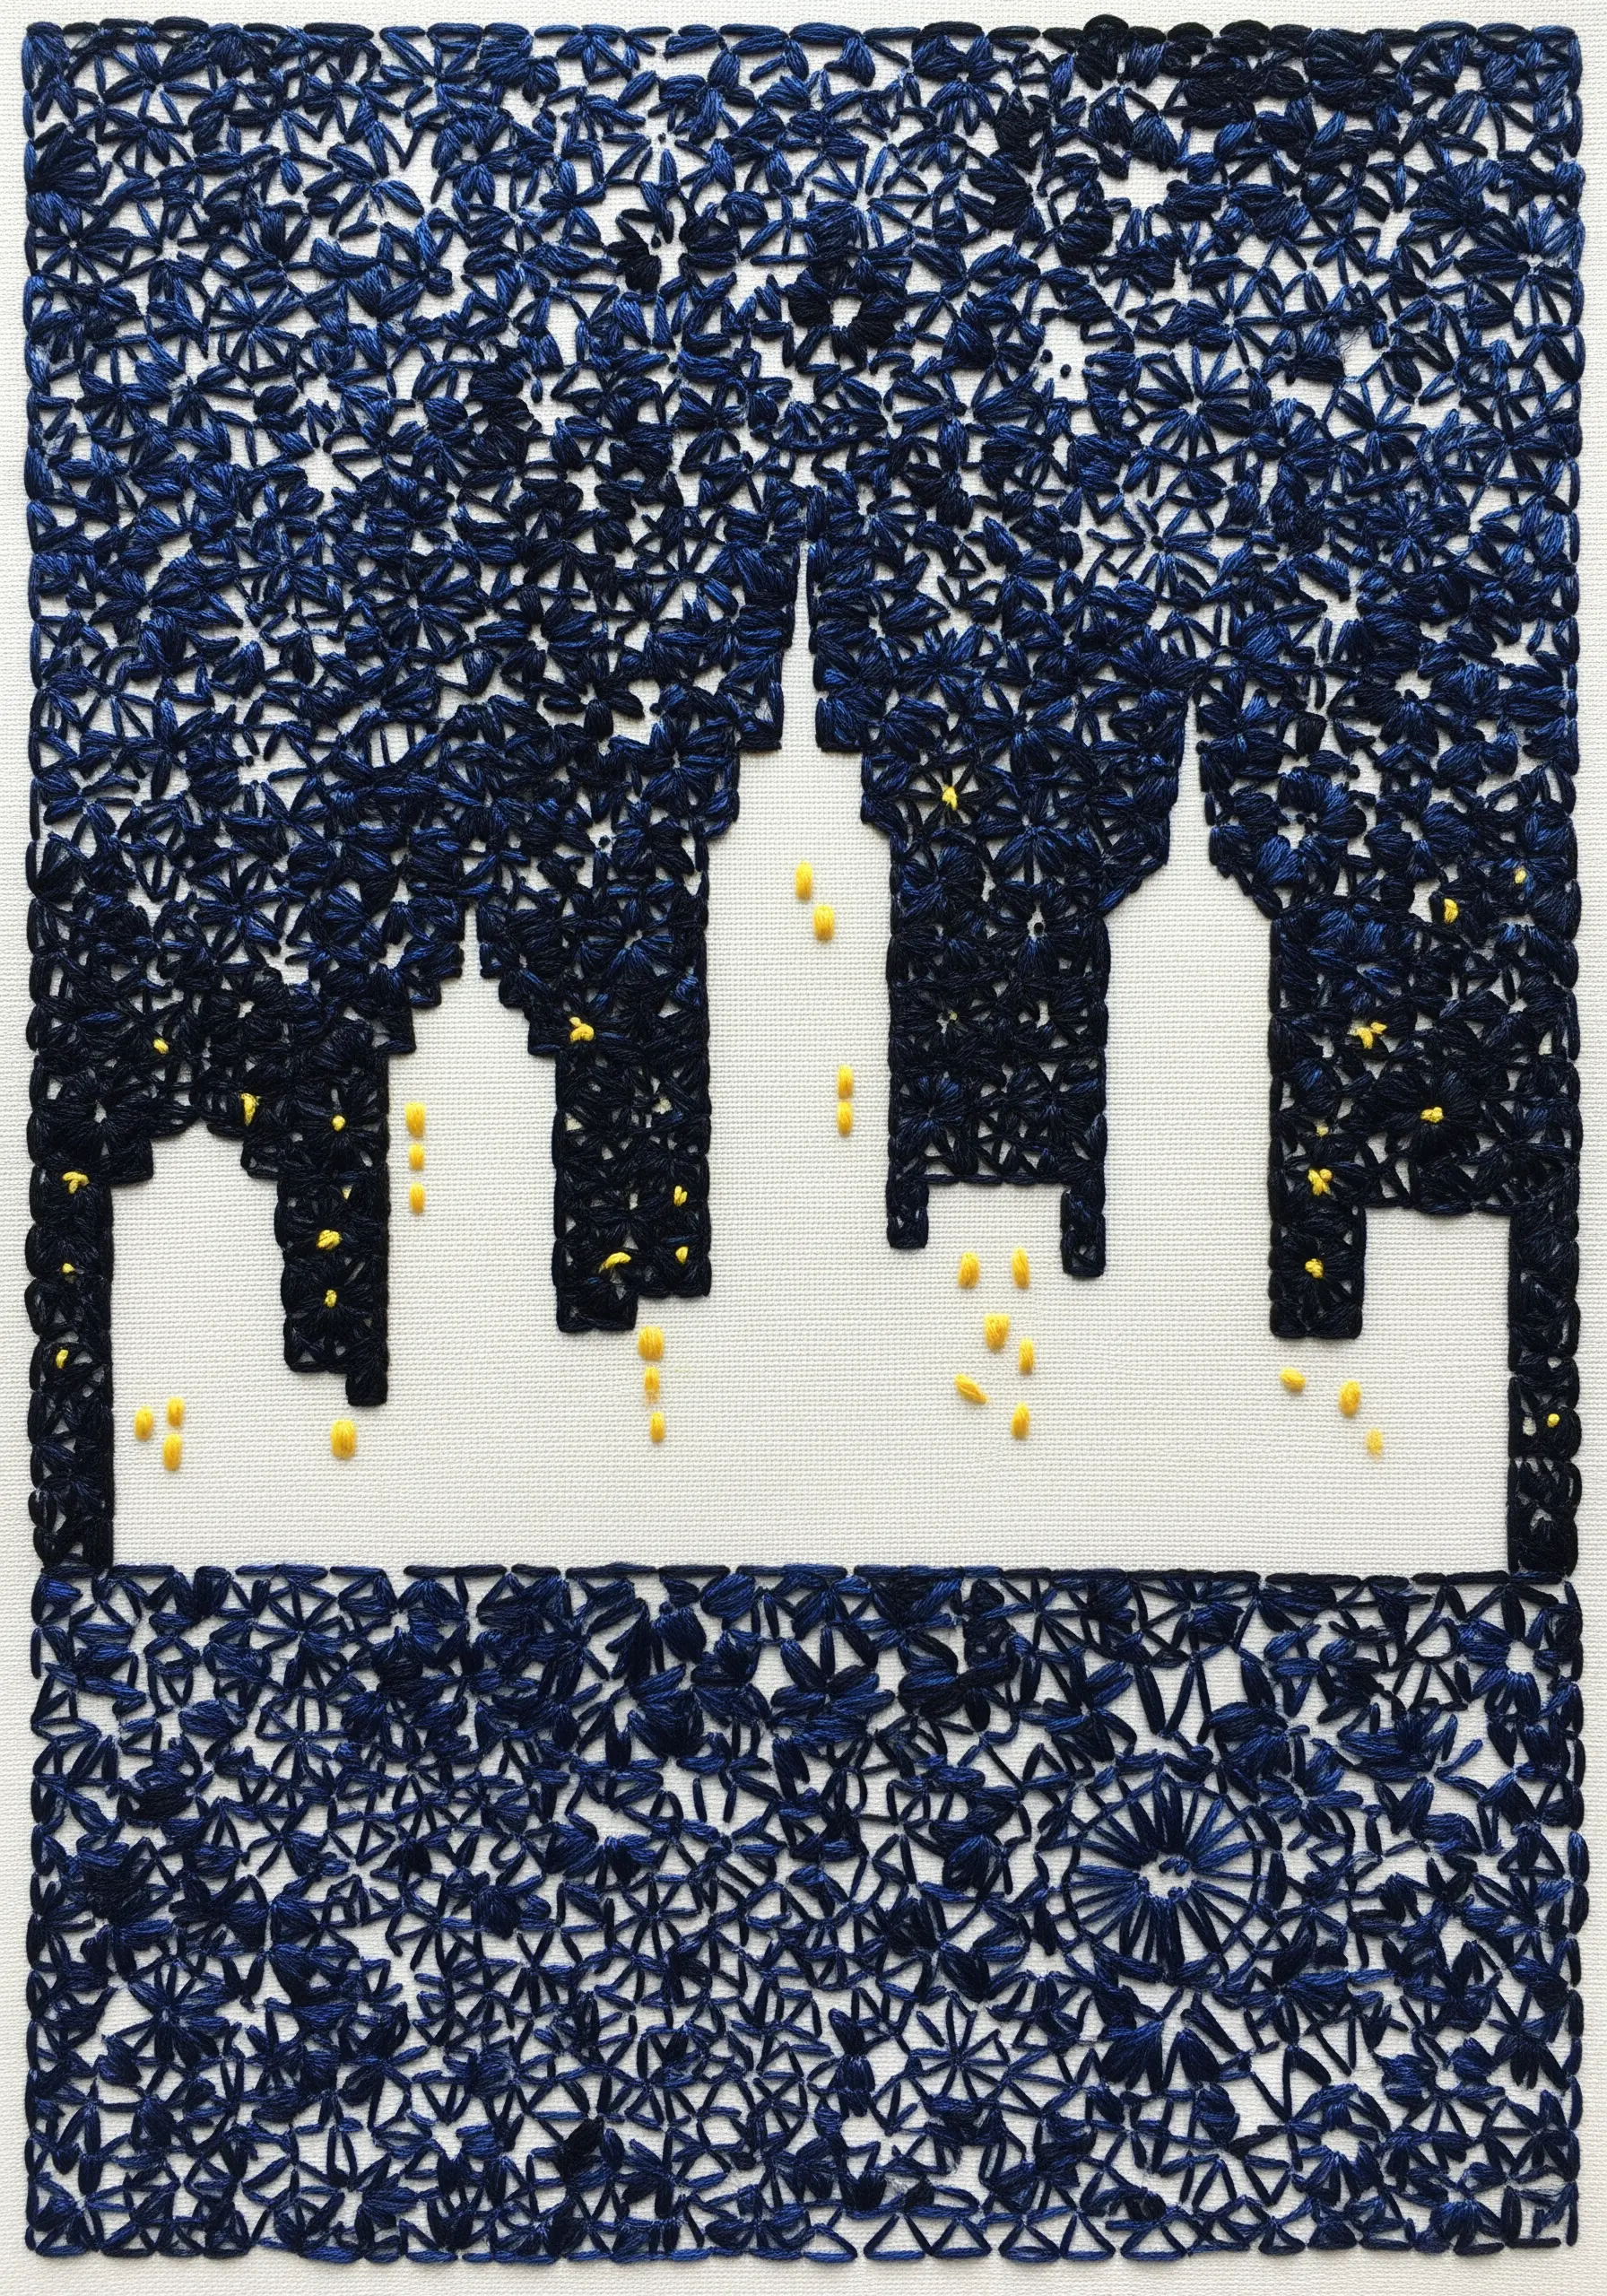
Make the un-stitched part of your fabric the subject of your piece.
Lightly trace your skyline onto the fabric, then fill the entire sky and foreground area with a dense, textured stitch like the star stitch or seed stitch.
By surrounding the building shapes with intricate texture, their blank, simple forms become the immediate focal point.
A few scattered yellow French knots within the negative space create the subtle suggestion of lit windows. This is one of many negative space patterns you can try.
25. Create a Deconstructed Look with Dripping Threads

Add a contemporary, artistic twist to a simple outline by letting your threads flow freely.
After stitching your skyline with a clean backstitch, don’t end your threads on the back.
Instead, unthread your needle and leave long, colorful tails hanging down the front of the hoop.
Vary the lengths and colors for a dynamic, liquid-like effect that transforms a basic design into a piece of abstract art.
26. Convey Depth Using a Monochromatic Palette

Create a sophisticated sense of atmospheric perspective using only shades of a single color.
Choose at least five tones, from very dark to very light.
Use your darkest, most saturated shades for the buildings in the foreground, and gradually shift to your palest shades for the buildings in the distance.
This mimics how color fades over distance, giving your flat embroidery an incredible illusion of depth.
27. Embellish with Beads for Miniature Details

On a small or intricate piece, French knots can look bulky.
Instead, use tiny metallic or glass seed beads to represent lights, stars, or architectural details.
Attach each bead with a single, tiny stitch using a thread that matches your fabric, making the stitch itself invisible.
This adds a delicate shimmer and a precise, refined texture that elevates the entire design, making it perfect for tiny embroidery patterns.
28. Capture a Neon Glow with Strategic Outlining

To make your embroidered signs look like they’re actually glowing, use a two-step color process.
First, stitch the letters or shapes in a bright, vibrant color like hot pink or electric blue.
Then, outline that shape with a single line of a slightly lighter, paler version of the same color, or even an off-white.
This subtle outer ‘halo’ tricks the eye into seeing a luminous aura, enhancing the neon effect.
29. Tell a Story Across a Series of Hoops

Use multiple hoops to capture a scene over time, such as a sunset.
Keep the cityscape silhouette—stitched in black at the bottom of each hoop—exactly the same across the series.
Devote the rest of the space to a smooth, color-gradient sky using long-and-short stitch.
Transition from deep night blue in the first hoop, to a blended dusk in the second, and a vibrant orange sunset in the third. The constant skyline anchors the progressive narrative.
30. Blend Whimsy and Detail with Contrasting Styles
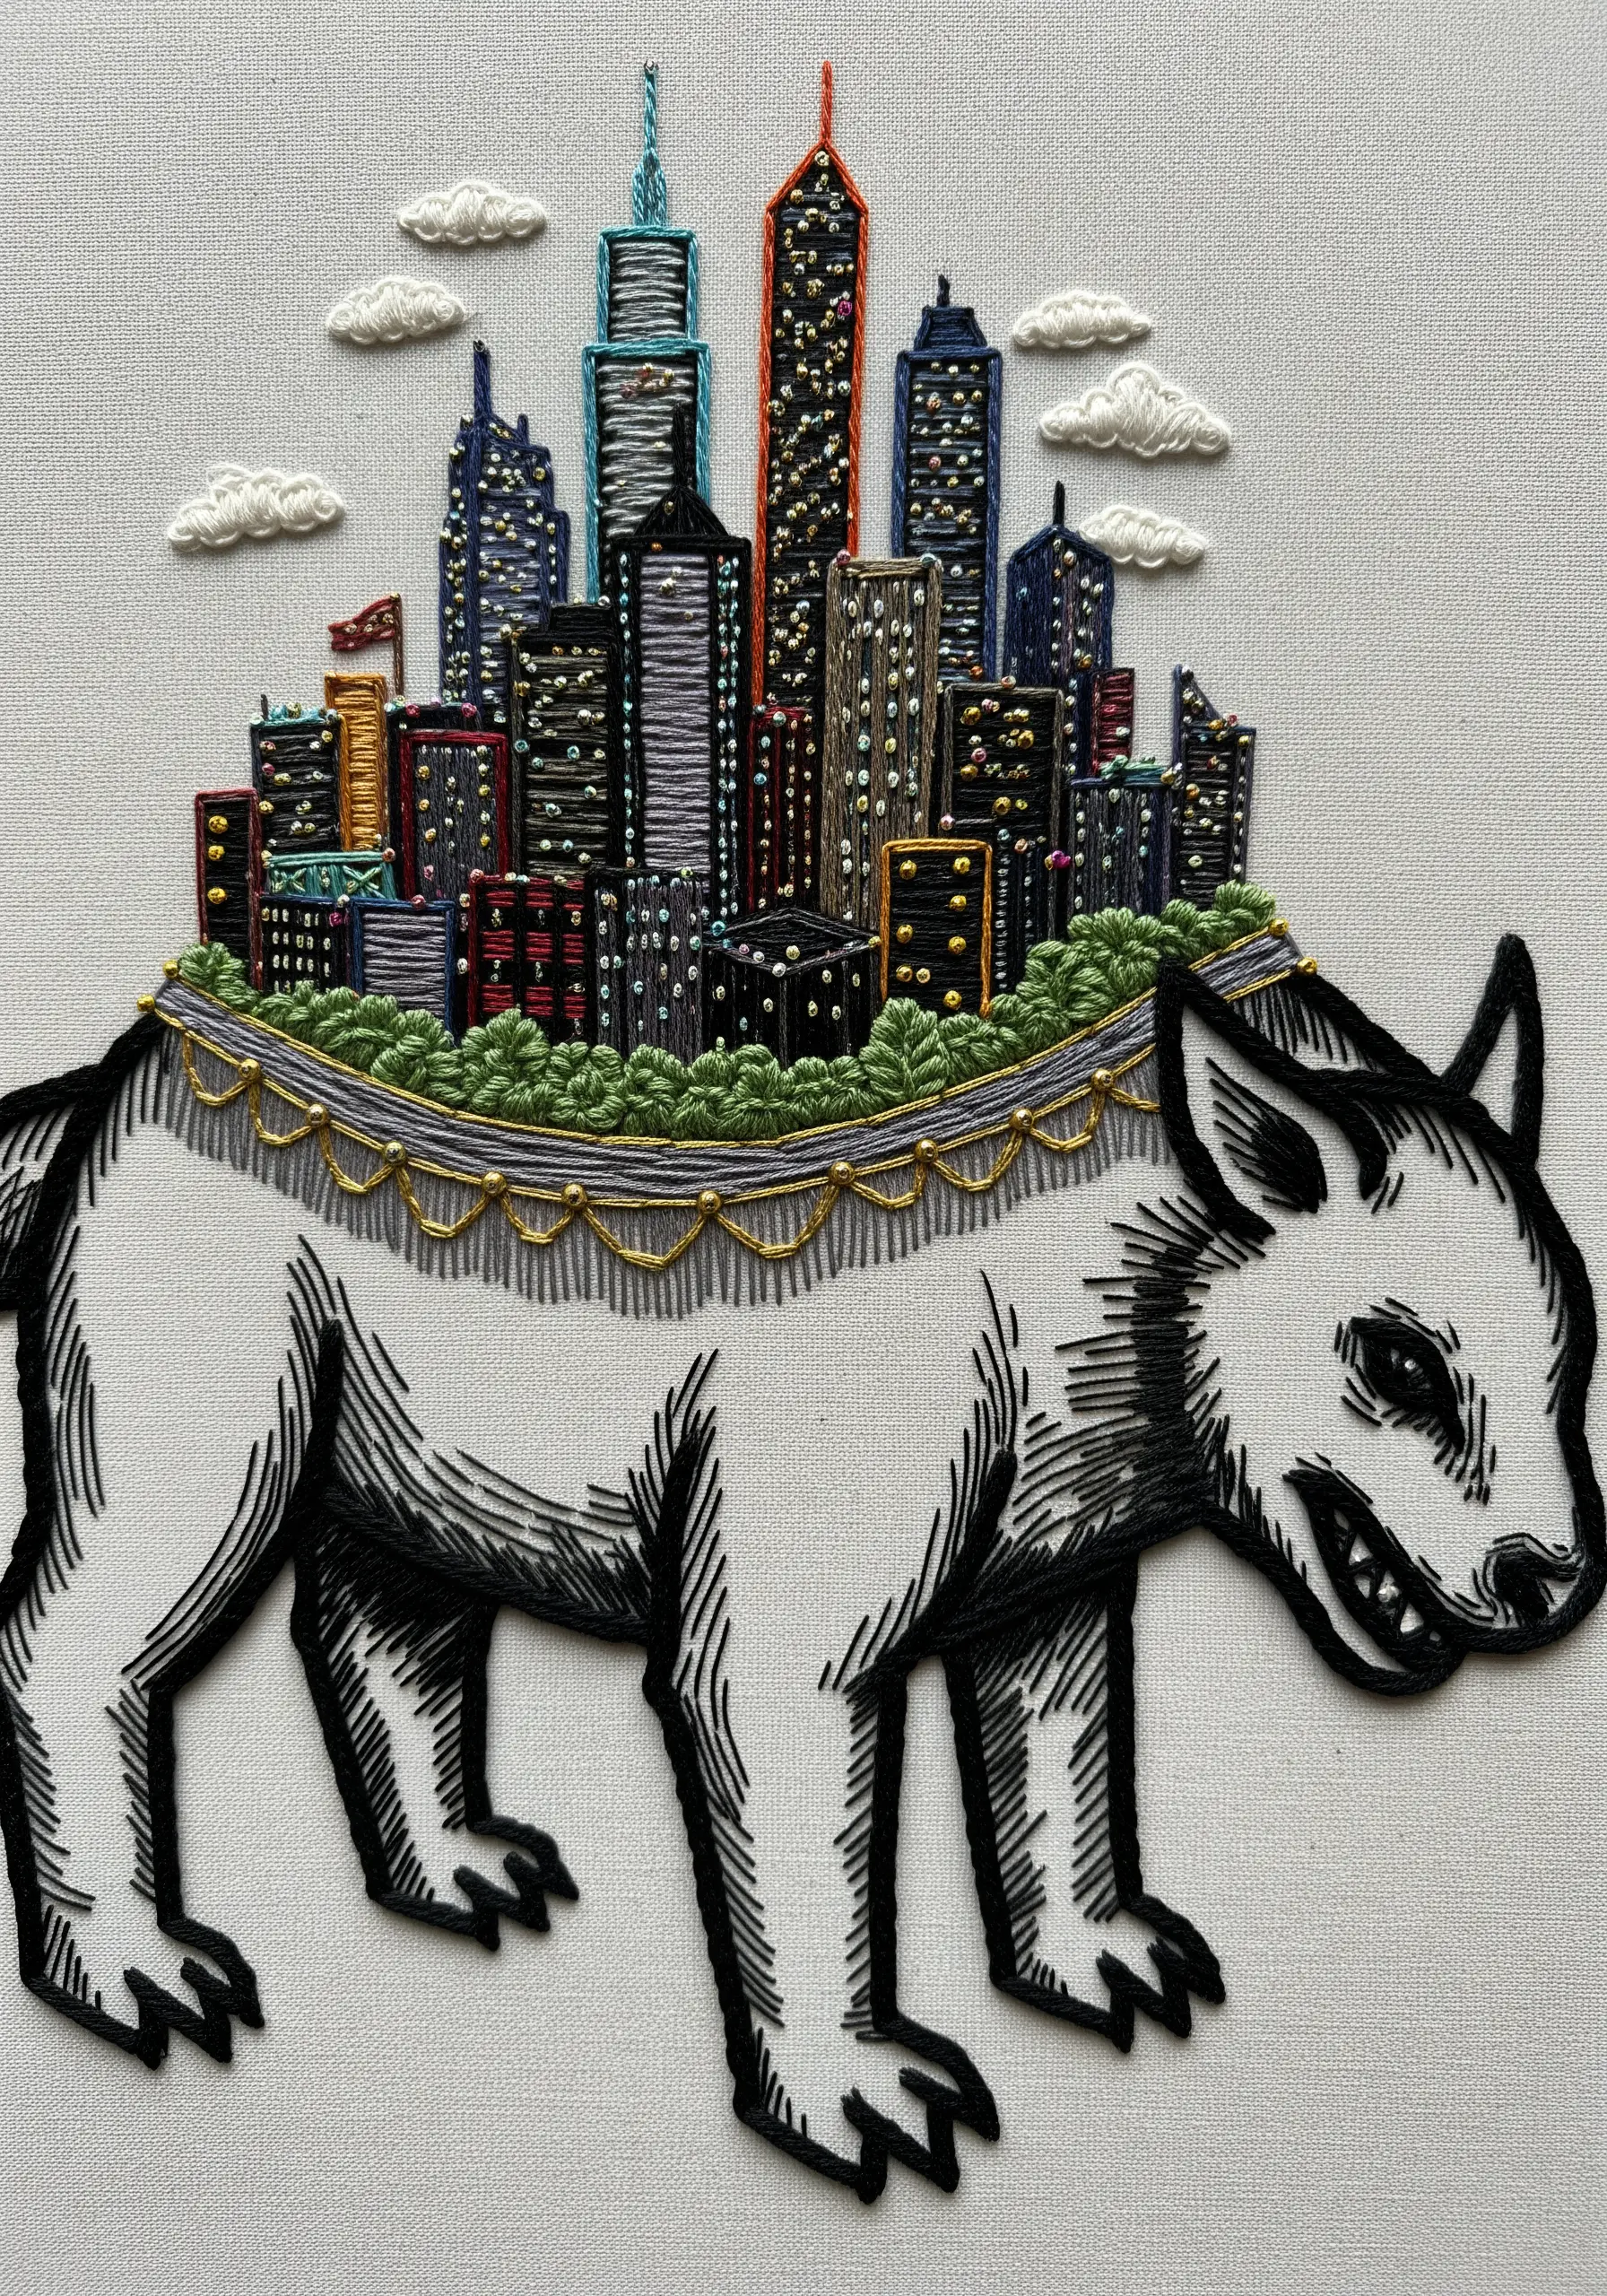
Create a surrealist masterpiece by juxtaposing two different embroidery styles in one piece.
Render the animal in a graphic, illustrative style using a bold whipped backstitch or heavy chain stitch for strong outlines.
For the miniature city on its back, switch to intricate thread painting with single-strand floss, focusing on realistic detail and color blending.
This sharp contrast between the simple and the complex is what gives the design its unique, storybook magic.


