

Have you ever looked at your finished embroidery and felt something was missing? Perhaps the idea was beautiful, but the final piece lacked the polish and intention you envisioned. This is a quiet frustration many of us feel. The solution, however, isn’t always more color or more complexity—it’s clarity.
Working with a monochrome or limited palette invites you to focus on what truly gives embroidery its soul: the texture of a French knot, the smooth sheen of a satin stitch, the elegant precision of a line. When color steps back, the artistry of your needlework steps forward. You begin to make more deliberate choices about thread weight, stitch direction, and composition.
These ideas are designed to help you explore that focus. Each one is a gentle exercise in restraint and technique. You will discover how a small shift—like adding padding under a stitch or varying the number of strands in your thread—can transform a simple floral into a modern, sophisticated work of art. This is your chance to stitch with renewed confidence and create something truly refined.
1. Master Graphic Linework with Variable Stitching
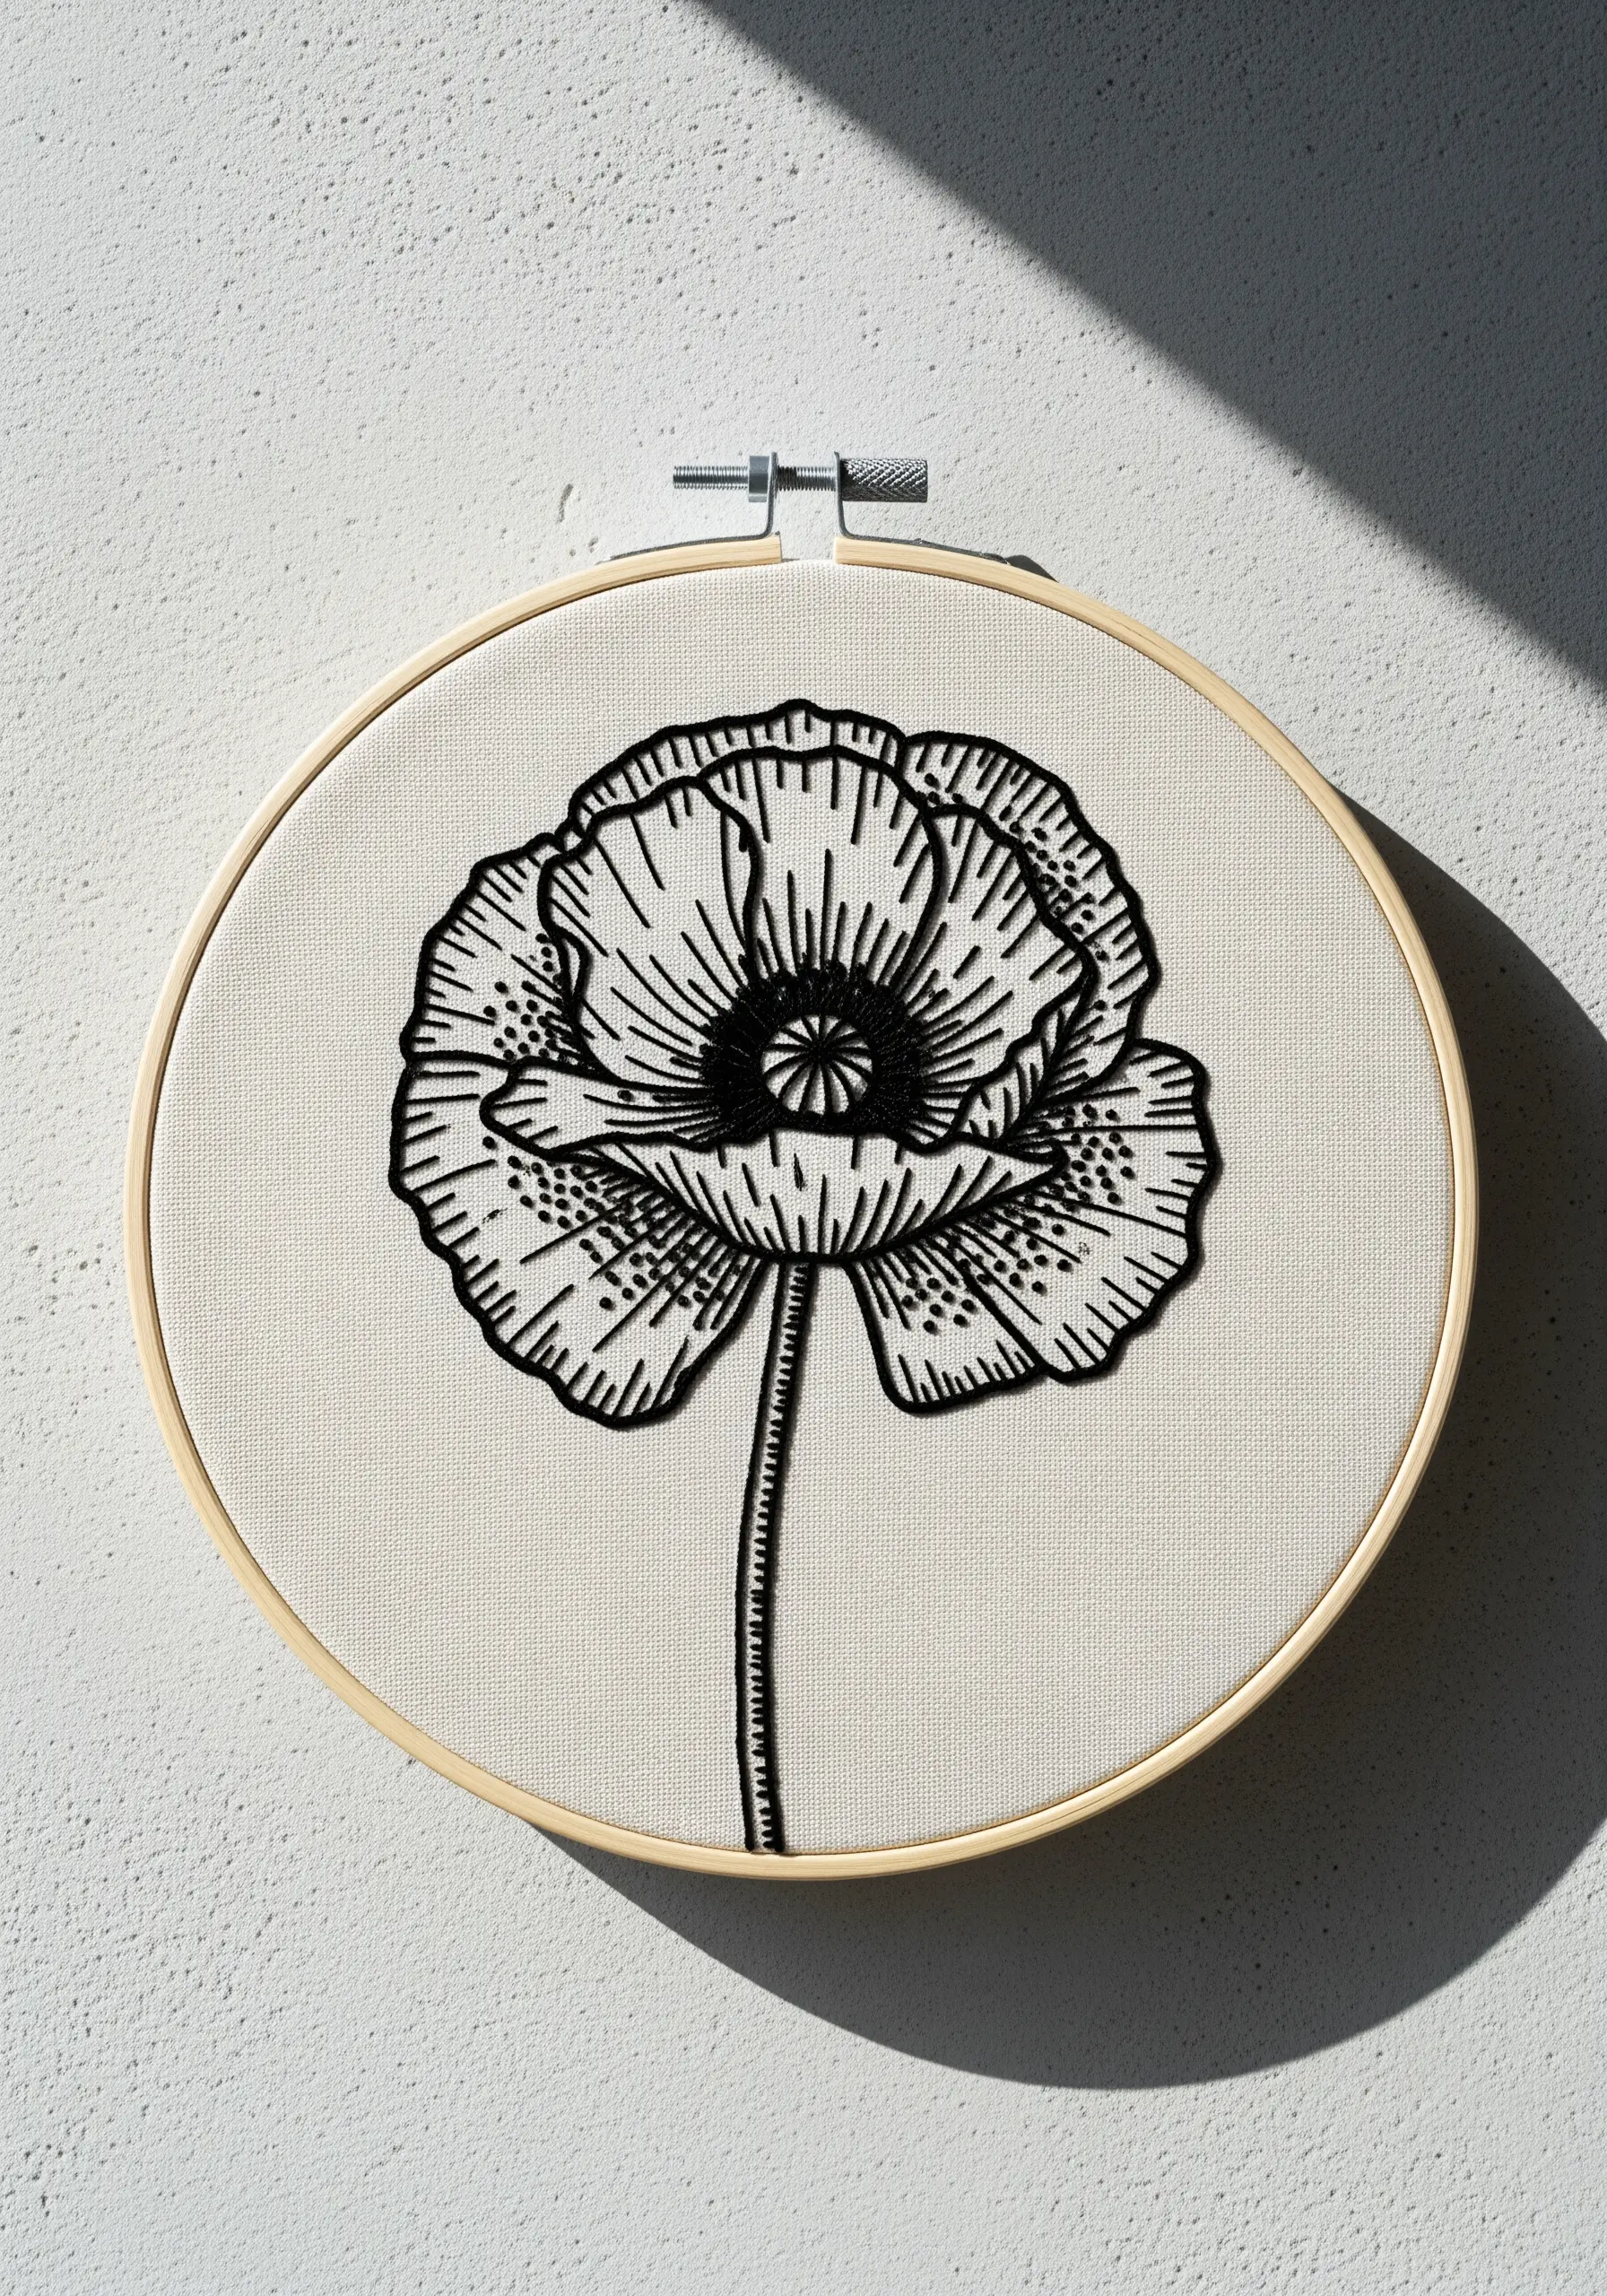
To achieve a striking, illustrative quality with a single color, vary your thread weight.
Use one strand of black floss for fine hatch marks to create a delicate shadow effect, mimicking an ink drawing.
For the bold outlines, switch to three strands and use a tight backstitch or stem stitch for a solid, graphic line that defines the form.
Fill the center with layered satin stitches to build density and draw the eye inward.
This deliberate contrast in thread weight is what gives the flower its depth and keeps the monochrome design from feeling flat.
2. Capture Ephemeral Beauty with Strategic Open Space
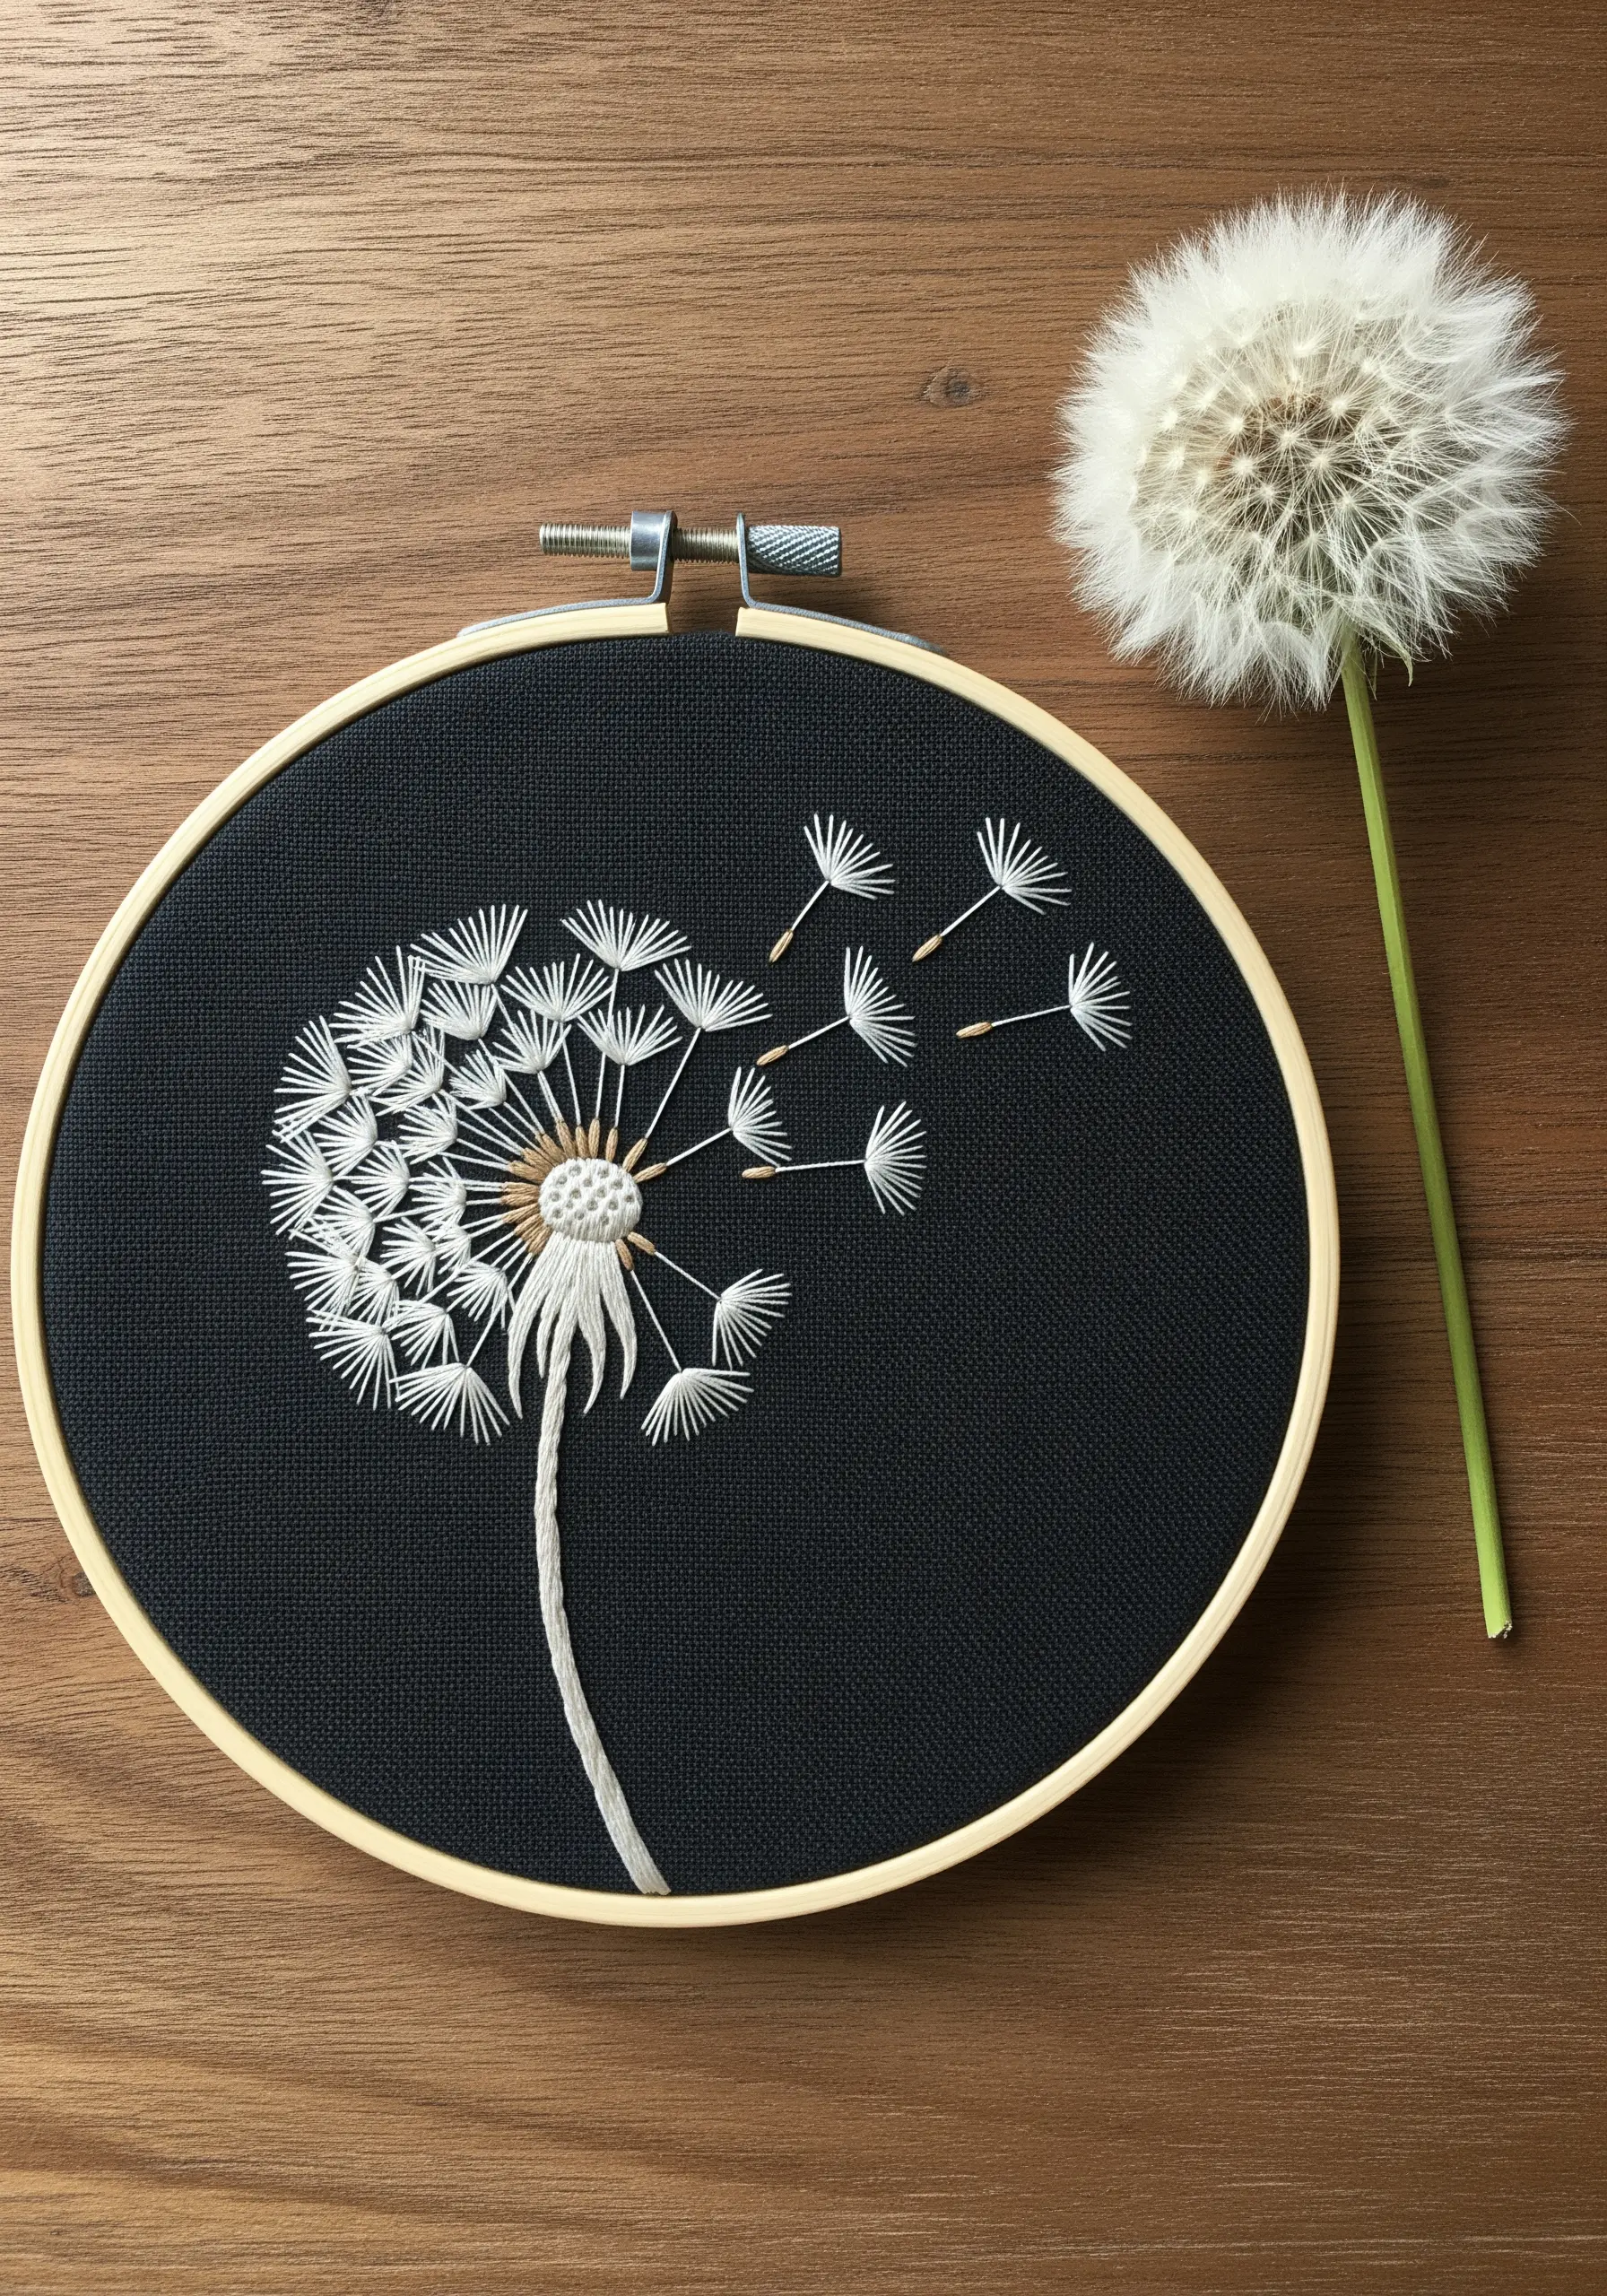
The elegance of this design lies in its use of negative space.
Use a crisp white thread on a dark, tightly woven fabric like black cotton twill to maximize the dramatic contrast.
For the dandelion seeds, stitch single straight stitches fanning out from a tiny French knot.
Resist the urge to fill every area; the illusion of movement comes from the seeds floating away into the empty background.
This thoughtful composition makes the design feel light and dynamic, not static.
3. Use Color Blocking for a Modern Botanical Statement
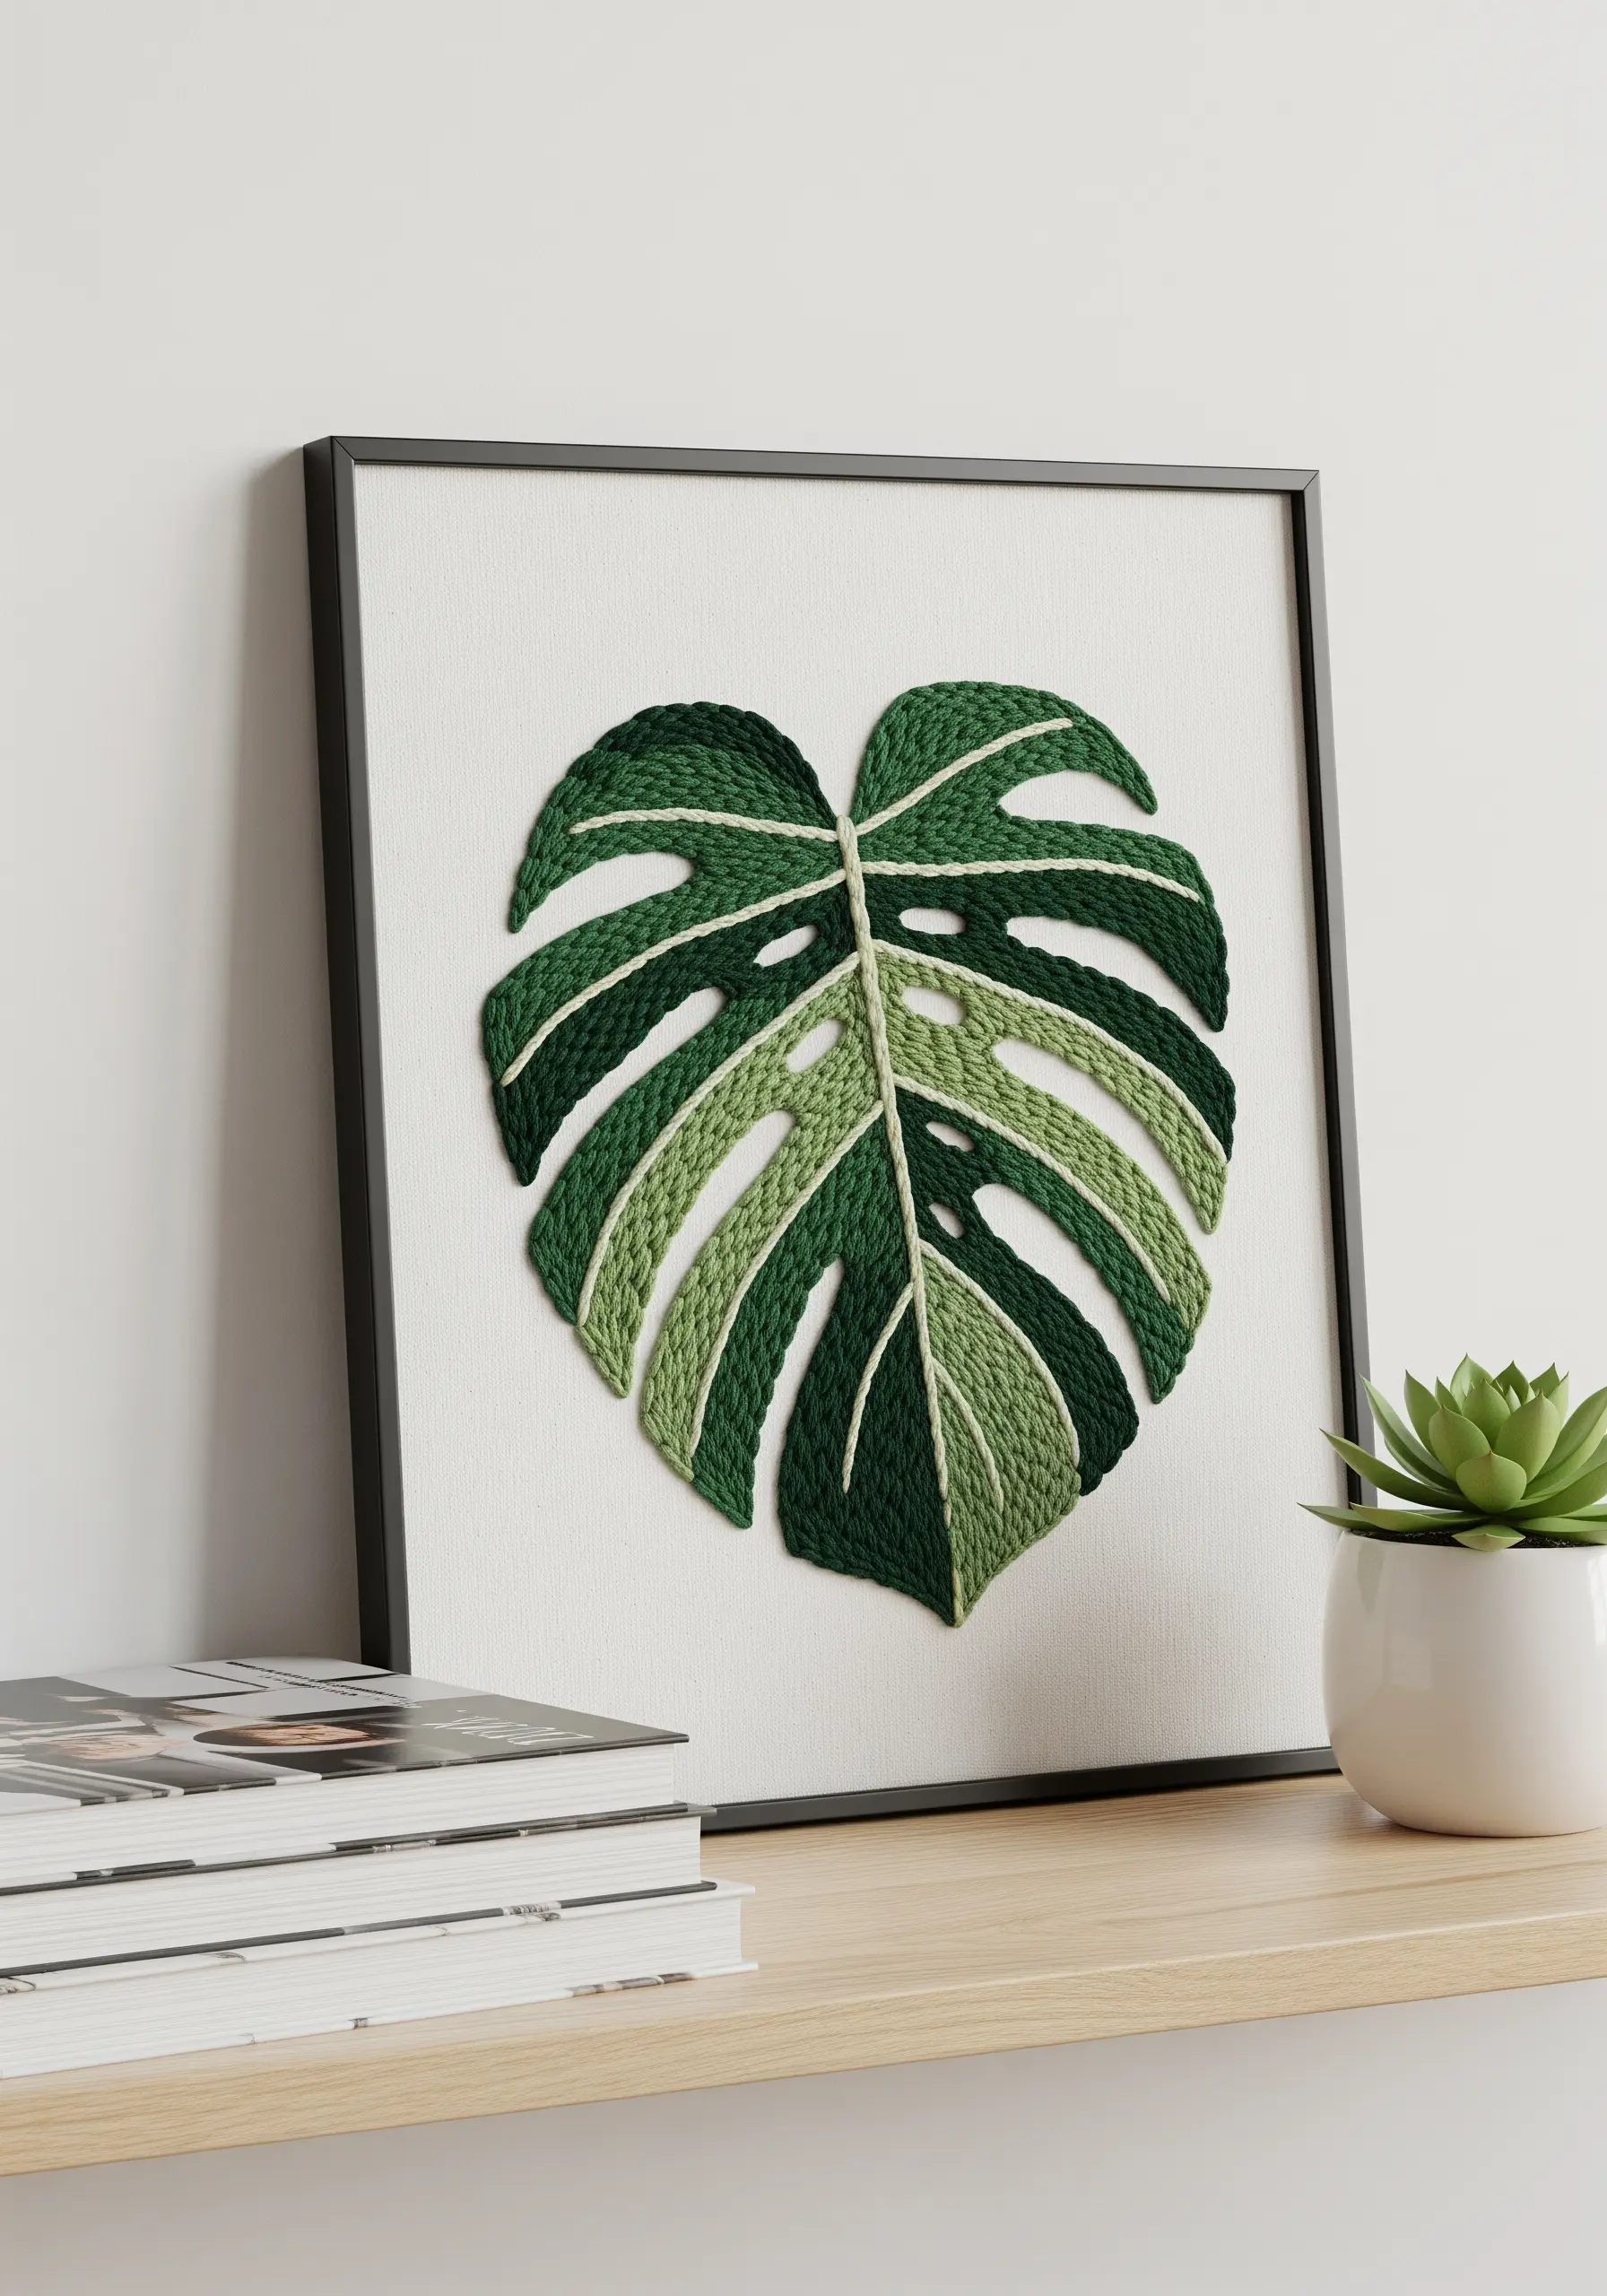
To achieve this bold, graphic look, map out your color sections before you begin stitching.
Use a thick thread, like a full six strands of floss or even Perle cotton, and fill each section with a dense satin stitch.
Keep your stitches parallel and tightly packed for a smooth, almost solid finish that resembles enamel.
The white thread acts as a clean highlight, breaking up the green and adding a sharp, modern edge.
This technique transforms a simple leaf into a piece of stunning fiber art.
4. Simplify Form with Suggestive Knots and Lines
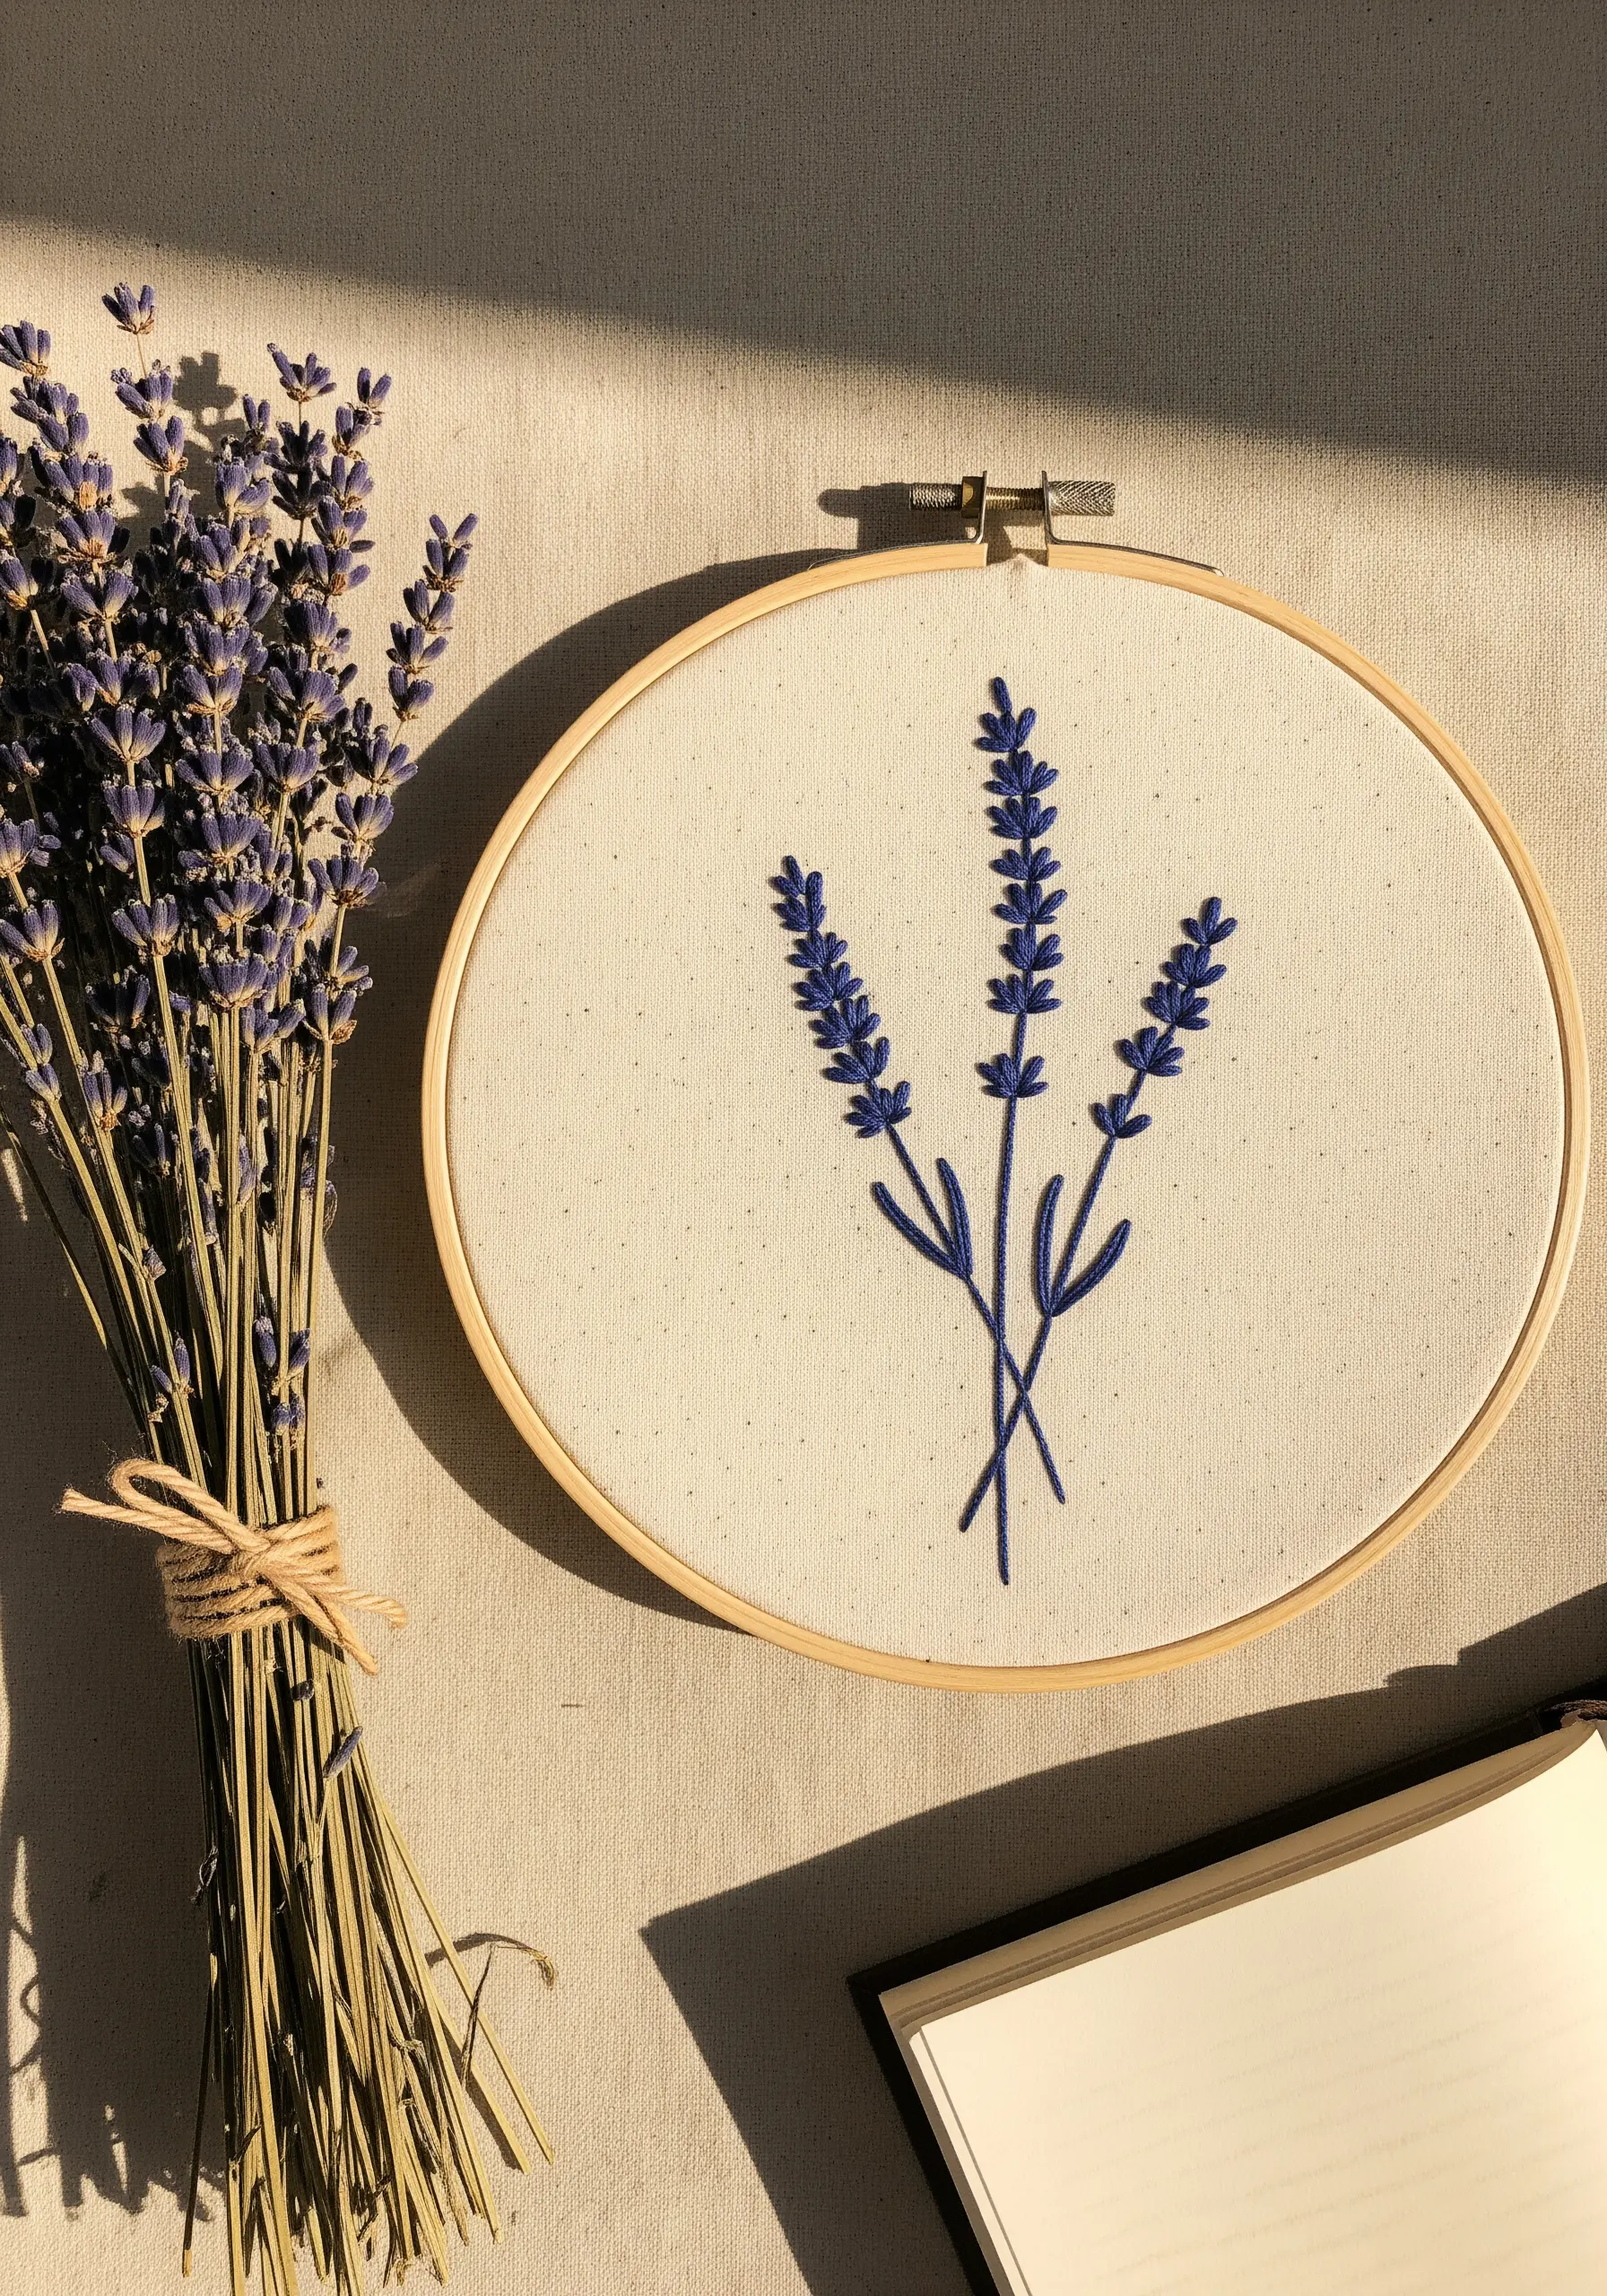
You don’t need intricate detail to convey a flower’s true essence.
For lavender, group French knots or colonial knots closely together to form the delicate buds.
Use just two or three strands of floss to keep the knots refined and petite, not bulky.
Connect them with a simple stem stitch for the stalks, creating an elegant silhouette.
This minimalist approach works because it captures the *texture* and *shape* of lavender rather than every tiny petal, making it one of the most effective simple embroidery designs.
5. Replicate Pencil Drawings with Single-Thread Shading
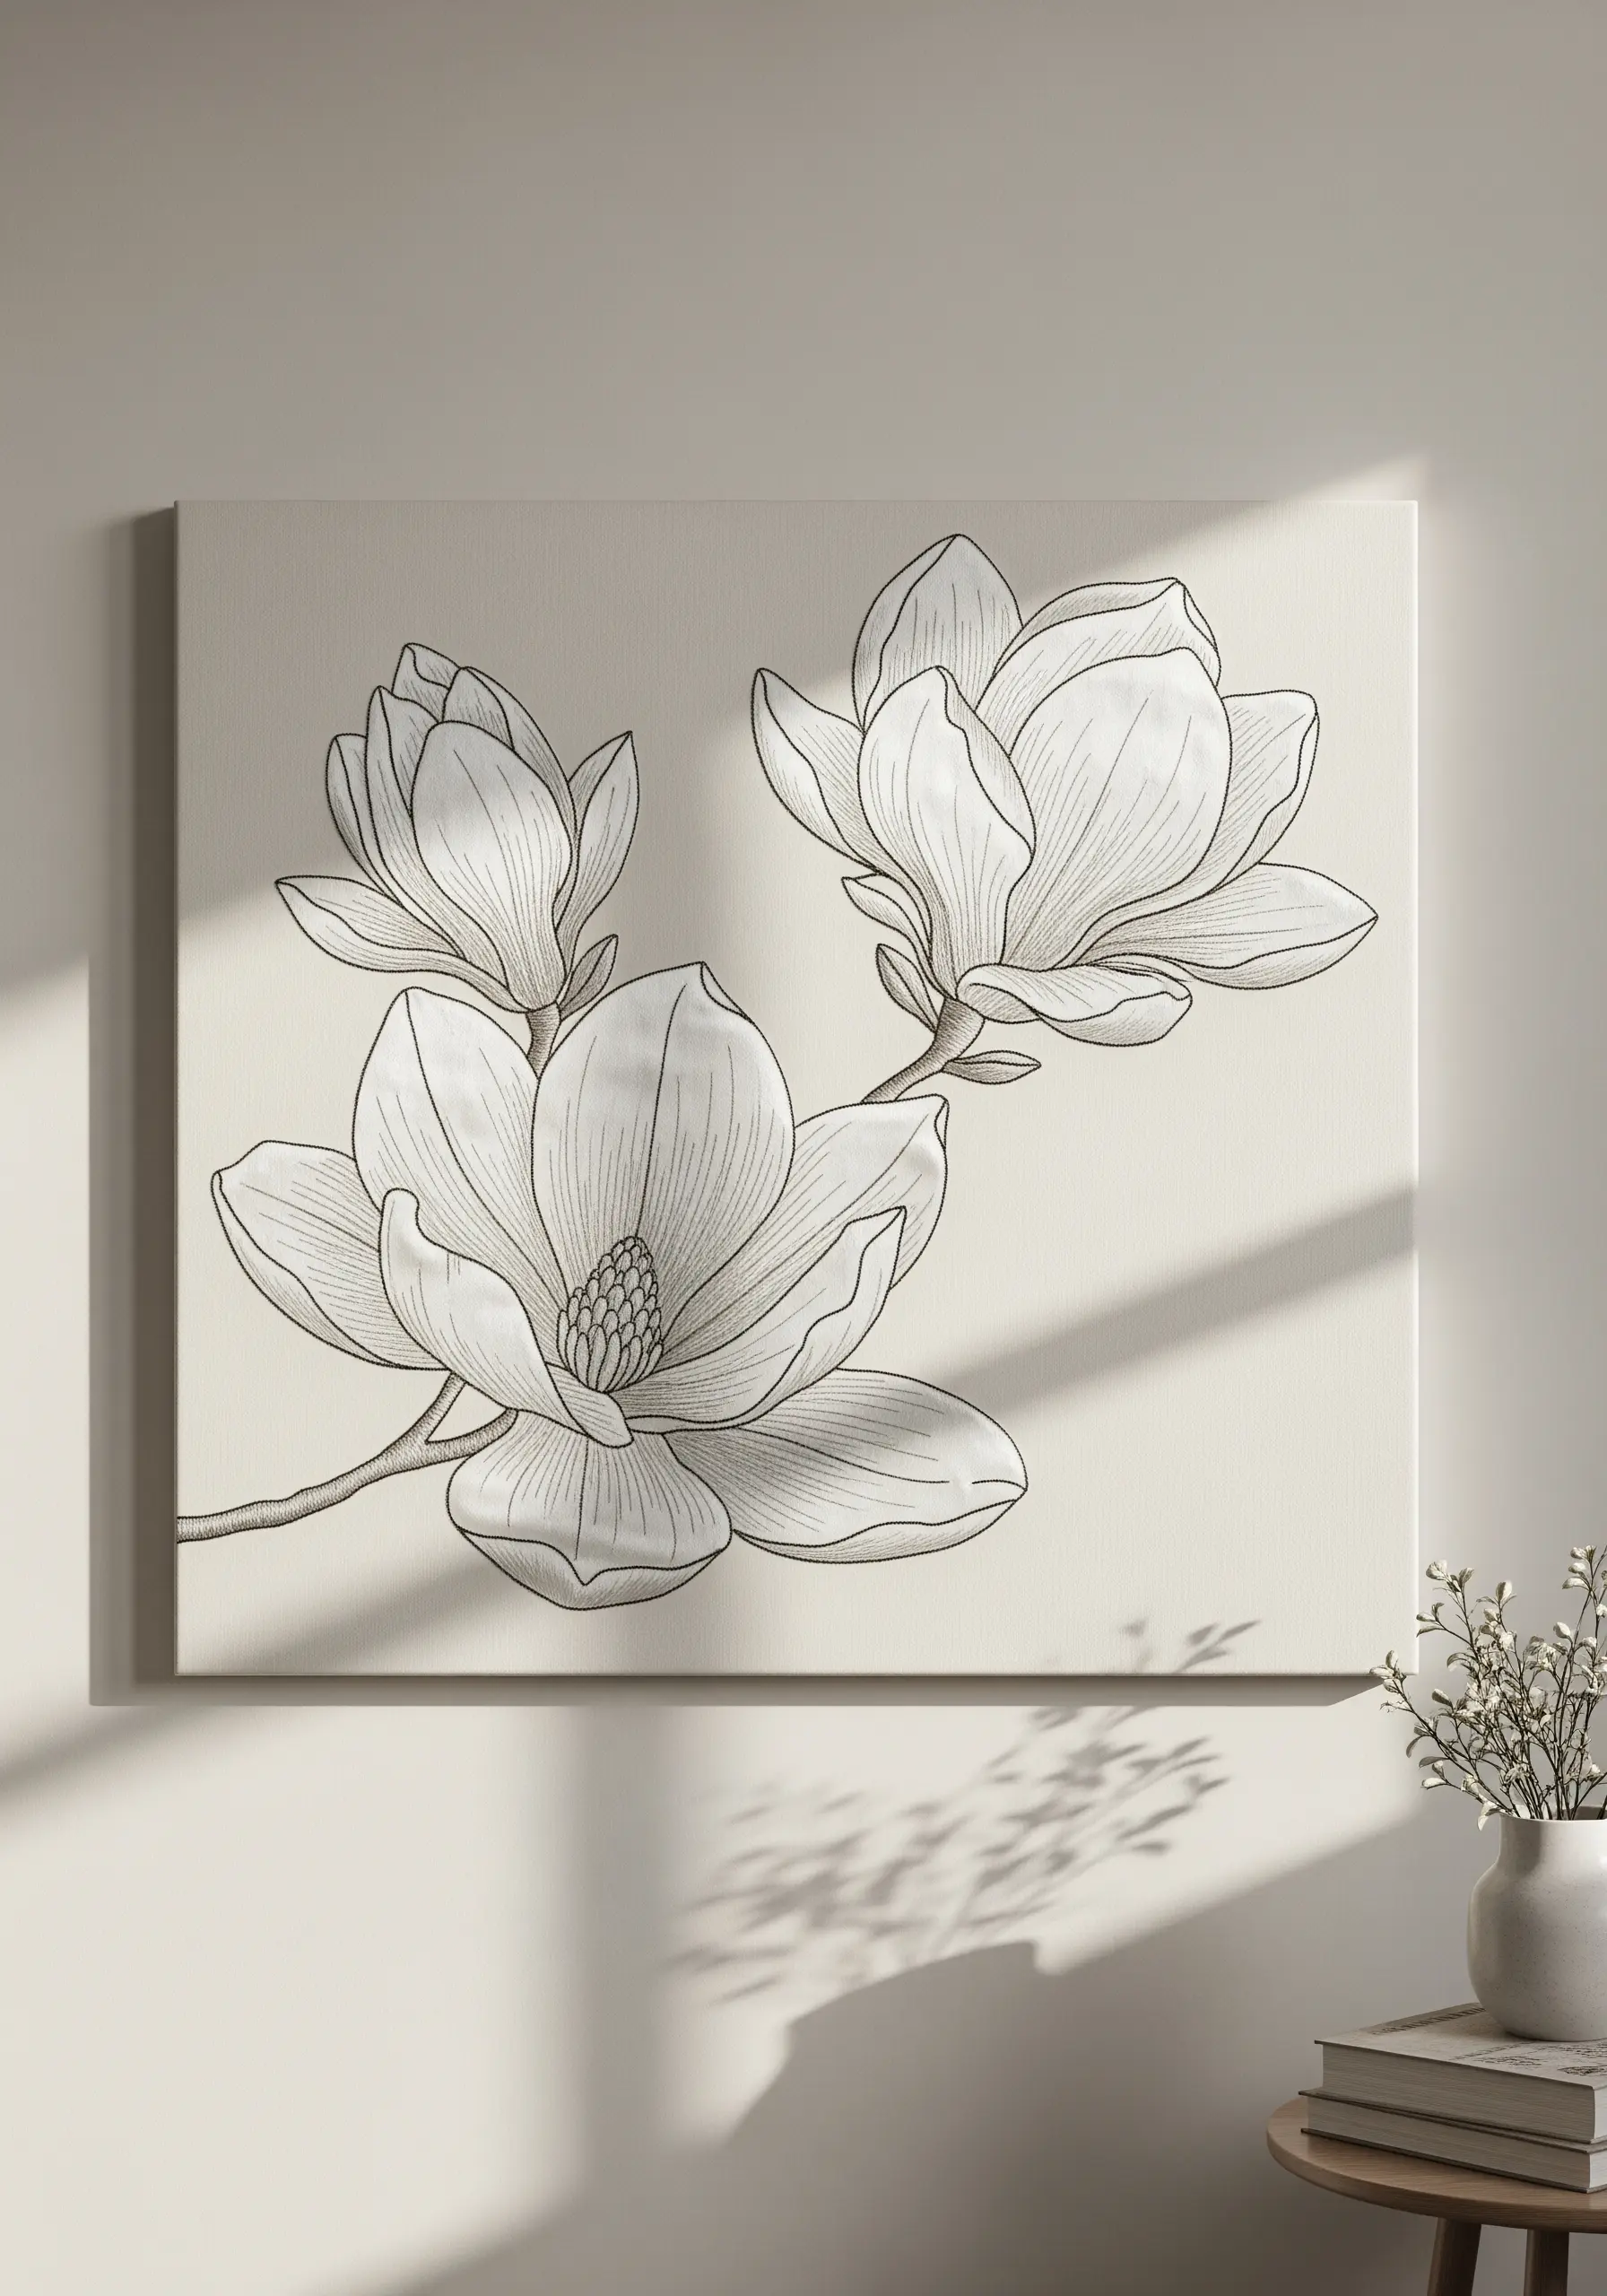
To achieve this delicate, illustrative quality, treat your needle like a fine-tipped pencil.
Use a single strand of a soft grey or taupe thread on a light, neutral fabric.
Outline the petals with a precise split stitch for clean, sharp lines.
For the shading, use tiny, evenly spaced seed stitches or short straight stitches that follow the natural curve of the petals.
The density of these stitches determines the depth of the shadow, resulting in taupe and vanilla embroidery designs that feel like fine art.
6. Create Rhythmic Patterns with Repetitive Motifs
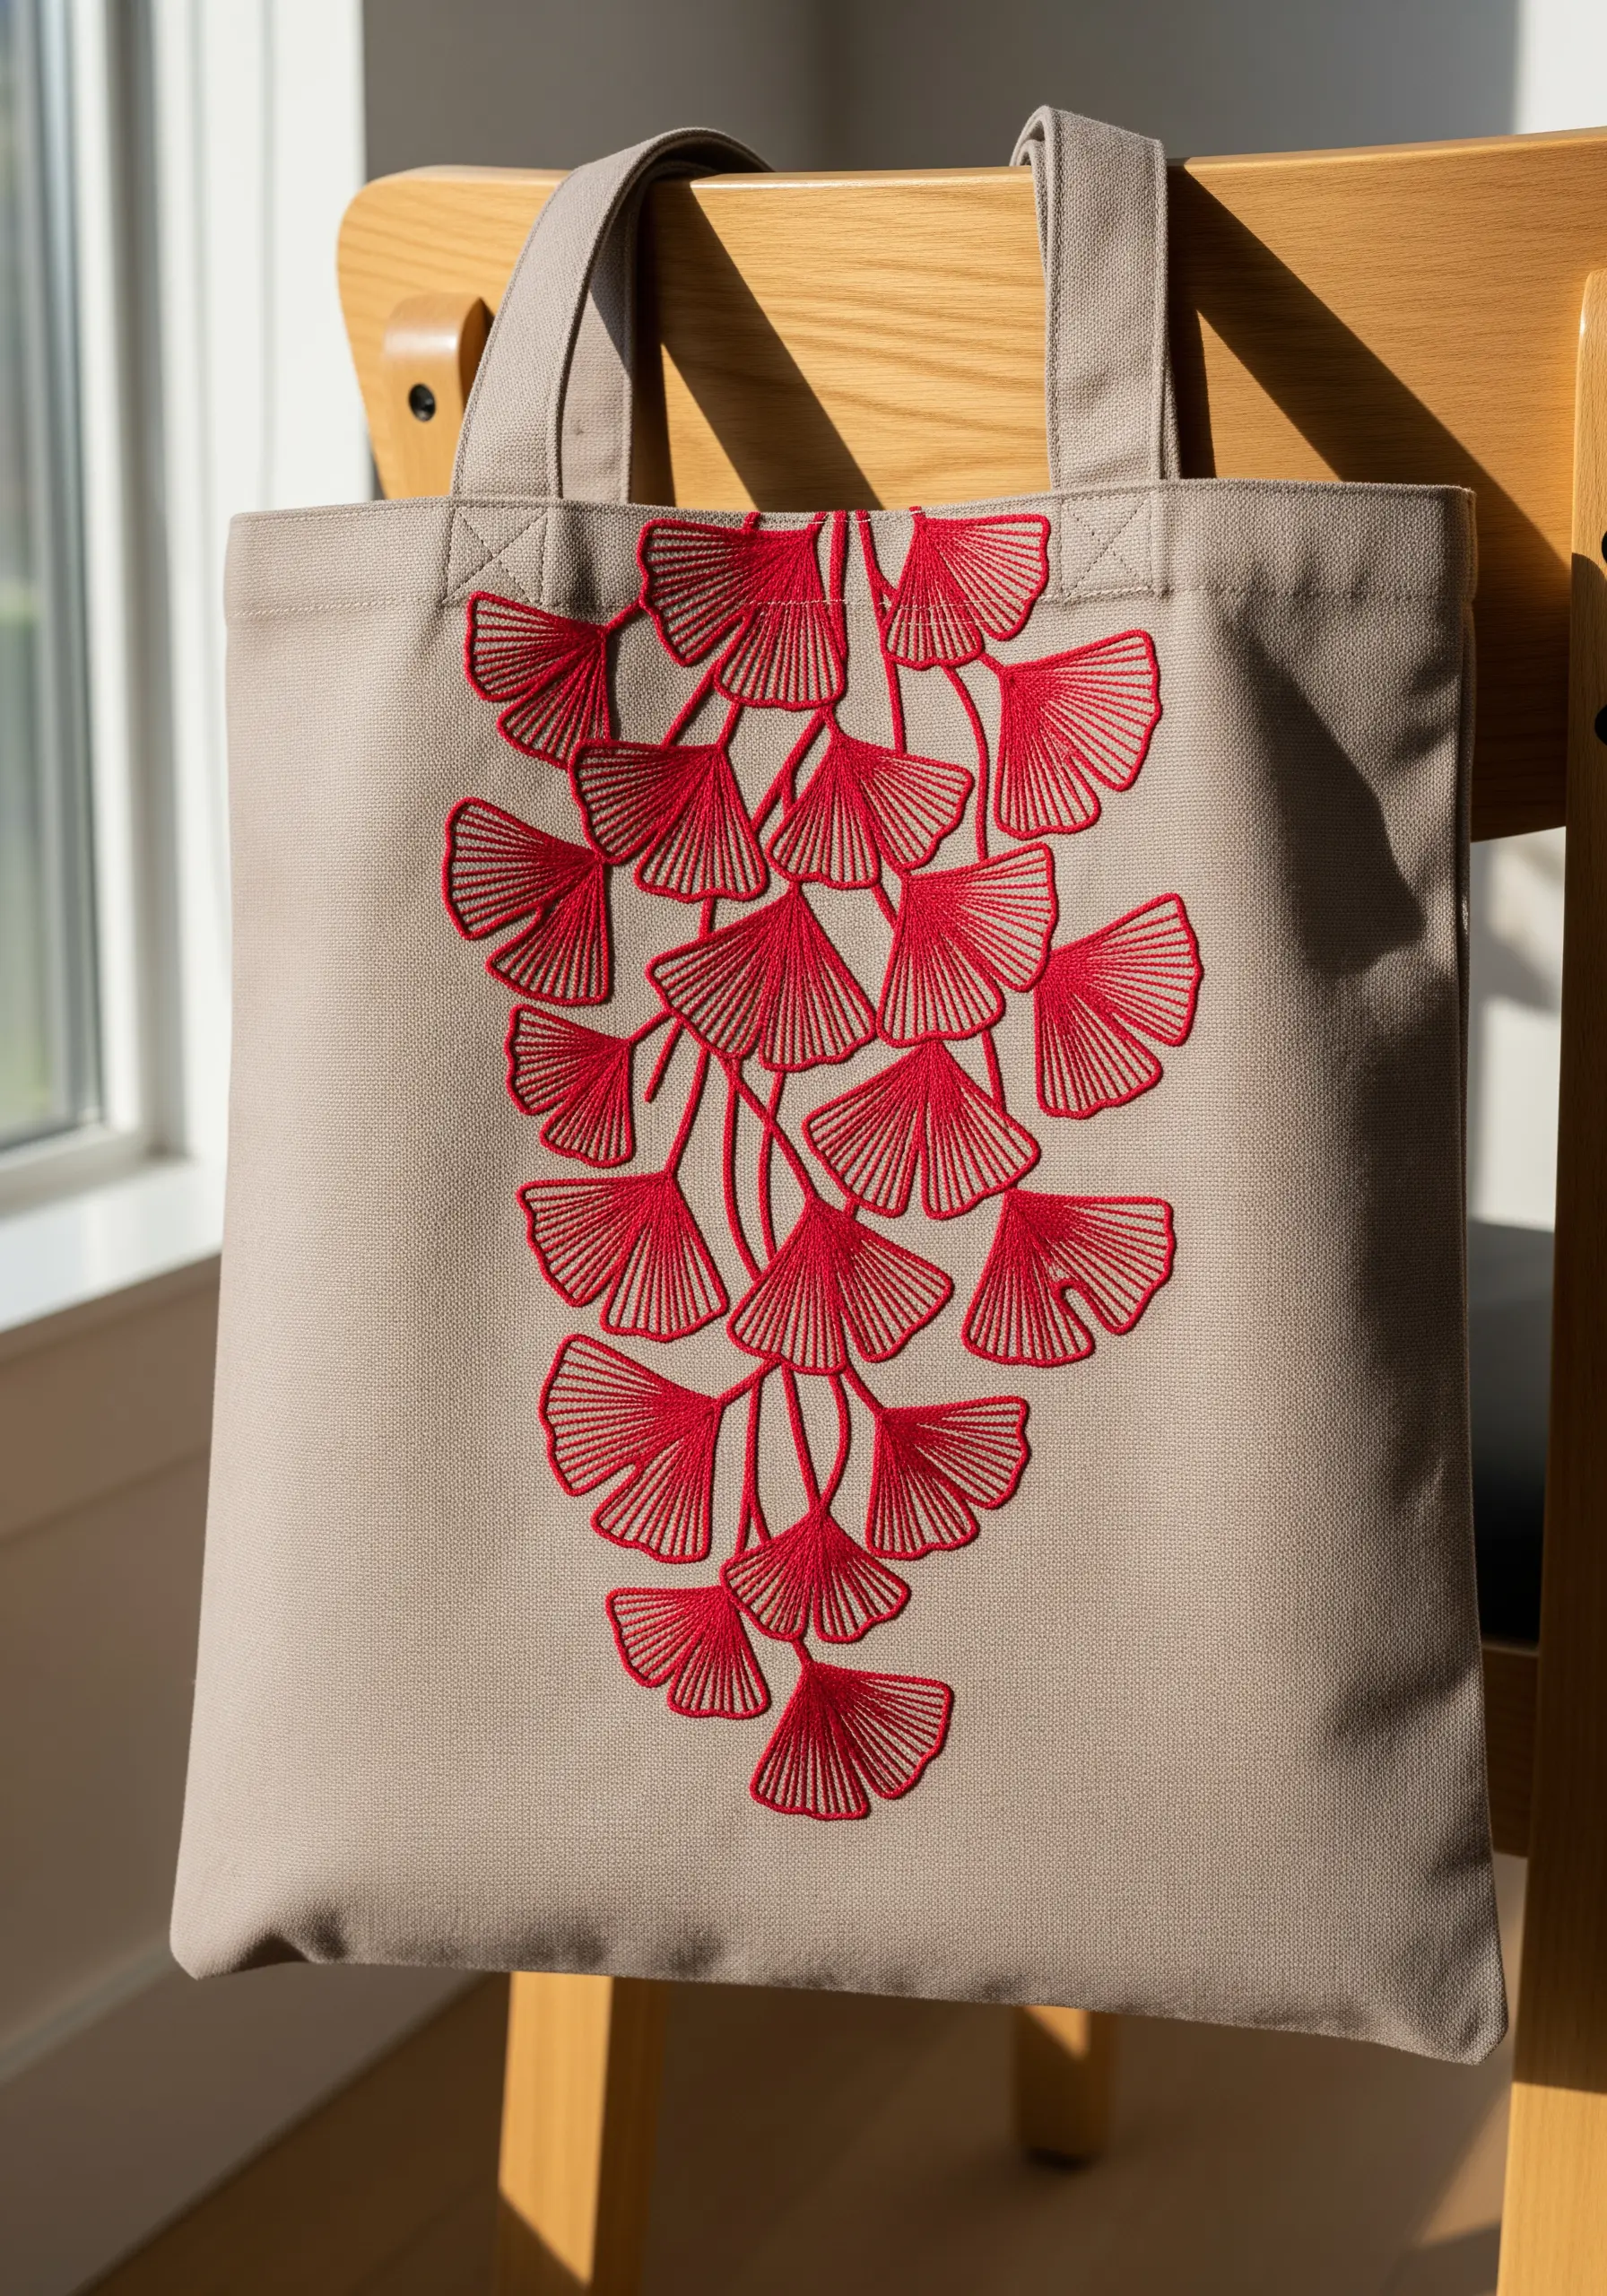
The power of this design lies in repetition and a strong, recognizable silhouette.
Choose a bold, high-contrast color like this rich red on a neutral canvas tote for maximum impact.
Use a satin stitch to fill each ginkgo leaf, ensuring all stitches run in the same direction for a uniform, beautiful sheen.
The thin stems, rendered in a simple backstitch, connect the leaves and create a sense of graceful, cascading movement.
This is an ideal project for elevating everyday items into pieces of aesthetic embroidery.
7. Explore Tonal Gradients for Subtle Depth
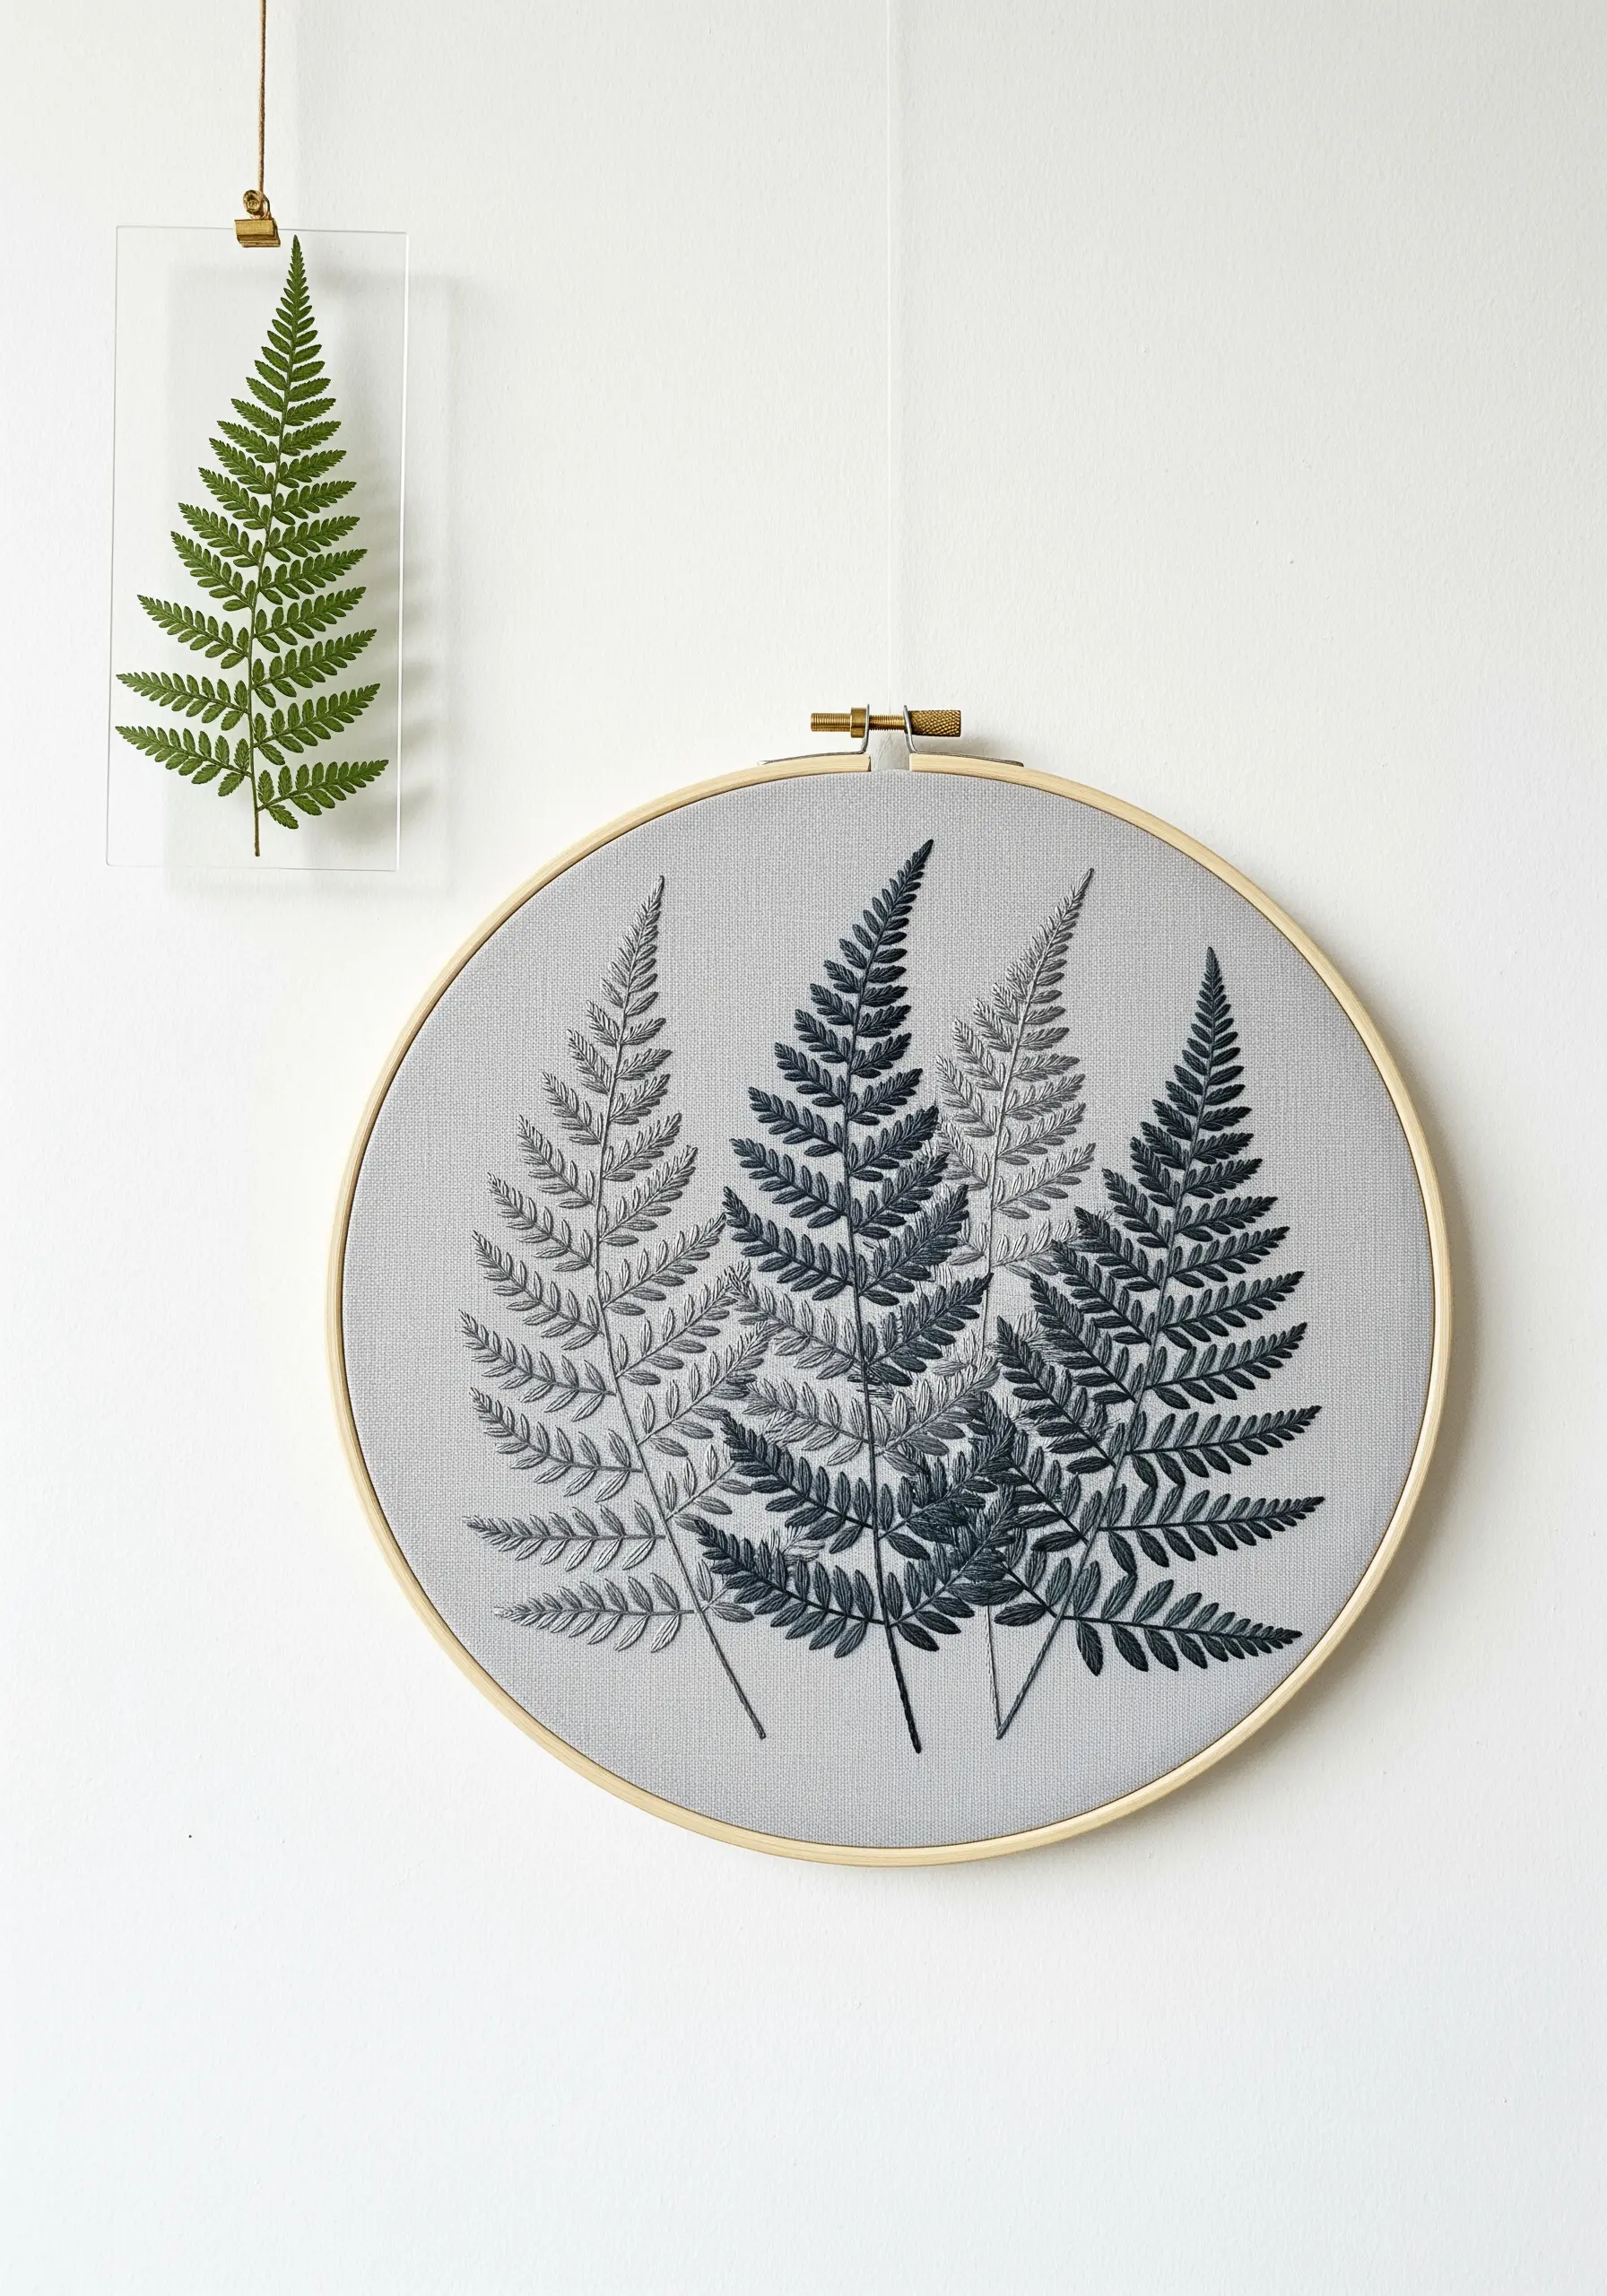
A monochrome palette doesn’t have to be just one shade; it can be a family of tones.
Select three to four tones of the same color, from light to dark grey, for example.
Stitch each fern in a different shade to create a subtle illusion of depth, as if some fronds are closer and others farther away.
Use a fishbone stitch or fly stitch for the leaves to mimic their natural, feathery texture.
This tonal approach adds sophistication and is a perfect way to explore nature-texture embroidery.
8. Combine Stitches for Rich Textural Contrast
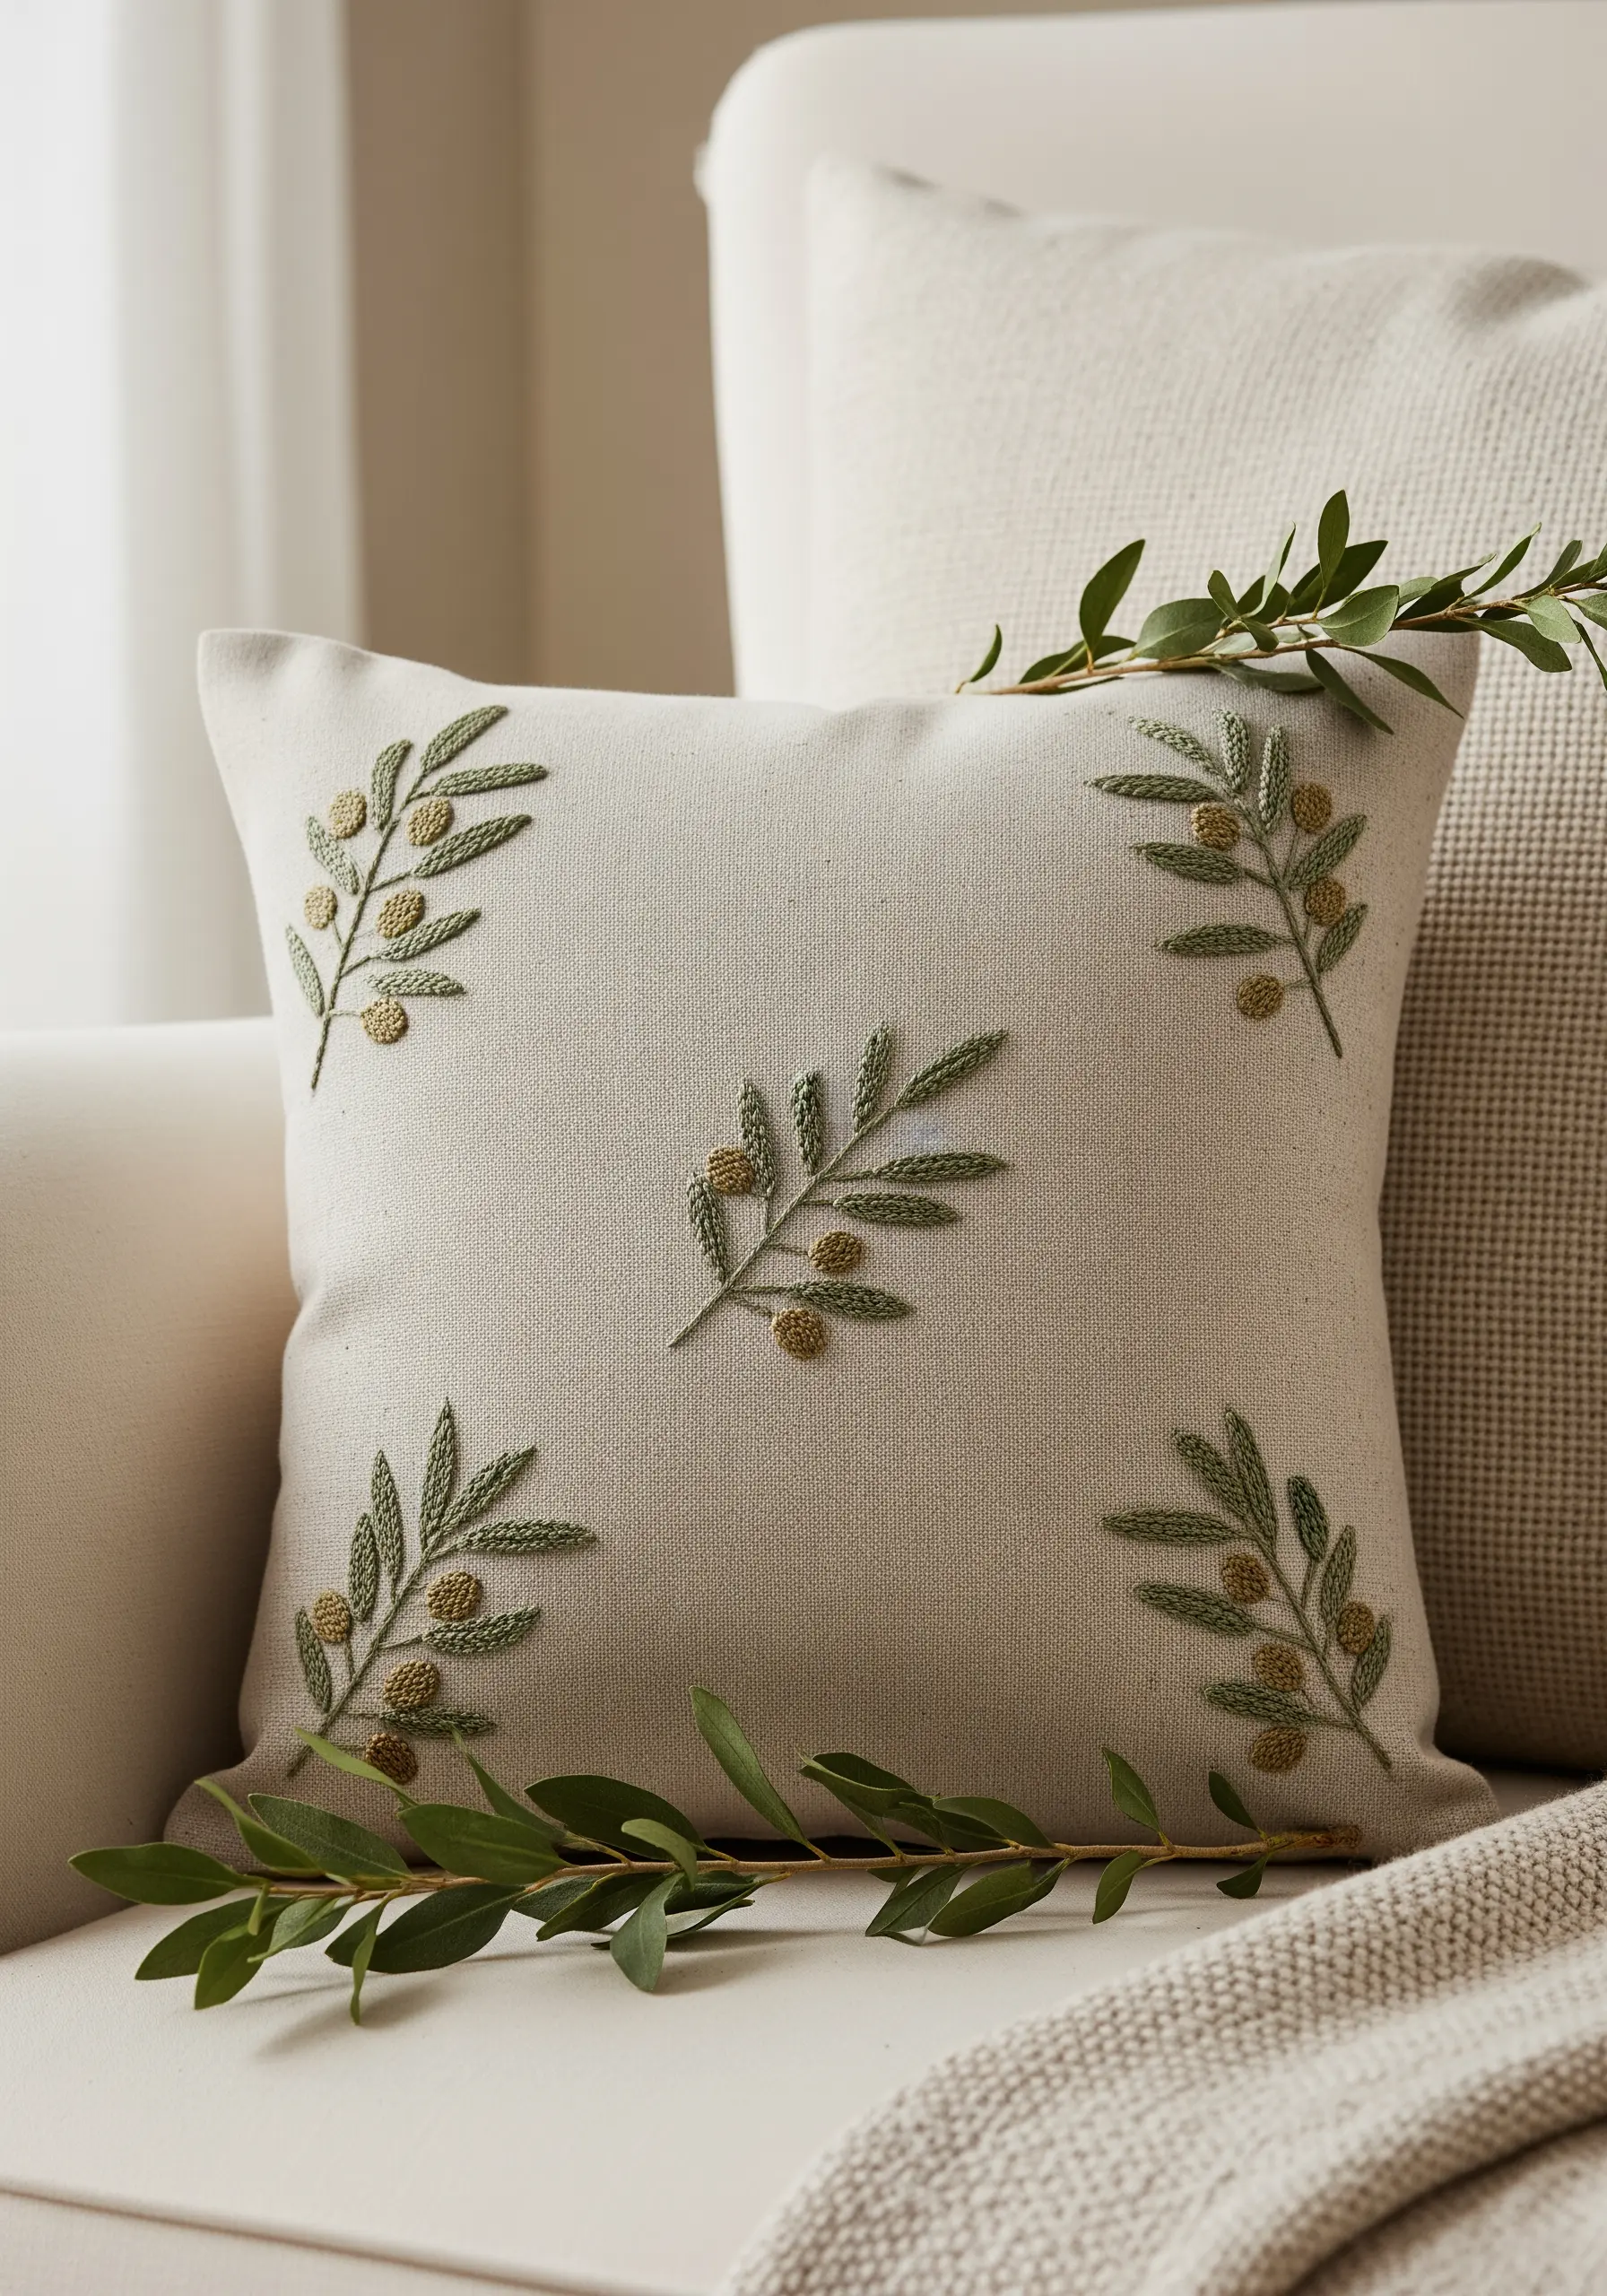
Elevate a simple botanical design by varying your stitch textures to engage the senses.
Use a flat satin stitch for the leaves to give them a smooth, subtle sheen that catches the light gently.
For the olives, switch to chunky French knots or bullion knots using a slightly thicker thread to make them pop from the surface.
This tactile contrast between the flat leaves and the raised olives adds a layer of dimension that is both visually and physically appealing, creating handmade embroidery touches that look professionally designed.
9. Frame a Solid Shape with Delicate Line Art
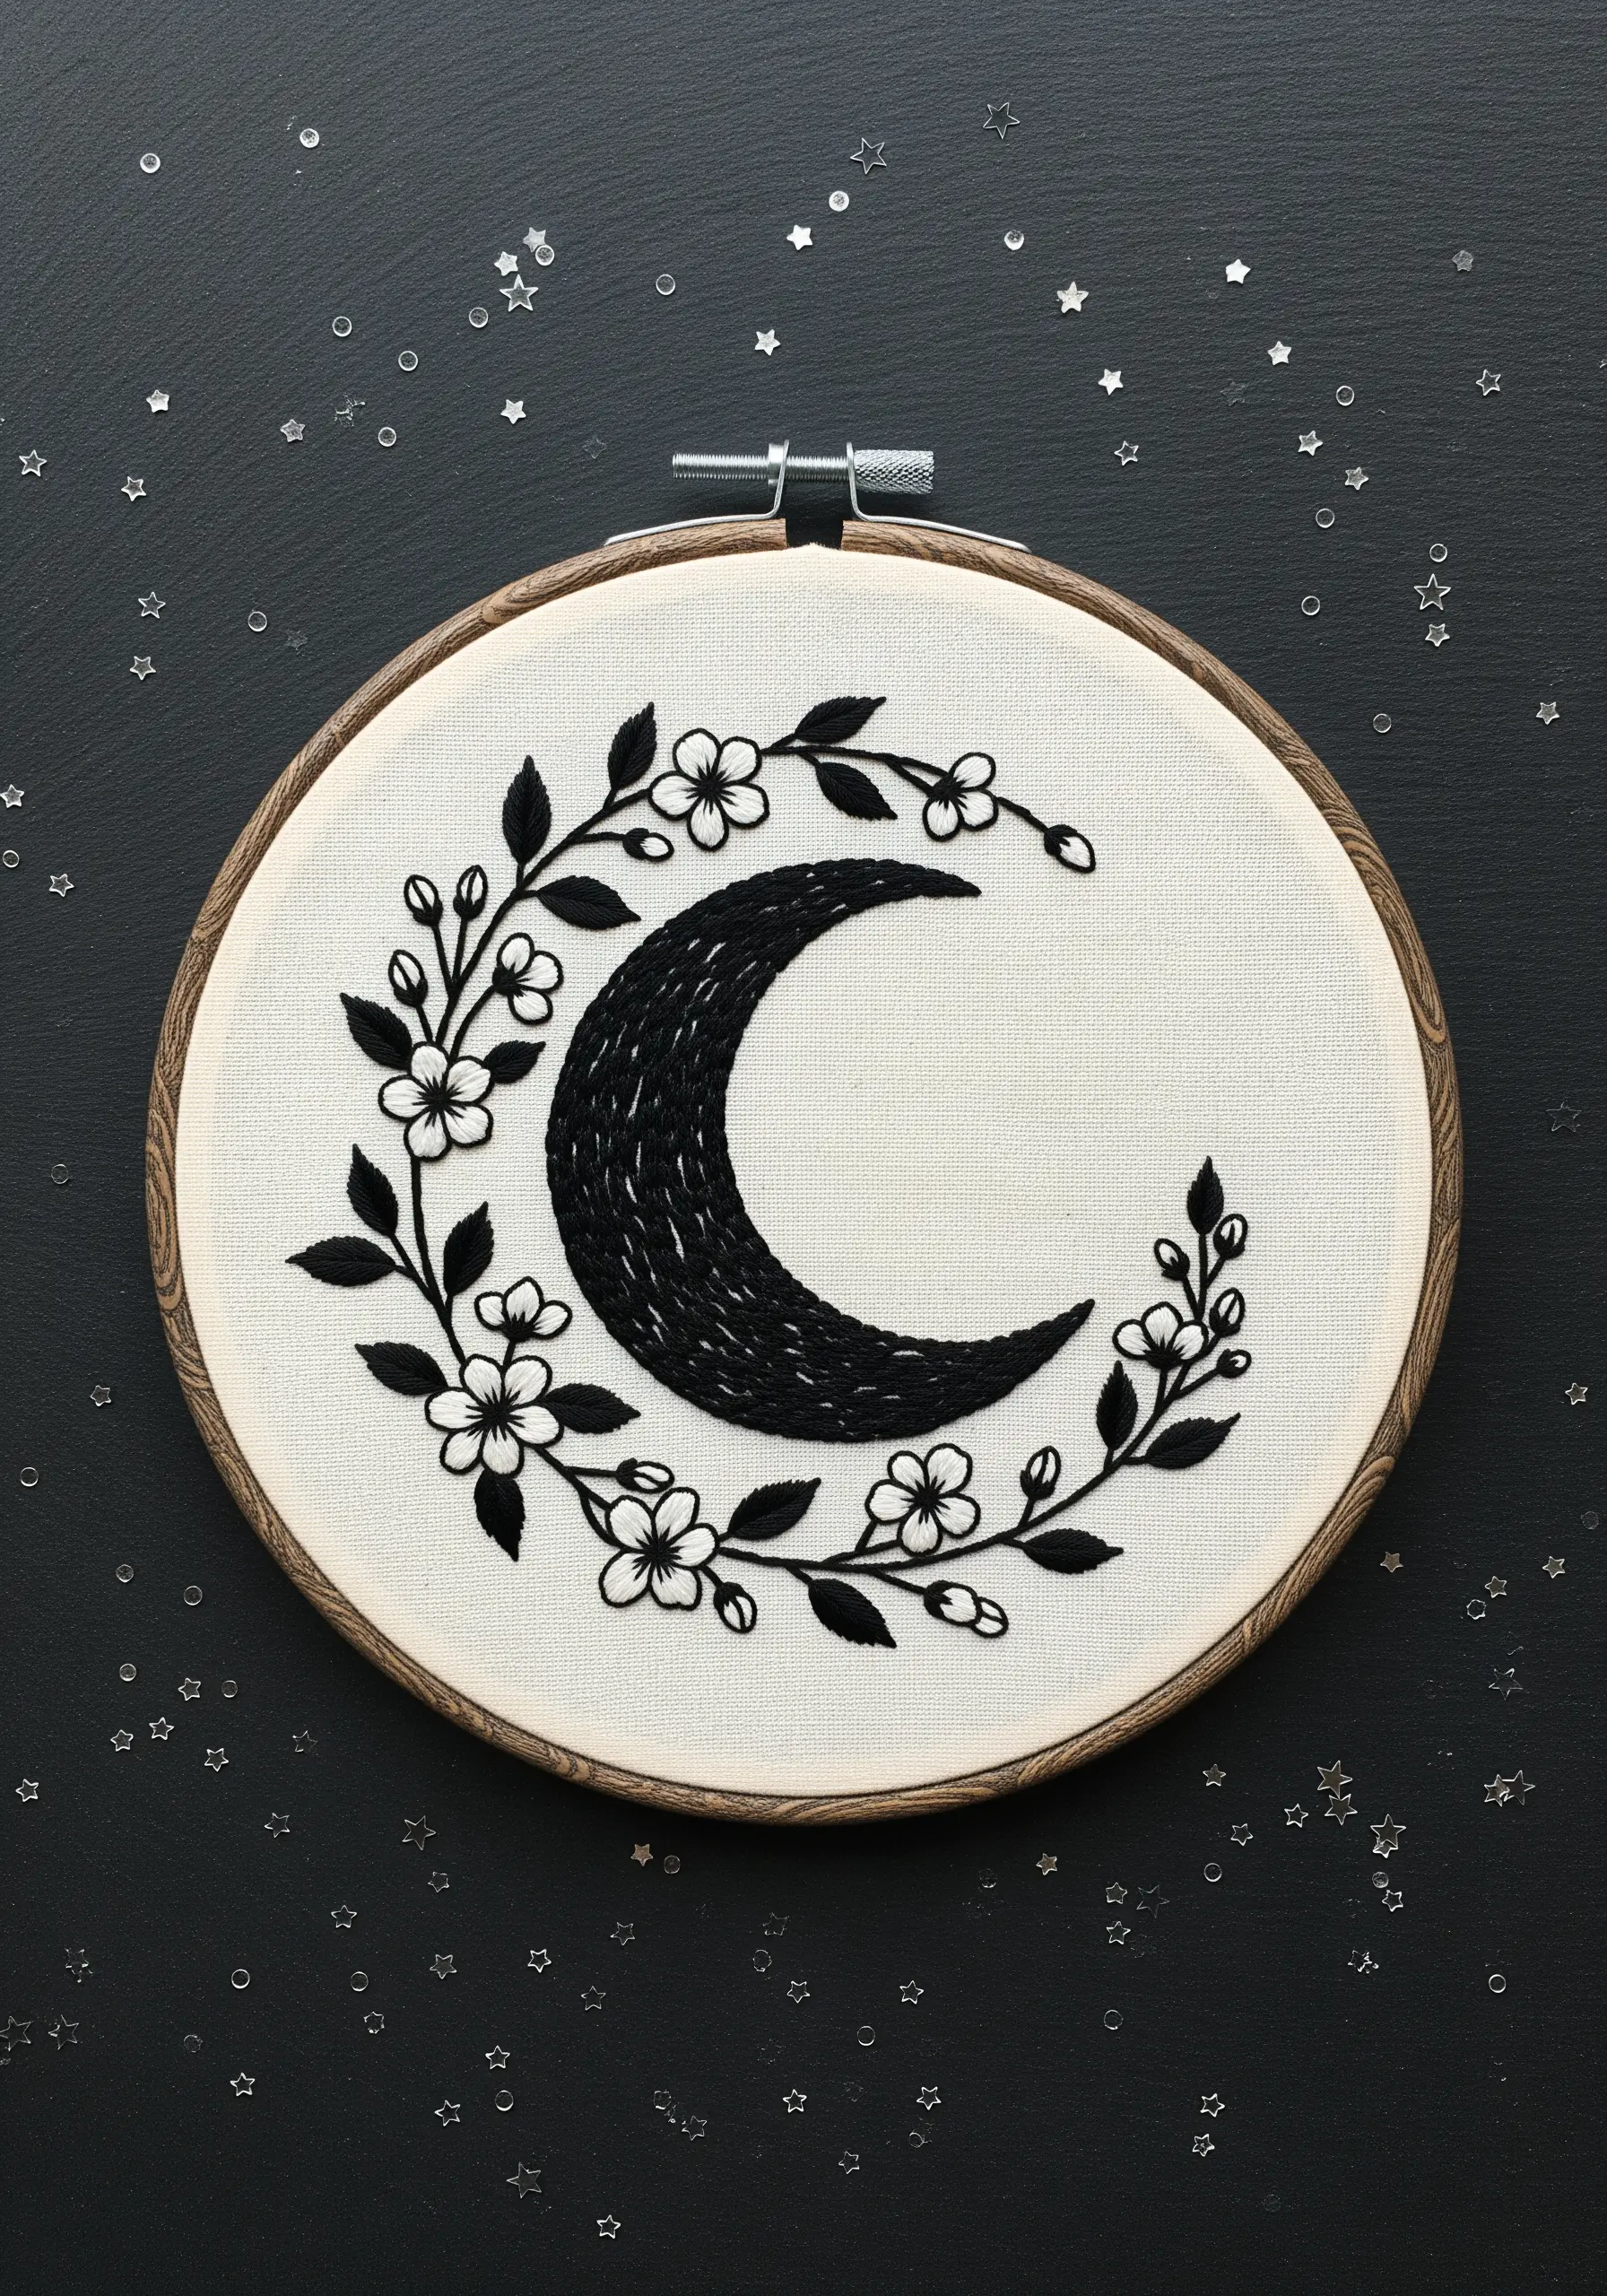
Create a striking visual balance by juxtaposing a densely filled shape with light, airy outlines.
Fill the crescent moon with long-and-short stitches in black to create a solid, textured mass that feels substantial.
Then, use a single strand of white thread for the surrounding floral wreath to maintain a delicate feel.
A fine backstitch for the stems and lazy daisy stitches for the petals will keep the wreath feeling light and intricate, beautifully framing the central motif.
10. Use Directional Stitching to Sculpt Petals

For complex flowers like the protea, the direction of your stitches is everything—it defines the form.
Use the long-and-short stitch, also known as thread painting, to create smooth color blending and dimensionality.
For the outer bracts, angle your stitches outward from the center to mimic their natural growth pattern.
For the delicate inner filaments, use straight stitches radiating from the base.
This meticulous technique is key for creating believable gradient color floral embroidery.
11. Create a Layered Composition with Intertwining Lines
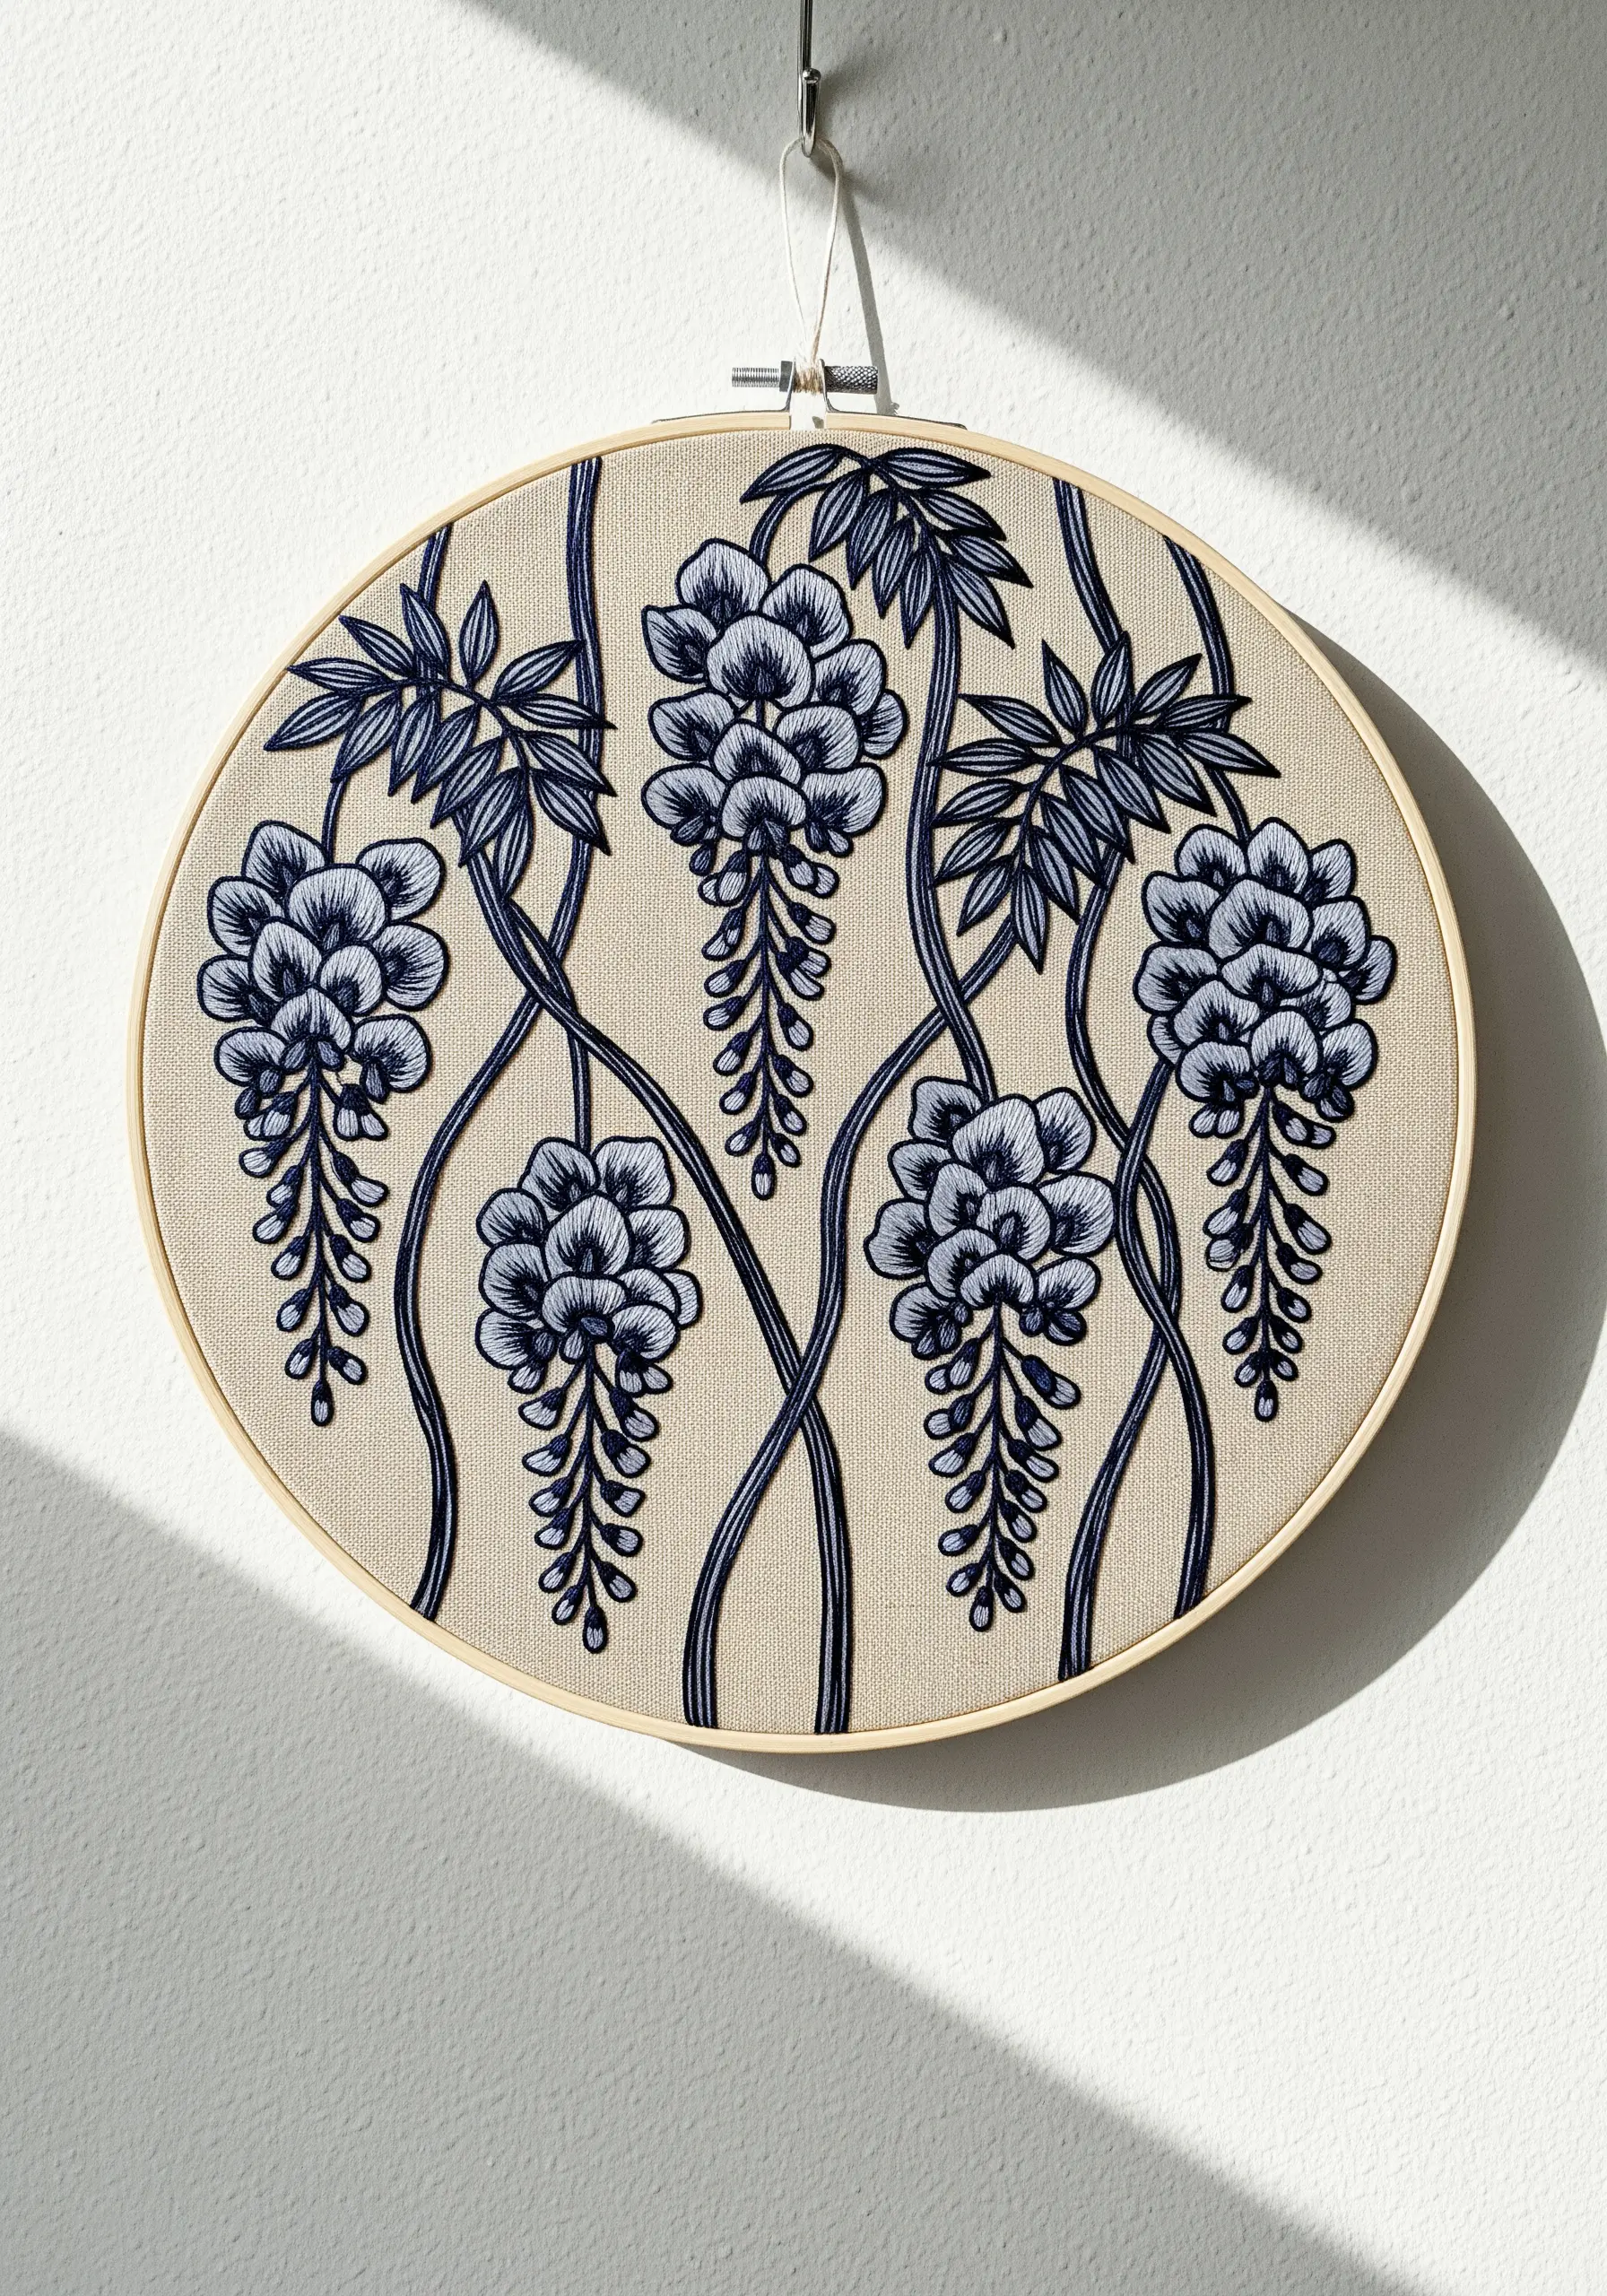
This elegant design achieves a wonderful sense of depth by layering elements strategically.
Stitch the background vines first, using a simple stem stitch in a dark, grounding color.
Then, add the wisteria blossoms on top, allowing them to overlap the vines in a natural way.
For the flowers, use a lighter shade and combine small satin stitches for the larger petals with French knots for the cascading buds.
This thoughtful overlapping creates a visual hierarchy, making these botanical stitch ideas dynamic rather than flat.
12. Merge Organic Shapes with Geometric Structure
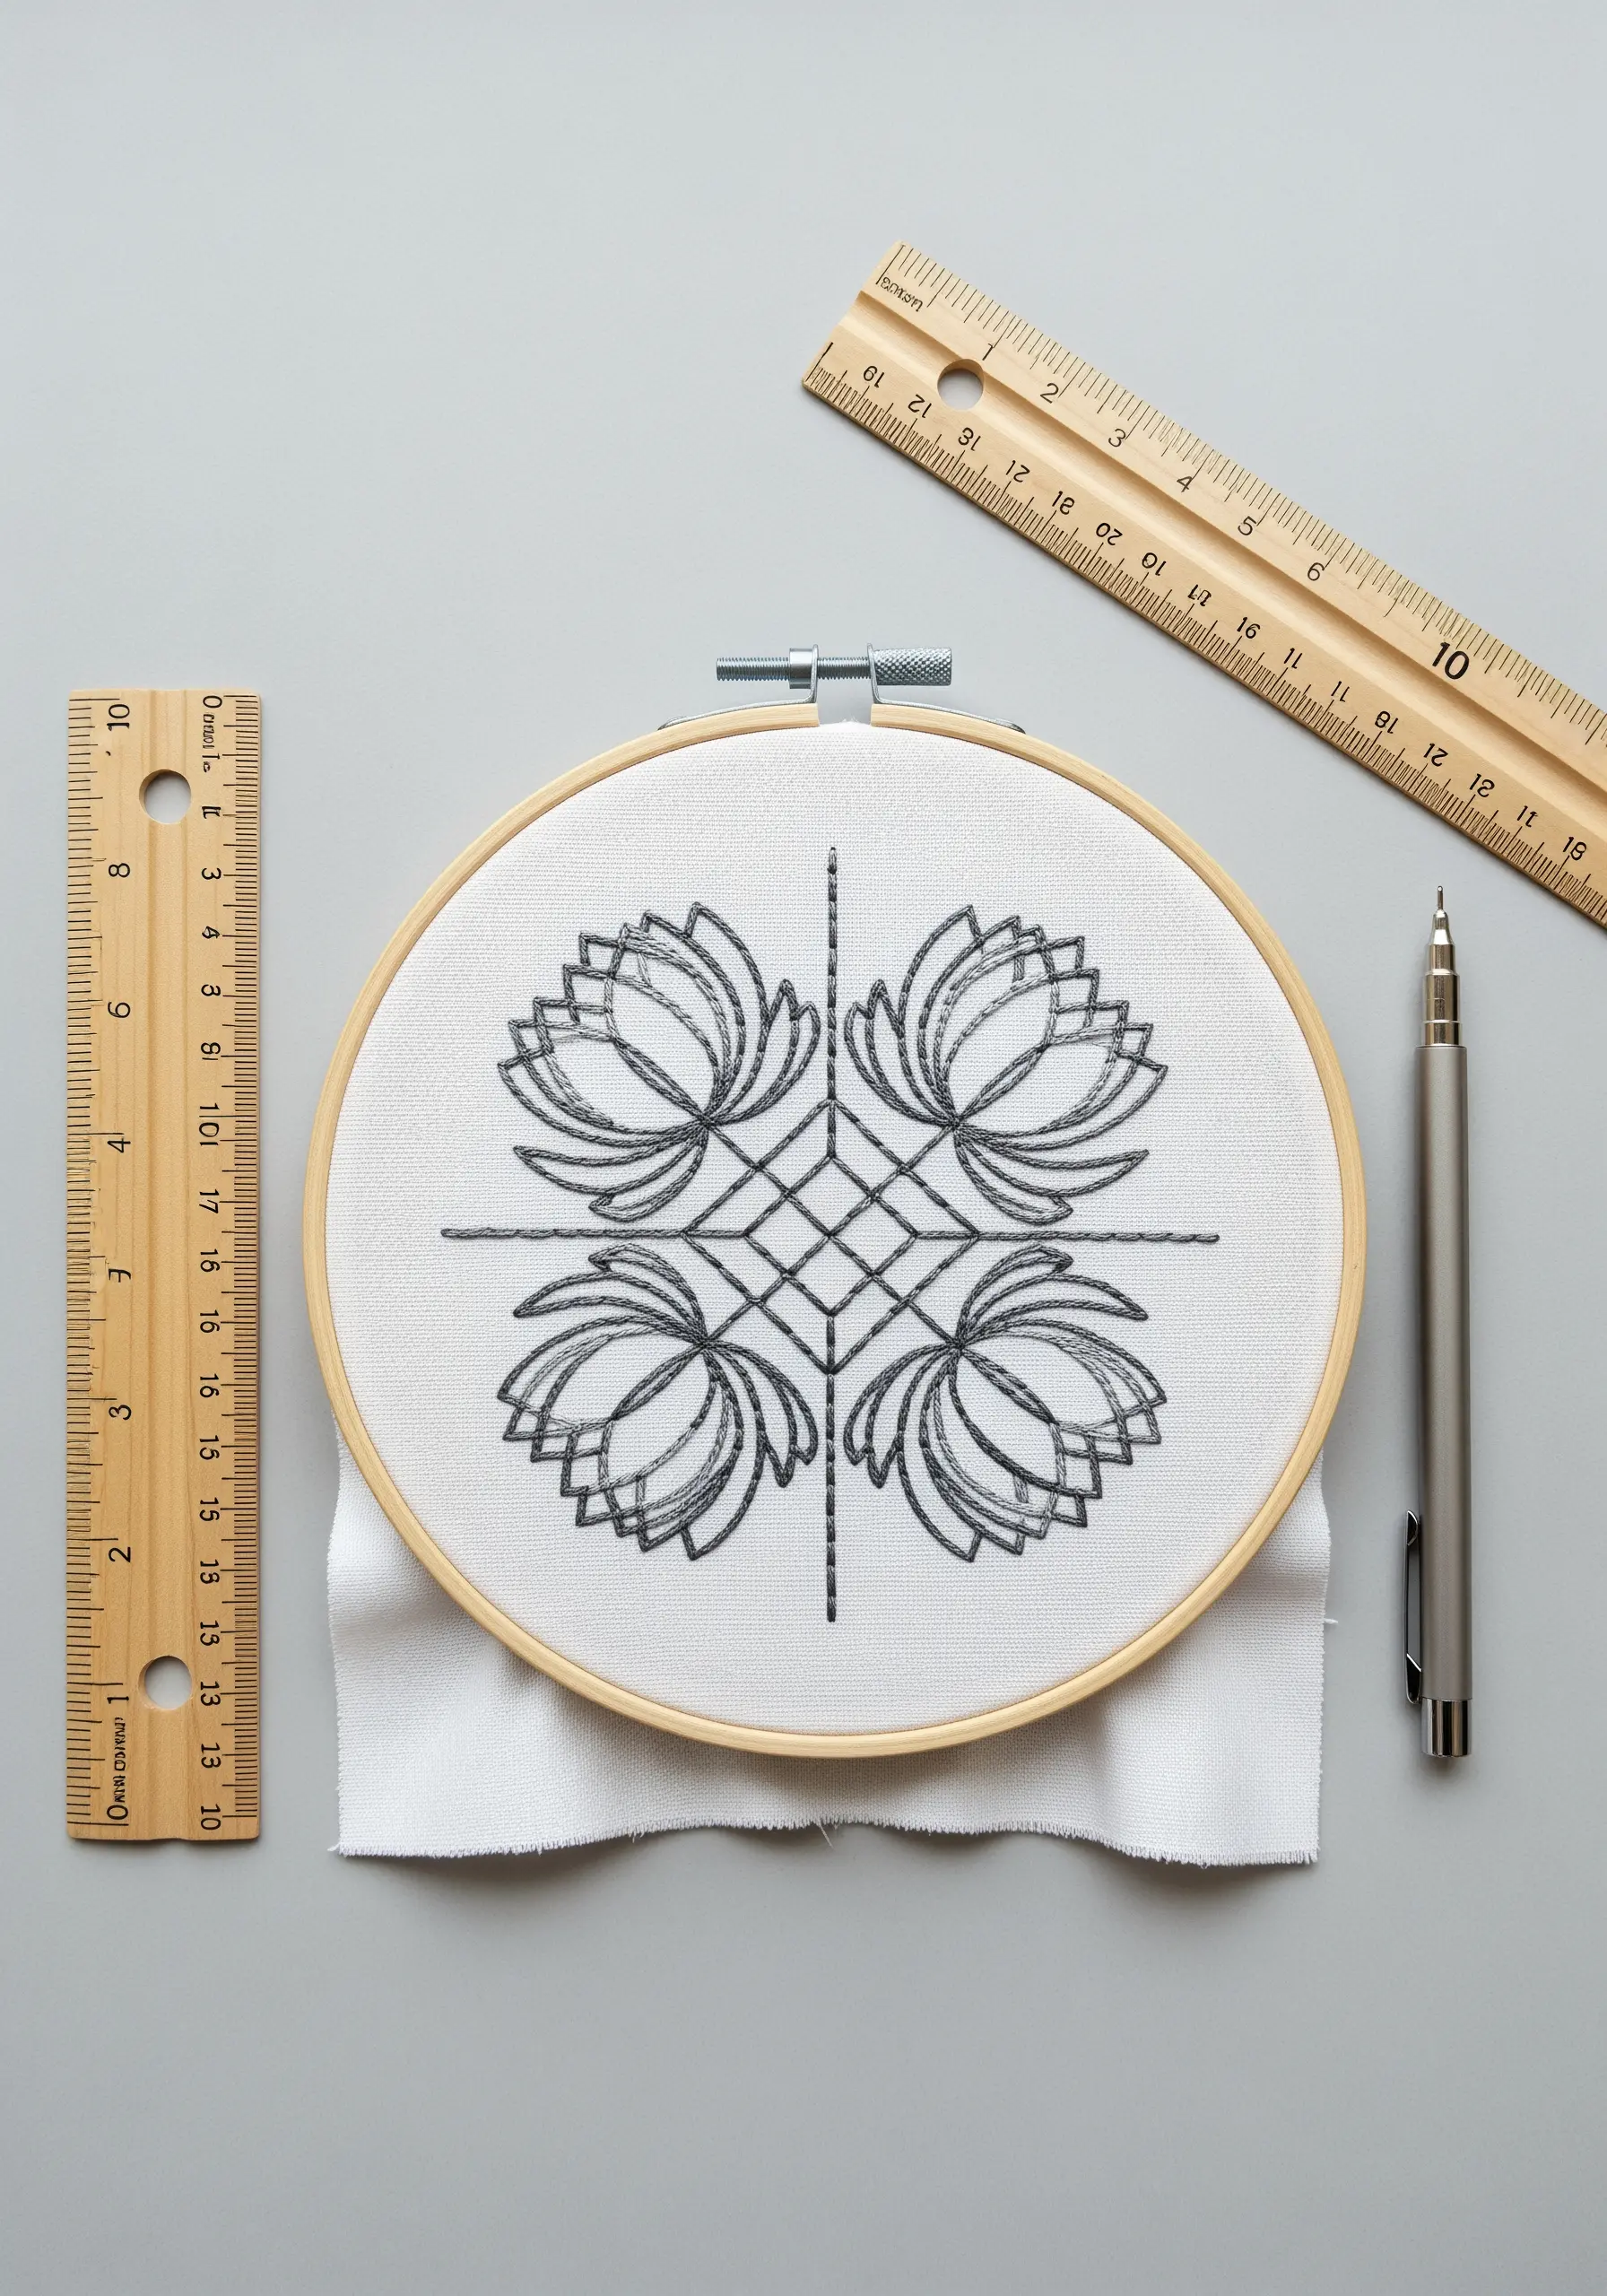
Create a compelling contemporary design by contrasting the soft curves of florals with the clean precision of a geometric grid.
Begin by stitching the structural grid lines using a simple, neat backstitch.
Then, fill in the floral motifs, allowing them to be framed and defined by the intersecting lines.
To maintain the clean aesthetic, use a limited stitch vocabulary—satin stitch for fills and backstitch for outlines.
This is a modern take on yarn wall art projects, translated beautifully into thread.
13. Build Dimension with Padded Satin Stitch
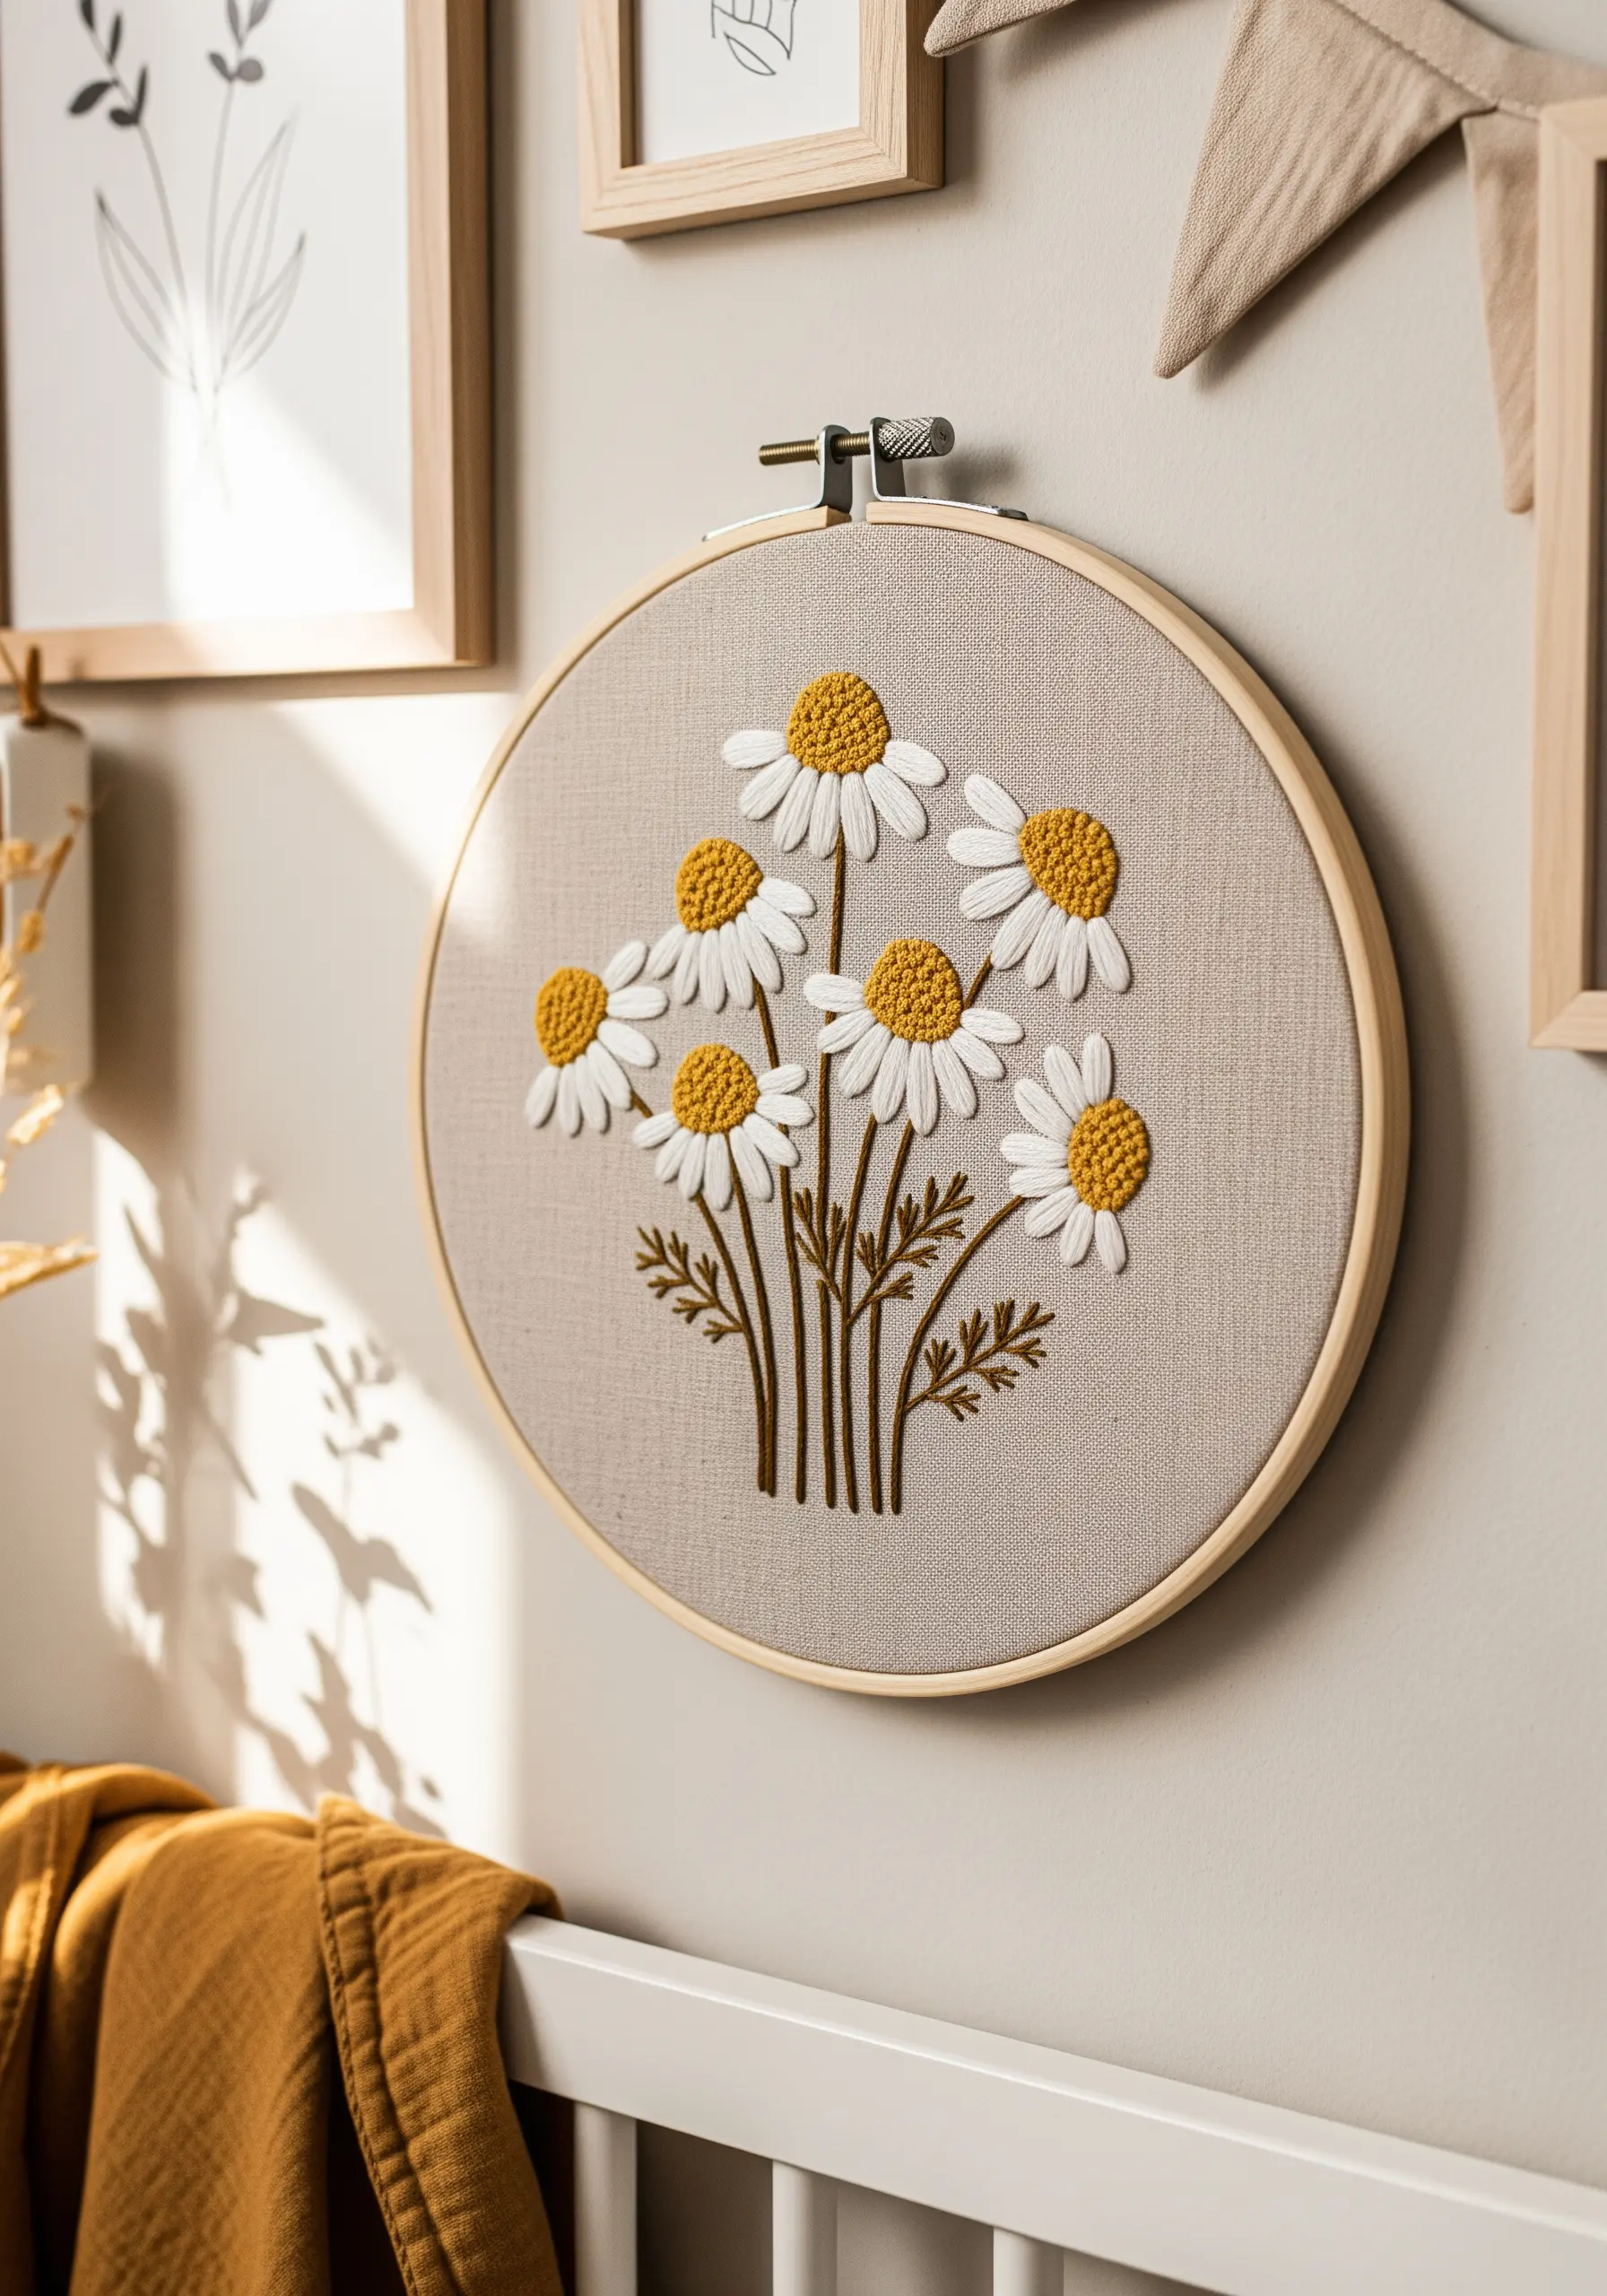
To make your petals physically pop from the fabric, use a padding technique before you begin your top layer of stitching.
First, fill the petal shape with a base layer of small seed stitches or straight stitches.
Then, cover this padding with your final satin stitch, working perpendicular to the underlying stitches.
This simple step raises the surface of the embroidery, creating subtle shadows and making the white petals stand out dramatically.
The effect transforms simple flowers into charming, tactile nursery decor.
14. Elevate Linens with a Single, Bold Outline
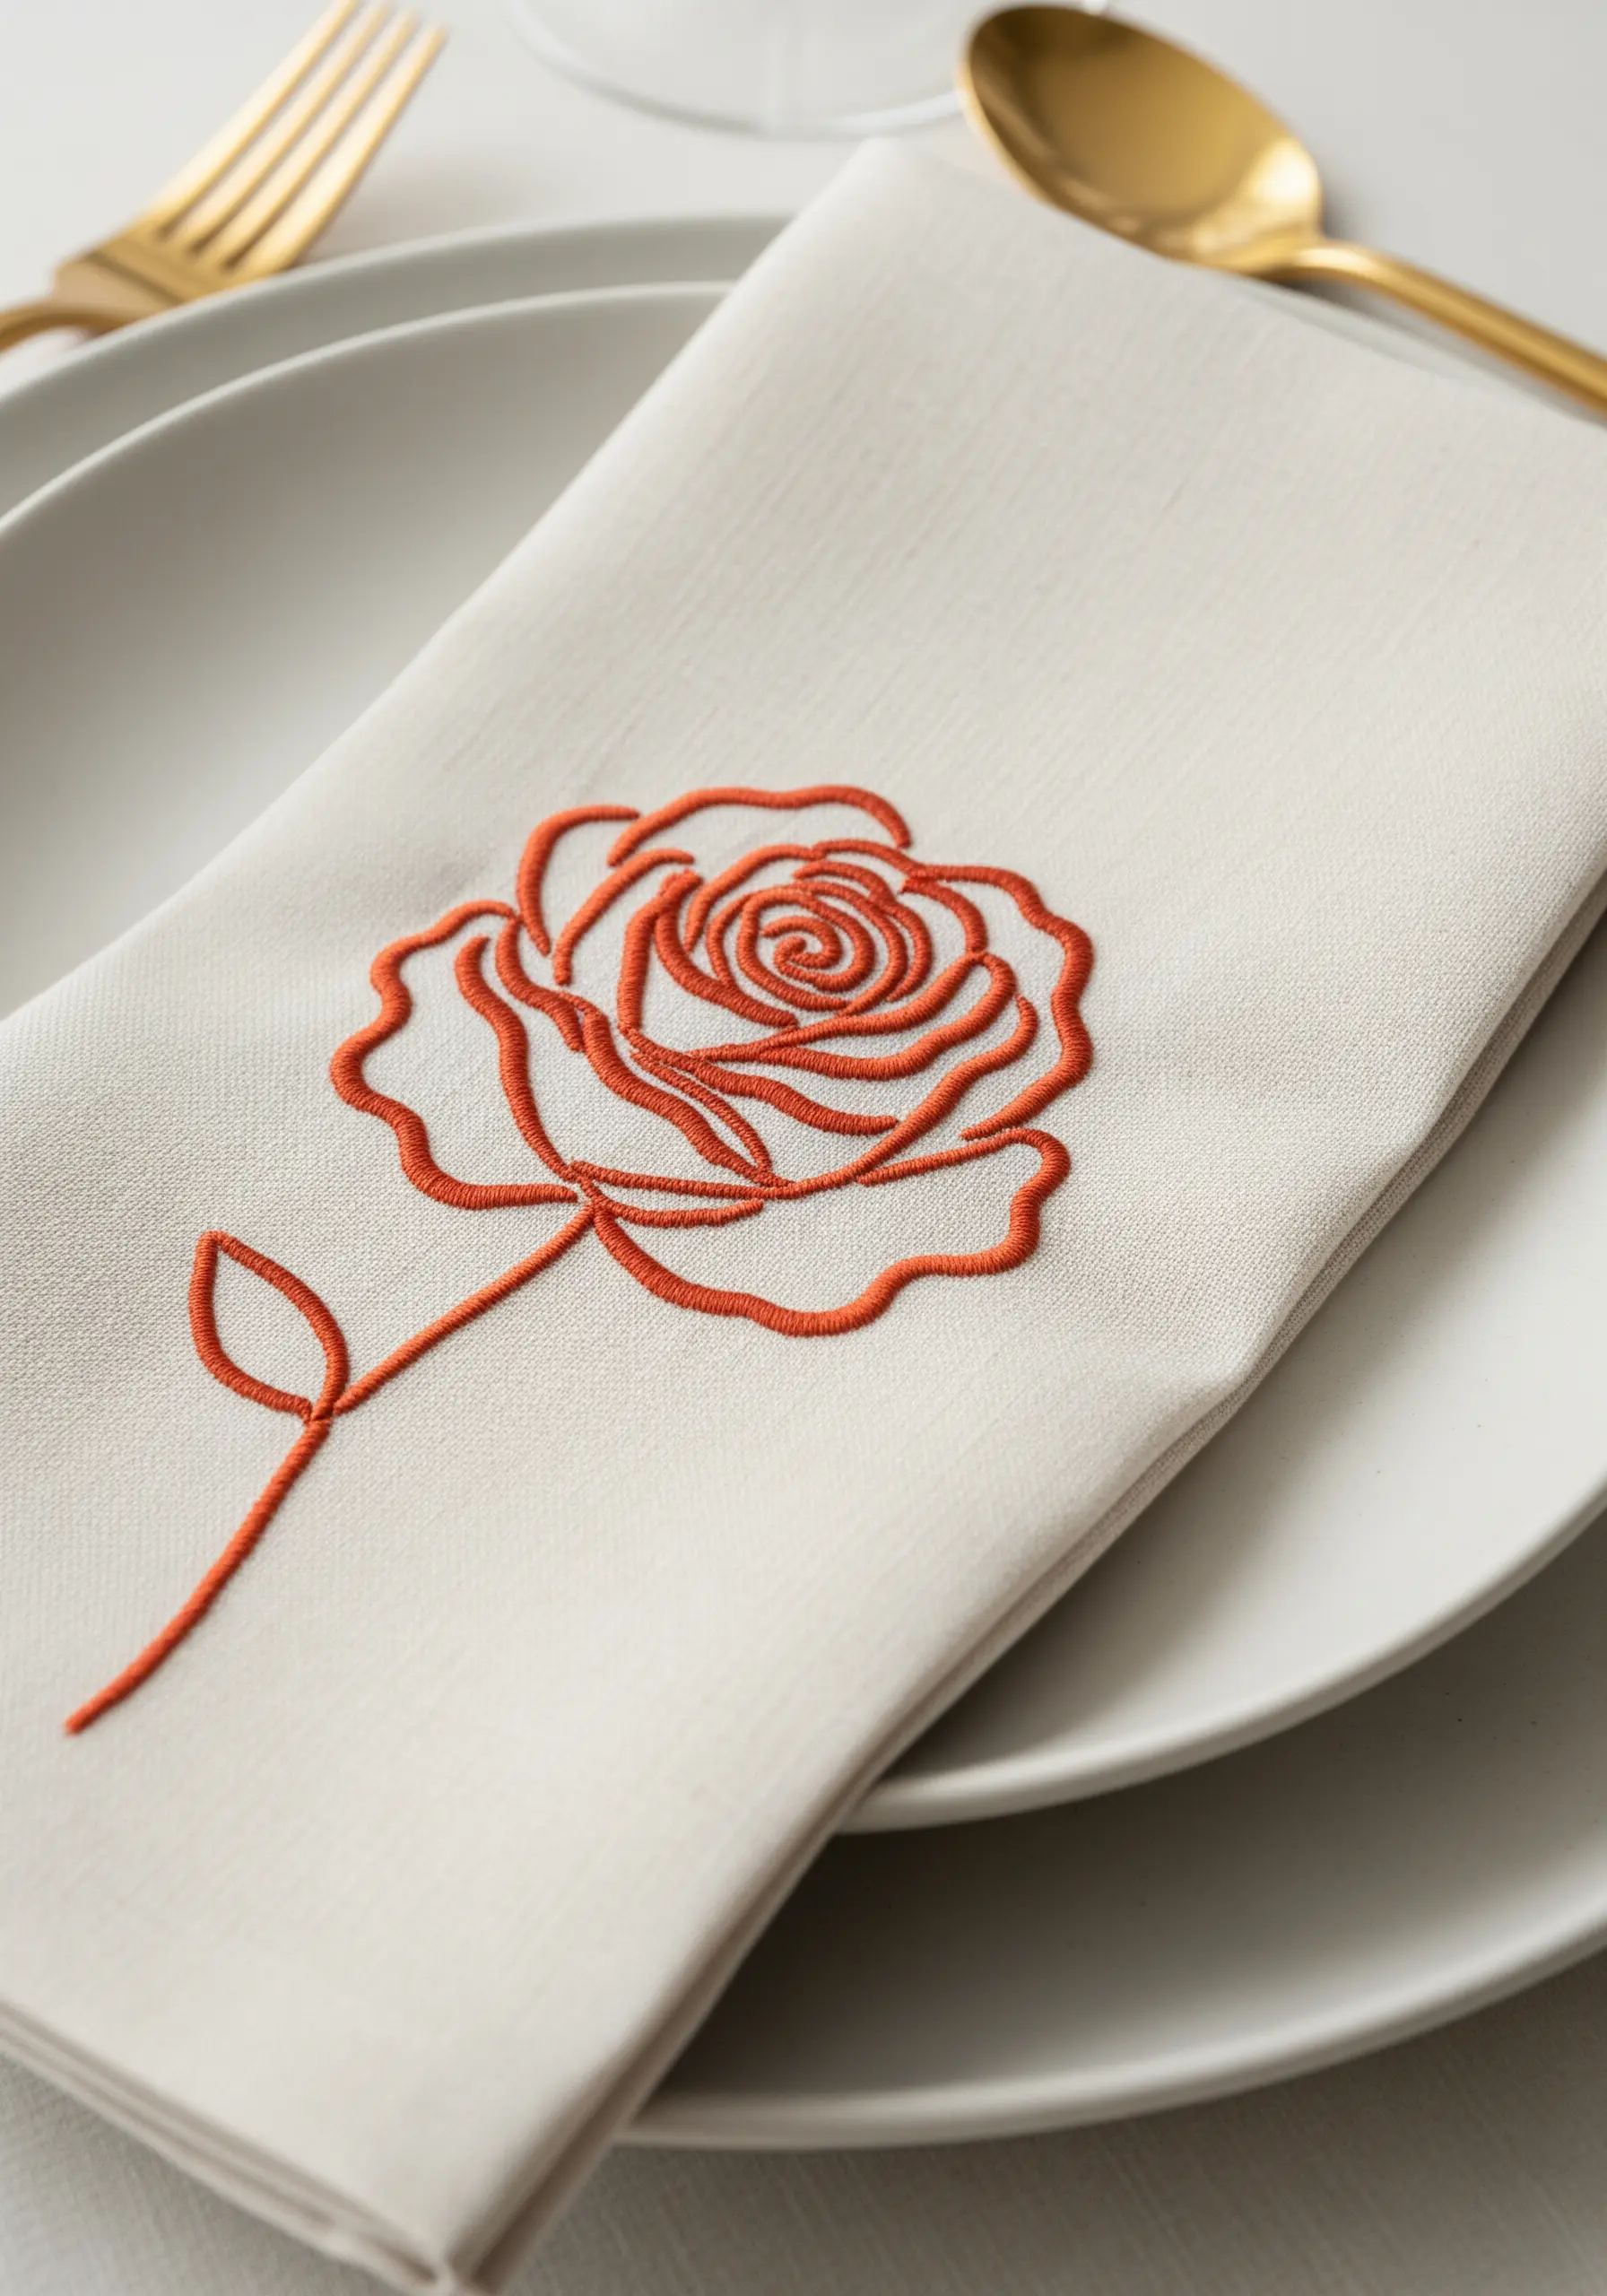
For maximum impact with minimal effort, a single, clean line is often all you need.
Choose a vibrant thread color that contrasts beautifully with your base fabric for a modern, graphic feel.
Use a whipped backstitch or a stem stitch with three to four strands of floss to create a smooth, cord-like outline that feels substantial.
The key to a professional finish is consistency—ensure every stitch is the same length for a flawless, flowing line.
15. Maximize Contrast for a Powerful Focal Point
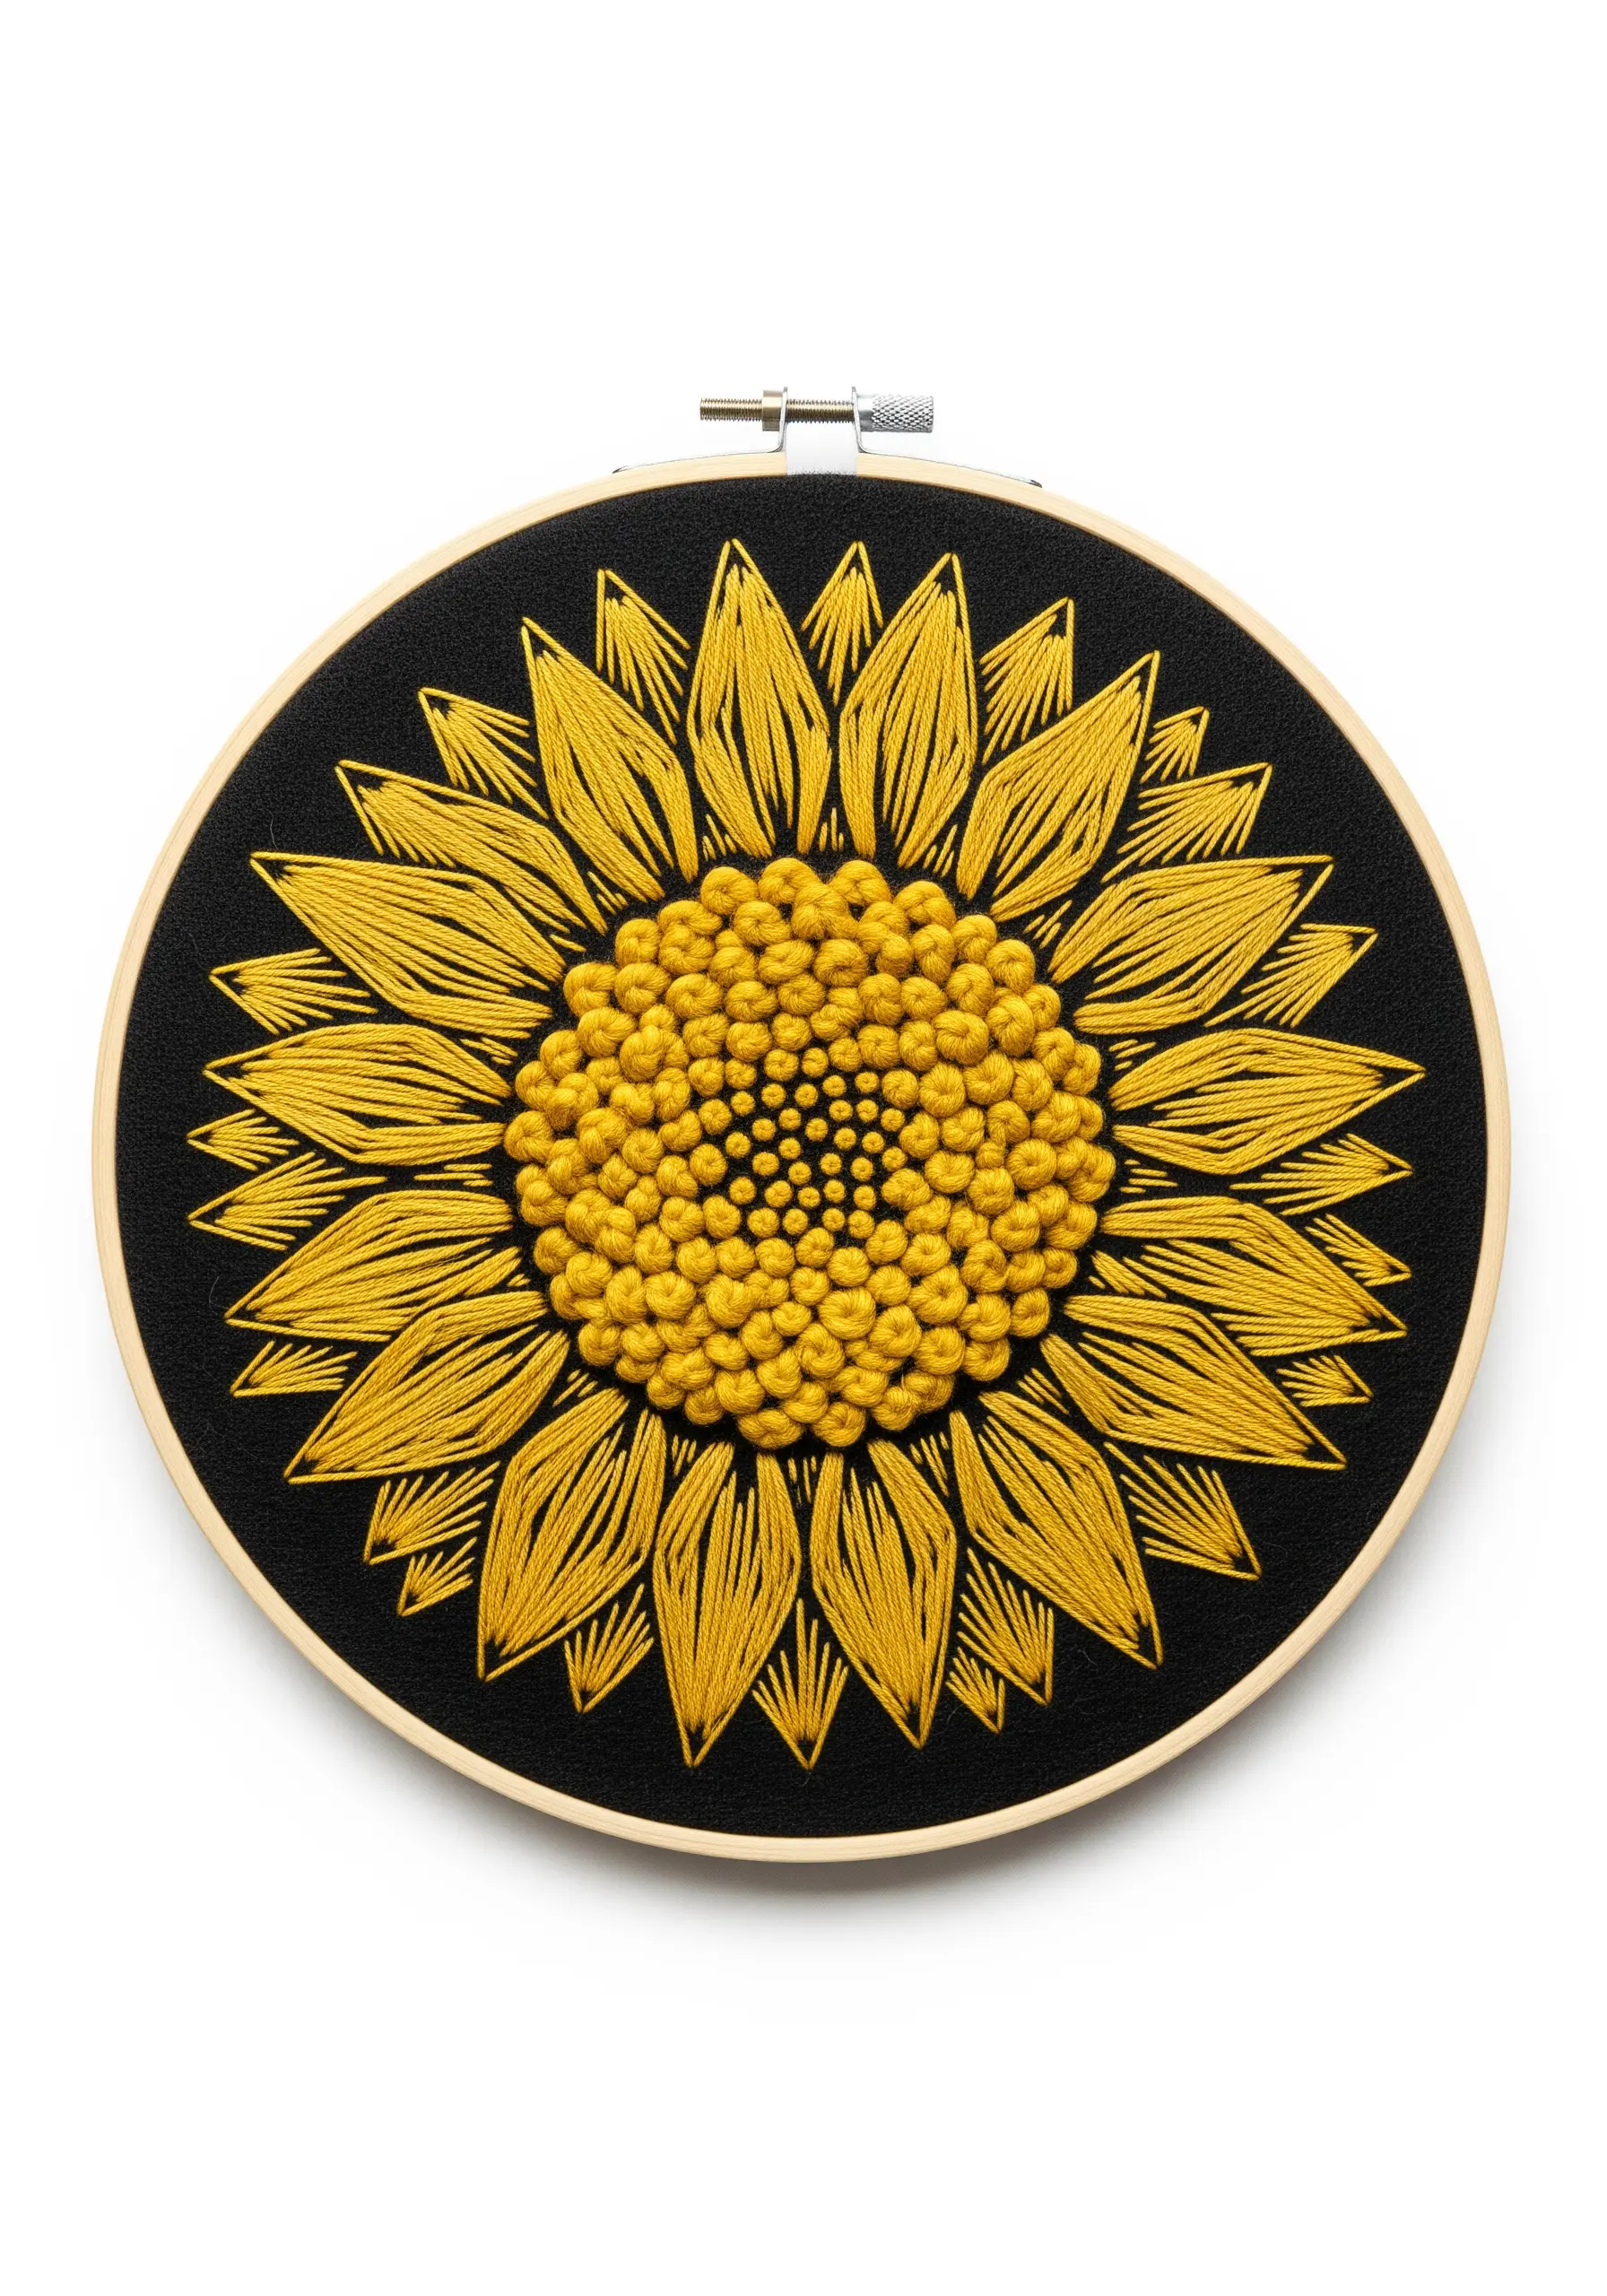
To make a single color feel incredibly vibrant, place it on a starkly contrasting background.
A brilliant yellow on deep black fabric creates an electric effect that immediately draws the eye and makes the color sing.
Use a long-and-short stitch for the petals to add texture and subtle light play.
For the center, pack French knots of varying sizes closely together to build a dense, seed-like texture.
This combination of high-contrast color and varied texture makes the design leap off the fabric.
16. Create Delicate Sprays with Clustered Knots
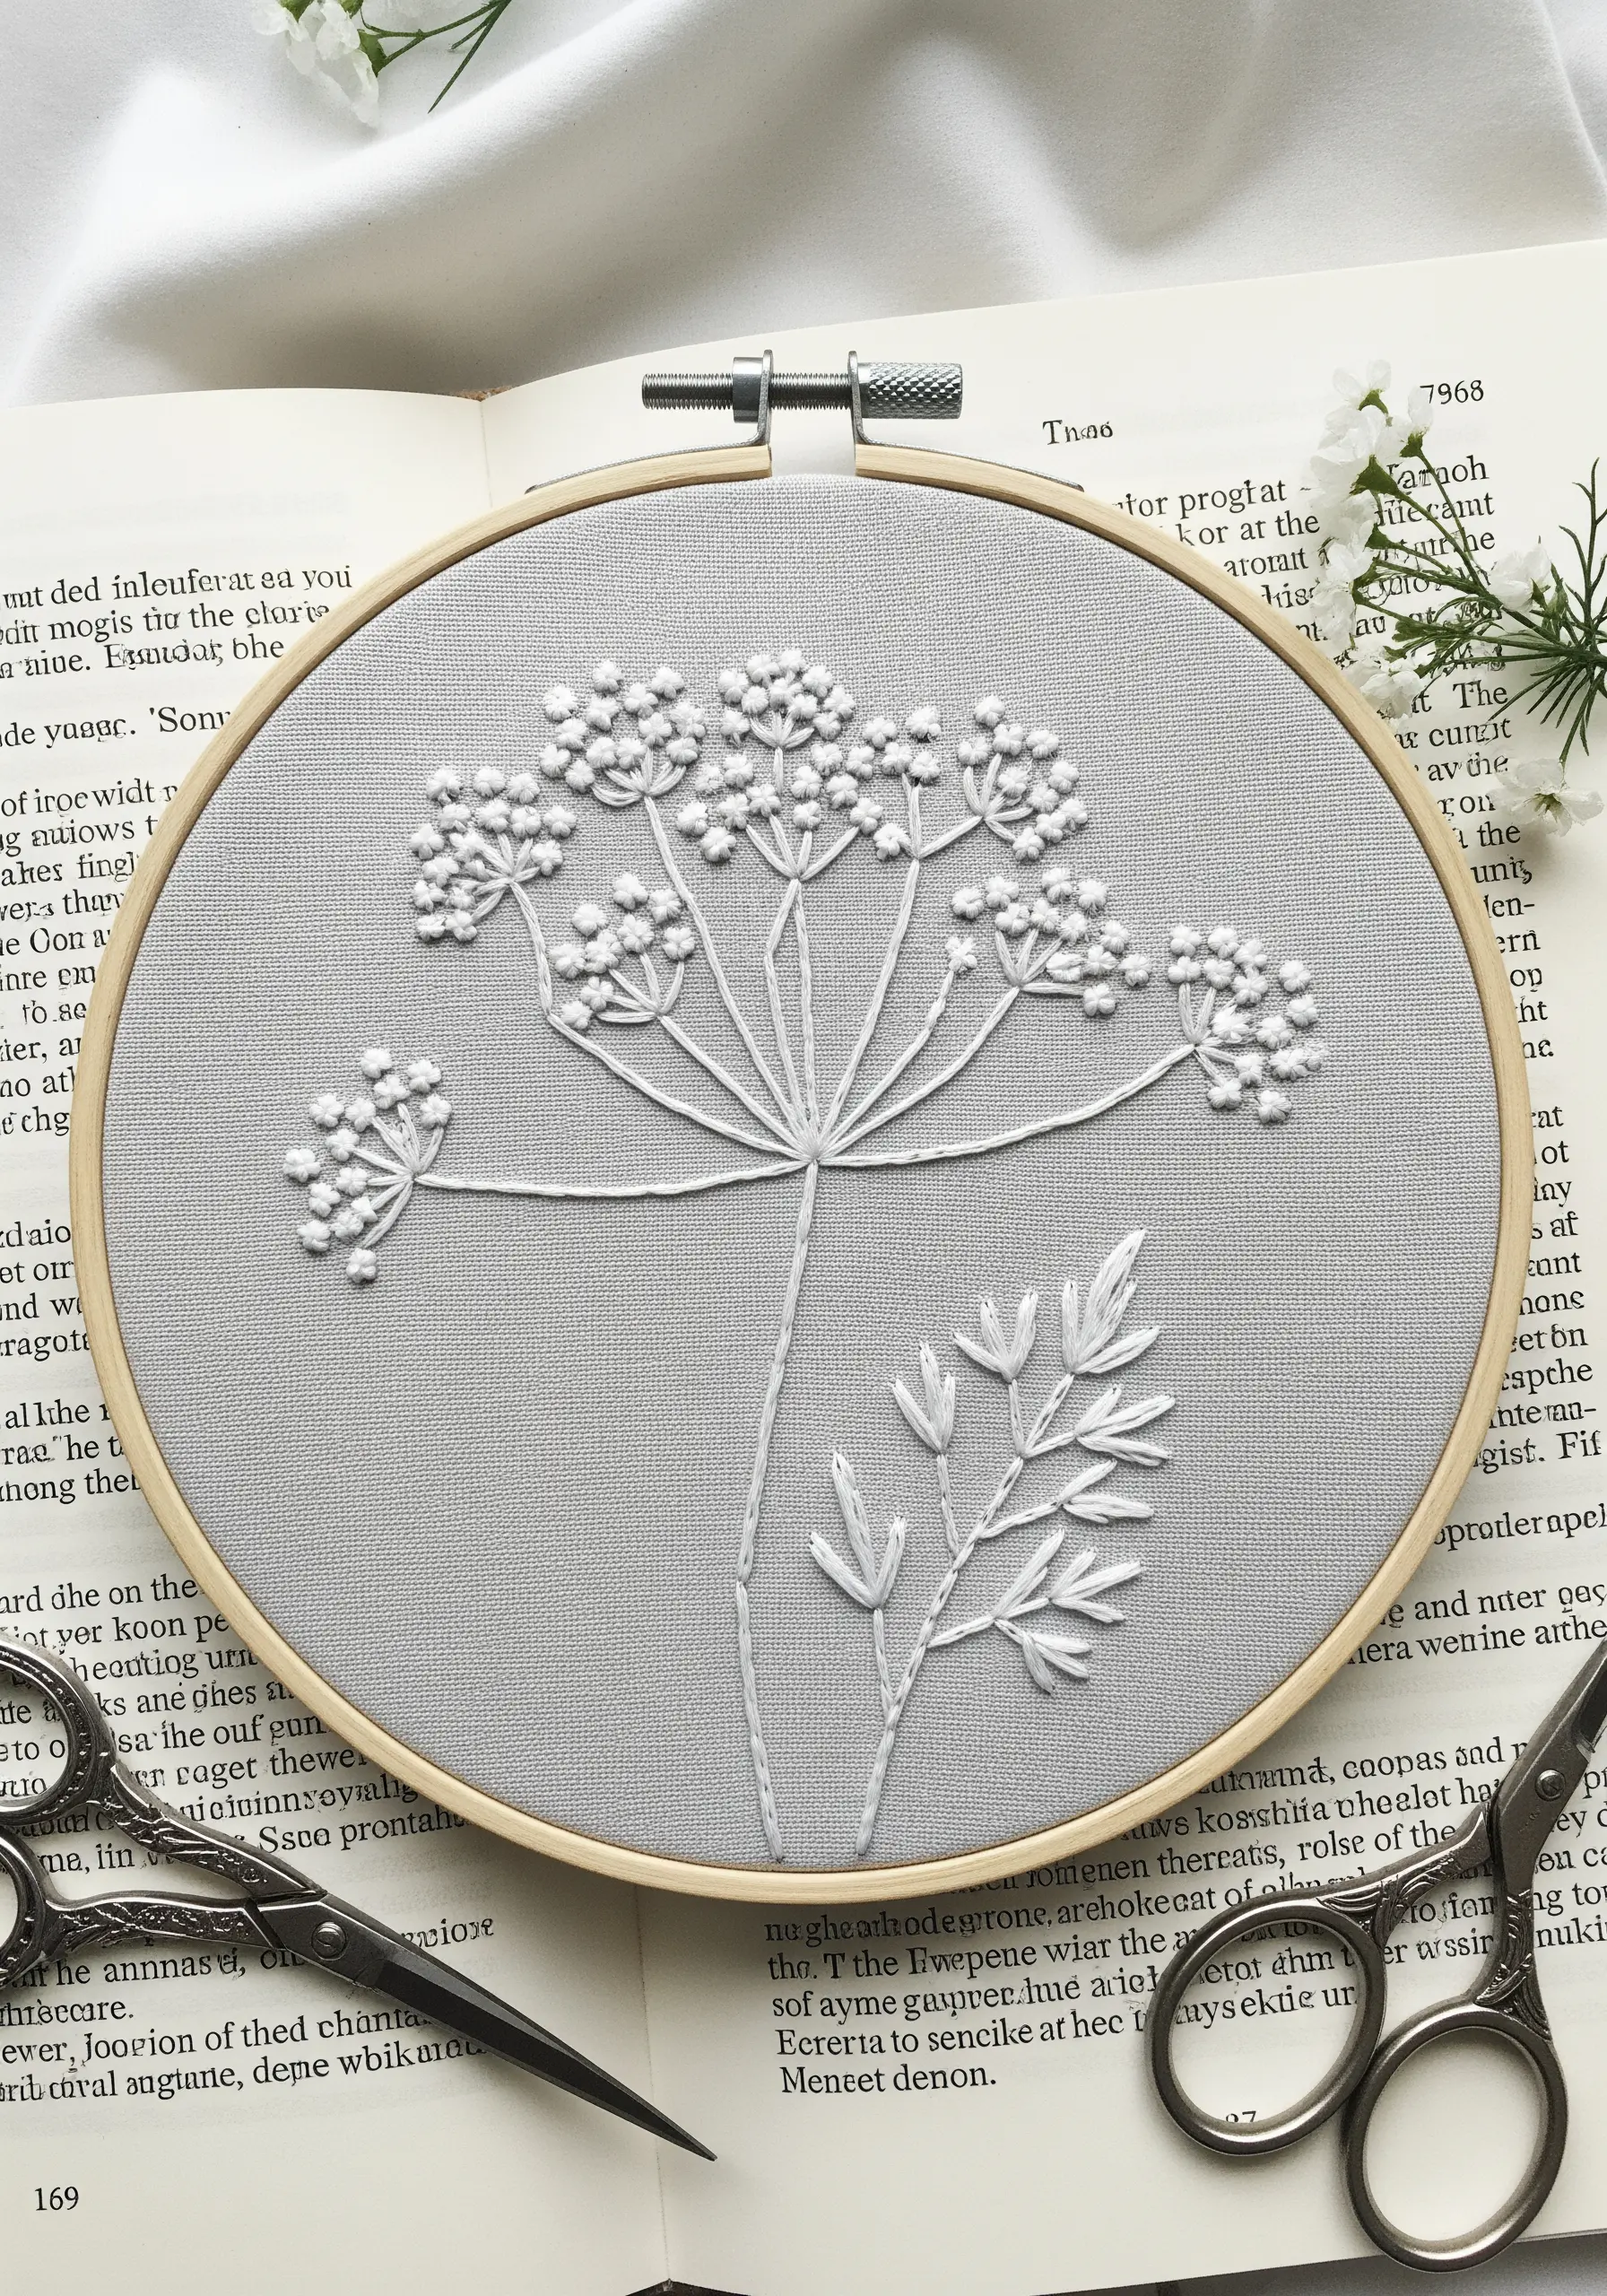
Capture the intricate, airy structure of Queen Anne’s Lace by focusing on creating delicate clusters.
Use tiny French knots or seed stitches for the individual flowers, grouping them into small umbels at the end of thin stems.
Use a single strand of white floss for the stems (a split stitch works well) and two strands for the knots to give them just enough presence without looking heavy.
This technique is all about creating texture through repetition, resulting in delicate line art embroidery that feels detailed yet is simple to execute.
17. Integrate Watercolor for Soft, Abstract Backgrounds
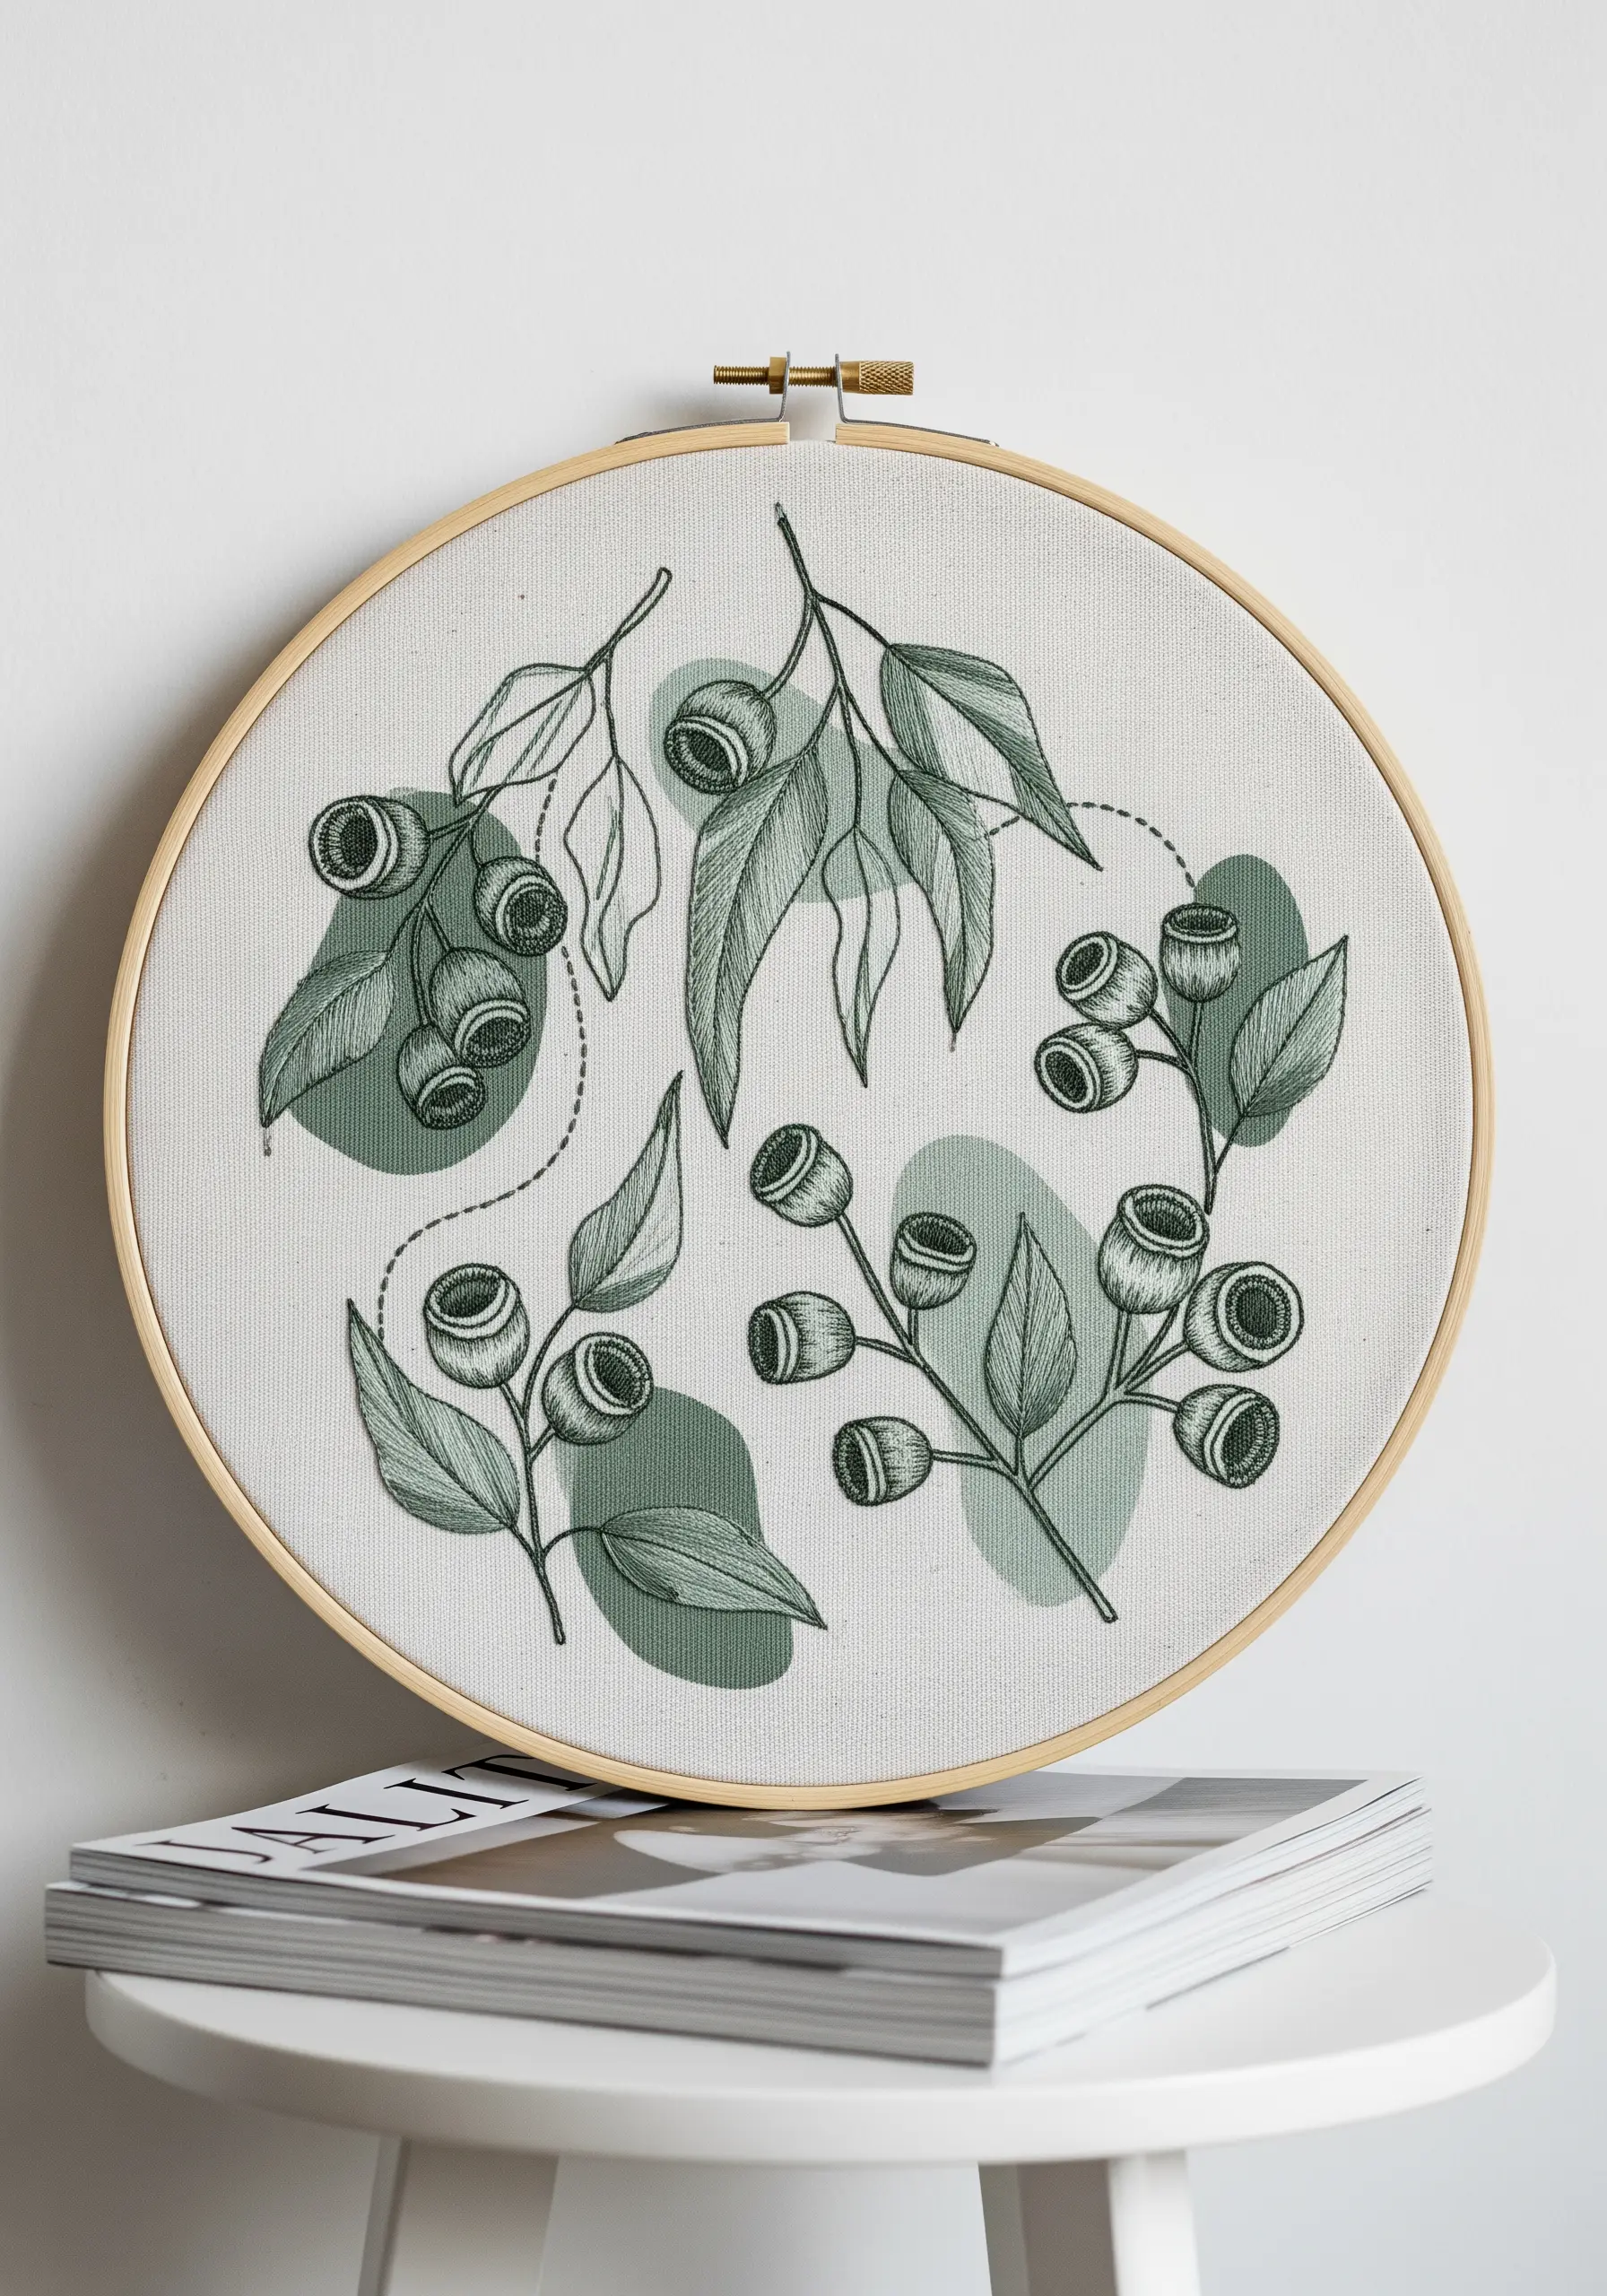
Add a layer of softness and depth to your linework by combining it with watercolor paint.
Lightly paint abstract blocks of color onto your fabric where the leaves will be, and let it dry completely before stretching it in the hoop.
Then, stitch your eucalyptus outlines directly over the painted shapes using a simple backstitch.
The thread provides crisp definition, while the watercolor adds a gentle, atmospheric quality that stitching alone cannot achieve.
This method is a beautiful entry into mixed-media crafts with embroidery.
18. Embrace Raw Edges for an Organic, Artistic Finish
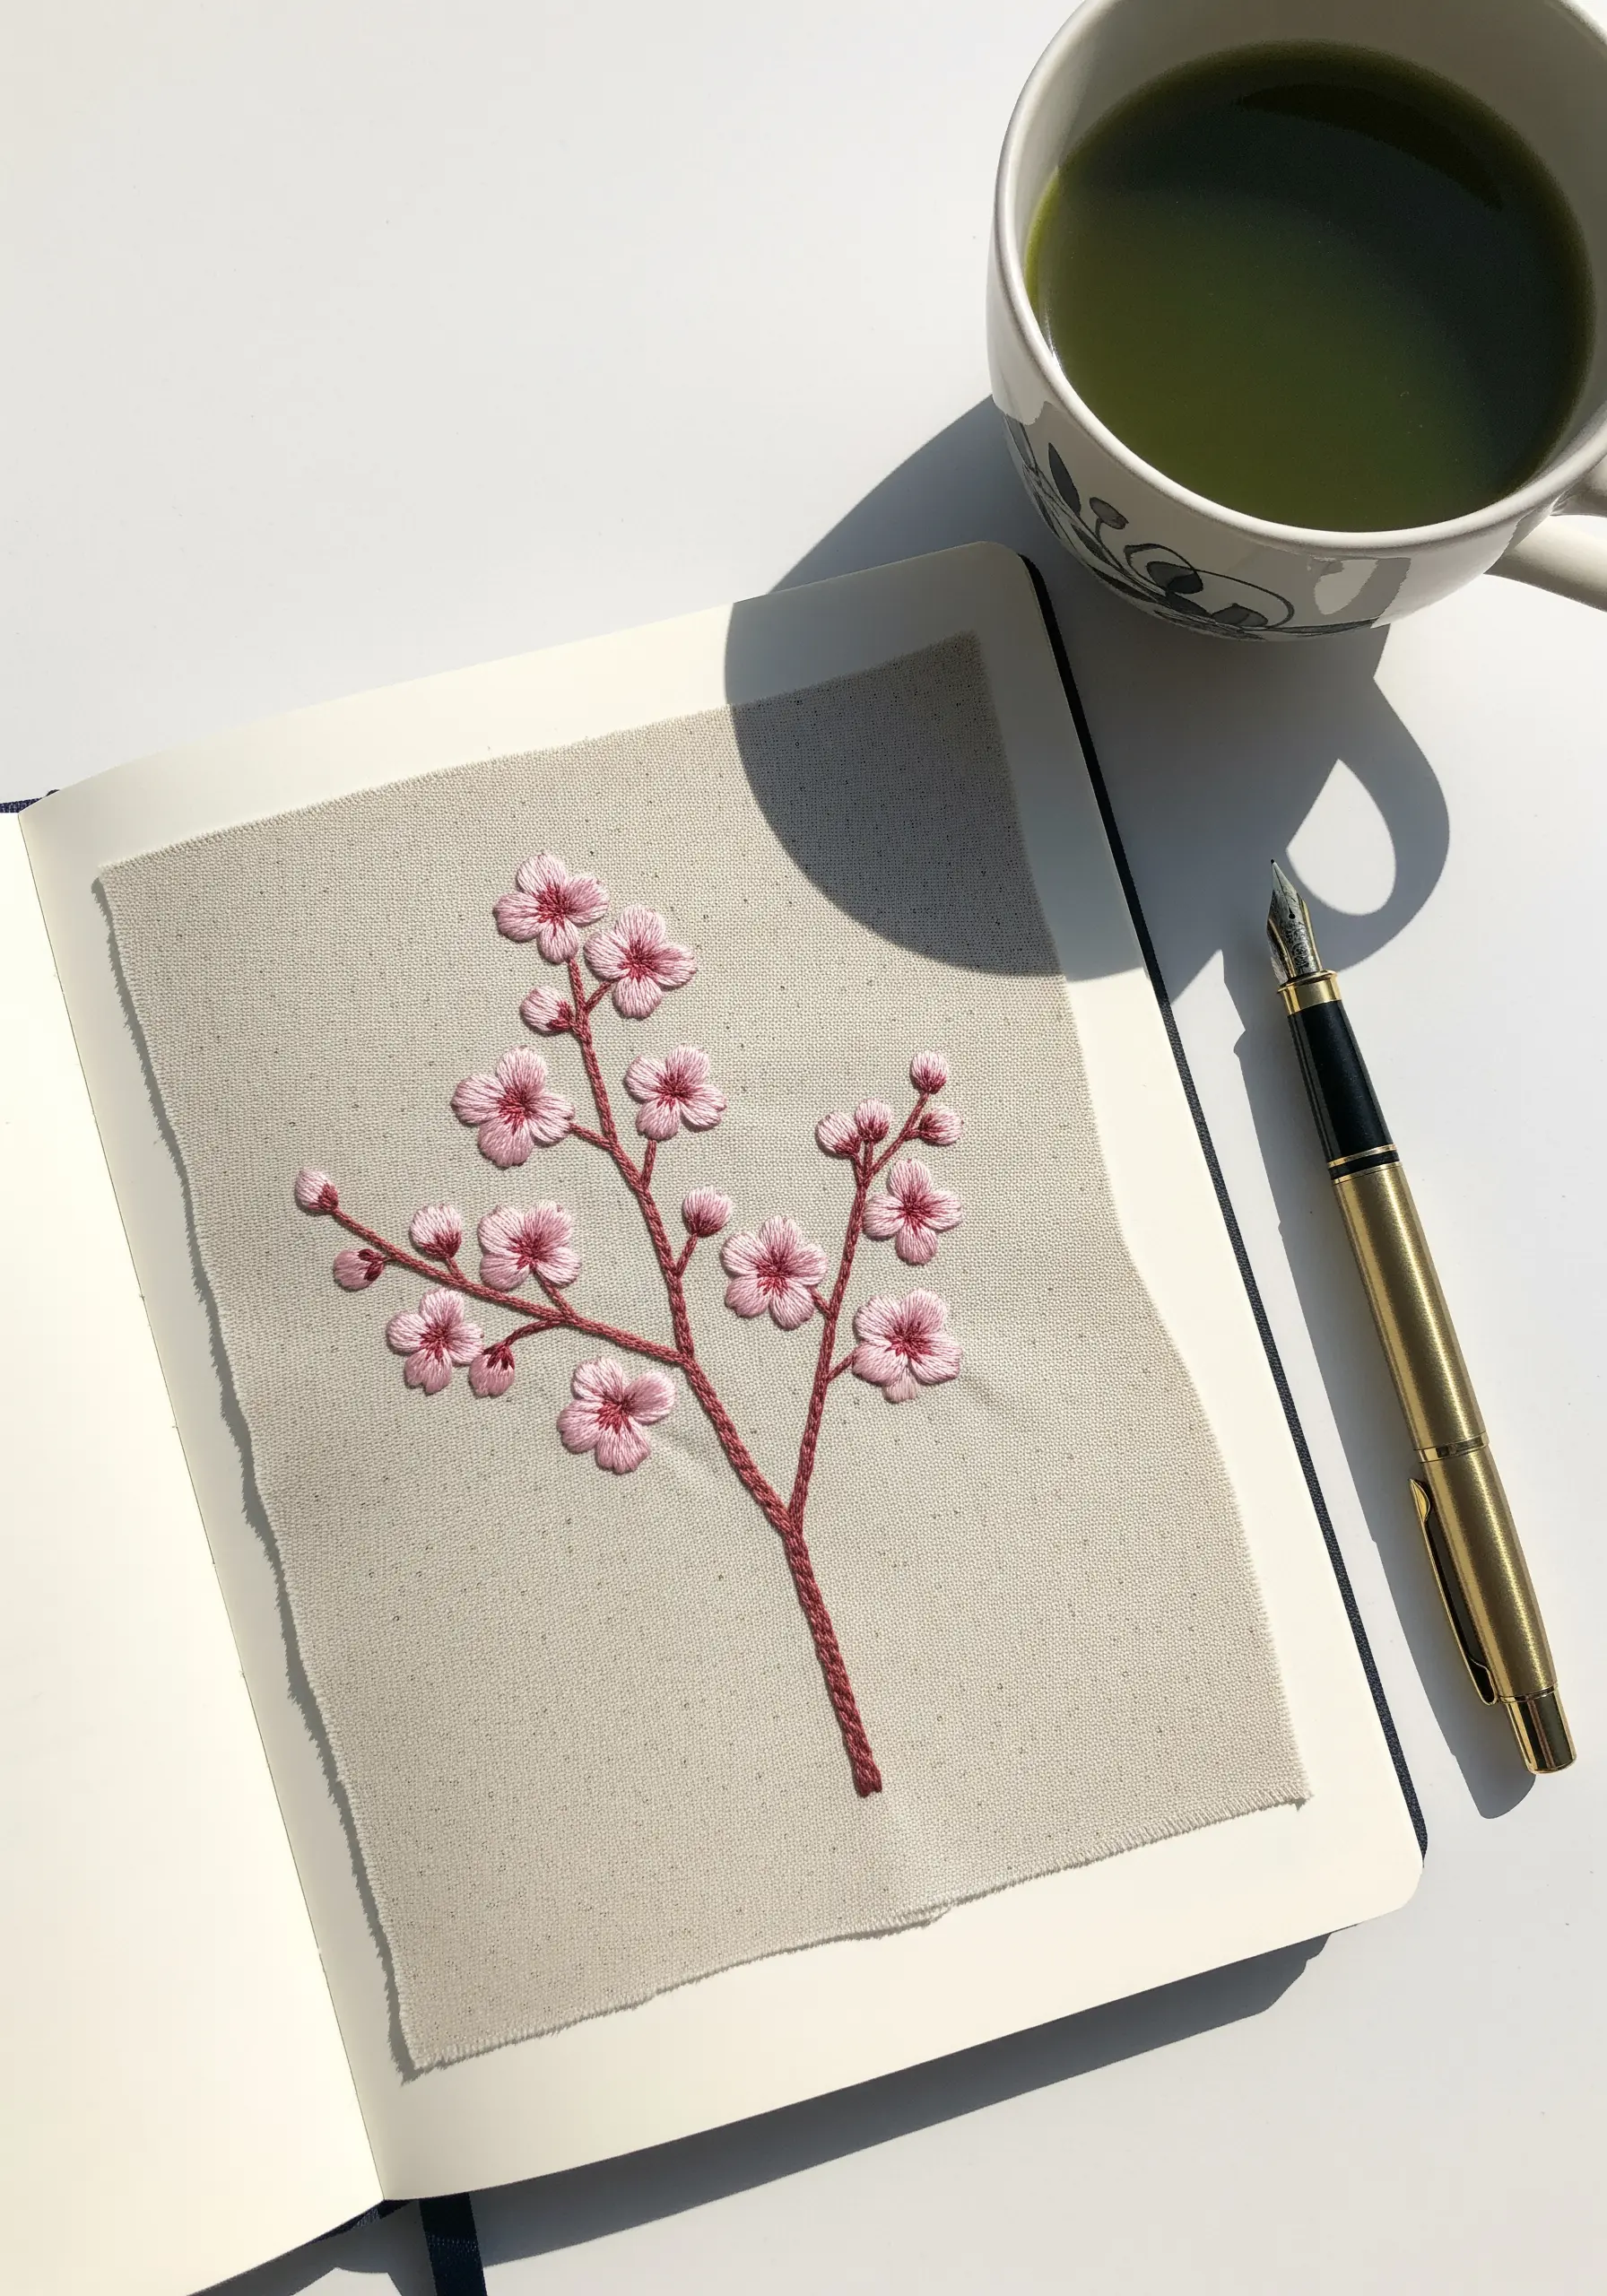
Move beyond the perfect circle of the hoop by stitching on a piece of fabric with frayed, raw edges.
This simple choice gives your work an intentional, deconstructed feel that is both modern and rustic.
For delicate cherry blossoms, use satin stitch for the petals and French knots for the centers, with a wrapped stem stitch for a textured branch.
Mount the finished piece on high-quality paper or in a floating frame to highlight the fabric’s unique texture.
This presentation makes even easy small embroidery patterns feel like precious artifacts.


