
When you look at the ocean, what do you see? Not just water, but movement, texture, and light. Your embroidery can capture that same depth and feeling, moving beyond simple outlines to tell a richer story.
This is where your needle becomes more than a tool—it becomes a way to translate the rhythm of a wave or the intricate structure of a shell into thread. It’s about choosing a stitch not just for how it looks, but for what it does. Does it create shadow? Does it build dimension? Does it reflect light?
Here, you’ll find twenty ideas designed to help you think differently about your stitches. We’ll explore how to use texture, color blending, and composition to create ocean-inspired art that feels alive, intentional, and uniquely yours. Let’s begin.
1. Capturing the Crest of a Wave with Textural Knots
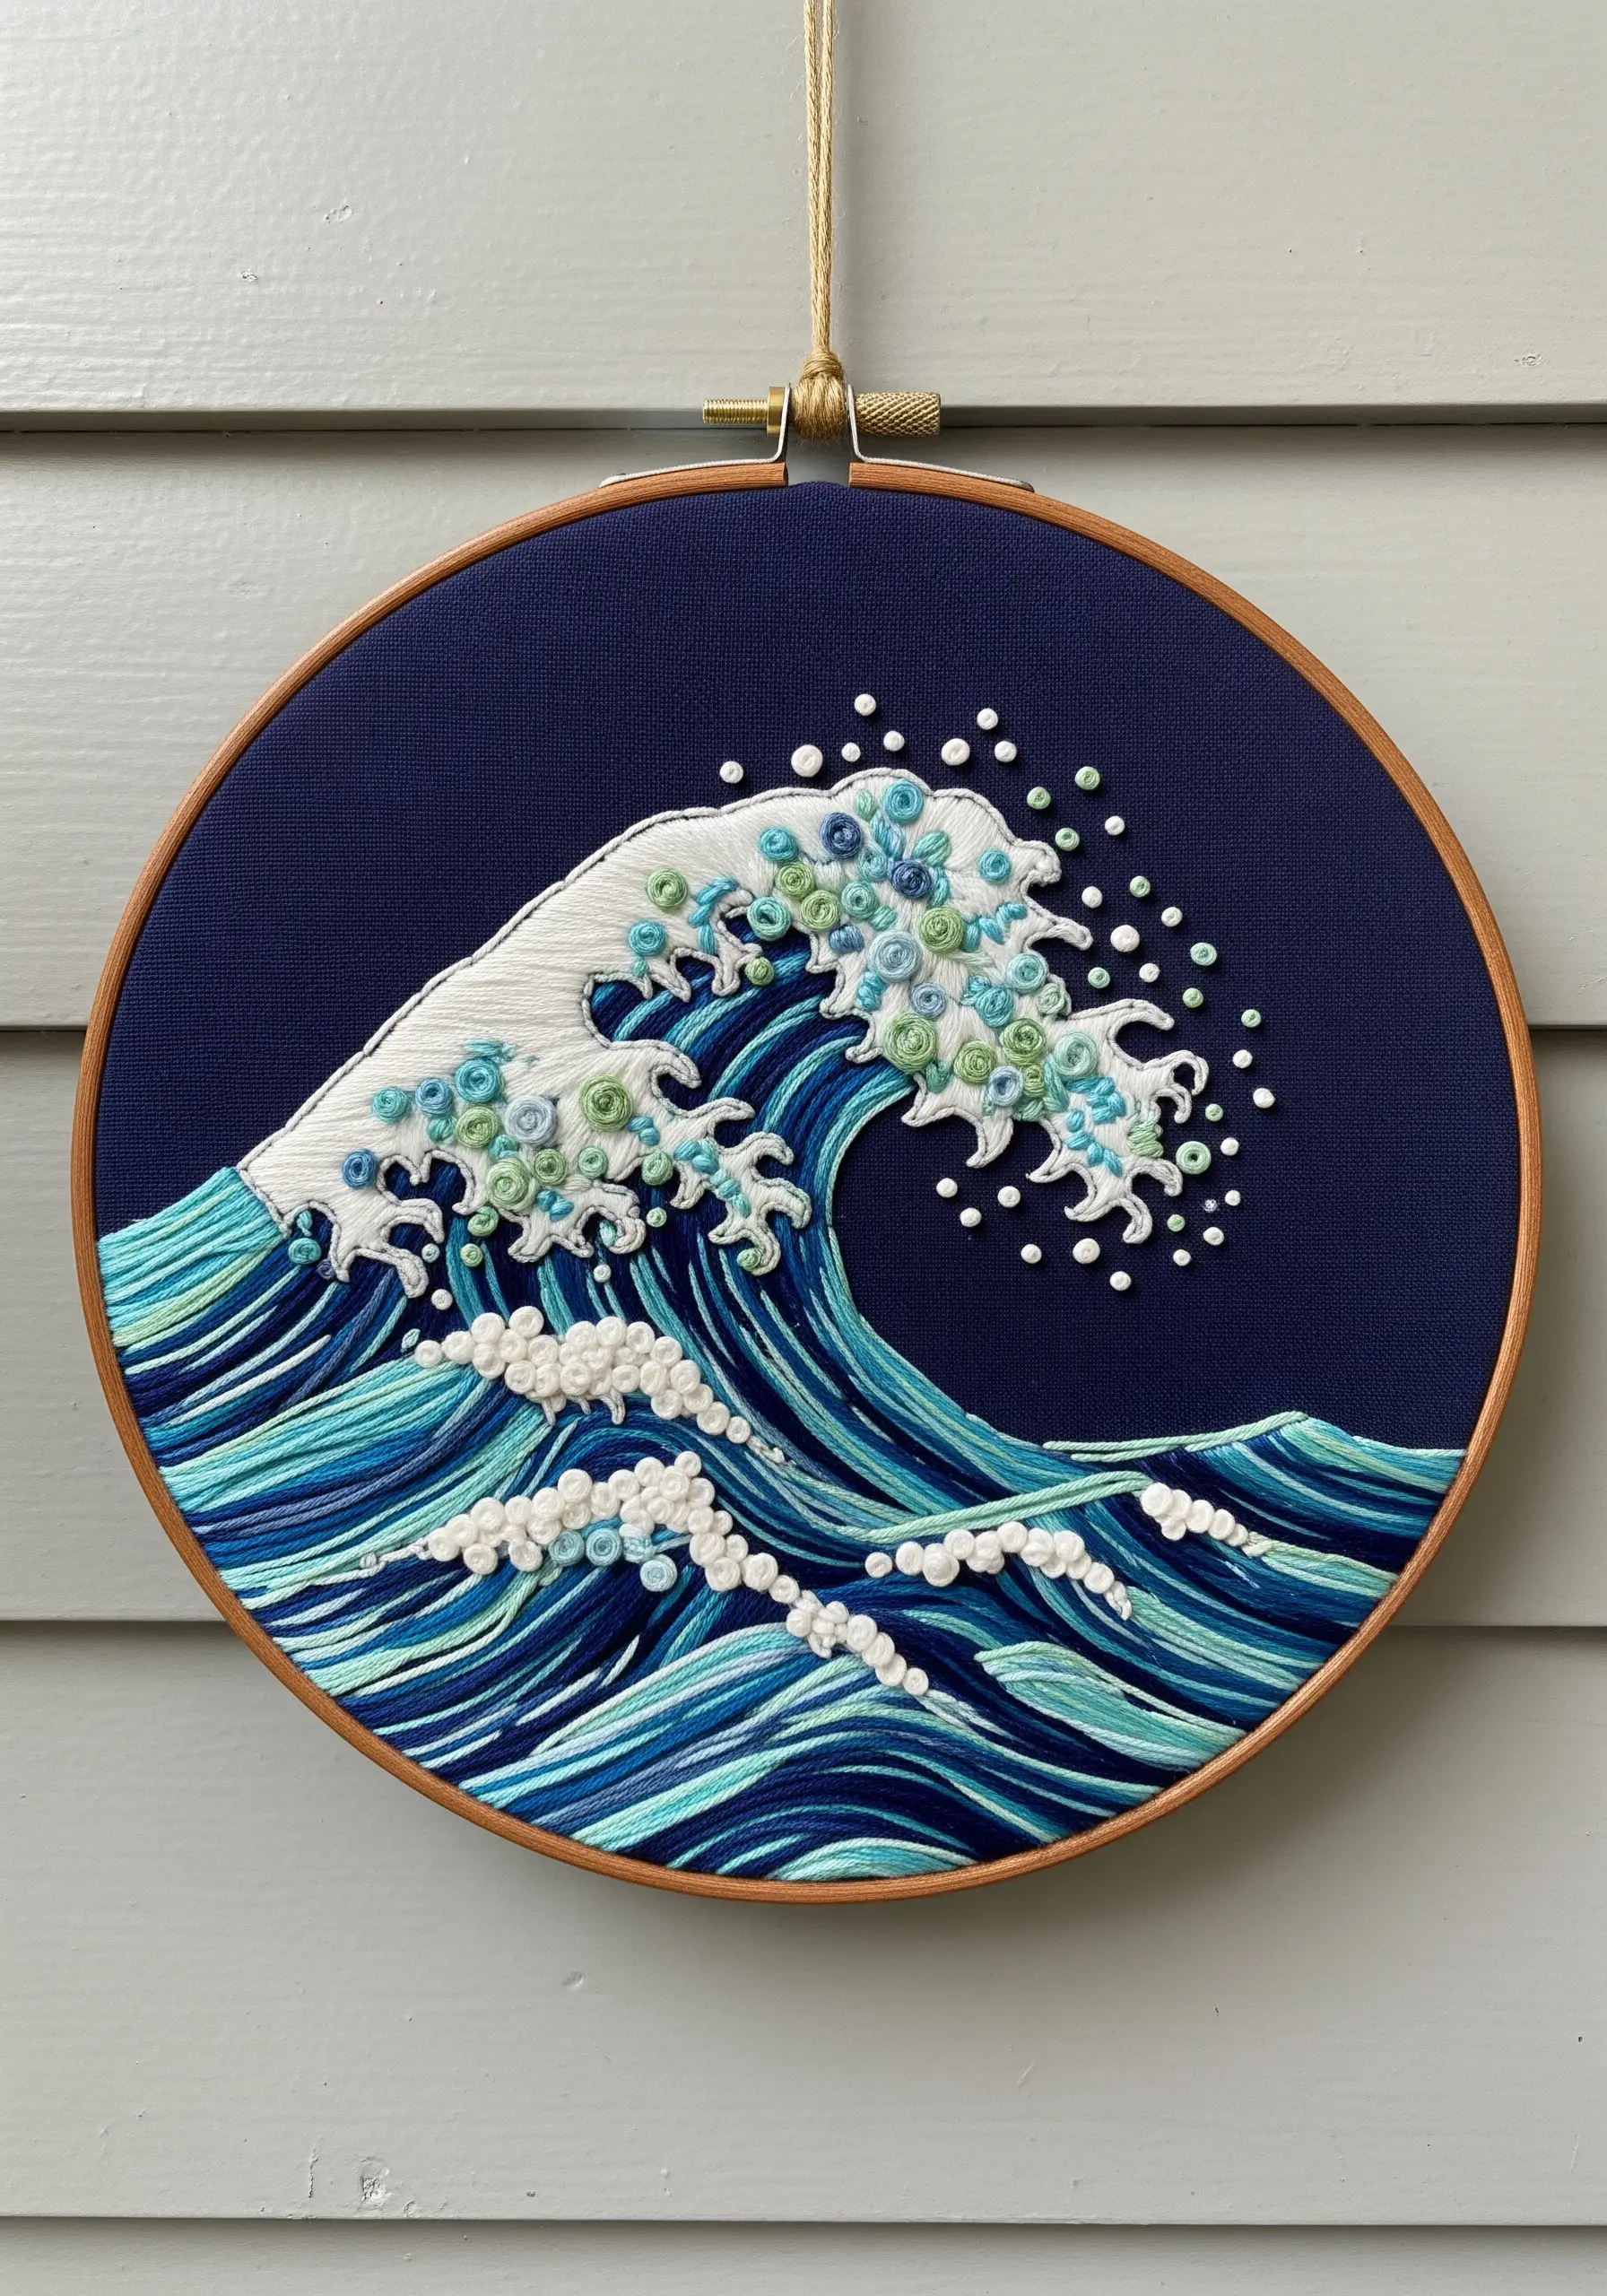
To give sea foam its characteristic volume and chaos, combine directional satin stitches for the wave’s body with dense clusters of French knots at the crest.
Vary the number of wraps and thread strands for your knots—use three strands for larger bubbles and a single strand for delicate spray.
This contrast between the smooth flow of the wave and the bumpy texture of the foam creates dynamic, realistic movement.
Stitching on a dark navy cotton makes the white, blue, and seafoam green threads appear more luminous.
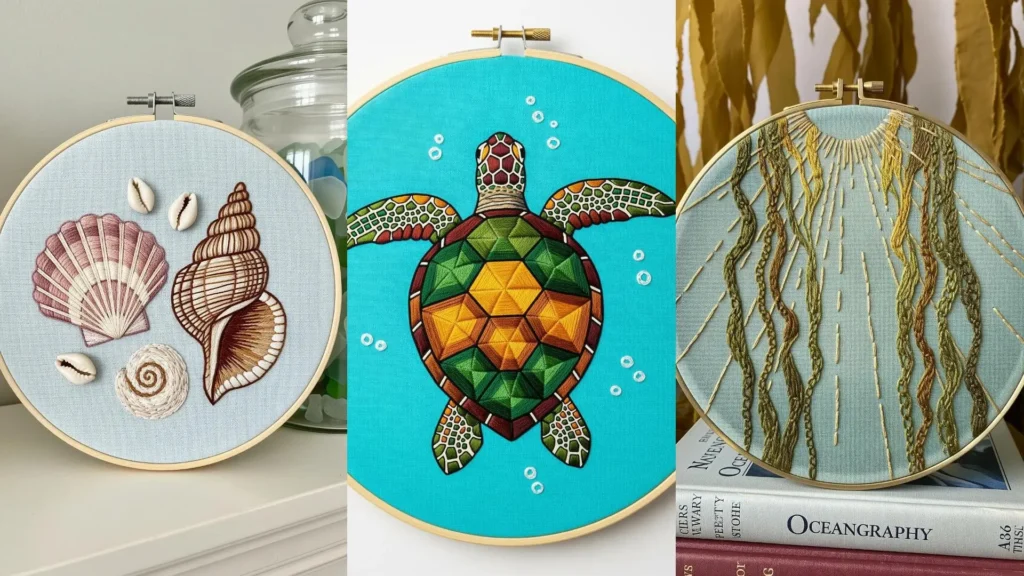
2. Defining Spiral Shells with Whipped Backstitch

For the clean, graphic lines of a nautilus shell, first outline each segment with a simple backstitch.
Then, wrap that backstitch with a darker or metallic thread—a technique called whipping—to create a smooth, raised edge that defines the form.
Fill each segment with long, angled satin stitches using a single strand of floss, transitioning from cream to bright white to mimic a natural, pearlescent gradient.
This method provides architectural precision without adding unnecessary bulk to the design.
3. Sculpting a Coral Reef with High-Relief Stitches
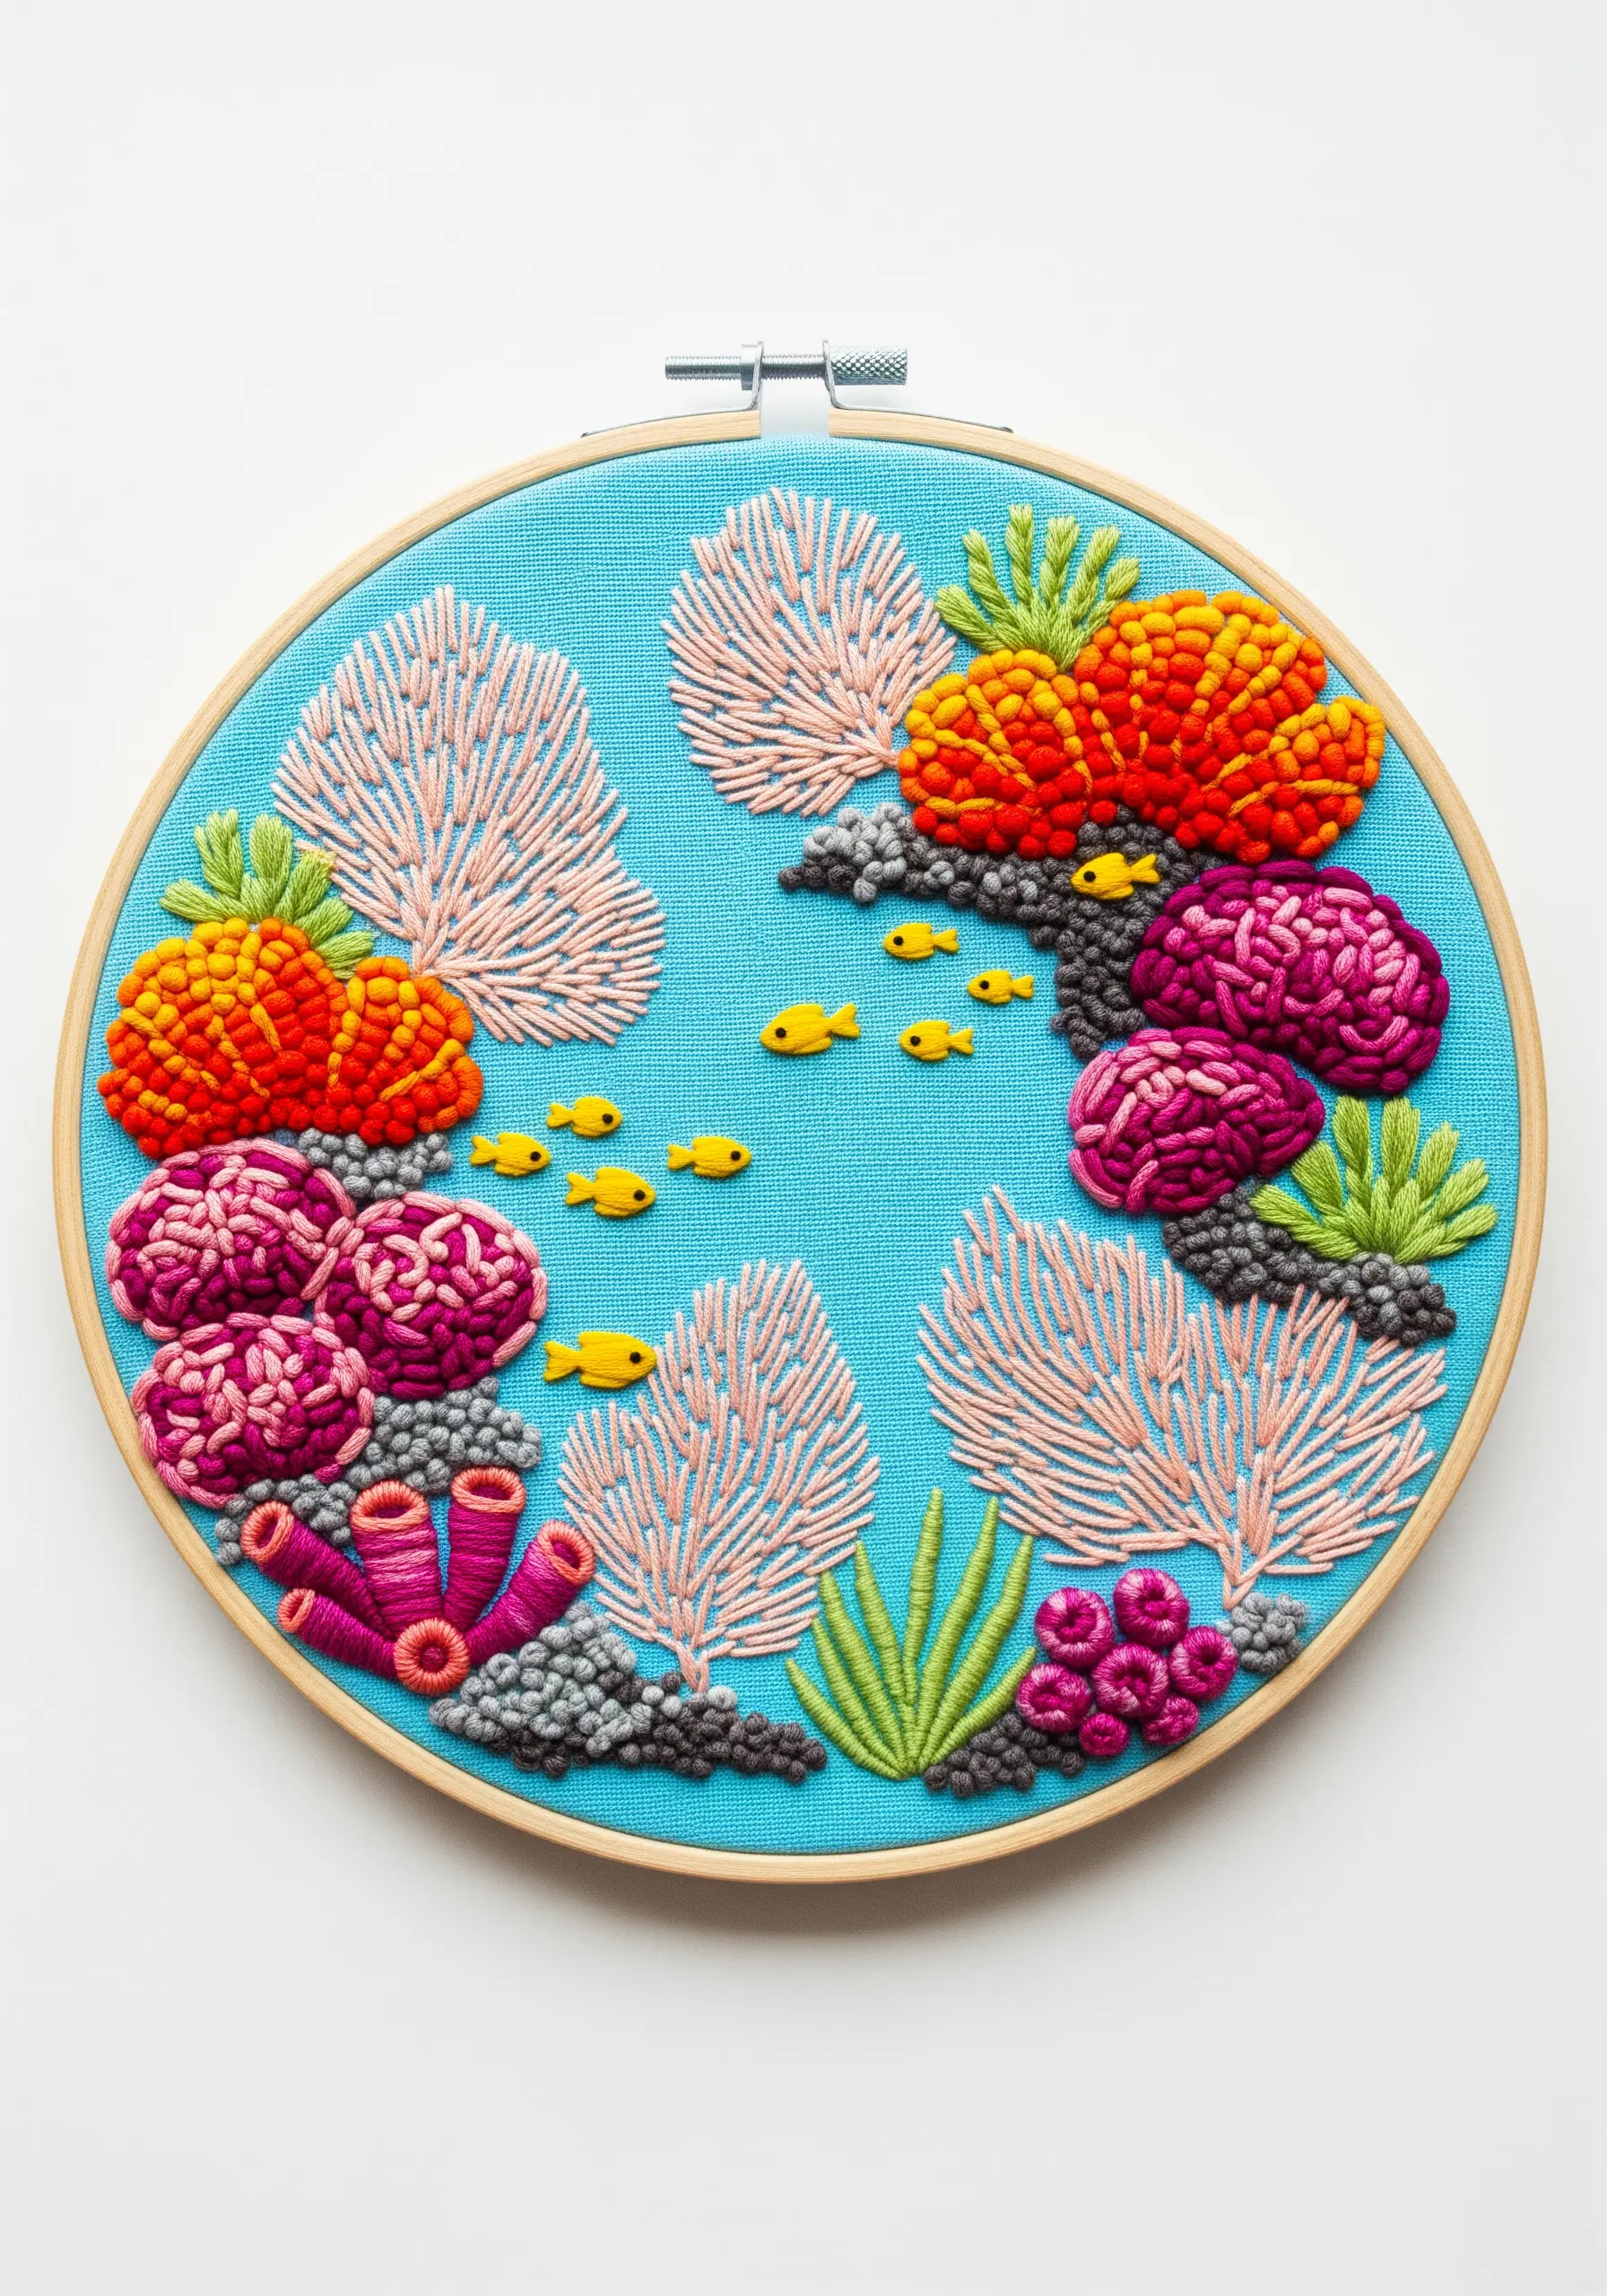
Move beyond flat fills to build a truly tactile underwater world.
Use tightly packed French knots in vibrant oranges and magentas to form brain coral, overlapping them to create a dense, bumpy surface.
For the delicate sea fans, use radiating straight stitches or fern stitch in a lighter, contrasting color like pale pink.
This combination of high- and low-profile stitches is key to creating a layered, high-texture embroidery piece that invites touch.
4. Illustrating Light Through a Kelp Forest
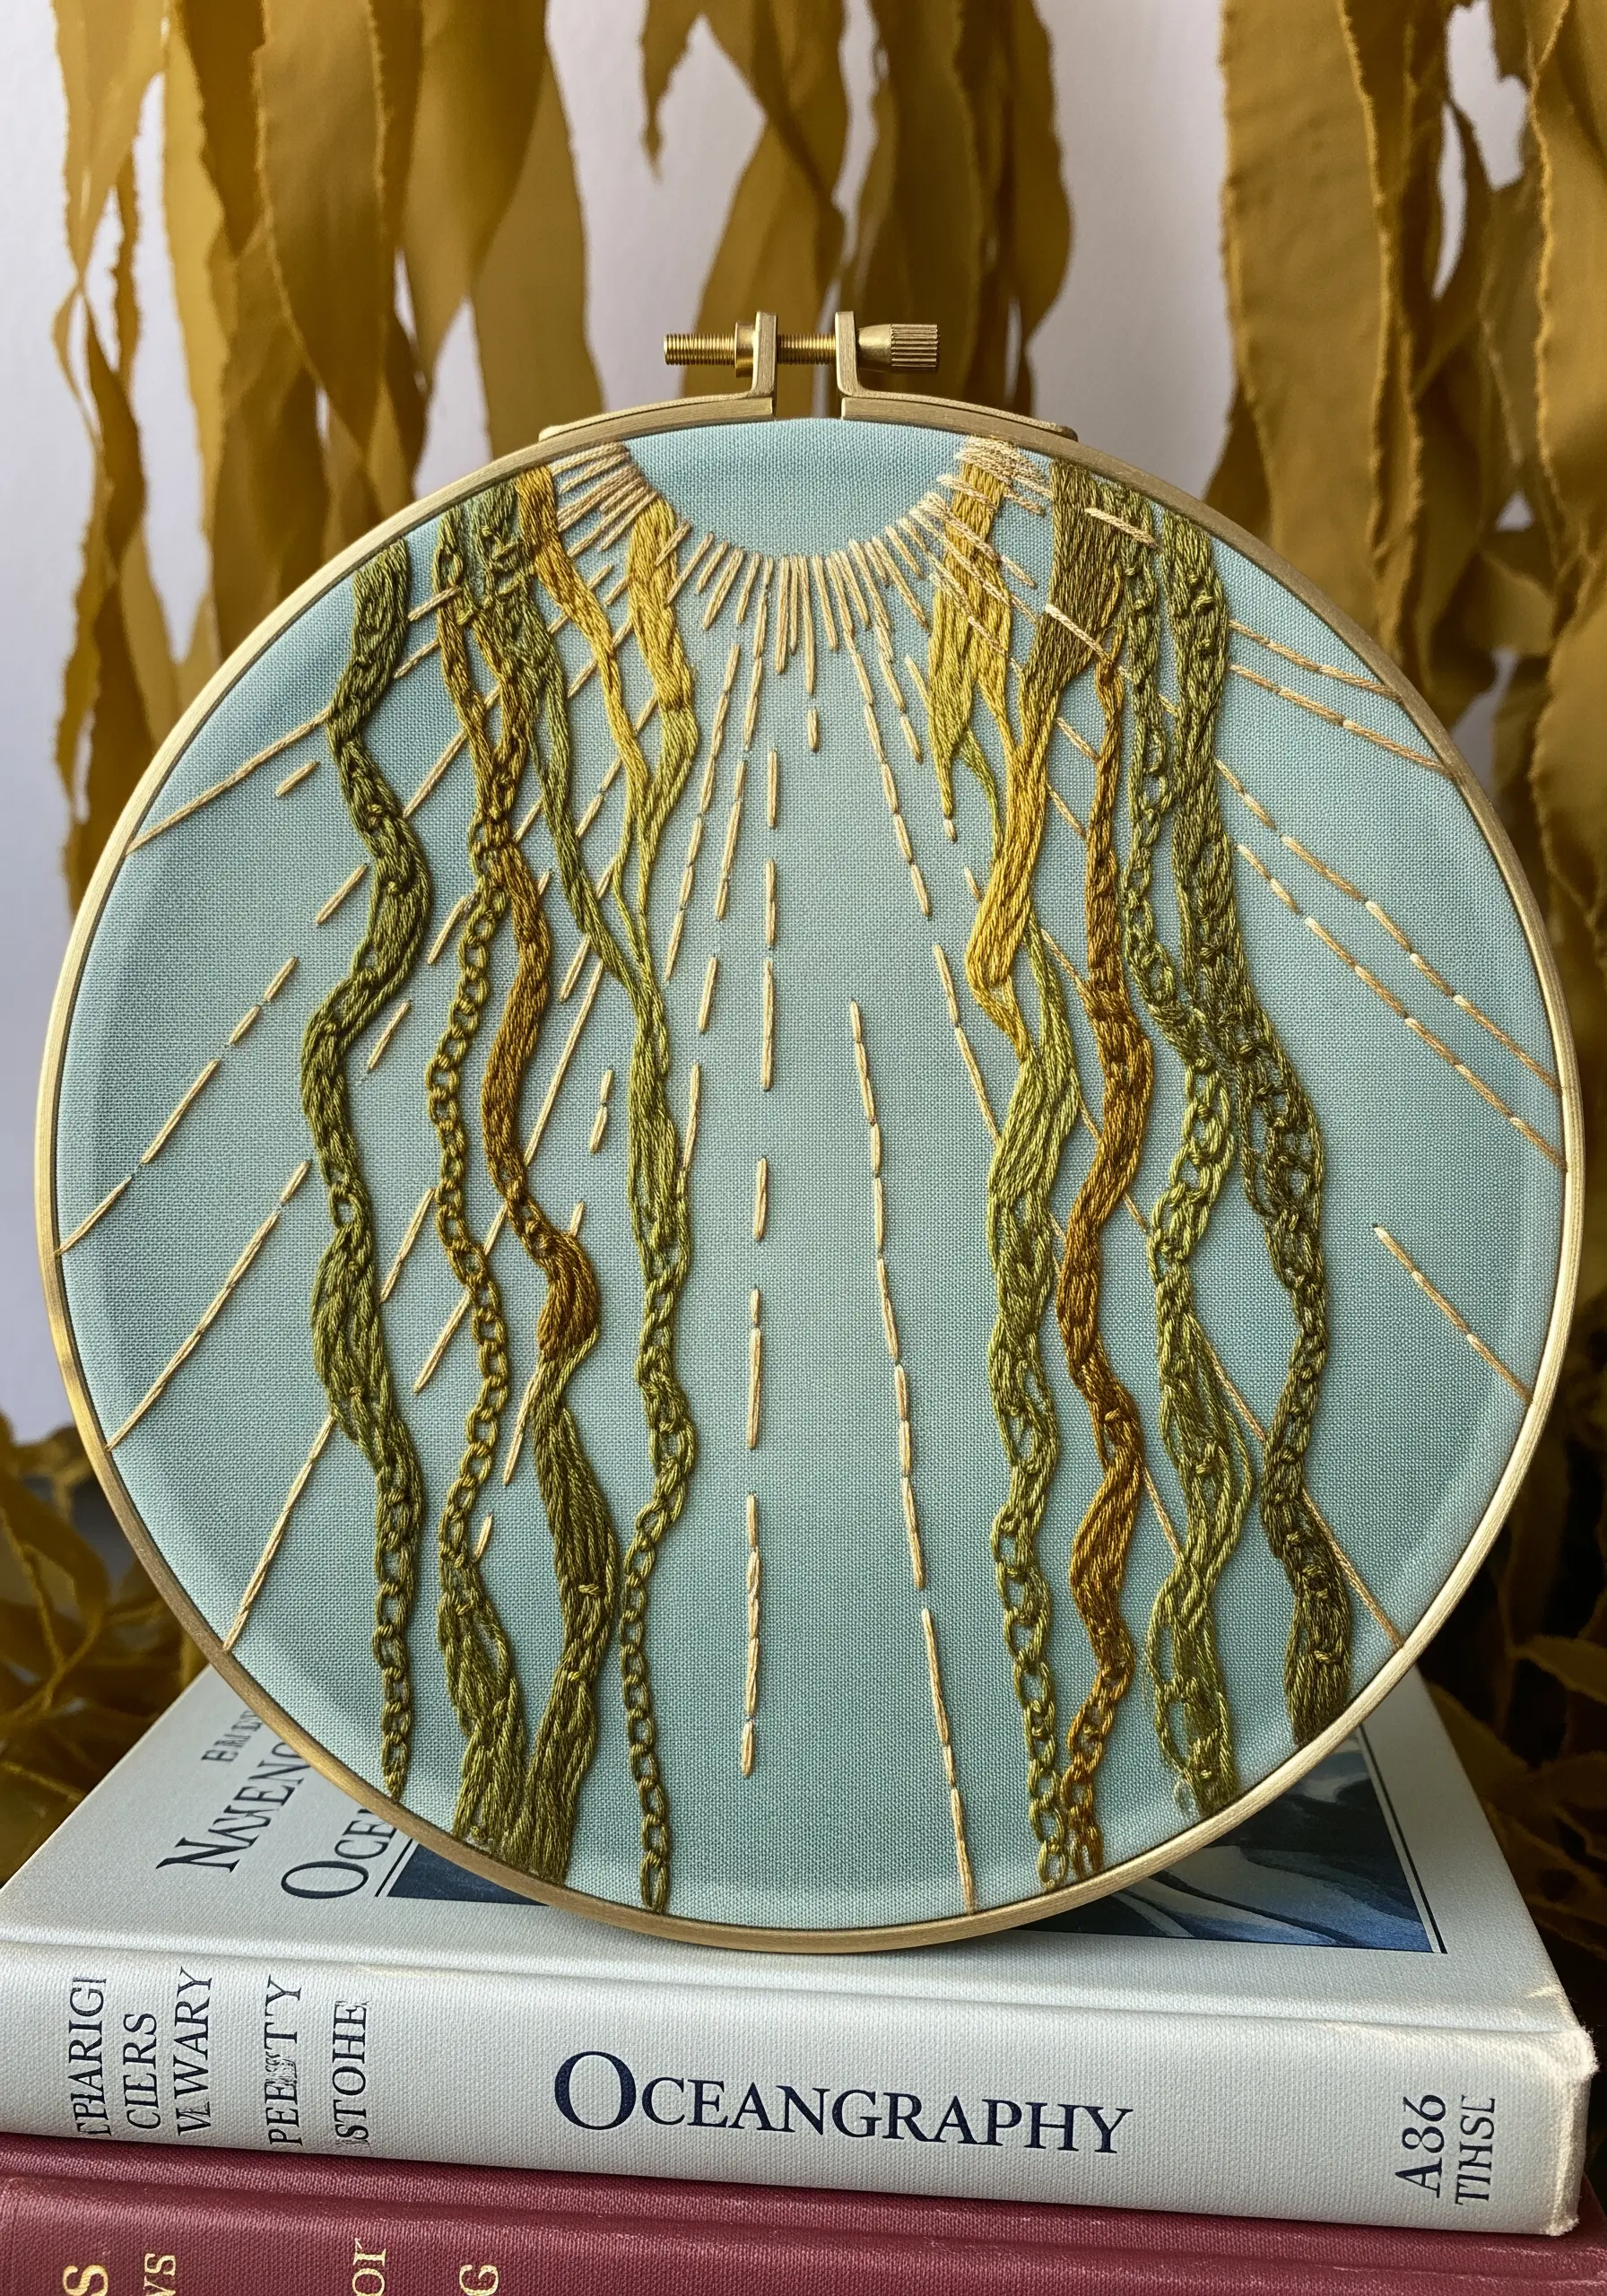
To capture the feeling of sunlight filtering through water, use single strands of metallic gold or pale yellow thread to create long, sparse straight stitches for the rays.
For the kelp itself, alternate between chain stitch and stem stitch using a variegated green-gold thread.
This combination creates natural-looking twists and turns without requiring constant color changes, perfectly suggesting gentle underwater movement.
The subtle shimmer of the metallic thread against the matte kelp adds a layer of quiet magic.
5. Fusing Fabric Appliqué and Stitch for a Sand Dollar
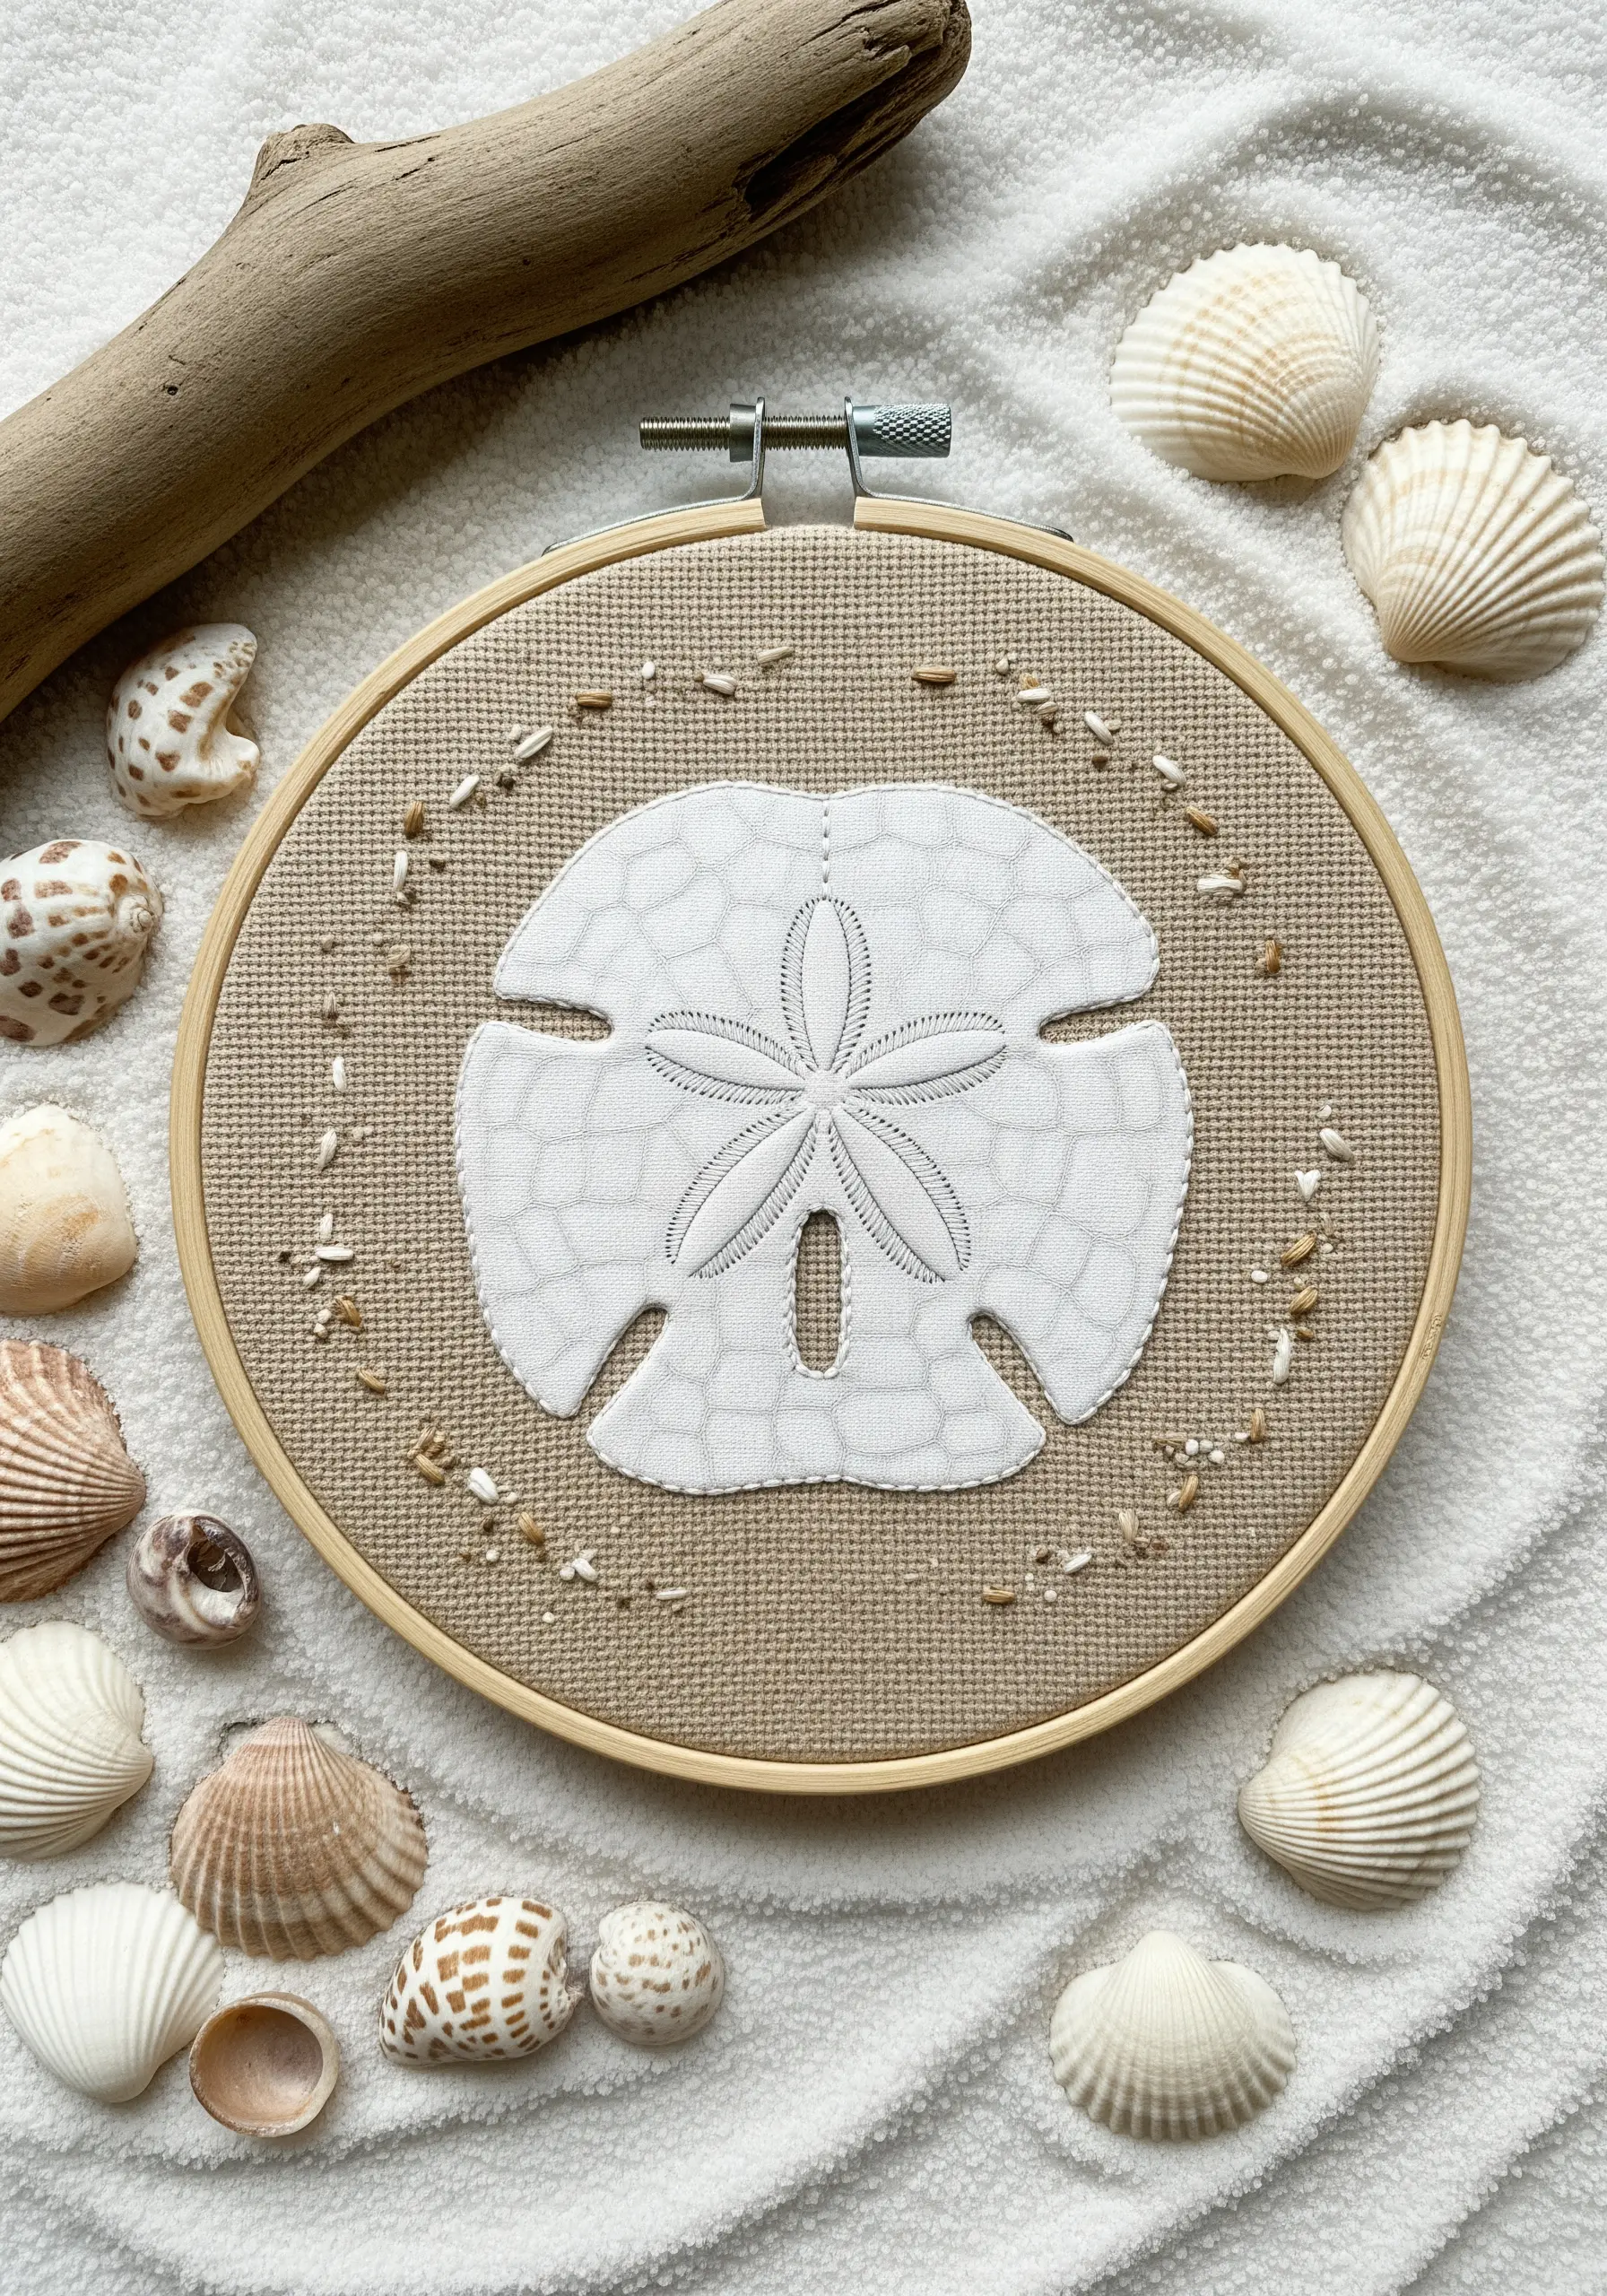
For a perfectly shaped sand dollar with subtle surface detail, begin with appliqué.
Cut the main shape from a piece of white or cream patterned fabric, tack it down with a fusible web, and secure the edges with a tiny running stitch.
Once the fabric is secure, add the central star motif and outlines using a simple backstitch directly onto the appliqué.
This fabric collage embroidery method gives you a crisp silhouette and adds a gentle layer of pattern and texture.
6. Stitching Moonlight on Water with Holographic Thread
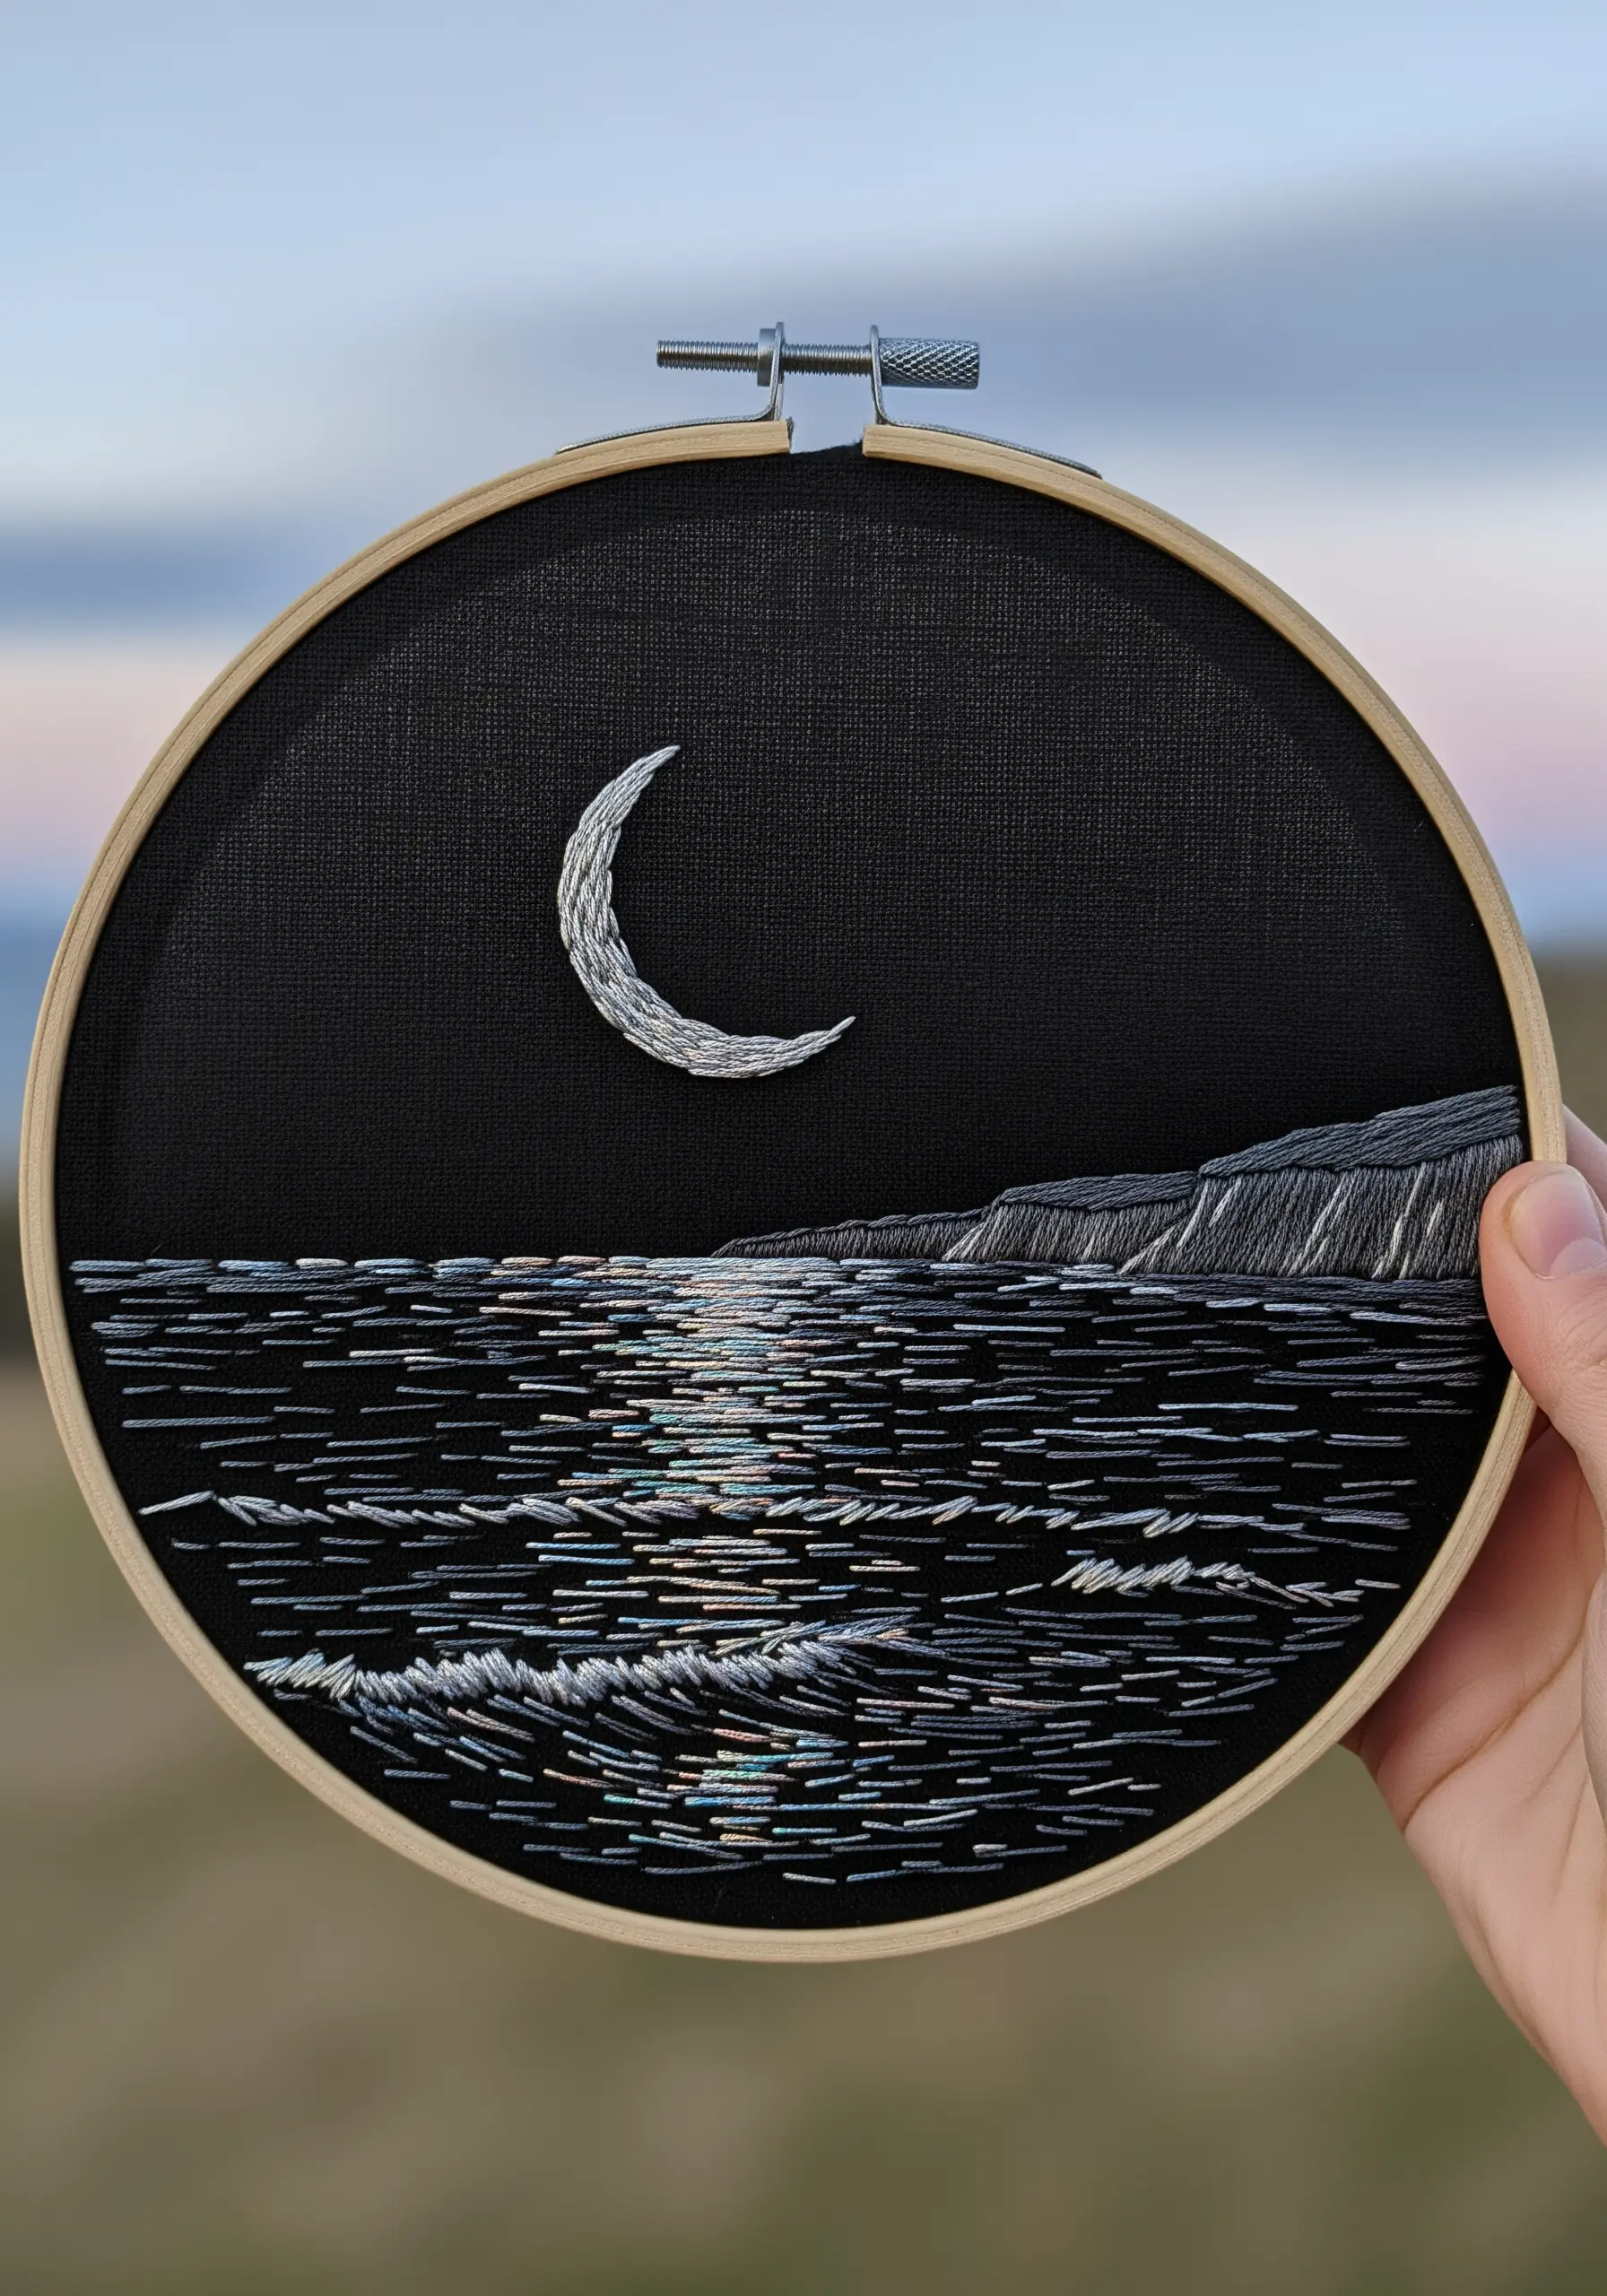
The secret to capturing the shimmer of a moonlit sea is your thread choice.
Use a holographic or variegated metallic floss for the water’s surface, laying down short, horizontal straight stitches in a scattered pattern.
The thread’s inherent color shifts will do the work for you, creating the illusion of light glinting off moving water.
Contrast this with the smooth, solid fill of the moon and cliffs, stitched with a standard cotton floss in long-and-short stitch, to make the water’s sparkle truly stand out against the dark fabric.
7. Creating Form in Shells with Thread Painting
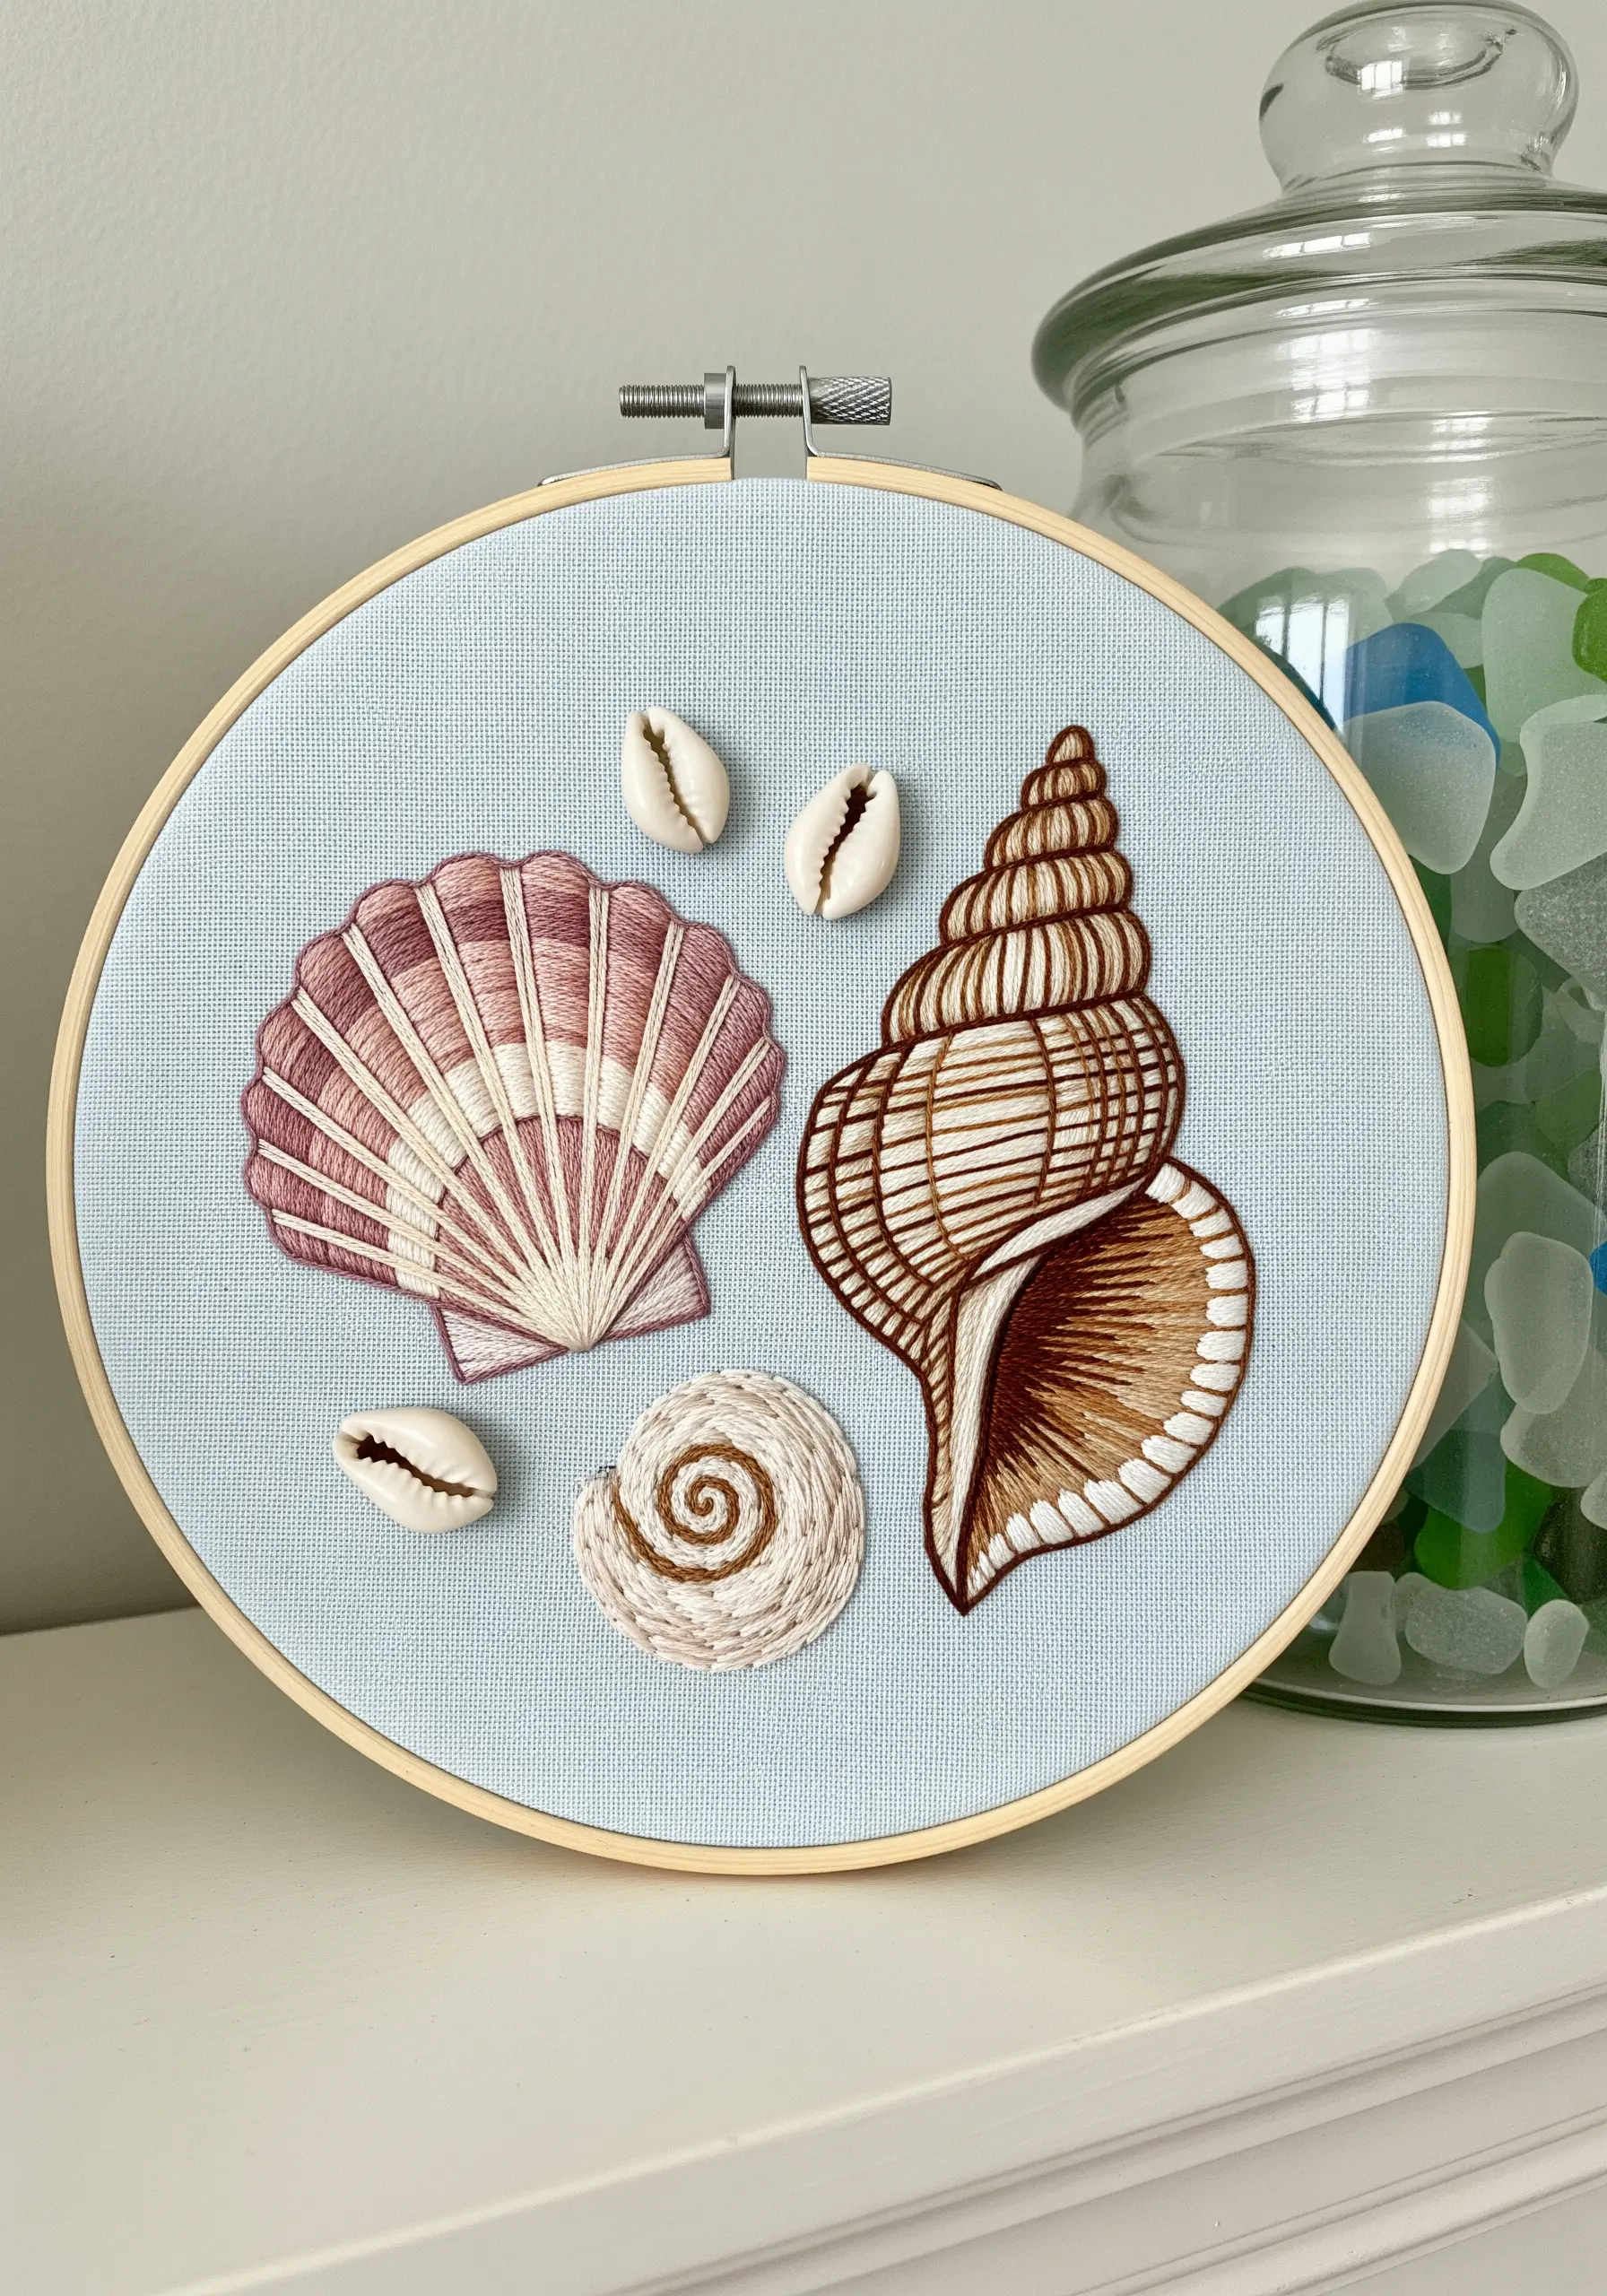
To make your shells appear three-dimensional, use the long-and-short stitch technique to blend colors smoothly.
Begin with your darkest shade in the areas that recede, like the grooves of a scallop shell, and gradually work toward your lightest shade on the raised ridges.
Using a single strand of floss is crucial for achieving a seamless gradient.
This approach, often called thread painting, transforms a flat sketch into a realistically shaded object.
8. Building Dimensional Barnacles with Padded Stitches
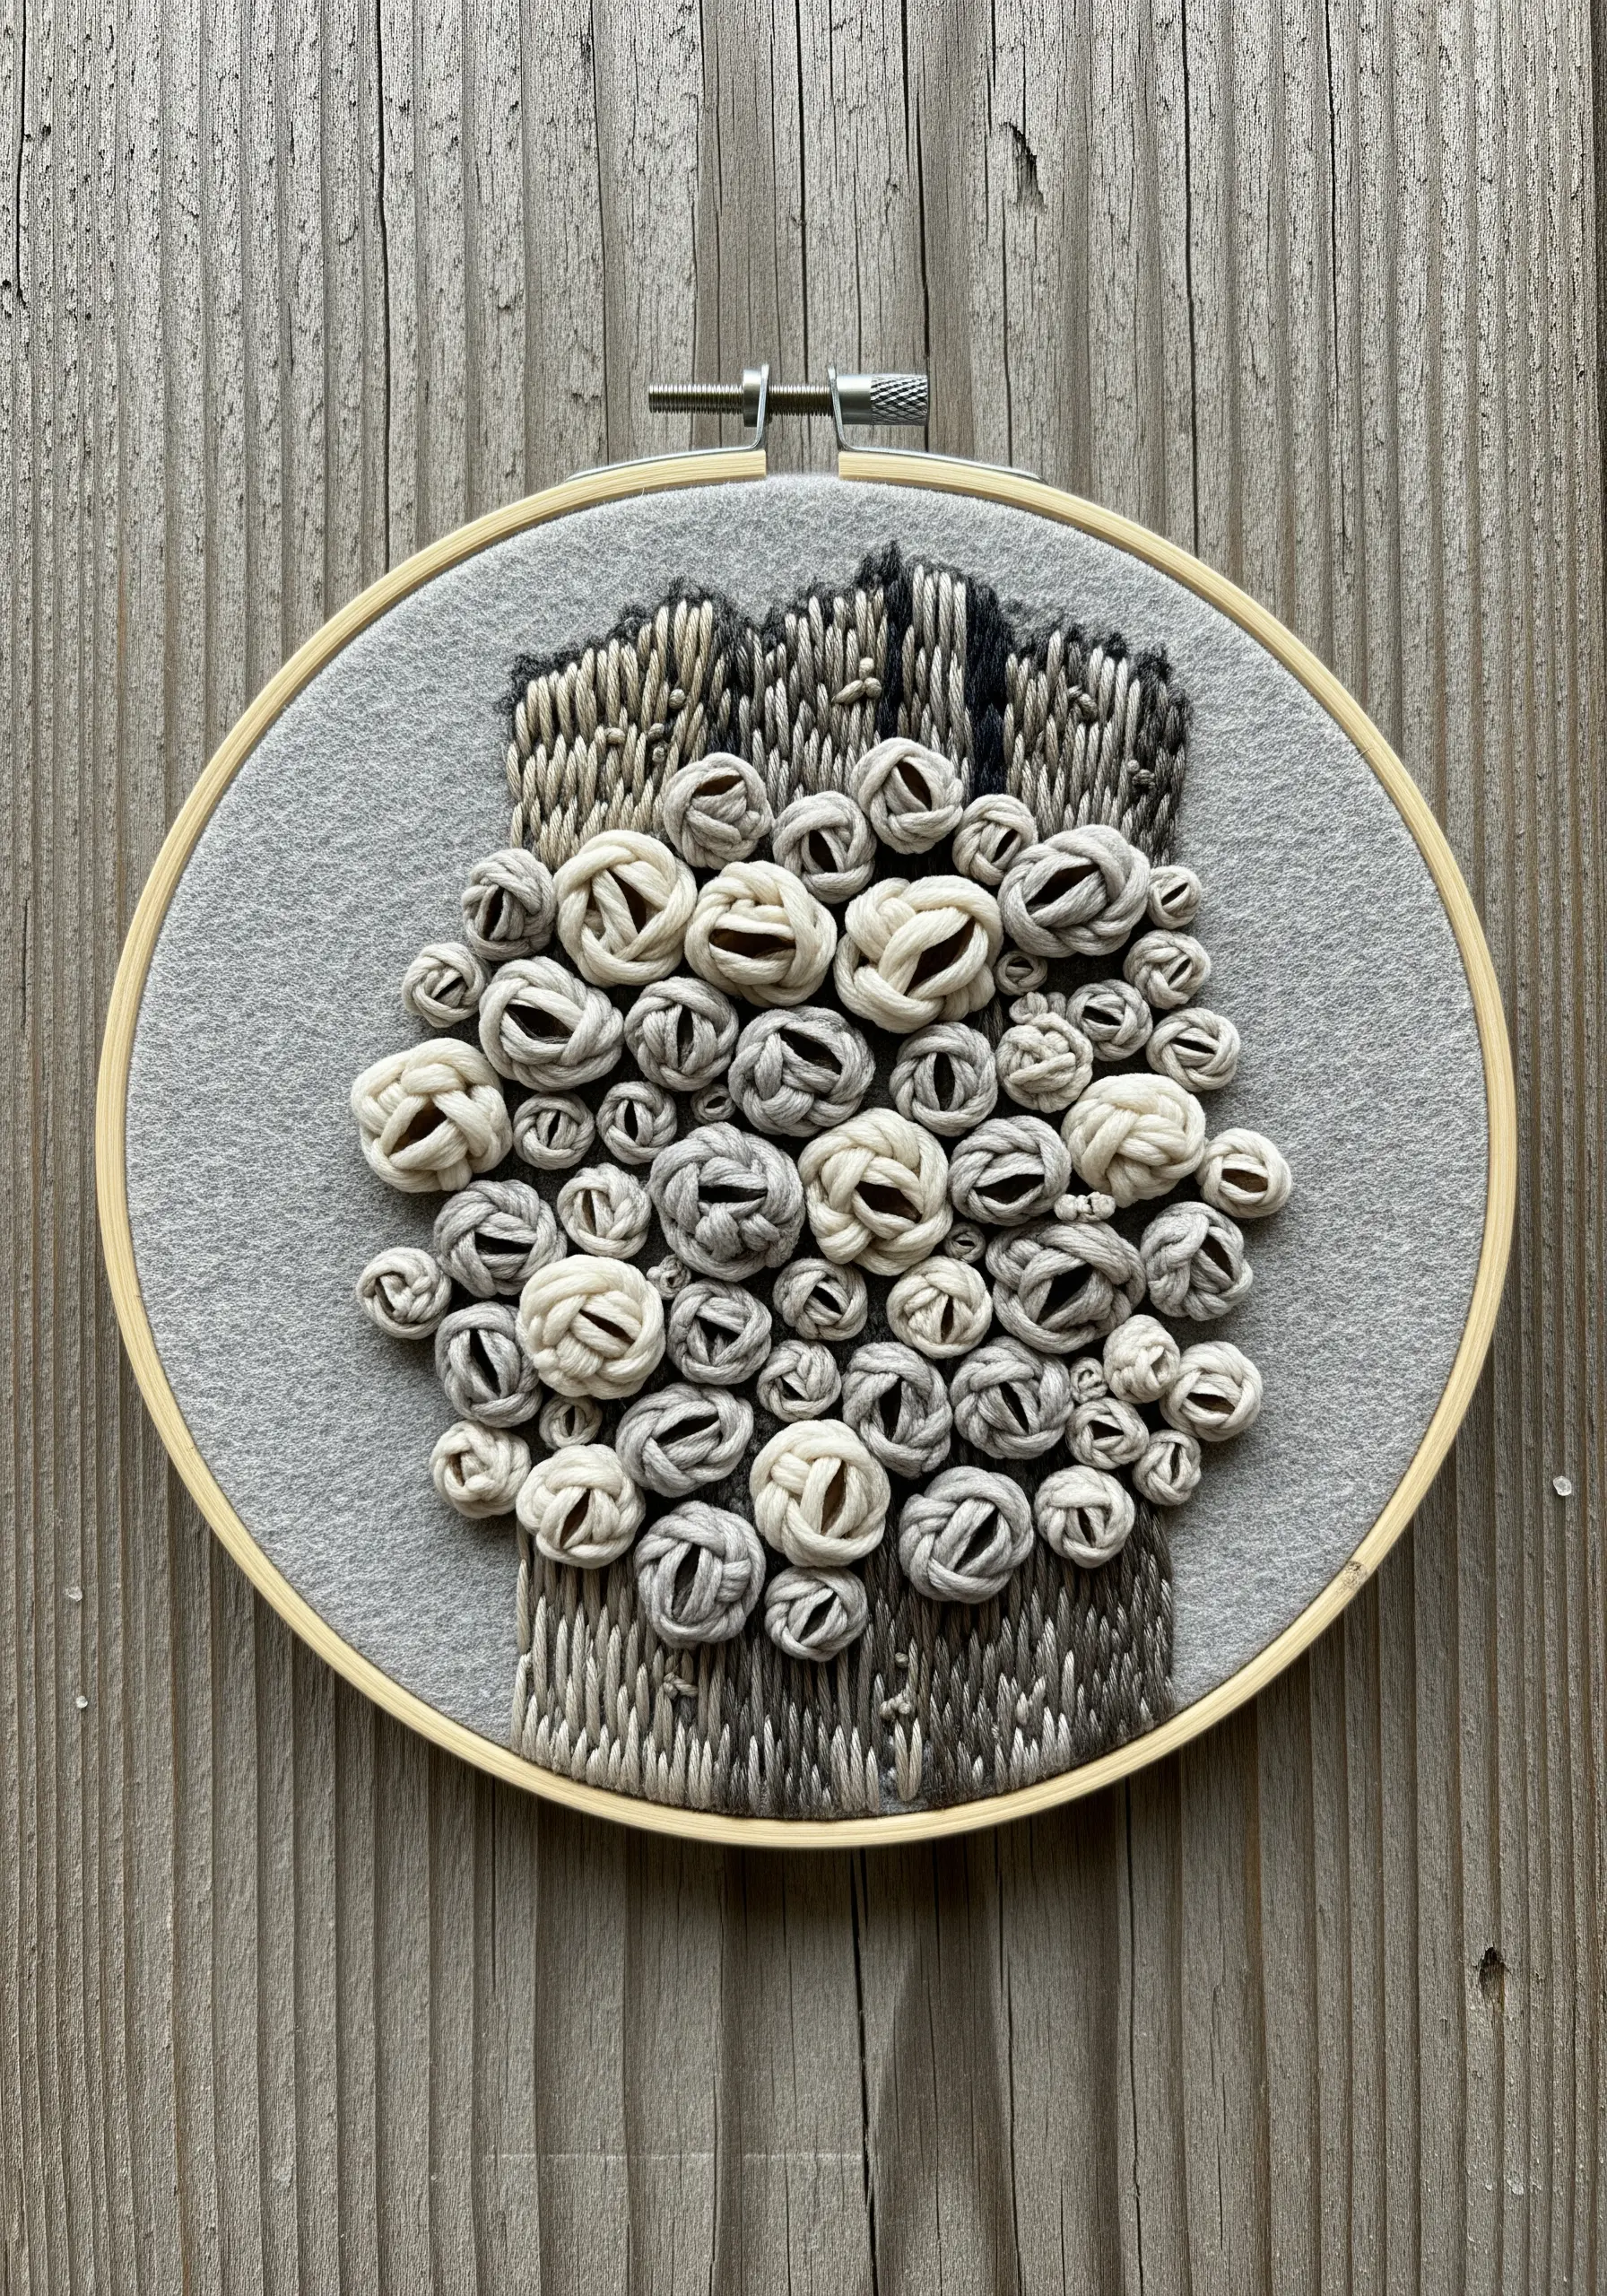
To achieve this organic, clustered texture, first create a foundation of small satin stitch pads where you want your largest barnacles to be.
Next, work woven wheel stitches or dense satin stitches directly over these pads using neutral greys, creams, and off-whites.
The padding underneath elevates the top stitches, giving the barnacles a true three-dimensional quality that lifts off the fabric.
Stagger the sizes and angles to capture nature’s textures with more realism.
9. Crafting Ethereal Coral on Sheer Tulle
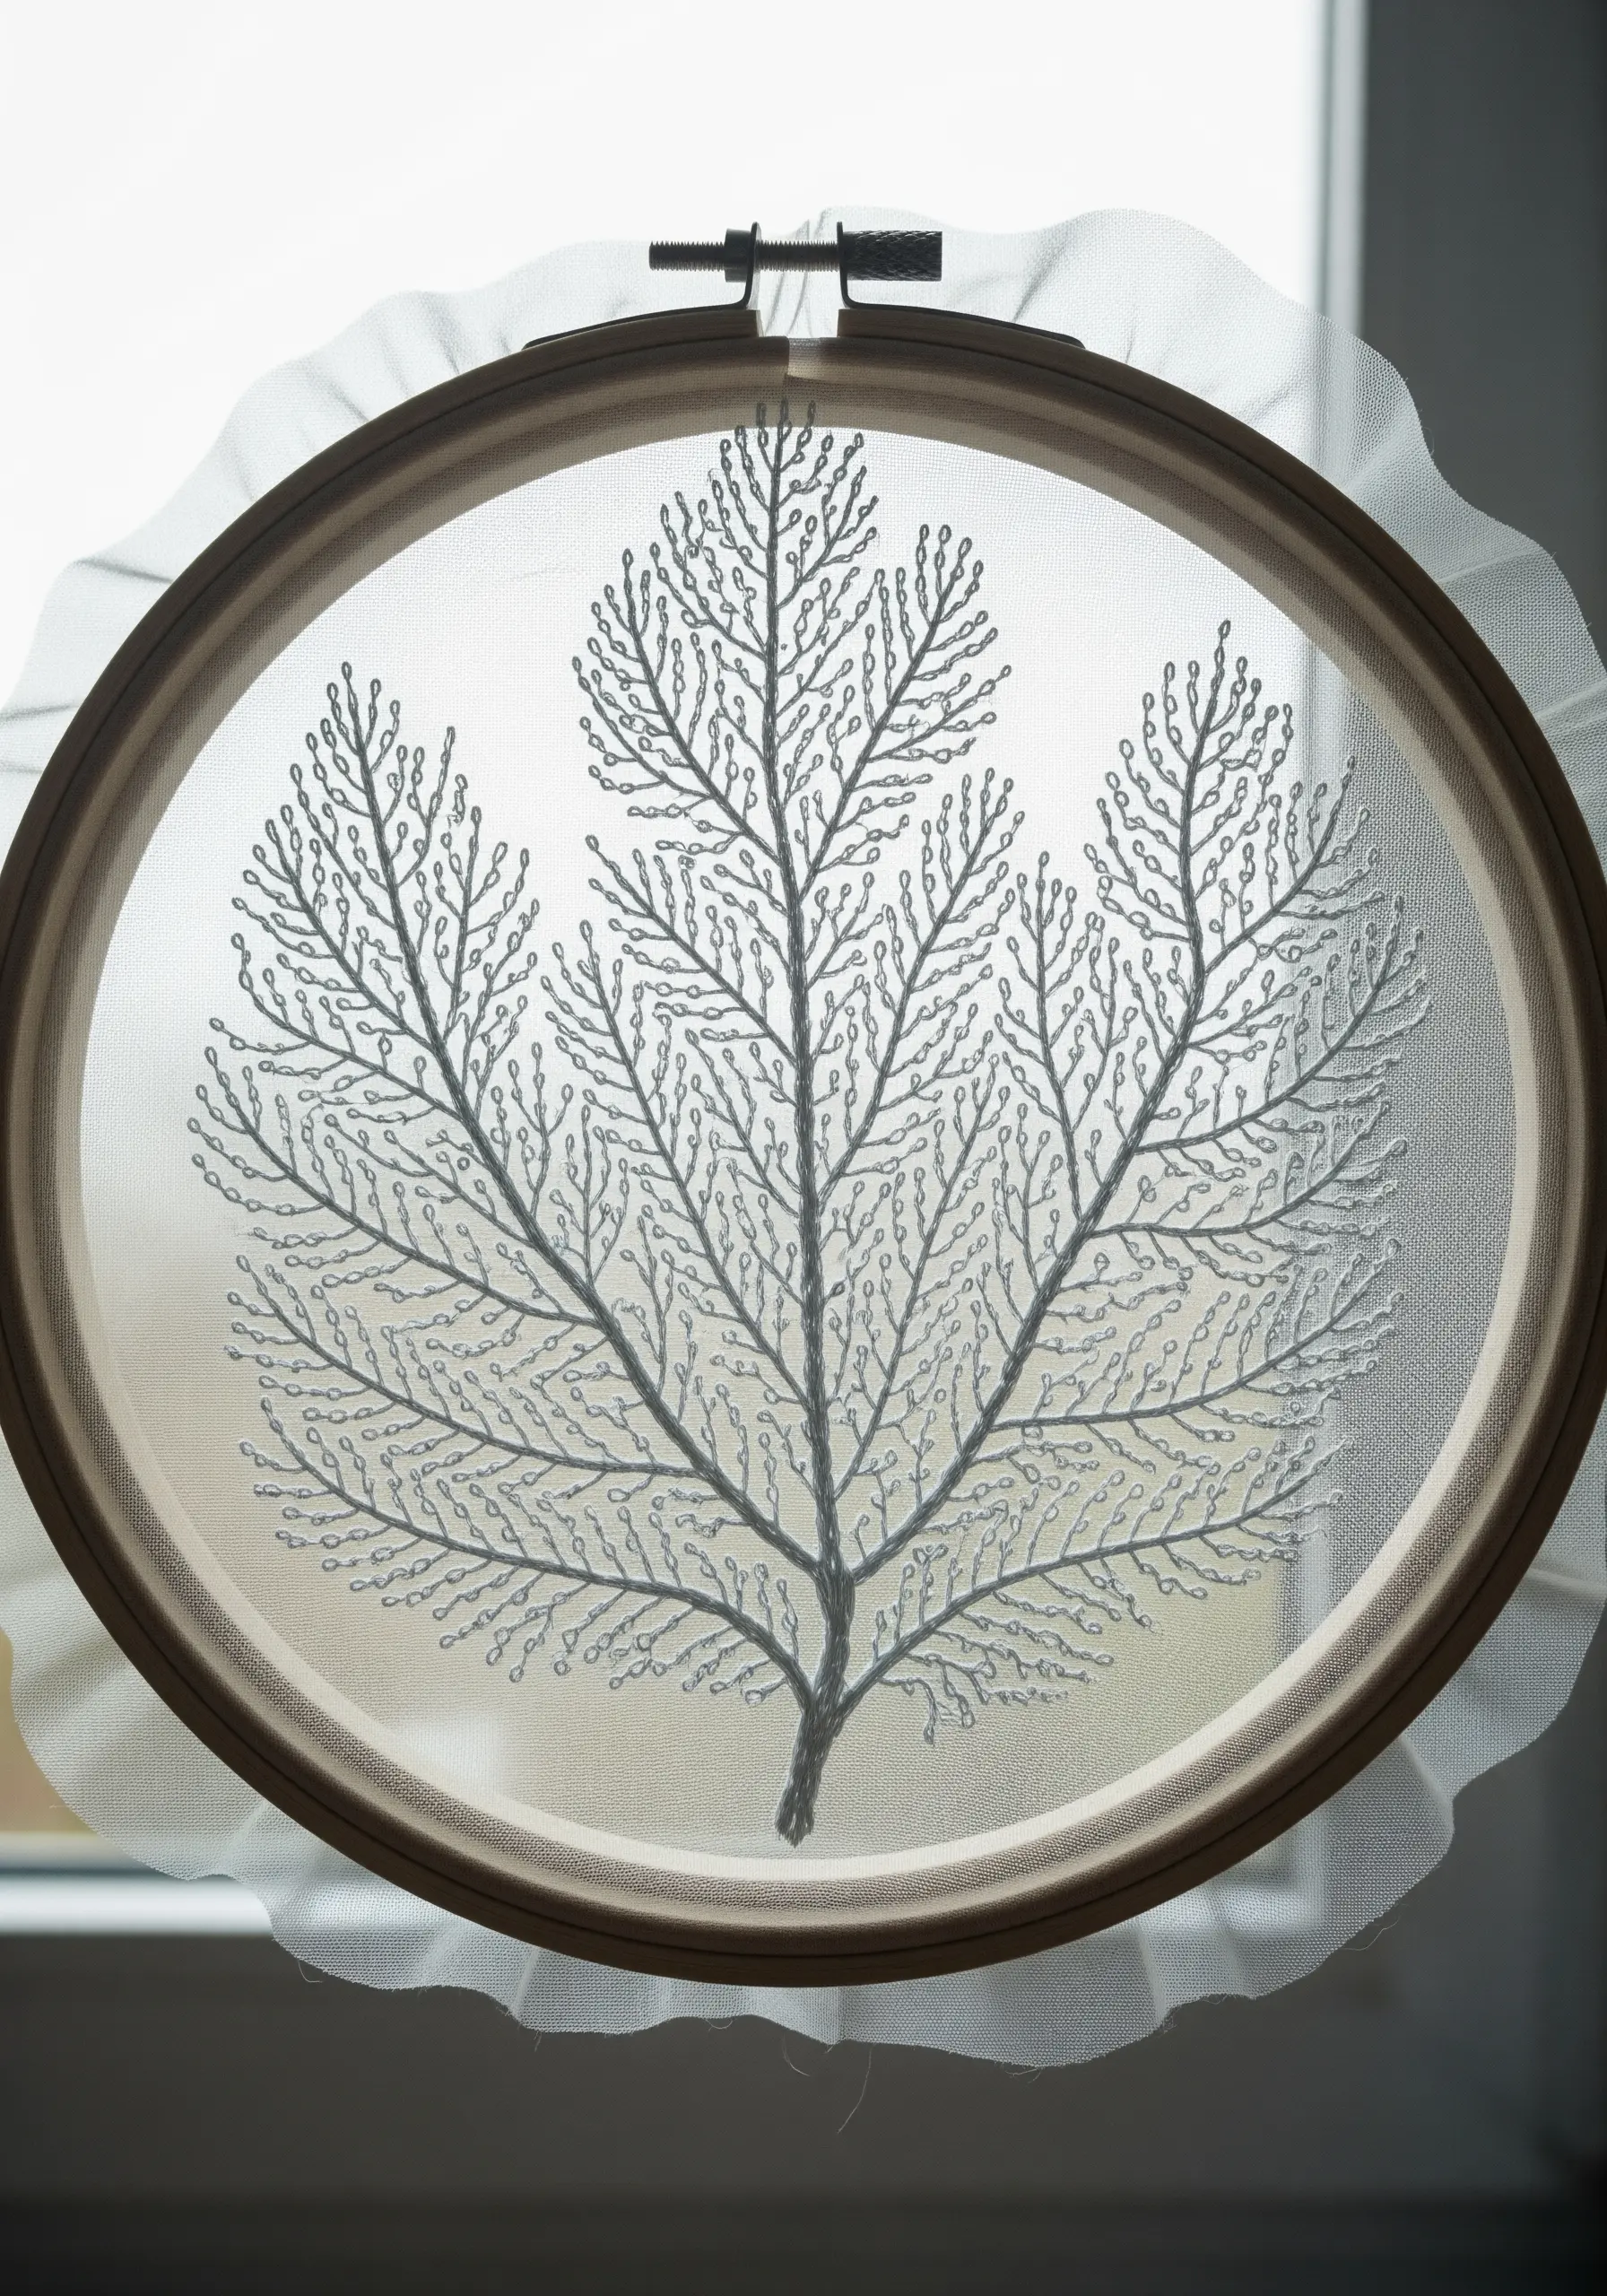
Stitching on a sheer fabric like tulle or organza allows you to create designs that appear to float in the hoop.
Use a simple backstitch or split stitch for the delicate branches of the sea fan.
The key to success is preparation: hoop your tulle with a layer of water-soluble stabilizer to prevent puckering and provide support.
Once you rinse the stabilizer away, only the elegant, weightless form of your stitching will remain.
10. Adorning Jellyfish with Beads and Sheer Layers
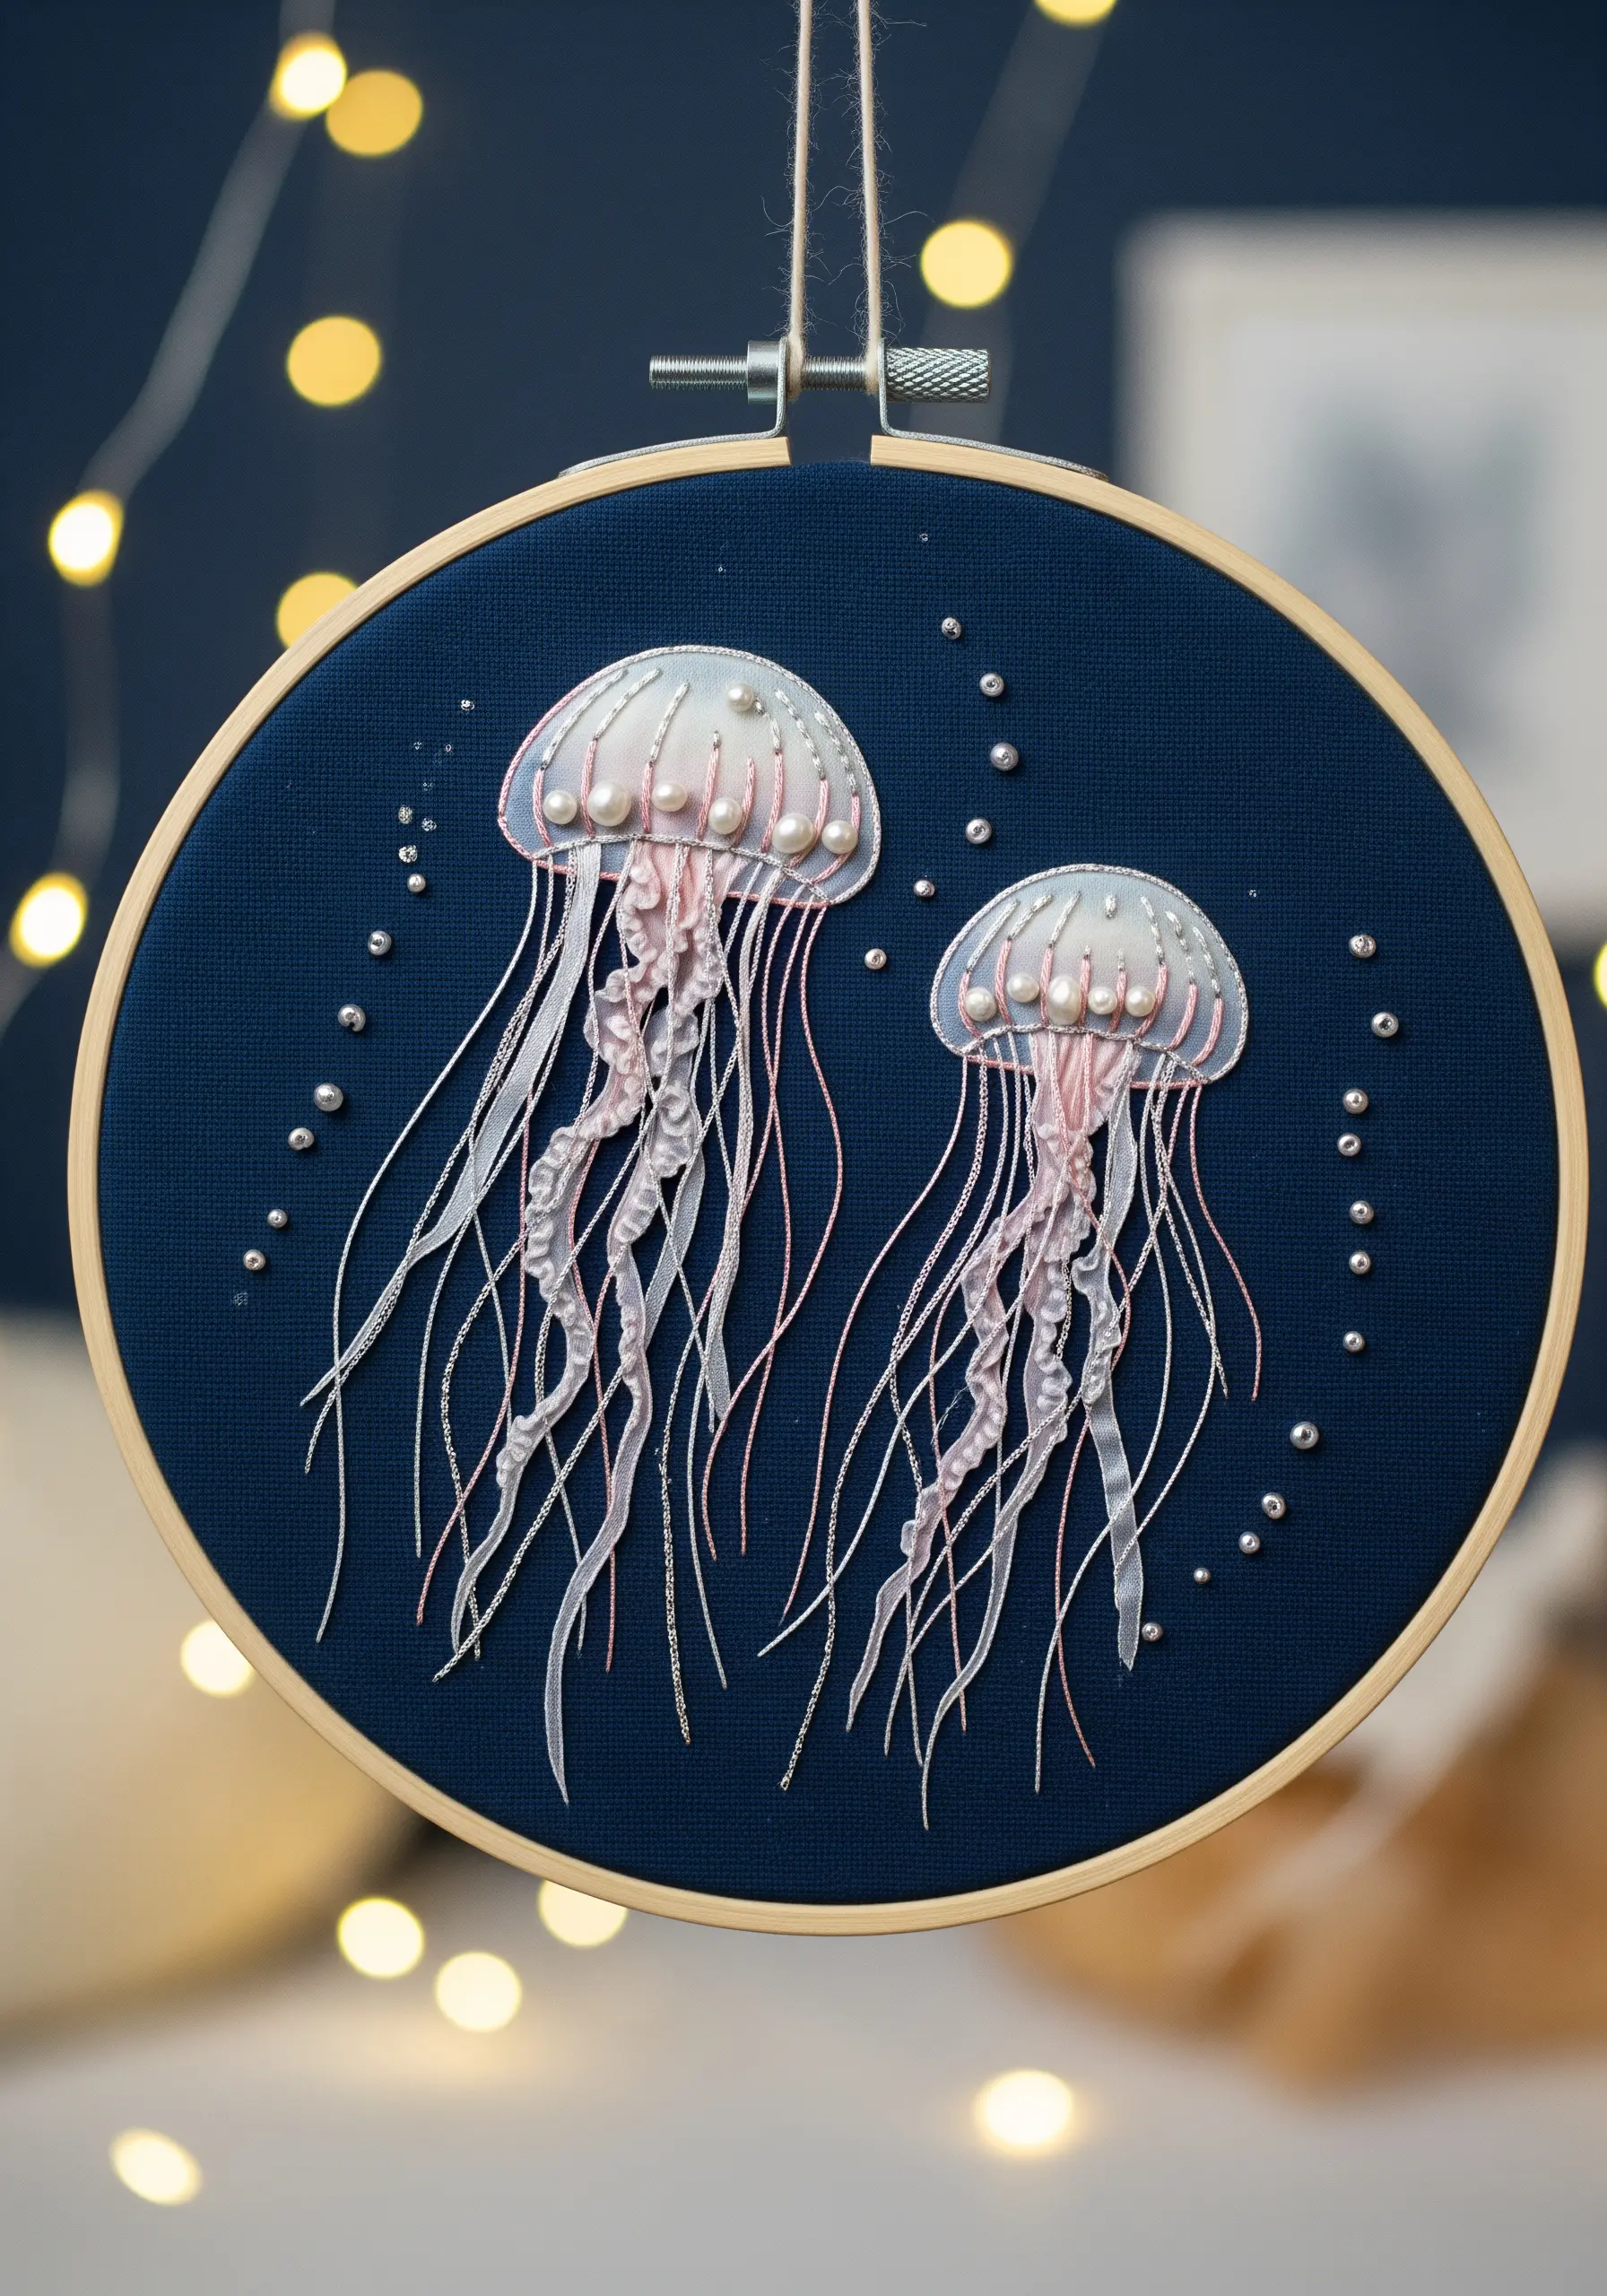
Elevate a simple jellyfish design by incorporating mixed media elements.
Use tiny seed beads or small pearls to add shimmering dimension to the bell, securing them with single stitches.
For the ethereal tentacles, couch thin, sheer ribbons or specialty metallic threads alongside your standard cotton floss.
This combination of textures—smooth beads, transparent ribbon, and fine thread—creates an otherworldly effect perfect for capturing these creatures.
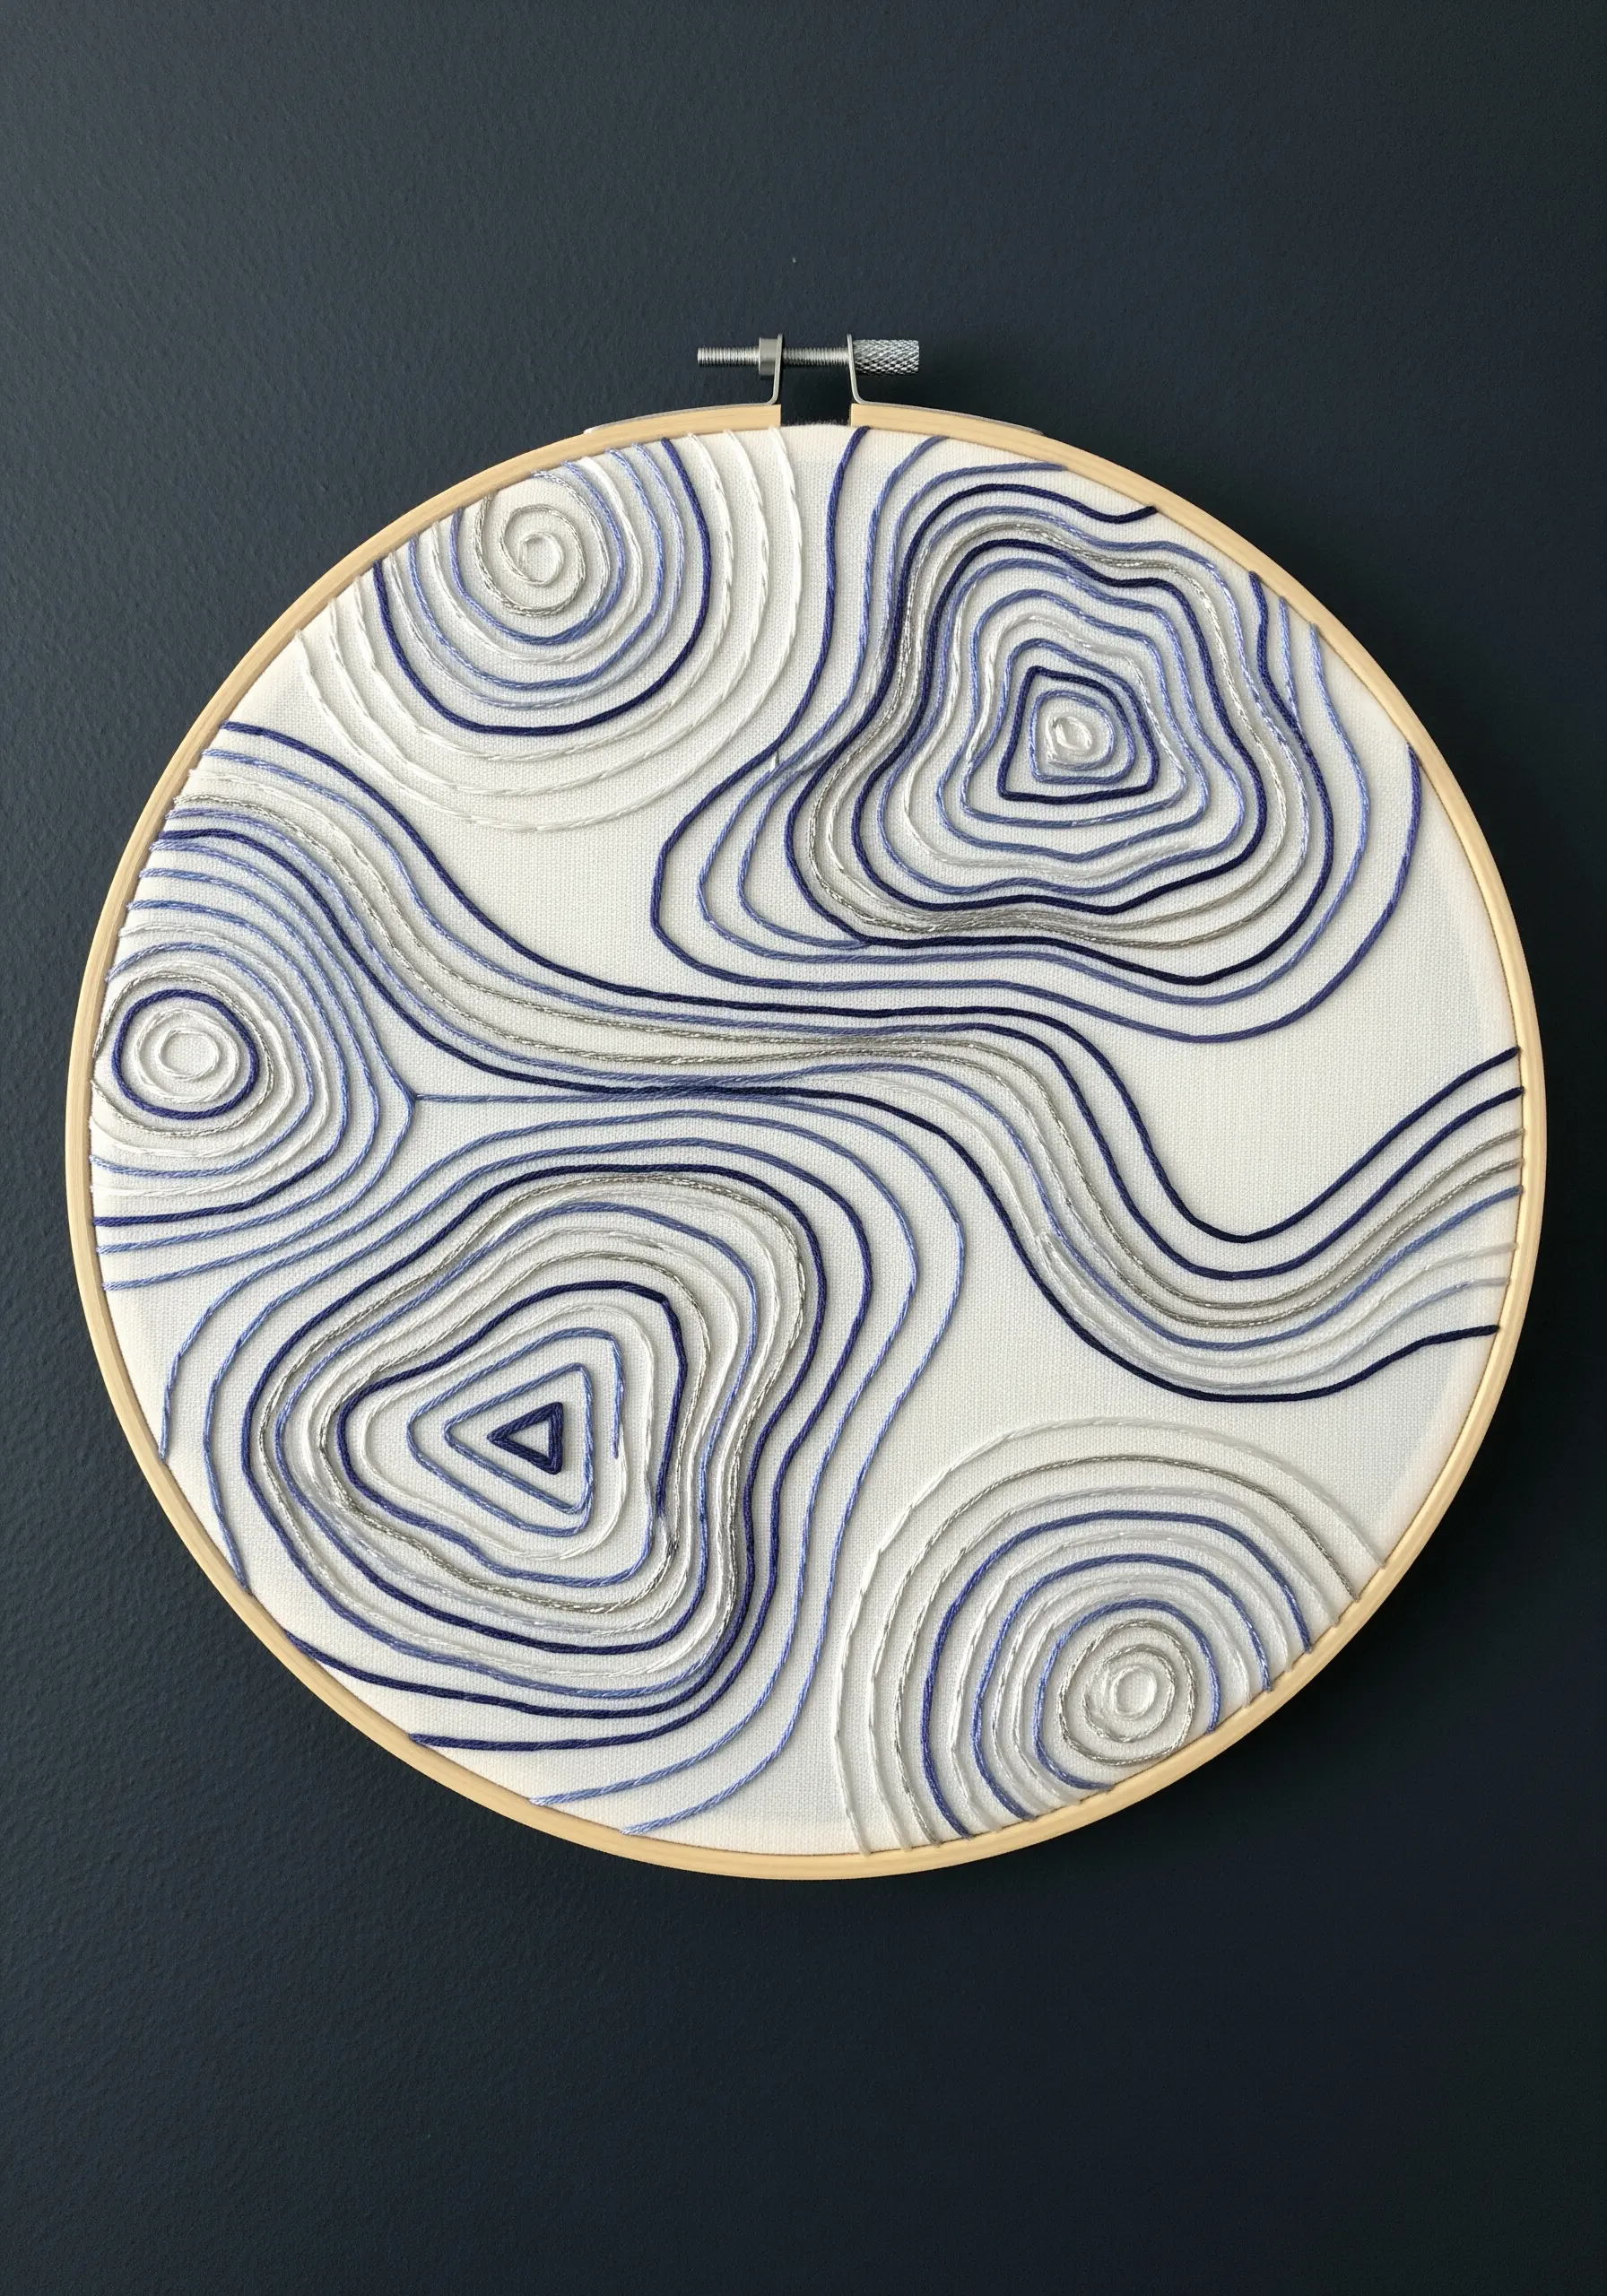
11. Abstracting Water Forms with Topographic Lines
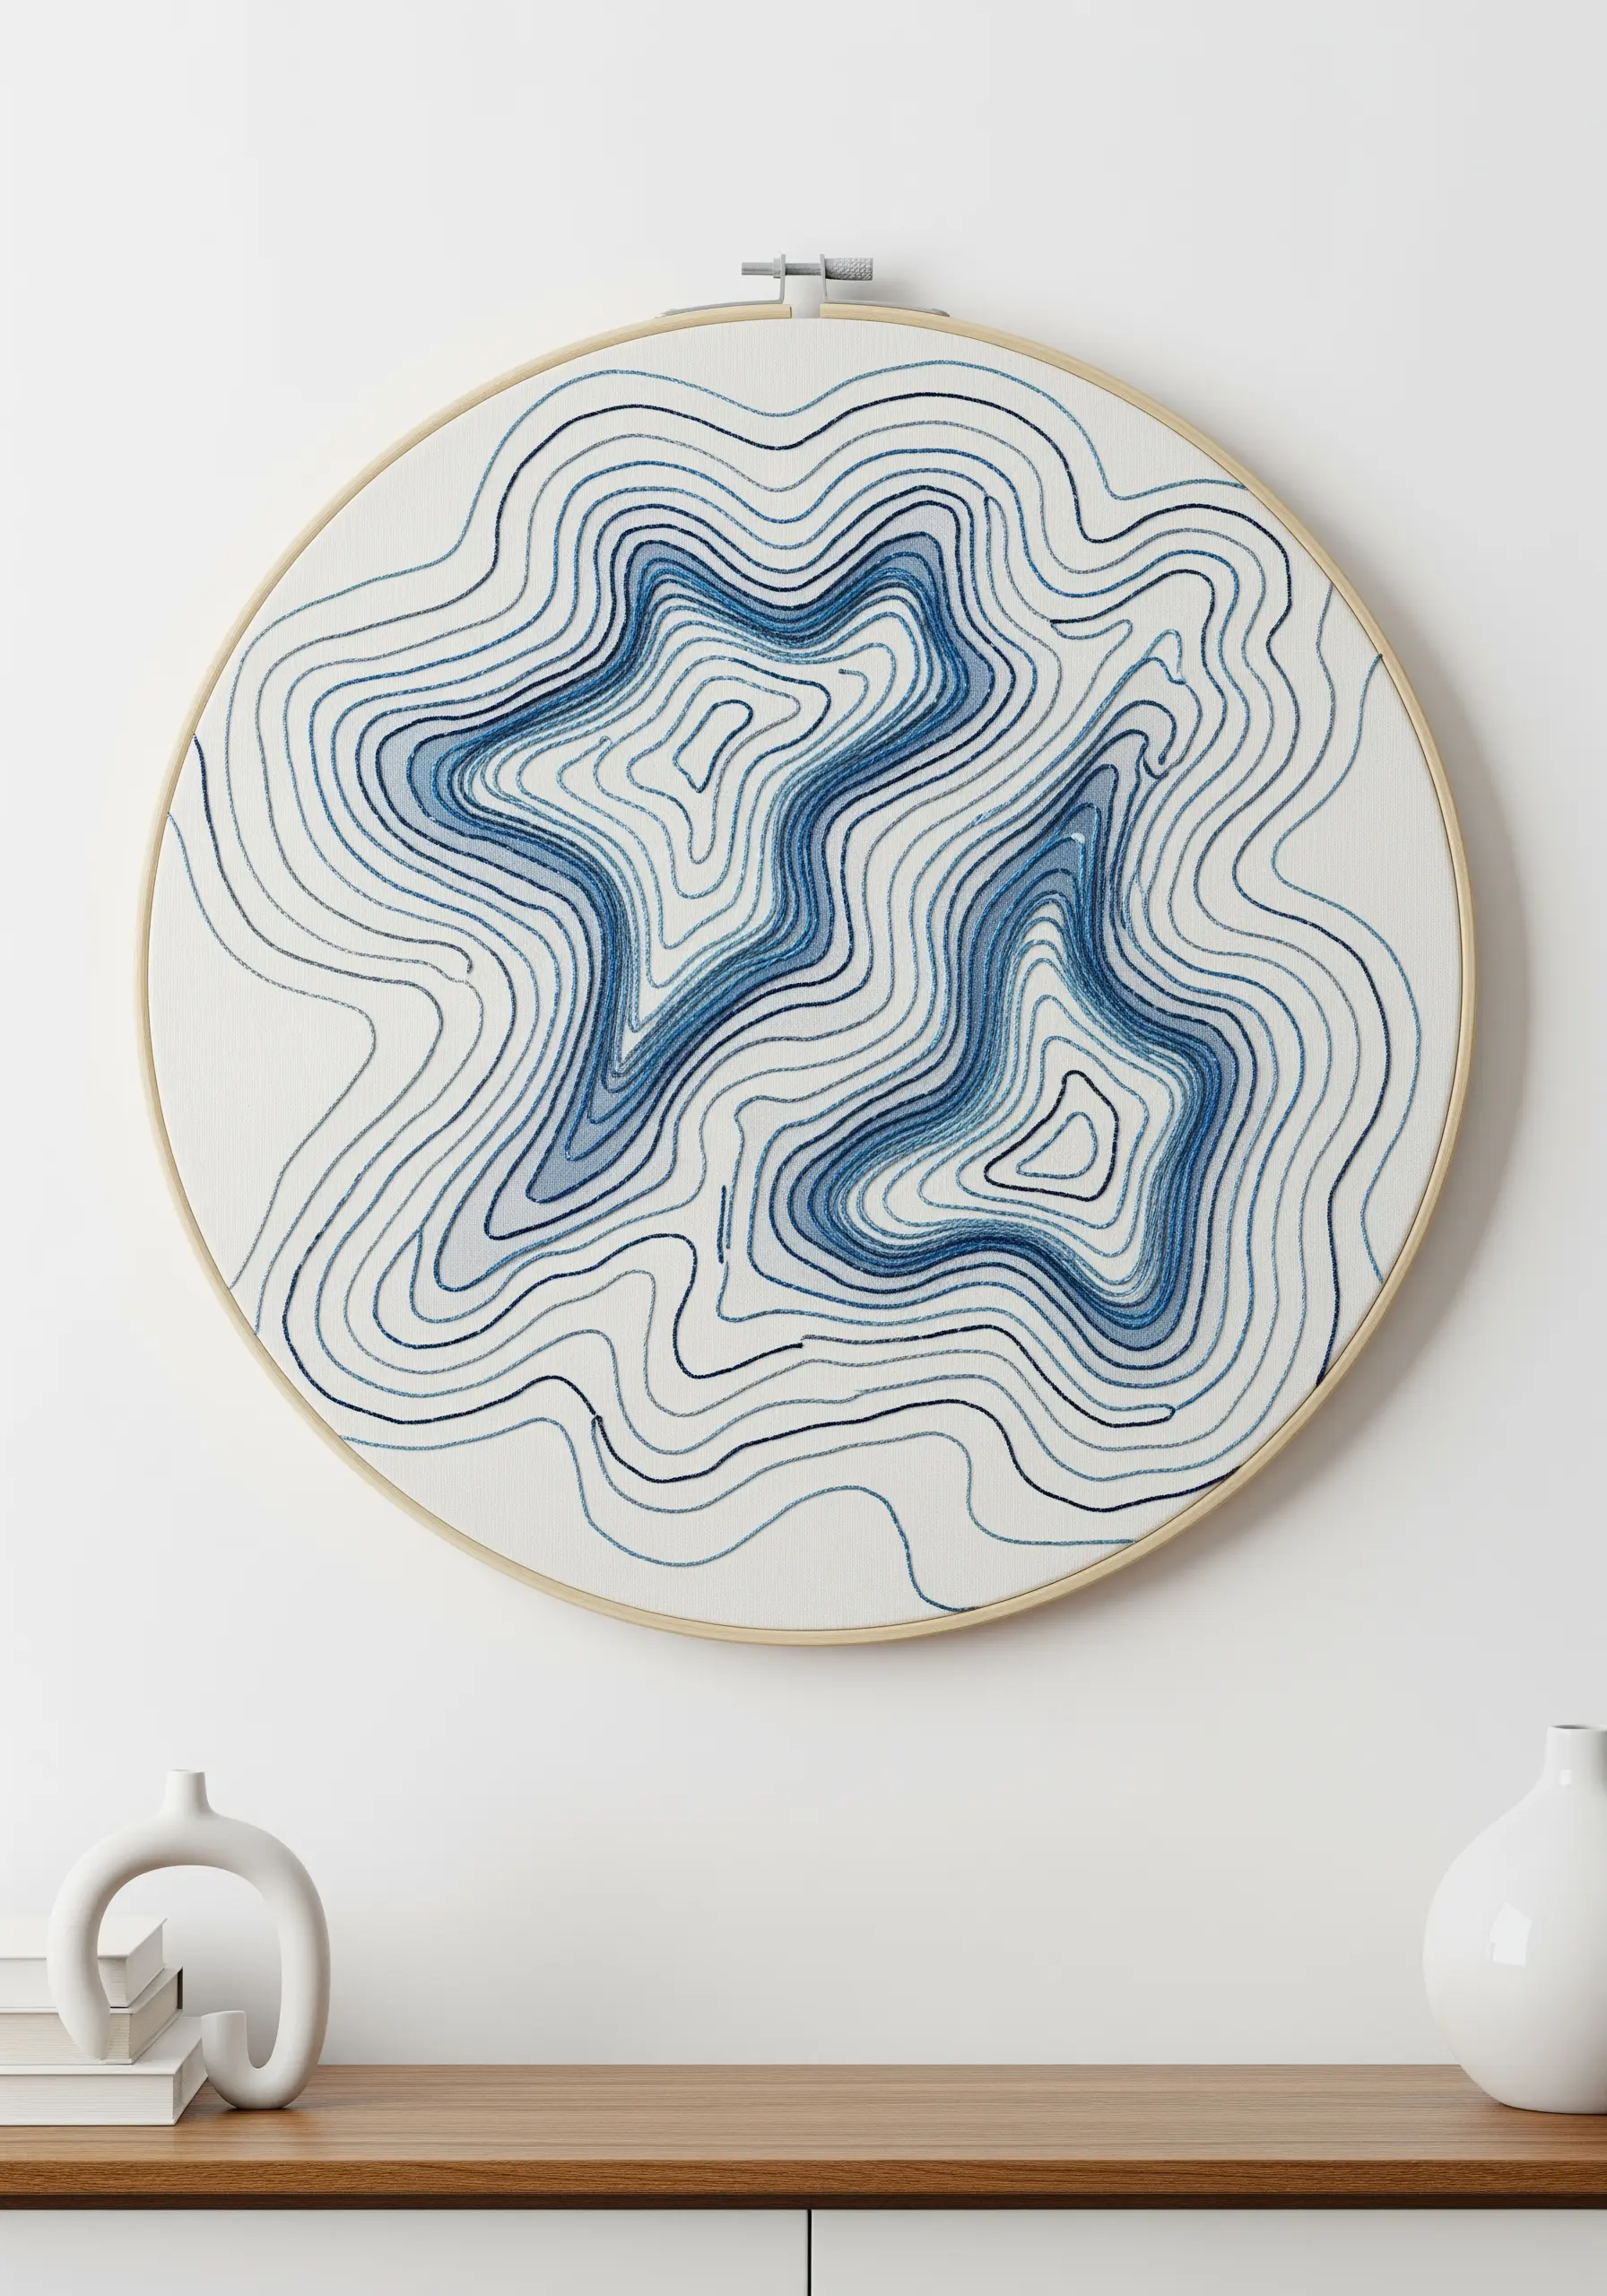
This modern interpretation of an ocean map relies on disciplined line work and varied thread weights.
Use a simple backstitch to trace the contours.
To create a visual sense of depth, use three or four strands of floss for the deepest water sections and taper down to a single strand for the shallowest contour lines.
This subtle shift in line thickness transforms a simple line drawing into a piece of sophisticated, minimalist embroidery wall art.
12. Composing a Vibrant Tide Pool Mandala

Arrange your sea creatures in a circular, mandala-like composition to create a sense of harmony and focus.
Choose a high-contrast color palette, like a vibrant orange starfish against dark anemones, to make each element pop.
For the anemone tentacles, use detached chain stitches or straight stitches radiating from a central point.
The symmetry of the layout turns a collection of motifs into a cohesive embroidered mandala wall art piece.
13. Recreating a Pebble Shoreline with Knots and Beads

To build a hyper-realistic pebble beach, fill the foreground with a dense field of French knots.
Vary the number of thread strands (from two to six) and the number of wraps for each knot to create a range of pebble sizes and shapes.
Use a palette of variegated neutral threads in greys, browns, and creams.
For a final touch of realism, intersperse tiny seed beads and miniature shells, securing them with a single stitch each. This mix of textures truly mimics a natural shoreline.
14. Designing a Geometric Turtle Shell with Satin Stitch
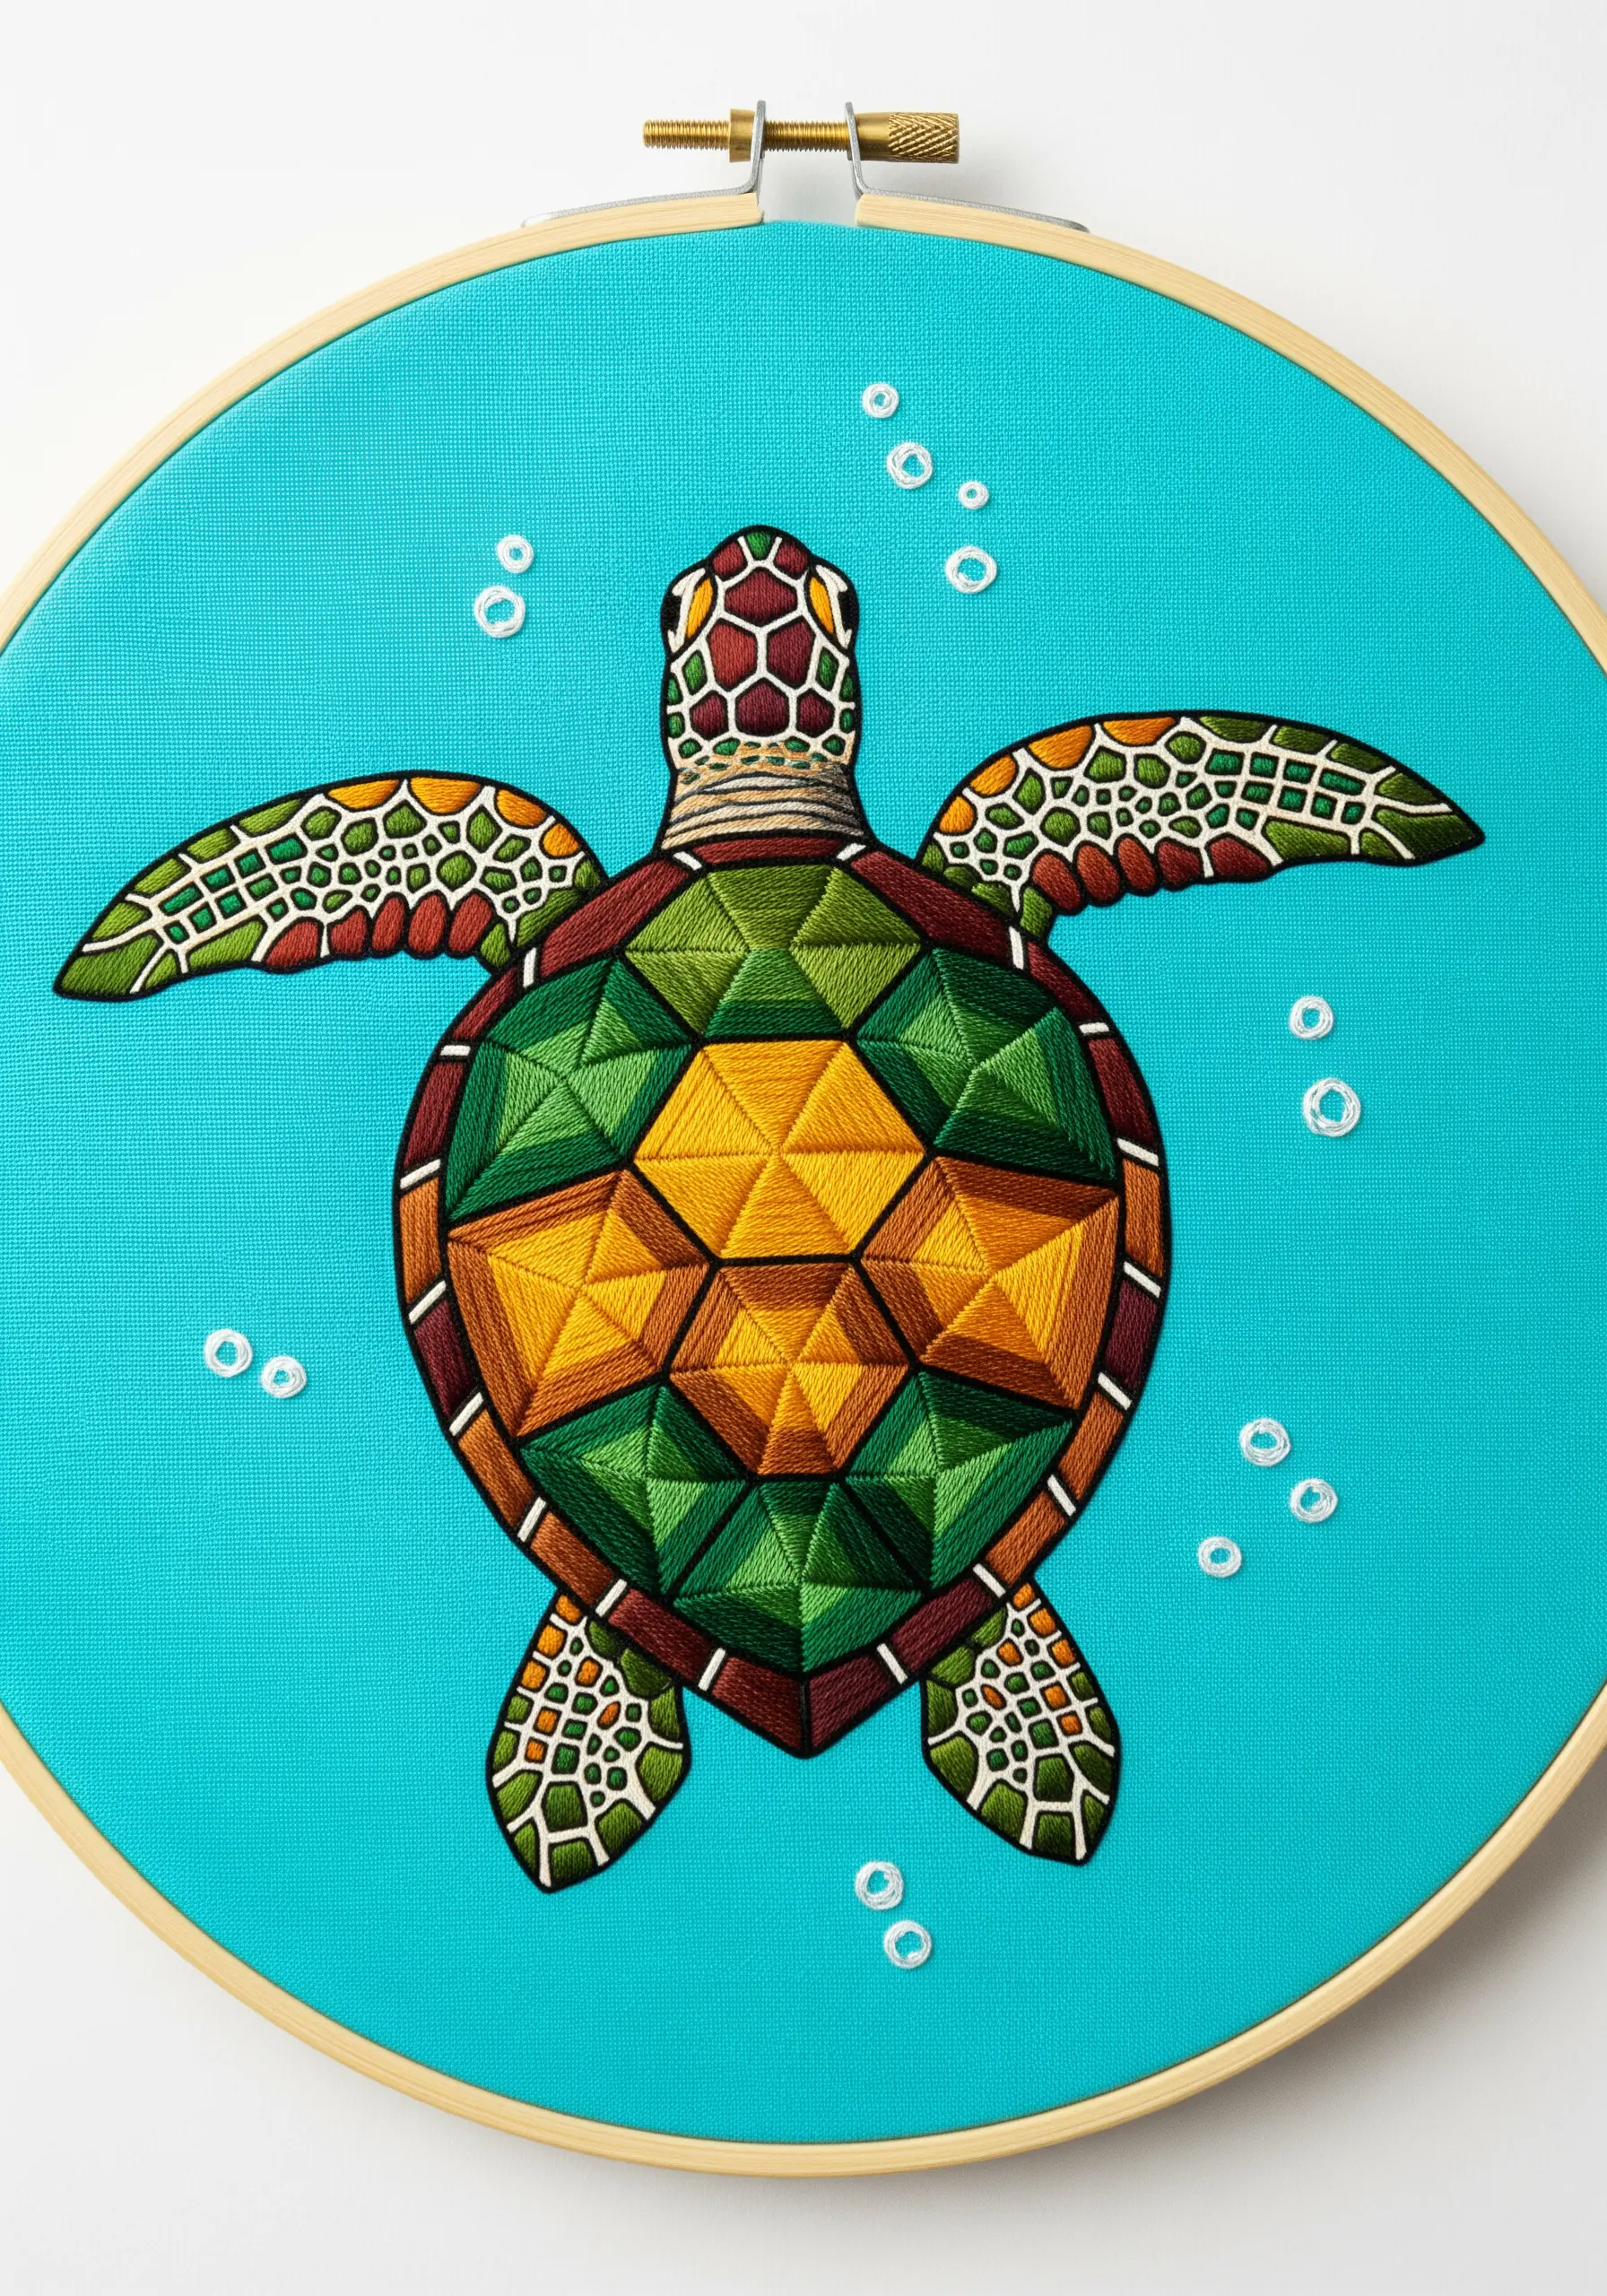
Instead of filling the turtle’s shell with a single color, divide it into geometric segments to highlight its pattern.
Outline each segment first with a split stitch; this creates a firm, raised edge for your fill stitches to sit against.
Then, fill each shape with a disciplined satin stitch, ensuring all stitches lie perfectly parallel within that block.
This technique results in exceptionally clean, defined shapes and a modern, graphic finish.
15. Achieving Pearlescent Sheen with Split Stitch Blending
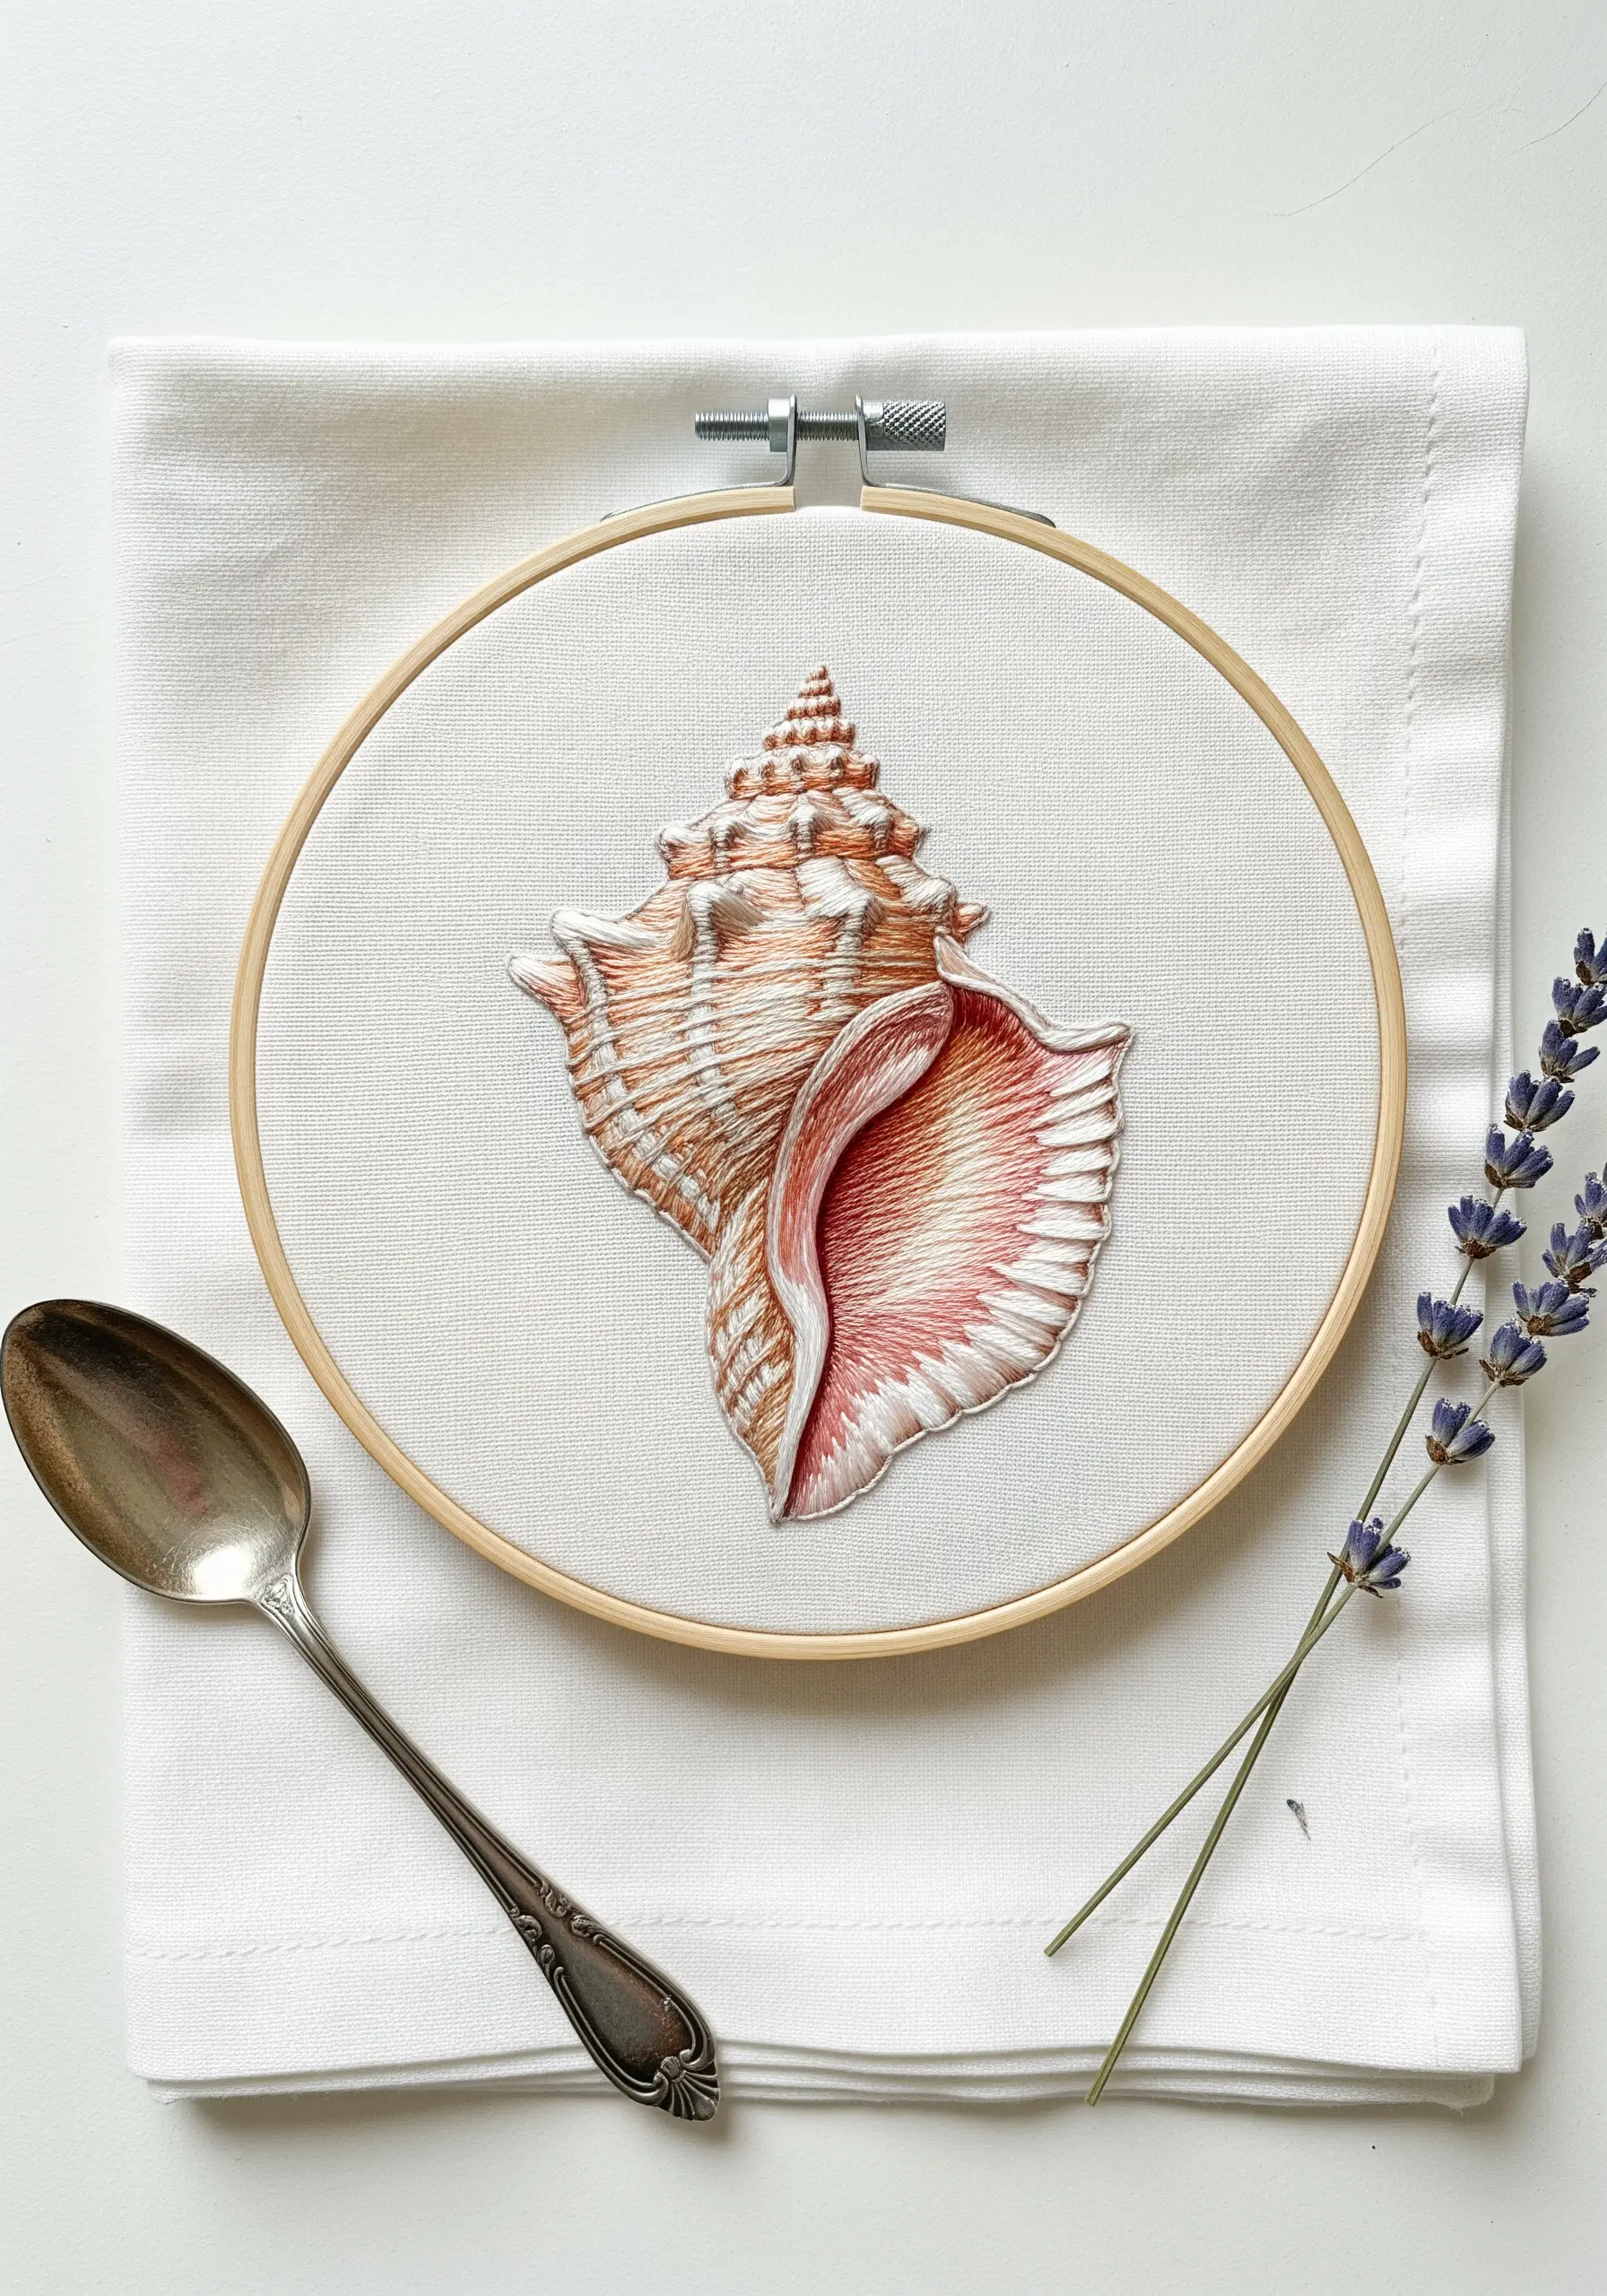
For the delicate, shimmering interior of a conch shell, use split stitch instead of the more common long-and-short stitch.
Work in curved rows that follow the shell’s natural contours, using only a single strand of floss.
By blending pale pinks, corals, and off-whites, the tiny split stitches will merge together, creating a soft, almost iridescent surface that looks painted on.
This technique offers incredible control over subtle color transitions, perfect for capturing that pearly glow.
16. Crafting an Atmospheric Underwater Shipwreck
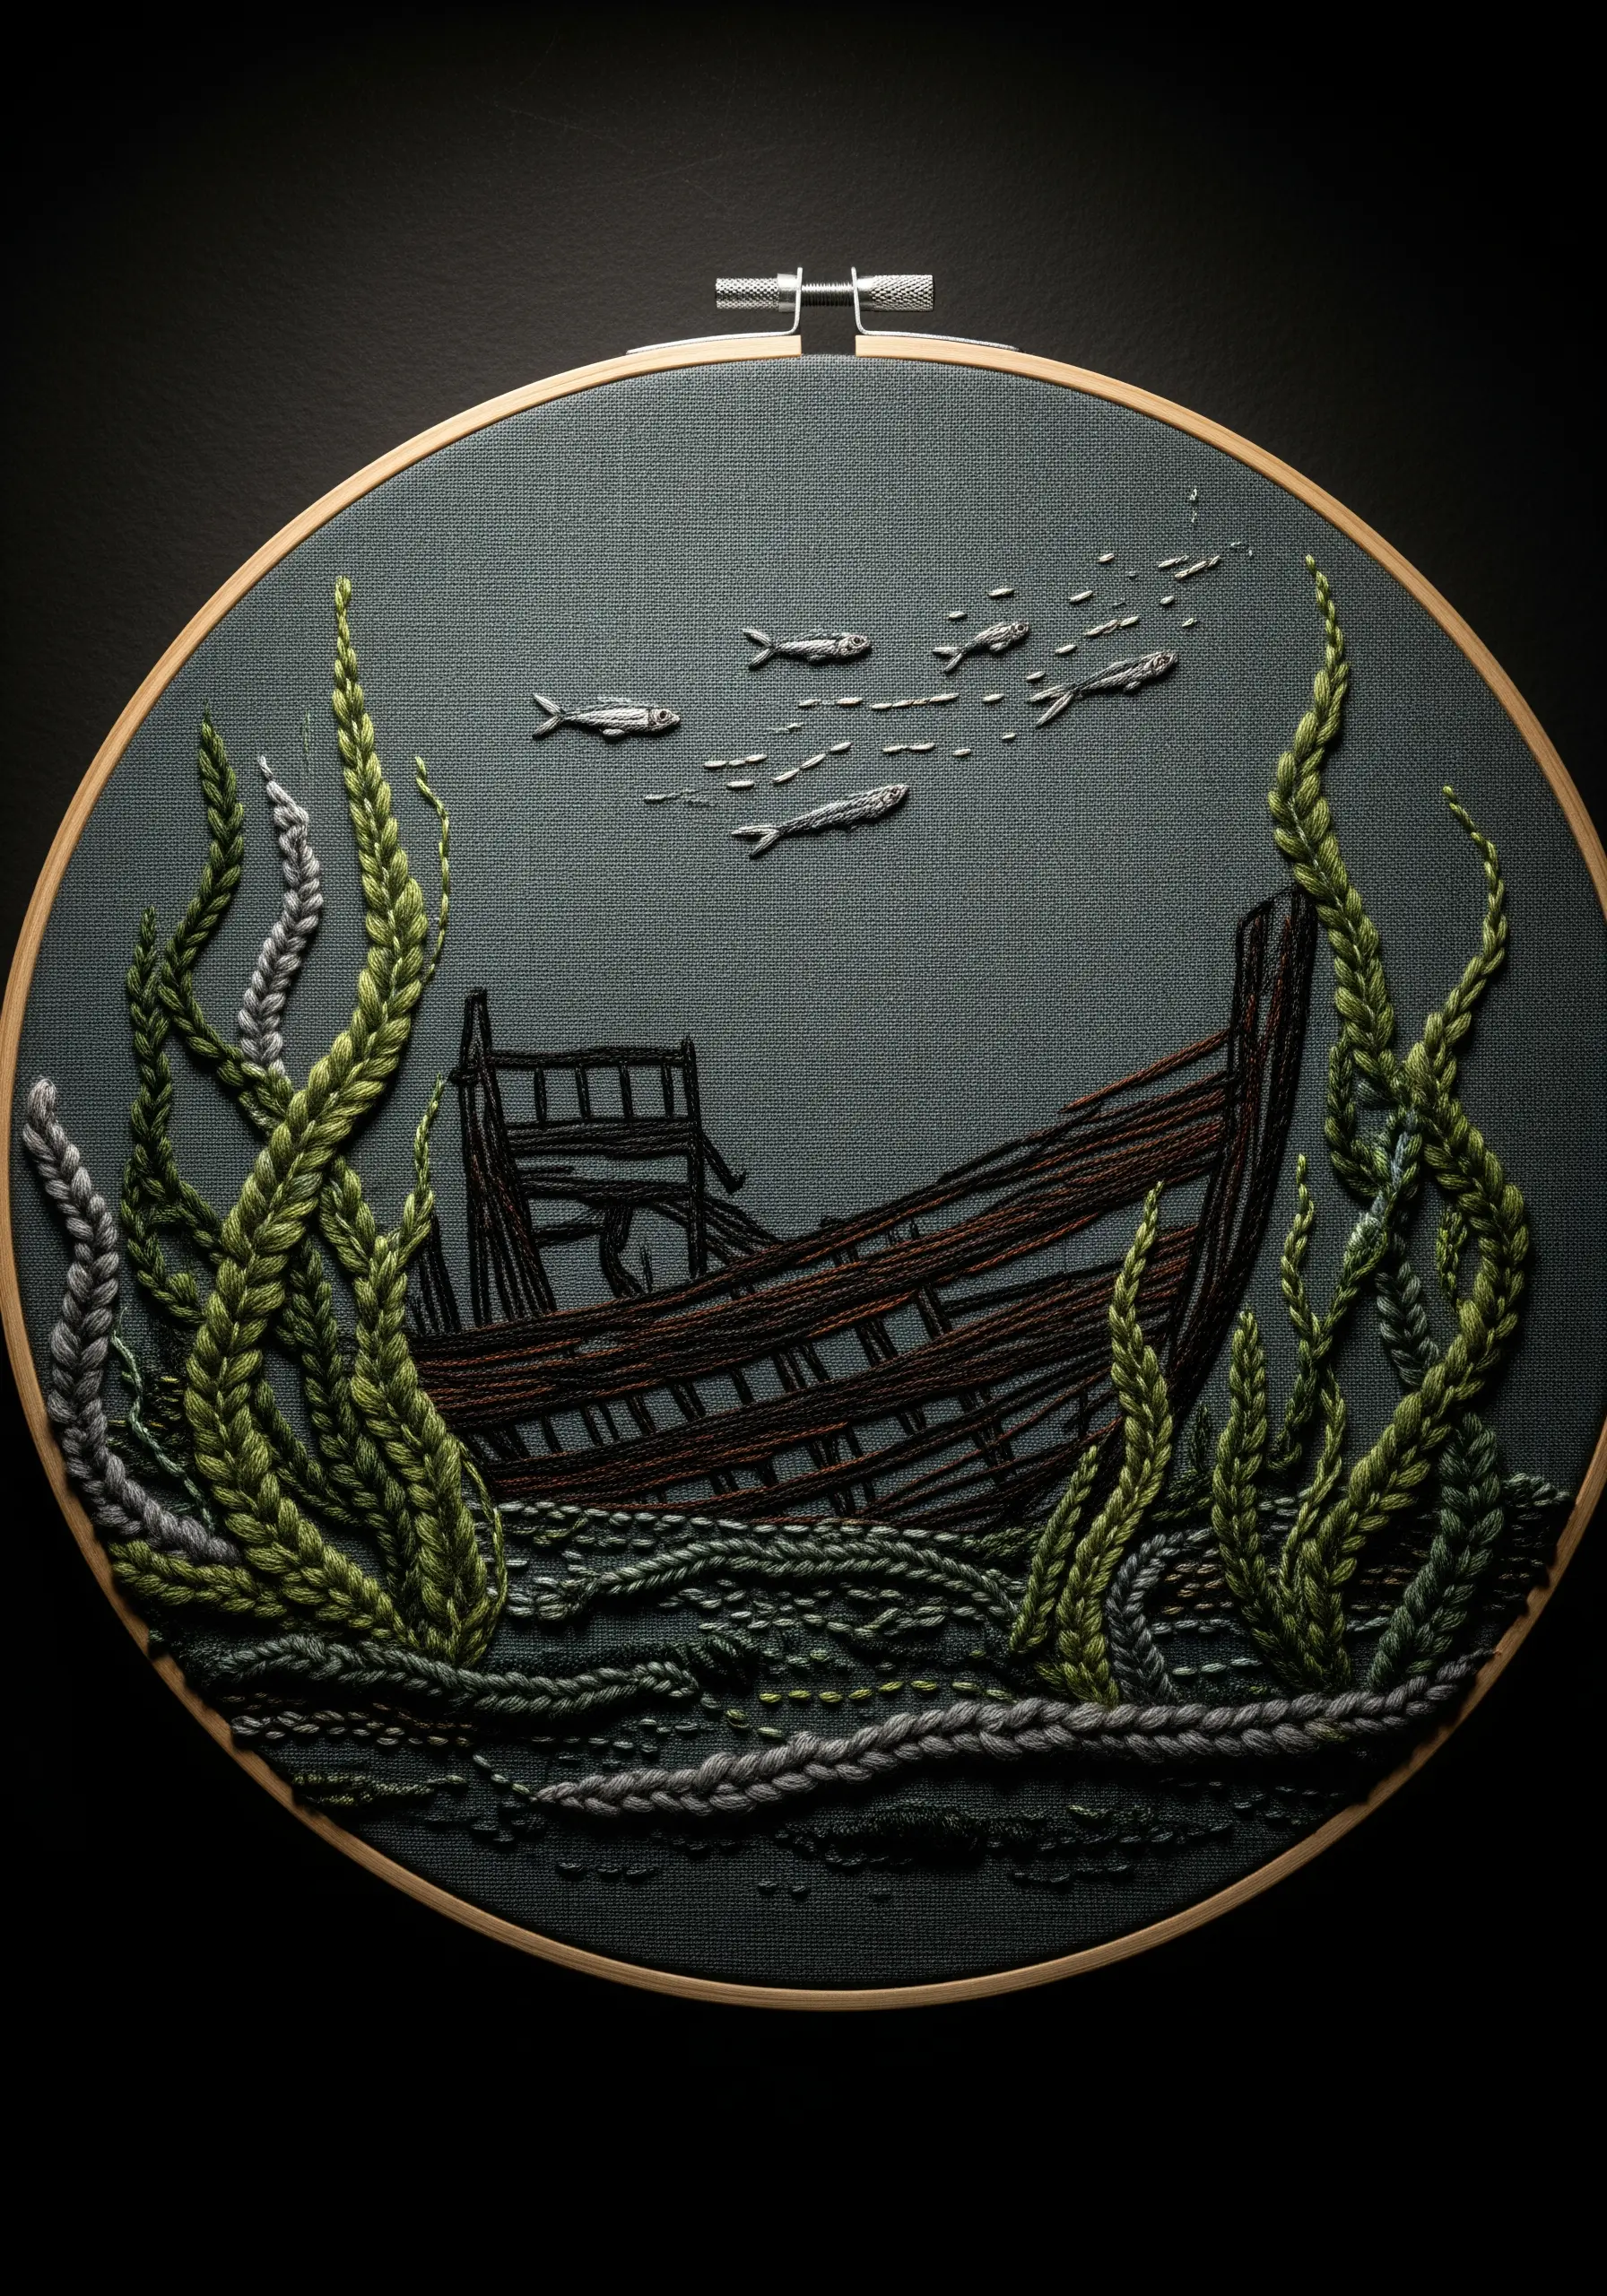
To set a mysterious, underwater tone, choose a dark, moody fabric like charcoal linen or deep teal cotton.
For the seaweed, use thicker, textural threads like a soft wool or chenille to give it weight and dimension against the flat background.
Render the shipwreck with sparse straight stitches in browns and blacks, suggesting a skeletal frame rather than a solid object.
This selective use of detail and texture creates a powerful, atmospheric narrative.
17. Abstracting a Coastal Meadow with Simplified Forms
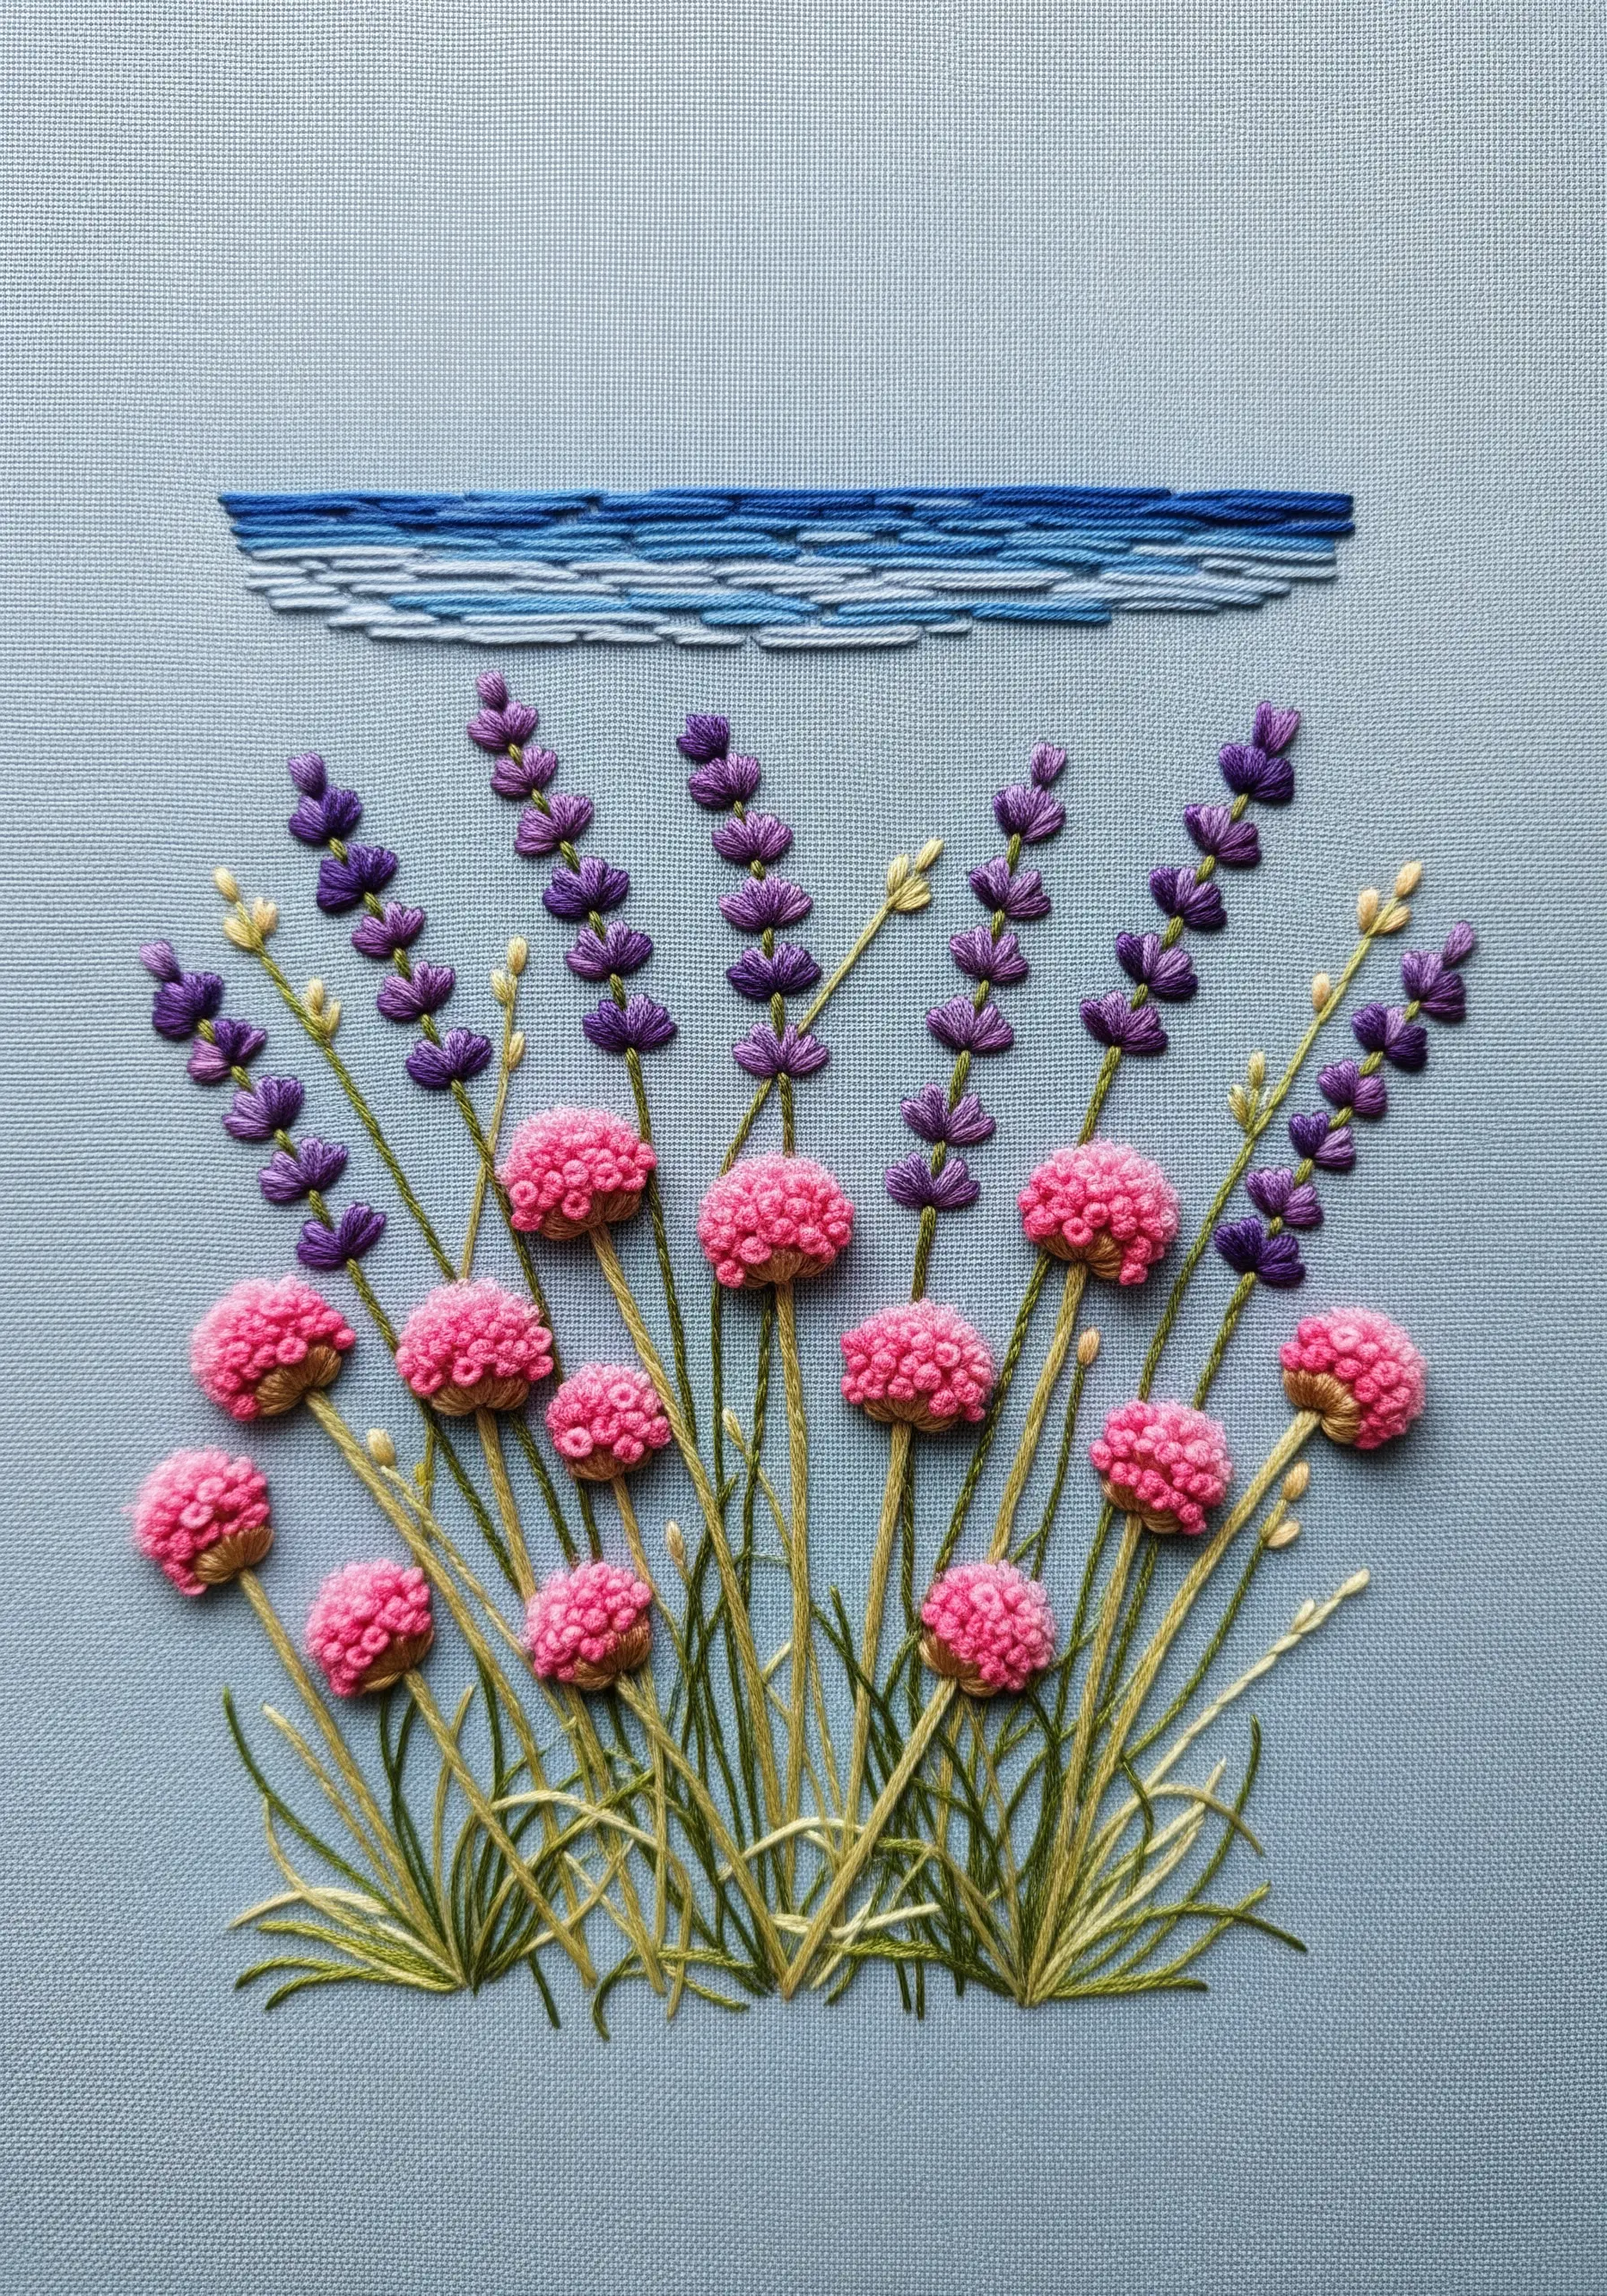
You can evoke a coastal landscape without stitching every blade of grass.
Represent the ocean with a few simple, horizontal bars of satin stitch in graduating shades of blue.
For the flowers, use textural stitches: clusters of French knots for pink sea thrift and bullion knots or detached chain stitches for purple sea lavender.
This stylized approach captures the color and feel of the scene, resulting in clean and modern abstract thread landscapes.
18. Sculpting 3D Water Ripples with Raised Stitches
To make your abstract ripple lines stand off the fabric, use a padded or whipped stitch technique.
First, create your foundation lines using a stem stitch or several parallel rows of backstitch.
Then, tightly wrap that foundation with your main thread, passing the needle under the stitches without piercing the fabric.
This method creates a raised, corded line that gives the abstract design a sculptural and highly tactile quality.
19. Achieving a Flawless Fill with Brick Stitch
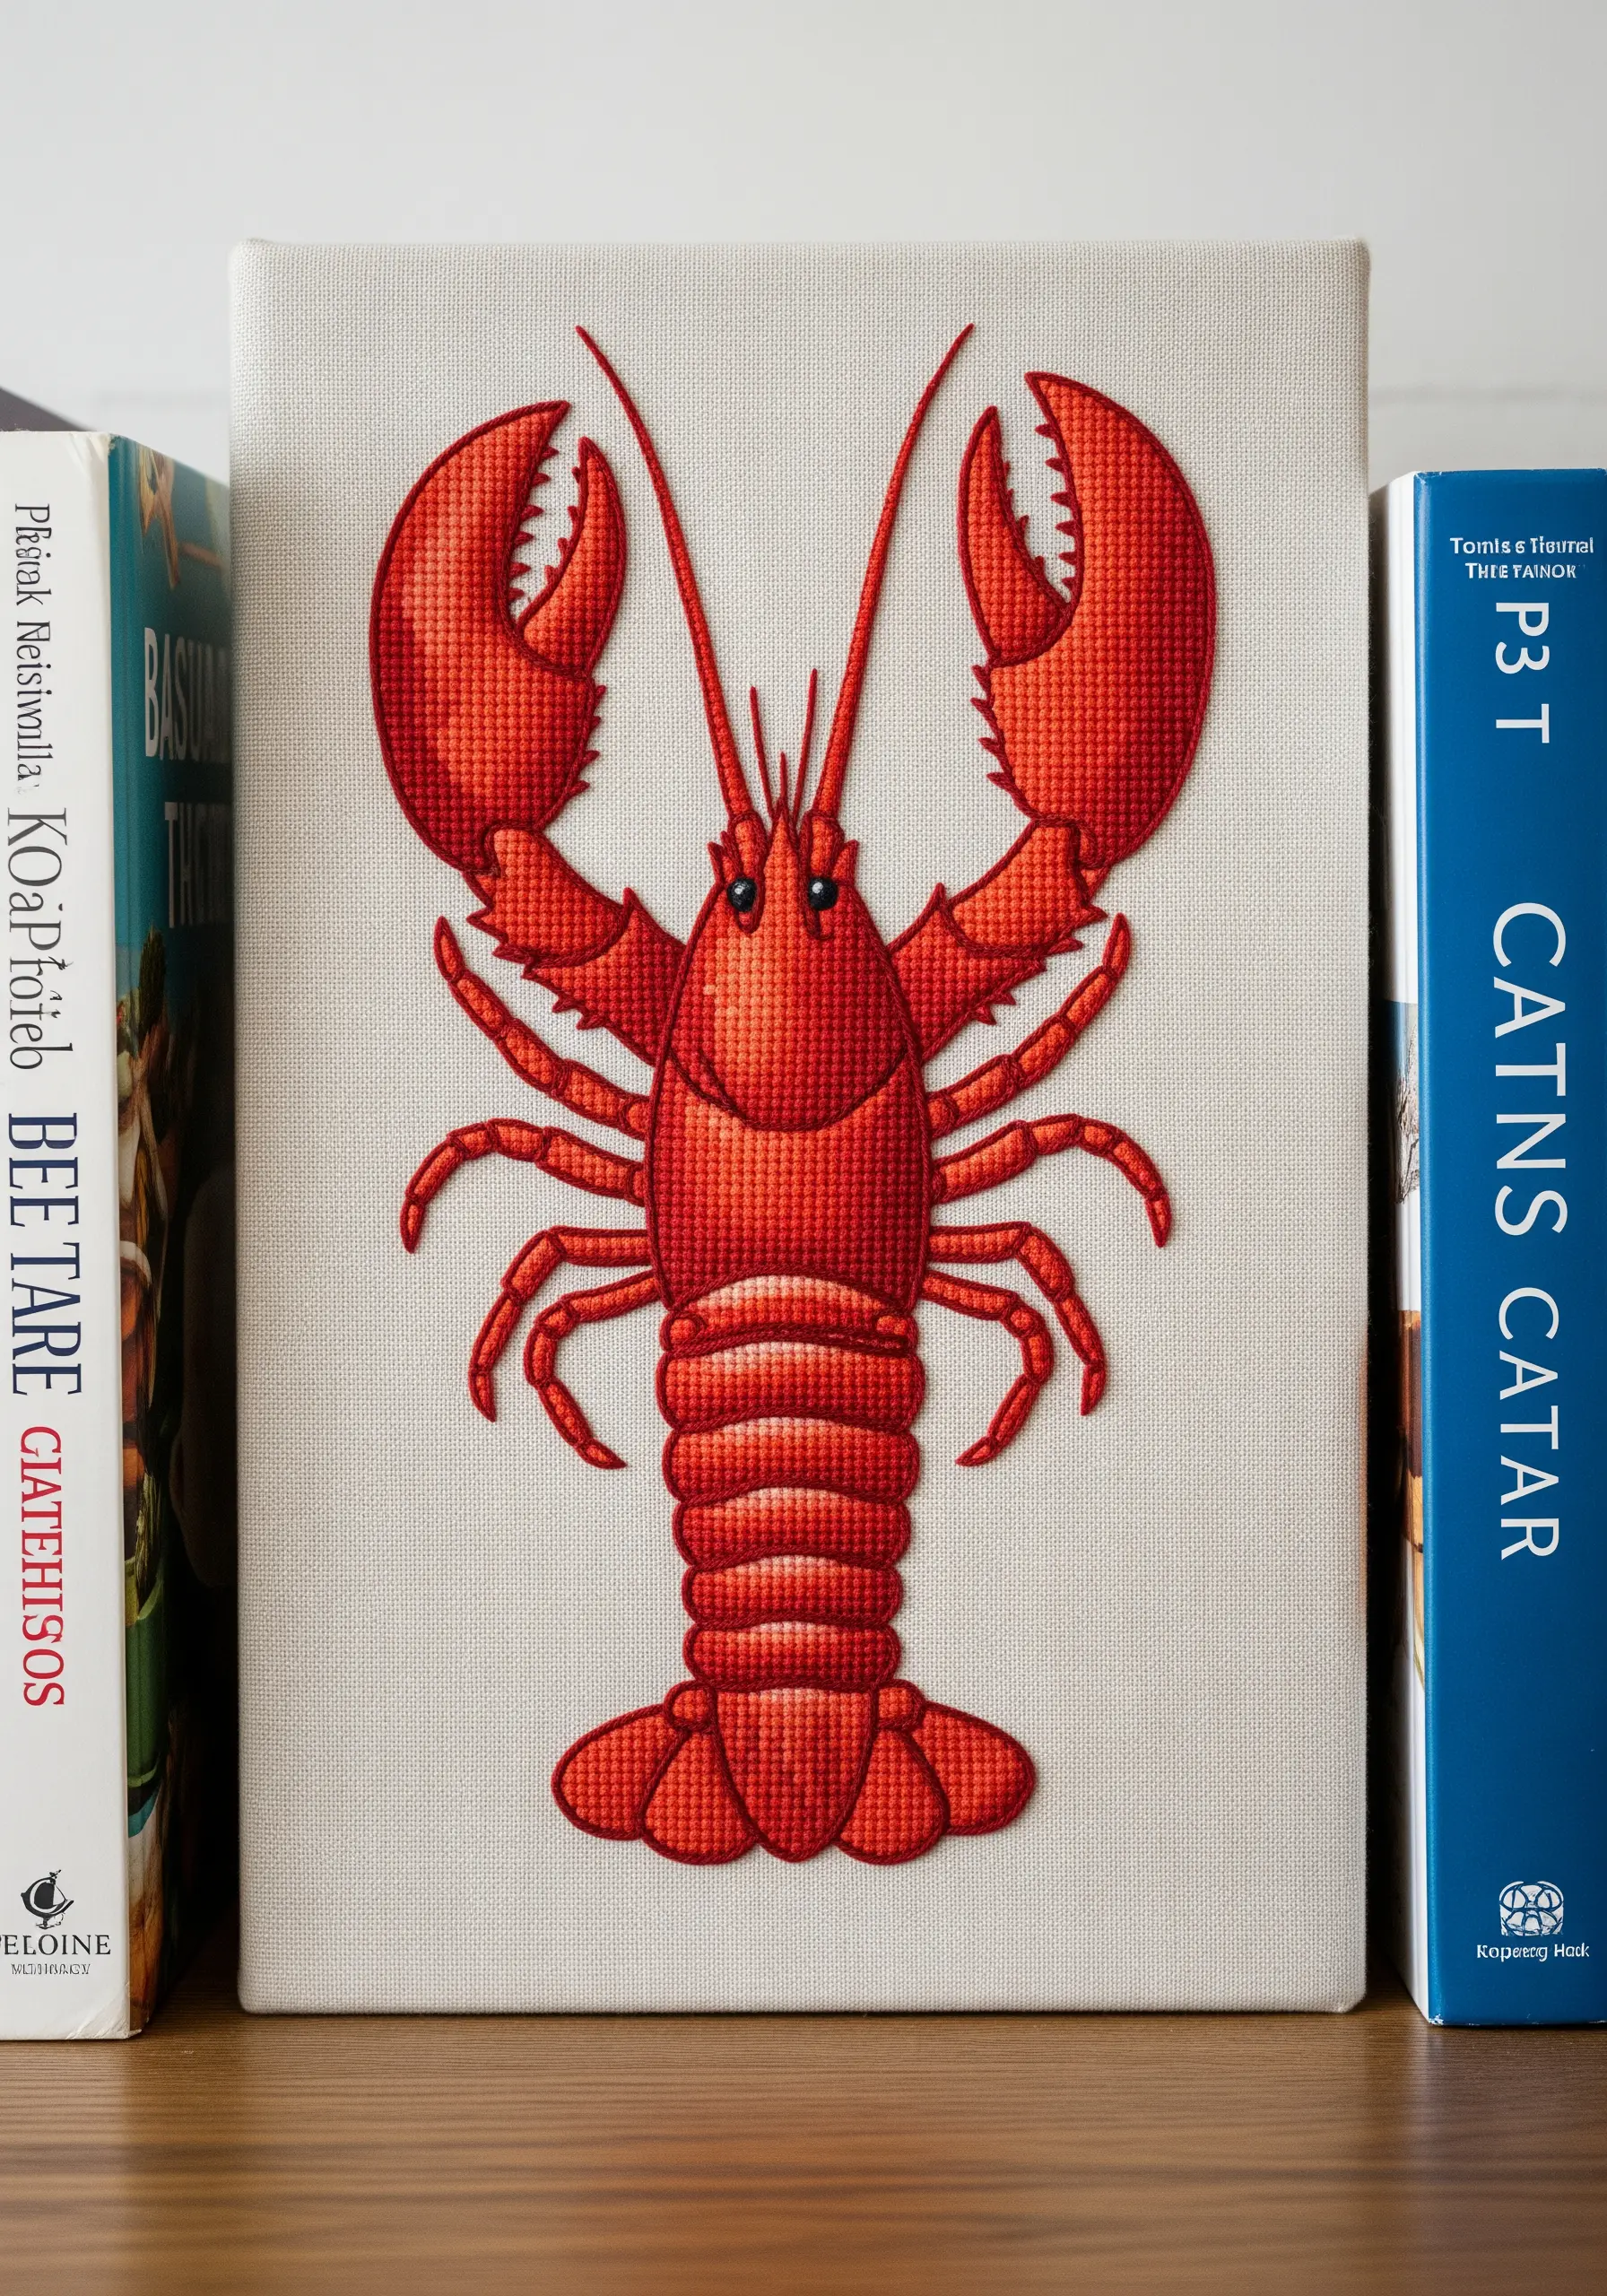
For a perfectly smooth, woven appearance on a solid shape like this lobster, use brick stitch.
Unlike satin stitch, which uses long parallel stitches prone to gapping, brick stitch is worked in staggered rows of short, straight stitches.
This technique interlocks the stitches, much like bricks in a wall, eliminating gaps and creating a flawless, uniform texture.
It is the ideal solution for filling large areas with precision and consistency.
20. Creating a Radiant Sea Urchin with Patterned Stitches
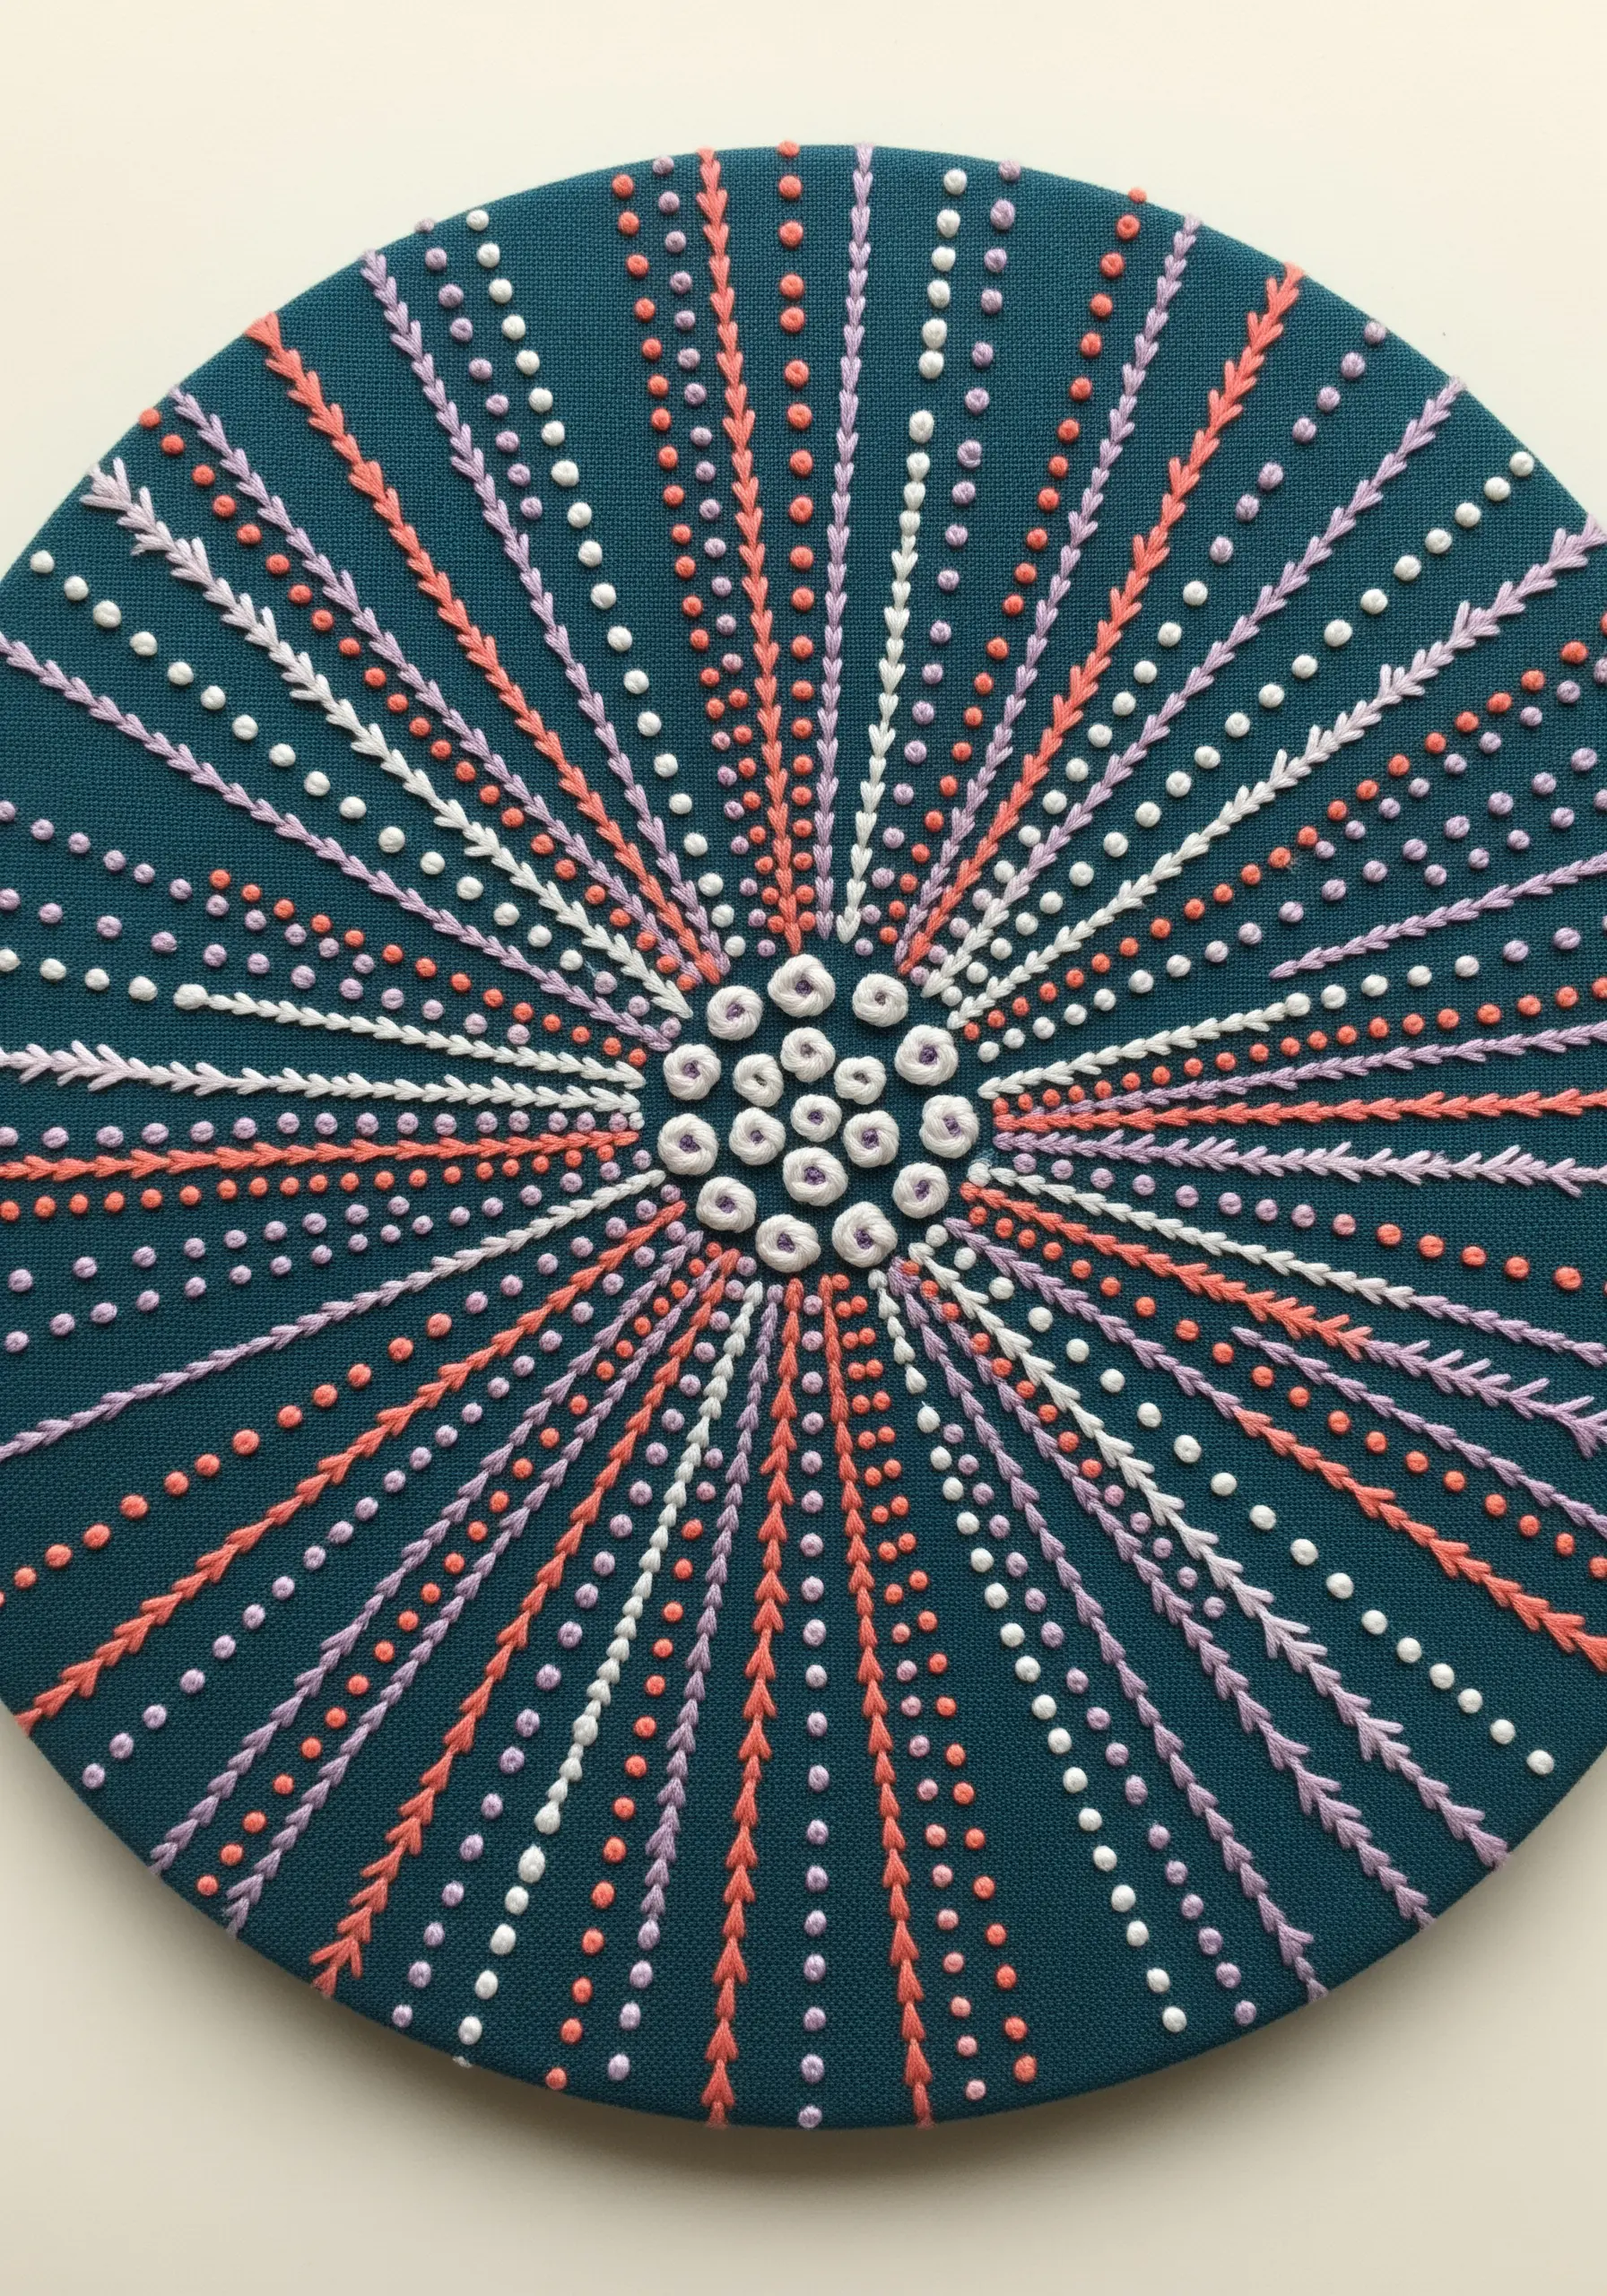
To maintain the perfect radial symmetry of a sea urchin, always build your design from the center outwards.
Start with a central circle of bullion knots or woven wheels.
From there, work radiating lines of alternating stitches—try pairing lines of French knots with lines of fly stitches or seed stitches.
Keeping to a limited color palette of three or four shades ensures that the intricate texture and pattern of the stitches remain the star of the show.


