

You don’t need endless hours to create something beautiful and polished. Often, the most impactful embroidery is born from a single, focused idea executed with intention. It’s about choosing the right stitch for the job, understanding how a small detail can transform a piece, and trusting that simplicity is its own form of elegance.
Think of these quick projects not as shortcuts, but as focused studies. Each one is an opportunity to perfect a specific technique—the smooth curve of a satin stitch, the crisp point of a star, or the rich texture of a French knot.
Here, you’ll find ways to add a quiet, personal touch to your clothes, your home, and your day. Forget the pressure of a masterpiece. Instead, pick up your needle and thread, and let’s create something small, meaningful, and finished—right now.
1. Master the Satin Stitch with a Single Leaf
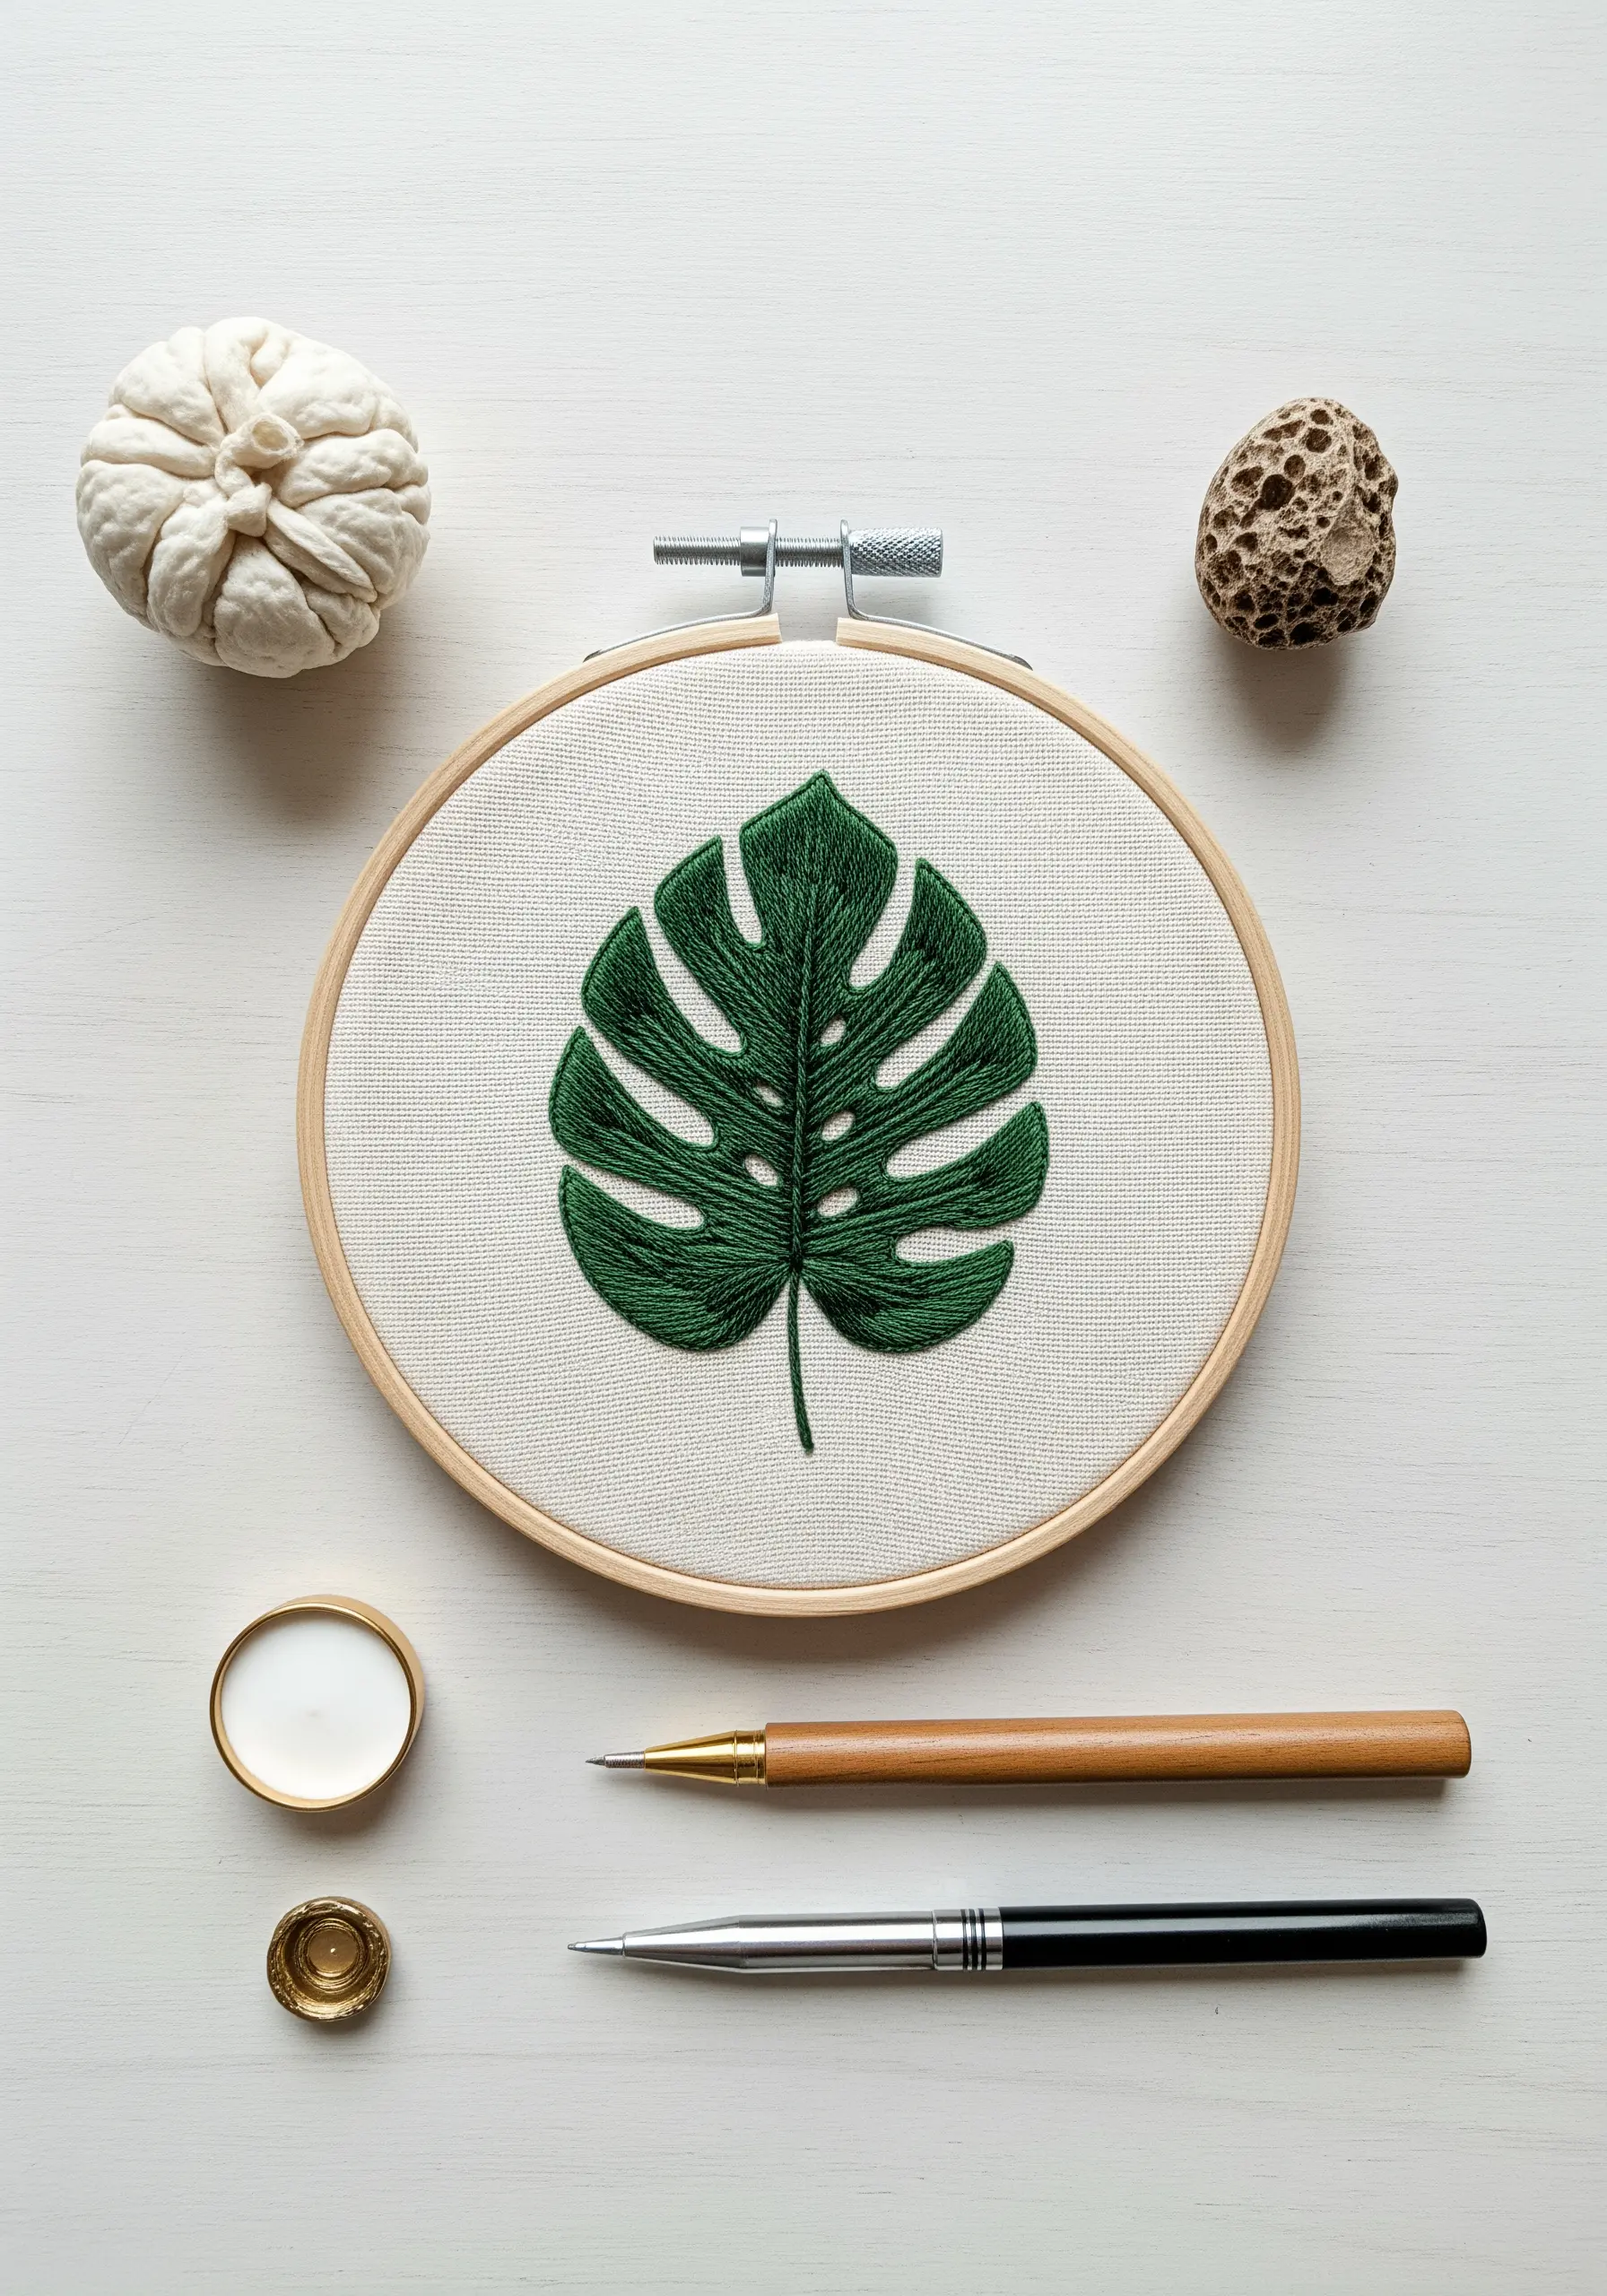
To achieve a perfectly smooth satin stitch surface, first outline your shape with a split stitch.
This simple preparation creates a raised edge that acts as a guide, preventing your fill stitches from straying and giving them a clean, defined boundary.
Fill the shape with parallel stitches, making sure each one sits snugly against the last without overlapping.
For a nature-inspired motif like this, angling your stitches slightly gives the leaf a subtle, organic sense of movement.
2. Stitch a Minimalist Constellation
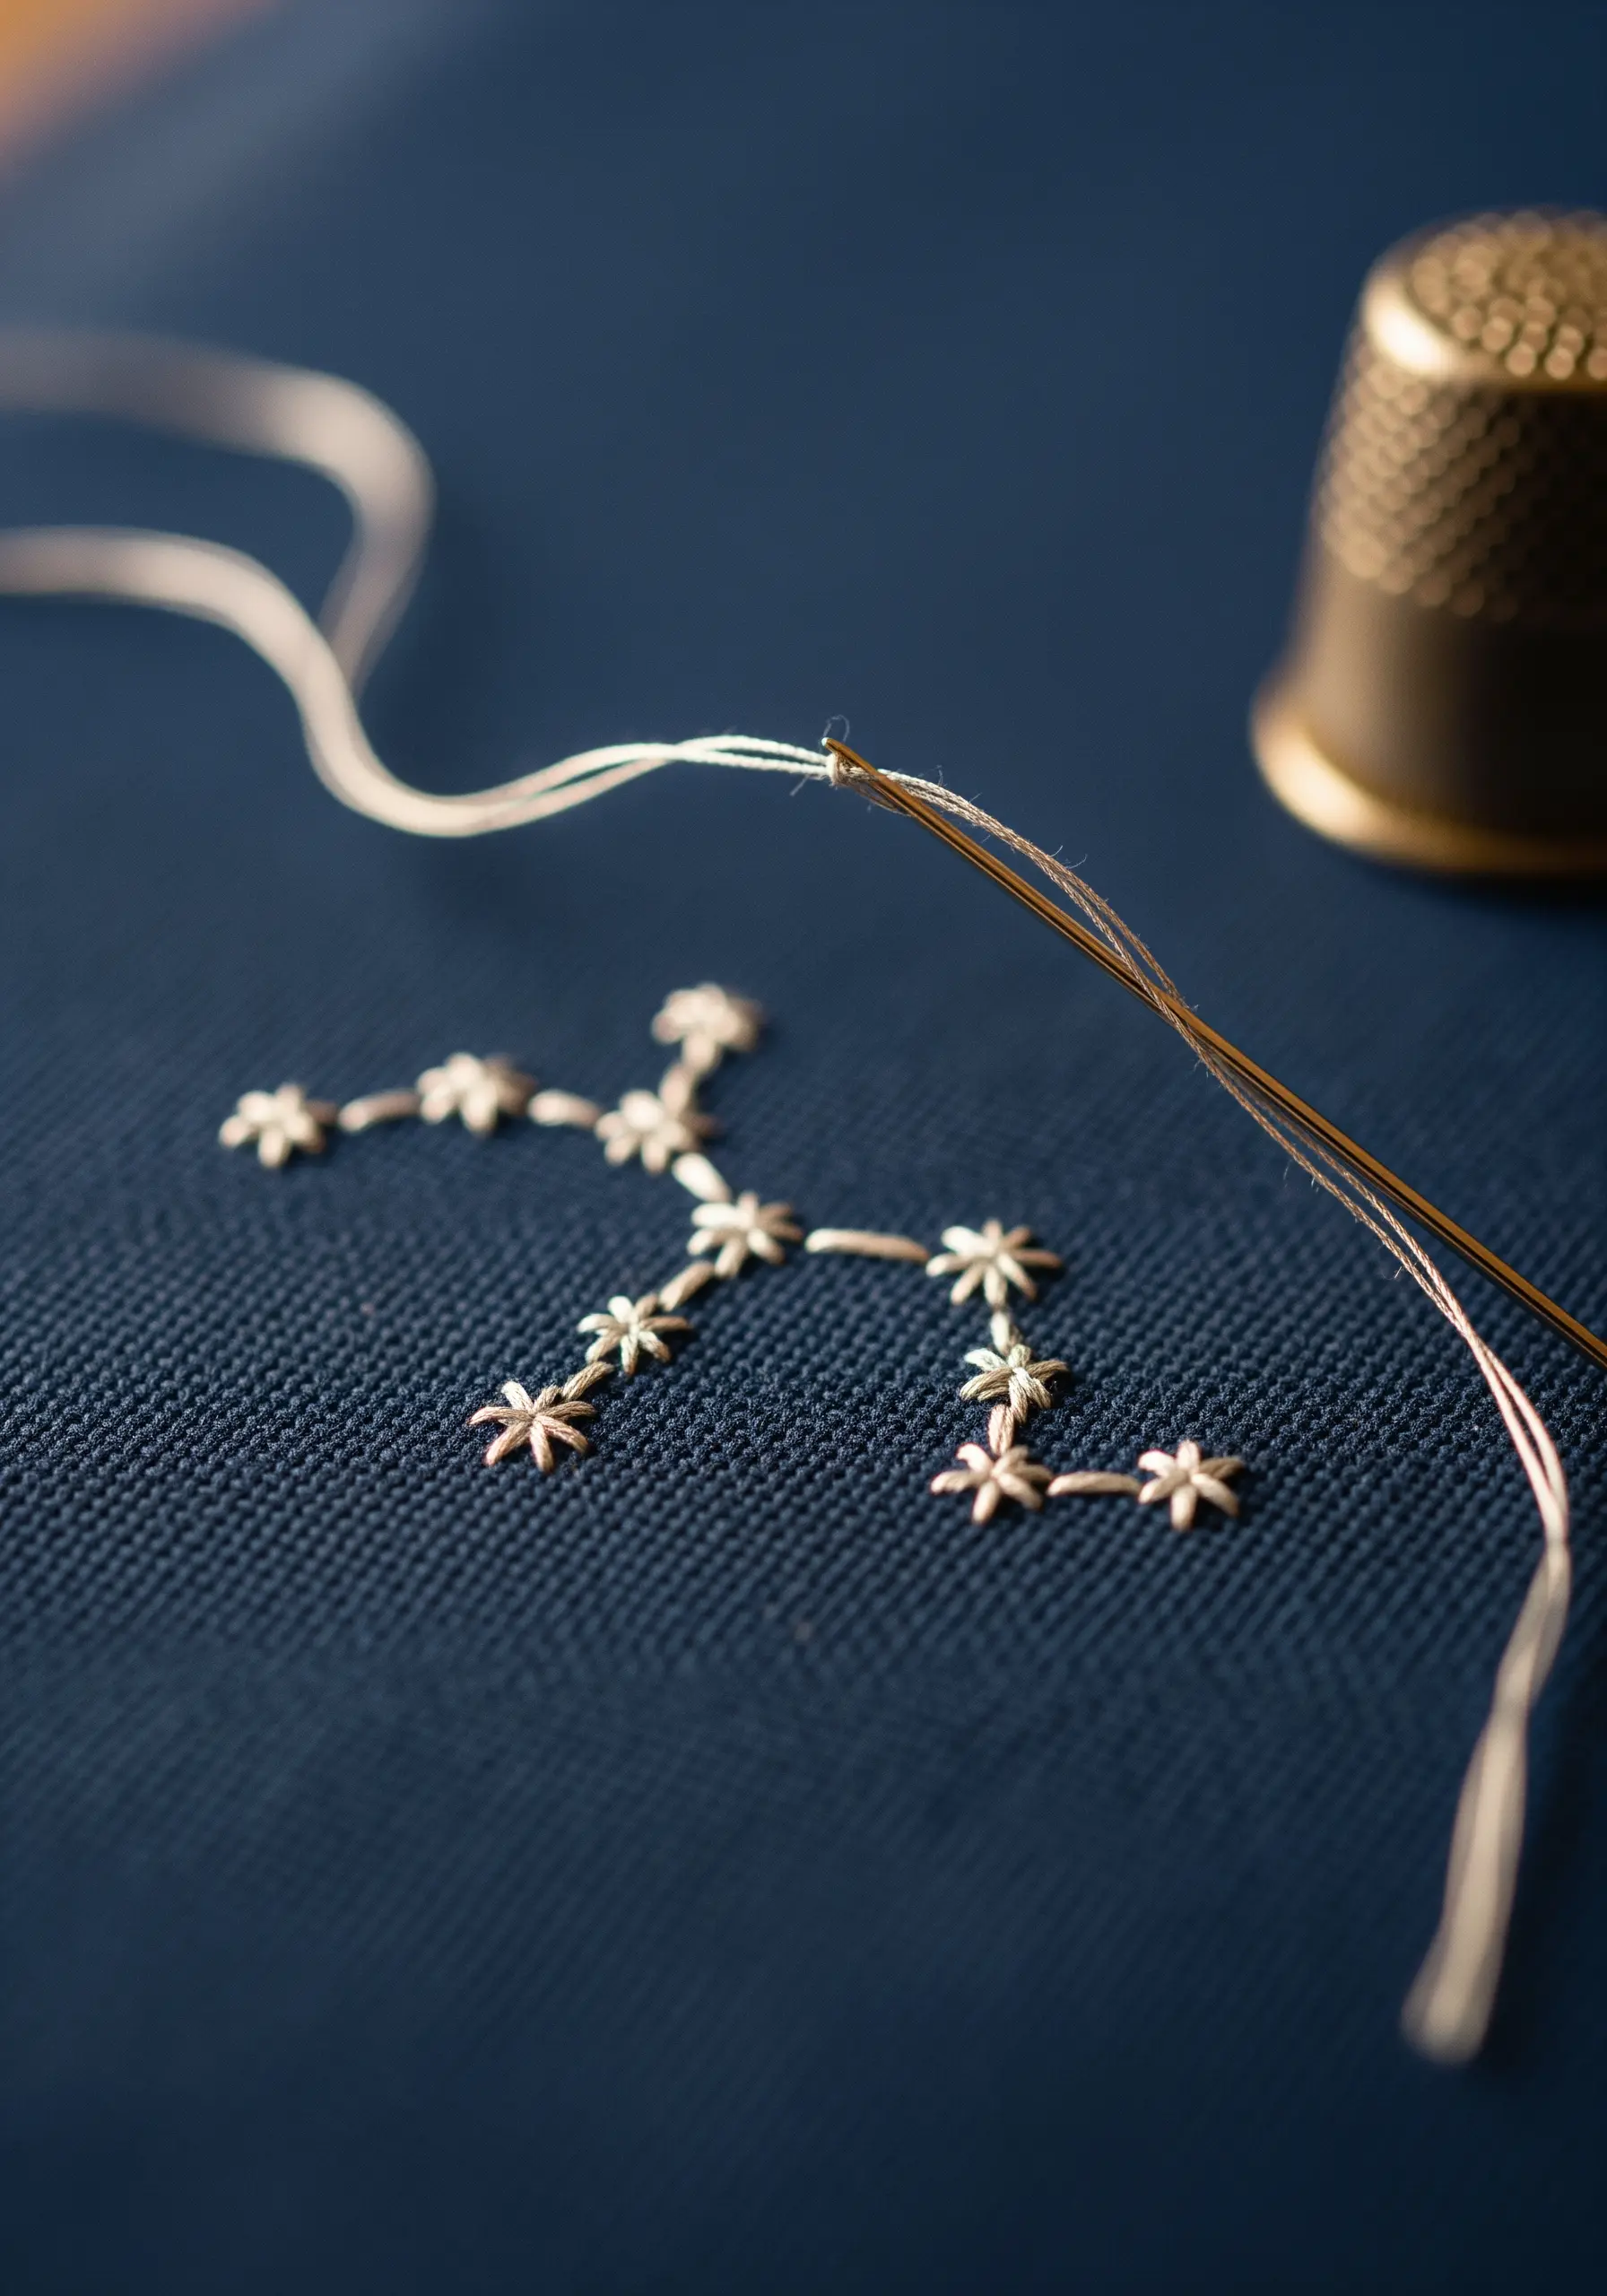
Create sharp, elegant star stitches by focusing on consistent tension.
Use a single strand of floss for delicate, crisp points, or a metallic thread for a subtle shimmer against dark fabric.
Mark your points with a water-soluble pen before you begin to ensure each ‘star’ is symmetrical.
This design’s power lies in its negative space; resist the urge to add more, allowing the simple constellation to command attention.
3. Create Radiating Energy with a Sun Motif
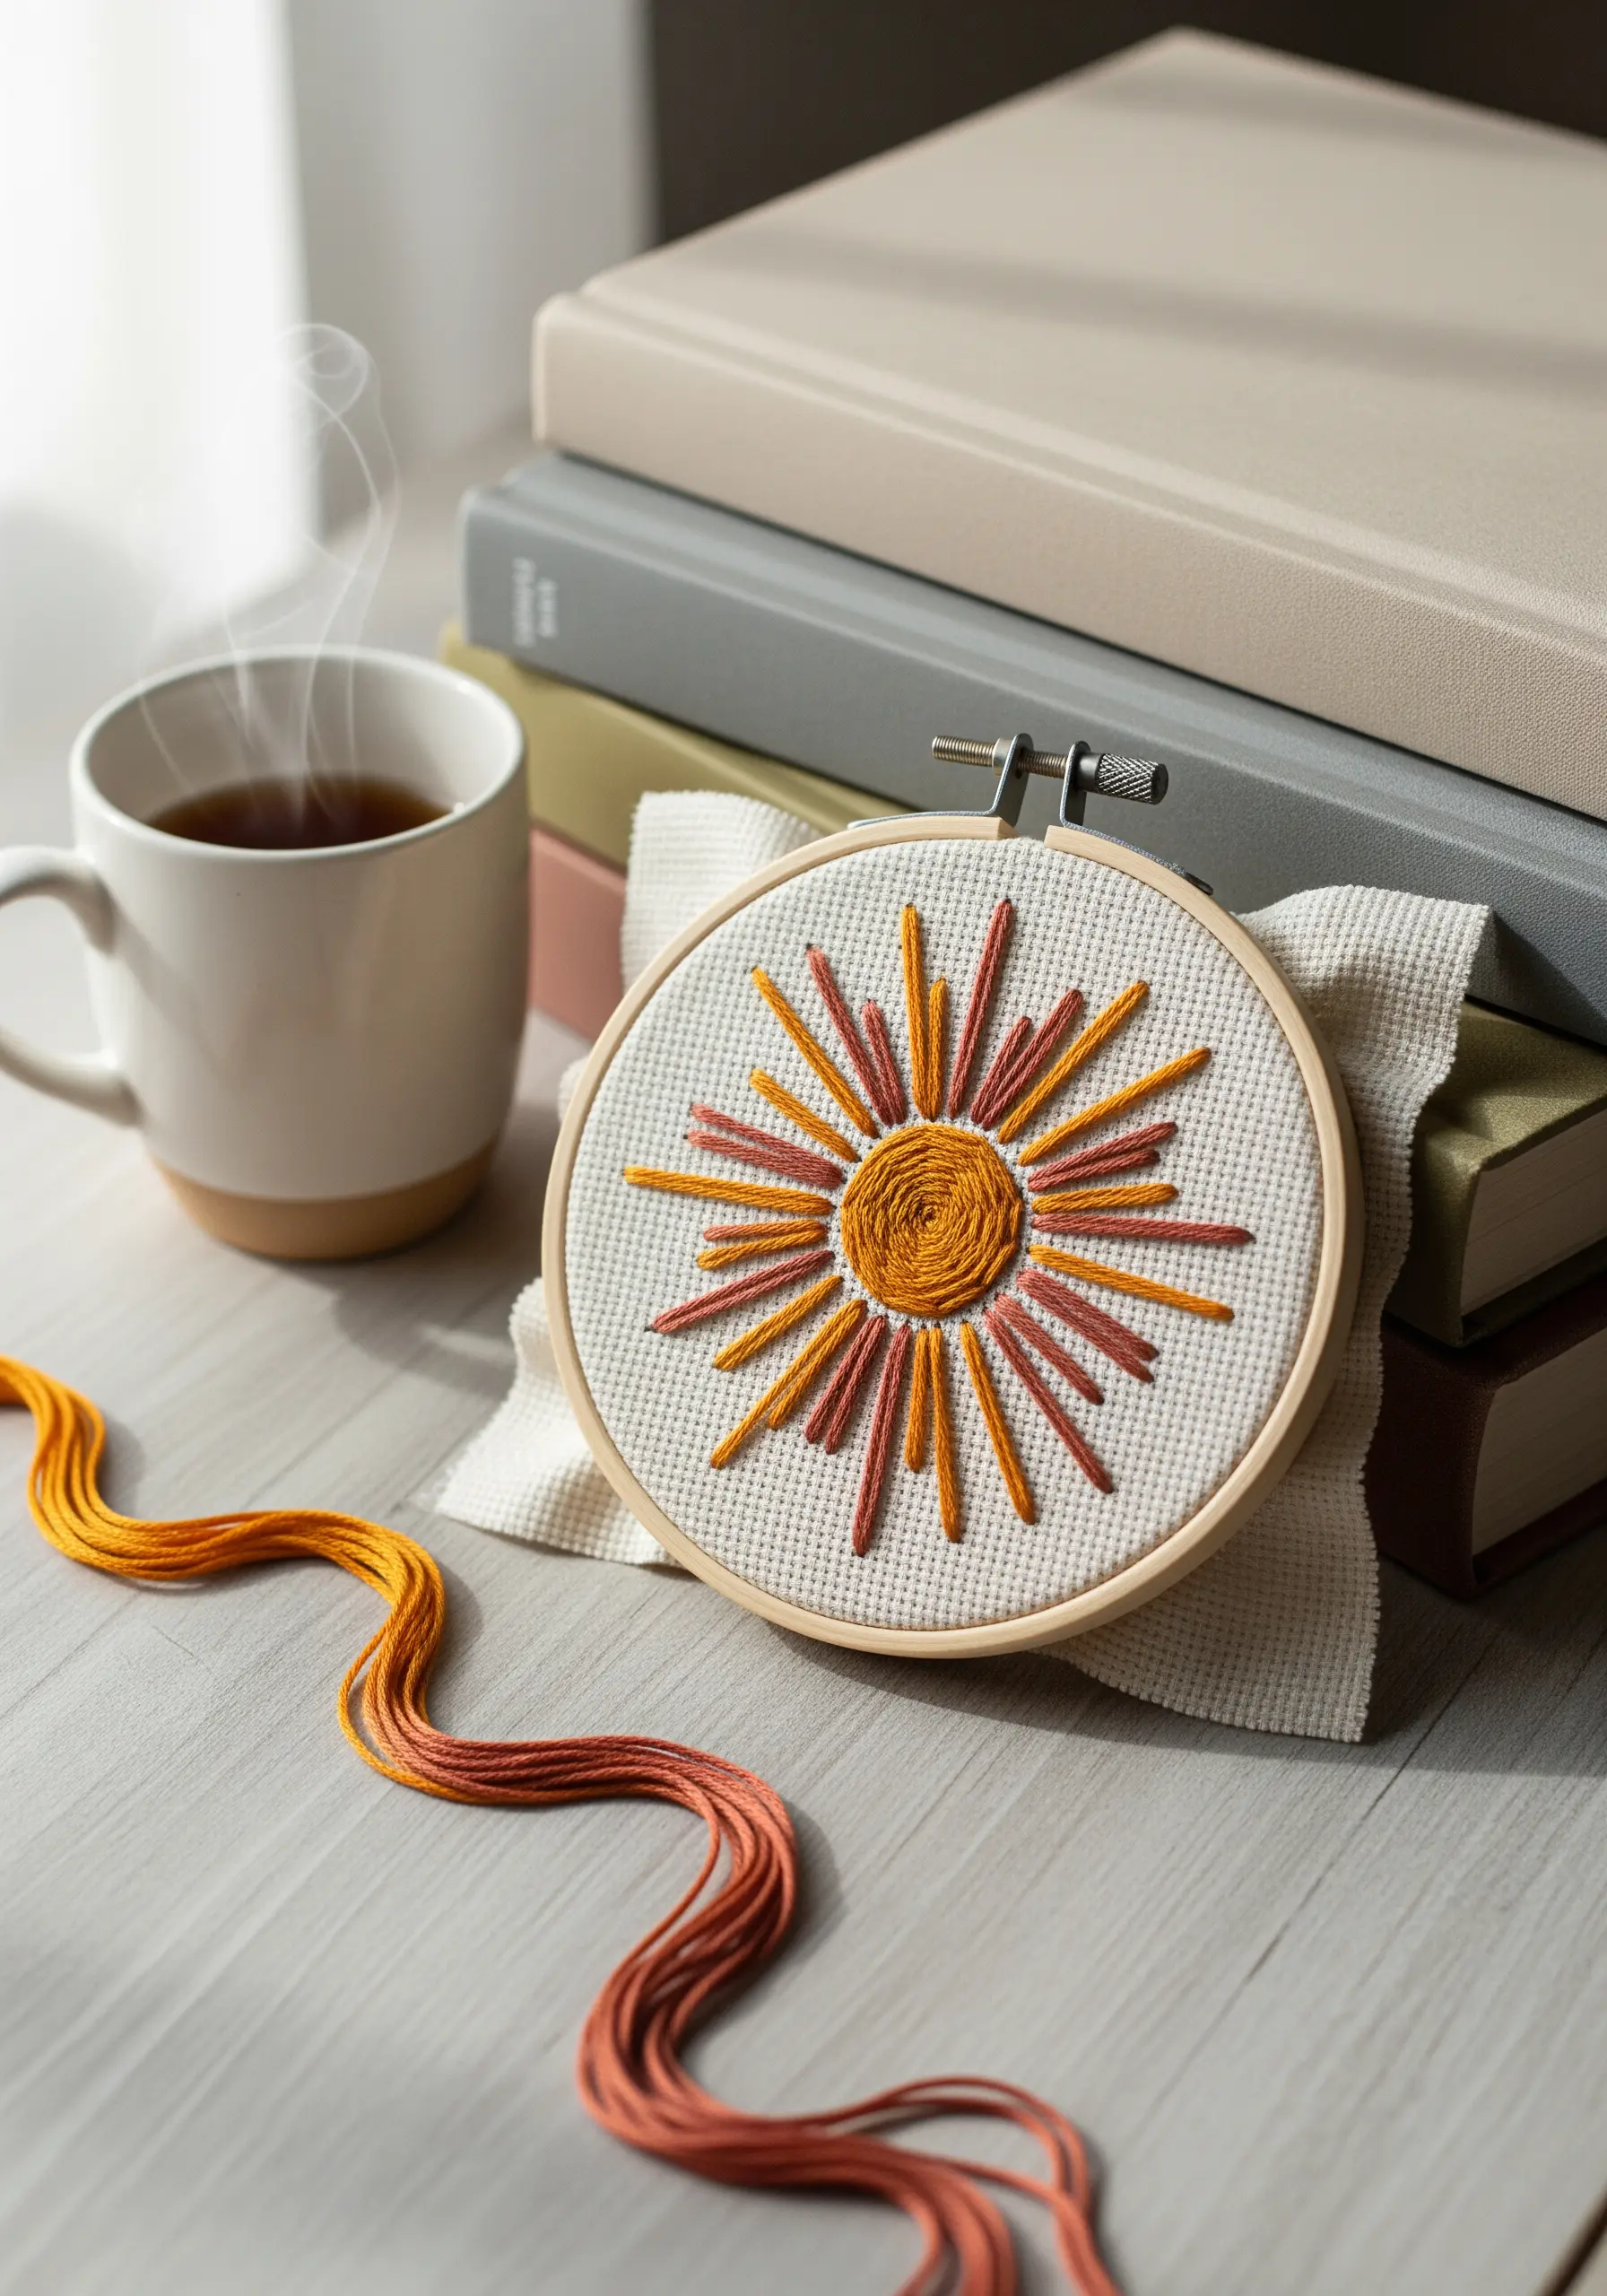
This design combines a central spiral of satin stitch with radiating straight stitches for a dynamic effect.
Use a variegated thread for the sun’s rays to create an effortless color gradient without changing floss—a simple trick for adding visual depth quickly.
Vary the length and color of the rays to give the sun a hand-drawn, energetic quality.
This is a perfect example of how combining bold and colorful framed embroidery with simple stitches can create stunning results.
4. Add Dimension to a Simple Bee
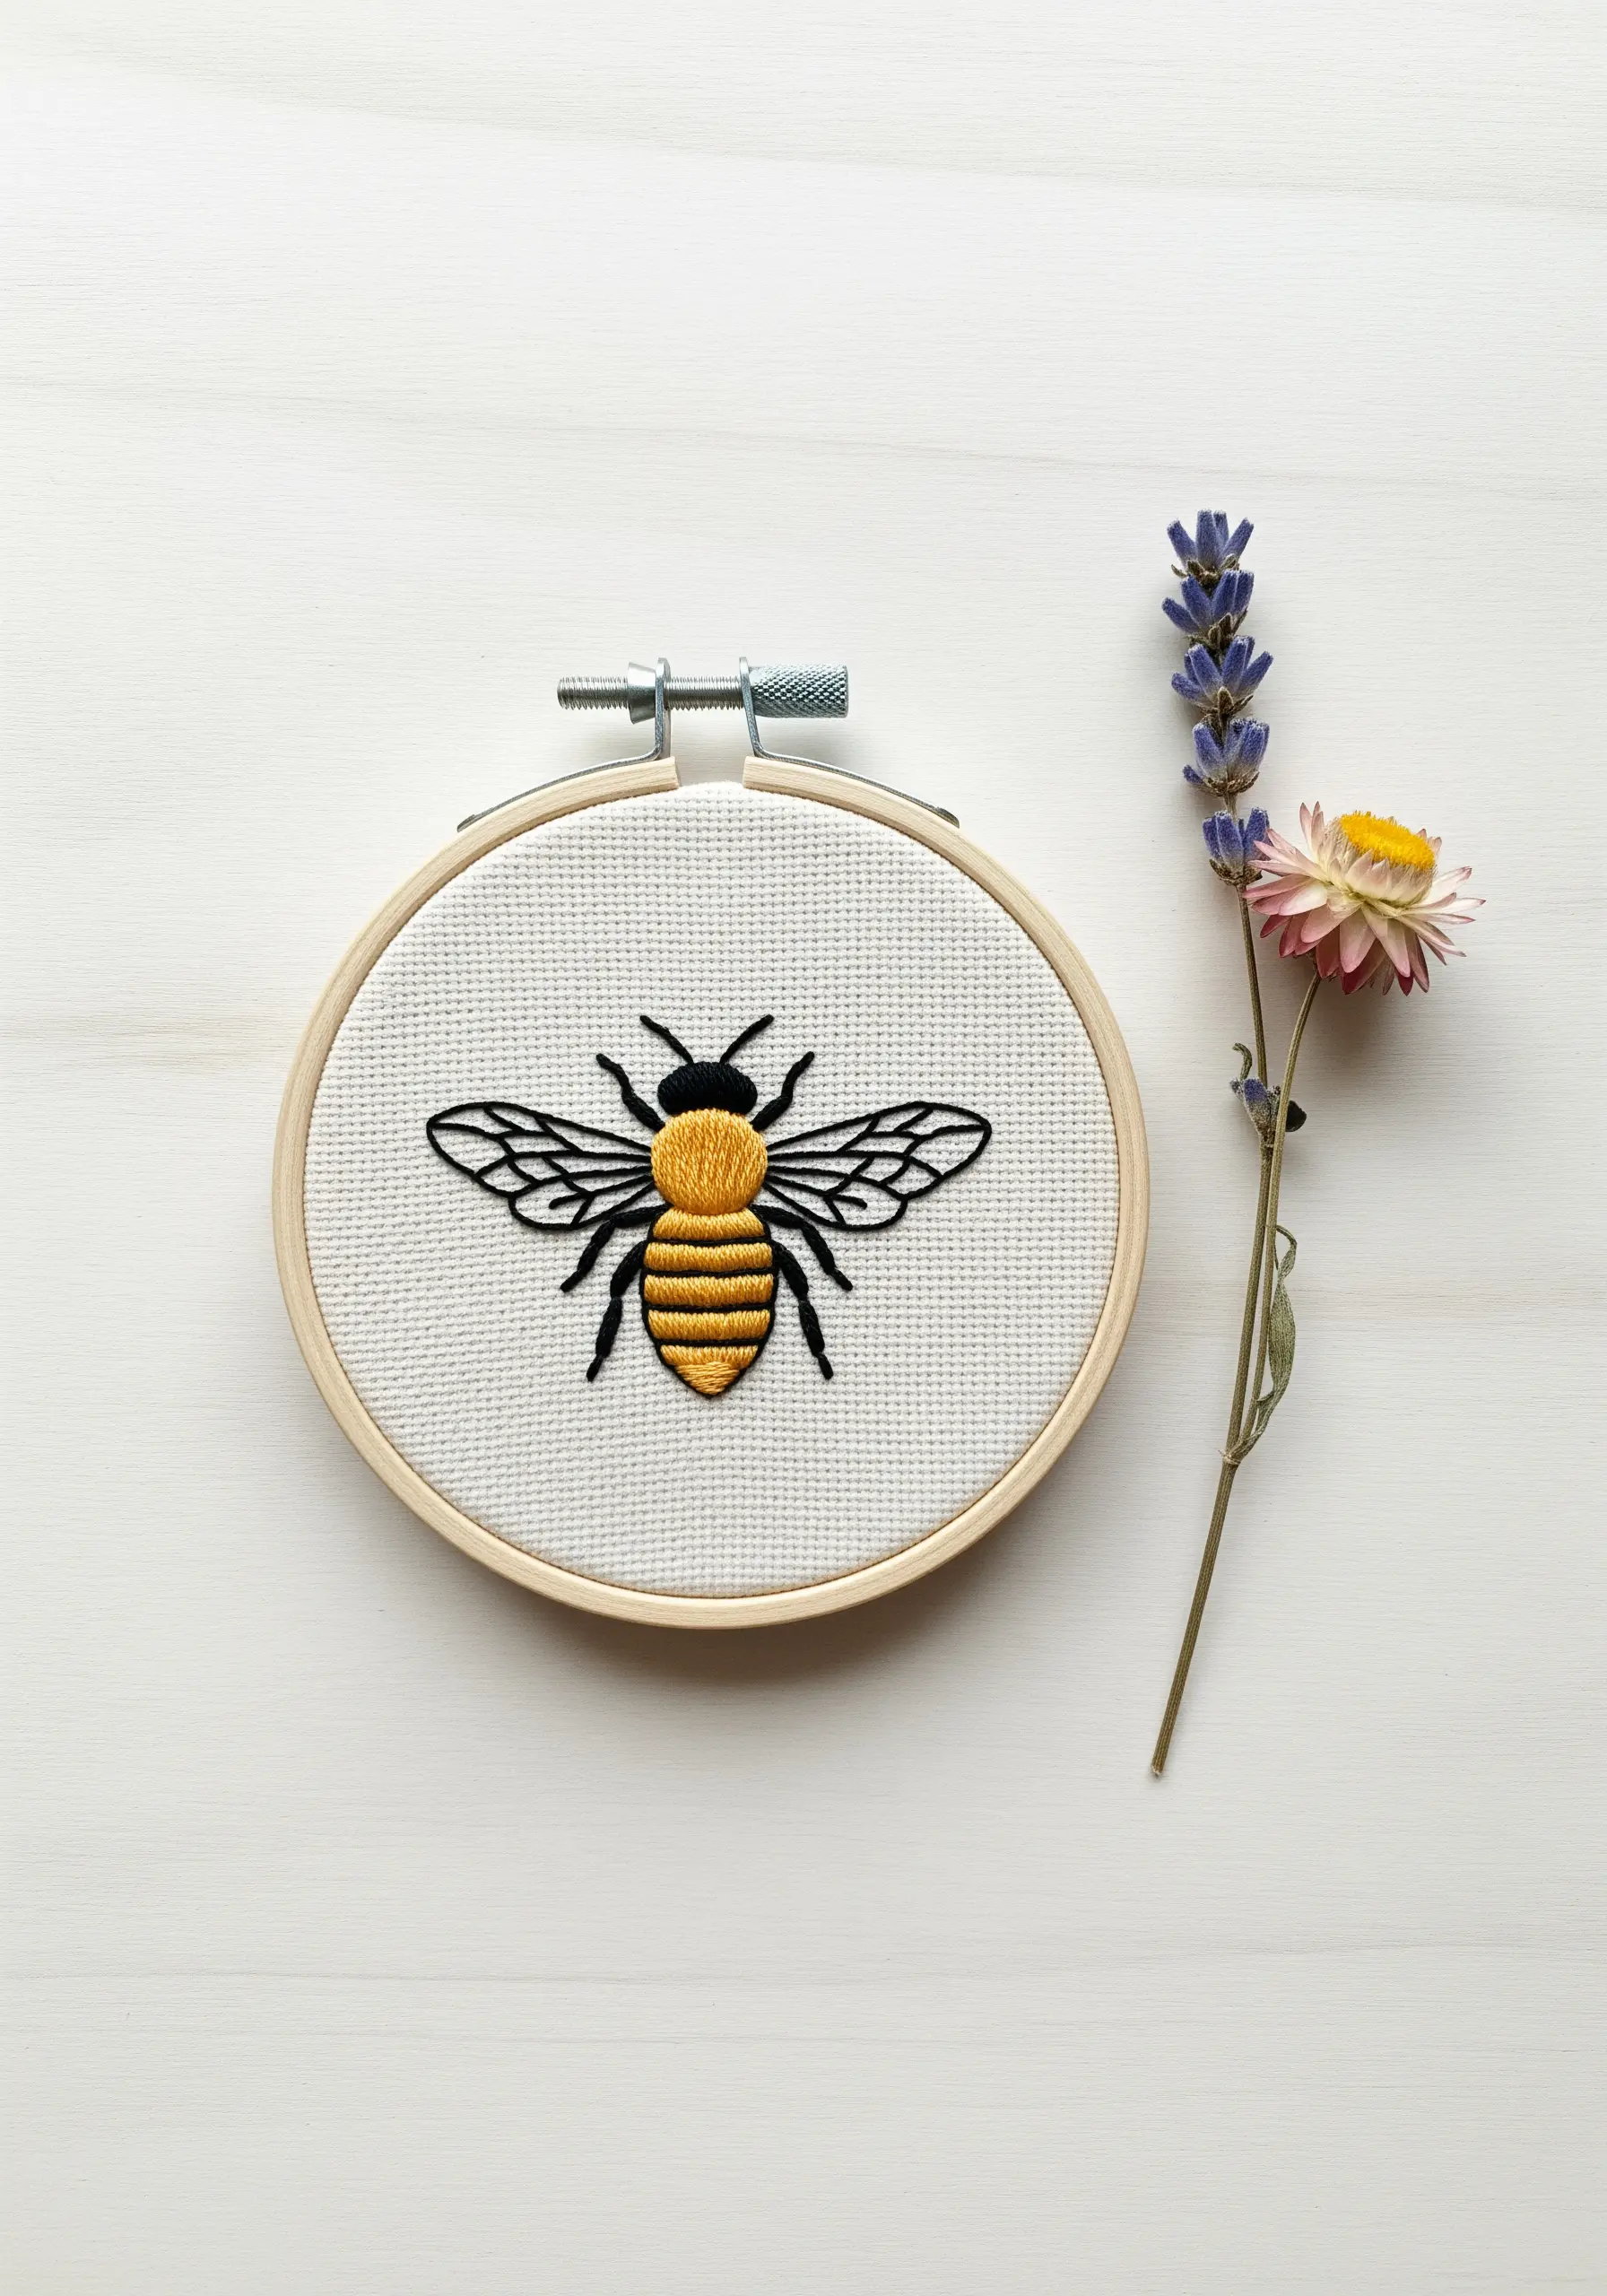
Elevate a simple bee design by focusing on texture and clean outlines.
Work the black stripes and head in satin stitch, then fill the yellow stripes using the same technique but with stitches angled in the opposite direction for subtle contrast.
Outline the wings with a fine backstitch and leave them unfilled to create a sense of lightness and transparency.
A single, well-placed French knot for the eye completes this charming motif.
5. Embellish a Collar with Subtle Waves
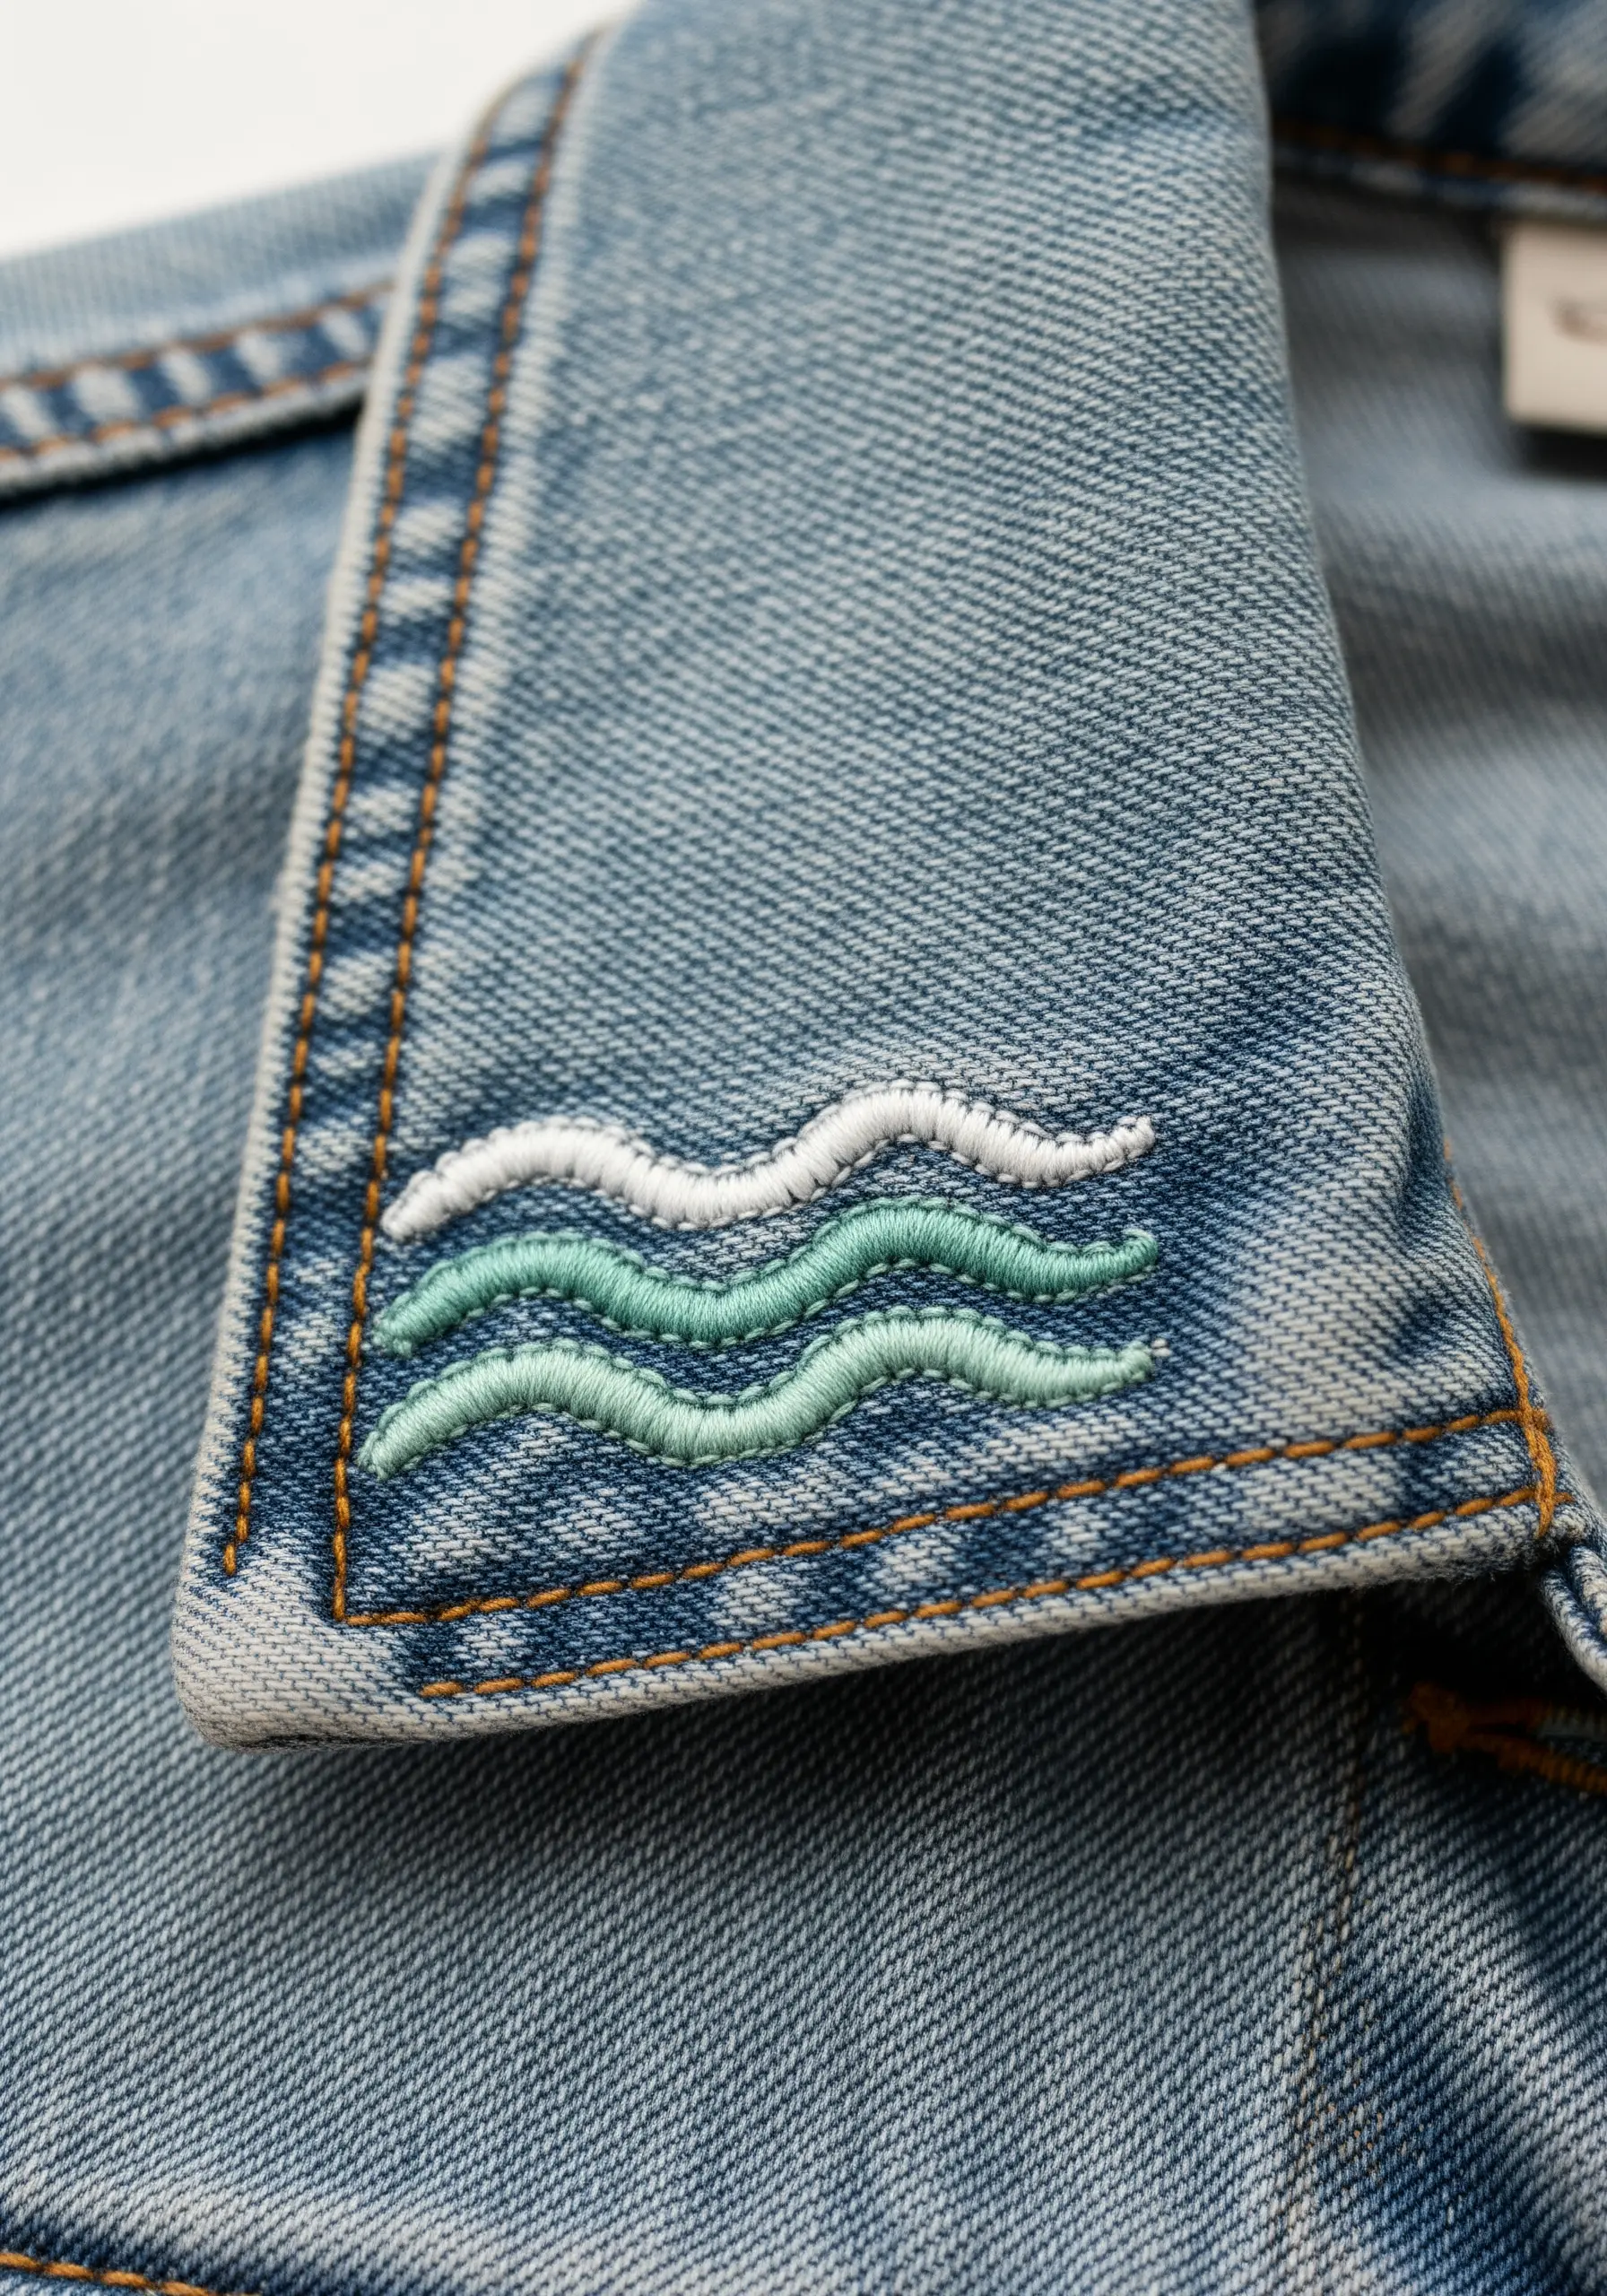
Transform a simple denim collar with a small, well-placed detail.
Use a whipped backstitch to create smooth, raised lines that mimic the flow of water. This involves completing a standard backstitch, then lacing a second thread through the stitches without piercing the fabric.
This technique adds dimension and durability, ensuring your design withstands wear and washing.
Choosing a tonal color palette—like these shades of sea green—keeps the embellishment looking sophisticated, not distracting.
6. Paint with Thread on Felt
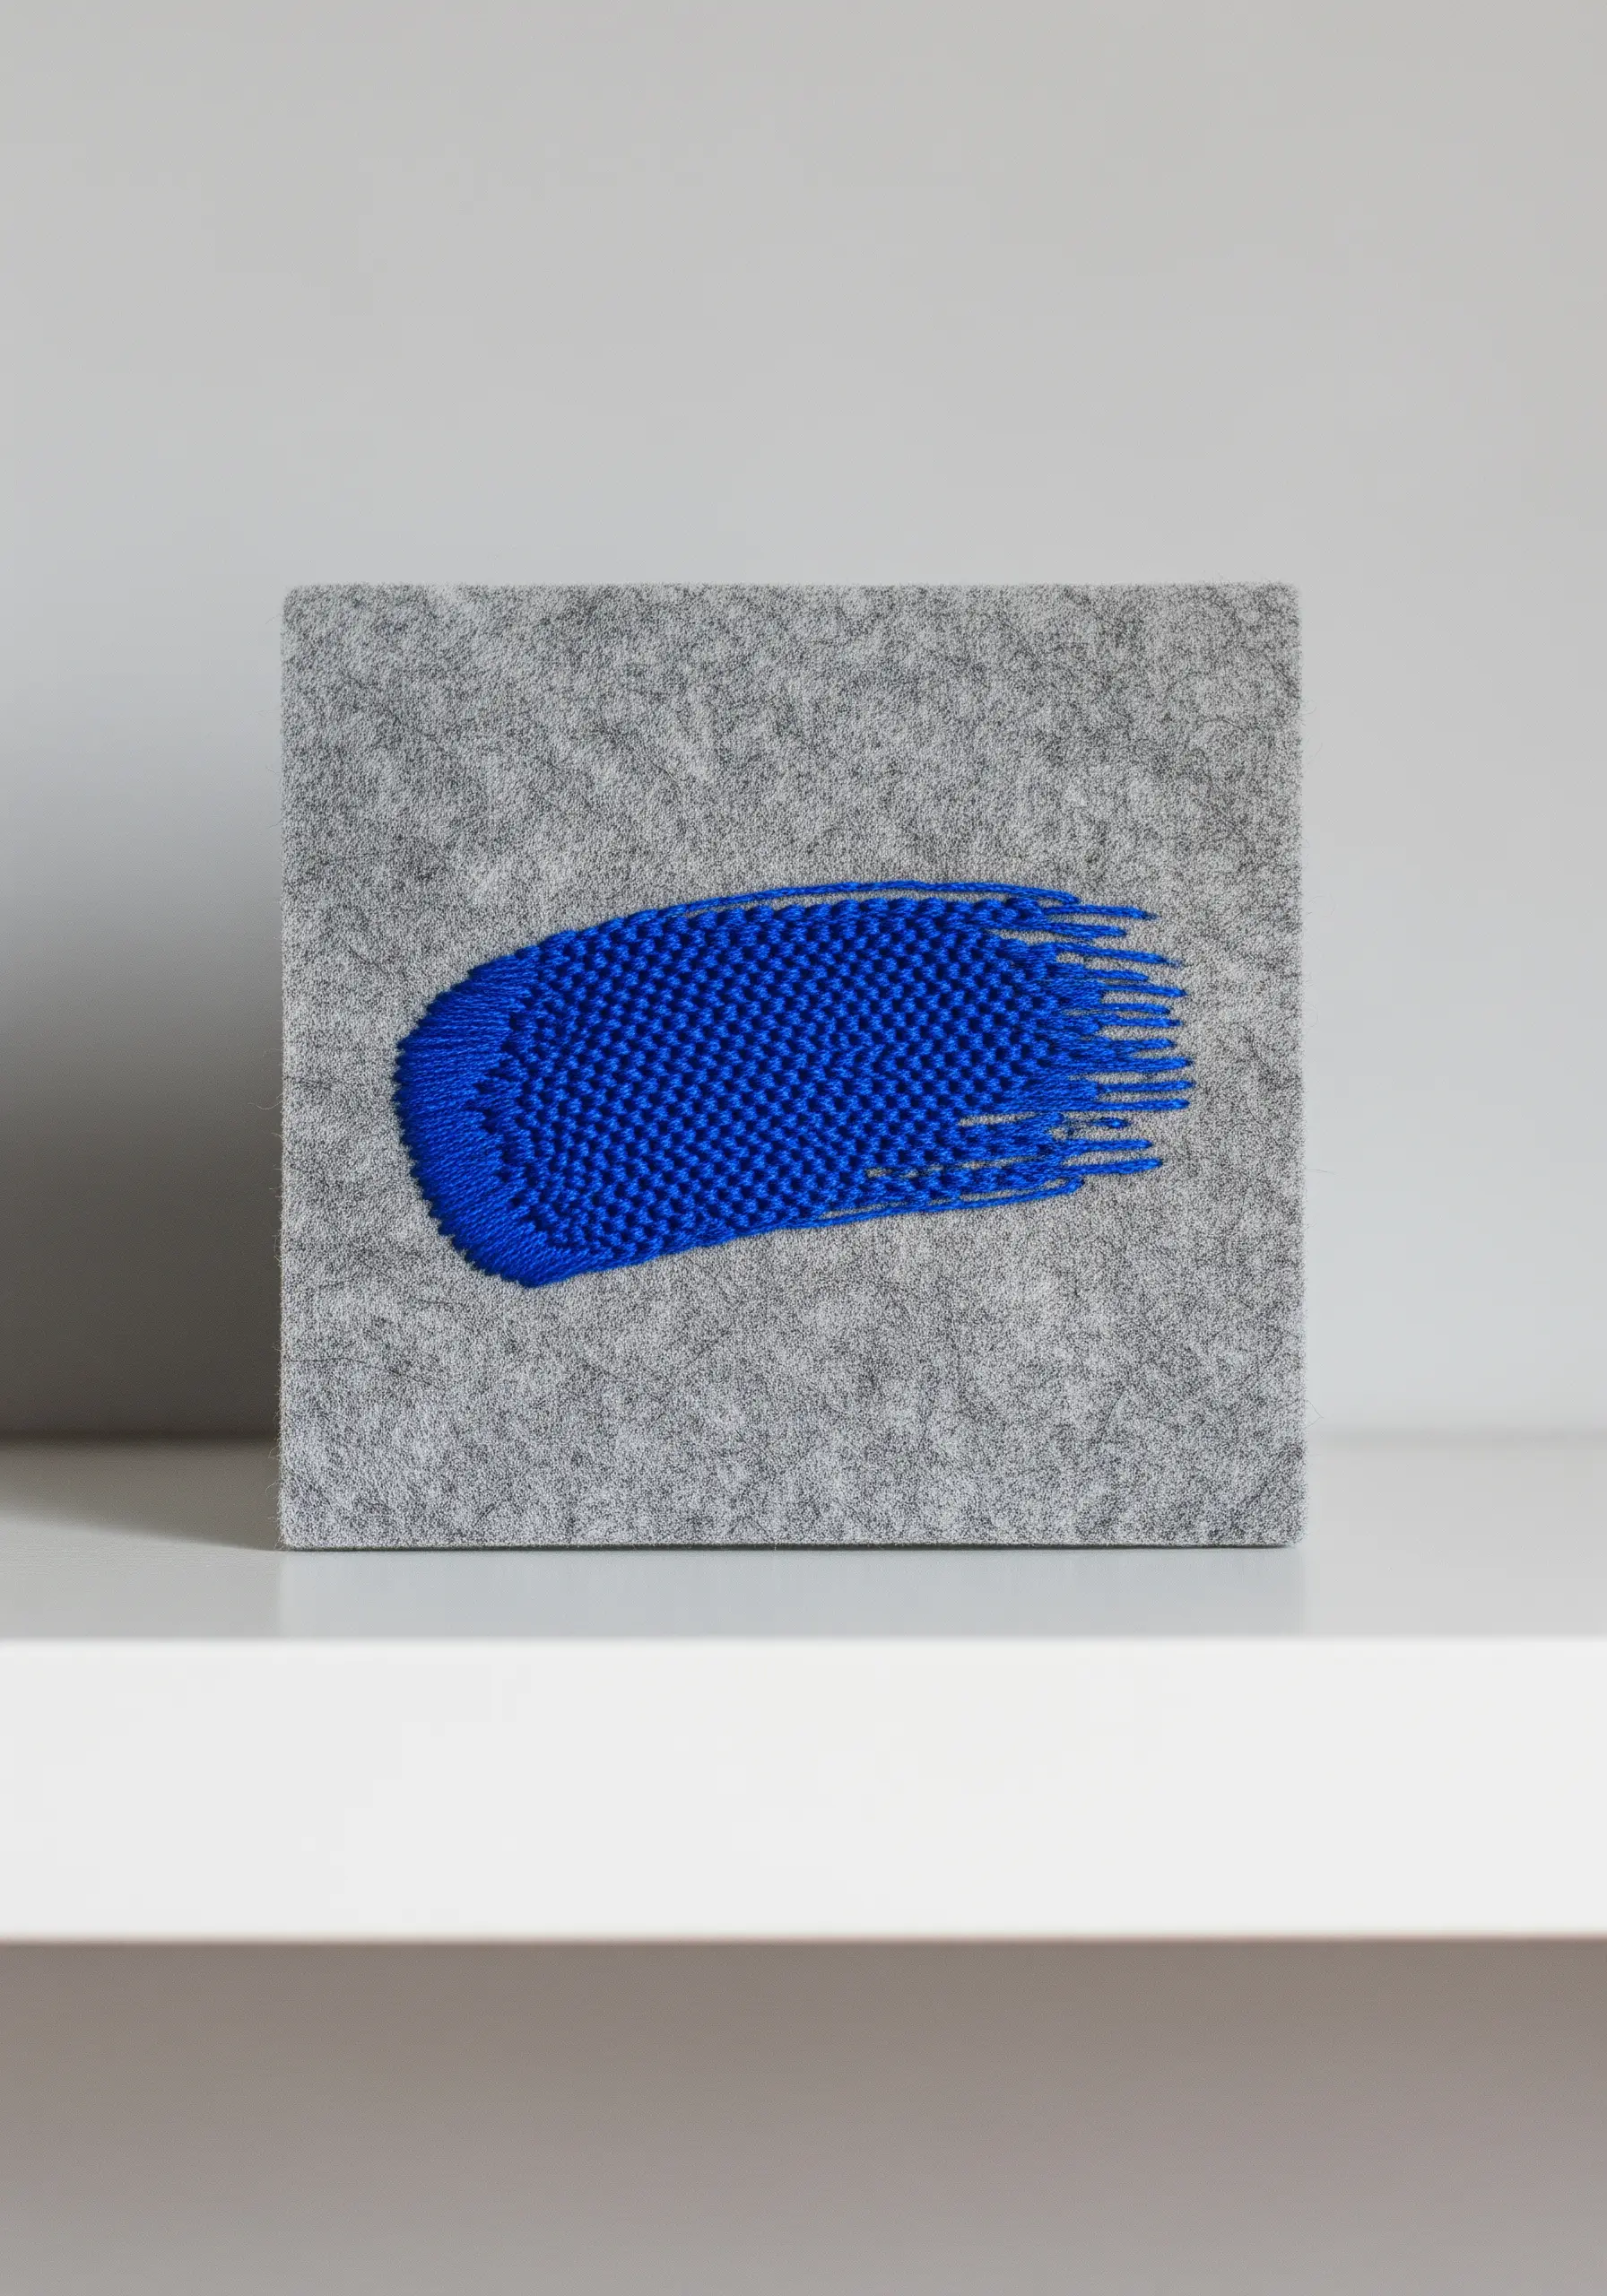
Create an abstract paint-stroke effect using a dense satin stitch on a textured, stable fabric like wool felt.
The felt’s thickness prevents puckering, allowing you to pack your stitches tightly for a solid, opaque look.
To mimic the drag of a paintbrush, let the ends of your stitches be slightly uneven and angled.
This project proves that embroidery doesn’t always have to be delicate; it can be bold, graphic, and textural.
7. Curve Your Satin Stitch for a Crescent Moon

When filling a curved shape like a crescent moon, the direction of your satin stitches is everything.
Instead of keeping them perfectly vertical, angle your stitches to follow the curve of the shape.
This technique, known as directional satin stitch, creates a sense of form and dimension, making the flat object appear rounded.
Pair it with simple star stitches in a metallic floss to complete these moon and stars embroidery ideas.
8. Sculpt Dandelions with Bullion Knots
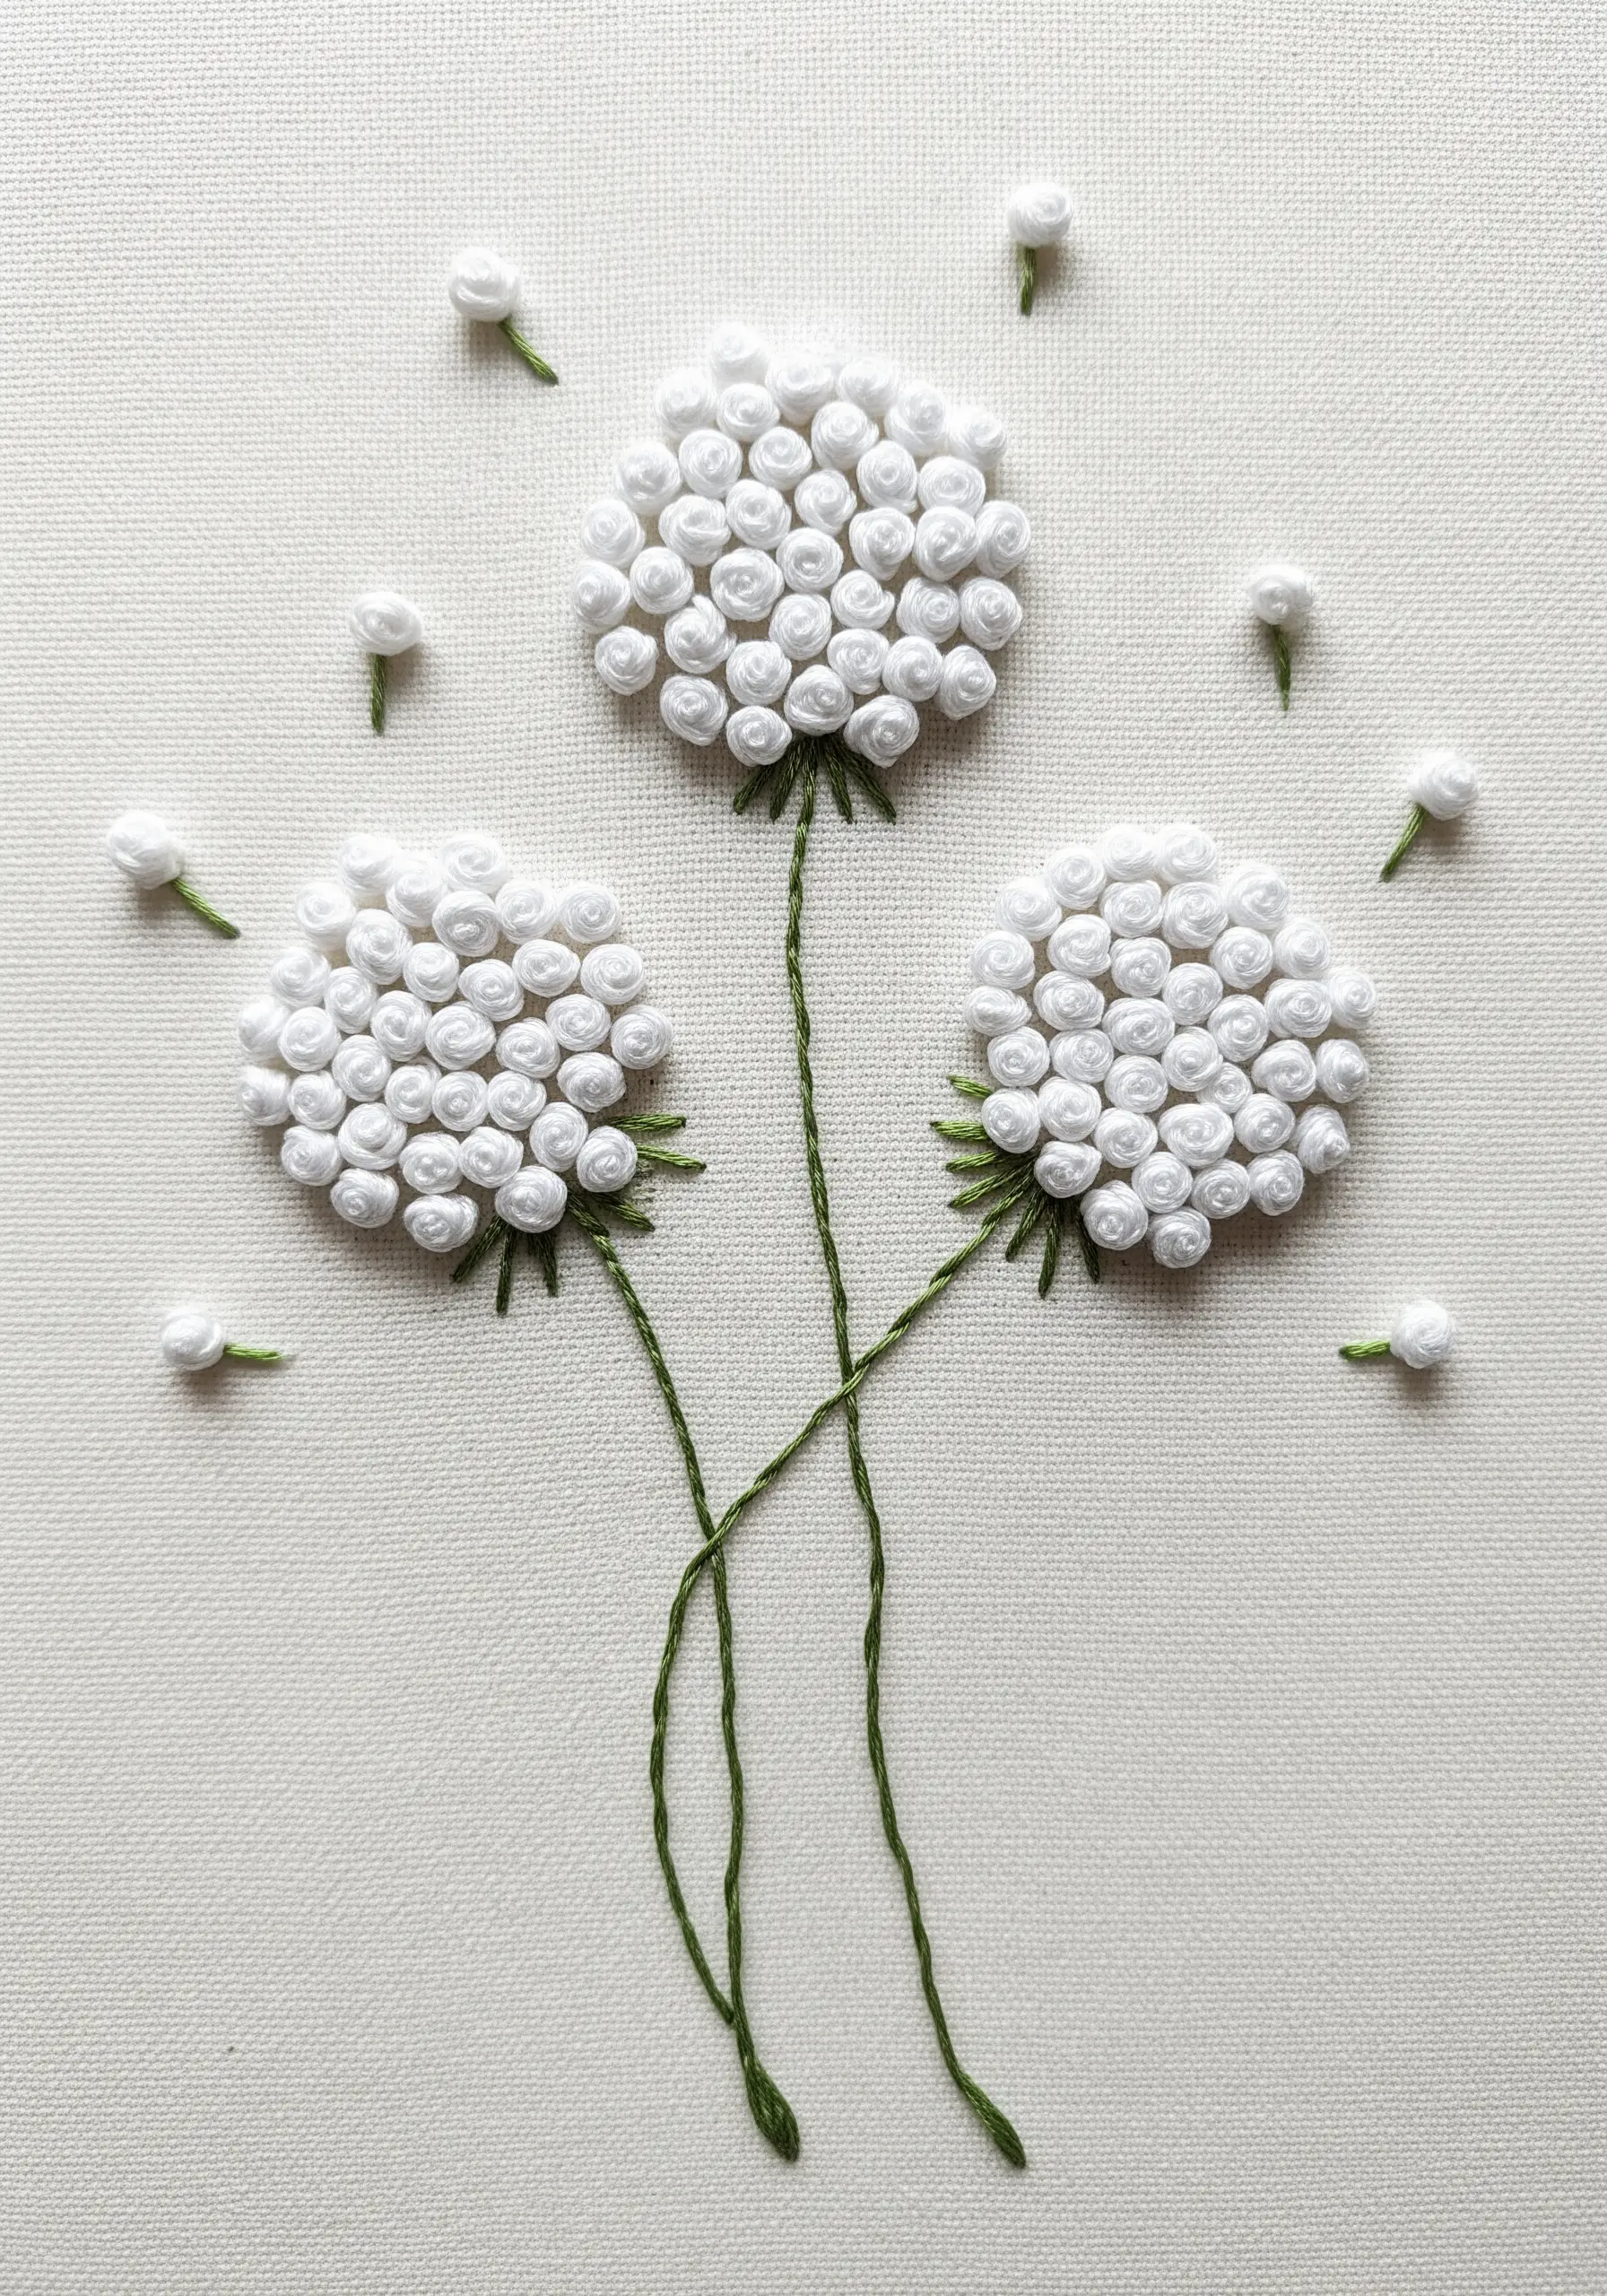
Build incredible 3D texture by clustering bullion knots together to form dandelion heads.
To create a bullion knot, wrap the thread around your needle several times before pulling it through the fabric, forming a small coil.
For a dense, floral look, create knots with seven to nine wraps and place them tightly side-by-side.
A few scattered, smaller knots suggest seeds blowing in the wind, adding a sense of delicate movement to your piece.
9. Upgrade a Tote with a Clean Line-Art Motif
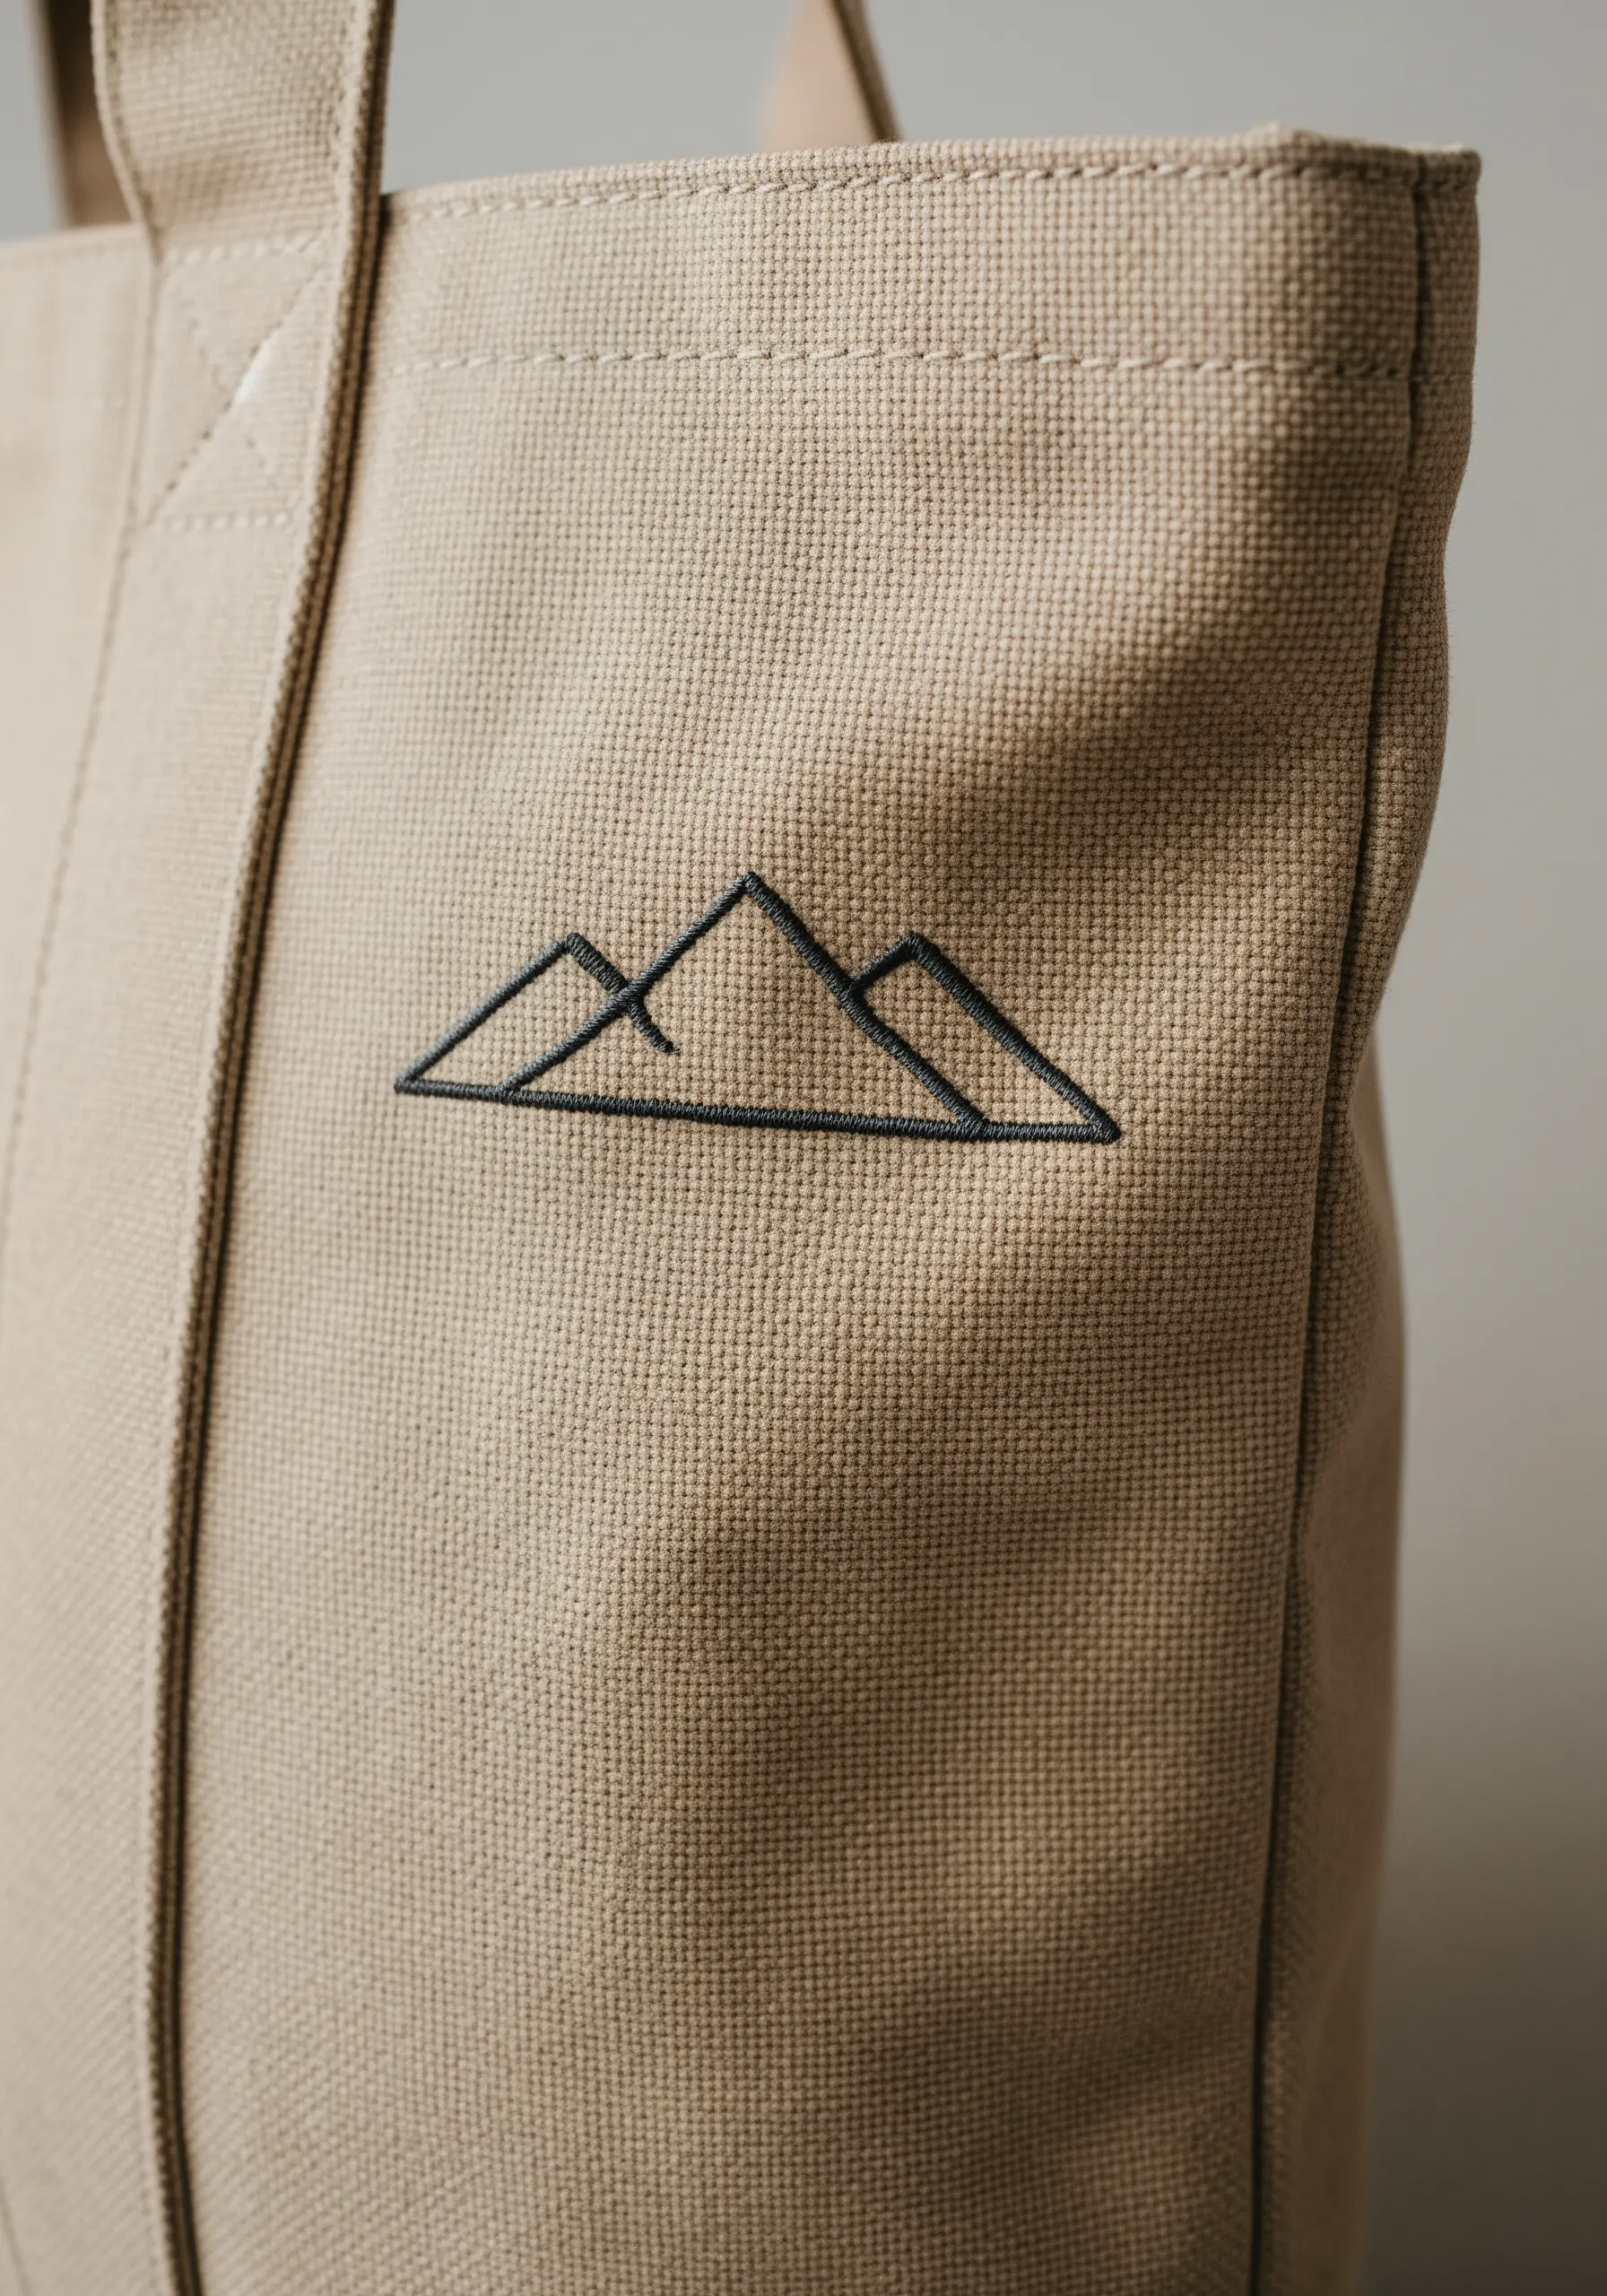
A simple, geometric design can instantly elevate a plain canvas bag.
Use a backstitch with all six strands of cotton floss, or opt for a thicker perle cotton, to create a bold, graphic line that stands out against the heavy fabric.
A sharp needle is essential for piercing the dense canvas weave cleanly.
These neutral-tone embroidery designs feel both modern and timeless.
10. Cluster French Knots for Realistic Lavender
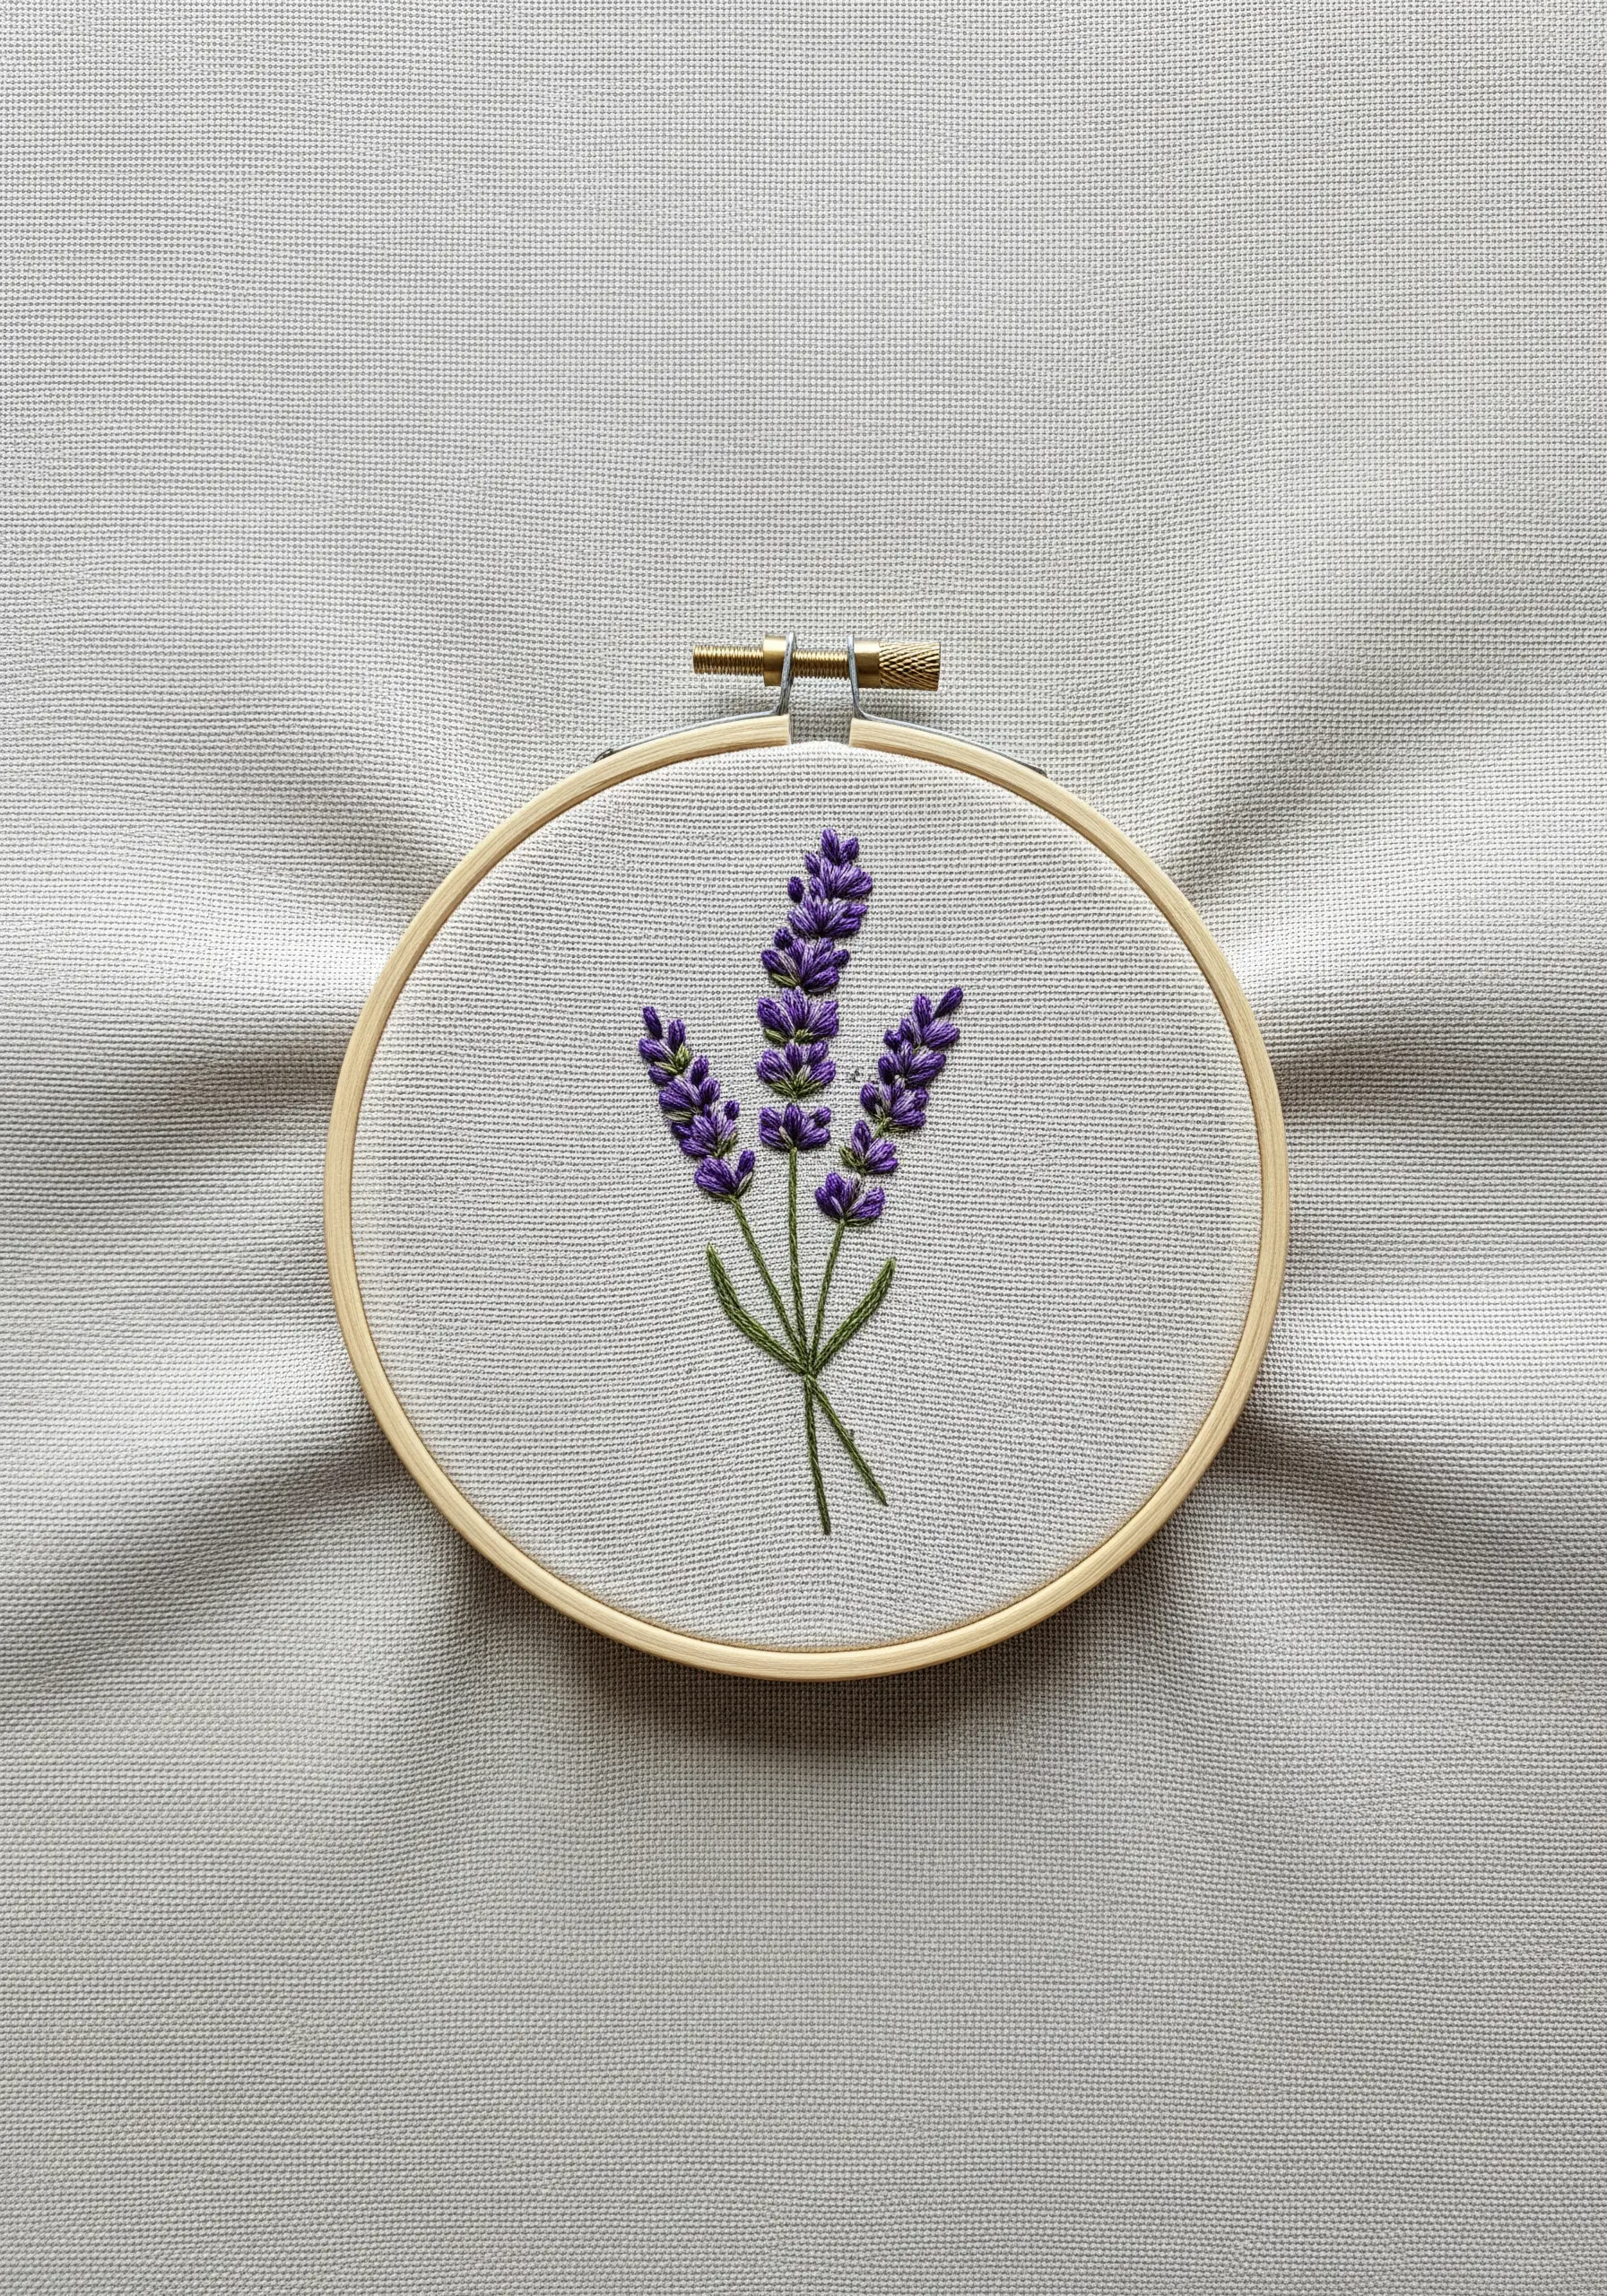
Mimic the texture of lavender blossoms by clustering French knots along a stem-stitched stalk.
Instead of one uniform color, use two or three similar shades of purple and mix them randomly.
This subtle variation makes the lavender appear more natural and less flat.
Wrap the thread around your needle just once for small, tight knots that resemble tiny buds—this is a perfect beginner-friendly embroidery pattern you can finish quickly.
11. Perfect a Classic Monogram
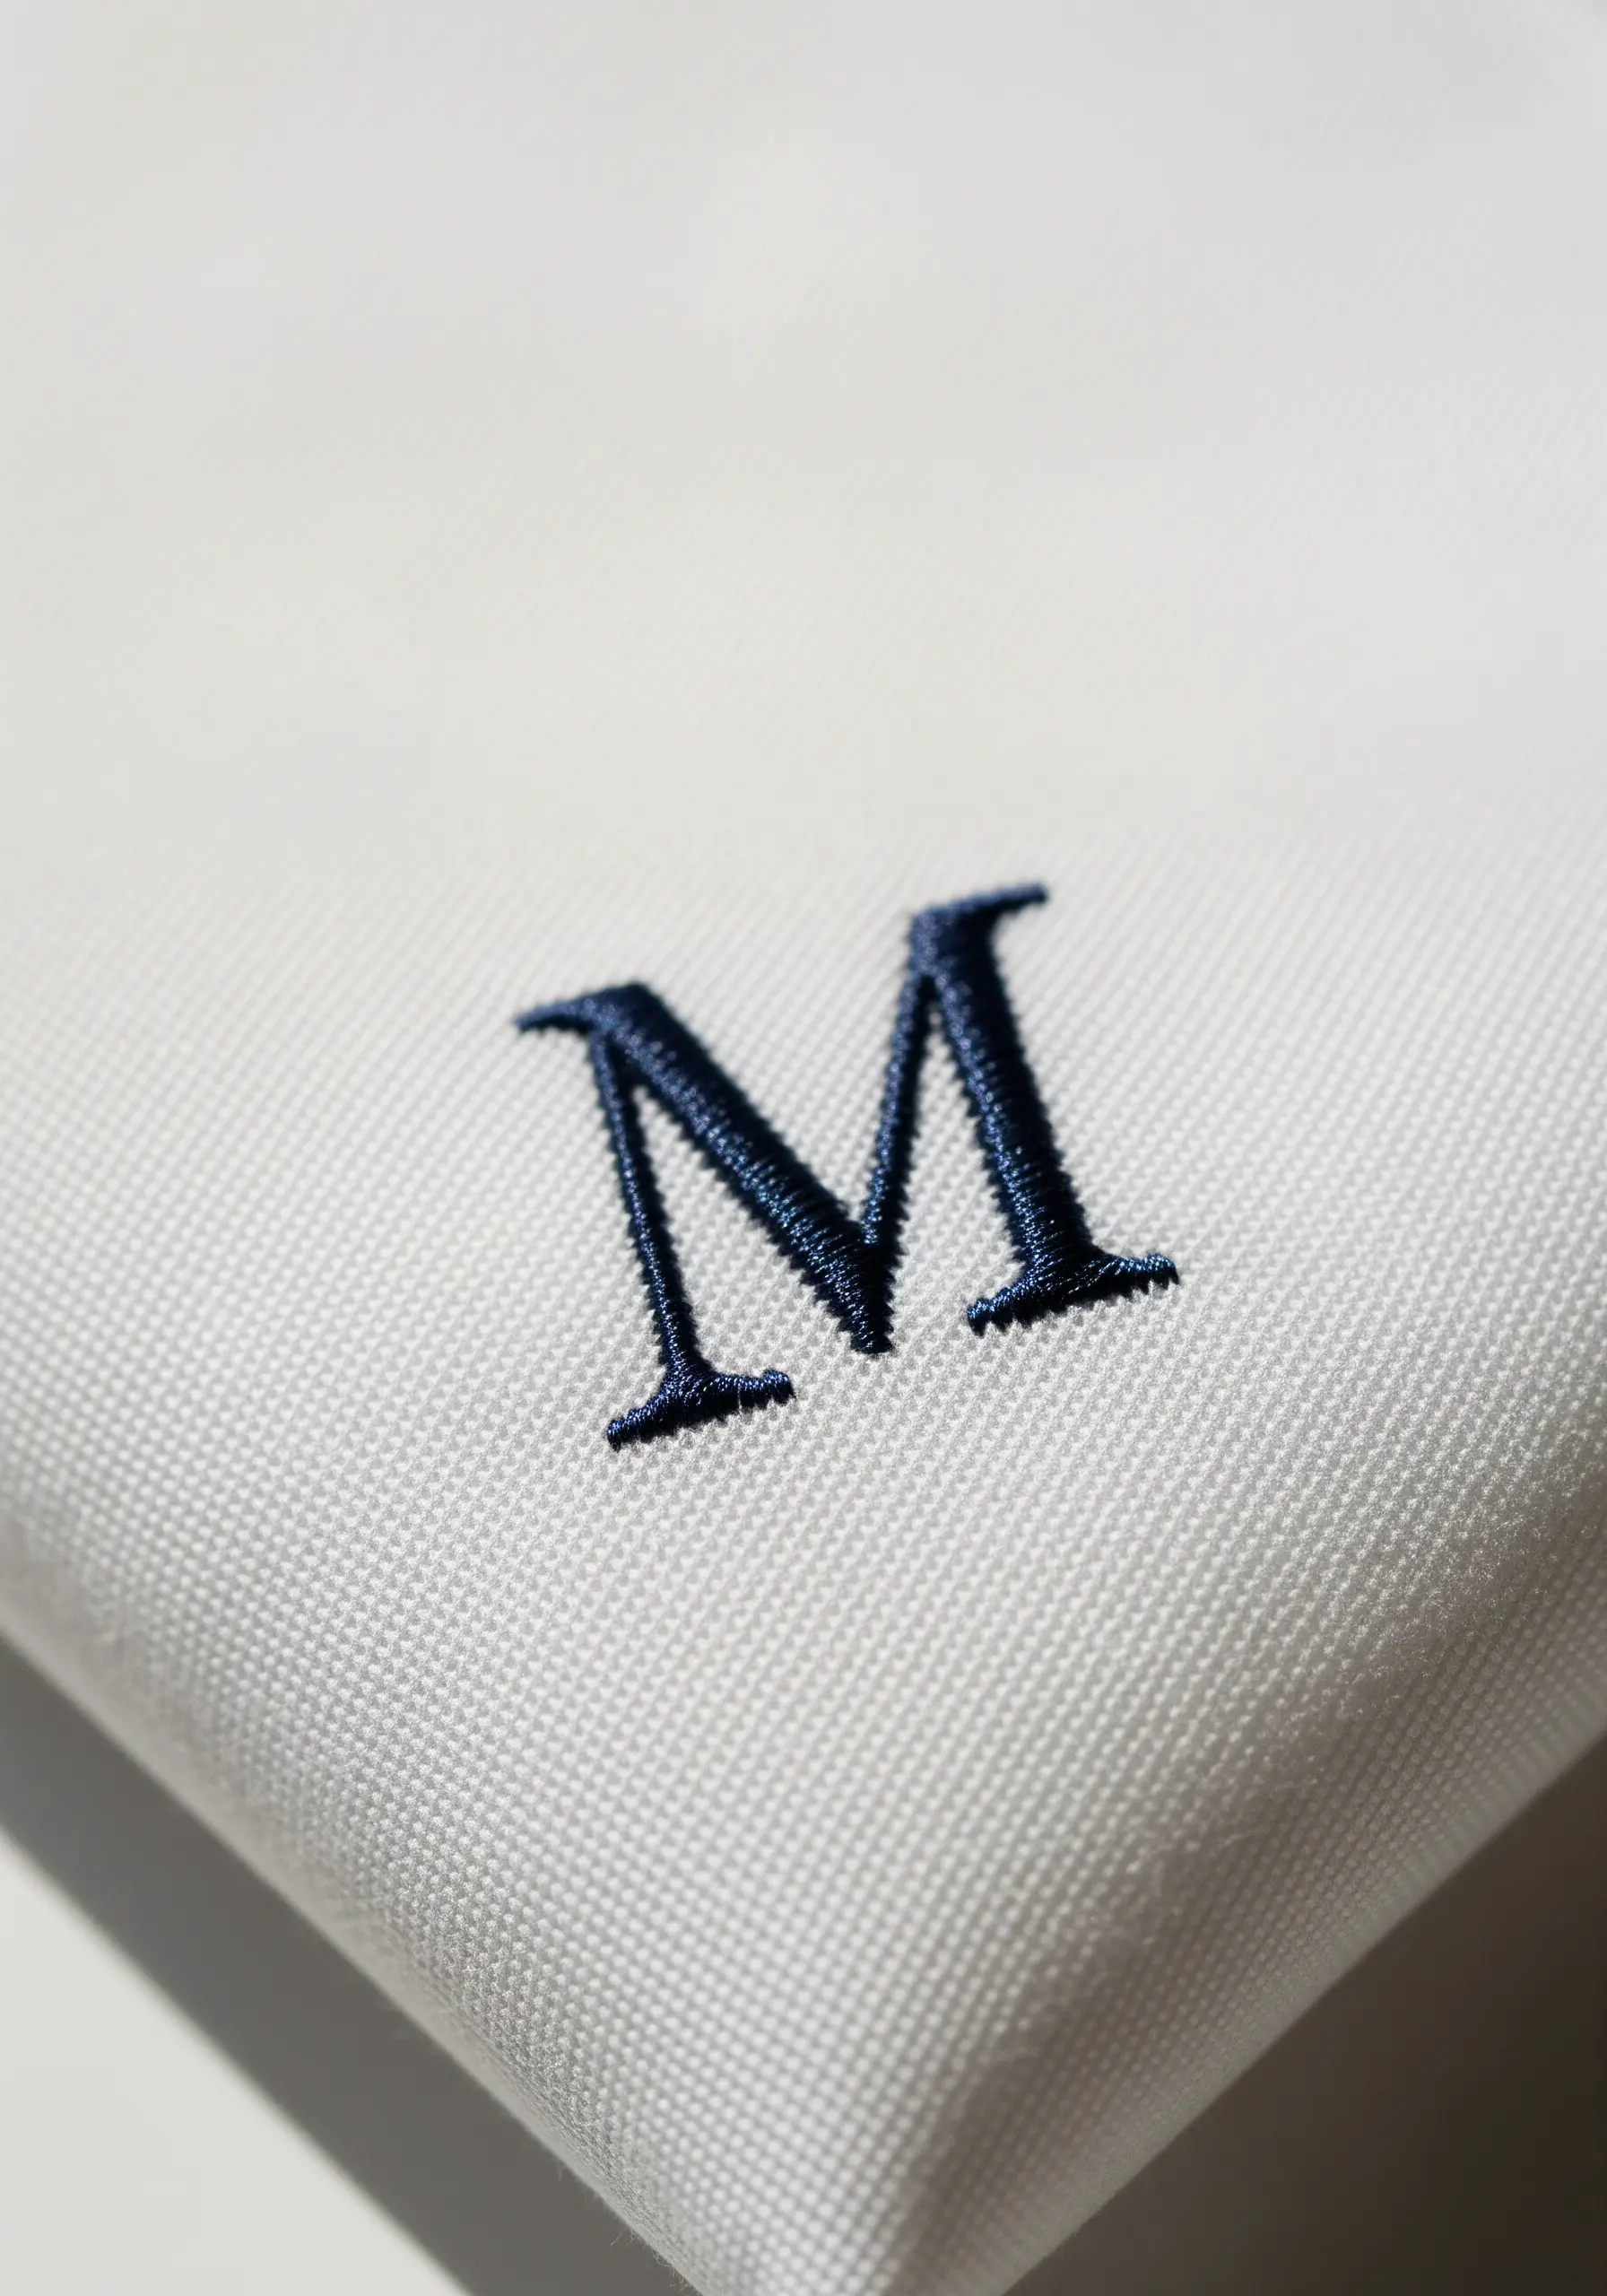
To achieve a crisp, professional-looking monogram, treat each part of the letter as its own small shape.
For a serif font like this, fill the main stems with vertical satin stitches and the serifs (the small feet) with horizontal ones.
This directional change defines the letterform and keeps the edges sharp.
Using a high-contrast thread on a crisp fabric like cotton or linen ensures your initial makes a timeless, elegant statement.
12. Frame a Simple Line Drawing

This project celebrates the elegance of a single, unbroken line.
Use a simple backstitch or stem stitch to create a clean, continuous outline that has the quality of a pen-and-ink drawing.
The key is maintaining consistent stitch length, especially around curves, to keep the line smooth.
Choosing to frame small hoop embroidery projects like this transforms a quick sketch into a piece of finished art for your desk or shelf.
13. Tell a Story with Stitched Motion
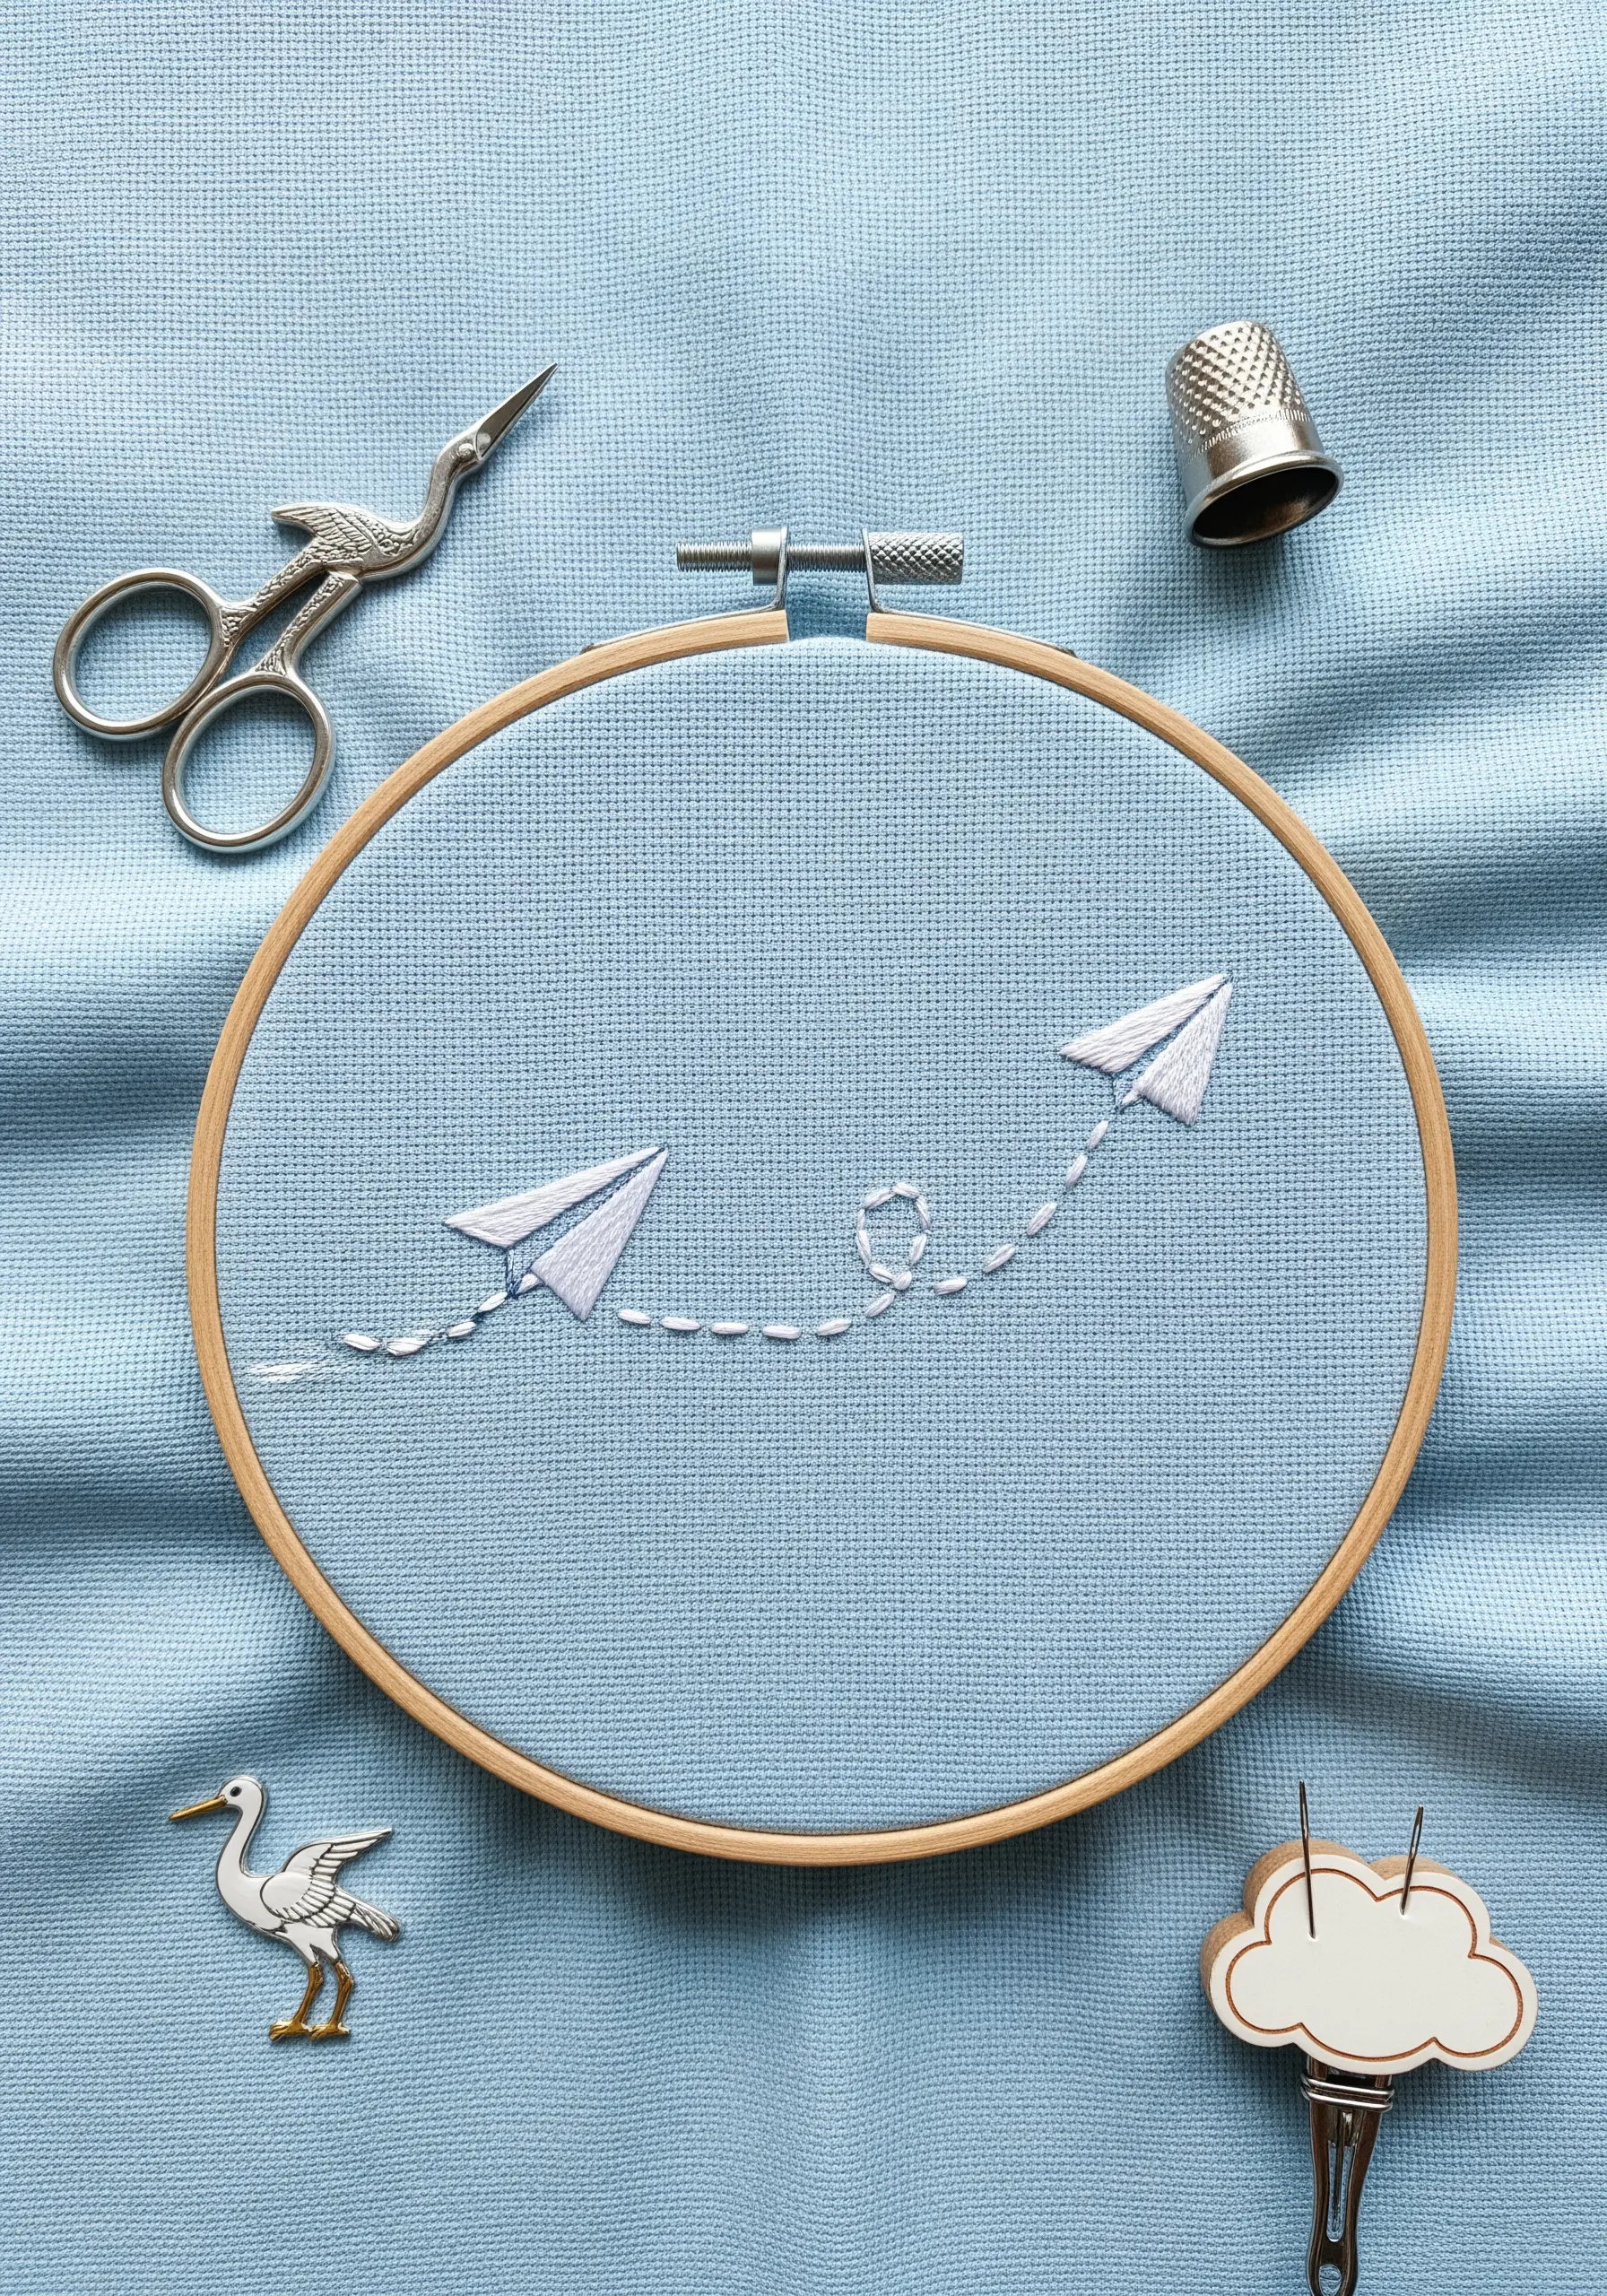
Combine different stitches to create a sense of movement and narrative.
Here, solidly filled paper airplanes (using a short satin stitch) appear to be in flight, guided by a dashed line of simple running stitches.
Add a playful loop-de-loop with a curved backstitch to give the composition a whimsical, dynamic feel.
This approach turns a static piece into a visual story, making for one of the most creative embroidery projects that transform ordinary fabric.
14. Craft a Durable Felt Patch
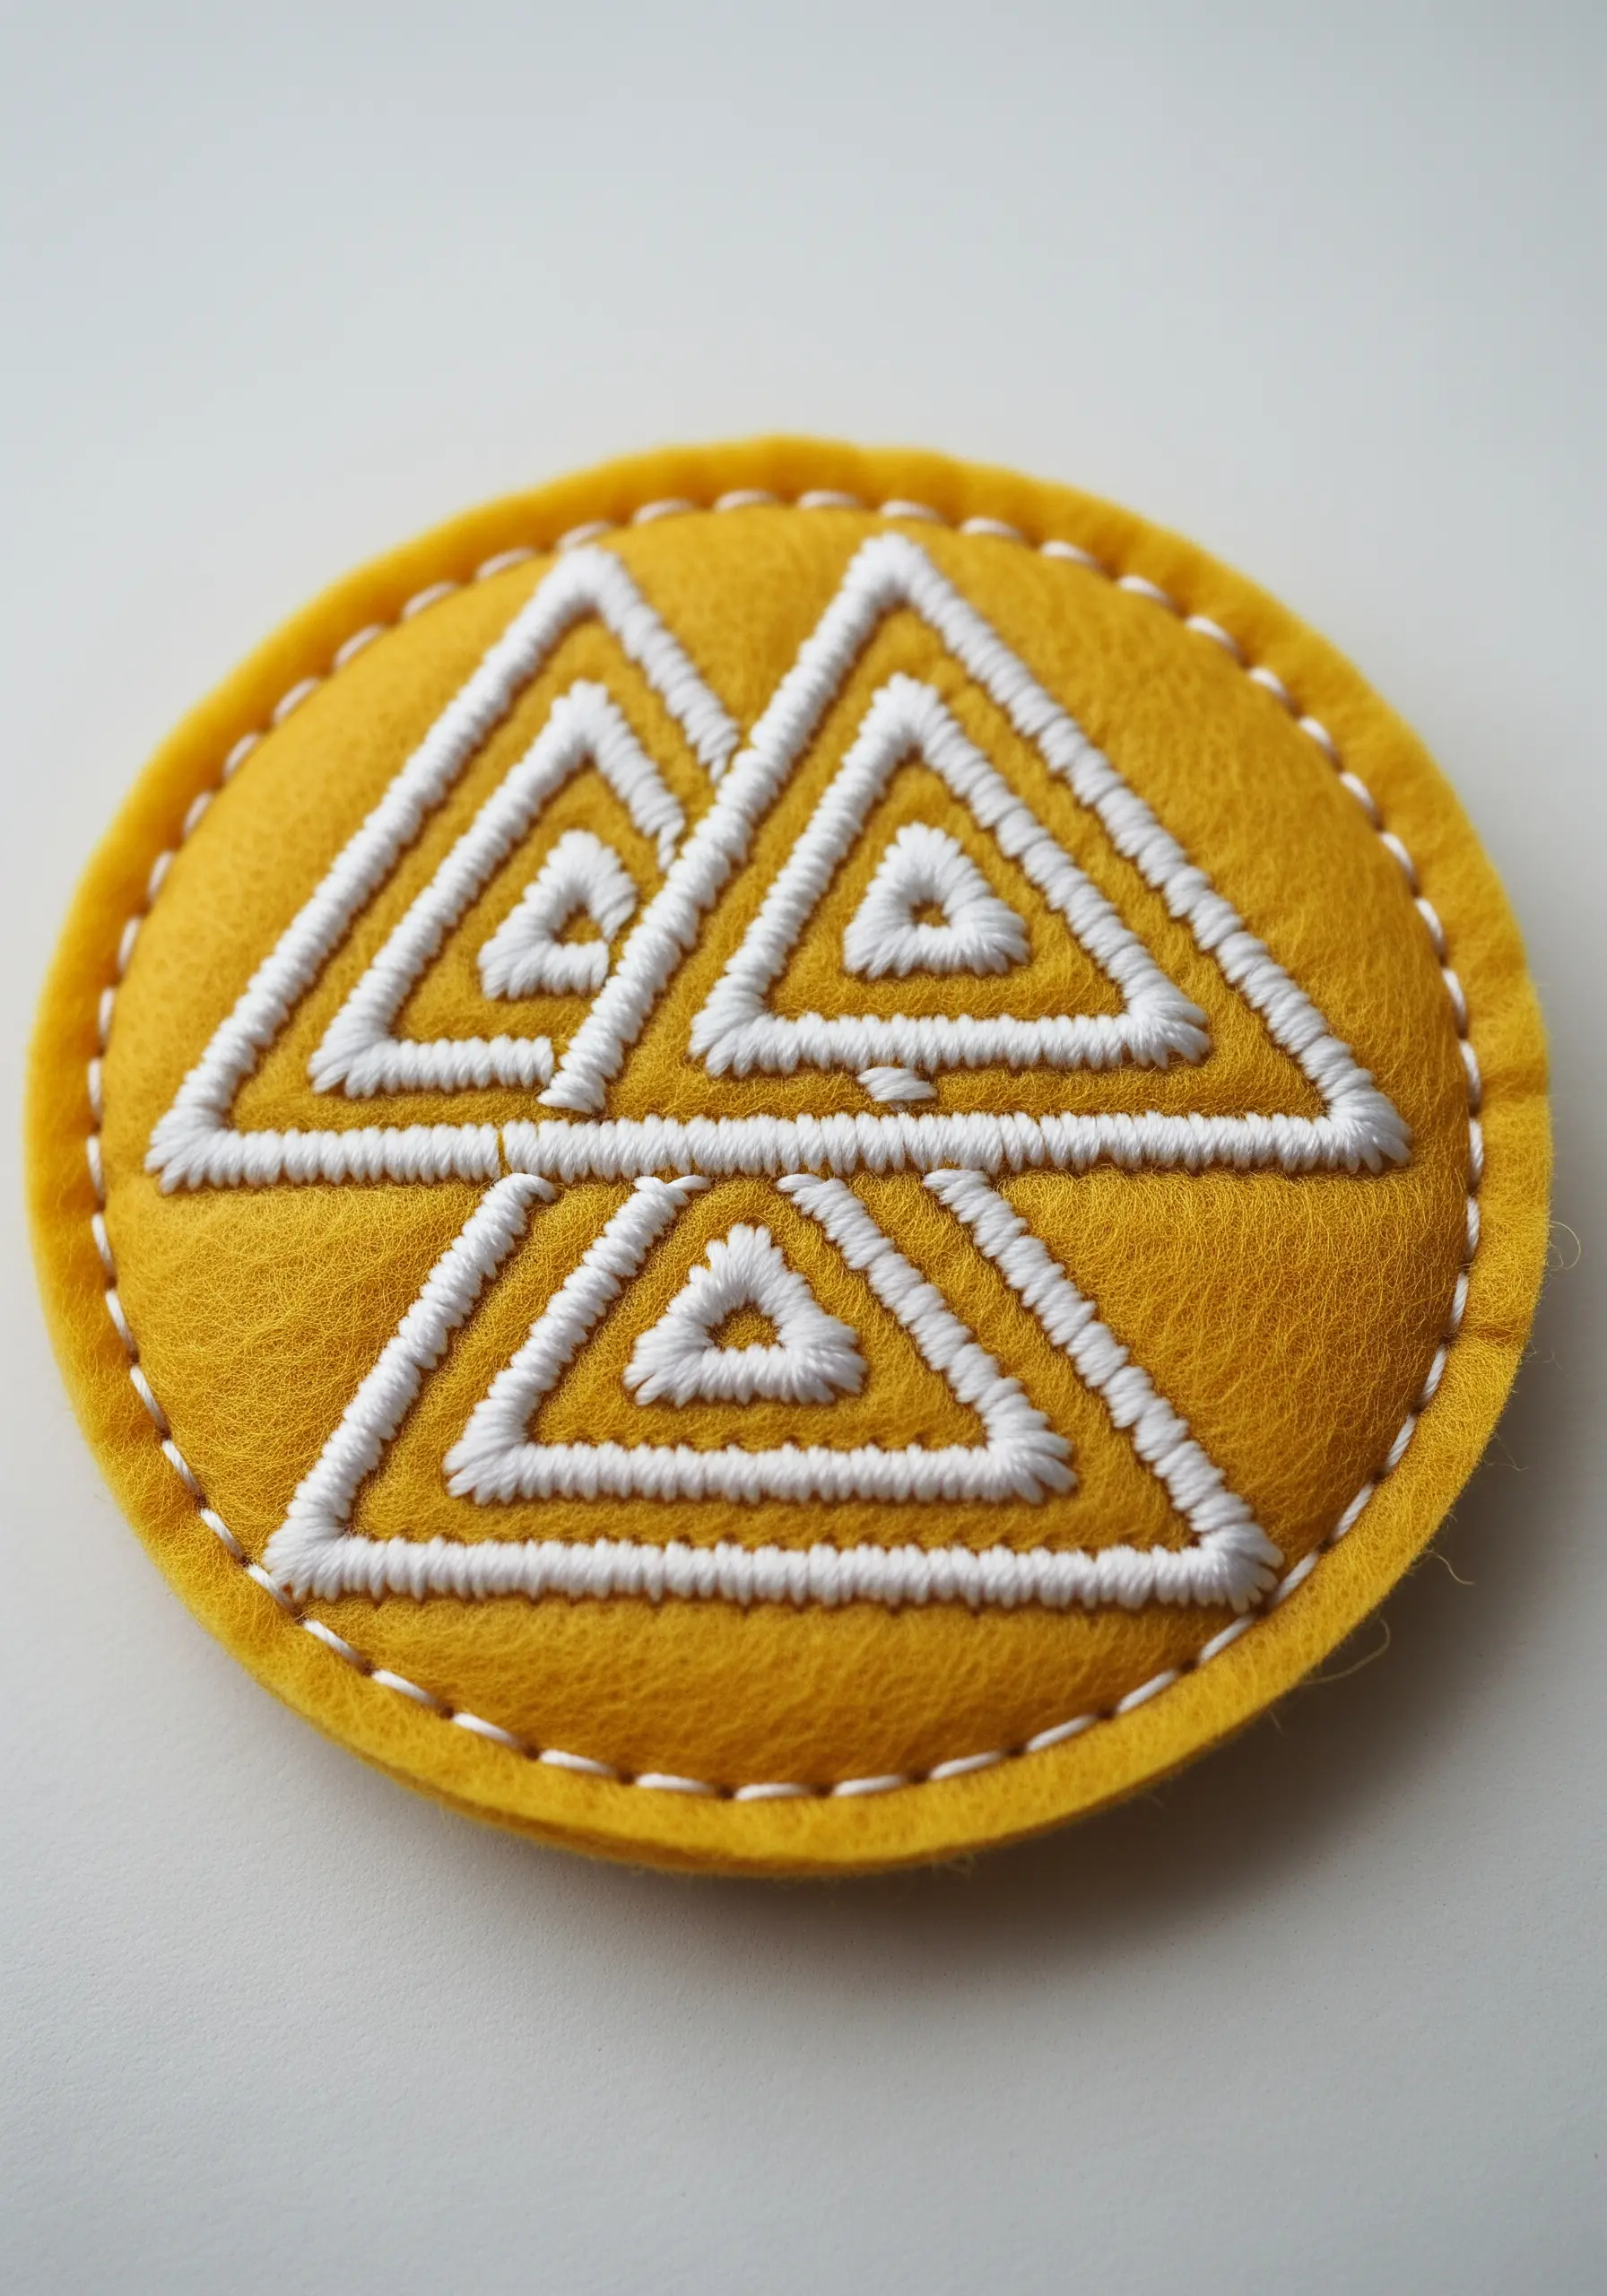
Turn a small embroidery design into a wearable patch by stitching it on felt.
The felt provides a stable, no-fray base for your stitches—here, a simple backstitch is all you need for the geometric design.
Once stitched, cut out the shape, leaving a small border.
Finish the edge with a blanket stitch for a durable, professional look that’s ready to be sewn onto a jacket or bag.
15. Stitch a Fern with the Fishbone Stitch

The fishbone stitch is the perfect choice for leaves like ferns, as it creates a central vein and fills the shape simultaneously.
Start with a single straight stitch down the tip of a frond, then work alternating, overlapping diagonal stitches from each side of the guideline.
This method builds a beautiful, organic texture that mimics the structure of a real leaf.
Stitching with a light thread on a darker, earth-toned fabric creates an elegant, high-contrast look.
16. Create a Flawless Silhouette

A solid silhouette is a powerful exercise in perfecting your satin stitch.
The goal is to create a fill so smooth and uniform that it looks like a single piece of fabric.
First, outline the shape with a tiny split stitch to create a firm boundary.
Then, fill the shape with long, parallel satin stitches, ensuring your thread tension is even and the floss lies completely flat.
This technique turns a simple shape into a bold, graphic statement.
17. Add a Pop of Color to a Pocket

A tiny embroidery detail on a pocket corner is an easy way to customize clothing without committing to a large design.
For a clean, arched rainbow like this, use a tight satin stitch for each color band.
To keep the curves smooth, use a water-soluble stabilizer to draw your guidelines directly onto the denim.
The stabilizer provides a smooth surface to stitch on and washes away cleanly, leaving you with a crisp, professional result.
18. Experiment with 3D Woven Knots

Move beyond the hoop by incorporating three-dimensional elements into your fiber art.
These woven knots, similar to a Turk’s Head knot, are created by weaving yarn into a dimensional, sculptural shape.
You can create them separately and attach them to your fabric, or build them directly onto the surface for a truly integrated piece.
This is one of those textured yarn wall art techniques that blends embroidery with sculpture.
19. Use Light to Make Fruit Look Real
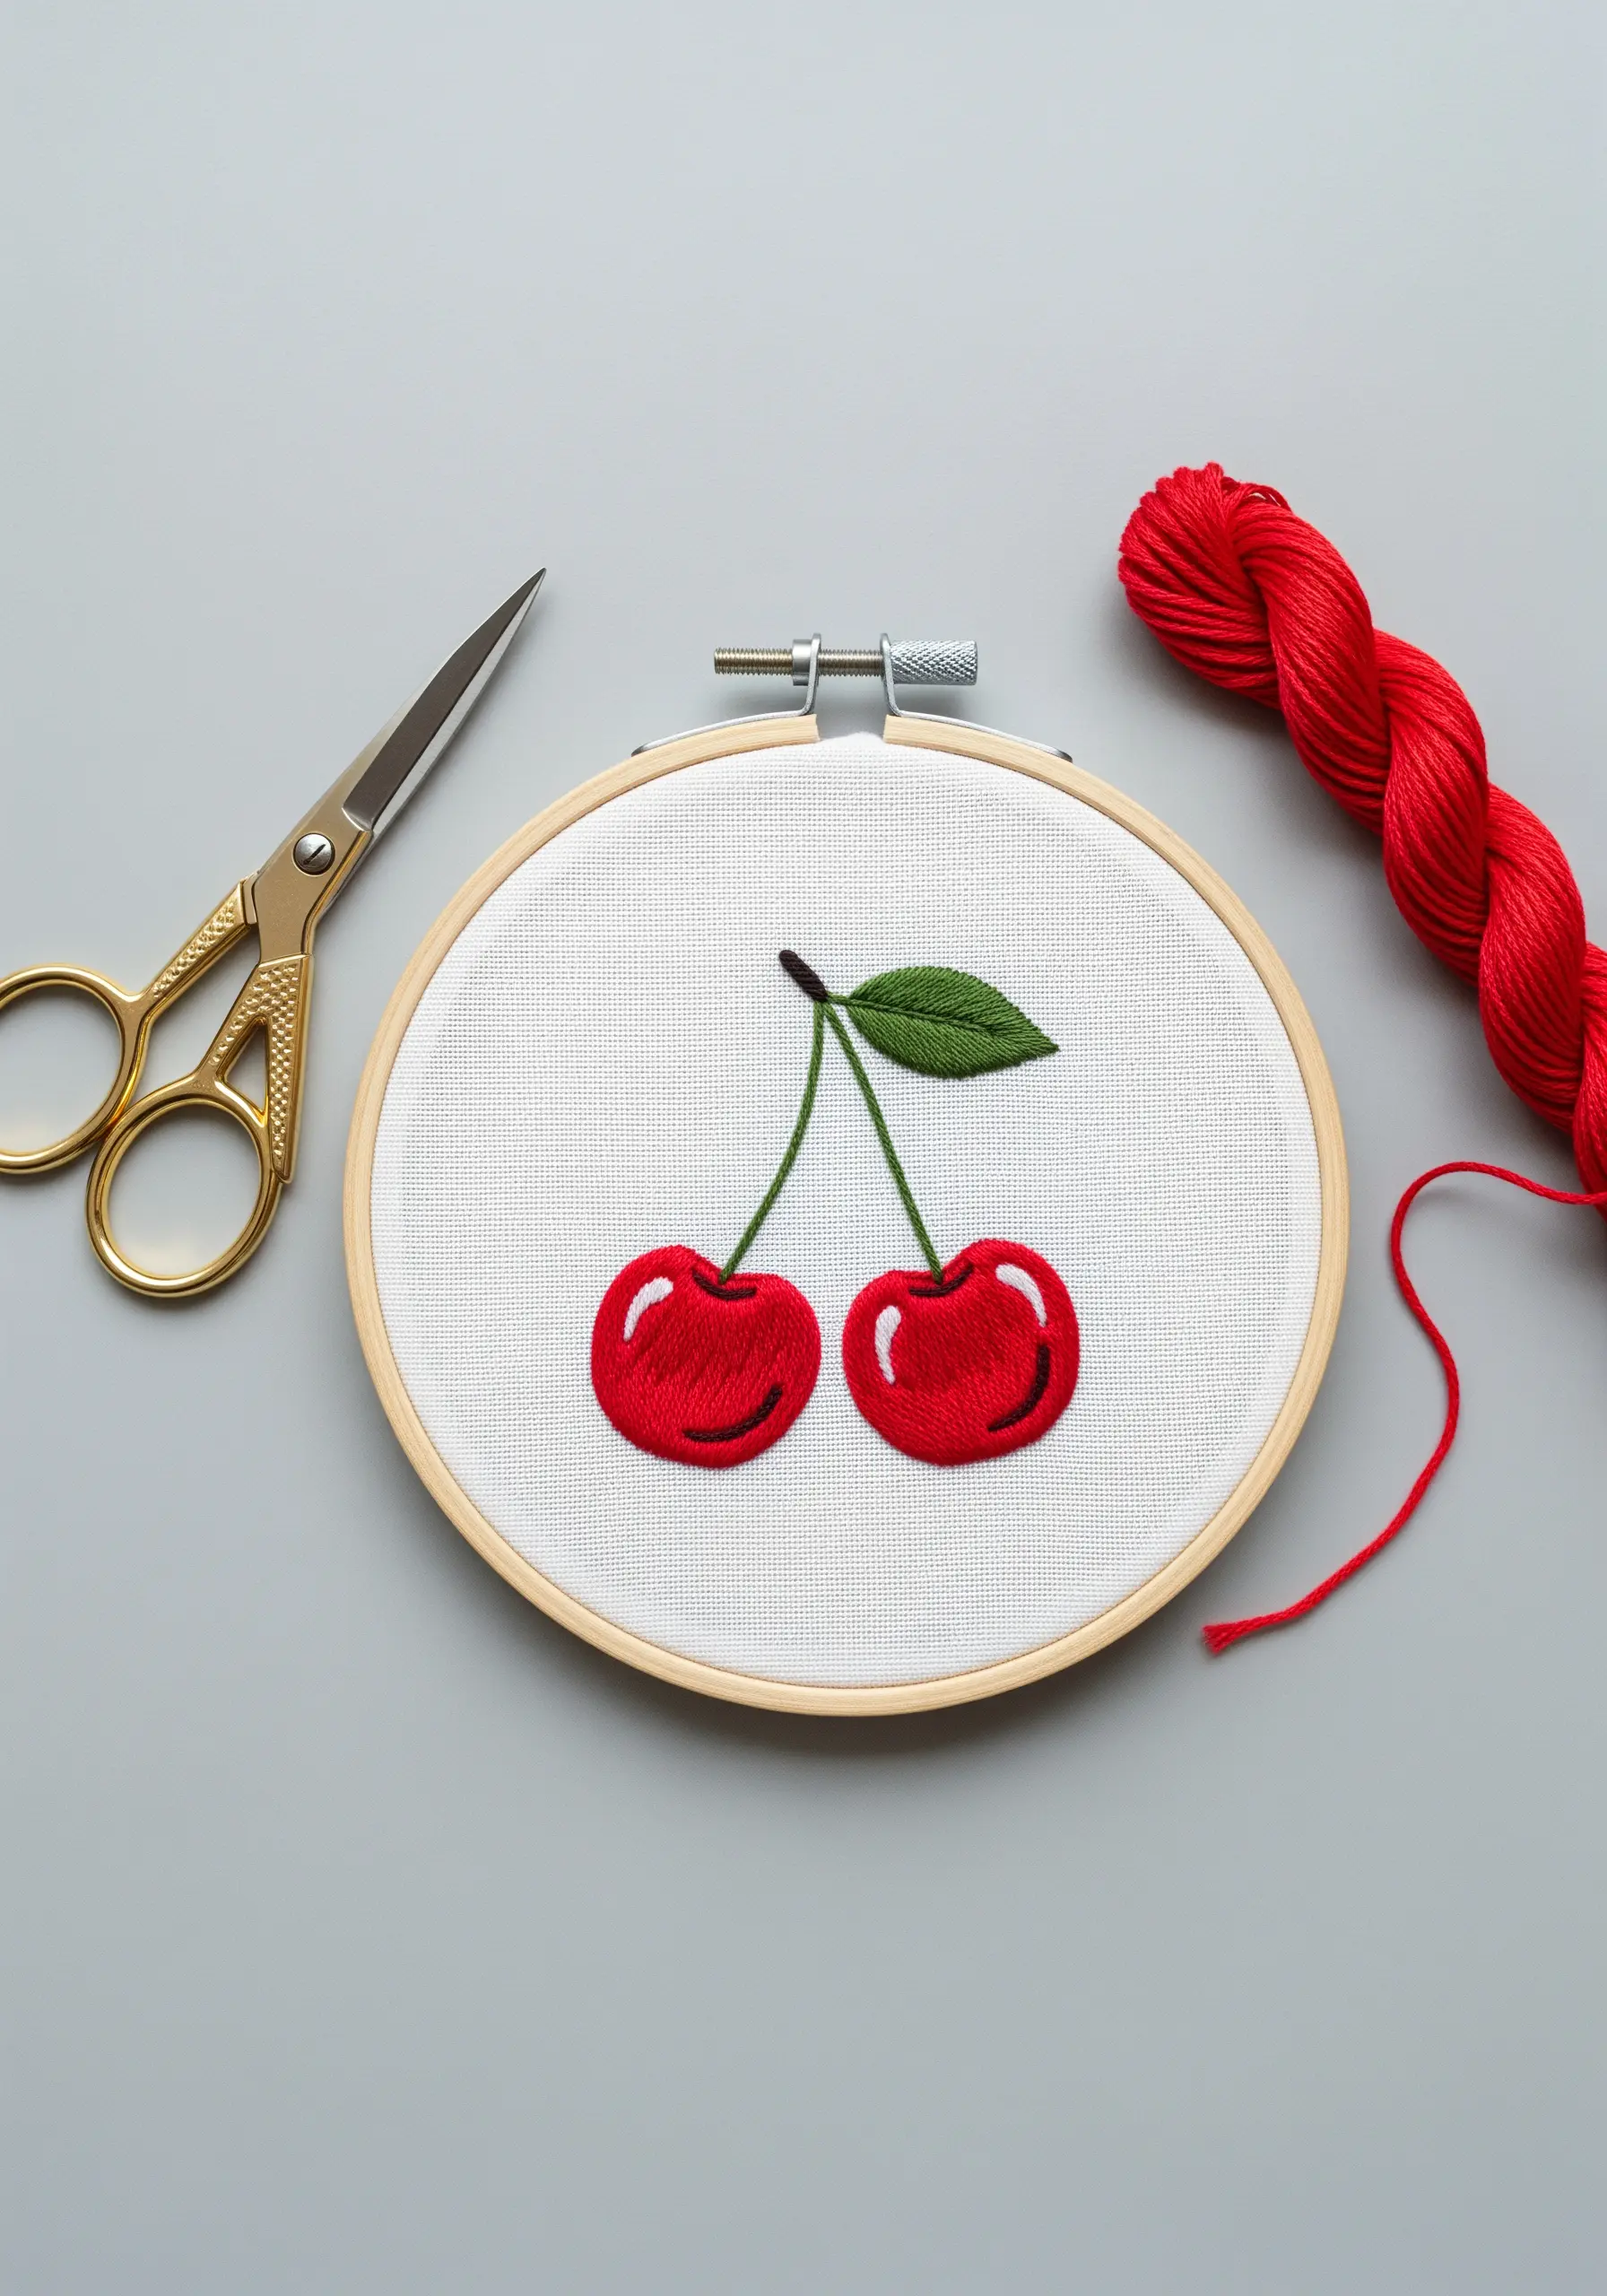
To make these satin-stitched cherries look round and glossy, all you need is a single, well-placed stitch.
Fill the main body of the cherries with a vibrant red, angling your stitches to follow the curve of the fruit.
Then, add a small, curved stitch in pure white near the top.
This simple highlight instantly creates the illusion of light reflecting off a shiny surface, giving your embroidery a realistic, three-dimensional pop.
20. Stitch a Functional Piece of Art
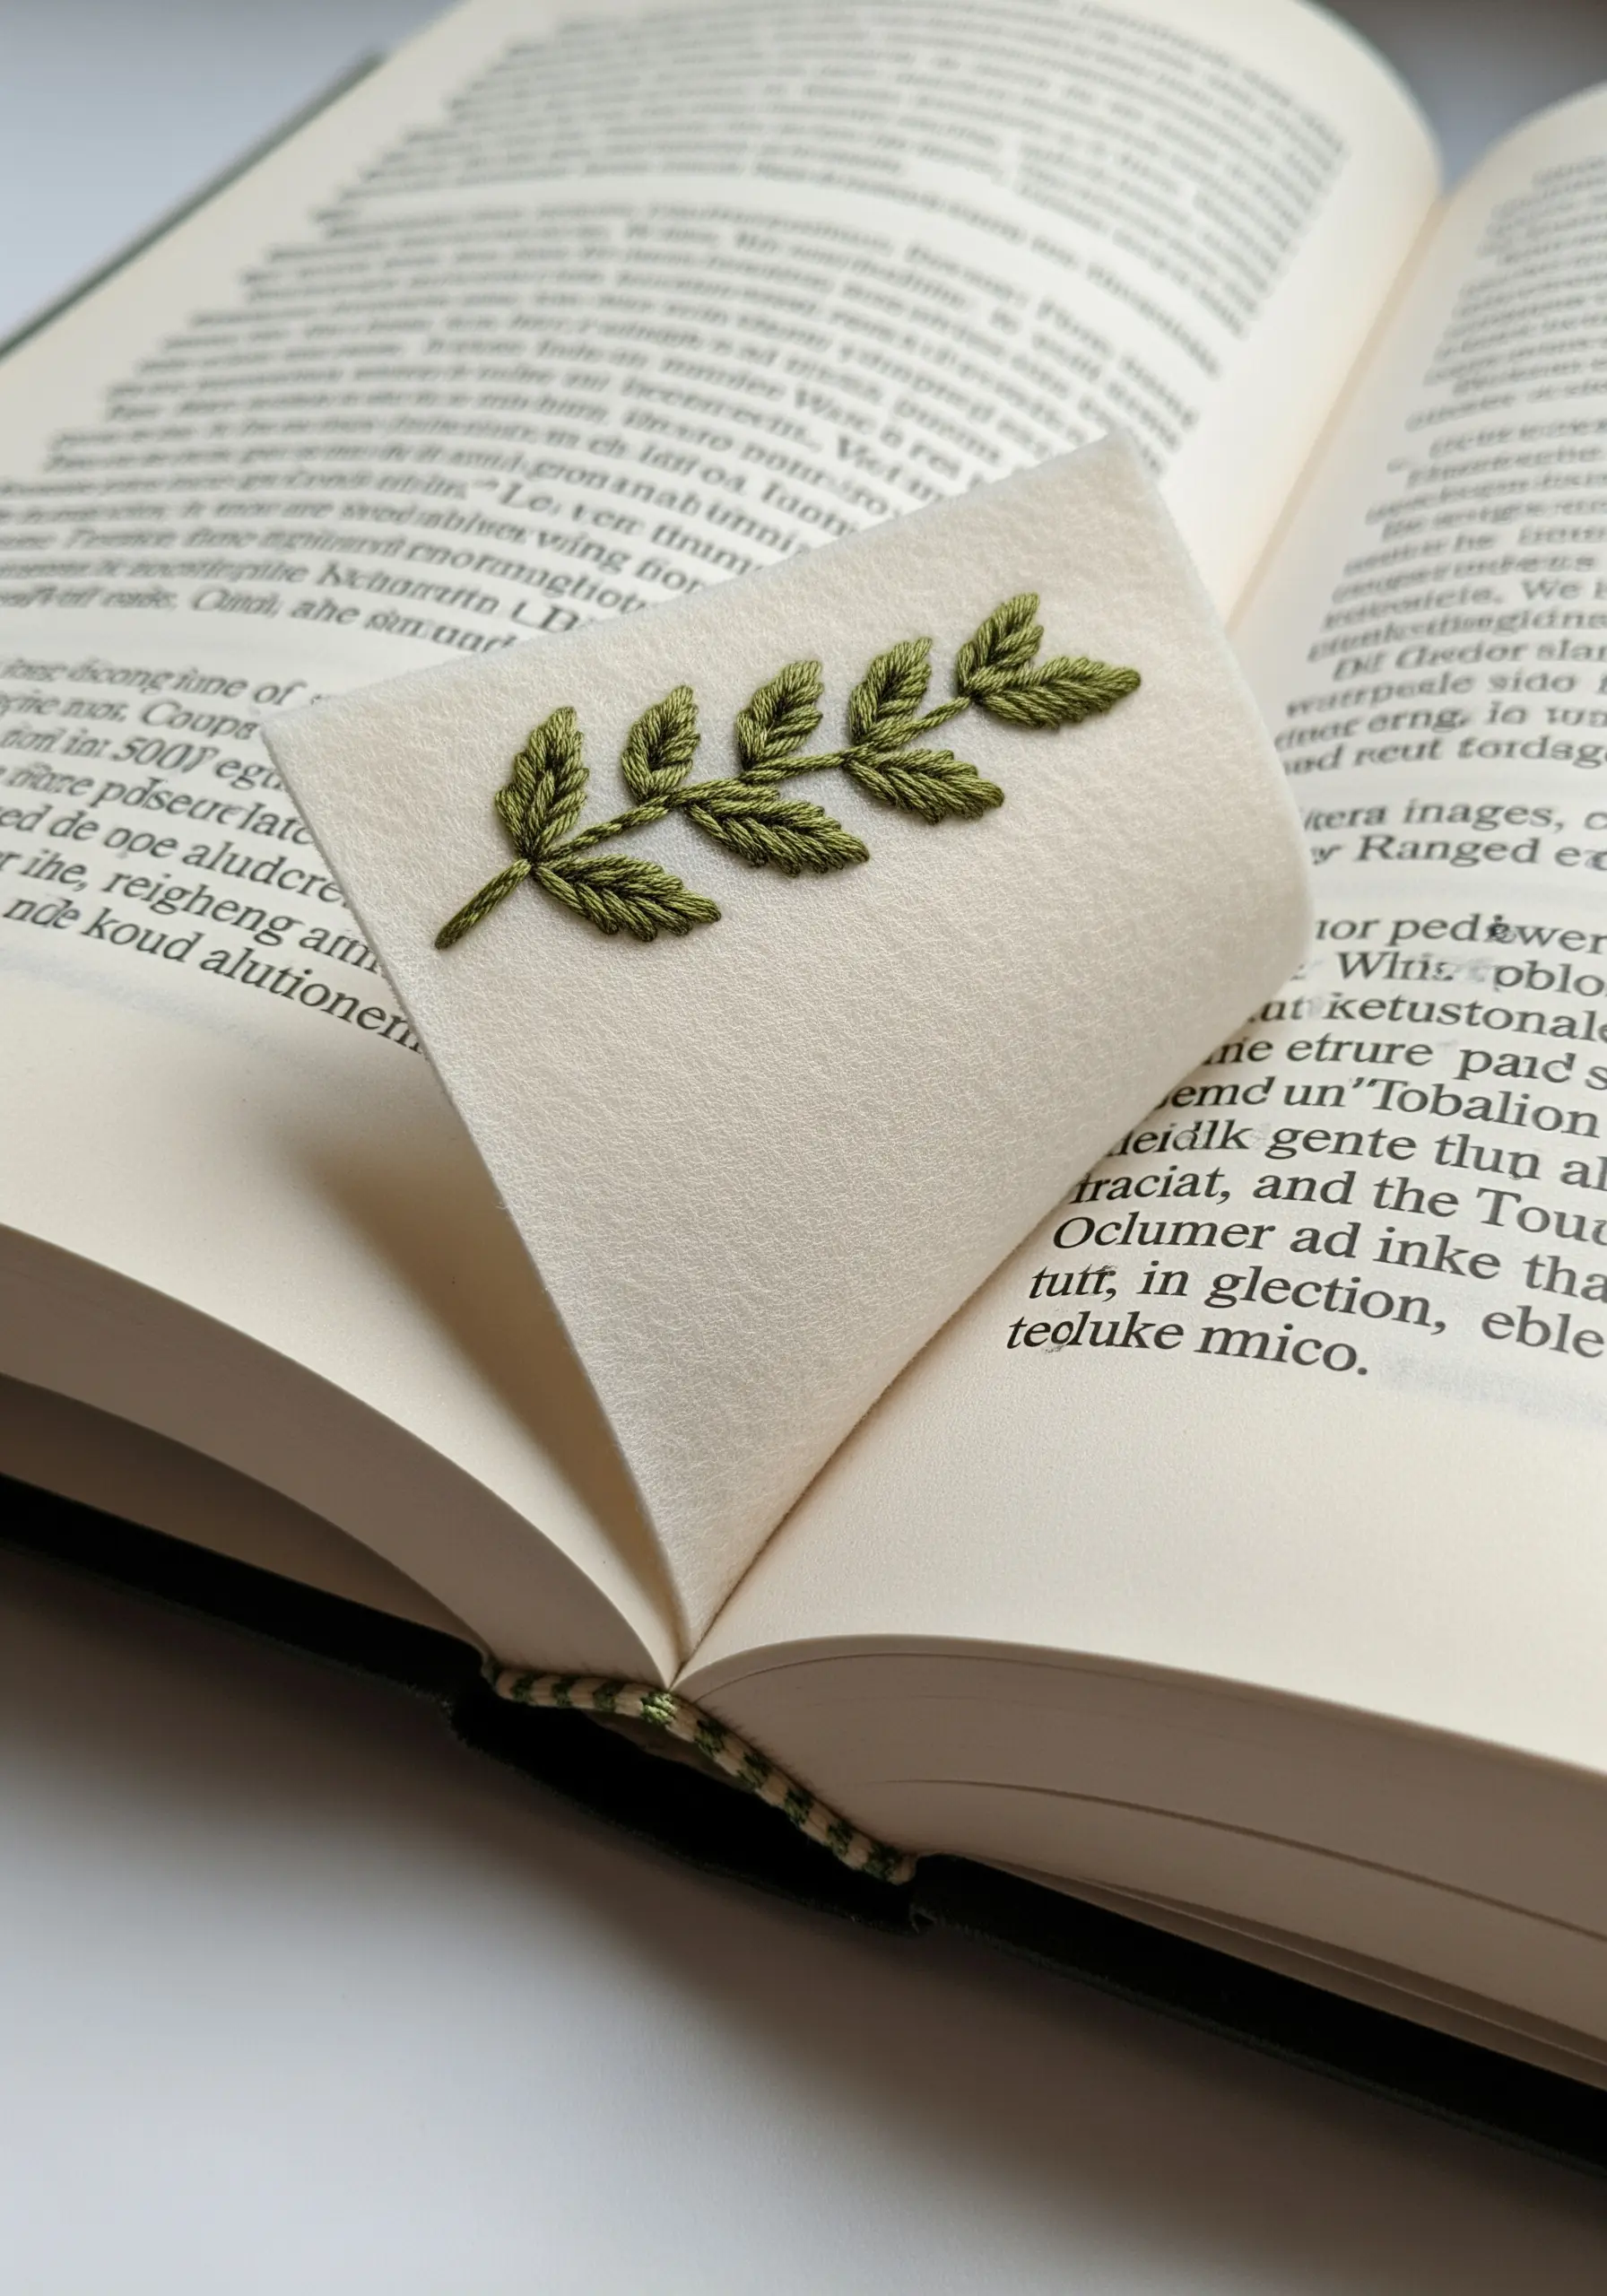
Take your embroidery off the wall by creating beautiful, functional objects like this corner bookmark.
Stitch a simple botanical motif, like this leafy branch, onto a stiff material like wool felt or two layers of bonded fabric.
The fishbone stitch is ideal here, creating elegant leaves with a central vein in one easy motion.
Carefully cut out the triangle to create one of the most thoughtful embroidered gift ideas that bring handmade magic to every occasion.
21. Play with an Ombré Color Palette

Create a dynamic, modern pattern by repeating a single, simple shape in a gradient of colors.
These teardrop shapes are filled with a basic satin stitch, but the effect is elevated by the thoughtful color progression from deep navy to pale blue and shimmering silver.
Vary the size and orientation of the raindrops to create a sense of natural, scattered movement.
This project shows how a strong color story can turn the simplest of stitches into peaceful abstract embroidery patterns.
22. The Only Stitch You Need for Leaves
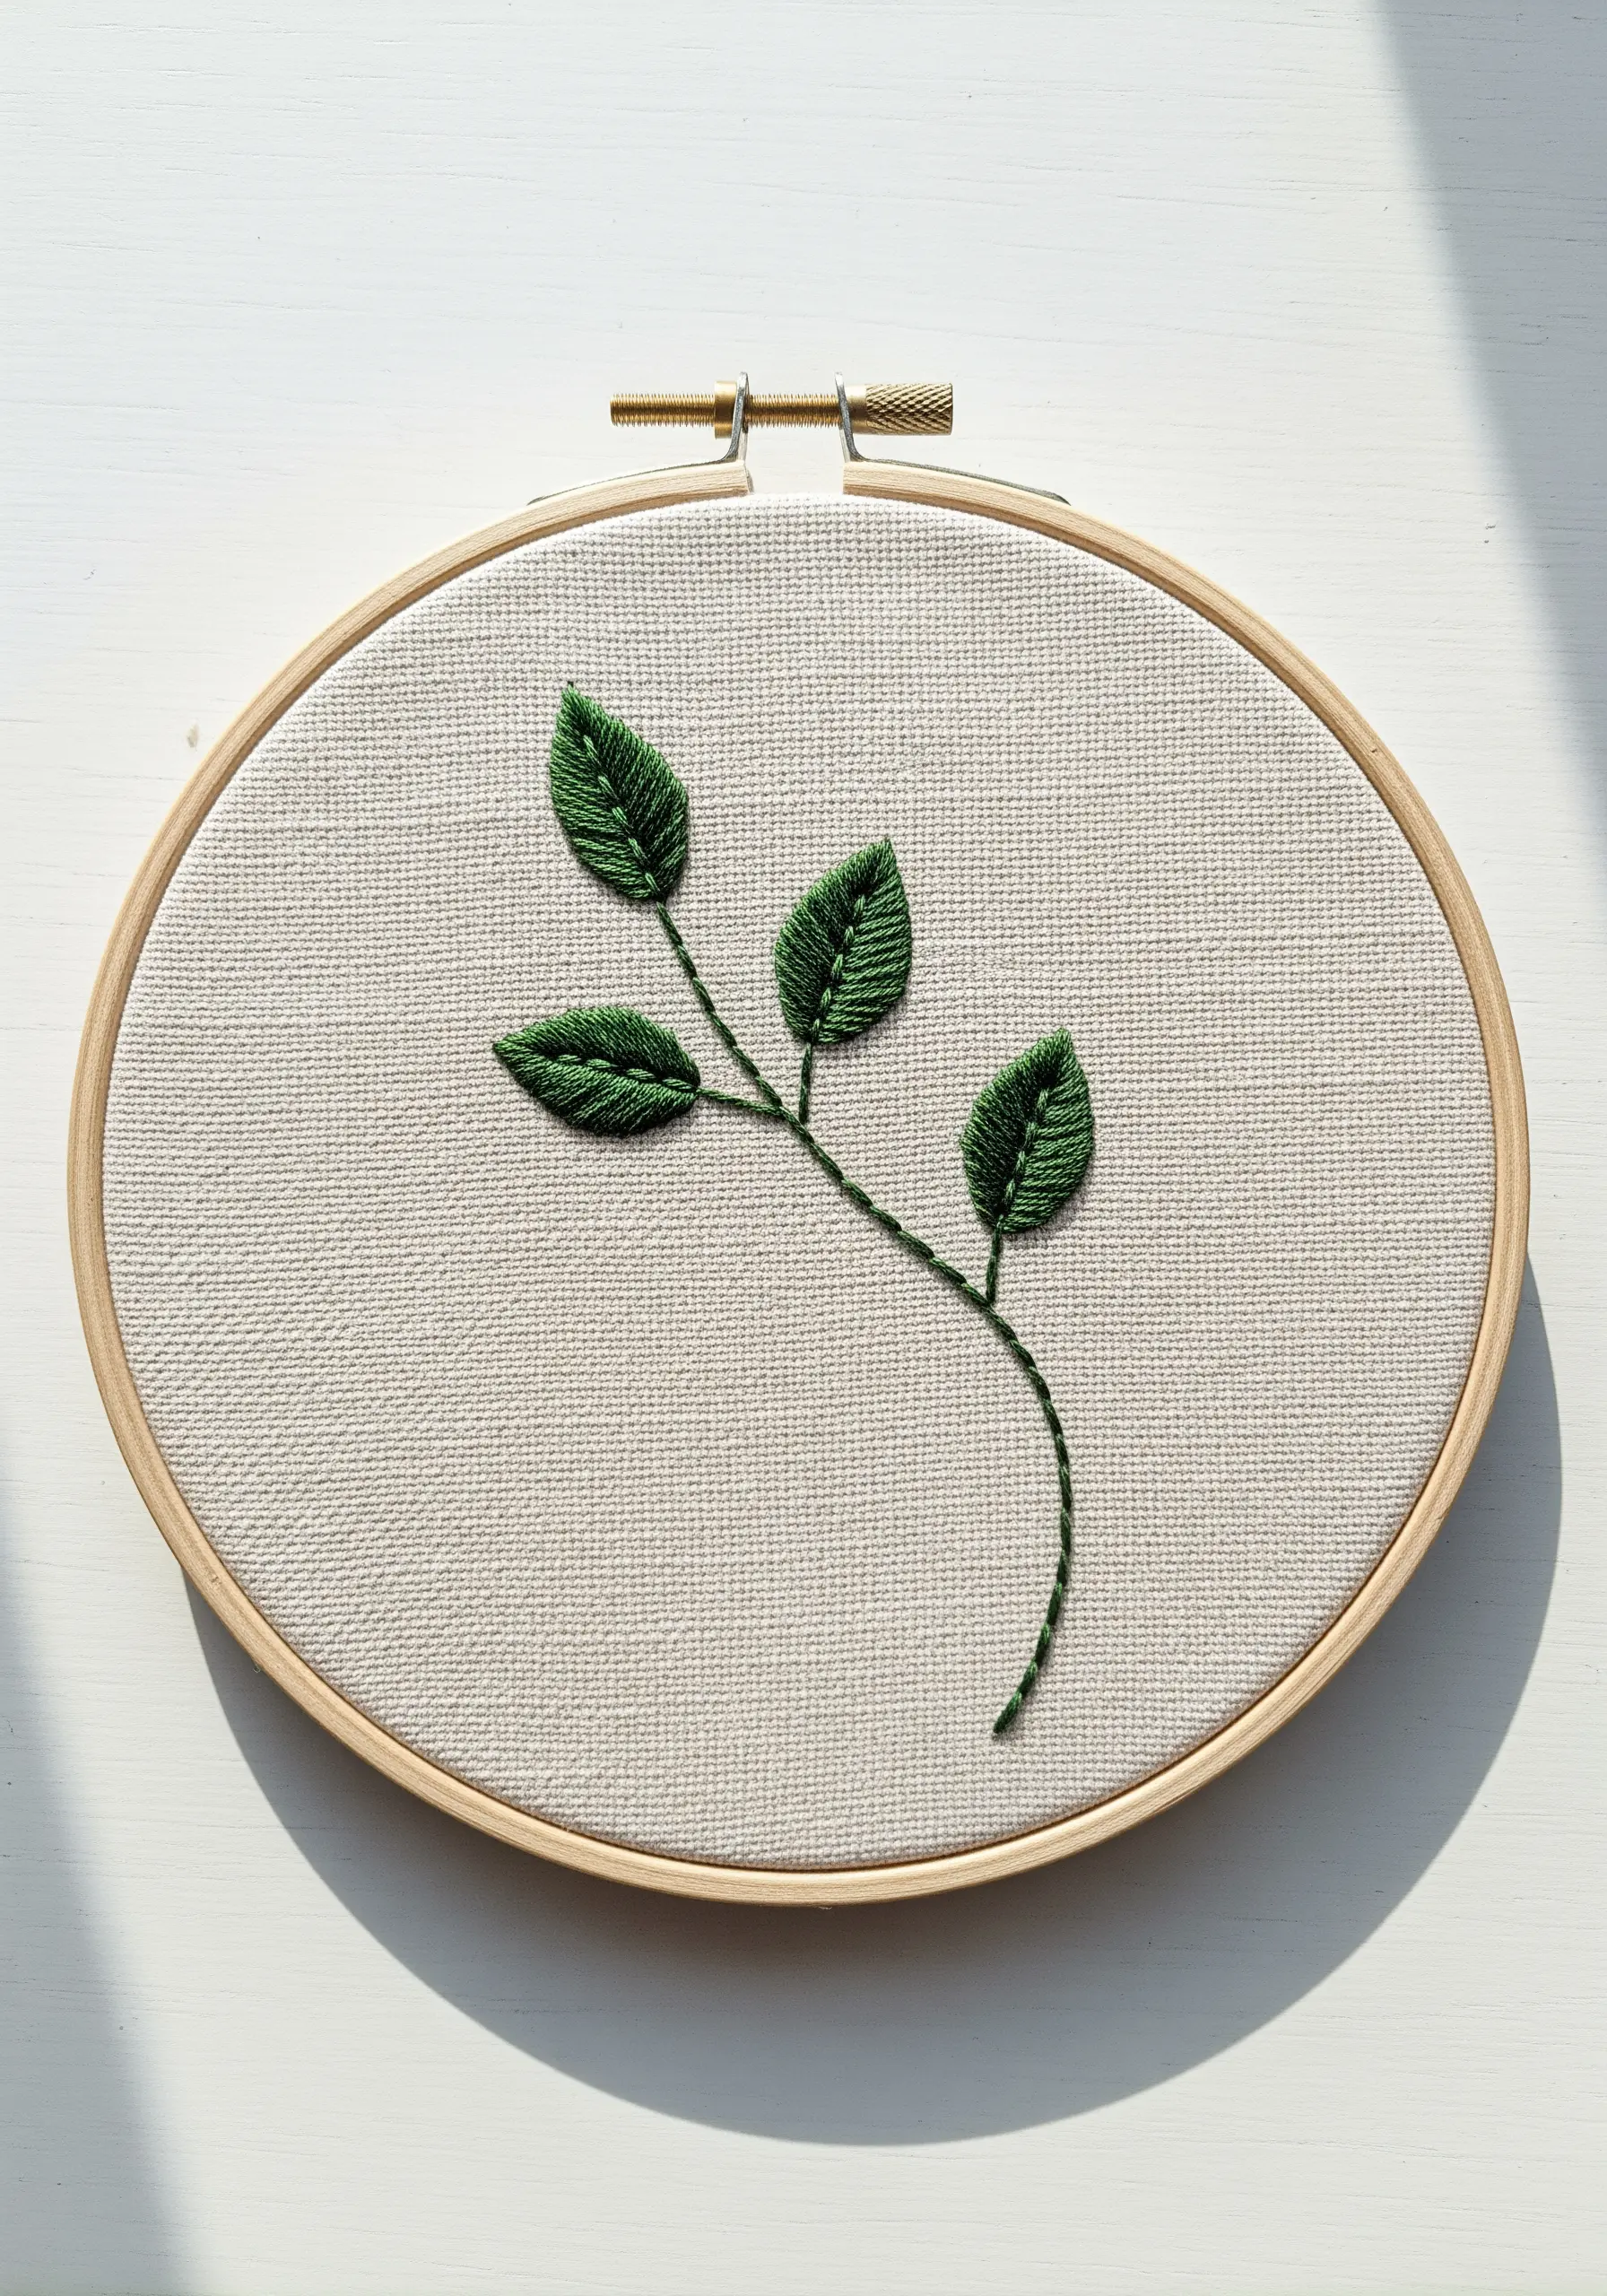
The fishbone stitch is your most efficient tool for creating beautiful, natural-looking leaves in minutes.
It works for almost any leaf shape and creates the fill and the central vein in a single, flowing motion.
For nature-inspired leaf clusters like this, simply vary the angle and size of each leaf to create an organic composition.
Use a single dark green for a classic look, or blend two similar shades for more depth.


