

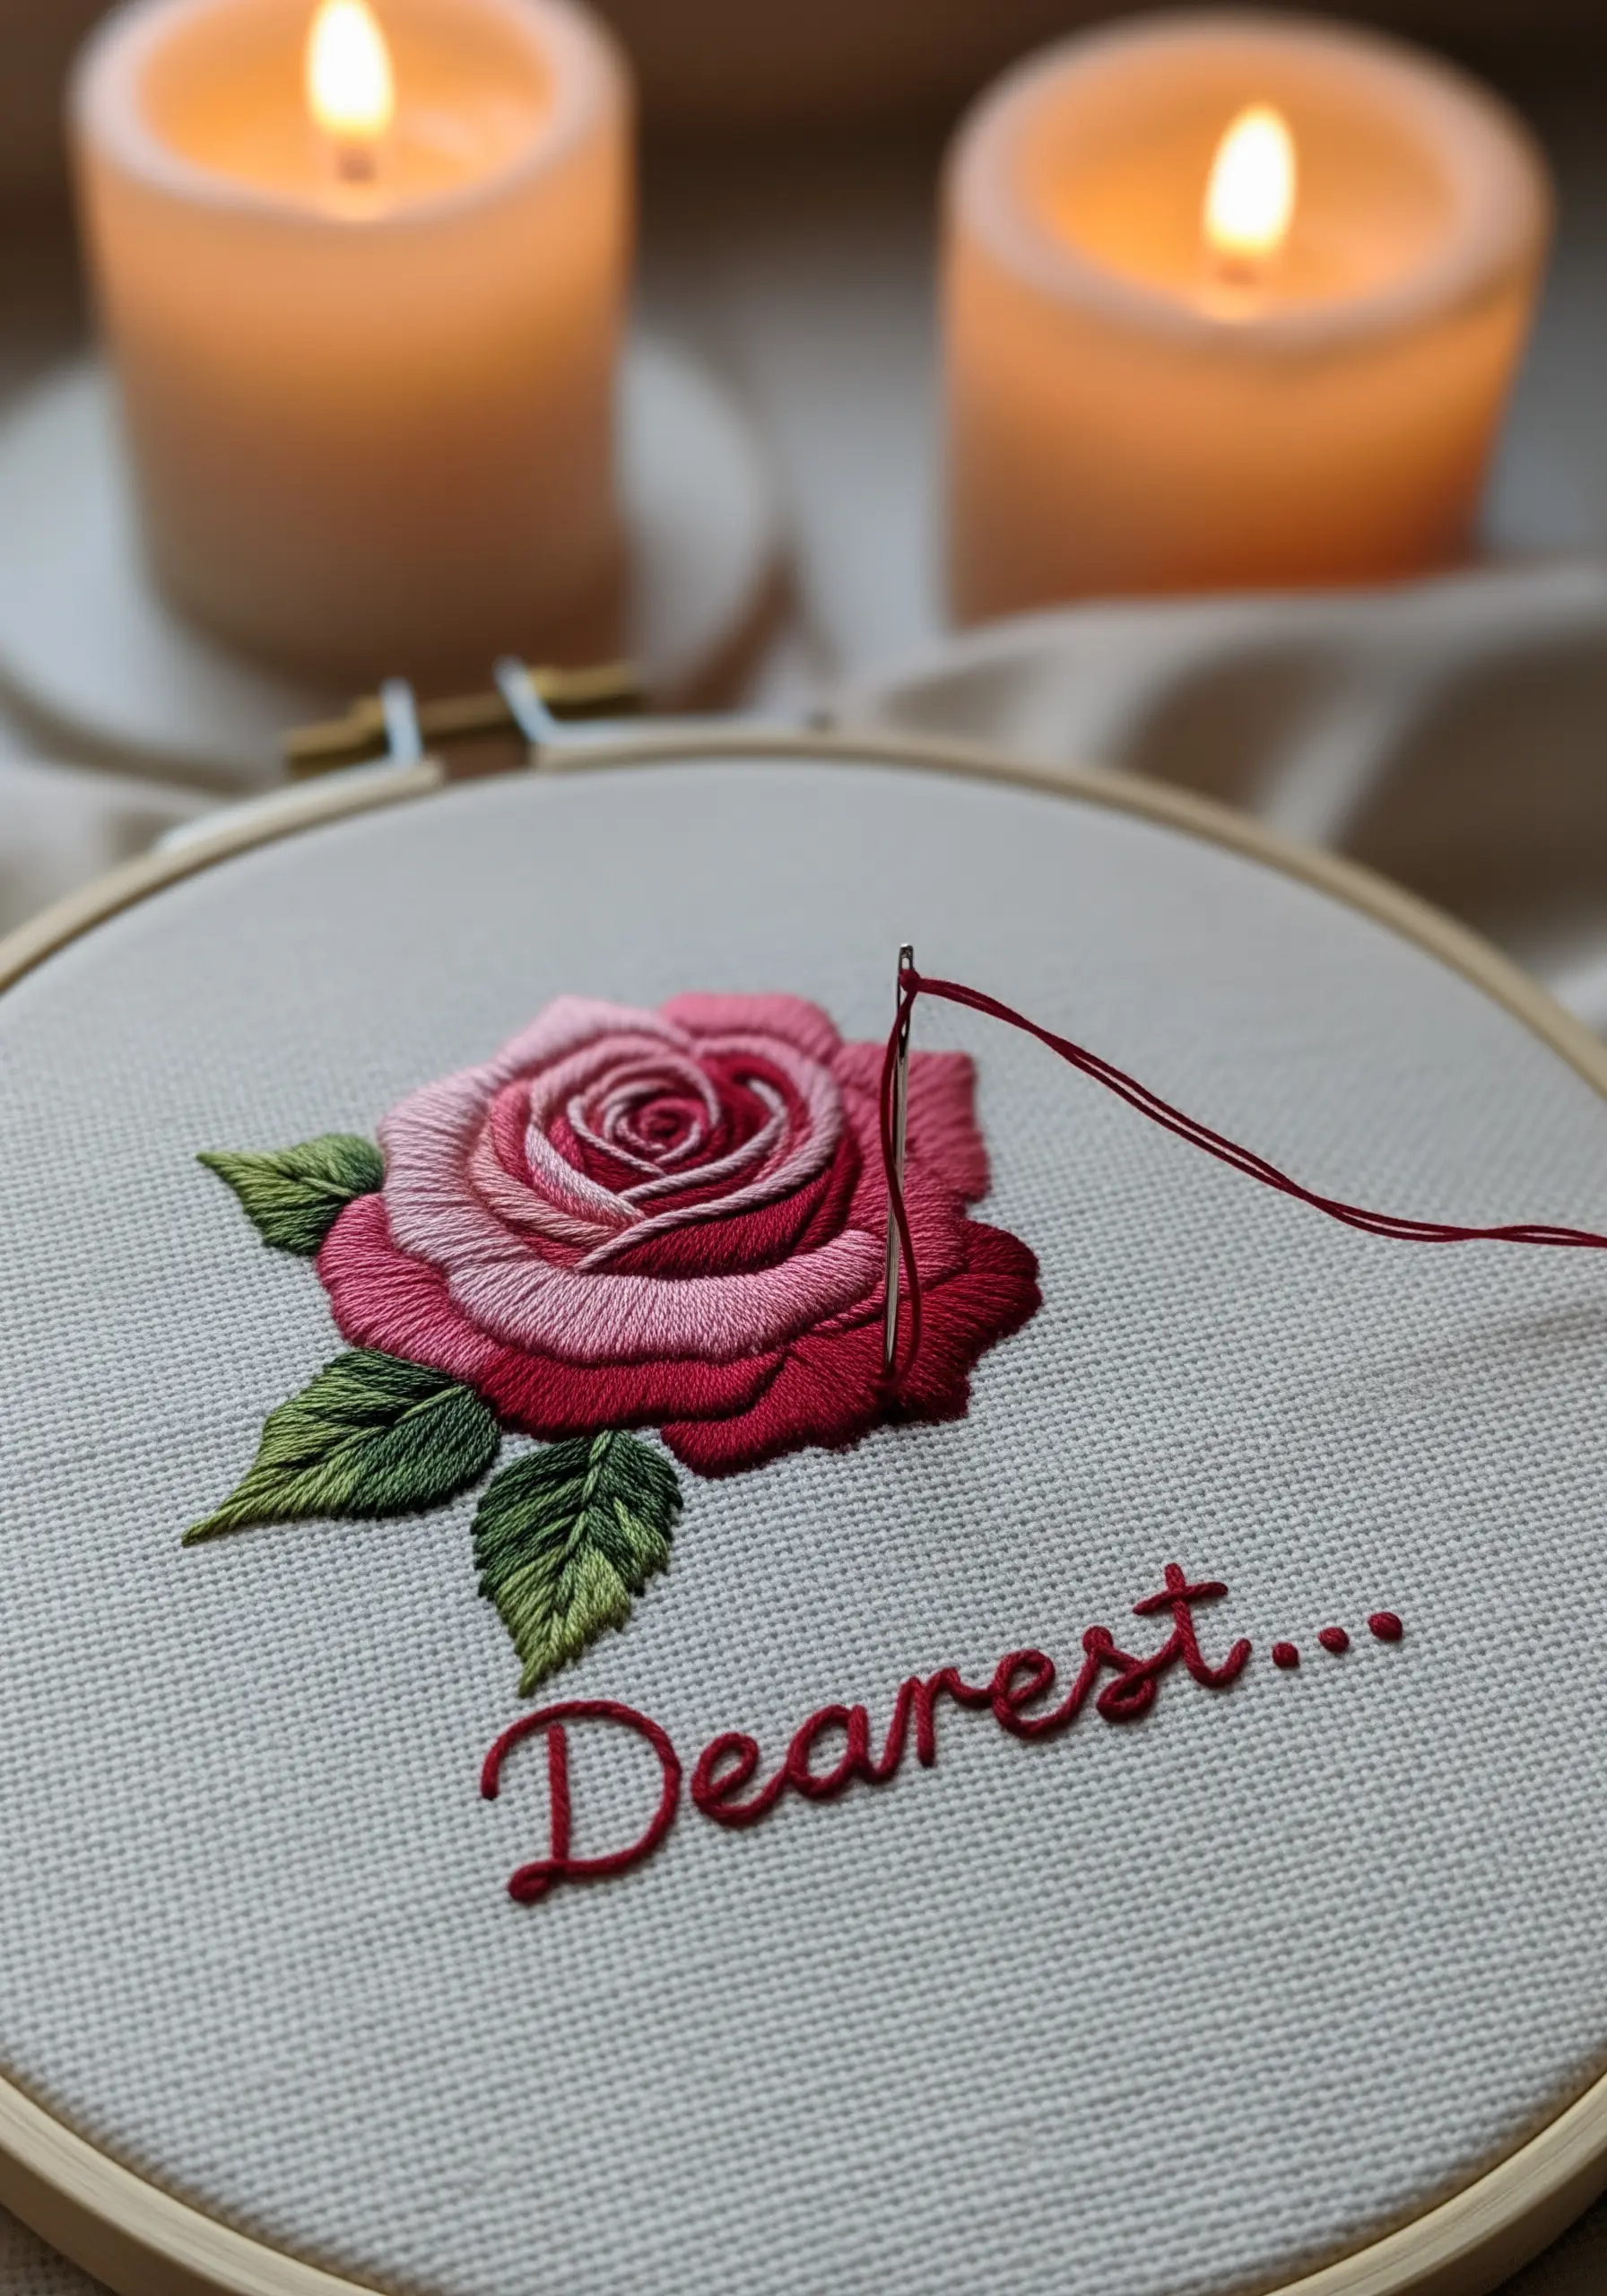
Think of your needle and thread not just as tools for craft, but as instruments for writing a love letter directly onto fabric. Each stitch can be a word, each flower a feeling, turning a simple textile into a piece of poetry that lasts forever.
These designs are more than just patterns; they are invitations to slow down and infuse your work with personal meaning. You’ll learn not only how to form a perfect rose, but how to give it character—whether it’s the resilient beauty of a thorny vine, the fragile memory of a pressed flower, or the timeless elegance of a single monogrammed bud.
Let’s explore techniques that add depth, texture, and narrative to your embroidery. This is your chance to move beyond copying a design and begin composing one, creating heirlooms that tell a deeply personal and romantic story.
1. The Art of Aging: Fabric Staining for a Vintage Finish
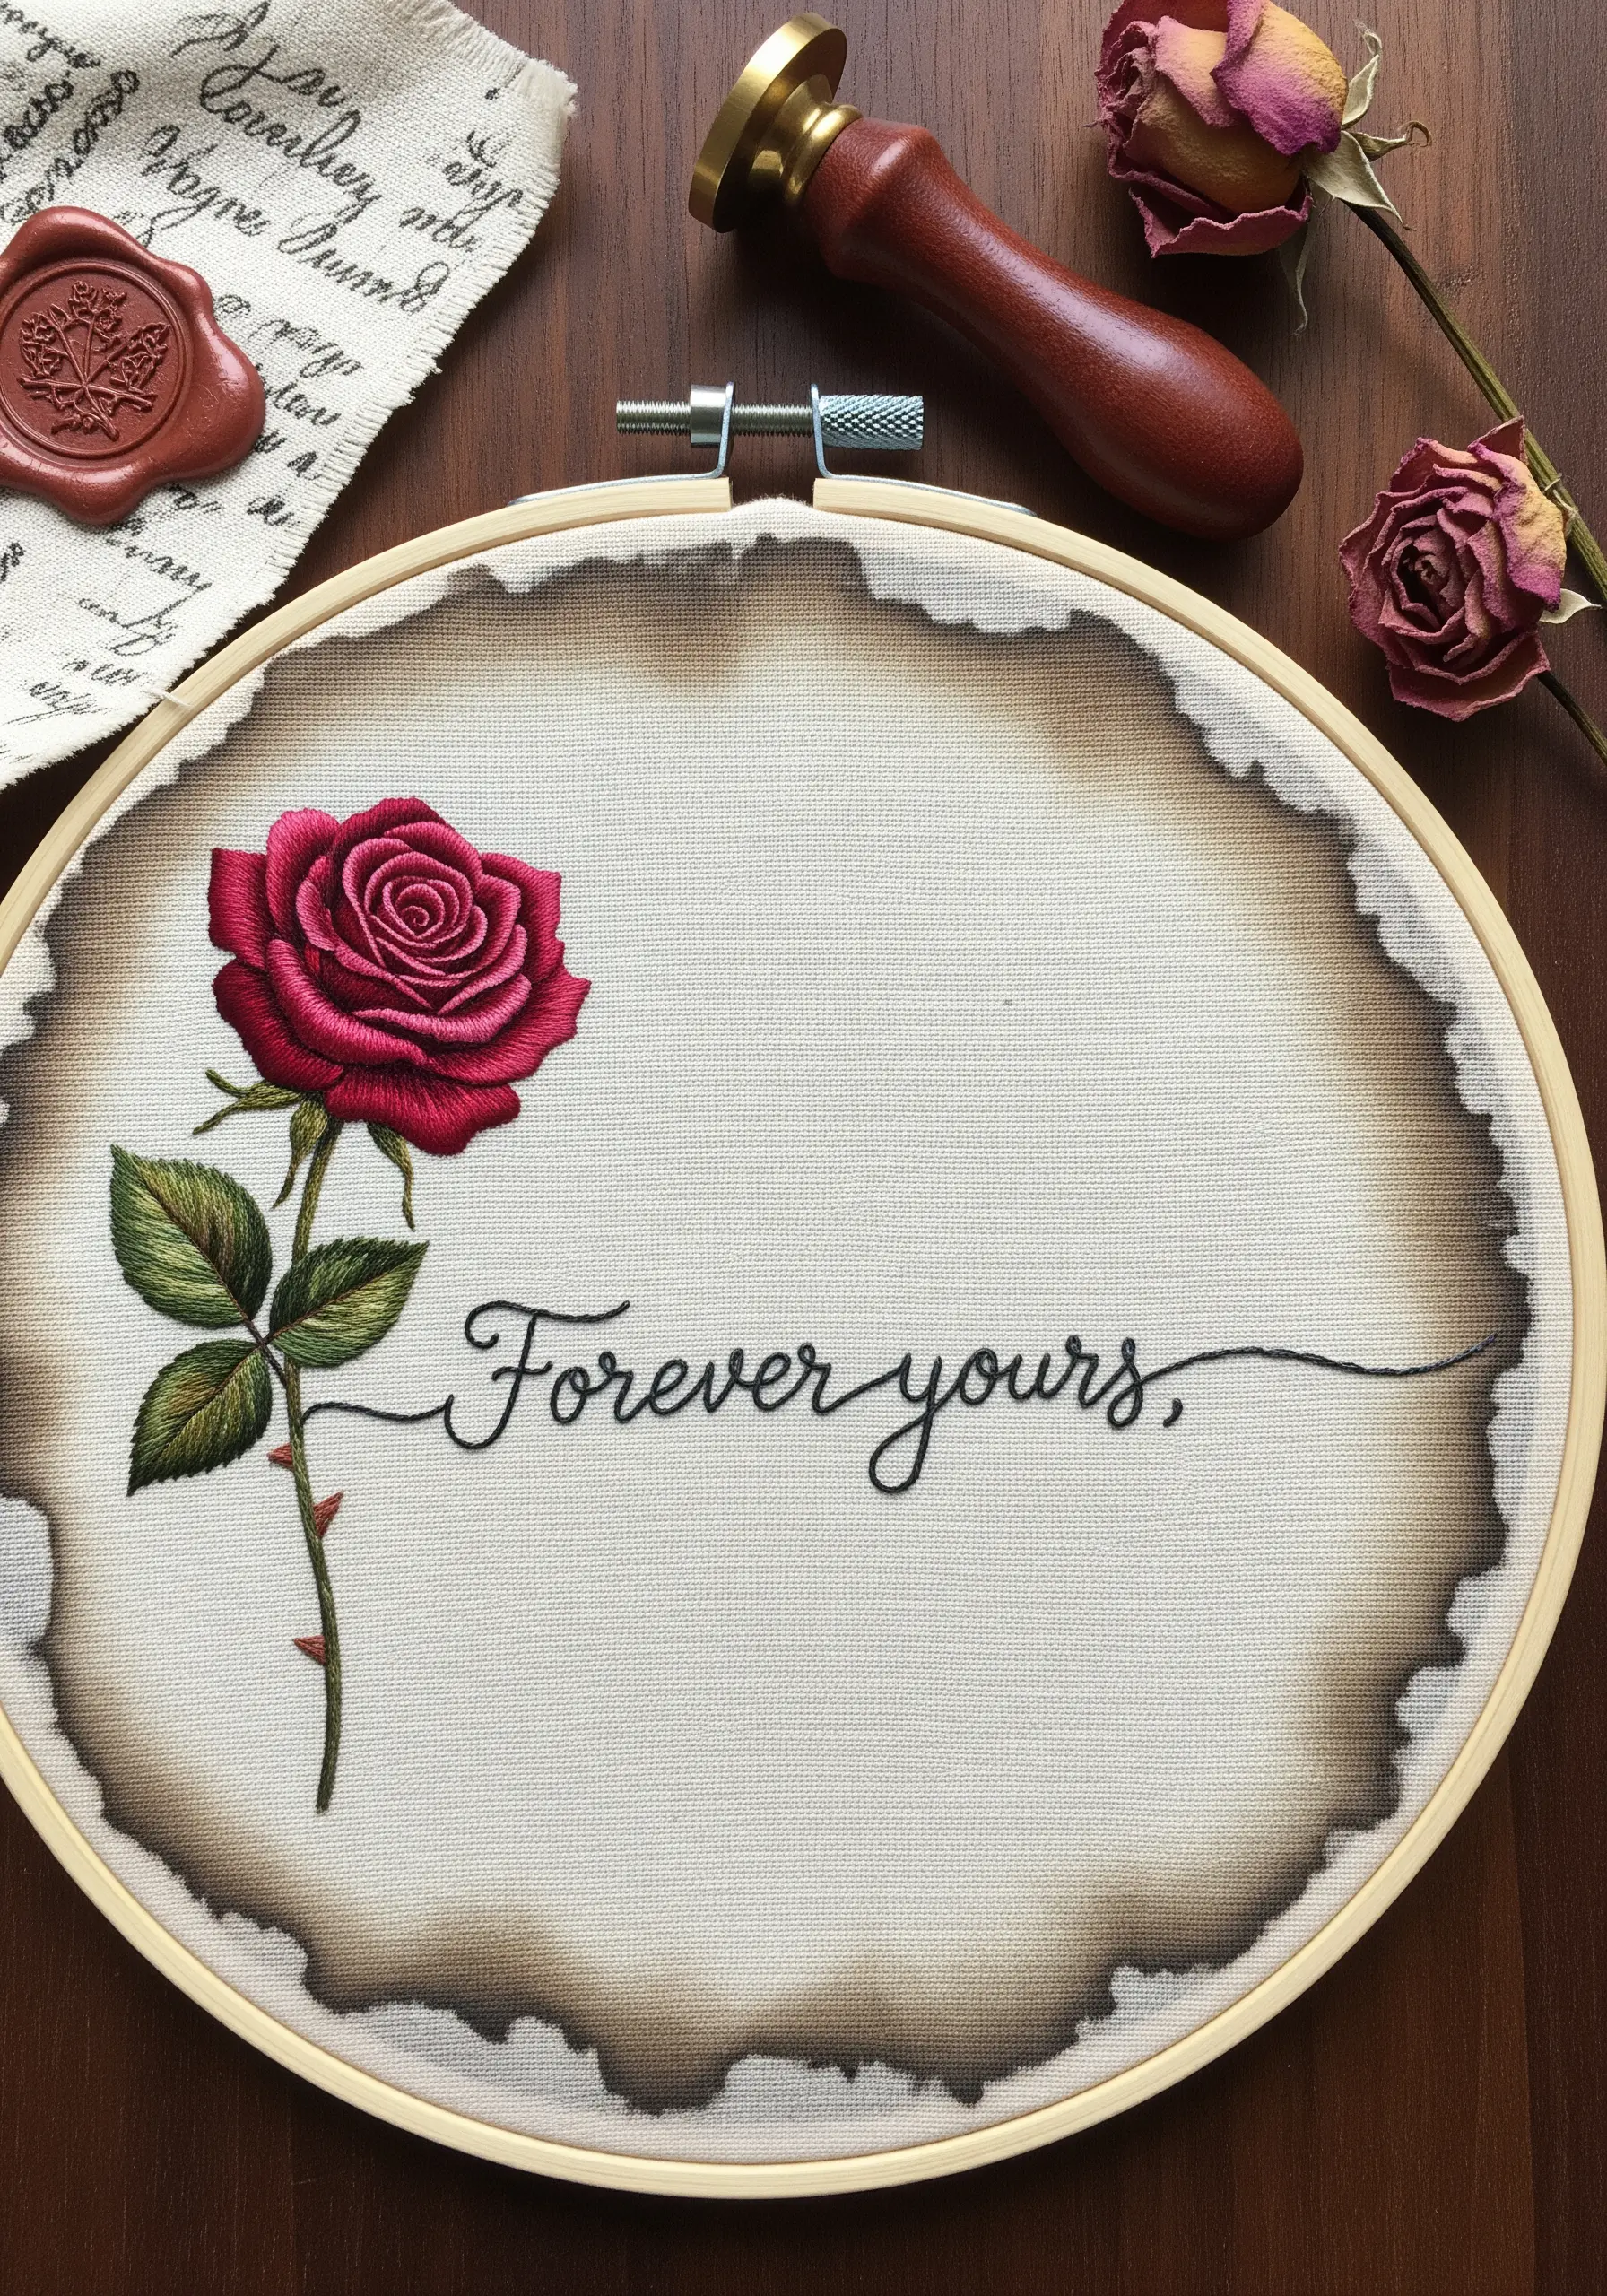
Create the illusion of a treasured, time-worn letter before you even make a stitch.
You can achieve this parchment effect safely by brewing strong black tea or coffee, letting it cool, and painting it onto your fabric, concentrating the color around the edges.
Blot with a paper towel to create natural variations and allow it to dry completely before stretching it in your hoop.
This stained base adds immediate depth and history, making your thread painting and delicate lettering feel like a true artifact.
2. Dimensional Florals with Woven Wheel Roses
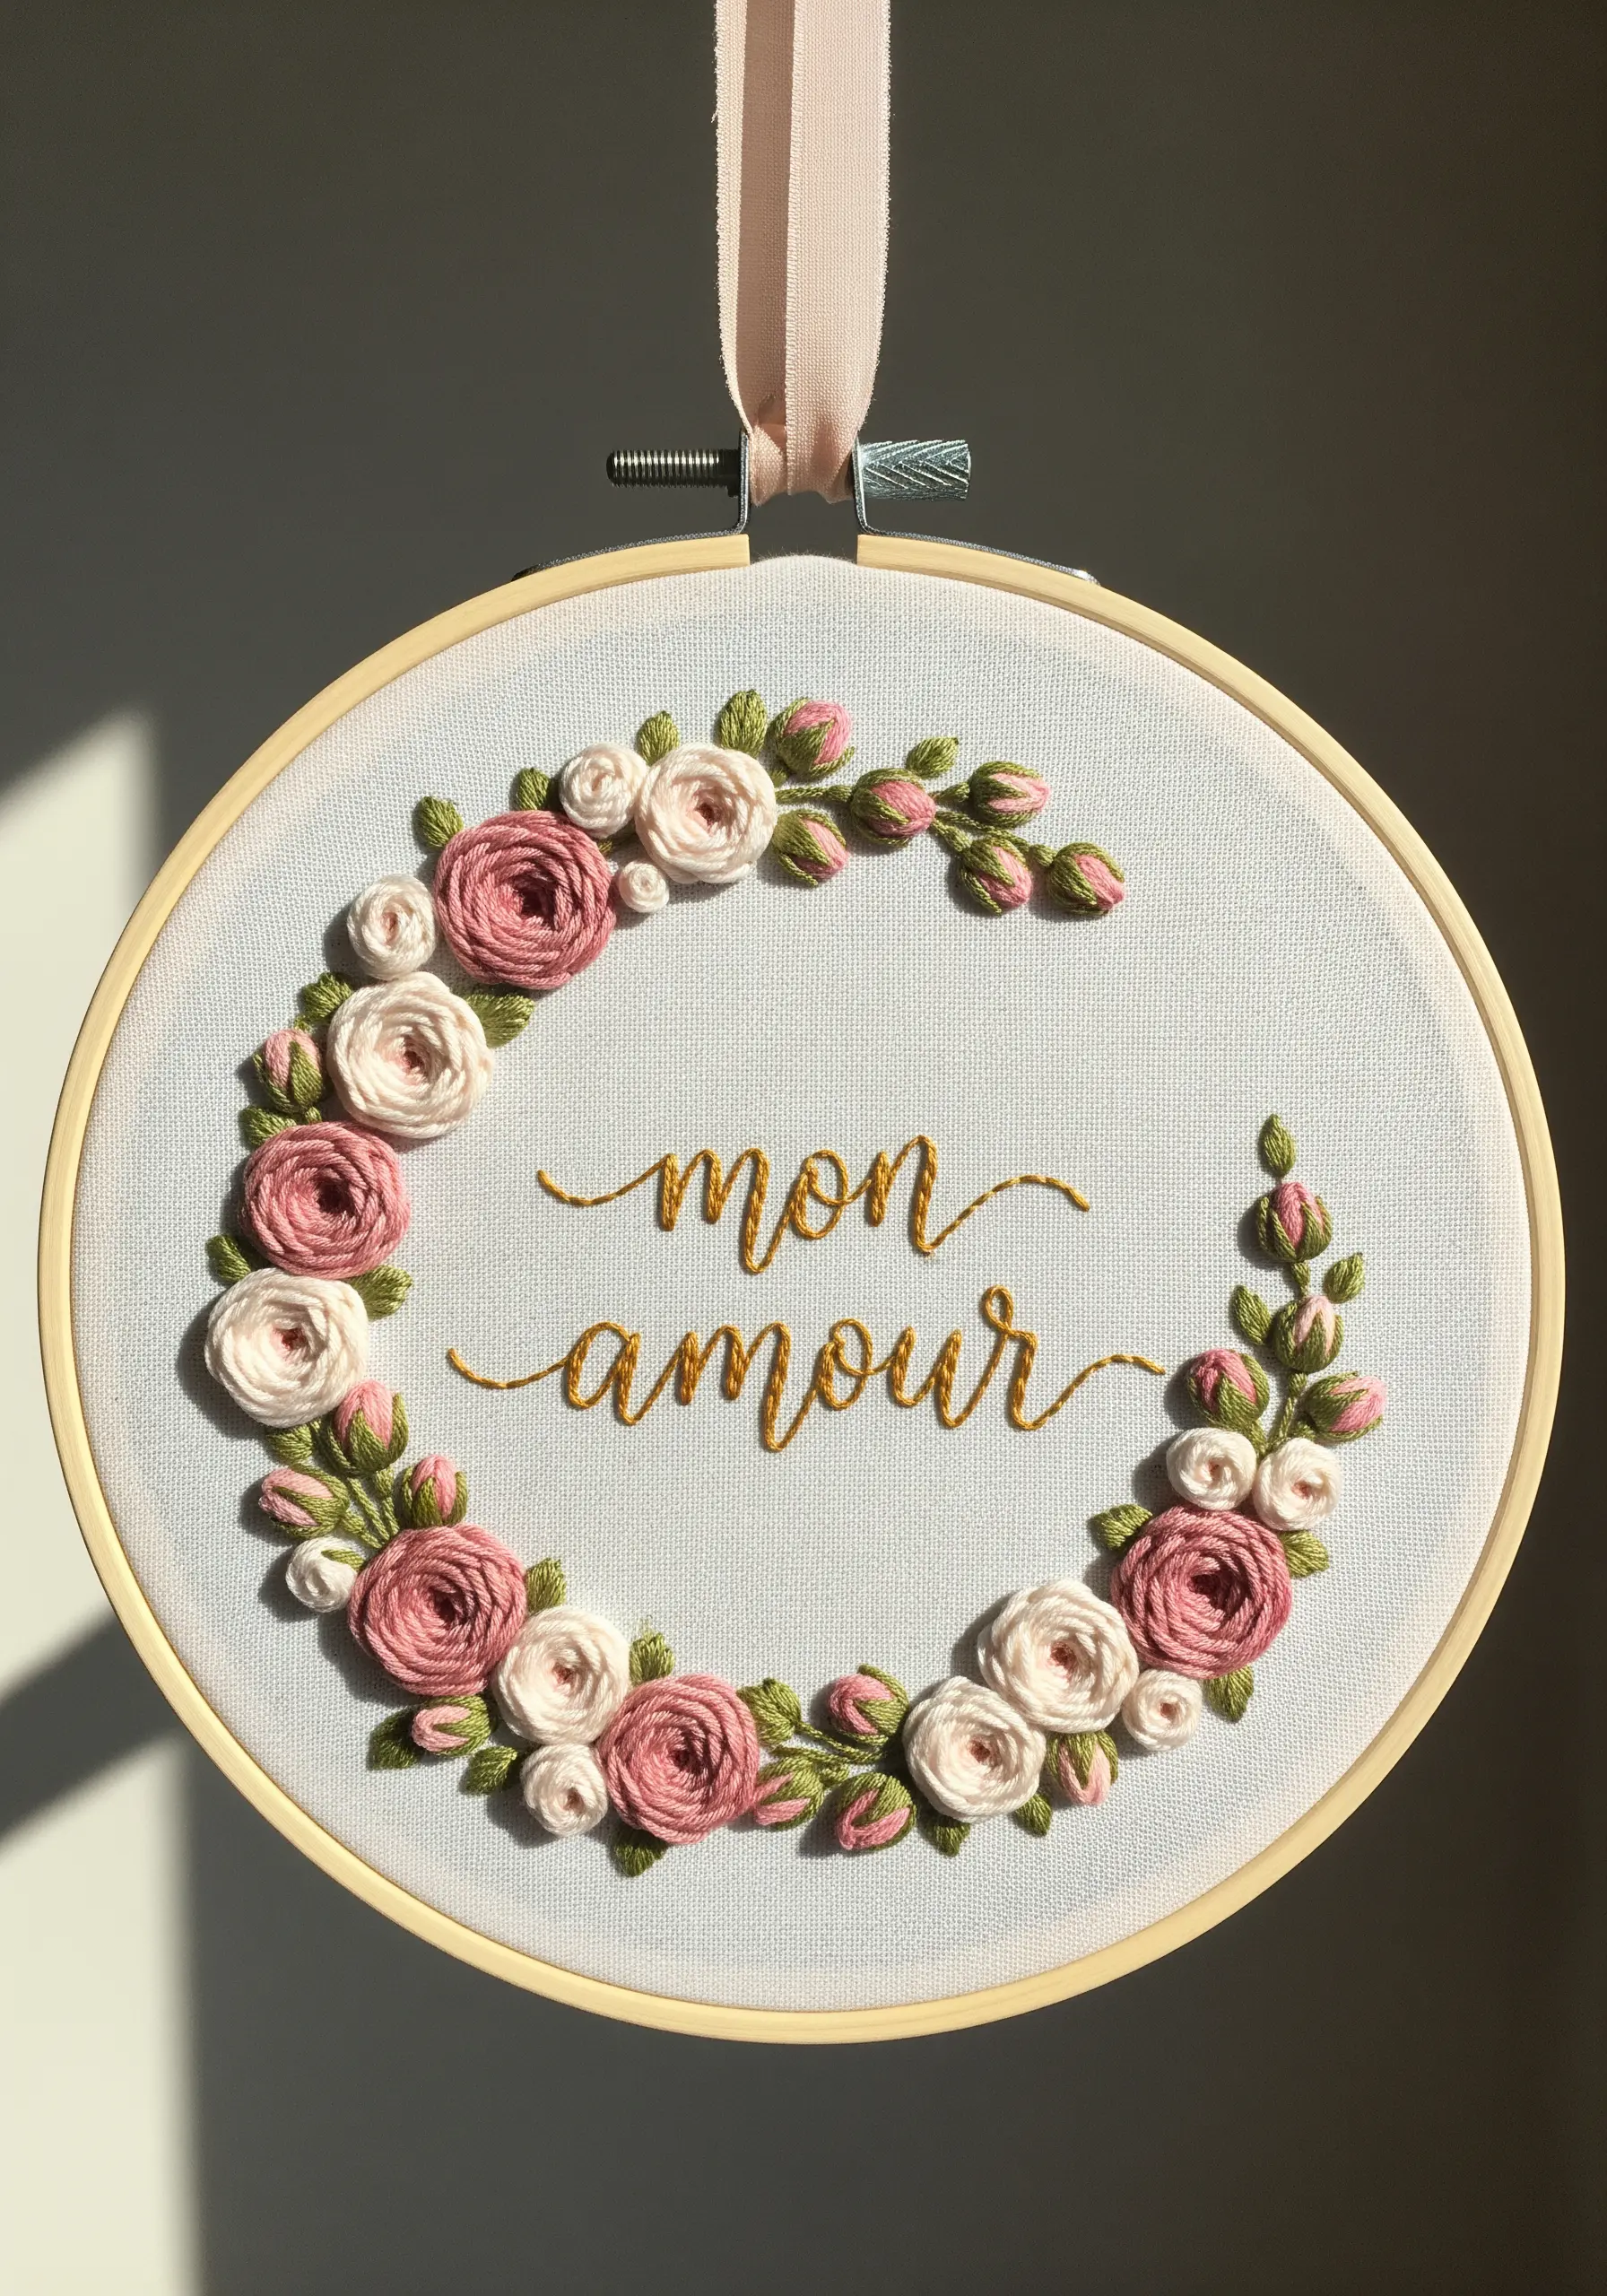
For roses that feel lush and three-dimensional, the woven wheel stitch is your most powerful tool.
Create a foundation of five straight stitches like the spokes of a wheel, then weave your thread over and under each spoke without piercing the fabric.
Vary the tension and the number of wraps to control the size and tightness of your roses—tighter wraps for buds, looser for blooming flowers.
Pairing these high-texture florals with a smooth metallic thread for lettering creates a beautiful contrast in both sheen and dimension.
3. Composing a Narrative: The Embroidered Postcard

Transform a simple piece of fabric into a story by recreating the intimate format of a vintage postcard.
Use a simple running stitch for the dashed lines and a clean backstitch for the lettering to maintain clarity and structure.
Frame the composition with delicate floral corners using stem stitch for vines and tiny satin stitches for the petals.
The key here is balance—the structured lines of the postcard format provide a perfect canvas for the organic, romantic florals.
4. Ribbon Embroidery for Luxurious, Lifelike Roses

Introduce a new level of realism and luxury by swapping cotton floss for silk ribbon.
The ribbon stitch naturally folds and twists as you pull it through the fabric, creating the soft, layered look of real rose petals with minimal effort.
Use a chenille needle with a large eye to avoid snagging the ribbon.
The combination of rich mauve and soft lavender ribbon against an off-white background creates a sophisticated palette that feels both classic and timeless.
5. The Monogrammed Keepsake: A Single Perfect Rose

On fine fabrics like linen or cotton batiste, a single, perfectly executed motif speaks volumes.
To prevent puckering on a delicate handkerchief, use a lightweight tear-away or wash-away stabilizer on the back.
Ensure your satin stitches are smooth, even, and lie flat by keeping your thread tension consistent.
Pairing the bloom with a simple, elegant monogram transforms the piece from a beautiful object into a personal, cherished heirloom.
6. Storytelling Through Texture: The Thorny Wreath
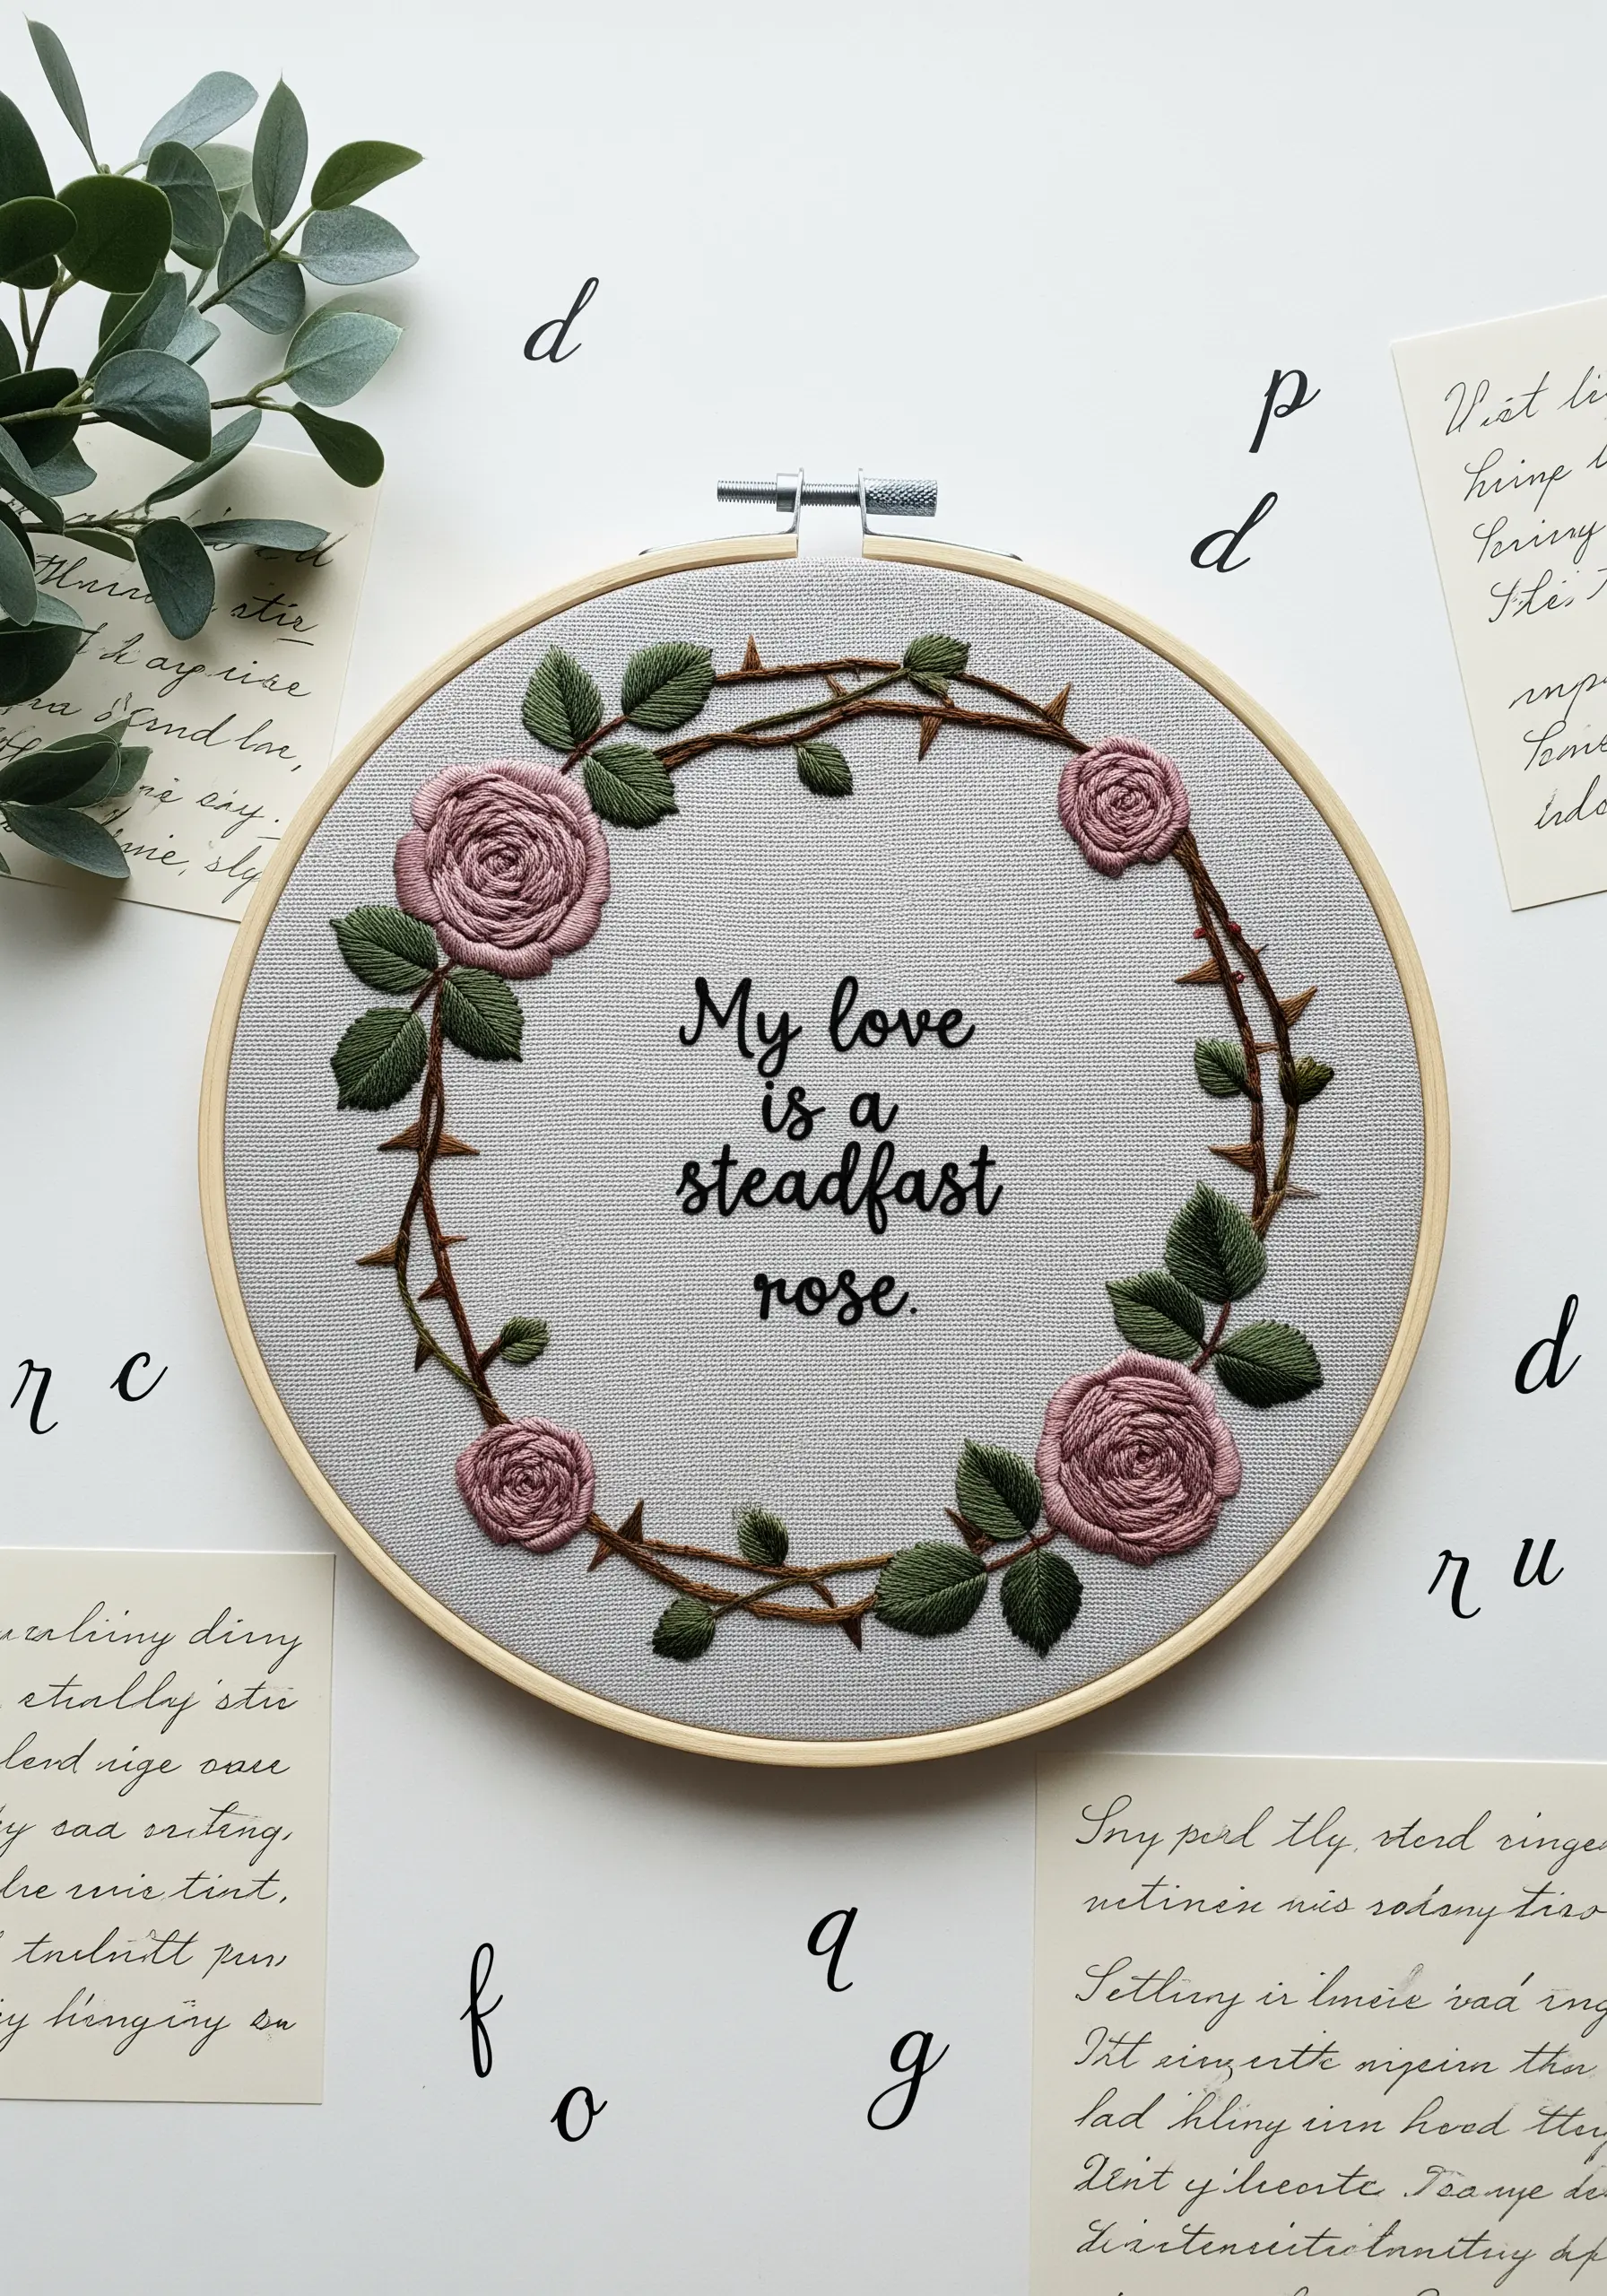
Create a design with emotional depth by contrasting soft and sharp textures.
Stitch the roses using the woven wheel method for a soft, full appearance, and then craft the vine with a thicker, more rustic stitch like a heavy chain stitch or a couched cord.
Form the thorns with single, sharp straight stitches pulled taut.
This textural interplay between the delicate petals and the protective thorns tells a story of resilient, steadfast love.
7. From Hoop to Home: The Statement Rose Border
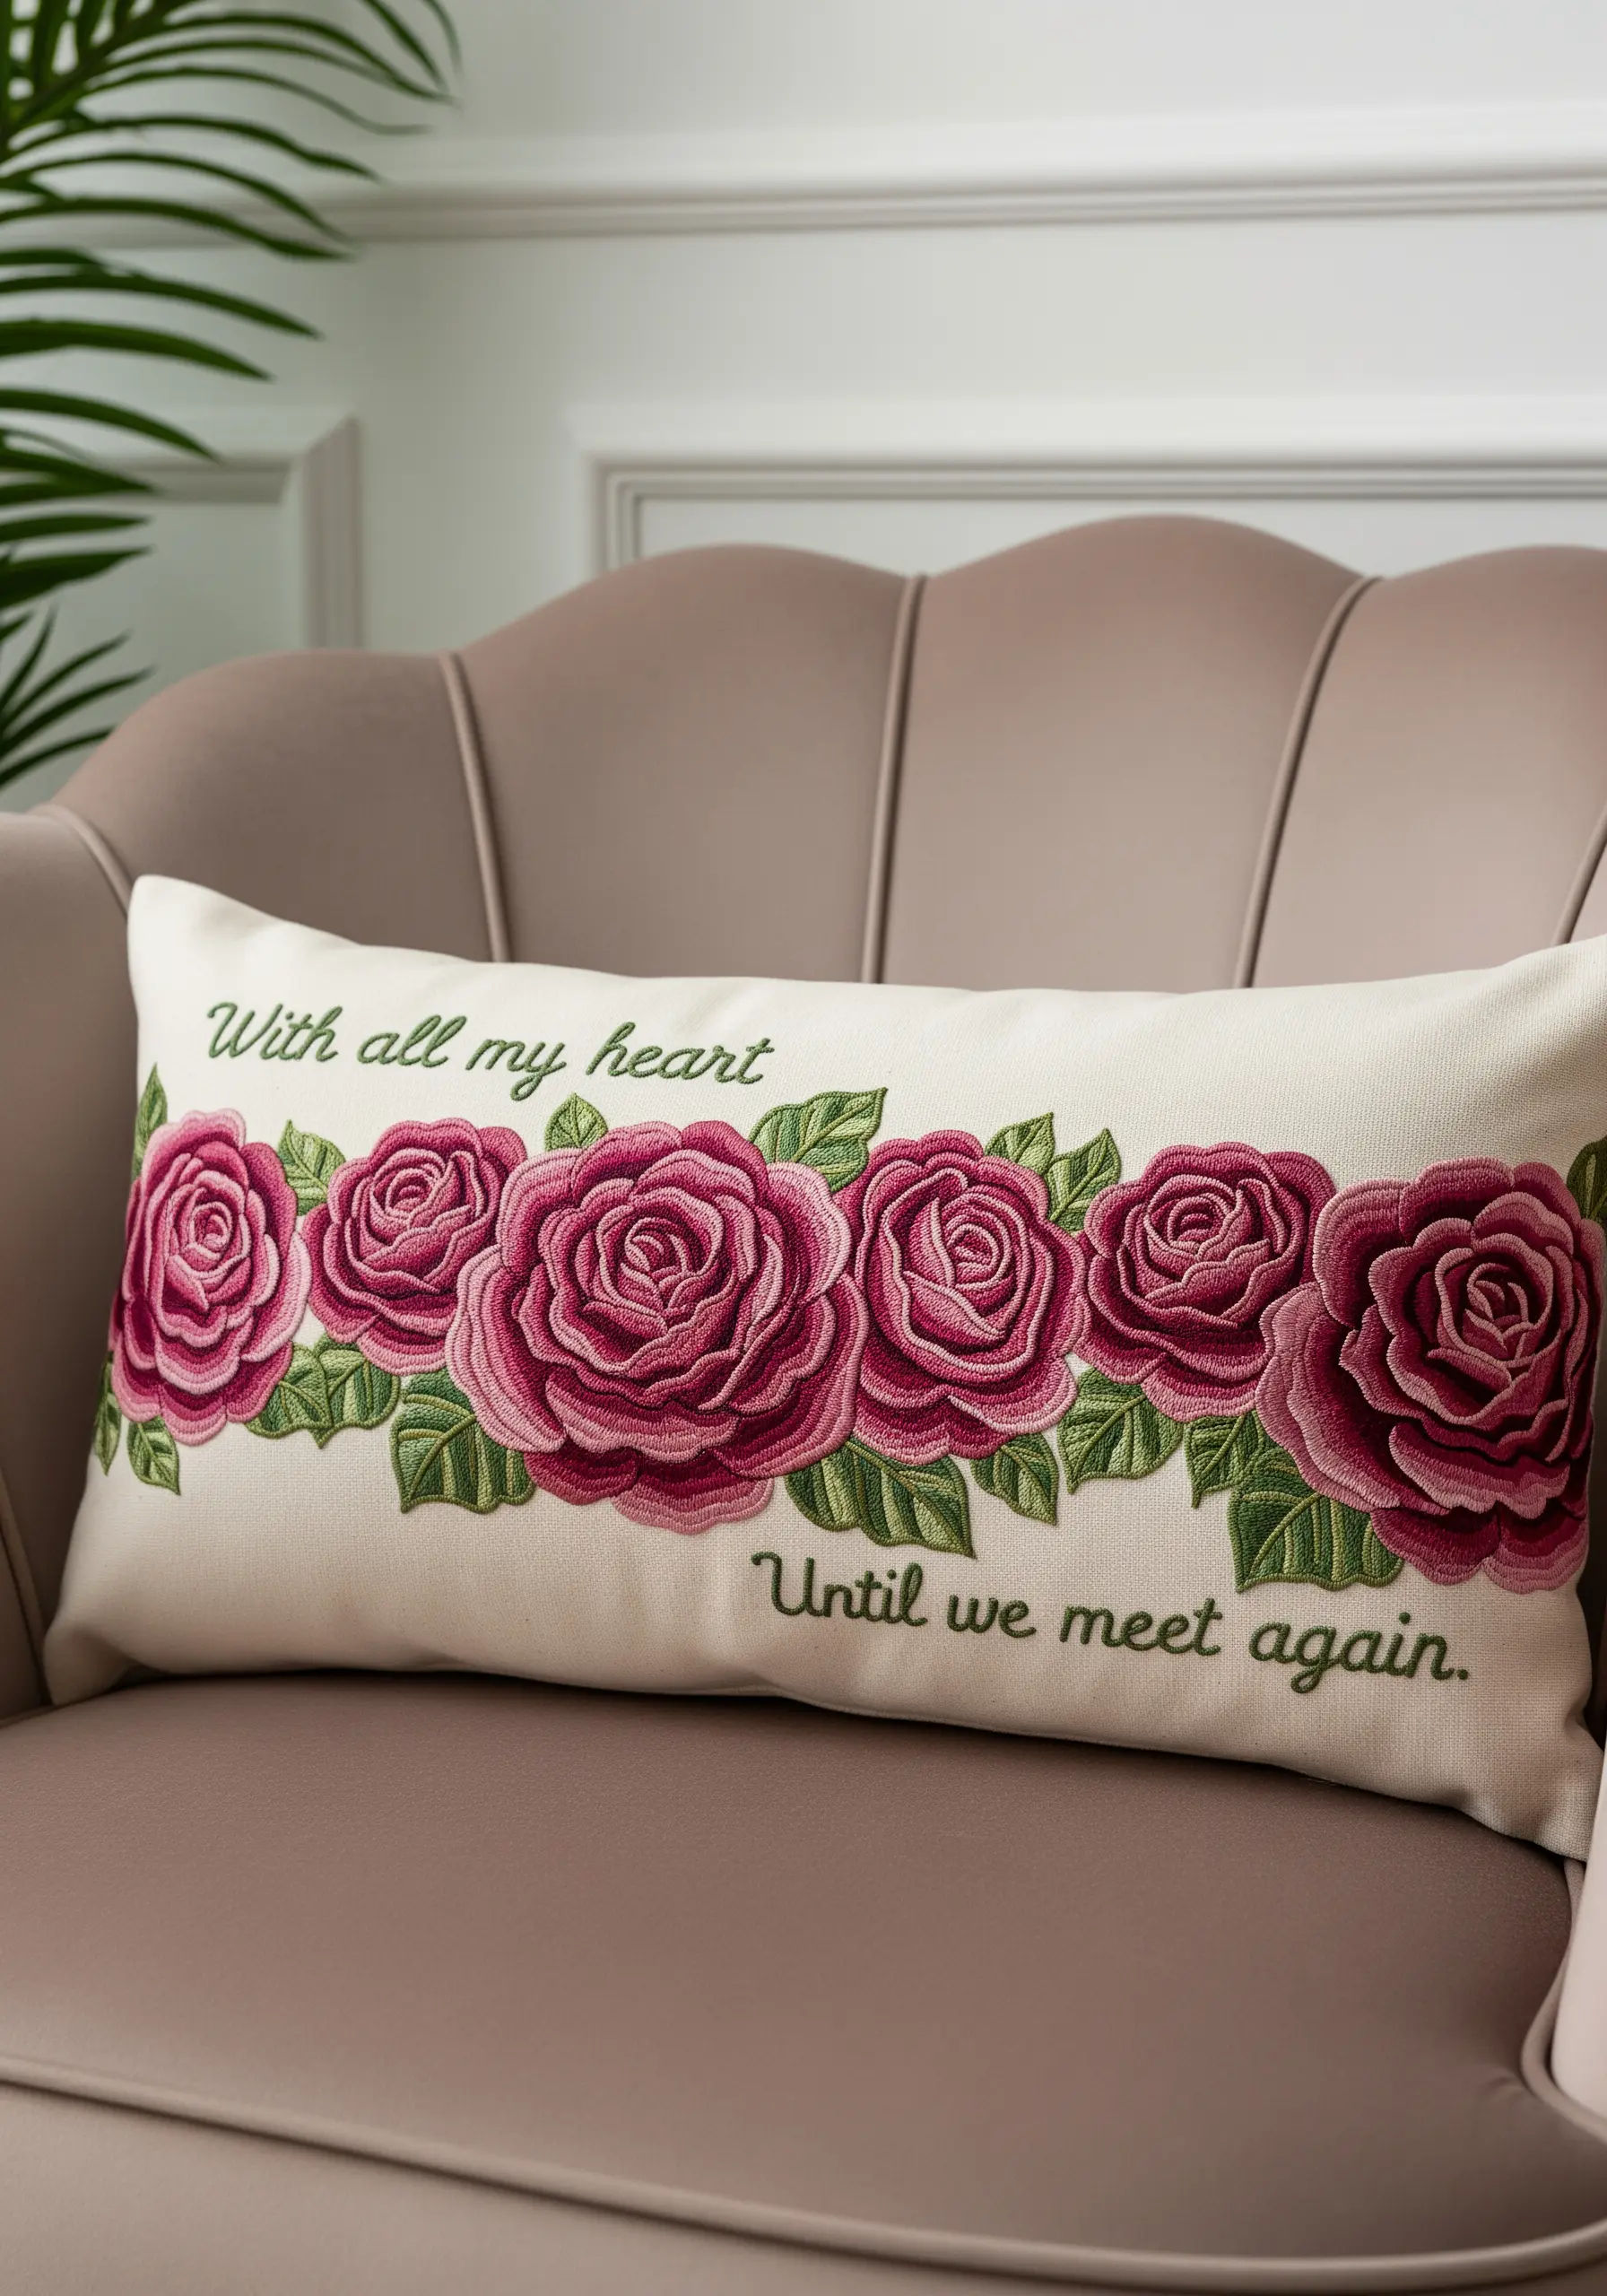
Take your embroidery beyond the hoop and integrate it into your living space with a statement pillow.
A repeating rose border offers powerful visual impact. To ensure consistency across a large design, create a reusable stencil or use a heat-erasable pen to draw the entire pattern before you begin.
The long-and-short stitch shading gives these roses a painted quality, turning a simple cushion cover into a piece of functional art.
Choose a durable fabric like a cotton-linen blend to ensure your work withstands daily use.
8. The Painterly Rose: Mastering Color Blending
Achieve the stunning realism of a painted rose by mastering the long-and-short stitch.
Work with just one or two strands of floss, using three to four closely related shades for each petal.
Your stitches should follow the natural direction of the petal’s curve, blending seamlessly from dark to light to create depth and shadow.
This technique, often called thread painting, transforms your needle into a paintbrush, allowing you to create breathtaking gradients.
9. The Elegance of Simplicity: Single-Line Contour
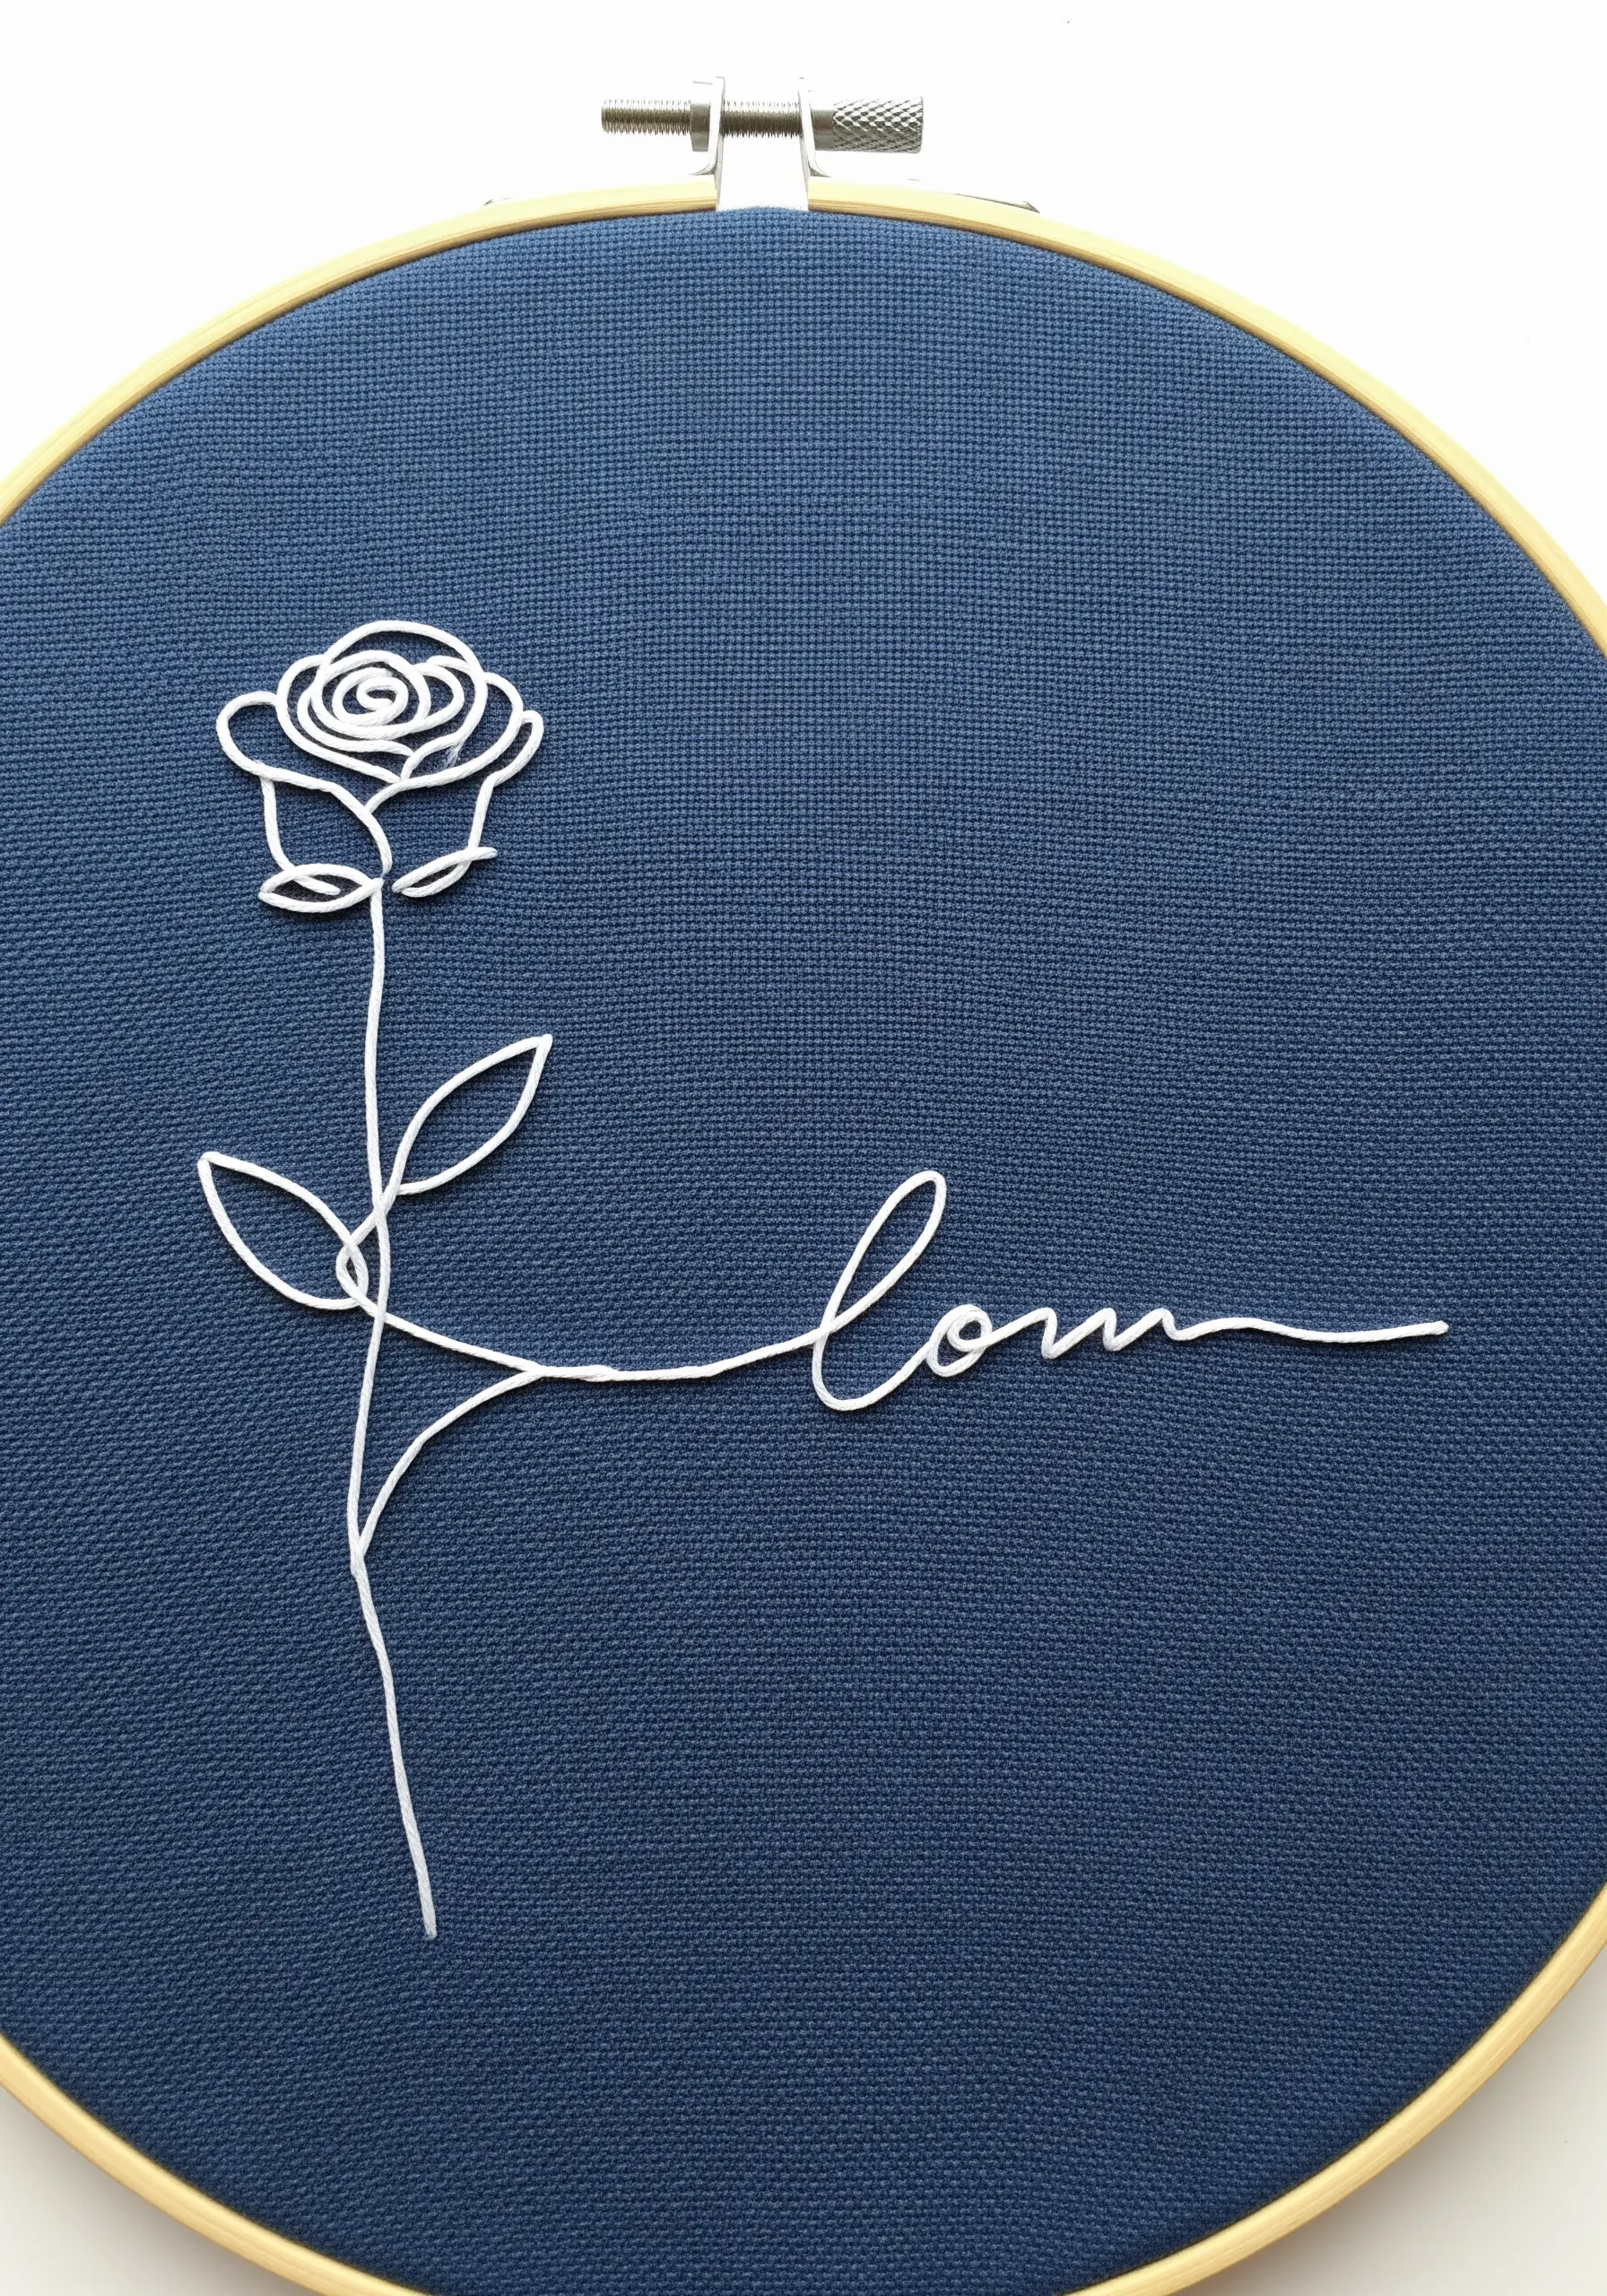
Discover the modern power of minimalism by creating a design from a single, unbroken line.
The key to a fluid contour is a smooth, consistent stitch like a whipped backstitch, which eliminates the jagged look of a standard backstitch.
Choose a high-contrast palette—like bright white on deep navy—to make the delicate line pop.
This technique celebrates negative space, turning the unstitched fabric into an essential part of the composition, perfect for gallery-style hoop art for minimalist apartments.
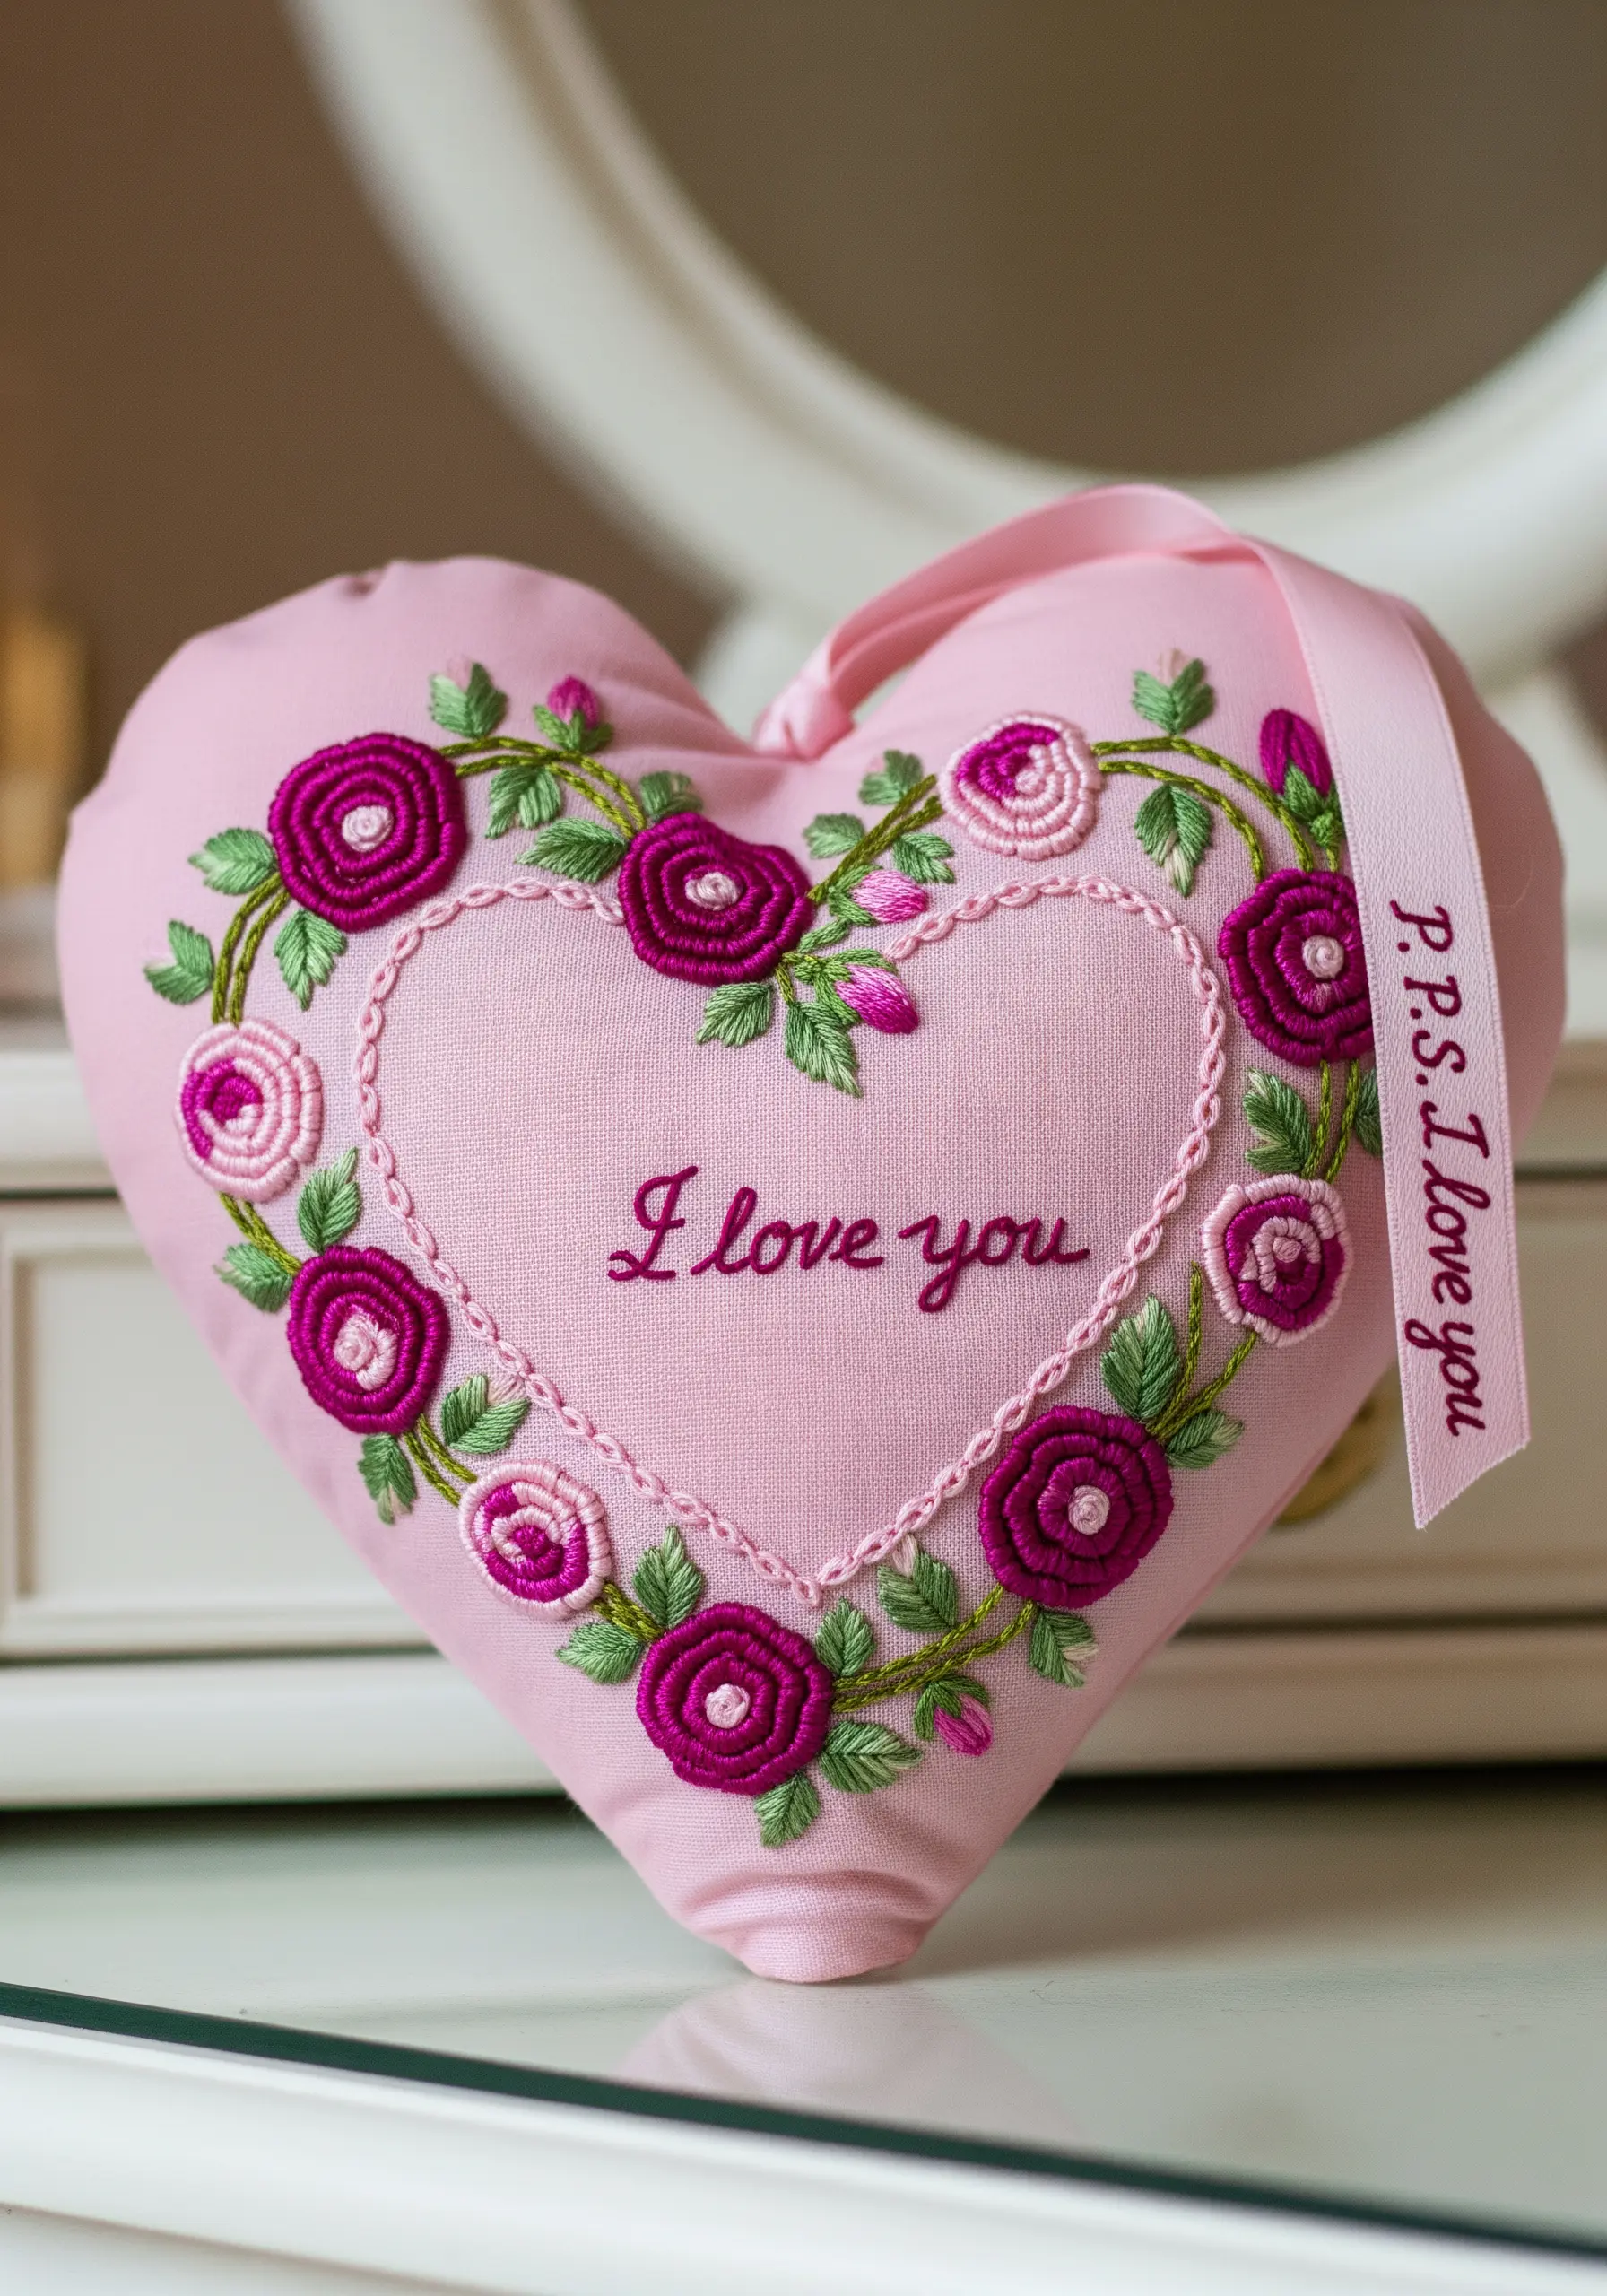
10. Commemorative Bouquets: Layering for Depth

To create the feeling of a full, dense bouquet, you need to build layers.
Always stitch the elements that are furthest in the background first—in this case, the leaves and smaller buds behind the main roses.
This allows you to slightly overlap the foreground flowers, creating a natural sense of depth and dimension.
Incorporate a simple banner with a significant date to turn a beautiful floral piece into a deeply personal memento.
11. Expressive Stitching: The Unfinished Narrative

Use your thread to convey emotion by incorporating loose, trailing strands into your design.
This technique turns the embroidery process itself into part of the story, suggesting longing, memory, or an unfinished thought.
To execute this, securely anchor the beginning of your thread on the back, then let it hang freely on the front, snipping it to your desired length.
It’s a powerful example of abstract concept art, where the medium enhances the message.
12. Practical Romance: The Embroidered Bookmark
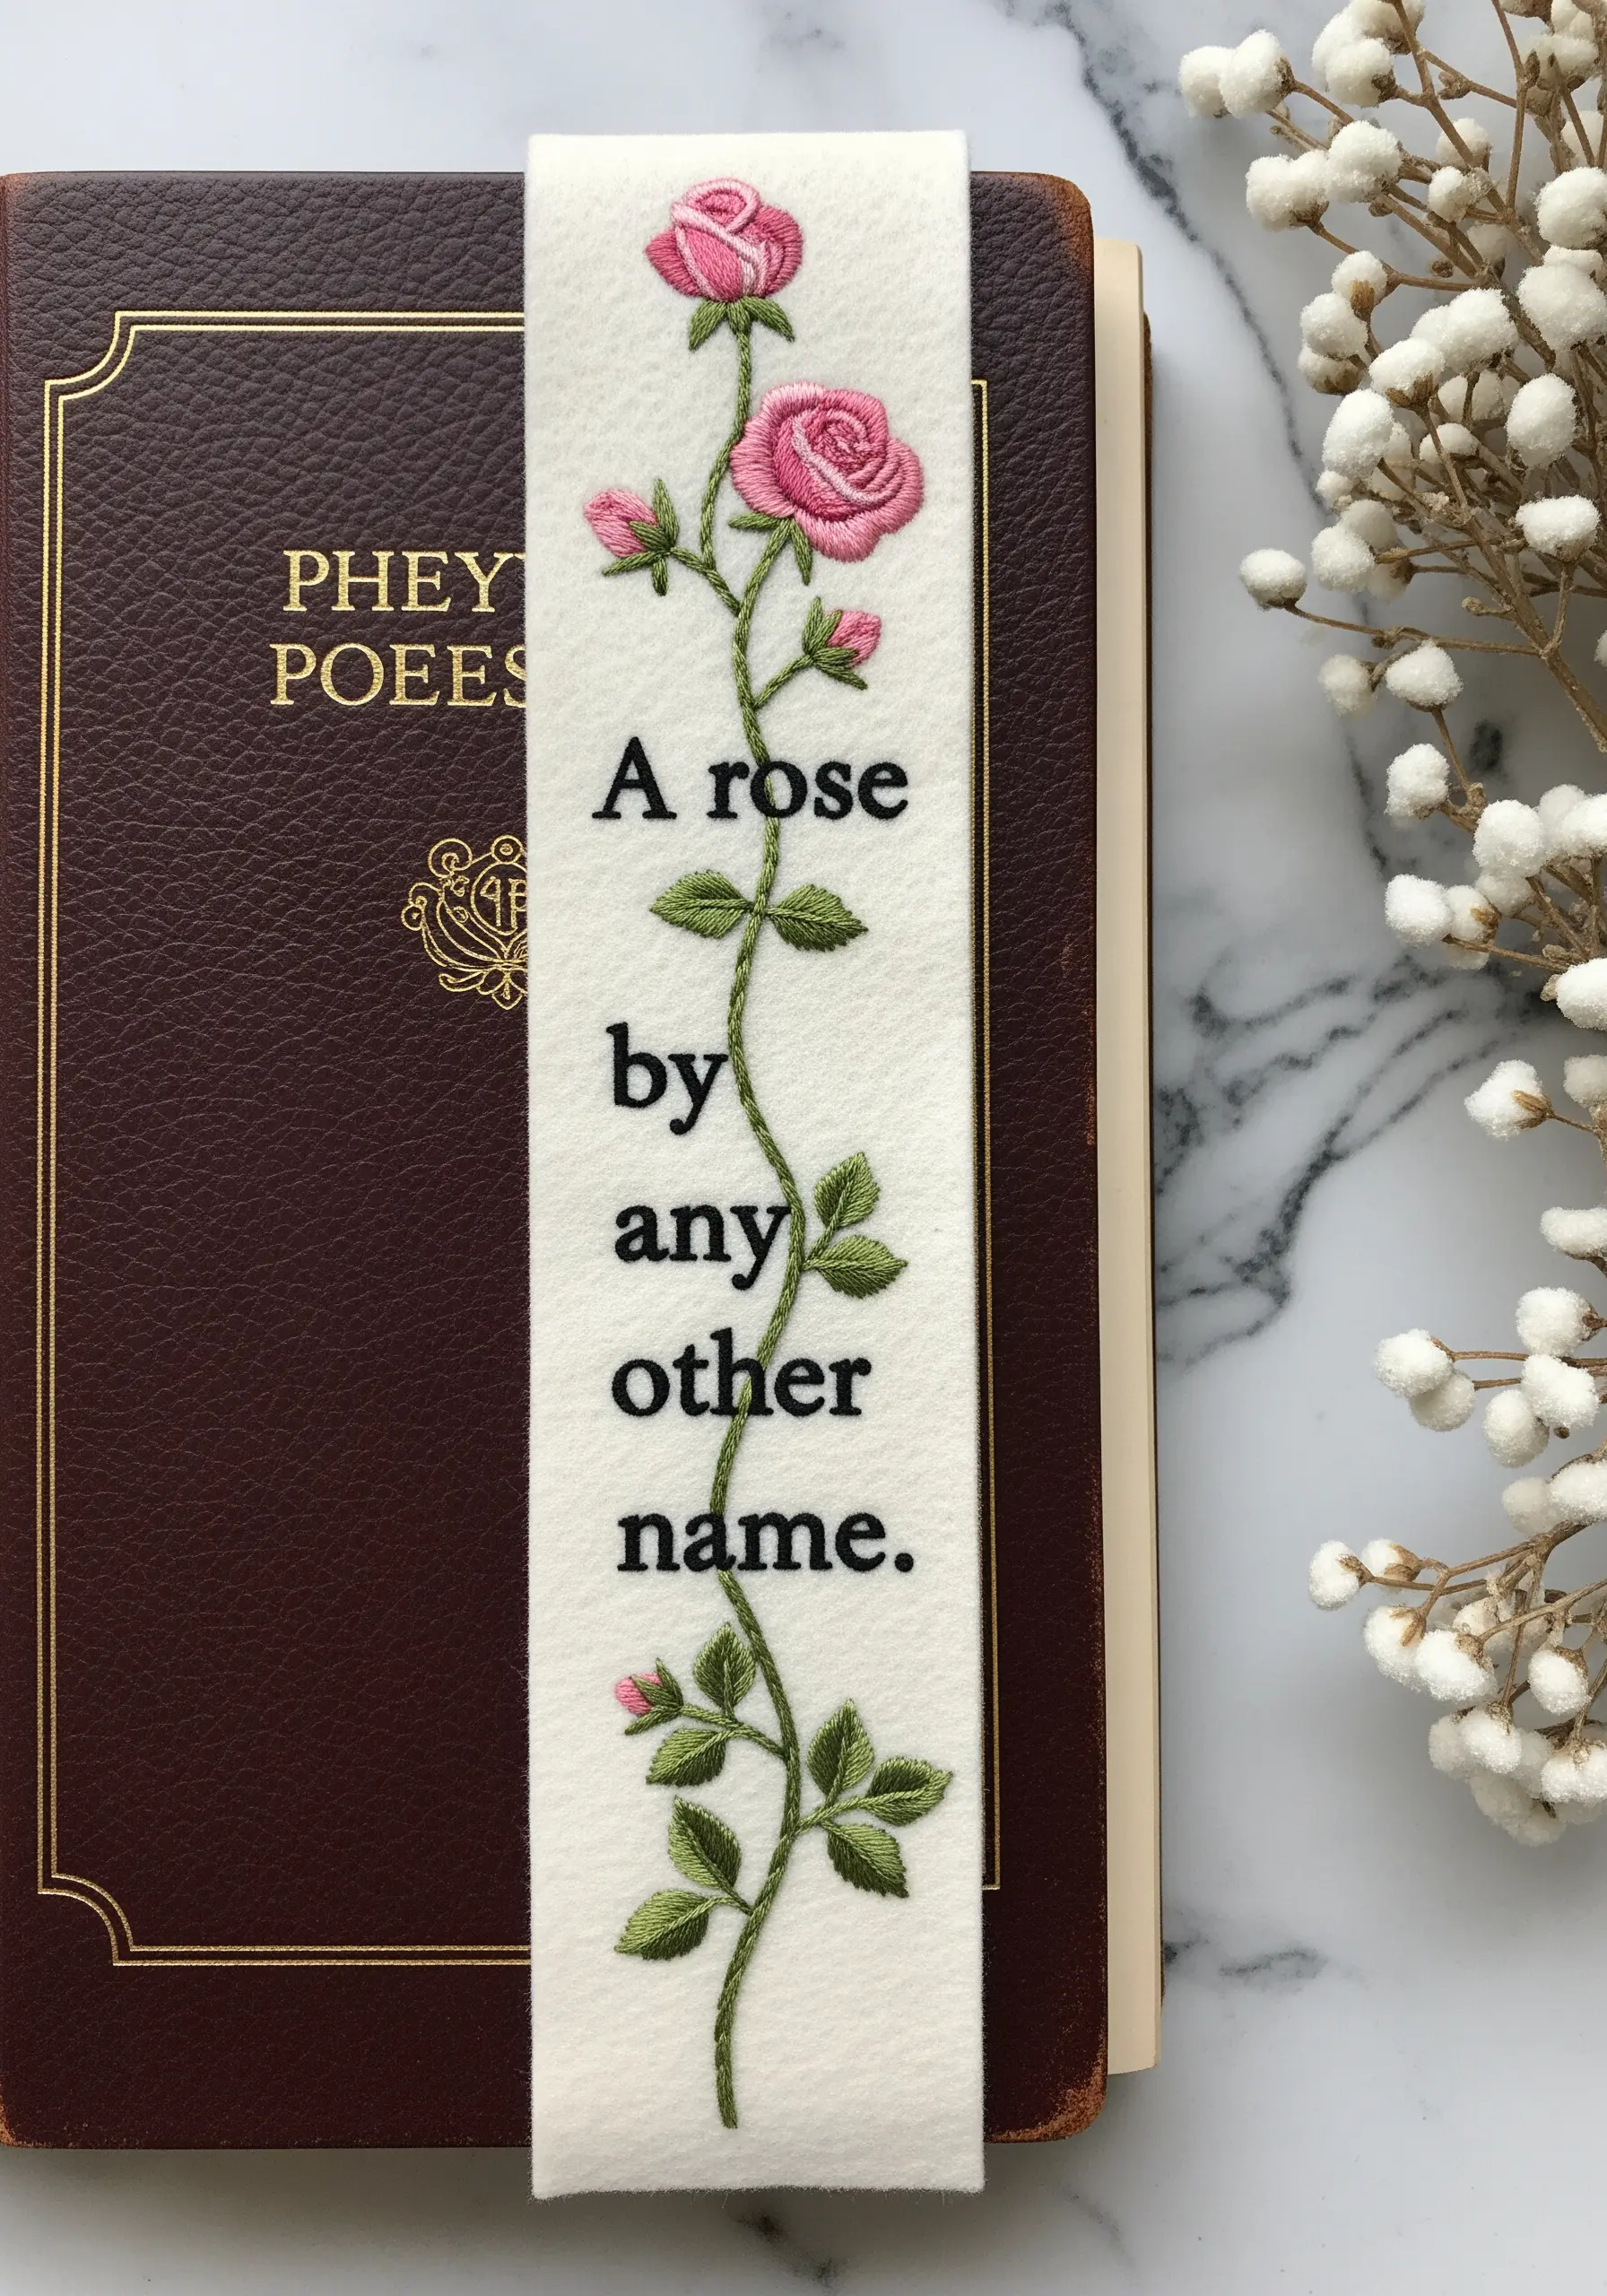
Take your art off the wall and into the pages of a beloved book with a functional, embroidered bookmark.
Stiff felt is an ideal base as it requires no hemming or stabilizer and provides a sturdy surface for stitching.
A simple, vertical composition like a climbing rose vine is perfectly suited to the long, narrow format.
Use a sharp, strong needle to easily pierce the dense material, and finish the back with a second piece of felt for a clean look.
13. Monochromatic Elegance: The Toile de Jouy Effect
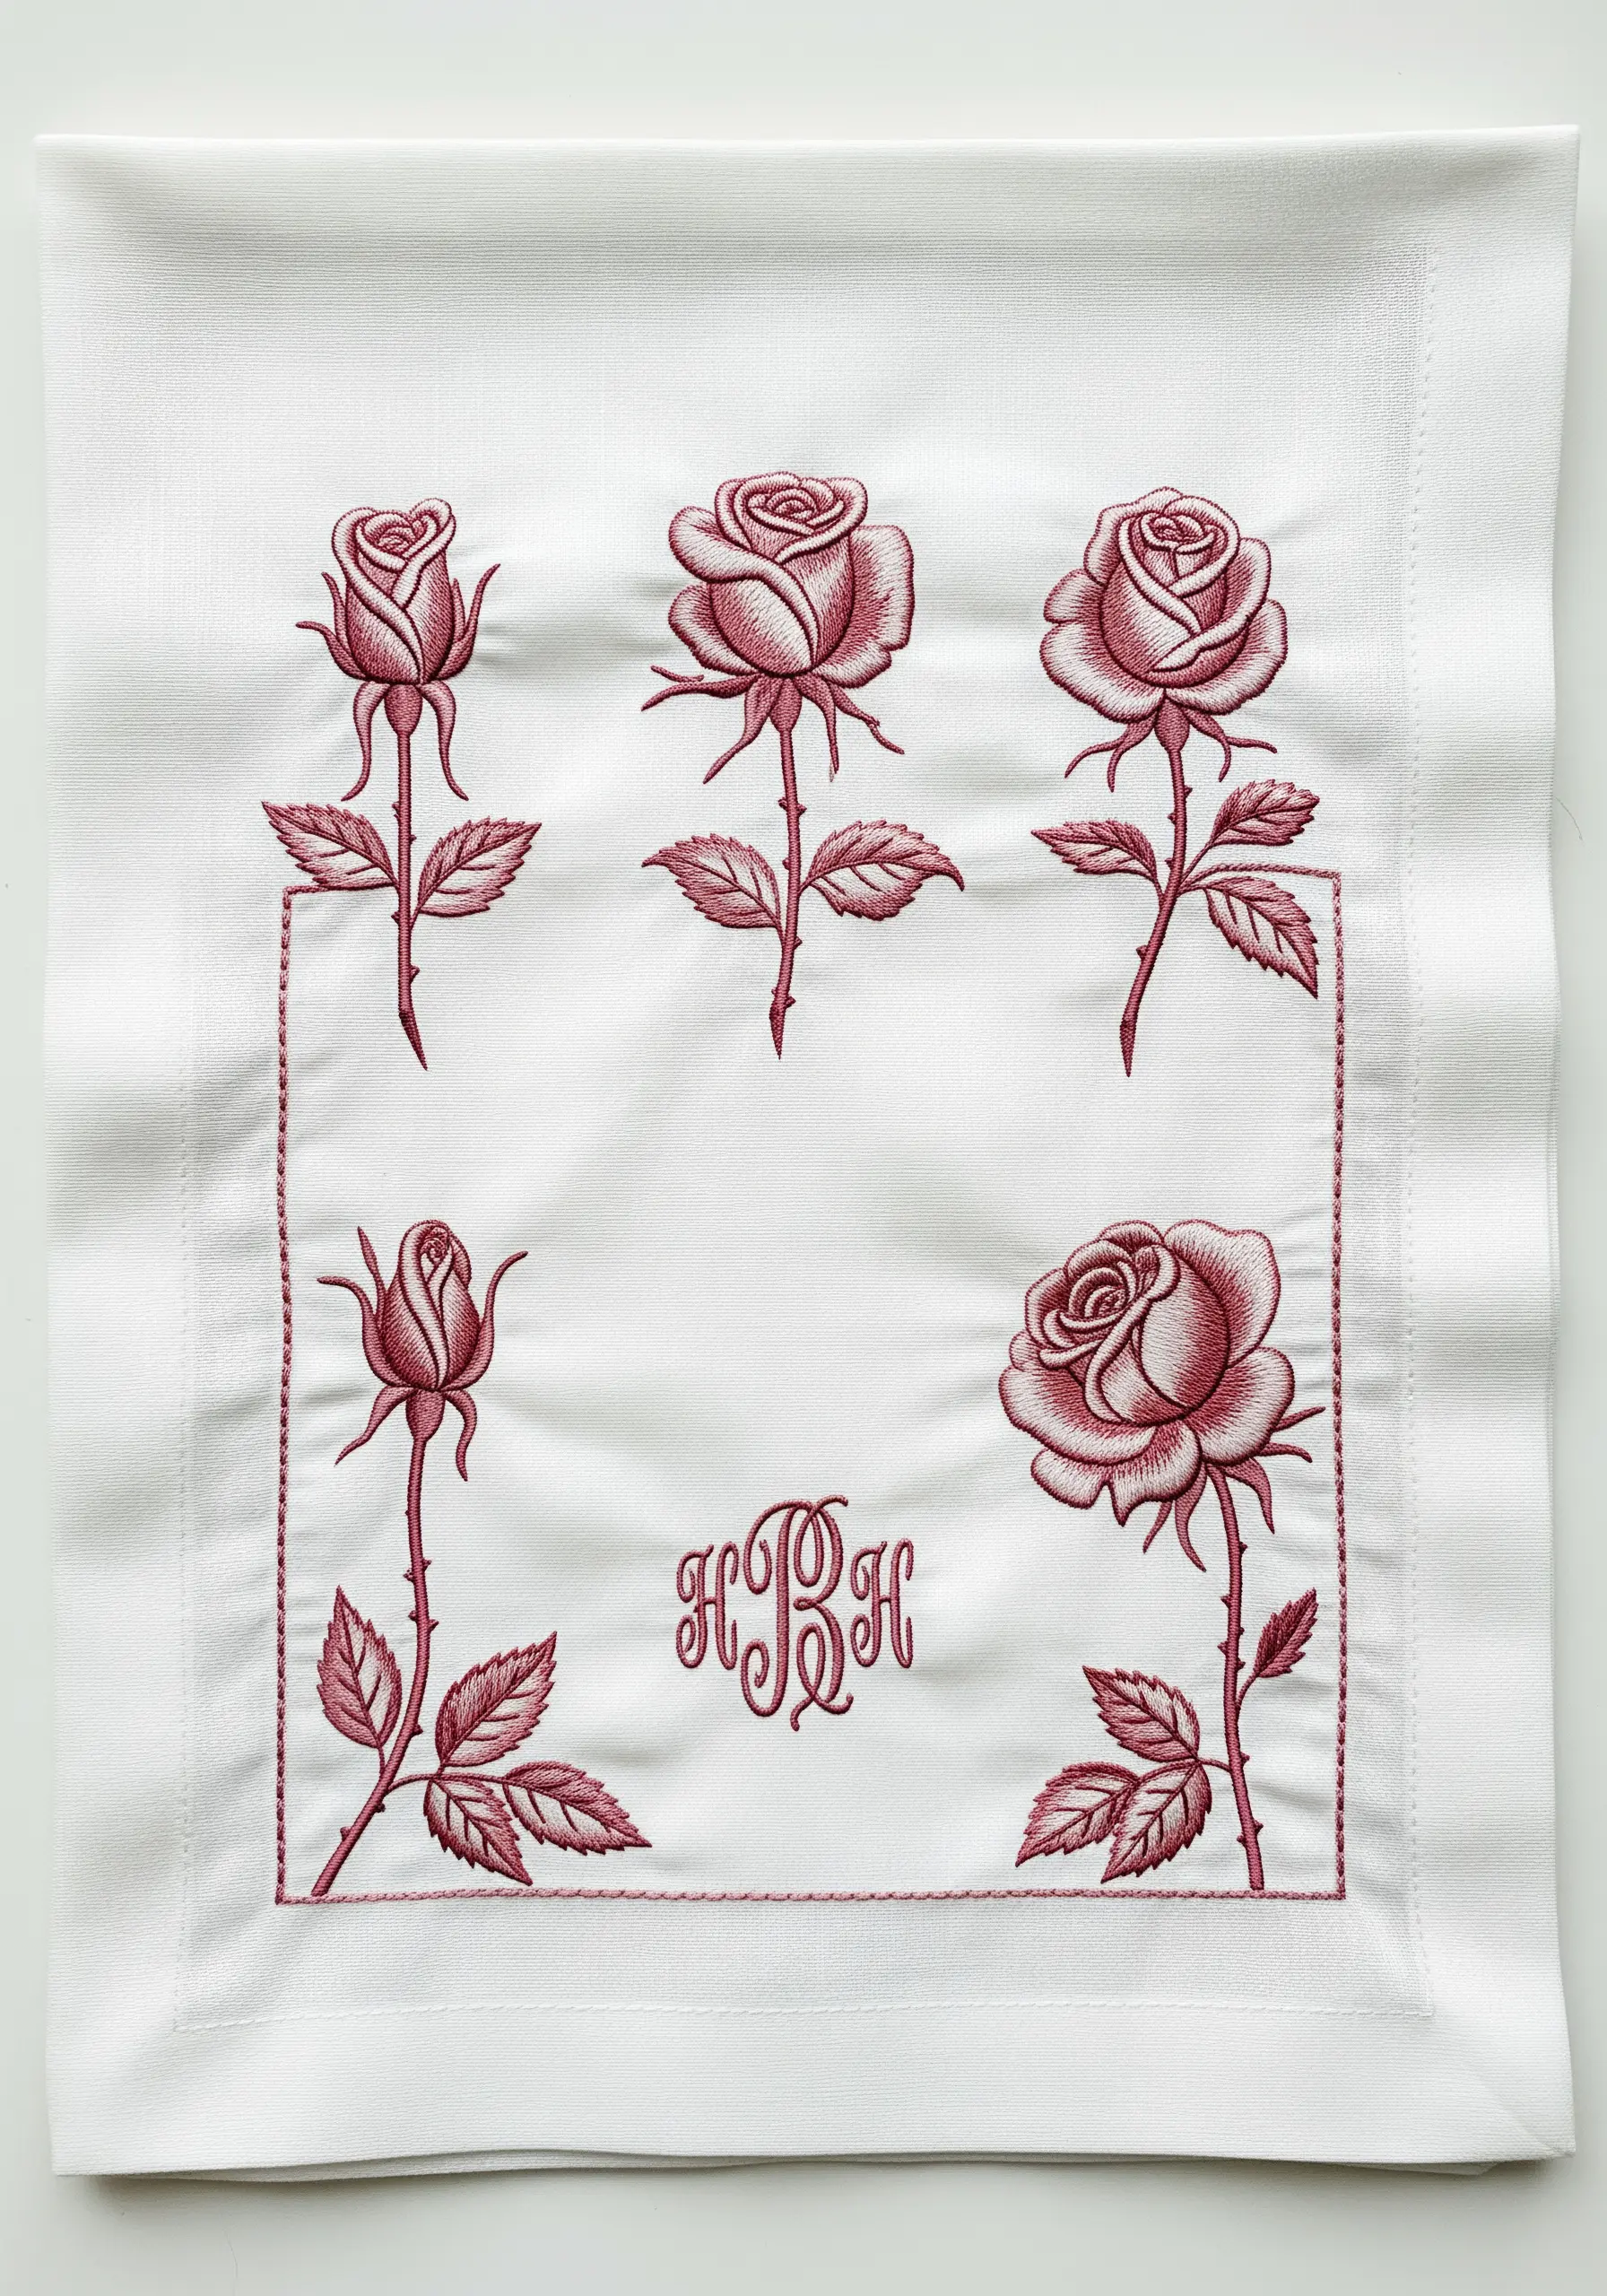
Challenge yourself to create depth and detail using only a single color.
This monochromatic approach forces you to focus on line, stitch direction, and density to create shading and highlights.
By varying the angle of your satin stitches, you can manipulate how light reflects off the thread, creating the illusion of different tones.
The result is a sophisticated, engraving-like finish that feels both classic and incredibly refined, perfect for elegant table linens.
14. The Scented Keepsake: Stitching a 3D Sachet
Learn basic construction techniques to turn your flat embroidery into a three-dimensional, sensory object.
After embroidering your design, place it face-down on a backing fabric and stitch around the perimeter, leaving a small gap.
Turn the shape right-side out, stuff it with dried lavender or cedar, and then close the opening with a nearly invisible ladder stitch.
Adding a personalized ribbon transforms it into a thoughtful, multi-sensory gift.
15. The Art of Imperfection: Stitching Pressed Flowers
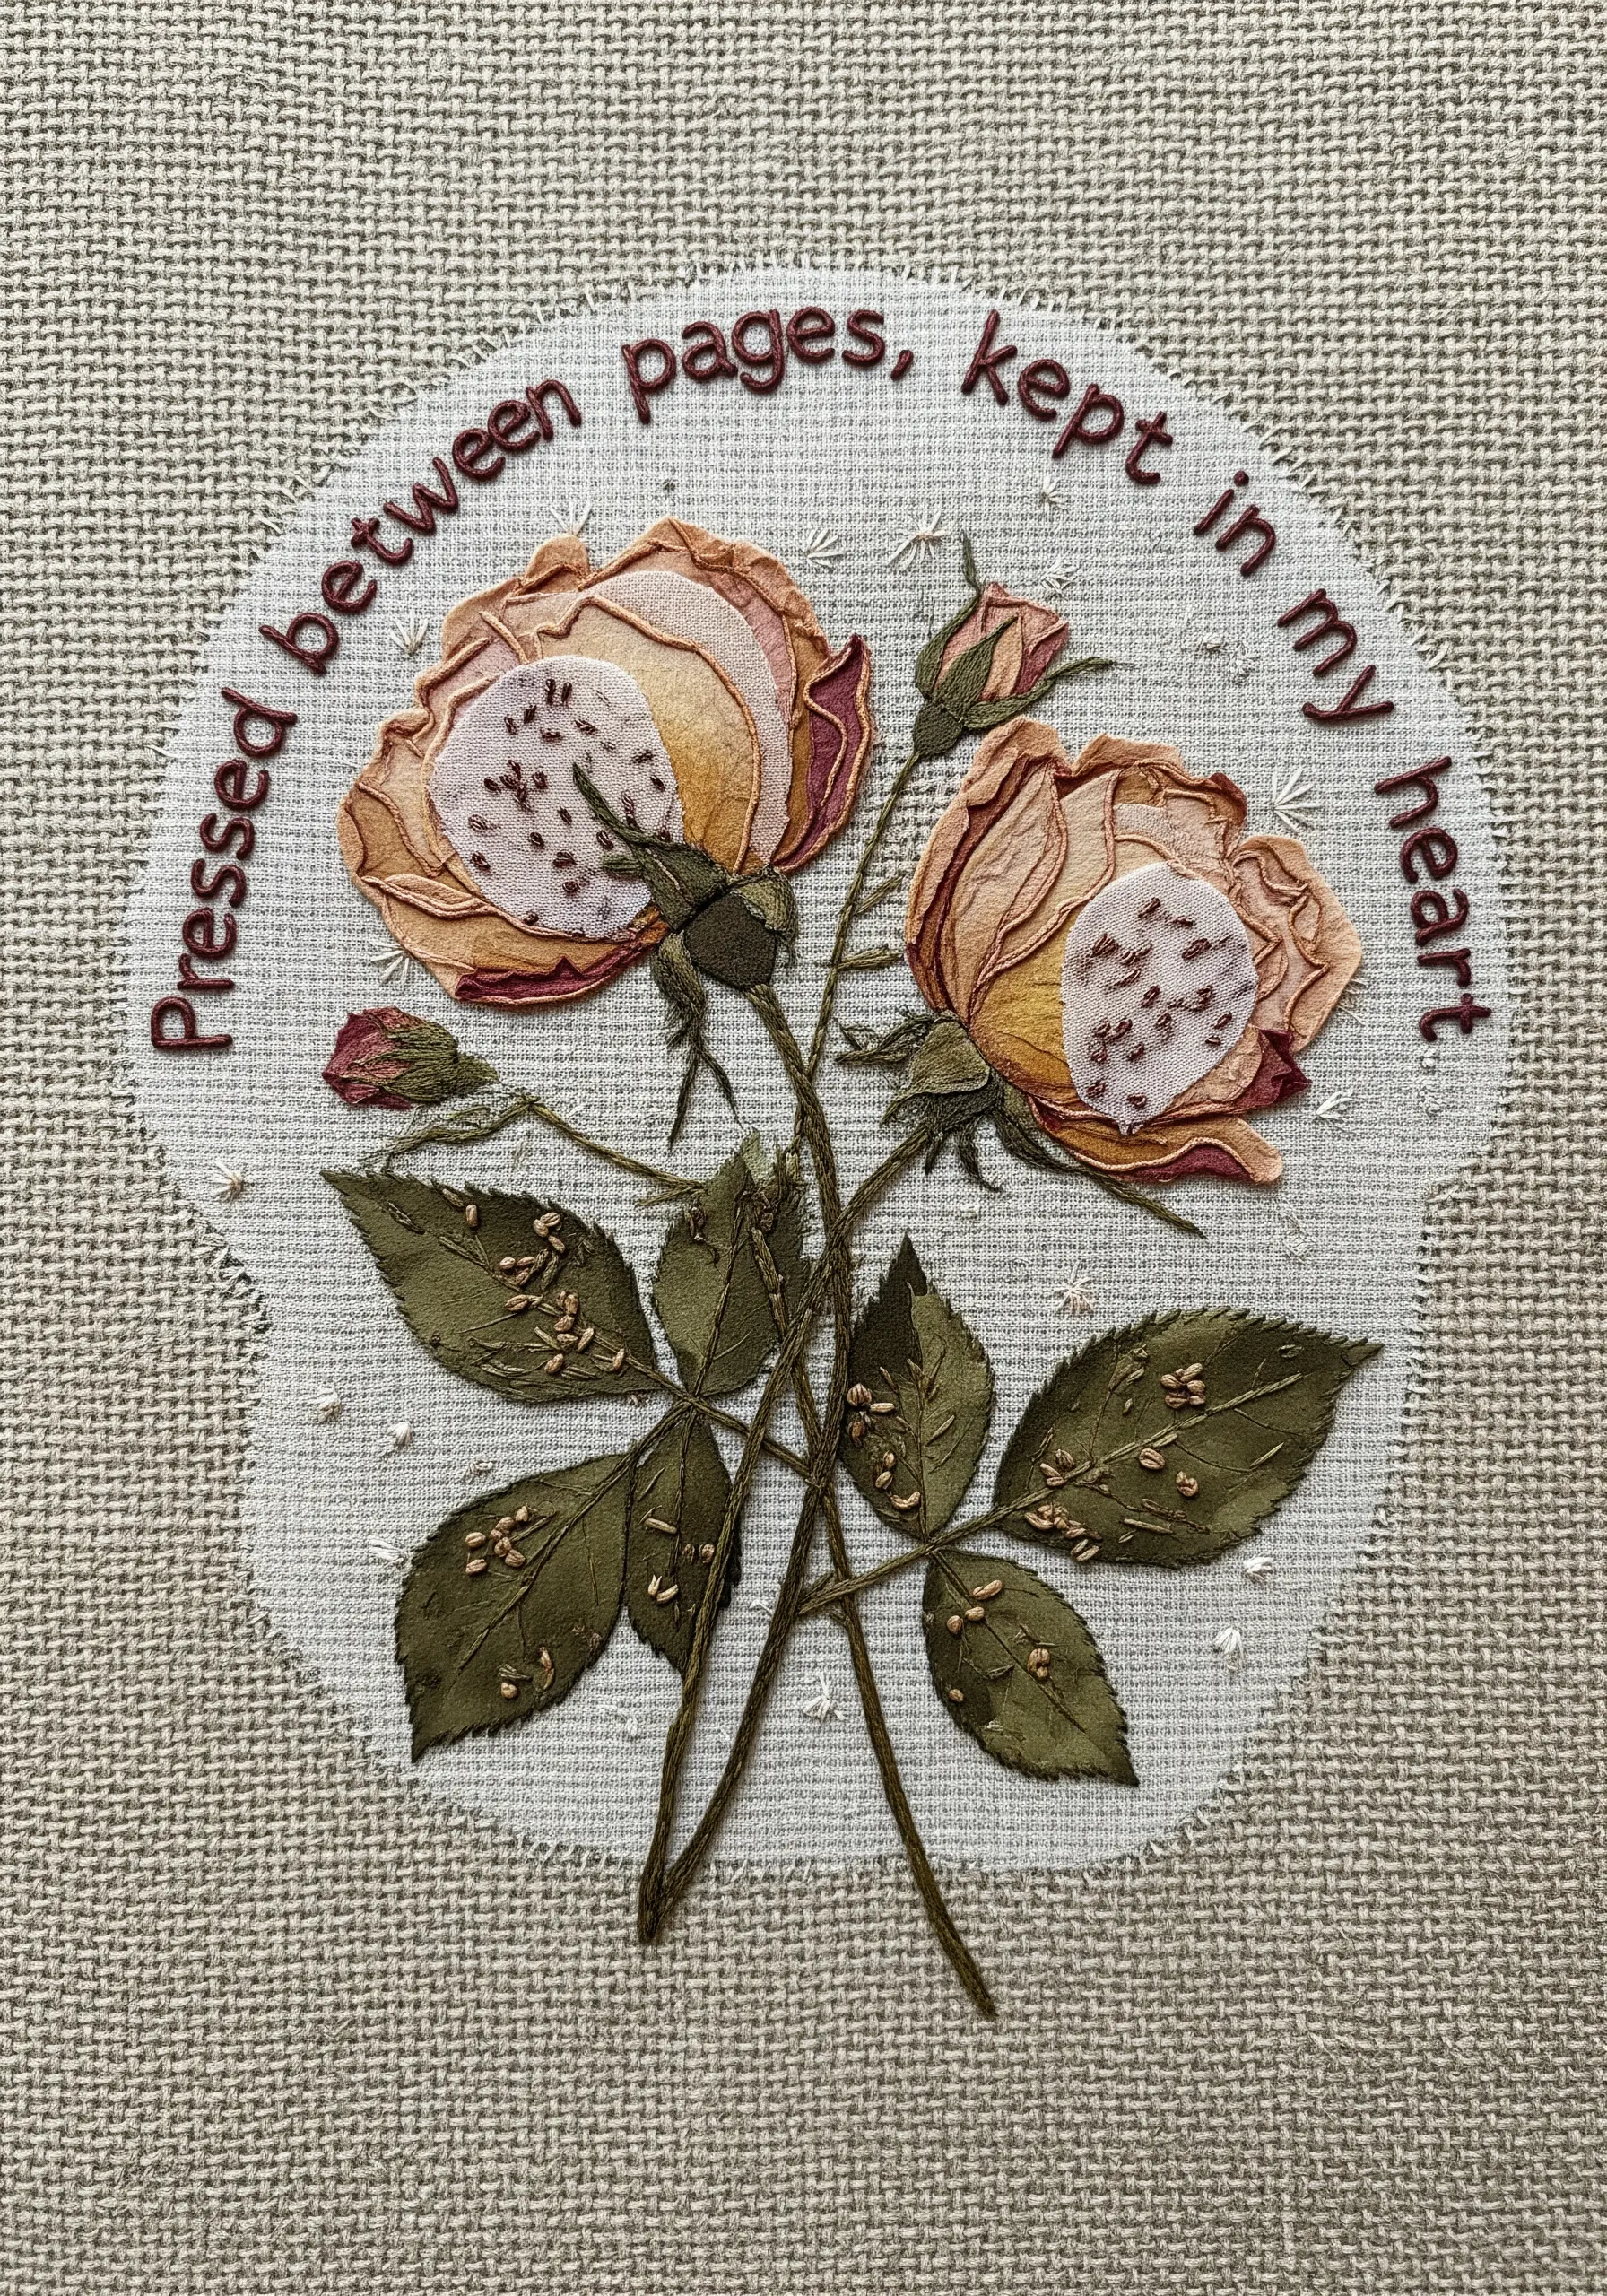
Recreate the delicate, papery beauty of preserved flowers by incorporating fabric appliqué into your embroidery.
Cut small petal shapes from a lightweight fabric like silk organza, tack them down, and then stitch over them to add veins and texture.
Allow the edges to fray slightly to mimic the imperfection of dried botanicals.
This high-texture fabric collage technique adds a wonderfully tactile and realistic dimension to your work.
16. Layered Narratives: Stitching Over a Scripted Background
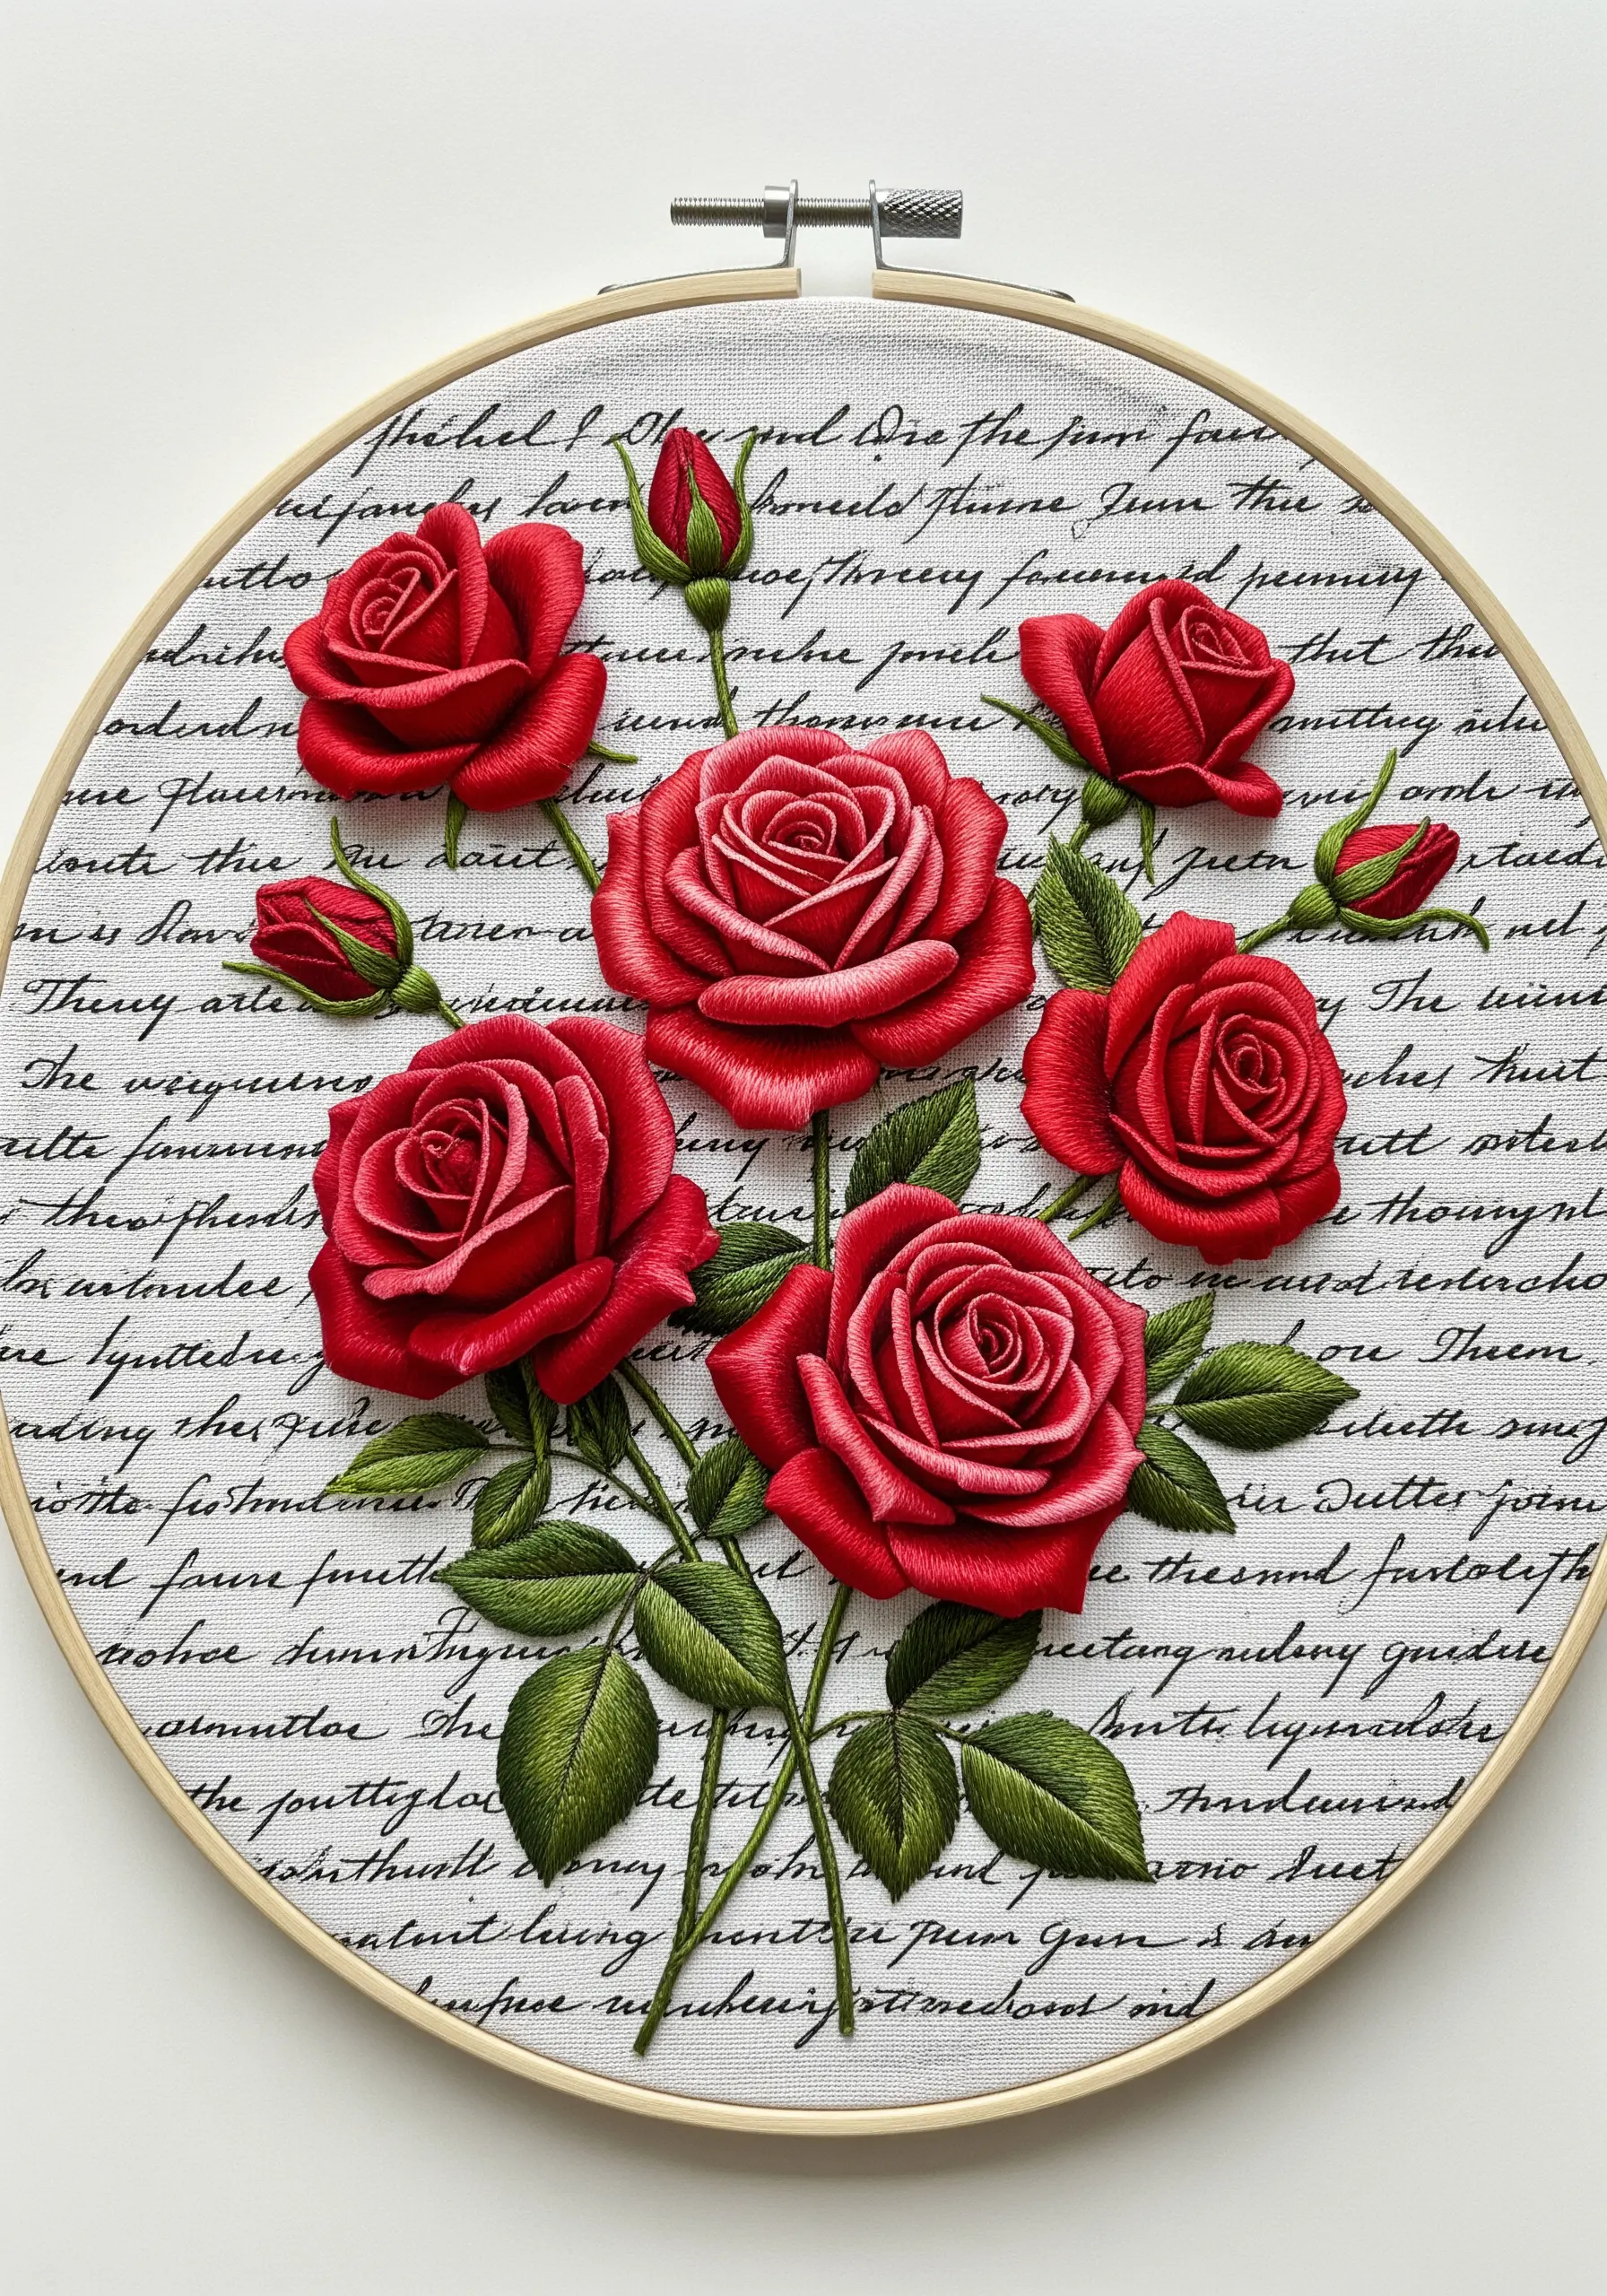
Begin your project with a layer of built-in story by choosing a printed fabric as your canvas.
The key is to select a floral design that is bold enough to stand out against the pattern without competing with it.
Achieve high-dimension roses using stumpwork techniques—padding your satin stitches with felt or layers of preliminary stitches—to physically lift your embroidery off the scripted surface.
This creates a stunning visual separation between the background narrative and your floral subject.
17. A Visual Melody: Combining Music and Florals

Weave two romantic languages—music and flowers—into a single, harmonious composition.
First, establish the structure of the piece by stitching the musical staff and notes with a clean, precise backstitch.
Then, allow your woven wheel roses and leafy vines to grow organically around the lines of music, as if the melody itself is blooming.
The contrast between the graphic, linear music and the soft, textural florals makes for a captivating piece of art, ideal for stunning embroidered wall hangings.
18. The Embroidered Sonnet: Pairing Florals with Text
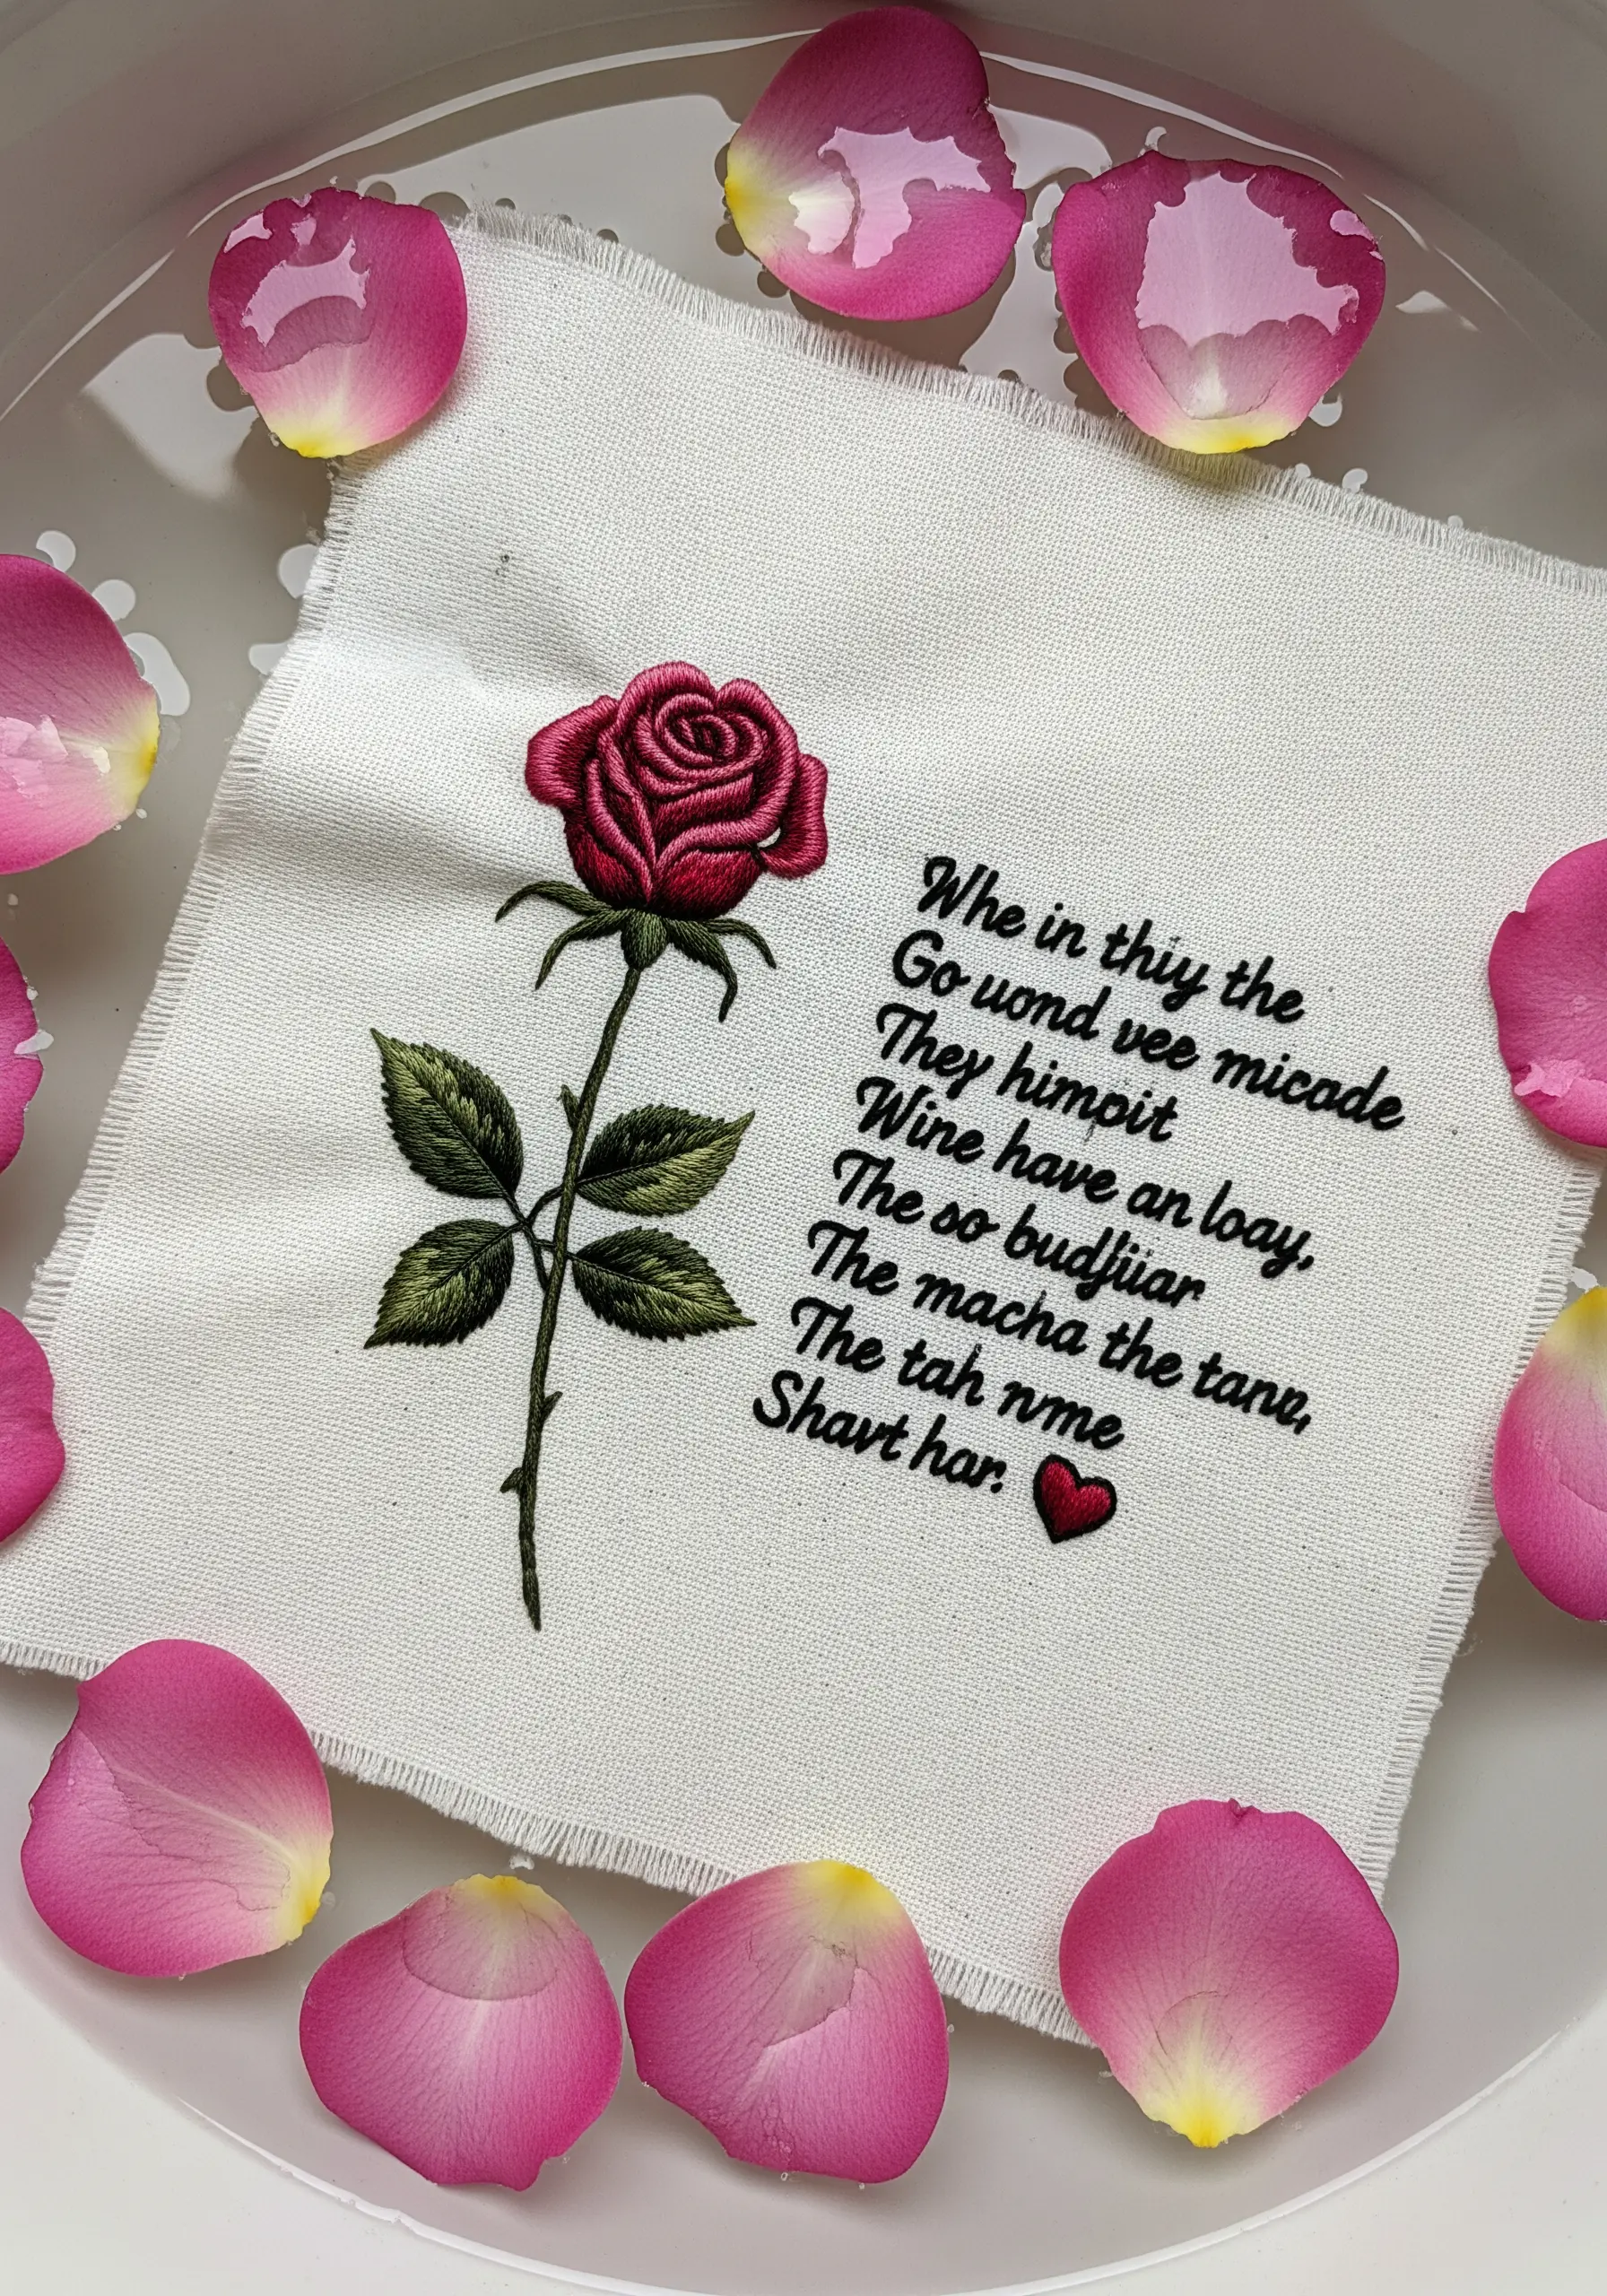
When placing words and images together, let each element breathe.
Position your floral motif to one side, acting as an elegant ‘illuminated manuscript’ detail that introduces the text without overwhelming it.
For the lettering, use a single strand of floss and a meticulous backstitch to ensure every word is crisp and legible.
To guarantee perfect alignment, print your quote onto a sheet of water-soluble stabilizer and stitch directly through it before dissolving.
19. The Celestial Rose Garden: A Constellation Wreath
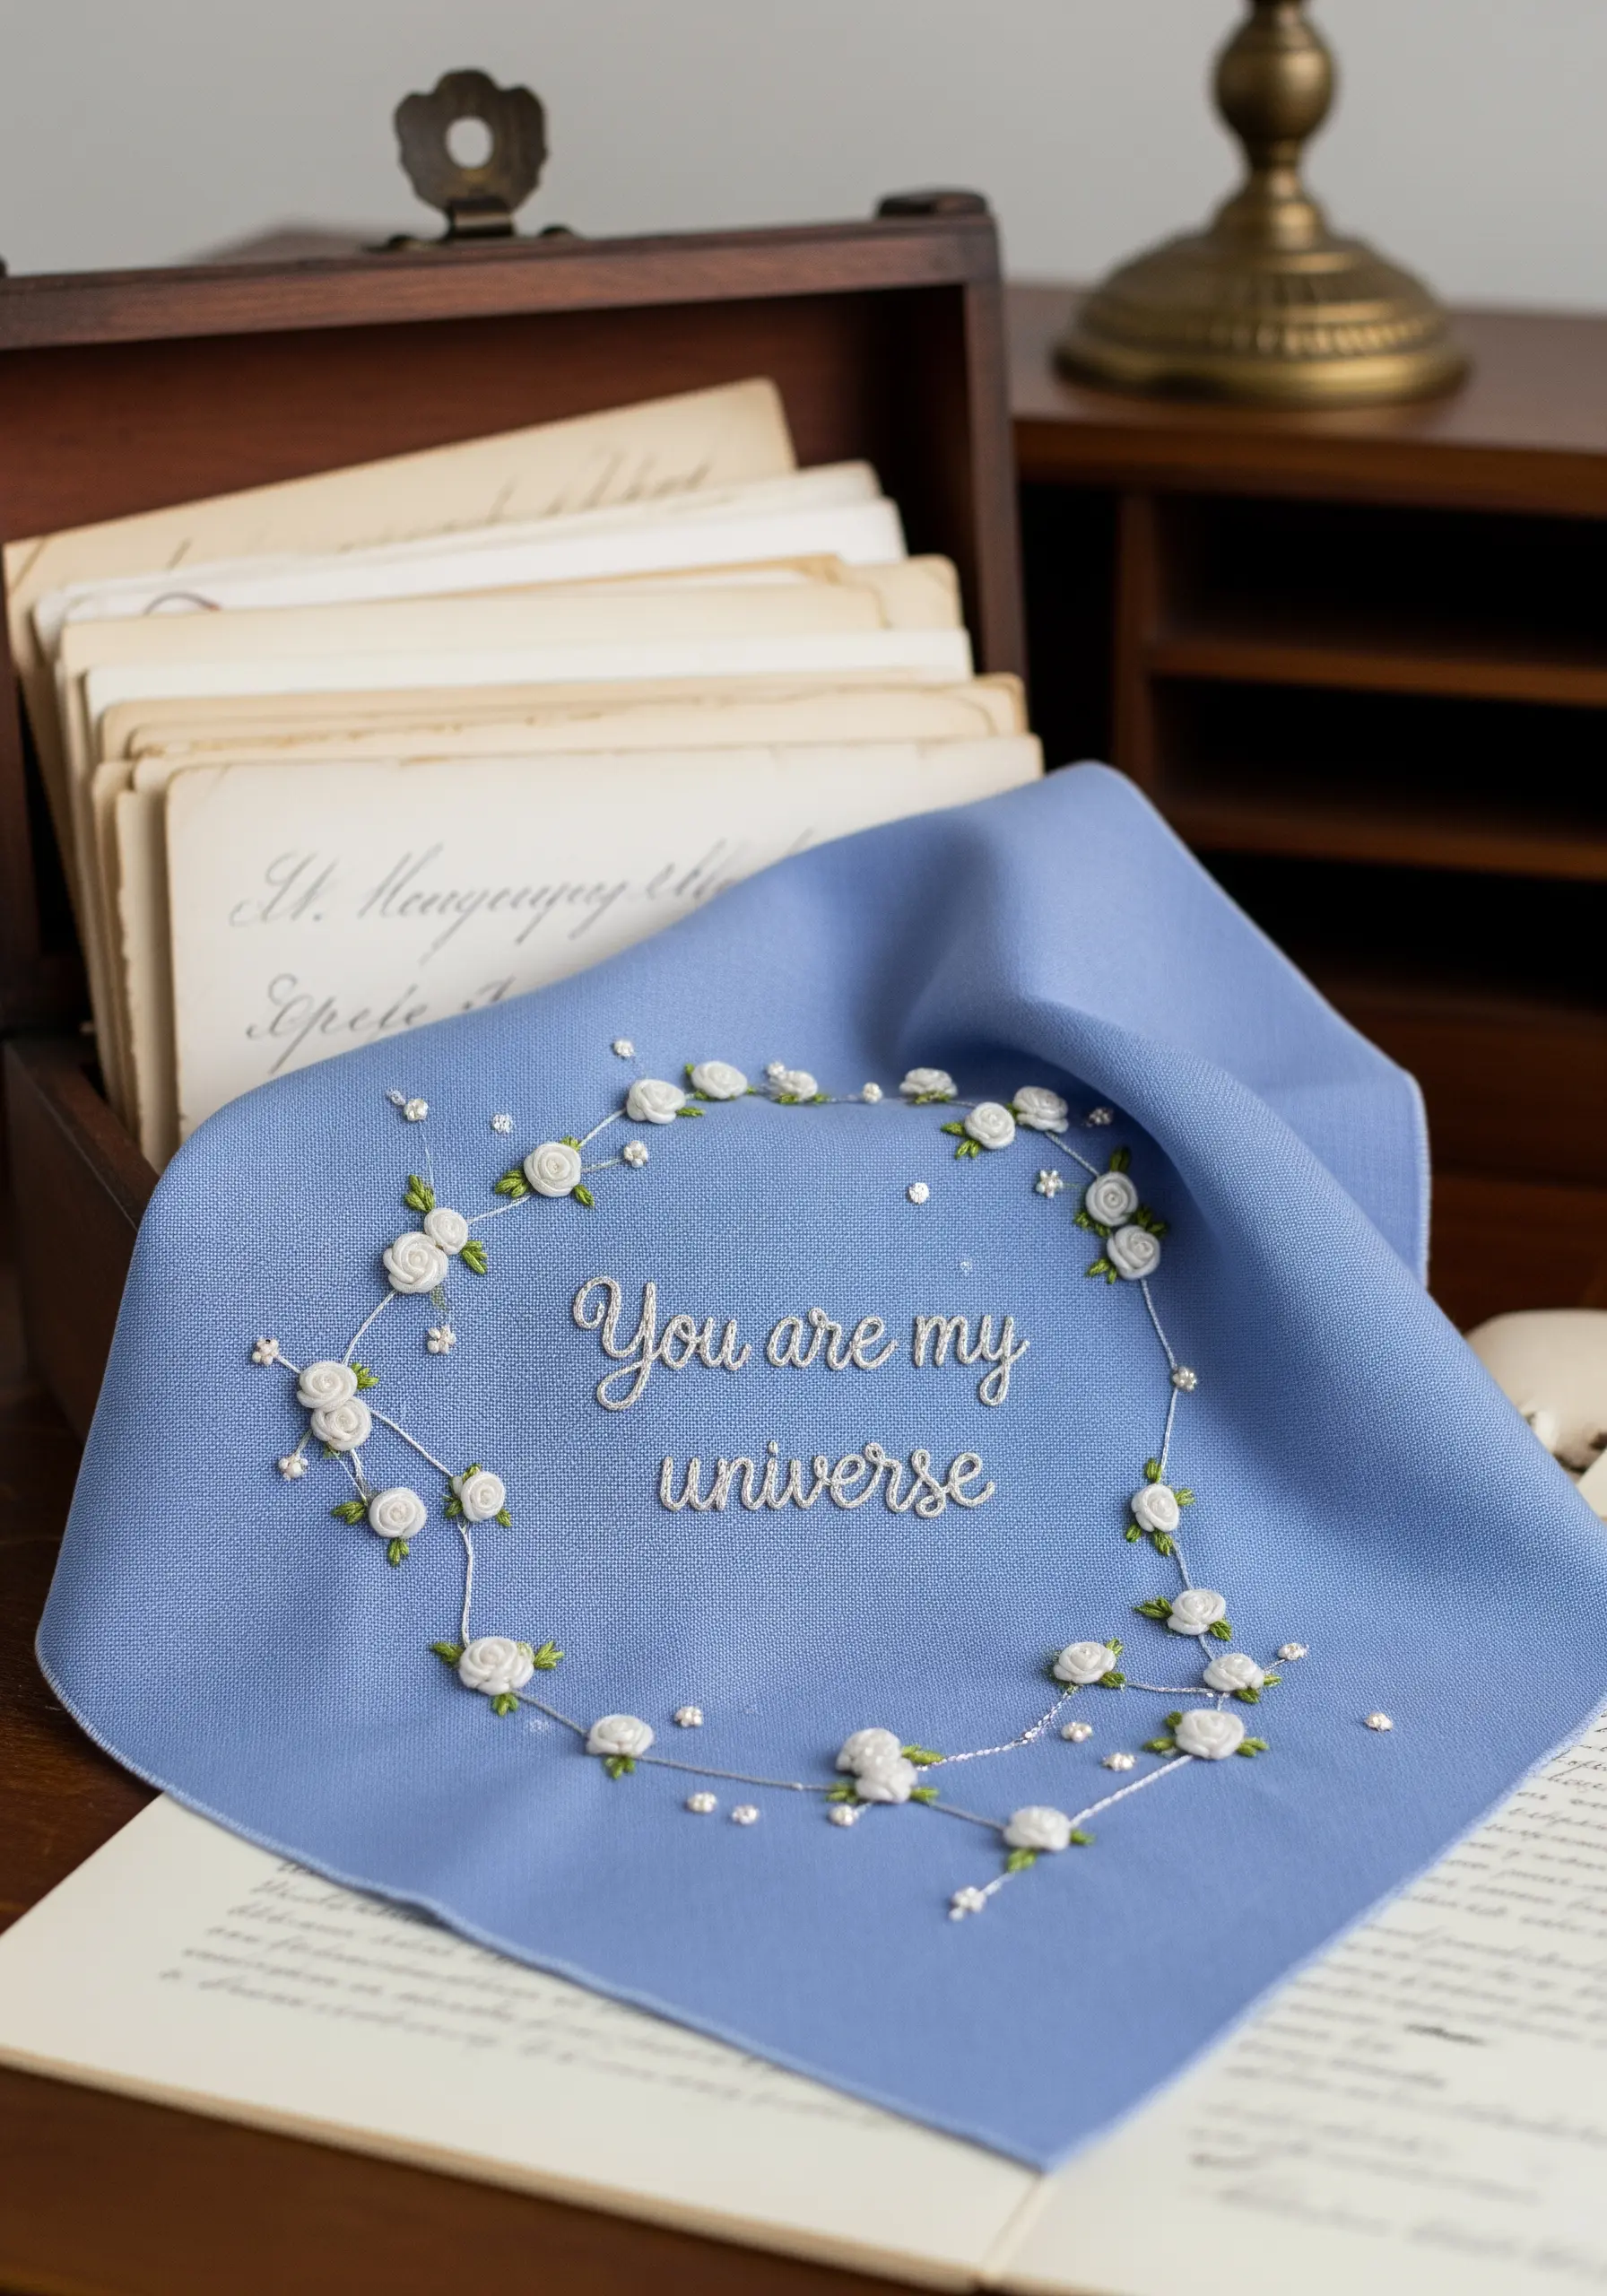
Evoke the magic of a twilight sky by arranging tiny roses into a celestial wreath.
Use bullion knots to create the tightly coiled rosebuds, and connect them with delicate, single-strand backstitches to form constellation patterns.
Scatter single French knots in a silvery white thread around the wreath to represent distant stars.
The deep blue fabric serves as the night sky, making this a wonderfully romantic concept for embroidered nursery decor or a personal keepsake.


