

You have the threads, the fabric, and the desire to create something beautiful for your space. But perhaps you feel stuck, repeating the same stitches or wondering how to make your projects feel less like practice and more like art.
The key isn’t necessarily learning more complex techniques. It’s about approaching your materials with intention. It’s in choosing to create a gradient with thread instead of dye, in seeing the potential for a sculptural line in a piece of yarn, or in understanding how a consistent color palette can turn three simple hoops into a single, cohesive statement.
Here, we’ll move beyond just following patterns. You’ll find ways to think about texture, composition, and finishing that will instantly elevate your work. These are not just projects; they are exercises in artistic decision-making that will give you the confidence to make any piece of fabric your own.
1. Beyond the Hoop: Textured Yarn Couching

Create large-scale, sculptural wall art by couching thick yarn onto a woven fabric base.
Instead of stitching through heavy fabric, lay wool roving or chunky cotton yarn on the surface and use a strong, matching thread to tack it down with small, evenly spaced stitches.
This method allows you to build raised, organic lines and textures without a loom.
Vary the density of your shapes—from tight clusters of loops to long, flowing lines—to create a dynamic and modern composition.
2. From Block Print to Thread: Geometric Fill Stitches
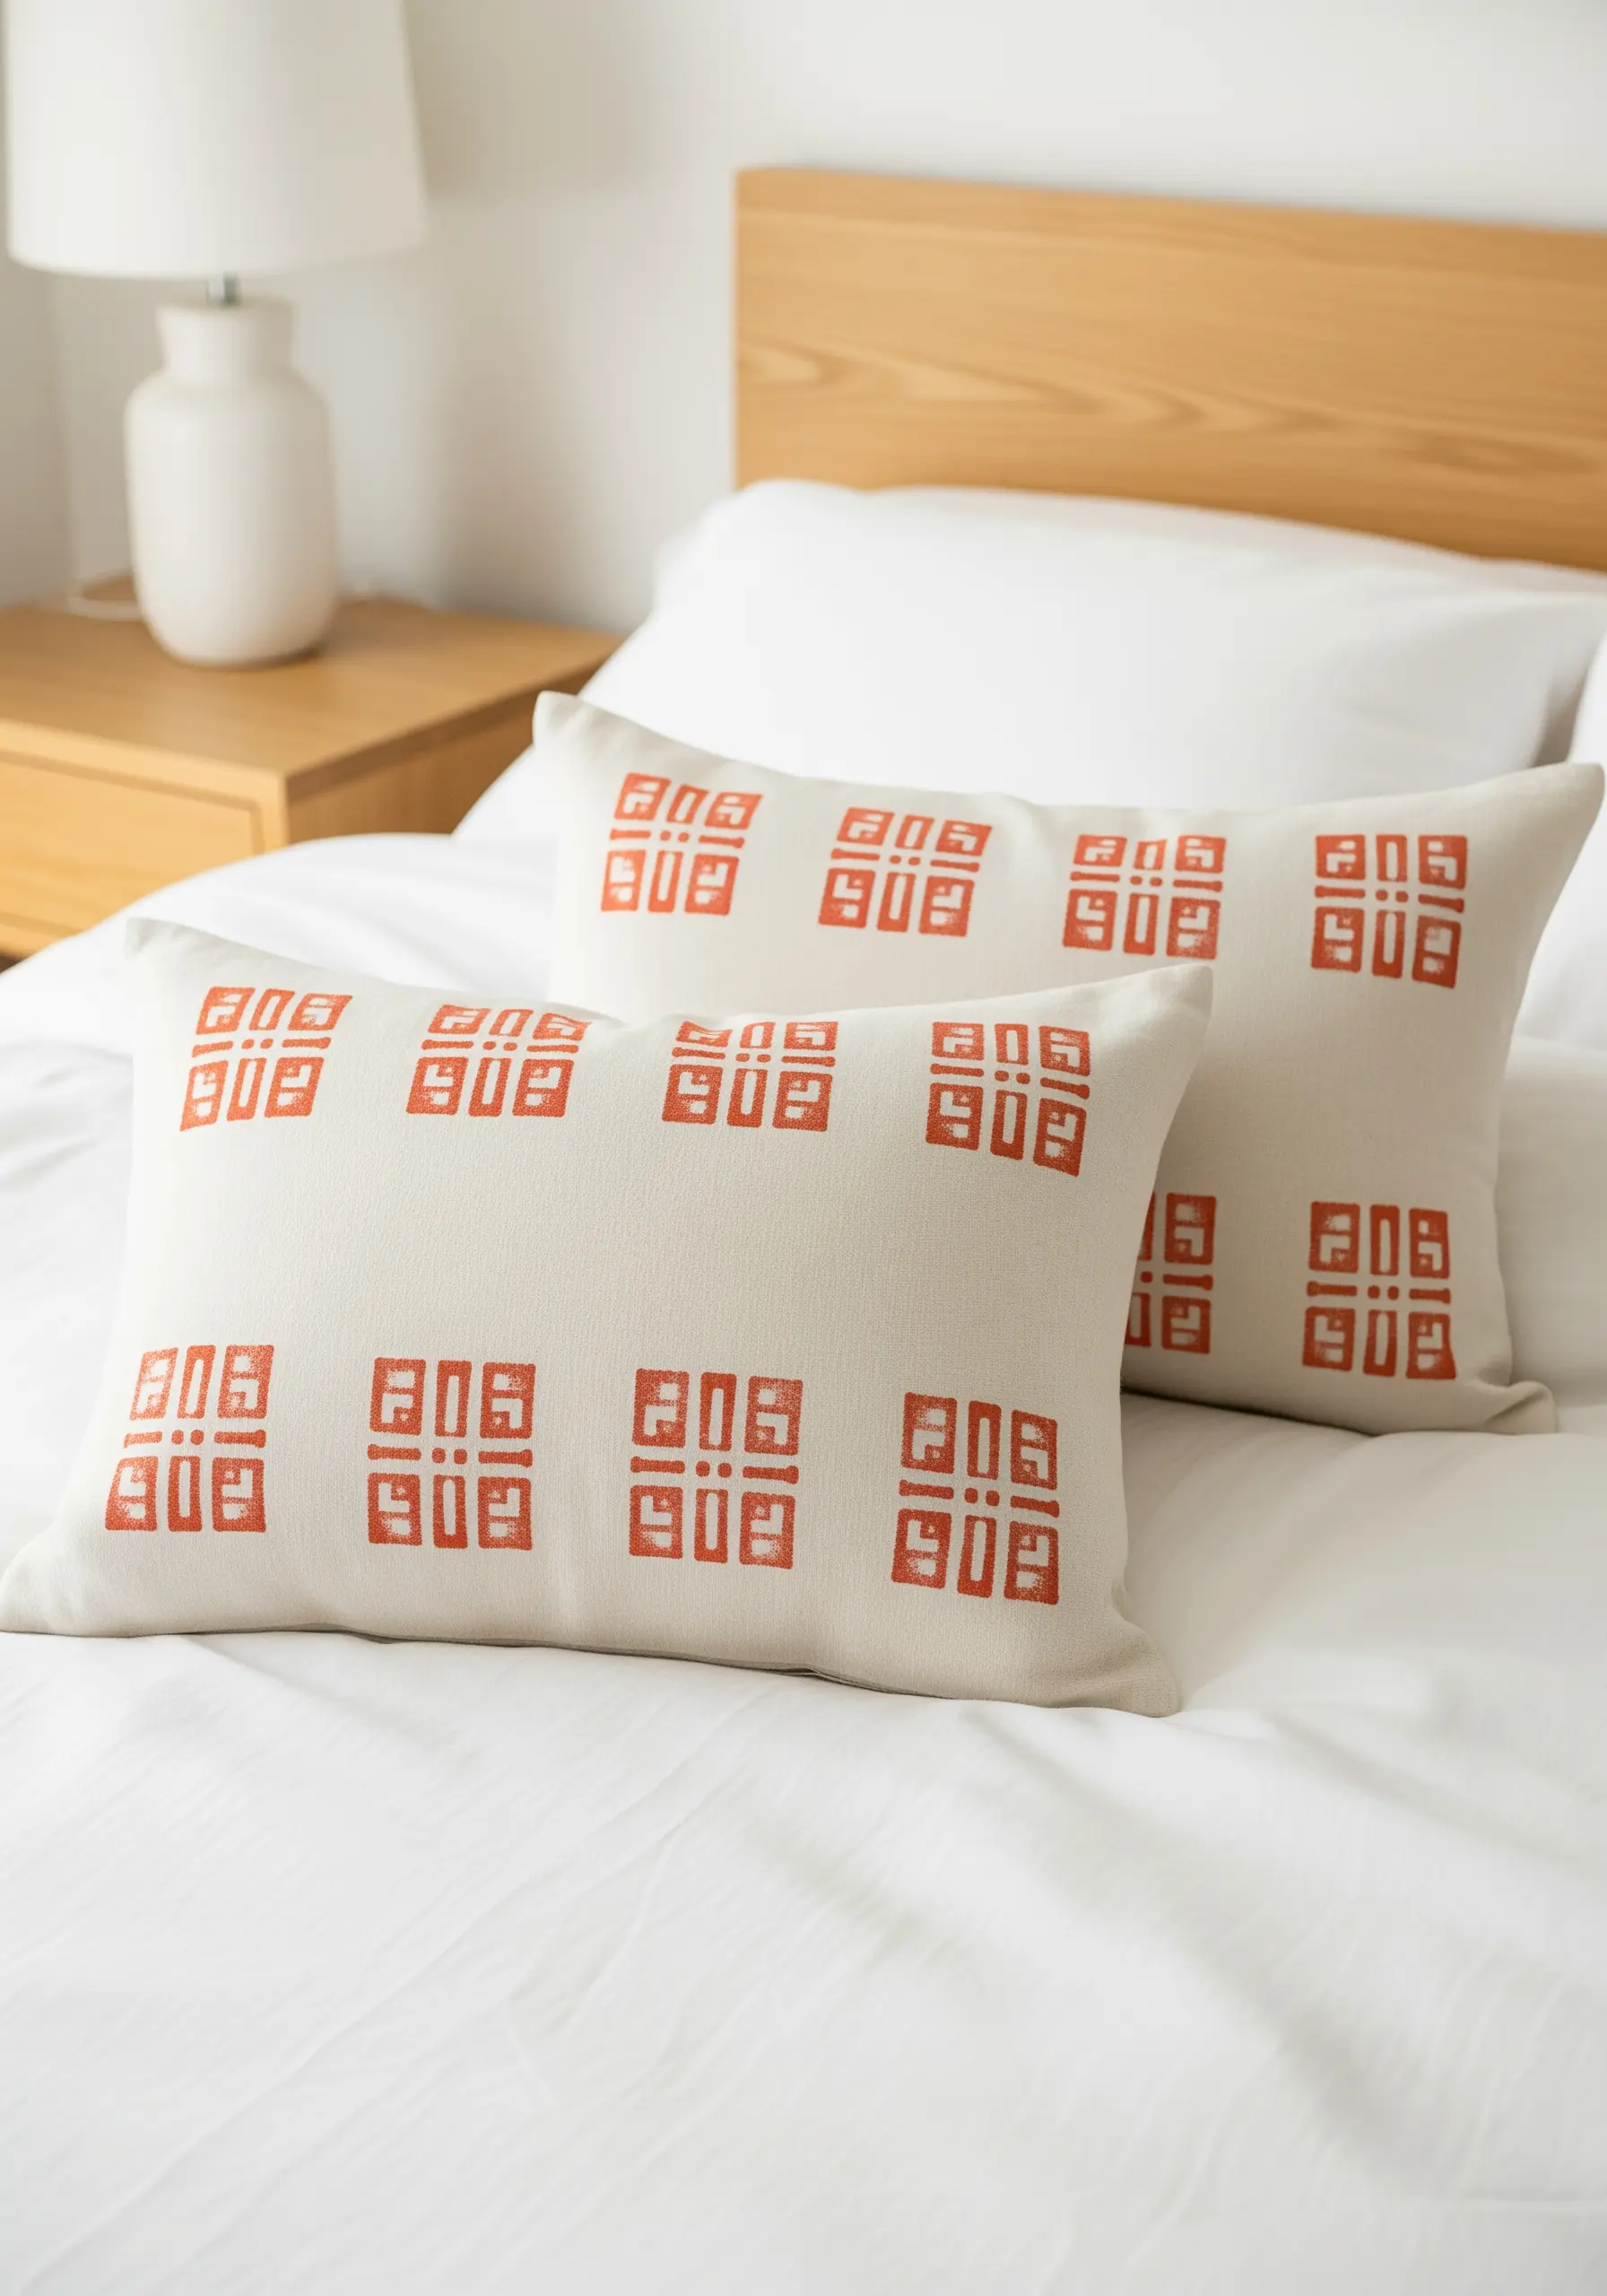
Translate the sharp, graphic feel of block-printed patterns into textural embroidery on your cushions.
Outline your geometric shapes with a precise backstitch, then fill them completely with a dense satin stitch or brick stitch.
Using a matte cotton floss in a high-contrast color will mimic the look of ink on linen.
This technique elevates a simple repeating pattern by adding tactile depth and the subtle dimension that only thread can provide.
3. The Modern Coil: Rope Baskets with Thread Accents

Construct functional art by coiling cotton rope and binding it with embroidery floss.
As you shape your bowl or tray, use a tapestry needle to wrap sections of the rope with colored thread, stitching through the previous coil to secure it.
The key to a sturdy structure is maintaining tight, consistent tension in your wrapping thread.
By changing thread colors, you can create stripes and patterns, turning a simple rope coil into a sophisticated catchall.
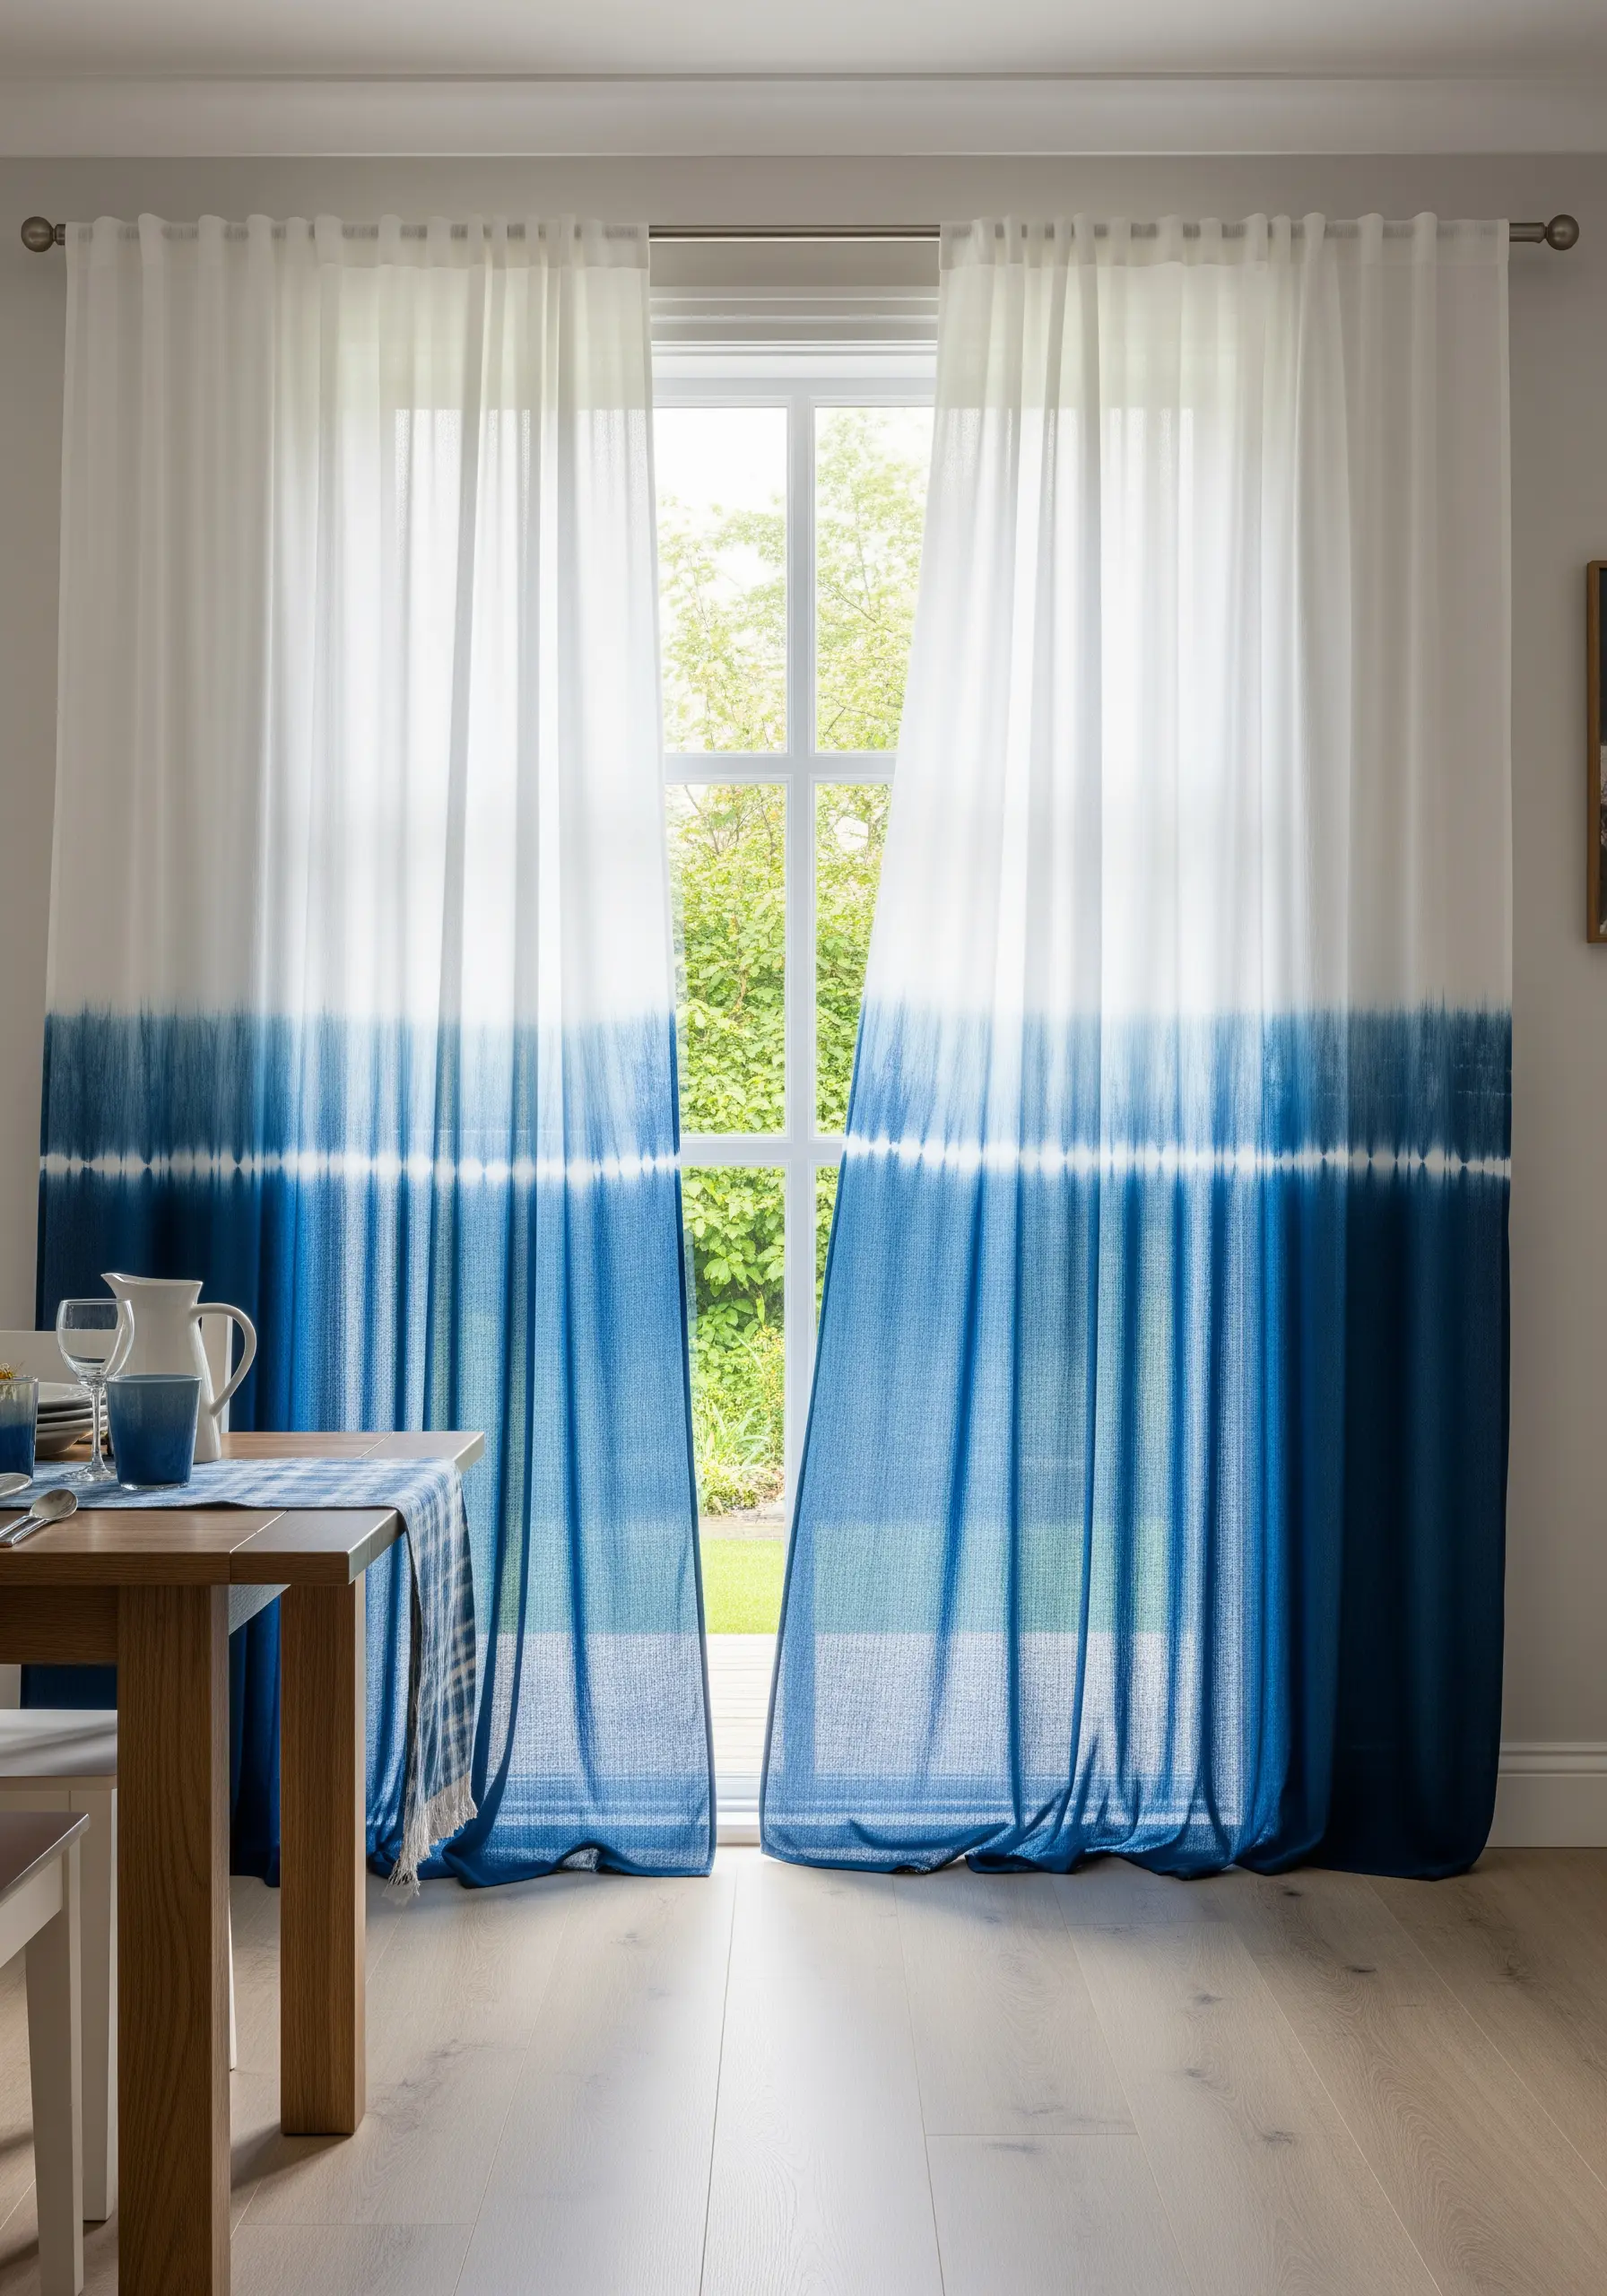
4. The Stitched Gradient: Embroidery as an Ombré Effect

Instead of dyeing fabric, create a controlled ombré effect on curtains or wall panels using only thread.
Begin at the bottom with your darkest shade, filling the area with dense seed stitches.
As you move upward, gradually increase the spacing between stitches and introduce progressively lighter thread colors.
This technique gives you complete control over the color transition while adding a beautiful, subtle texture that catches the light.
5. The Botanical Triptych: Creating Cohesive Sets

To make a simple collection of hoops feel like a curated gallery piece, establish visual consistency.
Use the exact same background fabric, hoop size, and a limited color palette across three or more designs.
Vary the botanical subject in each hoop—a fern, a broad leaf, a delicate vine—to maintain interest.
This thoughtful repetition of materials is what transforms individual stitches into a cohesive, intentional statement for your wall.
6. Upholstery Embellishment: The Bold Appliqué
For a high-impact upholstery project, turn to large-scale appliqué instead of dense embroidery.
Cut bold, graphic shapes from non-fraying fabrics like wool felt or sturdy cotton canvas.
Arrange your shapes and secure them with a decorative blanket stitch or a clean whip stitch around the edges.
This approach allows you to cover a large surface area with vibrant color and pattern much more quickly than filling with thread alone.
7. Illuminating Texture: Felt Appliqué on Lampshades
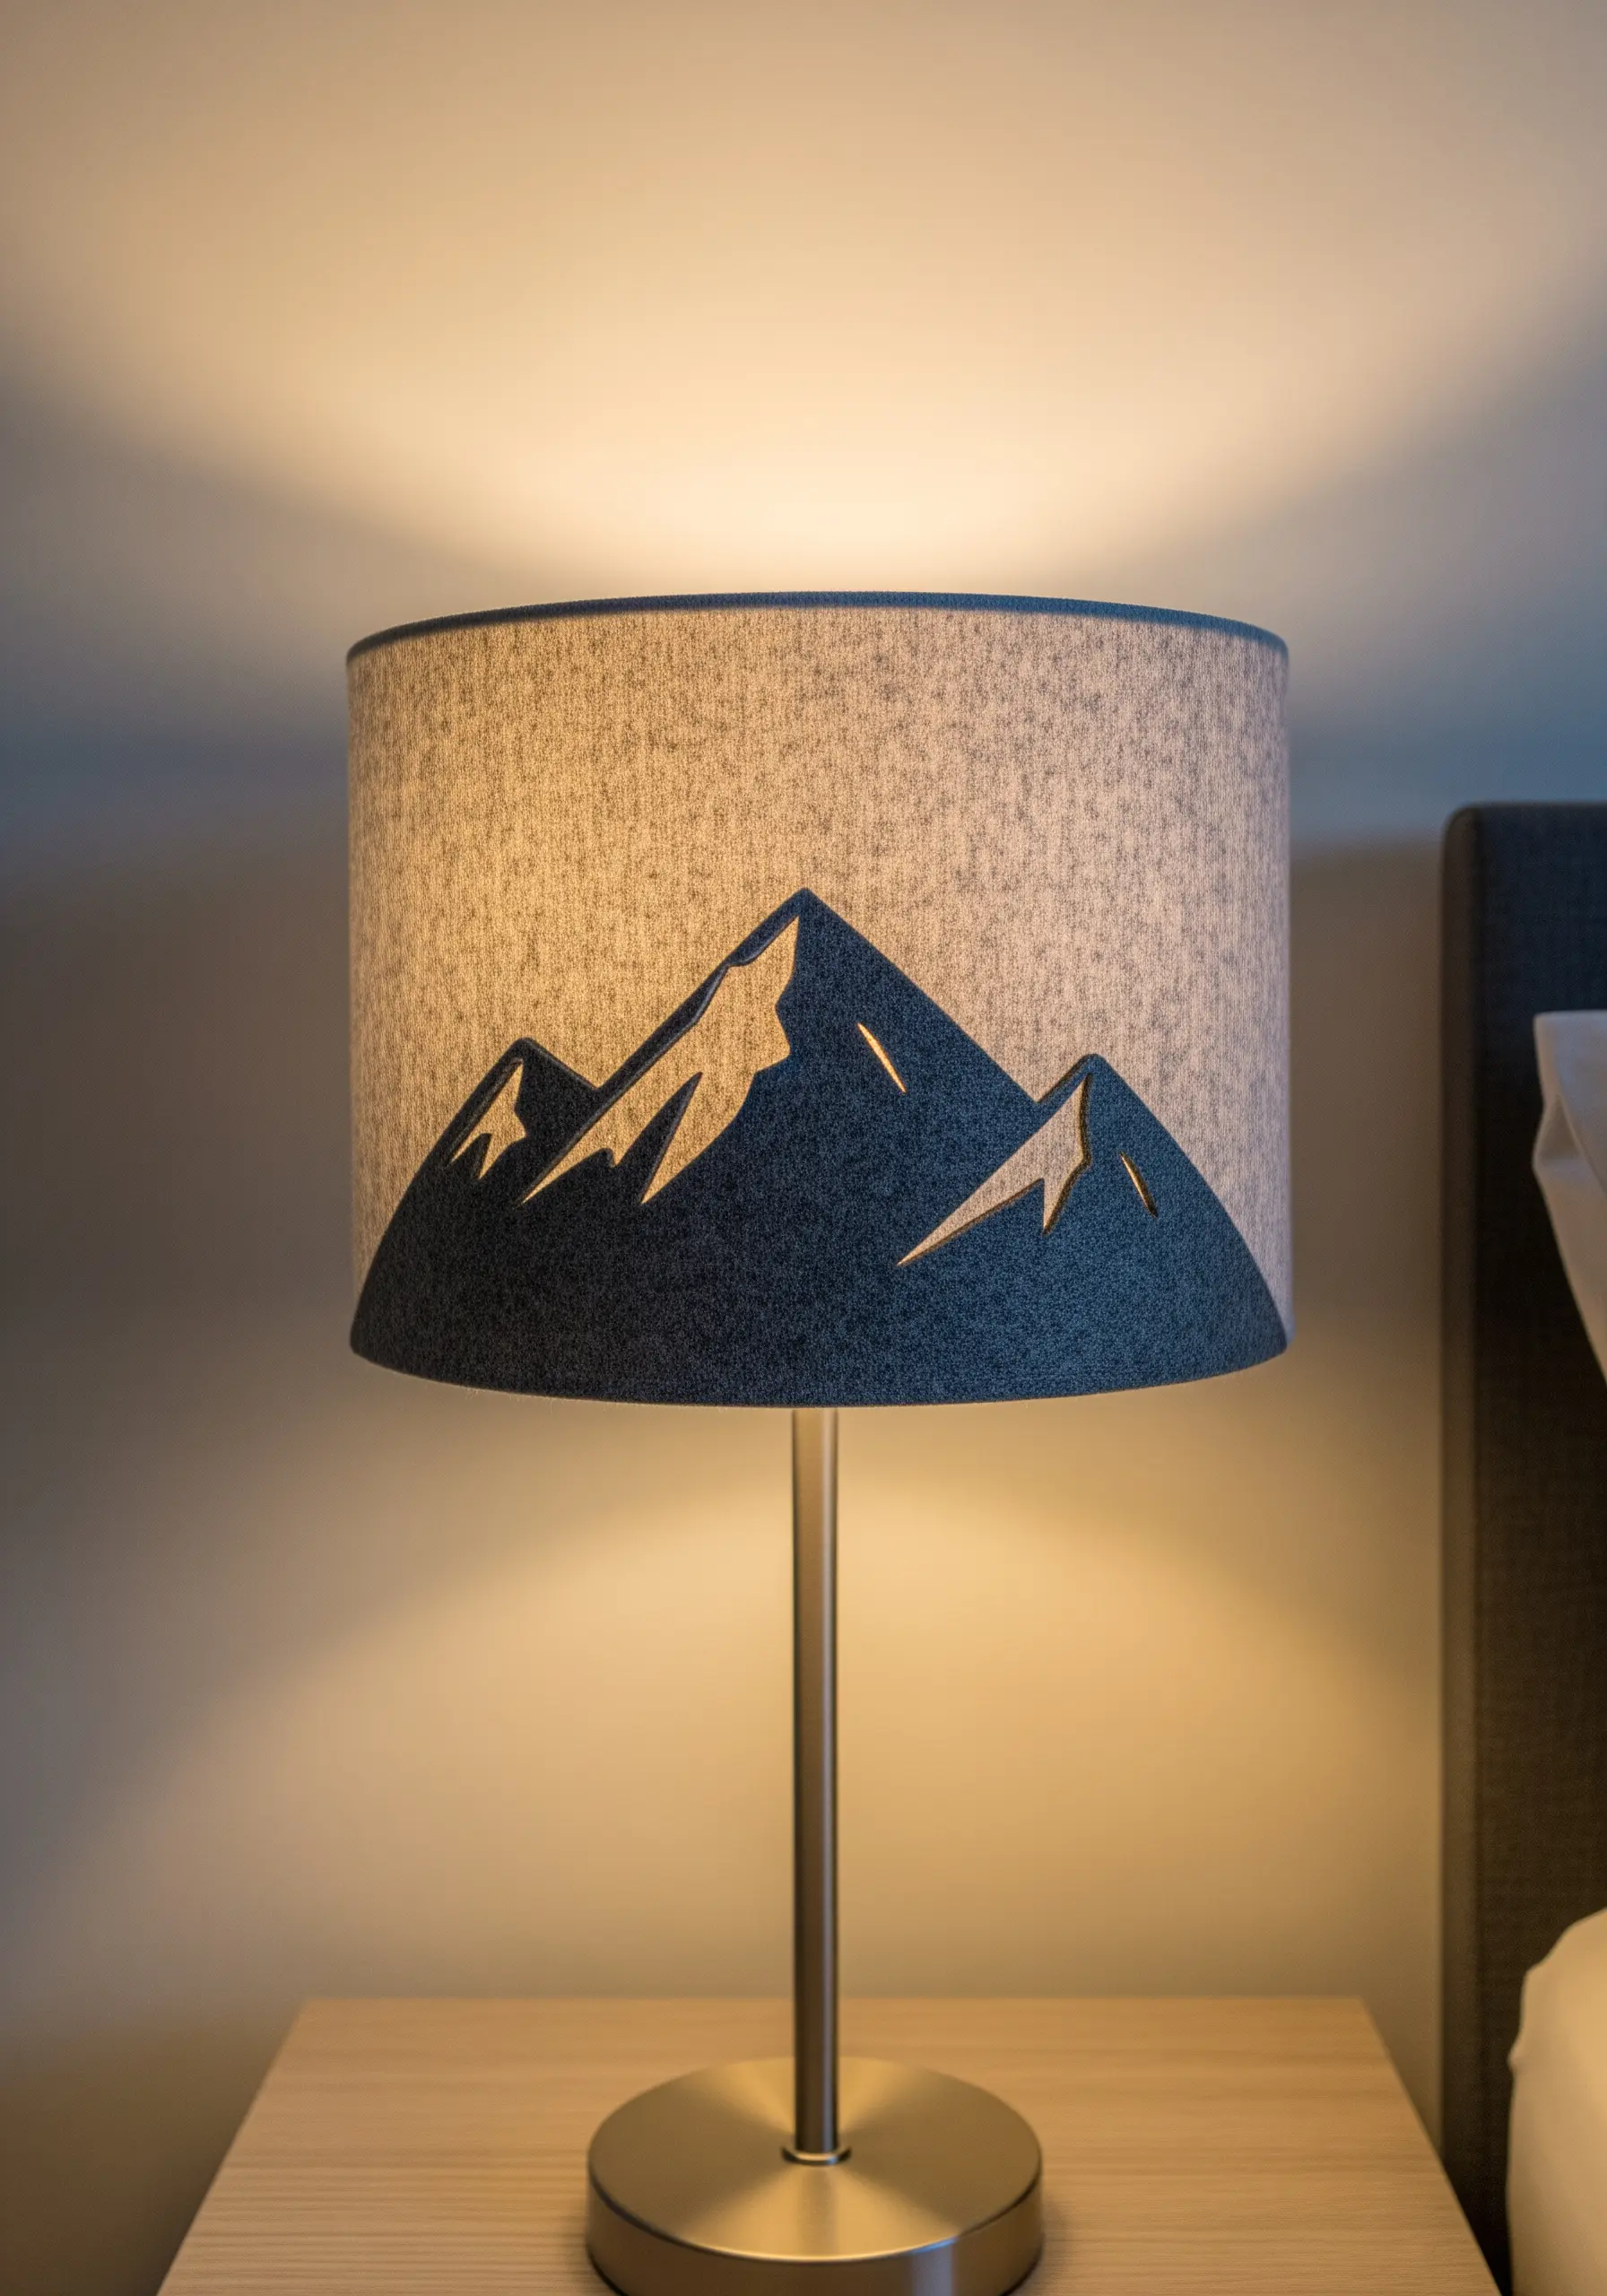
Add dimension to a plain lampshade with a simple felt appliqué.
Choose a thick, non-fraying wool felt for clean edges, and cut out your desired silhouette.
Attach it first with a light layer of fabric glue for perfect placement, then secure the edges with a simple running stitch in a matching thread.
When the lamp is lit, the raised felt creates a soft shadow, adding depth and a custom, handmade feel to your lighting.
8. Weaving Techniques for Embroiderers

Integrate woven textures directly onto your fabric base to add sculptural dimension to your wall art.
Using a tapestry needle, you can weave thick yarns and wool roving through the background fabric without a loom.
Experiment with a basic tabby weave (a simple over-under pattern) or create raised, braided lines with soumak knots.
This mixed-fiber approach adds a rich, tactile quality that beautifully complements traditional embroidery stitches.
9. Stitch Resist: Creating Patterns with Shibori
Use thread as a tool to create precise patterns before you dye your fabric.
This is a foundational Shibori technique: use a strong thread to sew a simple running stitch, then pull it tight to gather the fabric firmly.
This stitched and gathered area will resist the dye, creating a clean, crisp line.
By stitching grids, circles, or parallel lines, you gain artistic control over the dye process, turning plain curtains into bespoke textiles.
10. Refined Rusticity: Monograms on Burlap

Elevate the humble texture of burlap with a crisp, modern monogram on your placemats.
For a bold look, appliqué a letter cut from a contrasting fabric like smooth black cotton or felt, securing it with a neat running stitch.
If embroidering directly, use a thick perle cotton and a simple backstitch to create a letter that is substantial enough not to get lost in the burlap’s coarse weave.
11. Functional Fabric: The Upholstered Pinboard

Upgrade a standard cork pinboard into a piece of decor by upholstering it with your favorite fabric.
Choose a durable, tightly woven cotton or linen to avoid sagging.
Stretch the fabric tautly across the front and around the edges, securing it to the back with a staple gun.
The key is to pull evenly from the center outwards to ensure the pattern remains straight and the surface is perfectly smooth.
12. Arm Knitting for Textural Impact
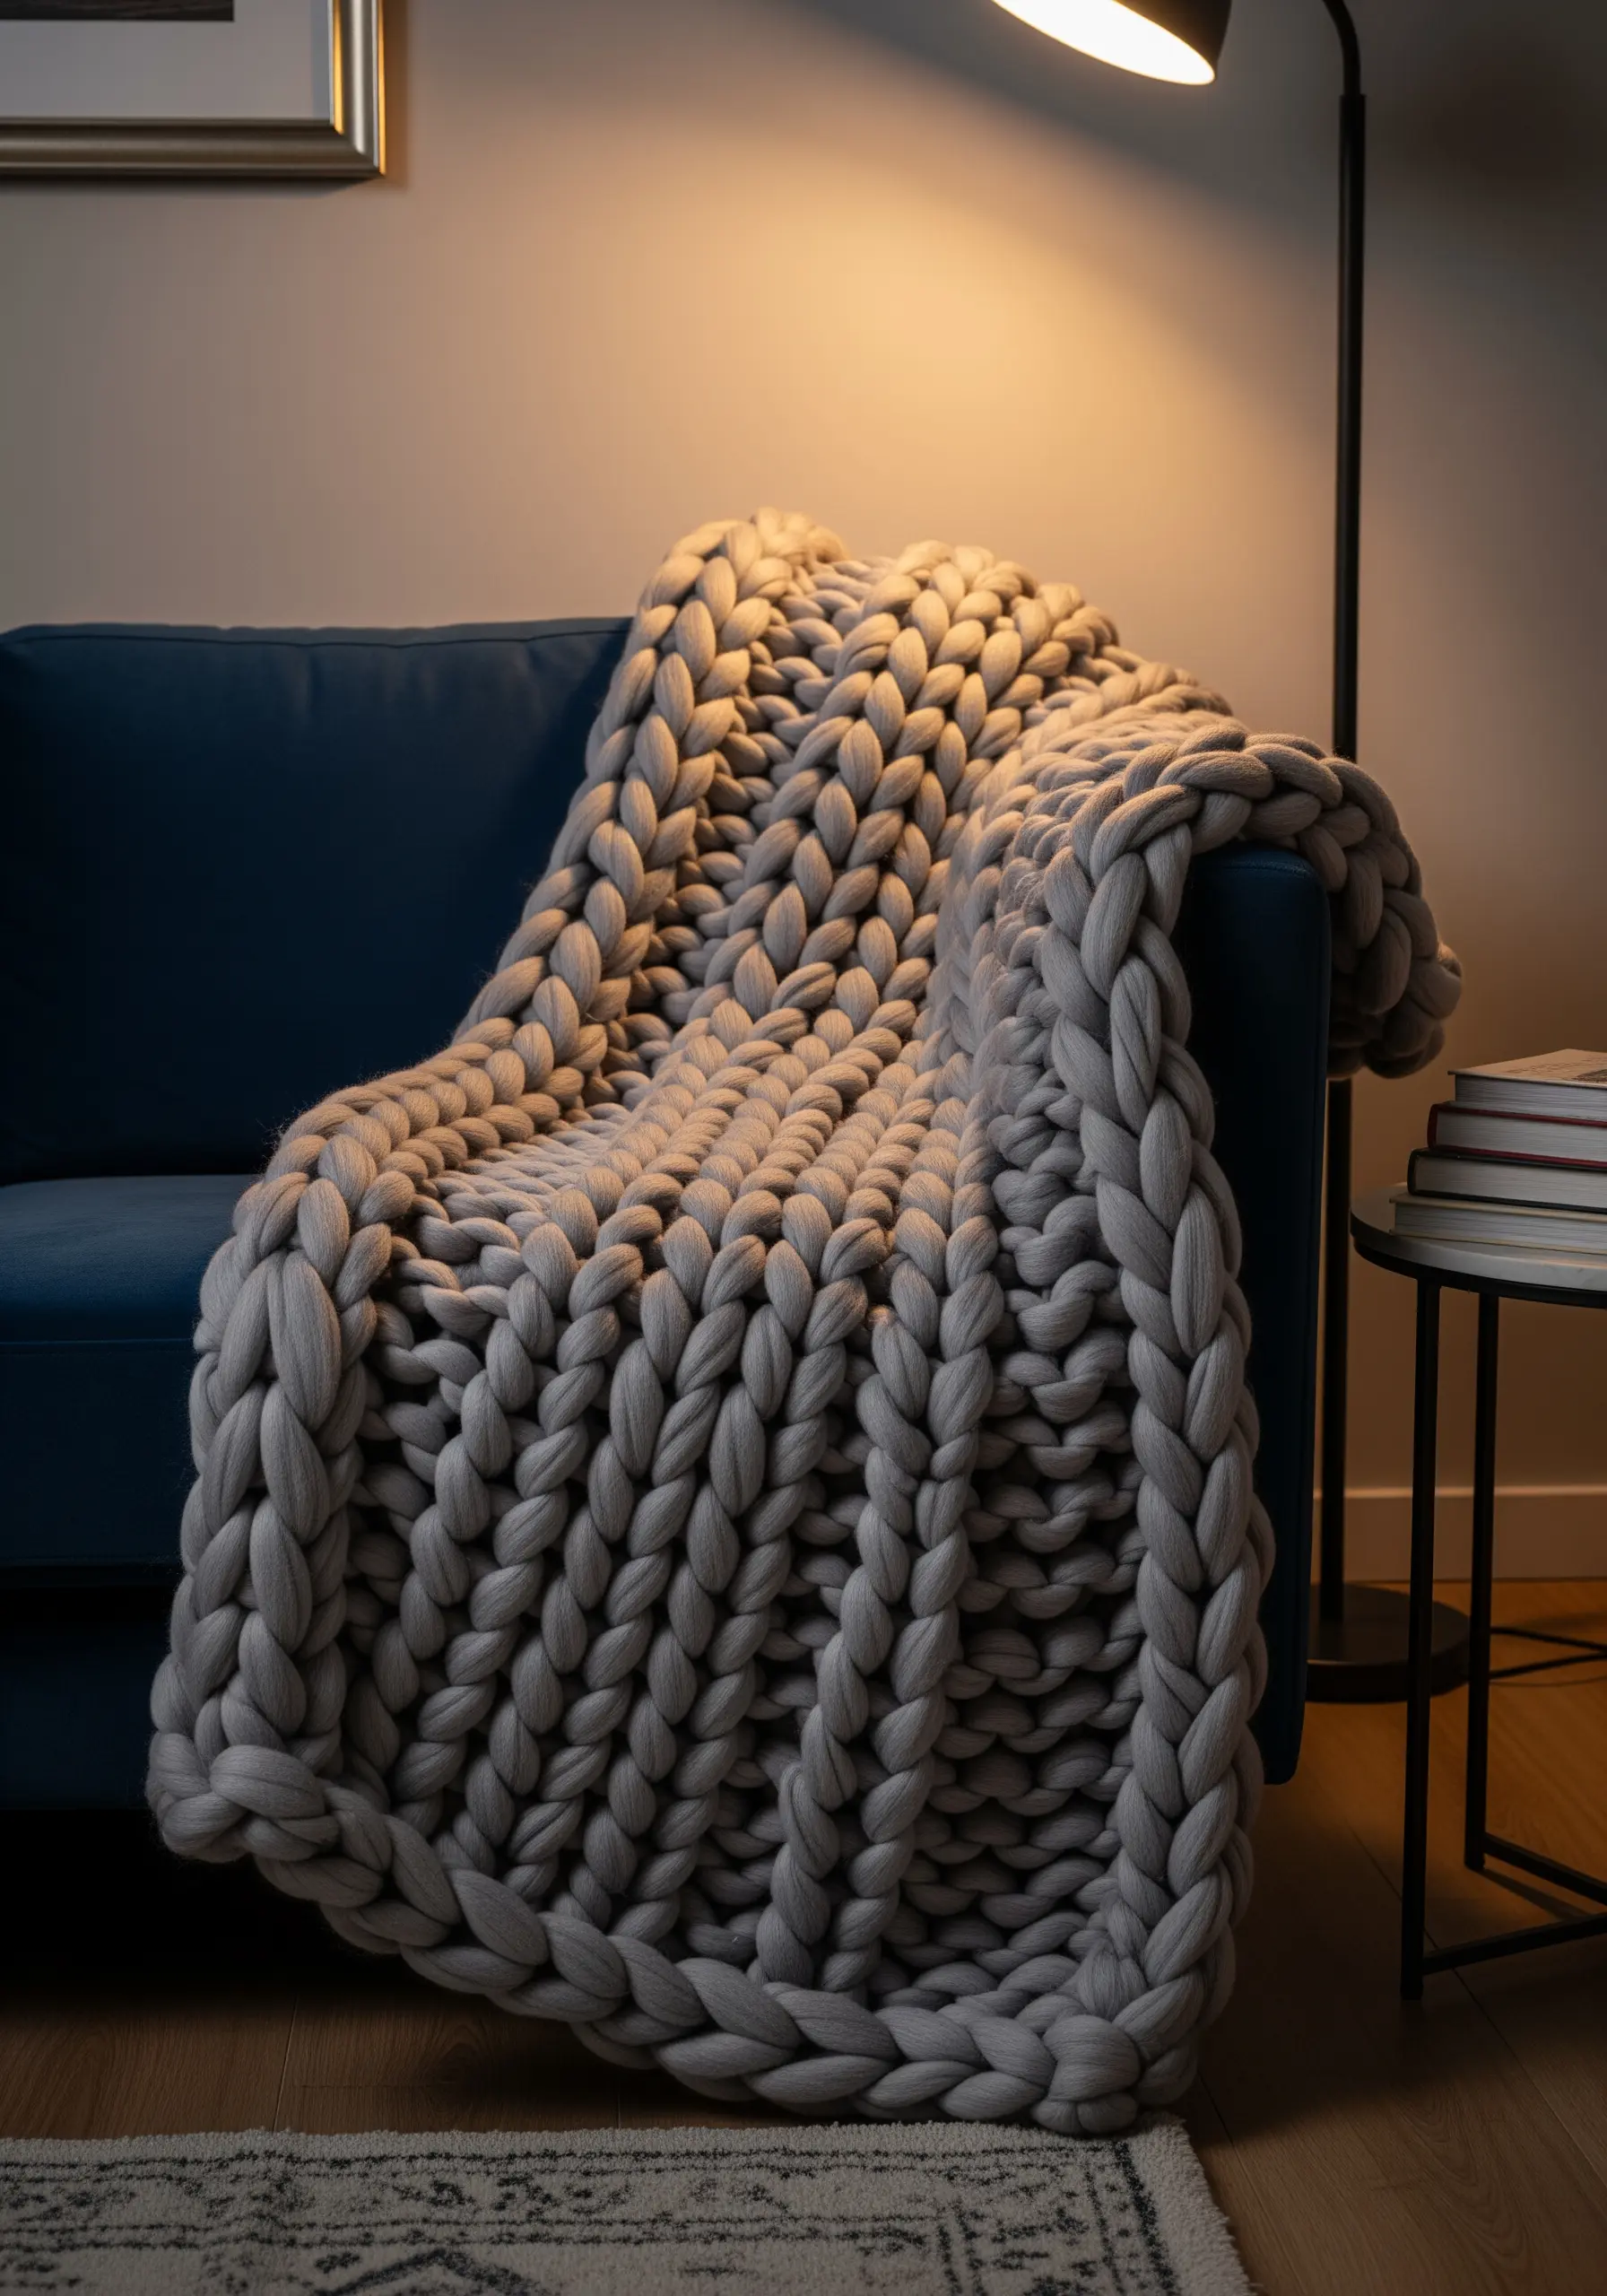
Create a statement throw blanket in an afternoon without any needles.
Arm knitting uses your own arms to form massive stitches with super-chunky wool roving or yarn.
The technique is simple to learn and builds up incredibly fast, resulting in a plush, weighty fabric.
This project is all about embracing texture, adding a dramatic layer of coziness and visual interest to your sofa or bed.
13. The Tactile Sampler: Framing Fabric Textures
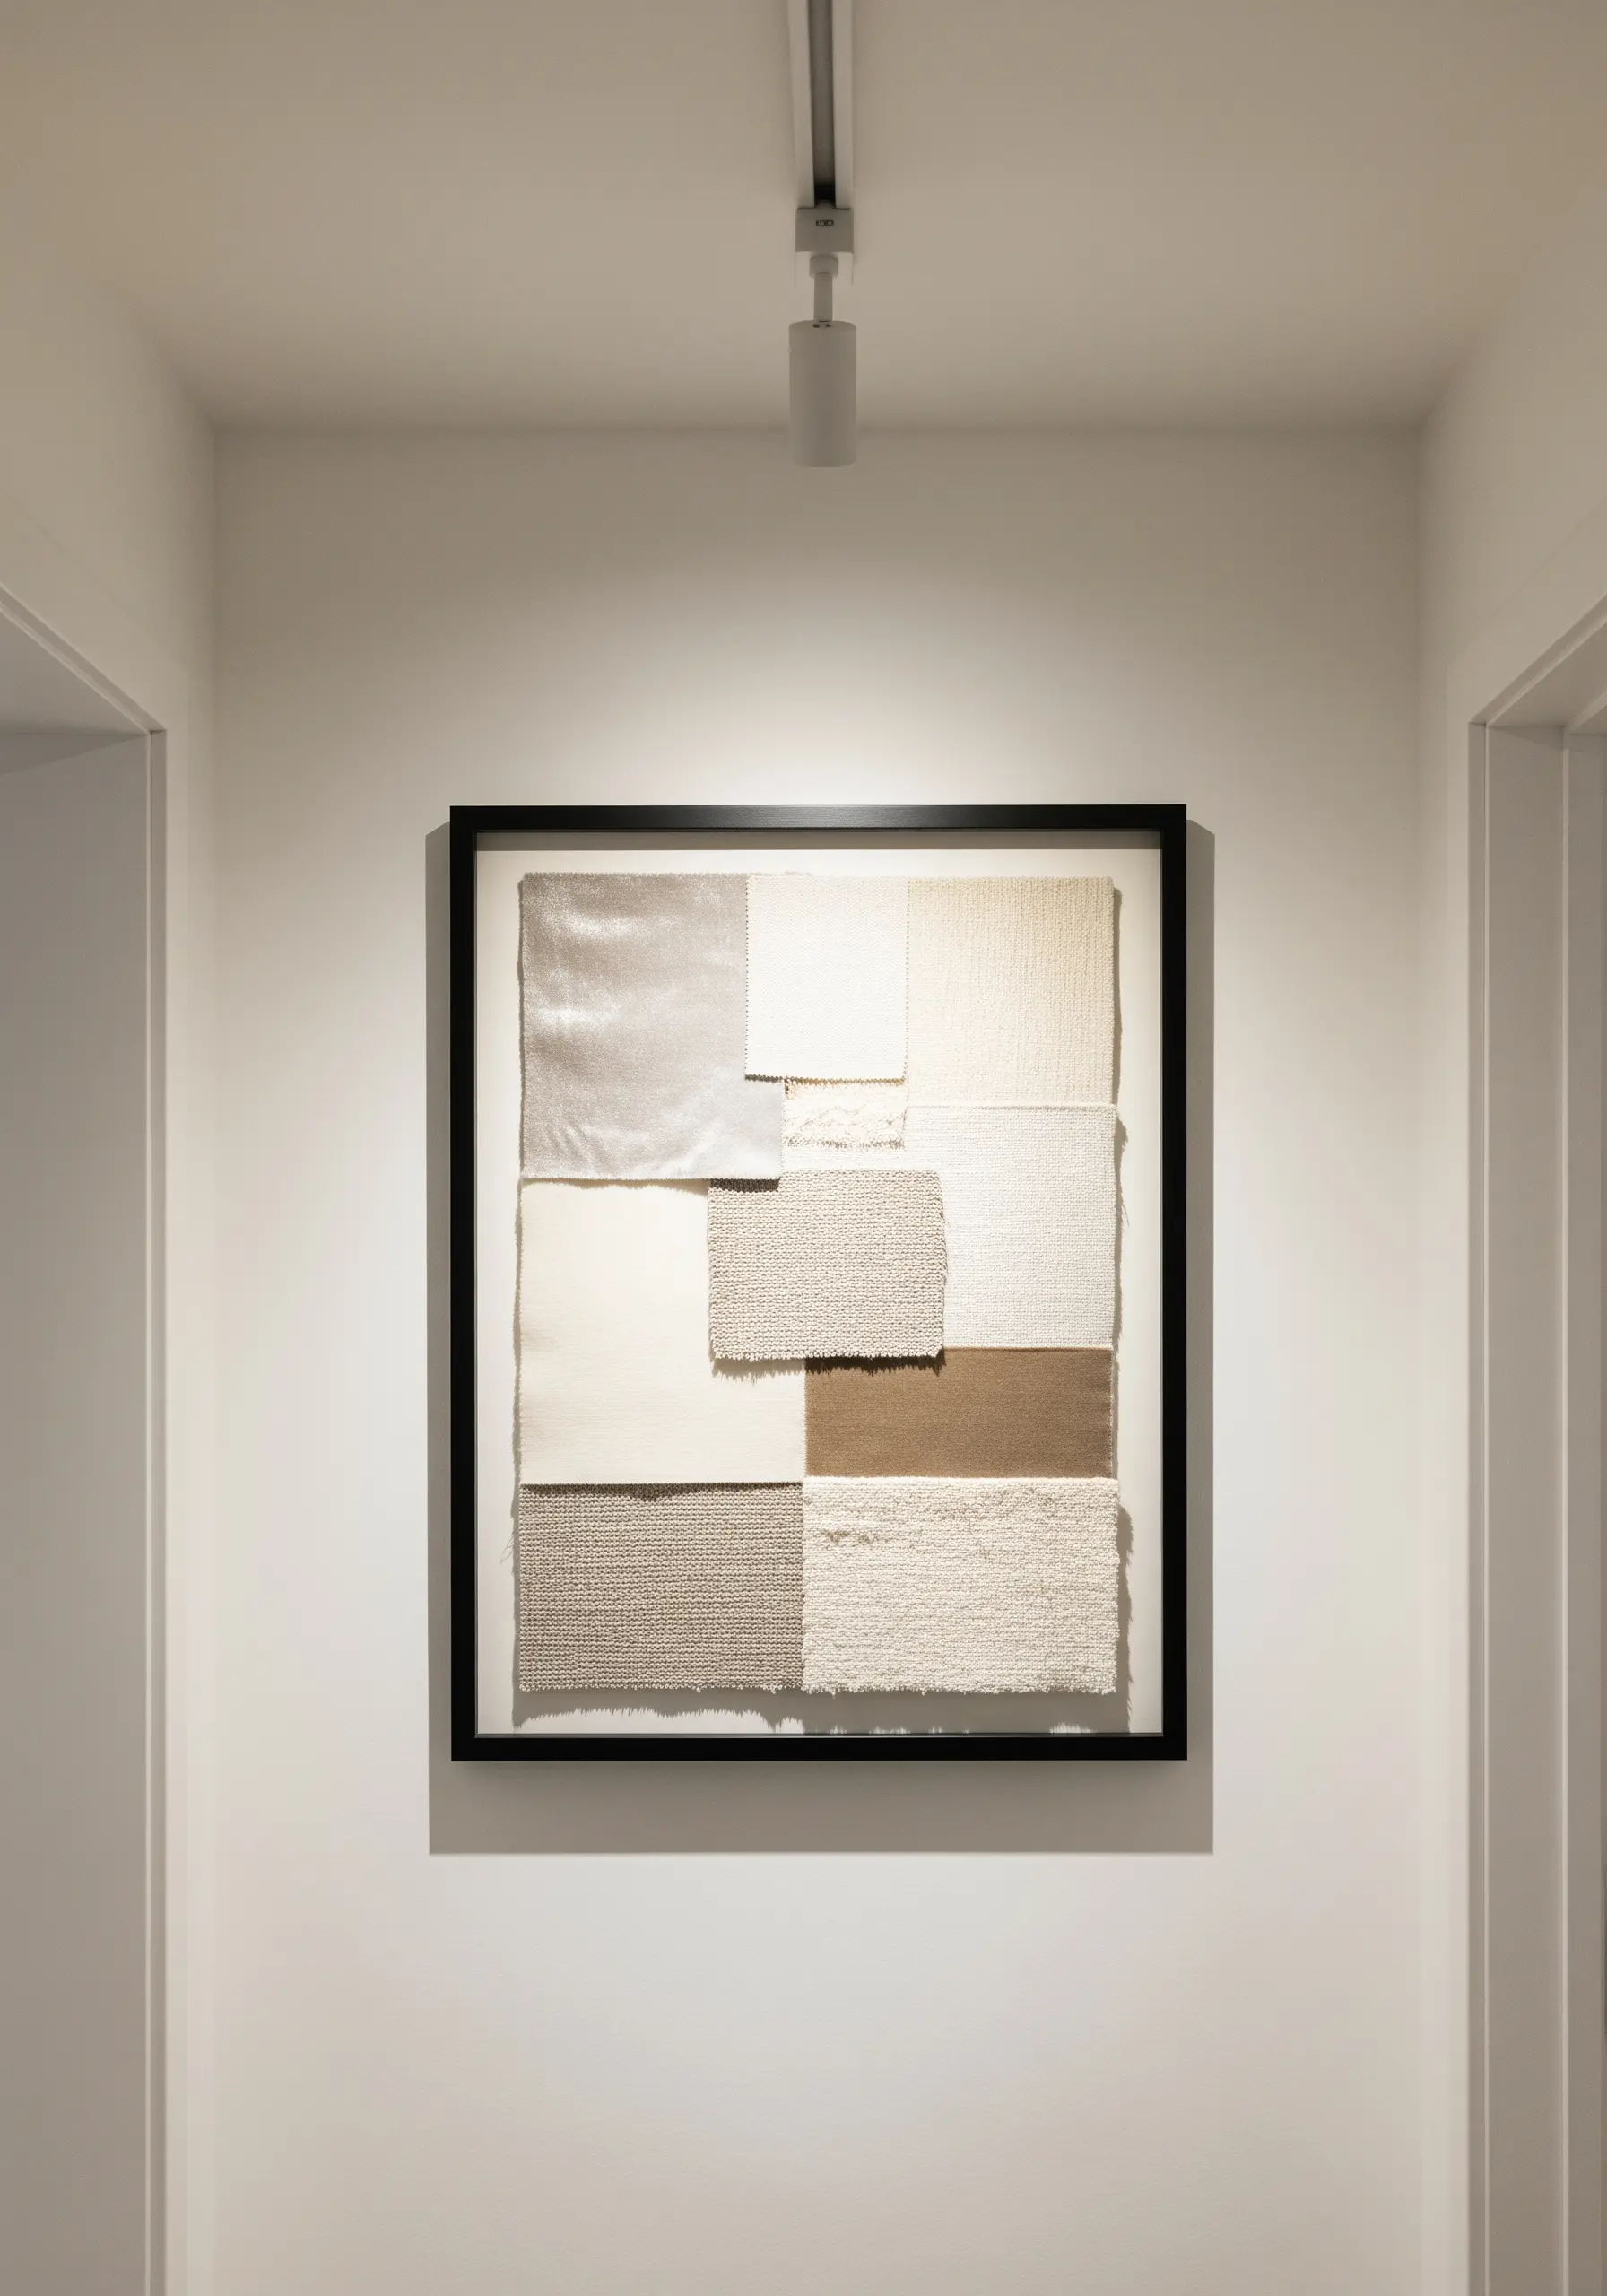
Create a sophisticated piece of art by focusing entirely on texture.
Gather fabric remnants in a cohesive, neutral palette—think raw silk, boucle, linen, and velvet in shades of cream, taupe, and gray.
Arrange the swatches in a balanced grid on a mat board and frame them.
The subtle interplay between different weaves and sheens creates a quiet, elegant piece of monochromatic textile wall art that draws the eye.
14. The Reversible Fabric Bunting

For a polished, durable bunting, create double-sided flags that hide all raw edges.
For each flag, place two identical fabric triangles right-sides together and stitch along the two long edges.
Turn the flag right-side out, press for a crisp point, and then encase the raw top edge within a folded strip of bias tape.
Stitching along the bias tape secures all the flags at once for a clean, professional finish.
15. The DIY Channel-Tufted Headboard
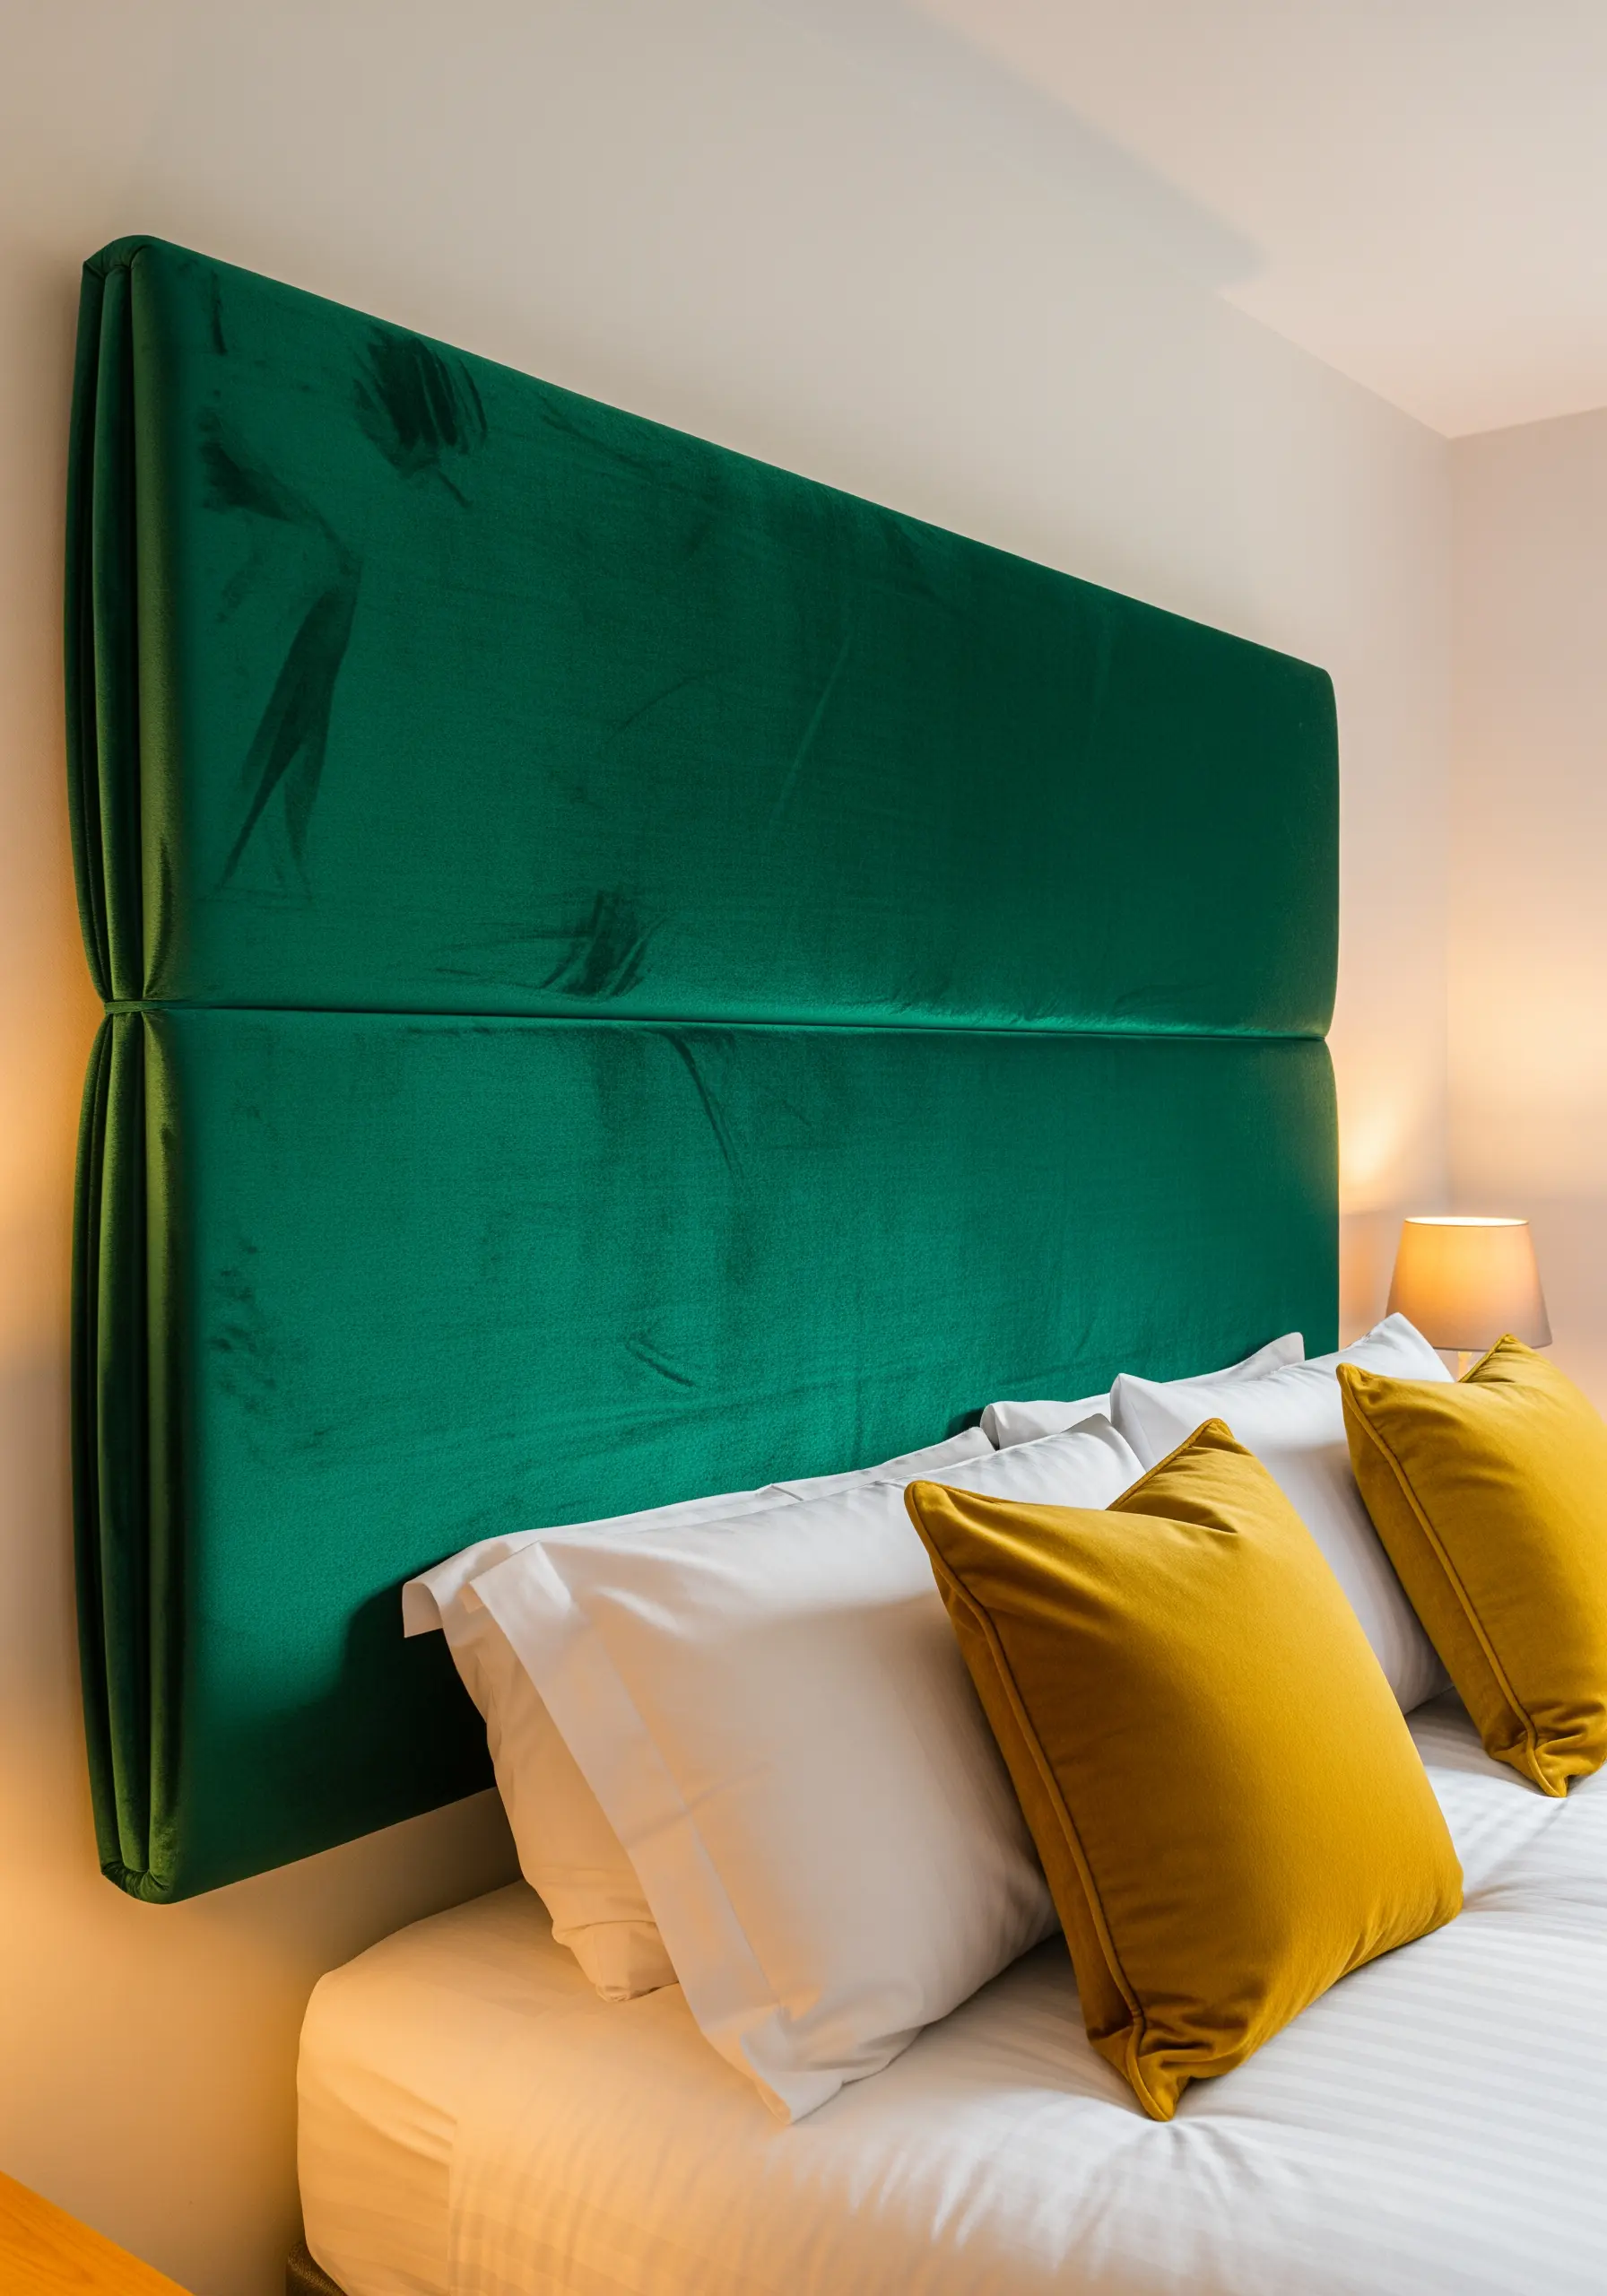
Construct a luxurious upholstered headboard using plywood, foam, and batting.
To achieve the channel-tufted look, first adhere foam to your plywood base.
Before adding the top layer of batting and fabric, use a craft knife to carve shallow vertical grooves into the foam.
When you upholster, pull the fabric tightly and use your staple gun to secure it deep within these grooves on the back, creating elegant, defined channels.
16. Clean Appliqué for Soft Storage
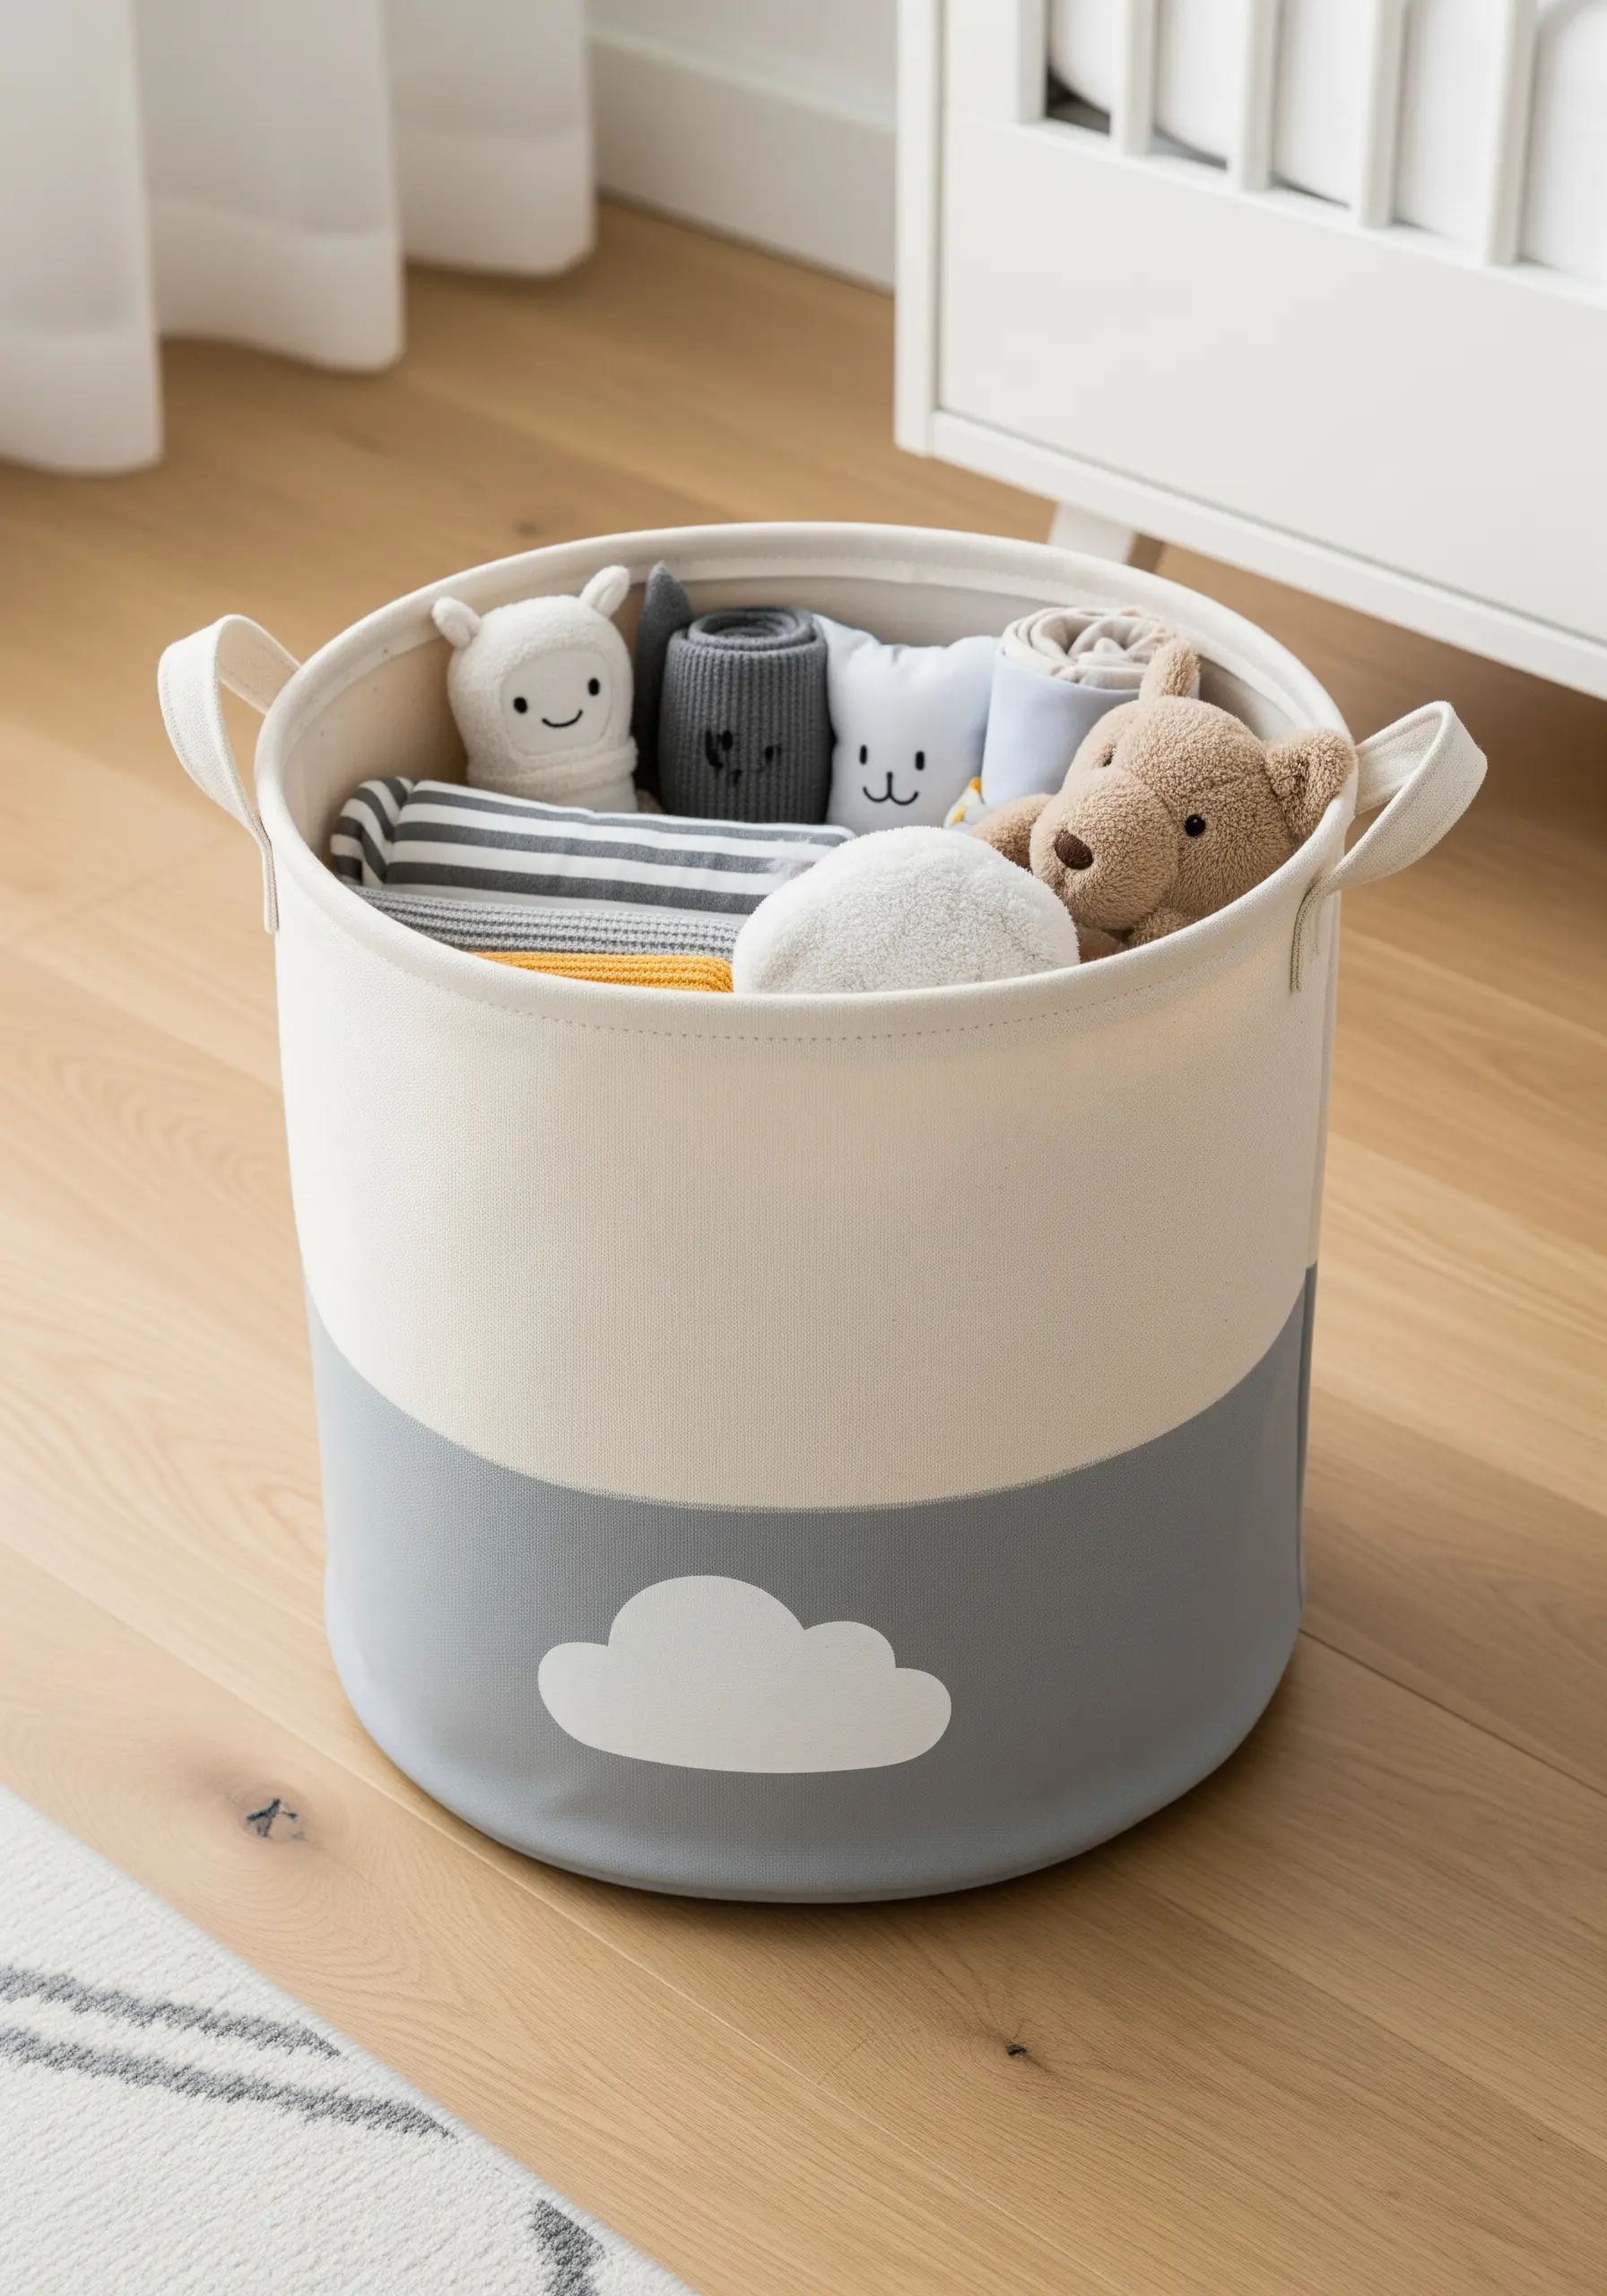
Personalize simple canvas bins with a crisp, modern appliqué.
To ensure your shape has perfectly clean edges, use a sheet of iron-on adhesive (like HeatnBond Lite) on the back of your appliqué fabric before cutting it out.
Iron the shape onto the bin for perfect placement, then add a neat running stitch or backstitch around the perimeter.
This secures the design permanently and adds a thoughtful, handmade detail.
17. Macrame Knots for Structural Decor

Create beautiful and functional plant hangers by mastering one simple knot: the square knot.
Tying a series of square knots creates a flat, decorative panel, while alternating the lead cords creates the classic netted pattern that forms the basket.
For a spiral effect, simply repeat one half of the square knot over and over.
Using a natural cotton cord provides both the strength and the timeless bohemian texture this craft is known for.
18. Woven Accents on Table Linens

Add a bold, textural border to a plain table runner by weaving directly onto the fabric.
Use a tapestry needle and a thick, contrasting material like cotton cord or yarn.
Instead of stitching through the fabric, weave your cord over and under the existing threads of the base material (this works best on linen or canvas).
This technique creates a raised, geometric design that adds significant weight and tactile interest.
19. Illustrating with Fabric Collage
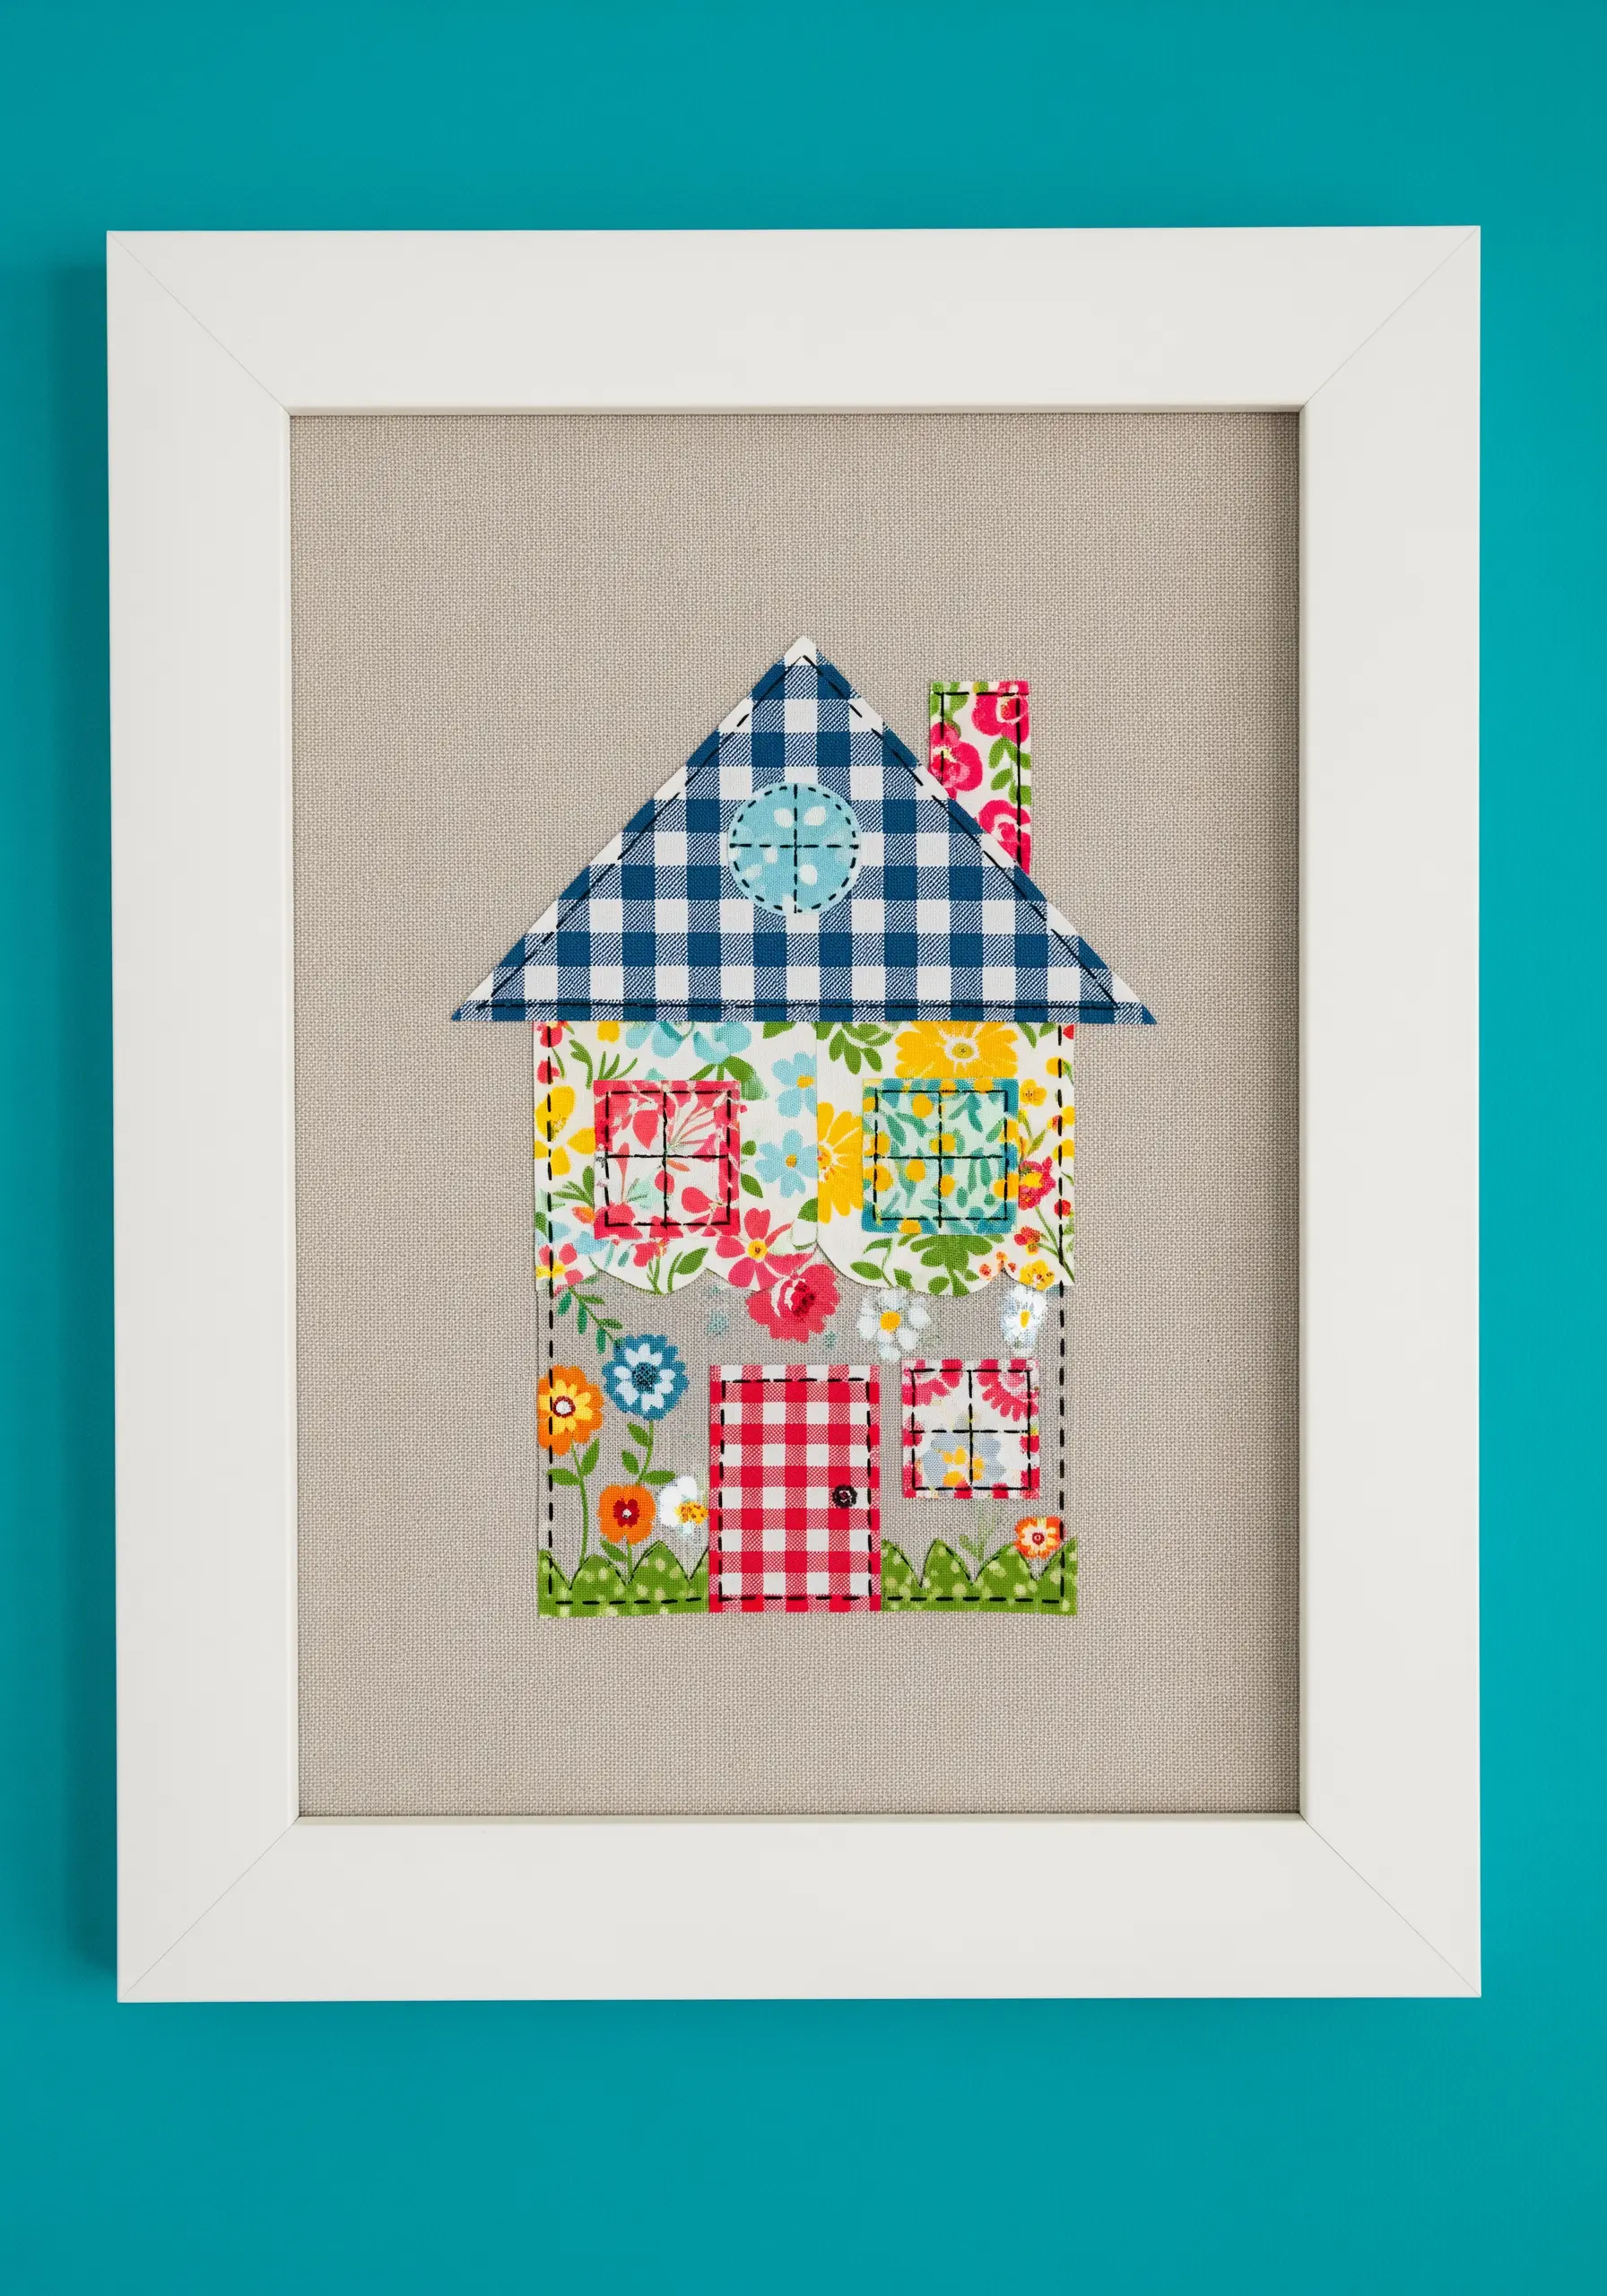
Create charming, illustrative art by using fabric scraps like paint.
Cut shapes from various patterned and colored fabrics to build your scene.
To keep everything perfectly in place as you work, use a lightweight, iron-on adhesive to tack down each piece onto your background fabric.
Once your composition is set, add definition and detail with simple embroidery, like a backstitch for outlines or French knots for small accents.
20. Modern Patchwork with a Graphic Palette
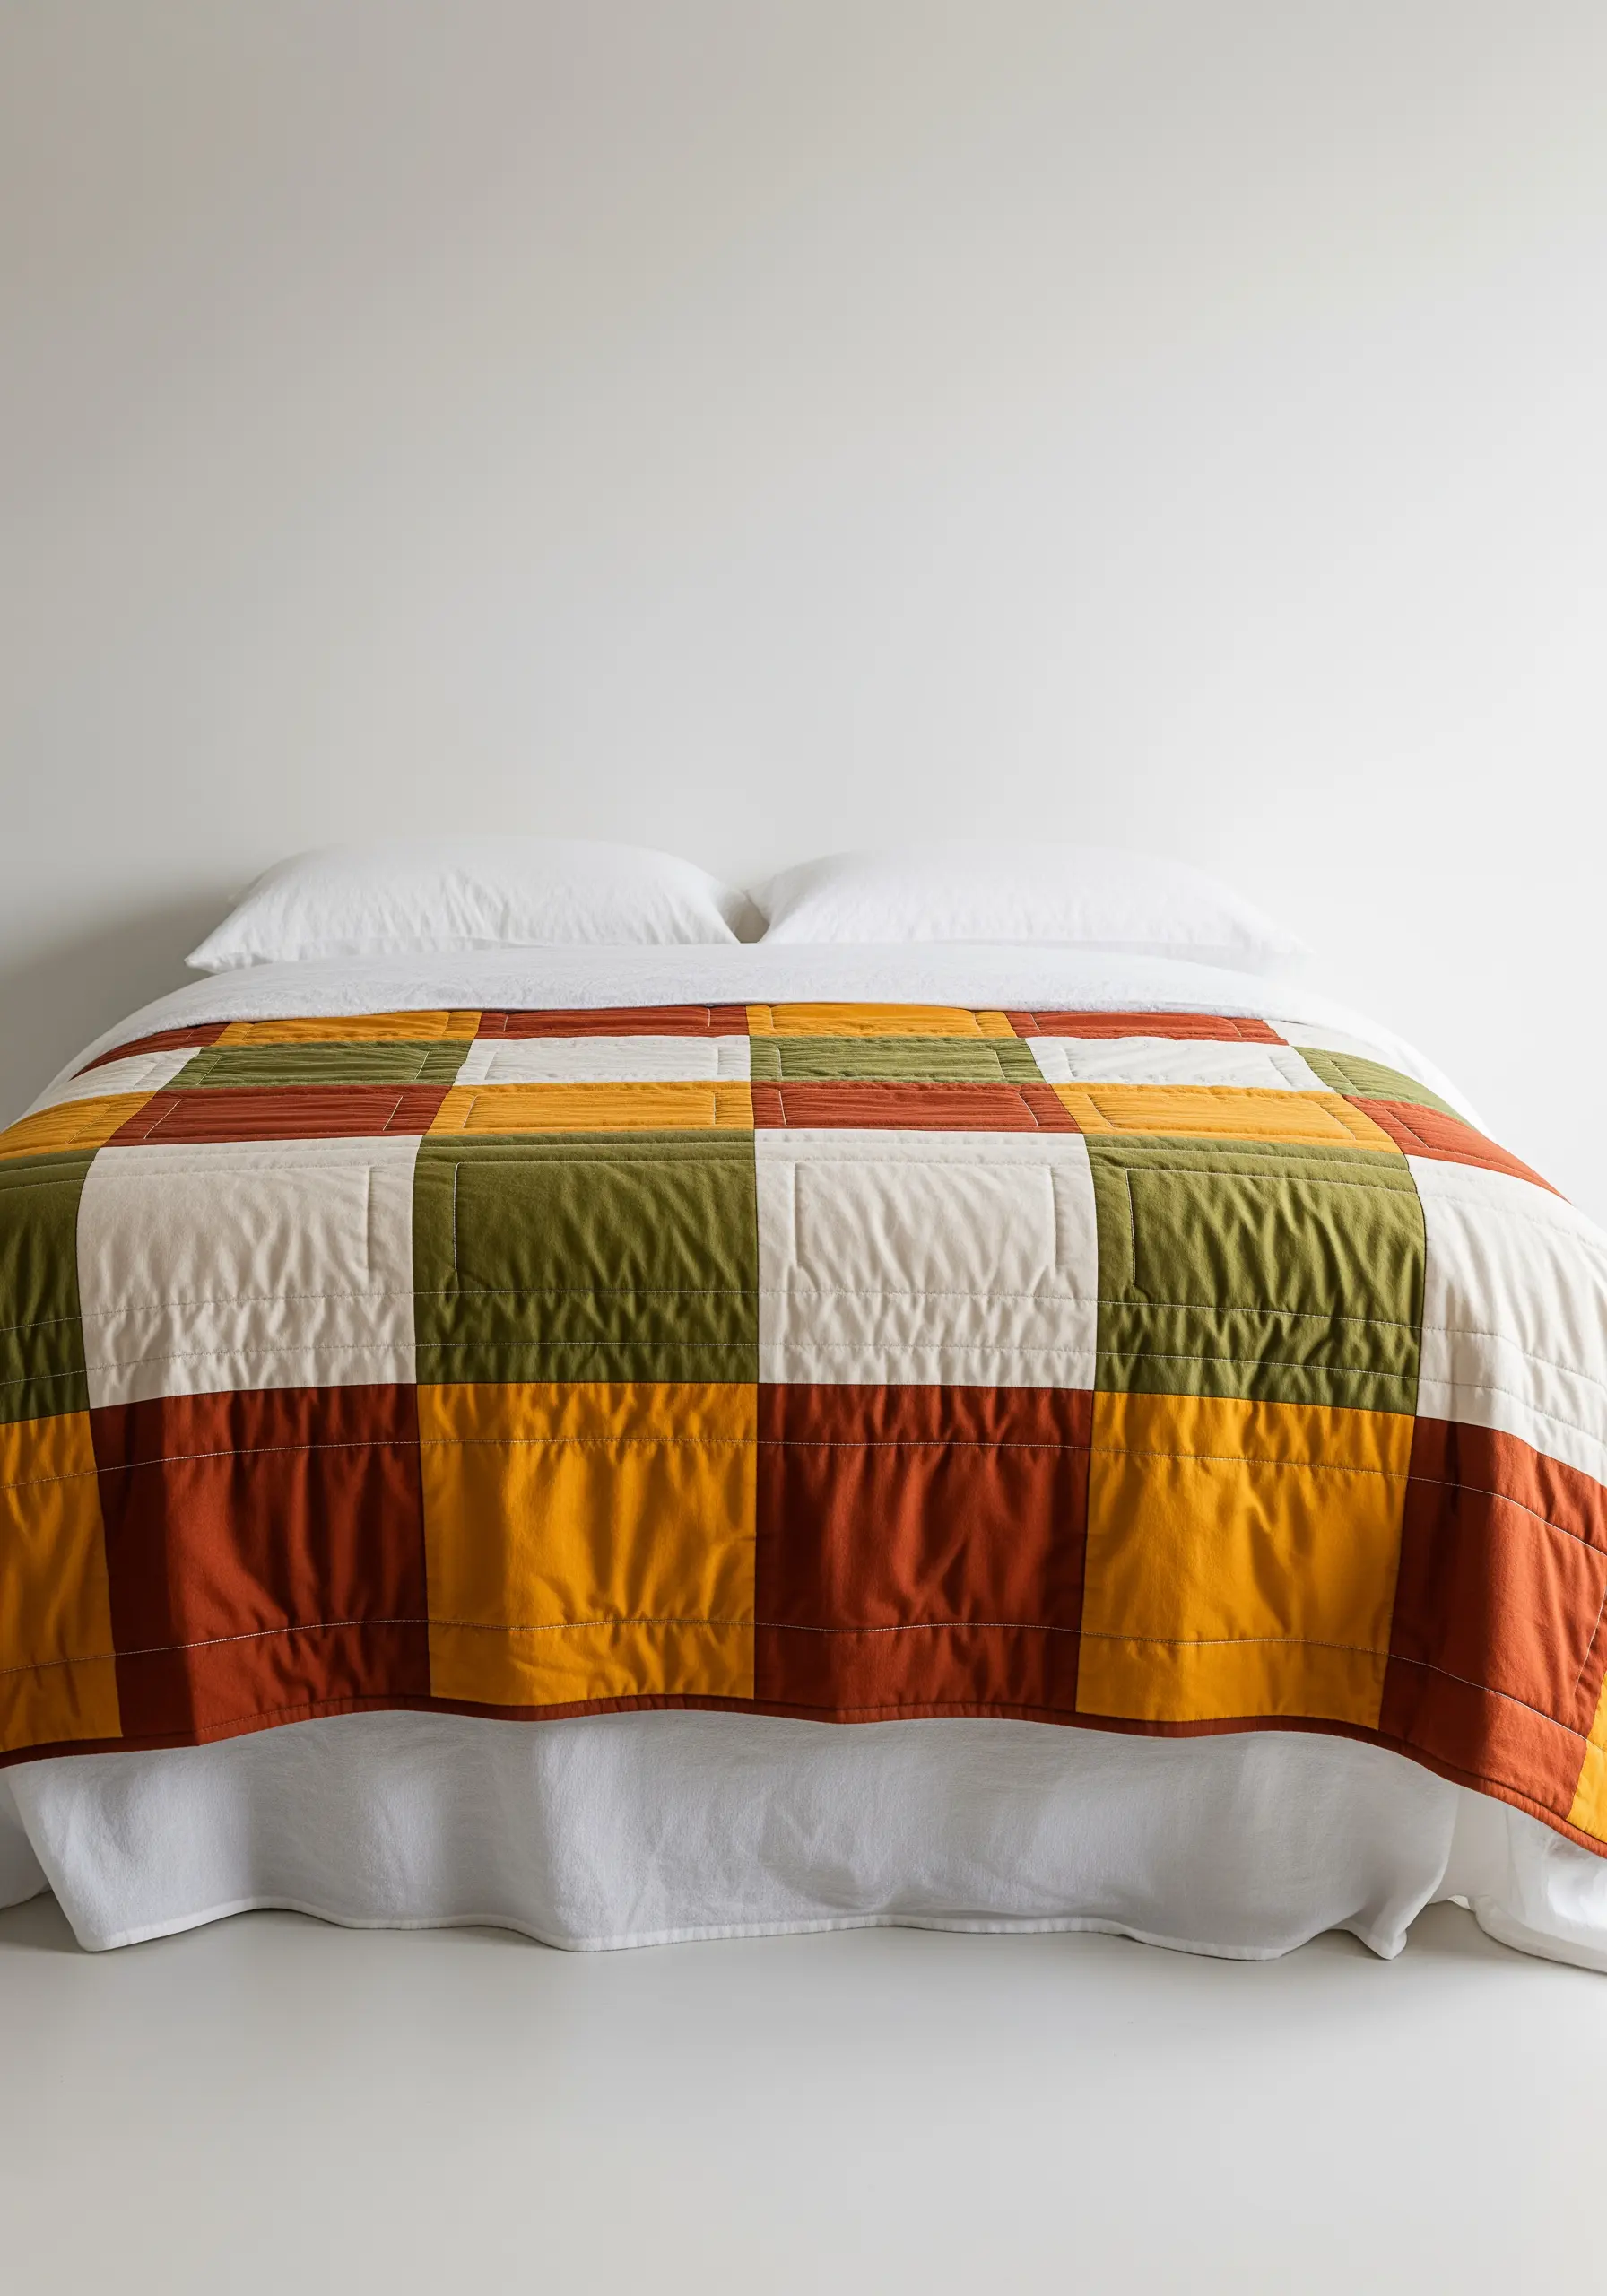
Give quilting a modern update by working with large blocks of solid-colored fabric.
Forget intricate patterns; the impact here comes from a carefully curated color palette and a simple, graphic grid layout.
Once your top is pieced, use straight-line quilting that runs parallel to your seams.
This minimalist approach emphasizes the bold geometry of your design and creates a clean, contemporary aesthetic.
21. Knotted Rope and Tassel Tie-Backs
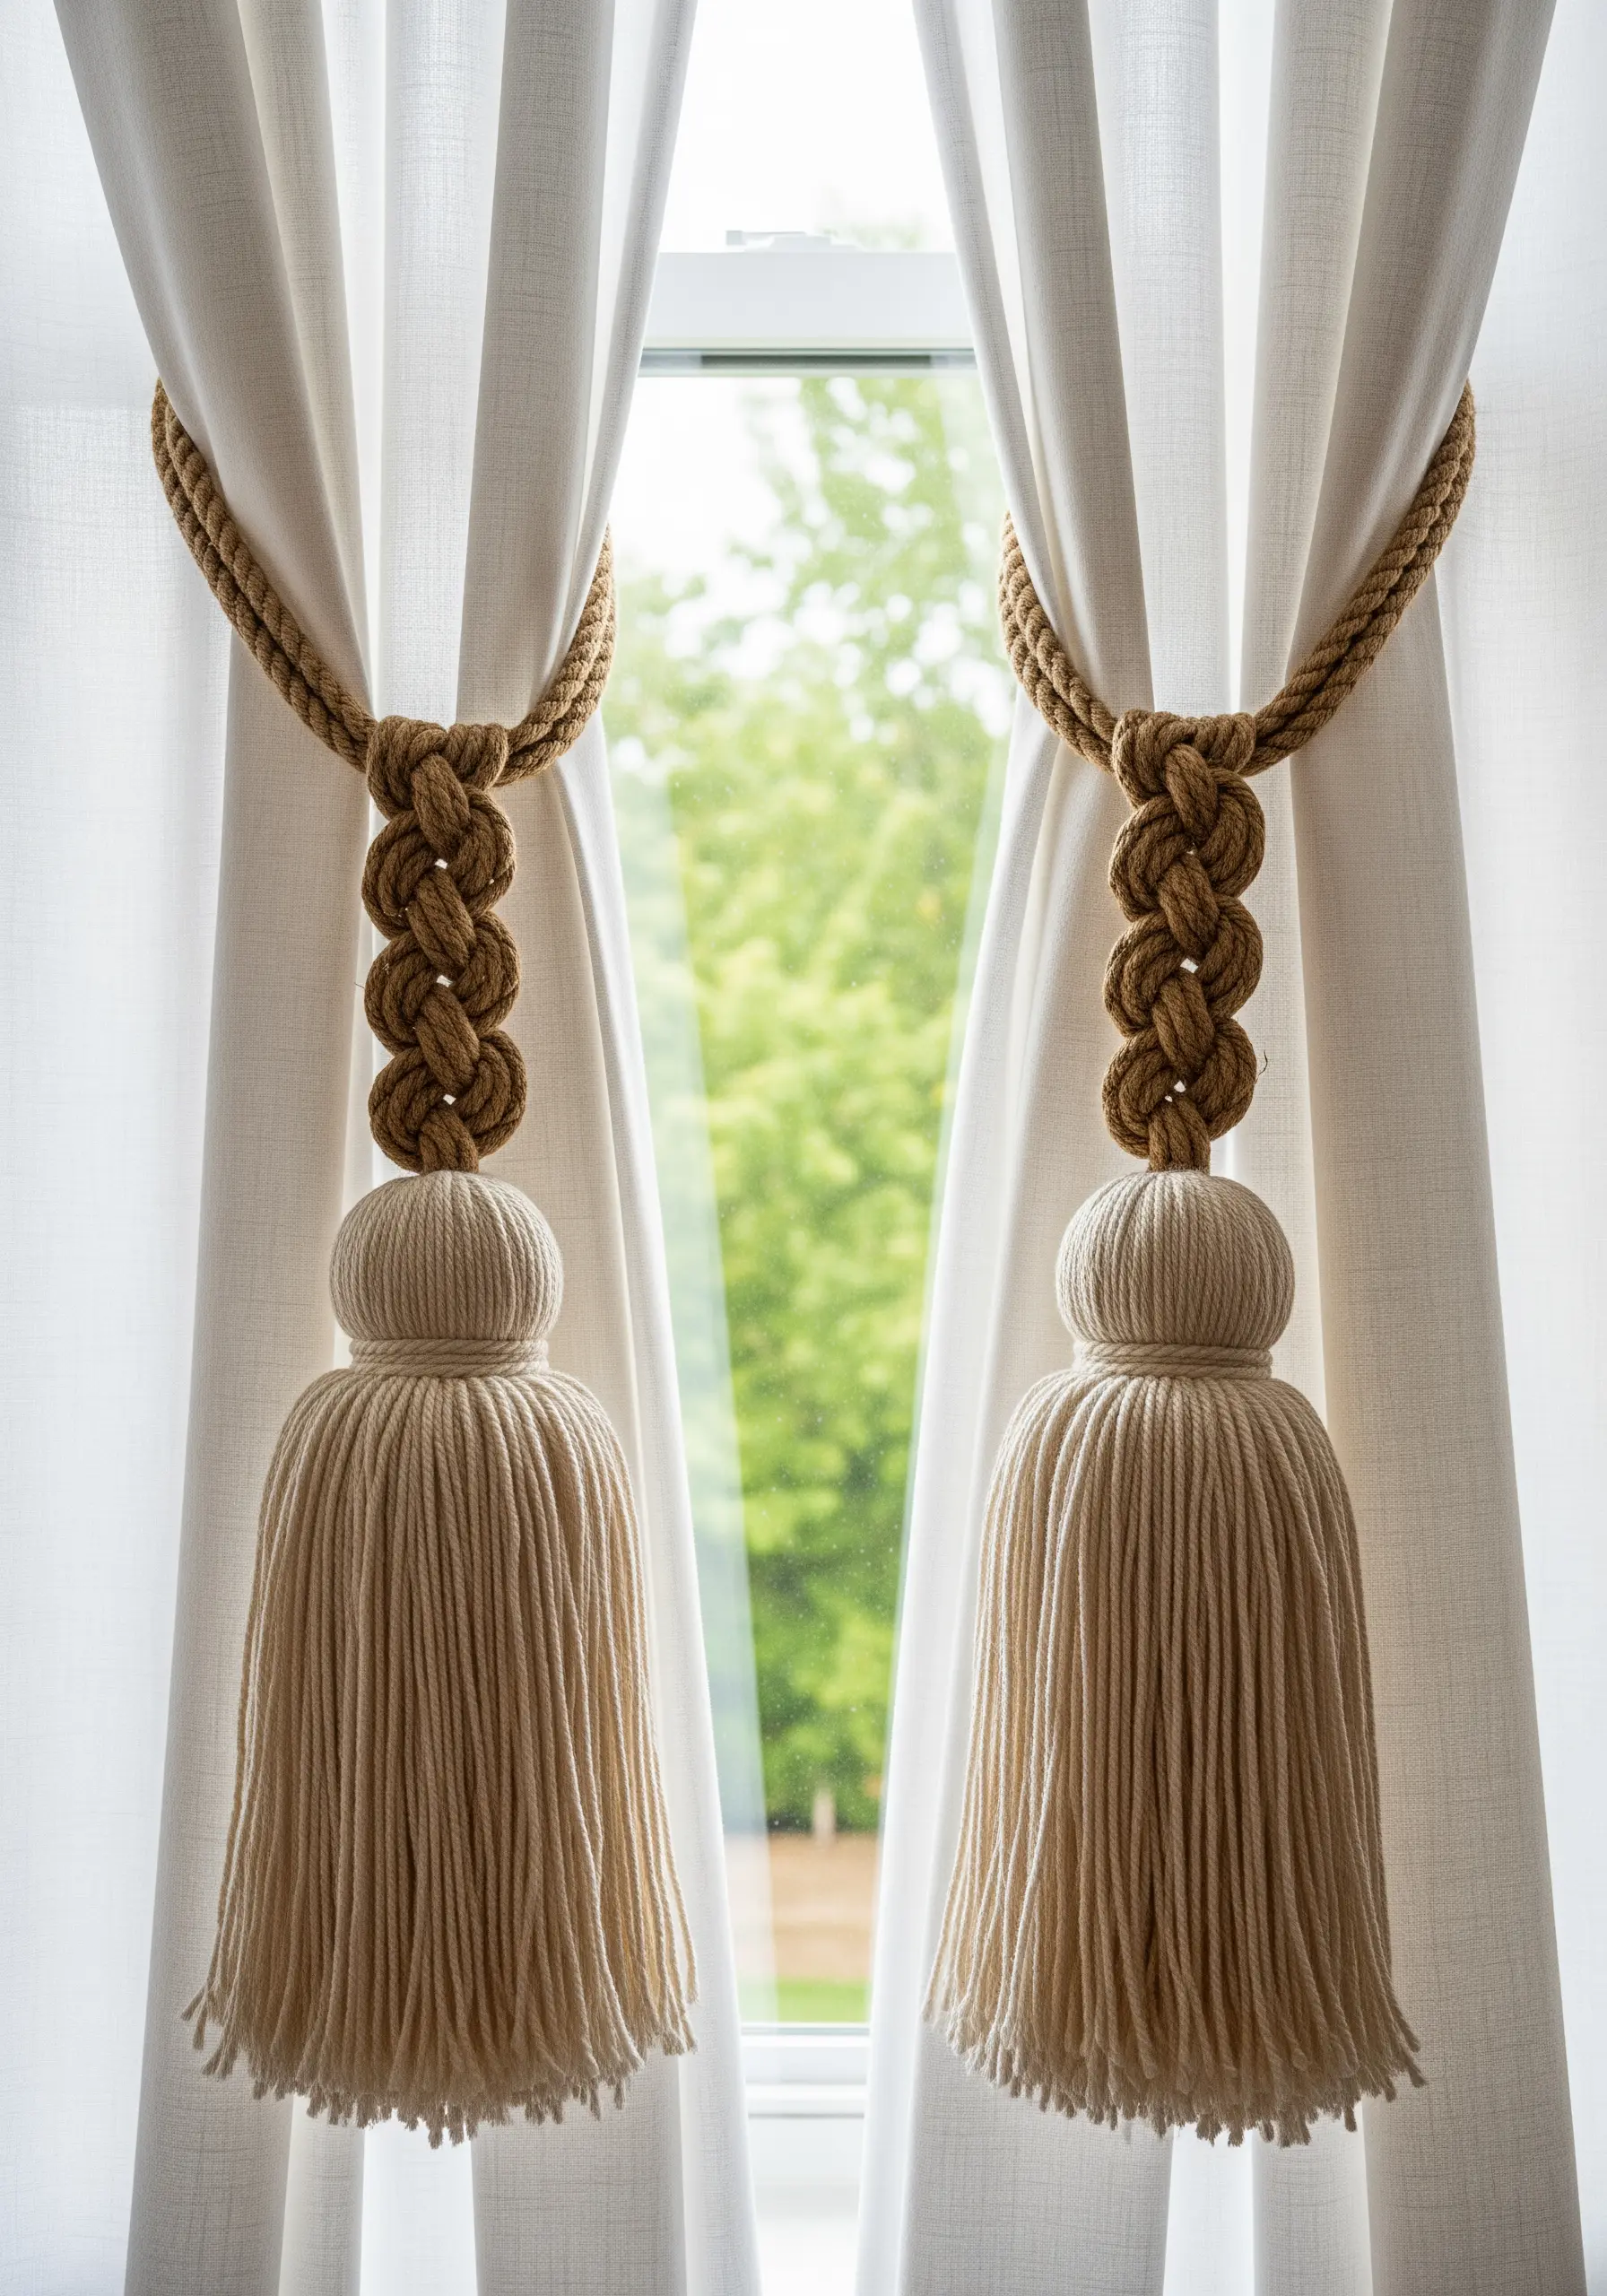
Craft elegant curtain tie-backs that blend structure and softness.
Use a thick, natural fiber rope to create a decorative knot, such as a Celtic knot or a simple braid, for the main body.
To make the lush tassels, wrap a soft yarn or embroidery floss around a piece of cardboard, tie it off securely at the top, and snip the bottom loops.
The contrast between the firm knot and the flowing tassel adds a sophisticated, tactile finish to your windows.
22. Tailored Fabric-Covered Storage Boxes
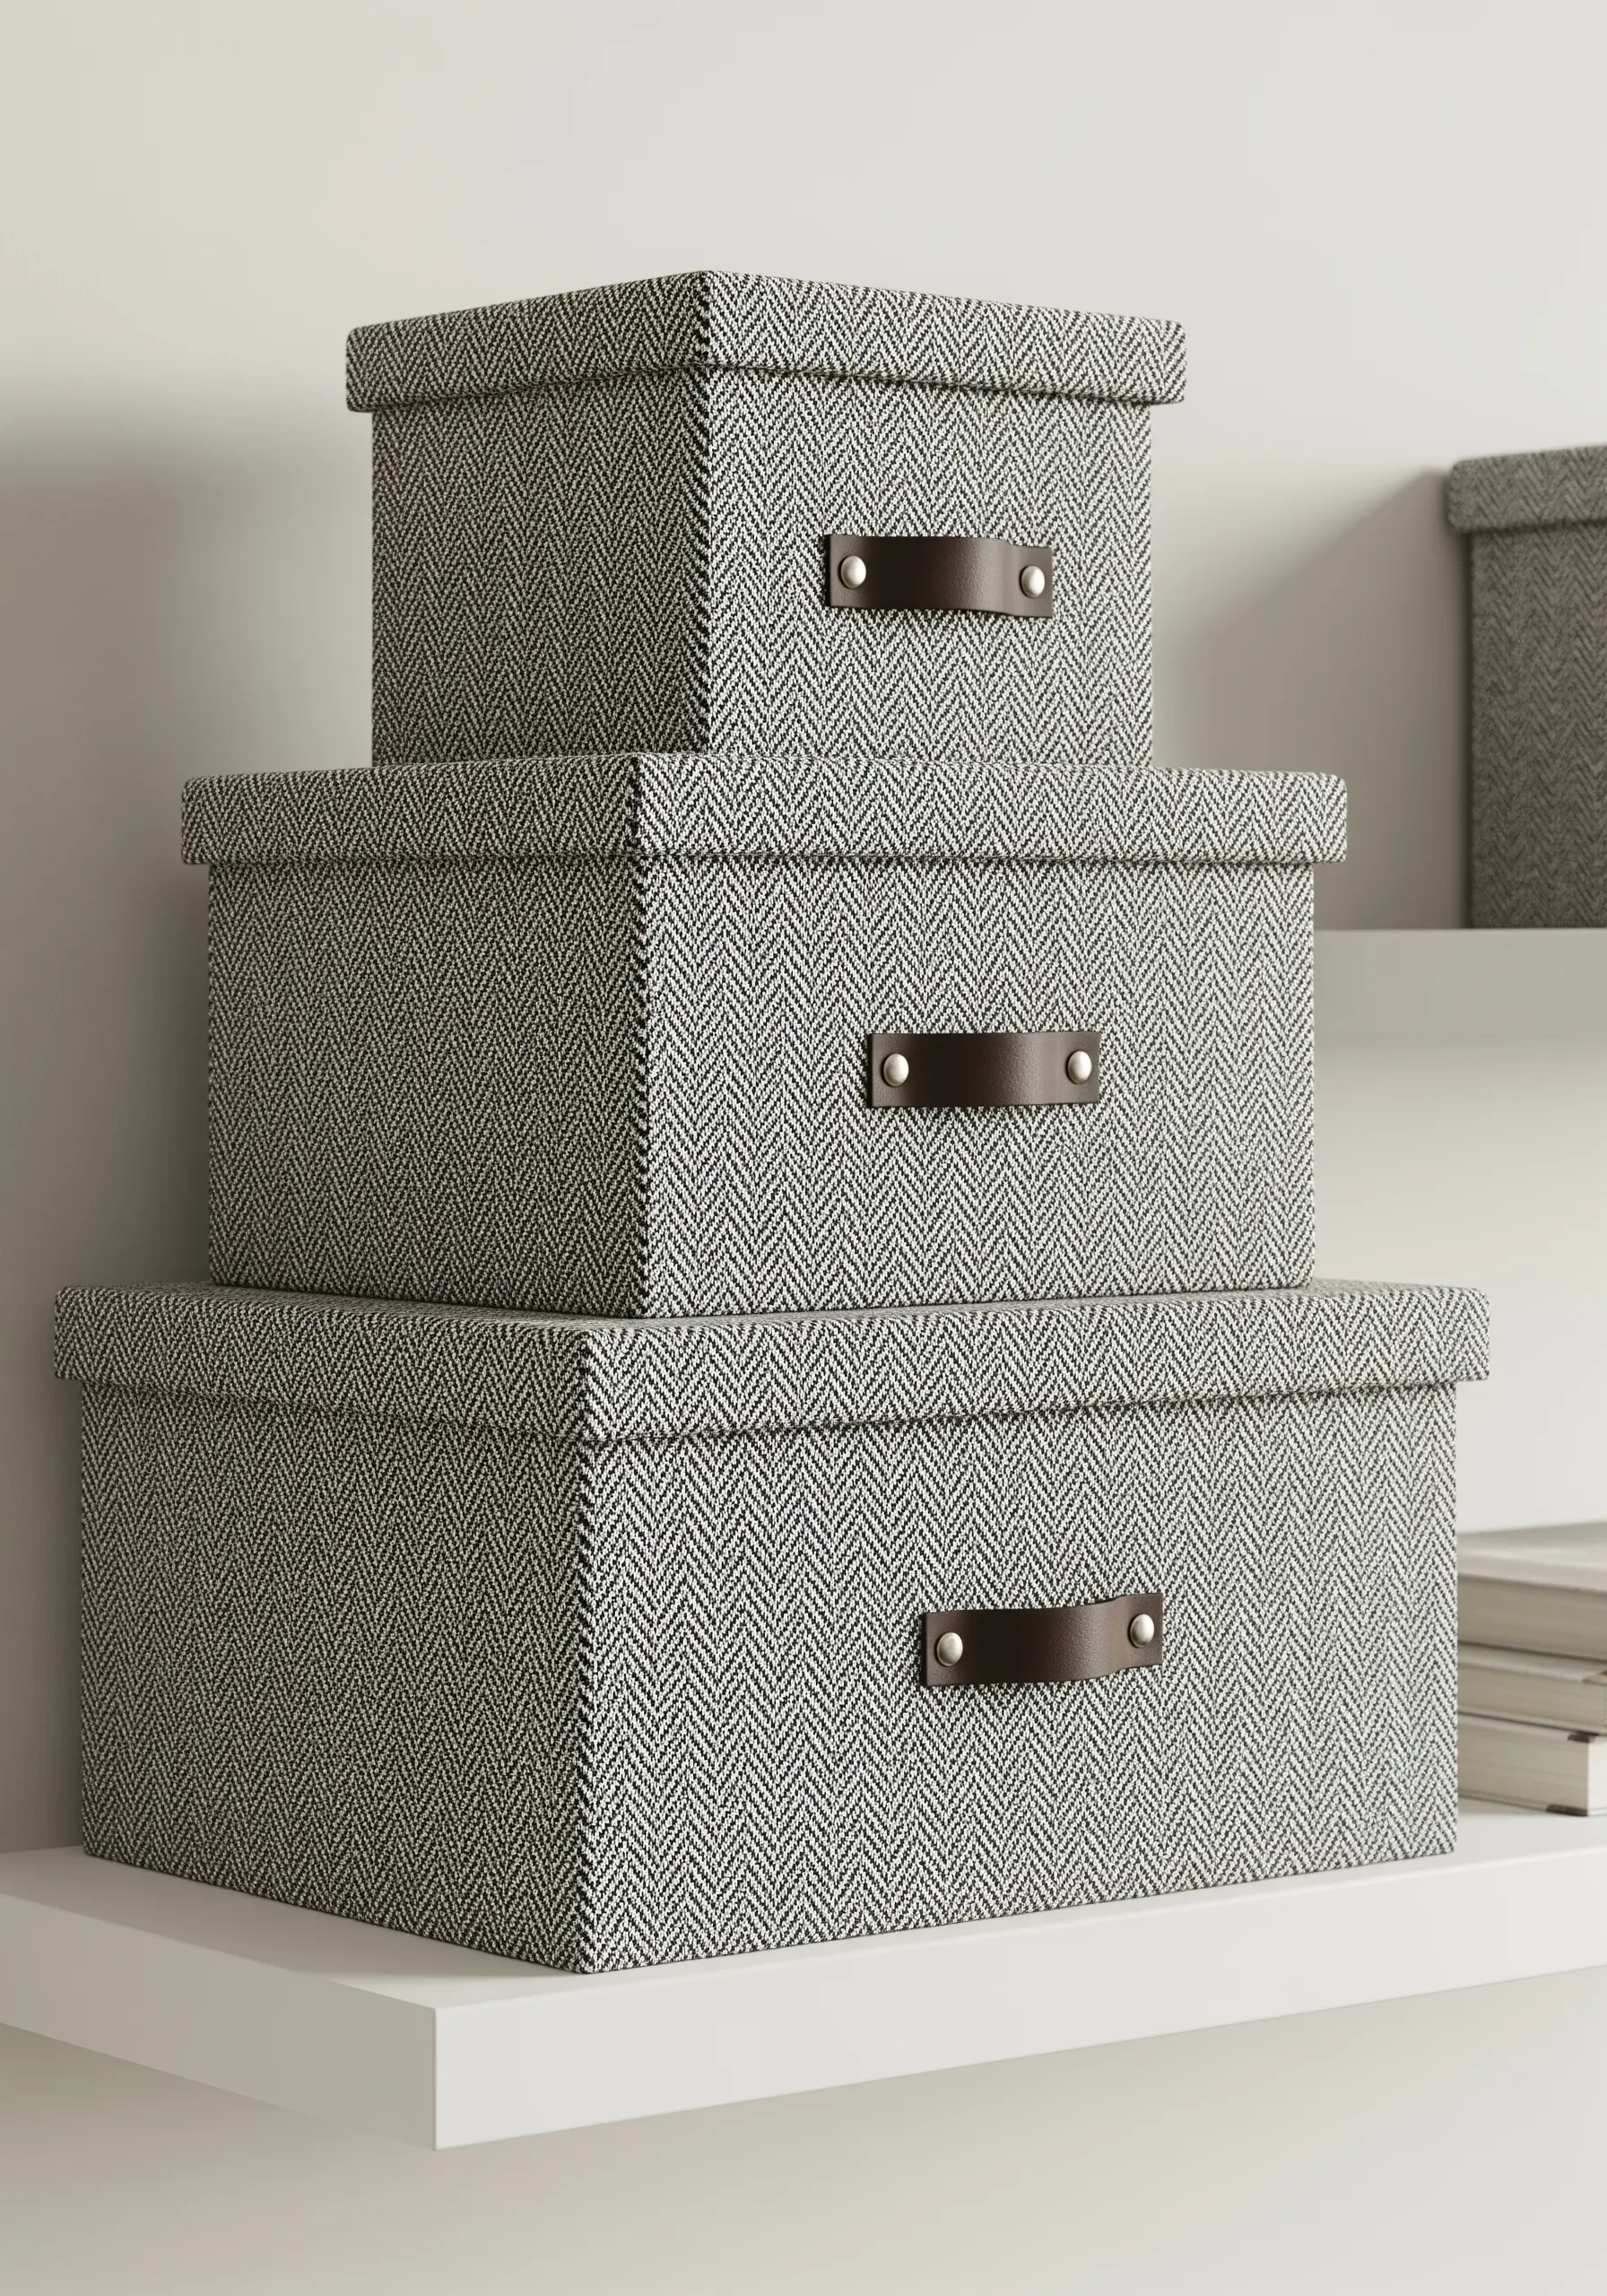
Transform inexpensive cardboard boxes into custom, high-end storage.
Use a fabric spray adhesive for a smooth, bubble-free application.
To achieve perfectly crisp corners, wrap the box as you would a gift, making precise diagonal cuts at the corners before folding the fabric over.
This technique turns basic organization into a seamless part of your room’s decor, especially when you add a smart leather pull handle.
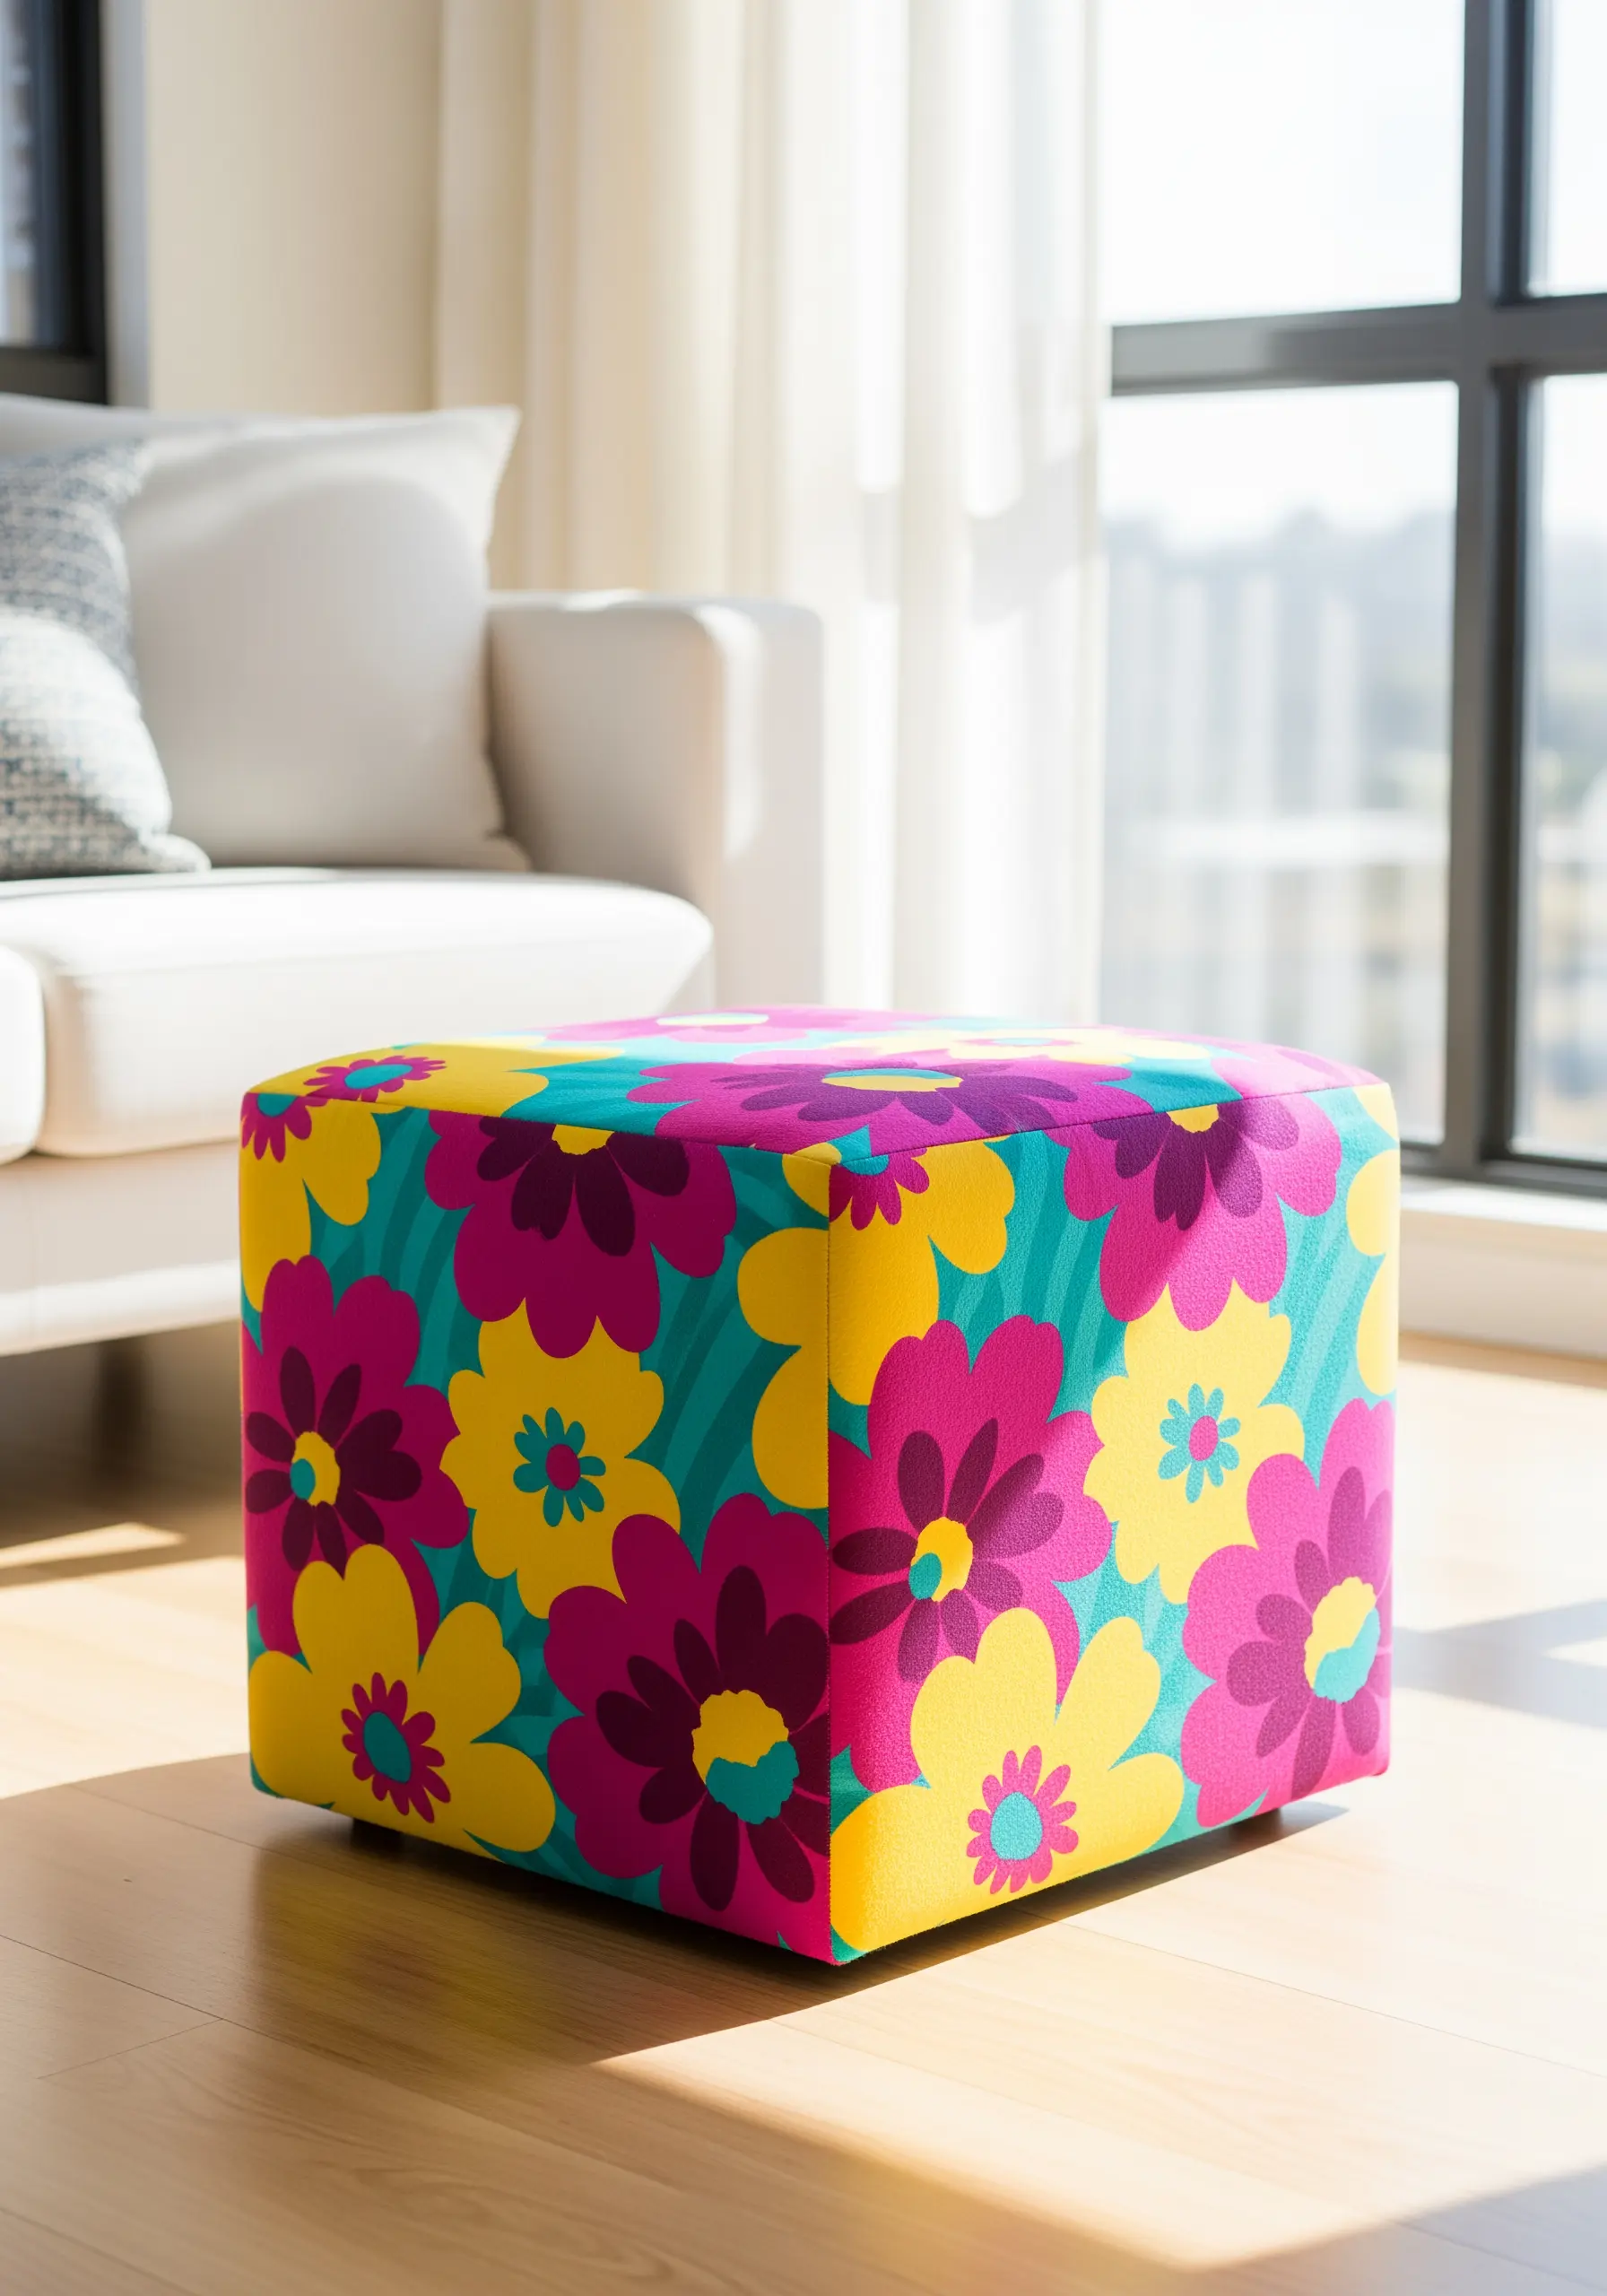
23. Sewing a Custom Floor Pouf

Create your own stylish and versatile seating by sewing a custom floor pouf.
You will need two large circles of durable upholstery fabric for the top and bottom, and one long rectangle for the sides.
After sewing the rectangle into a loop, attach it to the circular panels, leaving a small opening for stuffing.
For a firm, comfortable shape that holds up to use, fill it tightly with shredded foam, beanbag filler, or a mix of old linens and fabric scraps.
24. Applying Gold Leaf to Textile Art
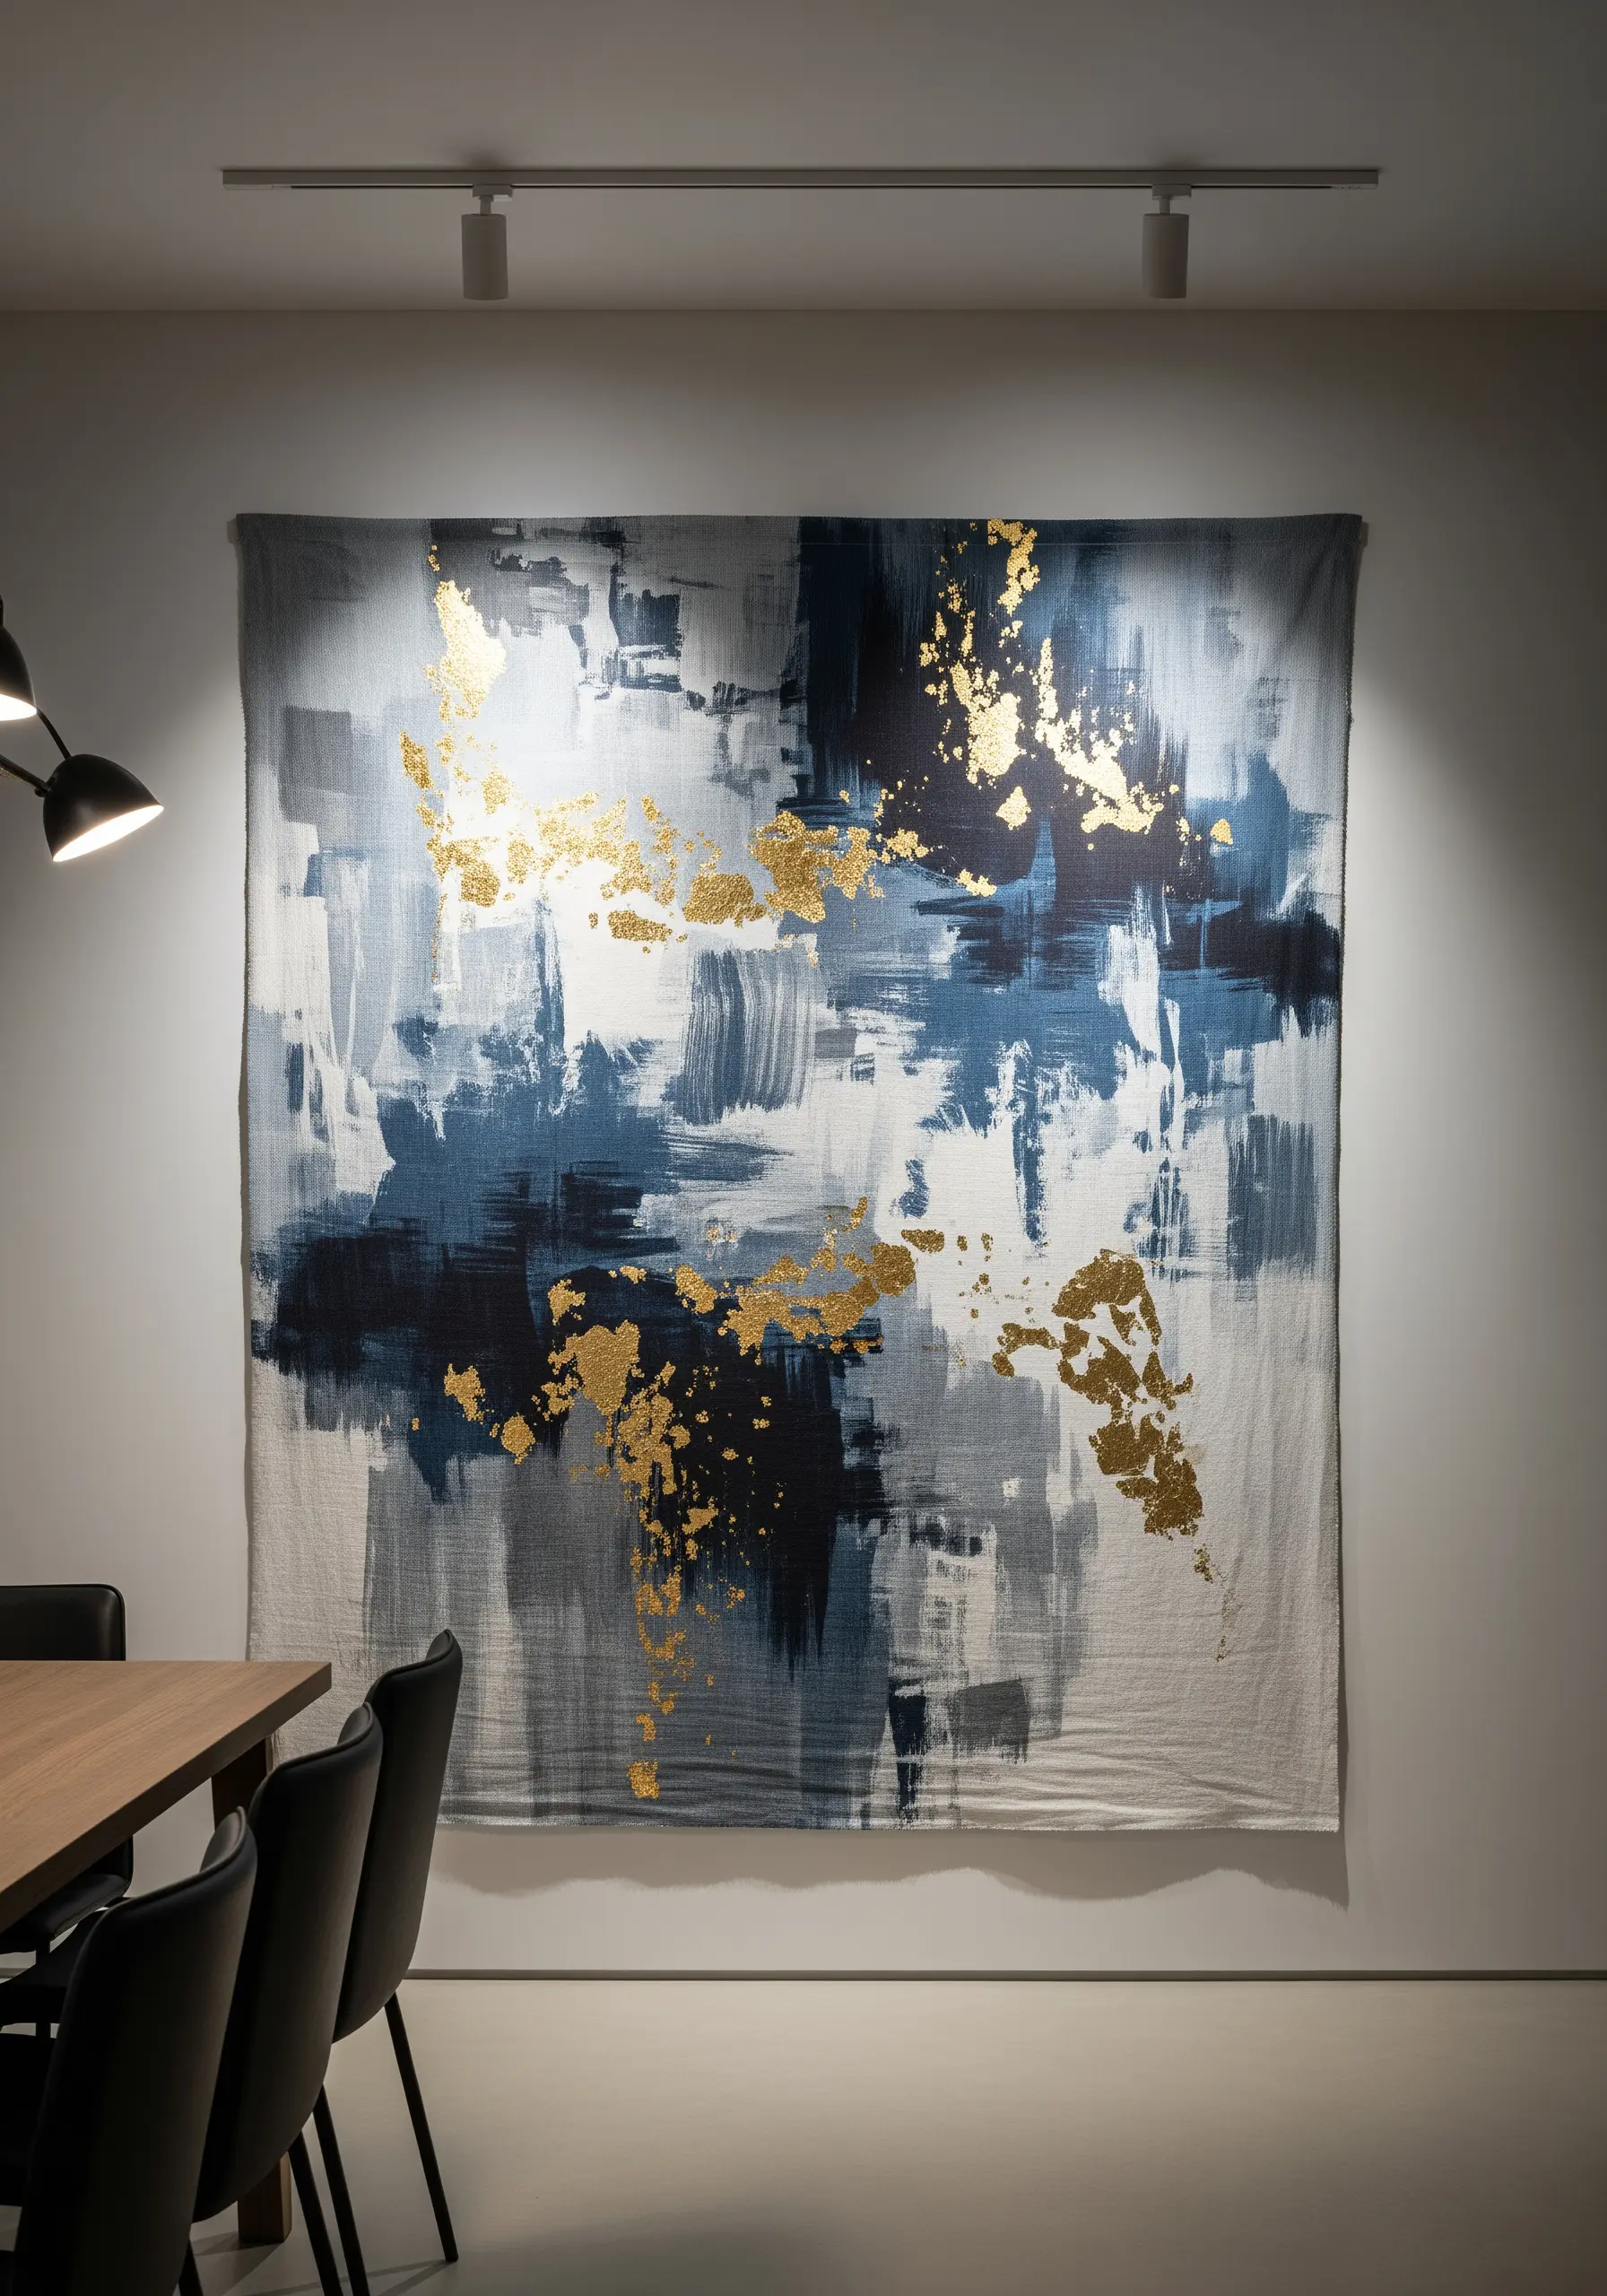
Introduce a touch of sophisticated shimmer to your fabric wall art with imitation gold leaf.
First, paint your abstract design onto the fabric using a clear adhesive sizing made for gilding.
Allow it to dry until it’s just tacky to the touch, then gently press the gold leaf sheets onto the adhesive areas.
Use a soft, dry brush to gently burnish the surface and sweep away any excess, revealing a stunning, light-catching metallic finish.


