
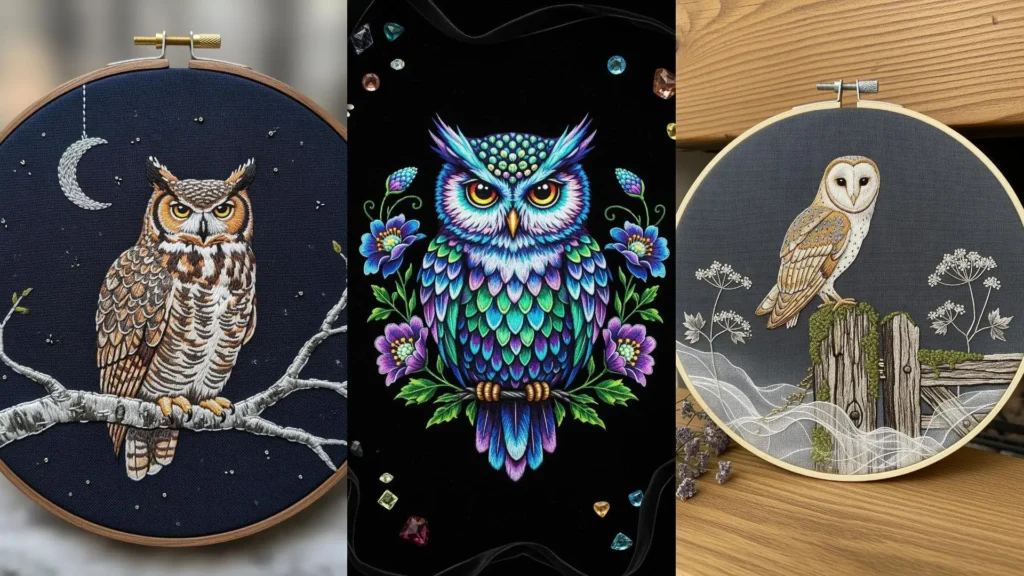
Perhaps you’ve felt it, too—that quiet moment when your needle and thread seem to hold a secret language. With owls, that language speaks of mystery, moonlight, and the deep stillness of the night.
But capturing that magic requires more than just following a pattern. It’s about choosing the right fabric to absorb the light, selecting threads that shimmer like starlight, and using stitches that build texture and shadow. It’s about turning a simple bird into a guardian of the night, stitched with intention and soul.
In these designs, you’ll discover how to use dark backgrounds to make your colors vibrate, how to blend threads for a painterly effect, and how to add just a touch of metallic floss or a tiny bead to mimic a star. Let’s explore these techniques together and bring your own nocturnal visions to life, one stitch at a time.
1. Master Realistic Feather Textures
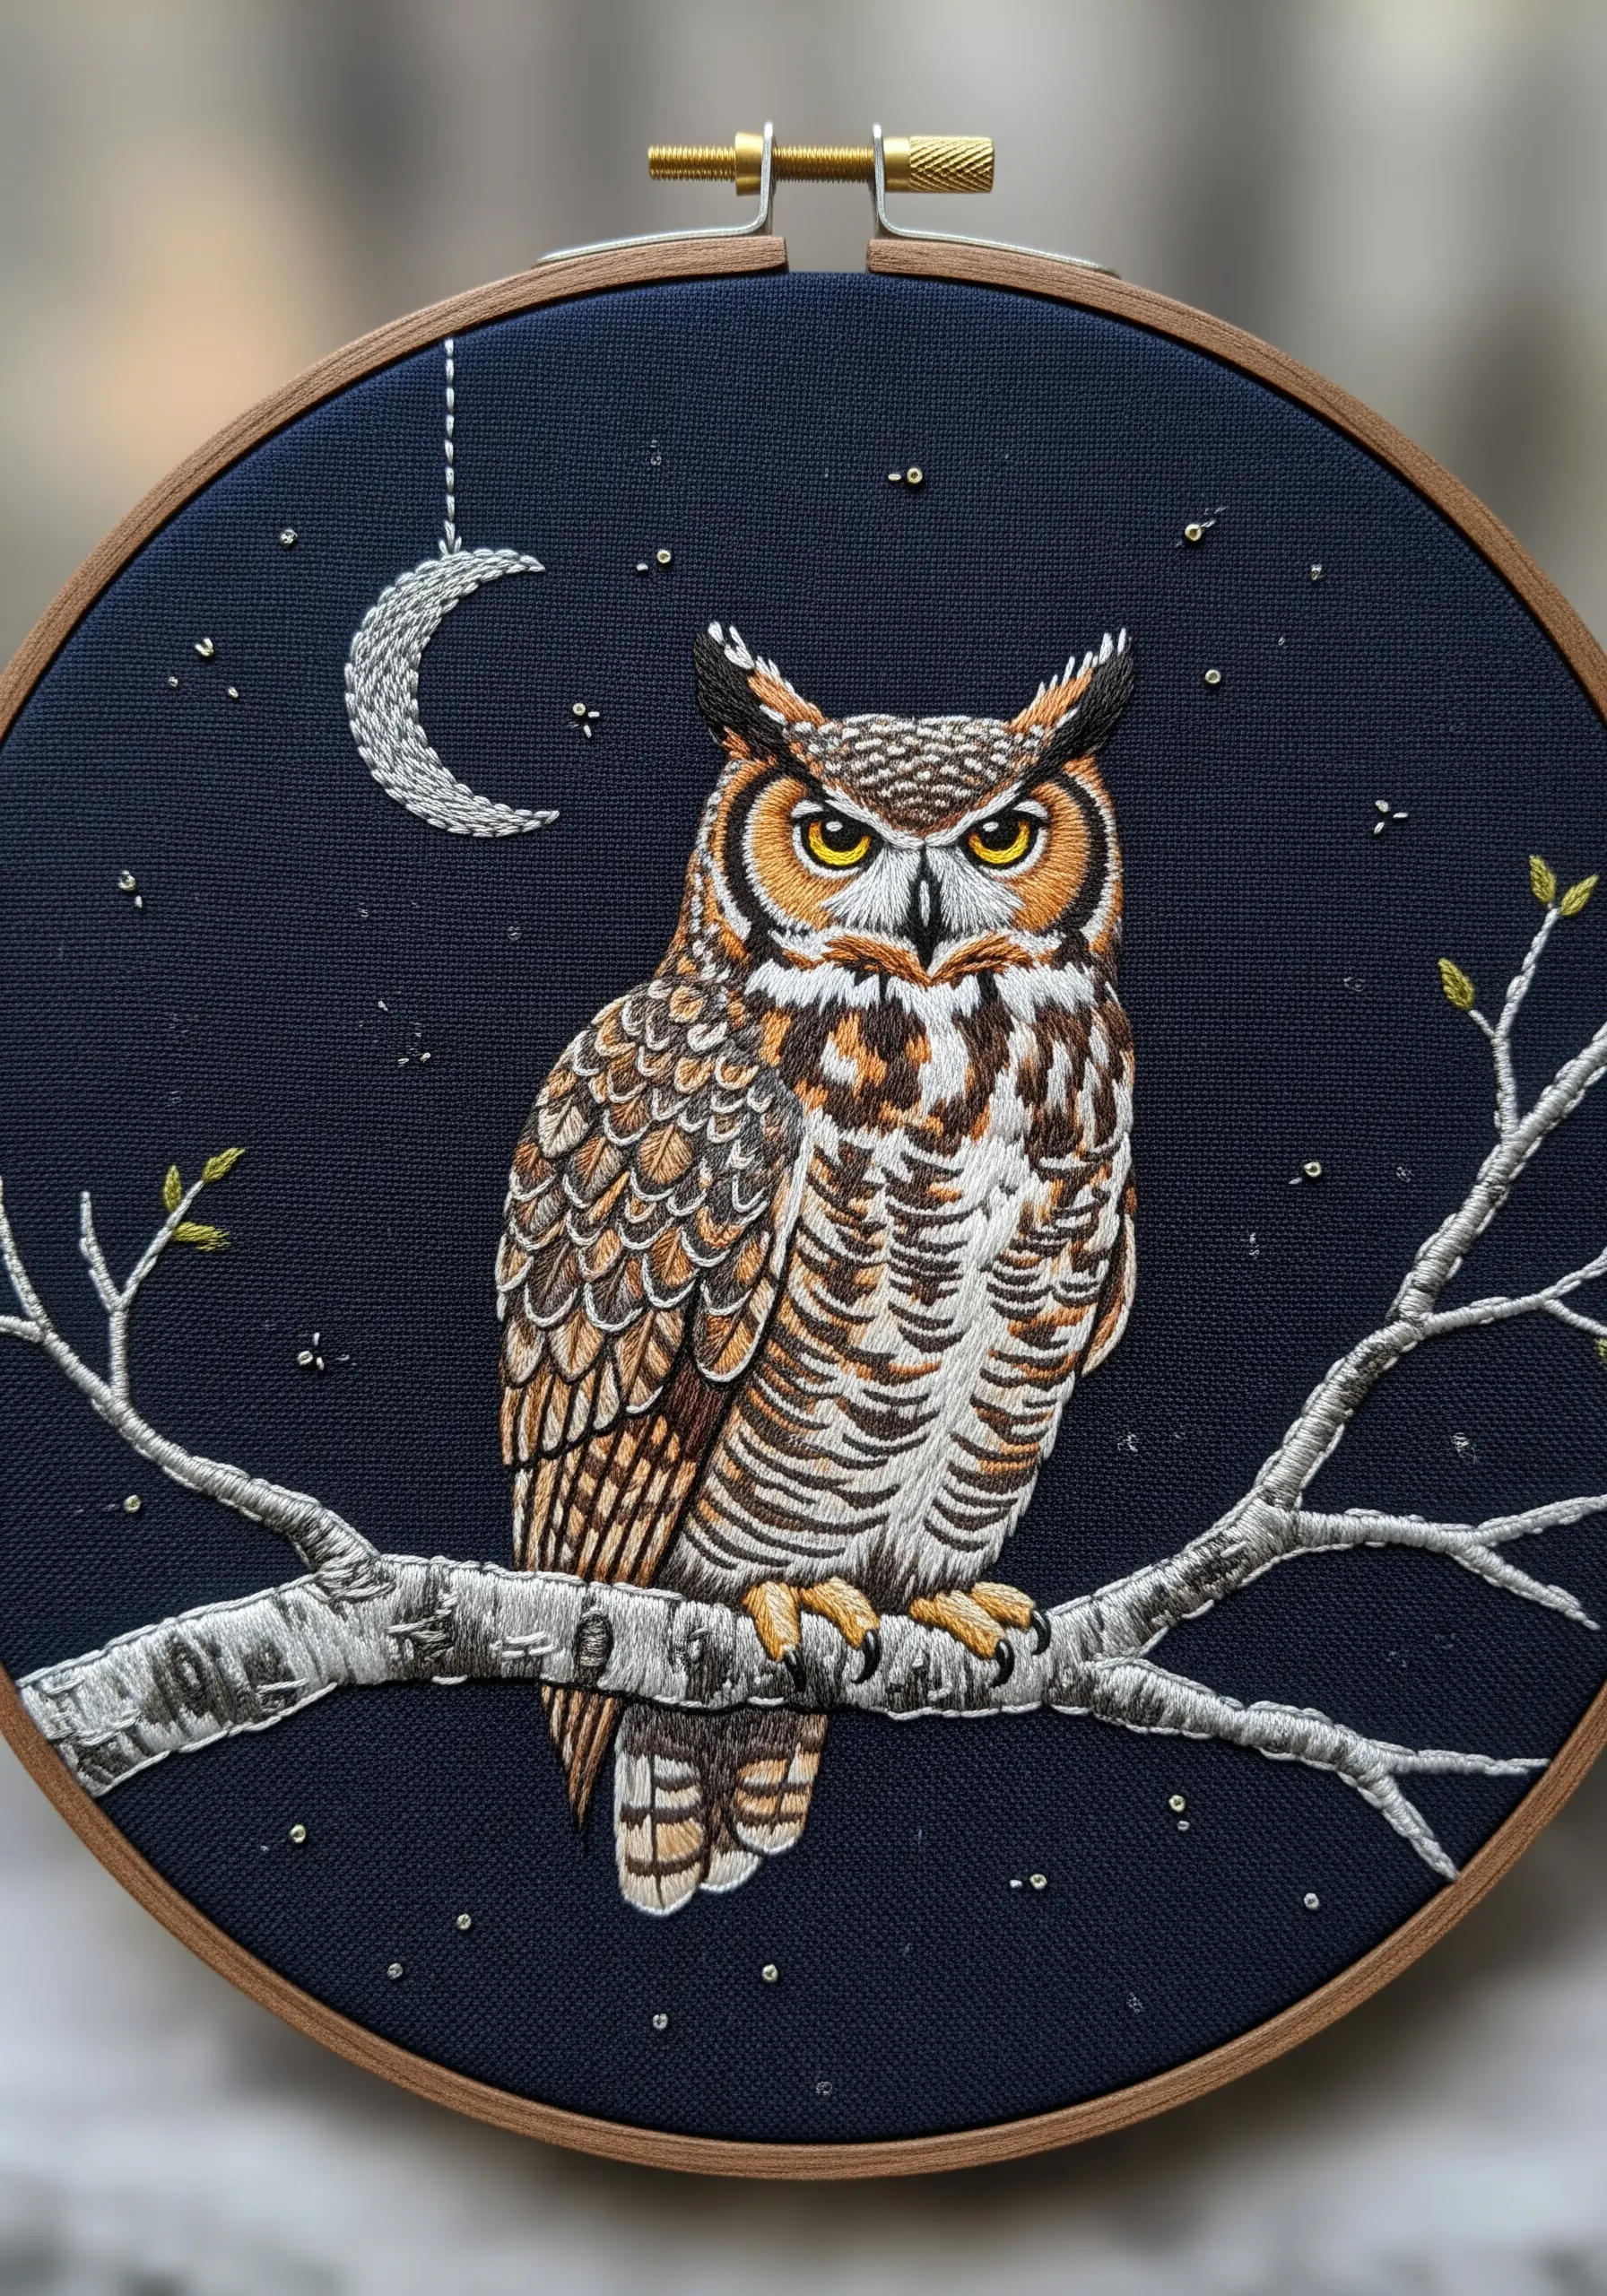
To achieve this level of realism, you must embrace thread painting with a single strand of floss.
Focus on the direction of your stitches, ensuring they mimic the natural lay of the owl’s feathers—short, downward strokes for the face and longer, overlapping stitches for the wings.
Use at least five shades of brown and three shades of cream to create seamless gradients.
For the branch, wrap your thread around a foundation of straight stitches to build a gnarled, realistic bark texture.
A few strategically placed seed beads or French knots in metallic thread will make the night sky feel alive without distracting from your subject.
2. Introduce Ethereal Shine with Sequins
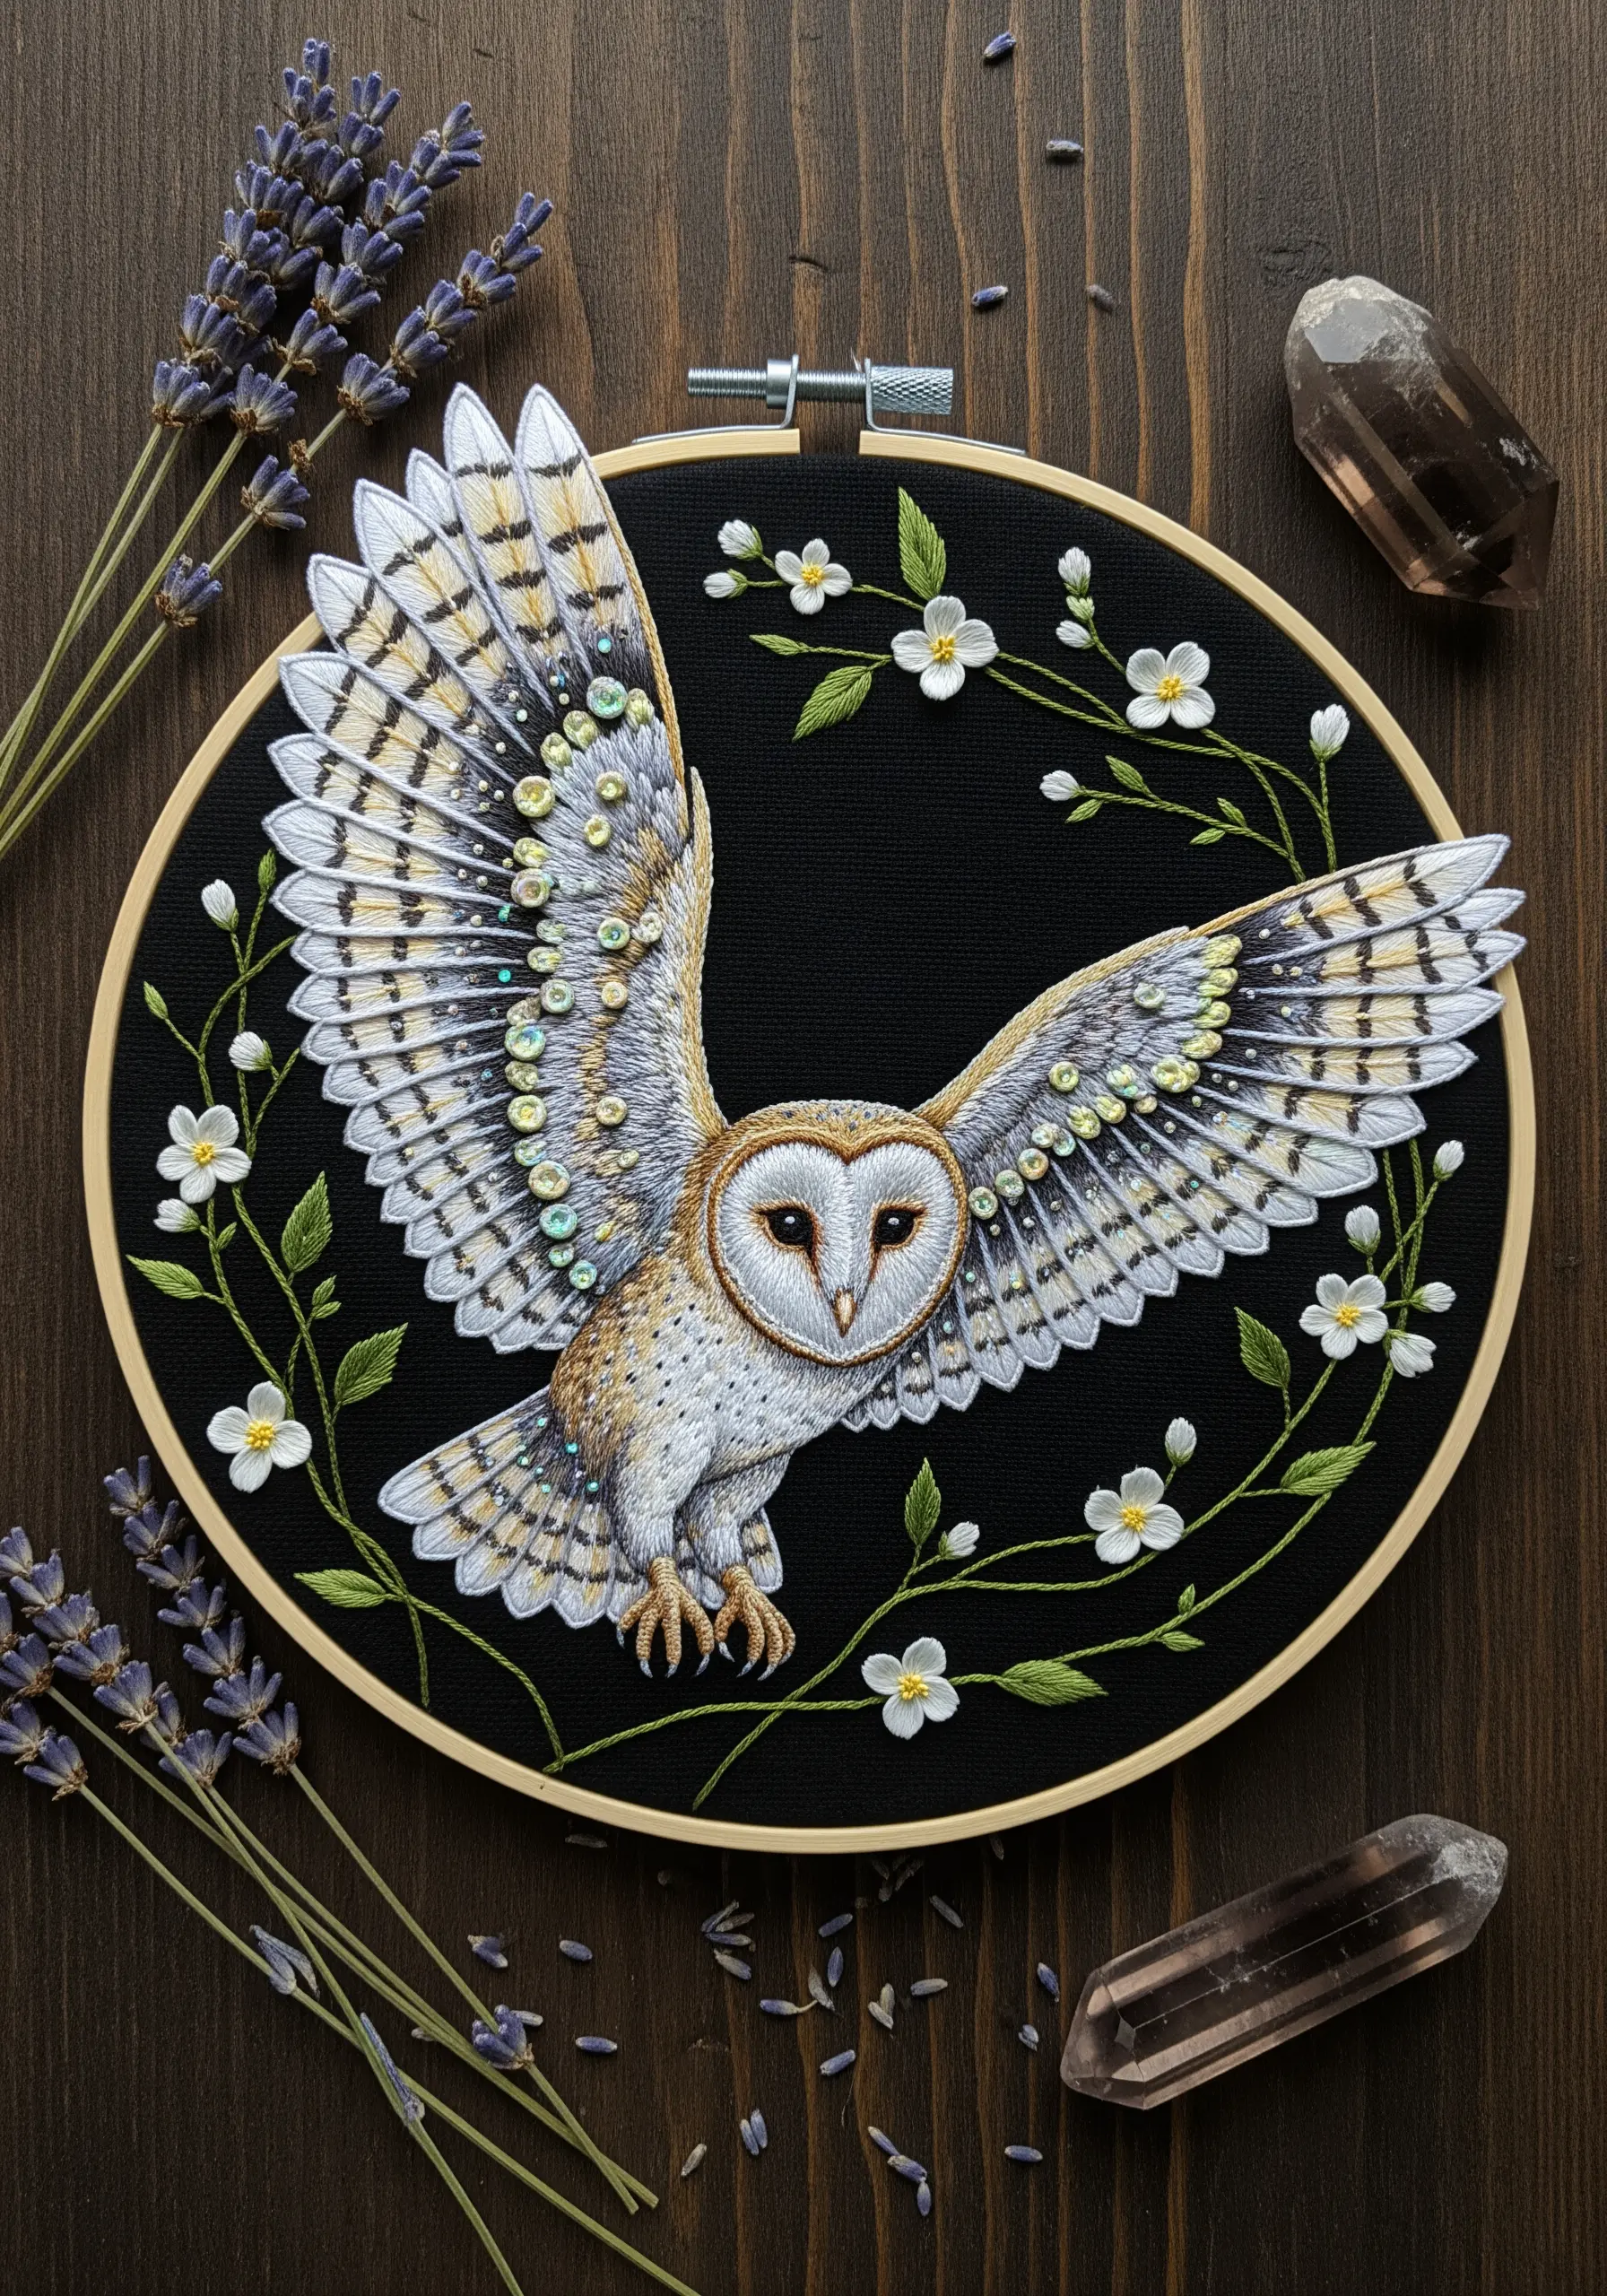
Elevate your design by incorporating sequins into the owl’s wings for a touch of magical shimmer.
To apply them, bring your needle up through the fabric, thread a sequin and a tiny seed bead, then go back down through the sequin hole. The bead acts as a secure and elegant anchor.
Contrast the iridescent sparkle with soft, matte textures in the surrounding foliage, using simple lazy daisy stitches for petals and stem stitch for vines.
This juxtaposition of textures is what gives the piece its dynamic, otherworldly quality.
3. Create Depth with Padded Satin Stitch
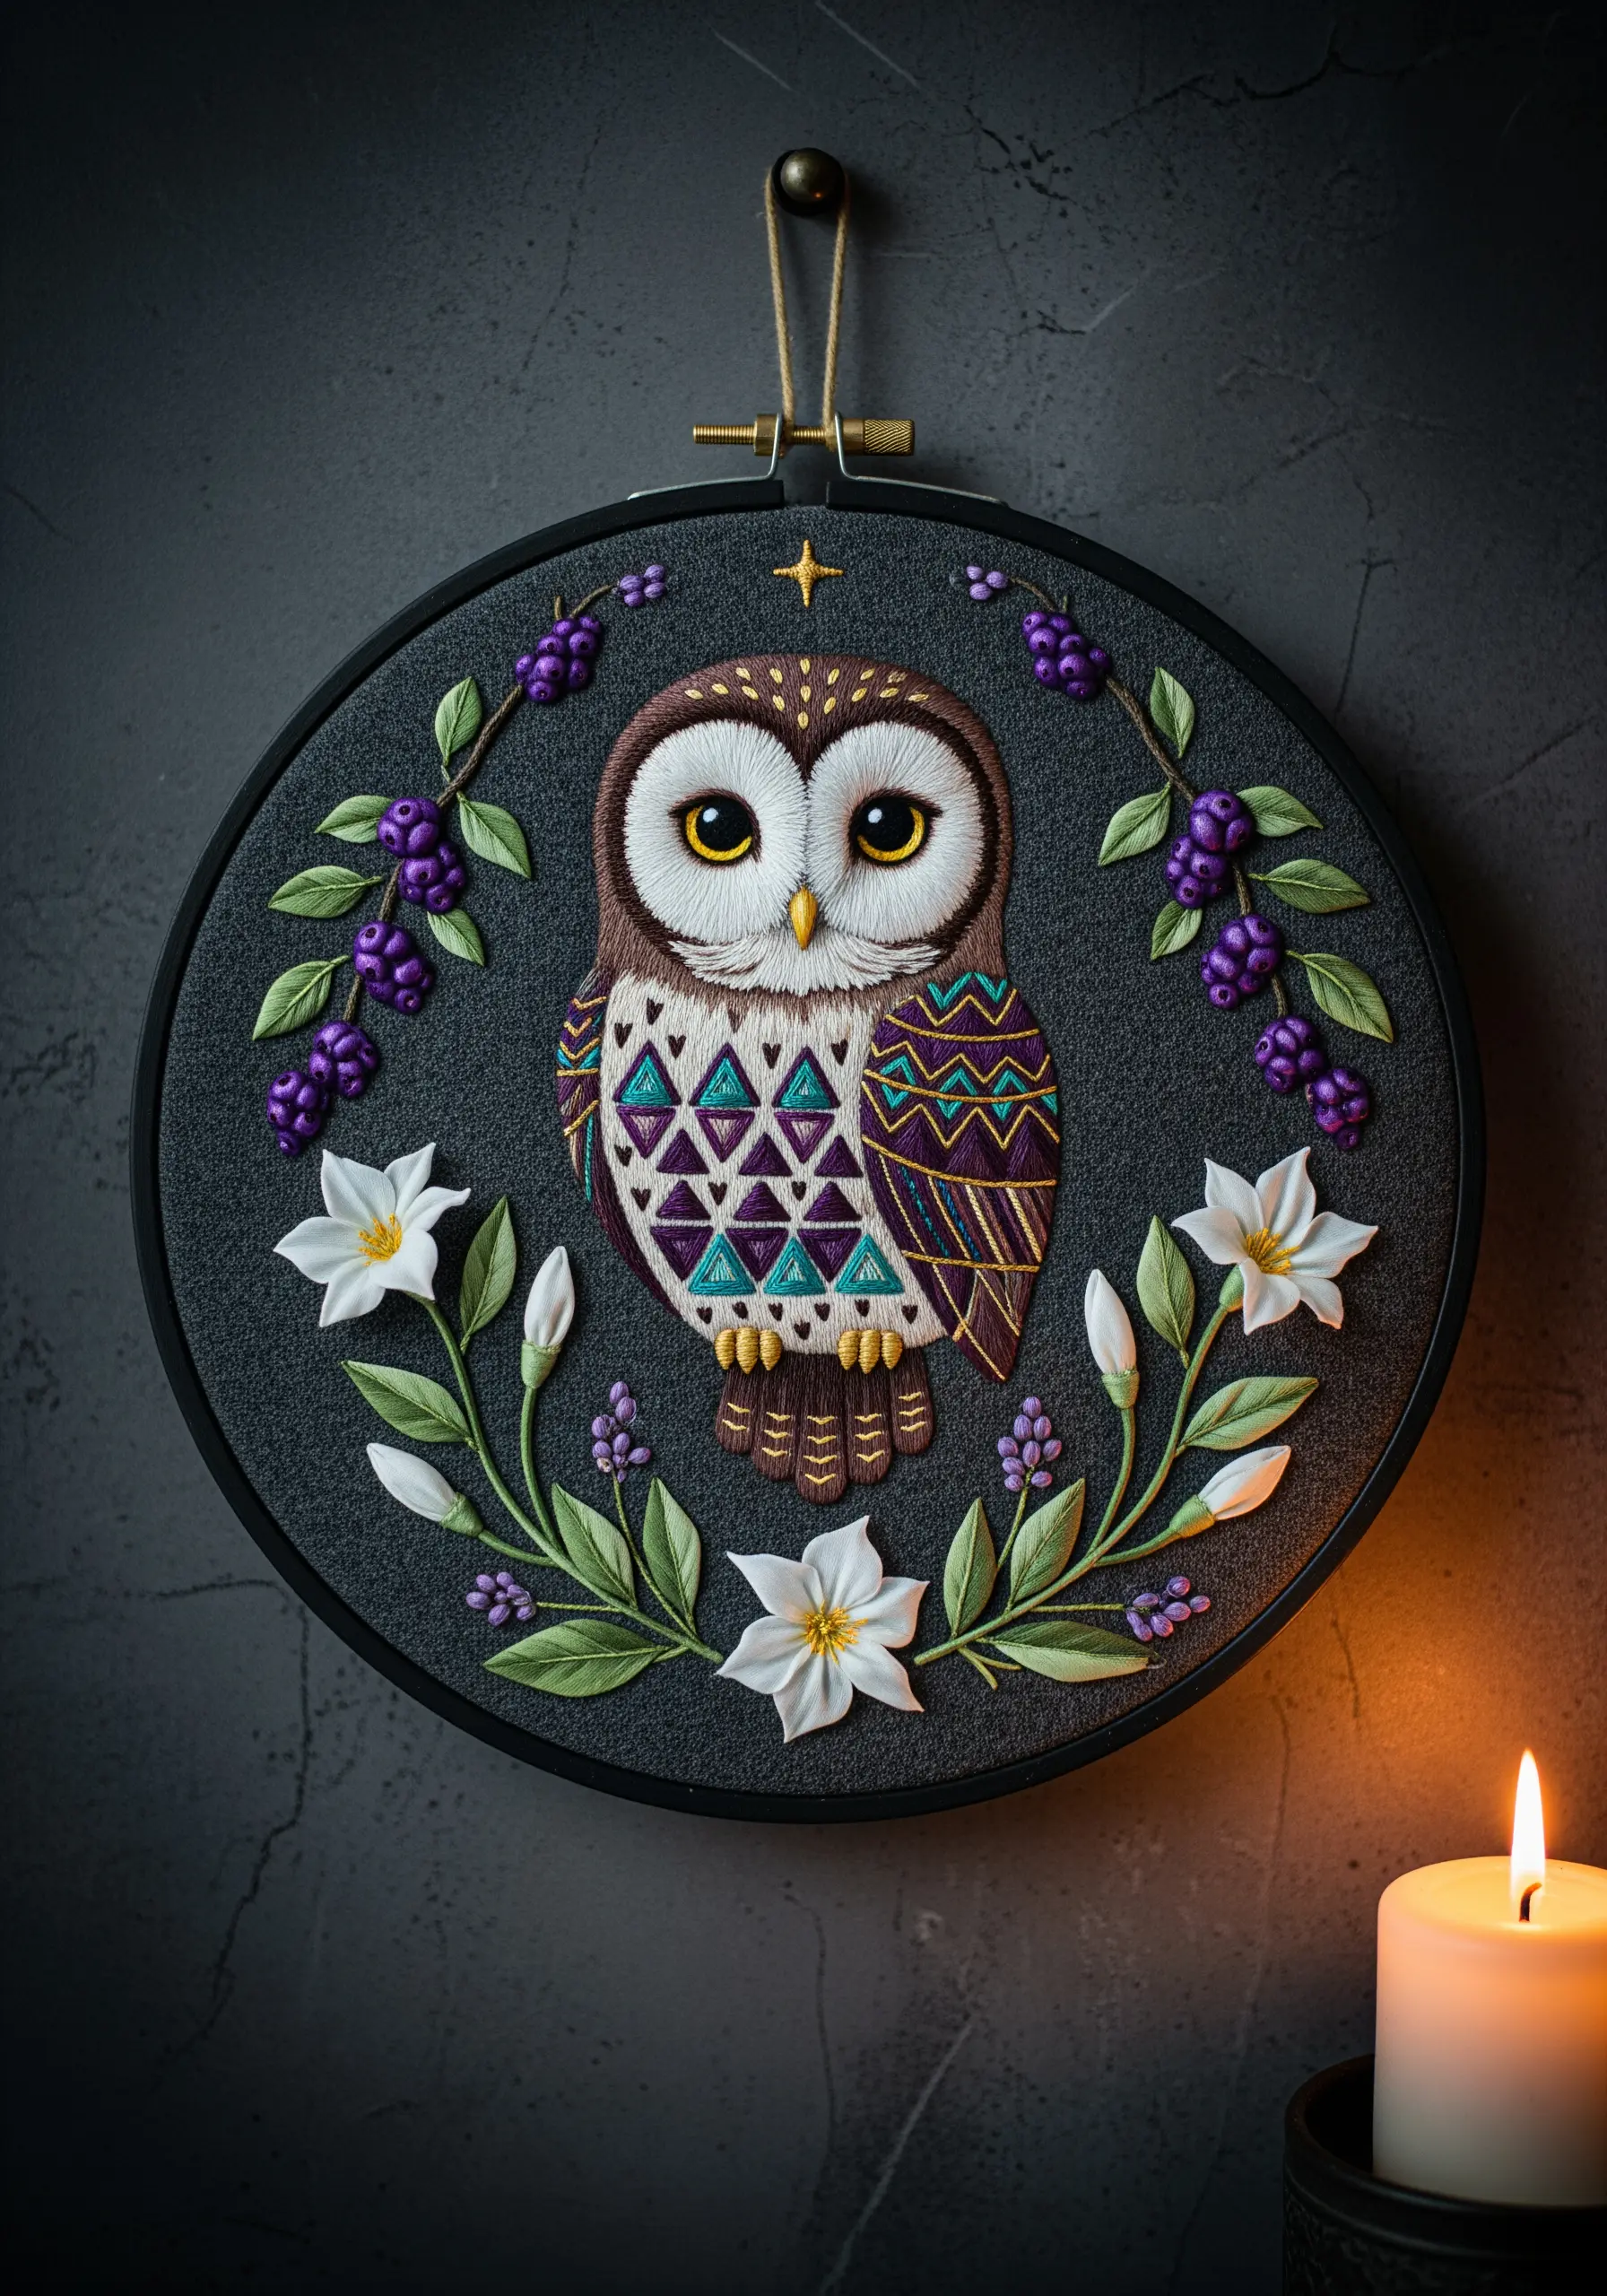
For a sculptural, three-dimensional effect, build up areas with a foundation of small running stitches before covering them with satin stitch.
This technique, known as padded satin stitch, will make the floral and berry elements physically lift from the fabric, creating captivating shadows.
Use this for the white flowers and purple berries to make them the focal point.
For the geometric patterns on the owl’s chest, maintain perfect tension and use a laying tool (or a large tapestry needle) to ensure every thread lies flat and smooth.
4. Fill Negative Space with Tactile French Knots
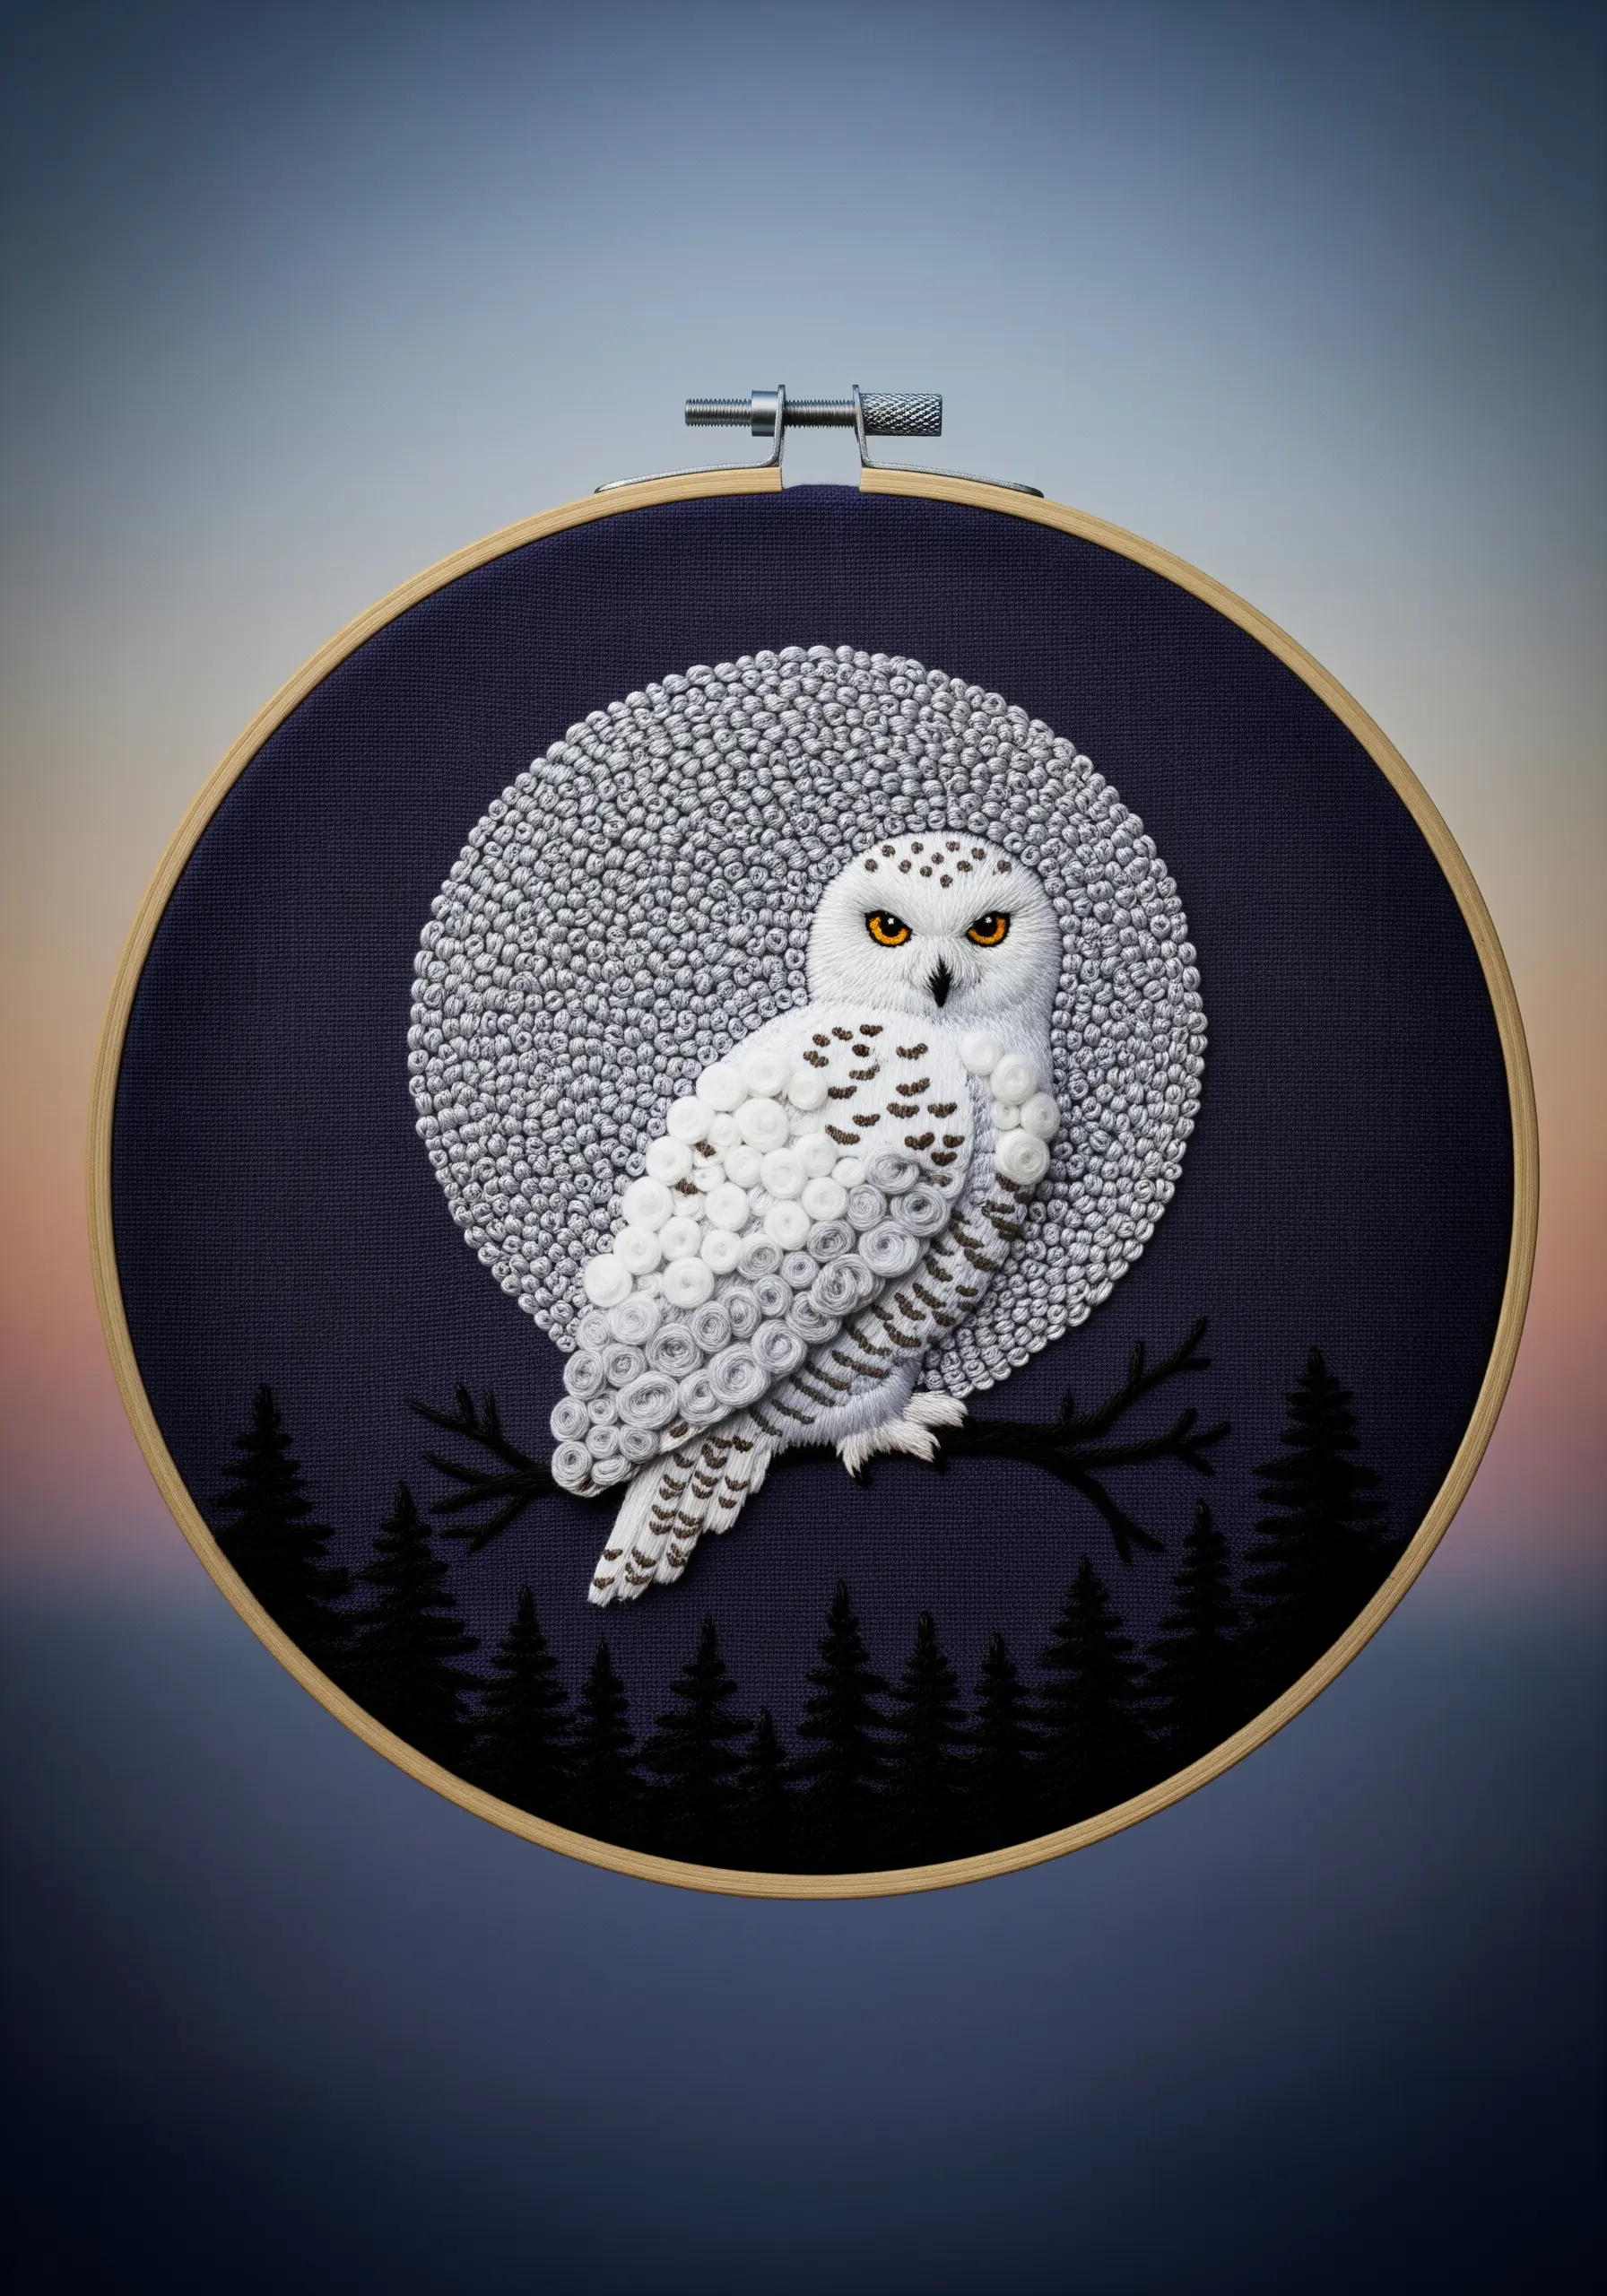
Transform a simple moon background into a stunning textural element by filling it entirely with French knots.
Vary the number of wraps around your needle (one, two, or three) to create knots of different sizes, giving the surface a rich, bumpy texture that mimics the lunar surface.
Use a slightly off-white or light grey thread for the moon to create a soft contrast against the stark white of the snowy owl.
This heavy texture makes the smooth, softly blended stitches of the owl’s body appear even more delicate and refined.
5. Stitch Expressive, Soulful Eyes
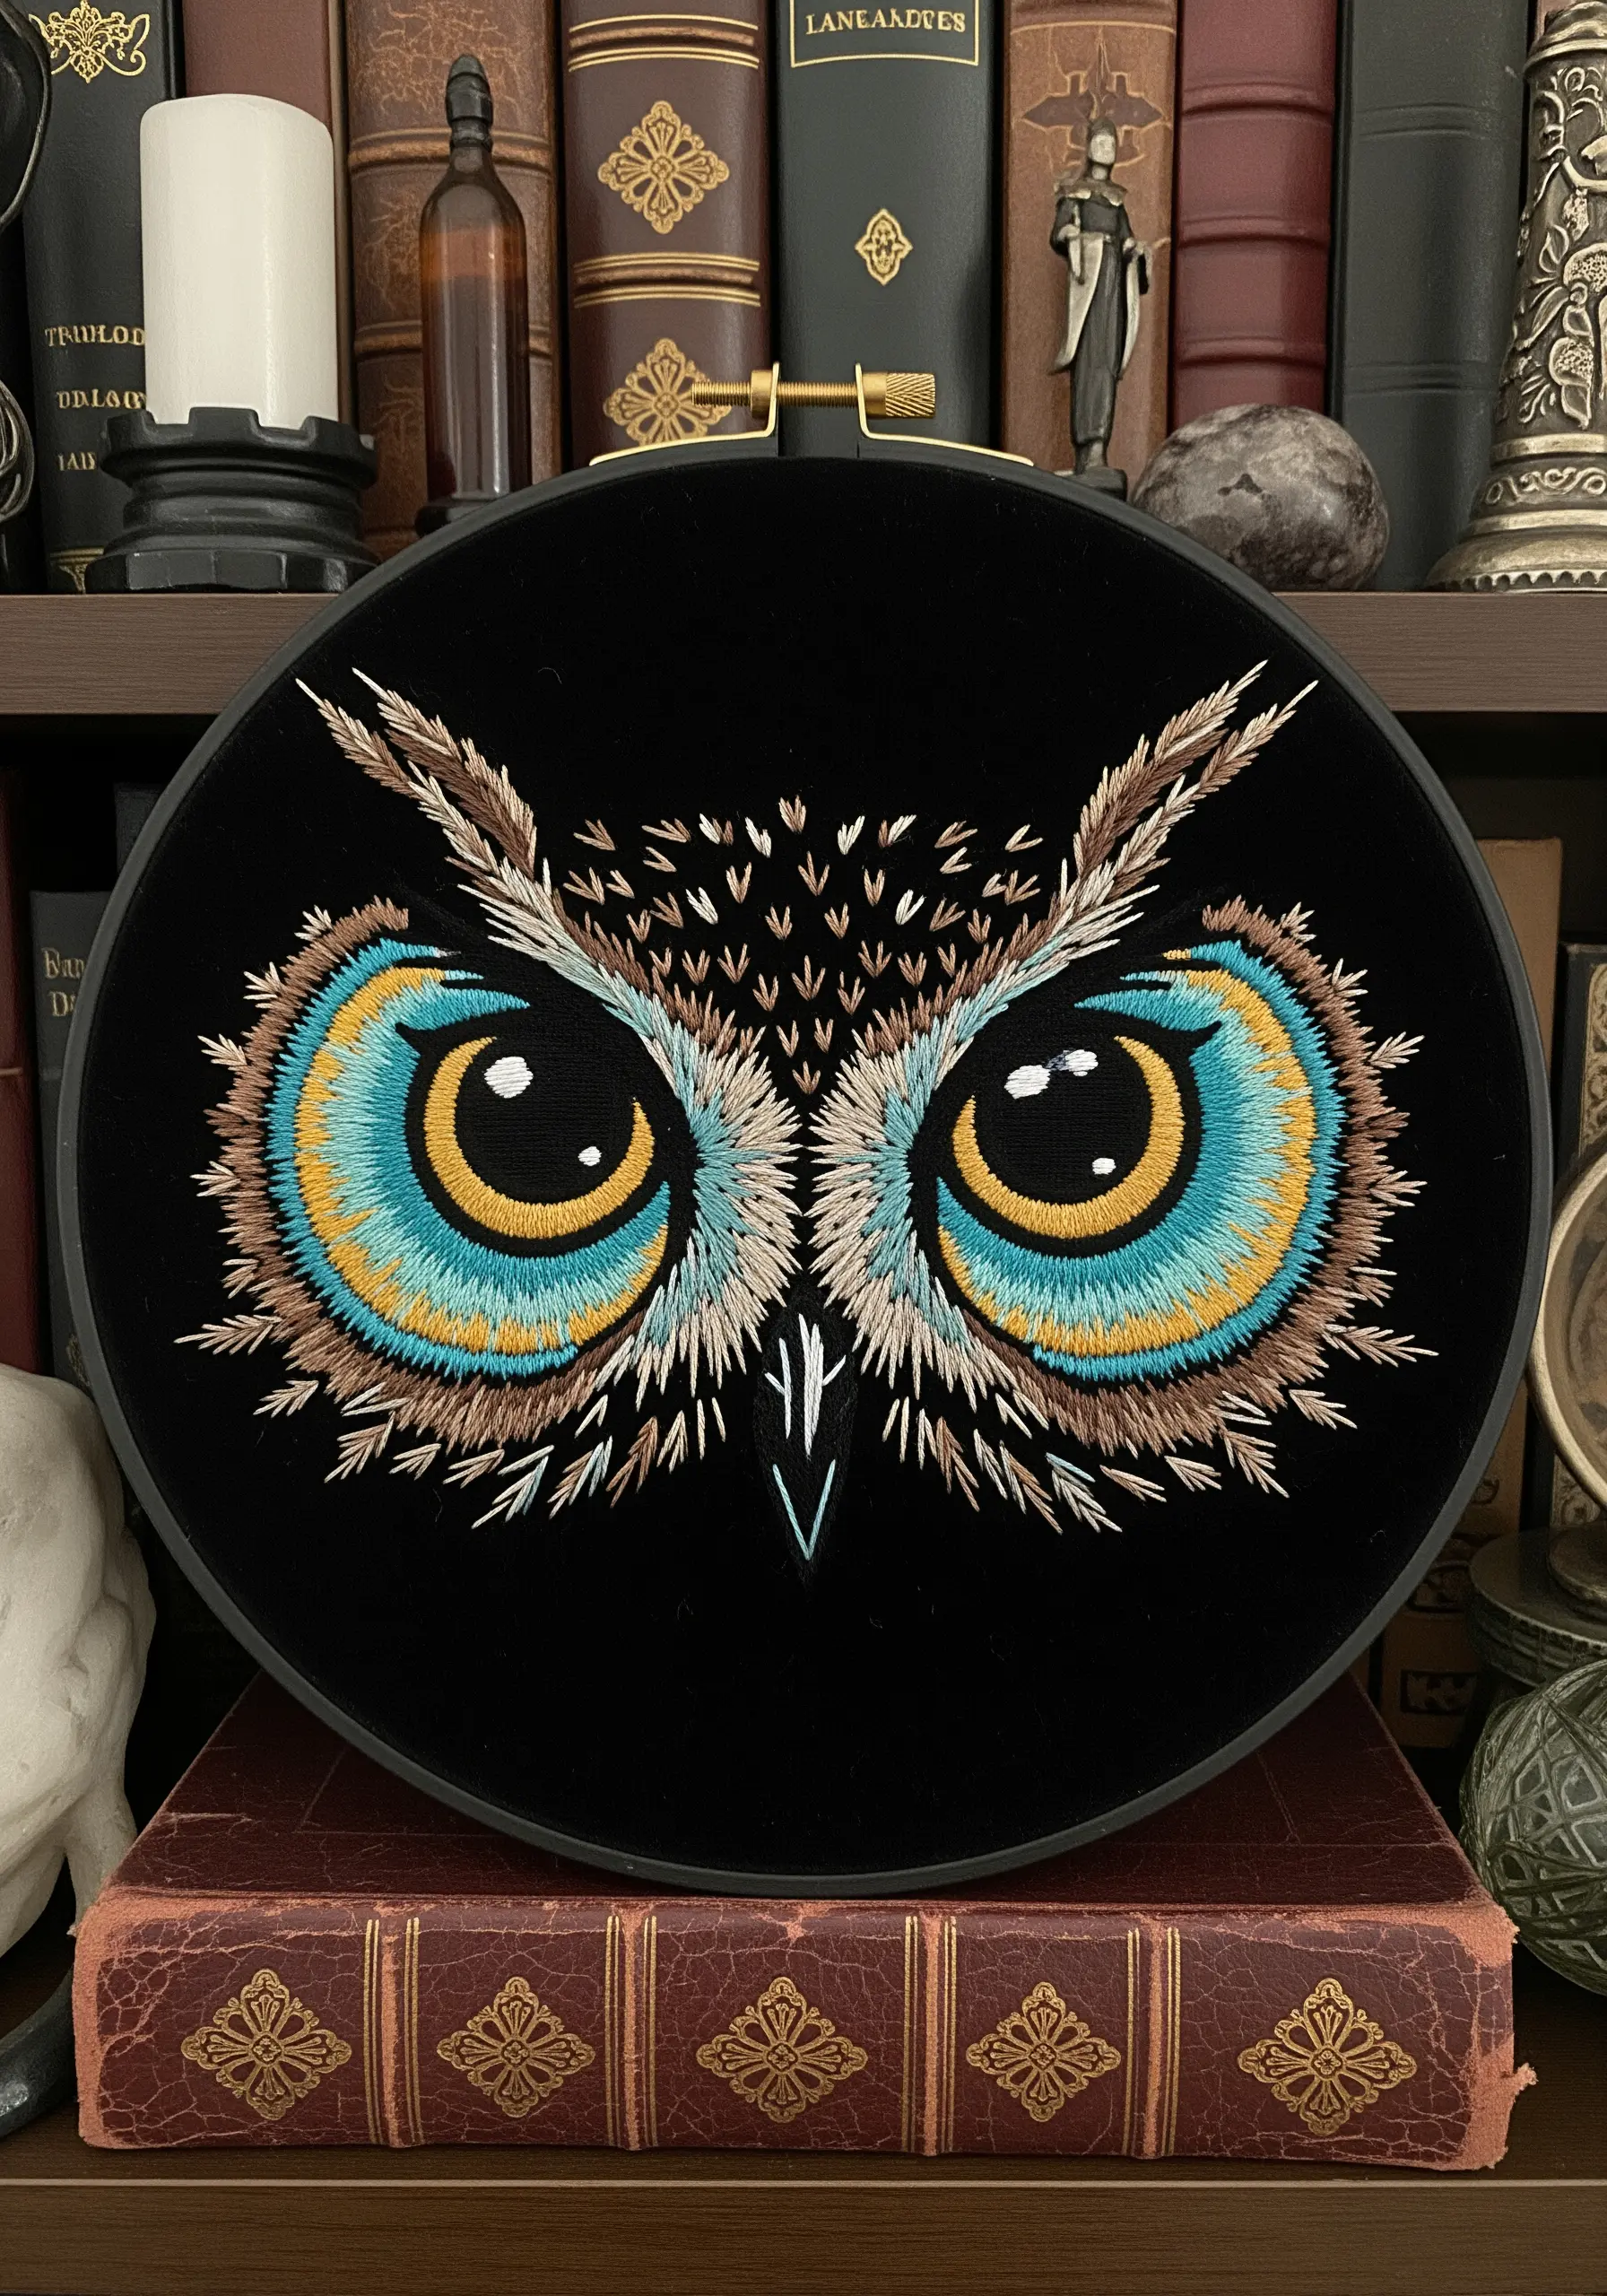
The key to captivating owl eyes is layering concentric circles of color with satin stitch.
Start with the outer ring and work your way inward, slightly overlapping each new color to create a smooth gradient.
Use a high-contrast black for the pupil and finish with a single, tiny white stitch—a catchlight—to instantly bring the eyes to life.
Frame the eyes with short, feathered stitches (like small straight stitches or fly stitches) radiating outward to create the look of fine, downy feathers.
6. Add a Hidden Glow with Specialty Threads
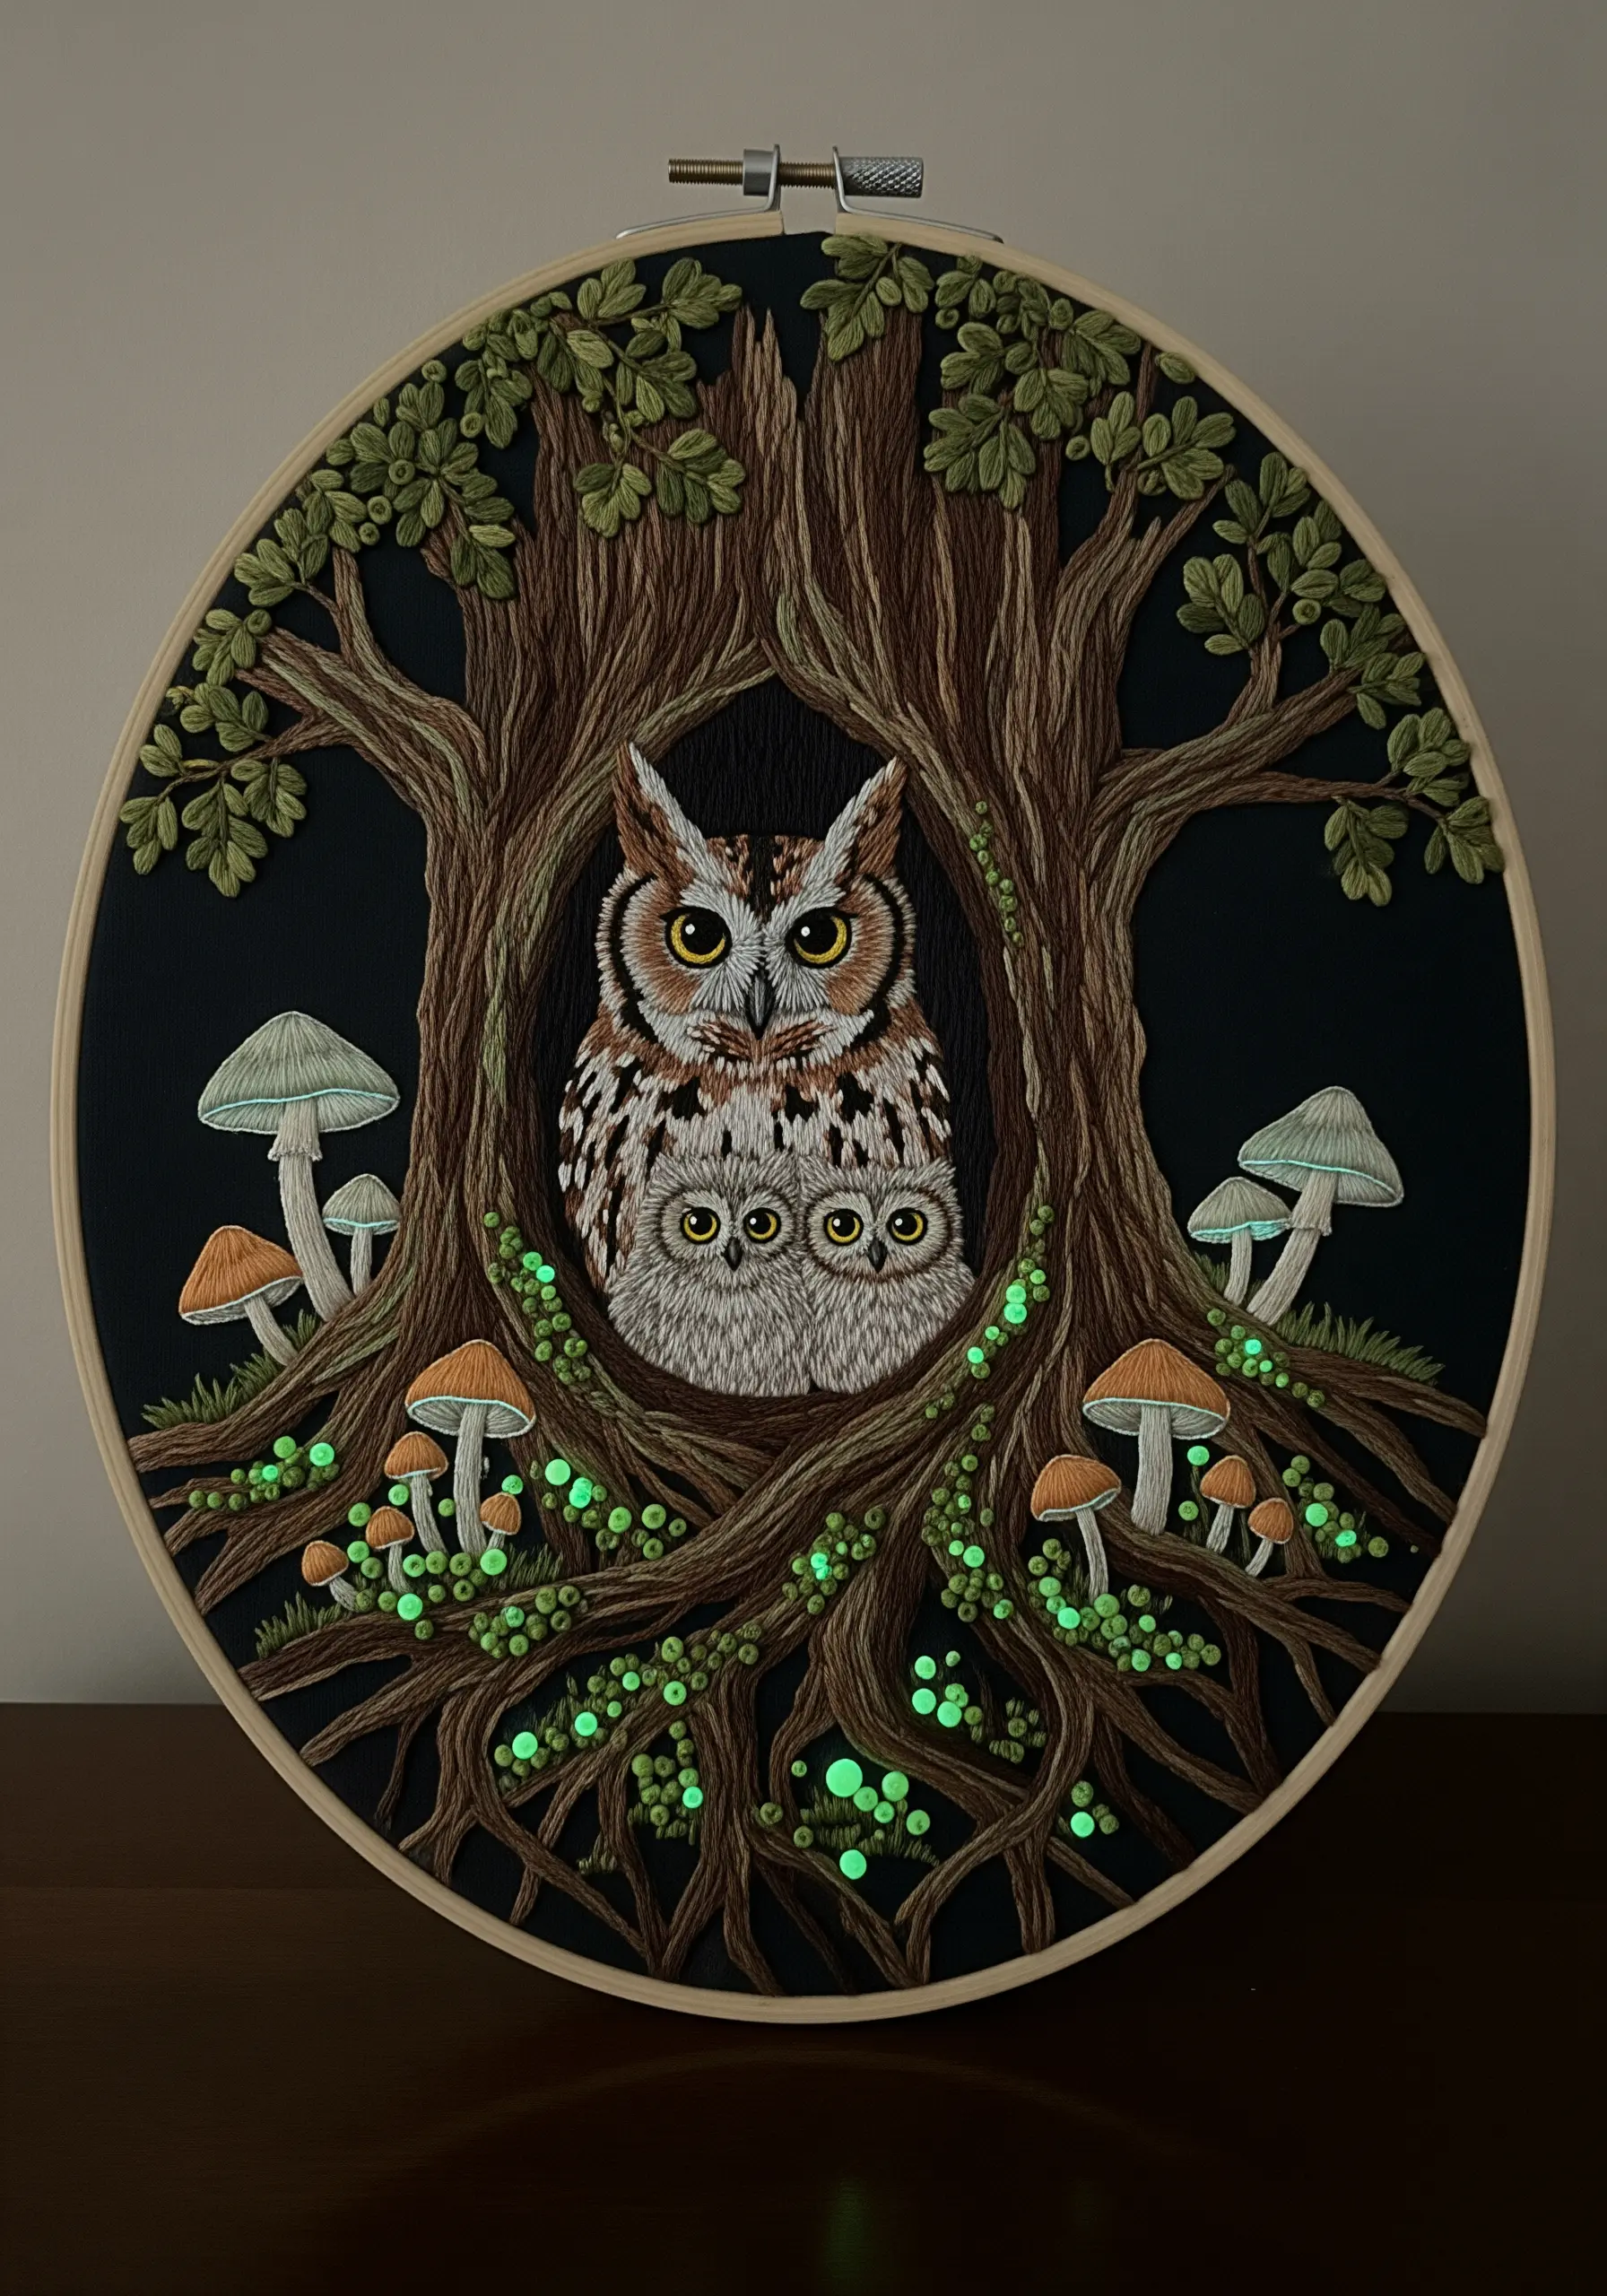
Incorporate glow-in-the-dark thread to add a layer of mystery that only reveals itself in darkness.
Use it for subtle accents like the glowing mushrooms or bioluminescent moss, stitched as French knots or seed stitches.
When working with this type of thread, use shorter lengths (no more than 12 inches) to prevent fraying and tangling, as it can be more delicate than standard cotton floss.
This technique is especially magical for nursery decor or art pieces in dimly lit rooms.
7. Weave a Story with Celestial Line Art
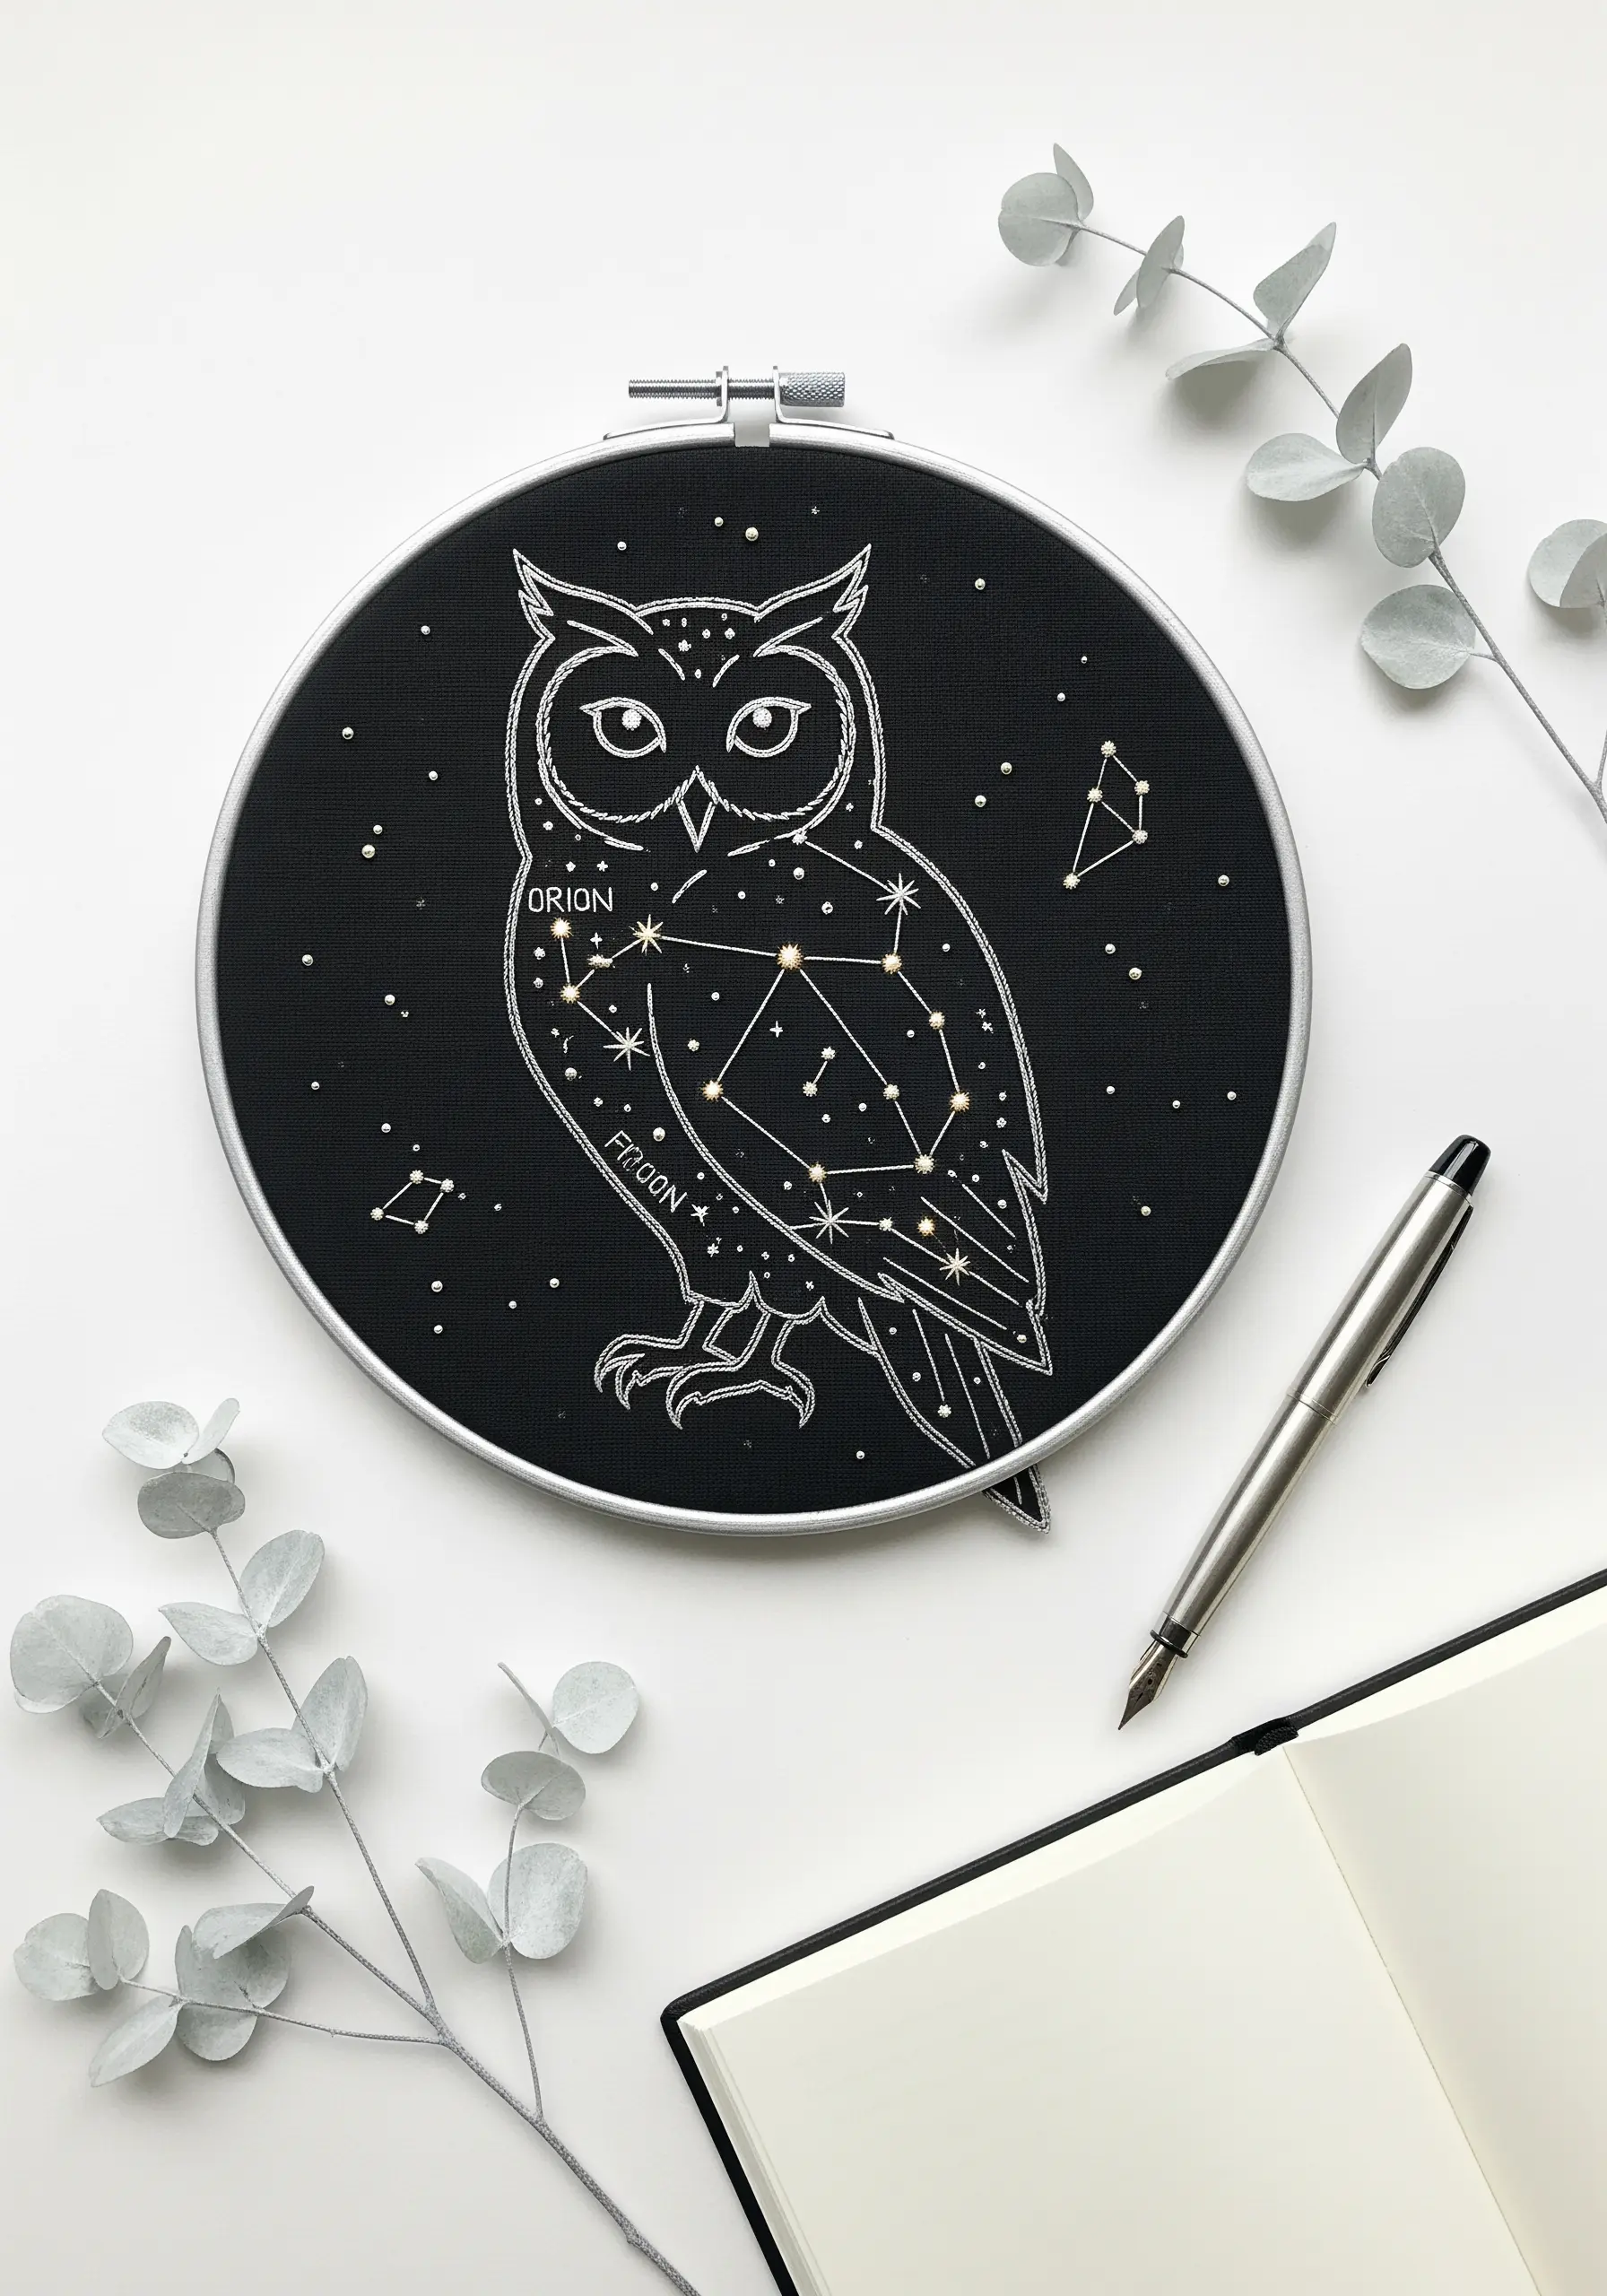
Combine scientific accuracy with artistic flair by mapping a real constellation onto the owl’s form.
Use a crisp backstitch or stem stitch for the outline of the owl, keeping your lines clean and consistent.
For the stars, use single French knots or tiny star stitches, varying their size slightly to represent different magnitudes.
Connect them with a single strand of thread to form the constellation lines. This minimalist approach proves that you don’t need complex fills to create a powerful design.
8. Emphasize Scale in Your Composition
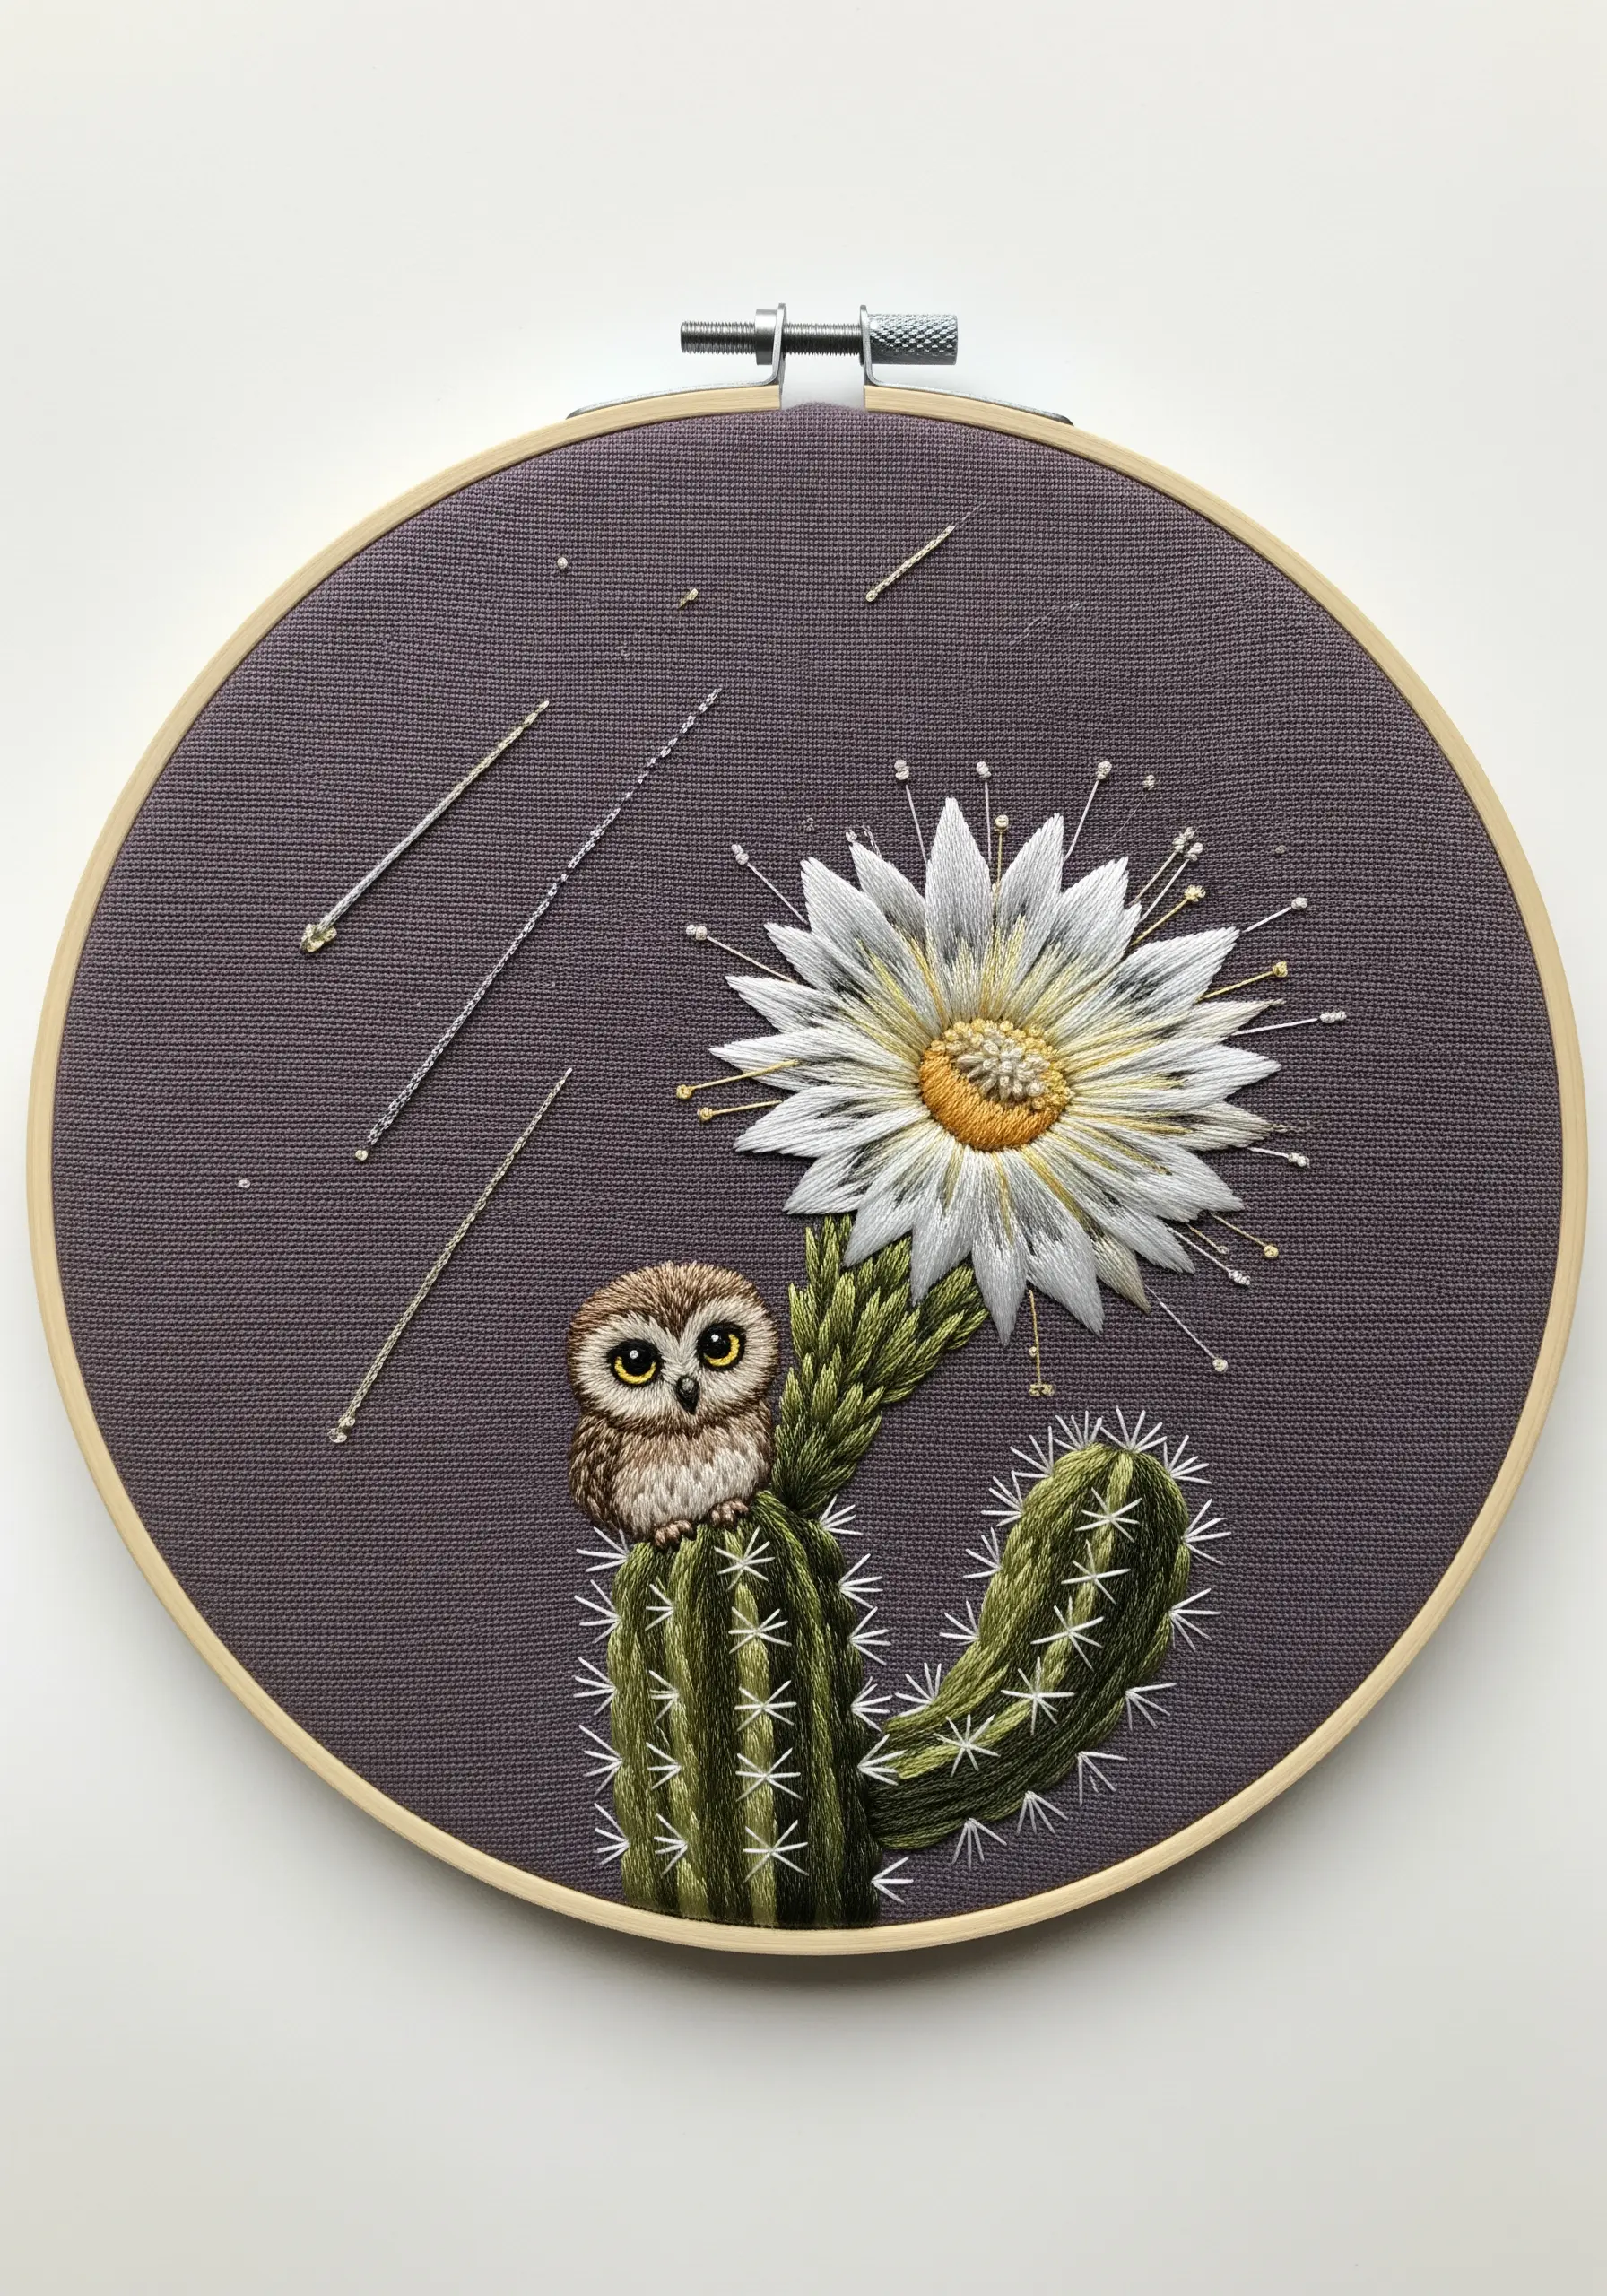
Create a dynamic composition by contrasting a tiny, intricately detailed subject with a much larger element.
Here, the miniature thread-painted owl feels precious and protected by the massive, blooming cactus.
For the cactus flower, use long-and-short stitch in whites and pale yellows to achieve a soft, petal-like gradient.
A few shooting stars made from metallic thread add a sense of wonder and balance the composition without overwhelming the tiny protagonist.
9. Master Monochrome Thread Painting
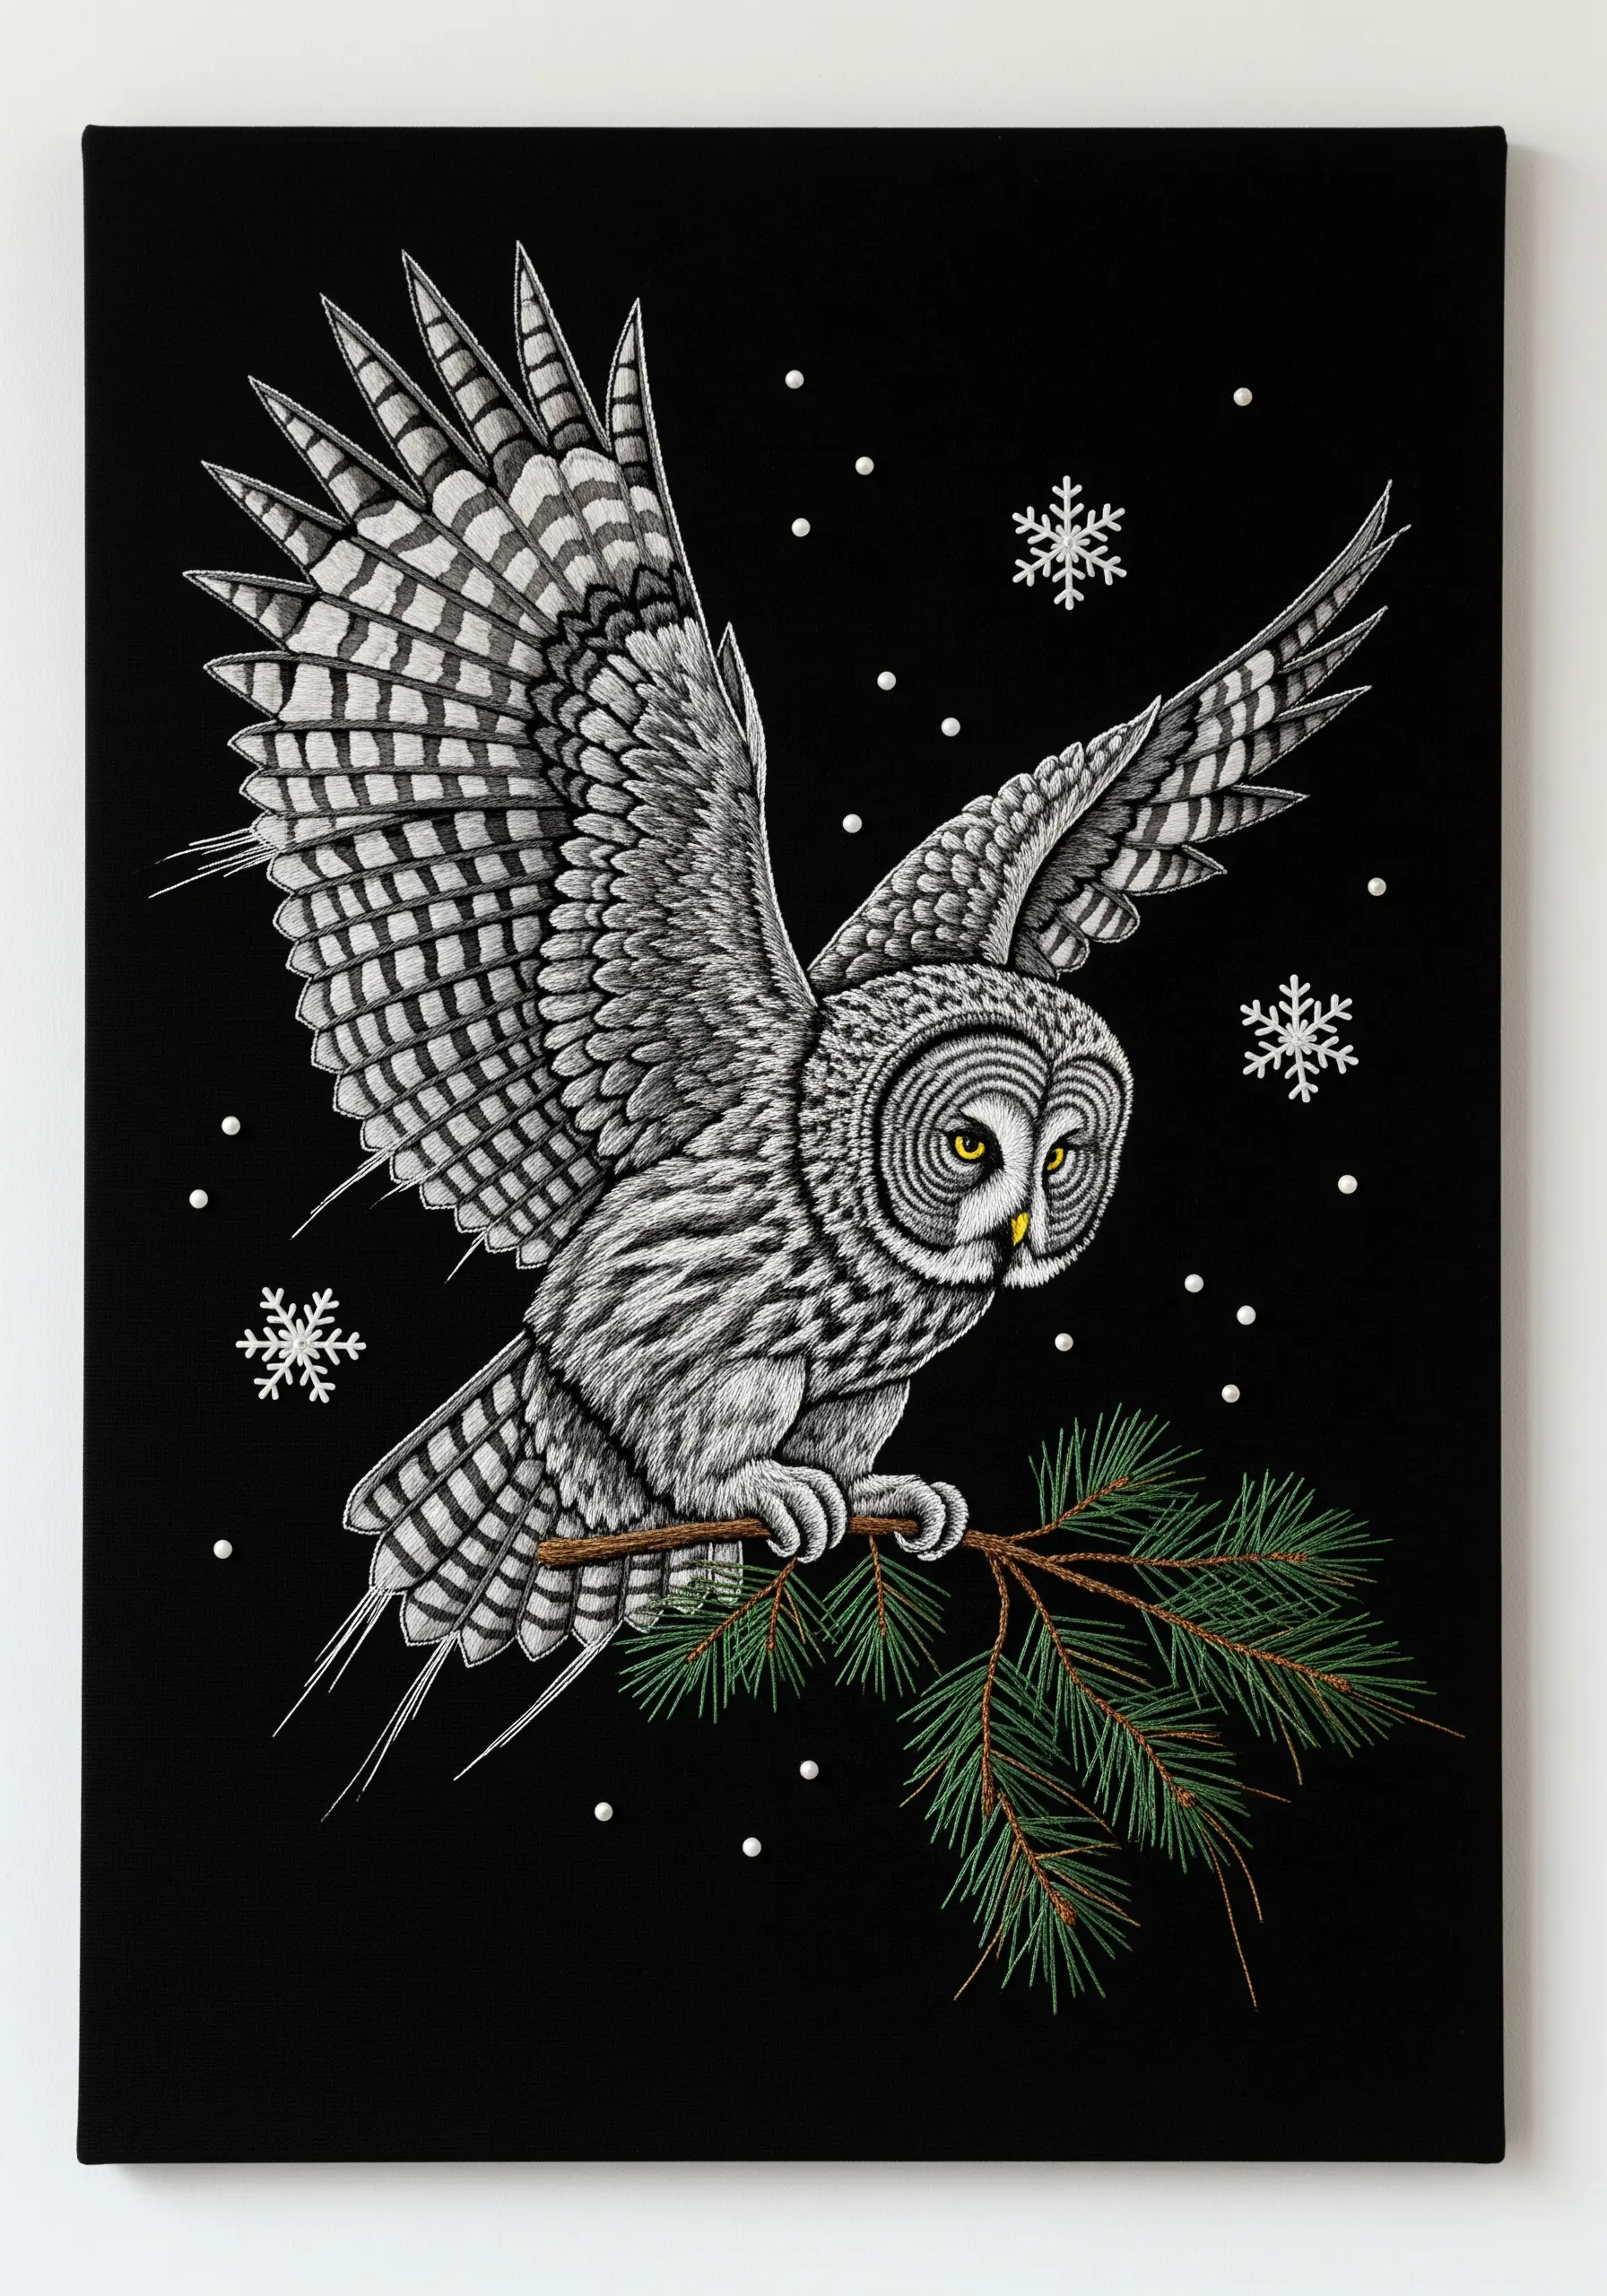
Challenge yourself by creating a complex design using only shades of grey, black, and white.
The absence of color forces you to focus on light, shadow, and texture to build form.
Use the darkest grey for shadows under the wings and the lightest grey or white for highlights where light would hit the feathers.
Varying your stitch length and direction is crucial here; it’s what differentiates one set of feathers from another. This approach creates a dramatic, almost sculptural effect.
10. Embellish a Journal with Lunar Symbolism
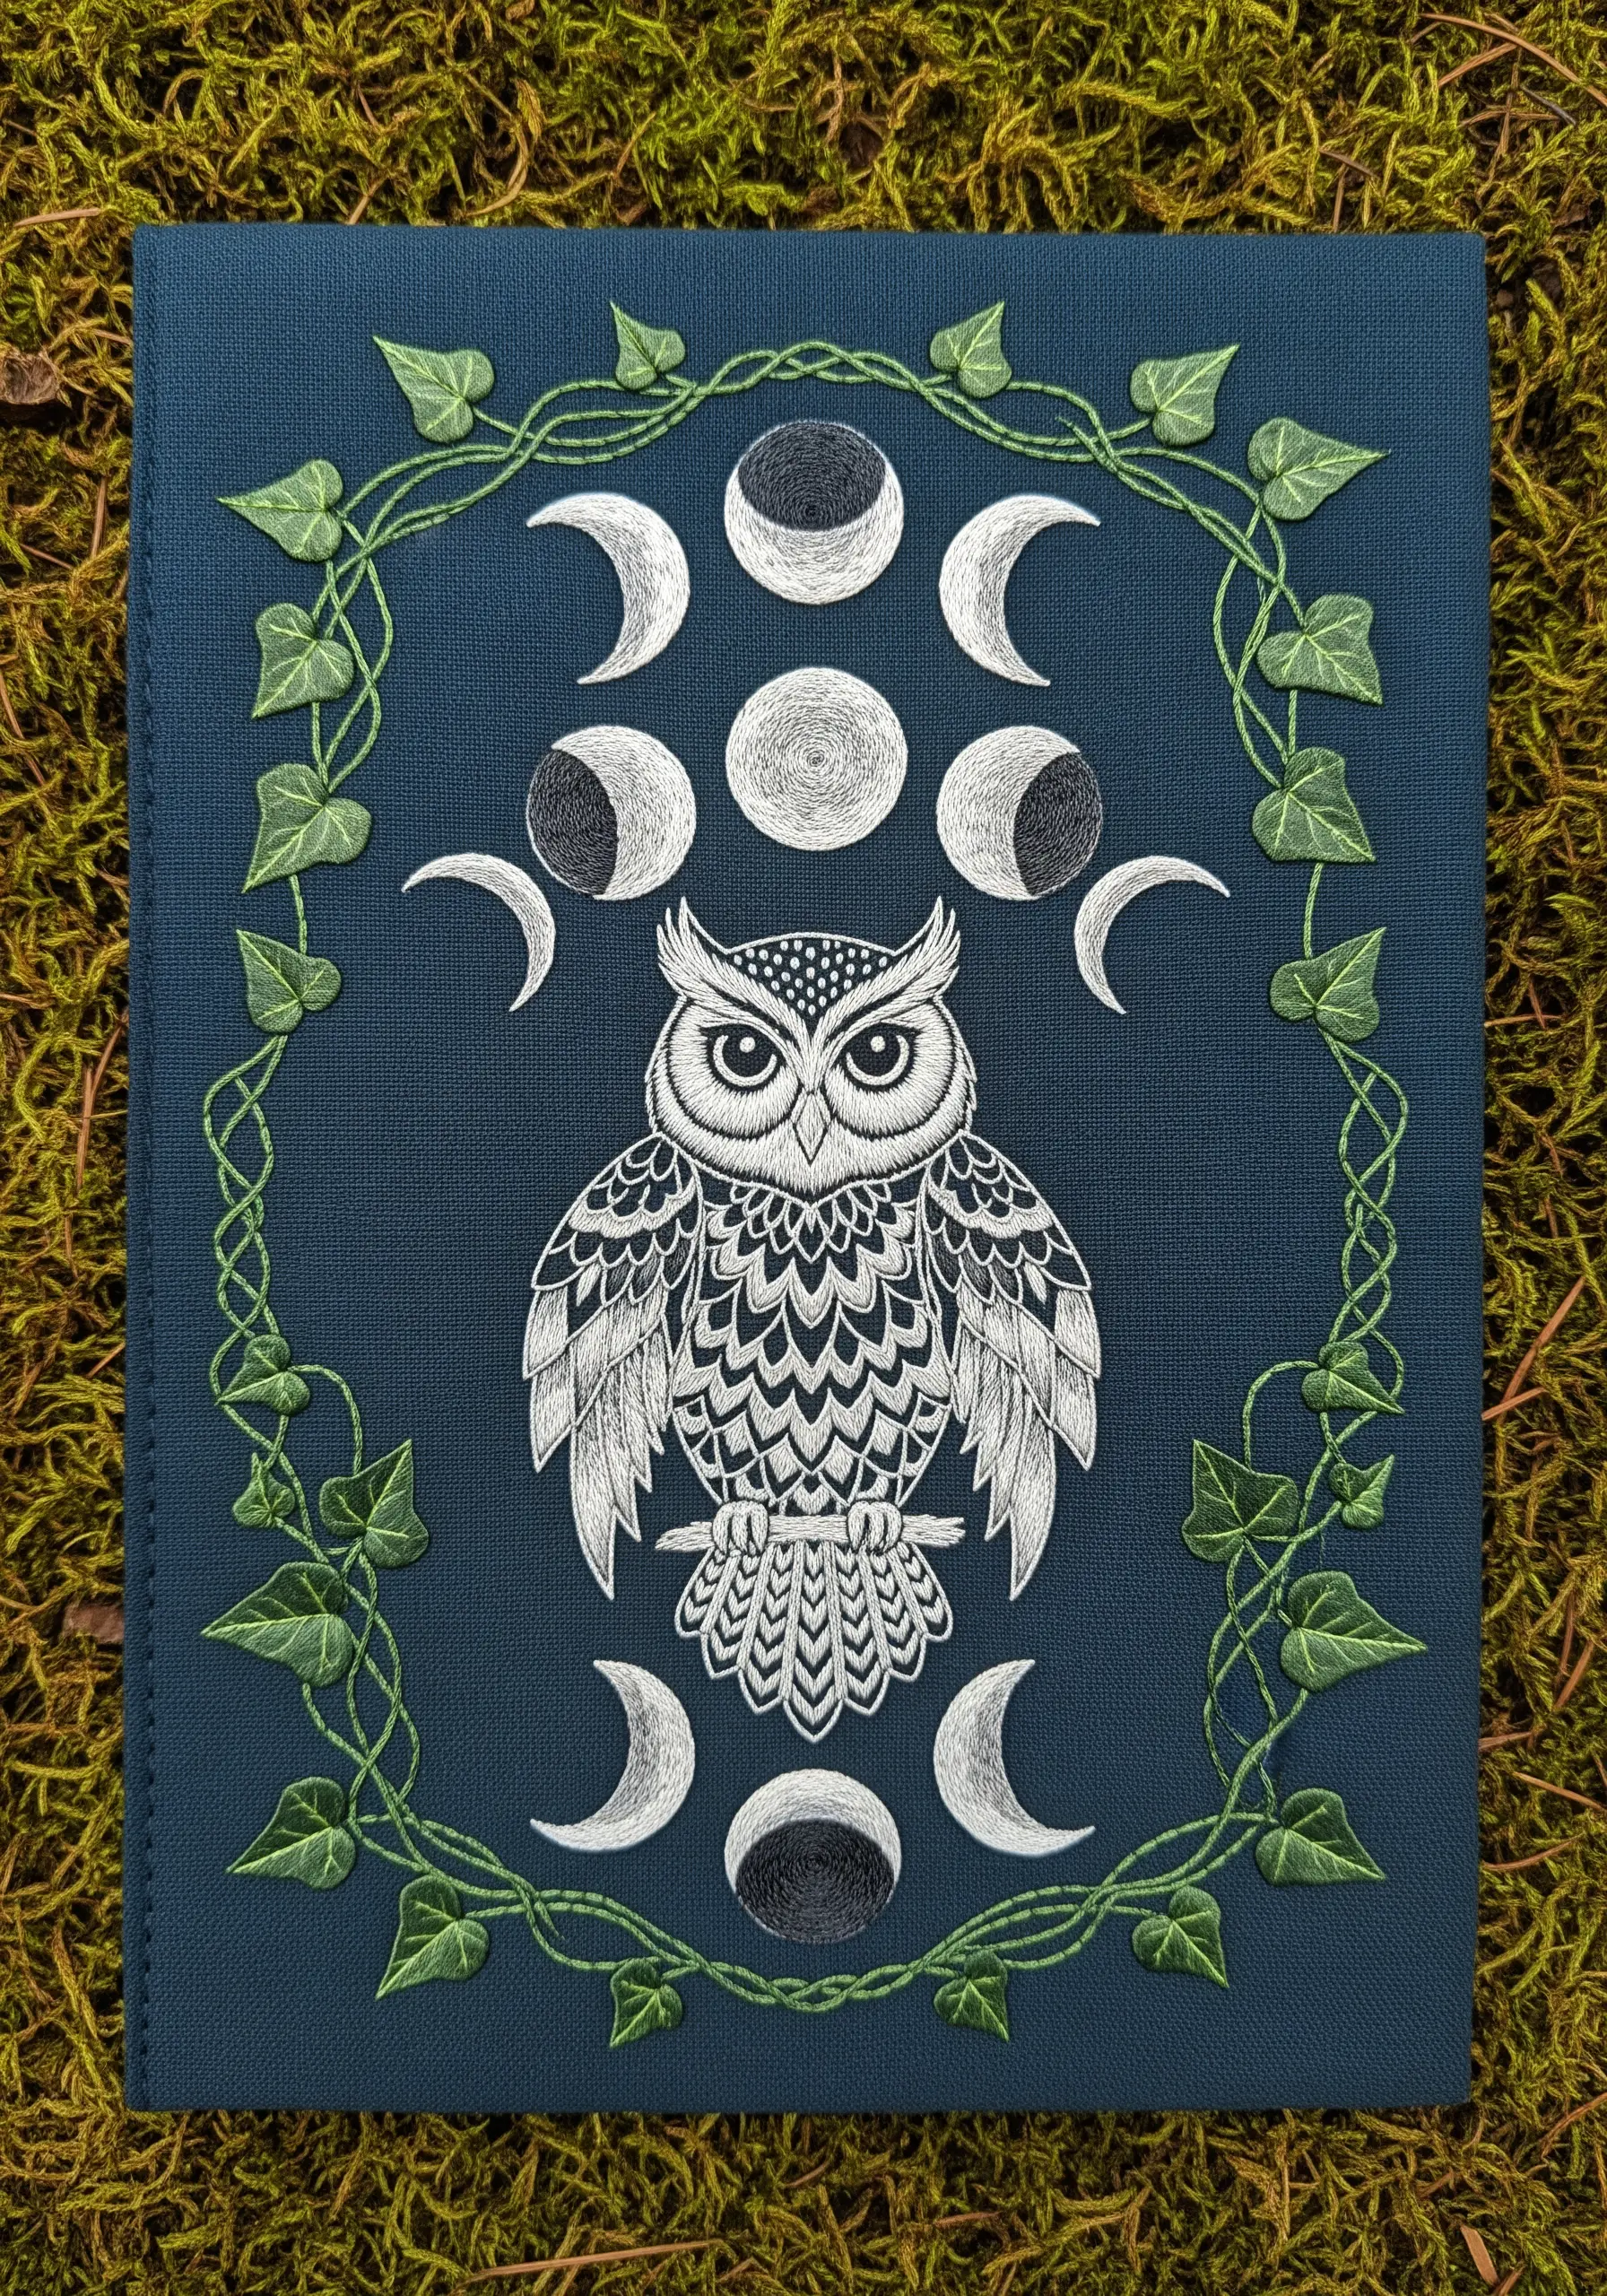
Turn a simple notebook into a personal talisman by embroidering a symbolic design on its cover.
Use a high-shine silver or white rayon thread for the moon phases to make them pop against the matte cotton of the owl and vines.
To create the textured, shadowed effect on the moons, fill them with tiny, dense seed stitches in a darker grey before outlining them.
This project transforms an everyday object into one of your most personalized gifts that feel deep and meaningful.
11. Create Atmospheric Fog with Sheer Fabric
Incorporate mixed media by layering sheer fabric, like tulle or organza, to create a sense of mist or fog.
Cut strips of the fabric and secure them with tiny, almost invisible couching stitches where you want the fog to appear densest.
Allow the edges to remain loose and frayed to enhance the ethereal, drifting effect.
This technique adds a layer of depth that thread alone cannot achieve, making your landscape feel more immersive and mysterious.
12. Paint a Galaxy with French Knots and Blended Thread
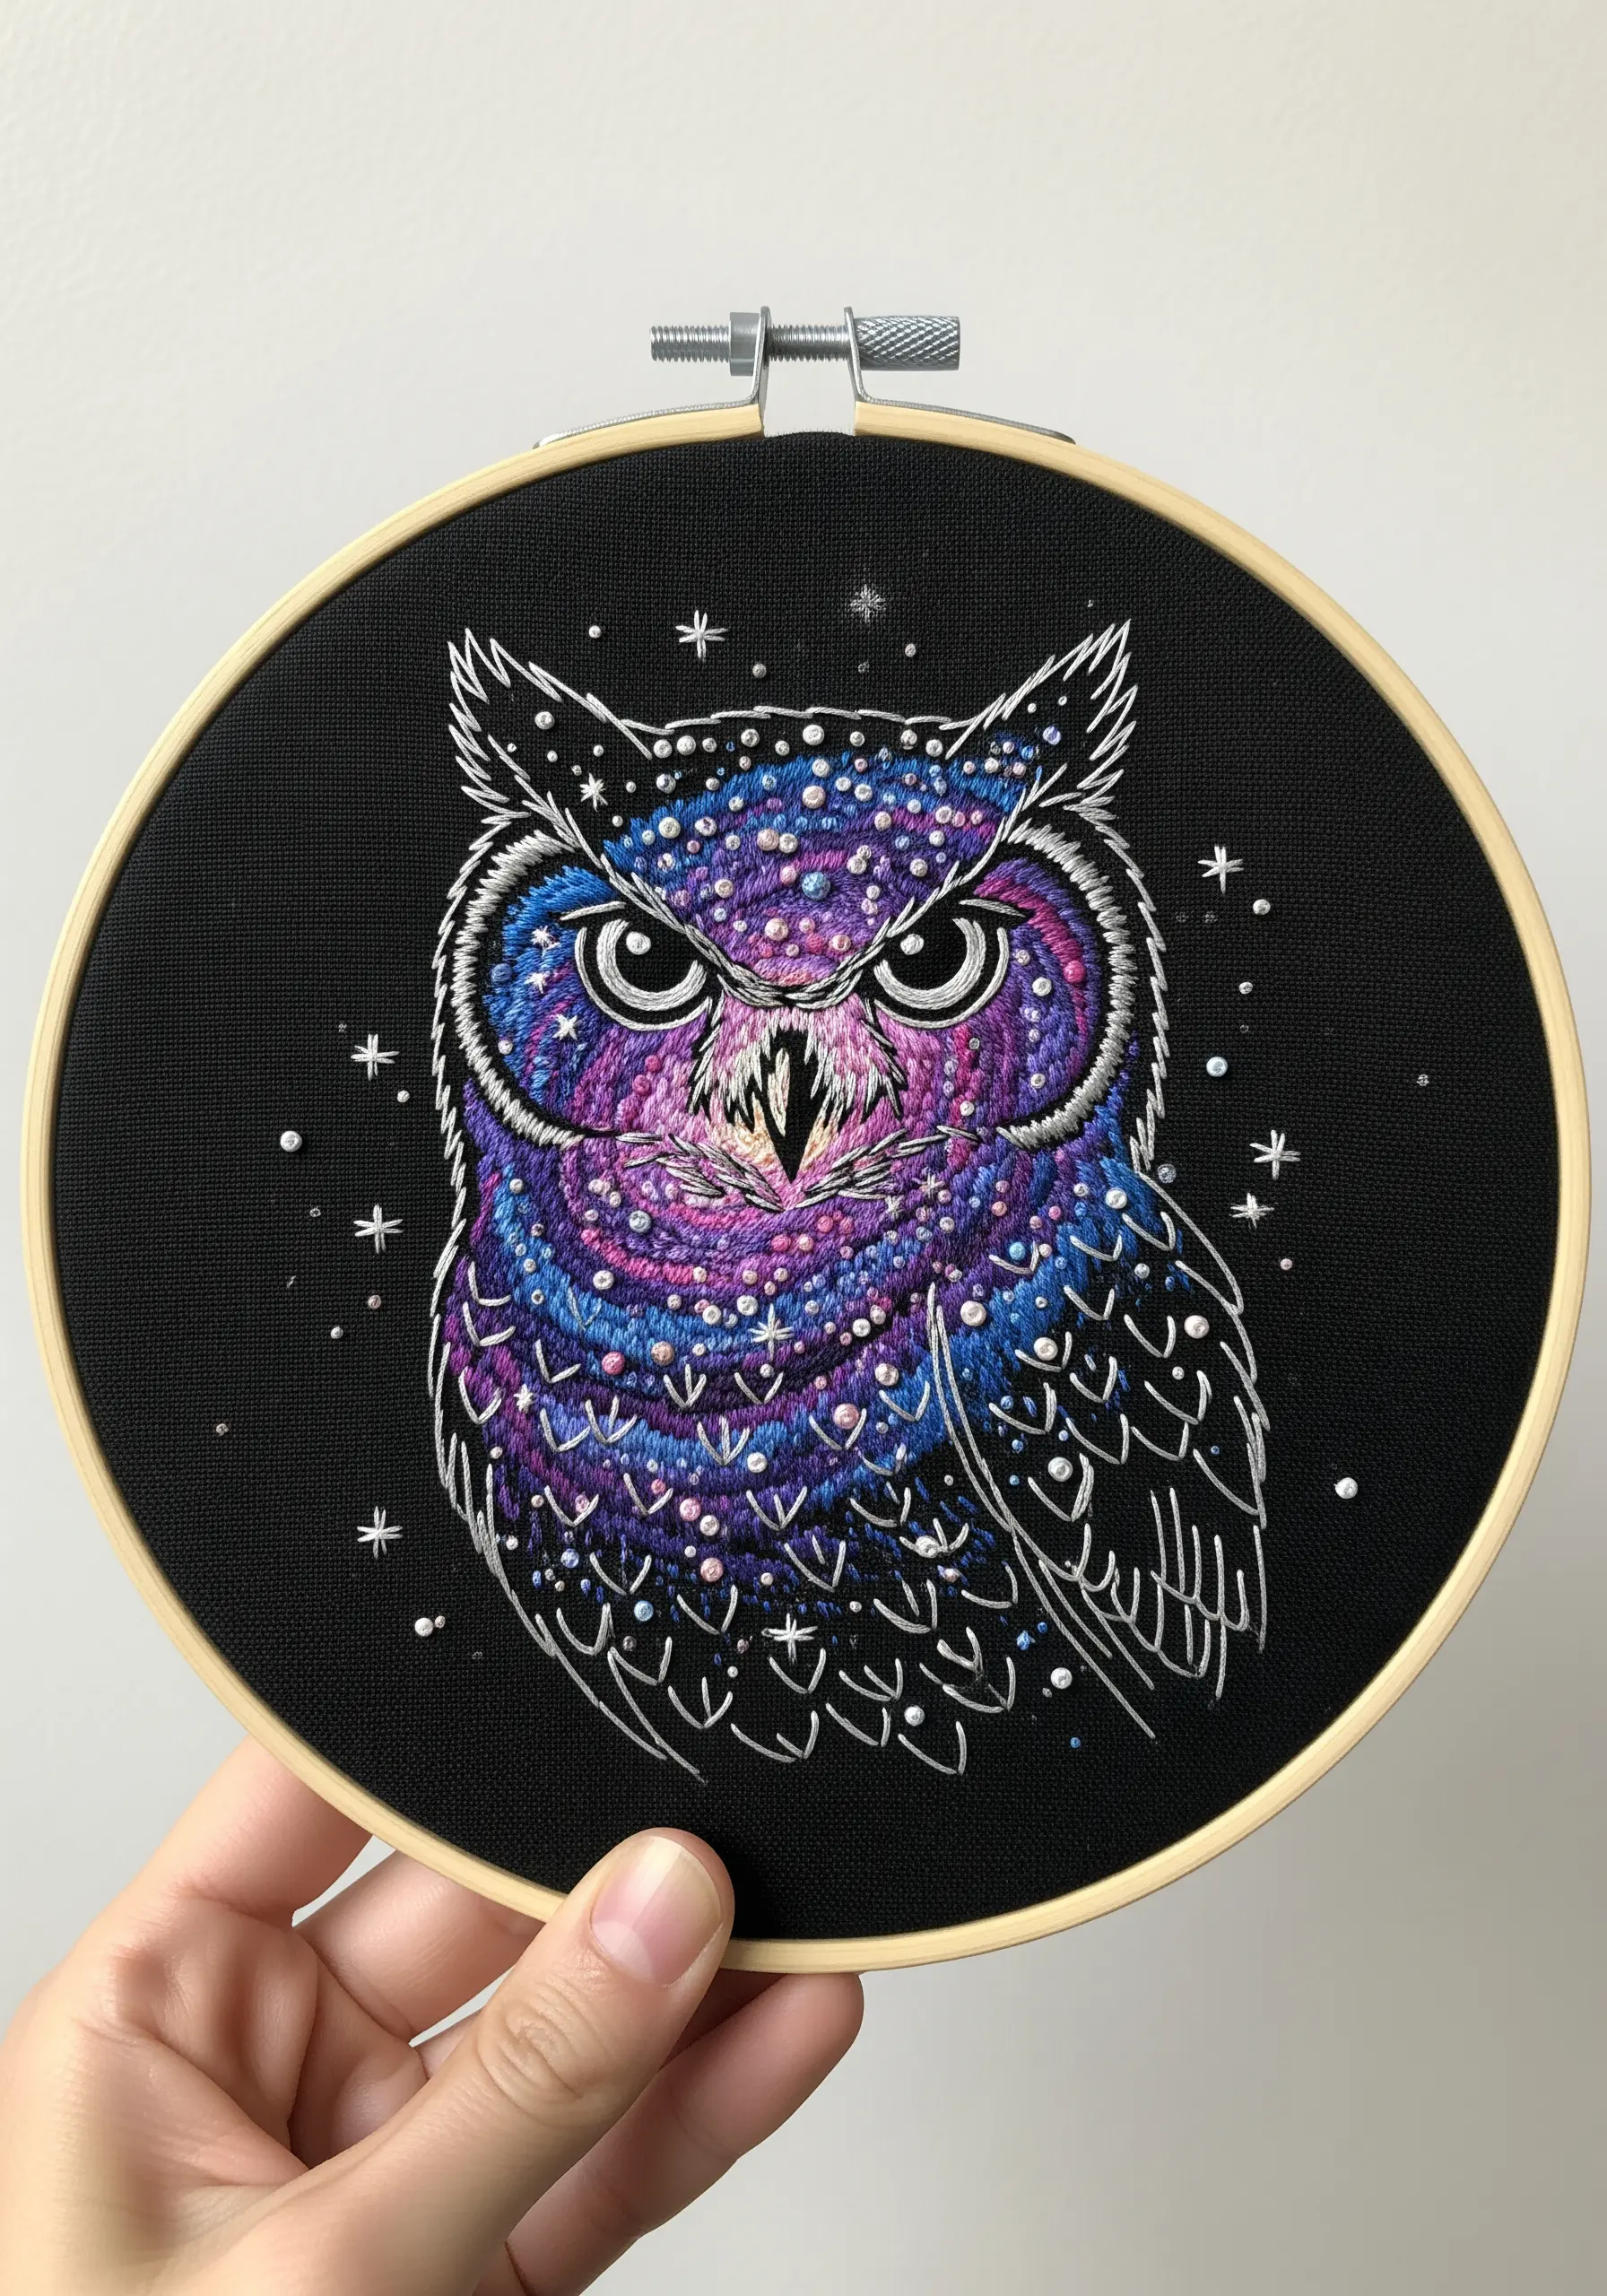
Stitch a cosmic owl by using variegated floss or by blending two to three different colors in your needle at once.
Fill large areas with this blended thread using short satin stitches or seed stitches to create a swirling, galactic texture.
Then, scatter French knots and tiny straight stitches in white, silver, and light blue to represent distant stars and nebulae.
Adding a few microbeads or sequins will catch the light and complete the celestial effect.
13. Evoke a Mood with an Autumnal Palette
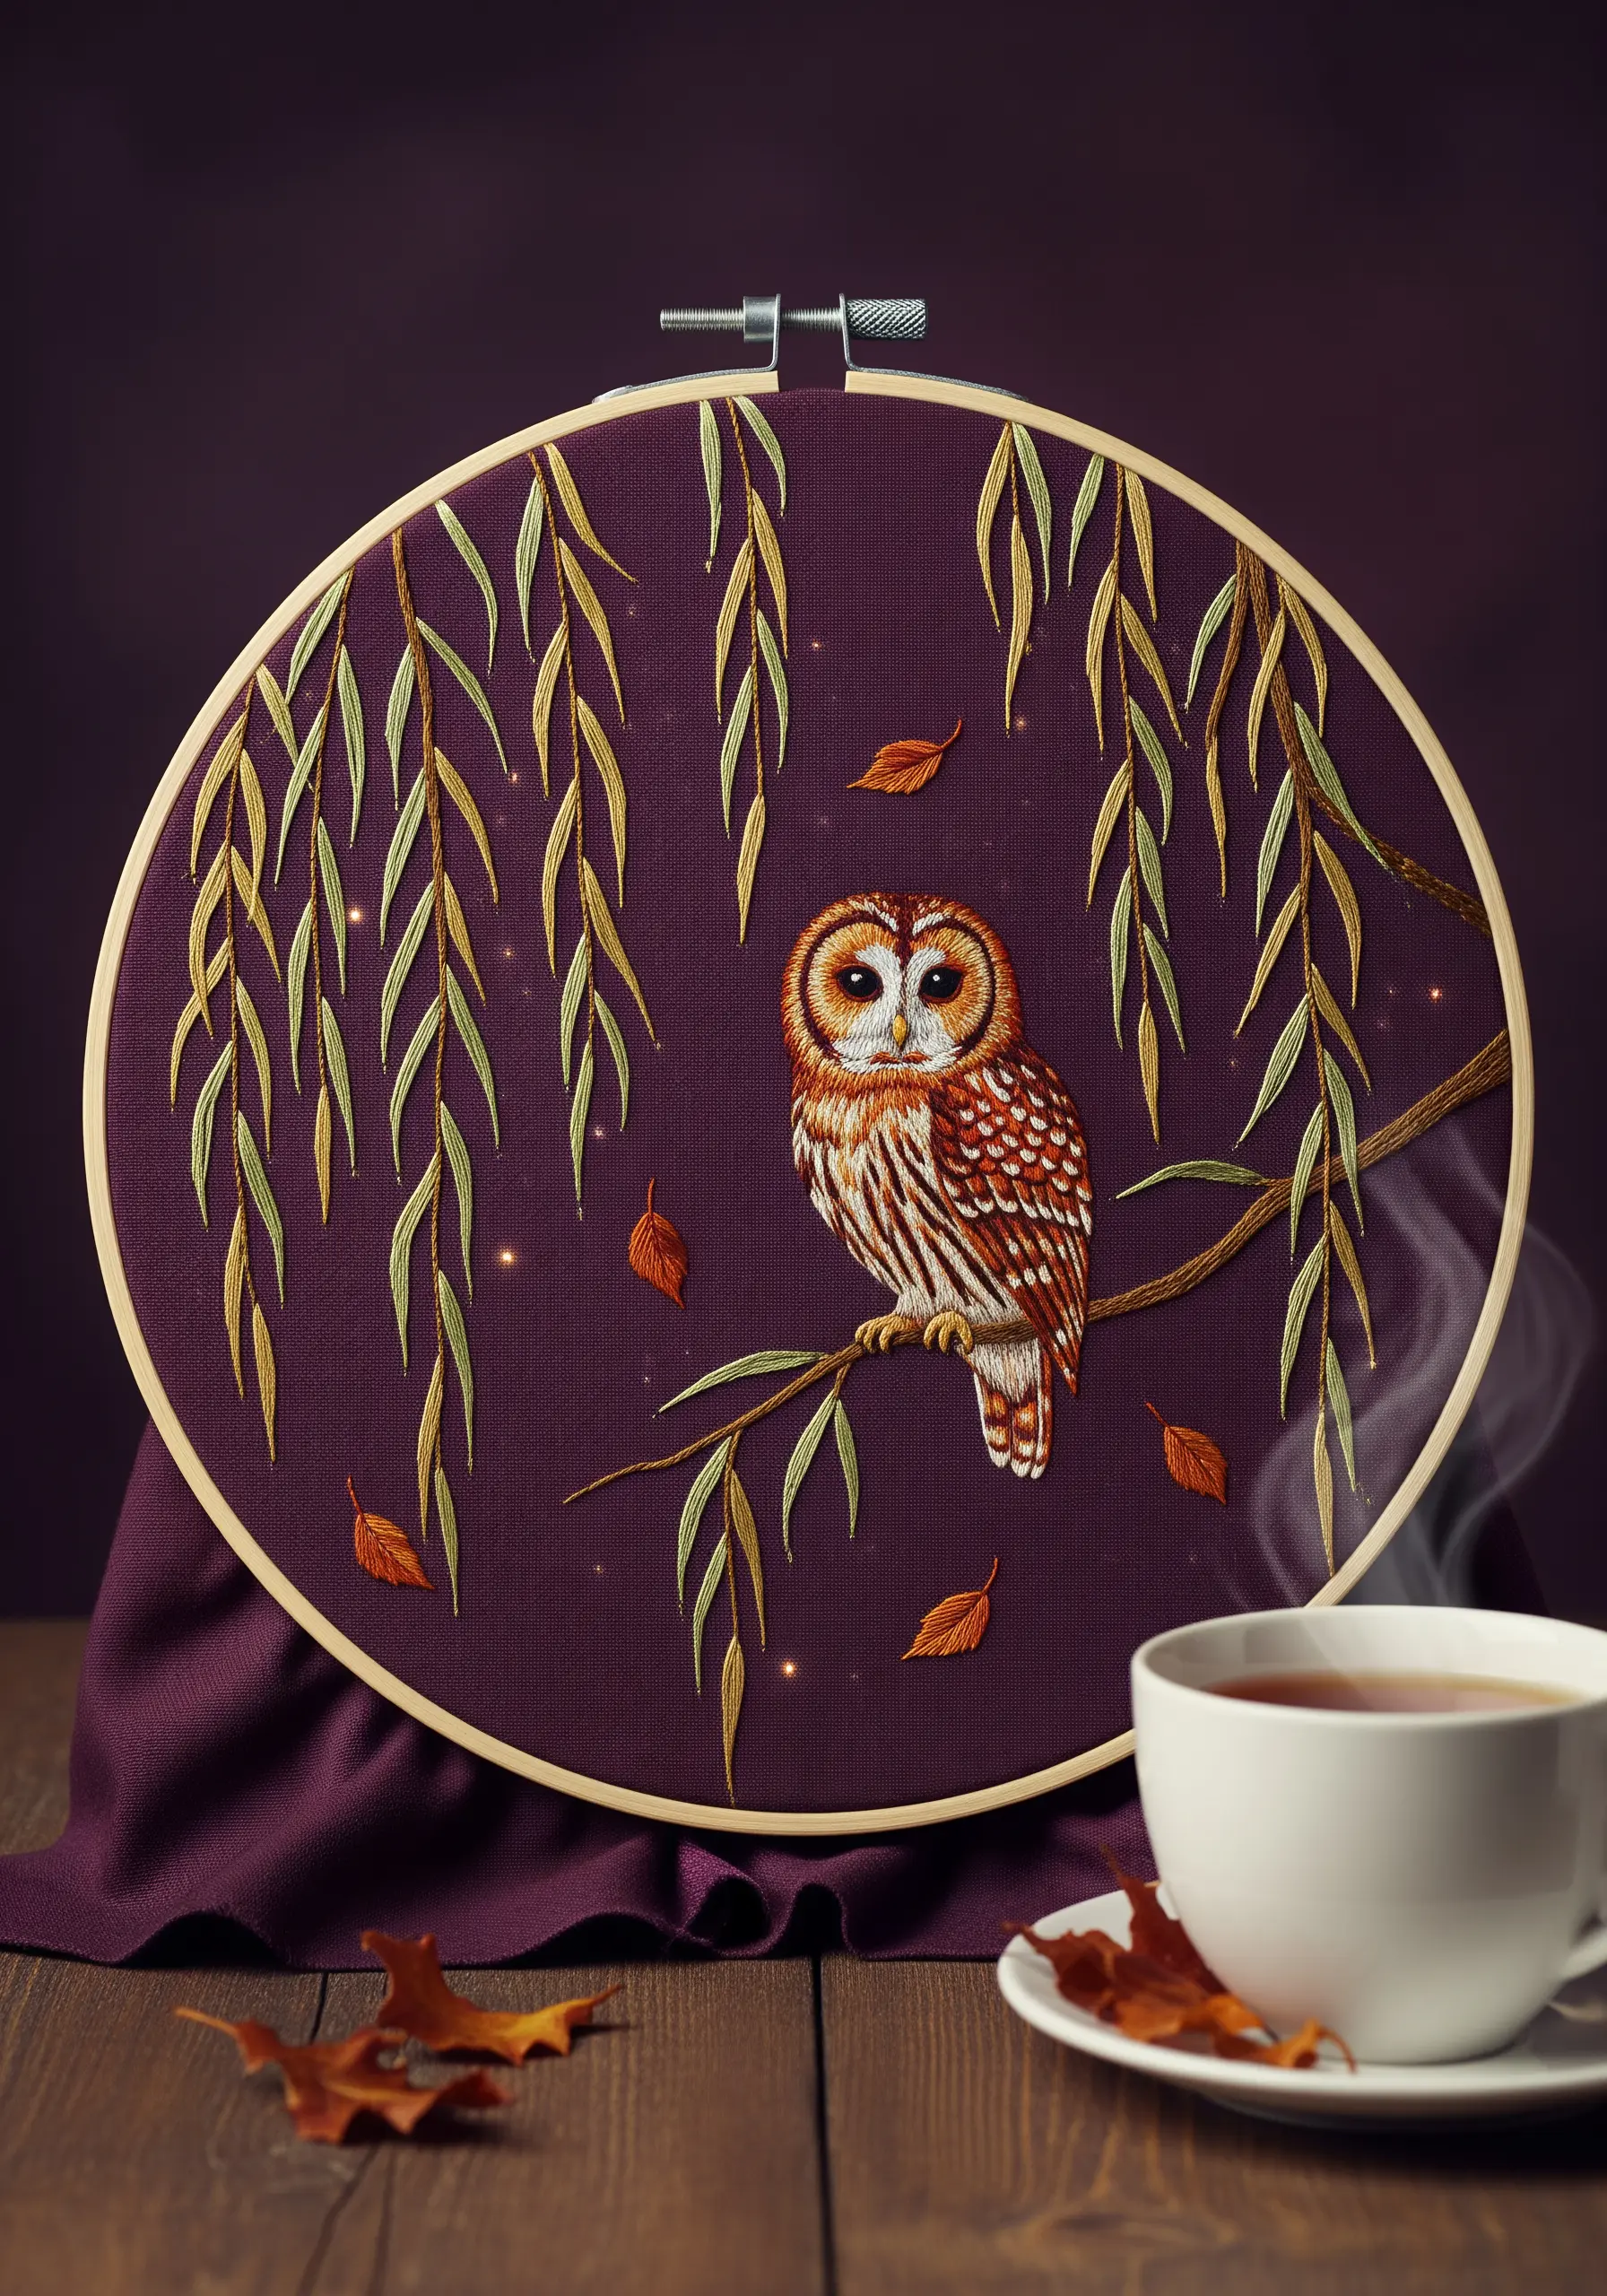
Set a specific mood by carefully curating your color palette. Here, deep plum, olive green, and burnt orange create a cozy, autumnal feeling.
For the weeping willow branches, use long, slightly curved straight stitches or stem stitches to mimic their graceful, drooping form.
Stitch the falling leaves using a single detached chain stitch with a short straight stitch for the stem. This adds a sense of gentle movement to the scene.
The rich, warm colors make this a perfect piece of seasonal embroidery decor.
14. Achieve a Jeweled Look with Bold Gradients
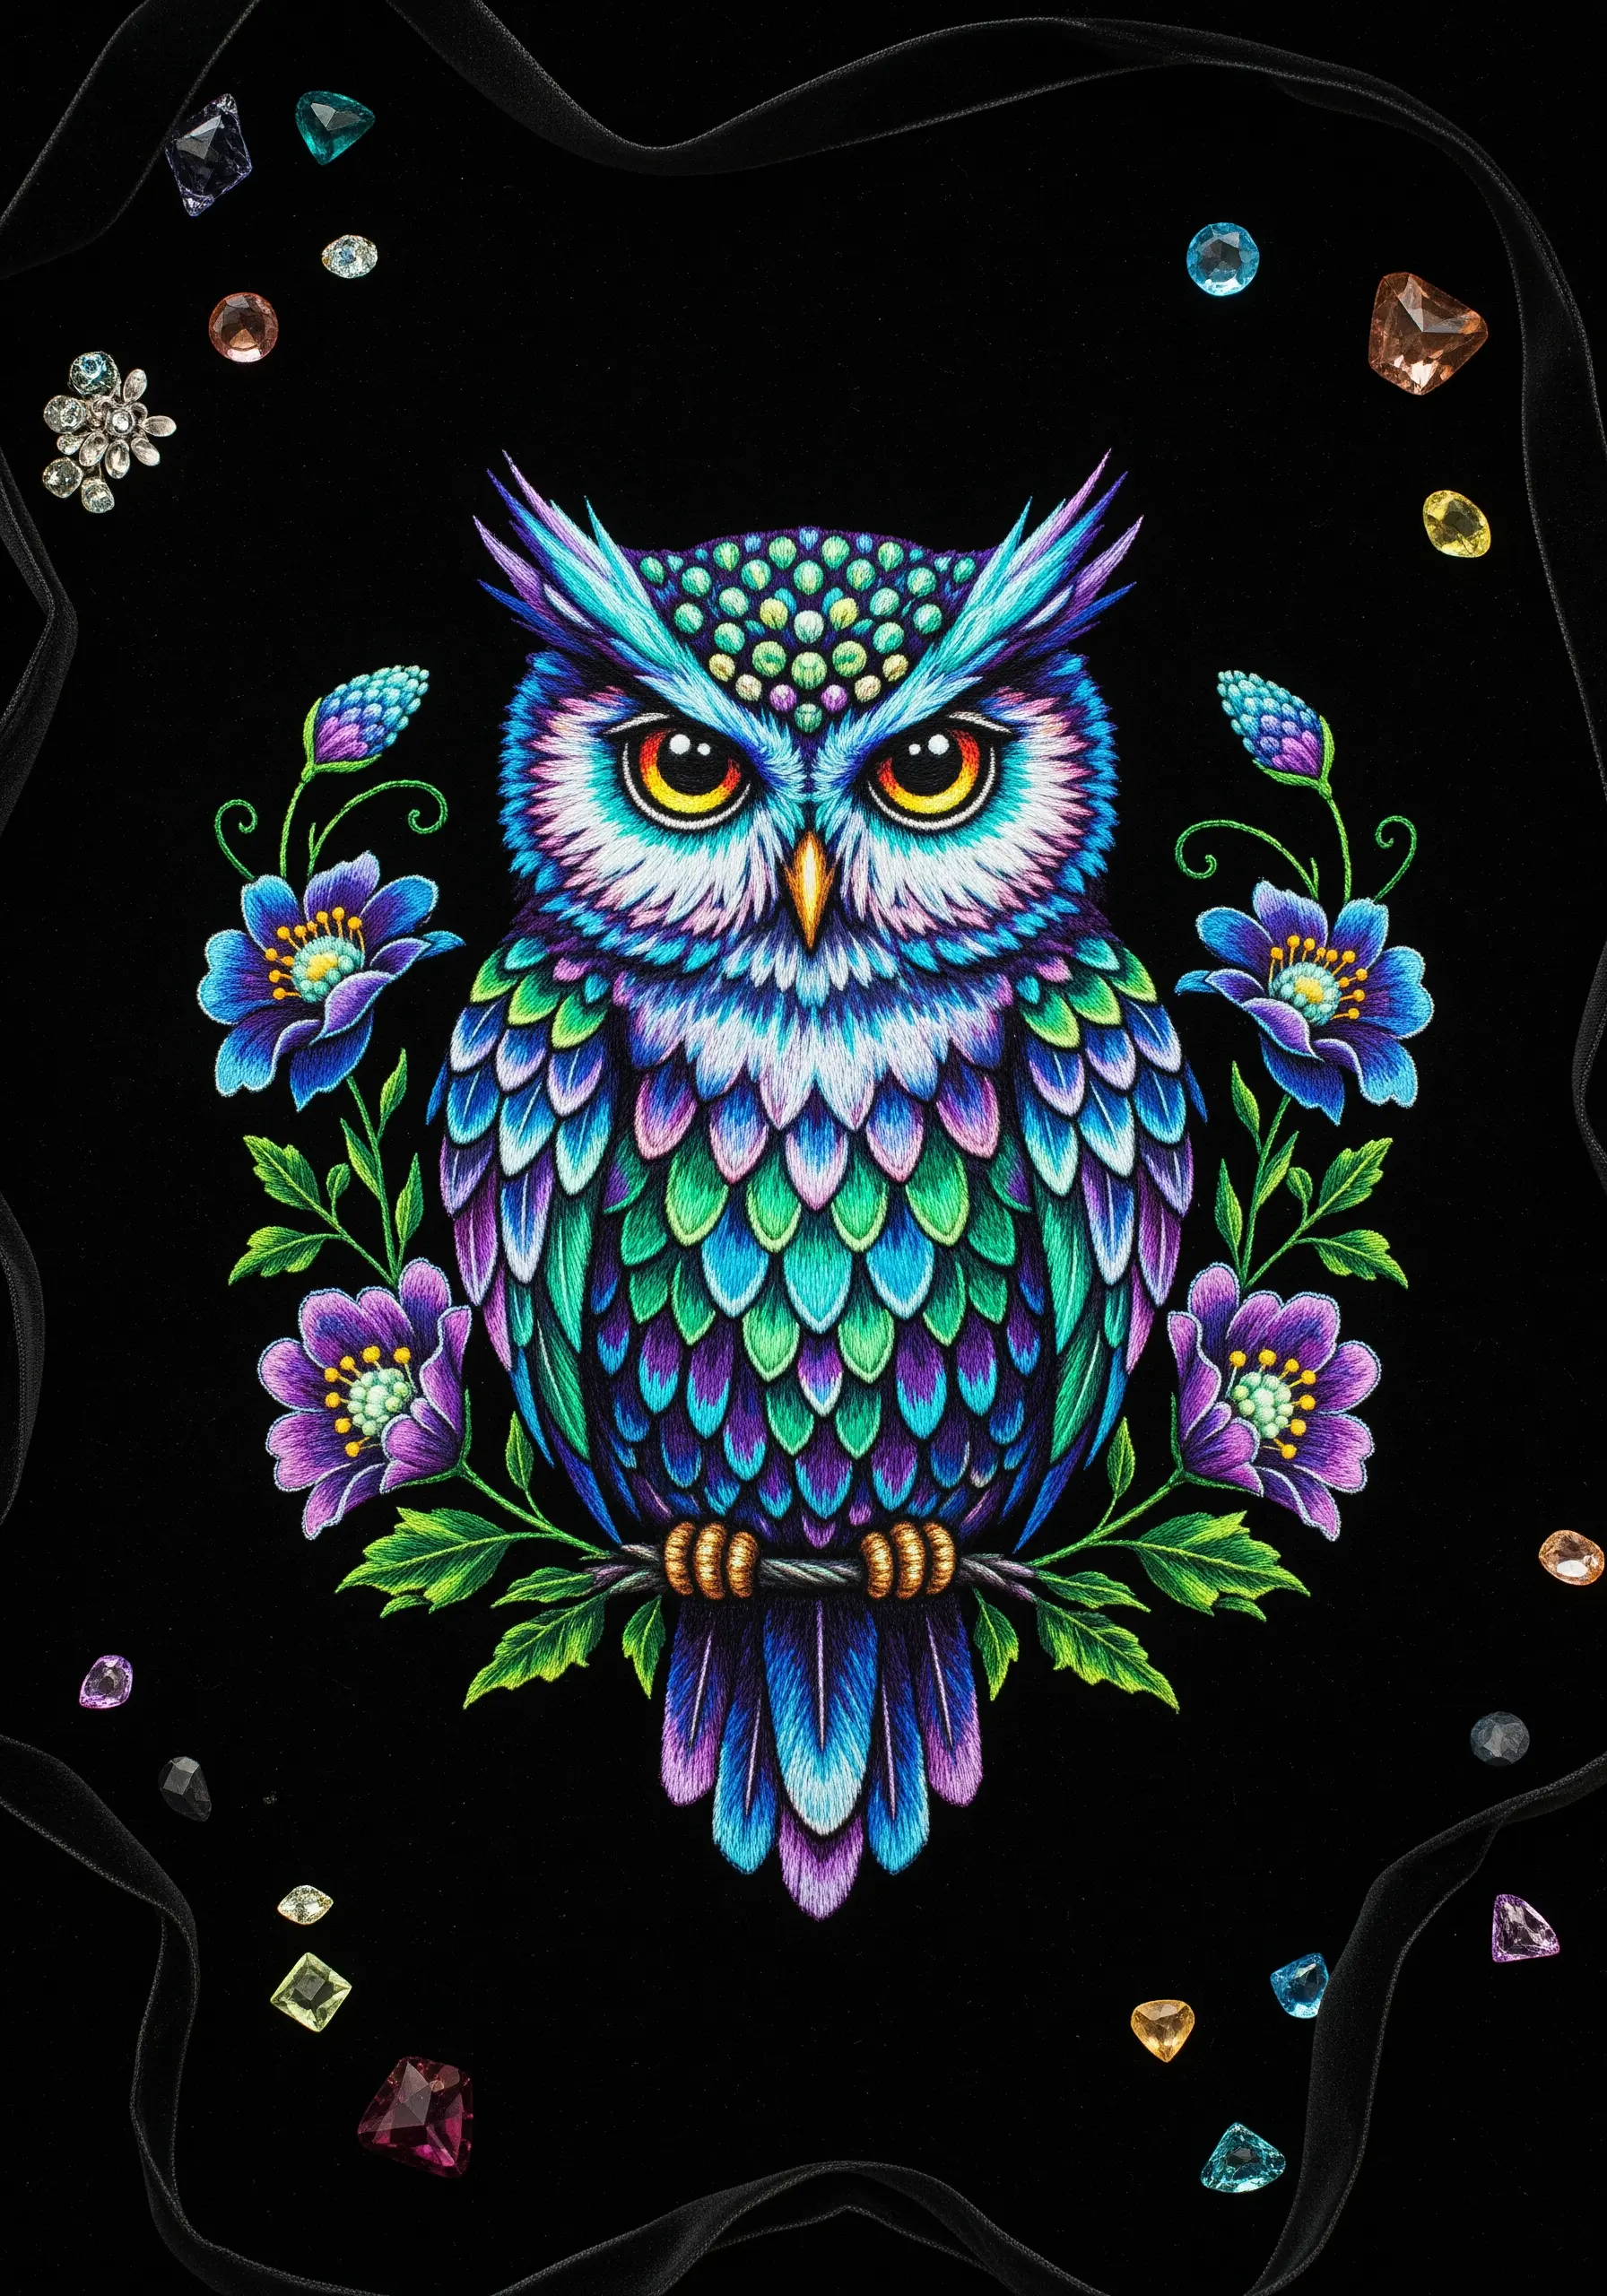
Create the illusion of iridescent, jeweled feathers by using bold color blocking and sharp gradients.
For each feather, pack satin stitches tightly together, transitioning from a dark shade to a vibrant, saturated hue, and finally to a light highlight.
The key is to make the color transitions clean and distinct rather than softly blended.
Outlining each feather section with a single strand of black backstitch will enhance the stained-glass effect and make the colors appear even more luminous.
15. Explore Minimalism with Geometric Forms
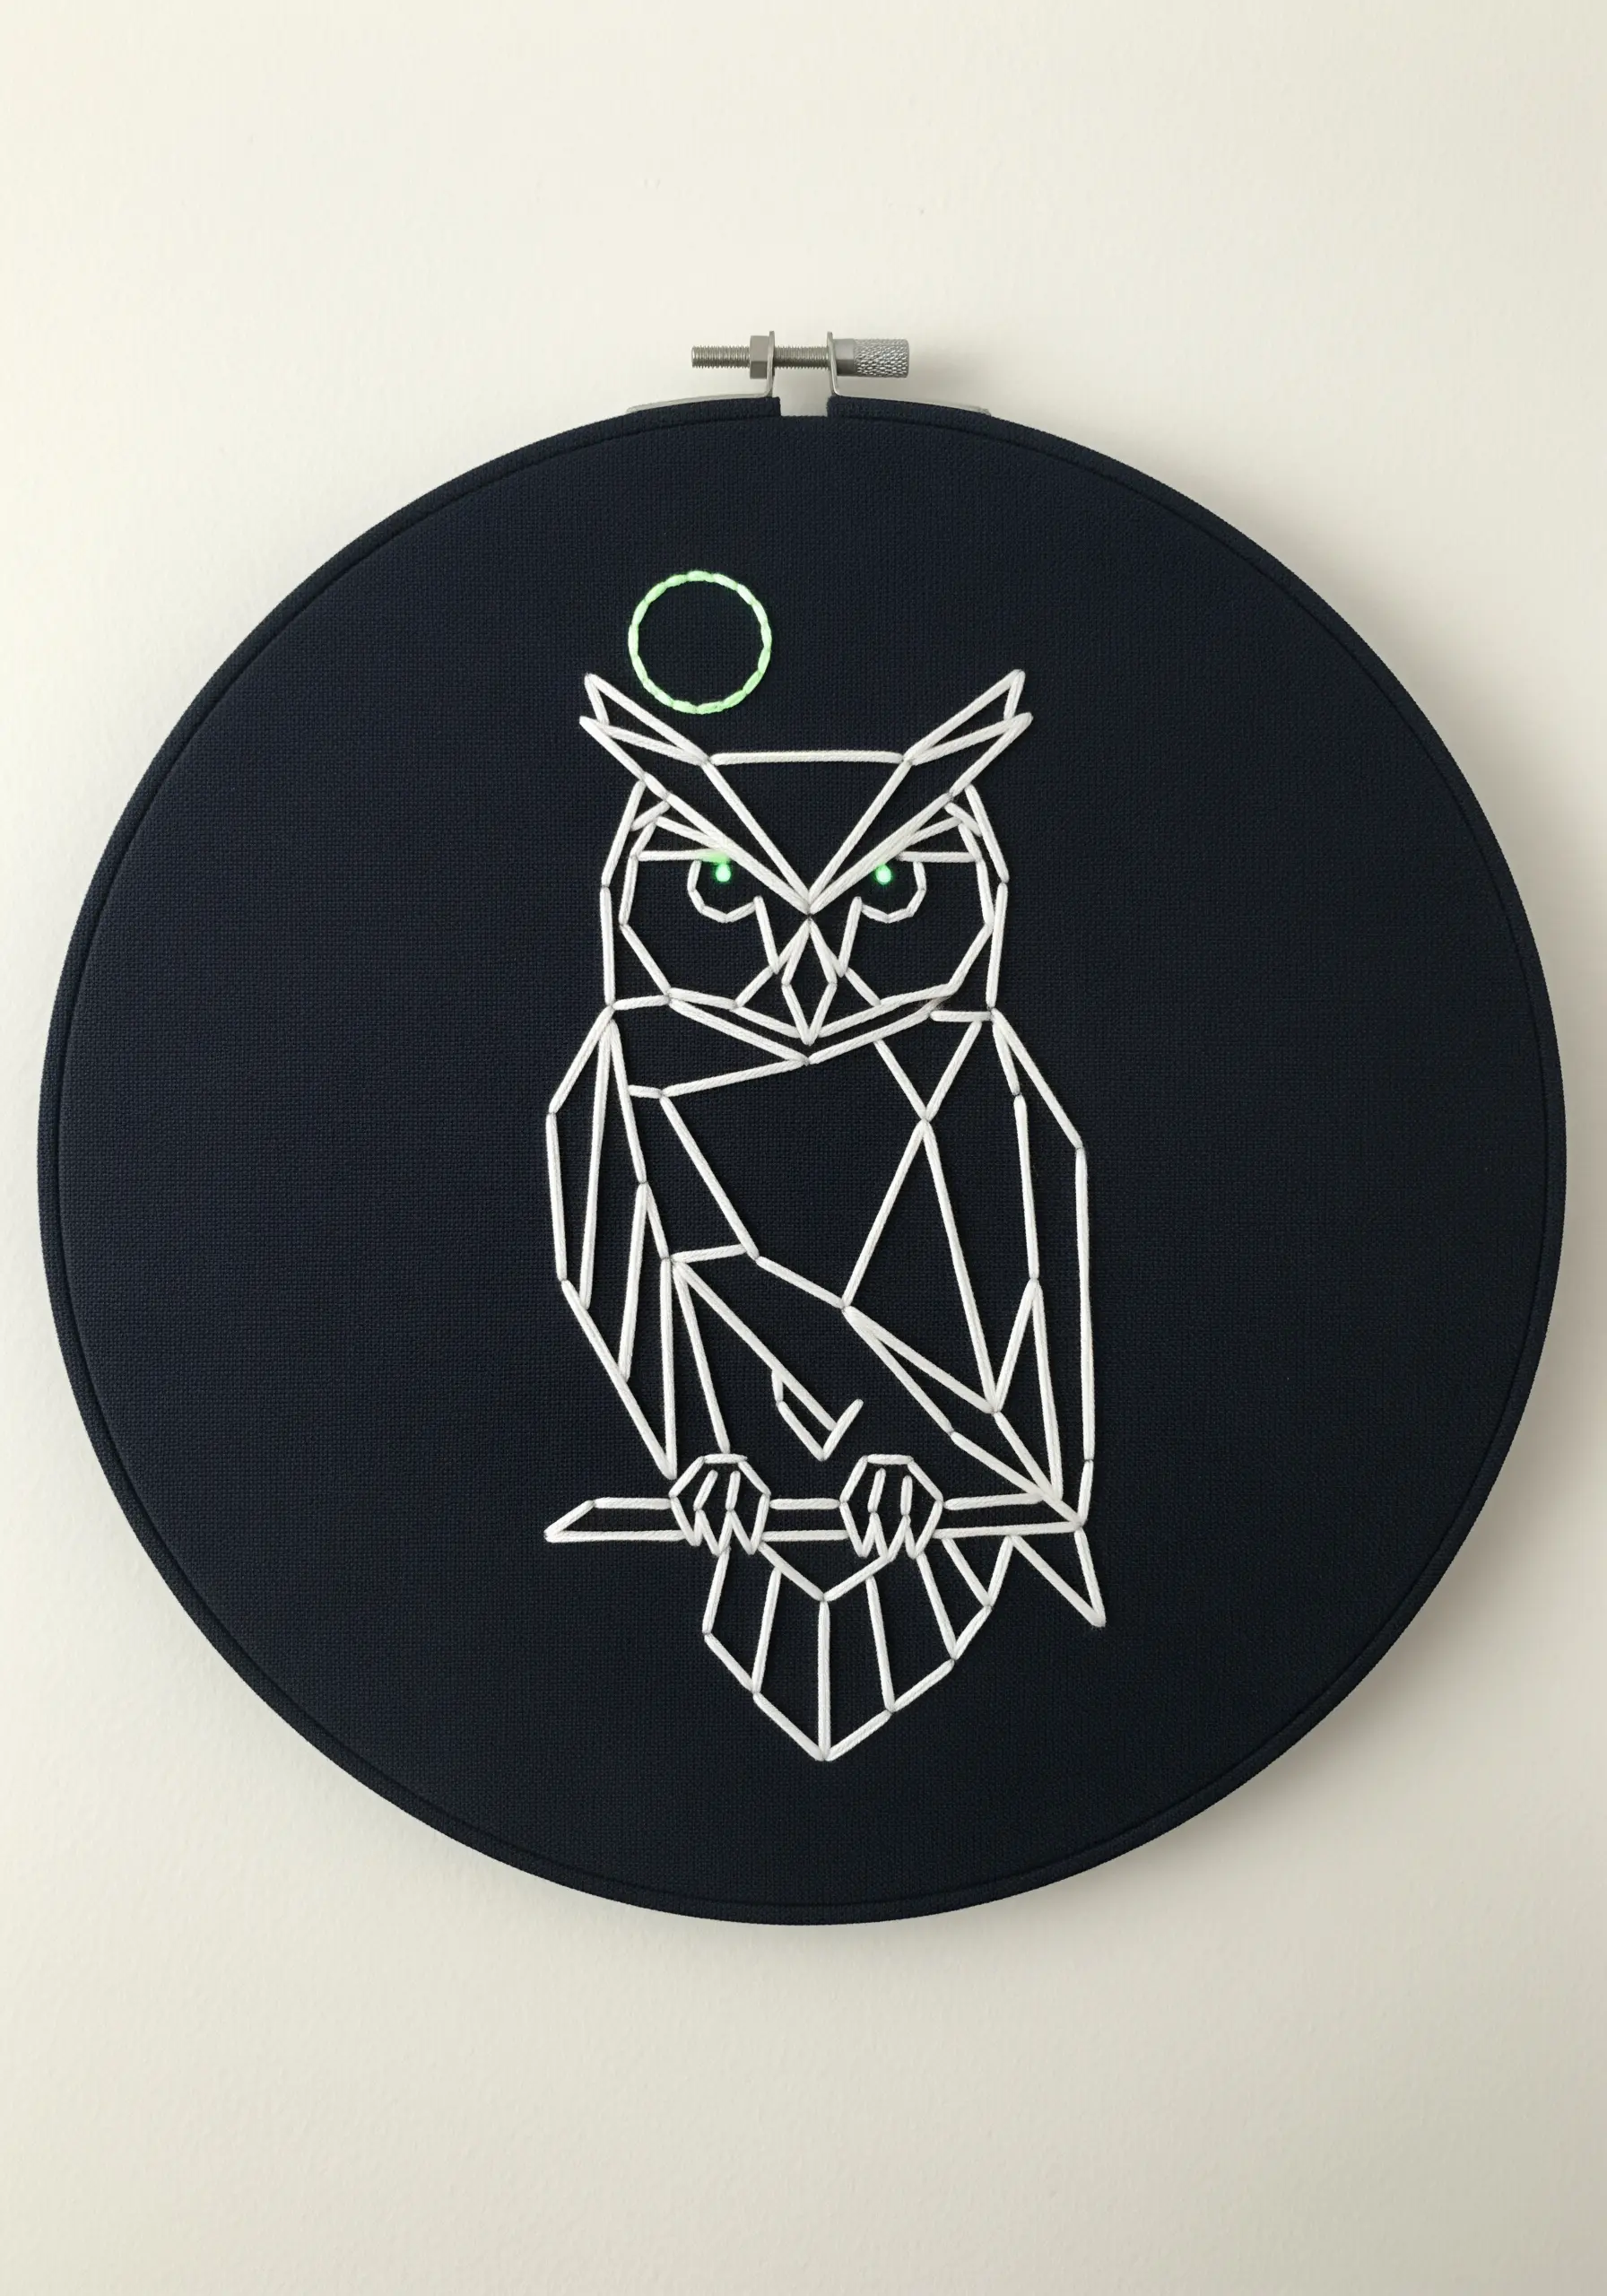
Reduce the owl to its essential geometric shapes for a modern, minimalist take.
Use a thicker thread, like a sashiko thread or multiple strands of floss, and stitch the lines with a whipped backstitch. This creates a raised, cord-like line that is both bold and clean.
The power of this design lies in its simplicity and use of negative space.
A single, unexpected pop of color—like the glowing green eyes and moon—draws the viewer in and adds a playful touch.
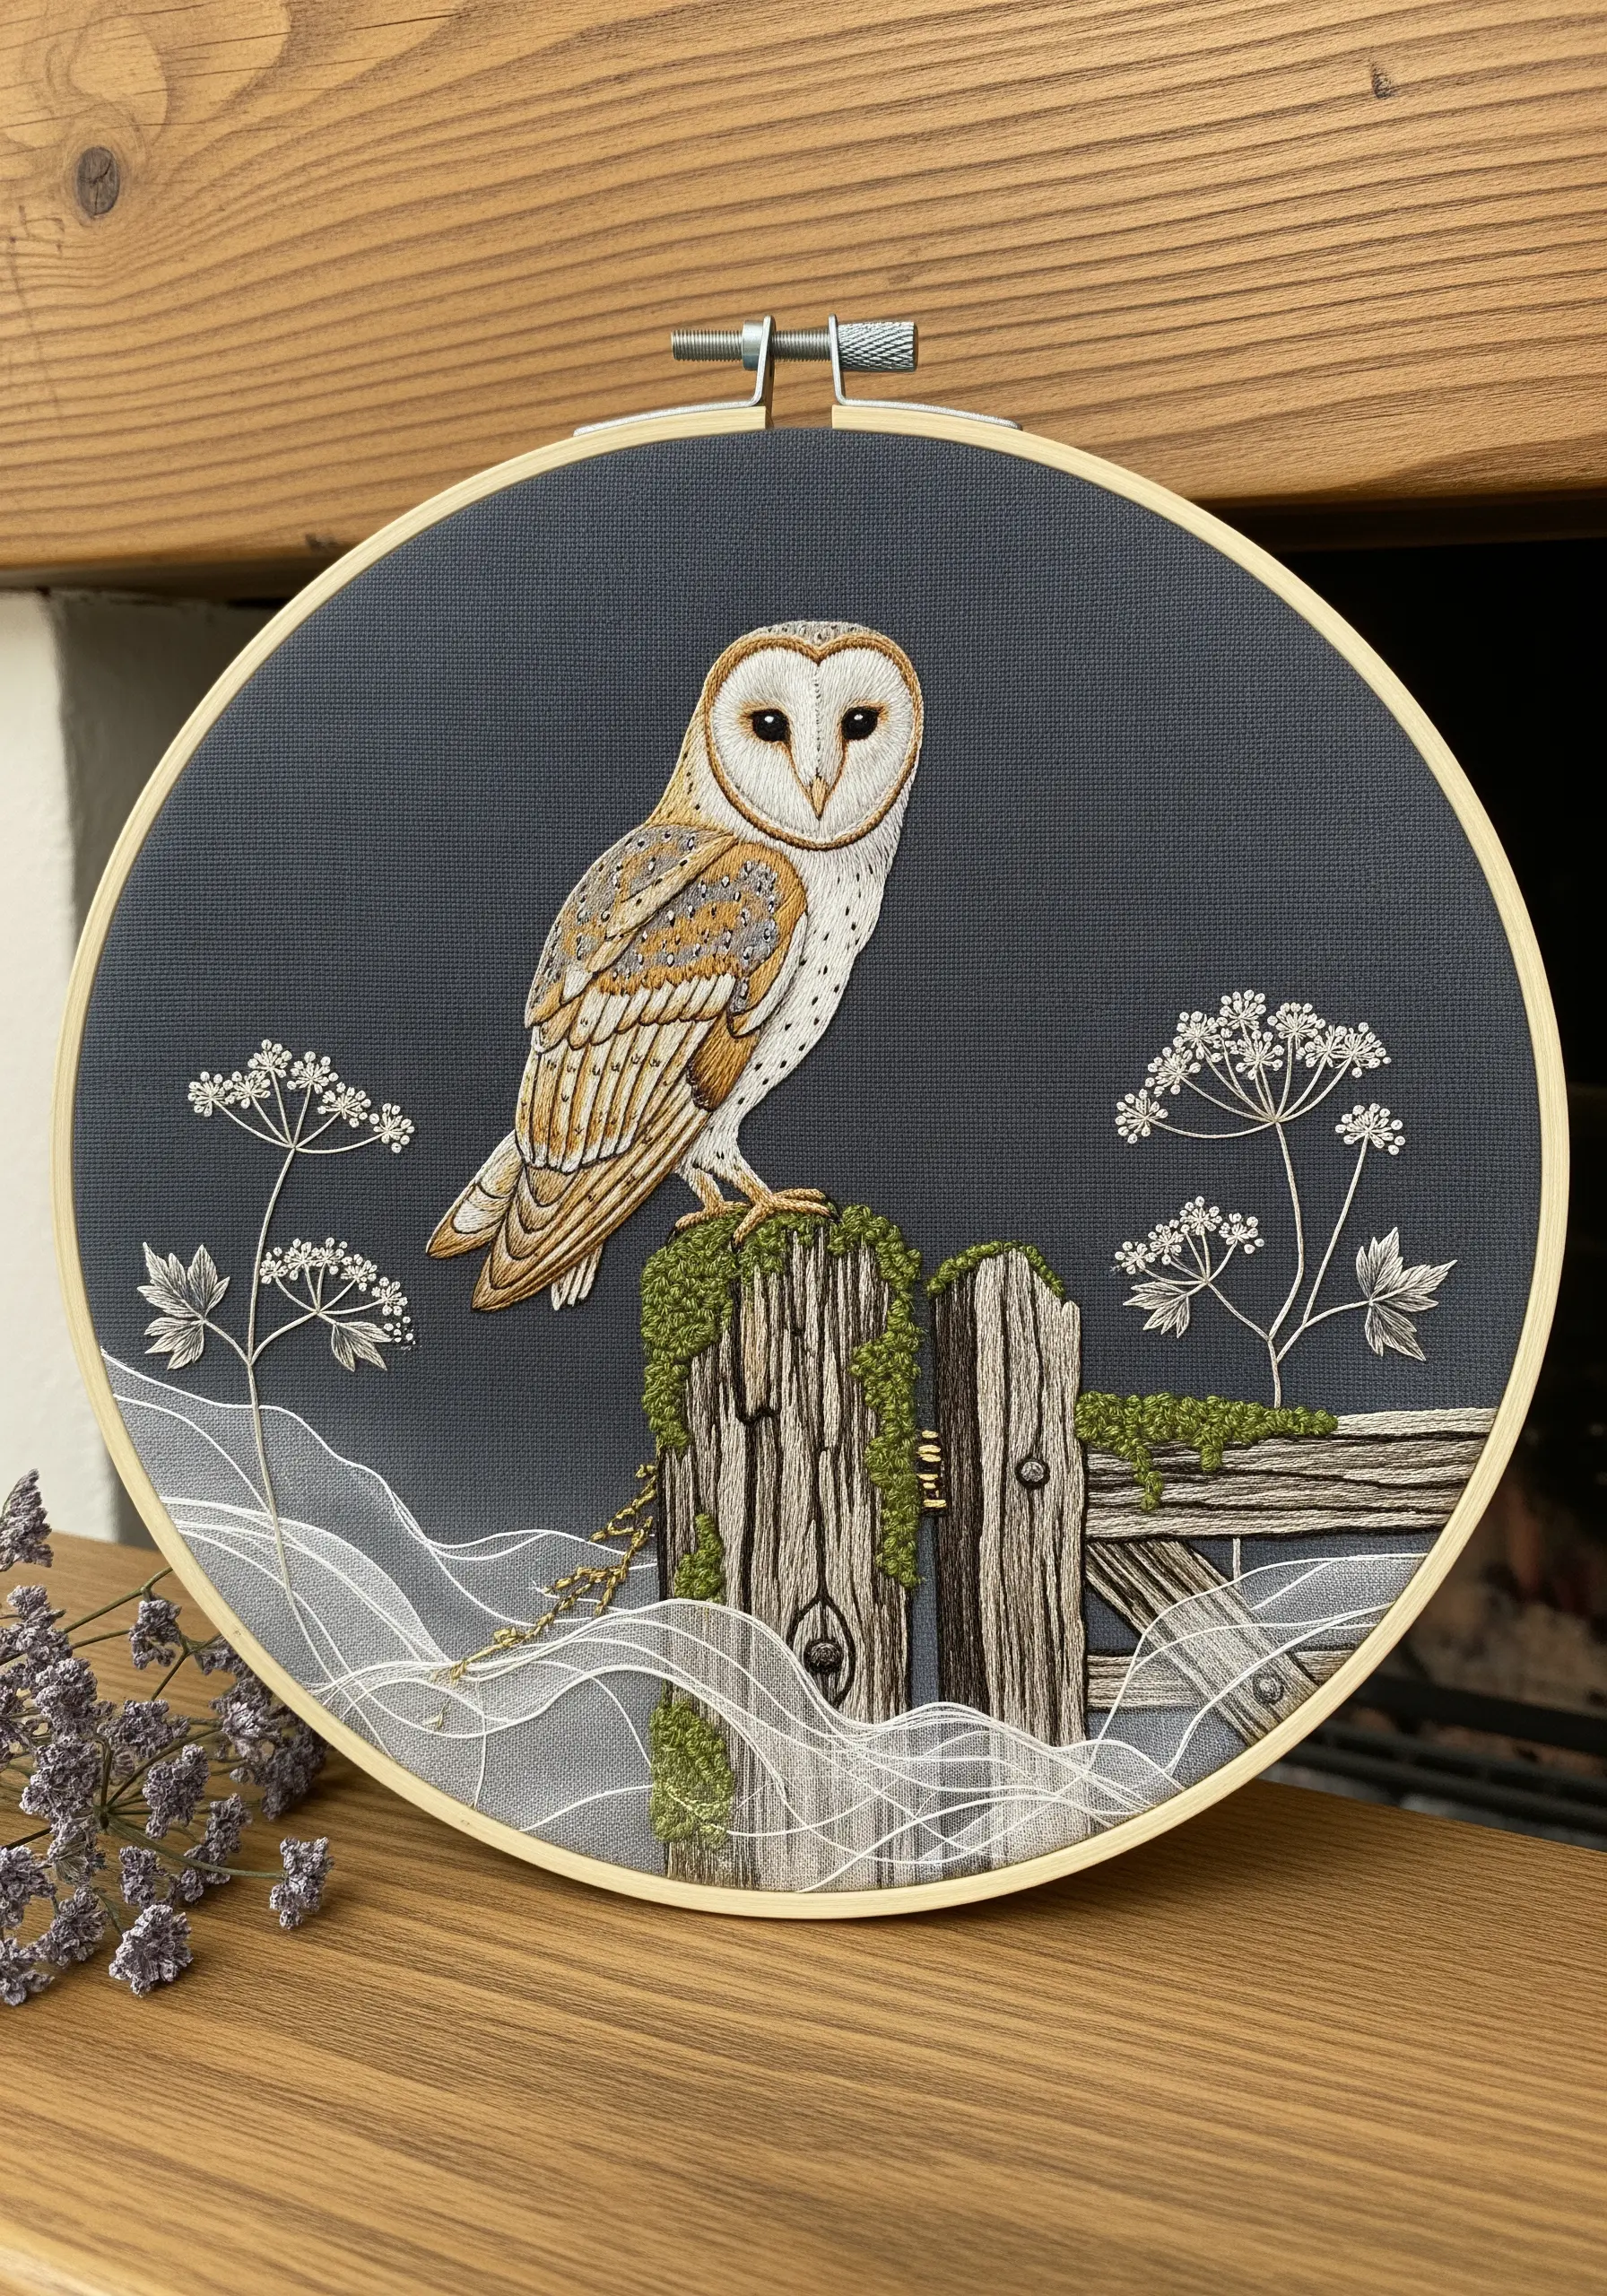
16. Frame Your Subject with Dense Foliage
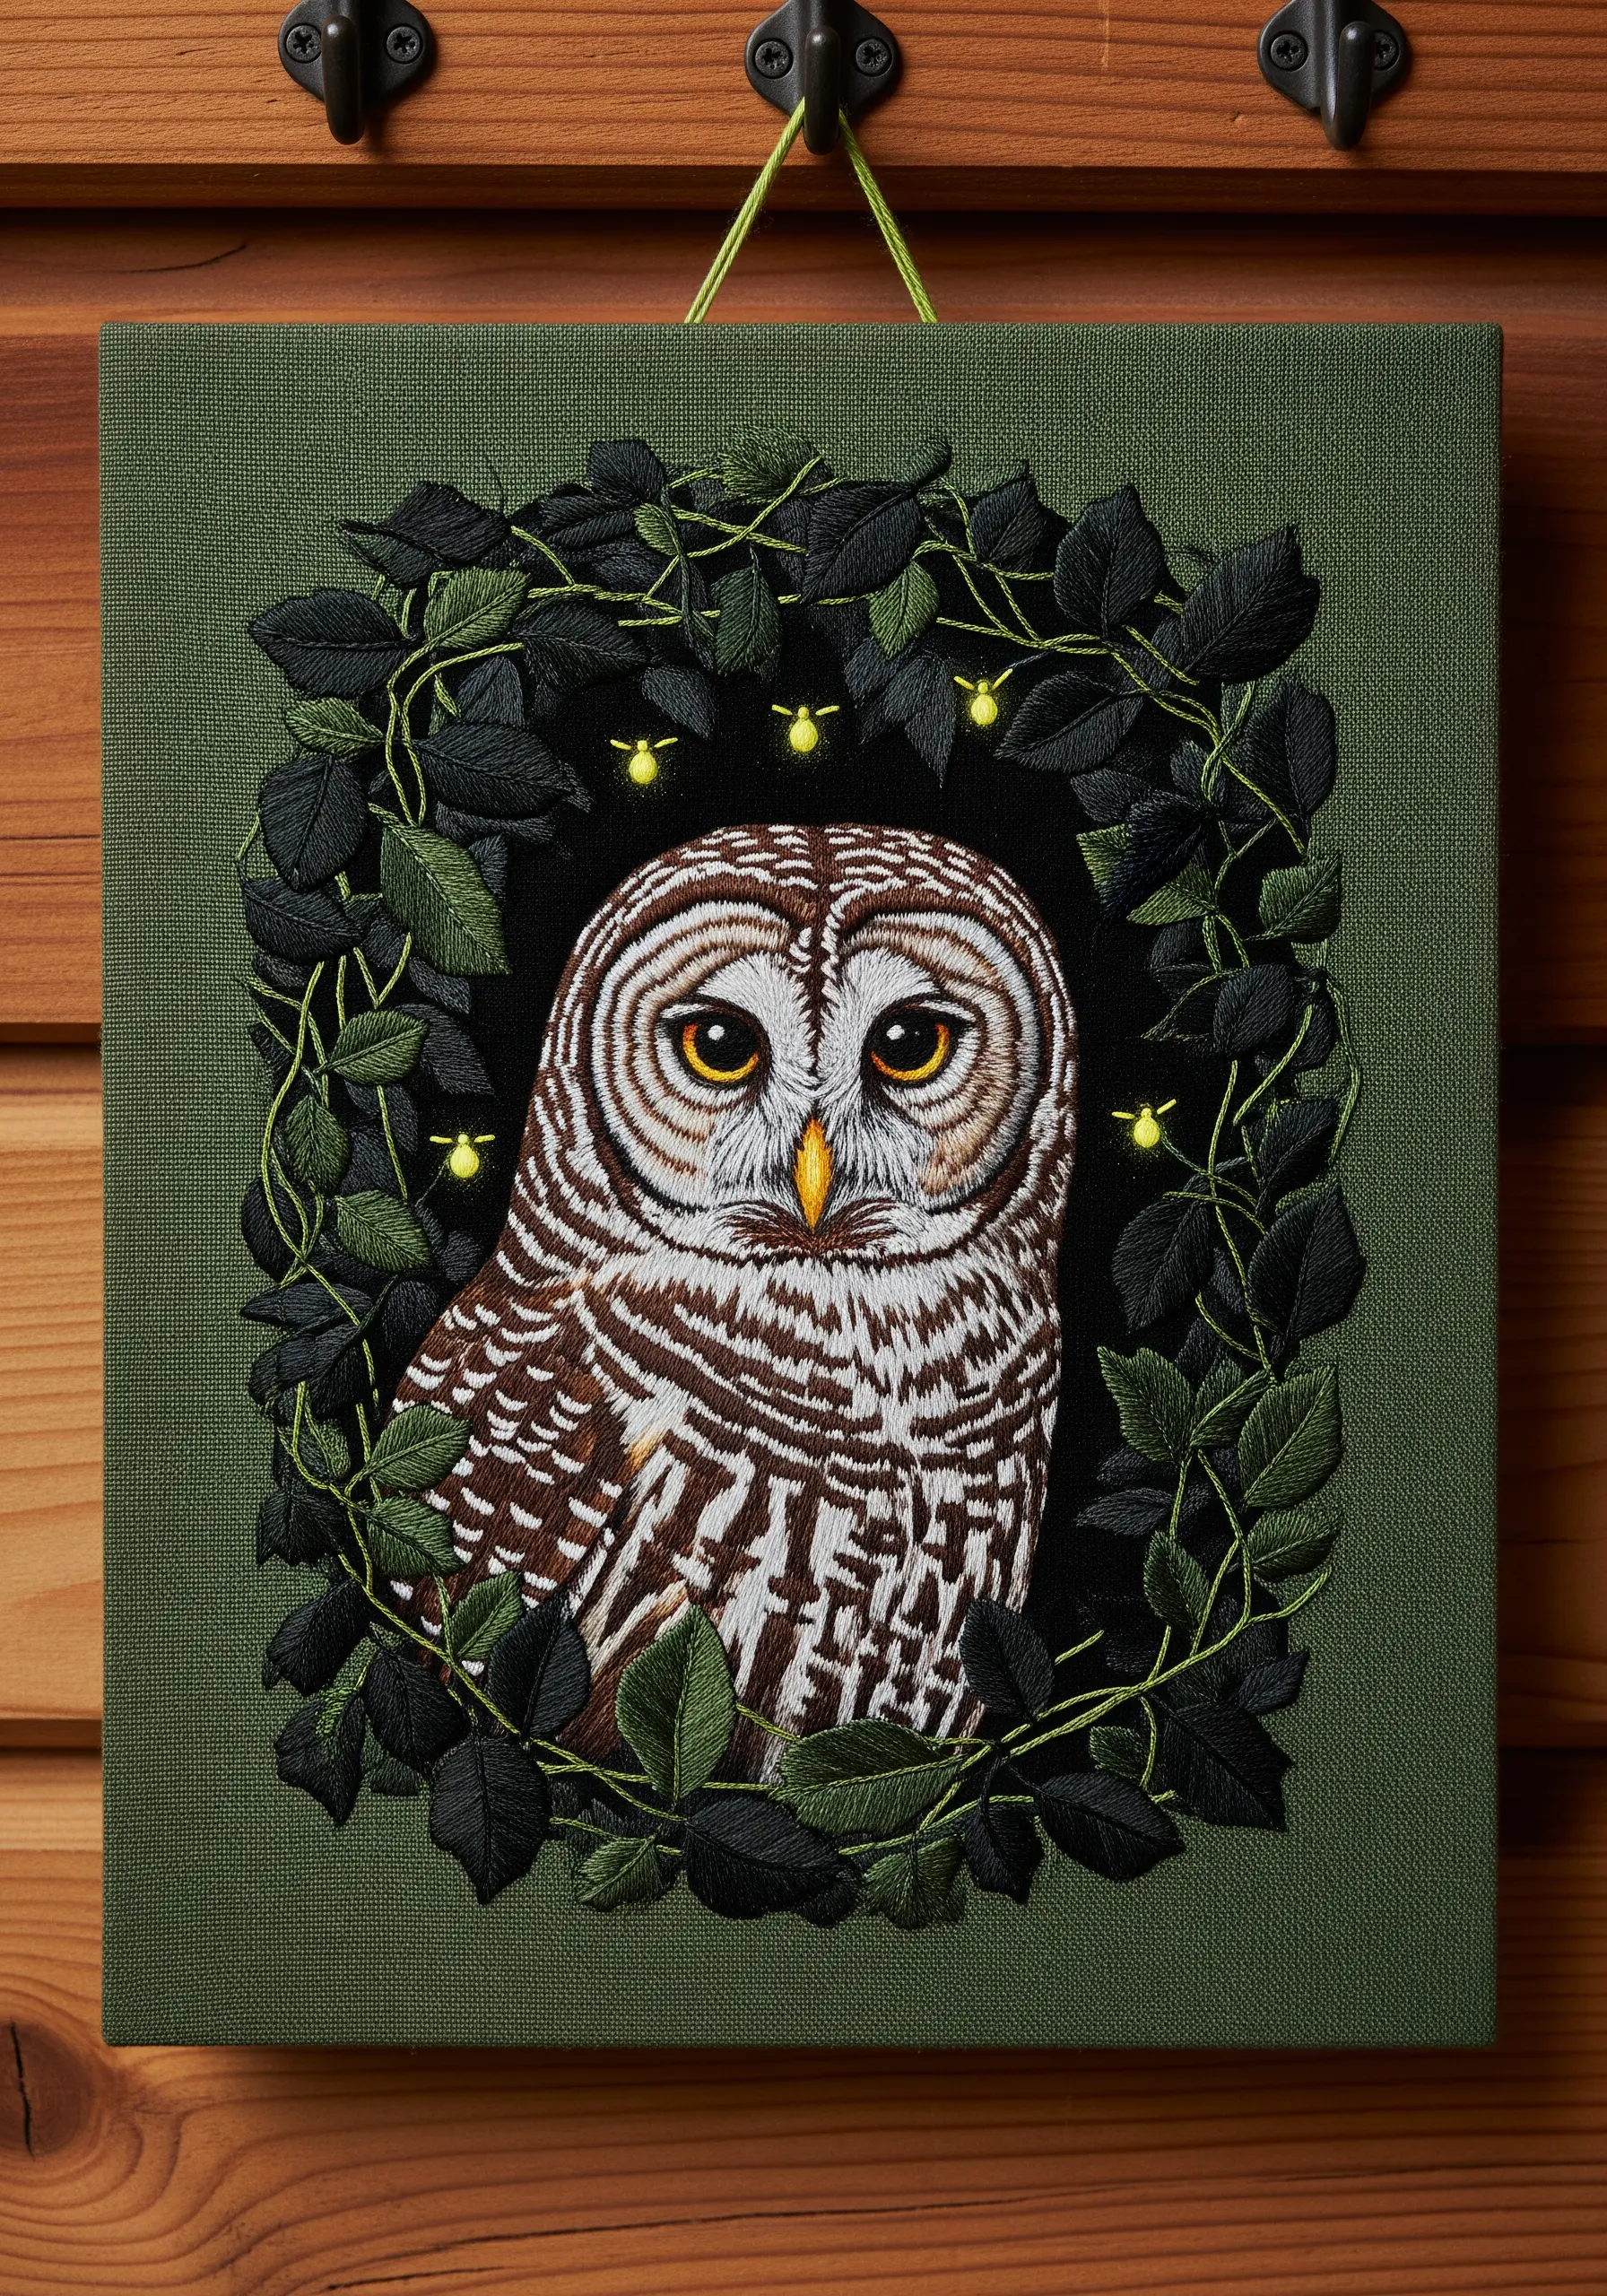
Create a natural vignette by surrounding your owl with a dense frame of leaves.
Stitch the leaves using fishbone stitch or satin stitch, varying their direction and overlapping them slightly to build up a lush, three-dimensional texture.
Use several shades of green to add realism and depth to the foliage.
A few scattered French knots in a bright, contrasting color like yellow can suggest fireflies, enhancing the magical, nighttime atmosphere of the piece.
17. Convey Ethereal Texture with Wispy Stitches
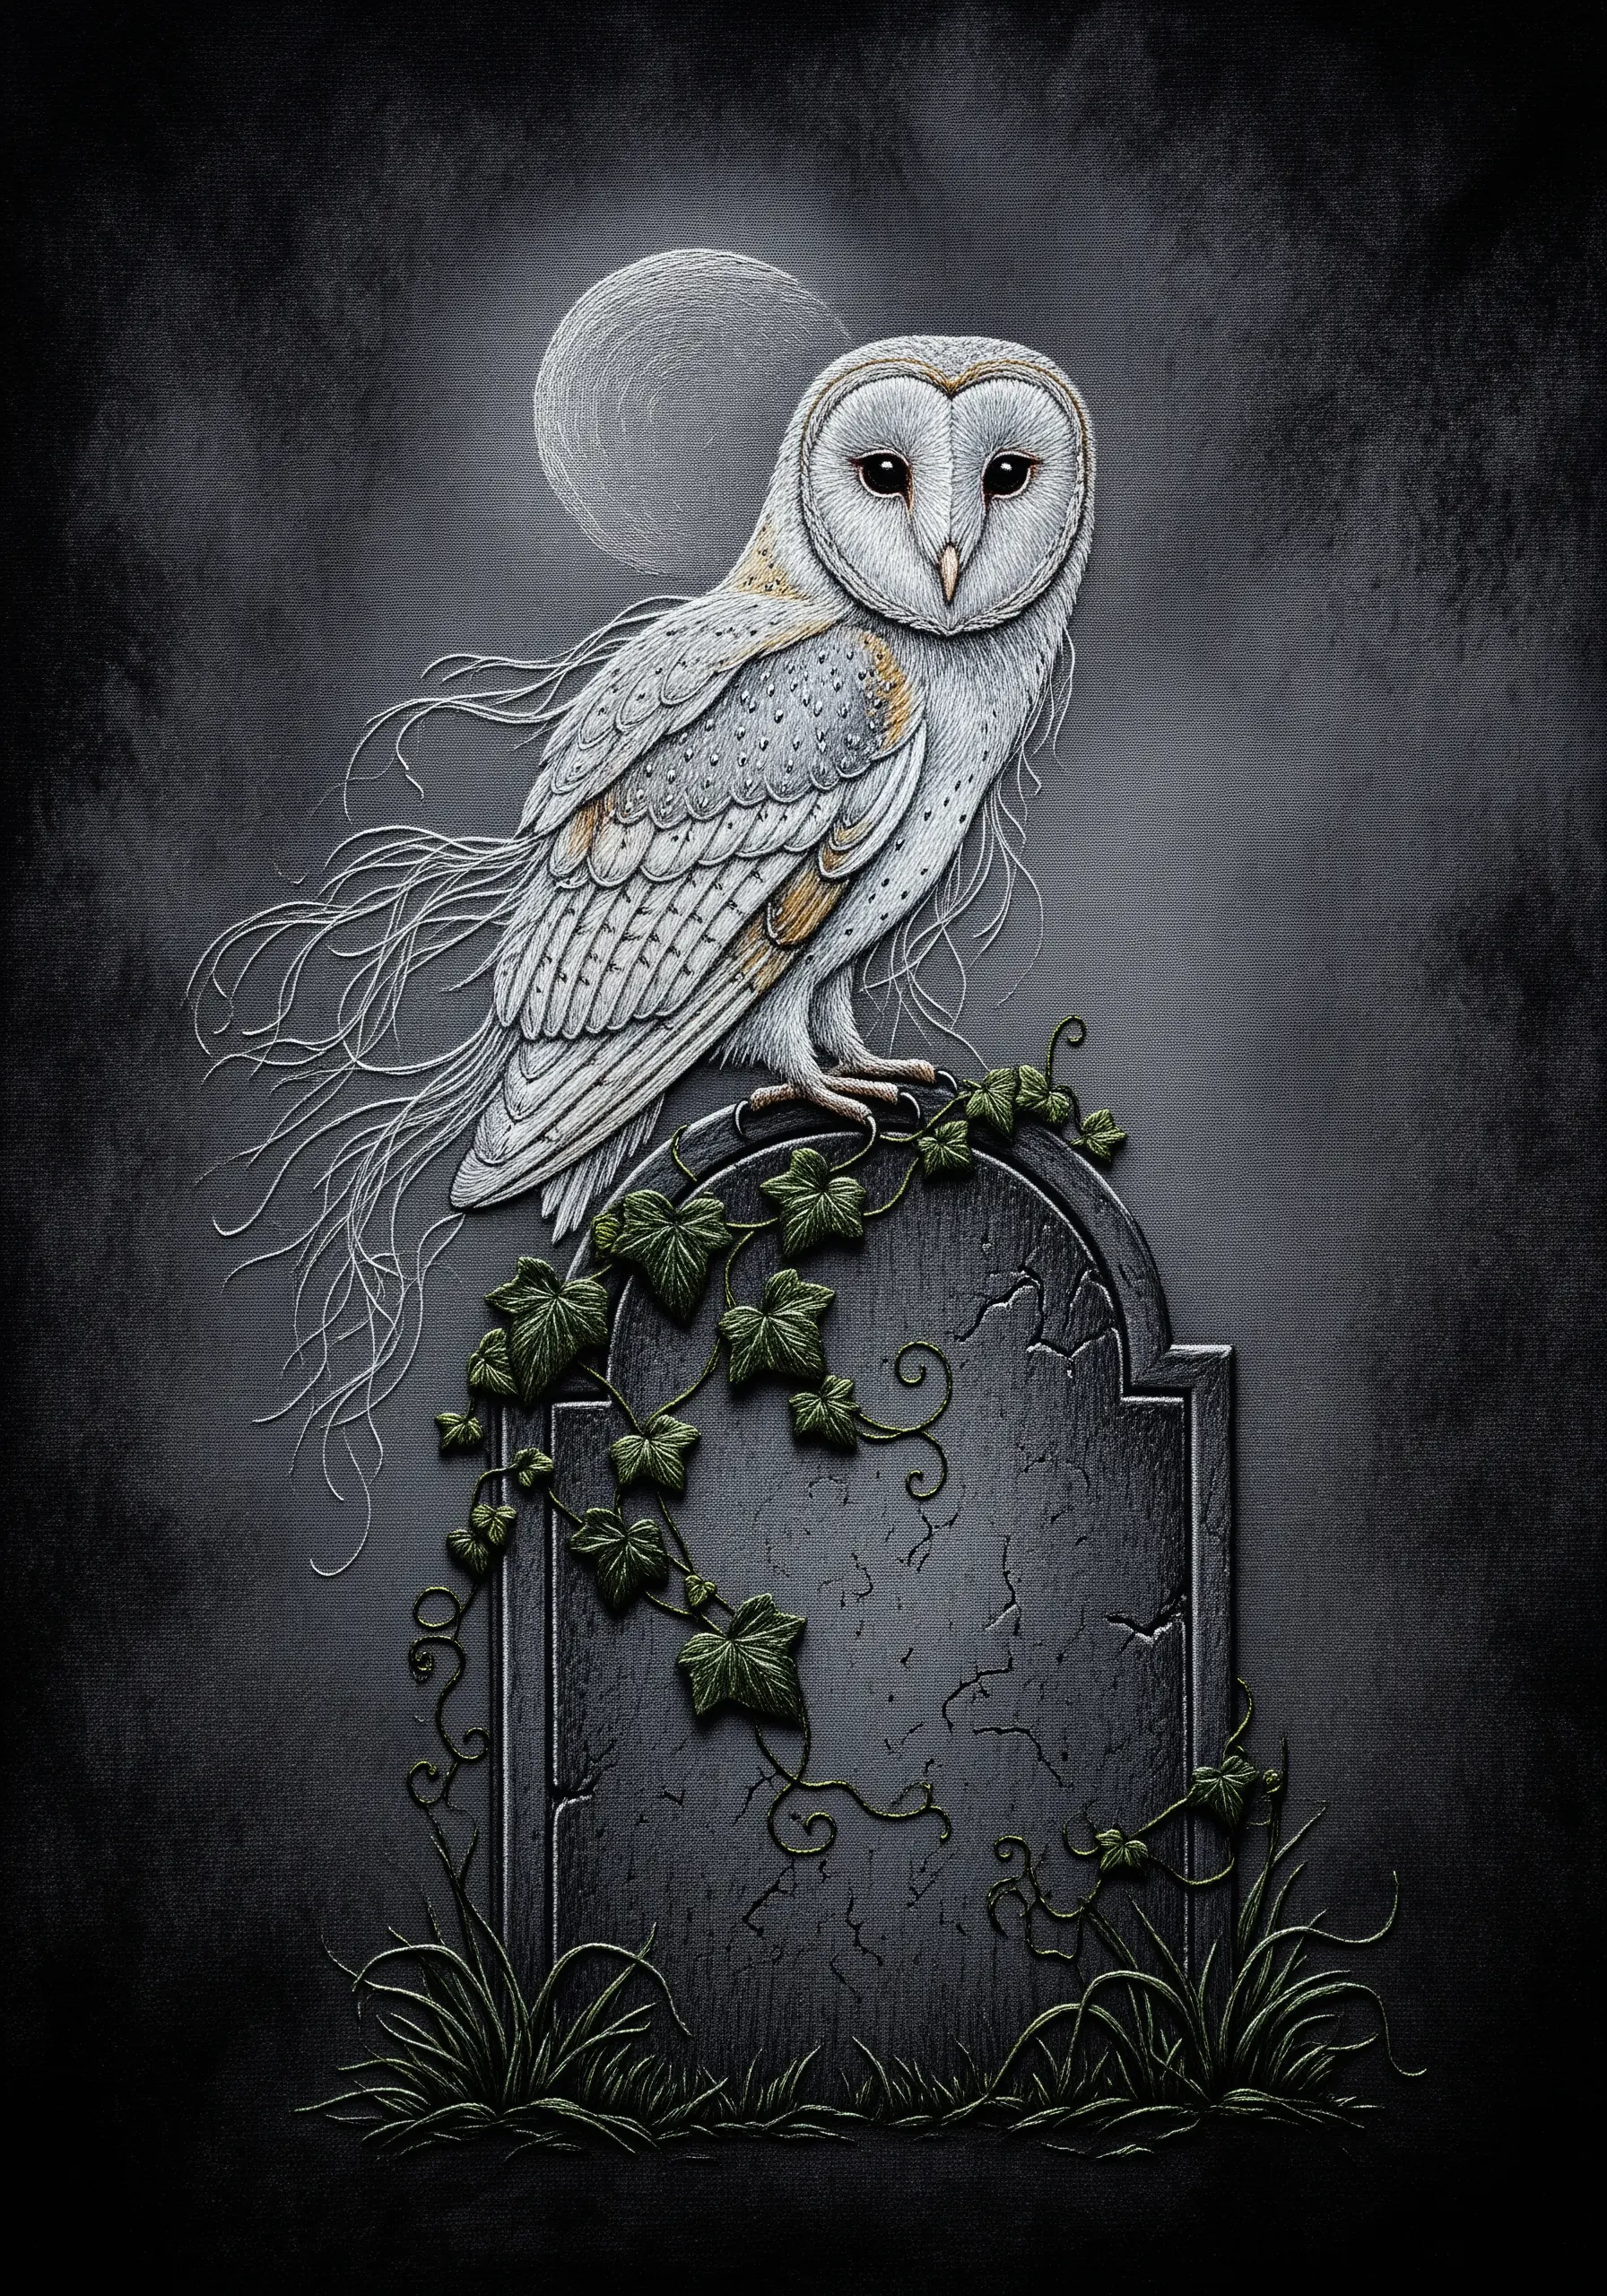
To give your subject a ghostly, ephemeral quality, use sparse, delicate stitches instead of solid fills.
Employ long, single-strand straight stitches that float over the fabric to create the wispy, dissolving feathers.
For the body, a light application of seed stitch allows the dark background fabric to show through, reinforcing the semi-transparent, ghostly effect.
This technique is all about restraint; the stitches you *don’t* make are as important as the ones you do.
18. Combine Appliqué and Embroidery for Bold Shapes
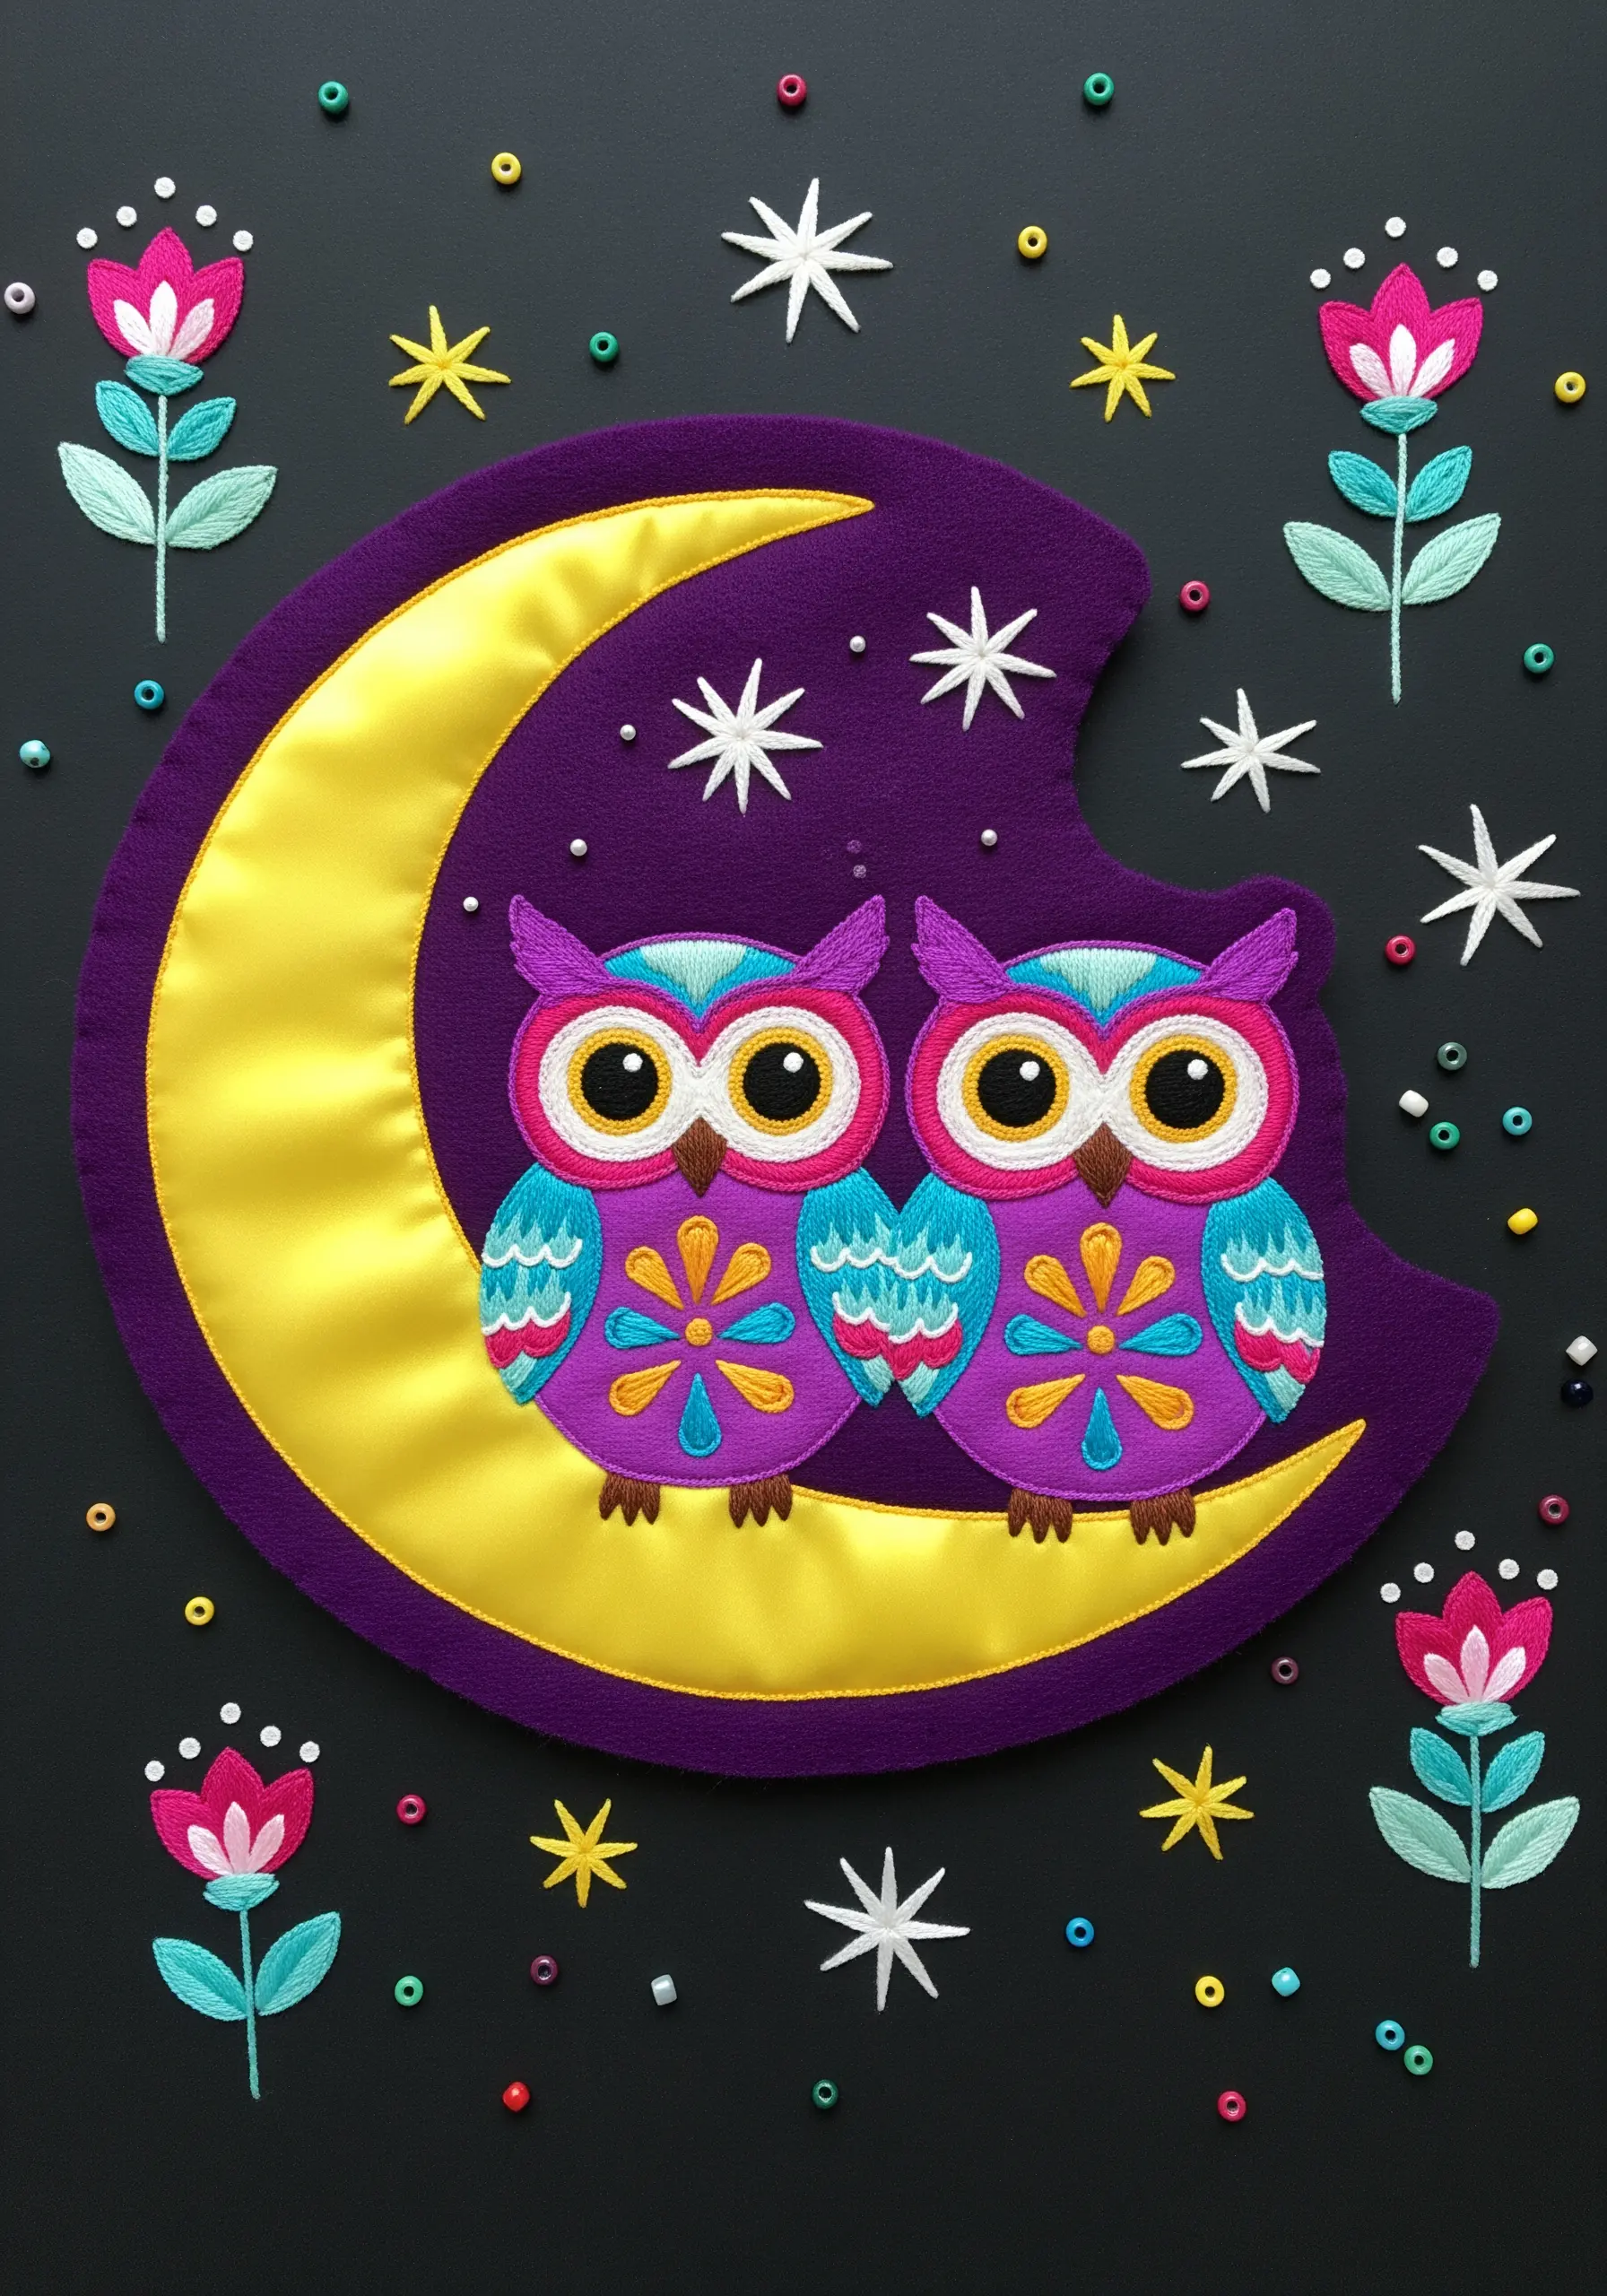
For clean, vibrant shapes with perfect edges, use appliqué with felt or non-fraying fabric.
Cut out your main shapes—the moon and the owls’ bodies—and secure them to the background fabric with a blanket stitch or a tight satin stitch around the edge.
This technique allows you to incorporate different materials, like the shiny satin used for the moon, adding another layer of texture and interest.
All the fine details, like the feathers and facial features, can then be embroidered on top of the appliqué pieces.
19. Capture an Intense Gaze with Directional Stitching
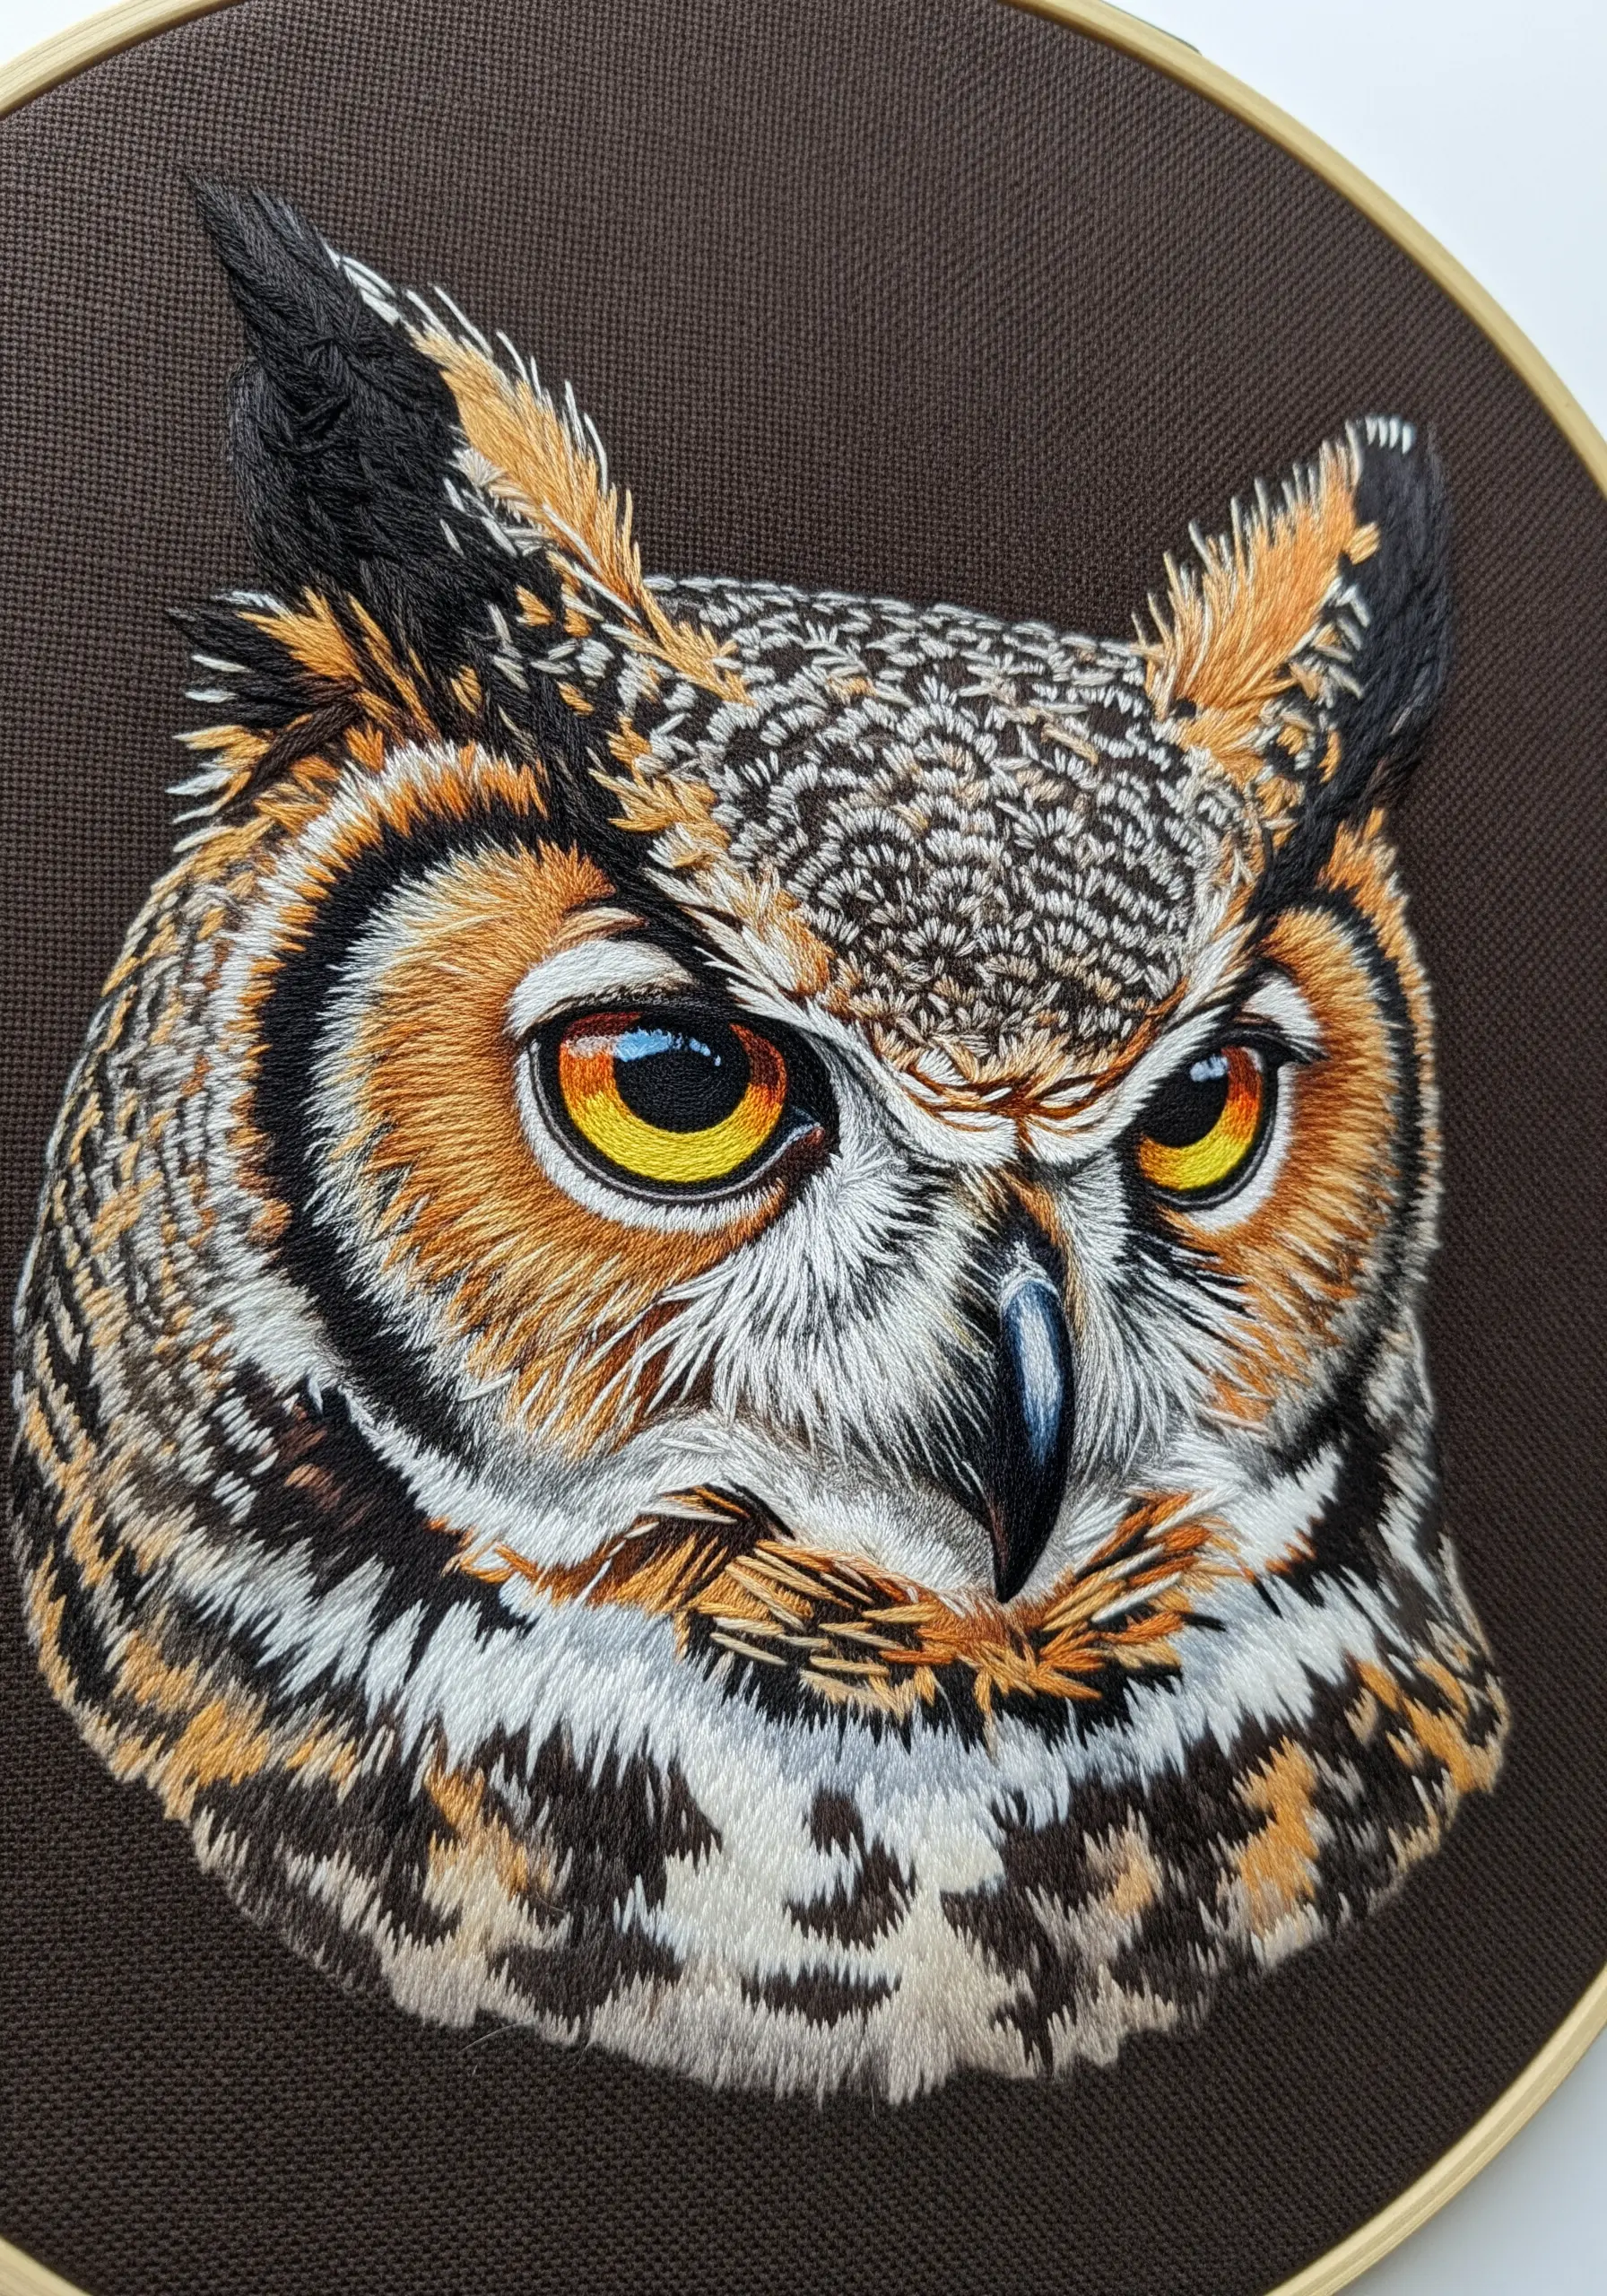
When thread painting a portrait, the direction of your stitches is everything. It defines the contours of the face and creates a sense of form.
Notice how the stitches radiate outwards from the beak and eyes, perfectly mimicking the way feathers grow on a real owl.
Use single-strand floss for the finest details, especially for the tiny, hair-like feathers around the eyes.
Achieving this level of detail requires patience and a close observation of your reference image, but the lifelike result is worth the effort.
20. Weave a Fairytale with Conceptual Textures
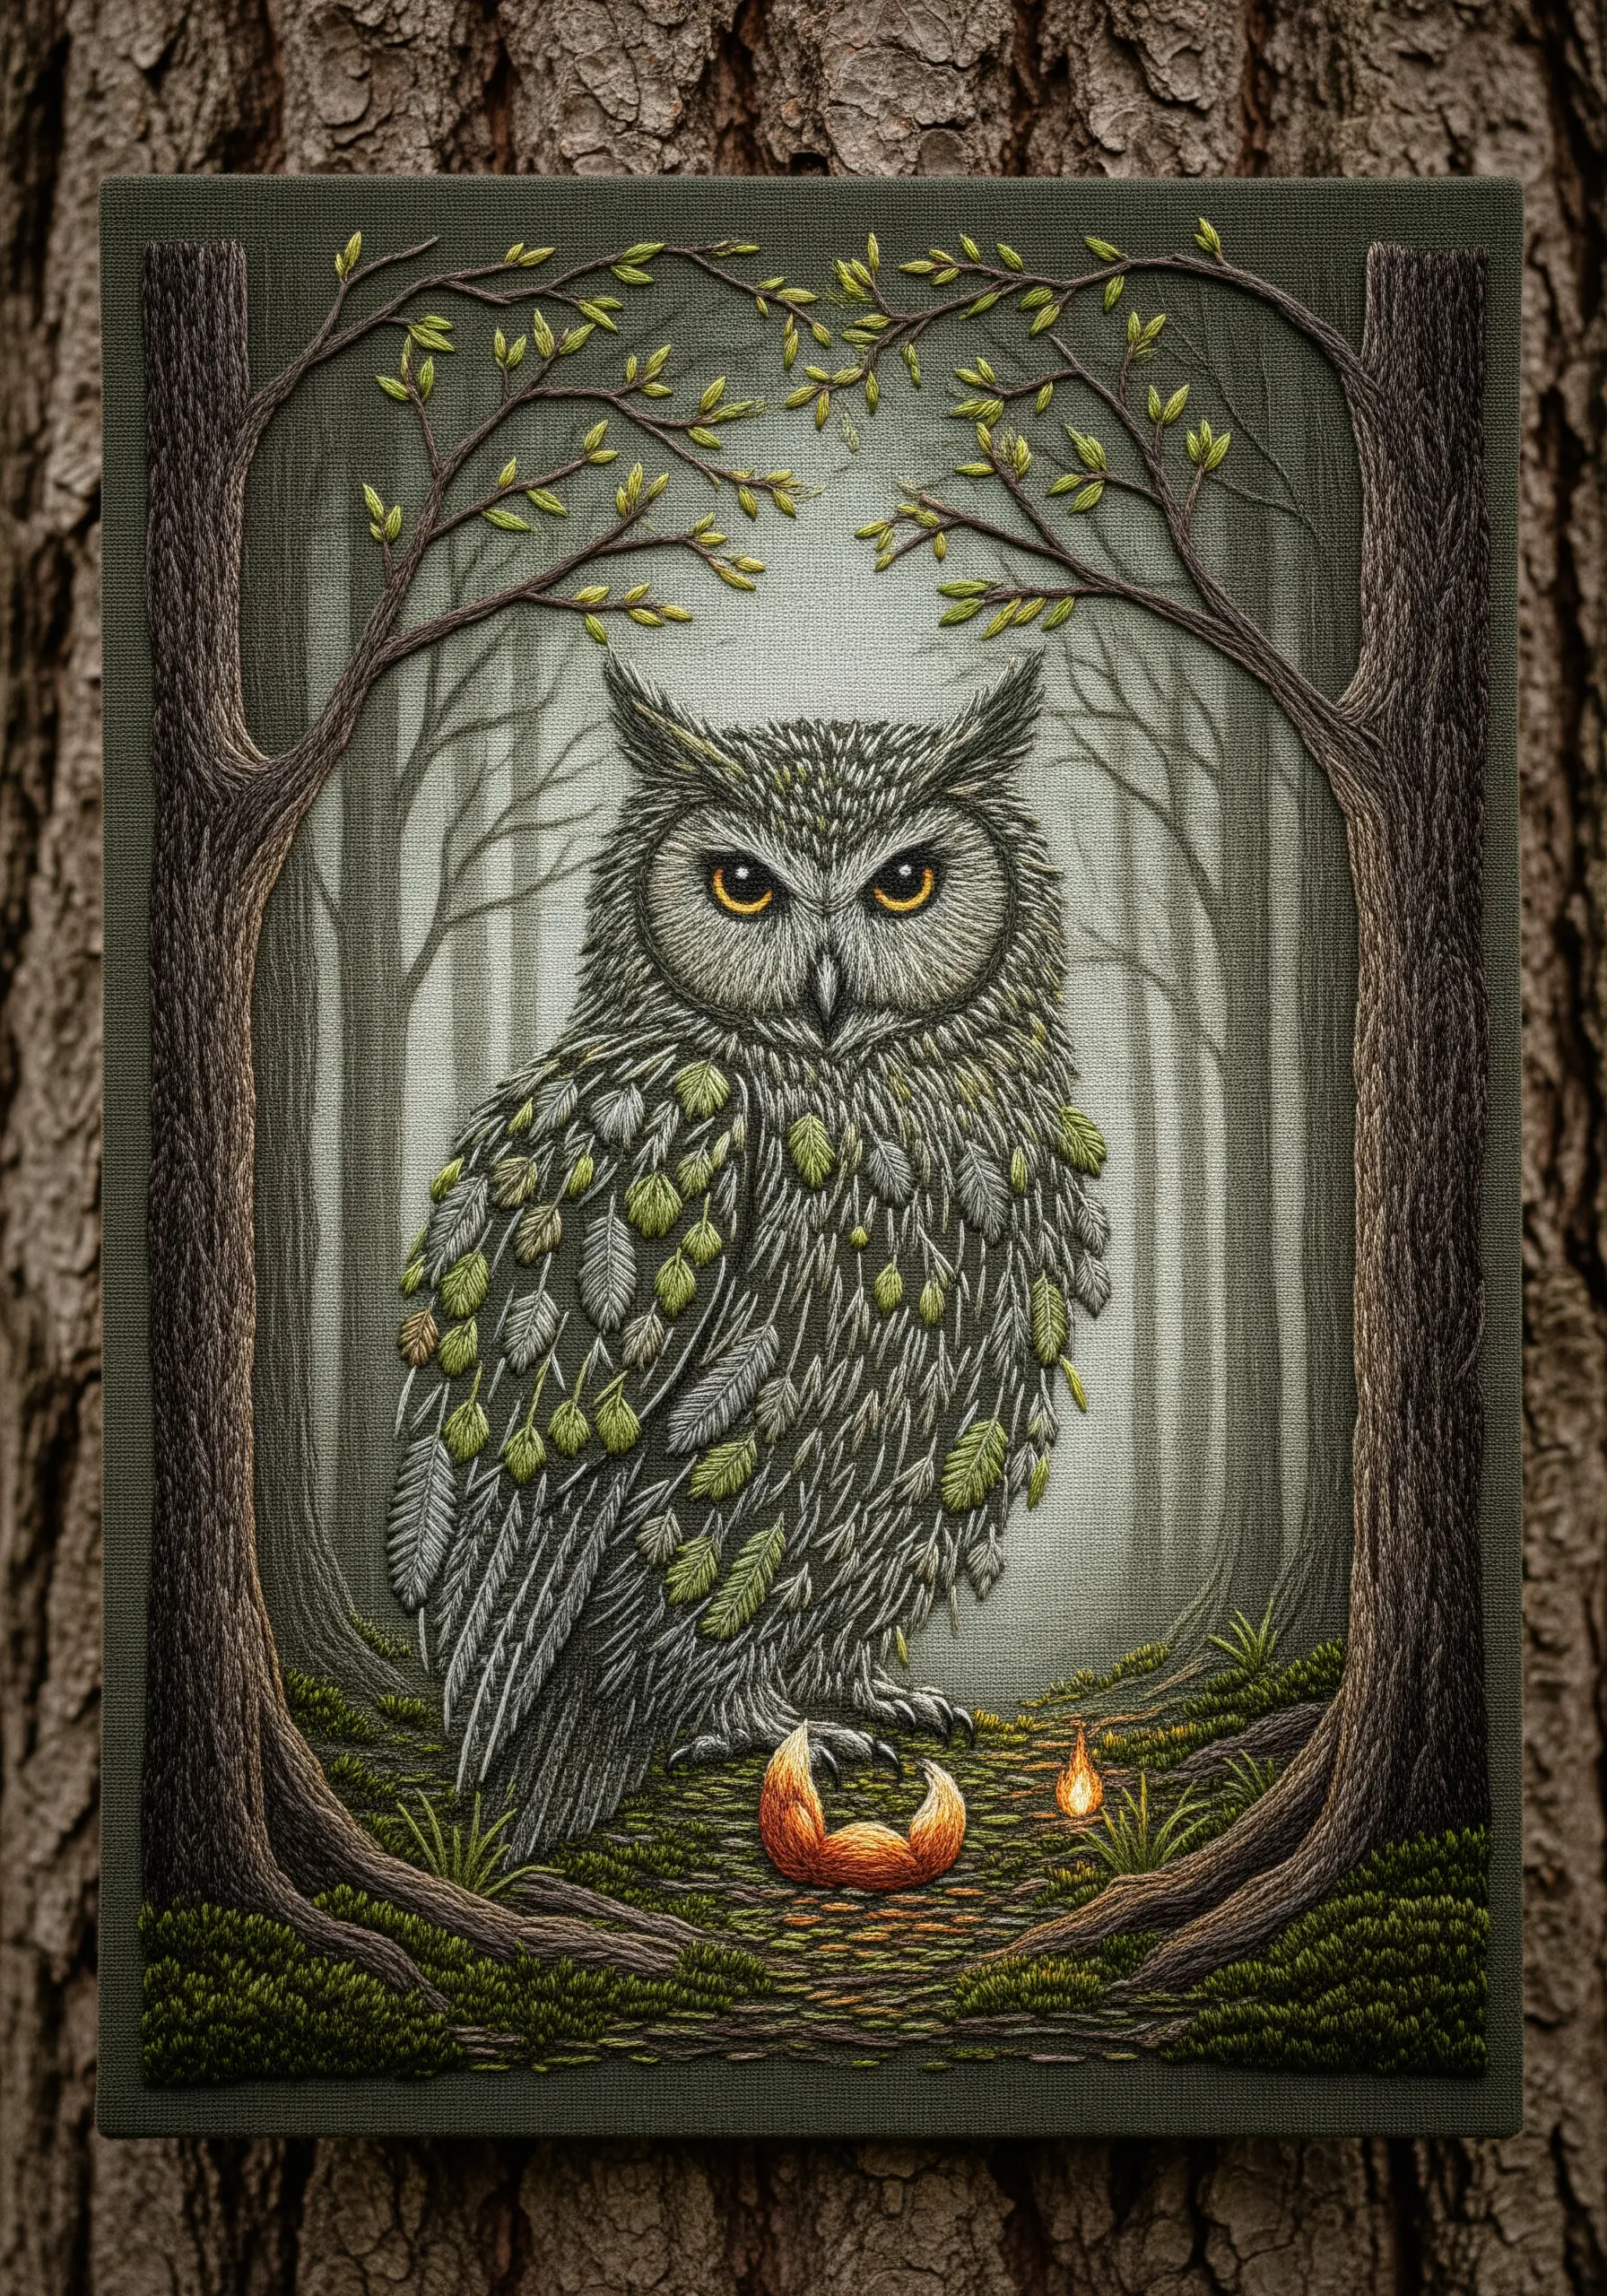
Push your creativity by replacing a realistic texture with a conceptual one. Here, the owl’s feathers are reimagined as leaves.
Create these leaf-feathers using detached chain stitches or fly stitches layered over one another.
Use a variegated green or multiple shades of green to give the foliage a more natural, varied appearance.
This whimsical approach transforms the owl into a mythical forest guardian, instantly telling a story through texture and form.
21. Stitch the Aurora with Blended Pastels
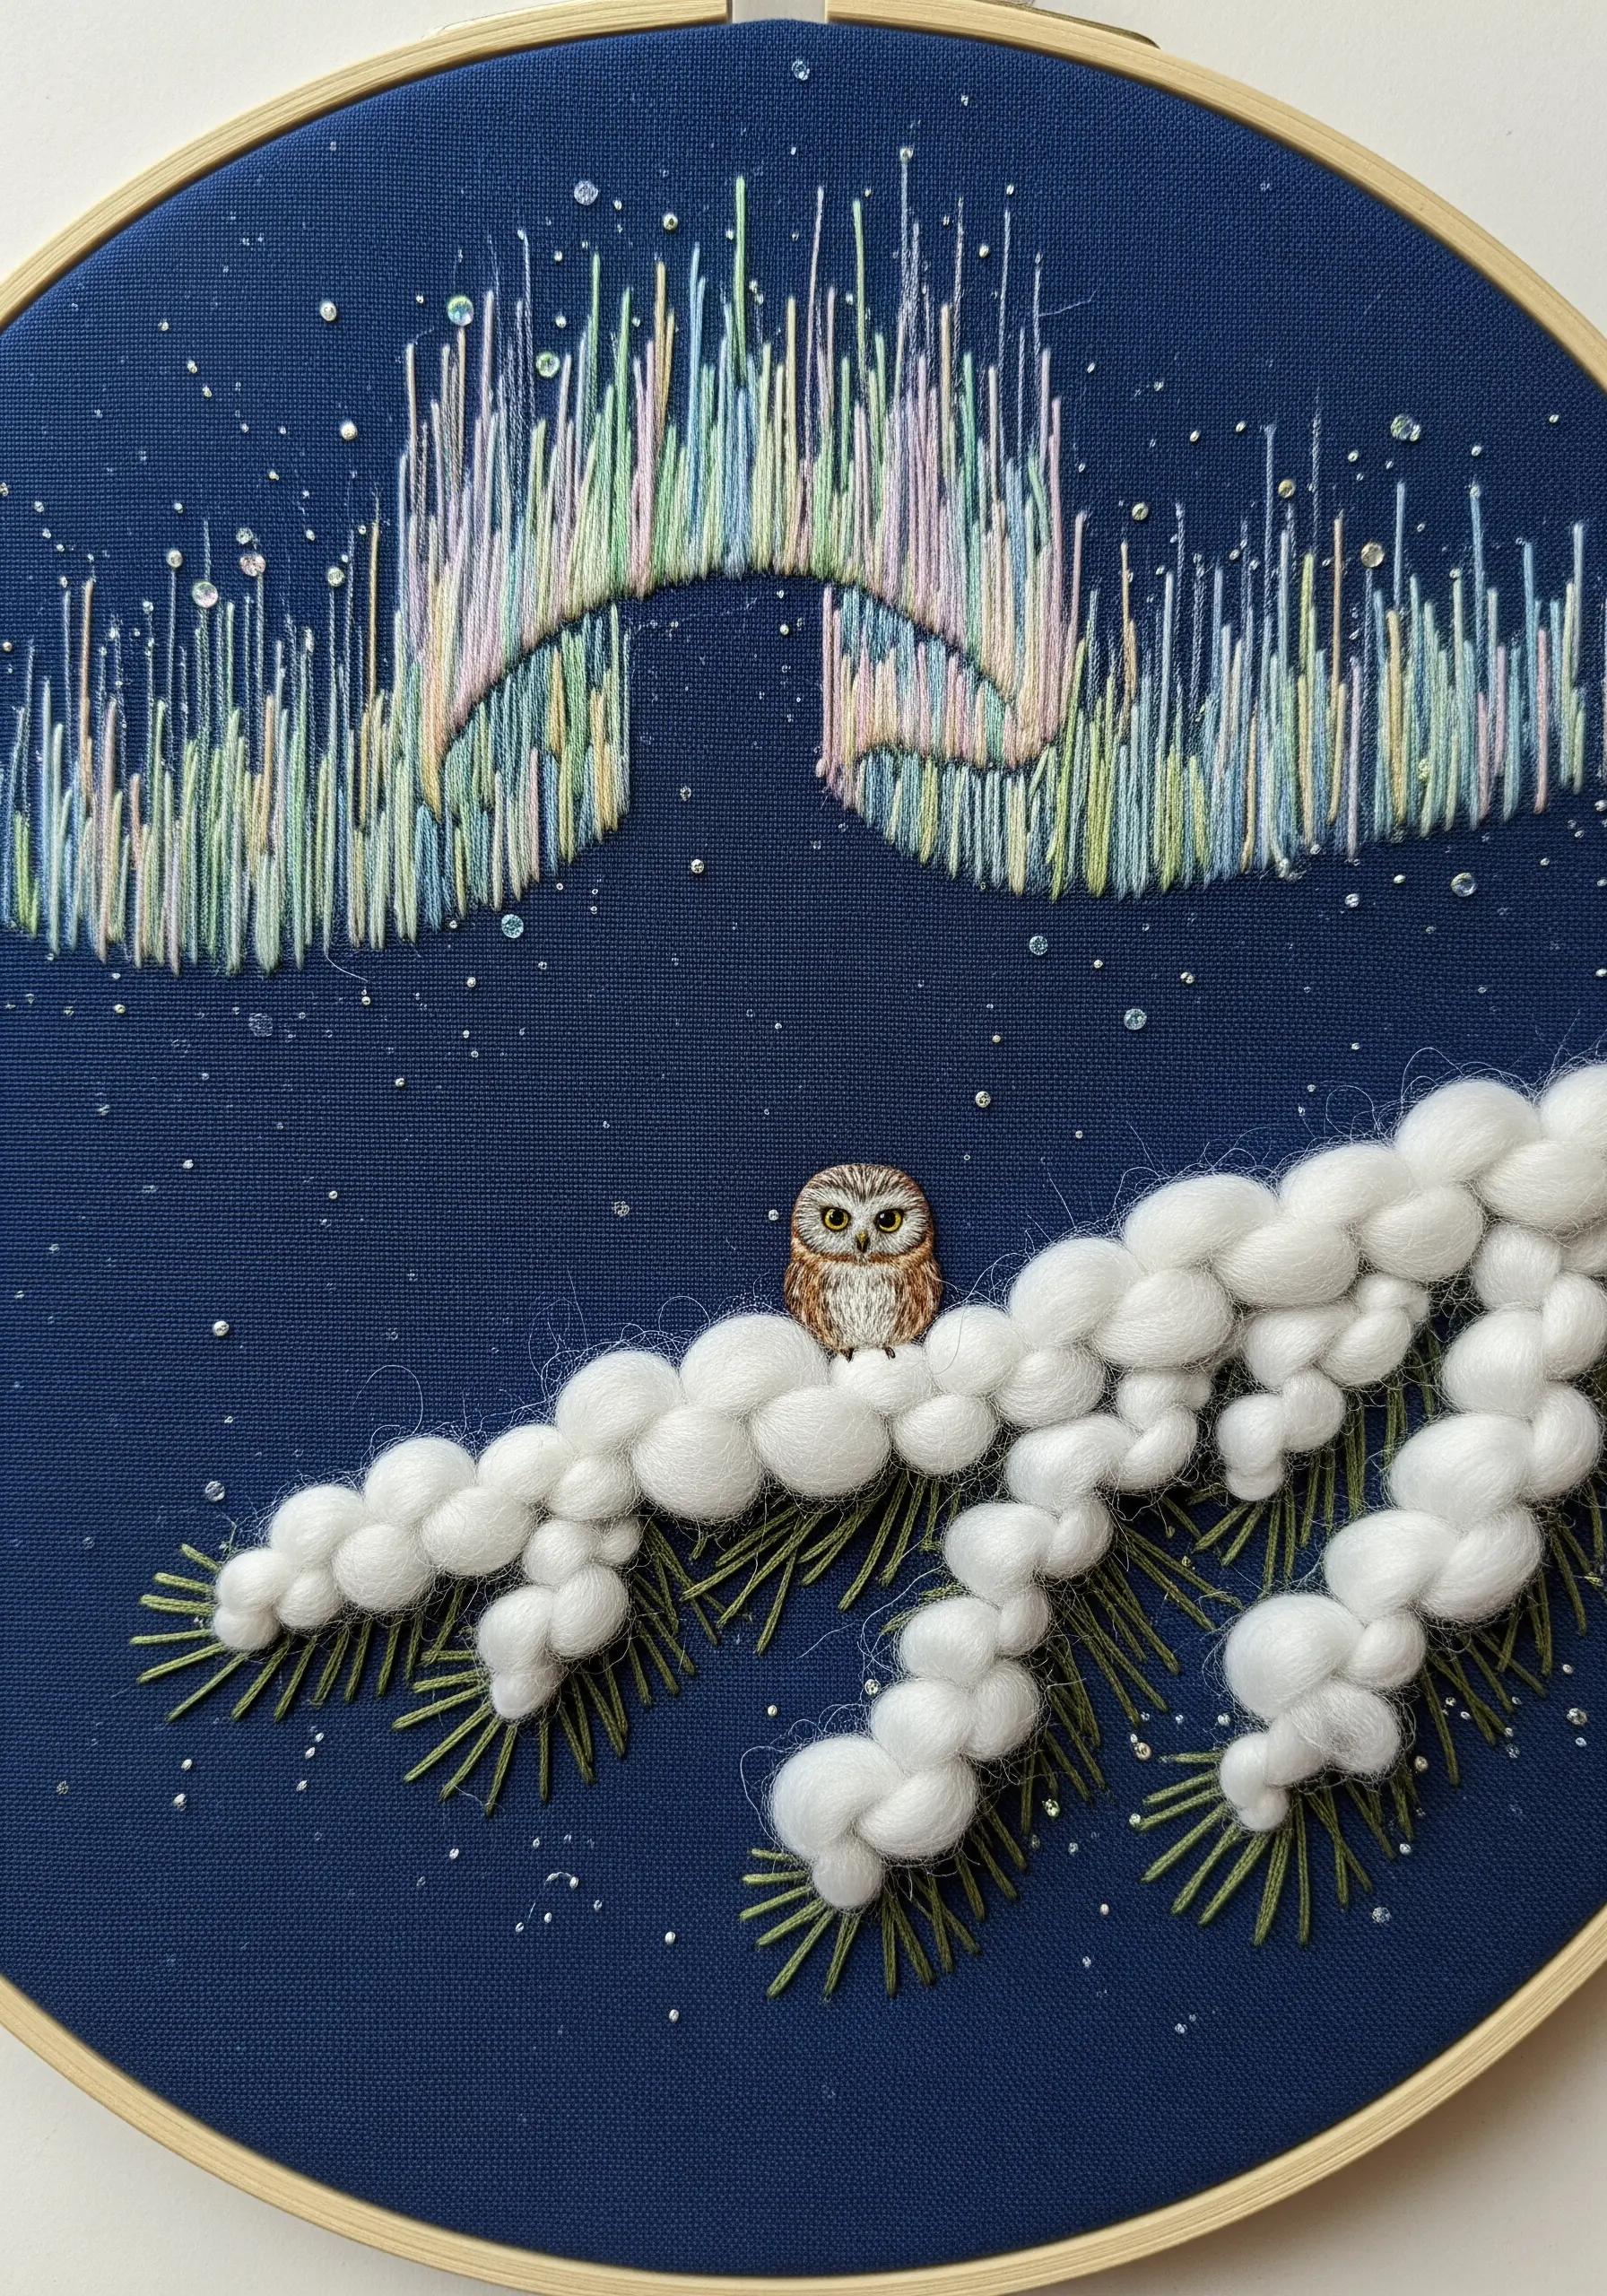
Capture the ethereal glow of the Northern Lights with long vertical straight stitches.
Use a blend of two or three pastel-colored threads in your needle at once—think soft pinks, greens, and yellows—to create the shifting, multi-tonal effect.
Incorporate a single strand of metallic or iridescent thread into your blend for a subtle shimmer.
Contrast this delicate, airy texture with a heavy, chunky element like the snow-covered branch, made from wrapped wool roving or dense chenille stitch.
22. Capture Dynamic Motion with Clean Line Art
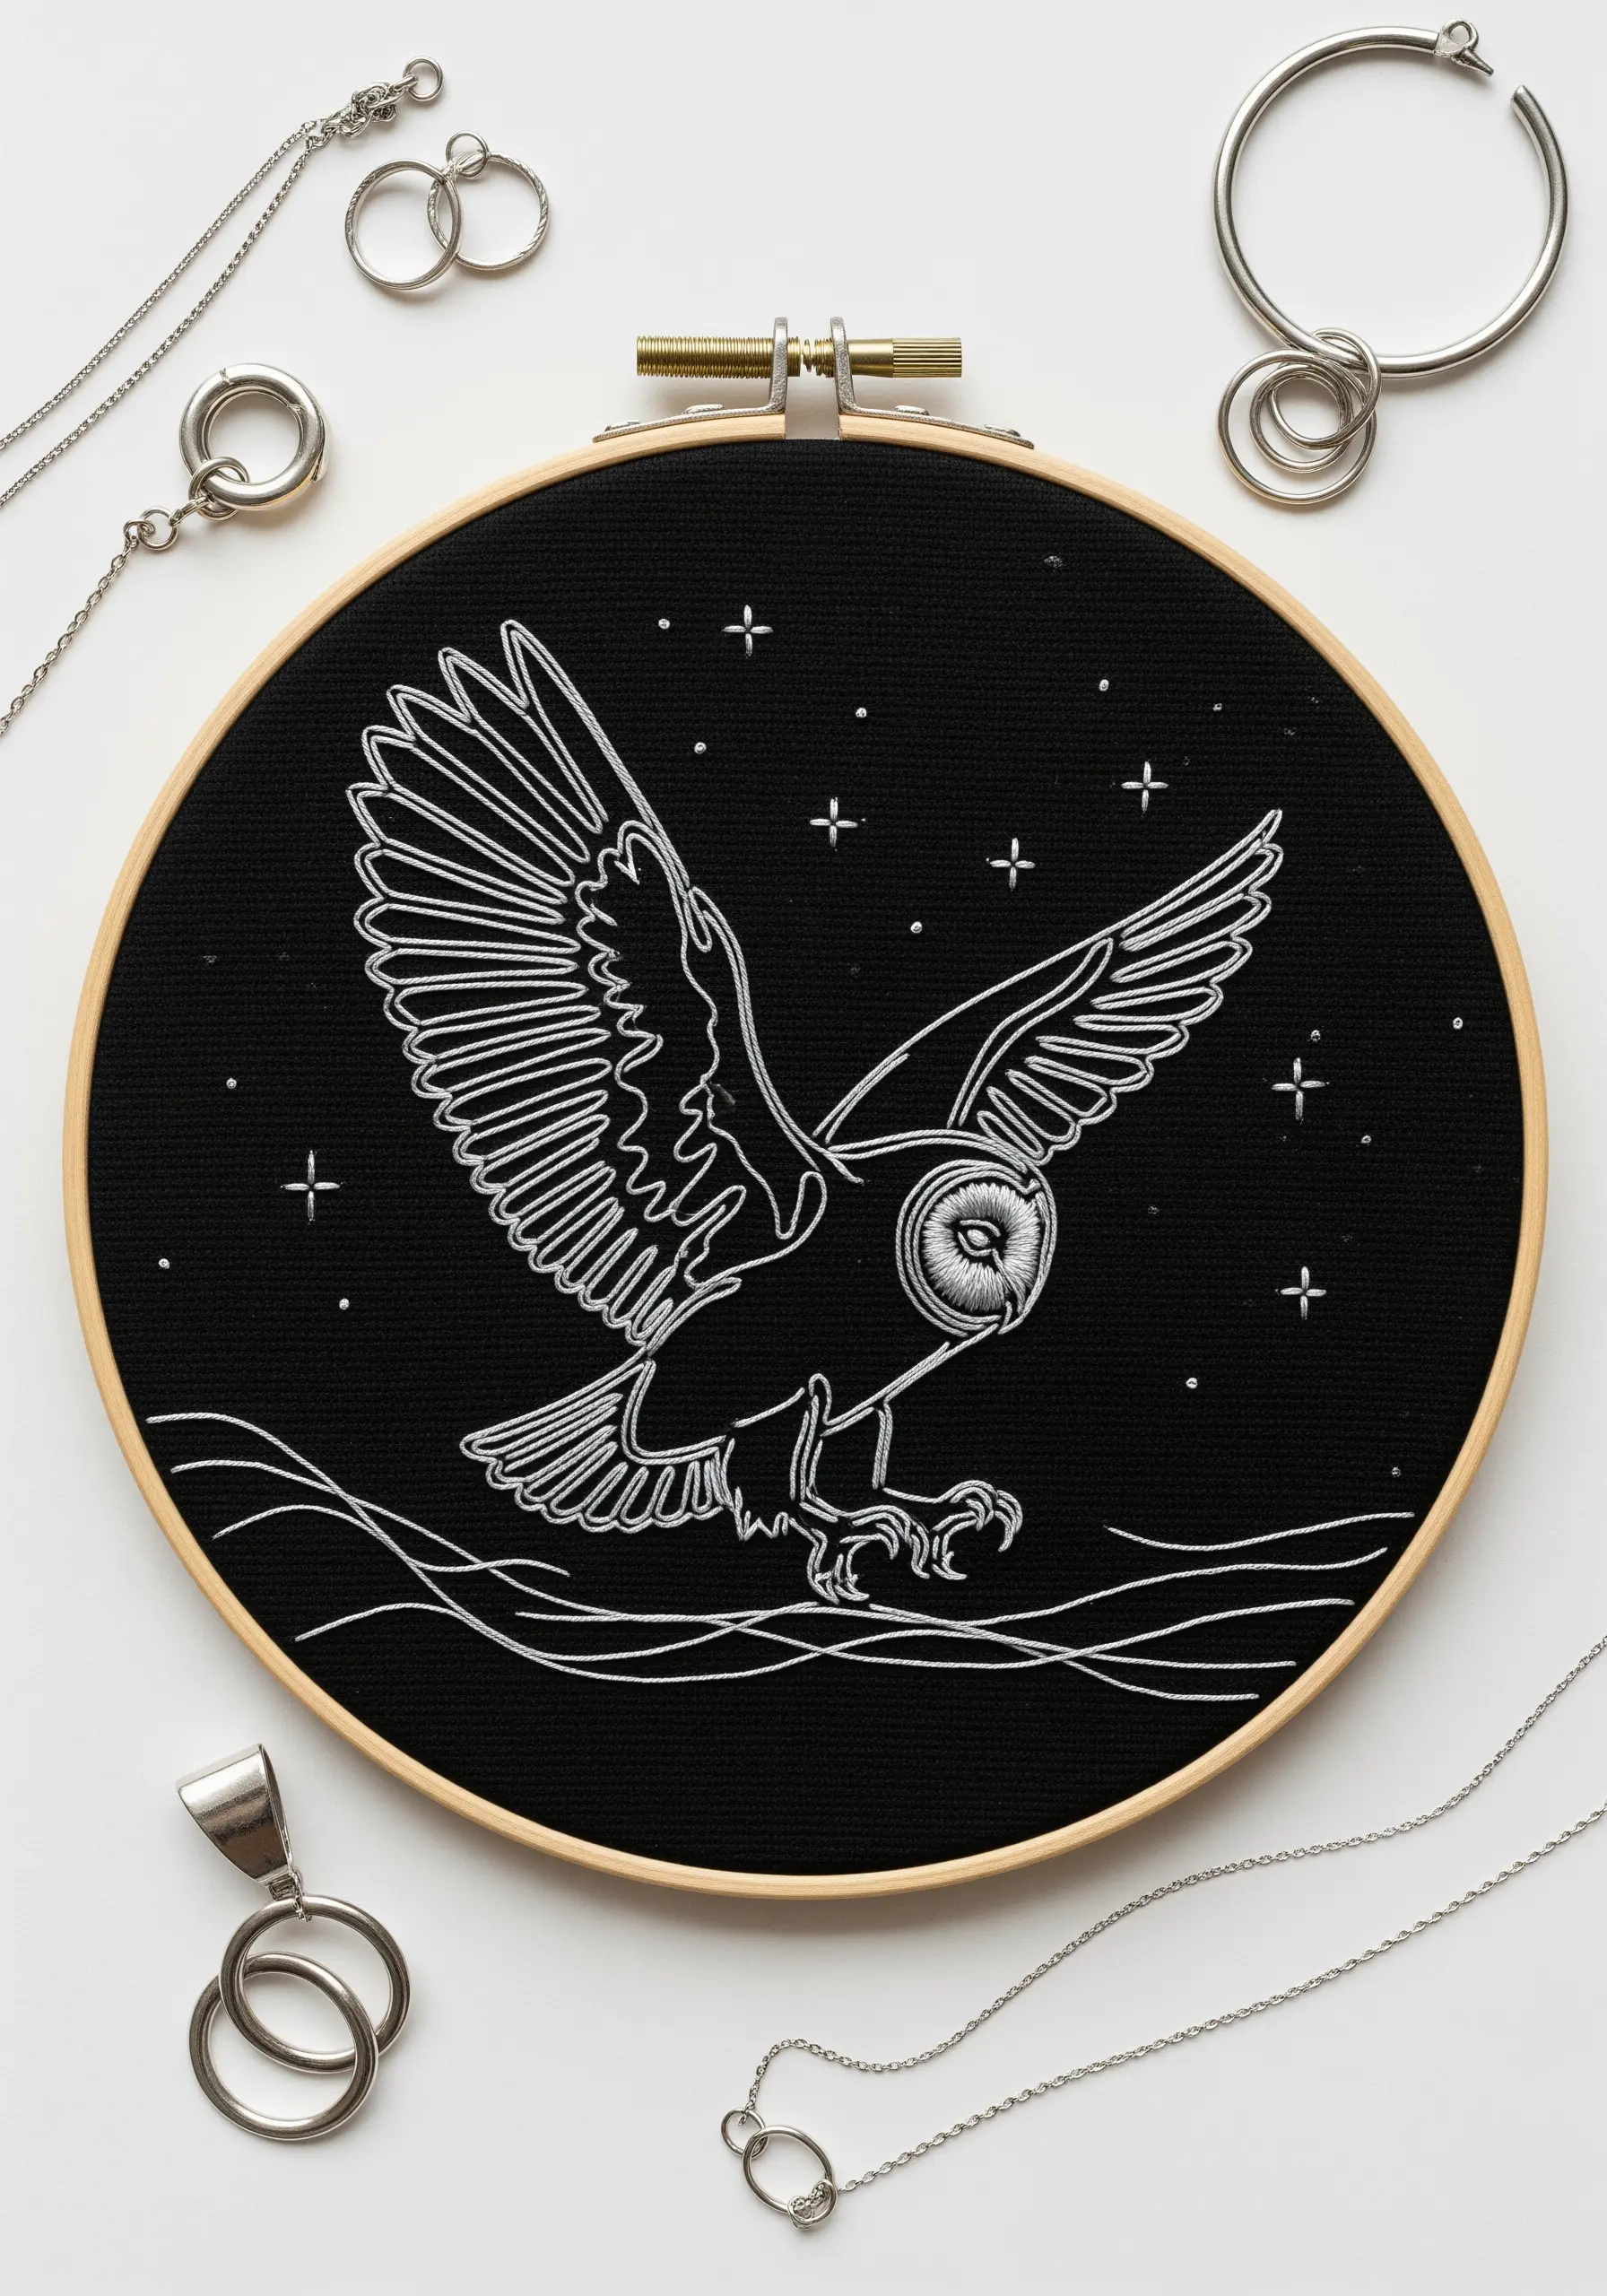
Illustrate the power of movement with a simple, high-contrast line drawing.
A crisp whipped backstitch or stem stitch will give your lines a smooth, solid quality that stands out against the dark fabric.
Use a bright white or silver metallic thread to maximize the contrast and create a striking, graphic image.
The success of this minimalist style relies on the precision and confidence of your lines, proving that less can be more.
23. Design an Intricate Celestial Mandala
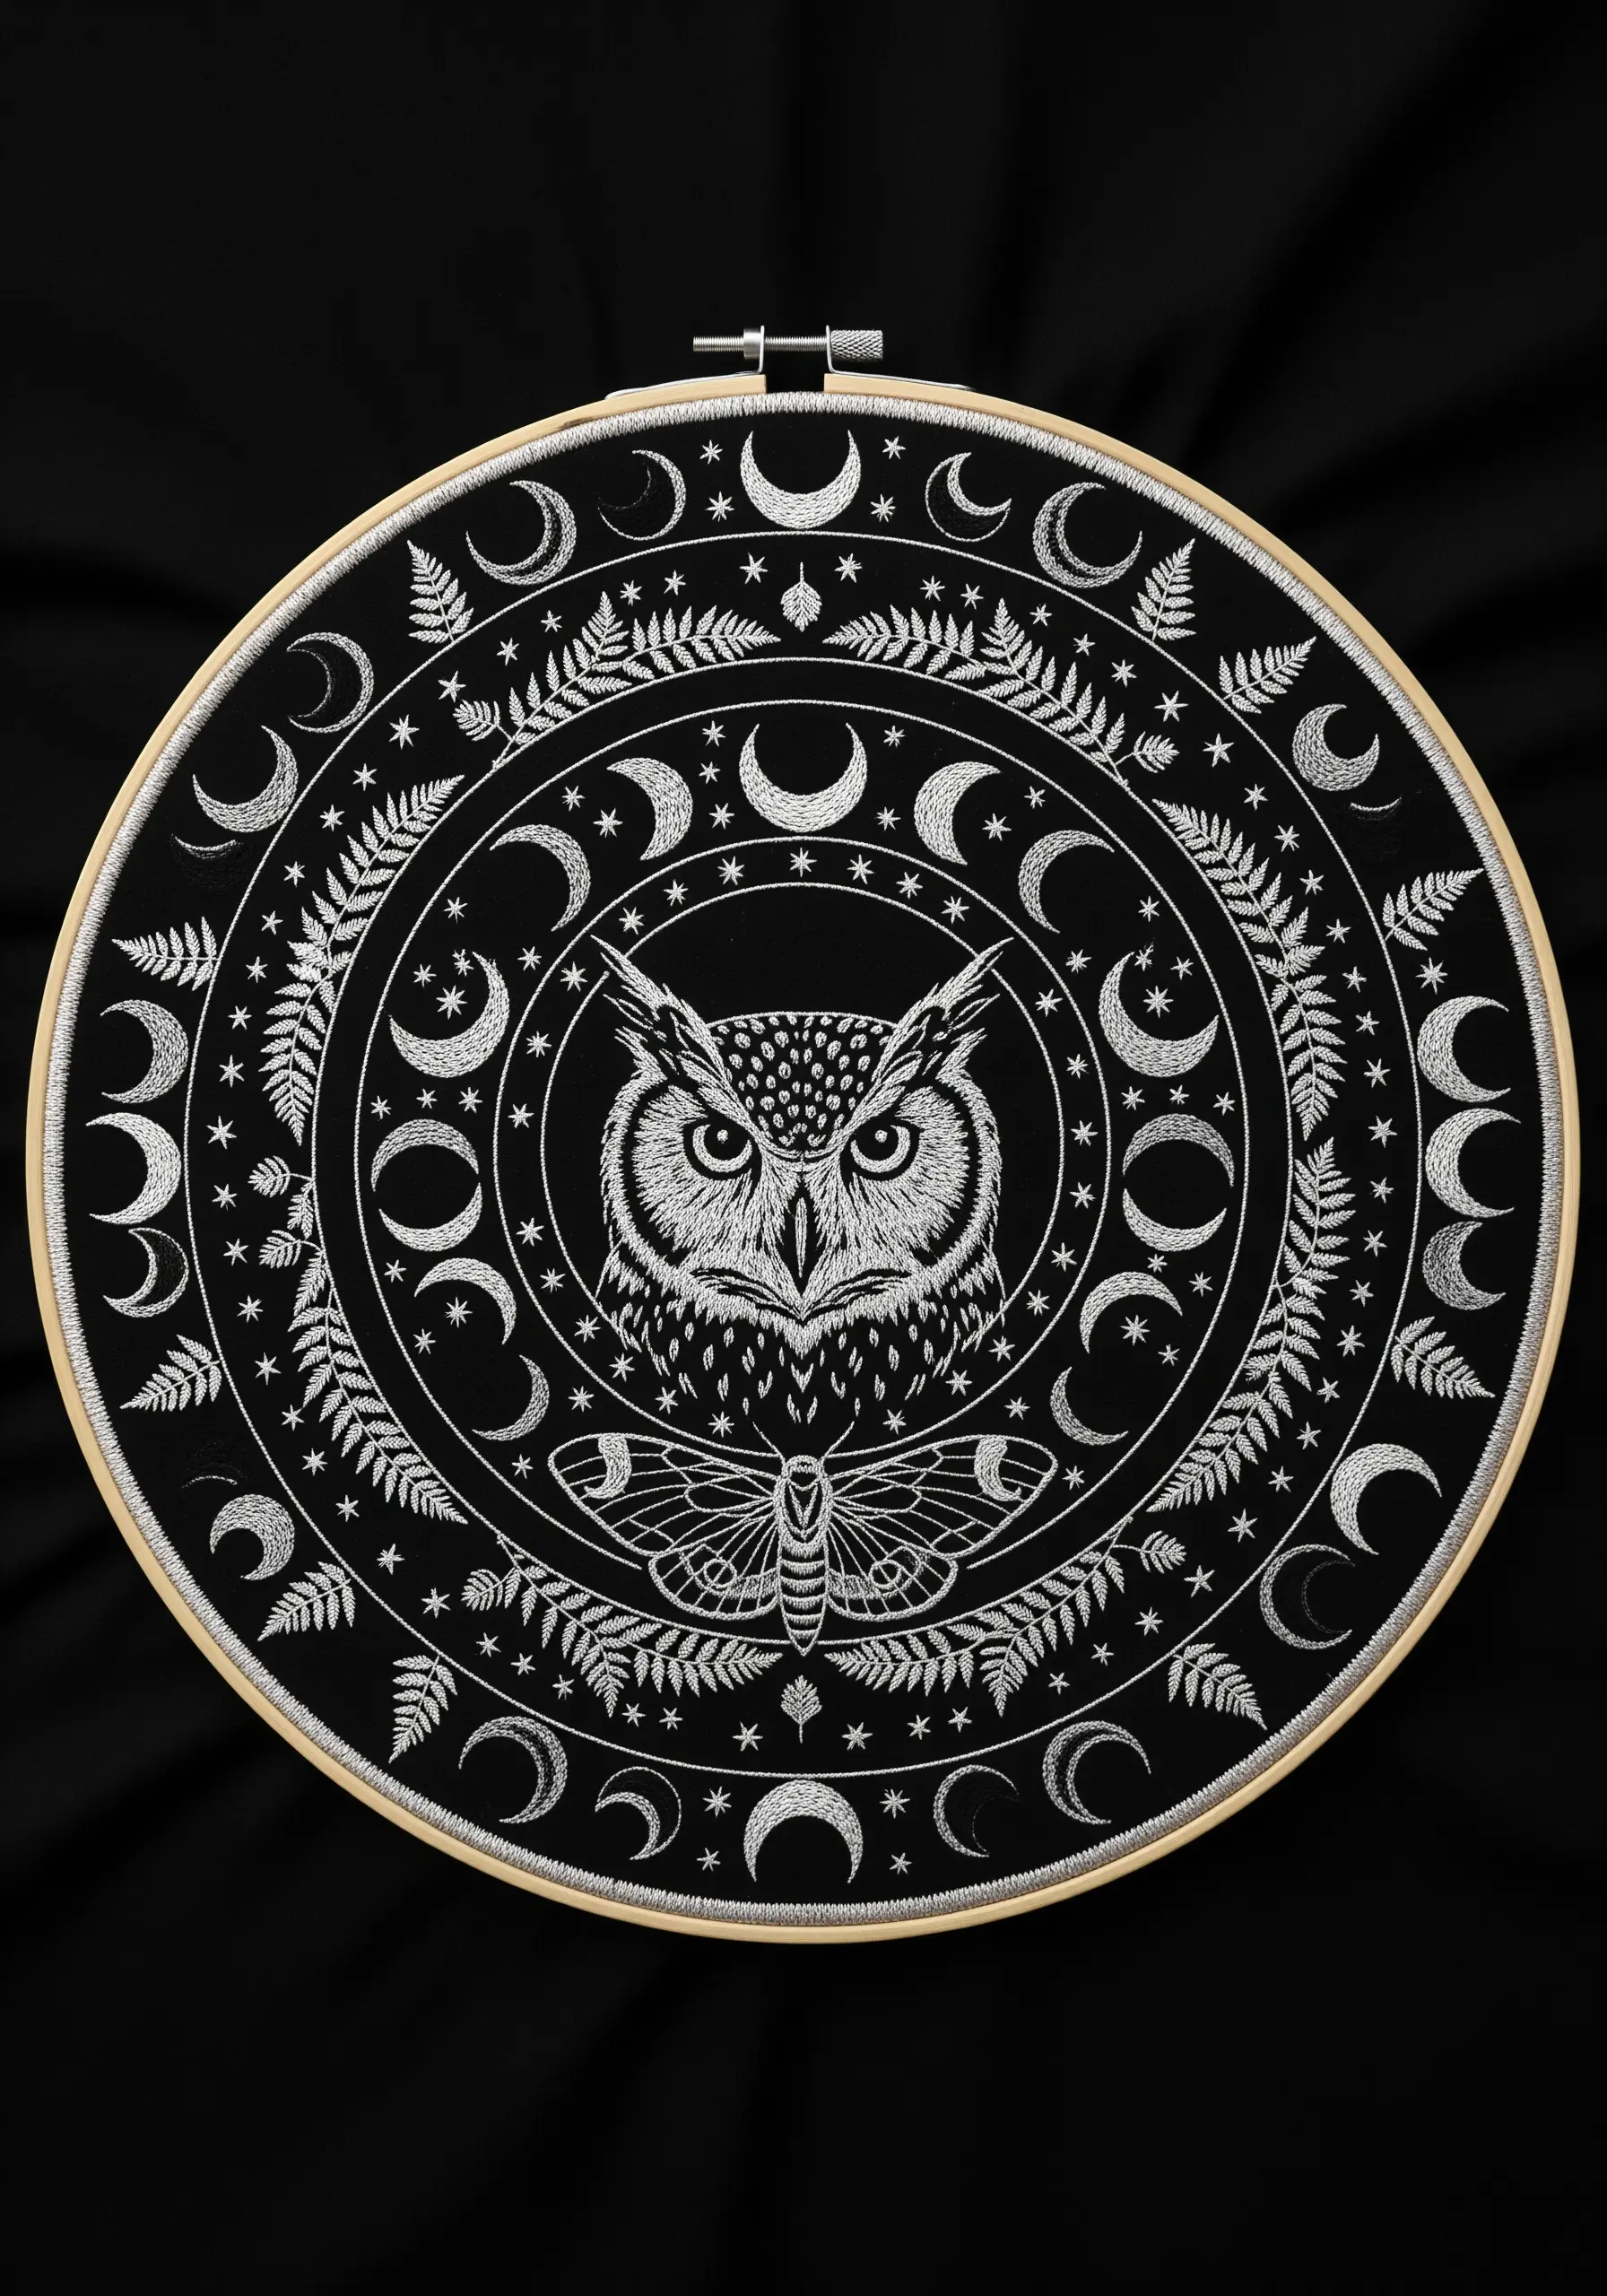
Build a complex and symbolic mandala by arranging repeating motifs in concentric circles.
Start with the owl as your central focal point, then radiate outwards with rows of crescent moons, stars, and fern leaves.
To maintain symmetry, lightly draw guidelines on your fabric with a water-soluble pen before you begin stitching.
Using only white or silver thread on a black background gives the intricate design a sophisticated, graphic quality that feels both ancient and modern.
24. Tell a Story with Embroidered Details
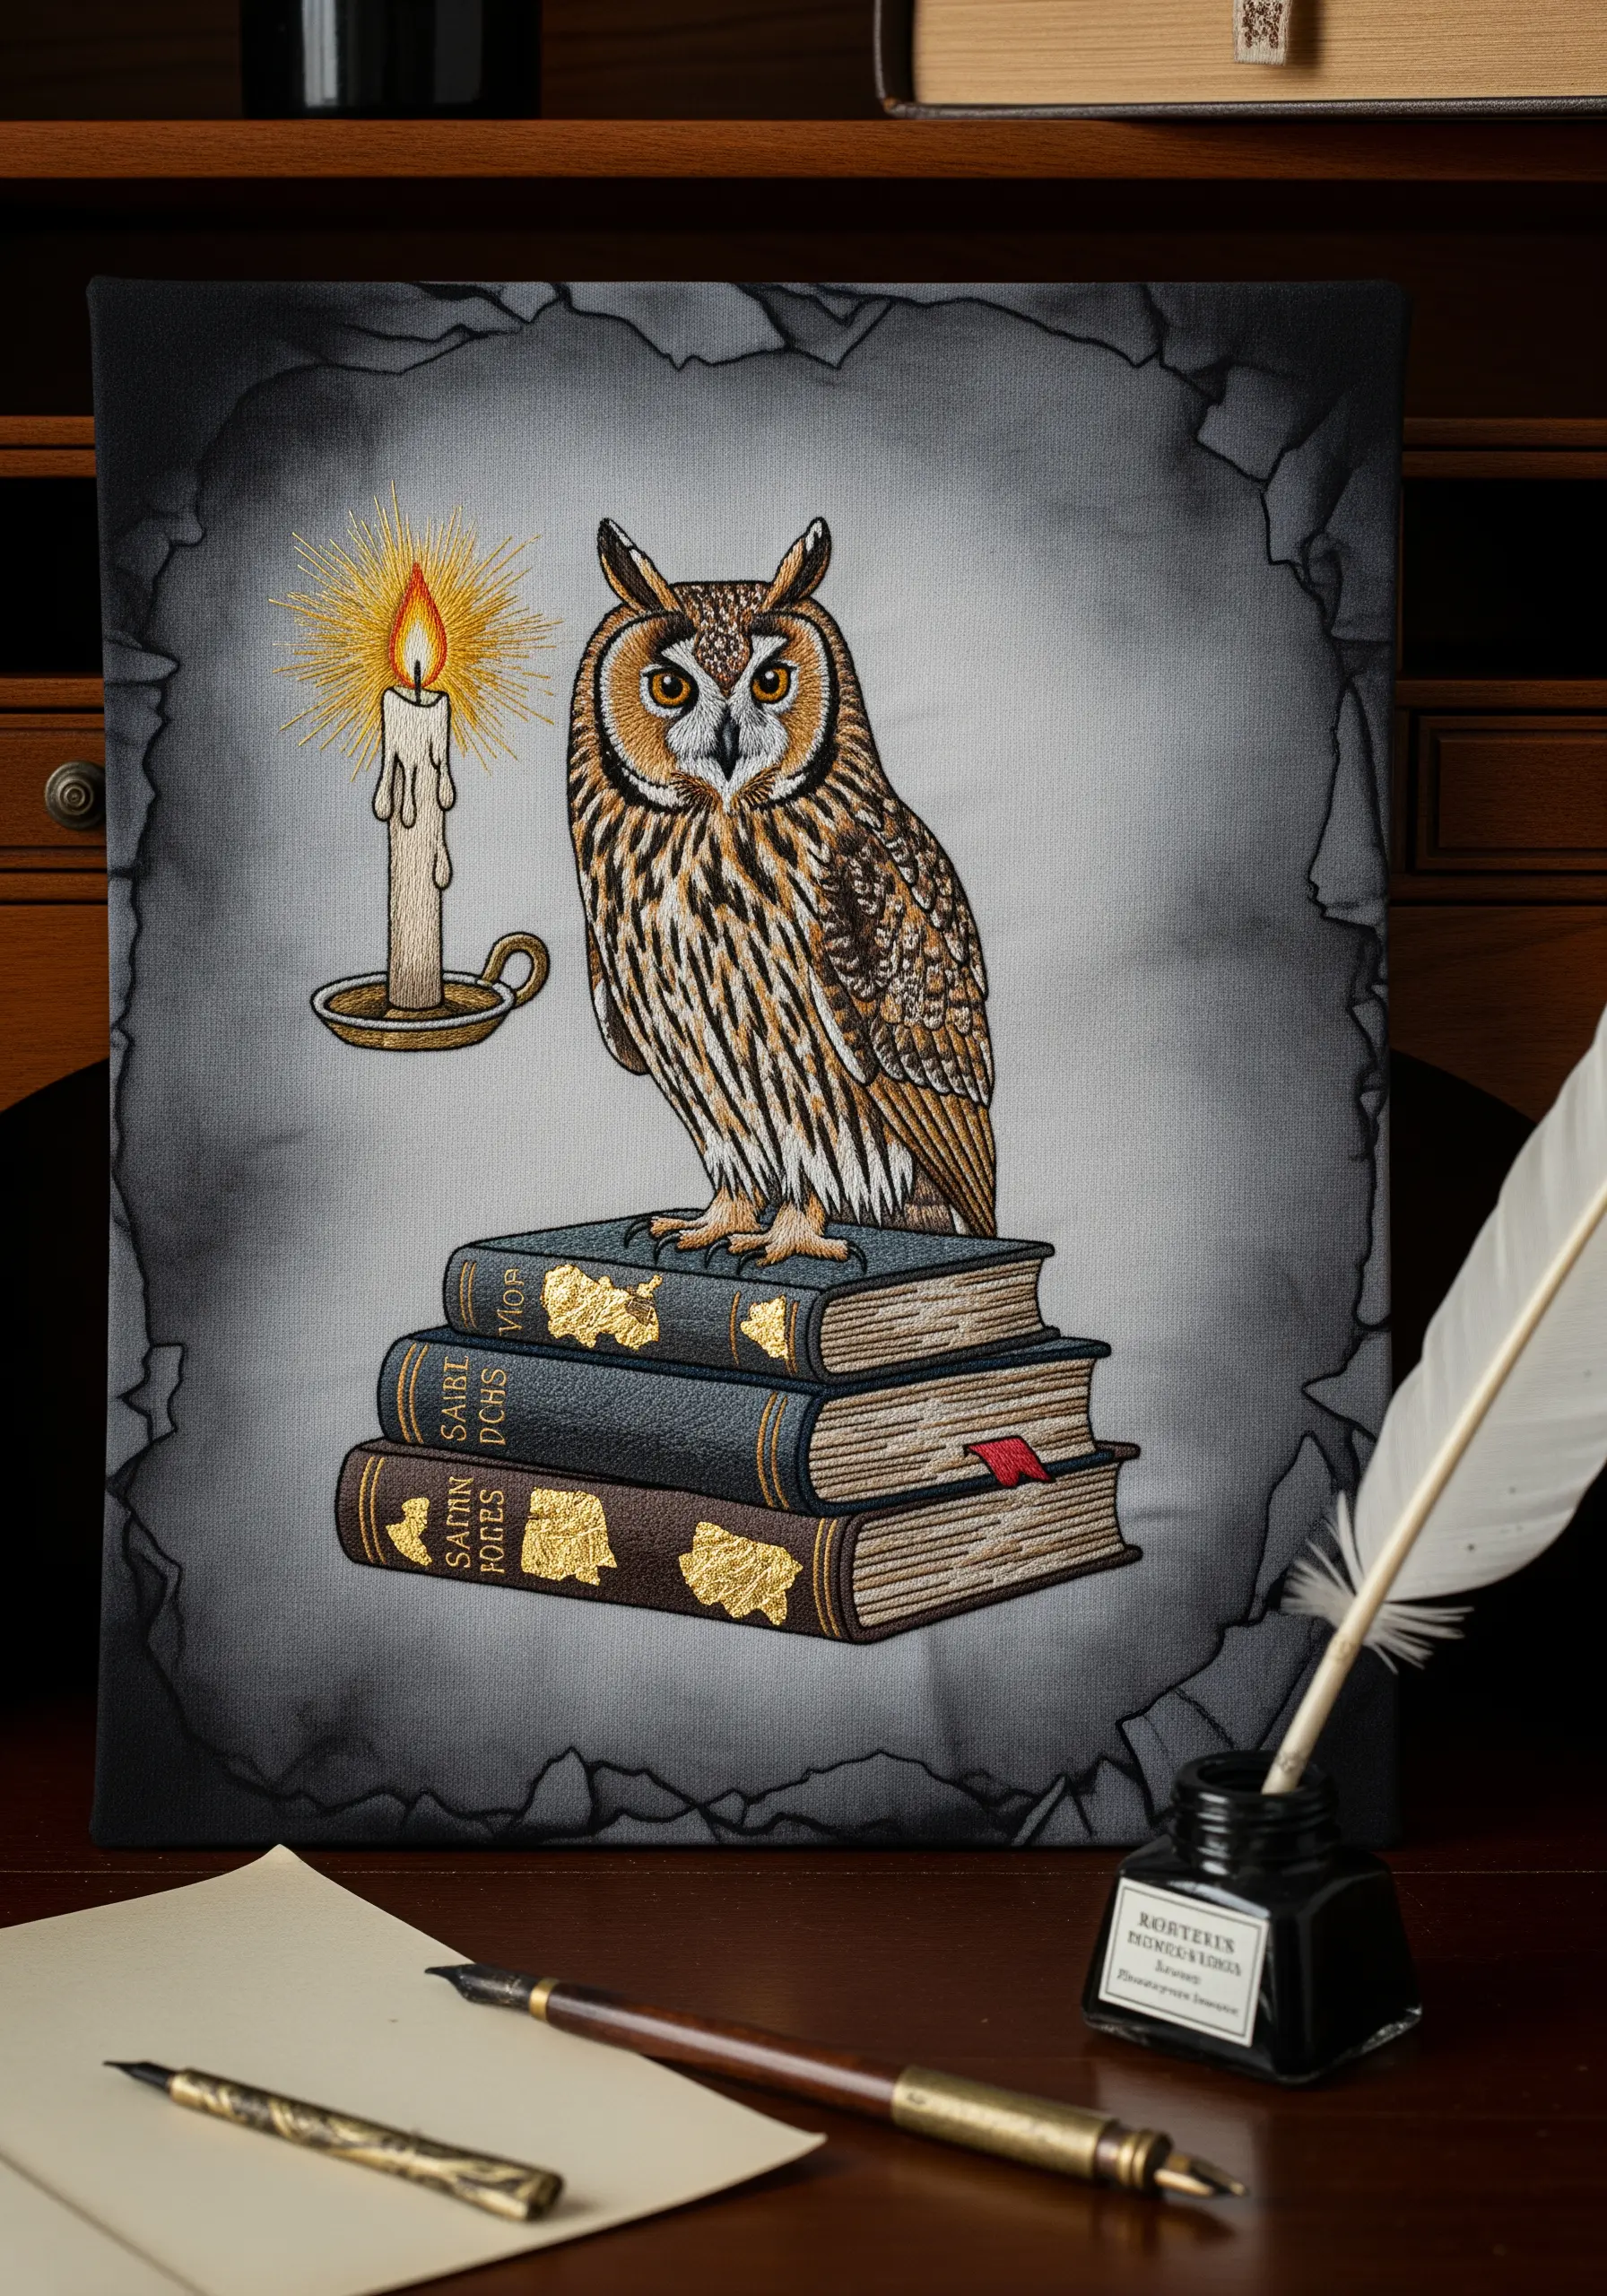
Go beyond a simple portrait and build a narrative scene. Here, the owl is a scholar, surrounded by books and candlelight.
Use a fine metallic thread for the lettering on the book spines to give them a gold-leafed, antique appearance.
To create the candle’s glow, stitch the flame with blended shades of yellow, orange, and white, then add radiating lines of pale yellow straight stitches around it.
These small details are what transform a picture into a story.
25. Achieve Delicate Realism in a Single Feather
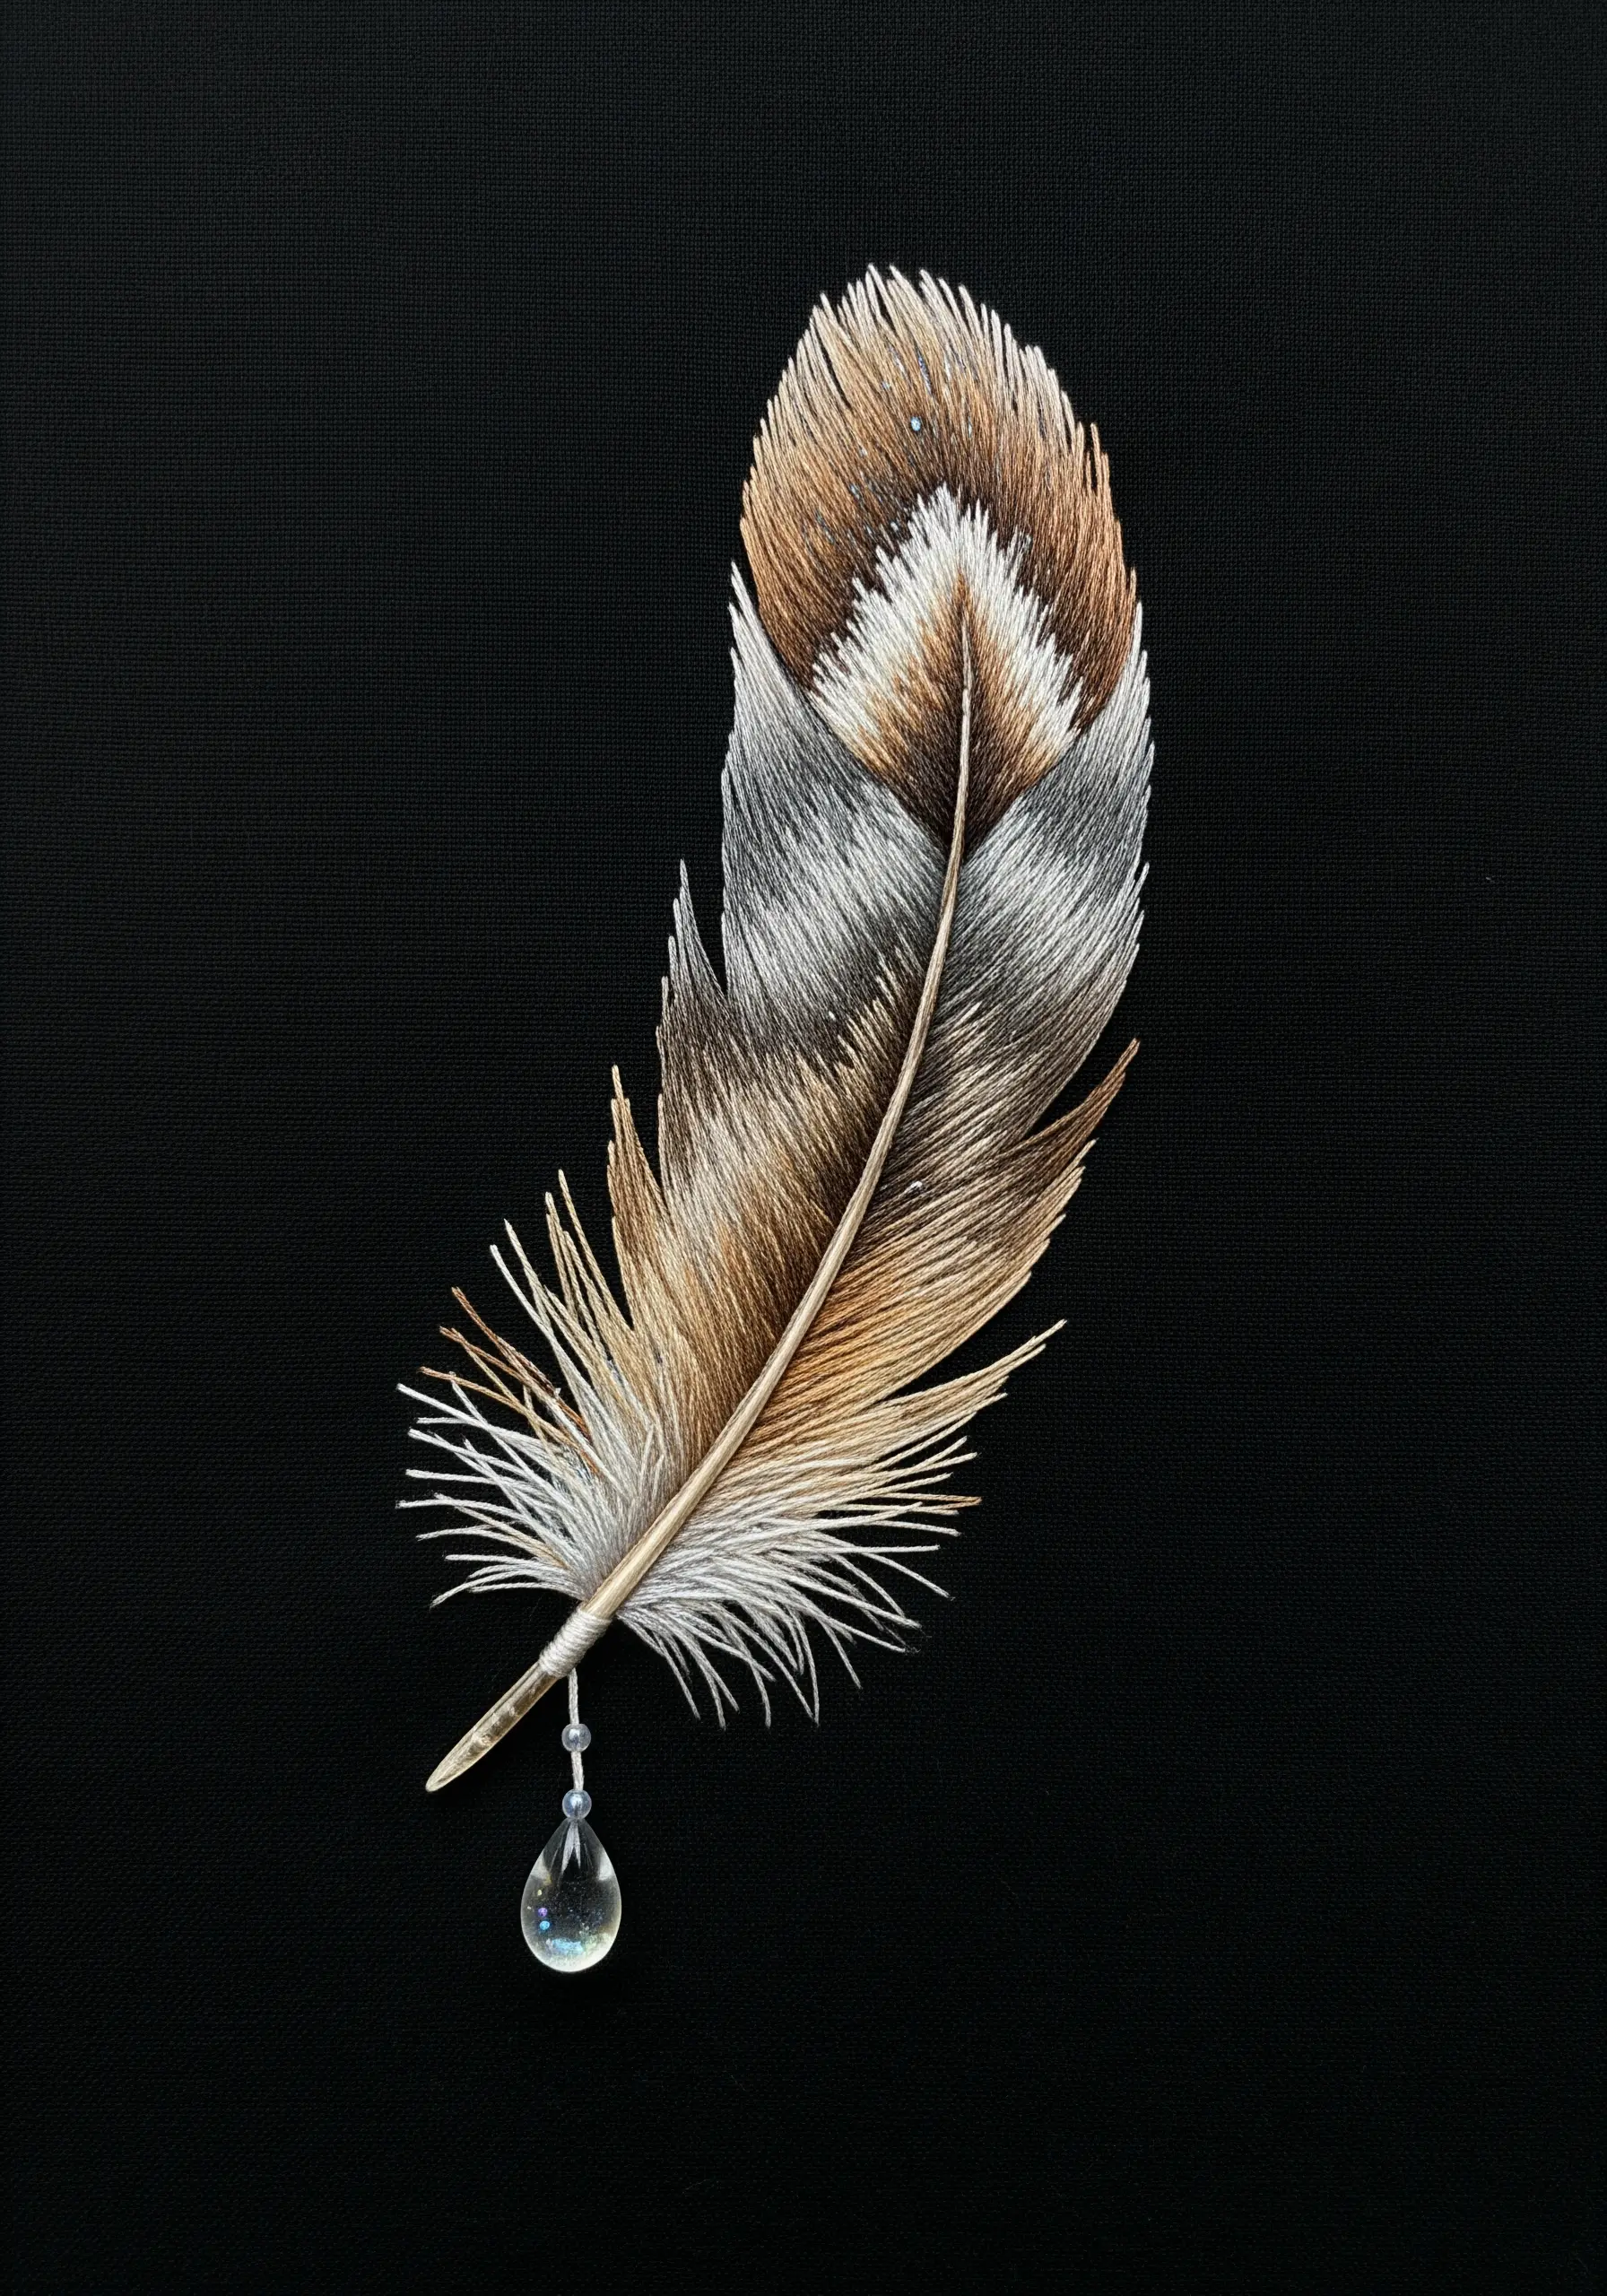
Focus on a single element to perfect your thread painting technique without the pressure of a large composition.
Stitch the barbs of the feather with long, delicate straight stitches angled away from the central shaft (or rachis).
Allow some stitches to be wispy and separated at the bottom to create a soft, realistic edge.
Adding a single crystal bead at the bottom suggests a drop of dew, adding a touch of elegance and a focal point to the simple design.
26. Create Drama with a Silhouette Sunset
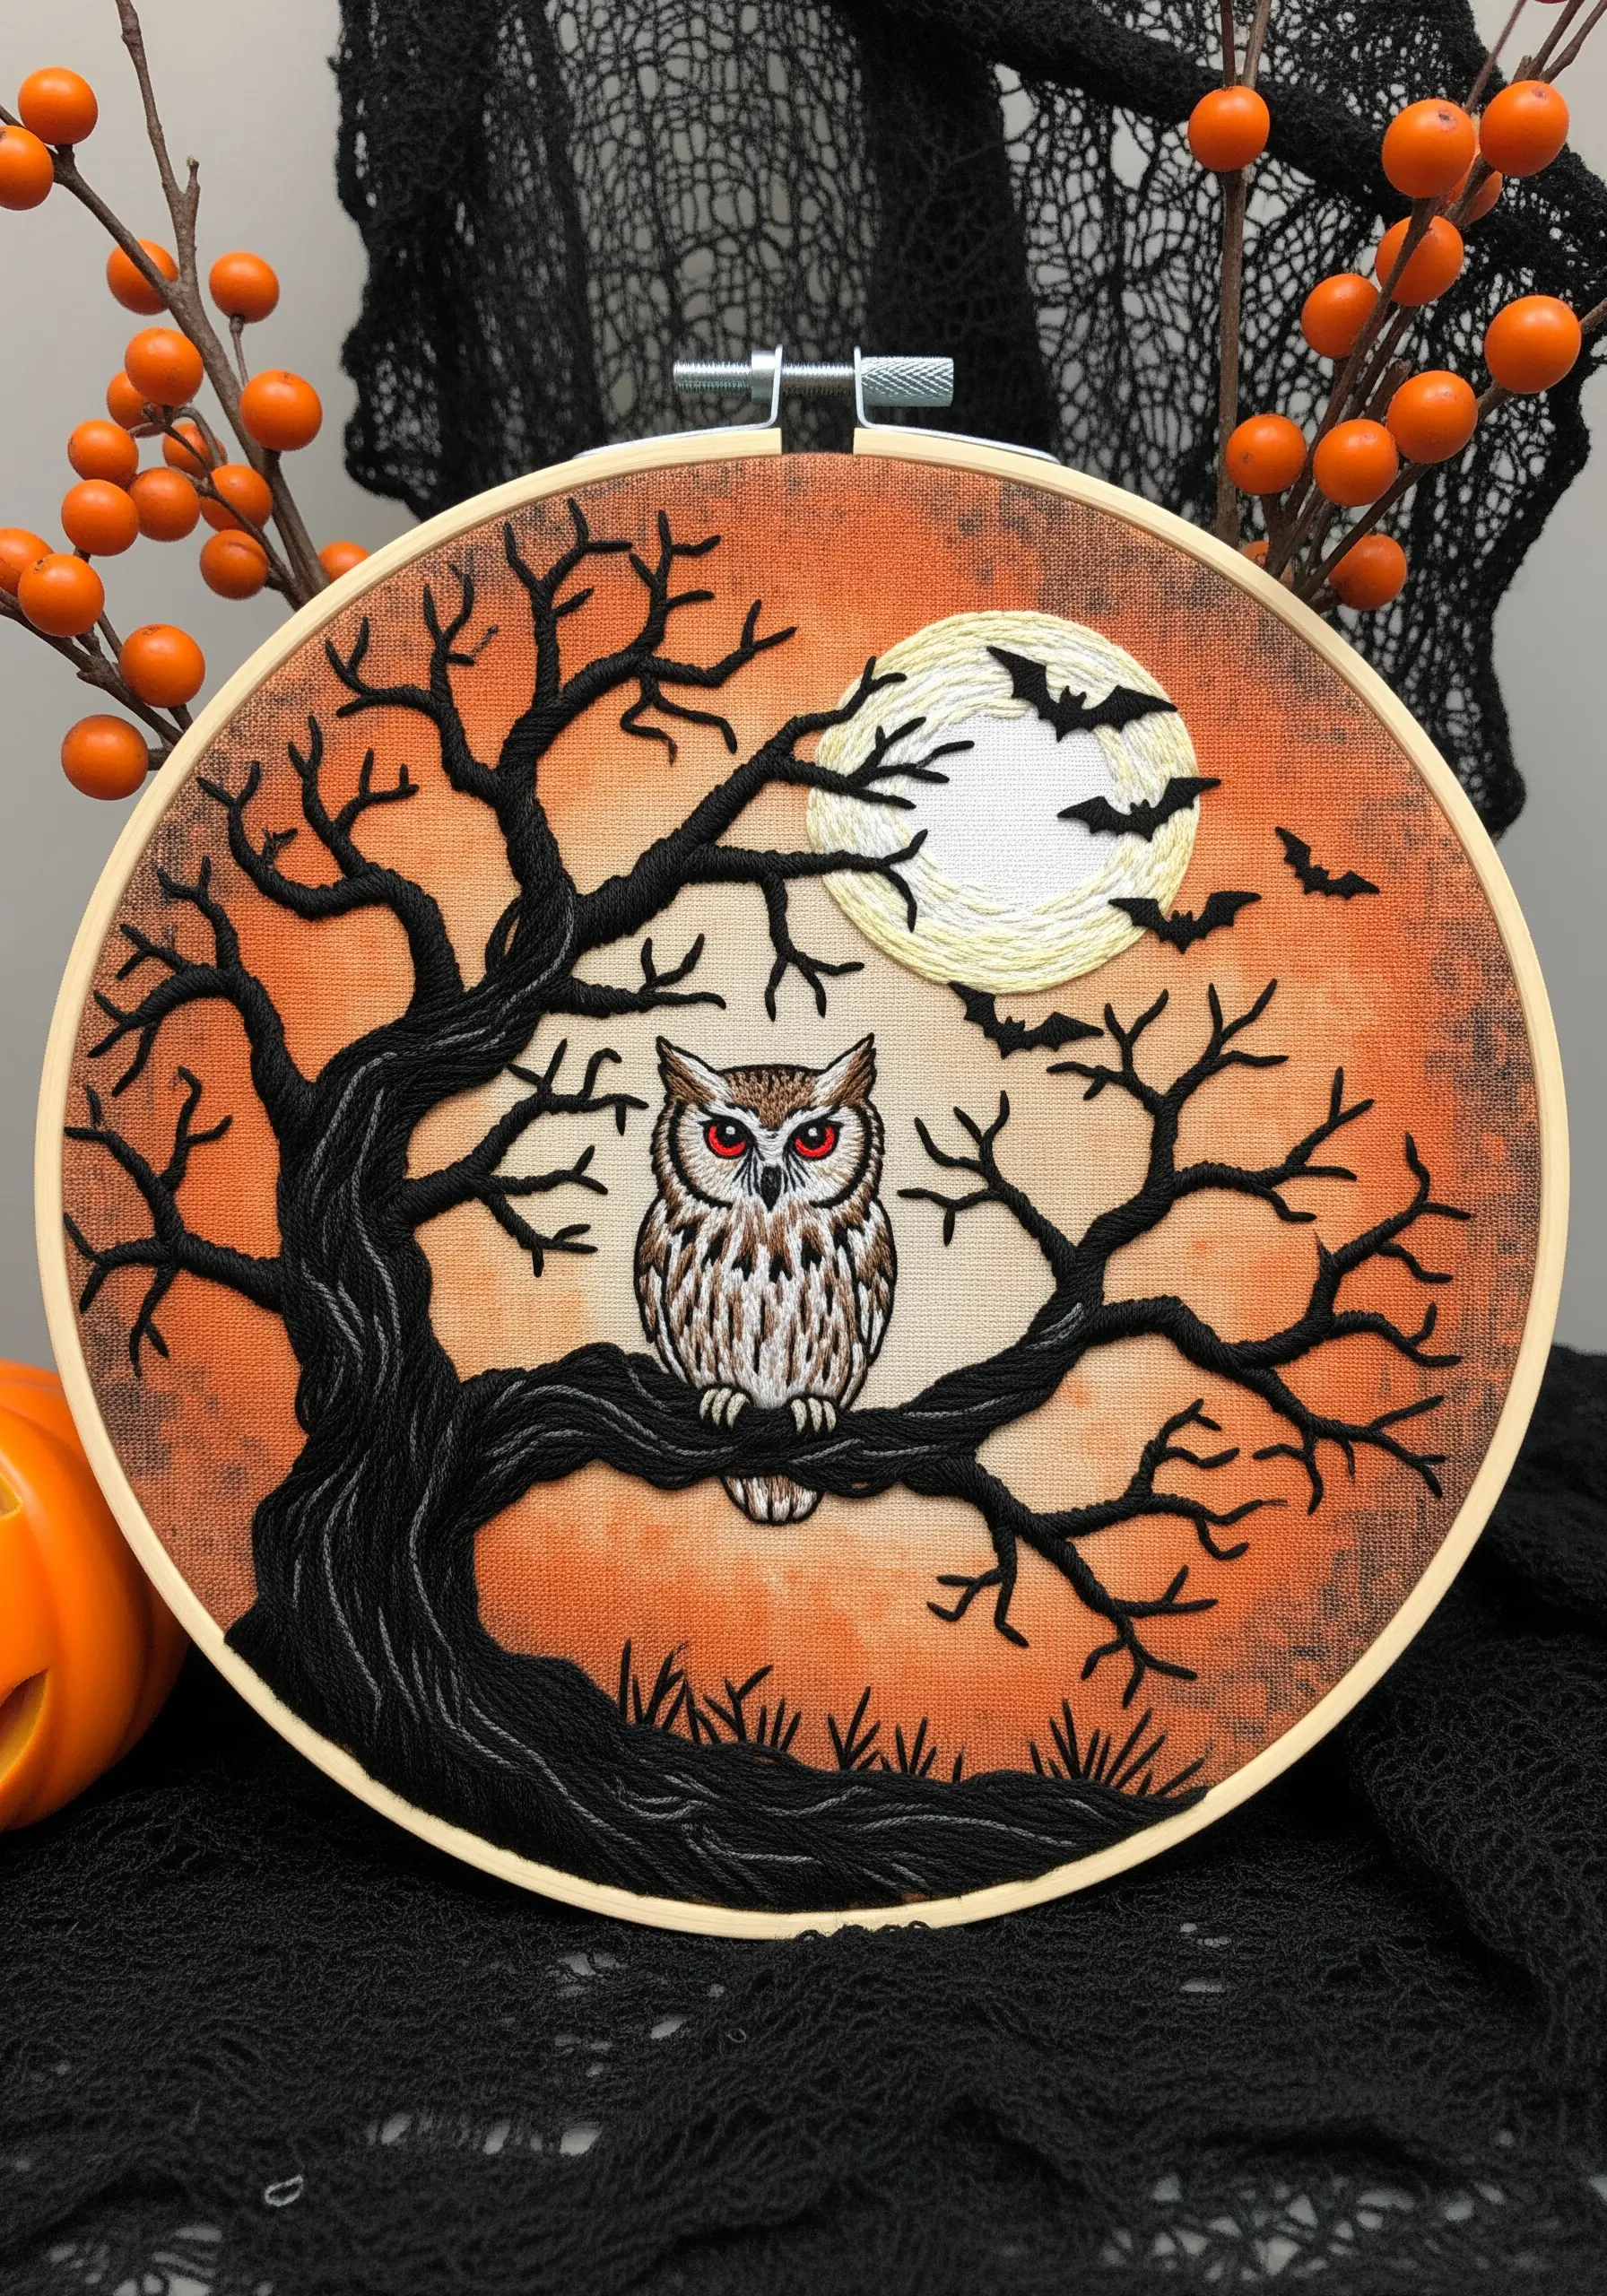
For a striking Halloween or autumnal scene, use bold silhouettes against a richly colored background.
Create the sky first by blending threads of orange, yellow, and black with long-and-short stitch to form a smooth gradient.
Once the background is complete, stitch the tree, owl, and bats in a dense, solid black satin stitch.
This technique creates incredible depth and contrast, making the silhouette elements pop. A pair of tiny red French knots for the owl’s eyes adds the perfect menacing touch.
27. Hide a Subject Within 3D Florals
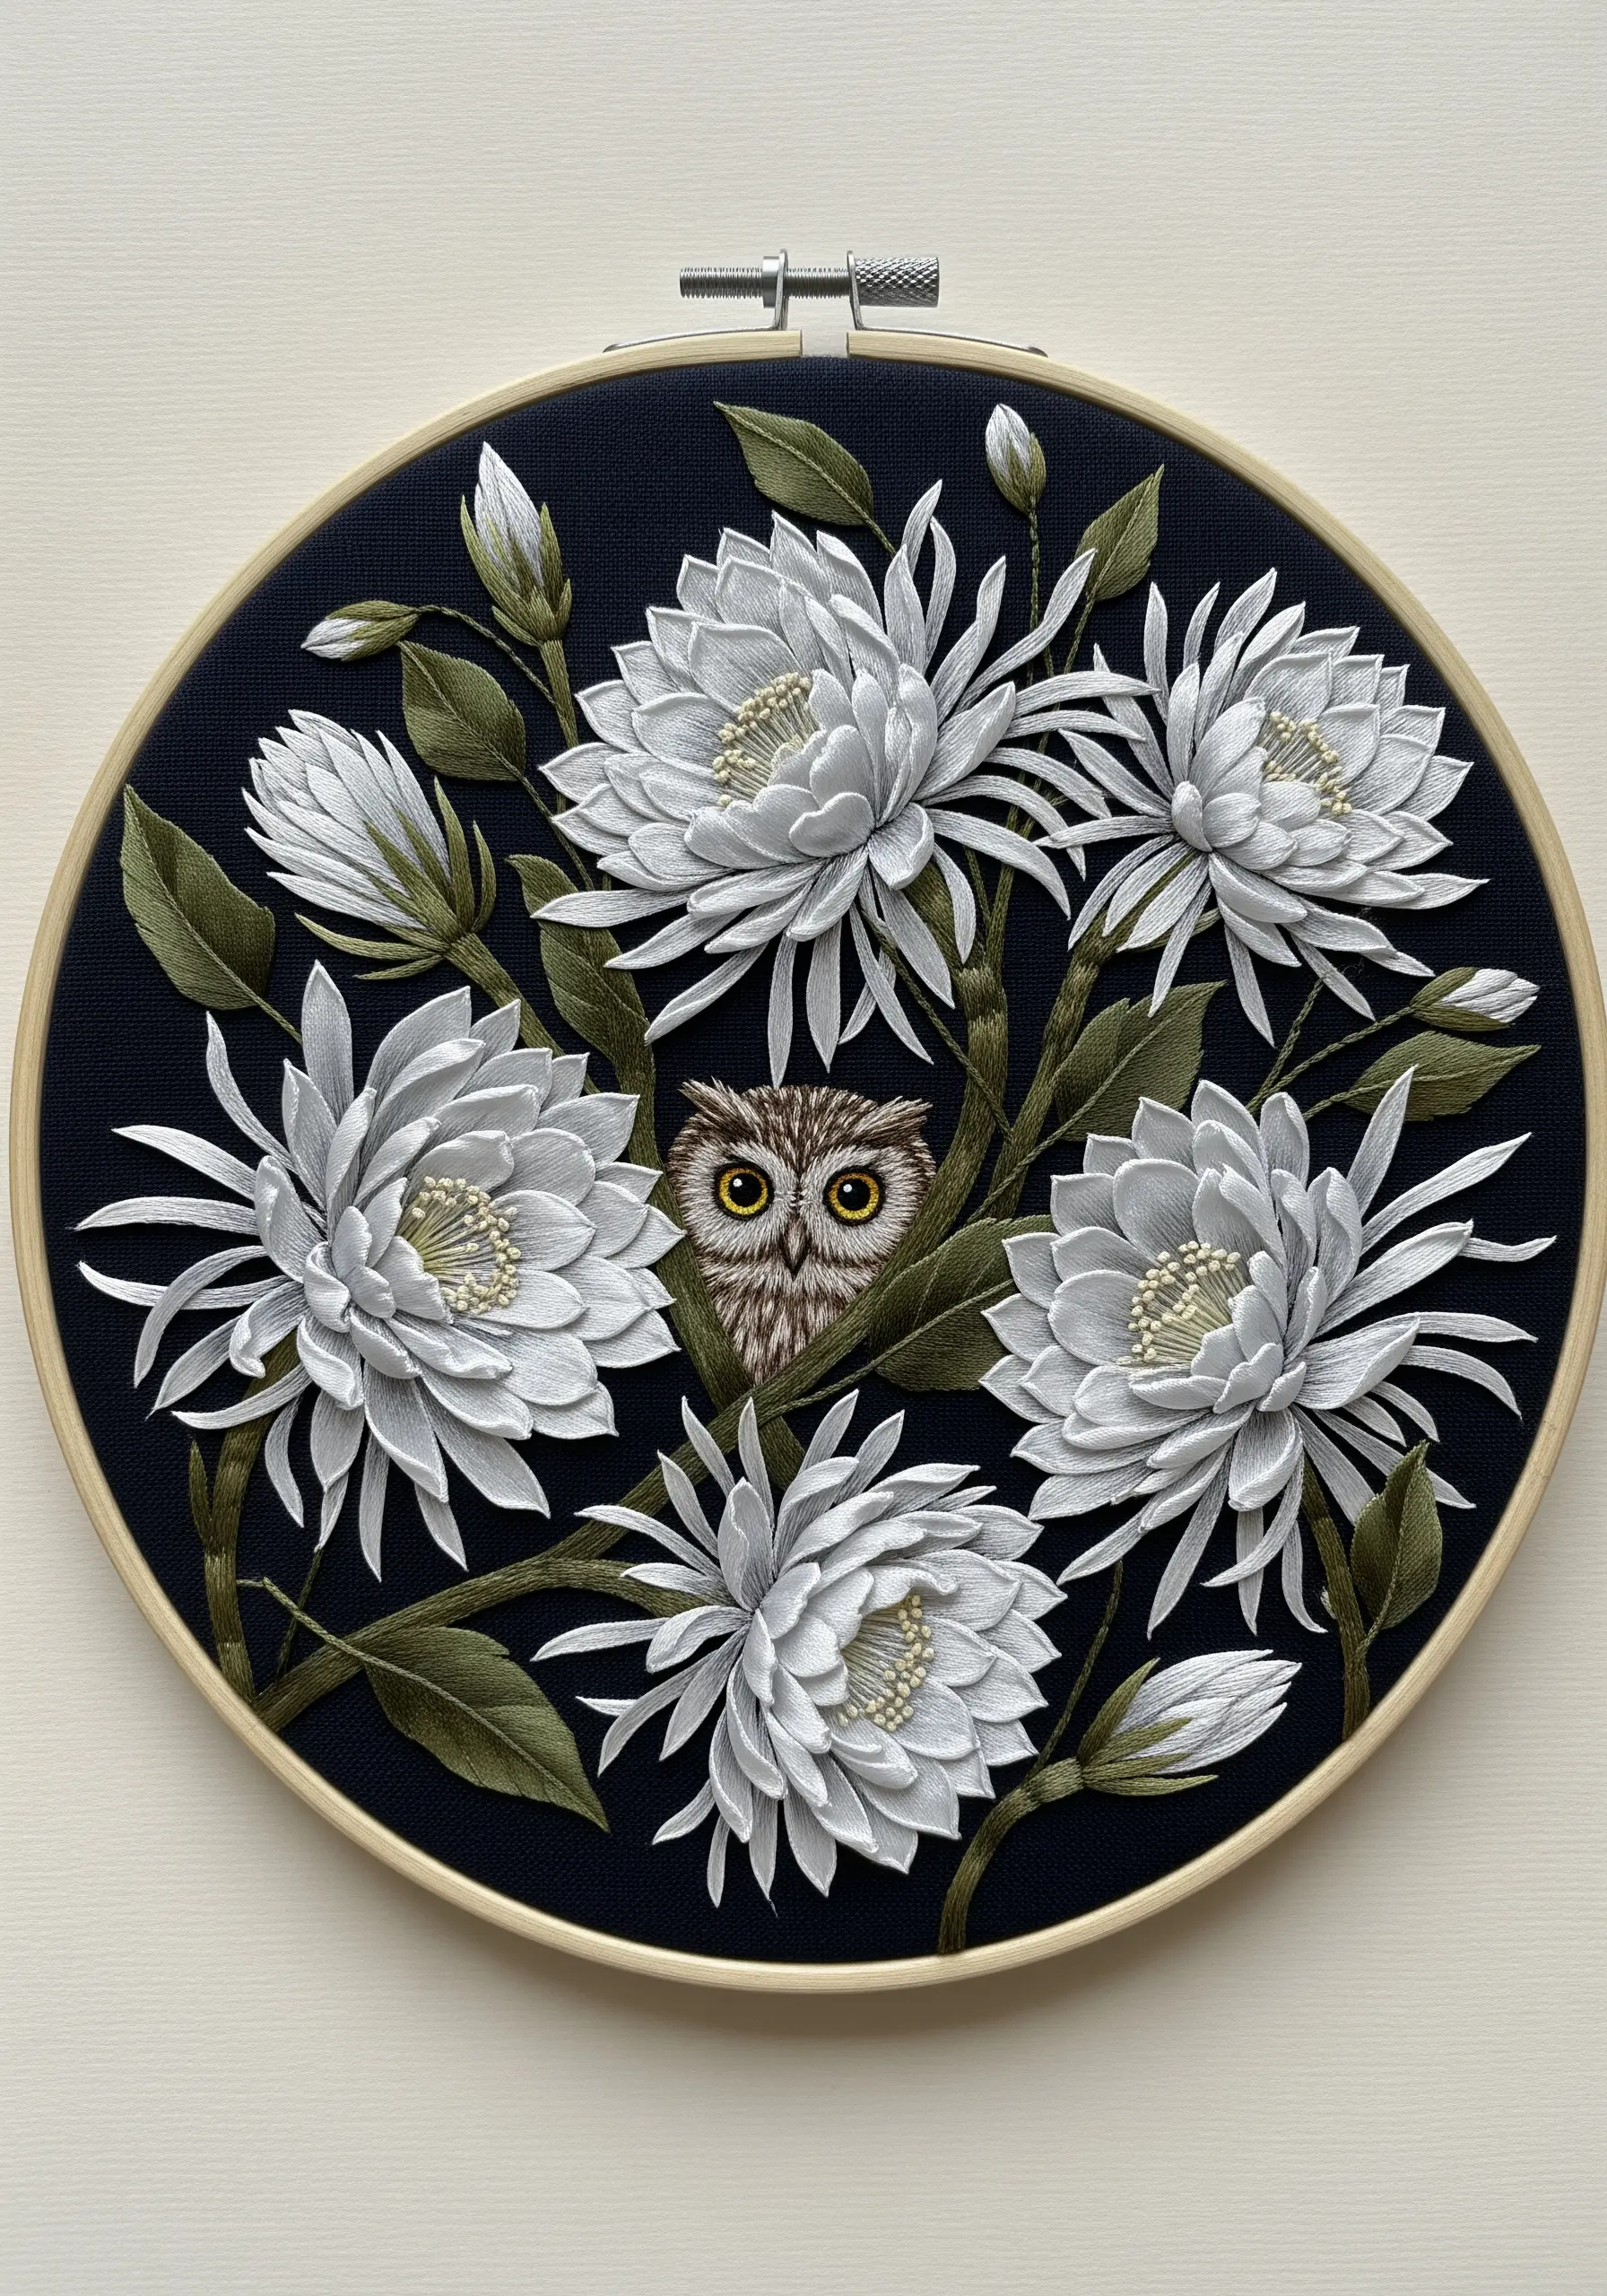
Create a playful and surprising composition by partially obscuring your main subject with dimensional elements.
Use stumpwork techniques to make the large white flowers. Stitch each petal individually over a wire frame, then cut them out and attach them to the fabric so they lift away from the surface.
This creates a lush, 3D bouquet that the small owl can realistically peek through.
The technique adds an interactive, discovery element to your artwork.
28. Evoke a Naturalist’s Collection

Present your embroidery as if it’s a scientific specimen in a naturalist’s collection.
Work on a small scale, keeping your thread painting neat and contained. Stitch on a neutral, textured fabric like linen or Aida cloth to enhance the vintage, scholarly feel.
Displaying your finished hoop alongside real dried flowers, seed pods, and handwritten labels completes the narrative and turns your craft into a curated piece of art.
It’s a beautiful way to combine your love for stitching and nature.
29. Design a Luminous Stained-Glass Effect
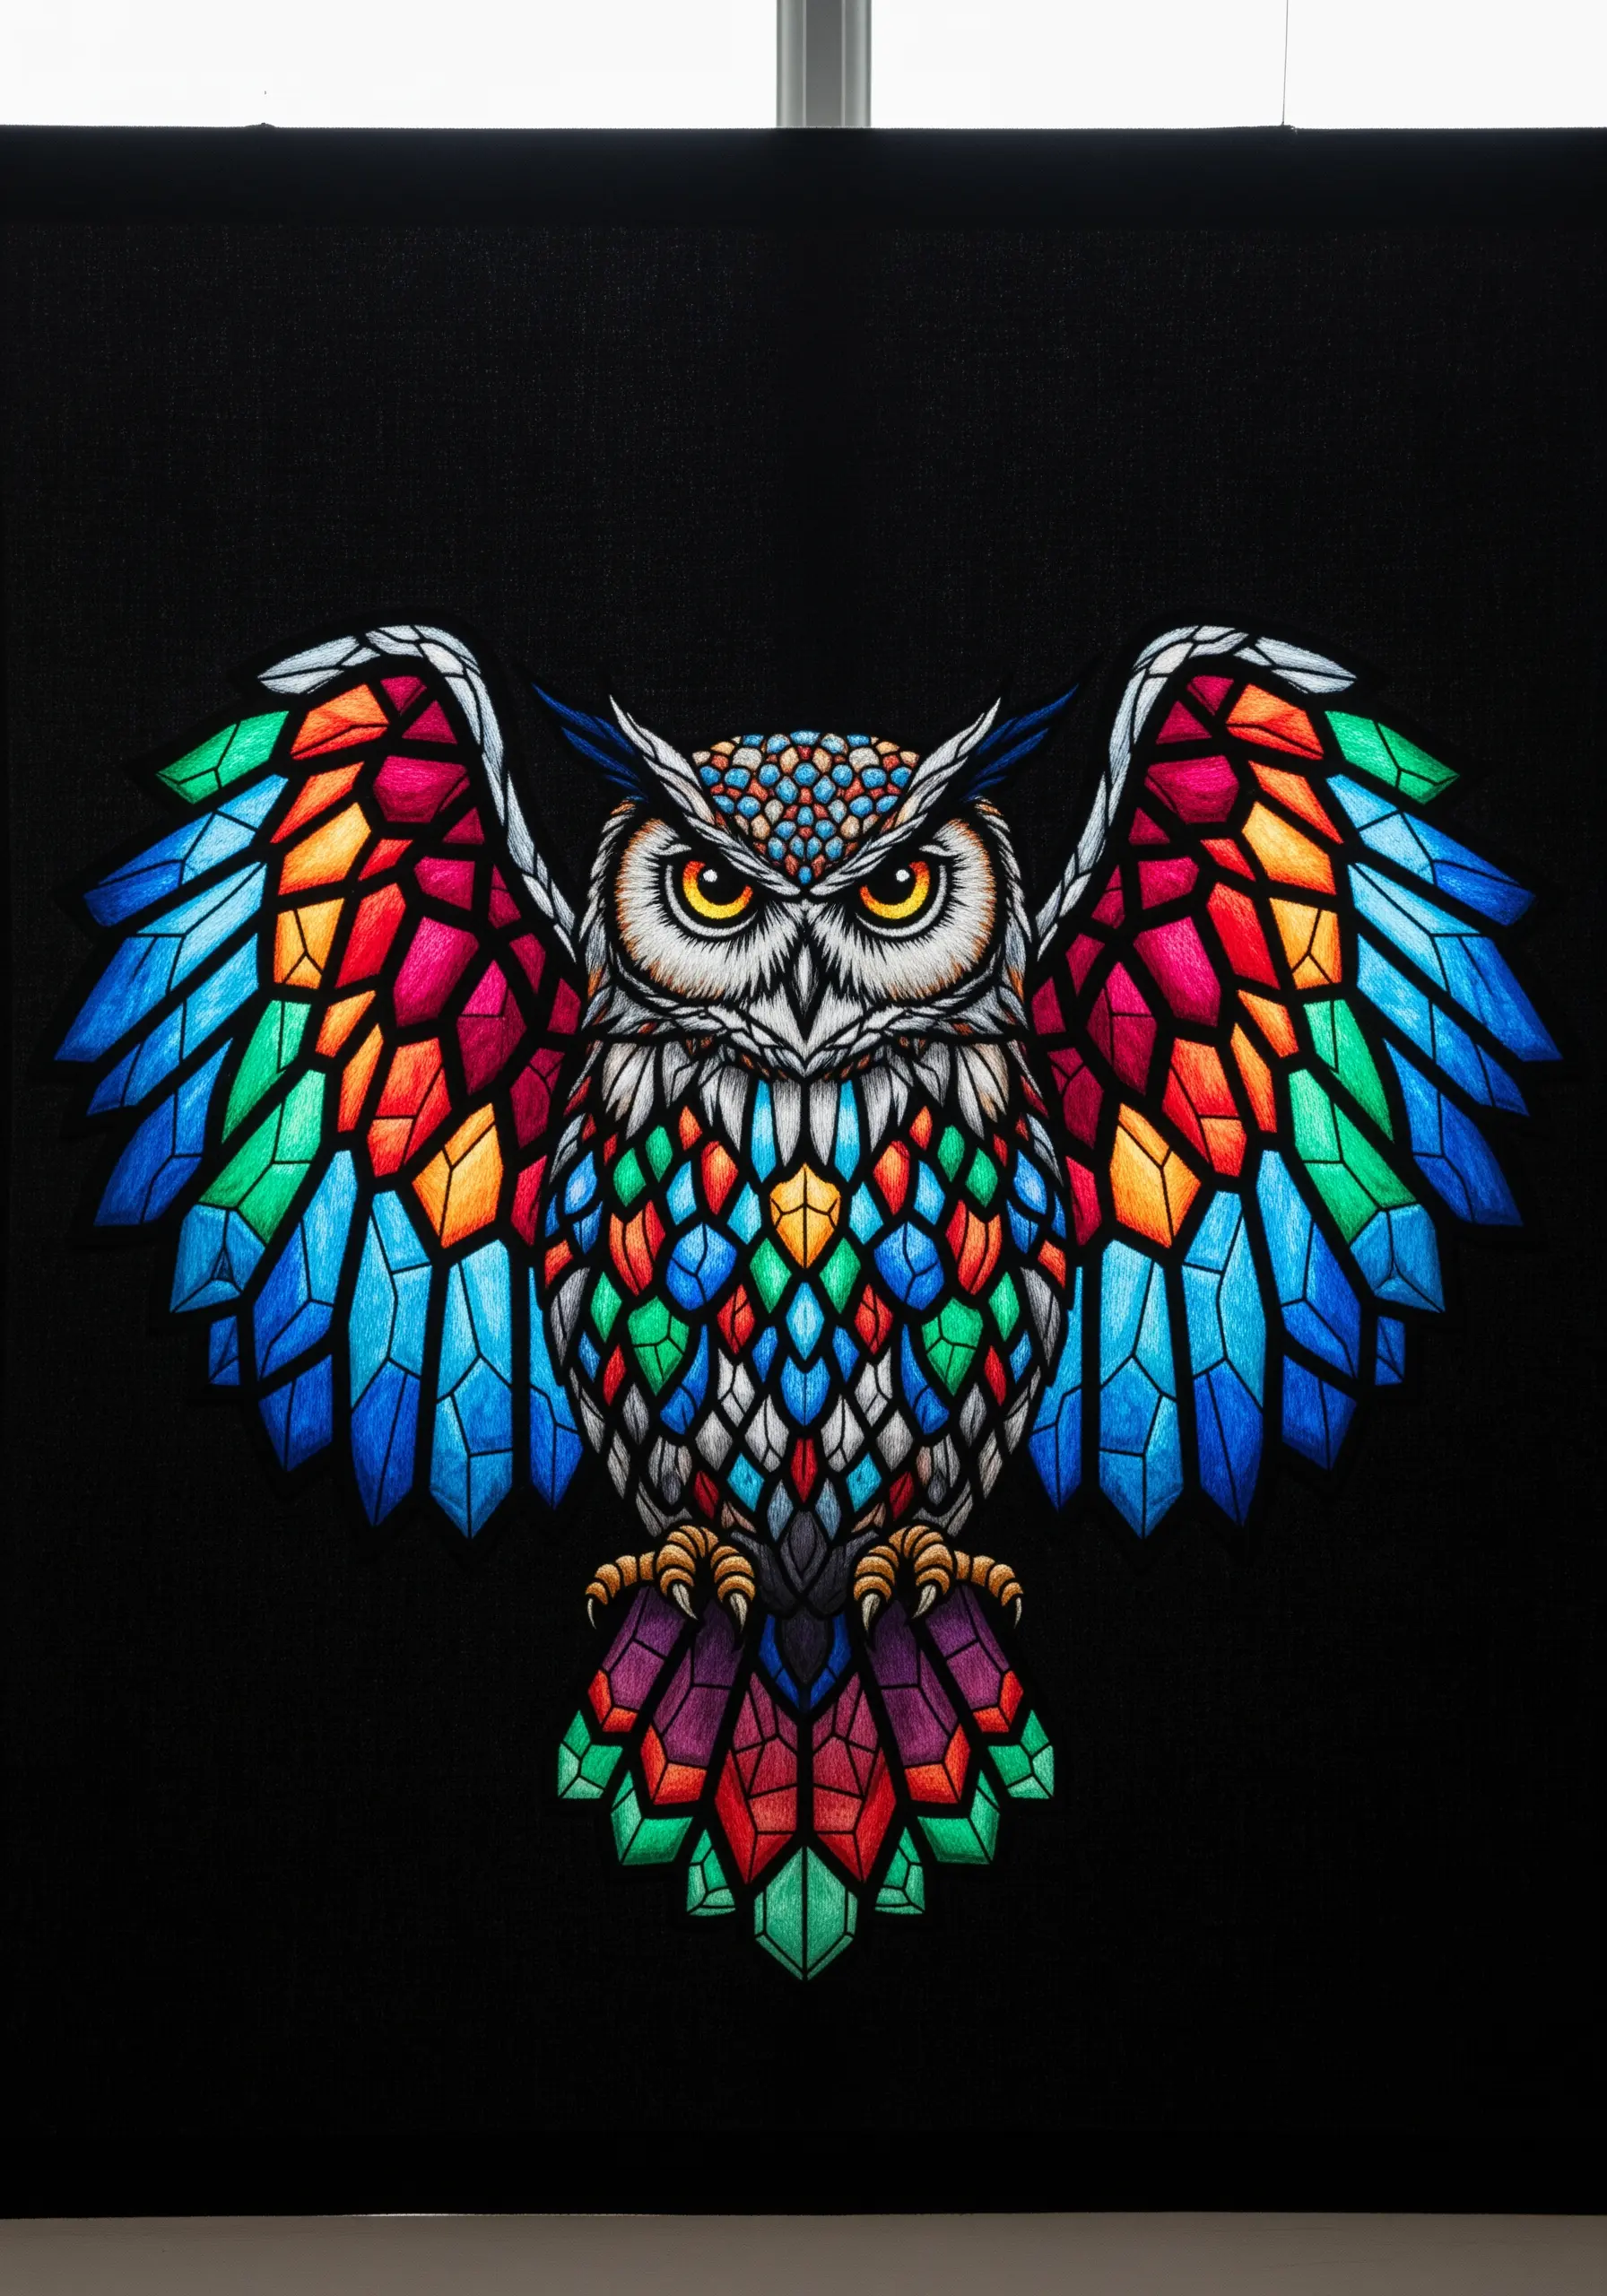
Mimic the look of stained glass by outlining every color segment with a bold, black line.
Use a stem stitch or a whipped backstitch for your outlines to ensure they are solid and consistent.
Fill each outlined shape with a vibrant, jewel-toned satin stitch, keeping all your stitches parallel and tightly packed for a smooth, glass-like finish.
This technique transforms the owl’s feathers into a mosaic of colorful light, creating a truly dazzling effect.
30. Sculpt a Planet with Textural Stitches
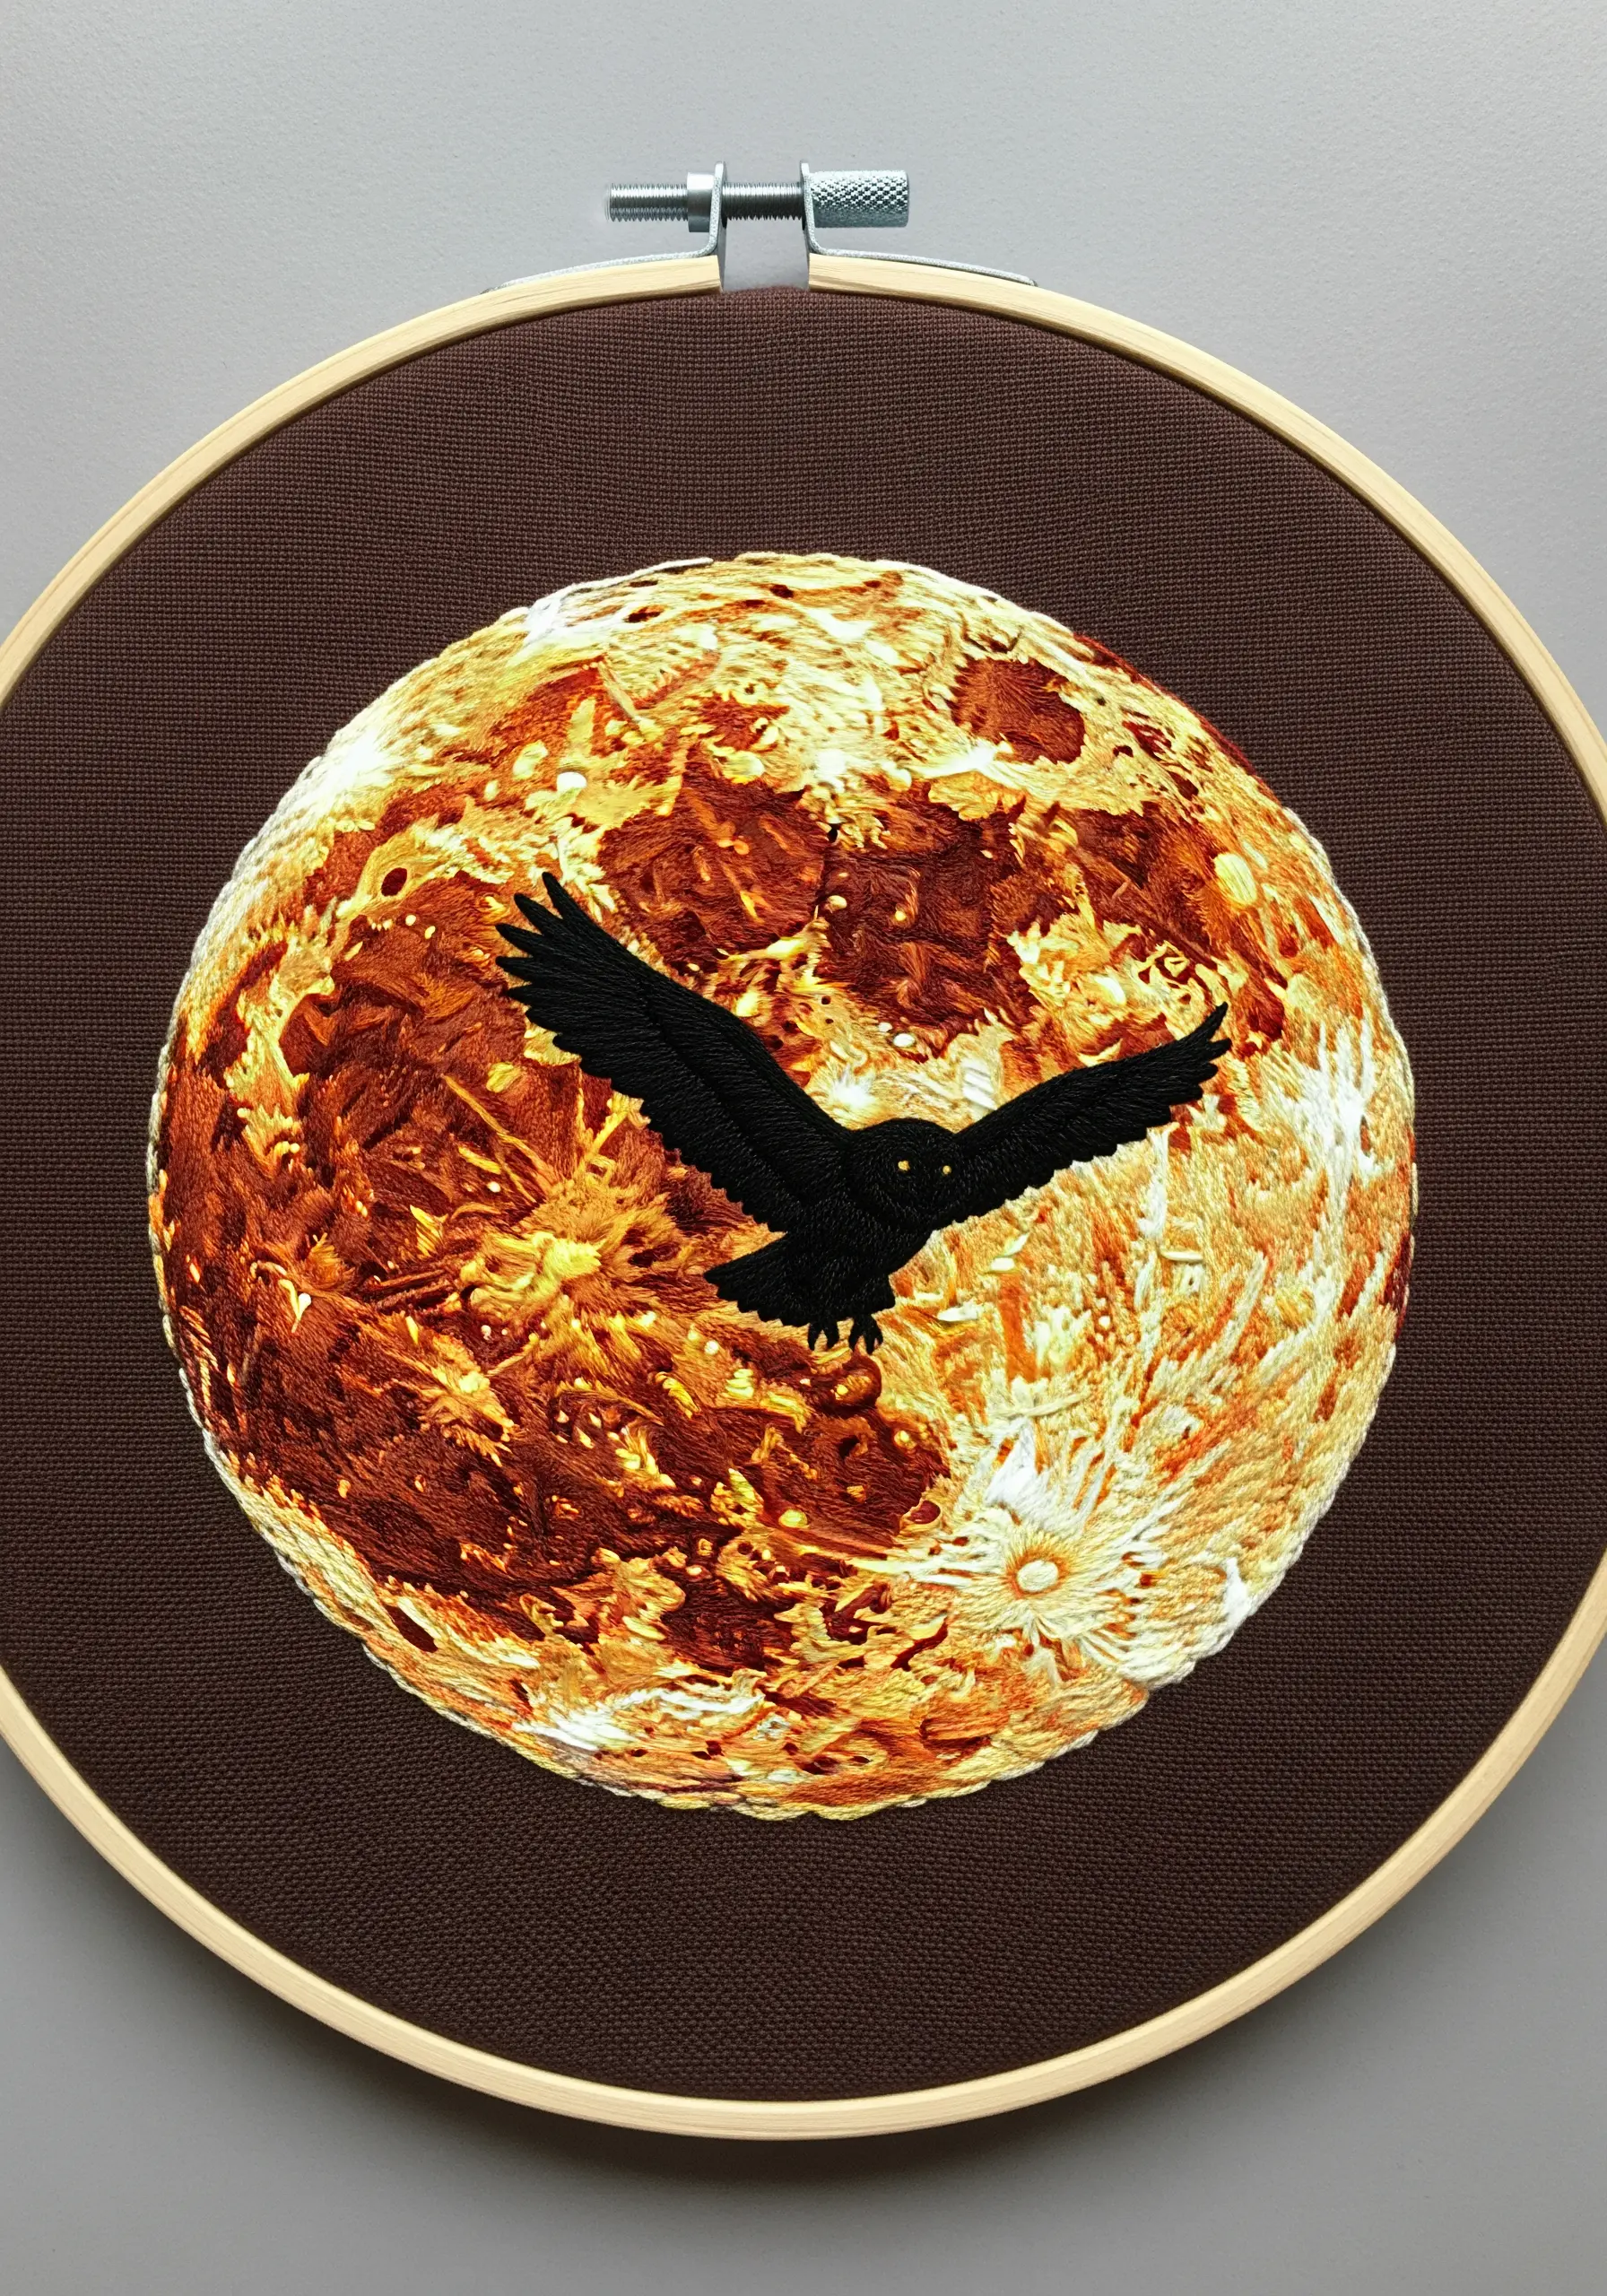
Instead of a simple moon, create a dynamic, fiery planet as your backdrop.
Use a chaotic mix of French knots, bullion knots, and short straight stitches in shades of gold, orange, and brown to build up a heavily textured surface.
Don’t try to make it uniform; the variation in stitch type and color is what gives the planet its molten, turbulent appearance.
A solid black silhouette of the owl flying across this textured sphere creates a powerful and dramatic focal point.
31. Stitch the Illusion of Sound and Movement
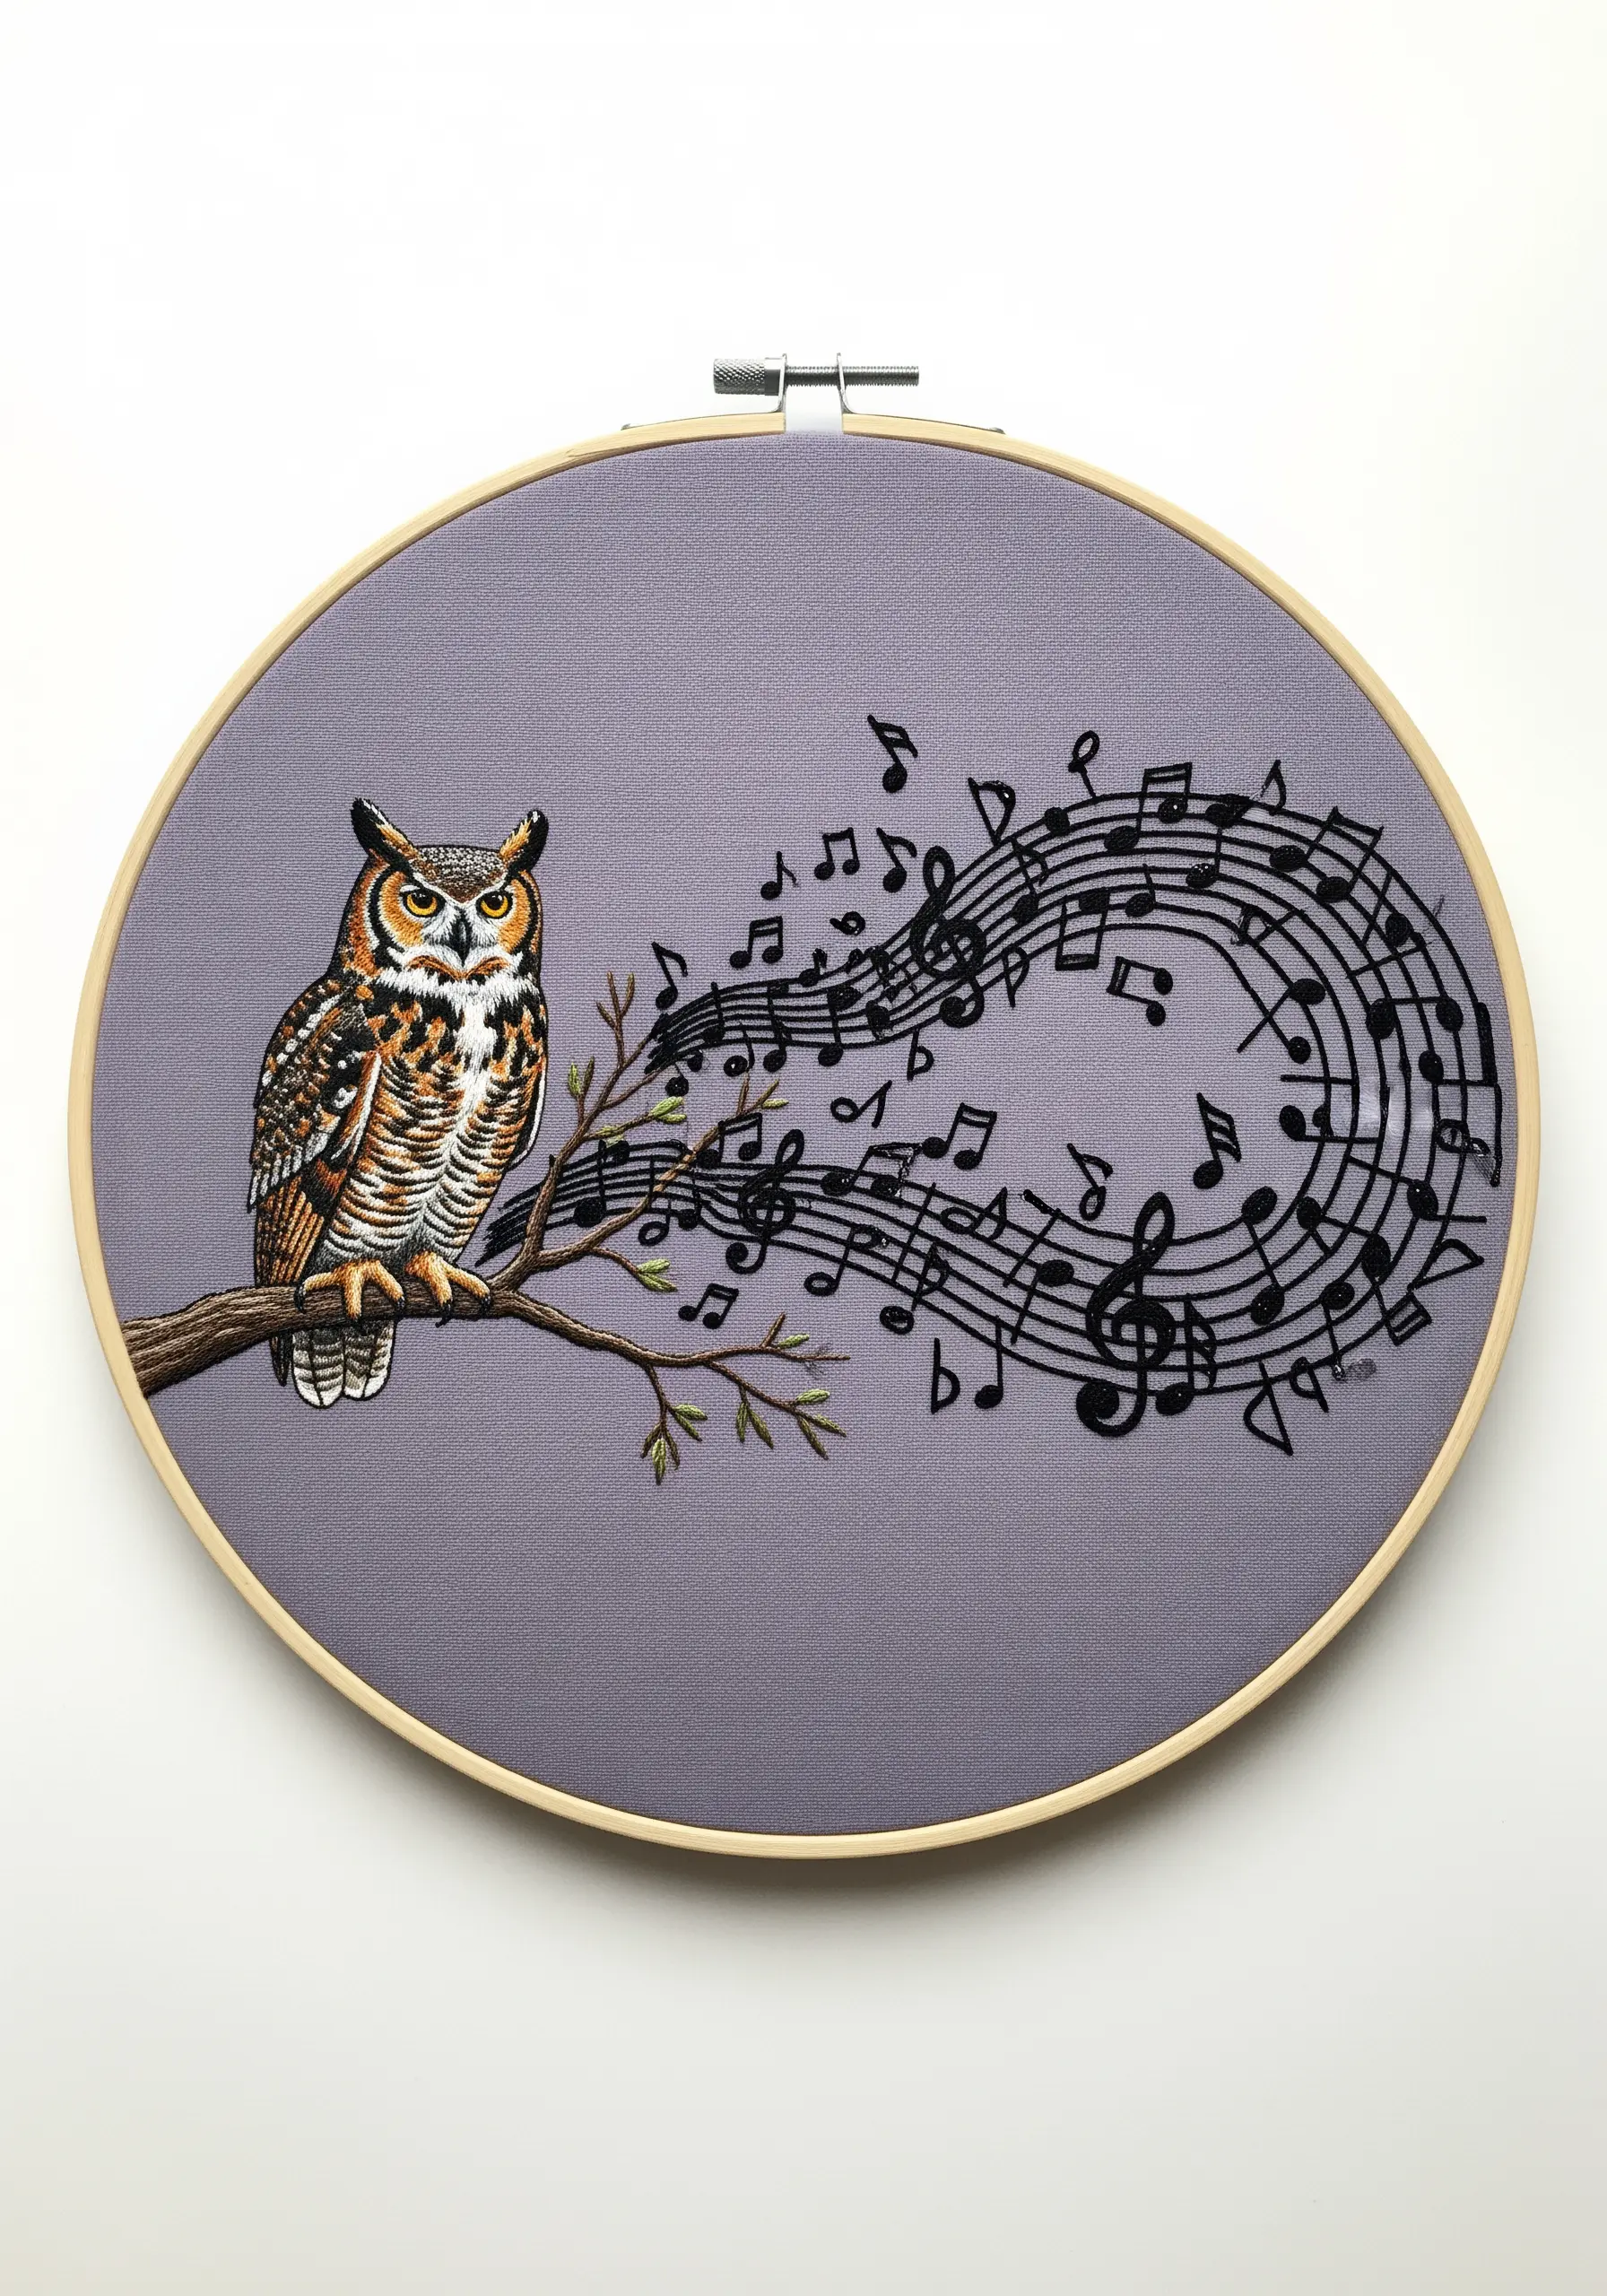
Visualize an abstract concept like music by translating it into stitched lines.
Use a fine, dark thread and a precise backstitch to create the crisp lines of the musical staff and notes.
Arrange the notes in a swirling, flowing pattern that appears to emanate from the owl, giving the static image a sense of rhythm and motion.
This imaginative composition connects the silent observer with the sounds of the night.
32. Create a High-Contrast Graphic Patch
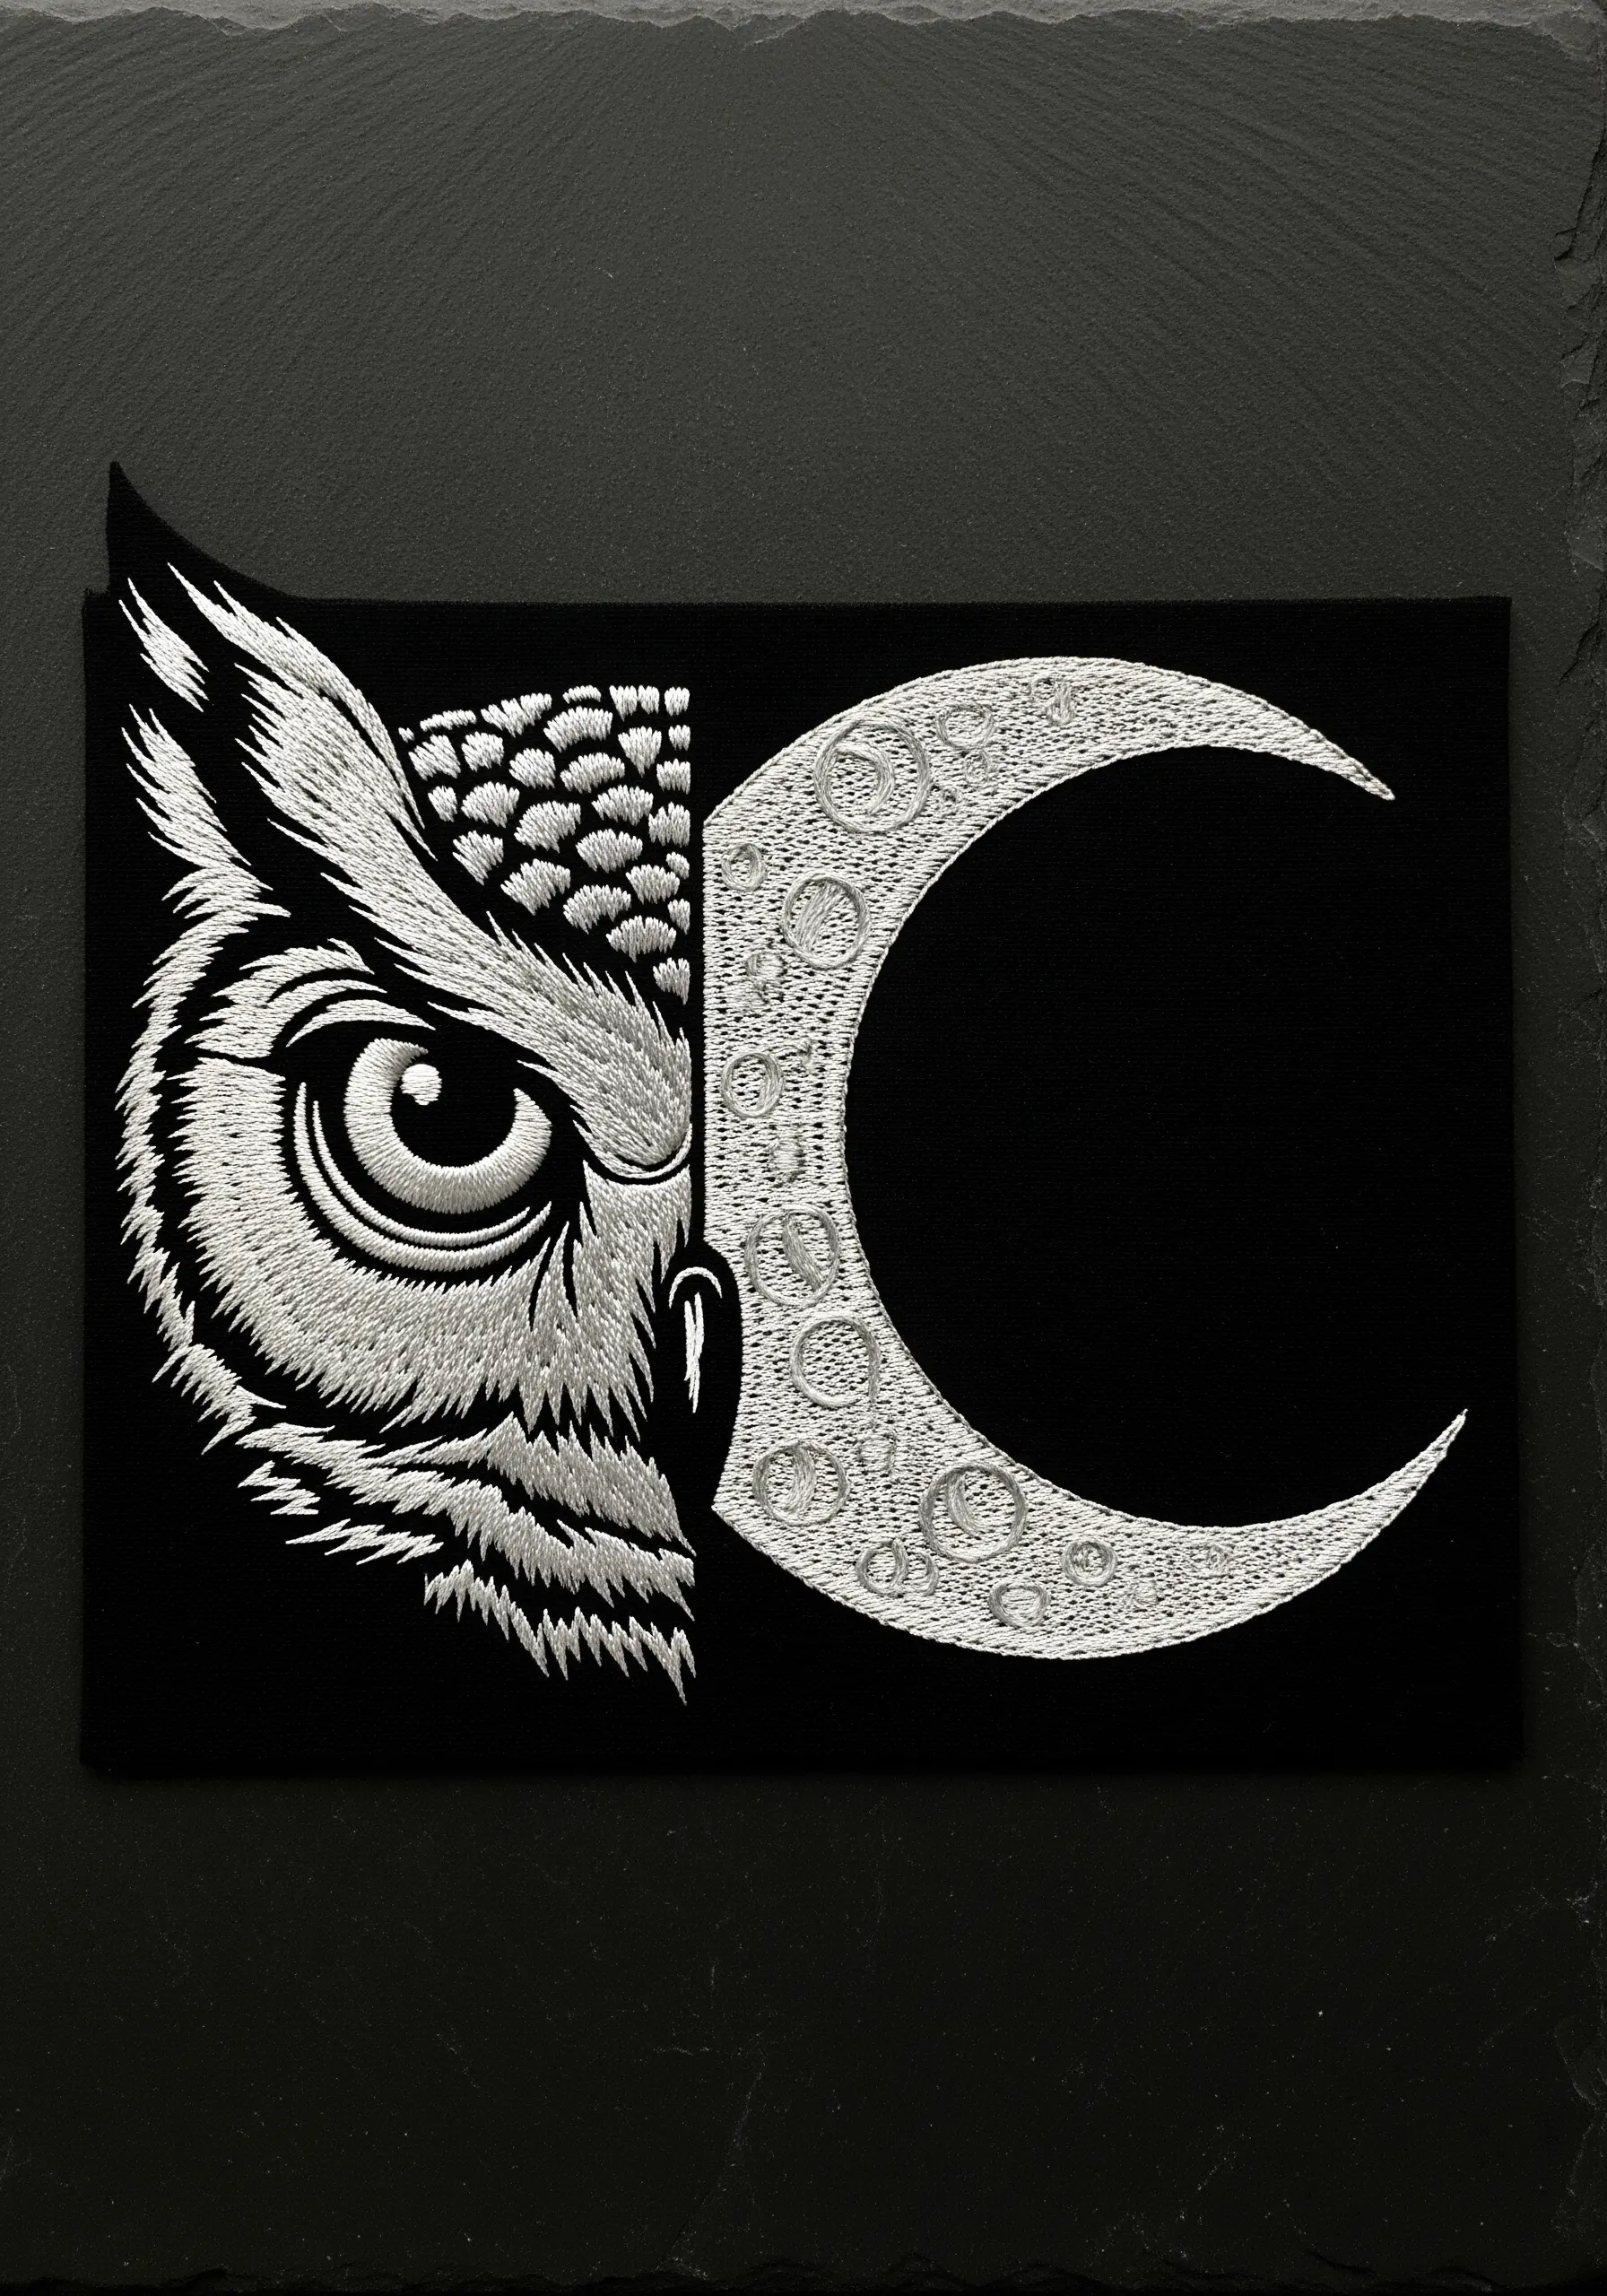
Design a powerful graphic by splitting two strong images—an owl’s face and a crescent moon—into a single composition.
Use a dense, perfectly smooth satin stitch to fill each shape, ensuring your stitch direction enhances the form. For example, stitch the owl’s feathers radiating outward from the eye.
The stark contrast between the silver-white thread and the black fabric creates a bold, modern emblem perfect for a patch or a statement piece on a jacket.


