

Have you ever held a pressed flower and wished you could preserve its delicate beauty not just behind glass, but within the soft texture of fabric? You can translate that fleeting moment into a timeless piece of art with just a needle and thread.
The secret isn’t in complex, difficult techniques. It’s in learning how to see—how to translate a petal’s gradient into blended threads, a leaf’s vein into a single, elegant stitch, and a wildflower meadow into a richly layered composition.
These ideas are your starting point. Think of them as invitations to look closer at the natural world and rediscover how a simple stitch can bring it to life in your hands. Let’s begin.
1. Create a Floating Botanical Display
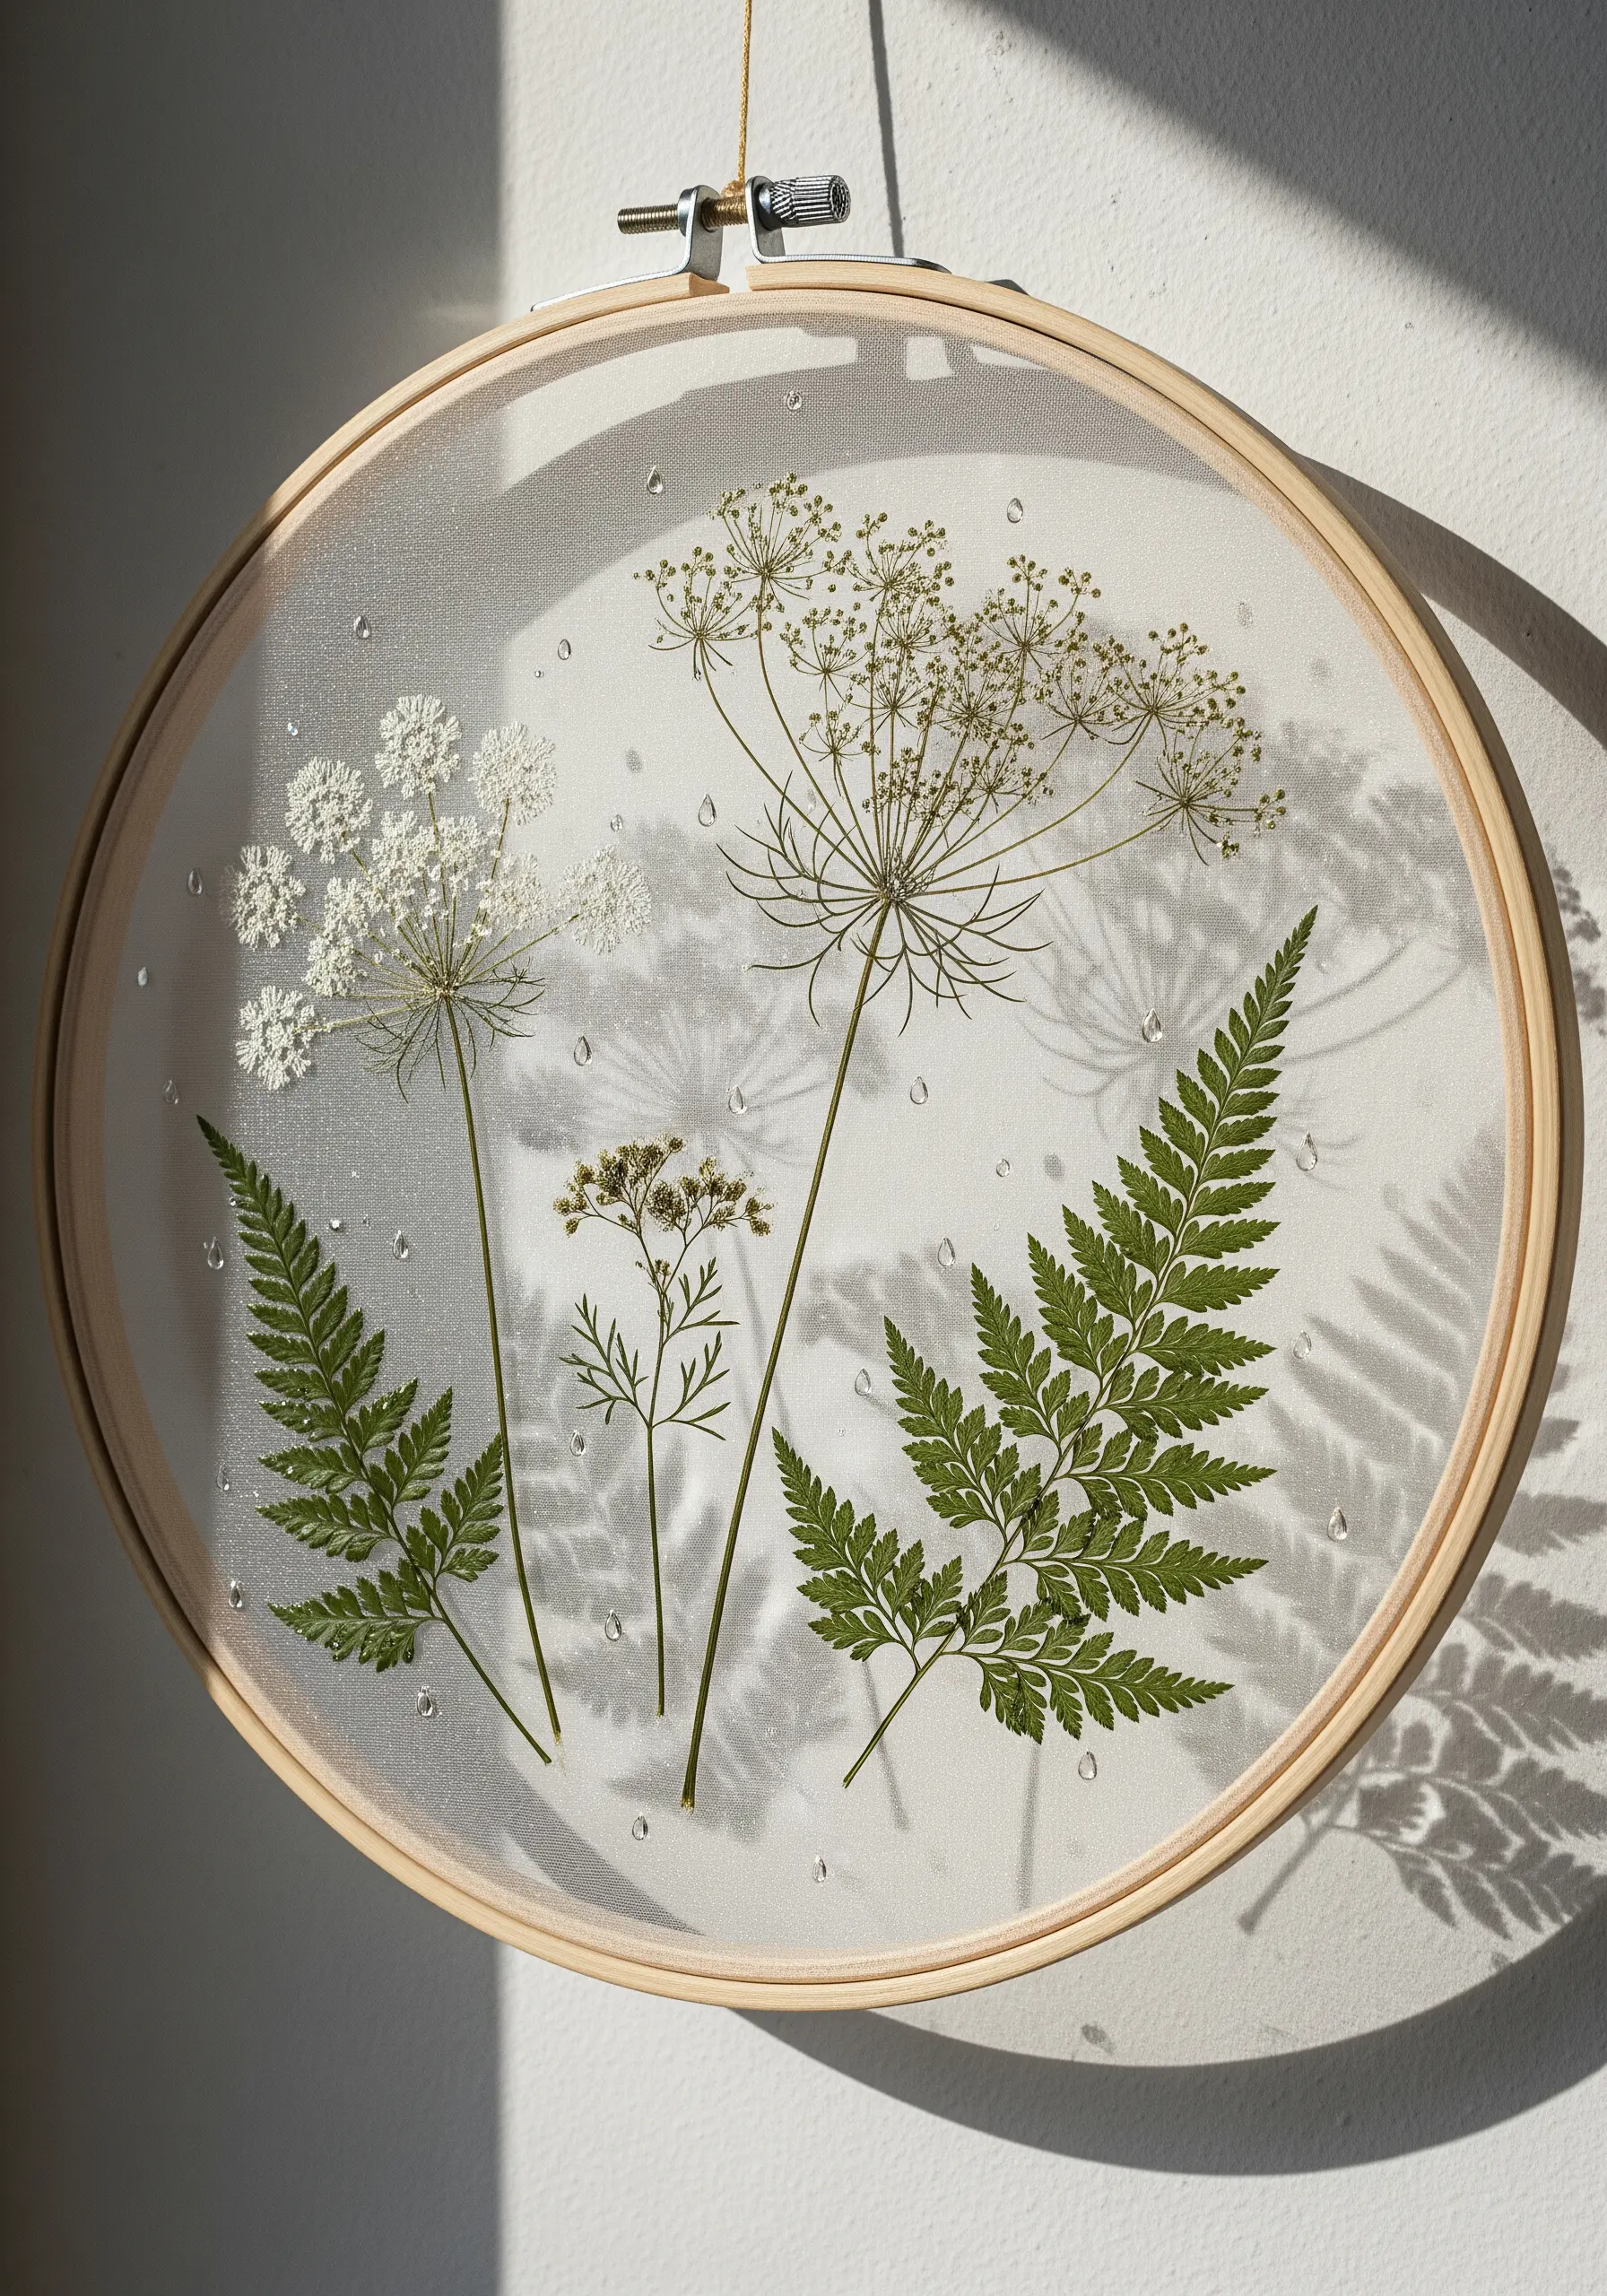
Stretch a layer of sheer organza or tulle in your hoop to create an ethereal, transparent background.
Carefully arrange your pressed flowers and ferns on the surface, securing them with tiny, almost invisible couching stitches that match the stem colors.
For a dew-kissed effect, scatter a few clear seed beads and secure them with a single strand of white thread, making them appear like water droplets.
This method transforms botanicals into delicate, suspended art, perfect for embroidery projects where pressed flowers take center stage and play with light and shadow.
2. Master Realistic Petal Shading
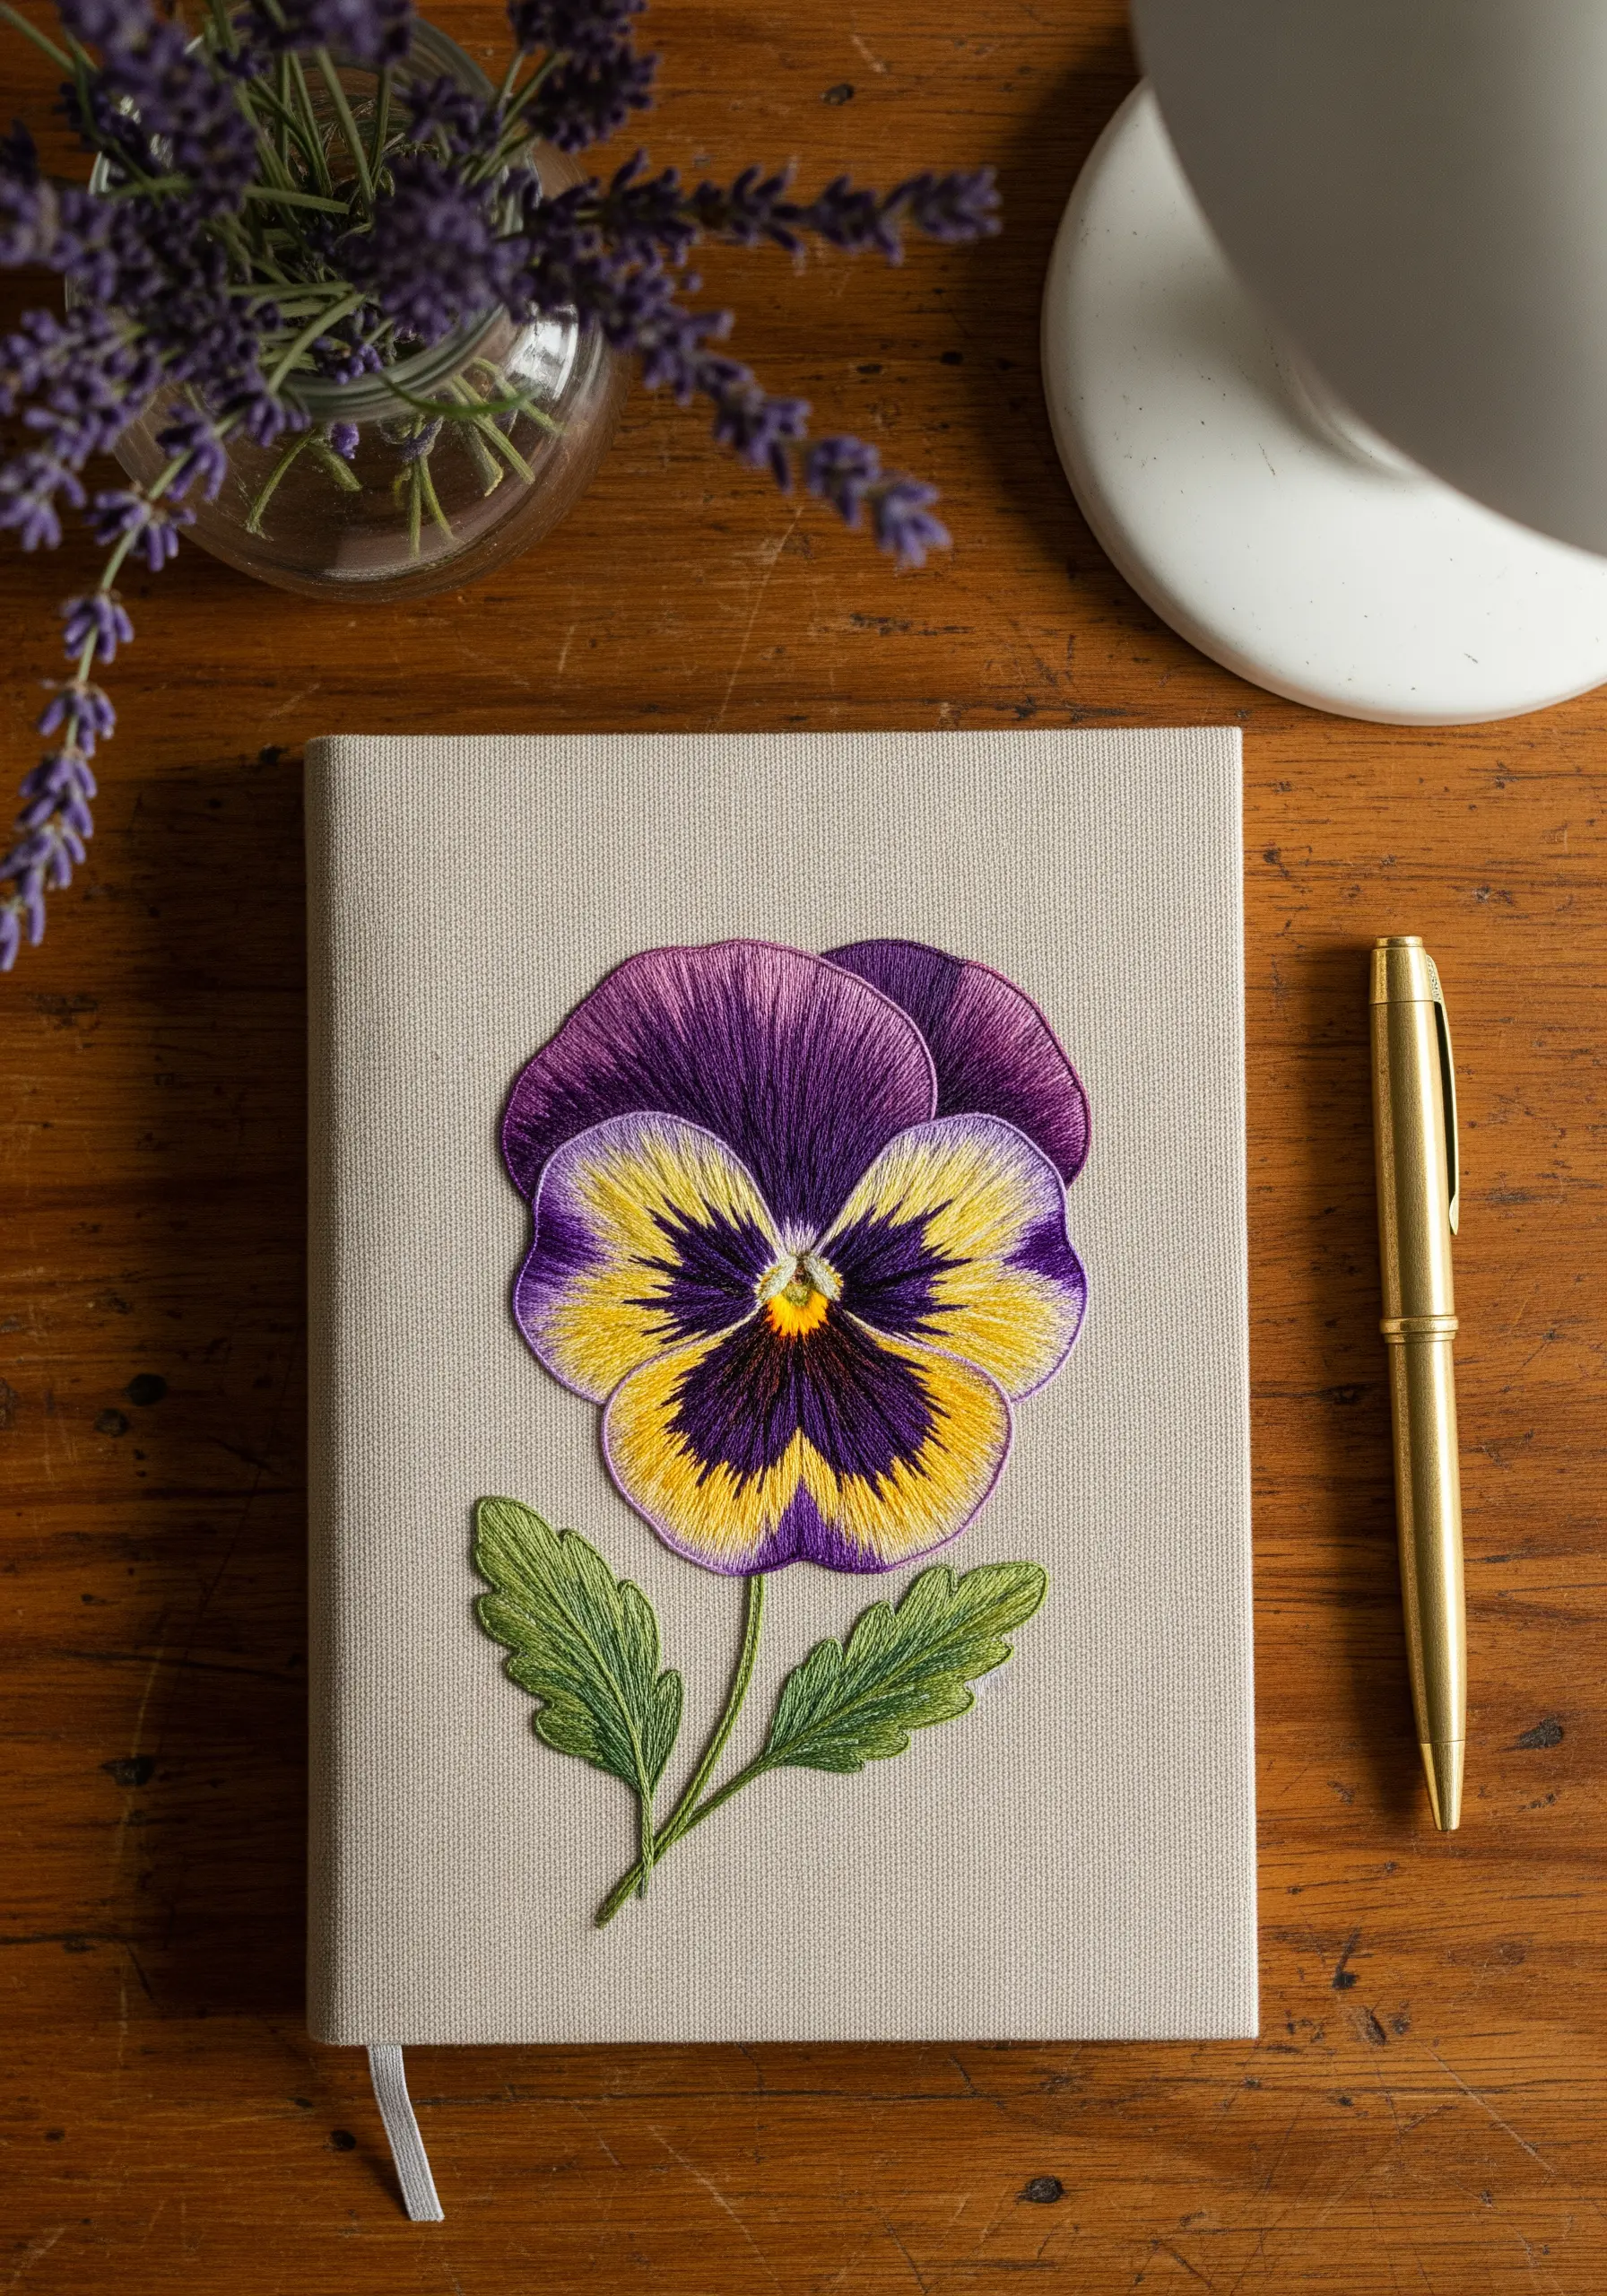
To achieve a pansy’s velvety texture, use the long-and-short stitch, also known as needle painting.
Start with the lightest shade in a section and work your way to the darkest, blending each new row of stitches into the previous one to create a seamless gradient.
Vary your stitch direction slightly to follow the natural curve of the petals, which gives the flower realistic dimension and movement.
These floral thread painting techniques are what turn a flat design into a piece of lifelike art, perfect for embellishing a journal cover or fabric panel.
3. Stitch Elegant Herbal Illustrations
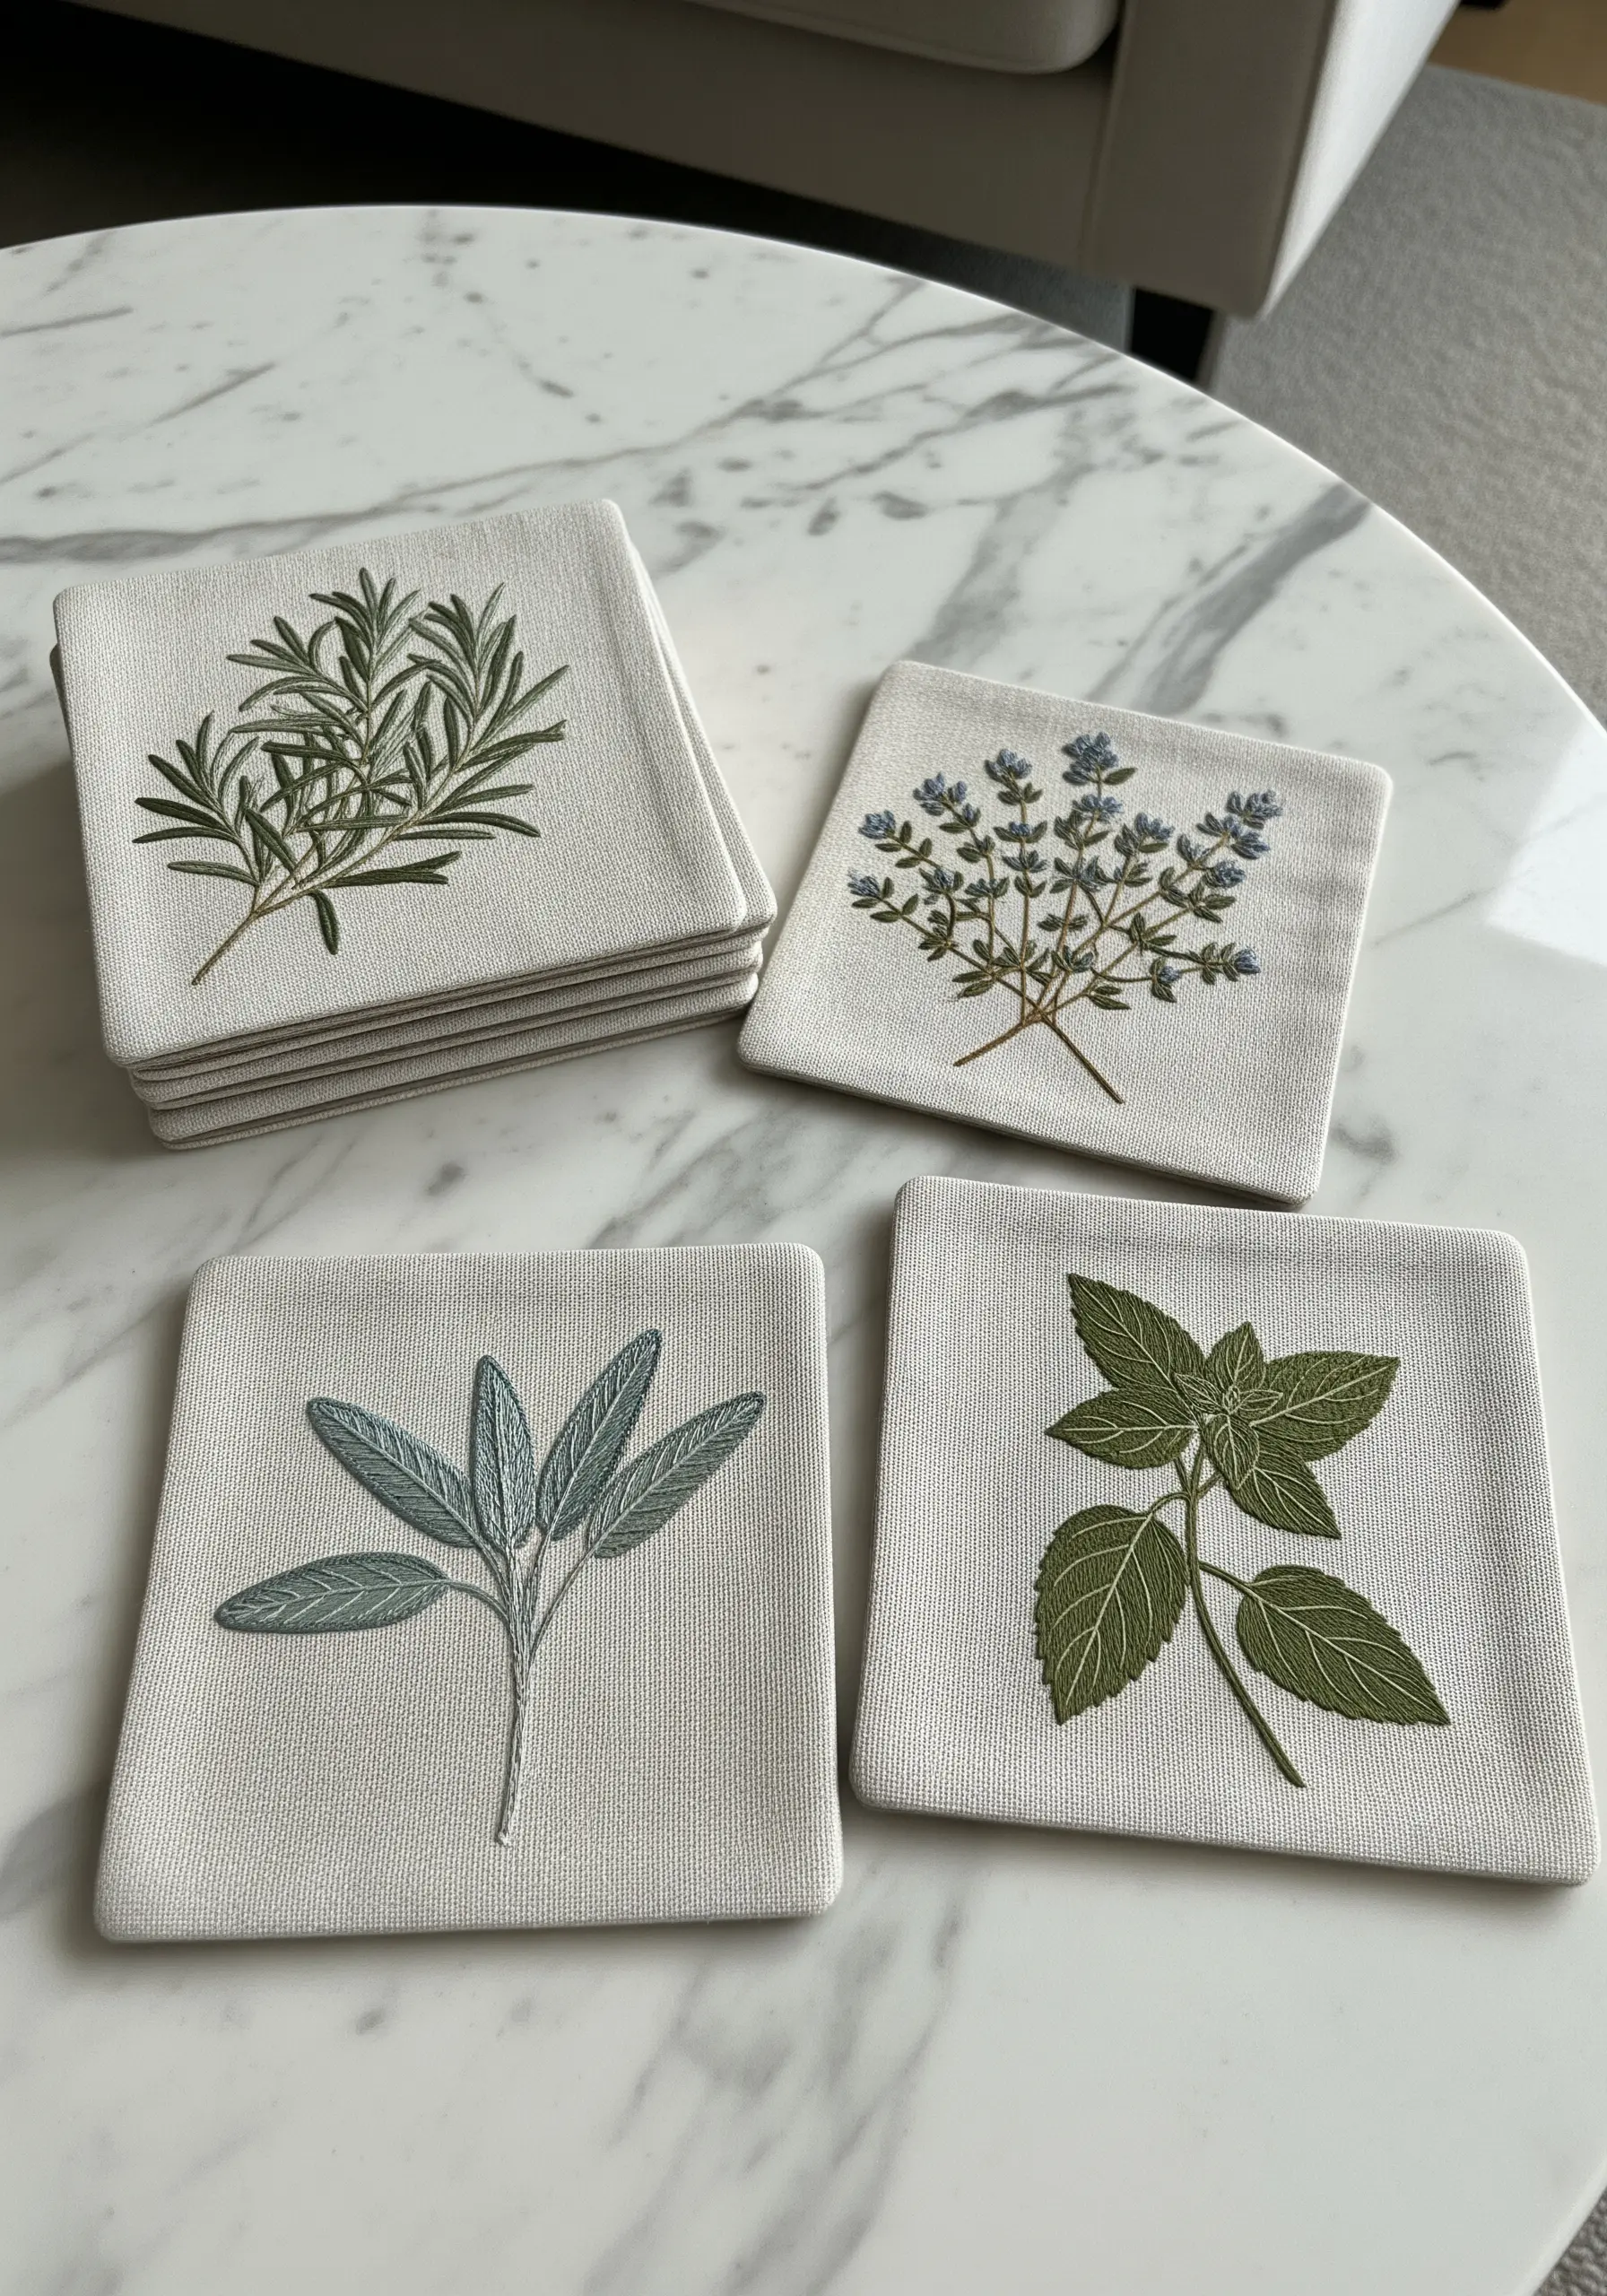
Capture the delicate structure of herbs like rosemary and thyme with a minimalist approach.
Use a single strand of embroidery floss and rely on precise backstitch or stem stitch for clean, illustrative lines.
For leaves like sage, use a fishbone stitch to create the central vein and fill the shape in one fluid motion, adding texture without bulk.
This technique emphasizes negative space and precision, making it ideal for a sophisticated set of coasters or kitchen linens and other minimalist embroidery projects.
4. Embellish Denim with a Wildflower Bouquet
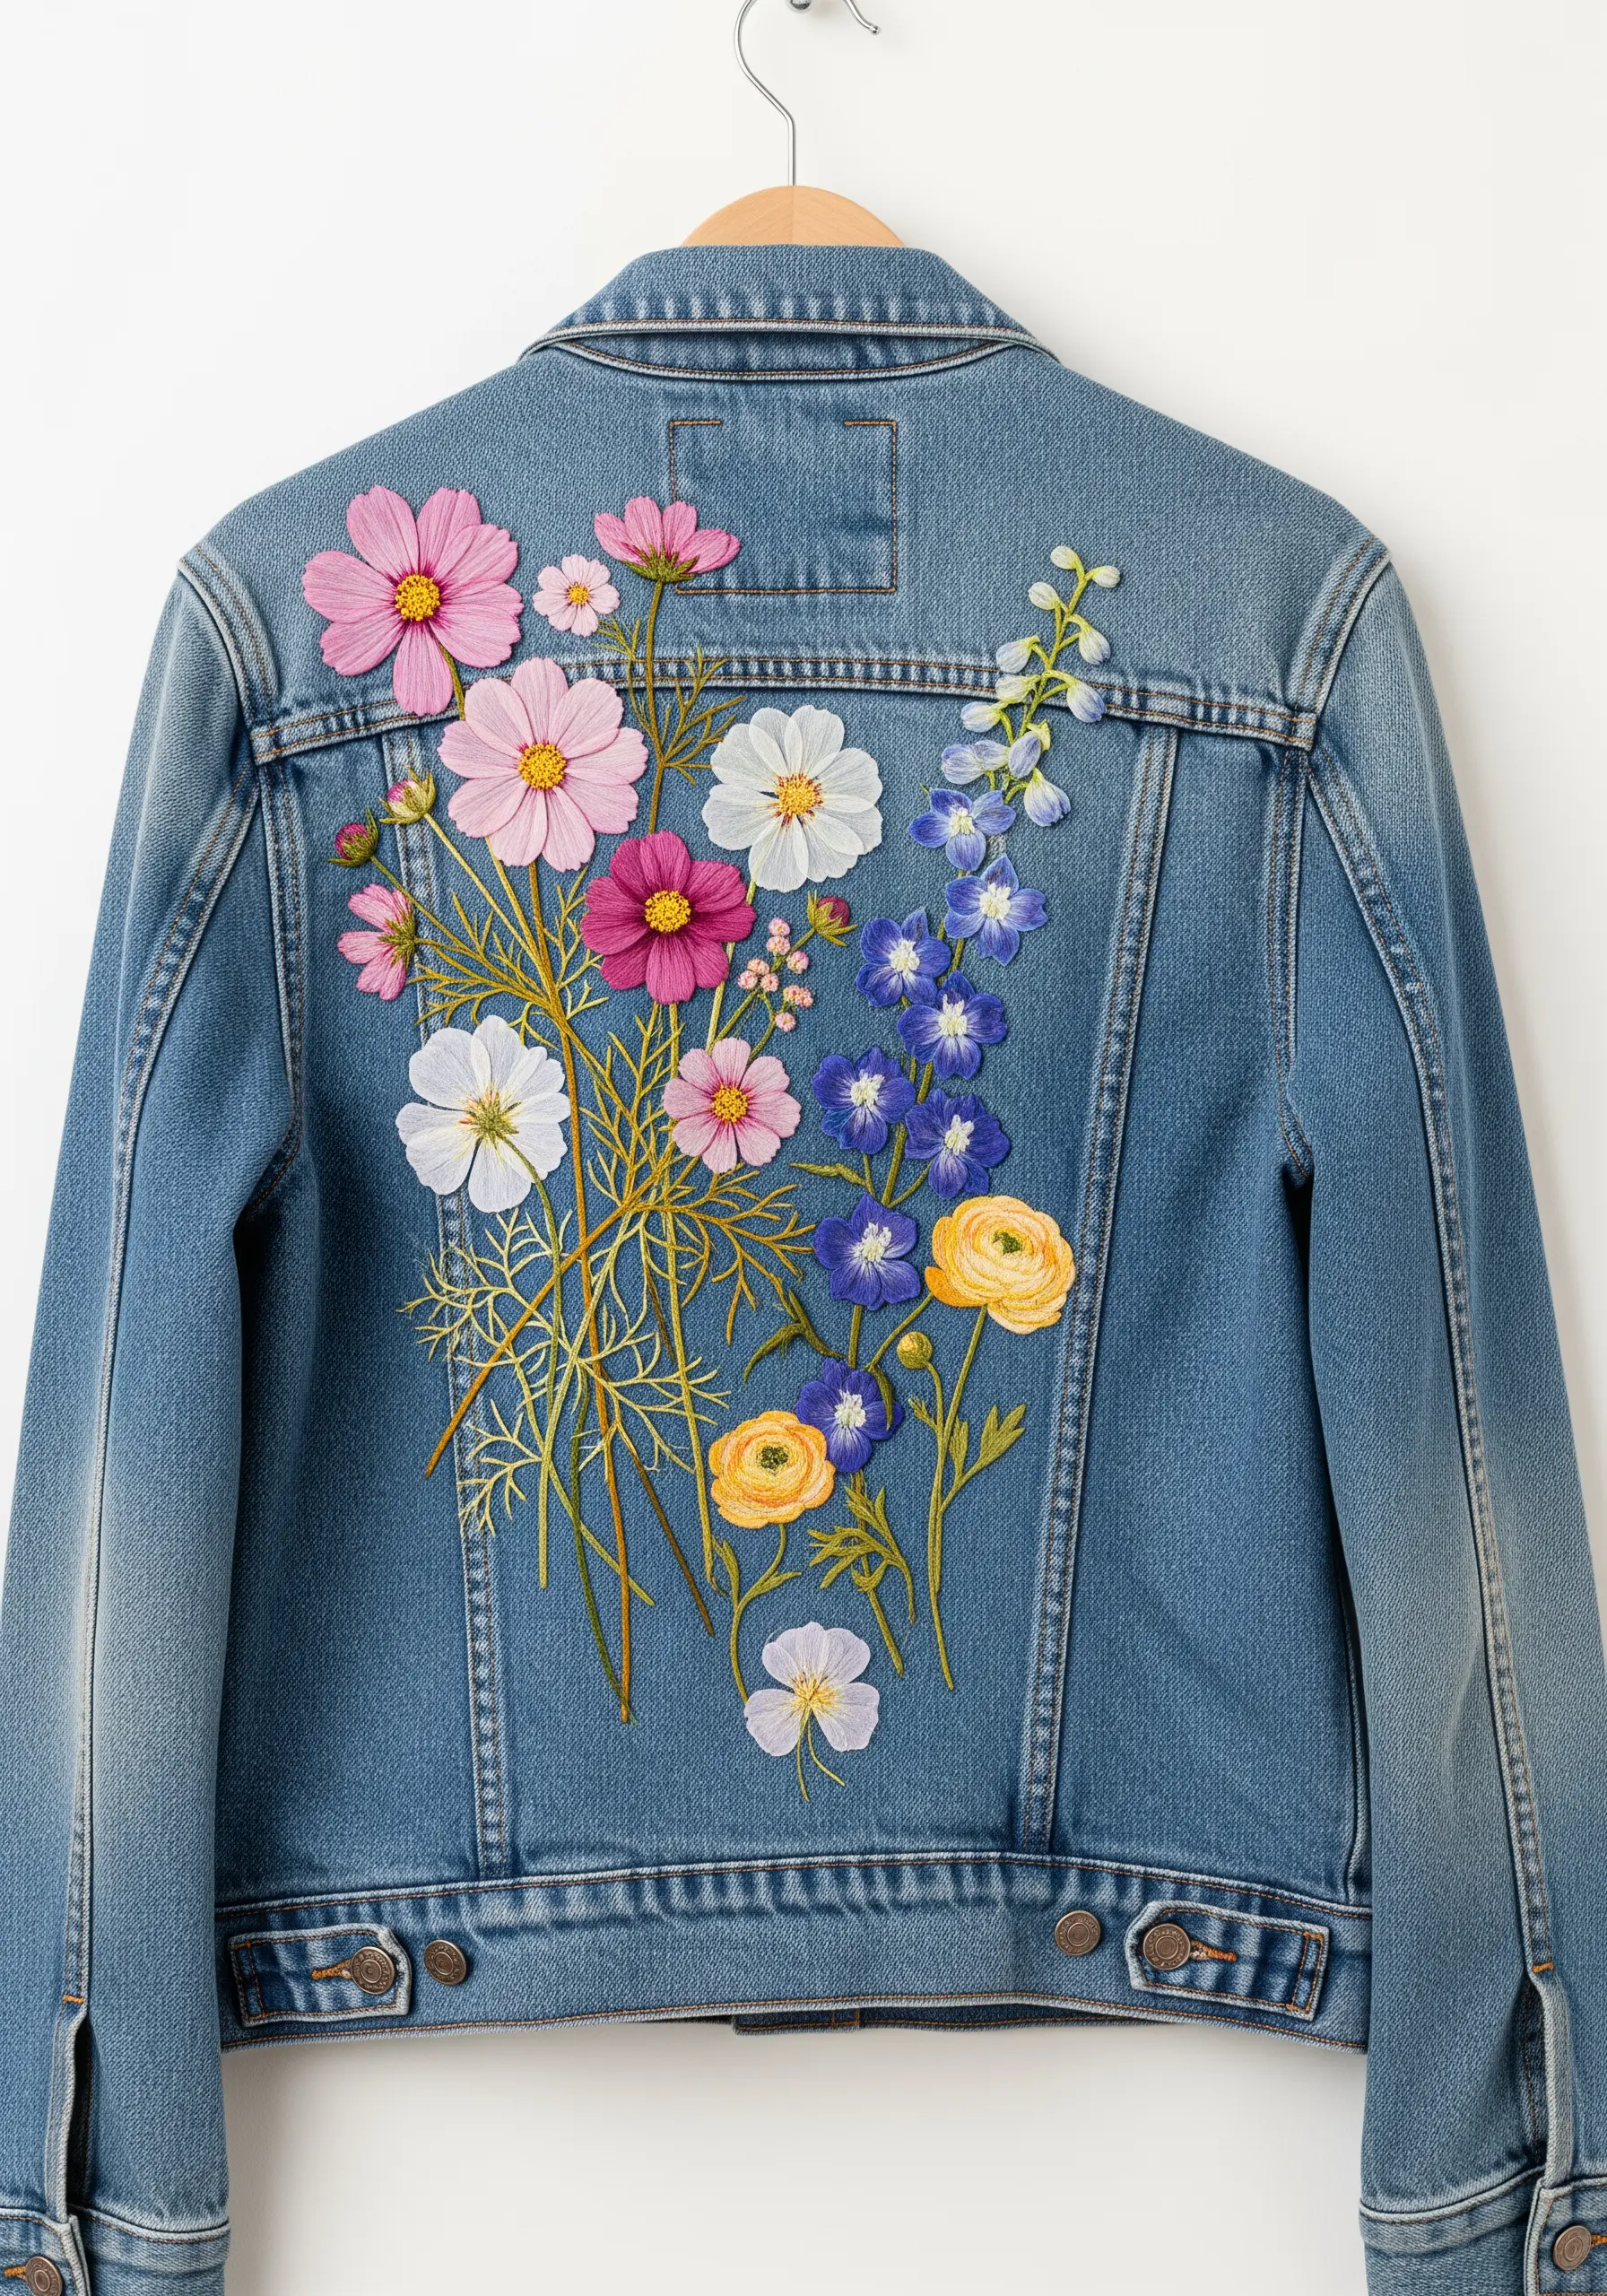
Transform a simple denim jacket by treating the back panel as your canvas.
Always use a medium-weight cut-away stabilizer on the inside of the jacket to prevent the dense stitching from puckering the fabric.
Create textural variety by combining different stitches: satin stitch for smooth petals, French knots for fluffy flower centers, and whipped backstitch for sturdy, defined stems.
This is one of the best tiny embroidery ideas to personalize your denim jacket, turning it into a piece of wearable botanical art.
5. Design a Meandering Vine Table Runner
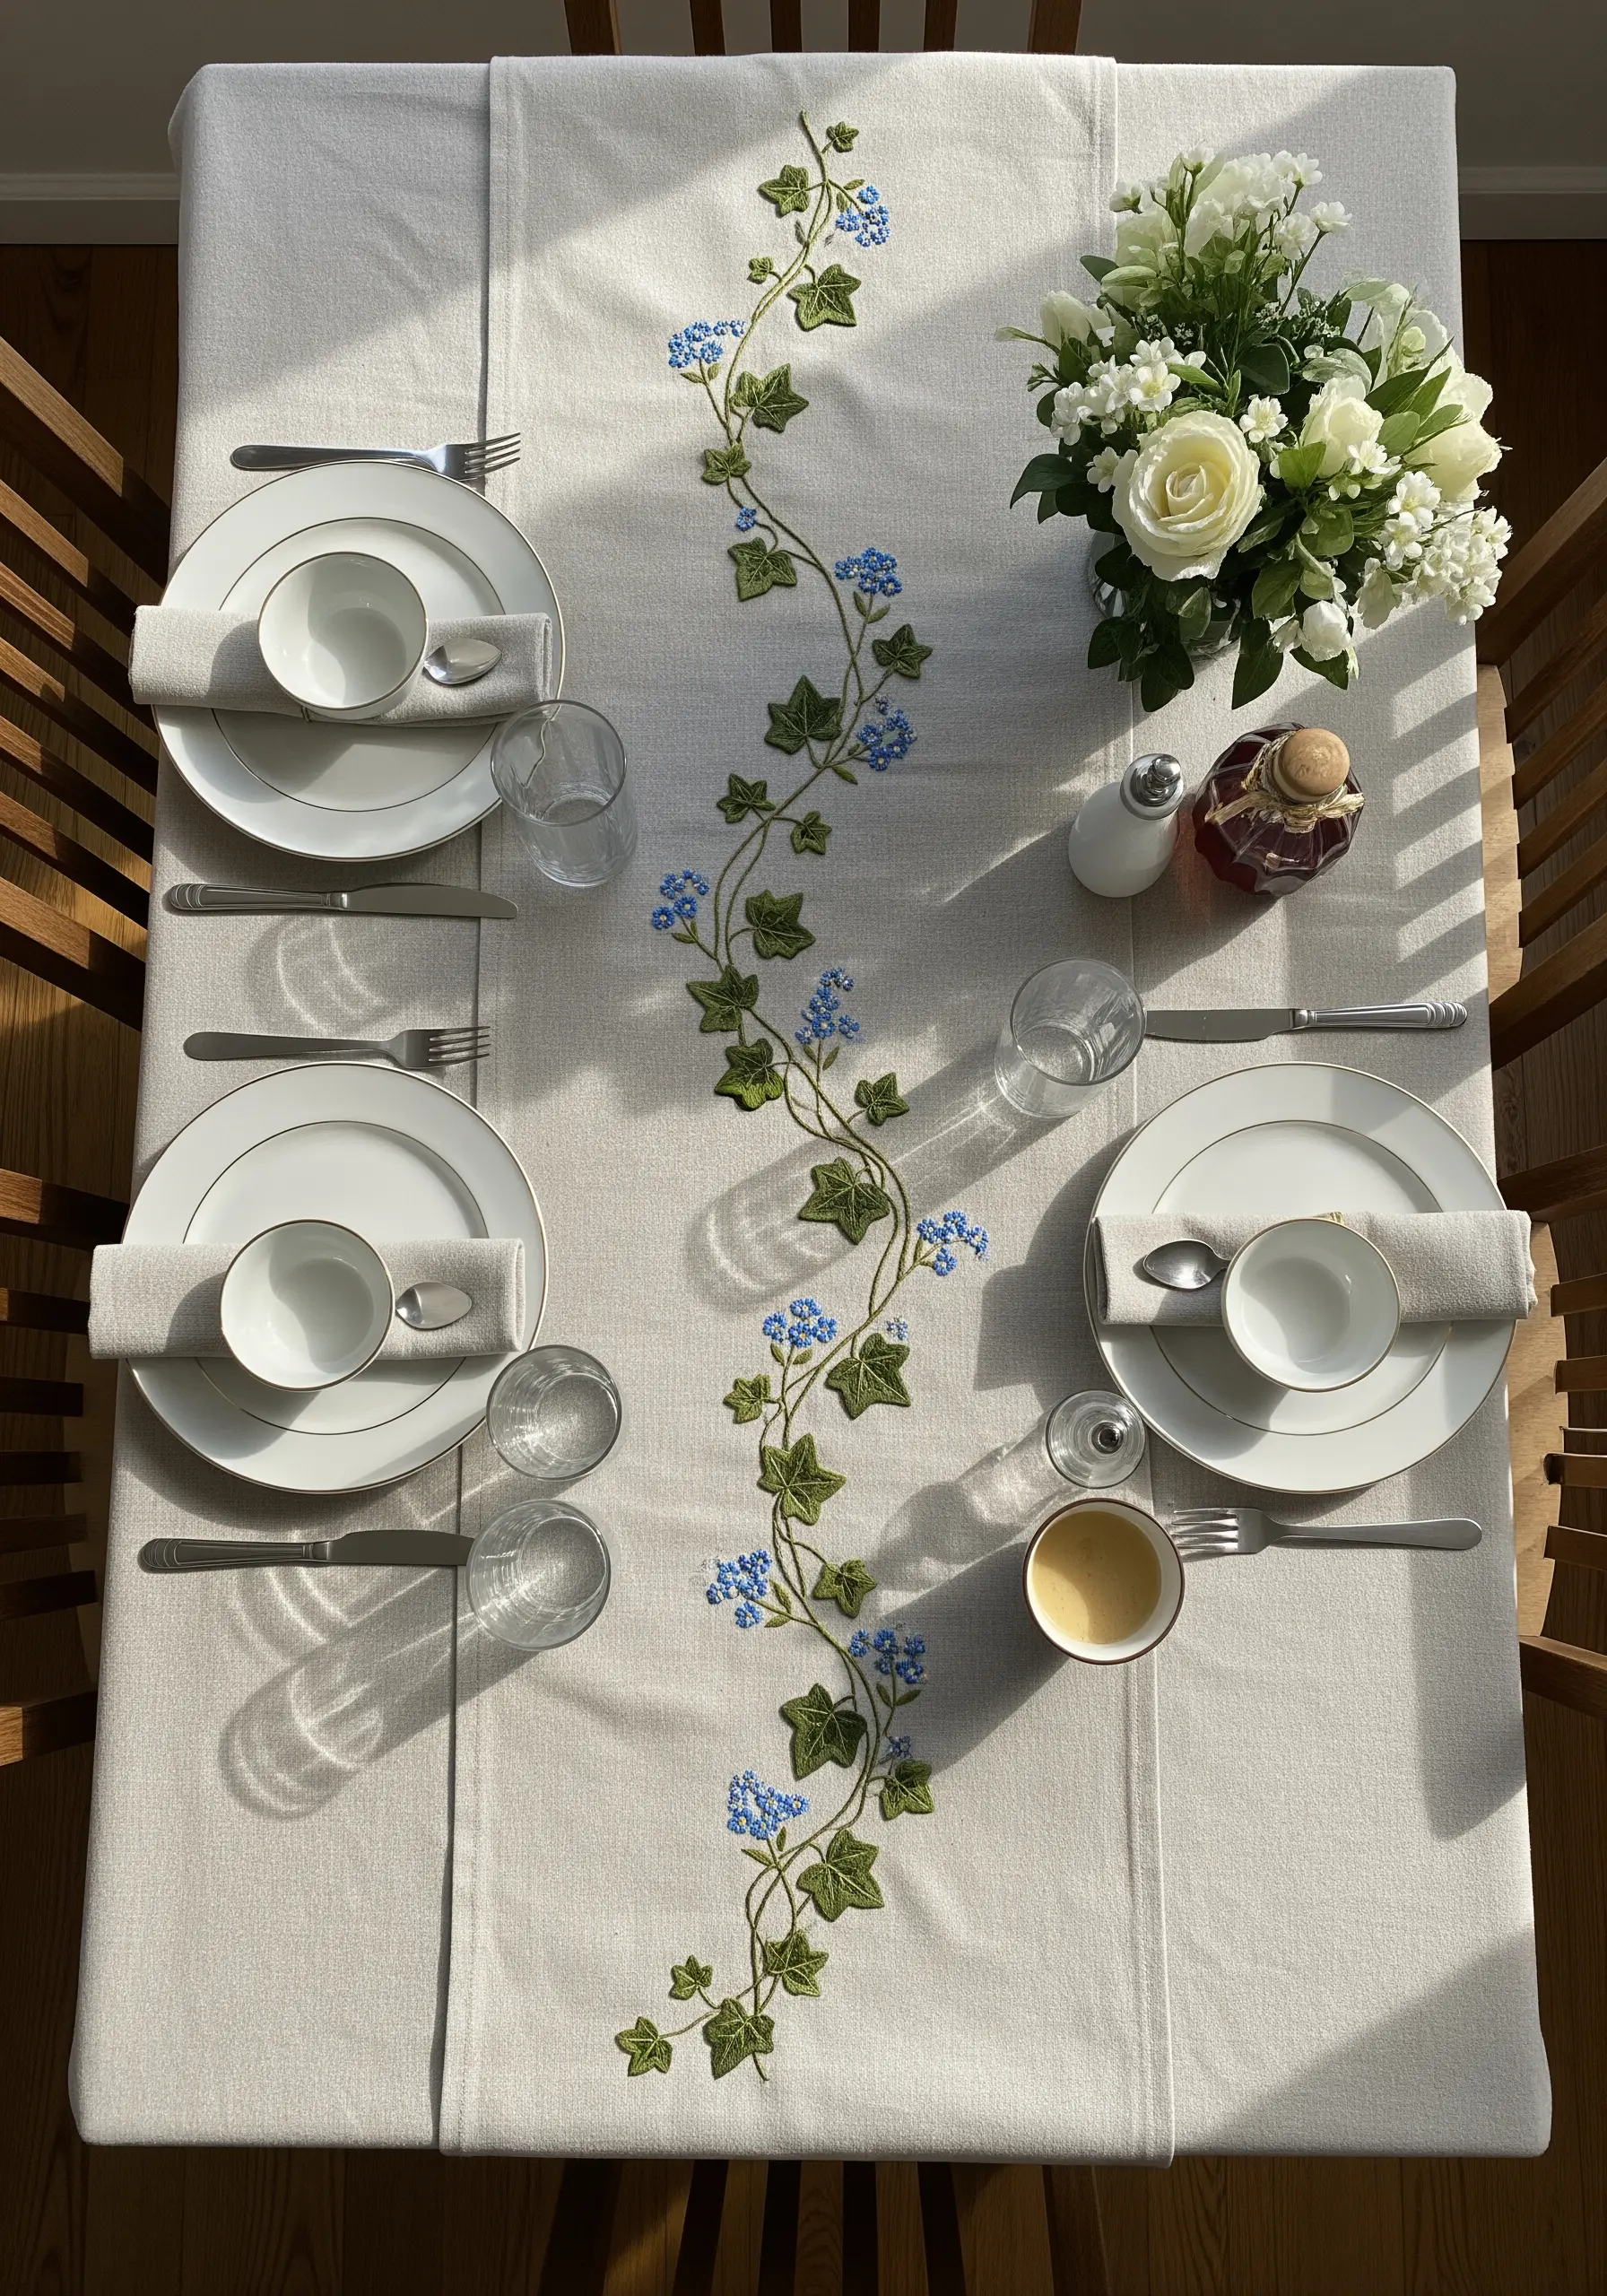
For a long design like a table runner, create a sense of natural movement by stitching the central vine with a gentle, organic curve using a whipped backstitch or stem stitch.
Anchor the design with repeating clusters of leaves and small blossoms, like forget-me-nots, using lazy daisy stitches for petals and French knots for centers.
Stick to a restrained color palette—two shades of green, one blue, and a hint of gold for the vine—to ensure the design remains elegant and doesn’t overwhelm your tablescape.
Explore other hand-stitched table runner embroidery designs to elevate your dining decor.
6. Frame Autumn Leaves as Stitching Guides
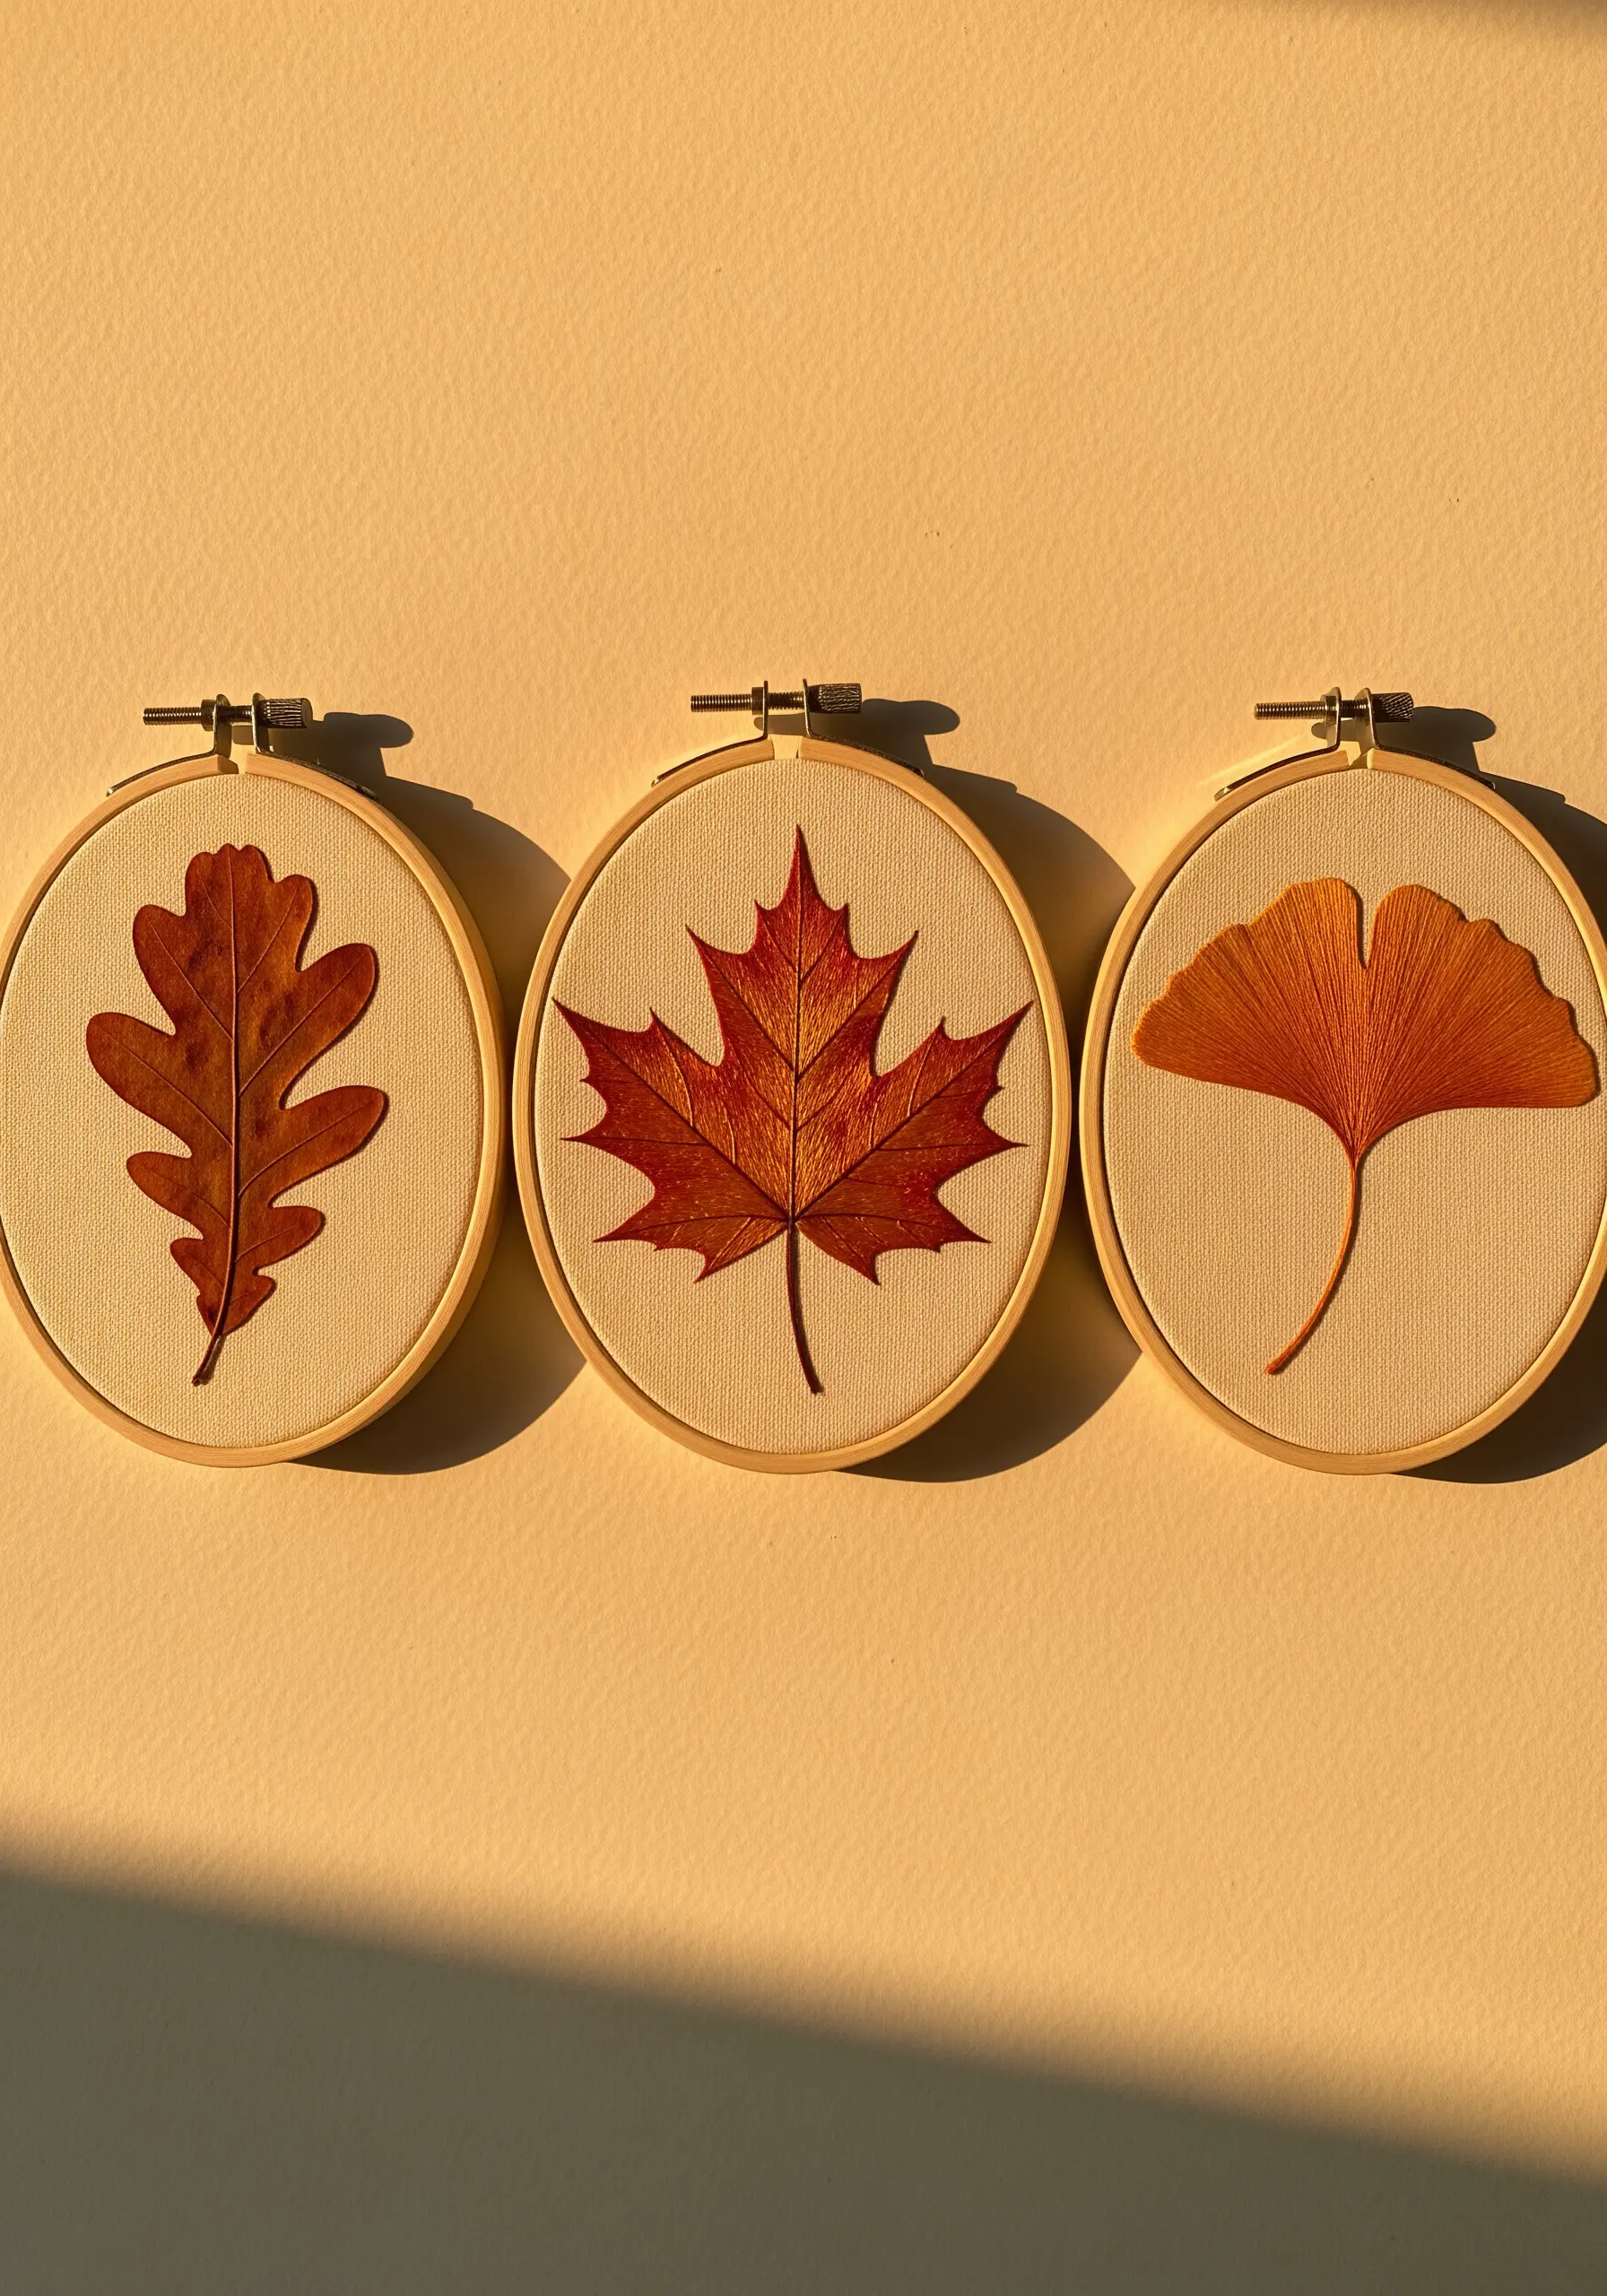
Use pressed autumn leaves not just as decor, but as perfect templates for your embroidery.
Place a leaf on your fabric and lightly trace its outline, then use fishbone or fly stitch to replicate the intricate vein patterns.
Alternatively, create a series of embroidery projects that use pressed leaves as the centerpiece by carefully securing a real pressed leaf to the fabric with tiny, hidden stitches around its edge for a beautiful mixed-media piece.
7. Build Texture in a Sunflower Head
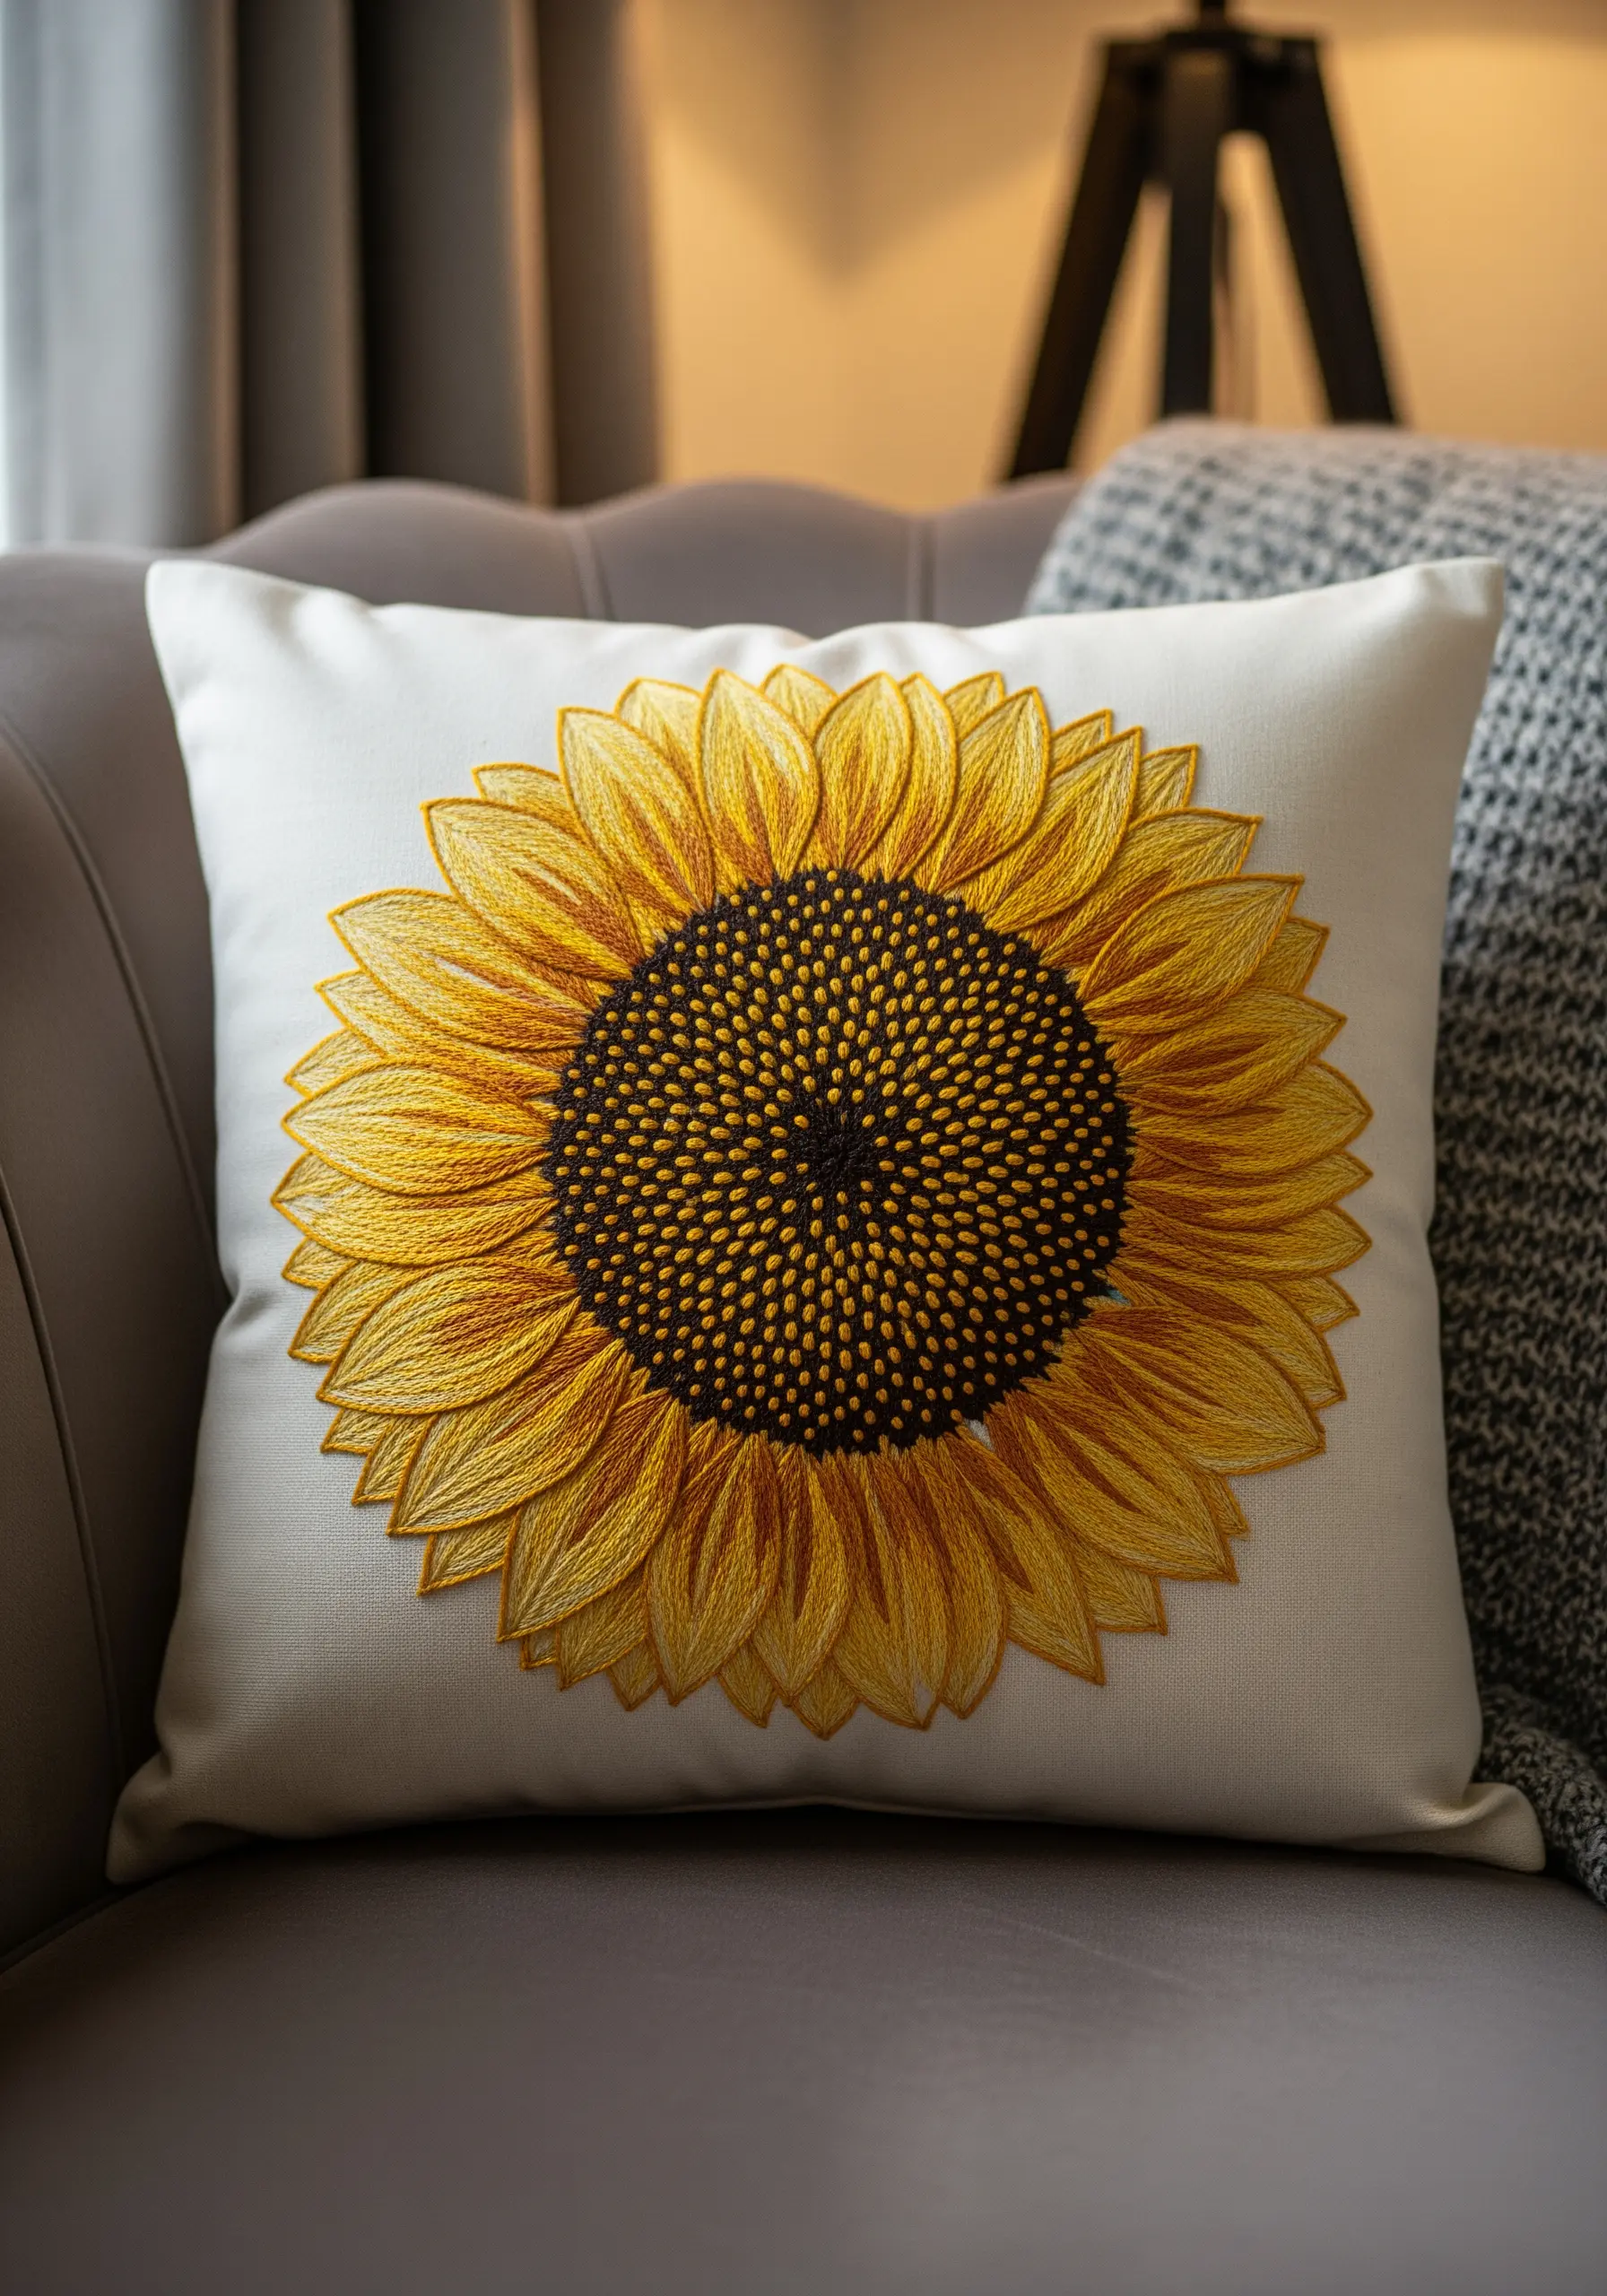
To create the iconic dense center of a sunflower, fill the area with hundreds of French knots.
Use at least two shades of brown and a touch of dark gold, clustering the darker knots toward the very center to create realistic depth.
For the petals, use a directional long-and-short stitch with three or four shades of yellow and gold, ensuring your stitches flow outward from the center to mimic natural growth.
This focus on texture is what makes sunflower-inspired embroidery crafts so visually striking and tactile.
8. Stitch Cascading Blossoms on Sheer Curtains
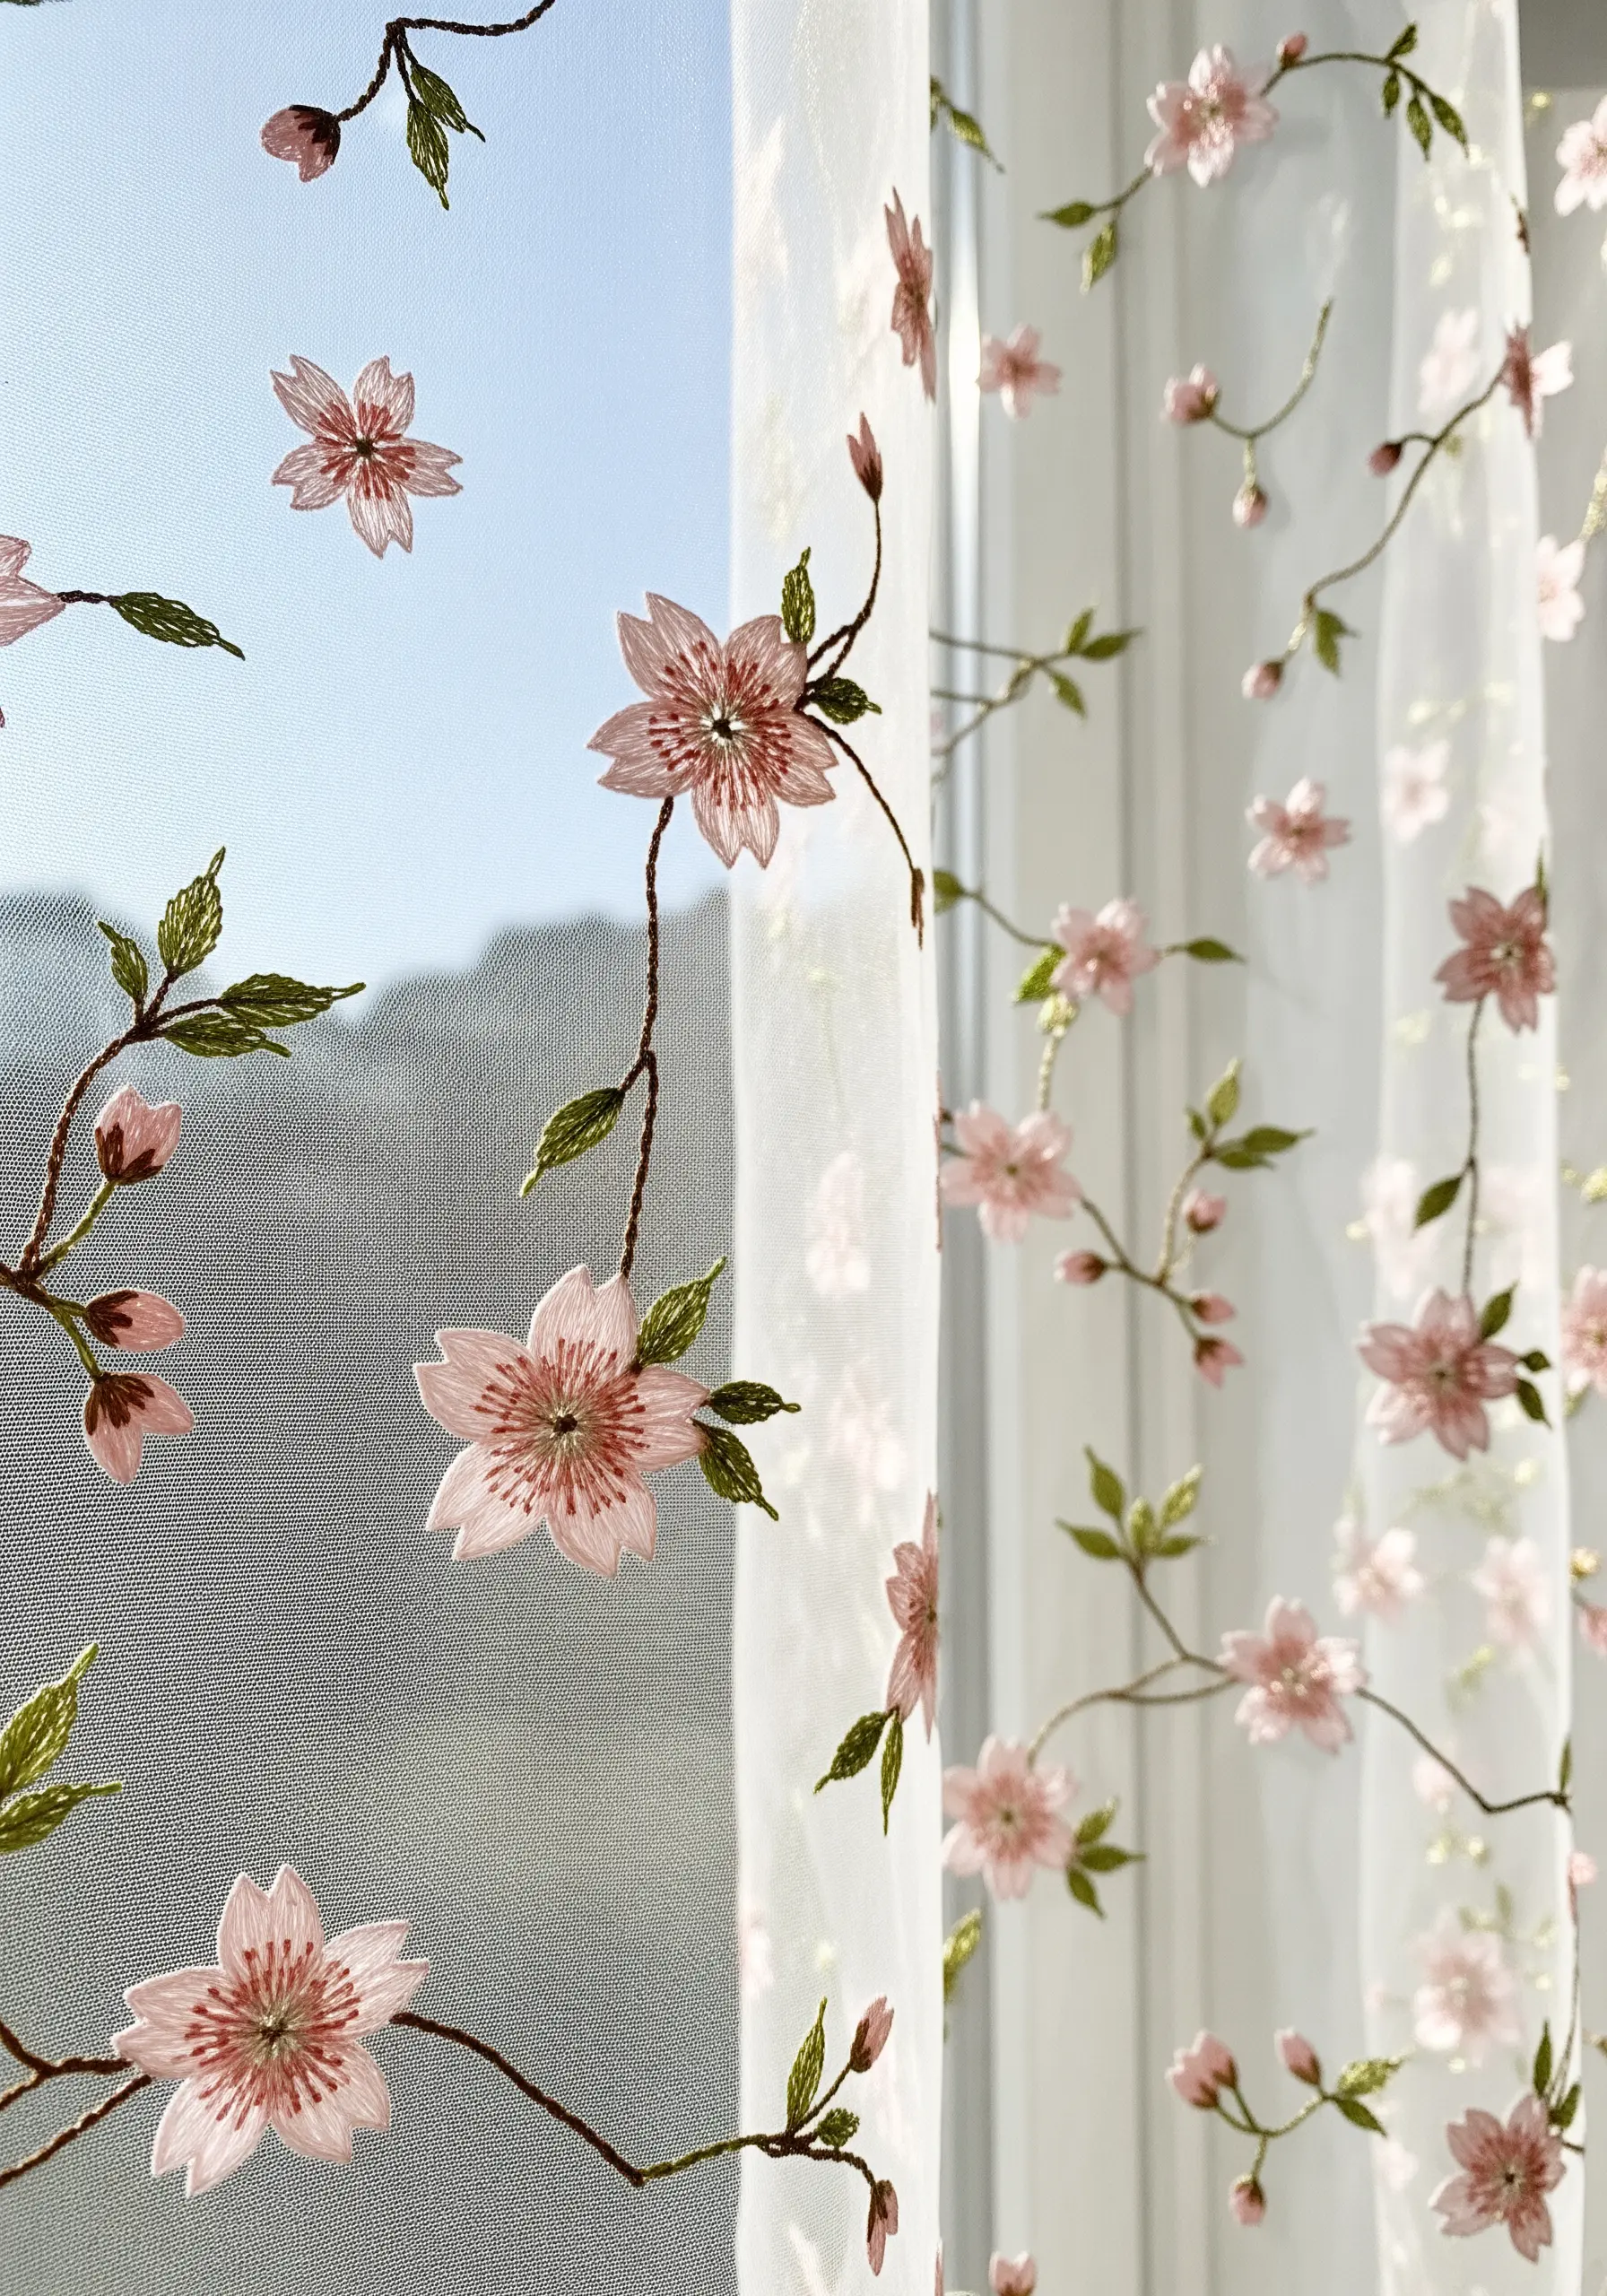
Embroidering on sheer curtain fabric creates a magical effect where the design seems to float in the air.
To prevent puckering on such delicate material, use a water-soluble stabilizer; it provides support during stitching and dissolves completely in water afterward.
Keep the stitching light and airy by using only two strands of floss for petals and a single strand for stems.
This technique of using sheer fabrics for dreamy effects allows light to filter through, highlighting the delicate silhouettes of the cherry blossoms.
9. Craft a Fragrant Lavender Wreath
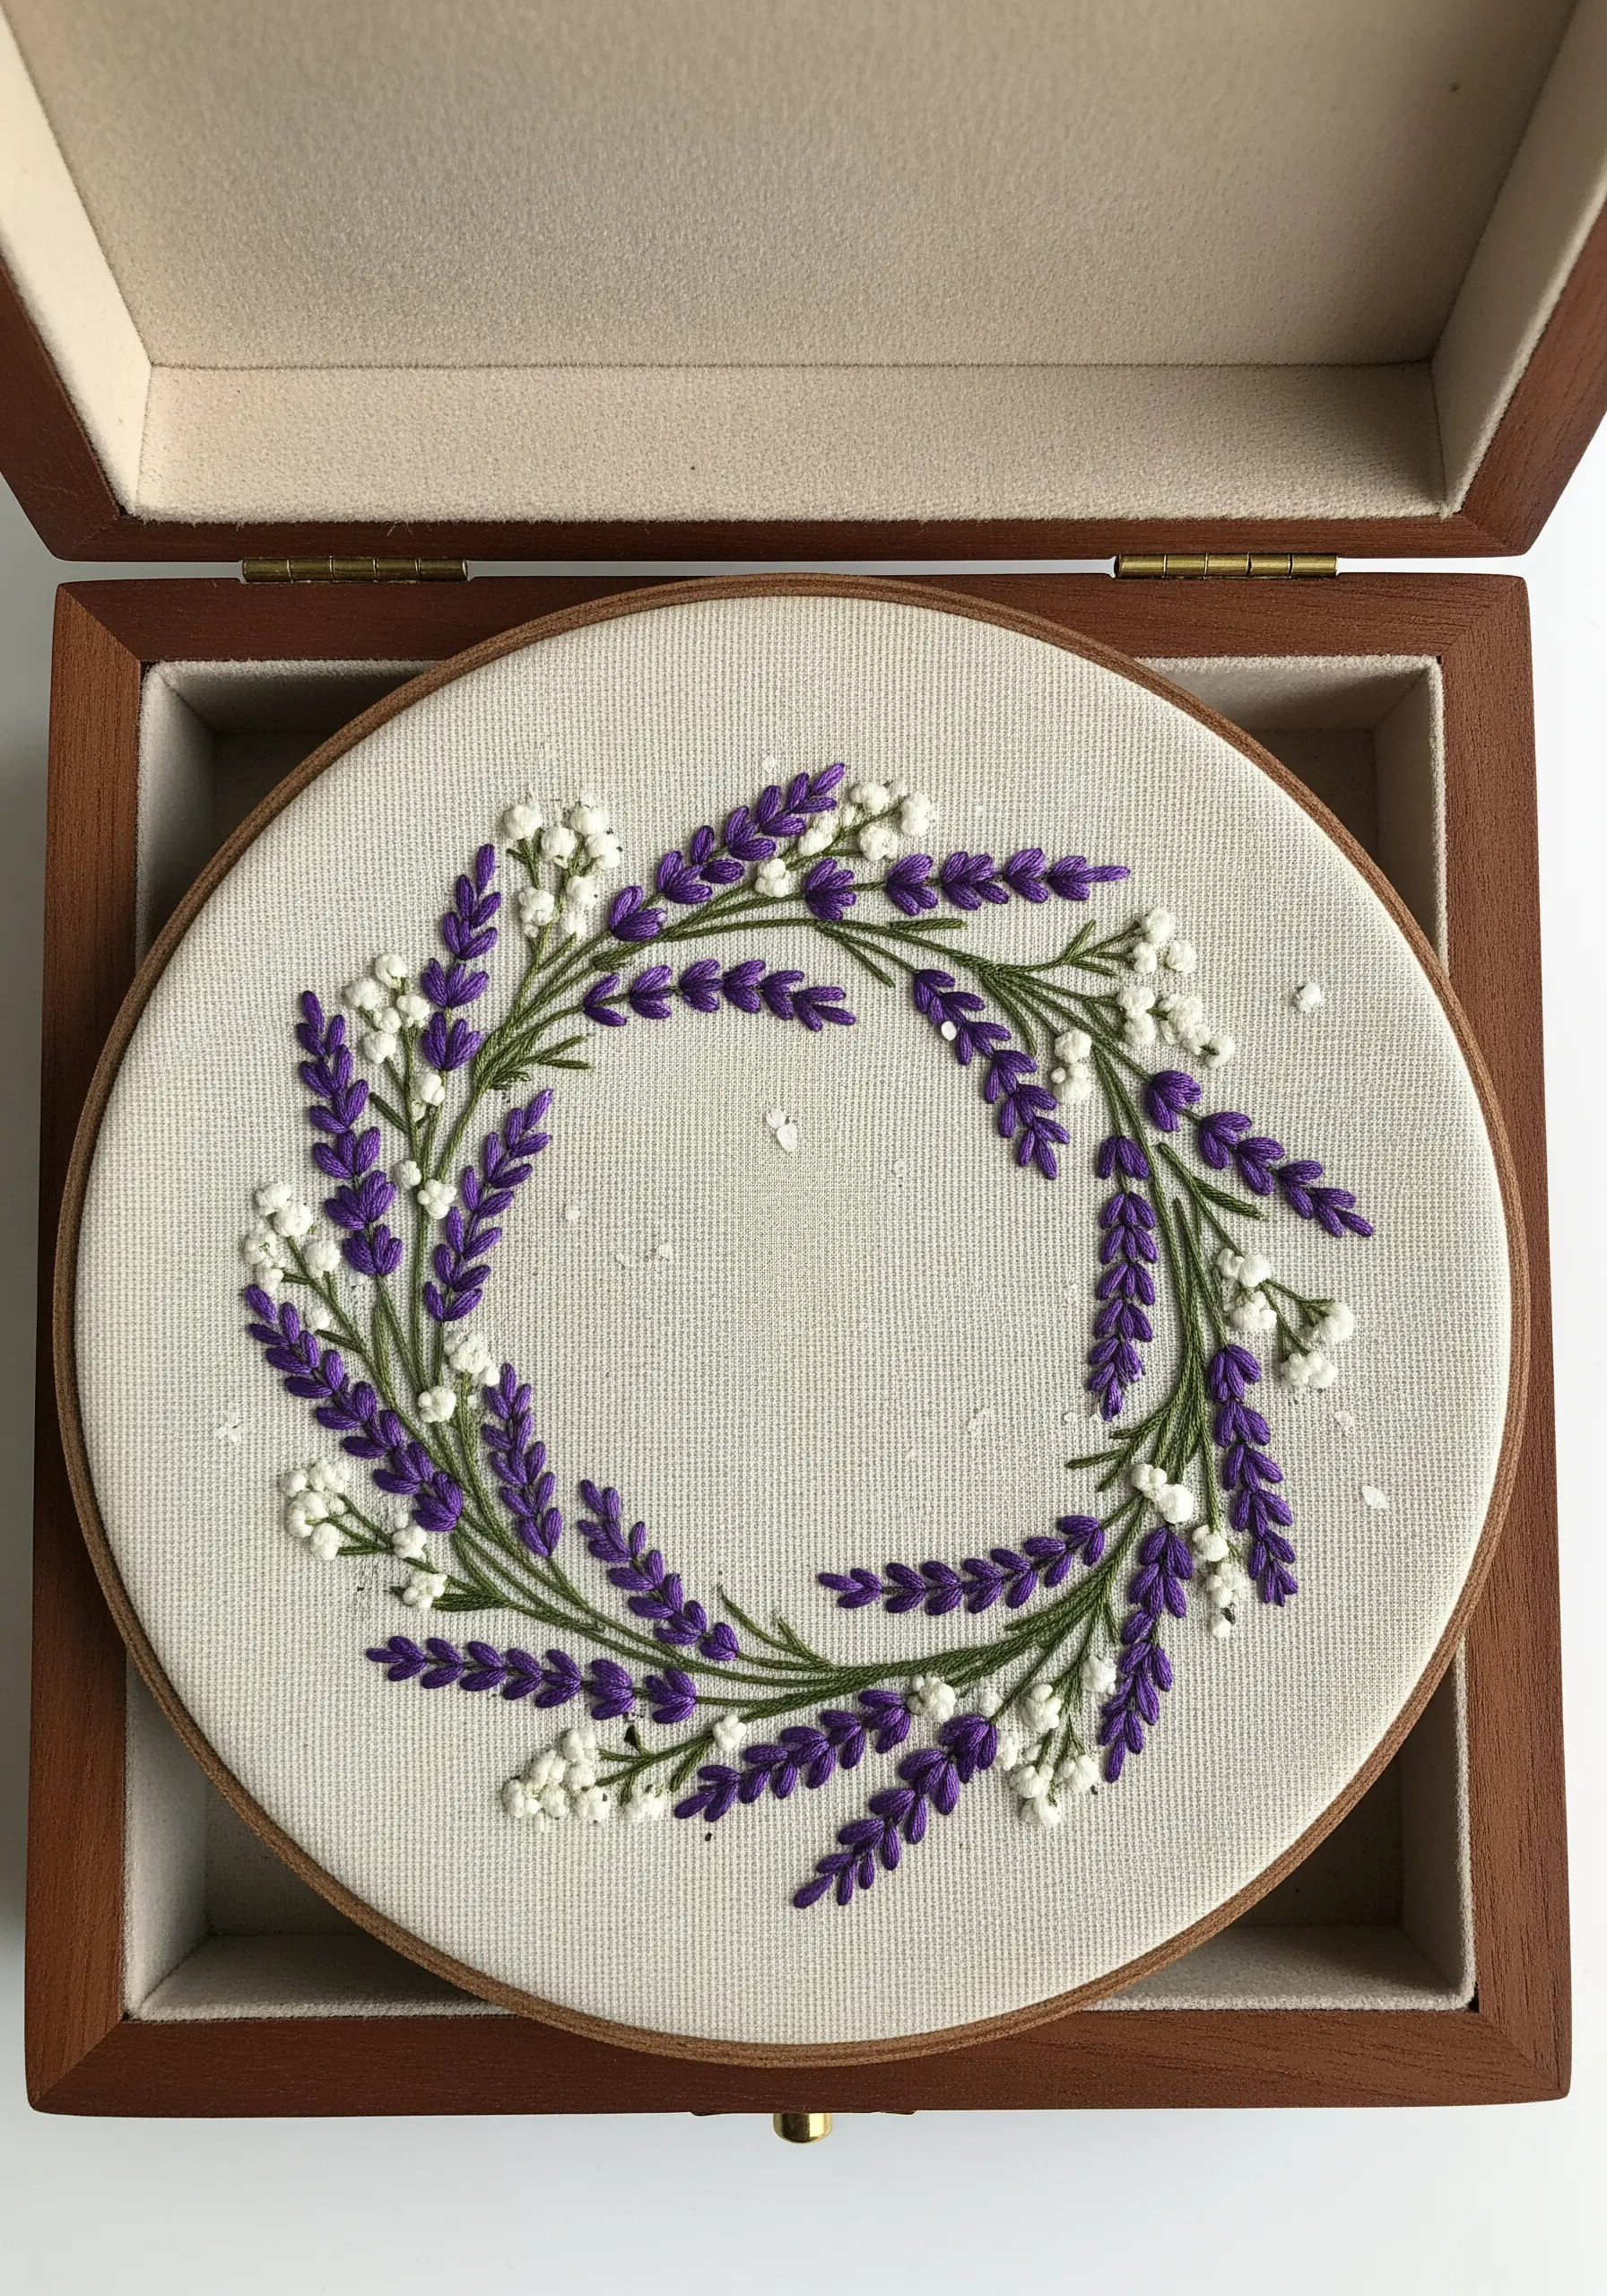
Create a beautiful lavender wreath by combining simple stitches for maximum texture.
Use straight stitches or bullion knots for the purple lavender buds, varying their length and angle slightly for a more organic look.
Contrast the sleek lavender with clusters of white French knots to represent baby’s breath, adding softness and filling out the wreath’s shape.
When finished, mount the hoop in a wooden keepsake box to create thoughtful handmade embroidery gifts that double as mini art pieces.
10. Compose a Vertical Wildflower Bouquet
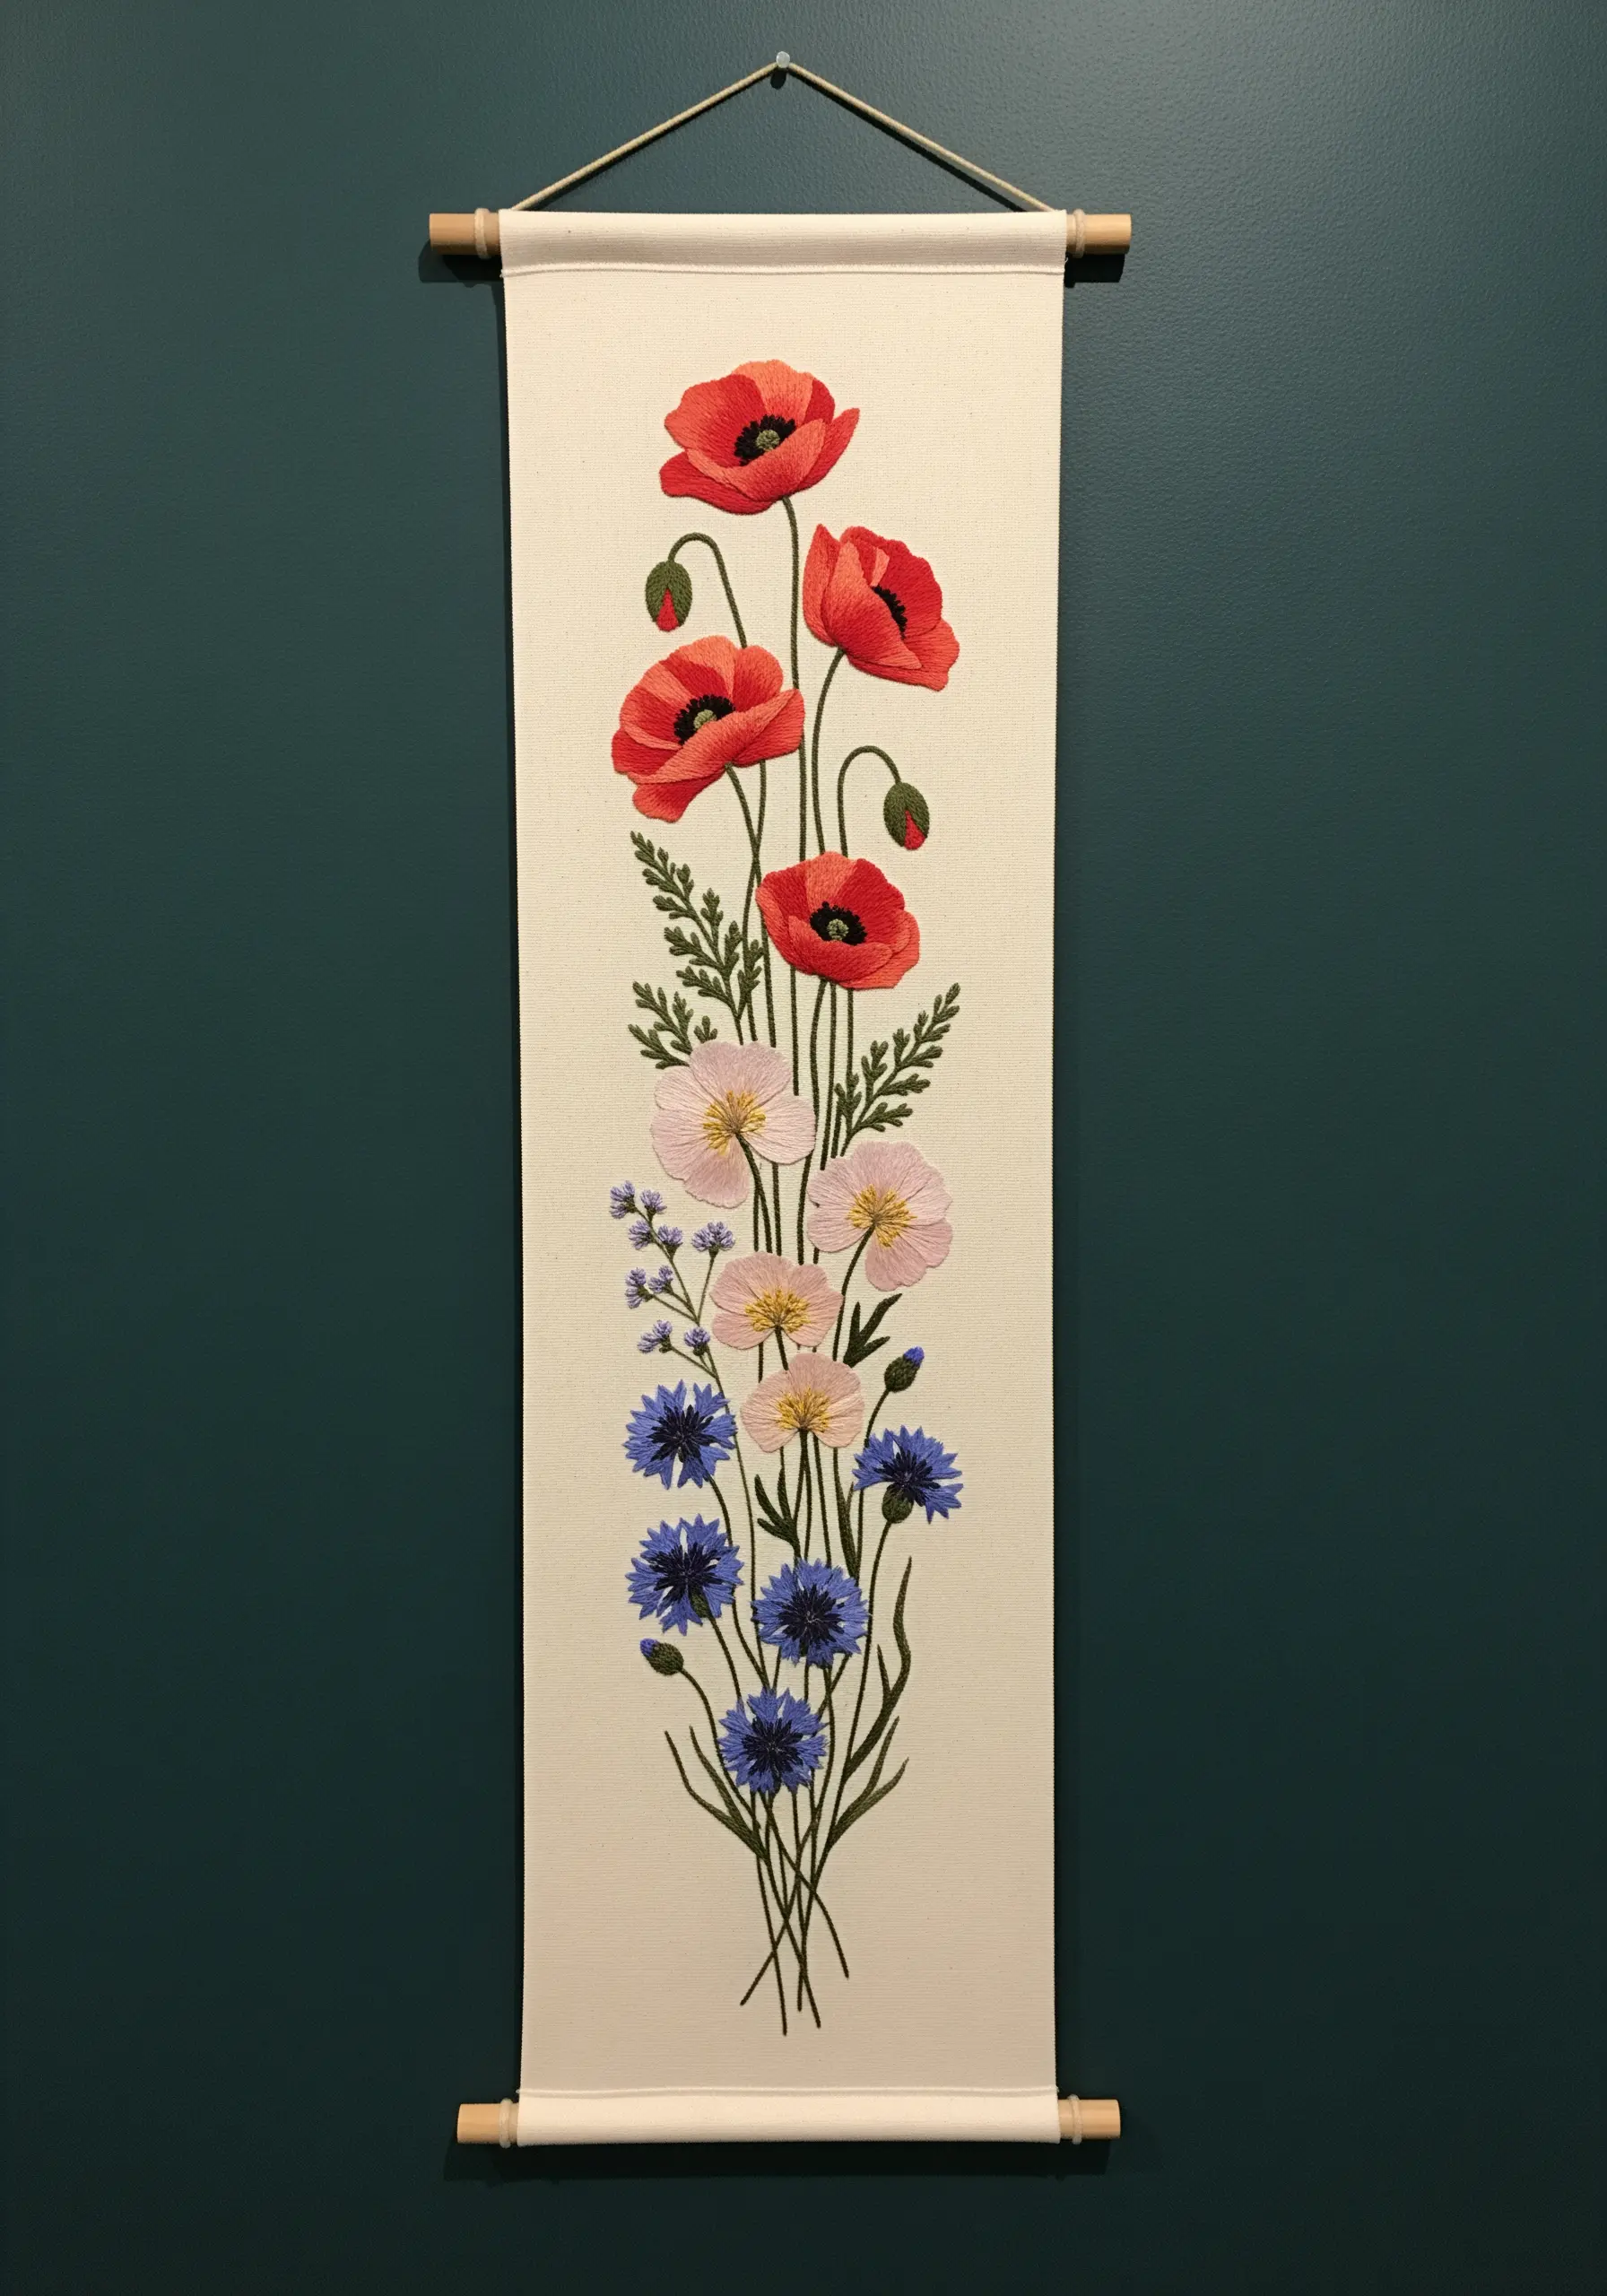
When designing for a vertical format like a wall banner, create a strong composition by varying the heights and shapes of your flowers.
Place the largest, boldest flowers (like poppies) at different eye levels to guide the viewer’s gaze up the banner.
Fill in the spaces with delicate stems and smaller supporting flowers, ensuring the greenery has varied tones to create a sense of depth and realism.
This approach turns a simple bouquet into stunning embroidered textile wall hangings.
11. Achieve Fern Delicacy with Precision Stitching
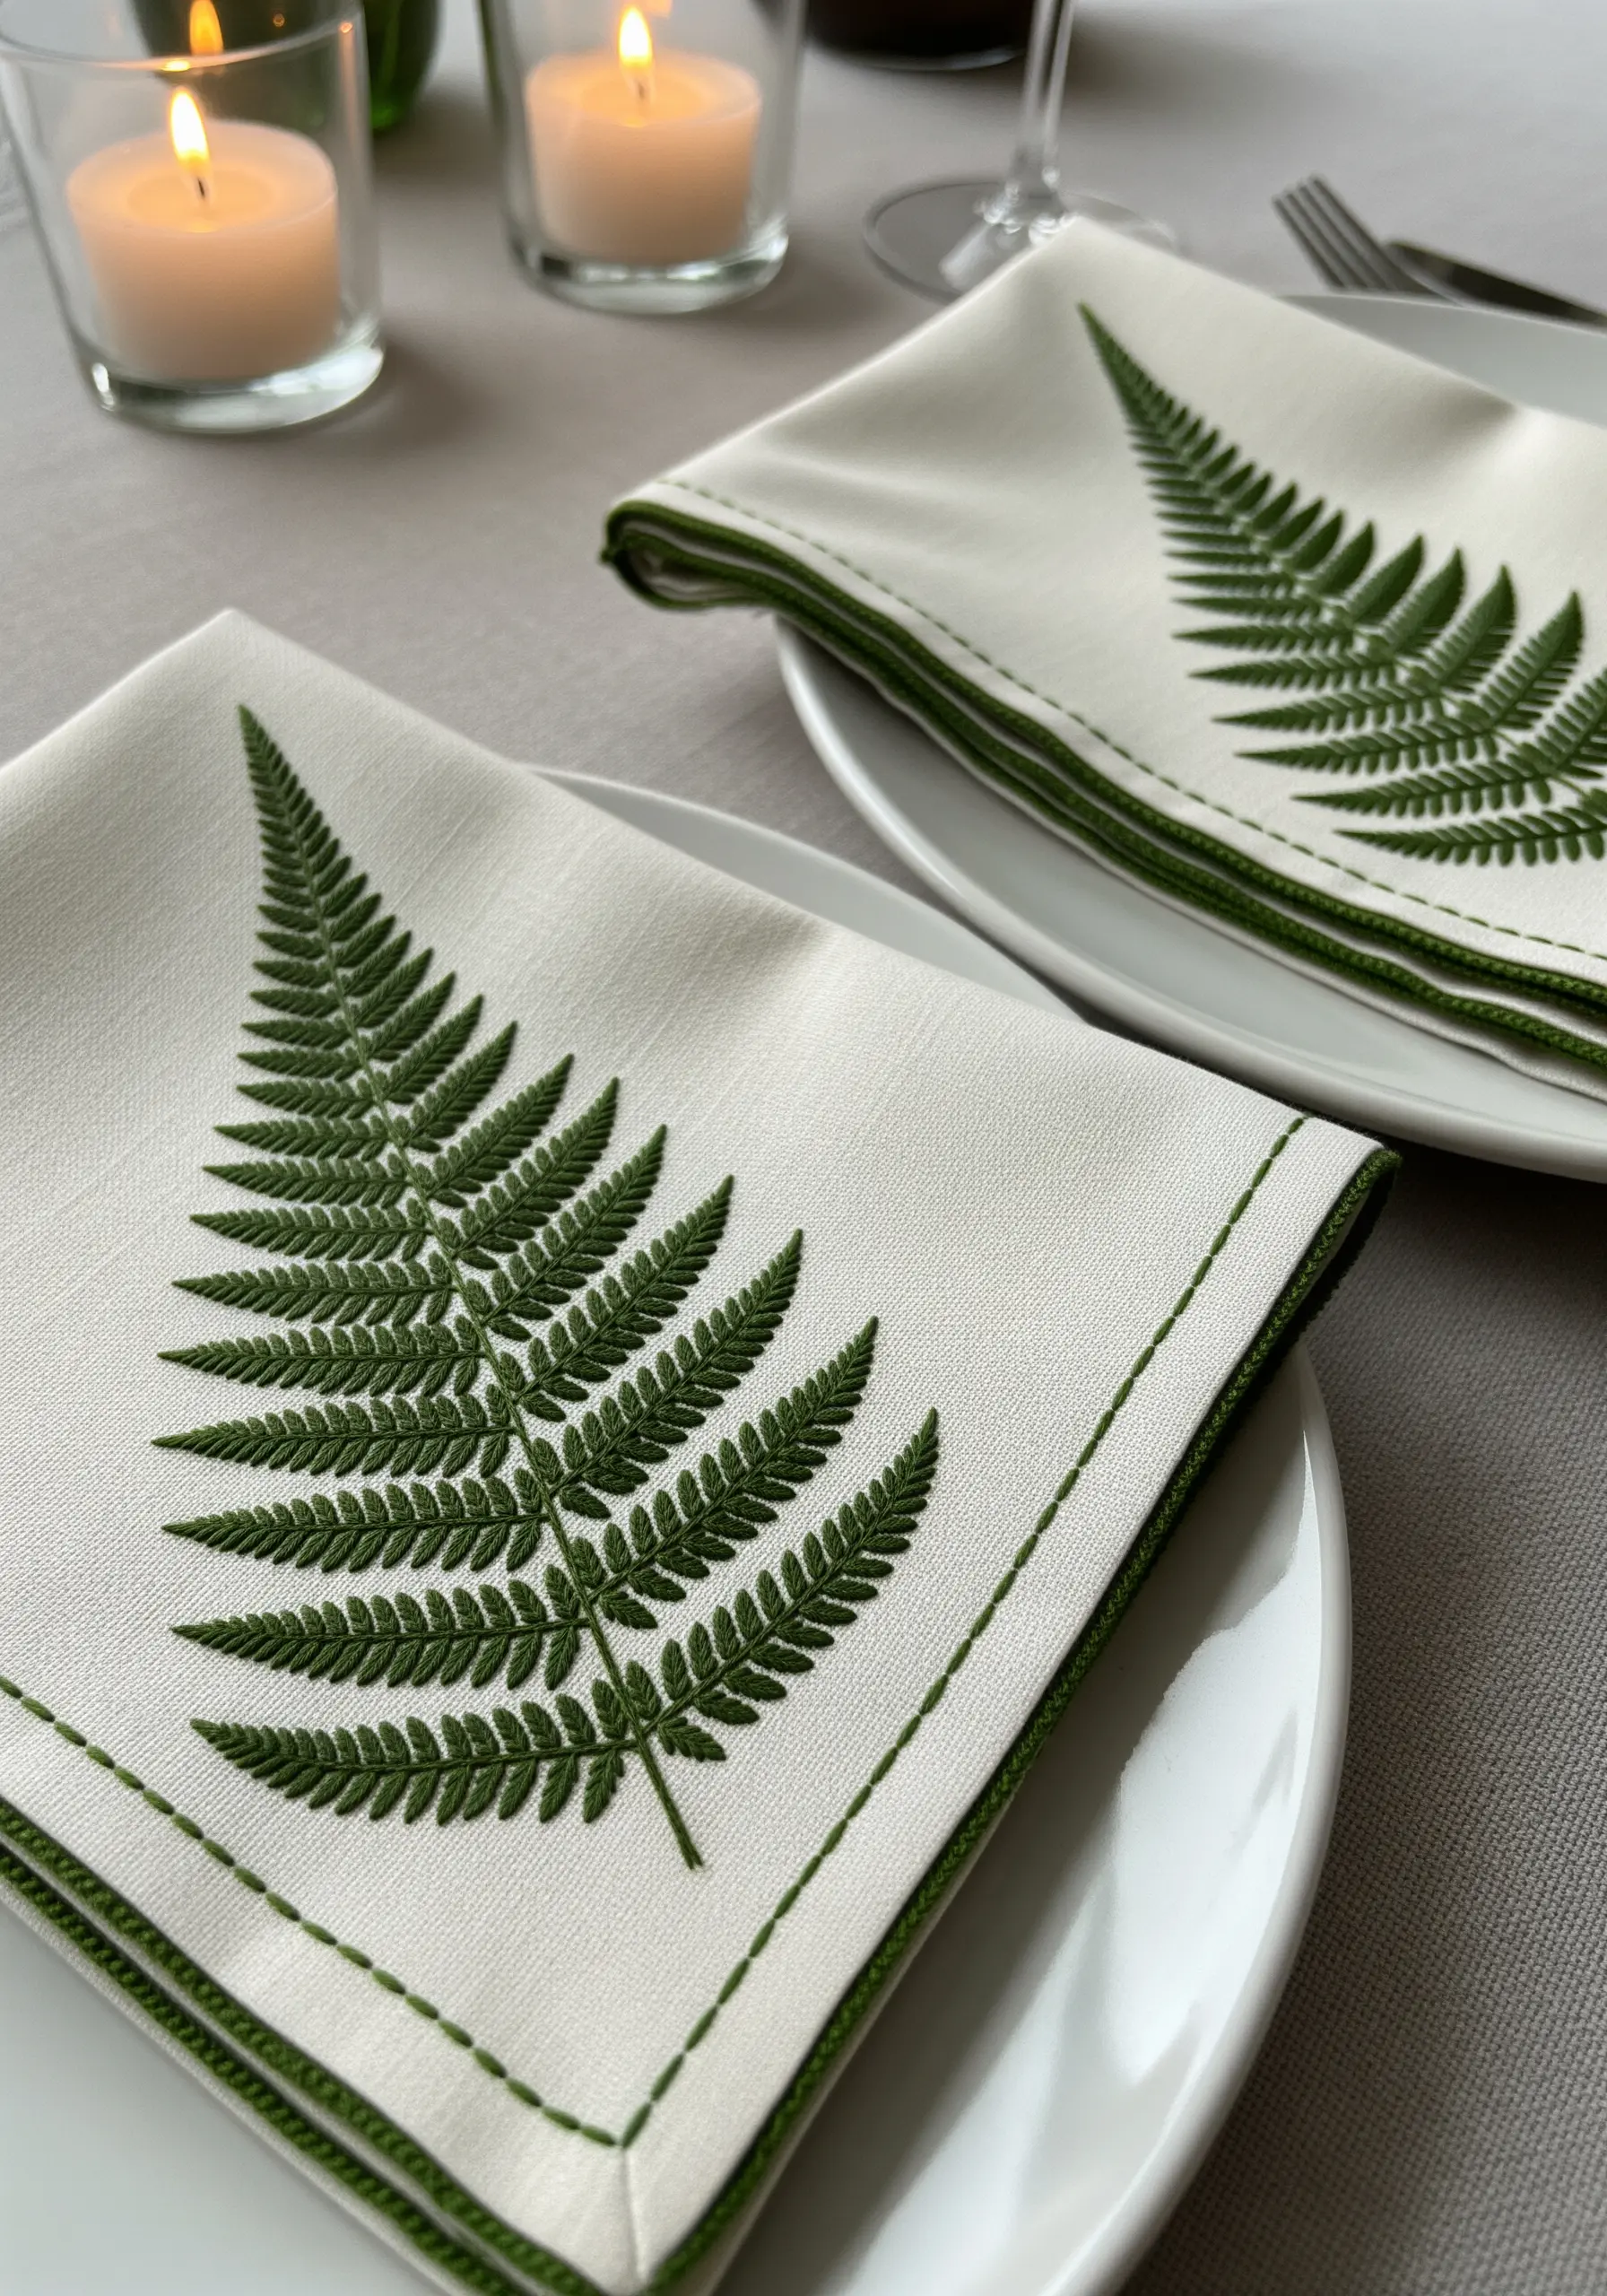
To capture the intricate detail of a fern leaf, use a central stem stitch for the main stalk.
For the individual fronds, stitch tiny, evenly spaced straight stitches angled outward from the stem.
The key to a realistic fern is consistency in the angle and length of these small stitches, which creates that classic herringbone-like texture.
Mastering these fern foliage stitch variations allows you to add a touch of woodland elegance to napkins or tea towels.
12. Embroider on Felt for Durable Bookmarks
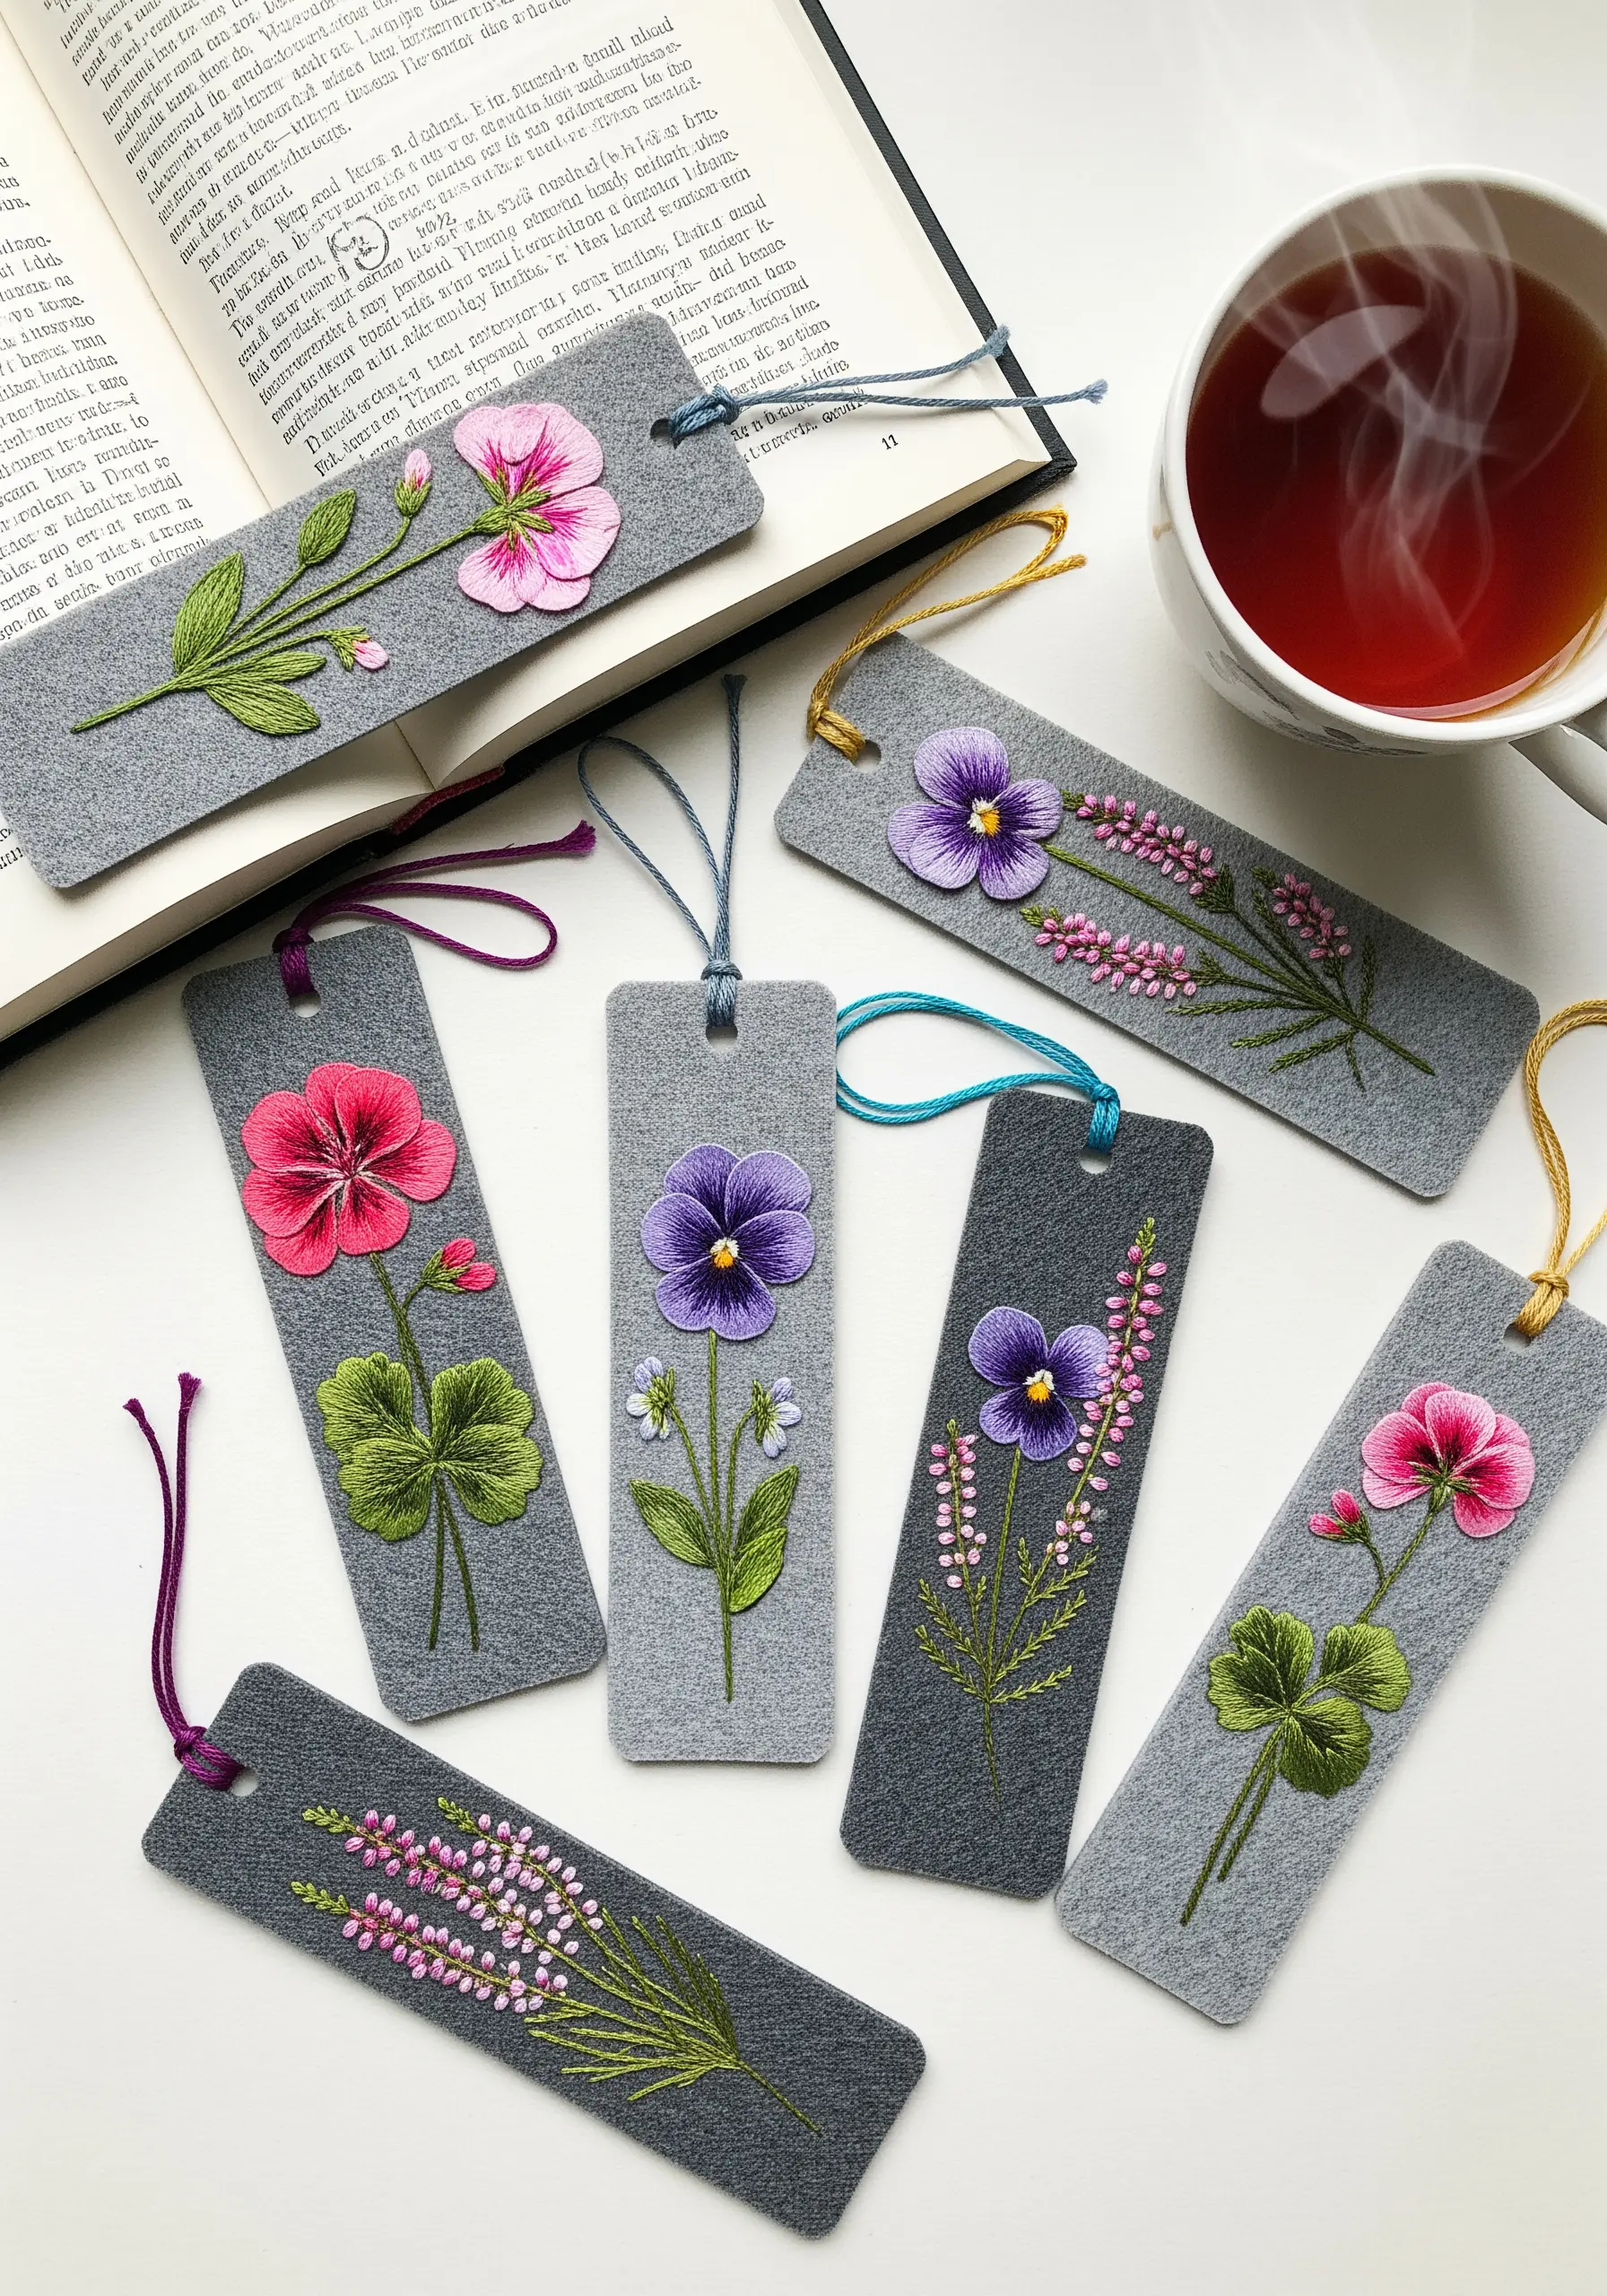
Felt is an excellent base for bookmarks because its edges won’t fray, eliminating the need for hemming.
Choose a stiff, high-quality felt to prevent stretching as you stitch. If your felt is soft, iron on a lightweight stabilizer before you begin.
Satin stitch works beautifully on felt, creating smooth, vibrant petals that pop against the matte texture of the background.
You can make a whole set of DIY cozy embroidery bookmarks in an afternoon, each with a different floral design.
13. Layer Sheer Fabric for a Mixed-Media Collage
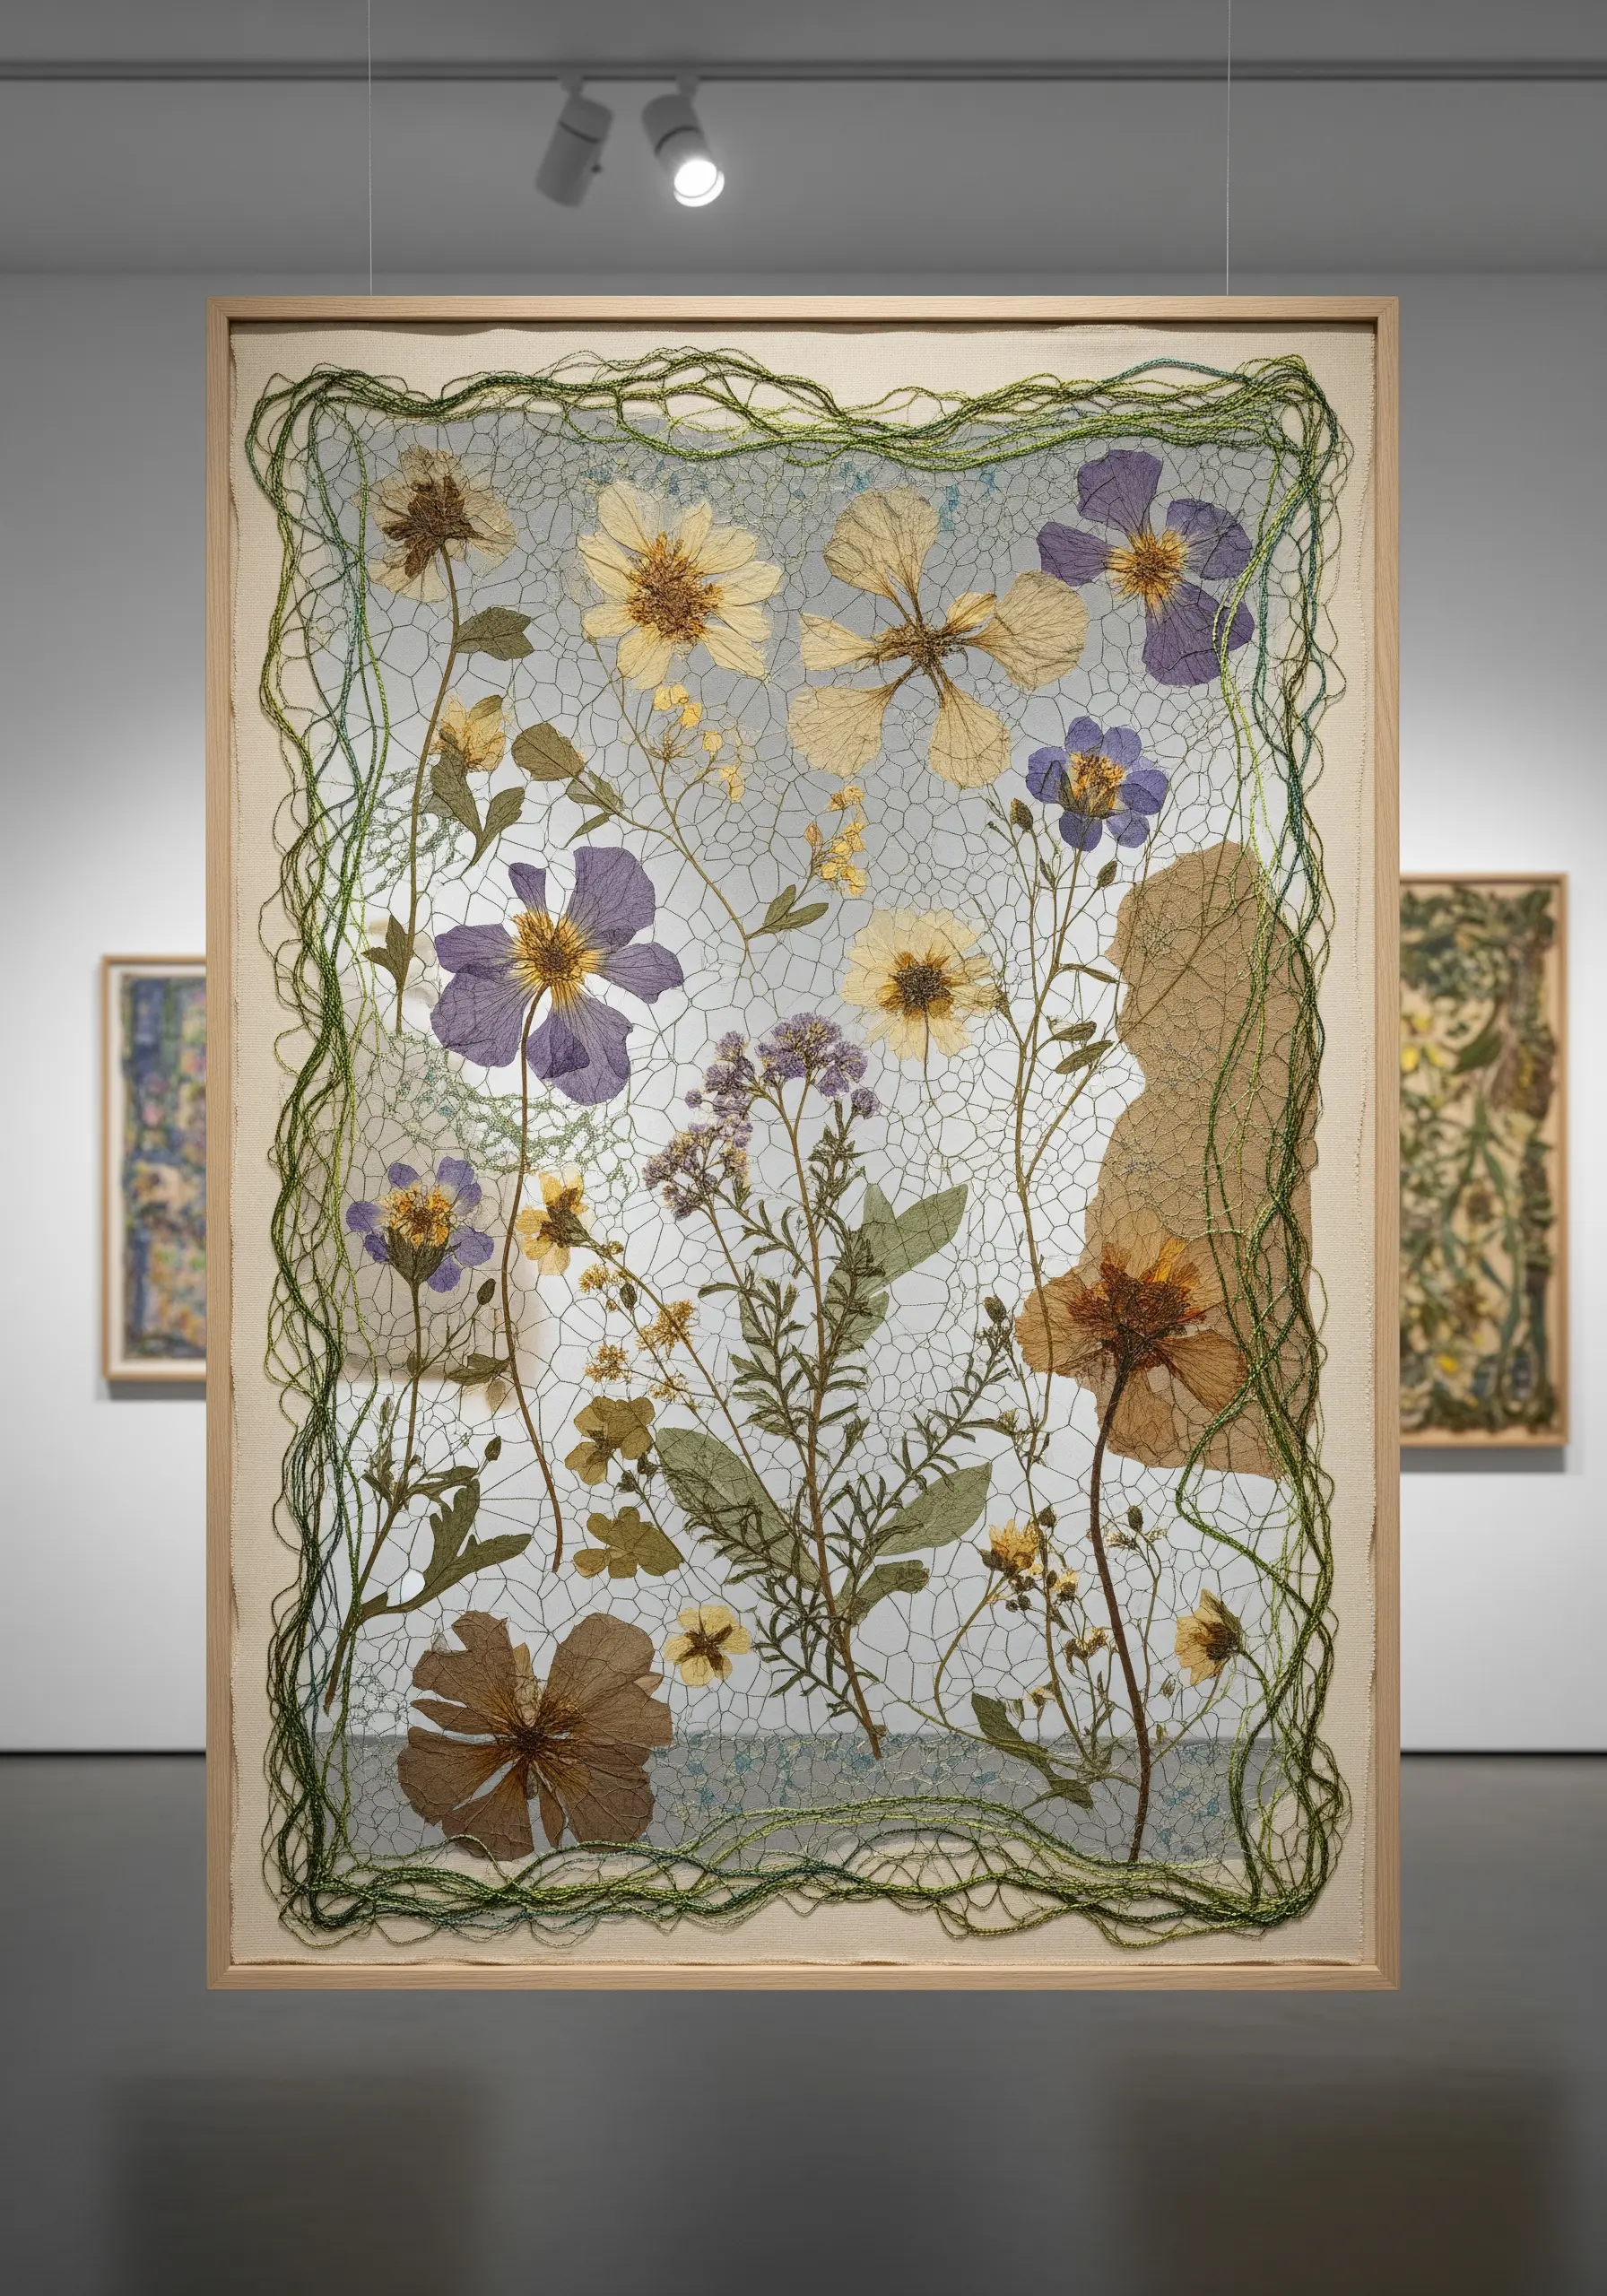
This technique involves layering pressed flowers between two pieces of fine netting or tulle.
Once the flowers are sandwiched, use free-motion machine stitching or meandering hand stitches to quilt the layers together, trapping the botanicals inside.
The stitching adds a textural, web-like pattern over the flowers, creating a cohesive and dreamlike composition.
It’s a perfect entry into mixed-media contemporary embroidery designs, blending natural elements with fiber art.
14. Design for Light with Lampshade Embroidery
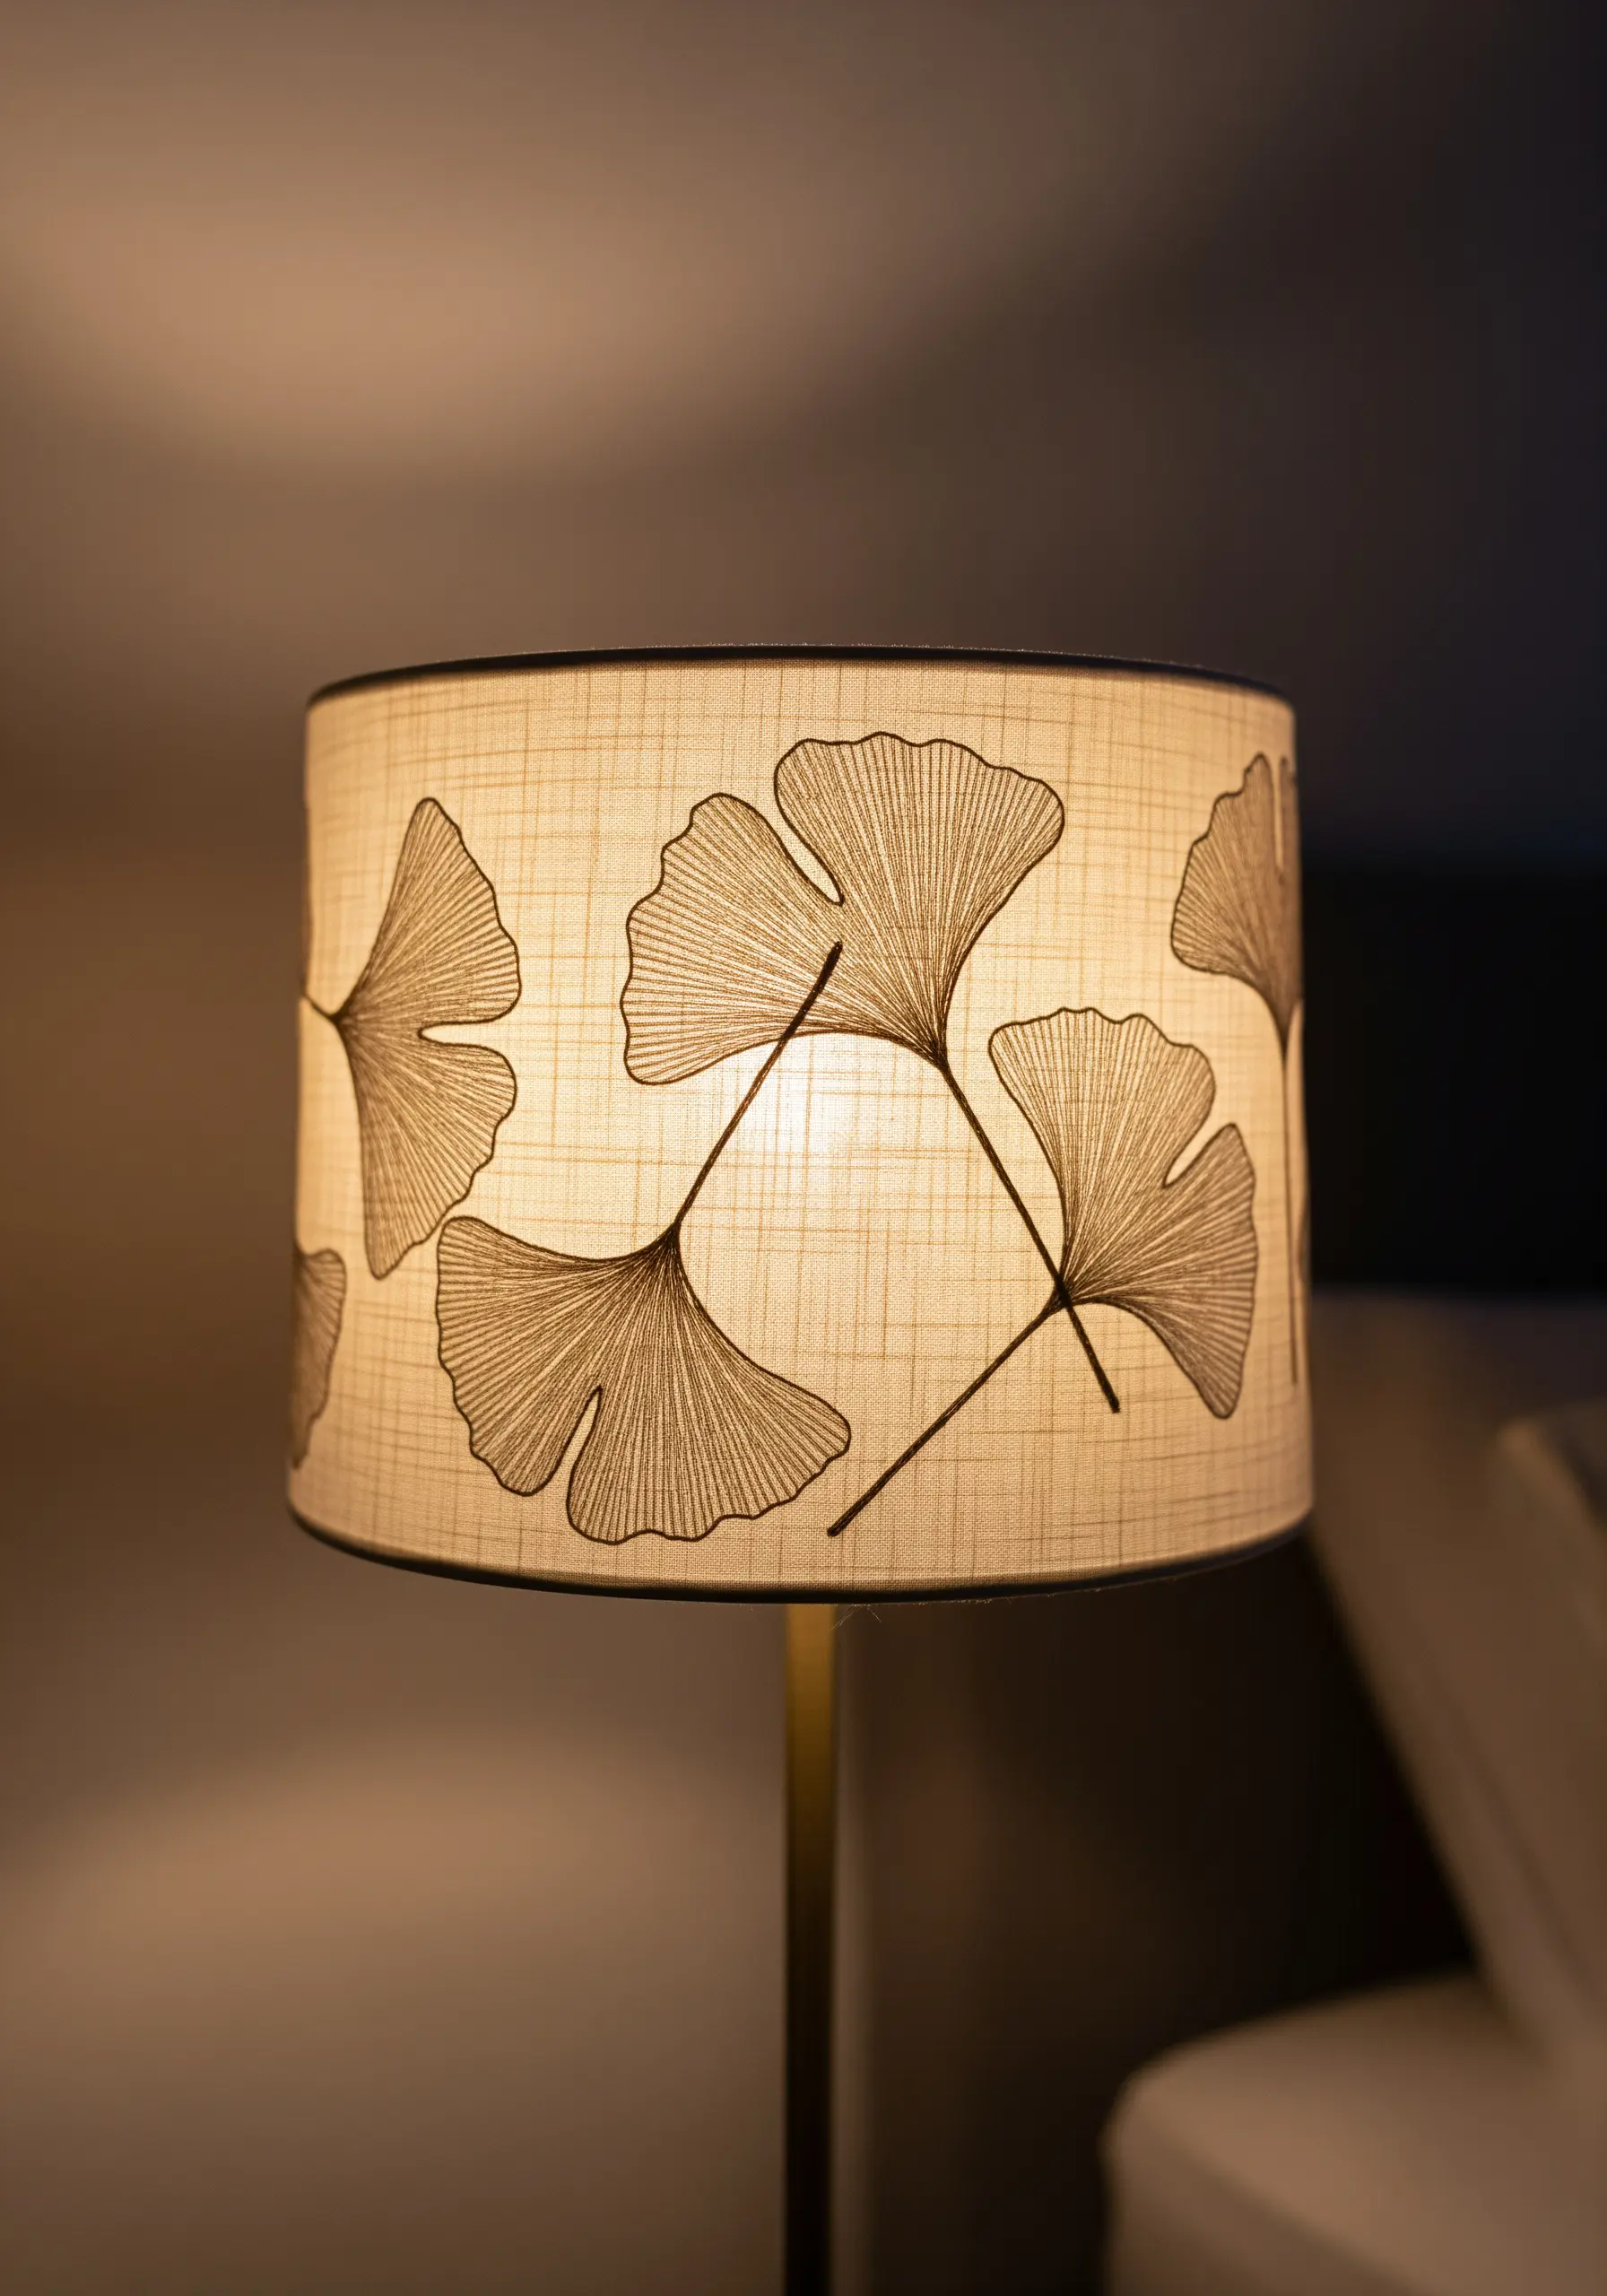
When embroidering a lampshade, your design must work both with and without backlighting.
Opt for clean, graphic outlines using a backstitch or stem stitch, as dense fill stitches can create dark patches and block light.
Use a thread color that provides enough contrast against the lampshade fabric to be visible when the lamp is off, but that also creates a beautiful silhouette when lit.
This approach to minimalist line art nature embroidery turns a functional object into a piece of interactive art.
15. Create a Dense Wildflower Meadow
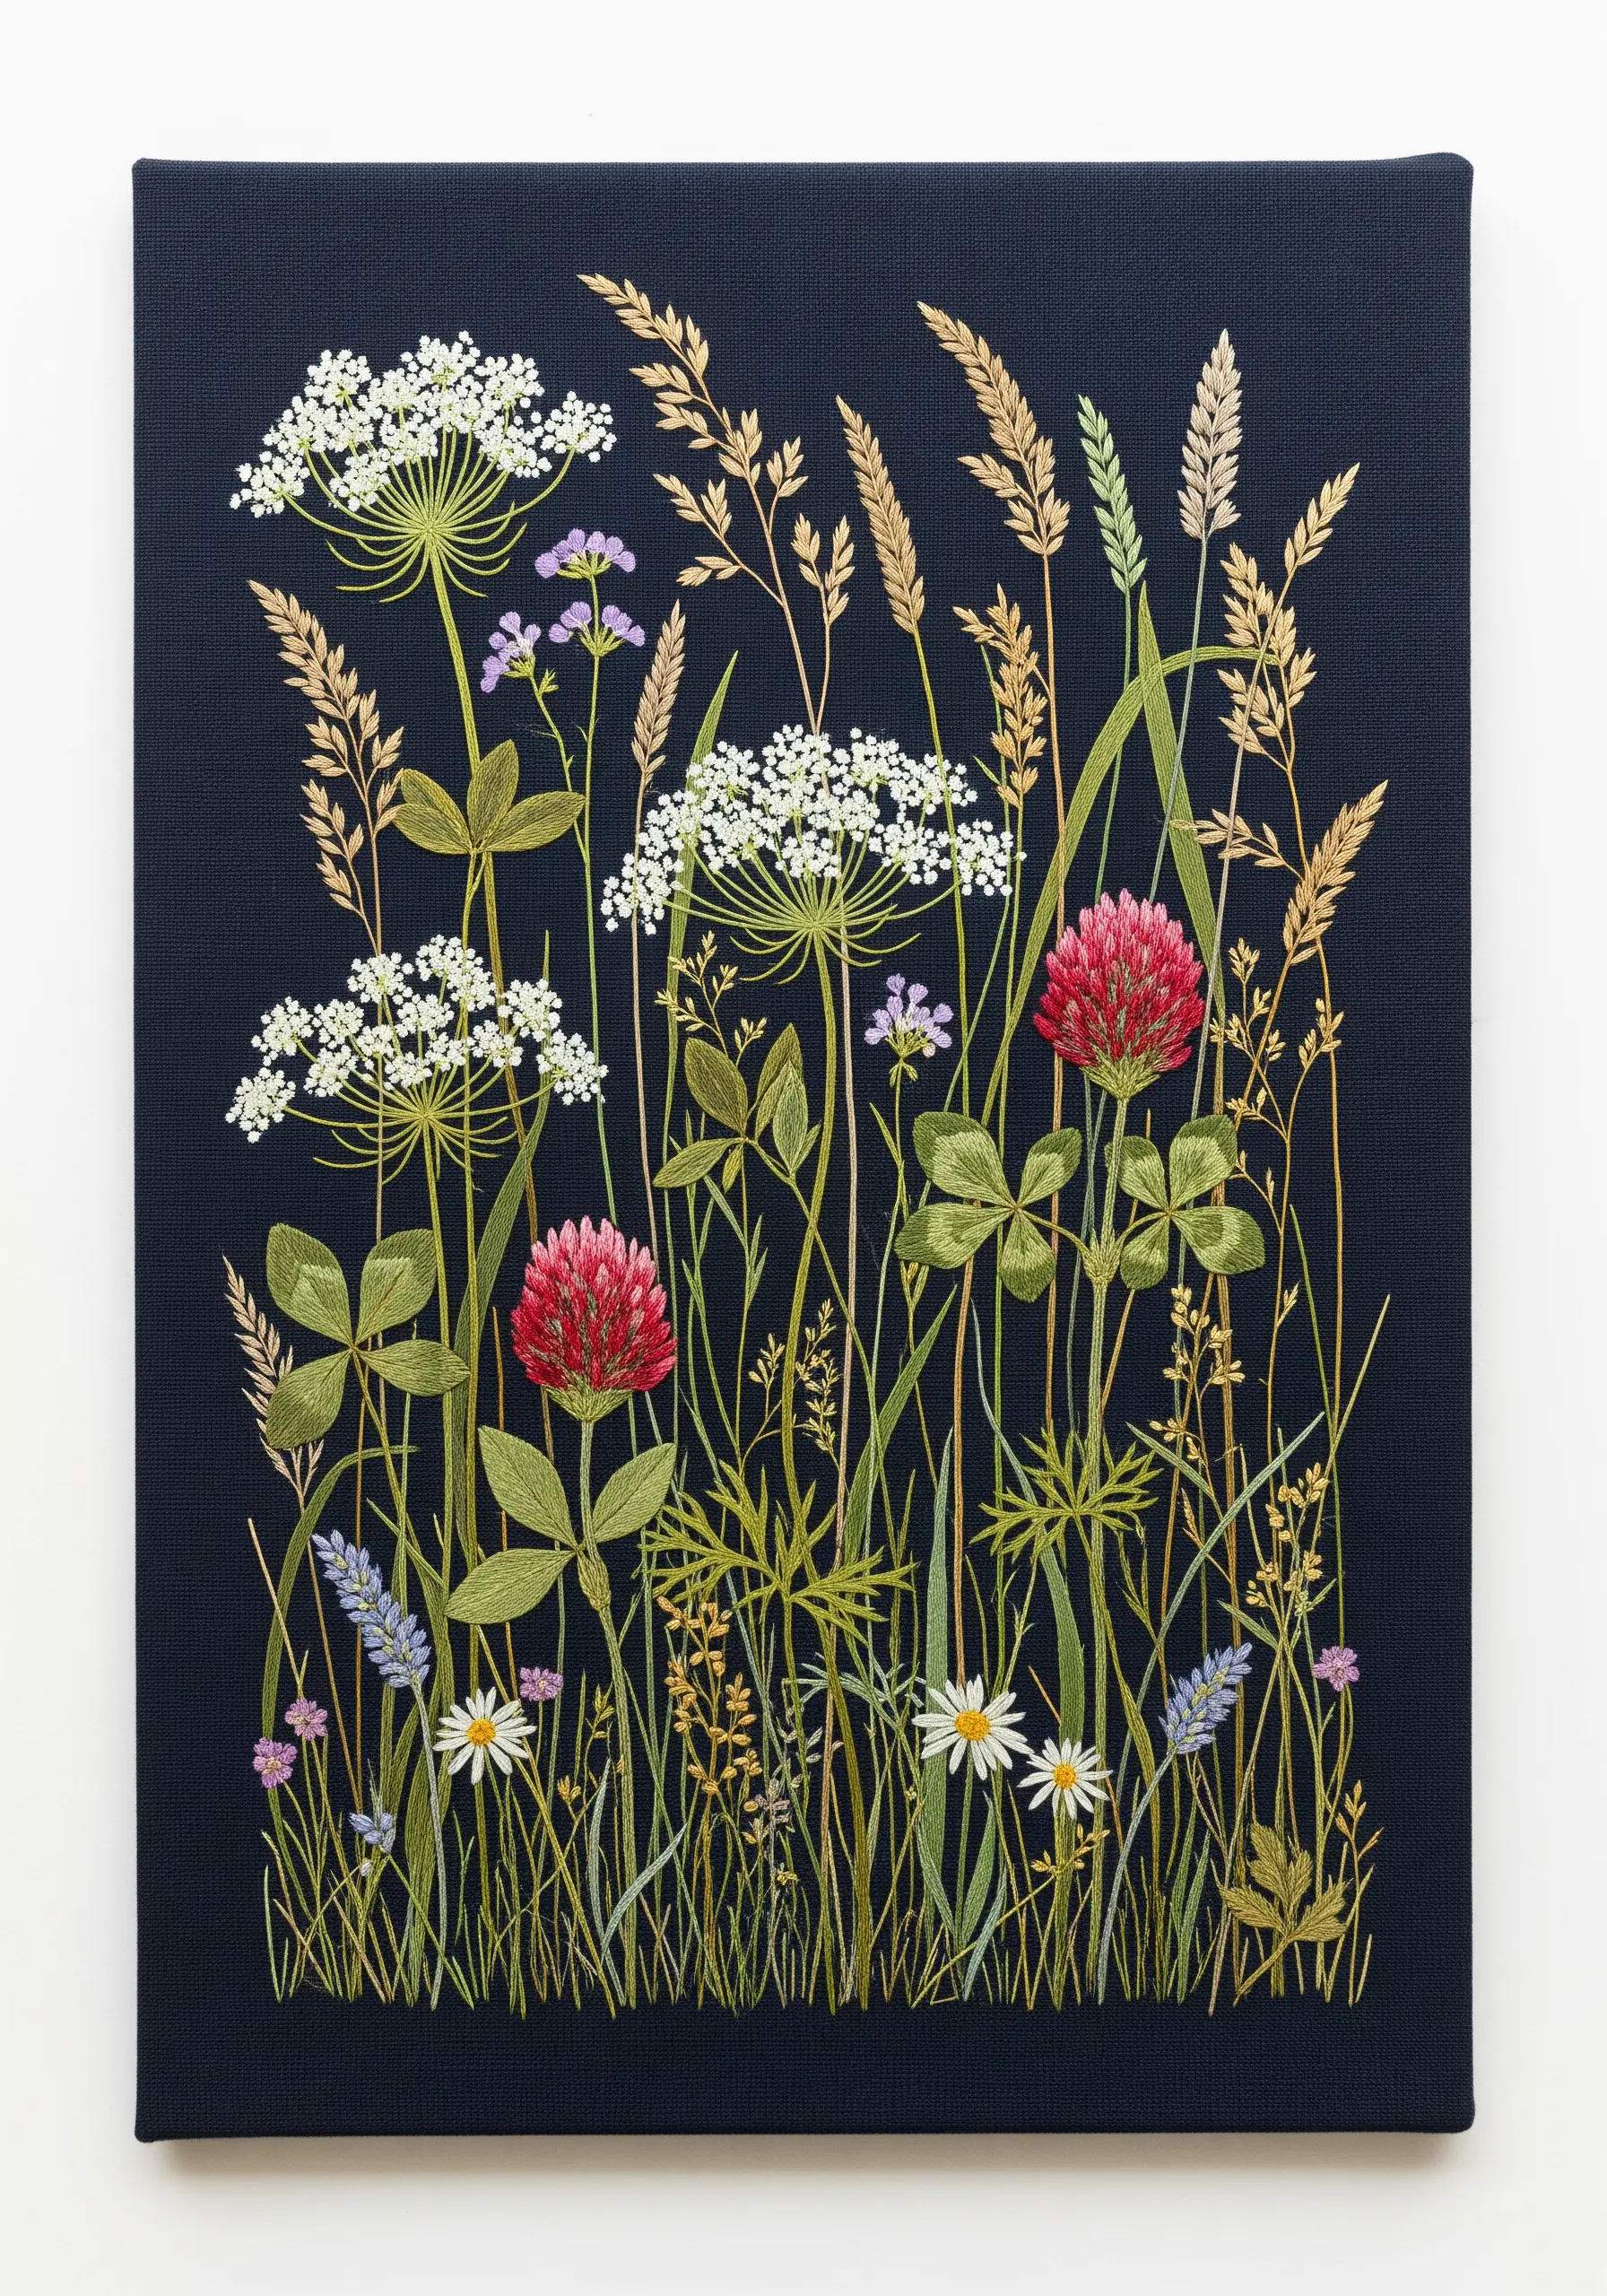
To build a convincing meadow scene, you need to think in layers.
Start by stitching the elements furthest in the background—the tall, thin grasses and indistinct greenery—using single straight stitches and muted greens.
Next, add your mid-ground flowers and leaves. Finally, stitch the most vibrant, detailed flowers in the foreground using bolder colors and a variety of stitches to make them pop.
Choose from wildflower thread palettes that make your hoop look like an actual meadow to enhance the natural feel.
16. Stitch Simple Motifs for Scented Sachets
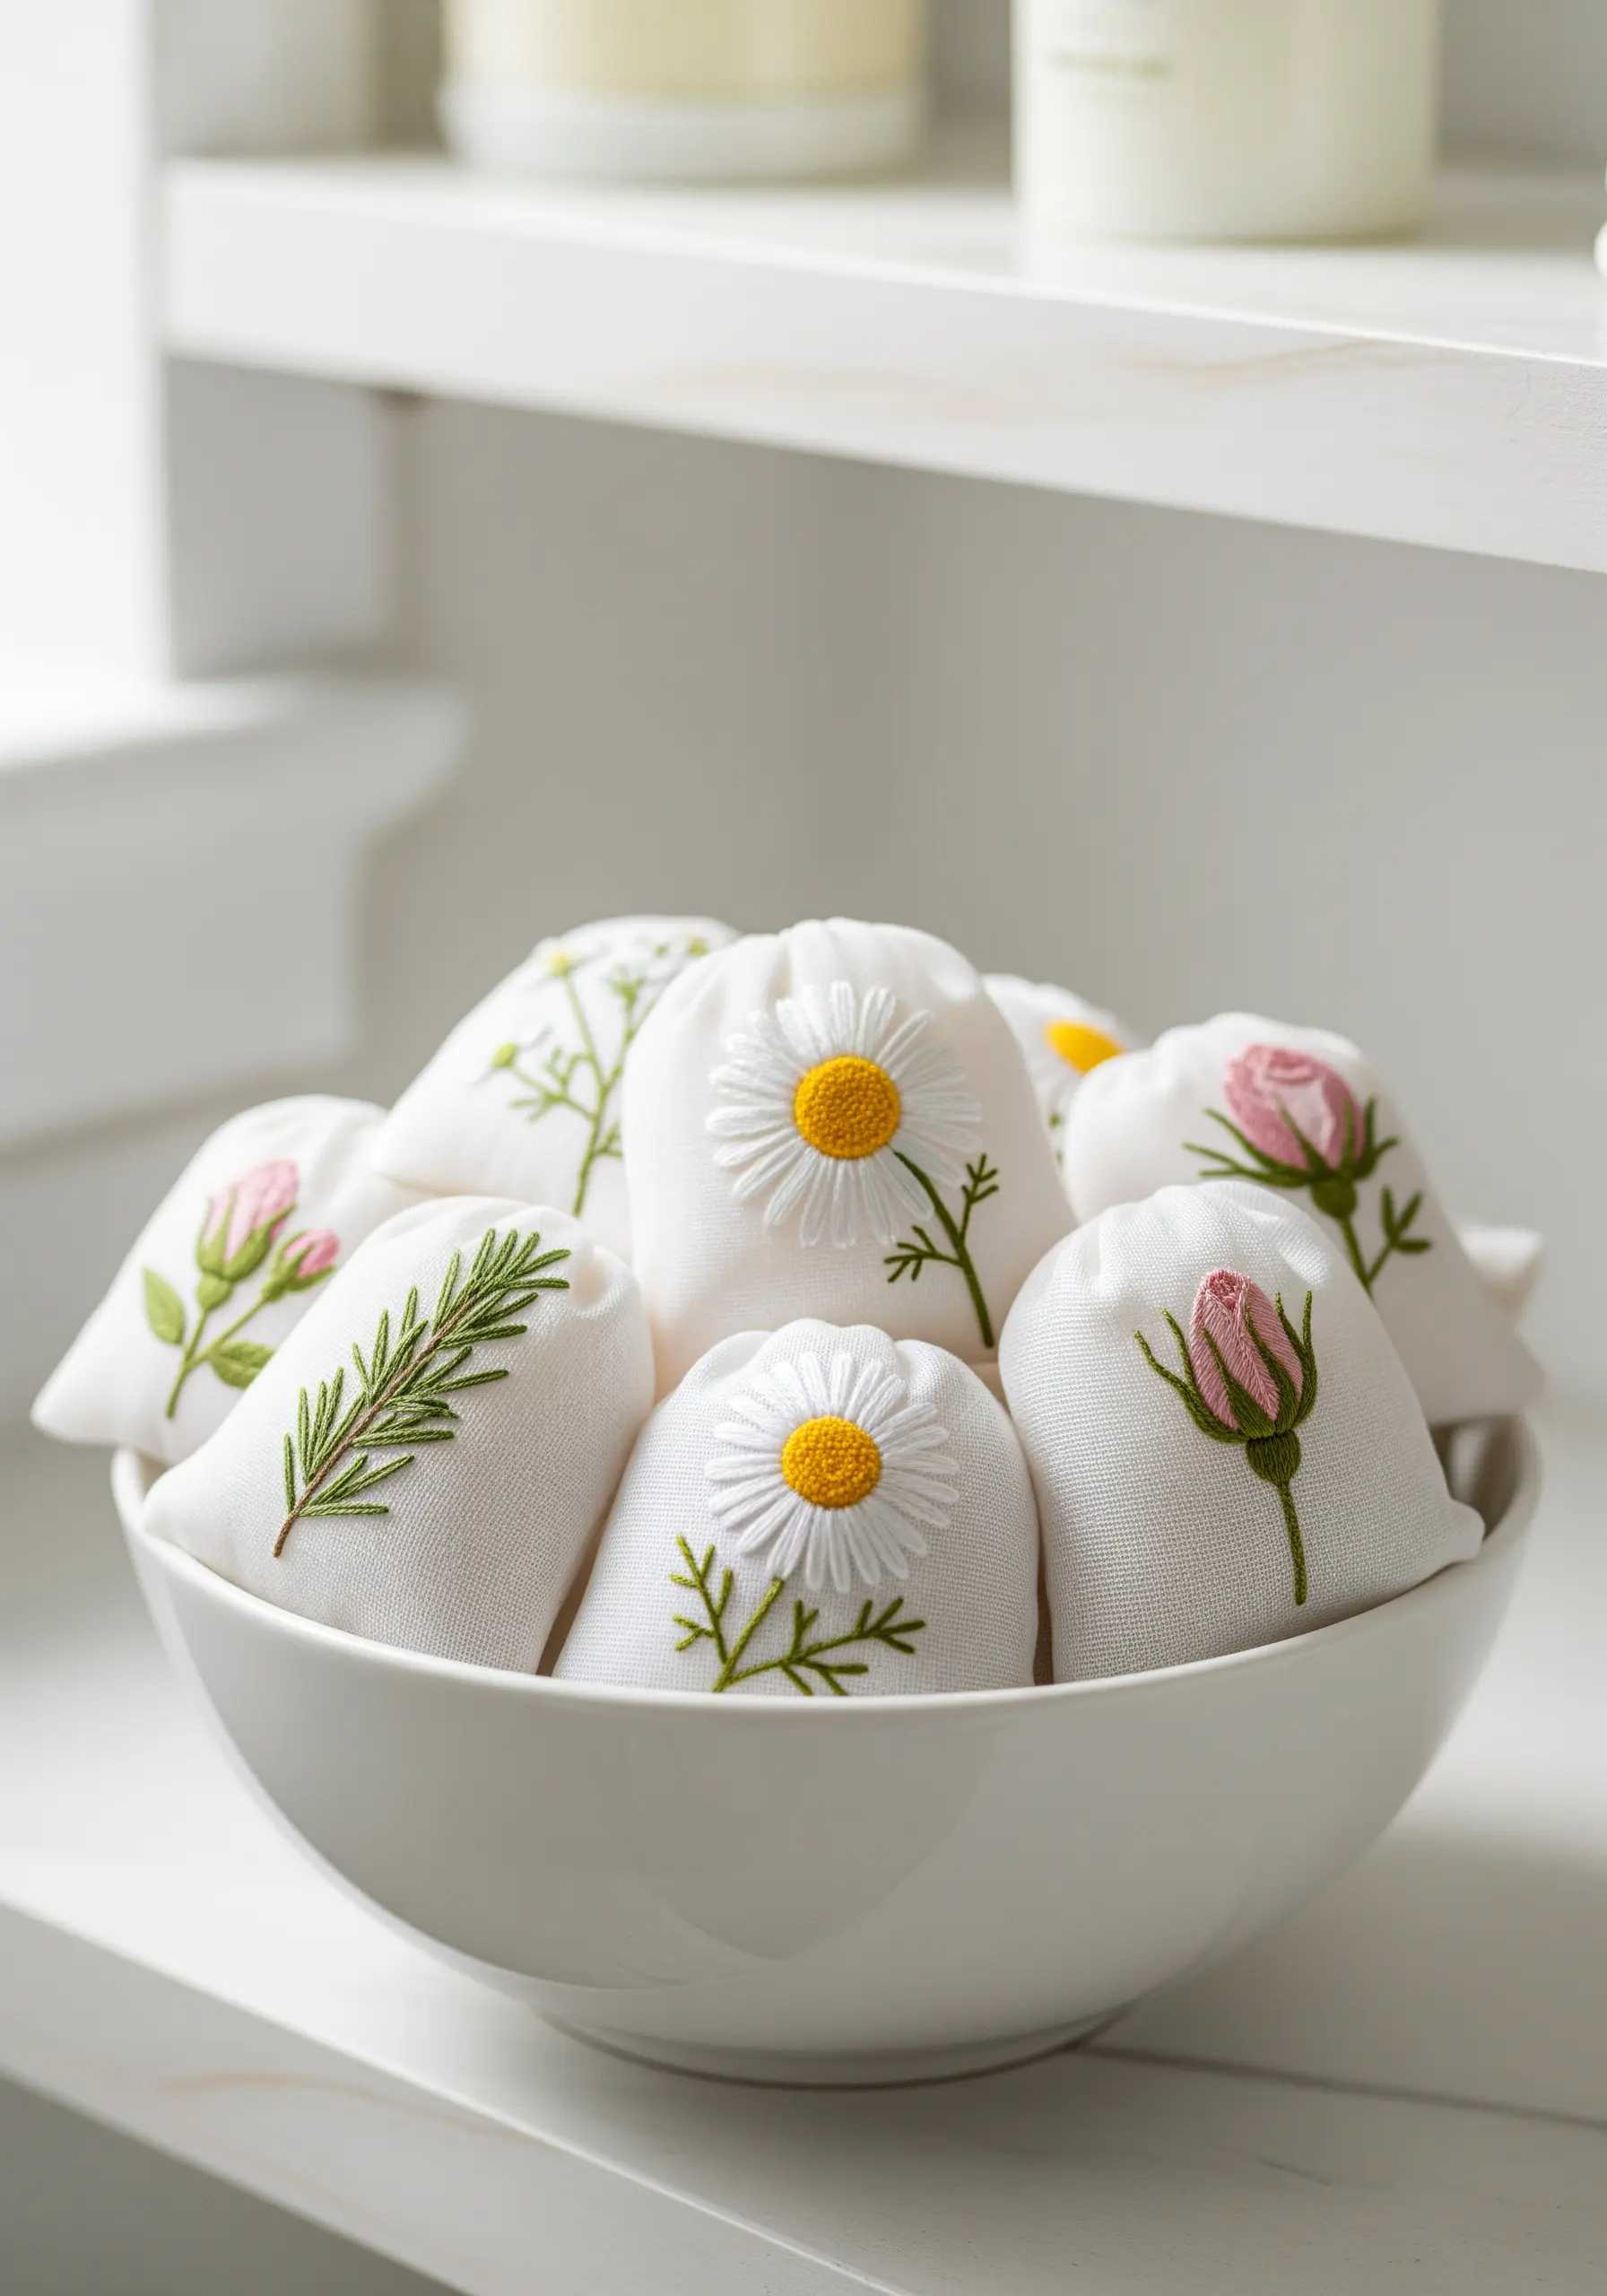
For small, functional items like sachets, choose simple and iconic floral motifs that are quickly recognizable.
A lazy daisy stitch is perfect for chamomile petals, while a few concentric straight stitches can form a lovely rosebud.
Work with just three or four strands of floss to keep the designs delicate and prevent them from feeling heavy on the lightweight fabric.
These are perfect for practicing delicate lavender stitch ideas or other simple herbal motifs before filling with dried botanicals.
17. Recreate Scientific Botanical Illustrations

Capture the elegance of vintage botanical charts by stitching with scientific precision.
Use a single strand of floss in muted, natural tones on a neutral linen background.
Focus on clean outlines with split stitch and use directional satin stitch to show the form of roots and leaves without heavy shading.
This style is a nod to vintage botanical pillow embroidery patterns and looks stunning as a triptych gallery display.
18. Contrast Textures with Fruit and Foliage
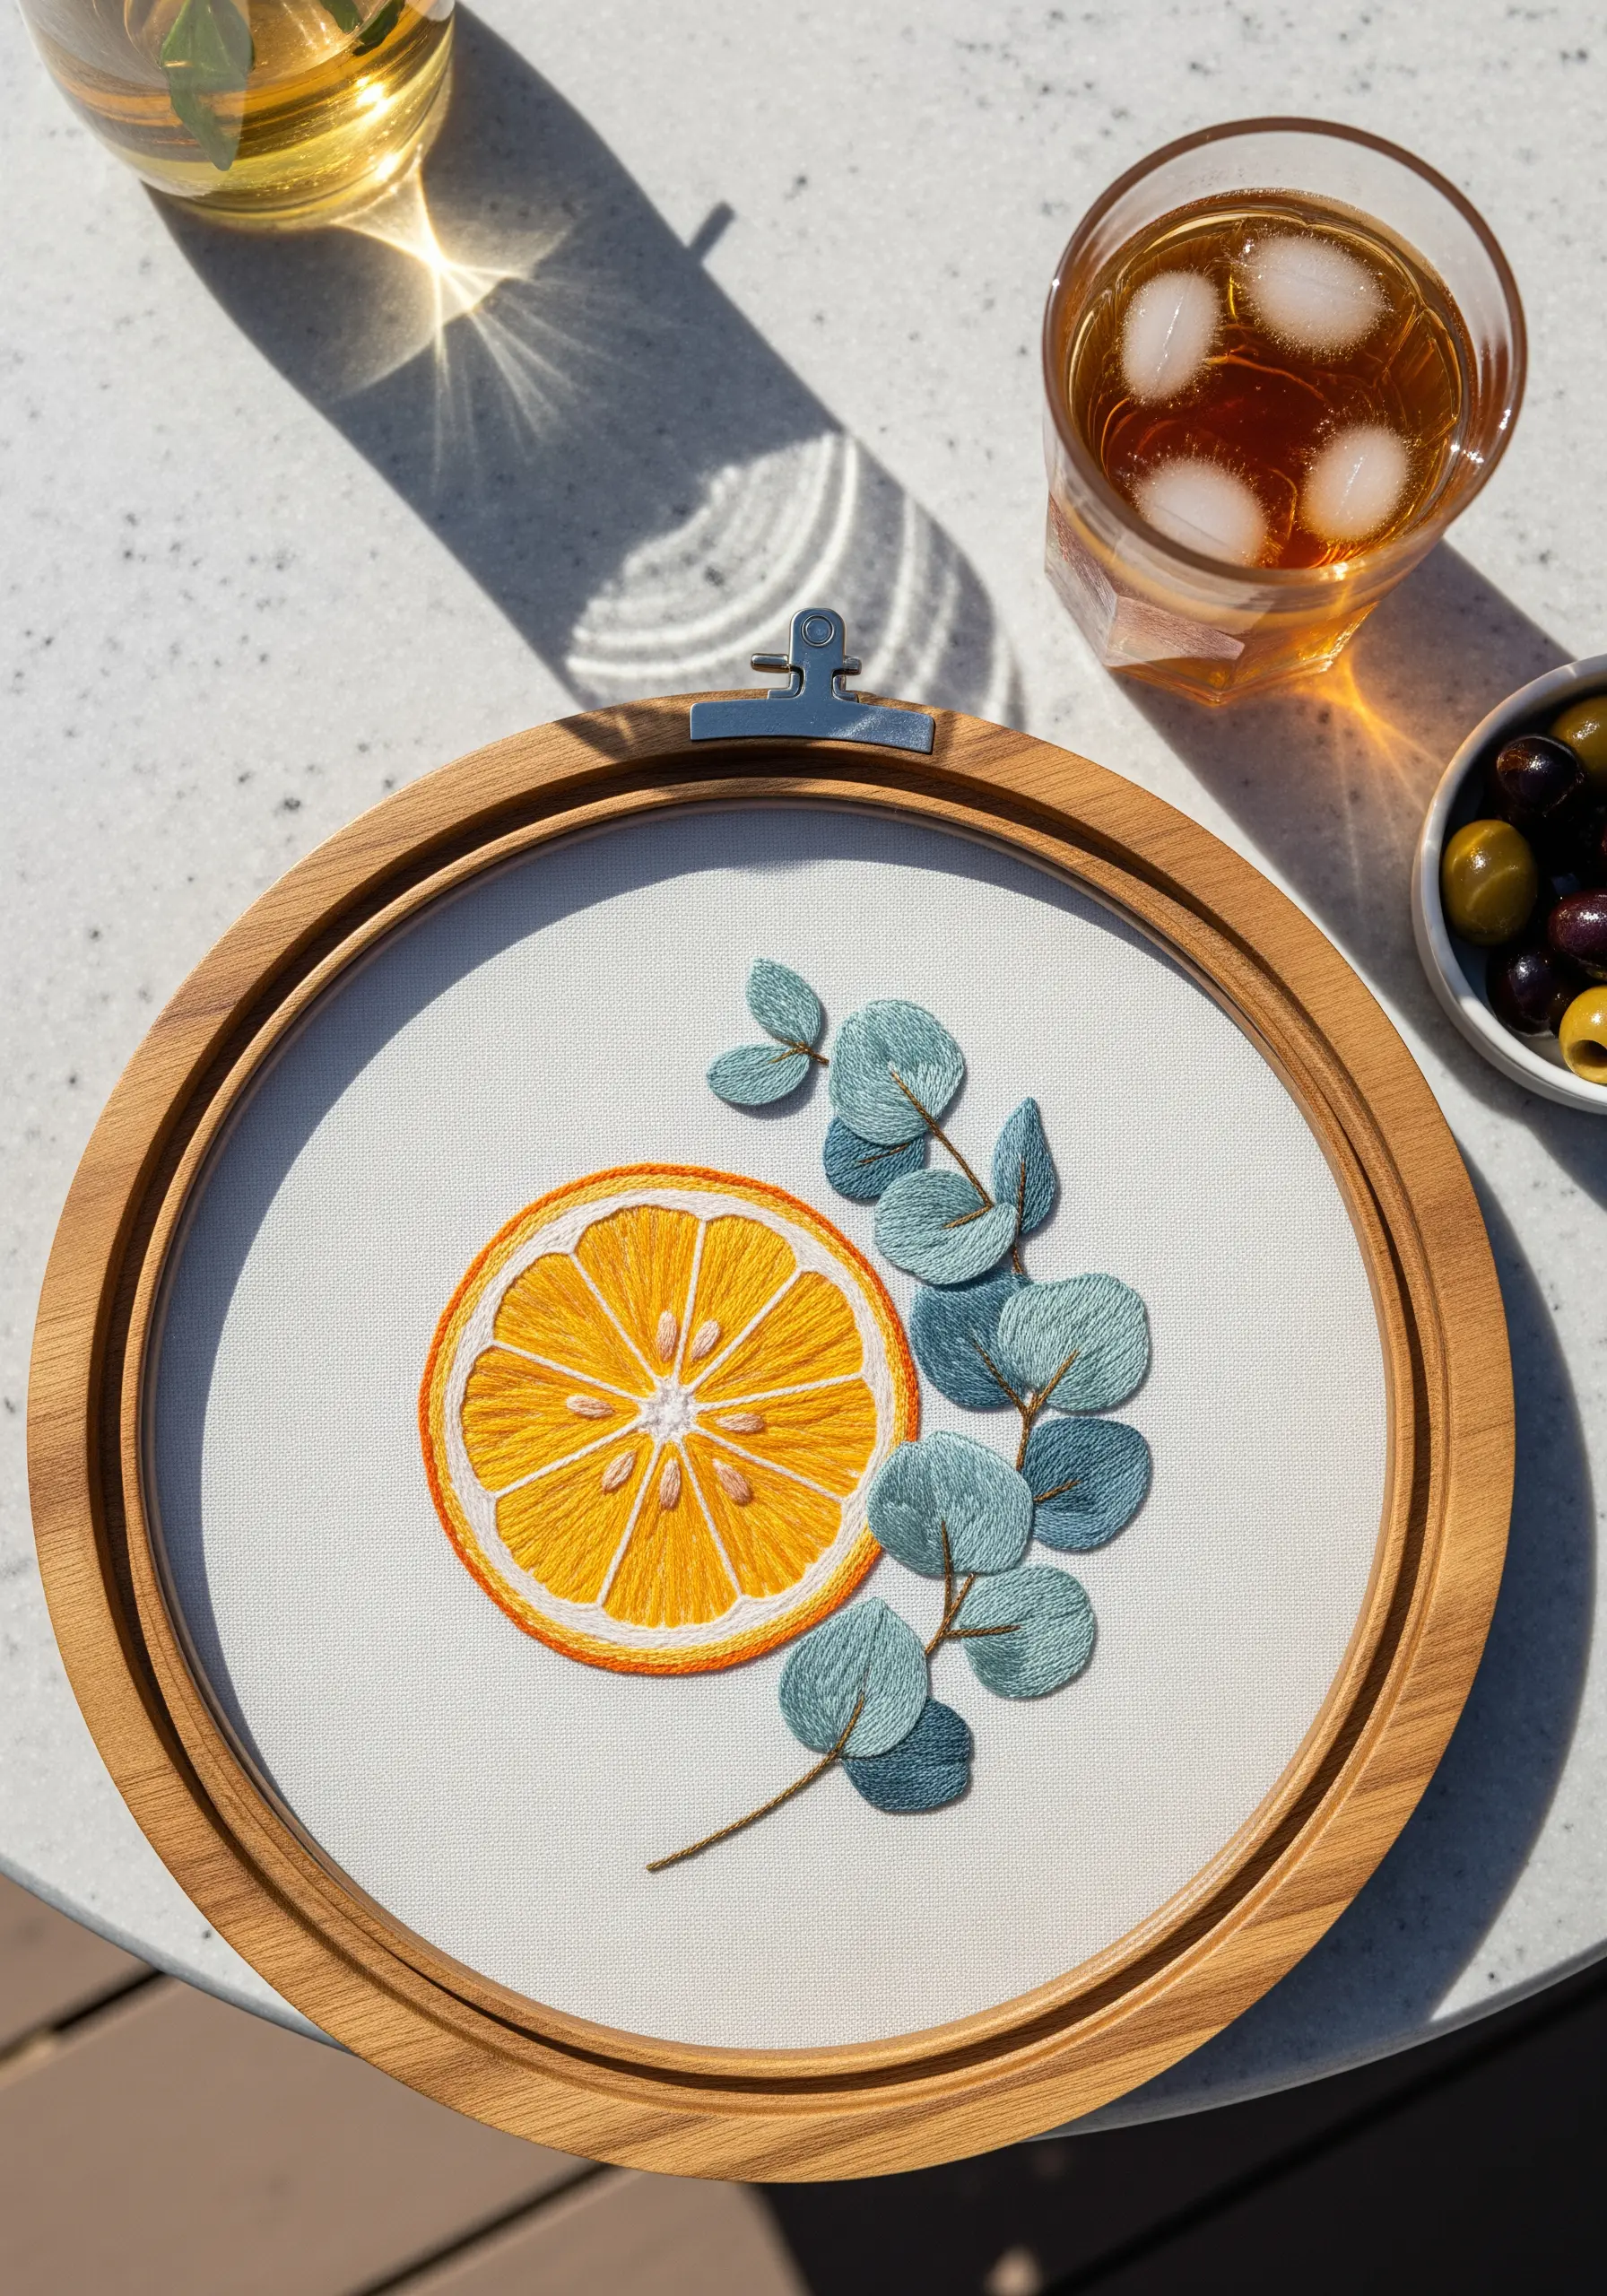
Create dynamic compositions by pairing elements with distinctively different textures.
For the orange slice, use a radial satin stitch for the segments and tiny seed stitches for the pulp, creating a flat but detailed surface.
Contrast this by using a padded satin stitch for the eucalyptus leaves; add a few underlying straight stitches before covering them with satin stitch to make them puffy and dimensional.
This is one of the most effective ways to create depth in your embroidery using natural textures and shapes.
19. Plant a Surprise Pocket Garden
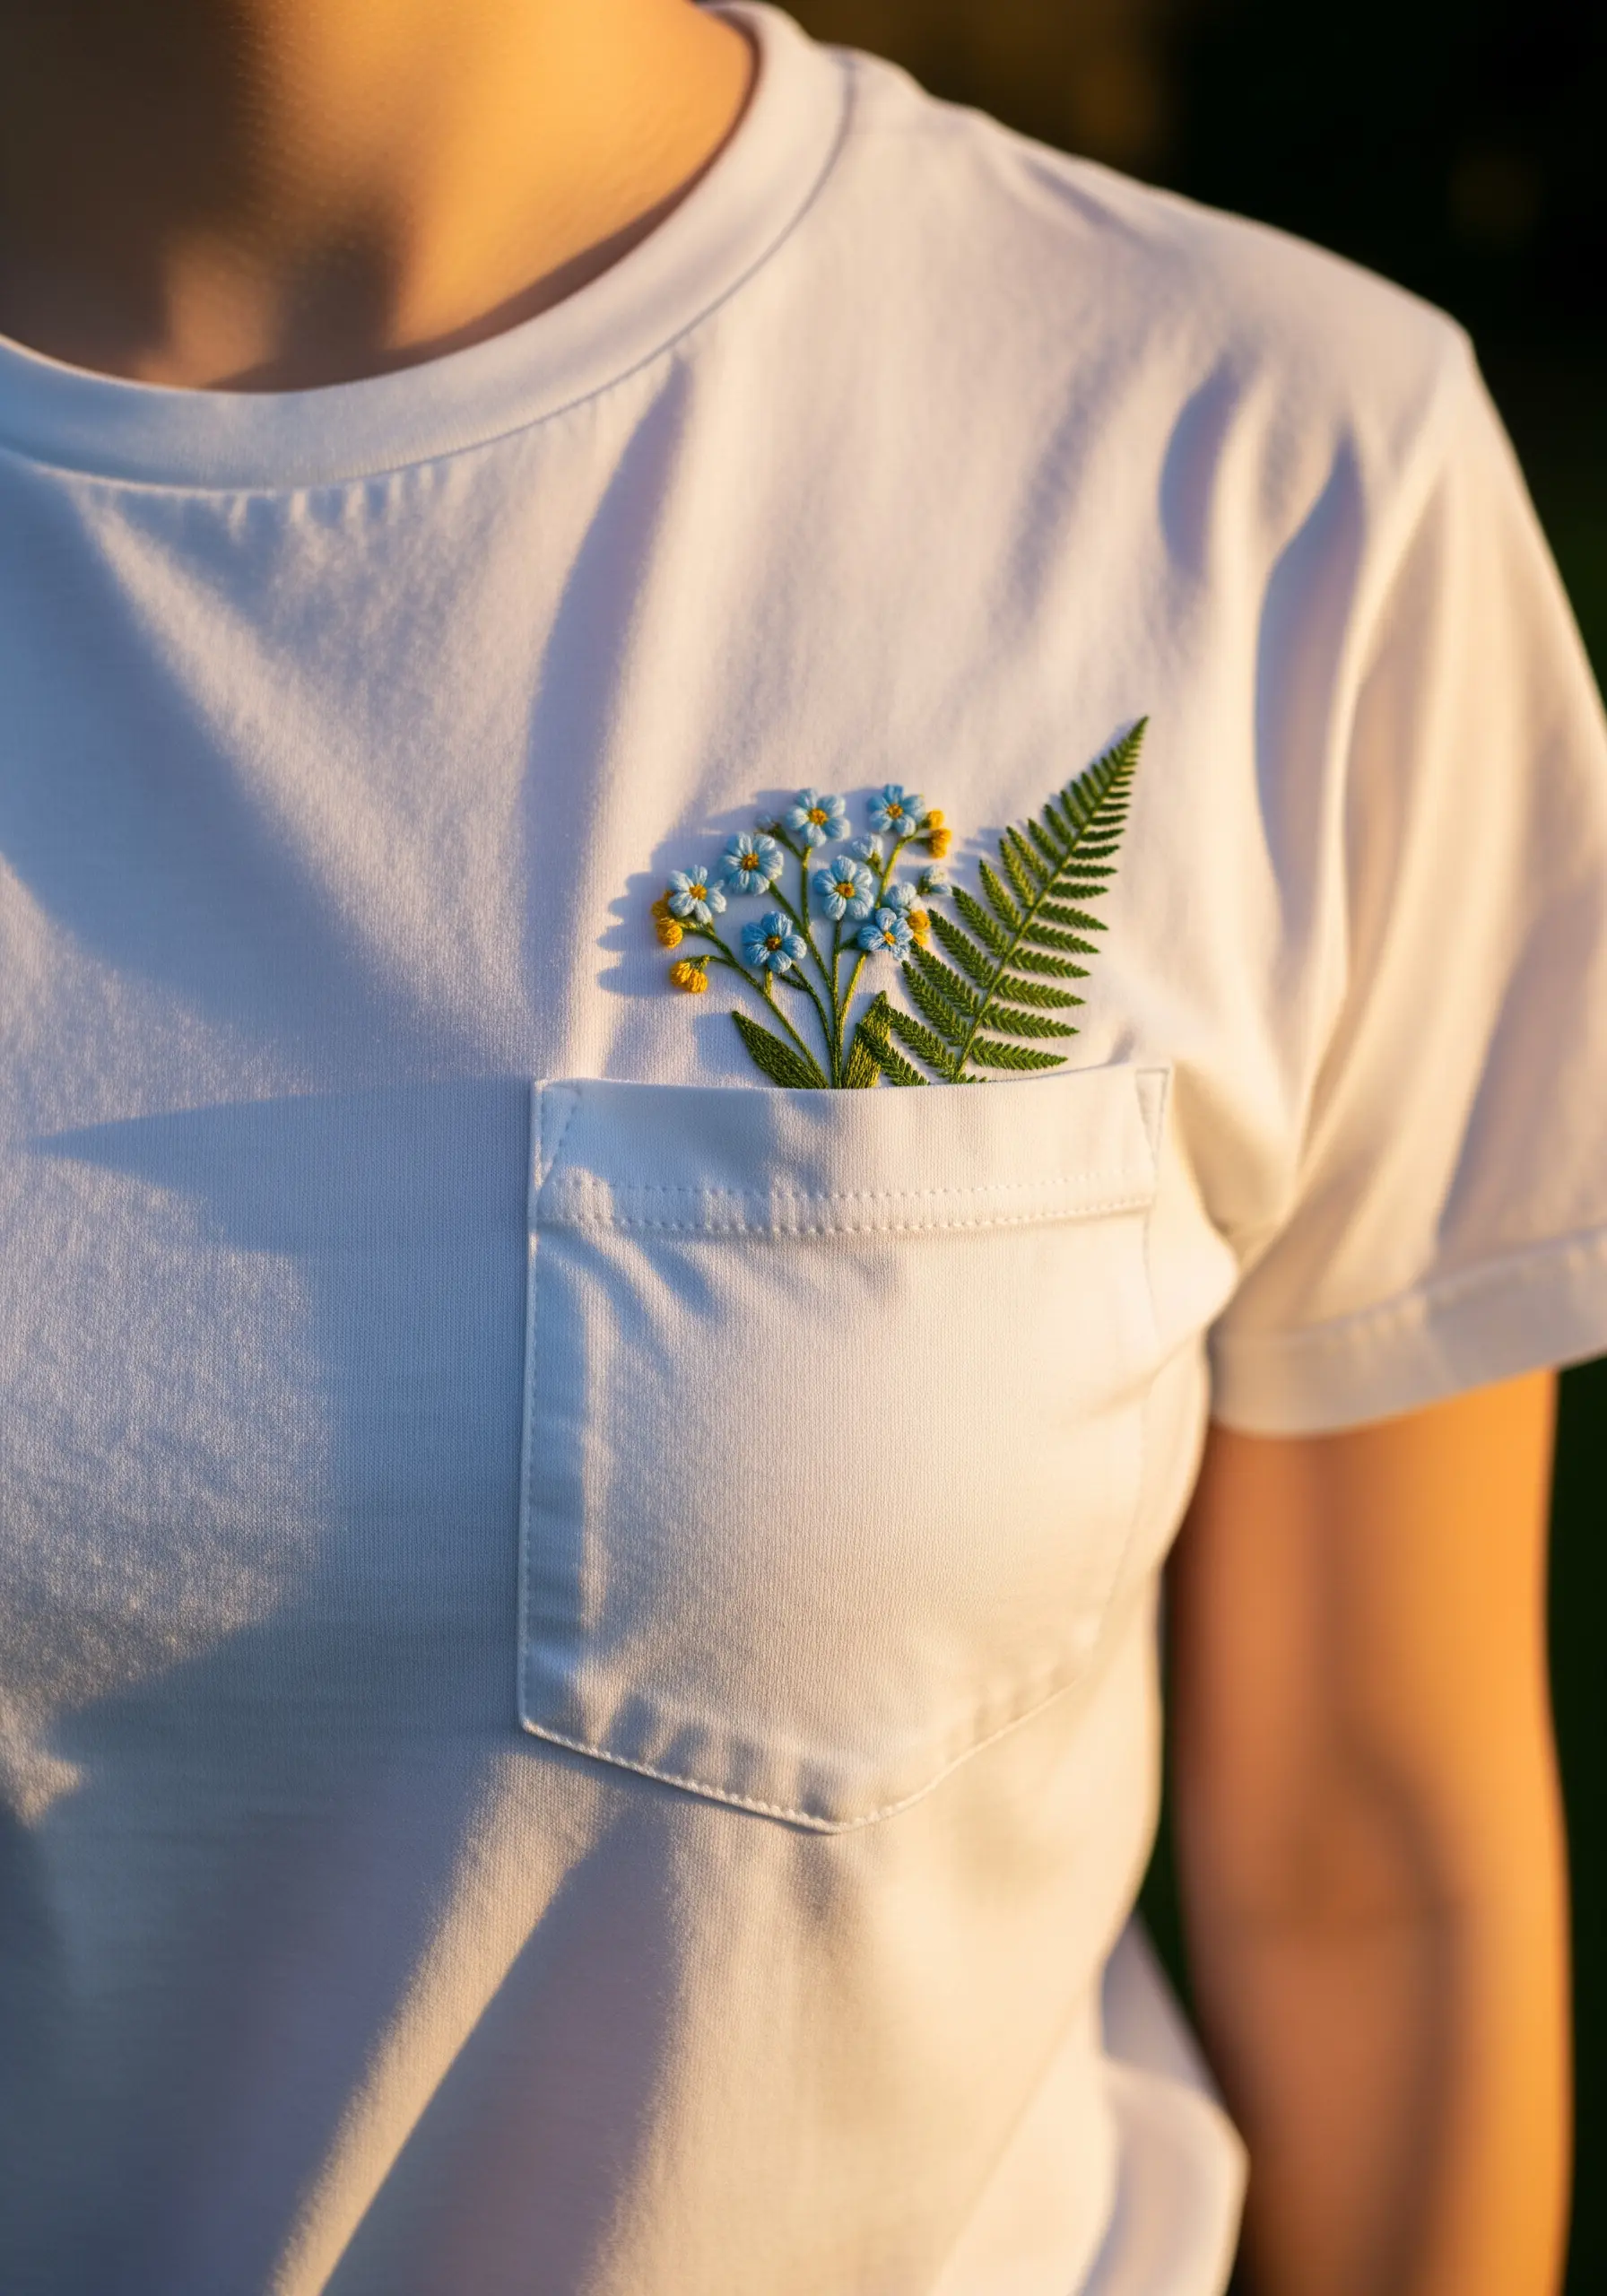
A t-shirt pocket is the perfect place for a small, unexpected burst of floral embroidery.
To make it easier to stitch, use a very small 3-inch hoop that can fit inside the pocket, or carefully stitch without a hoop, being mindful of your tension.
Combine a variety of stitches like woven wheel roses, lazy daisies, and straight-stitch ferns to create a miniature bouquet that looks like it’s peeking out.
This is a playful way to incorporate tiny secret embroidery ideas into your everyday wardrobe.


