

A botanical wreath is more than just a circle of stitches; it’s a space for quiet intention. Before you thread your needle, I want you to think about texture and rhythm. Imagine the soft, padded feel of a berry versus the delicate line of a fern. Your needle can create all of these, transforming a simple hoop into a world you can almost touch.
You don’t need dozens of complex stitches to make your work feel elevated. Often, the magic lies in a subtle shift—using one fewer strand of floss for finer detail, blending two shades of green in a single leaf, or leaving intentional open space in your design to let it breathe. These small adjustments are what separate a good piece from a truly breathtaking one.
These patterns are your starting point. Use them to build confidence in your technique, whether it’s mastering a perfectly smooth satin stitch or clustering French knots to create a mossy texture. This is your chance to create something gentle, beautiful, and entirely your own.
1. Balance Delicate Textures with Intention

To create a design that feels both detailed and calm, focus on balancing stitch textures.
Use a padded satin stitch for the daisy petals; the slight lift makes them feel soft and three-dimensional.
Contrast this smoothness with clusters of tiny French knots for the lavender, which adds a gentle, rustic texture without overwhelming the composition.
Mounting your work on a neutral, tightly woven linen allows these purples, whites, and greens to feel vibrant yet grounded.
2. Build a Forest Floor with Layered Stitches
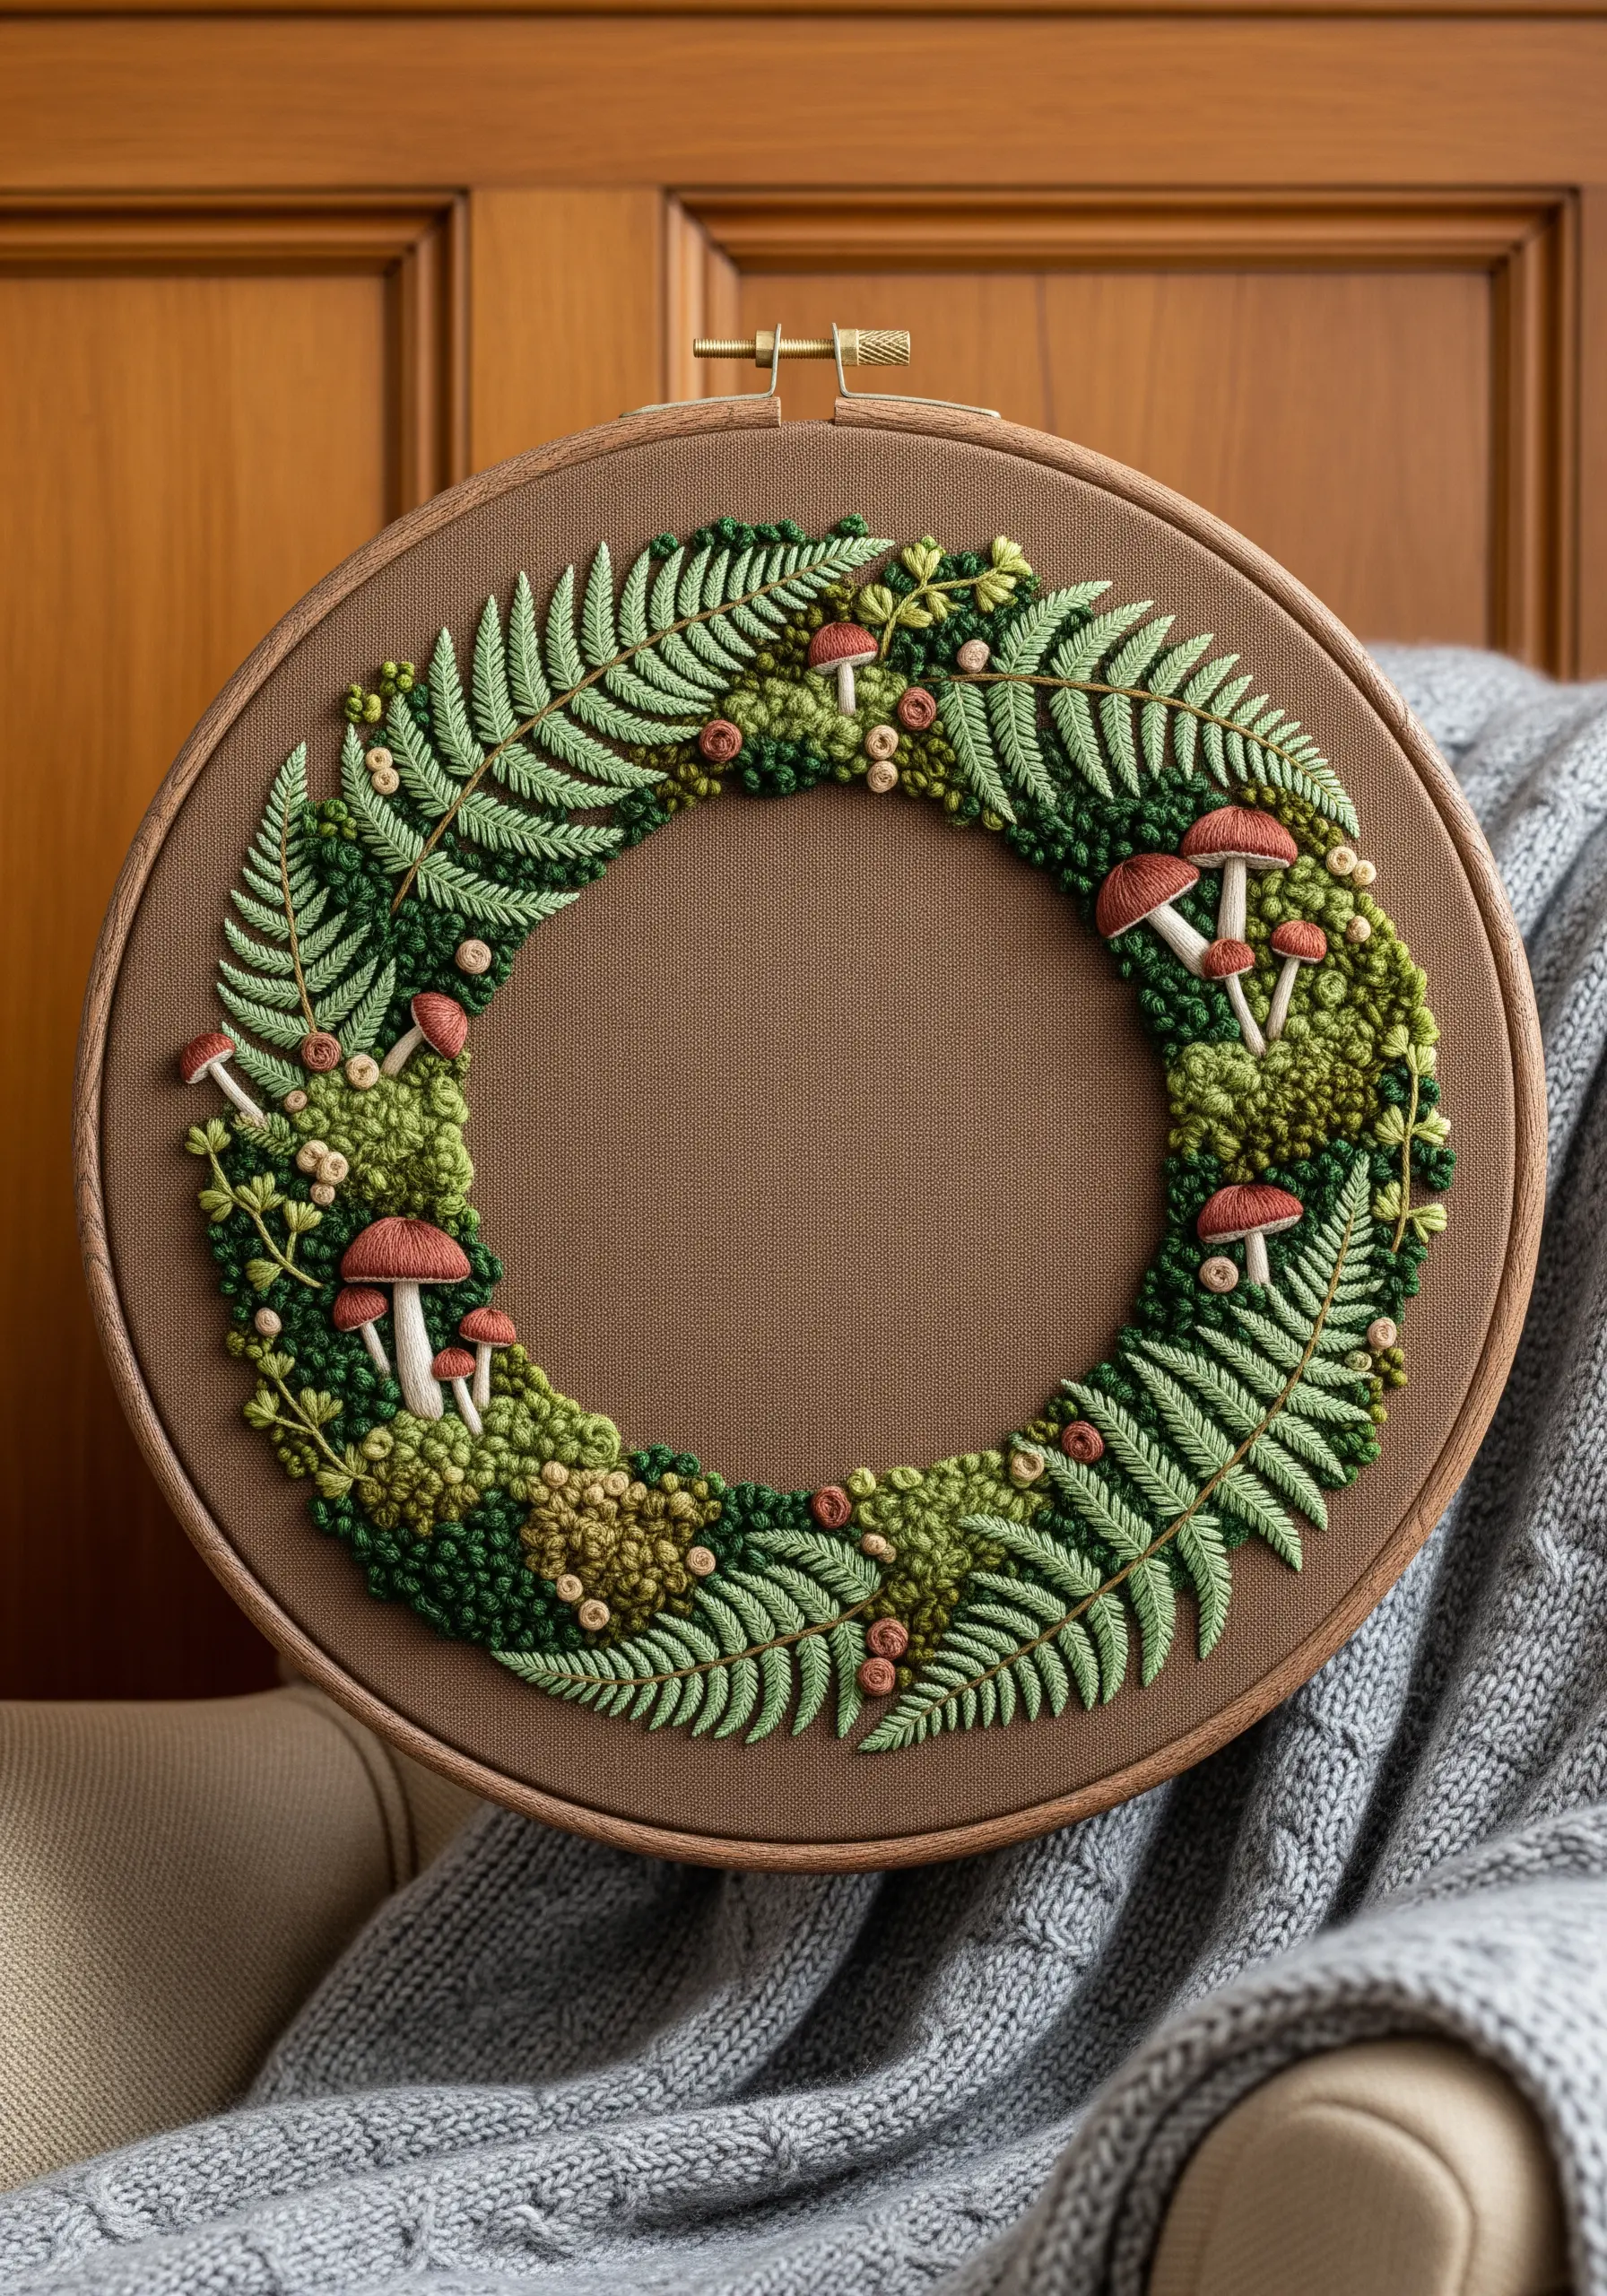
Create extraordinary depth by layering high-texture stitches to mimic a forest floor.
Use dense French knots in varying shades of green and ochre to build up a mossy base; this technique gives your work a tangible, almost spongy quality.
For the ferns, lay down a foundation of straight stitches as a guide, then fill with a fishbone stitch to capture the intricate pattern of the fronds.
Finally, elevate the mushrooms using padded satin stitch—a few underlying straight stitches will make them pop right off the fabric.
3. Capture Ephemeral Motion in Dandelions
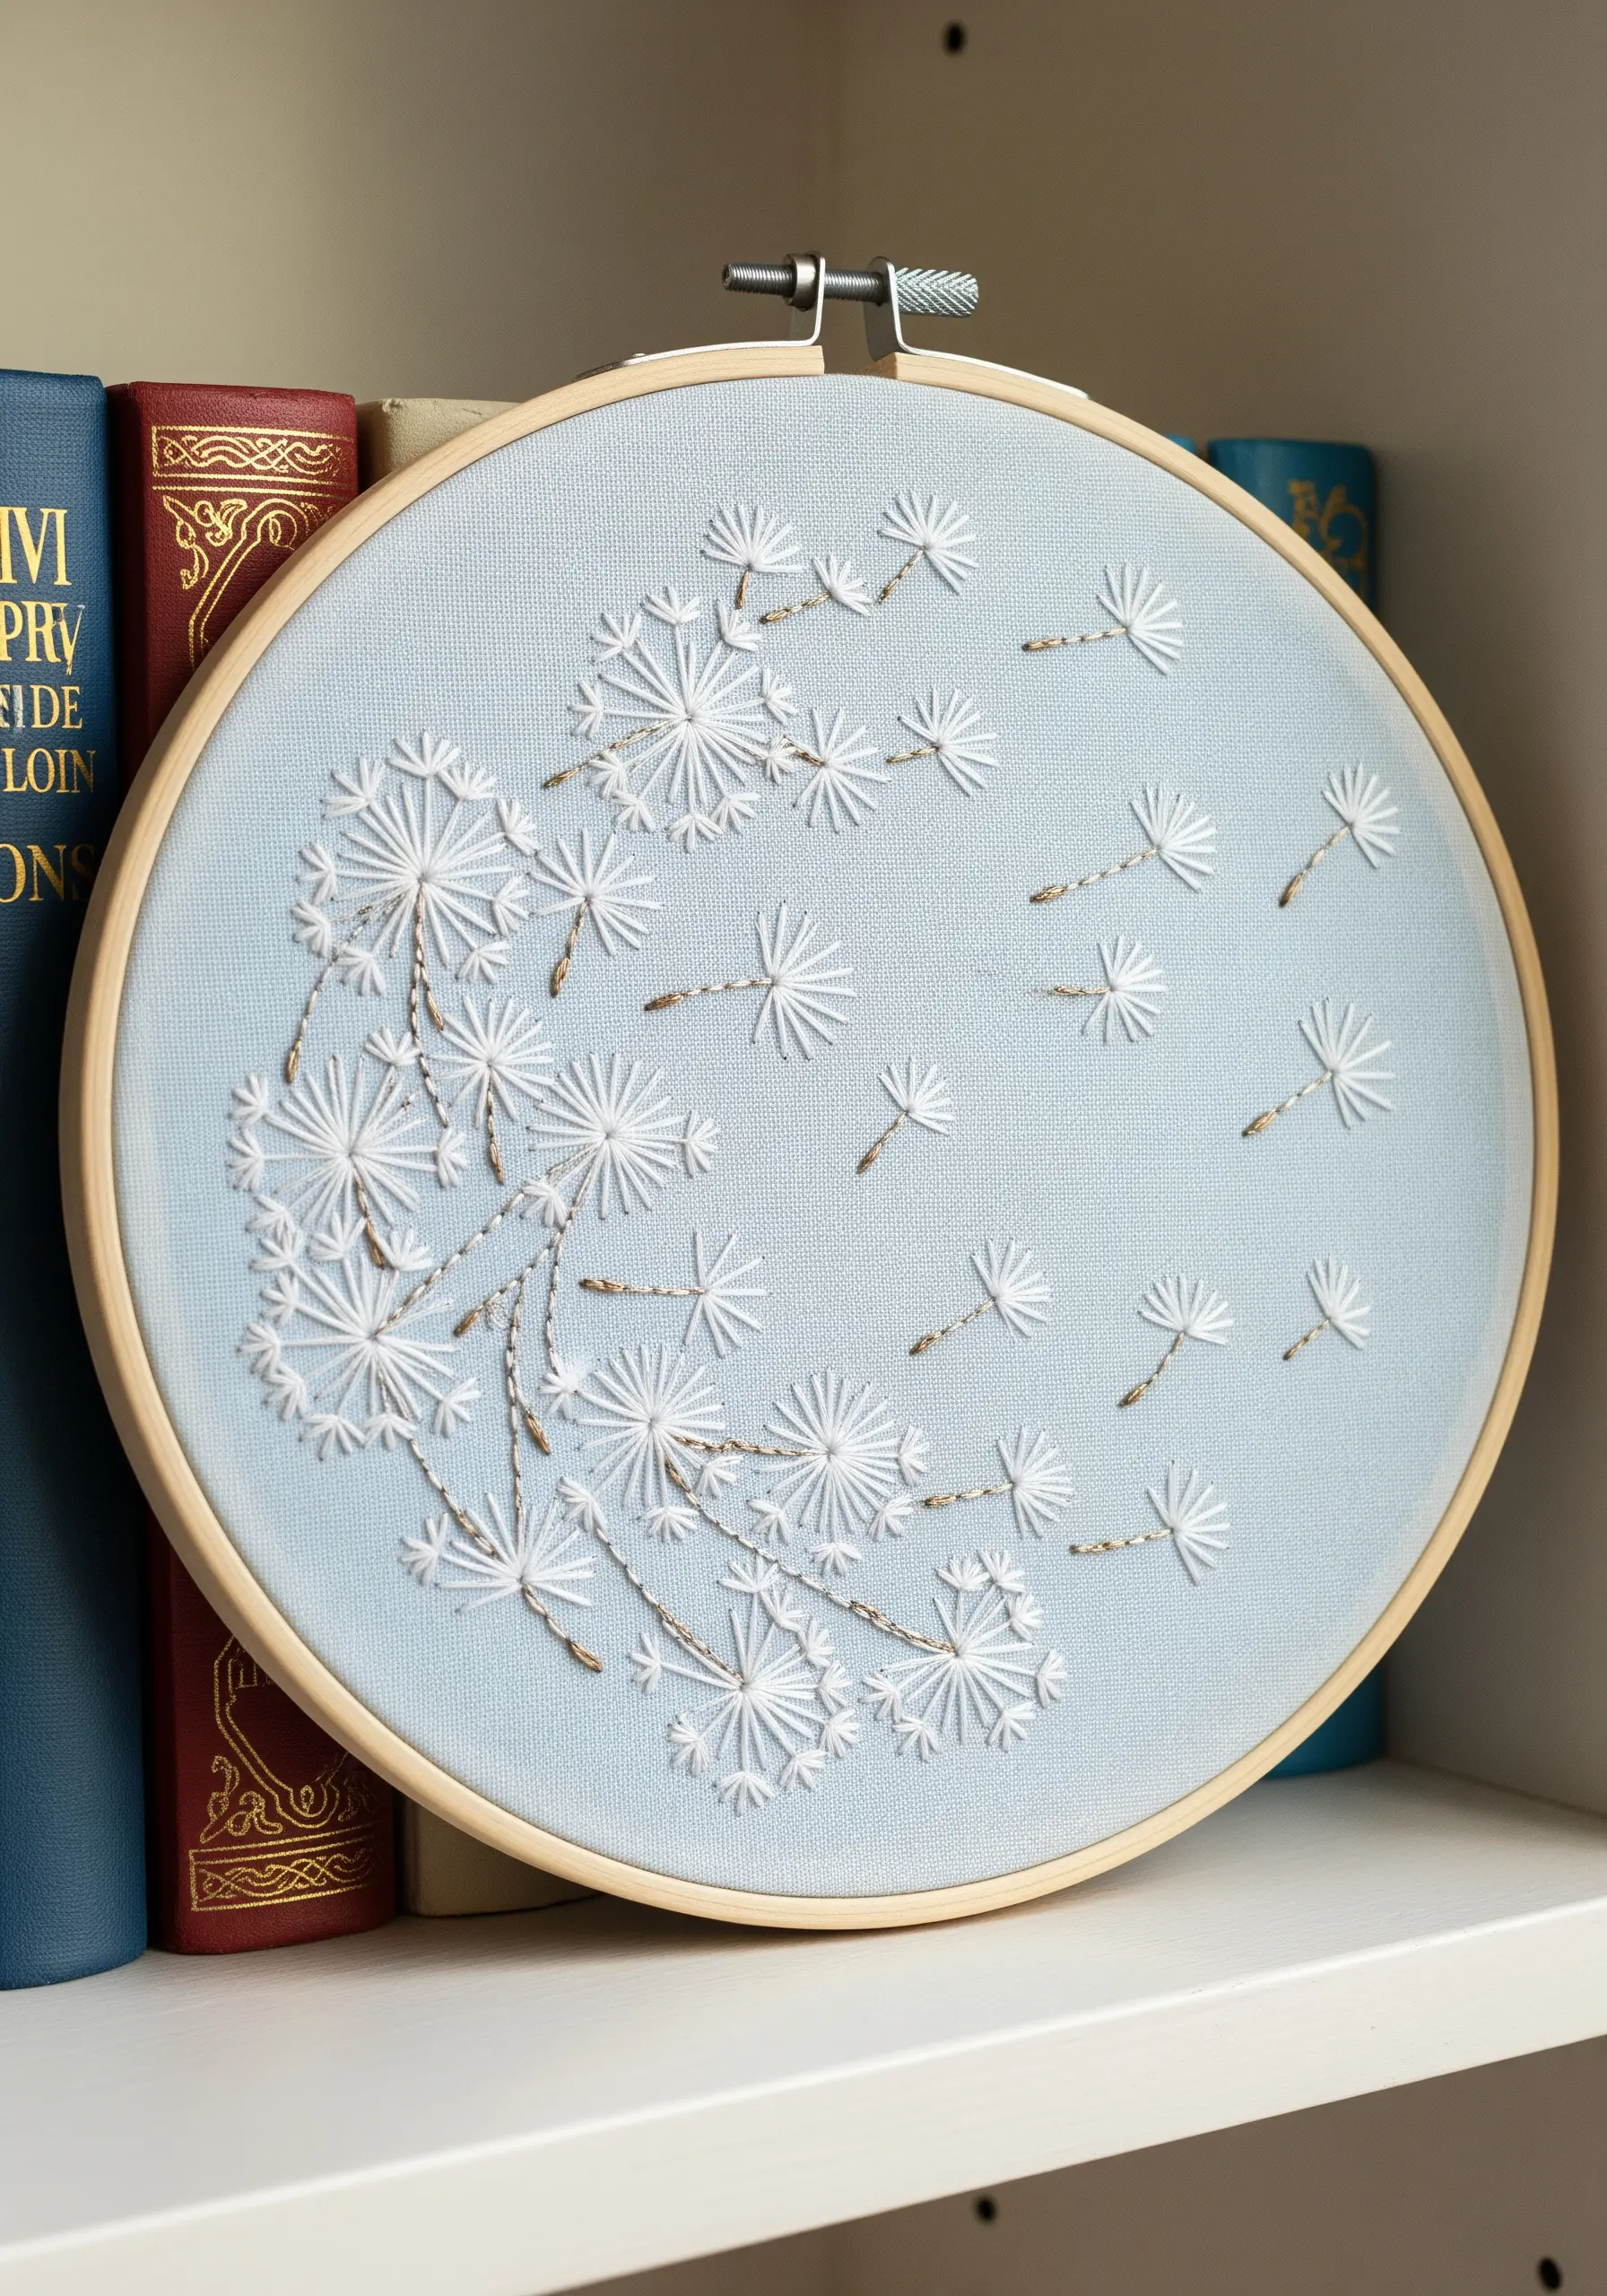
To give your dandelions a sense of weightless movement, let the stitches breathe and embrace negative space.
Use a detached chain stitch (lazy daisy) for the individual seed puffs, keeping them light and airy rather than densely packed.
For the stems, switch from standard cotton floss to a single strand of metallic gold thread. This subtle shift adds a touch of magic and visual interest, catching the light and guiding the eye across the composition.
The contrast between the matte white floss and the shimmering gold is what brings this delicate scene to life.
4. Master Sophisticated Greenery with Tonal Shading
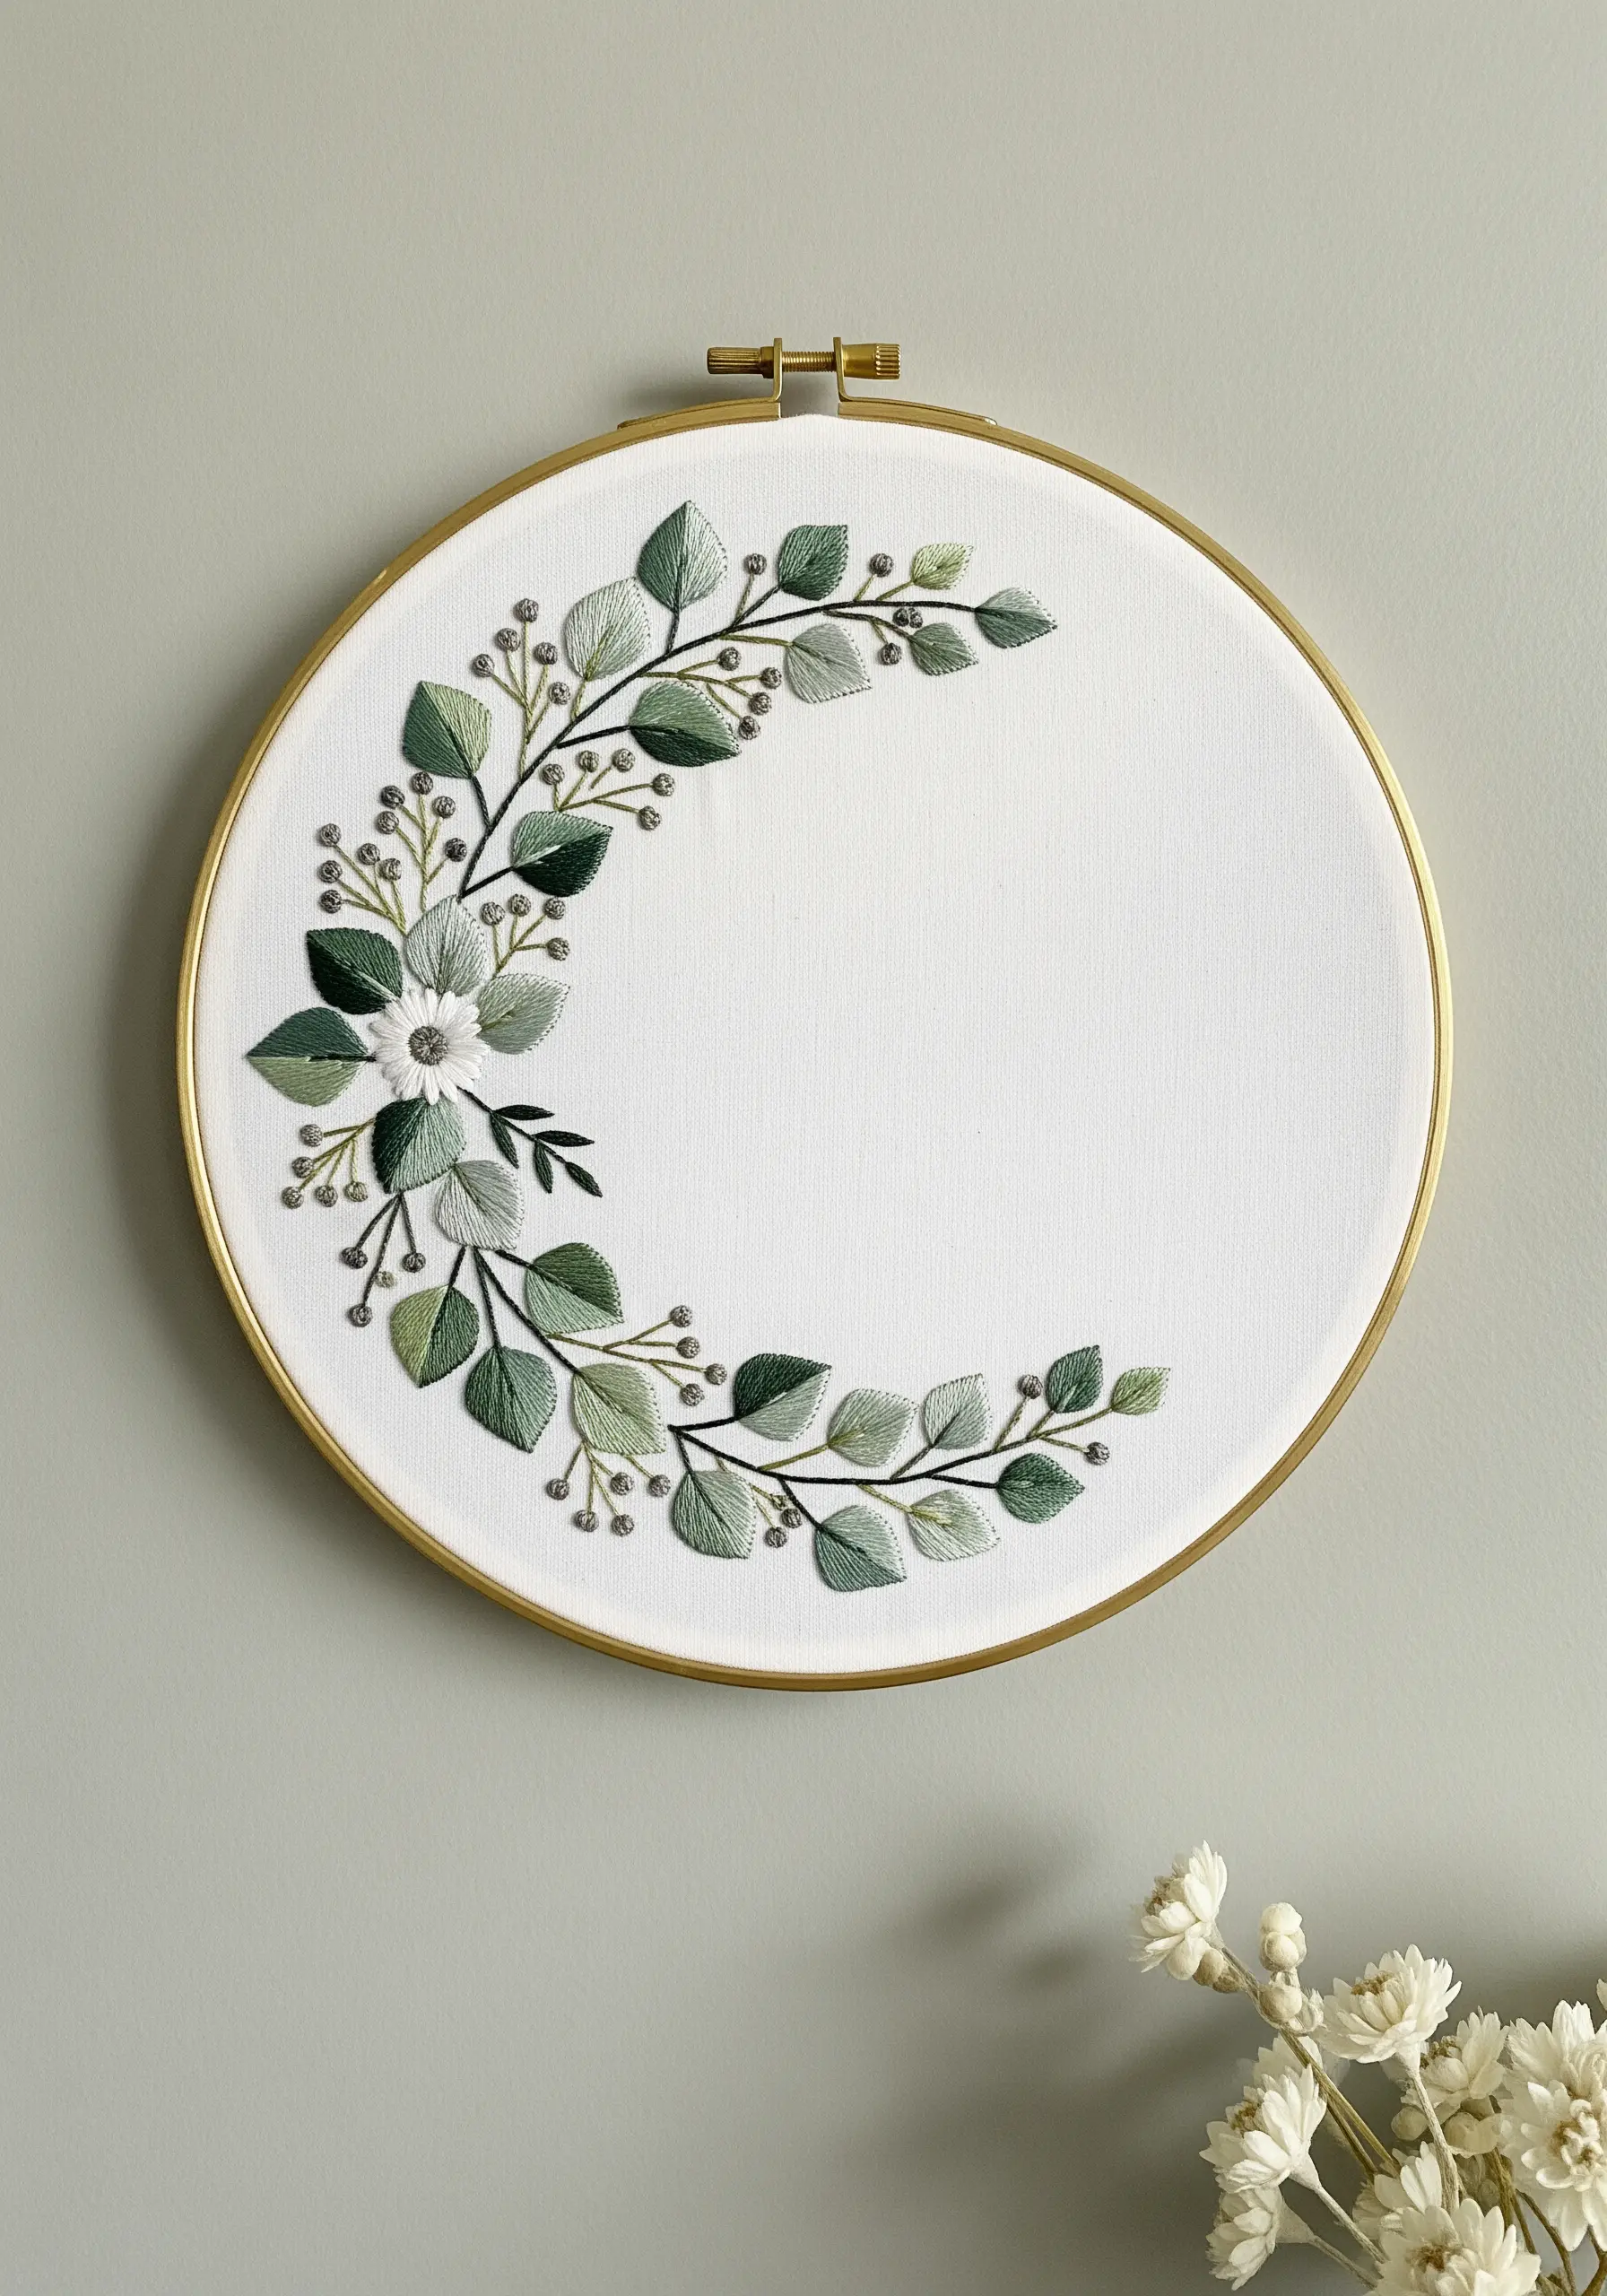
Elevate simple leaf shapes by using a long-and-short stitch to blend multiple shades of green within a single leaf.
This technique creates a soft, painterly gradient that adds realism and depth, making the foliage look sun-dappled and alive.
Arrange your composition as a crescent rather than a full circle; this modern, asymmetrical layout feels elegant and intentional.
Anchor the design with a few French knots or small satin-stitched berries to provide a contrasting texture and focal point.
5. Weave Voluminous Roses for Instant Dimension

For flowers that look full and lush, the woven wheel stitch is your most powerful tool.
Create a star of five or seven straight stitches as your base, then weave your thread over and under each spoke until the shape is filled.
To create more realistic blooms, vary the tension of your weave: a tighter wrap results in a neat, bud-like flower, while a looser wrap allows the ‘petals’ to arch and open up.
This single stitch adds impressive dimension and texture, making it perfect for statement florals in any wreath.
6. Infuse Autumn Leaves with Variegated Thread
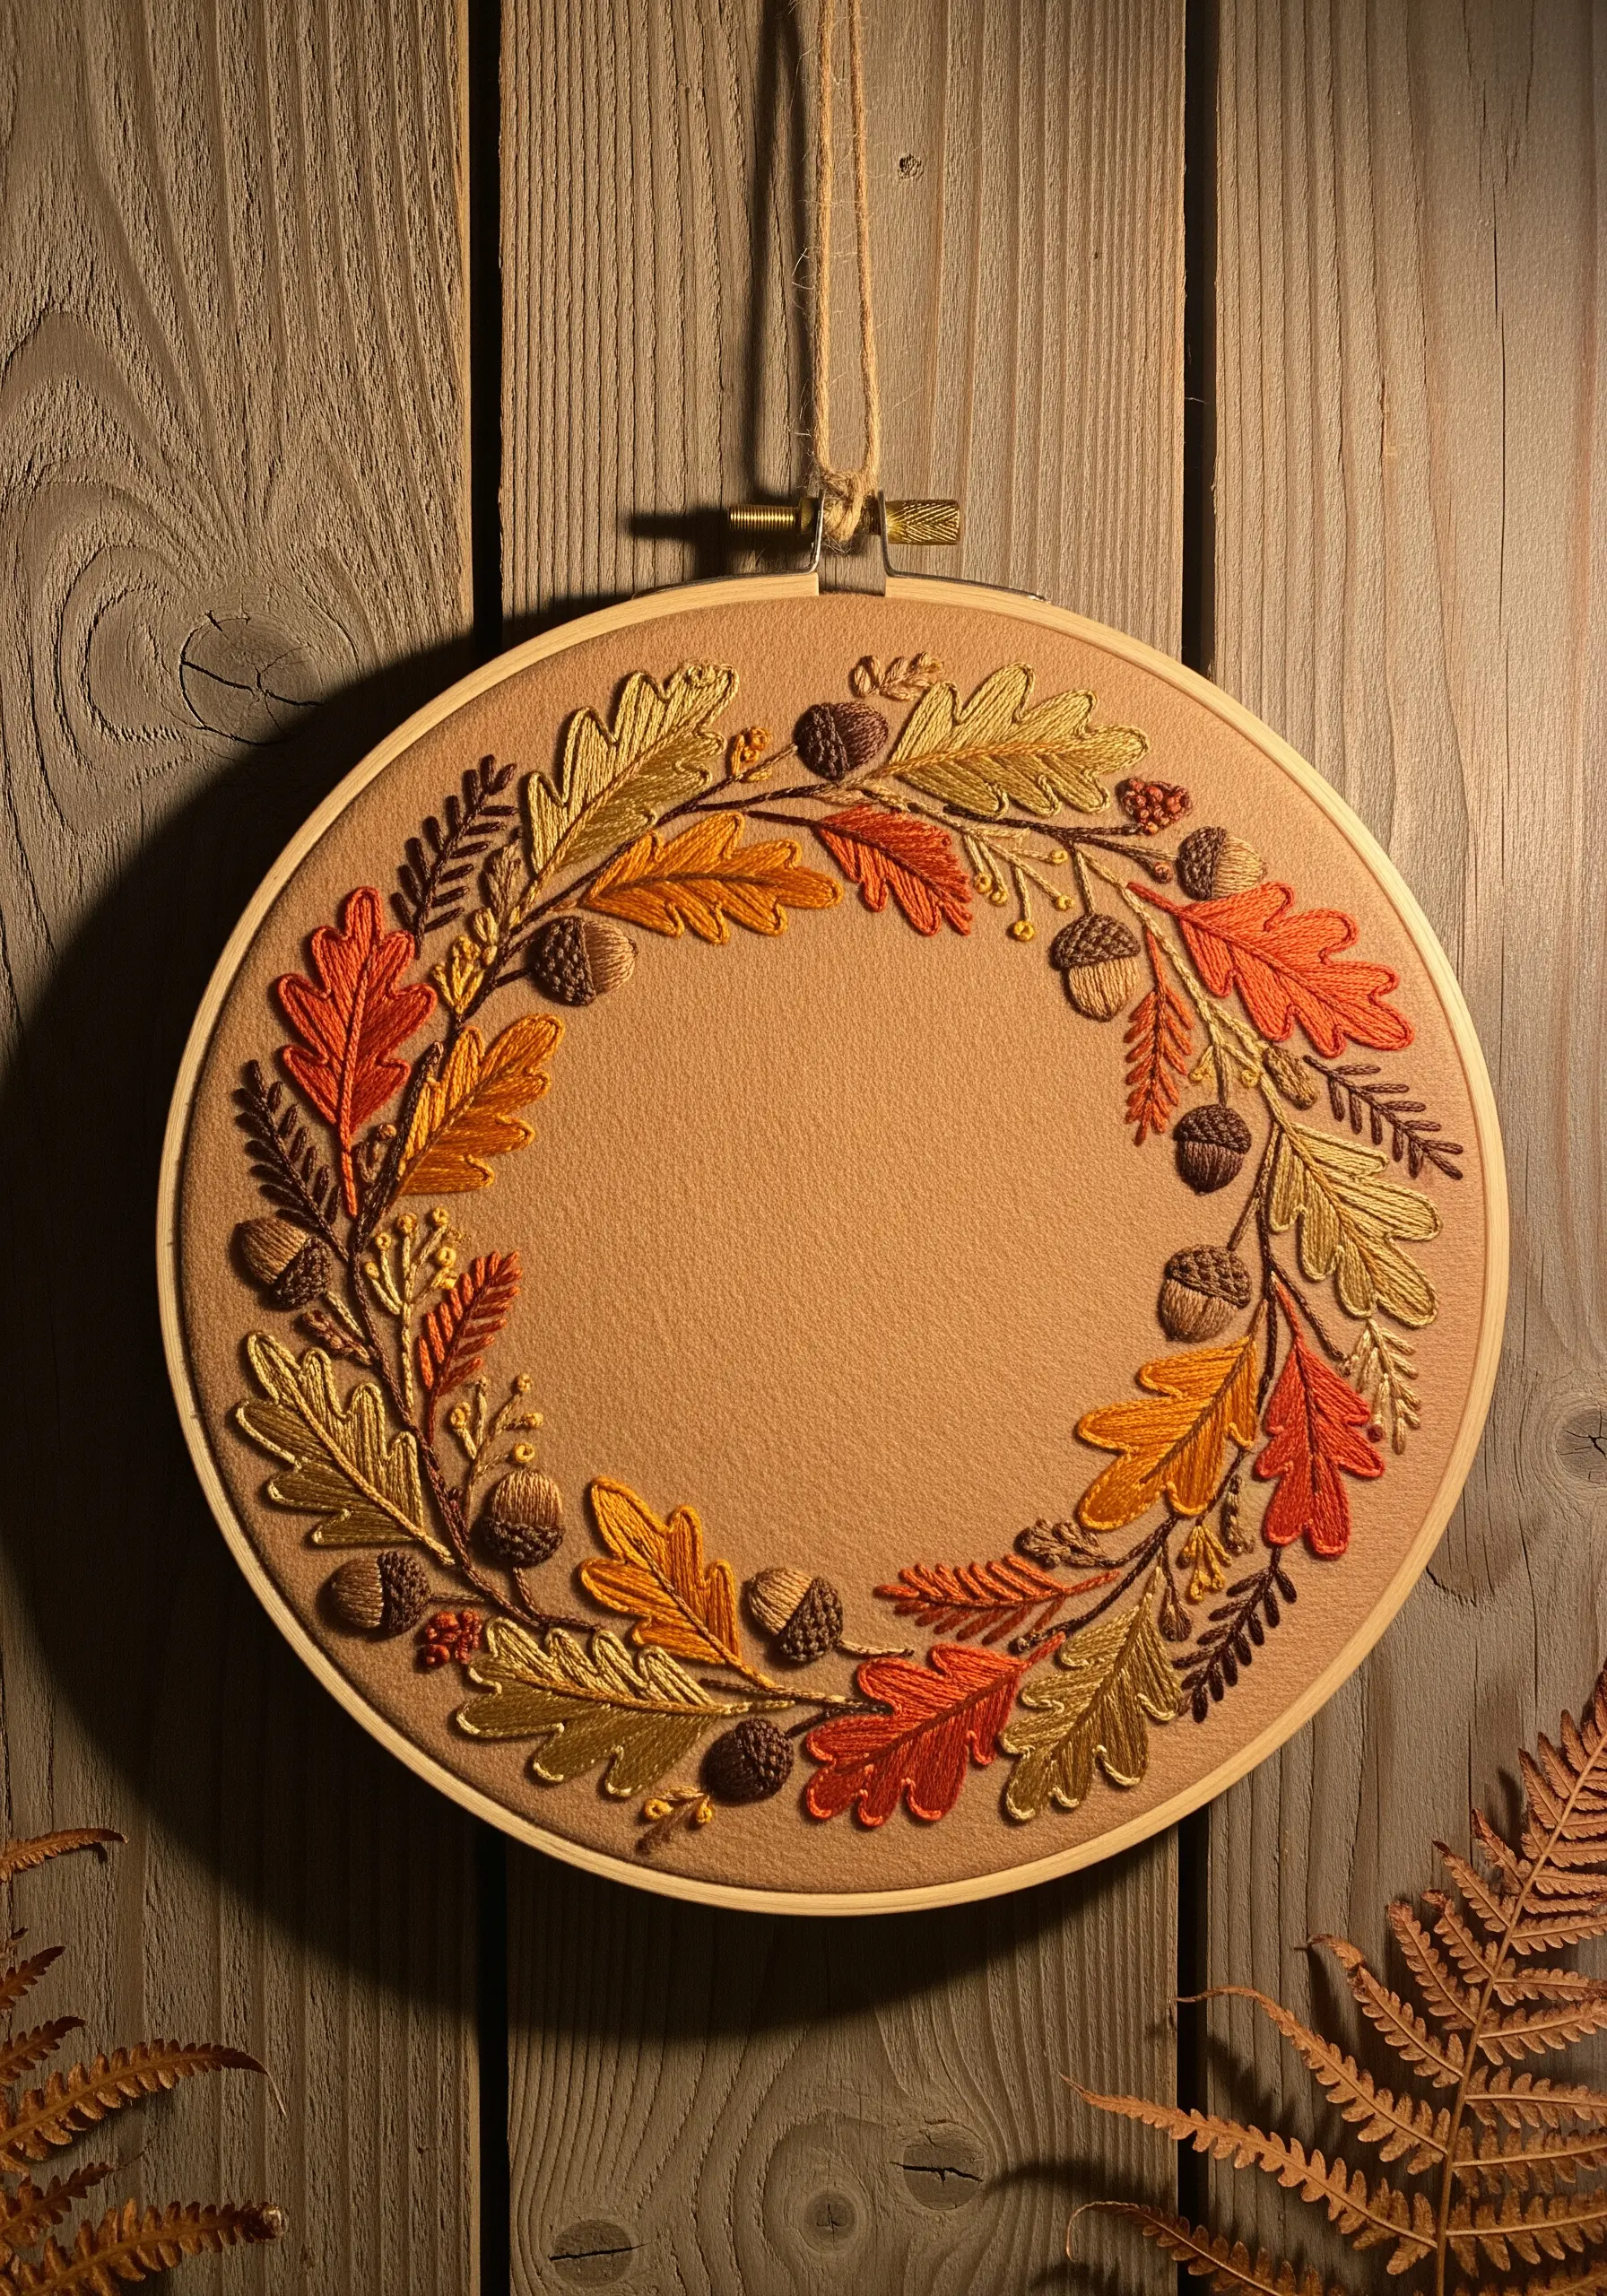
Capture the natural, unpredictable color shifts of autumn leaves by using variegated thread.
As you fill in each leaf with a fishbone or satin stitch, the thread will automatically transition between reds, golds, and oranges, creating organic gradients without needing to switch colors.
For the acorns, use a padded satin stitch in a solid brown to give them a smooth, rounded form that contrasts beautifully with the multi-toned leaves.
This pairing of variegated and solid threads creates a wreath that is visually complex yet simple to execute.
7. Create Delicate Florals on Grid-Weave Fabric
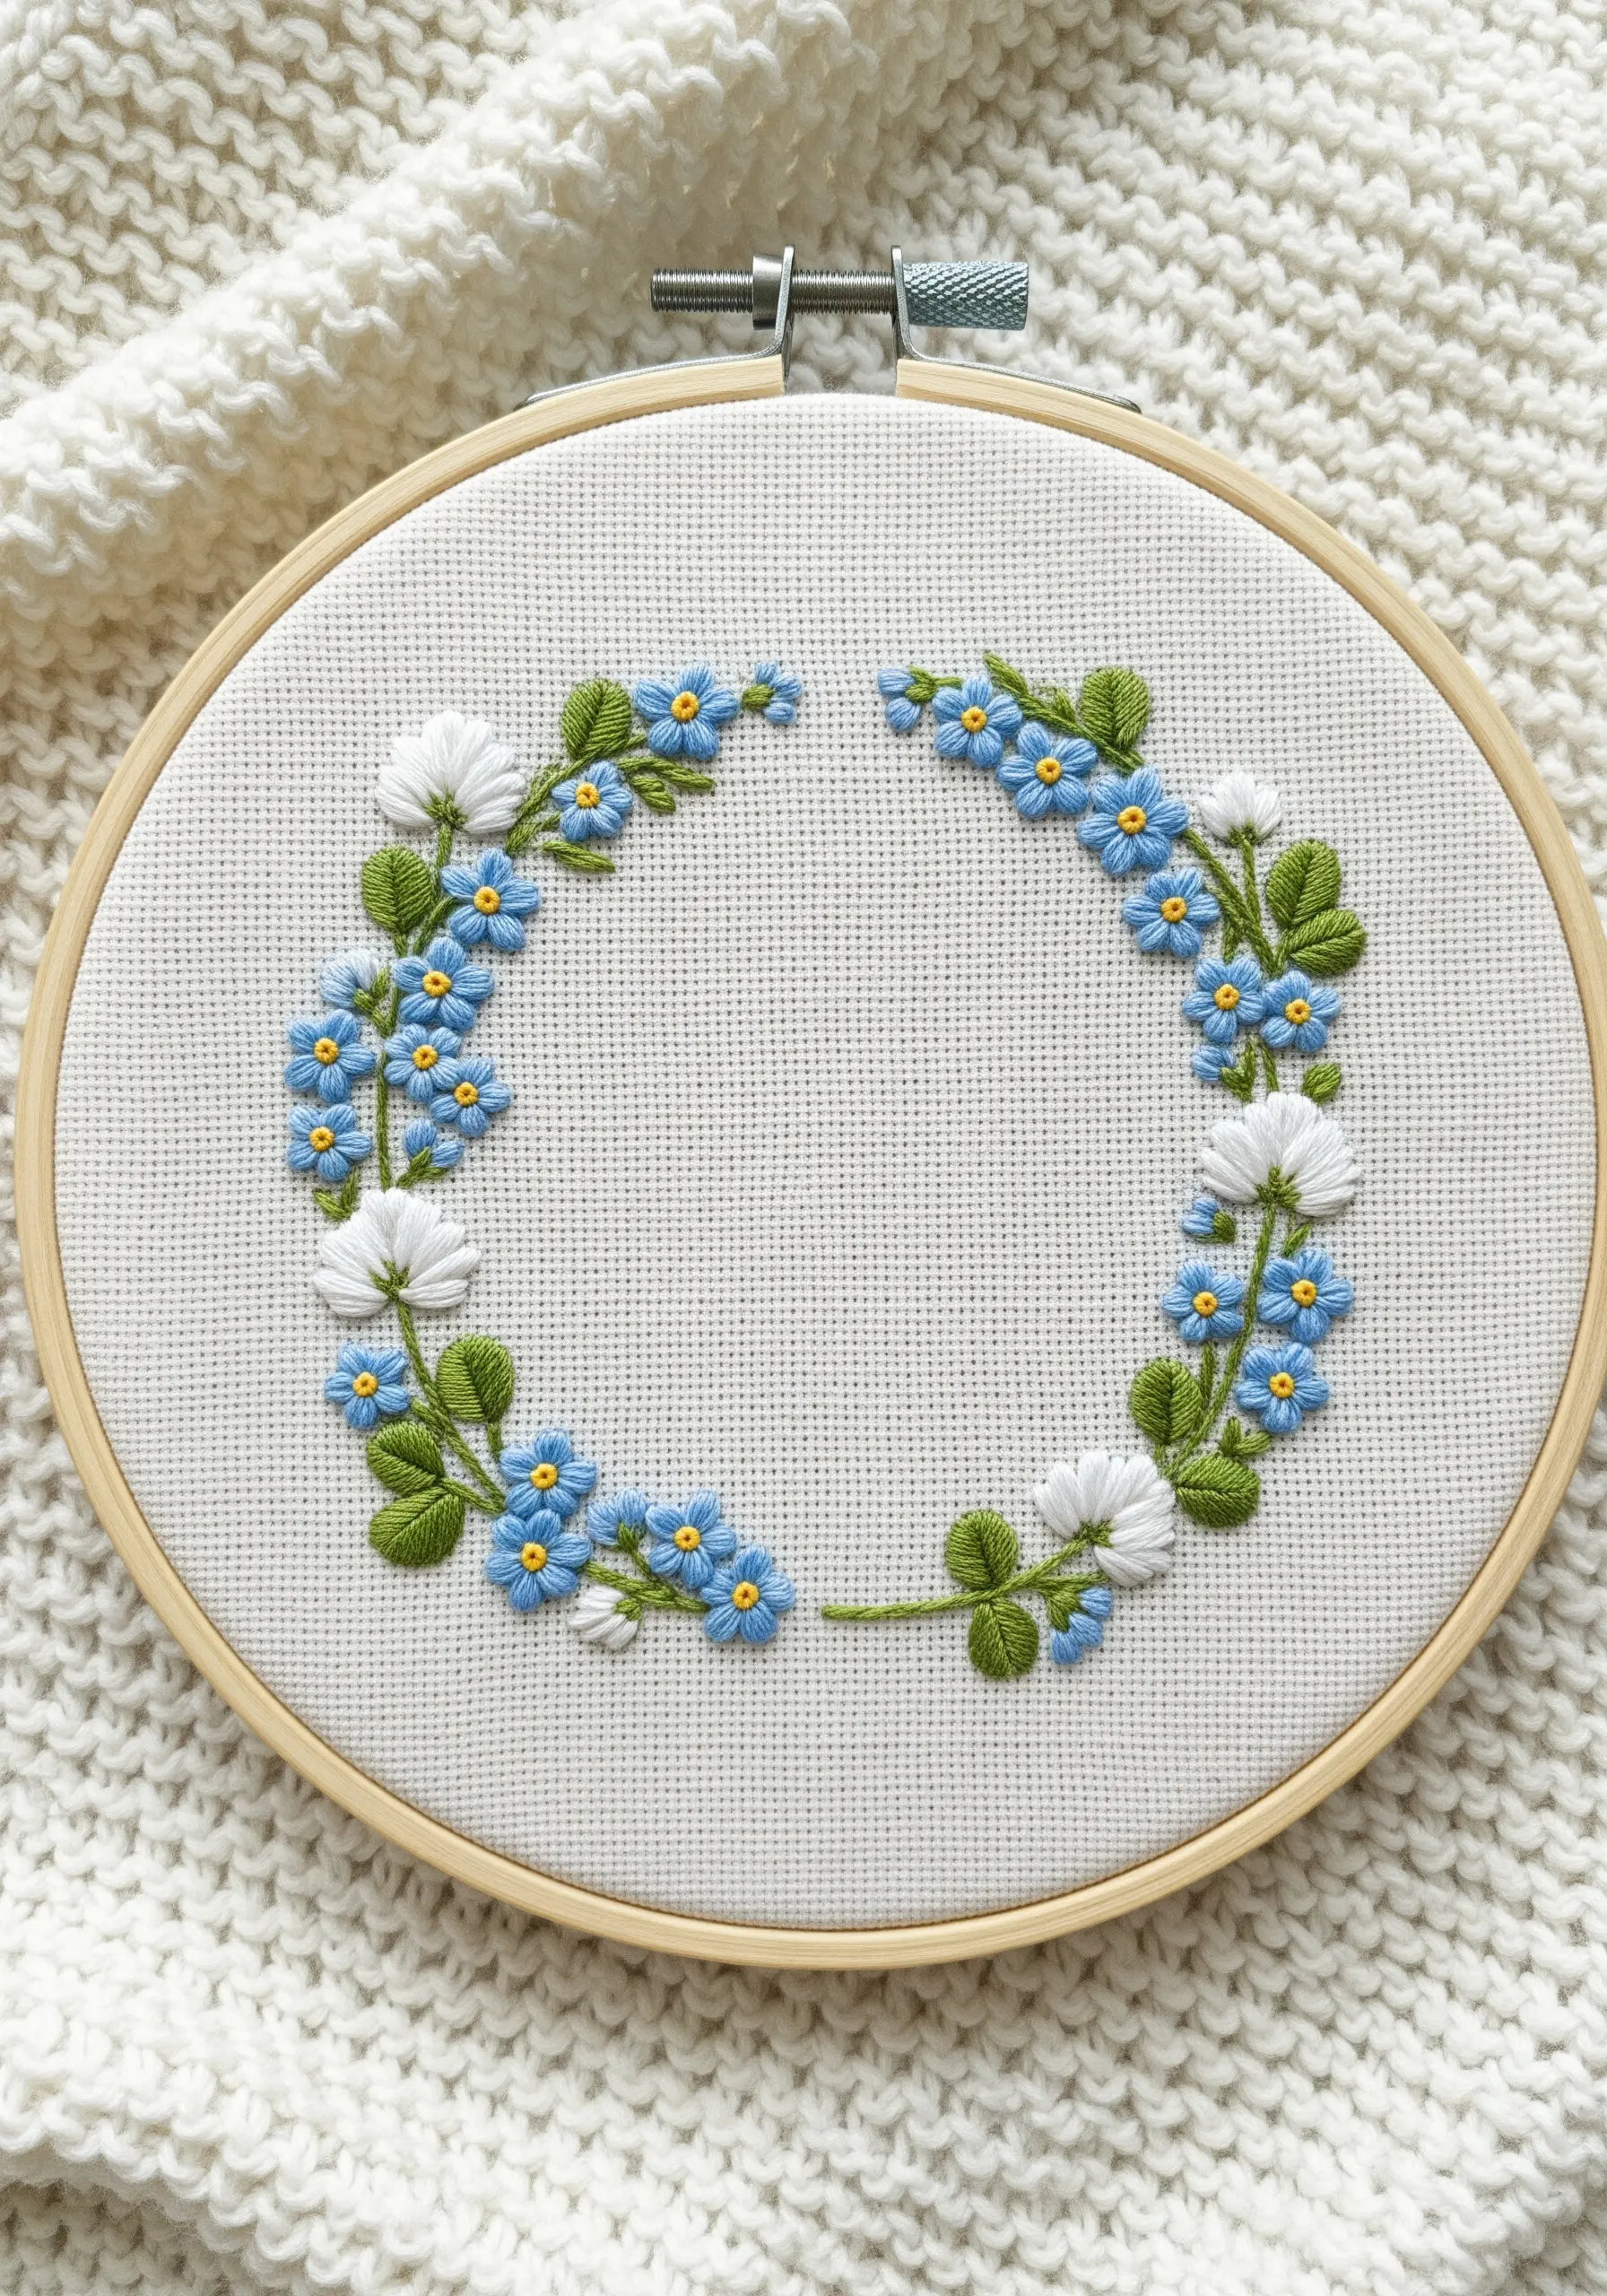
For tiny, clustered flowers like forget-me-nots, working on an even-weave fabric like Aida cloth ensures perfect stitch placement and uniformity.
Use a single detached chain stitch for each petal and a tiny French knot for the center. The grid of the fabric helps you keep the flowers consistent in size and shape.
Contrast the delicate blue clusters with larger, bolder white flowers made from multiple straight stitches fanning out from a central point. This change in scale adds rhythm and interest to the wreath.
8. Juxtapose Soft and Sharp Textures for a Wild Feel
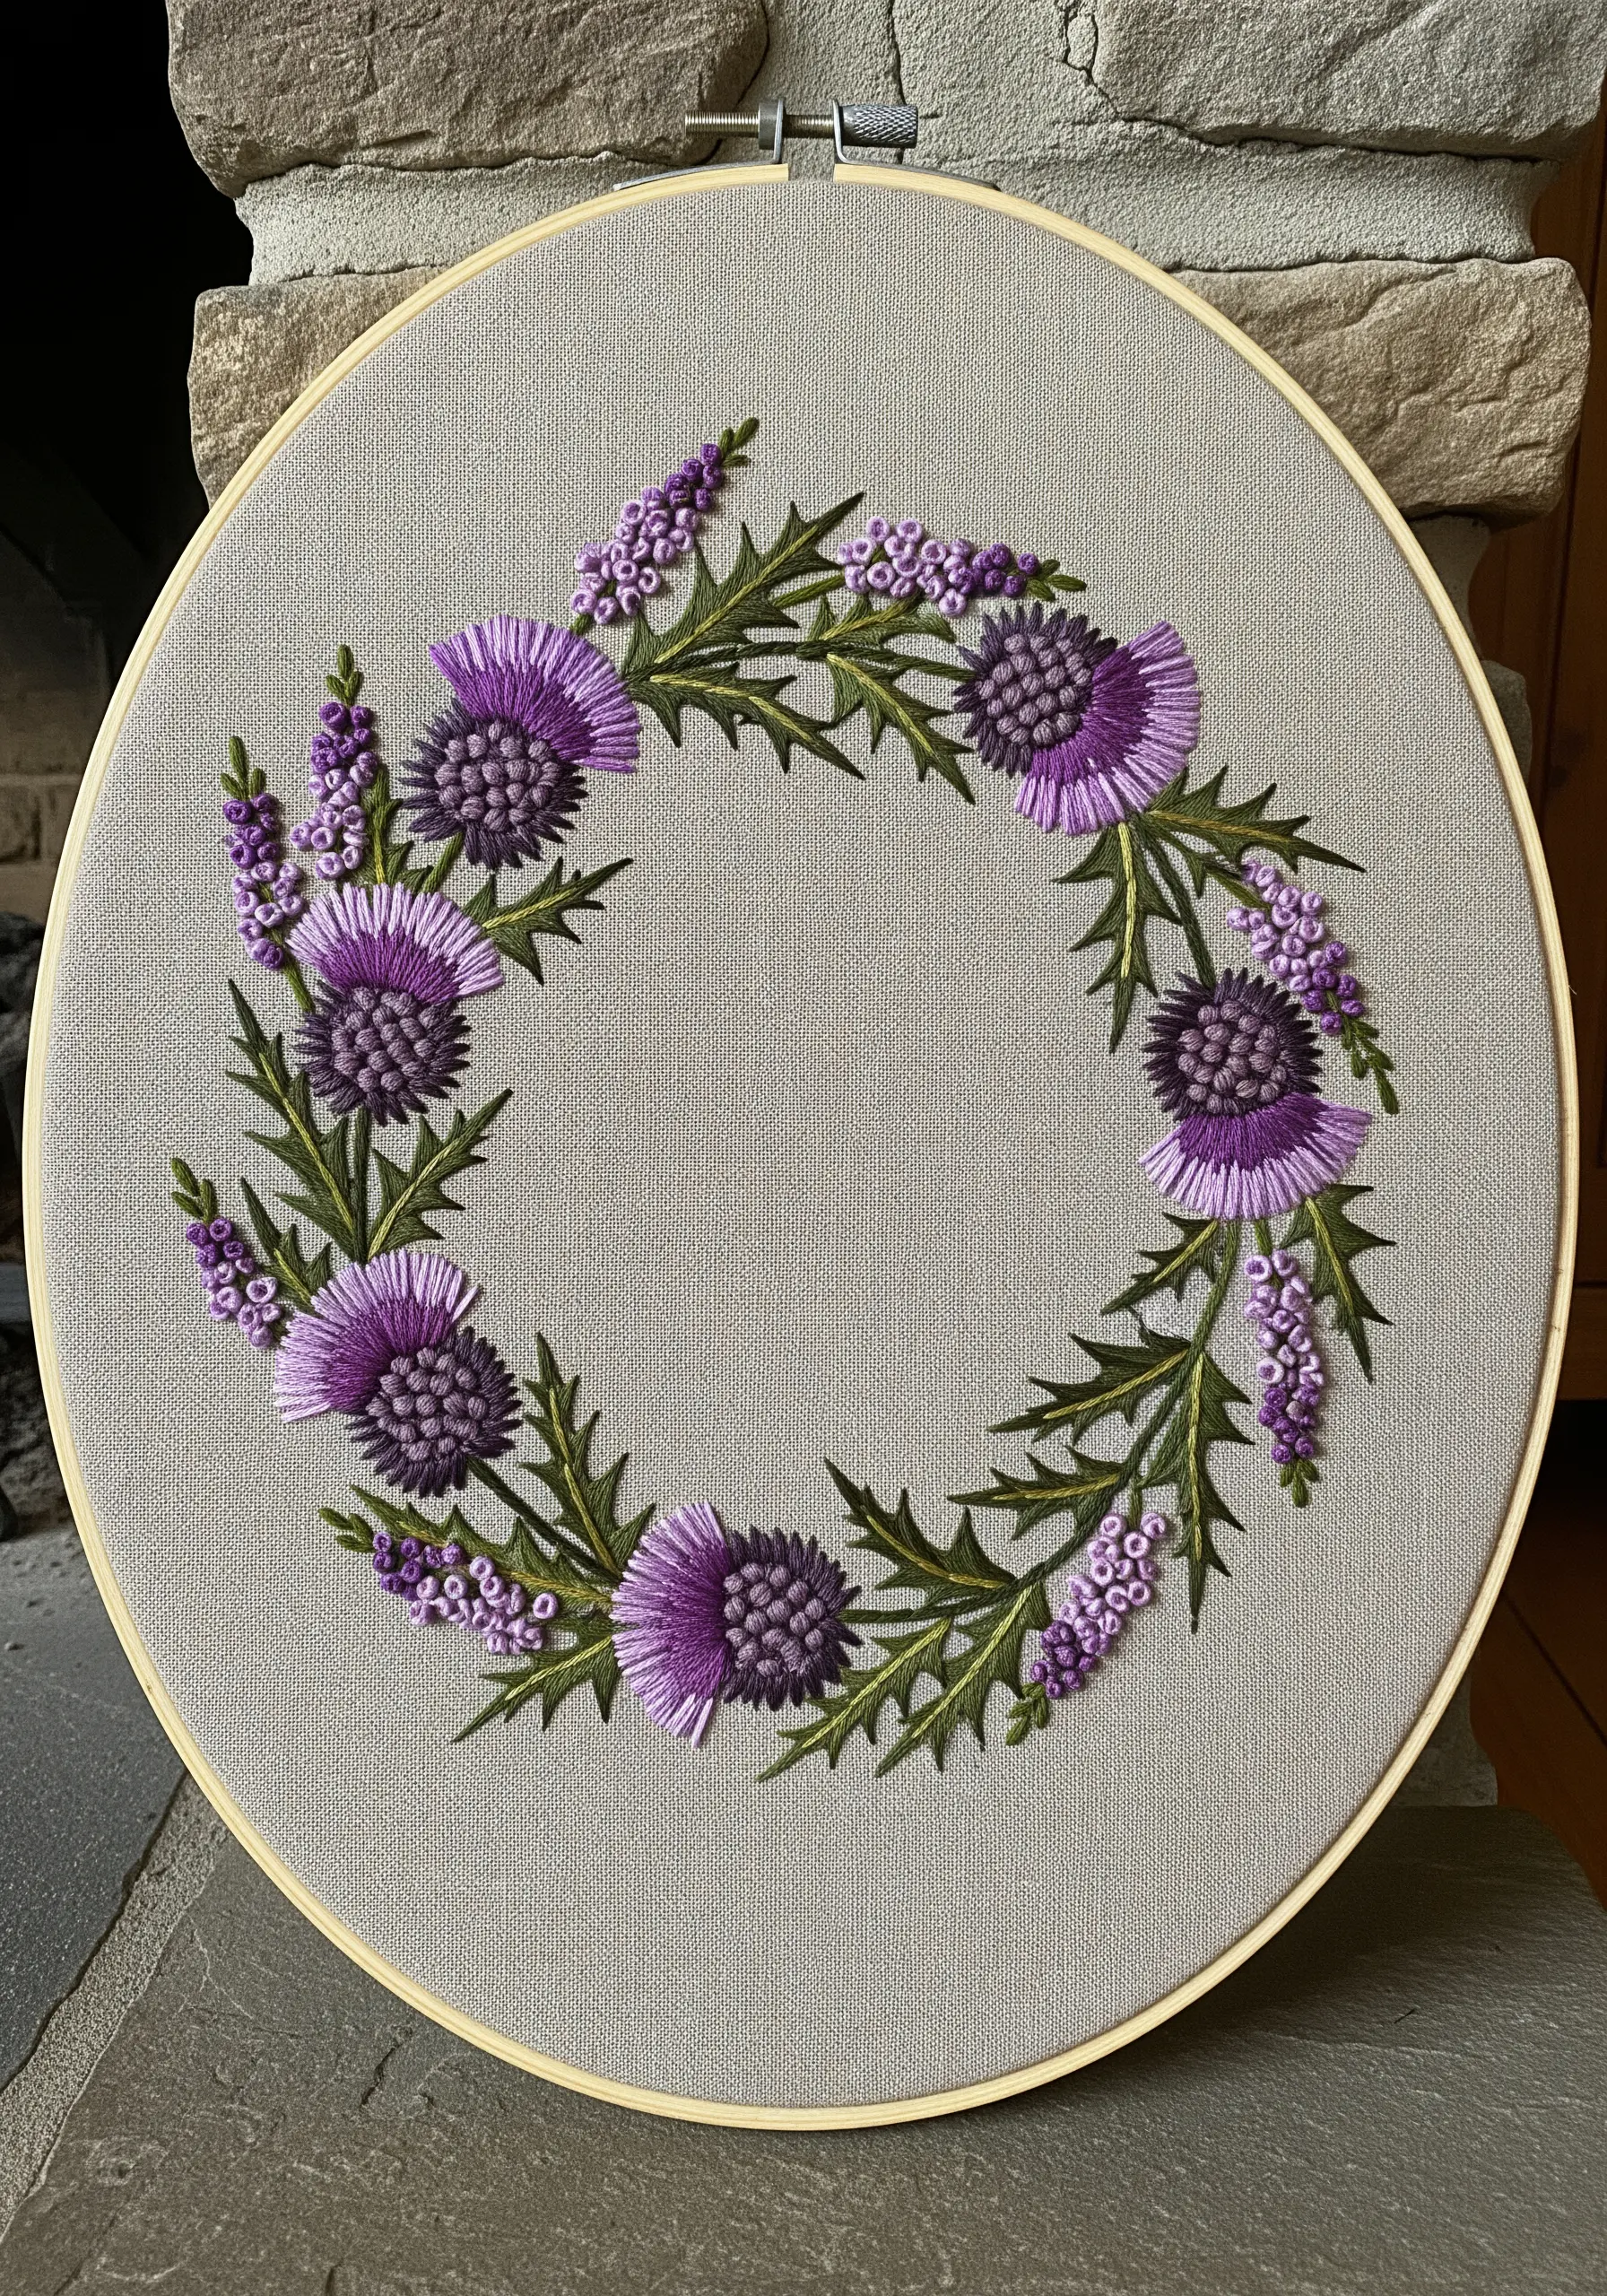
To give Scottish thistles their iconic character, focus on the contrast between their soft tops and prickly leaves.
Fill the flower heads with a dense long-and-short stitch using shades of purple for a soft, tufted appearance.
For the surrounding leaves, use sharp, decisive straight stitches and split stitches in dark green. The pointed ends of these stitches mimic the thistle’s spiky defense, creating a design that is visually and texturally dynamic.
9. Design a Lush, Monochromatic Foliage Wreath

Explore the beauty of a limited color palette by building a wreath entirely from shades of green.
Monochromatic harmony is achieved not through color, but through varied texture and form.
Incorporate different leaf shapes using distinct stitches: fishbone stitch for broad, veined leaves; lazy daisy stitch for small, rounded leaves; and stem stitch for delicate ferns.
By varying the stitch and the shade of green—from mint to olive to forest—you create a design that is sophisticated, cohesive, and deeply calming.
10. Capture the Rustic Texture of a Wheat Harvest
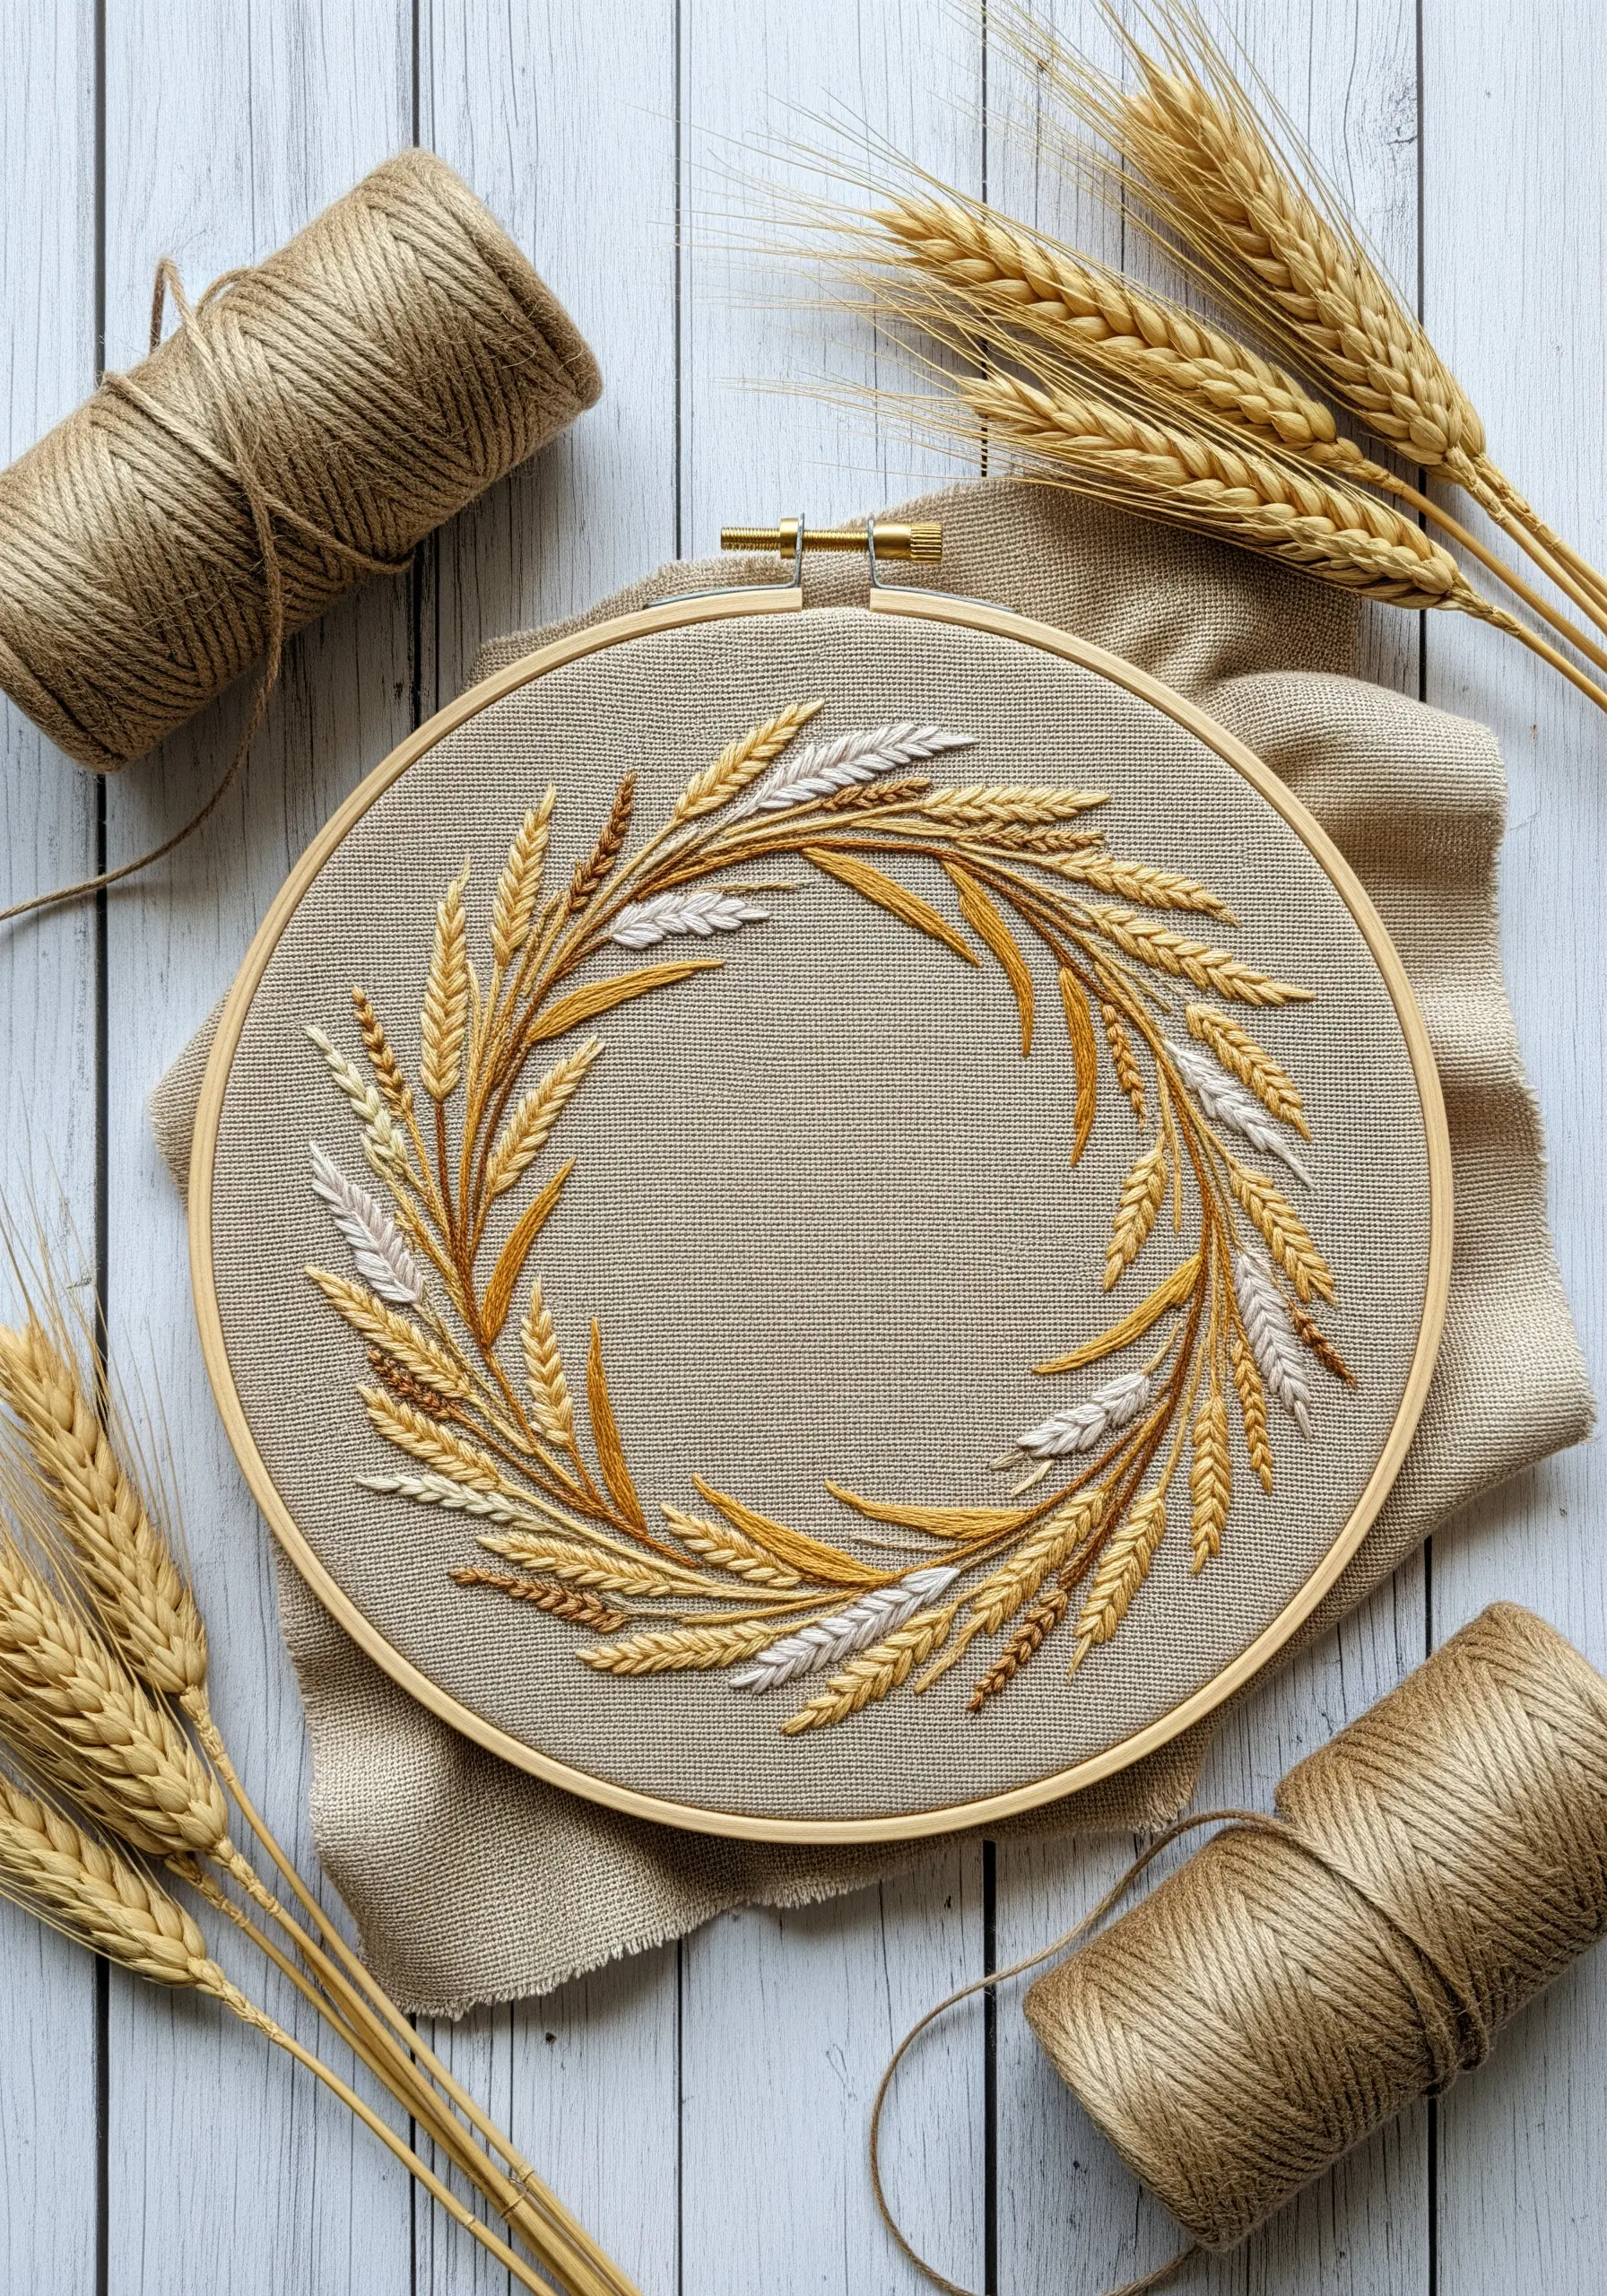
To replicate the look of dried wheat, focus on direction and thread choice.
Use a fishbone stitch for the wheat heads, ensuring your stitches angle upwards and outwards from a central line, just as they do in nature.
Select a palette of muted golds, creams, and light browns to evoke a sun-bleached, rustic feel. Capturing natural textures like these works best on an earthy fabric, like a raw linen or cotton-linen blend, which enhances the design’s organic warmth.
11. Stitch a Serene Winter Birch & Berry Wreath
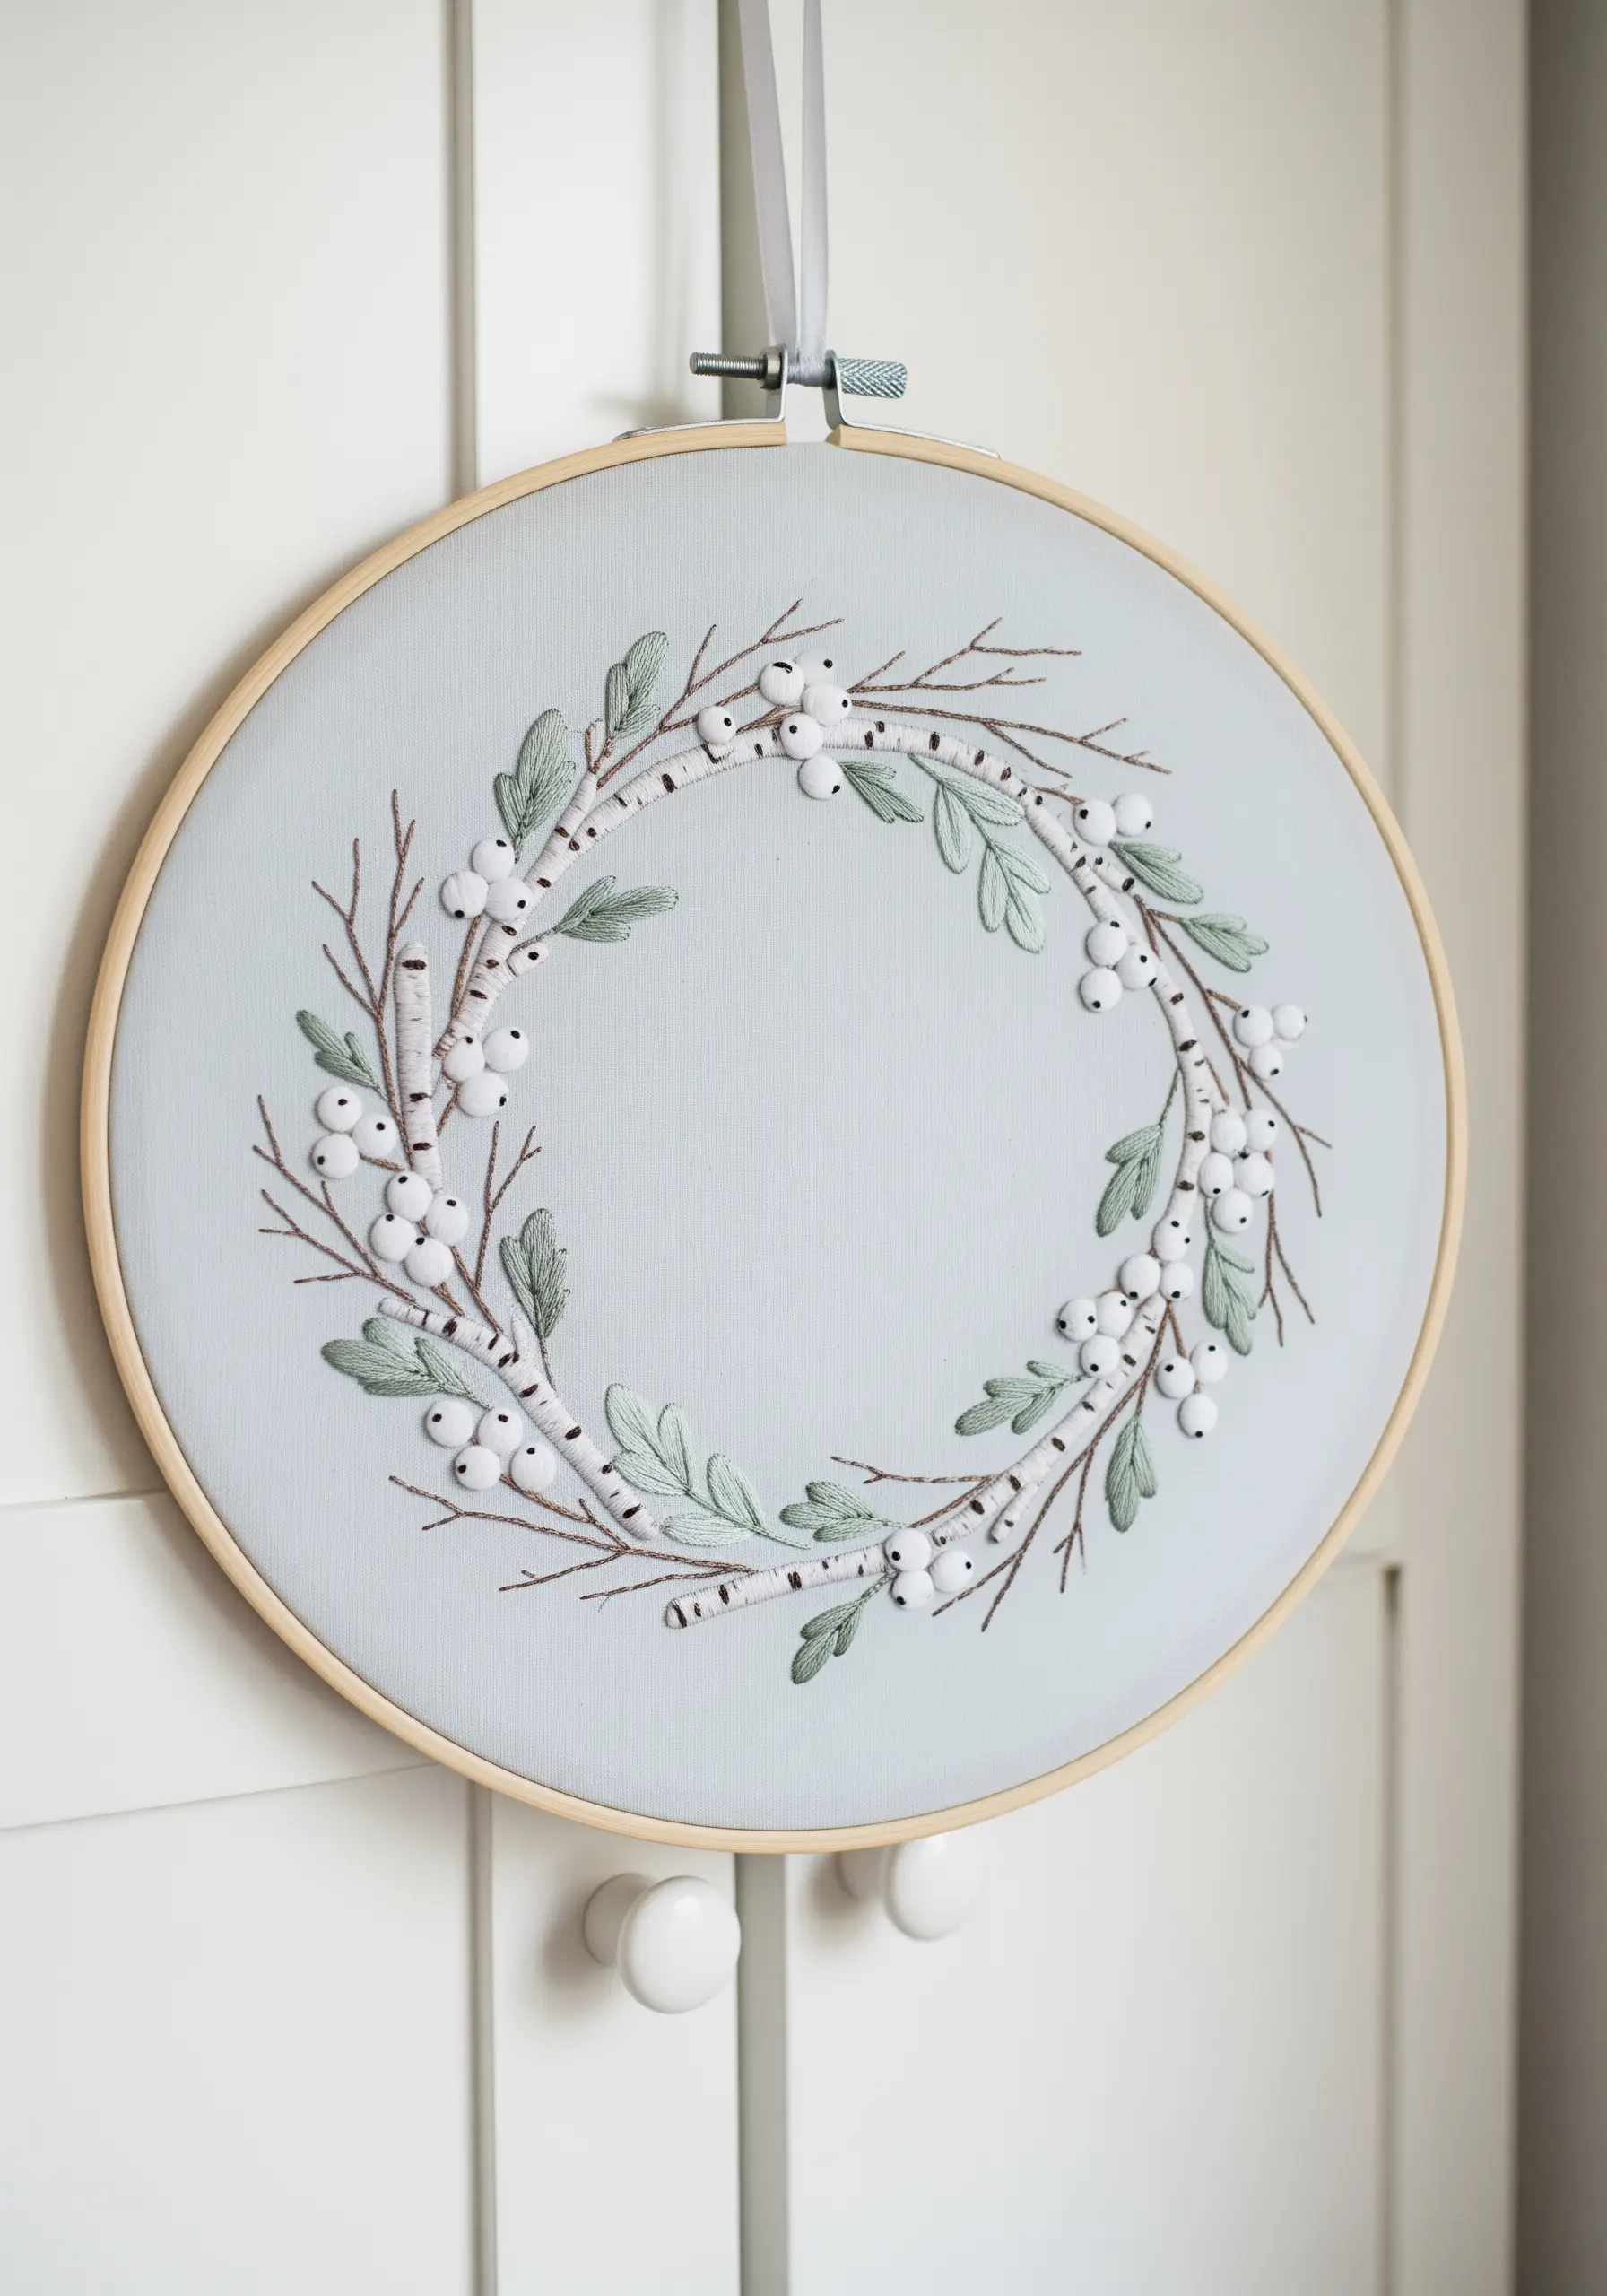
Achieve the delicate, papery look of birch bark by using a single strand of grey or black thread to create small, horizontal stitches (satin bars) along the branches.
For the white berries, use a padded satin stitch to give them a plump, rounded shape that stands out against the muted fabric.
Keep the palette soft and cool—pale blues, sage greens, and whites—to evoke the quiet stillness of a winter morning. This minimalist approach is perfect for creating a tranquil atmosphere.
12. Combine Appliqué and Knots for Bold Contrast

For a striking, high-contrast design, combine fabric appliqué with traditional embroidery stitches.
Create the buttercups from small circles of yellow fabric, securing them with a few central stitches and allowing the edges to lift slightly for a 3D effect.
Surround these bold shapes with dense clusters of white French knots to represent Queen Anne’s lace. This pairing of a large, smooth element with a small, textured one creates immediate visual impact and draws the eye.
13. Achieve Soft Dimension with Padded Stumpwork

To create the soft, fuzzy catkins of a pussy willow, turn to the basics of stumpwork embroidery.
First, stitch a small oval of felt padding onto your fabric. Then, cover the felt completely with satin stitches using a blend of white and light grey threads.
This padding lifts the catkins from the surface, giving them a truly three-dimensional and touchable quality. Add a tiny touch of brown at the base of each bud to complete the illusion.
14. Make Colors Pop on a Dark Fabric Canvas
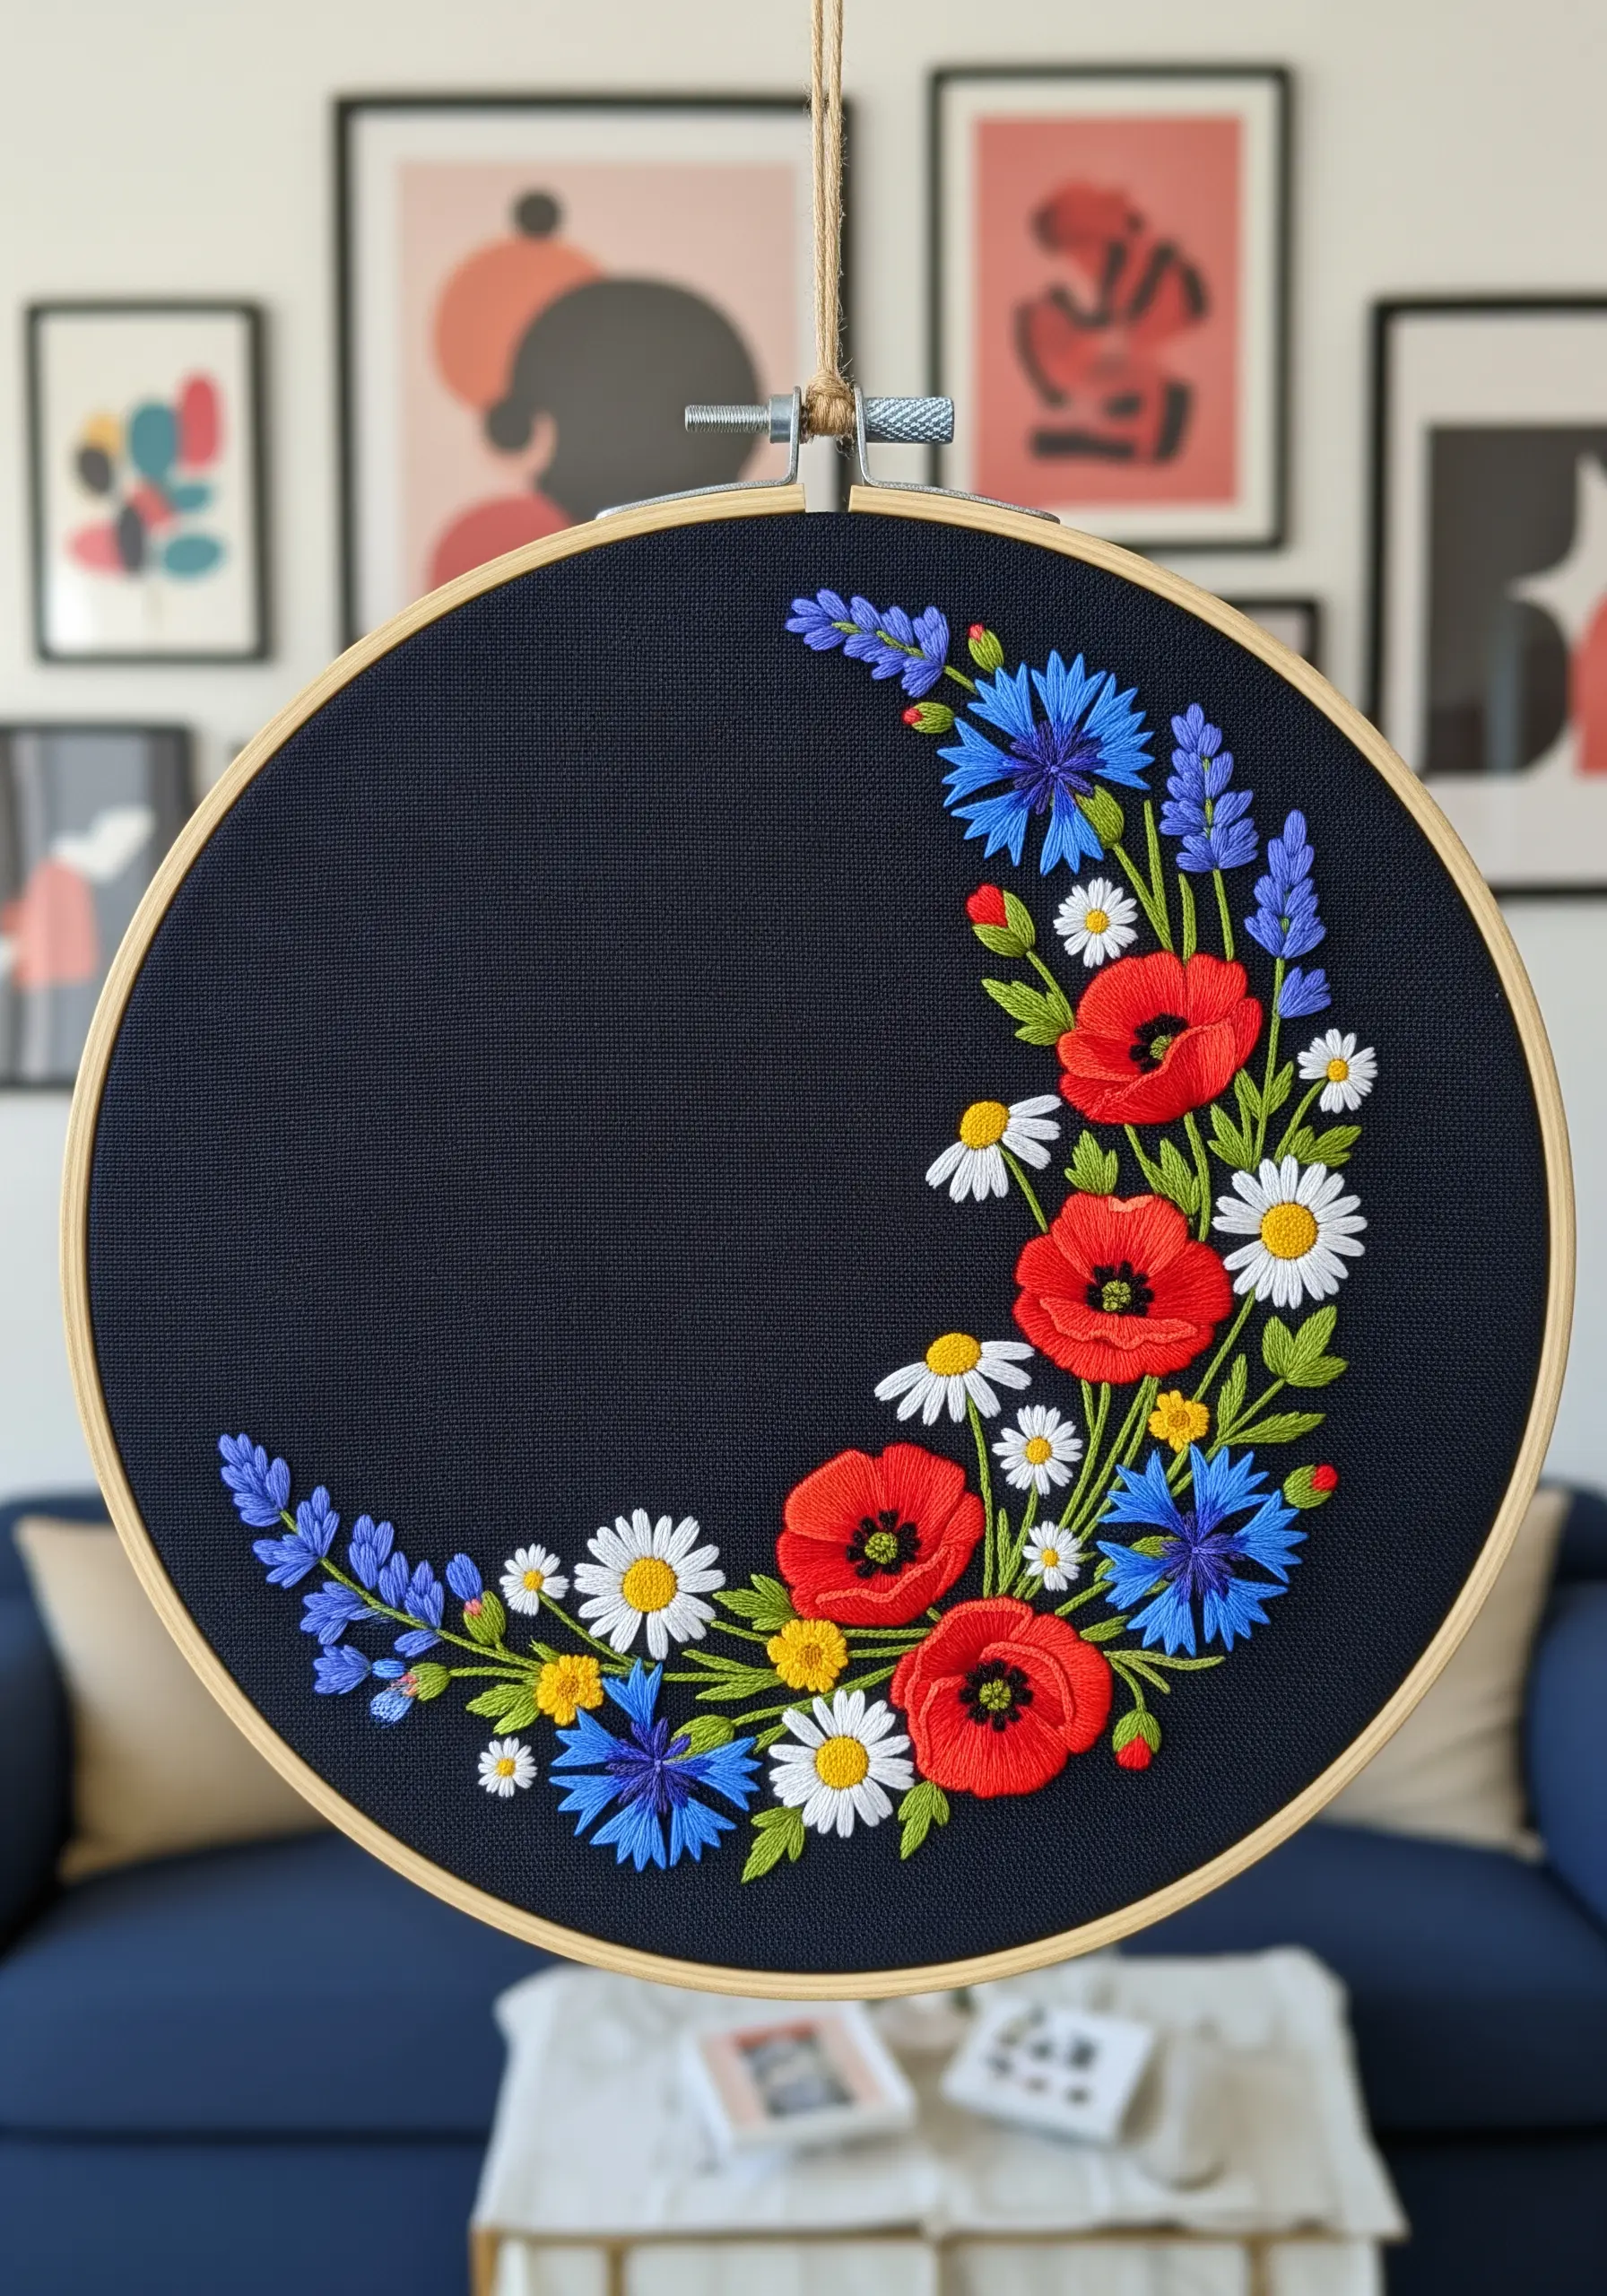
Stitching on dark fabric can make colors appear muted, but you can counteract this with a simple professional trick.
Before stitching your vibrant red poppies or bright blue cornflowers, lay down a base layer in the same shape using white floss. Once you stitch your color over this white foundation, it will appear significantly brighter and more saturated.
This technique ensures your vibrancy on dark fabric is not lost, creating a dramatic, high-contrast wildflower piece.
15. Frame a Monogram with Delicate Greenery
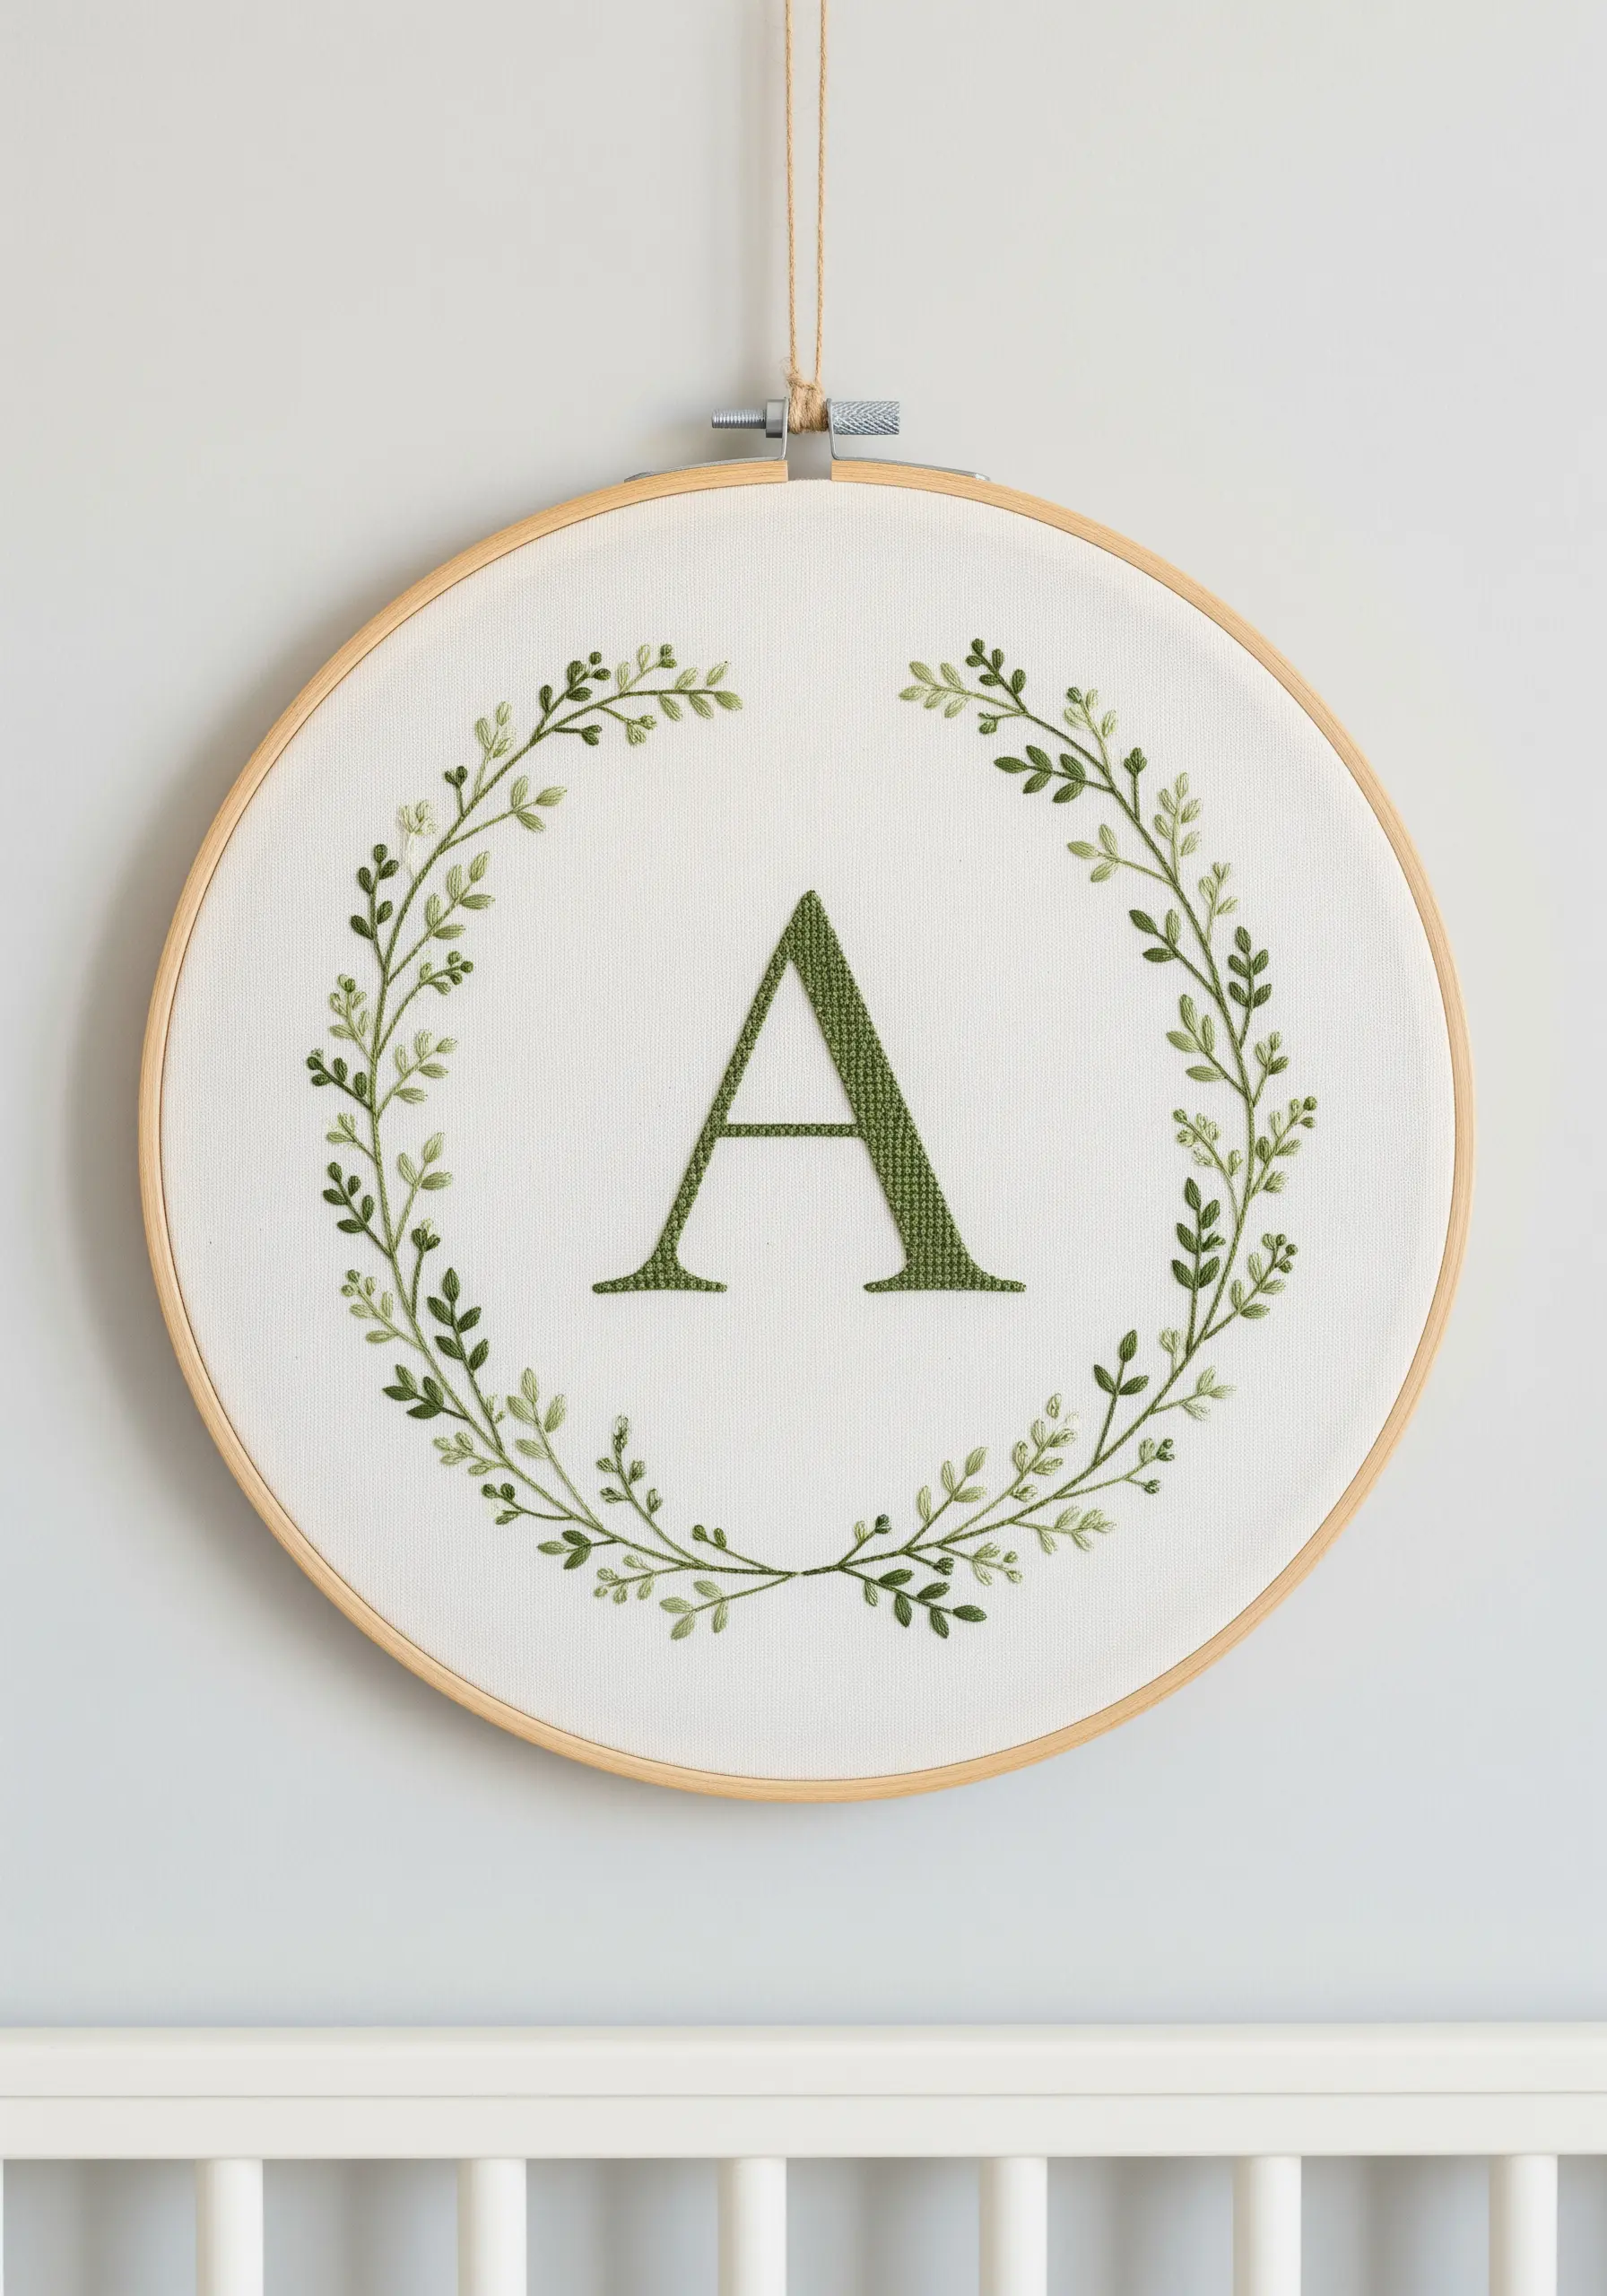
Transform a simple initial into a cherished keepsake by framing it with a delicate botanical wreath.
For the letter itself, use a dense, uniform fill like a satin stitch or long-and-short stitch. This gives the monogram a solid, classic presence.
Keep the surrounding wreath light and airy. Use a simple backstitch or stem stitch for the vines and tiny lazy daisy stitches for the leaves. This ensures the foliage elegantly frames the initial without competing with it, making it perfect nursery decor.
16. Create a Gentle Focal Point with a Woodland Creature
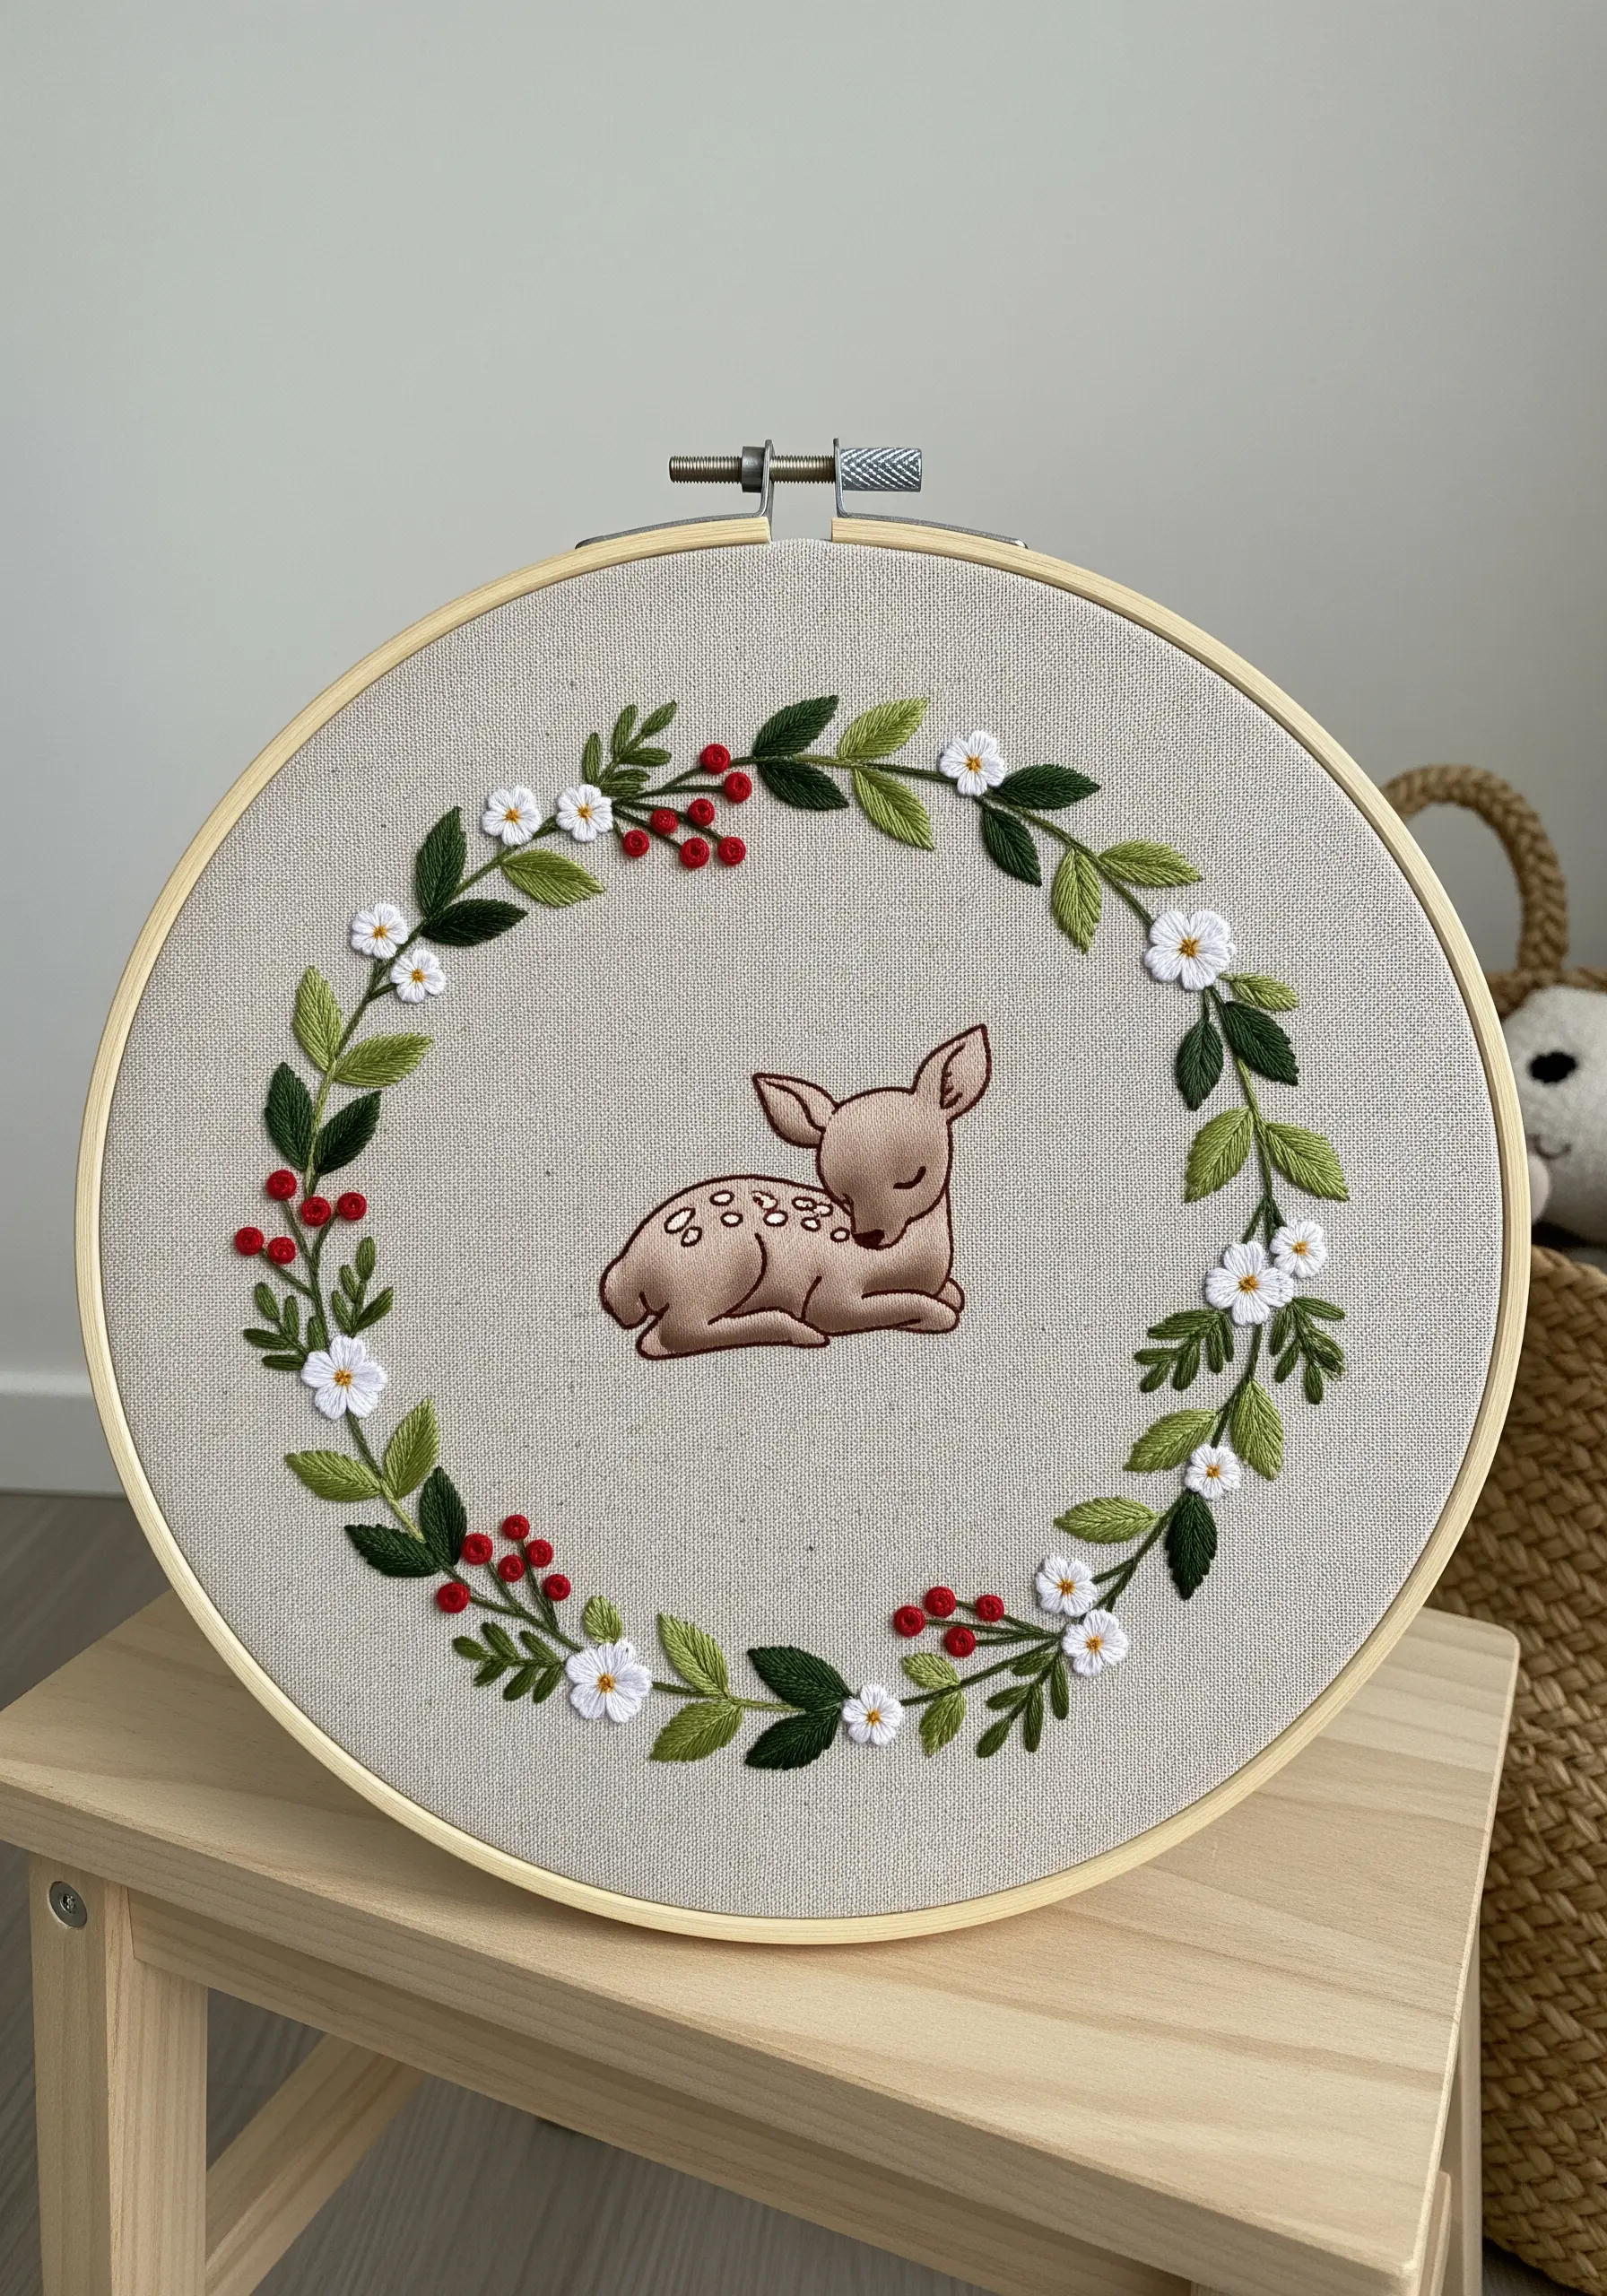
When including a character in your wreath, make it the undeniable star of the piece.
Use thread painting—blending shades of brown with the long-and-short stitch—to give the sleeping fawn a soft, realistic fur texture. Use single, delicate stitches for its closed eyes and spots.
The surrounding wreath should act as a quiet frame. Use simple satin stitches for the flowers and leaves, and add pops of color with red French knot berries. The simplicity of the flora ensures the fawn remains the peaceful centerpiece.
17. Weave in Coastal Elements for a Seaside Wreath
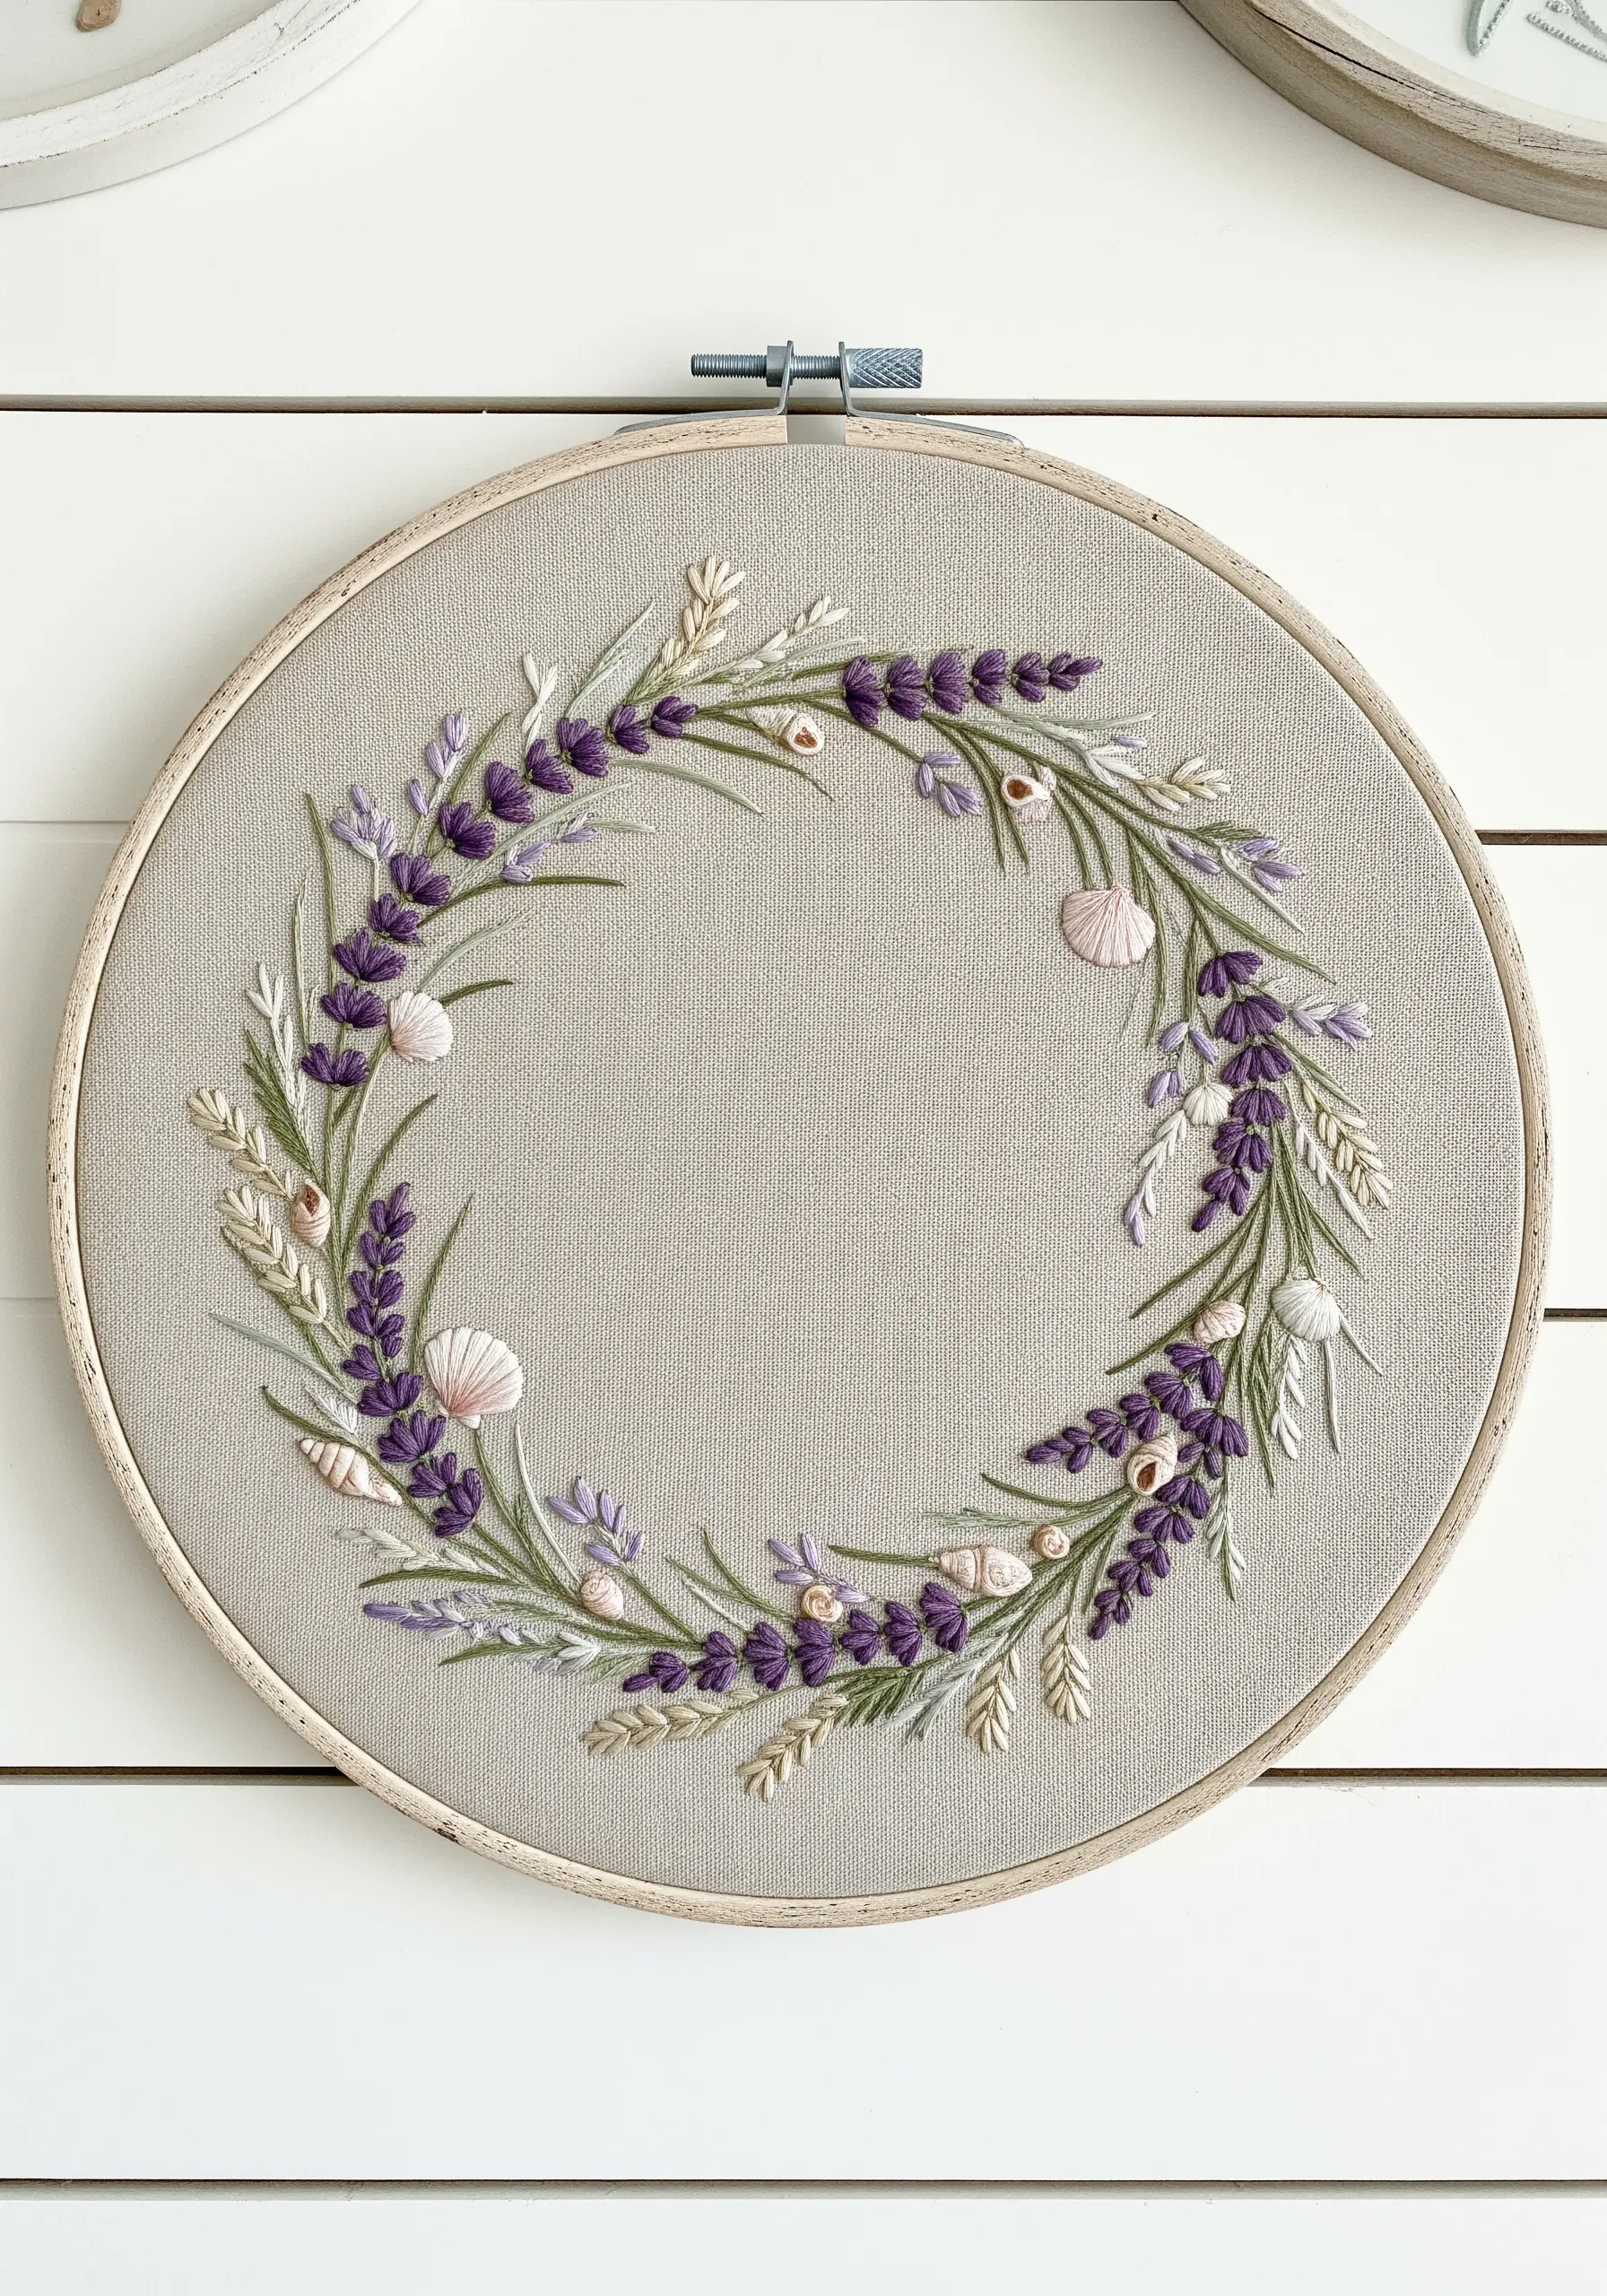
Evoke the feeling of a coastal garden by incorporating seaside motifs into a classic floral wreath.
Instead of berries or buds, add small, three-dimensional shells using a padded satin stitch. Use an off-white or pale pink floss and stitch in radiating lines to mimic a shell’s natural shape.
Pair these with lavender (French knots) and wispy sea oats (straight stitches) to complete the coastal aesthetic. The unexpected texture of the shells makes the entire piece more engaging and unique.
18. Add a Celestial Touch with Metallic Threads
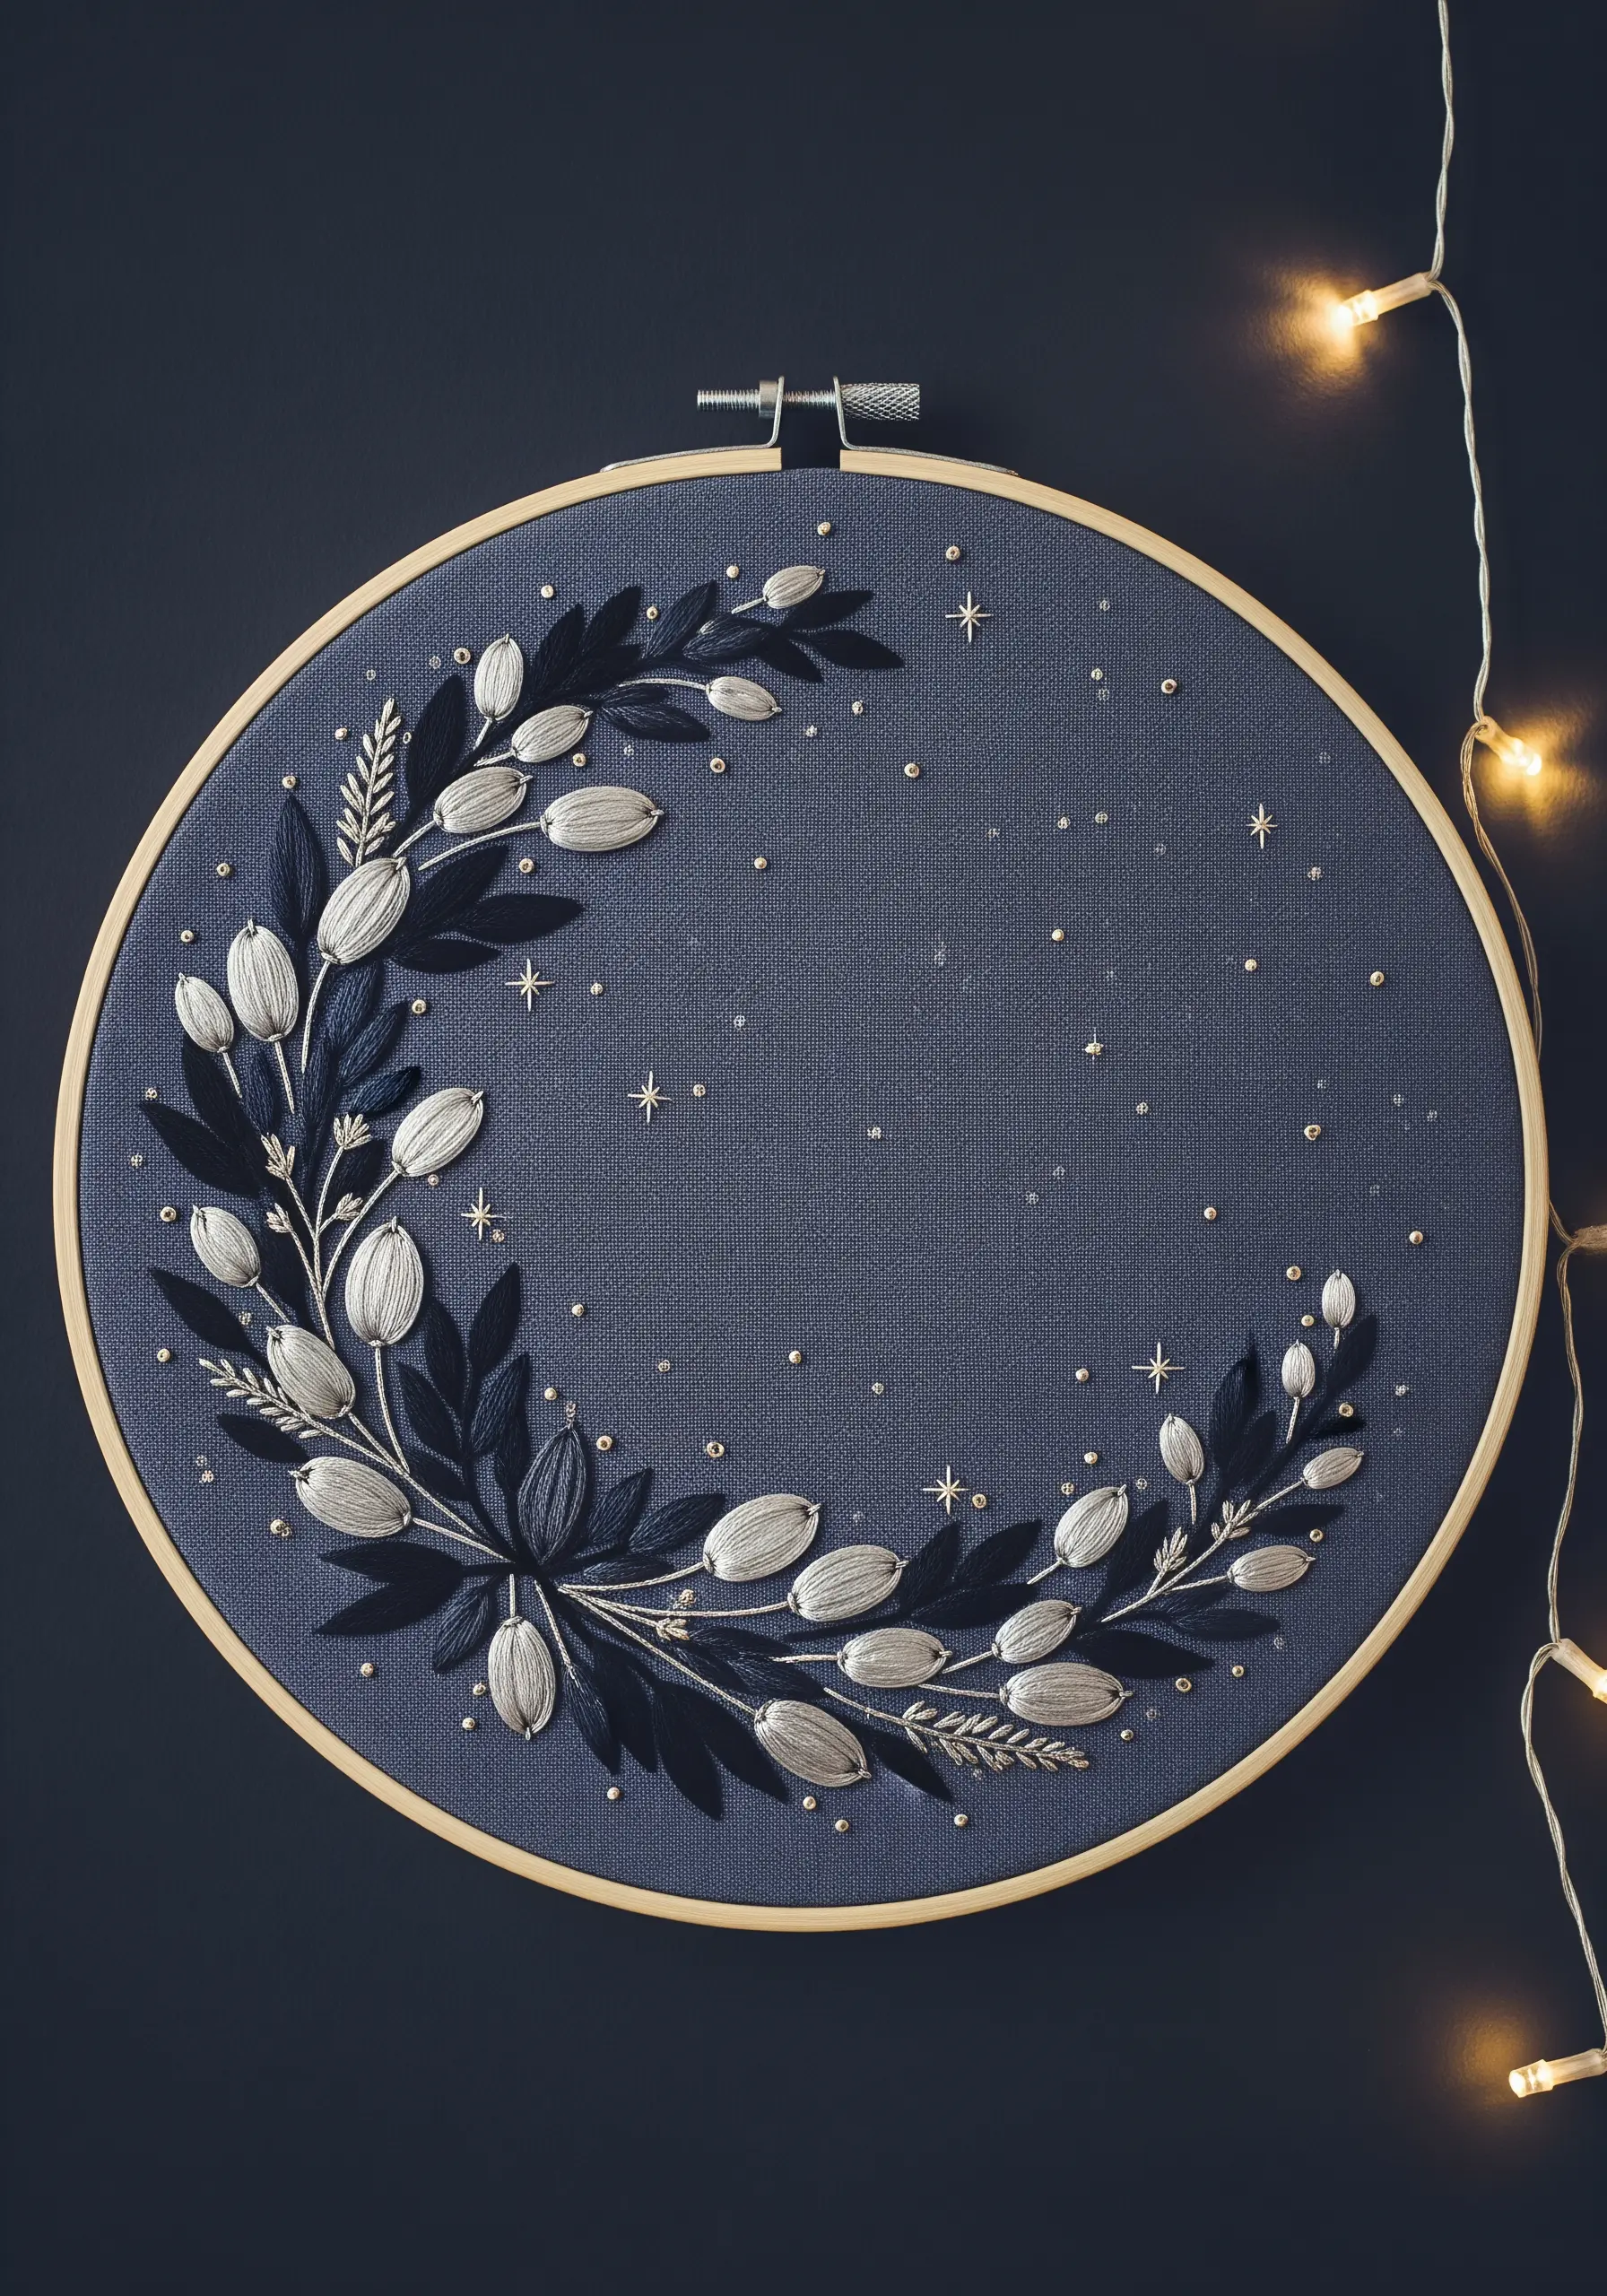
Elevate a simple botanical design into something magical by introducing metallic accents on a dark canvas.
Use a silvery-white floss for the satin-stitched buds and leaves to create a moonlit effect against deep navy fabric.
Then, scatter tiny gold French knots and straight-stitch stars throughout the negative space. This doesn’t just fill the void; it transforms the piece into a celestial night garden. The subtle sparkle of the metallic thread adds a layer of enchantment.
19. Stitch a Minimalist Herb Wreath for the Kitchen
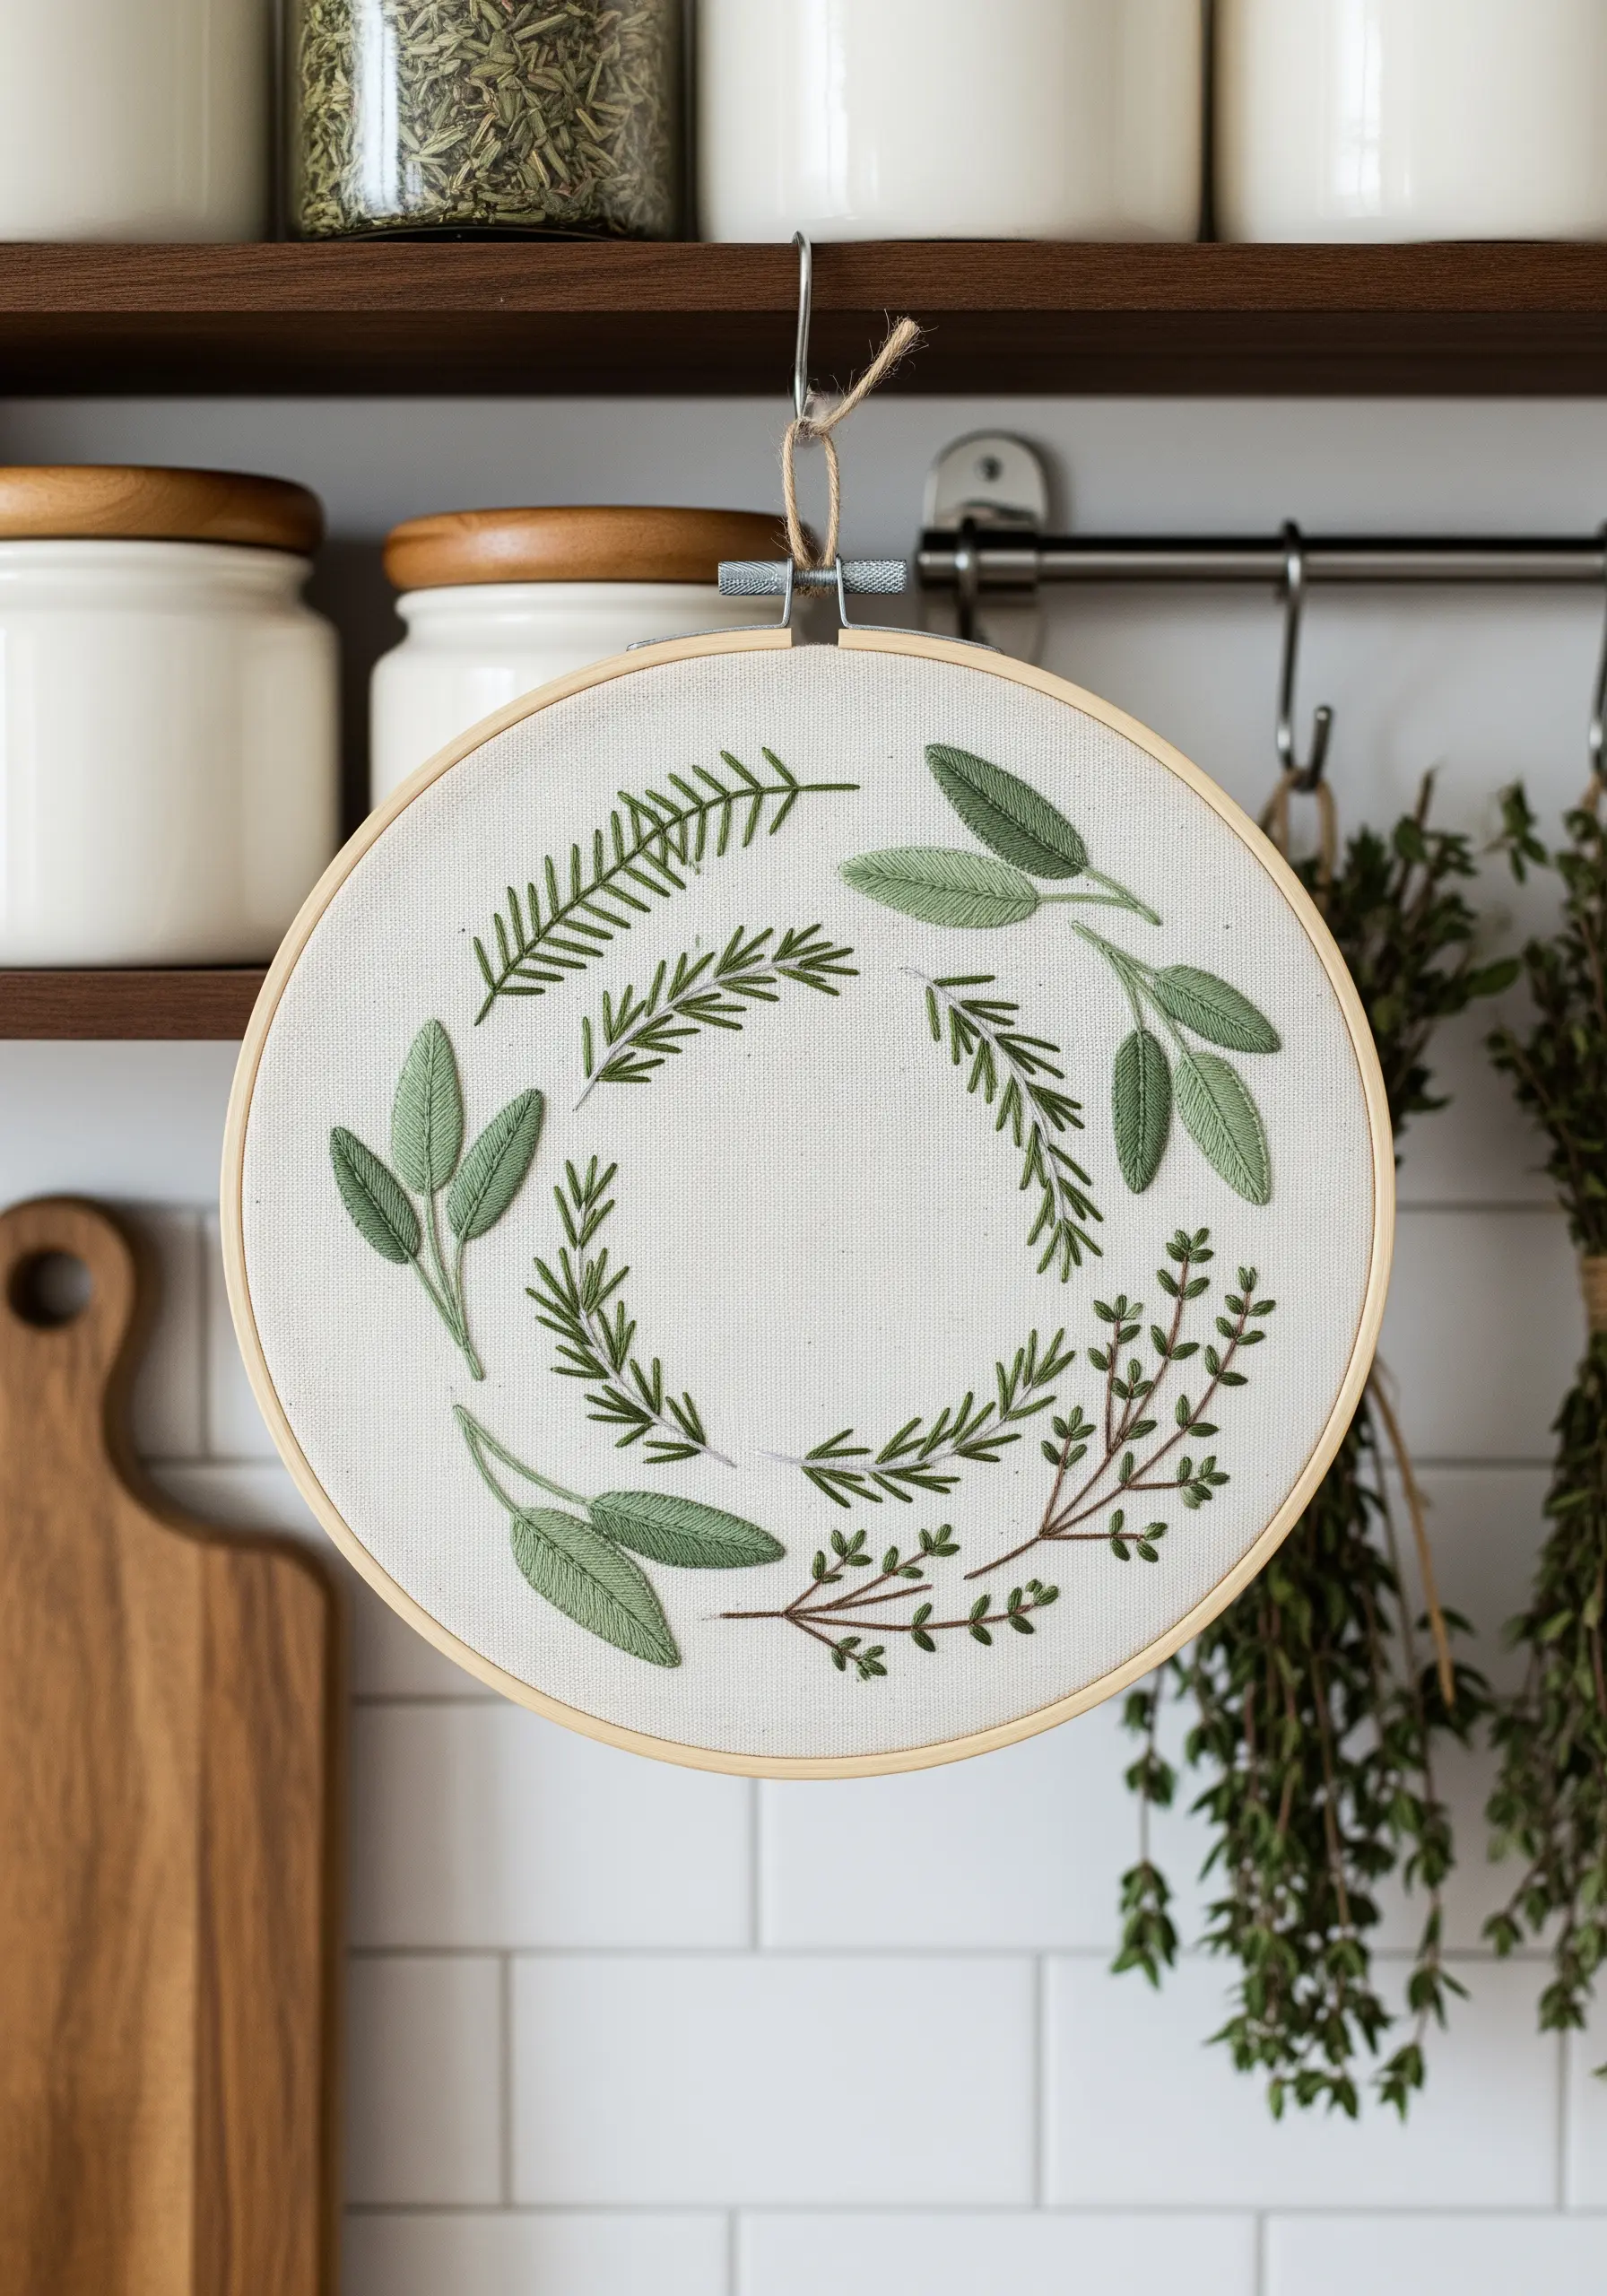
Capture the essence of fresh herbs with clean lines and open space, creating a piece perfect for a kitchen corner.
Focus on recognizable leaf shapes rather than dense detail. Use a fishbone stitch for sage leaves, a simple backstitch for rosemary needles, and tiny detached chain stitches for thyme.
By keeping the stitches simple and using only a few shades of green, the design feels modern, fresh, and uncluttered. It celebrates the simple beauty of culinary herbs without over-embellishment.
20. Layer Petals and Branches for Natural Depth
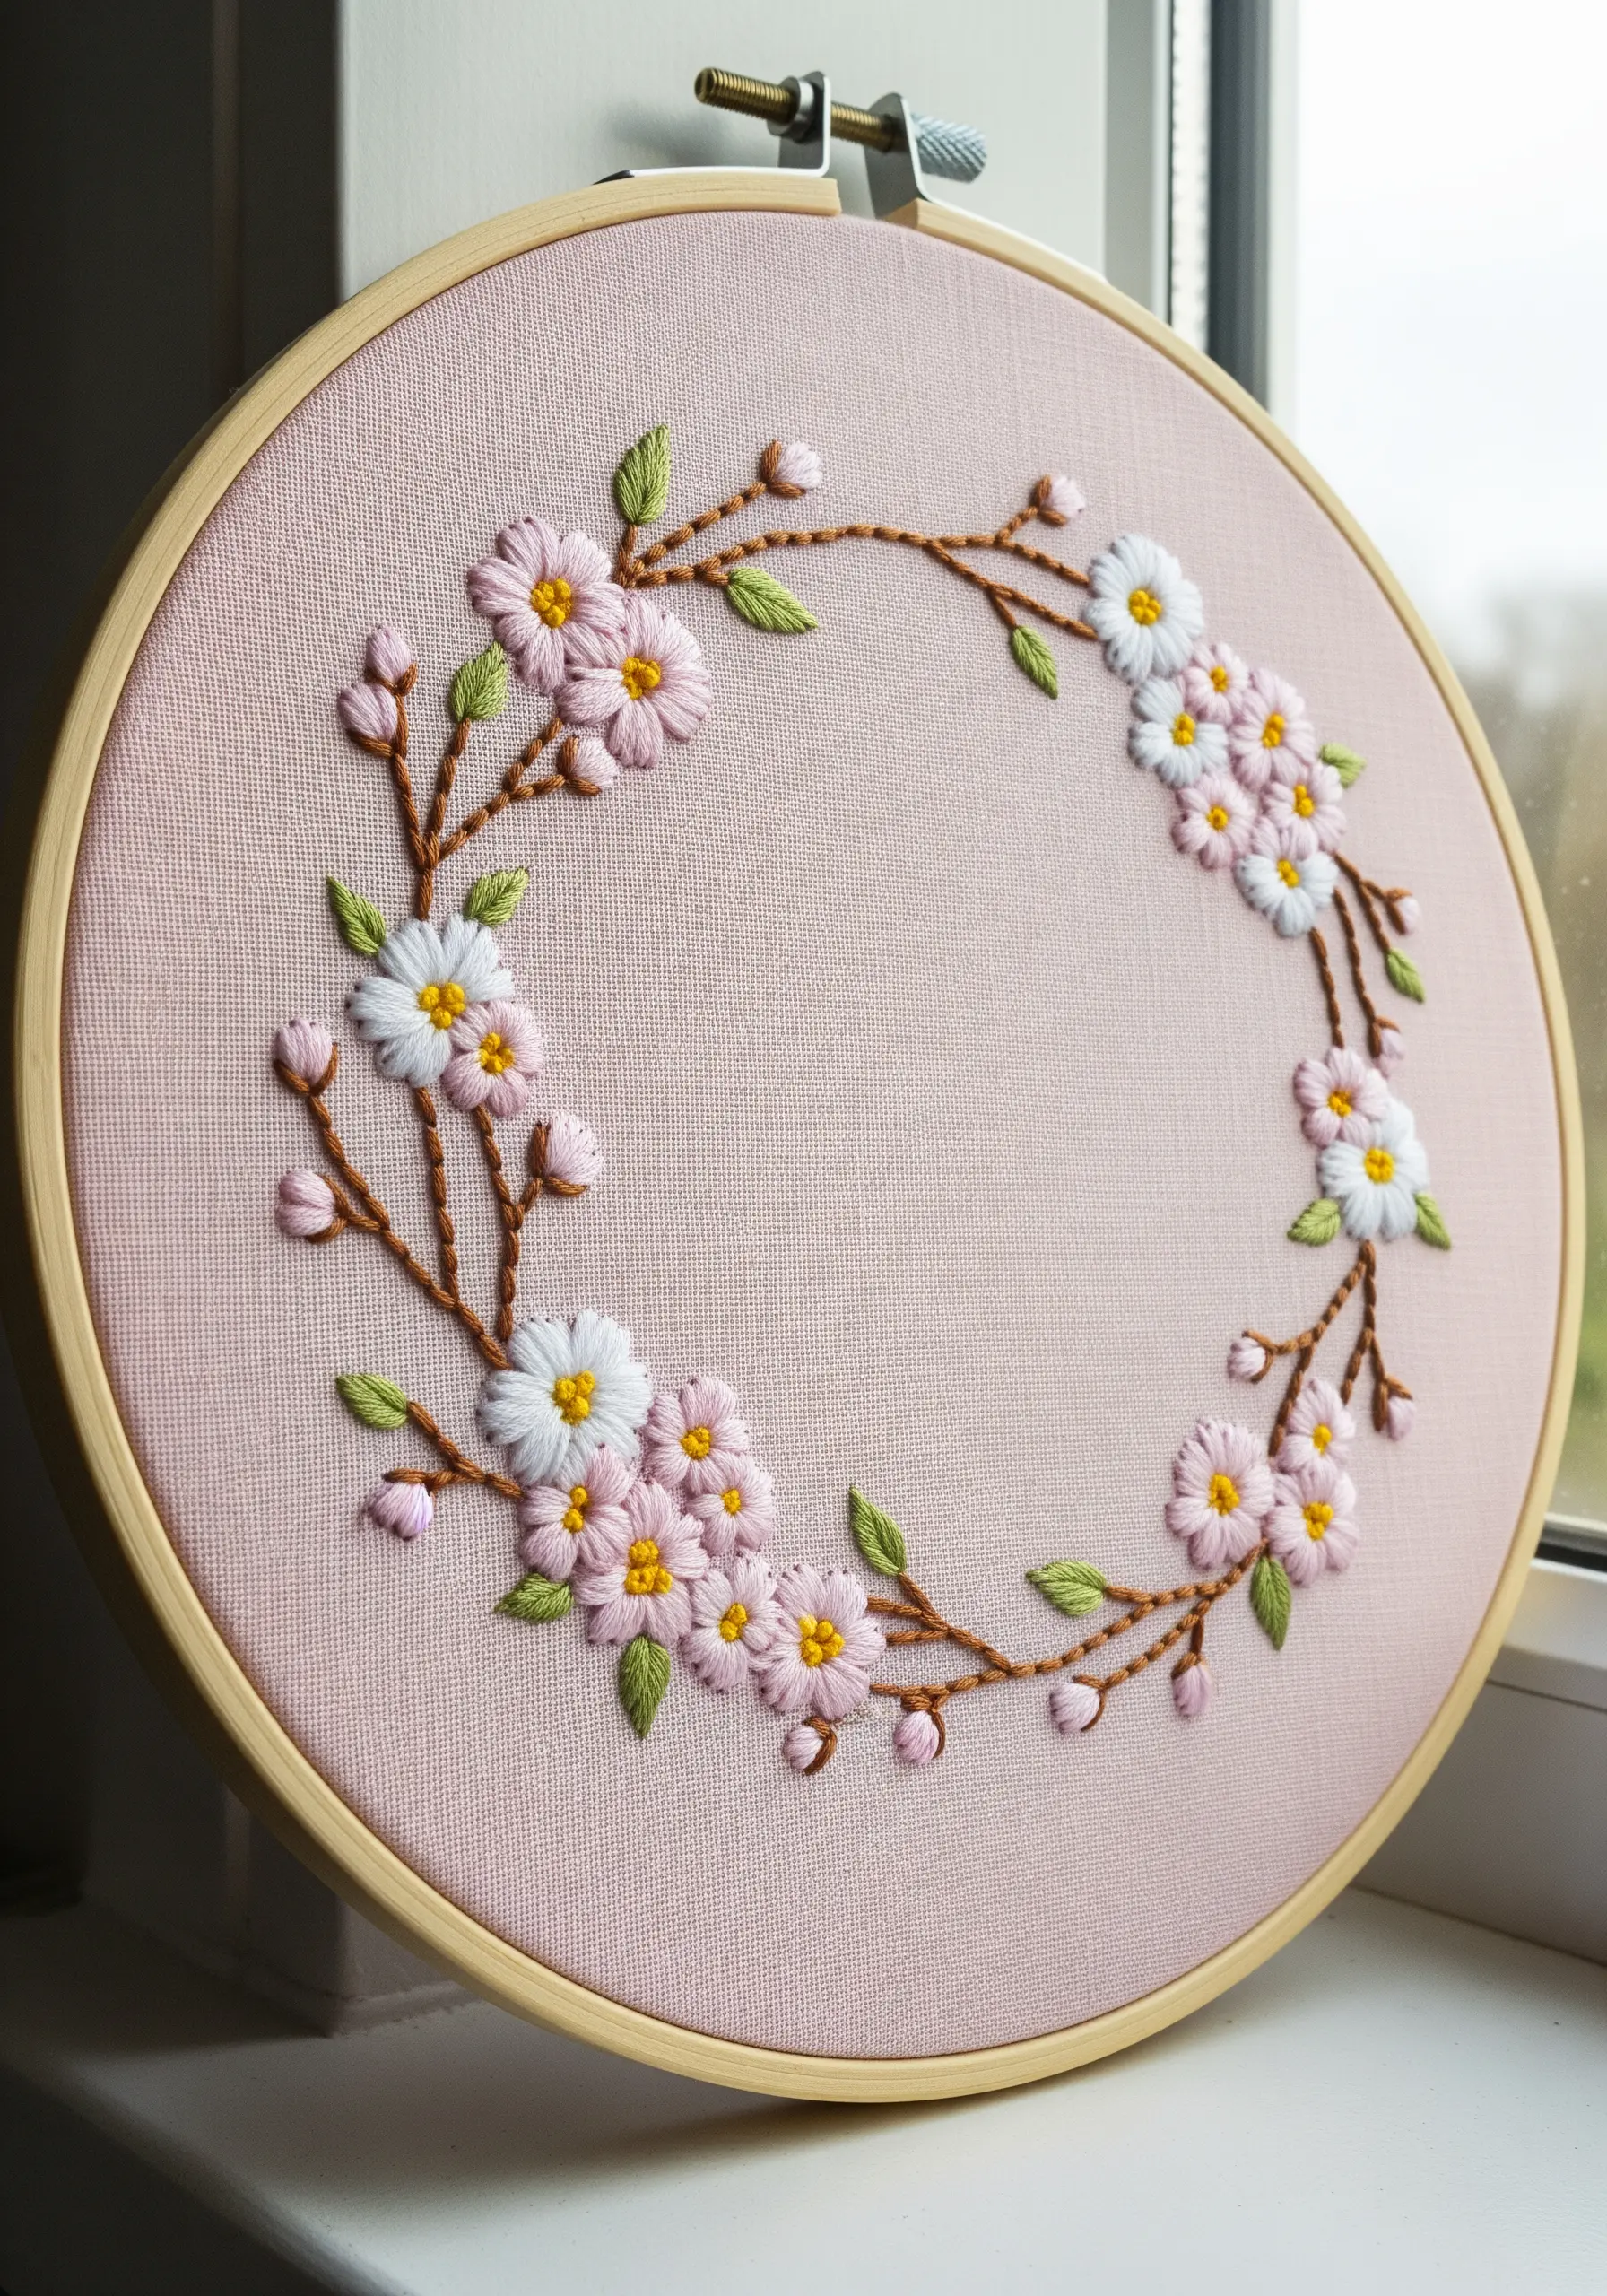
To create realistic flowering branches like cherry blossoms, think in layers, just as they grow in nature.
First, stitch the brown branches using a stem stitch or backstitch, allowing them to overlap and create a structural base.
Then, add the flowers on top. Use a combination of satin stitch for the petals and French knots for the centers, strategically placing some blossoms partially over the branches. This simple layering technique instantly creates a sense of depth and realism.
21. Design a Cascading Wreath that Breaks the Frame
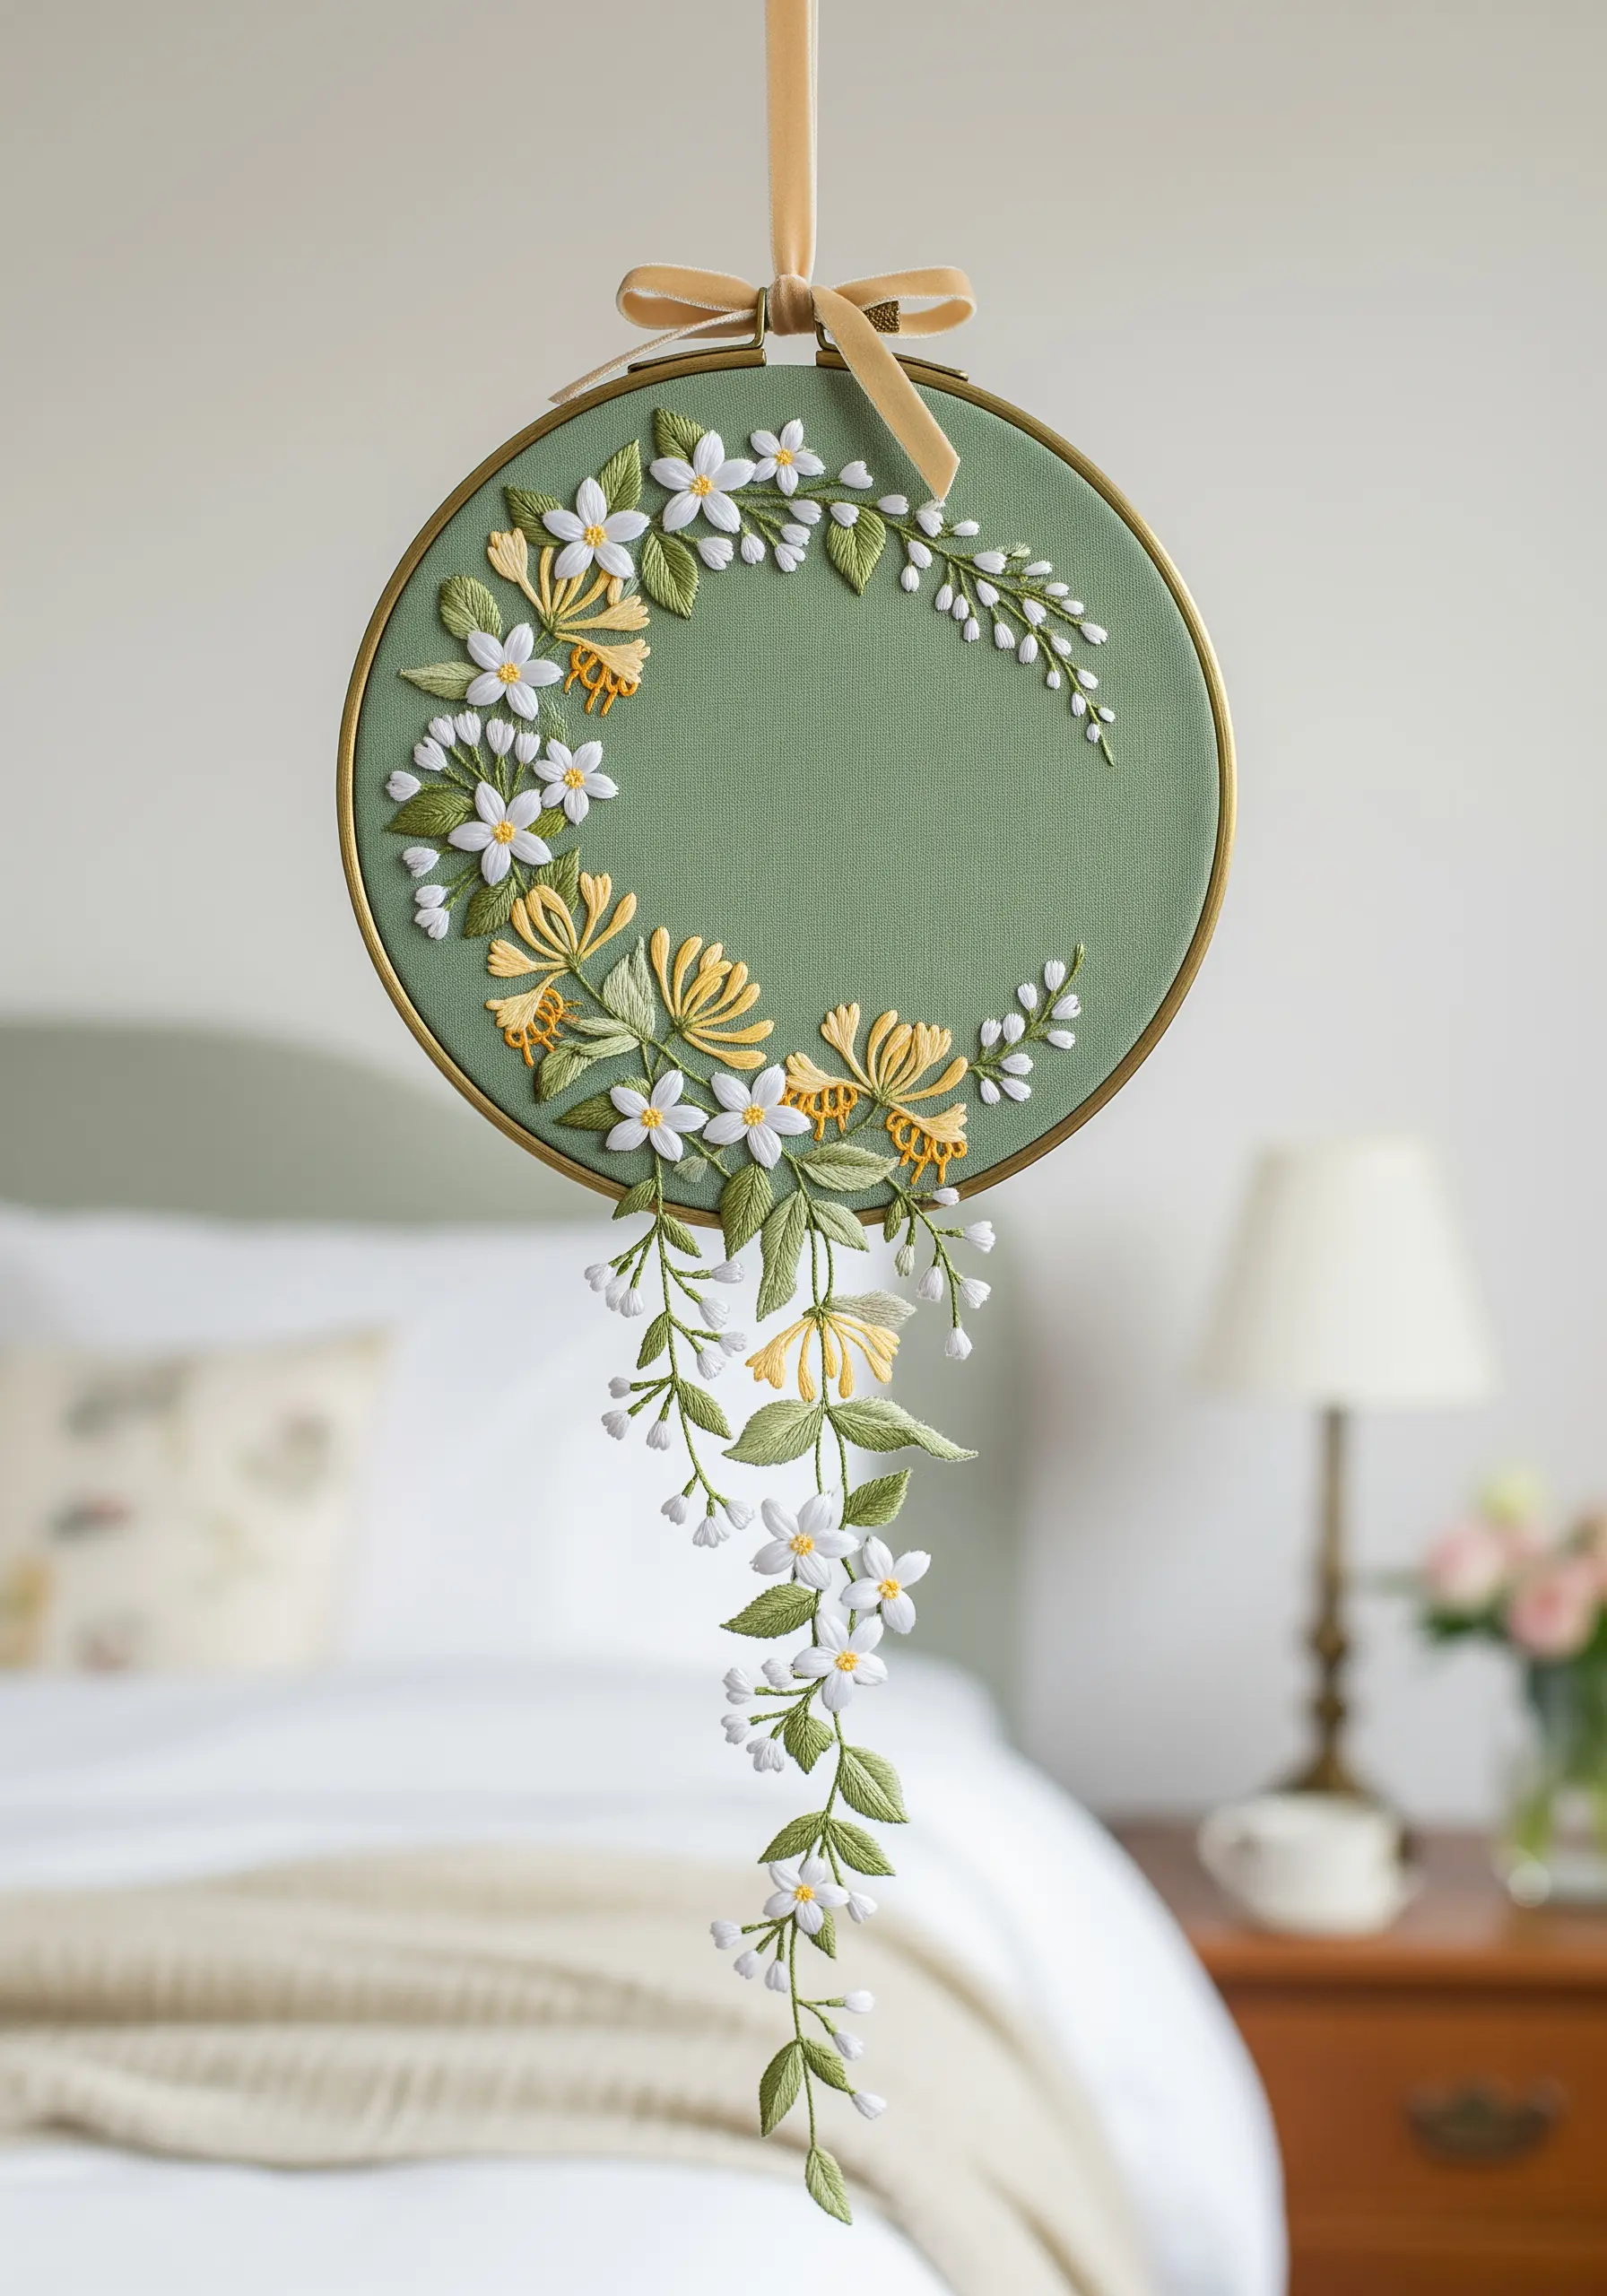
Create a dynamic and artistic statement piece when your design flows outside the circular frame of the hoop.
Embroider the main crescent of the wreath within the hoop as usual. For the cascading portion, allow the vine to trail down onto a separate piece of fabric or felt.
Carefully cut out the trailing section, leaving a small fabric border, and stitch it to the back of the main piece so it hangs freely. This technique turns a simple hoop into a stunning, sculptural wall hanging.
22. Create a Joyful Rainbow Gradient with Simple Flowers

A full rainbow of colors can feel overwhelming, but you can create a harmonious design by arranging them in a logical gradient.
Use a simple stitch, like the lazy daisy or a basic satin stitch, for all the flowers. This consistency allows the color to be the main focus.
By mastering color gradients and arranging the blooms in spectral order—from pinks and reds to blues and violets—you create a wreath that feels cohesive, cheerful, and perfect for a child’s room.
23. Craft a Sensory Wreath with Real Botanicals
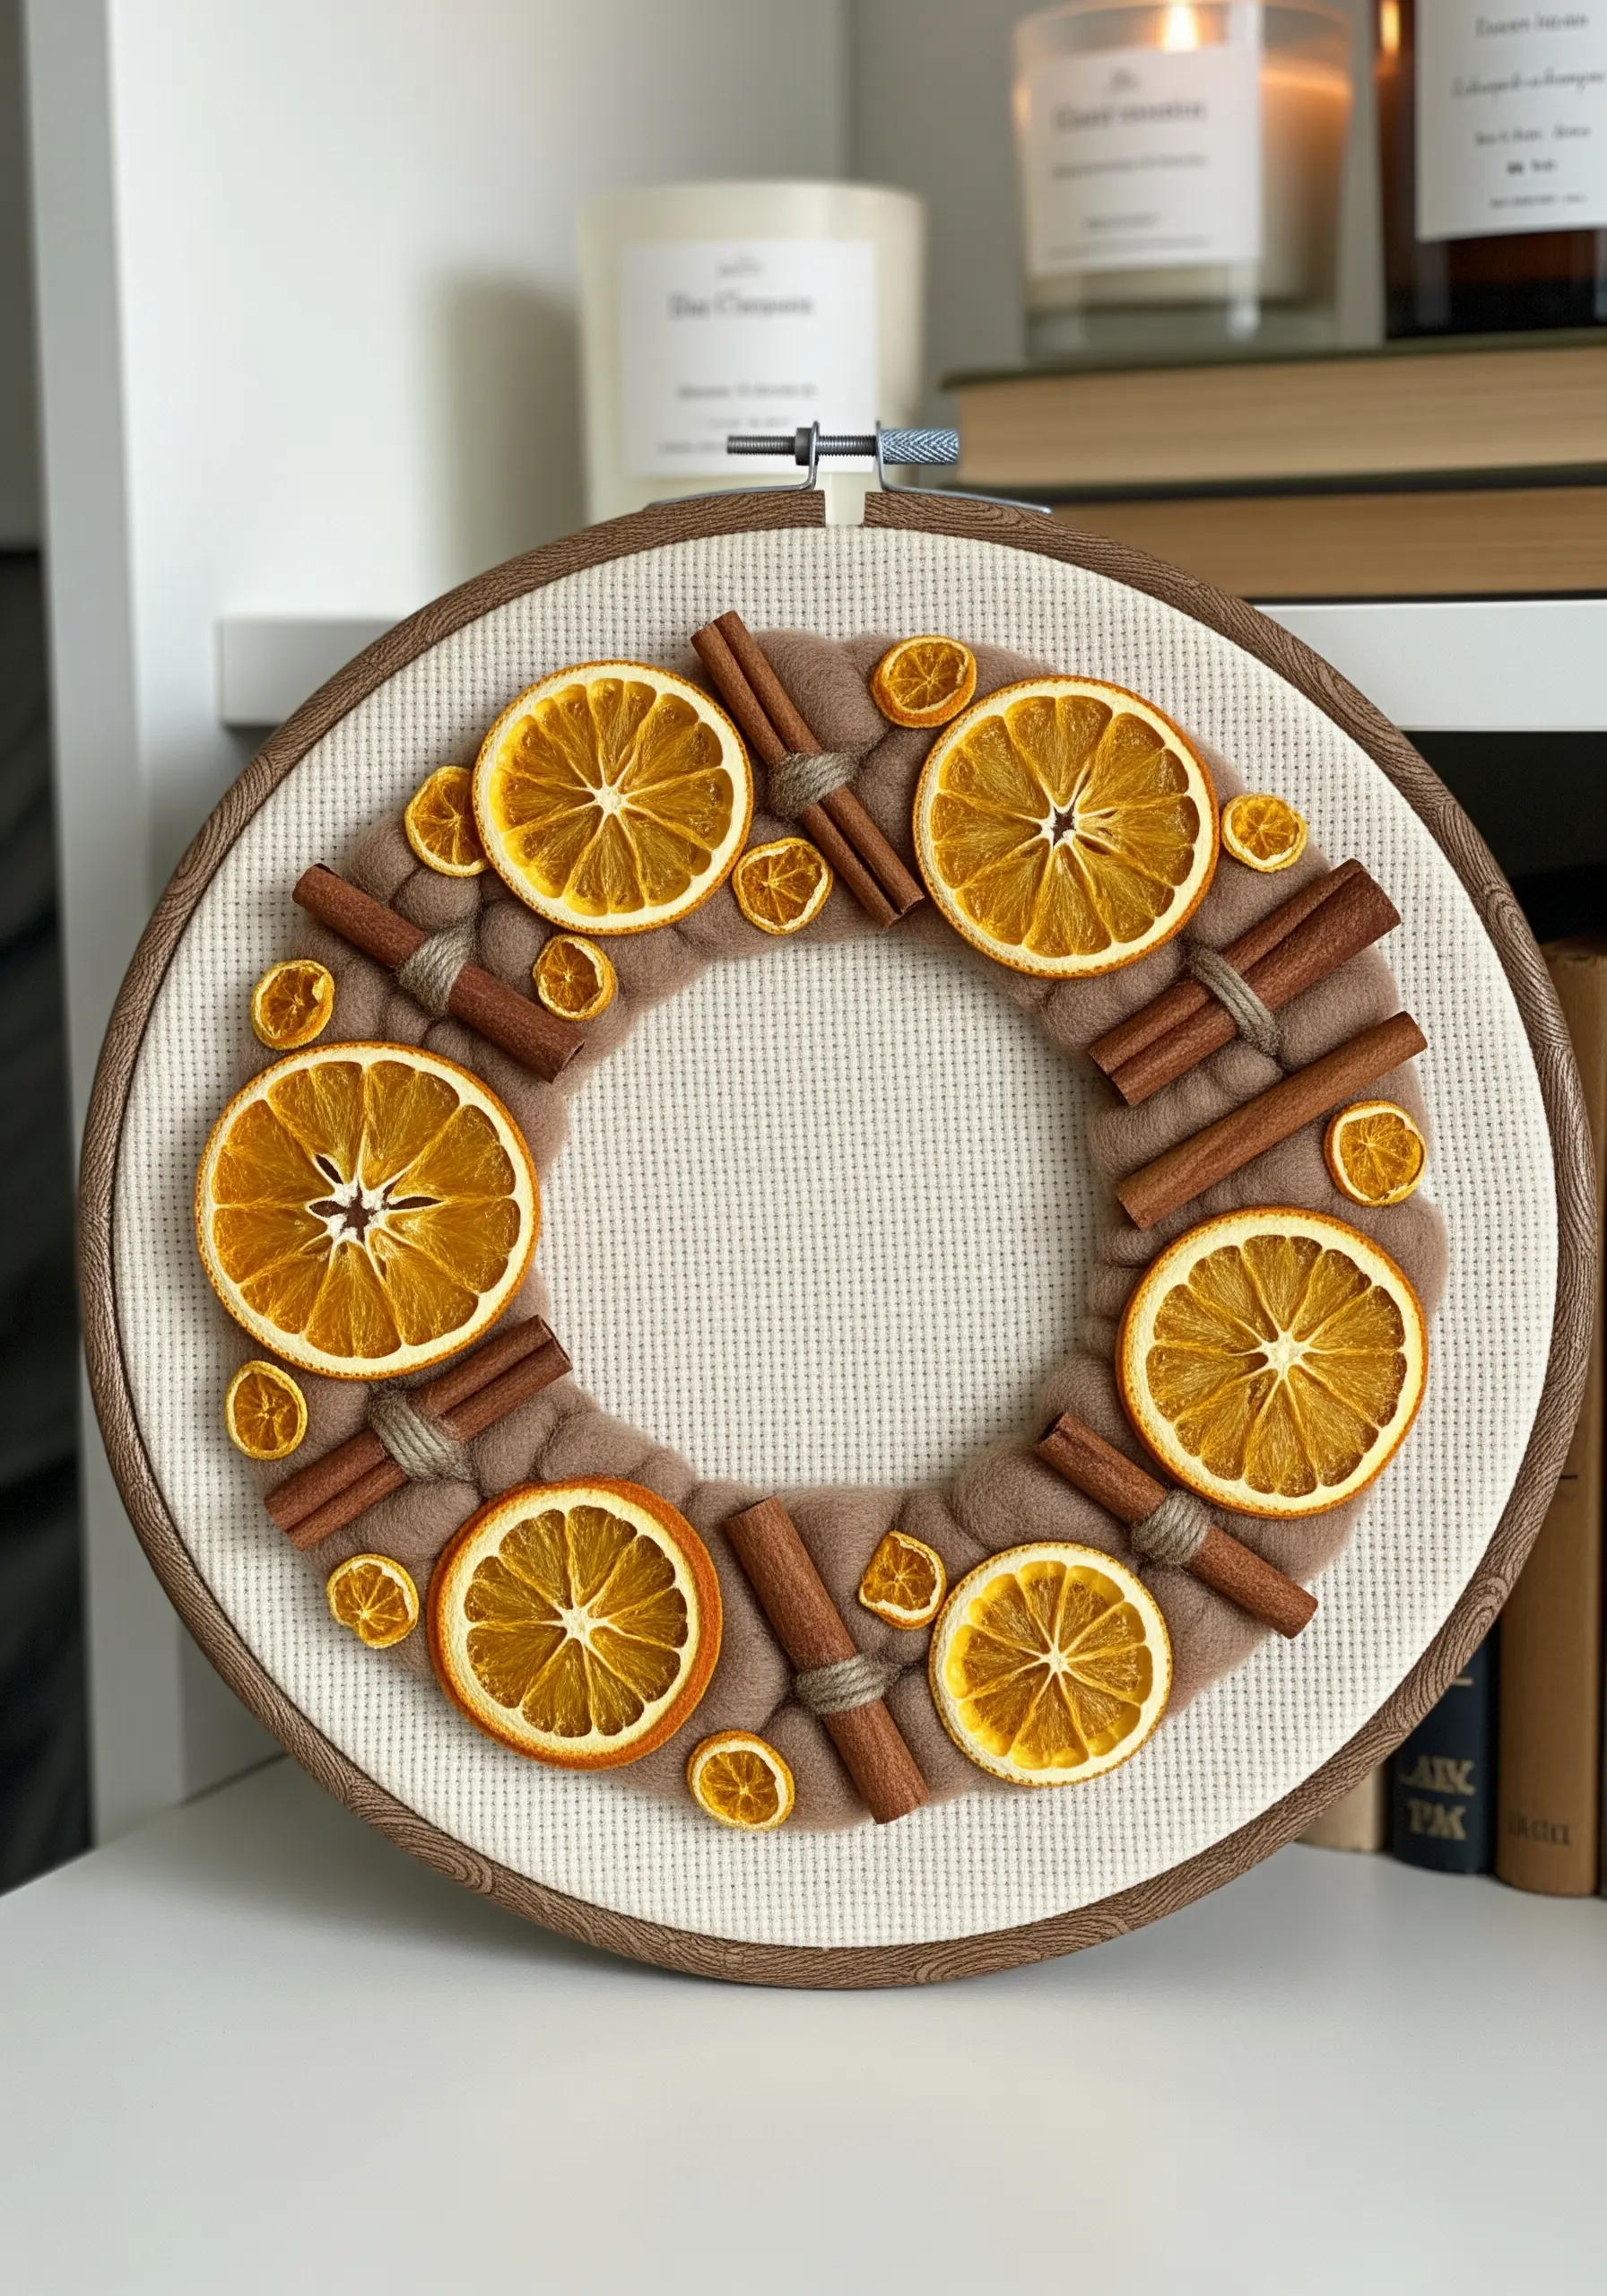
Move beyond thread to create a multi-sensory wreath by incorporating real, dried elements.
Use a sturdy fabric like felt or Aida cloth as your base within the hoop. Secure dried orange slices with a few hidden stitches through the center, and bundle real cinnamon sticks with jute twine before attaching them.
This mixed-media approach is not traditional embroidery, but it embraces the same handcrafted spirit. It creates a piece that offers visual warmth, texture, and even a subtle, cozy fragrance perfect for autumn and winter.


