
Have you ever finished a piece and felt it was missing something? A spark? A sense of life? You have the skill and the patience, but your beautiful florals still feel a little… flat. This is the moment to stop stitching harder and start stitching smarter, by adding the one element that changes everything: dimension.
That satisfying weight and shadow, the way a petal lifts just slightly from the fabric—this is what transforms your work from a flat image into a living piece of textile art. By exploring 3D techniques like stumpwork, ribbon embroidery, and dimensional stitches, you’re not just decorating a cushion; you’re sculpting with thread, creating an object that invites touch and draws the eye from across the room.
Each technique shared here is chosen for its stunning visual impact and its accessibility. You don’t need a studio full of new supplies—just a shift in perspective and the courage to let your florals bloom right off the surface. It’s time to create pieces that feel as luxurious and special as the ones you admire in high-end boutiques.
1. Master Silk Ribbon Peonies for Dramatic Depth
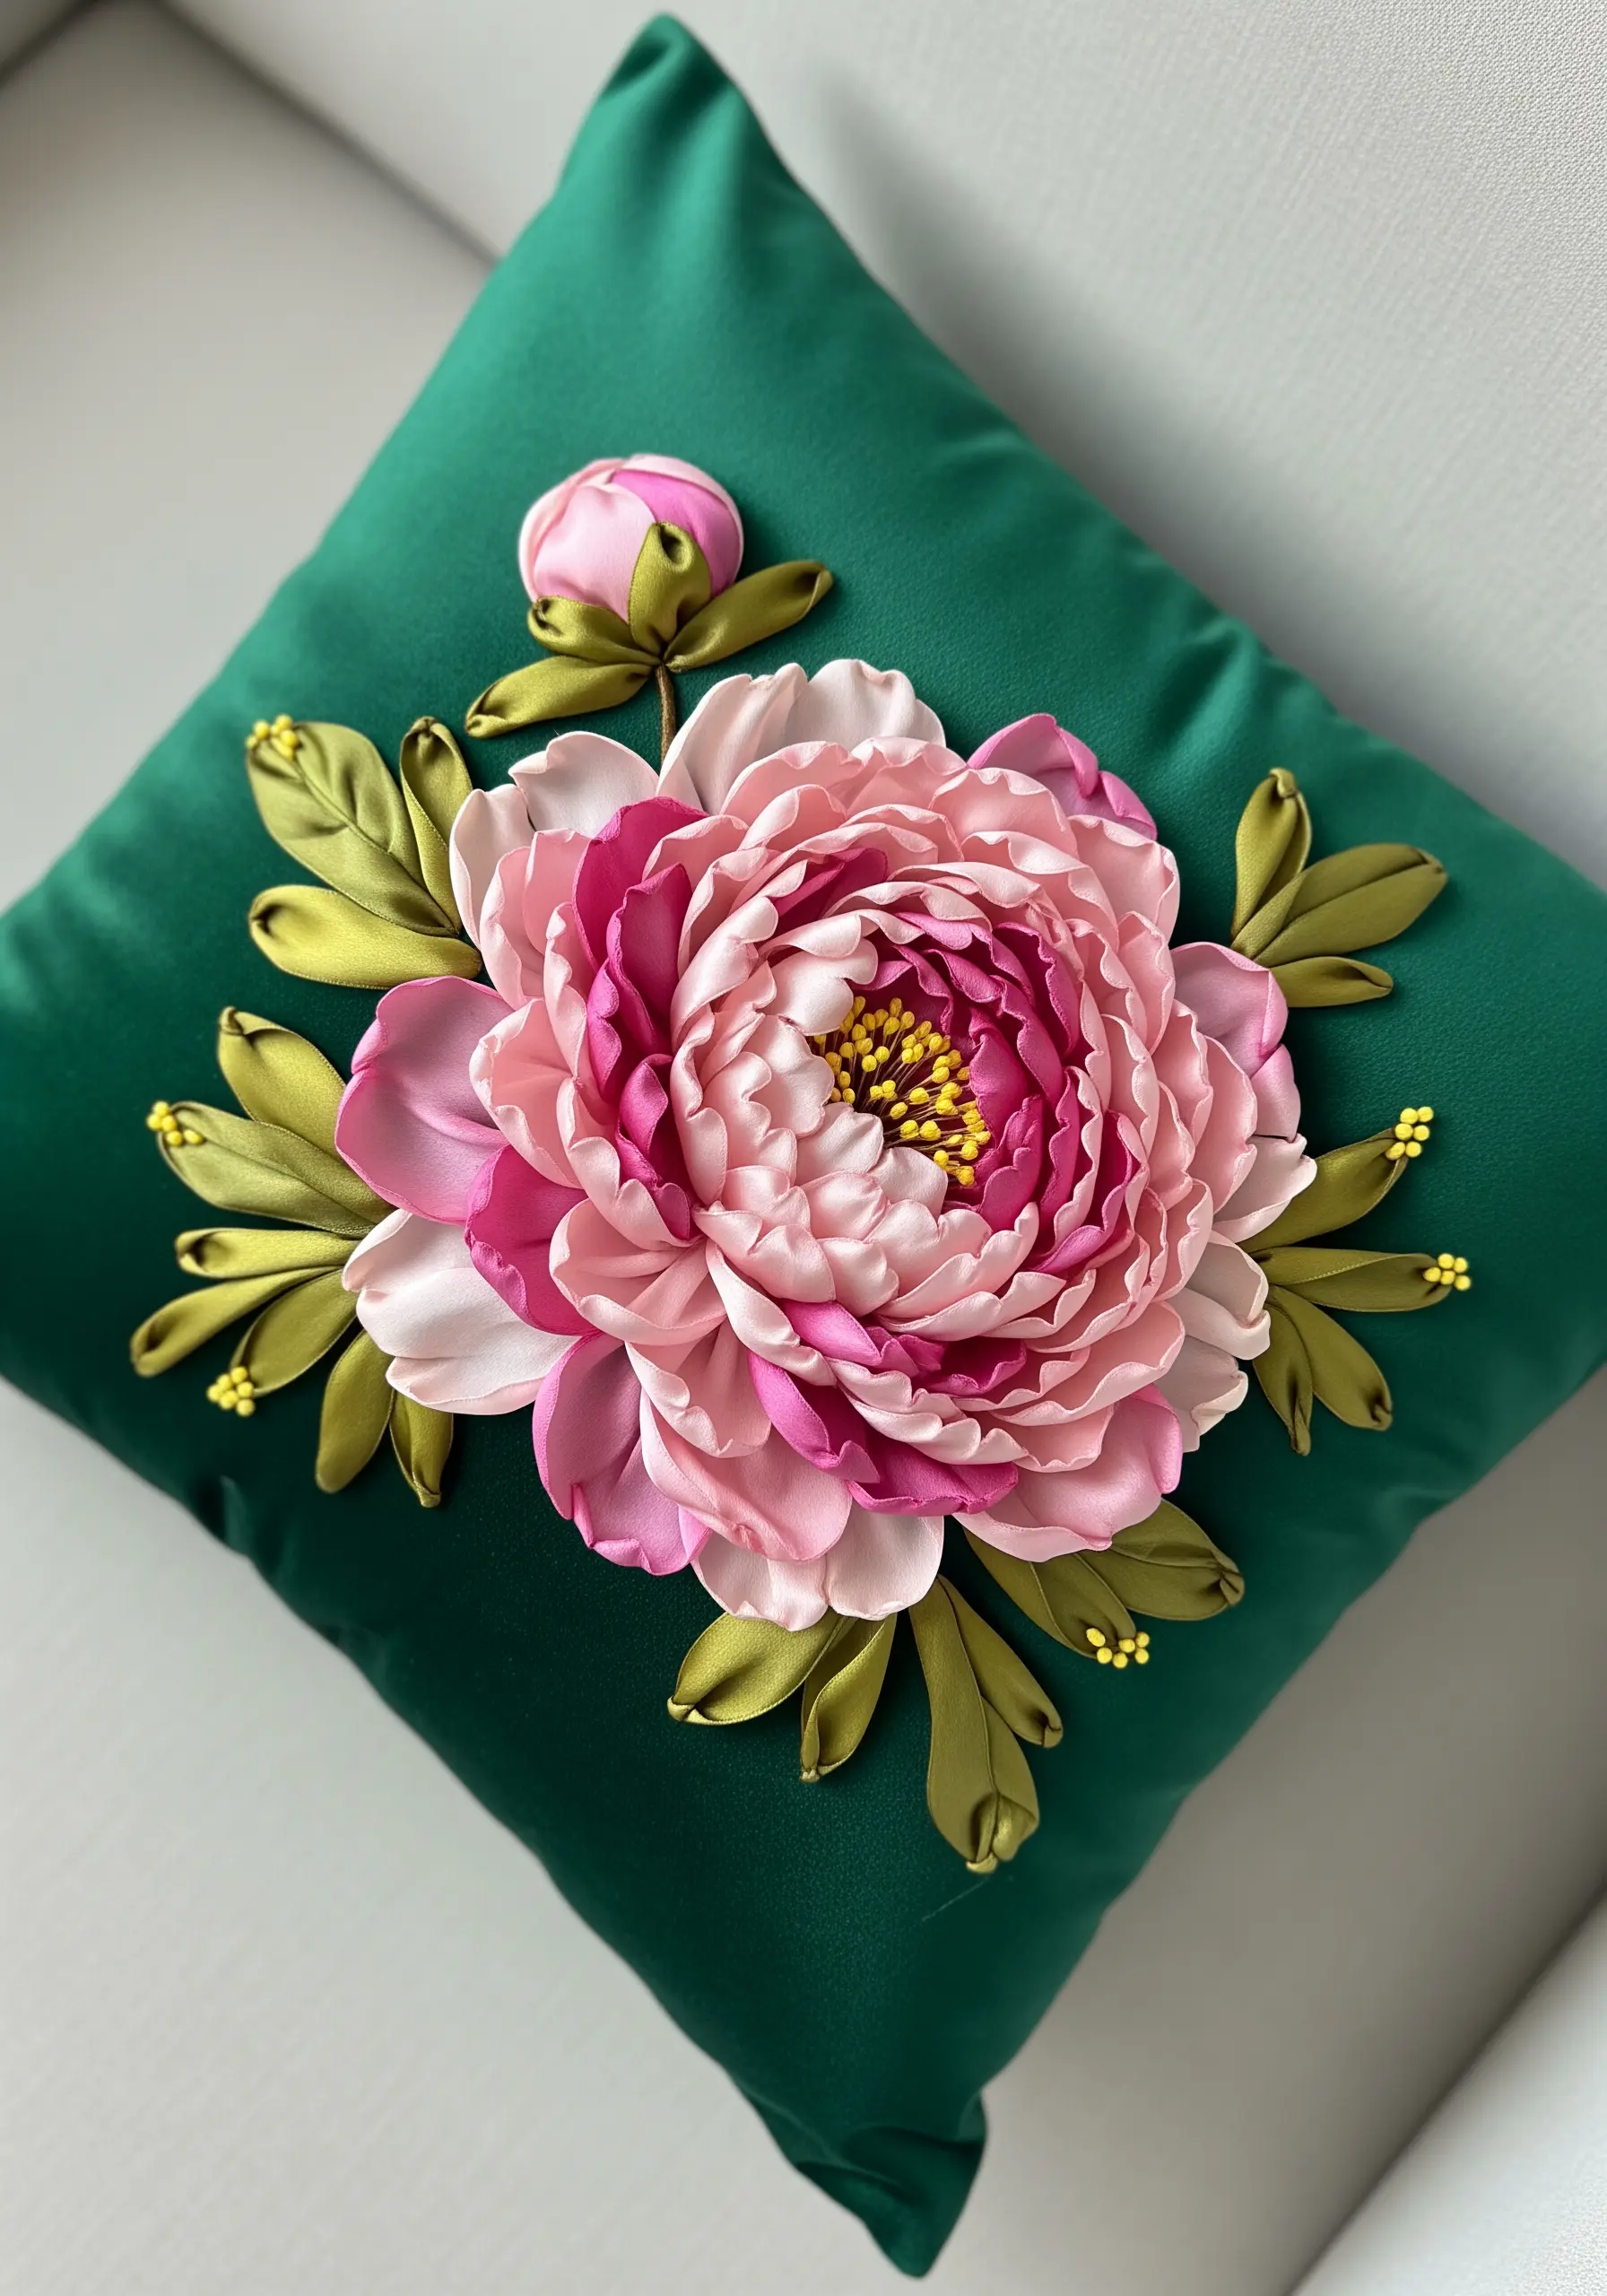
Focus on twisting and folding wide silk ribbon to build each petal individually, creating a lush, realistic bloom.
Start with the outer petals, anchoring them loosely to allow for natural curves, and work your way inward with smaller, more tightly gathered pieces to create the dense center.
Use a contrasting yellow for French knots in the stamen, which adds a crucial focal point and enhances the realism.
The sheen of a satin cushion complements the ribbon’s luster, creating a cohesive, luxurious finish similar to classic romantic rose embroidery designs.
2. Create Delicate Cherry Blossoms with Detached Chain Stitches

Use a single detached chain stitch (lazy daisy) for each petal to form delicate, open blossoms.
For subtle realism, try stitching with two shades of pink in your needle at once—one strand of each—to create an effortless color blend without complex thread painting.
Anchor the petals so they lift slightly from the fabric, giving them a natural, airy dimension that feels alive.
Contrast the soft petals with a sturdy whipped backstitch for the branch to provide a solid visual foundation, perfect for minimalist decor.
3. Illuminate Dark Fabrics with Raised Satin Stitch Florals
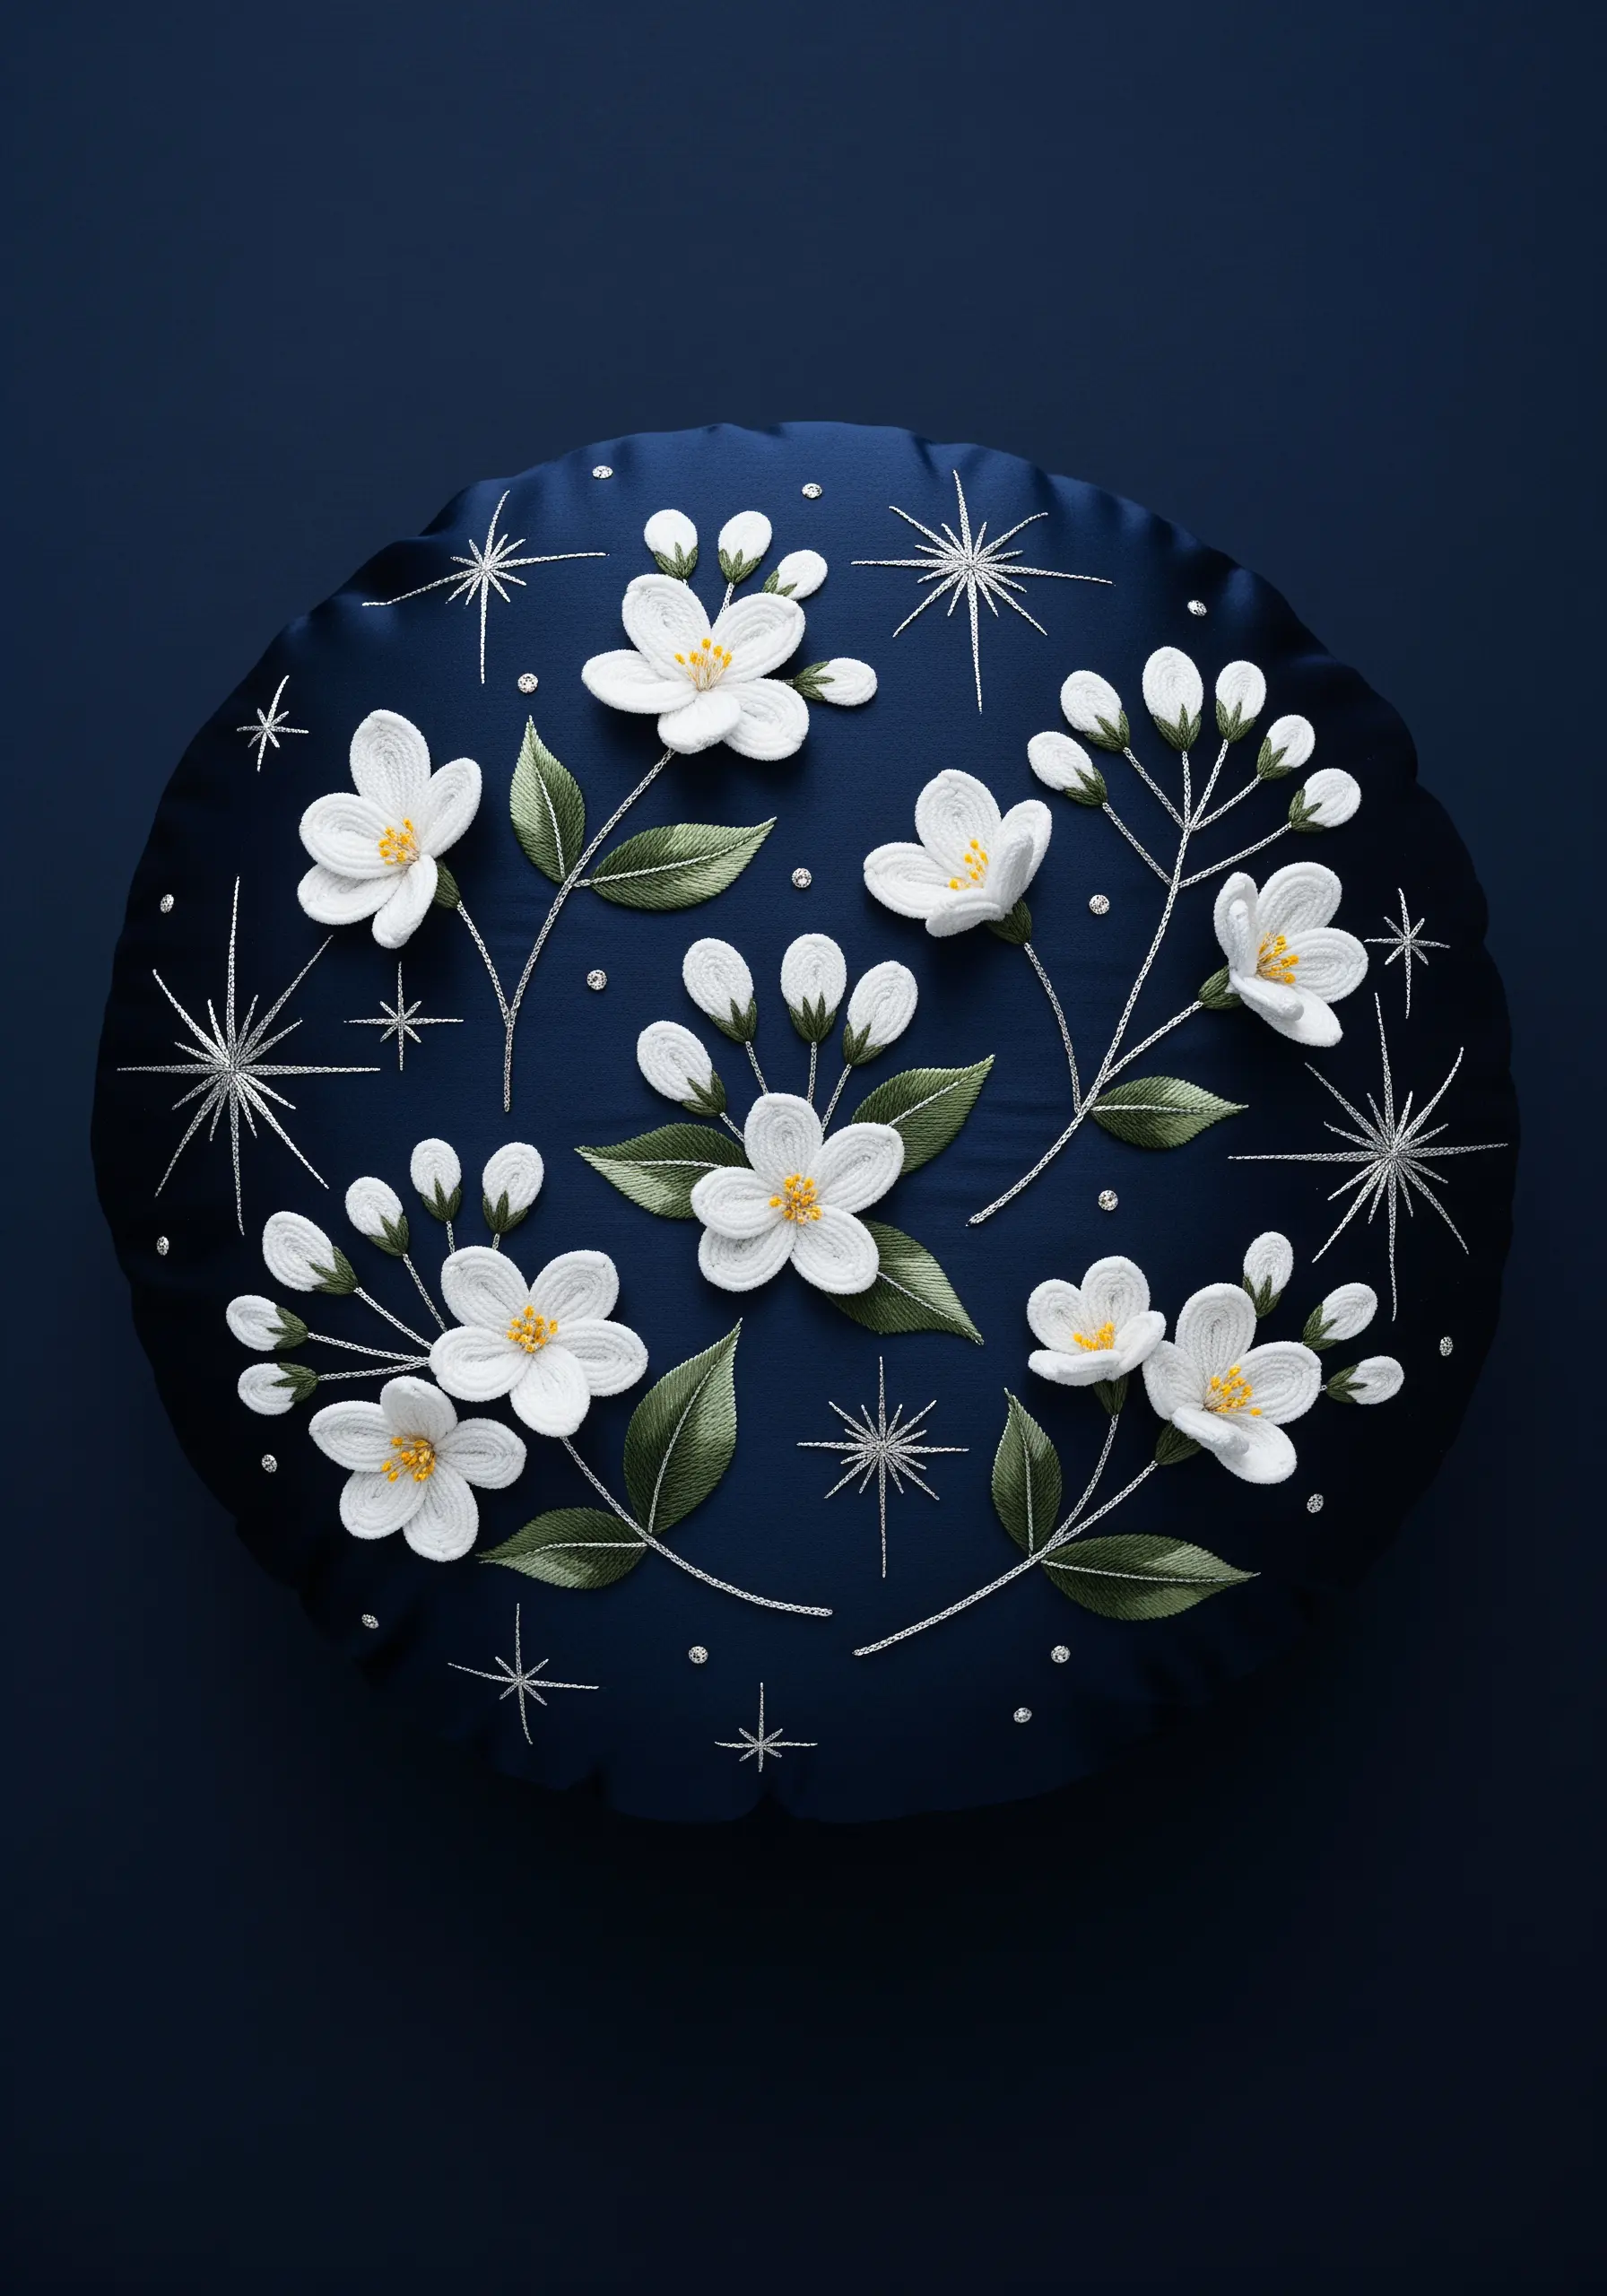
Create startling dimension by padding your petal shapes with felt or layers of foundation stitches before covering them with a smooth satin stitch.
This stumpwork technique makes white flowers pop dramatically against a dark navy background, creating a high-contrast focal point.
Incorporate fine metallic silver thread for the stems and tiny starburst details, making it perfect for night garden embroidery ideas.
The interplay between matte cotton thread and shiny metallic adds a touch of magic that catches the light beautifully.
4. Build Textured Sunflowers with Layered Stitches

Give your sunflower petals lifelike dimension by working them in two separate layers.
Stitch the back layer first using a slightly darker yellow, then add the front layer in a brighter shade using long and short stitch to blend the colors naturally where they overlap.
For the center, create a dense field of French or colonial knots in dark brown and black; this gives it a realistic, seed-like texture that you can’t achieve with flat stitches.
This method is the secret to creating bold, sunflower-inspired embroidery crafts.
5. Combine Appliqué and Thread Painting for Botanical Realism
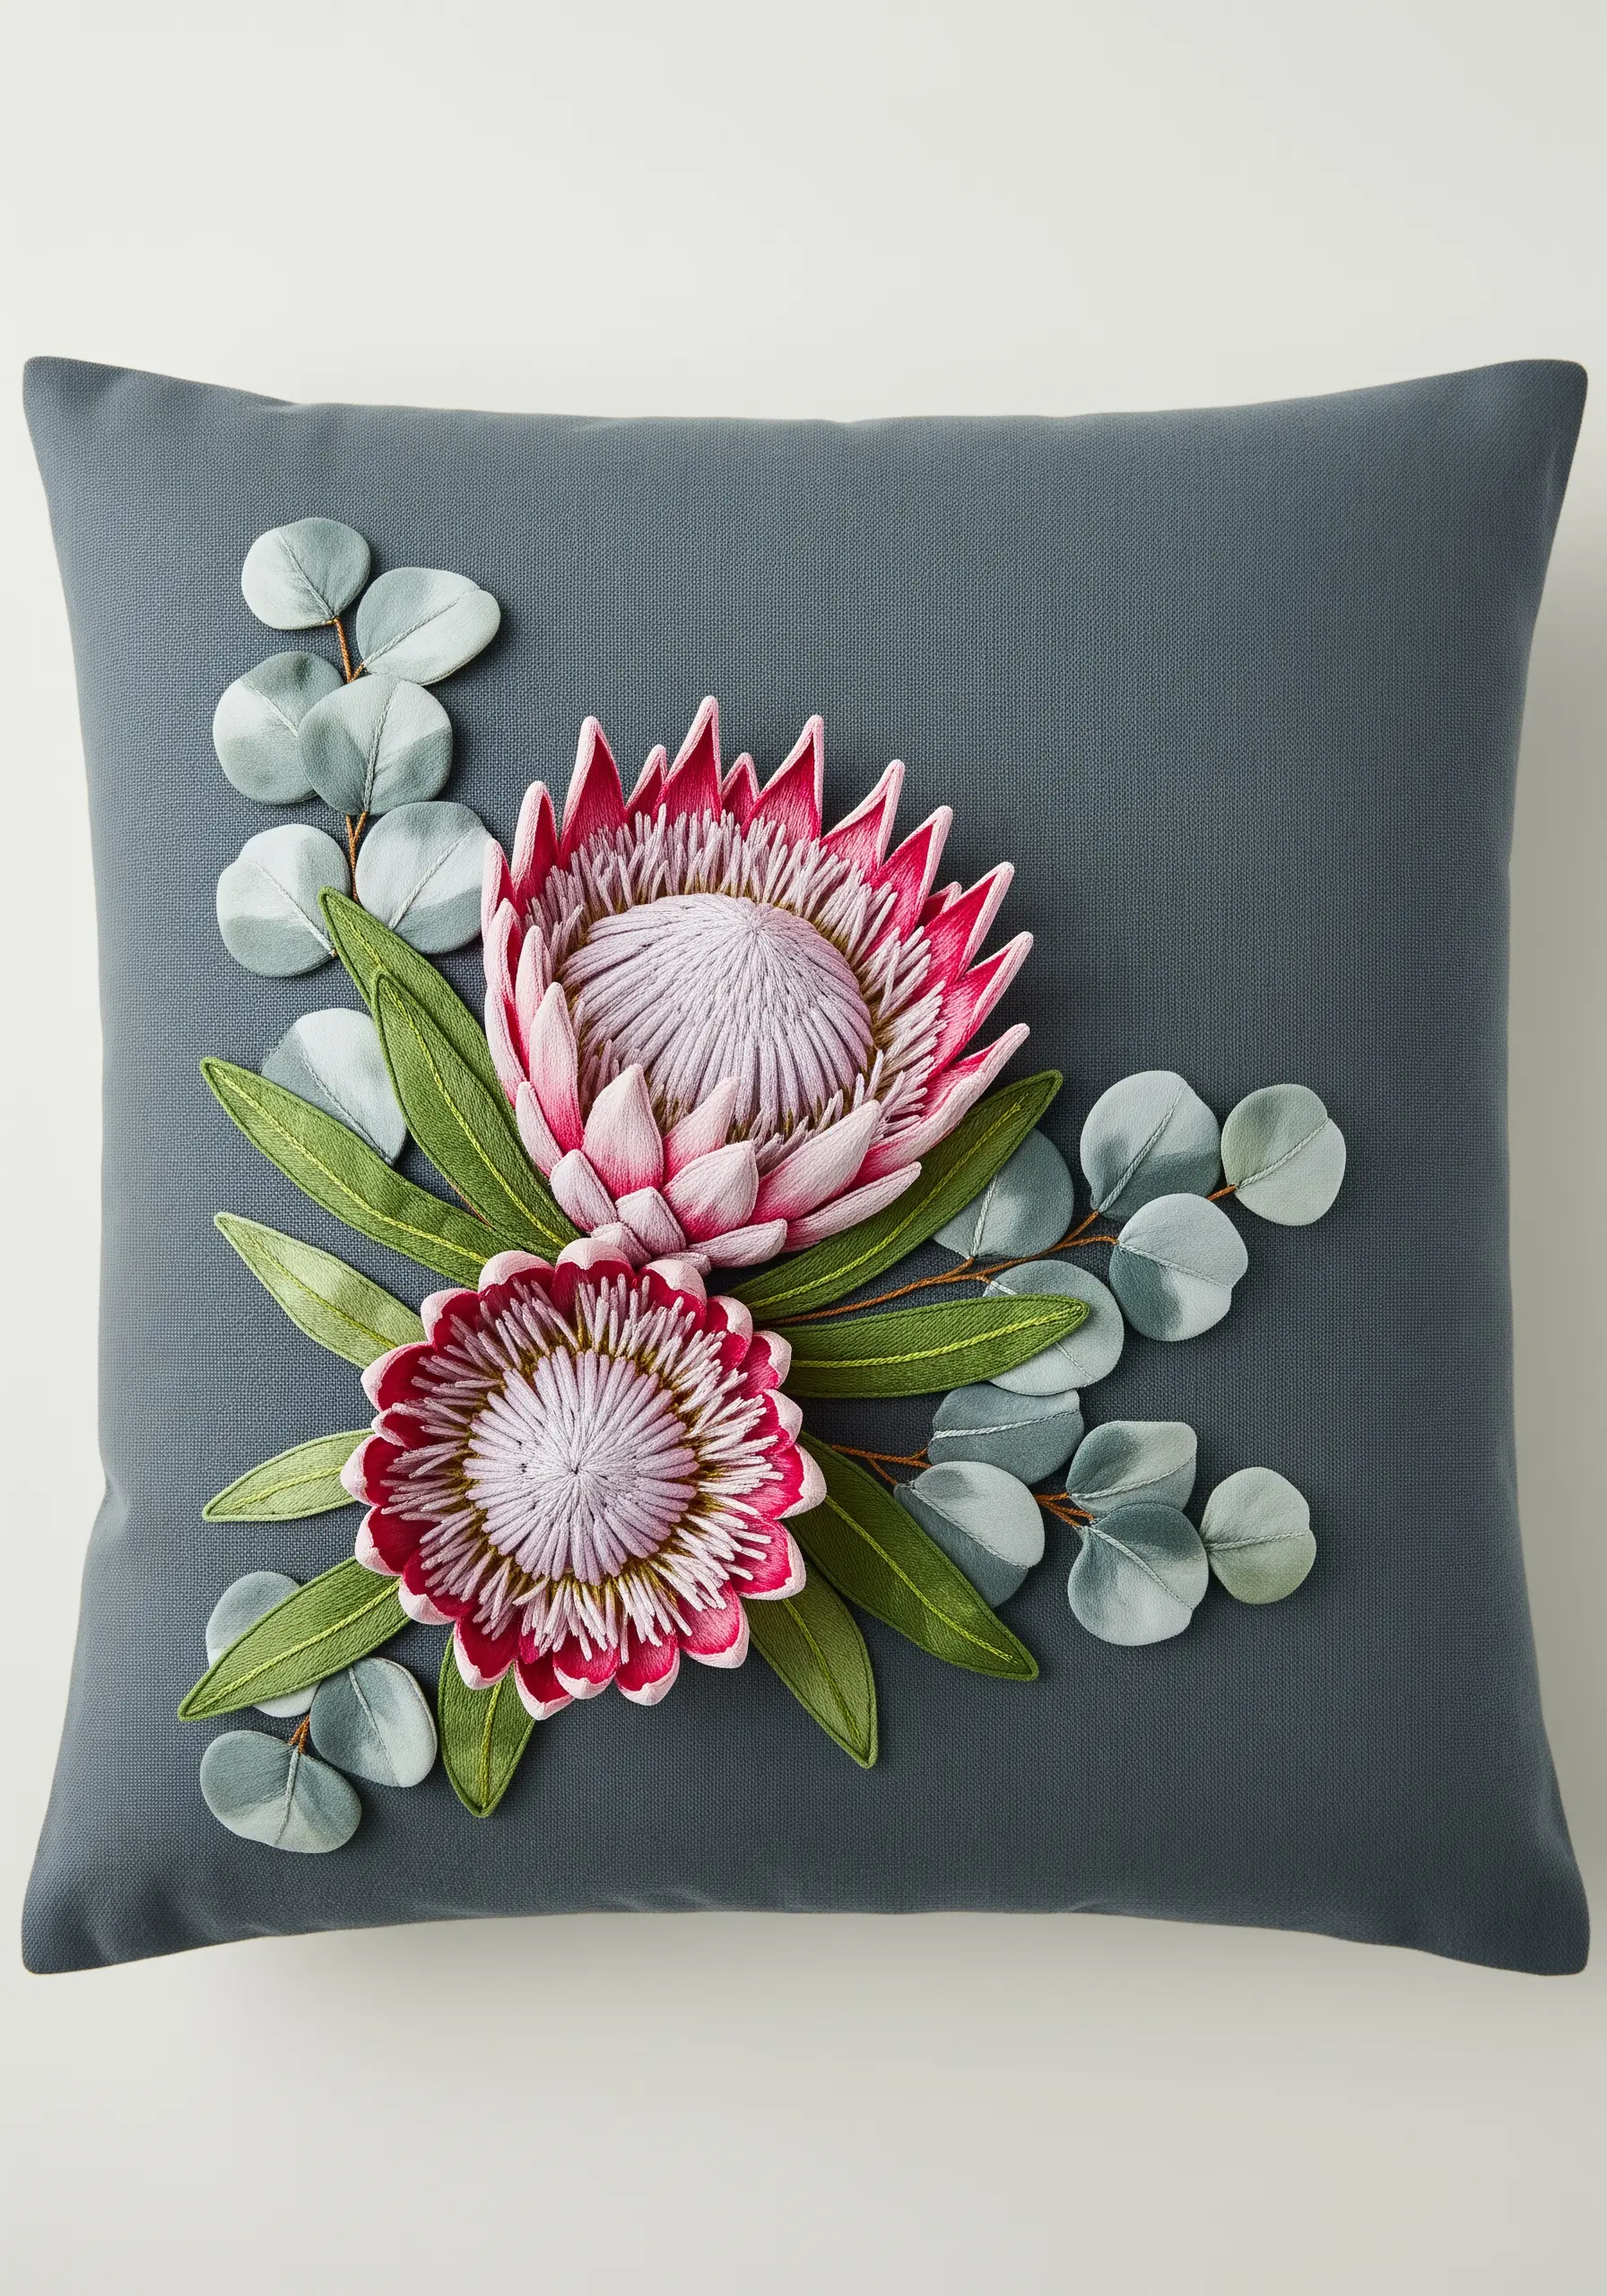
For the protea, use appliqué to achieve clean, defined shapes and immediate dimension.
Cut felt or a sturdy fabric for the base shapes, attach them to the cushion, and then use long and short stitch to “paint” the color gradients and fine details directly over the top.
The eucalyptus leaves can be simple fabric cutouts, tacked down with a single stitch line down the middle for a quick yet effective result.
This mixed-media approach elevates your botanical stitch ideas by blending speed and artistry.
6. Weave Cascading Wisteria with Knotted Stitches

Achieve the tumbling, clustered look of wisteria by using a series of Bullion knots or Woven Picot stitches.
Create each tiny blossom individually, varying the shades of purple, lavender, and blue to give the cluster authentic depth and movement.
Arrange the knots tightly together, overlapping them as you work your way down to mimic the natural, heavy drape of the flower.
This highly textural approach is incredibly tactile and transforms your cushion into a piece of fiber art.
7. Recreate a Thistle’s Texture with Turkey Work

The thistle’s iconic fluffy top is perfectly recreated using the Turkey work stitch.
Work rows of loops in vibrant purple and then carefully trim them to create a dense, brush-like pile that begs to be touched.
For the spiky base and leaves, use a sharp, precise long and short stitch with a darker green outline to define the prickly edges.
The contrast between the soft flower and the sharp leaves is what captures the true spirit of nature.
8. Sculpt a Water Lily with Padded Stumpwork

Construct the water lily by creating each petal separately as a stumpwork slip—a detached, three-dimensional element.
Embroider the petals over a wire frame or on a separate piece of fabric, cut them out, and then attach them in layers to the cushion for ultimate control over their shape.
For the lily pads, use a radial satin stitch, starting from the center and working outwards to create a beautiful sheen that mimics light on water.
This method turns your work into true framed embroidery art projects, even on a cushion.
9. Craft Vibrant Zinnias with Layered Buttonhole Wheels

Build these cheerful, dimensional flowers using concentric circles of buttonhole stitches worked around a central point.
Start from the center and work your way out, slightly overlapping each new row of stitches over the previous one to create layered petals.
Use a contrasting color for each row to achieve that signature zinnia pattern with minimal effort.
It’s a great example of texture-rich embroidery ideas that are both simple and impactful.
10. Capture Delicate Silhouettes with Strategic Knots and Loops
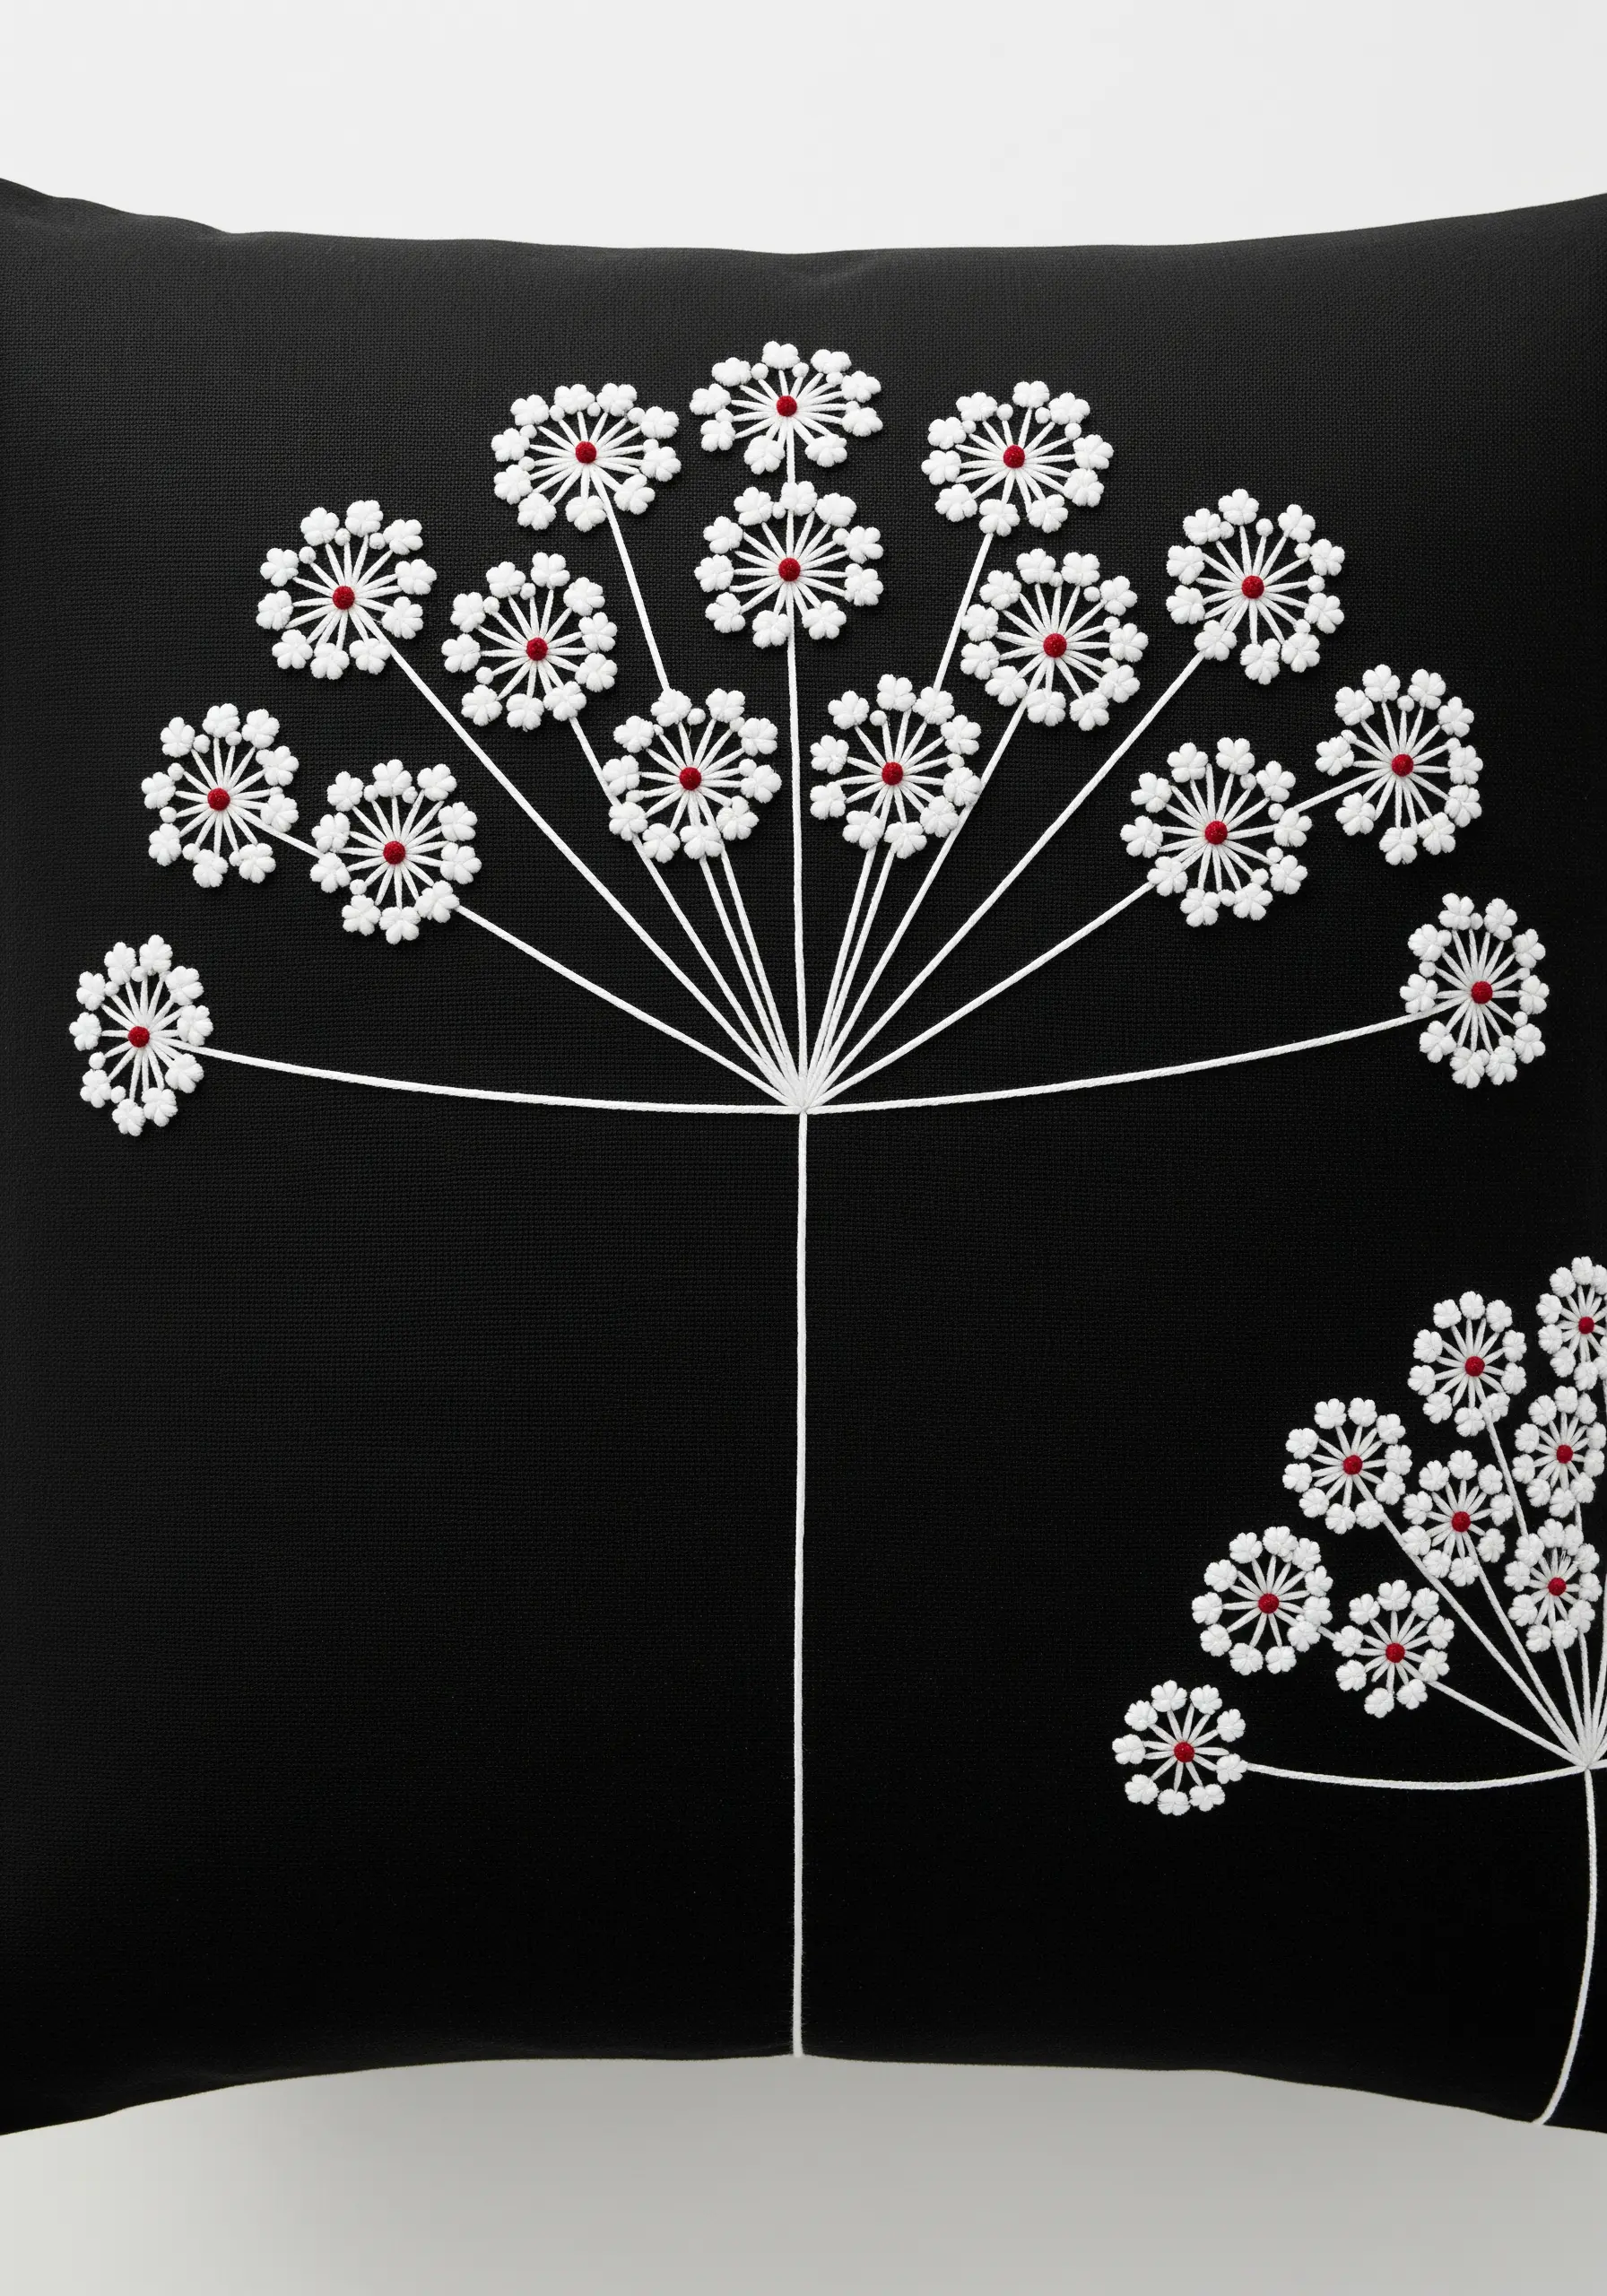
For a modern, graphic take on Queen Anne’s Lace, use stark white thread on a black background for maximum impact.
Each tiny floret is a cluster of detached chain stitches arranged in a circle, an efficient way to create a floral shape.
Place a single, contrasting French knot in the center of each floret—a deep red adds a surprising and sophisticated pop of color.
Use a clean backstitch for the stems to maintain the minimalist embroidery aesthetic.
11. Form a Textured Wreath with Woven Wheels and Bullion Knots

Create full, round daisy centers with the woven wheel stitch using a bright yellow thread for a raised, textured center that pops.
For the petals, use simple detached chain stitches in crisp white to contrast with the dense center.
To create the lavender stalks, stack several purple bullion knots vertically, mimicking their natural form.
This combination of textures creates a visually interesting floral wreath, making it one of the best cottagecore floral embroidery ideas.
12. Sculpt Desert Botanicals with Padded Couching

This technique uses thick yarn or cording laid on the surface of the fabric and stitched down to create bold outlines and textures instantly.
For the cacti, lay down parallel rows of green yarn and then couch them with a matching thread for a ribbed effect.
Use padded satin stitch for the succulent to create a smooth, fleshy contrast to the yarn.
Stitching on a textured fabric like corduroy enhances the rustic feel, which blends well with rustic woodland cottage themes.
13. Create Soft Pussy Willows with Plush Turkey Work

Achieve the unmistakable softness of pussy willow catkins with the Turkey work stitch.
Create small oval shapes with loops of white and grey thread, then carefully trim the loops to create a velvety, raised pile that mimics real fuzz.
A hint of black satin stitch at the base of each catkin provides definition and anchors the soft shape.
This technique is also wonderful for animal-themed pillow stitching ideas where a furry texture is needed.
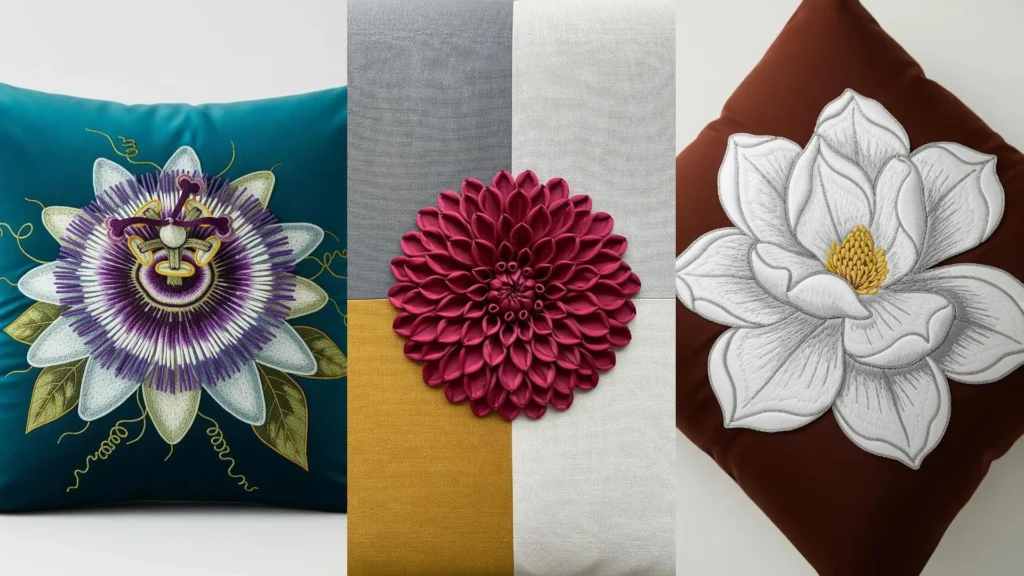
14. Define Petals with a Metallic Couching Outline
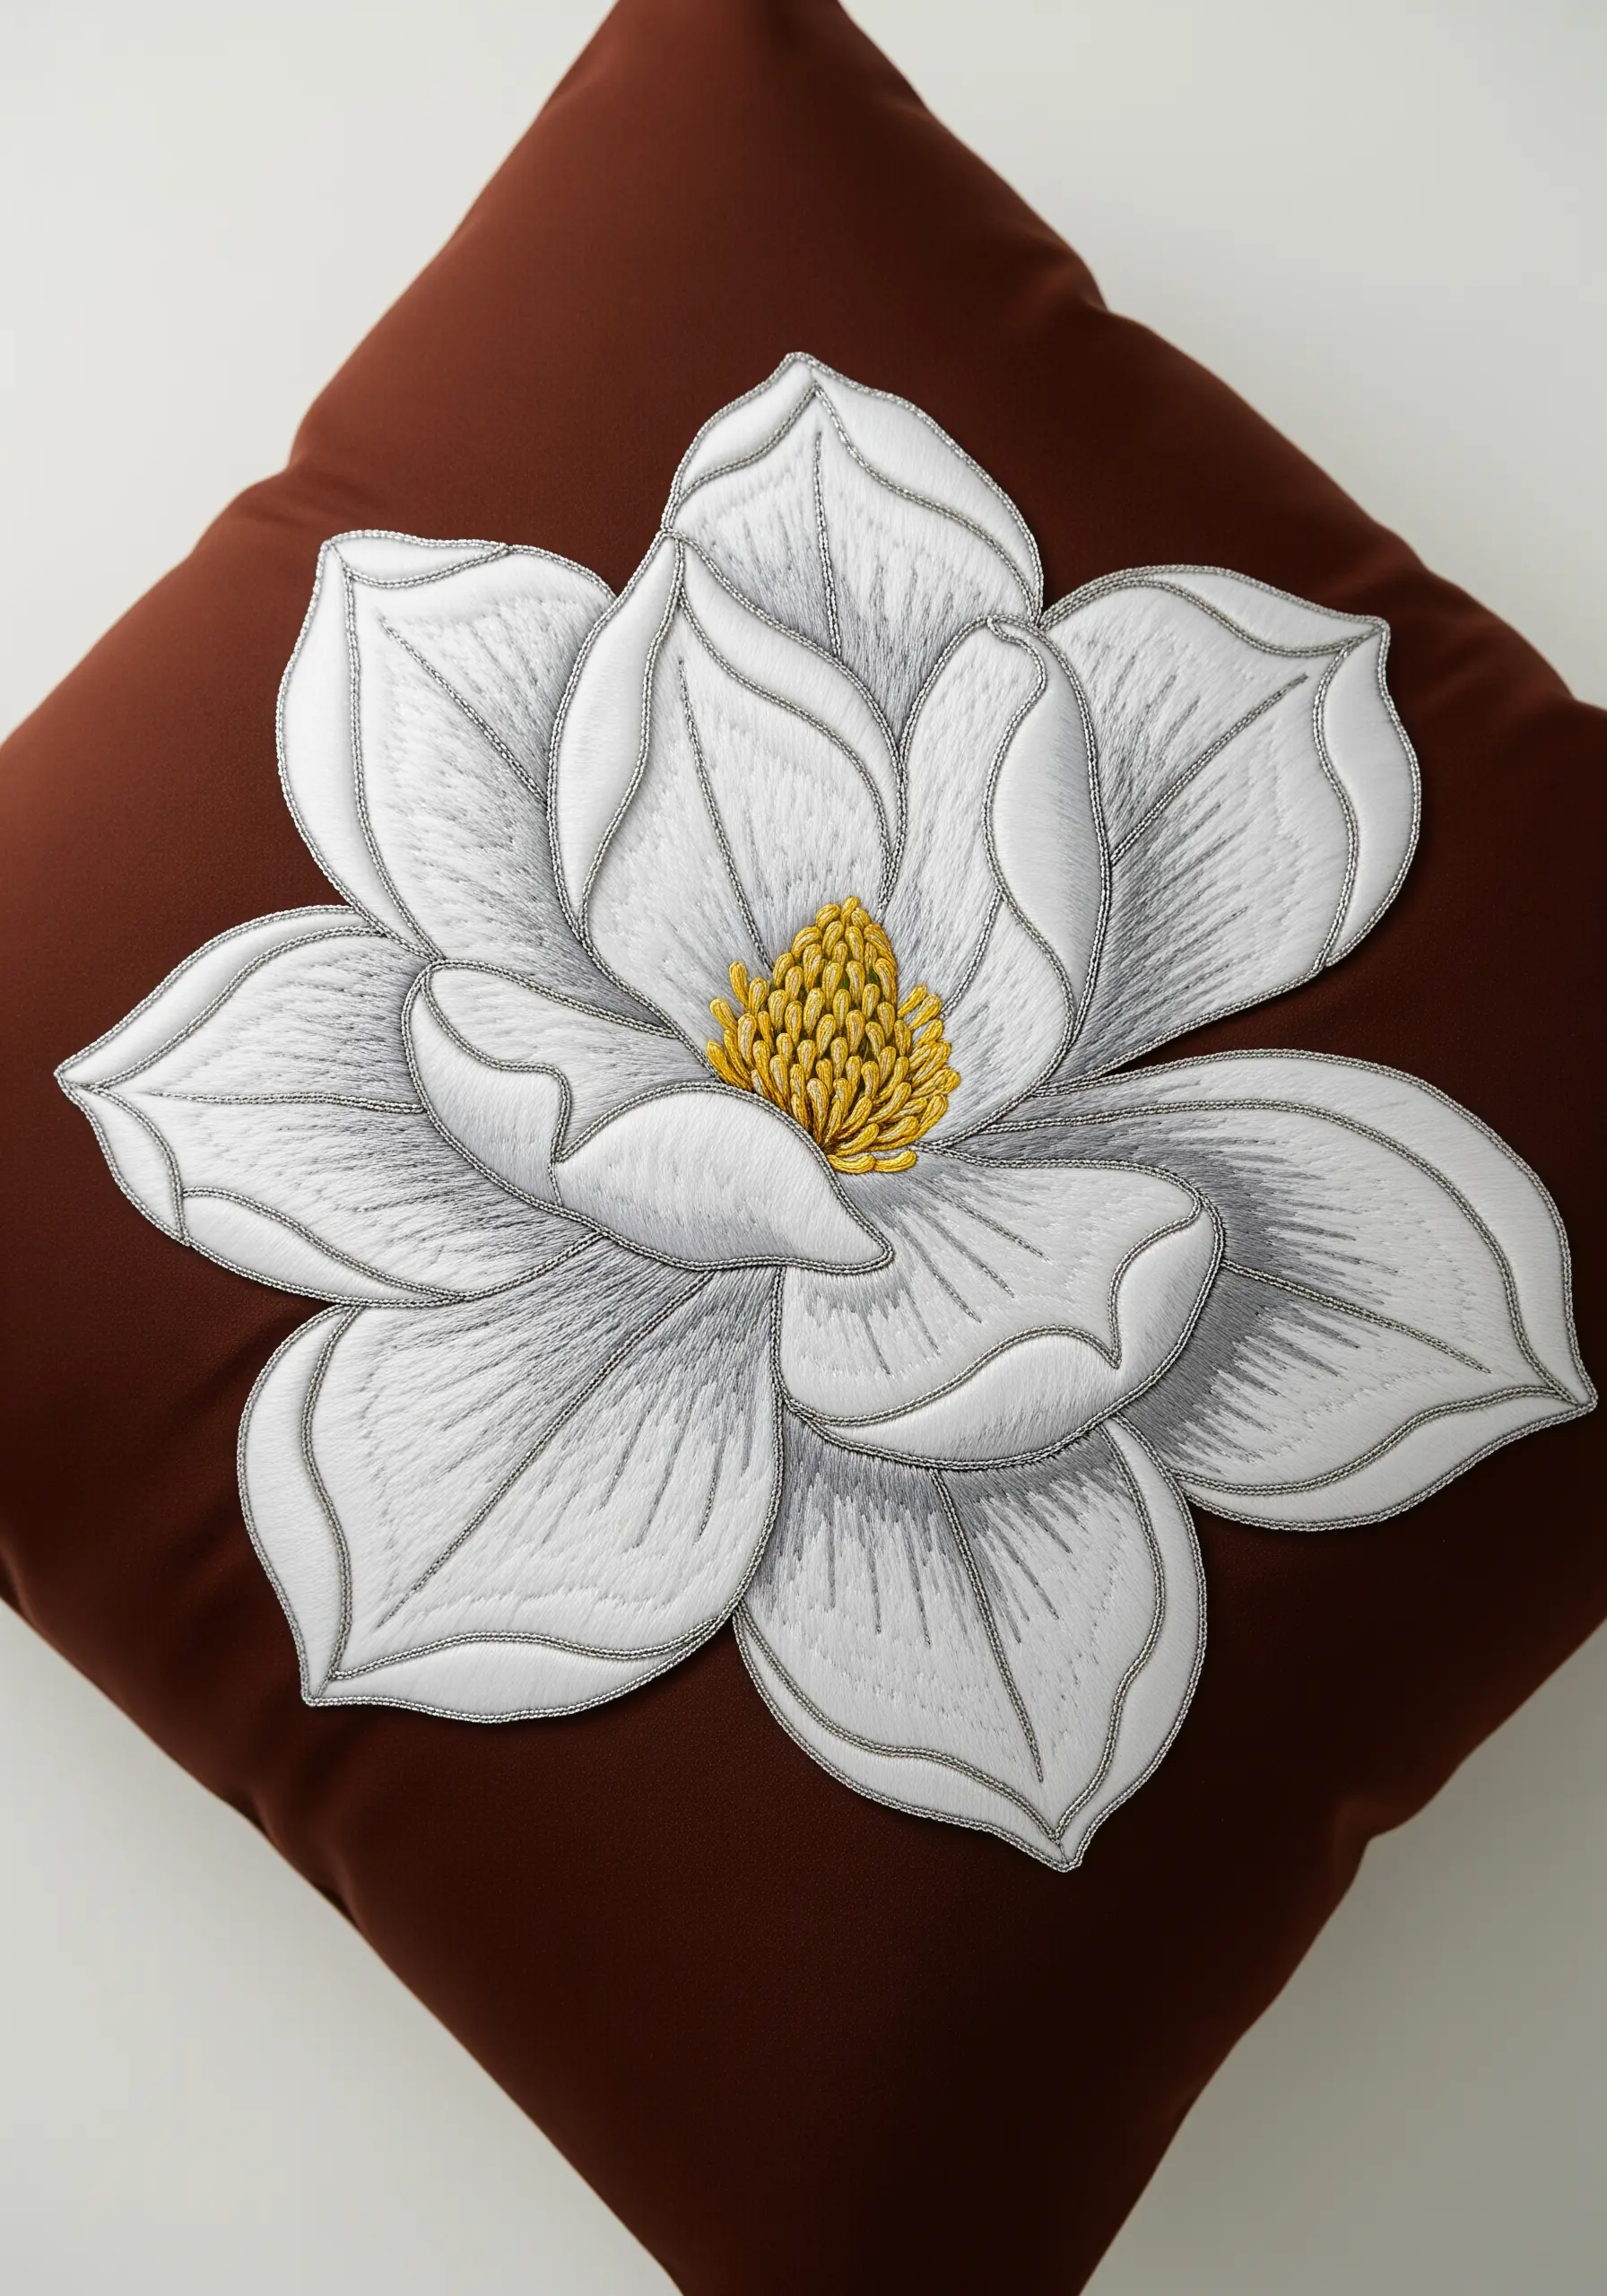
After filling the magnolia petals with smooth, white long and short stitch, elevate the design by outlining each one with a fine silver metallic cord.
Instead of stitching with the metallic thread, lay it on the surface and tack it down with small, invisible stitches of a matching polyester thread.
This technique, called couching, gives you a perfectly clean, crisp outline that adds a touch of luxury.
The effect is particularly striking, much like in abstract metallic thread projects that sparkle against dark backgrounds.
15. Shape Plump Tulip Buds with Padded Satin Stitch

Give your tulip buds a full, rounded shape by first creating a base of padding stitches—like seed or straight stitches—within the outline of the bud.
Then, cover this padding entirely with smooth, vertical satin stitches that follow the contour of the shape.
This raises the surface of the embroidery, making the tulips look three-dimensional and lifelike.
Using variegated thread enhances the effect, making it one of the most effective gradient color floral embroidery ideas.
16. Build a Moody Anemone with Layered Stumpwork Petals

Create each petal individually on a separate piece of fabric, using long and short stitch to achieve the delicate color gradient from dark blue to white.
Cut out each petal, leaving a small tab at the base for attachment.
Secure the petals to your main fabric in layers, starting from the back and working forward, to create incredible depth and realistic overlap.
This is a core skill in many floral thread painting techniques.
17. Design Abstract Floral Medallions with Whipped Spider Wheels

This entire design is built from one versatile stitch: the whipped spider web, also known as the woven wheel.
Create a base of straight stitches like spokes on a wheel, then weave your thread over and under them until the circle is full and raised.
By varying the colors, the number of spokes, and the size of the circles, you can create a dynamic, modern composition.
The result feels both playful and sophisticated, almost like abstract concept art embroidery.
18. Detail a Passion Flower with Precision Stitch Layering
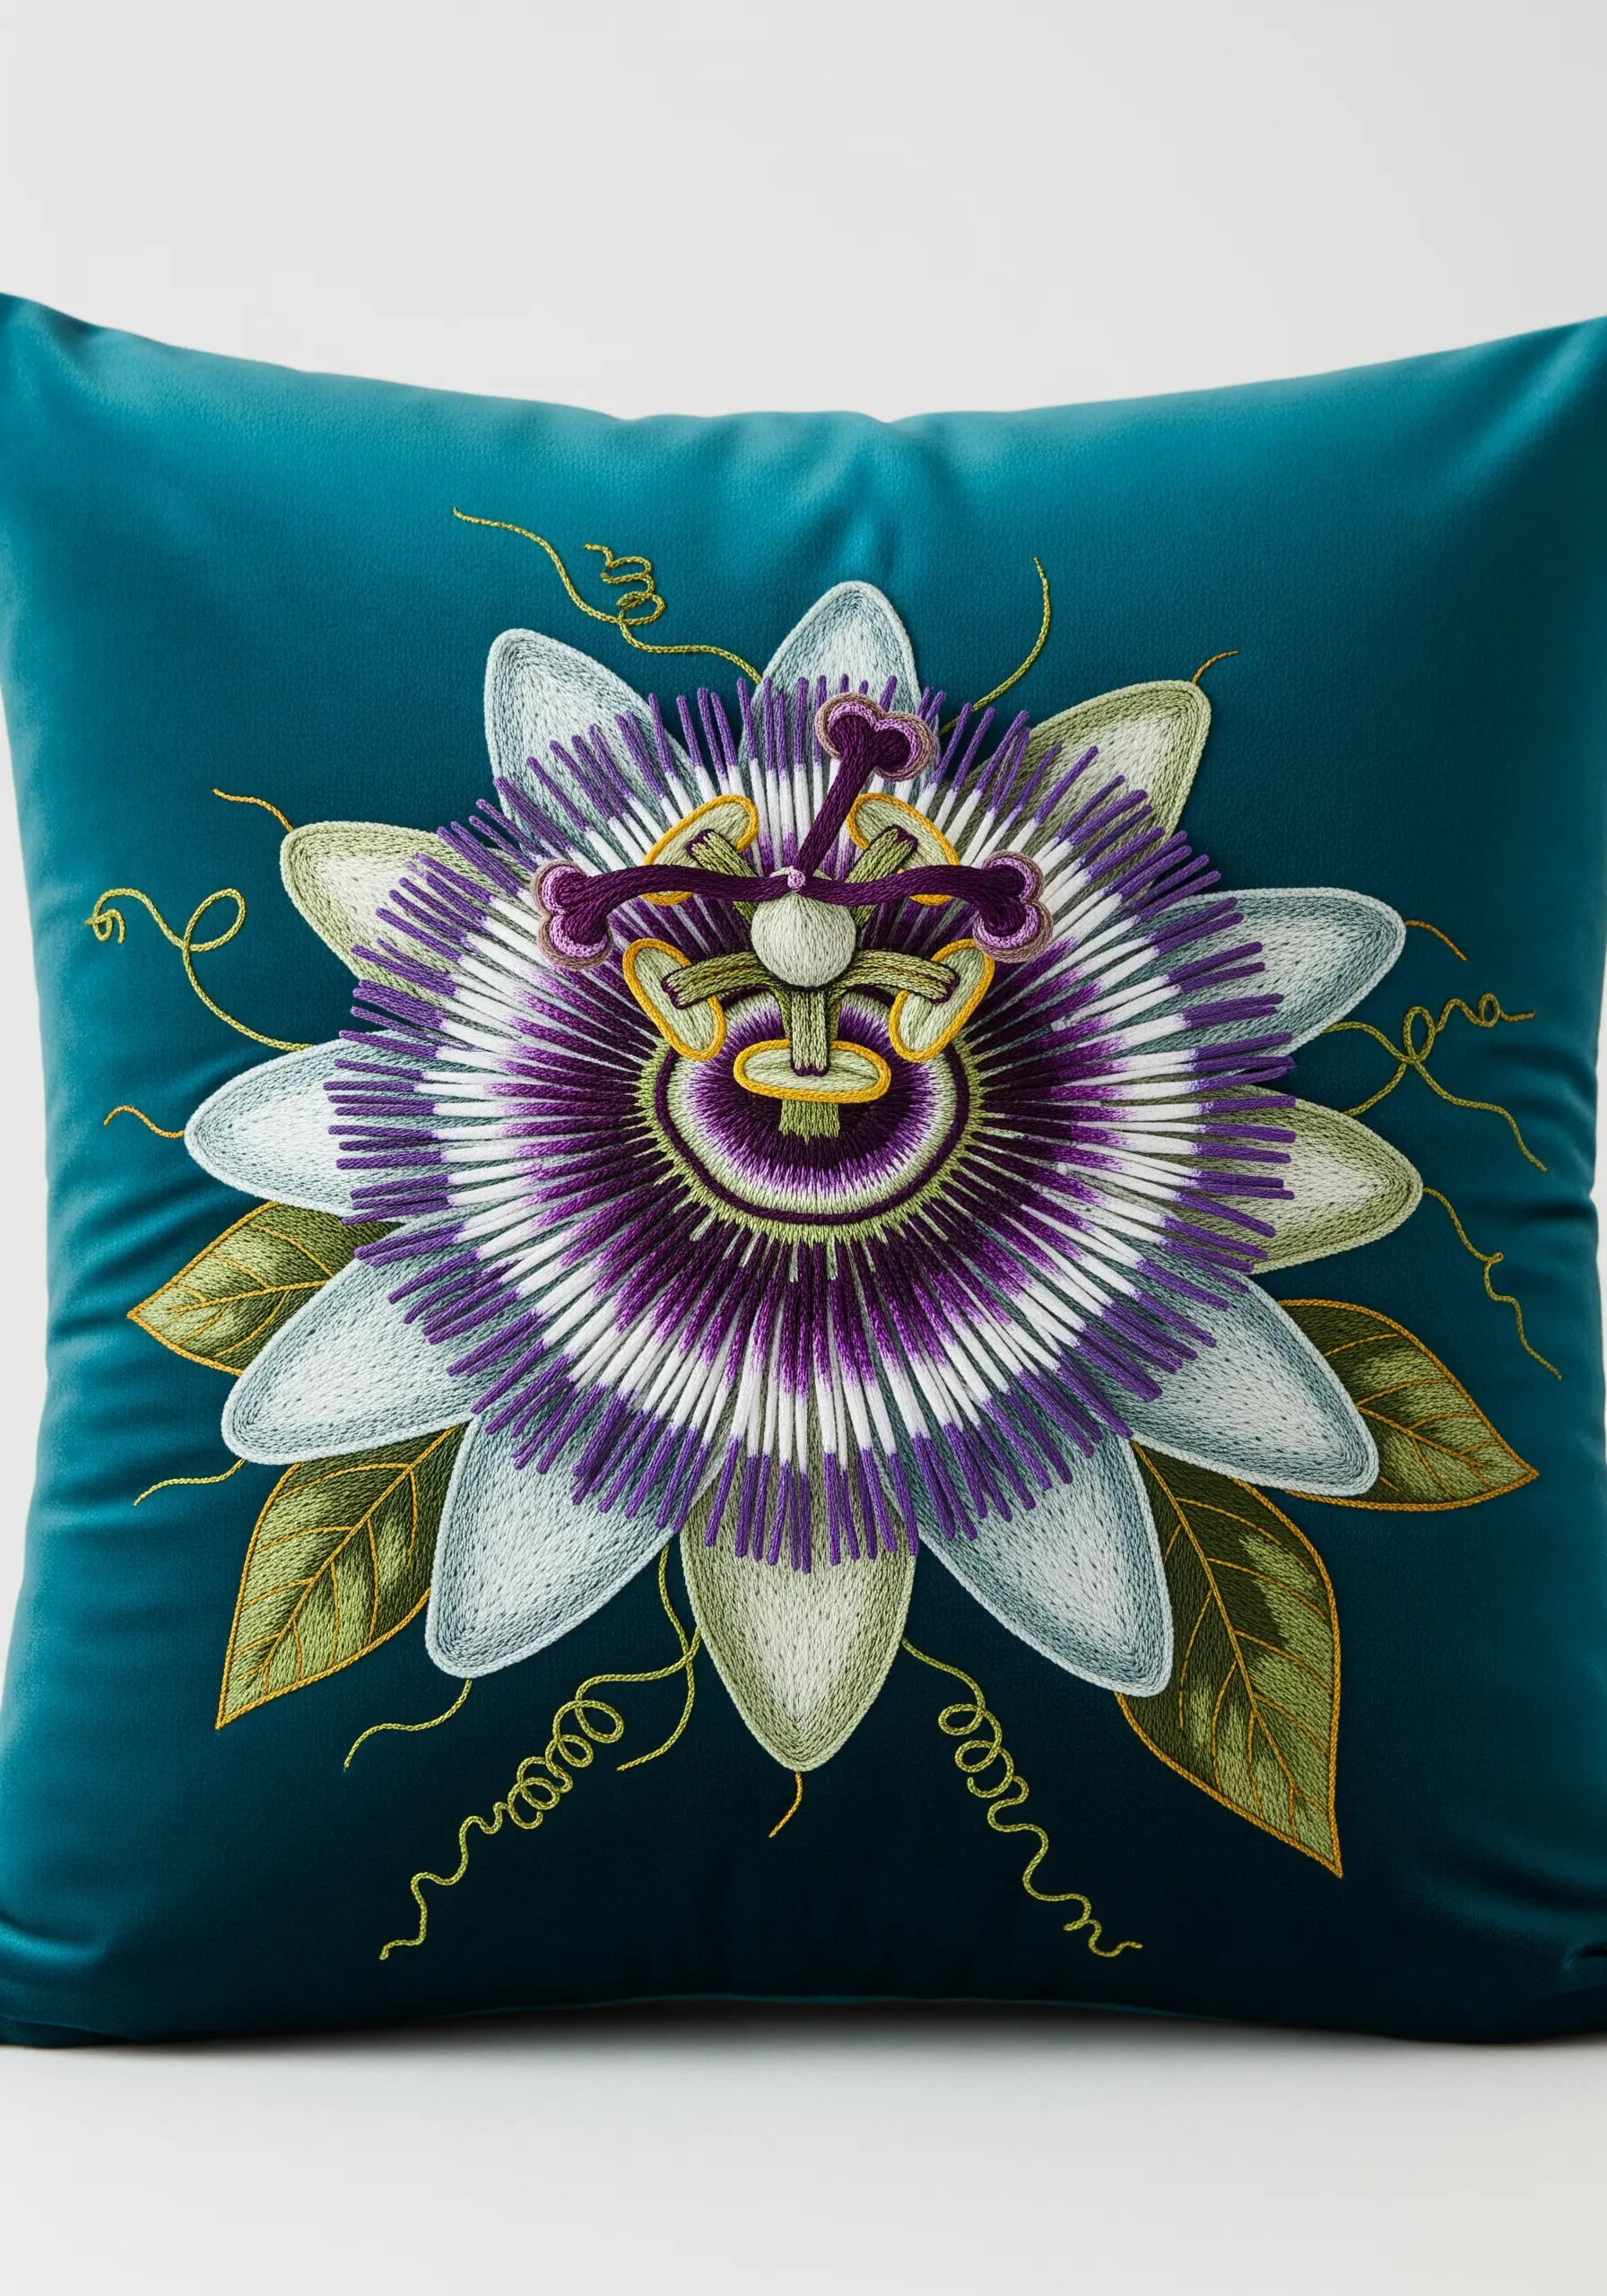
The complexity of a passion flower requires careful layering of different stitch types.
Use long and short stitch for the base petals to create a smooth foundation.
For the distinctive corona filaments, work radiating straight stitches in purple and white, keeping them long and slightly loose to mimic their delicate structure.
Finally, build up the central stigma and anthers with French knots and padded satin stitch to complete the intricate form, a great exercise found in nature-themed embroidery samplers.
19. Create Ruffled Poppies with Gathered Silk Ribbon

To get that delicate, paper-like texture of poppy petals, use a wide silk ribbon.
Instead of traditional ribbon stitches, run a gathering thread along one edge of a length of ribbon with small running stitches.
Pull the thread to create a soft ruffle, then shape and stitch this ruffled edge onto your fabric to form the petal.
For the center, a dense cluster of black seed beads provides the perfect contrast and turns your piece into a handmade art object.
20. Stitch a Whimsical Dandelion Scene with Simple Stitches

You don’t need complex techniques for a charming result; intelligent placement is key.
Create the dandelion seed heads with radiating straight stitches in white from a central point.
For the floating seeds, use a single straight stitch for the stem and a tiny detached chain stitch for the parachute.
This design shows how effective simple stitches can be when used with intention, similar to the power of delicate line art embroidery.
21. Shape Elegant Hellebores with Wired Stumpwork Petals

For flowers with a distinct cup shape, wired stumpwork is the ideal technique.
Outline each petal shape with a fine wire on a separate piece of fabric, then fill the shape with long and short stitch, blending muted greens and purples for a painterly effect.
Cut out the petal, leaving the wire inside the buttonhole stitch edge; you can then bend and shape the petals into a natural, drooping form when you attach them.
It’s an advanced way to capture nature’s textures in your embroidery.
22. Construct a Dahlia with Folded Petal Layers

This dahlia’s perfect geometry is achieved by creating each petal individually from a small piece of fabric or wide ribbon.
Fold the fabric into a pointed petal shape—a technique borrowed from Japanese Kanzashi—and secure the base with a few stitches or a touch of heat.
Then, stitch the finished petals onto the cushion in dense, concentric circles, starting from the outside and working your way in.
This method creates flawless symmetry and incredible depth, resulting in an effect much like abstract fabric collage embroidery.


