

A blank pillow is not an empty space; it’s an invitation. It’s a canvas waiting for the texture and character that only thread can provide. Before you begin your next stitch, I want you to reconsider the pillow not just as a comfortable object, but as a focal point that can anchor an entire room.
In your hands, a simple plant motif can become a piece of art. It’s not about mastering dozens of complex stitches. Instead, it’s about choosing the *right* stitch for the texture you want to create—the smooth glide of a satin-stitched leaf, the plush dimension of a woven wheel succulent, or the delicate trace of a stem-stitched vine.
These ideas are more than patterns; they are lessons in seeing. You will learn how a subtle shift in color can mimic sunlight, how stitch direction can create movement, and how combining textures can turn a simple design into a tactile experience. Let’s transform that pillow into something personal, polished, and alive with intention.
1. Master Layered Shading for a Living Monstera
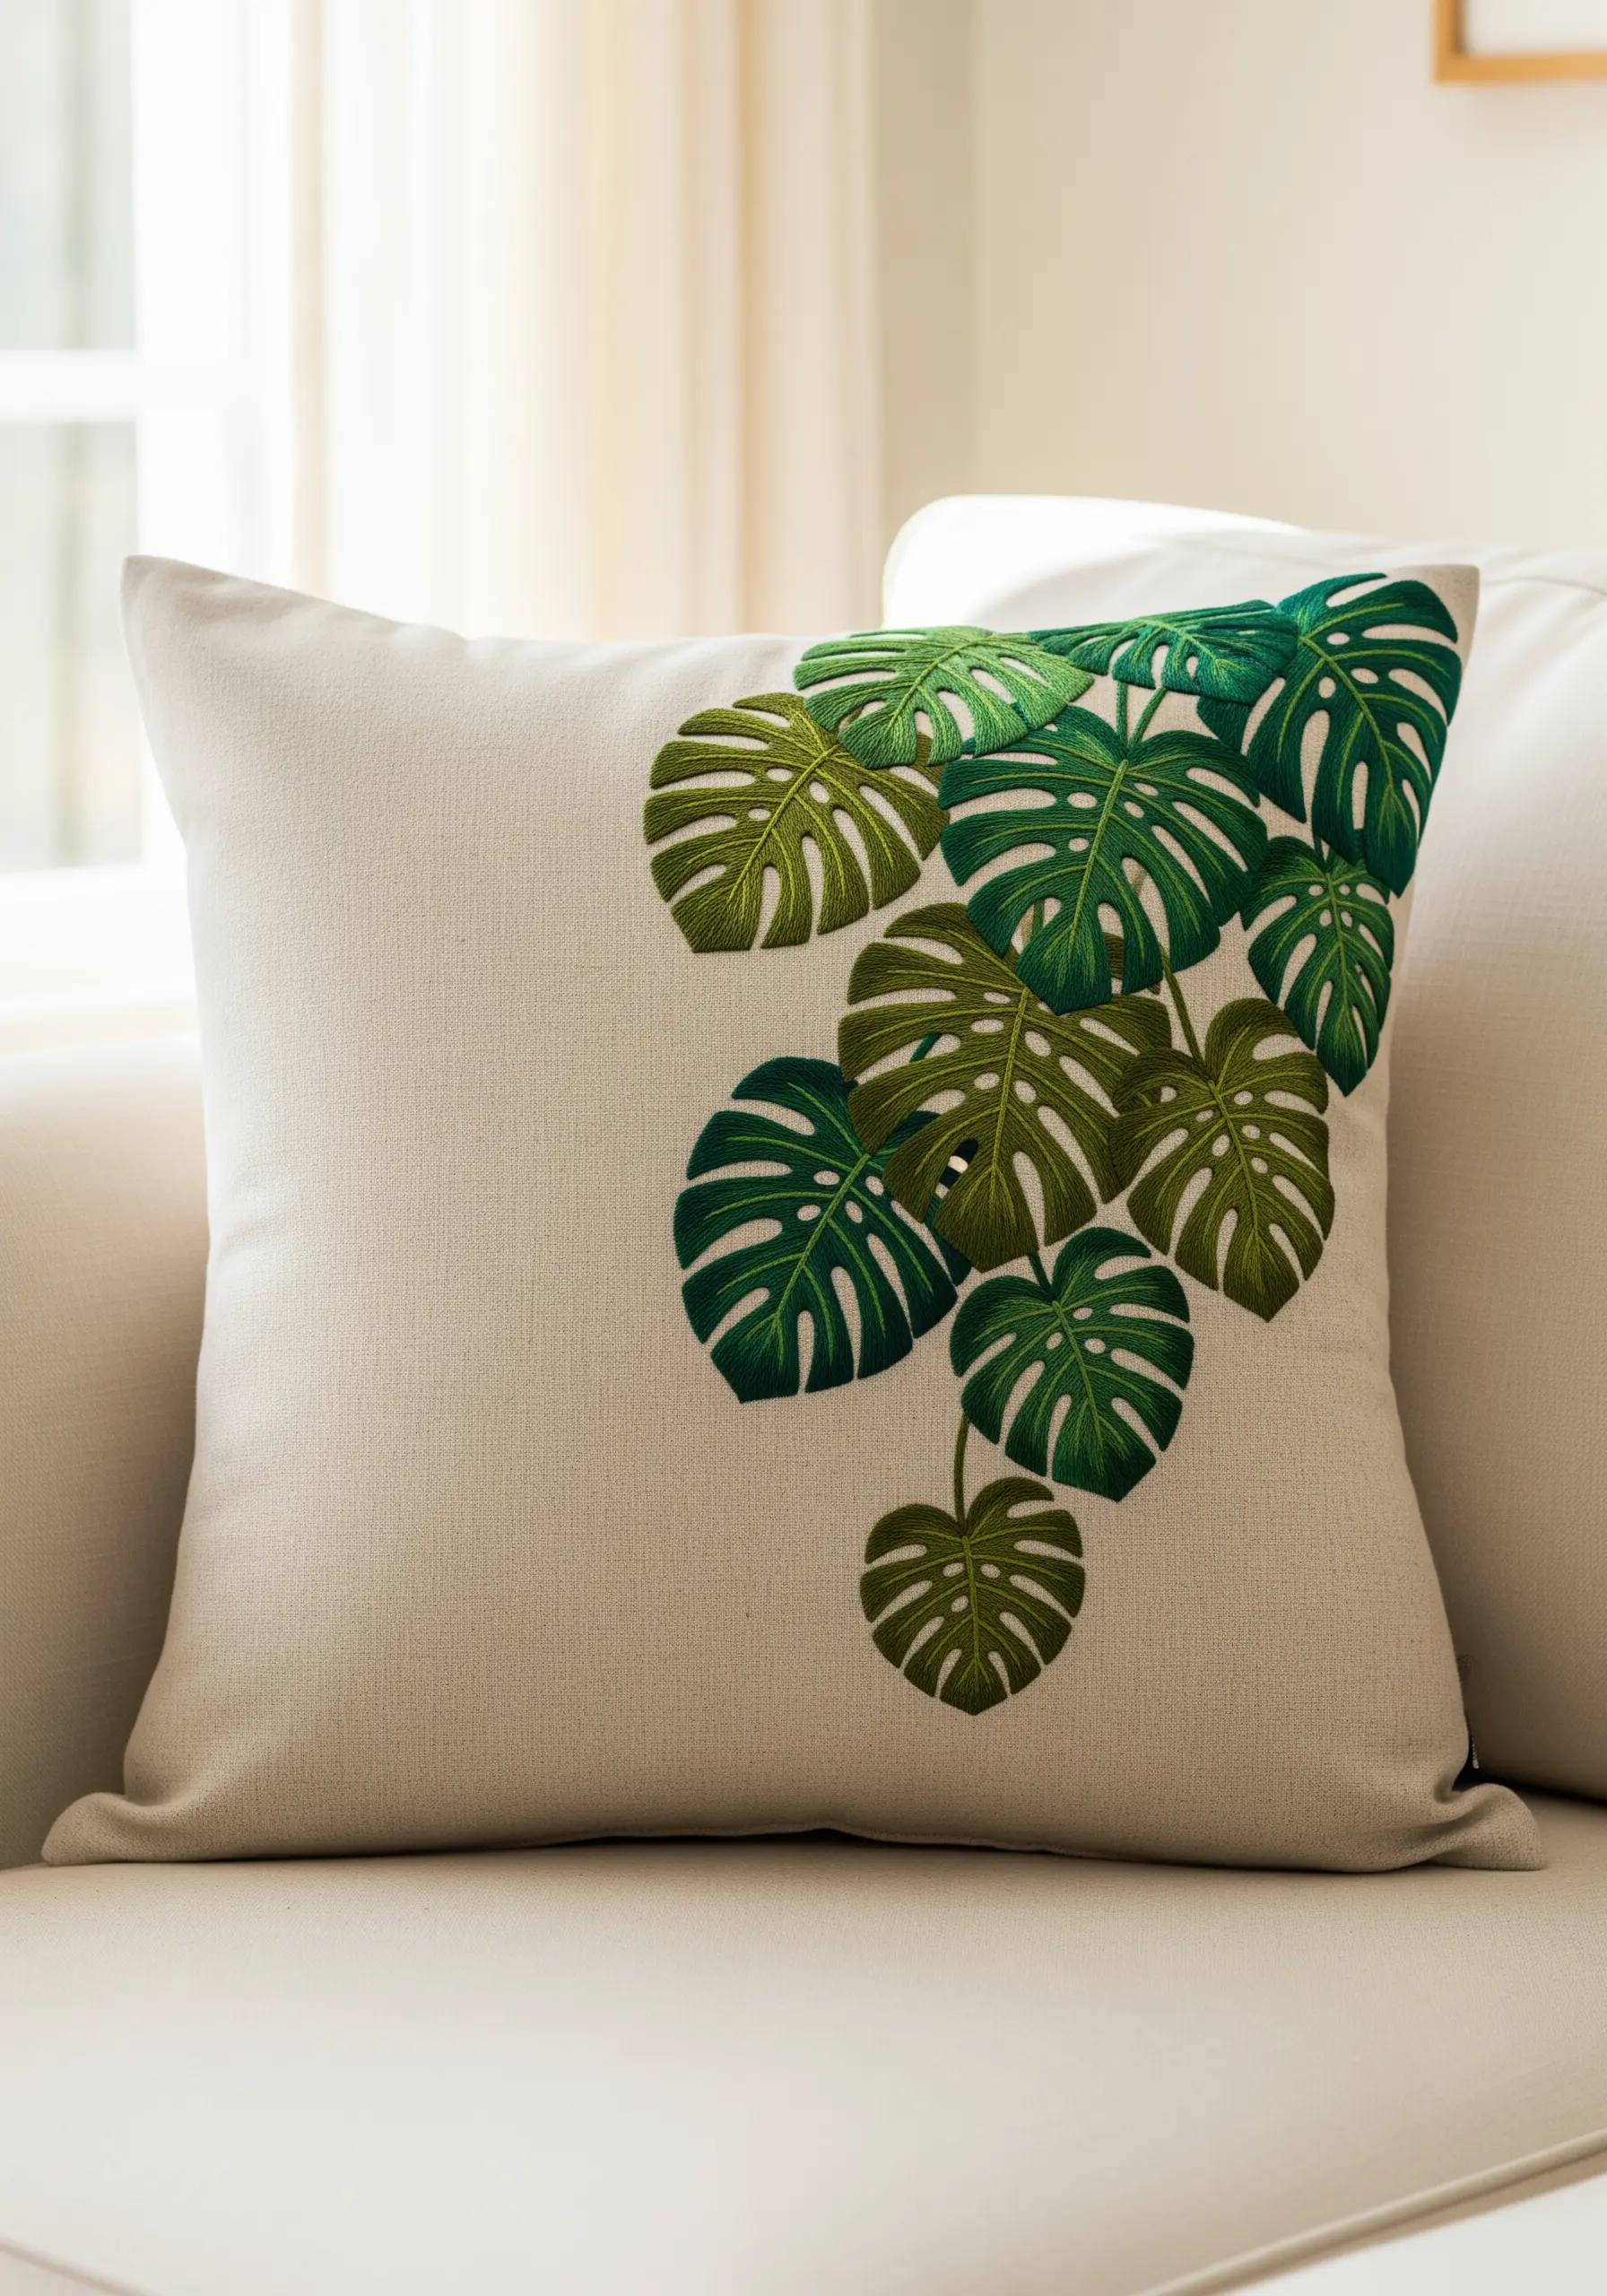
Create startlingly realistic depth on your Monstera leaves by treating each leaf section as a separate plane of color.
Instead of one solid green, use three to four shades—from a deep forest green for the shadowed base to a bright, lime green for the highlights where light would hit.
Use a directional satin stitch, angling your stitches to follow the natural curve of the leaf’s segments toward the central vein.
This technique turns a flat design into a three-dimensional statement piece, making the leaves appear to lift right off the fabric.
For the finest detail, outline the leaf slits with a single strand of the darkest green using a split stitch before you begin filling.
2. Weave an Ethereal Eucalyptus & Lavender Wreath
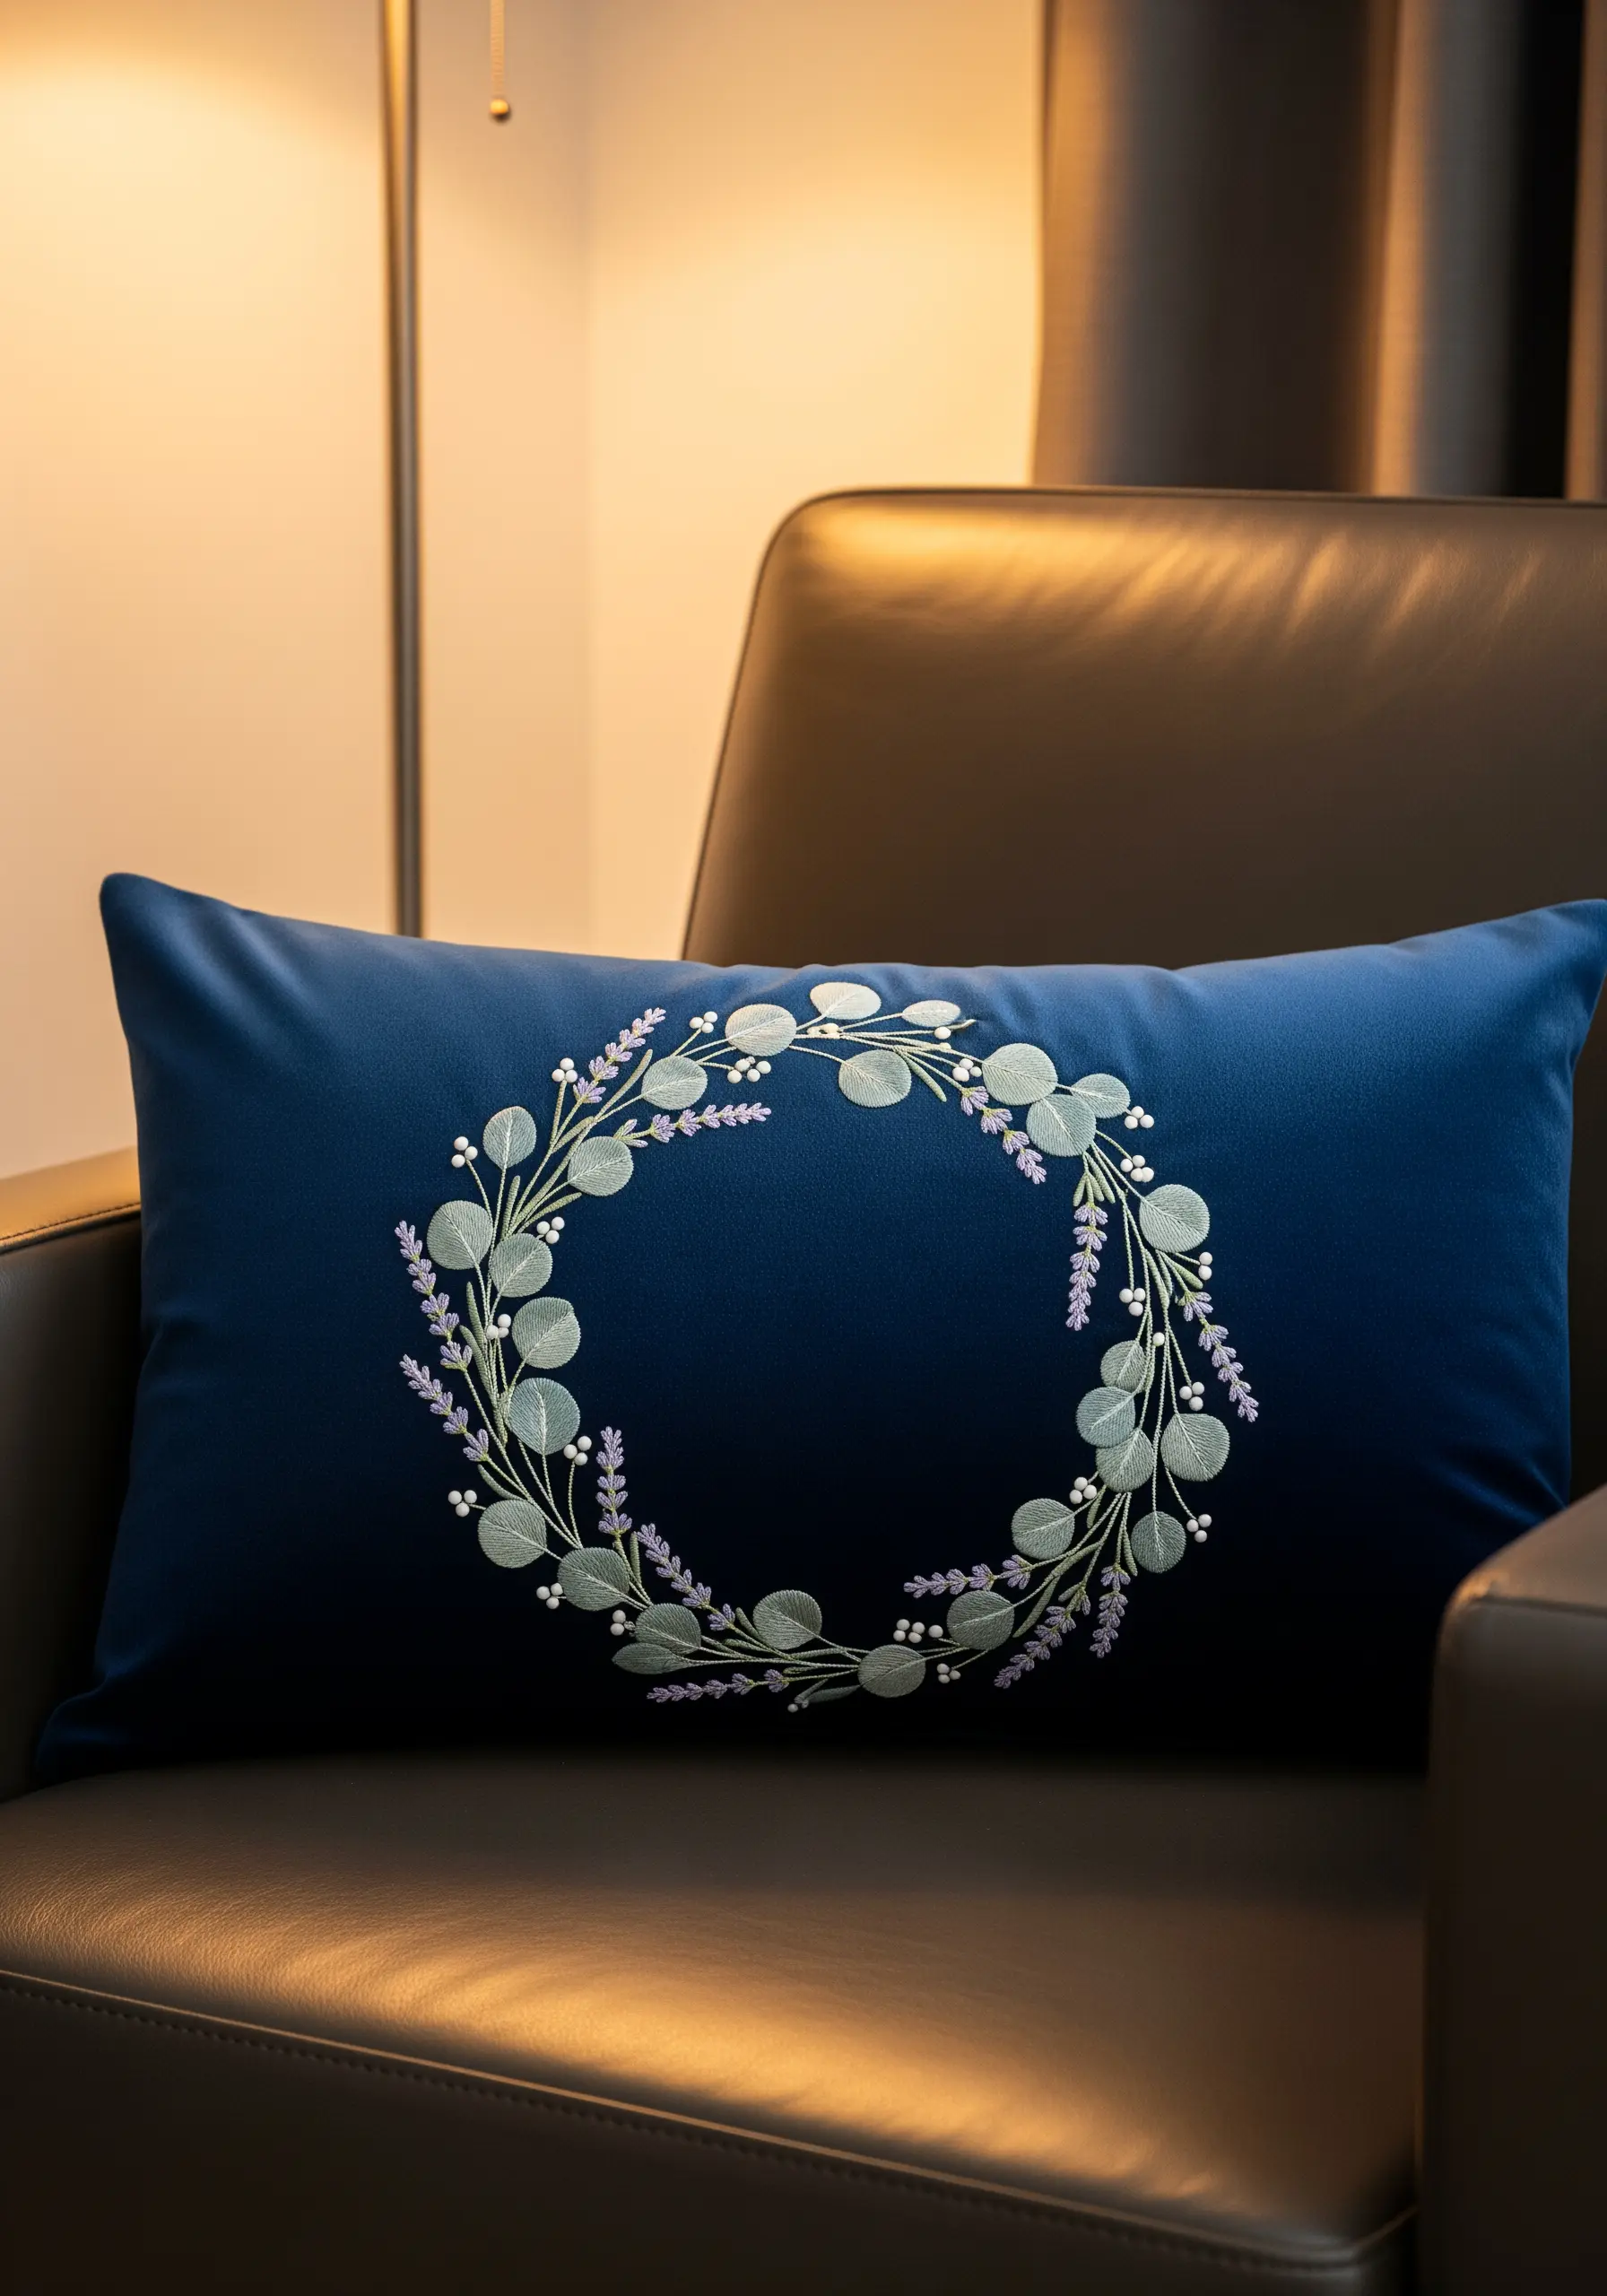
To achieve this delicate, airy look on dark fabric, focus on stitch variety and thread weight.
Use a fishbone stitch with a single strand of silvery-green floss for the eucalyptus leaves, which gives them a defined central vein and a soft, feather-like texture.
For the lavender, stitch tiny detached chain stitches in muted purple and lilac, clustering them tightly along the stem.
Scatter small, tight French knots in an off-white or cream thread to mimic baby’s breath, which adds brightness and fills gaps without overwhelming the design.
This combination of textures creates a wreath that feels both refined and natural, popping beautifully against a deep navy or charcoal pillow.
3. Paint with Thread for a Vibrant Bird of Paradise
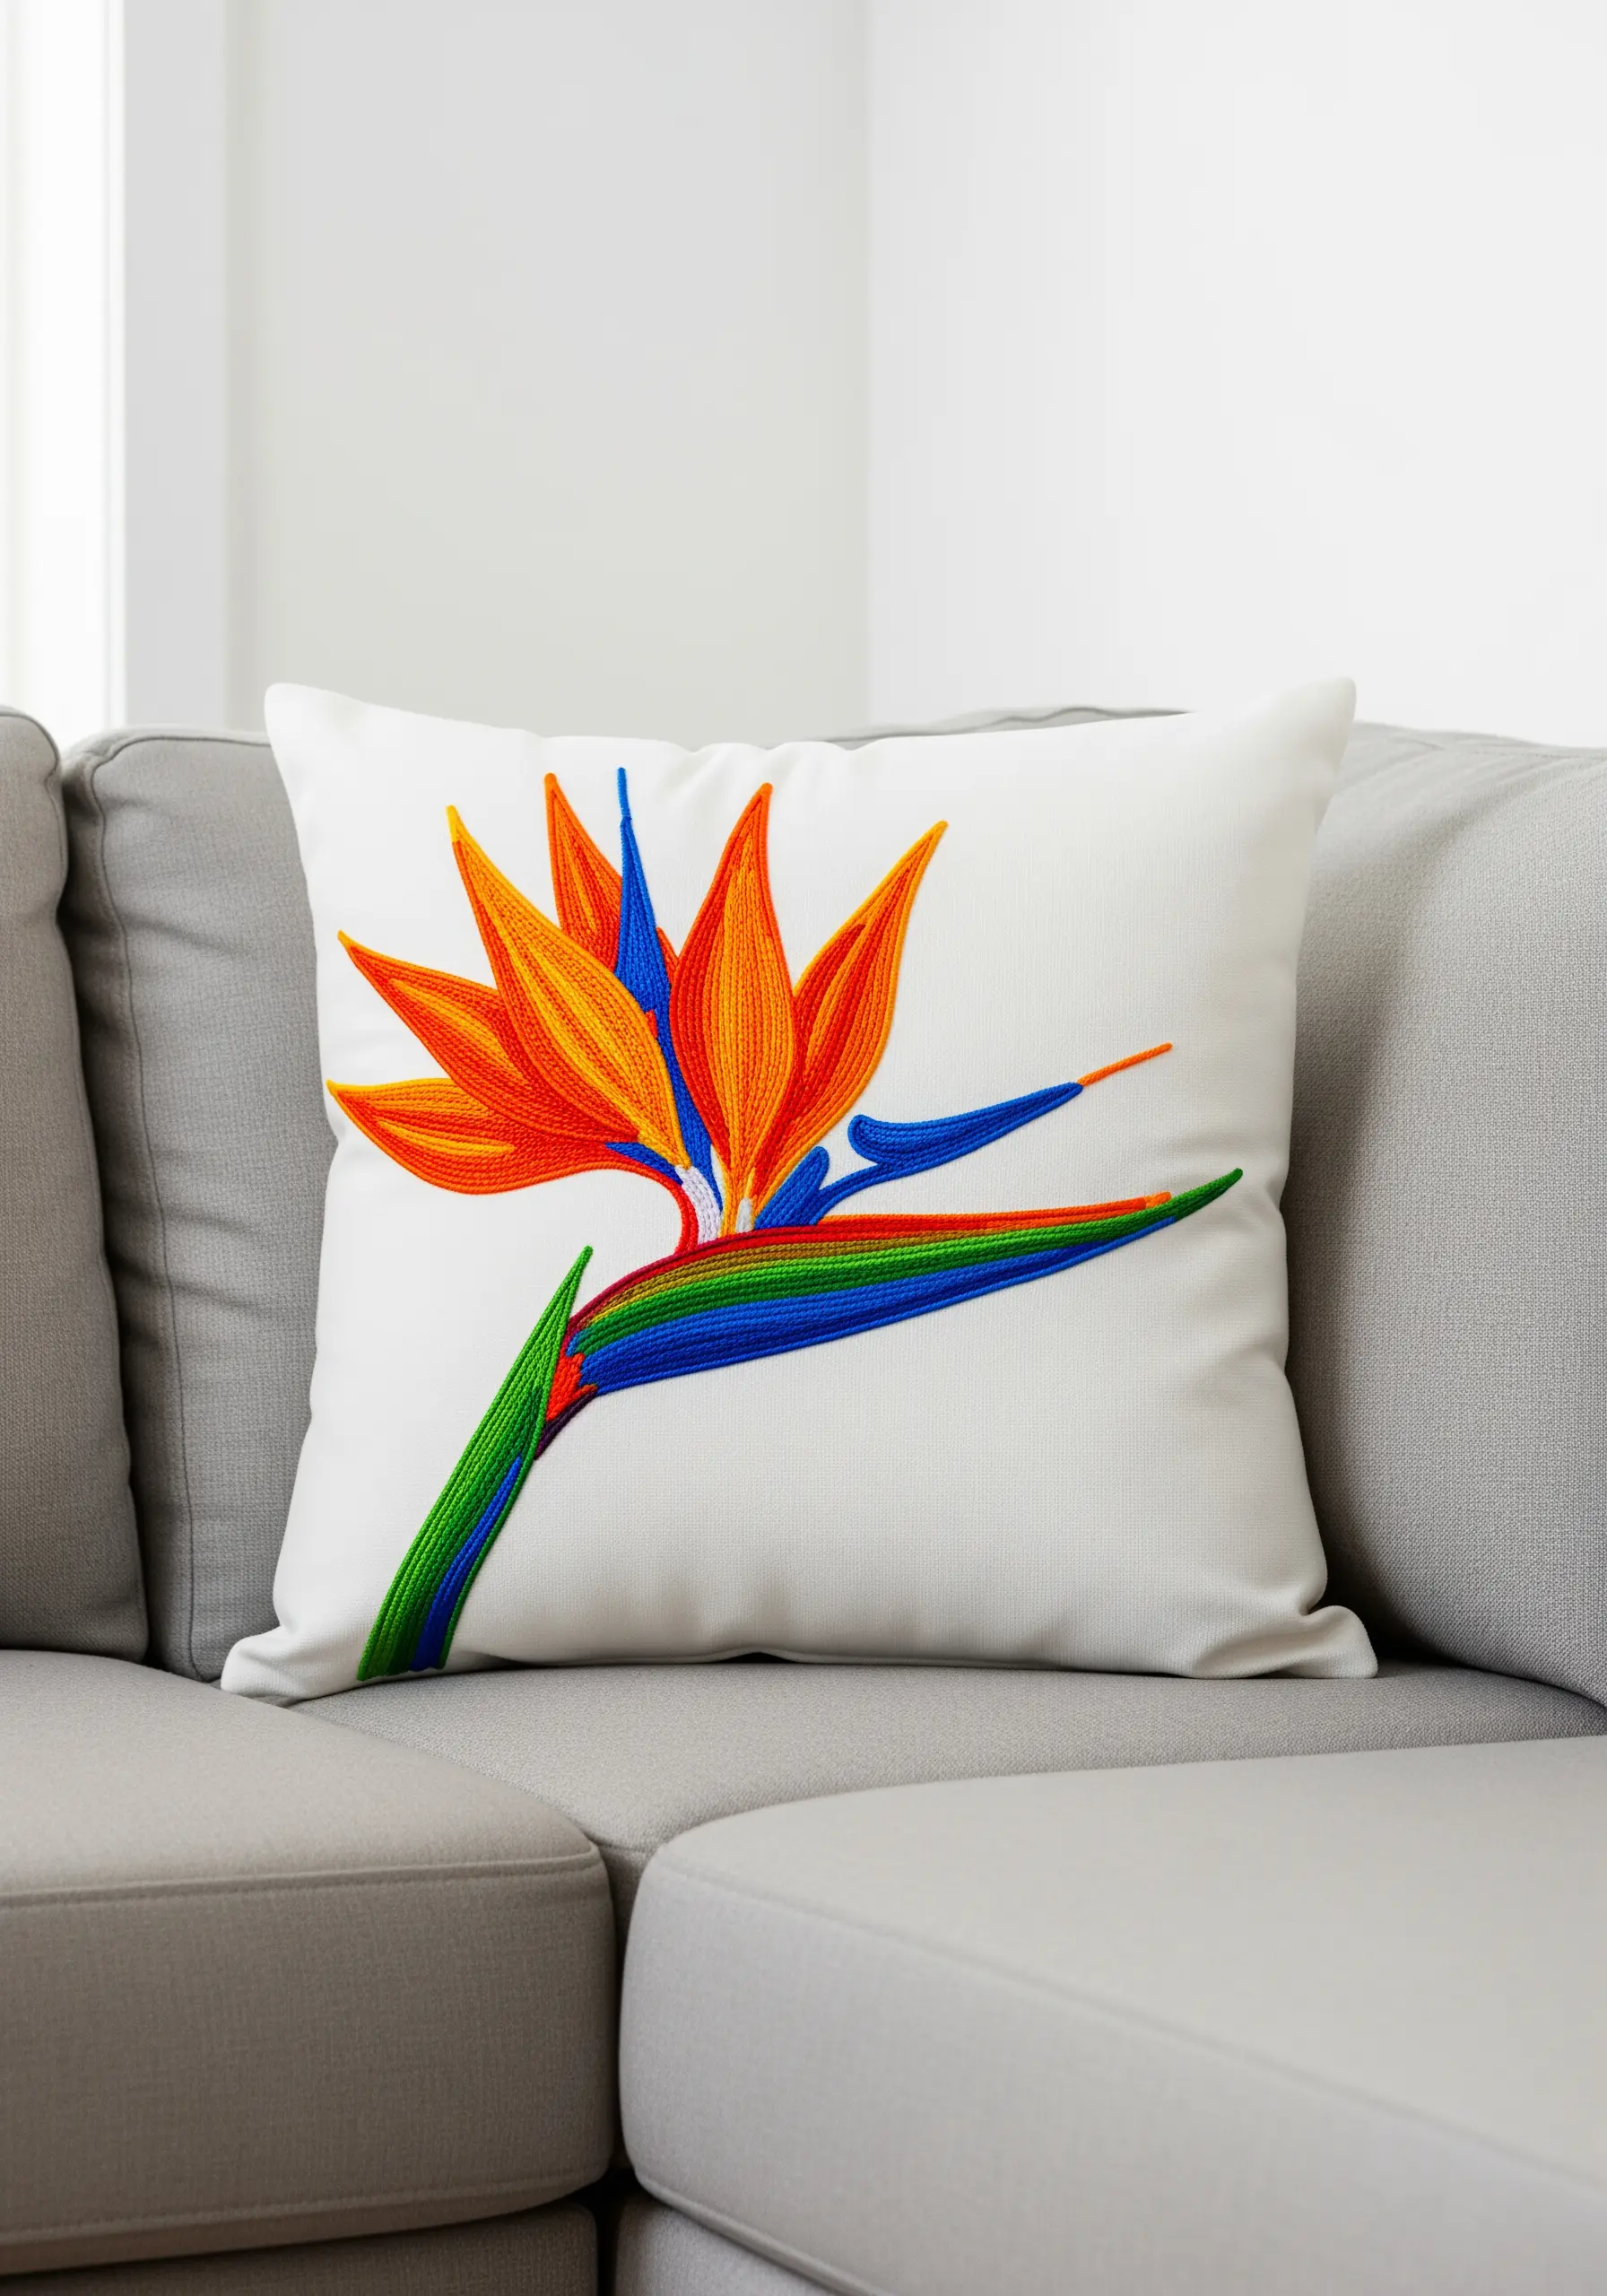
Capture the fiery energy of a Bird of Paradise flower by using long and short stitch as a thread painting technique.
Select a vibrant palette of orange, red, and yellow, and blend them seamlessly within each petal by staggering your stitches and overlapping the colors.
Pay close attention to stitch direction; your needle should always follow the growth pattern of the petal, fanning out from the base.
This method creates a smooth, gradient effect that mimics the texture of real petals and makes the colors look like they were applied with a brush, not a needle.
Use a bold, contrasting royal blue and emerald green to ensure every part of the flower stands out dramatically.
4. Sculpt Dimensional Succulents with Woven Wheel Stitches
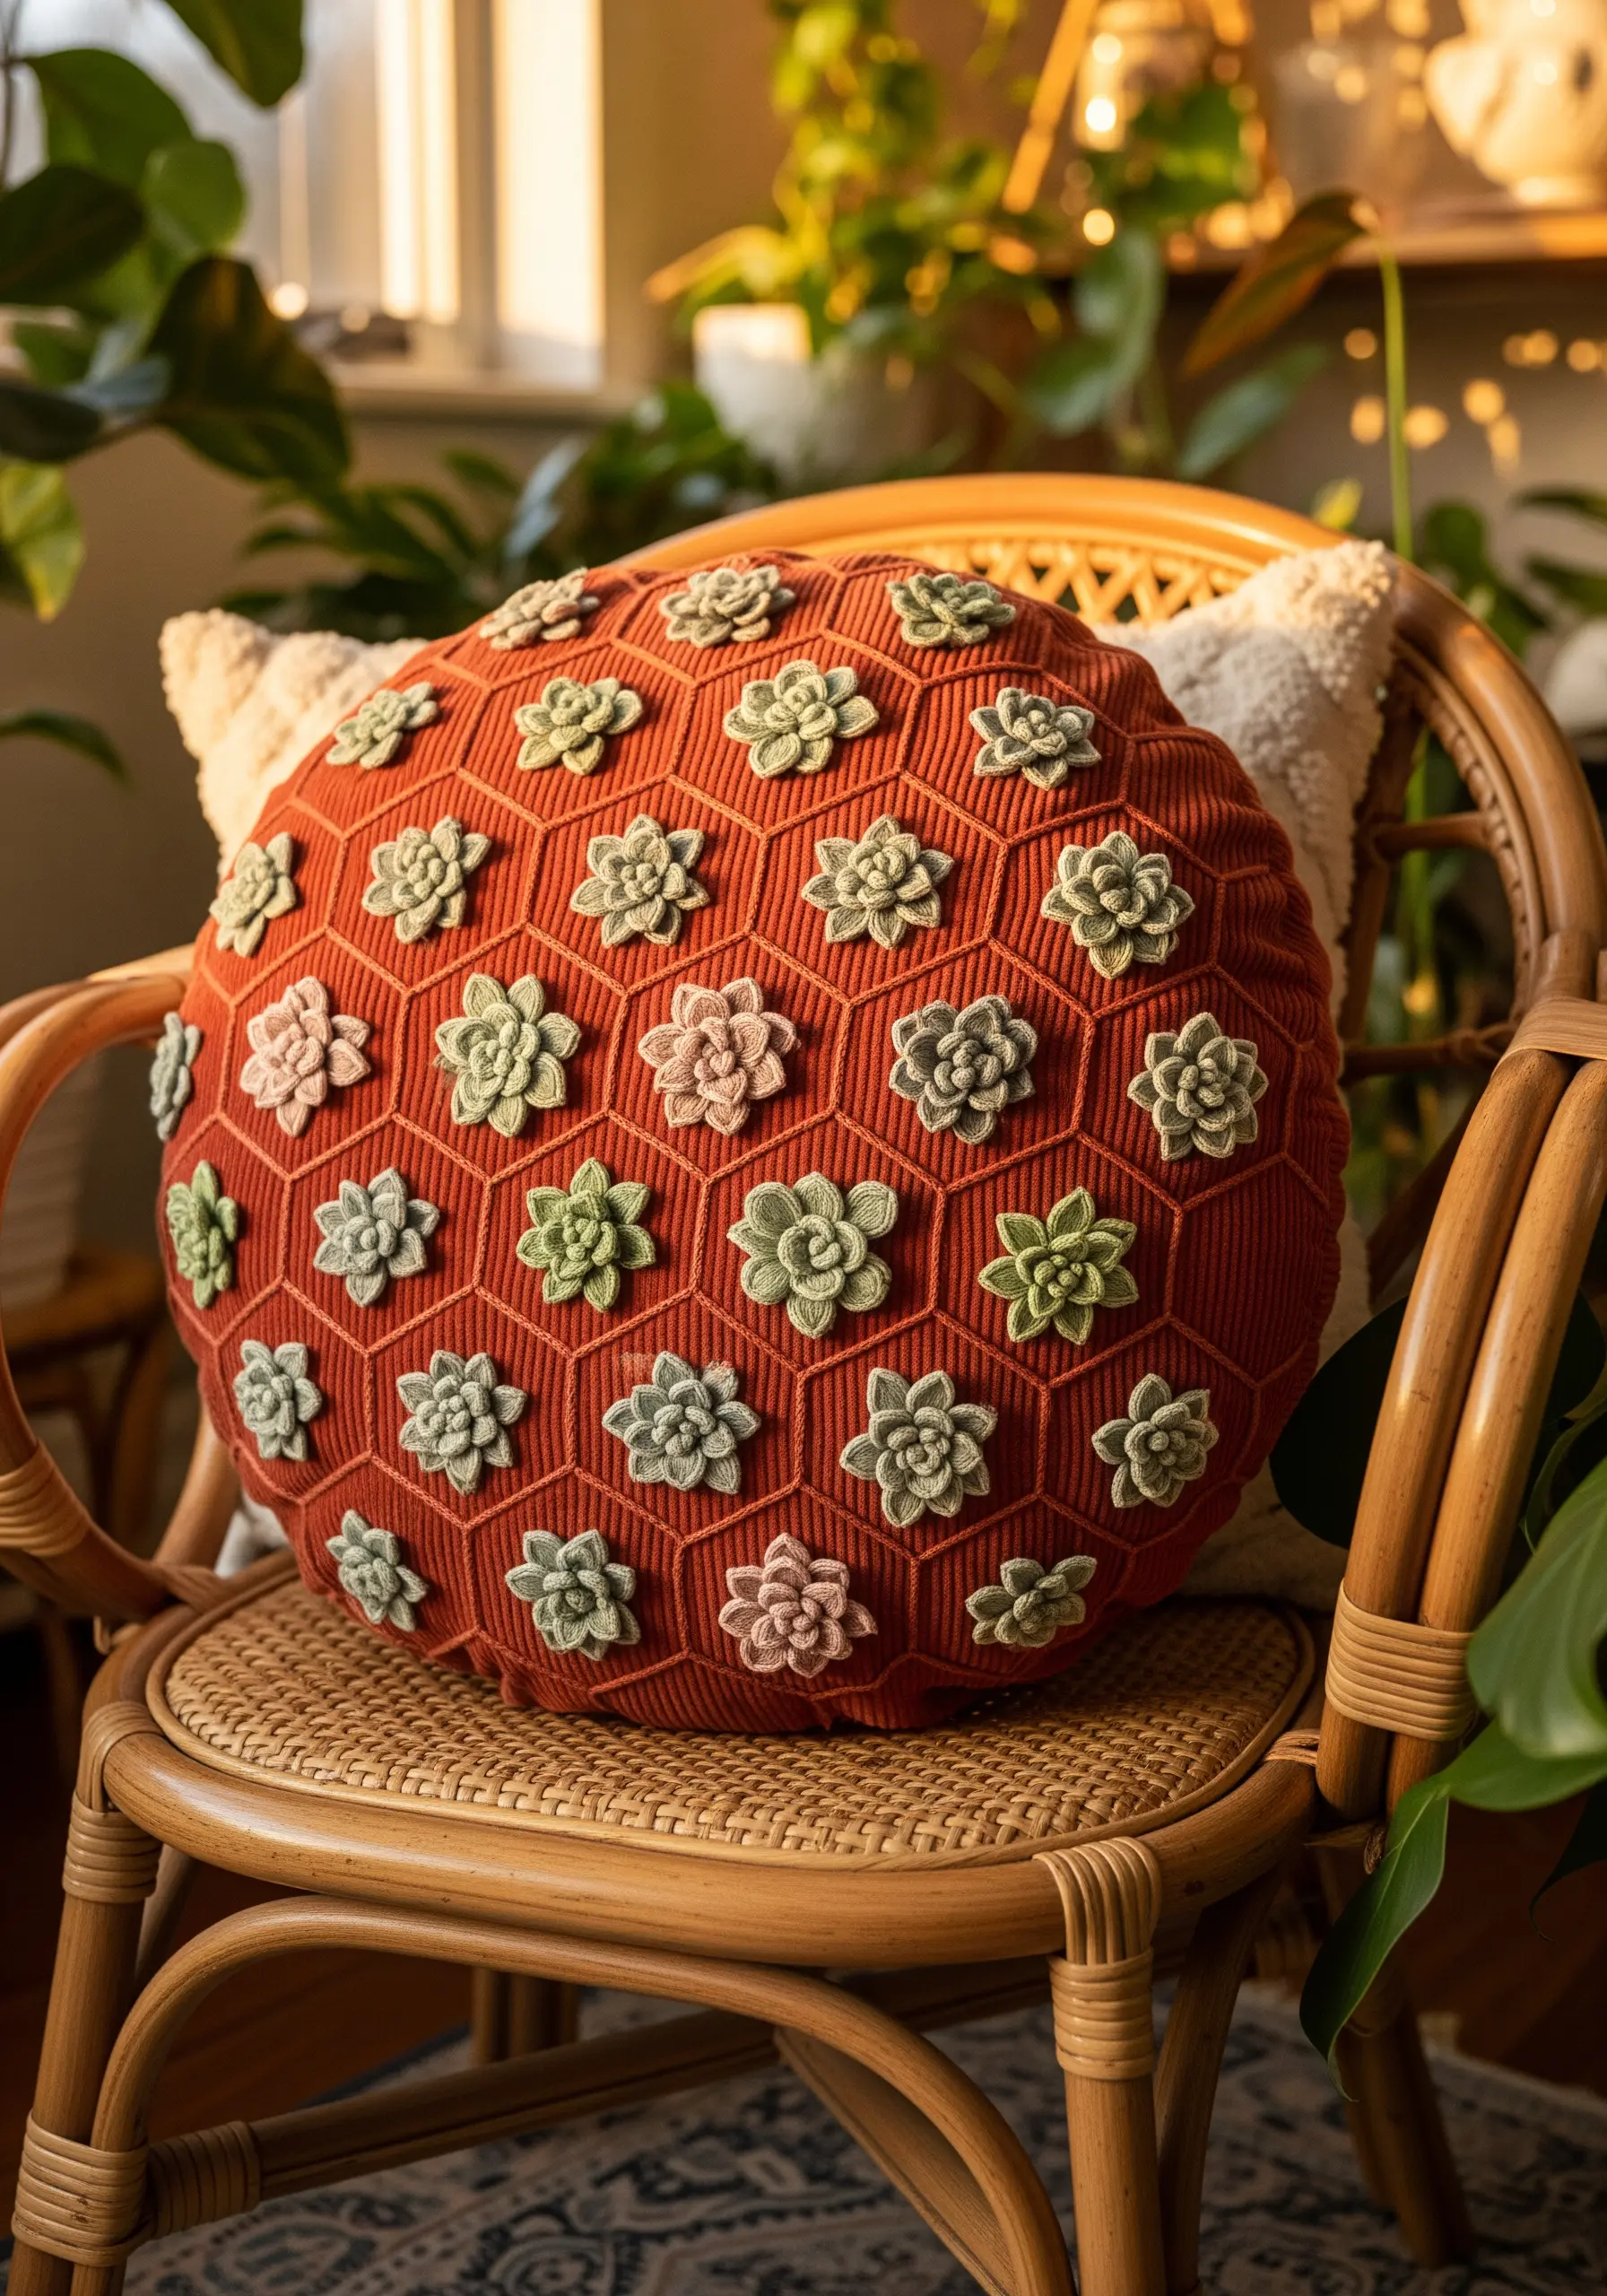
Move beyond flat embroidery by building three-dimensional succulents using the woven wheel stitch, often called a spider web rose.
Create a base of five or seven straight stitches radiating from a central point, then weave your thread over and under these spokes until the shape is filled.
By varying the tightness of your weave and the thickness of your thread (a full six strands works beautifully), you can create plump, realistic succulent forms that literally stand off the pillow.
Arrange them in a honeycomb grid stitched with a simple backstitch; this adds a modern, geometric structure that contrasts perfectly with the organic succulents.
5. Achieve Elegance with Tone-on-Tone Ferns
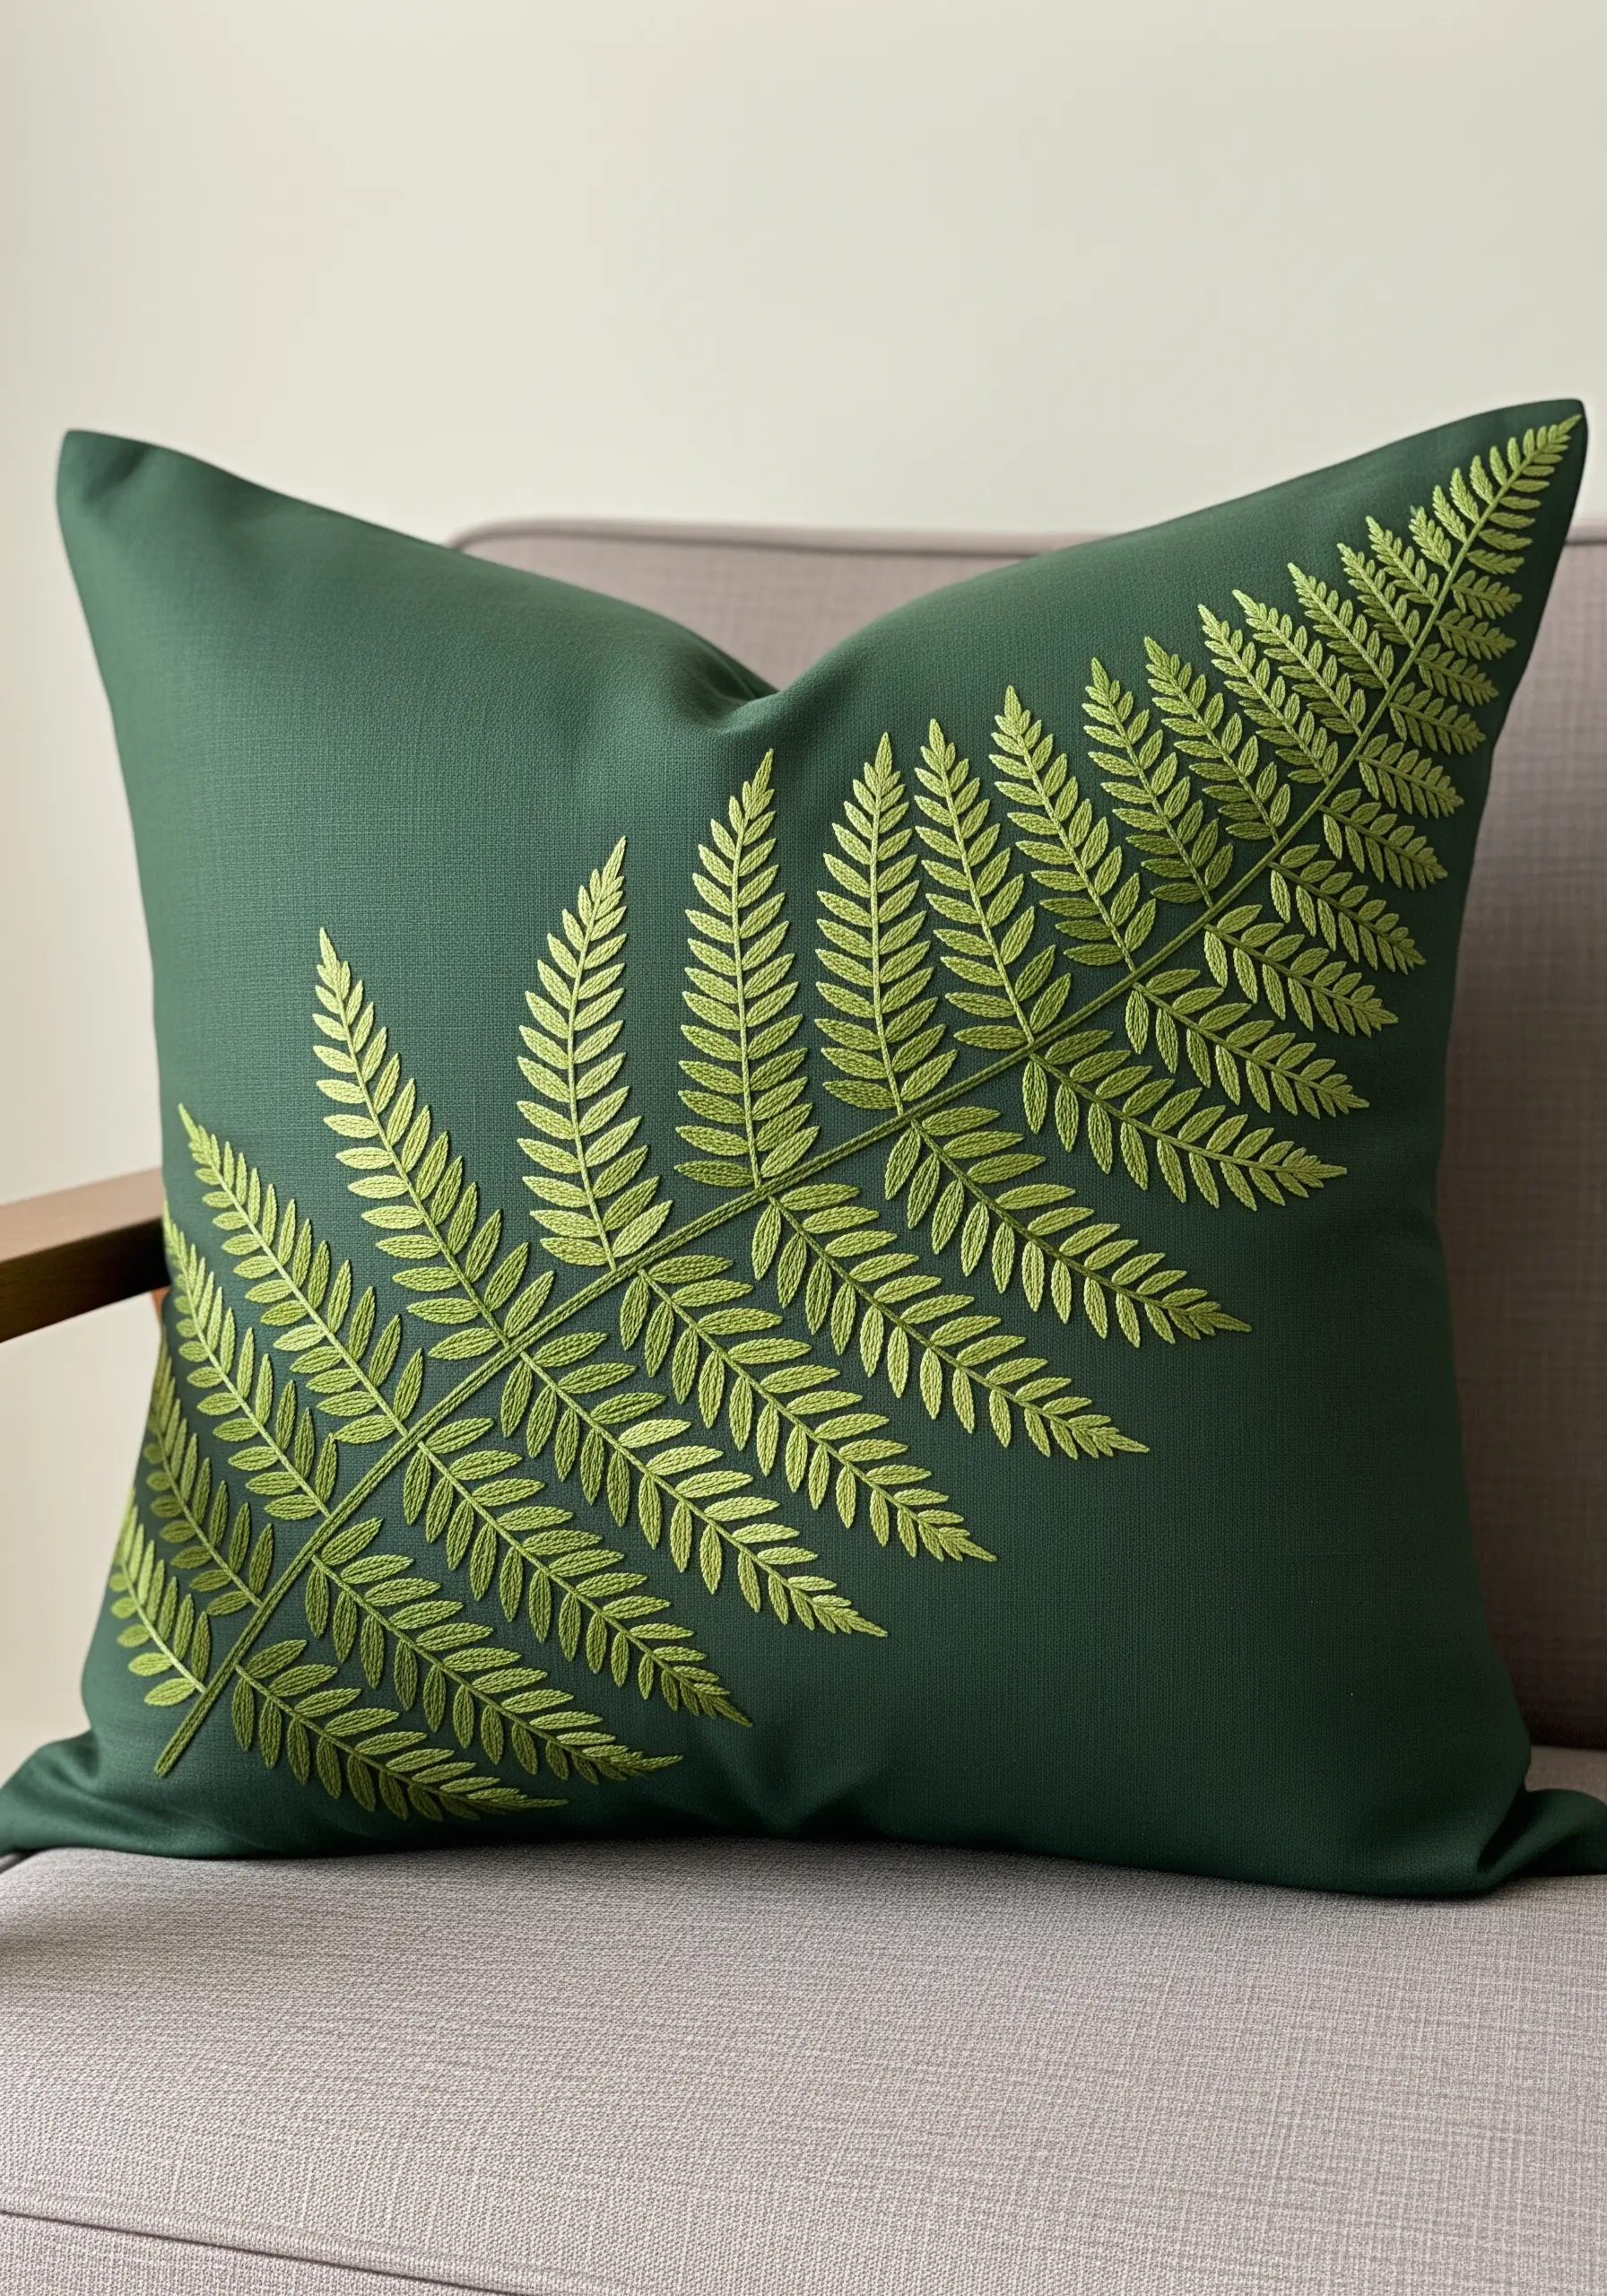
For a sophisticated, high-end look, embroider a design using thread that is only a few shades lighter or darker than your fabric.
This tone-on-tone technique creates a subtle, textured effect that feels luxurious and intentional.
A classic fishbone stitch is perfect for fern leaves, as it creates a beautiful braided texture along the central stem of each frond.
The key is precision—ensure your stitches are uniform in length and angle to achieve that clean, graphic quality.
This approach works best on matte fabrics like cotton twill or linen, where the slight sheen of the embroidery floss provides a gentle contrast.
6. Define Modern Botanicals with Gold Line Art

Embrace minimalism by focusing on the clean, elegant outlines of a ginkgo branch rather than a filled-in design.
Use a whipped backstitch with a metallic gold thread to achieve a smooth, uninterrupted line that has a slight corded appearance.
This stitch is made by first creating a standard backstitch outline, then lacing a second thread through the stitches without piercing the fabric, which refines the line and adds dimension.
Placing this minimalist line art nature embroidery on a cool-toned gray or charcoal pillow creates a contemporary look where the metallic thread can truly shine.
7. Compose a Vibrant Wildflower Meadow Bouquet
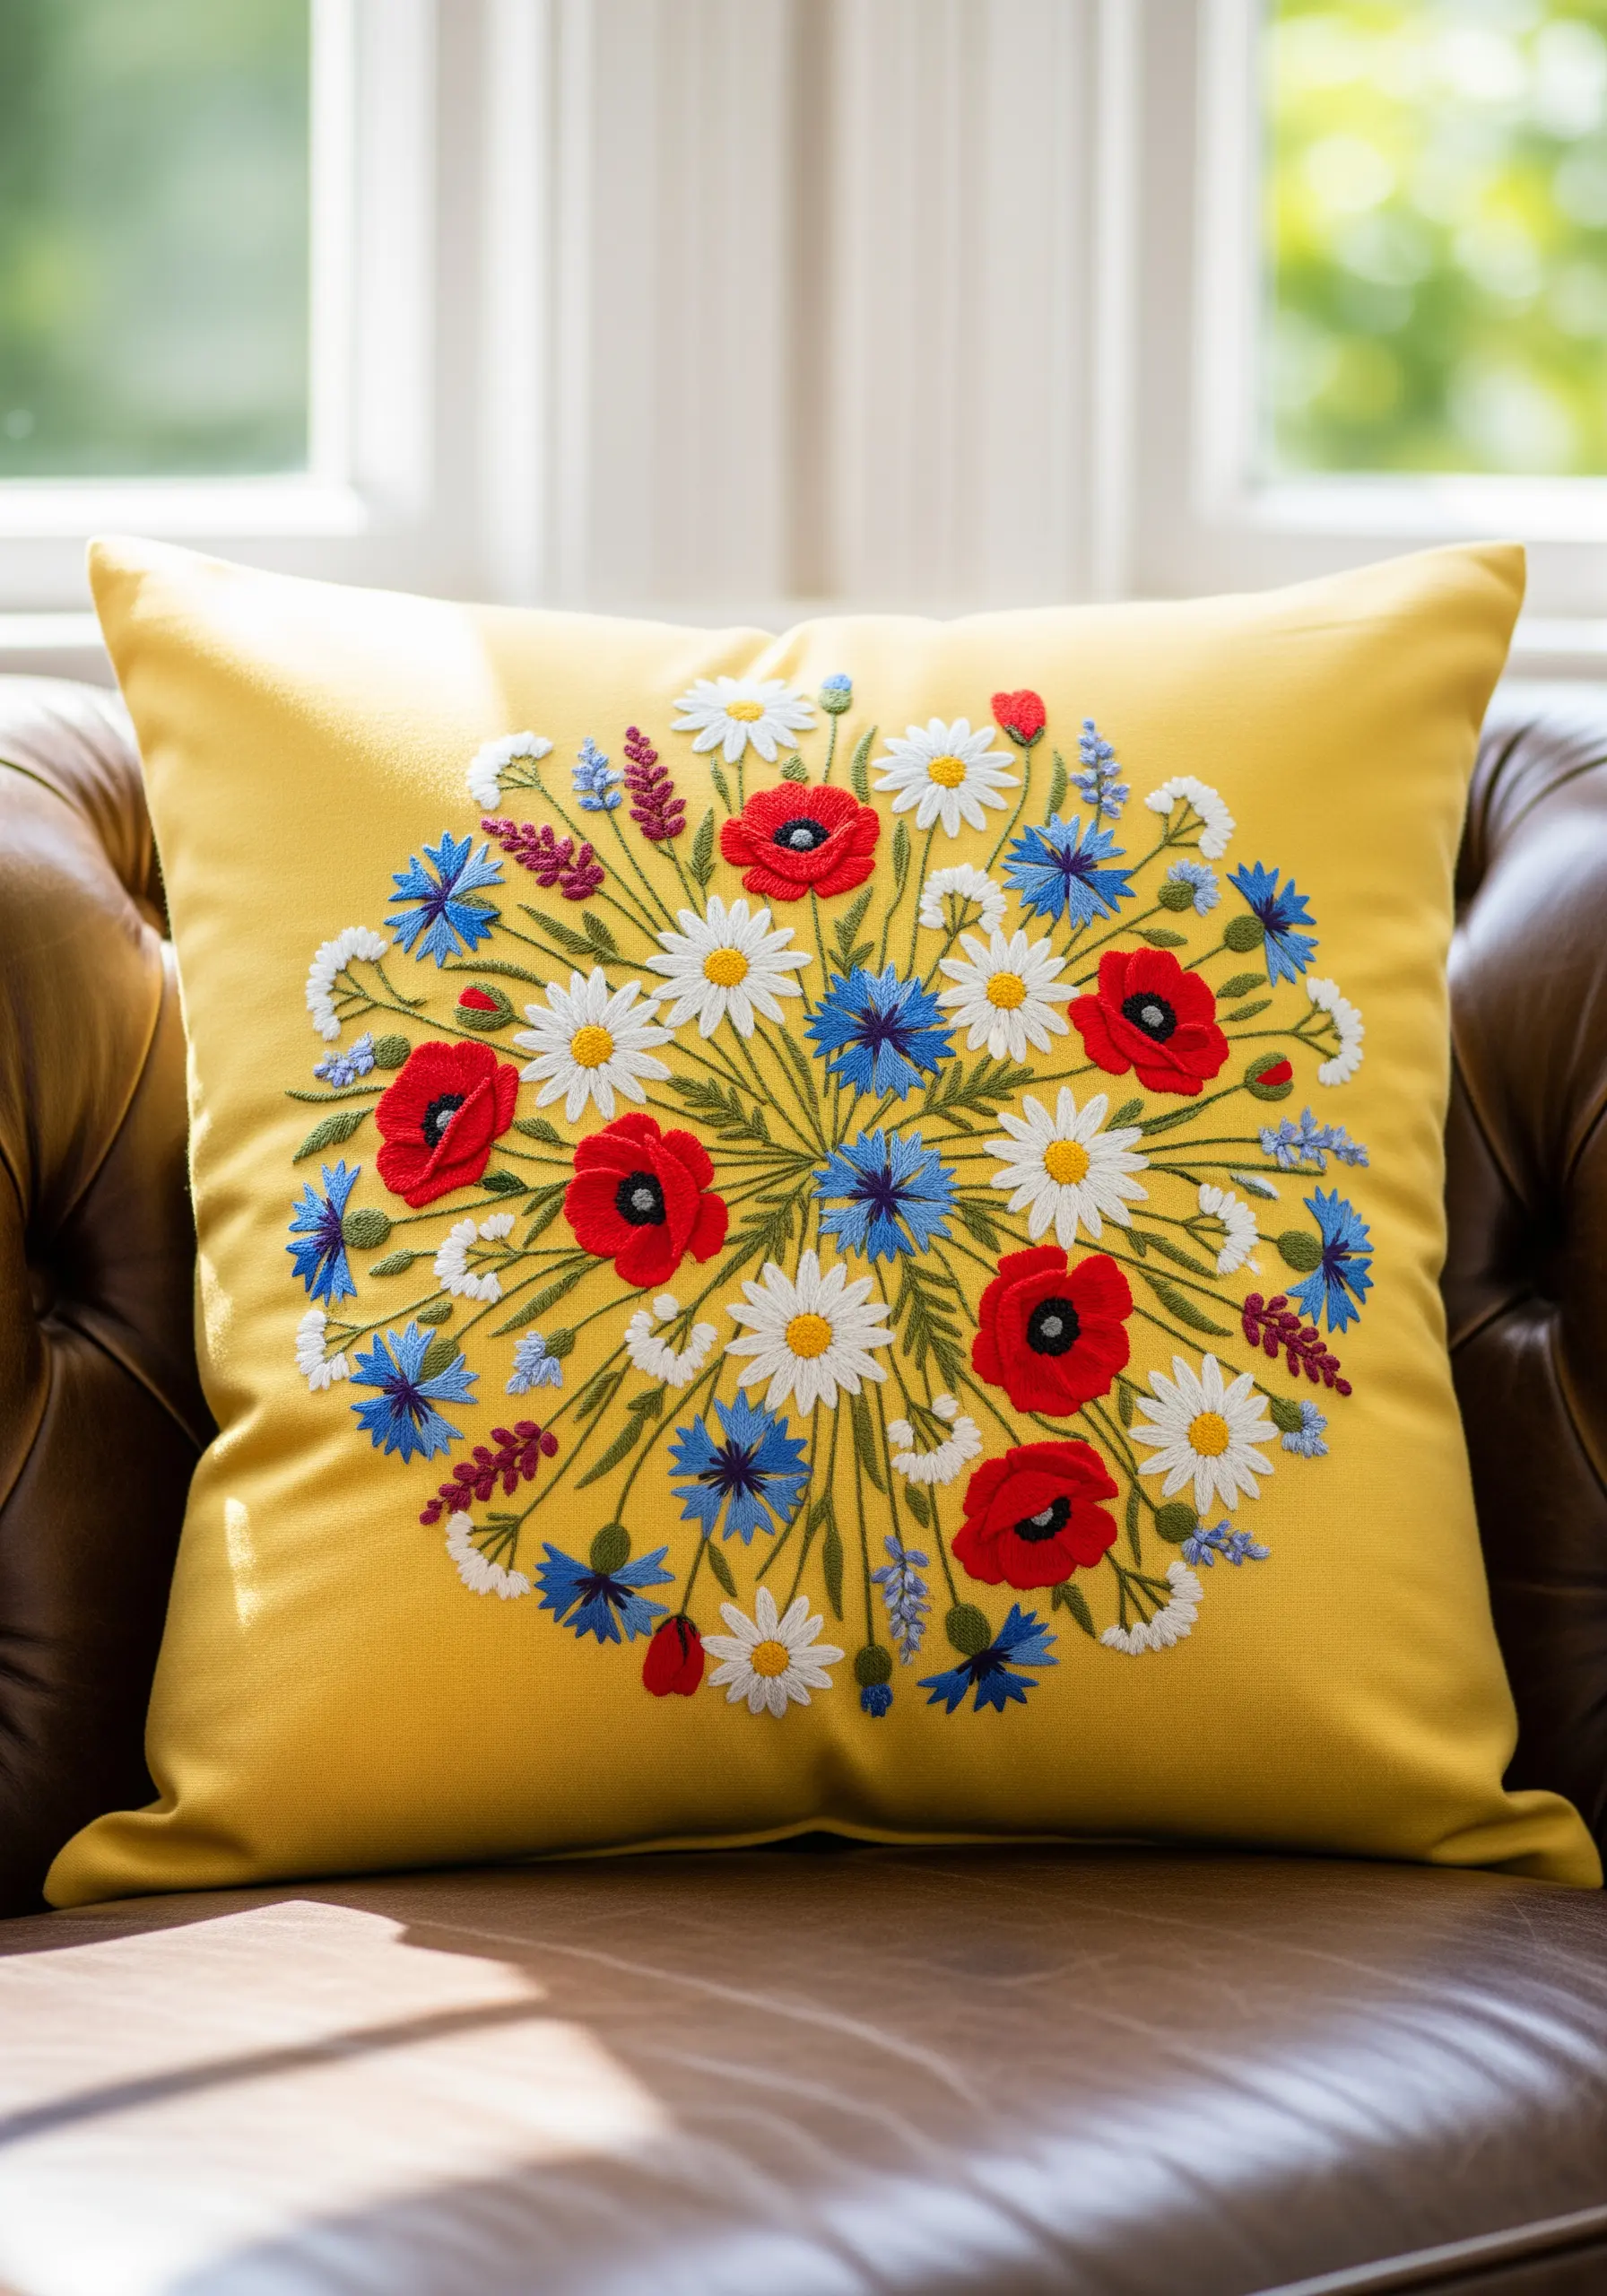
Create a joyful, meadow-like feel by combining multiple flower types and textures within a single, balanced composition.
Use bold satin stitch for the poppy petals, allowing them to be the focal point. Contrast this with delicate lazy daisy stitches for the chamomile and spiky straight stitches for the blue cornflowers.
Incorporate French knots of varying sizes and colors to add pollen details and fill in smaller gaps, which makes the bouquet feel lush and abundant.
The key to preventing visual chaos is to repeat colors and shapes throughout the design, creating a rhythm that guides the eye.
8. Capture Graphic Charm with Coiled Stitches
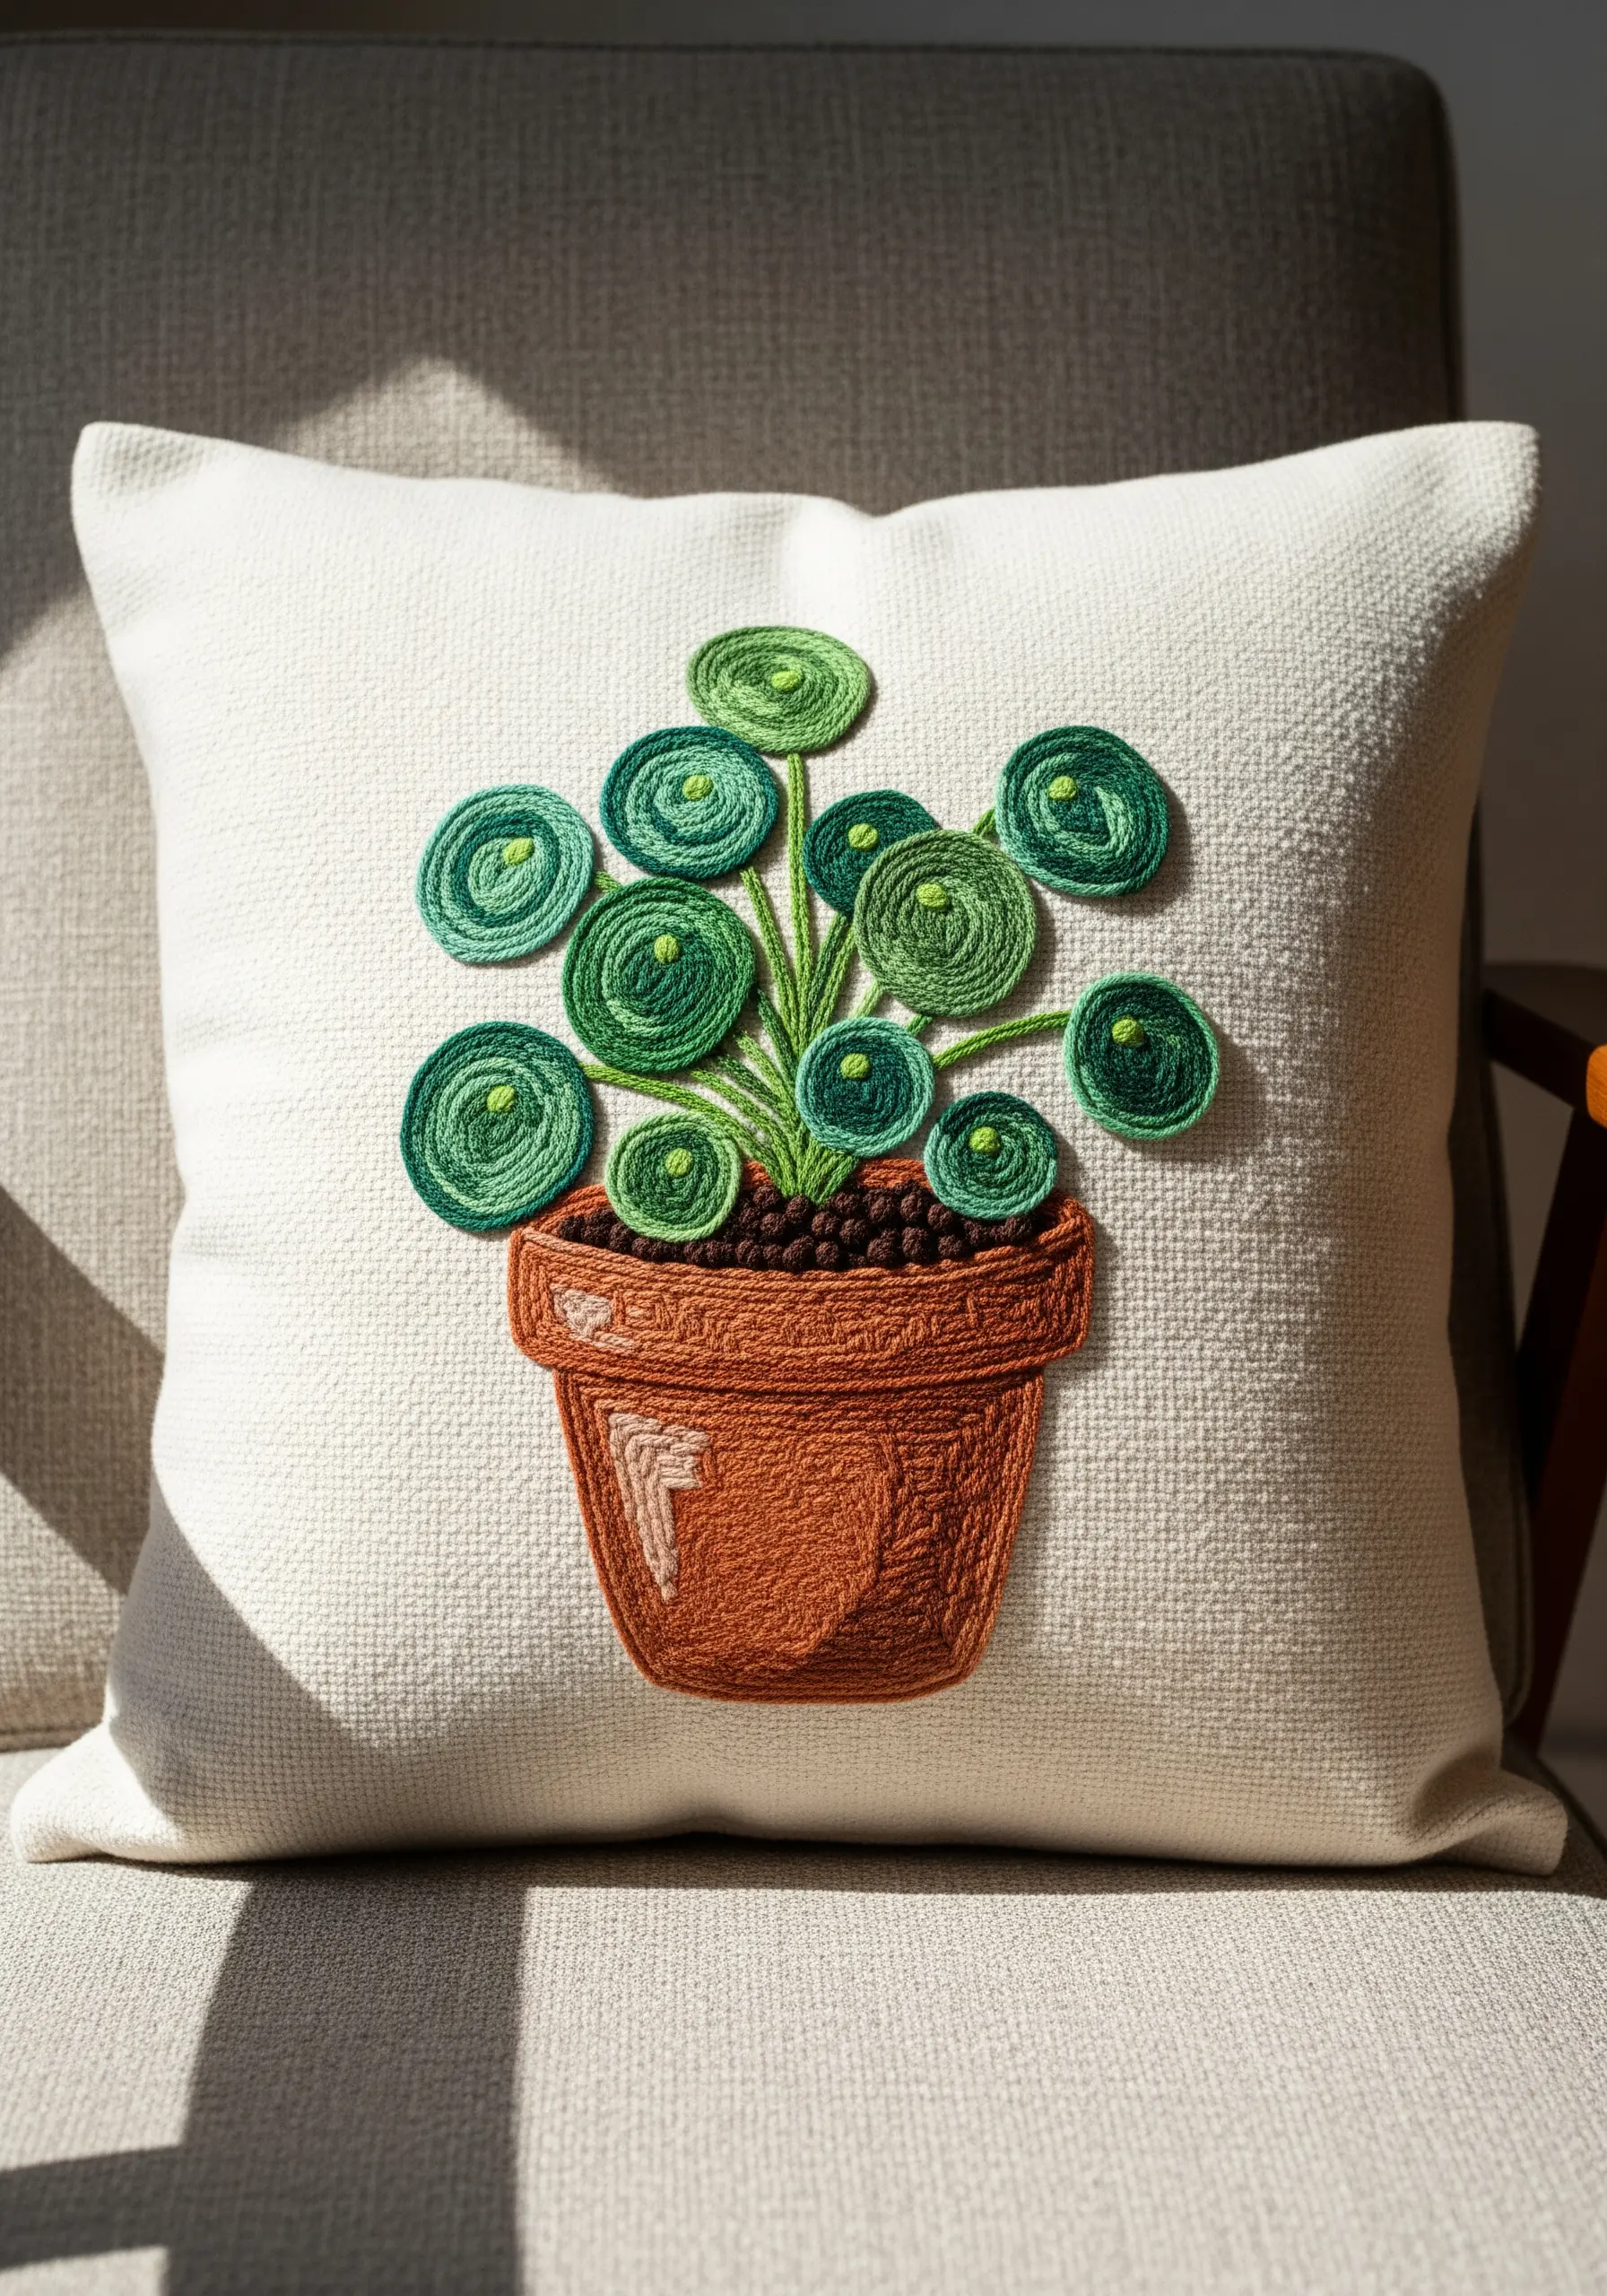
Translate the unique shape of a Pilea plant into a stylized, graphic motif using couching or a coiled satin stitch.
To create the flat, circular leaves, outline each circle with a split stitch, then fill it by working a continuous spiral of satin stitches from the outside in.
Alternatively, couch a thicker yarn or multiple strands of floss in a spiral shape for a faster, more textural effect.
Fill the terracotta pot with vertical satin stitches to contrast with the circular motion of the leaves. This technique gives your houseplant embroidery motifs a bold, modern, and playful feel.
9. Stitch Delicate Ivy on Luxe Fabrics
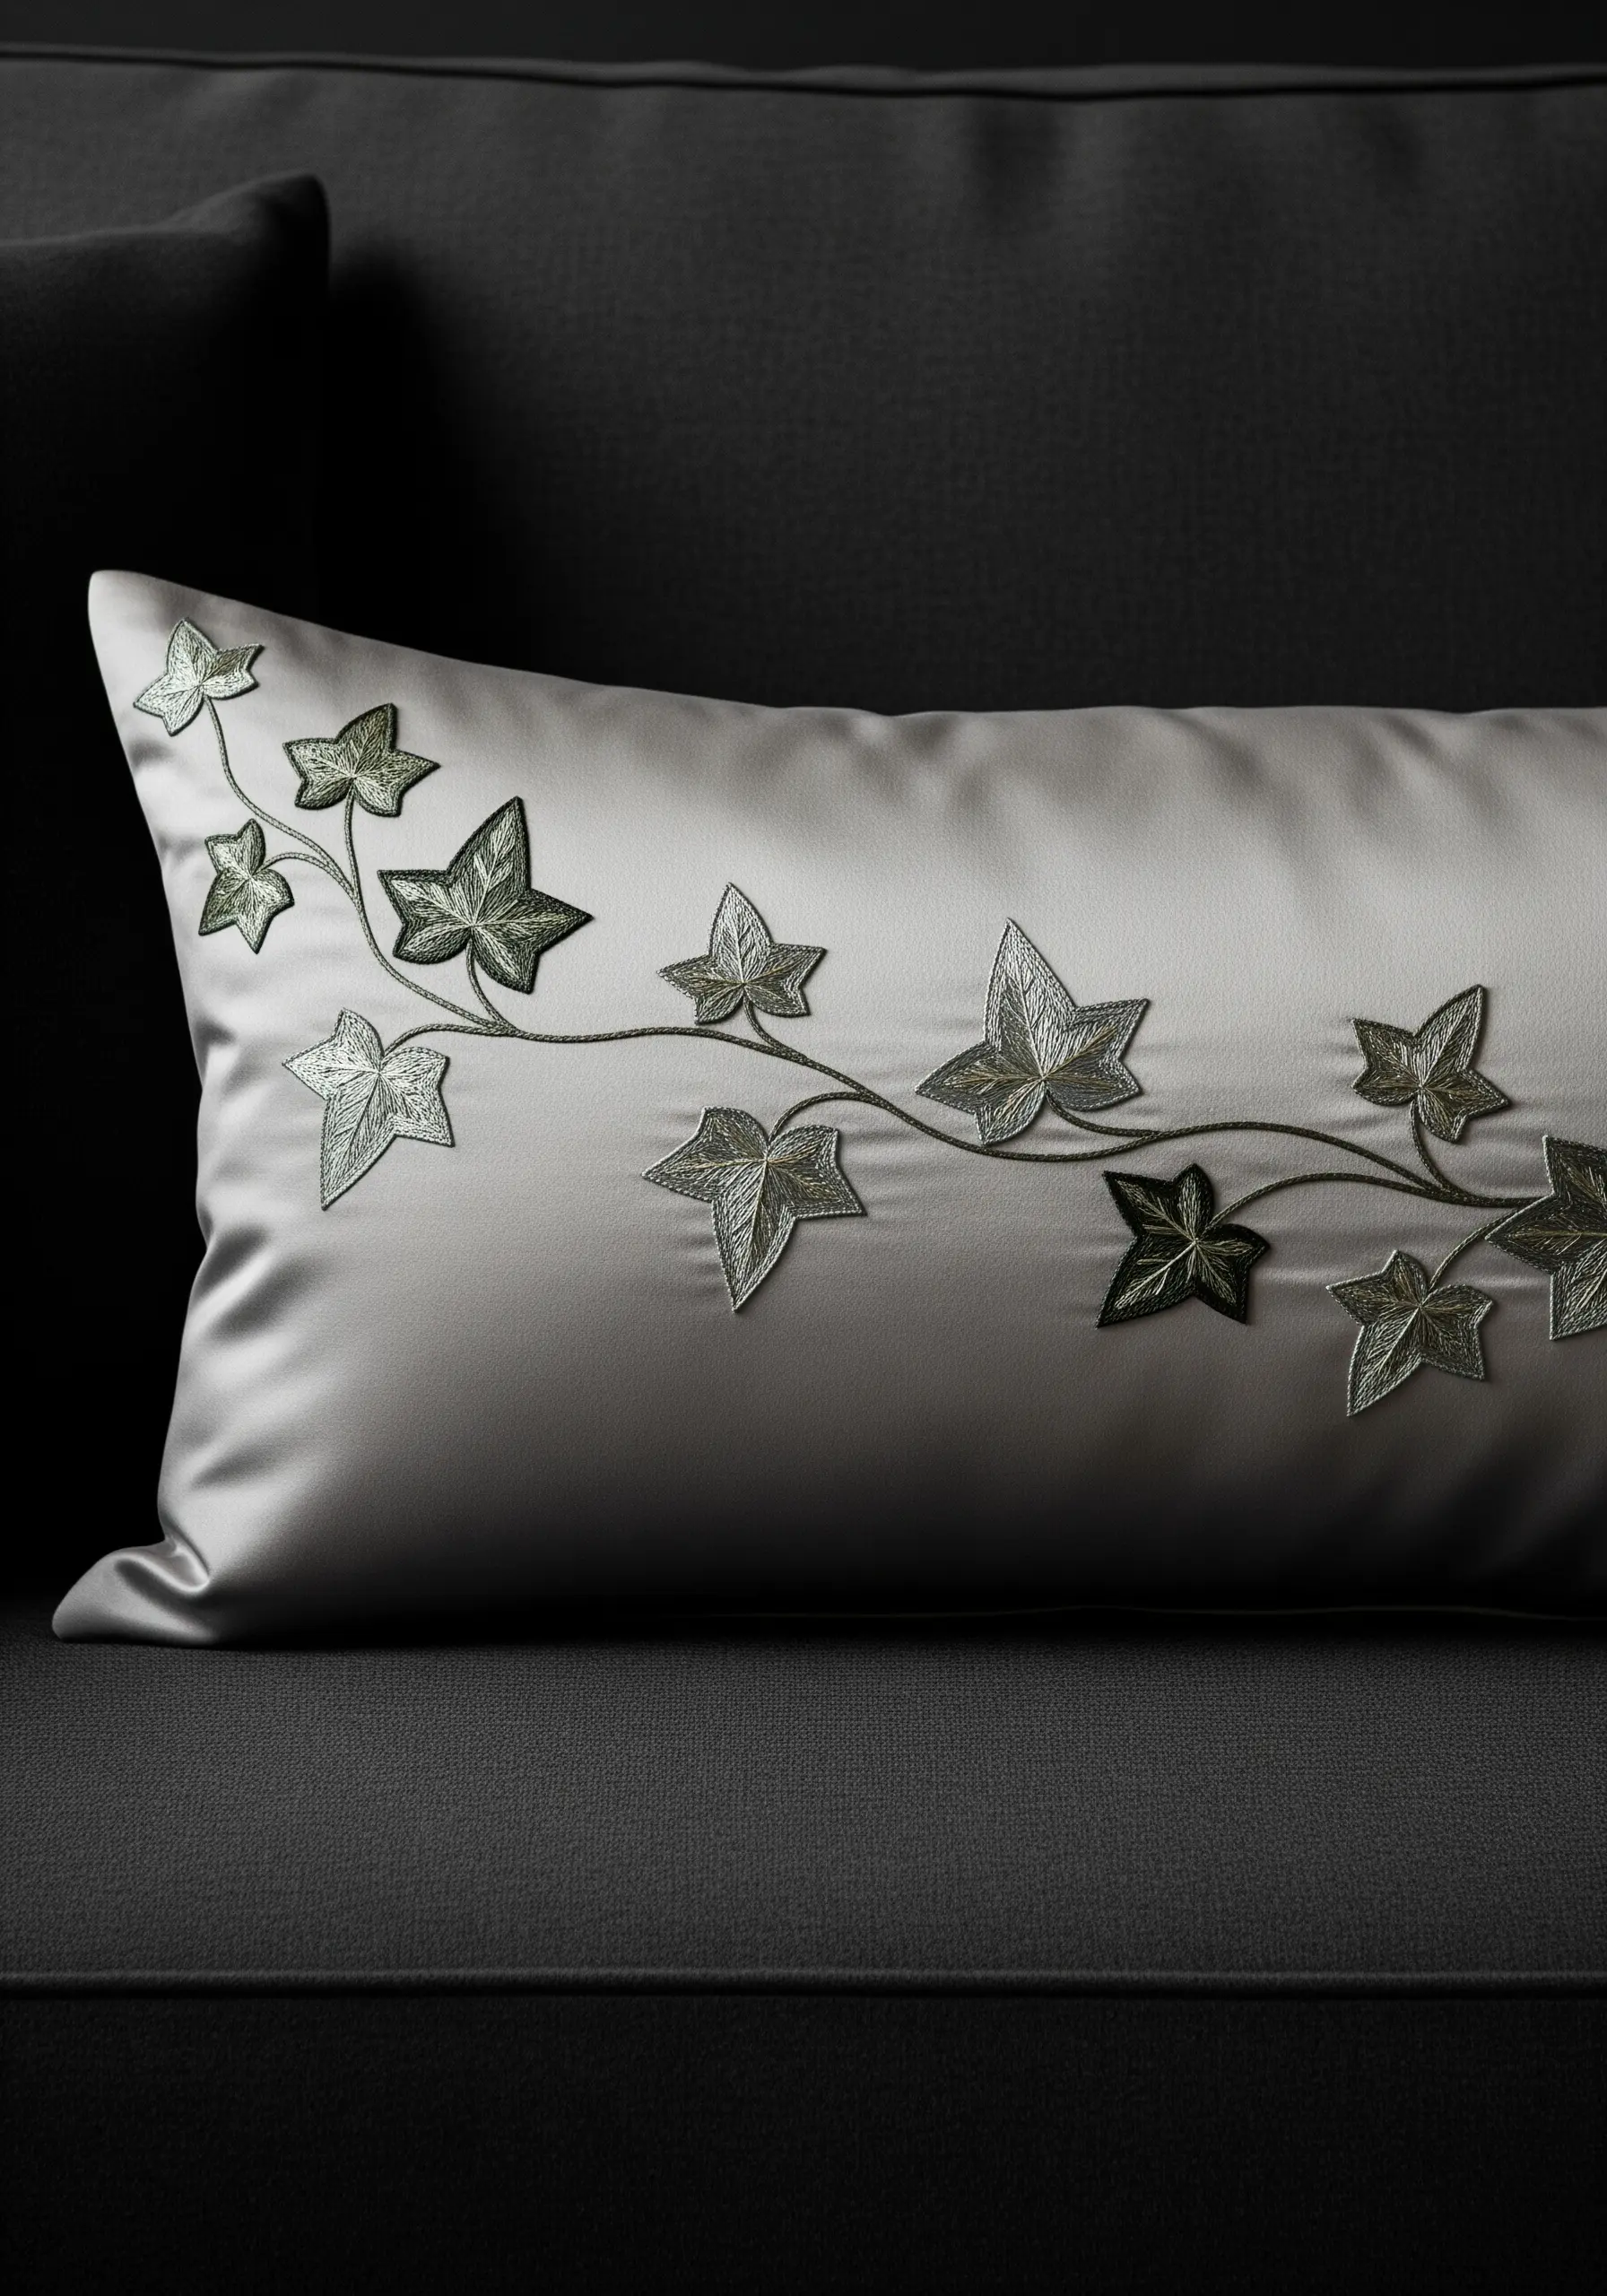
When embroidering on delicate fabrics like silk or satin, your technique must be flawless to avoid puckering.
Use a fine, sharp needle and a stabilizer on the back of your fabric. For the ivy leaves, a long and short stitch in silvery-green hues will create a soft, shaded look that complements the fabric’s sheen.
Keep the connecting vine delicate and light by using a simple, elegant stem stitch with only two strands of floss.
This design’s power is in its restraint; the negative space around the wandering vine is just as important as the stitches themselves, creating a feeling of understated luxury.
10. Create Bold Tropical Blooms with Directional Fills
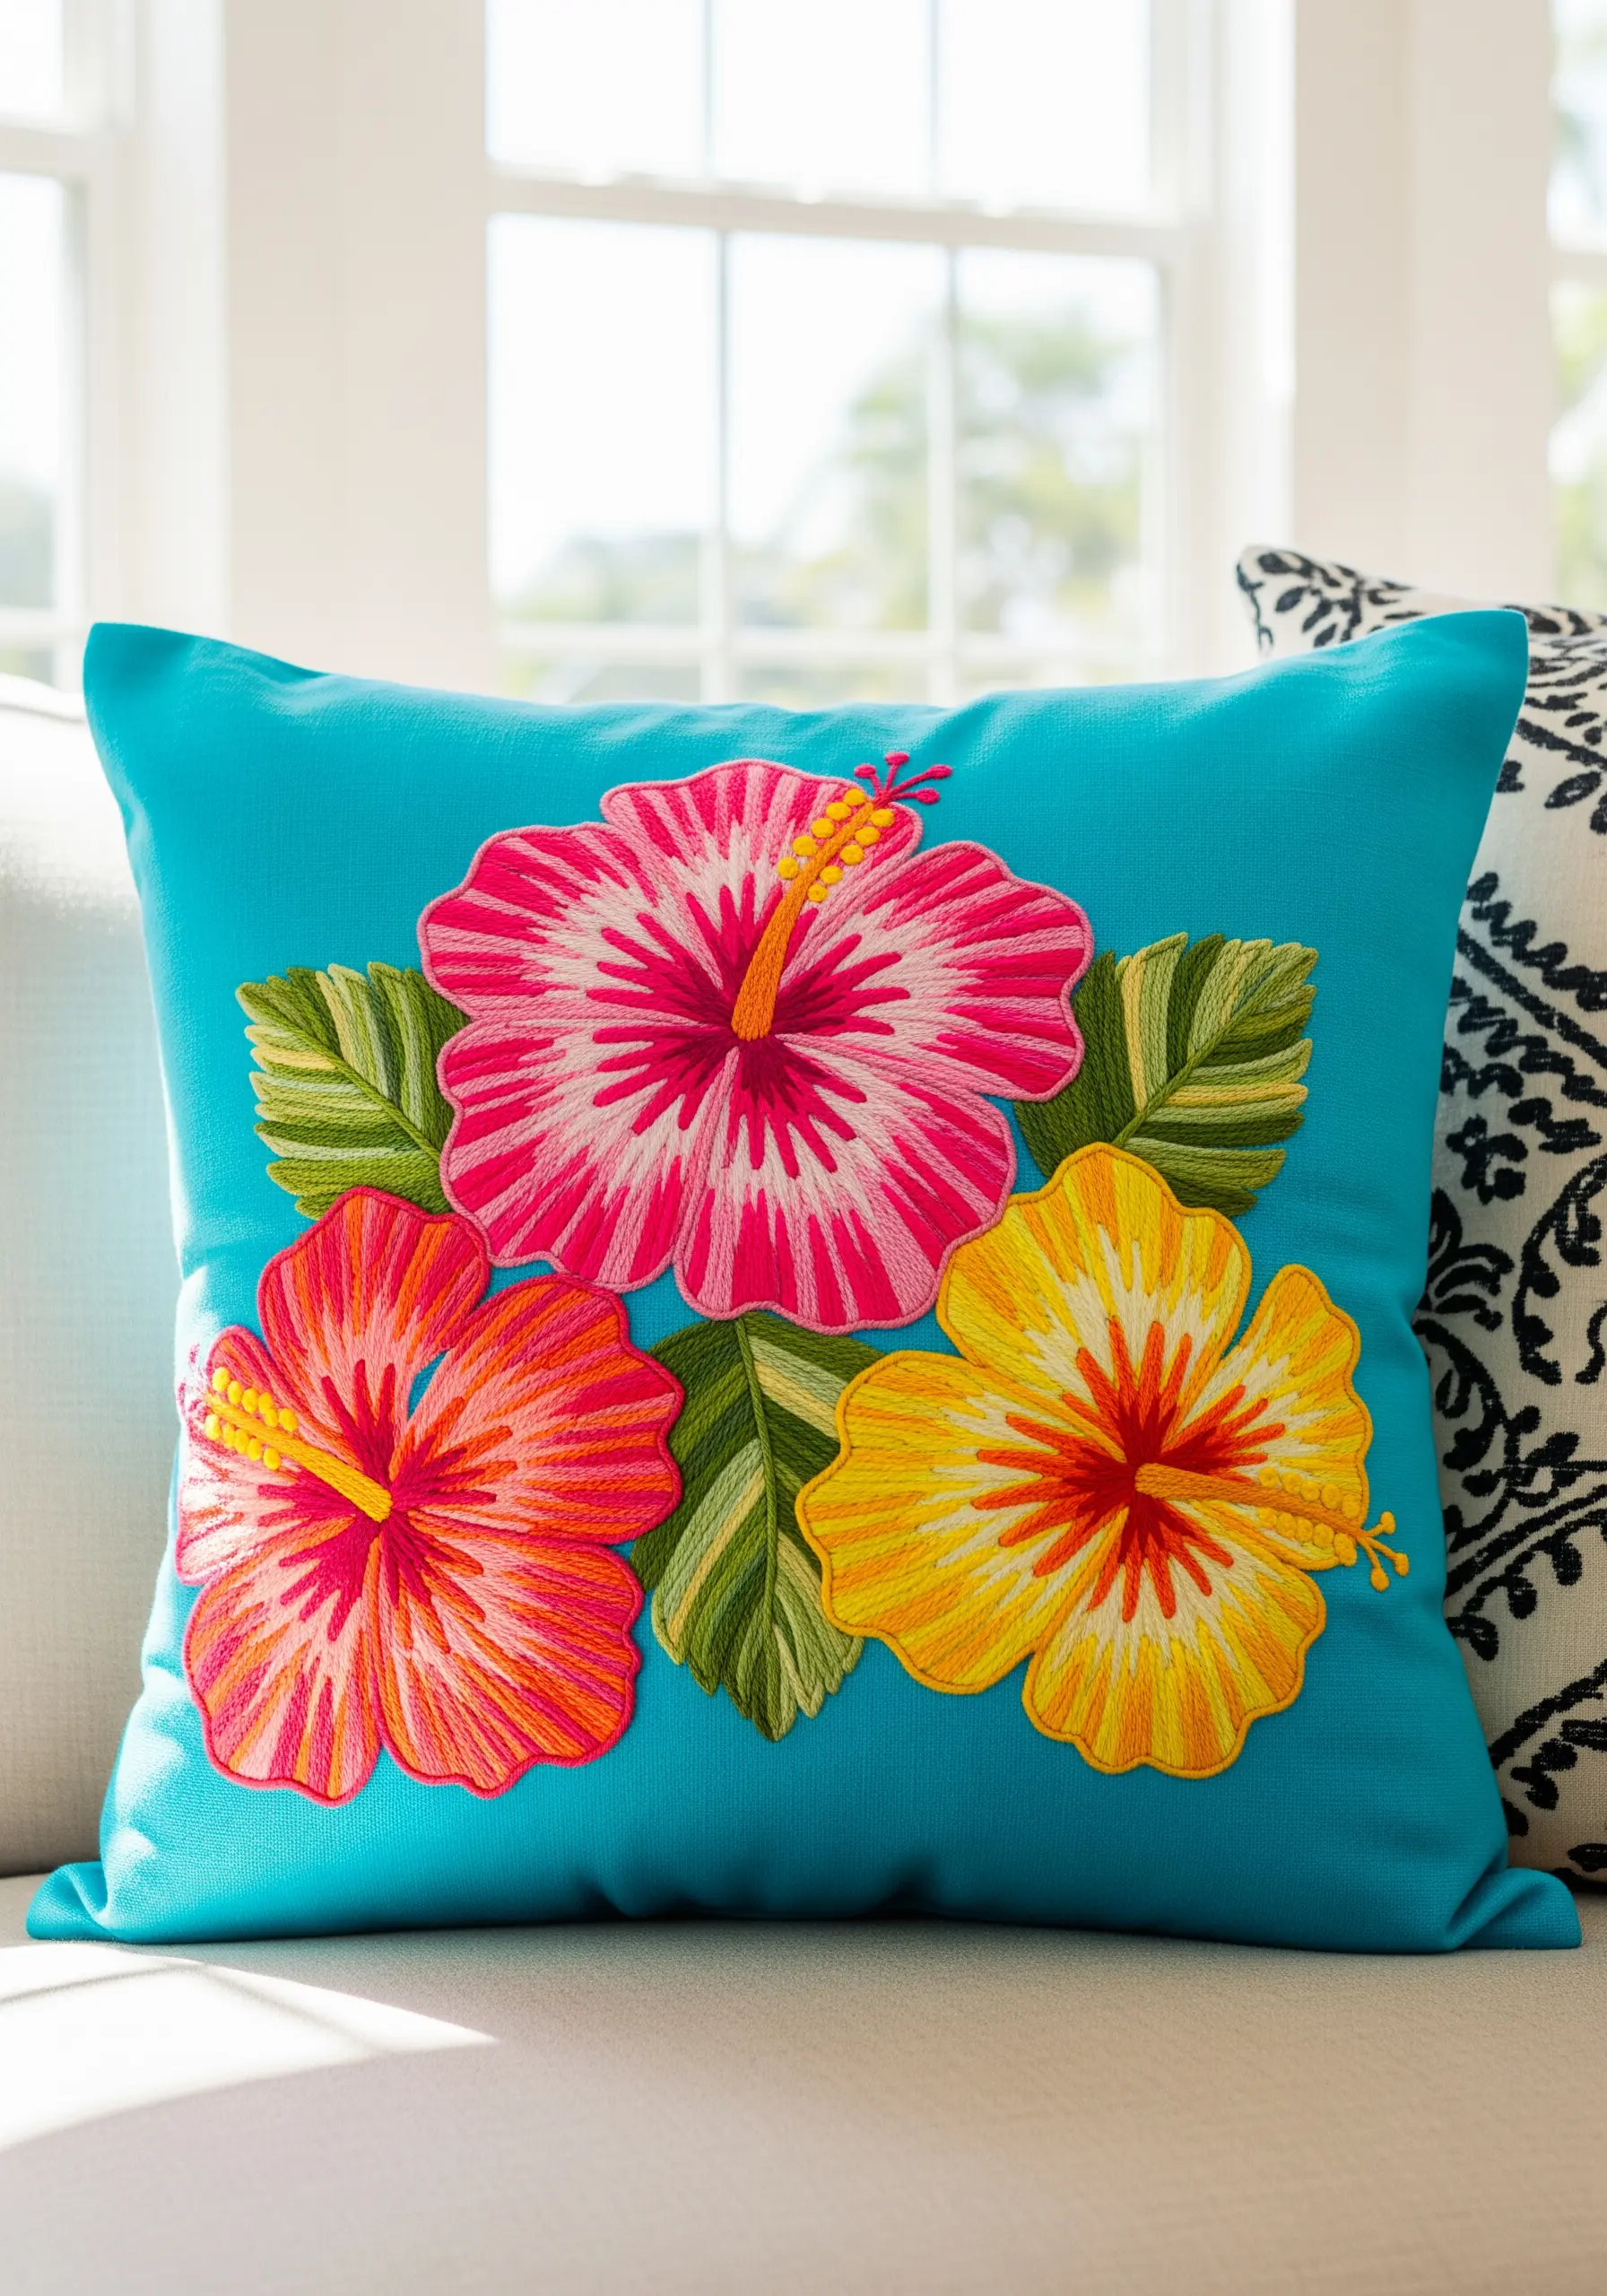
Make your hibiscus flowers pop by mastering directional satin stitch, where the angle of your stitches creates texture and light.
For each petal, divide it into sections and angle your stitches to radiate from the center, just as they would in nature.
Don’t be afraid of bold color choices; blending hot pink, orange, and yellow within a single flower adds a dynamic, sun-kissed feel.
For the leaves, use two shades of green in a fishbone stitch to create a central vein and add to the lush, tropical botanical embroidery patterns feel of the entire piece.
11. Evoke Autumn with Whipped Outlines and Warm Tones
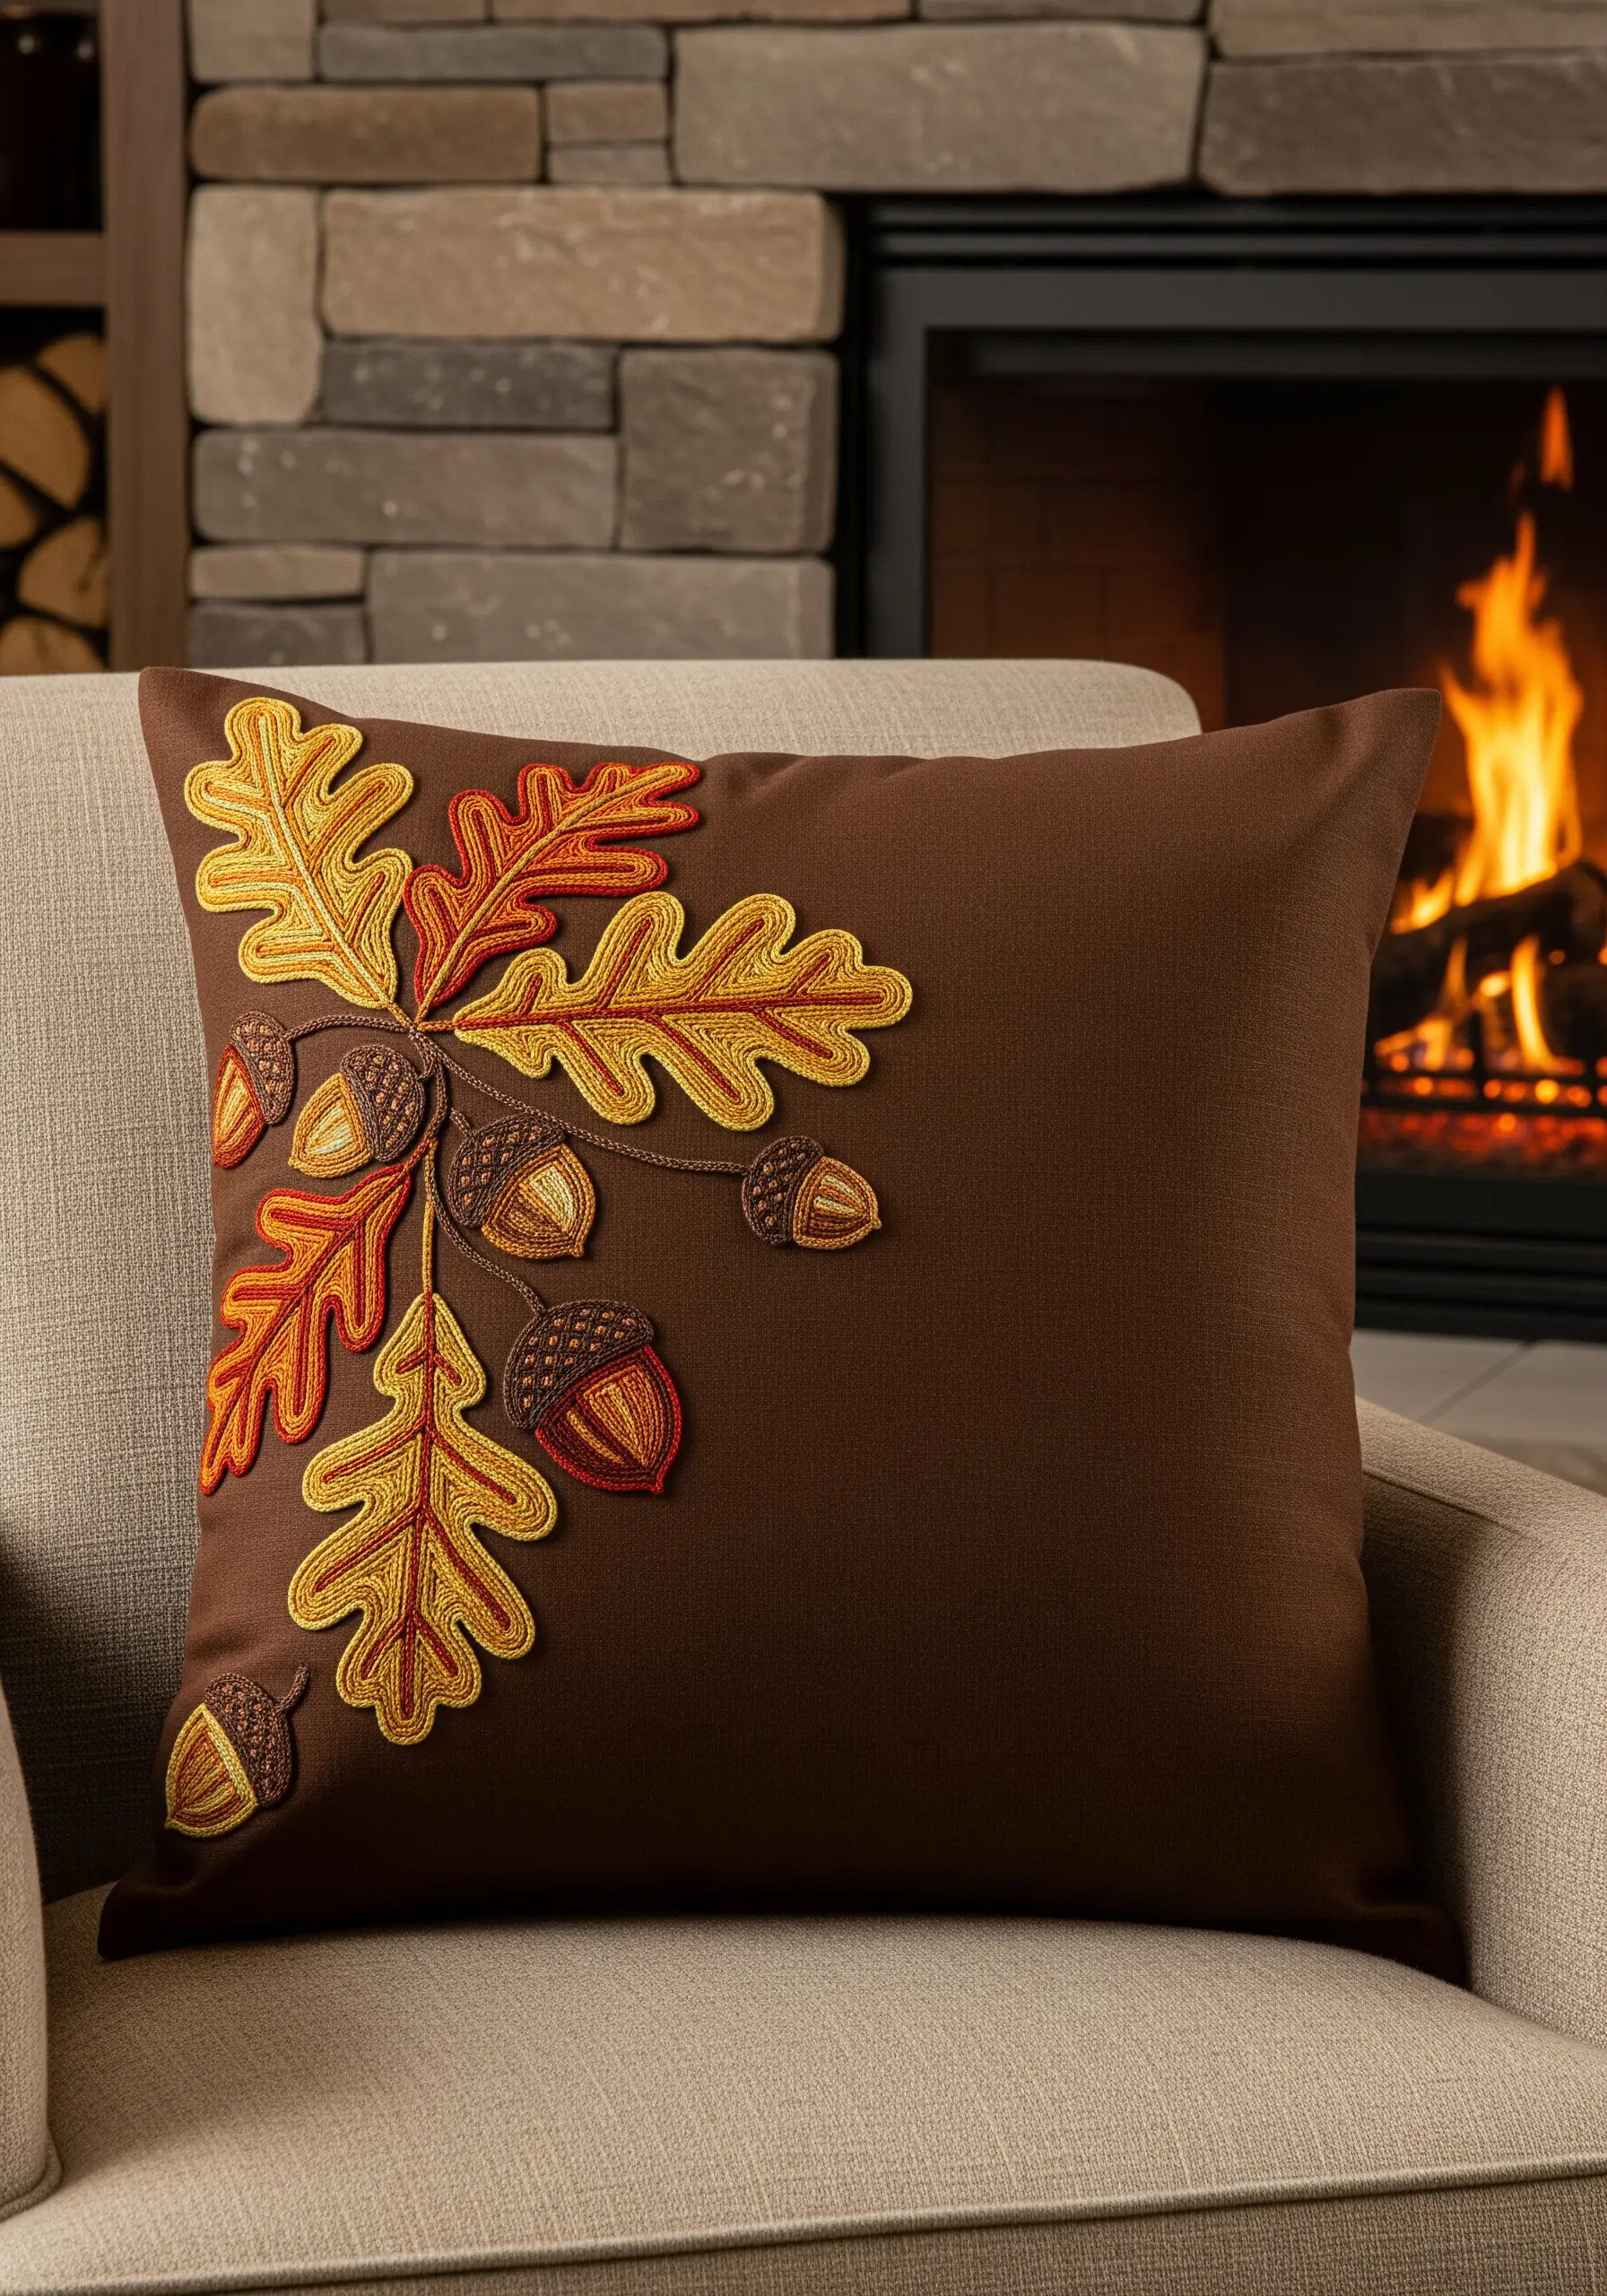
Capture the cozy feeling of autumn by focusing on a warm, earthy color palette and strong, defined shapes.
Use a whipped backstitch or chain stitch for the outlines of the oak leaves and acorns. This creates a raised, cord-like edge that makes the motifs stand out against the dark brown fabric.
Fill the leaves with a simple satin stitch, but use two complementary colors—like ochre and rust—to create a subtle variegated effect.
This combination of a bold outline and a simple fill is perfect for creating graphic, stylized designs that feel both rustic and polished.
12. Capture the Gentle Drape of a Willow Branch

To mimic the graceful, weeping form of a willow, your stitches must convey movement and lightness.
Use a braided chain stitch for the main branches to give them a woody, substantial texture. This stitch is thicker and more decorative than a standard chain stitch.
For the delicate hanging leaves, use single, long straight stitches or detached chain stitches (lazy daisies) in soft greens and muted tans.
Alternate the angle and length of these leaf stitches to create a natural, flowing rhythm, as if the branches are swaying in a gentle breeze.
The felted wool fabric of the pillow adds a soft, matte backdrop that makes the threads’ slight sheen stand out beautifully.
13. Design a Textured Desert Scene with Varied Fill Stitches
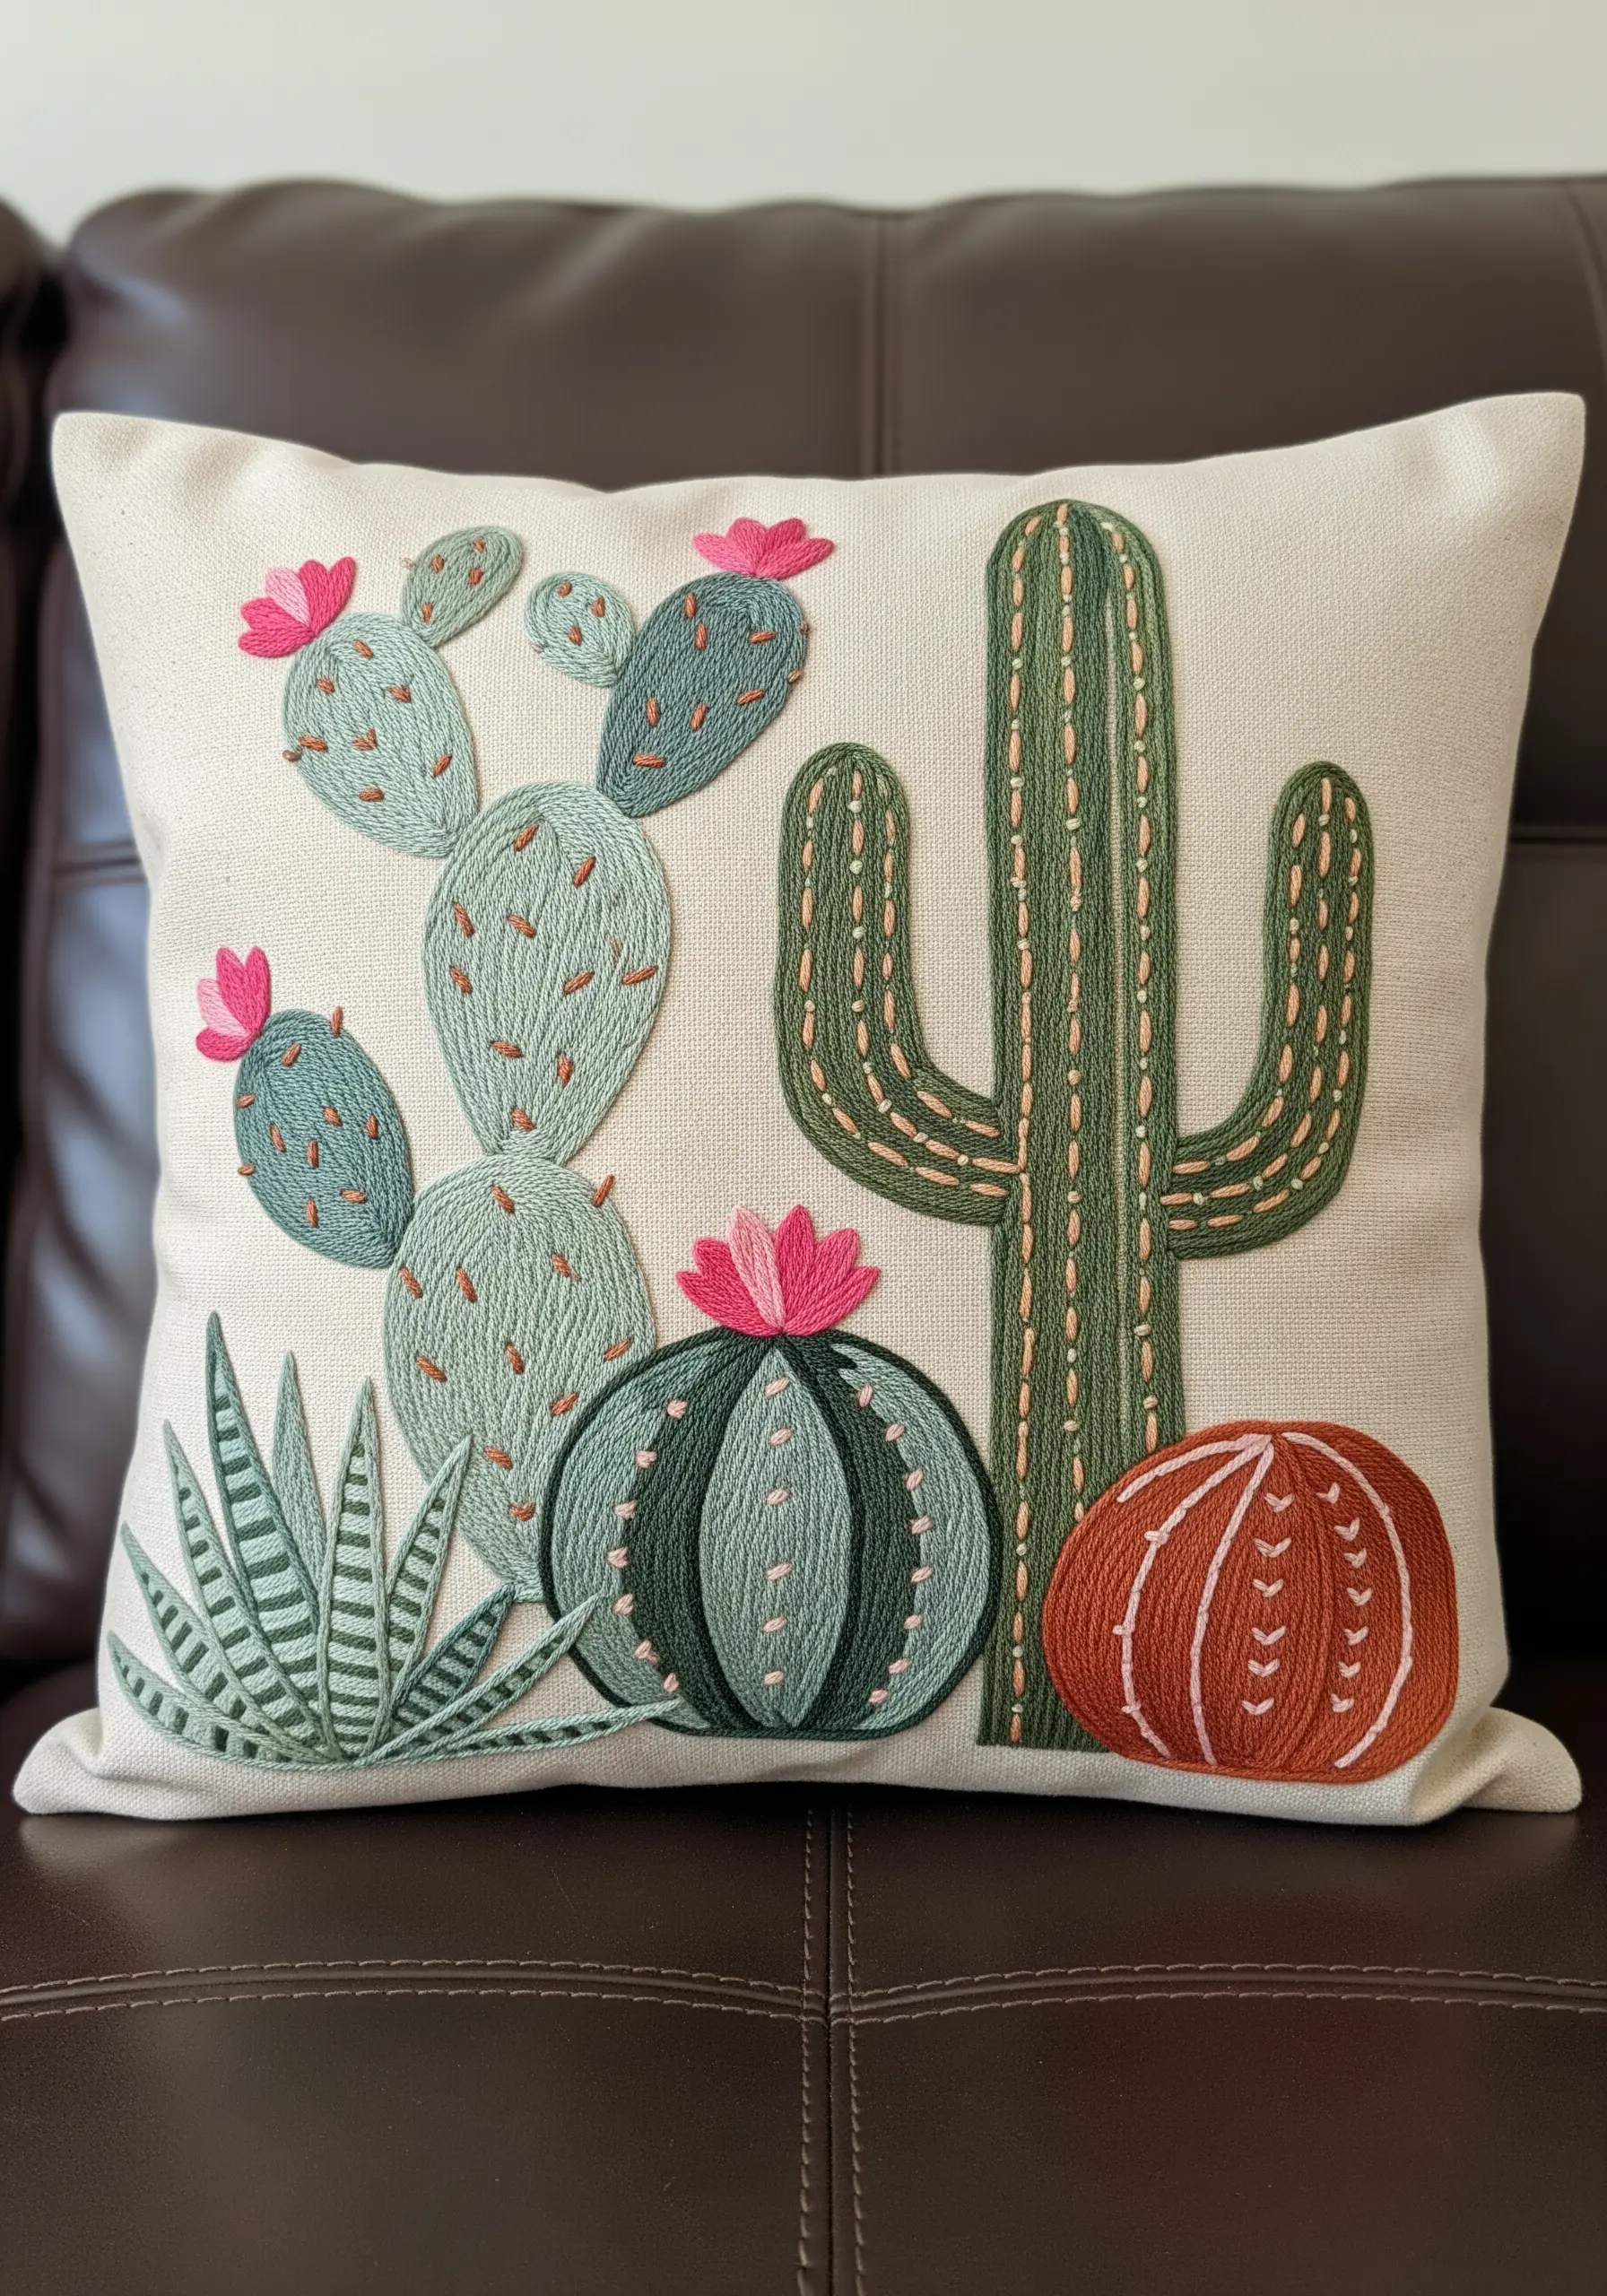
Give each cactus in your design a unique personality by assigning it a different textural fill stitch.
Use vertical chain stitch rows for a tall saguaro to mimic its ribbed texture. For a round barrel cactus, try a satin stitch that follows the curved segments.
A prickly pear can be brought to life with a field of tiny seed stitches, which gives it a perfectly speckled appearance.
By using distinct stitches for each plant, you create a visually engaging composition that invites touch and closer inspection, turning a simple pillow into a tactile desert landscape.
14. Create Dramatic Contrast with Cherry Blossoms on Black

Make delicate cherry blossoms feel incredibly striking by stitching them on a pure black pillow cover.
Use a pale pink and off-white palette for the flowers, filling the petals with a simple satin stitch. Don’t aim for perfect uniformity; slight variations in stitch direction will make them feel more organic.
Add tiny French knots with yellow thread in the center of each blossom for a pop of contrasting color.
For the branches, use a satin-finished brown or bronze thread in a split stitch to give them a subtle sheen that catches the light against the matte black background.
15. Build a Sculptural Protea with Layered, Raised Stitches
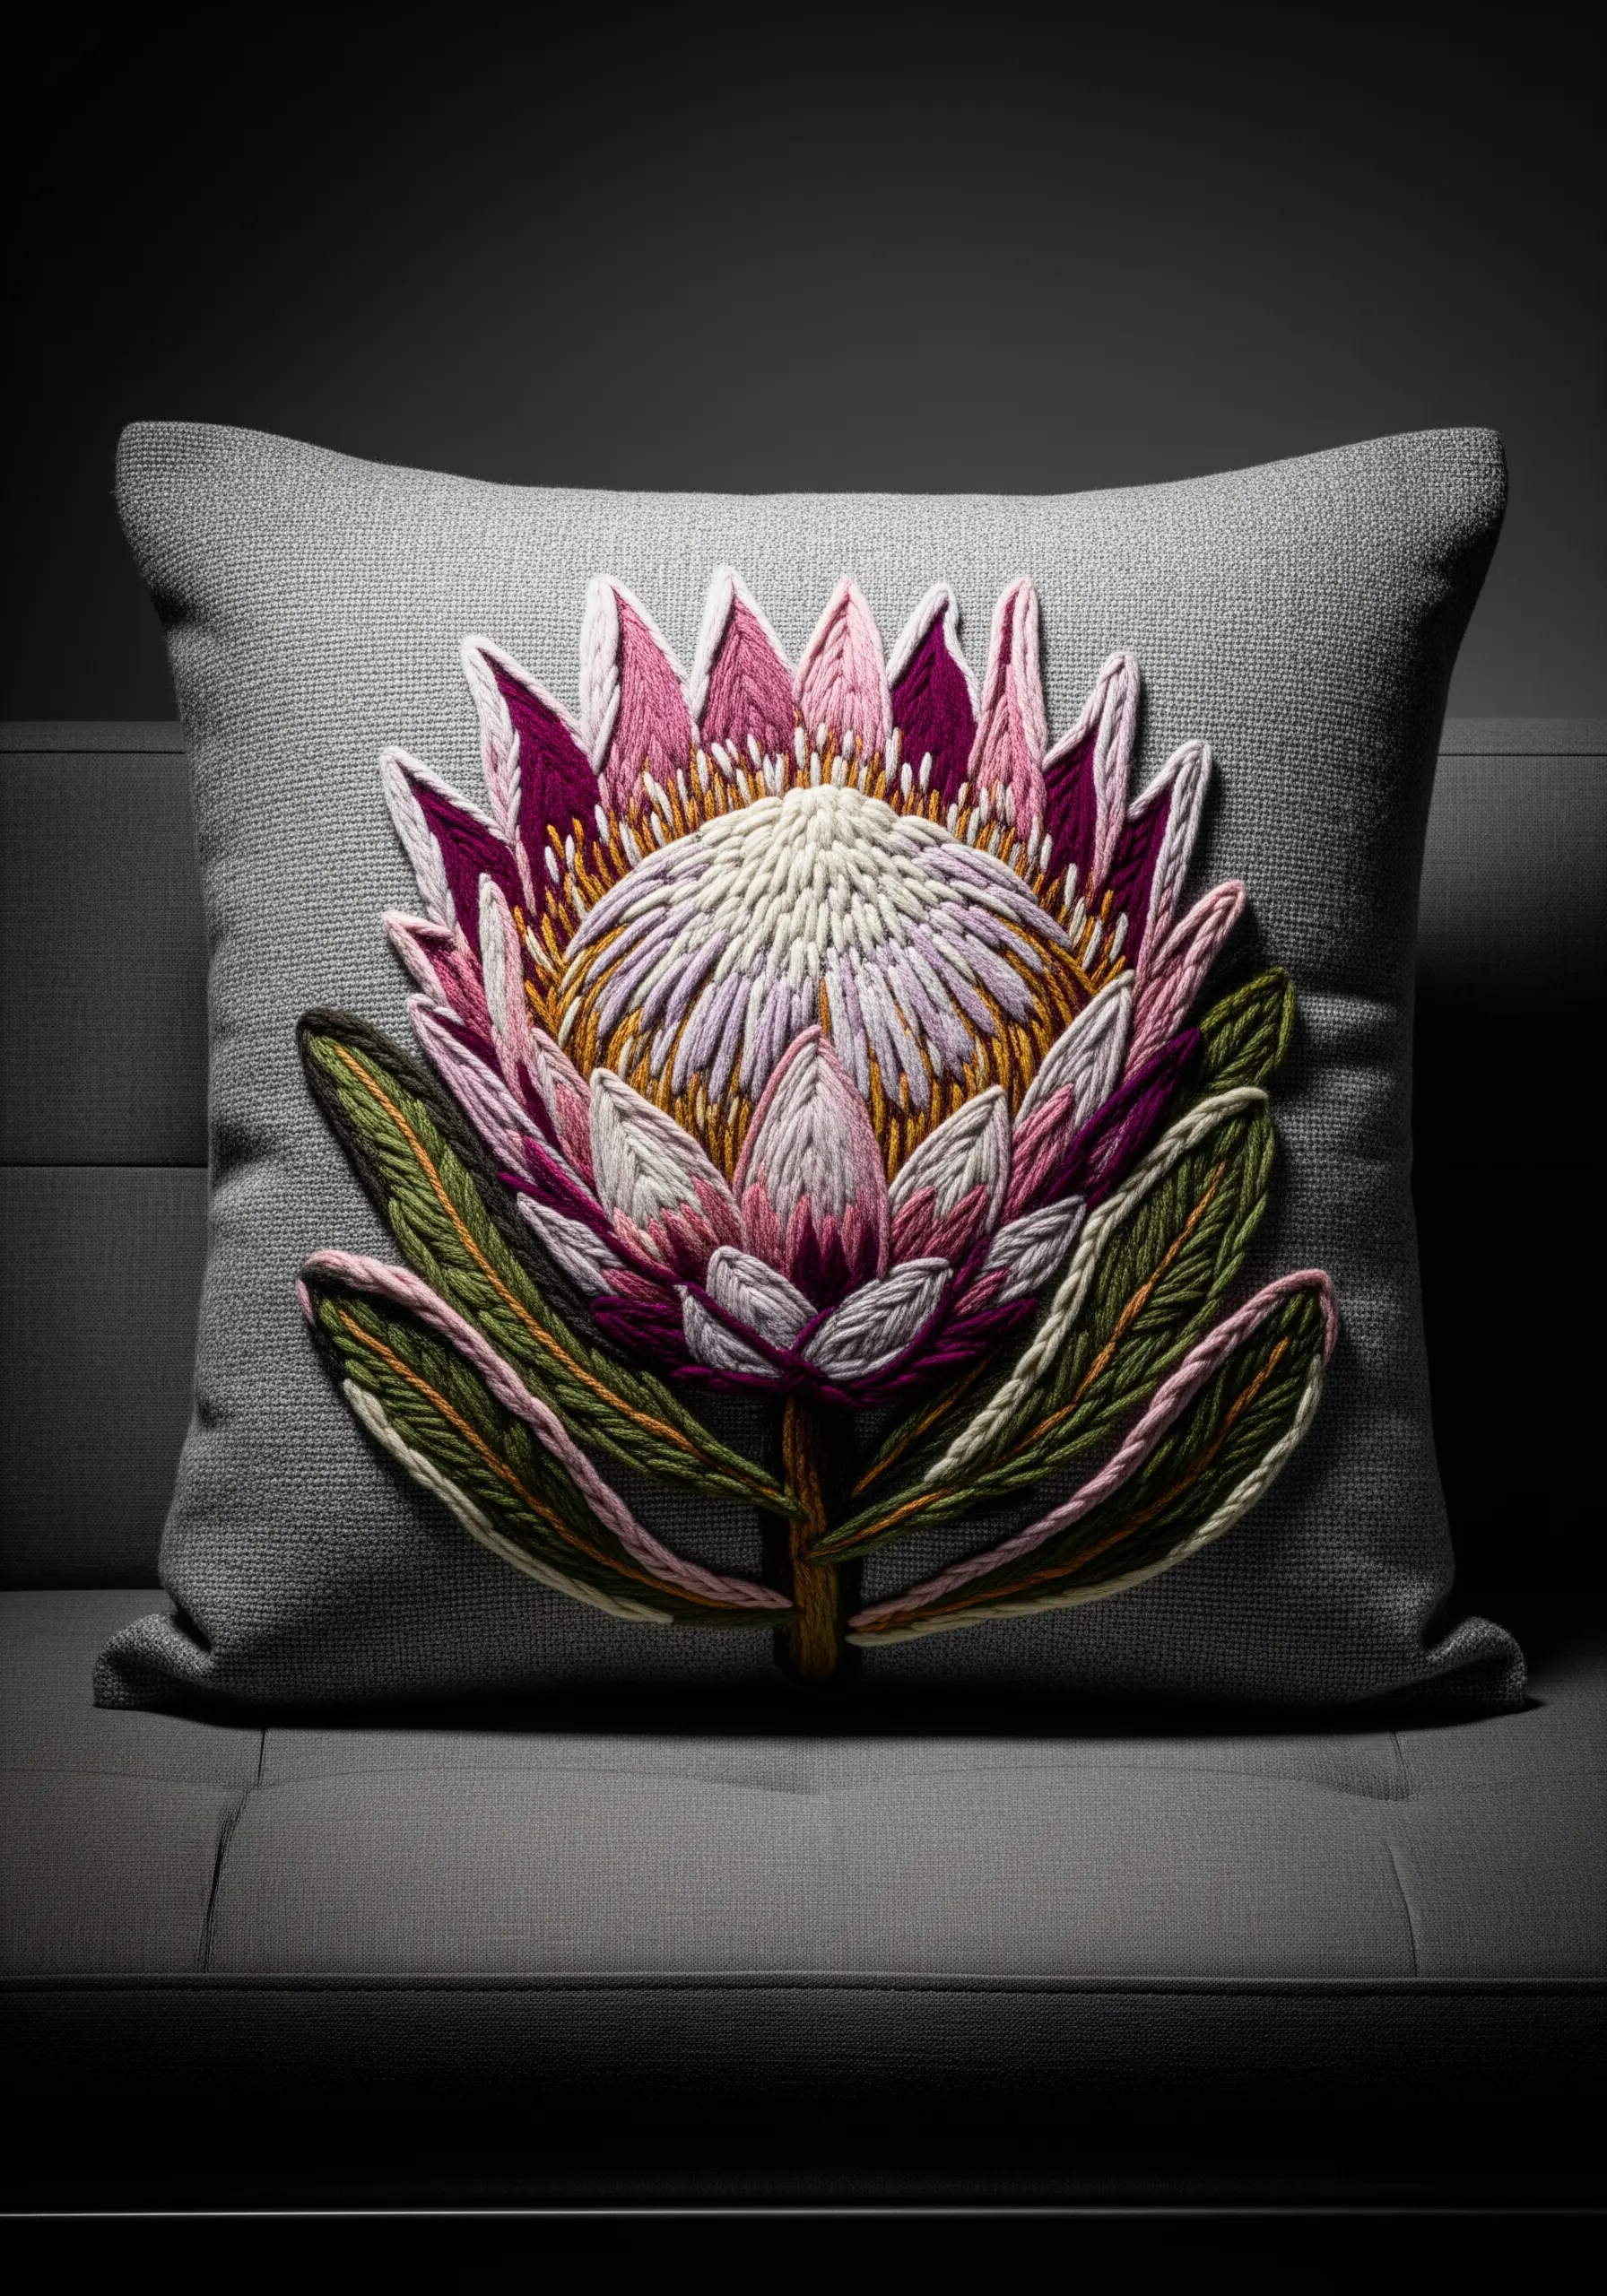
To capture the complex structure of a protea flower, you need to think in layers and dimensions.
Start with the outer leaves, using a long and short stitch with green and pink threads to create a smooth base.
For the inner petals, use a padded satin stitch—placing a layer of foundation stitches underneath—to make them physically raised from the surface.
Create the fuzzy central dome with a dense field of French knots or bullion knots in off-white and pale yellow. This layering of contemporary texture techniques to create raised sculptural embroidery effects results in a stunning, highly tactile piece of art.
16. Capture Ephemeral Movement with Minimalist Dandelions
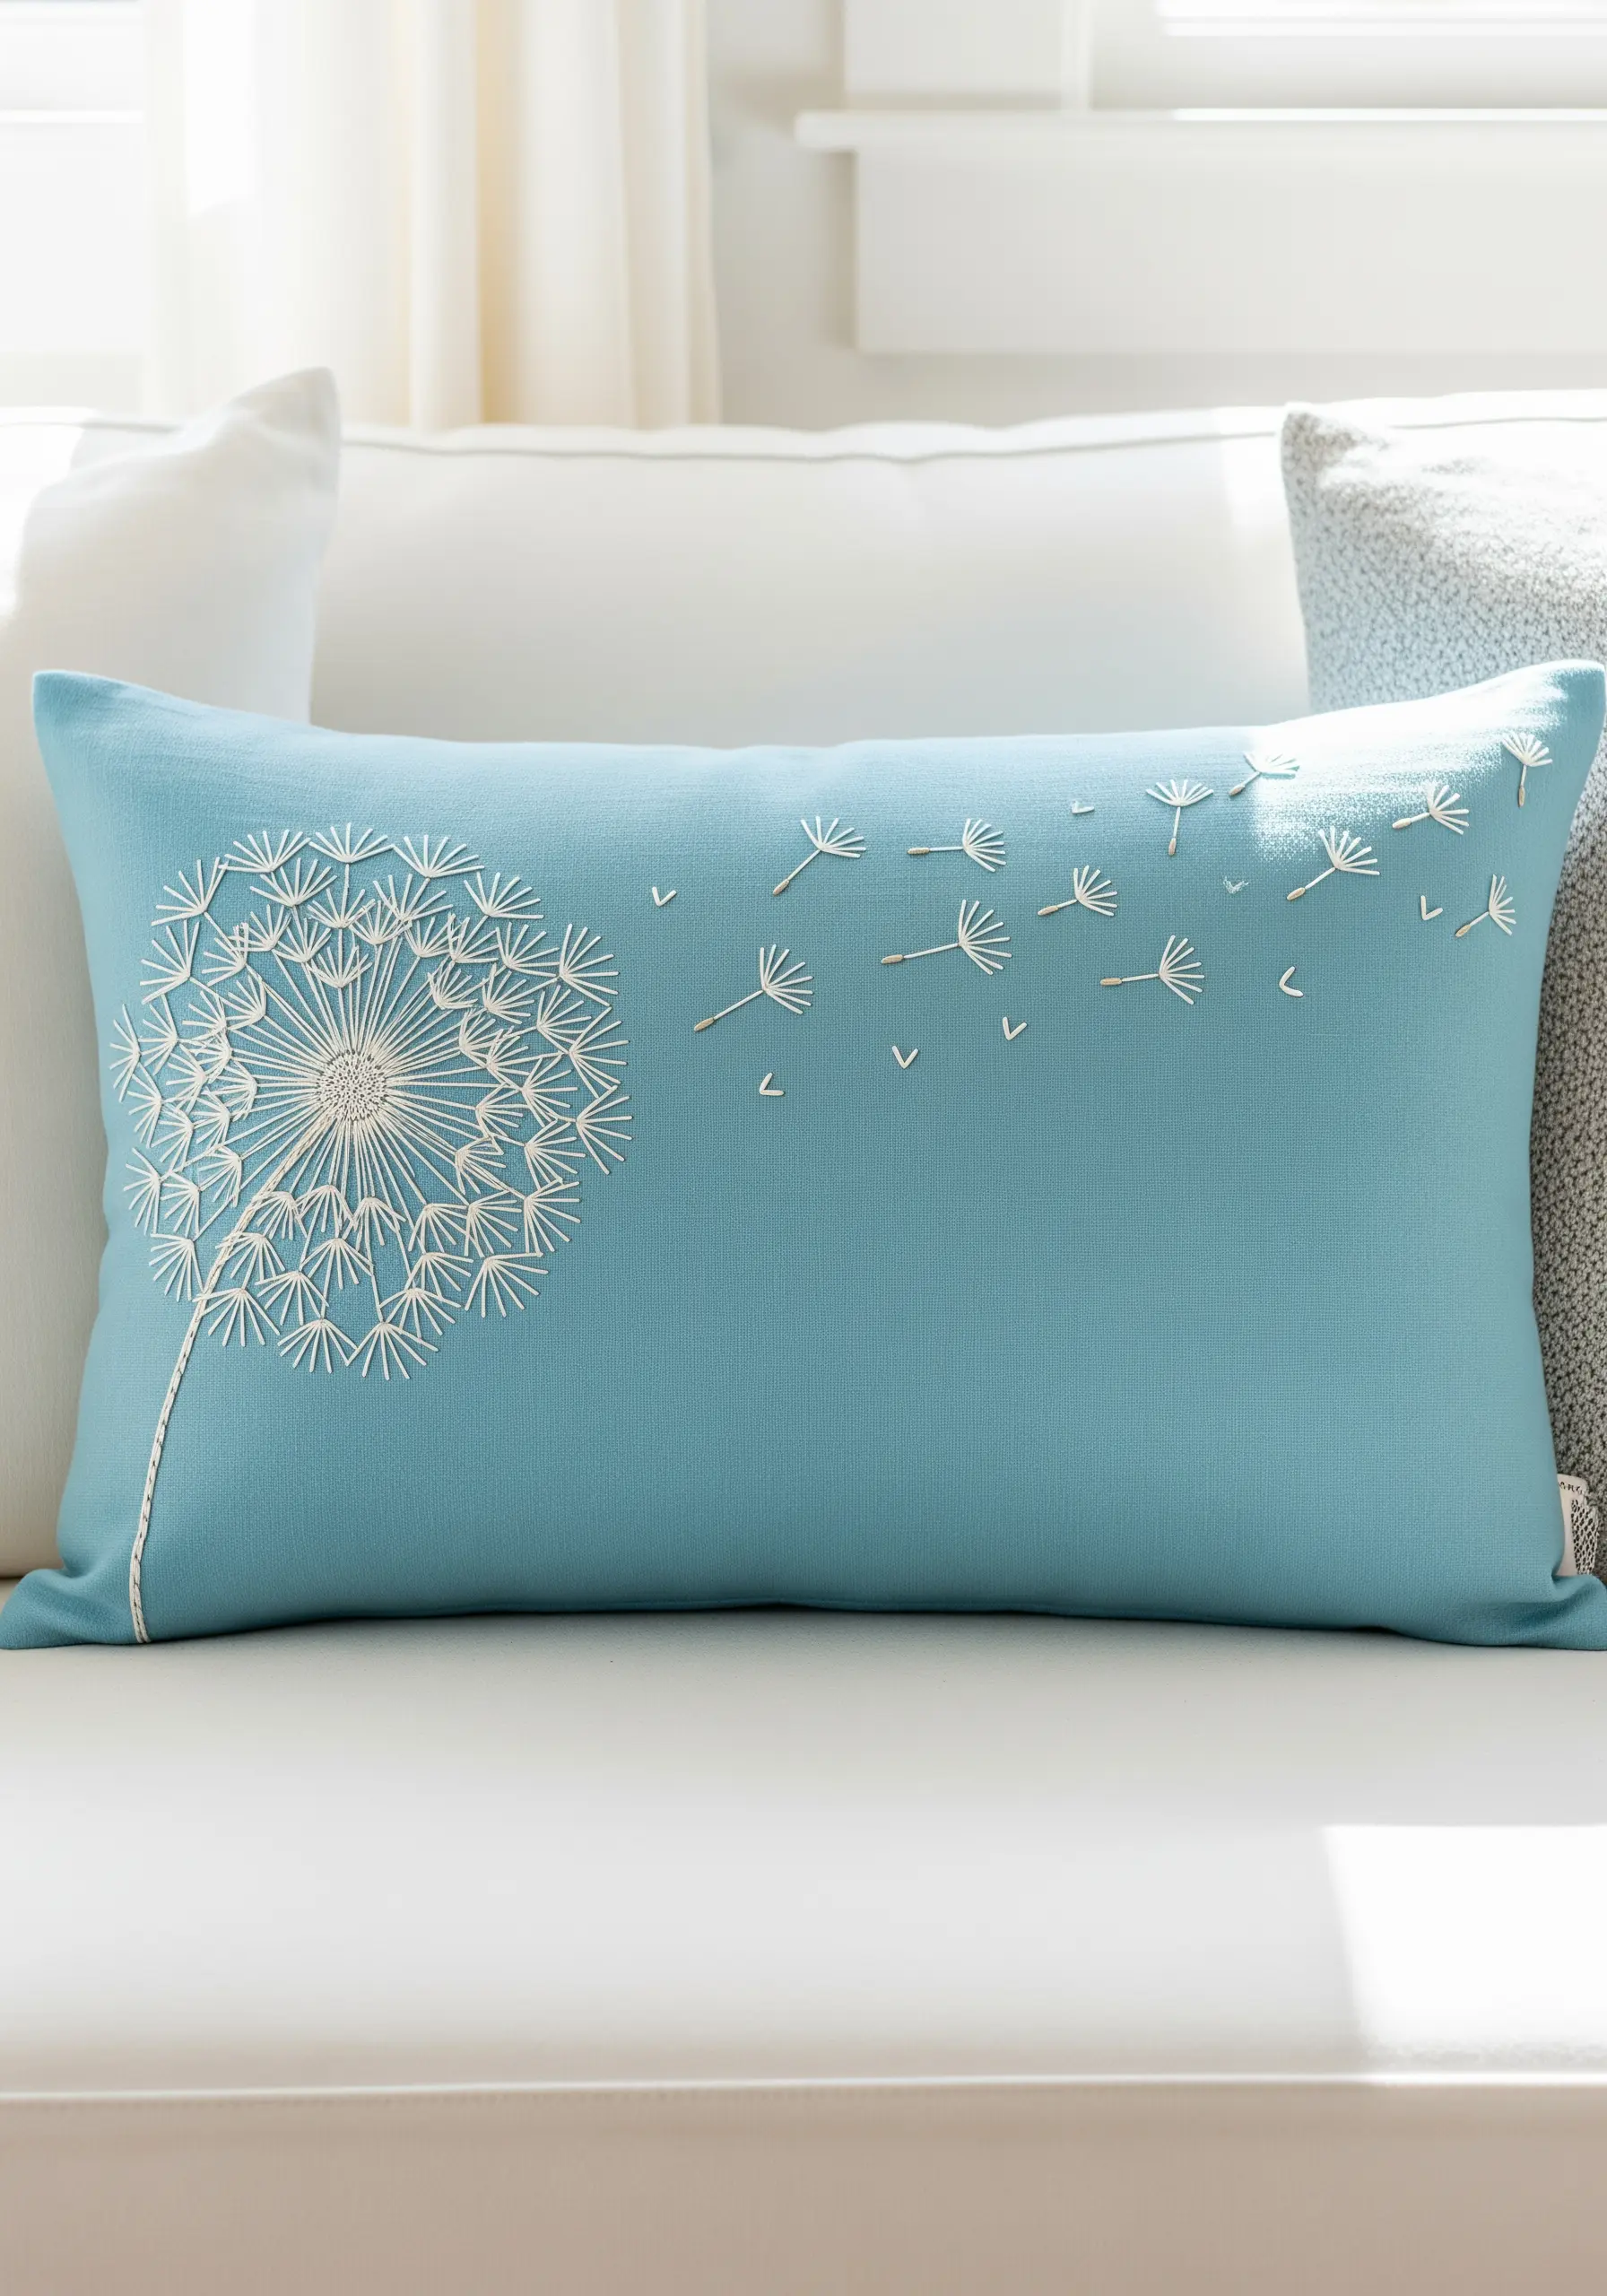
Suggest the feeling of wind and wishes with a simple yet effective dandelion design.
Create the dandelion head using long, straight stitches radiating from a central point. Vary the thread weight—using three strands for longer stitches and one for shorter ones—to add subtle depth.
For the floating seeds, use a combination of a single straight stitch for the stem and a tiny ‘V’ stitch or two small straight stitches for the pappus.
Scatter these seeds across the pillow in a gentle, curving arc to create a clear sense of movement. This minimalist approach allows the viewer’s imagination to fill in the rest.
17. Detail an Intricate Passionflower with Precise Layering
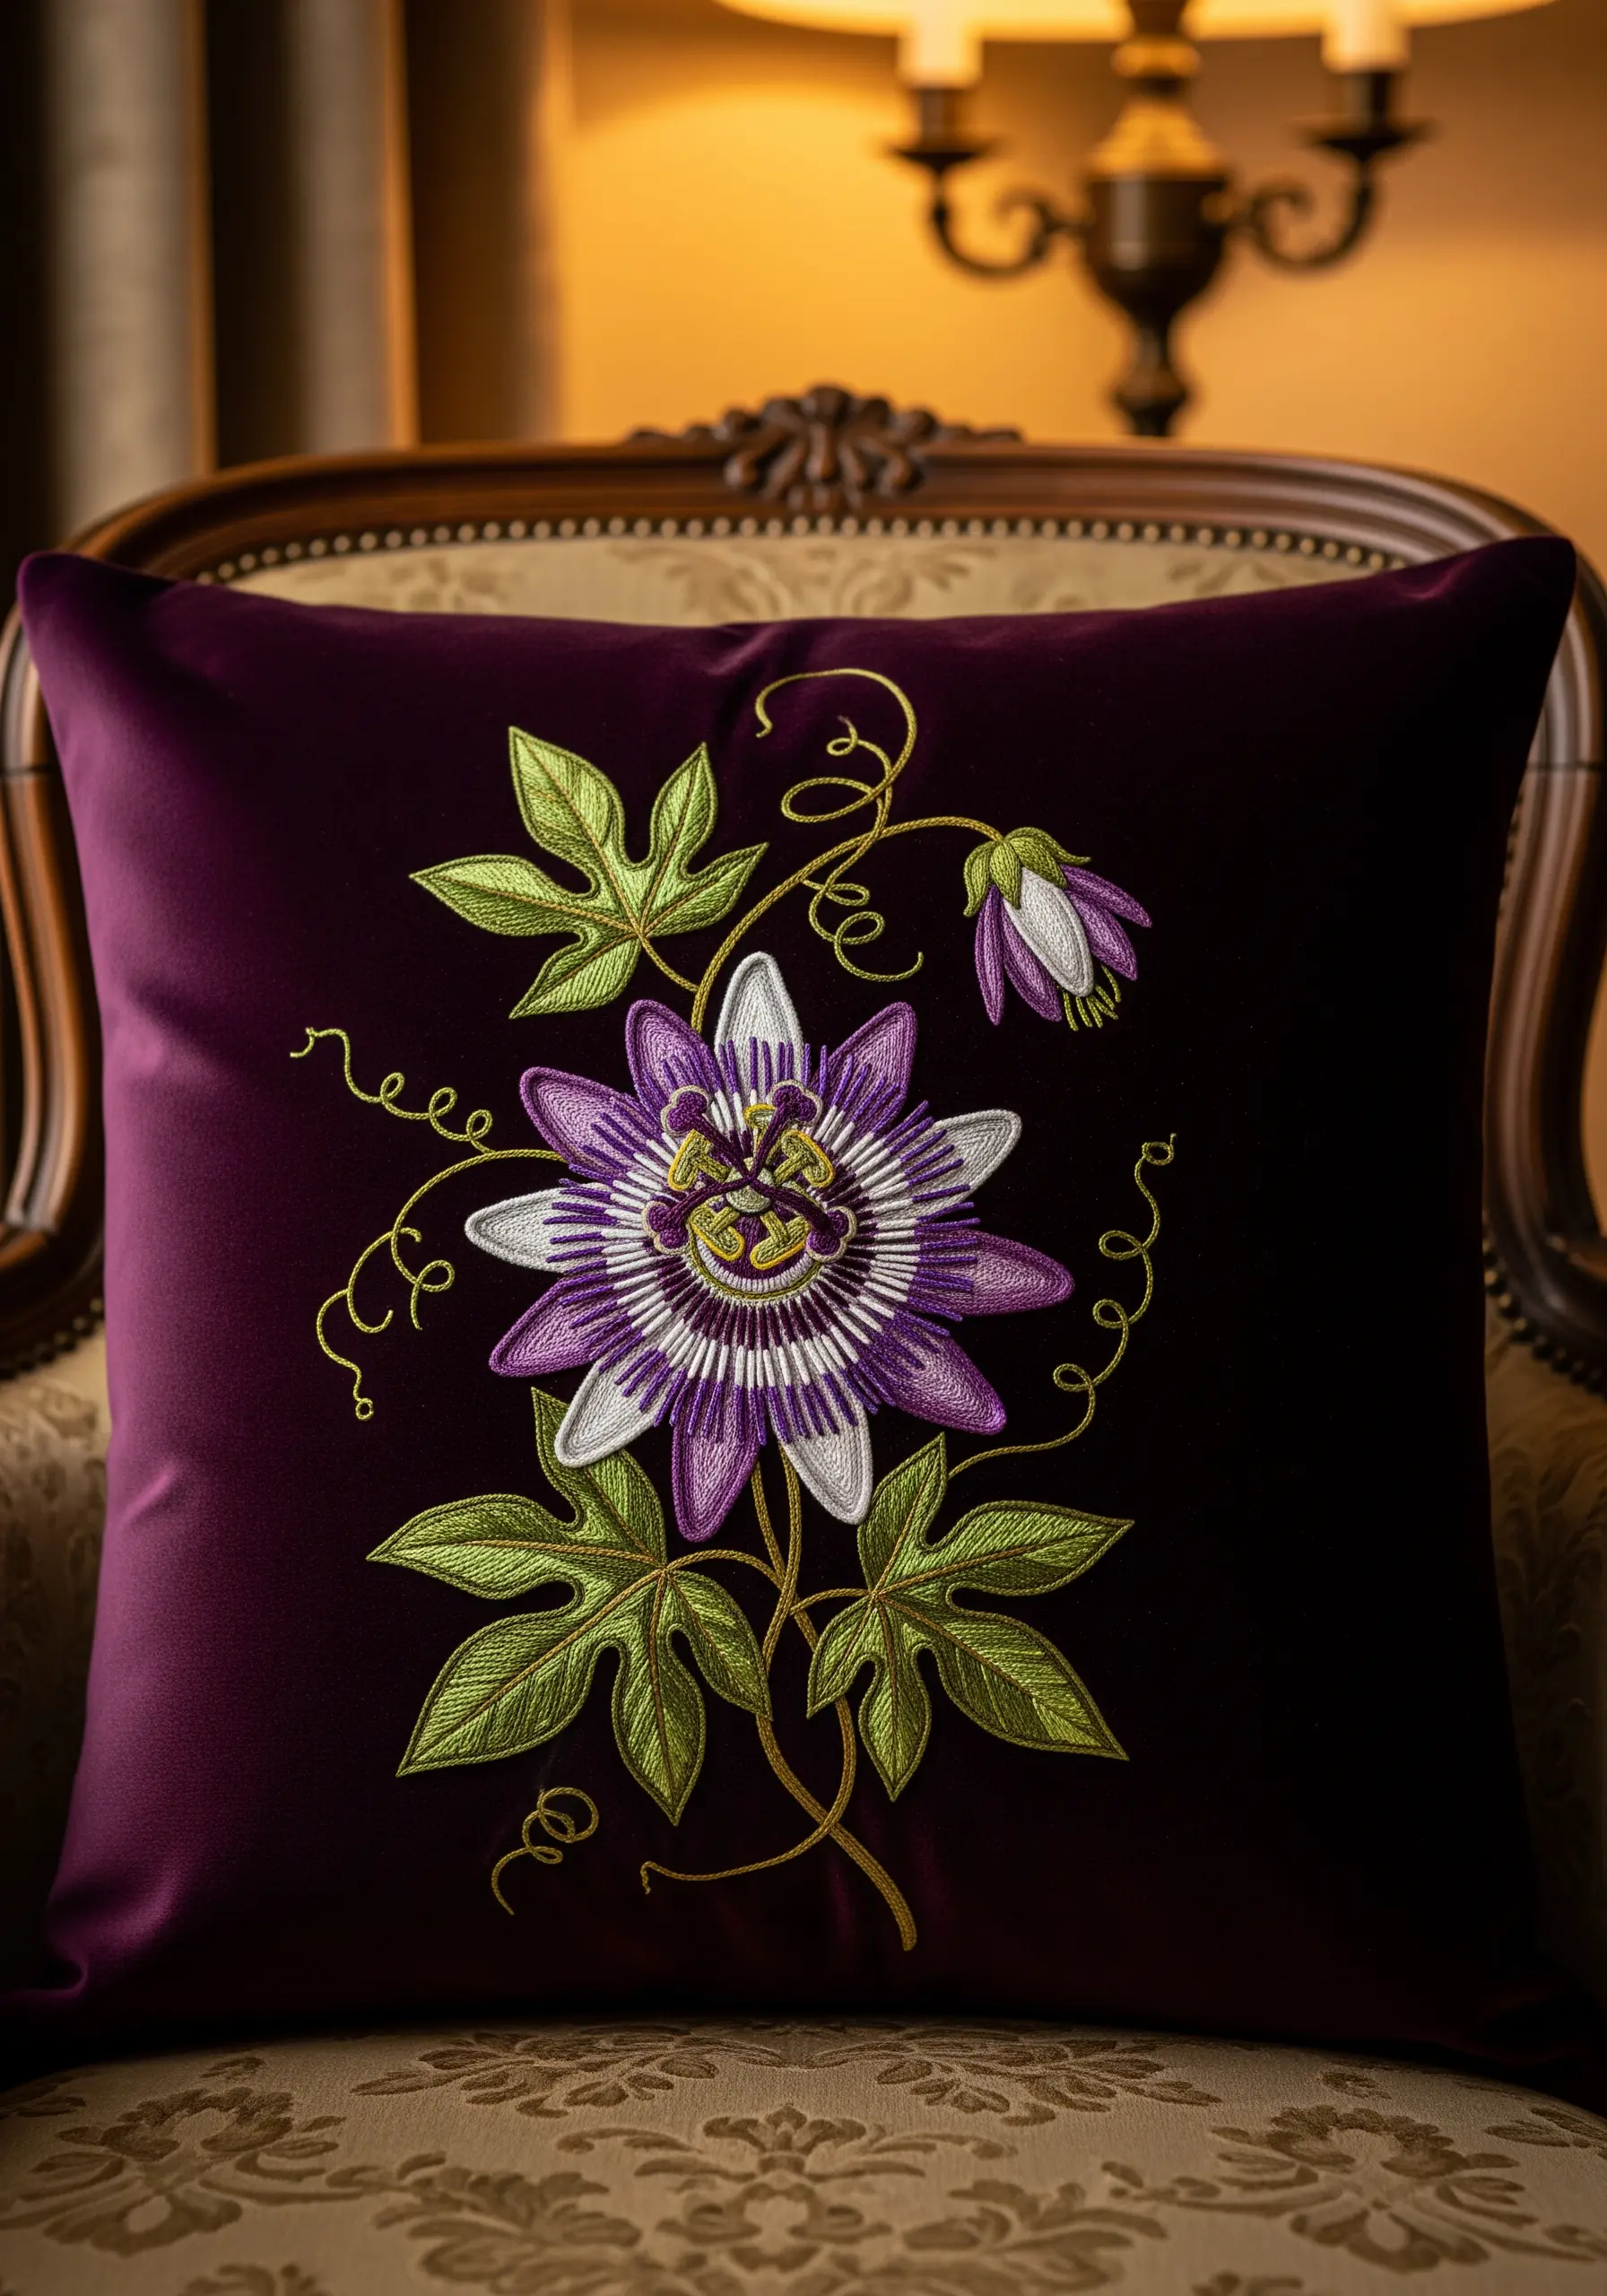
The beauty of a complex flower like the passionflower is best captured through careful, deliberate layering of stitches.
Begin by stitching the large back petals in a clean white satin stitch. Next, create the distinctive purple corona filaments with radiating straight stitches, keeping them fine and dense.
Use a different stitch, like a padded satin stitch or a cluster of French knots, for the central reproductive parts (the stigma and anthers) to make them pop.
This methodical back-to-front approach ensures each intricate part of the flower is clearly defined, resulting in a botanically accurate and visually stunning design.
18. Reimagine a Fiddle Leaf Fig with Geometric Fills
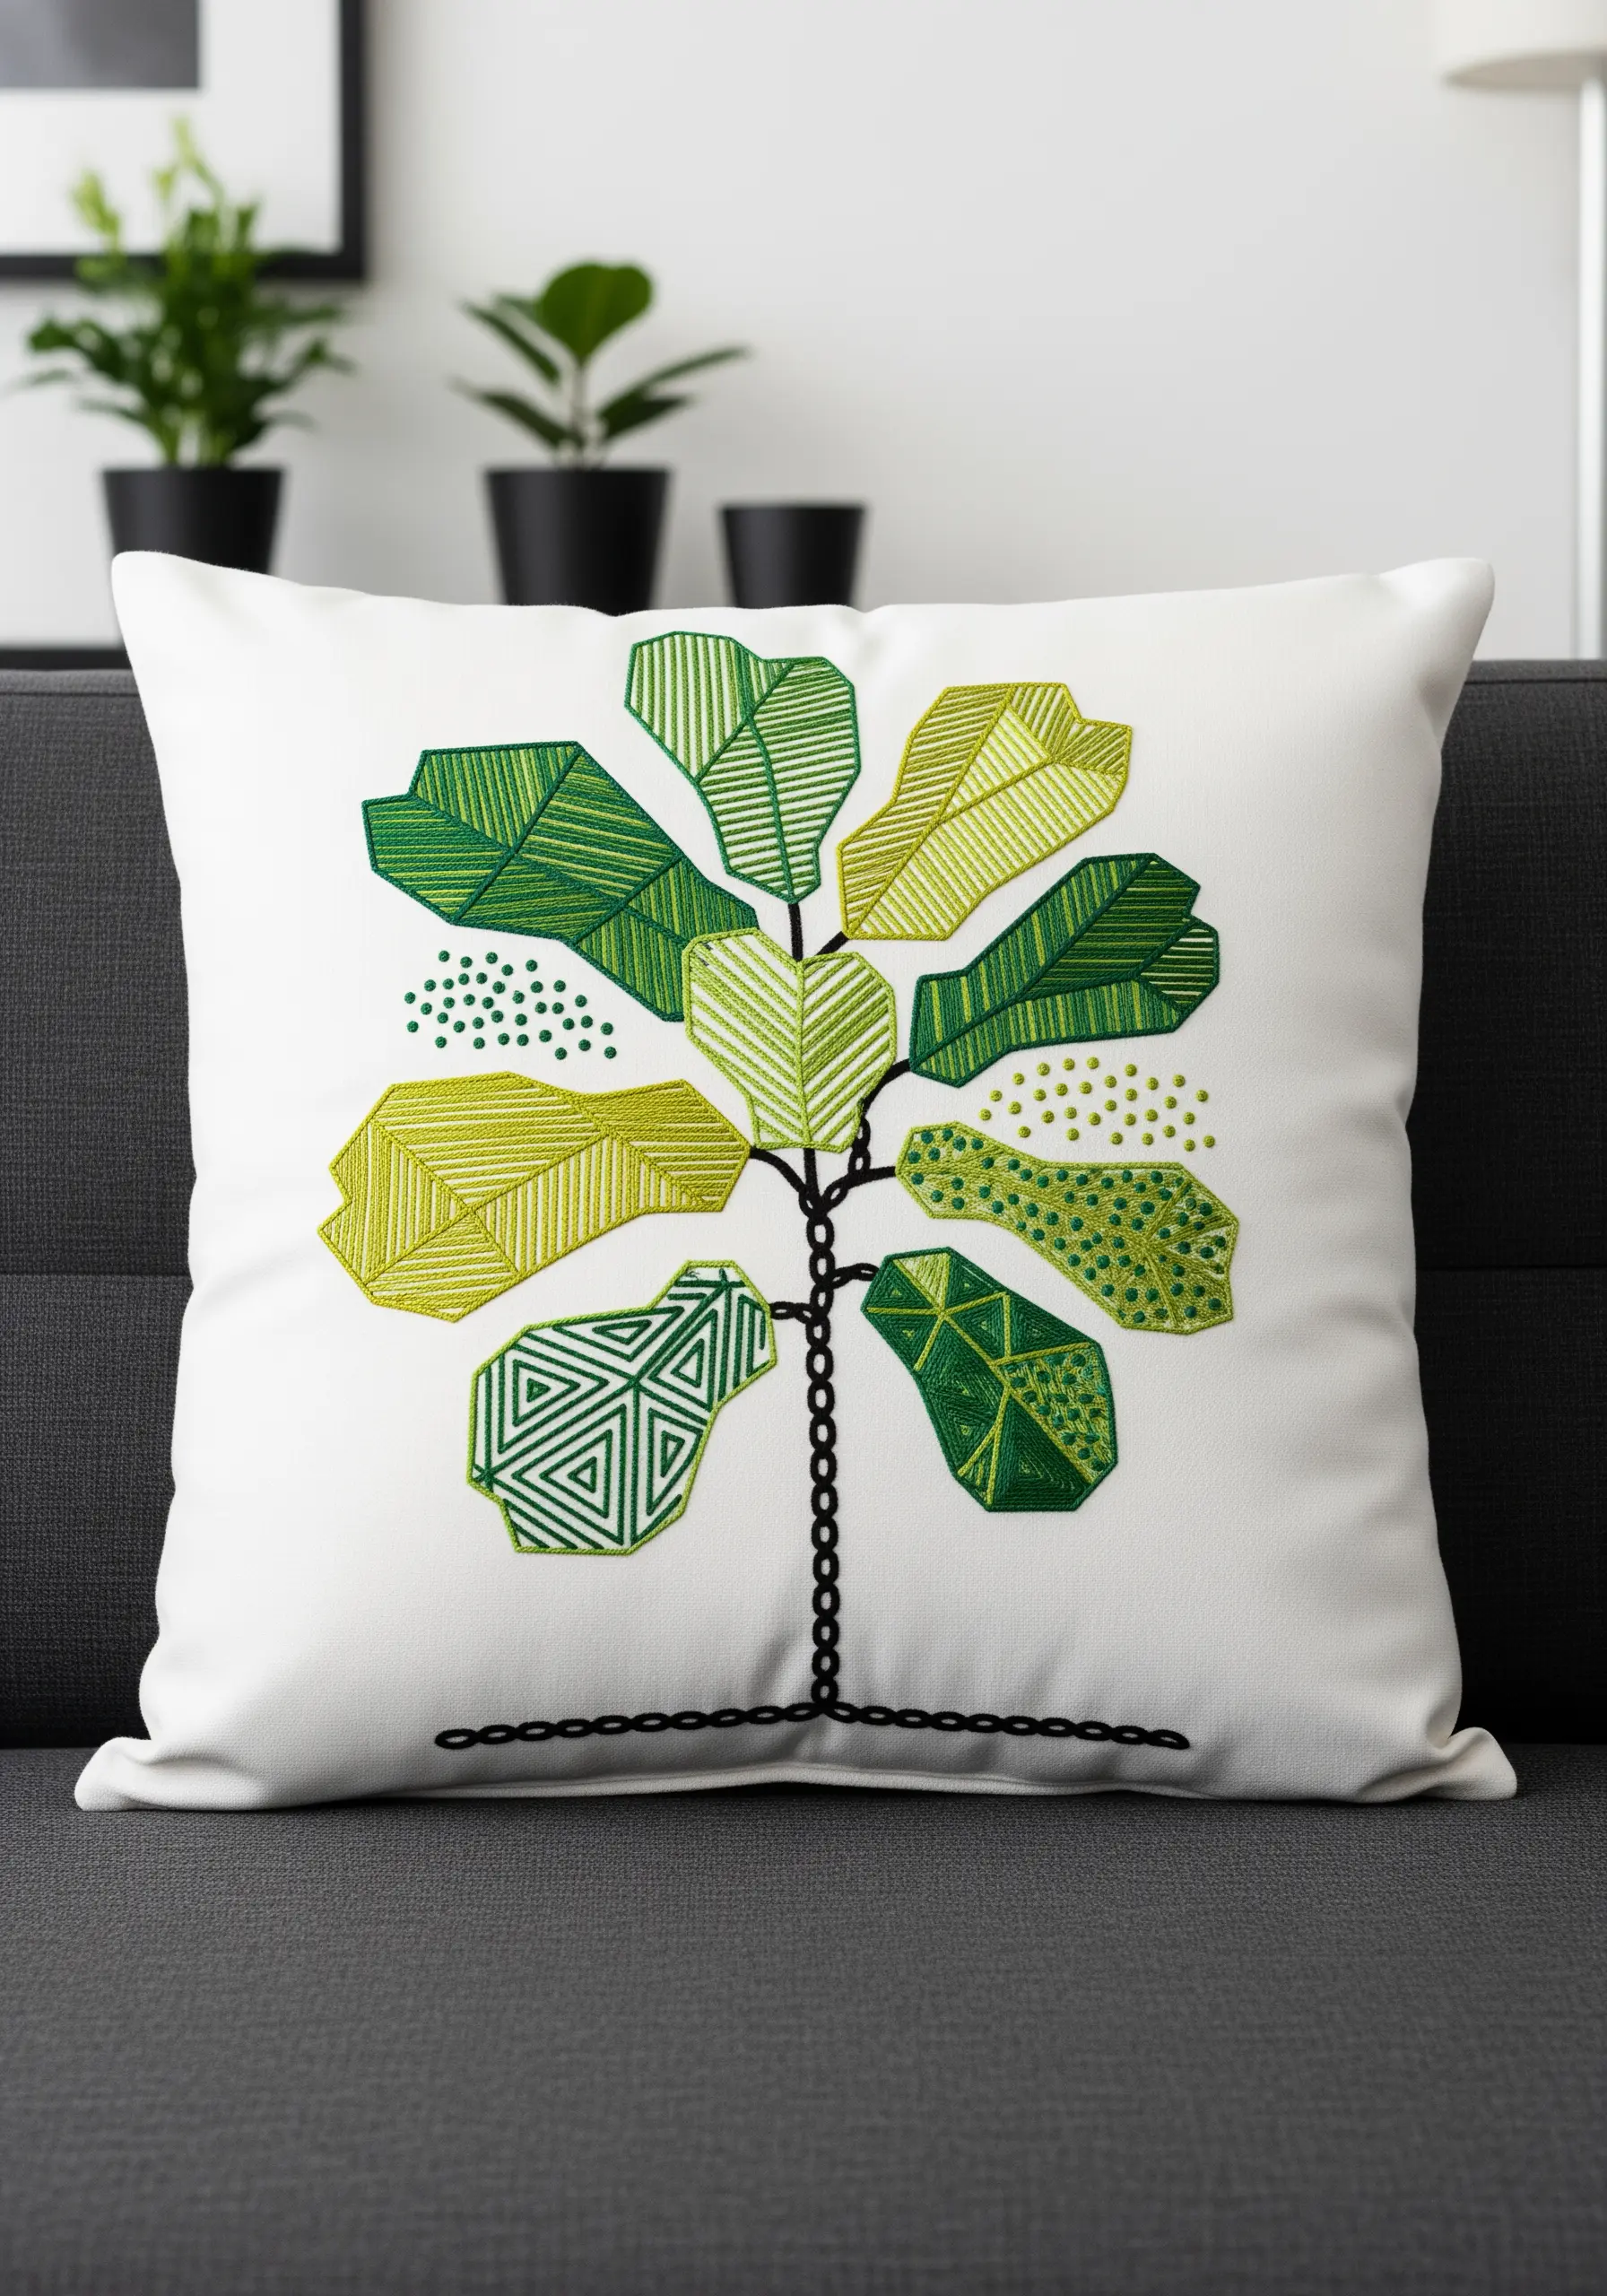
Give a classic houseplant a modern twist by swapping realistic shading for bold, geometric patterns.
Outline the iconic shape of the fiddle leaf fig’s leaves, then fill each one with a different pattern: parallel straight stitches, a grid of seed stitches, repeating triangles, or chevron lines.
Stick to a limited color palette of greens and chartreuse to maintain a cohesive look despite the varied patterns.
This technique transforms a familiar botanical shape into a piece of abstract art, perfect for a contemporary living room that values graphic design.
19. Create Luminous Night Blooms with Padded Appliqué
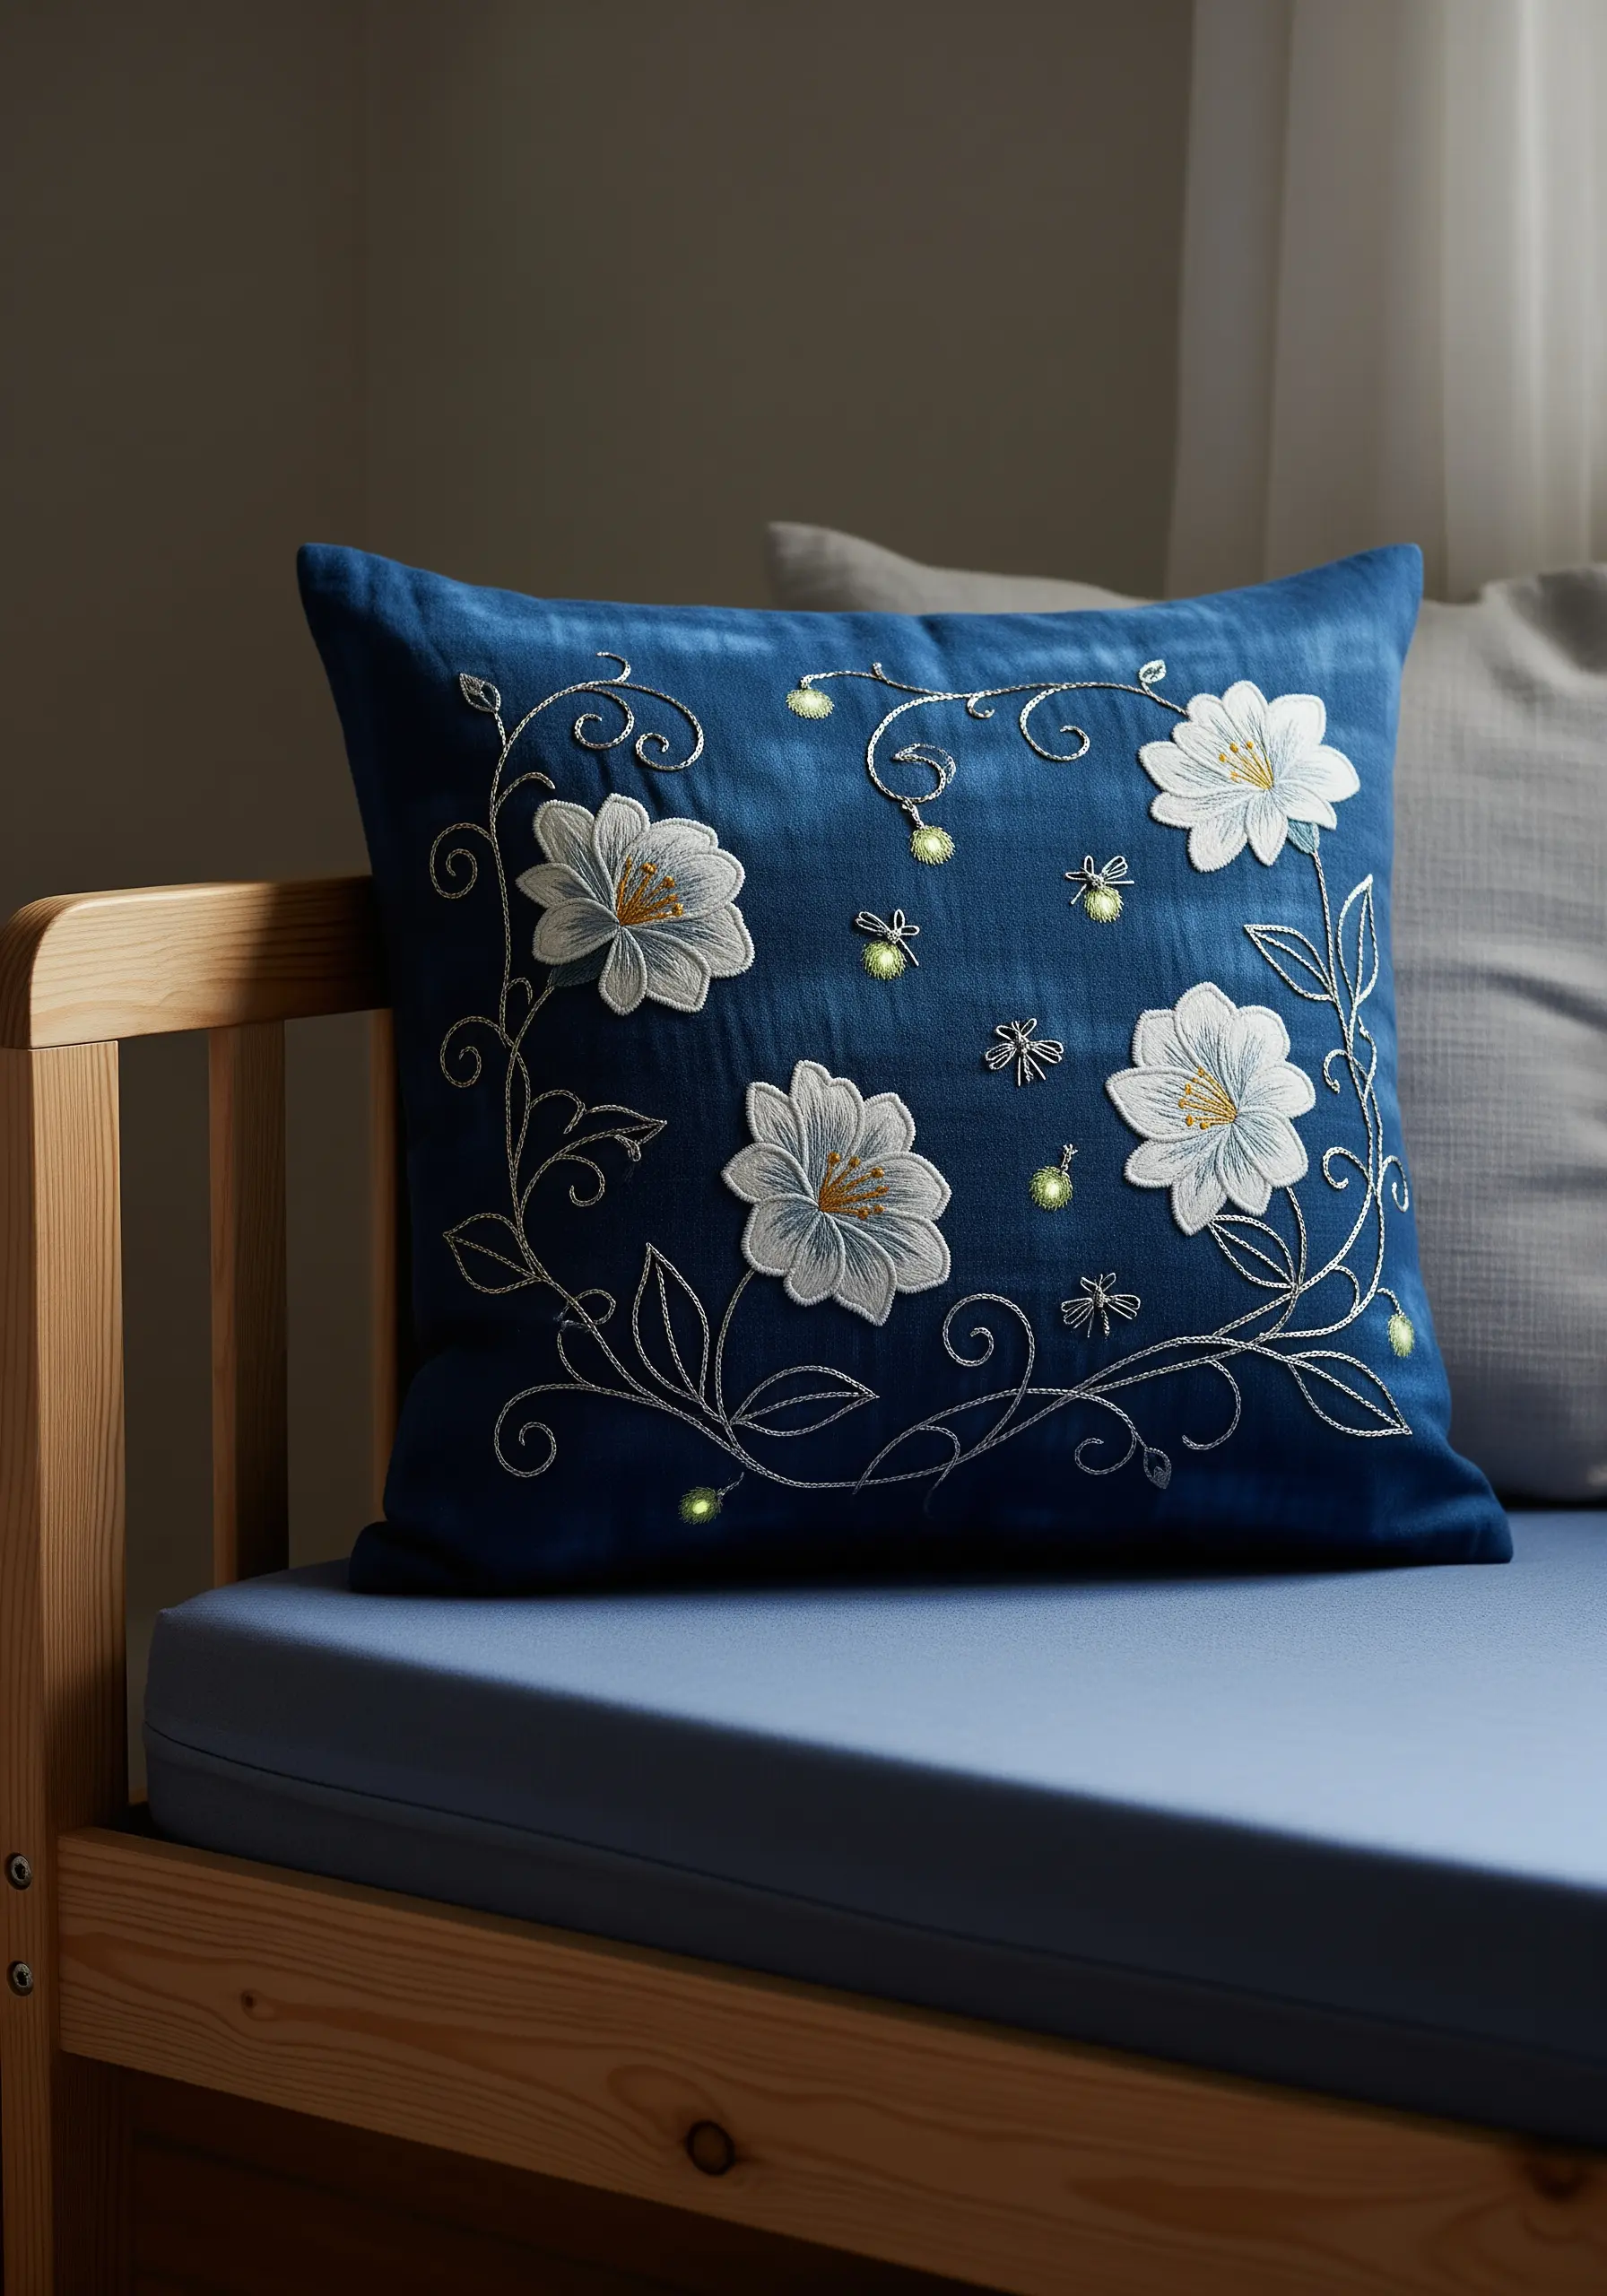
Achieve an incredible 3D effect by creating your flowers as separate, padded appliqué elements.
Embroider the white flower petals on a spare piece of fabric using long and short stitch shading with white, gray, and yellow threads.
Place a small piece of felt or batting behind the embroidered shape, cut it out carefully, and then secure it to your pillow using small, discreet whip stitches around the edge.
This stumpwork-adjacent technique makes the flowers appear to float on the dark blue background, while tiny metallic French knots scattered around them suggest fireflies, adding a magical, luminous quality.


