

Embroidering with pressed flowers is more than a technique—it’s a way to pause time. You are capturing a moment from a garden, a walk, or a season and weaving it directly into the fabric of your life. It allows you to carry a piece of nature with you, turning an ordinary piece of clothing into a deeply personal keepsake.
The magic is in the fusion of textures. The delicate, paper-thin quality of a preserved petal contrasts beautifully with the soft, raised lines of thread. Your needle and floss don’t just hold the flower in place; they complete it, adding stems, leaves, and details that transform it from a simple specimen into a piece of living art.
In these examples, I’ll show you how to move beyond simply stitching a flower onto fabric. We will explore composition, technique, and thoughtful placement, so you can create embellishments that are not only beautiful but also durable and full of meaning. Let’s begin.
1. Create a Full-Back Denim Jacket Meadow
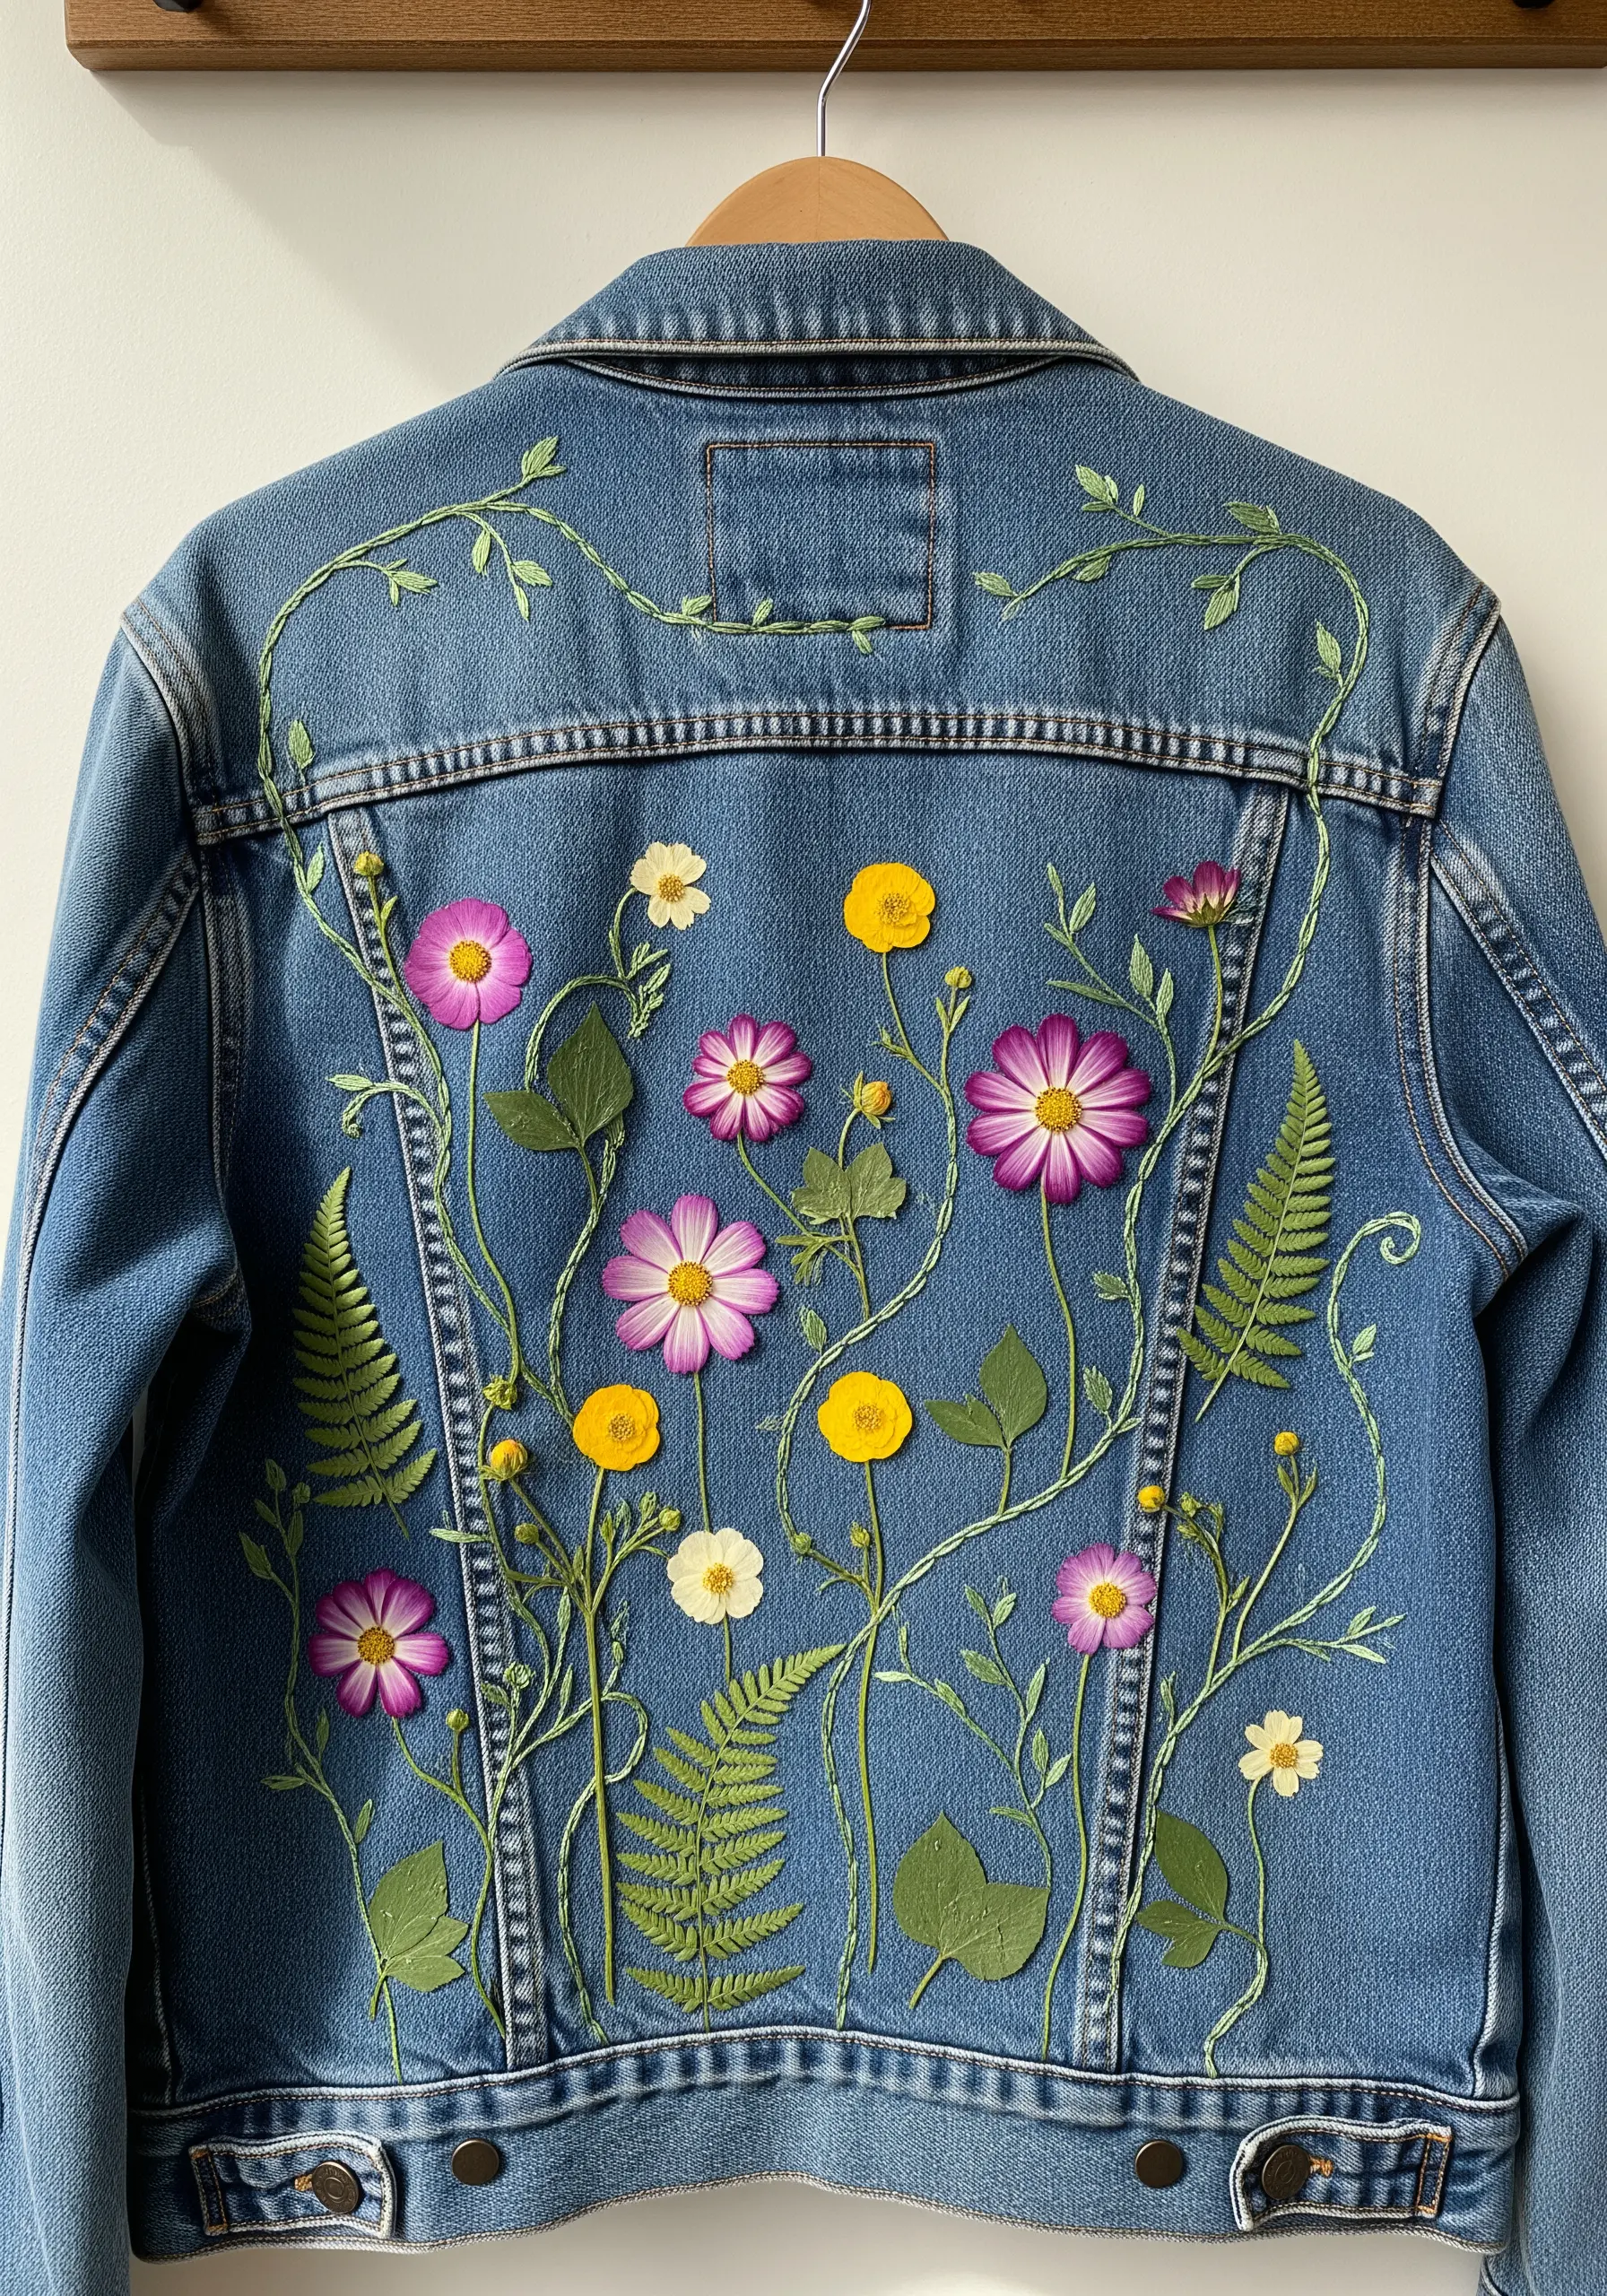
Transform the back panel of a denim jacket into a wearable canvas by mapping out a full botanical scene before you stitch.
Arrange your largest pressed flowers and ferns first to establish focal points, then use embroidery to connect them with winding stems and delicate leaves.
Use a sturdy backstitch or stem stitch in varying shades of green for the vines; this creates visual depth and makes the composition look integrated rather than just applied.
For securing the flowers, use tiny, discreet couching stitches over the stems and nearly invisible tacking stitches at the center of the blooms, preserving their natural shape.
2. Frame a Collar with Delicate Forget-Me-Nots

A shirt collar offers the perfect frame for symmetrical, detailed work.
Use small, flat-pressed flowers like forget-me-nots or lavender buds, as they won’t add bulk or feel awkward to wear.
Outline the collar’s edge with a fine, two-strand stem stitch to create a clean border, then arrange your tiny botanicals inside this frame.
Secure the flowers with a single seed stitch in a matching color at the center of each blossom and use a delicate detached chain stitch for tiny embroidered leaves, balancing the real and stitched elements.
This technique adds character without clutter and draws attention to the face beautifully.
3. Imply Growth with Conceptual Pocket Art
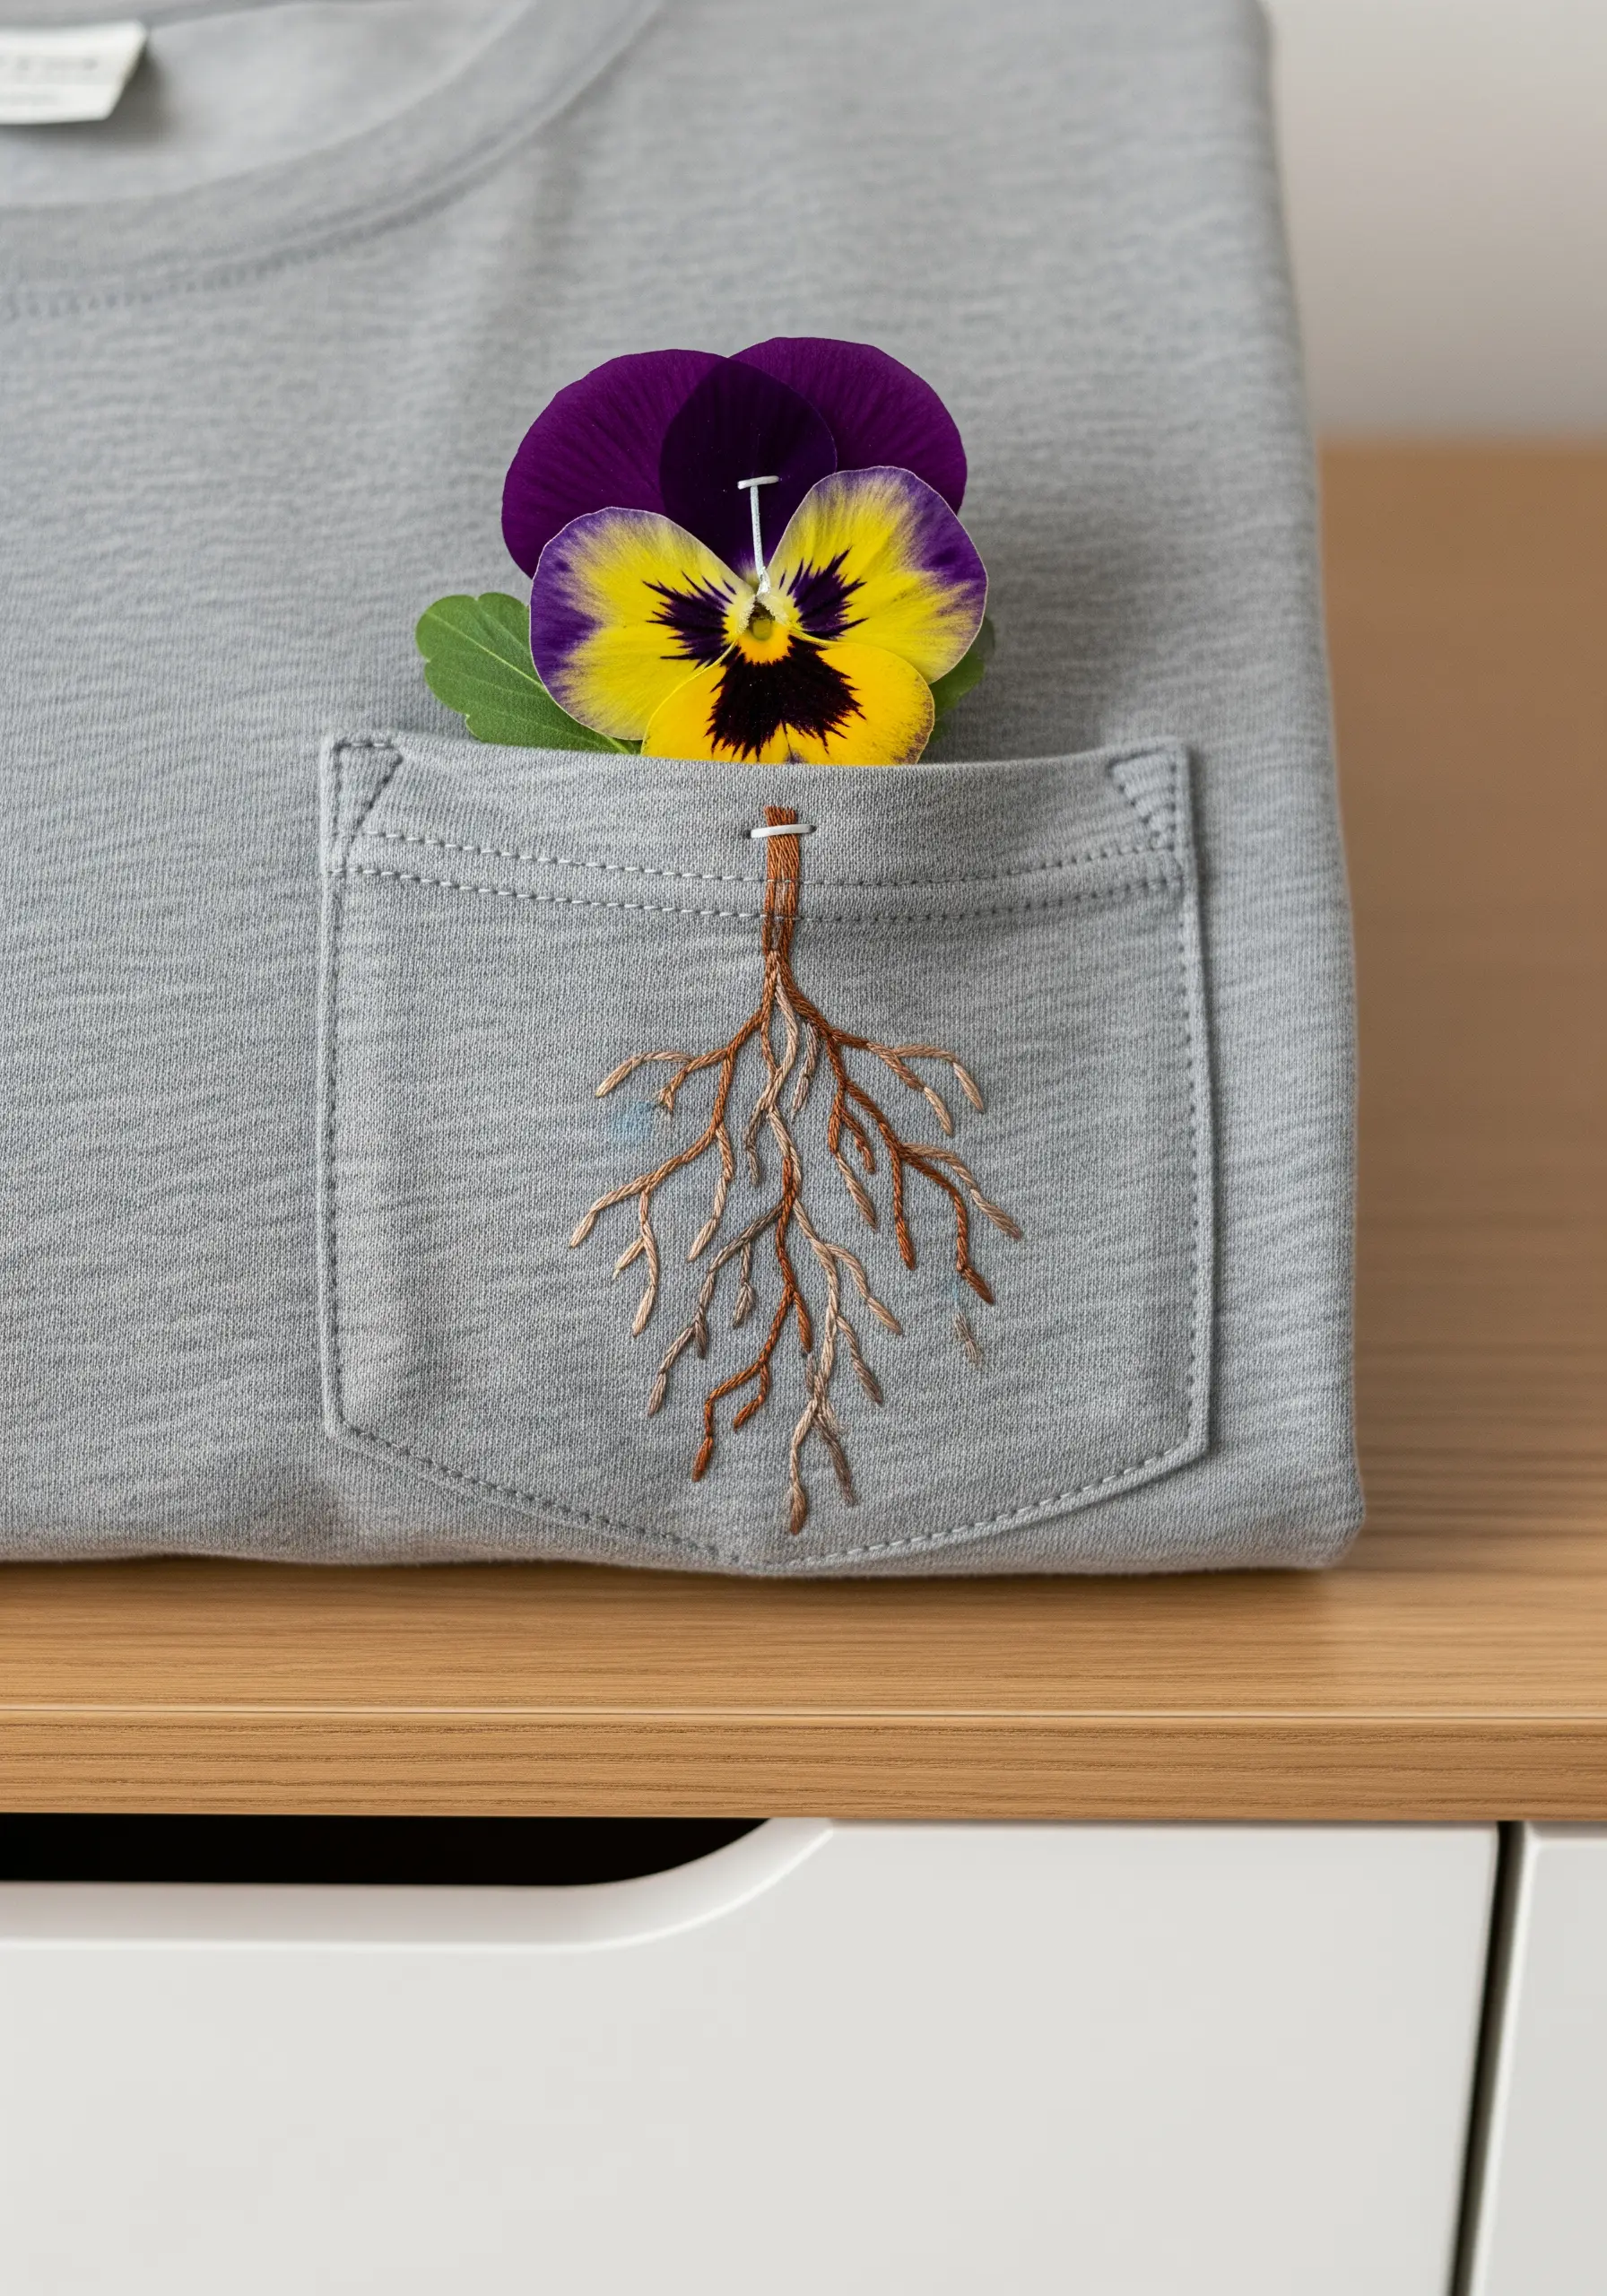
This approach uses embroidery to tell a story, turning a simple pocket into a point of intrigue.
Stitch a delicate root system on the pocket of a t-shirt or jacket using a split stitch in shades of brown and taupe for a realistic, textured effect.
Instead of permanently attaching a flower, simply tuck a fresh or pressed pansy into the pocket, creating an interactive and ever-changing piece of art.
This method allows you to change the flower with the seasons or your mood, making the garment a dynamic expression of your connection to nature.
4. Adorn a Silk Robe with Queen Anne’s Lace

Embroidering on silk or satin requires a gentle touch to prevent puckering and snags.
Always use a lightweight, iron-on stabilizer on the back of the fabric and a fine, sharp needle (size 9 or 10) to glide through the delicate weave.
Arrange dried Queen Anne’s Lace along the lapel in a cascading pattern, securing them with nearly invisible stitches made with a single strand of thread.
Use a simple running stitch with a fine metallic or silk thread to add a subtle, shimmering border that complements the fabric’s natural luster without overpowering the delicate flowers.
5. Design a Removable Pressed Flower Patch
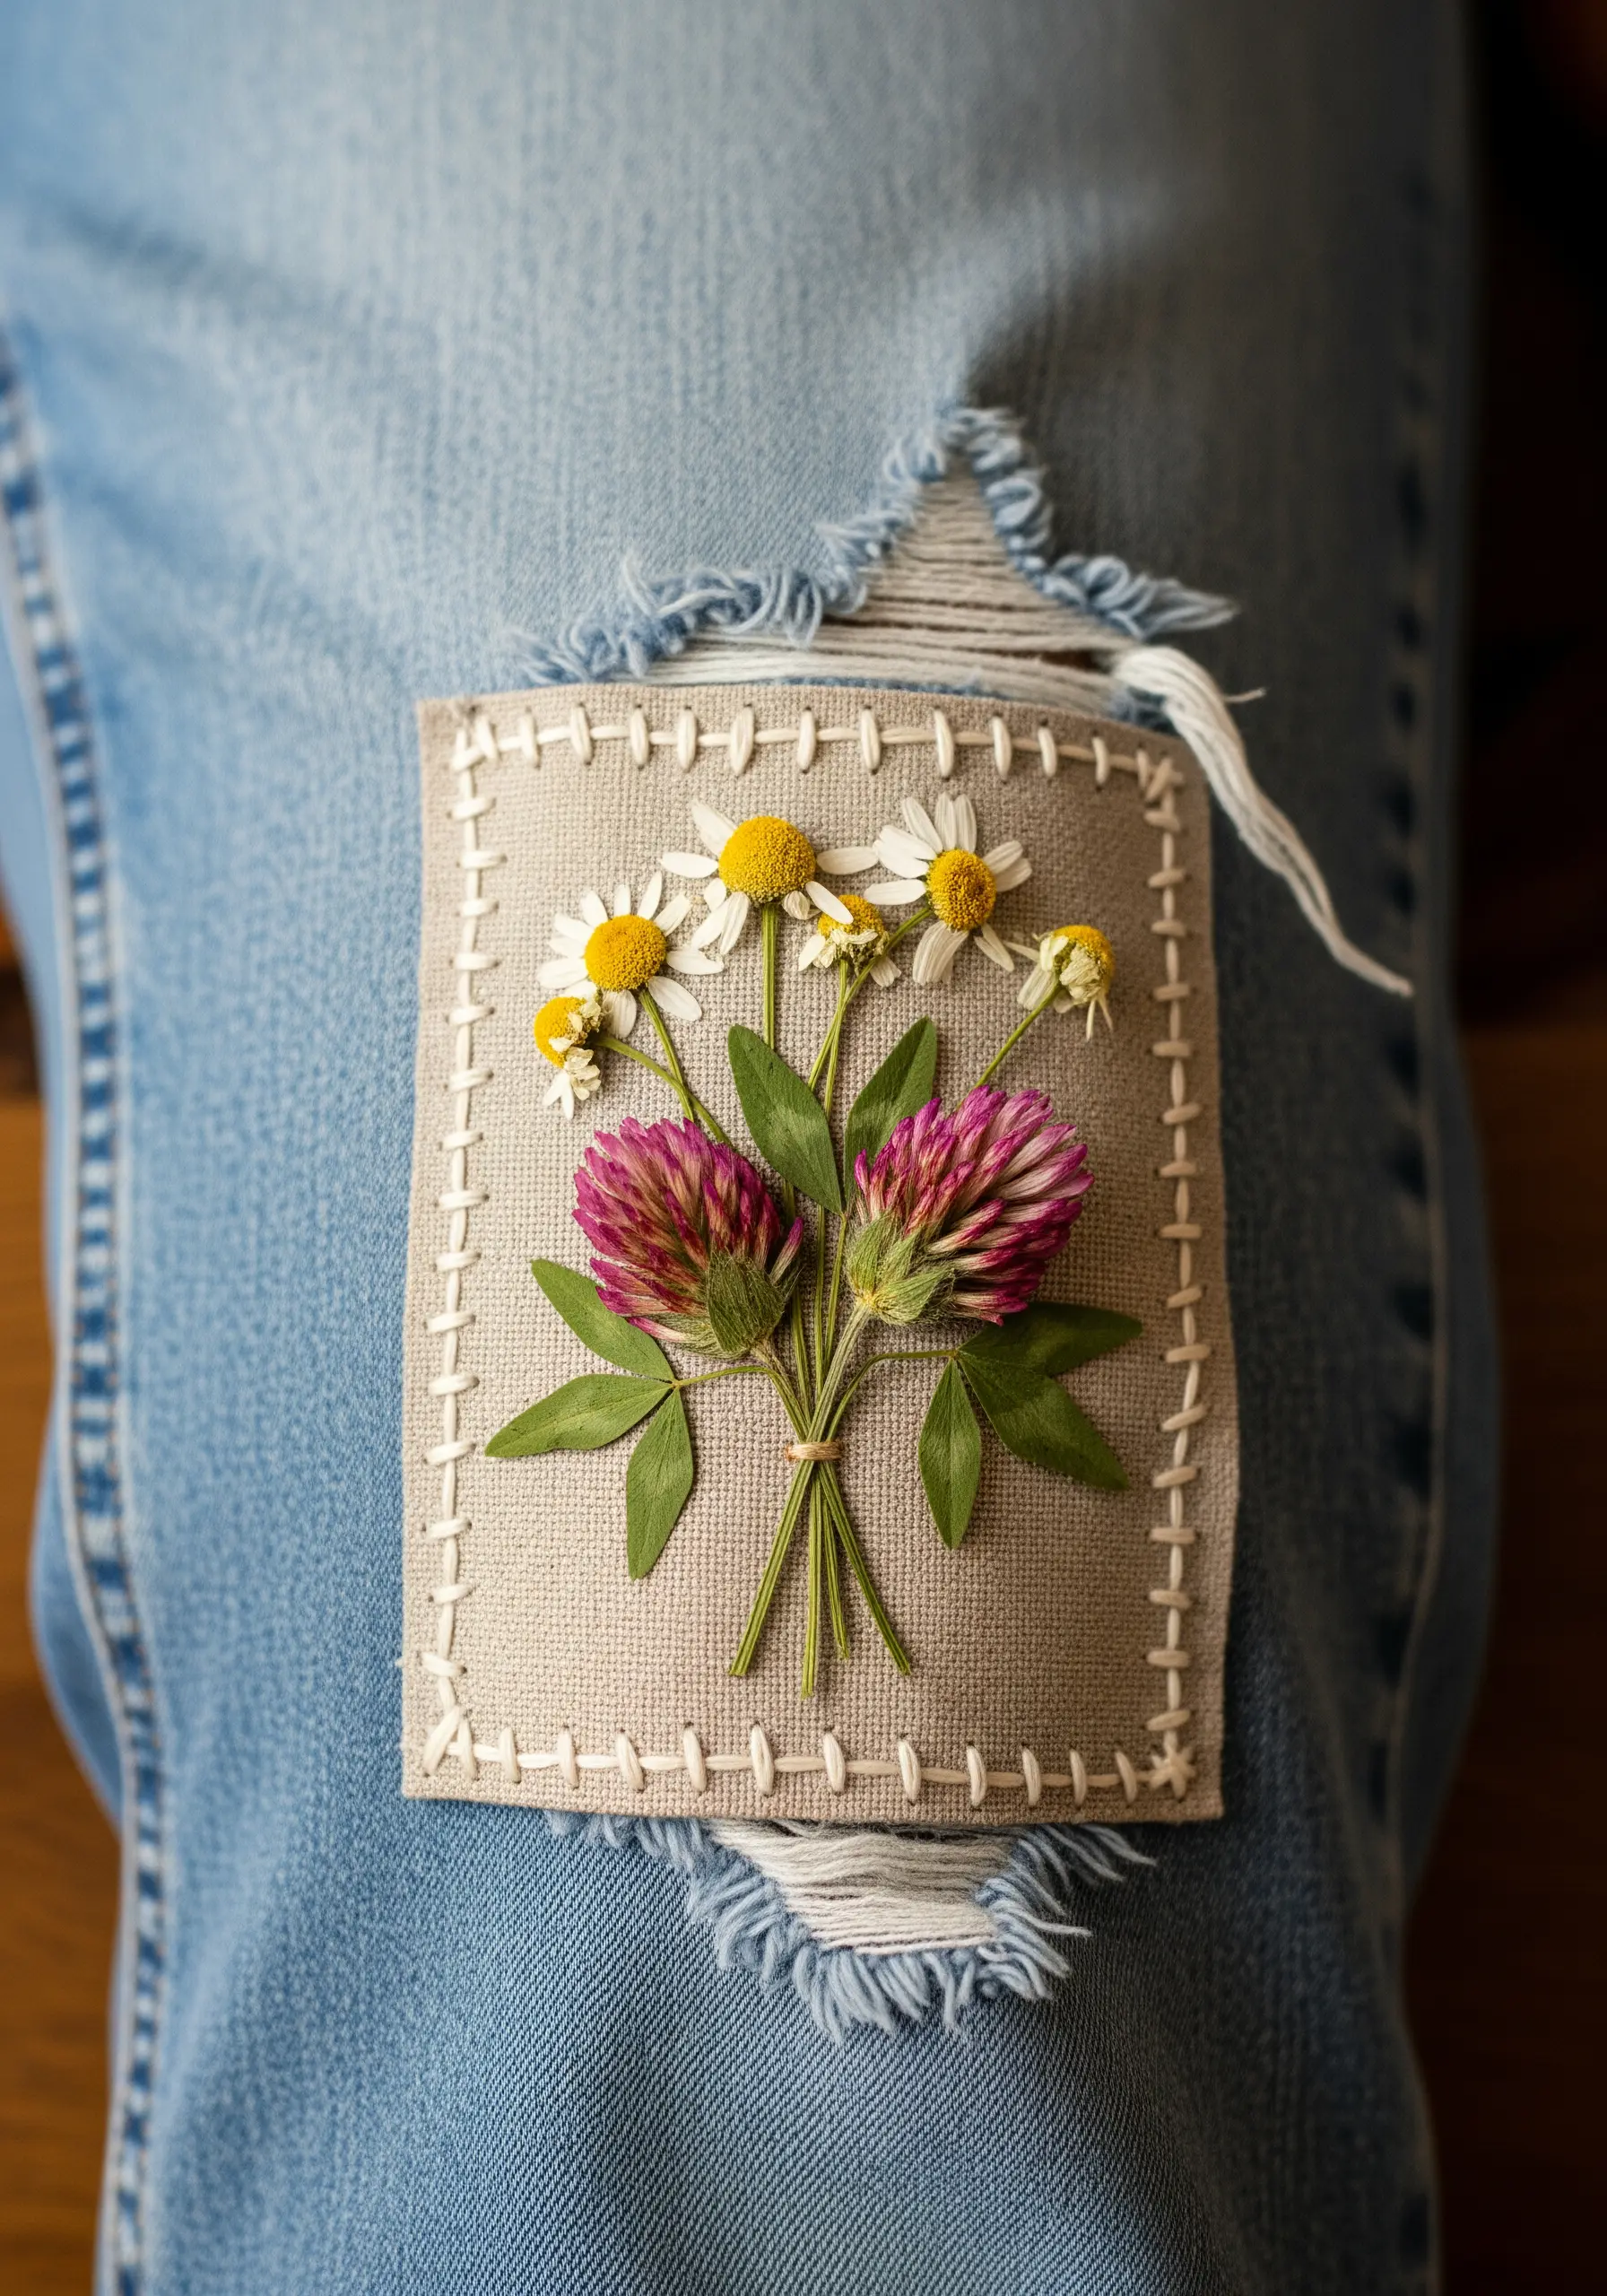
For a less permanent option, create a botanical patch that you can move between garments.
Start with a sturdy base fabric like linen or canvas, and arrange a small bouquet of pressed clover and daisies.
Secure the flowers with small stitches, then frame the arrangement with a bold blanket stitch or running stitch around the edge of the patch.
This method not only protects the flowers but also allows you to embellish delicate knitwear or ripped jeans without stitching directly into a fragile area.
You can then tack the patch onto your clothing with a few stitches at the corners for easy removal.
6. Capture Autumn’s Movement on a Sleeve

Use the length of a sleeve to create a sense of motion with pressed autumn leaves.
Arrange pressed ginkgo, maple, and oak leaves in a swirling pattern that flows from the shoulder toward the cuff.
Instead of stitching heavy stems, connect the leaves with a light, airy trail of seed stitches or small running stitches in a contrasting gold or copper thread.
This minimalist stitching technique suggests the movement of wind, allowing the beauty of the preserved leaves to remain the primary focus.
7. Cultivate a Wildflower Meadow Bodice
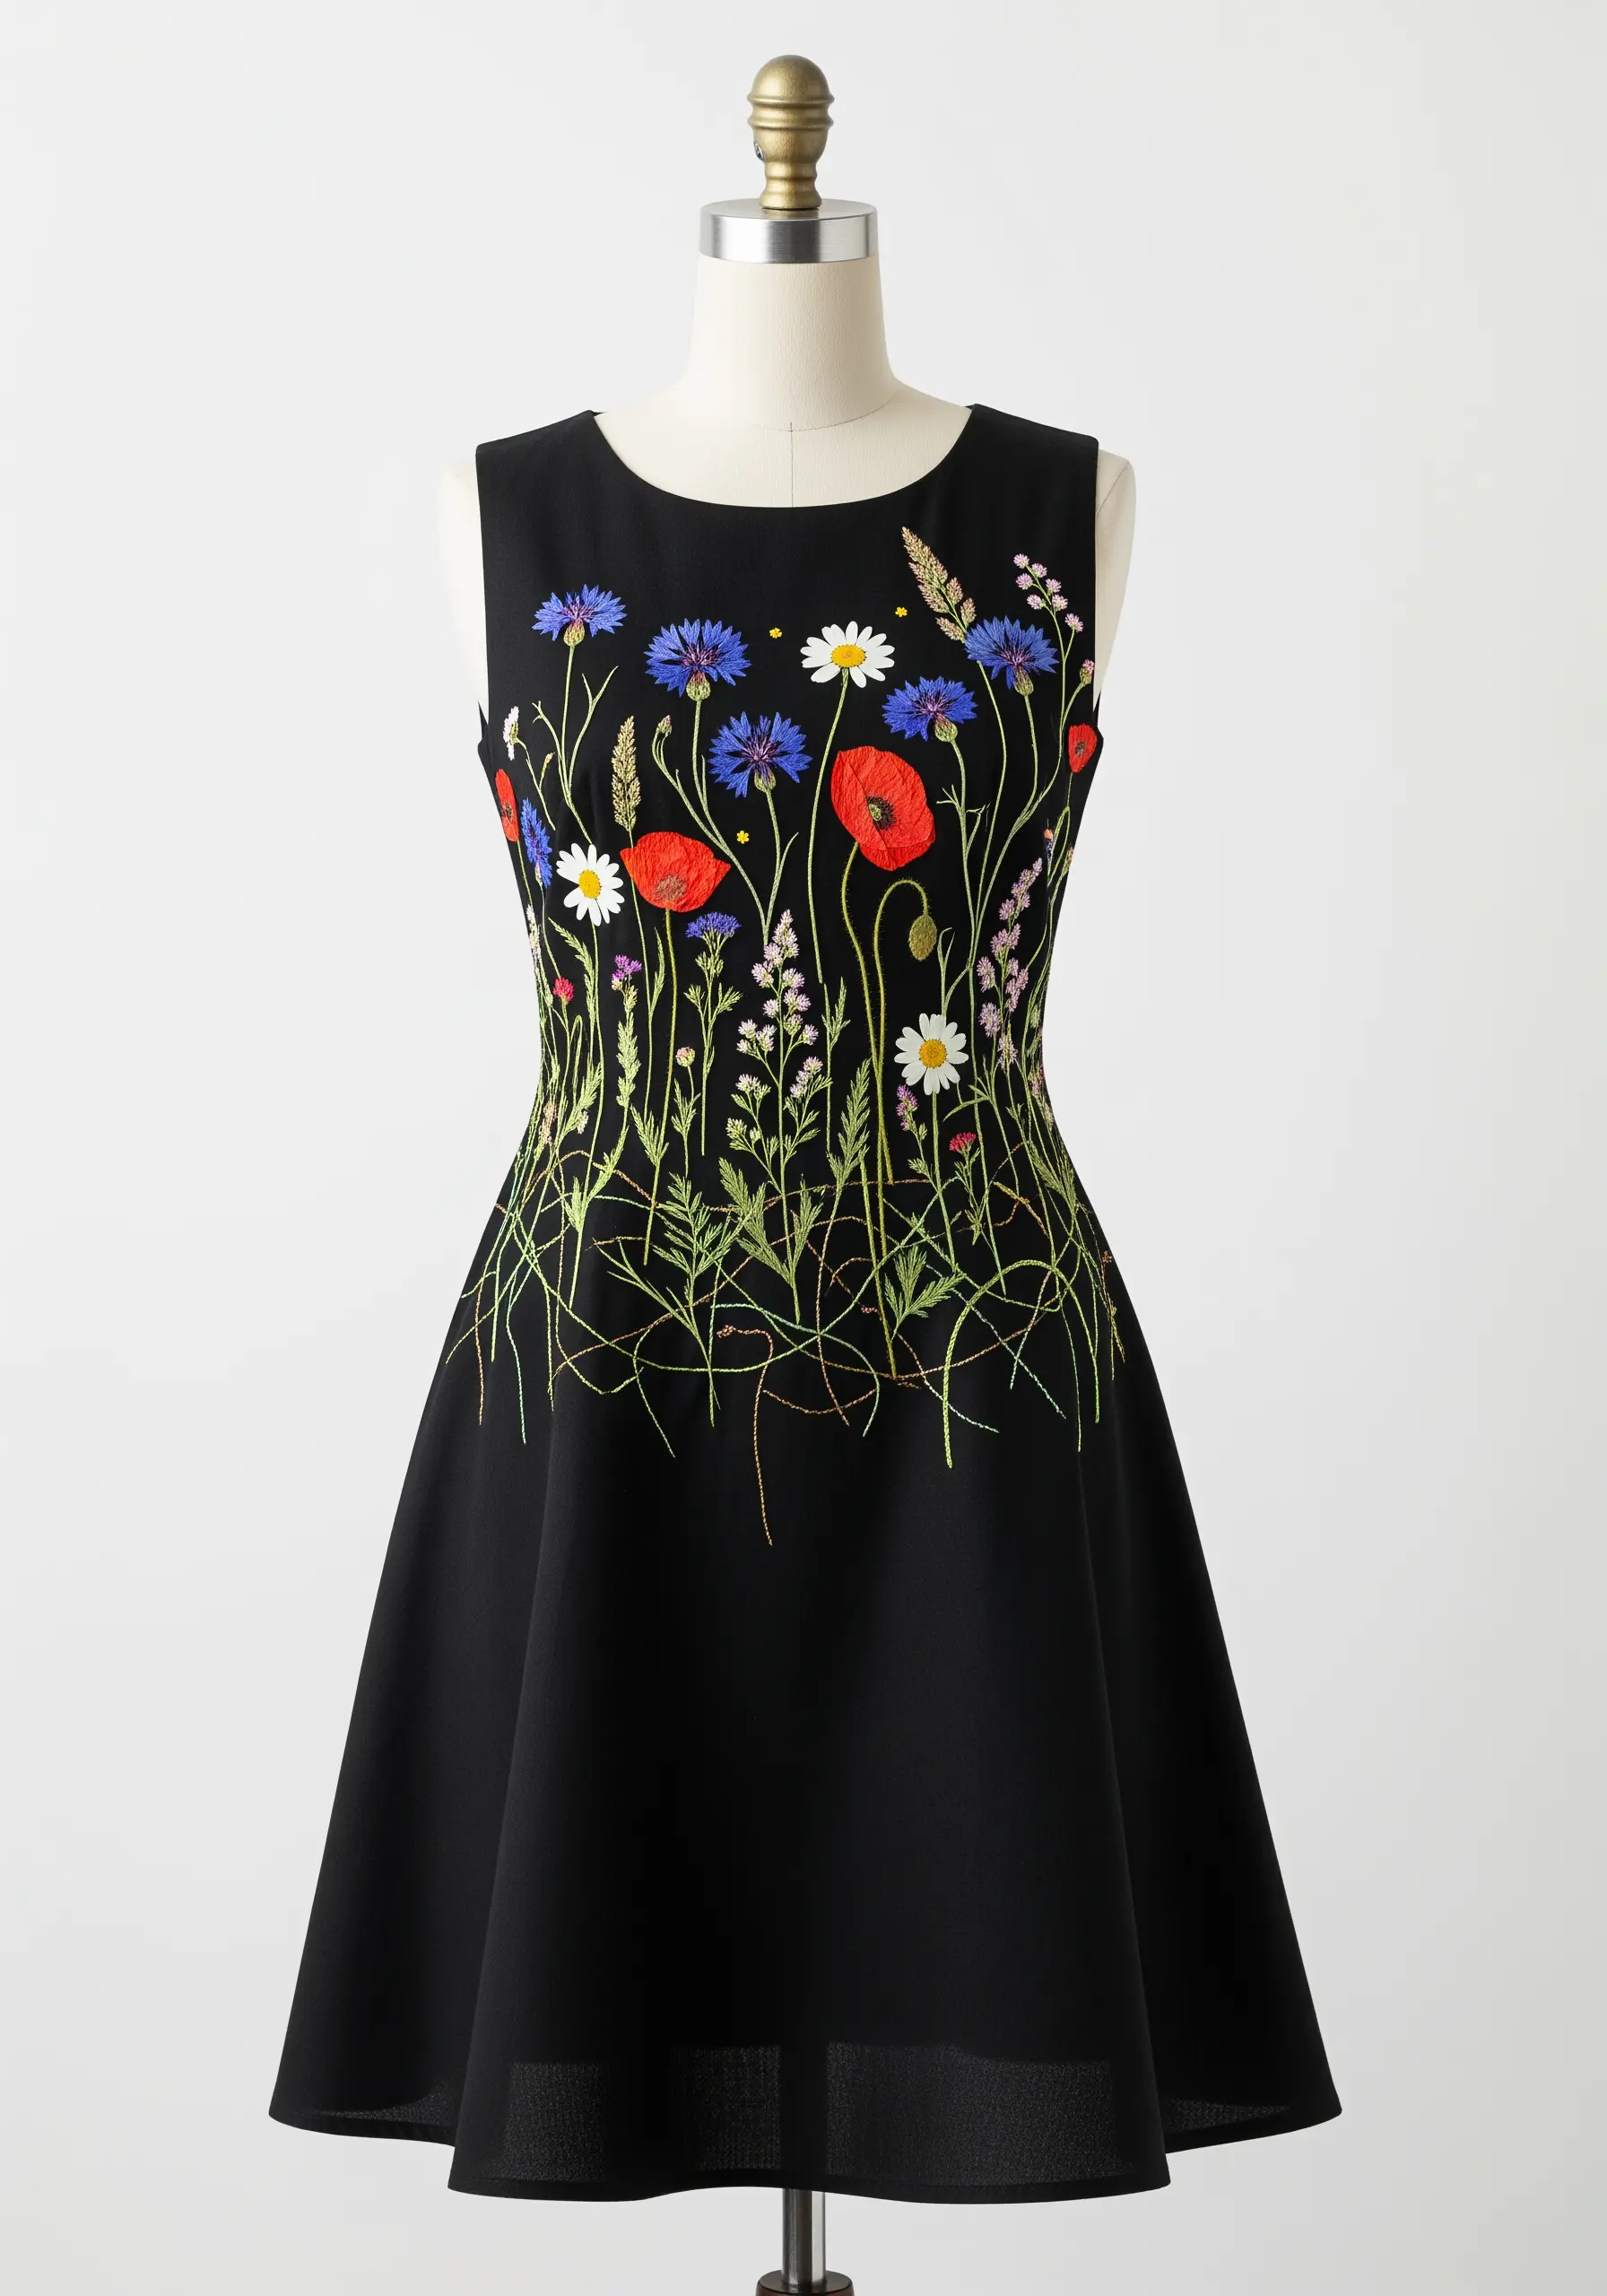
Turn the bodice of a simple dress into a vibrant, textured wildflower meadow.
This technique works best on a dark, solid-colored fabric, which makes the colors of the flowers and threads pop.
Layer a variety of pressed flowers—poppies, cornflowers, daisies—at different heights, concentrating them around the waist to create a flattering silhouette that draws the eye inward.
Fill in the gaps with an array of embroidered greenery using fly stitches for leaves and long straight stitches for grass, creating a dense, layered, and organic look.
8. Embellish a Bridal Veil with Ethereal Sprigs
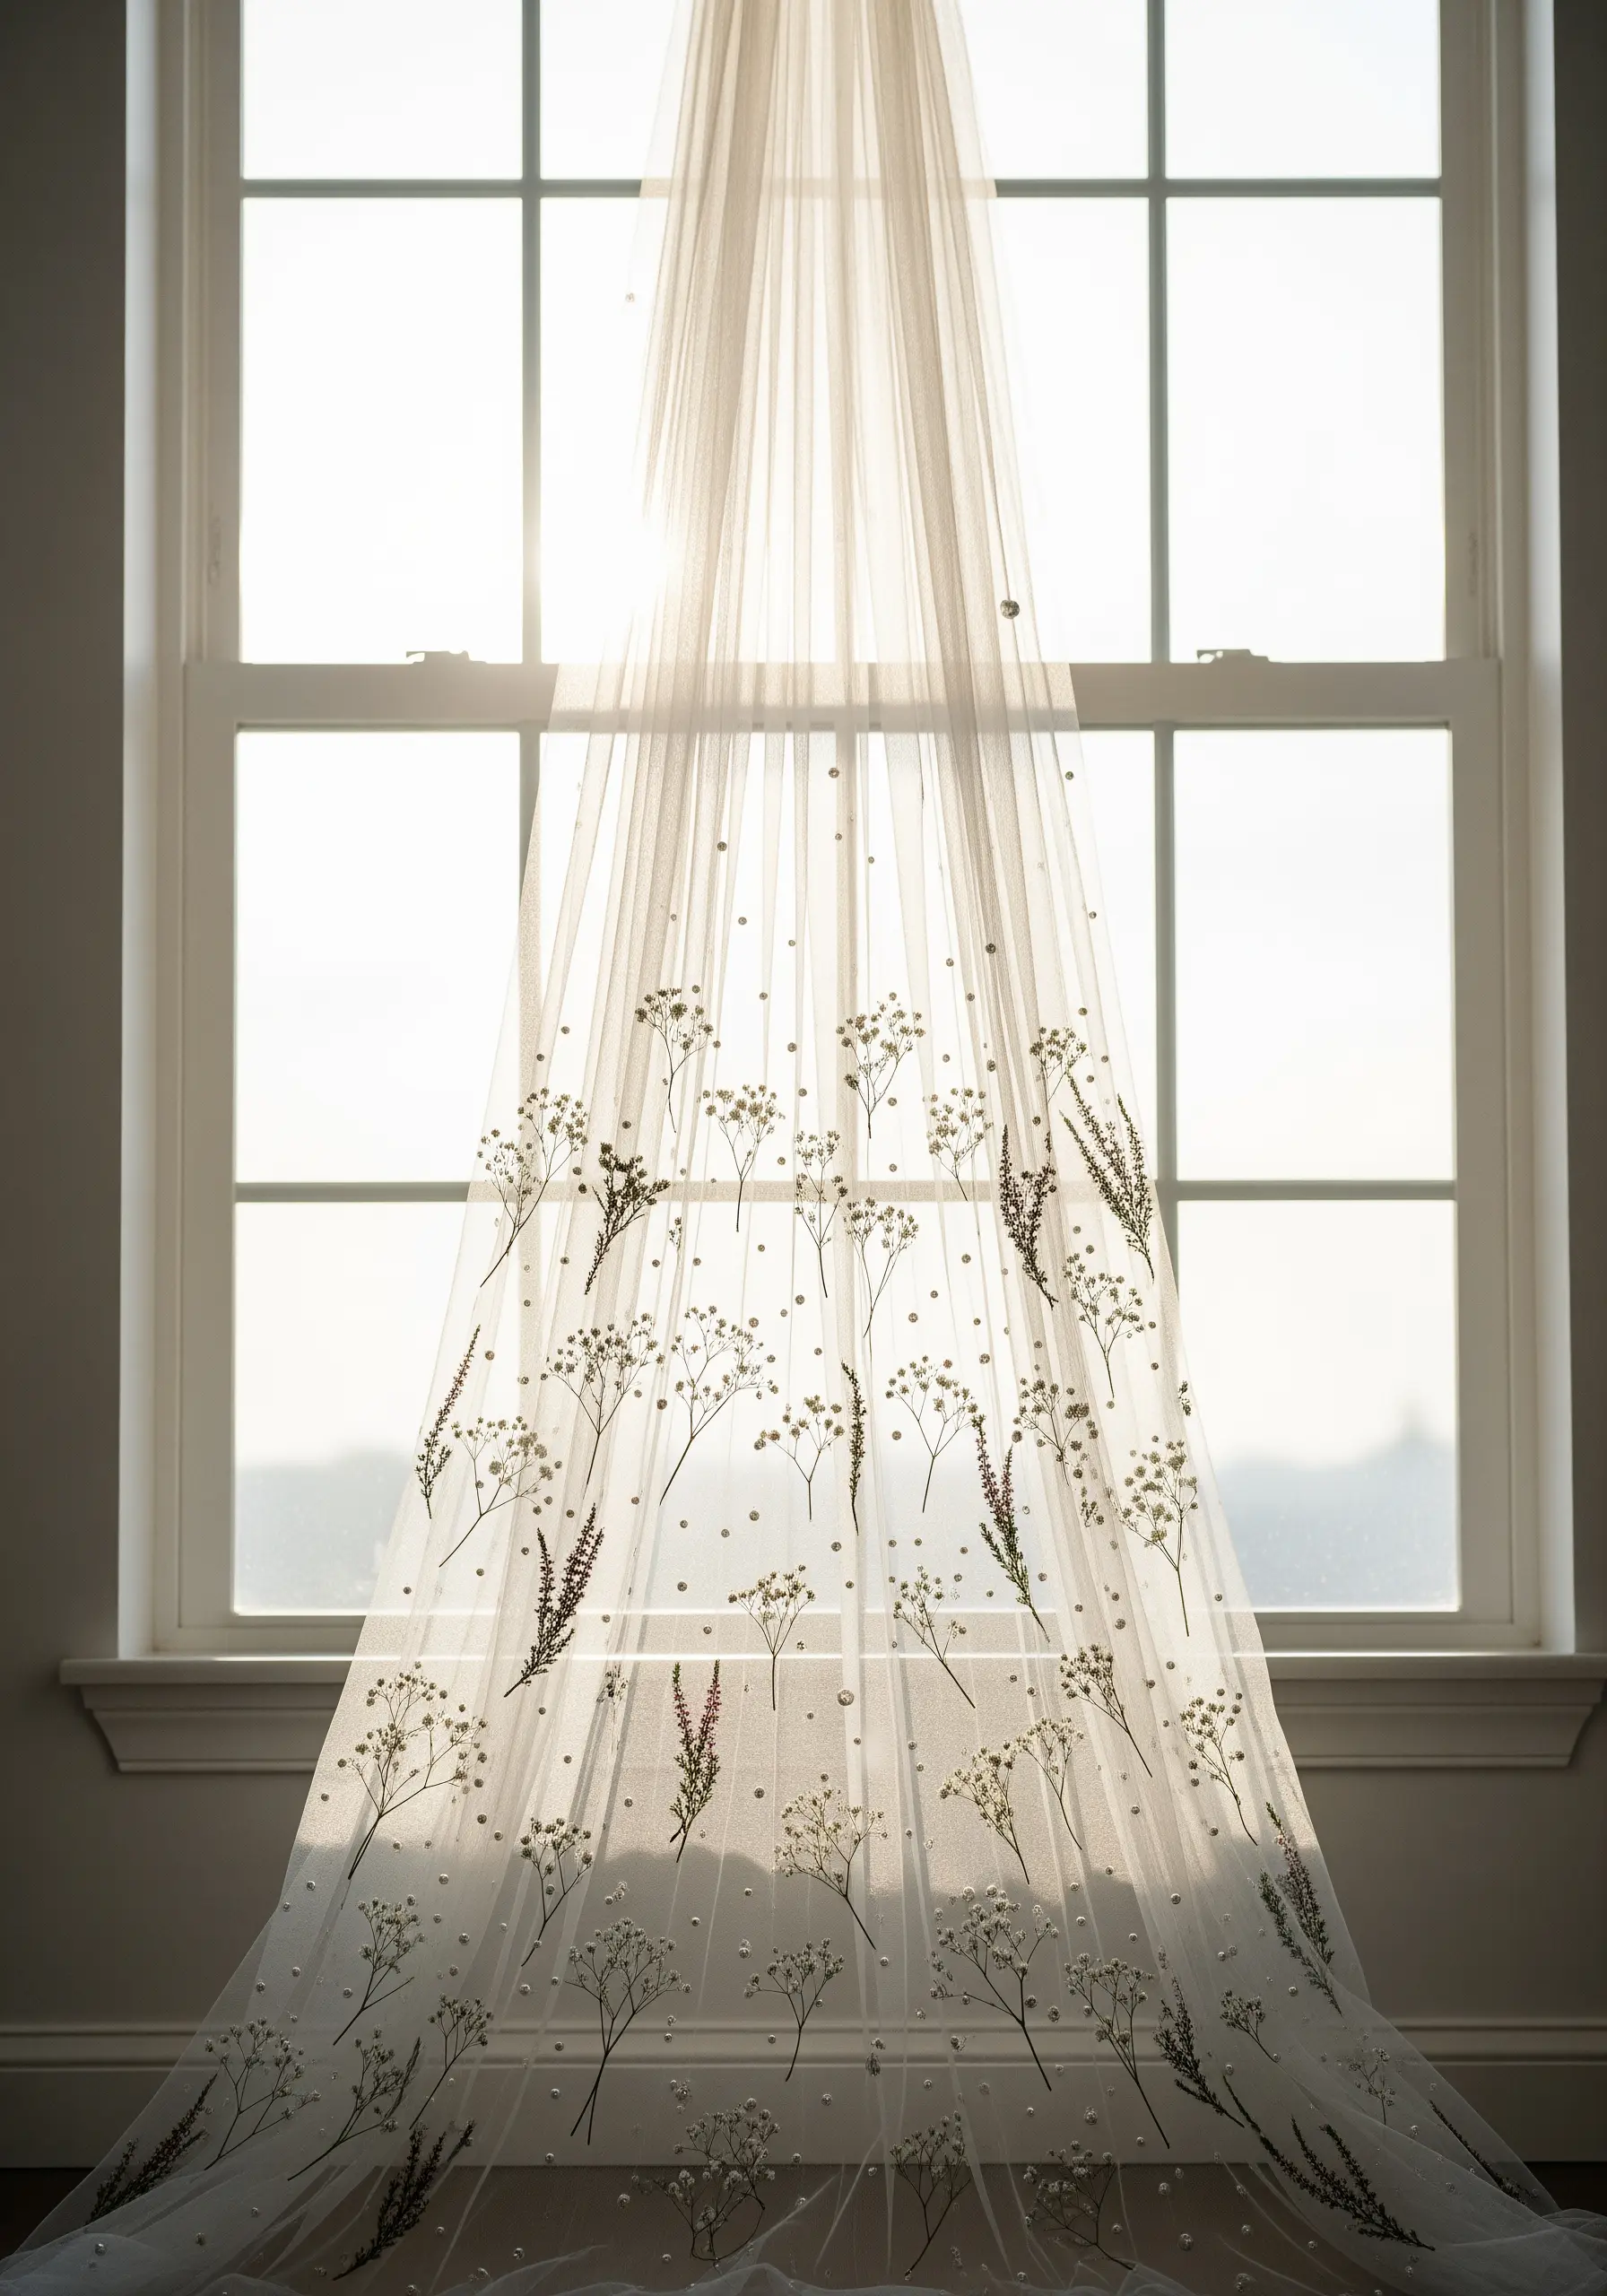
Working on sheer tulle requires precision and the right materials to achieve a floating, weightless effect.
Use tiny, delicate botanicals like baby’s breath and heather, which won’t weigh down the fabric.
Secure them to the veil using a water-soluble stabilizer on the back; this provides support while you stitch and dissolves completely, leaving no trace.
Use a single strand of translucent or ivory thread to make tiny tacking stitches at the base of each sprig. Scatter small pearls or beads between the flowers to add a touch of bridal elegance and catch the light.
9. Create a Bold Sunflower Composition on Canvas

A sturdy canvas tote bag can handle larger pressed flowers and bolder embroidery without buckling.
For large flower heads like sunflowers, secure them first with a small amount of fabric-safe glue, then add decorative and functional stitches on top.
Use a satin stitch with dark brown or black thread for the flower centers to add texture and dimension, and outline the petals with a simple backstitch to define their shape.
This combination of appliqué and embroidery ensures the large flowers are durable enough for everyday use.
10. Add a Gentle Touch to Baby’s First Gown

When embellishing baby clothes, prioritize softness, safety, and subtlety.
Choose a single, delicate sprig of a non-irritating plant like heather or lavender and place it on the chest, away from areas that might rub or chafe.
Secure the sprig with fine, matching thread, and ensure all knots are on the outside or covered with a soft, iron-on backing to protect delicate skin.
Frame the botanical element with a simple decorative stitch, like a tiny running stitch in a soft, contrasting color, to give the design a finished, intentional look.
11. Place a Singular Fern on a Crisp Cuff
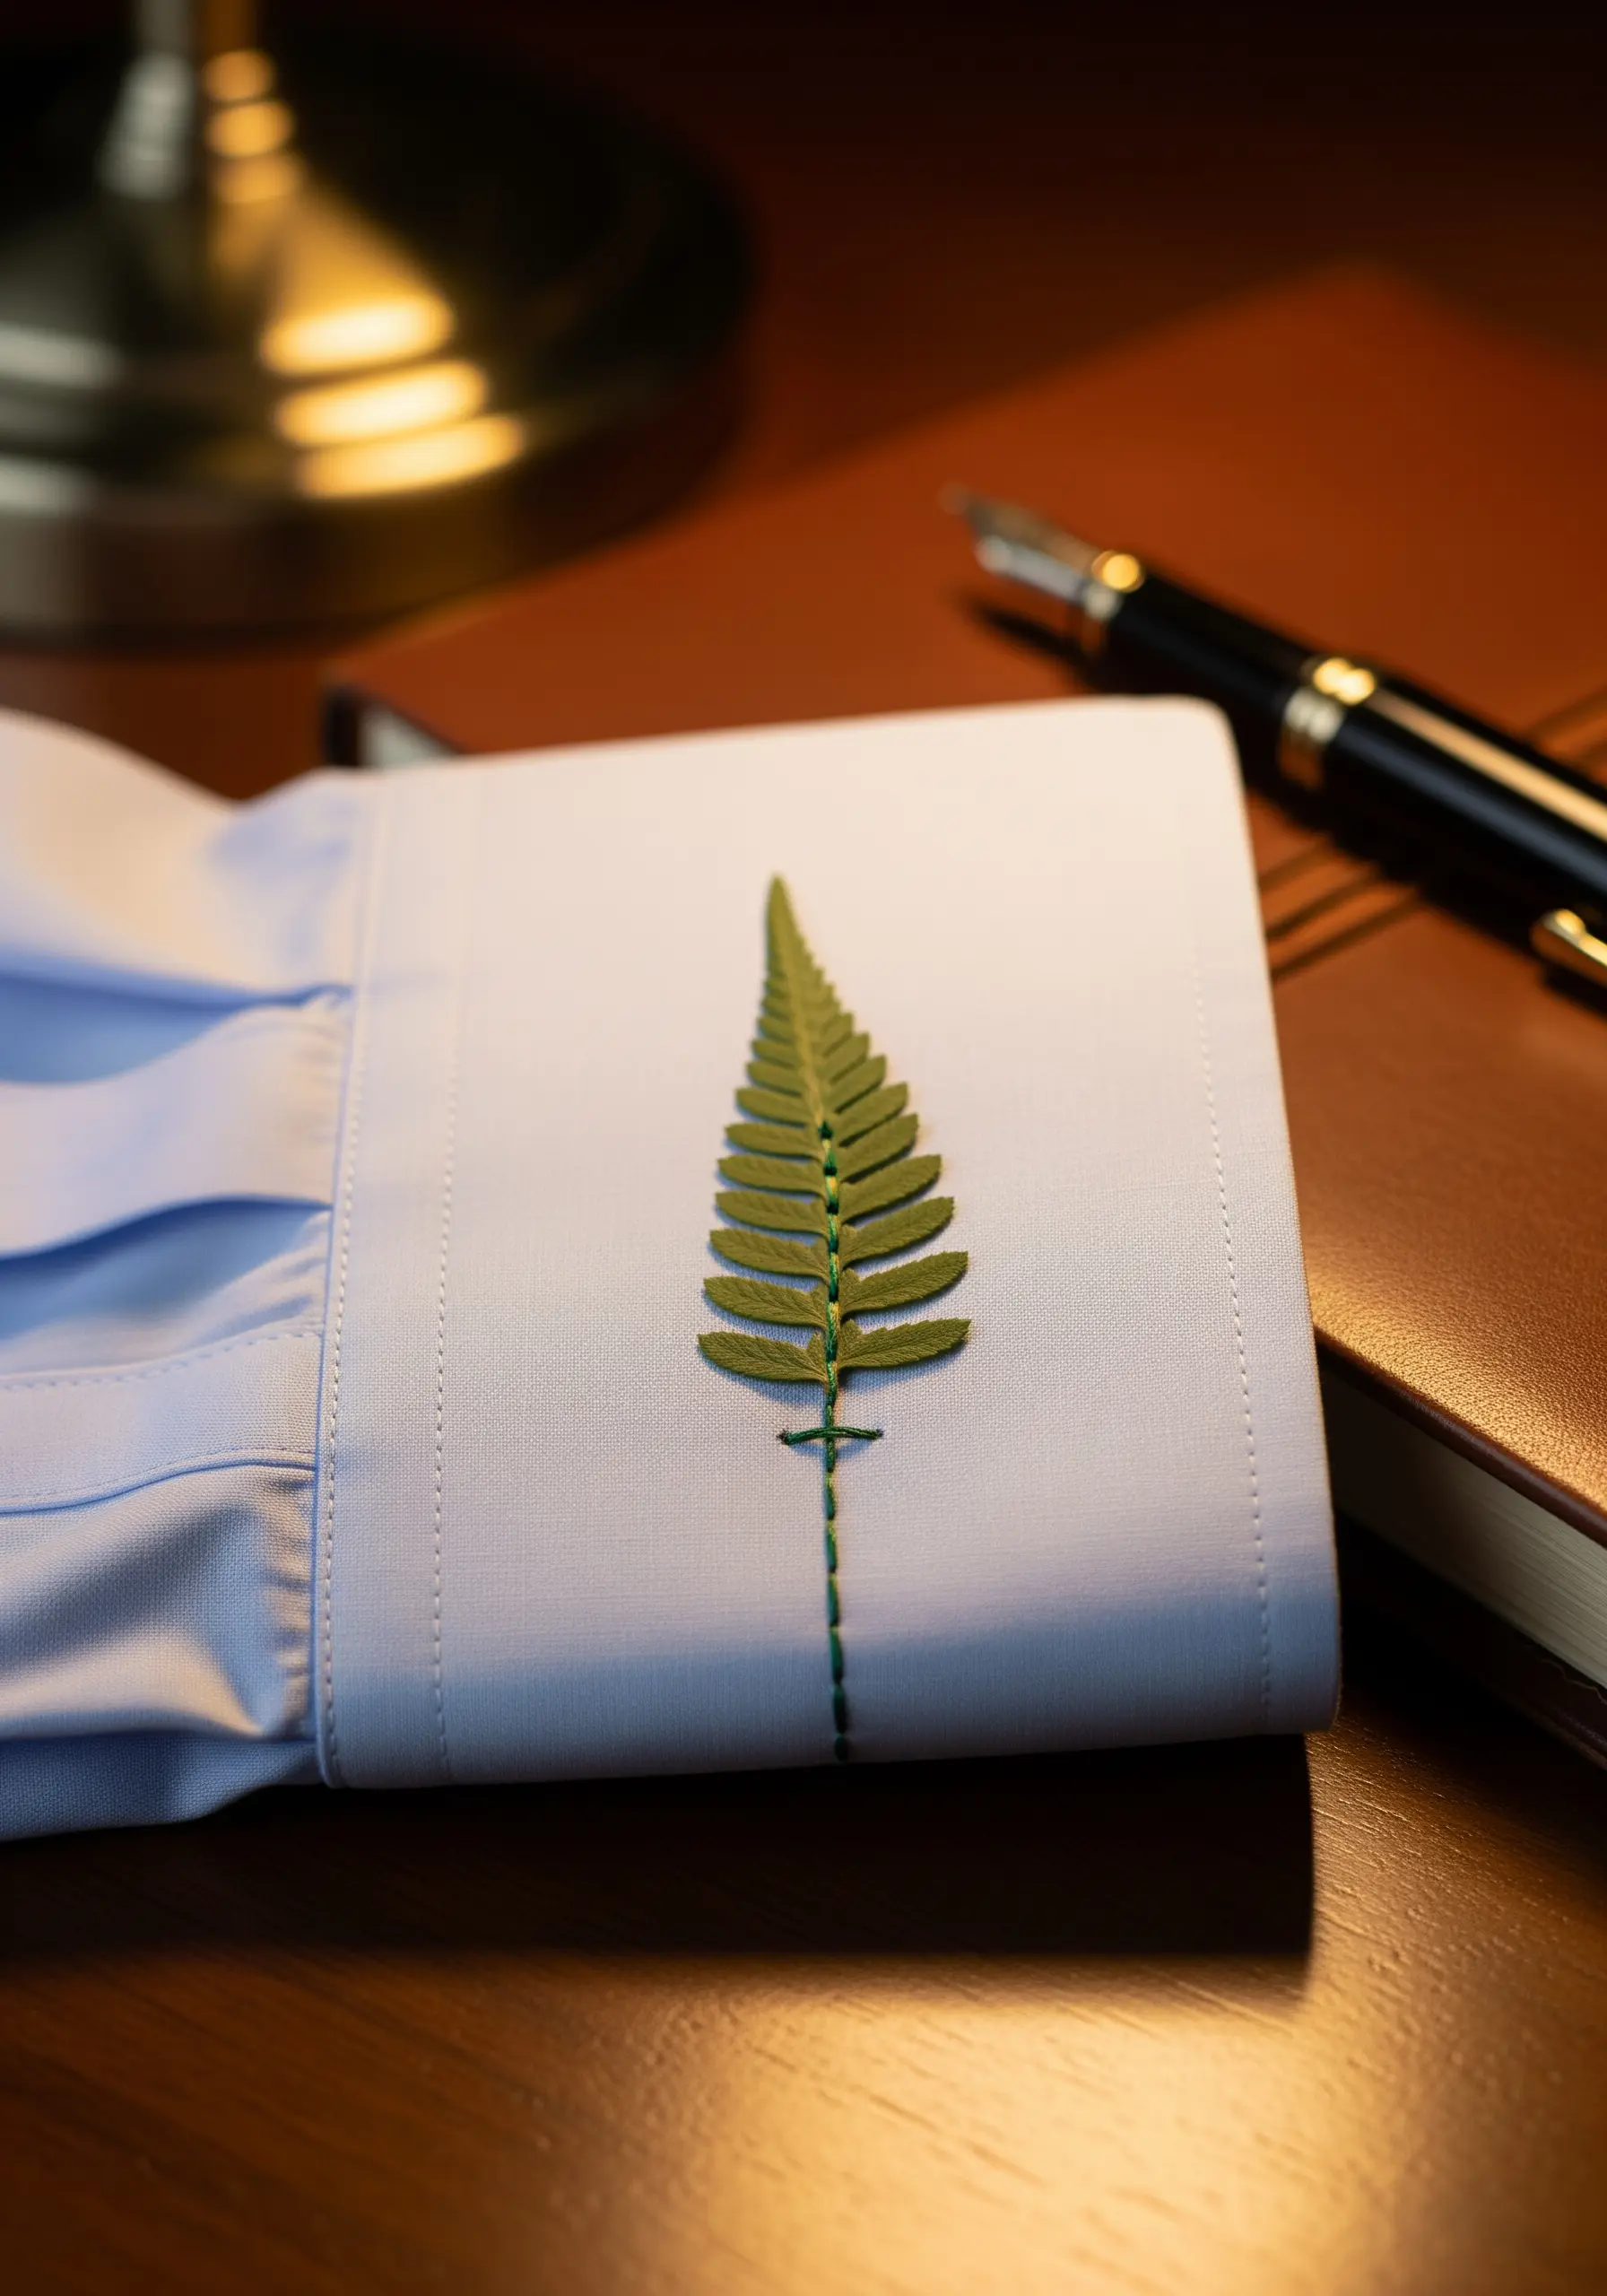
A single, perfectly placed motif on a shirt cuff exudes quiet confidence and bespoke elegance.
A pressed fern is an ideal choice due to its flat profile and intricate, graphic shape.
Position the fern vertically along the cuff’s button placket. Secure the central stem with a line of neat backstitches in a contrasting green, extending the stitching slightly beyond the leaf to ground the design.
Use tiny, almost invisible tacking stitches along the delicate fronds to keep them flat and secure during wear and washing. This is a subtle detail that makes a powerful statement.
12. Weave a Vibrant Floral Crown on a Sun Hat
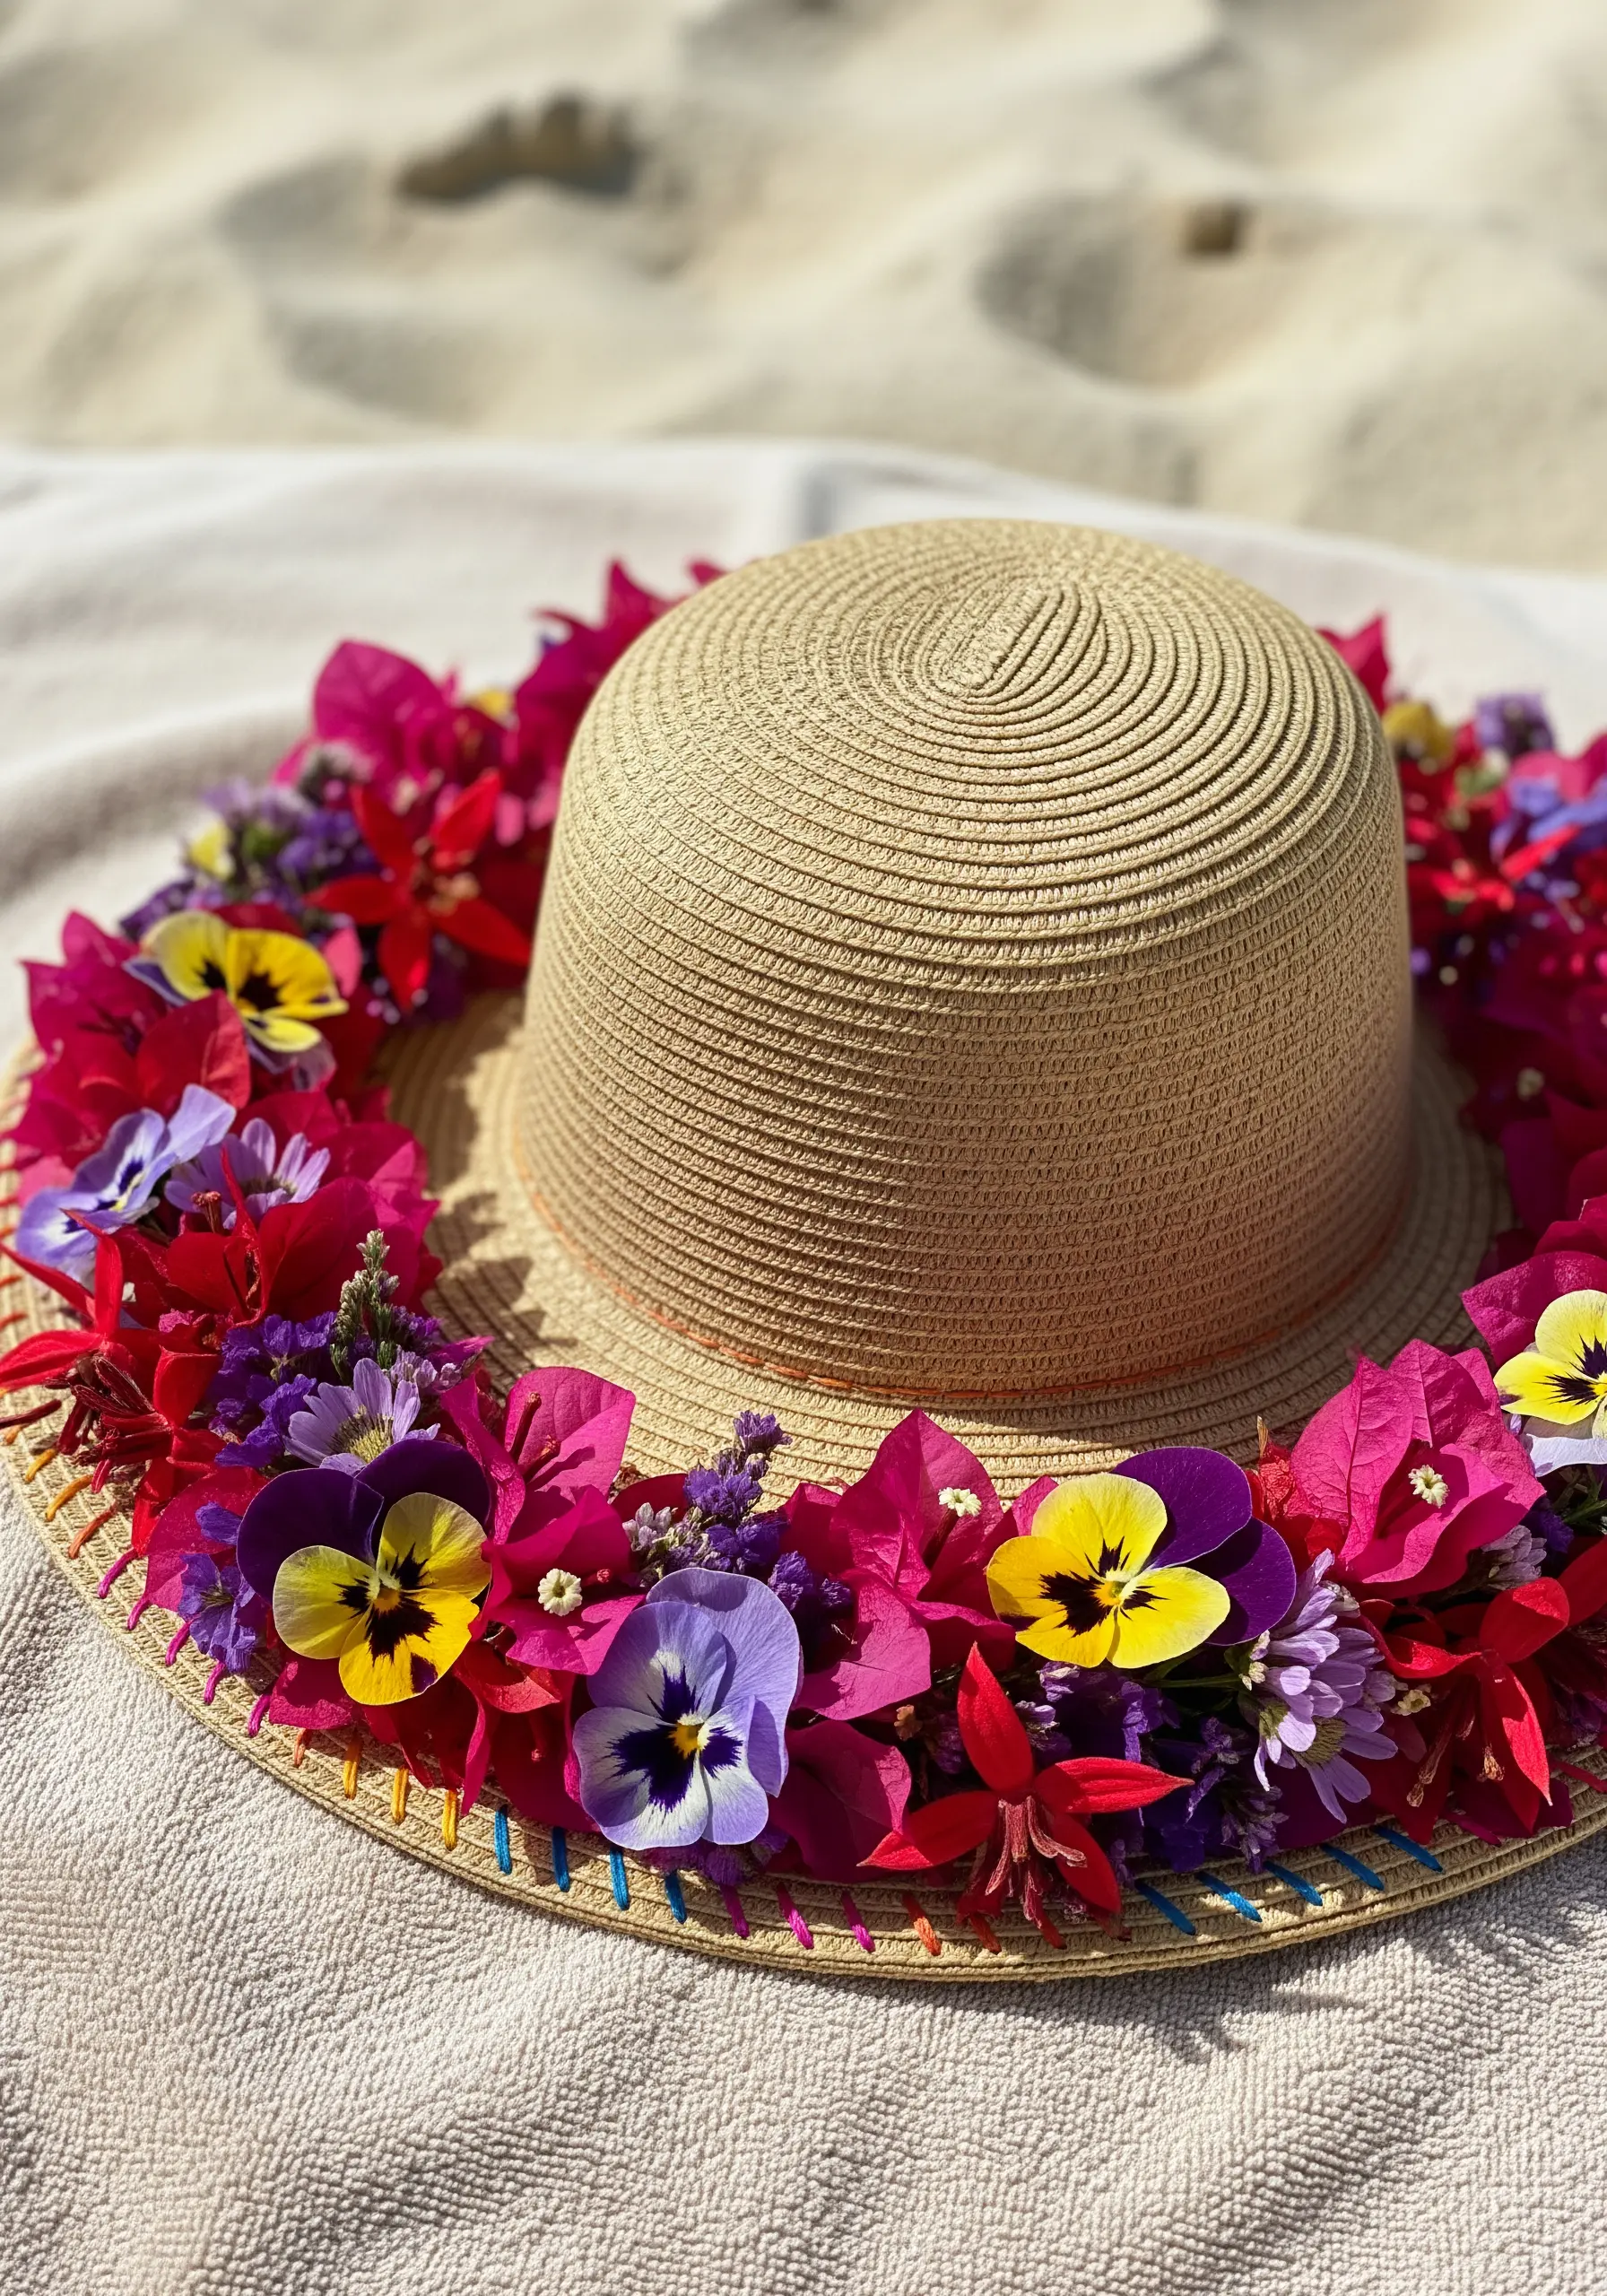
Embellishing a woven straw hat requires a different approach than fabric; you’ll be stitching *through* the material rather than *into* it.
Use a large, sharp needle and sturdy thread to anchor your design. Arrange a colorful mix of hardy pressed flowers like bougainvillea and pansies around the base of the crown.
Instead of tiny, delicate stitches, use longer, decorative stitches that wrap around the woven straw, securing the flower stems as you go.
This technique turns the embroidery into a structural element, creating a vibrant, durable flower crown that feels like part of the hat itself.
13. Craft a Detachable Hydrangea Brooch for Knitwear

Directly embroidering on chunky knits can cause stretching and damage. Instead, create a detachable brooch that offers the same botanical charm without the risk.
Start with a stiff felt or fabric backing cut to the shape of your hydrangea cluster. Arrange and secure the delicate dried blossoms using fabric glue and a few reinforcing stitches.
Embroider simple, graphic leaves around the flowers directly onto the backing. Once complete, attach a brooch pin to the back.
This allows you to add a beautiful handmade accent to any sweater or coat, moving it as you please.
14. Scatter Falling Petals on a Flowing Skirt
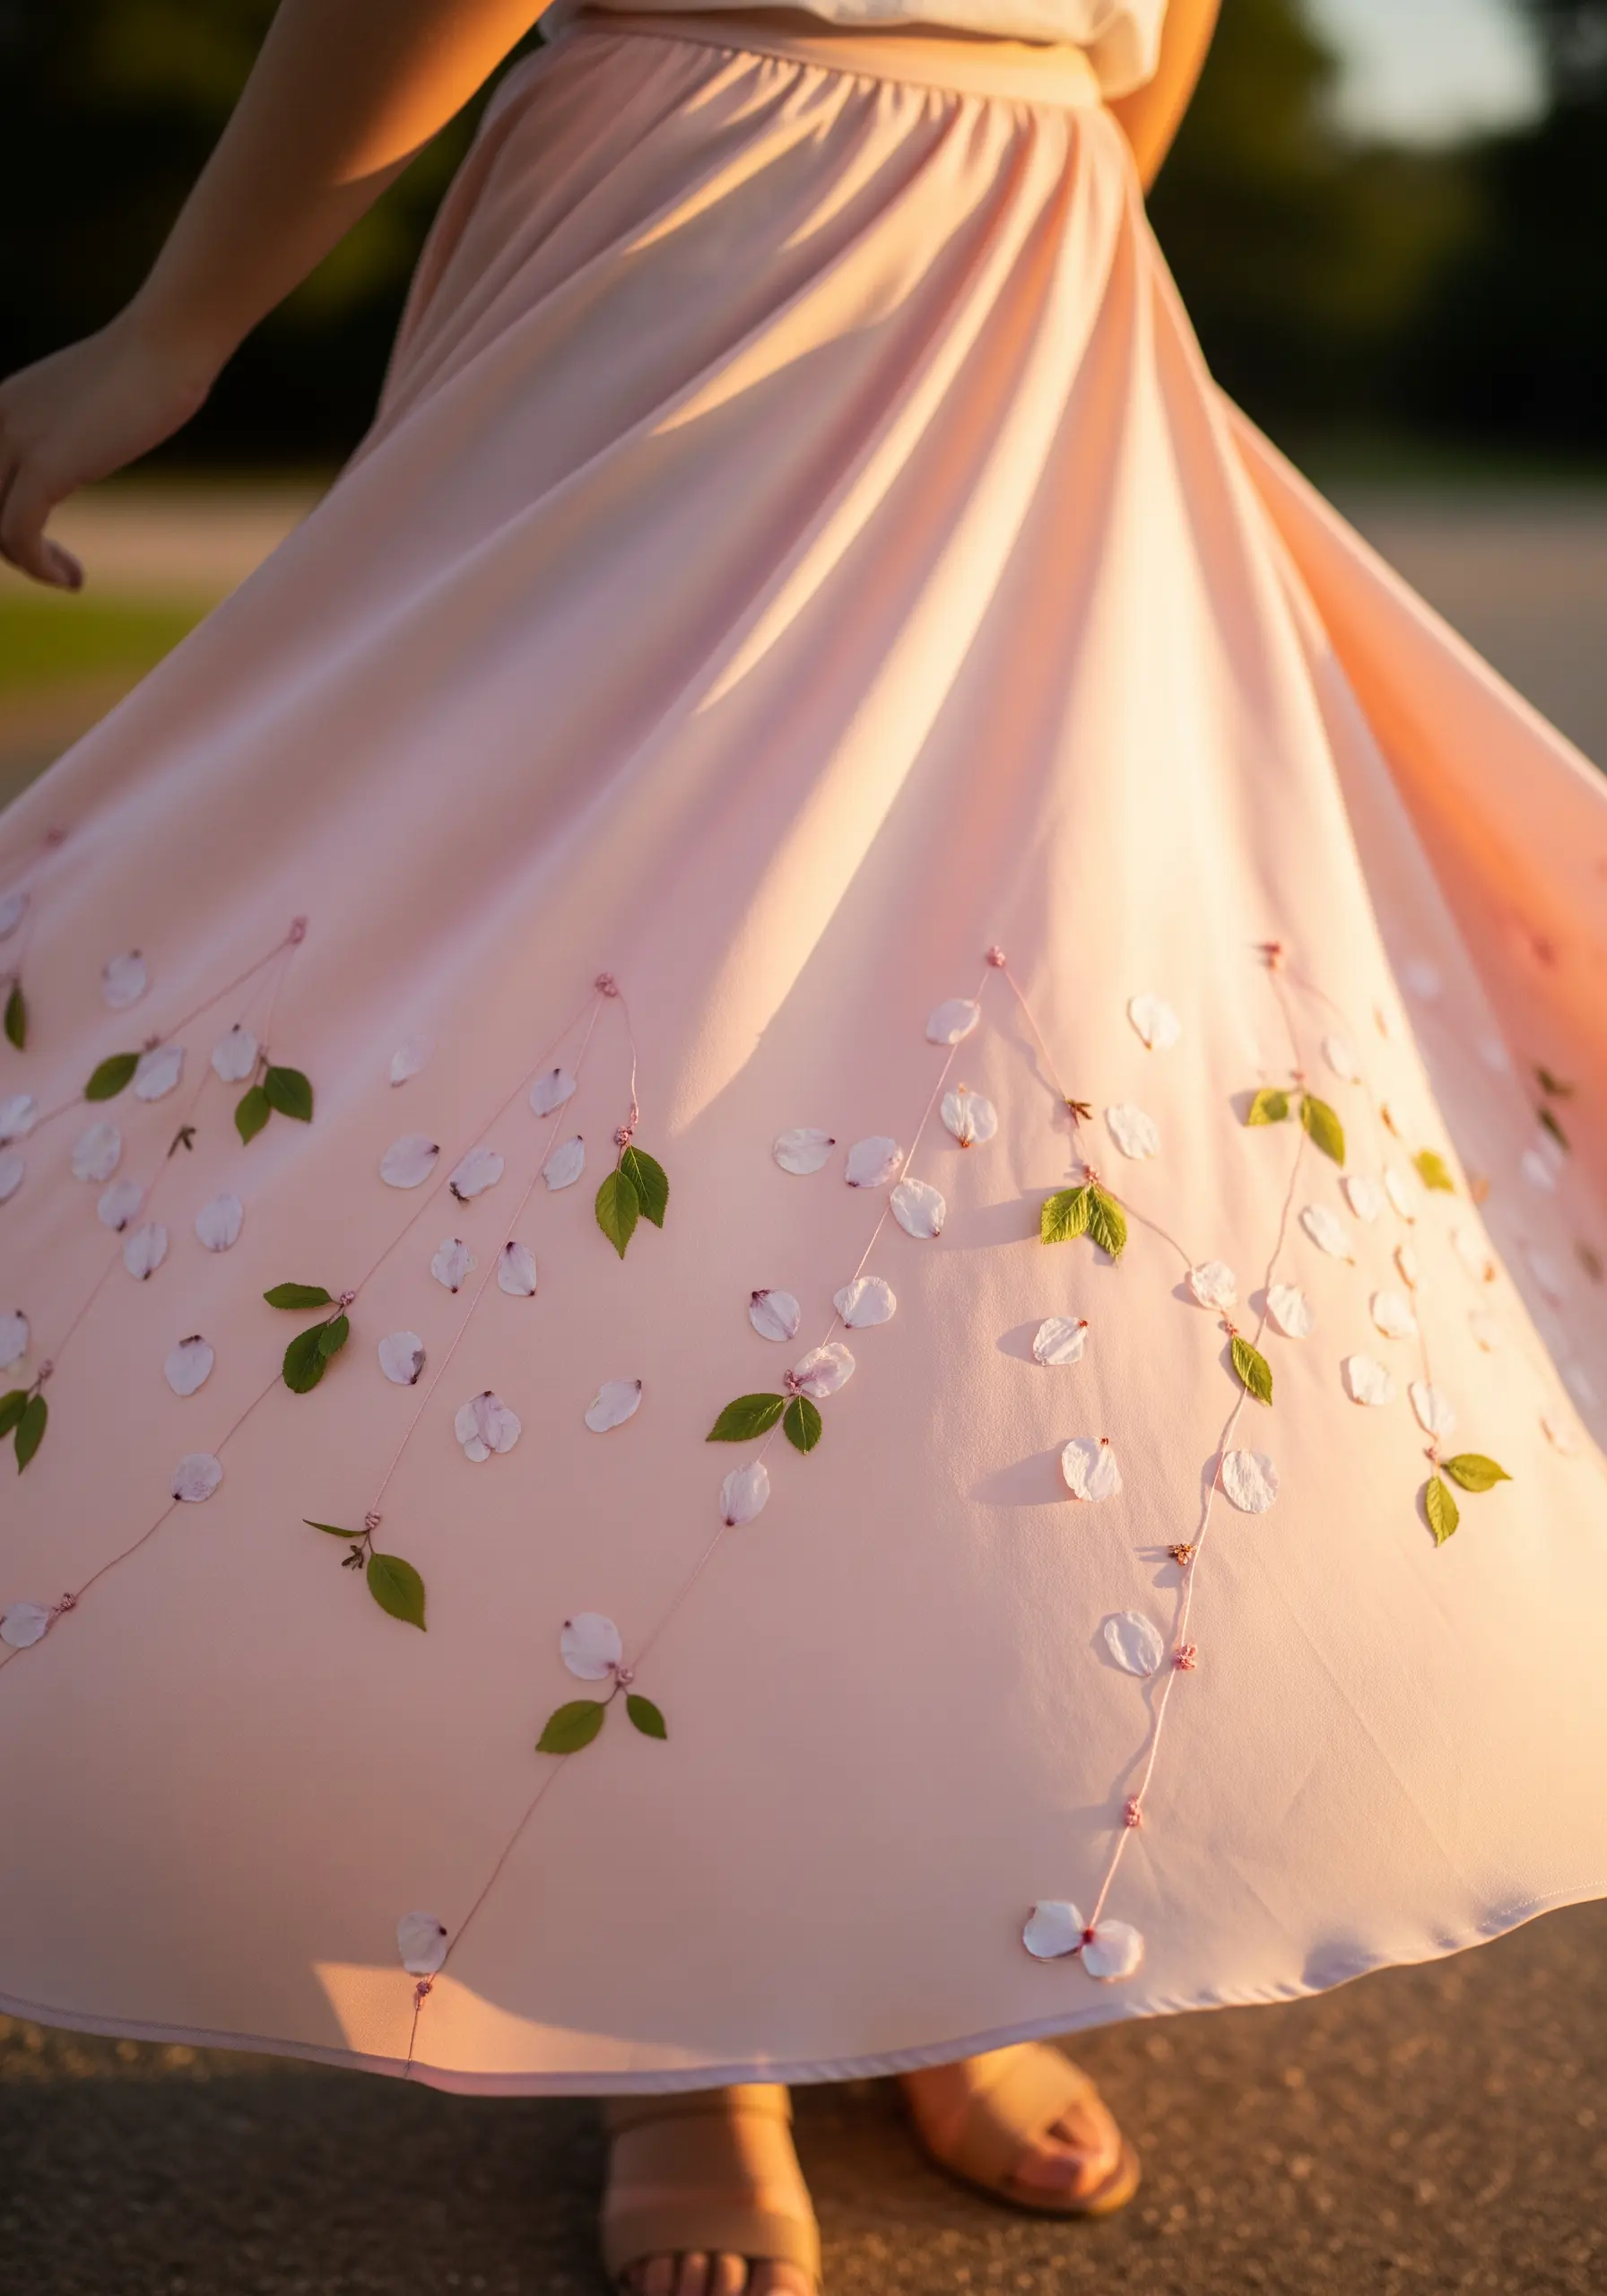
Create an illusion of movement on a long, flowing skirt by scattering delicate petals as if they are falling.
Use lightweight, single petals from flowers like cherry blossoms or small roses. Arrange them in a sparse, cascading pattern that drifts down the fabric.
Secure each petal with just one or two tiny, color-matched stitches at its base, allowing the top edge to lift slightly for a three-dimensional effect.
Connect the petals with faint, delicate embroidery lines in a soft pink or green thread to suggest trailing branches, enhancing the dreamy, ephemeral quality of the design.
15. Translate a Flower into a Geometric Sunburst
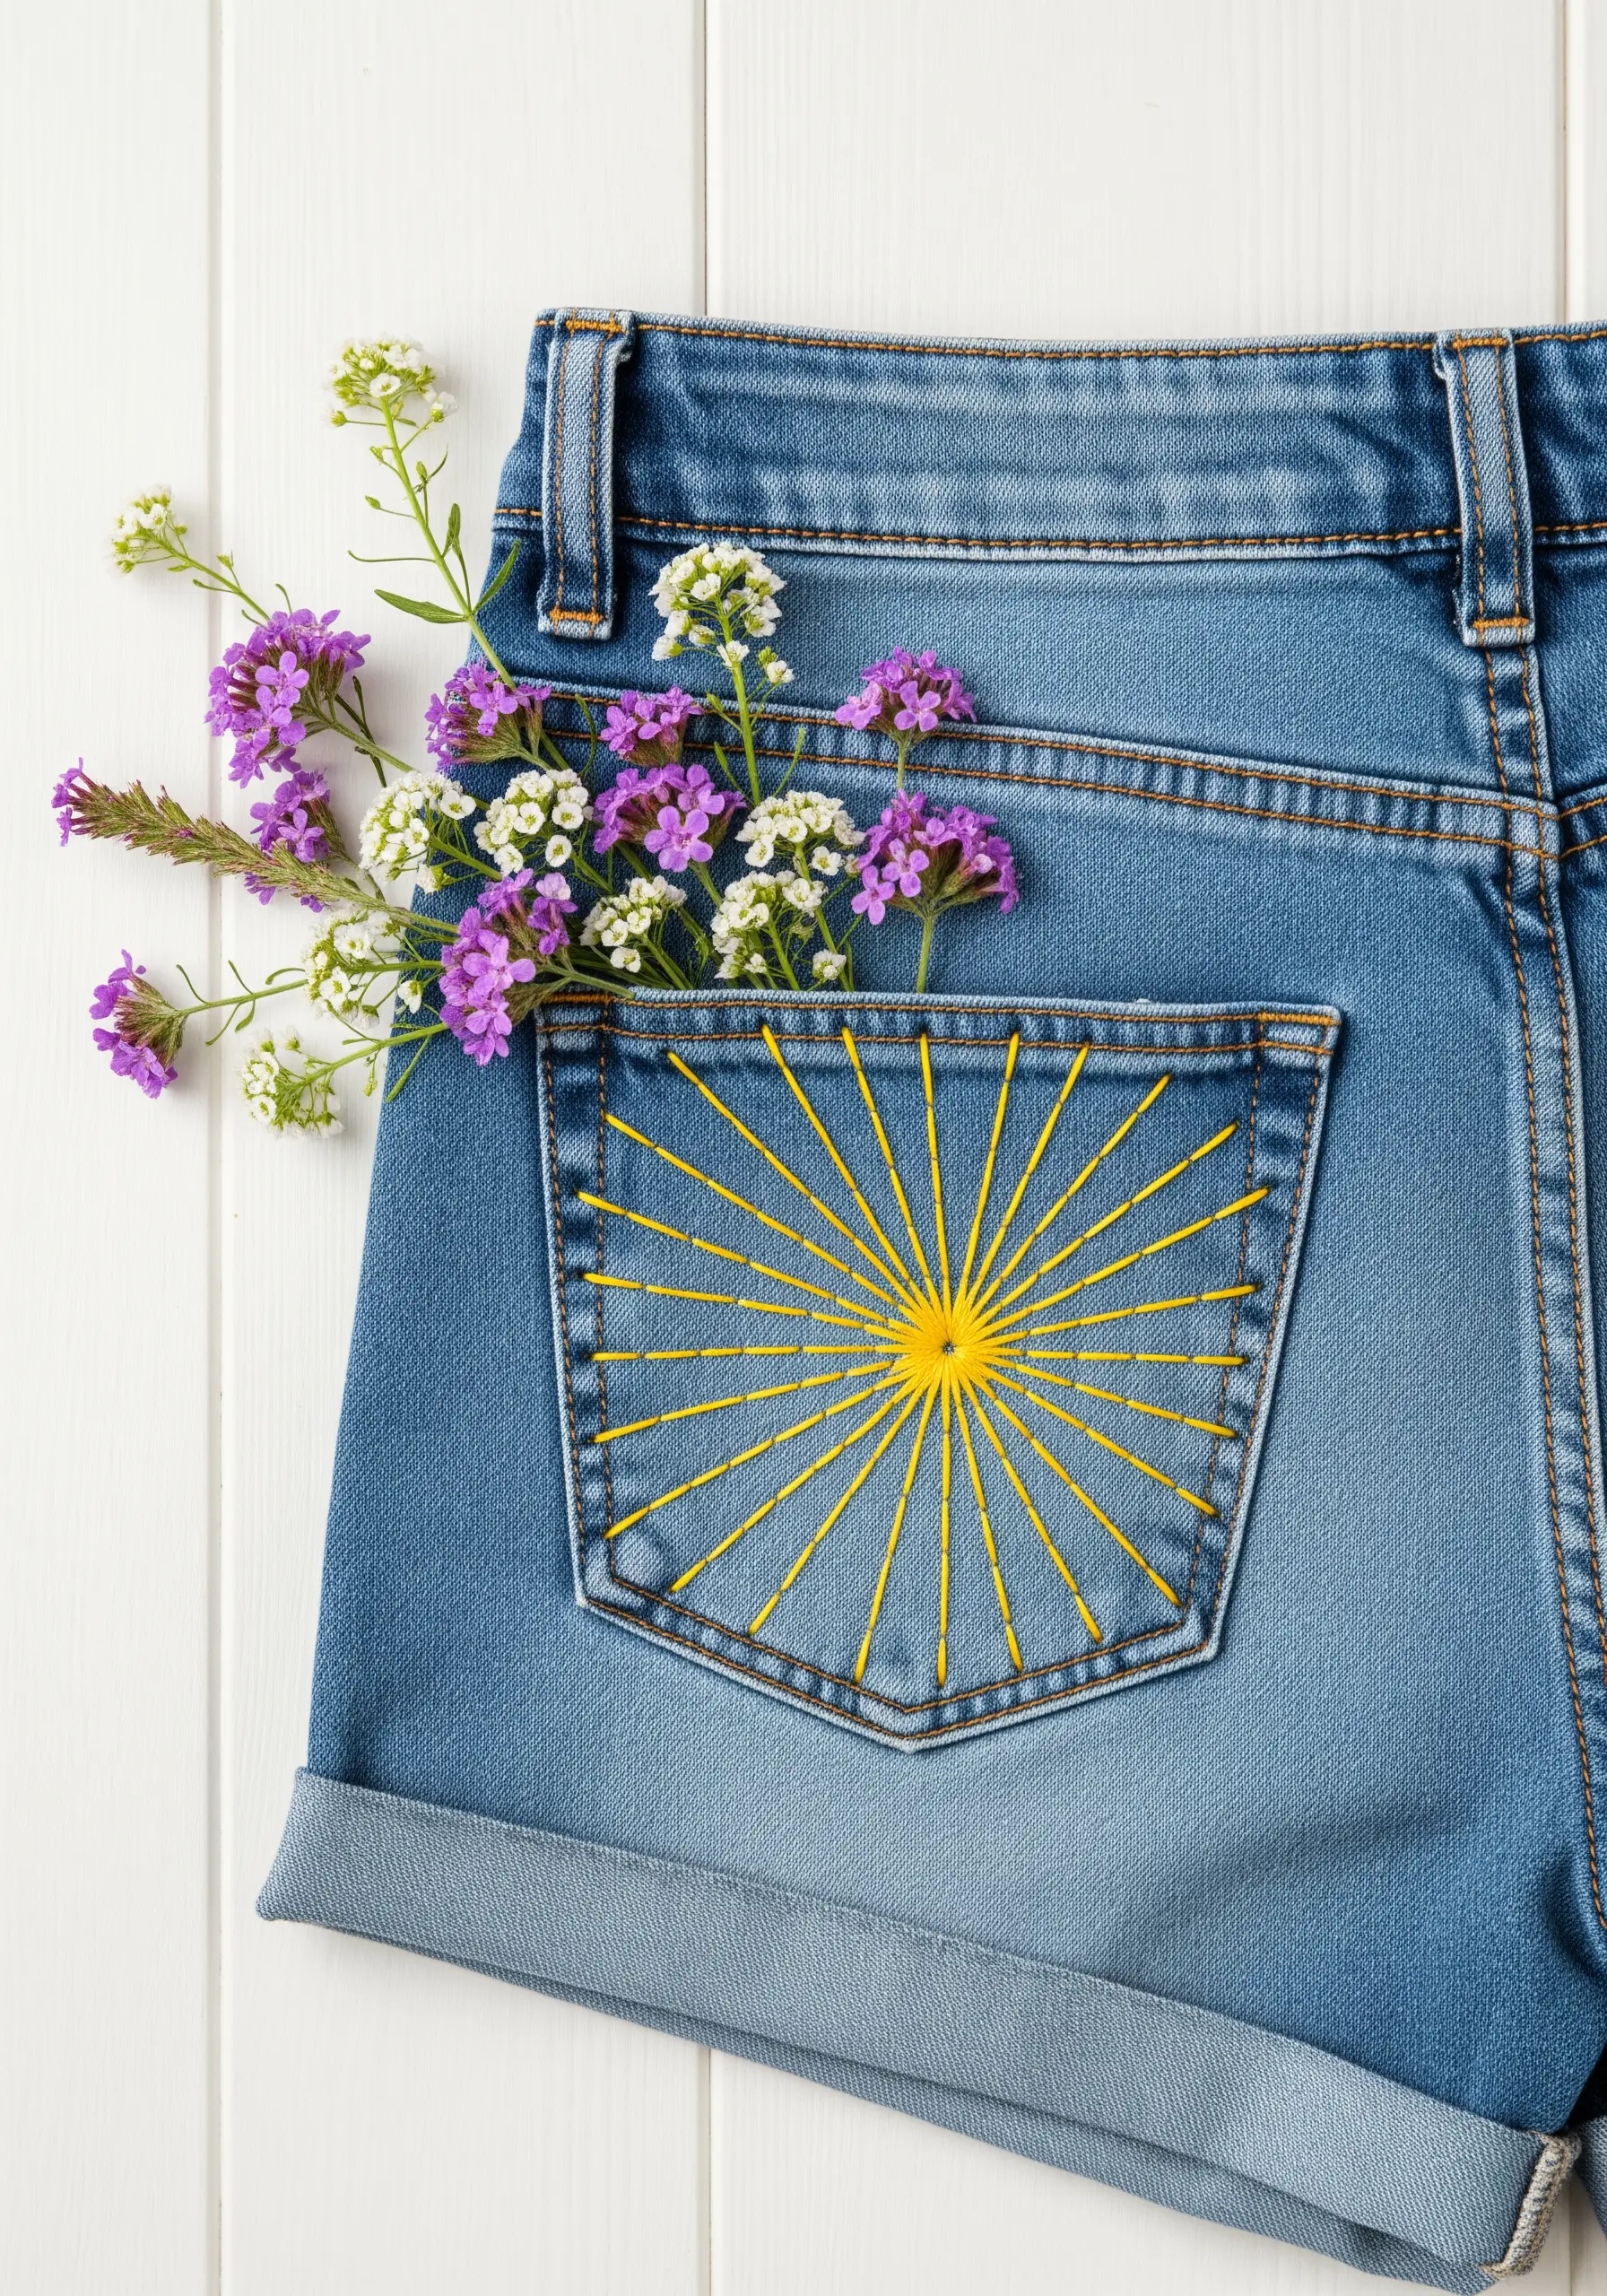
This is a clever way to evoke the essence of a flower without using a pressed botanical at all.
On a denim pocket, use a vibrant yellow or gold thread to stitch a sunburst pattern radiating from a central point.
Vary the length of your straight stitches to create a dynamic, star-like effect that mimics the shape of petals on a daisy or sunflower.
This purely embroidered design is incredibly durable and washable, making it a perfect, low-maintenance way to add a touch of floral-inspired geometry to everyday wear.
It’s an excellent example of how abstract shapes can modernize classic denim.
16. Design a Couture-Inspired Cascading Train
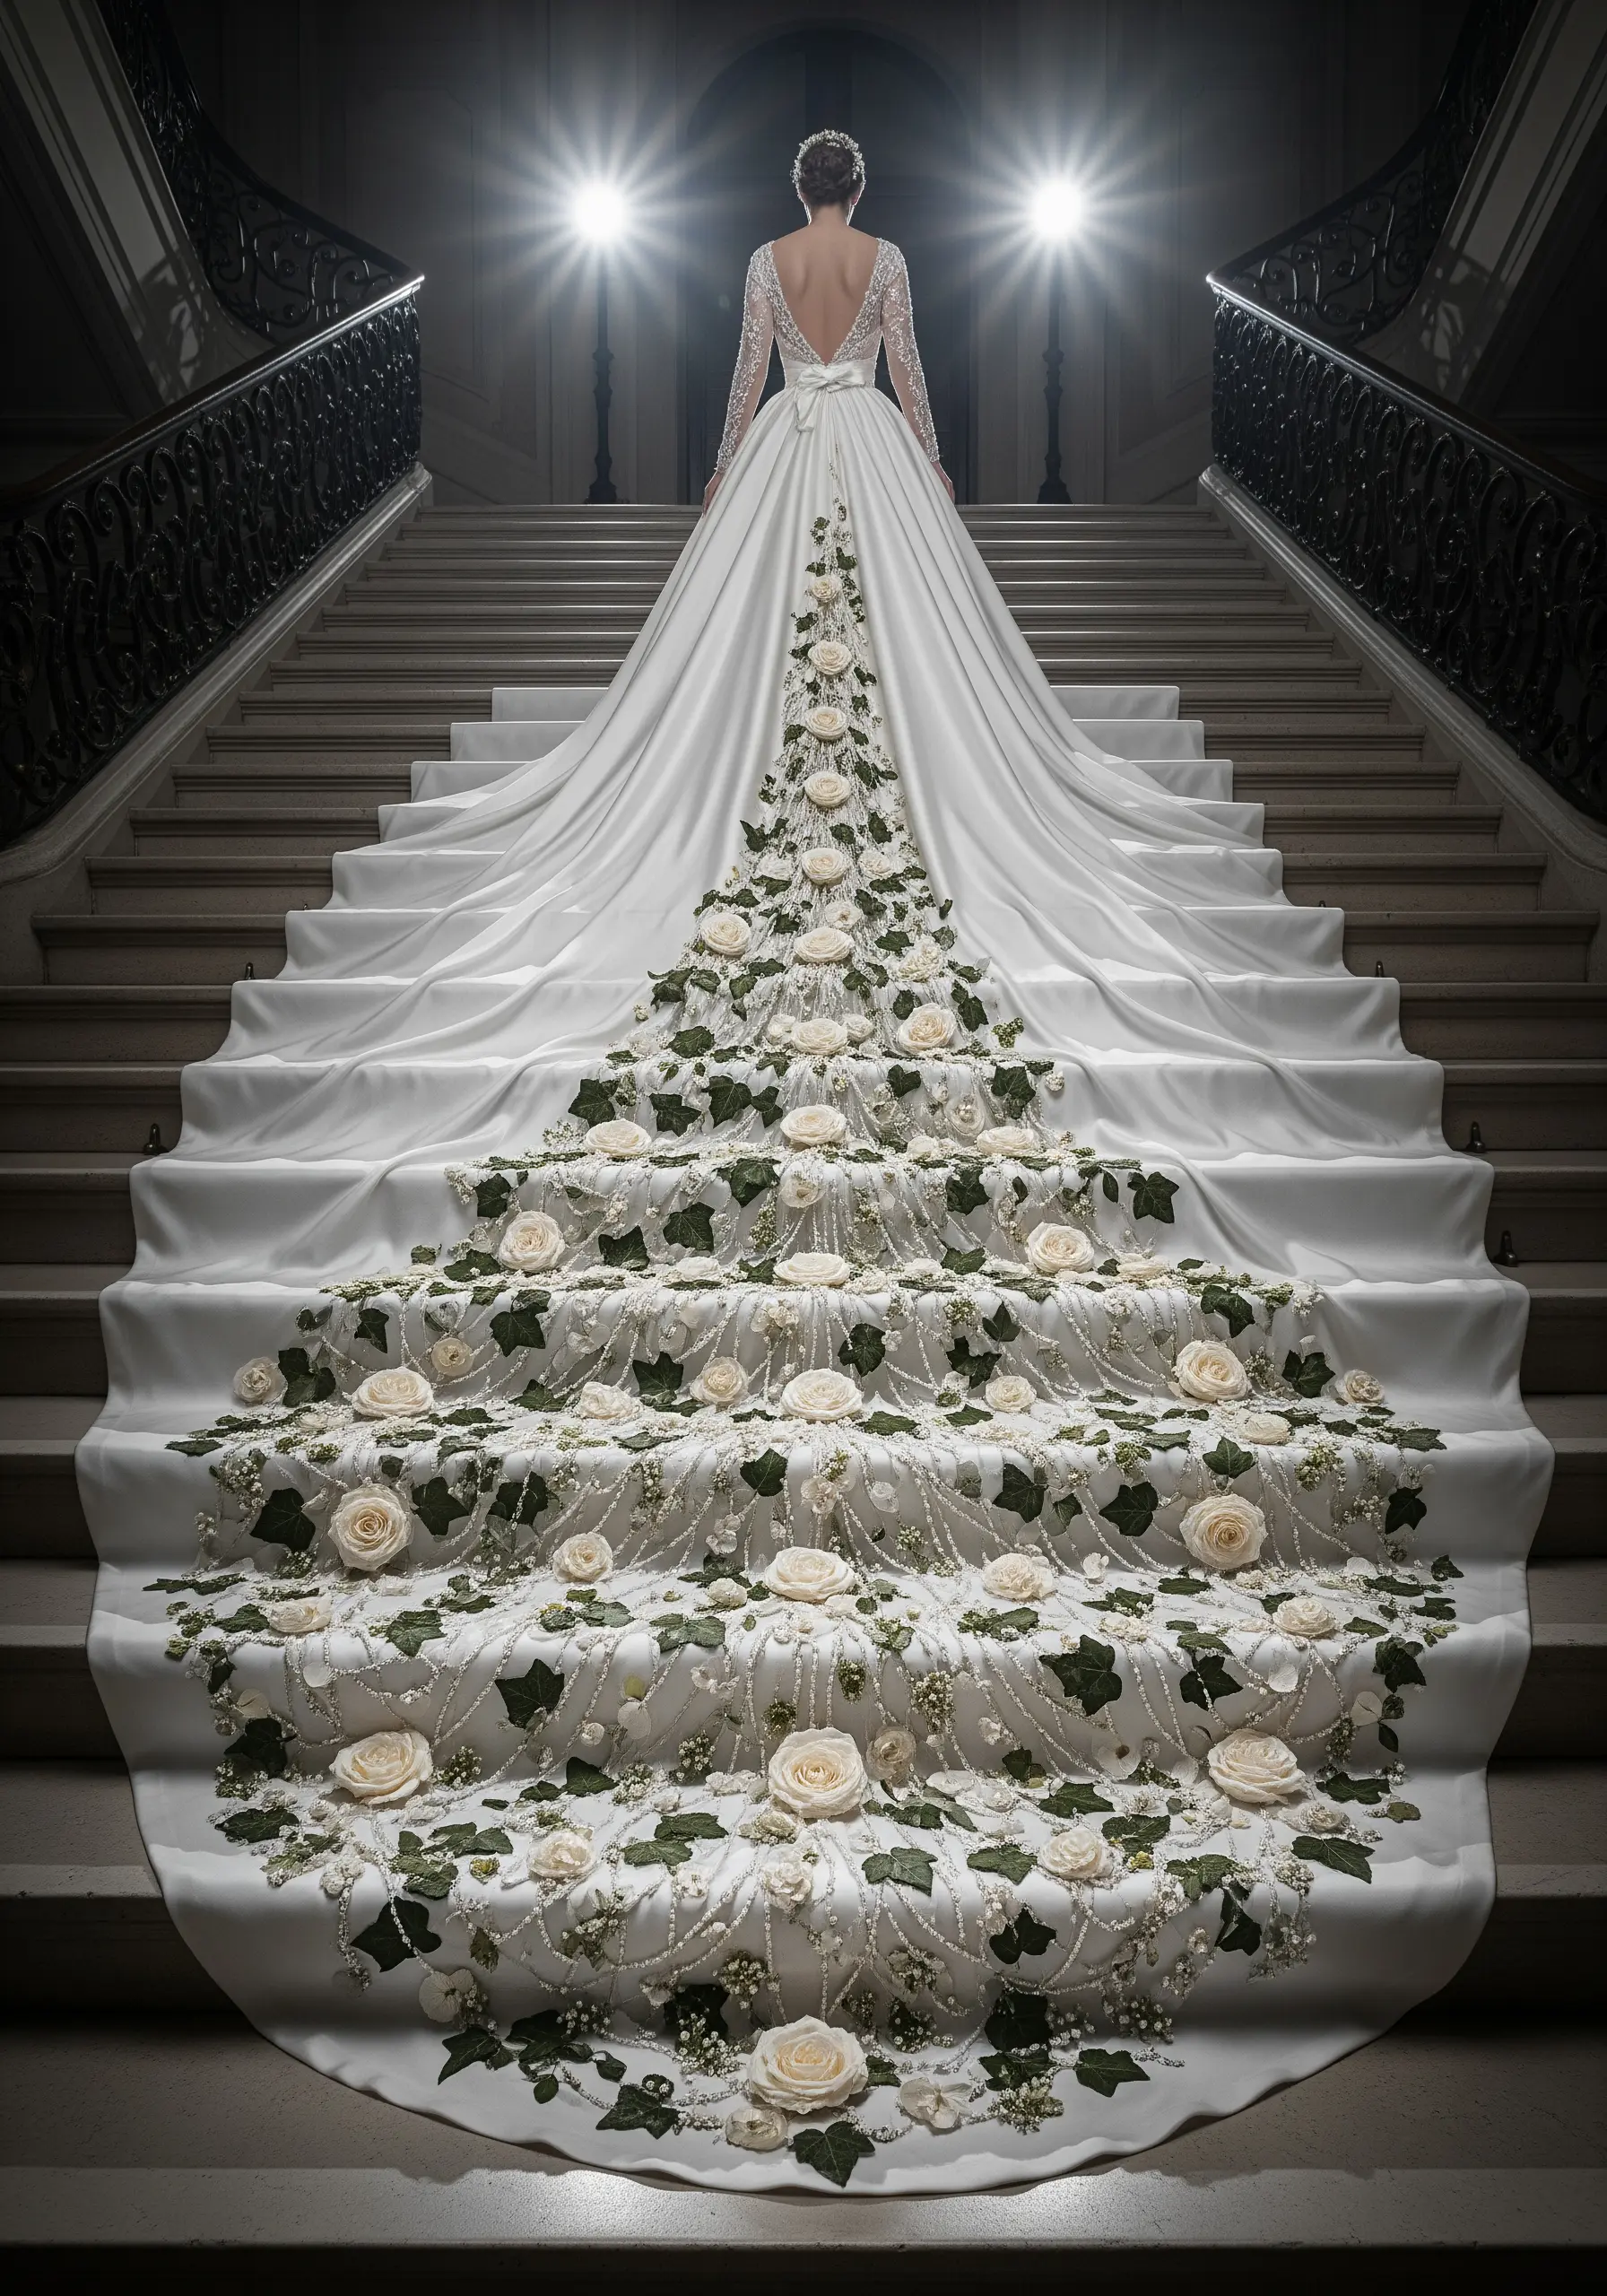
For a truly show-stopping piece, transform the train of a gown into a lavish, trailing garden.
This monumental project requires planning. Start by creating repeating motifs of fabric roses, embroidered leaves, and beaded vines on separate pieces of organza.
Appliqué these motifs onto the train, arranging them in a dense, meandering pattern that flows from the waist to the floor.
Connect the larger elements with delicate, hand-stitched garlands of pearls and seed beads, mimicking the look of baby’s breath. This technique builds a complex, textural masterpiece layer by layer.
17. Add a Temporary Accent to Vintage Lace Gloves
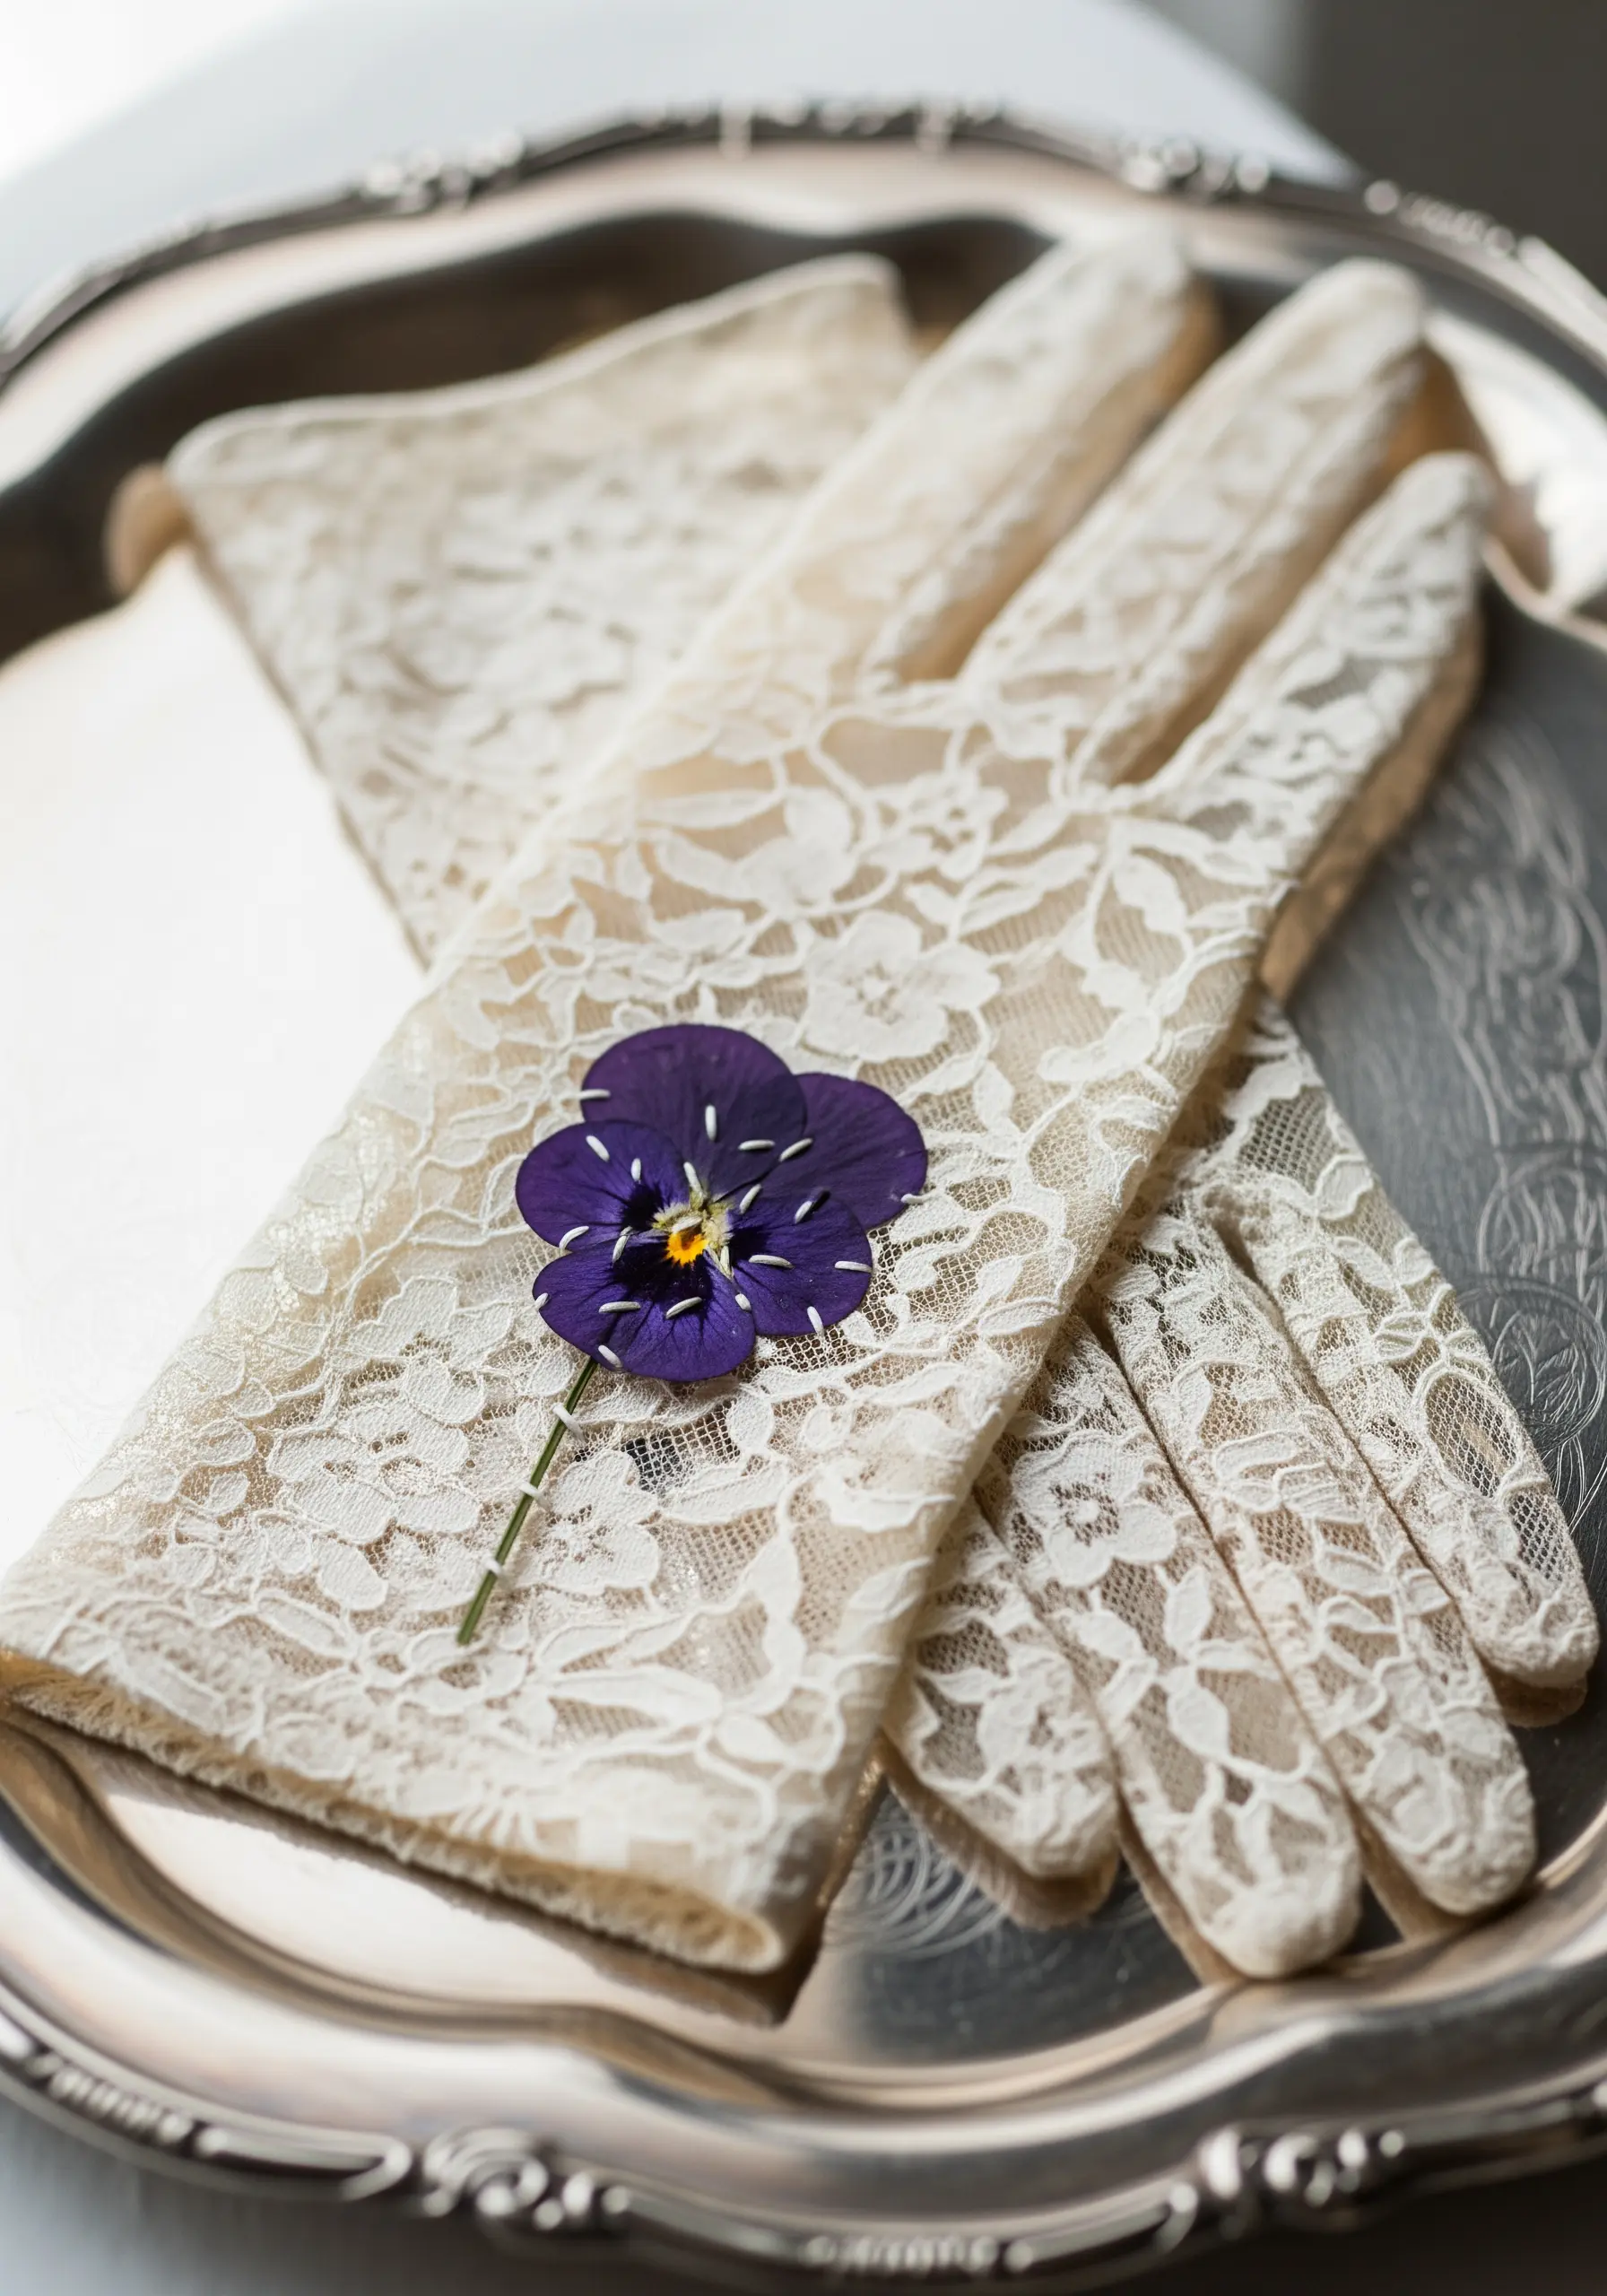
Sometimes the most elegant touch is also the most fleeting.
For a special event, you can temporarily adorn delicate items like lace gloves without causing permanent damage.
Select a single, striking flower, like a deep violet pansy, and place it on the back of the glove.
Use a single strand of fine silk thread in a matching color to make one or two tiny tacking stitches through the flower’s center and the lace. These stitches can be easily snipped and removed later, preserving the integrity of the vintage piece.
18. Construct a Sculptural Lapel Flower

For a structured garment like a blazer, a soft pressed flower can get lost. Instead, build a durable, three-dimensional flower that commands attention.
Cut petal shapes from stiffened fabric or thin craft leather. Gently shape them with heat or by hand to create natural-looking curves.
Layer and stitch the petals together at the base, building up the form of a gardenia or rose.
Mount the finished flower on a brooch back so it can be pinned to the lapel, creating a bold, architectural statement piece that is both elegant and resilient.
19. Weave a Clover Vine Up a Chambray Sleeve
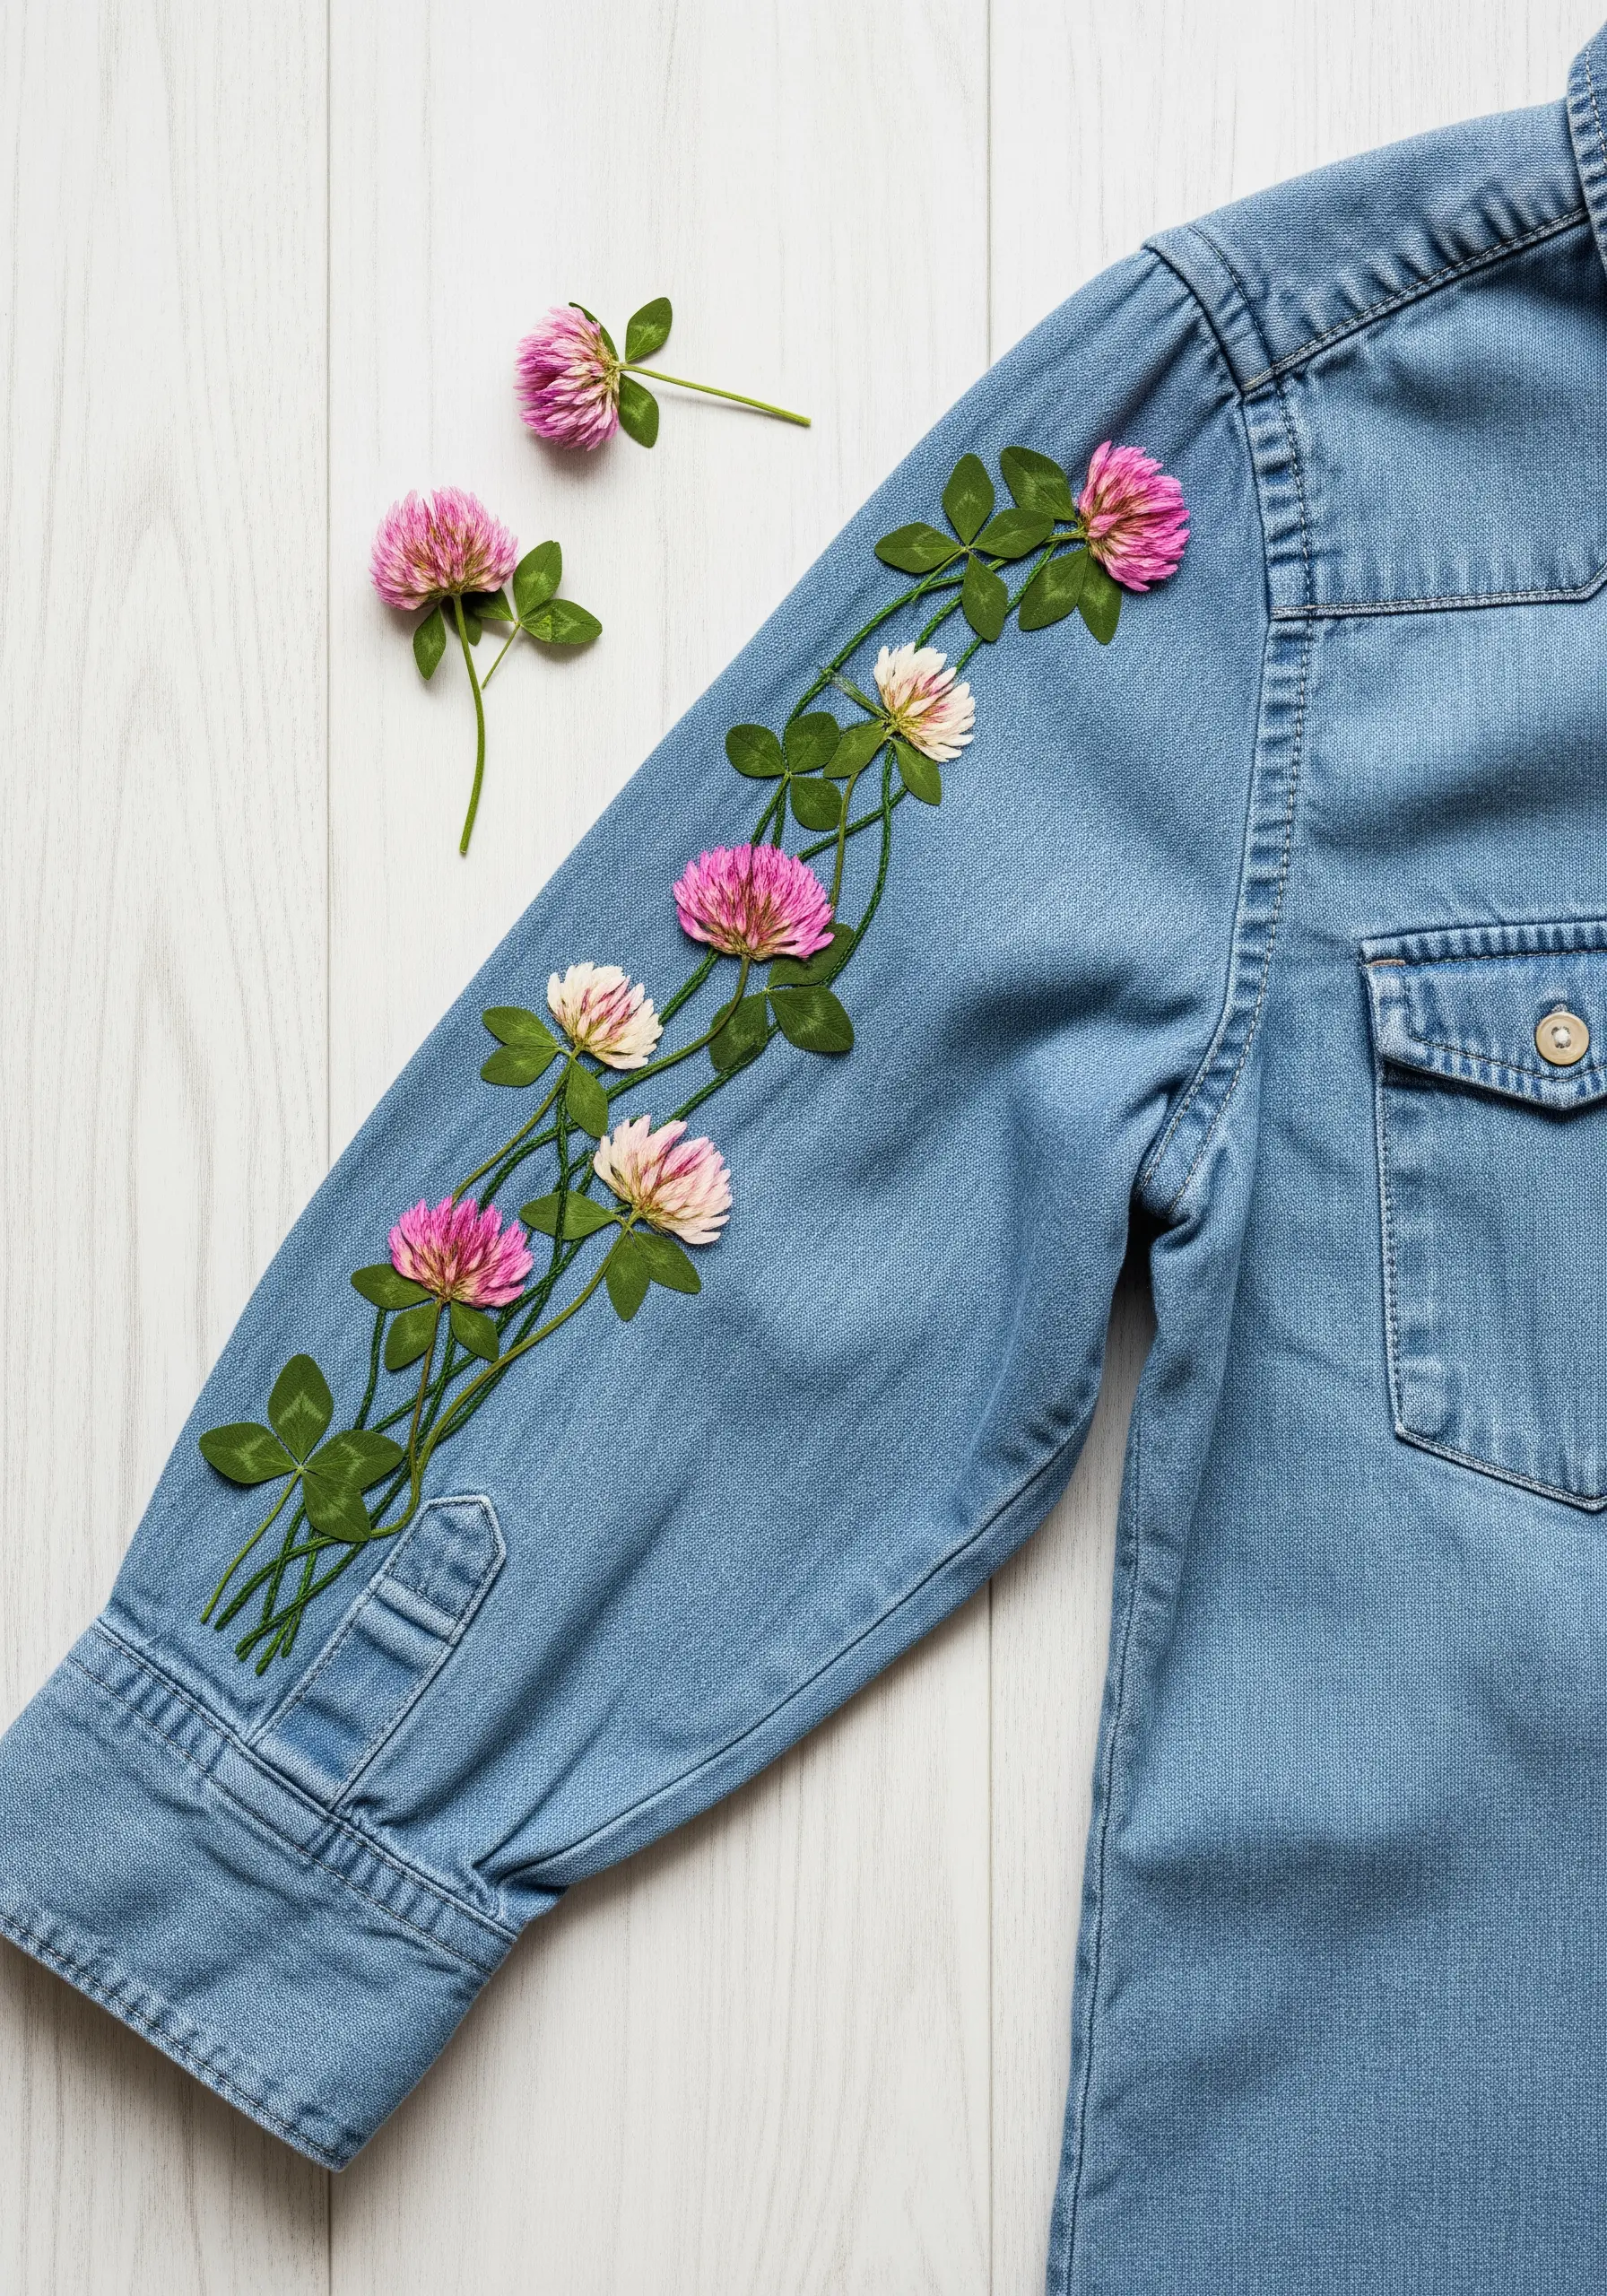
A climbing vine is a classic motif that beautifully follows the natural lines of a garment.
On a denim or chambray sleeve, create a meandering stem line using a textured stitch like a whipped backstitch or a heavy chain stitch.
Arrange your pressed clover blossoms along this embroidered vine, alternating their colors to create rhythm and visual interest.
Secure each clover head with small, central stitches and add tiny embroidered leaves using the detached chain stitch. This technique creates a cohesive, organic design that looks as if it has grown directly on the fabric.


