

When spring arrives, there’s a collective desire for renewal—to clear away the old and welcome in the light. This feeling doesn’t have to stop at your windows and closets; it can flow directly through your needle and thread, transforming your home one stitch at a time.
Elevating your embroidery isn’t about mastering impossibly complex techniques. It’s about making intentional choices. It’s in choosing a padded satin stitch over a flat one for a plump strawberry, or using trimmed turkey work to give a bumblebee a fuzzy, lifelike coat. It’s in understanding how a single strand of thread can create a delicate root system, or how a dark fabric can make your colors sing.
Here, you’ll find 24 botanical themes that are more than just patterns; they are invitations to look closer, to play with texture, and to stitch with a renewed sense of purpose. Let these ideas guide you in creating decor that doesn’t just look beautiful, but feels resonant, personal, and alive with the energy of spring.
1. First Blooms Through Melting Snow

Capture the contrast of early spring by combining soft and sharp textures in a single hoop.
Create the patch of melting snow using a base of padded satin stitch, then cover it densely with French knots in white and off-white to build a plush, three-dimensional surface.
For the crocus petals, use a sharp needle and a smooth satin stitch, ensuring your stitches lie flat to contrast with the bumpy texture of the snow.
Finally, scatter a few pearlescent beads to mimic glistening, melting droplets; this final touch adds a layer of realism and light to the composition.
2. Sculptural Daffodil Wreath
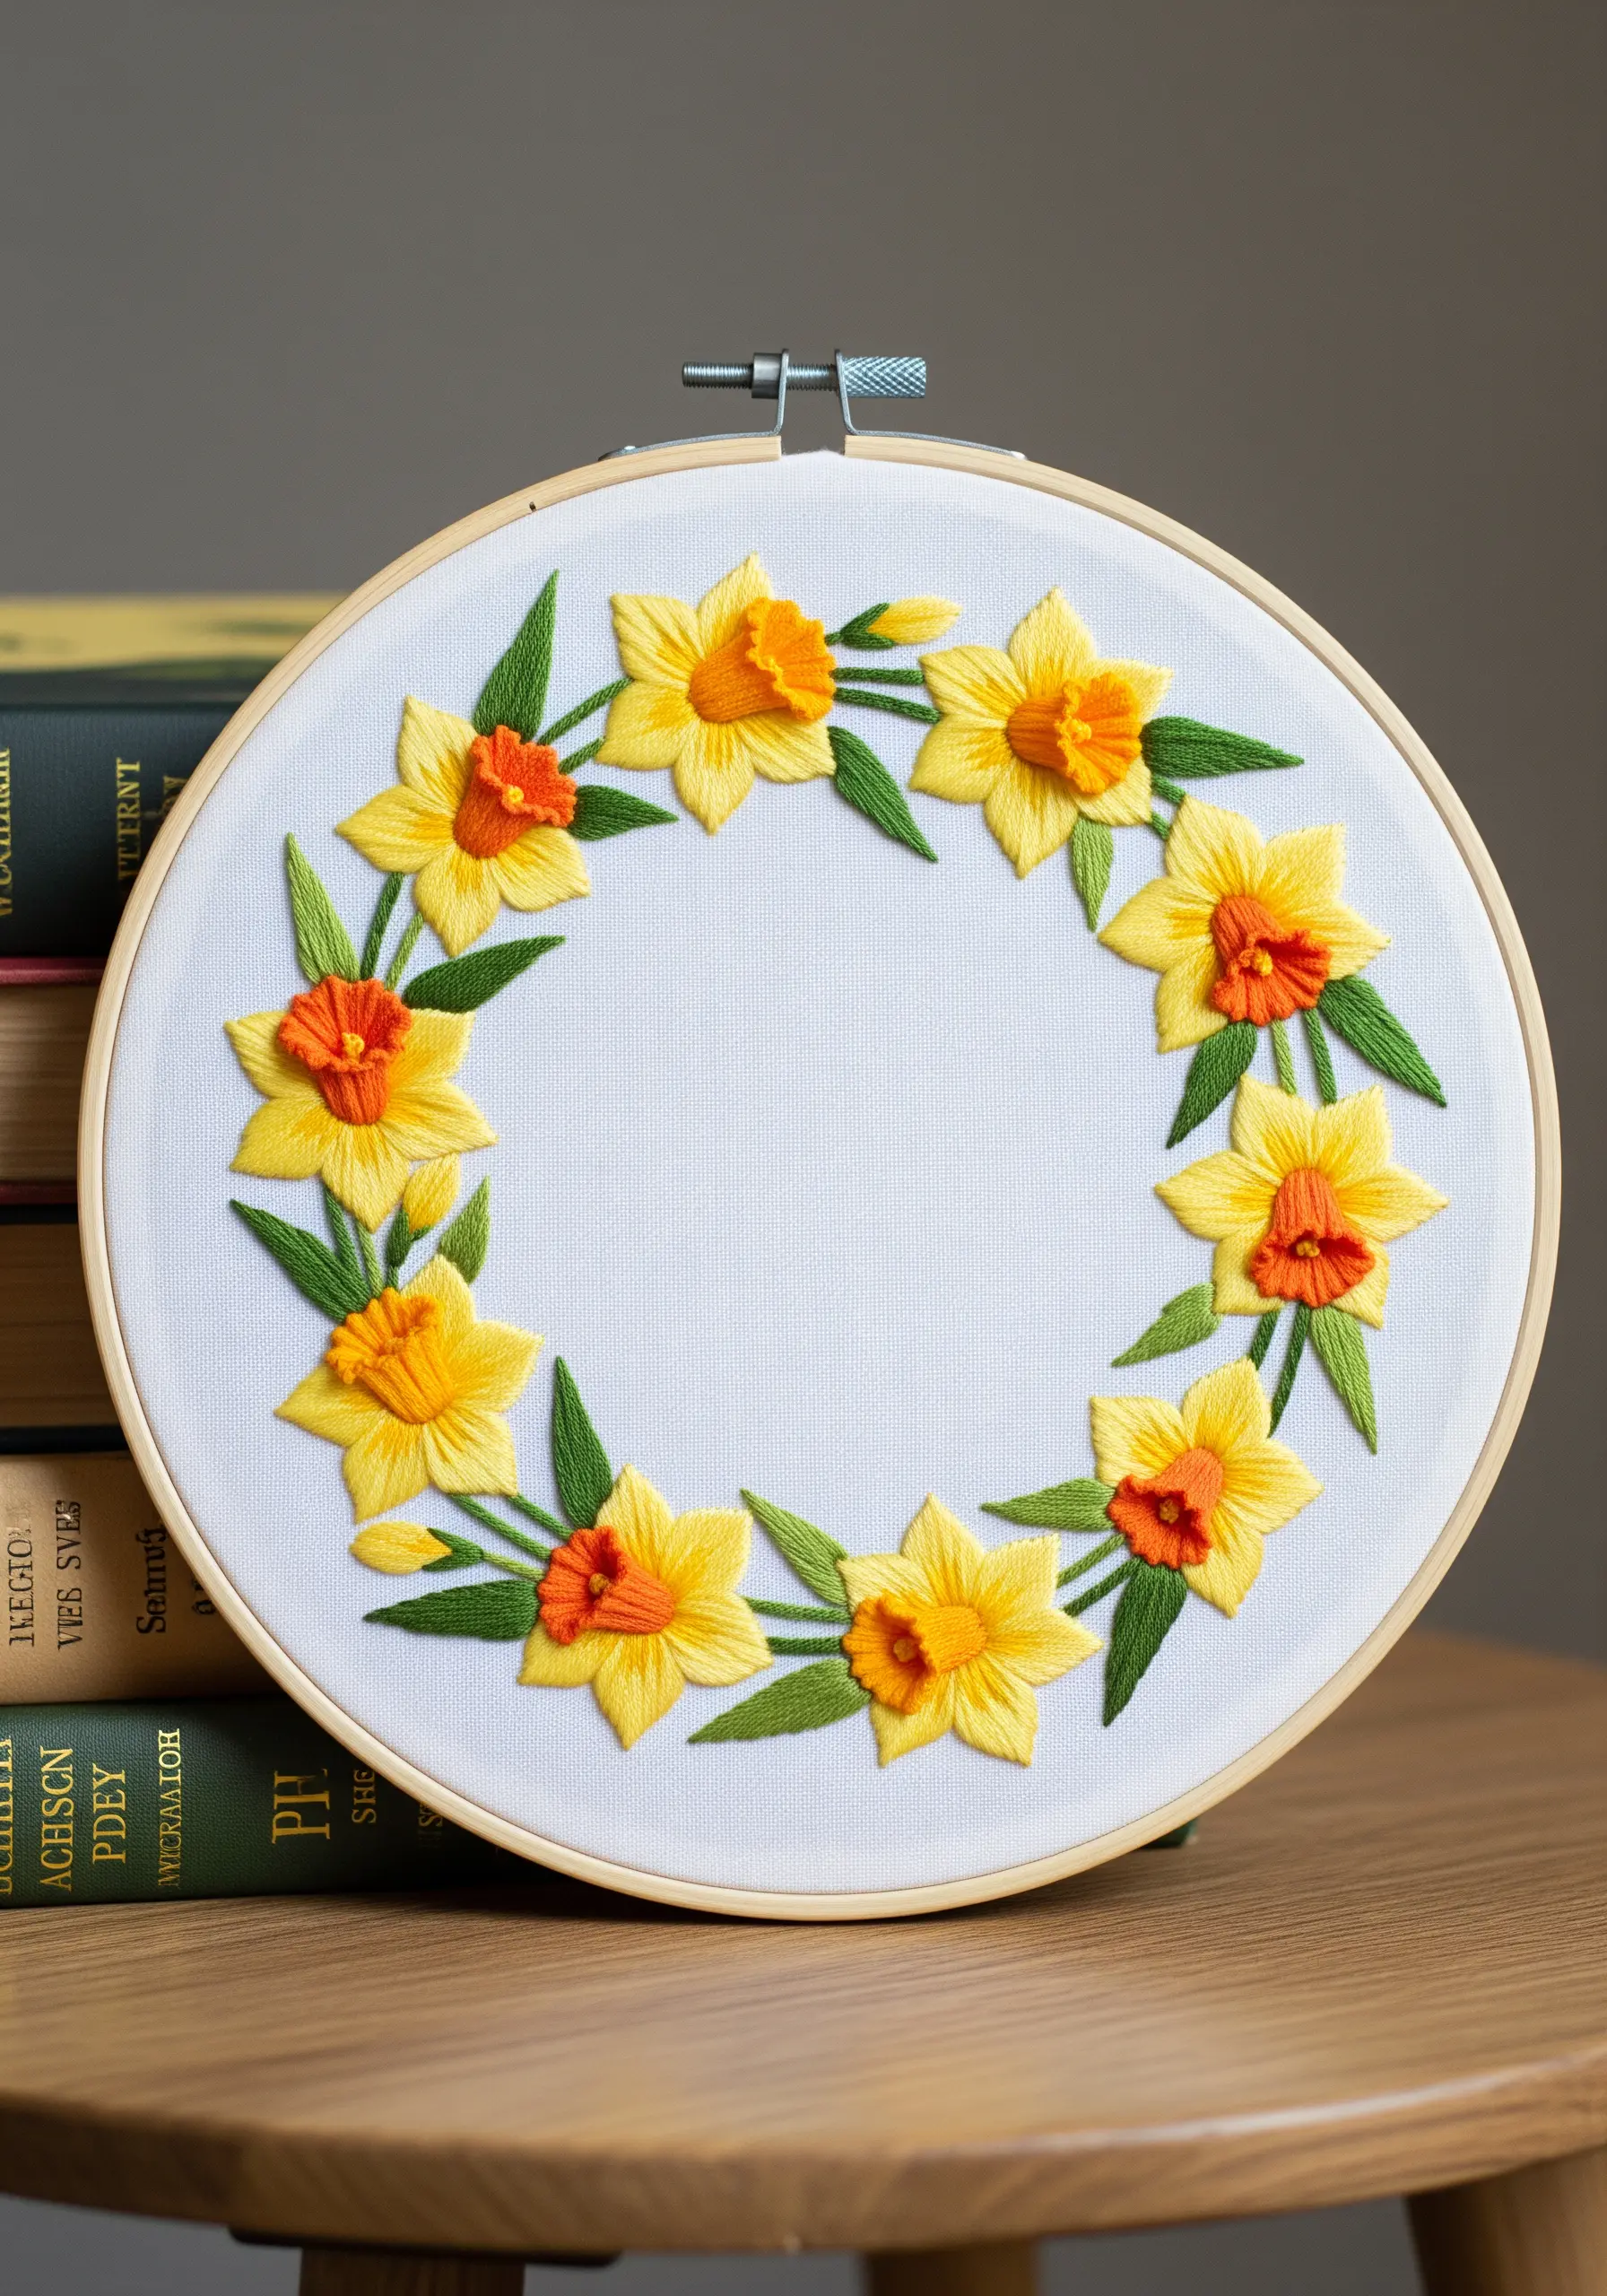
Give your florals a lifelike dimension by using raised stitches for central elements.
Instead of a flat satin stitch, form the daffodil’s trumpet using a detached buttonhole stitch worked in a small circle. This technique lifts the stitches off the fabric, creating a true, cup-like shape.
Frame these sculptural centers with smooth, long-and-short stitch petals, blending two tones of yellow to add depth and realism.
This is one of the best hand-stitched flower wreath hoop ideas to bring vibrant, tactile energy into a room.
3. Verdant Ferns in Thread Painting

Elevate your embroidery from a craft piece to wall art by stitching directly onto a stretched canvas.
For the coiled fiddlehead ferns, use a thick whipped backstitch or couching to create a prominent, rounded texture that mimics the real plant.
Use fishbone stitch for the unfurled fronds, as this stitch naturally creates the central vein and gives the leaves a delicate, realistic shape.
Working with multiple shades of green is key; use darker tones for shadows and brighter ones for highlights to give your botanical study incredible depth.
This is one of my favorite nature-inspired embroidery wall decor projects for creating a truly immersive piece.
4. Delicate Cherry Blossom Branches
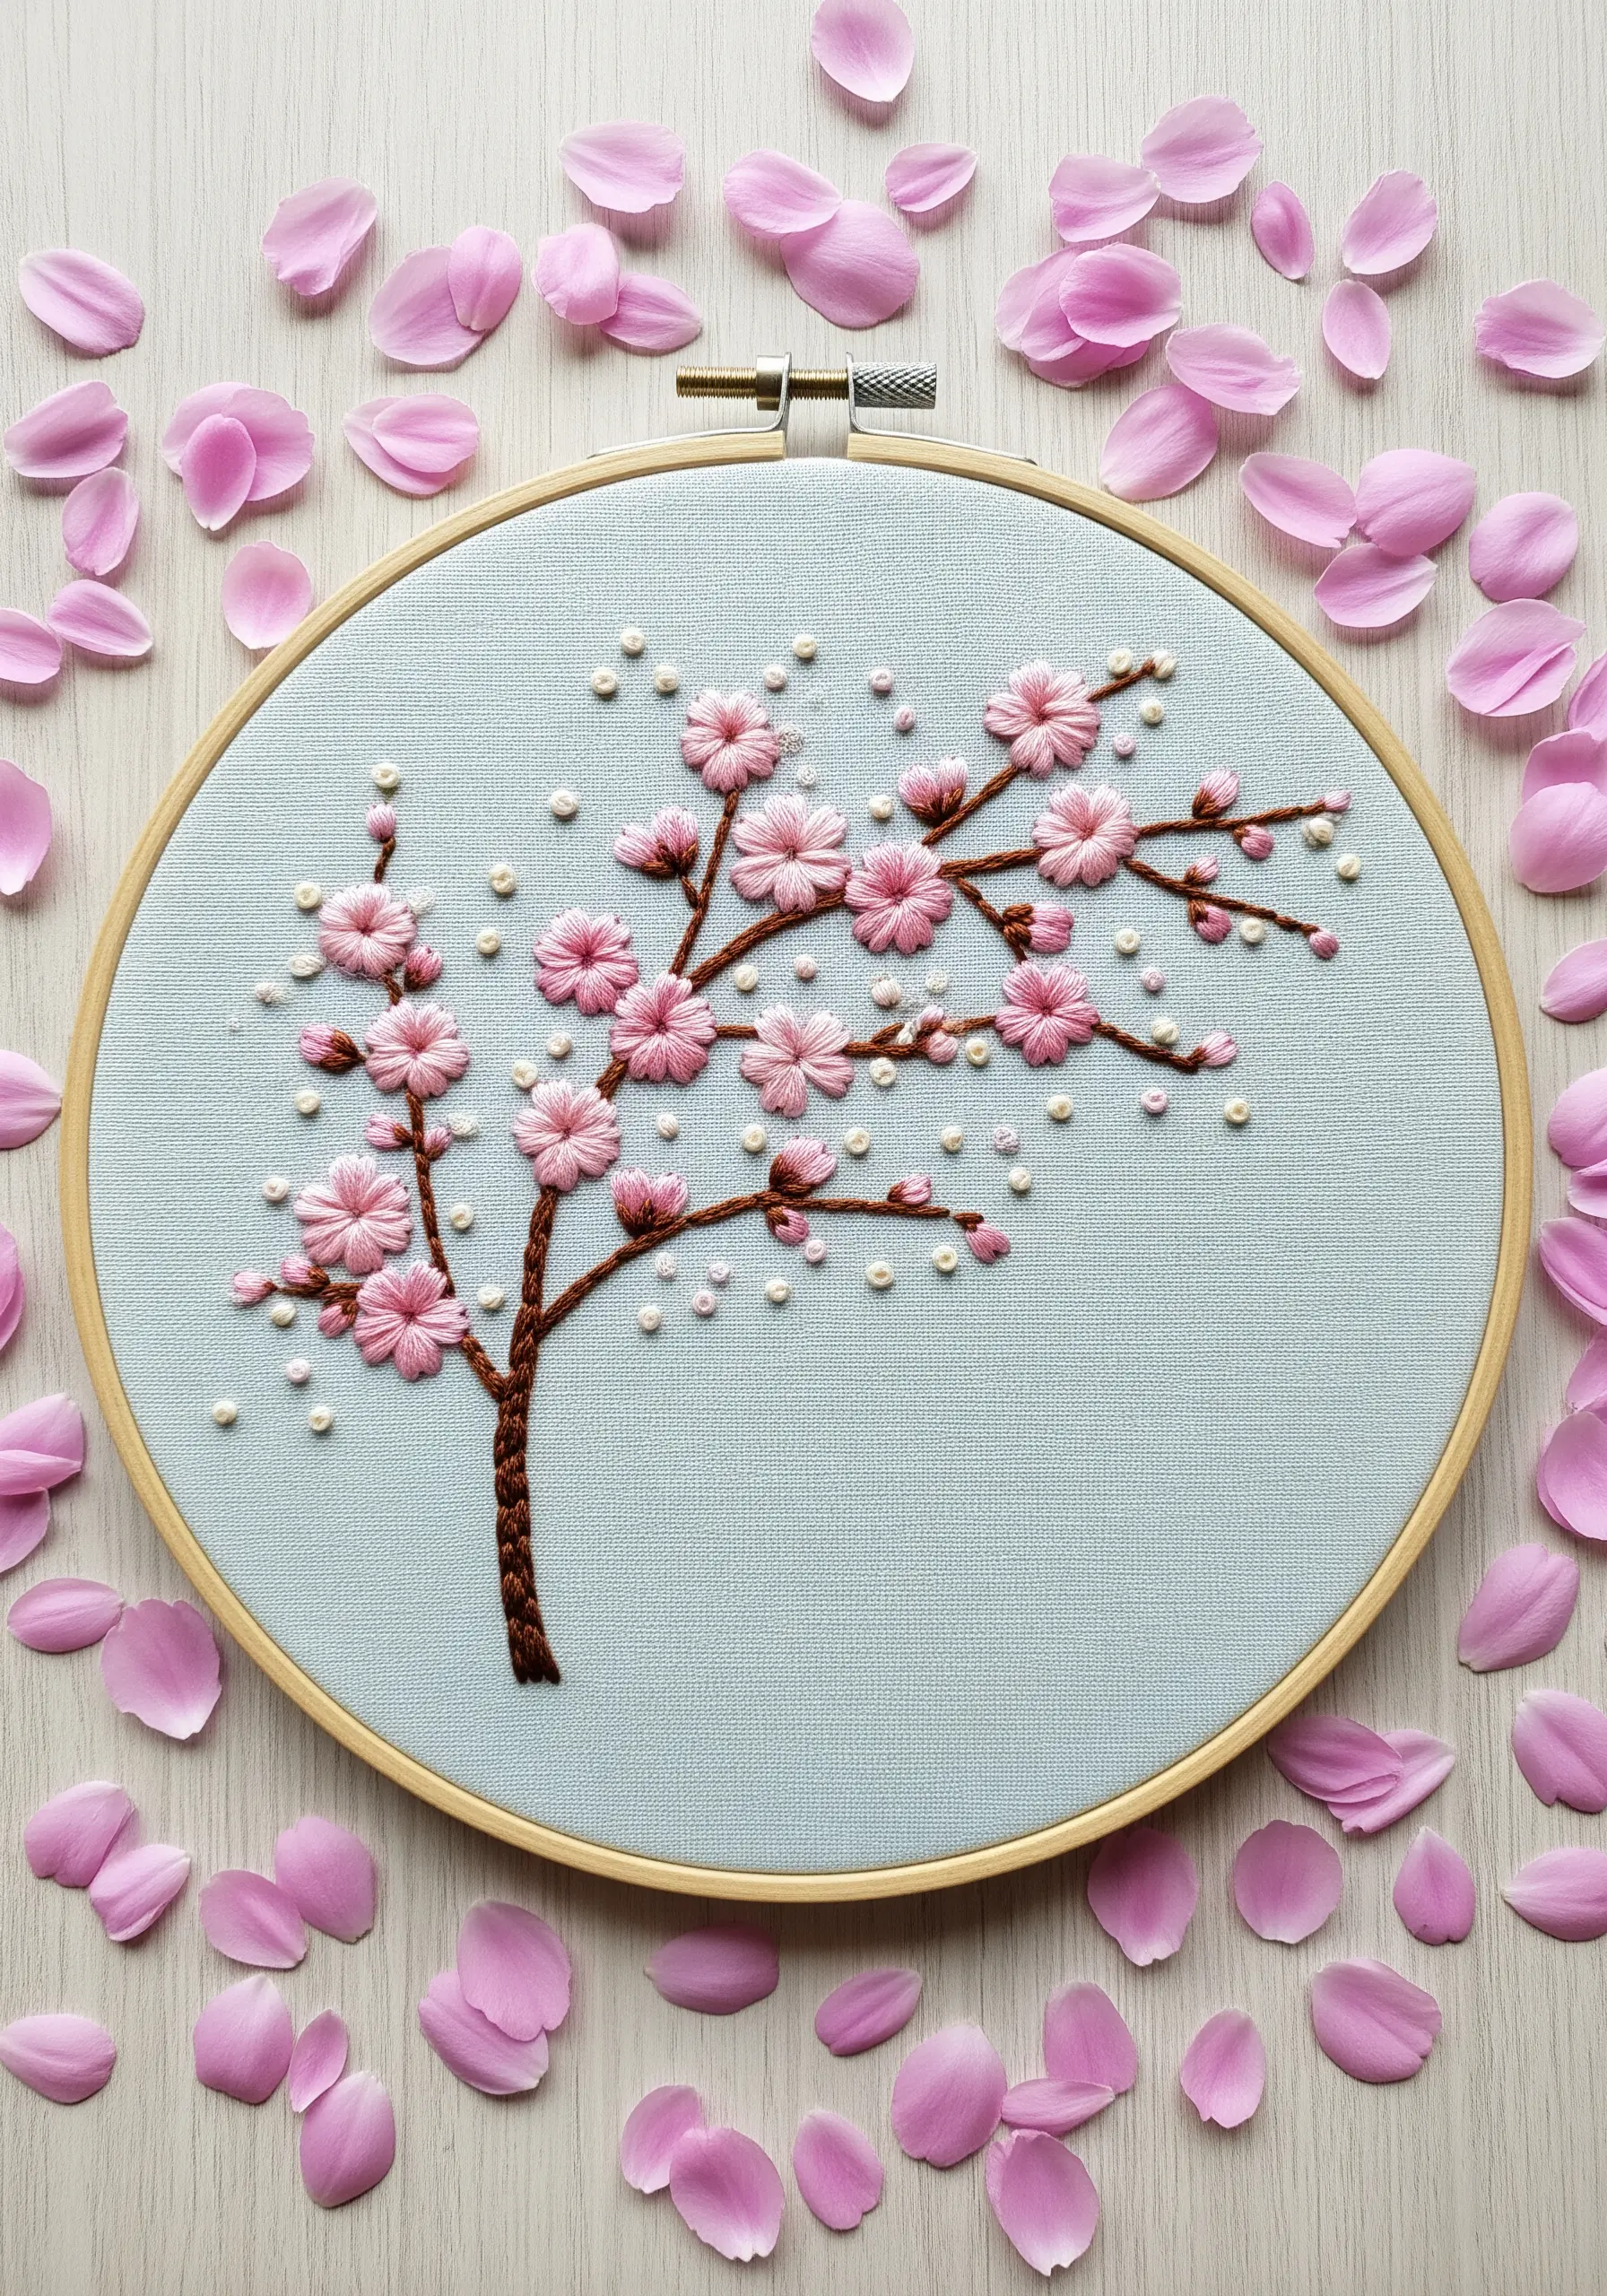
Master the art of minimalism by letting negative space do the heavy lifting in your composition.
The blossoms themselves are simple—just five straight stitches, or lazy daisies, for each flower—but their impact comes from careful placement and subtle color shifts between pale pinks and whites.
Use a textured, twisted thread for the branches, like a coton à broder, to give them a rough, bark-like appearance that contrasts with the smooth petals.
Scattered pearl beads suggest falling petals or dew, adding a touch of elegance without cluttering the design.
5. Minimalist Pussy Willow Stems

Create a powerful tactile experience by pairing contrasting materials and textures.
For the soft catkins, use a plush wool thread or chenille yarn with a raised satin stitch; you can even place a small piece of felt underneath for extra padding and dimension.
Wrap the stems tightly with a smooth, dark brown embroidery floss to create a sleek line that highlights the fluffiness of the buds.
Mounting this design on a piece of thick felt instead of traditional cotton or linen adds warmth and a modern sensibility, making it perfect for minimalist embroidery projects.
6. Celestial Balance: Sun, Moon, and Flora
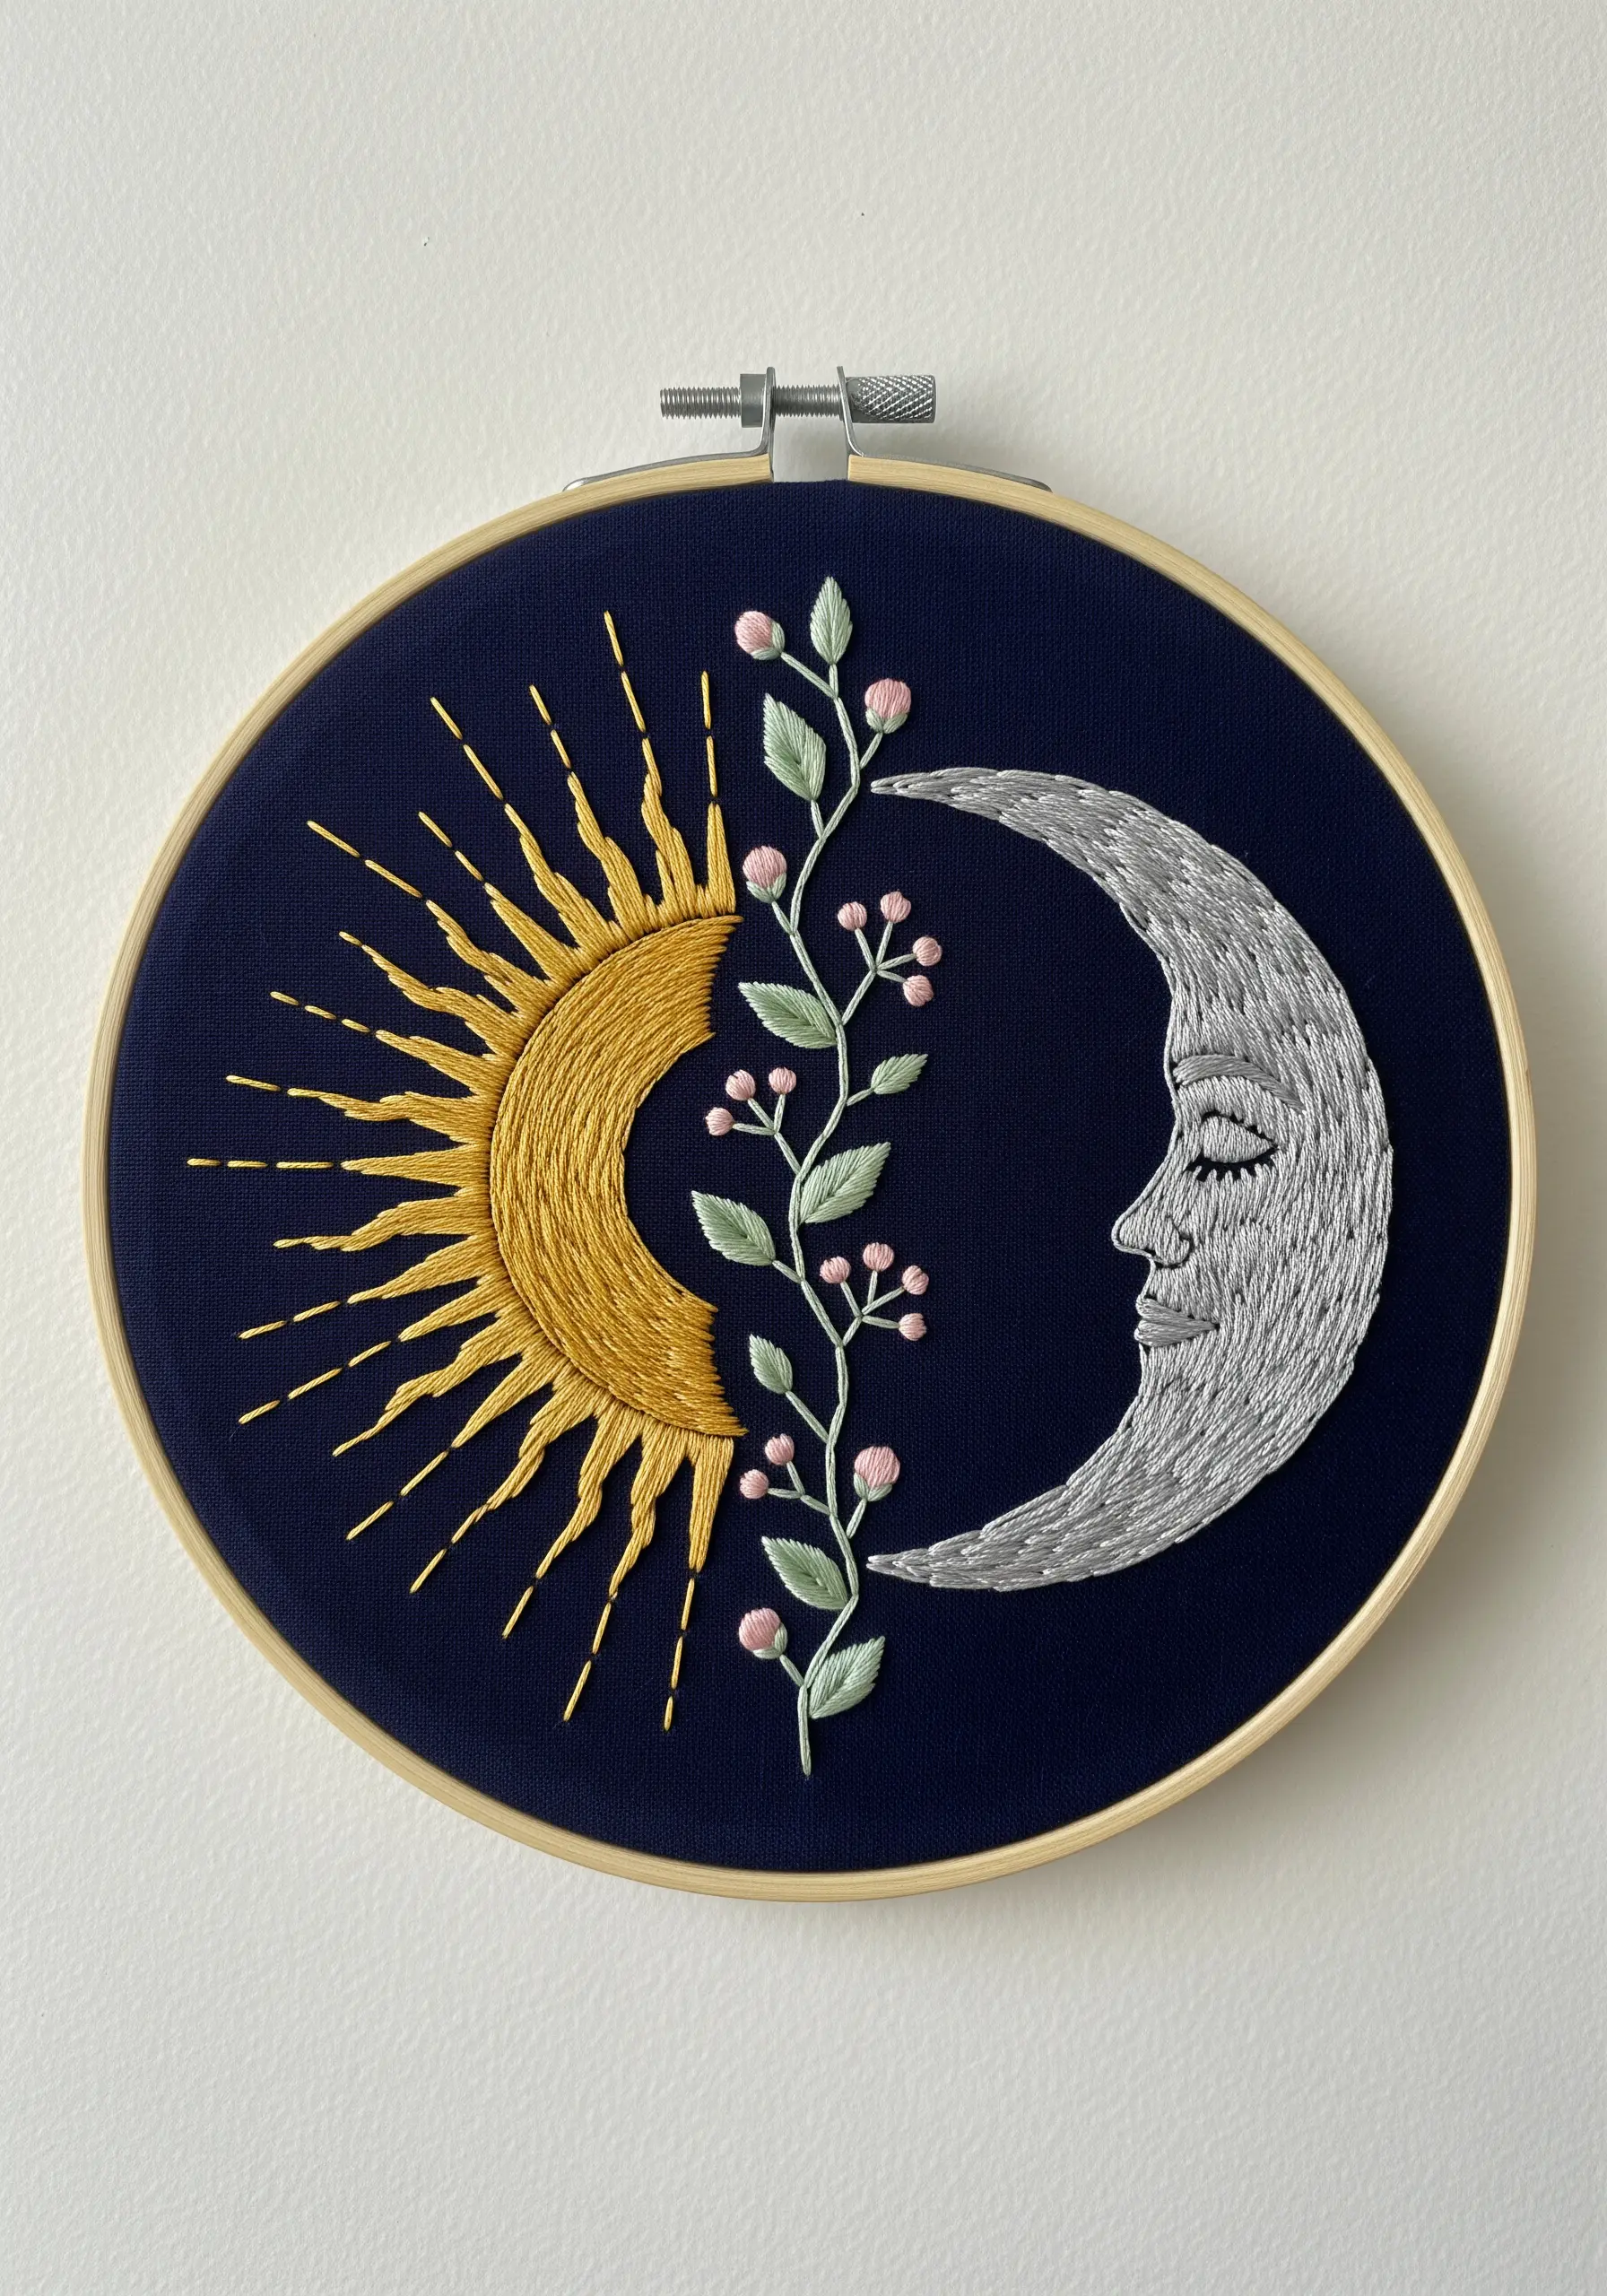
Make your celestial designs pop by choosing a high-contrast background and incorporating metallic threads.
A deep navy fabric provides the perfect canvas, making every stitch appear more luminous.
Use a shiny gold metallic thread for the sun’s rays, alternating between long straight stitches and targeted satin stitches to create a dynamic shimmer.
For the moon, use a silver or light gray thread in a smooth long-and-short stitch to achieve a soft, shaded glow that contrasts beautifully with the sun’s sharp rays.
This is a perfect example of contemporary metallic thread designs that feel both powerful and elegant.
7. Realistic Bee and Clover on Linen
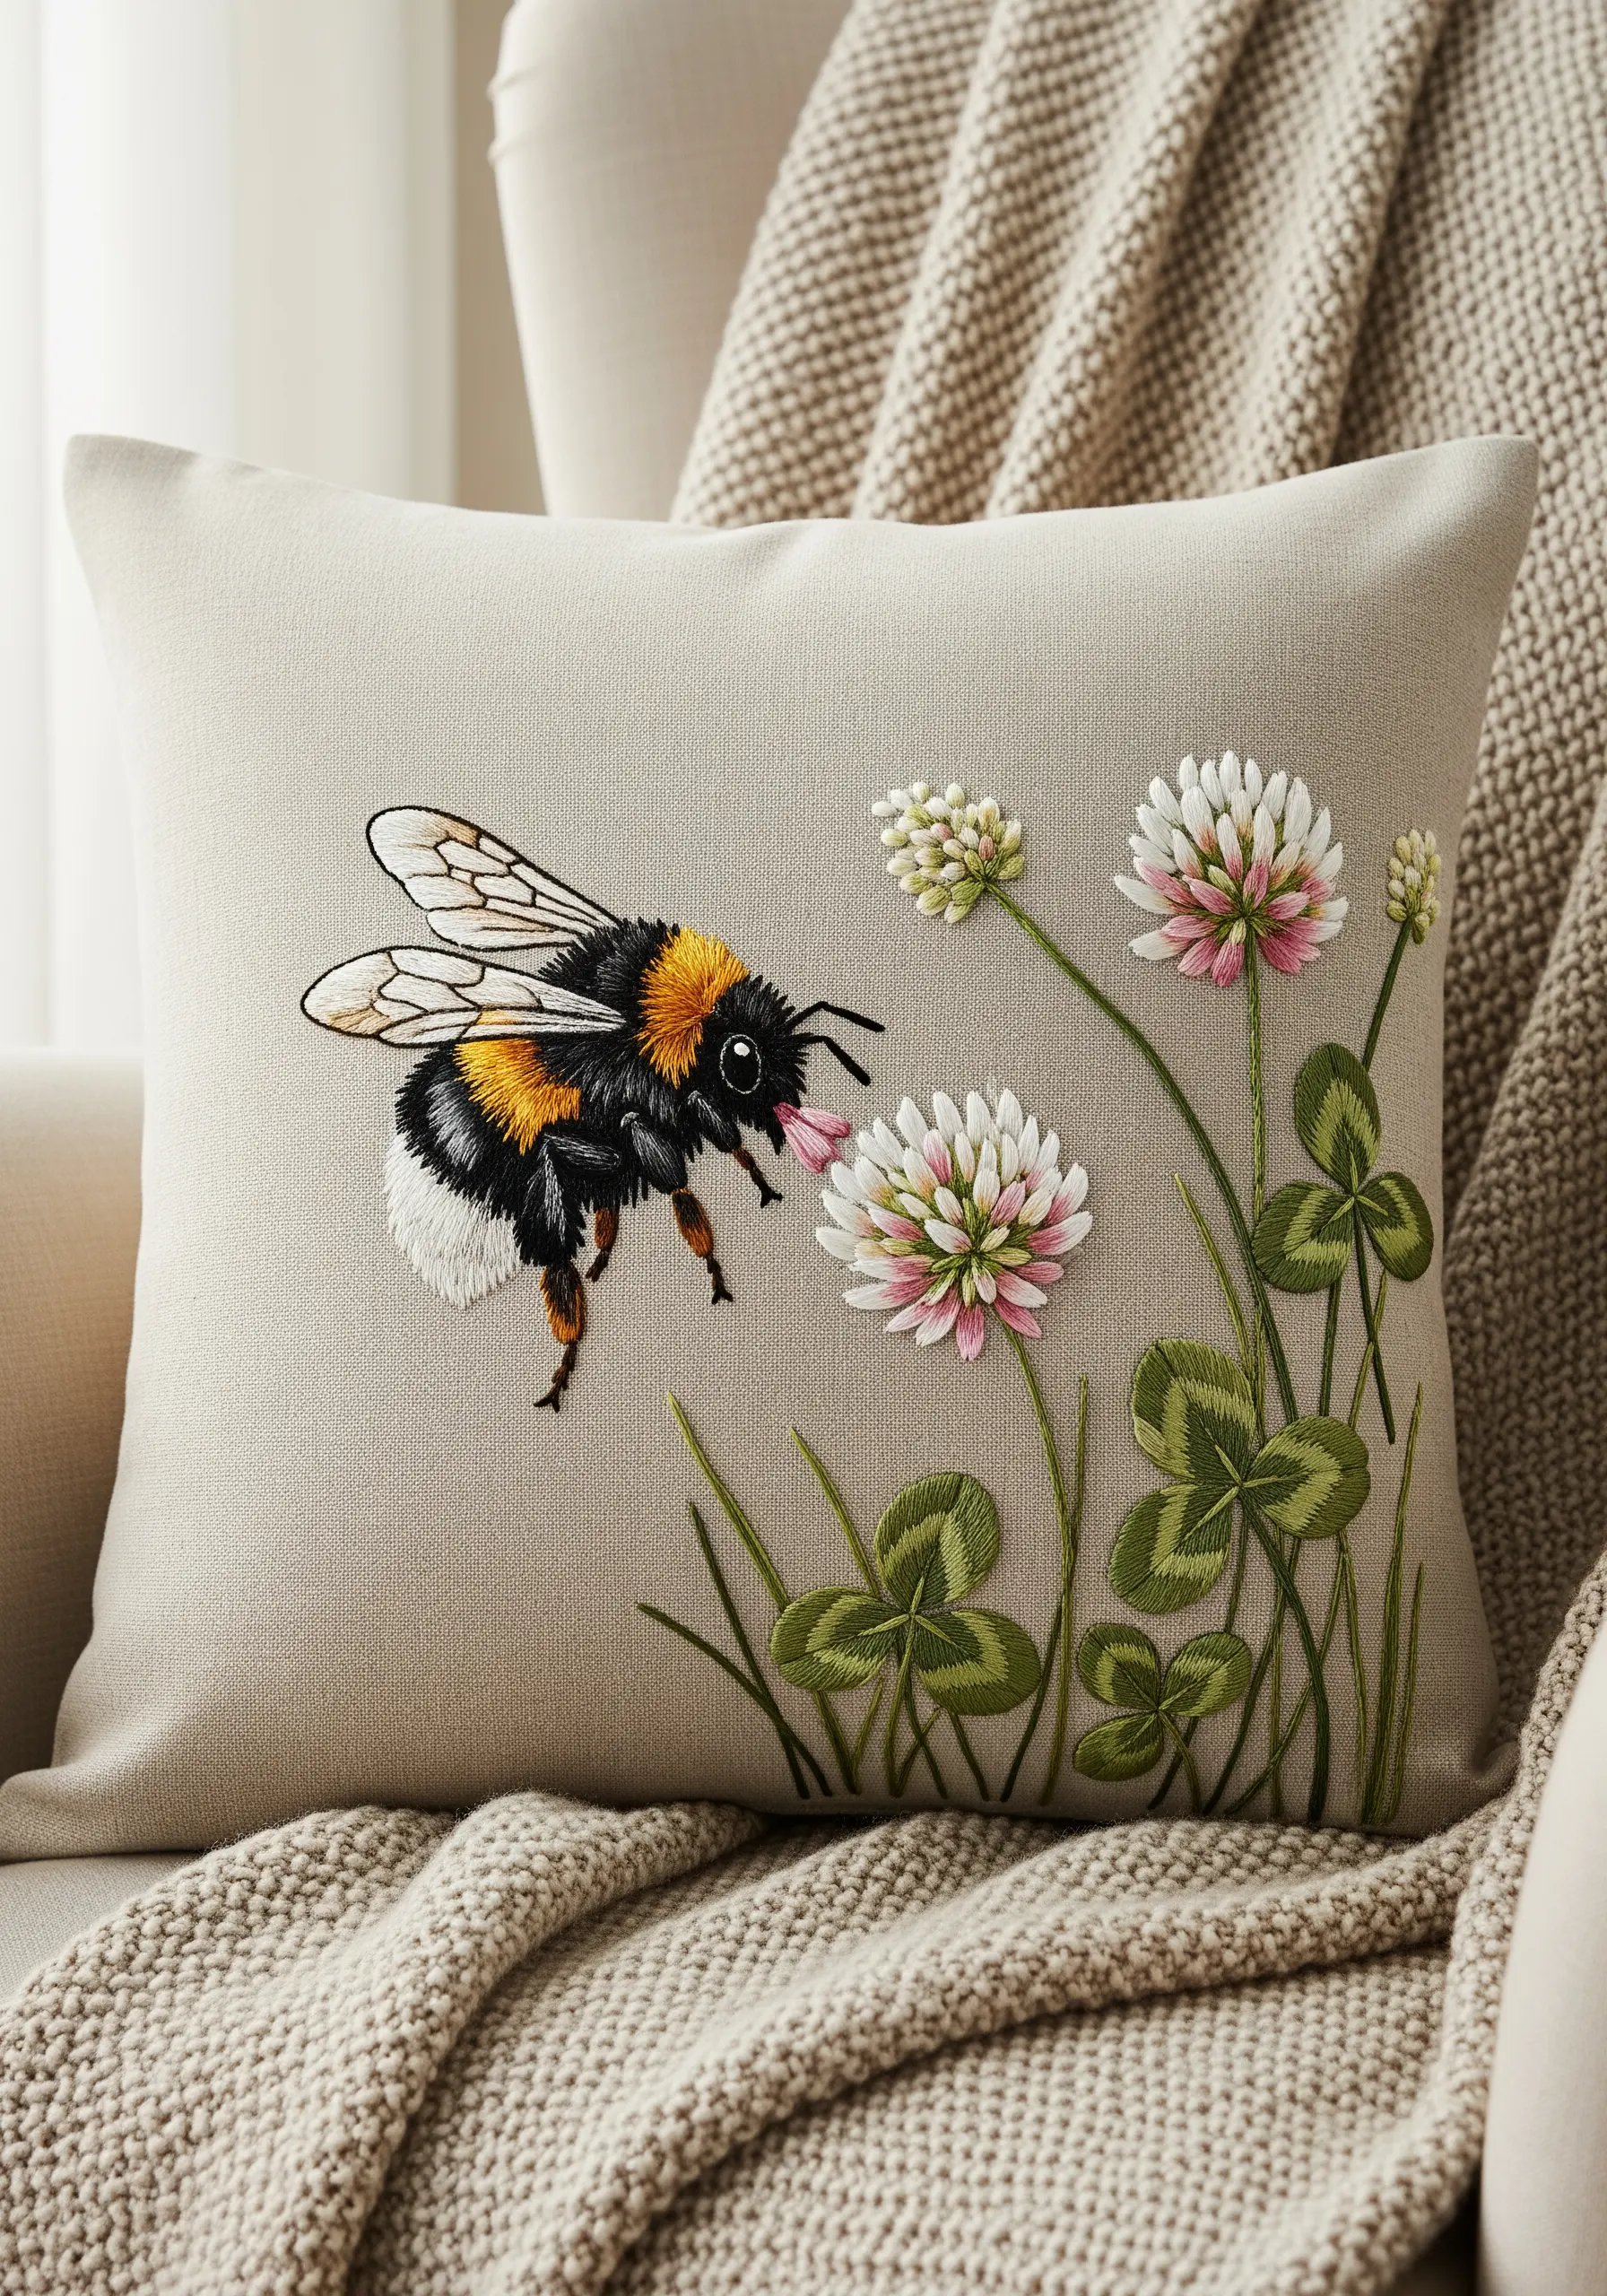
Achieve a lifelike, fuzzy texture on insects or animals by combining two key stitches.
Use long-and-short stitch as a base to block in the colors of the bee’s body.
Then, go back over the sections you want to be fluffy—like the thorax and tail—with the turkey work stitch, leaving long loops that you can trim down to create a soft, dense pile.
When stitching on functional decor like handmade pillow cushion embroidery patterns, always use a stabilizer on the back to prevent puckering and ensure the stitches hold up to use.
8. A Modern Tulip Gradient
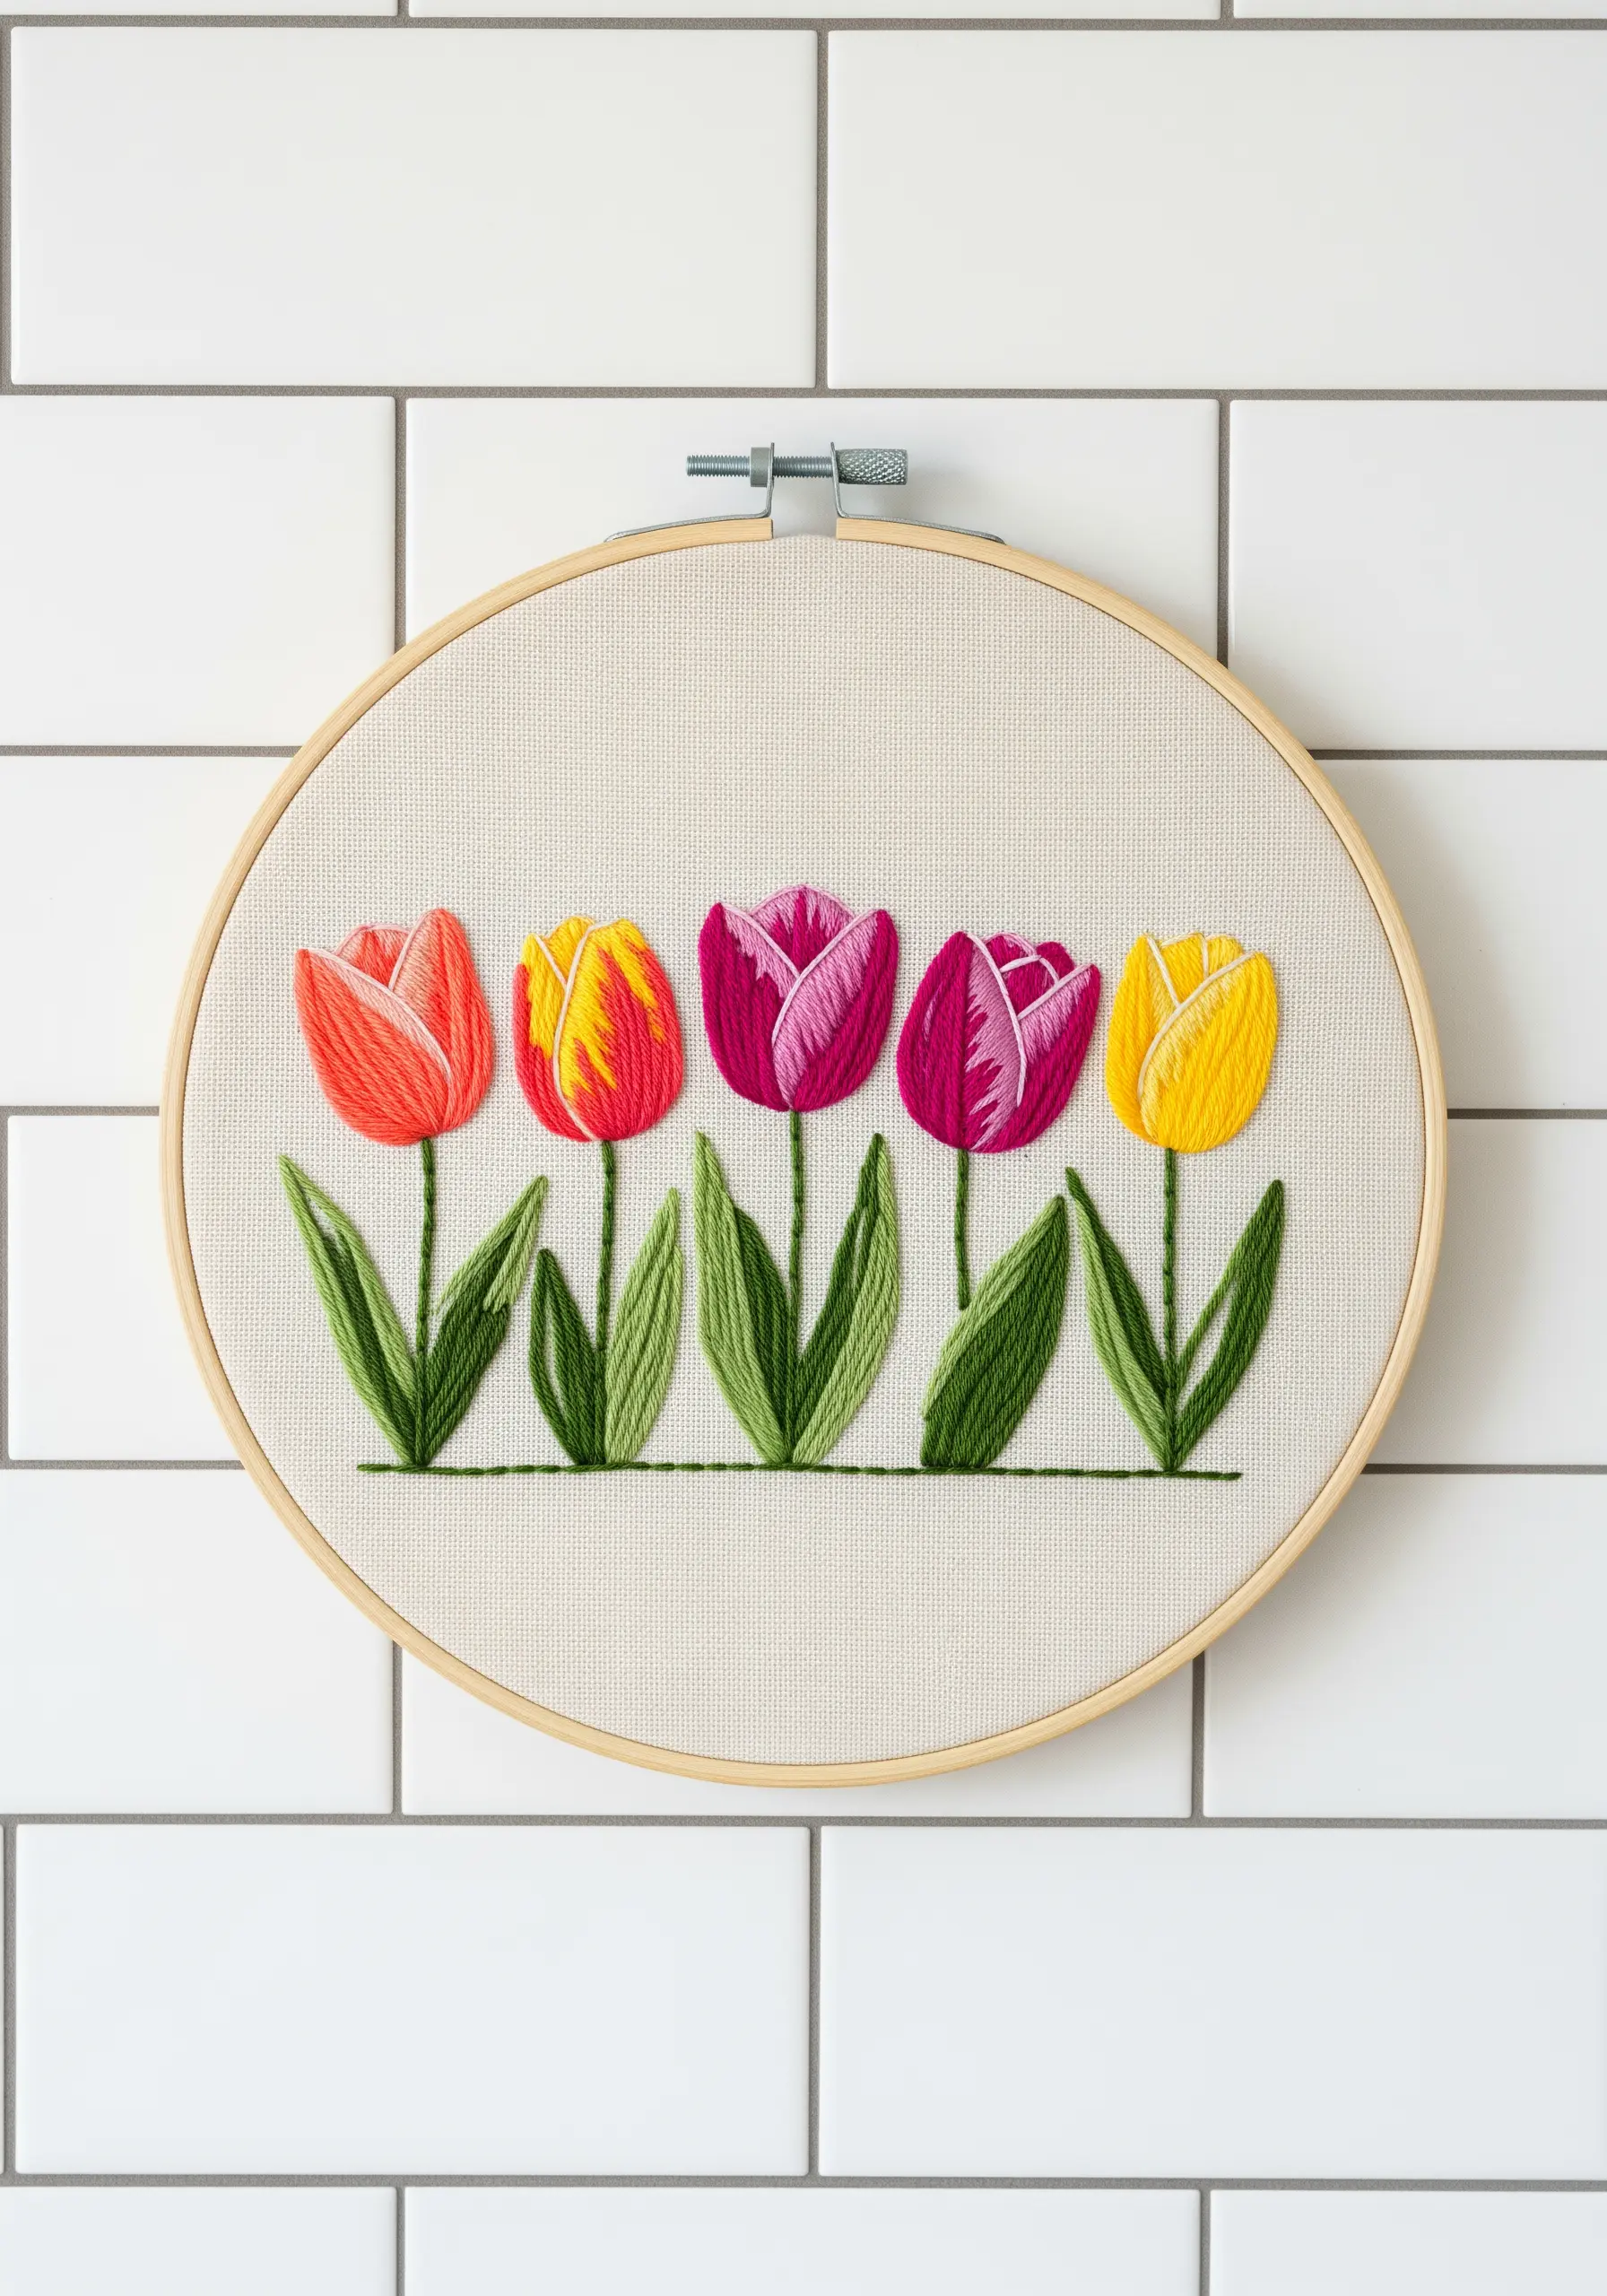
Elevate a simple satin stitch by focusing on sophisticated color blending within each shape.
To create the gradient effect on the tulip petals, blend two or three different shades of floss in your needle at the same time. This technique creates a subtle, painterly transition of color that looks far more complex than it is.
Keep all your satin stitches perfectly parallel and vertical; this clean, graphic approach gives the classic floral motif a distinctly modern feel.
This is a fantastic way to experiment with abstract color blend stitch ideas within a defined shape.
9. Dew-Kissed Wild Violets
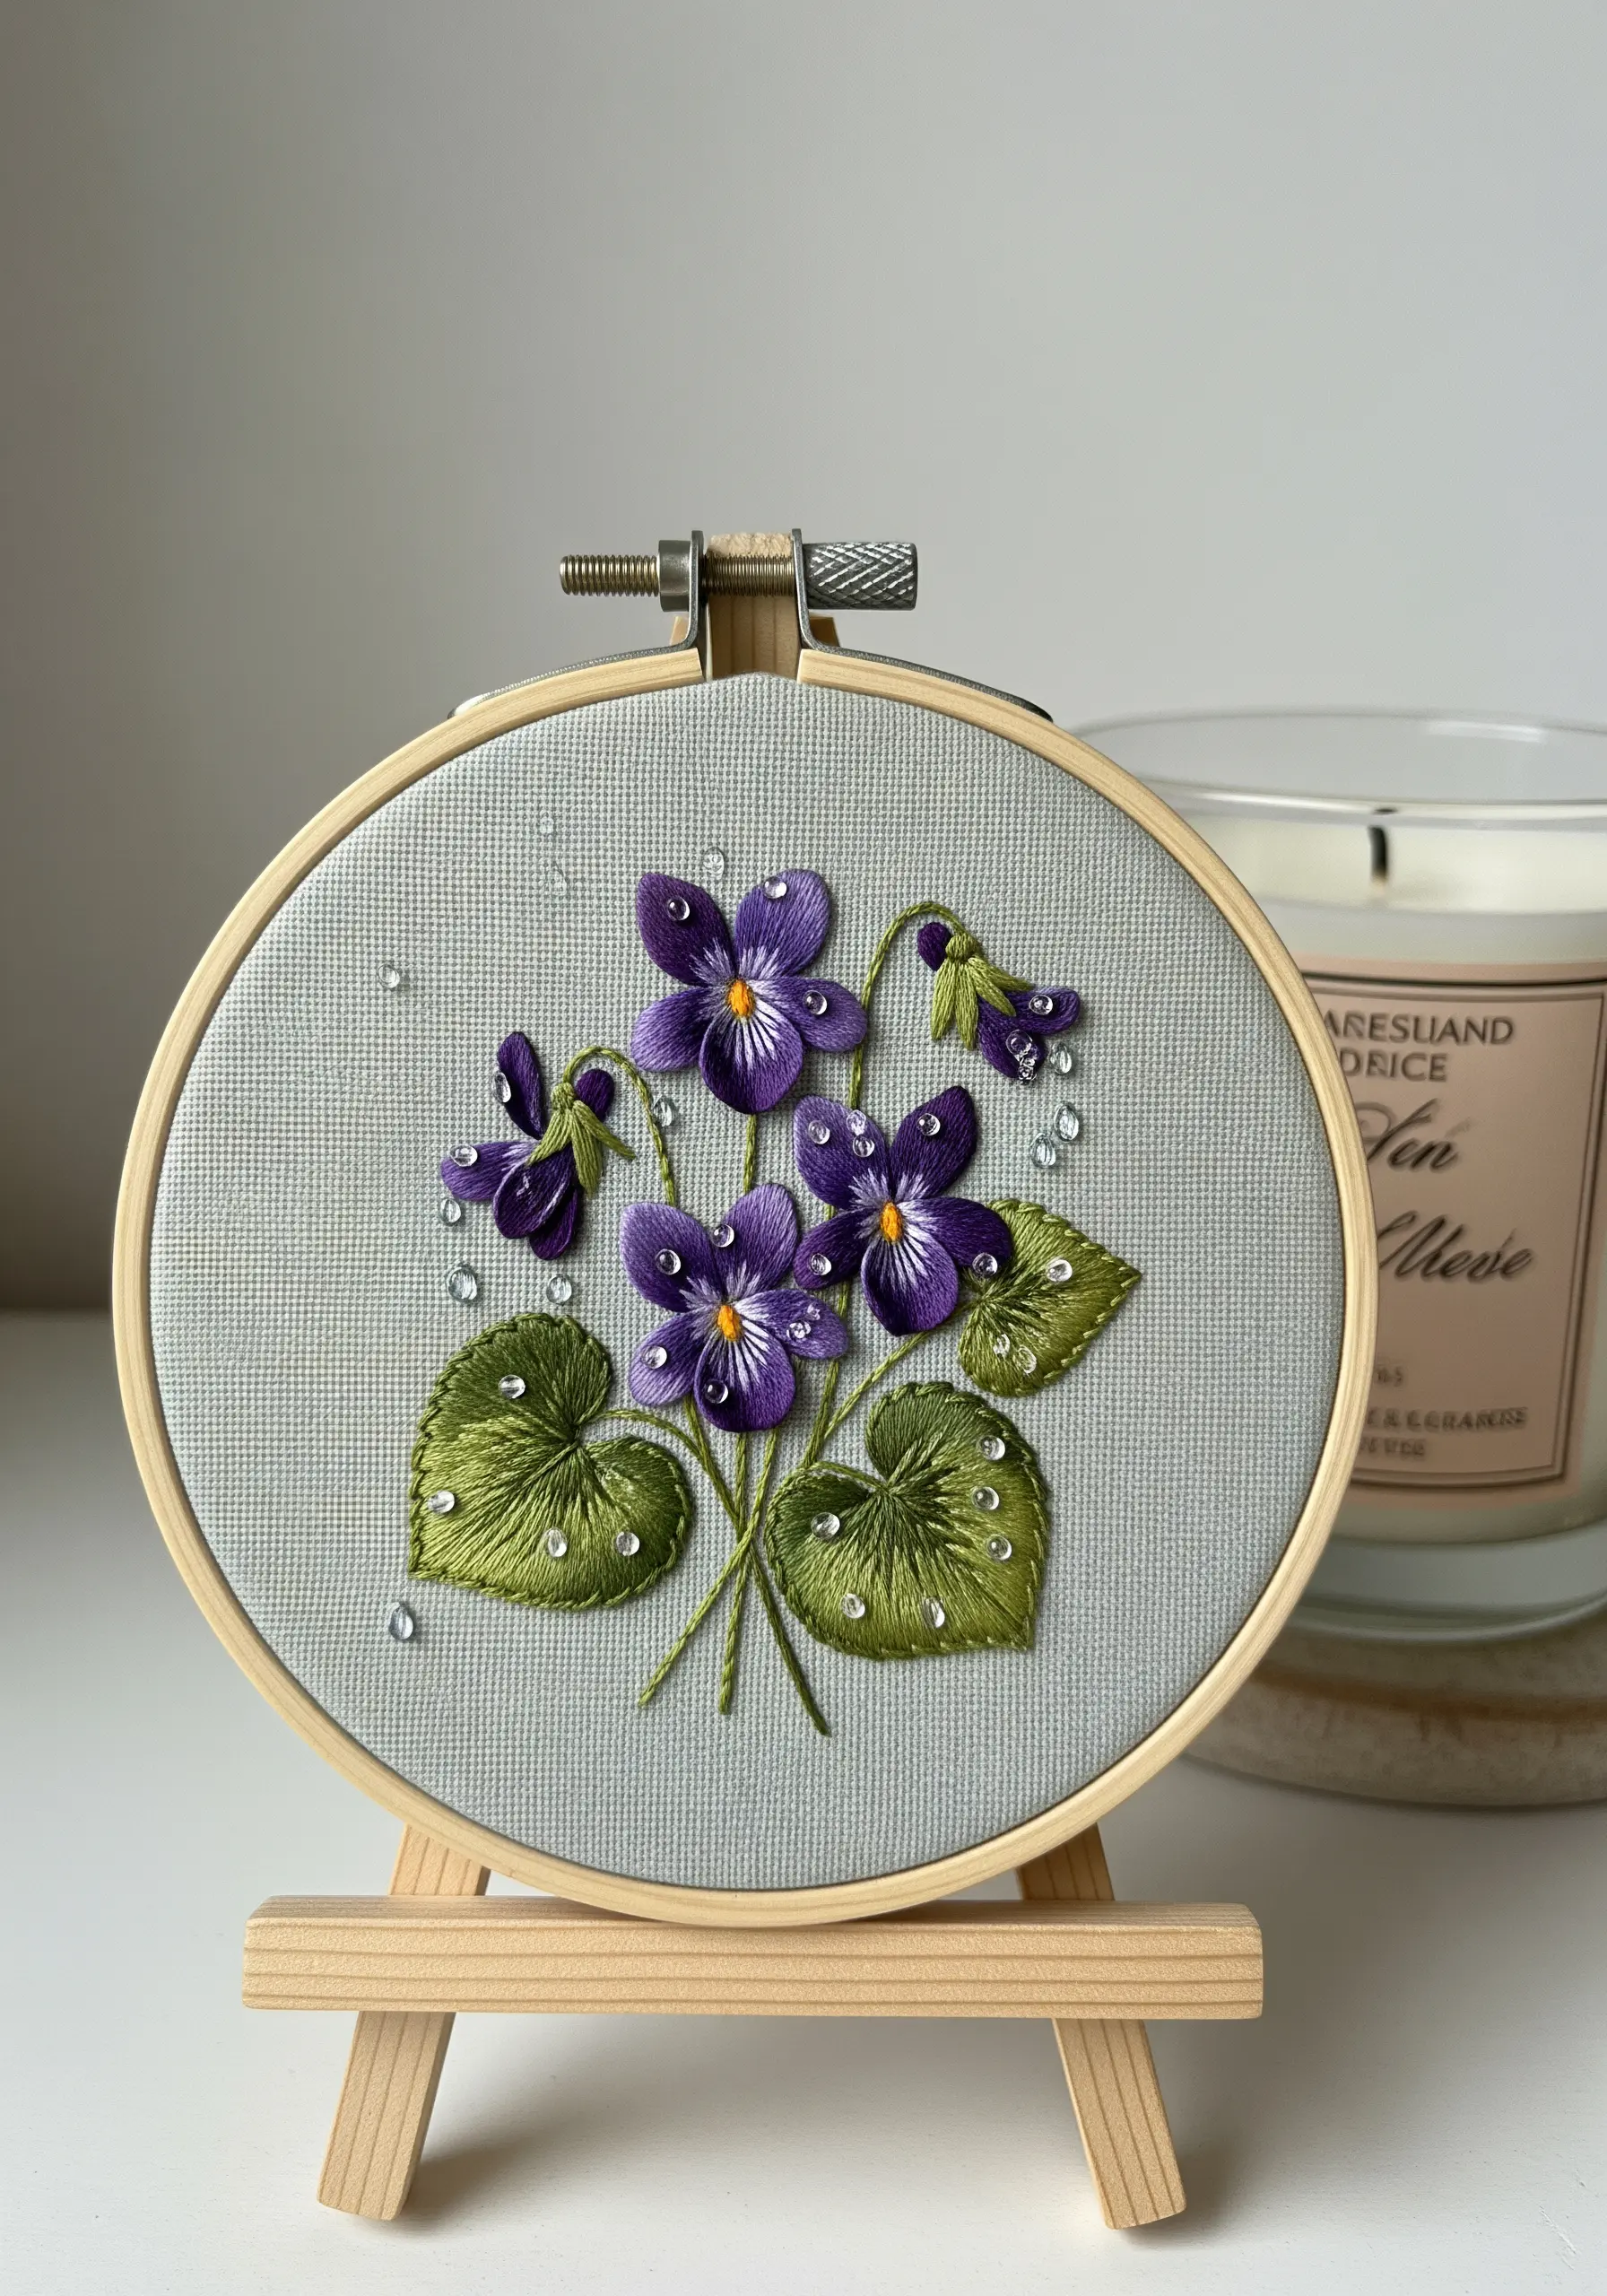
Add a touch of hyper-realism to your botanical work with a simple, elegant embellishment.
After completing the violets and leaves with your standard satin and fishbone stitches, scatter tiny, clear seed beads across the surface.
Secure each bead with a single, small stitch using a thread that matches the fabric. This makes the stitch nearly invisible and creates the illusion of freshly formed dewdrops.
Arrange the beads in organic, random clusters rather than in a pattern for the most natural effect.
10. The Strength of Roots and Shoots
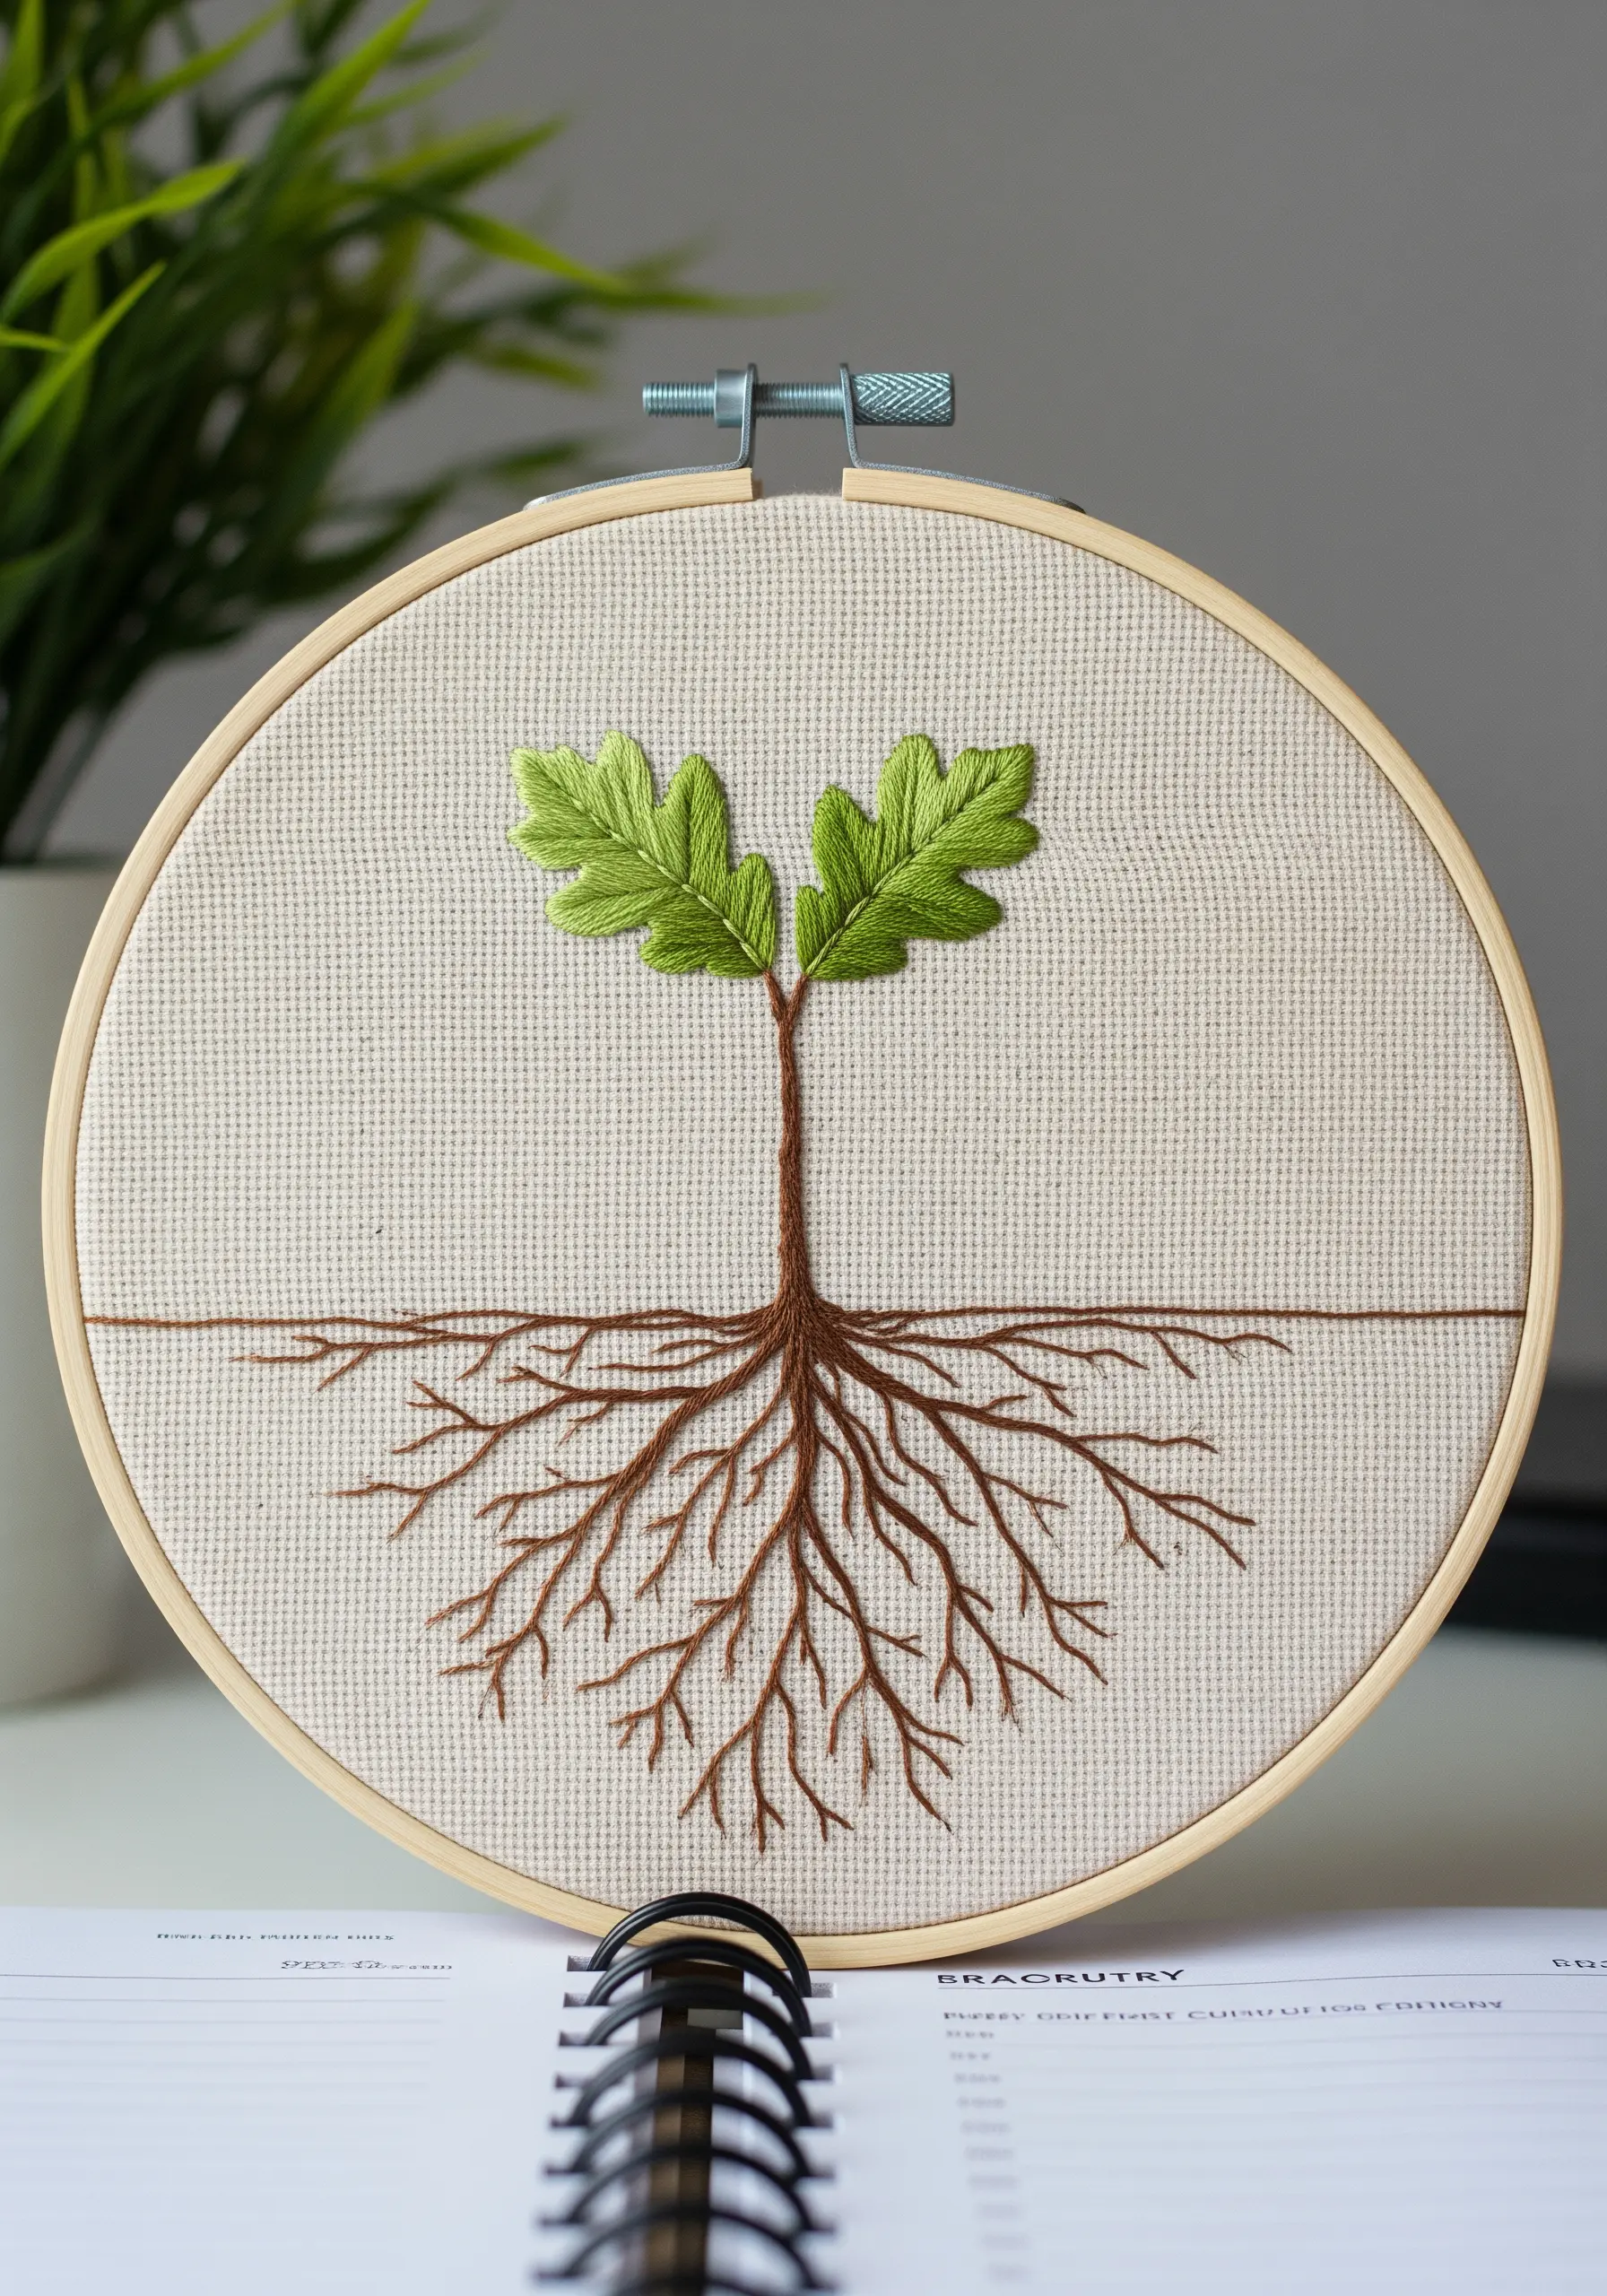
Create incredibly fine, delicate lines by adjusting your thread count and stitch choice.
For the intricate root system, switch to a single strand of embroidery floss. A single strand gives you maximum control and prevents the lines from looking bulky.
Use a combination of split stitch and backstitch to render the roots. The split stitch creates a smooth, continuous line, while the backstitch can be used for the tinier, branching filaments.
This technique is essential for embroidering realistic foliage and other delicate natural elements.
11. Climbing Morning Glories in 3D
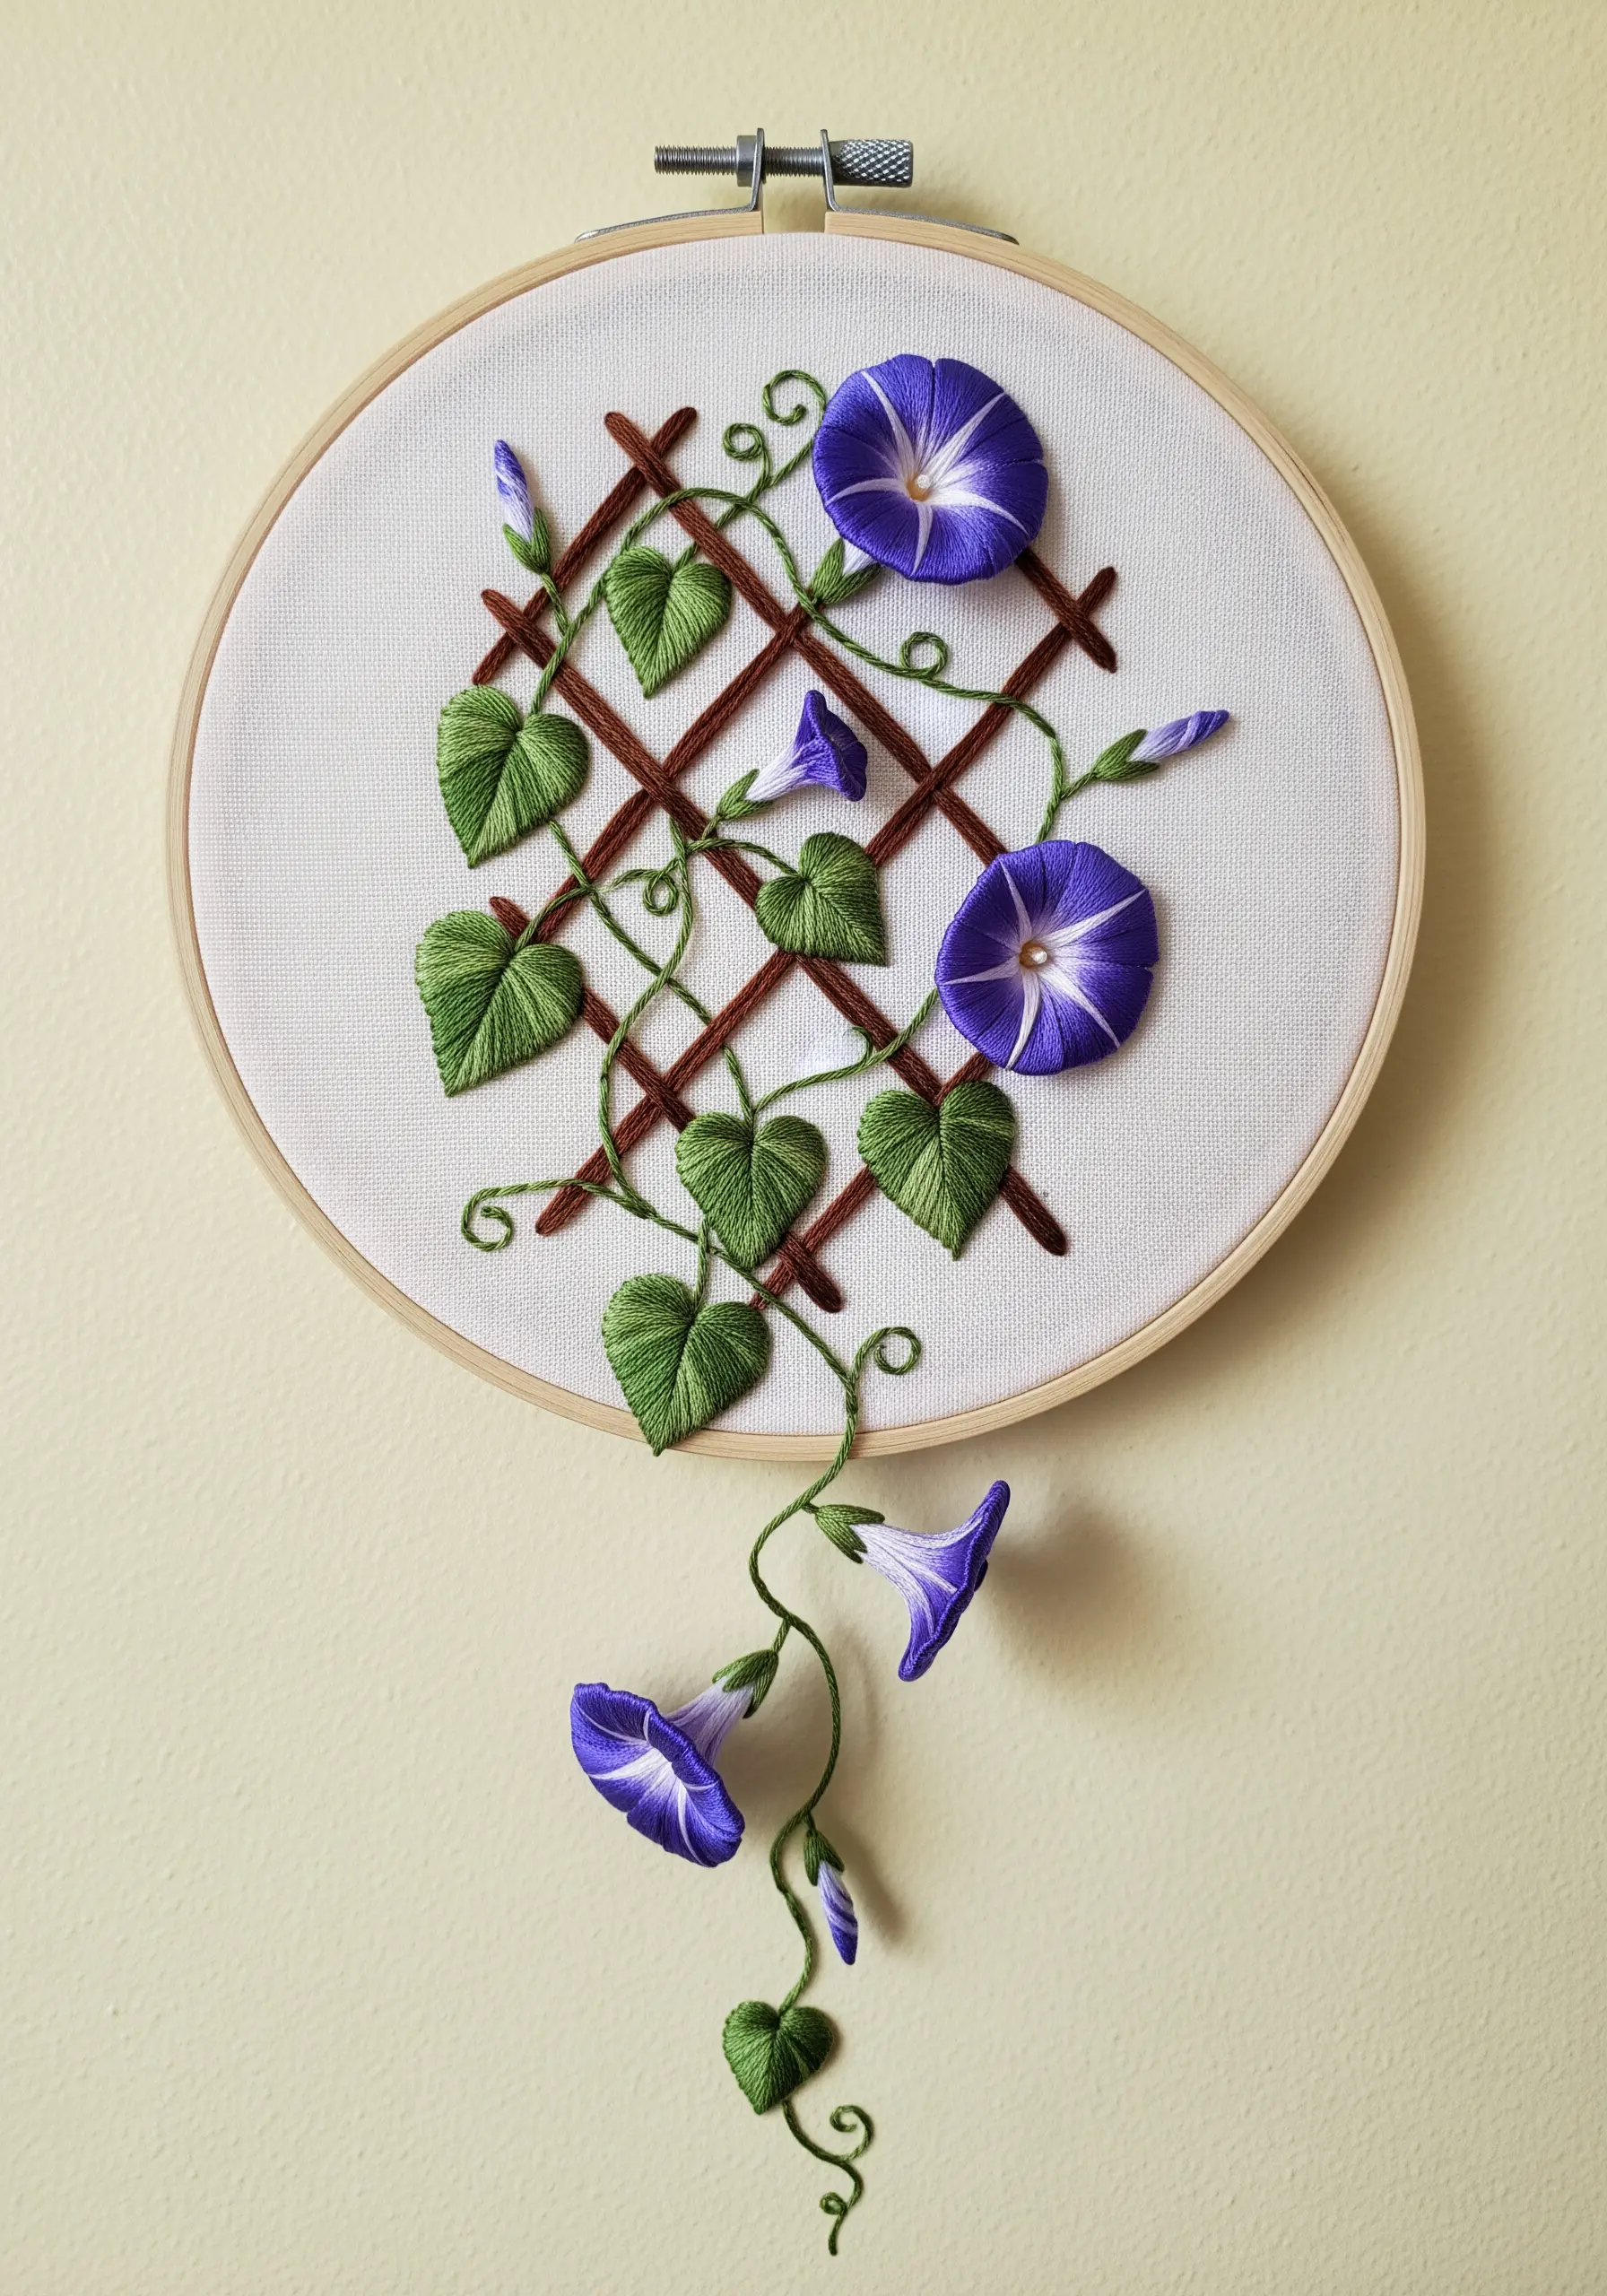
Break the boundaries of the hoop by incorporating stumpwork and off-the-edge elements.
Create the flowers separately on a piece of scrap fabric with a fine wire stitched along the edge of each petal. Once complete, cut them out and shape them before attaching them to your main design.
This technique allows the flowers to stand away from the background, creating dramatic shadows and a true 3D effect.
Letting a vine trail down past the edge of the hoop adds a playful, dynamic quality that makes the piece feel alive.
Explore these statement textured embroidery techniques to give your work sculptural depth.
12. Thread-Painted Equinox Sunrise
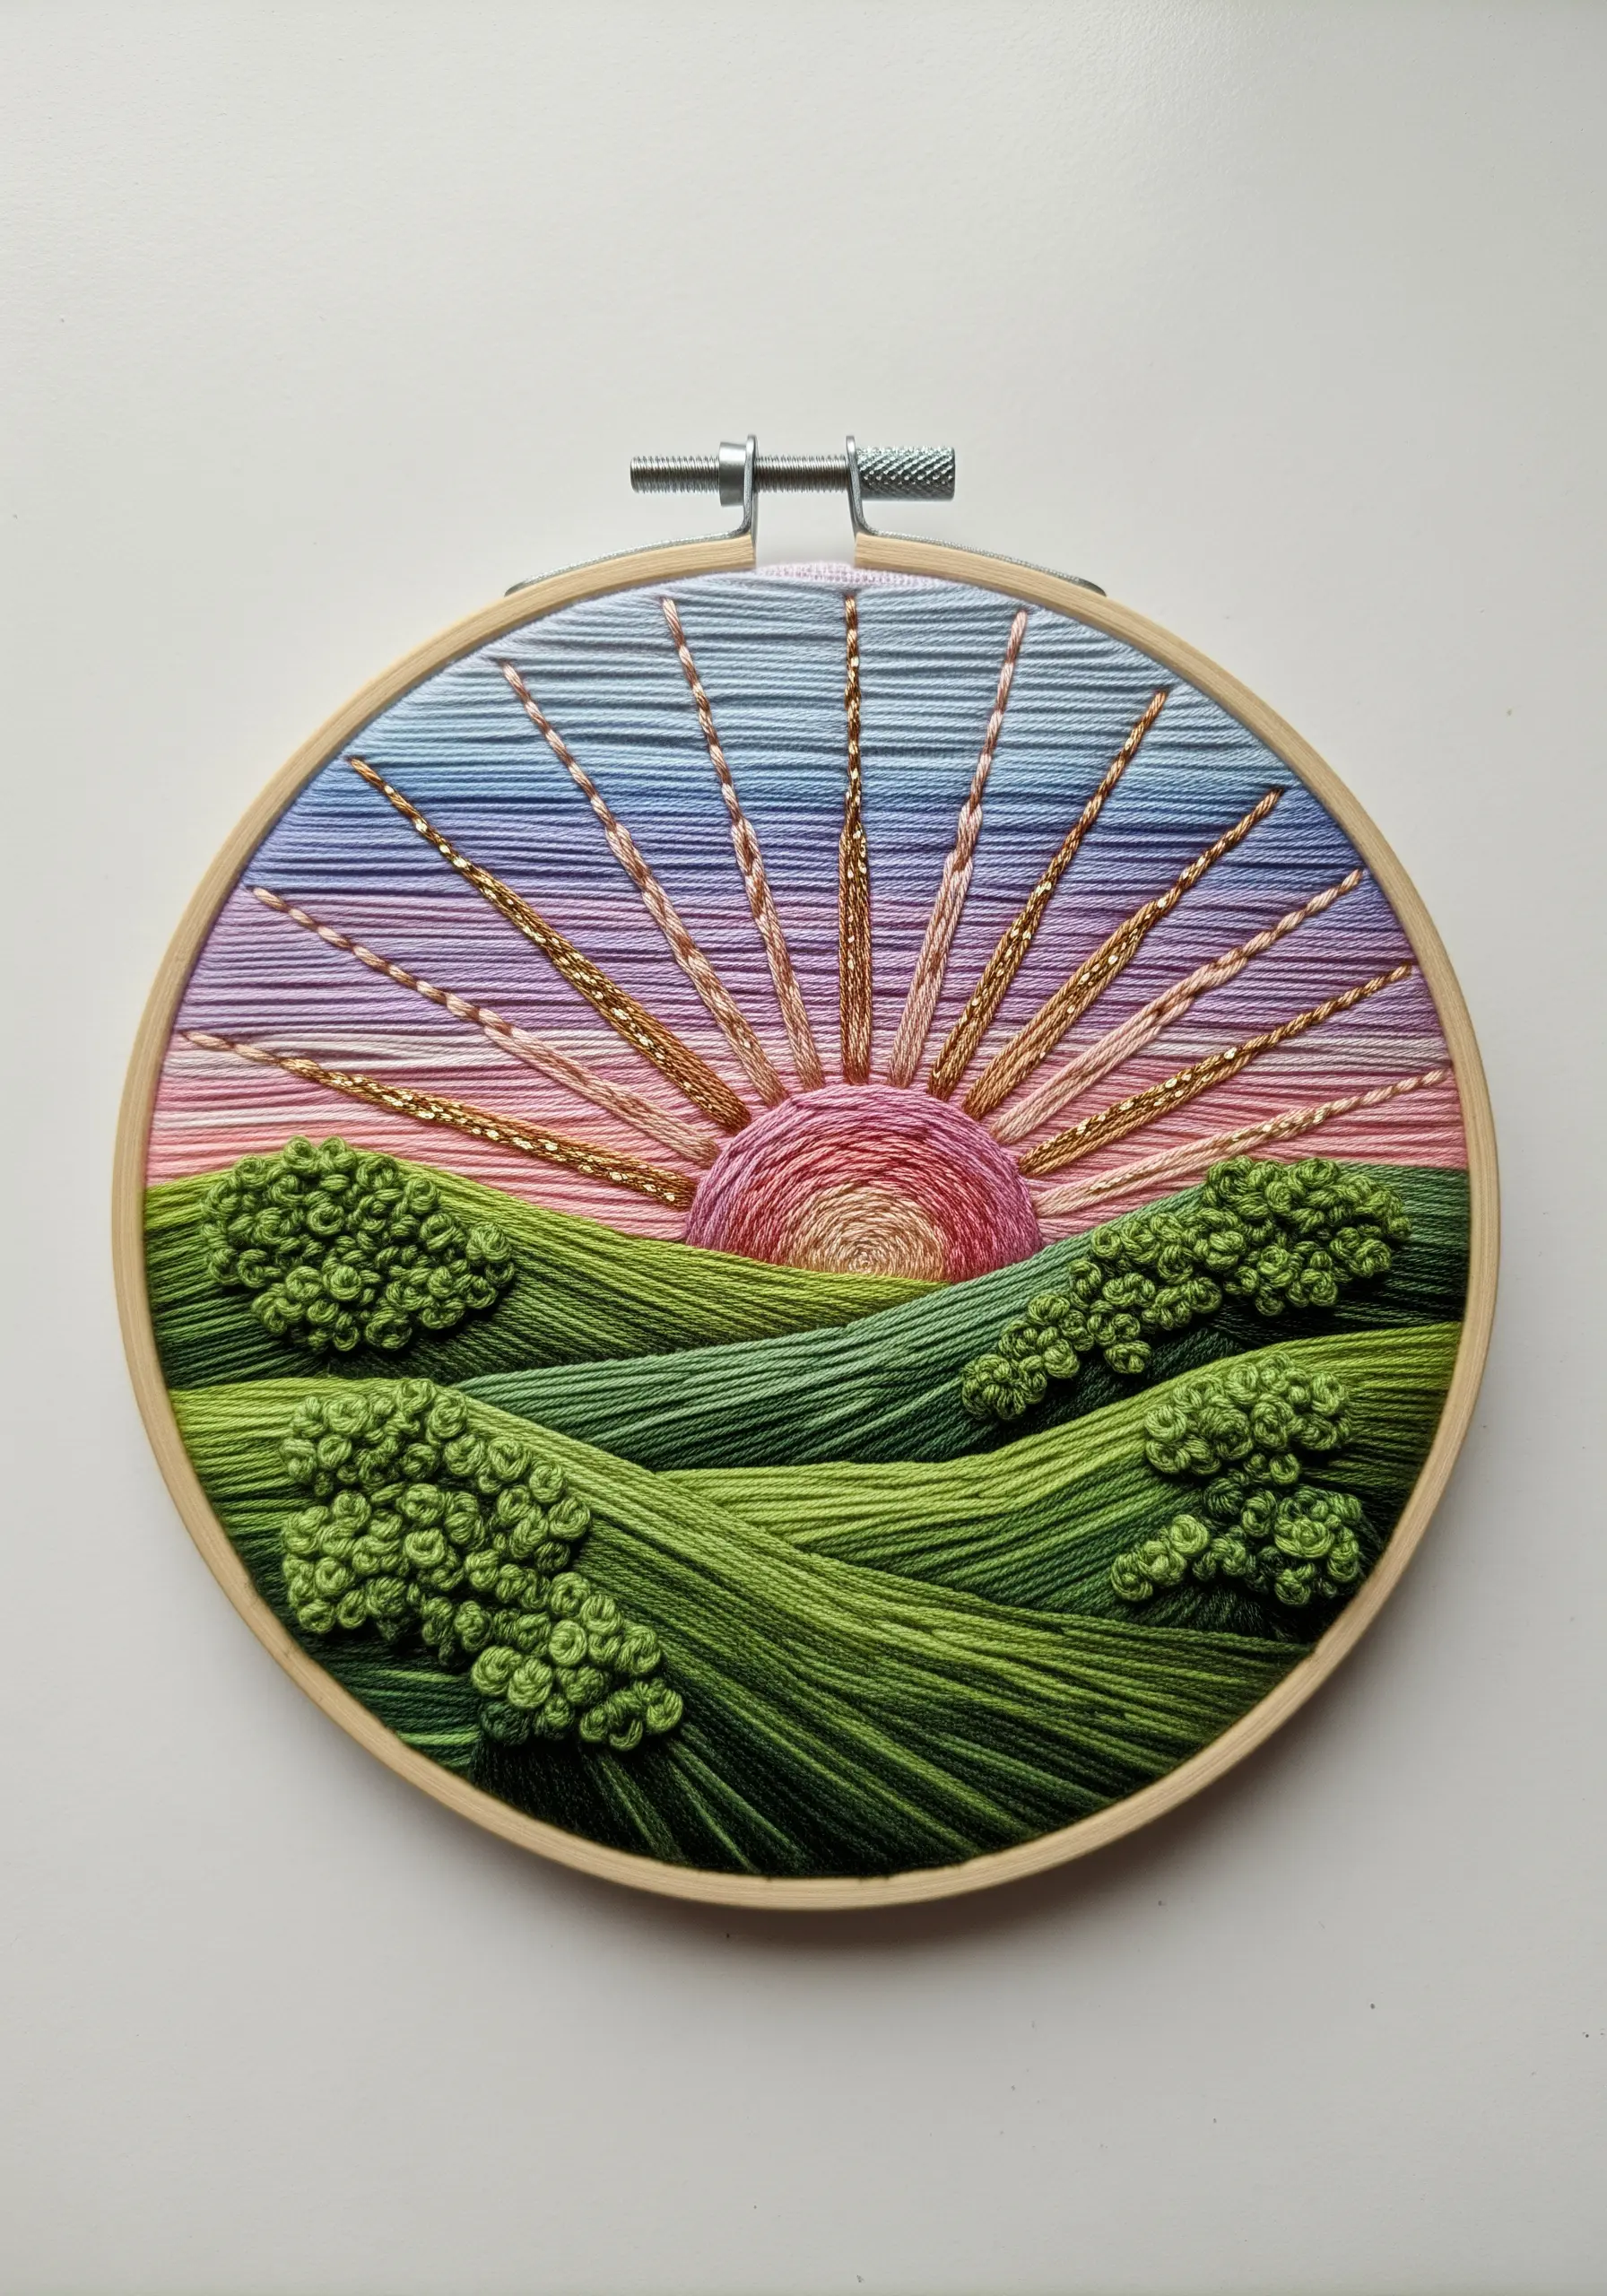
Use the direction of your stitches to paint a landscape and create a sense of depth and contour.
For the rolling hills, angle your satin stitches to follow the curves of the land. This simple adjustment makes the landscape feel dynamic rather than flat.
Fill the sky with long, horizontal stitches to create a serene, expansive feeling, blending colors to form a soft gradient.
Finally, add clusters of French knots for the foreground bushes. This textural contrast brings them forward, enhancing the illusion of distance in your mountain landscape thread painting.
13. A Woven Basket of Foraged Blooms
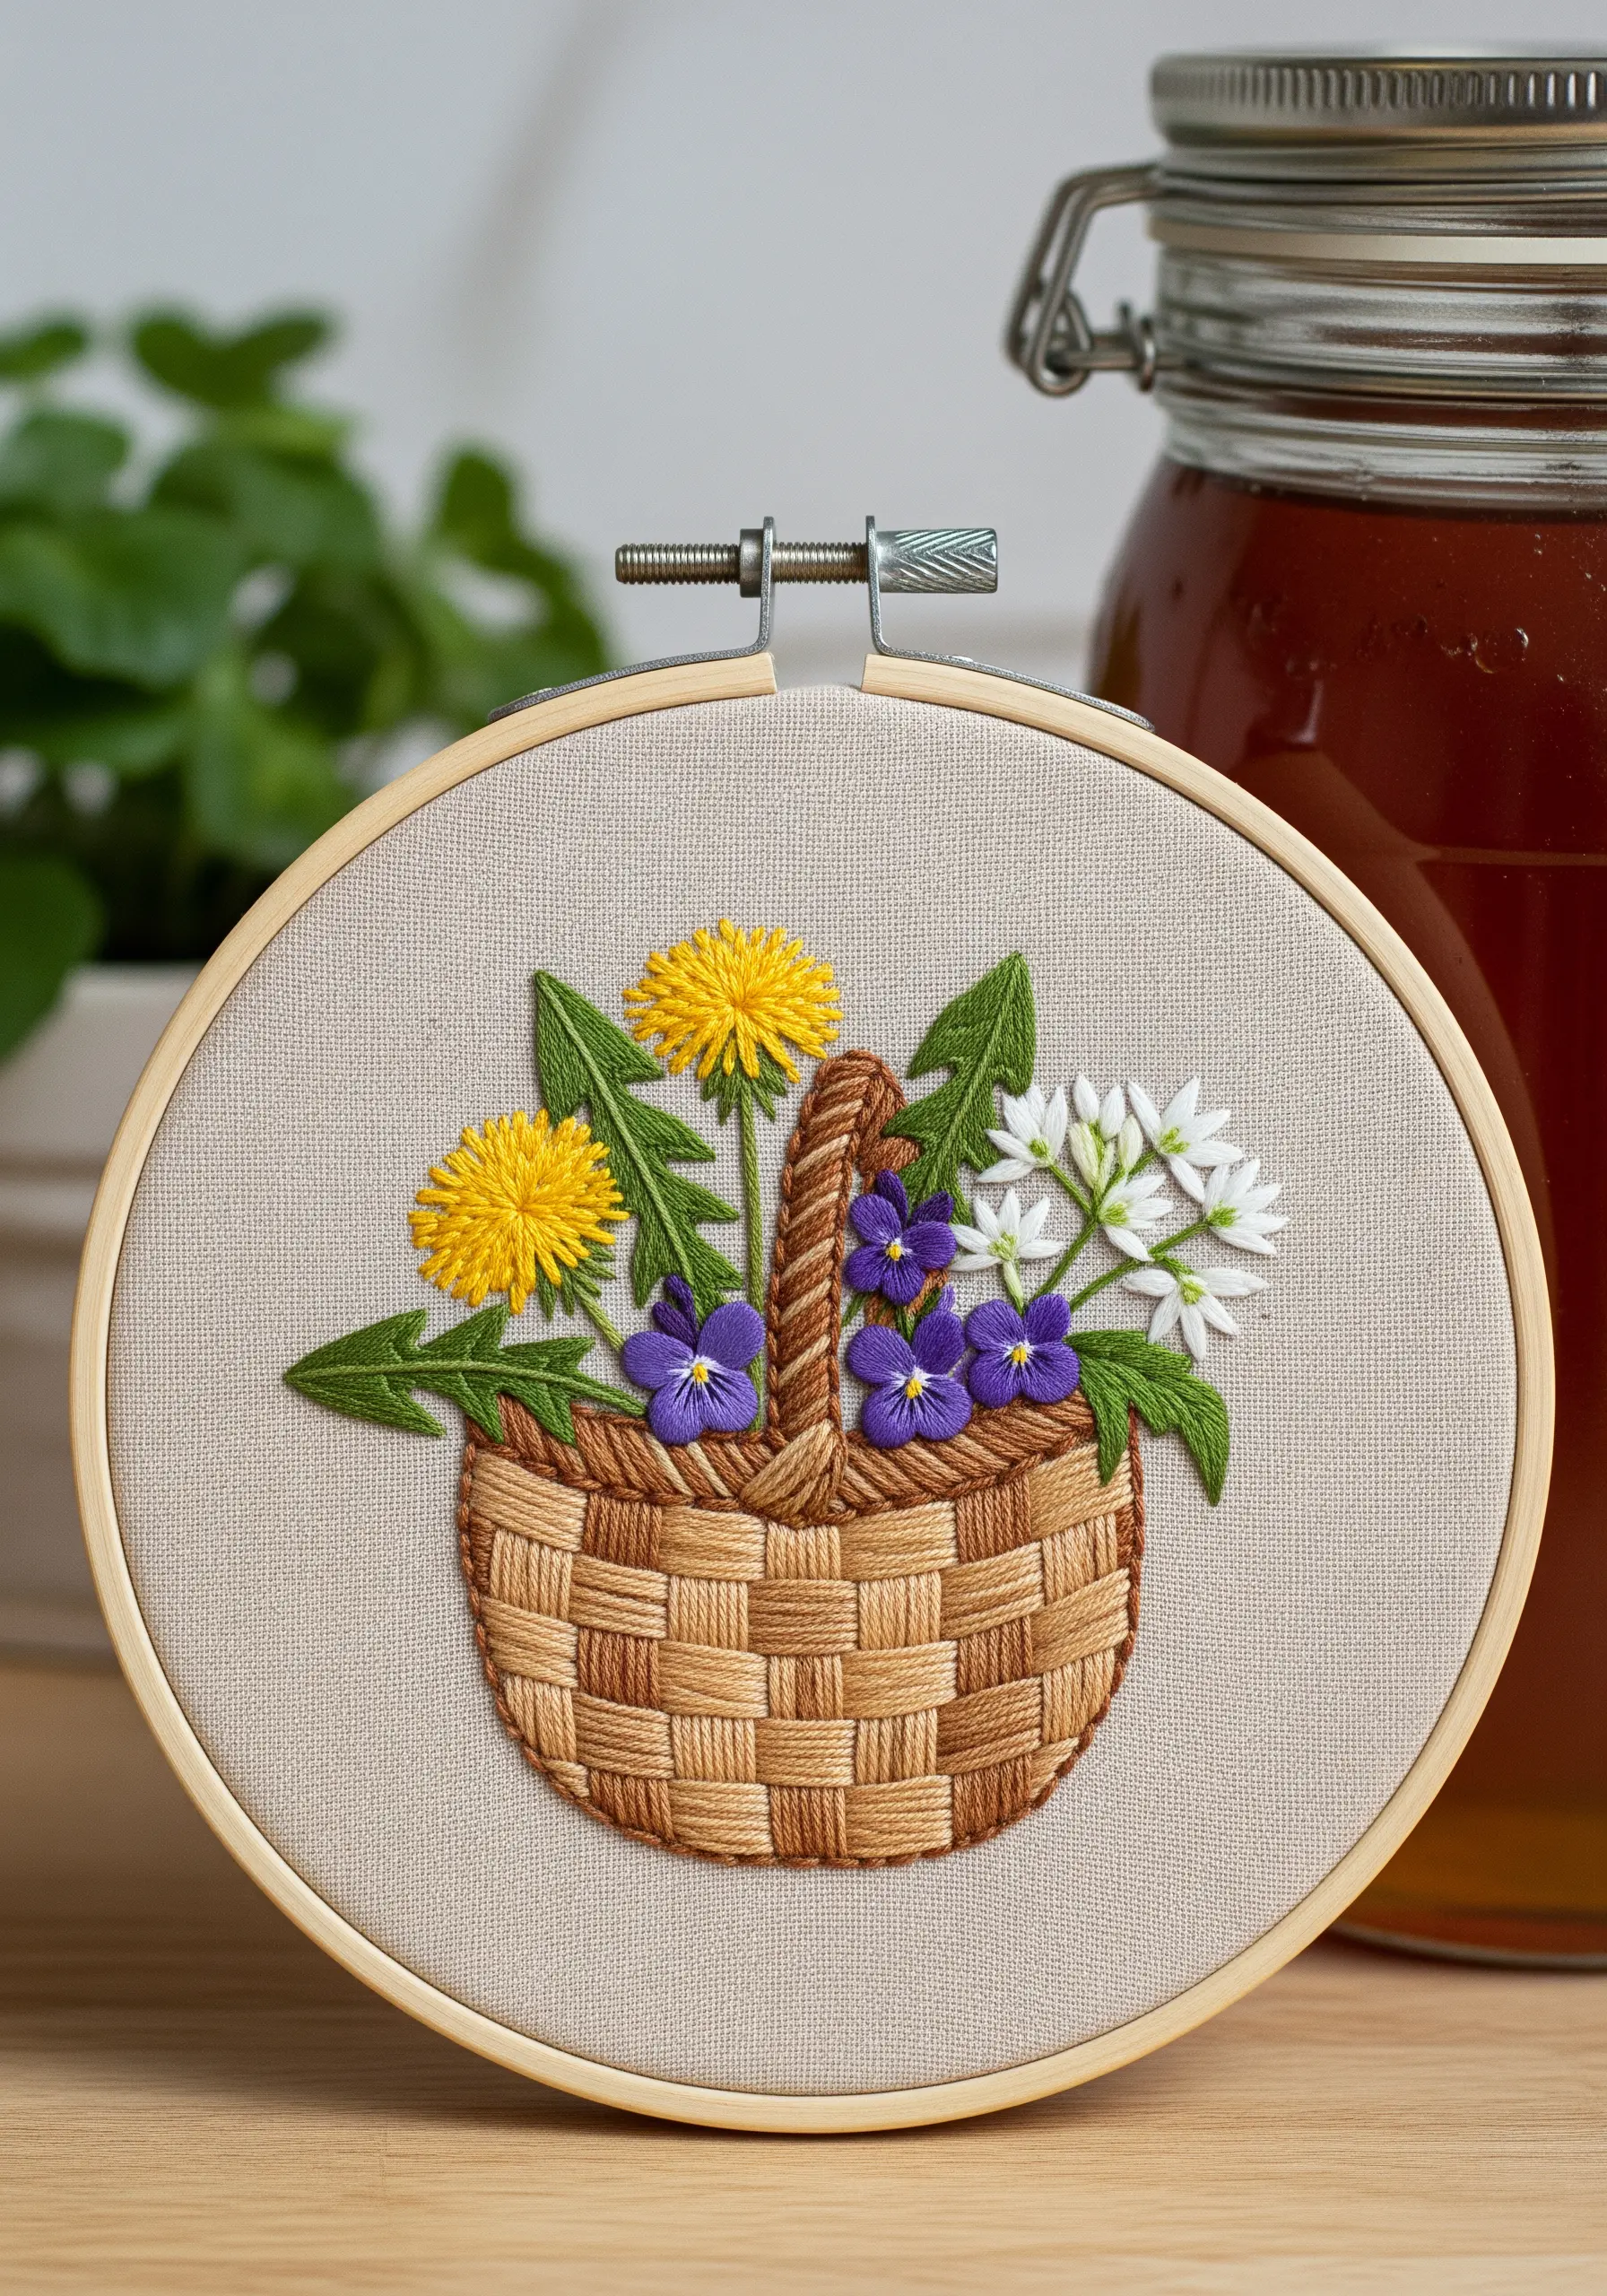
Create a stunningly realistic woven texture using a simple weaving technique.
First, lay down a foundation of long, parallel vertical stitches (the warp). Then, add a series of horizontal stitches across them (the weft).
Finally, take a new thread and weave it over and under the horizontal stitches, pulling it taut to create a raised, dimensional basketweave effect.
This technique provides a beautiful textural contrast to the delicate, simple stitches of the wildflower hoop art inside.
14. Textural Bird’s Nest Still Life
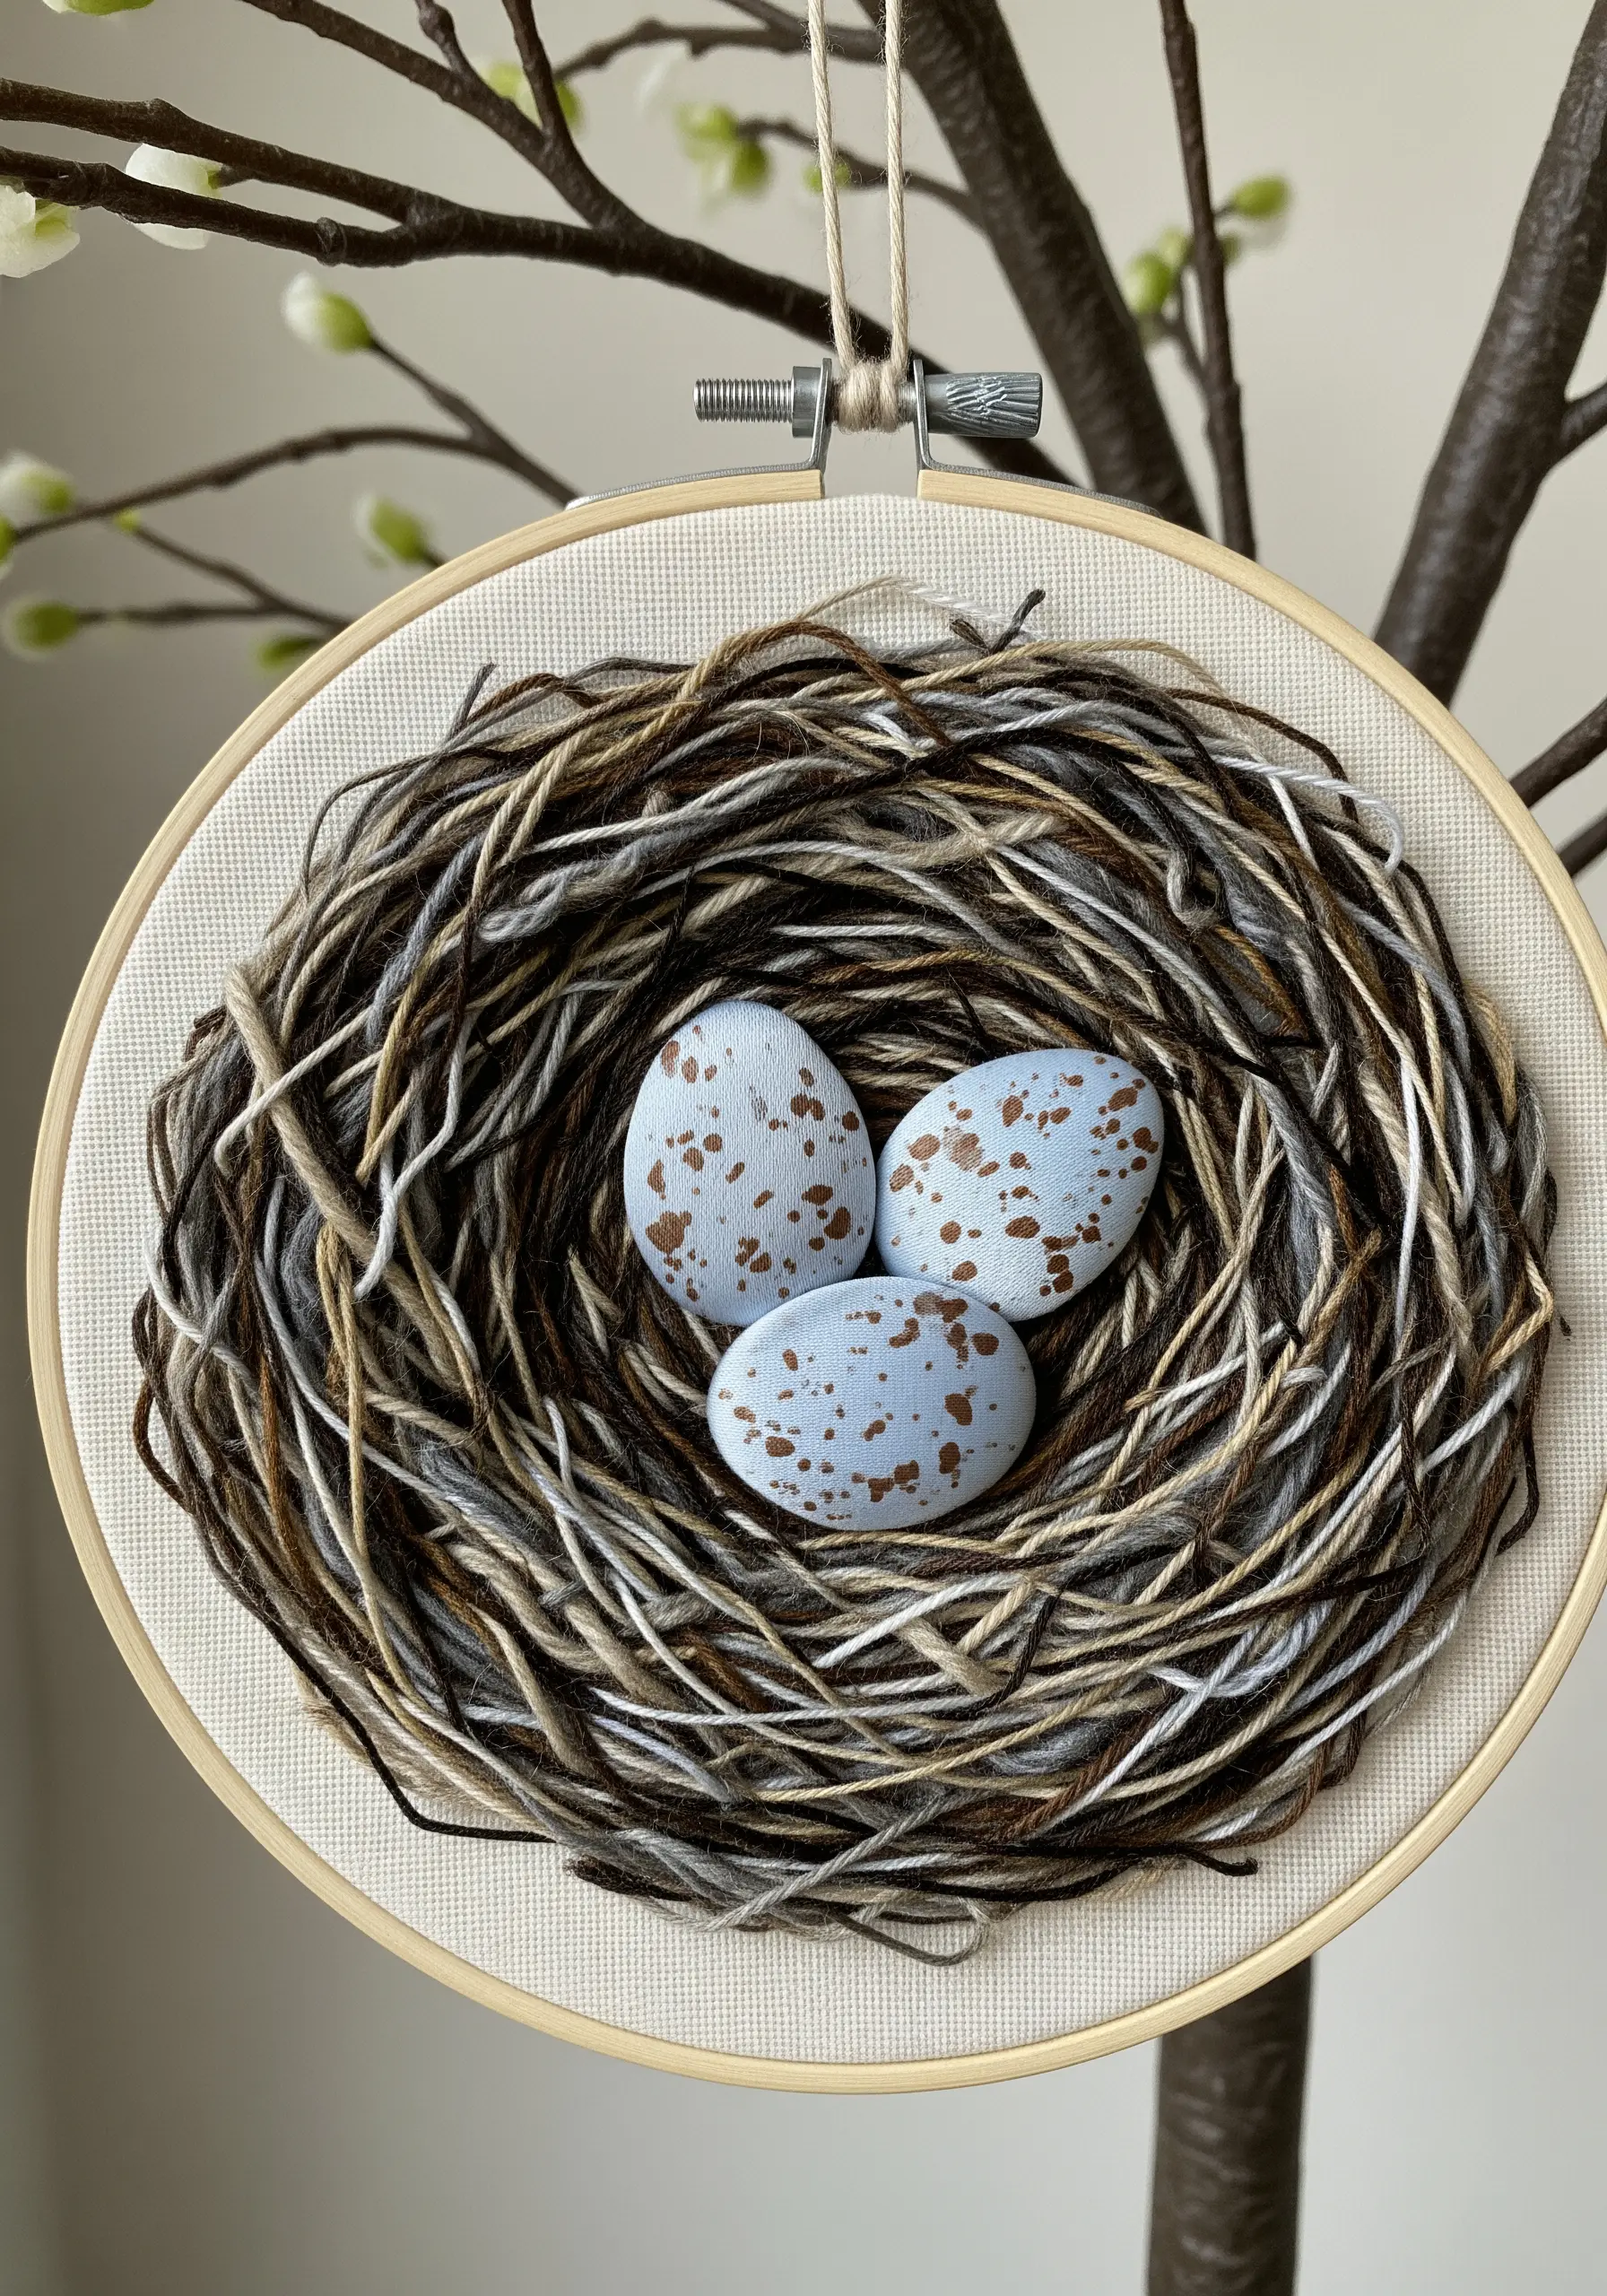
Move beyond traditional stitches to build raw, organic textures with mixed fibers.
To create the nest, use a variety of yarns and threads in neutral colors—some thin, some thick, some smooth, some textured. Lay them down in loose, overlapping loops and swirls.
Then, use a single strand of a matching thread to couch these fibers down, securing them to the fabric while maintaining their chaotic, natural look.
The speckled eggs can be made from 3D felt shapes or padded satin stitch, creating a smooth focal point amid the nest’s beautiful disarray.
15. Moody Hellebore in Thread Painting
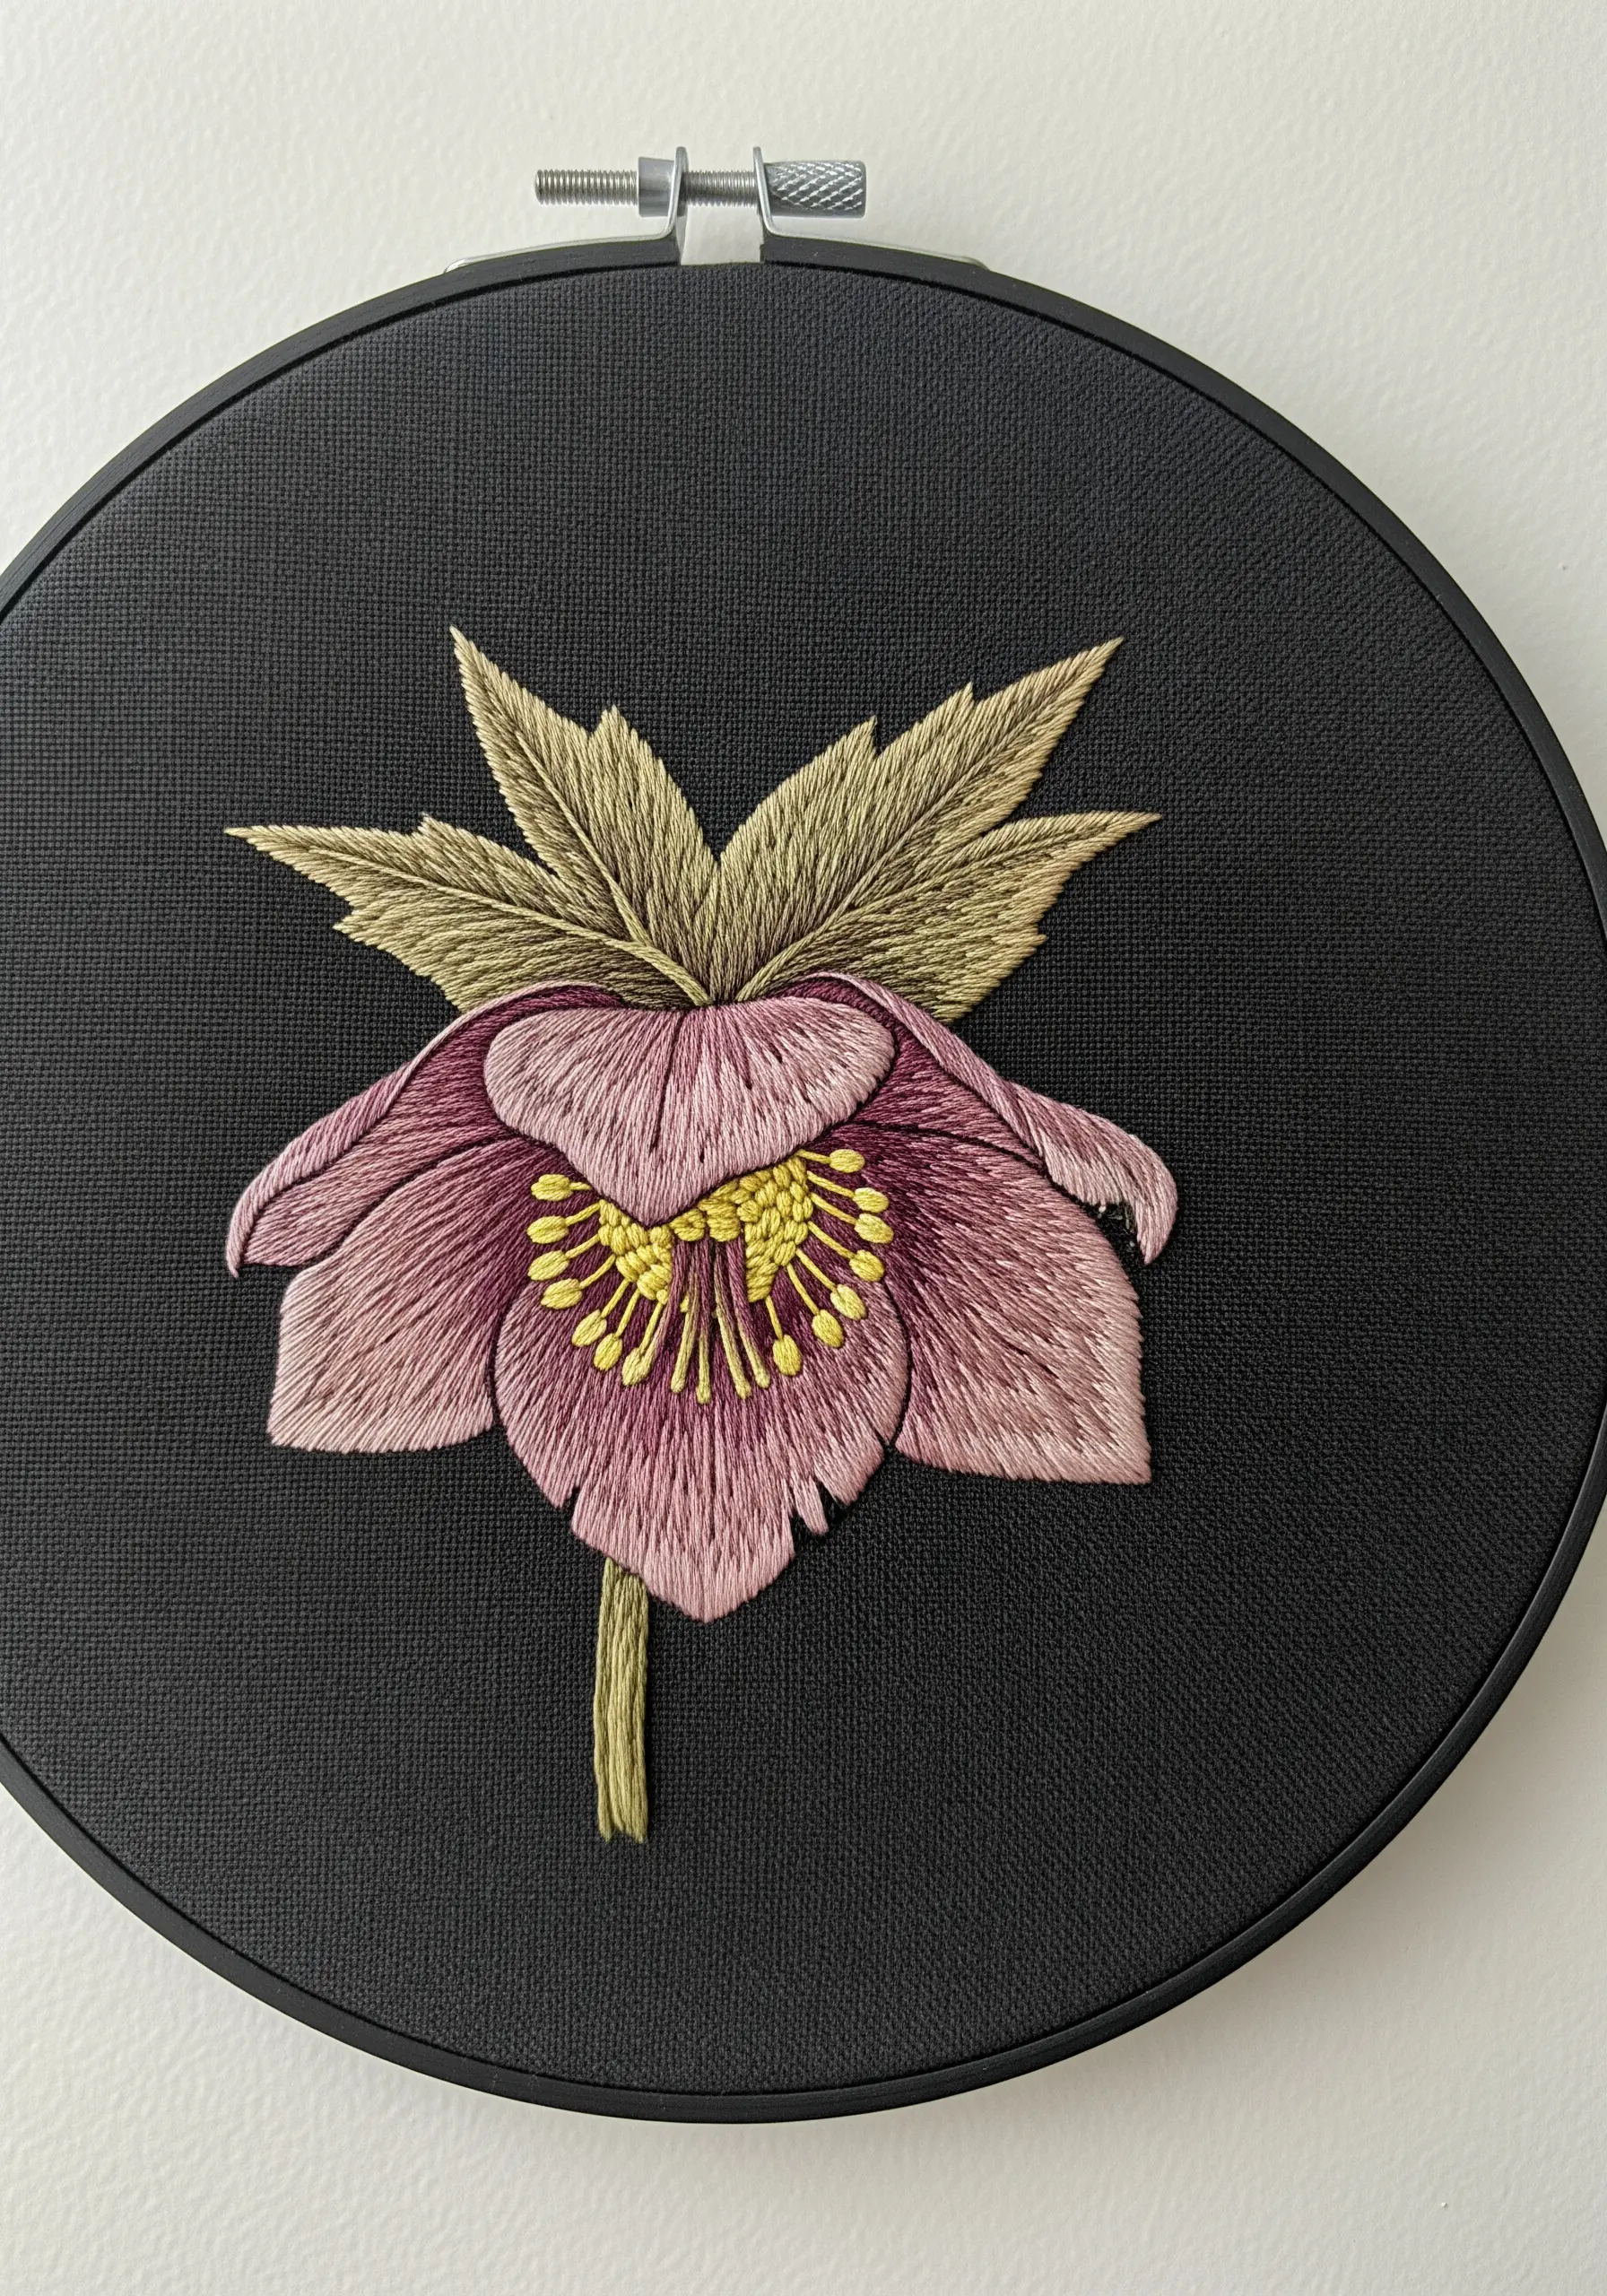
Unlock a new level of drama in your floral embroidery by choosing a black fabric background.
The dark canvas makes every color appear more saturated and luminous. When shading the petals with long-and-short stitch, your highlights will pop and your shadows will feel deeper and richer.
This technique forces you to consider your light source carefully, resulting in a more painterly and intentional piece.
Bright details, like the yellow French knot stamens, become brilliant focal points against the moody backdrop.
16. Elegant Lily of the Valley

Capture the delicate, bell-like shape of certain flowers with a dimensional stitch.
Instead of a flat satin stitch, use a detached buttonhole stitch worked over a single foundation stitch. This creates a small, hollow bell shape that stands away from the fabric, perfectly mimicking the form of a Lily of the Valley blossom.
Pair these dimensional flowers with simple, flat leaf stitches like the fishbone stitch. The contrast in dimension is what makes the design so effective and elegant.
17. A Modern Botanical Herb Sampler
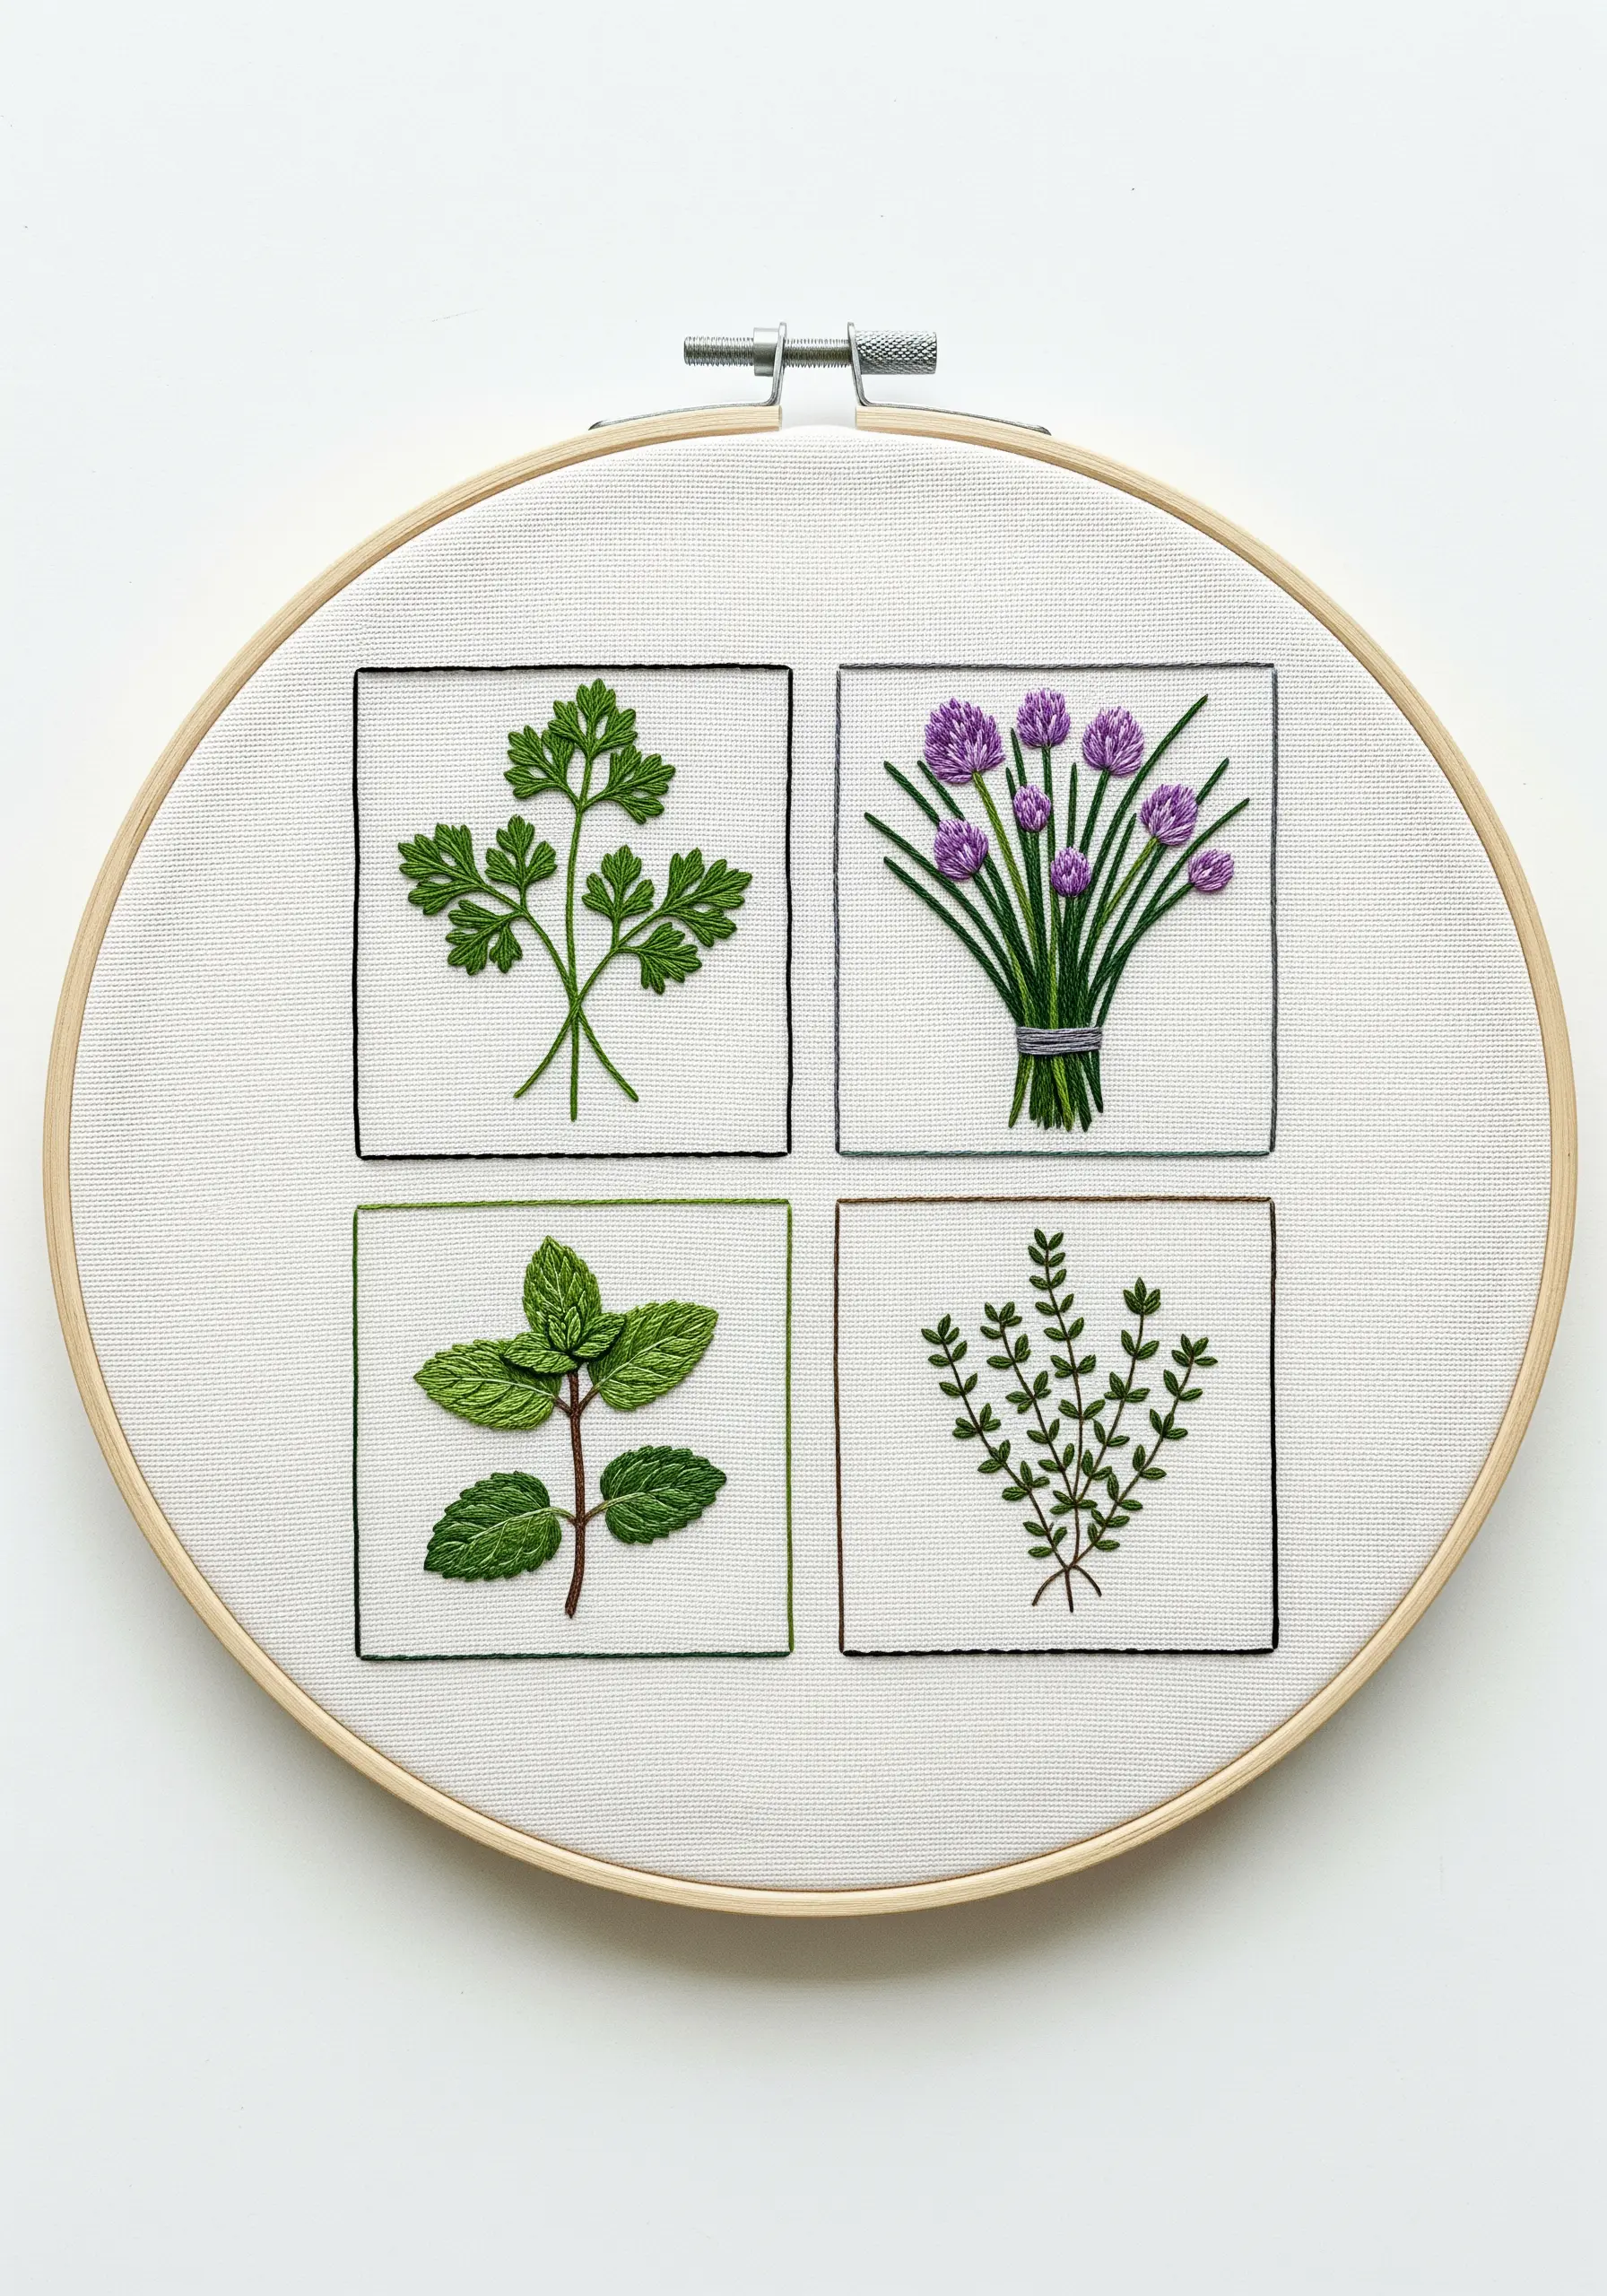
Reimagine the traditional sampler with a clean, graphic layout that feels fresh and contemporary.
Divide your hoop into a grid and dedicate each square to a different herb, turning it into a miniature botanical study.
Use a single strand of black thread and a neat backstitch to create the borders; this frames each herb like a scientific illustration.
This approach not only looks modern but also allows you to focus on perfecting the unique texture of each plant, from the fluffy parsley to the spiky chives.
These mini fruit & herb embroidery frames are perfect for adding a touch of green to your kitchen decor.
18. Vibrant Japanese Quince
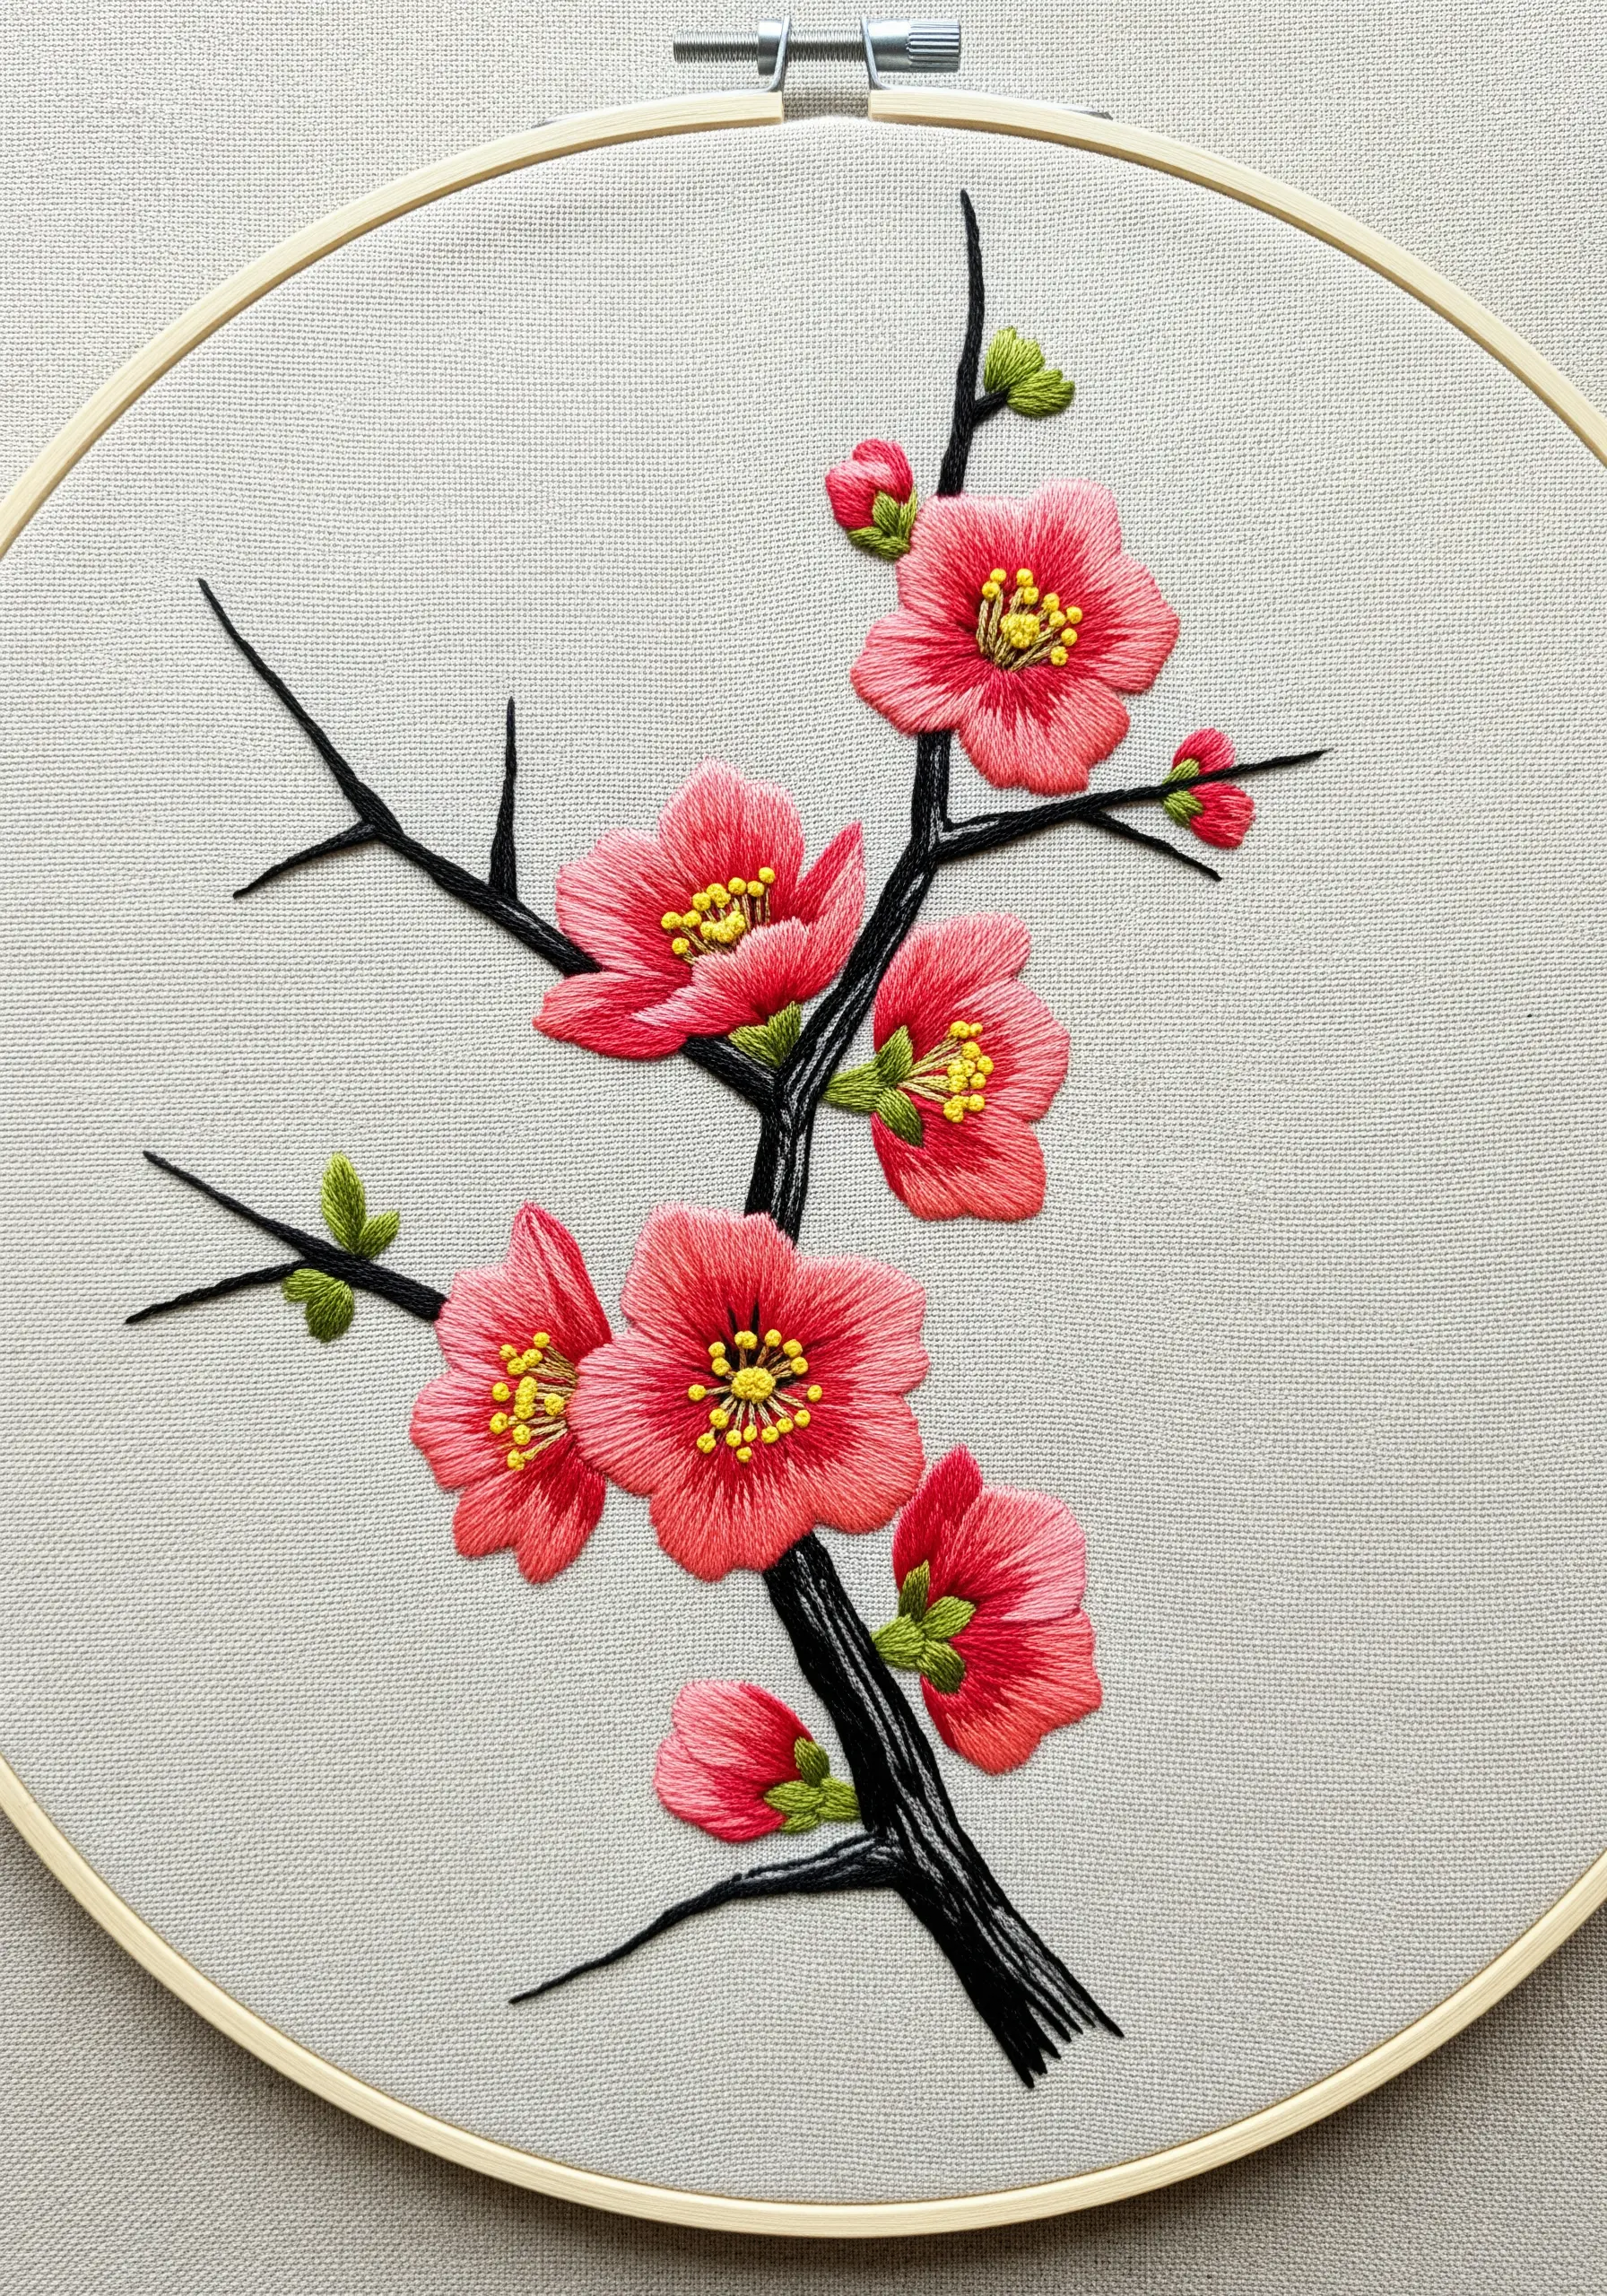
Create a more natural and dynamic floral arrangement by strategically layering elements.
Before you begin, lightly sketch out all your blossoms, making sure some overlap. Stitch the flowers in the background first, then stitch the foreground flowers on top.
This simple act of layering—stitching one petal partially over another—immediately creates a sense of depth and dimension.
Use long-and-short stitch to blend vibrant corals and pinks, making your gorgeous floral embroidery ideas feel lush and alive.
19. Symmetrical Spring Equinox Mandala
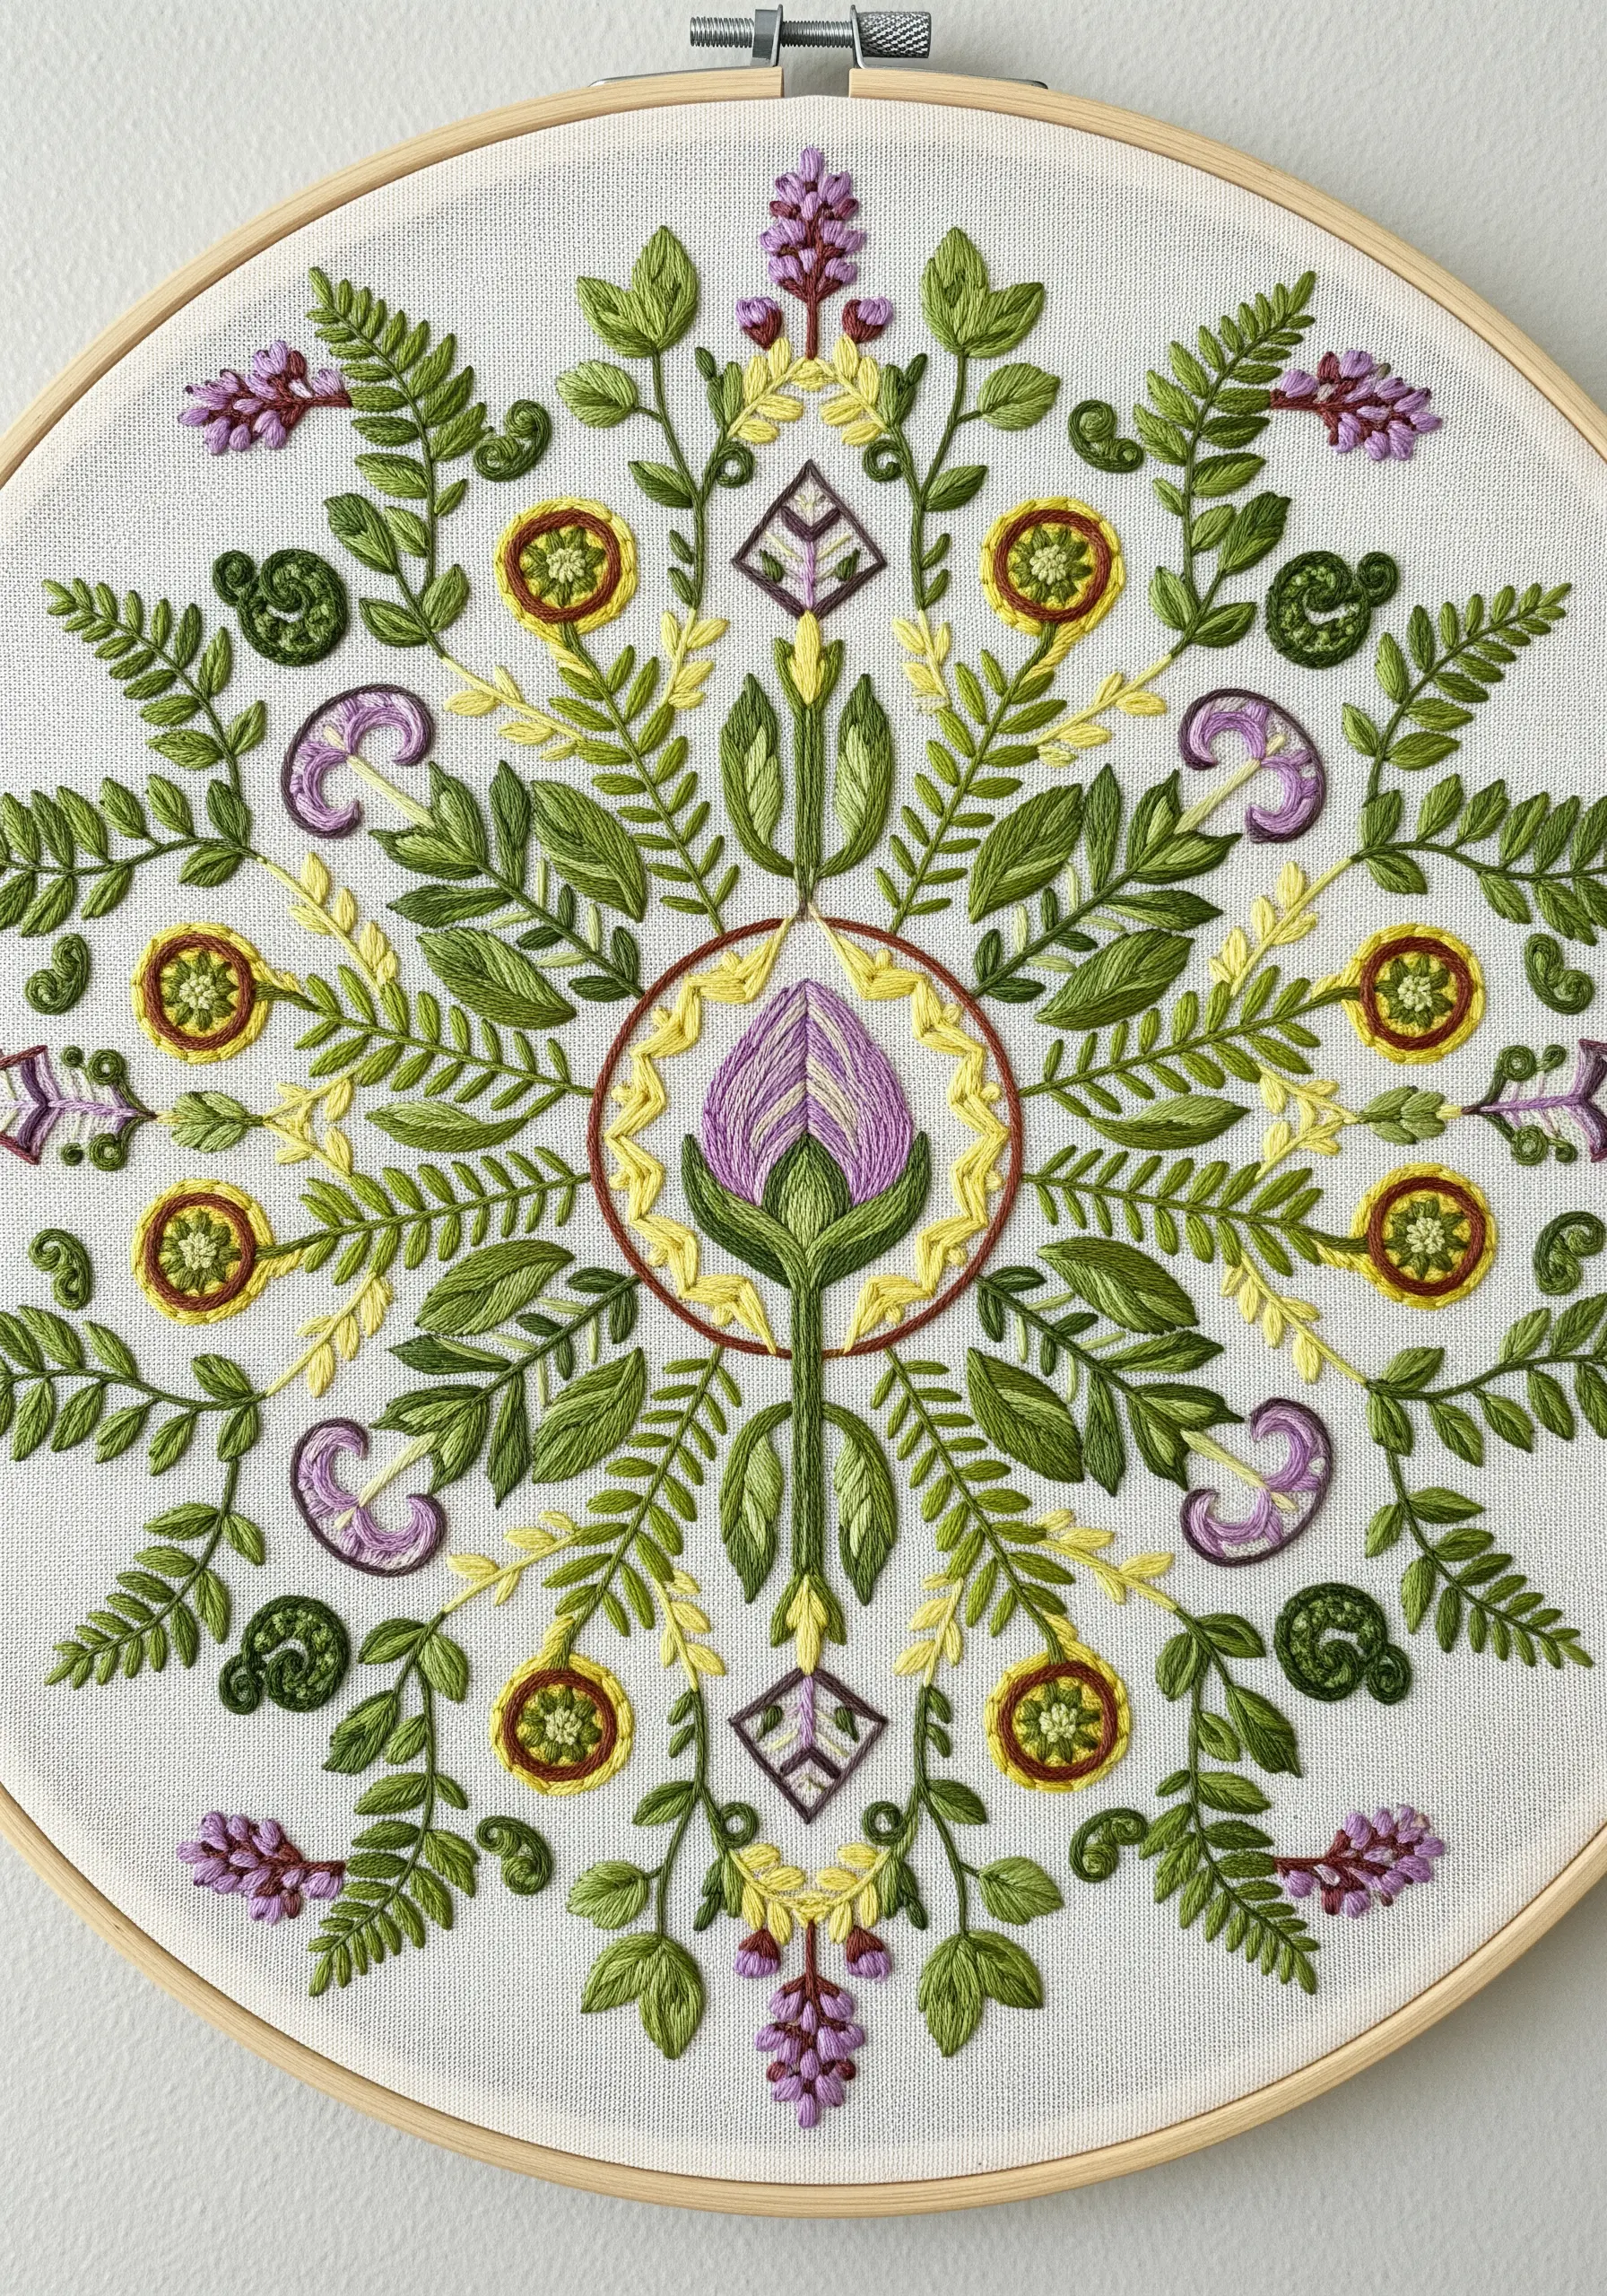
Bring a sense of calm and order to your stitching with a symmetrical botanical mandala.
The key to a perfect mandala is a flawless foundation. Use a water-soluble pen and a protractor to draw precise guidelines radiating from the center of your hoop before you start stitching.
Build the design outward, mirroring botanical elements like ferns, leaves, and buds in each section.
The repetitive, rhythmic nature of stitching a mandala makes it a wonderfully meditative process, perfect for welcoming the balance of the equinox.
20. The Soft Buzz of a Bumblebee
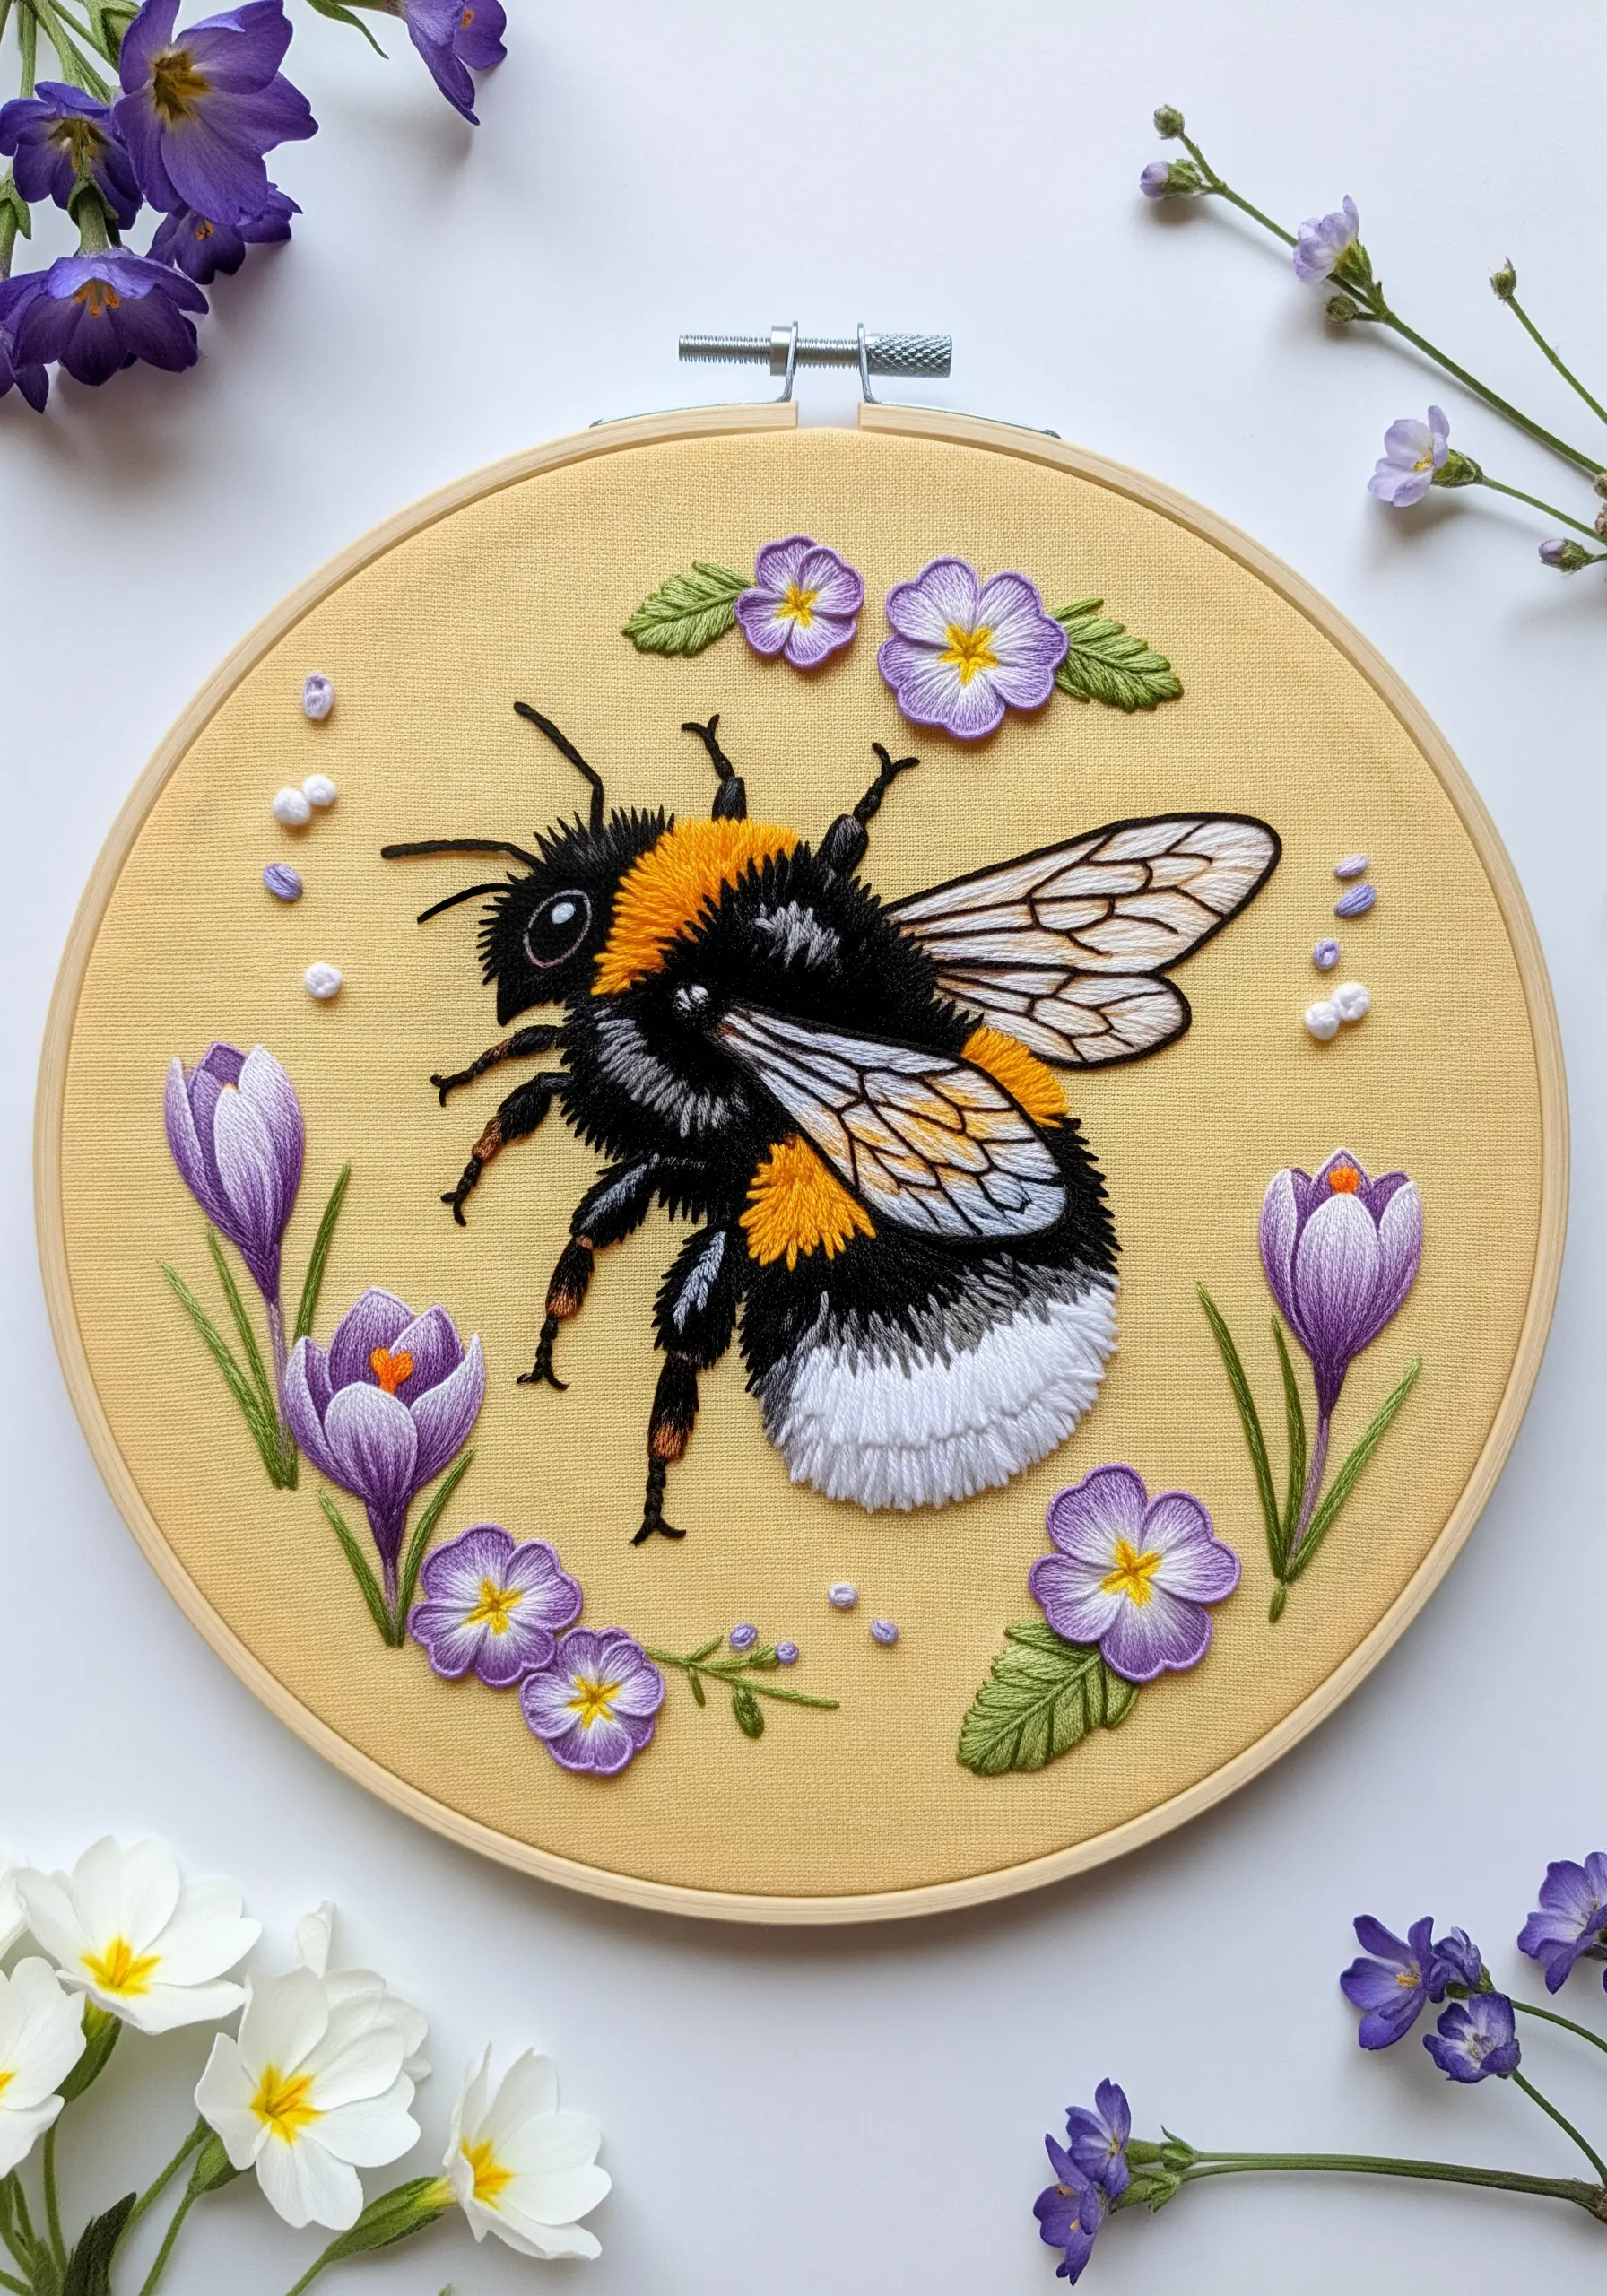
The turkey work stitch is your best friend for creating soft, fuzzy, and wonderfully tactile textures.
Work the stitch in dense rows to fill the body of the bee, leaving the loops long. Once an area is filled, take a small, sharp pair of scissors and carefully trim the loops to create a plush pile, like a tiny rug.
For the wings, switch to a delicate organza fabric and use a simple backstitch for the veins. This contrast between the heavy, soft body and the light, transparent wings is what brings the piece to life.
This is a great technique for all kinds of bird & butterfly embroidery patterns.
21. Woodland Morel Mushroom Study
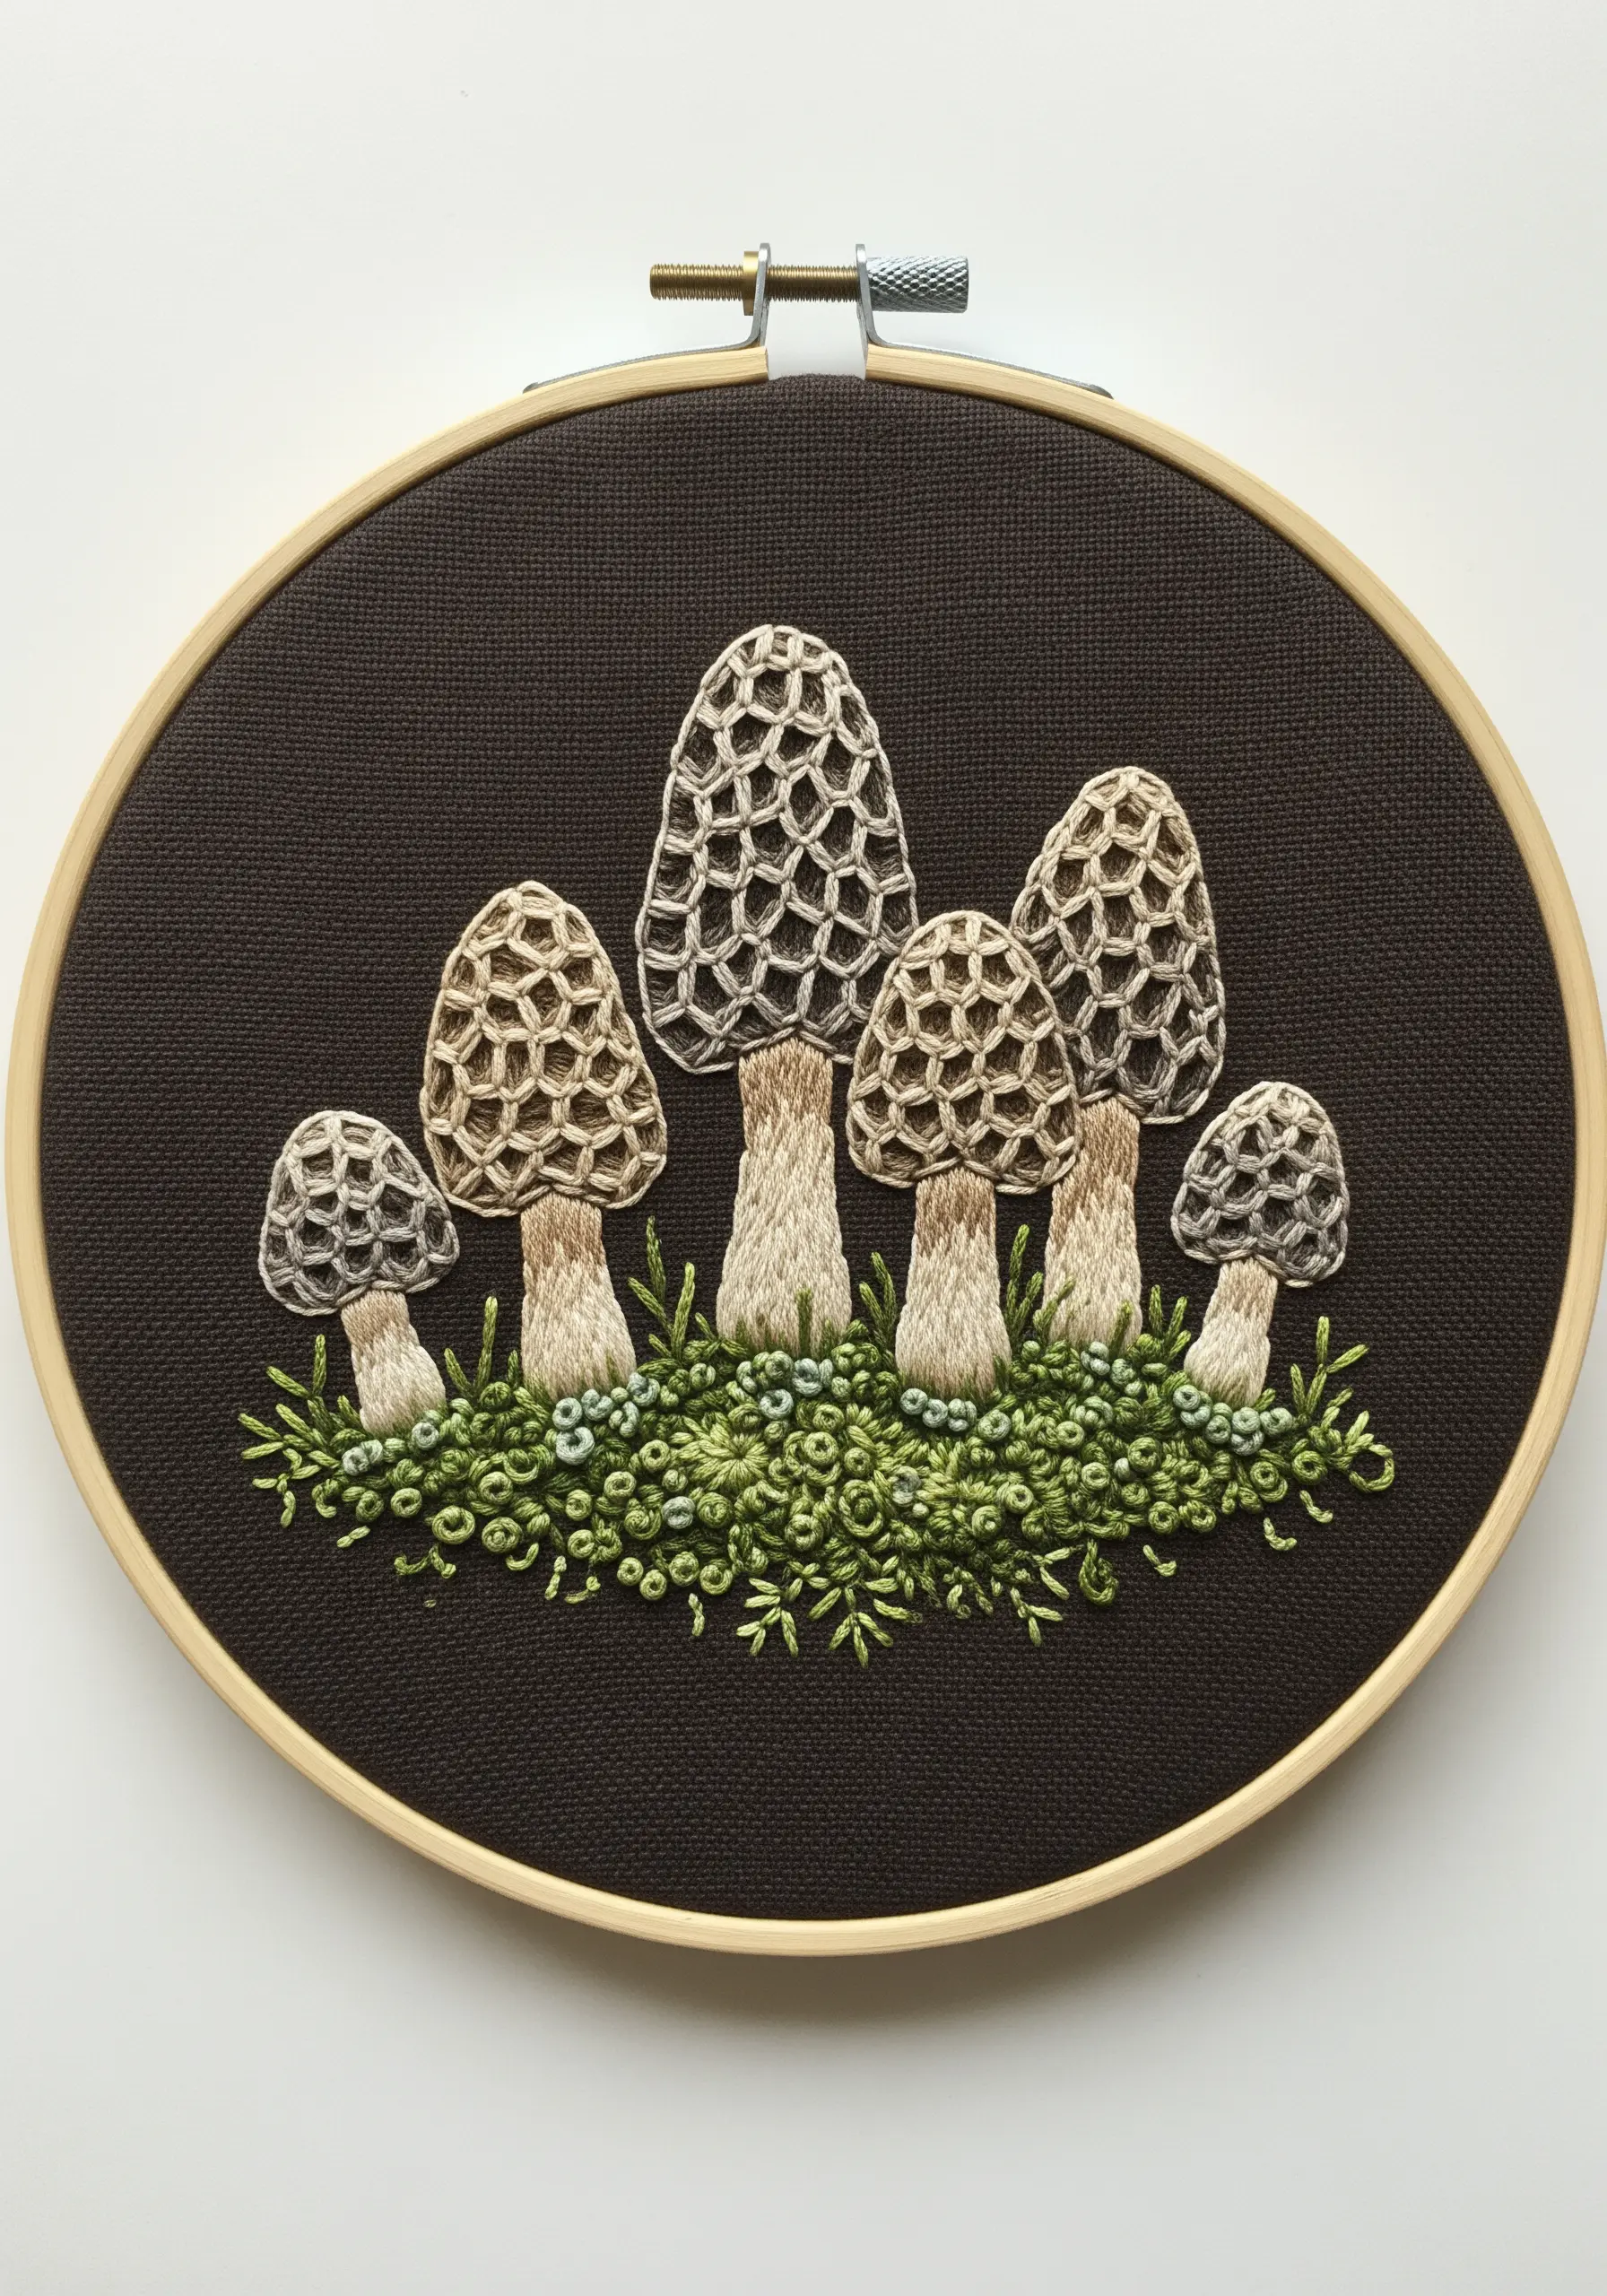
Replicate the unique, pitted texture of morel mushrooms with a clever couching technique.
Outline and fill the mushroom cap with a base color. Then, take a darker thread and lay it down in a honeycomb or net-like pattern over the surface.
Finally, use a second needle with a fine, matching thread to tack down the darker thread at each intersection. This creates a raised, web-like texture that is incredibly realistic.
Build up the mossy ground with a dense mix of French knots and straight stitches in various greens to complete your forest floor botanical scene.
22. Minimalist Birch Branch with Catkins
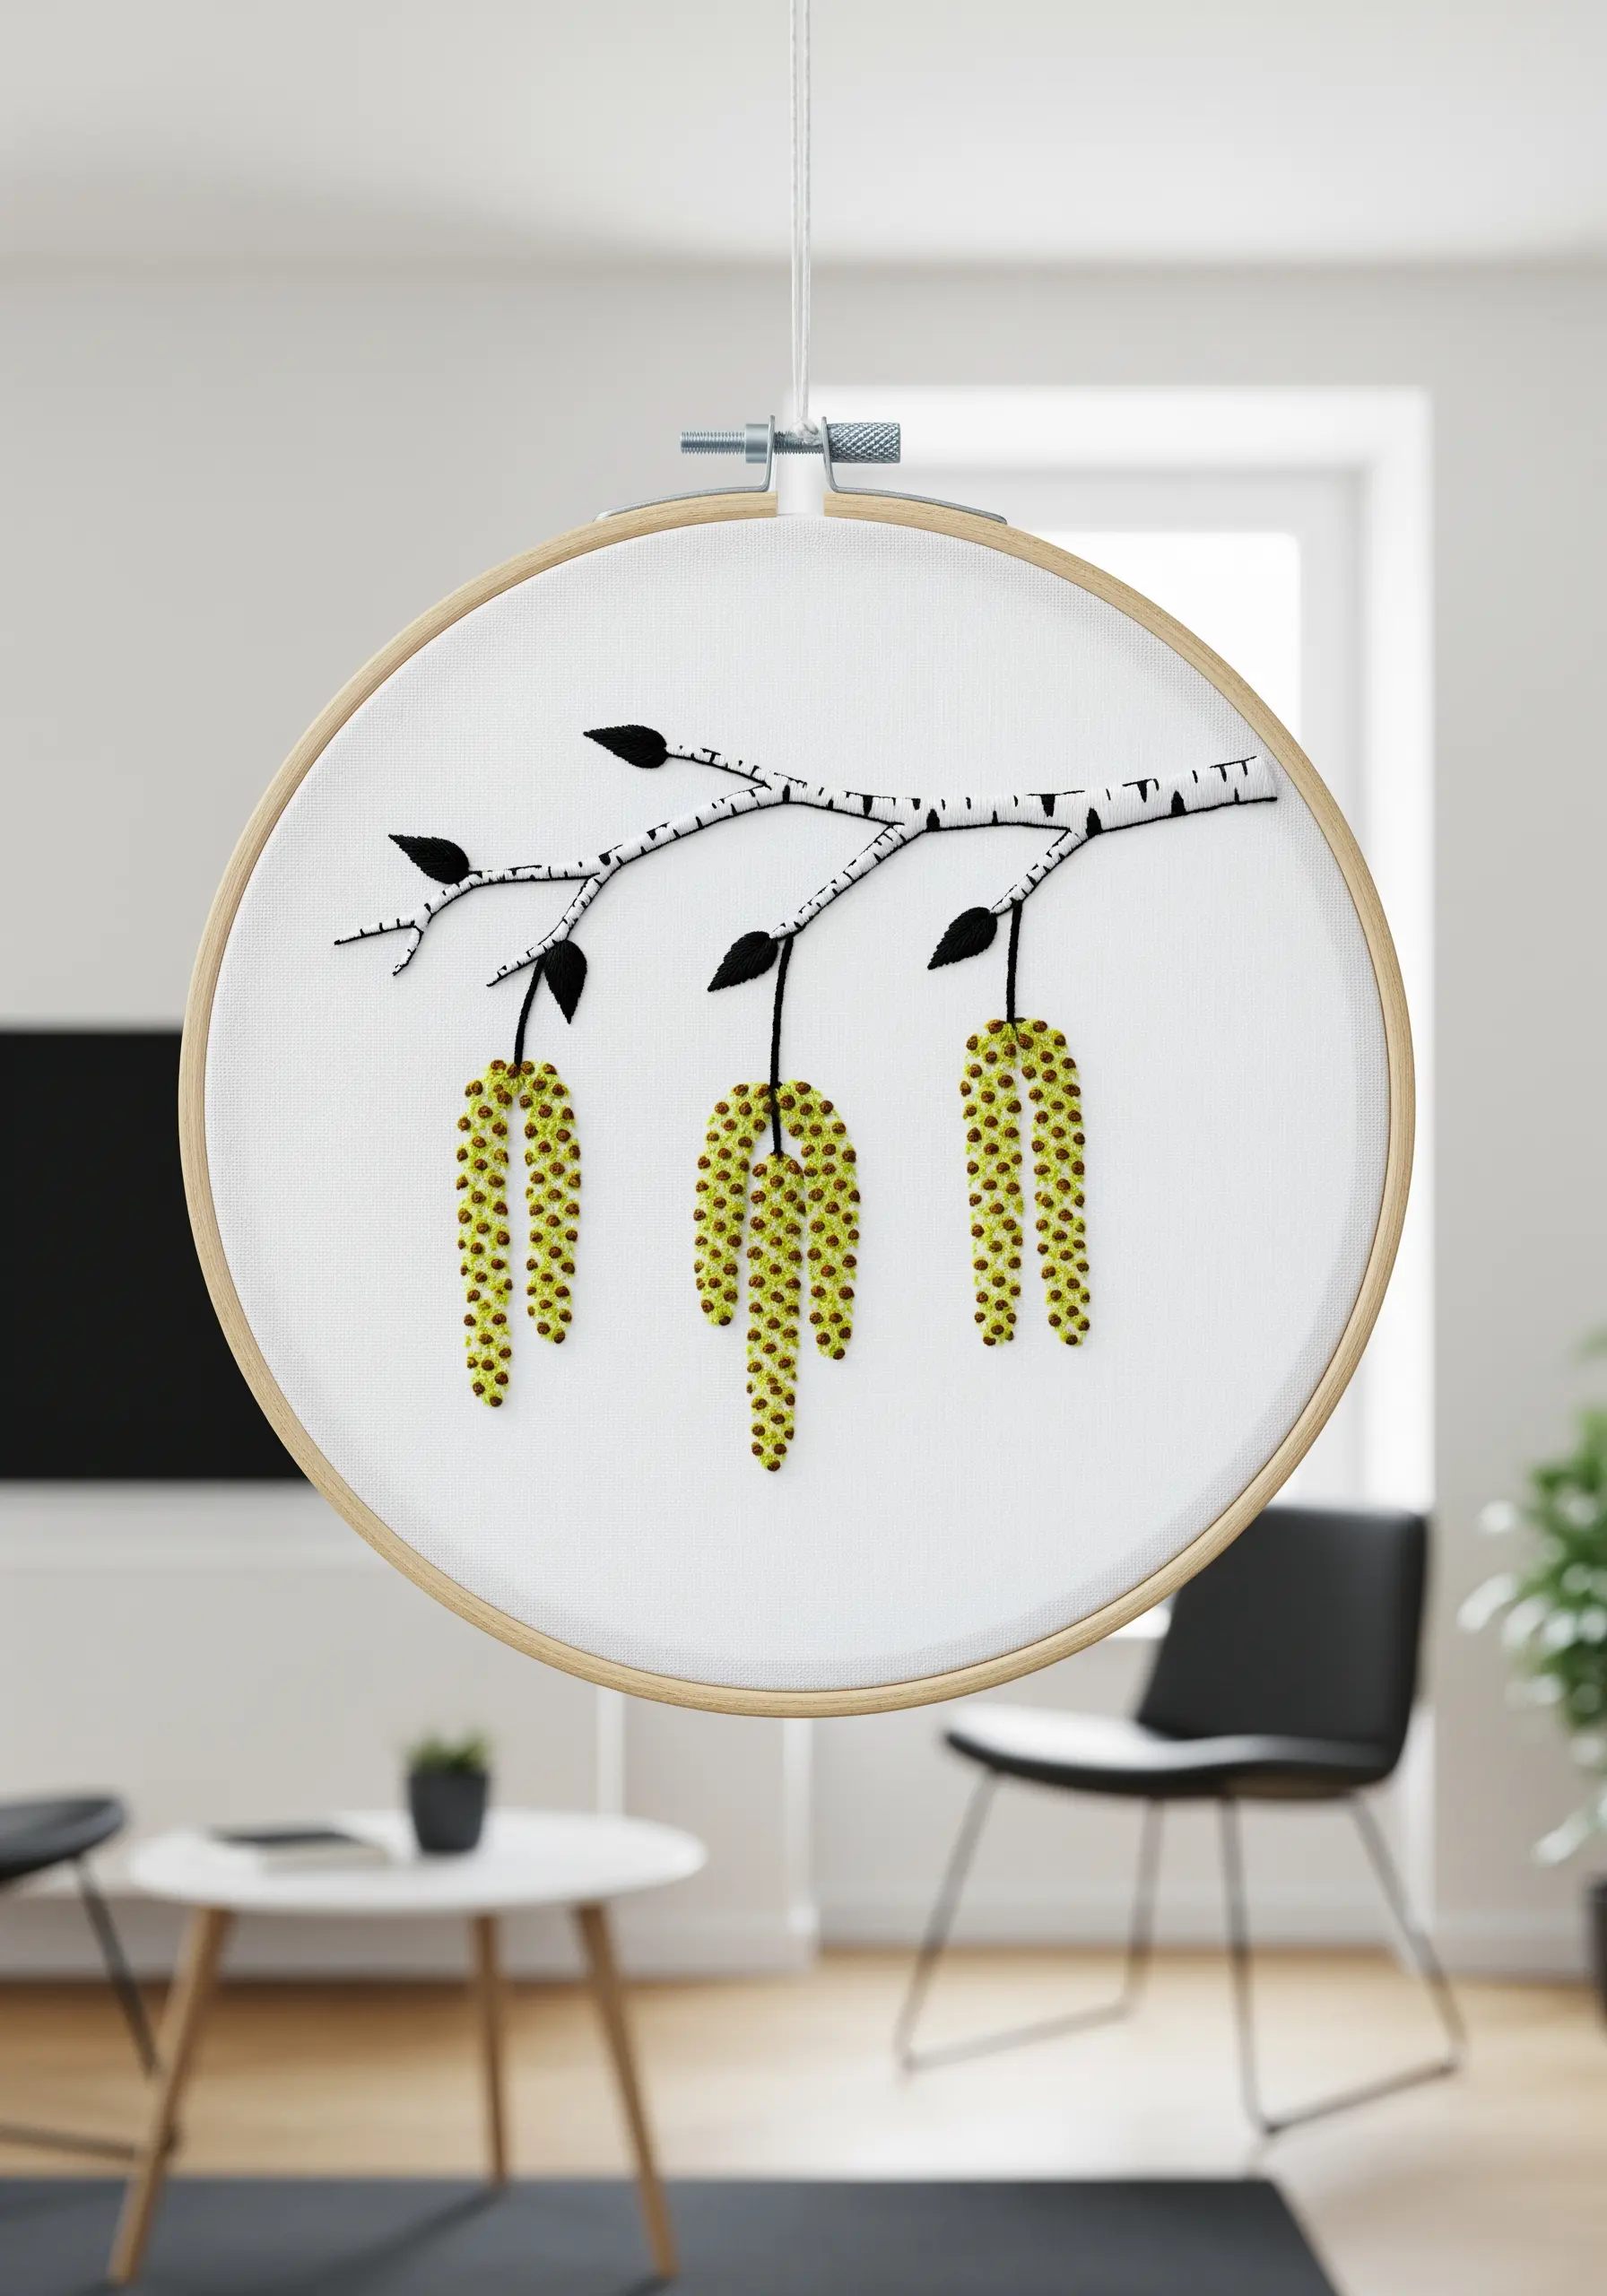
Use dense clusters of French knots to “paint” with texture instead of smooth, flat stitches.
To form the catkins, fill the shape with hundreds of tiny French knots, packed tightly together.
Use at least two or three similar shades of chartreuse green and vary them randomly. This subtle color variation will give the catkins a more natural, dimensional appearance.
The iconic texture of the birch bark can be achieved by adding short, horizontal straight stitches in black over a white fabric base.
23. Cascading Bluebells on Linen
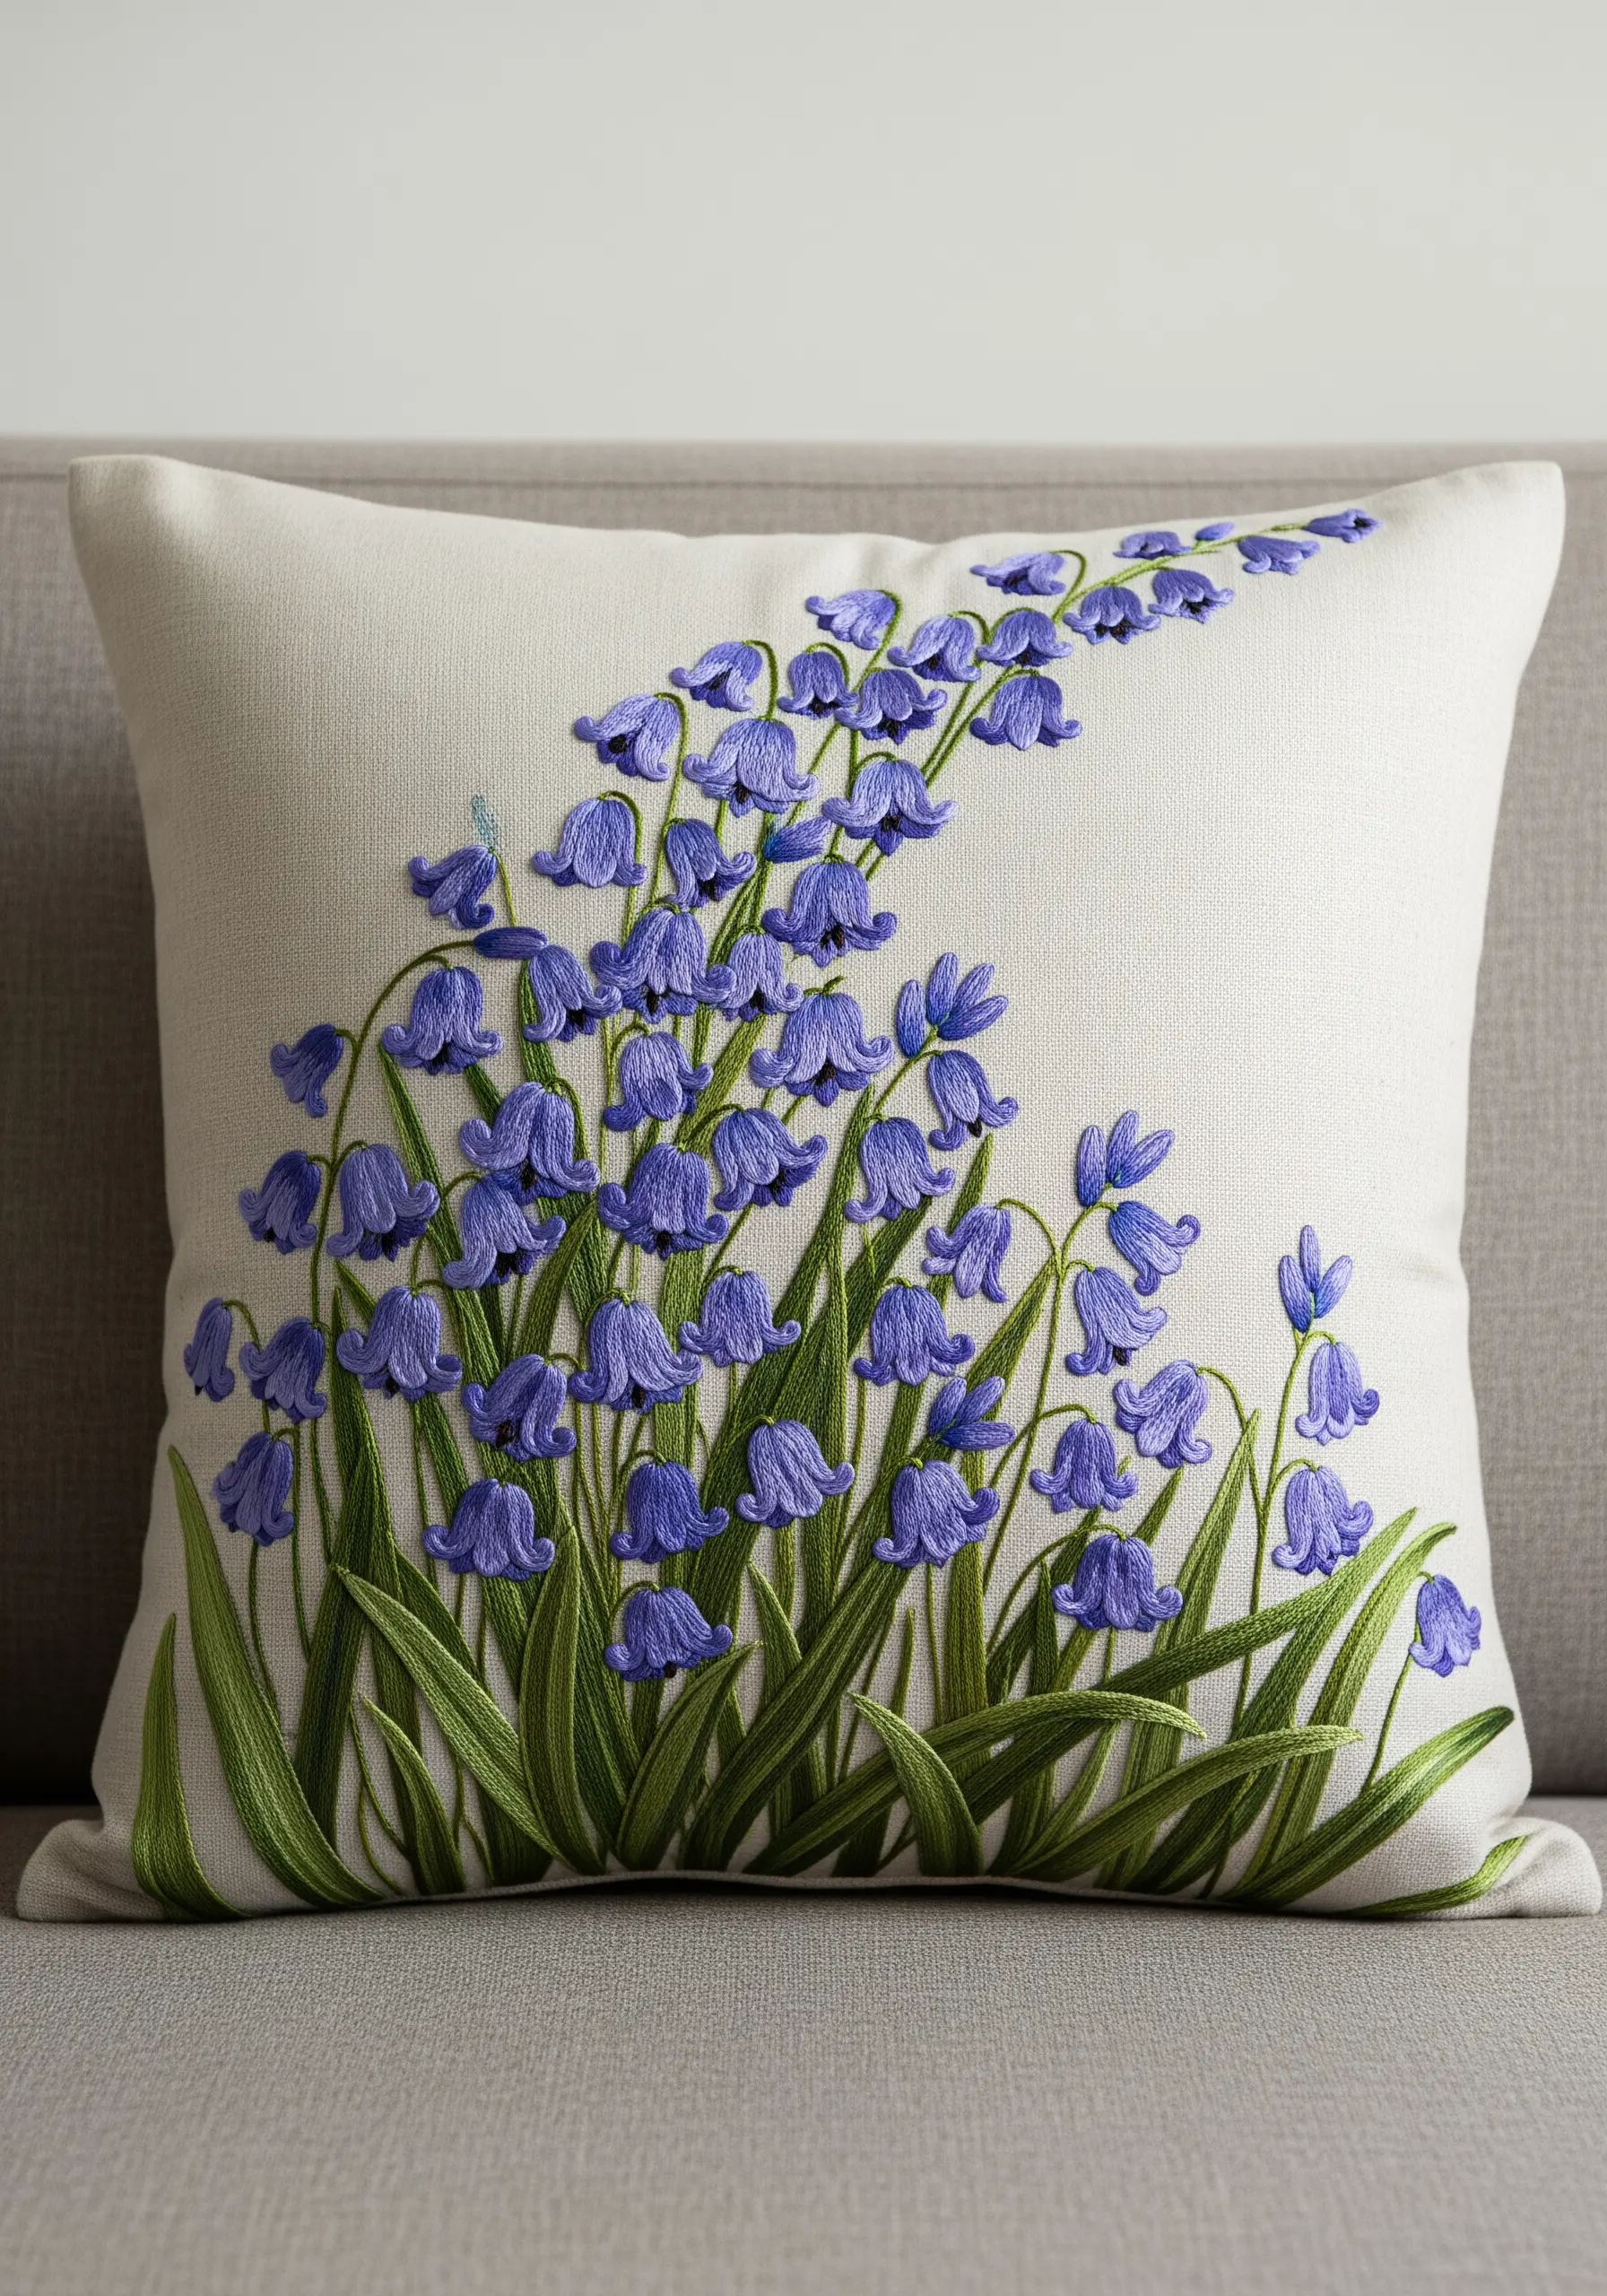
Create a sense of natural, graceful movement in your compositions by working along a diagonal line.
Instead of centering your design, arrange the cascade of bluebells to flow from one corner of the pillow to the other. This dynamic placement draws the eye across the piece and feels more organic.
Use a single lazy daisy stitch for each bell flower, perhaps with a small straight stitch inside to suggest depth, and connect them with delicate stem stitches.
These quick and charming embroidery designs for your pillowcases can instantly refresh a room.
24. Strawberry Vine Table Runner
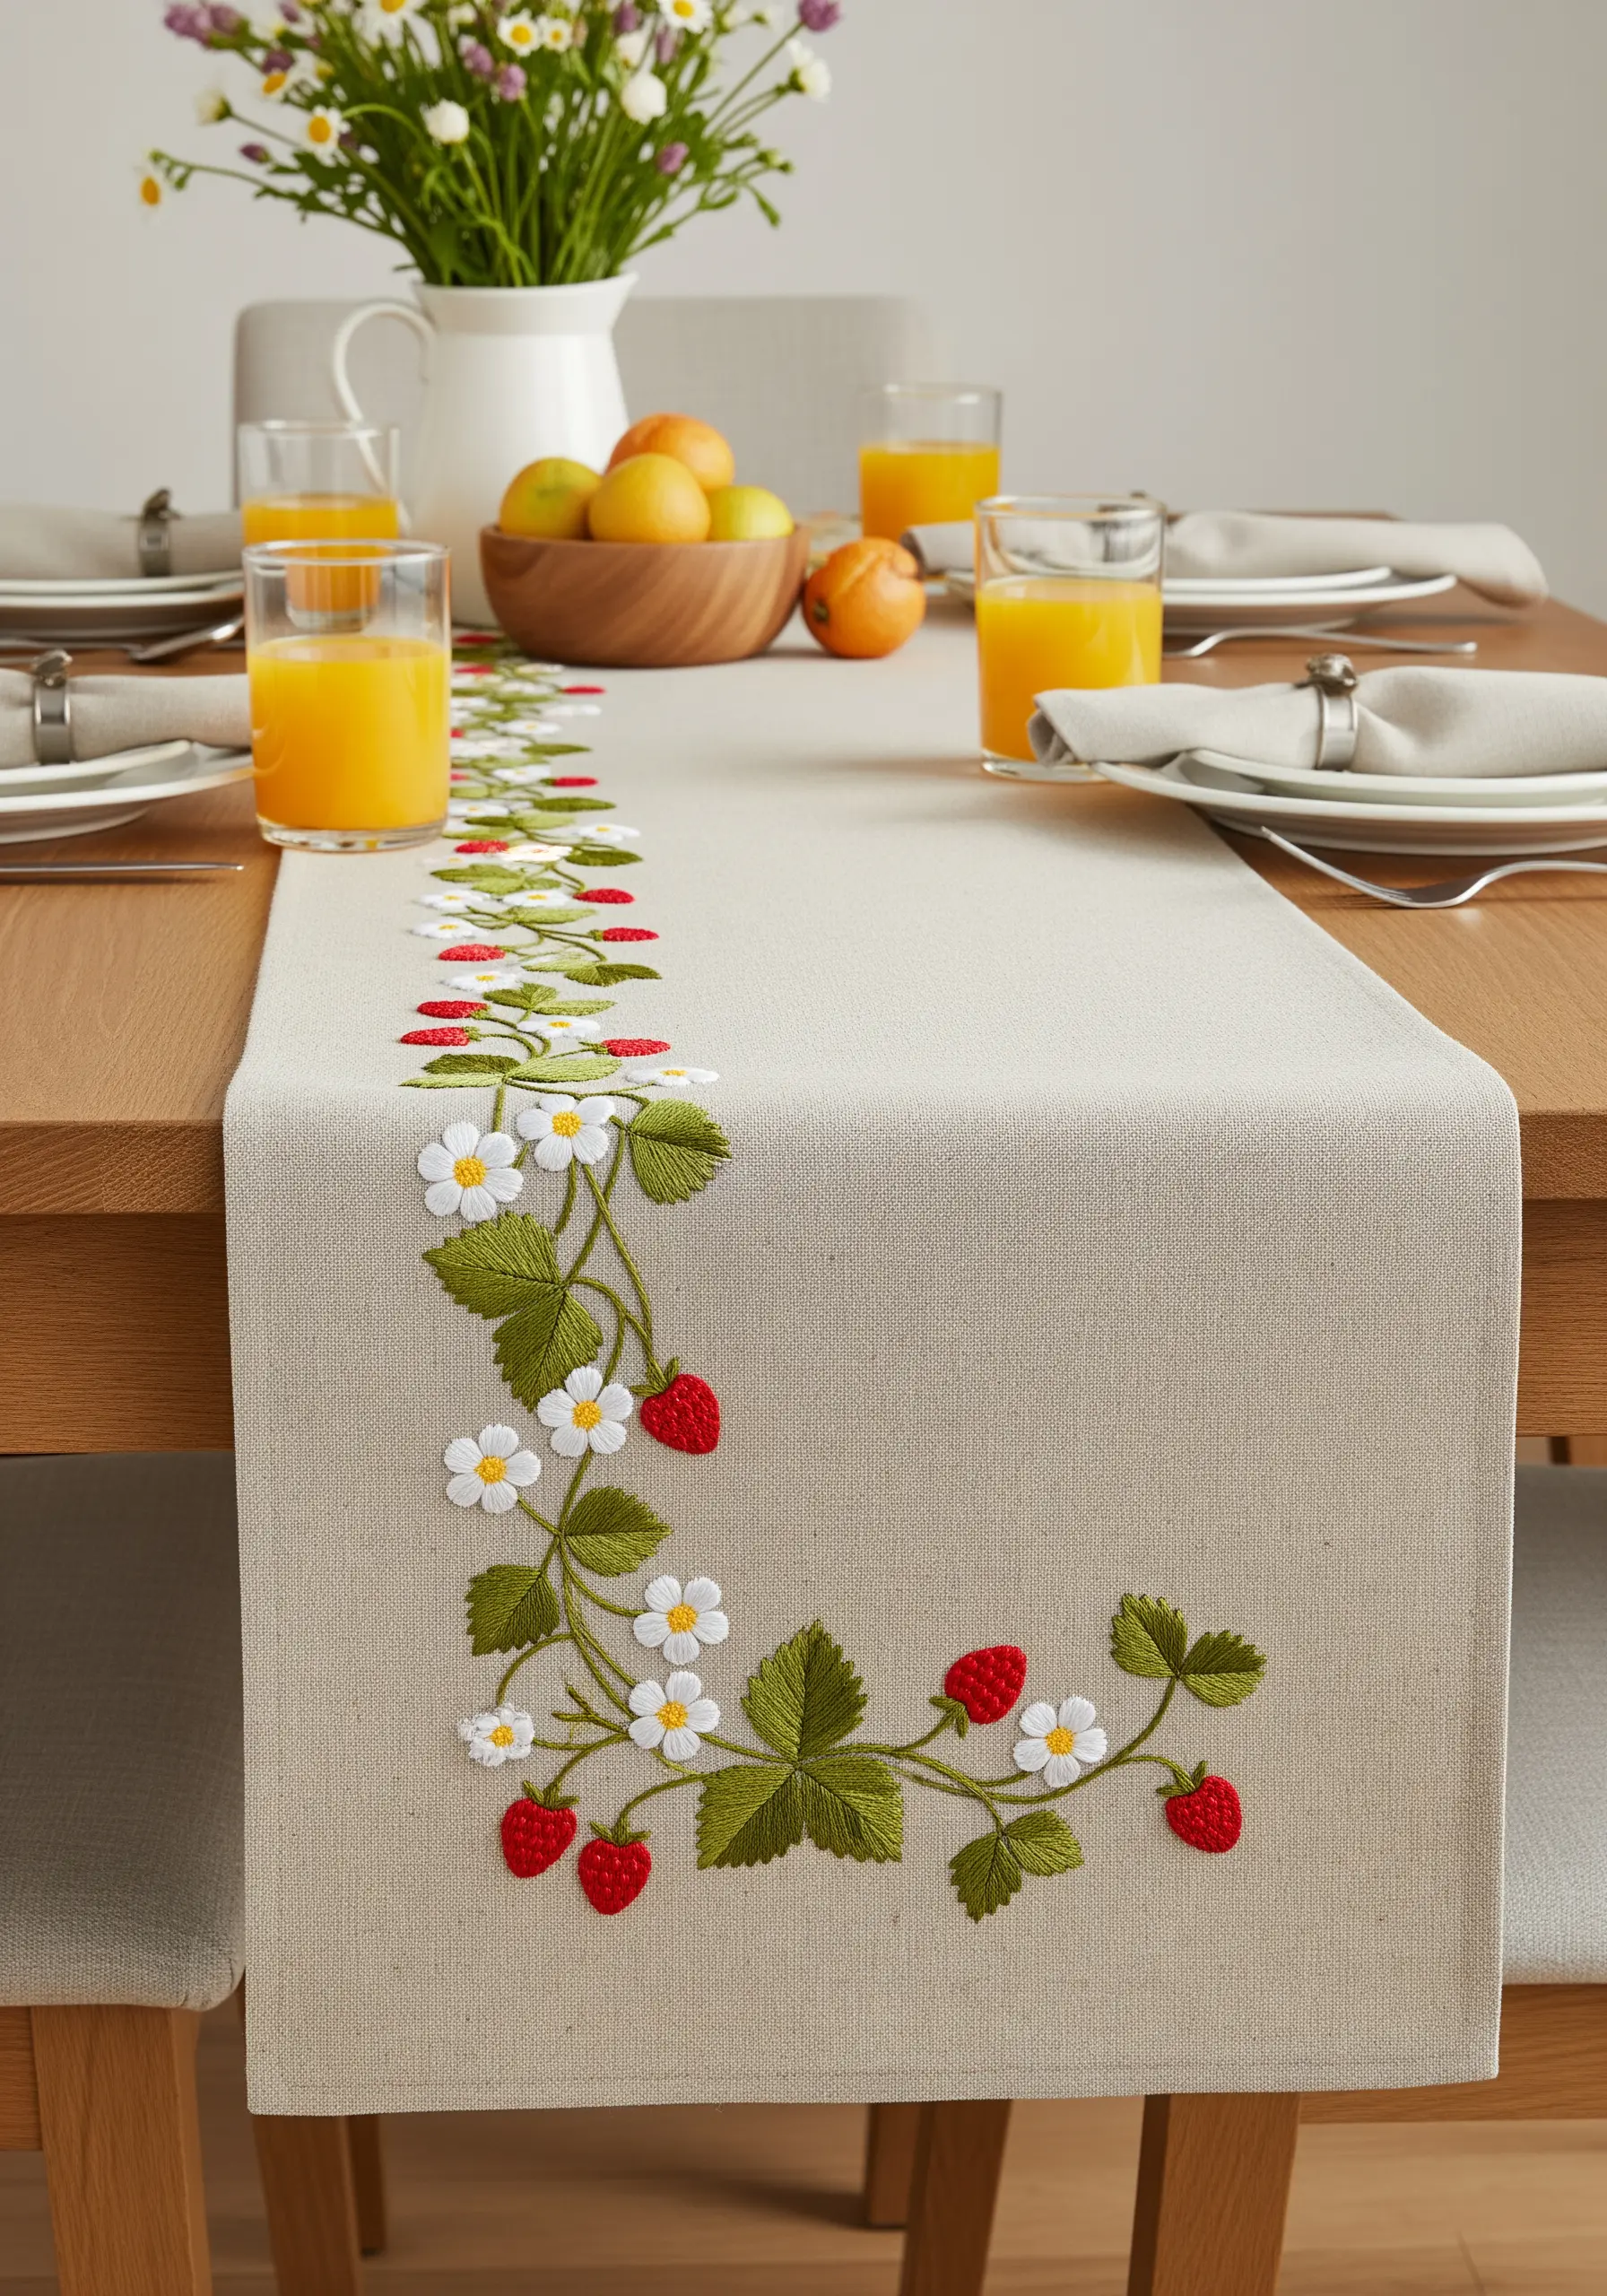
For larger home decor items like table runners, use a repeating motif to create a cohesive and elegant design.
A meandering stem stitch vine acts as the spine of the composition, unifying the entire length of the runner. From this vine, branch out with your repeating elements: padded satin stitch strawberries, lazy daisy flowers, and fishbone stitch leaves.
Vary the spacing and clustering of these elements to keep the design looking natural and not too uniform. This is how you transform table linen embroidery motifs into a flowing piece of art.


