

When you look closely at the forest floor, it’s not a single, flat surface. It’s a world of layers, textures, and subtle shifts in light. Your embroidery can capture that same depth, moving beyond simple outlines and flat fills to create something that feels truly alive.
In this collection, I want to show you how to think like a naturalist with a needle and thread. We’ll explore how a simple change—like adding a few beads for dew, swapping satin stitch for a woven texture, or using a single strand of thread for shading—can transform your work. It’s not about complexity; it’s about observation and intention.
Forget the pressure to be perfect. Instead, focus on capturing one true detail: the spongy texture of moss, the delicate gills under a mushroom cap, or the way light filters through the canopy. Let’s stitch a world you can almost feel and smell.
1. Capture Hyper-Realistic Texture with Layered Stitches
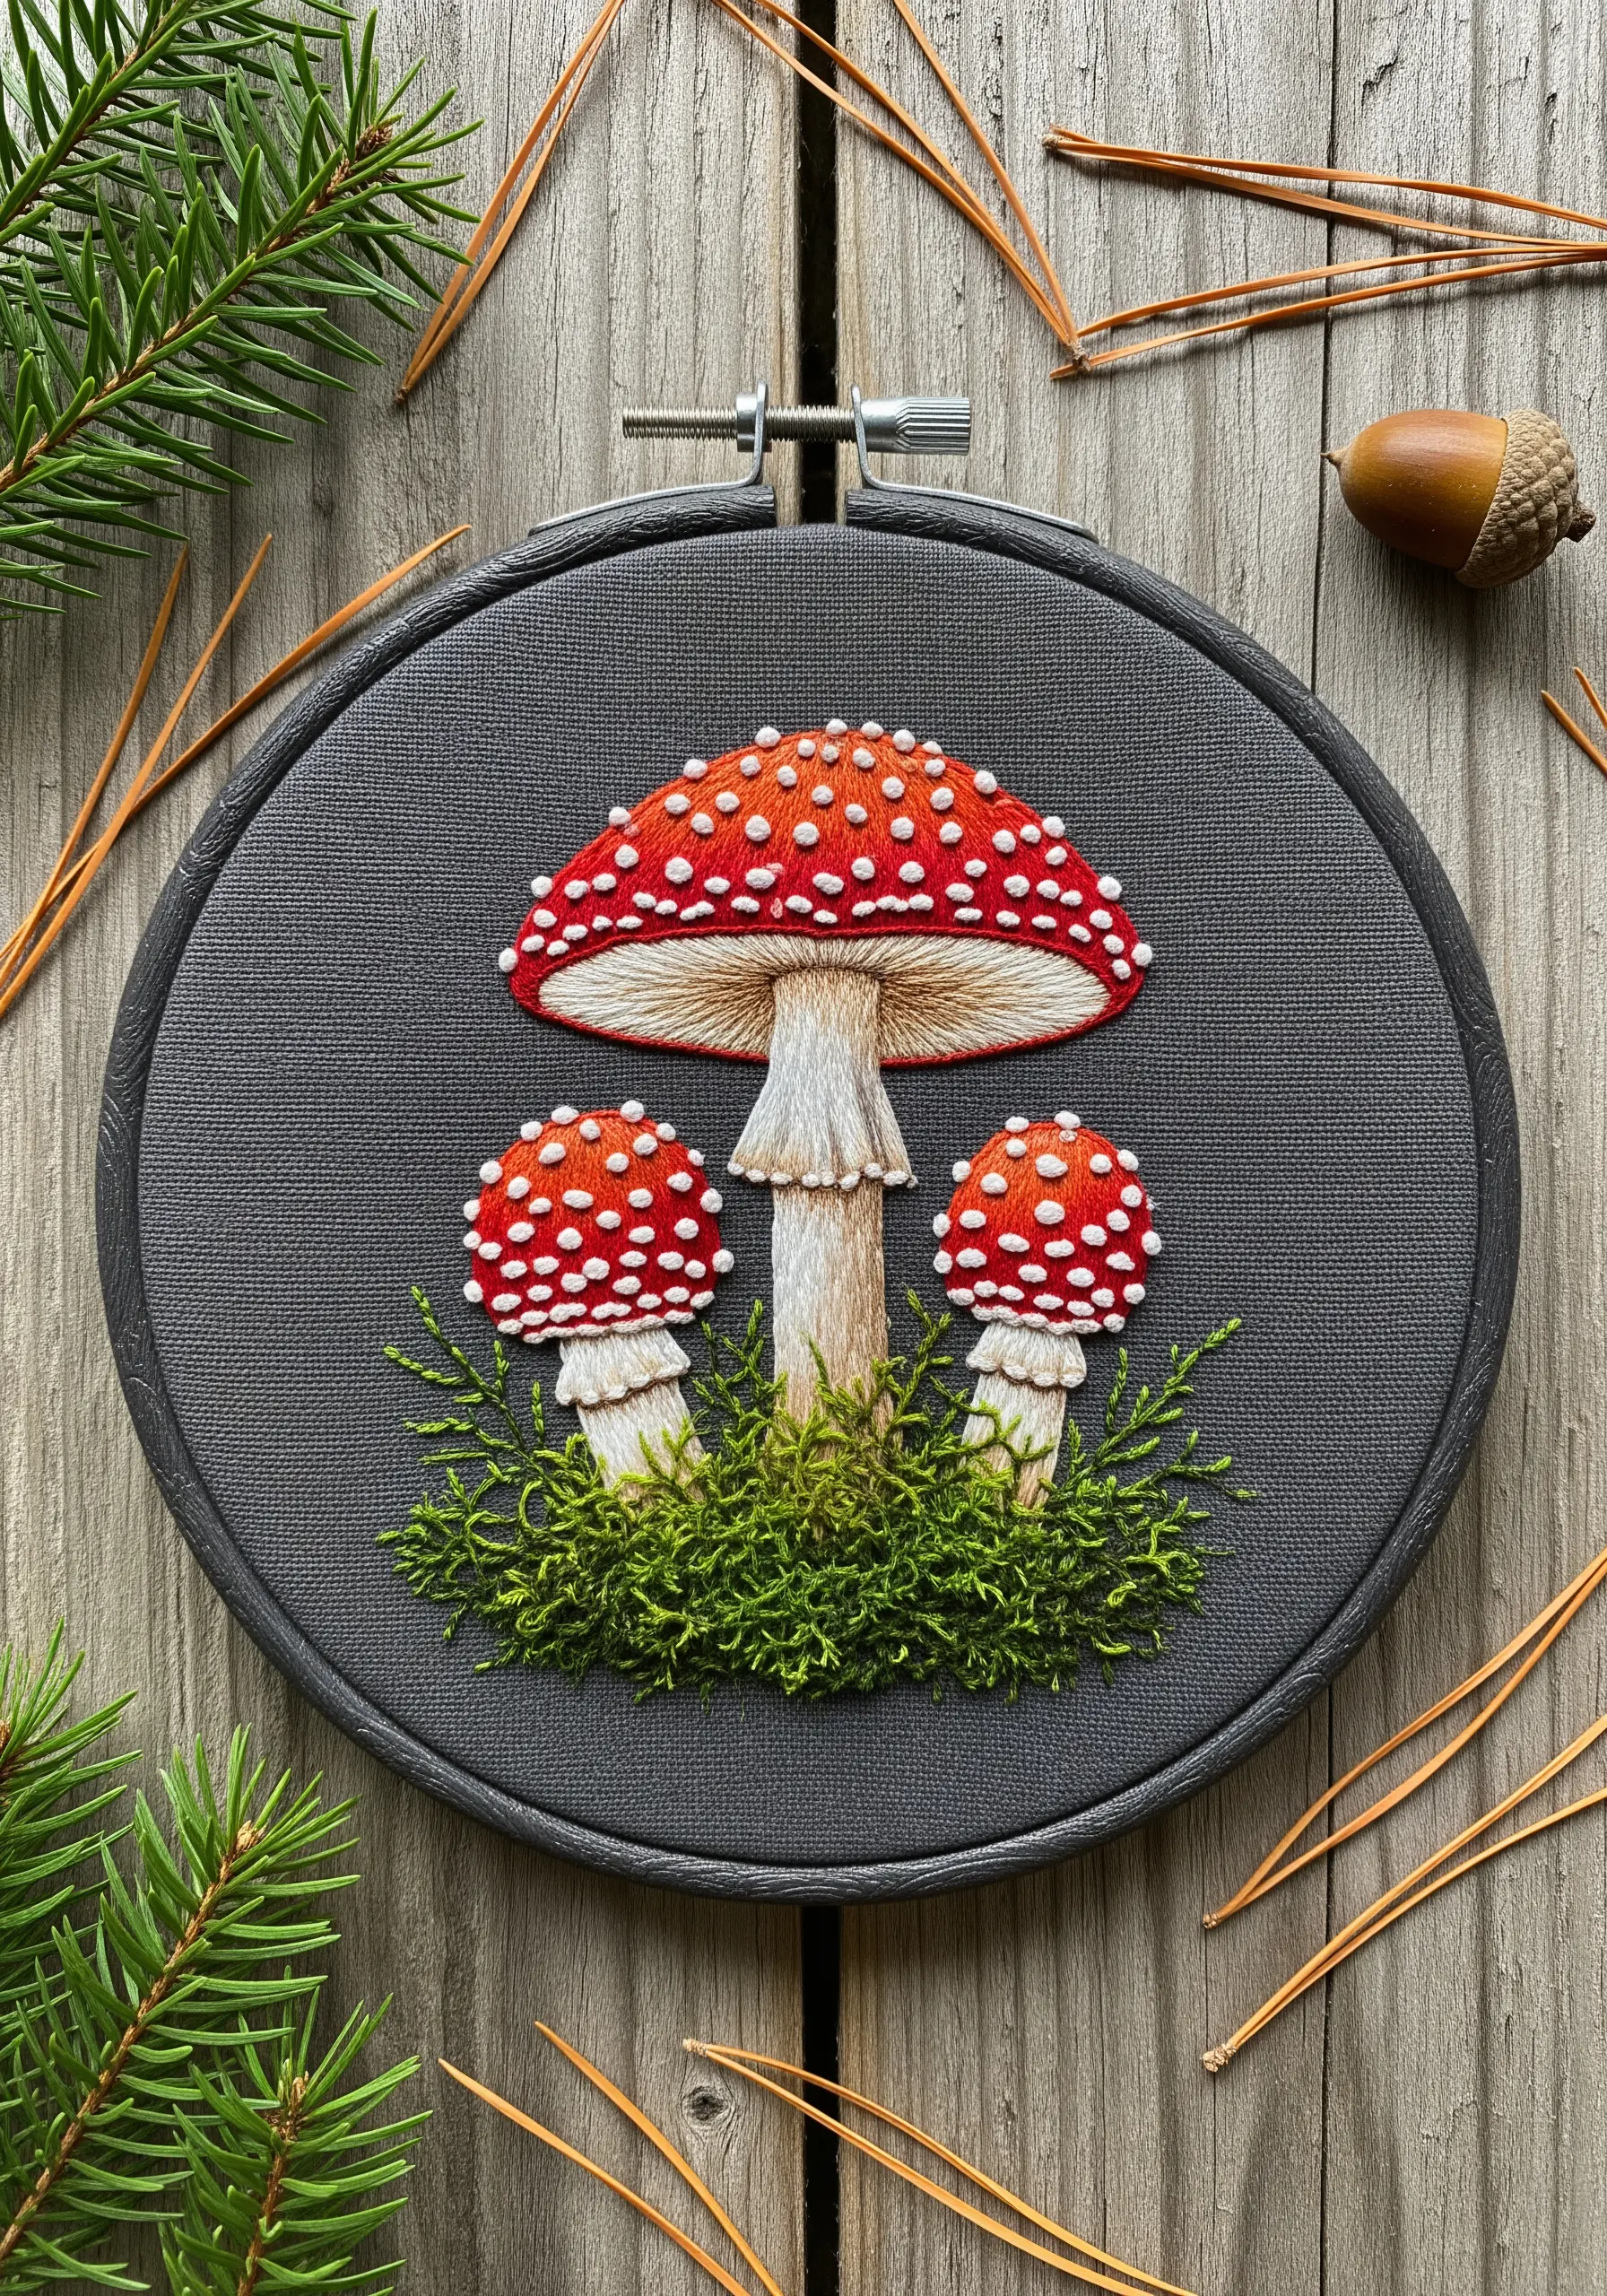
Create believable moss by clustering French knots using varied thread weights—try three strands for the dense base and a single strand for delicate, emerging growth.
Incorporate tiny, sporadic straight stitches within the knots to mimic blades of grass, which breaks up the uniformity and adds realism.
Stitching on dark grey or black fabric is a strategic choice; it provides immediate visual depth and makes vibrant colors, like the red of an Amanita cap, appear more luminous and striking.
For the iconic white spots, use tight, raised French knots to give them a tangible, three-dimensional quality that sits proudly on the surface.
2. Weave Dimension into a Morel Cap
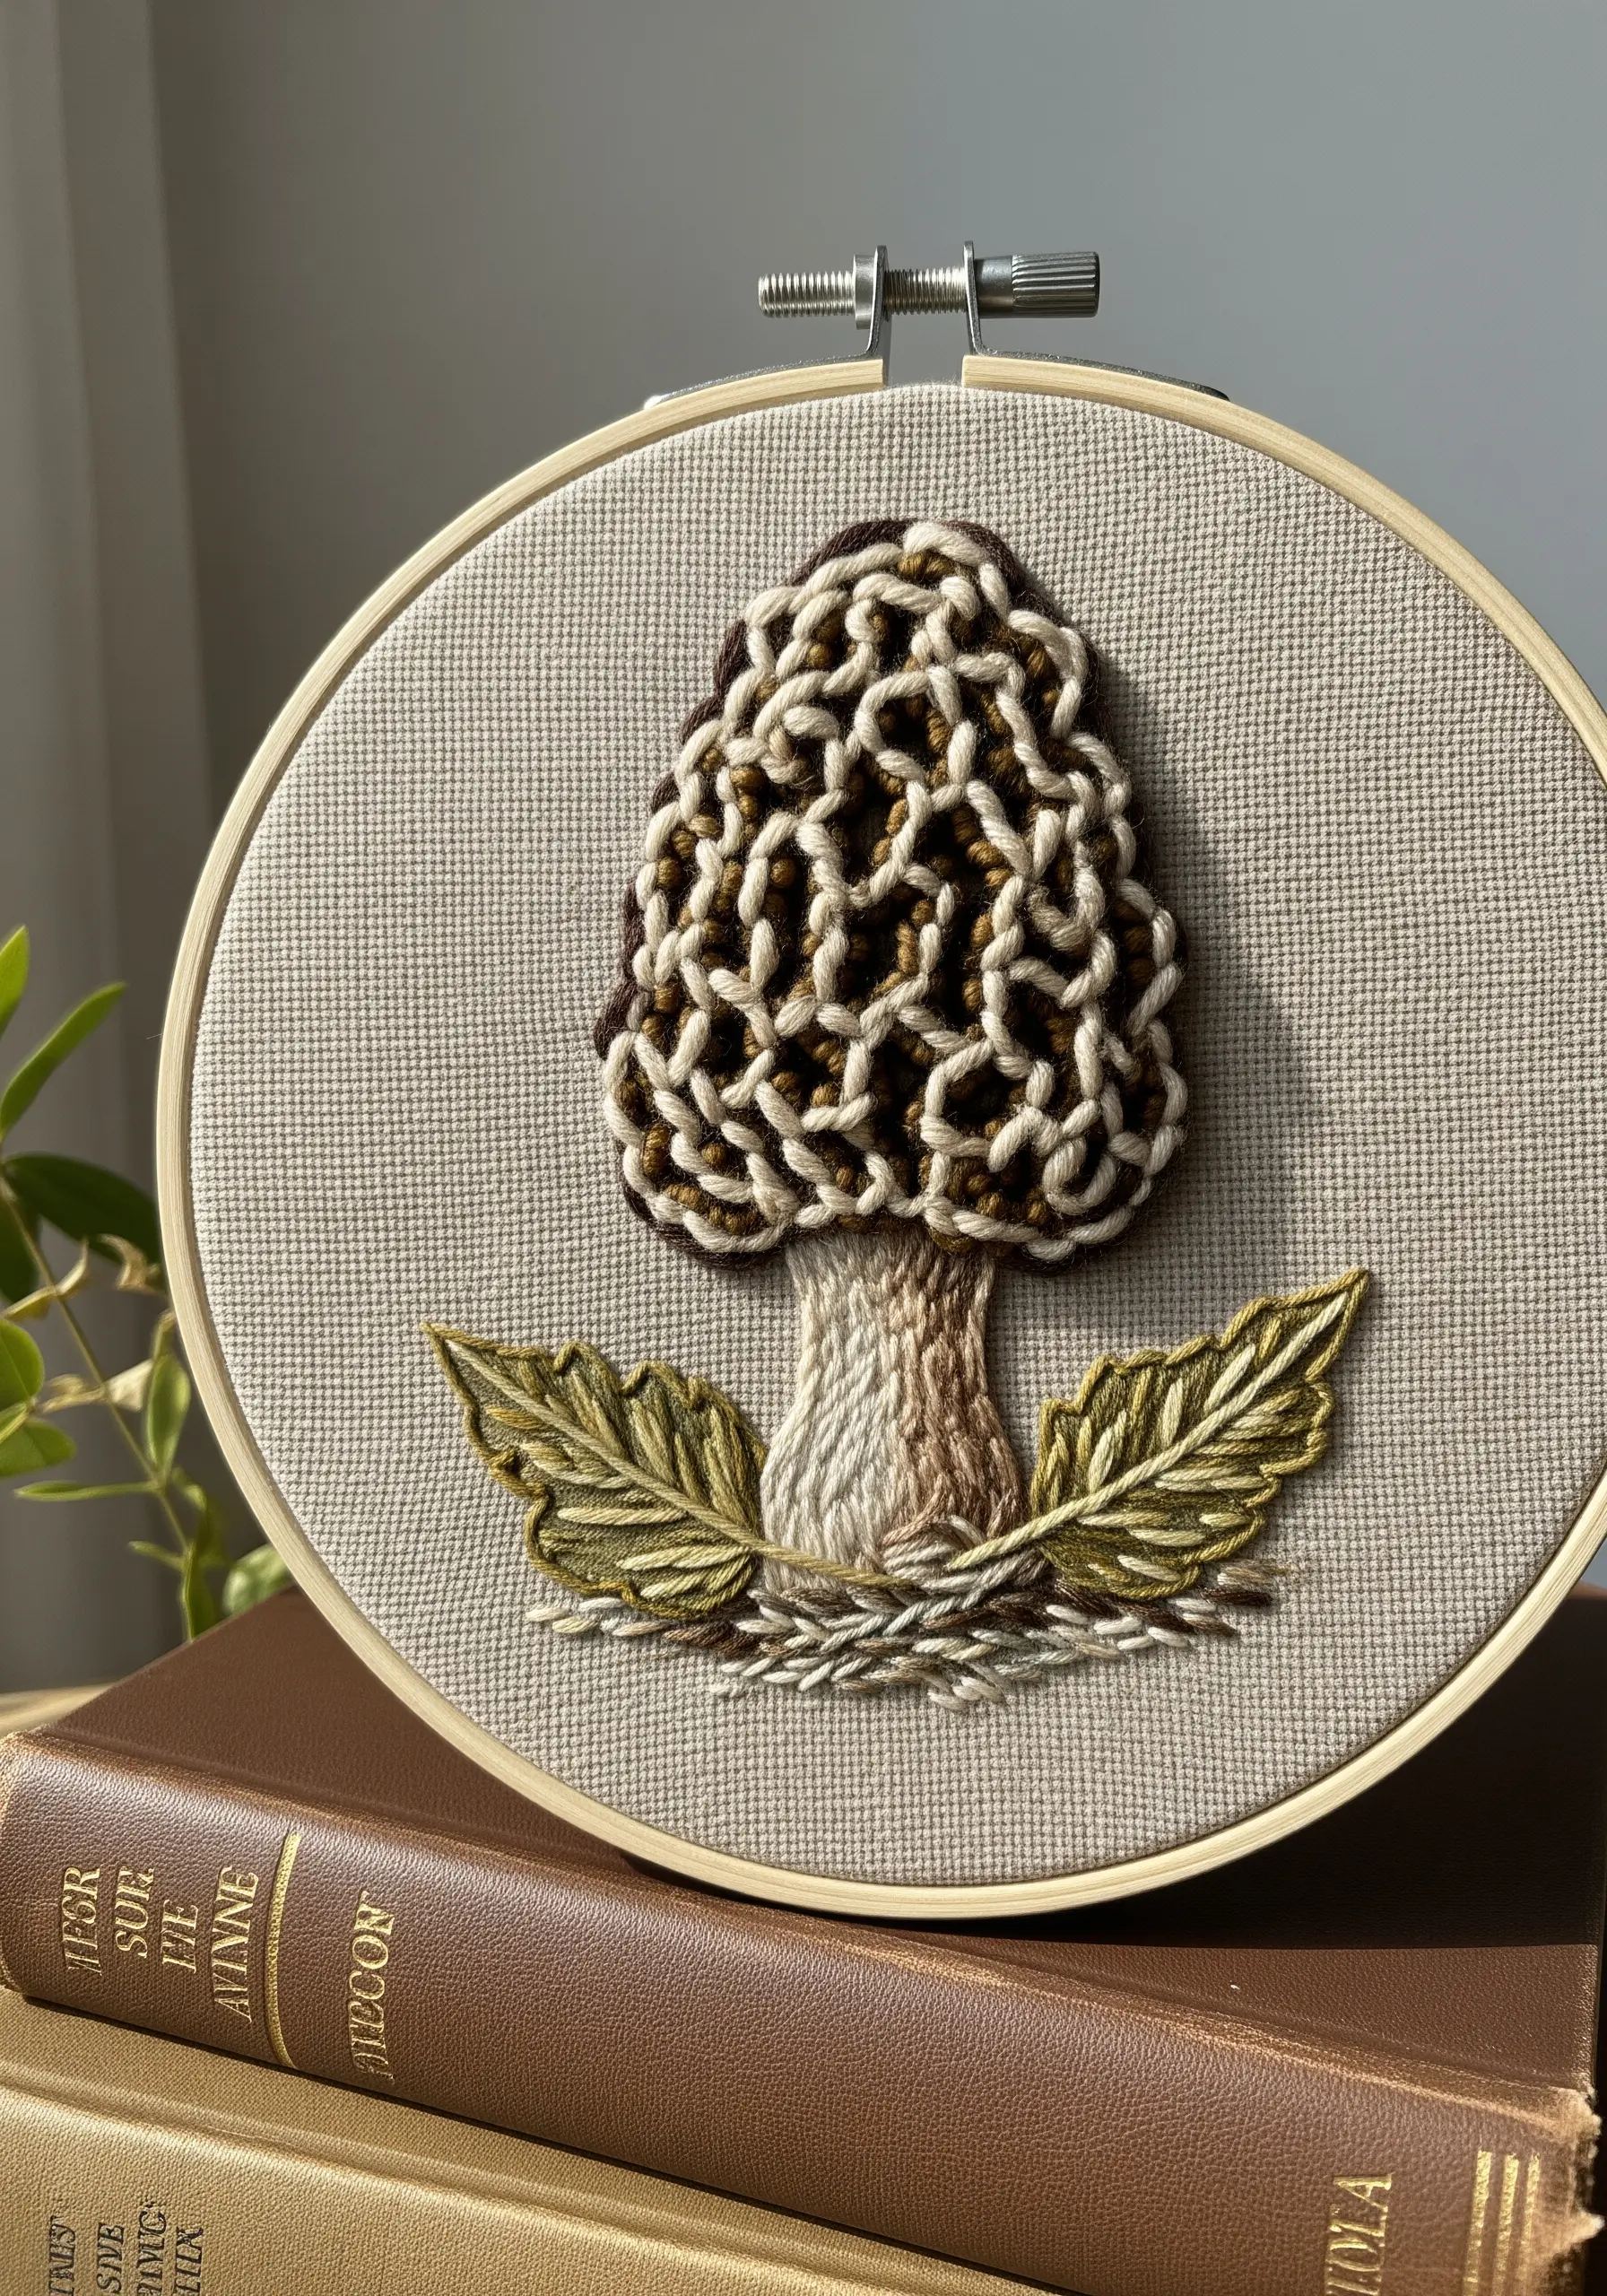
Instead of a flat satin stitch, replicate the morel’s unique honeycomb structure using a raised technique like a detached buttonhole stitch worked in rows.
This method builds the cap’s surface up and away from the fabric, giving it a tangible, sculptural form that casts its own subtle shadows.
Select a variegated brown floss to achieve organic color variations throughout the cap without needing to switch threads, saving time while enhancing realism.
Contrast this high-texture element with the elegant simplicity of a smooth fishbone stitch for the leaves, creating a satisfying balance of complex and clean textures.
3. Stitch an Ethereal Glow with Strategic Blending
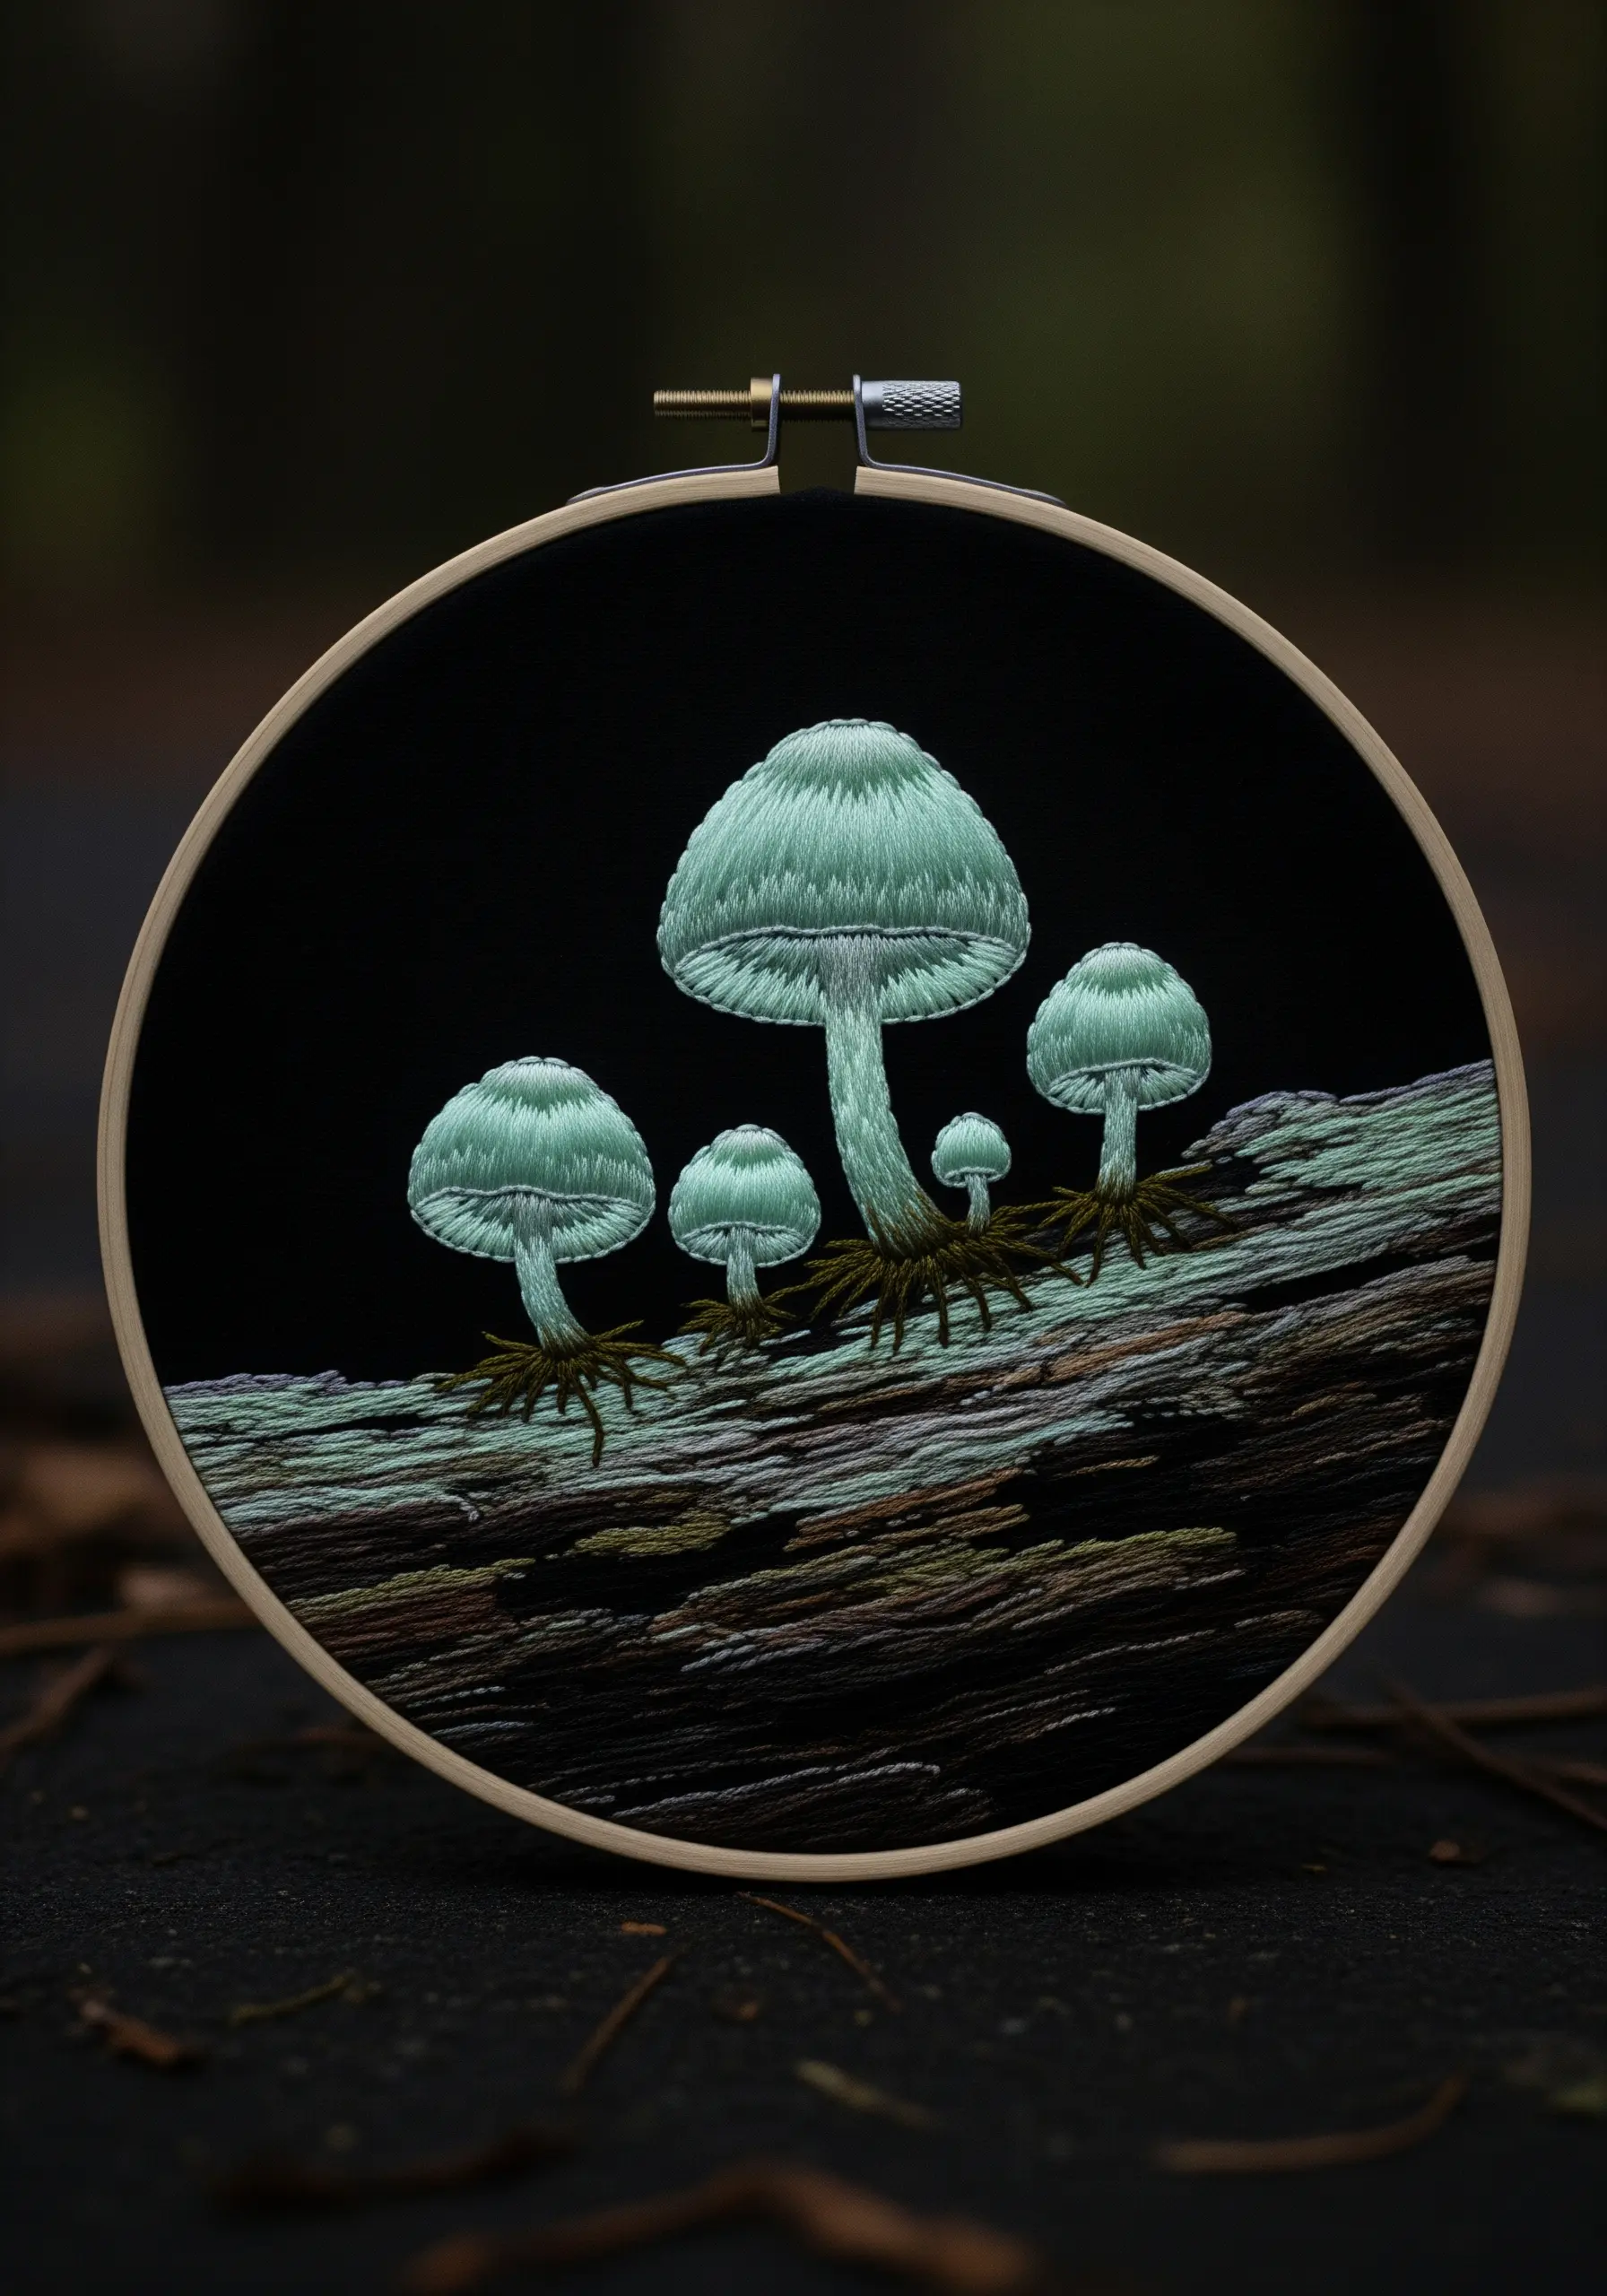
To create the soft glow of bioluminescence, work with a single strand of a pale, ethereal color like mint green or aqua against a black fabric background.
Use long and short stitches on the mushroom caps, carefully blending the glowing thread into a slightly darker base shade to create a soft, radiant gradient.
For the decaying log, use long, irregular straight stitches in muted tones—browns, greys, and olives—allowing them to overlap slightly to mimic the texture of weathered wood grain.
The black fabric is non-negotiable here; it acts as the darkness of night, making your carefully chosen threads appear as if they are lit from within. This is one of those embroidery projects inspired by textures you’d find on a nature walk.
4. Add Photorealistic Dew Drops with Seed Beads
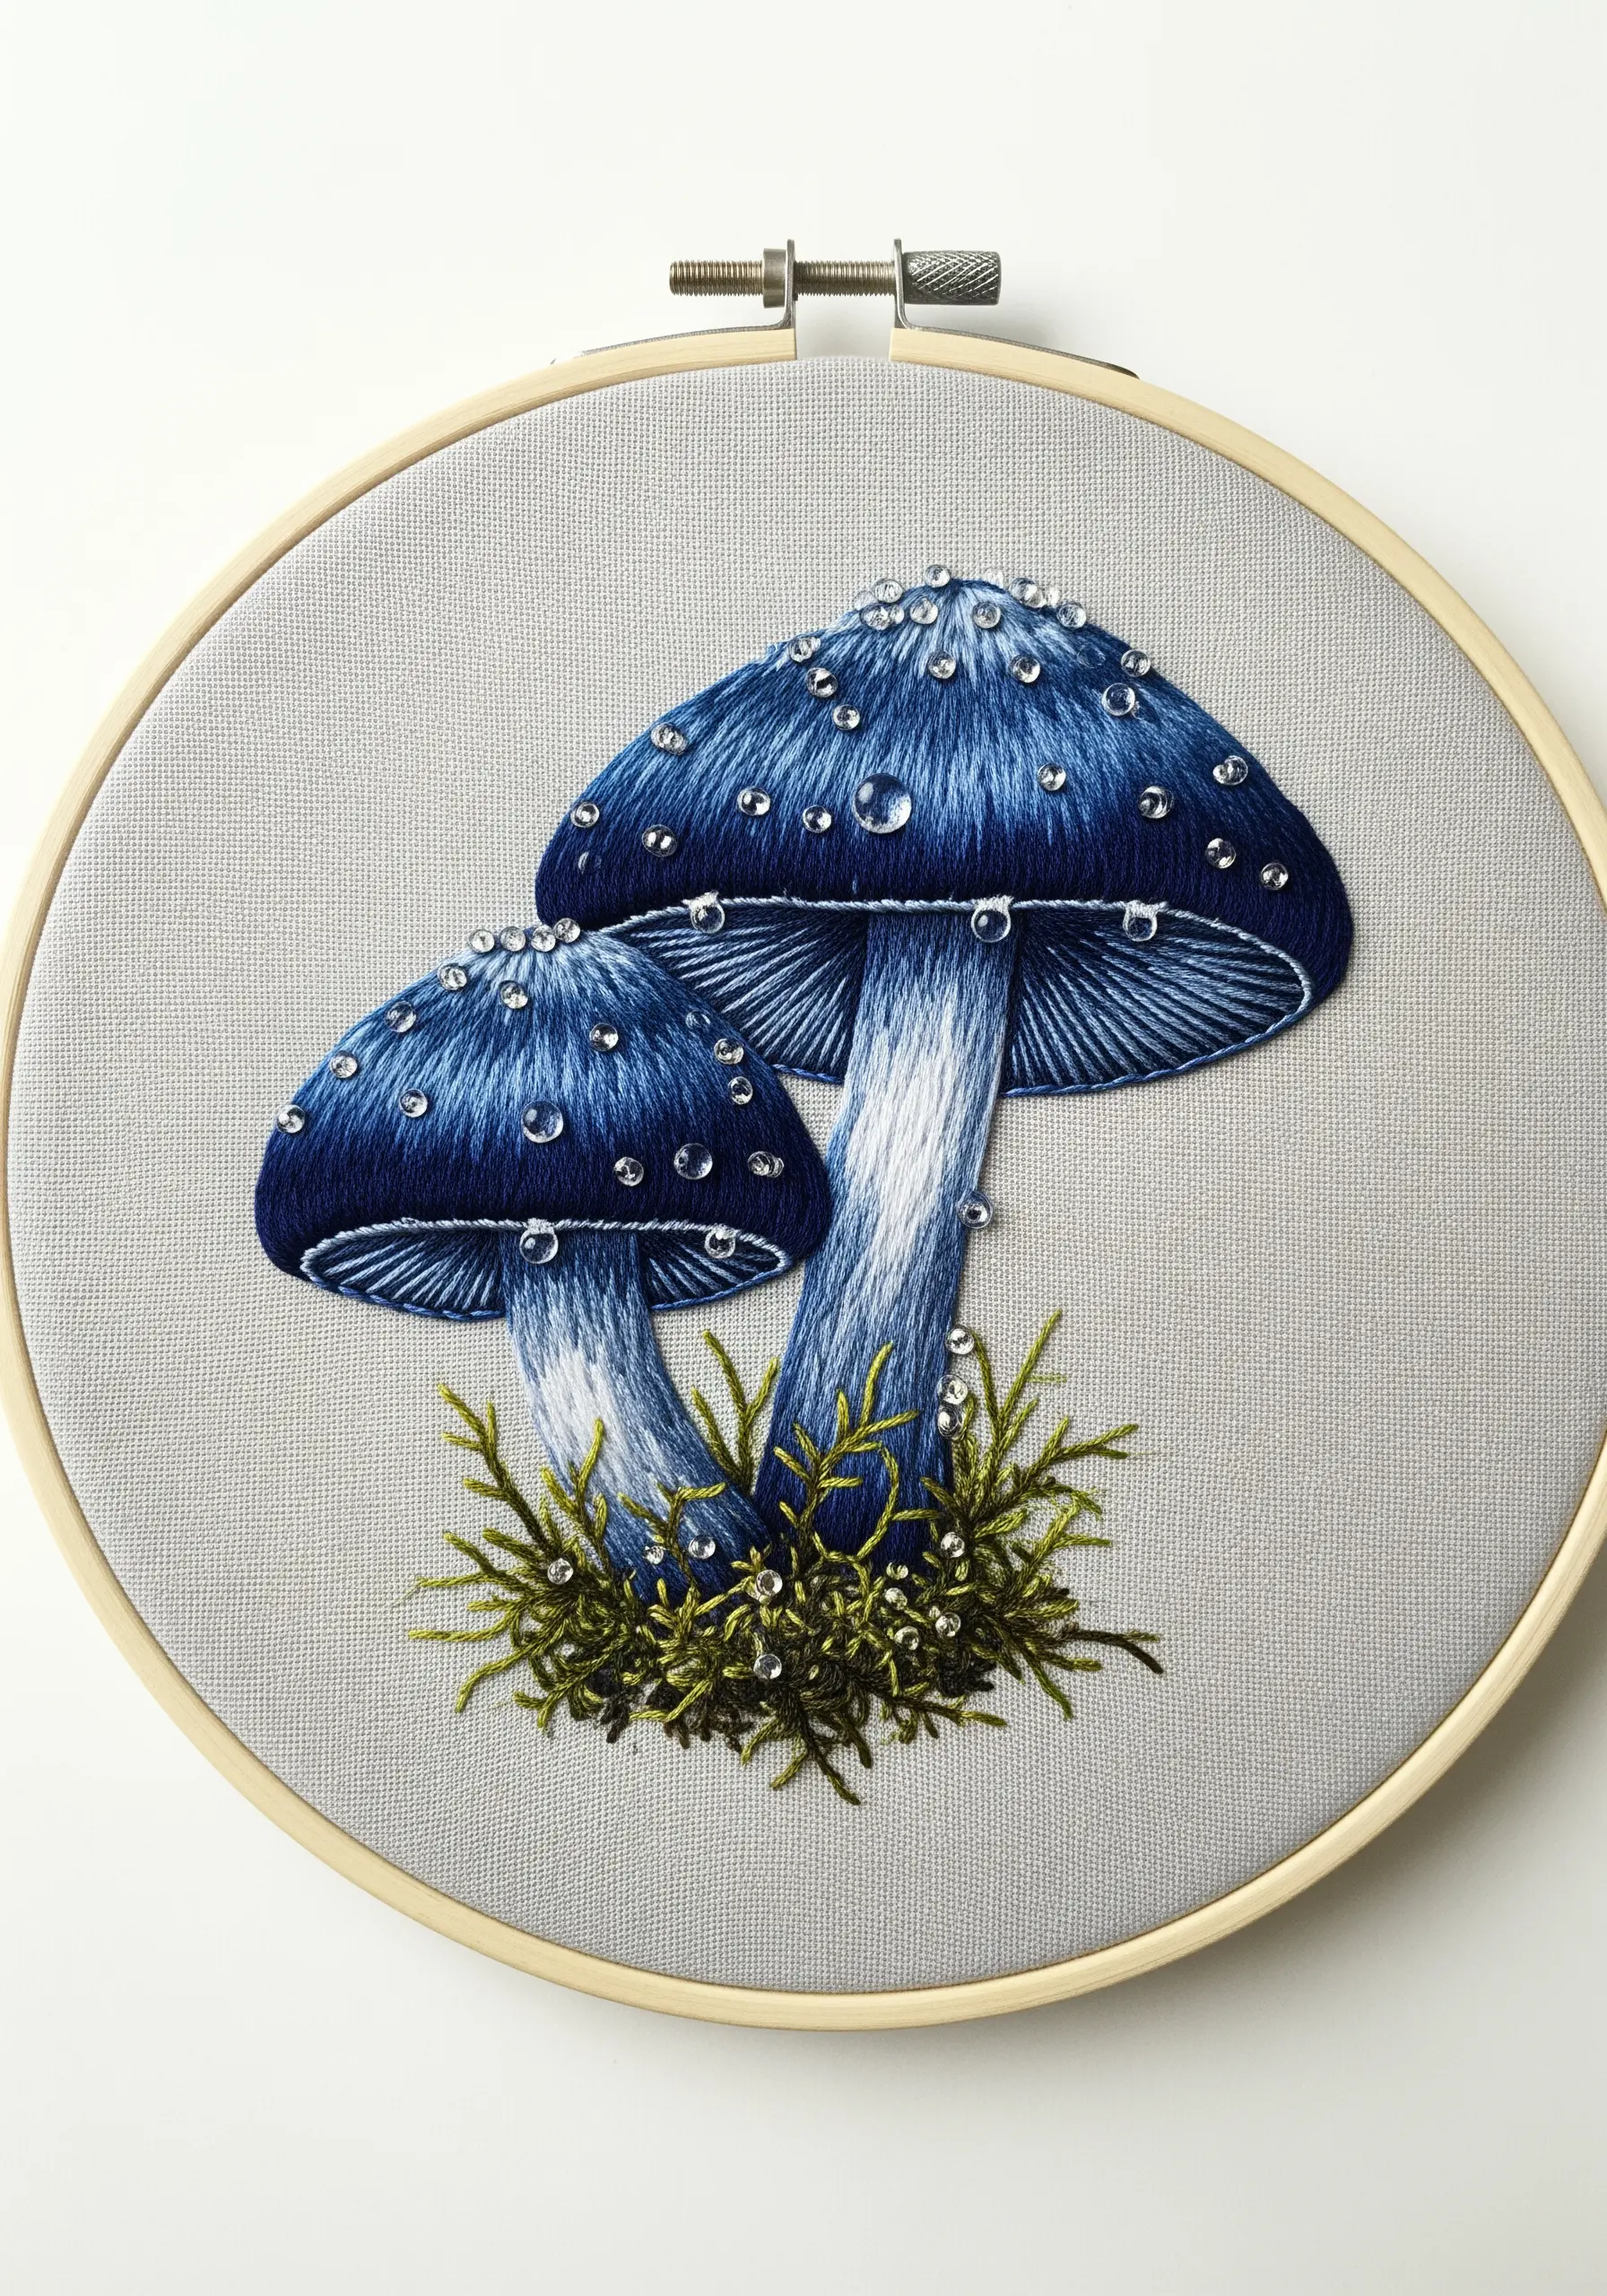
Instantly elevate your thread painting by incorporating clear seed beads to simulate glistening dewdrops.
After filling the mushroom caps with smooth long-and-short stitches, use a single strand of matching blue thread to discreetly secure each bead to the surface.
Avoid placing the beads in a uniform pattern. Instead, scatter them irregularly, clustering a few together and leaving others isolated to mimic how water droplets naturally form.
This simple mixed-media addition catches the light and transforms a beautifully stitched motif into a dynamic, hyper-realistic scene.
5. Illustrate a Soil Cross-Section with Mixed Media
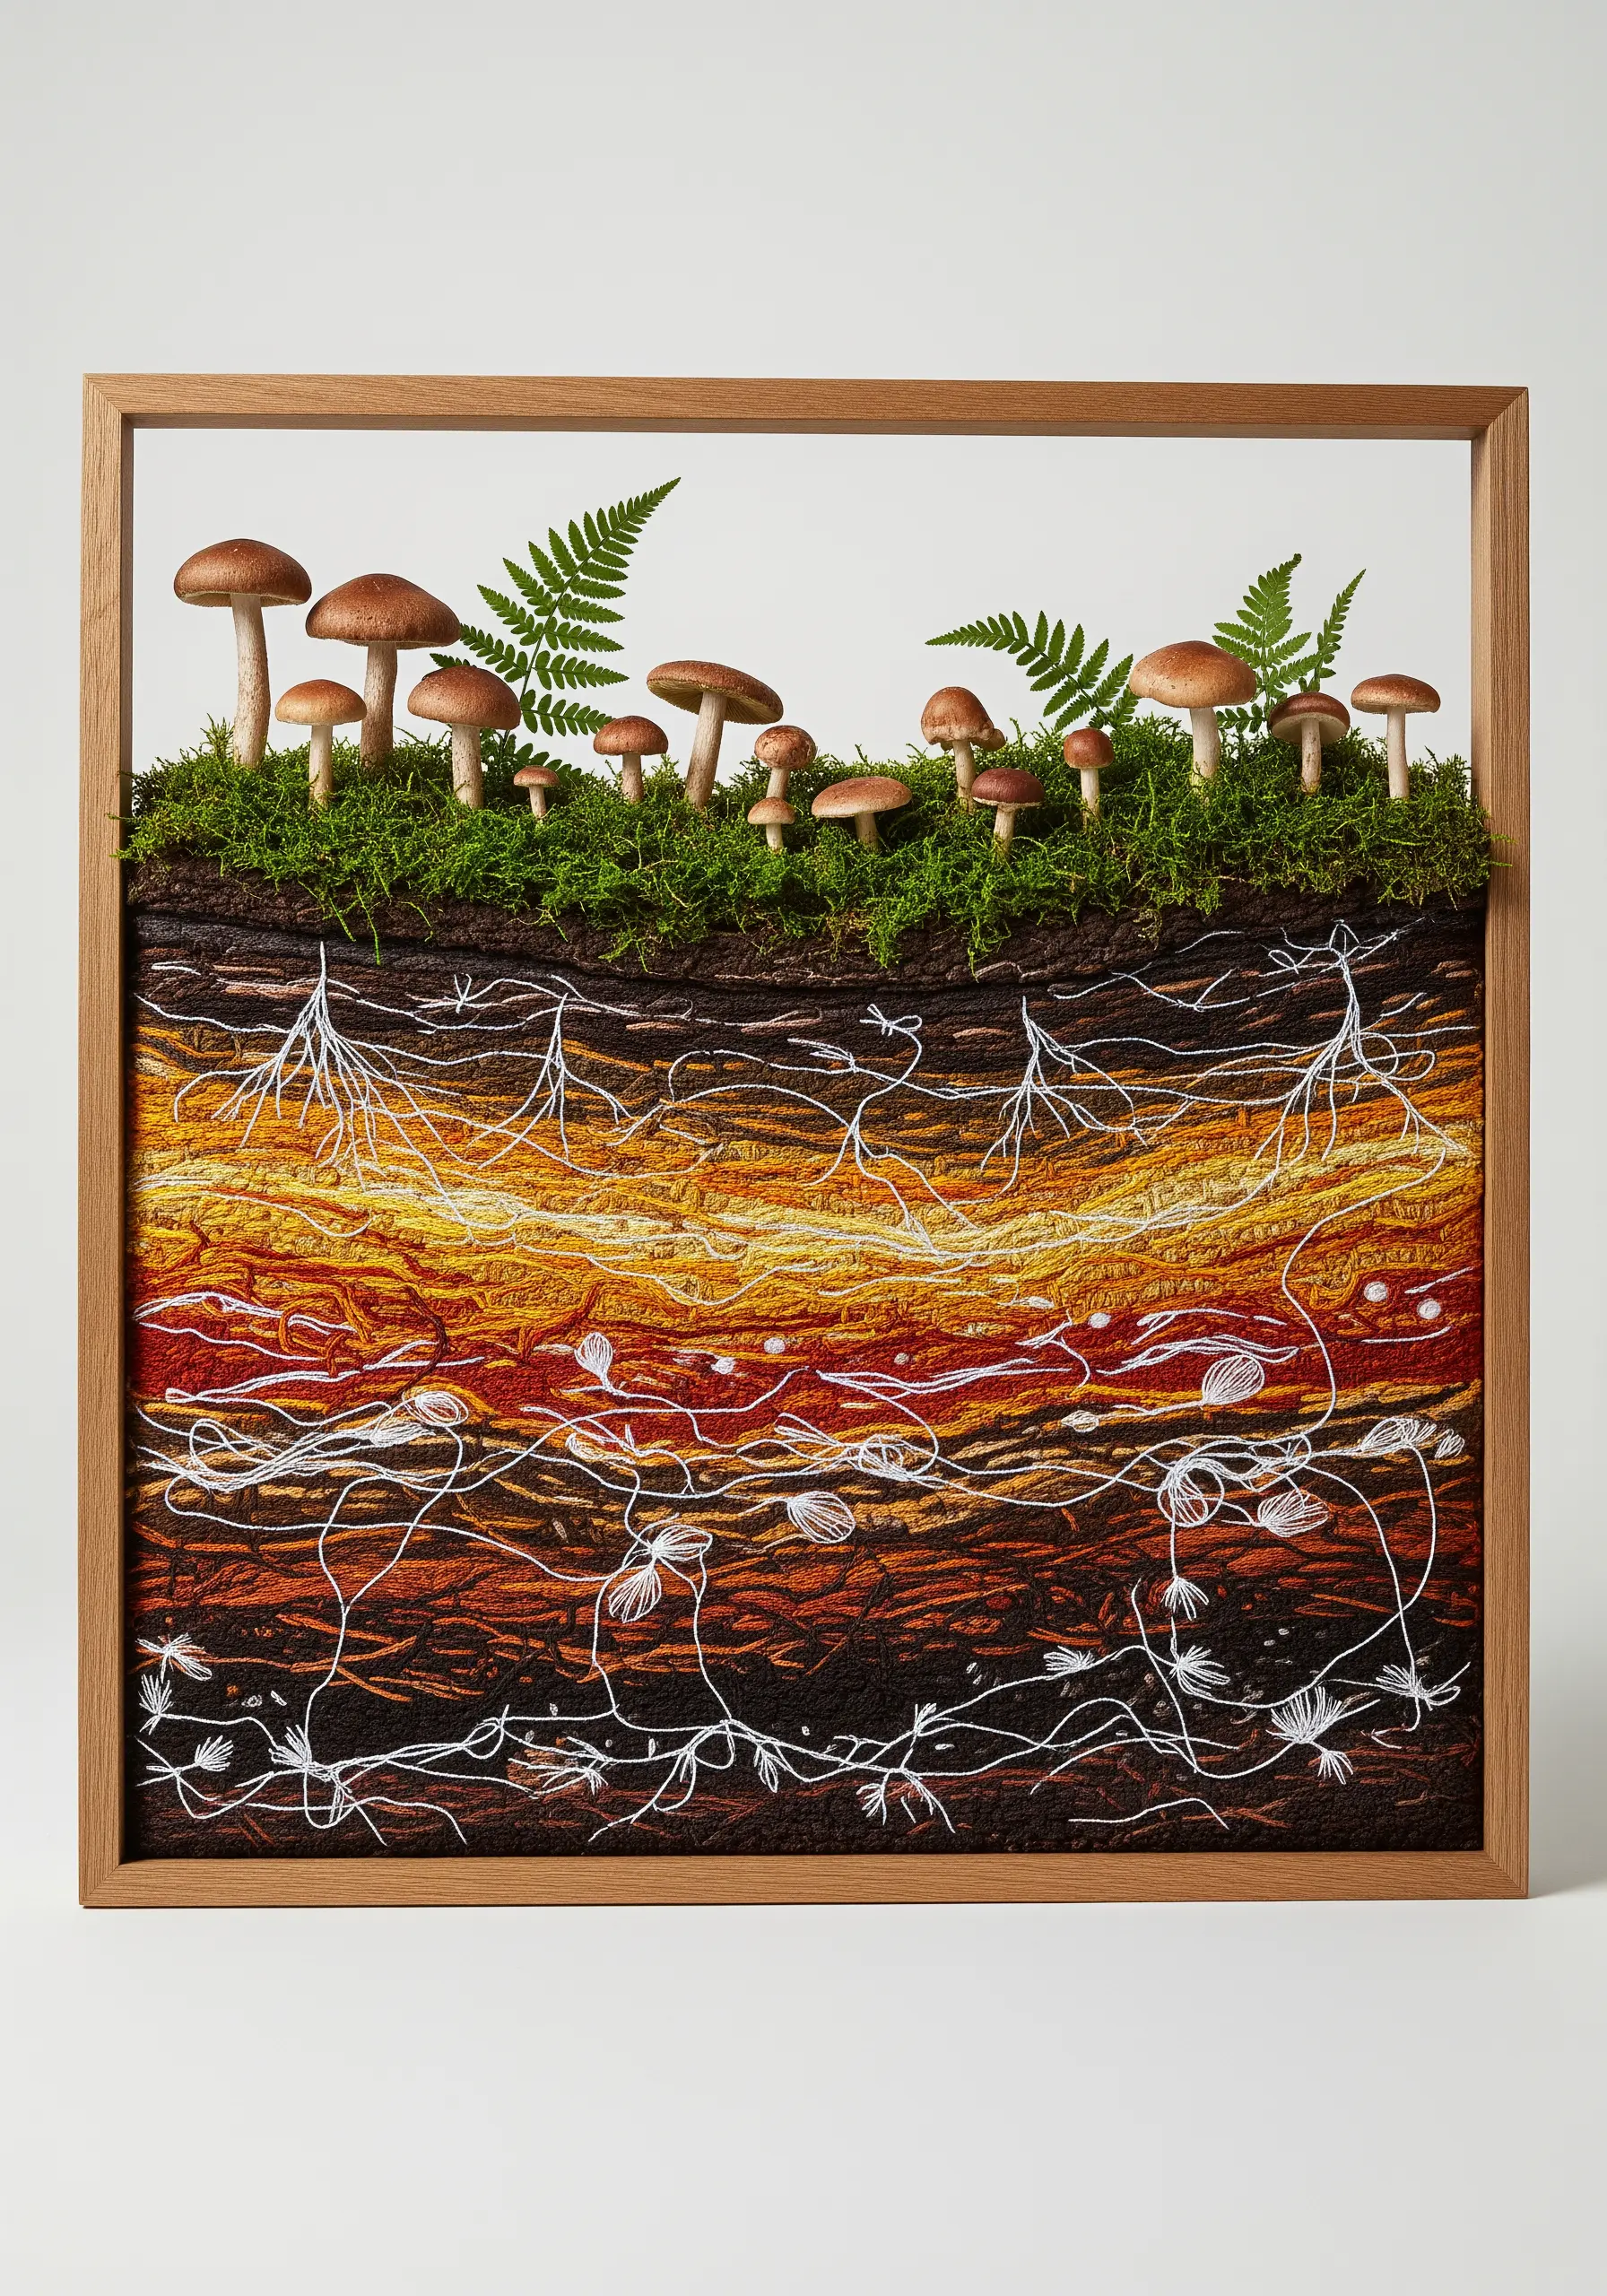
Move your art beyond the hoop by creating a botanical diorama inside a shadow box frame.
Embroider the soil layers using dense, textural stitches like seed stitch or French knots in a gradient of earthy reds, ochres, and deep browns.
Use a single, delicate strand of white thread to stitch the wandering mycelial network, letting your backstitches branch out organically to represent fine roots.
Complete the piece by affixing preserved moss, faux ferns, and realistic model mushrooms to the top layer, creating a stunning mixed-media sculpture that merges fiber art with natural history.
6. Design a Balanced and Rhythmic Botanical Wreath
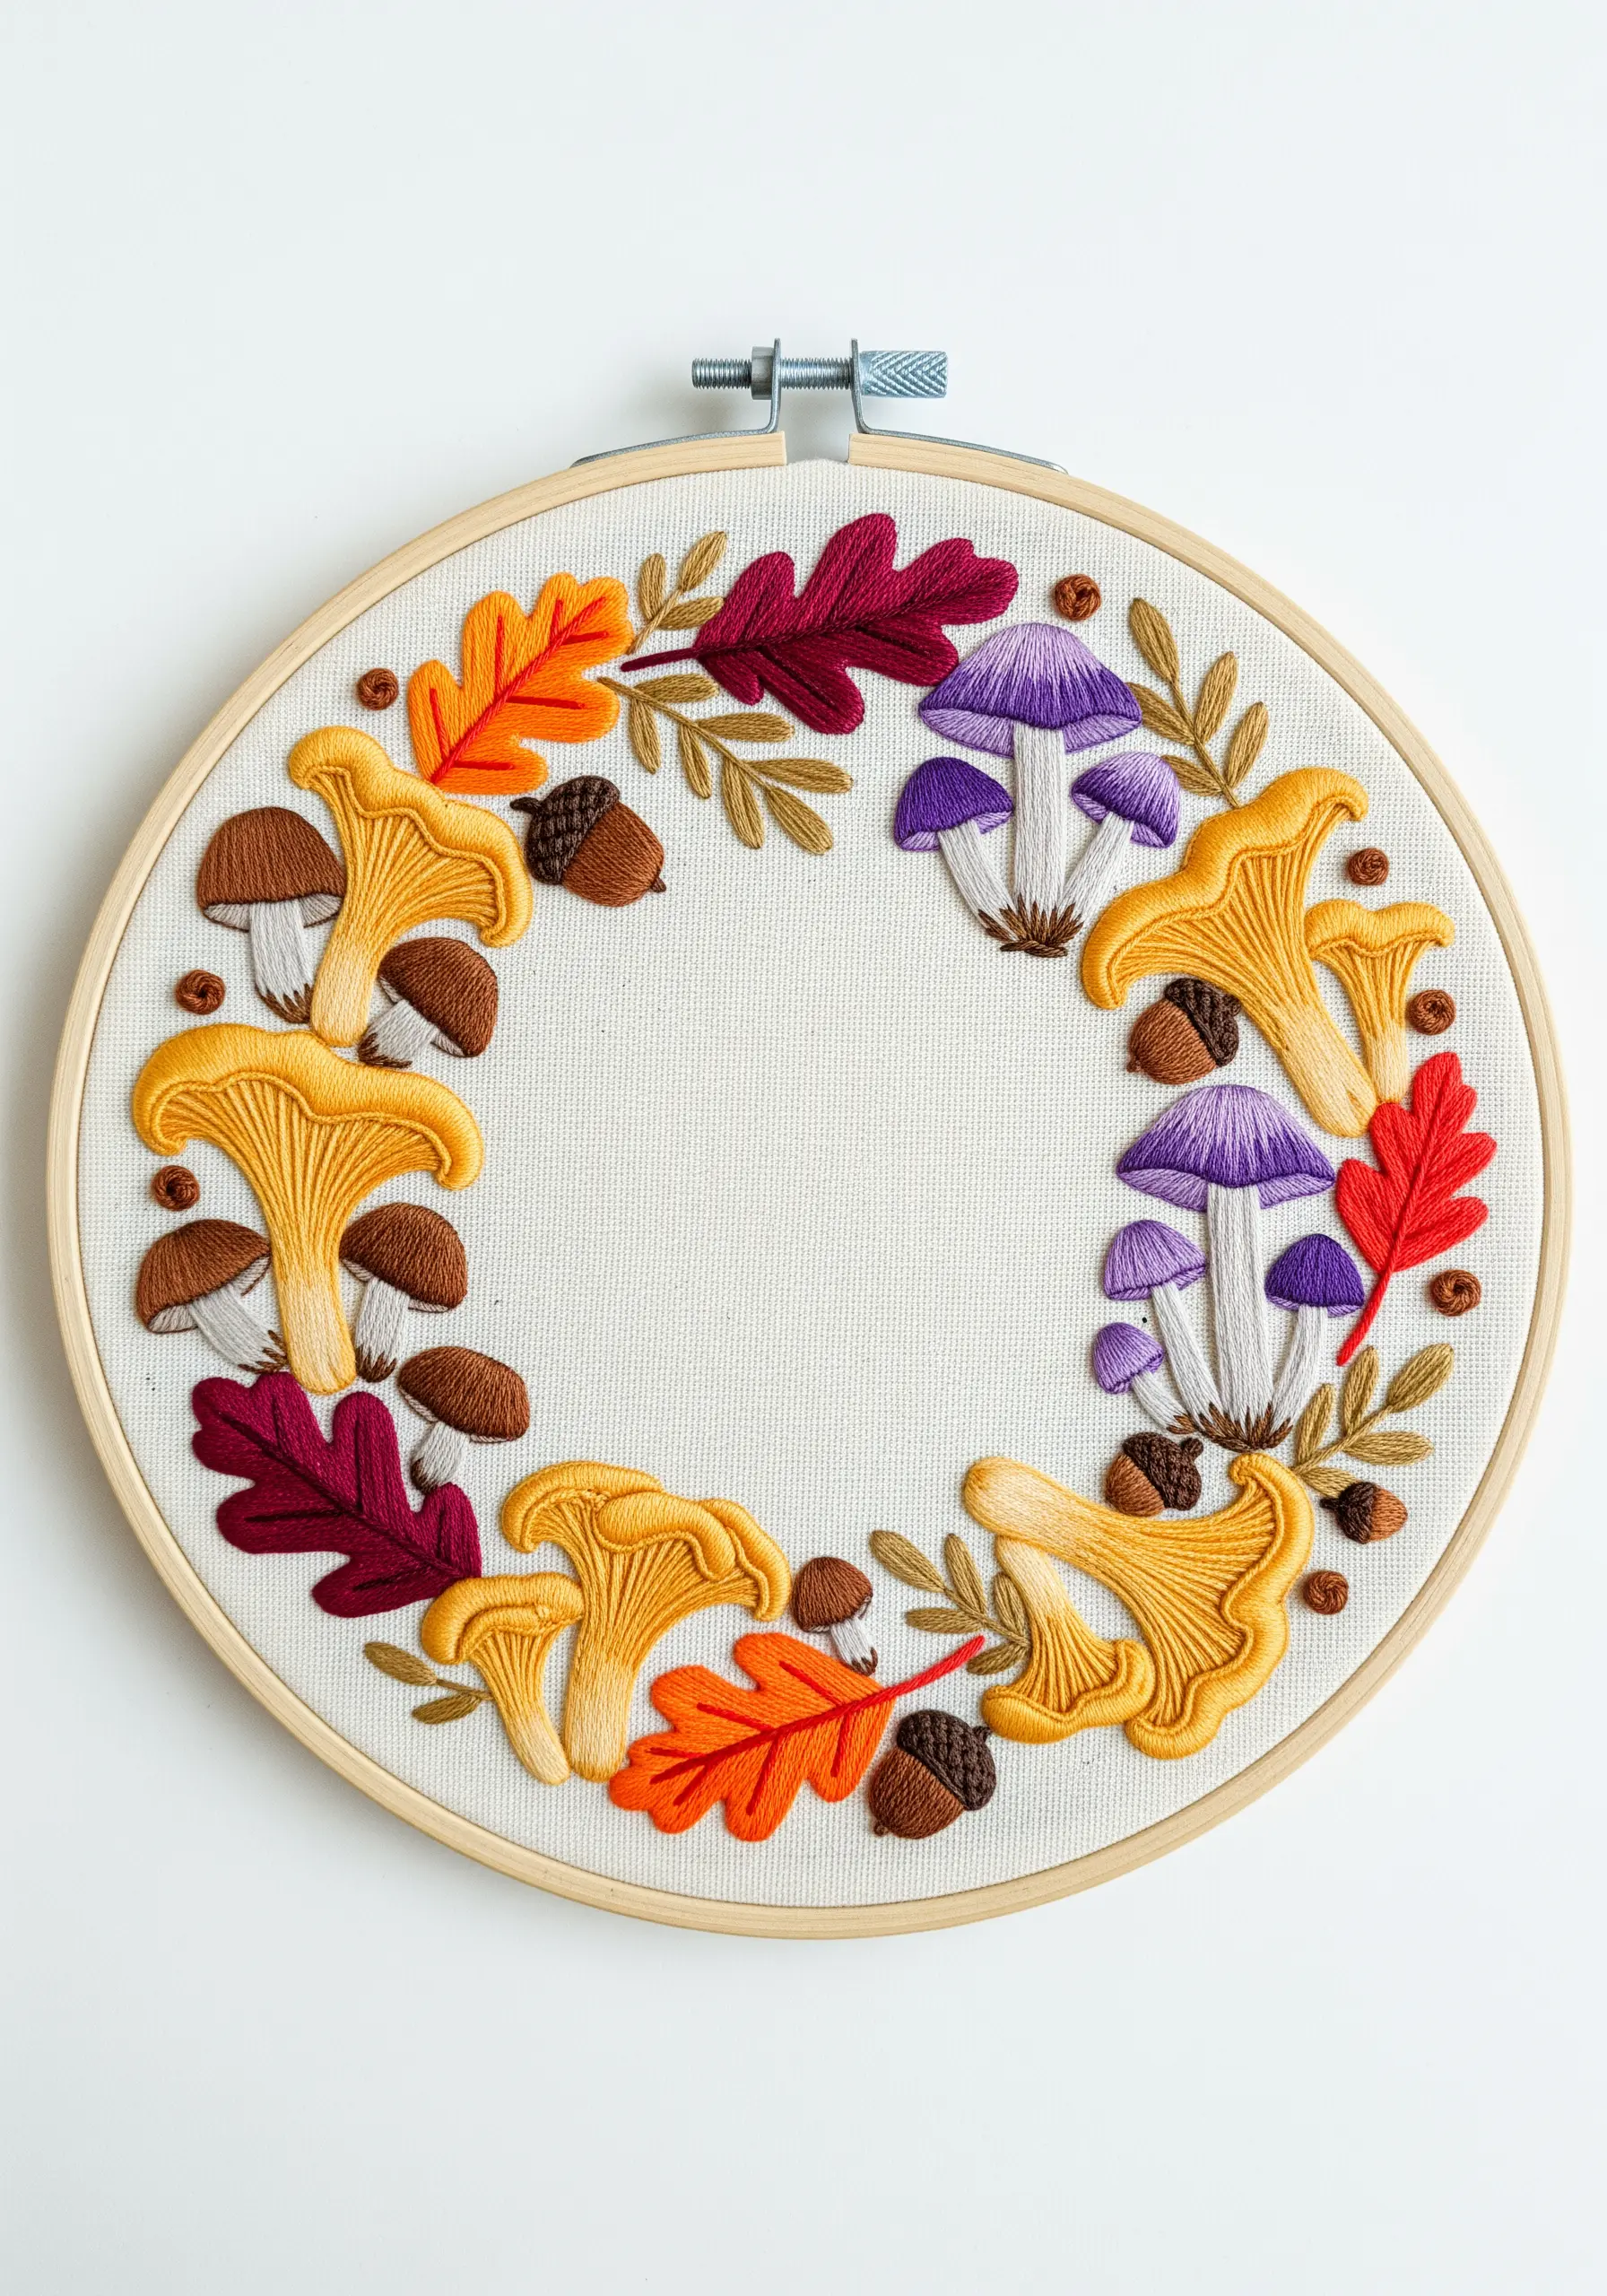
When composing a wreath, think in terms of visual rhythm and balance rather than perfect symmetry.
Group similar elements, like the chanterelle mushrooms, into clusters of two or three, then distribute them unevenly around the circle to create points of interest.
Use smaller motifs, such as leaves and acorns, to fill the gaps and guide the viewer’s eye smoothly from one cluster to the next.
A unified color palette with intentional pops of contrast—like the deep magenta leaves against the golden mushrooms—ensures the final design feels cohesive and vibrant, not chaotic.
7. Sculpt 3D Oyster Mushrooms with Stumpwork
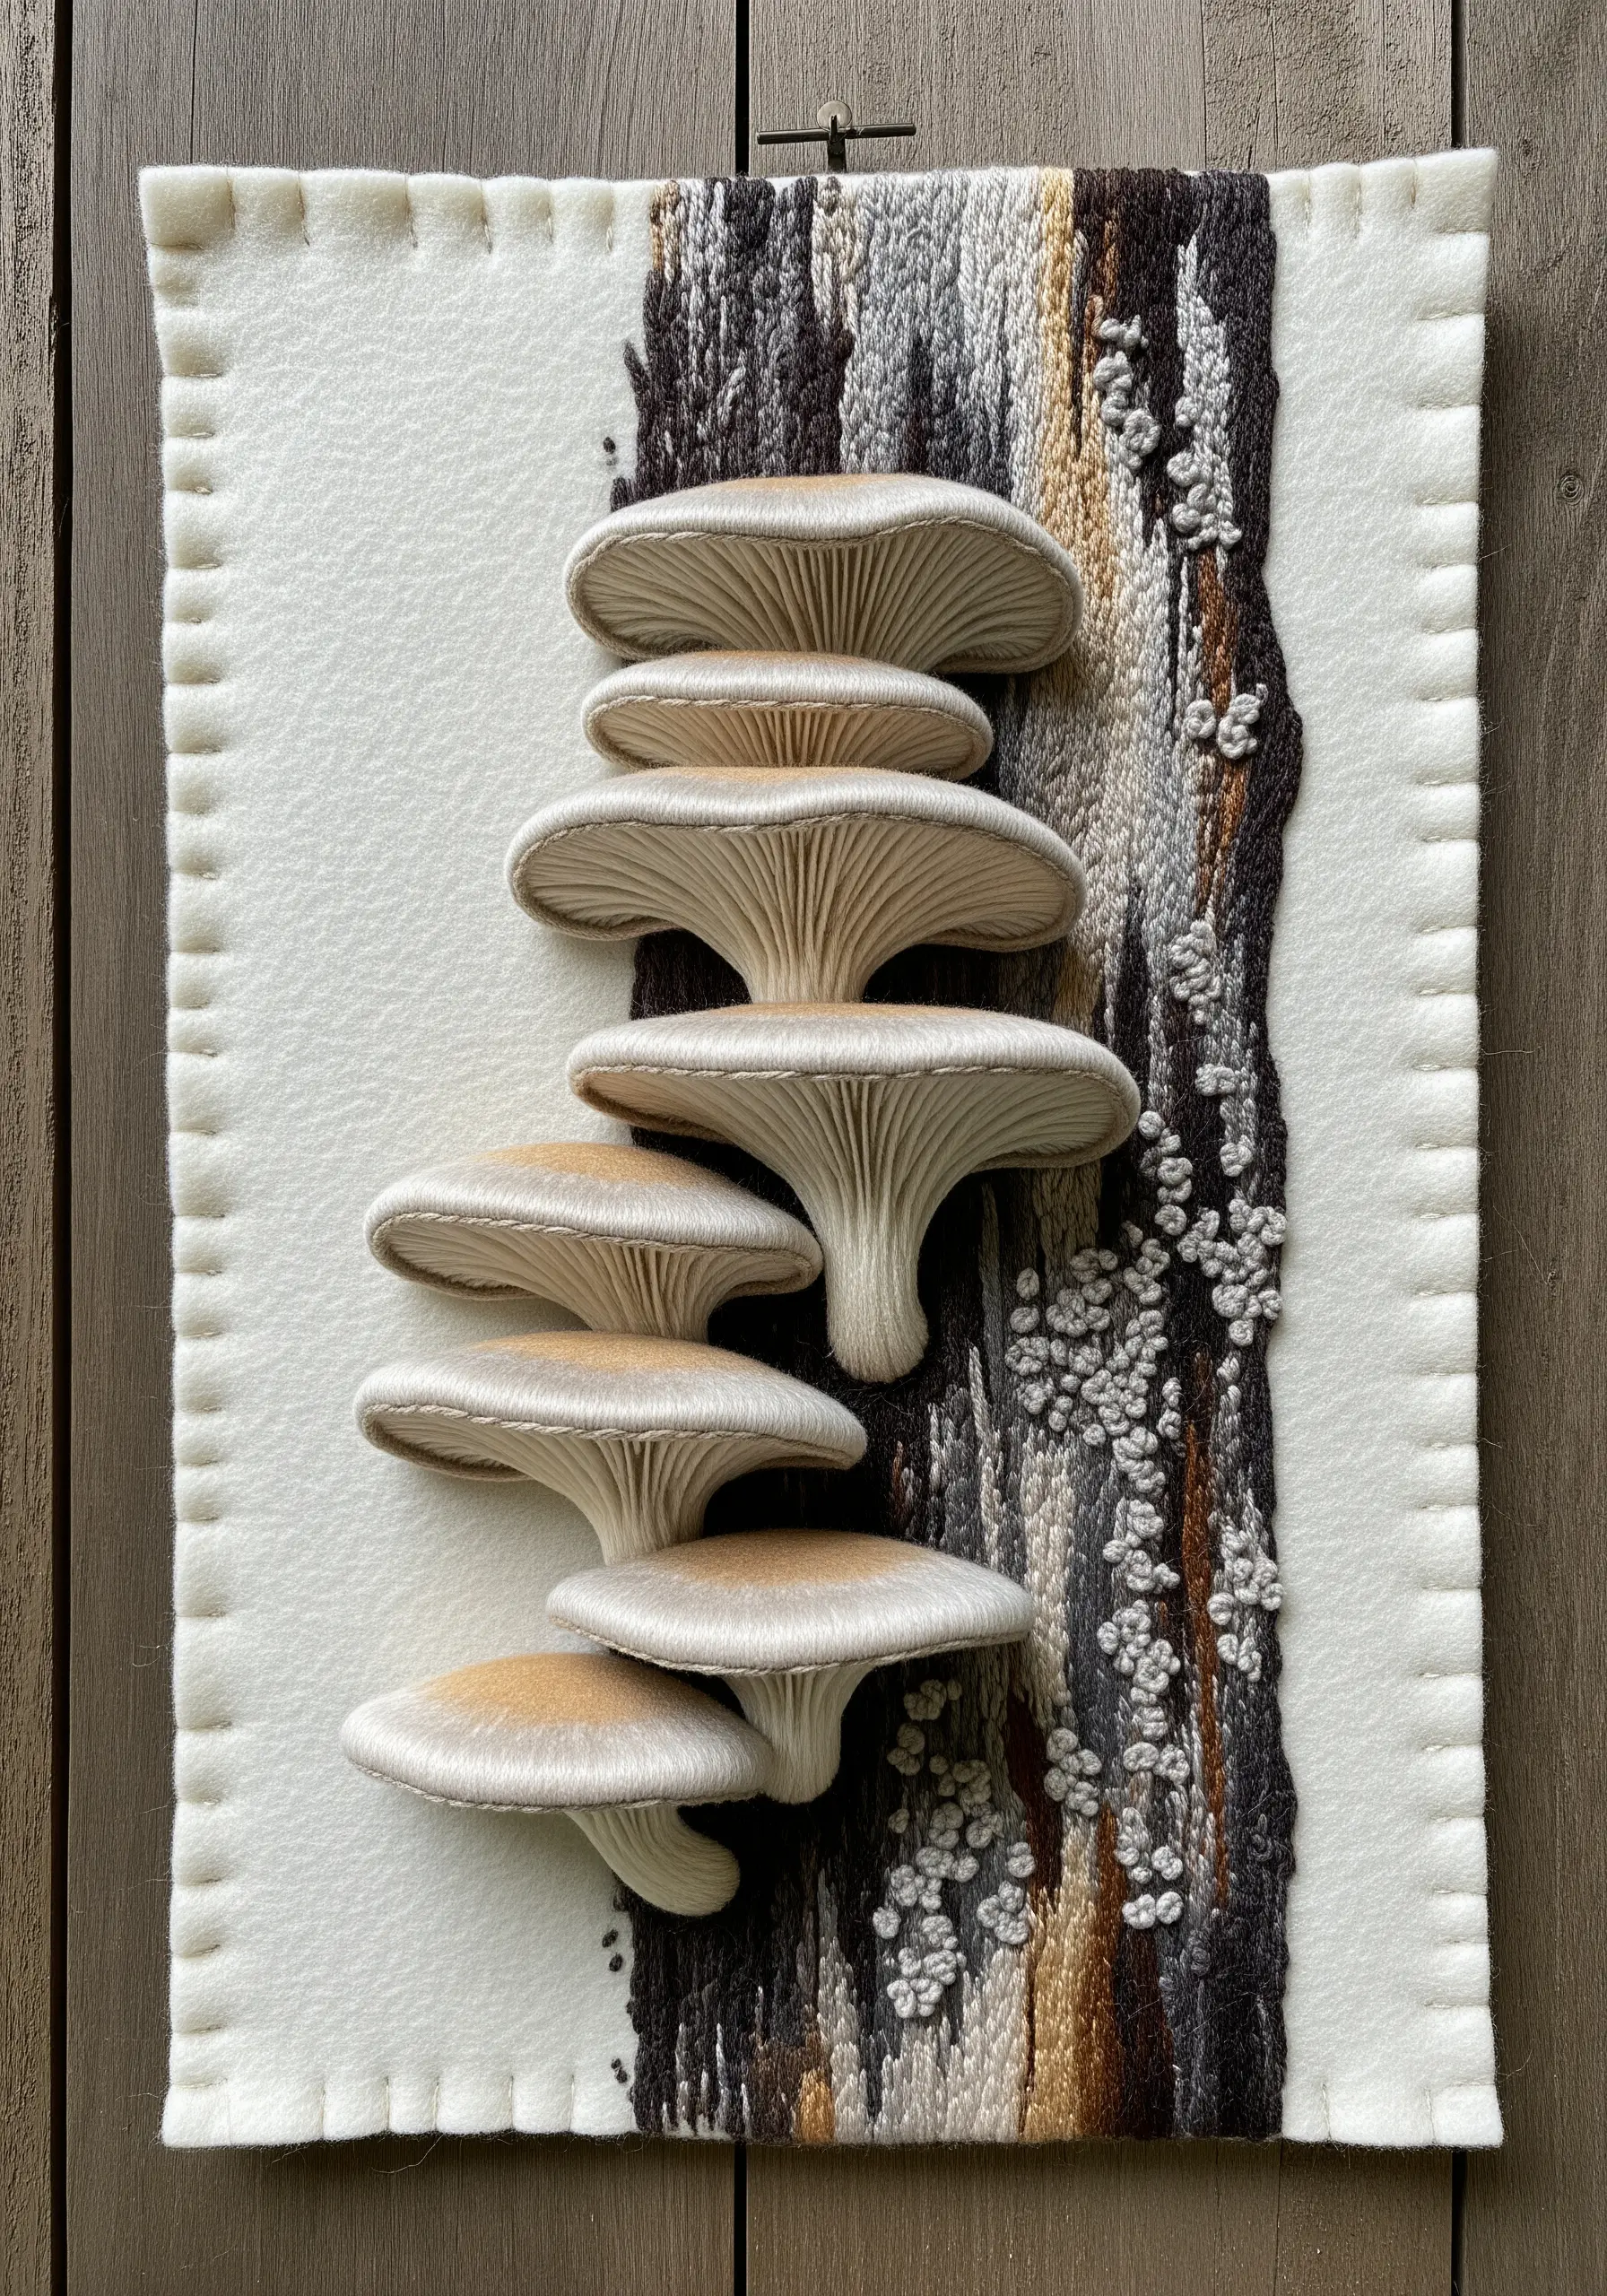
To achieve true, sculptural dimension, embrace the stumpwork technique for your oyster mushrooms.
Embroider each mushroom cap individually on a separate piece of fabric, working long-and-short stitches over a fine wire outline.
Once completed, carefully cut out each shape and attach it to your main fabric background, gently bending the wire to create the realistic, shelf-like form of the gills.
This advanced technique literally lifts your embroidery off the surface, creating natural shadows and a level of depth that flat stitching cannot replicate.
8. Master Subtle Shading on a Porcini Mushroom

The key to a photorealistic porcini mushroom lies in seamless, gradual shading, often called thread painting.
Work with a single strand of floss at a time, using several closely related shades of brown and cream to avoid harsh lines between colors.
For the cap, ensure your long-and-short stitches follow its natural curve. For the stem, use vertical stitches to blend the white striations into the beige base, mimicking its fibrous texture.
The goal is an almost imperceptible transition between tones, which gives the mushroom a soft, painterly quality. This skill is perfect for minimal embroidery designs that use only three colors but require impact.
9. Add a Glossy Slime Trail with UV Resin
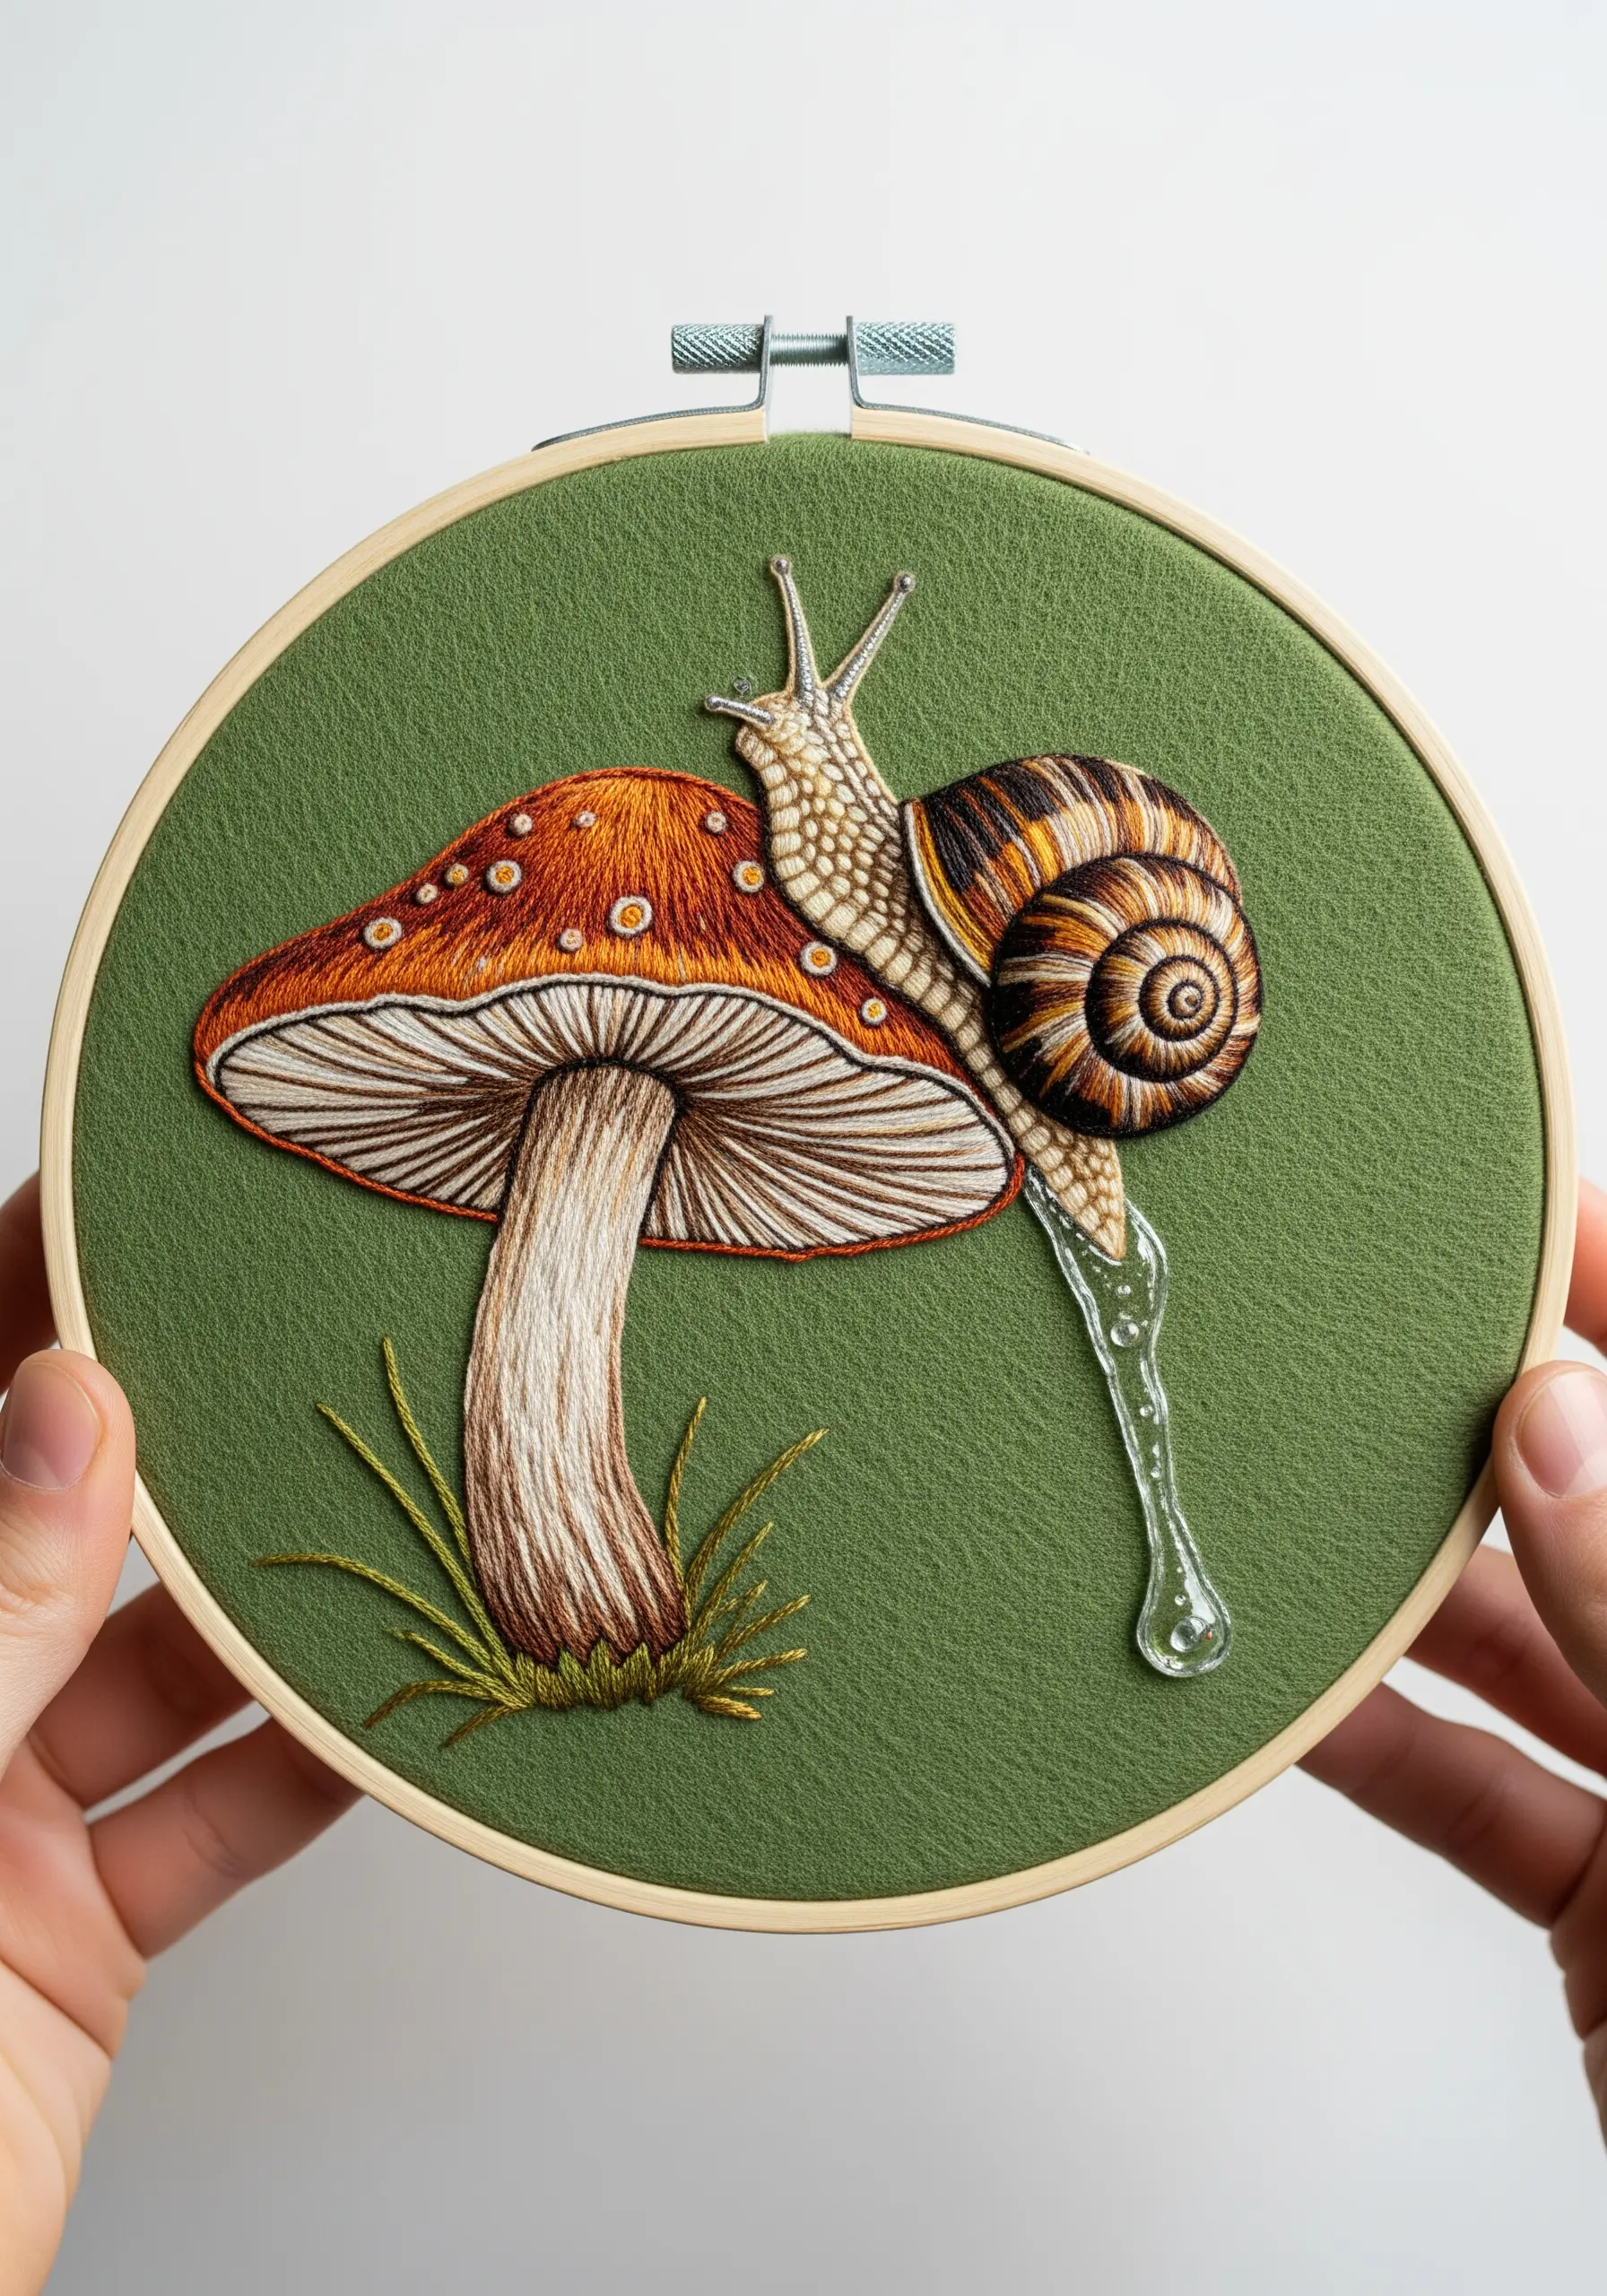
Introduce an unexpected element of hyper-realism by adding a slime trail with clear UV resin.
First, complete all your thread work, paying special attention to the texture of the snail’s shell and the soft shading of the mushroom cap.
Once the stitching is finished, carefully apply a thin, watery line of UV resin from the snail’s body downwards, letting it drip naturally.
Cure the resin with a UV light for a permanent, glossy finish. The slick, transparent trail creates a stunning textural contrast against the soft matte thread.
10. Build a Lush Forest Floor with Layered Stitching
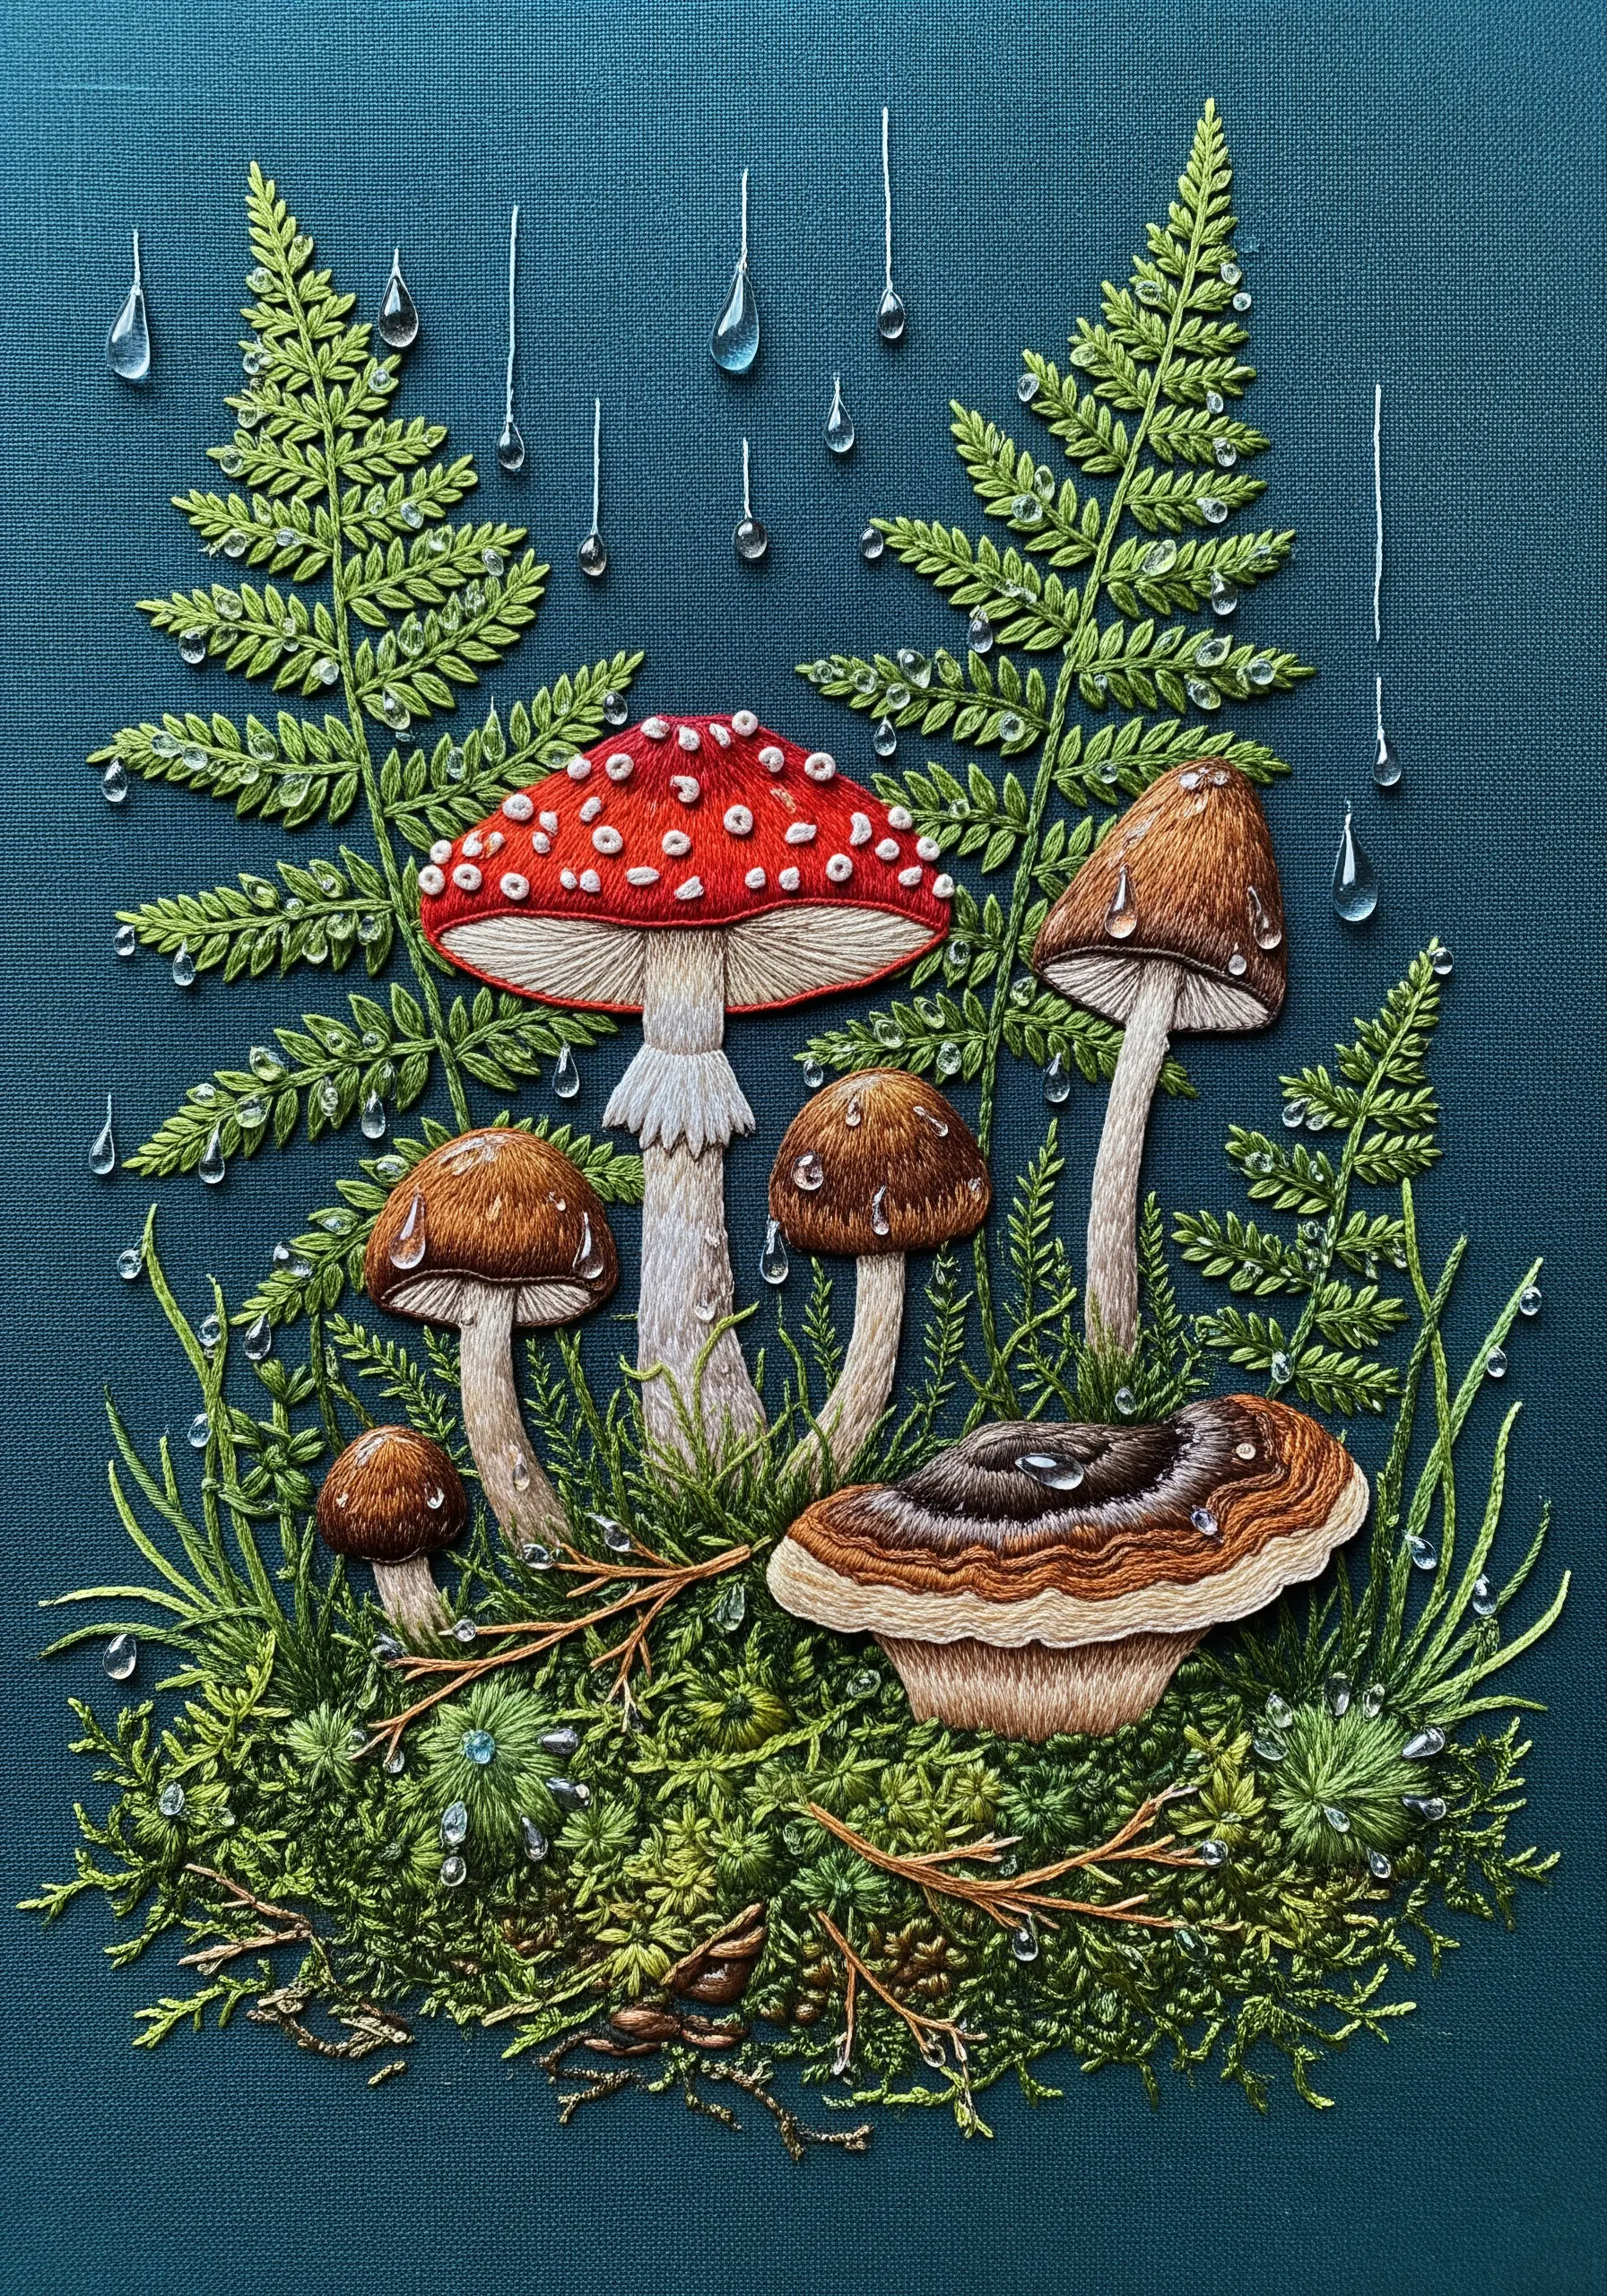
Create a convincing sense of density by layering various stitches to build your forest floor from the ground up.
Start with a base of French knots and turkey work for the moss, varying the thread colors and loop heights to create an uneven, natural-looking terrain.
Next, add ferns using fishbone or detached chain stitches, tucking some behind your primary mushroom subjects.
Finally, stitch your mushrooms, allowing some to be partially obscured by the foreground elements. This layering is what creates true visual depth, making the scene feel rich and immersive.
11. Emulate Scientific Illustrations with Fine Line Work
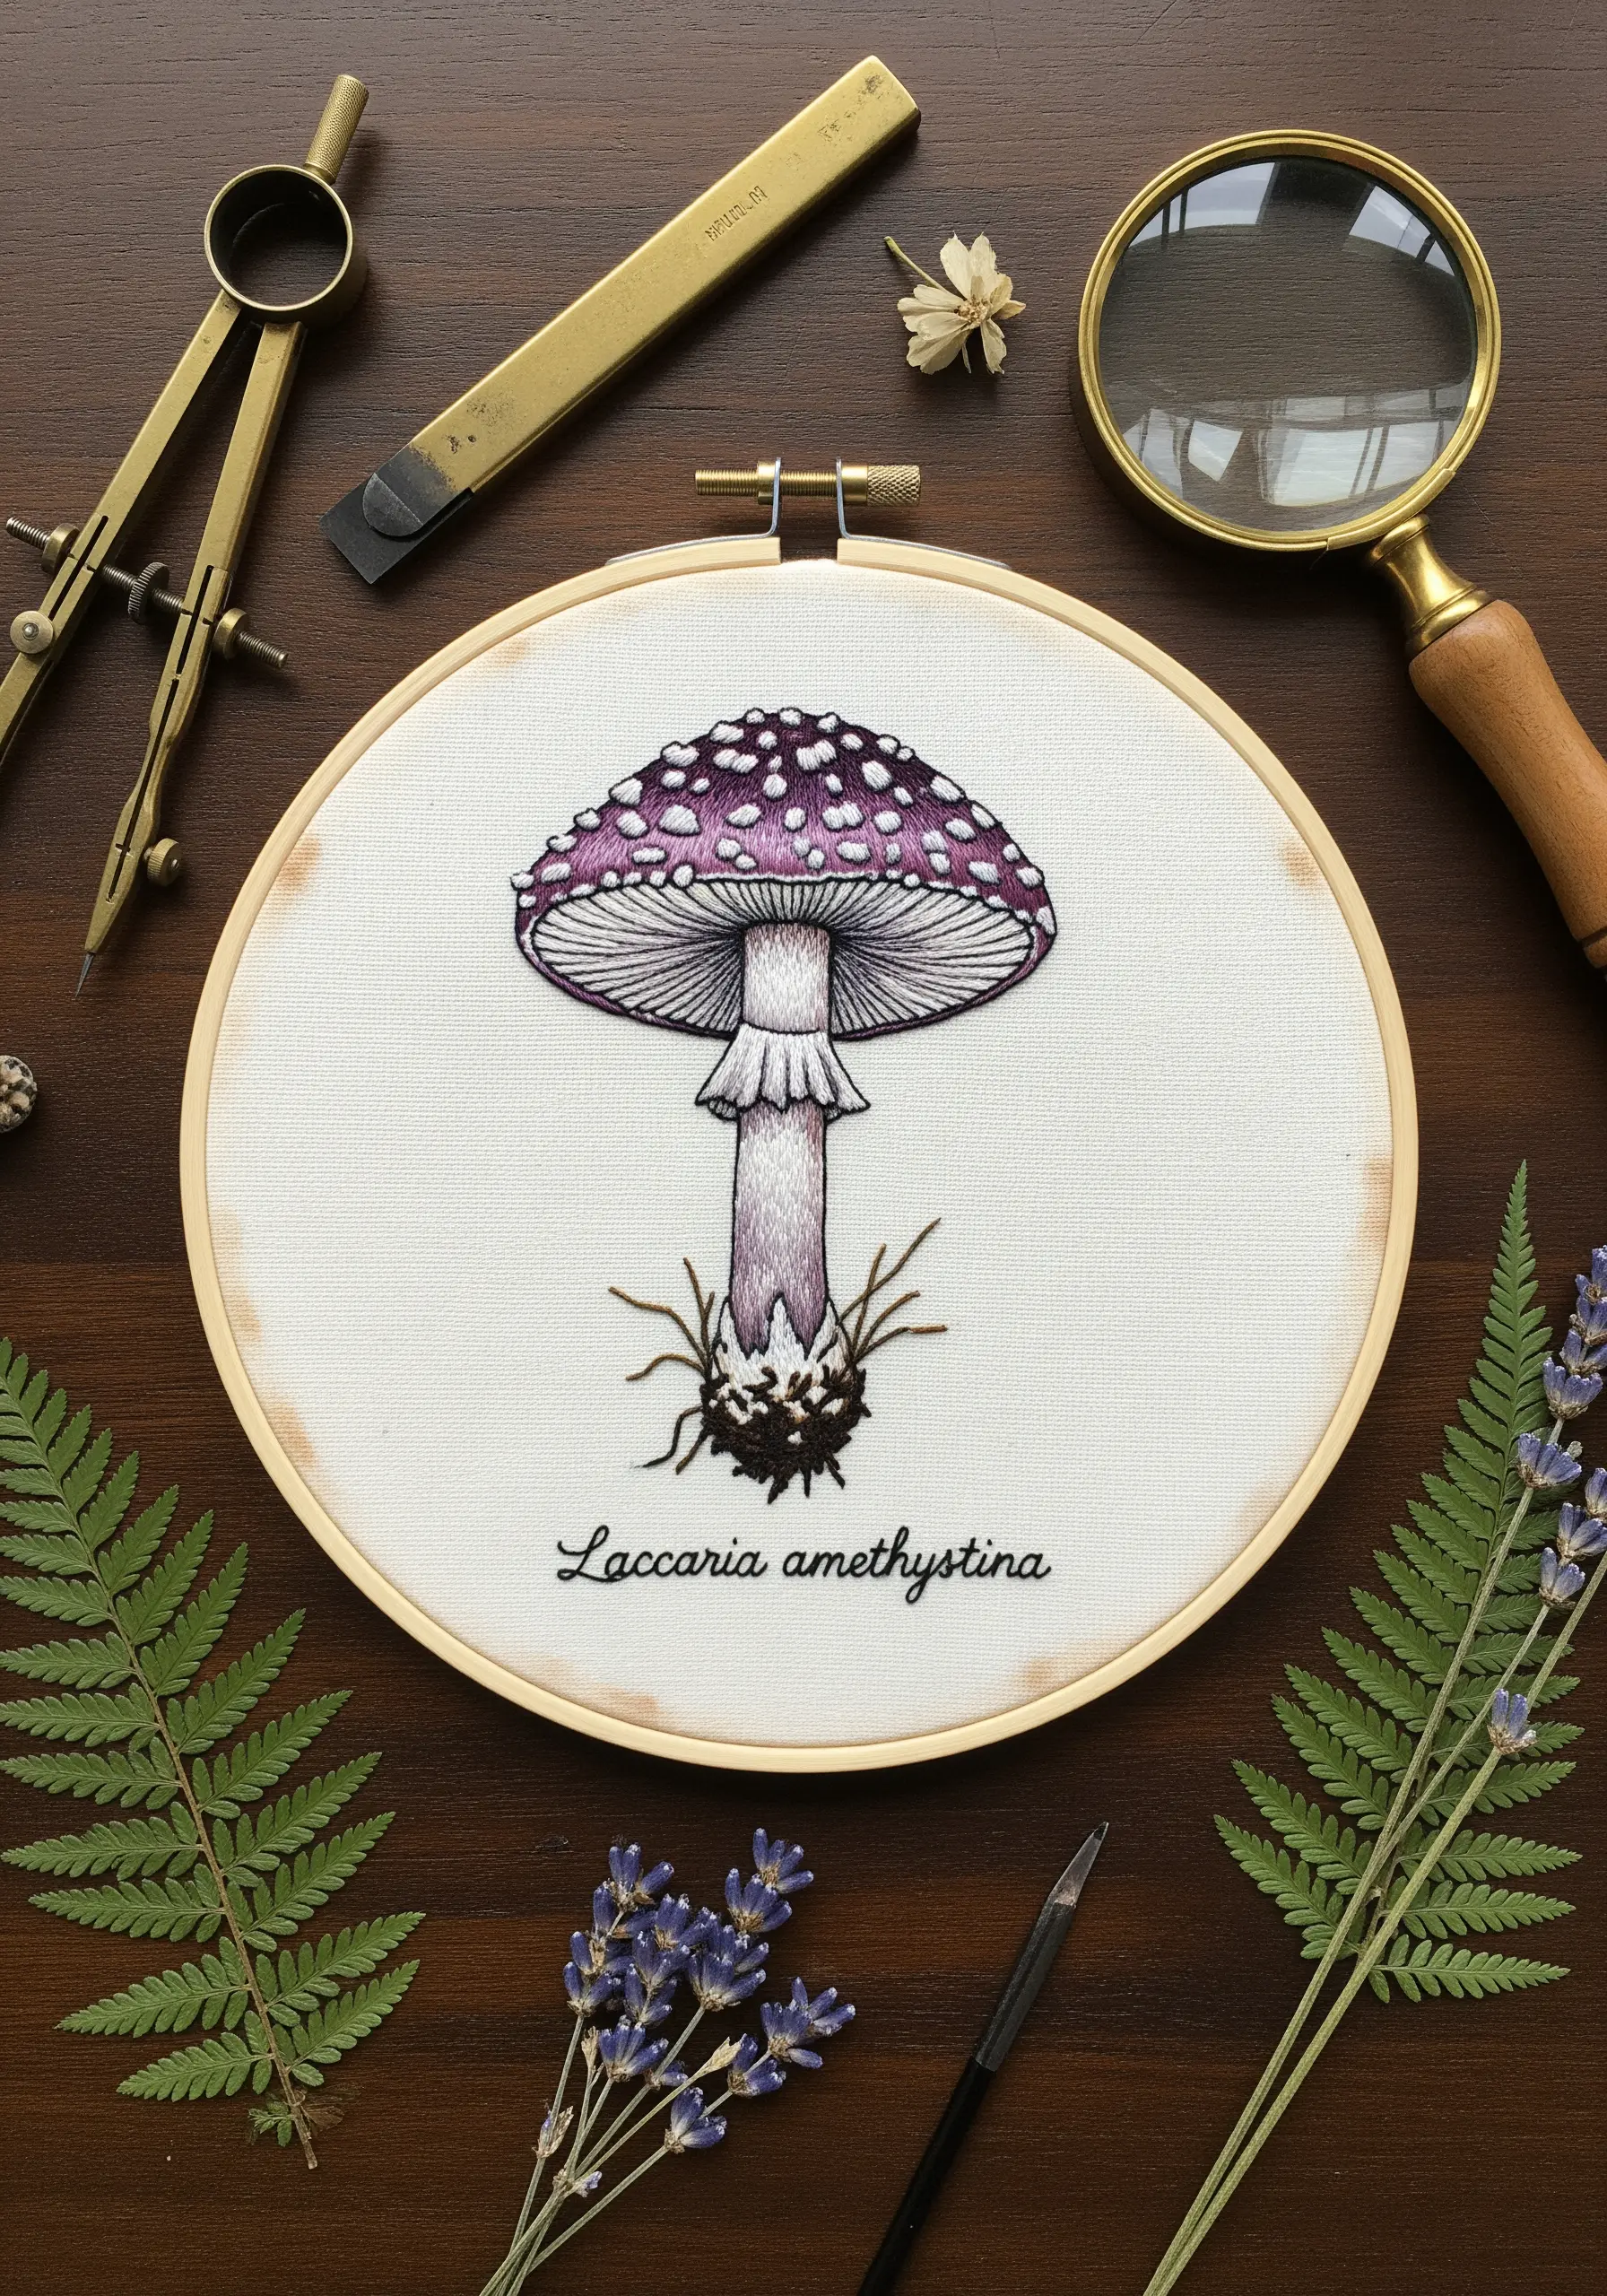
Capture the precision of a classic botanical drawing by prioritizing clean line work over filled shapes.
Use a single strand of black or dark grey thread with a sharp needle to ensure your stitches are crisp and refined.
Choose stitches that create smooth lines, like a whipped backstitch or a stem stitch, for all your outlines.
For shading under the mushroom cap, use tiny, parallel straight stitches (a technique called hatching) instead of color blending. This method emphasizes form and anatomical detail, giving your work a sophisticated, scientific feel.
12. Sculpt a Mossy Log with High-Pile Stitches

This intensely tactile landscape is built with stitches that create a high pile, such as dense clusters of French knots and the turkey work stitch.
For the mossy mounds, work rows of turkey work loops in various shades of green, then trim the loops to different heights to sculpt realistic contours.
Create the log with long, overlapping satin stitches in browns and greys, and stitch the turkey tail fungi with tight, concentric arcs of color.
This is a perfect example of high-texture fabric collage embroidery projects for people who love tactile art.
13. Curate a Cohesive Triptych Wall Display
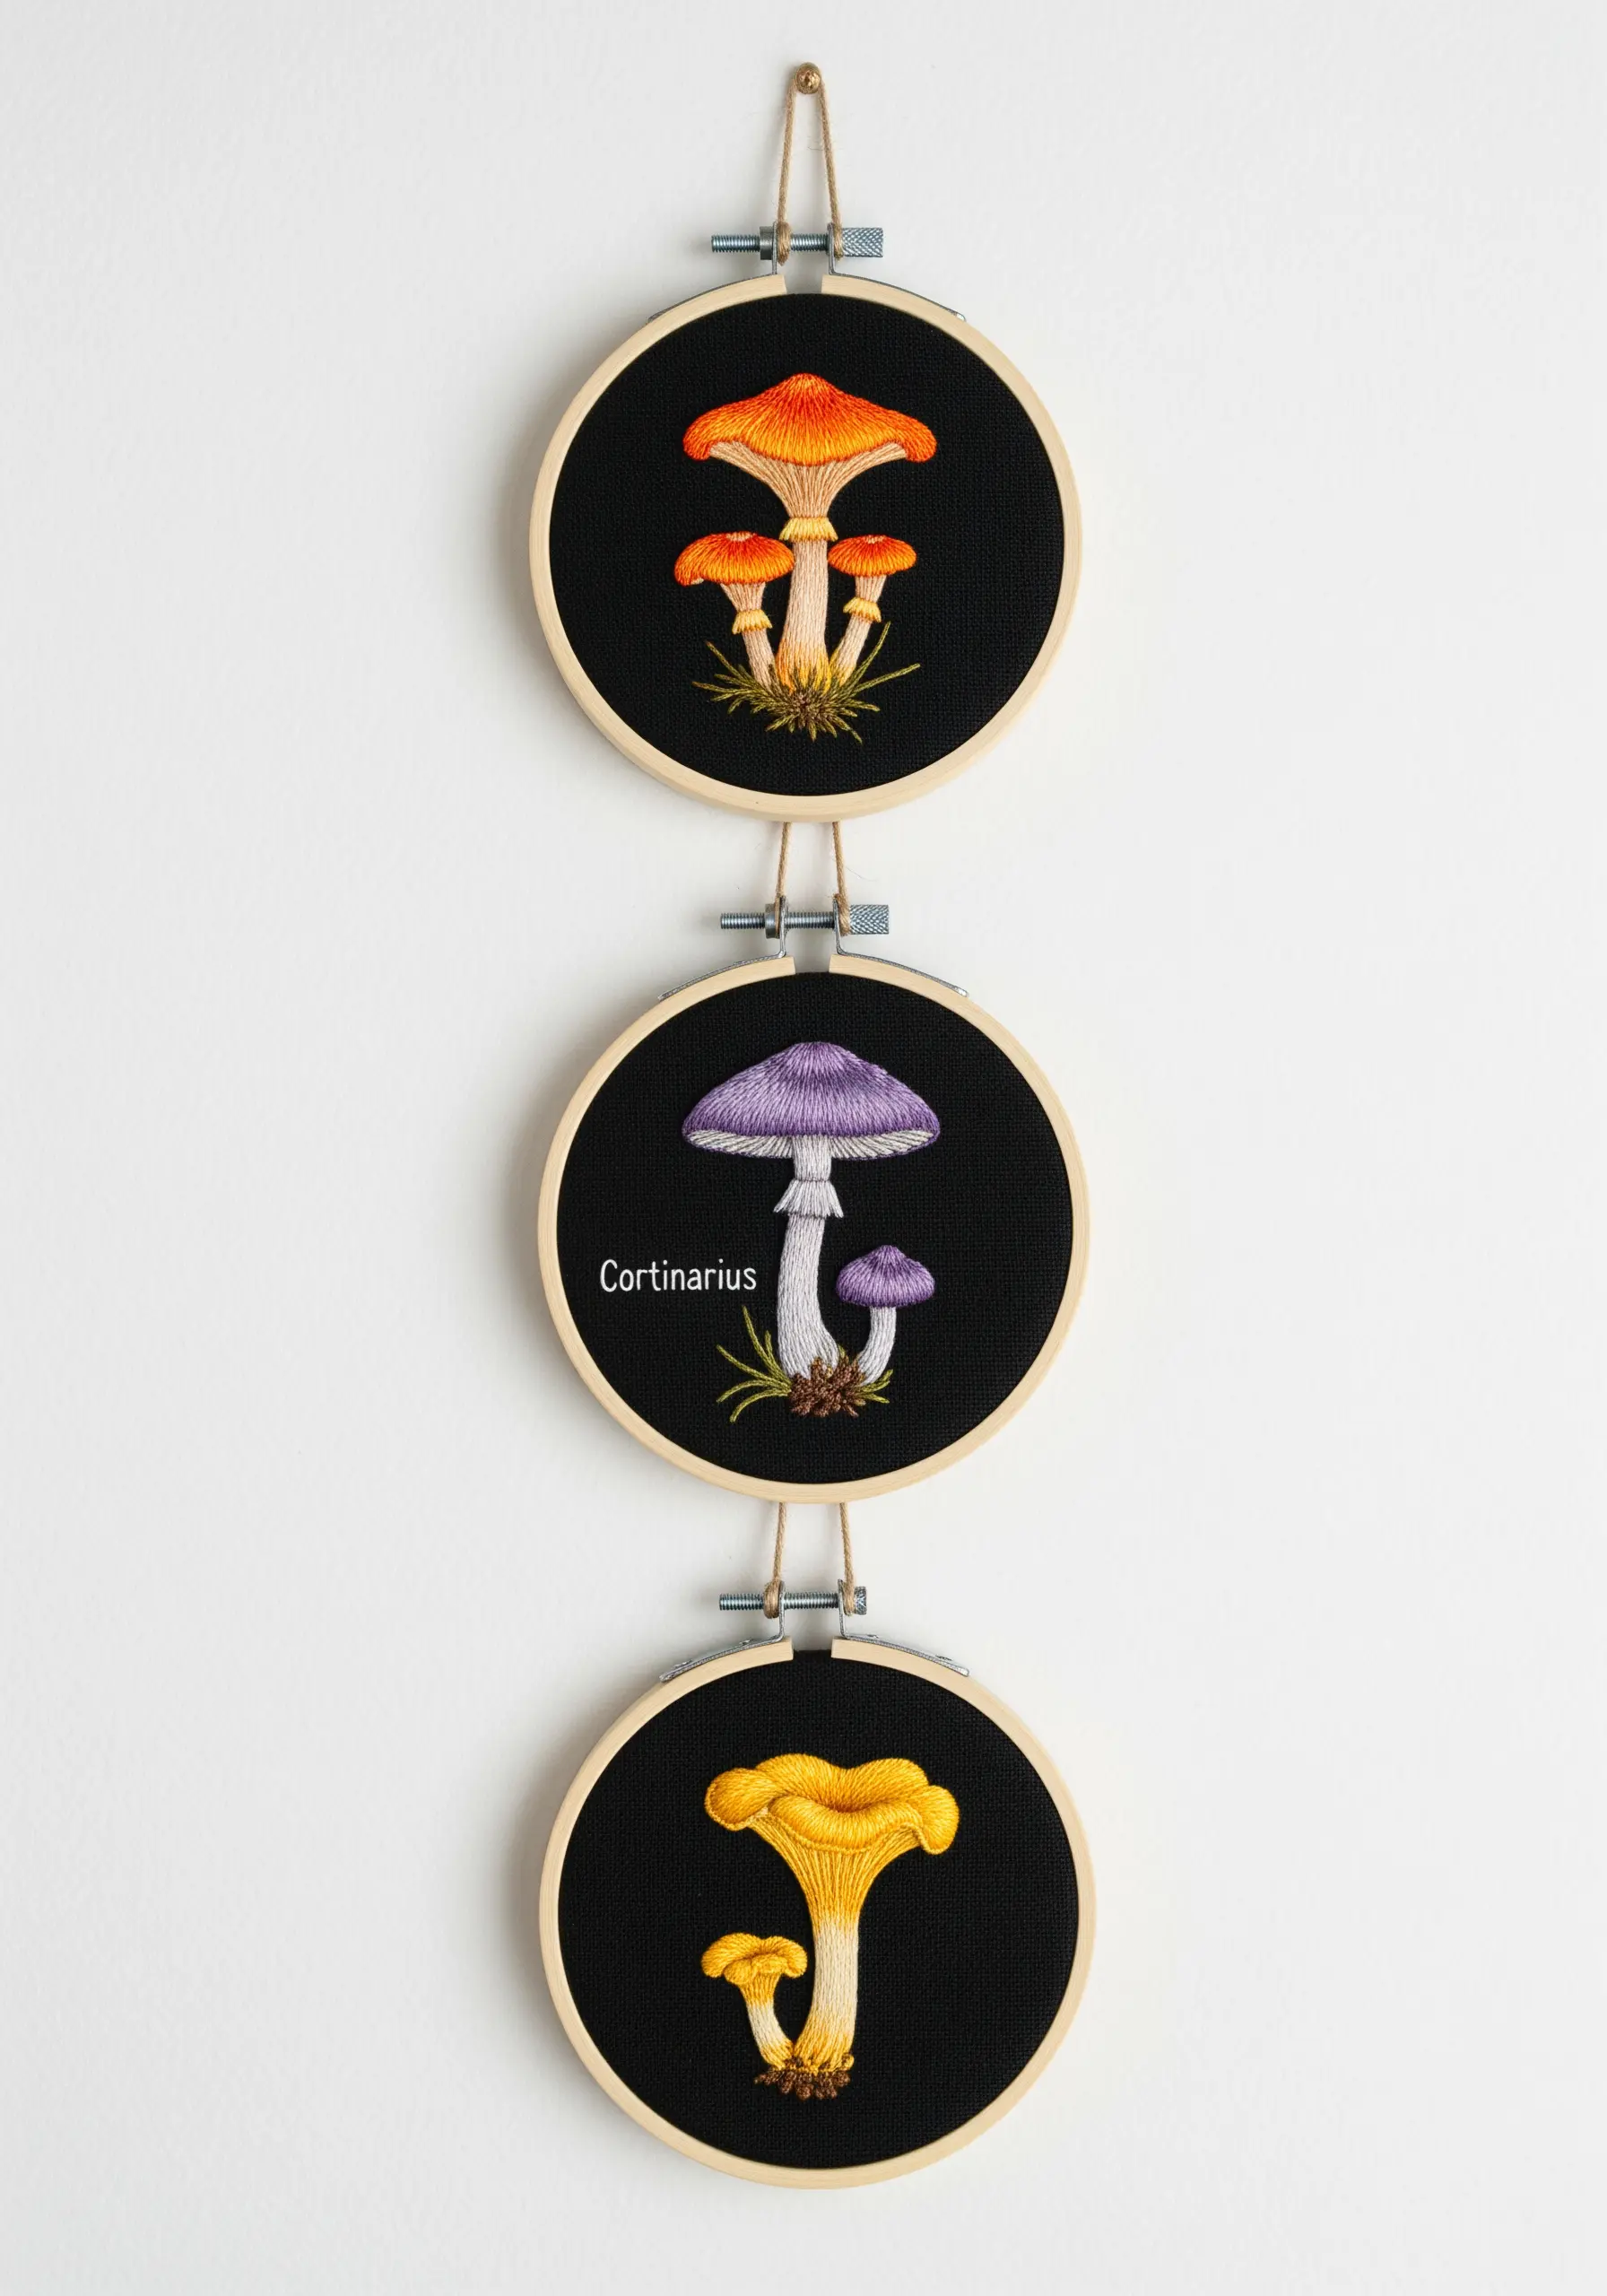
To turn individual hoops into a unified collection, consistency is your most important tool.
Use the same size hoop and the same color background fabric for each piece. This simple choice immediately ties them together visually.
Select a related theme, such as different mushroom species, but vary the specific subject, color palette, and composition in each hoop to maintain interest.
Hanging them in a neat vertical or horizontal line transforms three small works into a single, impactful art installation. These are great minimalist embroidery wall art ideas that turn plain white walls into calming luxury spaces.
14. Construct a 3D Mushroom Ring with Padded Stitching
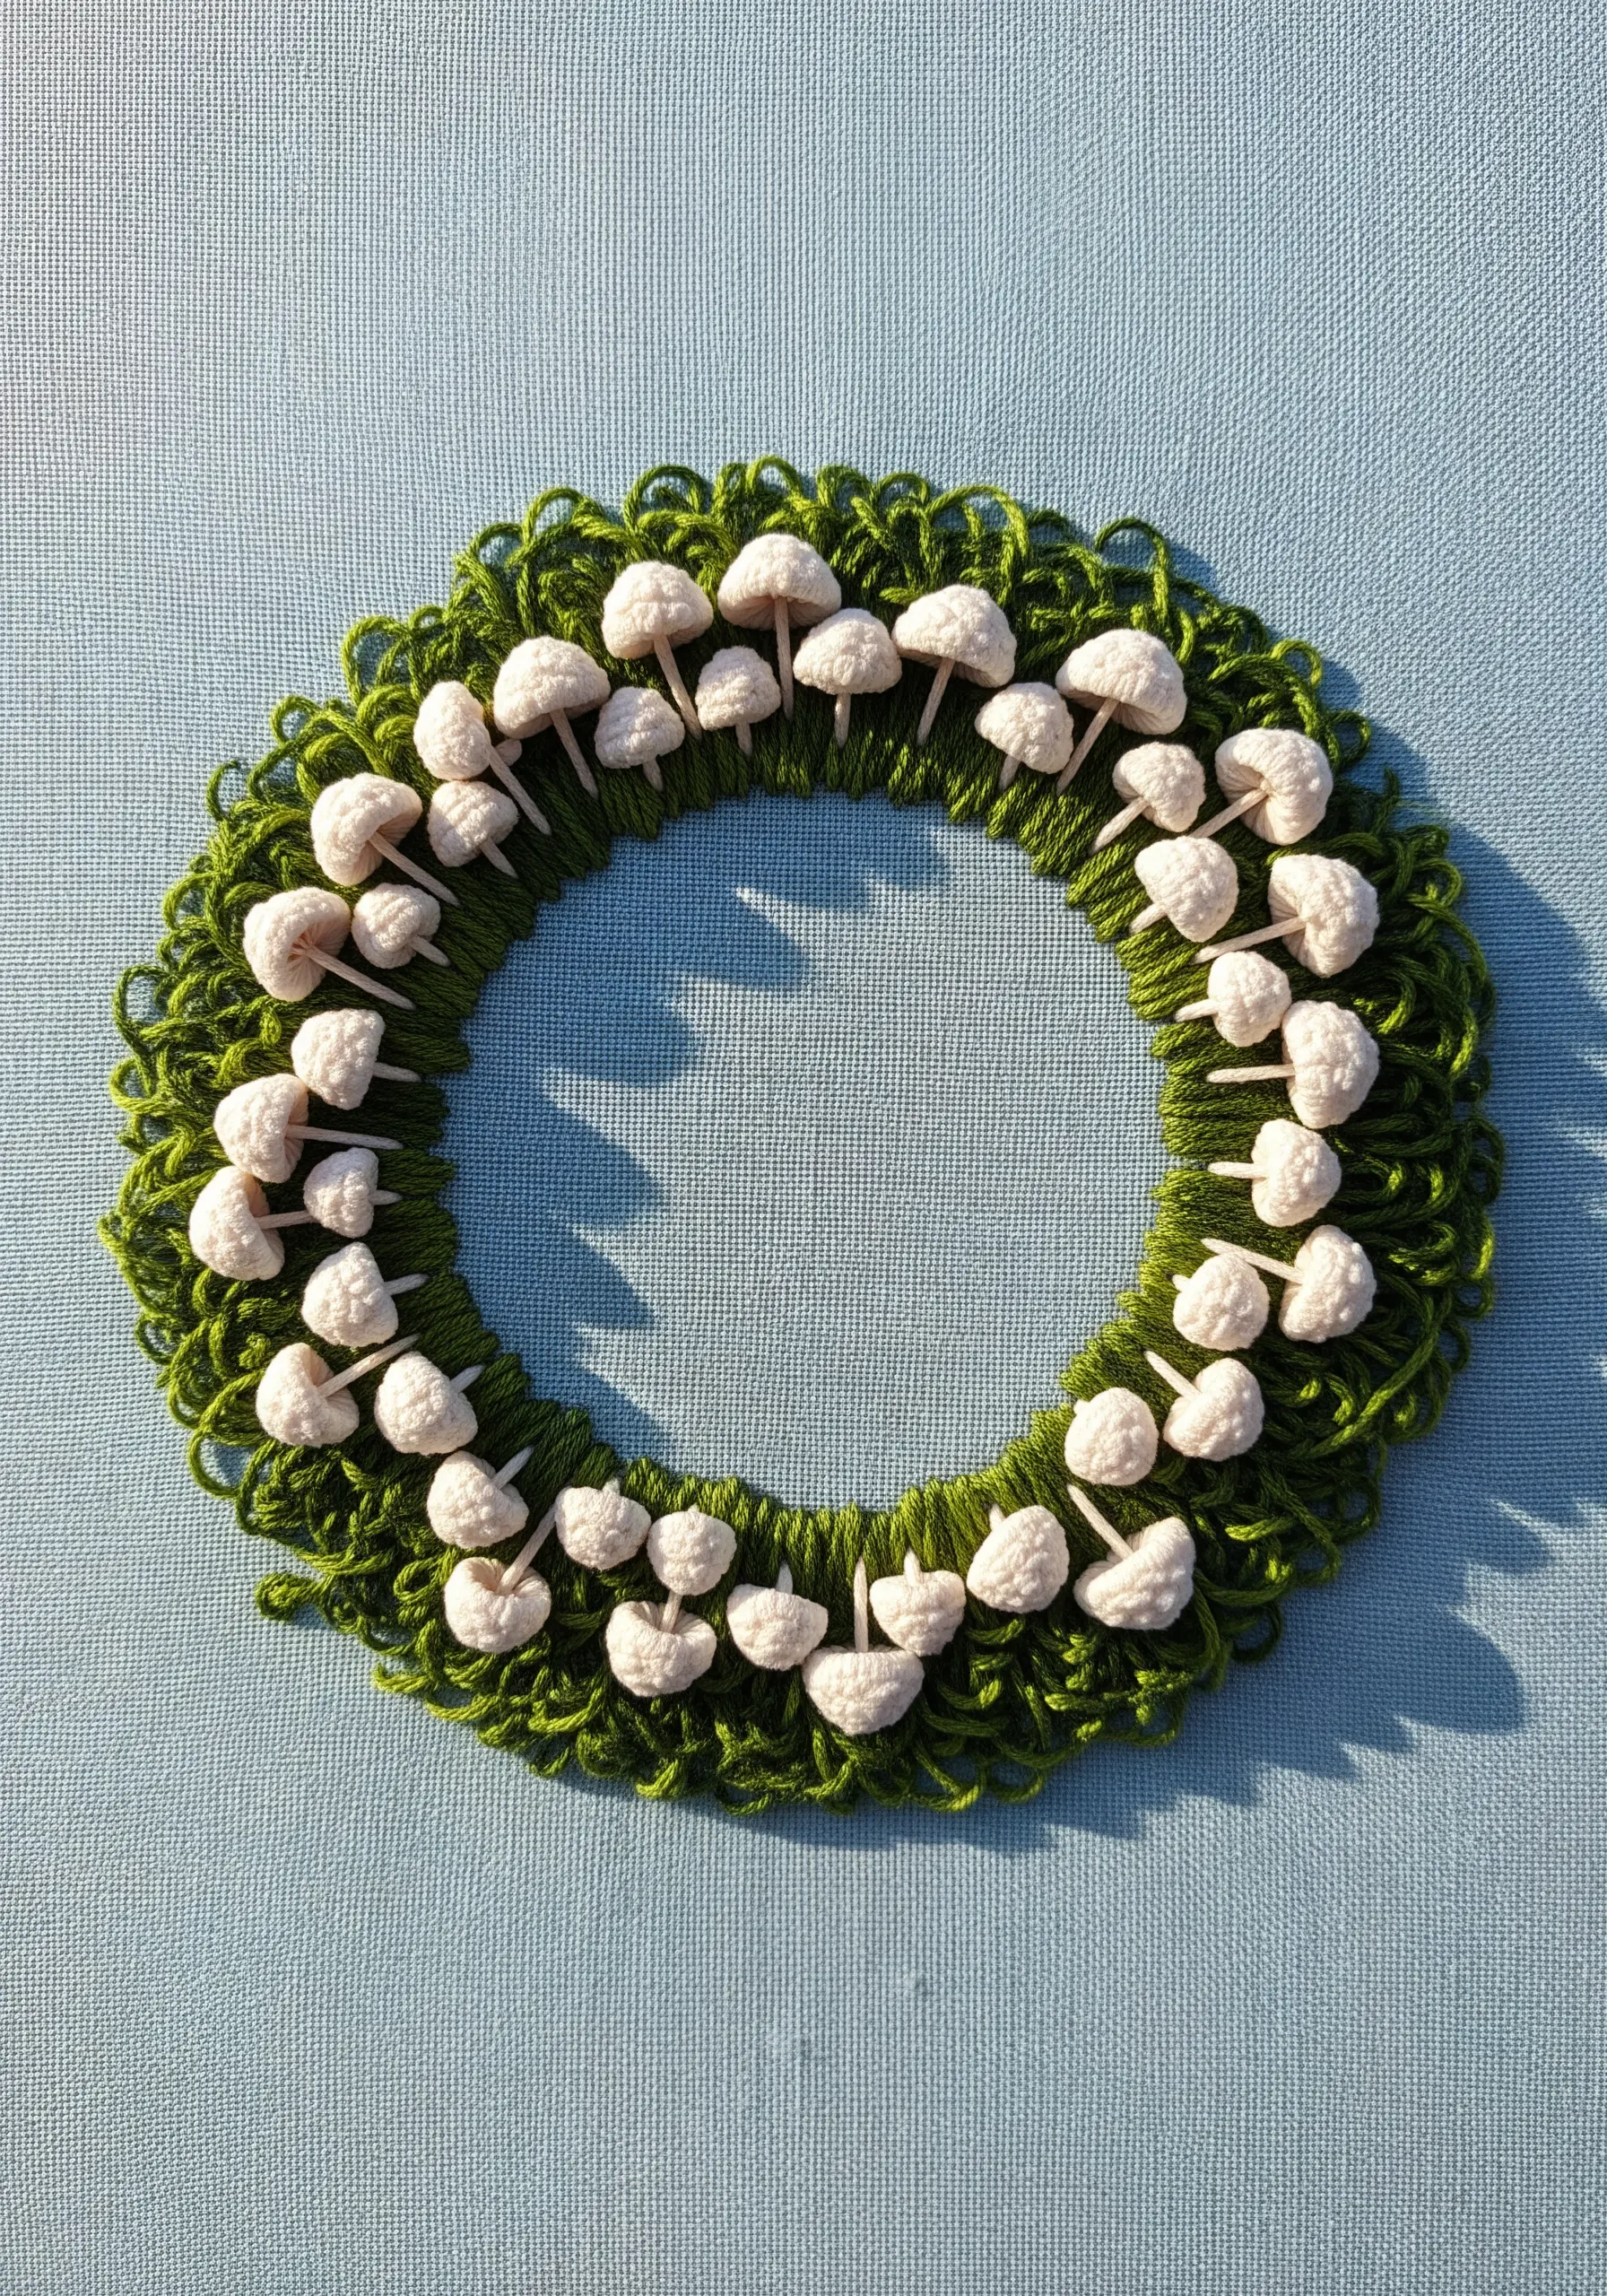
These charming, three-dimensional mushrooms get their volume from padded satin stitch.
For each mushroom cap, first create a small mound of foundation stitches (like seed stitches or tiny satin stitches). Then, cover this padding with smooth, dense satin stitches in white.
The underlying bulk forces the top layer of stitching to curve, creating a perfect little dome.
Arrange these tiny sculptures in a circle over a textured base of green looped stitches or couched yarn to form a whimsical, tactile wreath.
15. Layer Sheer Fabric for a Floating Illustration
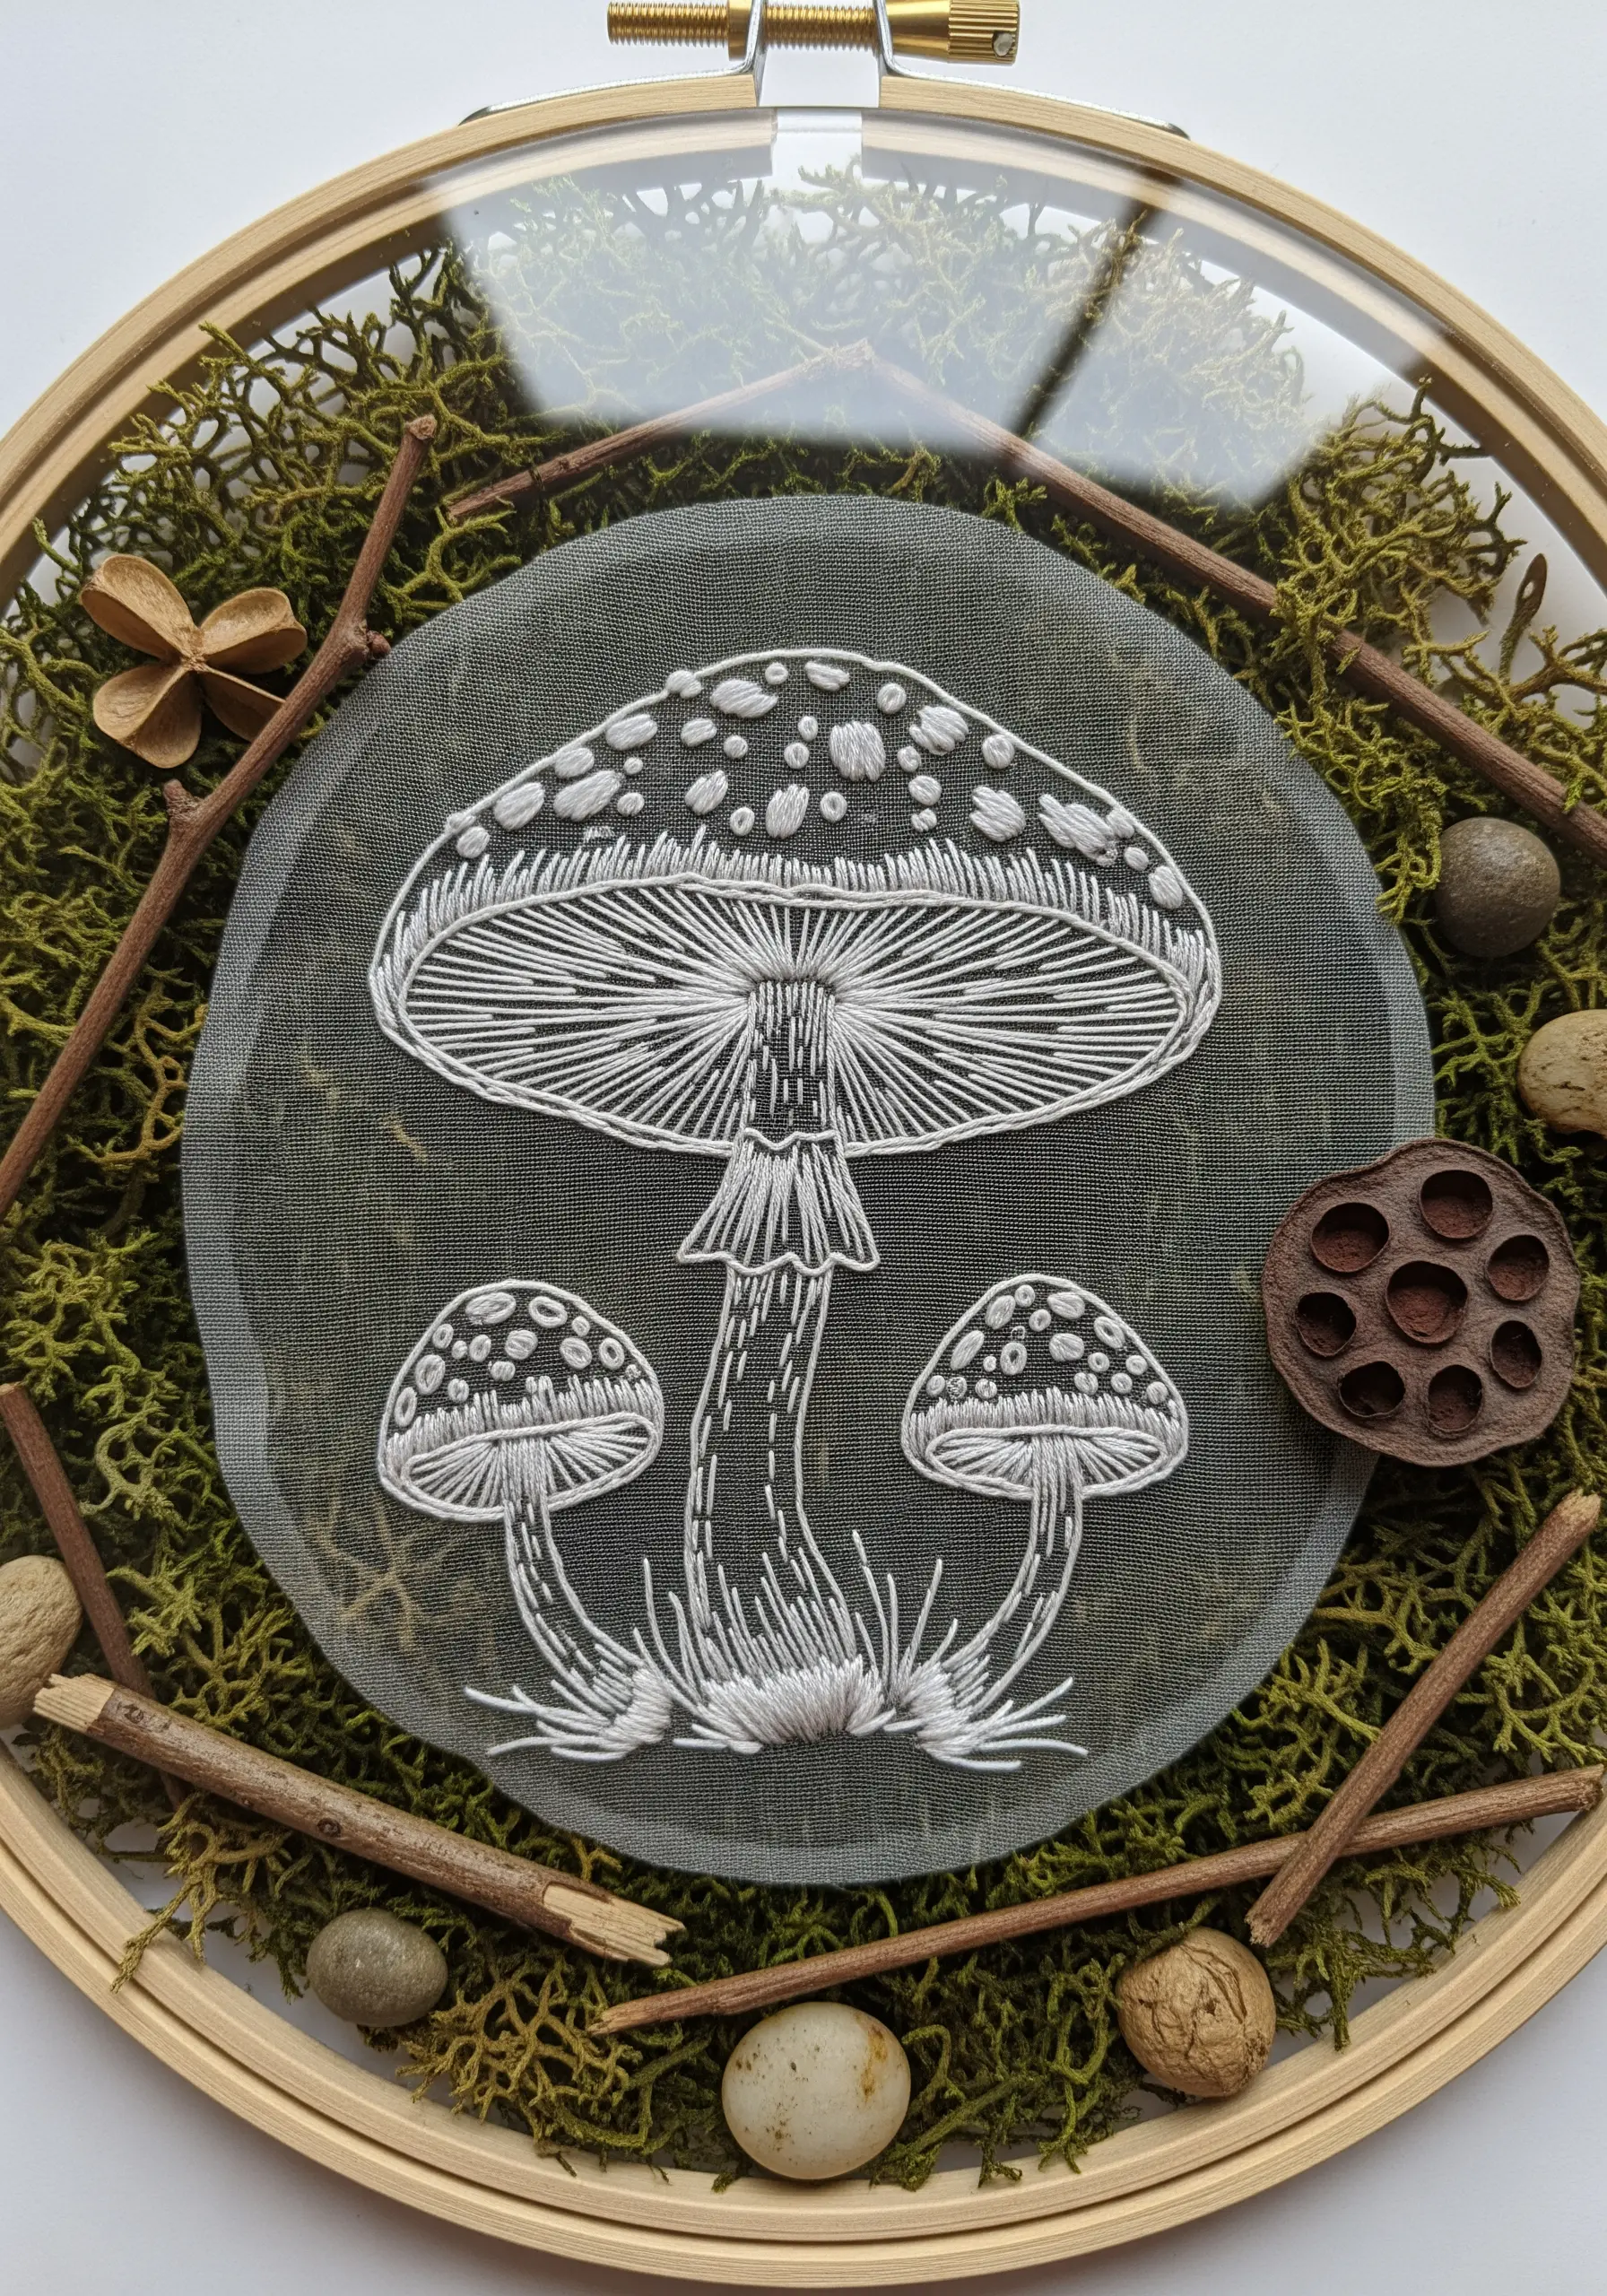
Stitching line art onto a sheer fabric like organza or tulle creates a magical, floating effect.
Use a simple backstitch with a single strand of white thread for a clean, graphic look that stands out against the transparent background.
For a truly unique display, mount the finished embroidery in the top layer of a deep shadow box frame. Fill the space behind it with real moss, twigs, and other natural elements.
This layering technique creates a beautiful interplay between the delicate, suspended embroidery and the rustic textures behind it.
16. Paint an Abstract Landscape with Knots and Couching

Approach this piece not as a literal depiction, but as an abstract exploration of texture.
Create vast fields of French knots, colonial knots, and bullion knots, intentionally varying their size, tightness, and color to build up rolling, moss-like forms.
Incorporate couching by laying down thicker yarns or wool roving in wavy lines and tacking them in place with a thinner thread to suggest water or soil layers.
This method focuses on capturing the tactile *sensation* of a natural texture embroidery pattern rather than its exact appearance.
17. Create a Durable and Professional Embroidered Patch
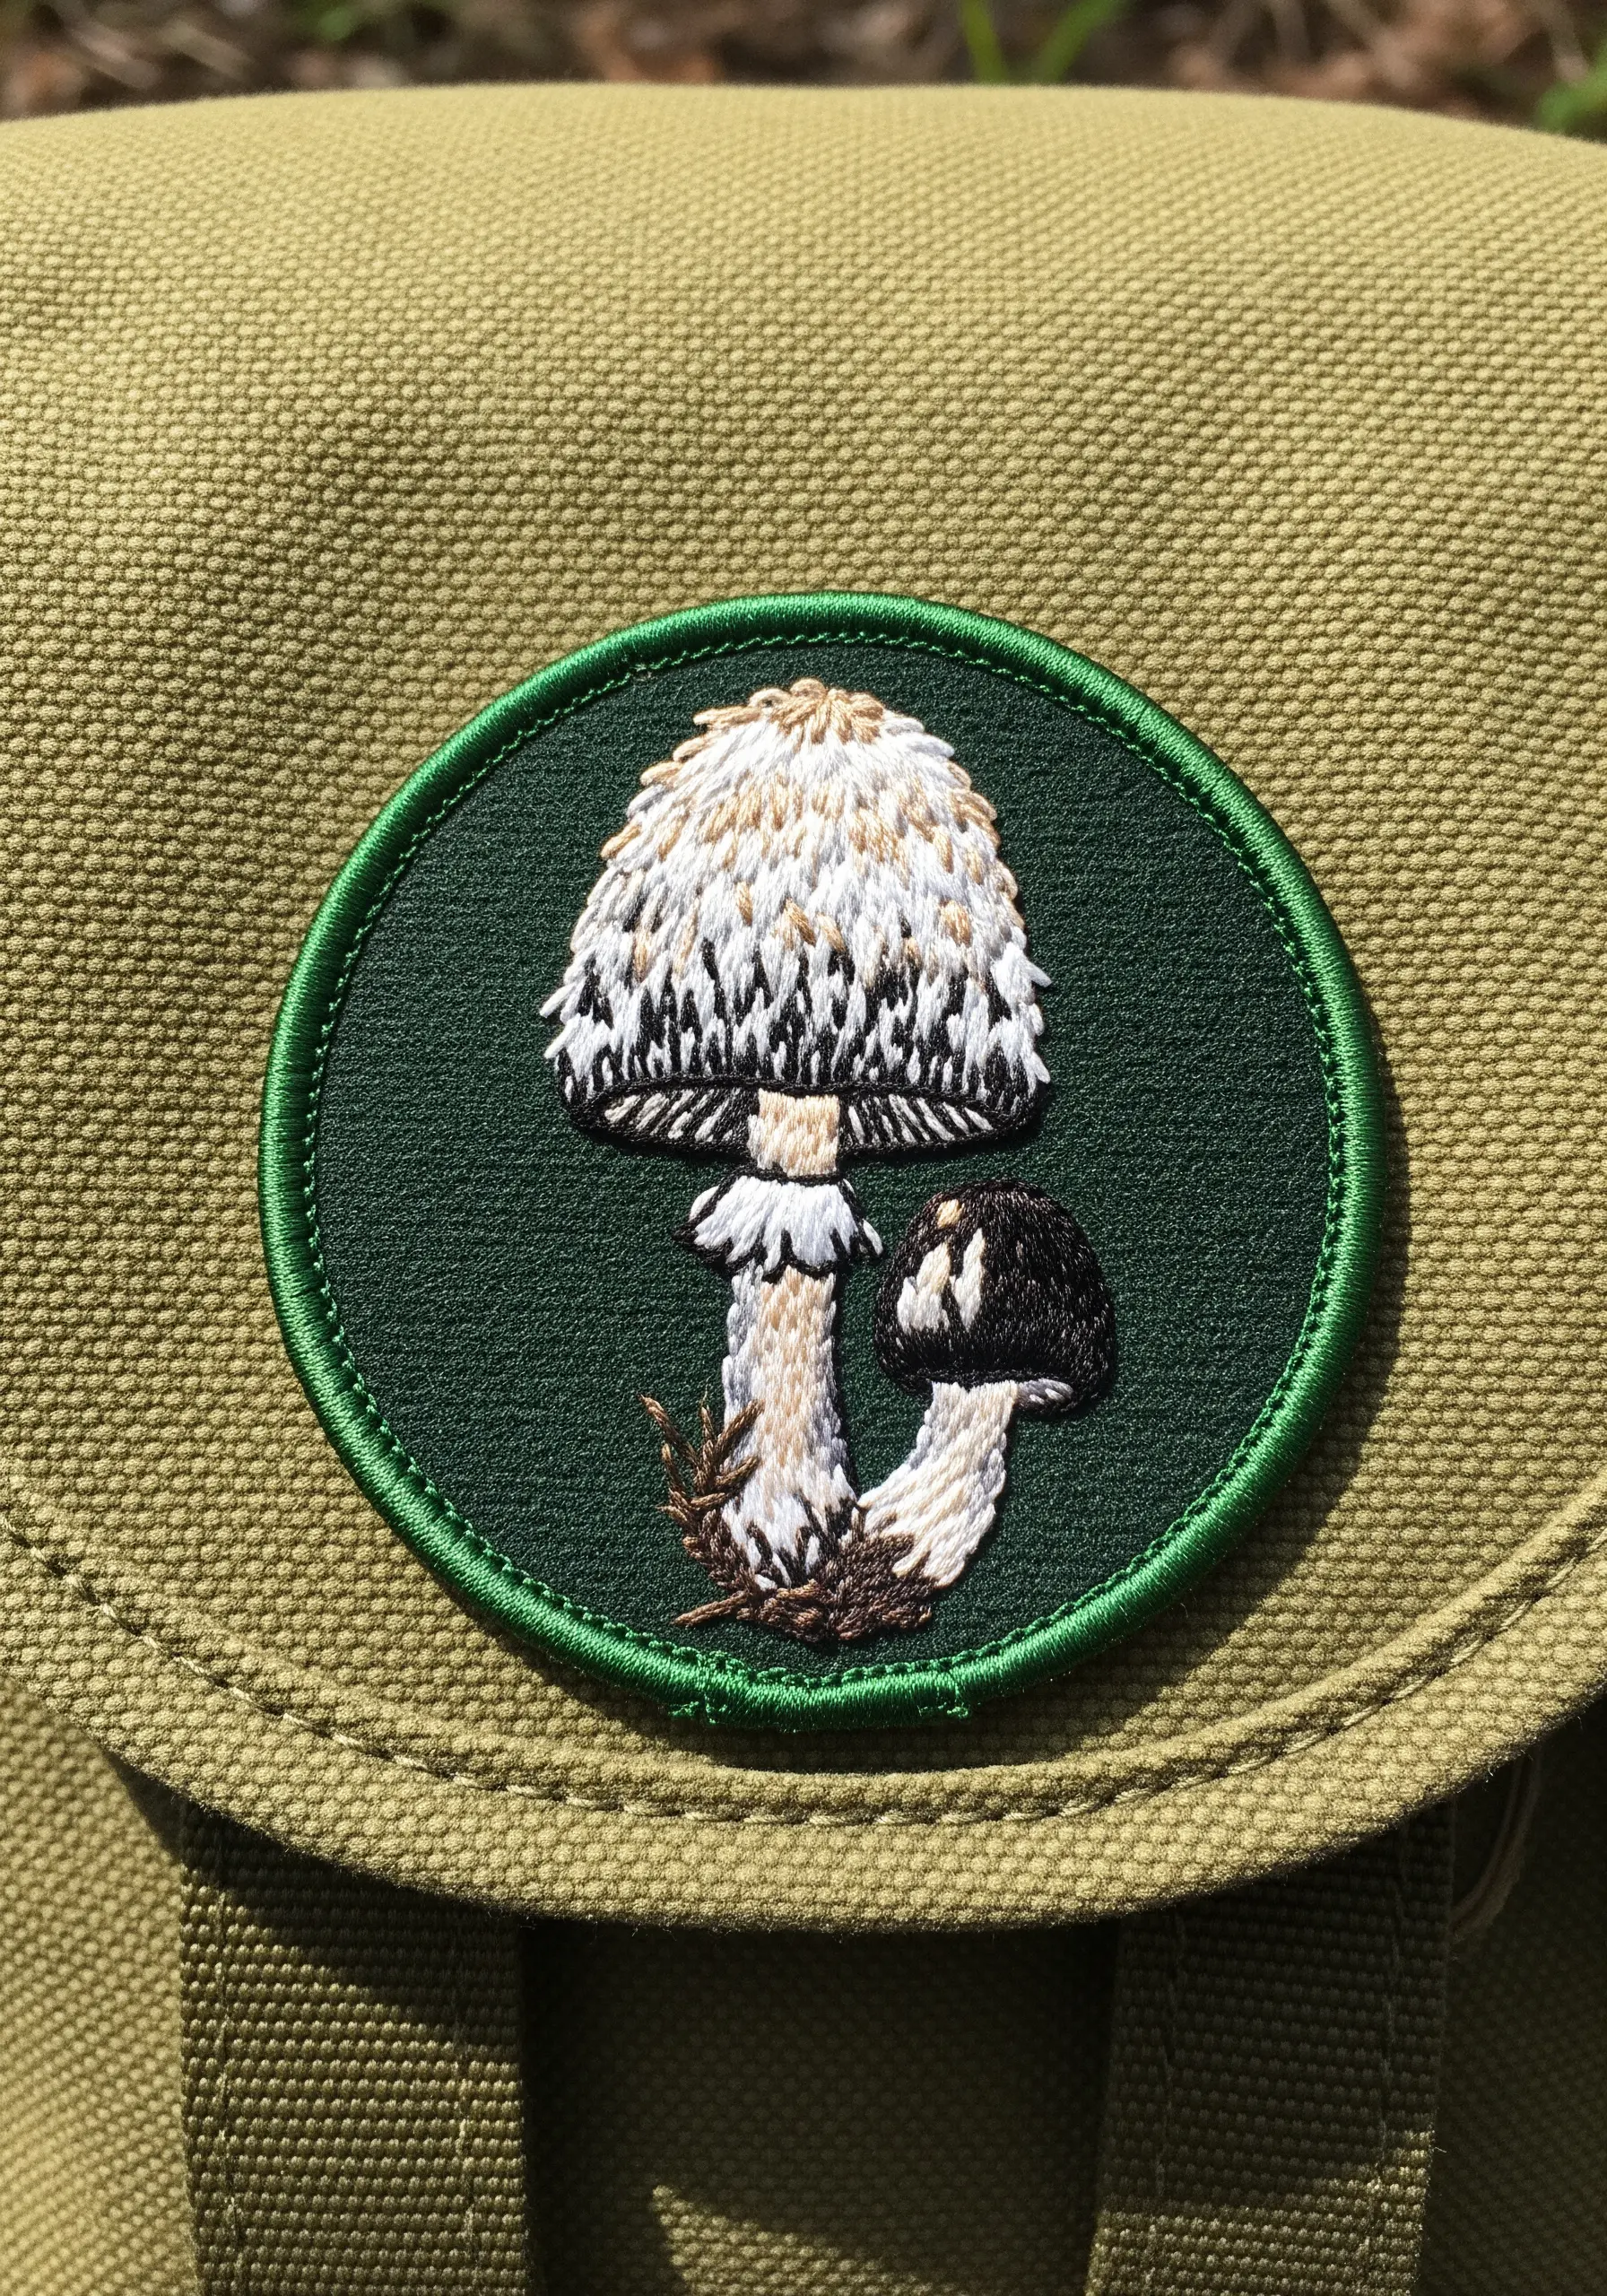
The key to a long-lasting, professional-looking patch is all in the finishing.
After stitching your design on a sturdy fabric like cotton canvas, create a clean, non-fraying edge by working a tight, dense satin stitch border around the perimeter.
Once the border is complete, carefully trim the excess fabric right up to the edge of your stitching.
Finally, apply a sheet of iron-on adhesive to the back. This will allow you to securely attach your patch to any jacket, backpack, or fabric surface. These cottagecore floral patches can be adapted for any motif.
18. Achieve Depth with Monochromatic Thread Painting
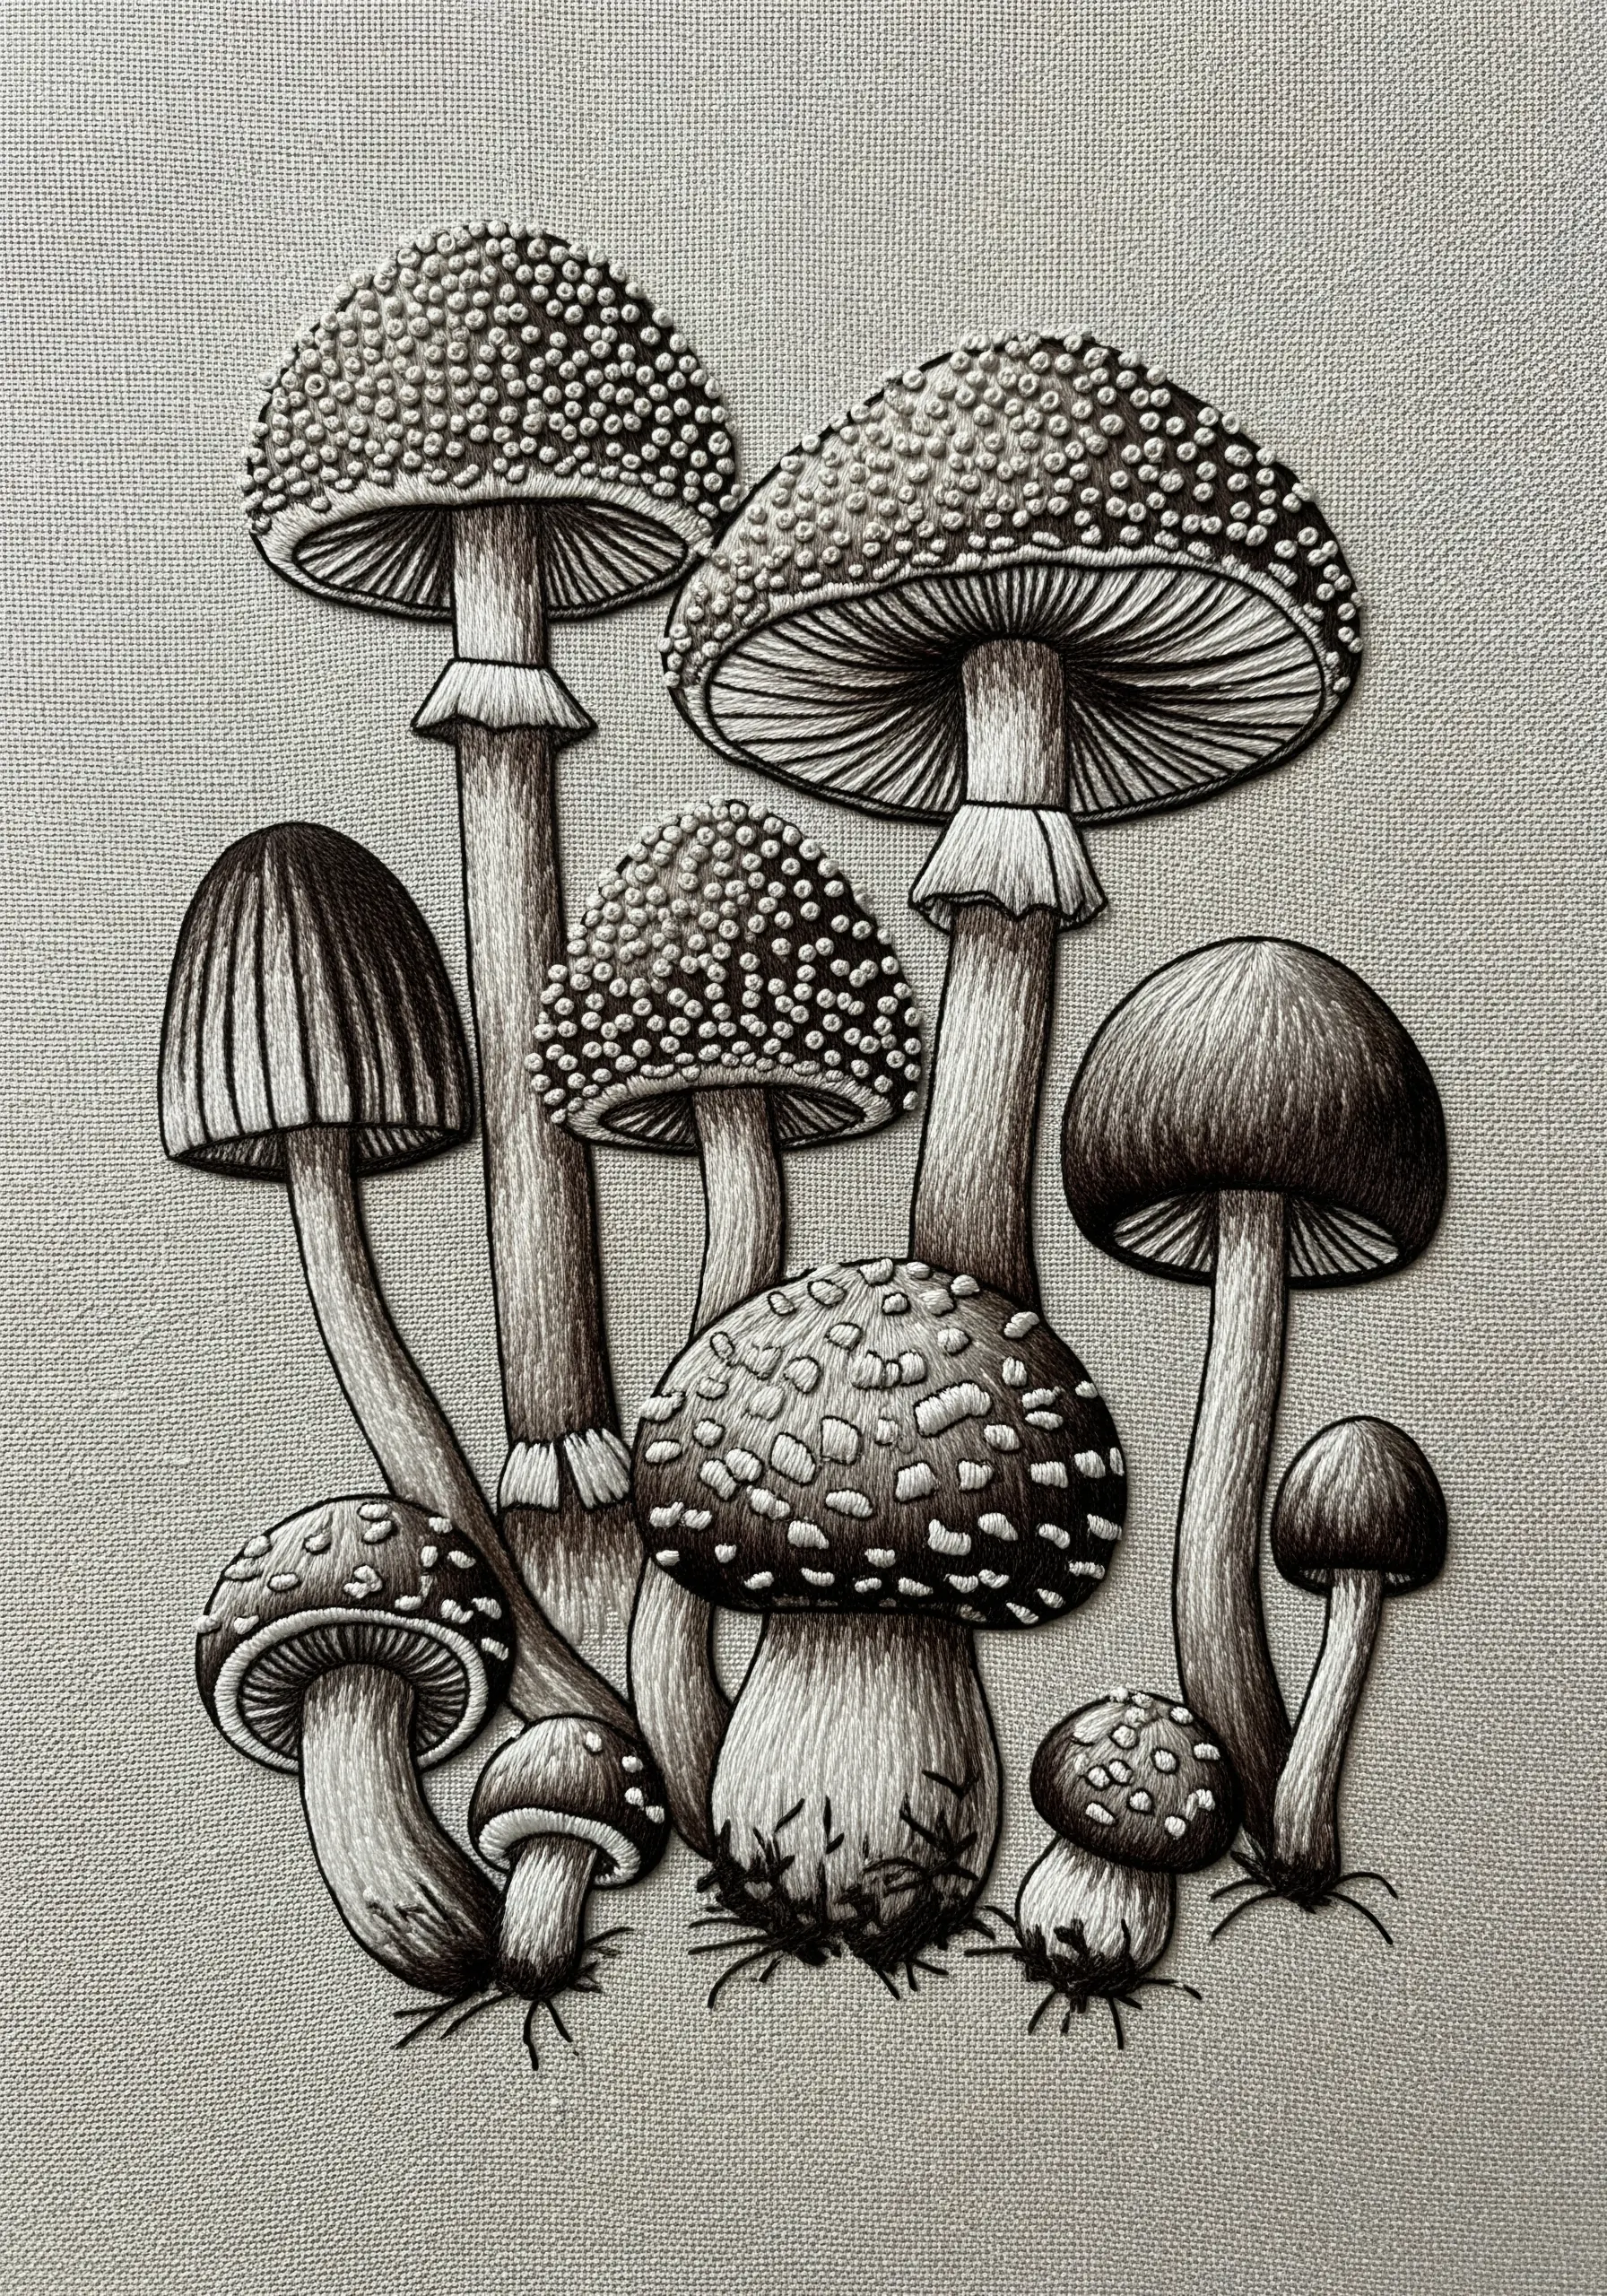
You don’t need a full spectrum of color to create stunning realism. A monochrome palette forces you to master light and shadow.
Work with a limited range of threads—black, white, and a few shades of grey—using single strands to blend values just as you would with colored thread painting.
Pay close attention to your light source. Use white only for the brightest highlights on the mushroom caps, and reserve pure black for the deepest shadows under the gills.
This focused approach results in a dramatic, graphic, and timeless piece of art that emphasizes form above all else.
19. Tell a Visual Story from Mycelium to Spores
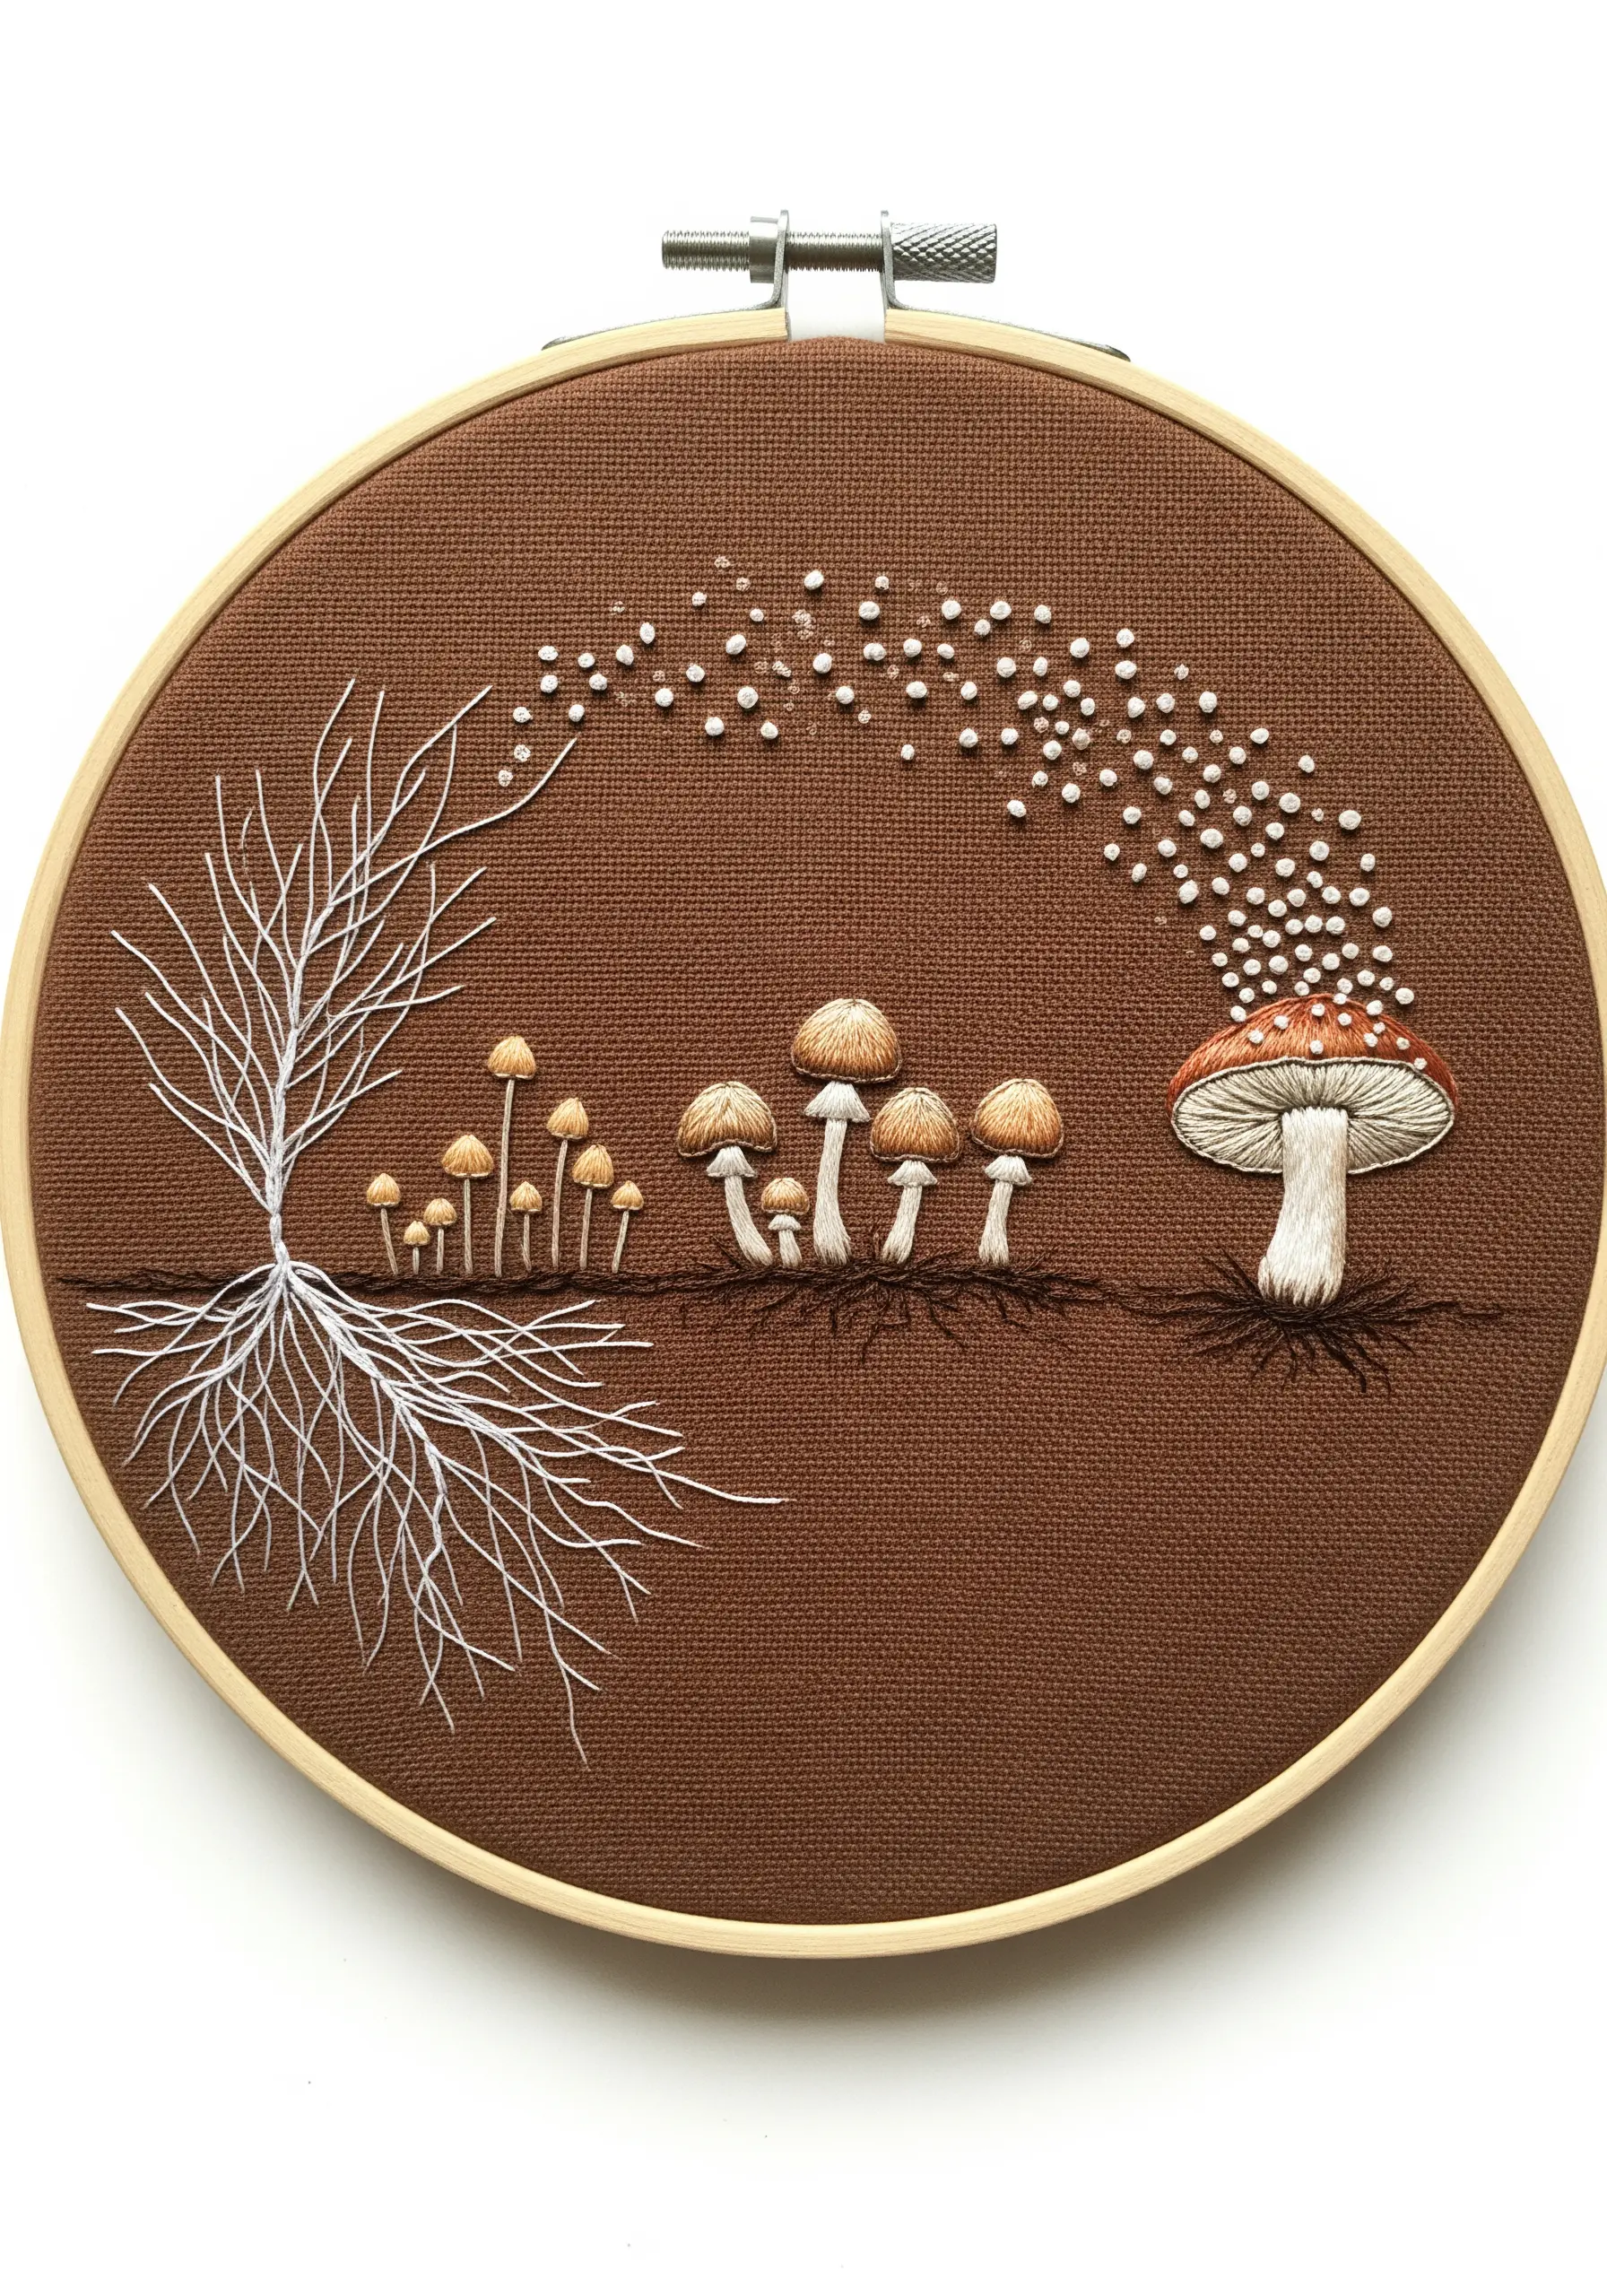
Use the entire space of your hoop to illustrate a narrative, such as the life cycle of a mushroom.
Begin on one side with a delicate network of mycelium, stitched with a fine, branching backstitch in white or off-white thread.
Transition this into a line of mushrooms embroidered in various stages of growth, from tiny pins to mature caps.
Complete the story on the other side with a cloud of tiny, scattered French knots or seed stitches representing the release of spores. This compositional flow turns a simple motif into a compelling visual journey.


