

When you stitch a portrait of a cat, you’re doing more than just recreating a likeness; you’re capturing a spirit. But how do you translate that playful energy, that quiet contentment, or that regal stare into thread? It’s not about using the most complex stitches, but about making intentional choices.
This collection is designed to help you think differently about your approach. You’ll see how changing the direction of a stitch can create the illusion of soft fur, how a few carefully placed French knots can build a lush, textured world, and how even the simplest line can tell a profound story.
Consider this your guide to moving beyond the pattern. Here, you’ll find the techniques to not only stitch a cat, but to imbue your work with personality, emotion, and life. Let’s turn that love for your feline friend into a piece of art that truly feels alive.
1. Layering Foliage for Three-Dimensional Depth

To make your subject pop, build the environment in layers.
Stitch the background Monstera leaves first using a fishbone stitch to create a defined central vein.
Next, embroider the cat using a short, directional satin stitch to mimic fur texture.
Finally, add the foreground leaves, stitching them so they slightly overlap the cat’s paws, which pushes the animal into the scene and creates a convincing sense of depth.
This layering technique transforms a flat design into three-dimensional botanical texture that pops.
2. High-Contrast Elegance on Dark Fabric
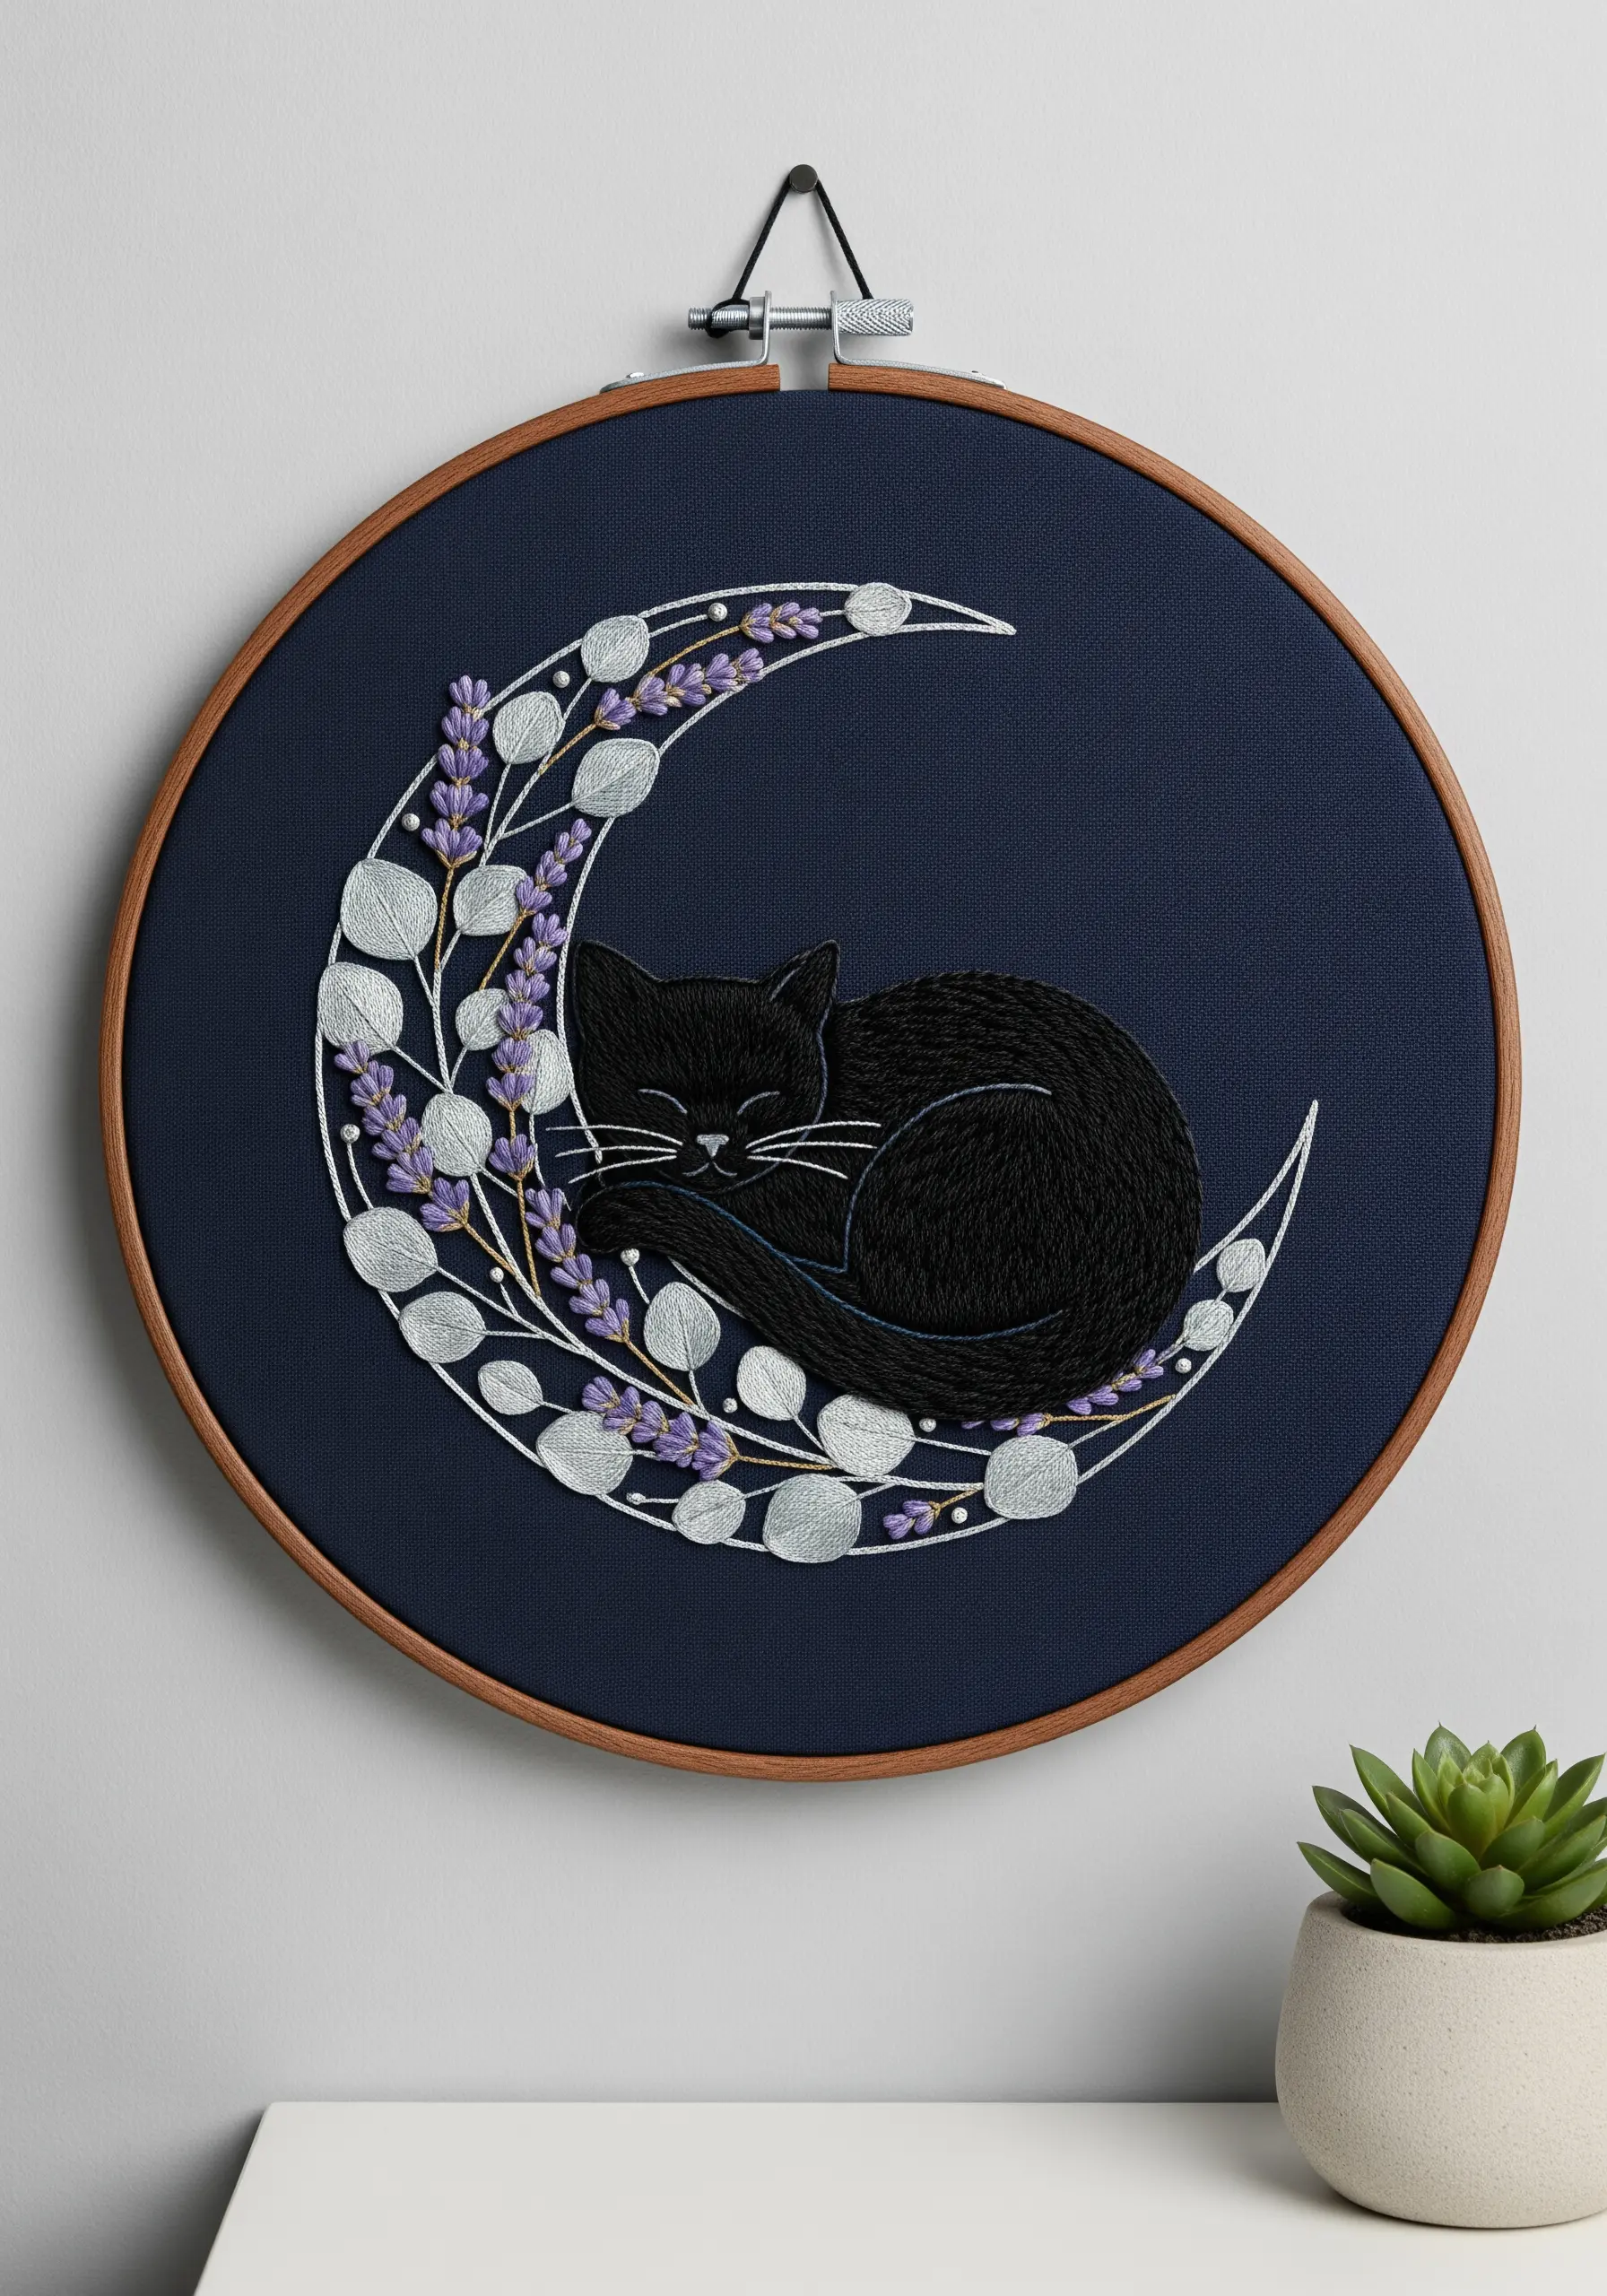
Let your fabric choice do the heavy lifting.
Using a dark navy or black cotton-linen blend makes lighter threads appear more vibrant without any extra effort.
For the crescent moon, outline it with a single strand of silver metallic thread or a bright white to achieve a crisp, sharp edge.
Combine padded satin stitch for the eucalyptus leaves and small French knots for the lavender to introduce subtle texture against the smooth, dark backdrop.
3. Capturing Fur Texture with Thread Painting
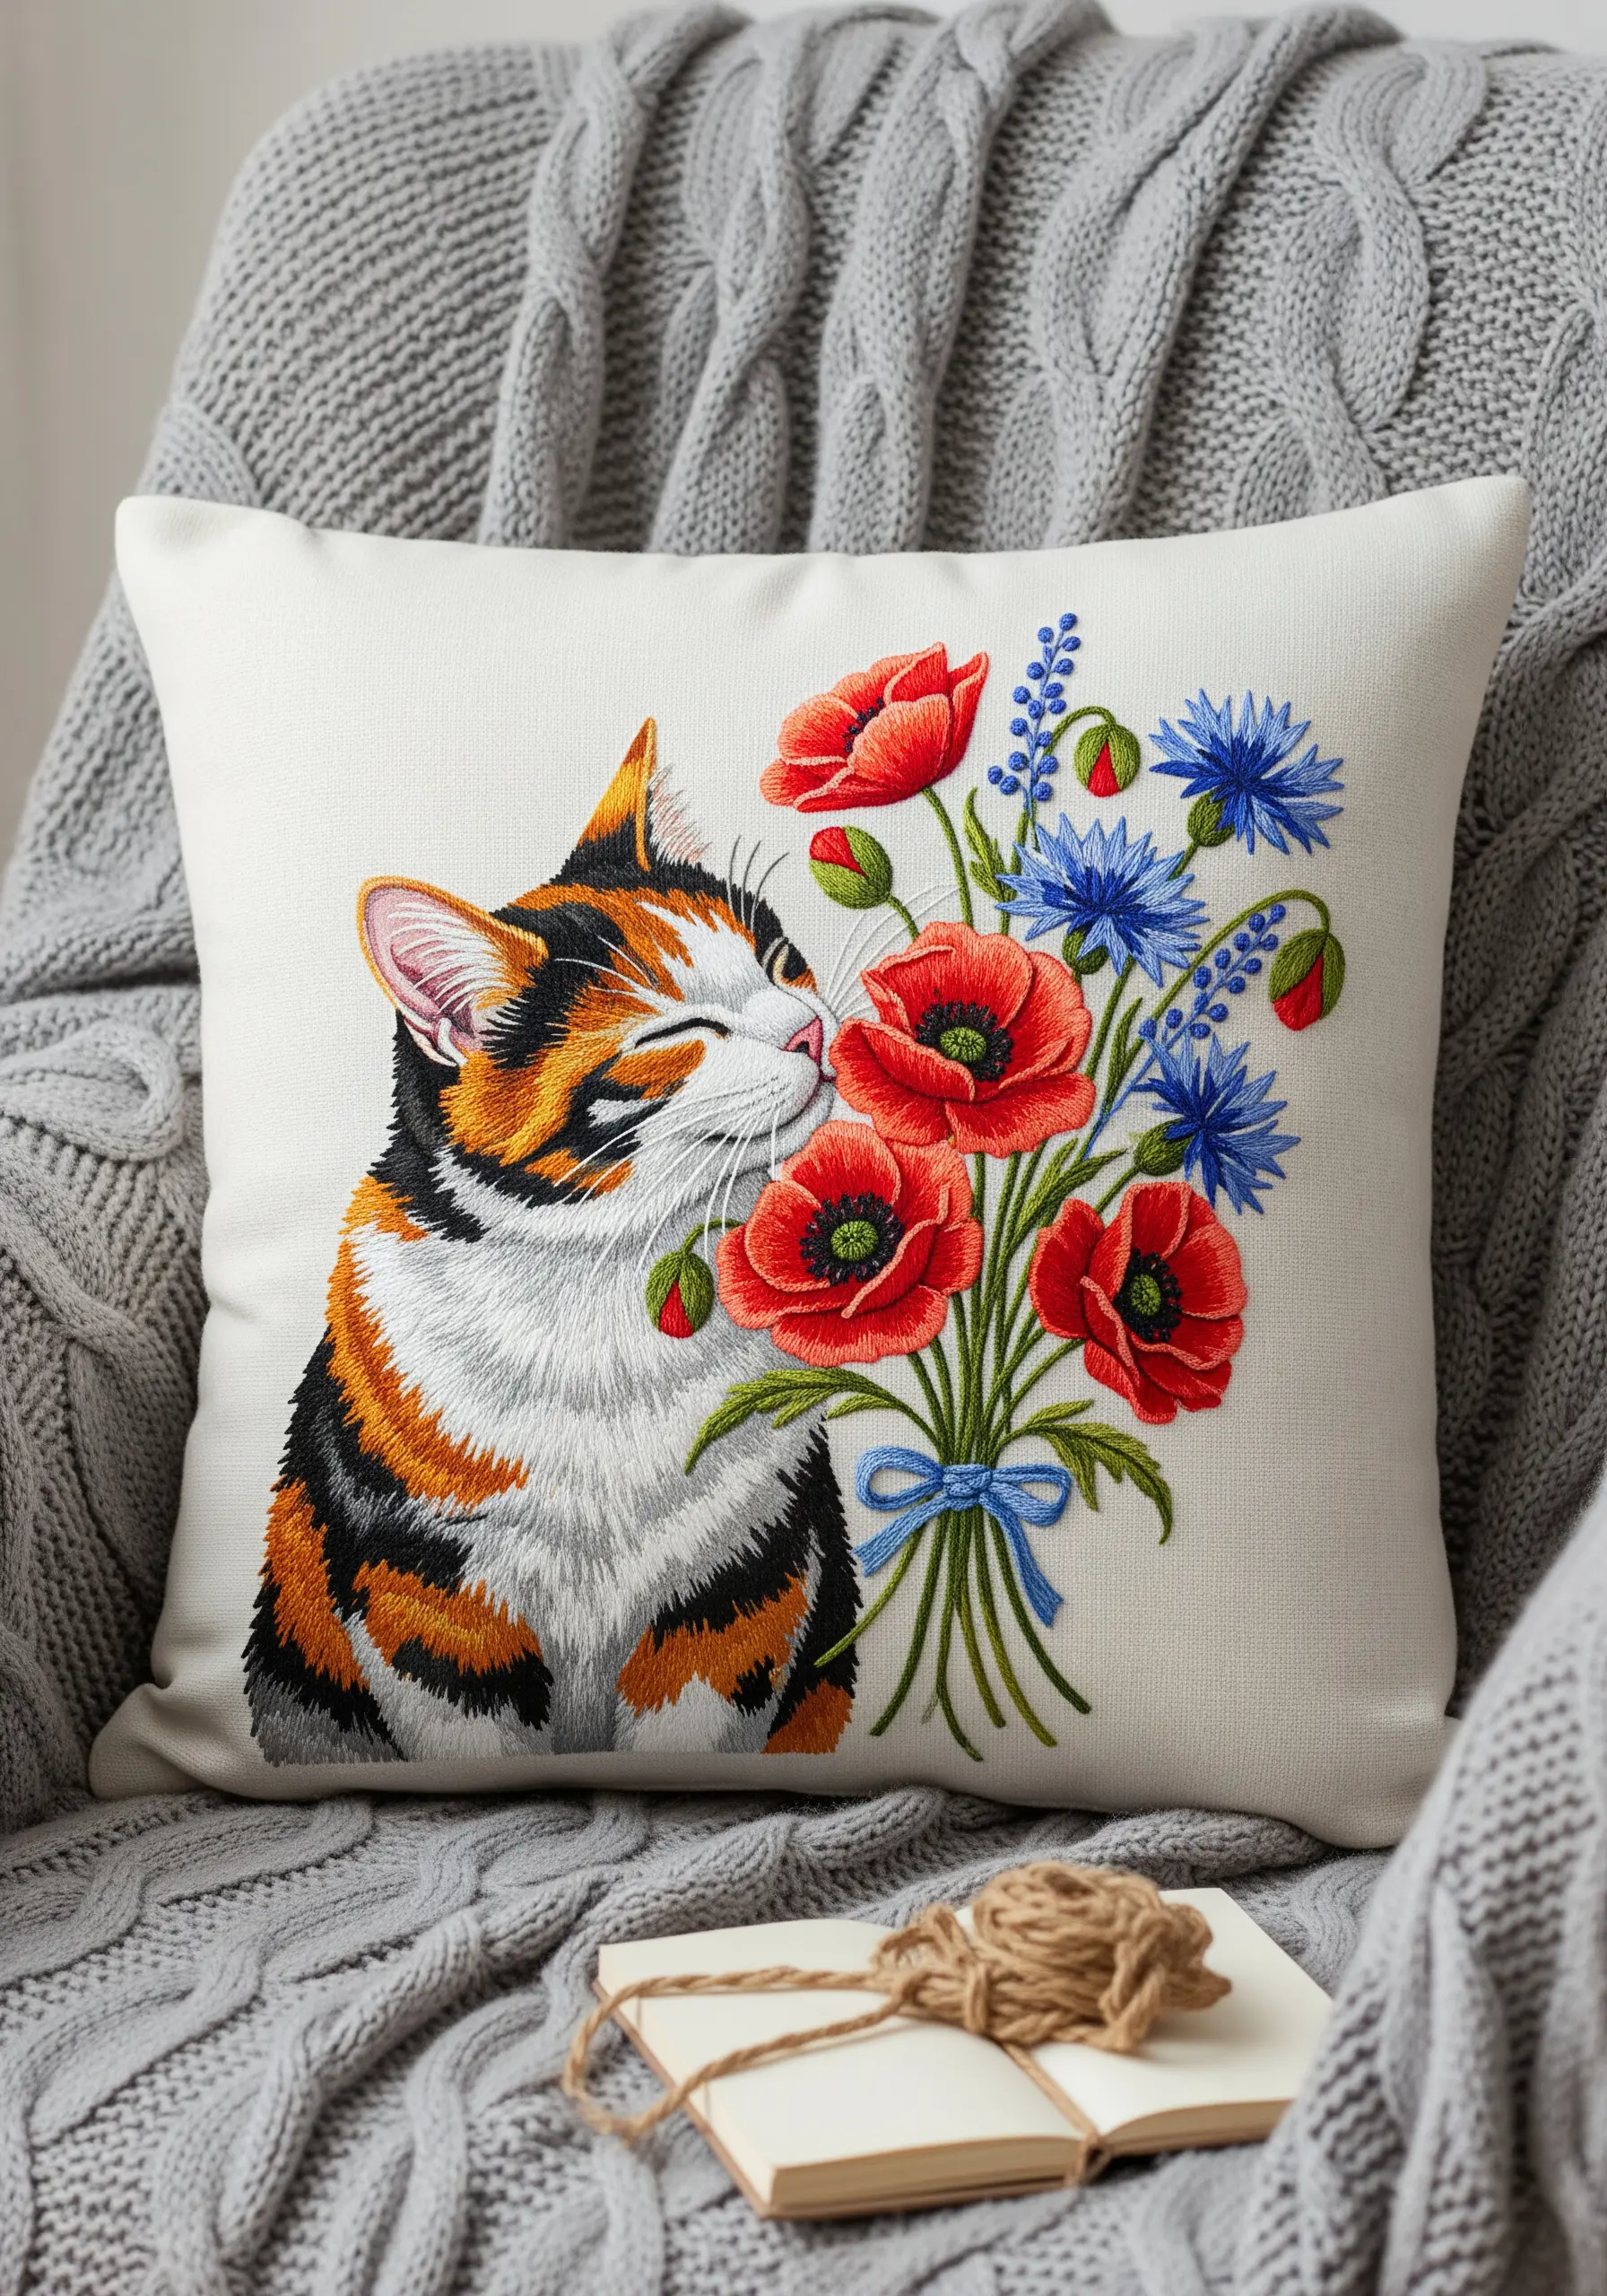
To achieve a realistic fur effect, you will use the long-and-short stitch, also known as thread painting.
Work with a single strand of floss to allow for seamless blending between the black, orange, and white patches of the calico’s coat.
Pay close attention to the direction of your stitches, ensuring they follow the natural growth of the fur—outward from the nose, down the back, and around the contours of the face.
This directional stitching is what gives the portrait life and movement.
4. Stitching Playful Motion and Delicate Details

Capture a fleeting moment of playfulness by focusing on form and motion.
Use curved backstitches for the tabby stripes, making sure they wrap around the form of the body to suggest roundness.
For the fuchsia flowers, use detached chain stitches for the outer petals and a different shade for the inner petals to create depth.
A single falling petal adds a narrative element, transforming a static portrait into a dynamic scene.
5. Creating Plush Fur with Layered Stitches
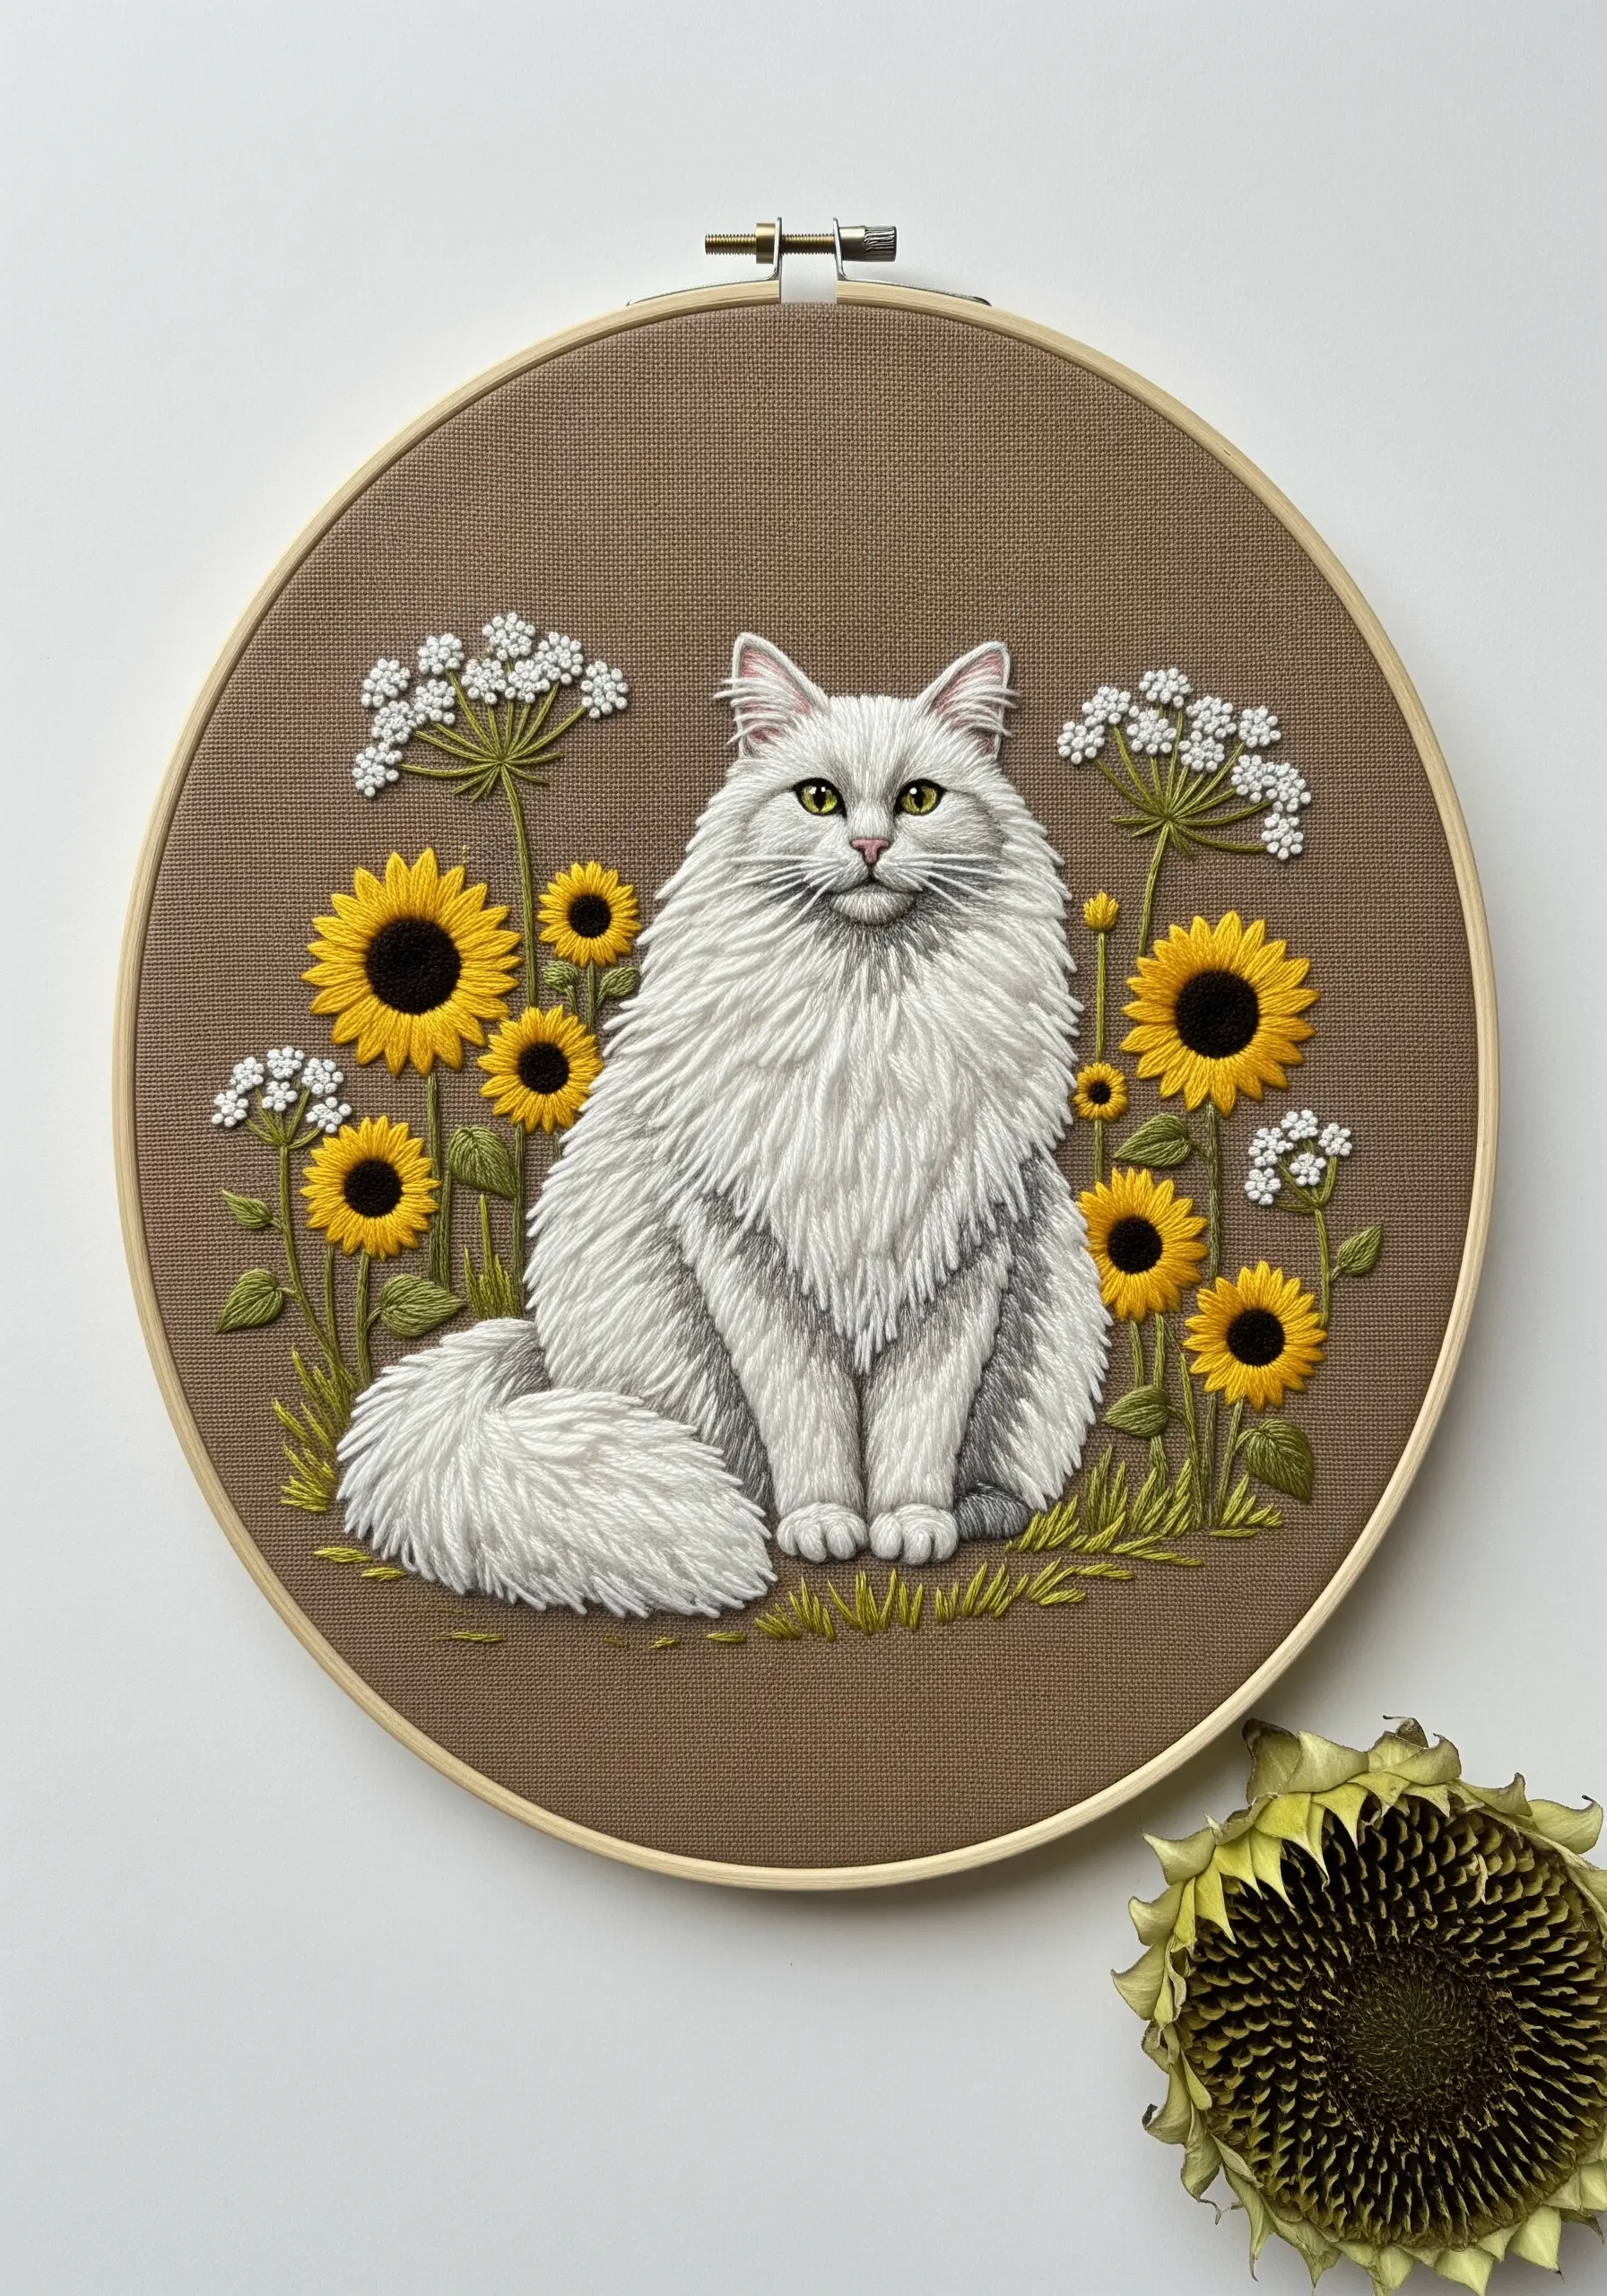
To create the appearance of long, fluffy fur, you need to build up texture with layered stitches.
Use two or three strands of white floss and fill the body with long straight stitches, all flowing in the direction of hair growth.
For extra-fluffy areas like the tail and chest, add a second layer of stitches over the first, slightly offsetting them to build volume.
This technique avoids bulky knots and creates a soft, plush finish that looks remarkably real.
6. Building Atmosphere with Foreground and Background
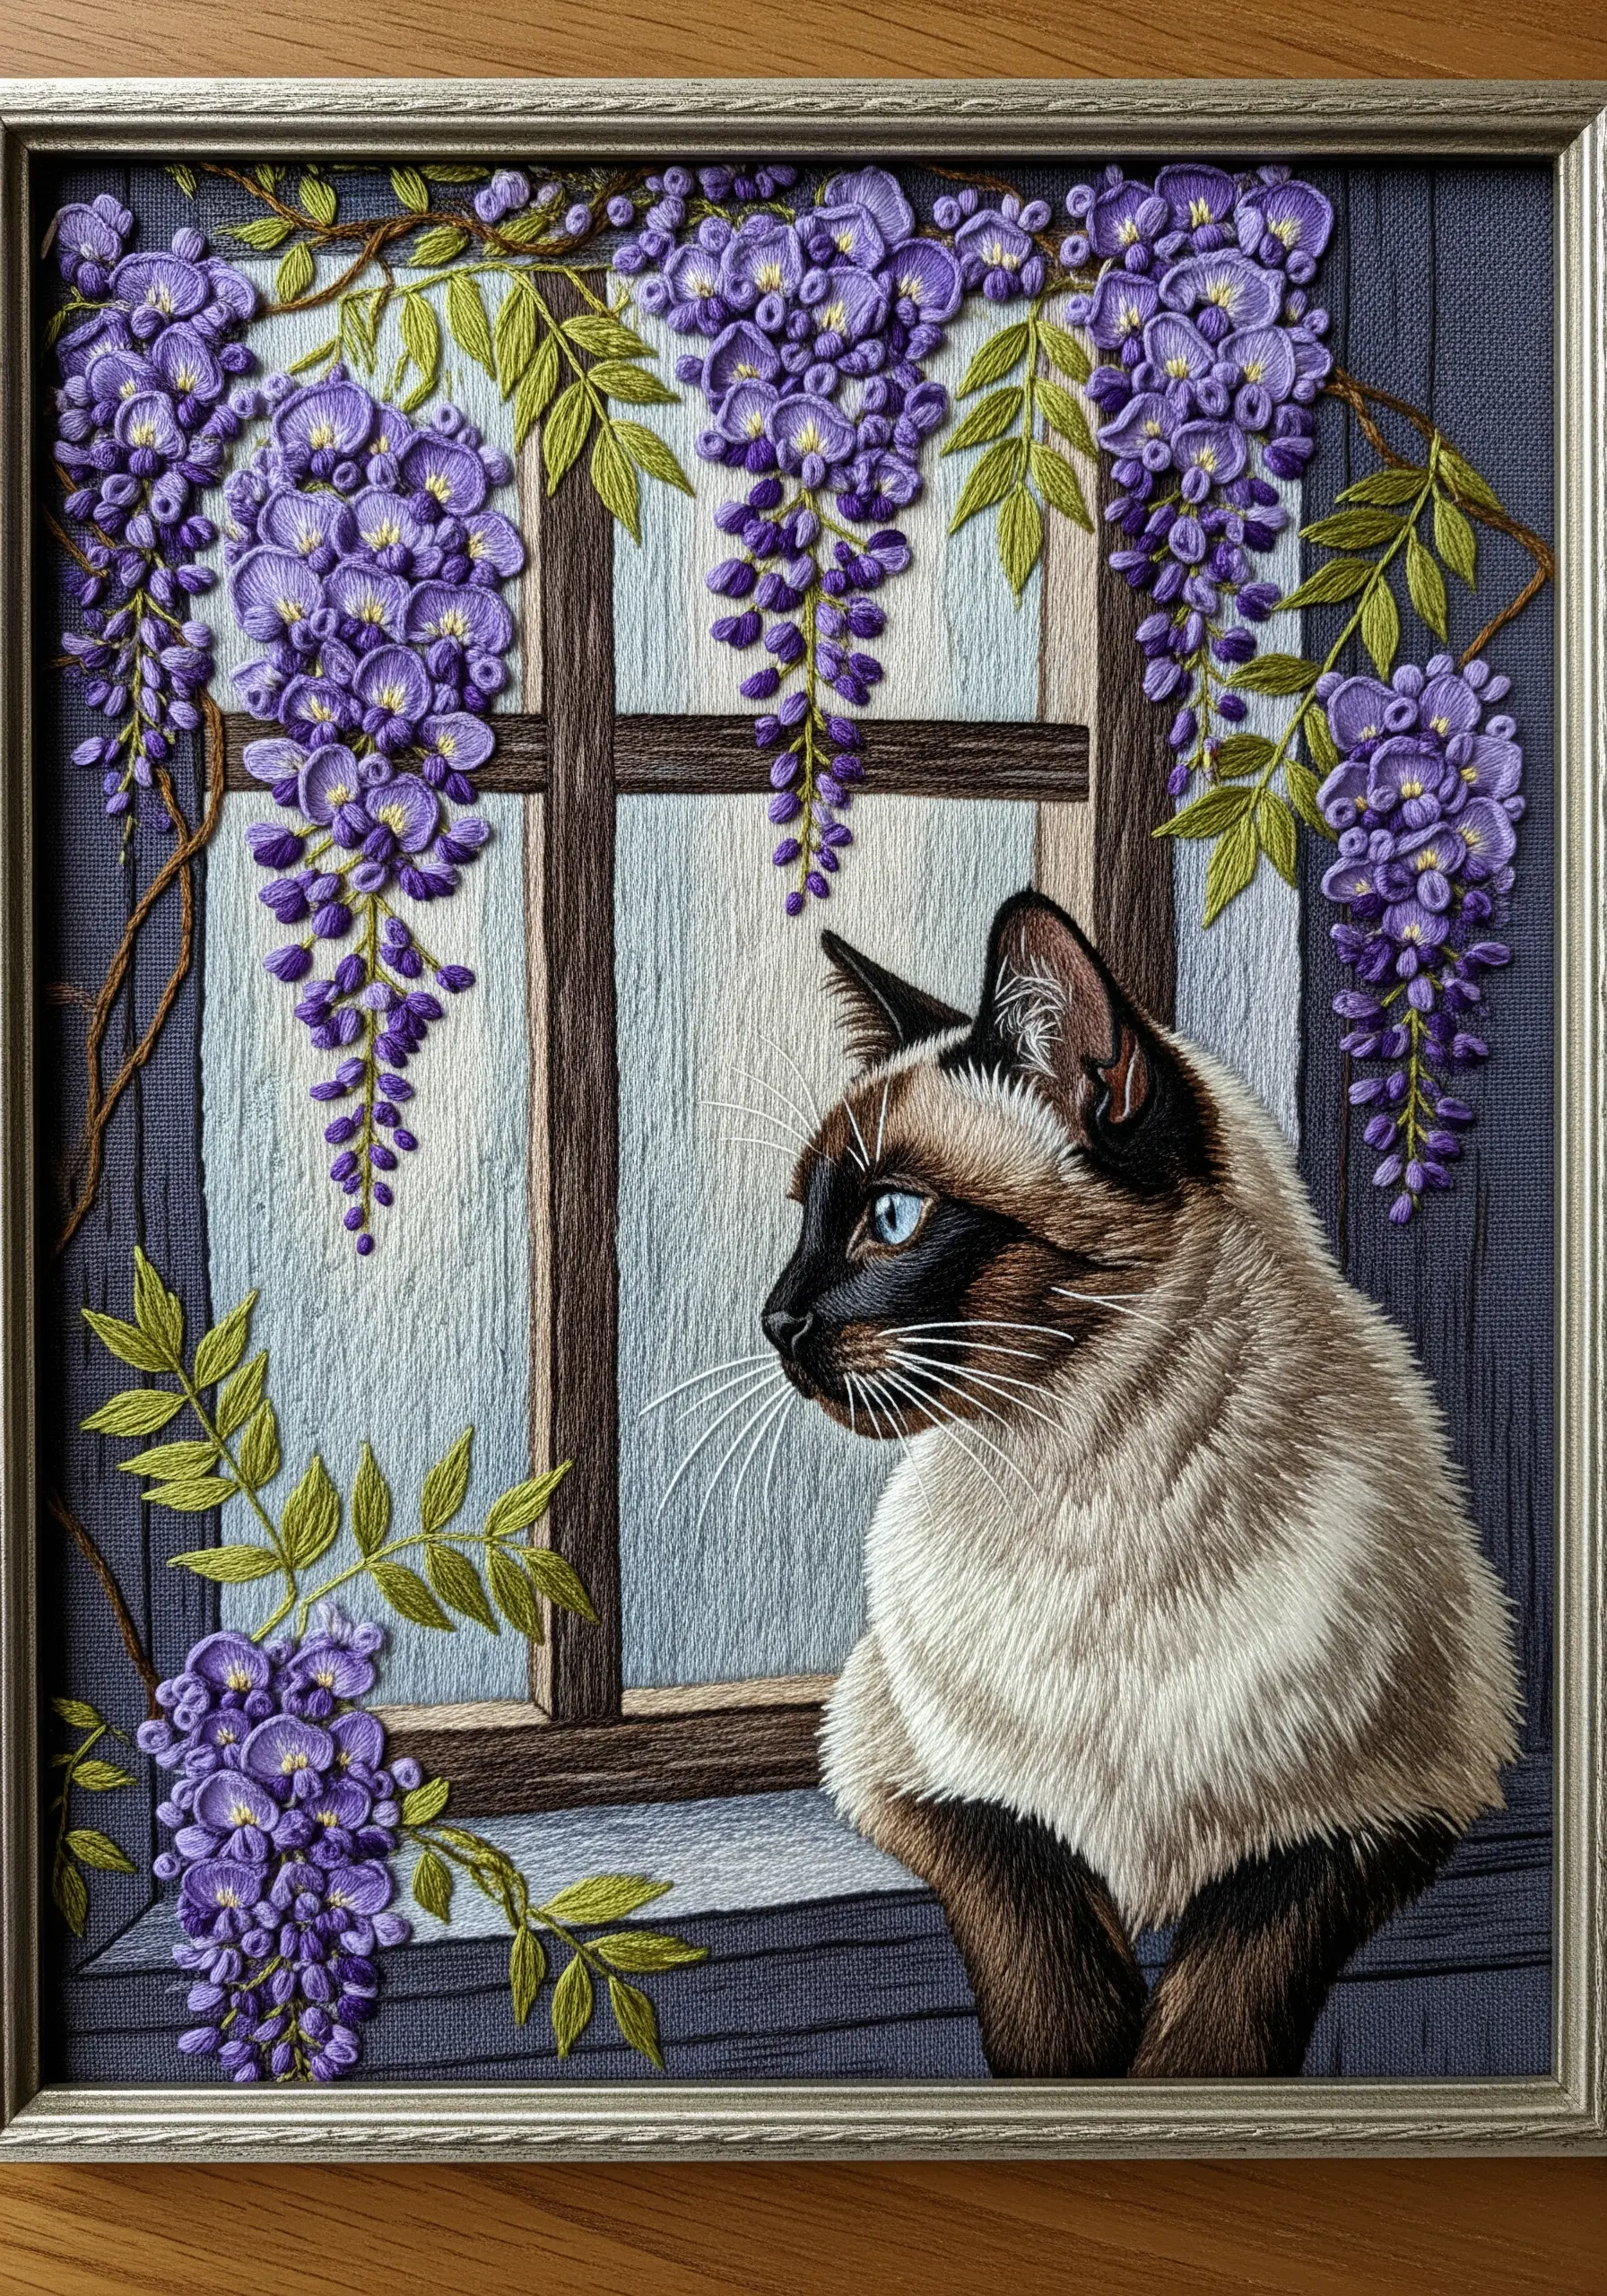
Create a sense of atmosphere by differentiating between foreground and background elements.
For the windowpanes in the distance, use single-strand straight stitches in muted grays and blues to suggest light and reflection without adding heavy detail.
In contrast, stitch the wisteria and leaves in the foreground using plush French knots and bold satin stitch with three strands of floss.
This contrast in thread weight and stitch density immediately establishes a deep, layered perspective.
7. Combining Textures for a Cozy Nest Effect
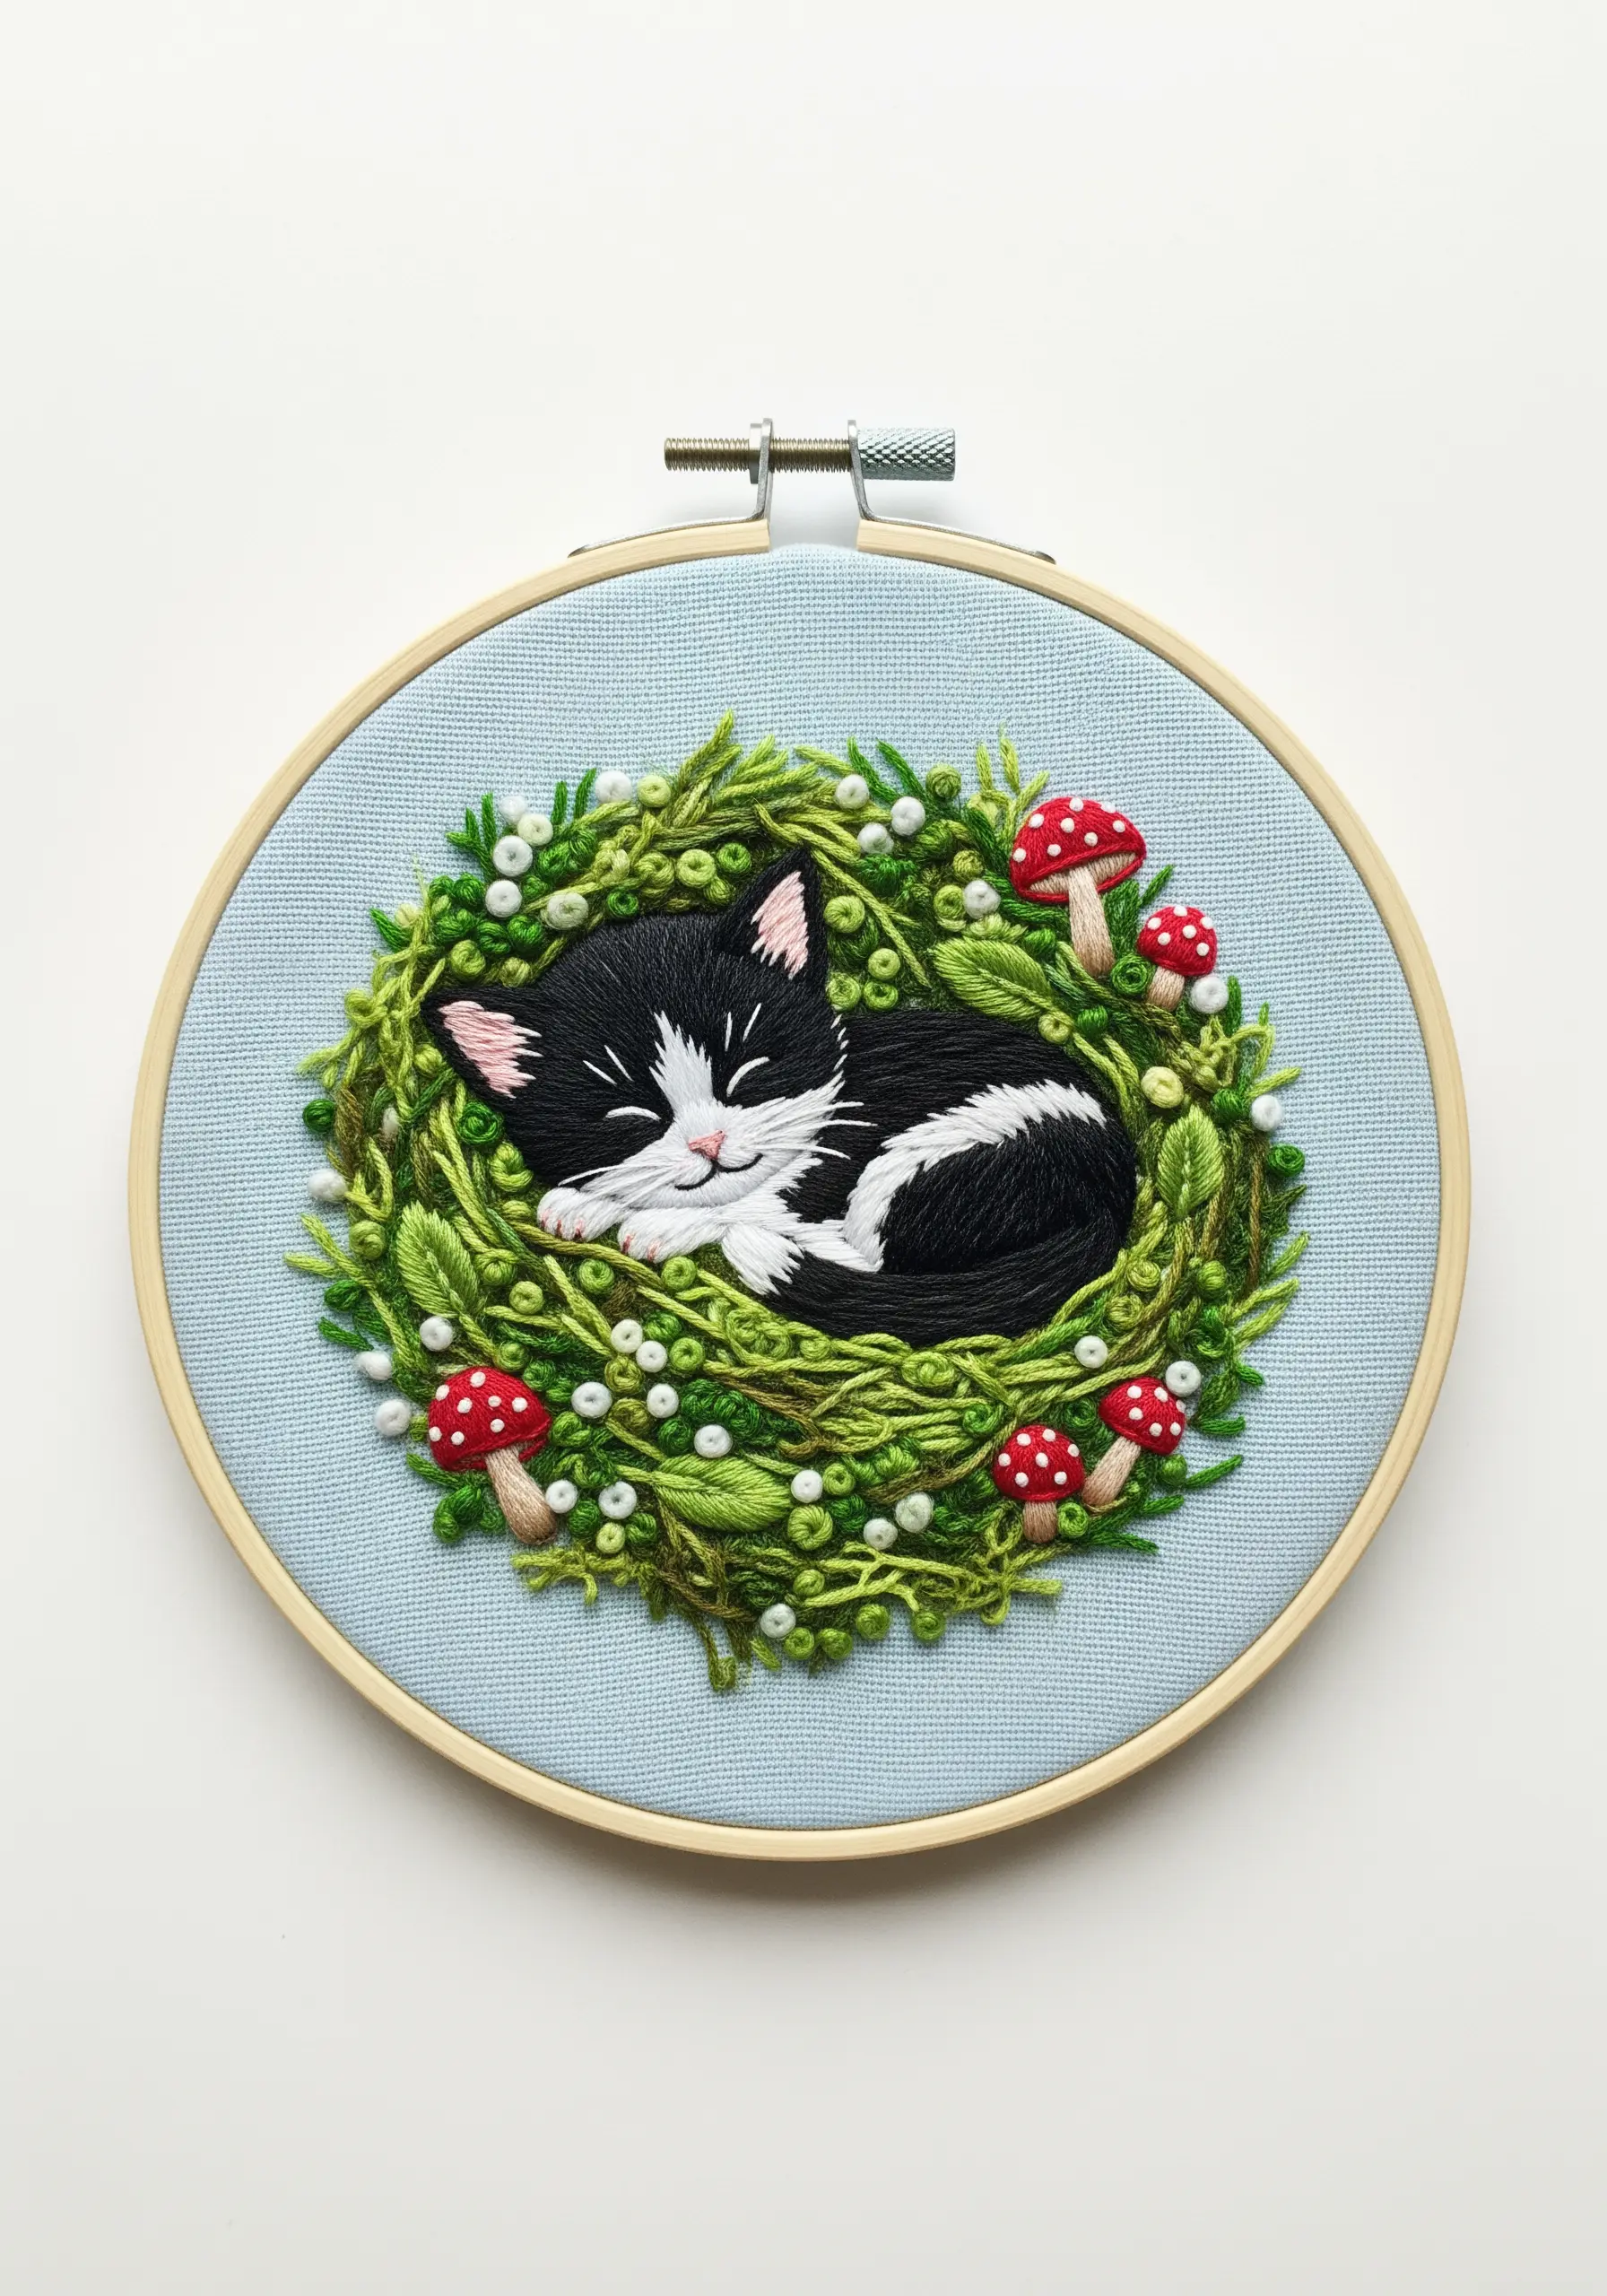
Make your sleeping subject look even cozier by surrounding it with a variety of textures.
The kitten is stitched with a smooth, flat satin stitch, which gives it a sleek appearance.
For the surrounding wreath, use a chaotic mix of French knots, bullion knots, and straight stitches in multiple shades of green to build a mossy, dimensional nest.
This textural contrast makes the kitten the undeniable focal point.
8. Creating Dynamic Motion on Apparel
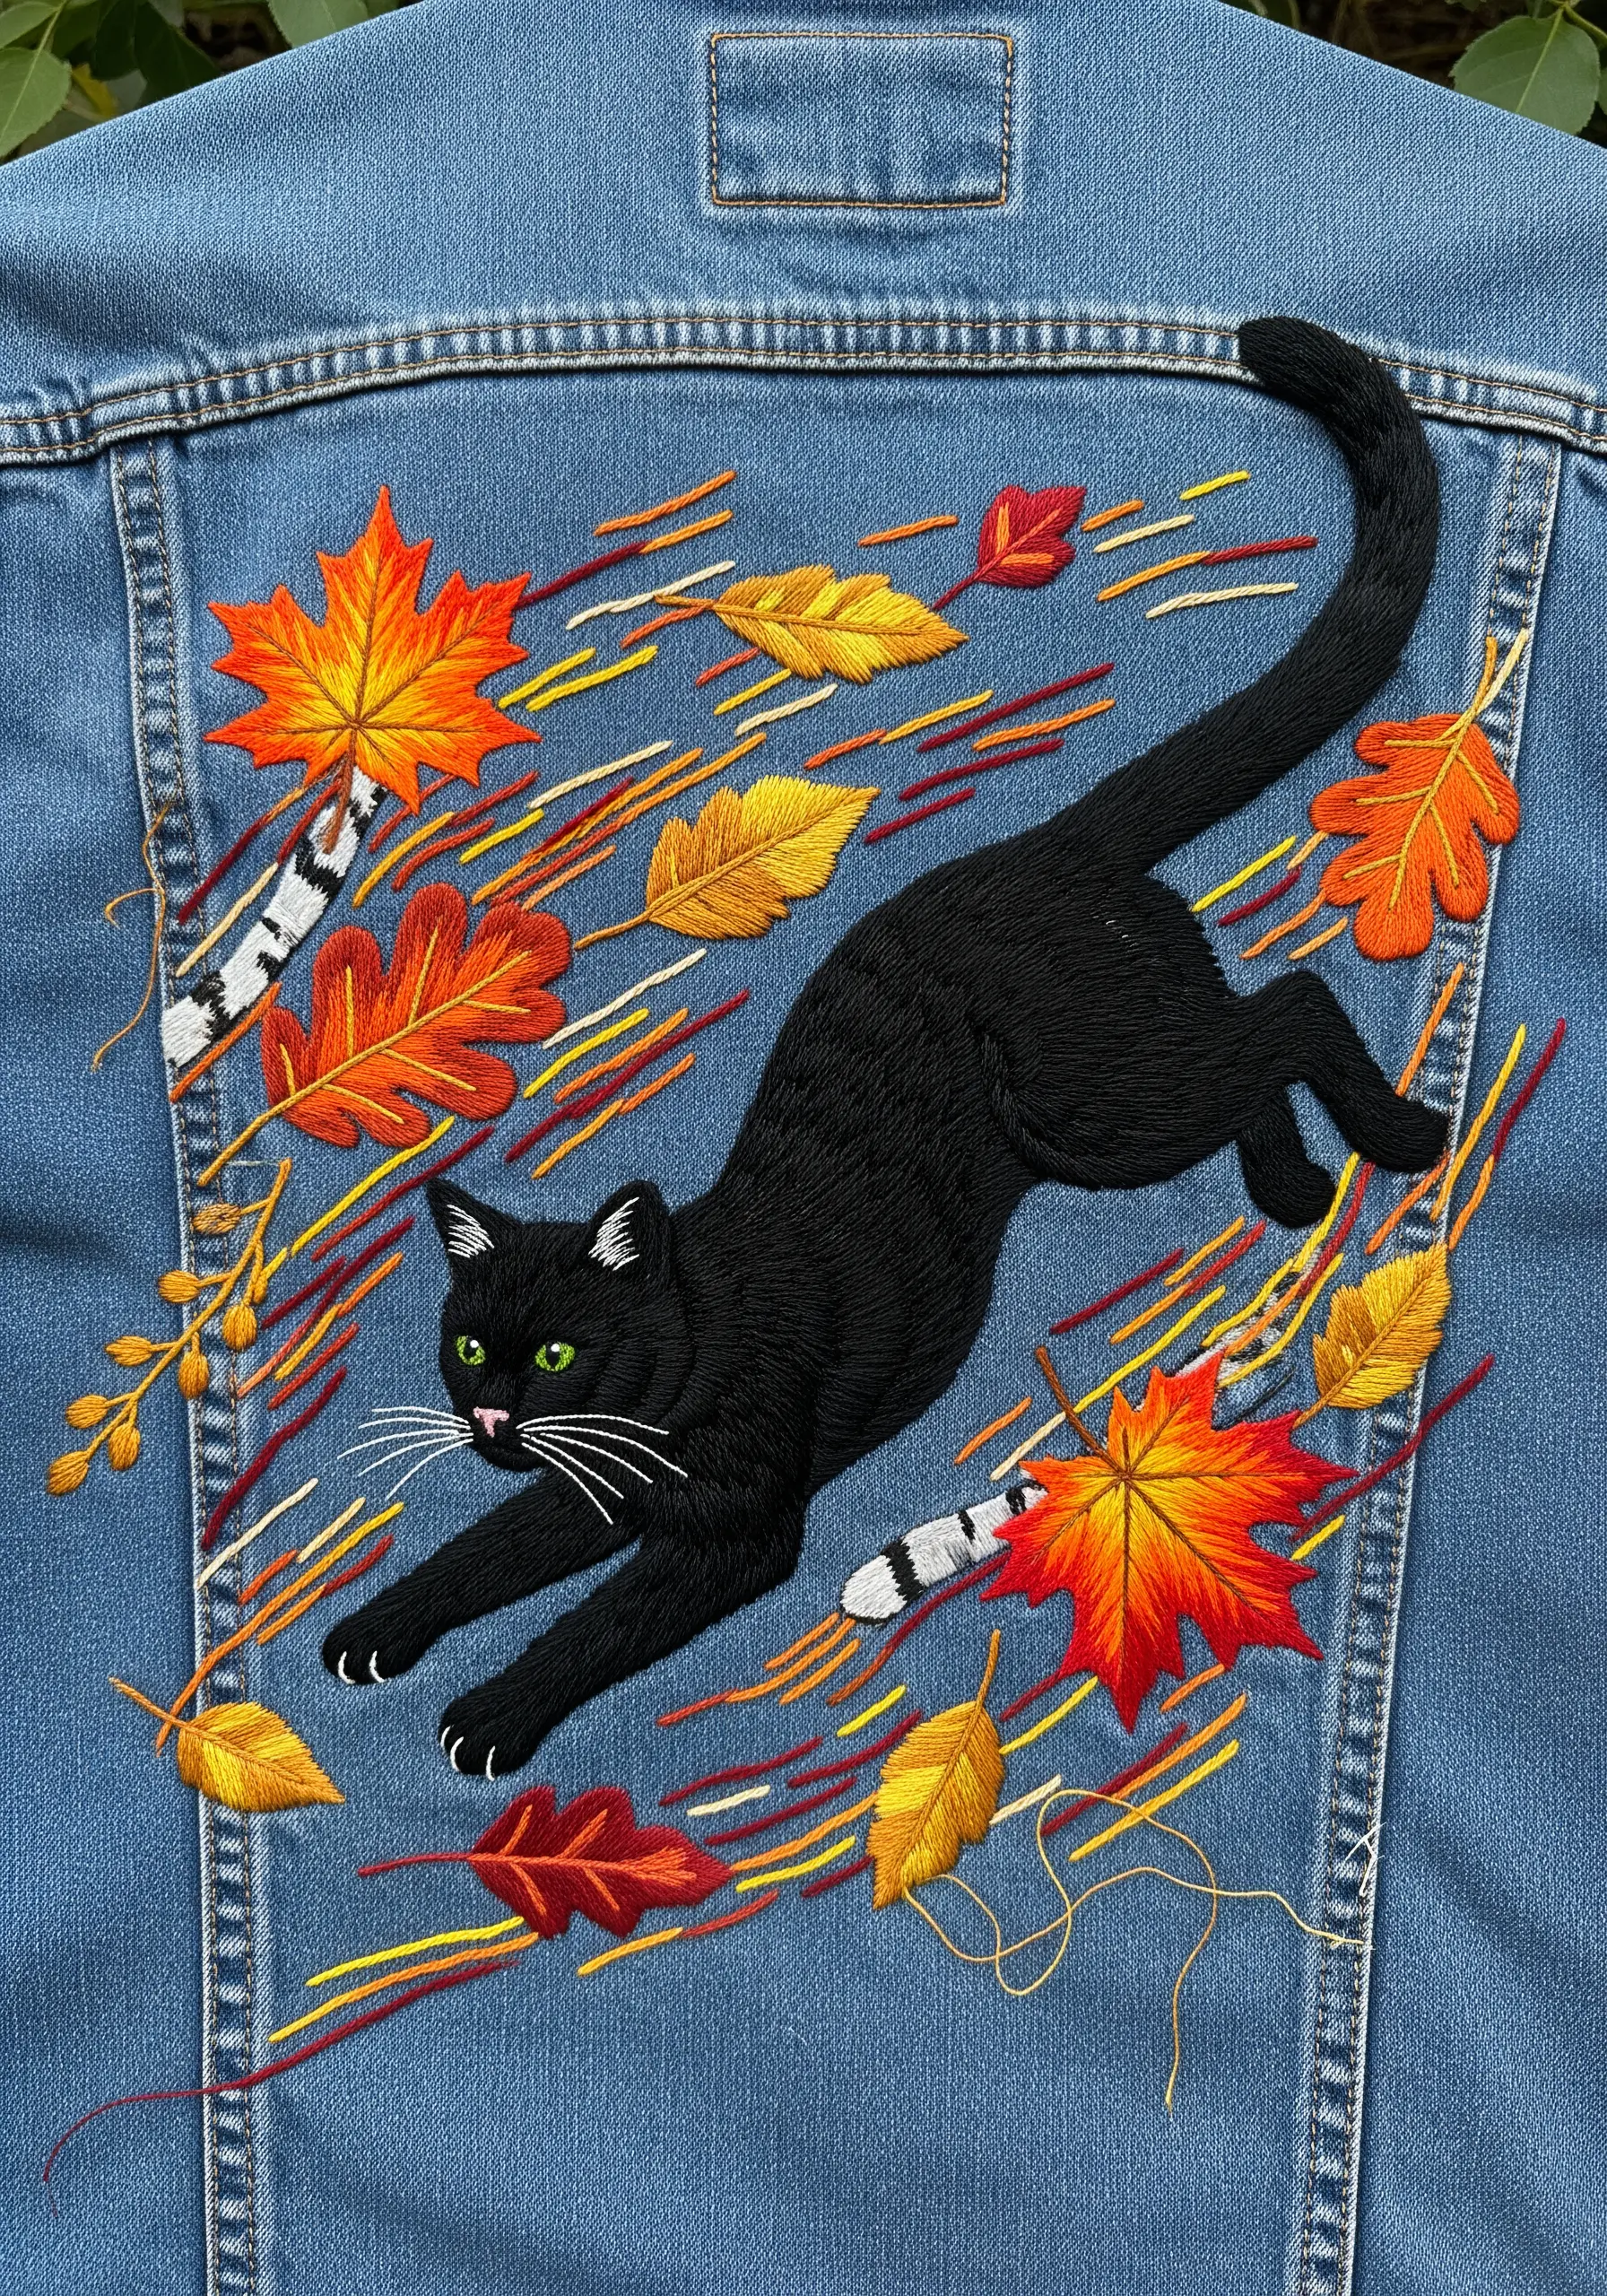
When embroidering on denim, your goal is durability and visual impact.
Always use a stabilizer on the back of the fabric to prevent stretching and puckering.
To create the illusion of wind and speed, add long, diagonal straight stitches in bright, contrasting colors that radiate from behind the cat.
This simple technique adds energy and directs the viewer’s eye across the entire composition, turning a static image into a scene of action.
9. Achieving a Watercolor Effect with Sparse Shading

You don’t always need dense fill stitches to convey color and form.
For a softer, more artistic effect, use sparse long-and-short stitches with a contrasting color (like pink over white) to suggest shading and stripes.
By leaving some of the base fabric visible through the stitches, you create a delicate, airy quality reminiscent of a watercolor painting.
This technique works beautifully for subjects with subtle markings.
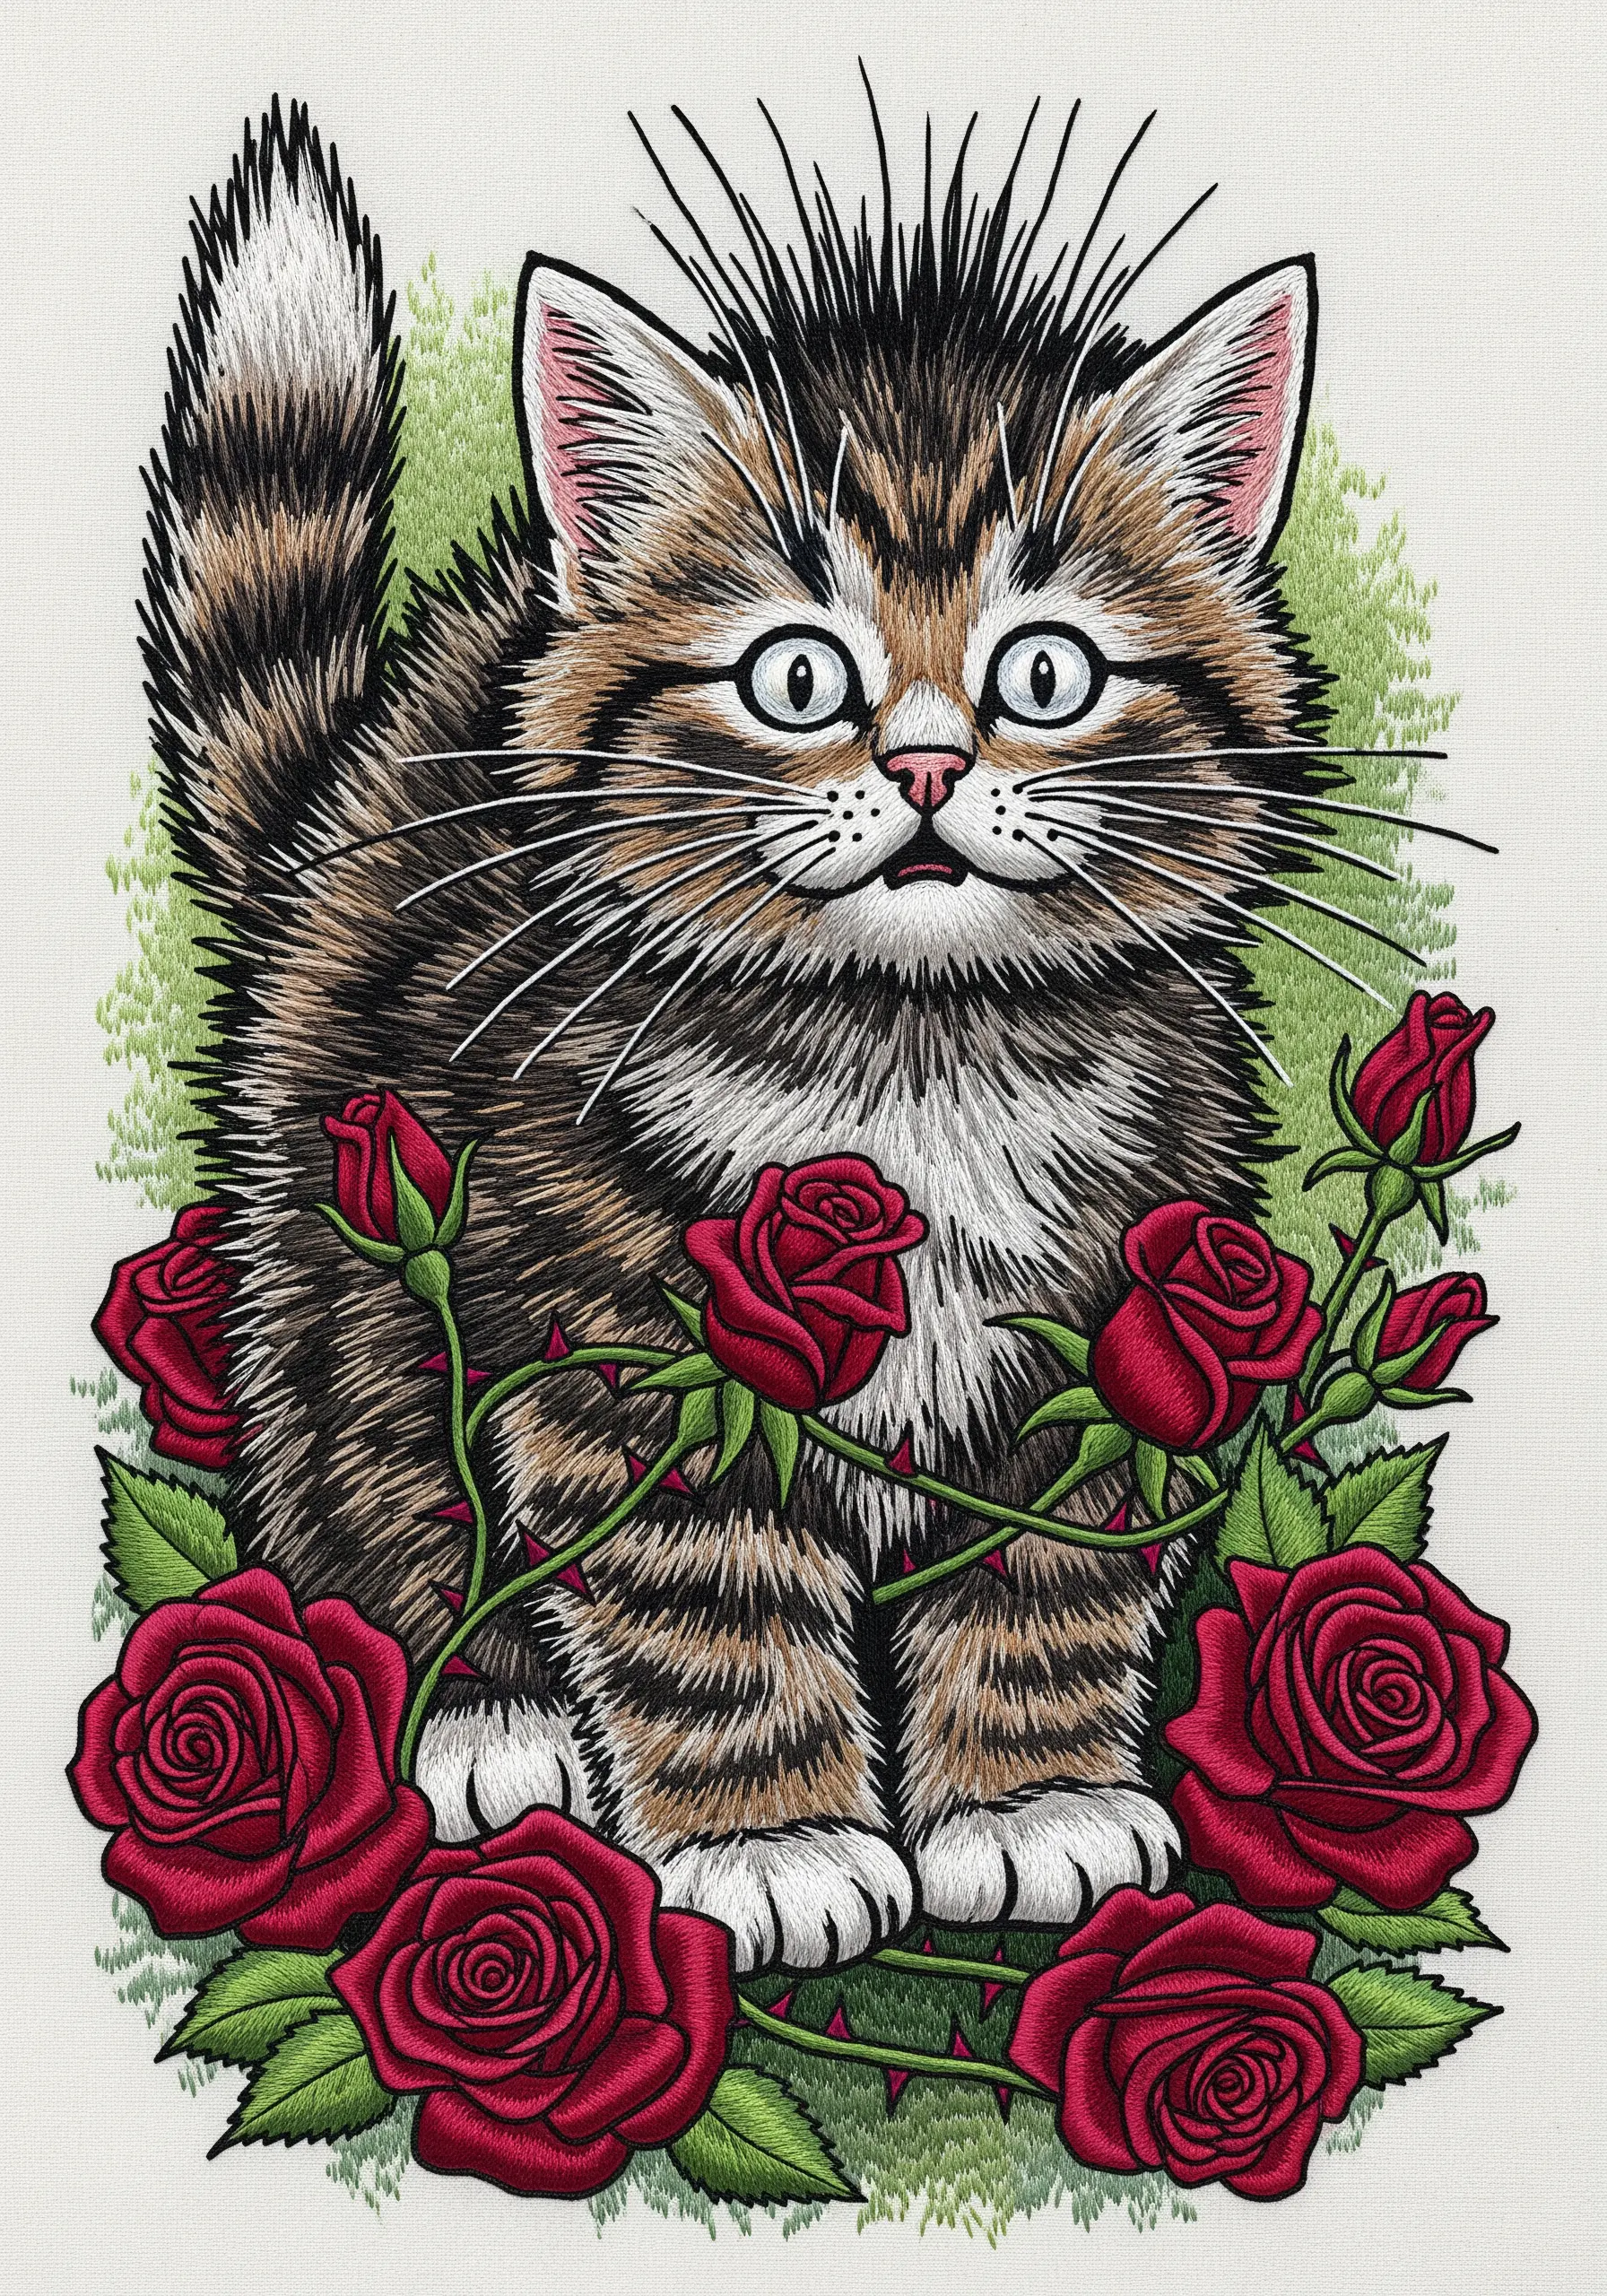
10. Framing a Portrait with Botanical Elements
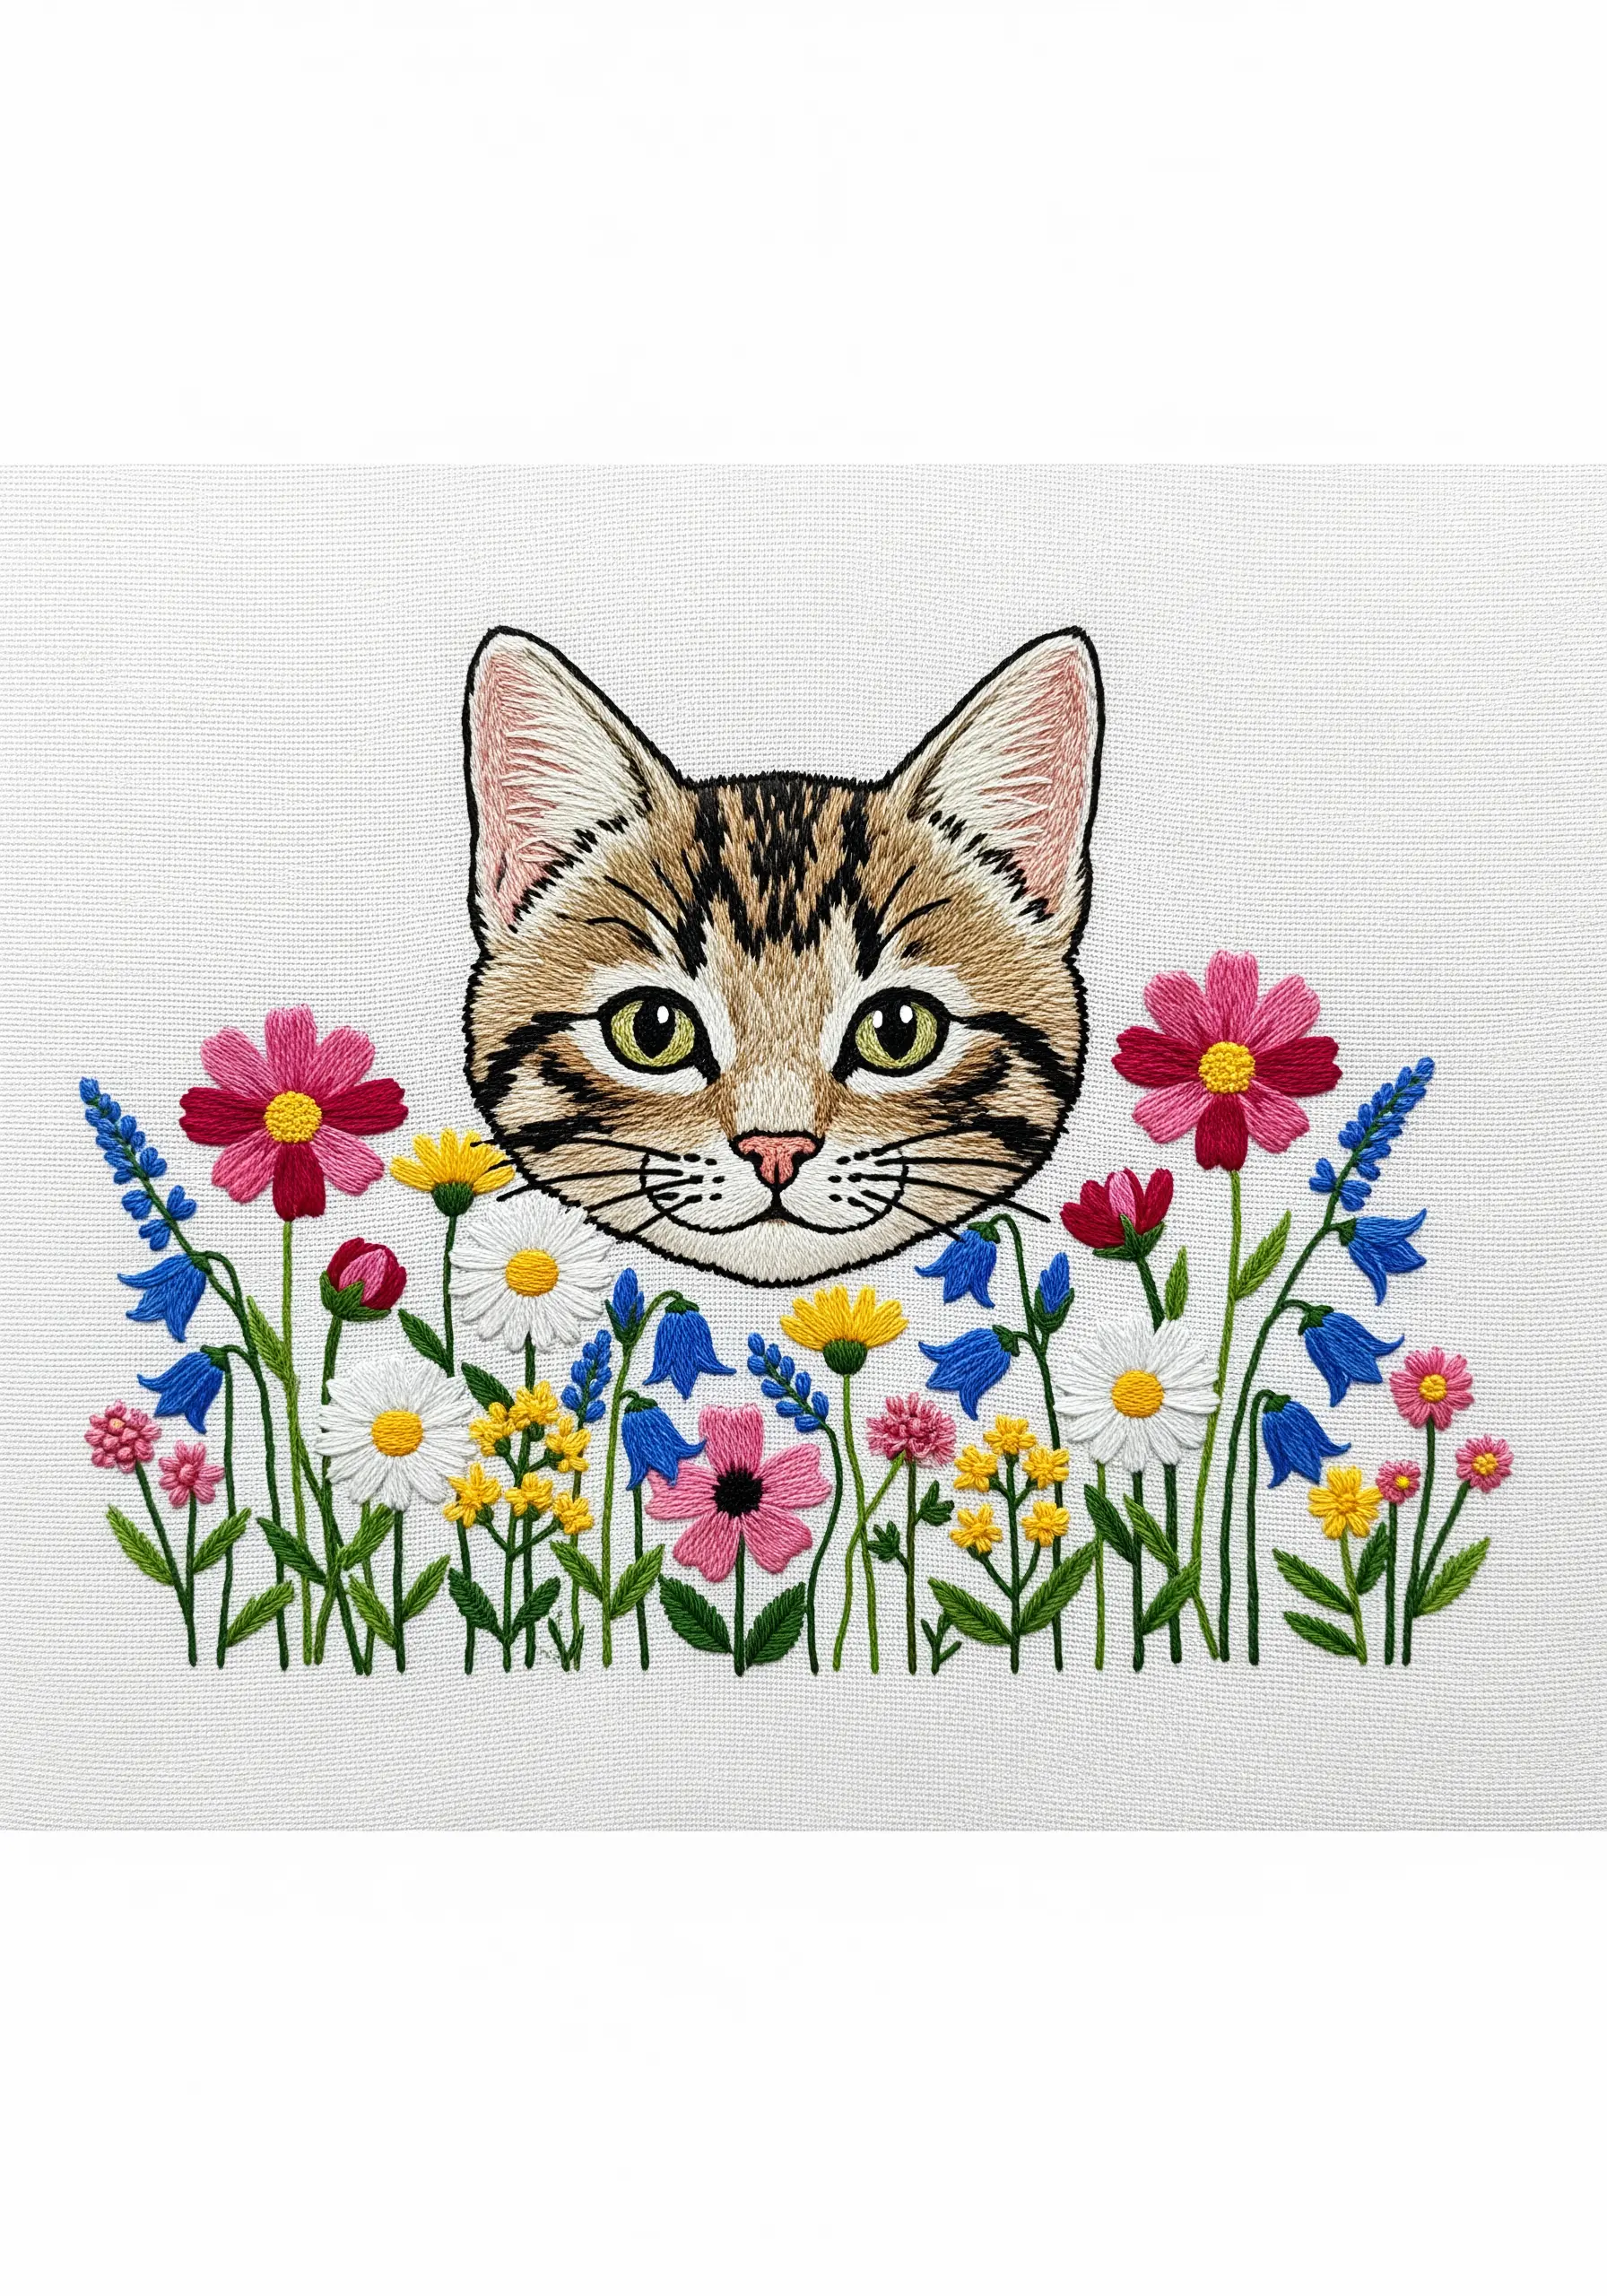
Turn a simple pet portrait into a complete piece of art by adding a floral frame.
Begin with the cat’s face, using precise thread painting to capture its unique markings and expression.
Once the portrait is complete, add a vibrant garden of wildflowers along the bottom edge.
Use a mix of lazy daisy stitches, French knots, and satin stitch to create a textured, colorful foreground that draws the eye upward to the main subject.
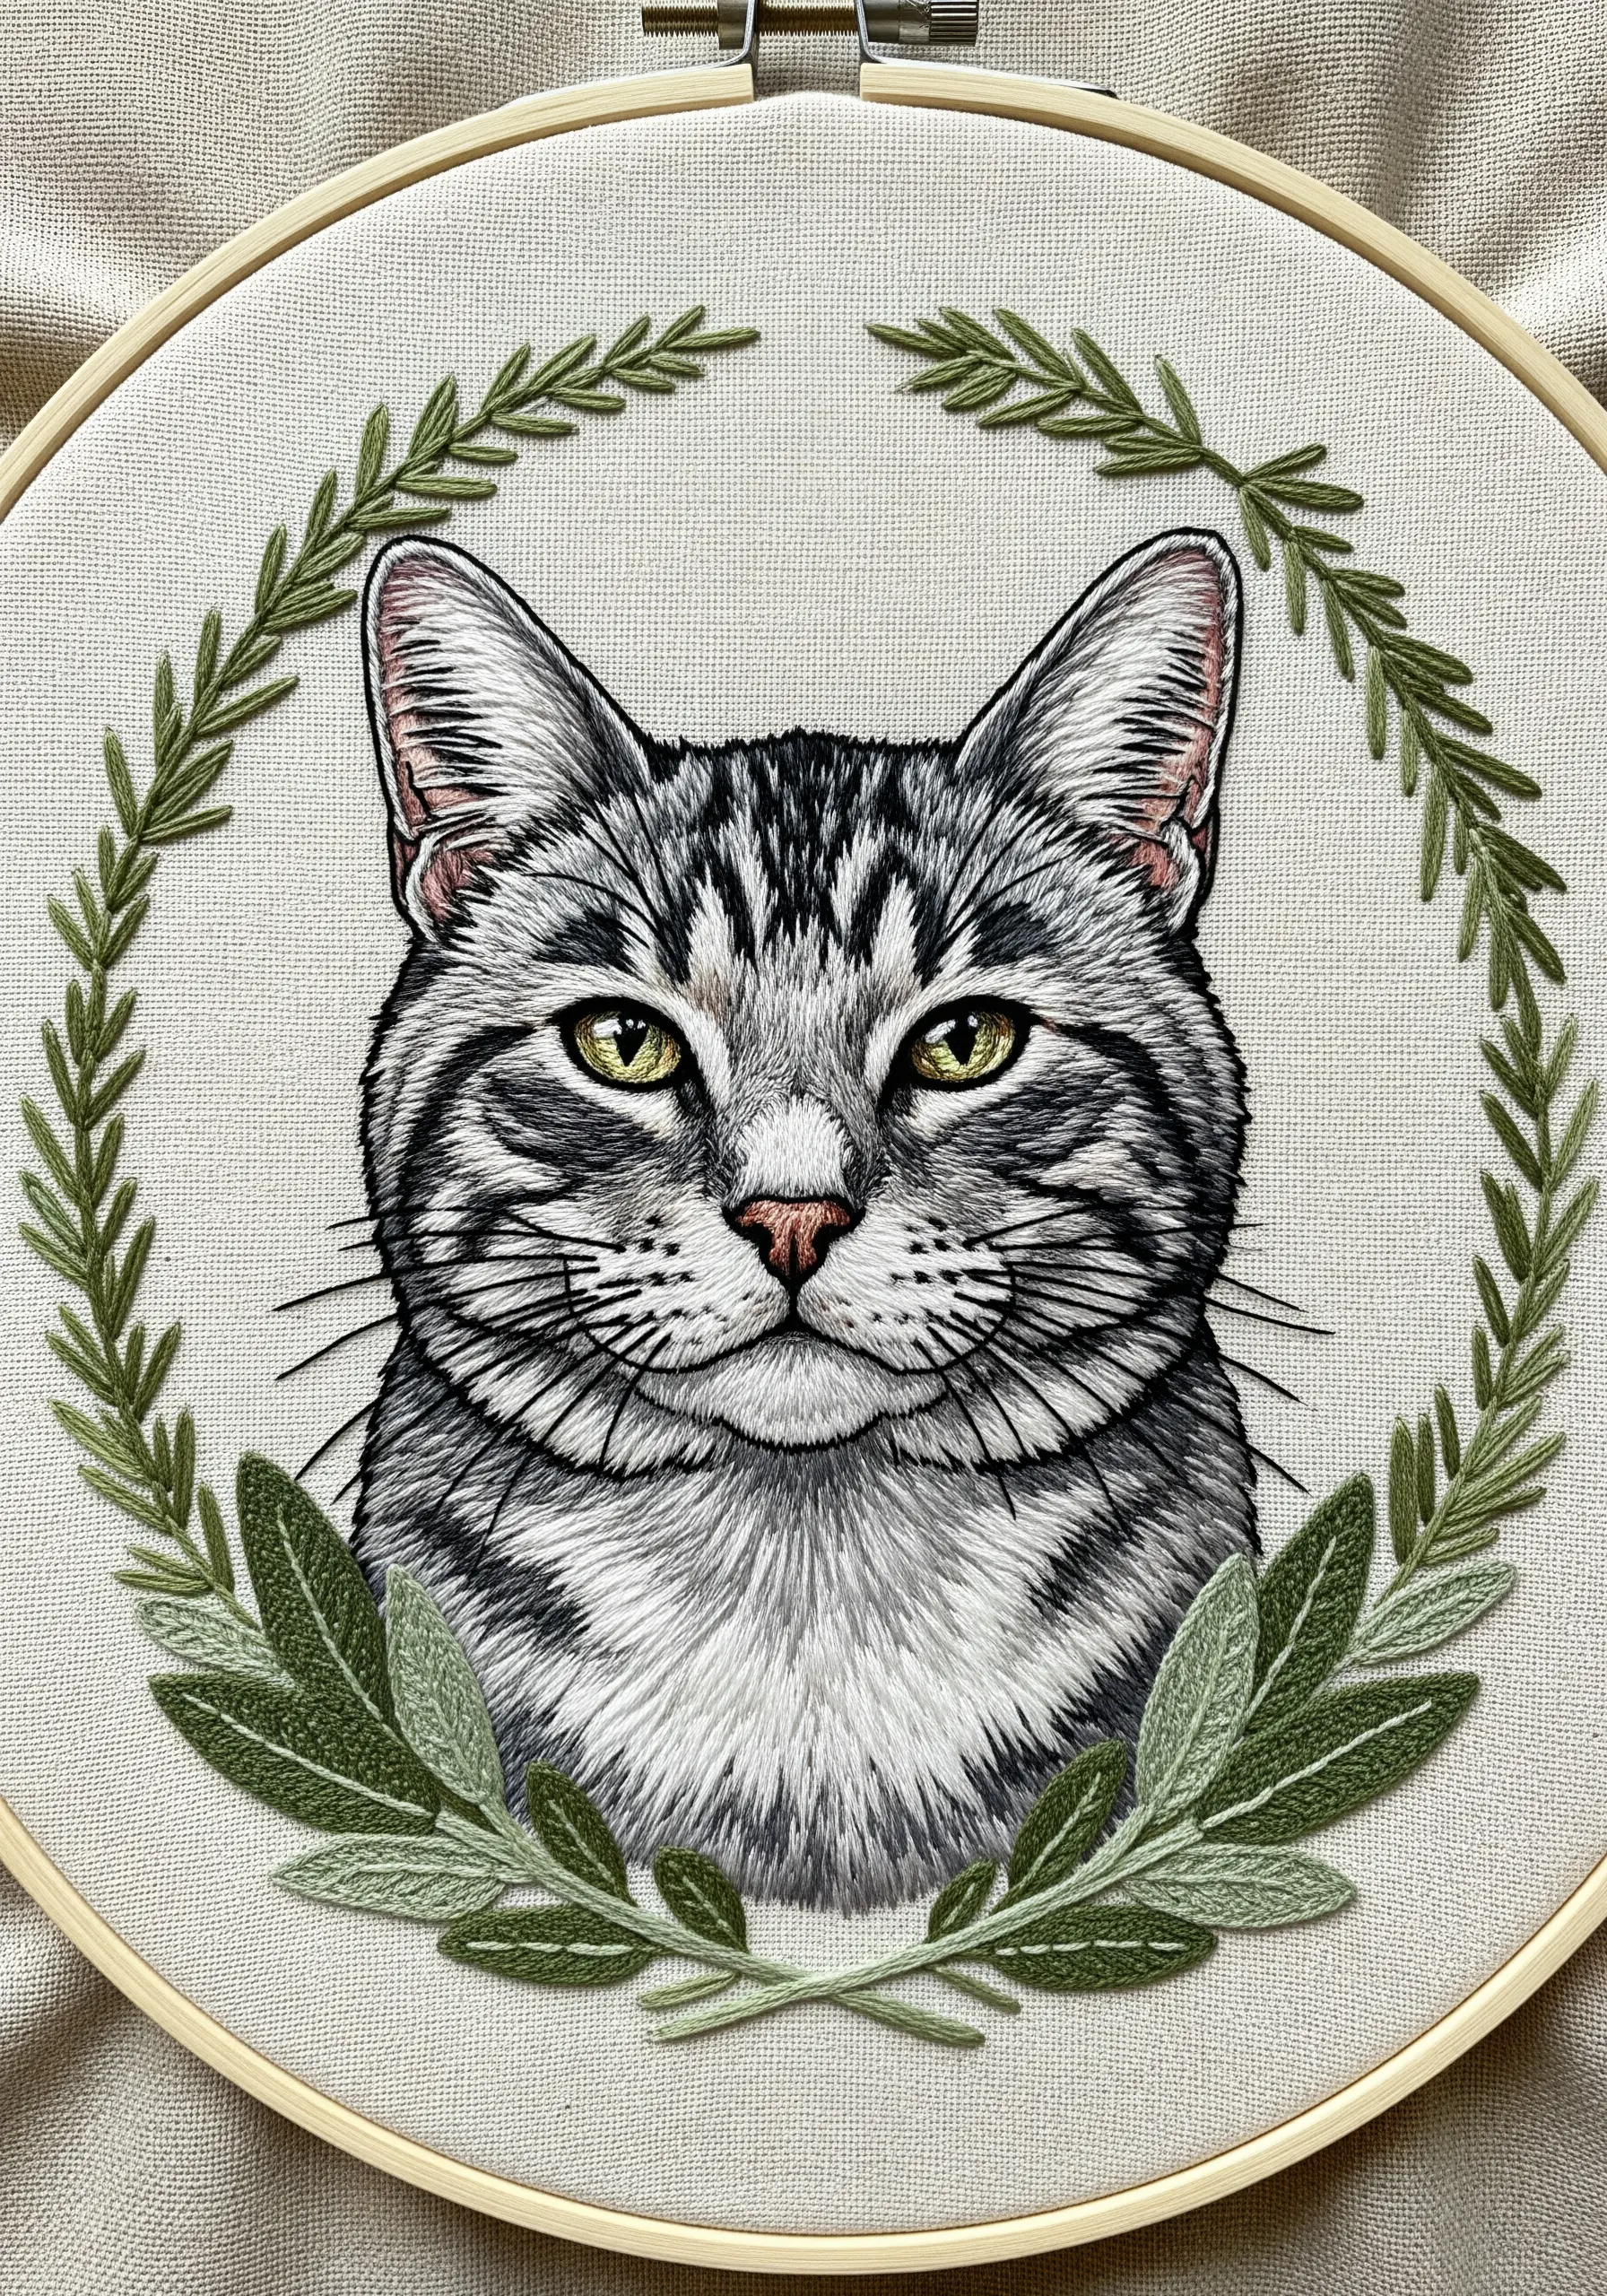
11. Highlighting Detail with Negative Space

A detailed portrait doesn’t always need a complex background.
Here, the incredibly detailed thread painting of the calico’s face is the star of the show.
By framing it with simple, open fern stitches, you add a touch of natural elegance without overwhelming the subject.
The negative space around the portrait gives the viewer’s eye a place to rest, making the intricate stitching of the fur appear even more impressive.
12. Storytelling with Minimalist Line Art
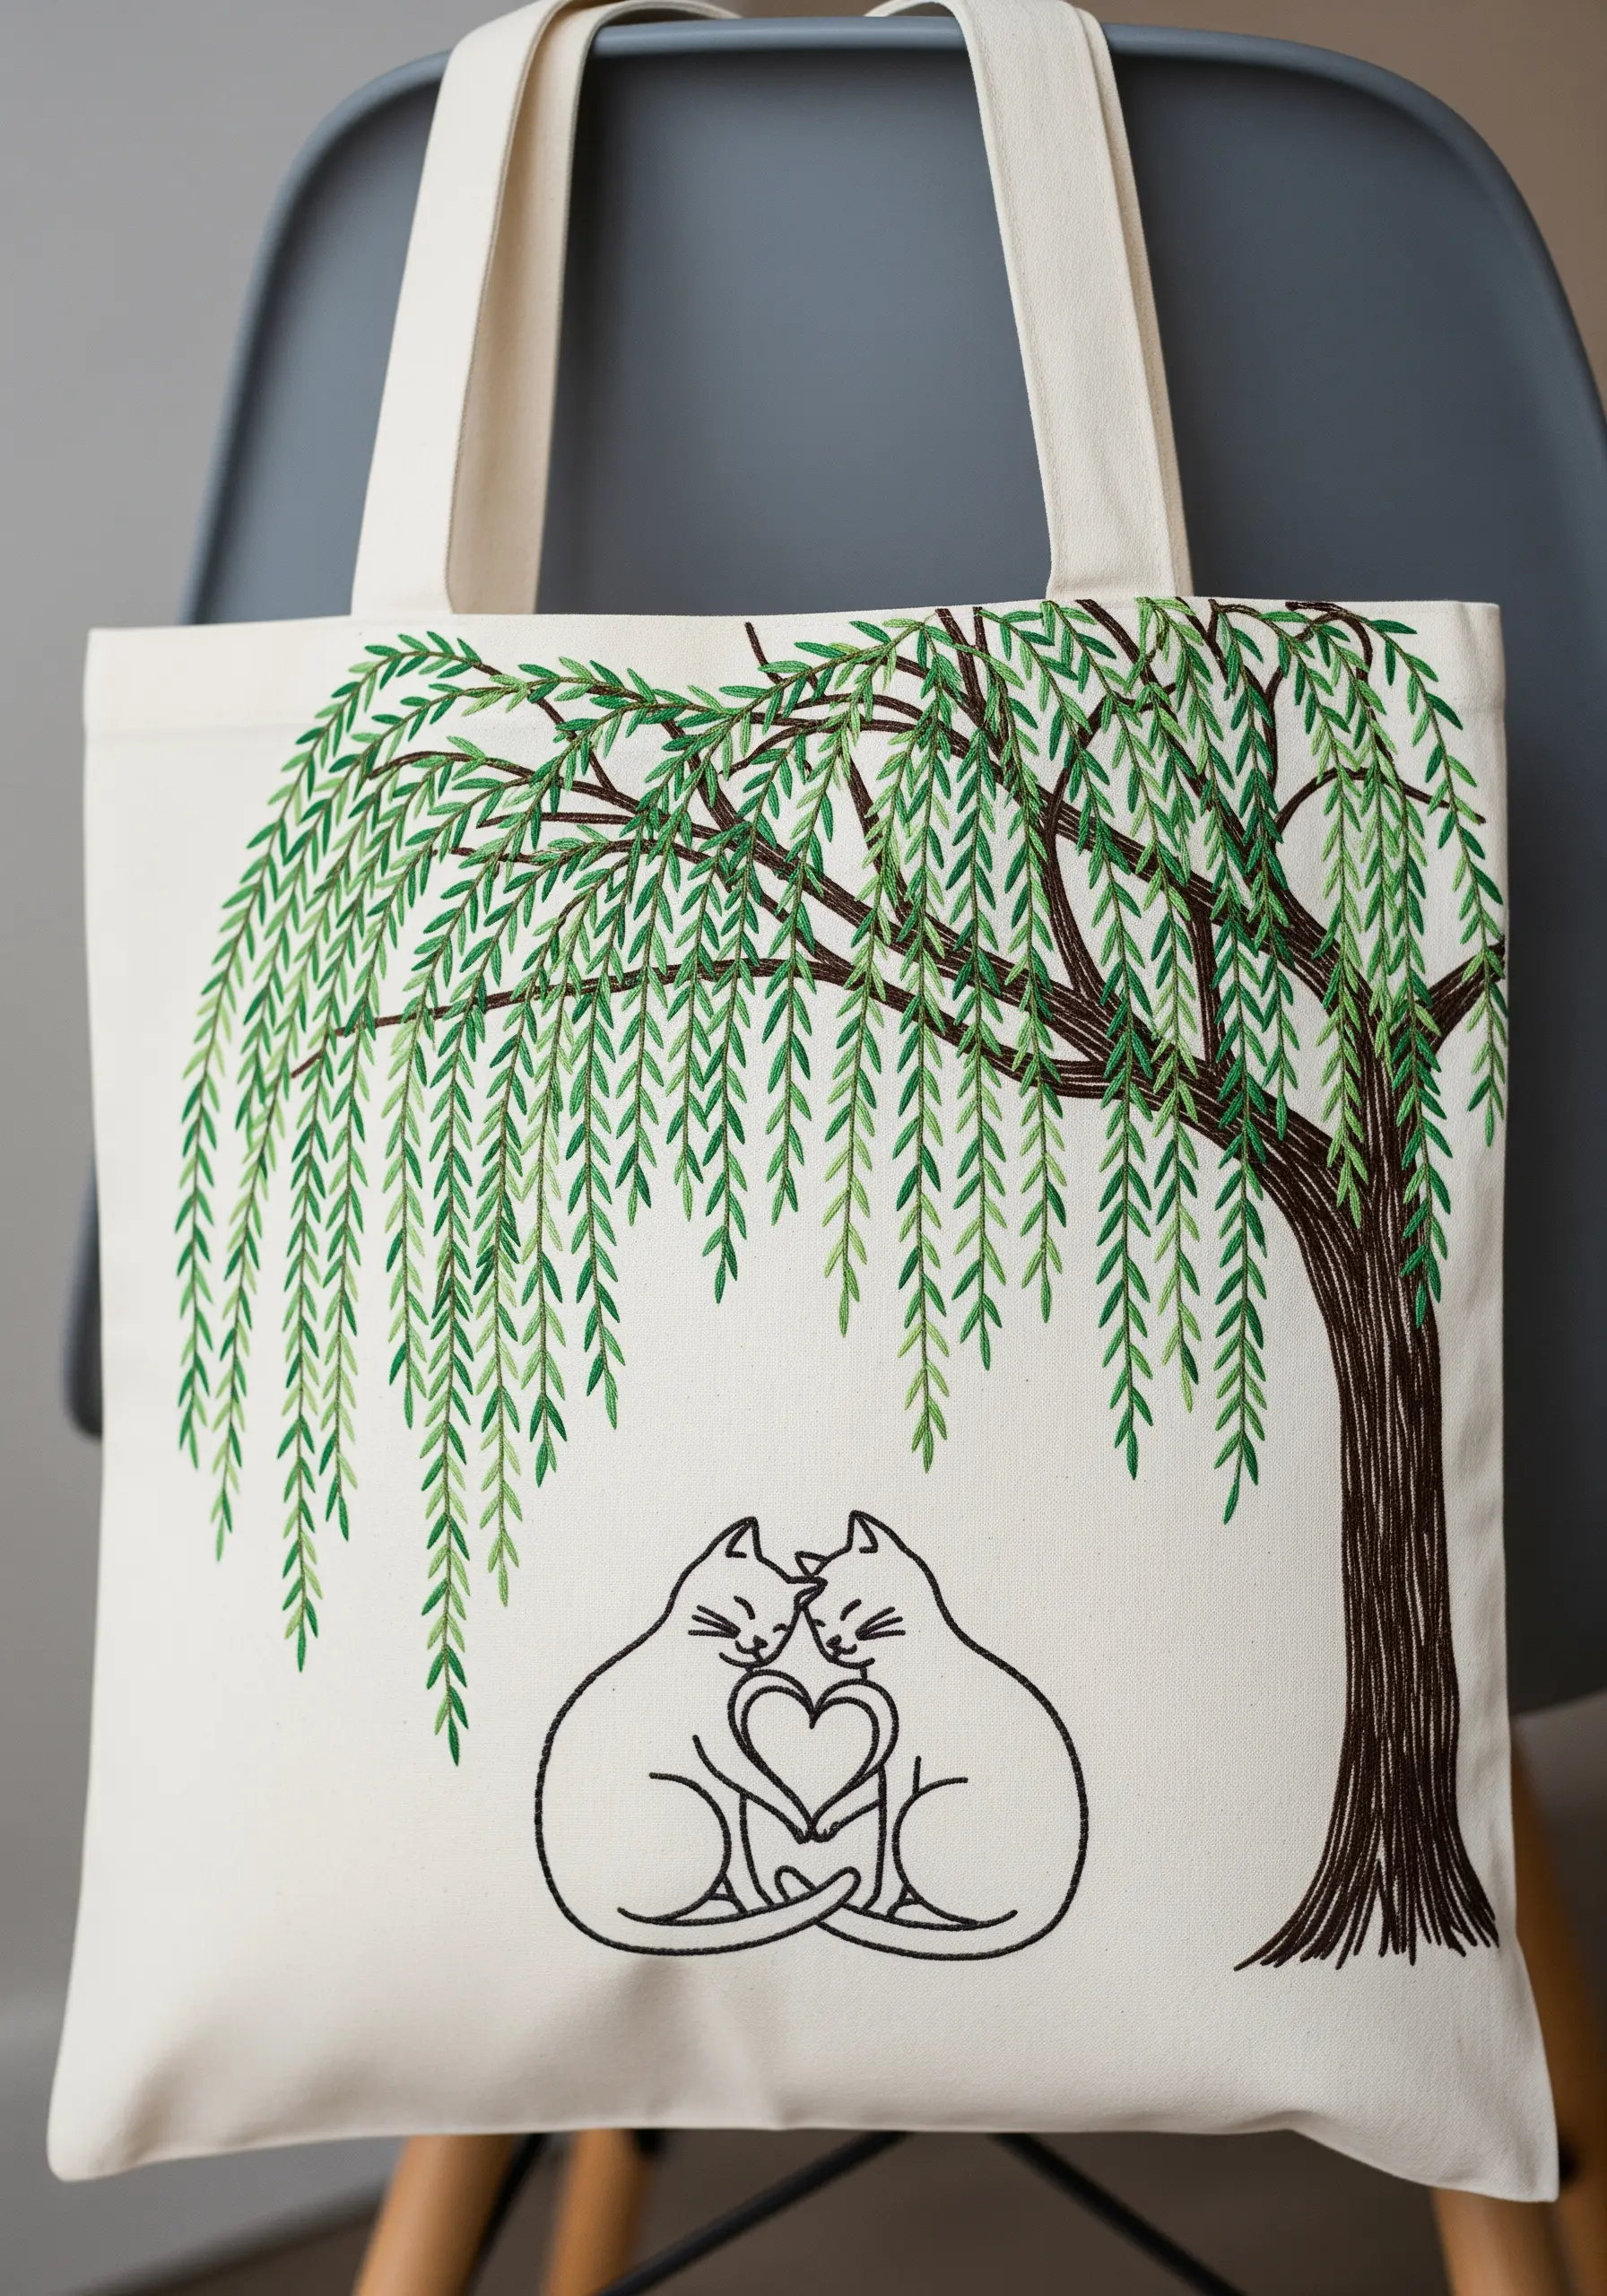
You can convey a powerful emotion or story with nothing more than a clean line.
For this tote bag embroidery project, use a stem stitch or whipped backstitch with three strands of black floss to ensure the outlines are bold and consistent.
The simplicity of the cats’ forms allows the small, central detail—the heart shape made by their tails—to become the emotional core of the entire piece.
13. Building Rich Texture with Cross-Hatching
For a highly stylized, illustrative look, move beyond traditional fill stitches.
Create depth and shading by using fine cross-hatching—layers of tiny, overlapping straight stitches—to build up color.
This technique, borrowed from pen-and-ink drawing, gives the surface a unique texture that feels both graphic and dimensional.
Contrast this with solid white satin-stitched flowers for a stunning visual effect.
14. Enhancing Cross-Stitch with Freestyle Details

Elevate your cross-stitch projects by incorporating freestyle embroidery accents.
While the main scene is created with the structured grid of cross-stitch, you can add softness and detail with other stitches.
Here, the sun’s rays are rendered with simple backstitches, and the cat’s whiskers are single straight stitches.
This combination of techniques adds a layer of sophistication and breaks the uniformity of the grid.
15. Capturing Whimsy with Delicate Thread Weights
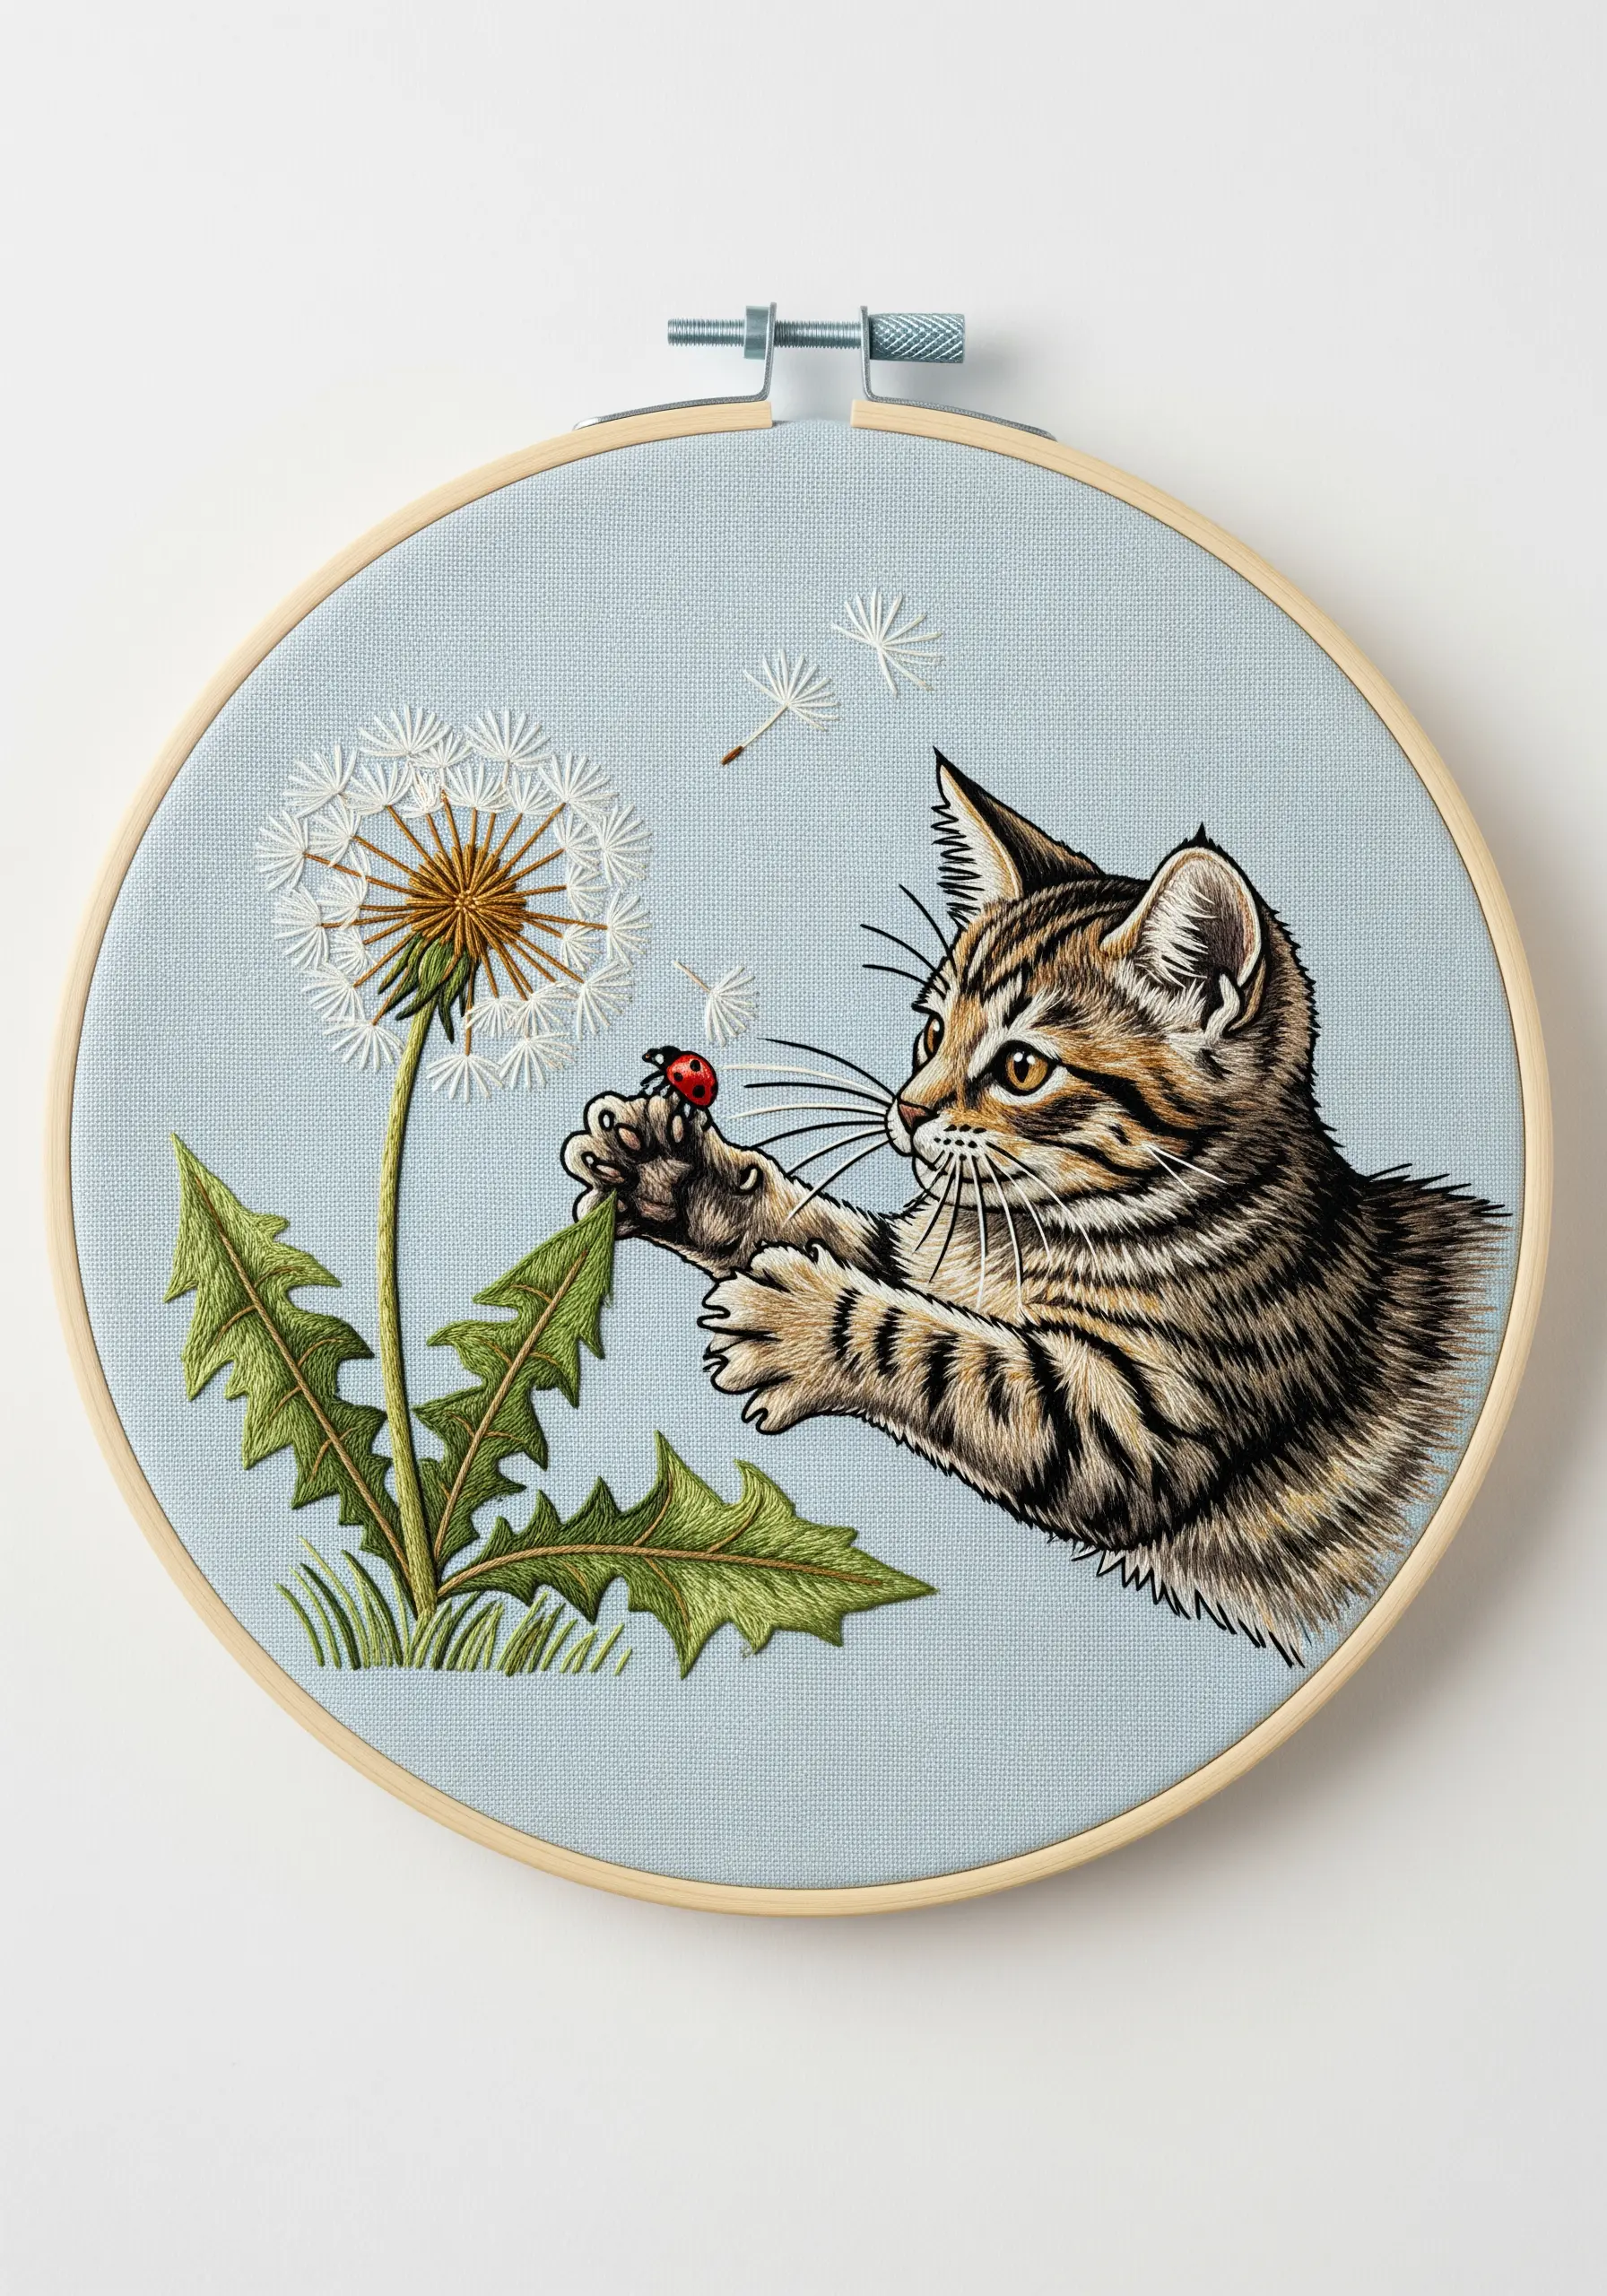
The key to making elements look light and airy is your choice of thread.
For the dandelion head, use two strands of floss for the main structure, but switch to a single strand for the delicate seeds floating away.
This subtle shift in thread weight creates a visual hierarchy and makes the floating seeds appear almost weightless.
It’s a small adjustment that has a huge impact on the final piece.
16. Creating a Foundation for a Perfect Portrait
For a professional-looking pet portrait, precision starts with a solid foundation.
Before you begin the thread painting, stitch the entire outline of the cat’s head, ears, and major markings using a split stitch.
This simple step creates a slightly raised, stable edge for your long-and-short stitches to meet.
It prevents gaps, sharpens the silhouette, and is the secret to achieving those clean, defined edges in your hand-stitched portrait wall art ideas.
17. Incorporating Beads and Metallics for Sparkle

Add a touch of magic to your work by introducing mixed media elements.
Stitch the kitten with standard cotton floss for a soft, matte finish.
For the butterfly, create a base of color with satin stitch, then sew seed beads and metallic threads over the top.
This contrast between the matte thread and the reflective beads draws the eye and adds a playful, tactile dimension to the piece.
18. Merging Embroidery with Photography
Push the boundaries of the medium by stitching directly onto a printed image.
Start with a high-quality photograph printed on stiff cardstock or special printable fabric.
Use a sharp needle to pierce the paper and add simple embroidered elements that interact with the scene.
This technique allows you to add a layer of texture and surreal whimsy, transforming a simple photograph into a unique piece of DIY collage art.
19. Using Felt as a Textured Canvas
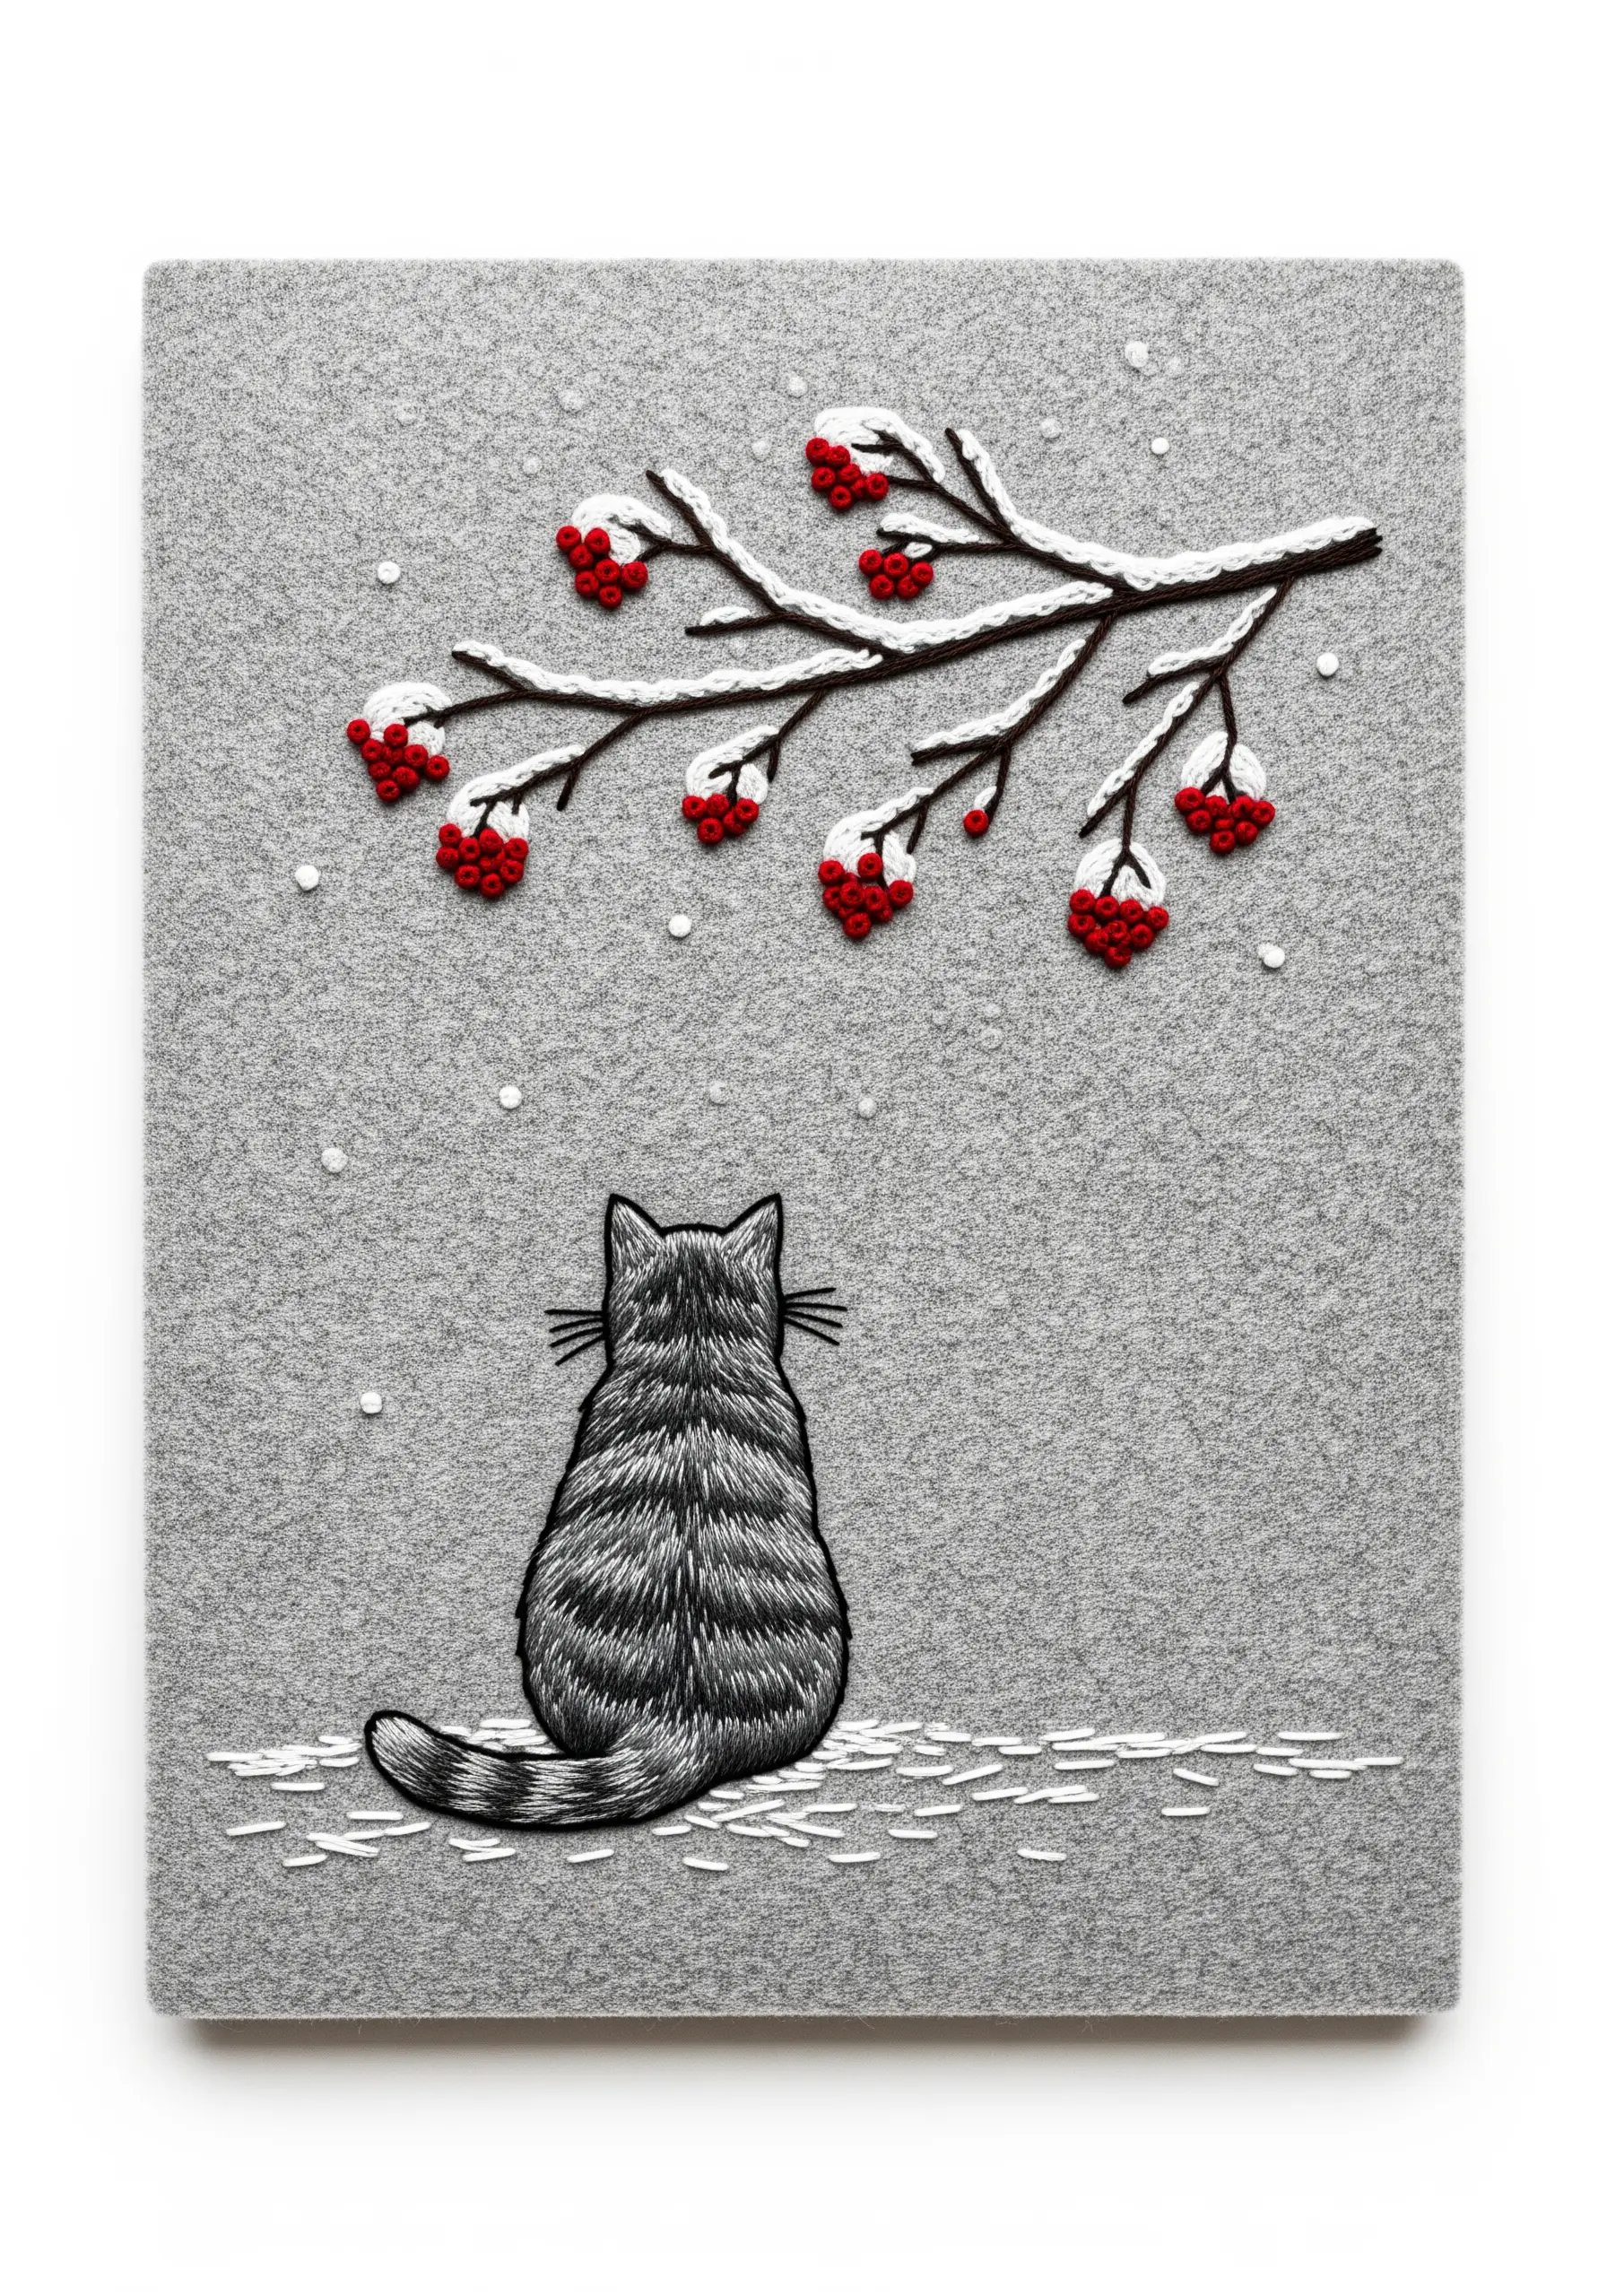
The fabric you choose can dramatically alter the mood of your work.
A high-quality wool-blend felt provides a soft, matte background that absorbs light and makes your thread colors appear rich and deep.
The inherent texture of the felt adds warmth and complements the softness of the embroidered fur.
Use dense French knots for the berries to create raised, tactile points of interest.
20. Recreating Natural Textures with Thread
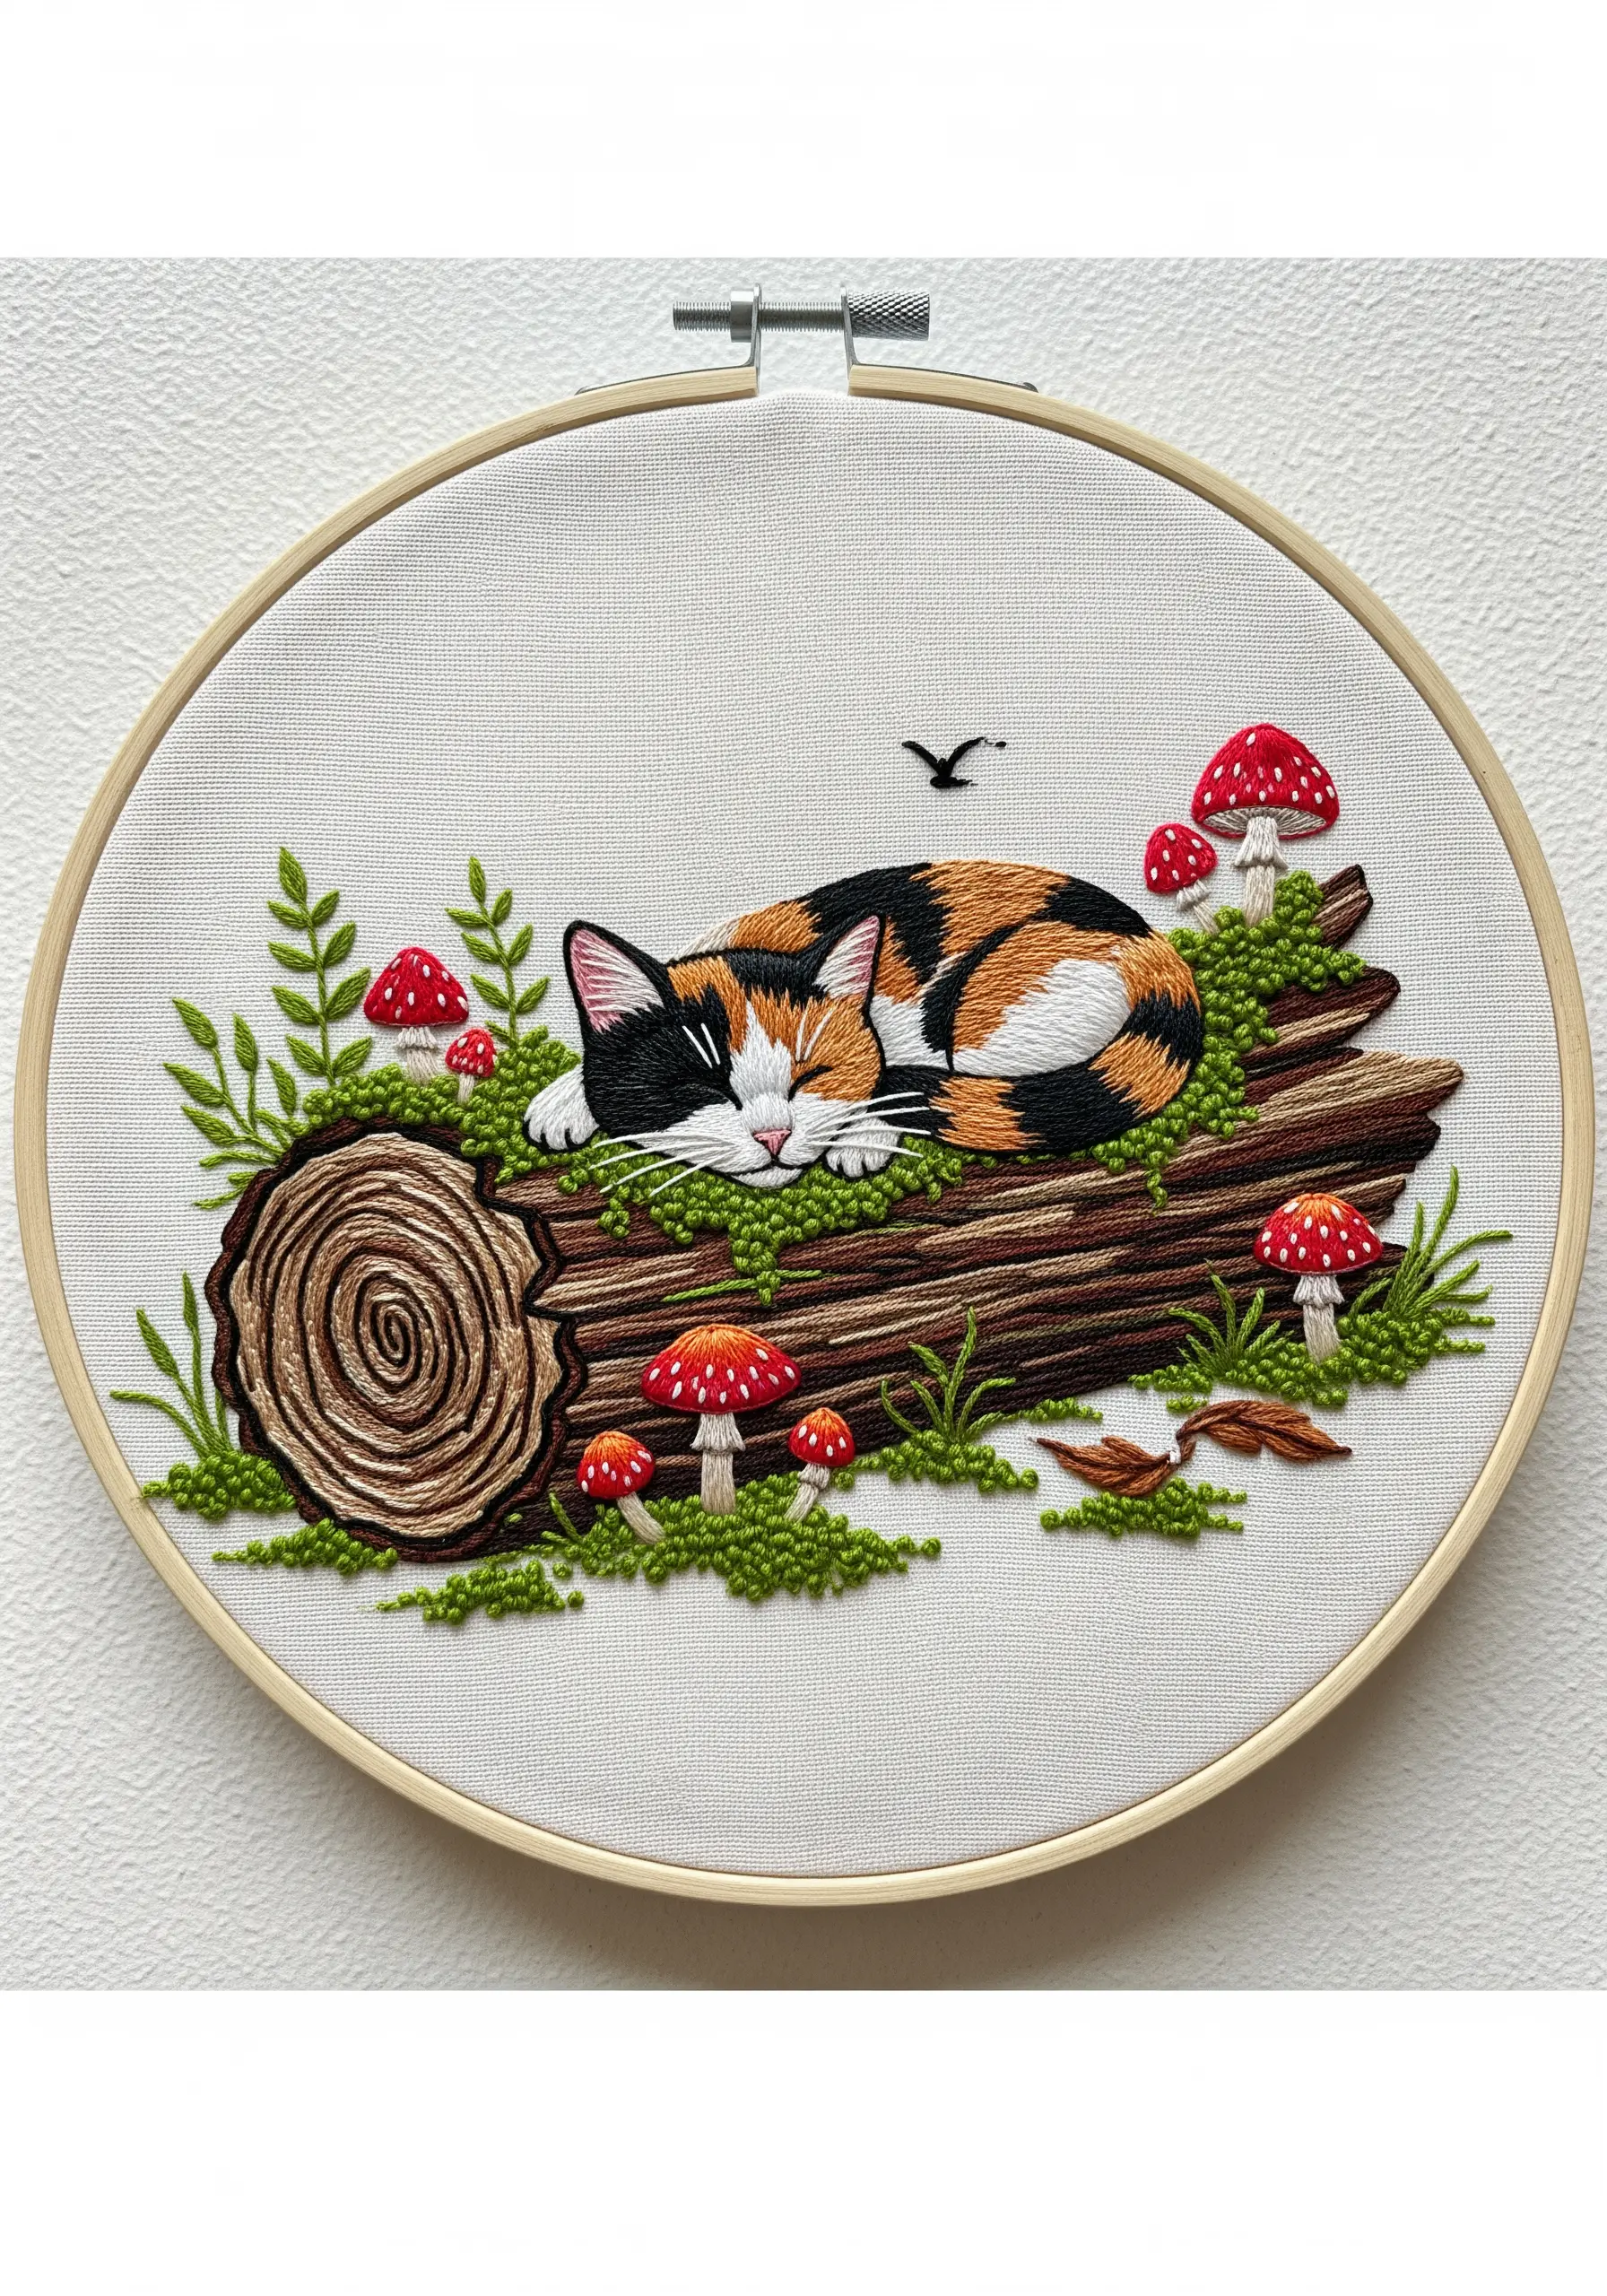
Capture the essence of a woodland scene by mimicking its textures with thread.
For the log, use long, parallel straight stitches in varying shades of brown to create the illusion of woodgrain.
To simulate moss, cover the surface with dense, slightly chaotic French knots in at least three different shades of green.
This contrast between the linear woodgrain and the bumpy moss makes the entire scene feel more authentic and tangible.
21. Modern Aesthetics with Geometric Fills

For a clean, contemporary look, translate your subject into geometric shapes.
The key to this style is precision. Before filling any section, outline it with a backstitch or split stitch.
This creates a crisp boundary and ensures your satin stitches have a sharp, defined edge to press against.
Fill each segment with satin stitch, keeping your threads perfectly parallel for a smooth, graphic finish.
22. Conveying Tenderness Through Stitch Direction
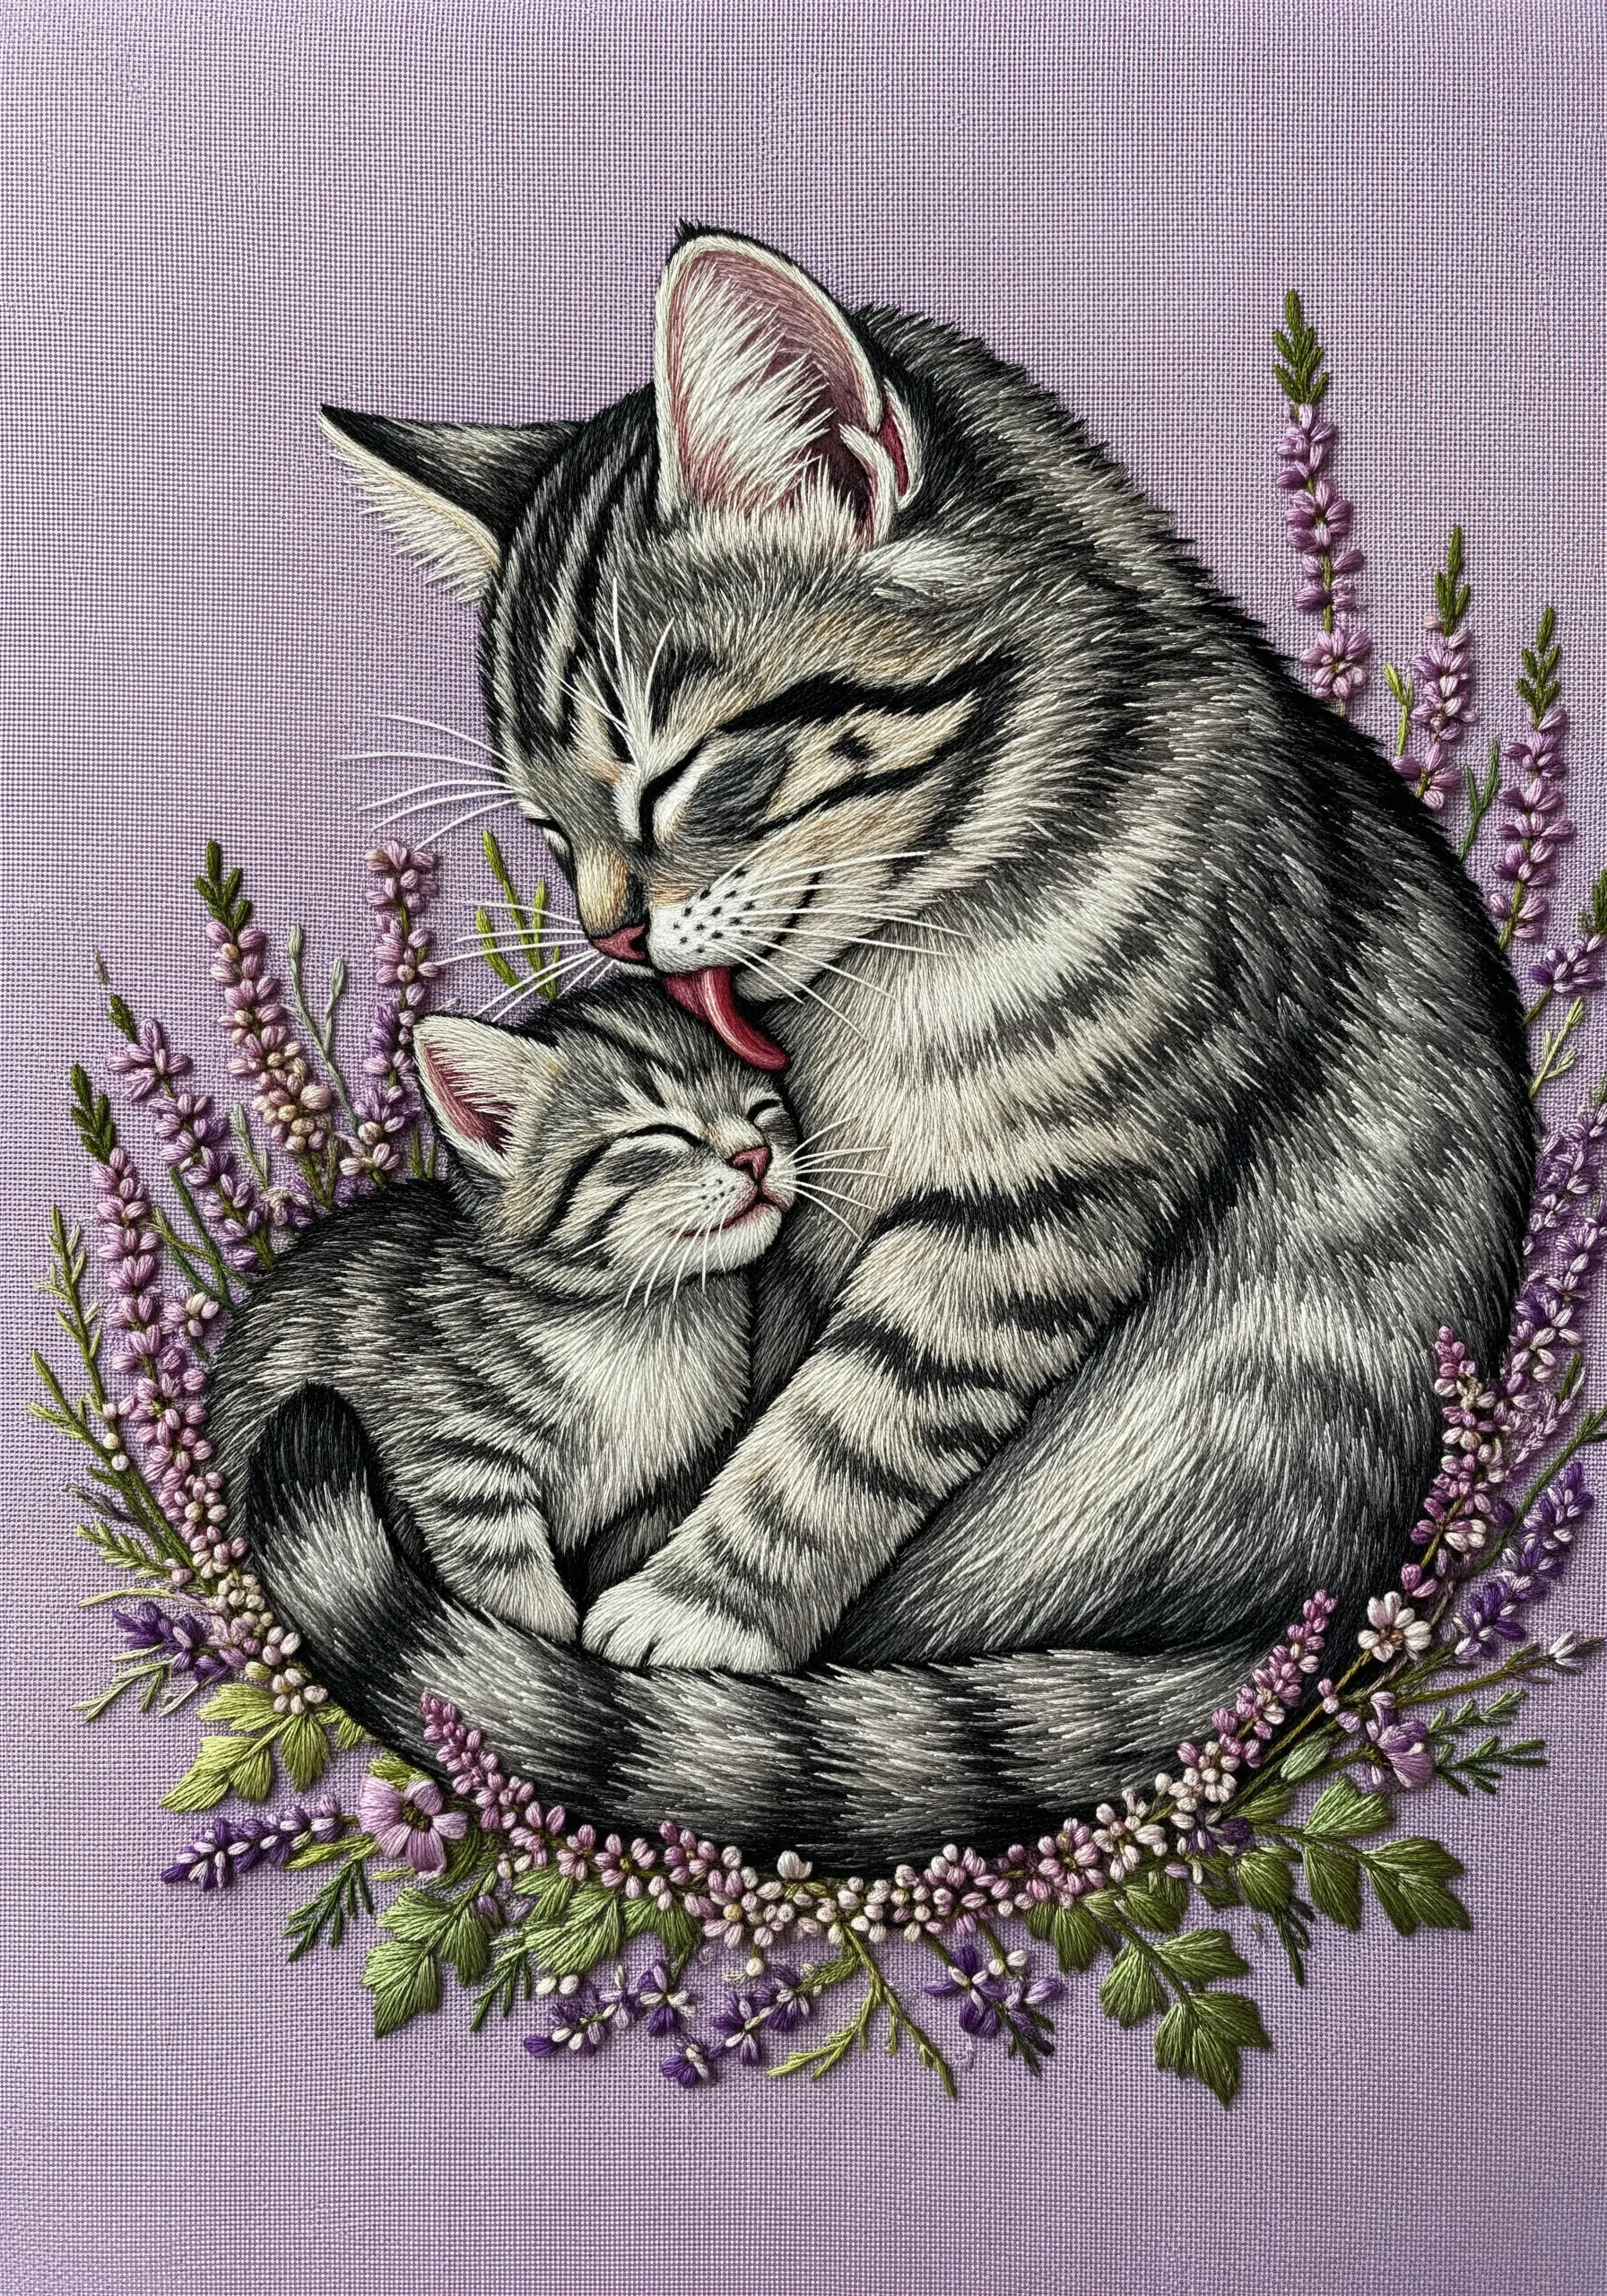
The direction of your stitches can communicate emotion as much as color or shape.
As you thread-paint the mother and kitten, ensure your stitches follow the contours of their bodies, wrapping around them in a gentle curve.
The small swirl of pink thread for the tongue, stitched in the direction of the lick, is a tiny detail that conveys immense tenderness.
This mindful application of stitch direction transforms a portrait into a heartfelt moment.
23. Mastering the Silhouette for High Impact
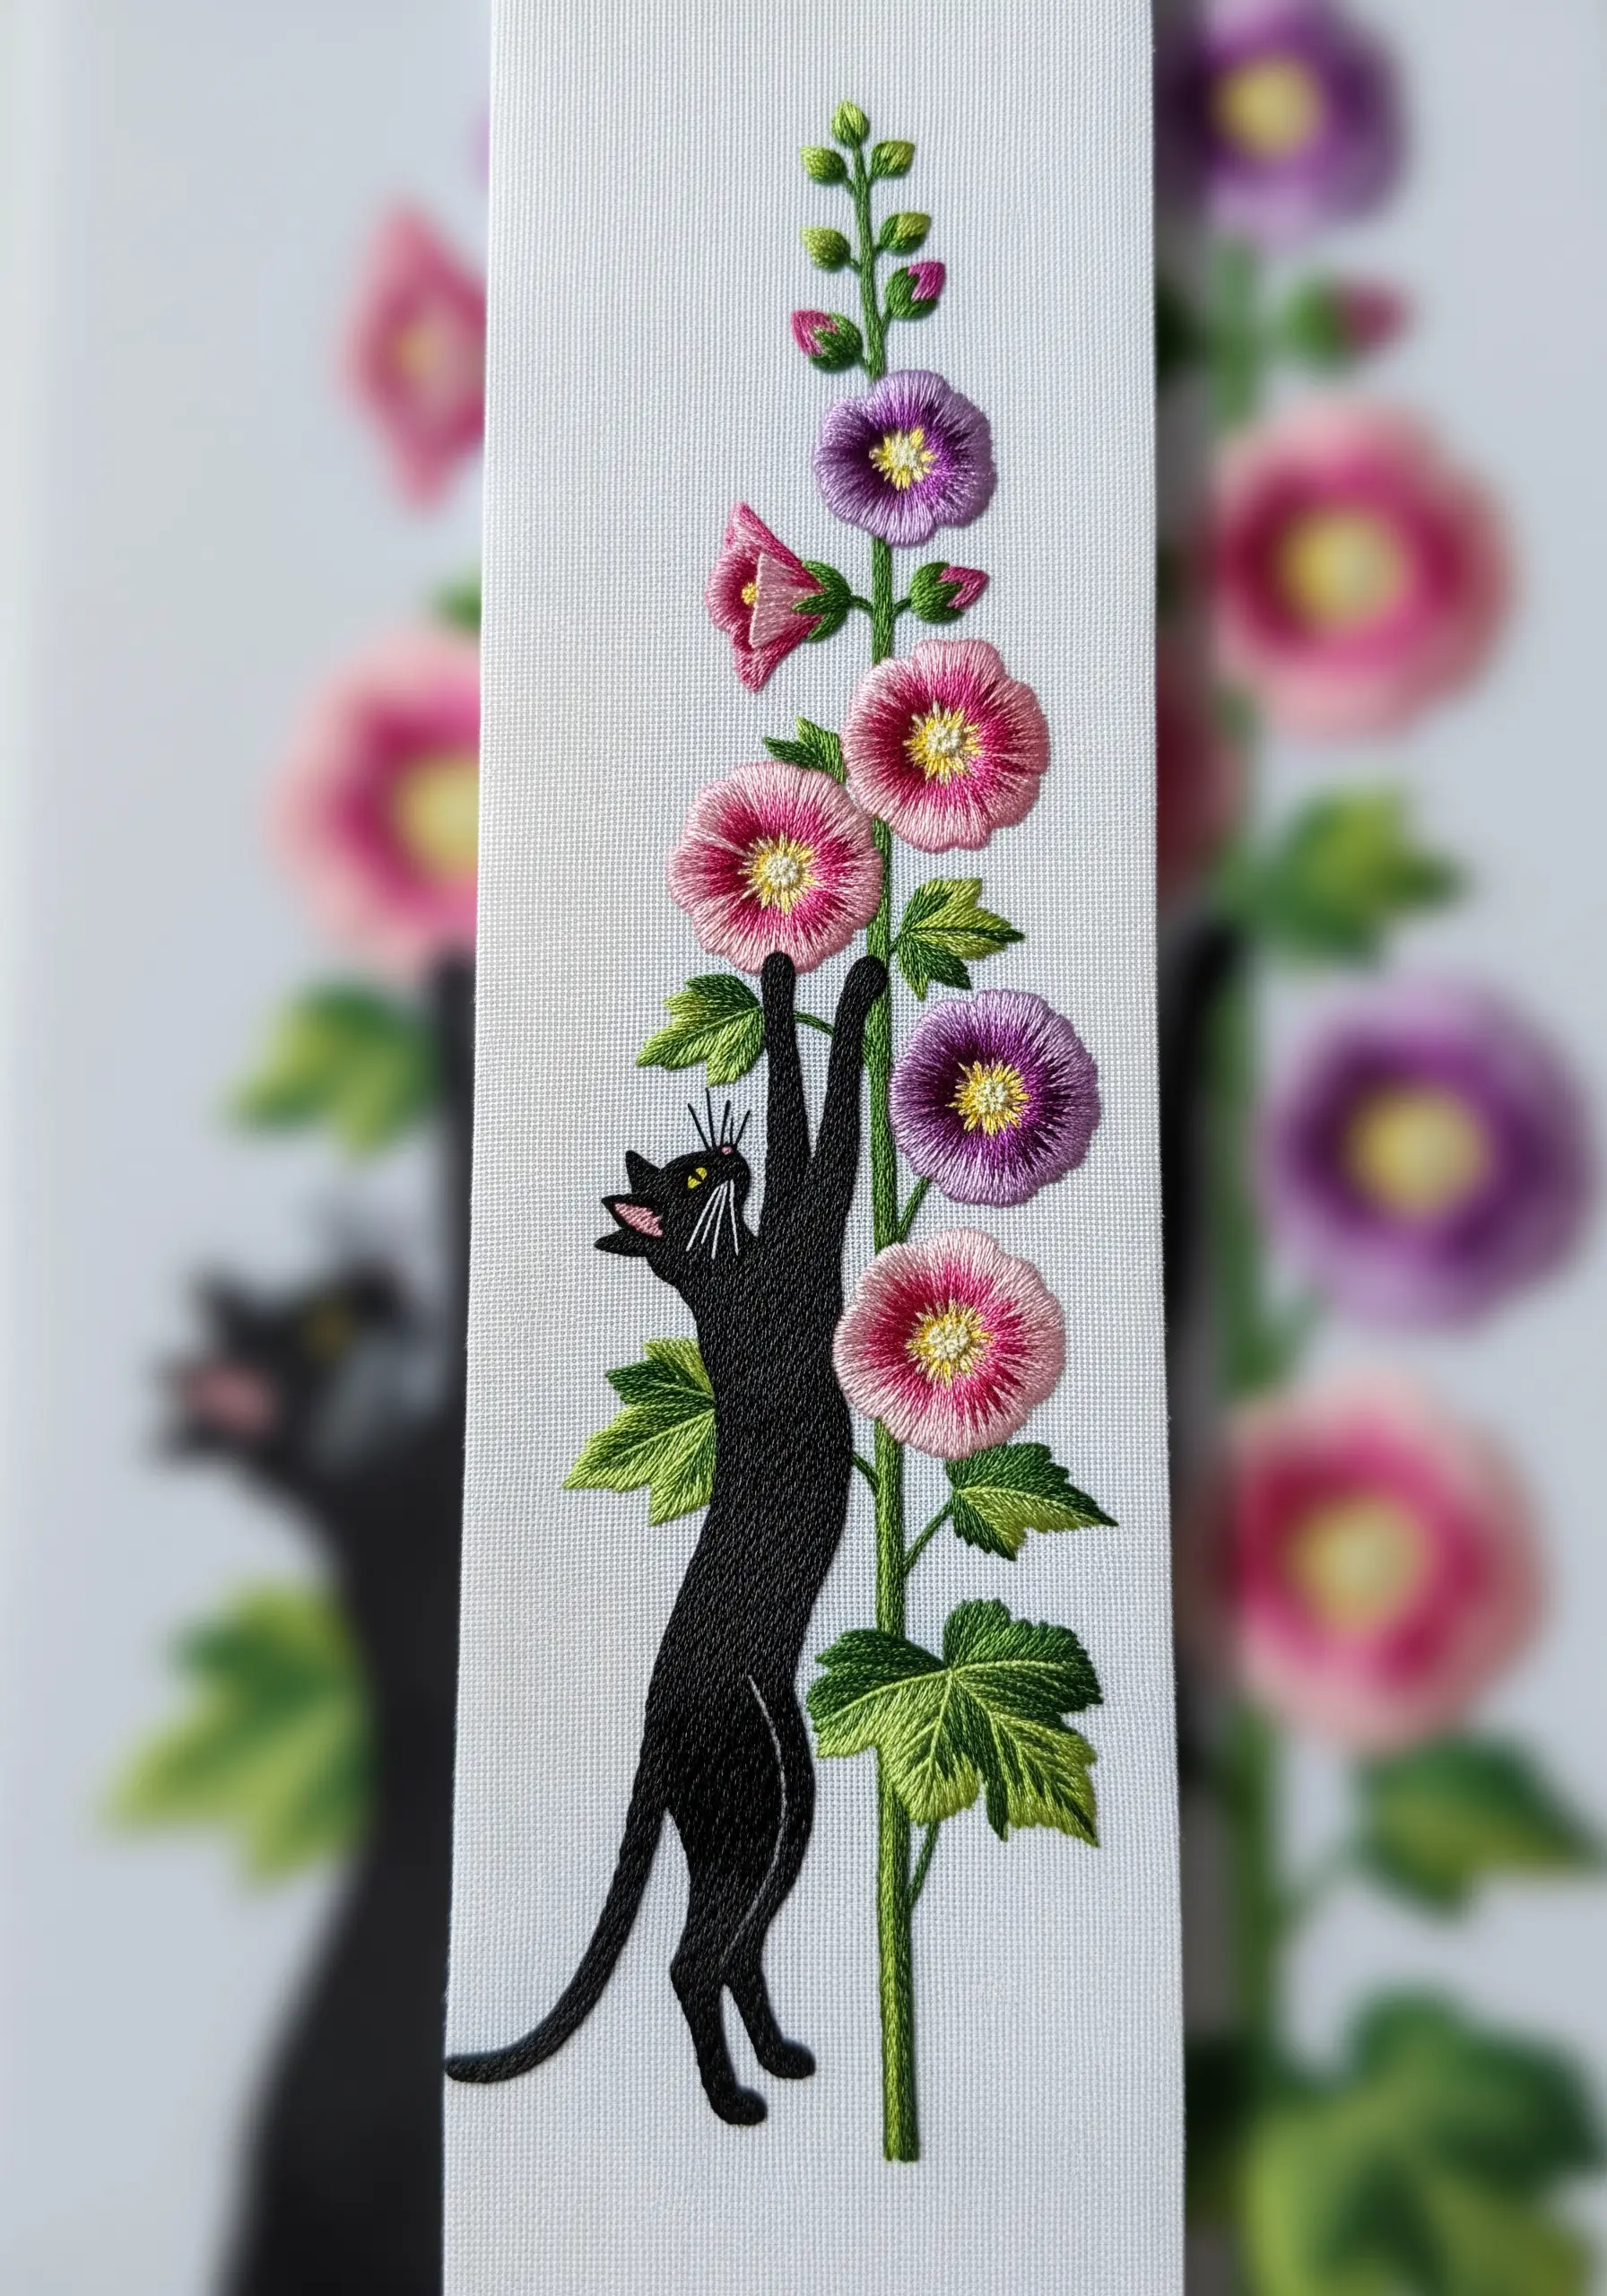
Sometimes, the most powerful statement is the simplest one.
To create a striking silhouette, use a dense, short satin stitch with at least three strands of black floss.
The goal is complete, solid coverage with a clean, sharp edge.
This solid shape provides a strong graphic contrast against the delicately shaded, multi-toned flowers, making the entire composition visually dynamic and modern.
24. Creating a “Spiky” Fur Effect with Straight Stitches
To capture the texture of a startled, fluffy kitten, think beyond smooth stitches.
For the fur along the back and tail, use individual straight stitches that radiate outwards from the body, rather than lying flat against it.
Keep them short and slightly varied in length and angle to create an energetic, spiky appearance.
This simple change in stitch placement adds a huge amount of personality and expression.
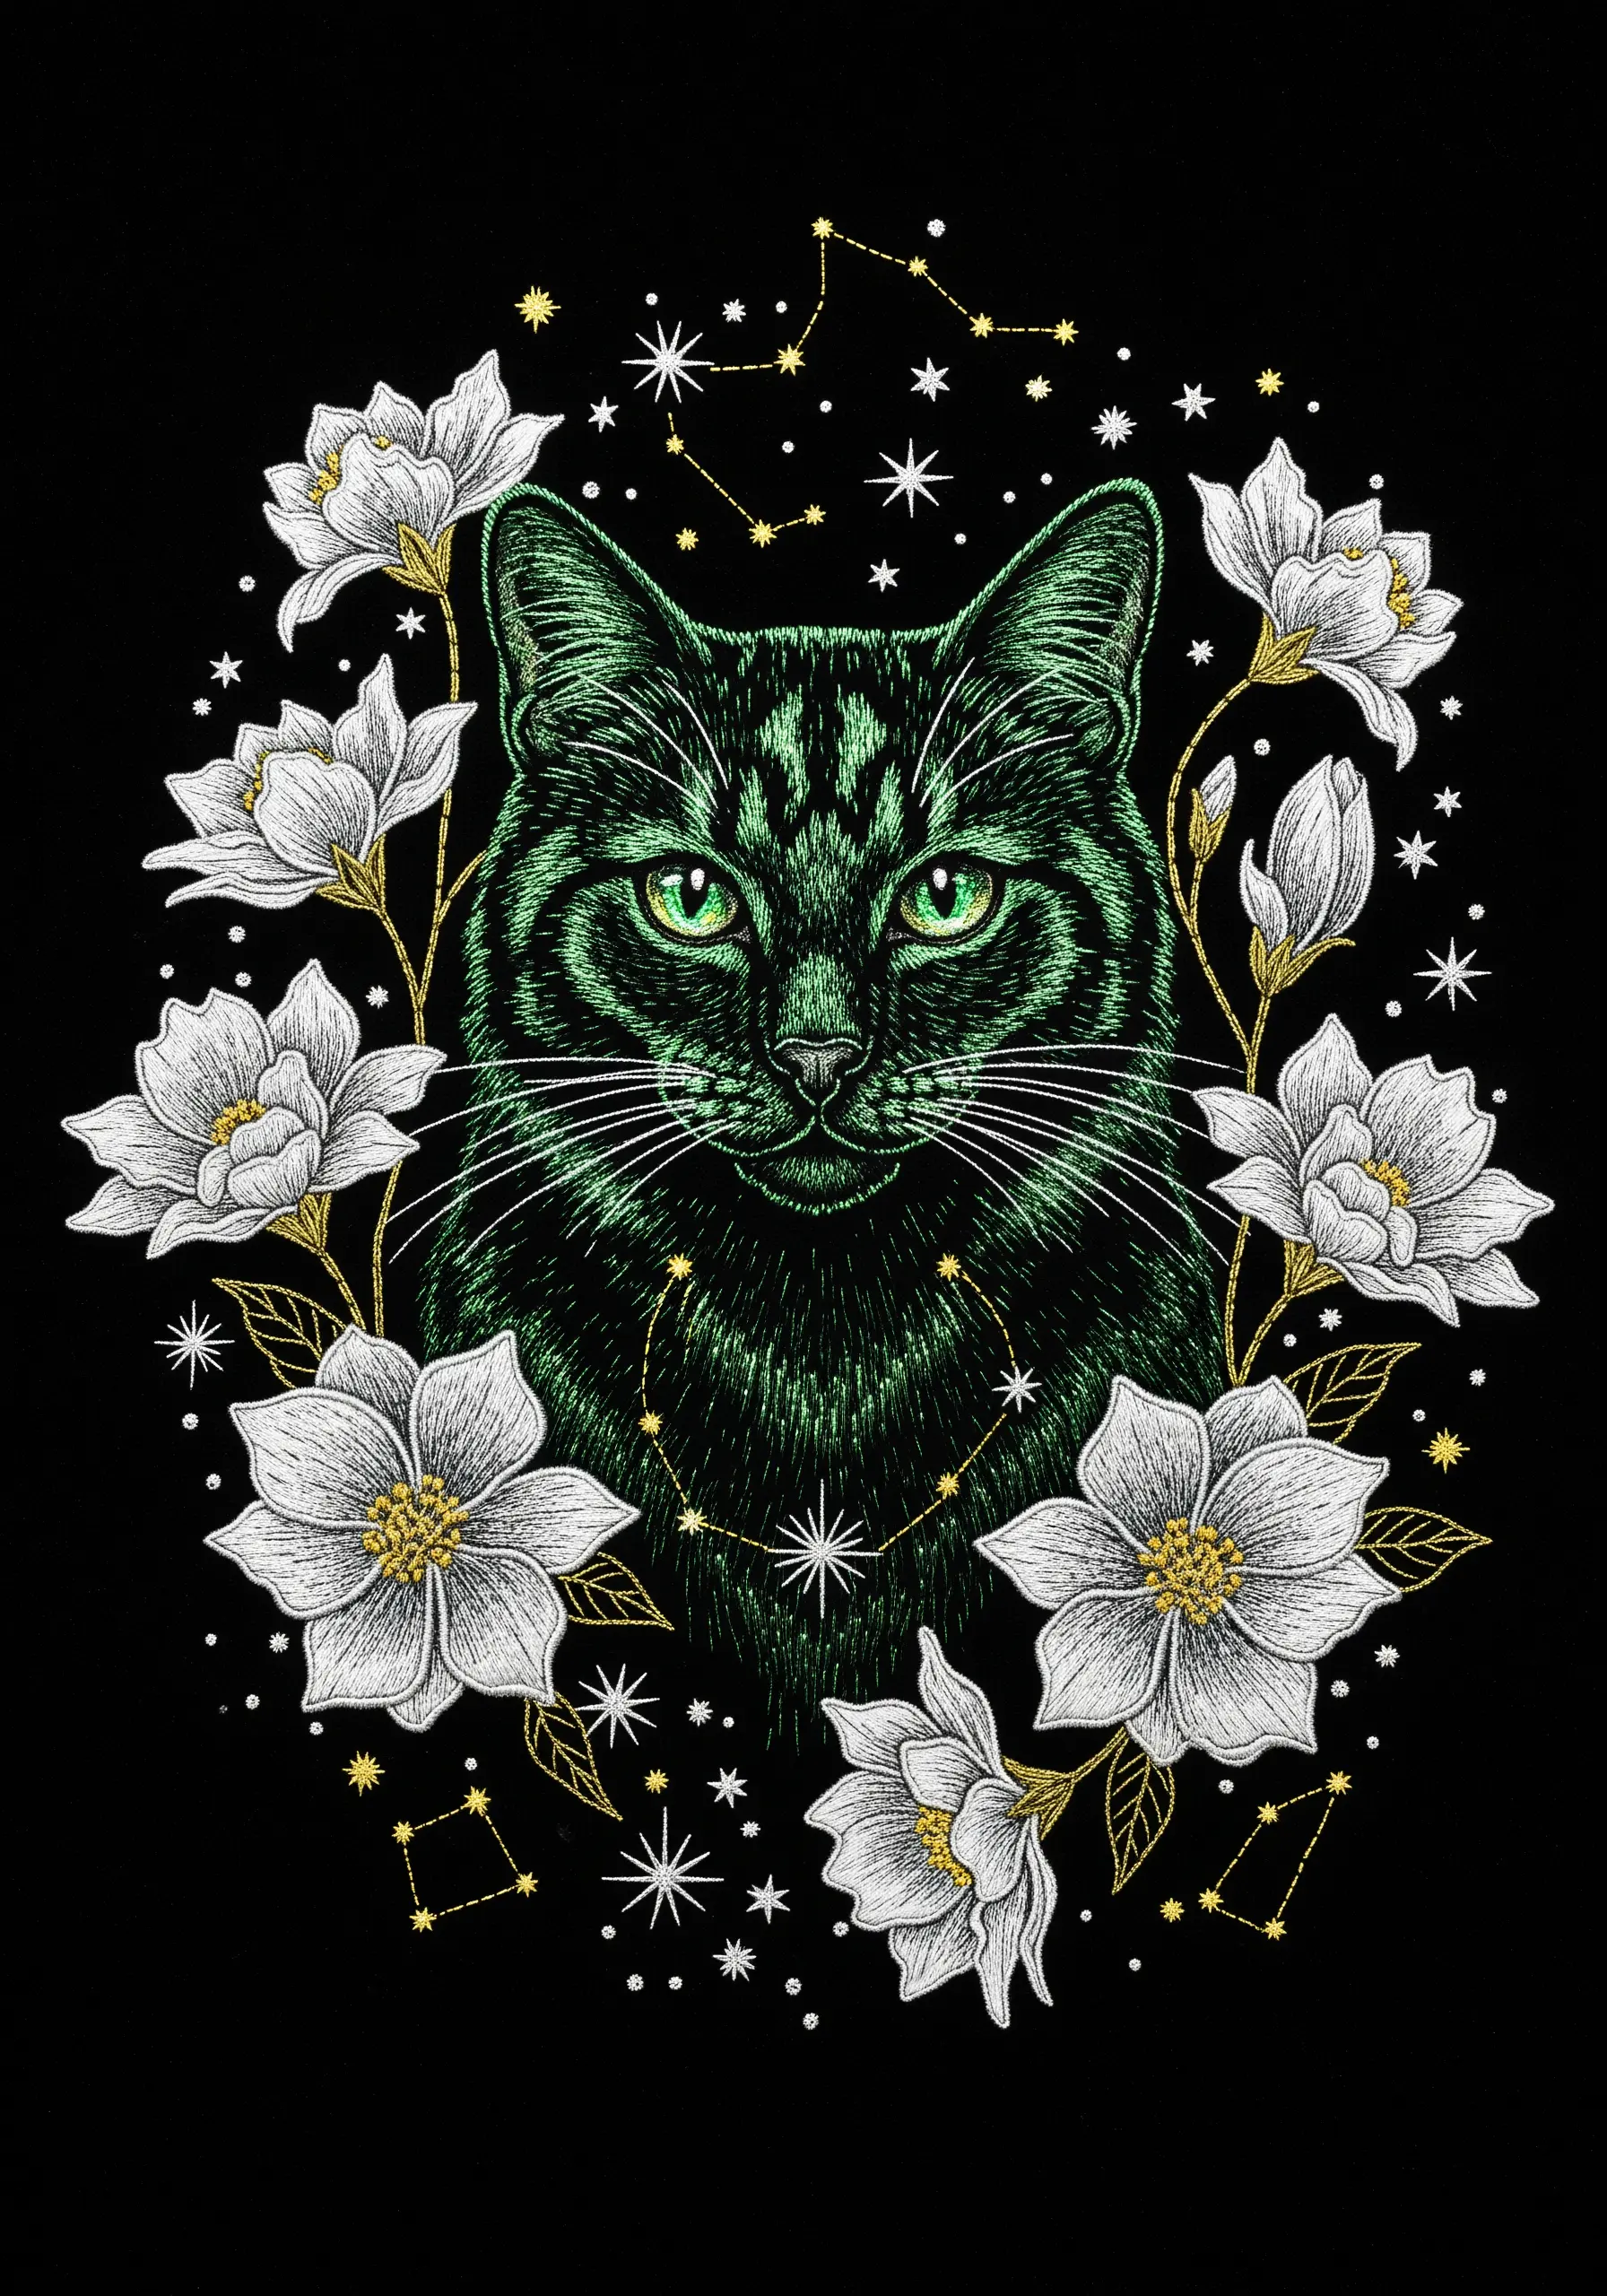
25. Using Thread Color for a Dramatic Glow
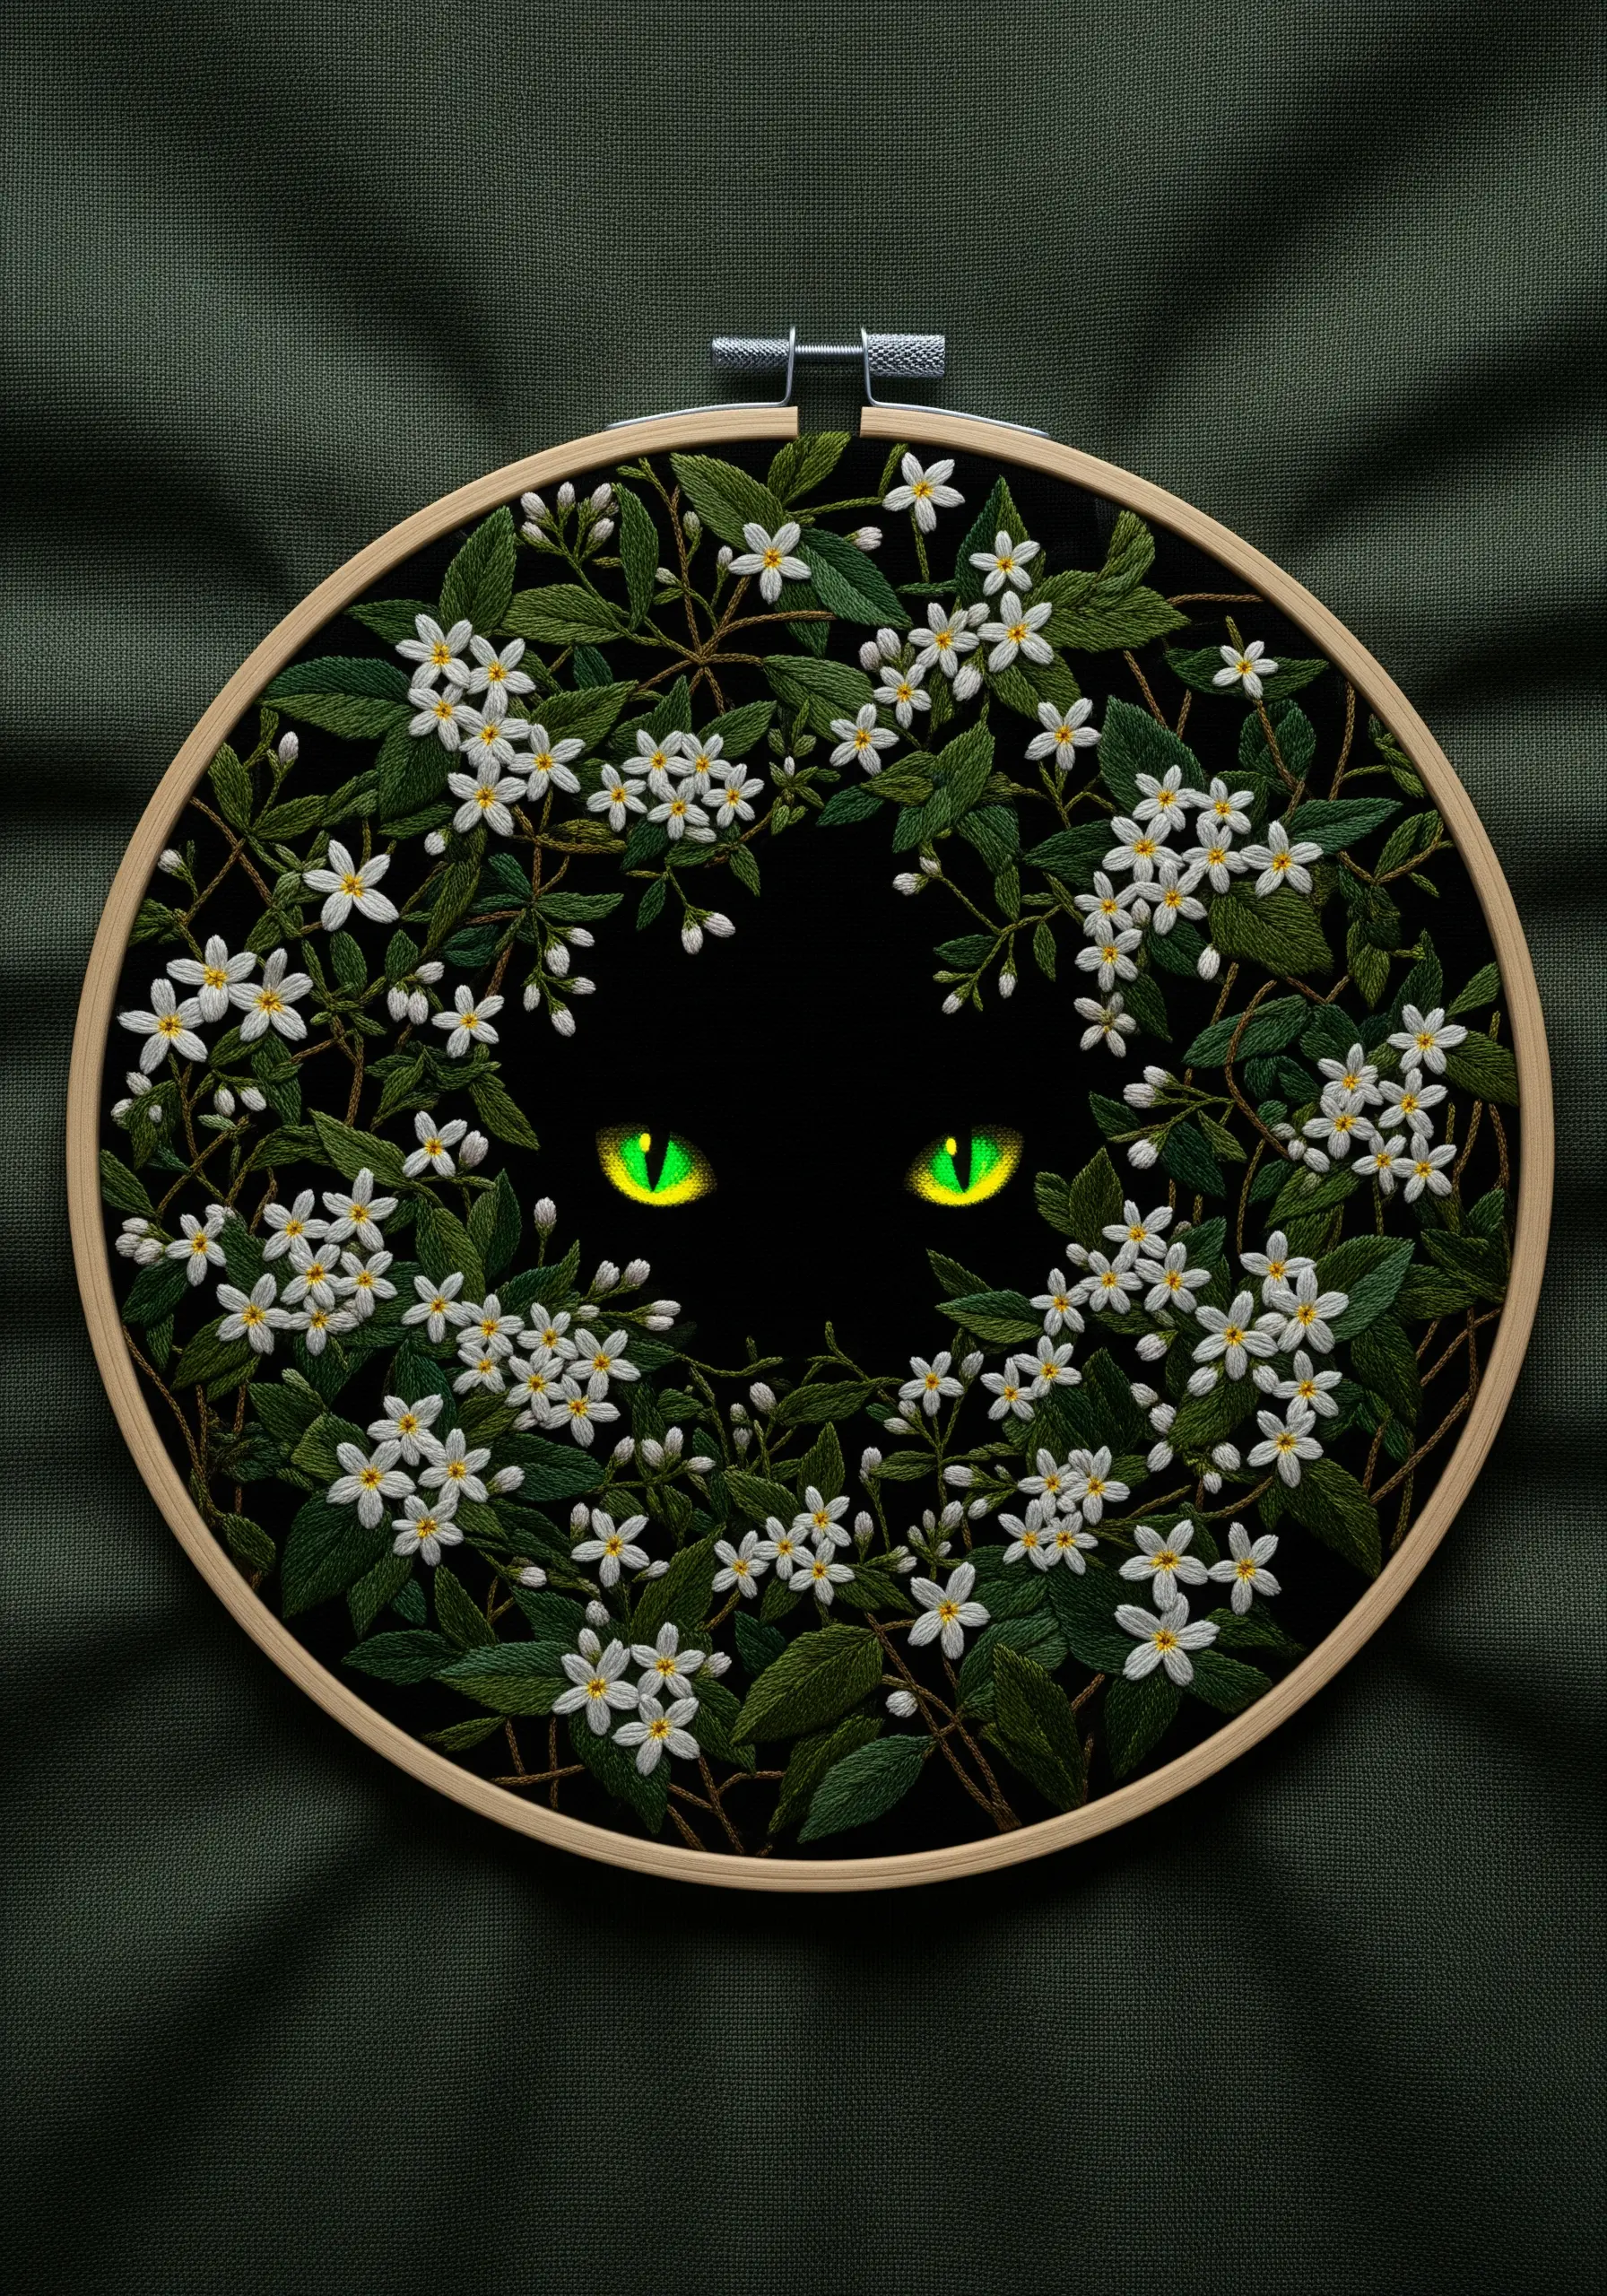
Create the illusion of glowing eyes through strategic color choice.
On a dark fabric, the high contrast between the black background and vibrant threads is essential.
Use bright, almost neon shades of green and yellow for the iris, blending them with short satin stitches.
The most critical detail is the catchlight: a single, tiny stitch of bright white floss placed in the exact same spot on each eye. This is what brings them to life.
26. Embracing Rustic Textures with Burlap
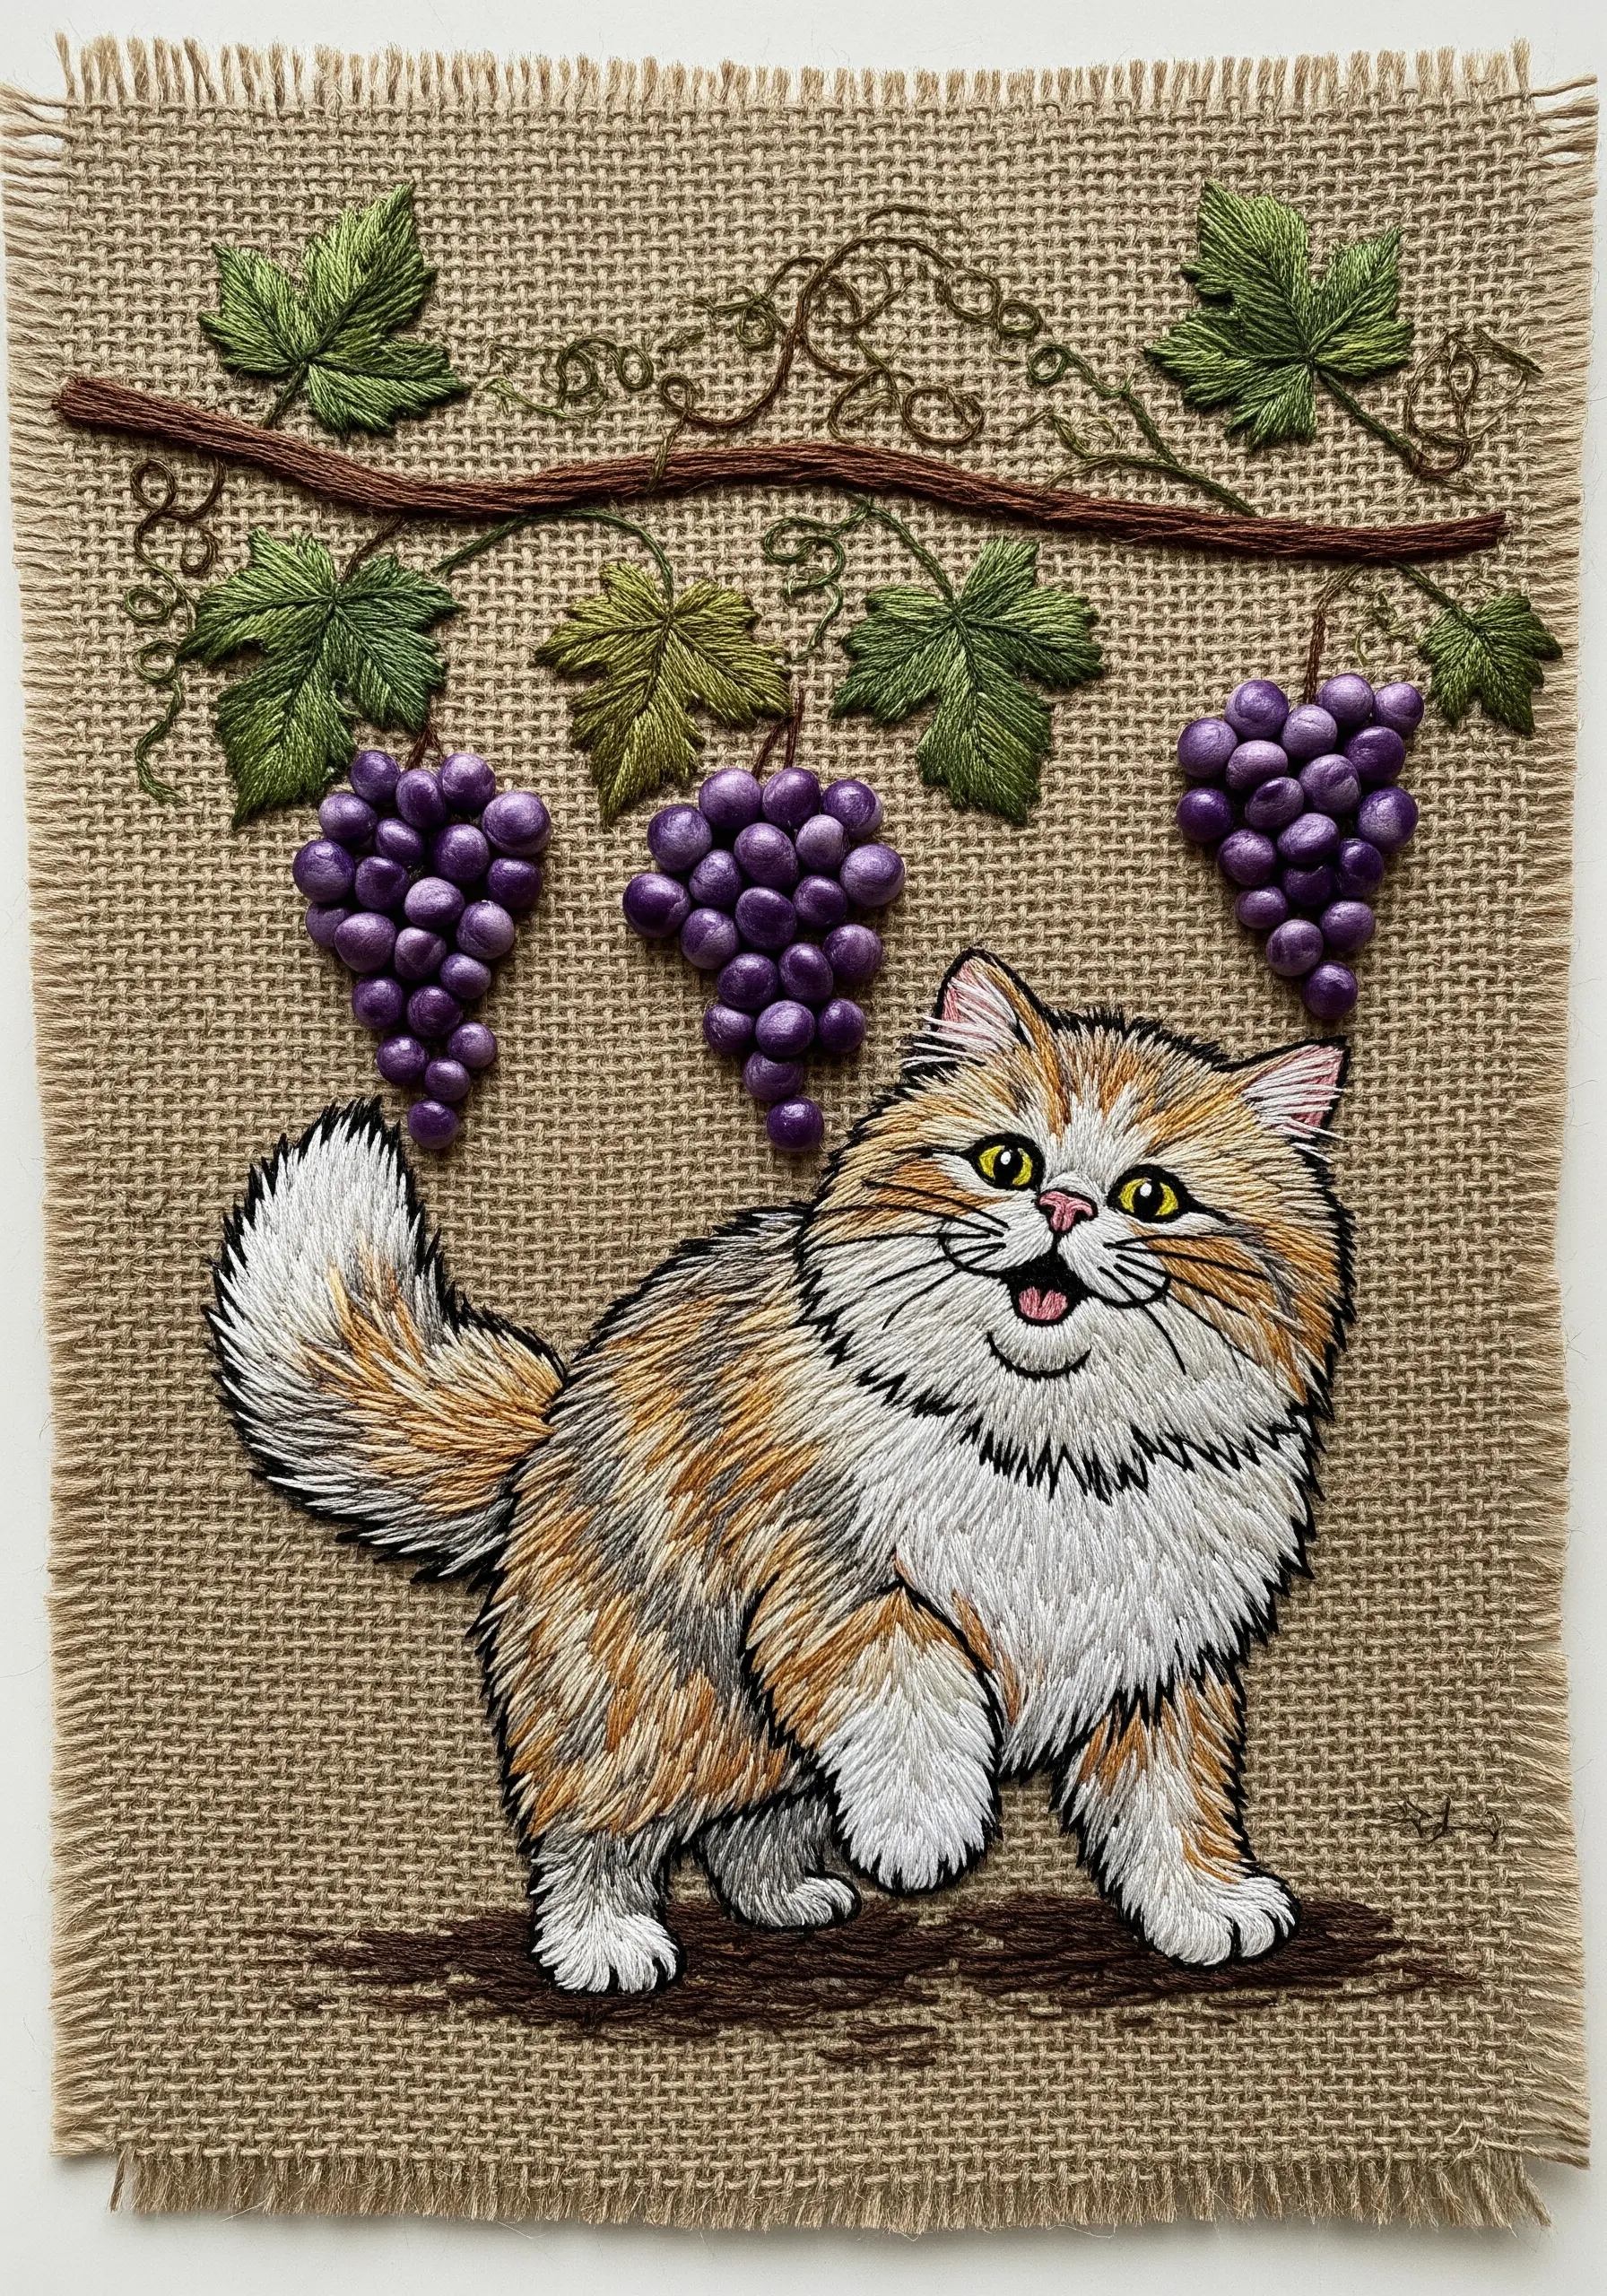
Stitching on an open-weave fabric like burlap requires a different approach.
Because the weave is loose, you need to use a thicker thread to ensure your stitches are bold and don’t disappear into the fabric.
Use all six strands of your cotton floss, or even switch to a fine wool or pearl cotton.
The texture of the burlap adds an immediate rustic farmhouse embroidery feel, perfectly complementing the charming subject matter.
27. Shading with Lines for an Illustrative Style

Instead of filling the autumn leaf with a solid satin stitch, treat your needle like a colored pencil.
Use long straight stitches in various shades of orange, red, and brown to create the veins and color gradients.
By layering these lines and allowing them to overlap, you create a sense of texture and depth that feels more like a detailed drawing than a traditional embroidery.
This technique adds a sophisticated, artistic quality to your work.
28. The Elegance of a Single, Continuous Line

For a minimalist design, the quality of your line is everything.
To achieve this fluid, unbroken look, use a whipped backstitch. First, create a standard backstitch outline, then whip it with a second thread without piercing the fabric.
This process smooths out the jagged edges of a standard backstitch, resulting in a clean, cord-like line.
It provides the perfect contrast to the solid satin stitch of the flower, creating a balanced and elegant piece of minimalist art.
29. Enhancing Embroidery with a Watercolor Background

Add instant atmosphere and depth to your work with a touch of paint.
Before you begin stitching, use a soft brush to apply a light wash of watercolor or diluted fabric paint to your background fabric.
Let it dry completely before hooping.
This technique creates a soft, impressionistic backdrop that allows your crisp, detailed embroidery to stand out, adding a layer of professional polish to the finished piece.
30. Creating a Dense, Lush Composition

For a full-coverage design bursting with color, a methodical approach is key.
To prevent the fabric from distorting under the tension of so many stitches, always begin with the central elements—in this case, the two cats.
Once they are complete, work your way outwards, filling in the background with the dense flowers and leaves.
This center-out method ensures your fabric remains taut and your composition stays flat and beautiful.
31. Combining Bold Line Art with Pockets of Color

Create a striking, modern design by playing with contrast.
First, establish the entire form of the cat using a clean, consistent backstitch with black thread. This creates a strong graphic outline.
Then, instead of filling the entire shape, choose one area—like the body—to fill with dense, colorful floral stitches.
This selective use of color creates a powerful focal point and an engaging balance between simple line work and intricate detail.
32. Stitching Personality Through Micro-Expressions
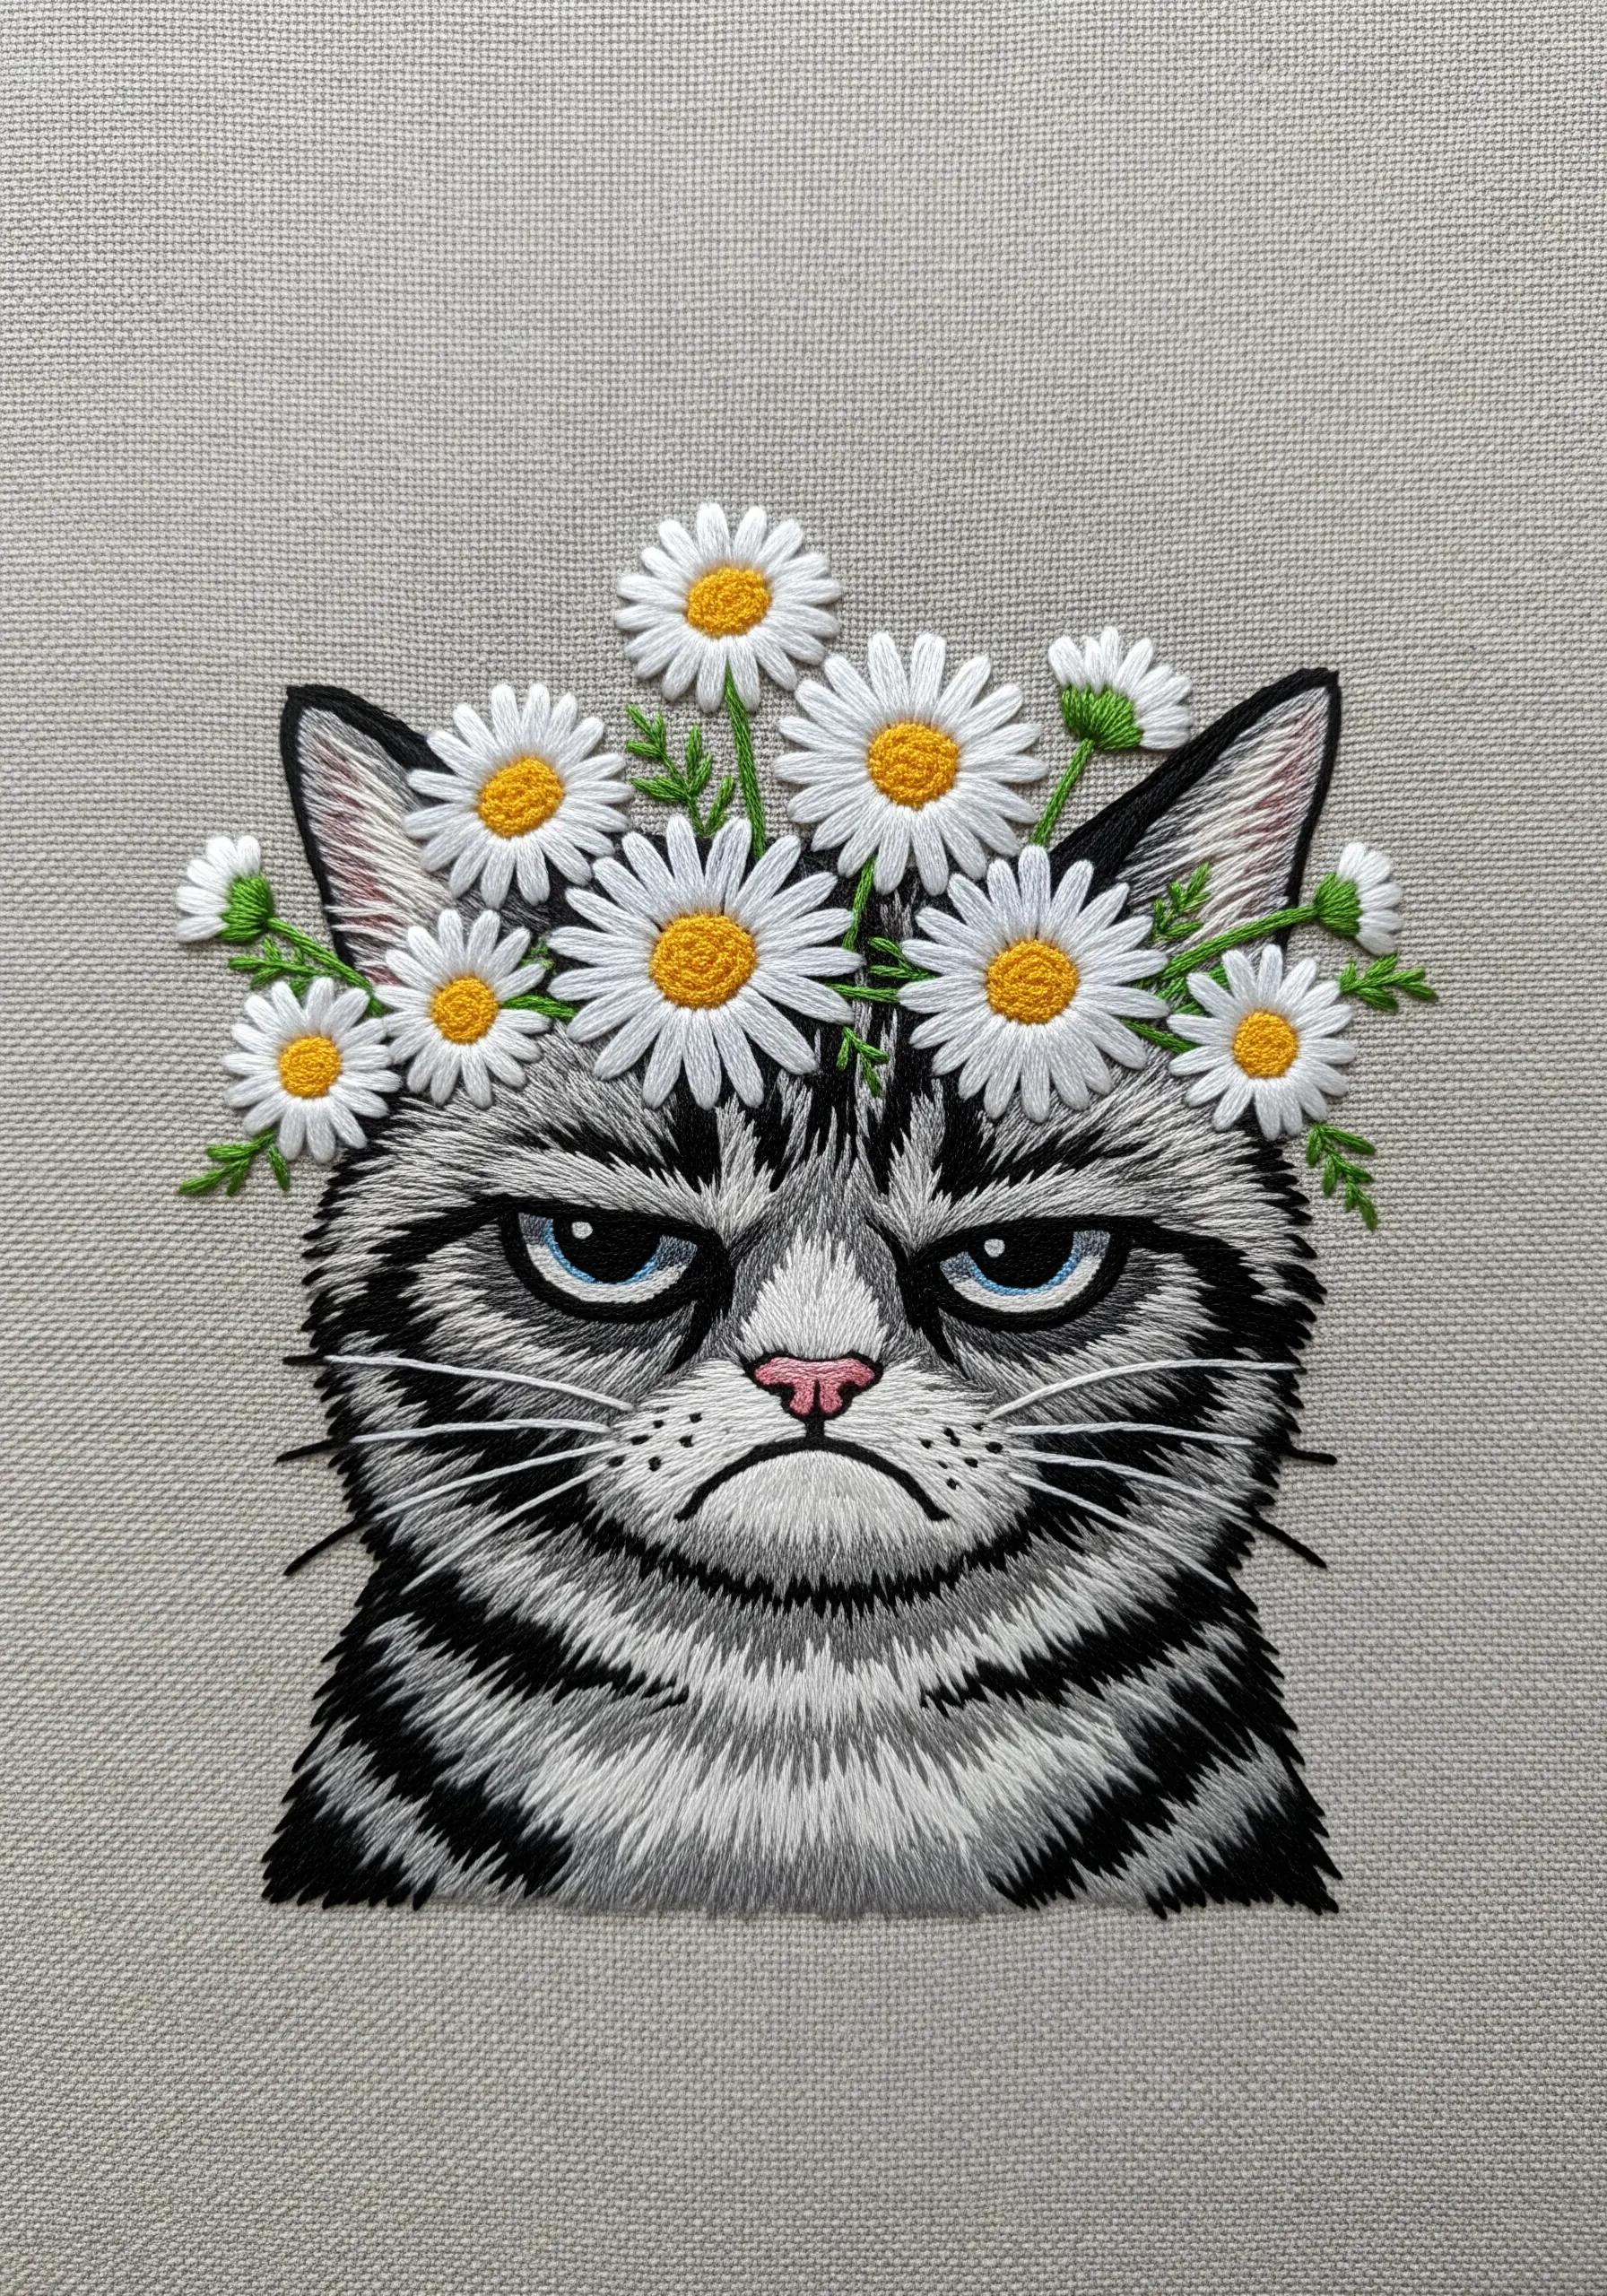
The difference between a generic cat and a cat with personality is in the smallest details.
To capture this iconic grumpy expression, focus on the precise angles of the eyes and mouth.
Use a single strand of thread for these features to give you maximum control.
A slight downward turn at the corners of the mouth and inwardly angled brows are all it takes to convey a powerful and recognizable emotion.
33. Crafting an Airy, Dreamlike Atmosphere

To make your subject feel weightless and ethereal, you must control the background.
Instead of a solid blue sky, use a wash of pale blue fabric paint for the base color.
Then, add very sparse, scattered straight stitches and French knots in white to suggest distant clouds and light without adding visual weight.
This minimalist approach keeps the focus on the delicately shaded kitten and enhances the dreamy, floating sensation of the scene.
34. Stitching a Galaxy with Knots and Seed Stitches

You can create a mesmerizing galaxy effect within any silhouette.
First, fill the cat’s shape with a blended base of dark blues and purples using long-and-short stitch.
Next, scatter hundreds of tiny French knots in white, pale yellow, and light blue across the surface to represent stars.
Finally, add a few star shapes using four intersecting straight stitches. The variety in stitch type and color is what makes the galaxy feel deep and dynamic.


