

Your workout wear is more than just fabric; it’s a companion on your journey toward strength and mindfulness. What if you could infuse it with the same intention you bring to your practice? Embroidery offers a way to do just that, transforming a simple garment into a personal source of motivation.
Forget generic prints. We’re talking about the subtle elegance of a tone-on-tone reminder stitched along a seam, the vibrant energy of a gradient phrase on a sleeve, or the bold texture of a 3D-stitched word that you can feel. These aren’t just decorations; they are tactile mantras.
Here, you’ll discover how to choose the right stitch, thread, and placement to make your message resonate. Learn the techniques to work with performance fabrics, ensuring your creations are as durable as they are beautiful. It’s time to make your apparel a true reflection of your inner fire.
1. The Power of a Gradient Sleeve Statement

Transform a simple hoodie sleeve by using an ombré thread effect to convey energy and motion.
To create this gradient, divide your lettering into three sections and use two shades of a transition color where they meet, blending them with a long-and-short stitch.
This technique turns a static phrase into a dynamic visual, perfect for a placement that moves with you.
Always use a medium-weight cut-away stabilizer on fleece to prevent the fabric from stretching and to support the stitch density.
2. Subtle Legibility on Performance Fabric
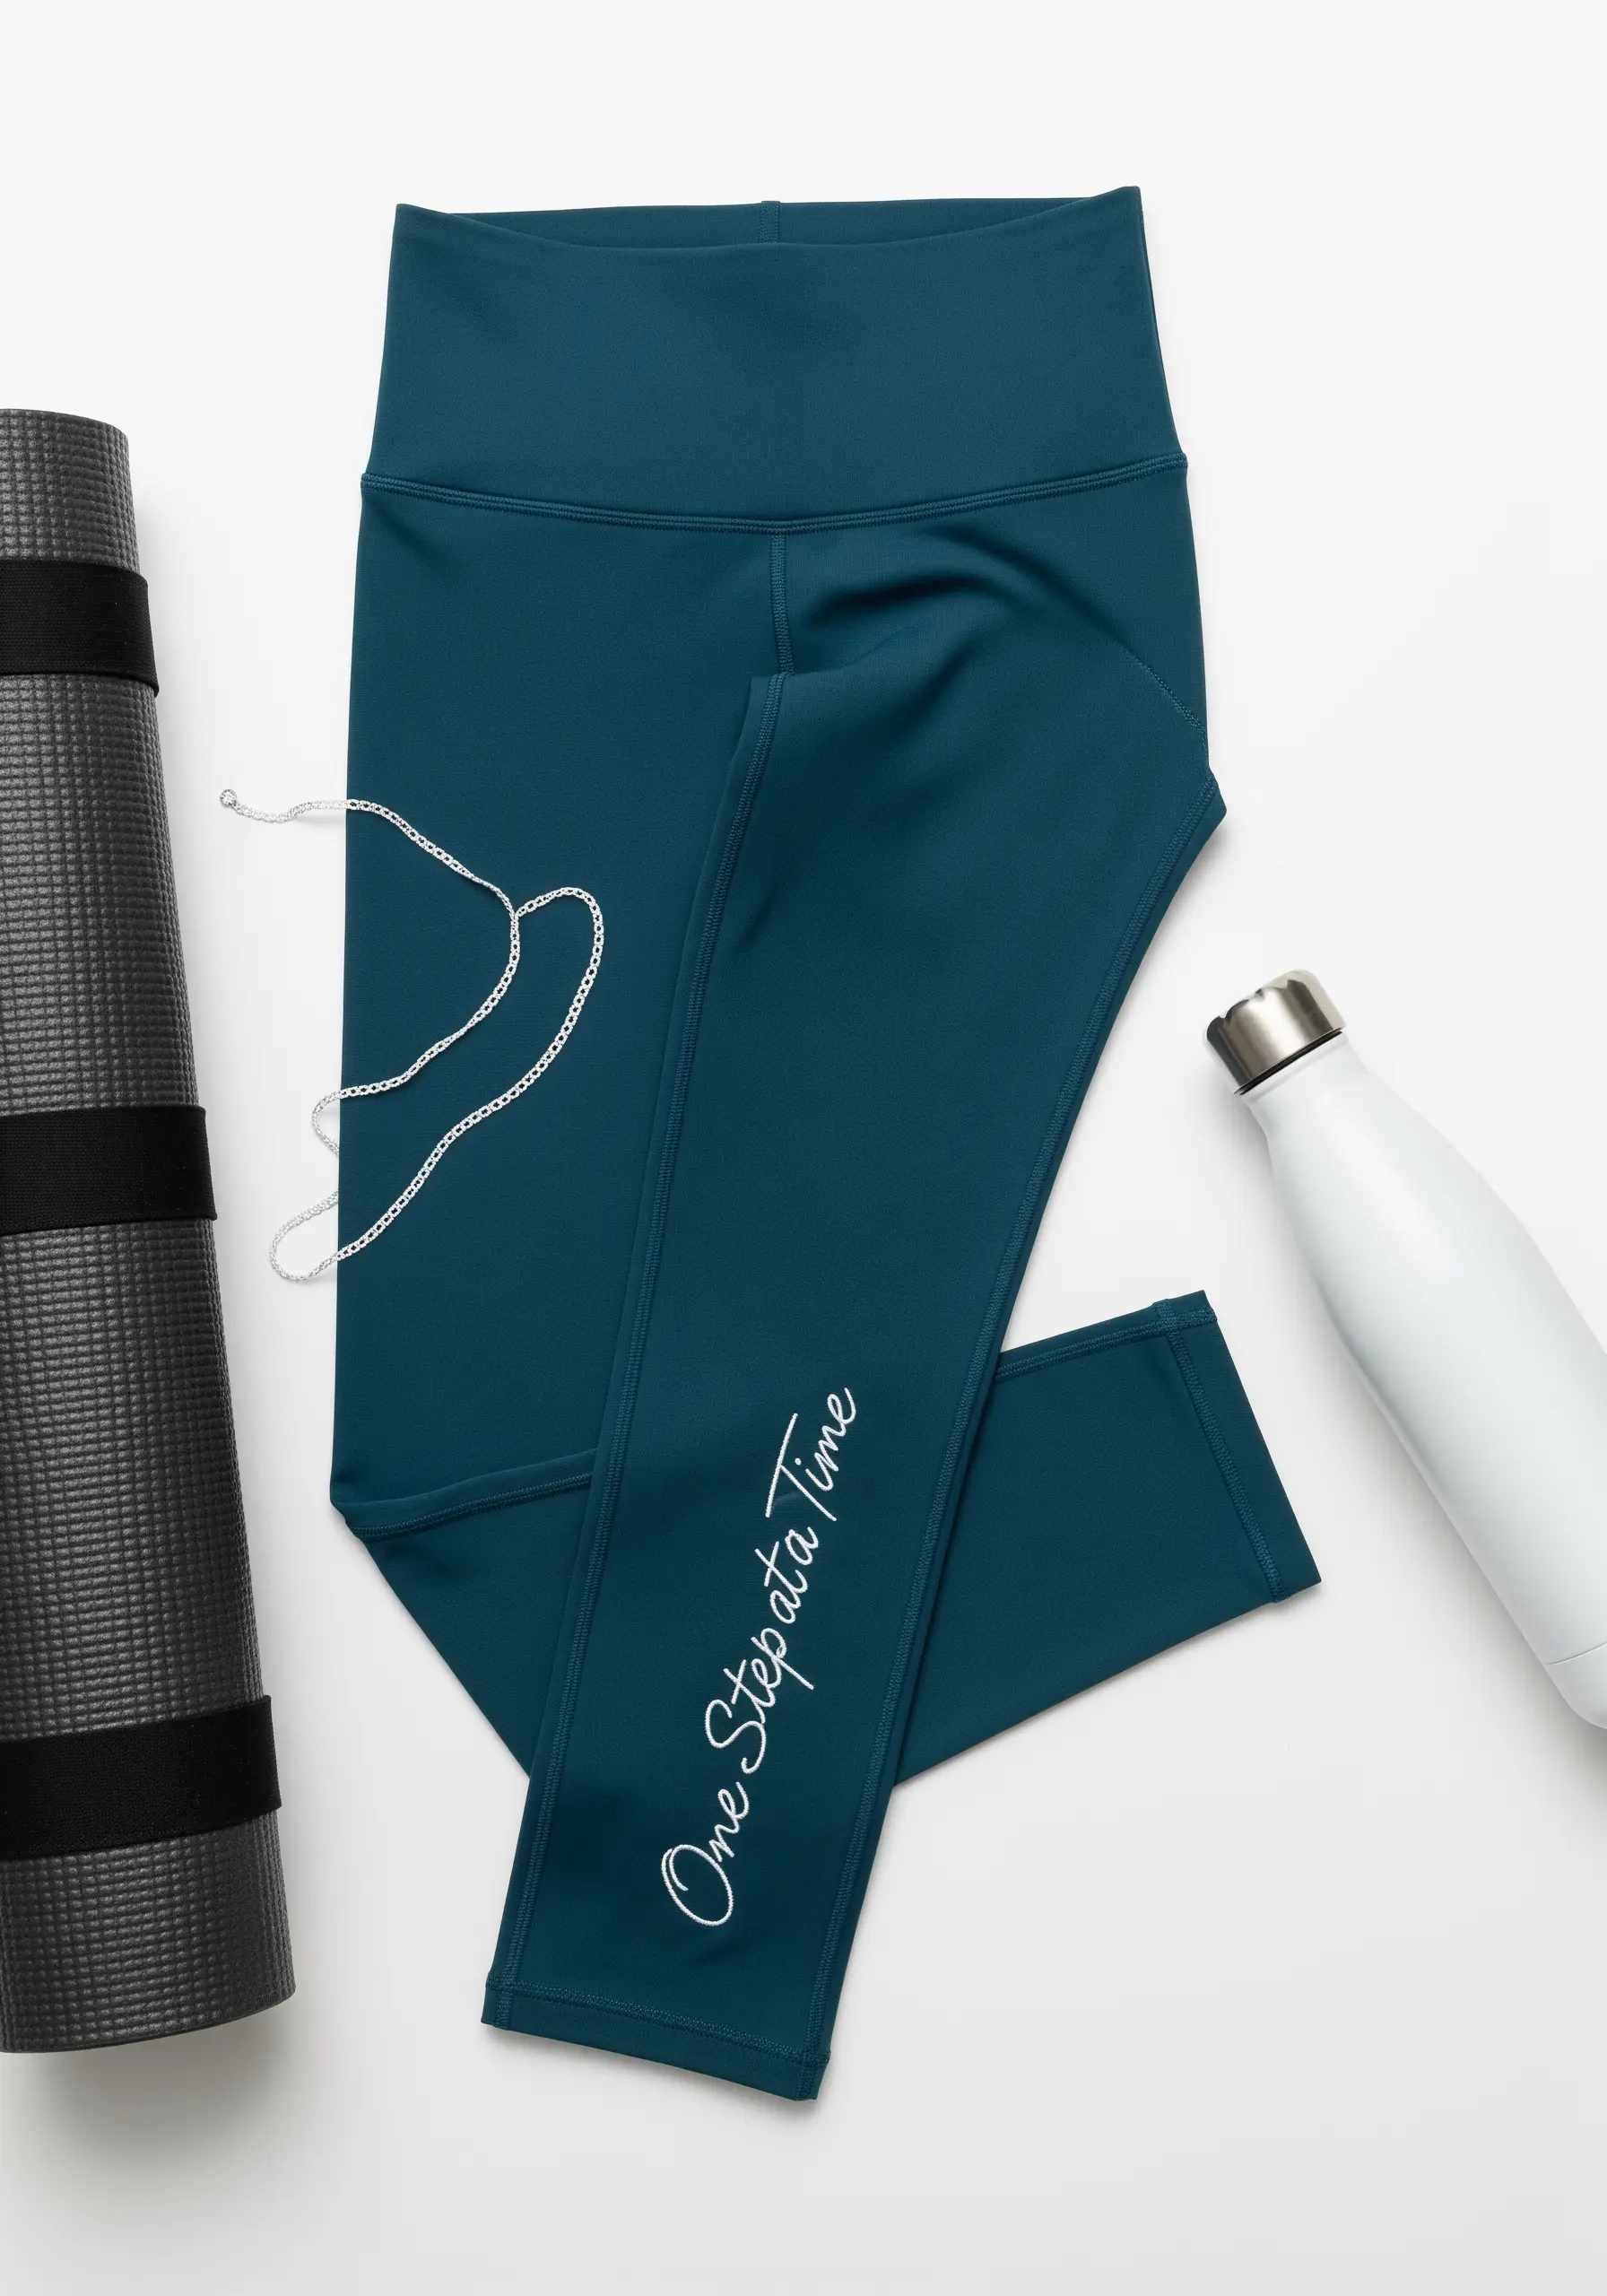
Embroidering on slick, stretchy leggings requires a delicate touch to avoid puckering.
Opt for a single-strand whipped backstitch using a fine, sharp needle (a 75/11 is ideal) to create a clean, raised line that doesn’t add bulk.
Use a lightweight, soft cut-away stabilizer that will remain on the garment without irritating your skin during movement.
Placing a simple white script vertically along the calf is an elegant, unexpected detail that enhances the garment’s lines.
3. Crafting a Collegiate-Style Appliqué Patch

Achieve a classic, bold athletic look by combining appliqué with dense satin stitching.
First, cut your letters from a non-fraying fabric like felt and secure them with a fusible web.
Then, frame each letter with a wide, tight satin stitch border to create that iconic varsity-jacket definition and durability.
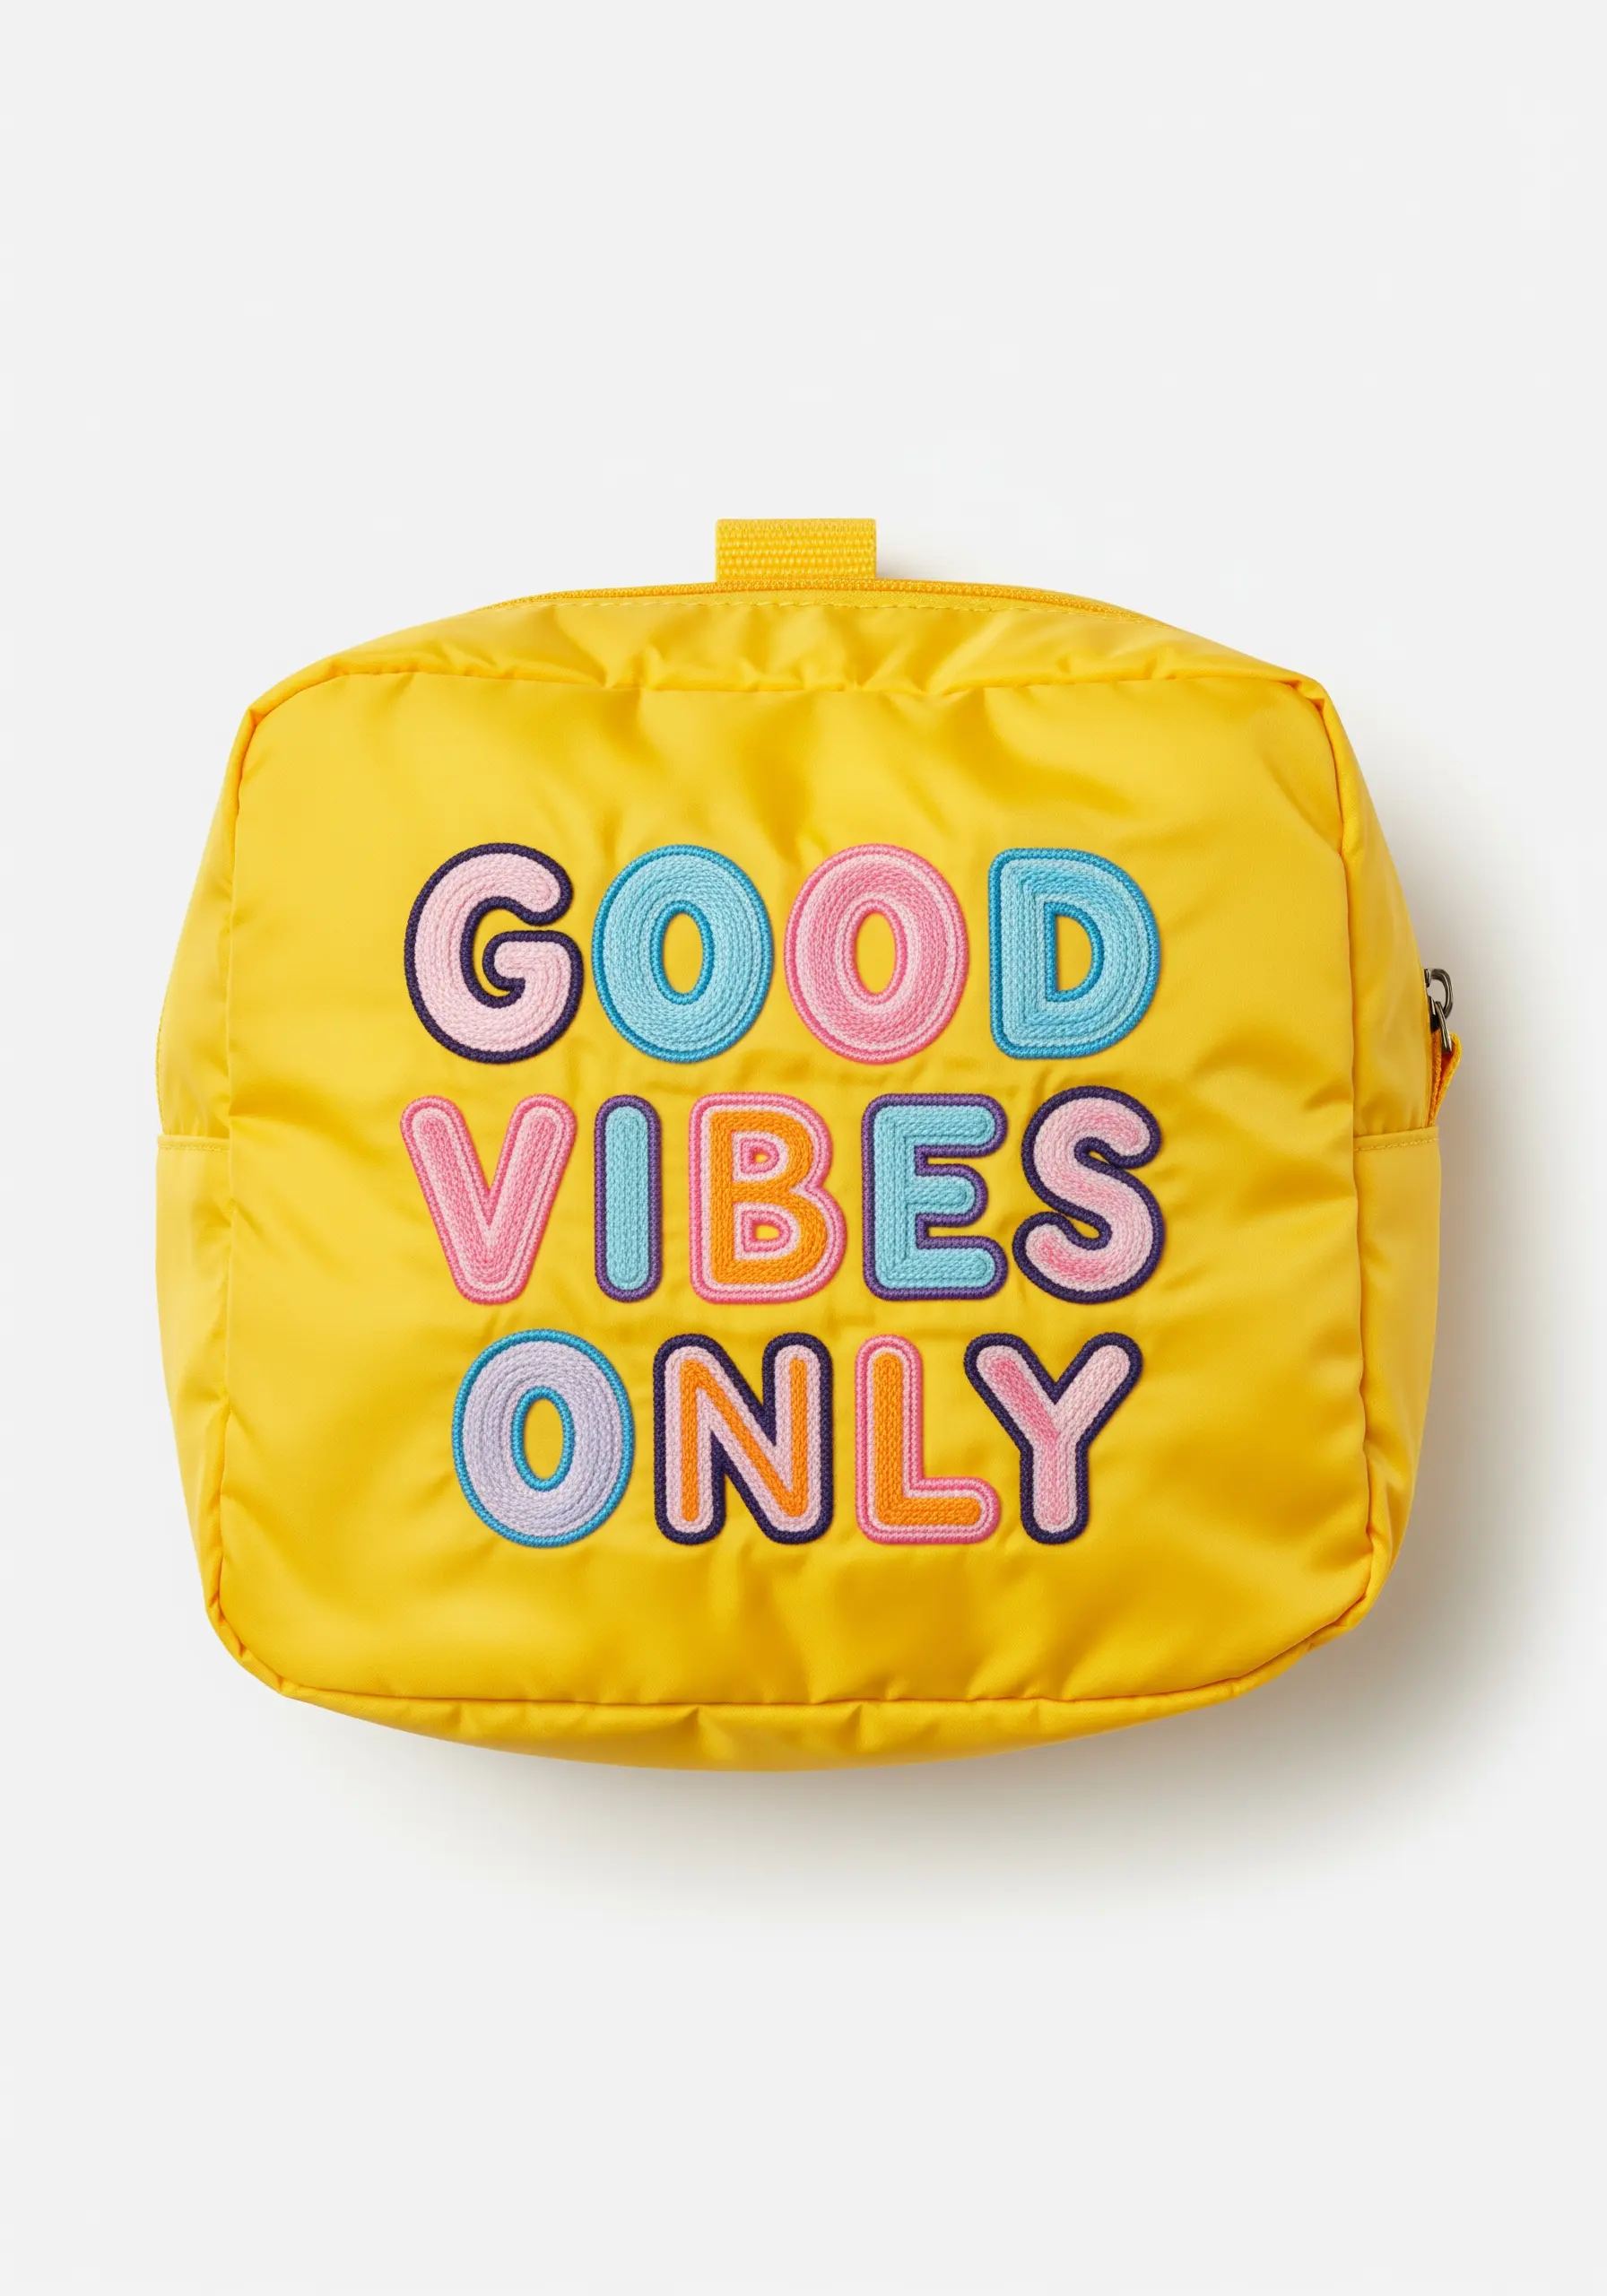
This technique is perfect for adding texture and weight to sturdy fabrics like the canvas of a gym bag.
4. Minimalist Stitching for High-Impact Reminders
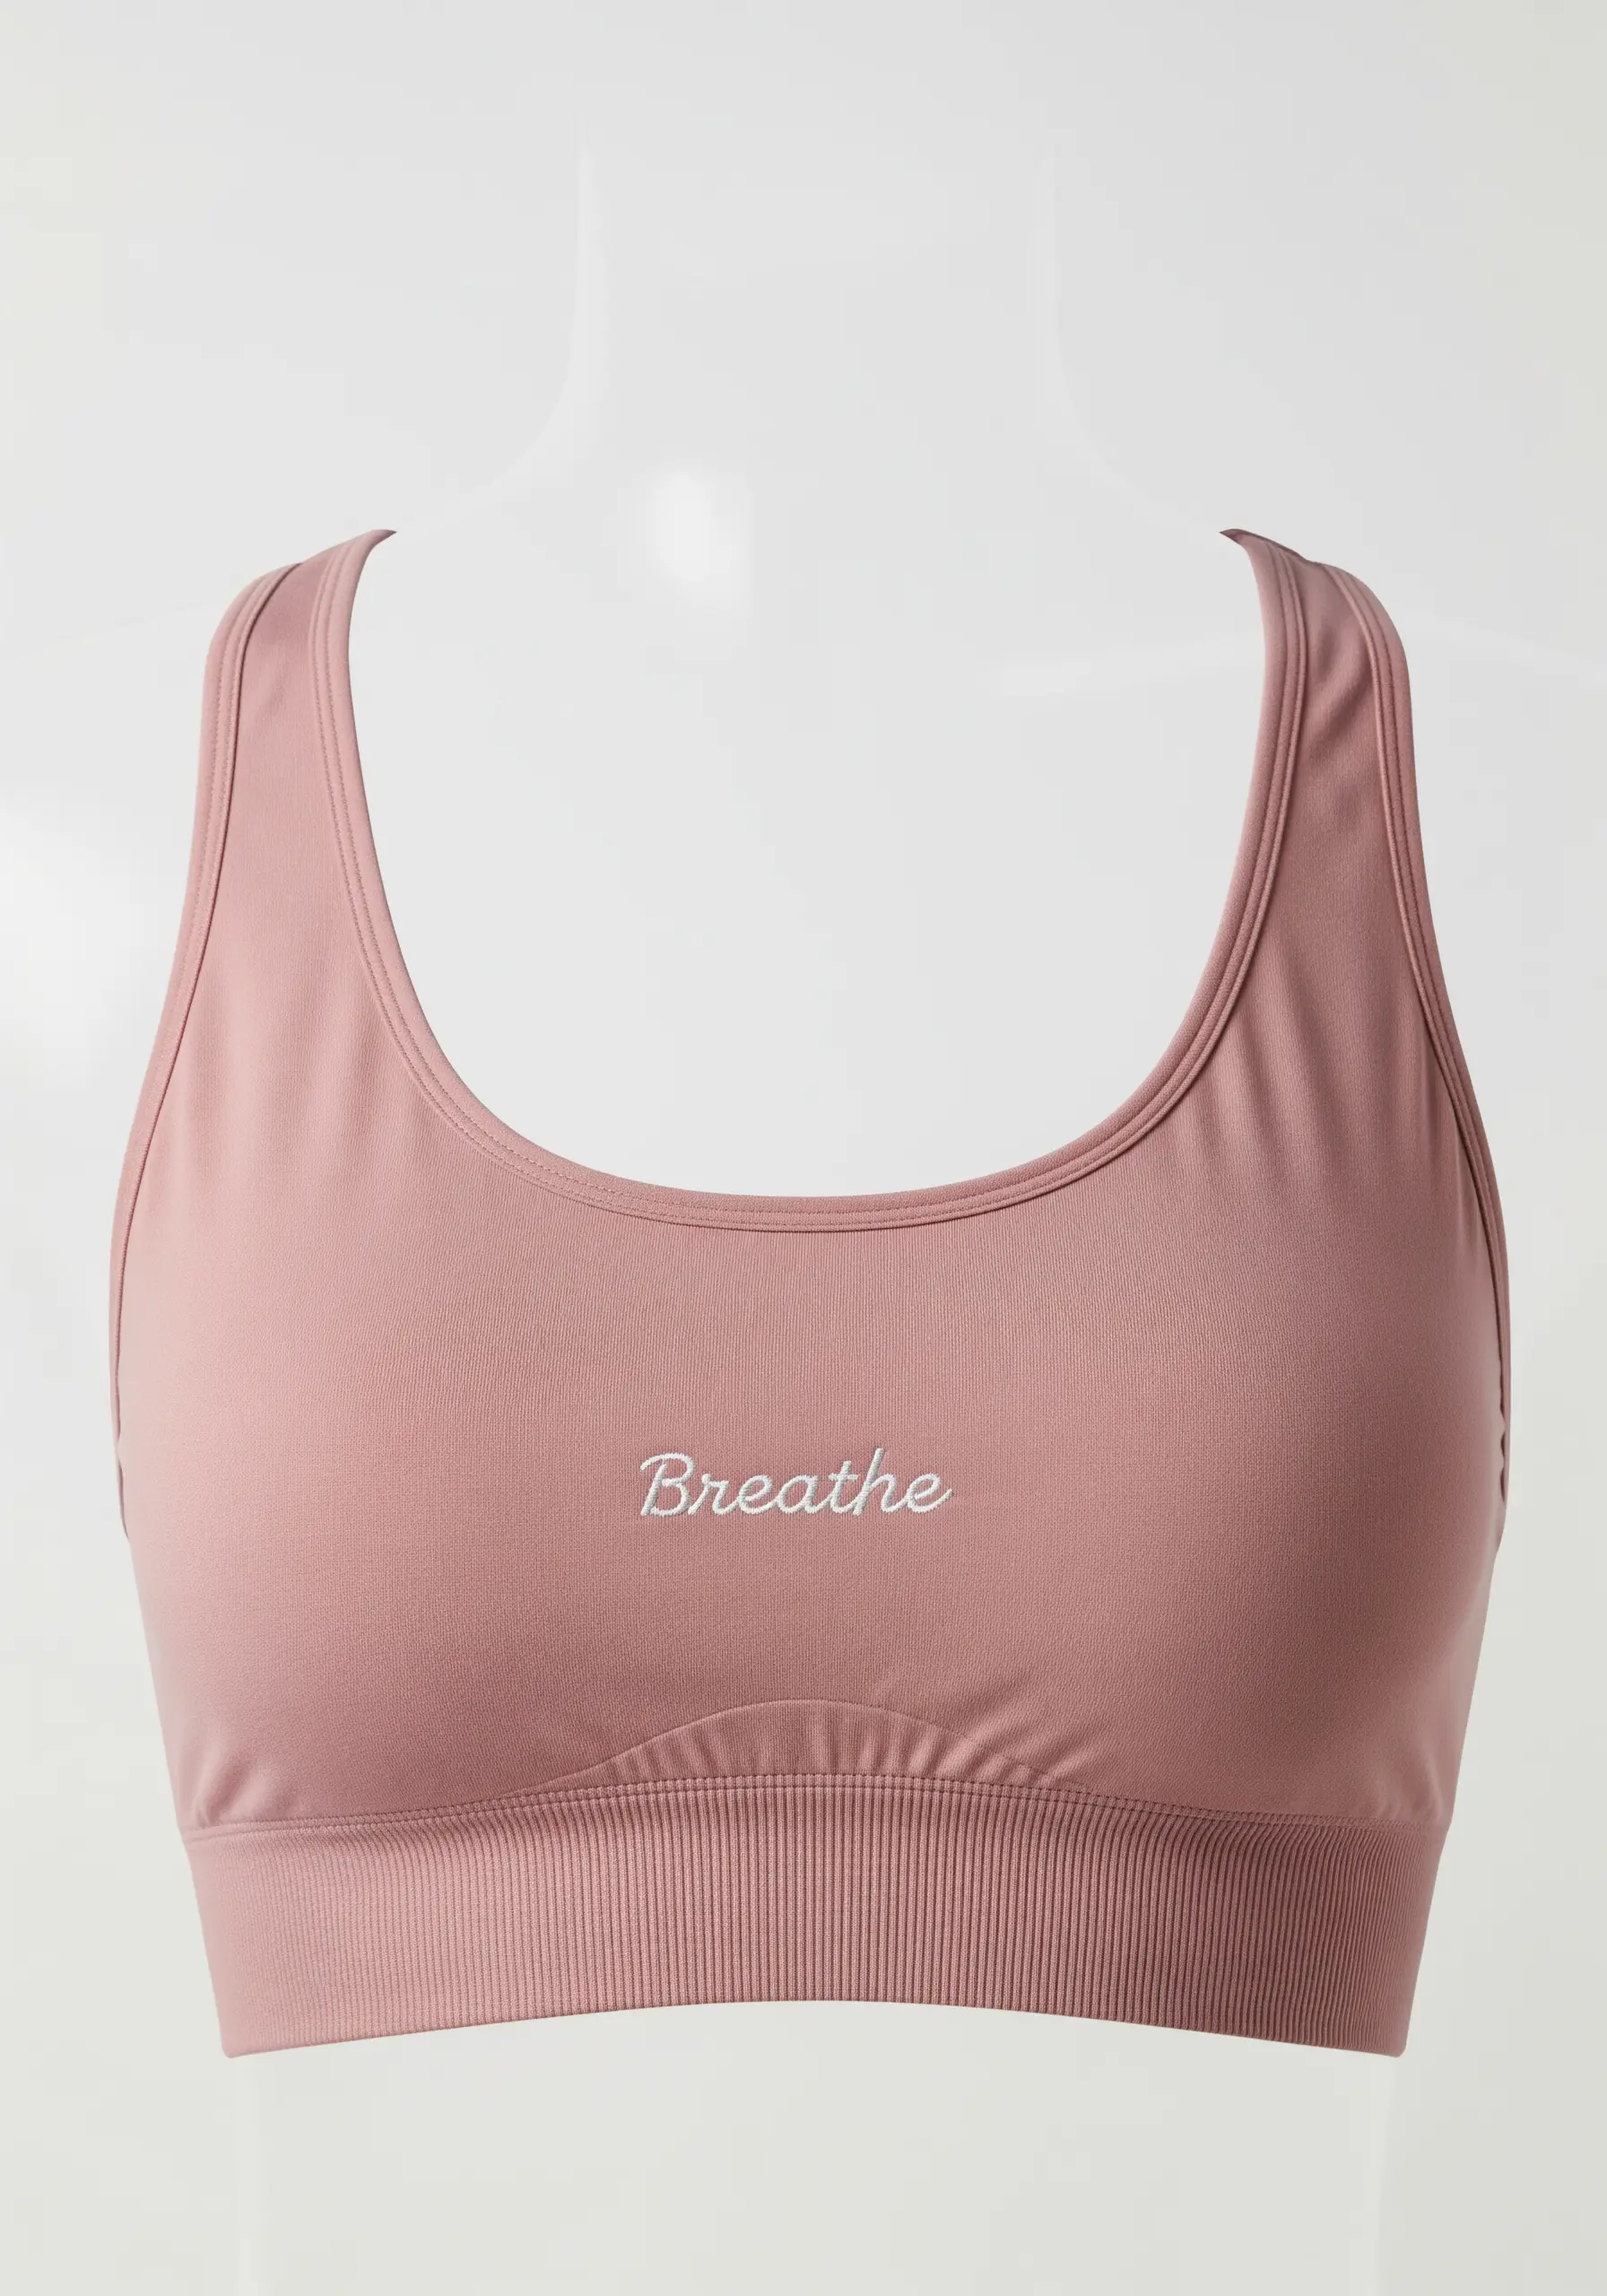
A single, beautifully stitched word can be more powerful than a complex design, especially on minimal activewear.
For a smooth script on a sports bra, use a two-strand stem stitch, which creates a tidy, rope-like texture.
Choose a thread color that is only a few shades lighter than the fabric for a subtle, tone-on-tone effect that feels premium.
Always back delicate stretch fabrics with a soft, no-show stabilizer to protect both the material and your skin.
5. Achieving Crisp Lettering on Fleece
To prevent your stitches from sinking into plush fabrics like fleece or sweatpants, you must use a water-soluble topping.
This thin film sits on top of the fabric, creating a smooth surface for your stitches to form on, resulting in exceptionally crisp and clean letters.
A simple, bold sans-serif font filled with a dense satin stitch provides excellent legibility and a modern, graphic finish.
After stitching, the topping dissolves away with water, leaving only your flawless embroidery behind.
6. Layering Colors for a Retro-Inspired Design

Give your motivational quotes a playful, vintage energy by layering colors and adding simple graphic elements.
First, stitch your main text in a prominent color using a whipped backstitch for a solid line.
Next, add a shadow effect with a contrasting color using a simple split stitch, offsetting it slightly from the main letters.
Tiny starbursts, created with intersecting straight stitches, fill the negative space and complete the dynamic, retro feel.
7. Creating 3D Texture on Structured Caps

Elevate standard lettering by filling it with a tactile stitch that invites touch.
After creating a bold satin stitch outline for your letters, fill the interior with hundreds of tiny French knots or seed stitches.
This technique creates a stunning contrast between the smooth border and the textured fill, giving the design a raised, three-dimensional quality.
On a structured item like a cap, this adds a custom, high-end feel that stands out.
8. The Art of the Deconstructed Outline
Embrace a raw, hand-drawn aesthetic by using a simple running stitch for your lettering.
Instead of aiming for perfect, uniform stitches, allow for slight variations in length and spacing to enhance the sketchy, personal feel.
This technique is intentionally minimal, suggesting a thought-in-progress and celebrating the beauty of imperfection.
It uses very little thread and is incredibly quick, making it one of the cute and colorful embroidery projects you can finish in a day.
9. Integrating Typography into a Geometric Emblem
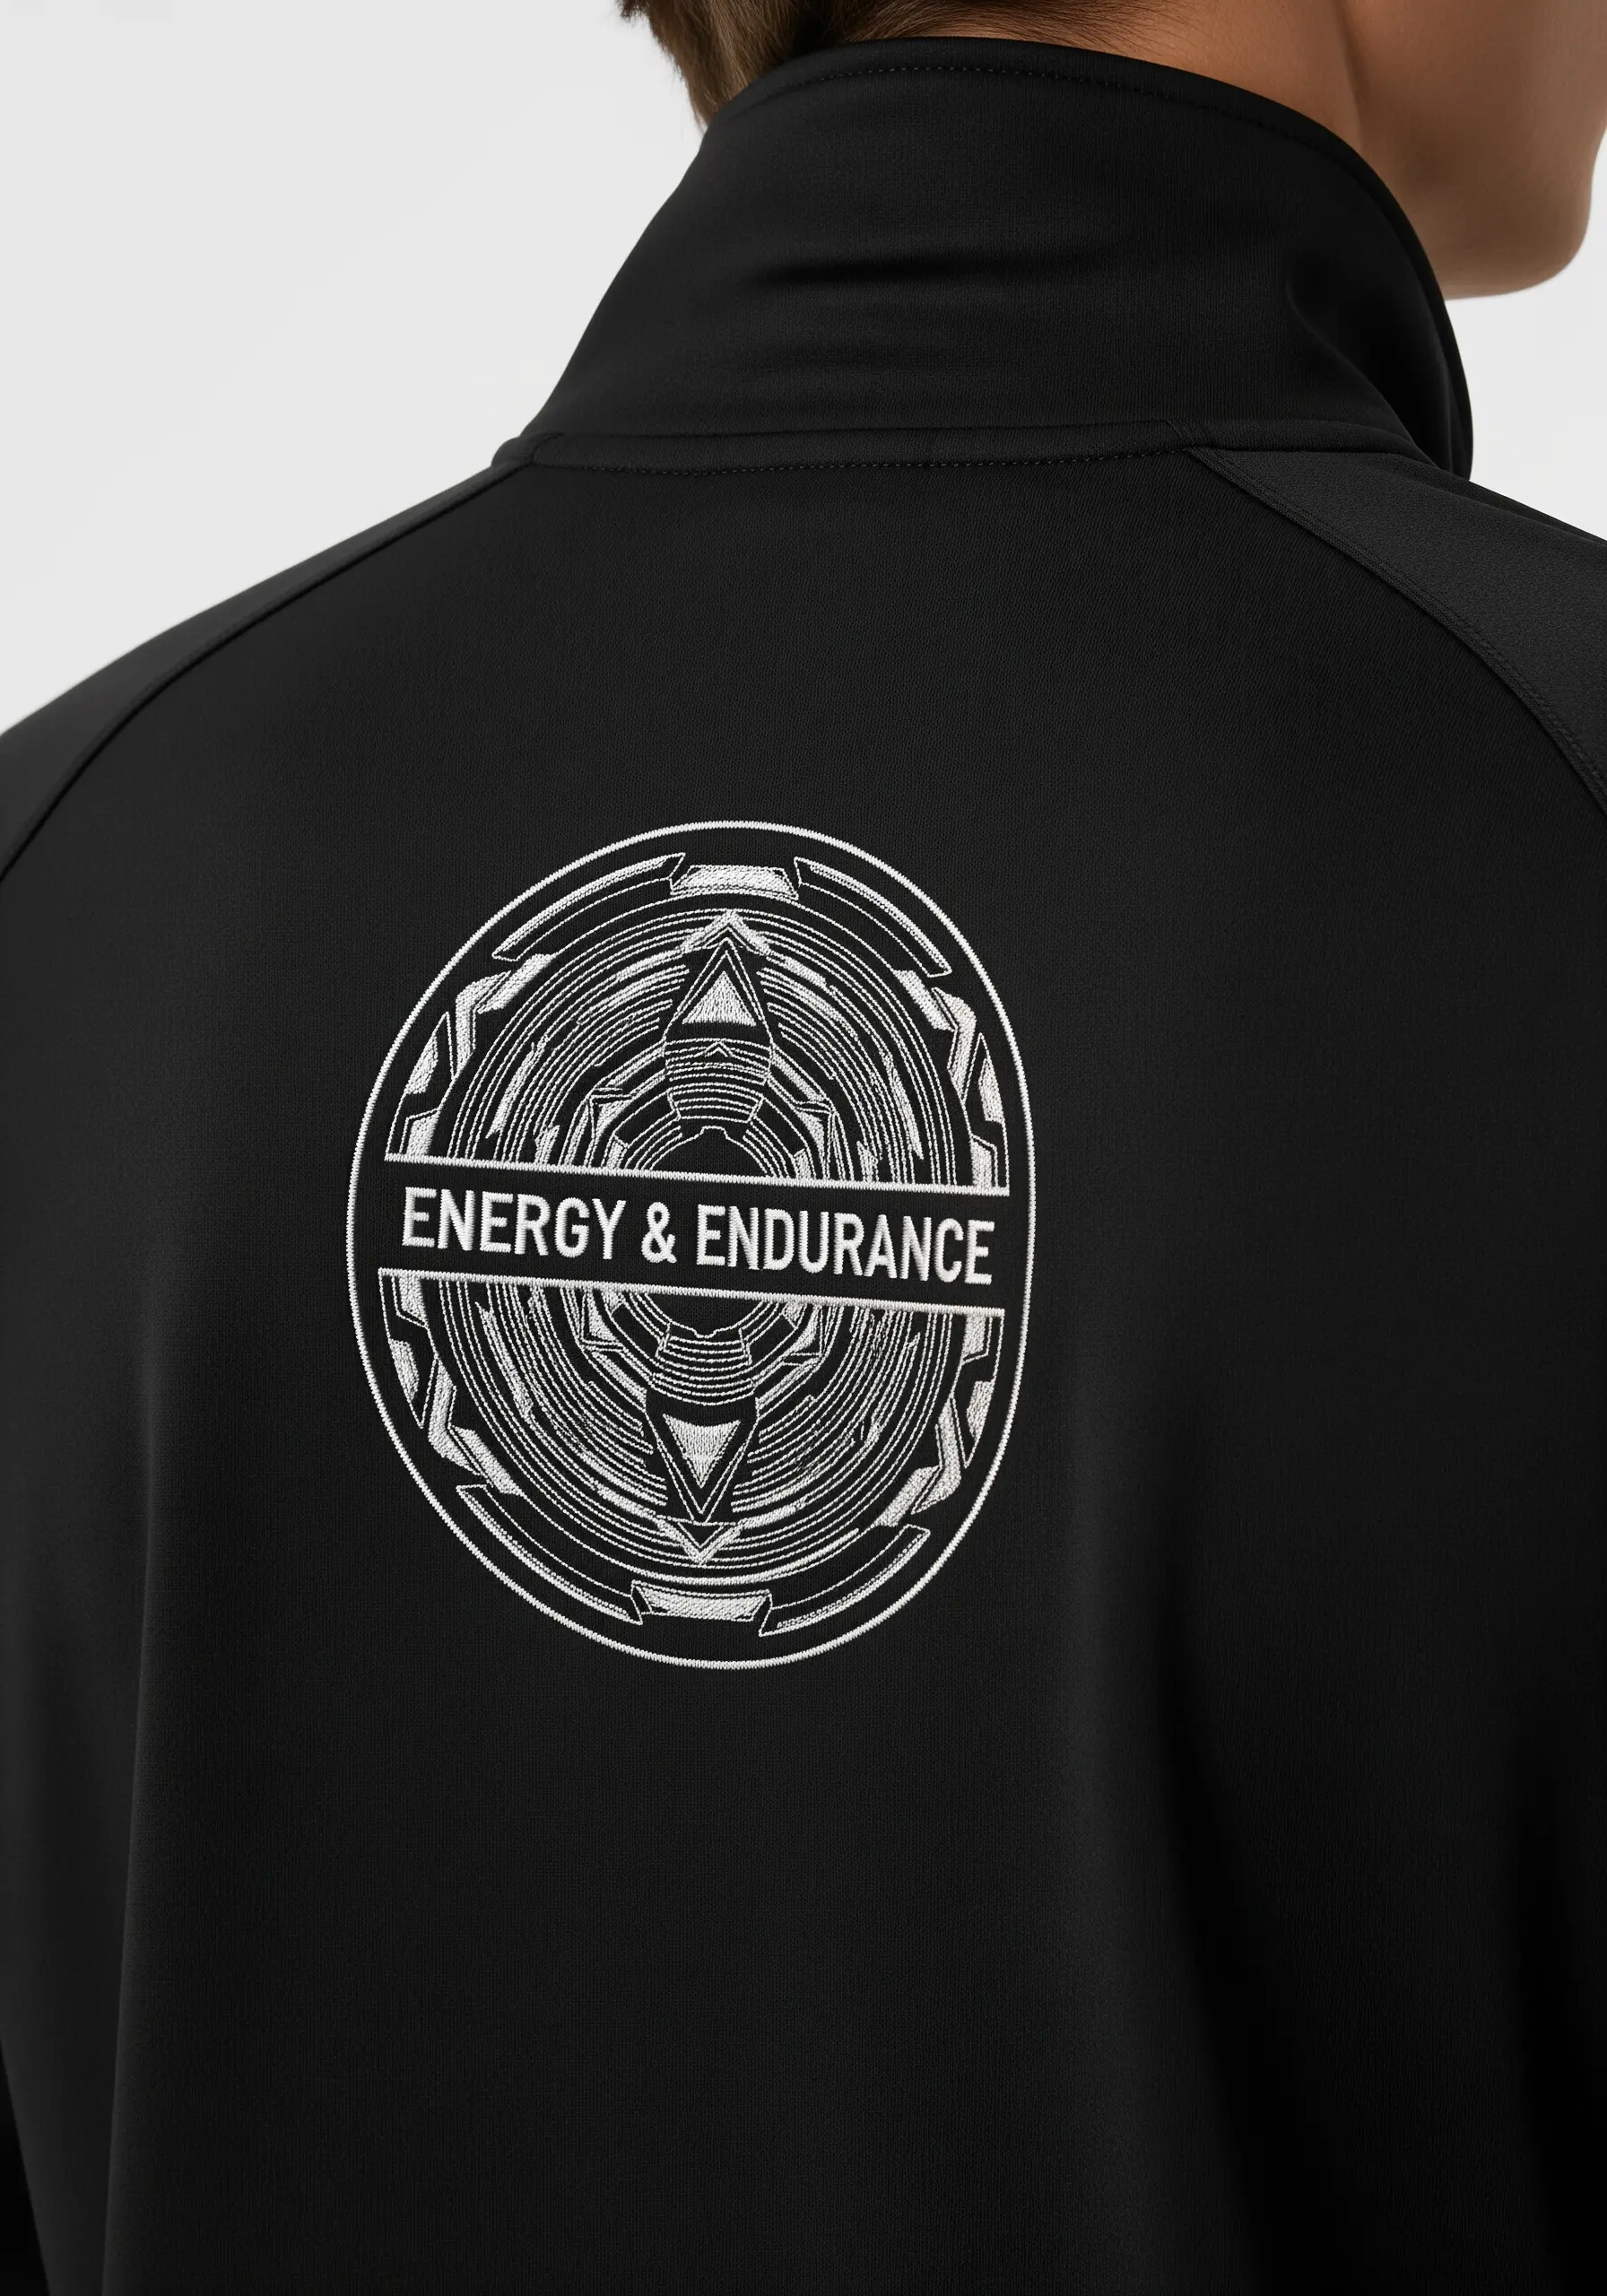
Combine your motivational phrase with an abstract geometric design for a modern, tech-inspired look.
Use a single color thread, like white on black, to create a high-contrast, graphic effect that feels clean and powerful.
Stitch the geometric elements with a precise backstitch, then place your lettering inside using a smaller, equally clean backstitch for legibility.
This approach turns a simple quote into a sophisticated, personal logo.
10. Functional Typography for Performance Socks
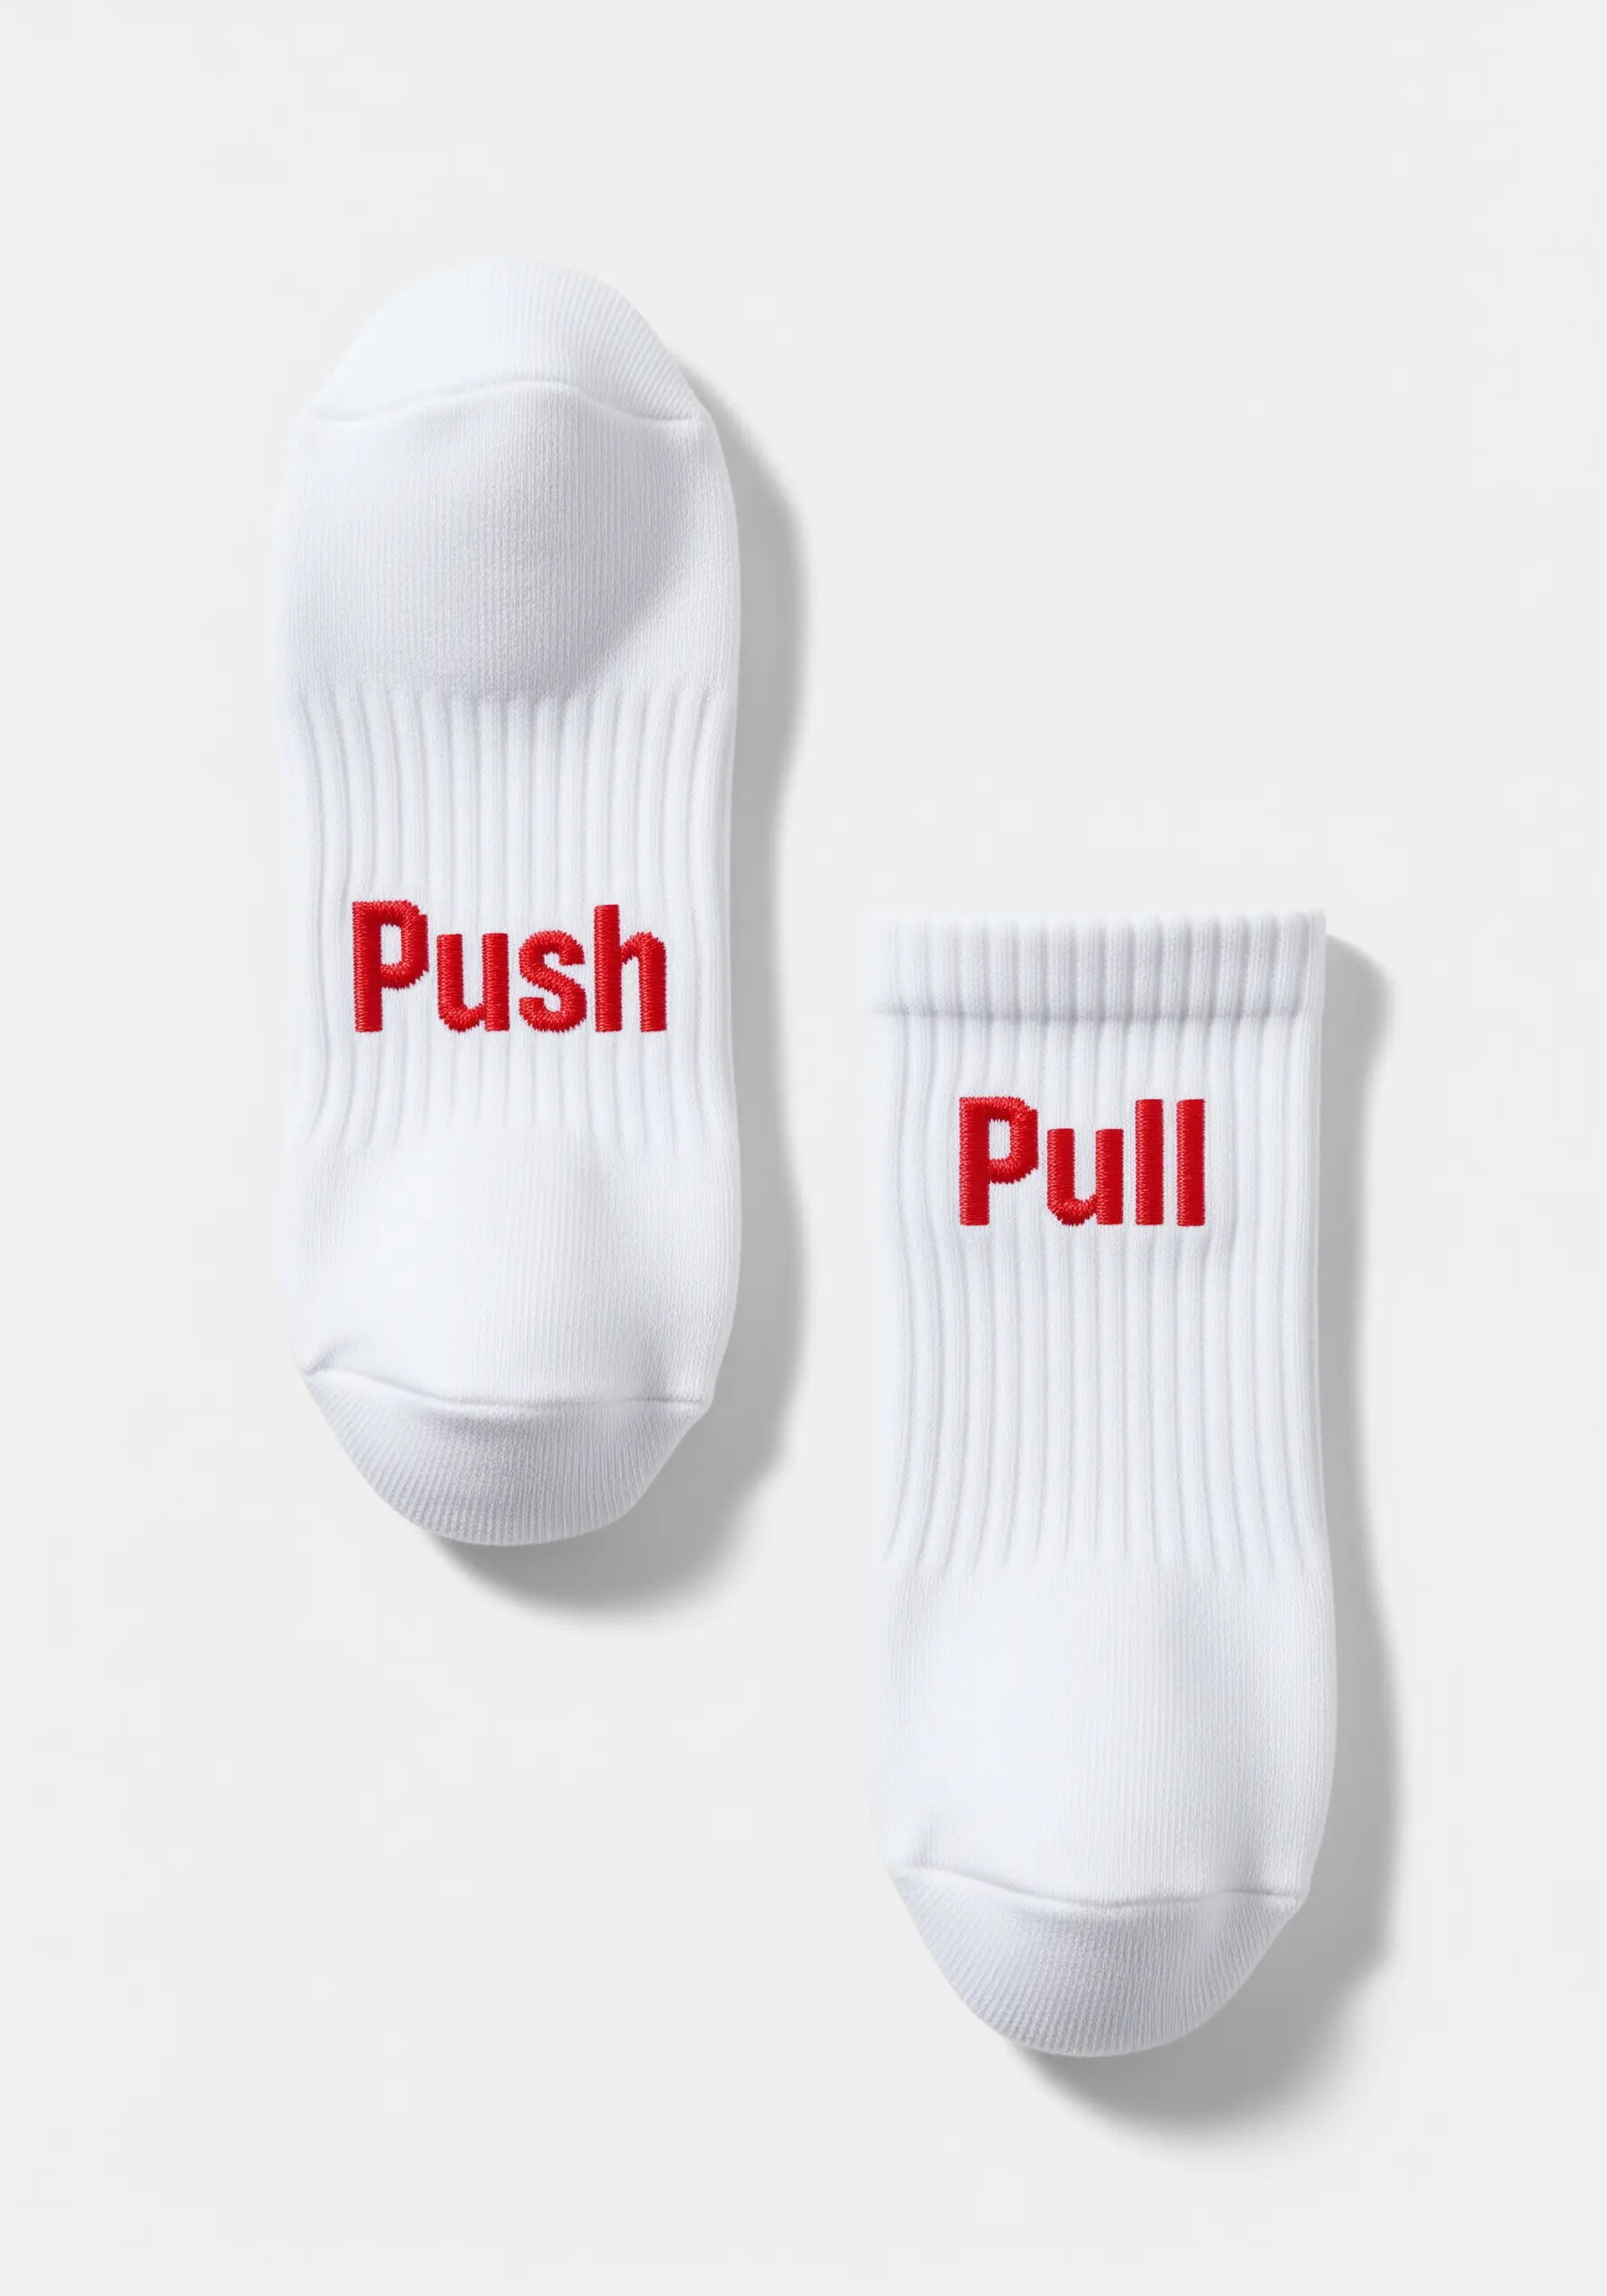
Add a clever, functional detail to your workout socks with simple, bold text.
On ribbed knits, always use a water-soluble topping stabilizer to ensure your satin stitches sit smoothly on the surface rather than sinking into the fabric’s grooves.
Choose a clean, sans-serif font for maximum readability and a high-contrast color like red on white for an energetic pop.
This is one of those small embroidery projects that make perfect handmade gifts for your favorite gym partner.
11. Understated Placement Along a Hoodie’s Edge

For a message that feels more personal, consider an unconventional placement like the outer rim of a hood.
A tone-on-tone color scheme—using a thread just a few shades different from the fabric—creates a subtle, elegant effect that you notice up close.
Use a simple, two-strand backstitch and a clean, unobtrusive font to maintain the minimal aesthetic.
This detail transforms the garment into a quiet sanctuary, with a message meant just for you.
12. High-Density Stitching on Ribbed Fabric
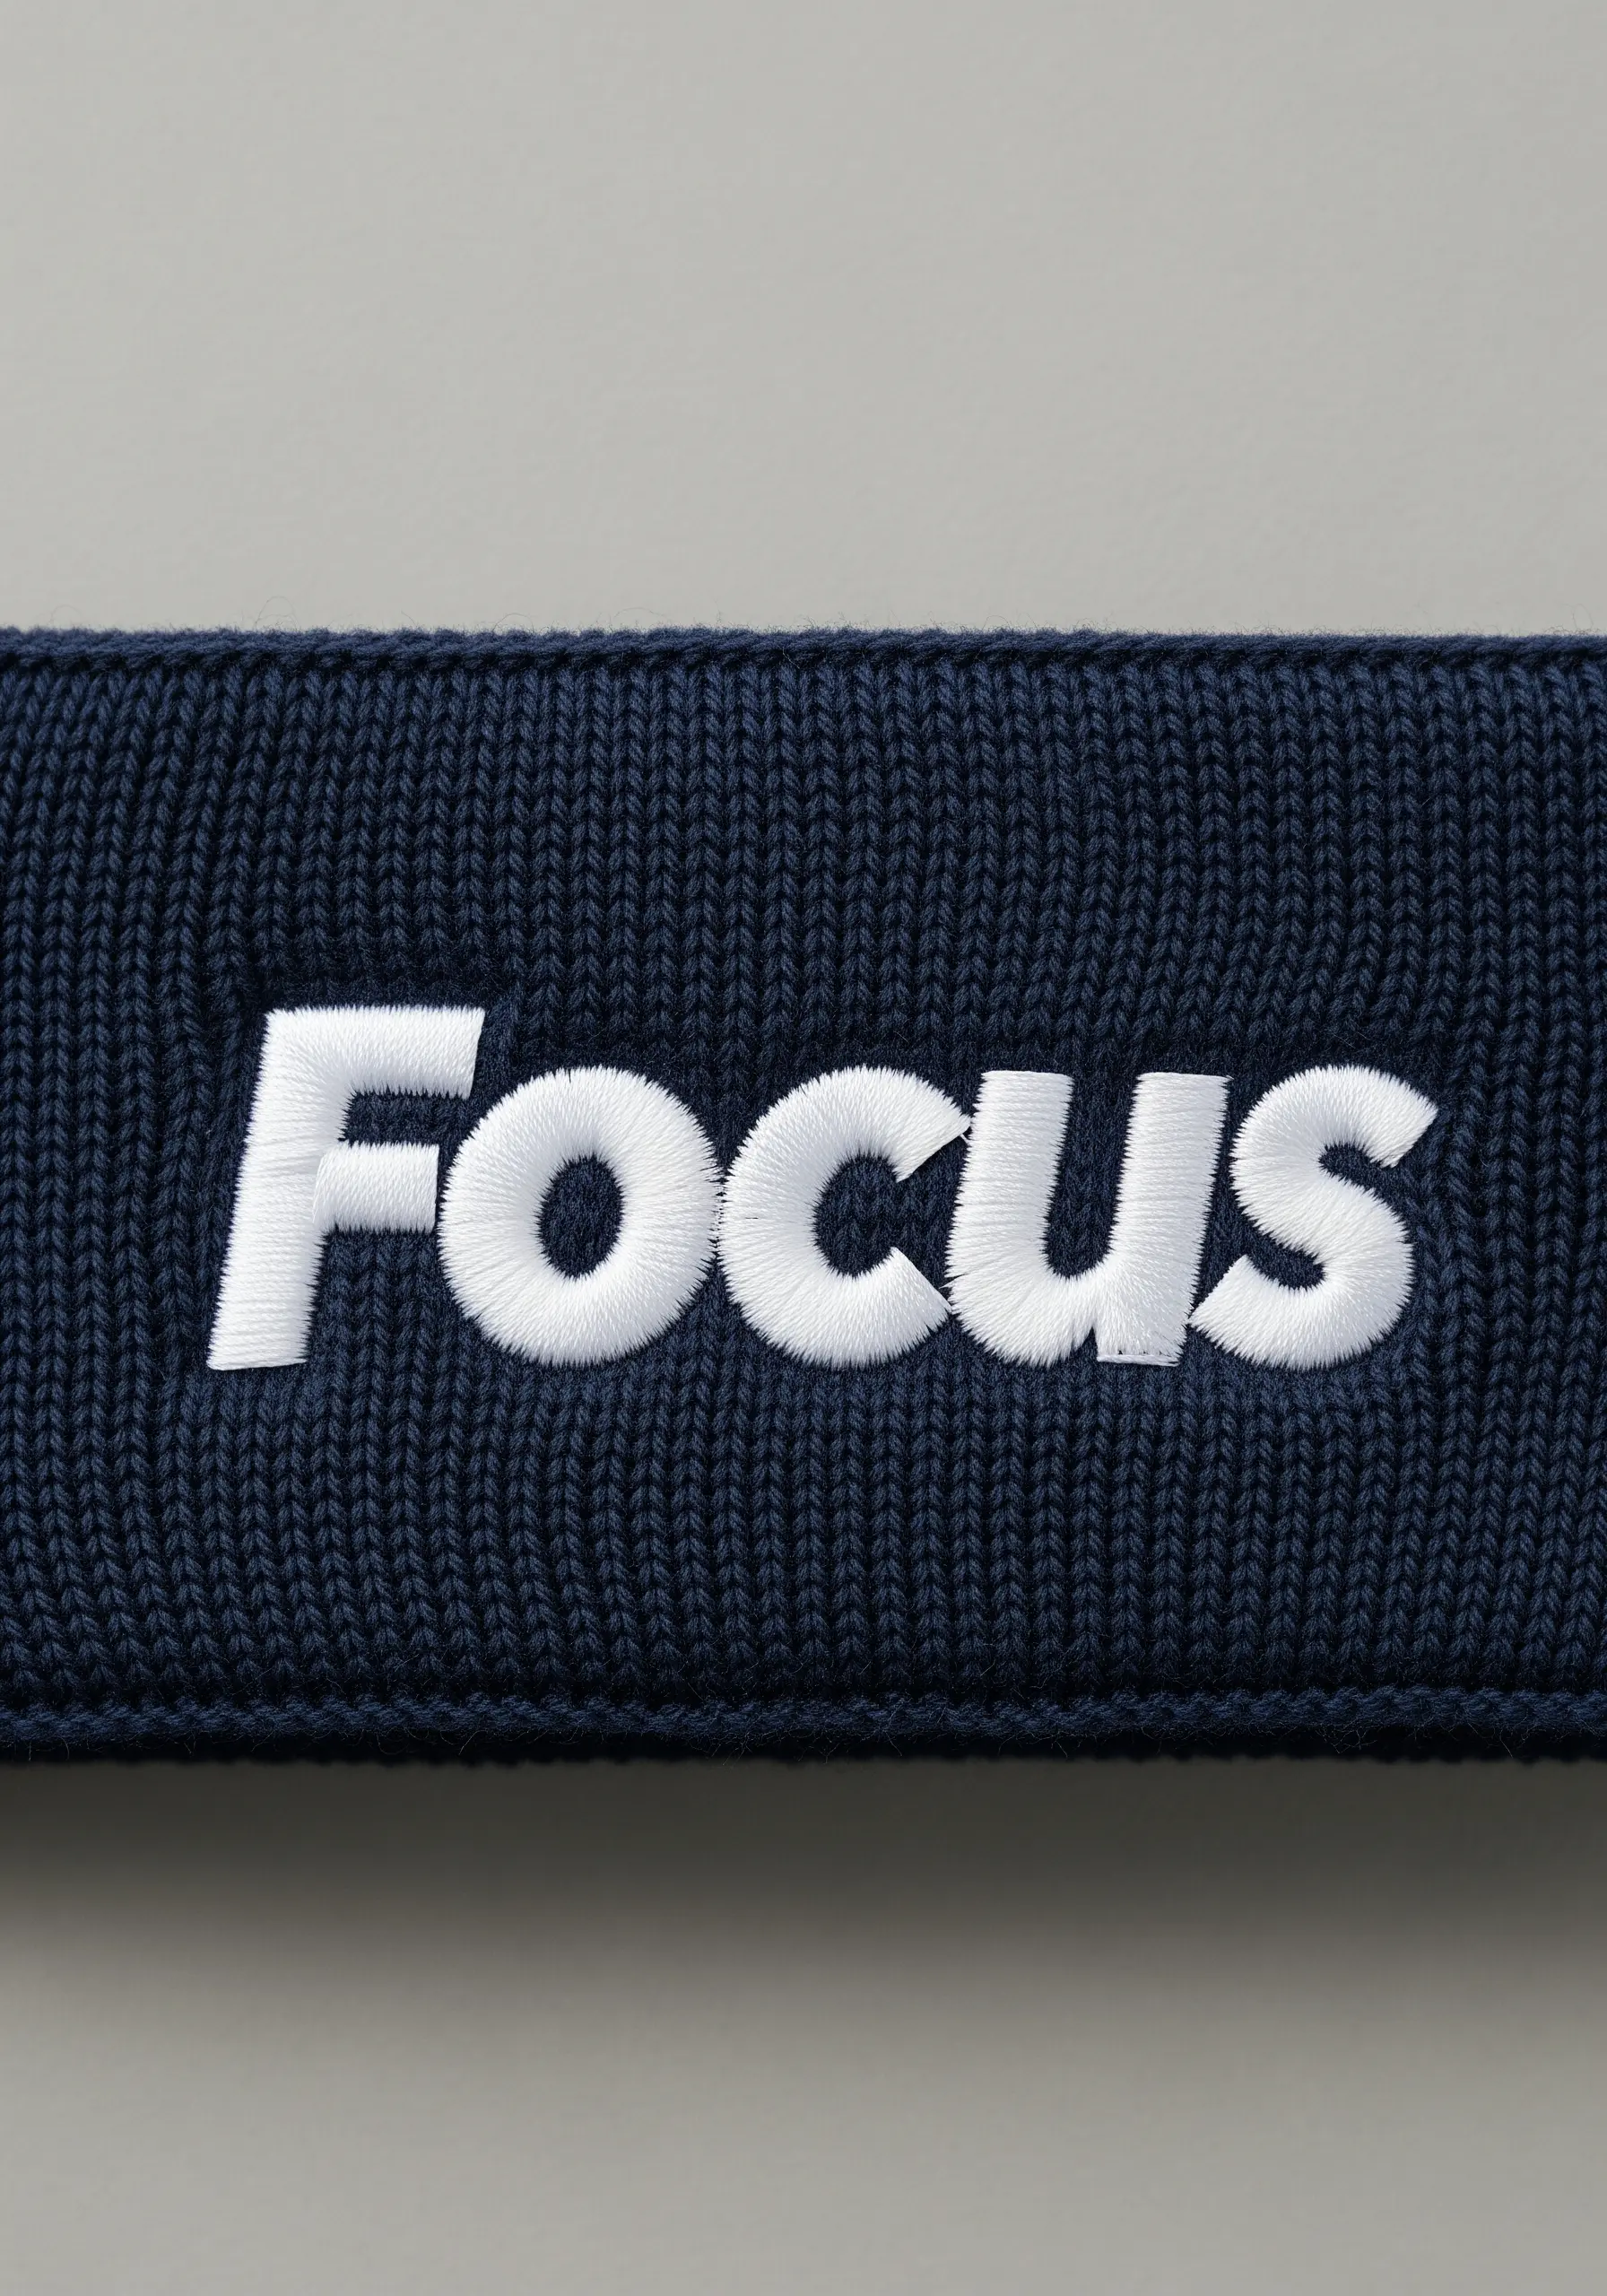
To achieve a smooth, almost-embossed finish on a stretchy, ribbed headband, you need to control the fabric completely.
Use a firm cut-away stabilizer on the back and a water-soluble film on the top.
This ‘sandwich’ technique prevents the knit from stretching or distorting under the tension of a dense satin stitch.
The result is a perfectly raised, professional-looking word that appears to float on the fabric’s surface.
13. Mastering Stacked Text for Readability

When embroidering multiple lines of text, the space between the lines (leading) is just as important as the stitches themselves.
Ensure there is enough room between each line to allow the words to breathe and remain legible from a distance.
For heathered jersey fabric, use a split stitch instead of a backstitch; it creates a more solid, less broken line that stands up against the fabric’s texture.
A dark grey thread on a lighter grey marl is a sophisticated, low-contrast choice.
14. Designing a Multi-Element Embroidered Patch

Create a rugged, utilitarian patch by combining different fonts, colors, and stitch types on a single piece of heavy-duty fabric like canvas.
Use a bold satin stitch for emphasis on key words and a simple backstitch for smaller, secondary text.
Frame the entire design with a dense satin stitch or merrowed border to give it a clean, finished edge before sewing it onto your vest or bag.
This is a great way to use up fabric scraps for eco-friendly embroidery decor ideas that are also wearable.
15. The Subtlety of Tone-on-Tone 3D Embroidery
Achieve a sleek, high-end look with 3D puff embroidery, a machine technique that creates raised, rounded lettering.
Special embroidery foam is placed on the fabric, and a high-density satin stitch is sewn over it. The excess foam is then torn away.
When you use thread that matches the fabric, the effect is purely textural—a subtle, shadowed design that communicates quality and minimalist style.
This works best with simple, thick fonts on smooth performance fabrics.
16. Elegant Metallics for a Refined Cuff Detail

Add a touch of unexpected luxury to your performance wear with a delicate metallic thread.
To prevent the notoriously fussy metallic floss from breaking, use a needle with a larger eye and apply a thread conditioner like beeswax.
A simple two-strand backstitch is all you need to create a fine, shimmering script.
Placing the quote on the cuff turns it into a private affirmation, catching the light as you move.
17. Embroidering on Non-Traditional Surfaces like Leather

You can add custom embroidery to sneakers, but you need the right tools.
Use a specialized leather needle, which has a triangular point designed to pierce the material cleanly without tearing it.
Since you cannot hoop leather without leaving marks, secure the area with a strong, self-adhesive stabilizer on the inside of the shoe.
A dense satin stitch in a high-contrast color creates a bold, graphic look that feels professionally customized.
18. Mapping Text to a Dynamic, Organic Line

Turn a phrase into a graphic element by having it follow a flowing, organic path across the garment.
Draw your guiding line with a water-soluble pen, then use a flexible stitch like a chain stitch or stem stitch, as they navigate curves beautifully.
Enclosing the text within a parallel stitched line creates a channel that adds structure and intentionally guides the viewer’s eye.
This technique integrates the words into the fabric’s drape, making them part of the movement.
19. Playful Dimension with Puffy Appliqué
Create fun, tactile lettering with a soft, three-dimensional feel that’s perfect for casual bags and pouches.
For each letter, stitch two fabric pieces together, leaving a small opening. Turn it right-side out, stuff it lightly with batting, and stitch the opening closed.
Arrange your puffy letters on the base fabric and attach them with a neat, discreet whipstitch around the edges.
This is a great technique to adapt for trendy hoodie embroidery designs teens are using to stand out, especially on sweatshirts and jackets.


