

You’ve gathered your linens, chosen your threads, and are ready to create something beautiful. But how do you move beyond simple patterns and stitch something that feels truly special—something with the weight and grace of an heirloom?
The secret lies not in complexity, but in intention. It’s in choosing the right stitch to create a specific texture, understanding how a subtle shift in color can mimic nature, and composing motifs that feel alive on the fabric.
This collection is your guide to mastering those details. We’ll move beyond the ‘what’ and into the ‘why’—exploring techniques that add dimension, realism, and a quiet, professional polish to your work. Prepare to transform your table linens from simple cloths into cherished pieces of art.
1. Sculptural Roses with Padded Satin Stitch
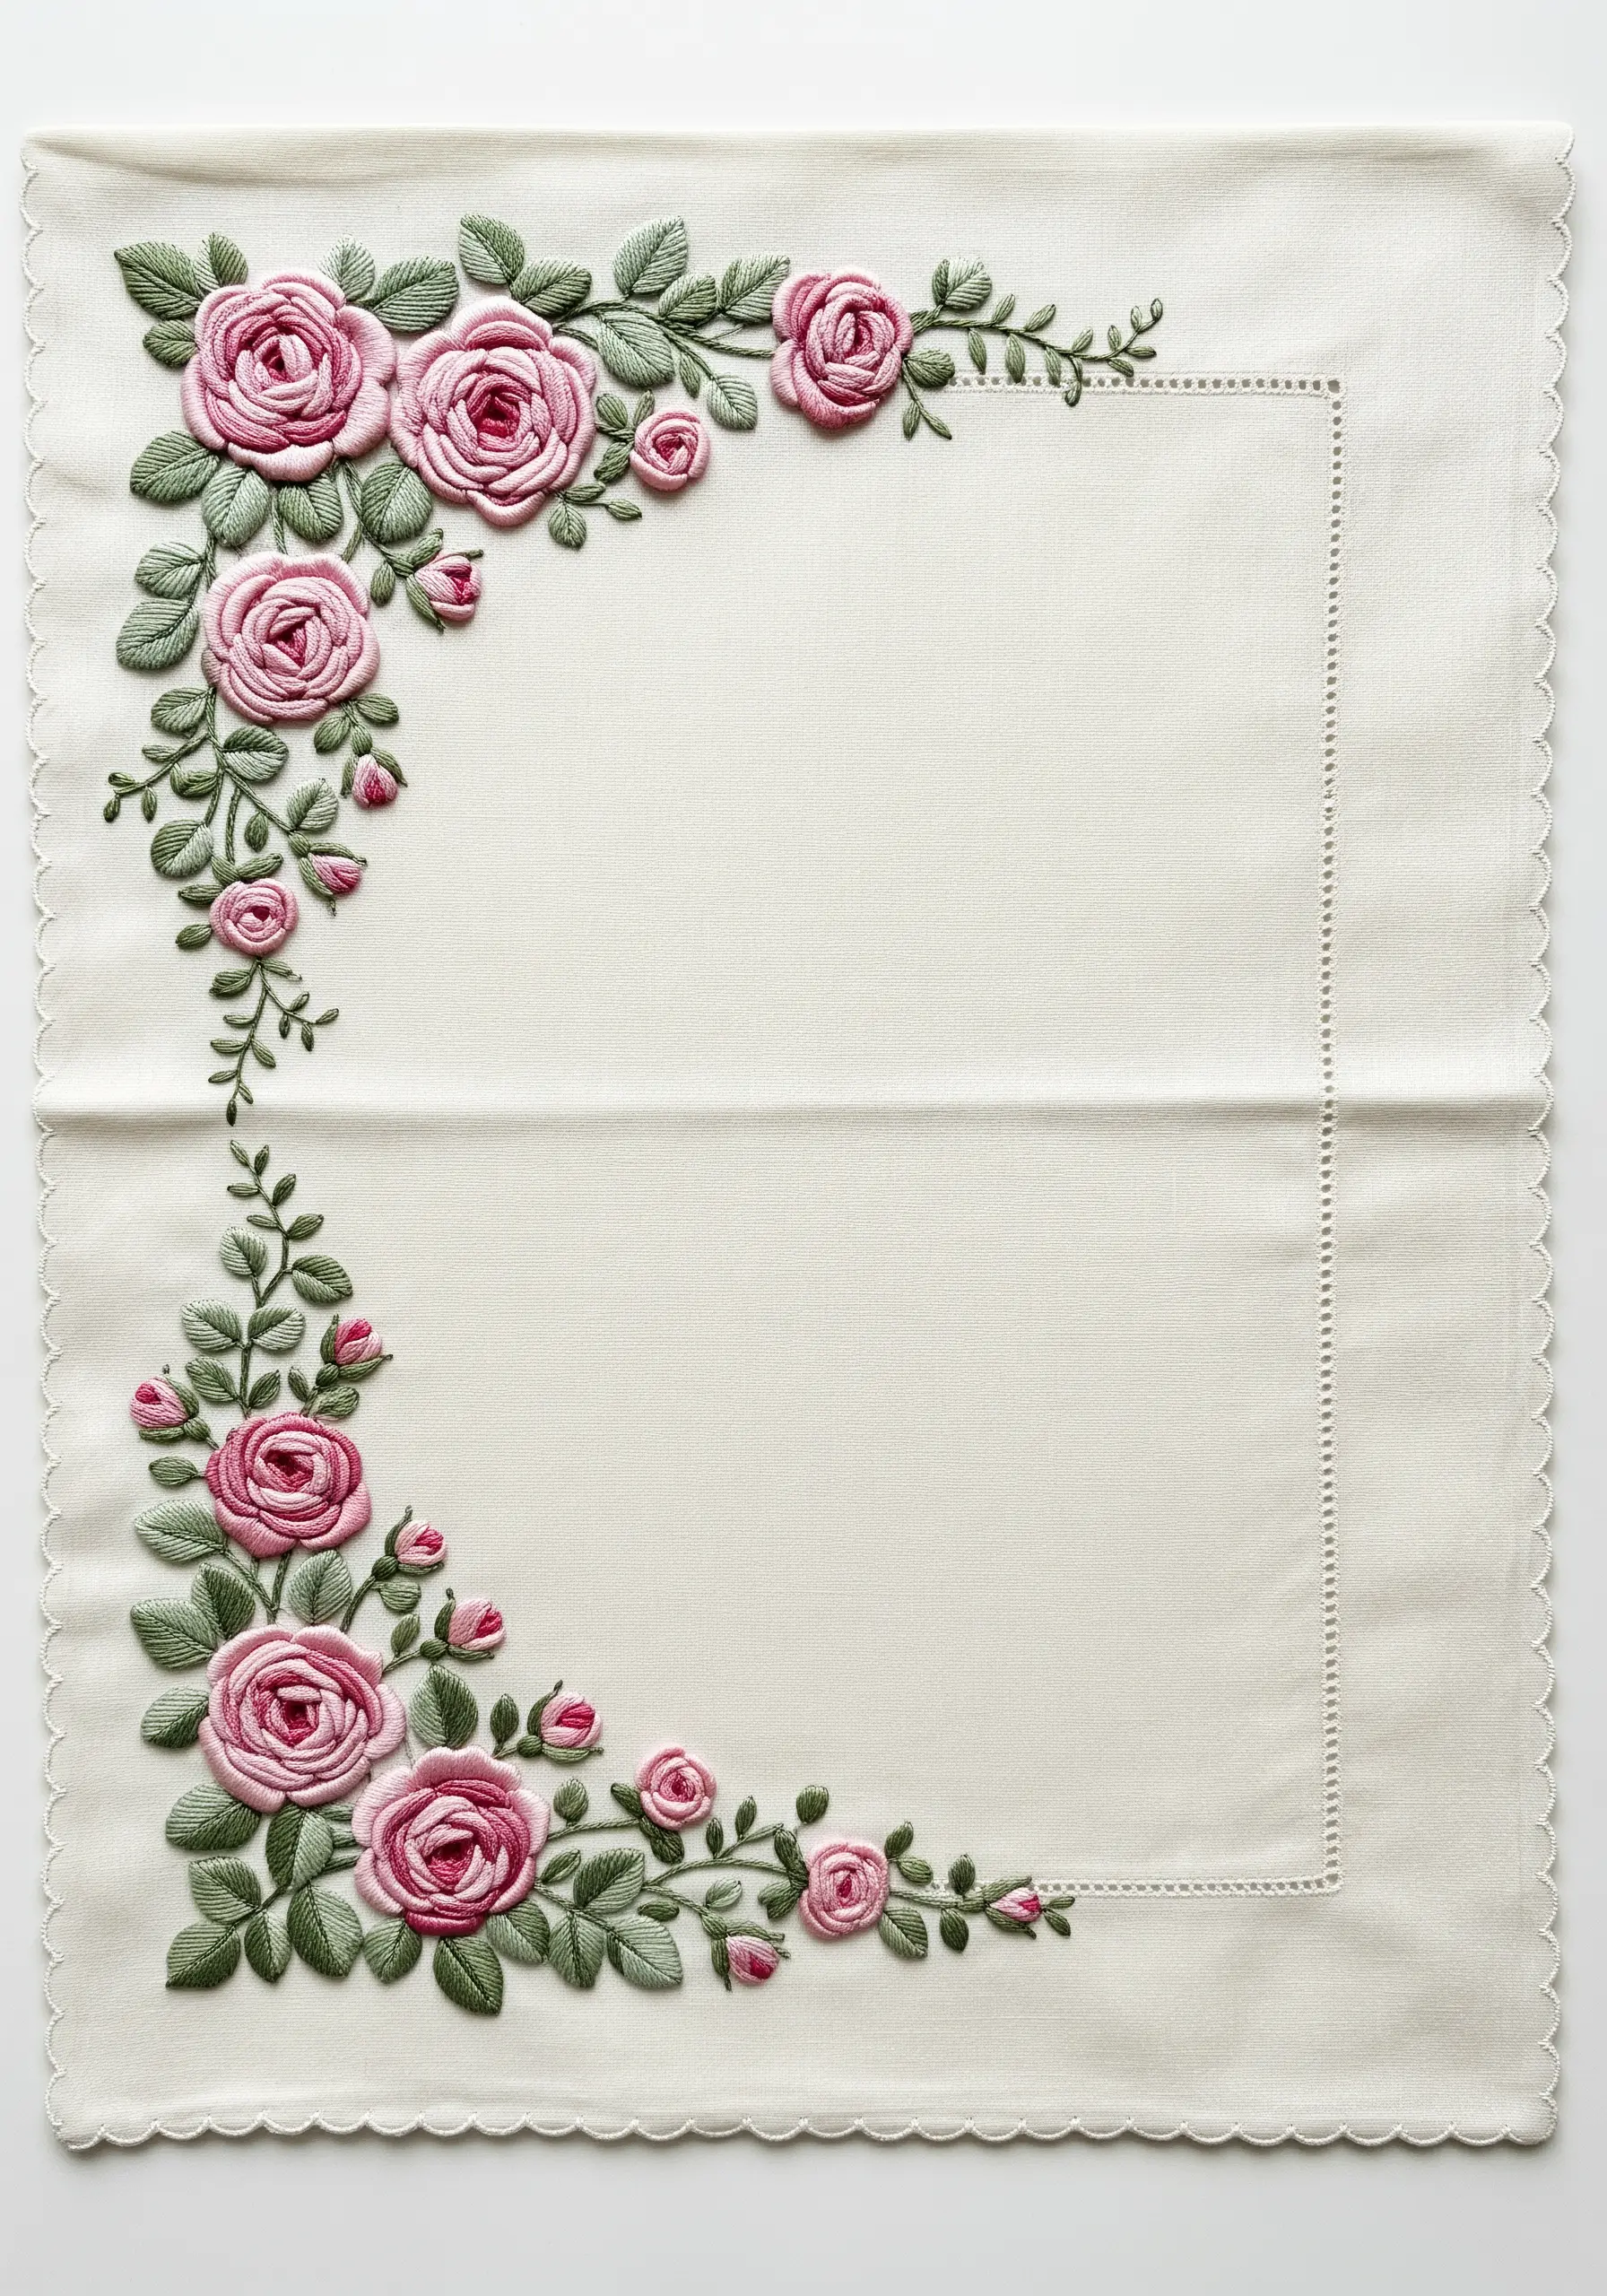
To give your embroidered roses a raised, three-dimensional quality, build up the core of each petal with a base of small, underlying stitches before covering them with satin stitch.
This technique, known as padded satin stitch, lifts the threads from the fabric surface, creating highlights and shadows that mimic real flower petals.
Use a single color for the padding stitches, then work your gradient satin stitch on top with two to three shades of pink, from dark at the base to light at the edge, for a realistic bloom.
For the leaves, a fishbone stitch provides a central vein and gentle texture that complements the smoothness of the plush petals.
2. Cascading Wisteria with Textural Knots
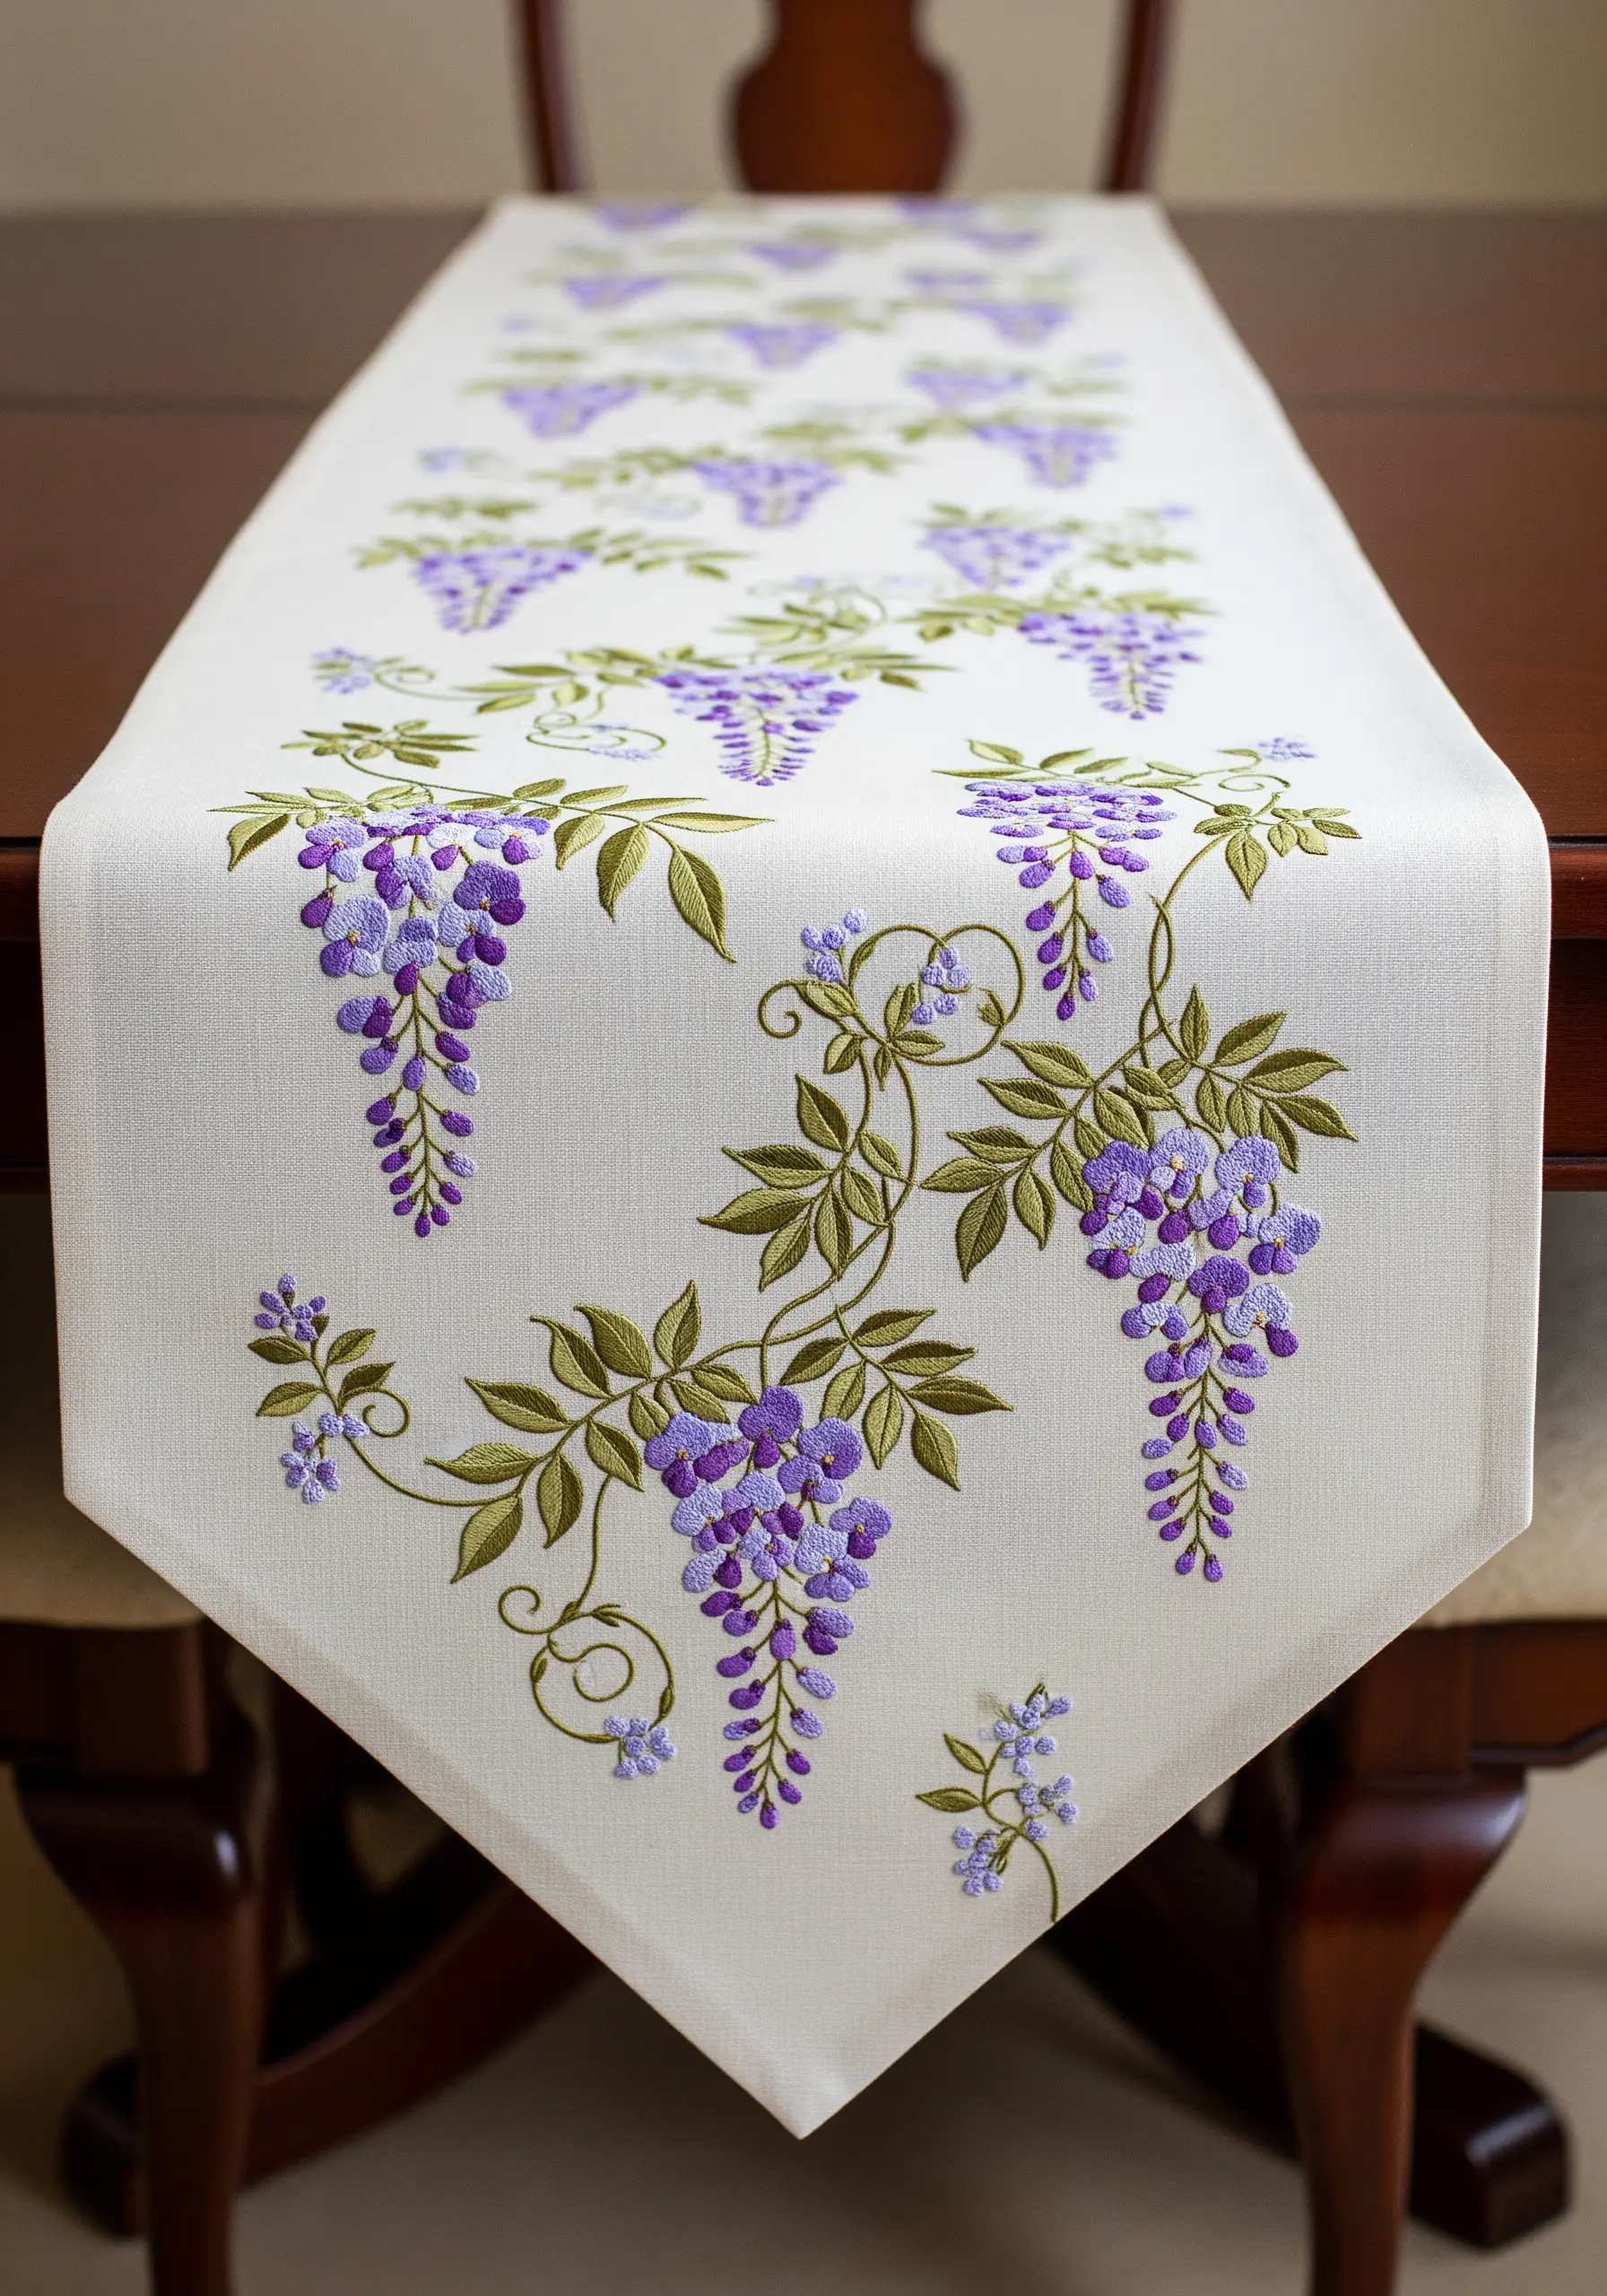
Capture the graceful drape of wisteria by grouping French knots and detached chain stitches into dense, tapering clusters.
Vary the thread color within each cluster—using lilac, lavender, and a touch of white—to create depth and prevent the design from looking flat.
For the trailing vines, use a whipped backstitch. This stitch creates a smooth, rope-like line that elegantly connects the blossoms and leaves, guiding the eye down the length of the table runner.
This method ensures your climbing plant stitch designs have natural movement and visual weight.
3. Elegant Monograms with Floral Wreaths
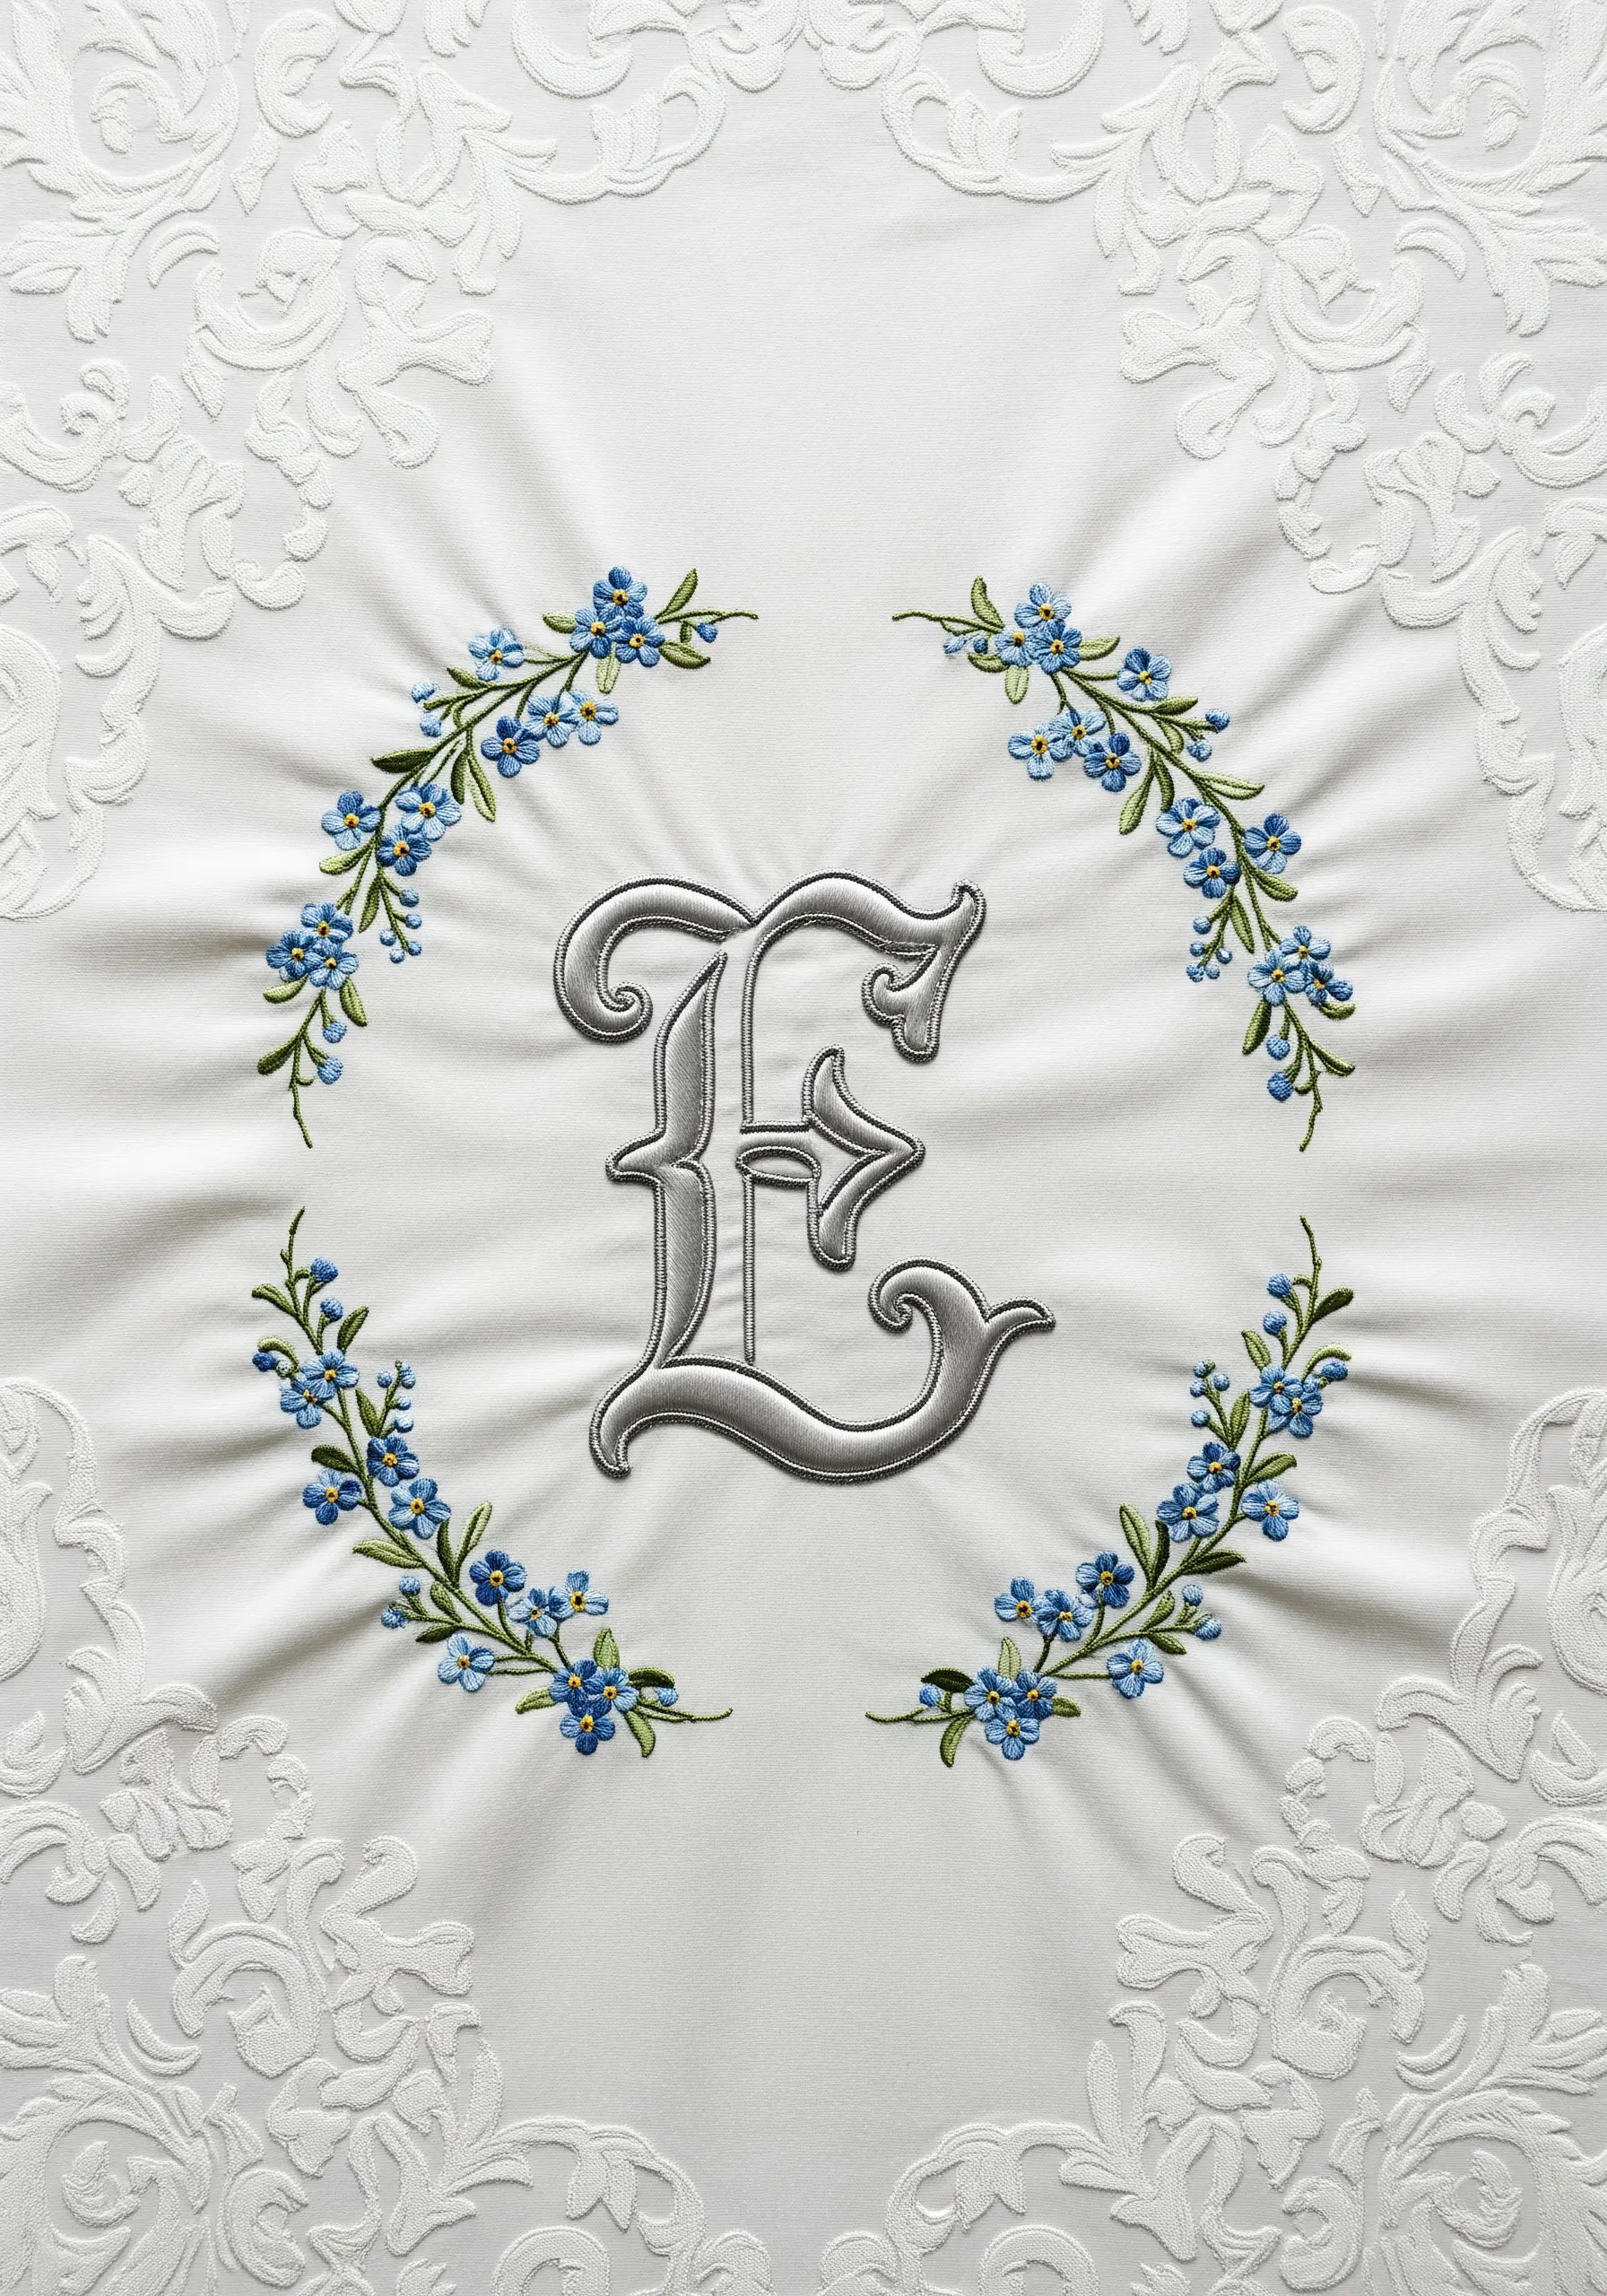
For a truly heirloom feel, frame a satin-stitched monogram with a delicate wreath of forget-me-nots. The contrast between the bold, smooth letter and the tiny, detailed flowers creates a beautiful focal point.
Stitch the monogram using a pearl cotton or a metallic silver thread for a subtle sheen that catches the light. This choice of thread adds a touch of luxury without being overpowering.
Create the forget-me-nots with five tiny detached chain stitches for the petals and a single yellow French knot for the center. This delicate scale makes the central letter feel more significant.
This is one of the most classic personalized monogram table linen embroidery ideas you can create.
4. Iridescent Feathers with Thread Painting
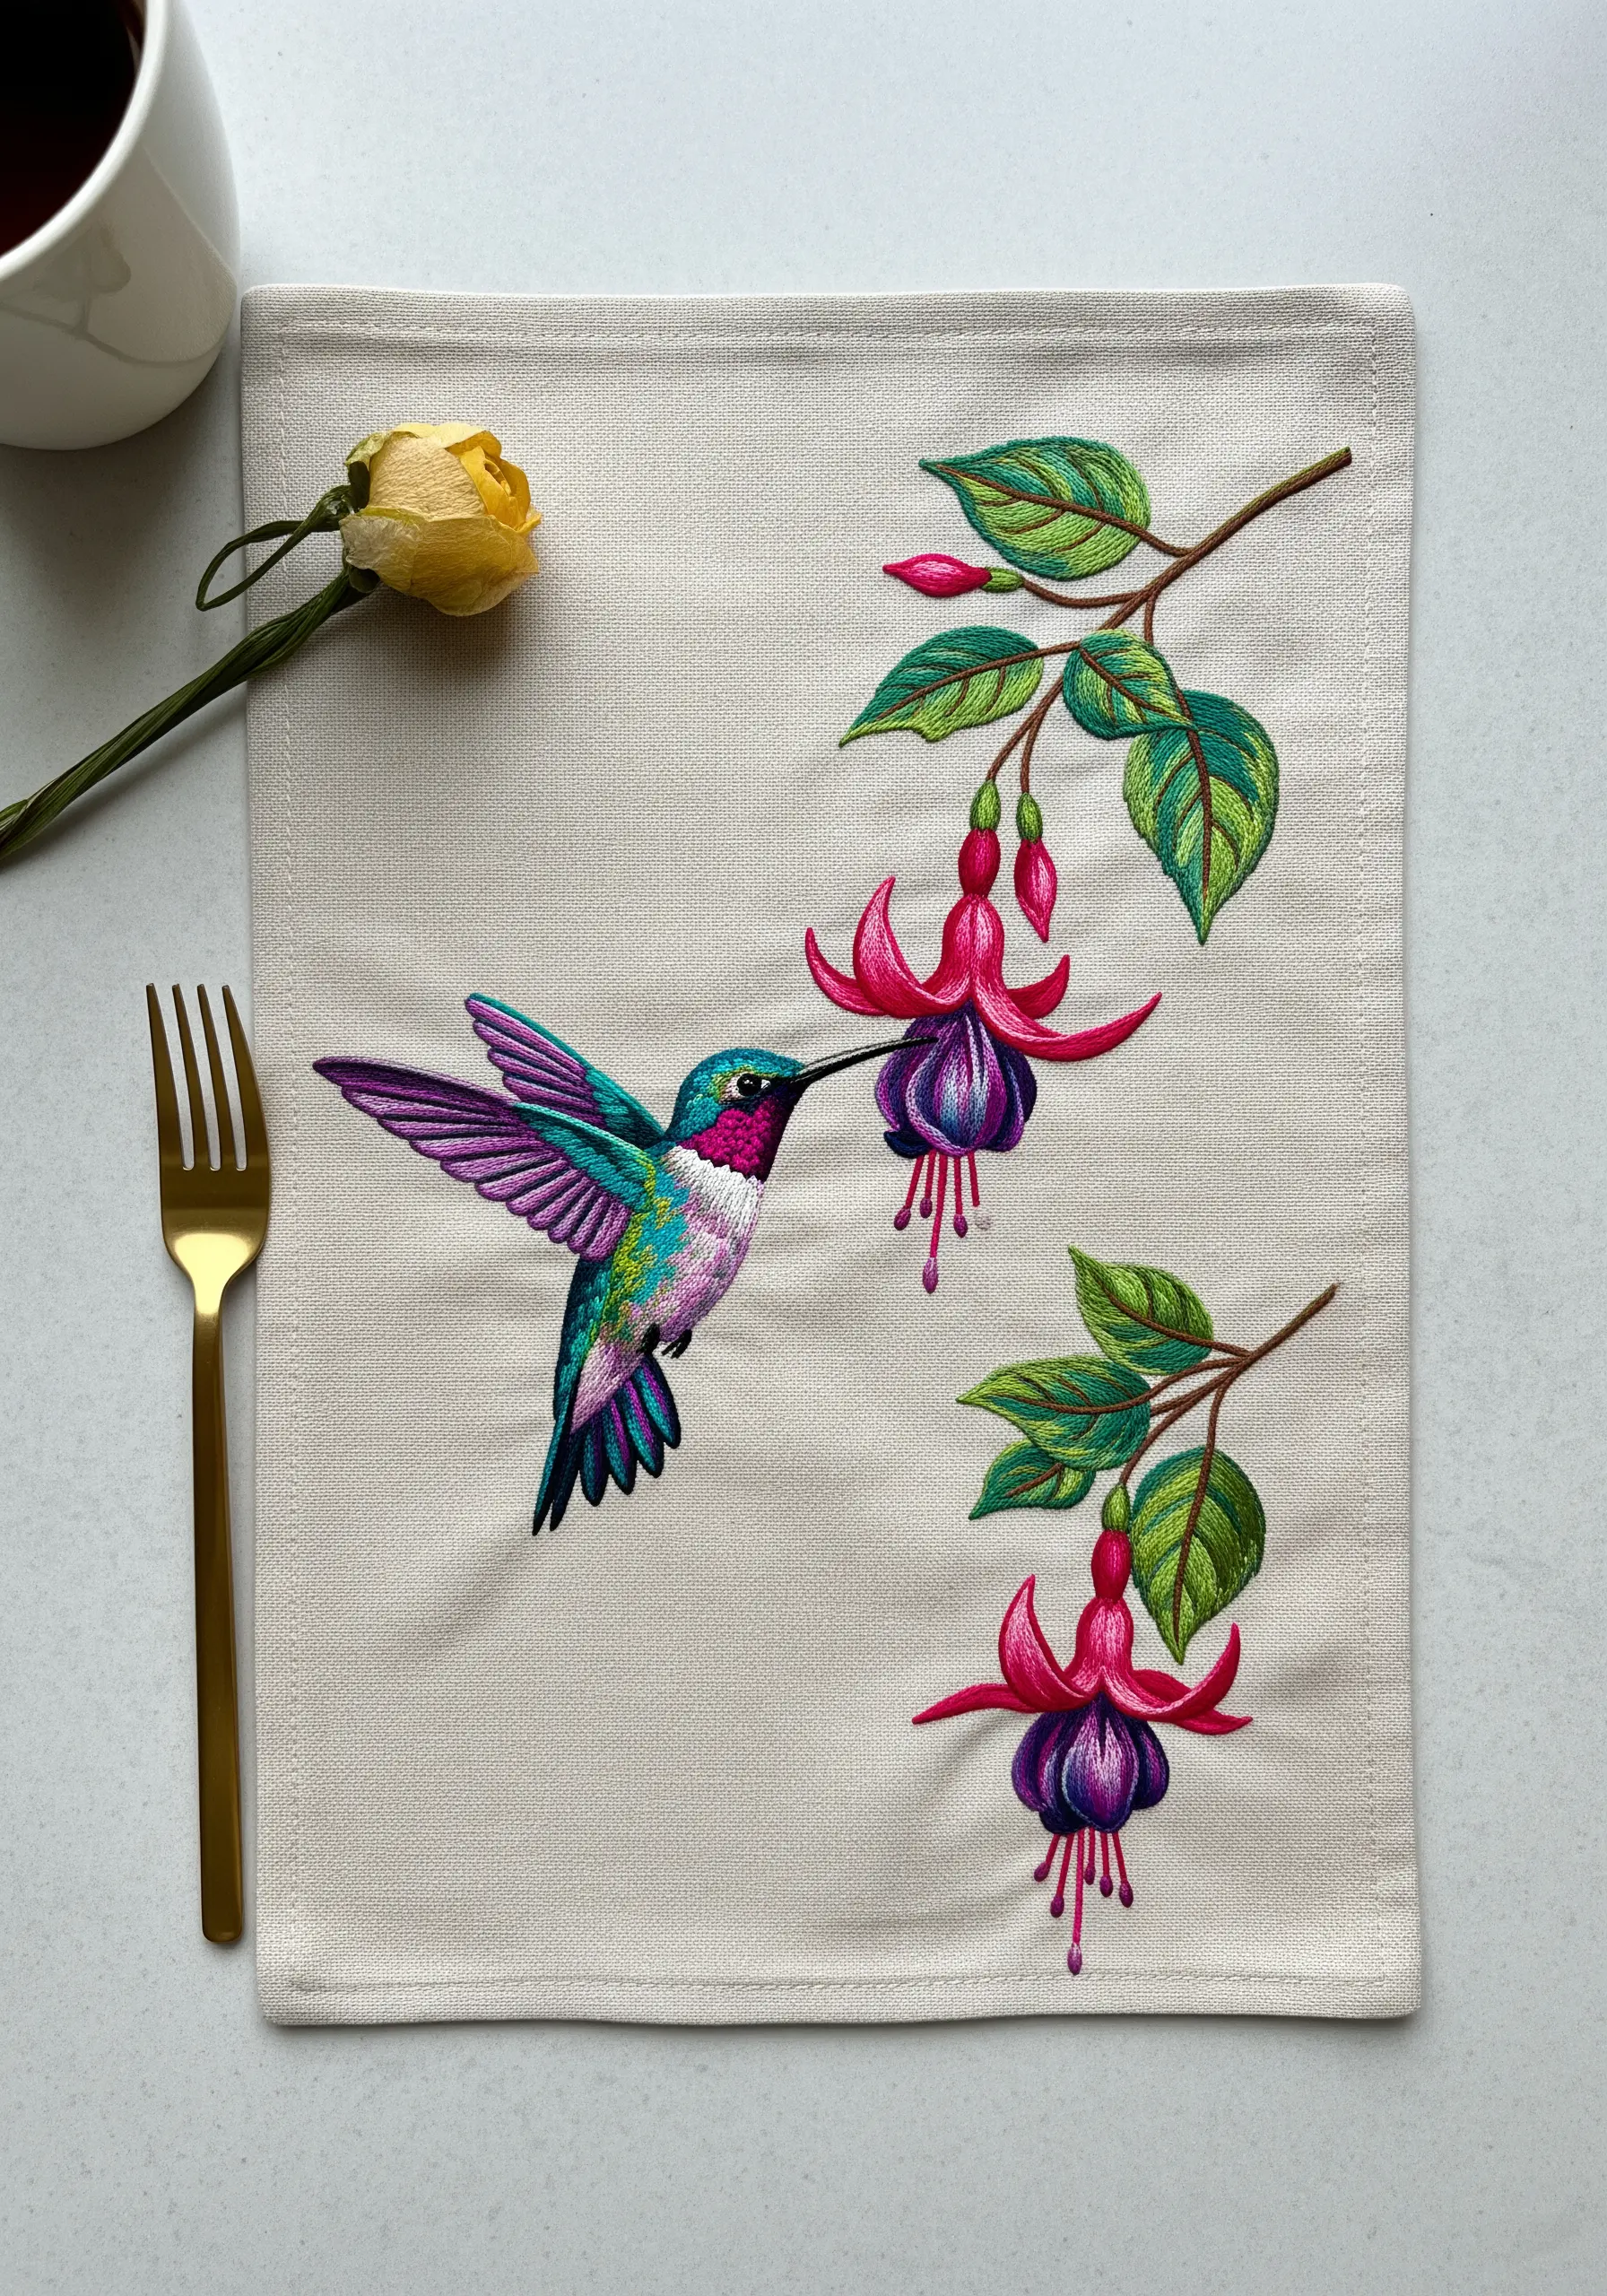
Recreate the shimmering iridescence of a hummingbird’s feathers using the long-and-short stitch, also known as thread painting.
Work with a single strand of embroidery floss to achieve the smoothest possible color transitions, blending shades of teal, purple, and magenta seamlessly.
Pay close attention to the direction of your stitches, following the natural contours of the bird’s body and wings. This directional stitching is what creates the illusion of light and movement.
This technique elevates simple bird and butterfly embroidery patterns into photorealistic works of art.
5. Cohesive Napkin Sets with Varied Motifs
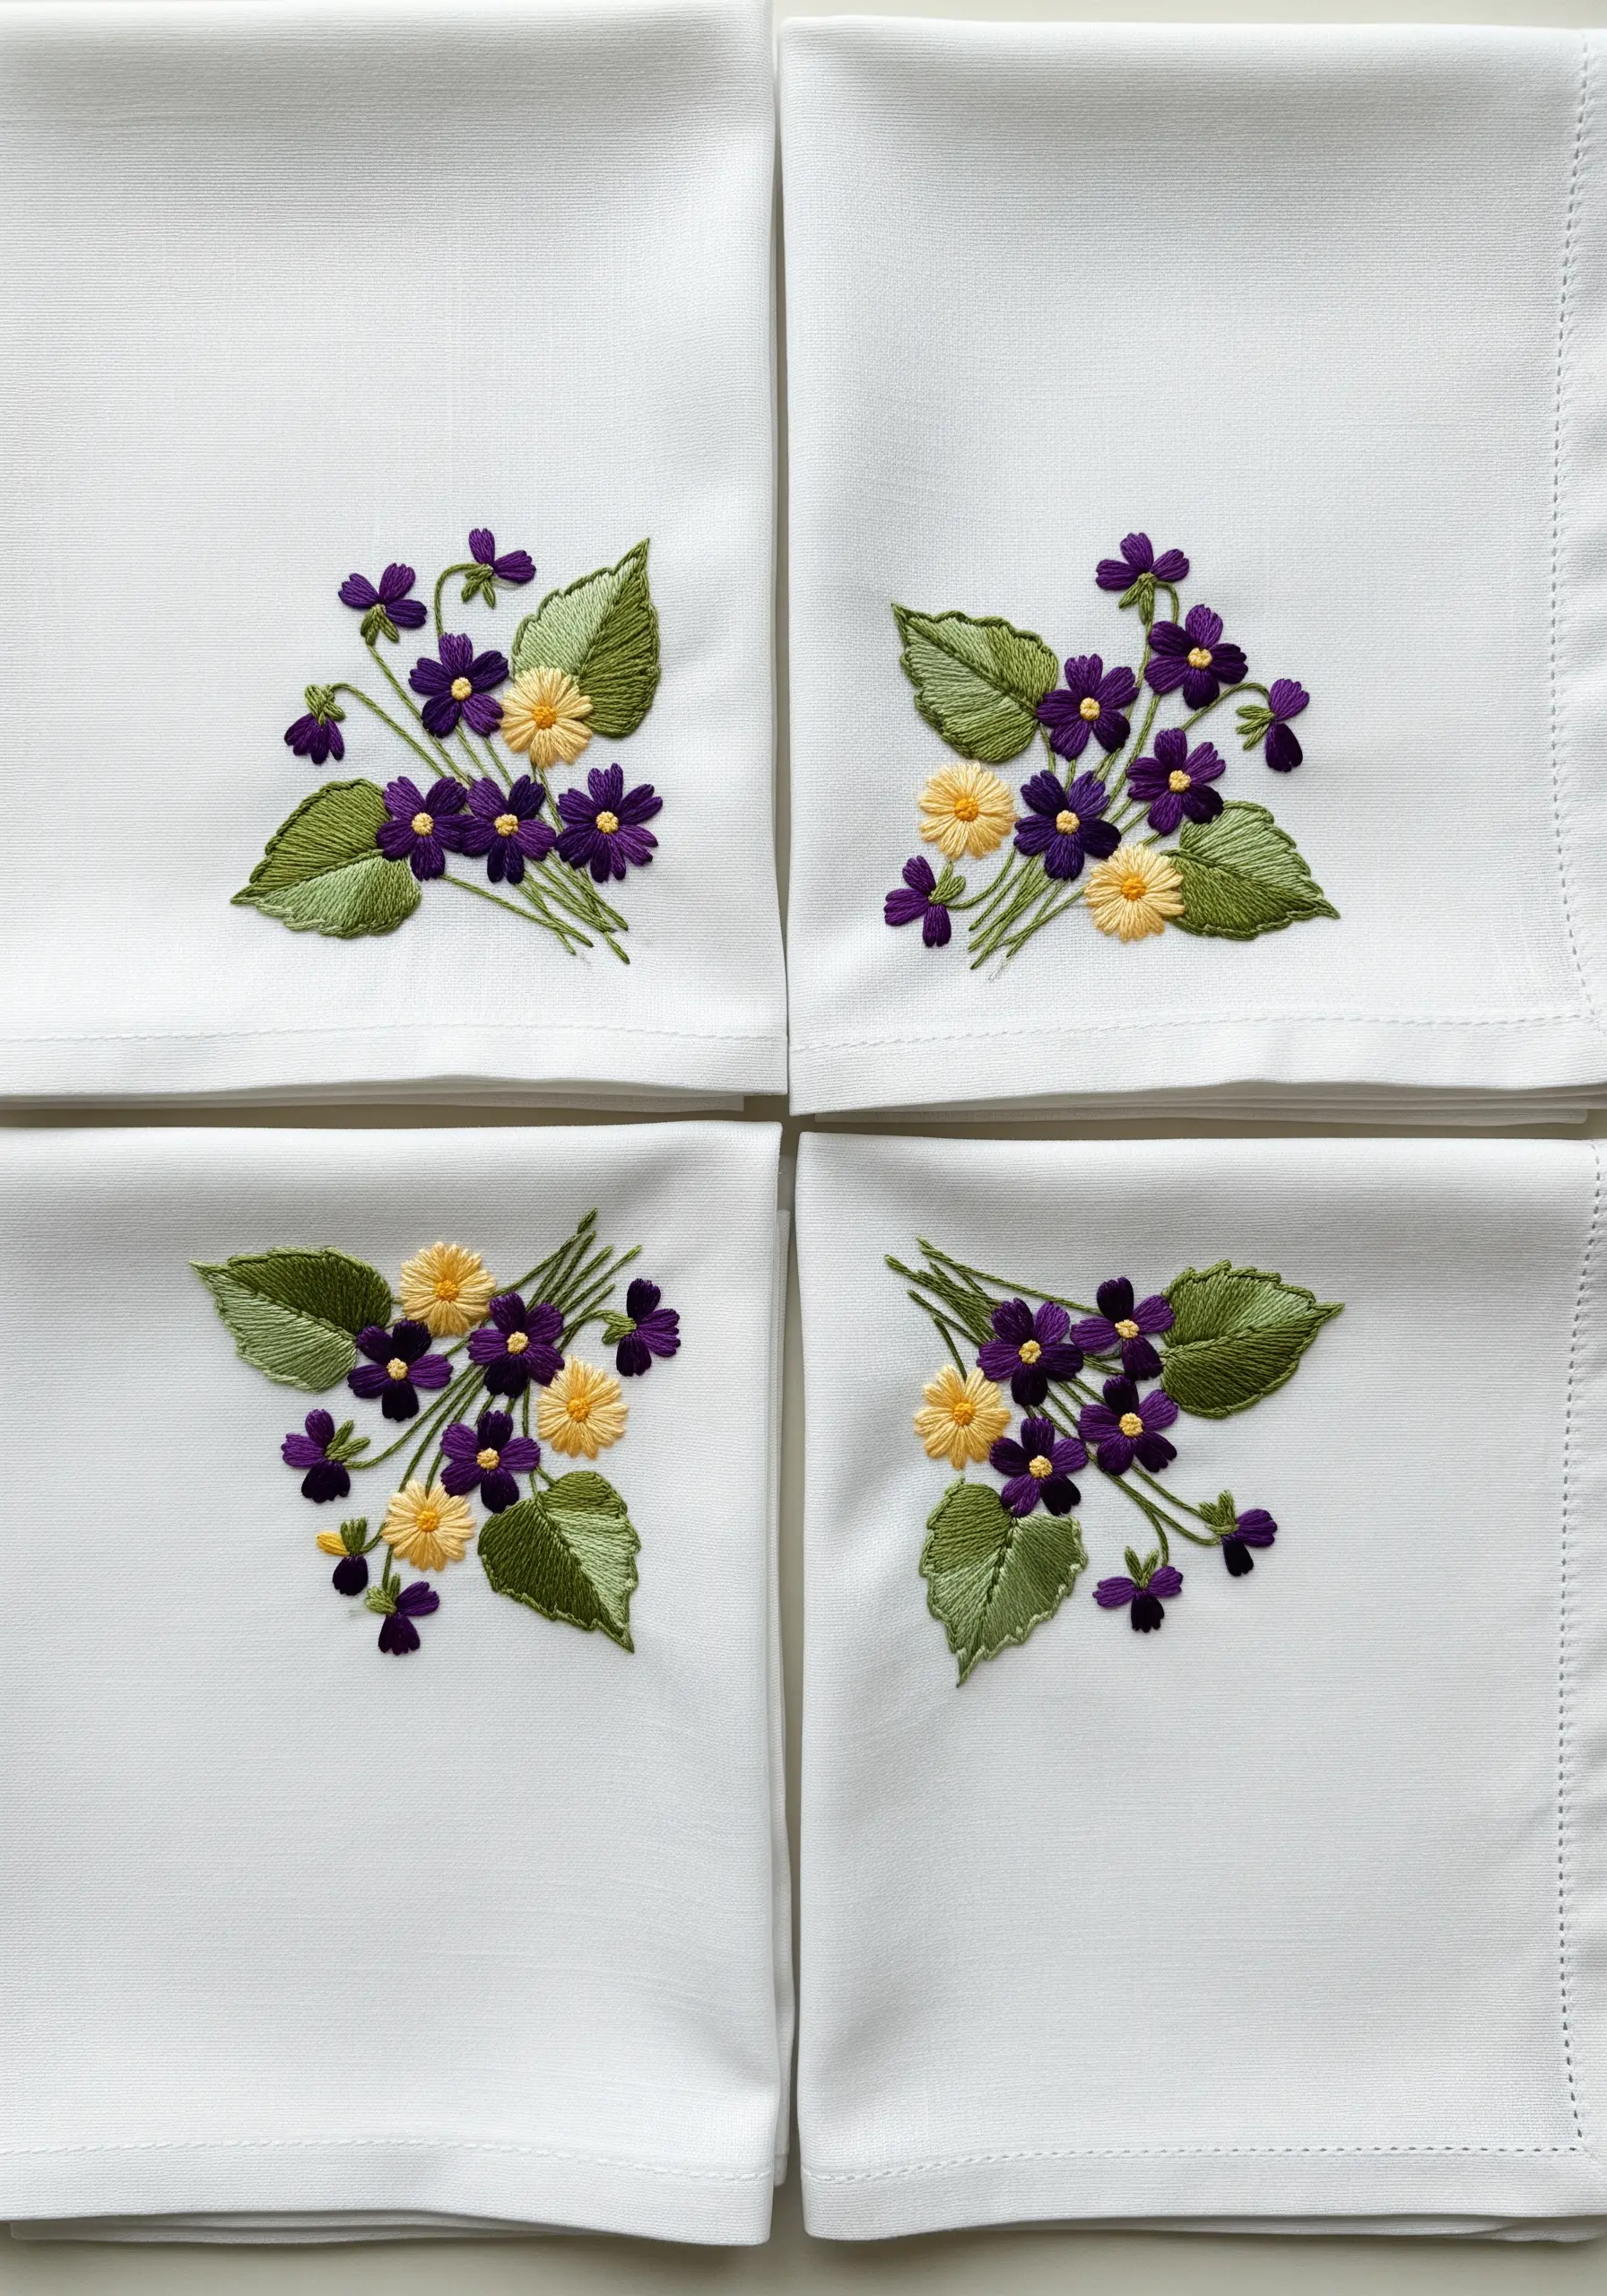
When embroidering a set of napkins, create a cohesive yet dynamic look by slightly altering the composition of the floral bouquet on each piece.
Instead of stitching the exact same design four times, mirror the image, or subtly rearrange the stems and buds. This makes each napkin unique while maintaining a unified theme.
Use bullion knots for the deep purple violets to give them a dense, textured appearance, contrasting them with flatter, daisy-stitched yellow flowers.
These tiny floral motifs add a personal touch to your table setting.
6. Flowing Ivy Borders with Stem Stitch

To create a continuous, organic border of ivy, use a flowing stem stitch for the vines, allowing them to meander naturally around the edge of the tablecloth.
For the leaves, alternate between satin stitch and fishbone stitch. This variation adds subtle texture and prevents the design from becoming monotonous, mimicking the way light hits real leaves.
Incorporate tiny red French knots to represent berries, adding a small pop of color that breaks up the green and draws the eye along the design.
Perfectly executed leaf border embroidery ideas rely on this balance of repetition and variation.
7. Delicate Linework for Illustrative Effects
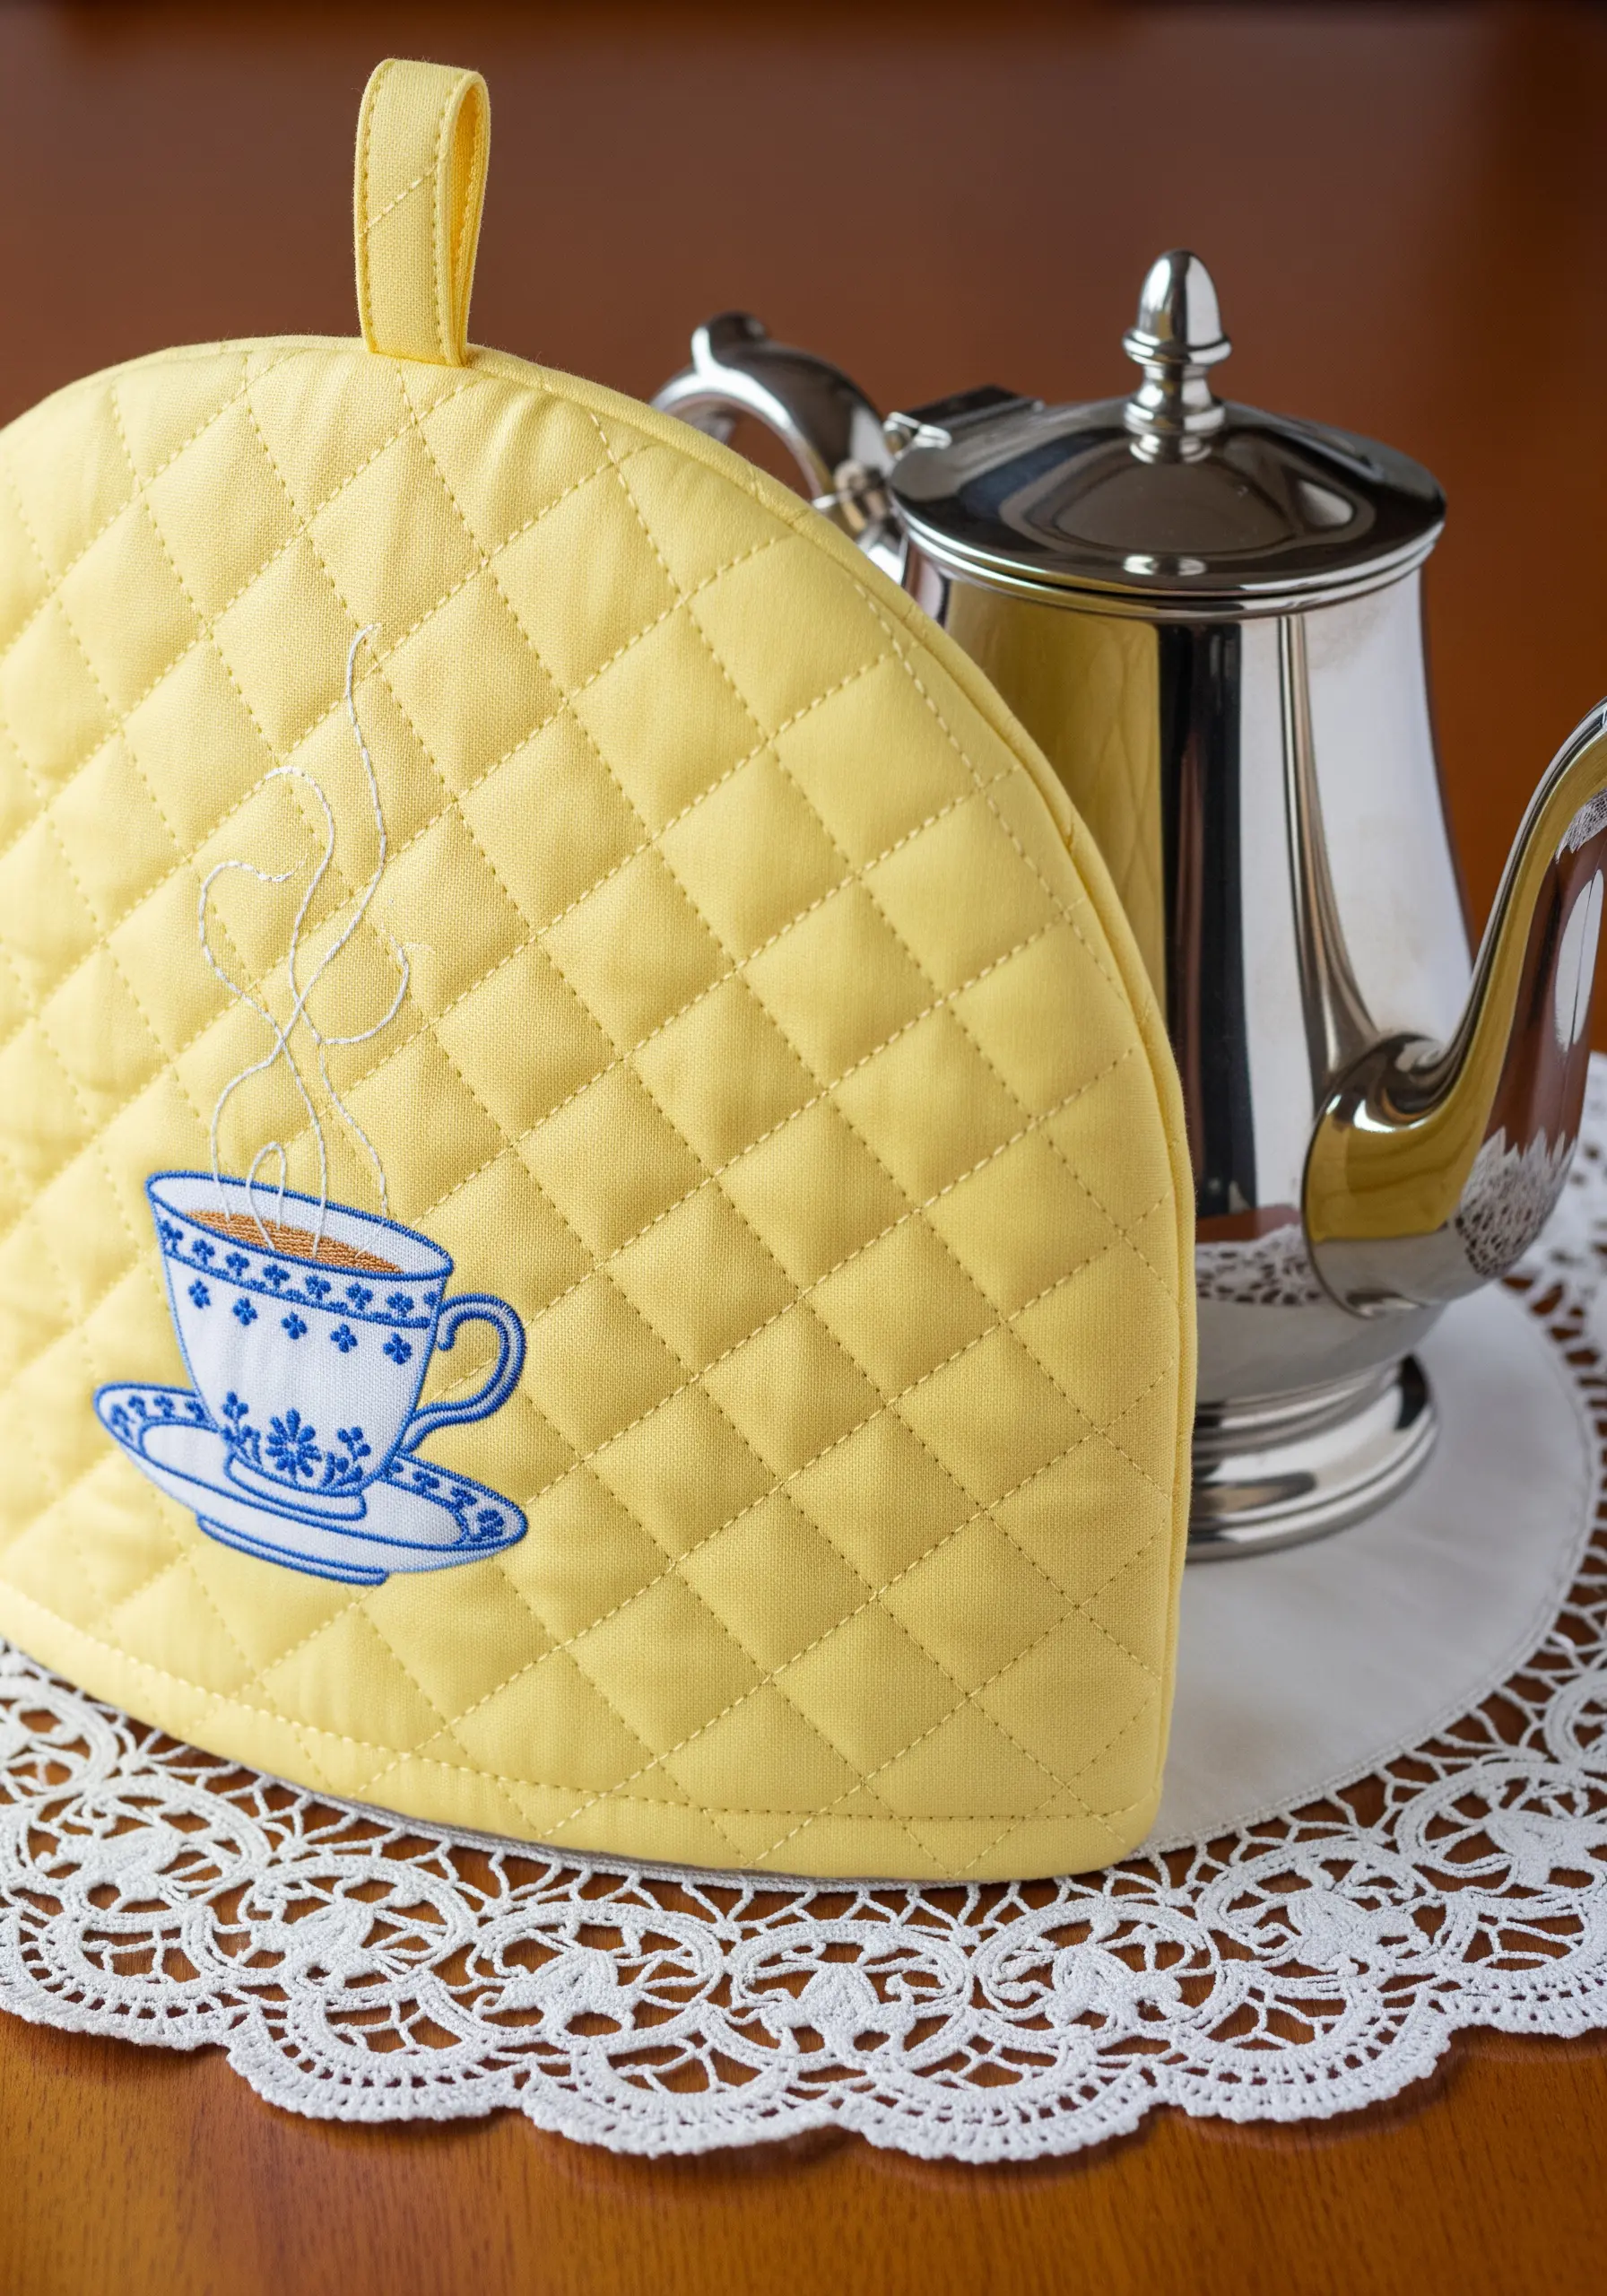
For fine, illustrative details like the steam rising from a teacup, switch to a single strand of white or silver floss and use a simple backstitch or stem stitch.
This creates a delicate contrast against the more solidly filled areas of the design, like the blue-and-white porcelain pattern on the cup, which can be done with satin stitch.
The key is the variation in thread weight and stitch density. This intentional contrast is what makes the design feel refined and thoughtfully composed.
These kinds of tiny artistic home touches show a command of detail and subtlety.
8. Shadow Work for Sheer and Voile Fabrics
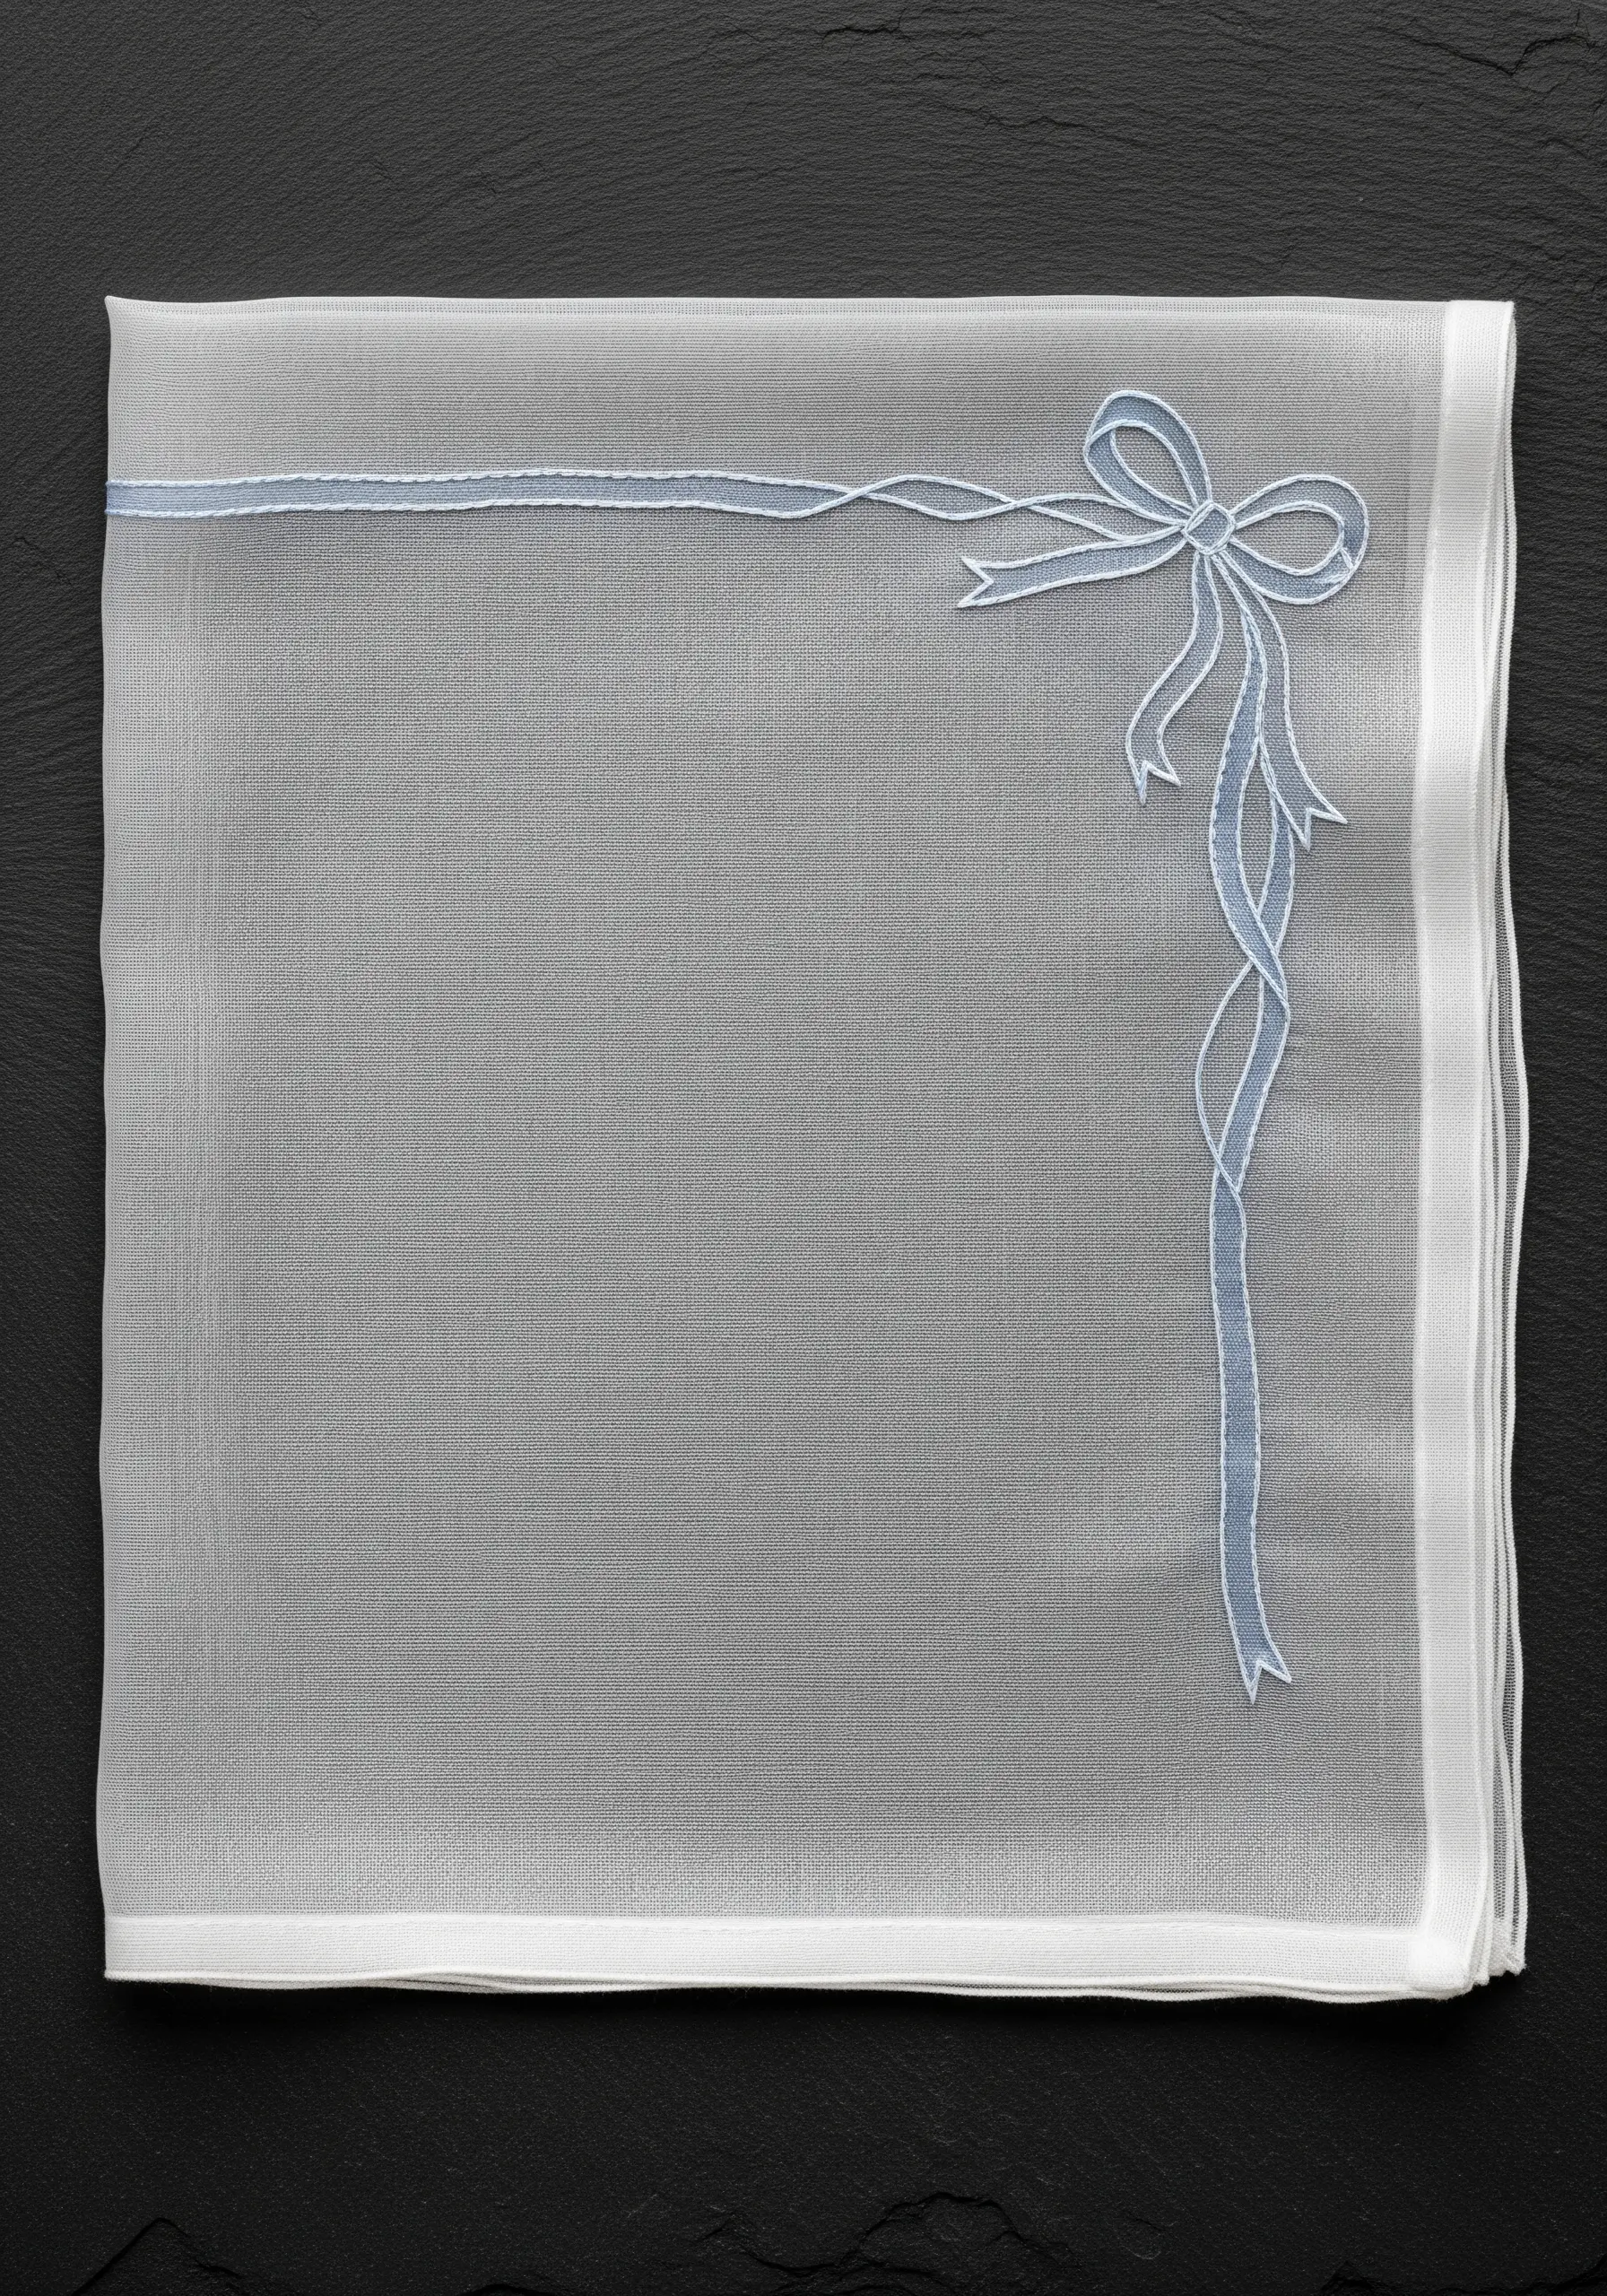
To embroider on sheer fabrics like organdy or voile without heavy stitches showing through, use the shadow work technique.
This is achieved by working a closed herringbone stitch on the *back* of the fabric. From the front, this creates a soft, shadowed fill with a clean double-backstitch outline.
Choose a thread color that is only a shade or two darker than the fabric for the most elegant, ethereal effect. This is a perfect example of tone-on-tone embroidery techniques.
The result is a design that appears trapped within the layers of the fabric itself, offering a hint of color and form without sacrificing lightness.
9. Achieving Velvety Texture in Pansy Petals

The key to realistic pansies is capturing the velvety texture of their petals. Achieve this with densely packed long-and-short stitches that radiate from the center outwards.
Use a rich, dark floss—like deep purple or near-black—for the center markings, blending it carefully into the main petal color to create that signature soft, dark face.
The direction of your stitches is crucial. They must follow the slight curl and curve of each petal to create dimension and realism.
This approach turns your work into a form of abstract thread painting, using color and direction to build form.
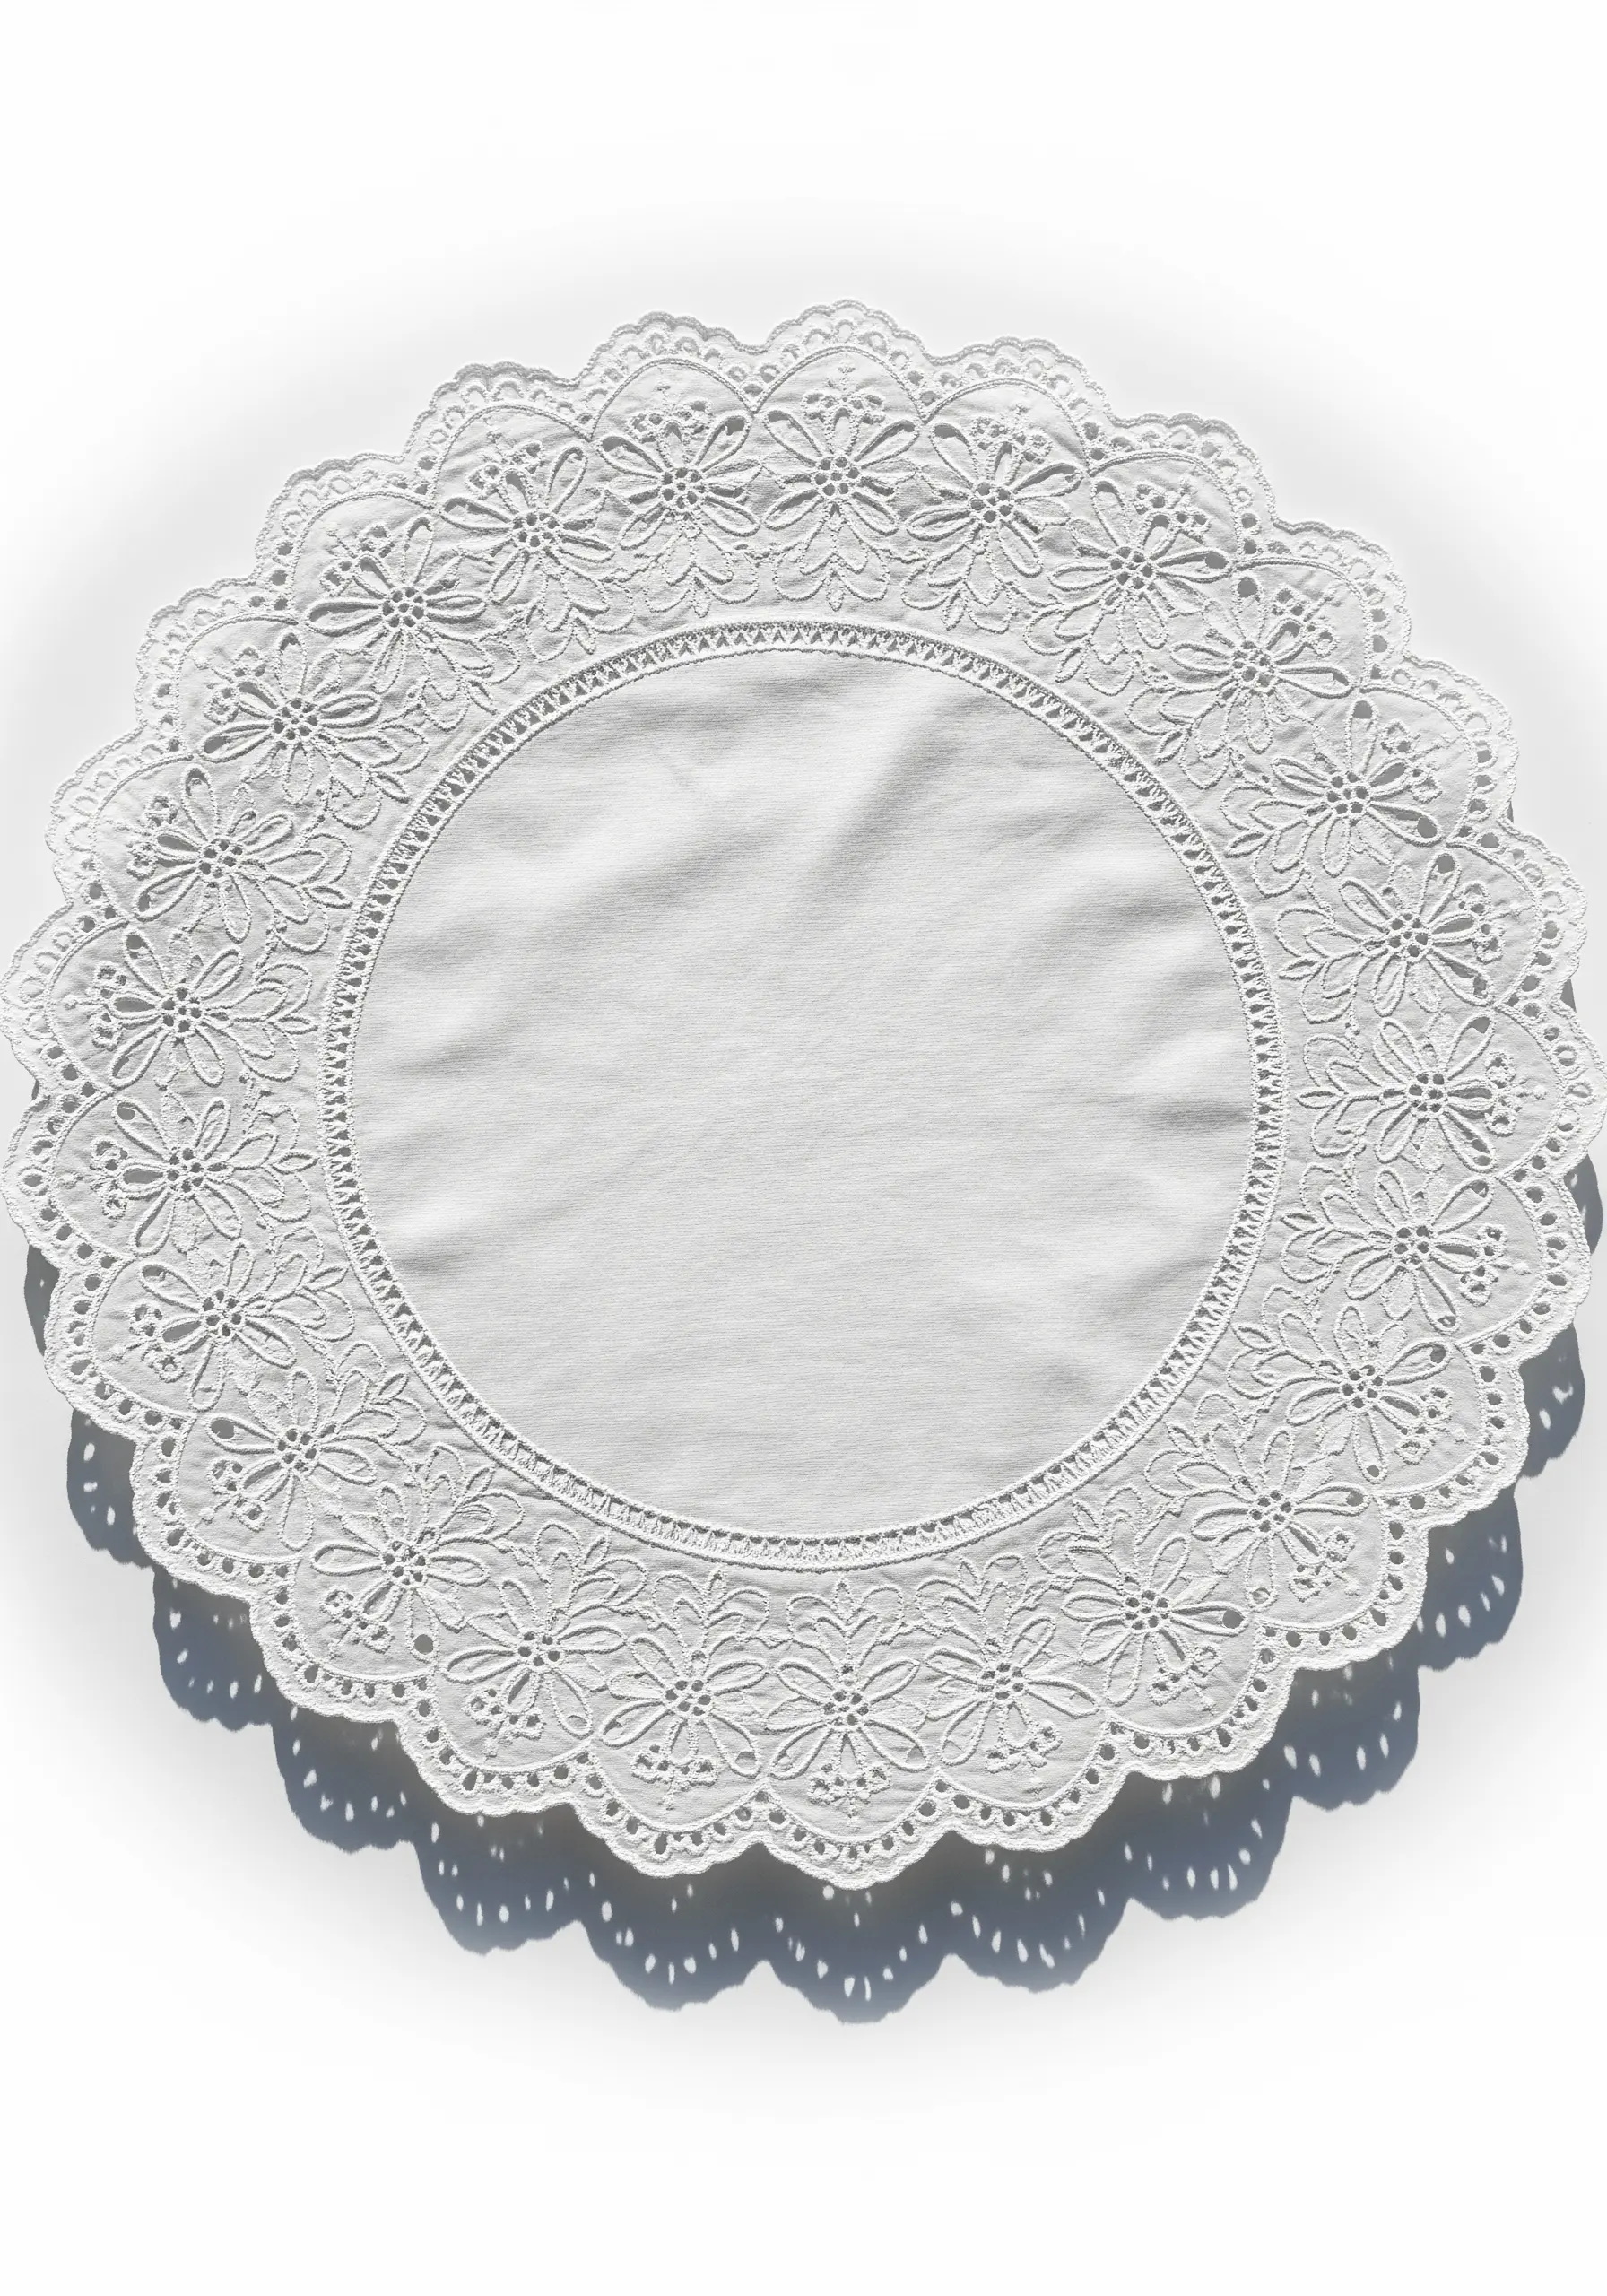
10. Creating Modern Heirlooms with Cutwork
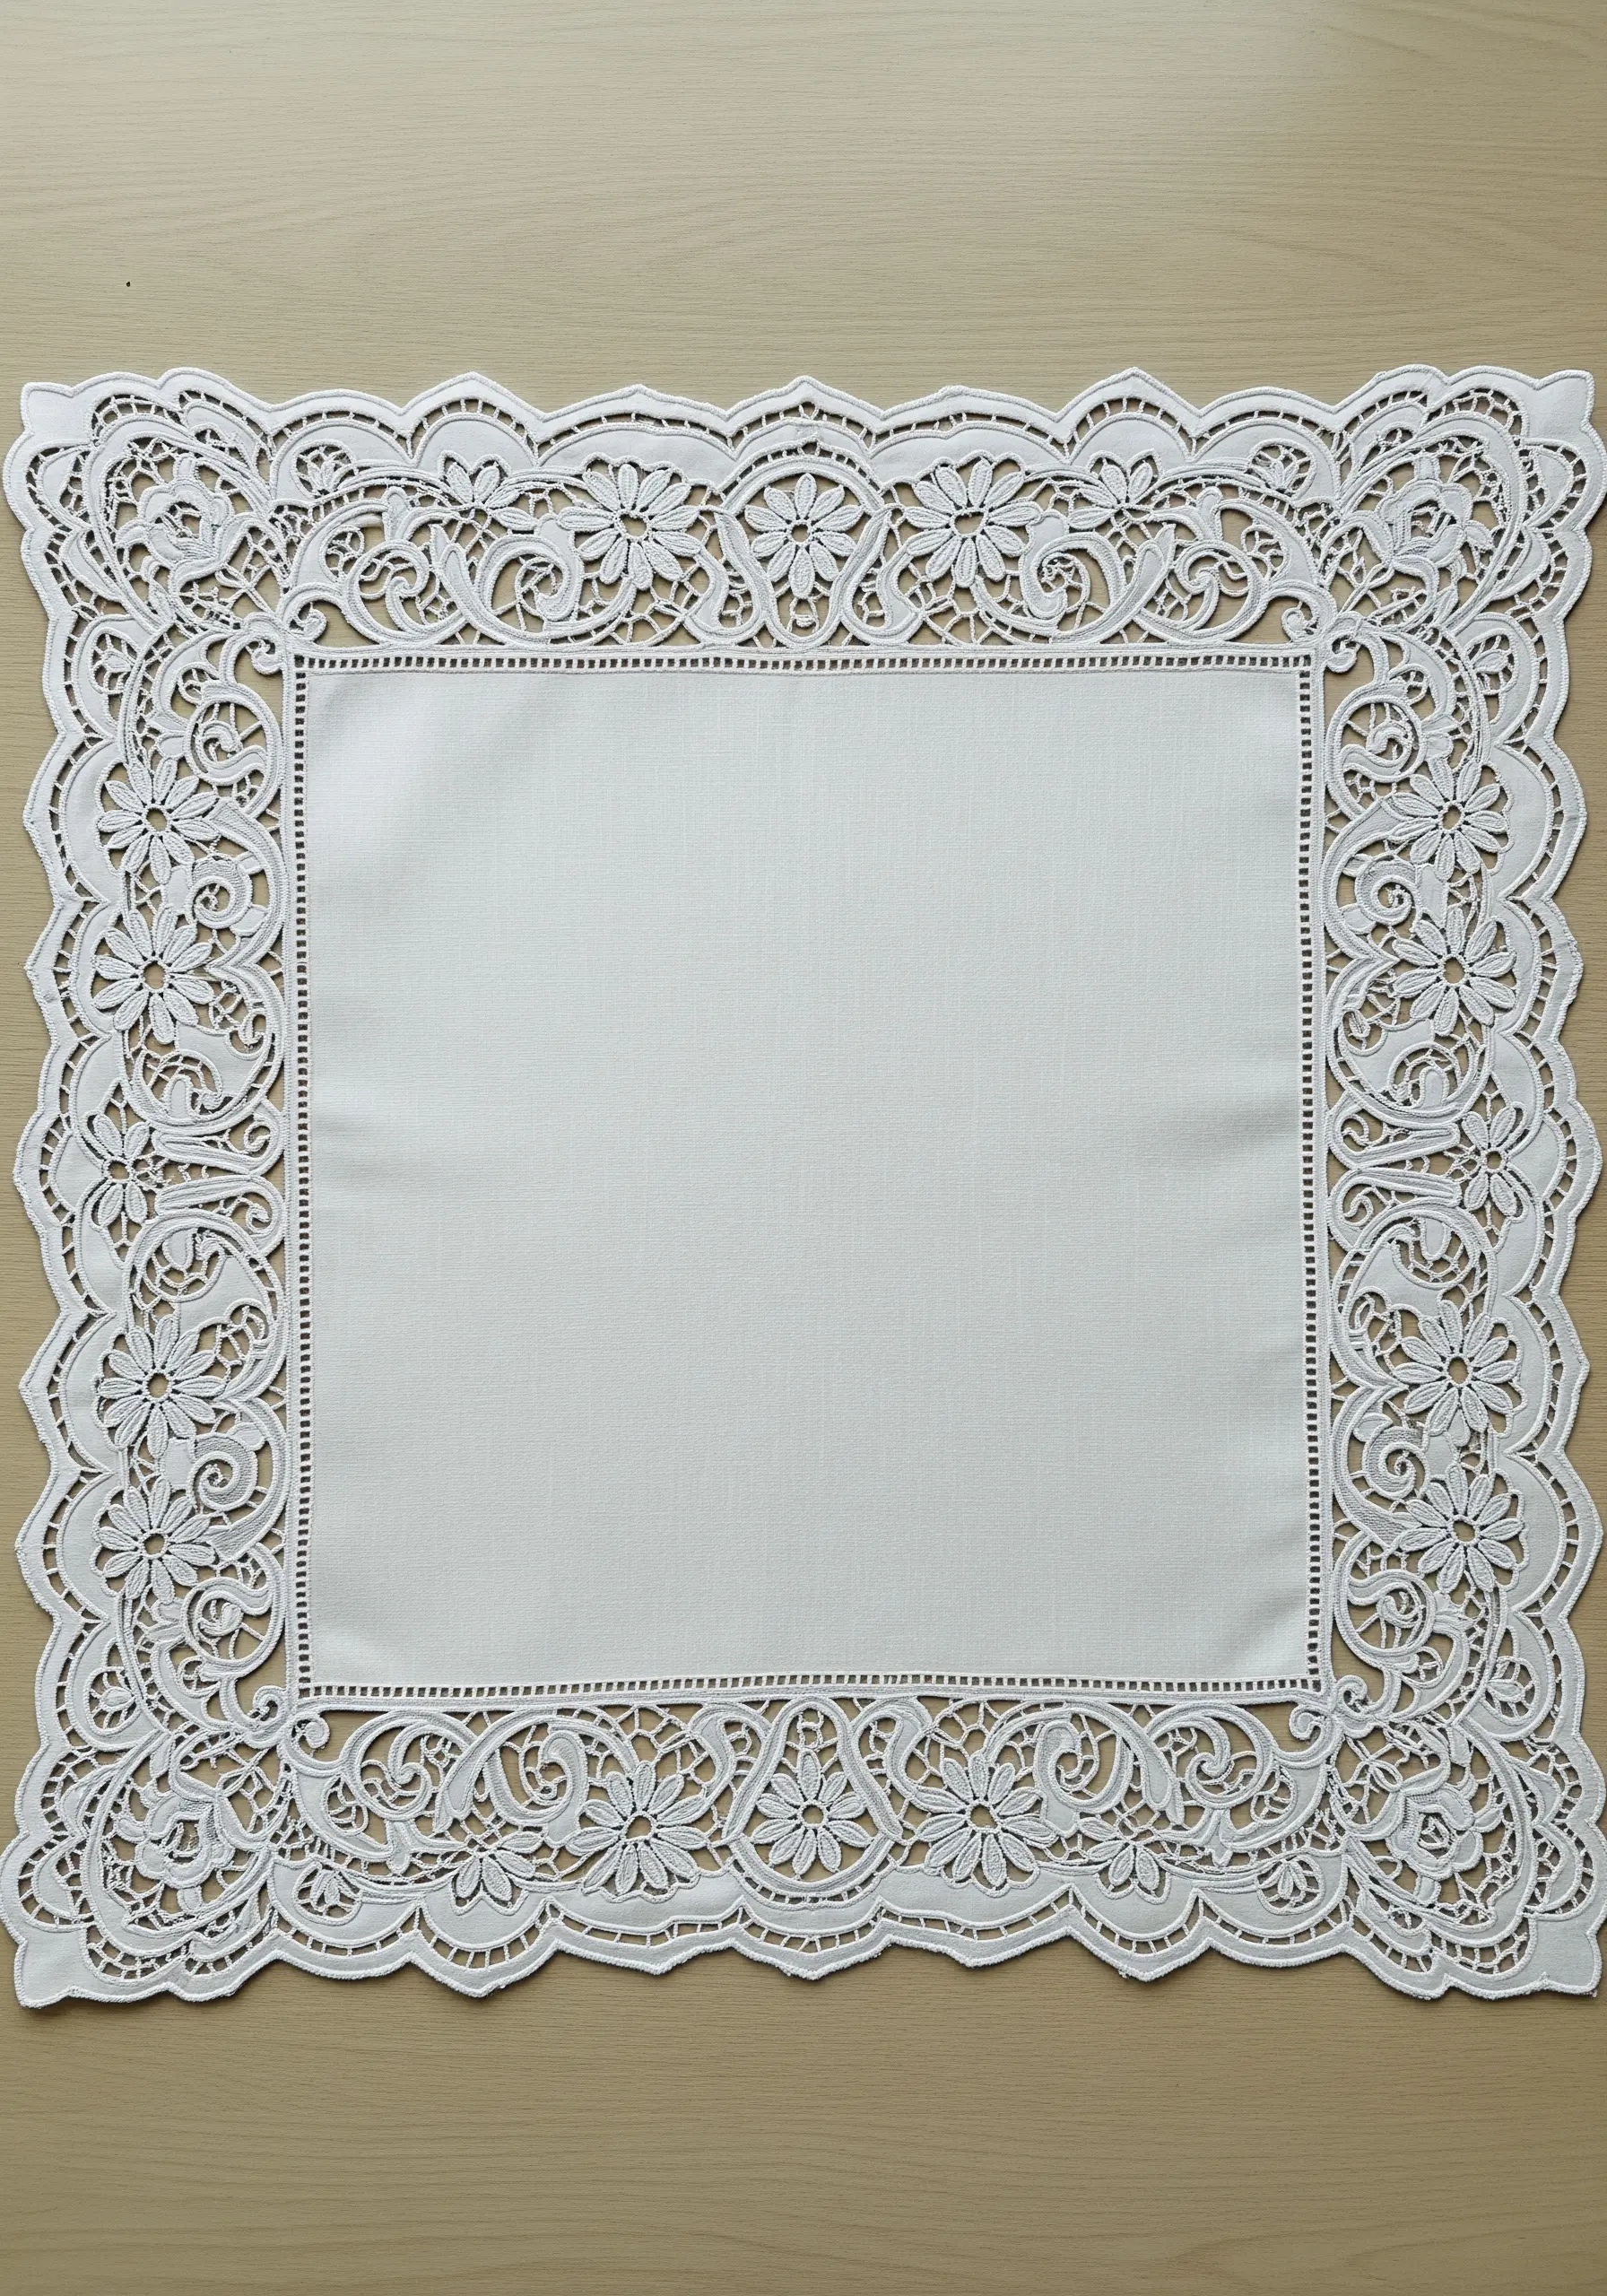
For a truly heirloom finish, explore the art of cutwork, or Broderie Anglaise. This technique involves carefully cutting away sections of the fabric and securing the edges with dense buttonhole stitches.
Start by outlining your floral or scrollwork design with a running stitch. Then, work your buttonhole stitches over this line before snipping away the interior fabric with sharp, fine-tipped scissors.
The result is a beautiful, lace-like effect that adds incredible texture and lightness to a plain linen placemat.
This transforms simple fabric into something reminiscent of vintage lace embroidery table linen.
11. Scattered Lavender Sprigs for Subtle Charm
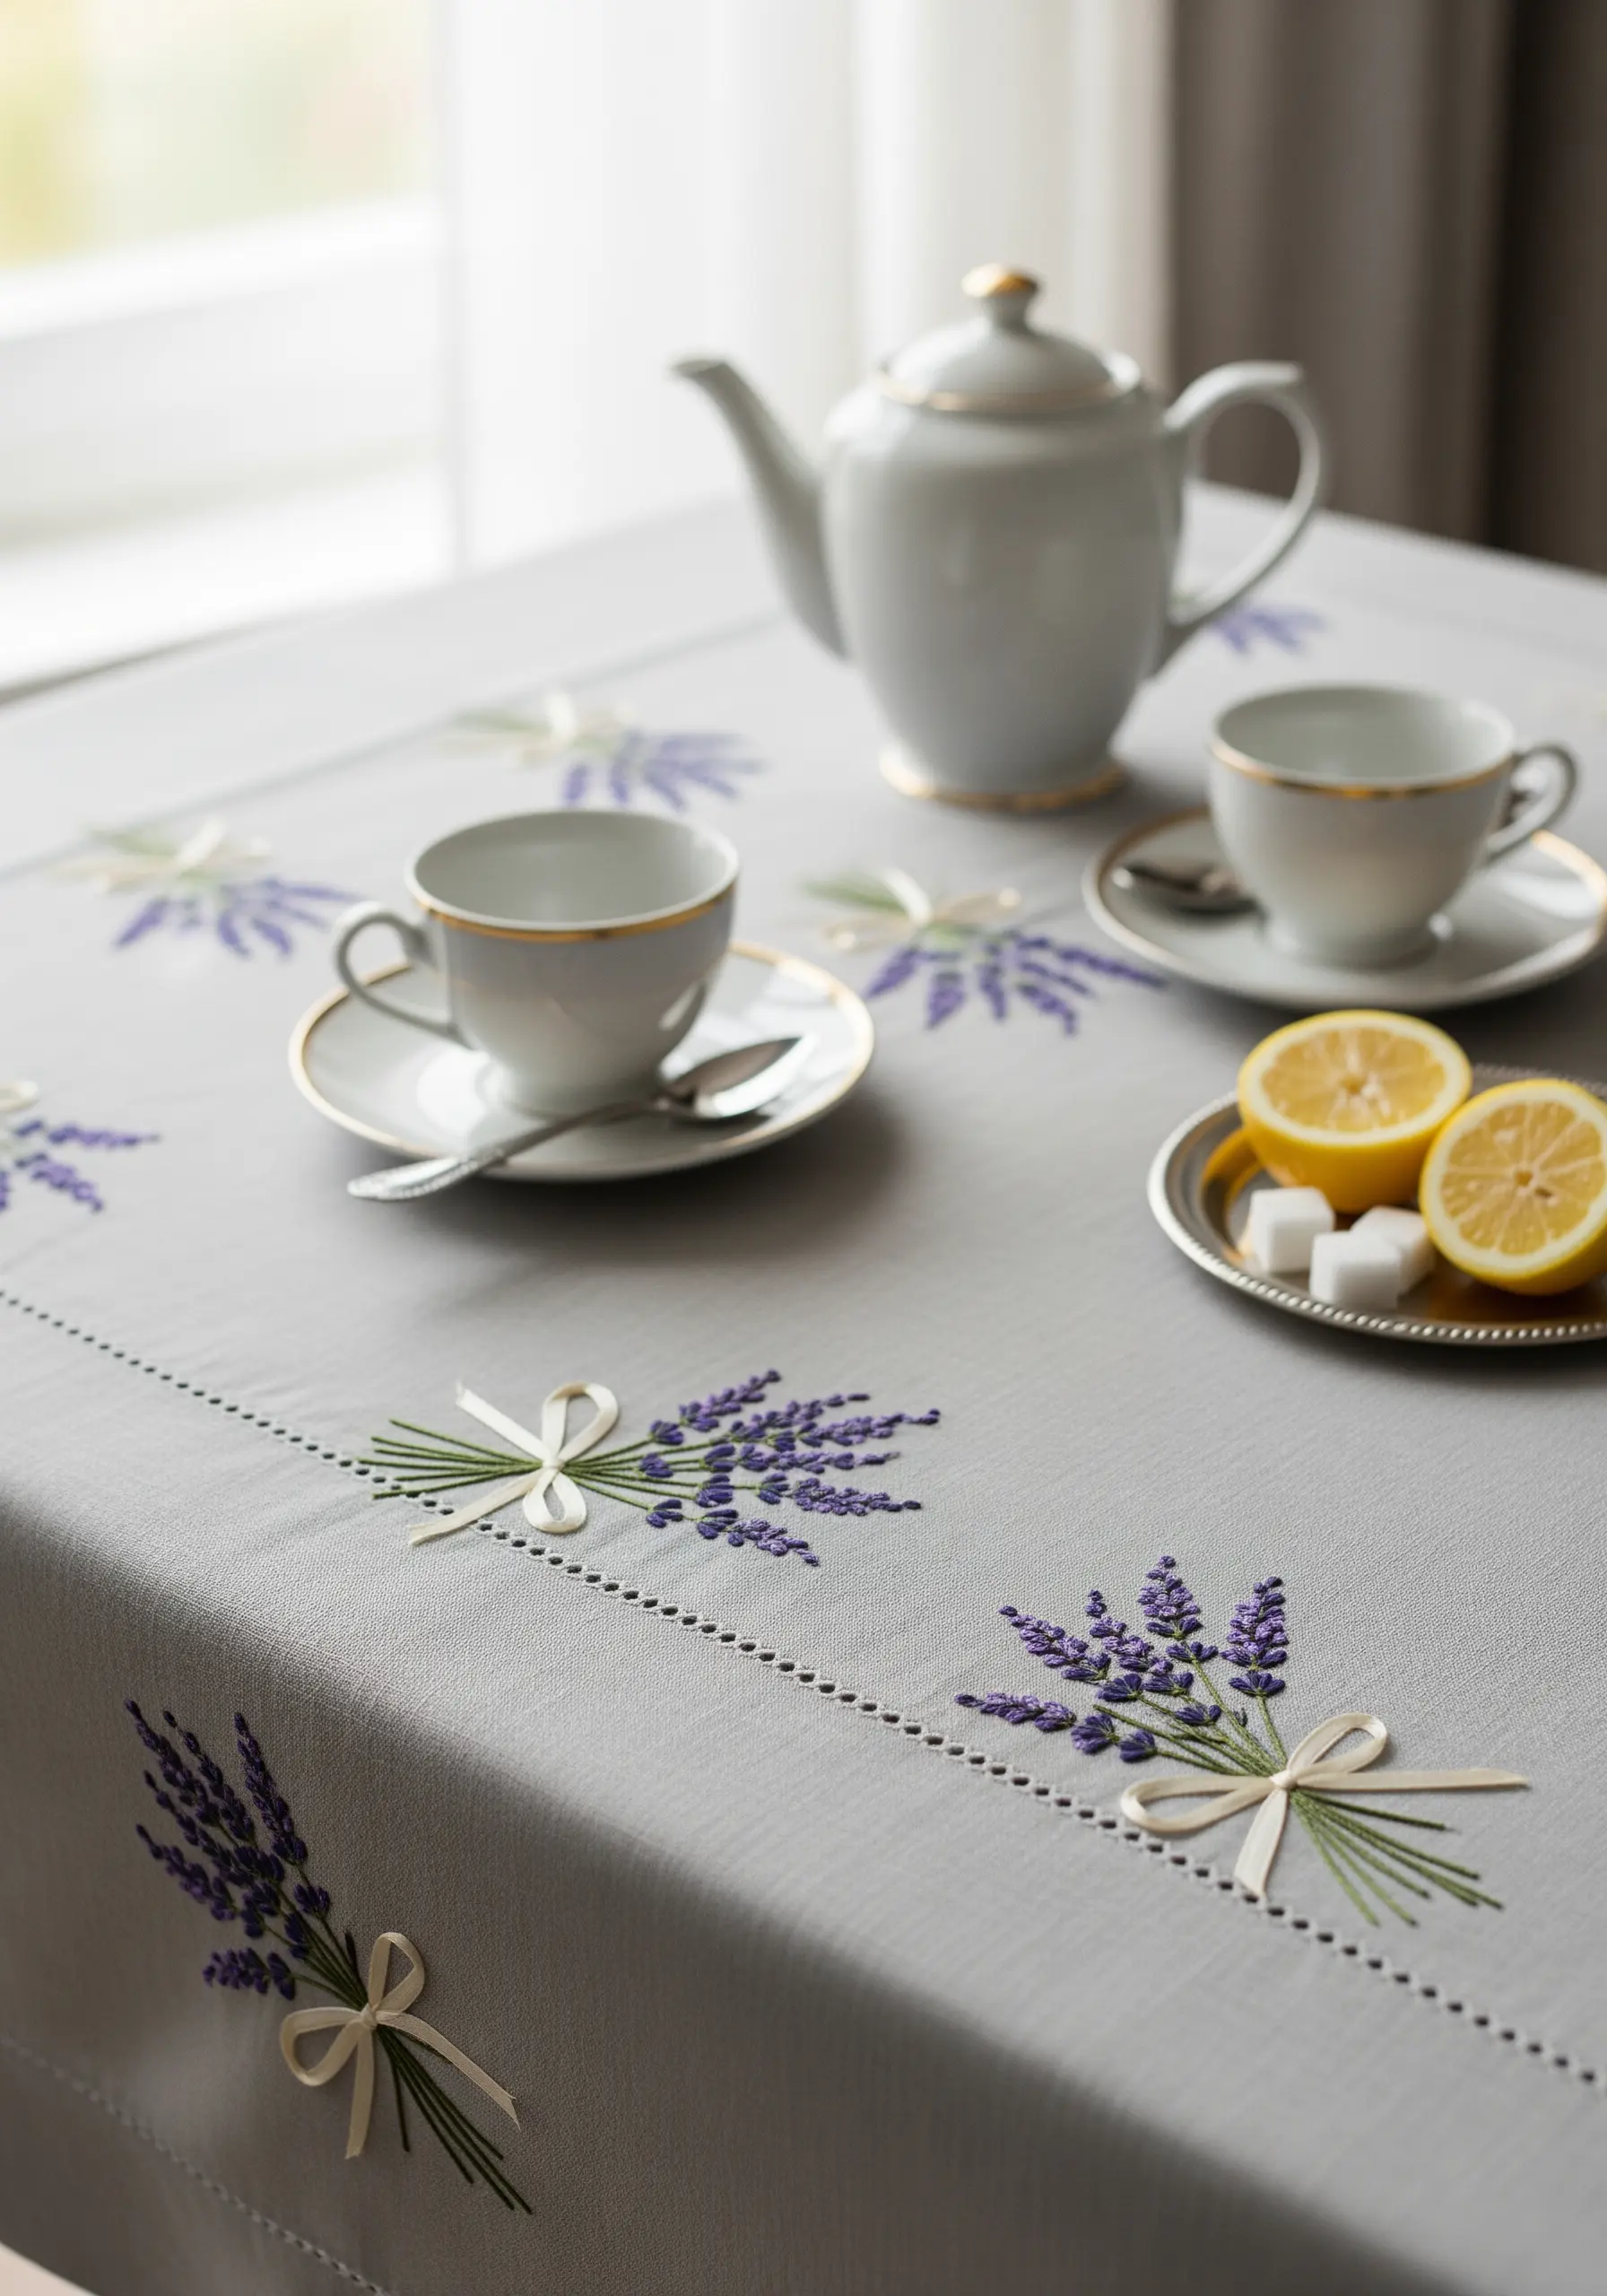
Embellish a tablecloth with small, scattered sprigs of lavender for a design that feels both elegant and effortless. This approach is less formal than a continuous border and adds a touch of rustic charm.
Create the lavender buds using clusters of French knots or short straight stitches, varying the shades of purple for more texture.
For a finishing touch, add a tiny bow tied from a single strand of cream-colored floss at the base of each bouquet. It’s a small detail that elevates the entire piece.
The simplicity of these lavender field embroidery ideas is what makes them so timeless.
12. 3D Gardenias for Sculptural Napkin Rings
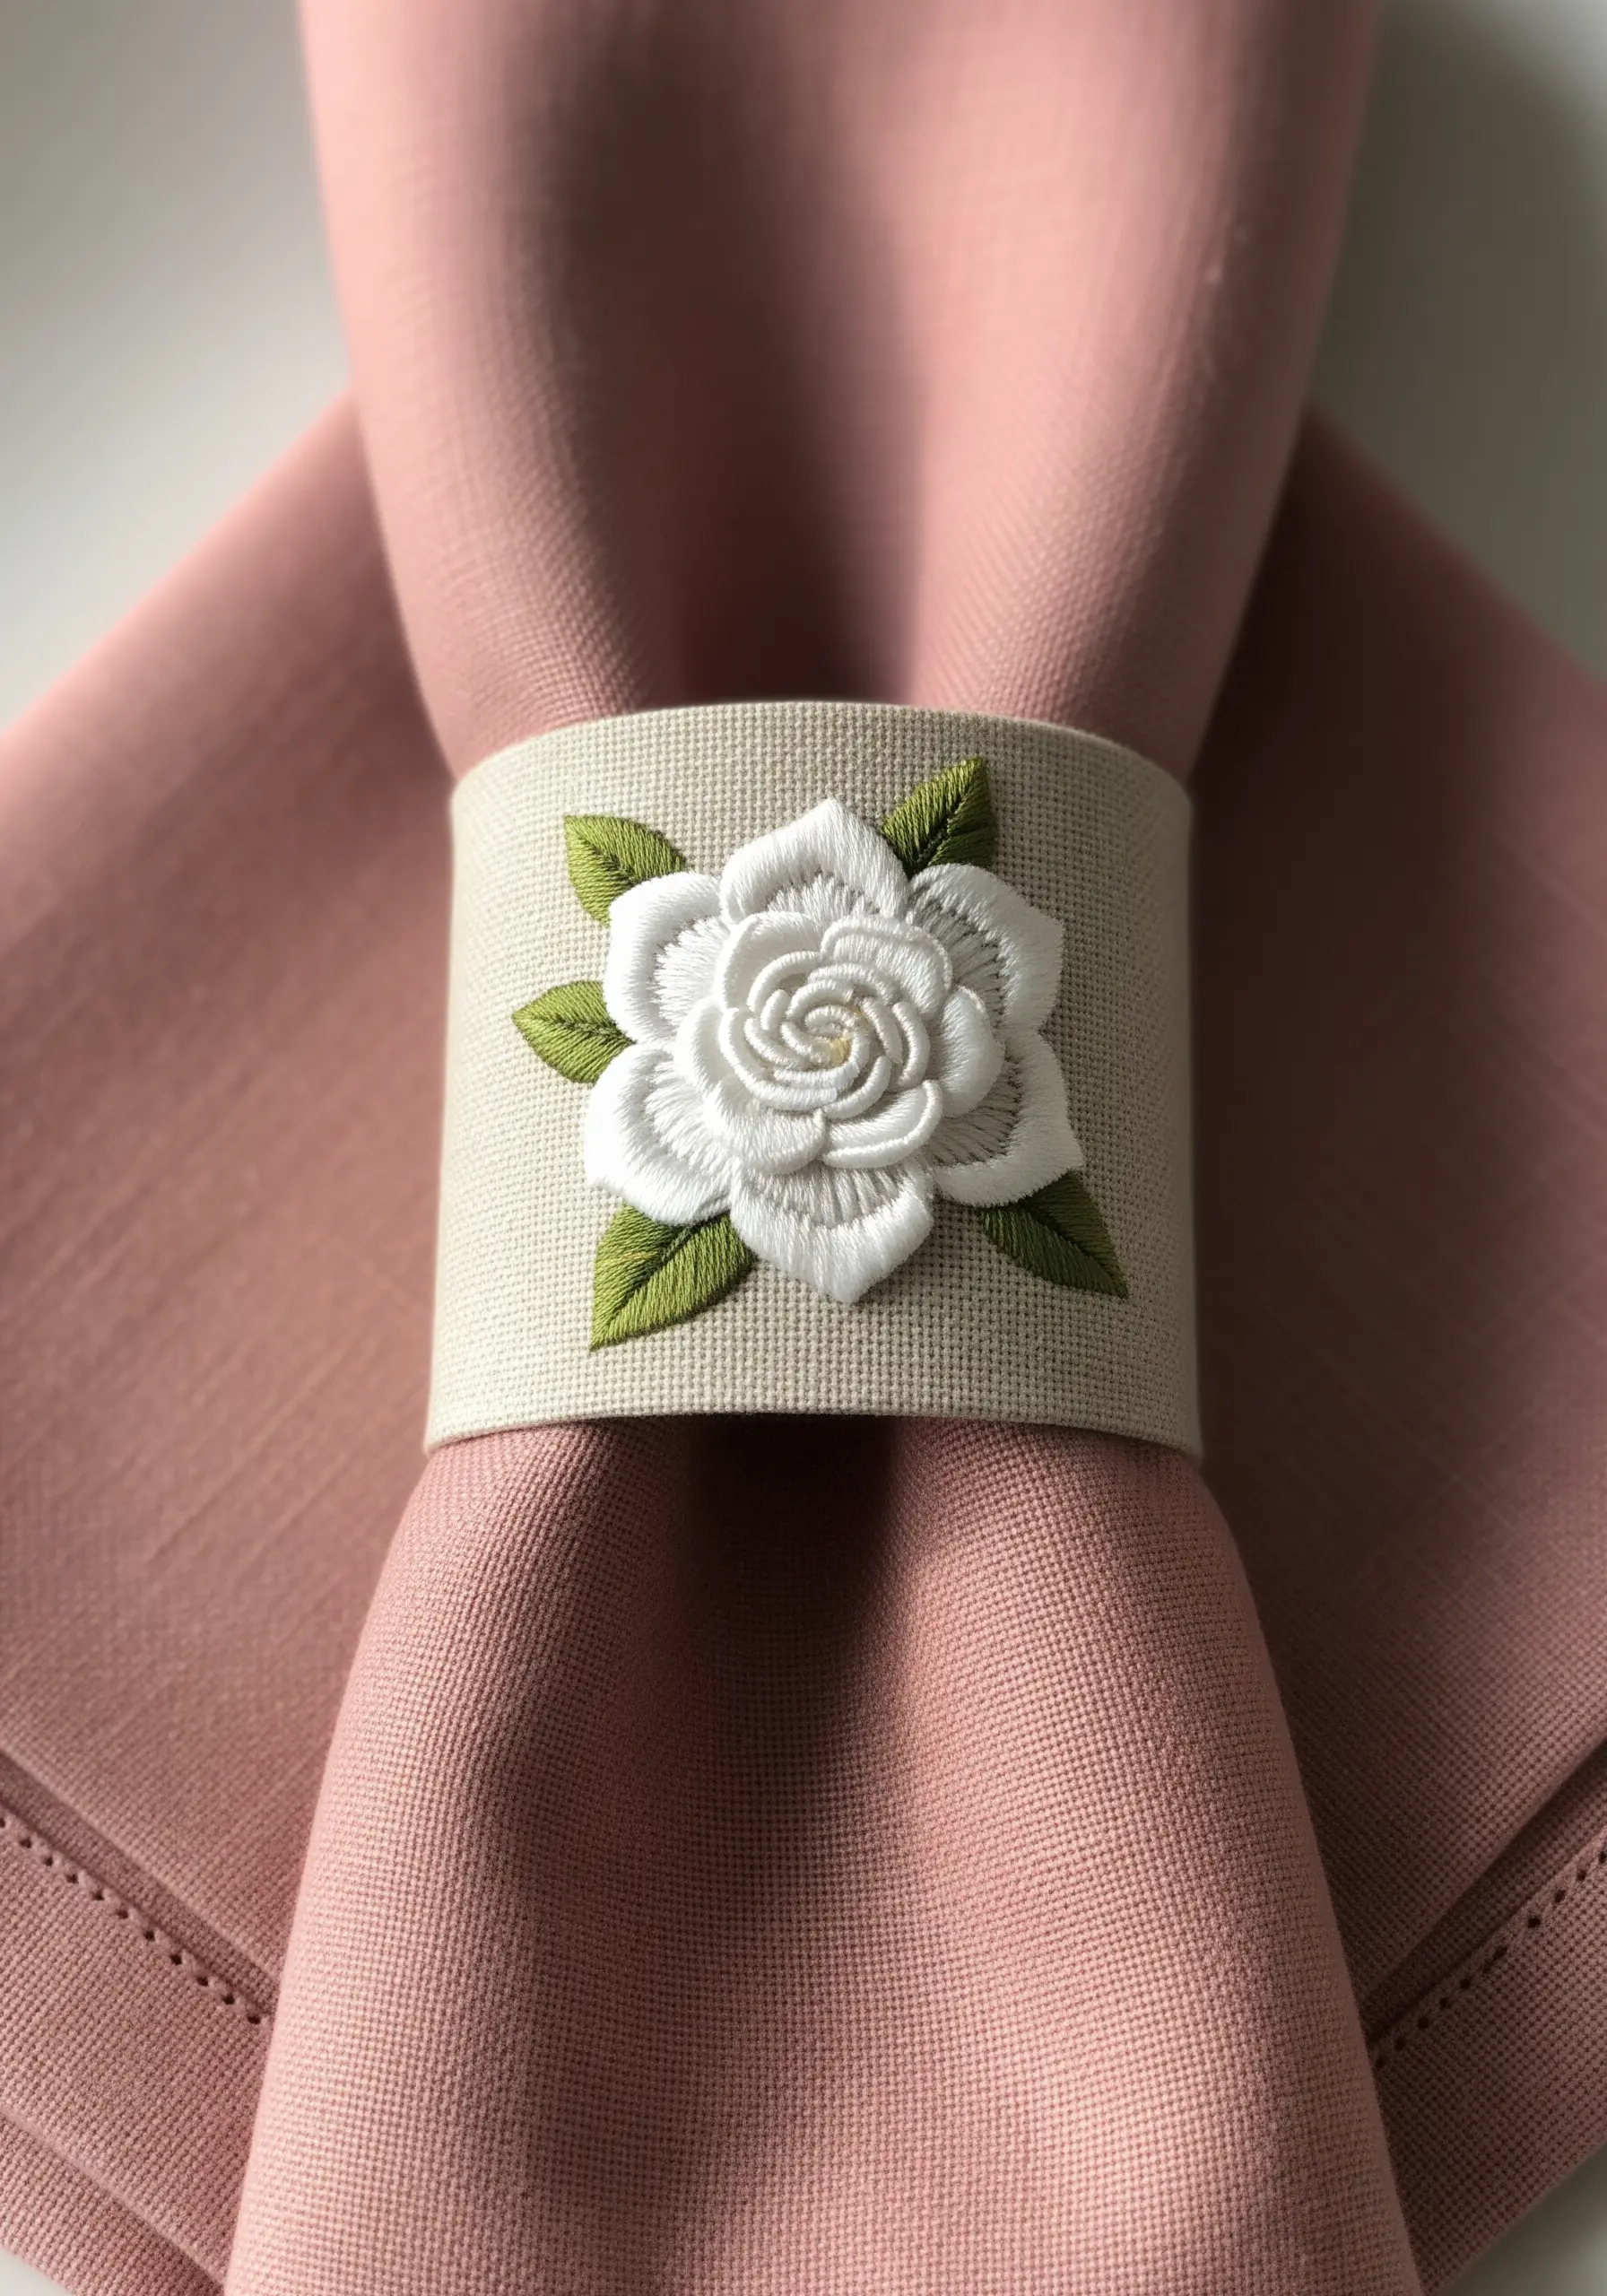
Move your embroidery off the flat surface and into the third dimension by creating a stumpwork gardenia for a napkin ring.
Work each petal individually as a detached element using layered buttonhole stitches over a wire frame. This allows you to shape and curve the petals just like a real flower.
Once all petals are complete, assemble them layer by layer, stitching them securely to the fabric base of the napkin ring. The result is a stunning, touchable piece of floral art.
These statement textured embroidery techniques transform functional items into conversation pieces.
13. Damask-Inspired Embroidery with Muted Palettes

Evoke the richness of woven damask or tapestry by stitching an intricate, symmetrical design using a sophisticated, muted color palette.
Choose four to five complementary colors, such as dusty rose, slate blue, antique gold, and sage green. Using these restrained tones prevents a complex pattern from becoming visually overwhelming.
Vary your fill stitches—using satin stitch for smooth areas, long-and-short stitch for blended sections, and seed stitch for texture—to add depth and interest to the composition.
This creates modern embroidered tapestry designs with a timeless, historical feel.
14. Realistic Butterflies with Needle Painting

To capture the delicate beauty of butterfly wings, use single-strand thread painting to blend colors and create fine details.
Start by creating a simple outline of the wing shape with a split stitch. Then, fill the interior with long-and-short stitches, paying close attention to the direction of your needle to mimic the texture of the wings.
For the fine black veins and edge details, use a single strand of black floss in a precise backstitch. This clean, sharp line work provides the structure that makes the blended colors pop.
You can make embroidery animals that look alive by focusing on these fine details.
15. Geometric Lace and Floral Bands
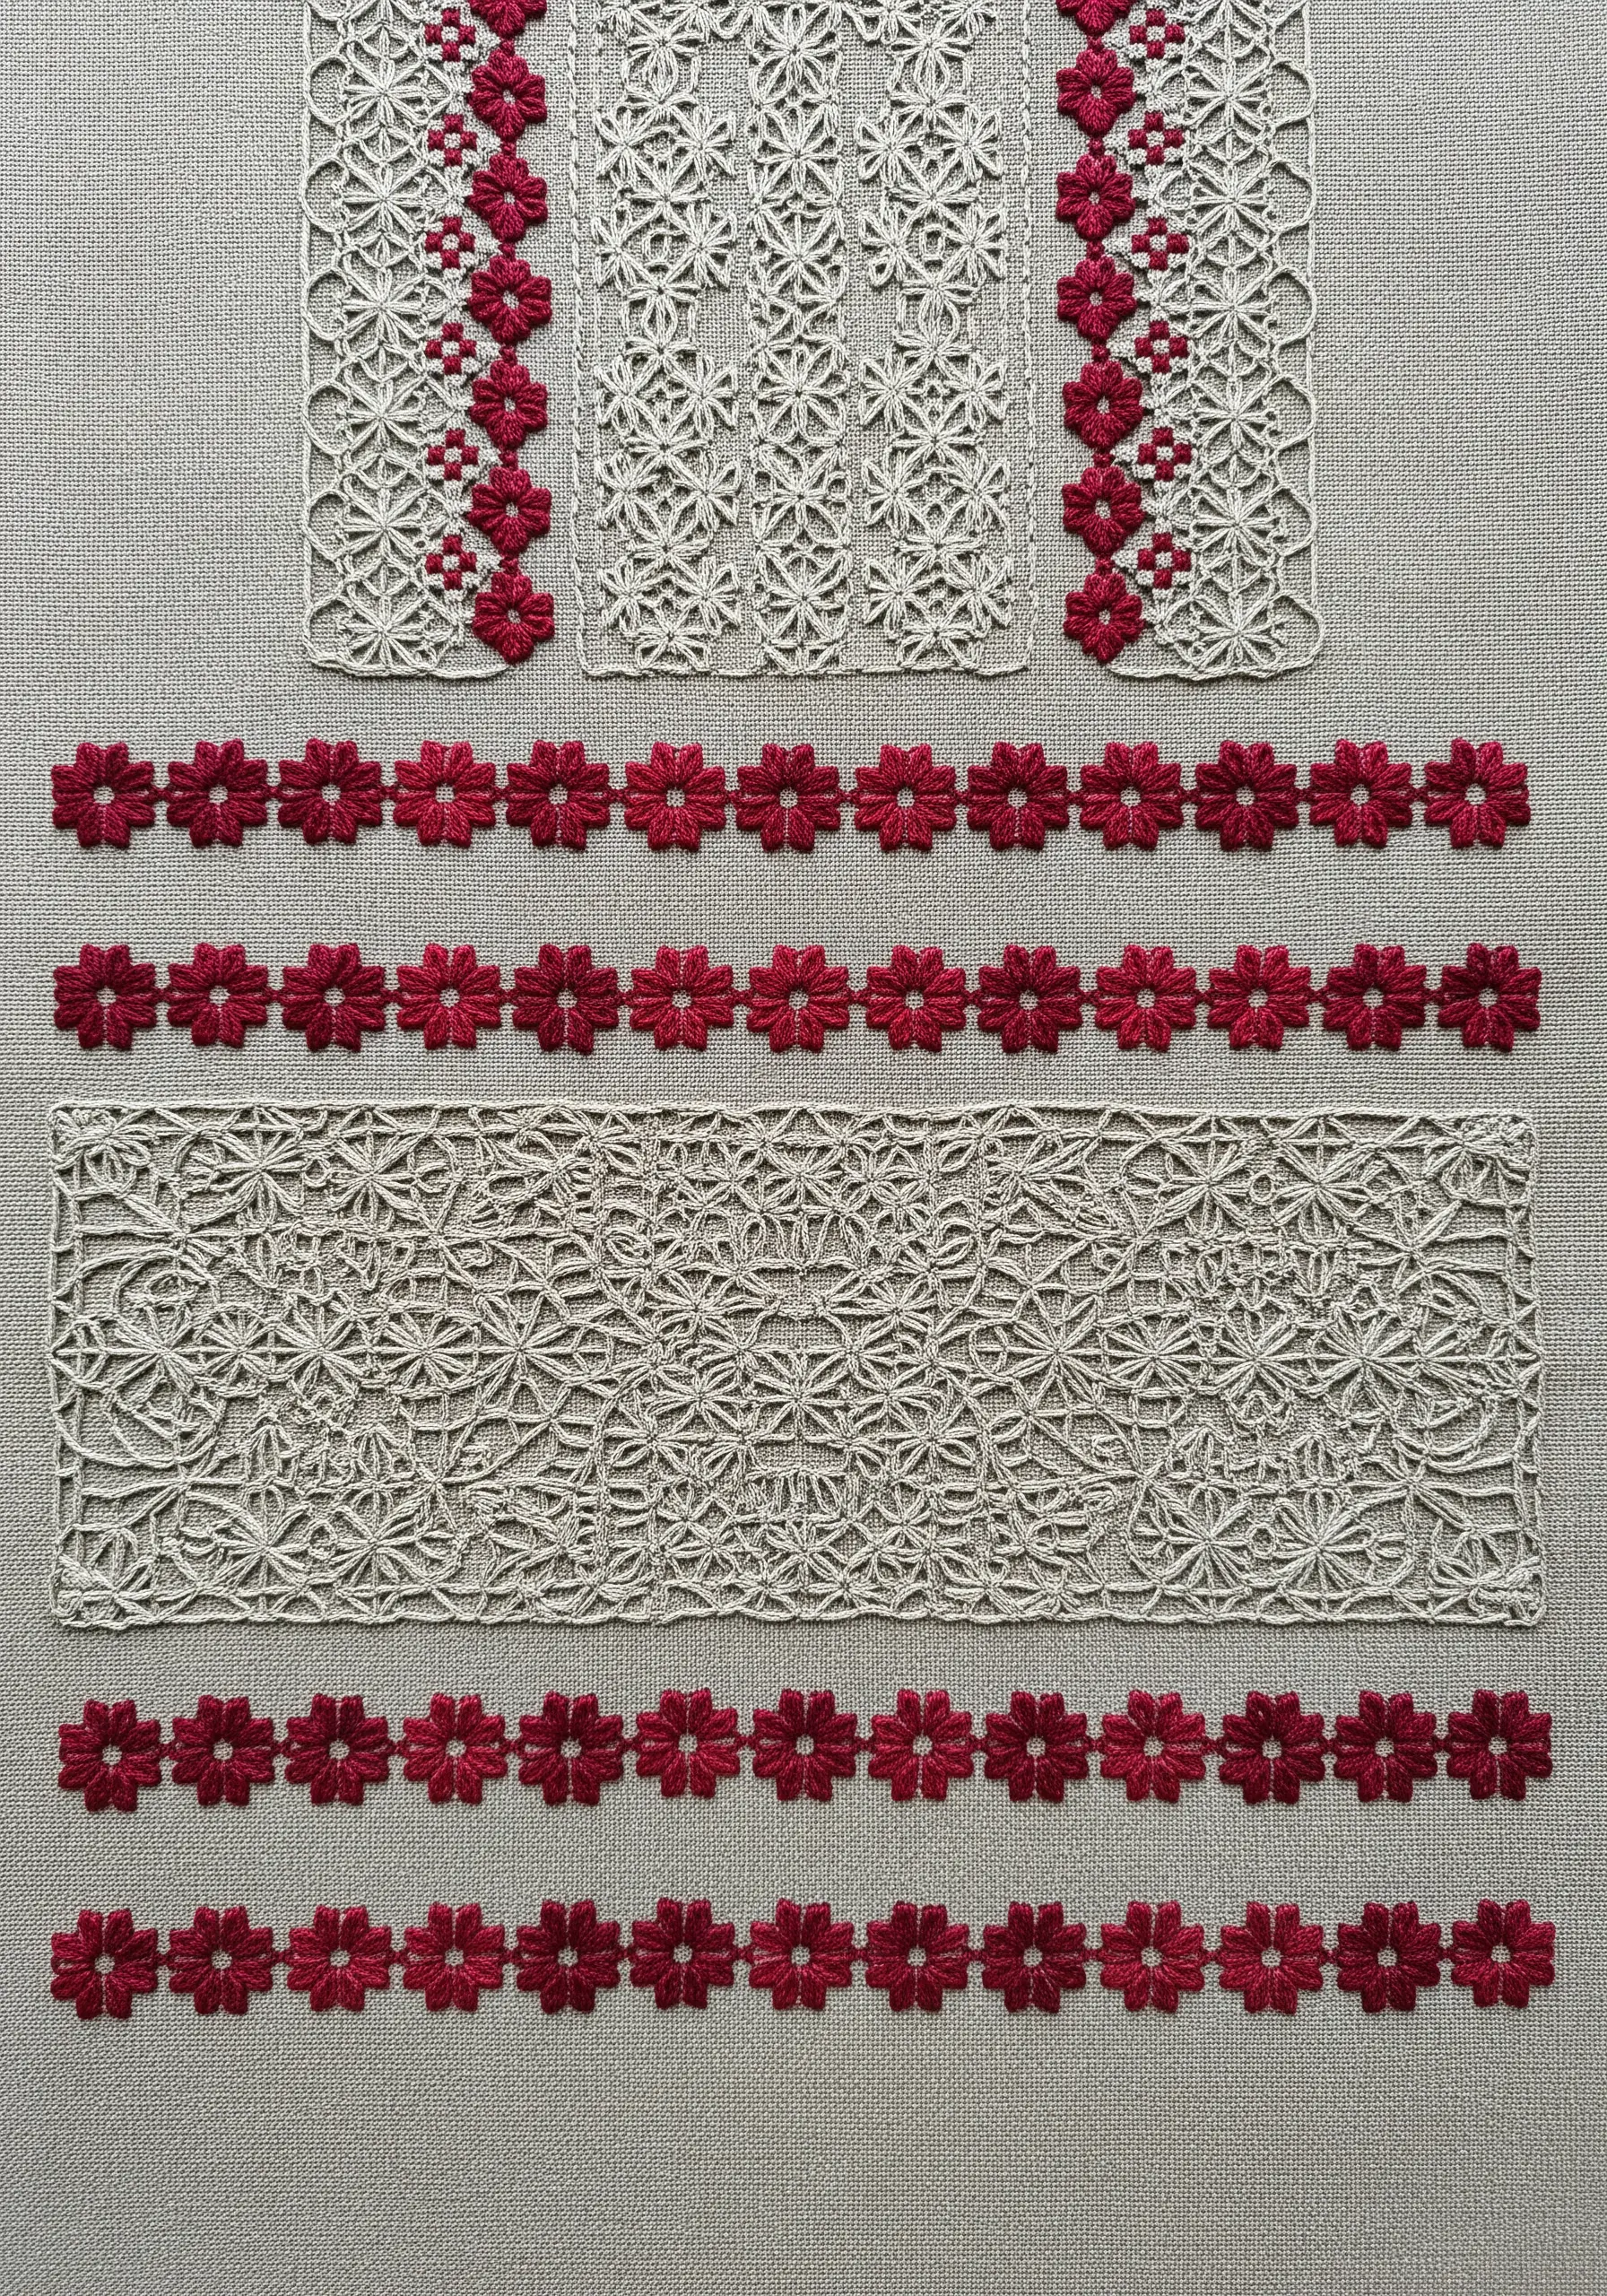
Combine the geometric precision of drawn thread work with the softness of floral motifs for a design rich in contrast and texture.
Create the lace-like panels by carefully withdrawing threads from the linen fabric and then weaving the remaining threads into intricate patterns with your needle.
Juxtapose these airy sections with dense bands of floral embroidery. Stitching small, repeating flowers in a bold color like crimson creates a strong visual anchor against the delicate lacework.
This technique blends structure and softness, much like many ethnic-inspired embroidery designs.
16. Chinoiserie Scenes with Two-Tone Simplicity
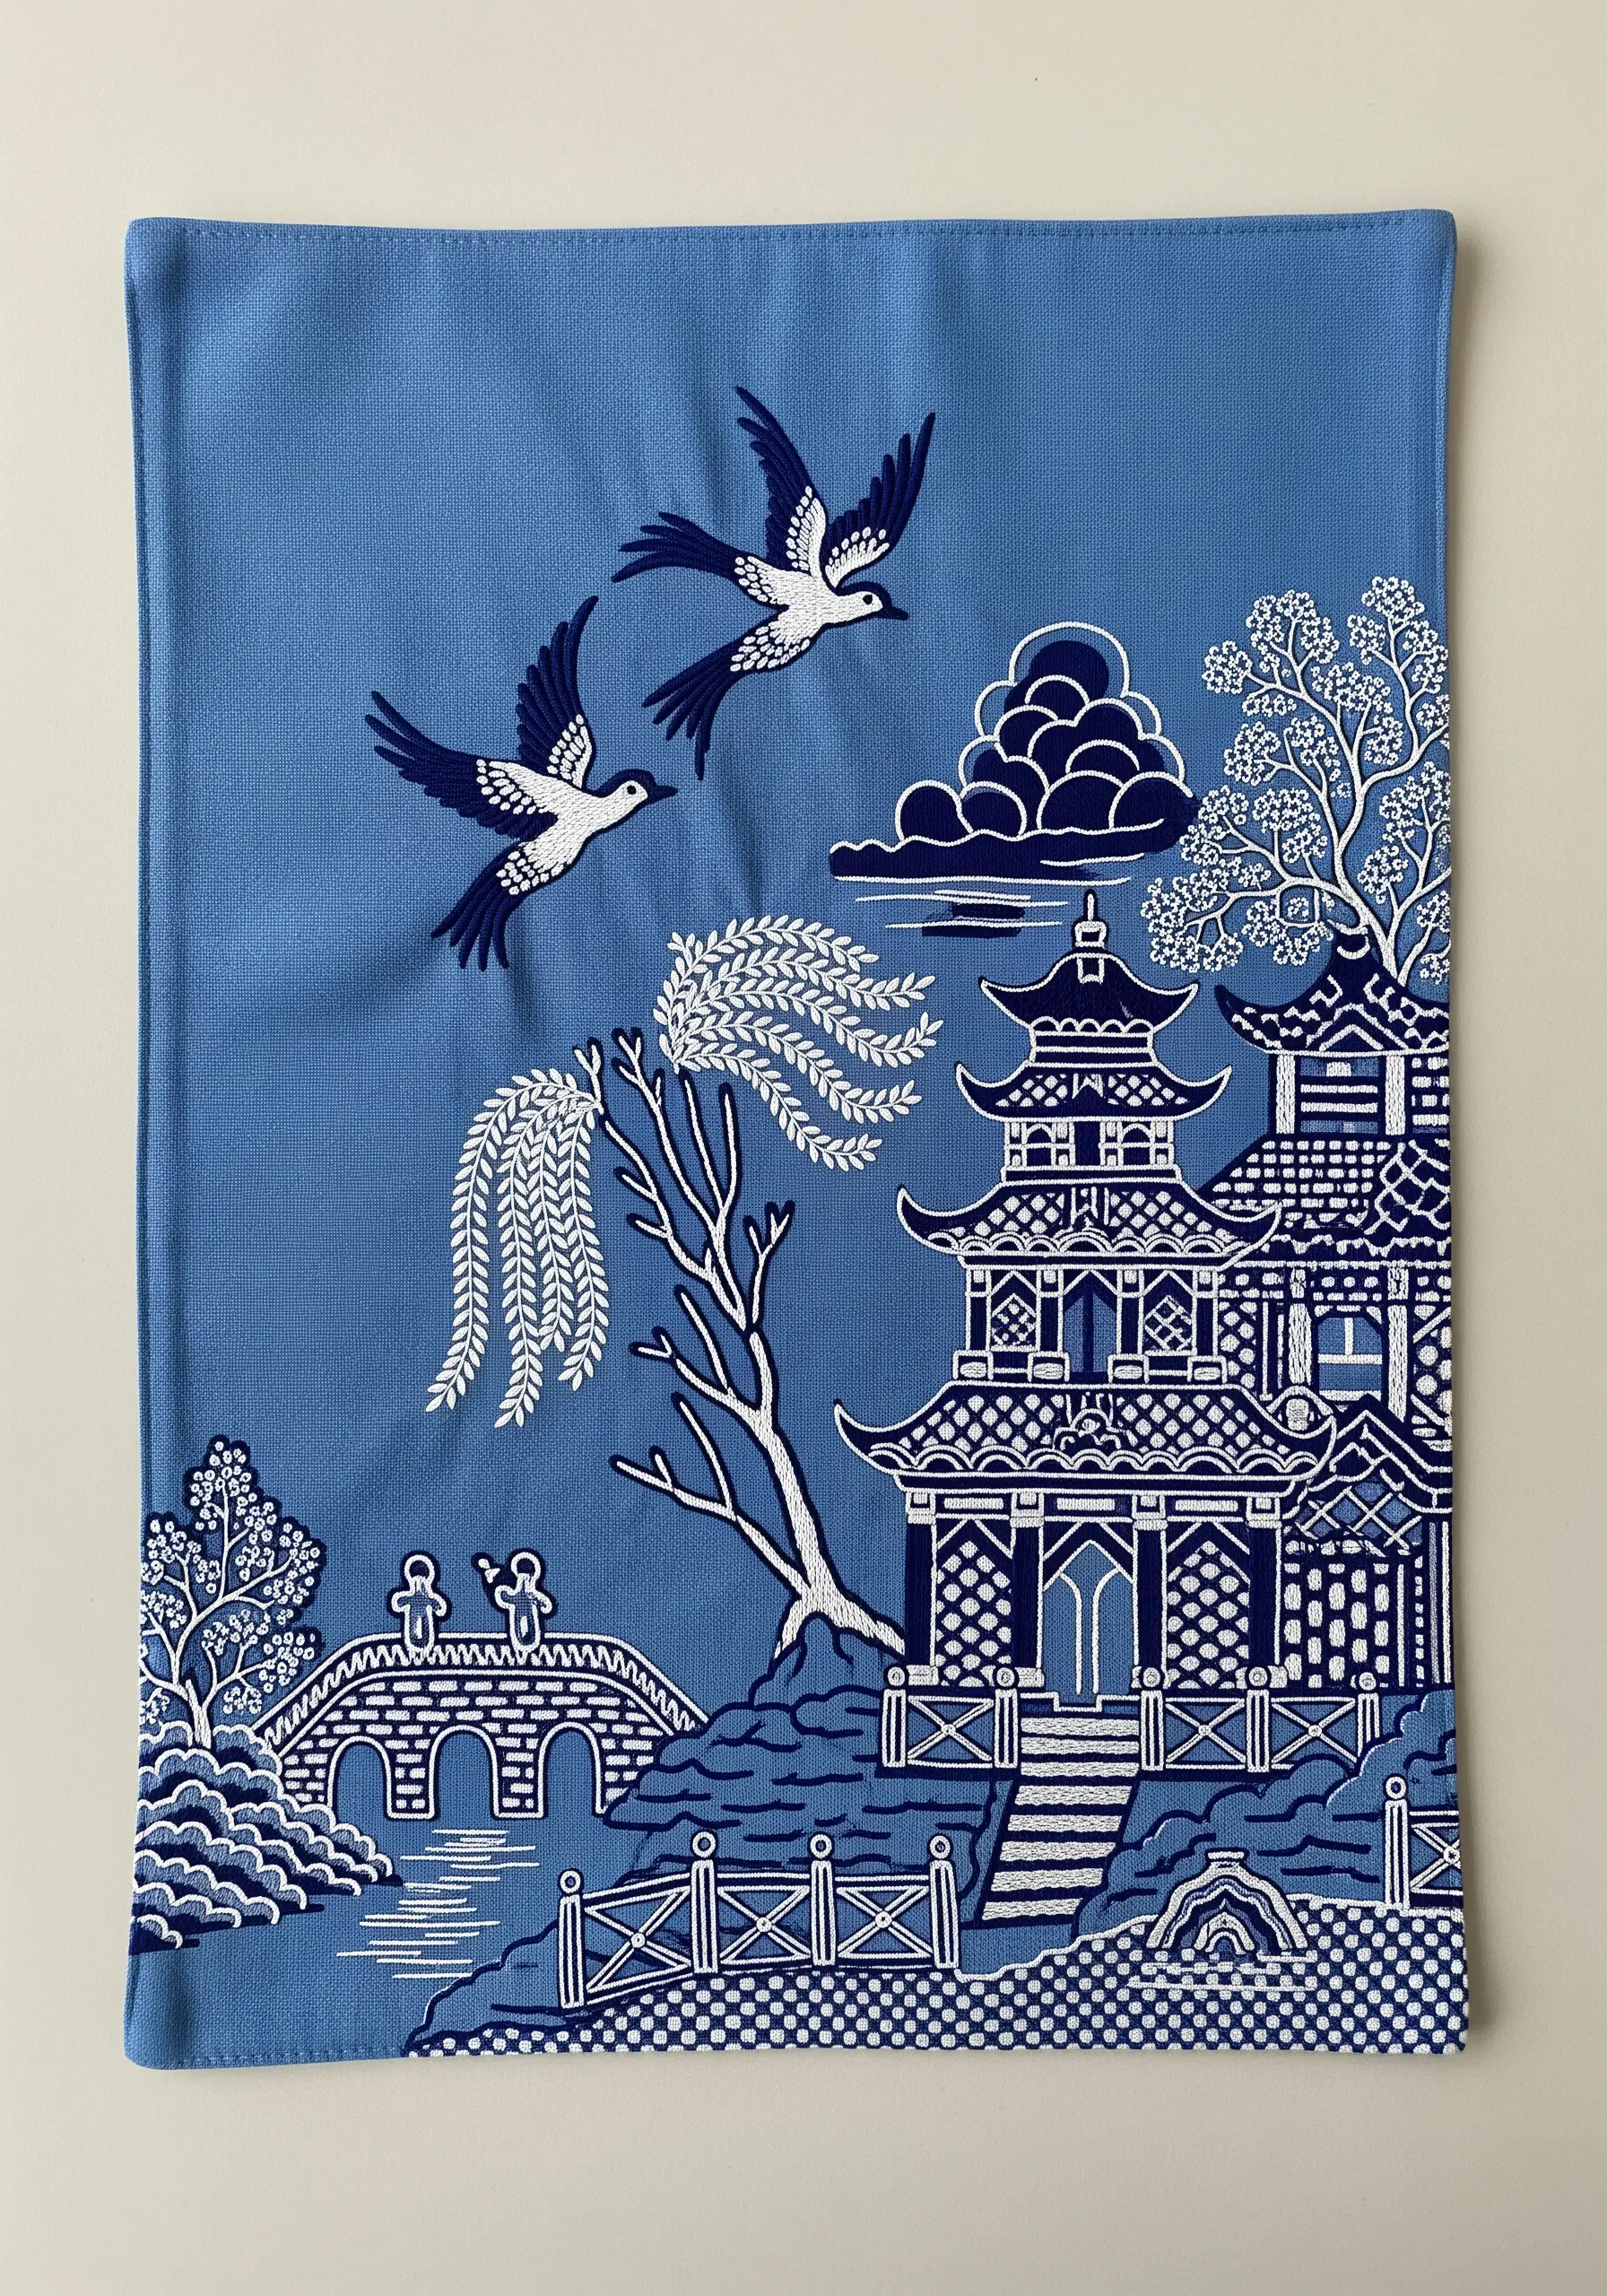
Create a classic Chinoiserie-style narrative scene using only two colors: a rich blue and a crisp white. The limited palette forces you to focus on composition, line, and texture.
Use negative space as a key design element, allowing the unstitched white areas to define shapes and create balance. For example, stitch the outlines of clouds but leave the centers empty.
Vary the stitch density to create a sense of depth. Use dense satin stitch for foreground elements like the pagoda roof and looser, more open stitches like seed stitch for background textures.
This approach proves that minimal embroidery patterns can tell a rich story.
17. Capturing Feather Detail with Layered Stitches

To embroider a realistic bird like a pheasant, you must build the feathers in layers, just as they grow in nature.
Begin with a base layer of long-and-short stitches in the main colors. Then, work on top of this foundation with shorter, finer stitches in accent colors to define the individual feather barbs and tips.
Use a single strand of floss for the finest details, like the iridescent sheen on the head and the delicate patterns on the tail feathers. It’s this meticulous layering that creates photorealistic depth.
The same principles can be used to create realistic wolf embroidery motifs, focusing on fur direction.
18. The Understated Elegance of a Tiny Monogram
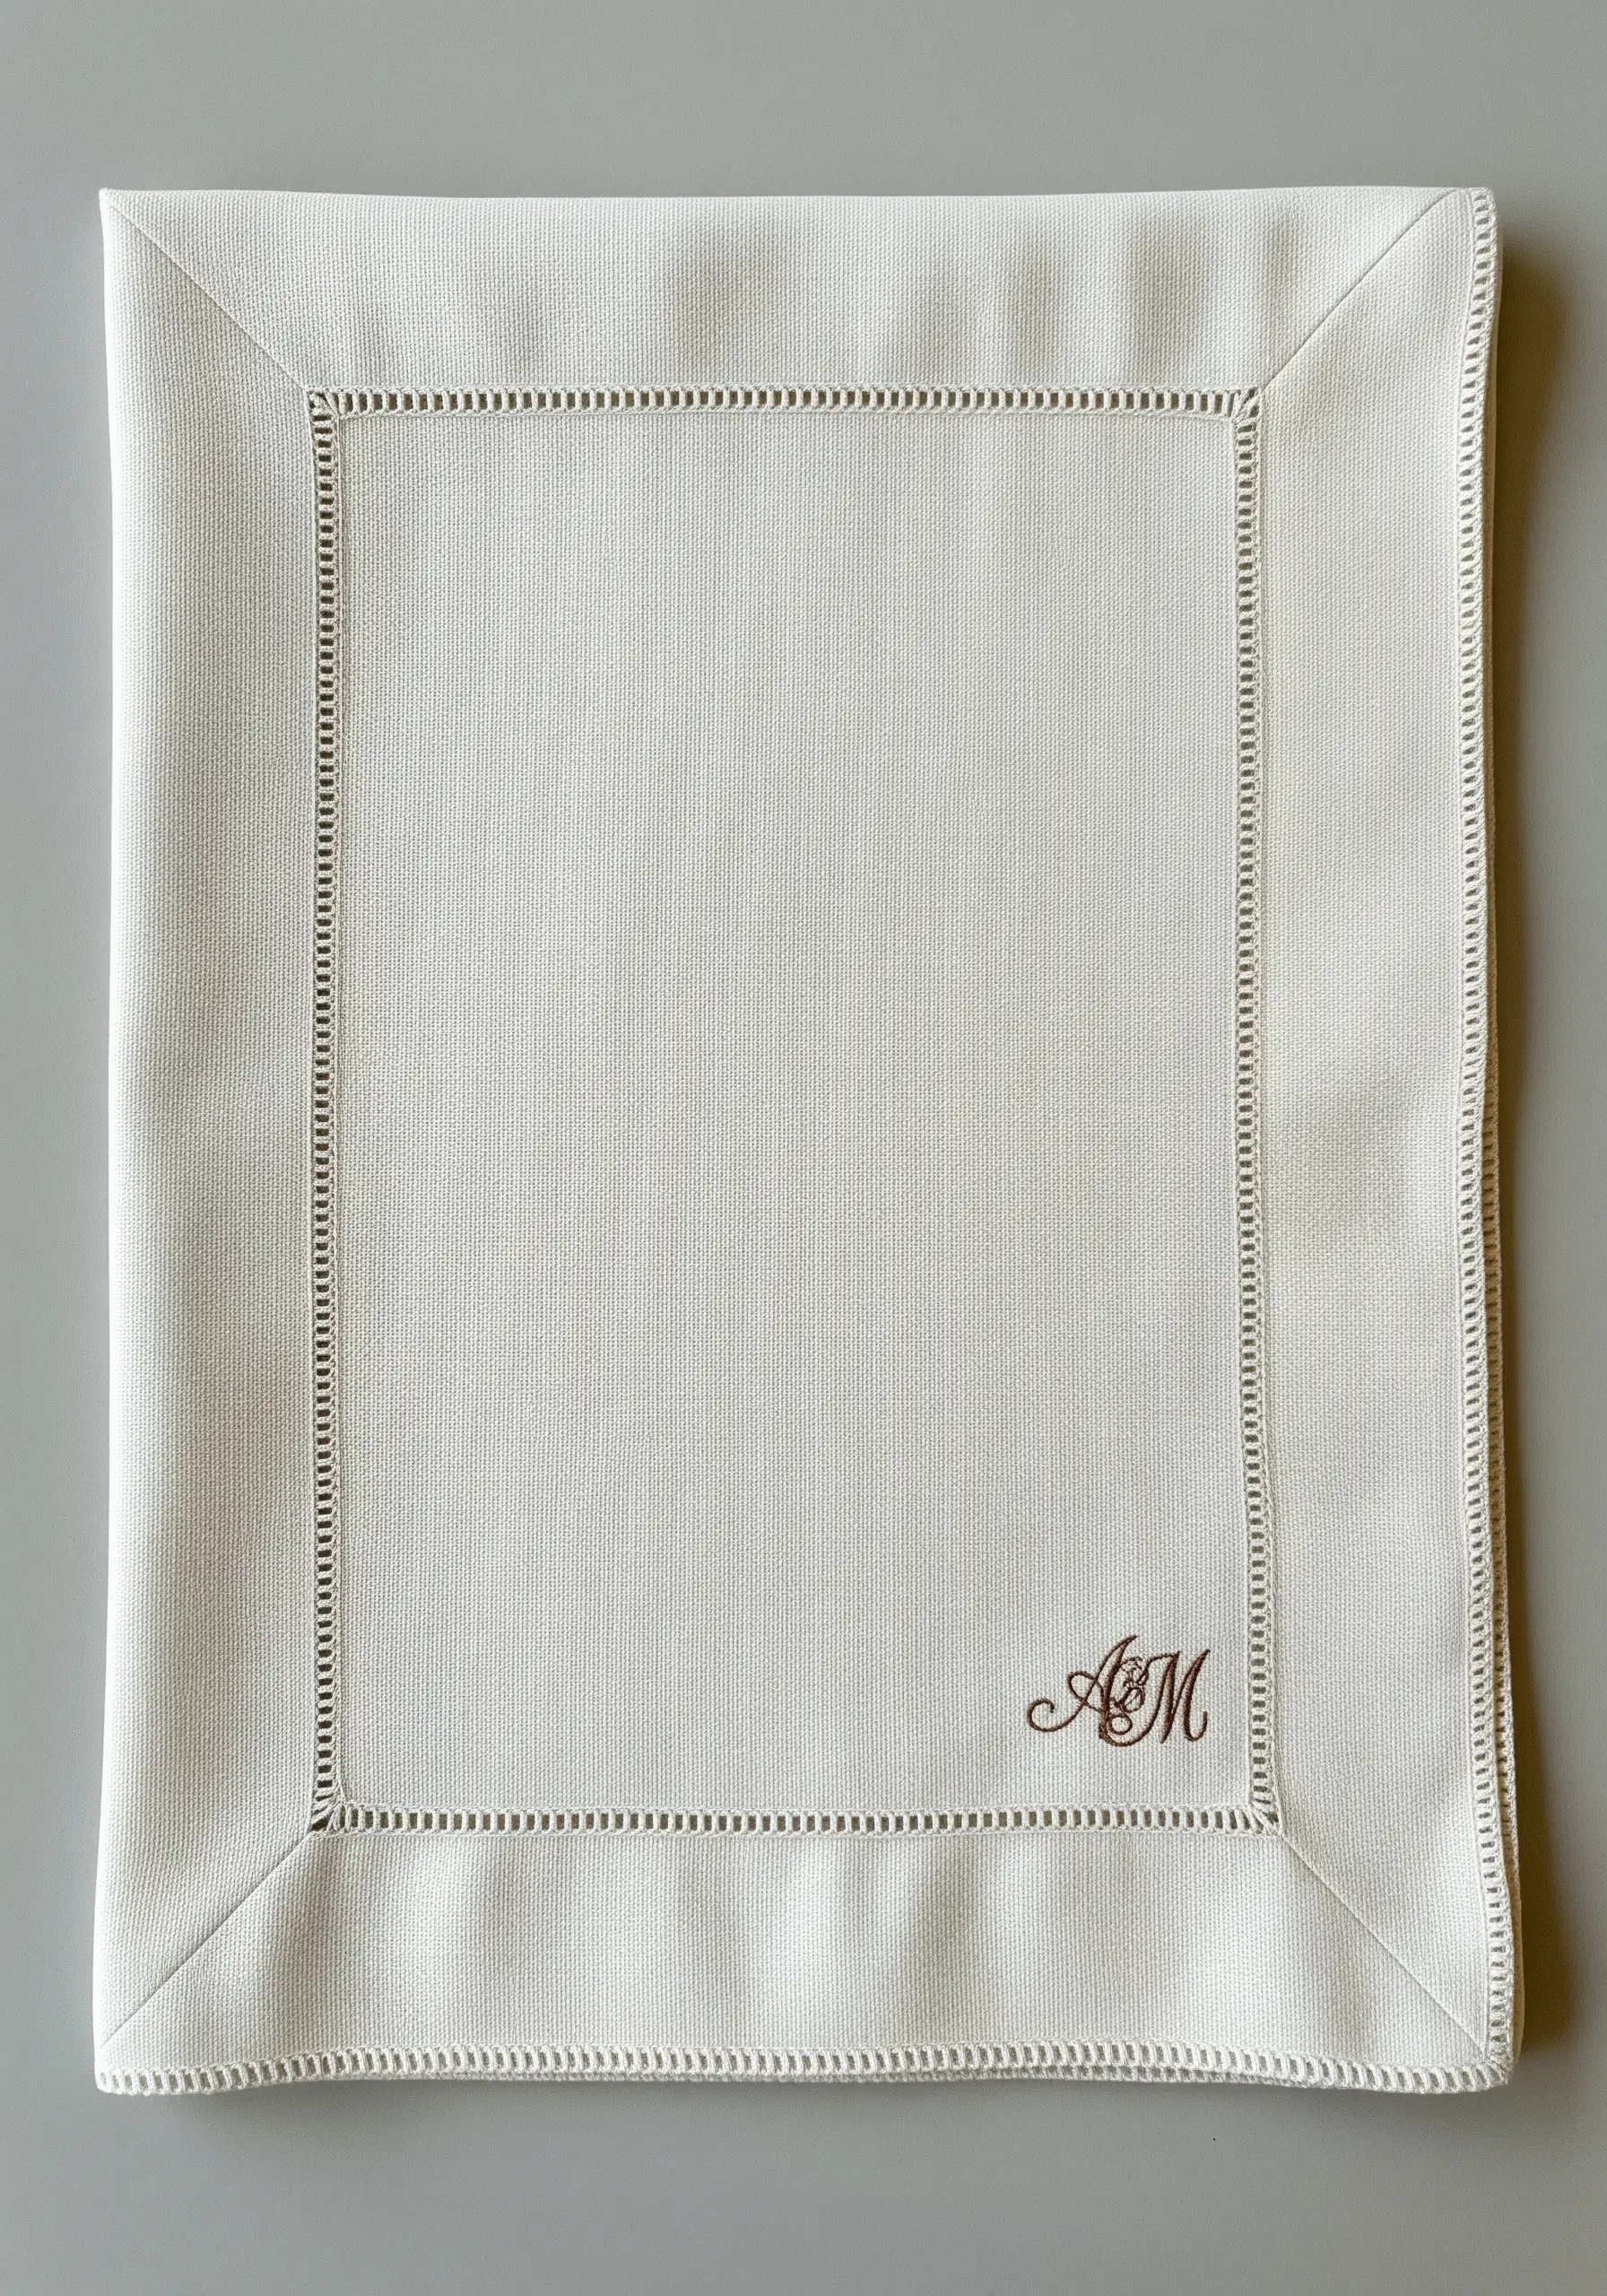
Embrace minimalism by placing a very small, delicately stitched monogram in the corner of a placemat or napkin. Its power lies in its subtlety.
Choose a thread color that is just a few shades darker than the linen fabric. This tone-on-tone approach creates a quiet, luxurious finish that feels personal and refined.
The key to success with such a small design is perfect stitch tension and precision. A tiny, flawlessly executed script monogram makes a much stronger statement than a larger, less perfect one.
These minimal typography embroidery patterns embody quiet confidence.
19. Playful Appliqué with Embroidered Details
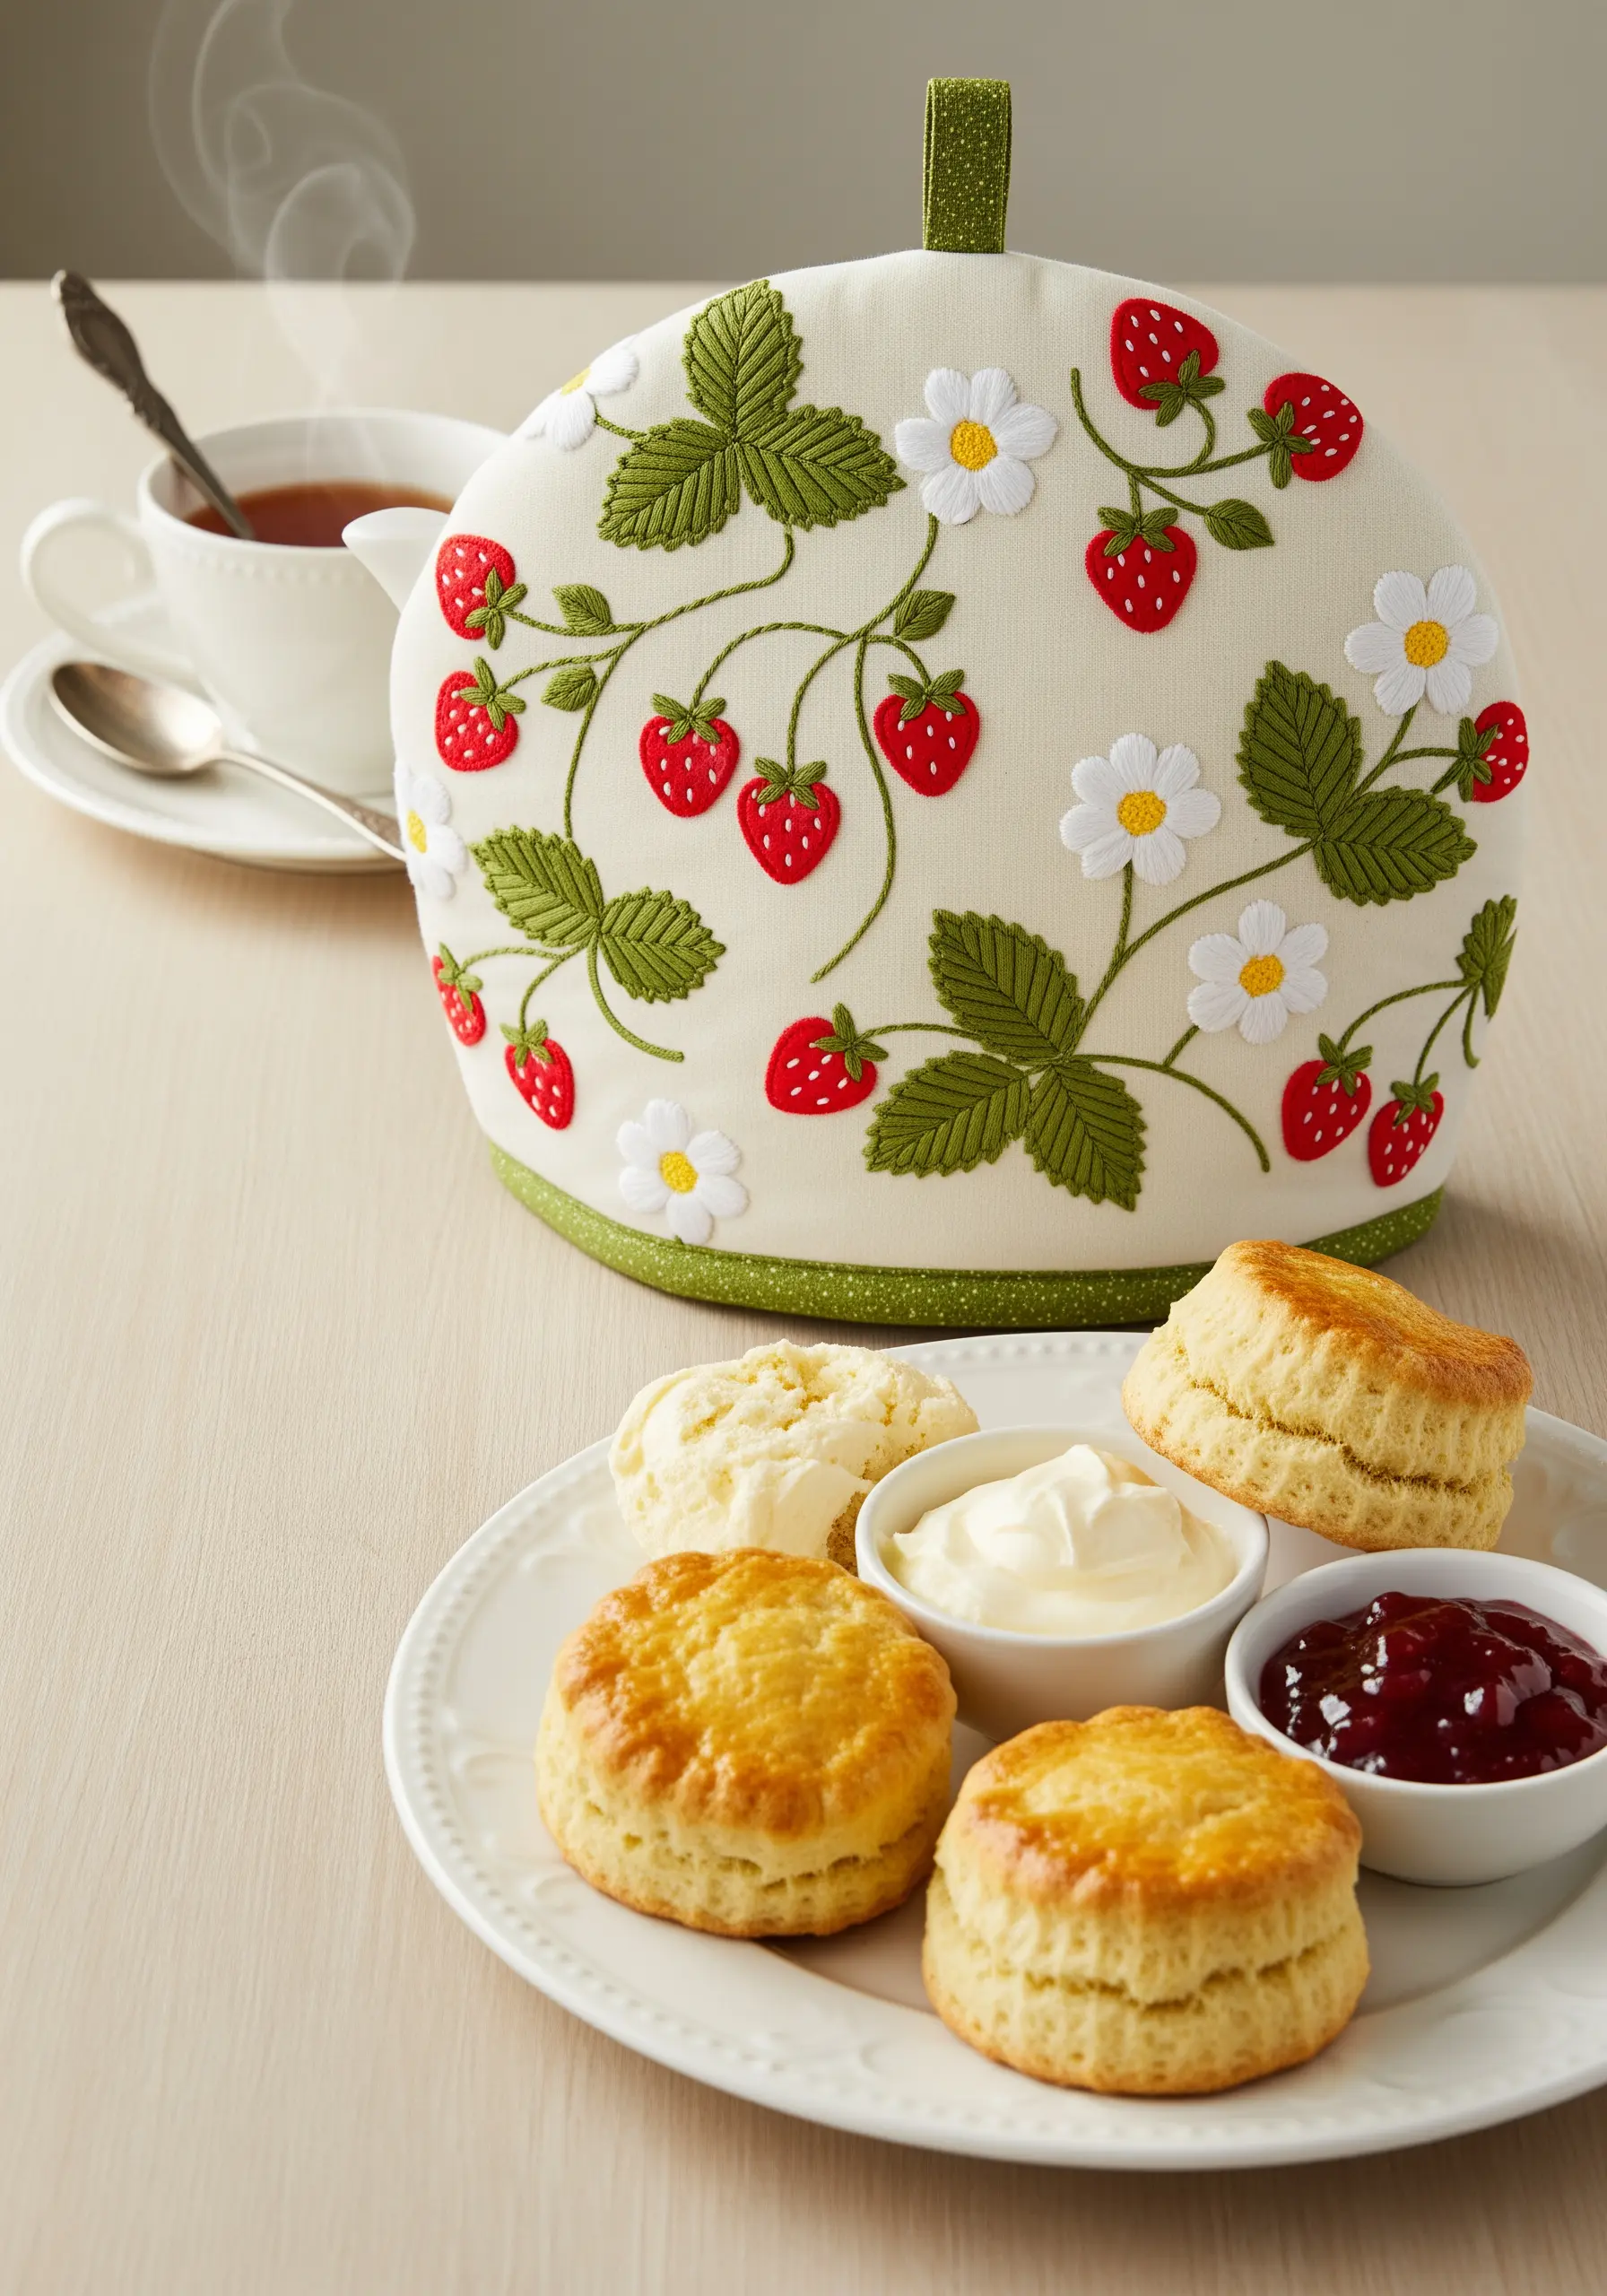
Combine appliqué and embroidery for a charming, textural design like this strawberry-covered tea cozy. This technique allows you to create bold shapes quickly and then add fine details.
Cut the main leaf and strawberry shapes from felt or cotton fabric and secure them to the base fabric with a neat blanket stitch around the edges.
Then, add the embroidered details directly on top: tiny yellow French knots for seeds, white detached chain stitches for blossoms, and green stem stitch for the delicate vines connecting everything.
This combination helps even beginners achieve beautiful blending and texture in their meadow bloom stitch projects.
20. Creating Translucent Wings for Insects
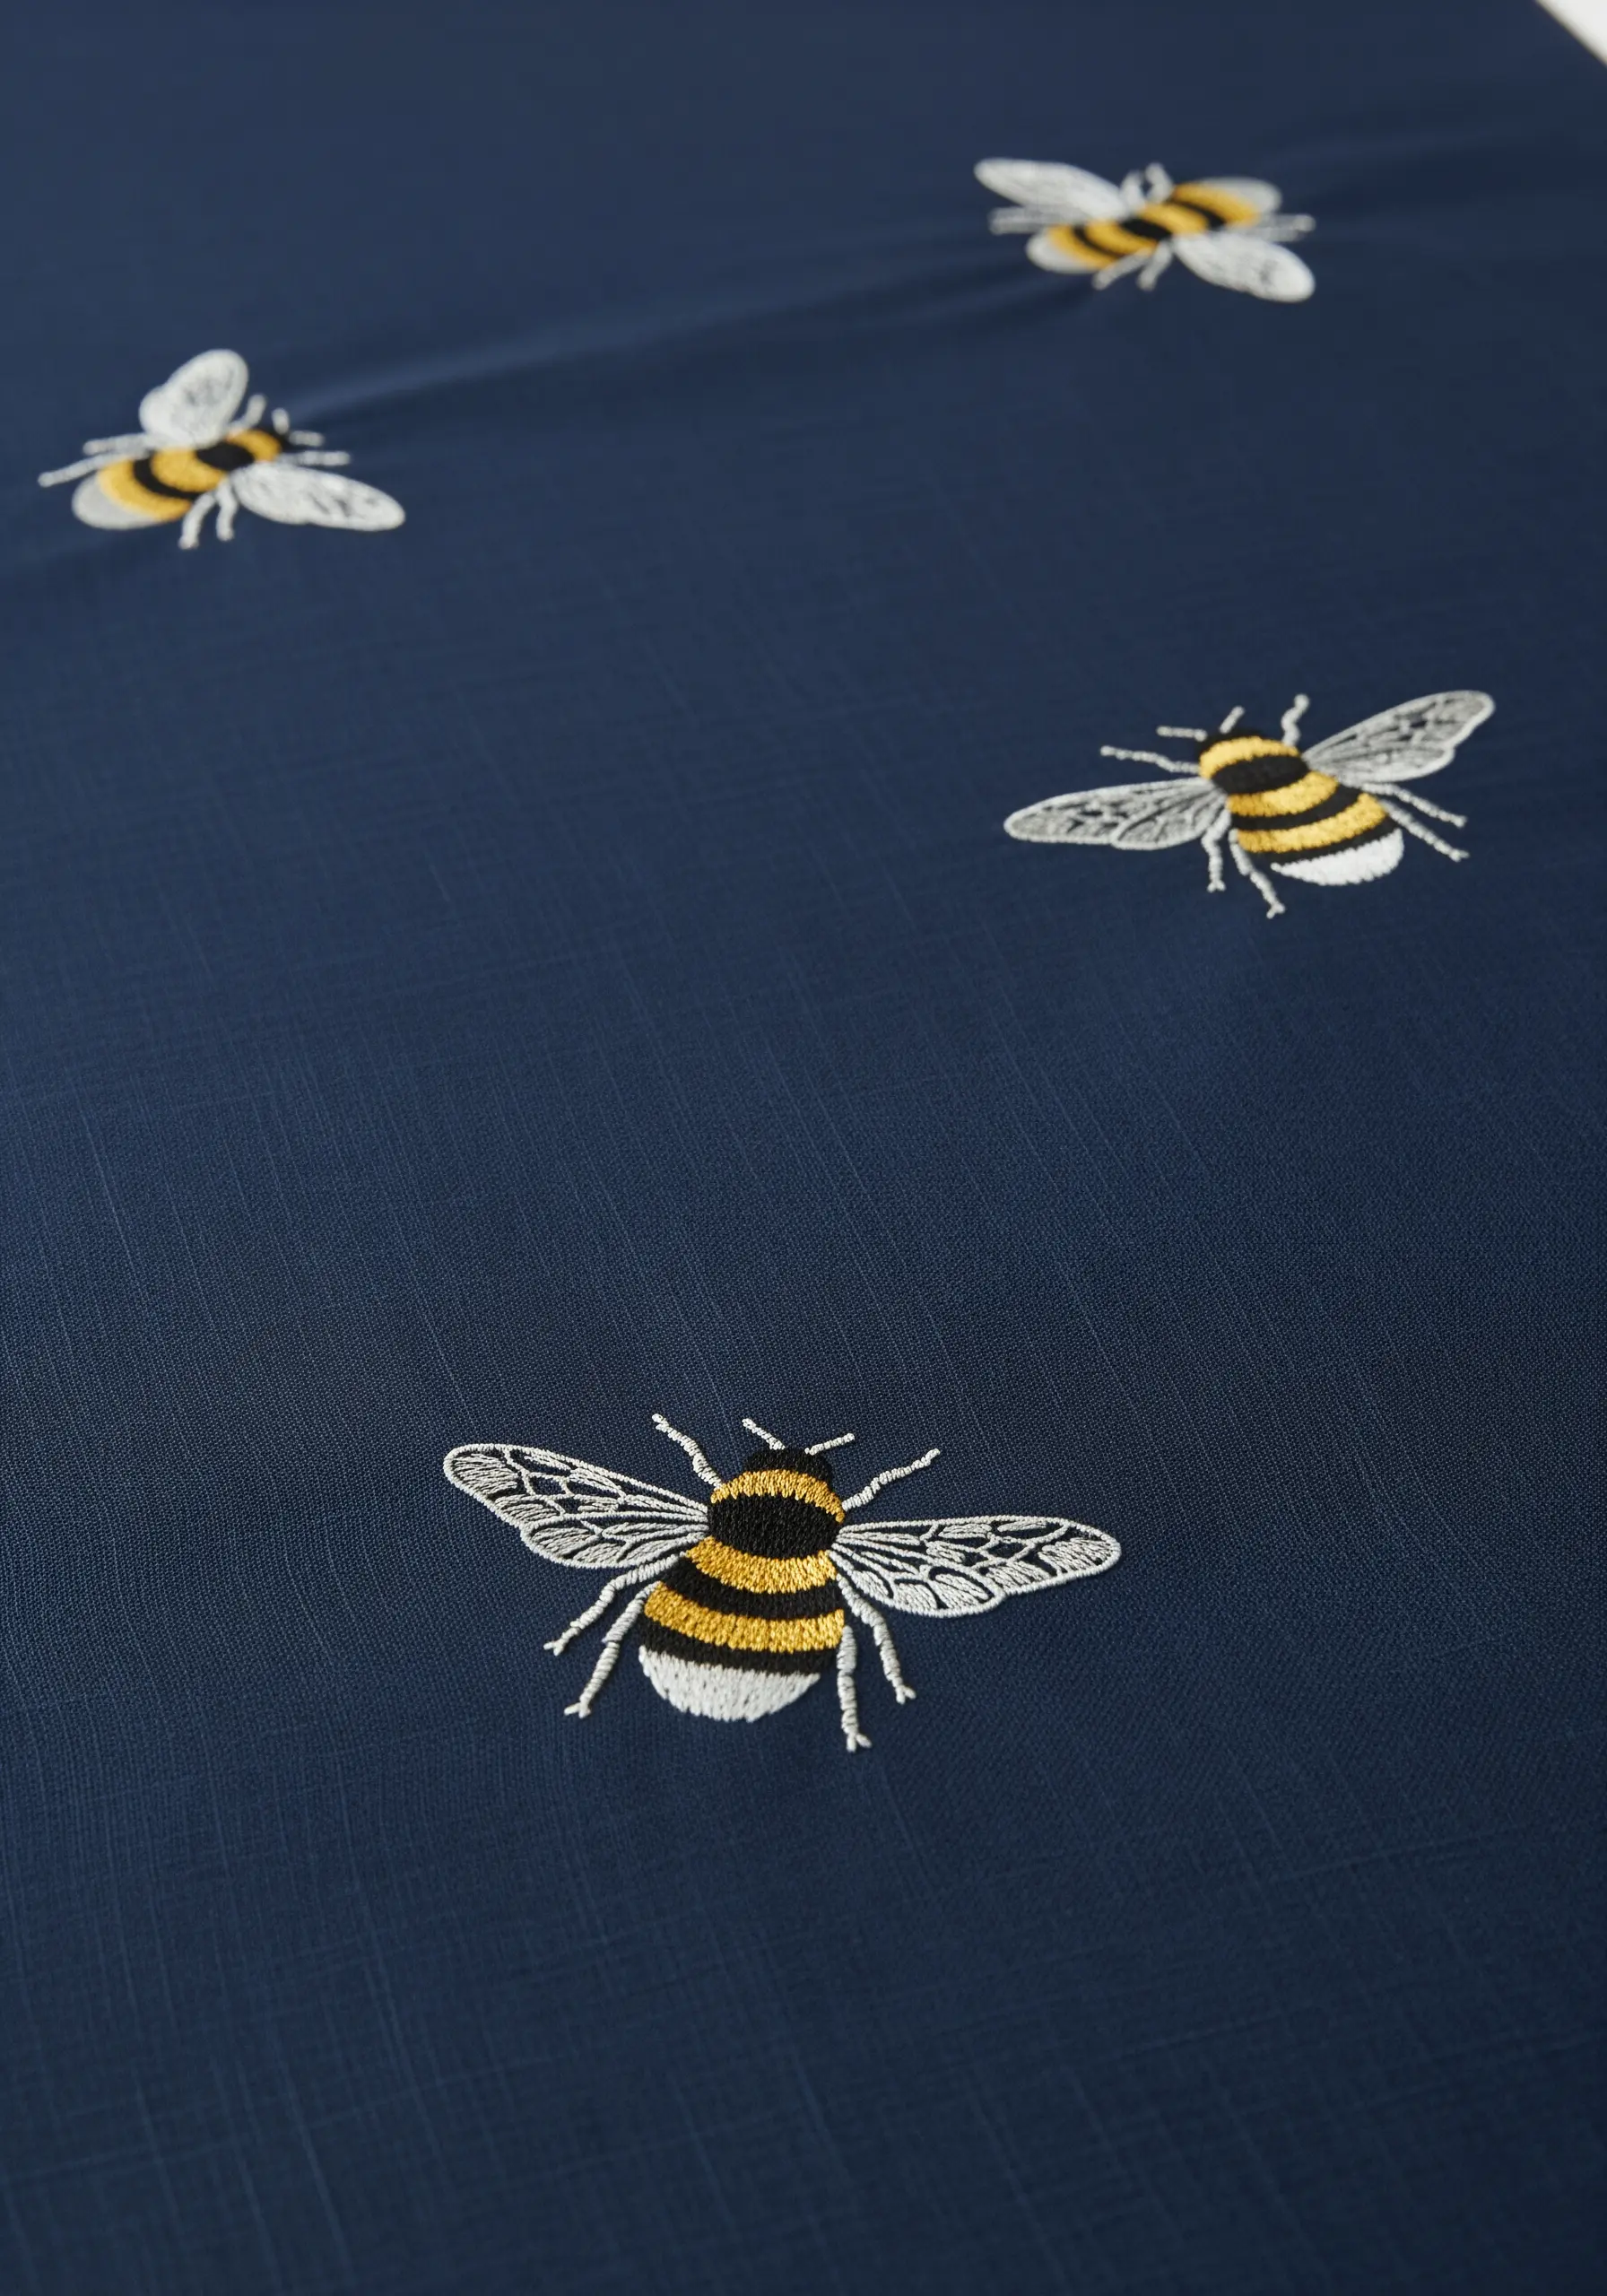
To give embroidered insects like bees a sense of realism, you need to suggest the translucency of their wings. Avoid filling them with solid satin stitch.
Instead, outline the wing shape with a delicate split stitch using a light gray or off-white thread. Then, fill the interior with a few sparsely placed seed stitches or straight stitches to mimic veins.
This technique creates a light, airy effect that contrasts beautifully with the densely stitched, fuzzy body of the bee, which can be achieved with French knots or a textured chenille thread.
Even tiny animal embroidery designs benefit from this attention to textural contrast.
21. Stitching the Illusion of Interwoven Ribbons
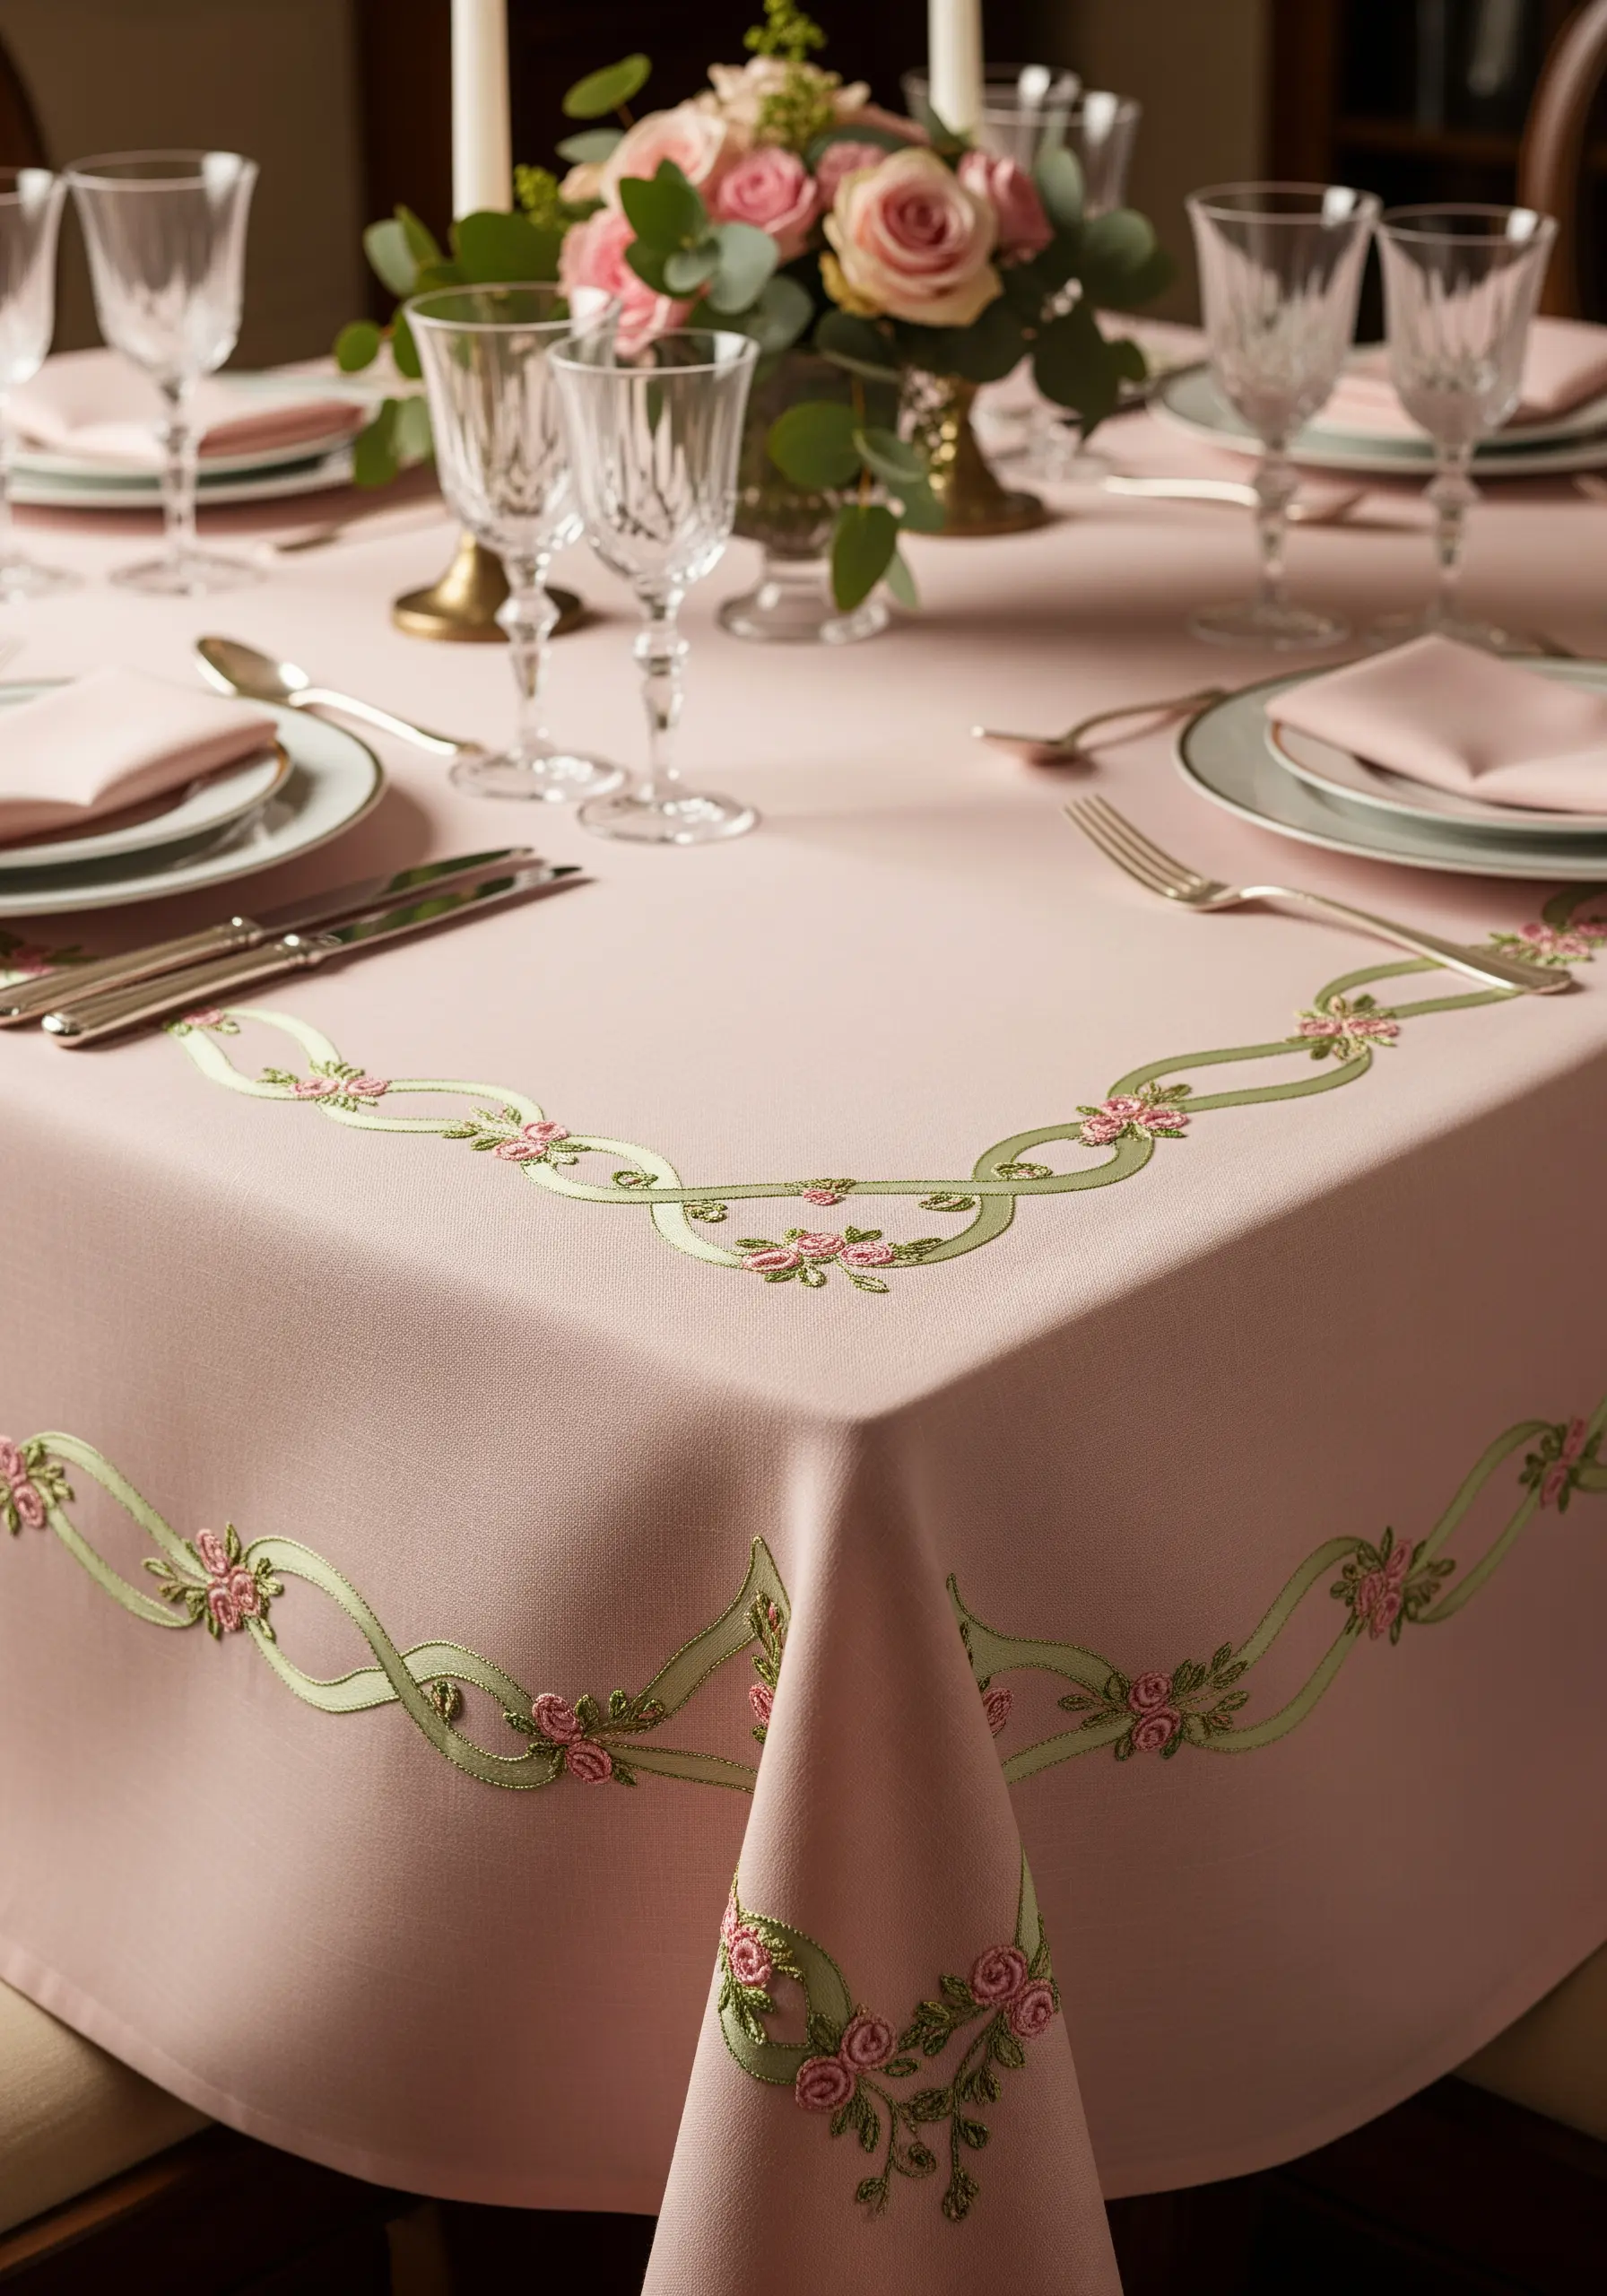
Create a sophisticated border that looks like a ribbon woven through the fabric using careful stitch direction and shading.
Stitch the main ribbon using a smooth, flat satin stitch. To create the illusion of one part passing over another, make sure the stitches on the top layer are angled slightly differently than the layer beneath.
Use a slightly darker shade of thread on the ‘under’ sections of the ribbon to create a subtle shadow, enhancing the three-dimensional effect.
This concept is central to many floral-inspired ribbon embroidery ideas, turning flat thread into flowing fabric.
22. The Graceful Curves of Calla Lilies

Capture the elegant, sculptural form of calla lilies with long, gracefully curved satin stitches that follow the natural sweep of the petals.
Instead of stitching straight across, angle your stitches to radiate from the base of the flower outwards, fanning slightly as you move towards the edge. This enhances the sense of a curved, unfolding bloom.
Use a pale gray or light green thread for subtle shading on the underside of the petal to create depth and separate it from the stem behind it. A single, bold yellow French knot completes the look.
Even a single elegant bloom can elevate decor, just like one-line floral embroidery motifs.
23. A Set of Napkins for Every Season
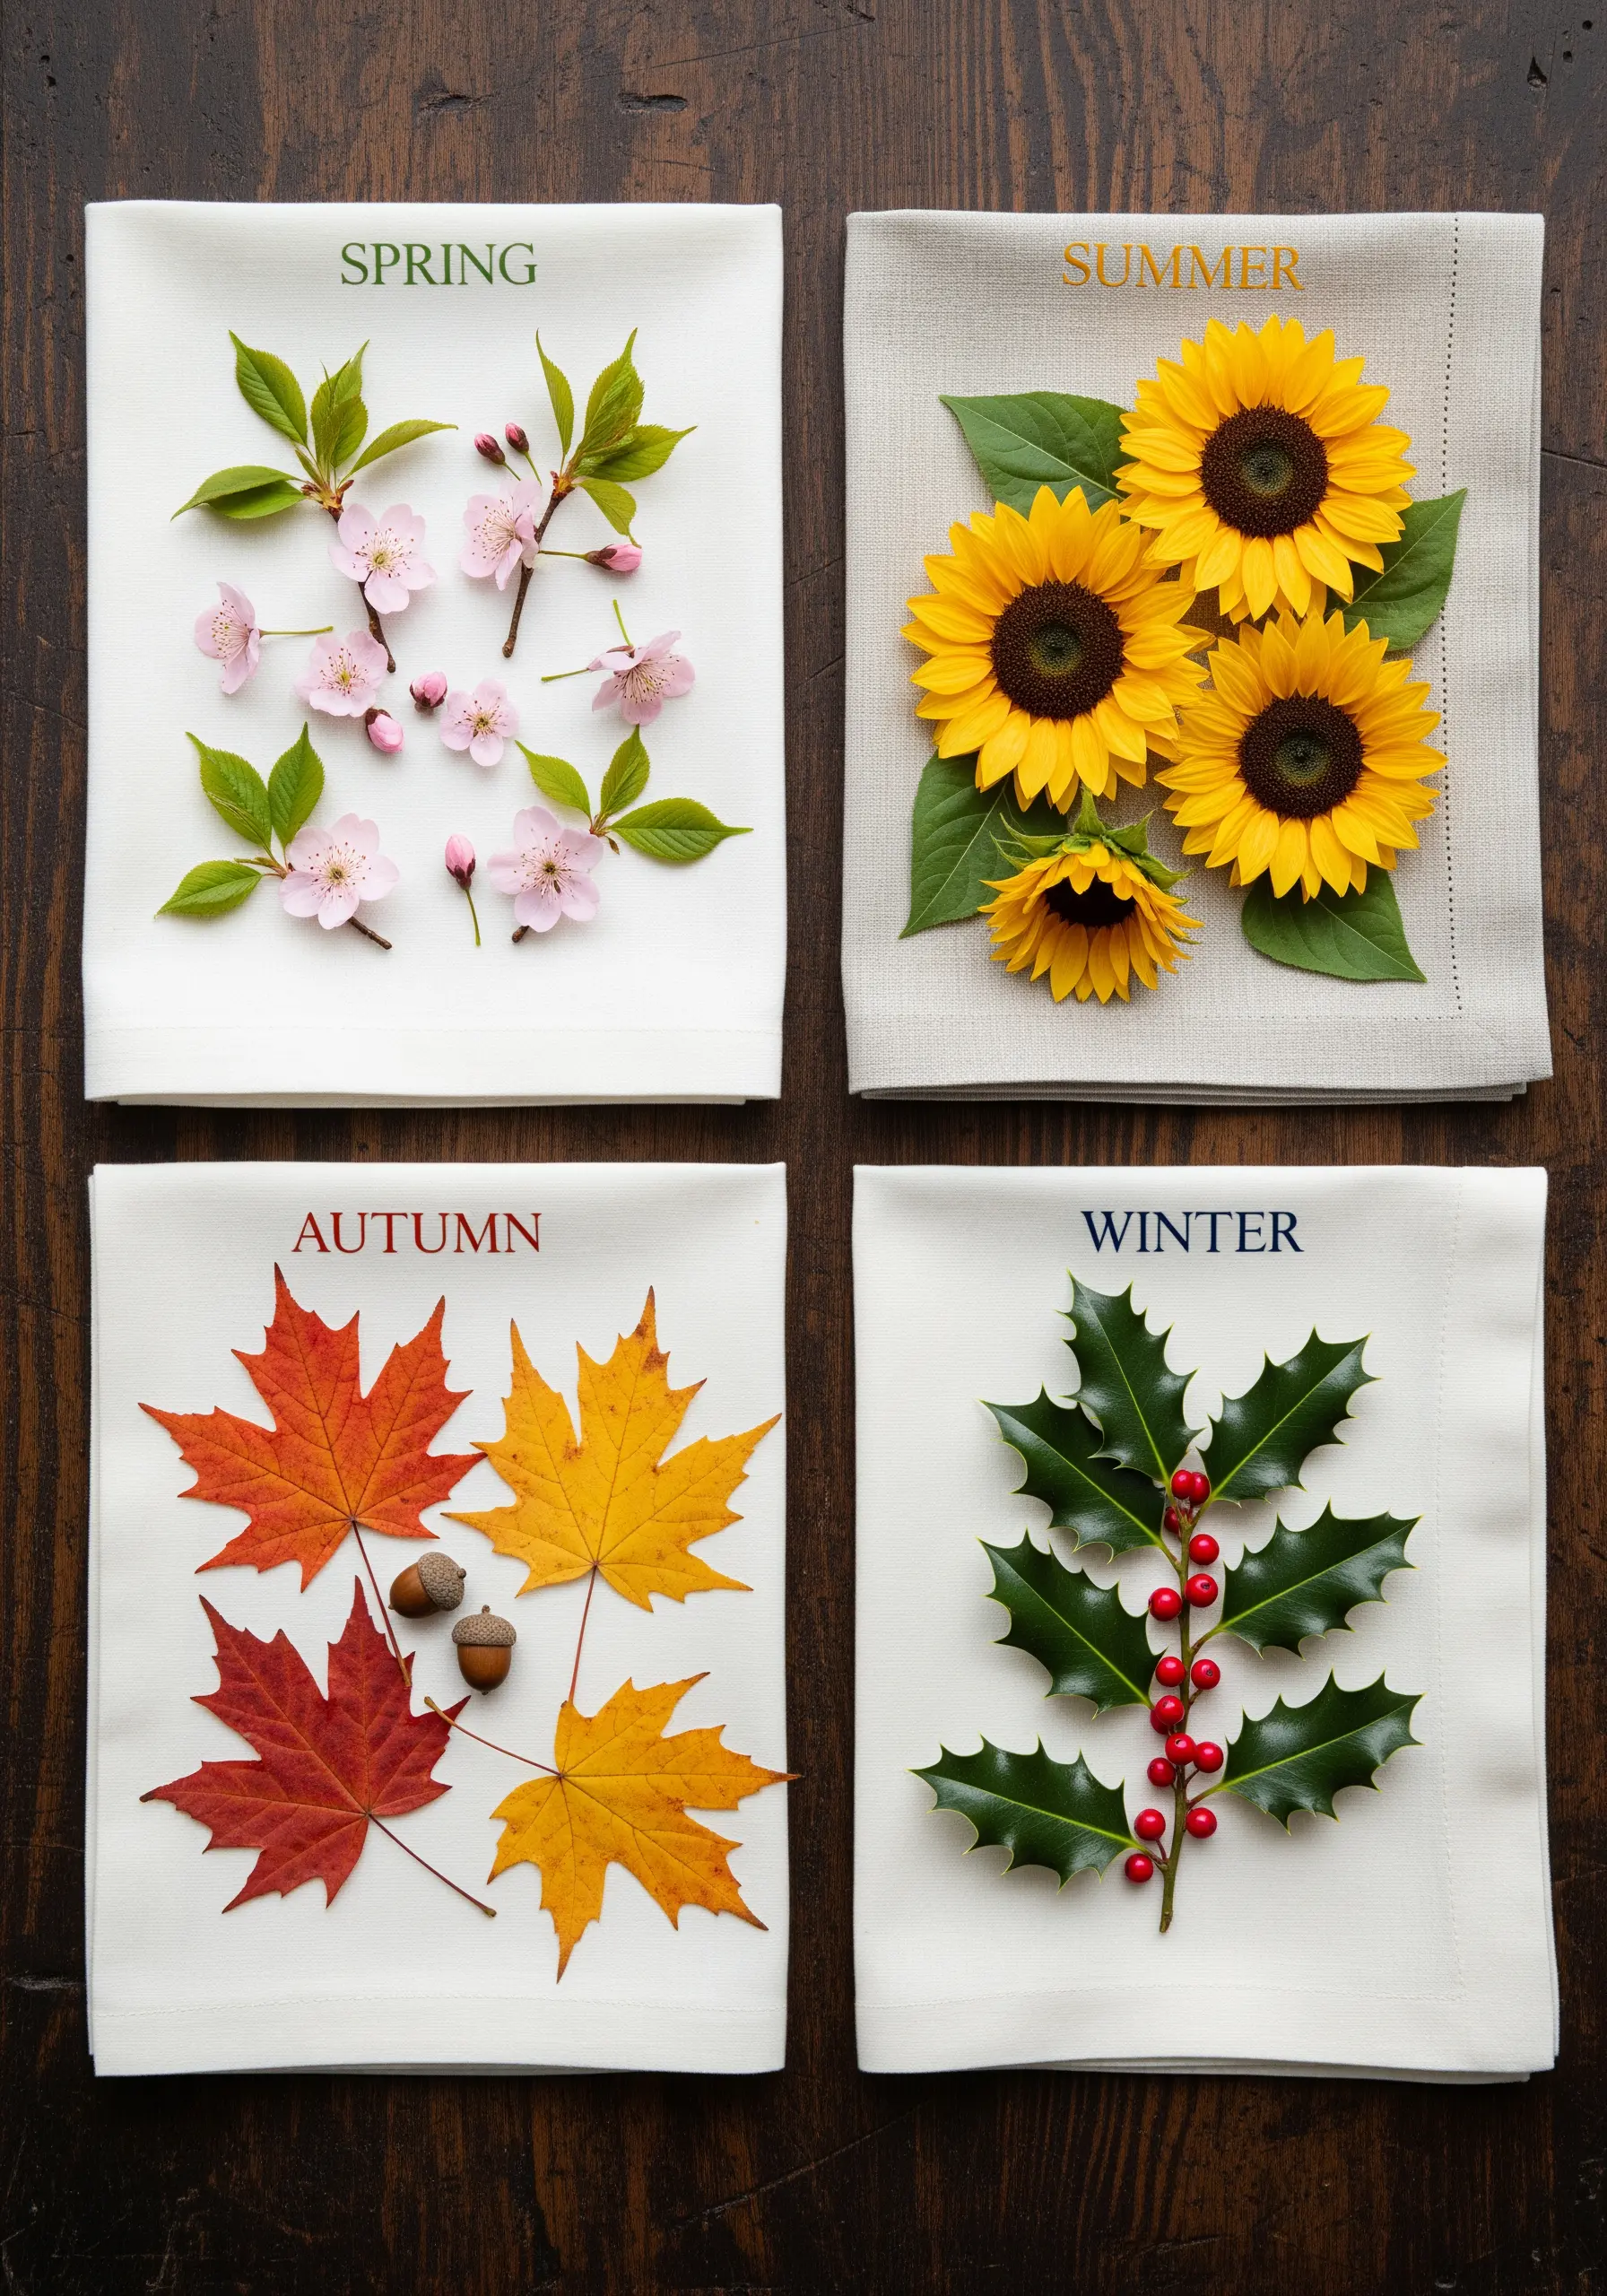
Create a timeless and versatile set of table linens by dedicating one napkin to each of the four seasons. This allows you to rotate your decor throughout the year.
For Spring, stitch delicate cherry blossoms using detached chain stitches. For Summer, use bold satin stitches for sunflowers. For Autumn, try thread painting for richly colored maple leaves.
For Winter, combine white backstitching for holly leaf outlines with bright red colonial knots for berries, which are more durable for linens than French knots.
These seasonal embroidery wall decor ideas translate perfectly to functional table linens.
24. Advanced Needle Lace and Cutwork
Elevate your cutwork by incorporating elements of needle lace, creating delicate bars and nets across the open spaces of your design.
After creating your cutwork voids with buttonhole stitches, you can create ‘bars’ by stretching a thread across the opening and covering it tightly with more buttonhole stitches. Weave these bars together to form intricate, lace-like fillings.
This advanced technique requires patience and precision but results in an heirloom-quality piece that is astonishingly light and detailed.
It is the ultimate expression of negative space embroidery techniques, where the absence of fabric is the design itself.
25. Blackwork-Inspired Geometric Panels
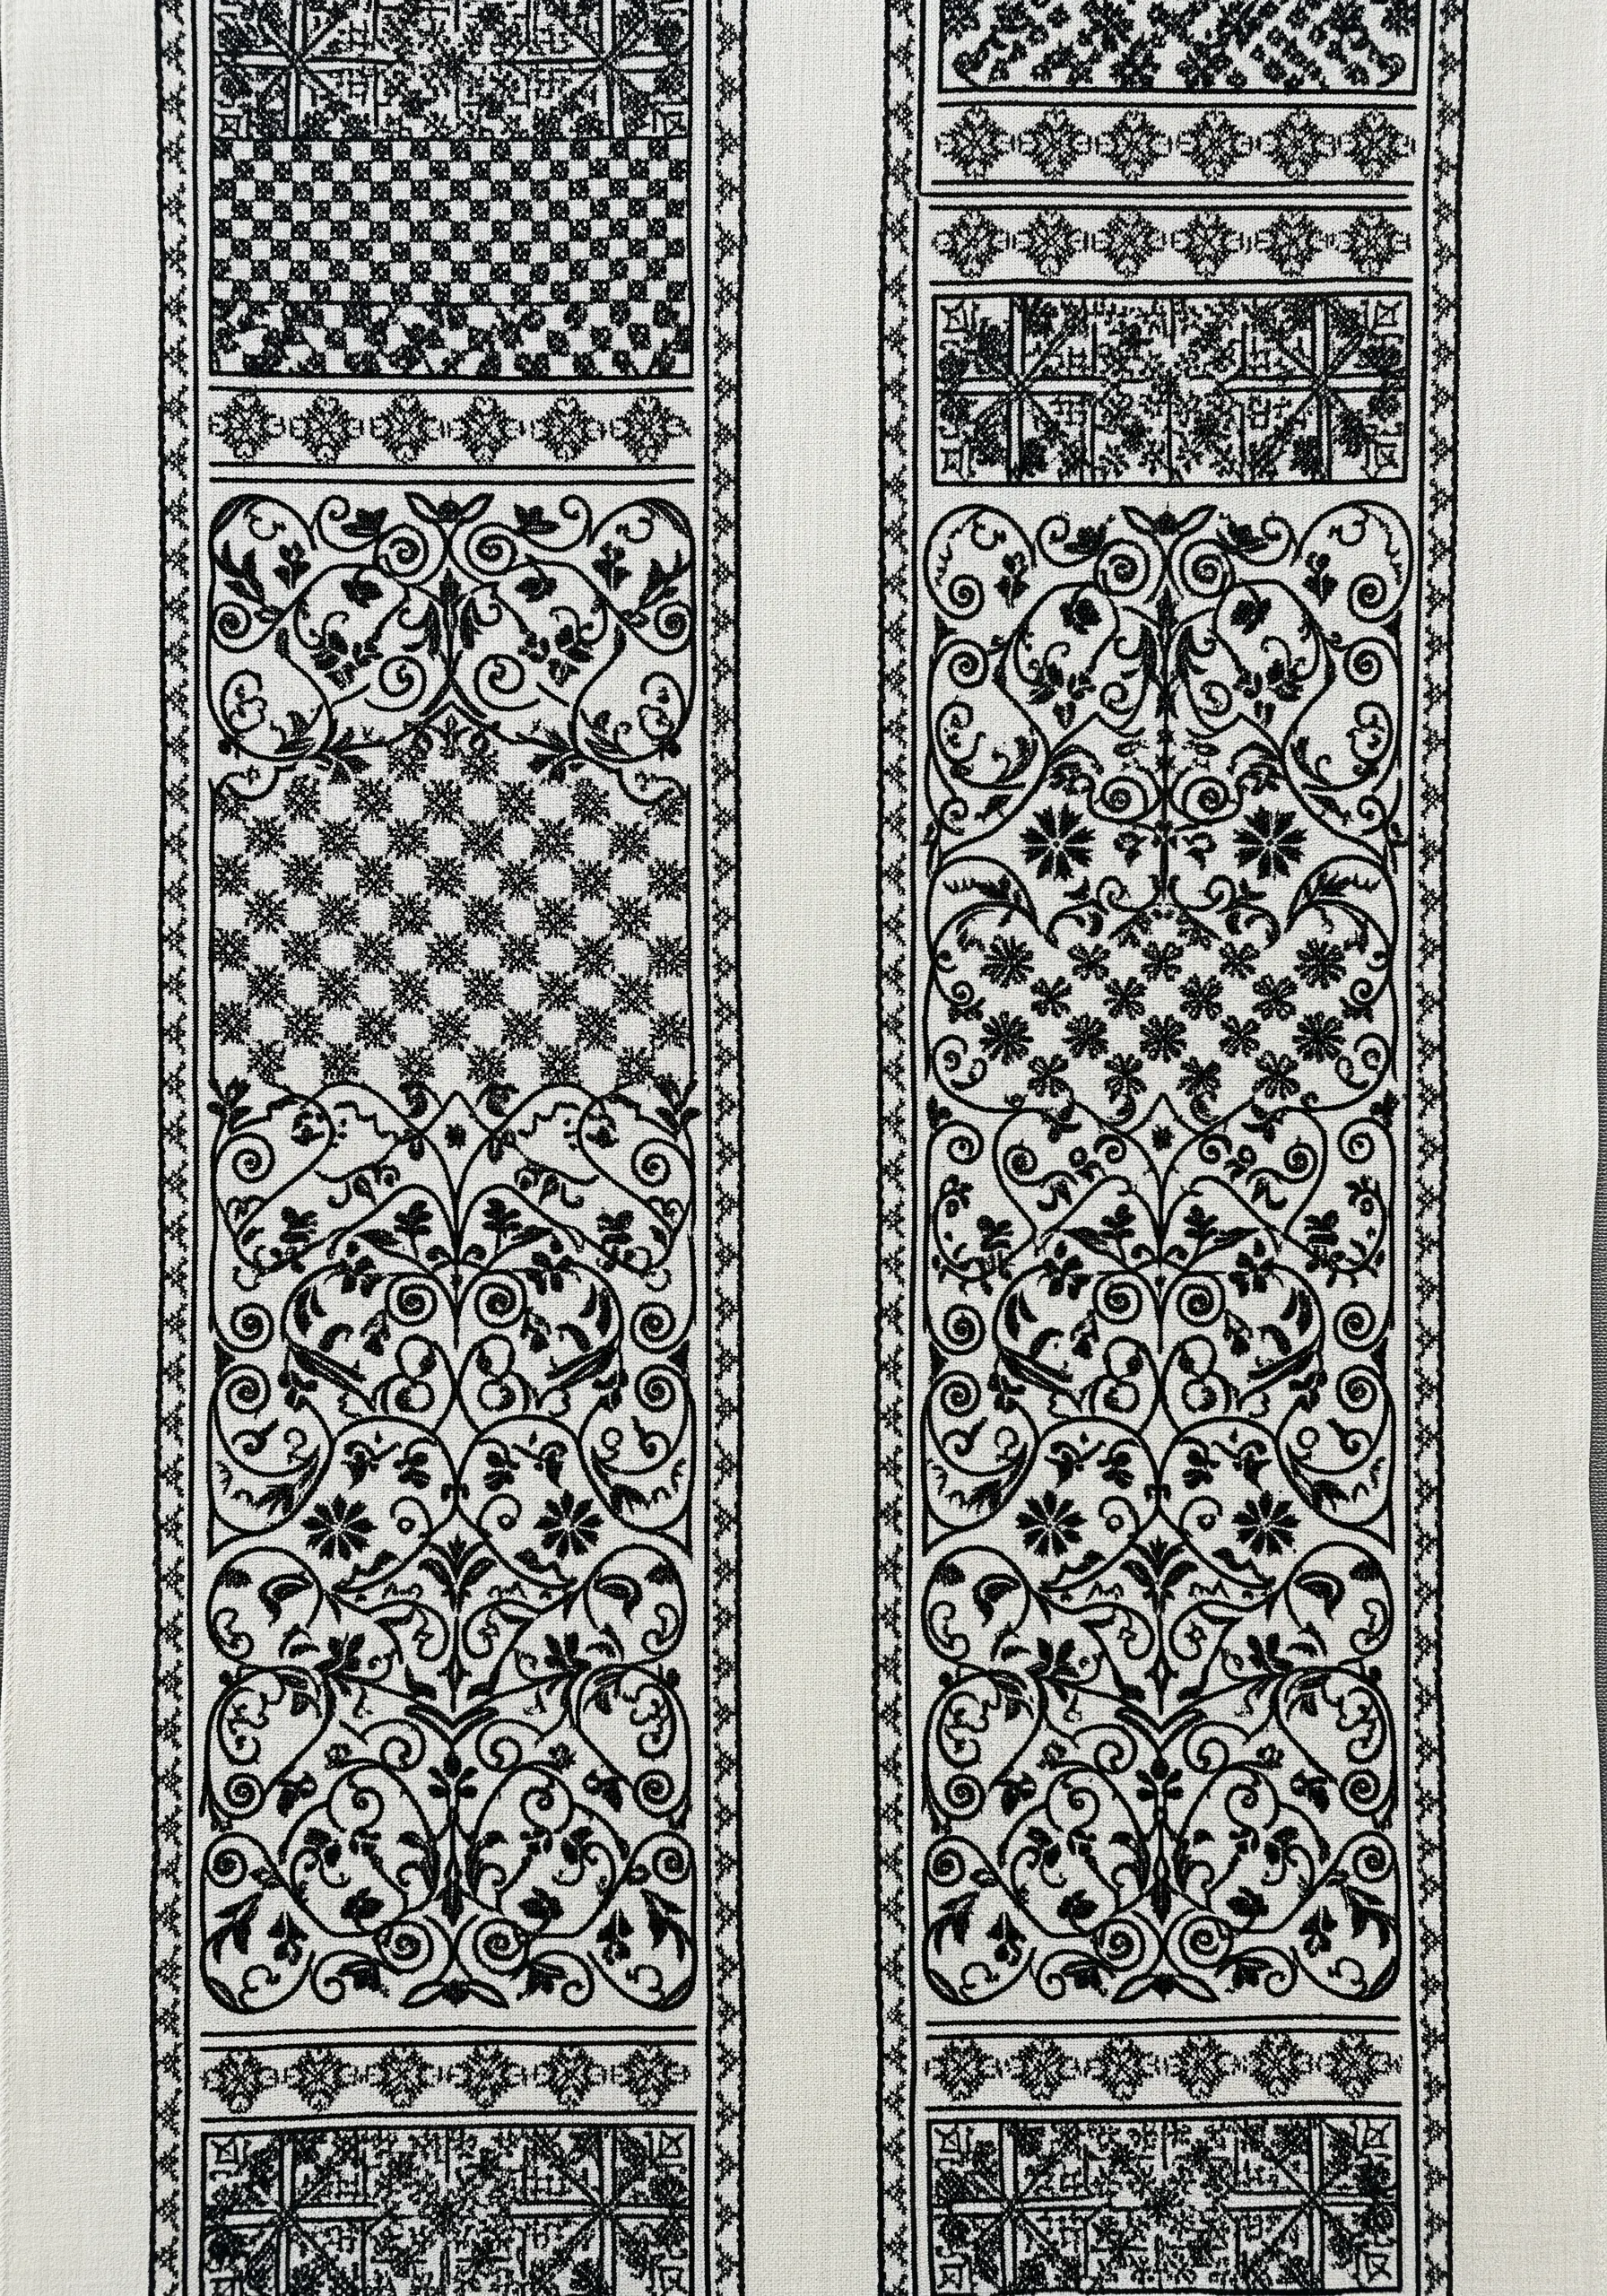
Explore the historical art of blackwork to create intricate, textured table runners with a surprisingly modern feel. The technique relies on repeating geometric patterns stitched in a single color.
Fill different panels of your design with various ‘diaper patterns’—small, repeating motifs made from backstitch or double running stitch. The contrast between these different textures creates visual interest.
While traditionally done in black, you can adapt this style using any dark, contrasting color like navy, crimson, or deep green for a contemporary twist.
This is a perfect way to explore abstract monochrome thread designs with historical roots.
26. Delicate Lily of the Valley Bells
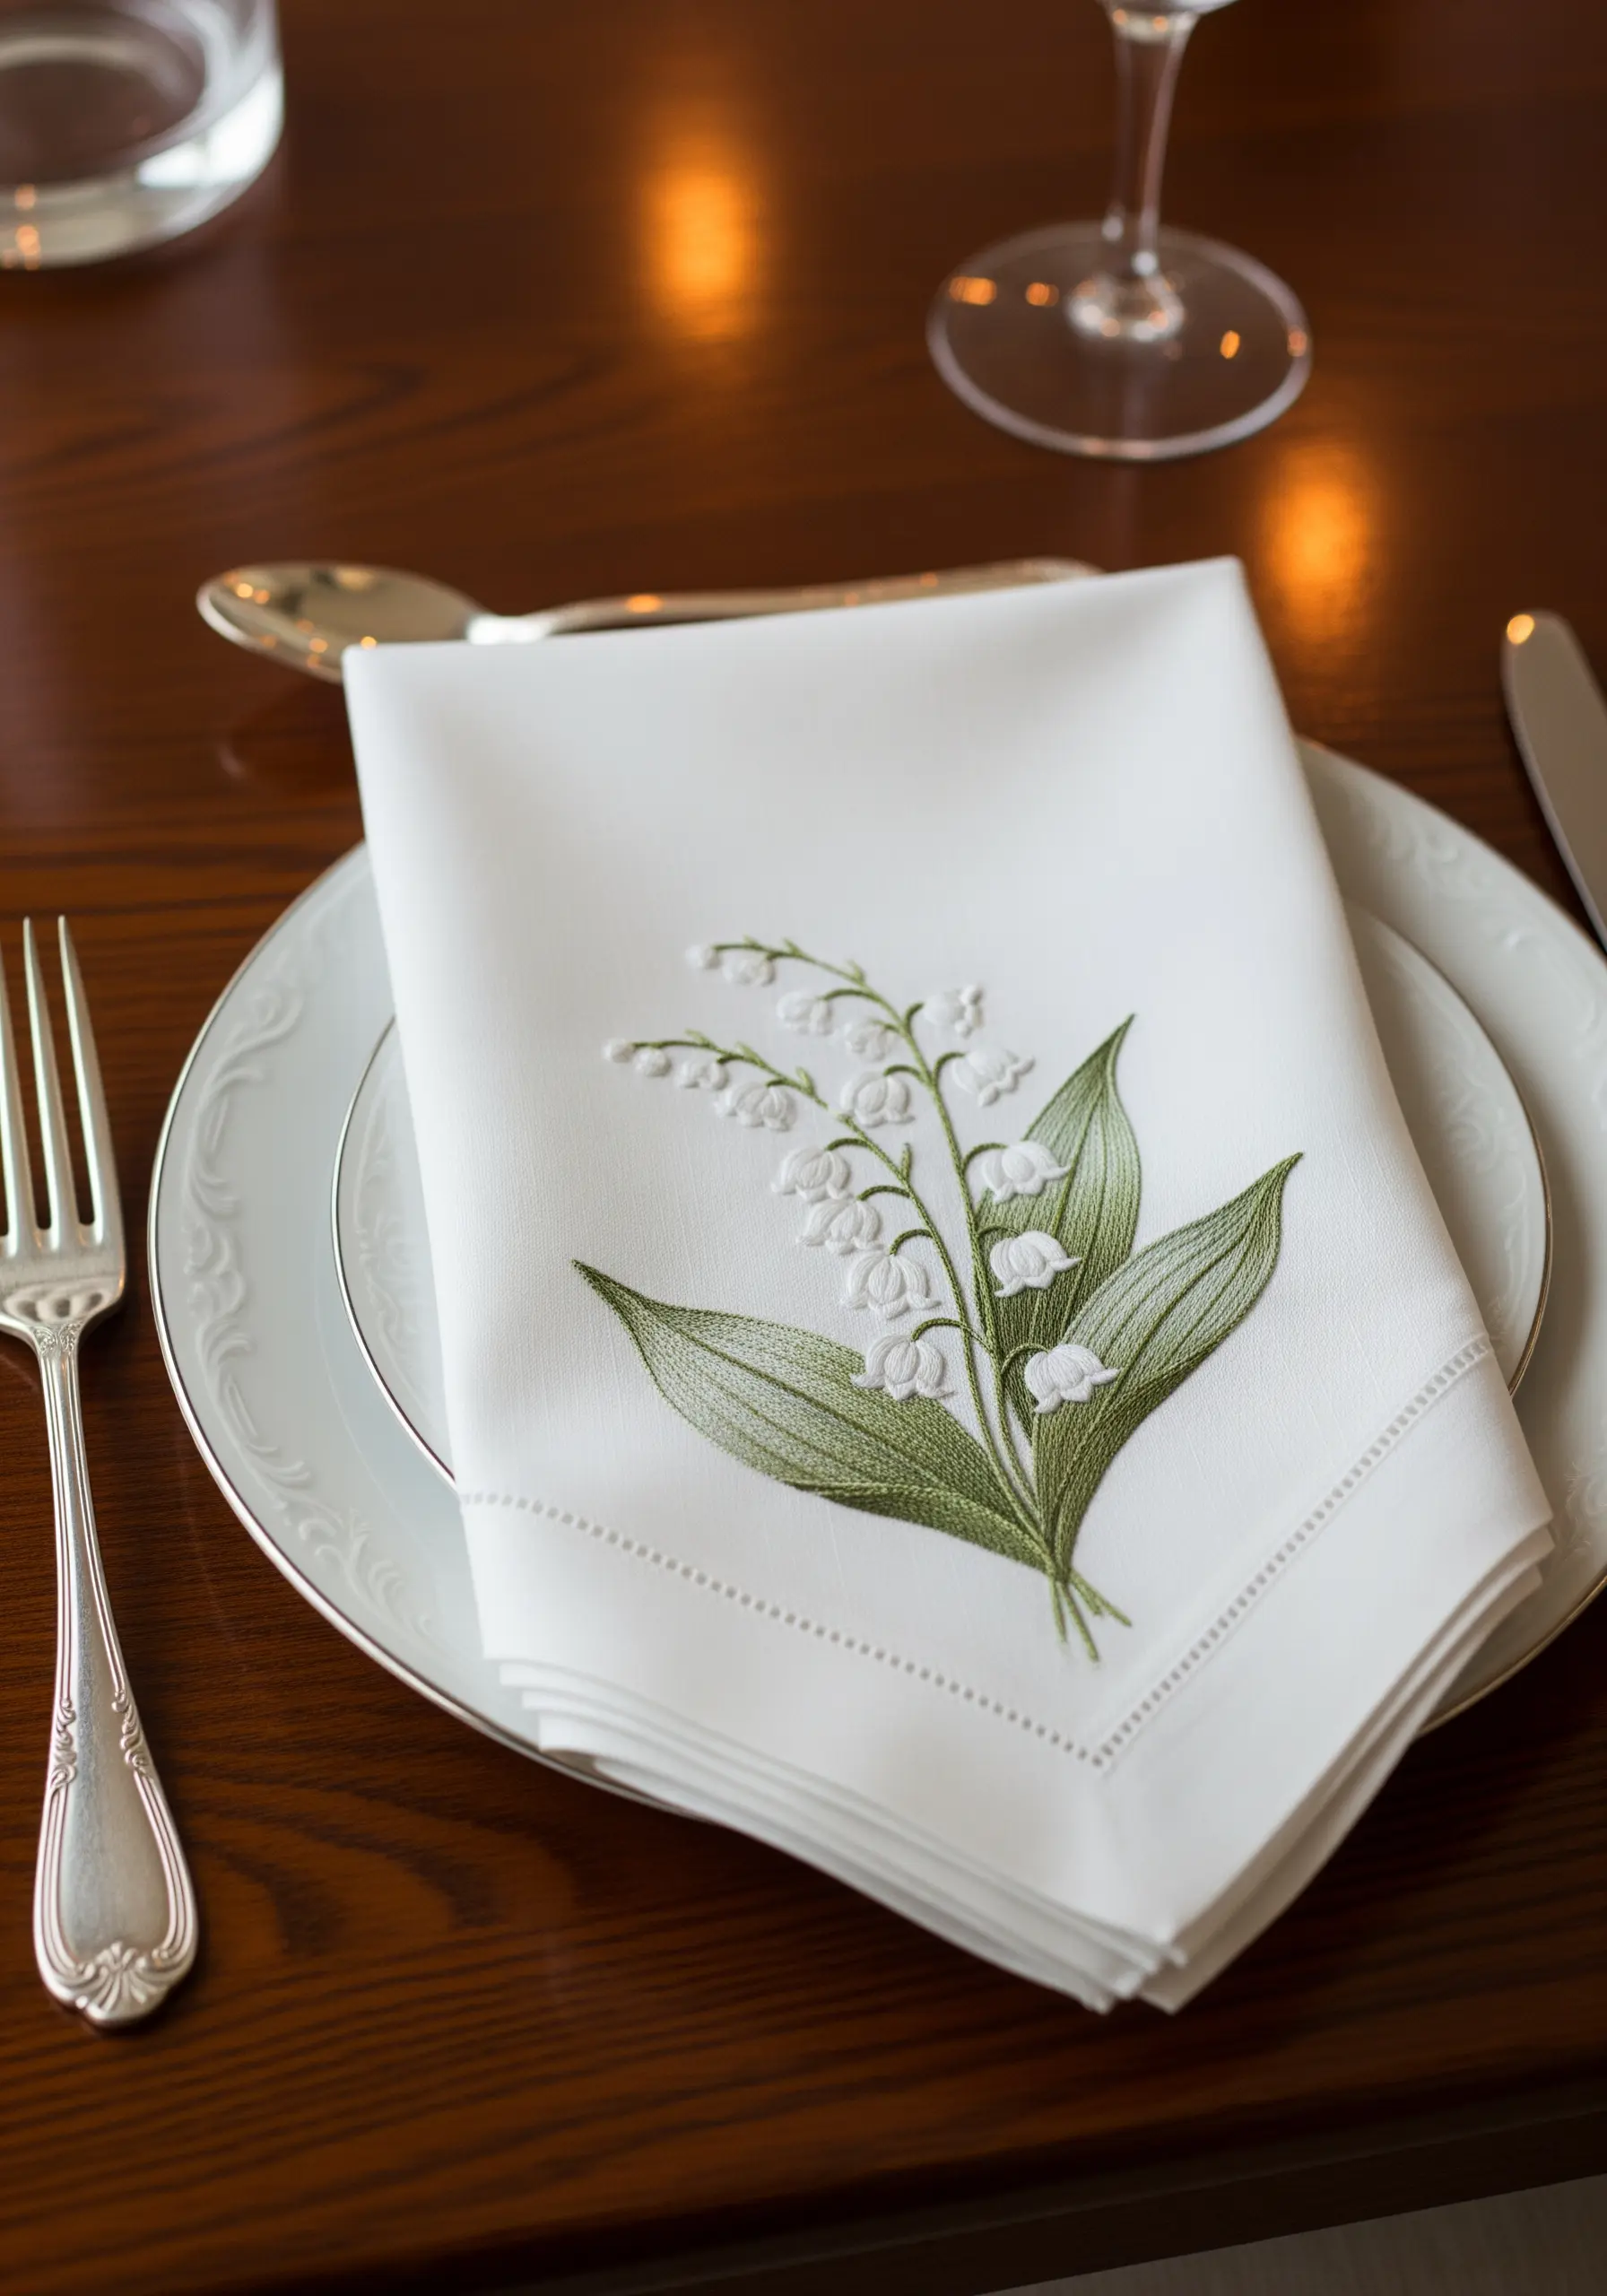
To capture the delicate, bell-like shape of Lily of the Valley flowers, use a padded satin stitch or a single, puffy detached chain stitch for each blossom.
Arrange these tiny white bells in a gentle downward curve along a fine, arching stem made with stem stitch. This composition gives the flowers their characteristic graceful droop.
For the leaves, use long-and-short stitch in several shades of green to create realistic shading and the illusion of a central fold, making them appear three-dimensional.
These gentle floral embroidery ideas bring a touch of woodland elegance to any table setting.


