

It’s easy to master the basic stitches, but much harder to know how to combine them with intention. You find yourself creating beautiful work, but feel that a certain level of artistry—that polished, cohesive look—remains just out of reach.
The secret isn’t in learning dozens of new, complicated techniques. It’s in refining the way you see color, texture, and form. It’s about choosing the right thread for the right purpose and understanding *why* one stitch creates a soft shadow while another creates a sharp, graphic line.
Here, you’ll find 22 distinct approaches to botanical embroidery that move beyond the basics. Think of this as a conversation about nuance—a guide to help you make the small, deliberate choices that transform your craft into art. Let’s begin.
1. Illuminate Veins with Metallic Thread
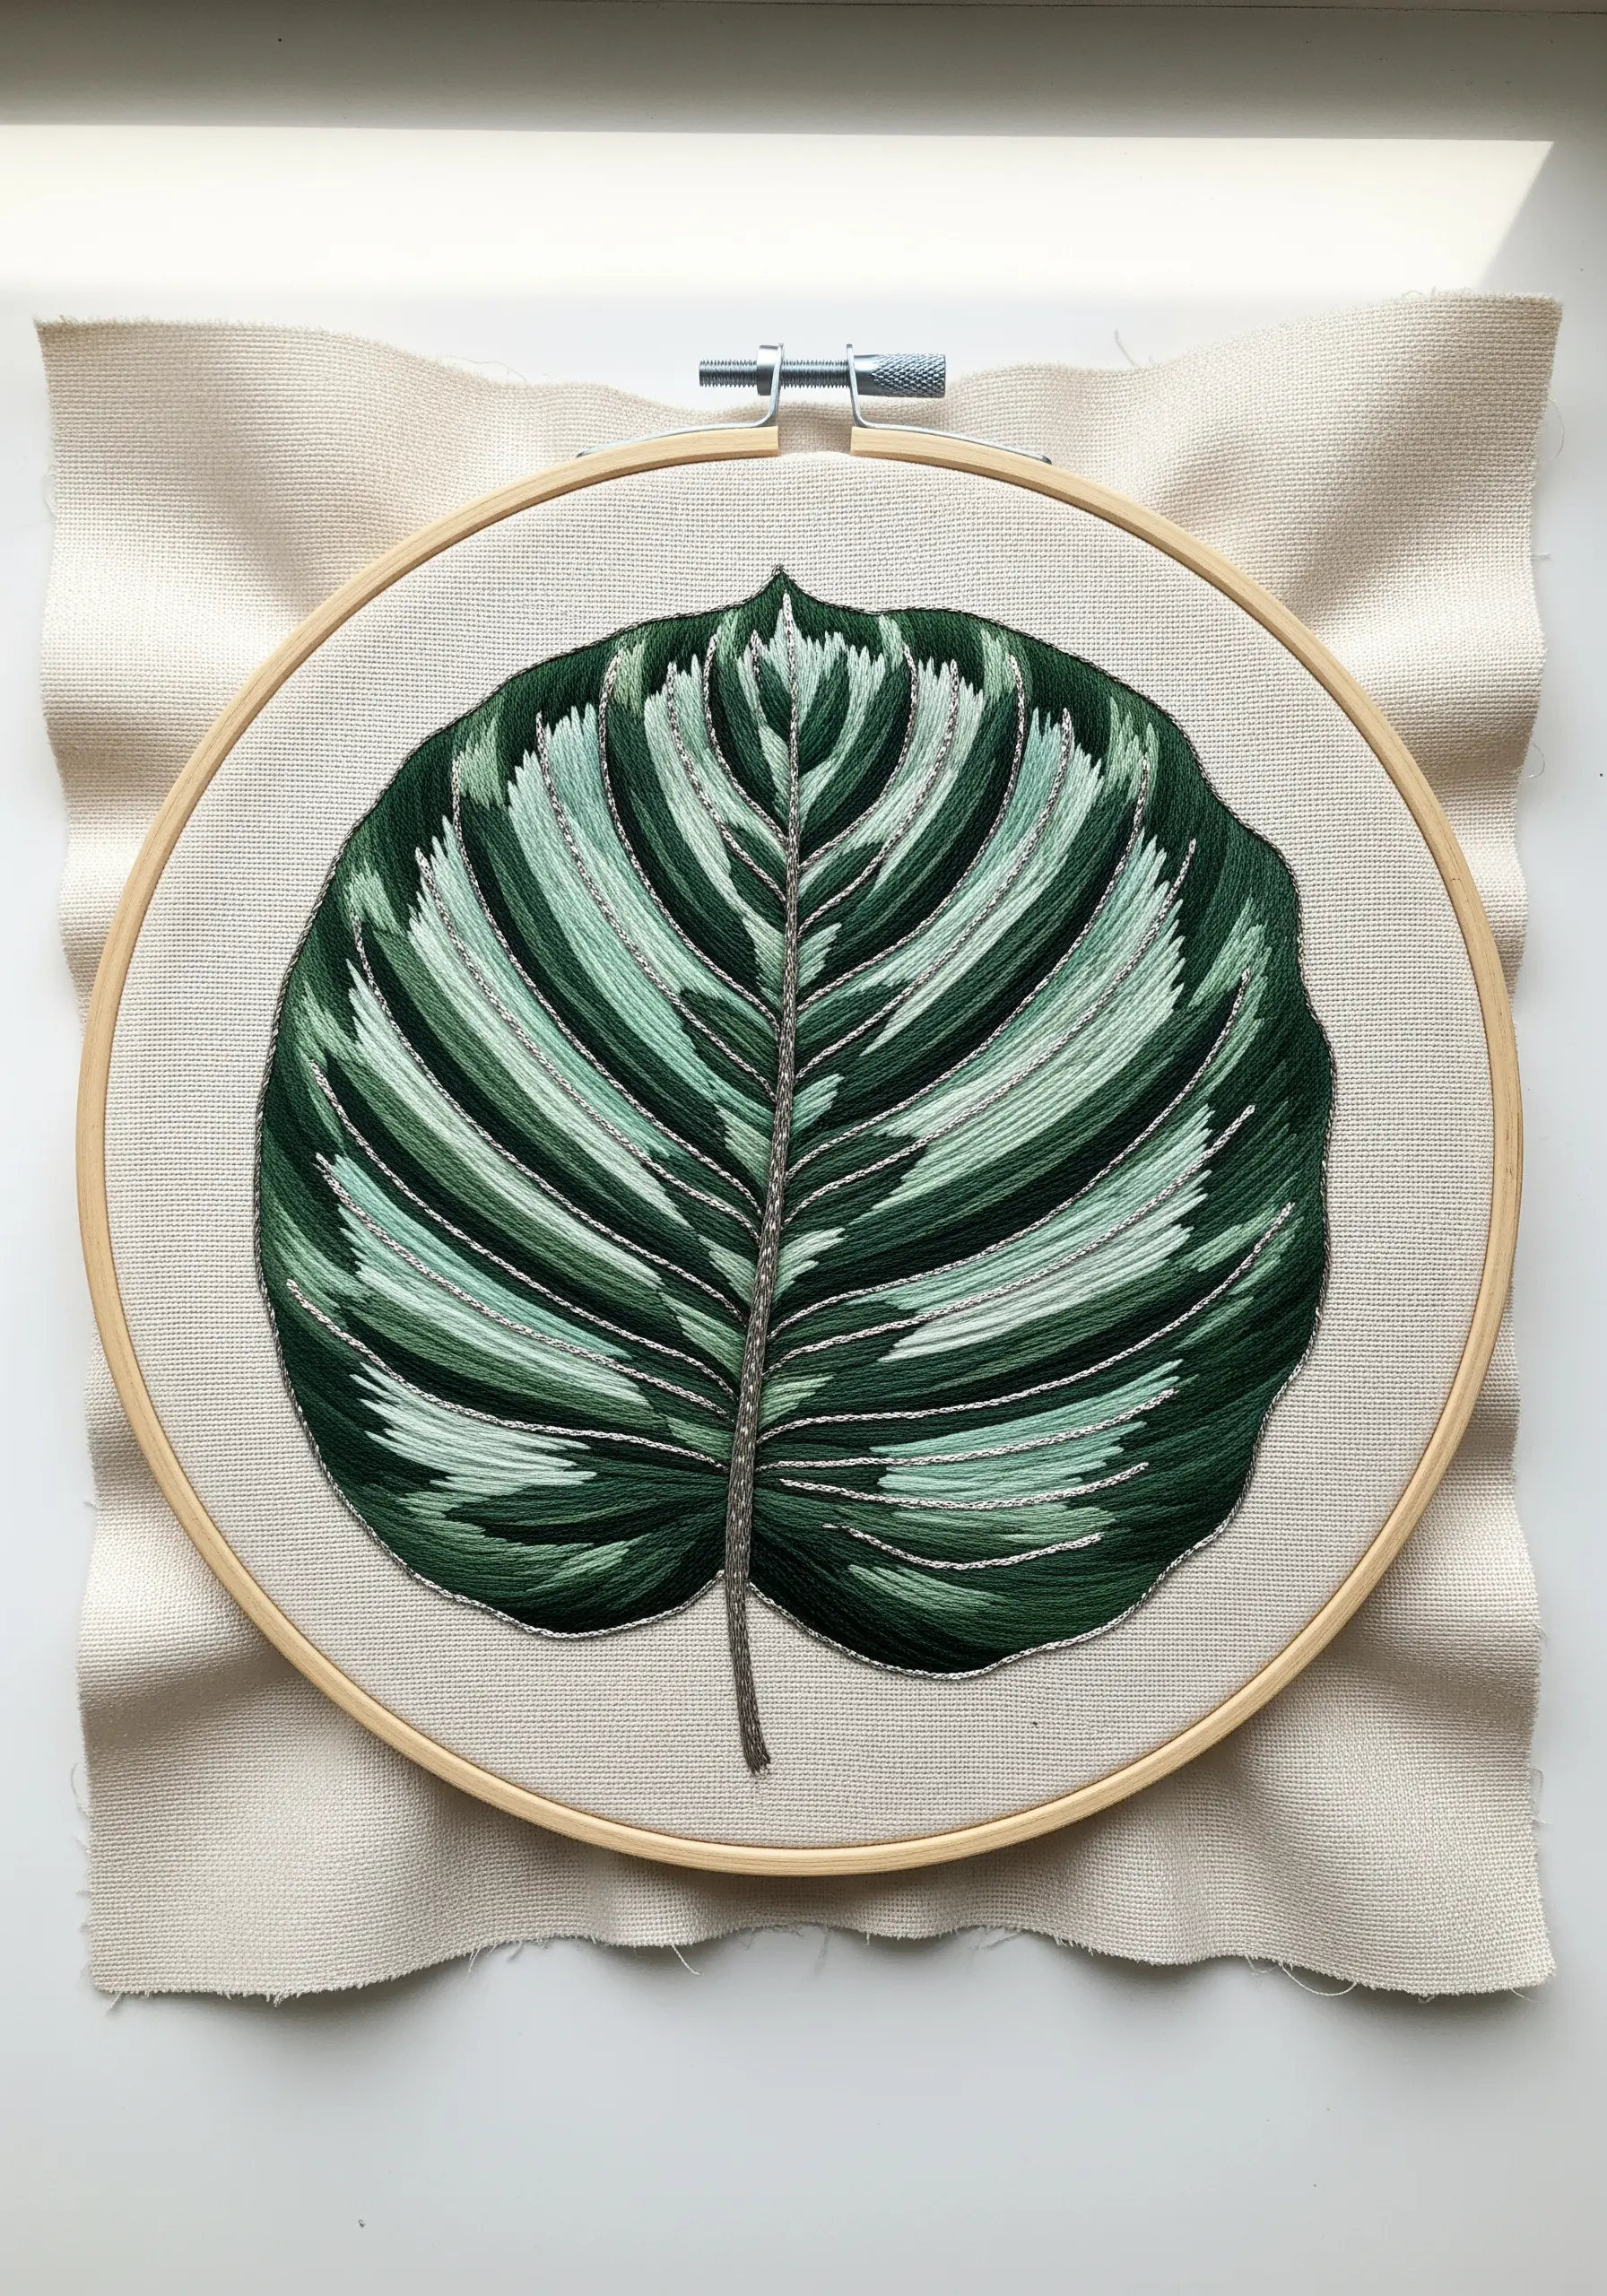
To capture the luminous stripes of a Calathea, use a single strand of silver metallic floss for the veins, outlining them before filling the leaf sections.
Work your long-and-short stitches *towards* the metallic outline, nestling the last stitch neatly against the shimmer.
This technique creates a crisp, defined border between the color blocks and adds a subtle light-catching quality that mimics the plant’s natural sheen.
The contrast between the soft cotton floss and the rigid metallic thread provides a sophisticated textural shift that elevates the entire piece.
2. Master Appliqué for Bold Begonia Leaves
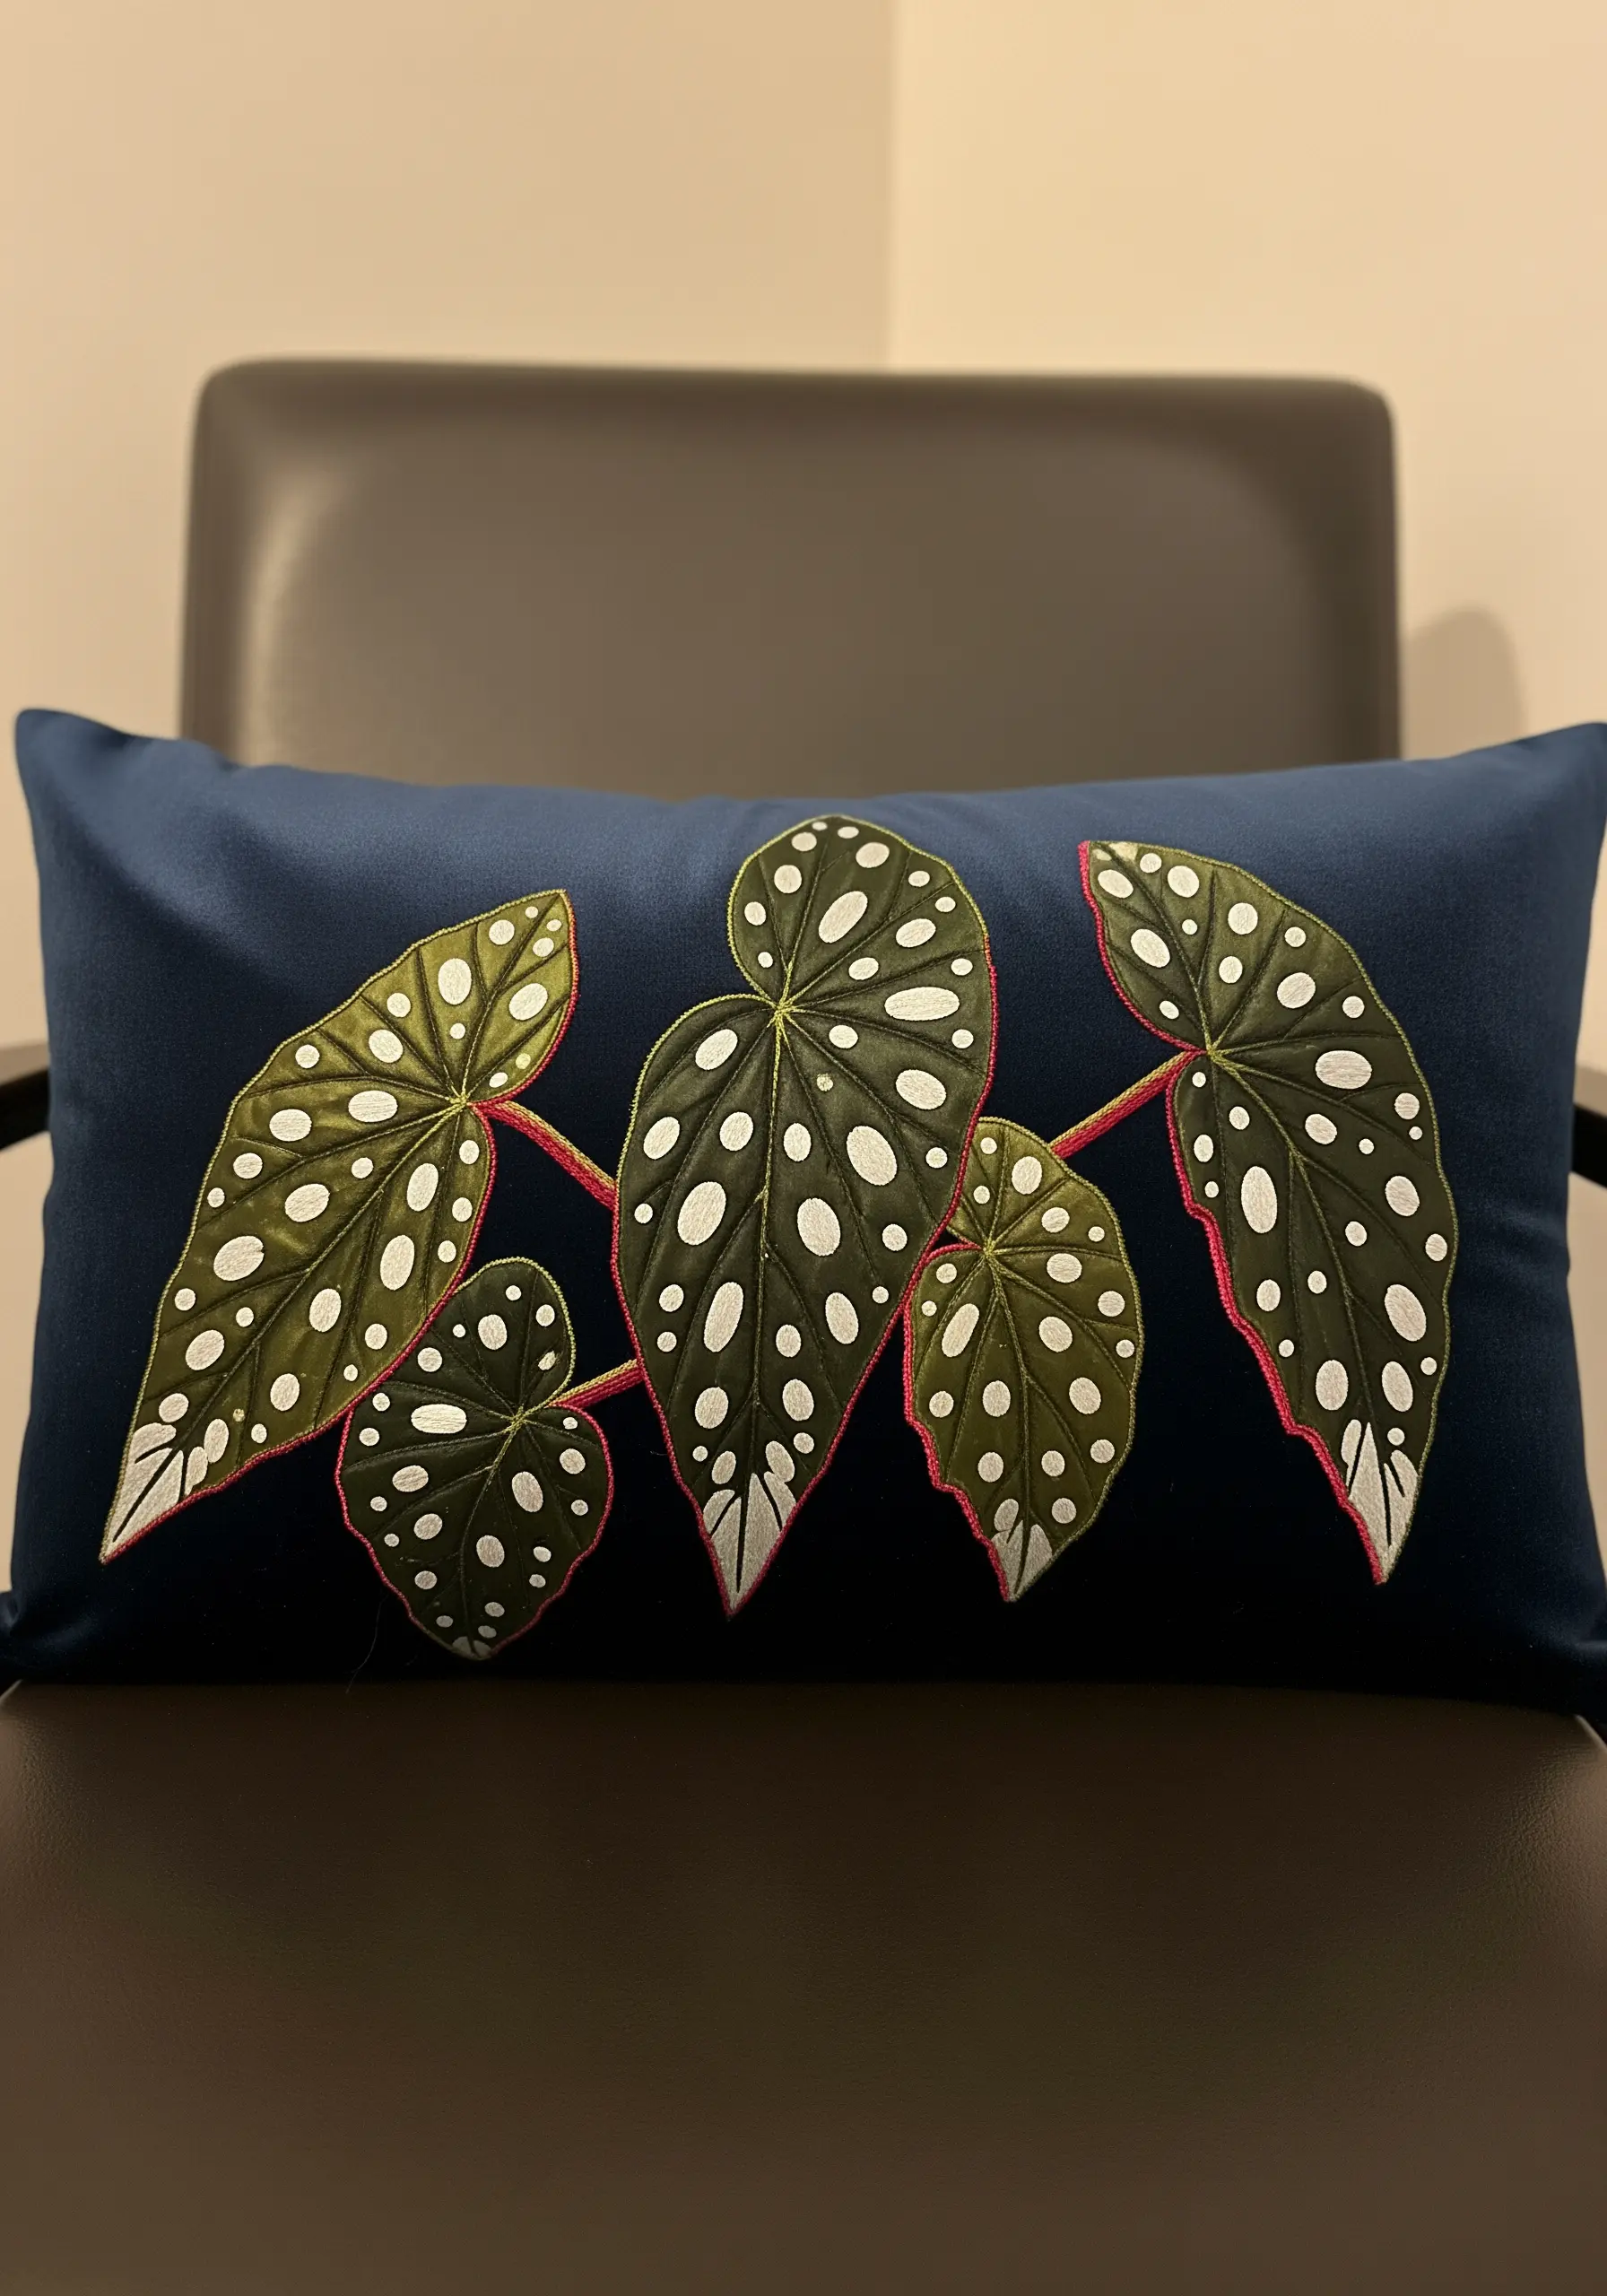
Instead of stitching the entire leaf, combine appliqué with embroidery for a faster, high-impact result, especially on dark, plush fabrics like velvet.
Cut your leaf shapes from a contrasting fabric (like felt or cotton), secure them with an iron-on adhesive, and then stitch the edges with a tight satin stitch outline.
For the iconic polka dots, use tightly packed French knots with three or four strands of white floss to give them dimension and prevent them from sinking into the fabric.
This mixed-media approach makes the leaves pop, creating a piece that has both graphic clarity and tactile depth.
3. Construct Veins with Beaded Couching
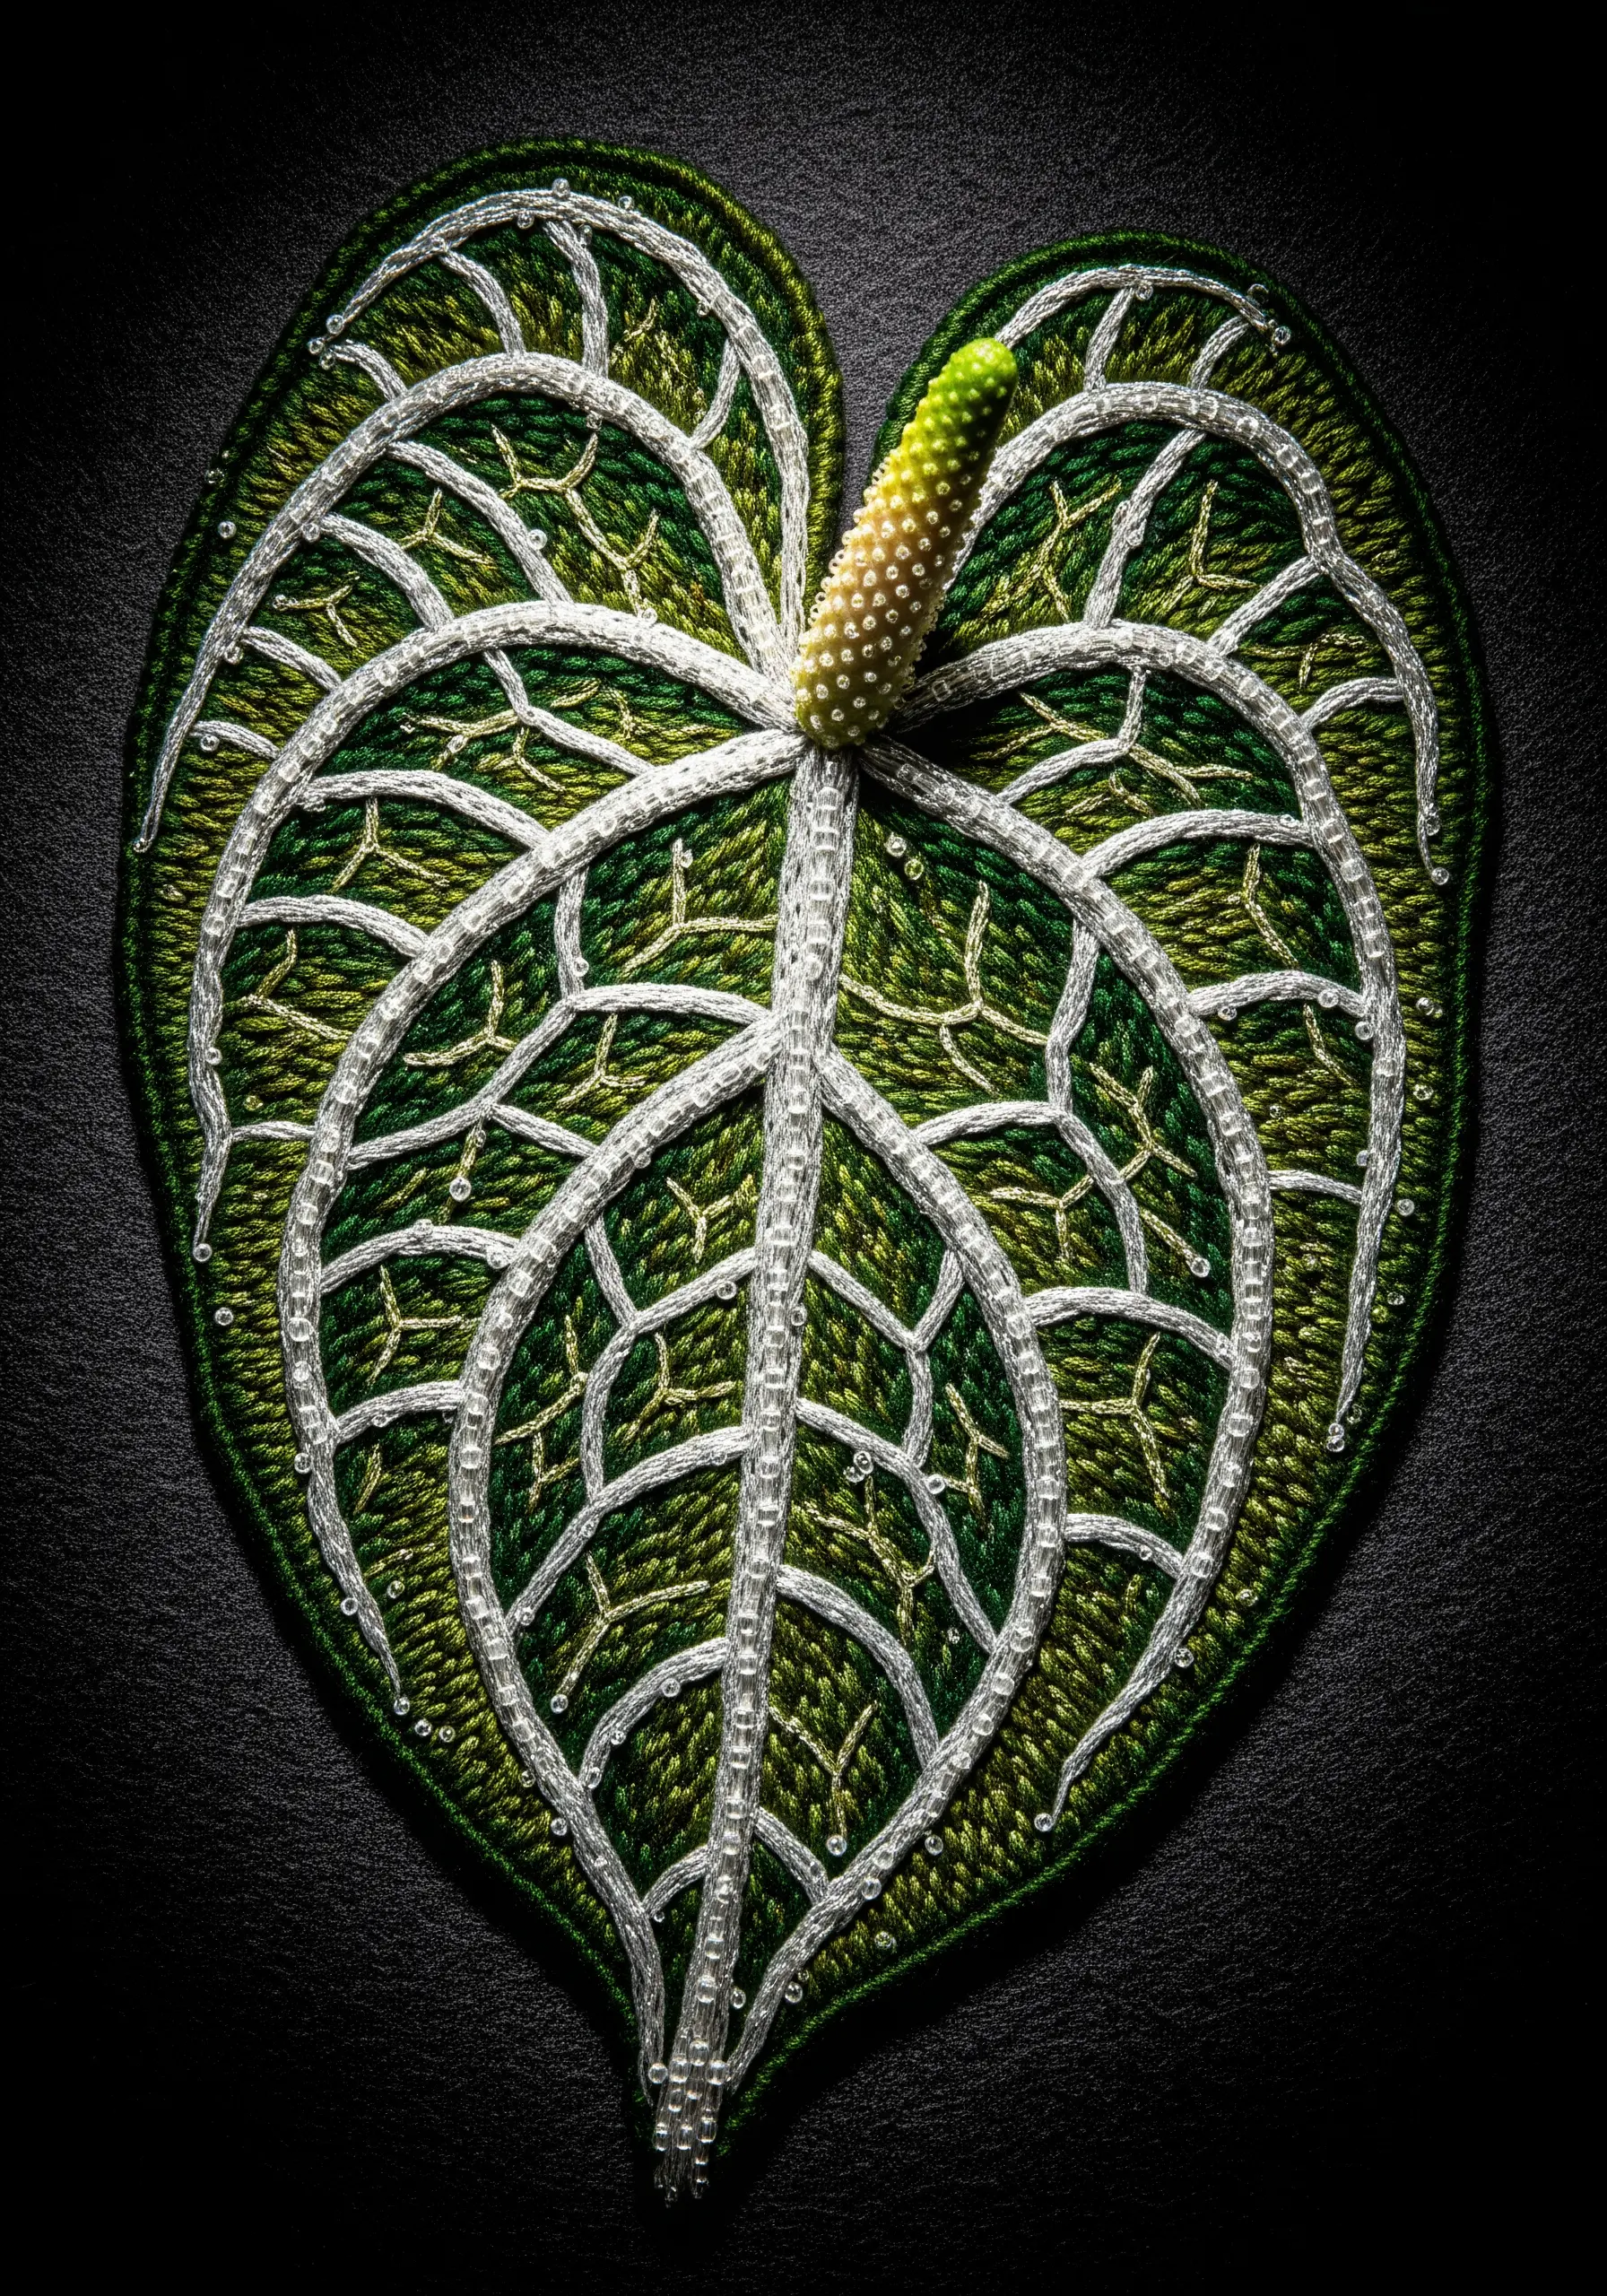
Recreate the prominent, crystalline veins of an Anthurium by couching over a string of tiny seed beads instead of thread.
Lay down your string of beads along the vein line and use a single strand of matching or invisible thread to tack it down between every second or third bead.
For the leaf texture, use a bed of randomly placed seed stitches in various shades of green to create a bumpy, organic surface that contrasts with the smooth, linear veins.
This technique turns the veins into the structural and textural focal point of the piece, mimicking the plant’s unique anatomy with precision.
4. Achieve a Seamless Repeat Pattern
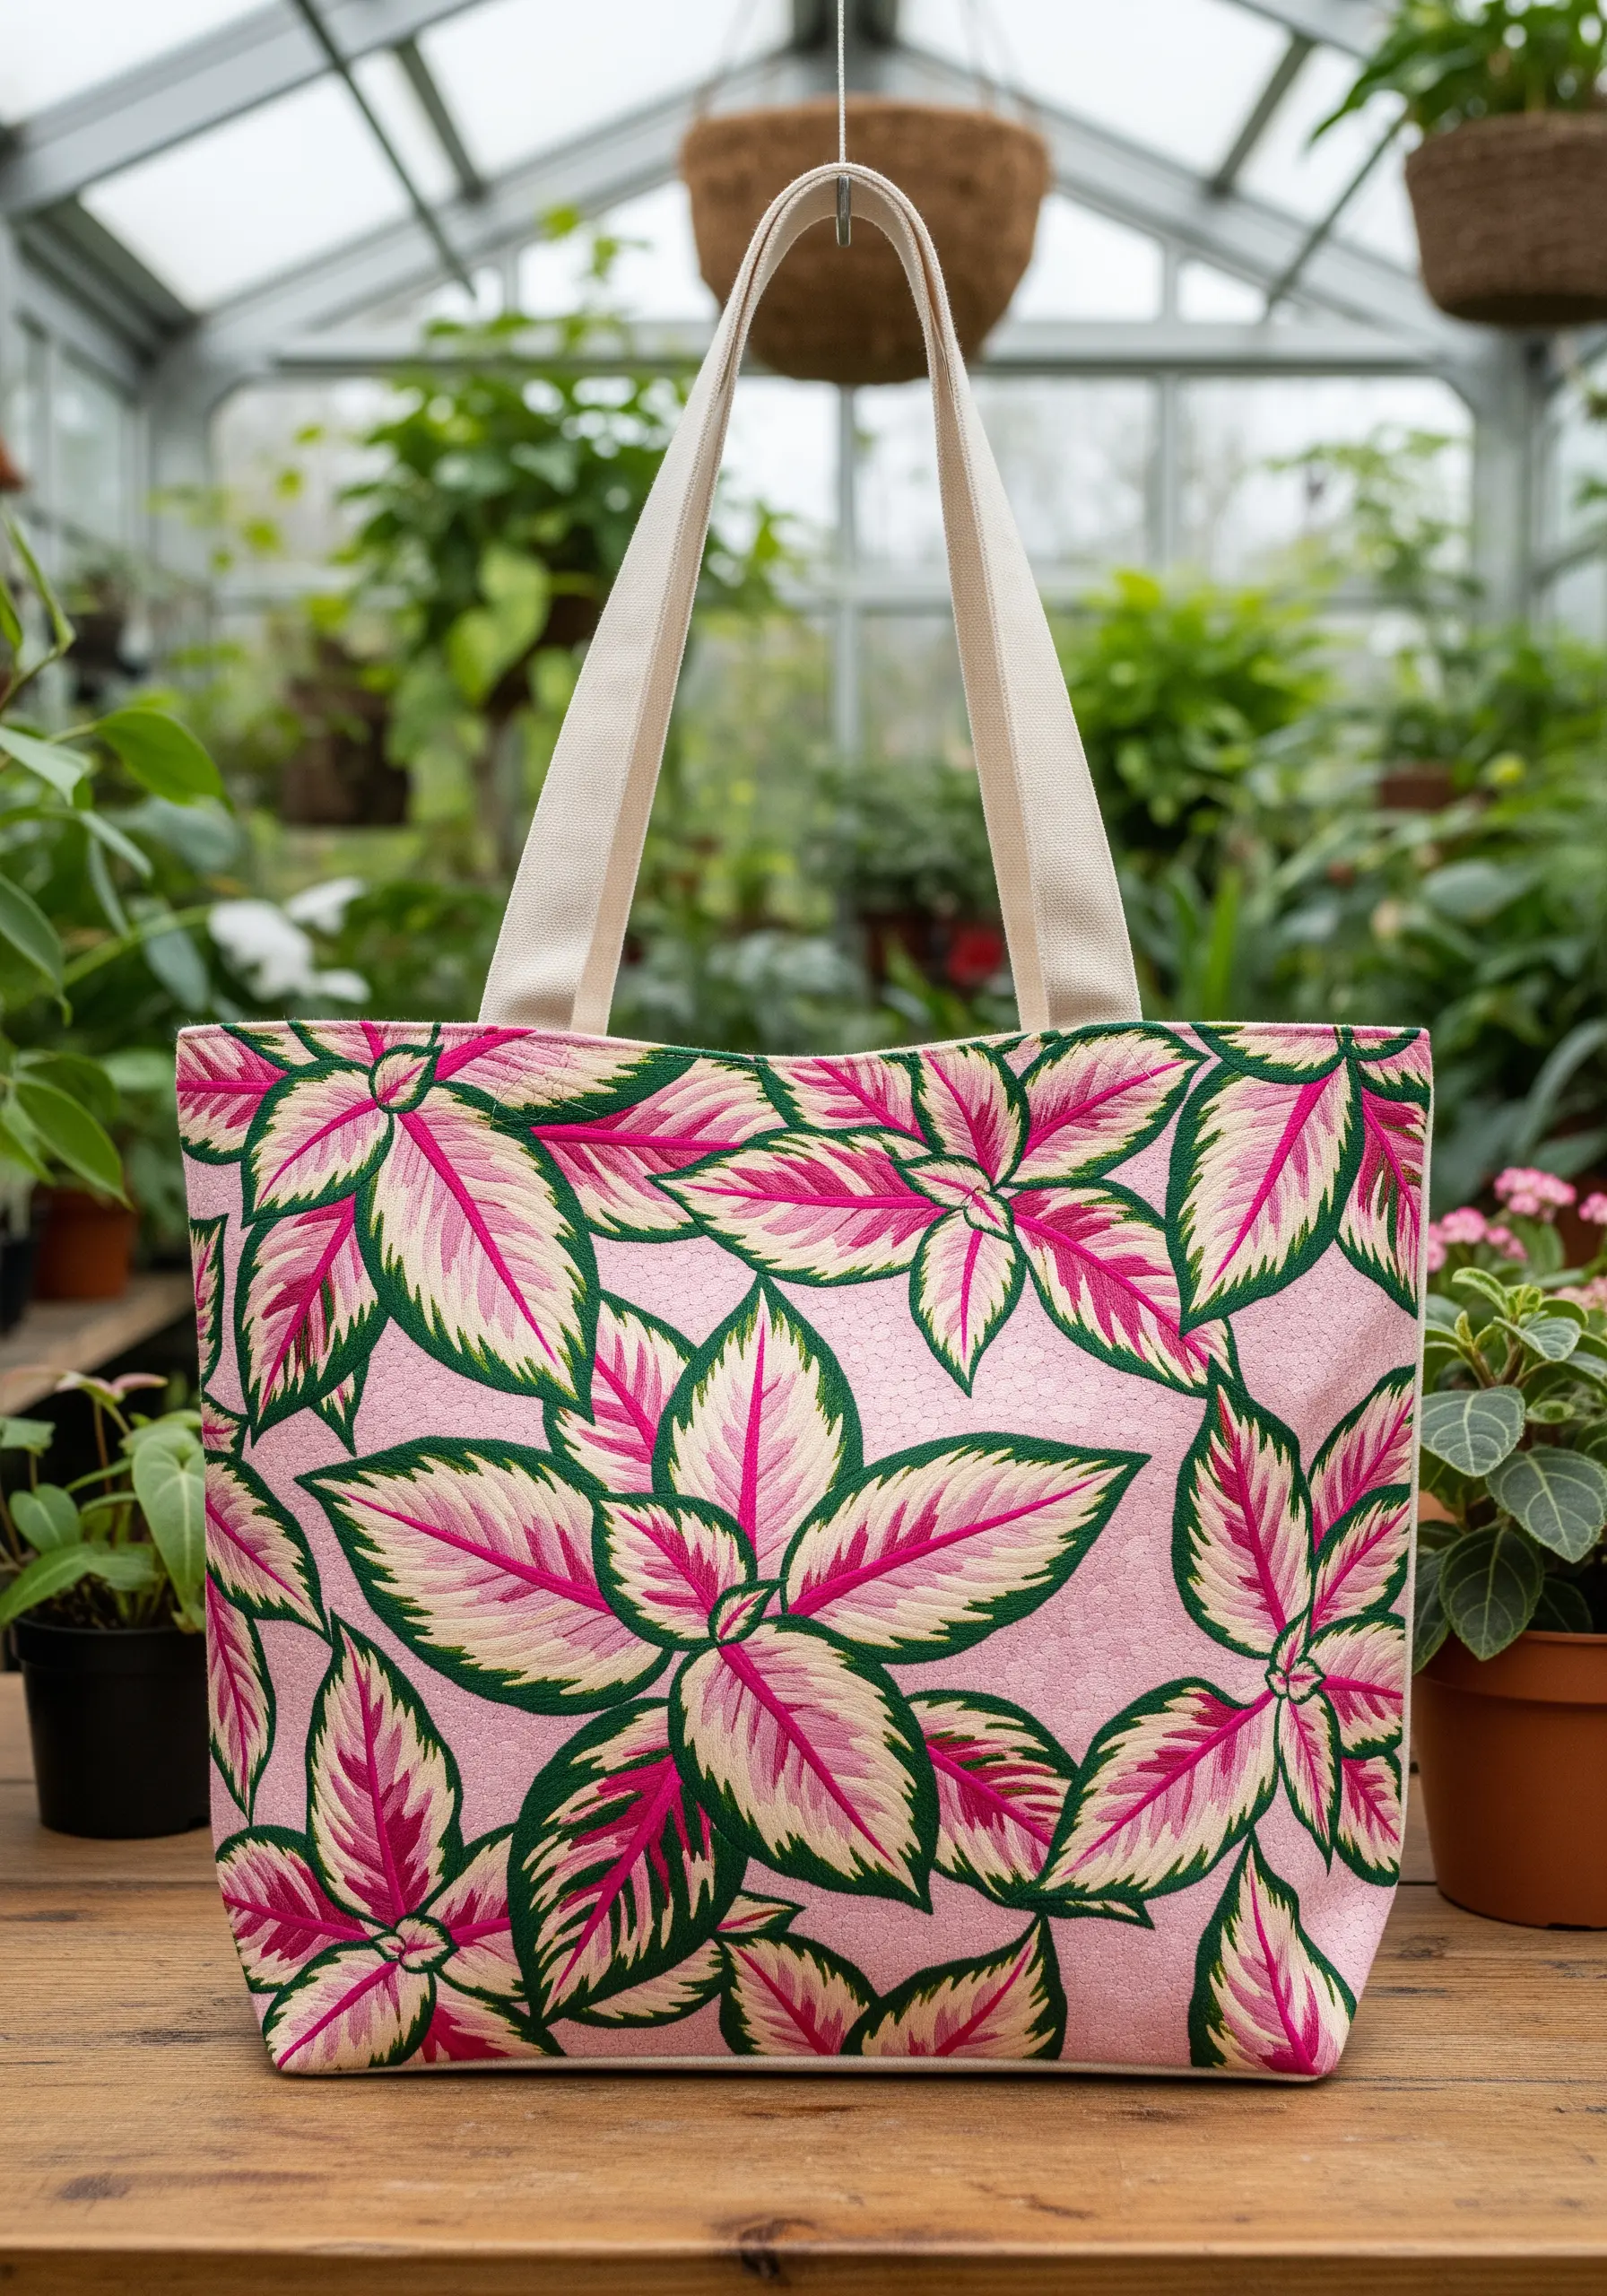
To create an all-over leaf pattern that feels intentional, not chaotic, focus on the flow and overlap of each motif.
Lightly sketch a grid on your fabric to ensure even distribution, then vary the orientation of each leaf to create a sense of natural movement.
Use a limited, harmonious color palette—like the pinks, creams, and greens here—to maintain cohesion across the entire surface.
This method works beautifully for functional items like tote bags or pillows, transforming a simple object into a piece of custom textile art.
5. Isolate Detail with High-Contrast Line Work
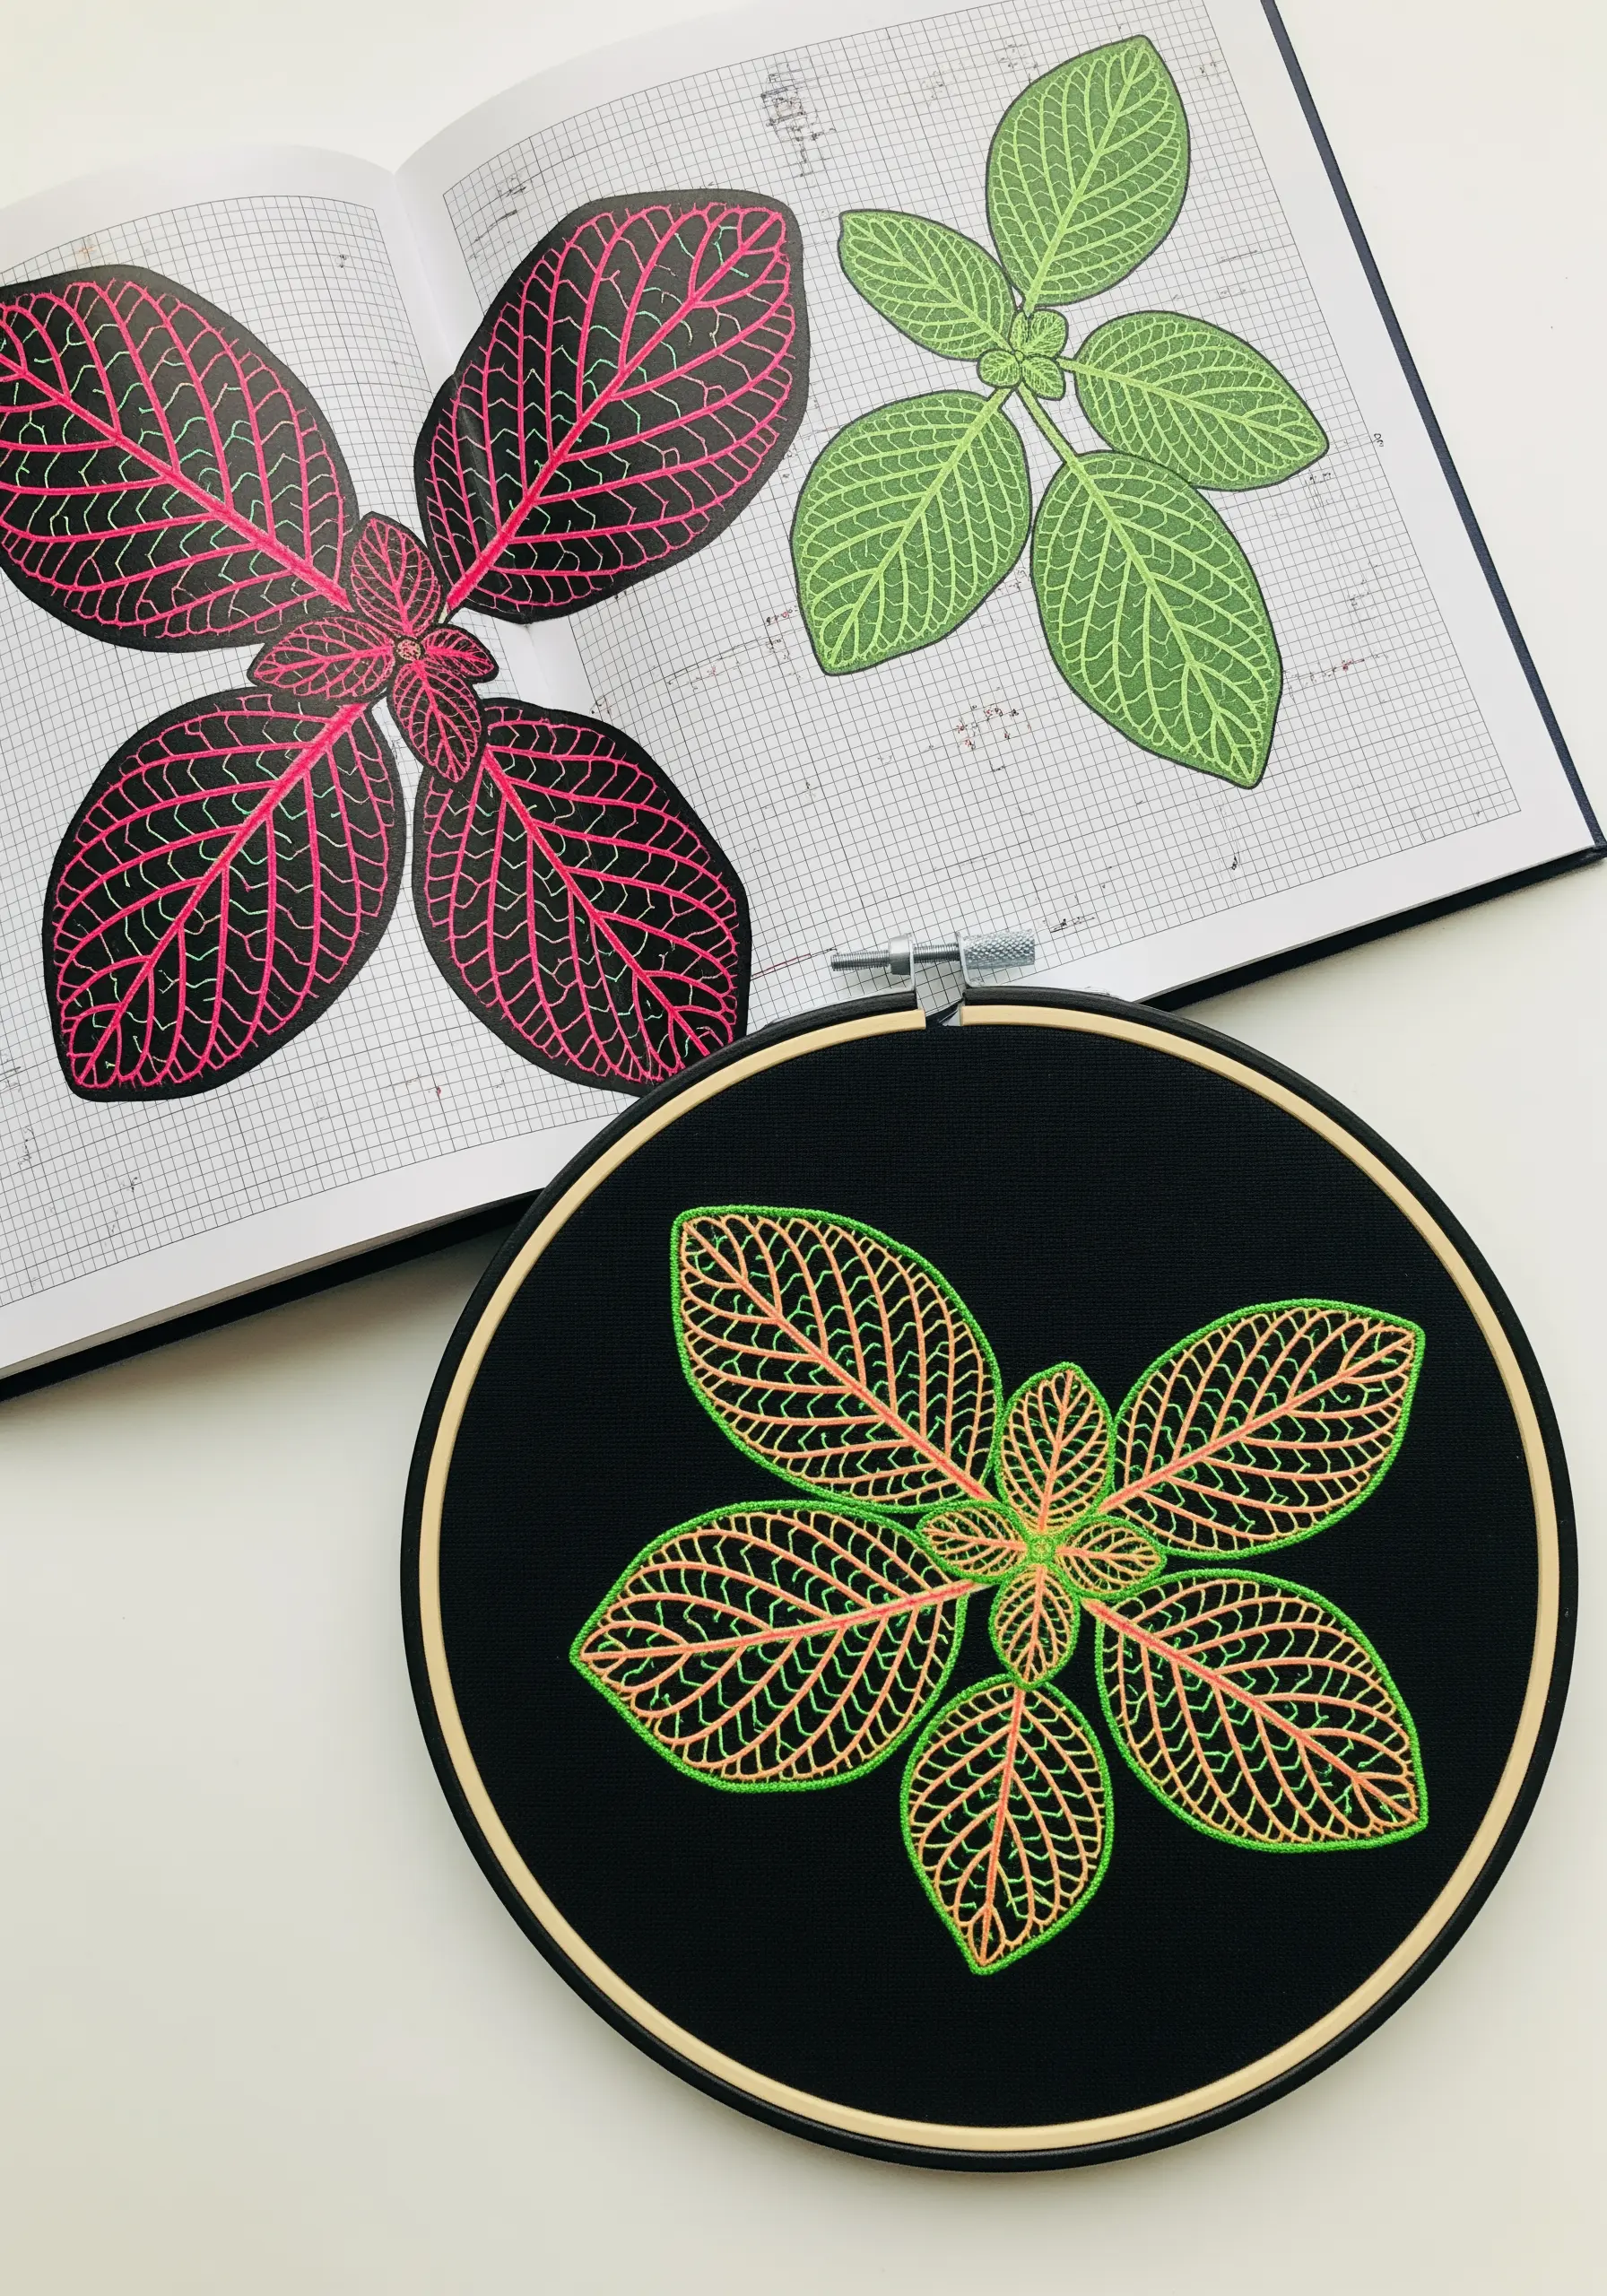
Emphasize the intricate network of a Fittonia, or nerve plant, by stitching its veins in a bright, neon thread on a pitch-black fabric.
Use a fine, sharp needle and a single strand of floss with a precise backstitch or split stitch to keep your lines crisp and delicate.
By omitting the leaf fill entirely, you direct all attention to the pattern itself, turning the veins from a detail into the entire subject.
This minimalist approach is a powerful exercise in precision and creates a stunning, graphic piece of botanical line art.
6. Create a Statement Back Patch
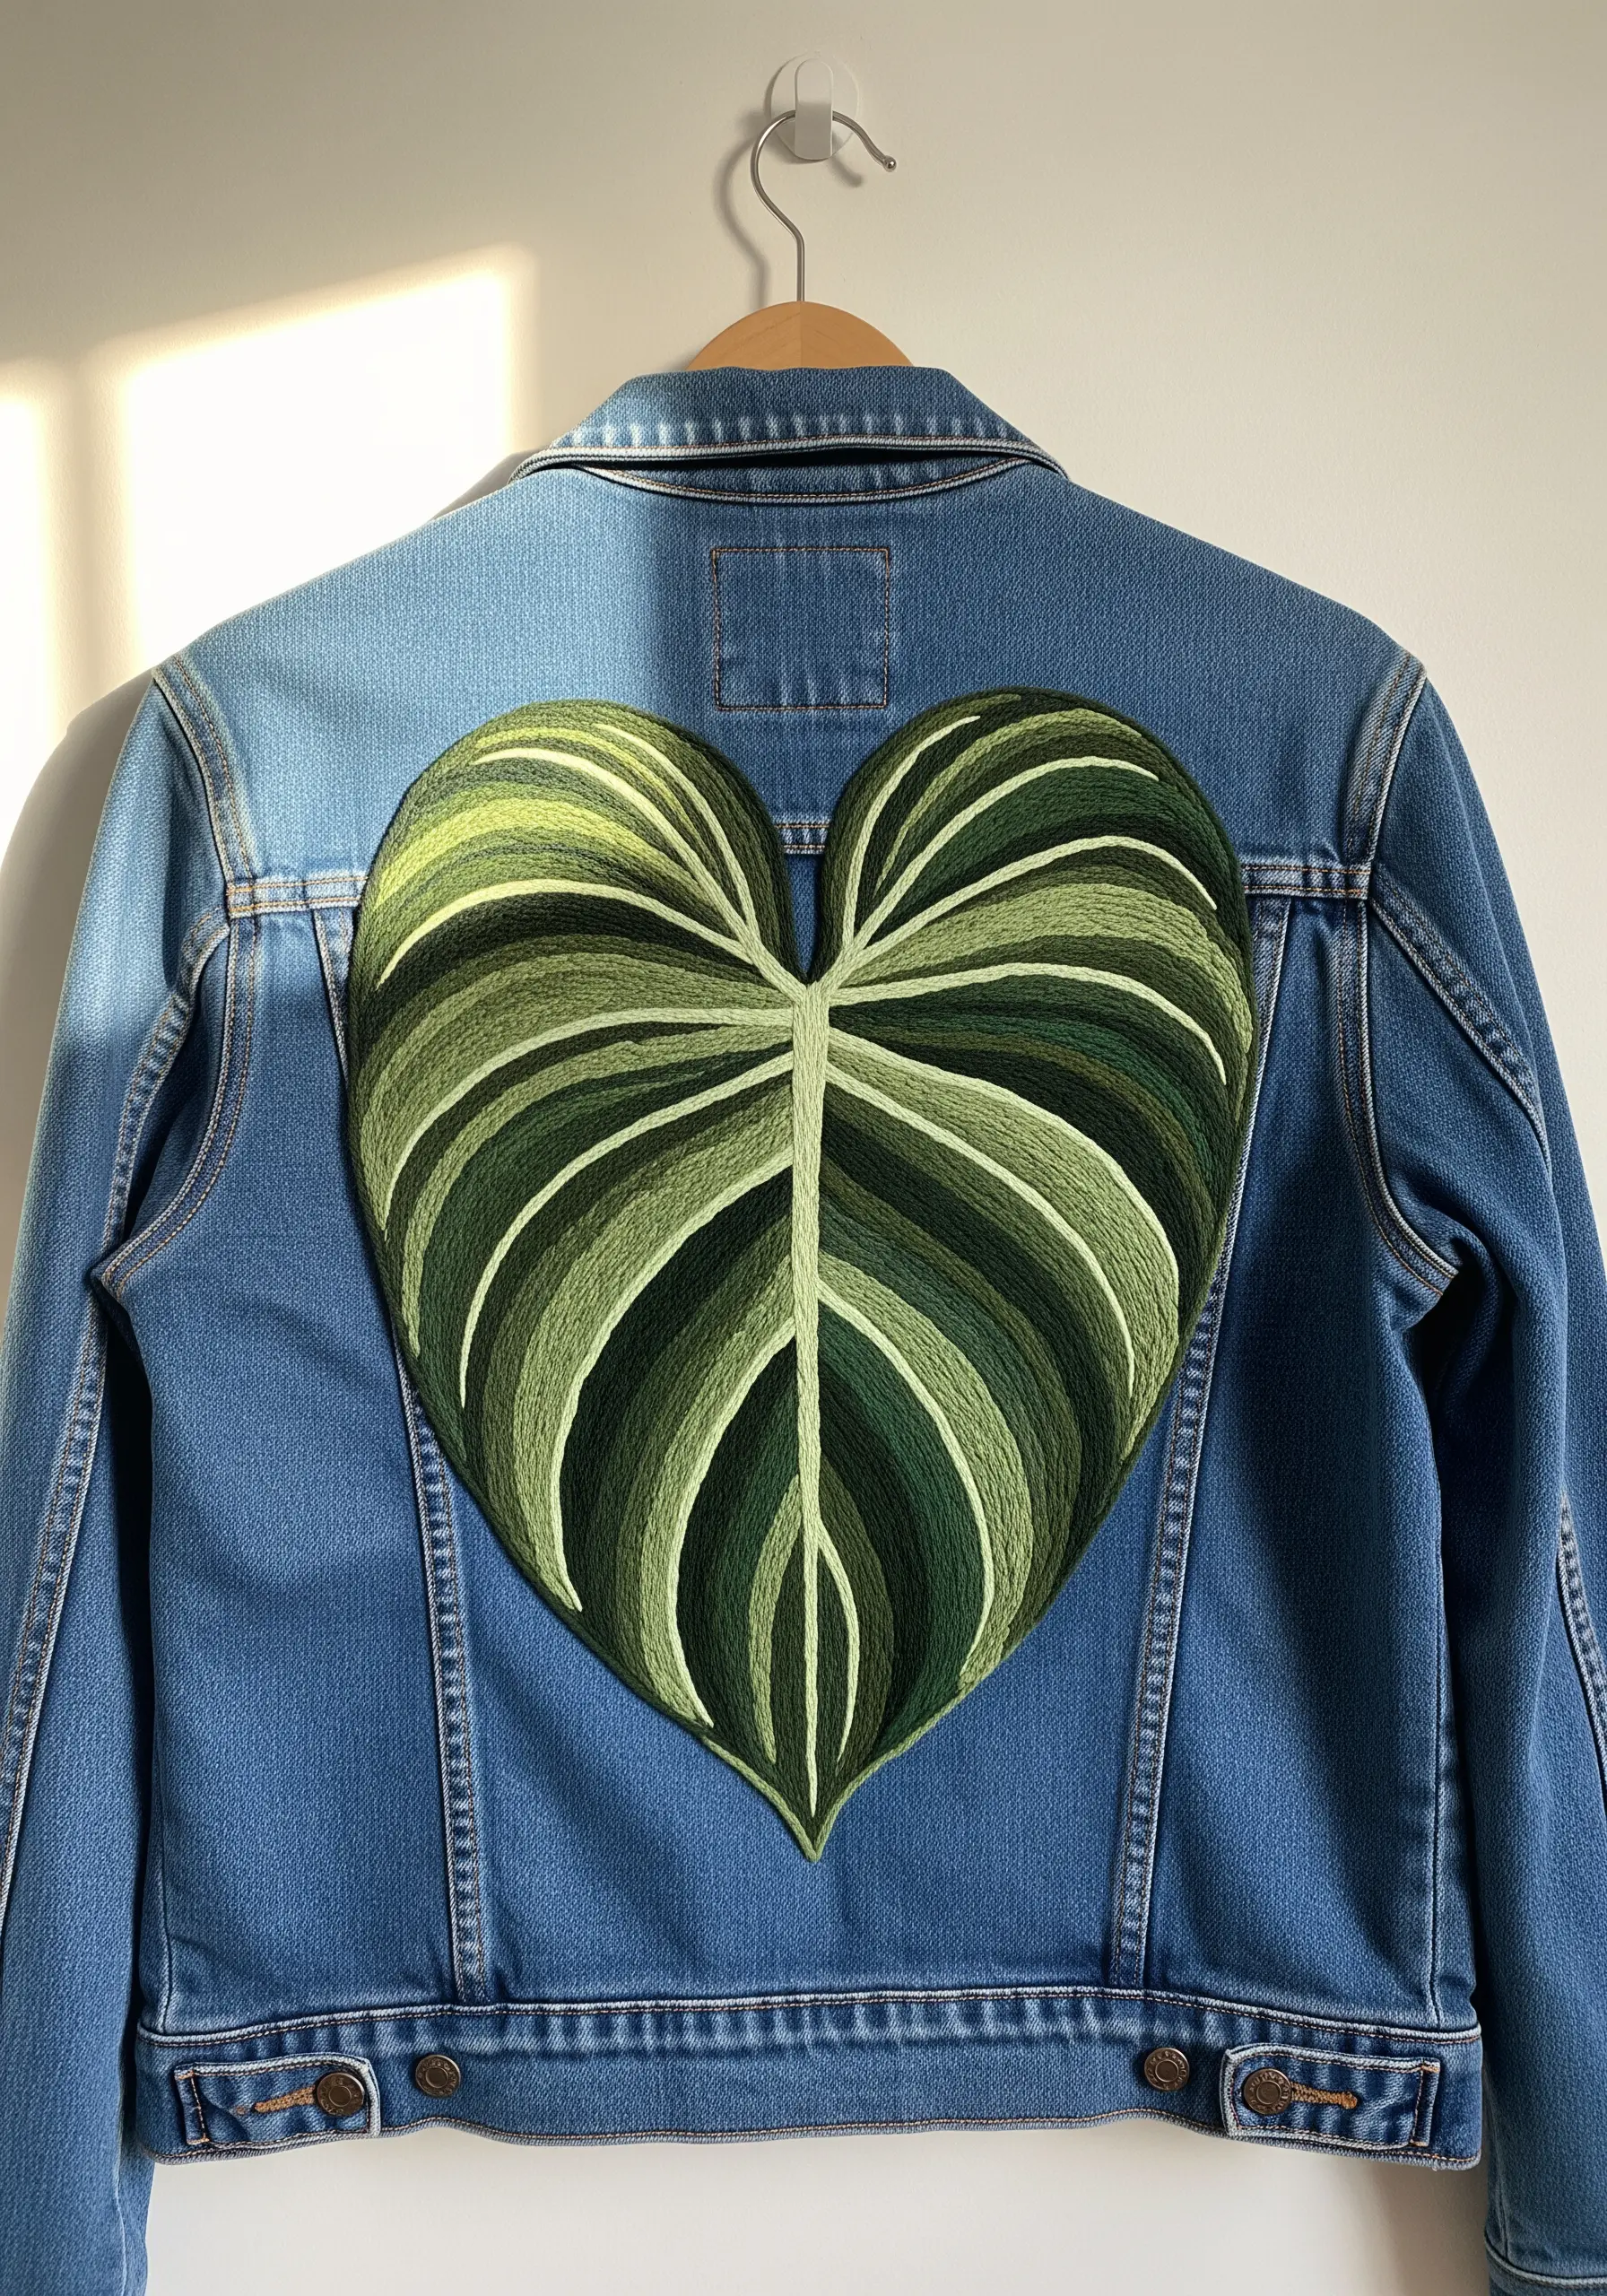
Transform a simple denim jacket with a large-scale, embroidered leaf patch that acts as a wearable piece of art.
To create smooth color transitions on this scale, use the long-and-short stitch, blending at least five shades of green from light to dark.
Stitch the patch on a separate piece of sturdy fabric, like felt or canvas, and cut it out with a small border before securely whip-stitching it onto the jacket.
This approach gives you more control over the stitching tension and allows you to create a professional, durable embellishment.
7. Weave Elegance with Metallic Threads

Elevate a classic leaf motif for home décor by using a palette of metallic threads in jewel tones like amethyst, silver, and bronze.
When working with metallics, use a thread conditioner and a needle with a larger eye to prevent shredding and frustration.
Alternate the direction of your satin stitches within each leaf section to maximize the way the threads catch the light, creating a dynamic, shimmering effect.
This simple switch in material transforms traditional foliage into a sophisticated design perfect for table linens and other luxe spring centerpieces.
8. Build Dimension with Chunky Stitches
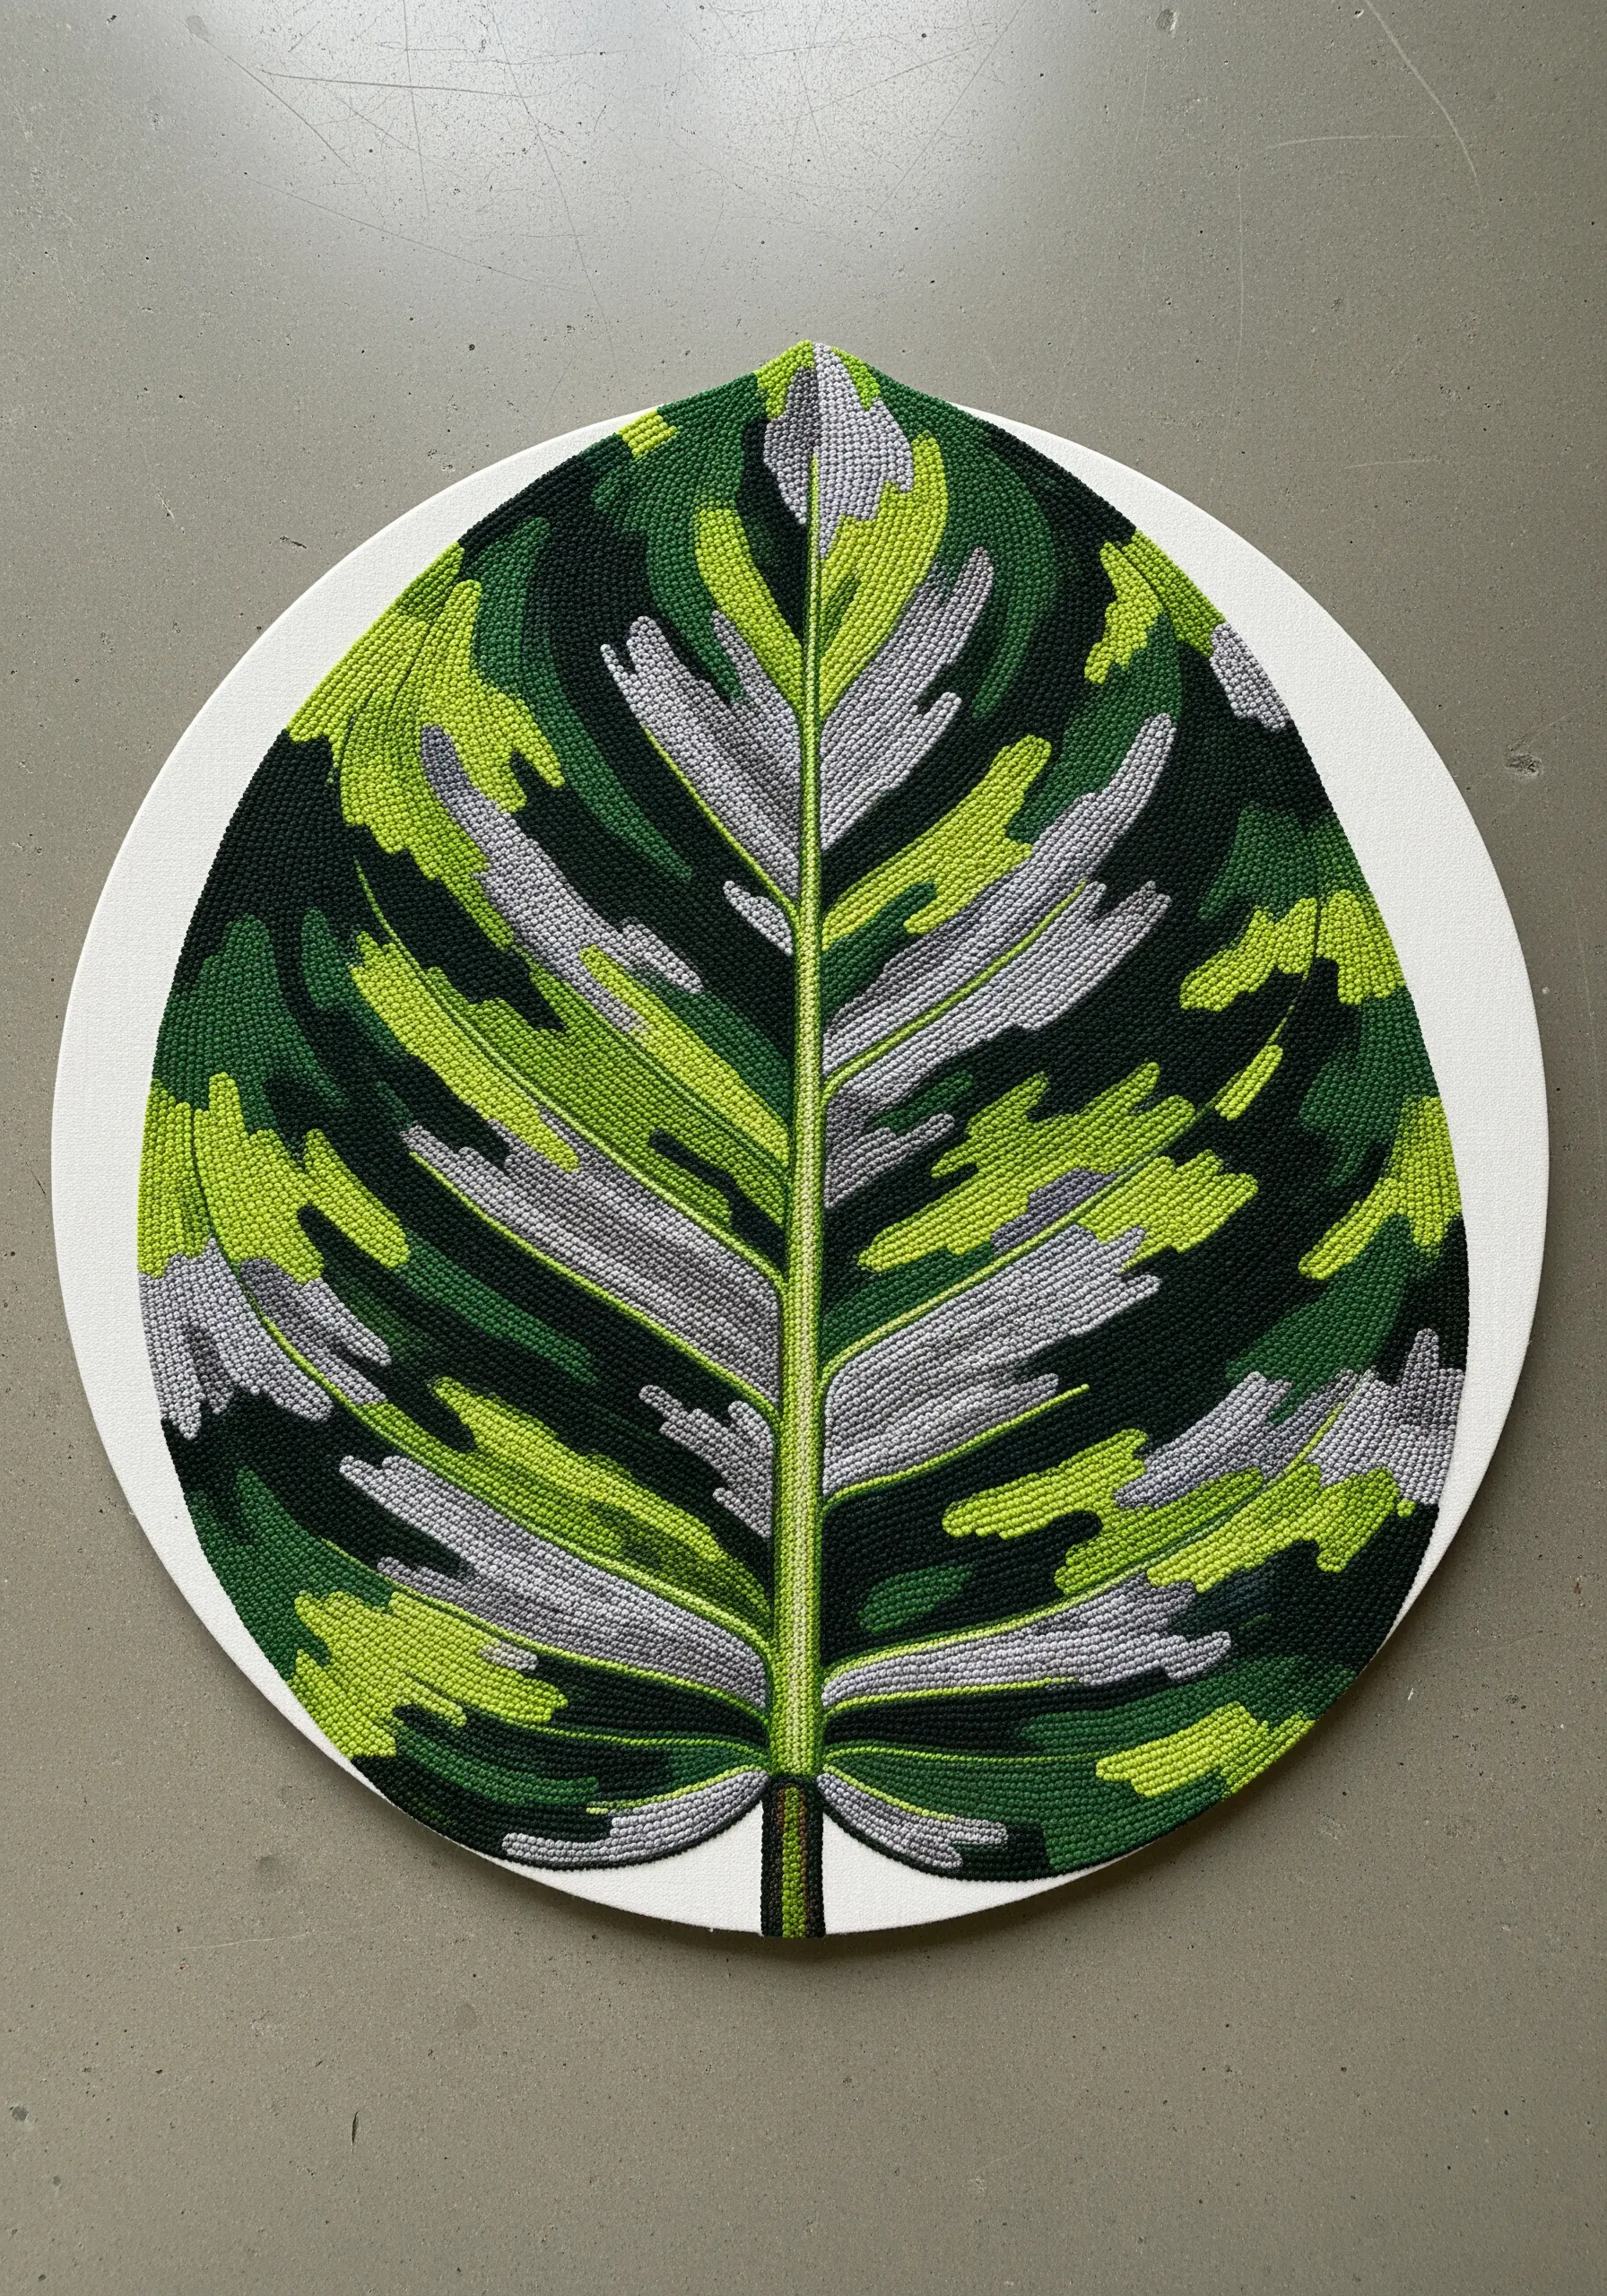
Move beyond standard floss to create bold, graphic leaves with incredible texture by using thicker threads like tapestry wool or multiple strands of embroidery floss (10-12 strands).
Fill large color blocks with a chunky chain stitch or laid work instead of satin stitch; this adds texture and covers the area more quickly without sacrificing density.
Mounting the final piece on a circular canvas board instead of a hoop provides a clean, modern finish that feels more like a painting.
This technique is perfect for creating impactful wall art that has both visual weight and a compelling tactile quality.
9. Capture Variegation with Satin Stitch Blocking
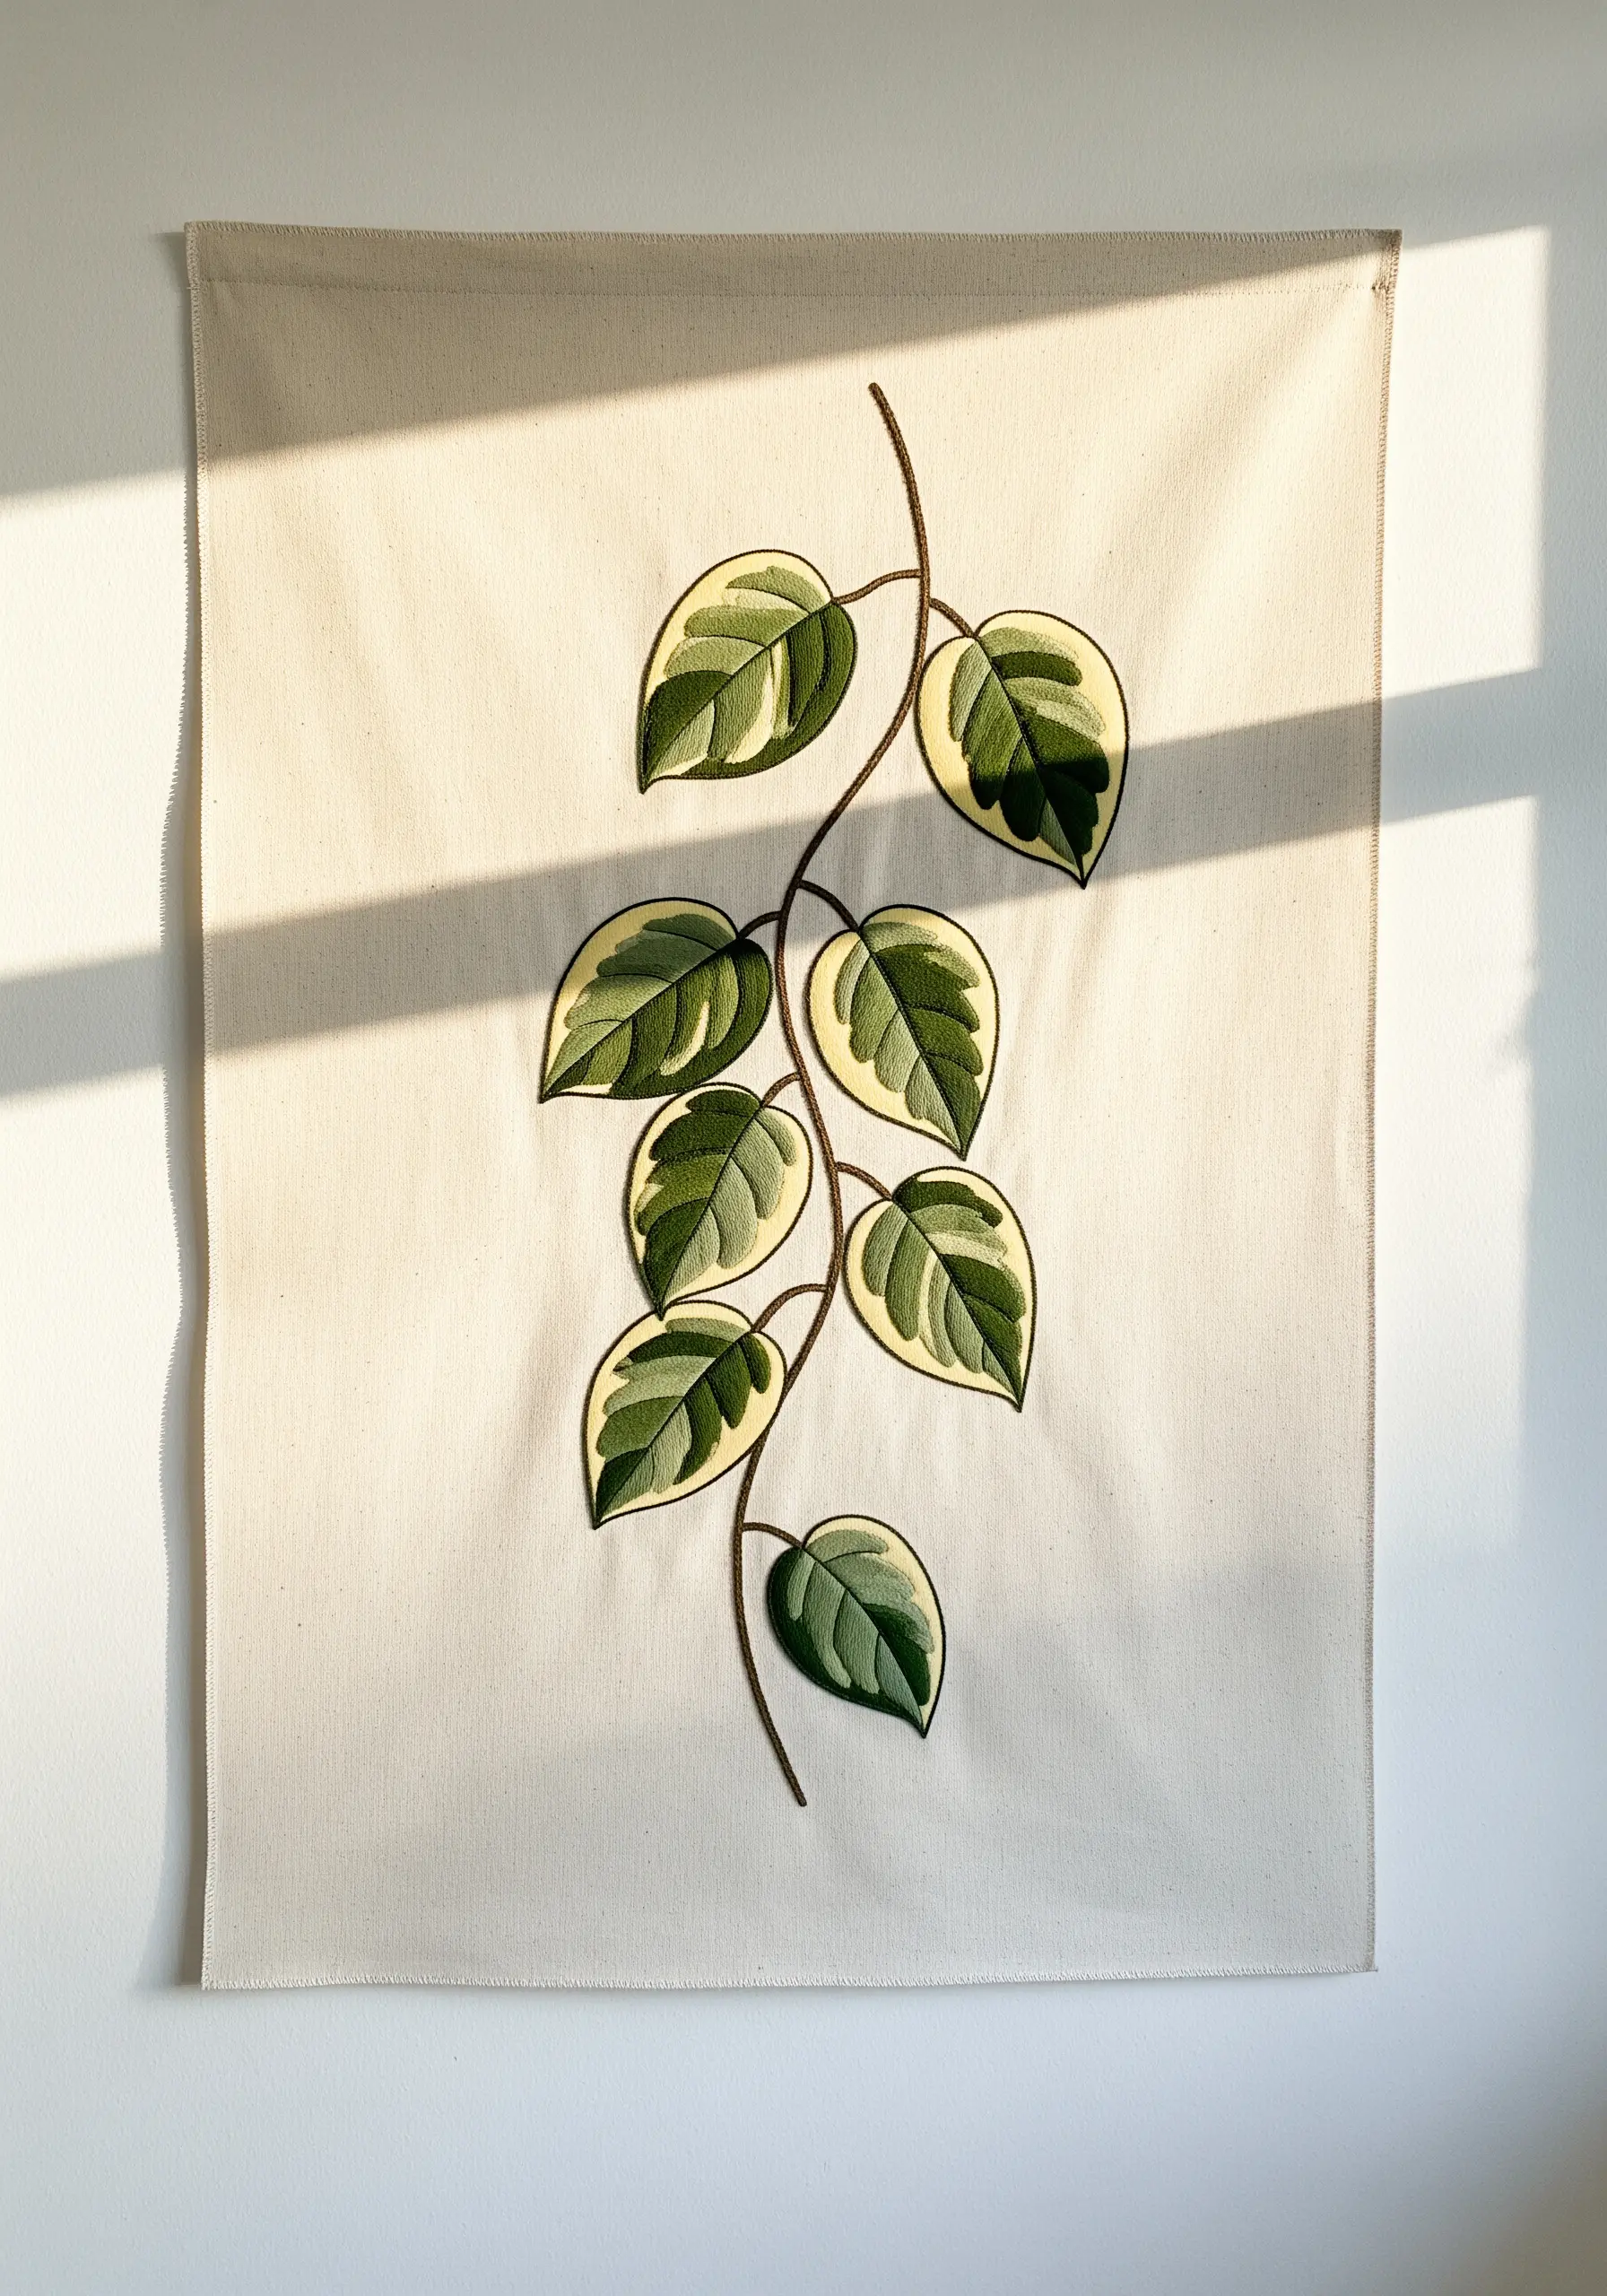
To embroider variegated leaves like the Pothos ‘N’Joy, treat the different colored sections like a puzzle, outlining each patch of color first before filling it in.
Use a disciplined satin stitch, keeping all stitches parallel to one another within each block of color for a smooth, seamless finish.
Pay close attention to the edges where colors meet; your stitches should sit snugly against each other with no gaps for the most realistic effect.
A fine, dark green backstitch outline around the entire leaf provides the final definition needed to make the variegation pop.
10. Layer Motifs for Depth and Opulence
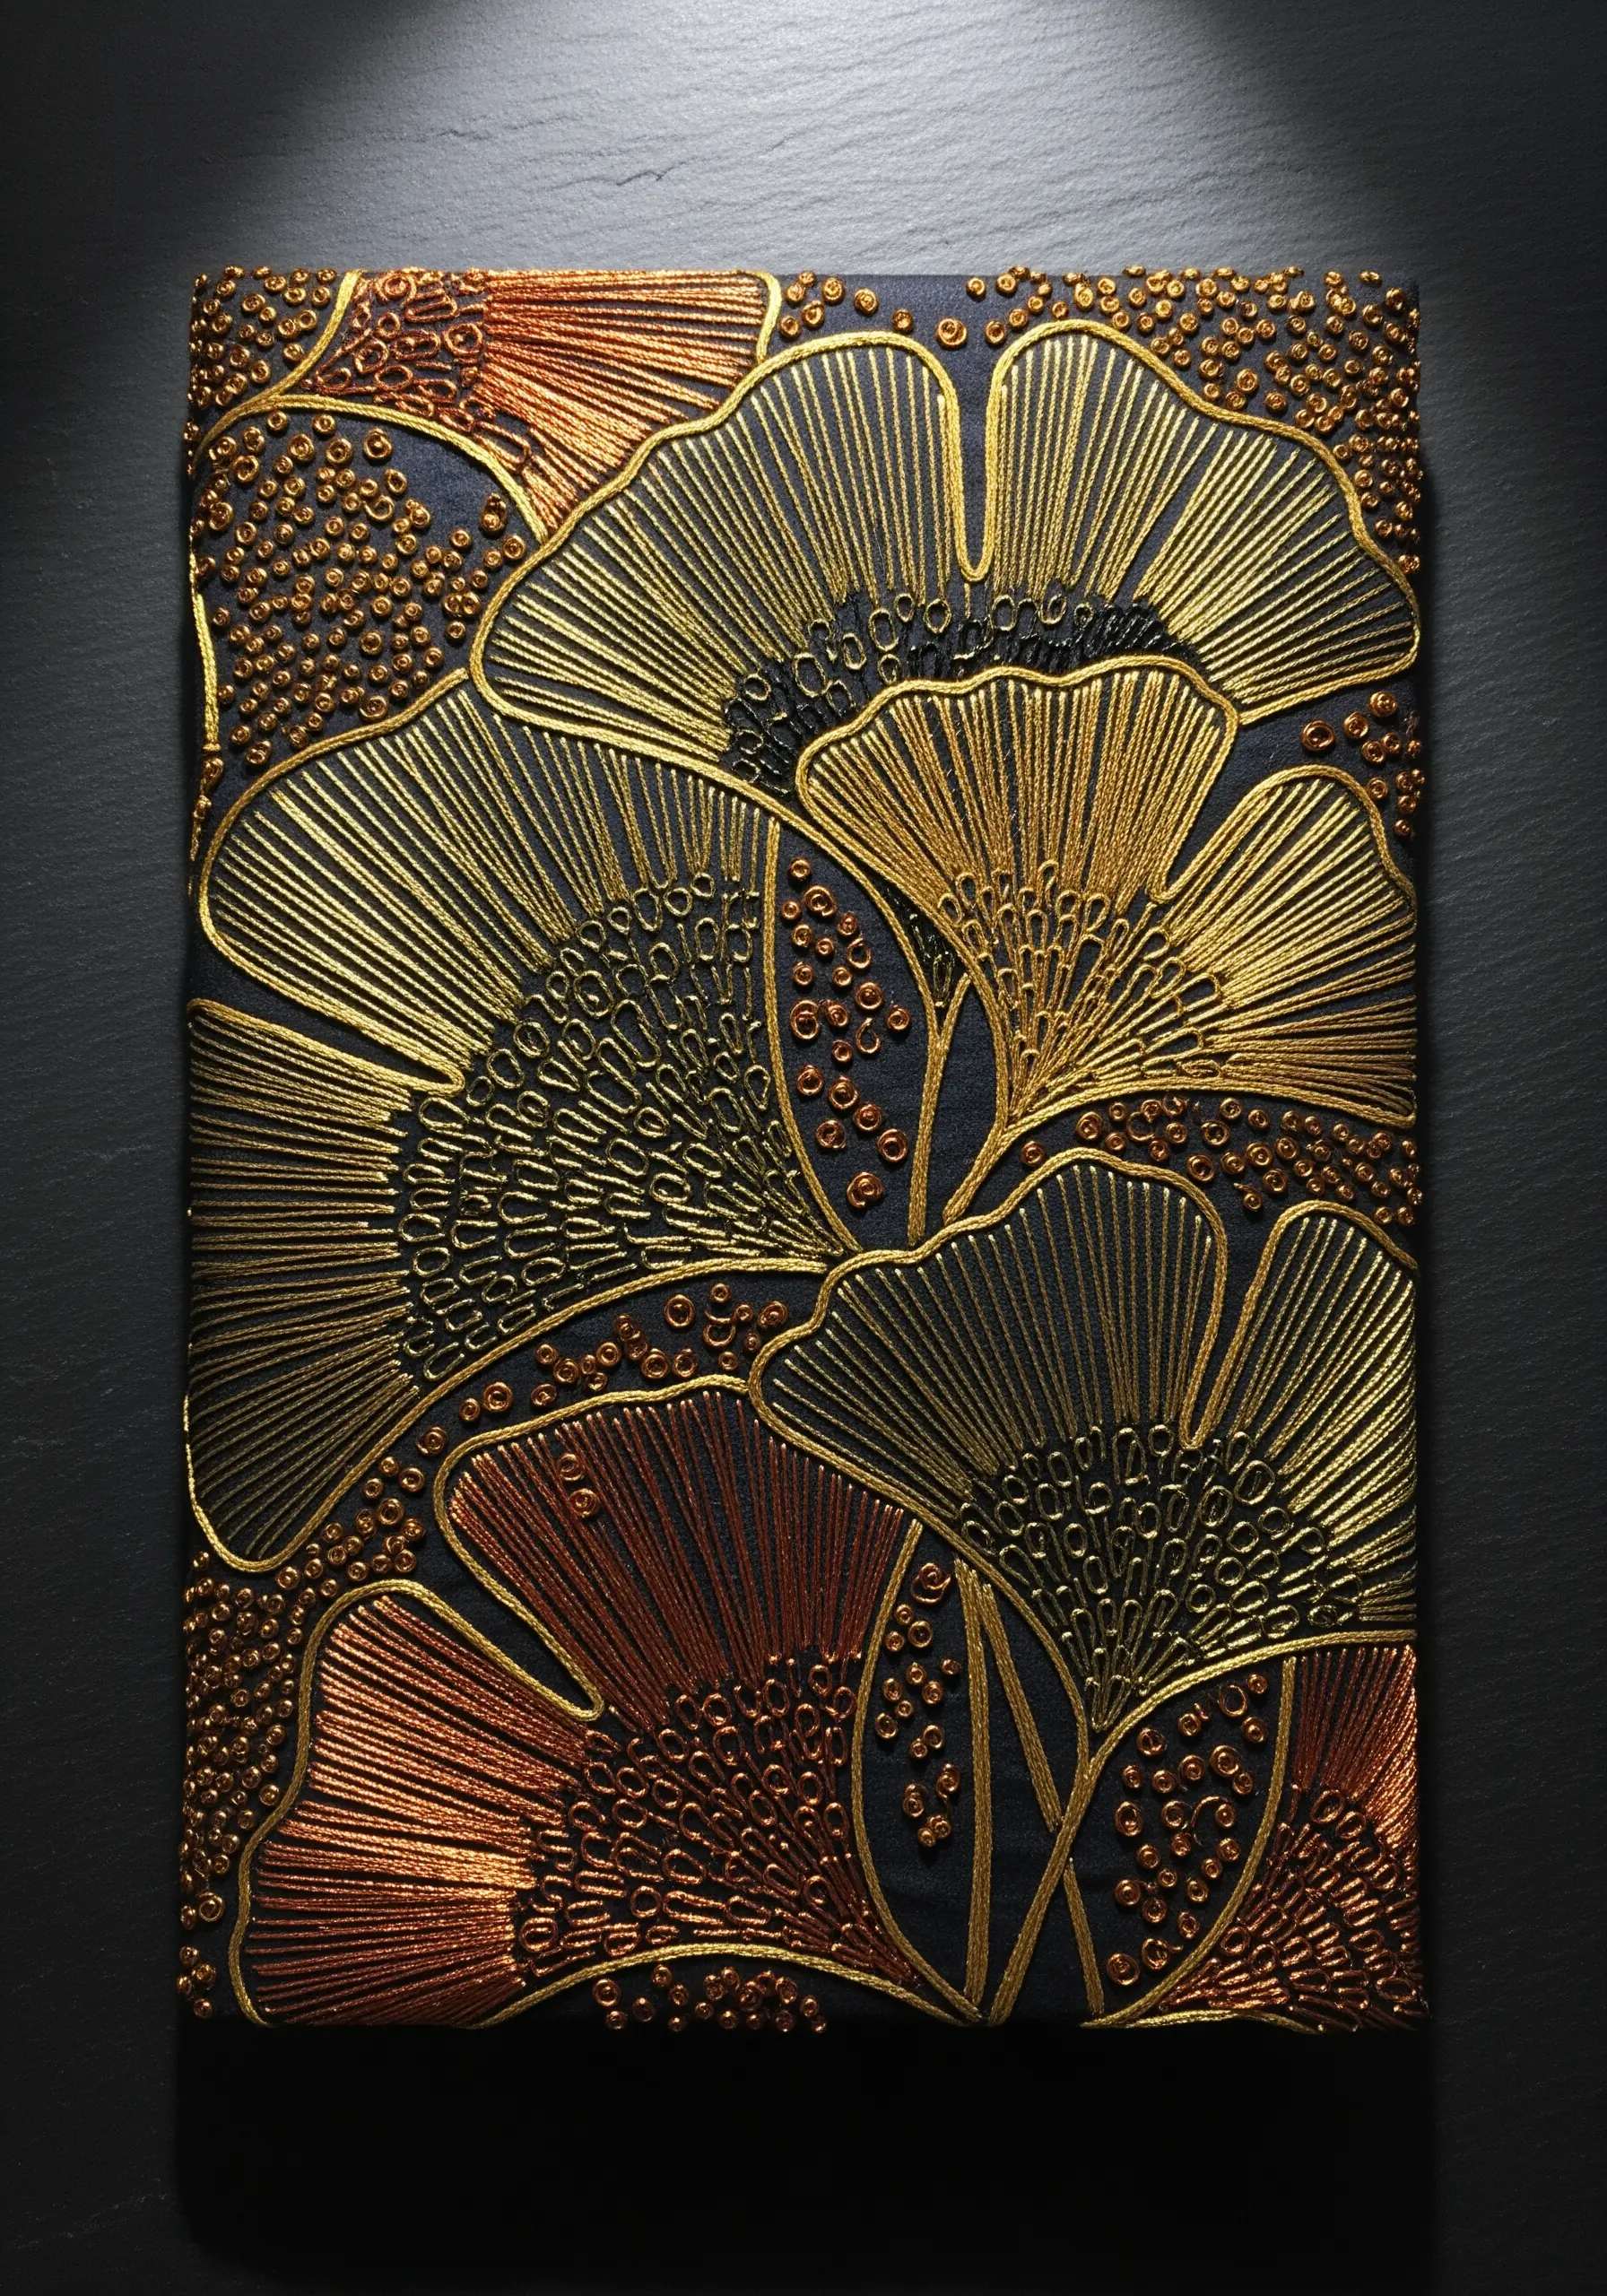
Create a dense, luxurious composition by overlapping Ginkgo leaf motifs, using a combination of line work and textural fillers.
Use metallic threads in gold, bronze, and gunmetal to establish a rich, harmonious palette against a dark fabric background.
Fill some leaves with radiating satin stitches to mimic their natural fan shape, while filling others with dense French knots for contrast. This juxtaposition of texture is key.
This approach to high-texture fabric collage creates a piece with incredible visual depth, inviting the viewer to look closer and appreciate the intricate details.
11. Design a Cohesive Botanical Set
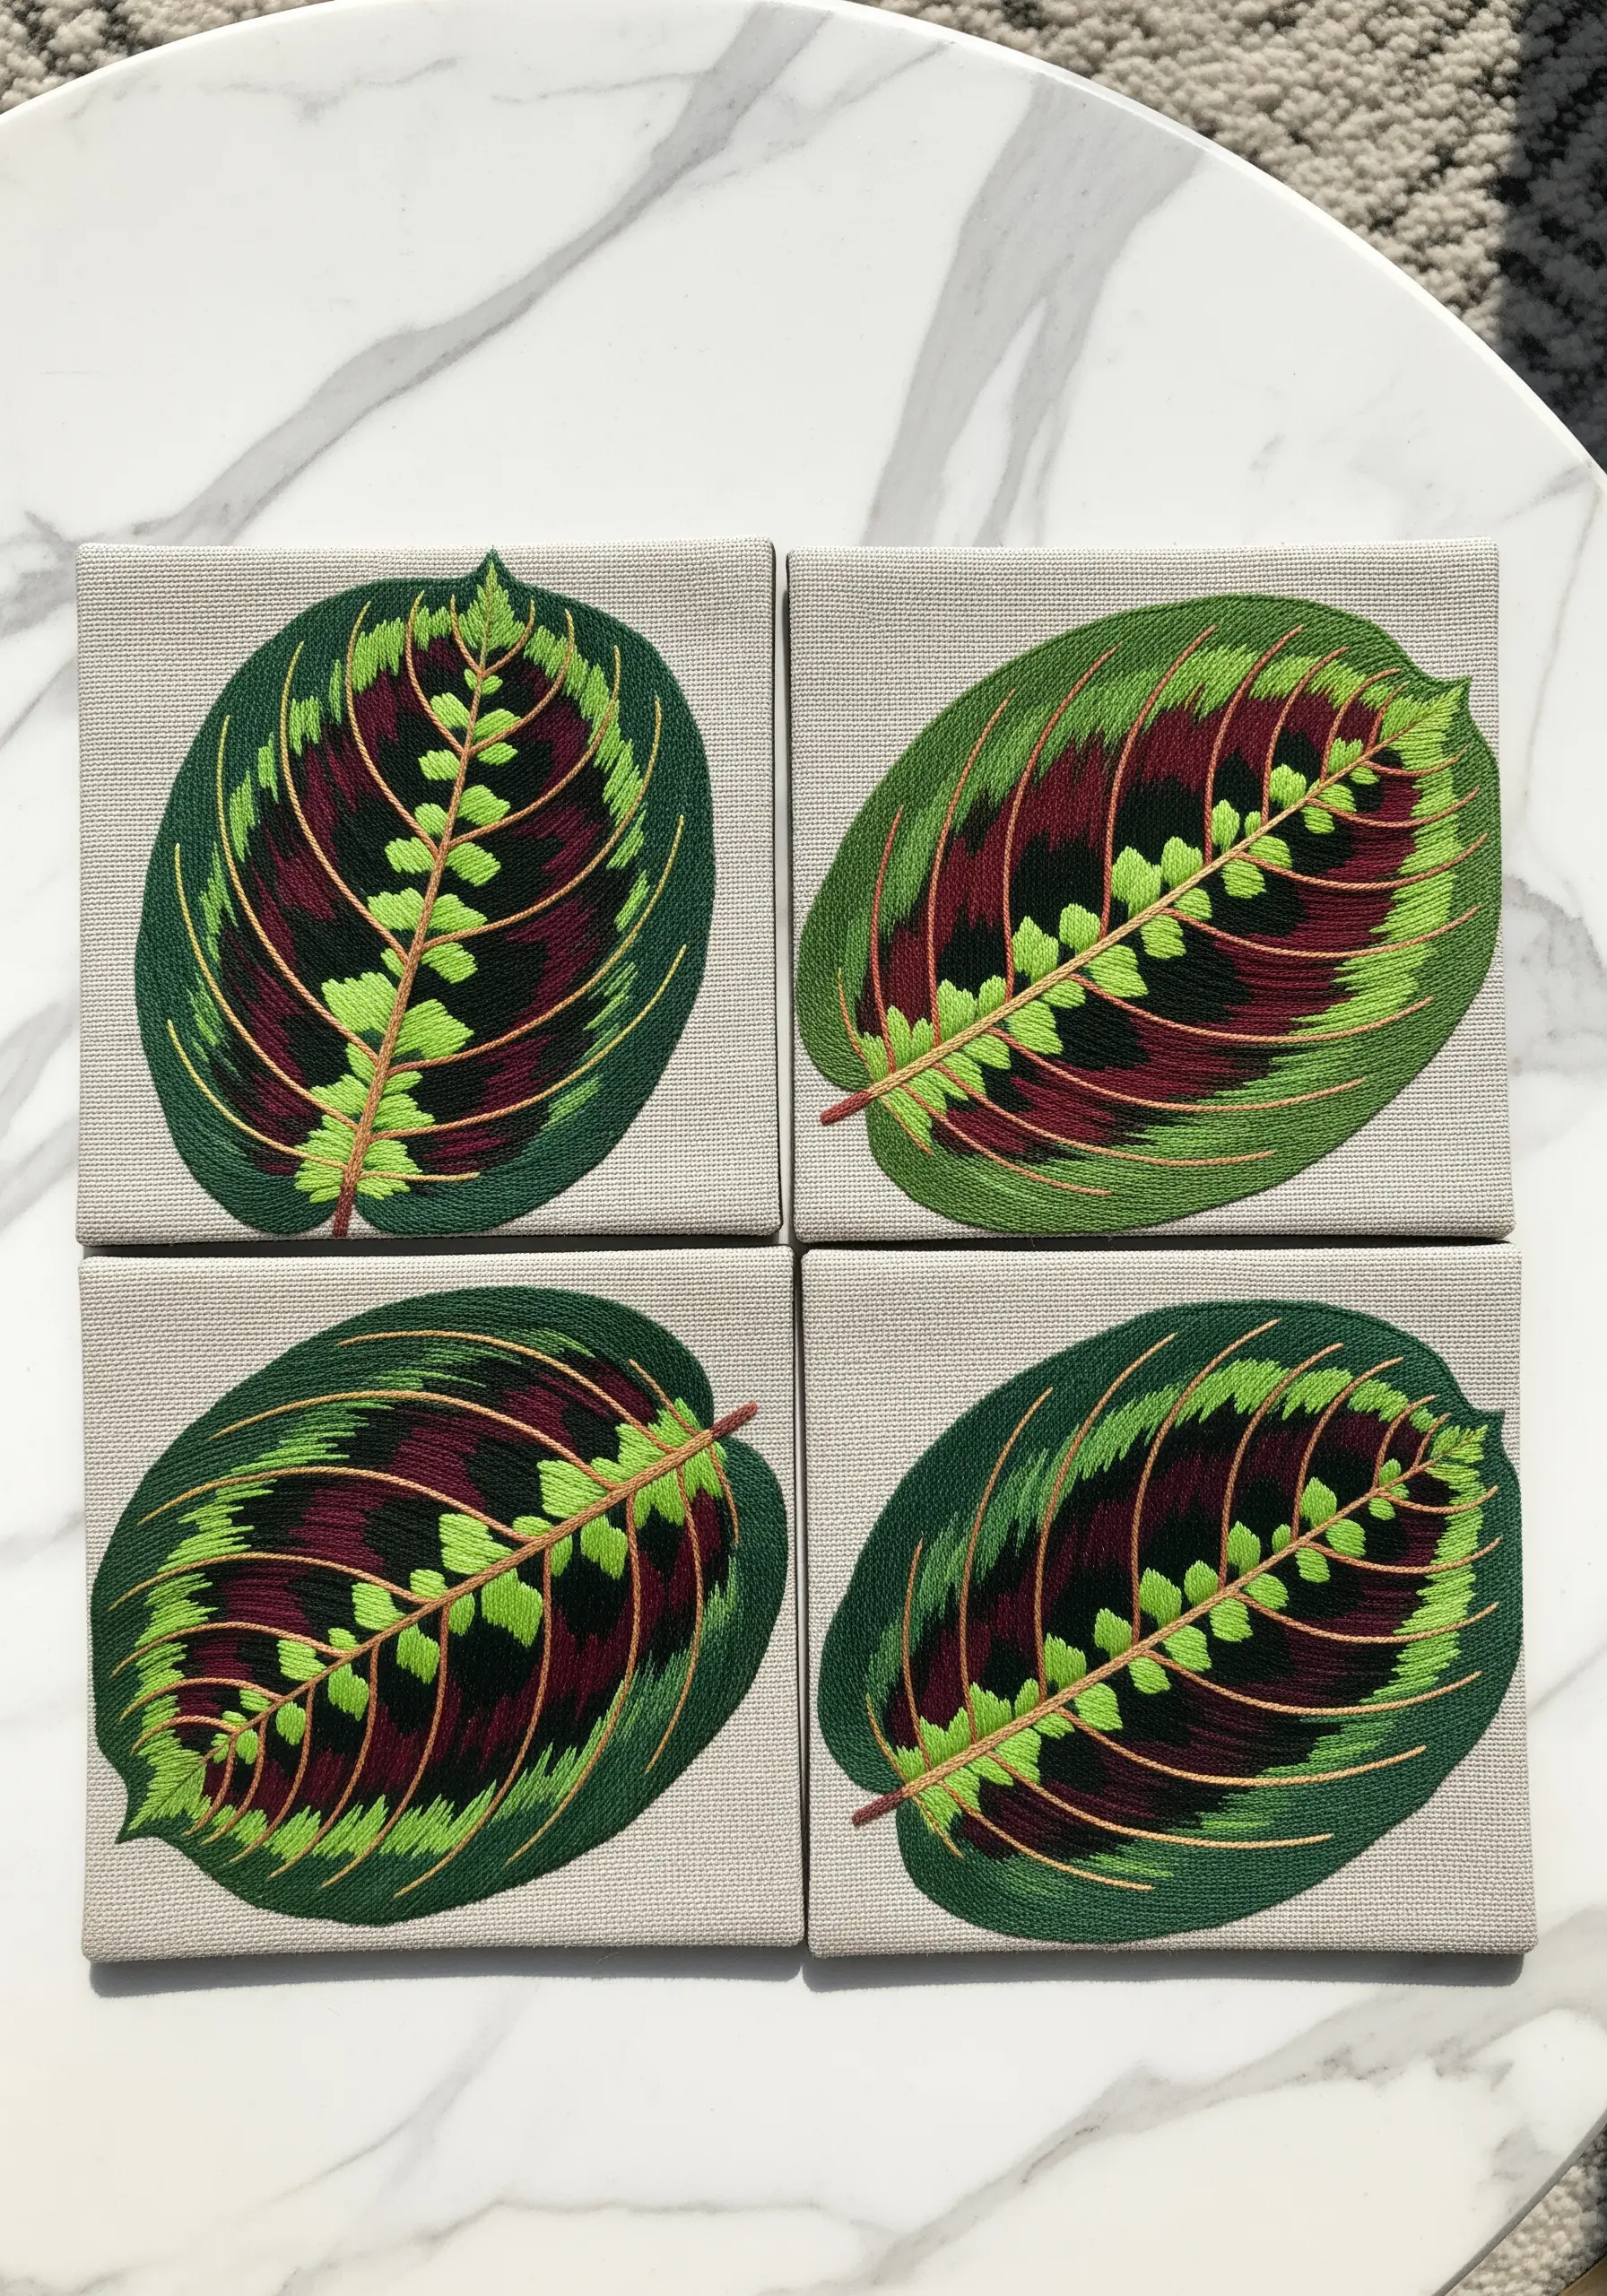
Translate a single complex leaf, like the Maranta, into a series of smaller, focused studies for a set of coasters or mini art panels.
Though each piece is unique, maintain cohesion by using the exact same thread palette and stitch direction for corresponding parts of the leaf.
Focus your thread painting on capturing the sharp, herringbone pattern and the deep red veins, as these are the plant’s most defining features.
Presenting them as a set transforms individual embroideries into a curated collection that tells a more complete story.
12. Stitch Ethereal Skeleton Leaves
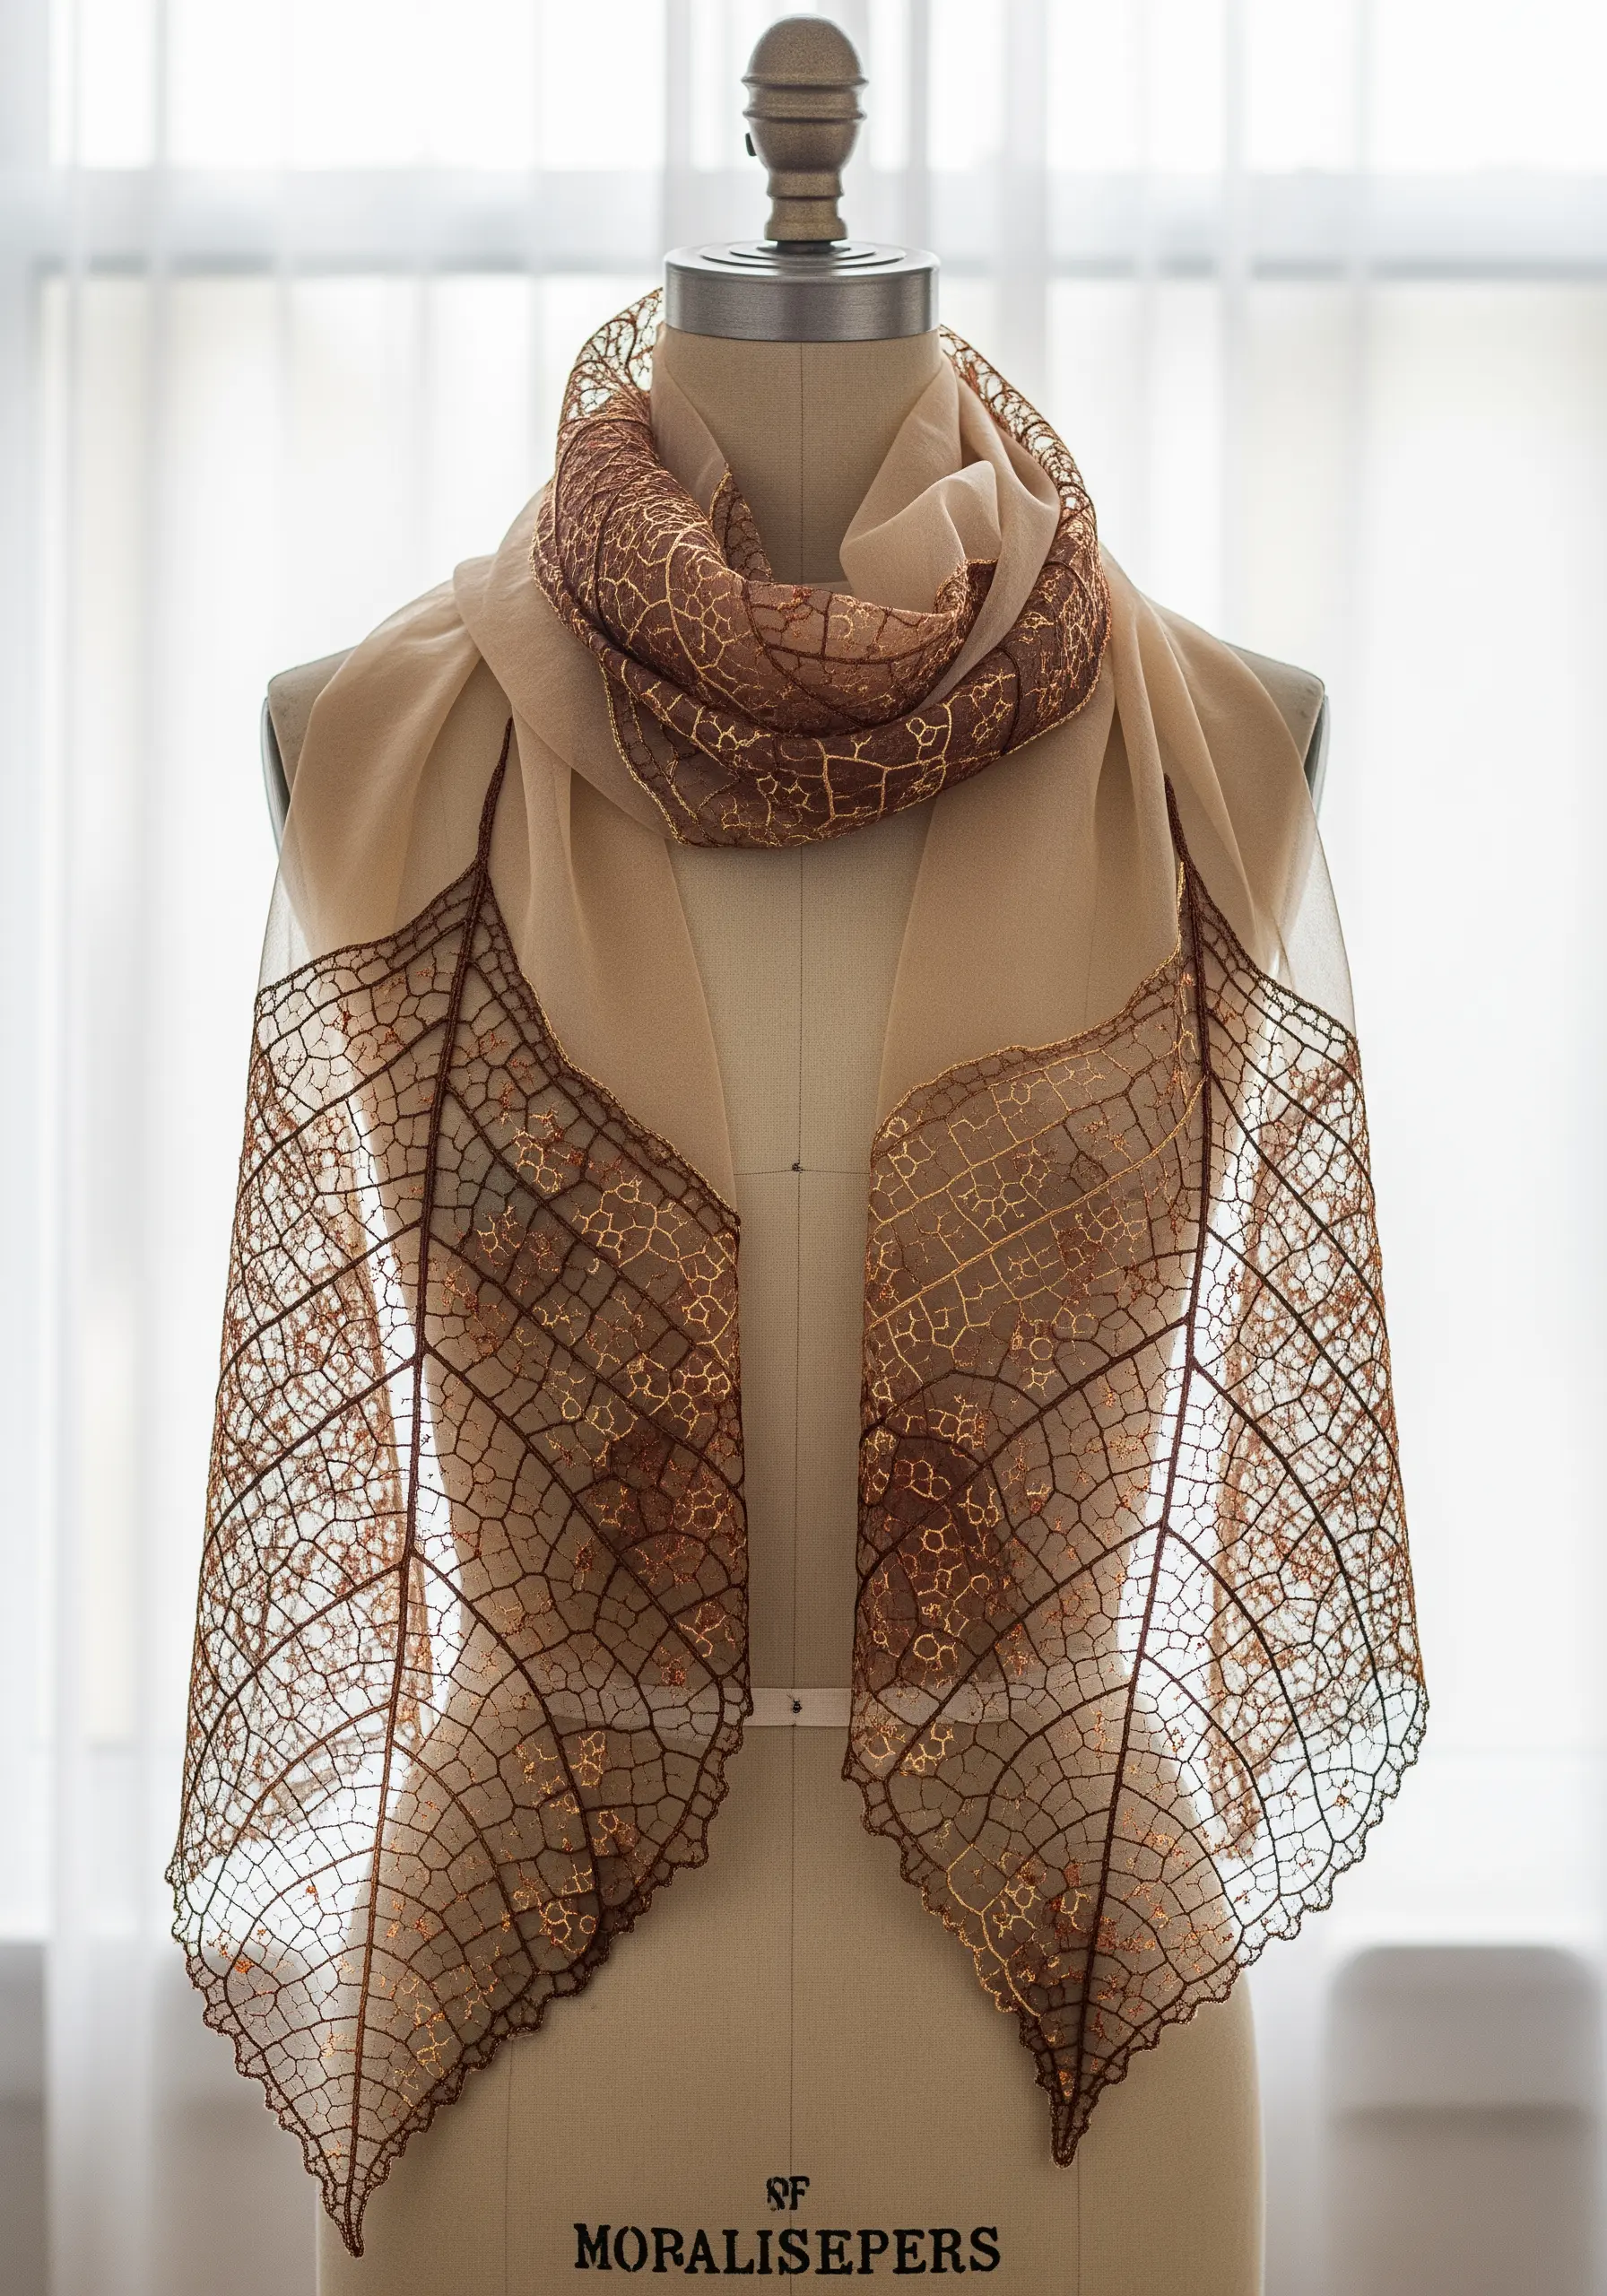
Create delicate, lace-like leaves by stitching a dense network of veins onto a water-soluble stabilizer, with no base fabric.
Hoop the stabilizer securely and use a free-motion machine embroidery technique or meticulous hand-stitching to connect all your lines, ensuring the final piece holds together.
Once the stitching is complete, simply dissolve the stabilizer in water, leaving only the thread structure behind.
This advanced technique is perfect for creating lightweight, ethereal embellishments for scarves, apparel, or delicate art installations.
13. Thread Paint on Shimmering Fabrics
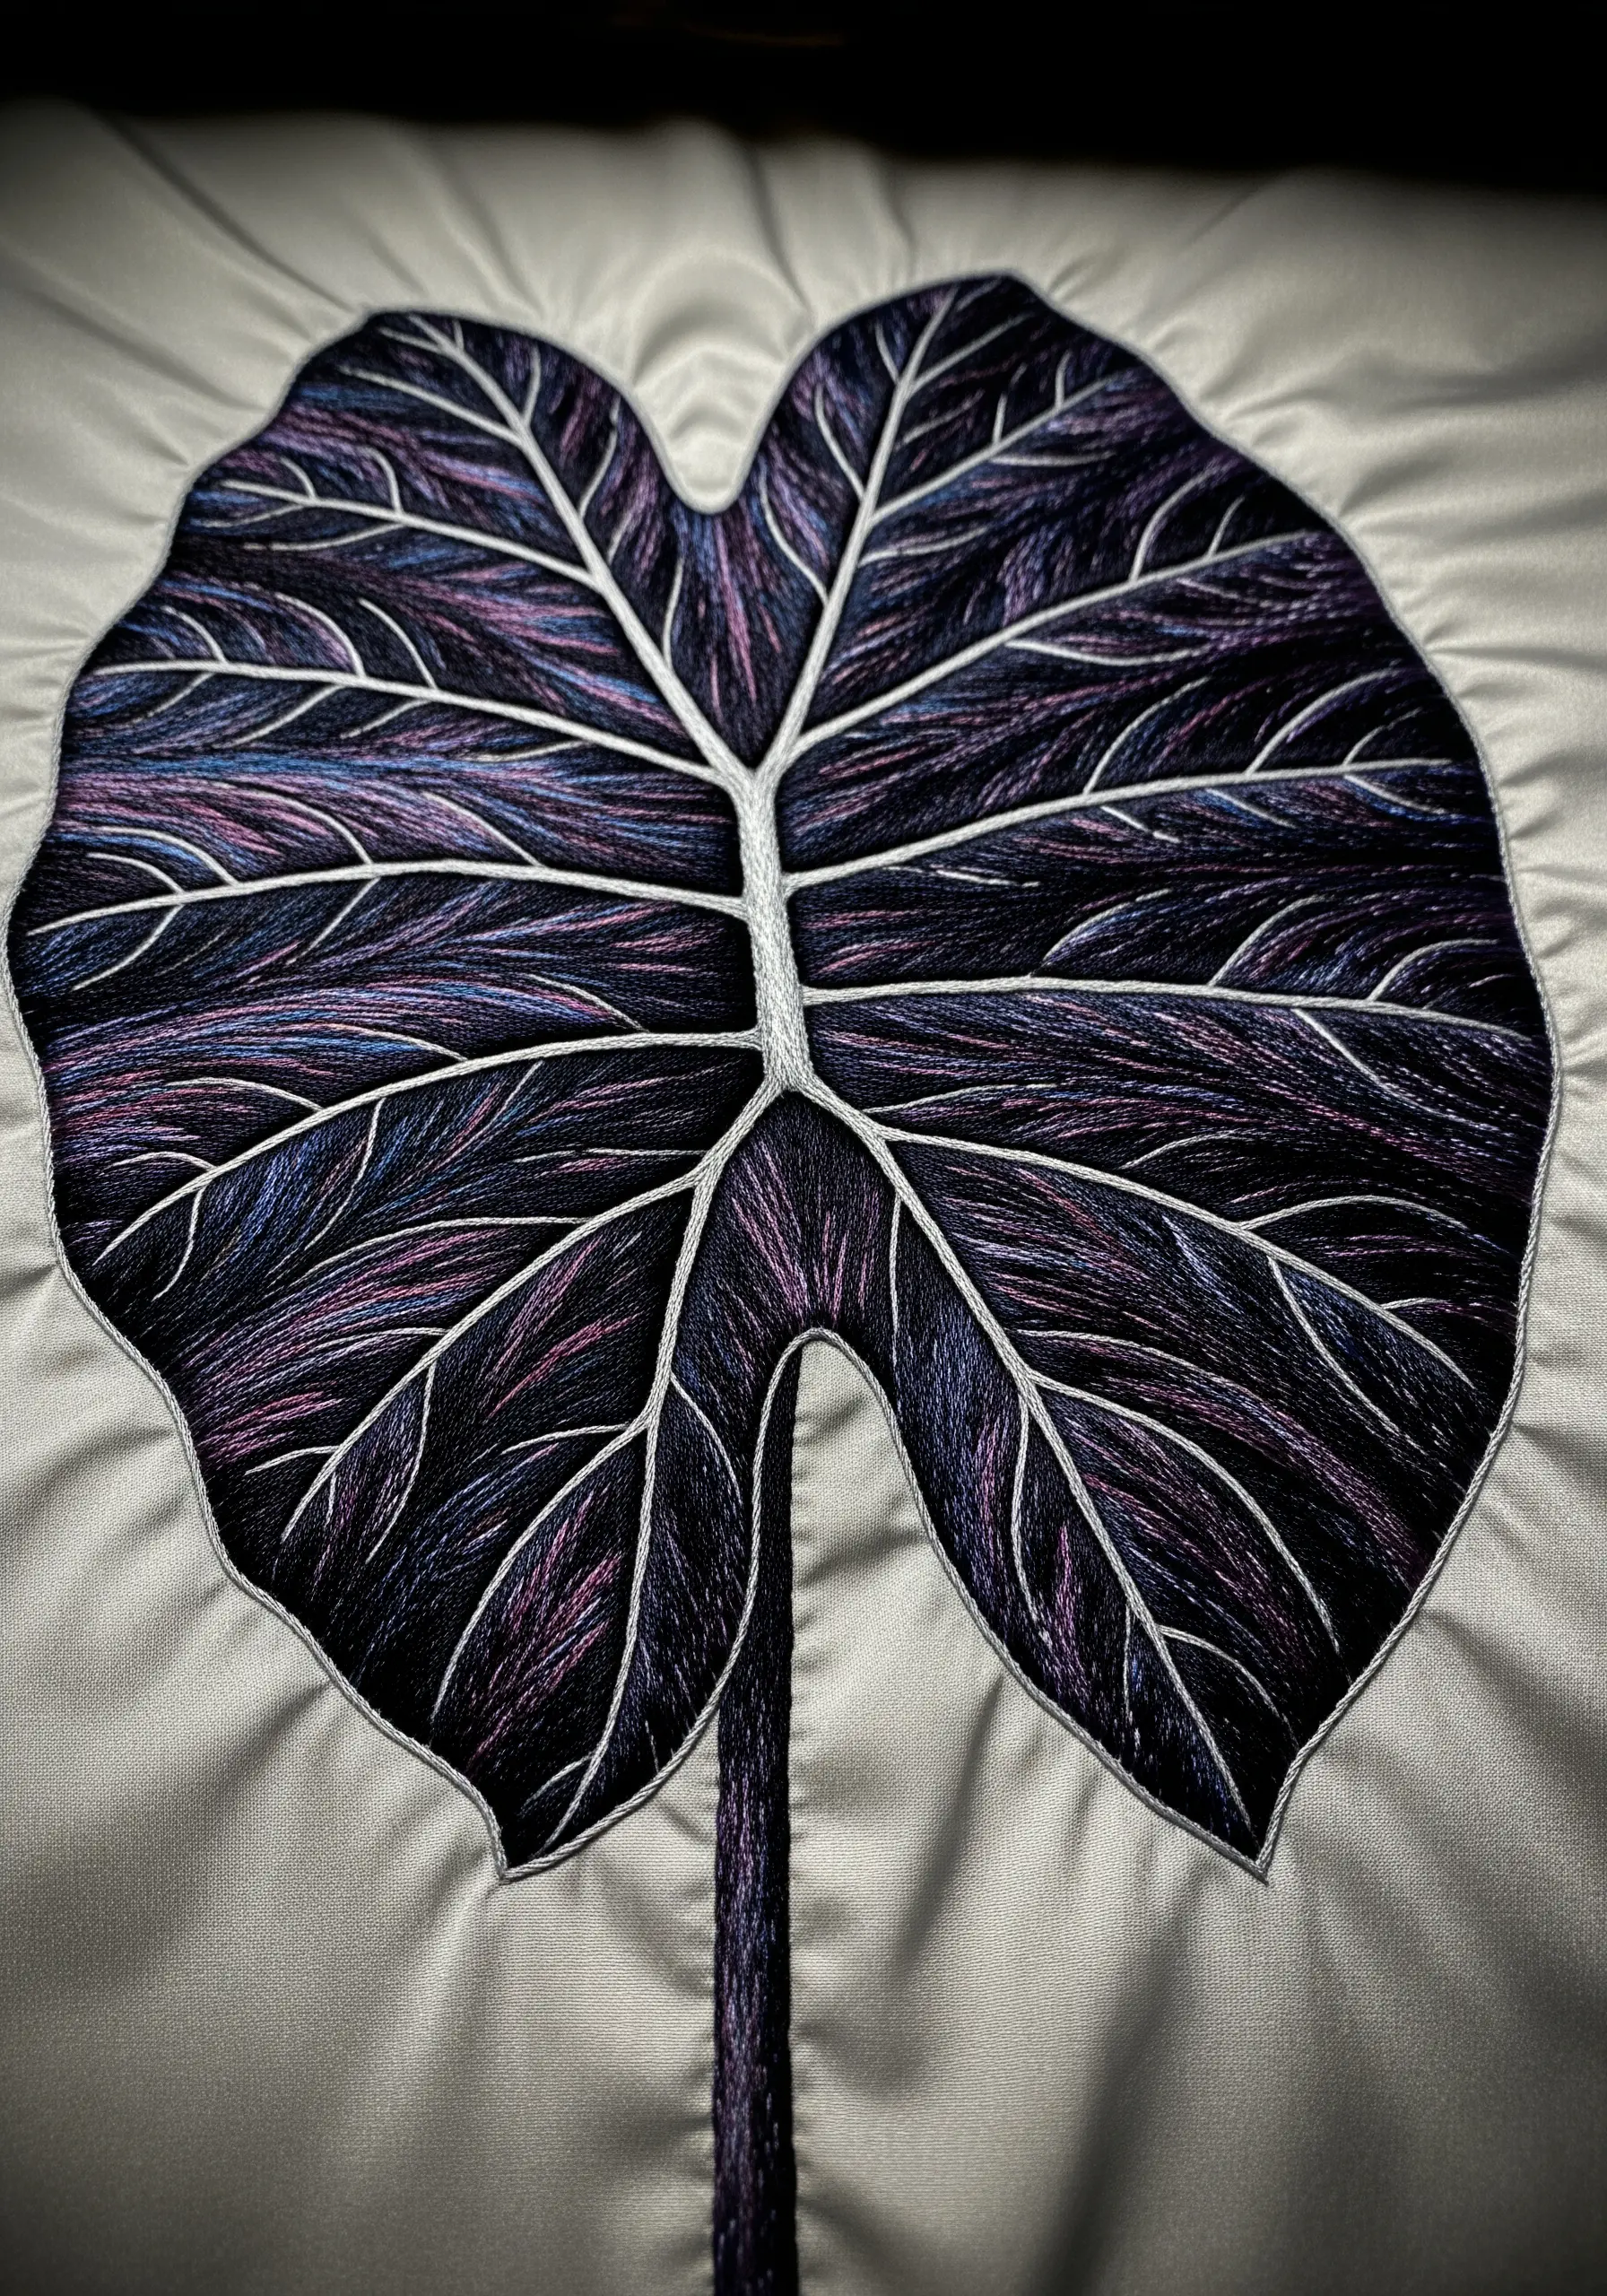
Stitching on slick fabrics like satin or silk requires preparation, but the result is a stunning interplay of light and texture.
Always use a lightweight, iron-on stabilizer on the back of the fabric to prevent puckering and give the thread something to grip.
Use a single strand of floss and the long-and-short stitch to create a painted effect, blending iridescent purples and blues to mimic the velvety sheen of an Alocasia leaf.
The fabric’s natural luster will shine through, enhancing the richness of your thread painting and creating a truly luxurious finish.
14. Define Shapes with Appliqué Outlines

For a clean, graphic Monstera leaf, combine appliqué with simple outline stitches for a look that is both bold and refined.
Cut the full leaf shape from your main fabric, then stitch it onto a base fabric using a neat whipstitch or buttonhole stitch around the edges.
Use a contrasting thread color—like the off-white here—to stitch the veins with a simple backstitch, which adds detail without overwhelming the iconic shape.
This technique is a fantastic way to create cottagecore floral patches or minimalist botanical art with clean lines and strong visual impact.
15. Elevate Your Work with Gallery-Style Framing
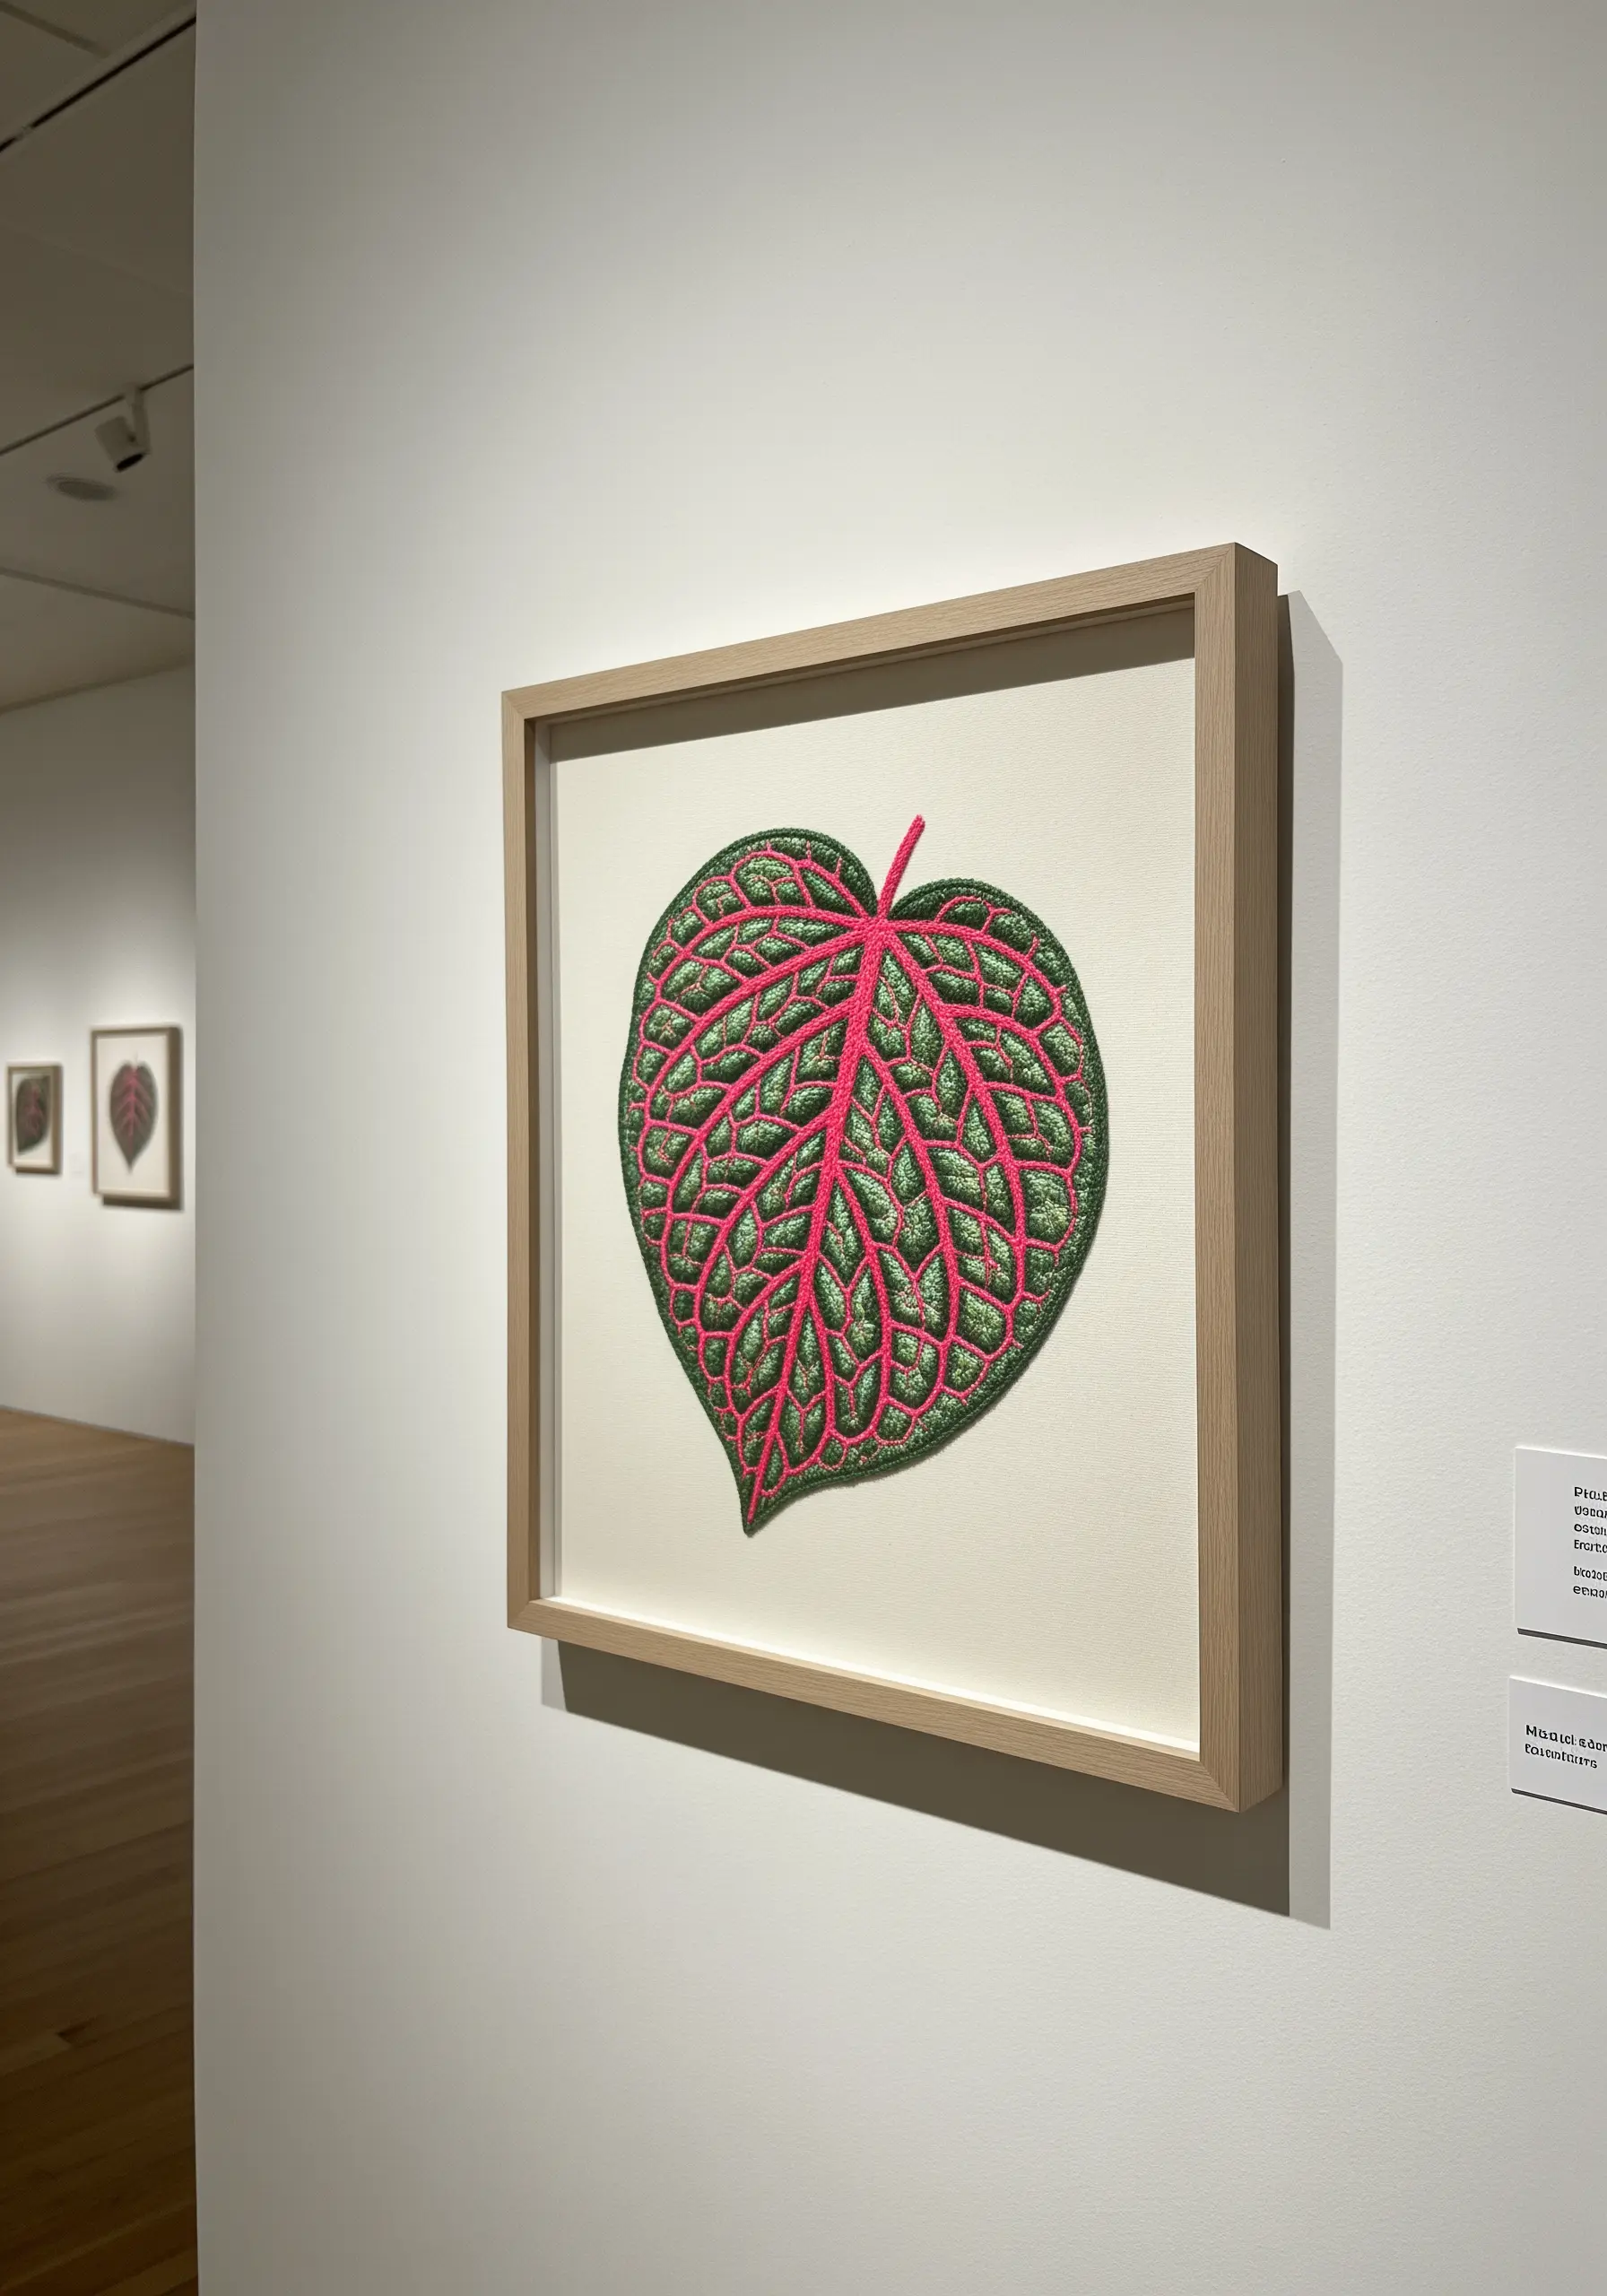
The final presentation of your work is just as important as the stitching itself. Choose a frame that complements, rather than competes with, your art.
For a detailed, vibrant piece, a simple, light-colored wood frame with a generous mat board provides breathing room and draws the eye inward.
Ensure your fabric is stretched taut and perfectly centered before securing it. This professional finish signals that your work is a piece of fine art.
Investing in quality framing is the final step in creating stunning framed embroidery pieces that feel intentional and complete.
16. Engineer a Dimensional Curtain Tie-Back
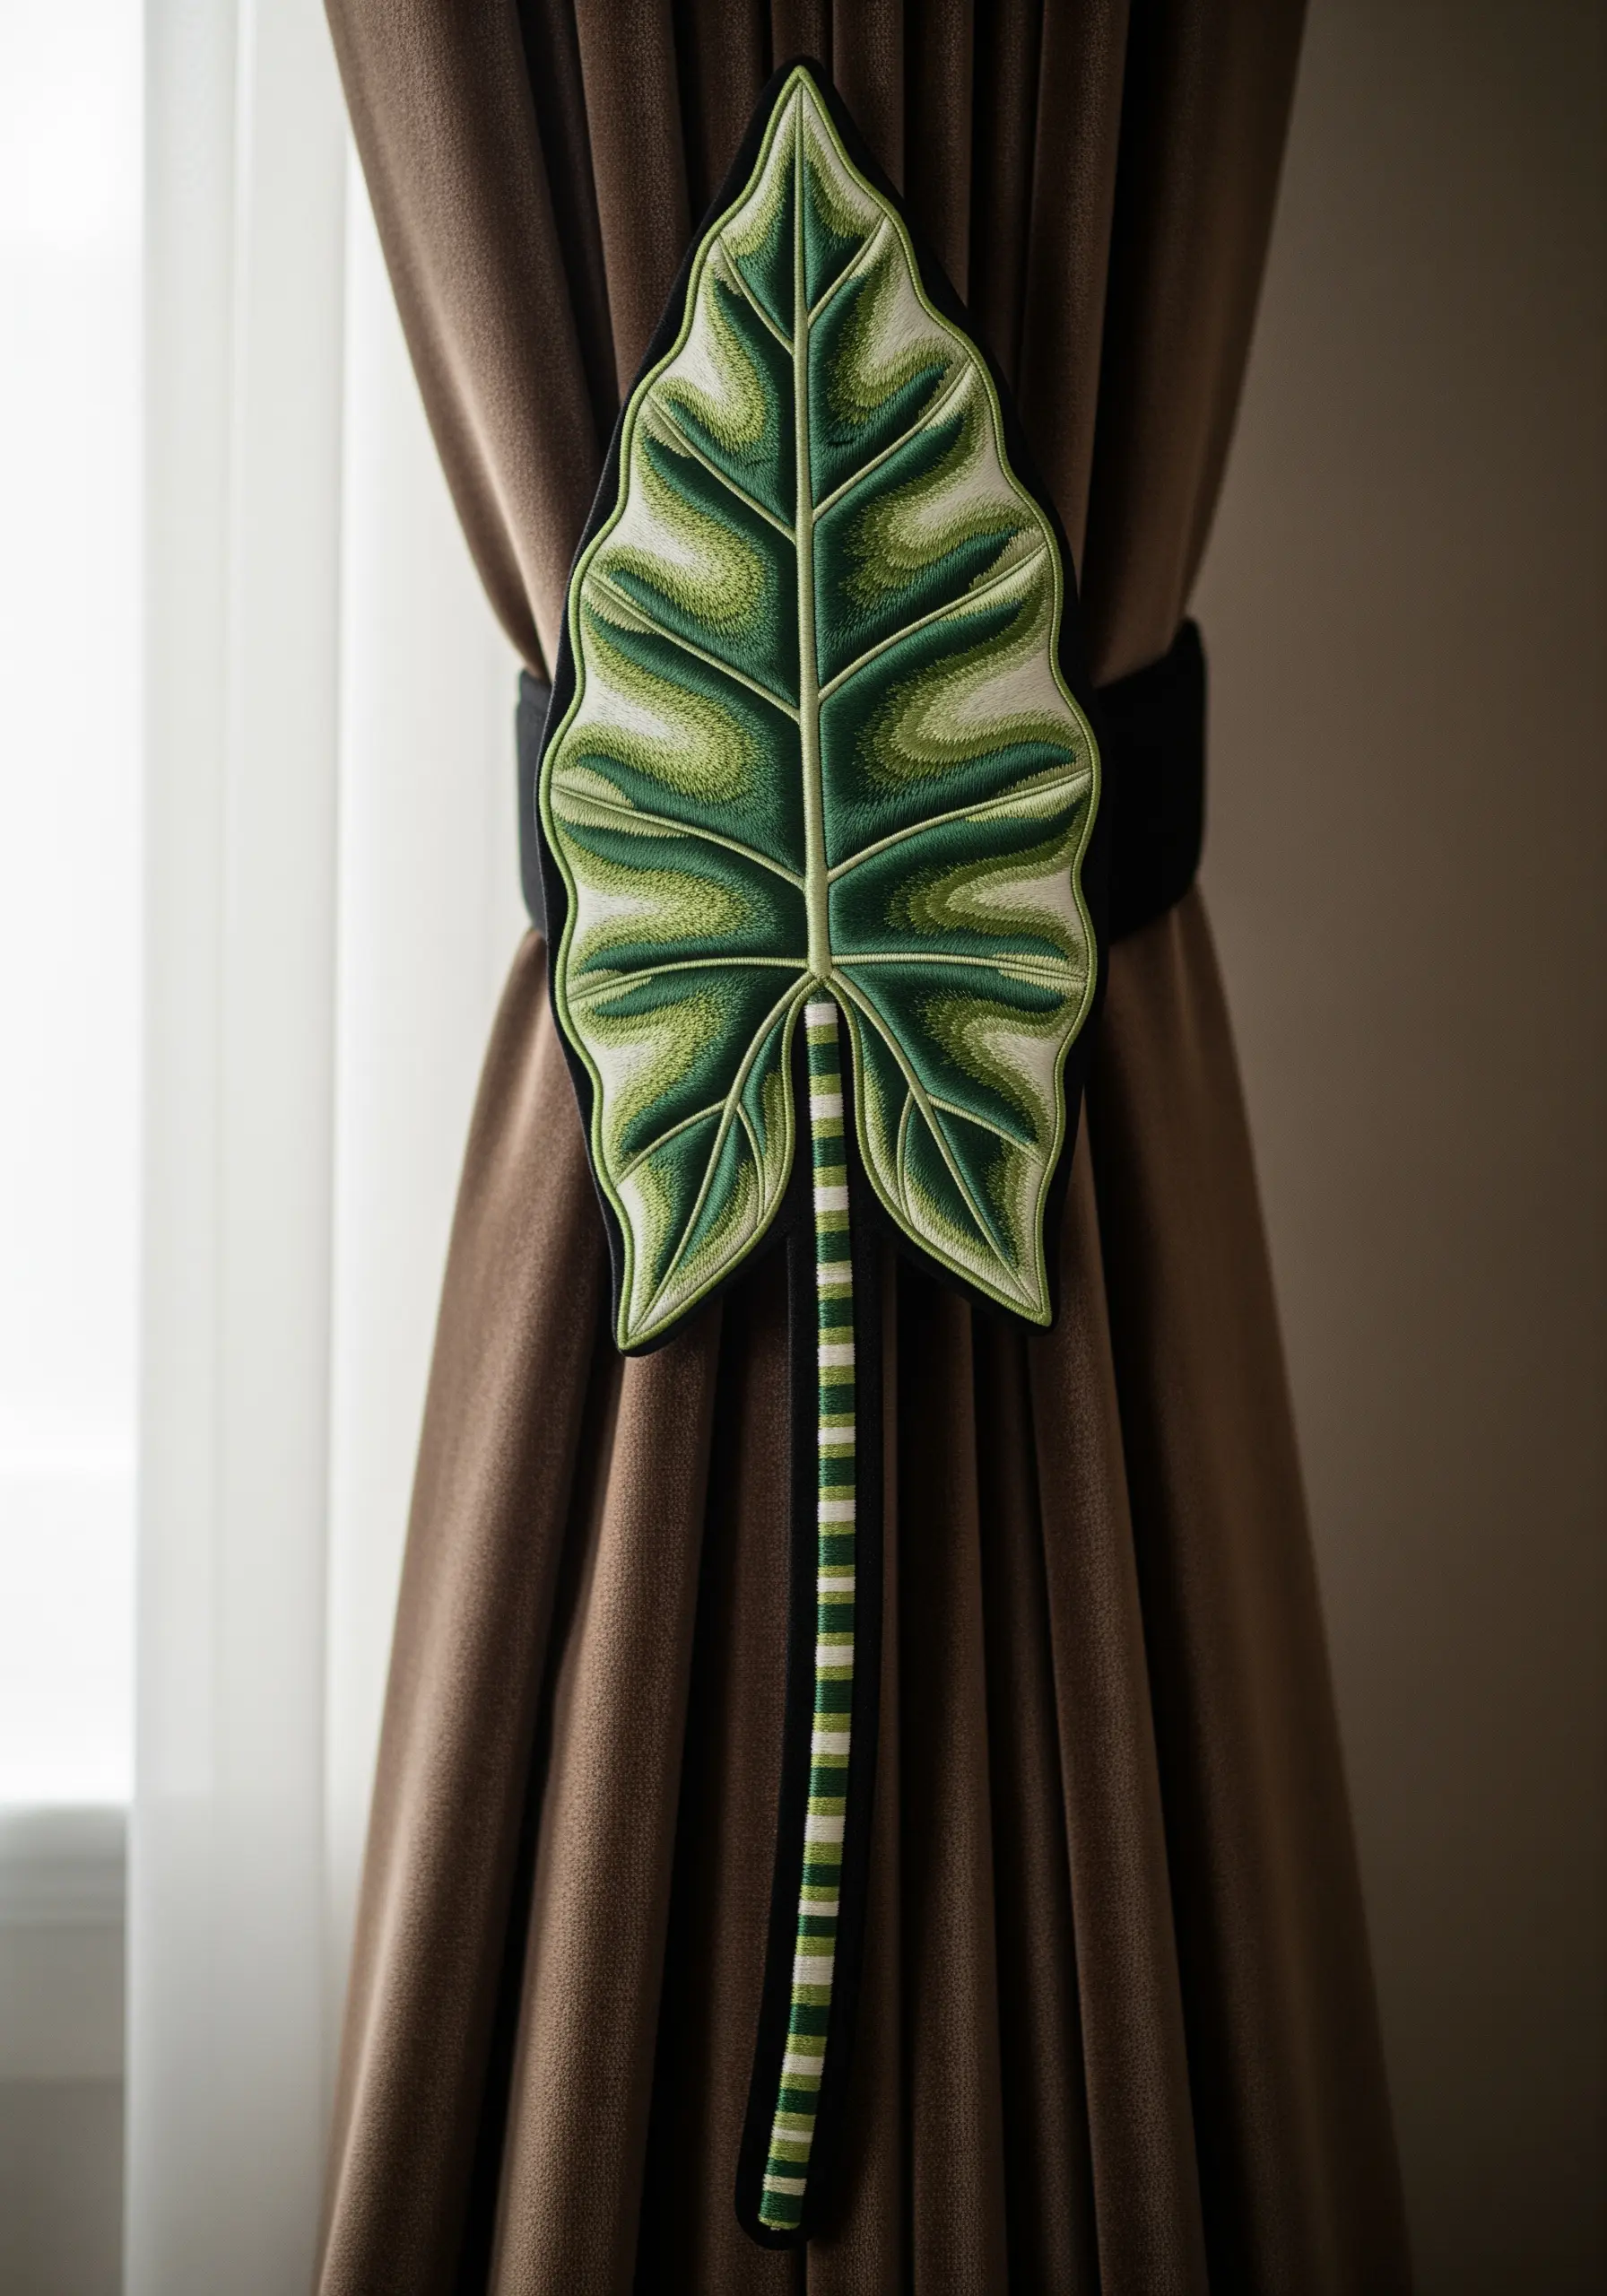
Turn your embroidery into a functional object by creating a three-dimensional, structured leaf.
Stitch your leaf onto a sturdy base fabric like felt, and include a thin, flexible wire within the satin-stitched border to allow the leaf to be shaped.
For the stem, create a separate embroidered strap that can wrap around the curtain, attaching it securely to the back of the leaf.
This stumpwork-inspired approach moves your embroidery off the wall and into the everyday workings of your home, blending artistry with utility.
17. Batch-Produce High-Quality Patches
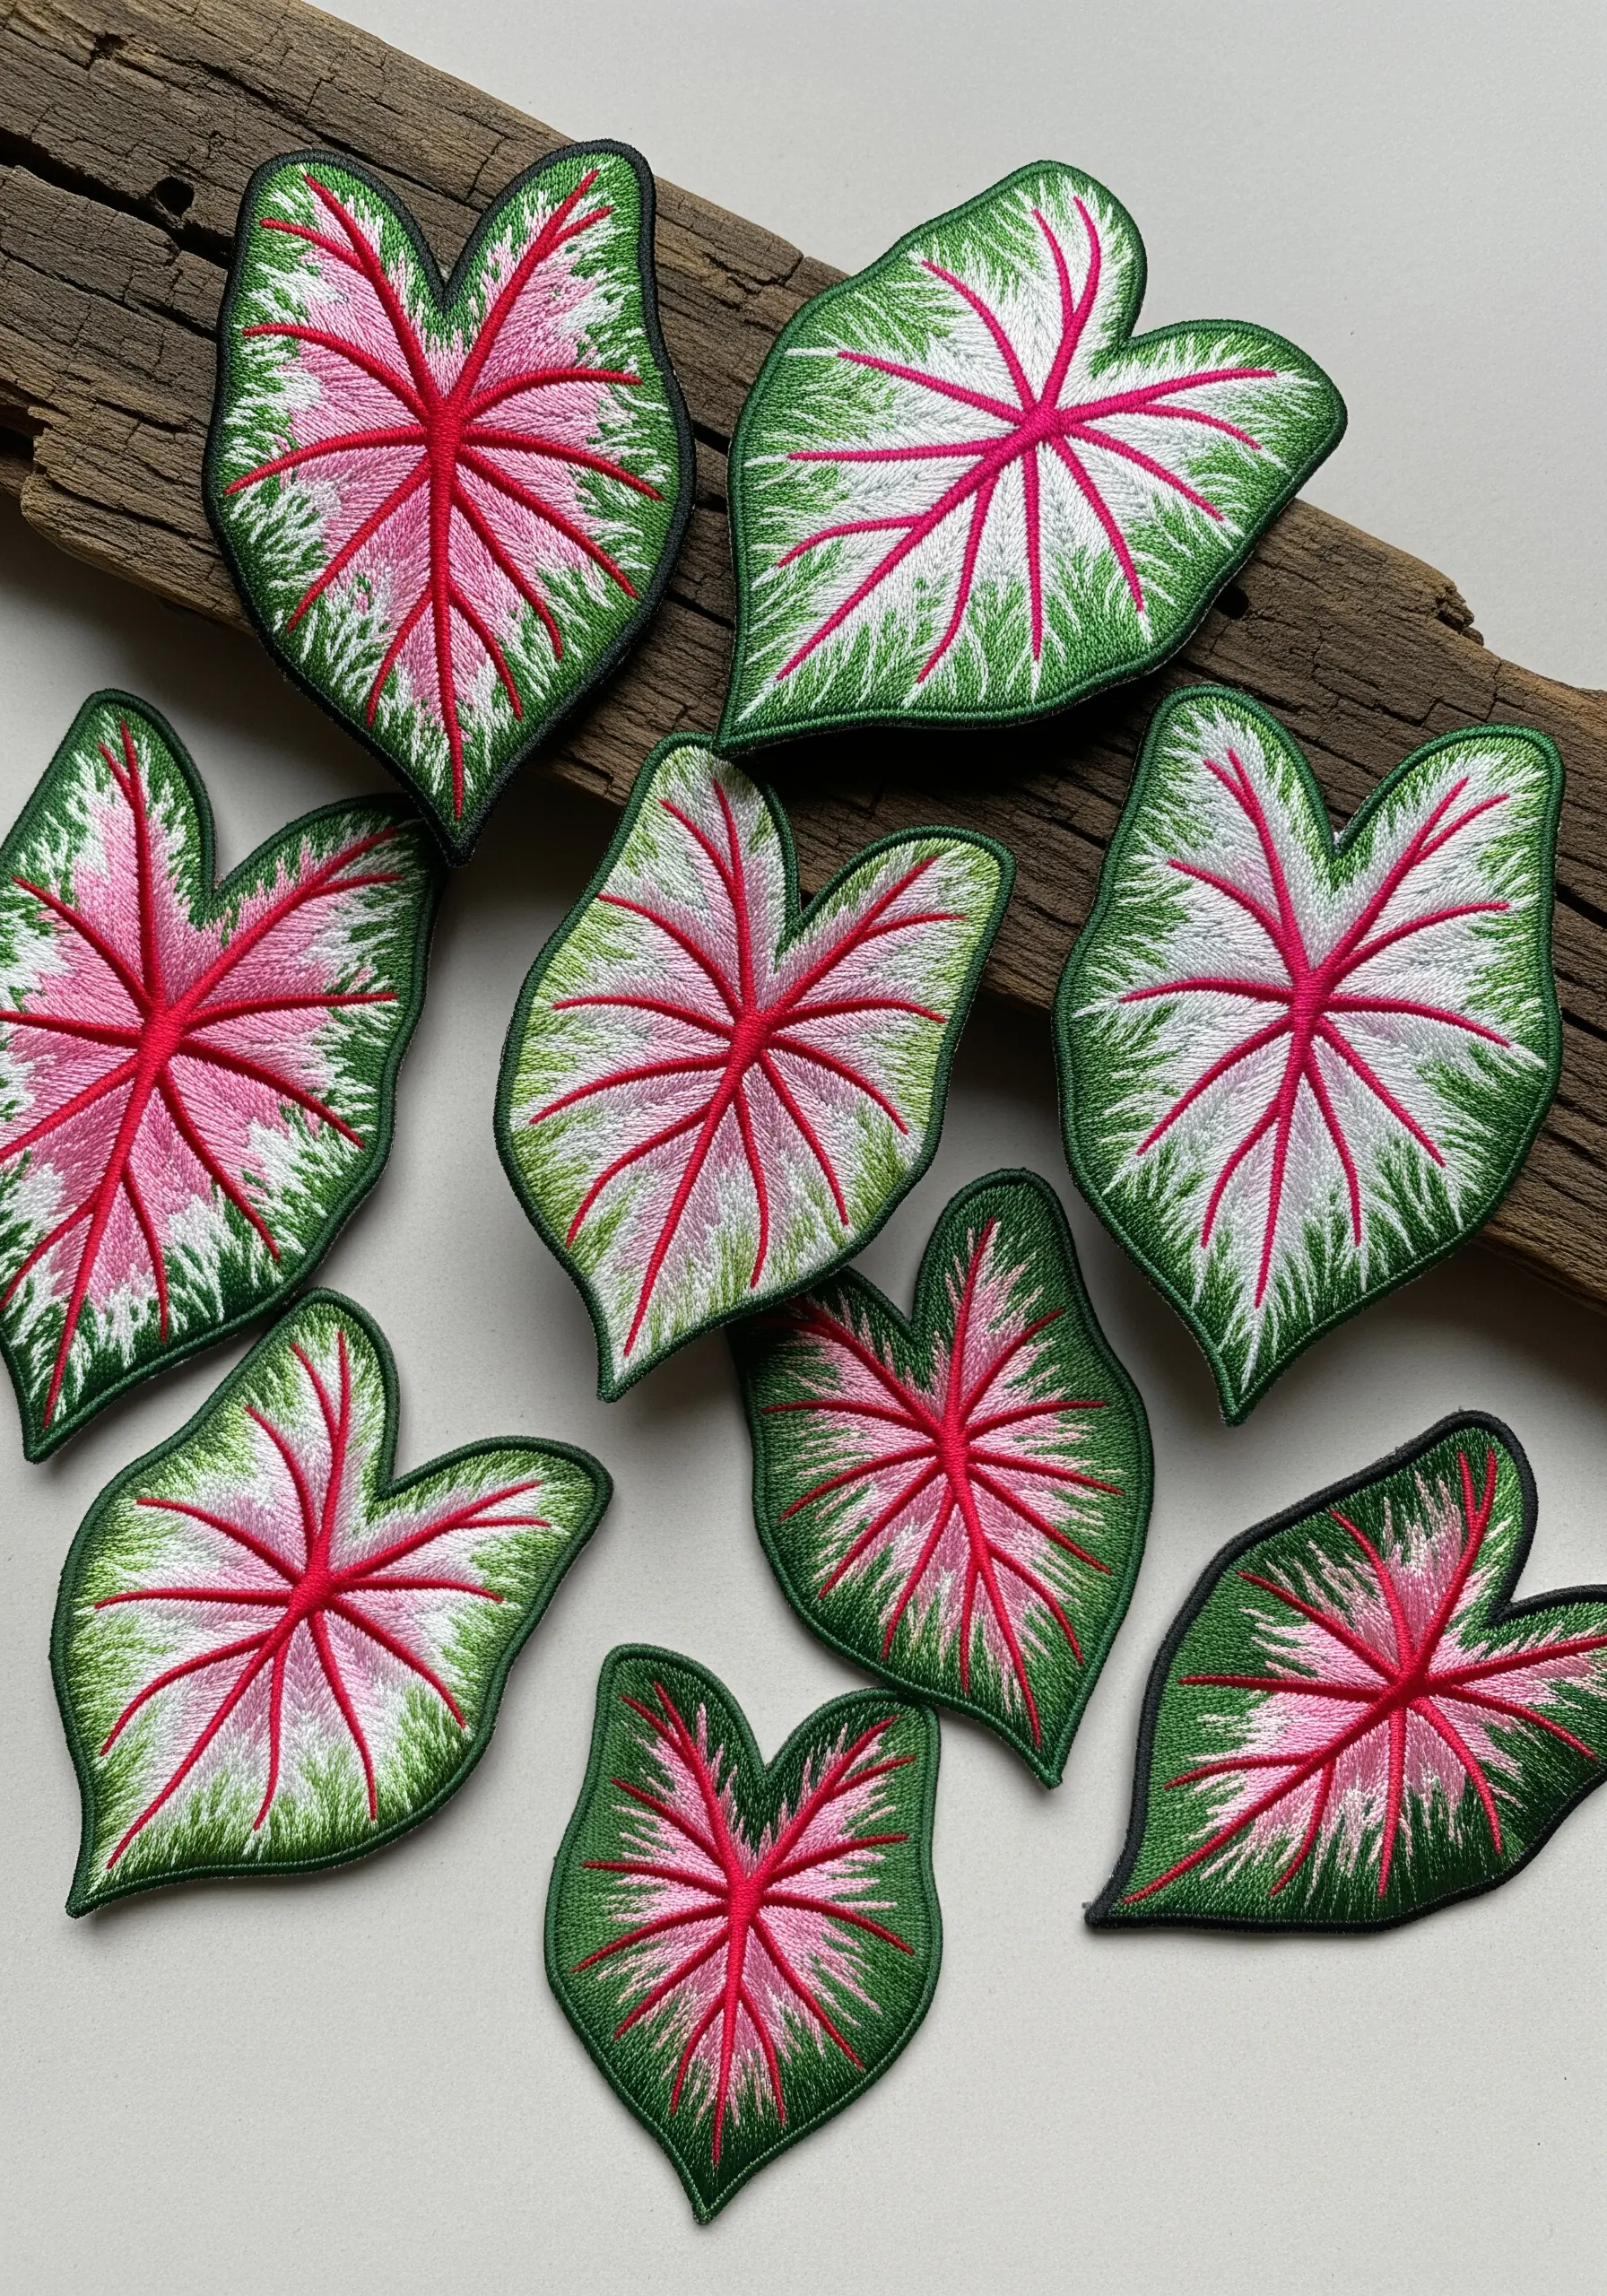
Creating a series of embroidered patches requires consistency in both technique and materials to ensure a professional, cohesive result.
Use the same digital pattern or a very precise stencil for each patch to maintain identical shapes and sizes.
Complete the edges with a dense, machine-stitched or hand-wrapped satin stitch border for a clean finish that prevents fraying.
To make them iron-on, apply a sheet of heat-activated adhesive to the back once all stitching is complete.
18. Embellish Unconventional Surfaces
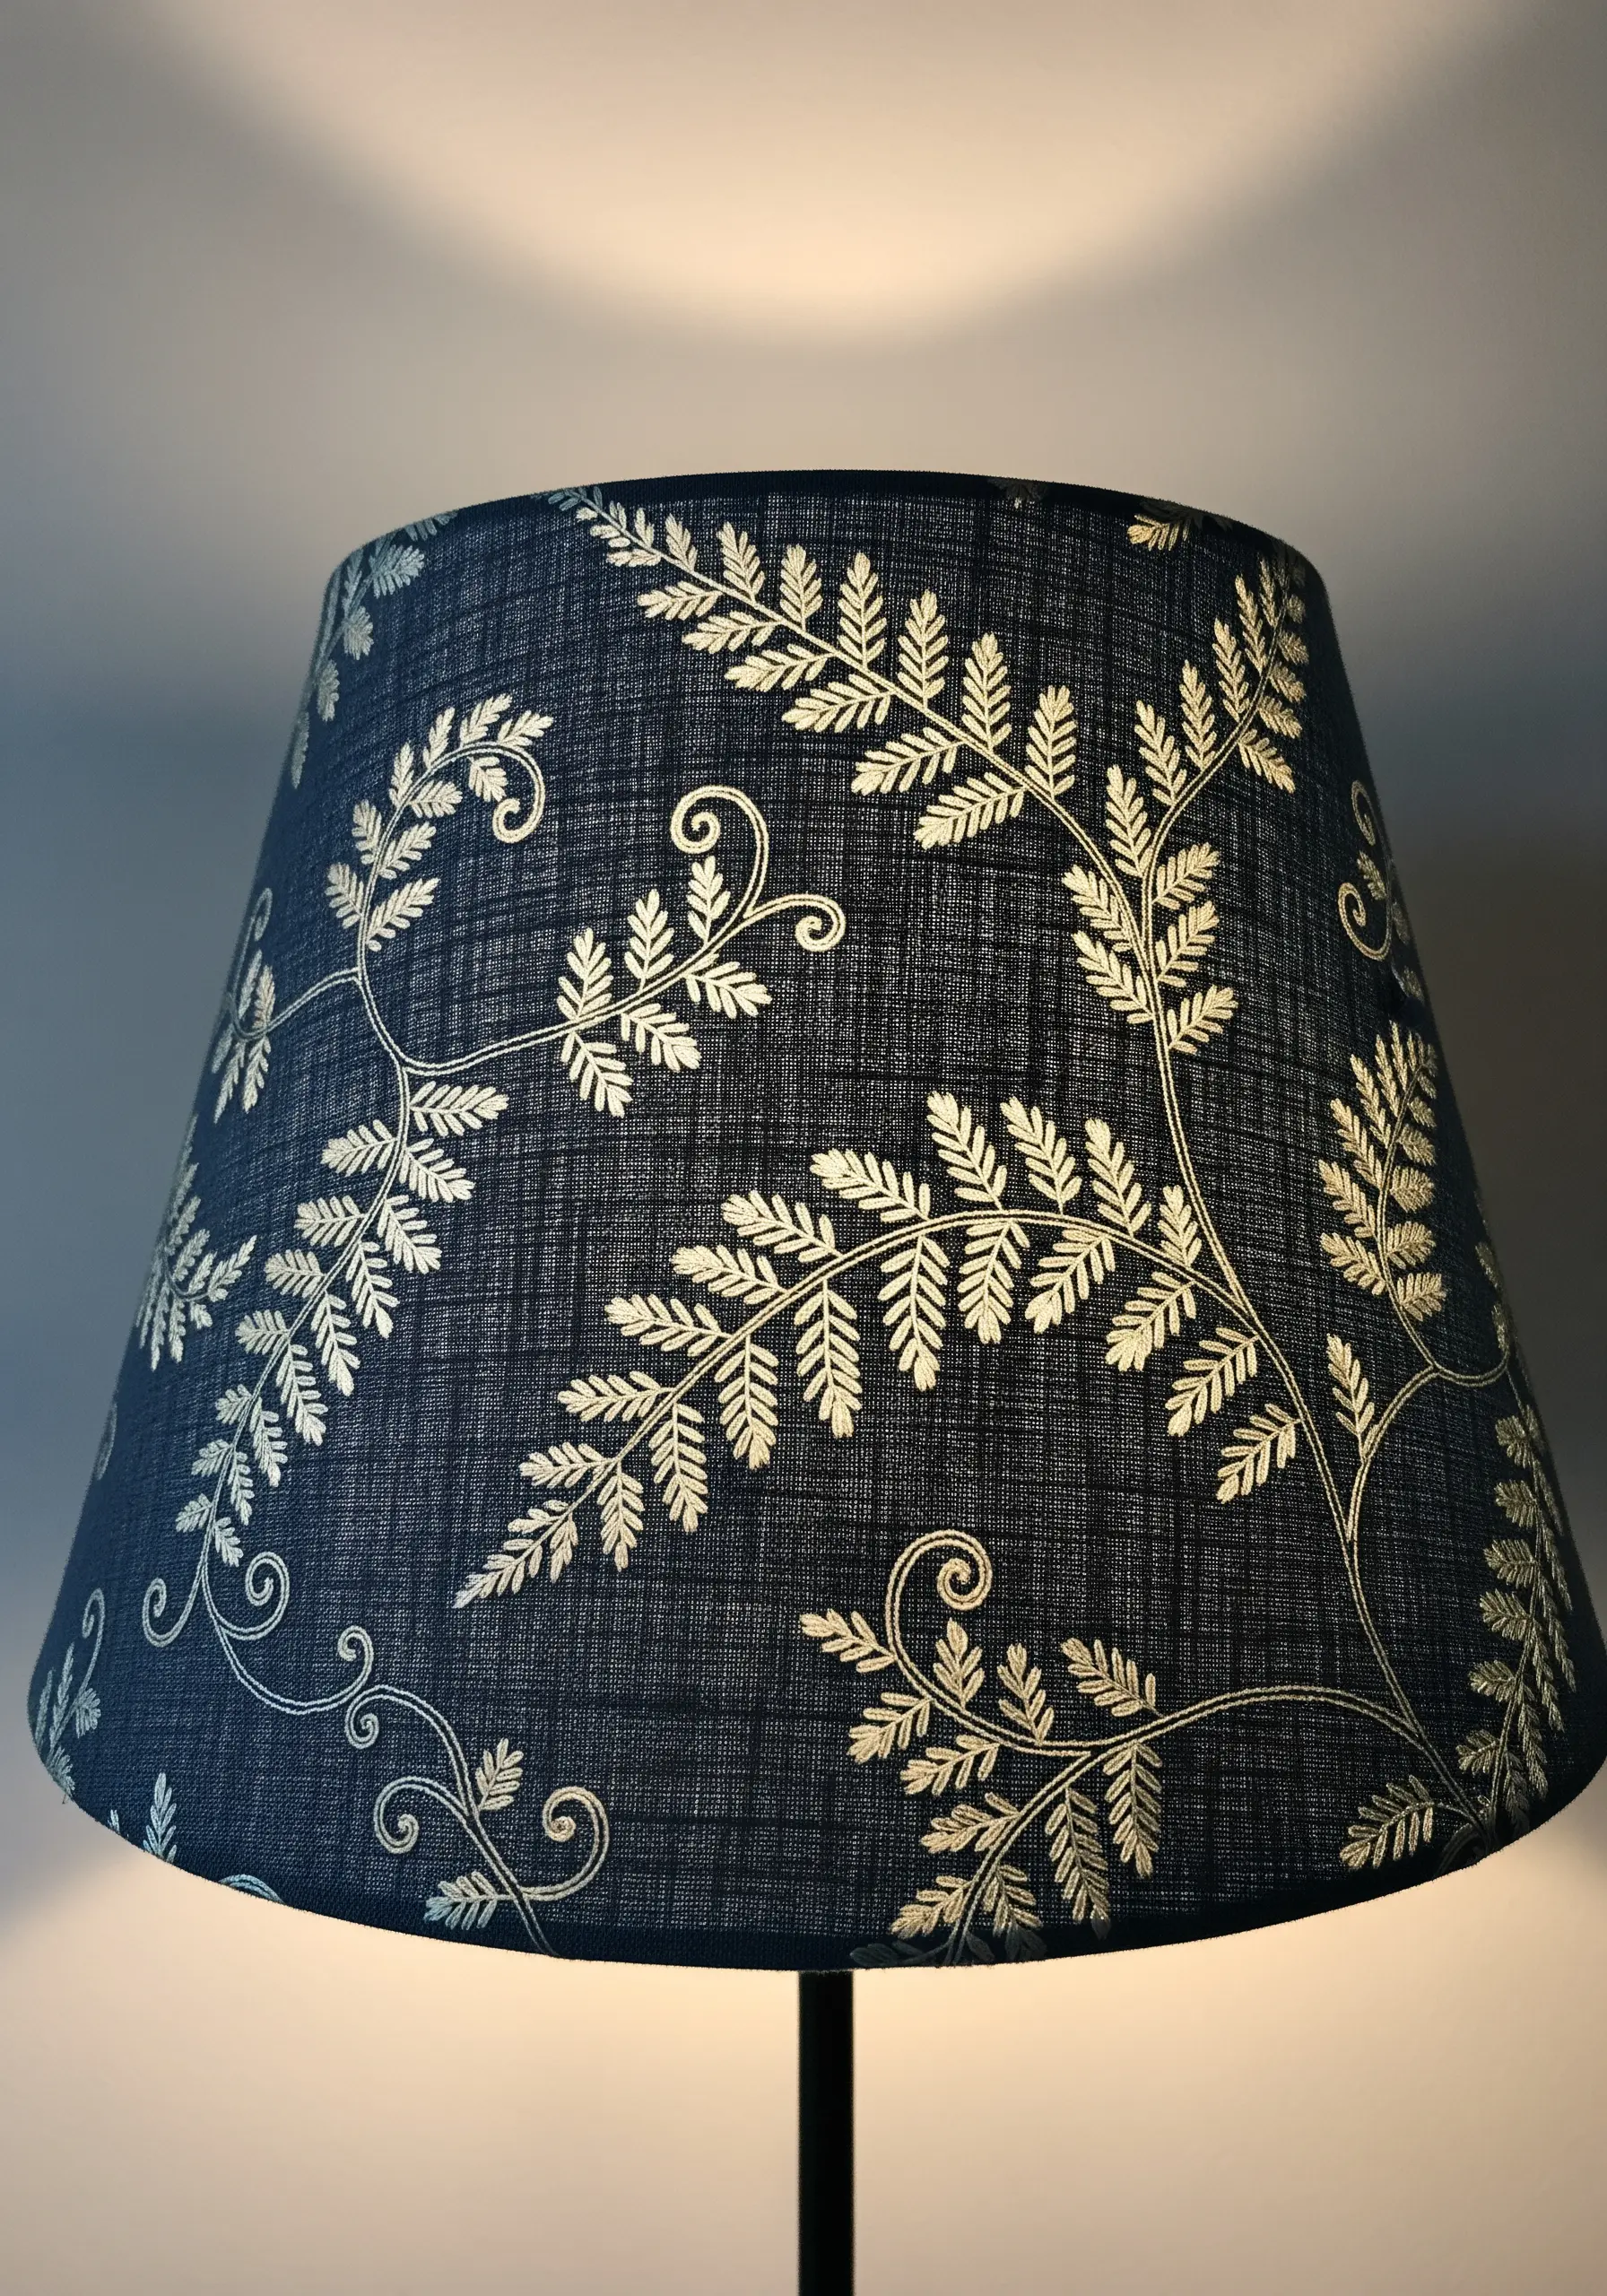
Take your embroidery beyond the hoop by applying it to unexpected objects like a fabric lampshade.
Choose a simple, elegant design like these fern fronds, as a complex pattern can be difficult to execute on a curved or rigid surface.
Use a fine metallic thread and a simple stitch like the backstitch or stem stitch. A single color creates a sophisticated, cohesive look.
For best results, work with the fabric before it is attached to the lamp frame, or use a sharp needle and thimble for stitching directly on the finished shade.
19. Create Variegation with Fabric Collage
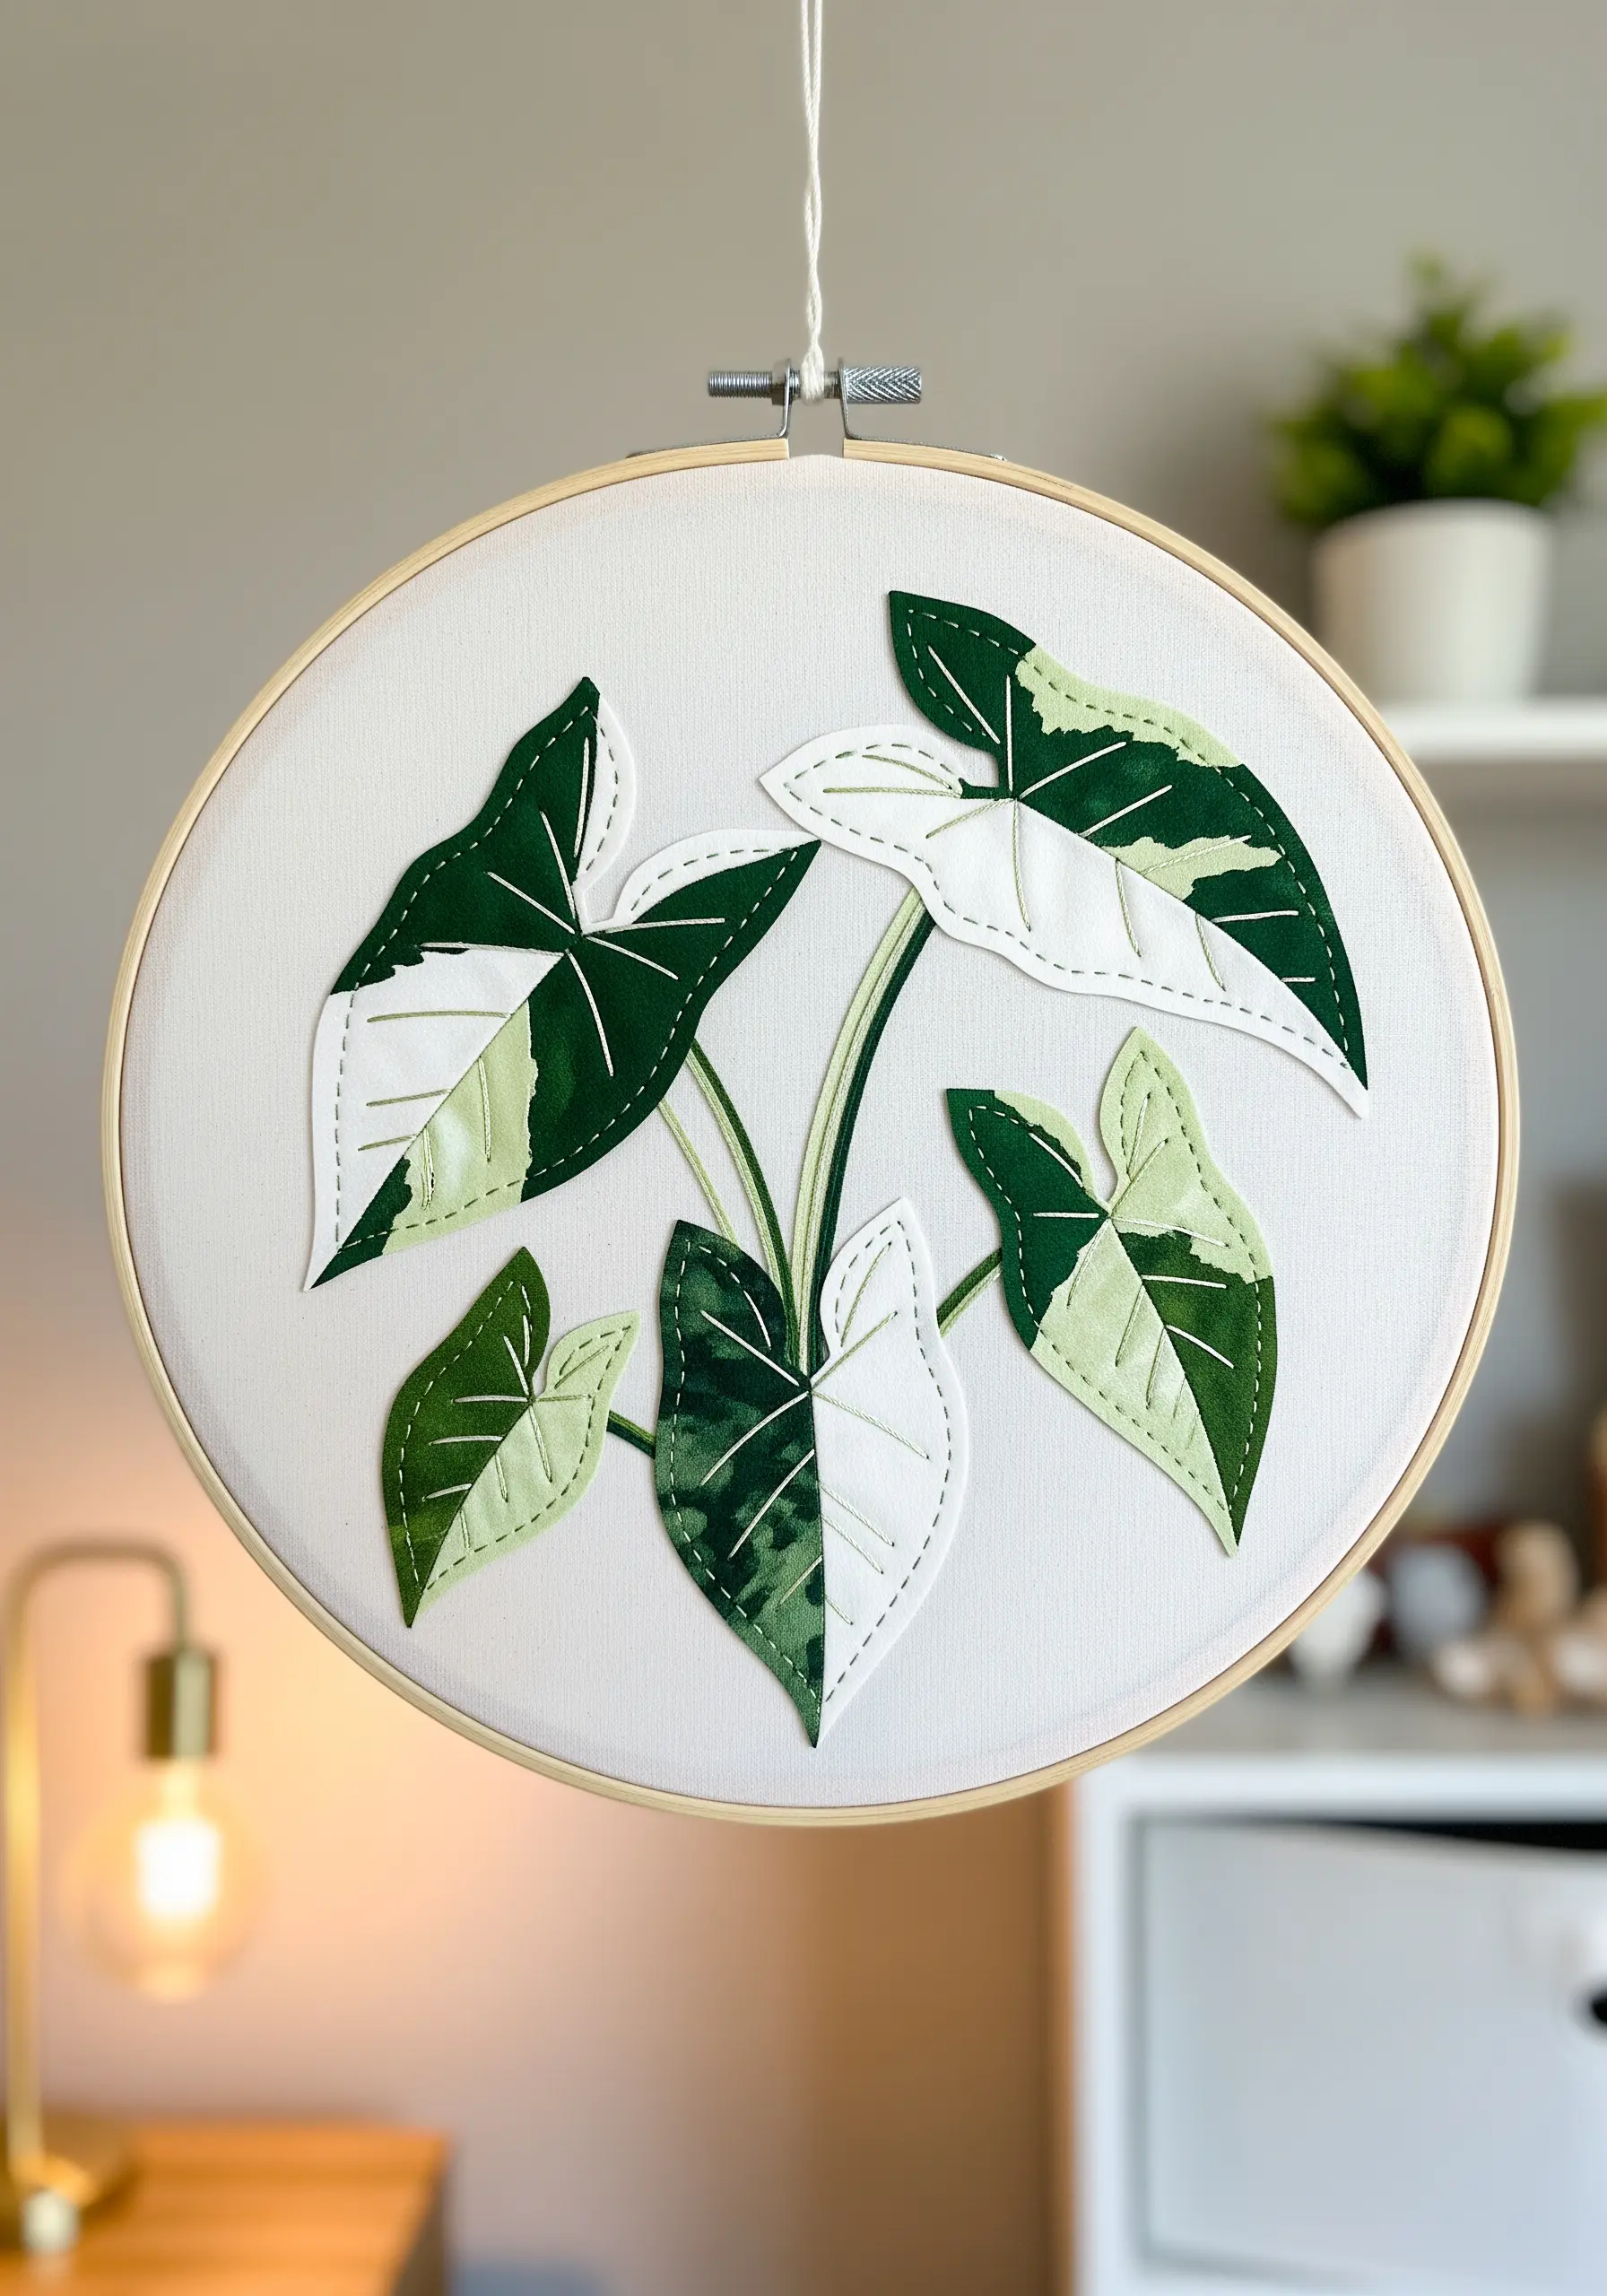
Instead of thread painting, use fabric itself to create the bold blocks of color in a variegated leaf like the Alocasia Frydek.
Cut pieces of white, light green, and dark green fabric to match the variegation pattern, then appliqué them onto your base fabric.
Use a simple running stitch or backstitch in a contrasting thread to outline each piece and add the vein details.
This DIY mixed-media embroidery technique is faster than thread painting and results in a clean, graphic style that highlights the leaf’s structure.
20. Craft a Beaded and Wired Brooch
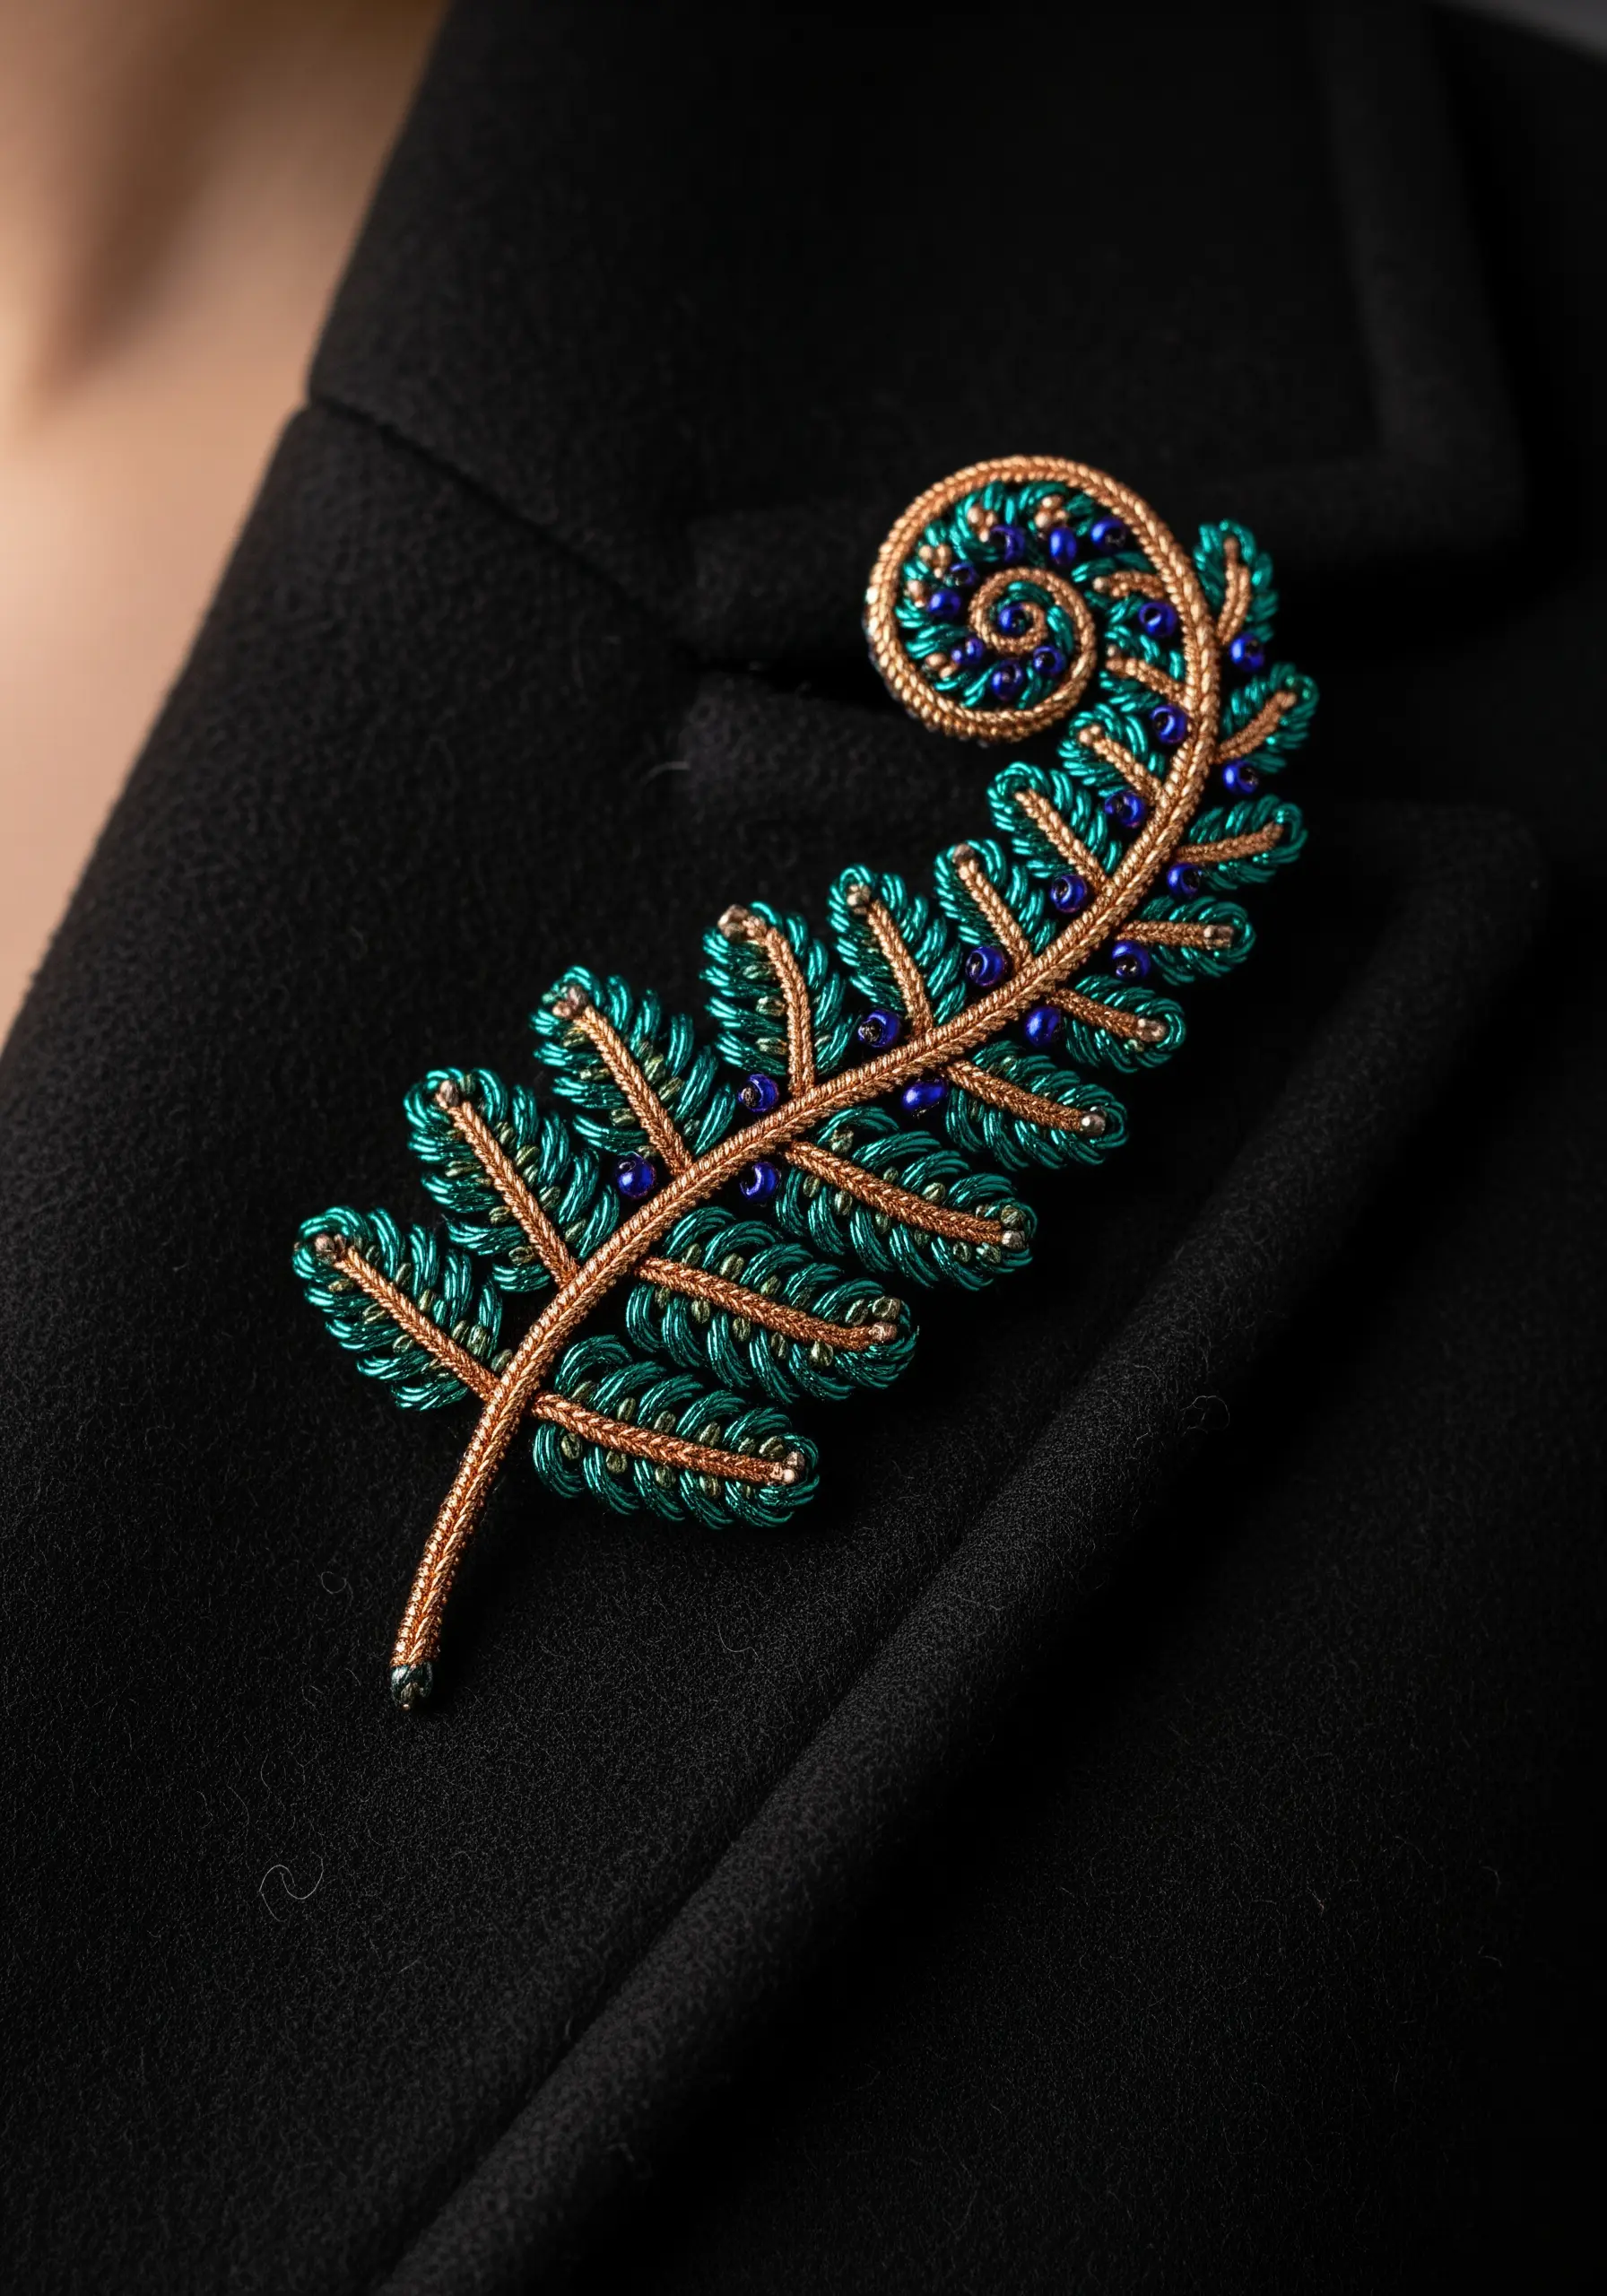
Construct a dimensional fern brooch using stumpwork techniques for a piece of wearable, botanical art.
Shape the central stem and individual leaflets around a framework of fine copper wire, which allows you to bend the finished piece into a natural curve.
Wrap the wire elements tightly with metallic or silk thread, and then add tiny seed beads between the leaflets for a touch of color and sparkle.
This intricate method combines embroidery, wirework, and beading to create a sturdy, three-dimensional accessory that is both delicate and durable.
21. Design a Symmetrical Leaf Mandala
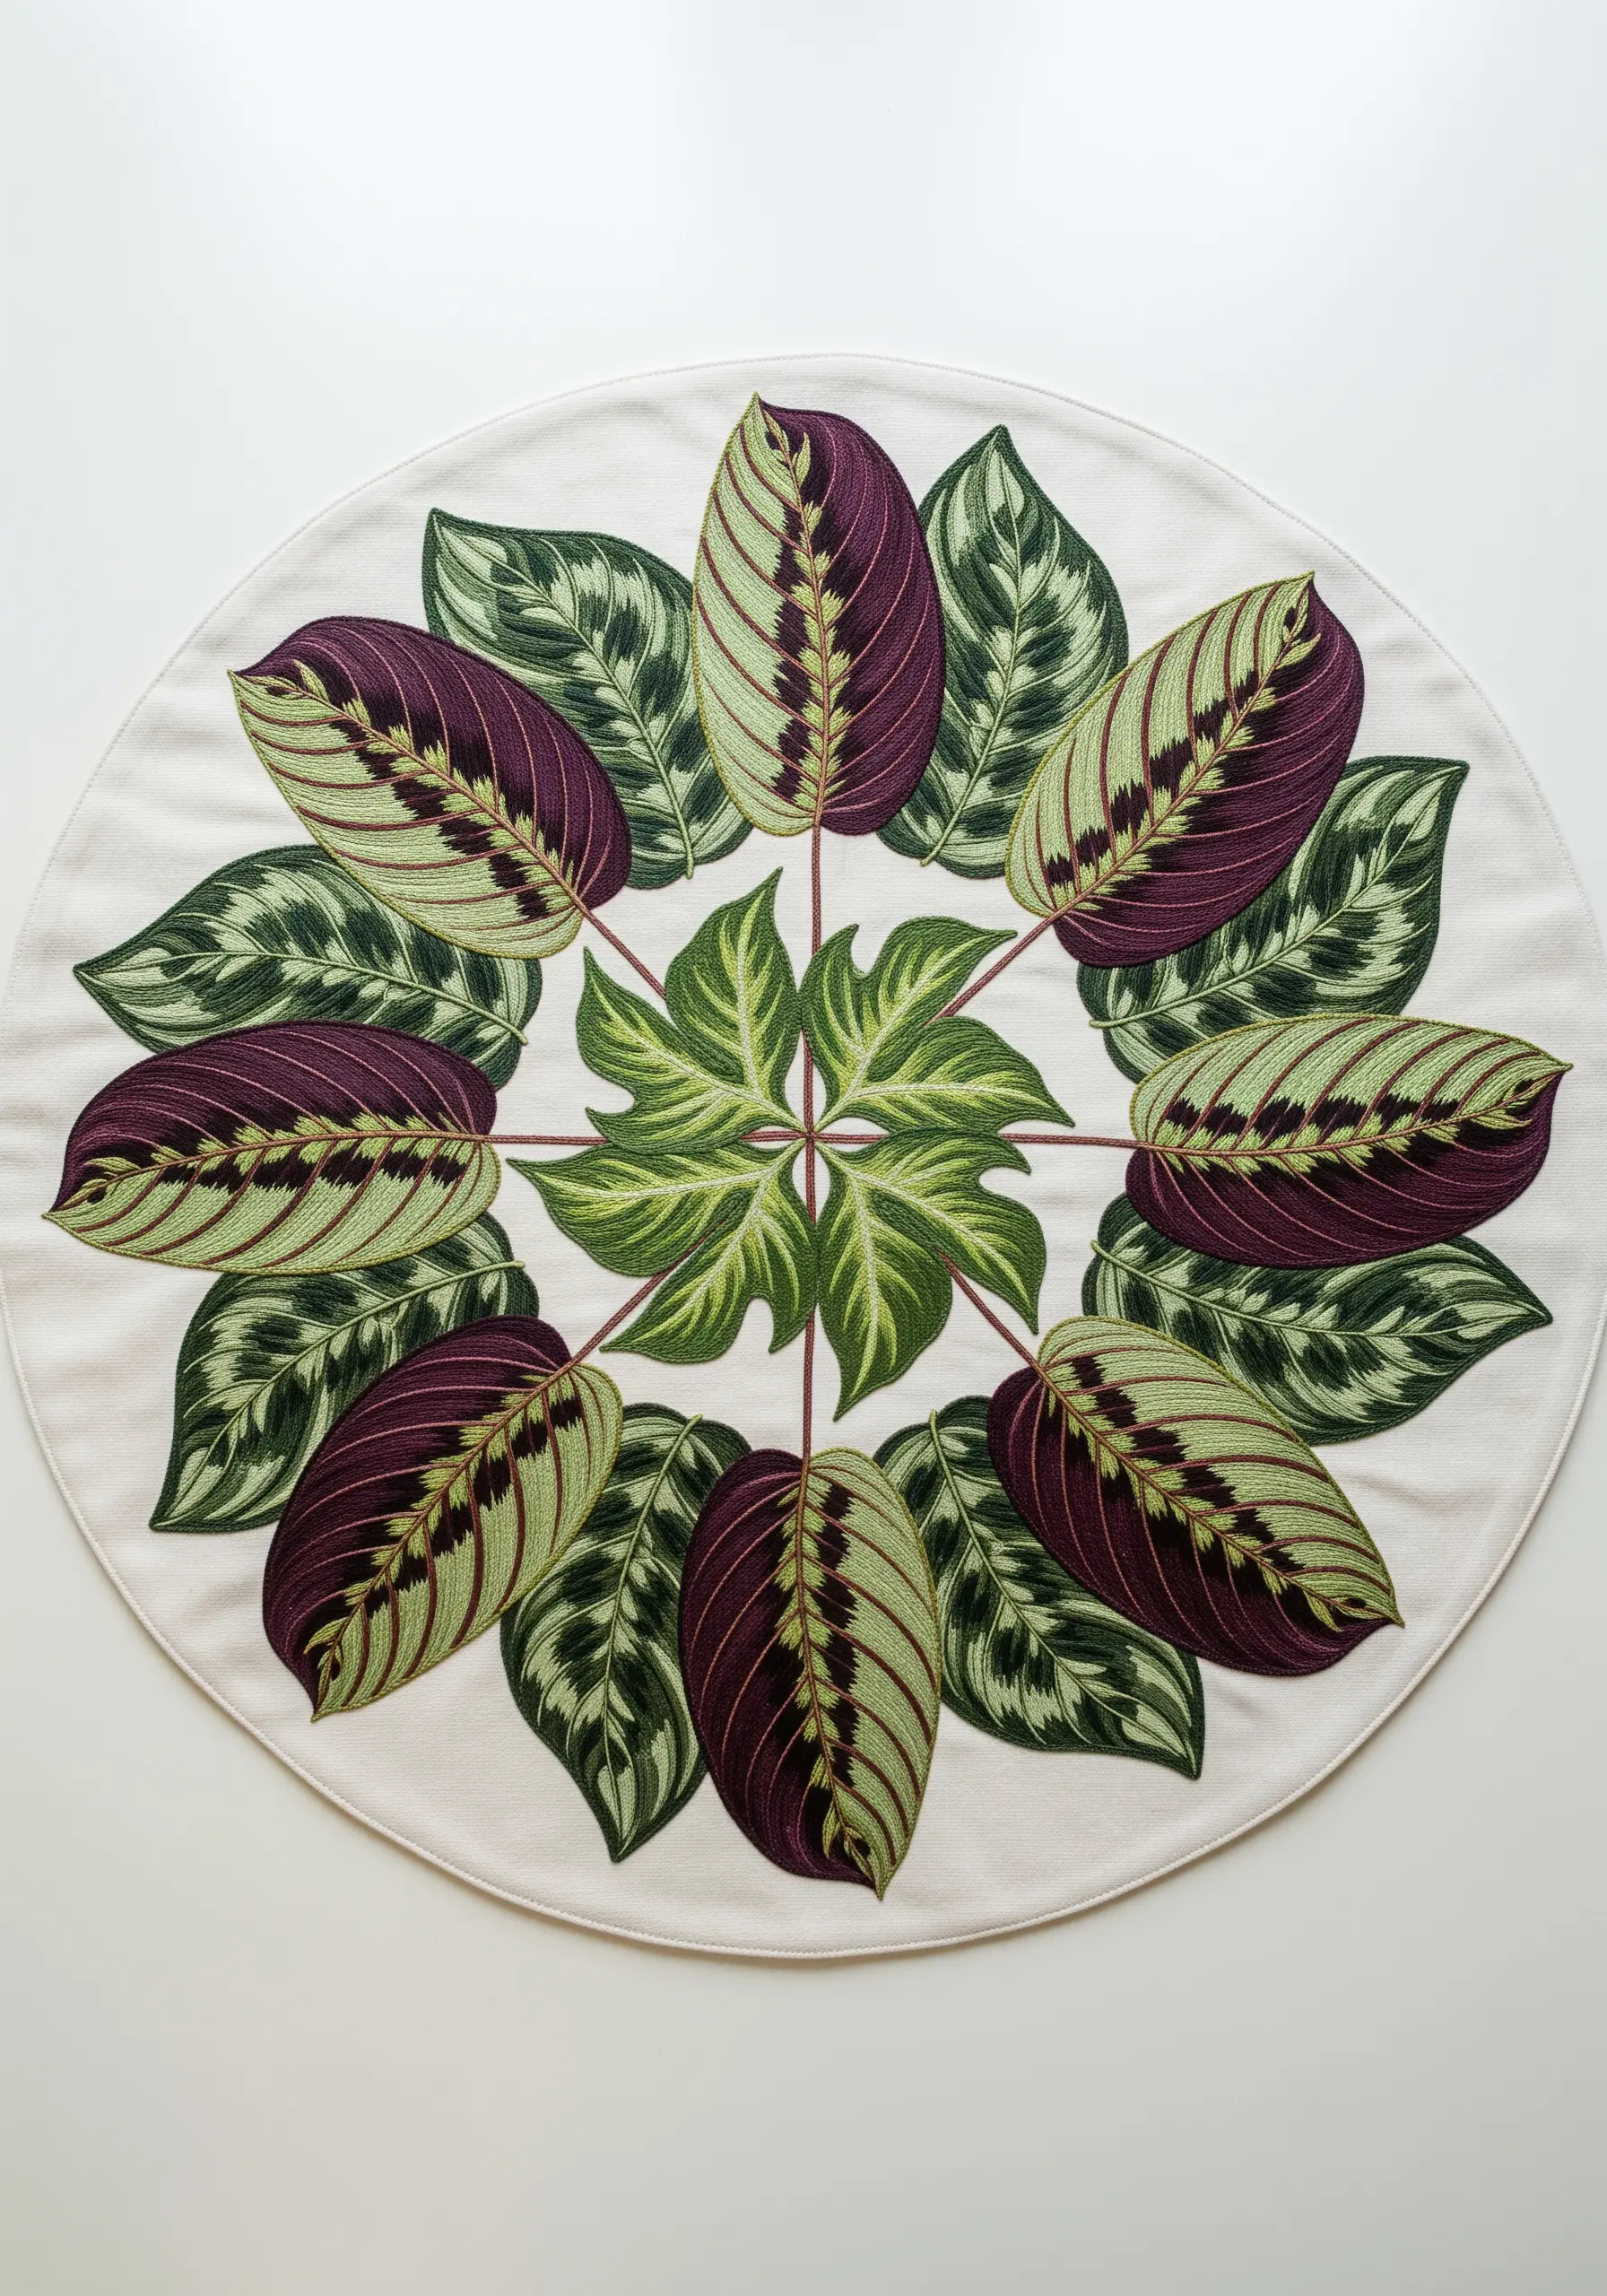
Create a stunning piece of wall art by arranging a single leaf motif into a radial, symmetrical pattern.
Precisely map out your design on the fabric first, using a compass and protractor to ensure perfect spacing and alignment.
By repeating the same complex, thread-painted leaf, you create a design that is both meditative to stitch and mesmerizing to view.
This composition transforms botanical studies into a sophisticated, embroidered mandala wall art design that feels both organic and orderly.
22. Finish Small Pieces with a Perfect Edge

Transform a small embroidery into a polished object like a bookmark or pin by giving it a flawless, sturdy edge.
After completing your stitching on a piece of felt or stiff fabric, carefully trim it, leaving a tiny 1-2mm border.
Use a buttonhole or whip stitch with matching thread to tightly encase the raw edge, creating a smooth, durable border.
This finishing technique is essential for any project that isn’t framed, providing a professional look that protects your work from unraveling.


