

Have you ever finished an embroidery project and felt that something was missing—a certain depth or polish that separates simple stitching from true textile art? You have the skills, but you’re looking for that next step to make your work feel cohesive and intentional.
The secret often lies not in learning a more complex stitch, but in rethinking your canvas. Fabric collage is your bridge from following a pattern to designing with texture, color, and form. It’s about layering pieces of fabric—felt, cotton scraps, old denim, sheer organza—and using your stitches to unite them into a single, expressive story.
Here, you won’t find intimidating techniques. Instead, you’ll discover twenty accessible methods that blend appliqué and embroidery to create art with dimension and sophistication. These are the subtle approaches that elevate your work, turning fabric scraps into focal points and simple stitches into powerful design elements.
1. Layer Felt Appliqué for Graphic Scenes
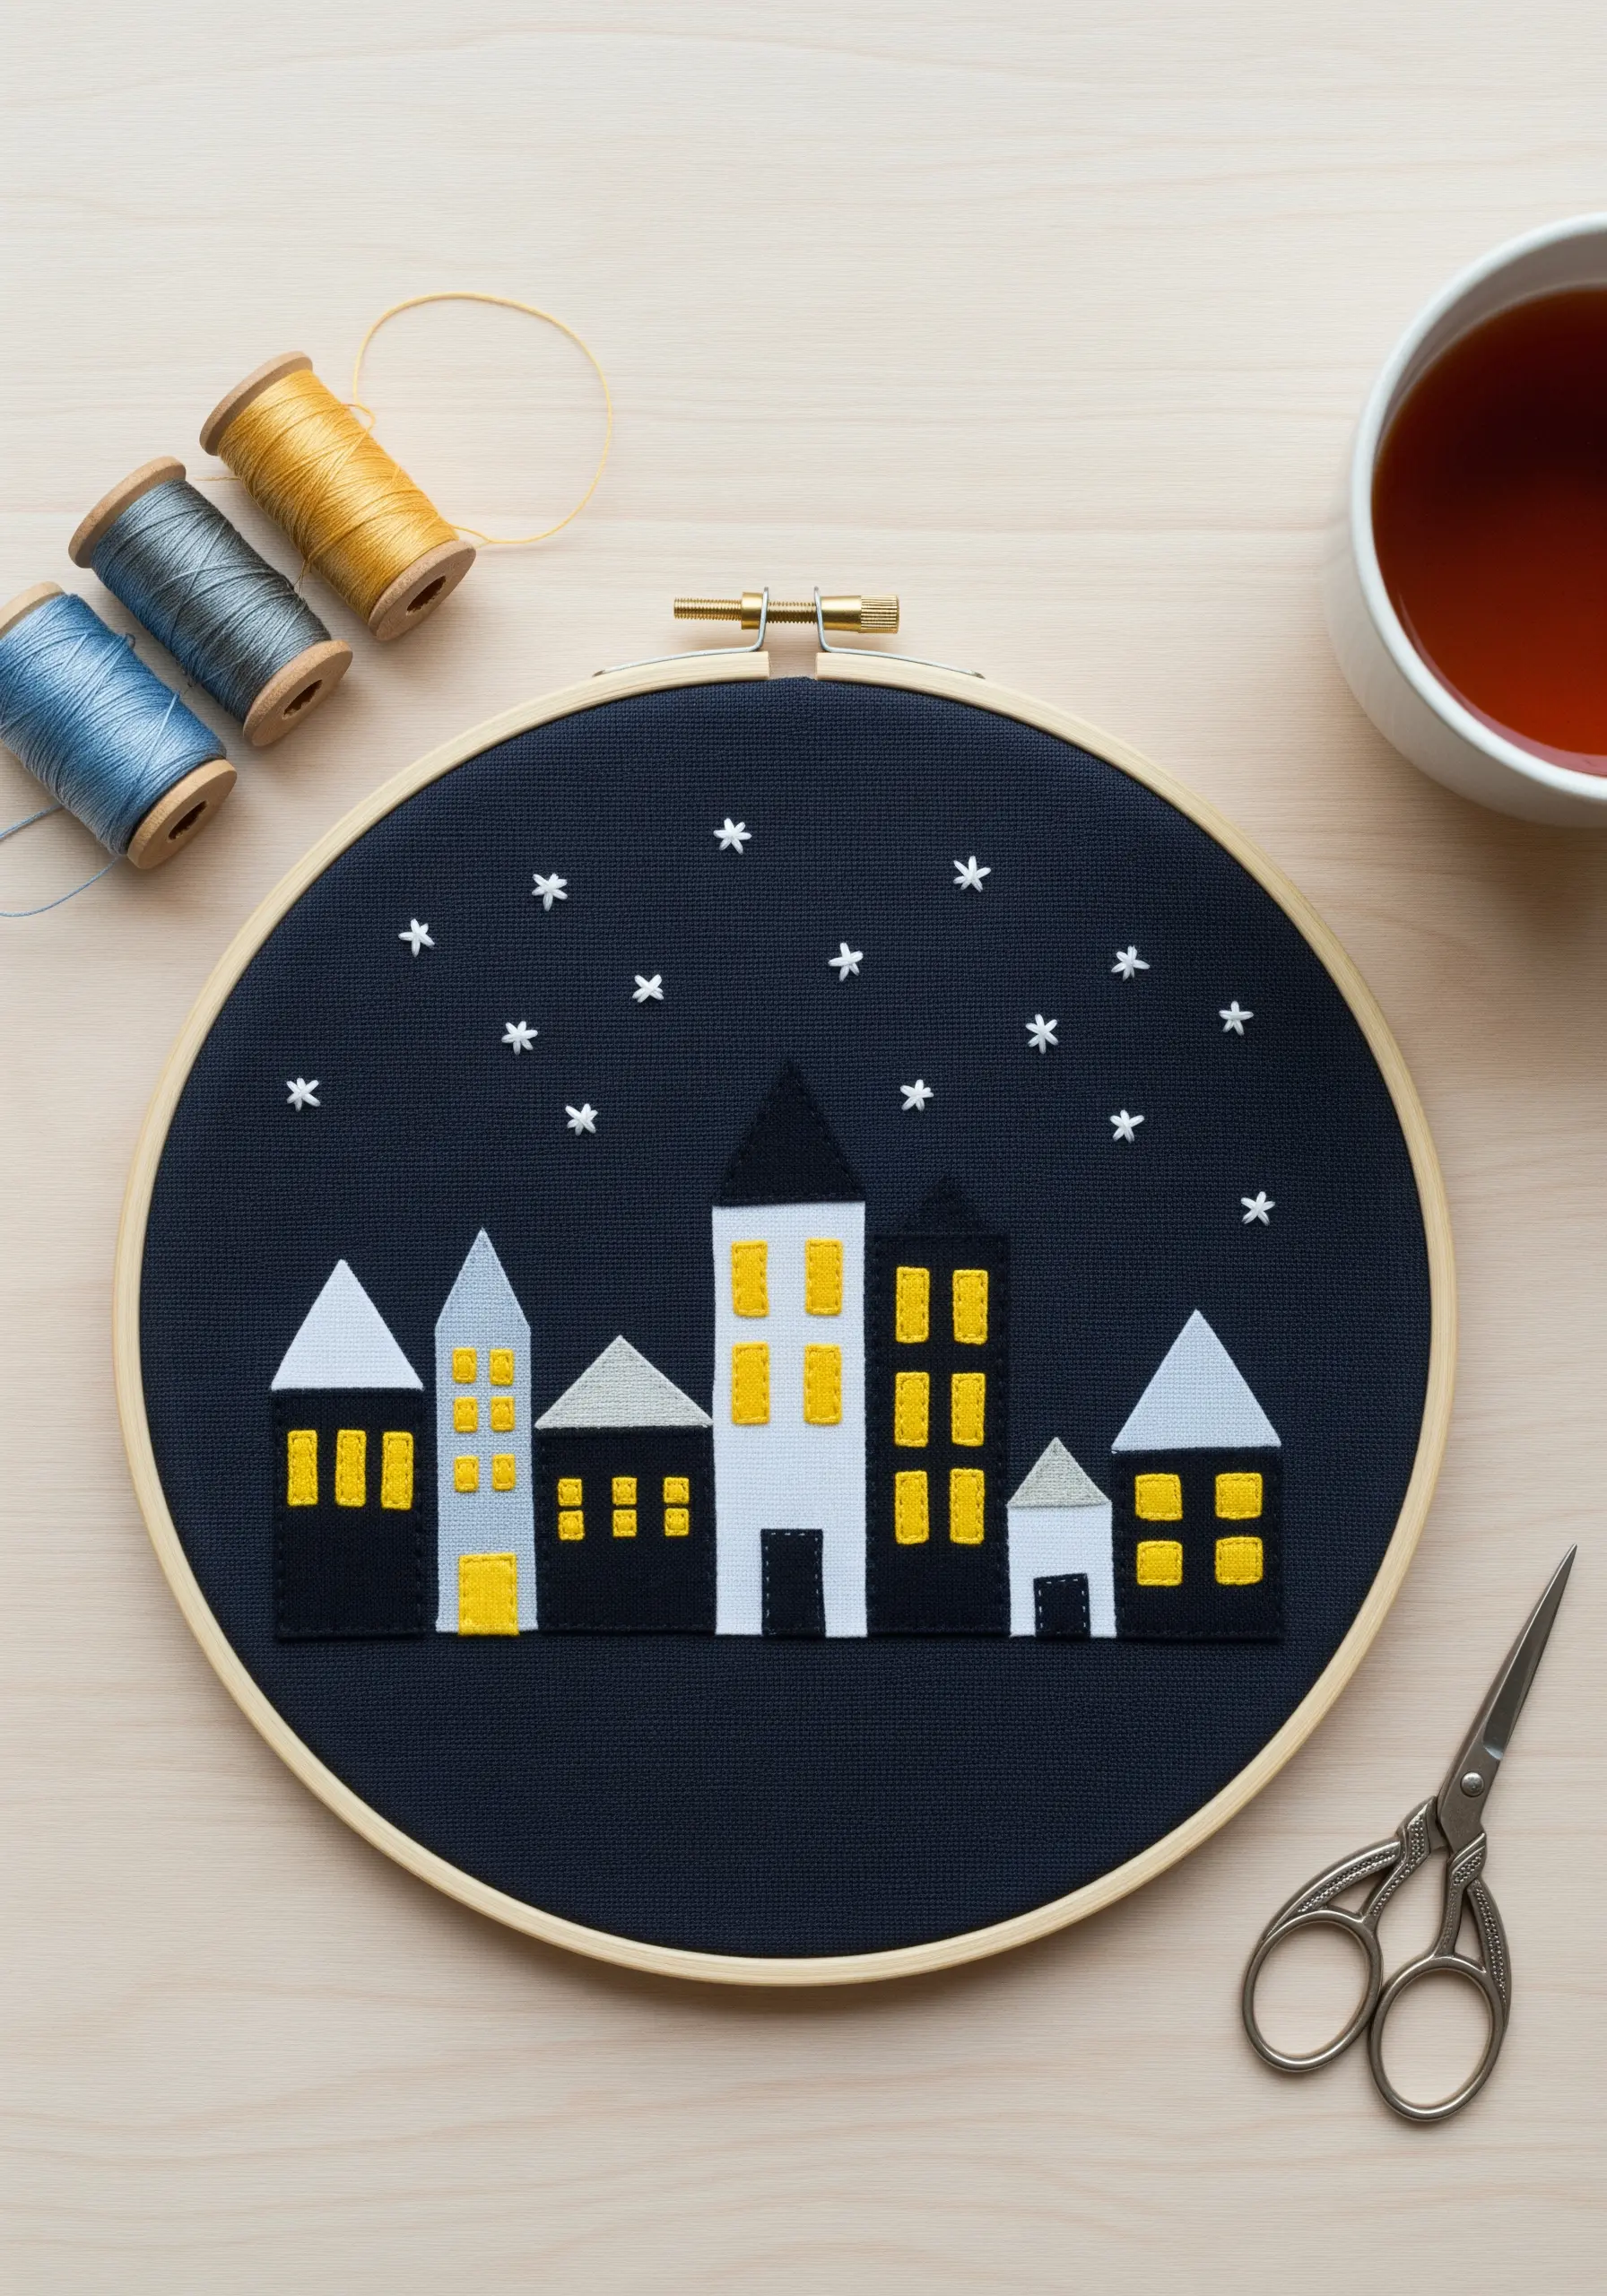
Begin by cutting crisp, geometric shapes from felt to form your main elements, like buildings or landscapes.
Secure each piece to a dark, high-contrast background fabric, such as navy cotton or linen, using a thin layer of fabric glue to prevent shifting.
Instead of a simple backstitch, outline the glowing windows with a tight satin stitch in a vibrant yellow or gold thread to create a solid block of light.
For the stars, use single detached chain stitches or tiny cross stitches rather than French knots for a sharper, more graphic celestial effect.
This method transforms simple shapes into a clean, modern narrative with strong visual impact.
2. Compose with Raw-Edge Denim for Coastal Textures
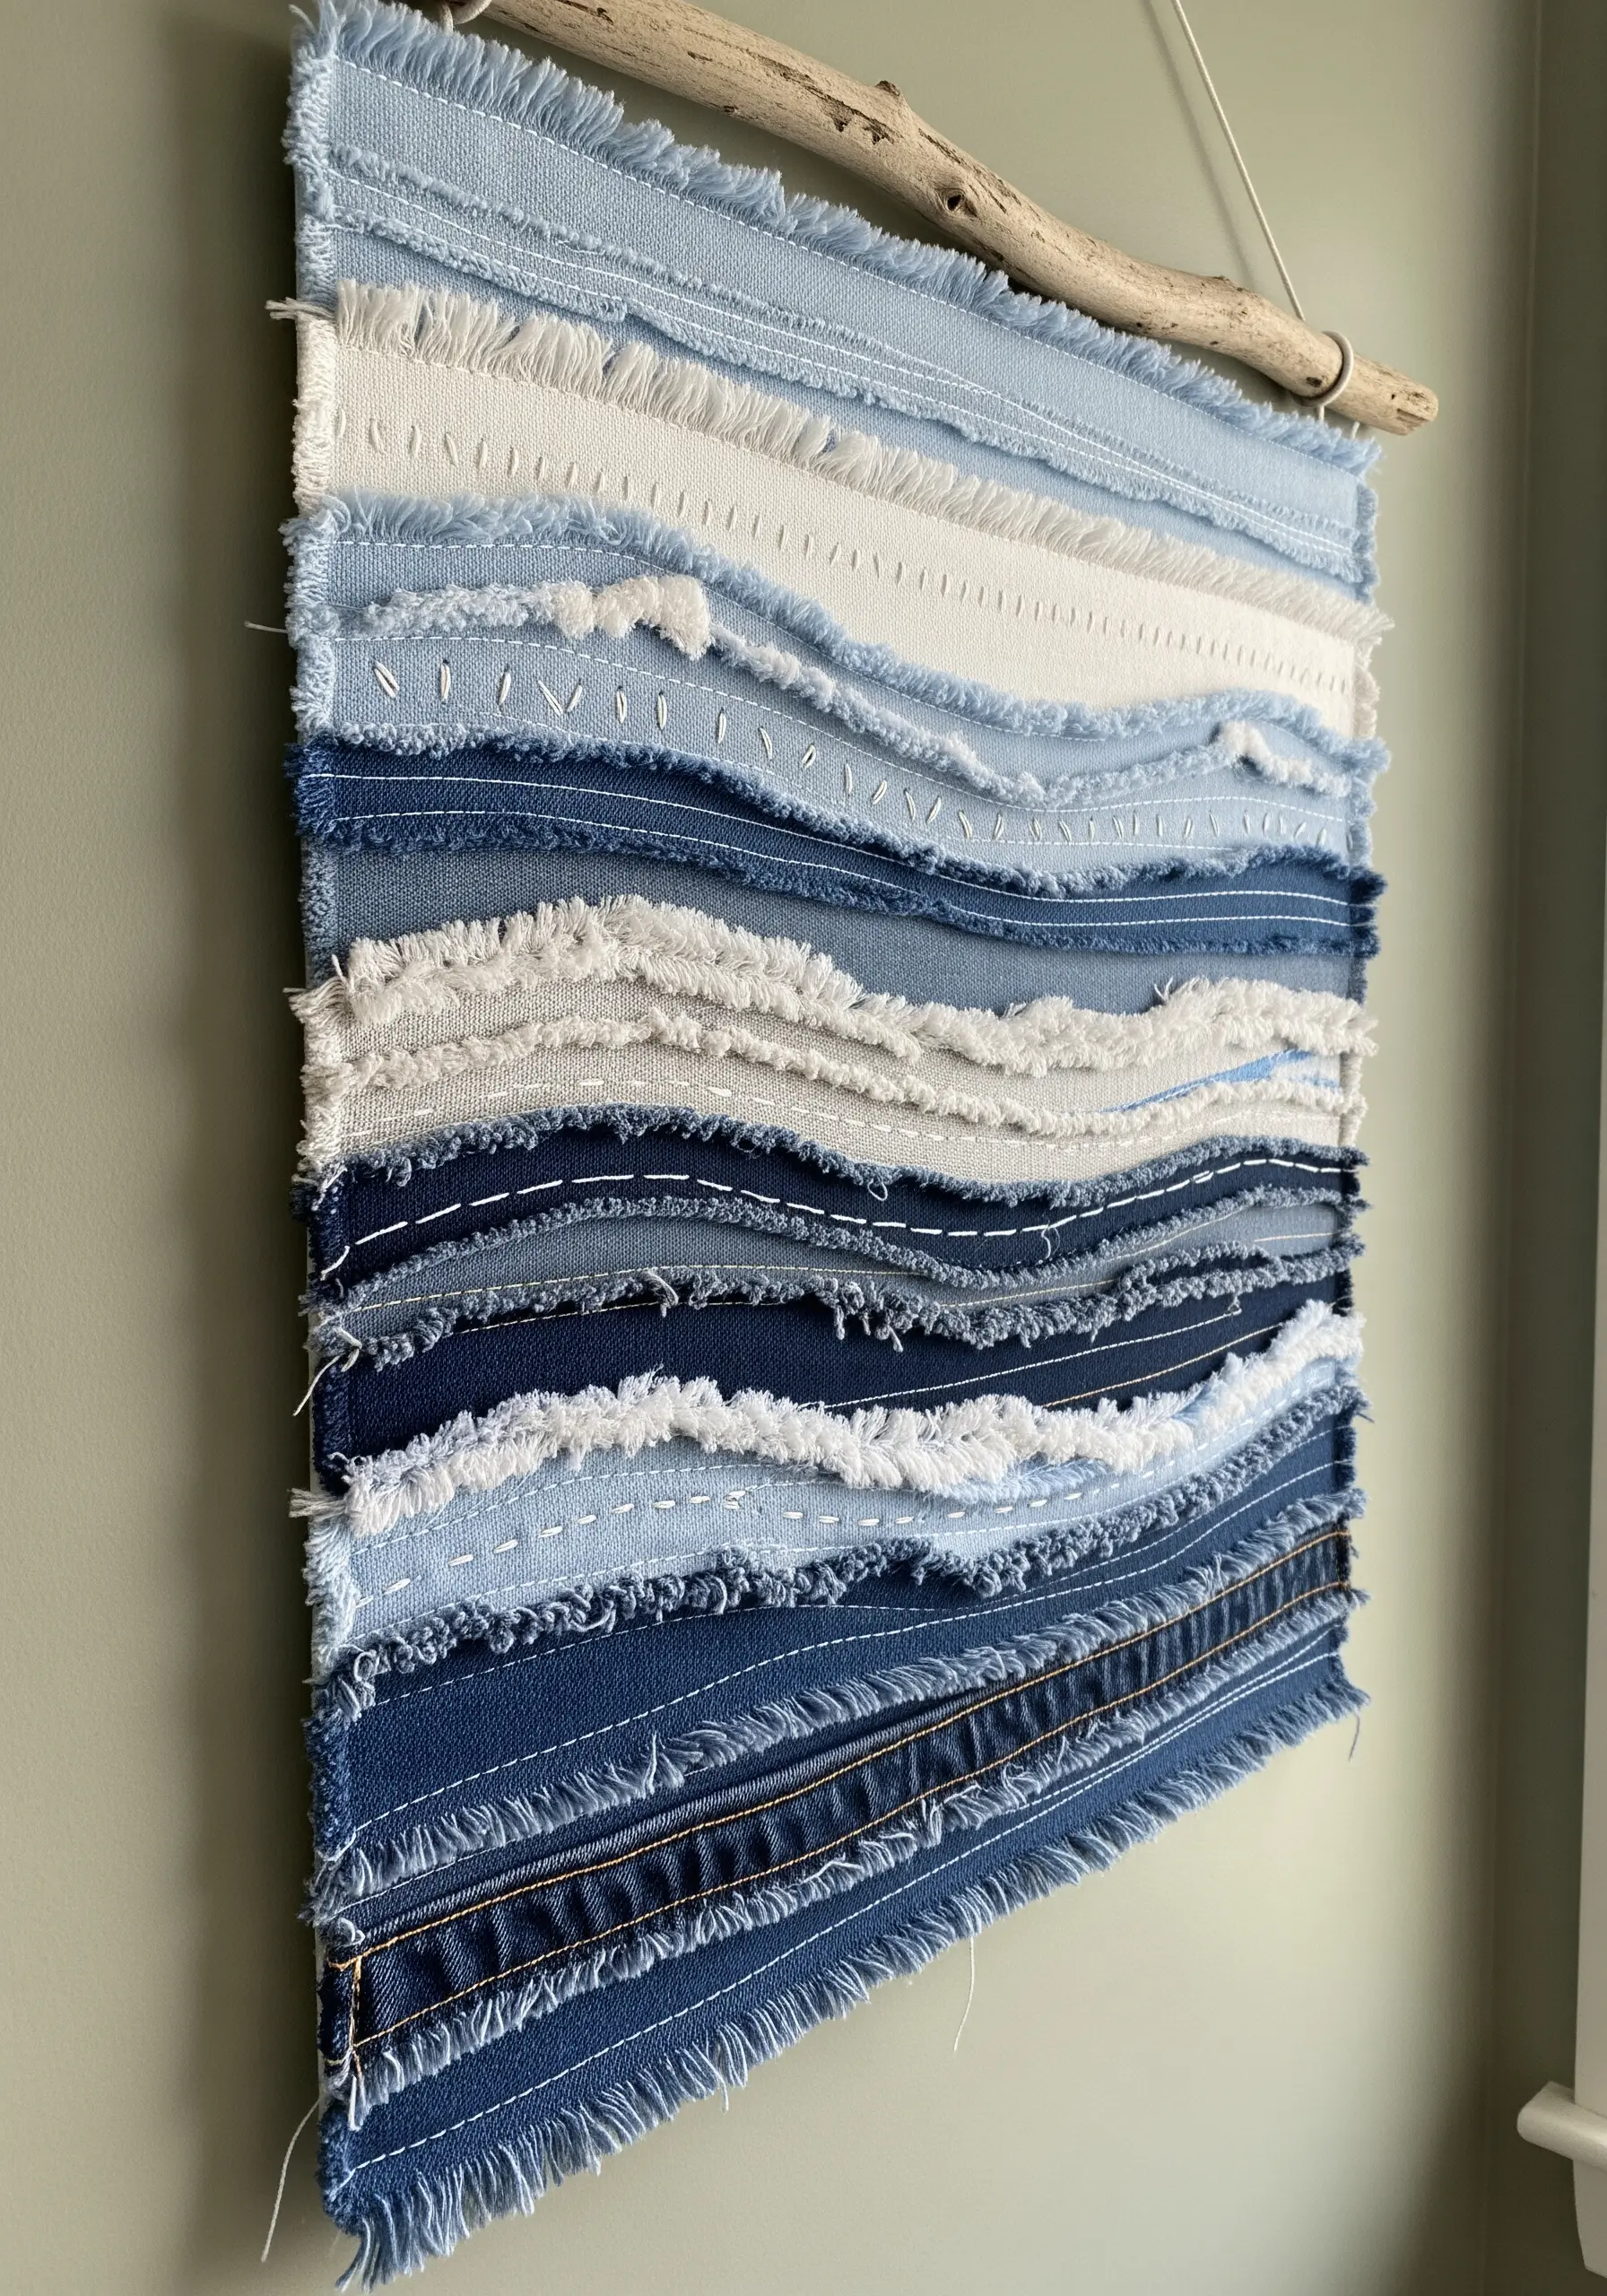
Gather denim scraps in various washes, from deep indigo to bleached white, to create a rich, monochromatic palette.
Instead of cutting clean shapes, tear the fabric strips to create frayed, raw edges that add immense texture and movement.
Layer the strips horizontally, overlapping them to mimic the rhythm of ocean waves or shifting sands.
Use a simple, visible running stitch with a contrasting white or ecru thread to anchor the layers, letting the stitch itself become part of the design.
This technique turns discarded fabric into expressive fiber art installations that evoke natural landscapes.
3. Create a Mosaic Effect with Patterned Fabric Scraps
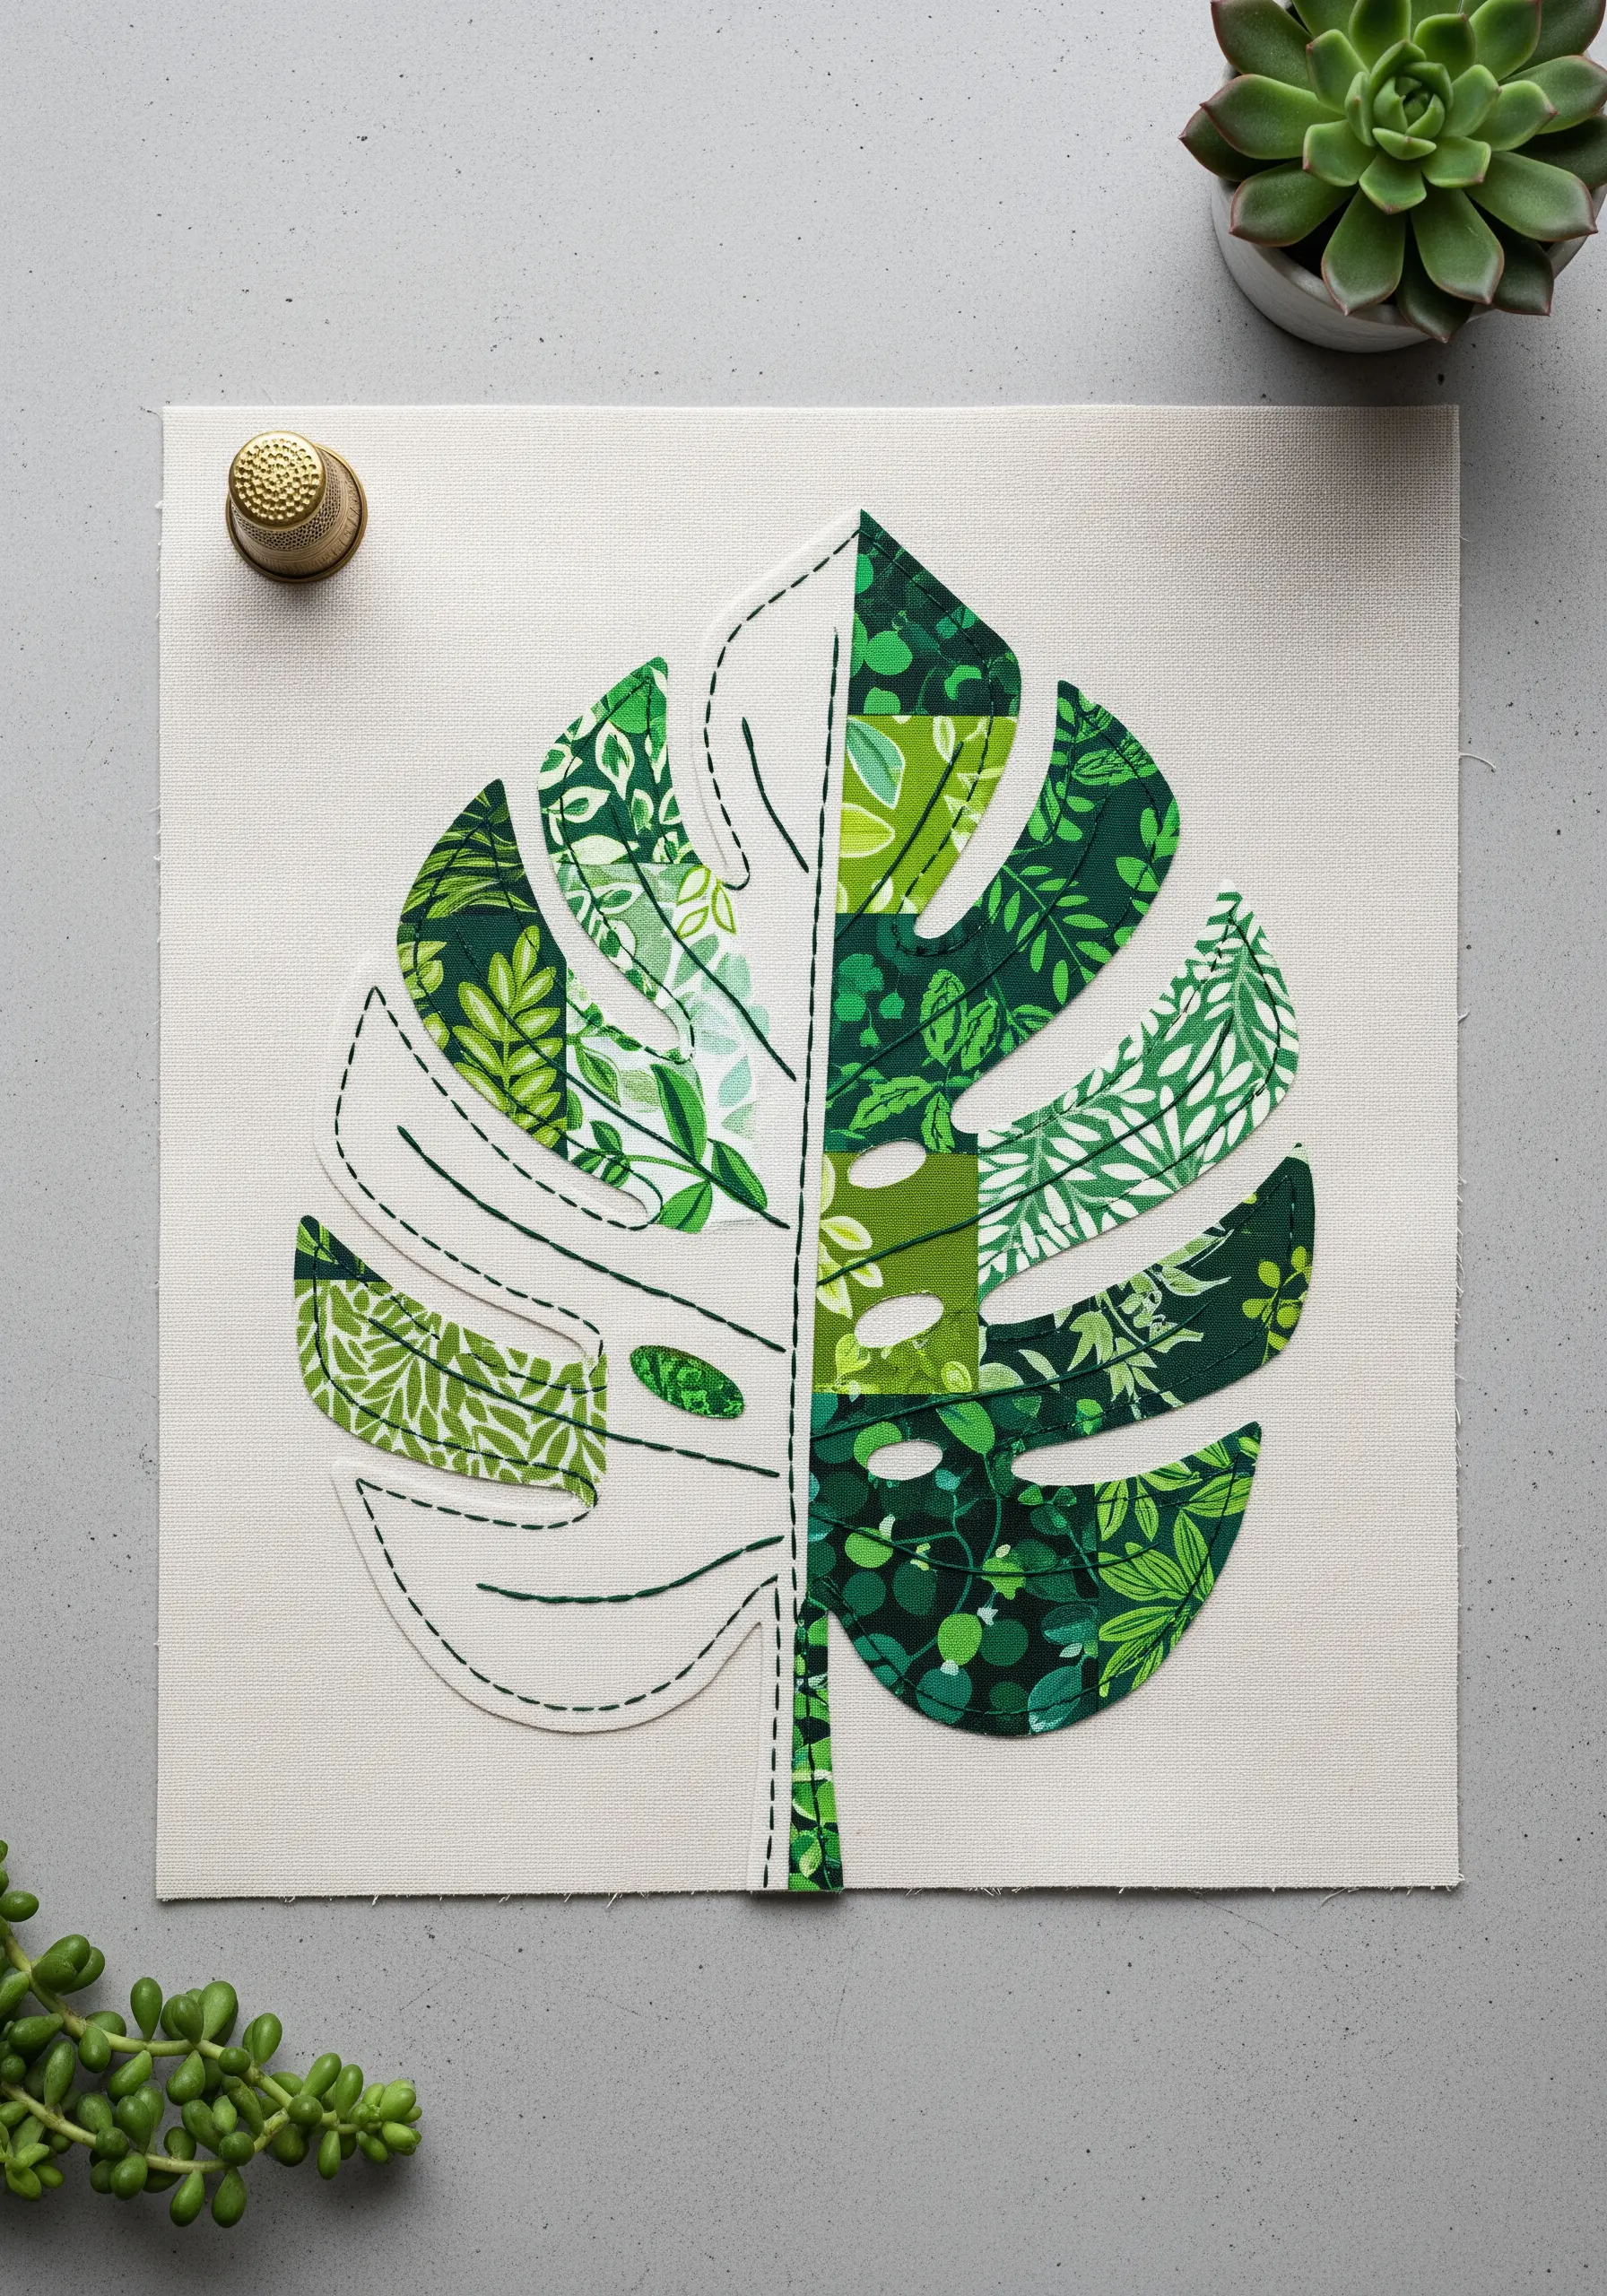
Select a simple, bold silhouette, such as a large leaf or animal, as your canvas.
Cut small, geometric pieces from various patterned fabrics within a cohesive color family, like different shades of green.
Arrange these pieces within your silhouette, fitting them together like a puzzle to create a dynamic, patchwork interior.
Once glued down, use a simple backstitch or stem stitch in a contrasting color to outline the entire shape and its internal veins.
This method adds intricate visual detail without requiring complex embroidery, making it one of the most effective leaf and plant embroidery ideas for beginners.
4. Define Collages with Minimalist Line Work
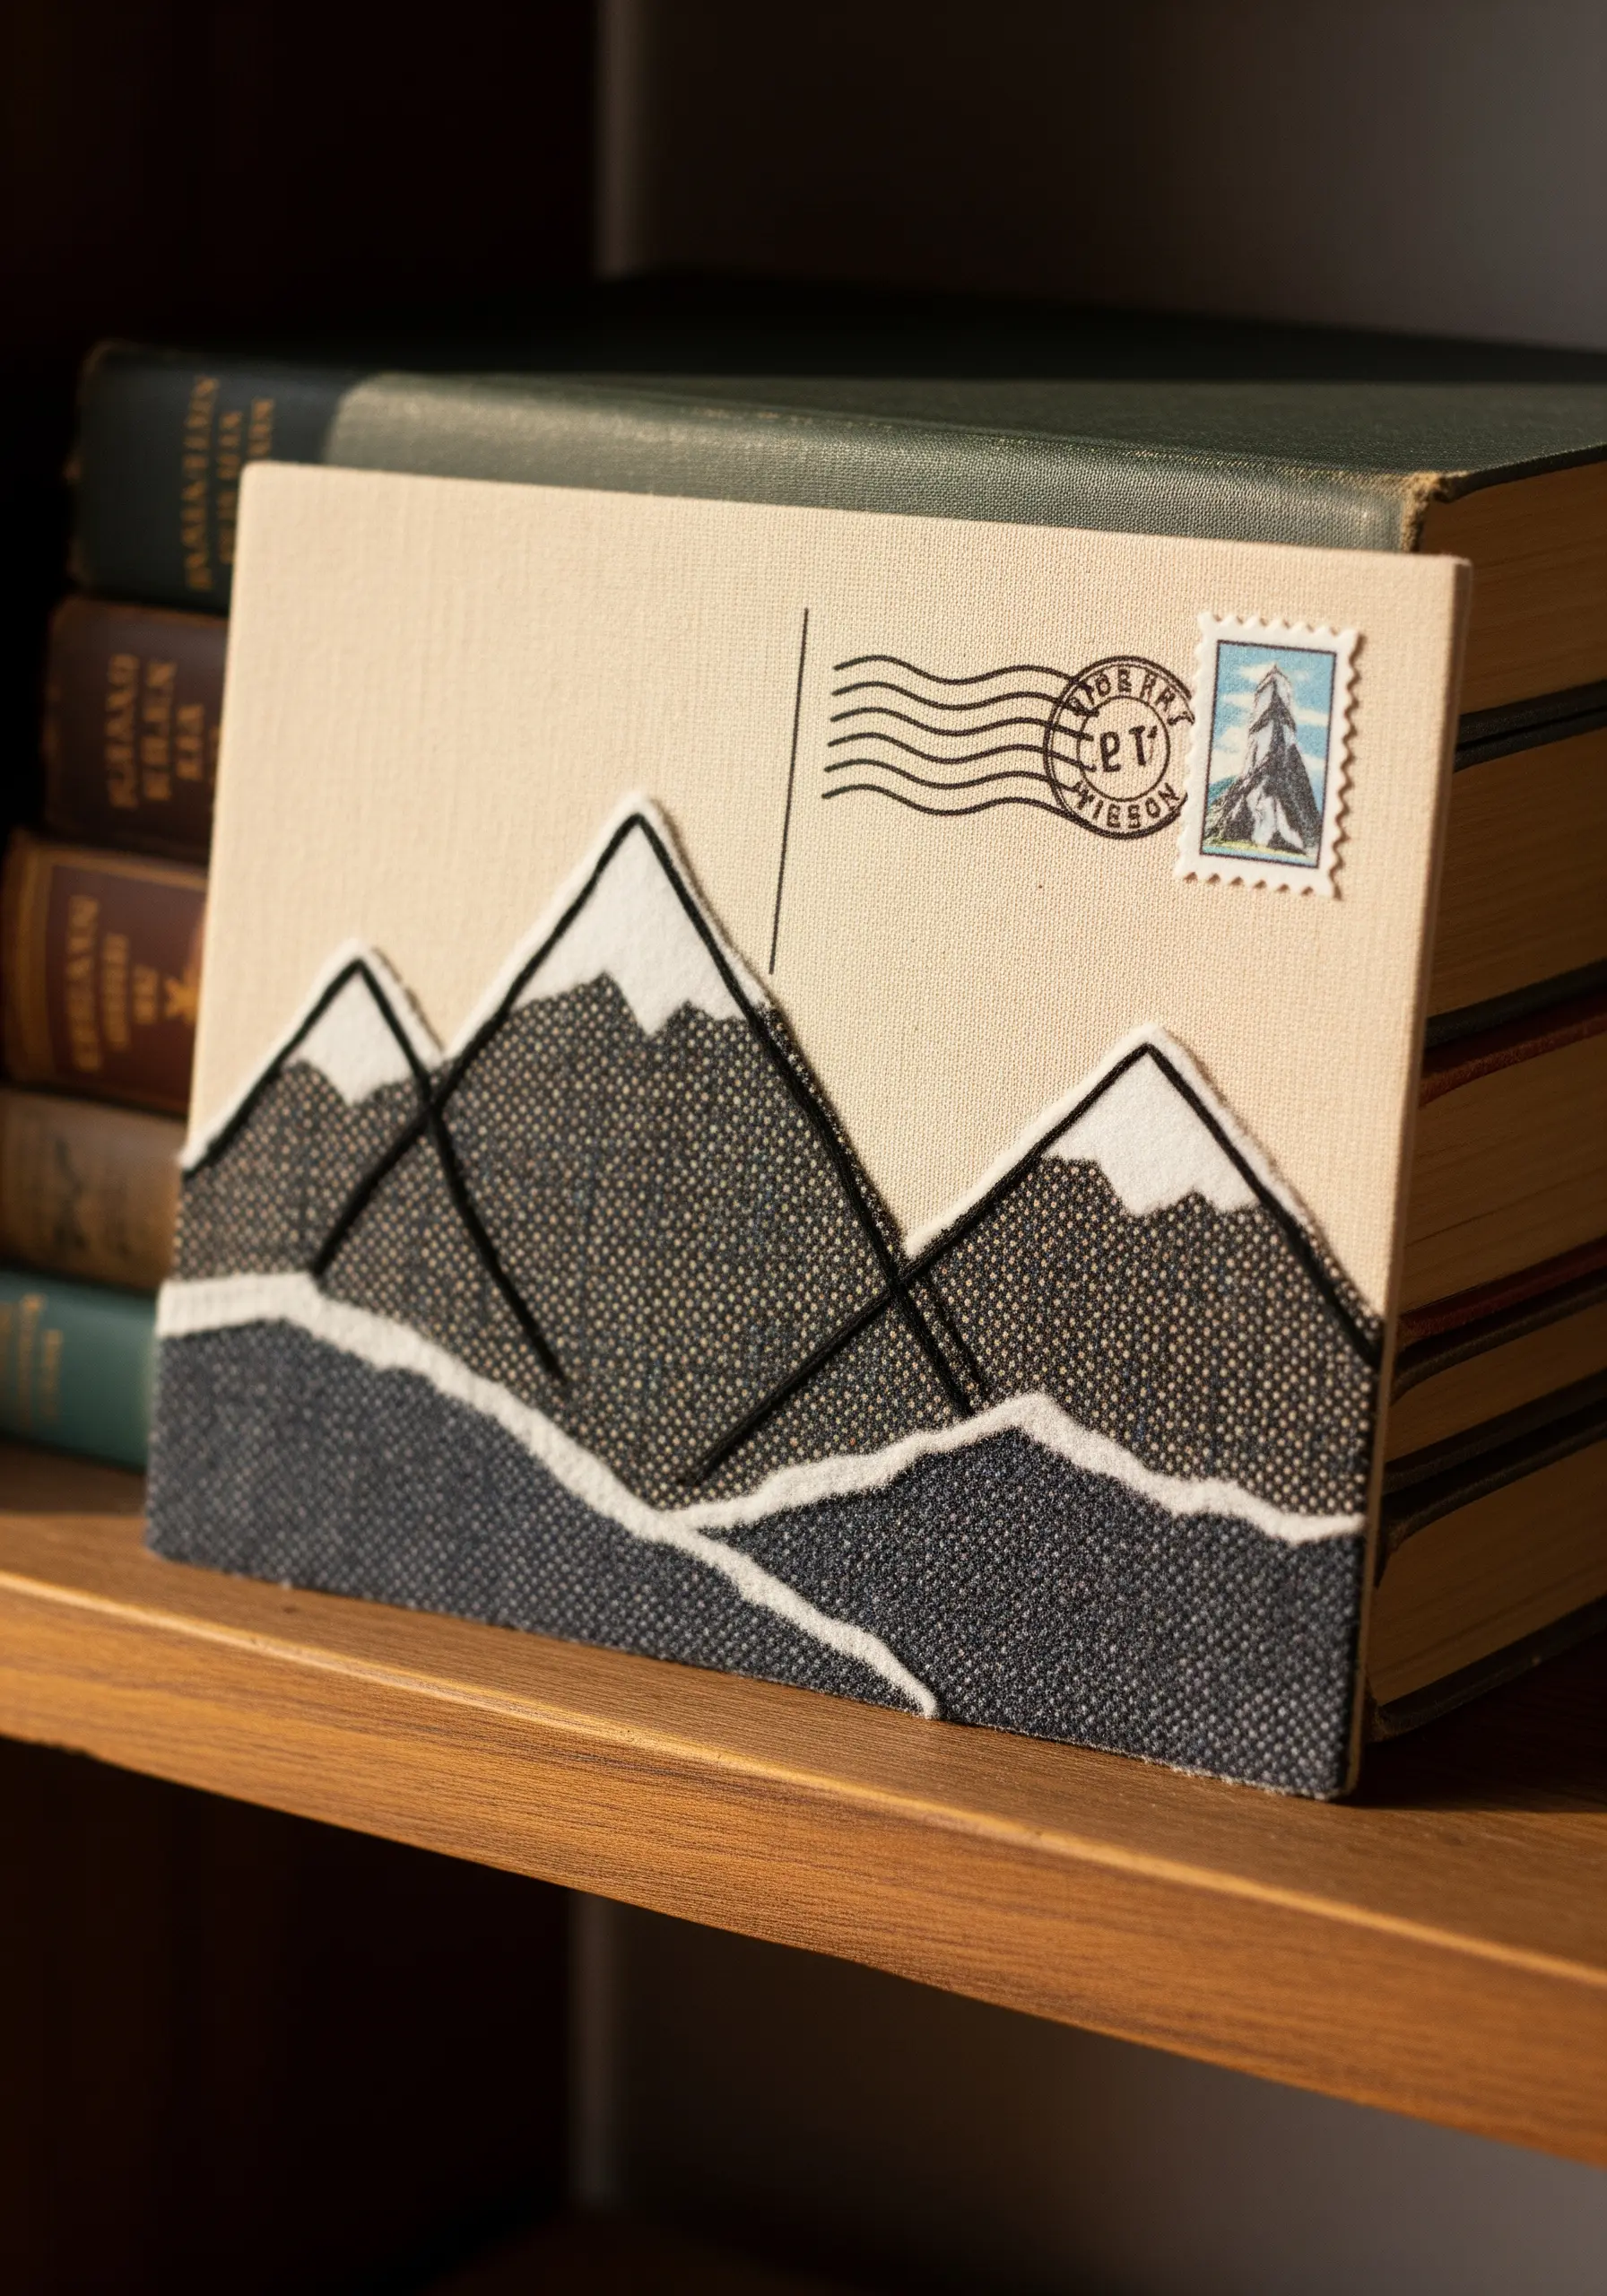
Build a simple landscape using fabric pieces with subtle textures, like tweed or woven cottons, for mountains and hills.
Create depth by choosing fabrics in graduating tones, with darker shades in the foreground.
Instead of stitching the fabric edges down, allow them to be slightly raw or torn for a more organic feel.
Then, use a single, bold line of black stem stitch or couched thread to draw contour lines across the fabric pieces, unifying the composition.
This combination of soft texture and sharp lines creates sophisticated, travel-inspired art with minimal effort.
5. Layer Sheer Fabrics for Ethereal Portraits

Use translucent materials like organza, tulle, or chiffon in neutral tones to build subtle, overlapping shapes for your portrait.
The transparency allows you to create soft gradients and shadows that would be difficult to achieve with thread alone.
Once your fabric pieces are arranged on a sheer base fabric, couch a single strand of black thread over the top to create the outline.
Couching, which involves tacking down a thicker thread with smaller stitches, ensures your line remains smooth and unbroken.
This technique is perfect for creating delicate single-line face profiles that feel both modern and weightless.
6. Mix Textures for Playful Still Life Compositions
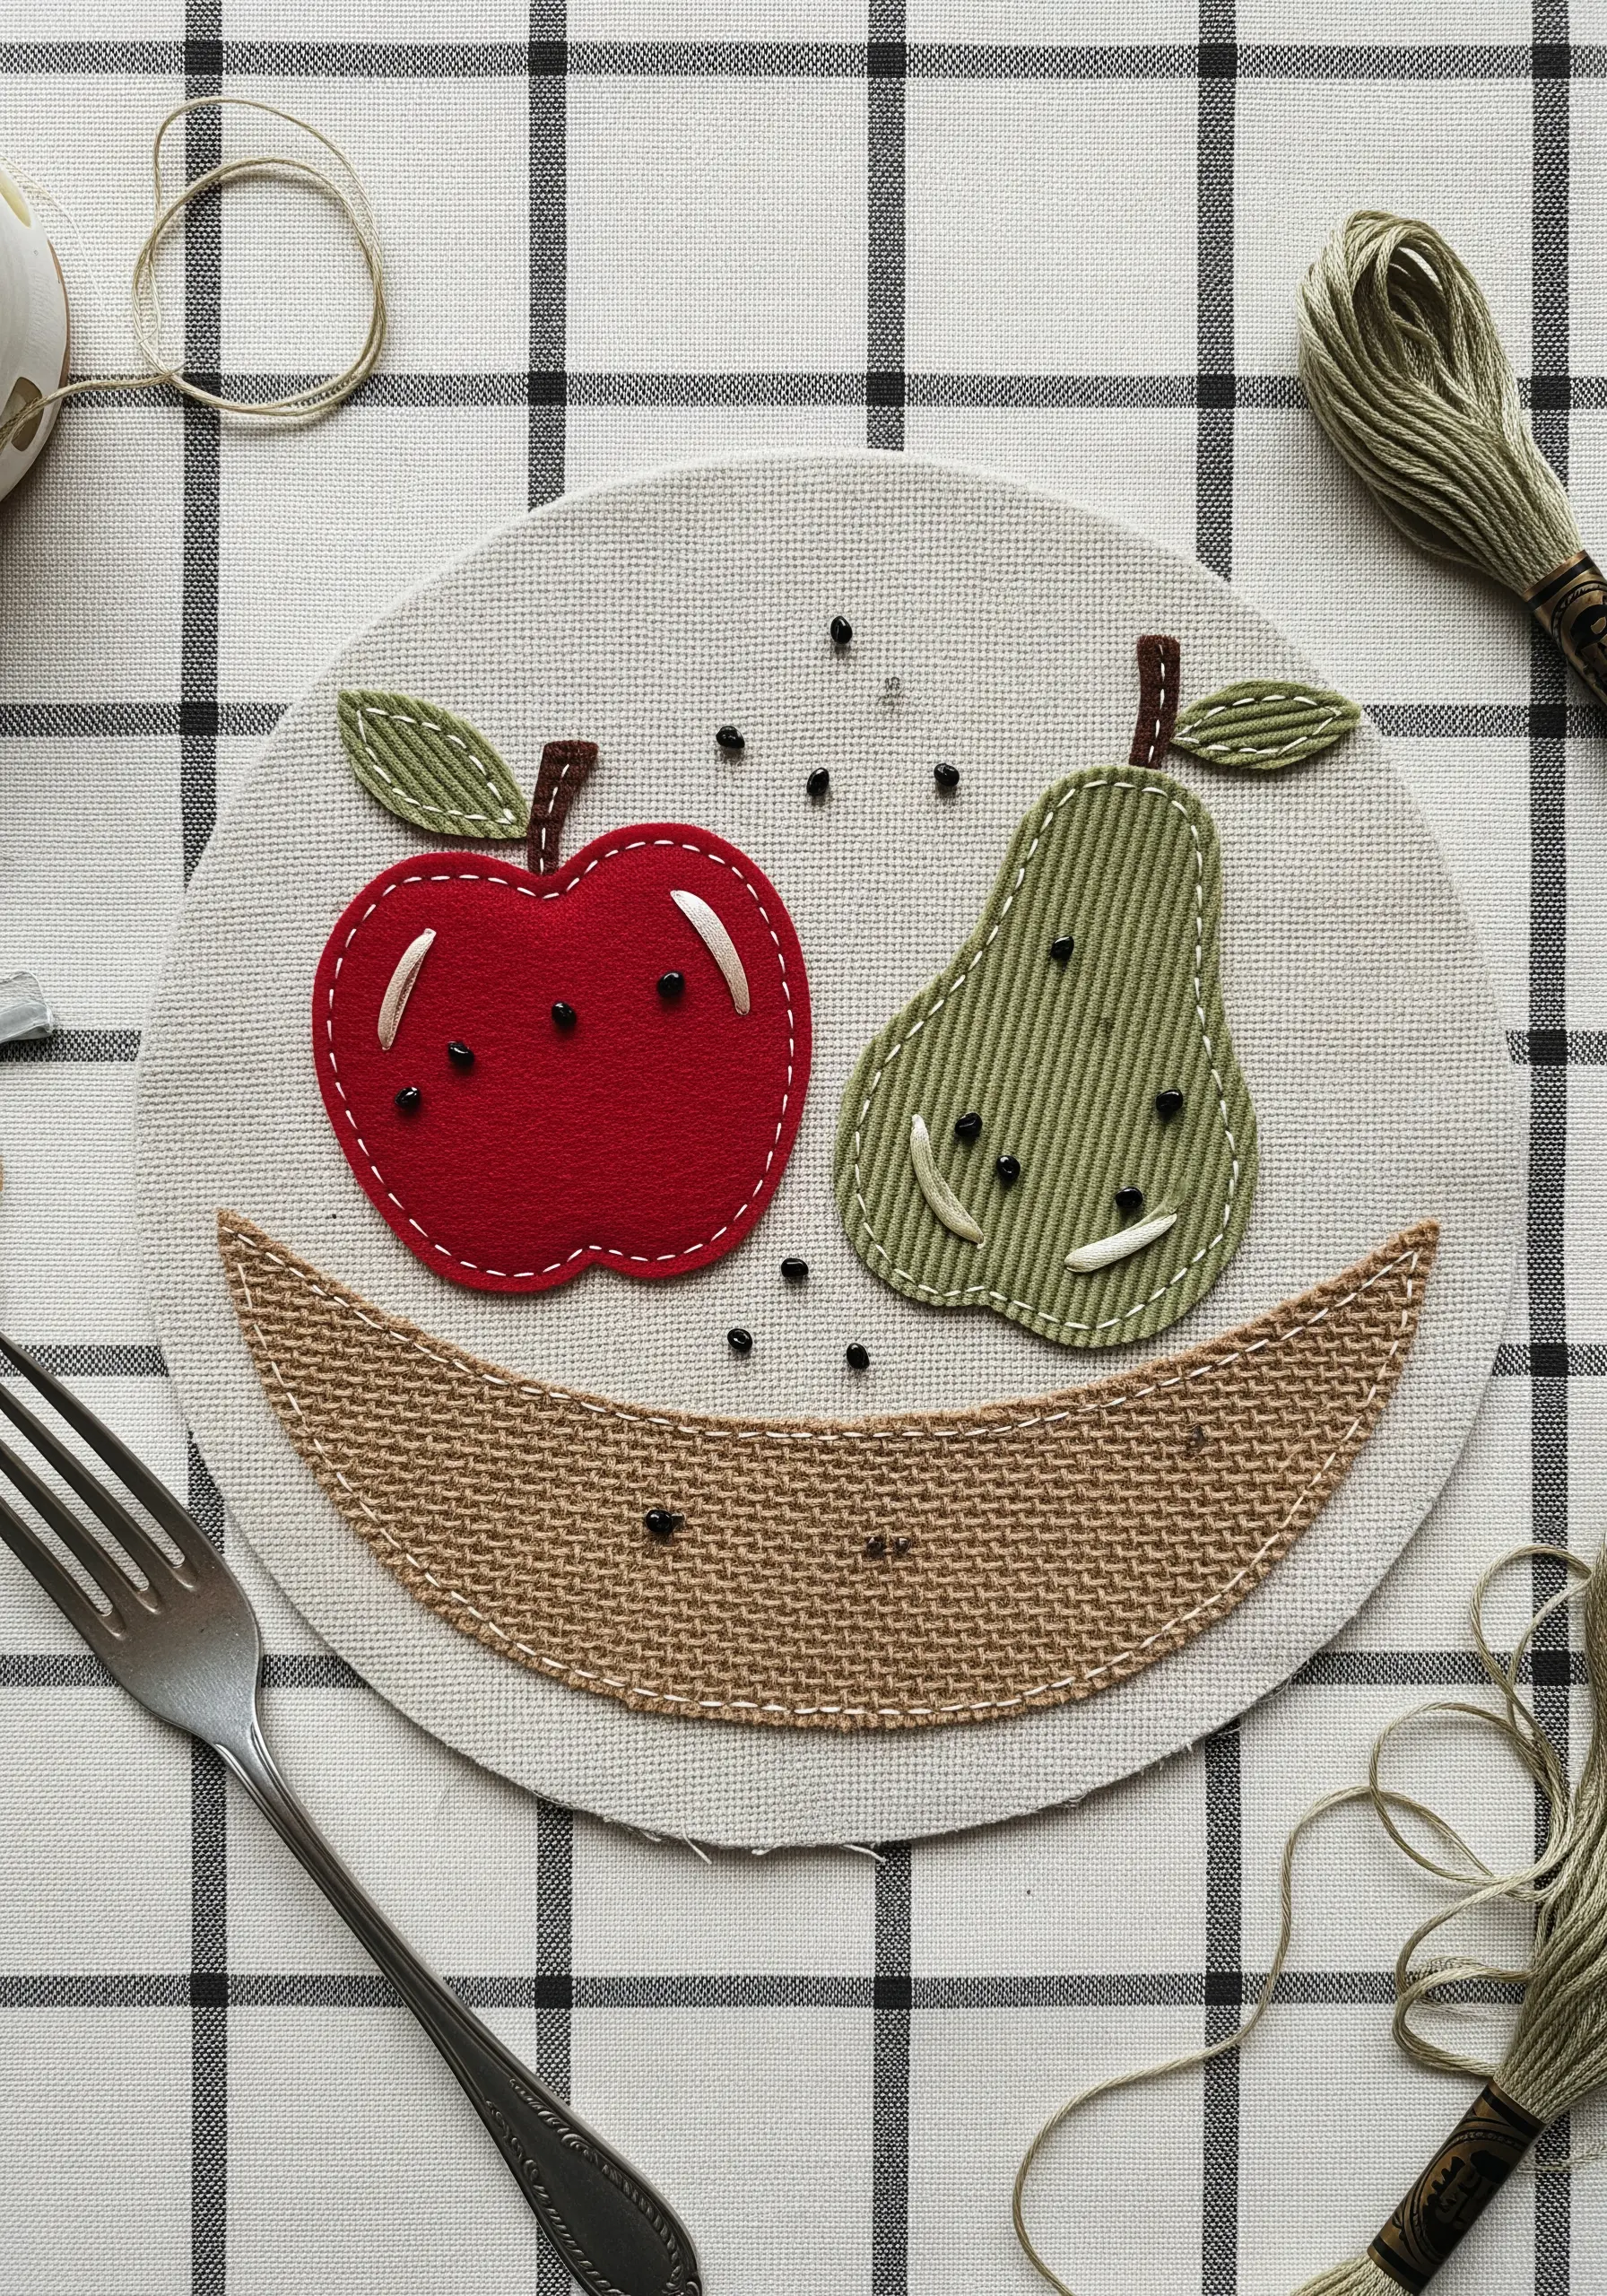
Combine fabrics with distinctly different textures to add tactile interest to simple shapes.
Pair smooth felt for an apple with a ribbed corduroy for a pear, and use coarse burlap for the bowl.
Secure the appliqué pieces with a neat blanket stitch around the edges, which adds a charming, handcrafted finish.
Instead of filling the shapes with dense stitching, add minimal details like scattered seed stitches or a few strategically placed beads for highlights.
This approach lets the fabric textures do the expressive work, creating delightful and minimal food motifs.
7. Unify Scraps with Rhythmic Running Stitches
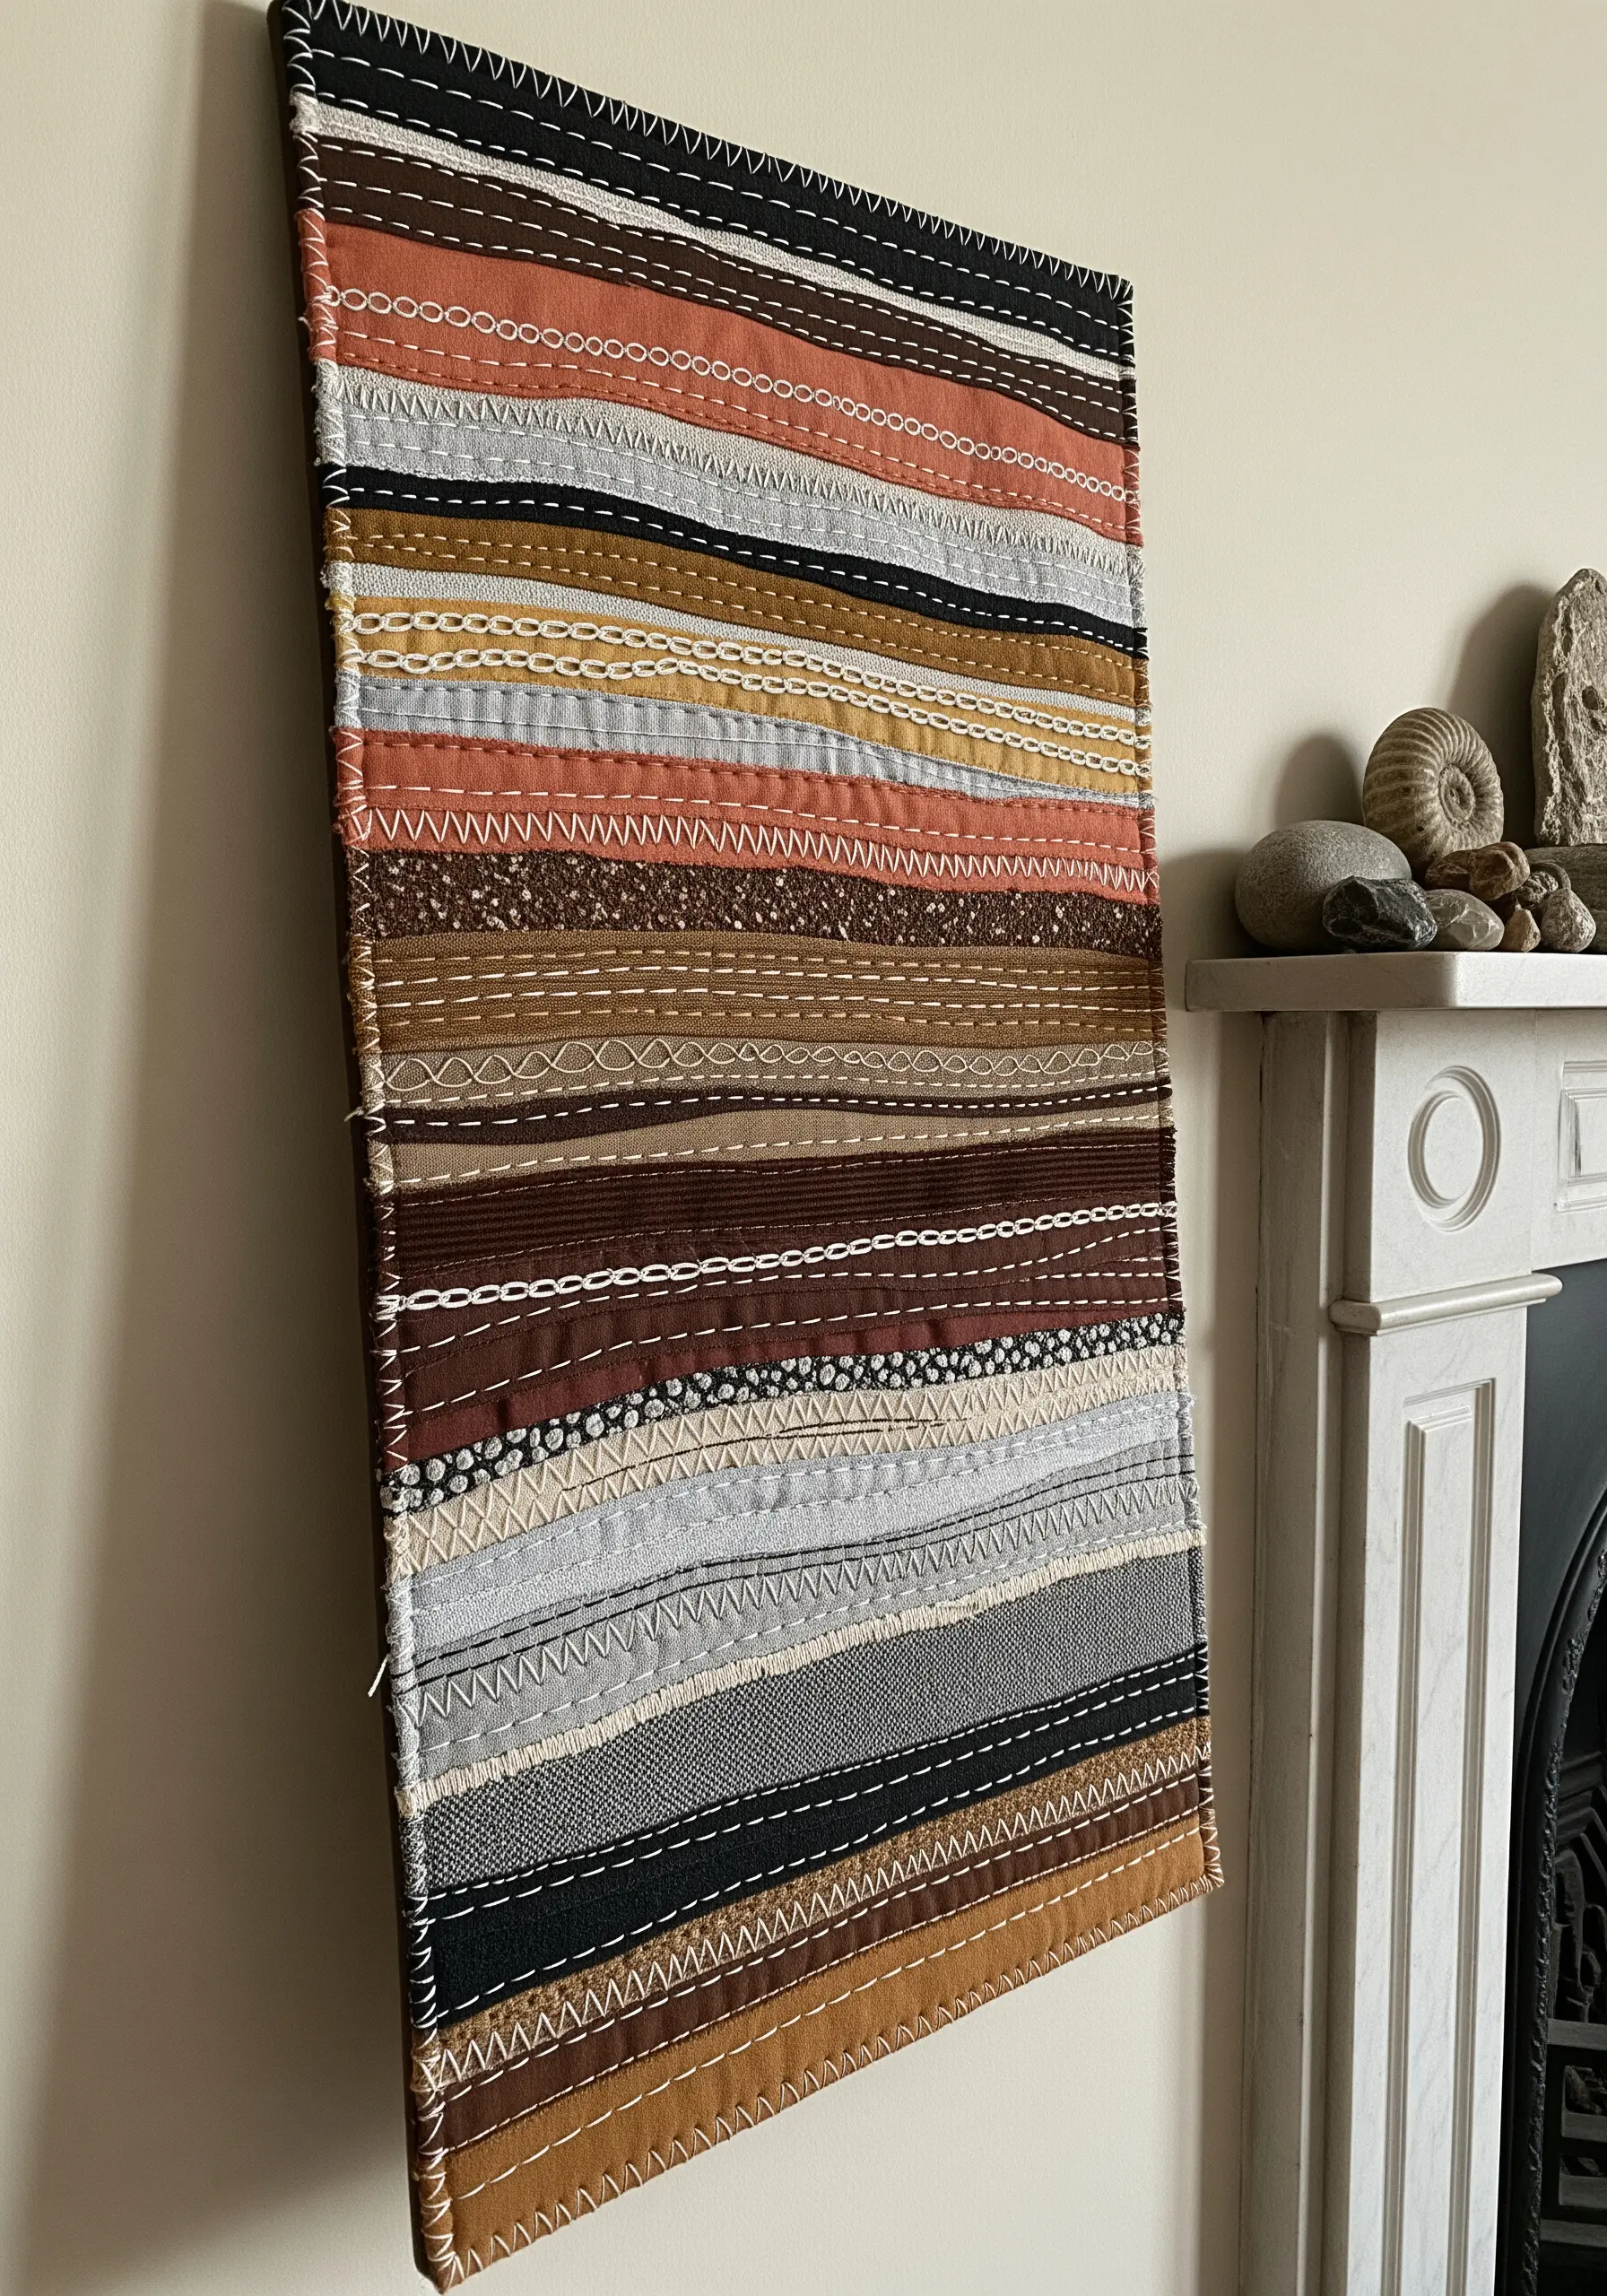
Arrange strips of fabric—cottons, linens, silks—in an appealing color sequence, ignoring perfect alignment for a more organic feel.
Instead of intricate patterns, use rows of simple running stitches, known as Sashiko or Kantha stitching, to connect all the layers.
Vary the color of your thread and the length of your stitches to create visual rhythm and texture across the piece.
This technique is not only meditative but also transforms a pile of scraps into a cohesive piece of abstract mixed-media embroidery.
8. Sculpt 3D ‘Islands’ for Miniature Worlds
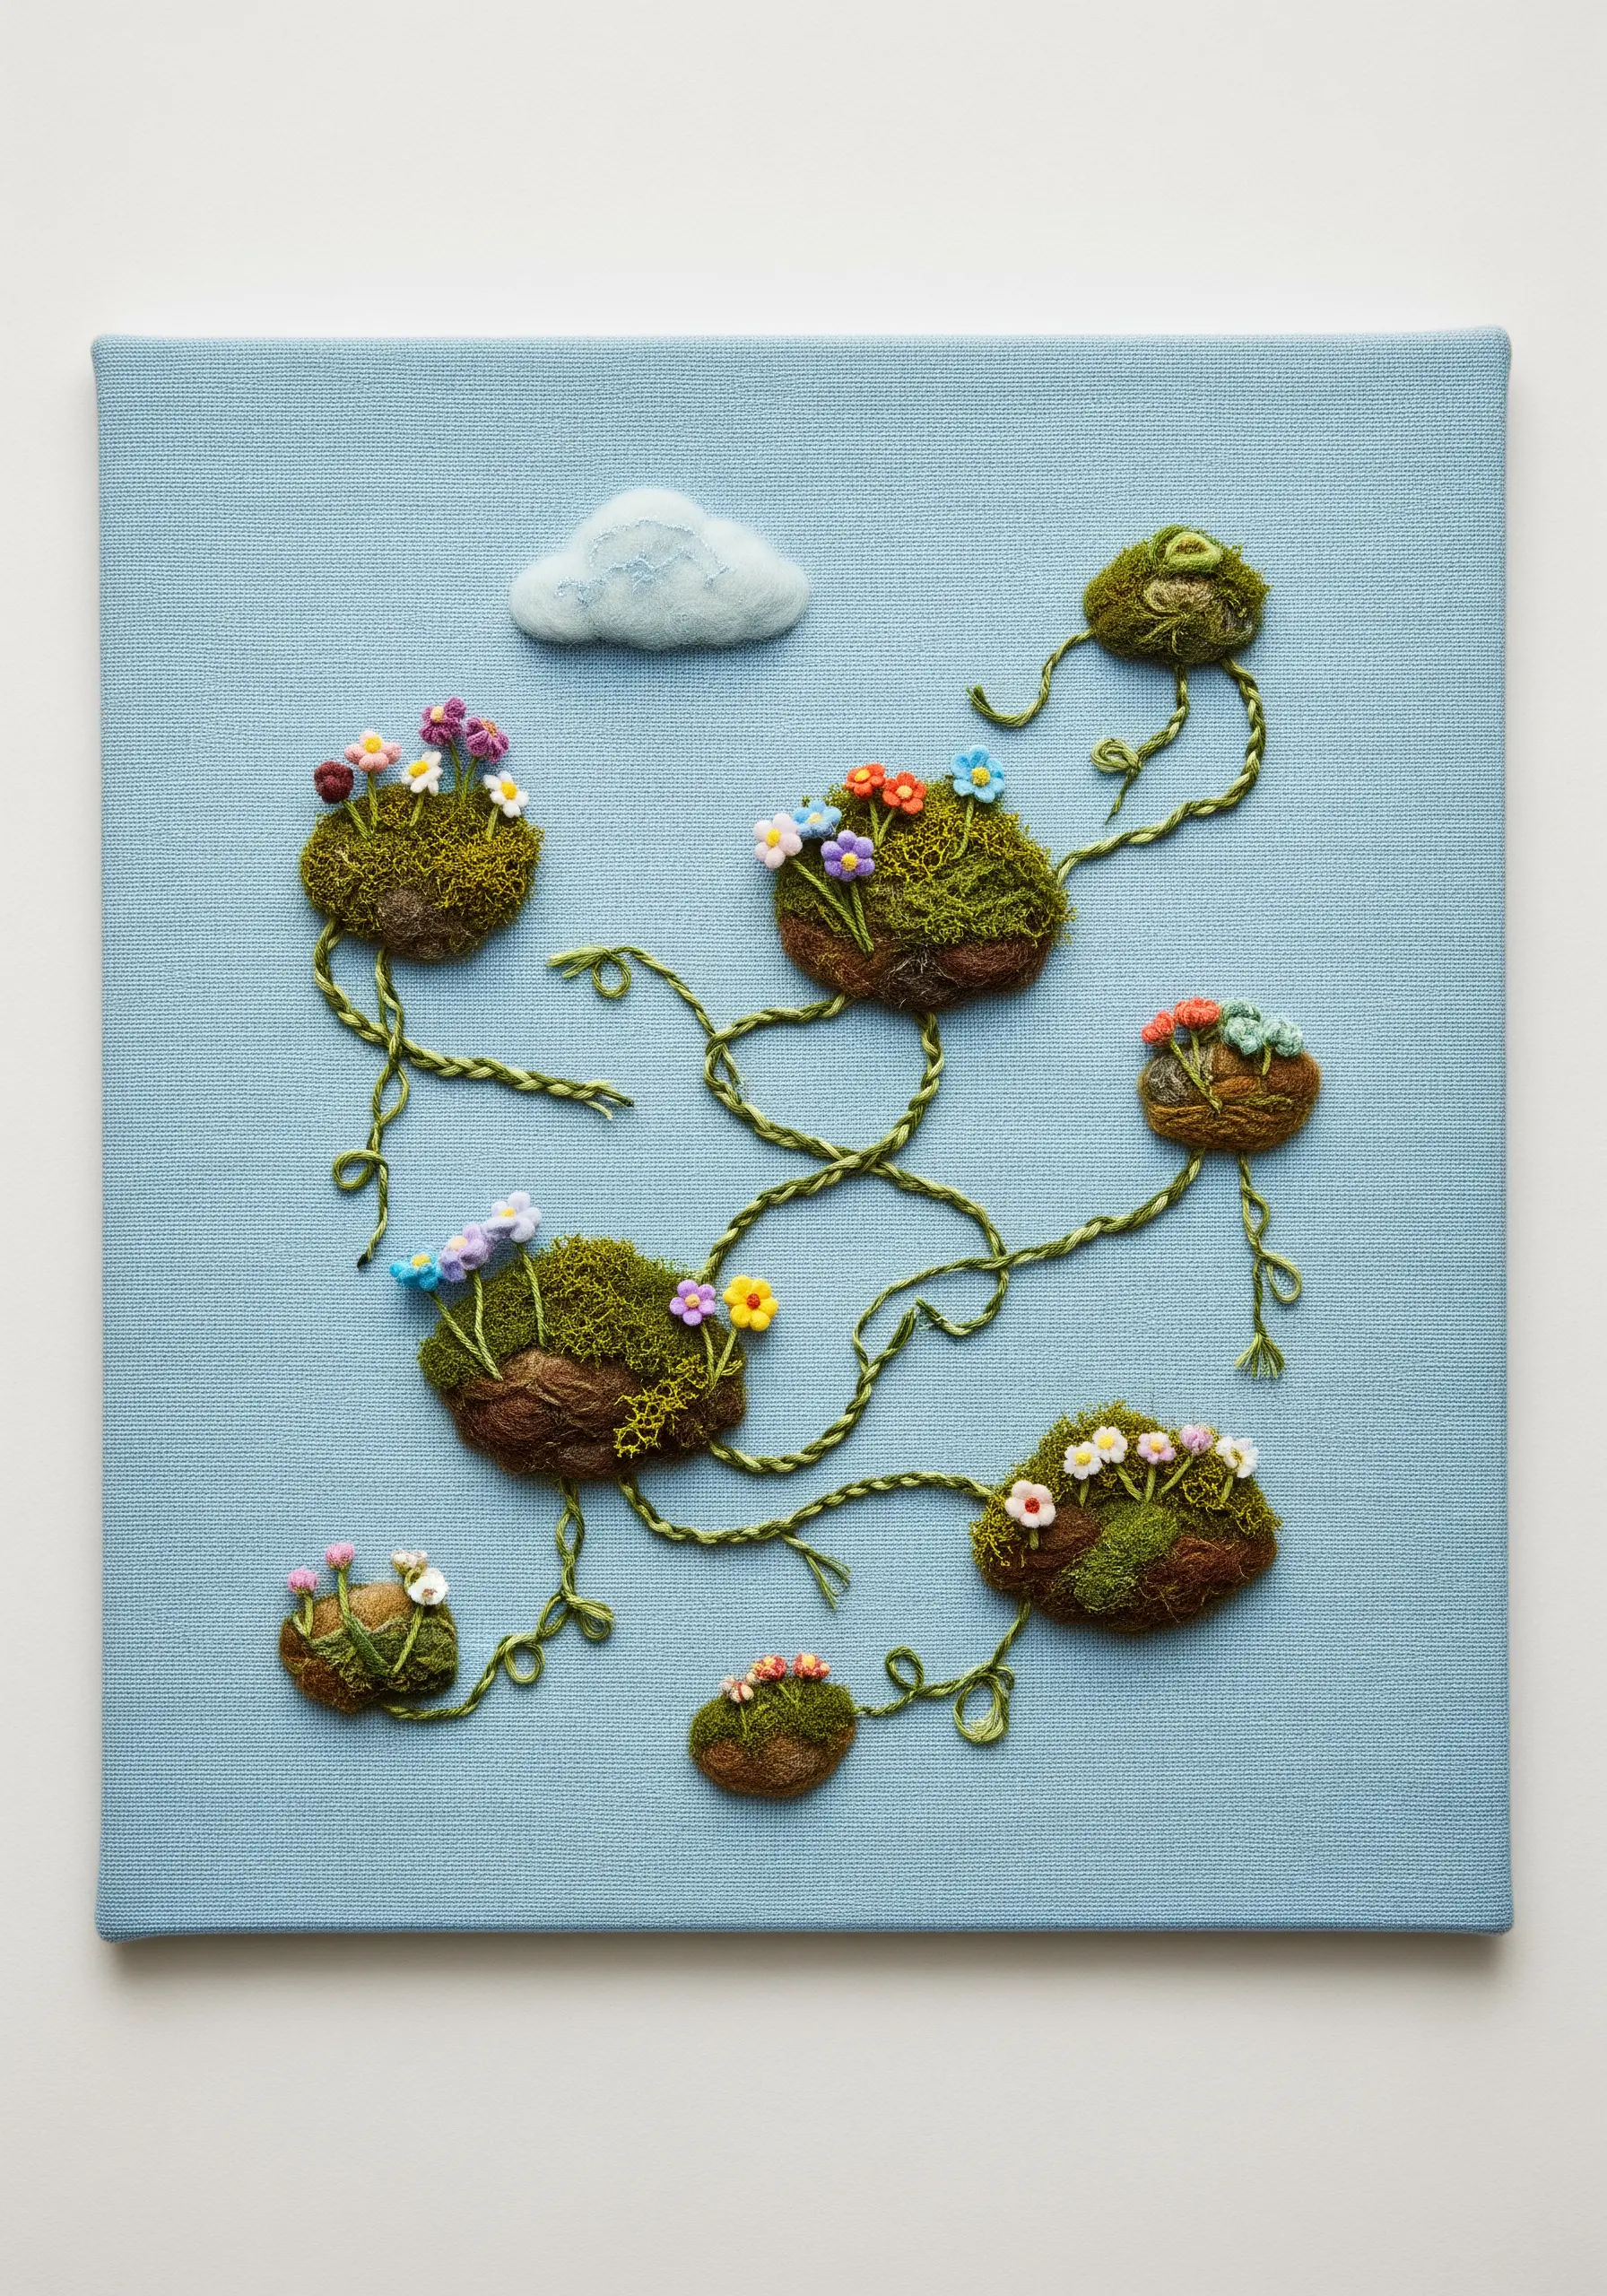
Create small, padded forms by wrapping felt or textured fabric around a bit of batting or cotton stuffing.
Stitch these dimensional pods onto your background fabric to act as ‘islands’ of moss or land.
Use couched, textured yarn like chenille or boucle to create twisting vines that connect the islands, adding movement to the composition.
Embellish the islands with tiny detached chain stitches, French knots, and lazy daisies to represent miniature flowers.
This stumpwork-inspired method results in a charming, high-texture fabric collage that invites closer inspection.
9. Mimic Stained Glass with Fabric and Yarn
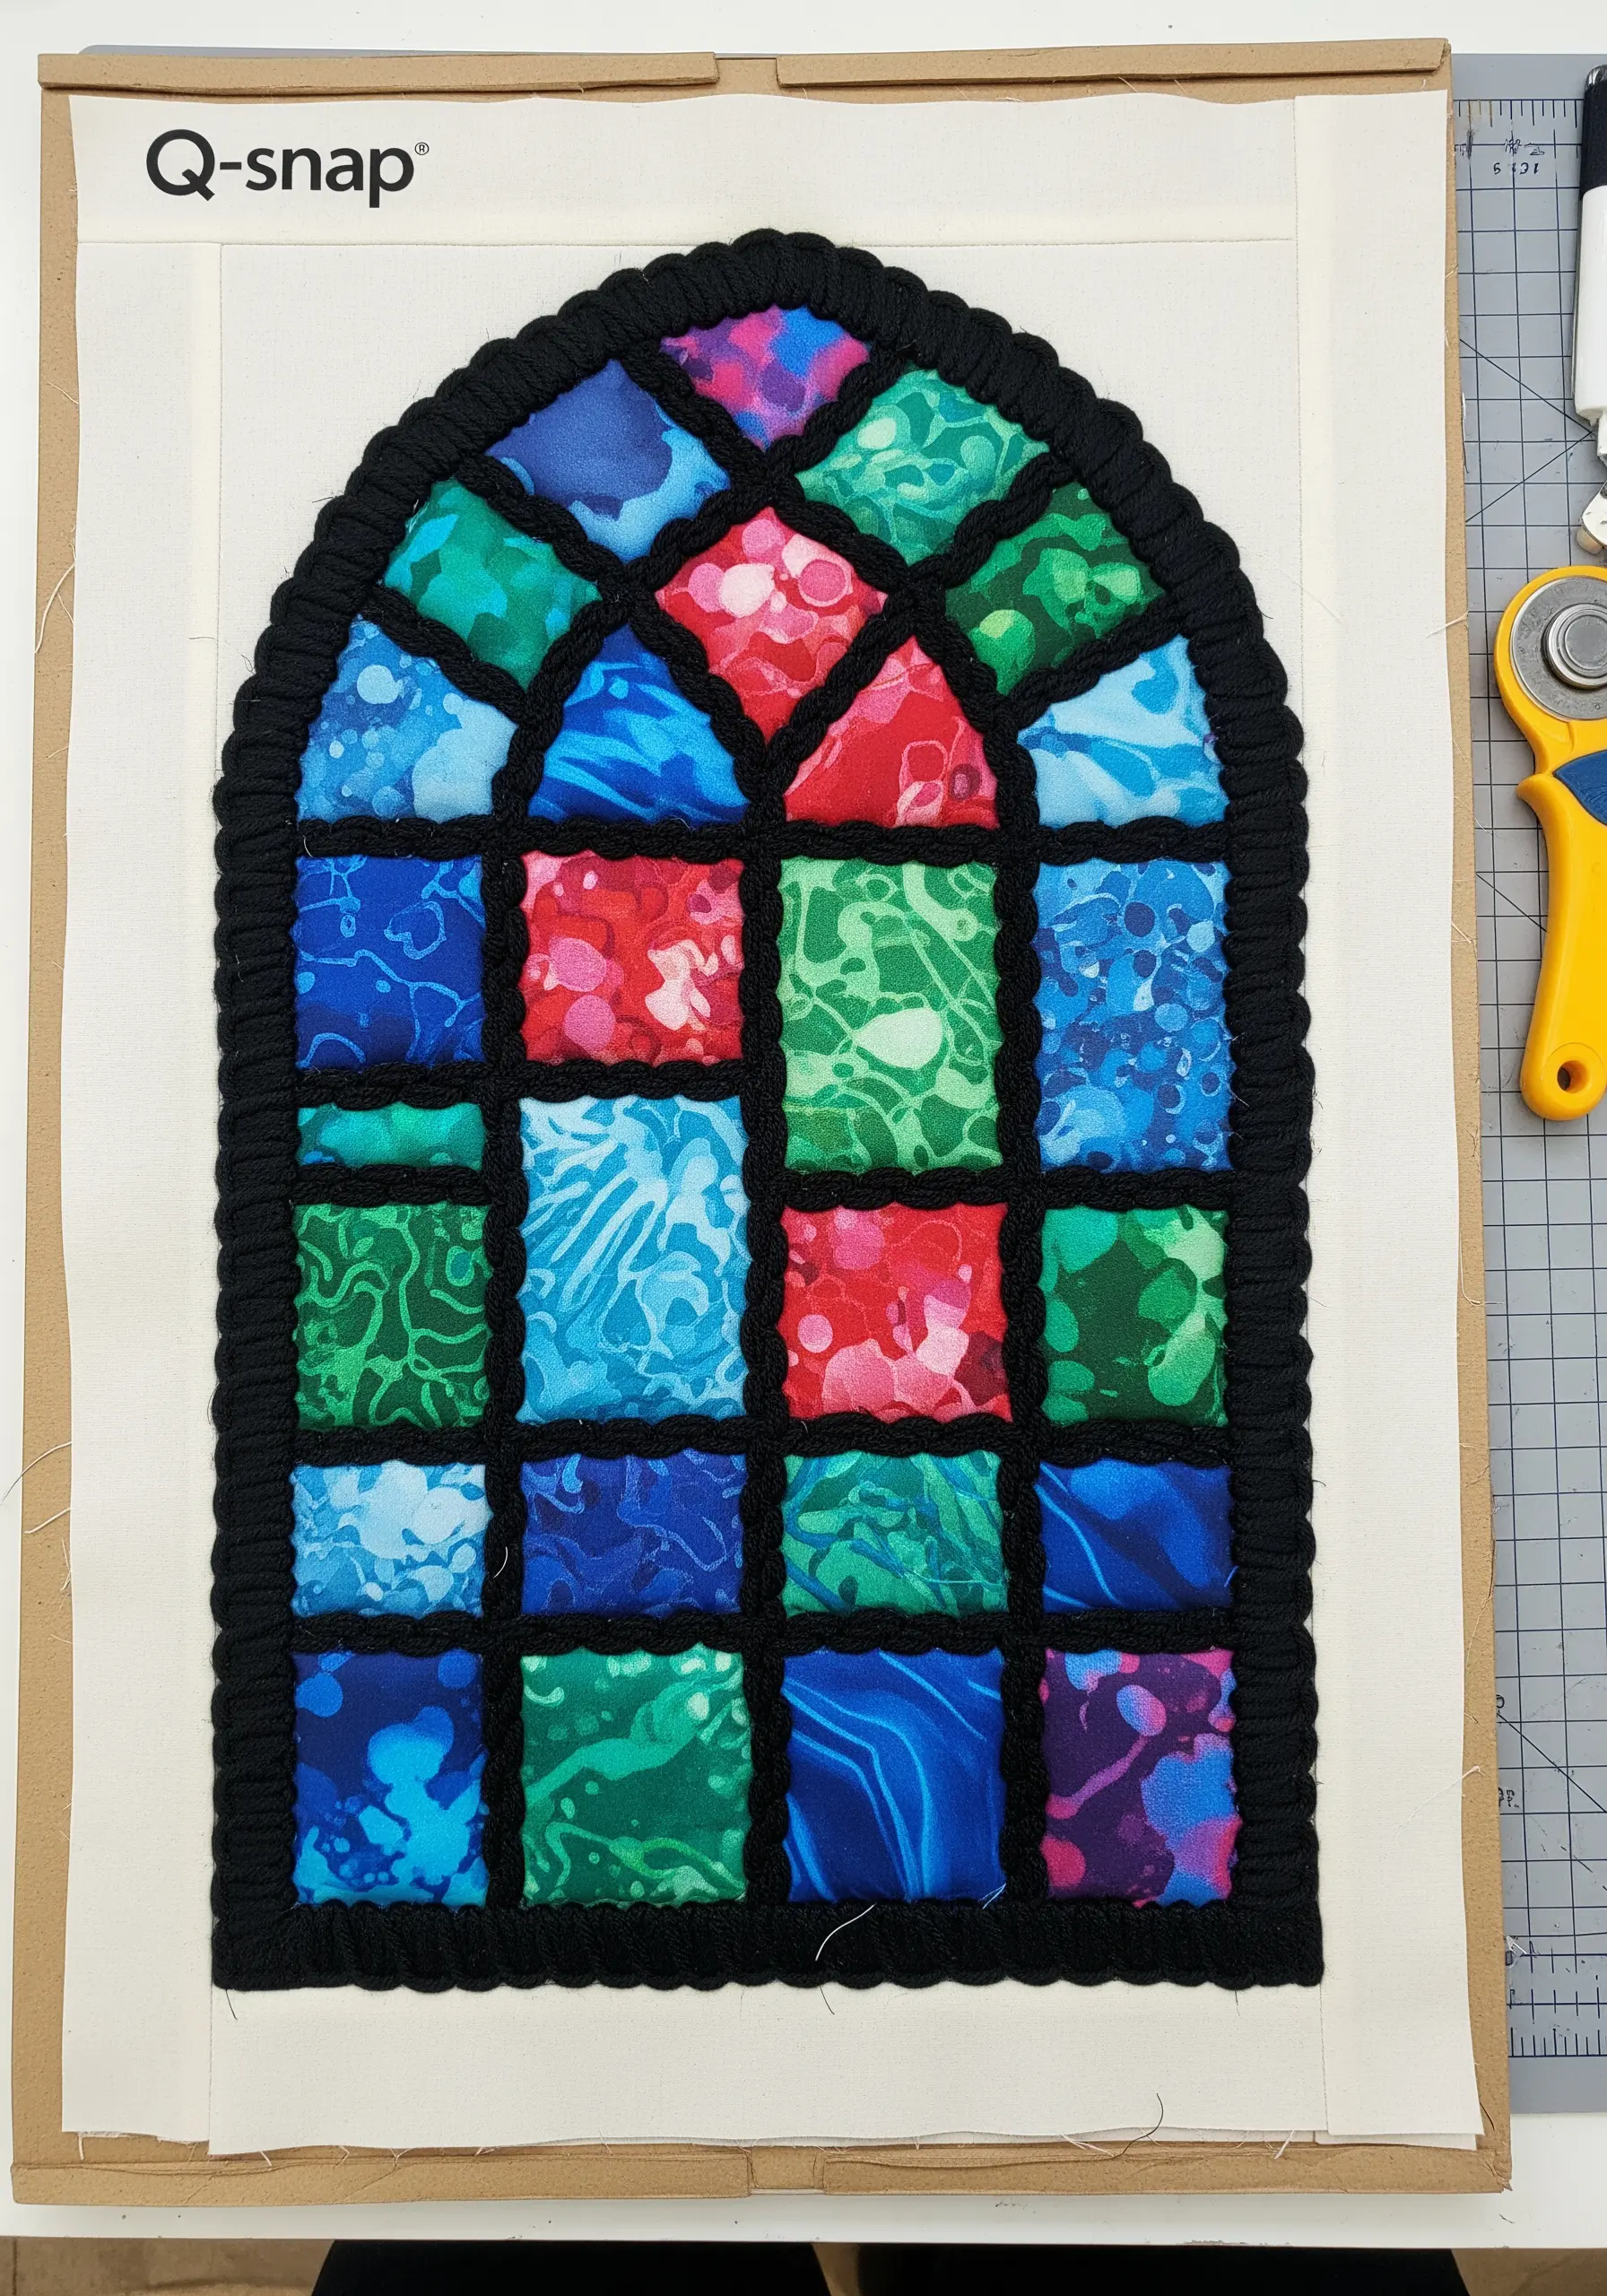
Cut pieces of vibrant, patterned fabric like batik or hand-dyed cotton to serve as your ‘glass’ panes.
Arrange and glue them onto your base fabric according to your design, leaving a small gap between each piece.
Instead of stitching, couch a thick black yarn or cord over the gaps to create the ‘leading’ that holds the glass together.
The couching stitches should be small and use a matching black thread to become invisible, allowing the thick yarn to create a bold, clean outline.
This is a brilliant way to achieve a stained-glass effect, ideal for creating stunning embroidery wall panels.
10. Master the Minimalist Silhouette
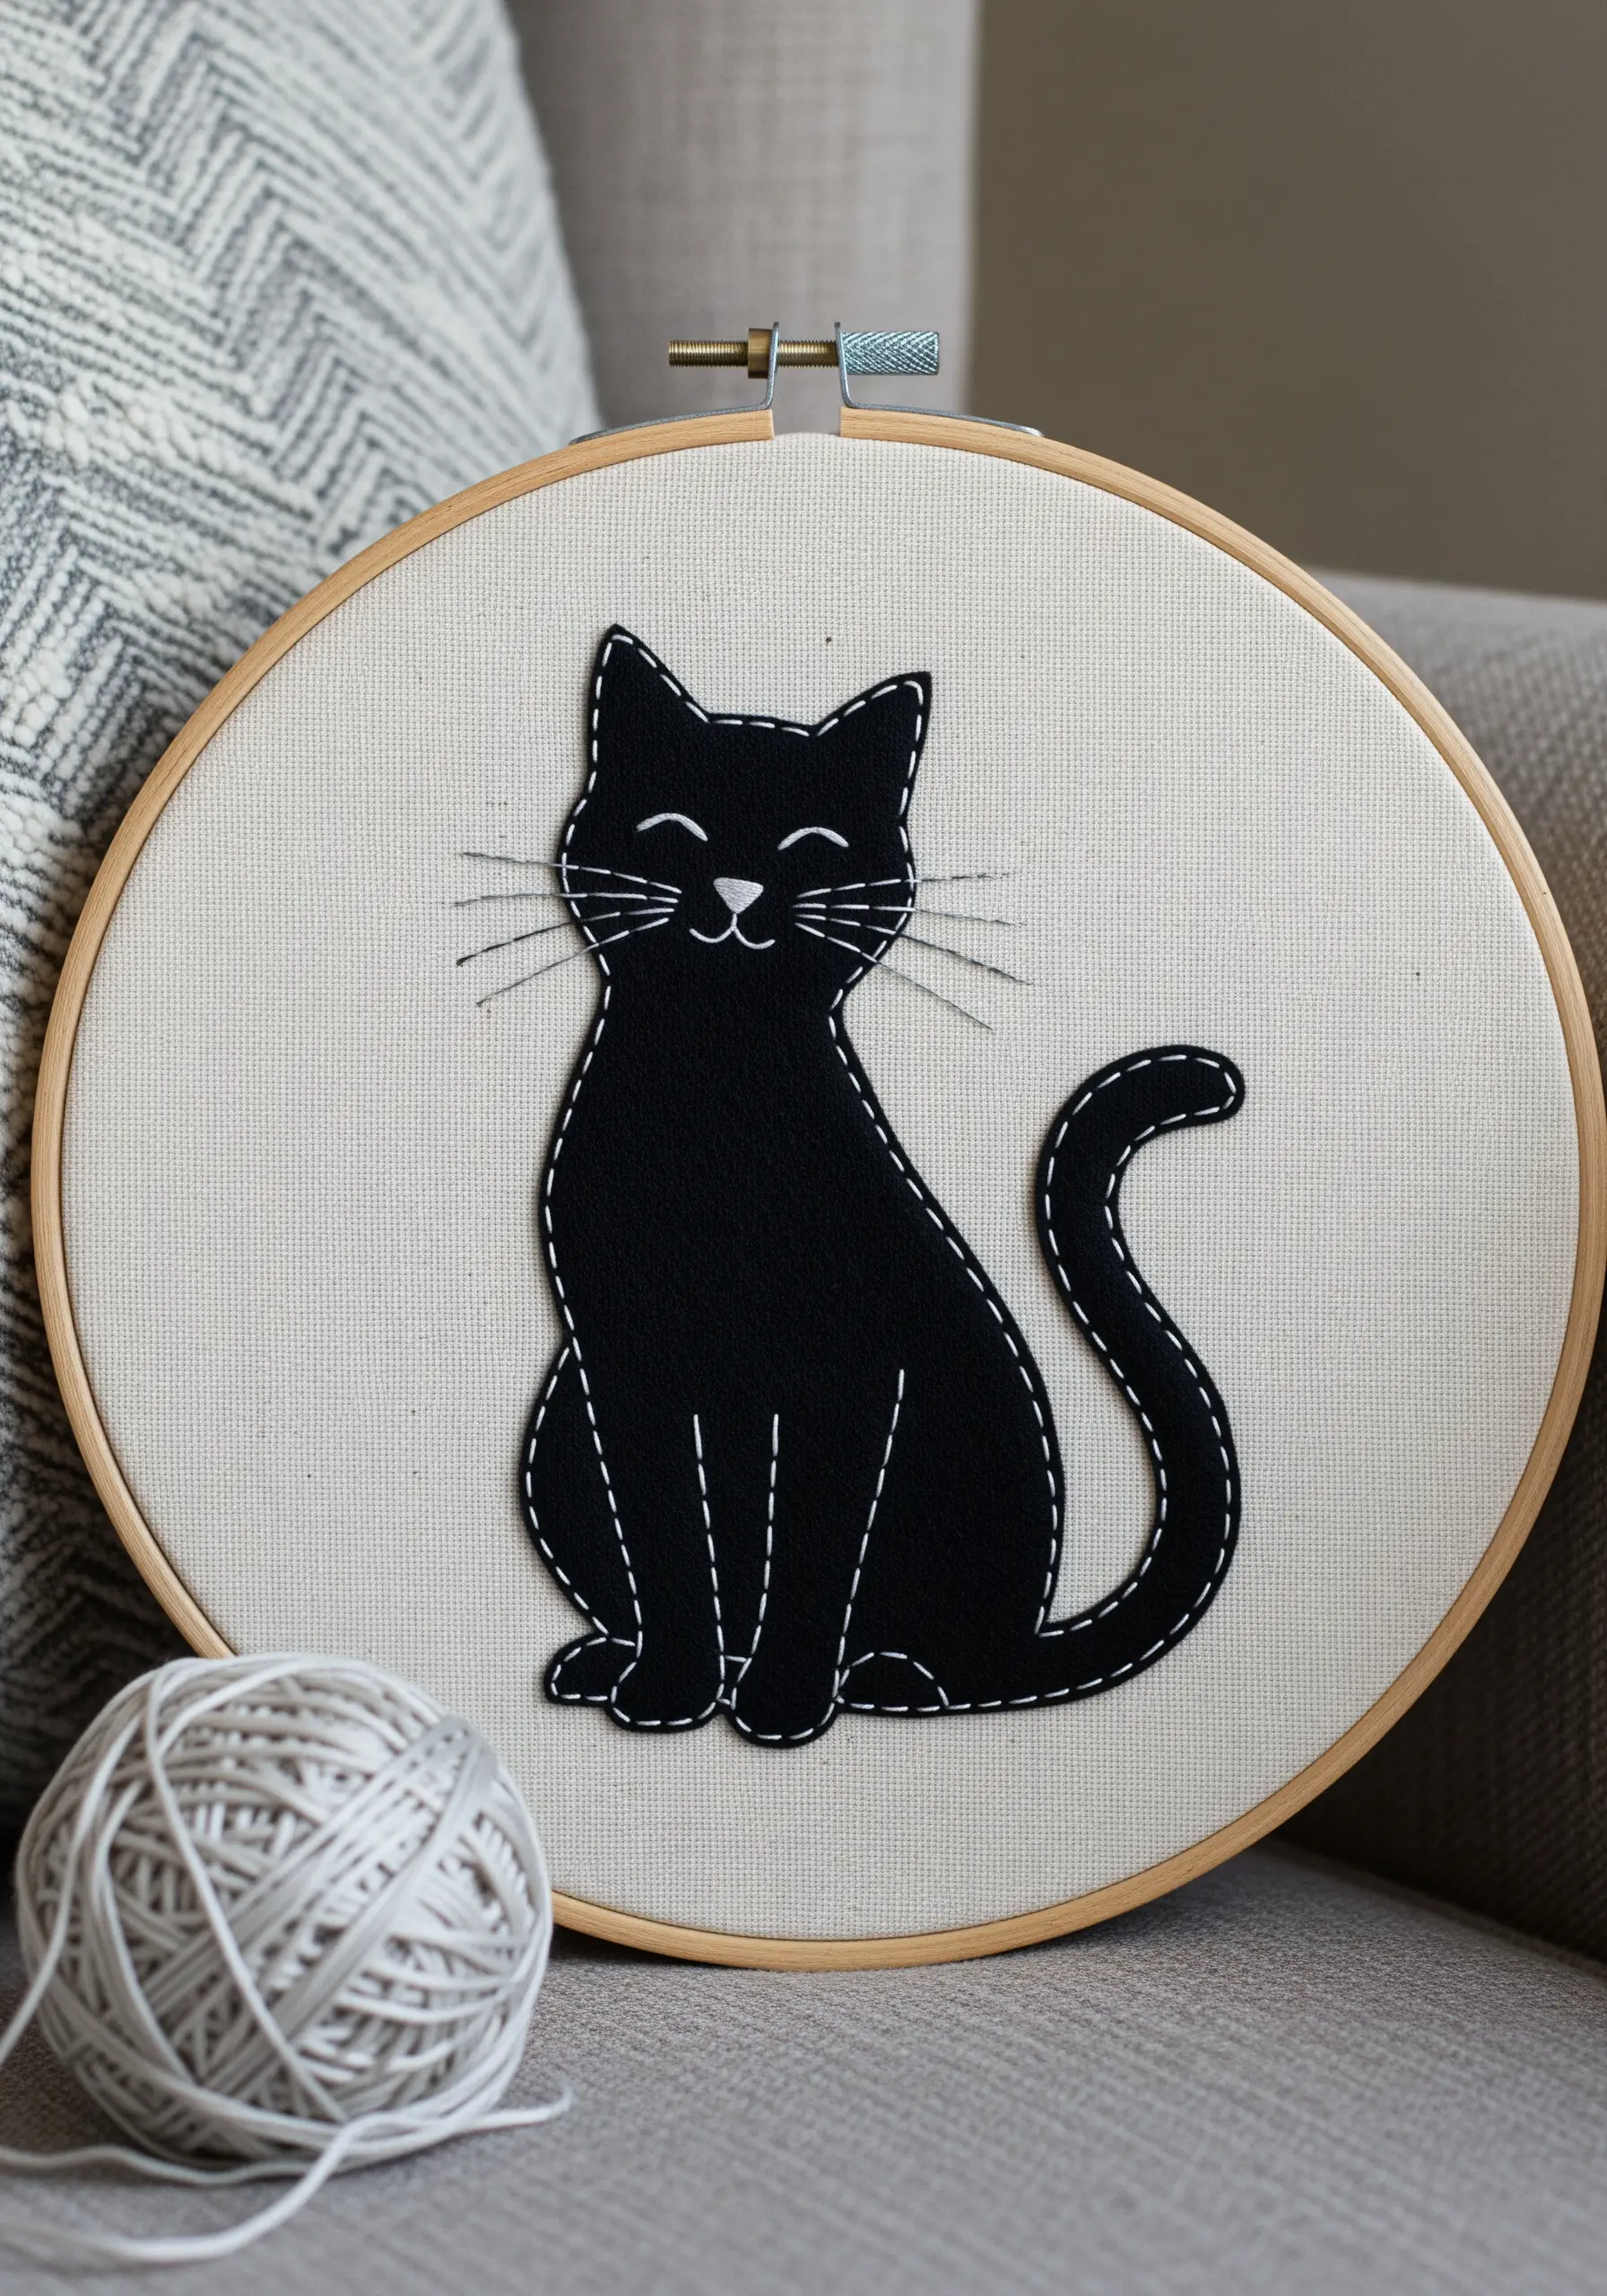
Choose a single, strong color for your appliqué—black on a neutral background offers the most striking contrast.
Carefully cut out a clean, recognizable silhouette, ensuring the edges are sharp and free of fraying.
Secure the shape with a neat, evenly spaced running stitch just inside the edge, using a contrasting thread like white or silver.
This stitch not only holds the appliqué but also acts as a design element, adding a subtle highlight to the form.
This technique demonstrates how minimal pet-themed line art can be incredibly effective and polished.
11. Stitch on Treated Fabrics for a Botanical Print Effect

Start with a cyanotype-treated fabric or a sturdy piece of watercolor paper that can handle a needle.
Arrange flattened leaves or paper cutouts on the surface before exposing it to light to create negative-space silhouettes.
After the print is developed and dry, use a fine needle and a single strand of white or light gray thread to add delicate details.
Trace the veins of the leaves with a tiny backstitch, which adds texture and dimension without overpowering the beautiful blue background.
This combination of photography and stitch turns simple botanicals into elegant paper art designs.
12. Layer Patterned Fabrics for Cozy Holiday Scenes
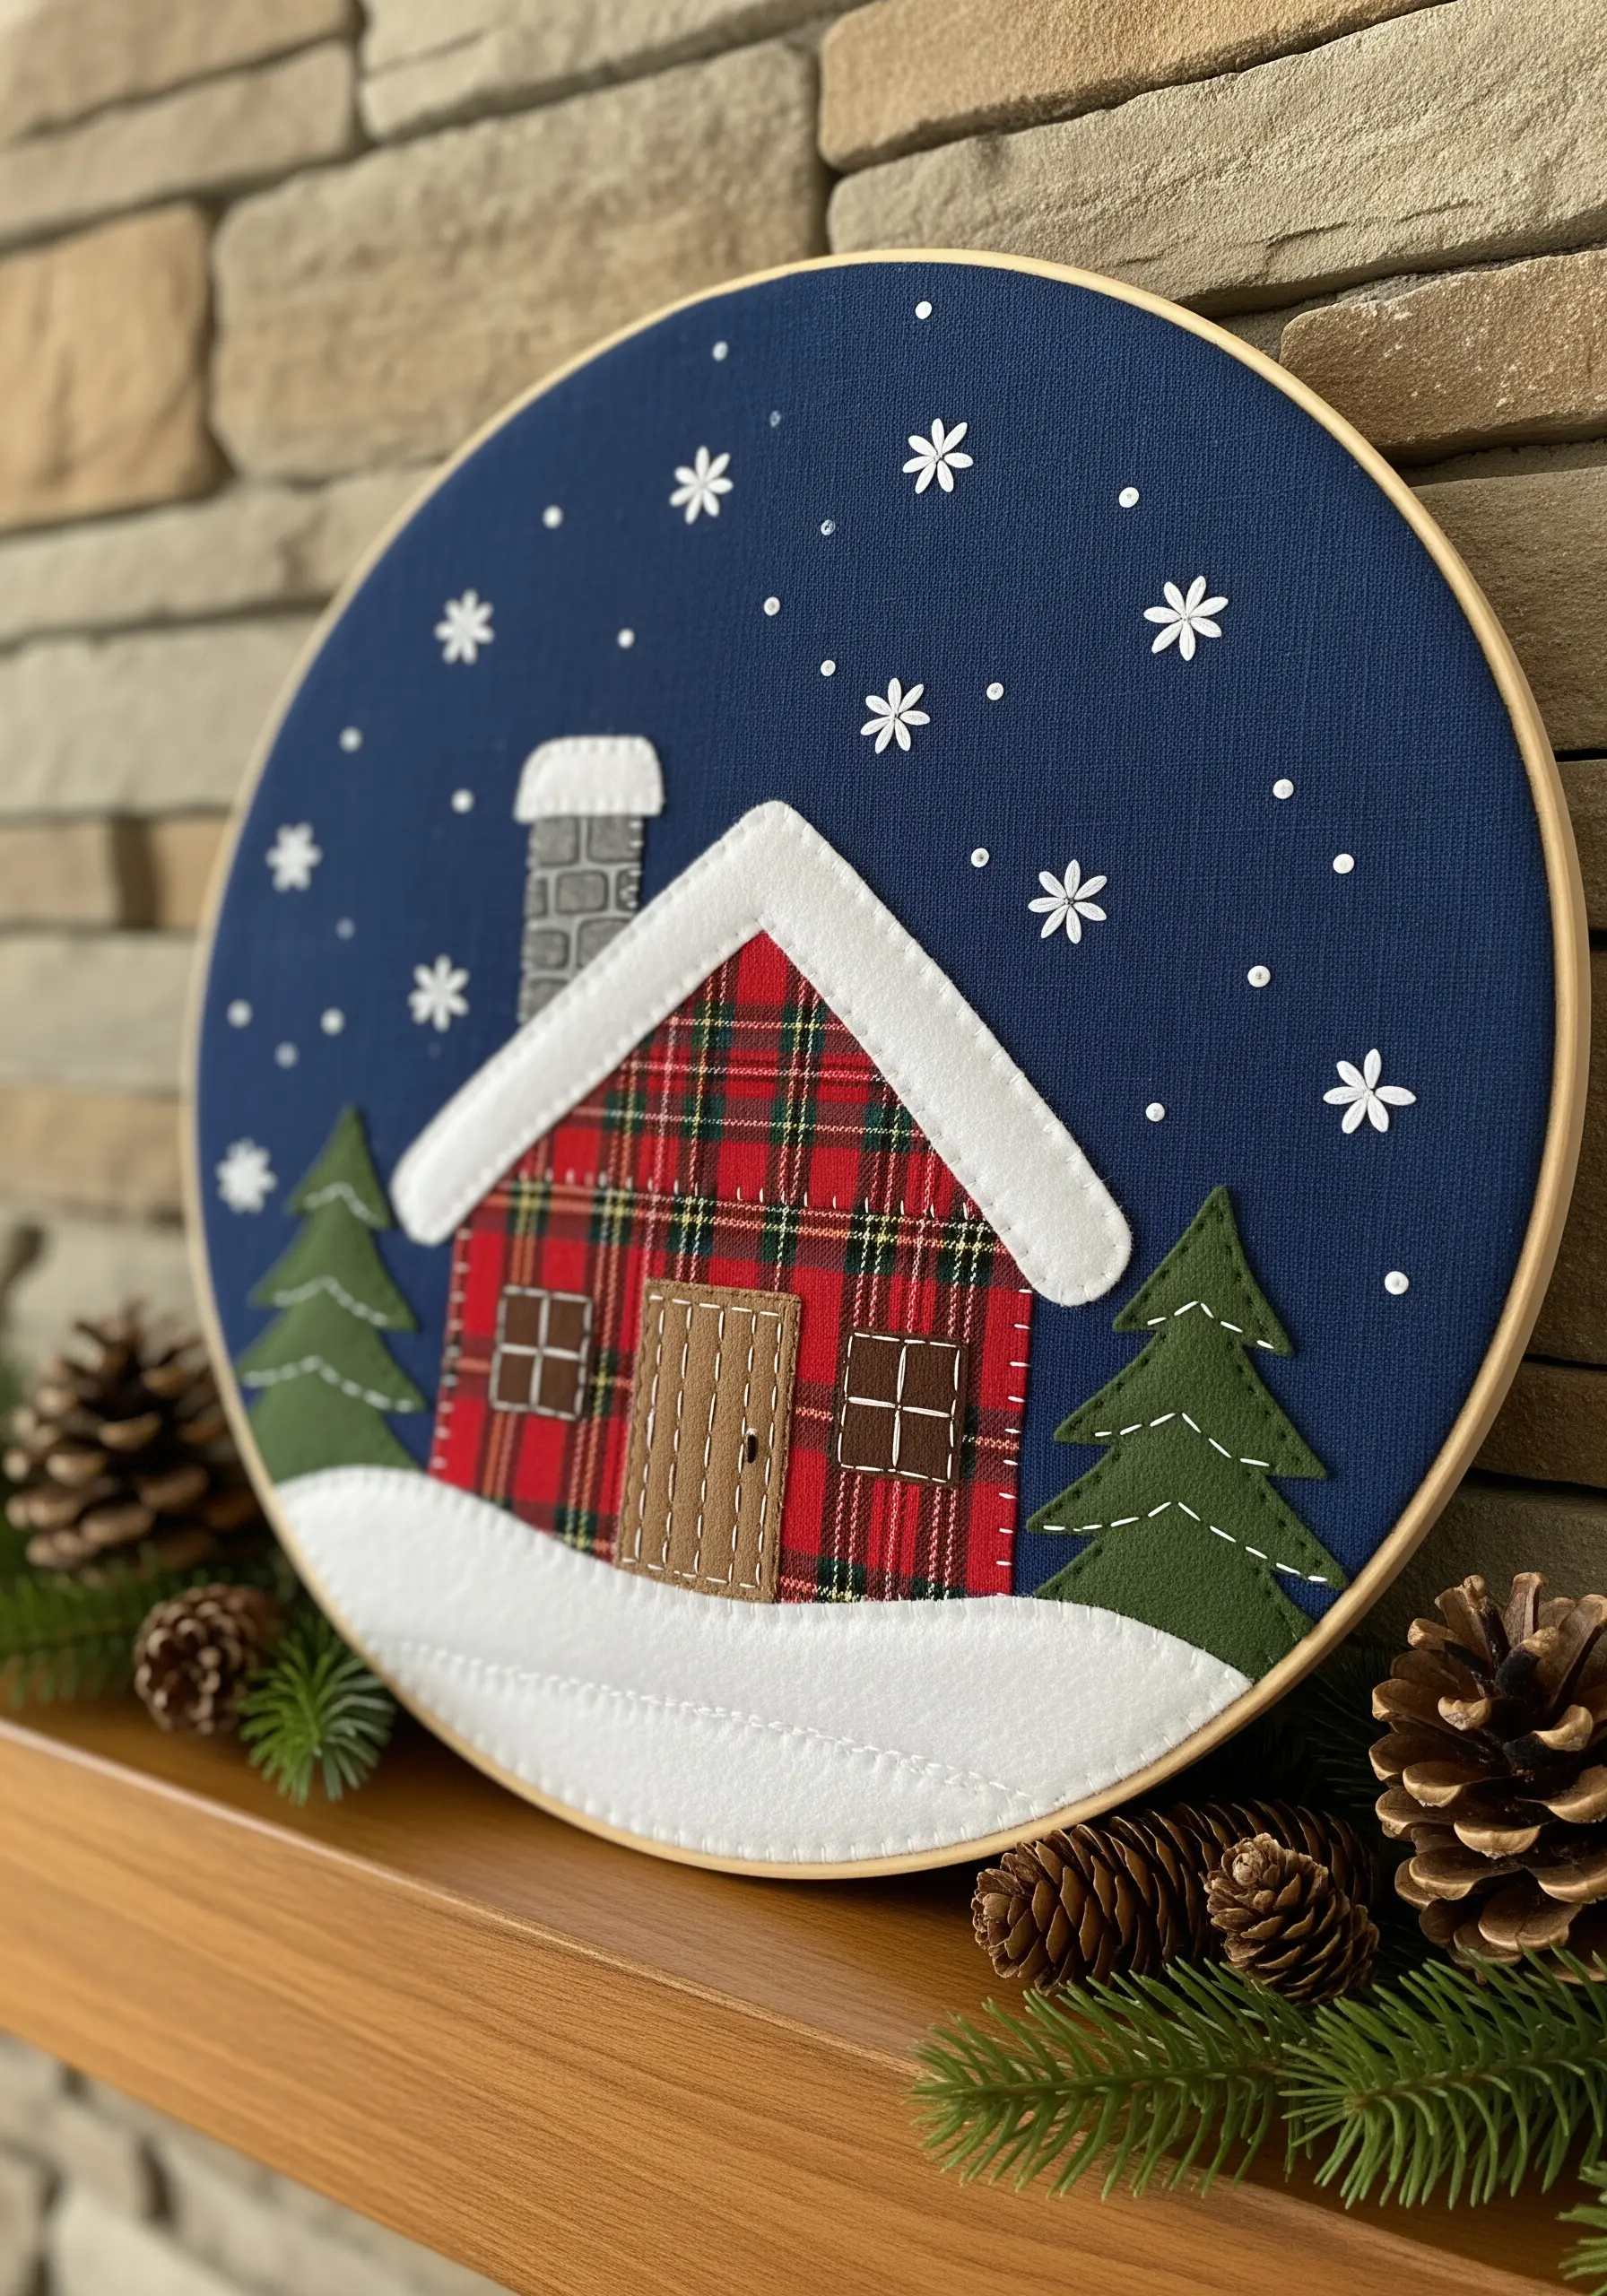
Use fabrics with inherent patterns, like tartan or plaid, to add instant detail to your collage elements without extra stitching.
Combine these with solid-colored felts for snow and trees to create a balanced composition.
Secure the appliqué pieces with a simple, functional running stitch in a matching thread to keep the focus on the fabric patterns.
This method allows you to build a detailed, festive scene quickly, making it perfect for creating minimal festive motifs with maximum charm.
13. Create a Cohesive Sampler with a Limited Palette
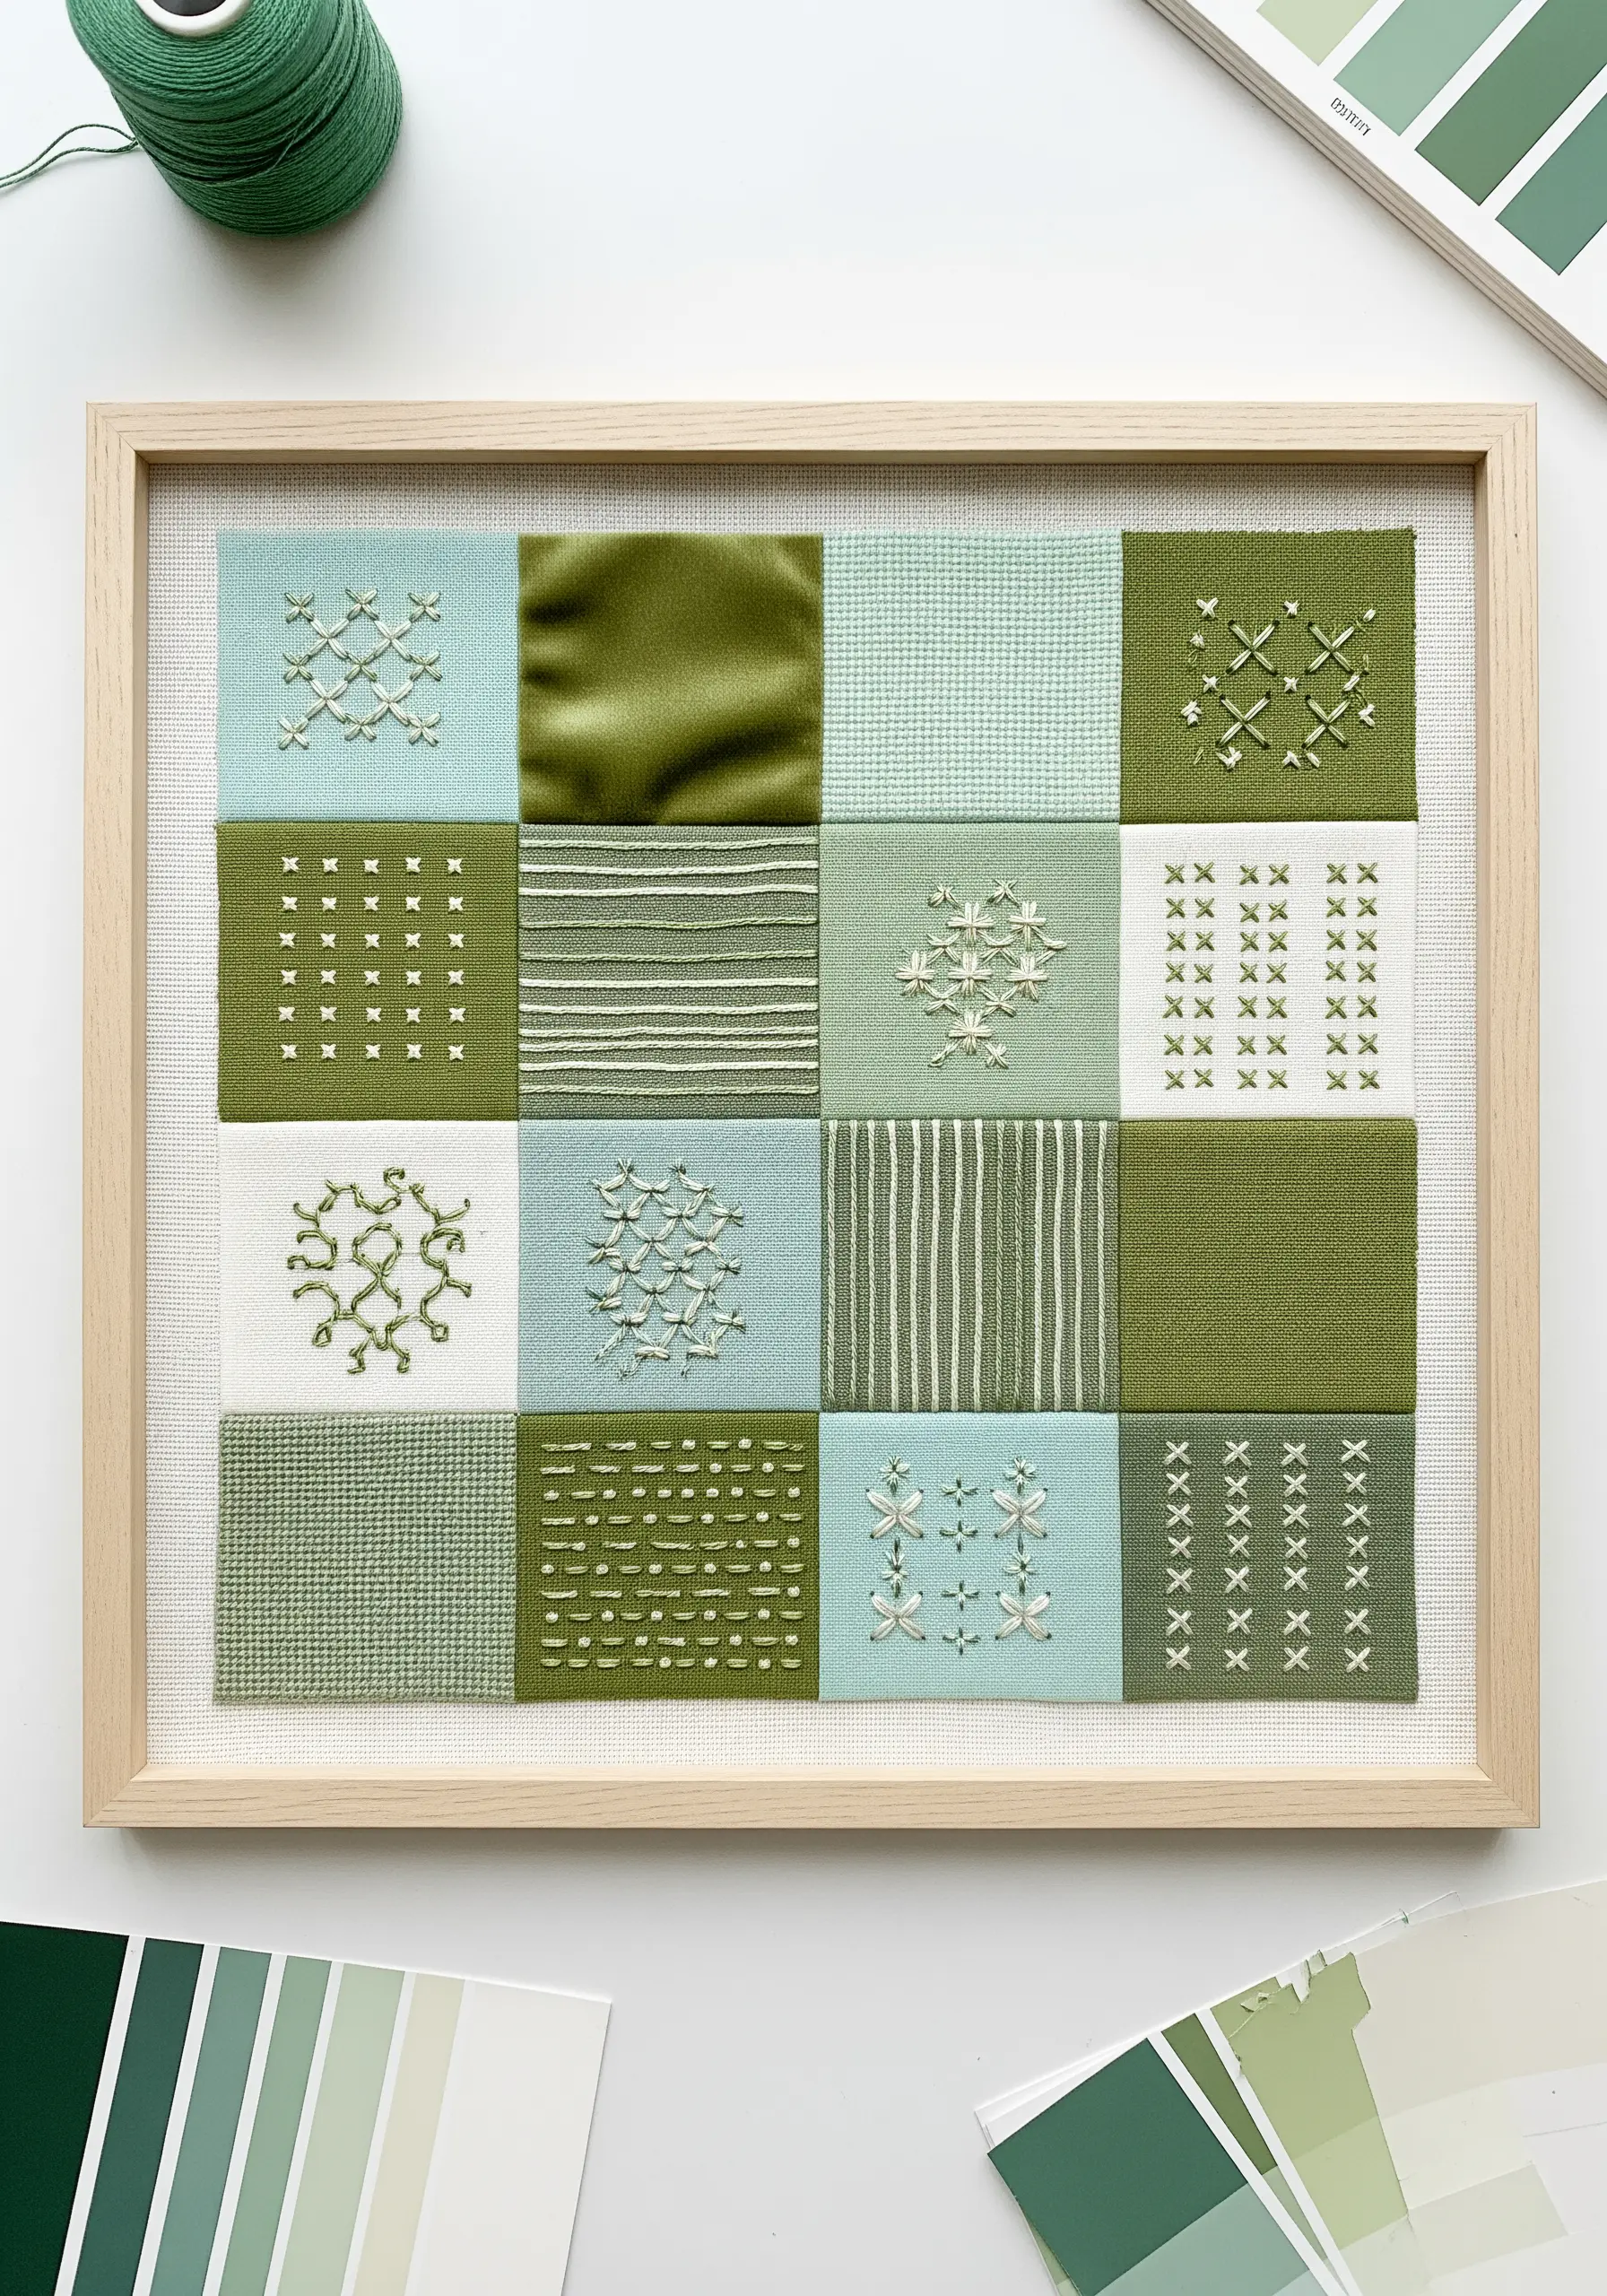
Divide your background fabric into a grid and fill each square with different fabrics—cottons, silks, linens—all within a narrow color family.
This limited palette ensures the final piece looks unified and intentional, not random.
Use each square to explore a different texture or stitch, such as parallel running stitches, cross stitches, seed stitches, or even leaving some squares plain.
This structured approach to experimentation creates a beautiful reference piece and is a great way to practice nature texture embroidery hacks.
14. Repurpose Found Objects Like a Denim Pocket
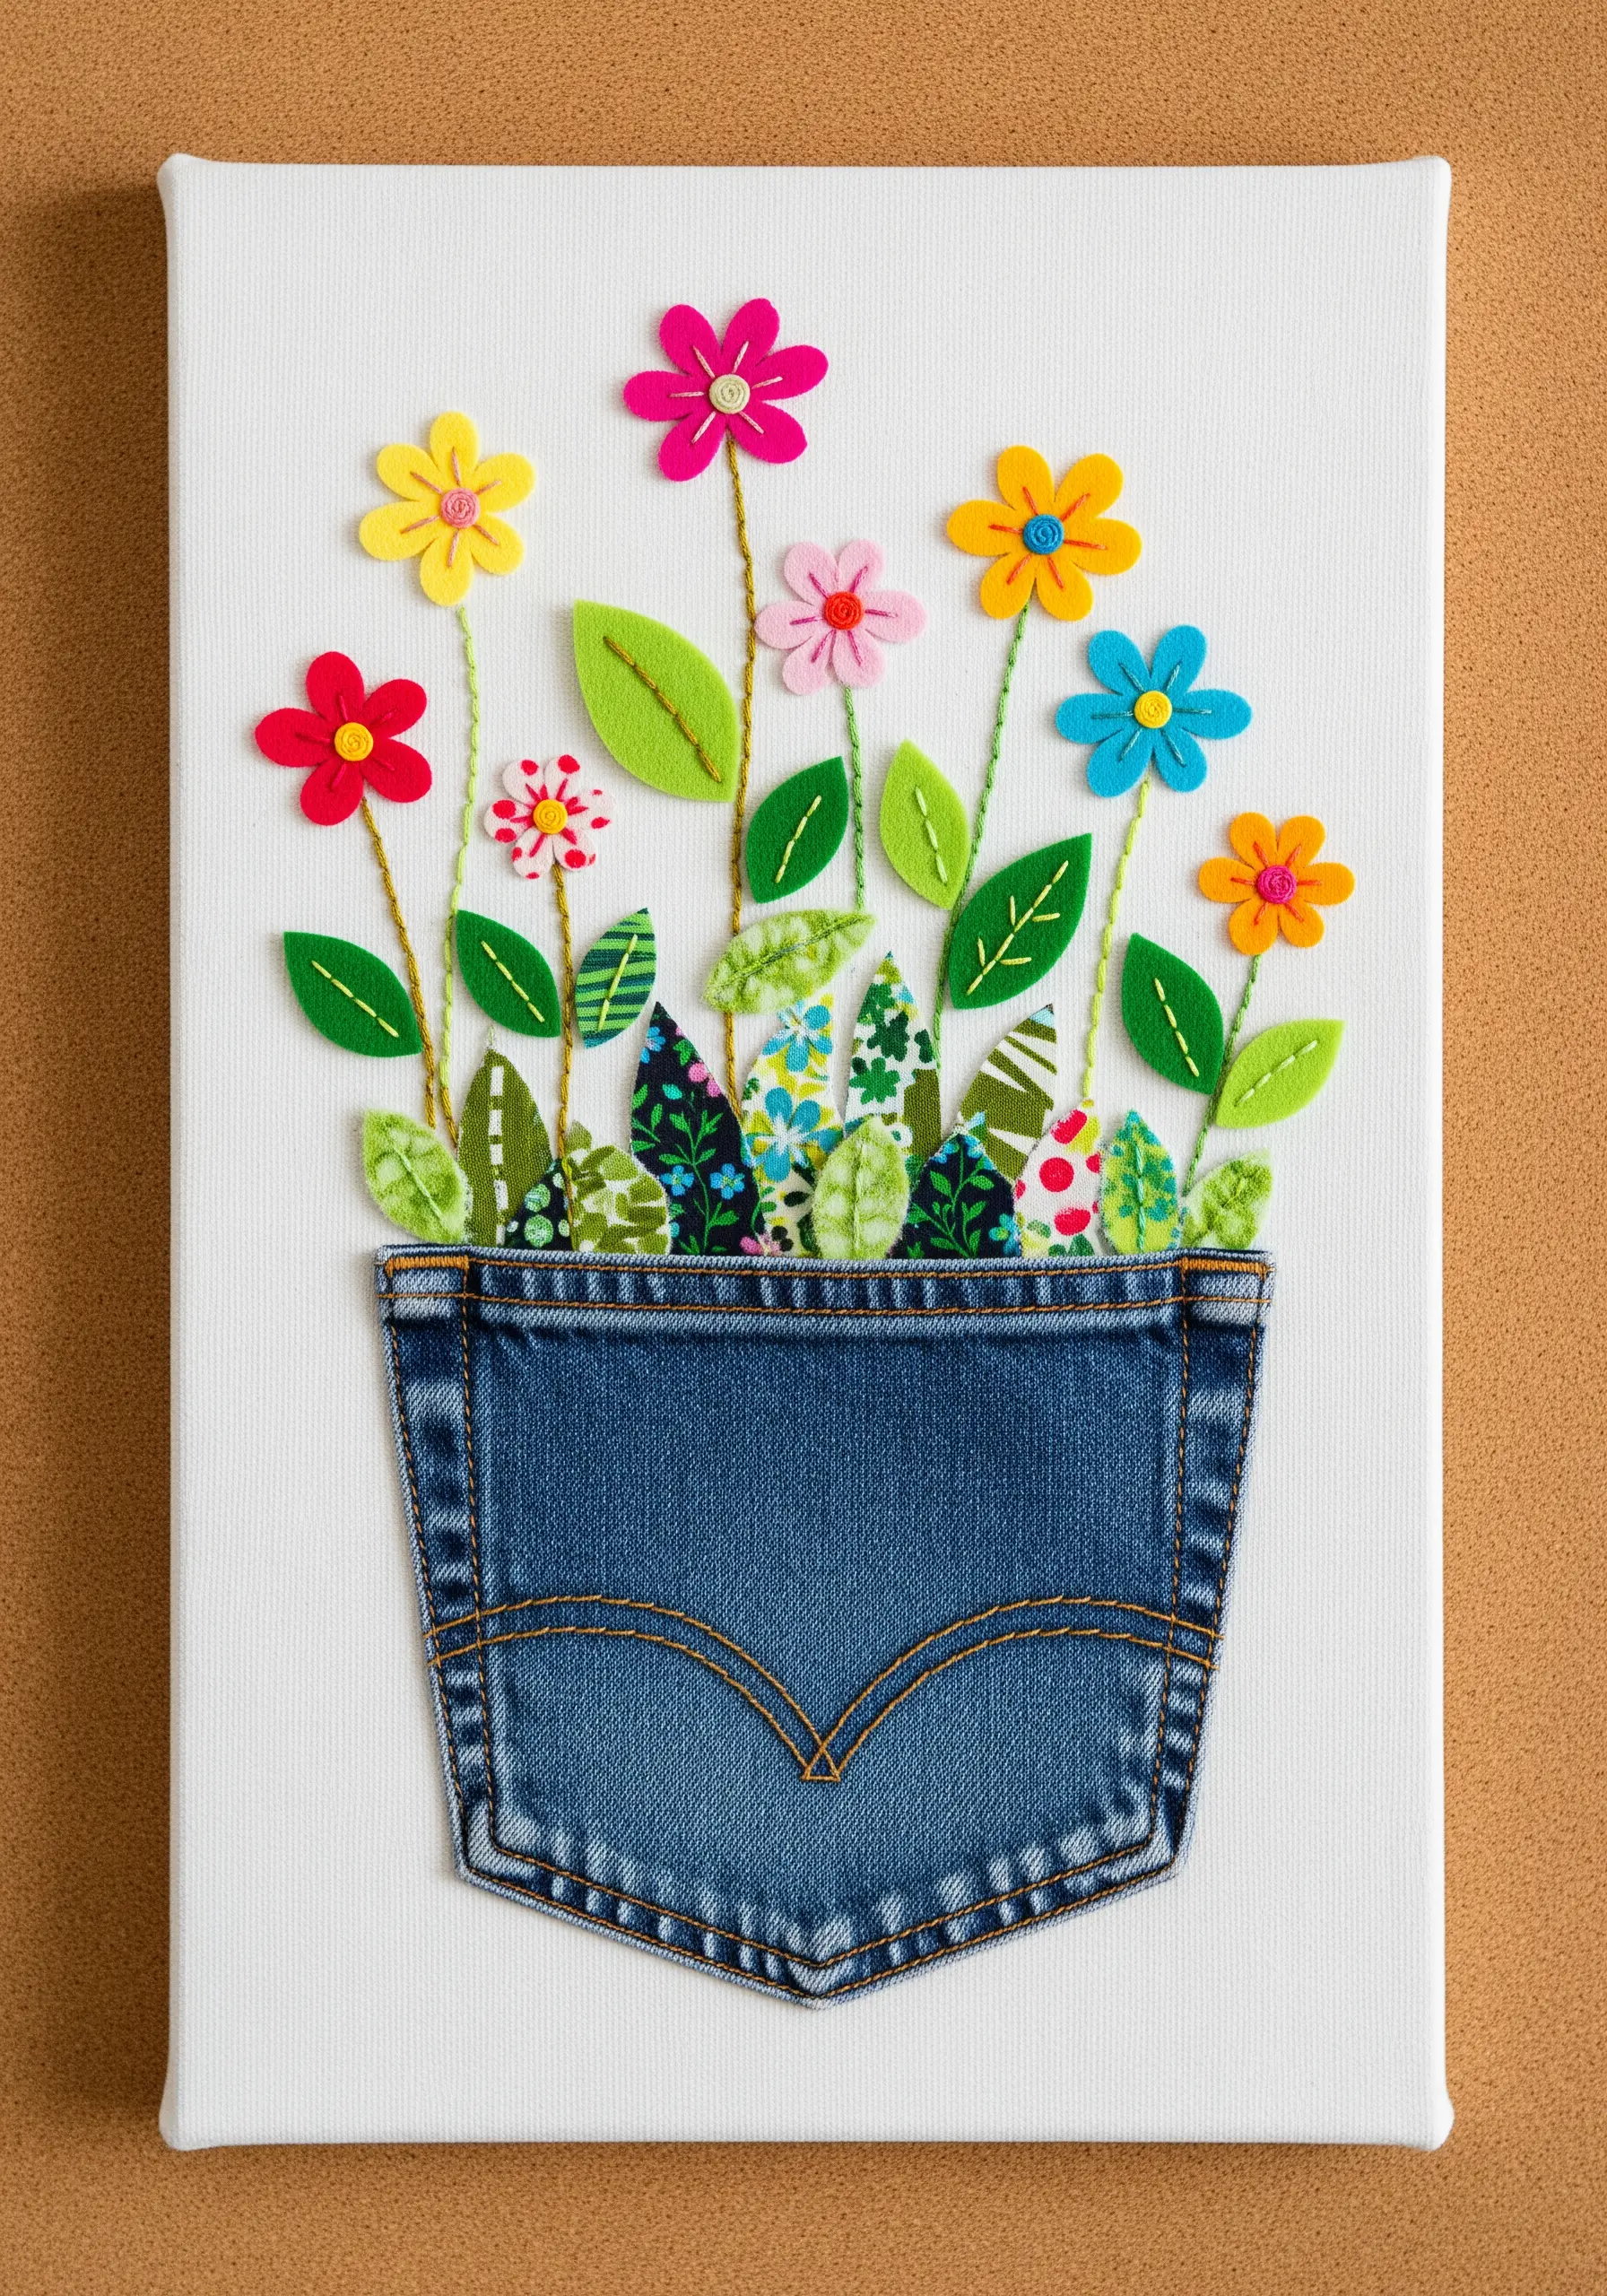
Incorporate a real object, like a pocket from an old pair of jeans, as the focal point of your collage.
Mount it onto a stretched canvas or sturdy fabric base to serve as a planter or vase.
Fill the ‘planter’ with a bouquet of fabric leaves and felt flowers, mixing patterns and solids for a vibrant look.
Use a simple stem stitch for the flower stems, connecting the pocket to the blooms and integrating it into the composition.
This is one of the most creative fabric collage embroidery ideas that reuse old clothes in an artistic and unexpected way.
15. Outline Layered Shapes with Contrasting Couching

Cut layers of solid-colored canvas or cotton to represent a mountain range, using progressively darker shades for the foreground to create atmospheric perspective.
Instead of stitching the edges down, secure them with fabric glue for perfectly clean lines.
Lay a bright, contrasting thread, like a gold metallic or vibrant orange, along the top edge of each fabric layer.
Couch this thread down with a thin, matching sewing thread to create a crisp, graphic outline that makes the colors pop.
This modern technique transforms simple shapes into stunning framed embroidery pieces.
16. Embroider Directly onto a Printed Map

Choose a vintage-style map printed on fabric or sturdy paper as your background.
Use a thick, textured thread like perle cotton or all six strands of embroidery floss to stitch your journey.
Instead of a simple line, use a chunky seed stitch or a series of connected French knots to create a tactile, dashed line that stands out from the printed details.
This personalization turns a generic map into a meaningful keepsake, making it one of the most personal travel-inspired string art maps you can create.
17. Enhance Printed Fabric with Selective Stitching
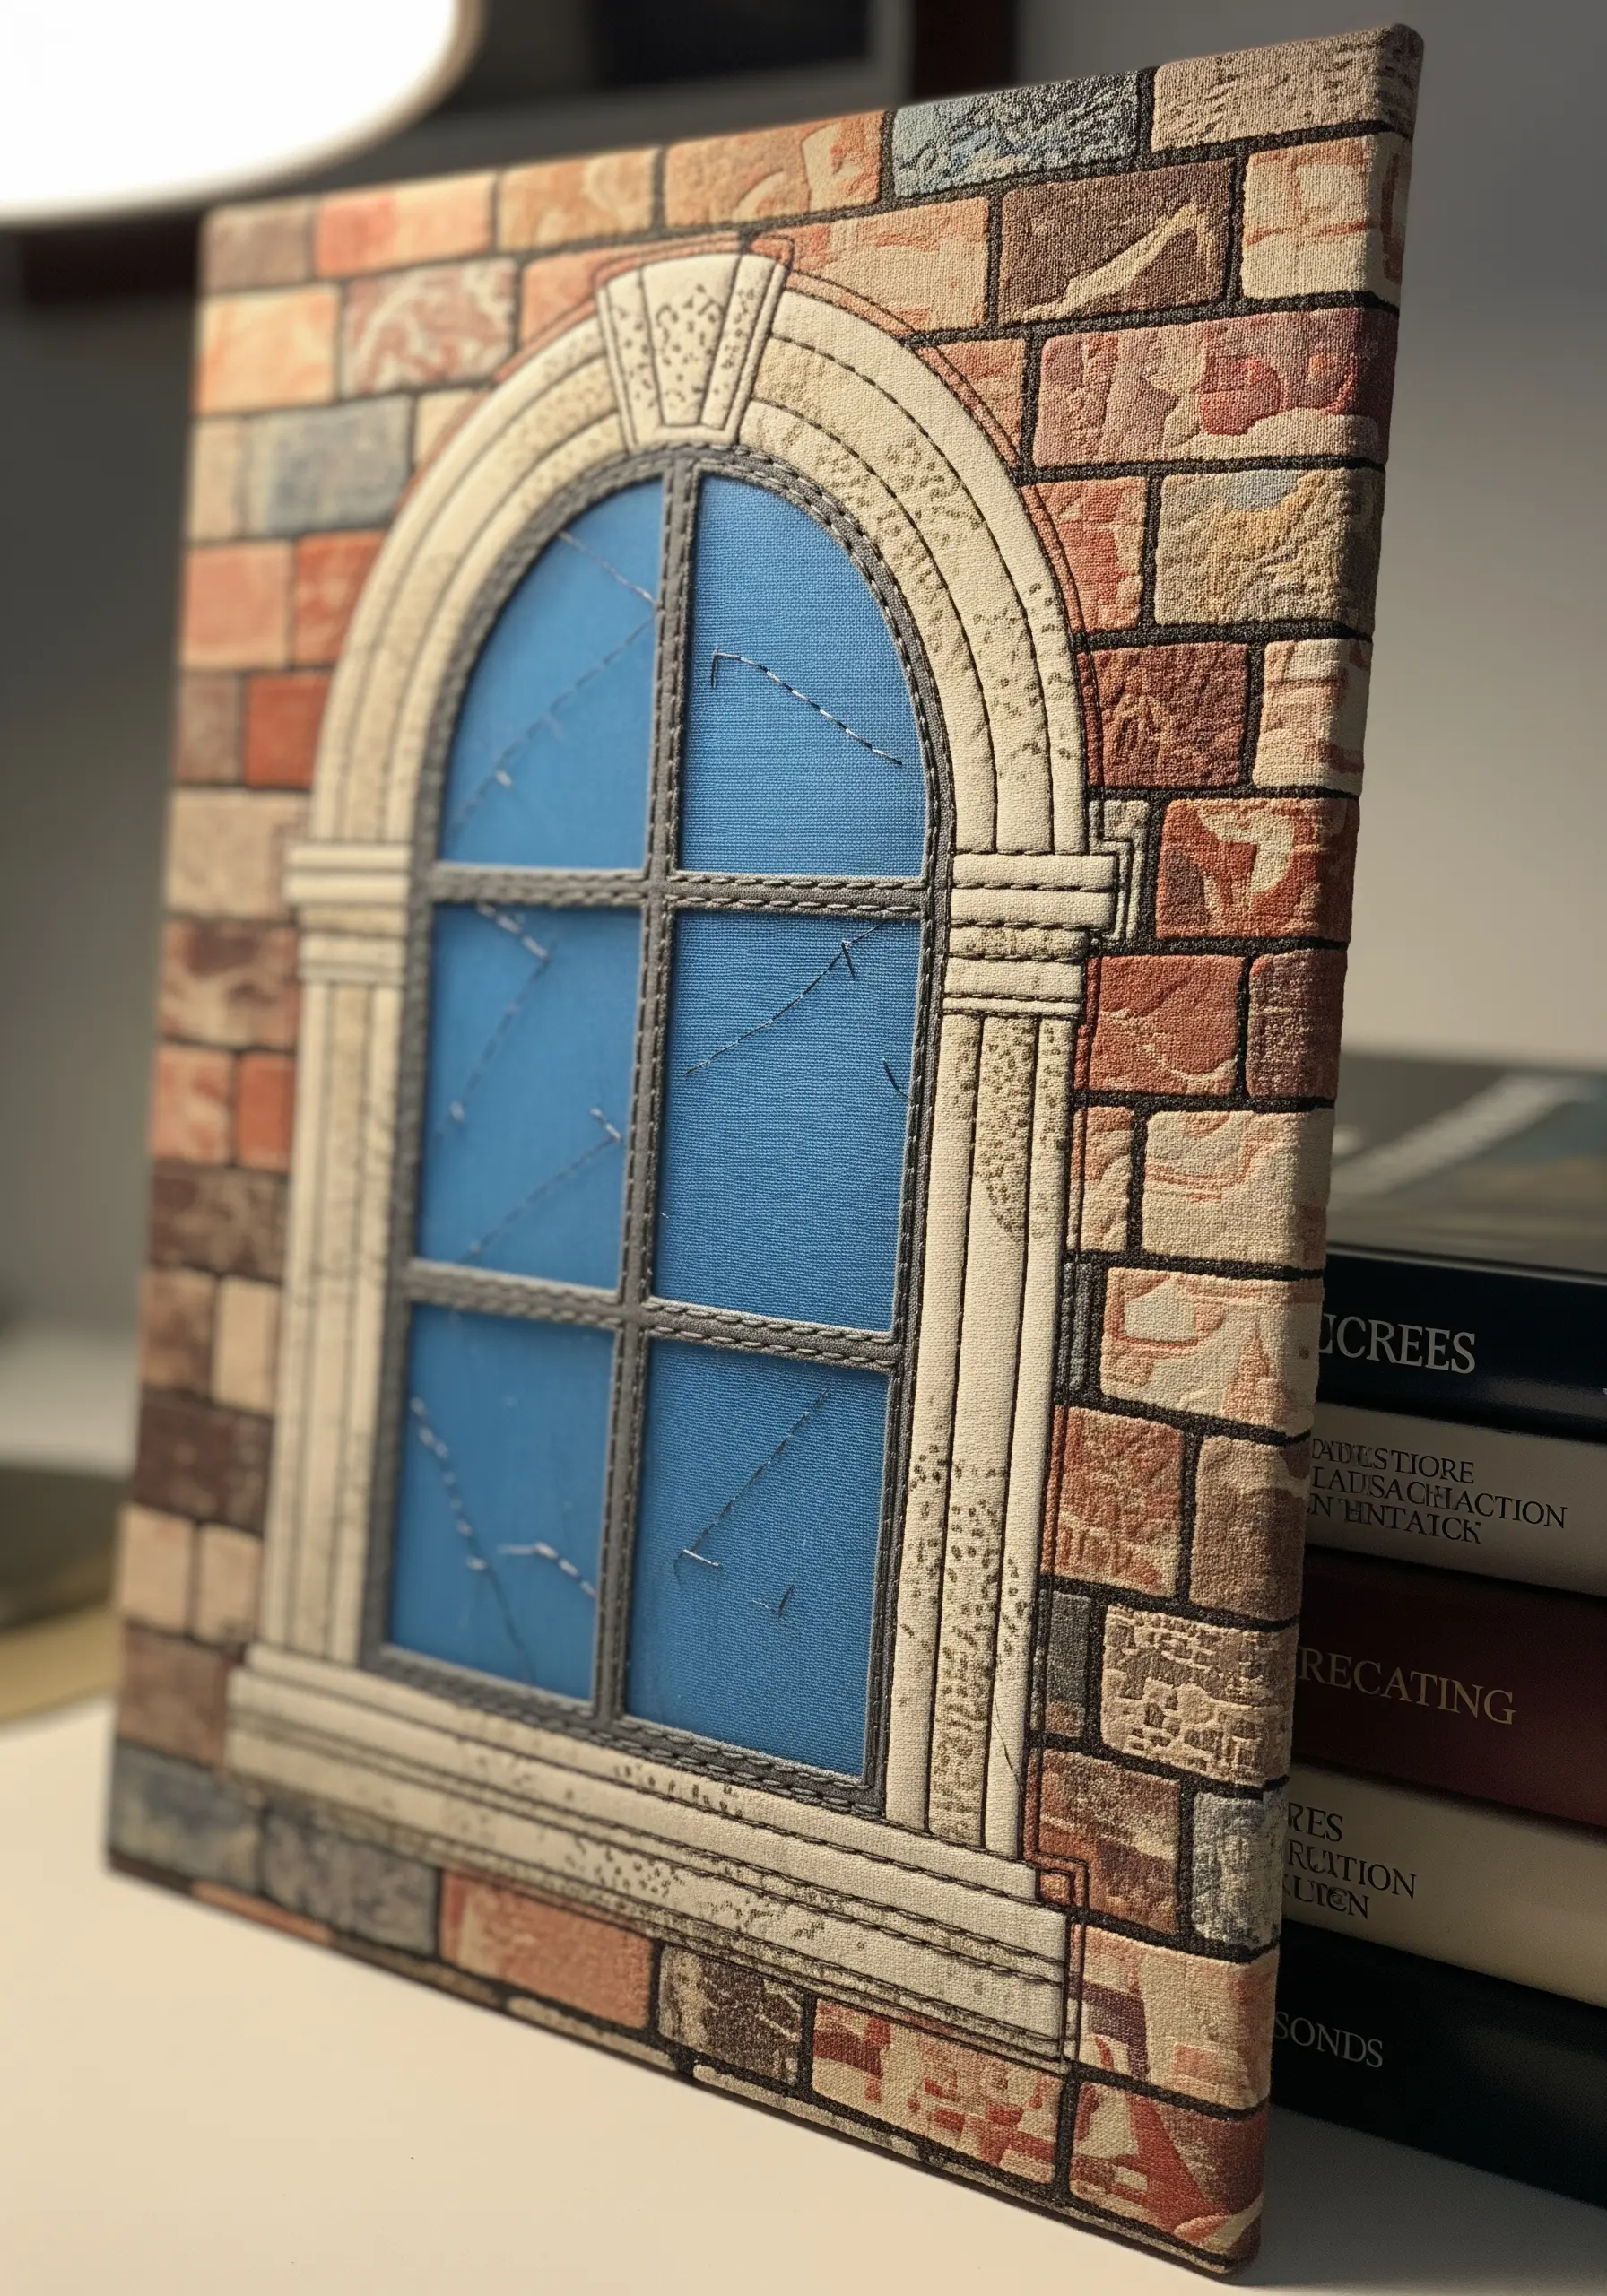
Start with a fabric that already features a detailed pattern, such as a brick wall or floral print, to do most of the heavy lifting for you.
Add your main collage elements, like the window frame, using a contrasting fabric that stands out.
Use minimal embroidery to enhance, not cover, the printed design—for example, add a few straight stitches on the ‘glass’ to suggest reflection.
This smart use of pre-printed fabric allows you to create a complex scene with minimal effort and makes for great DIY framed embroidery art.
18. Combine Metallic and Matte Fabrics for Celestial Designs
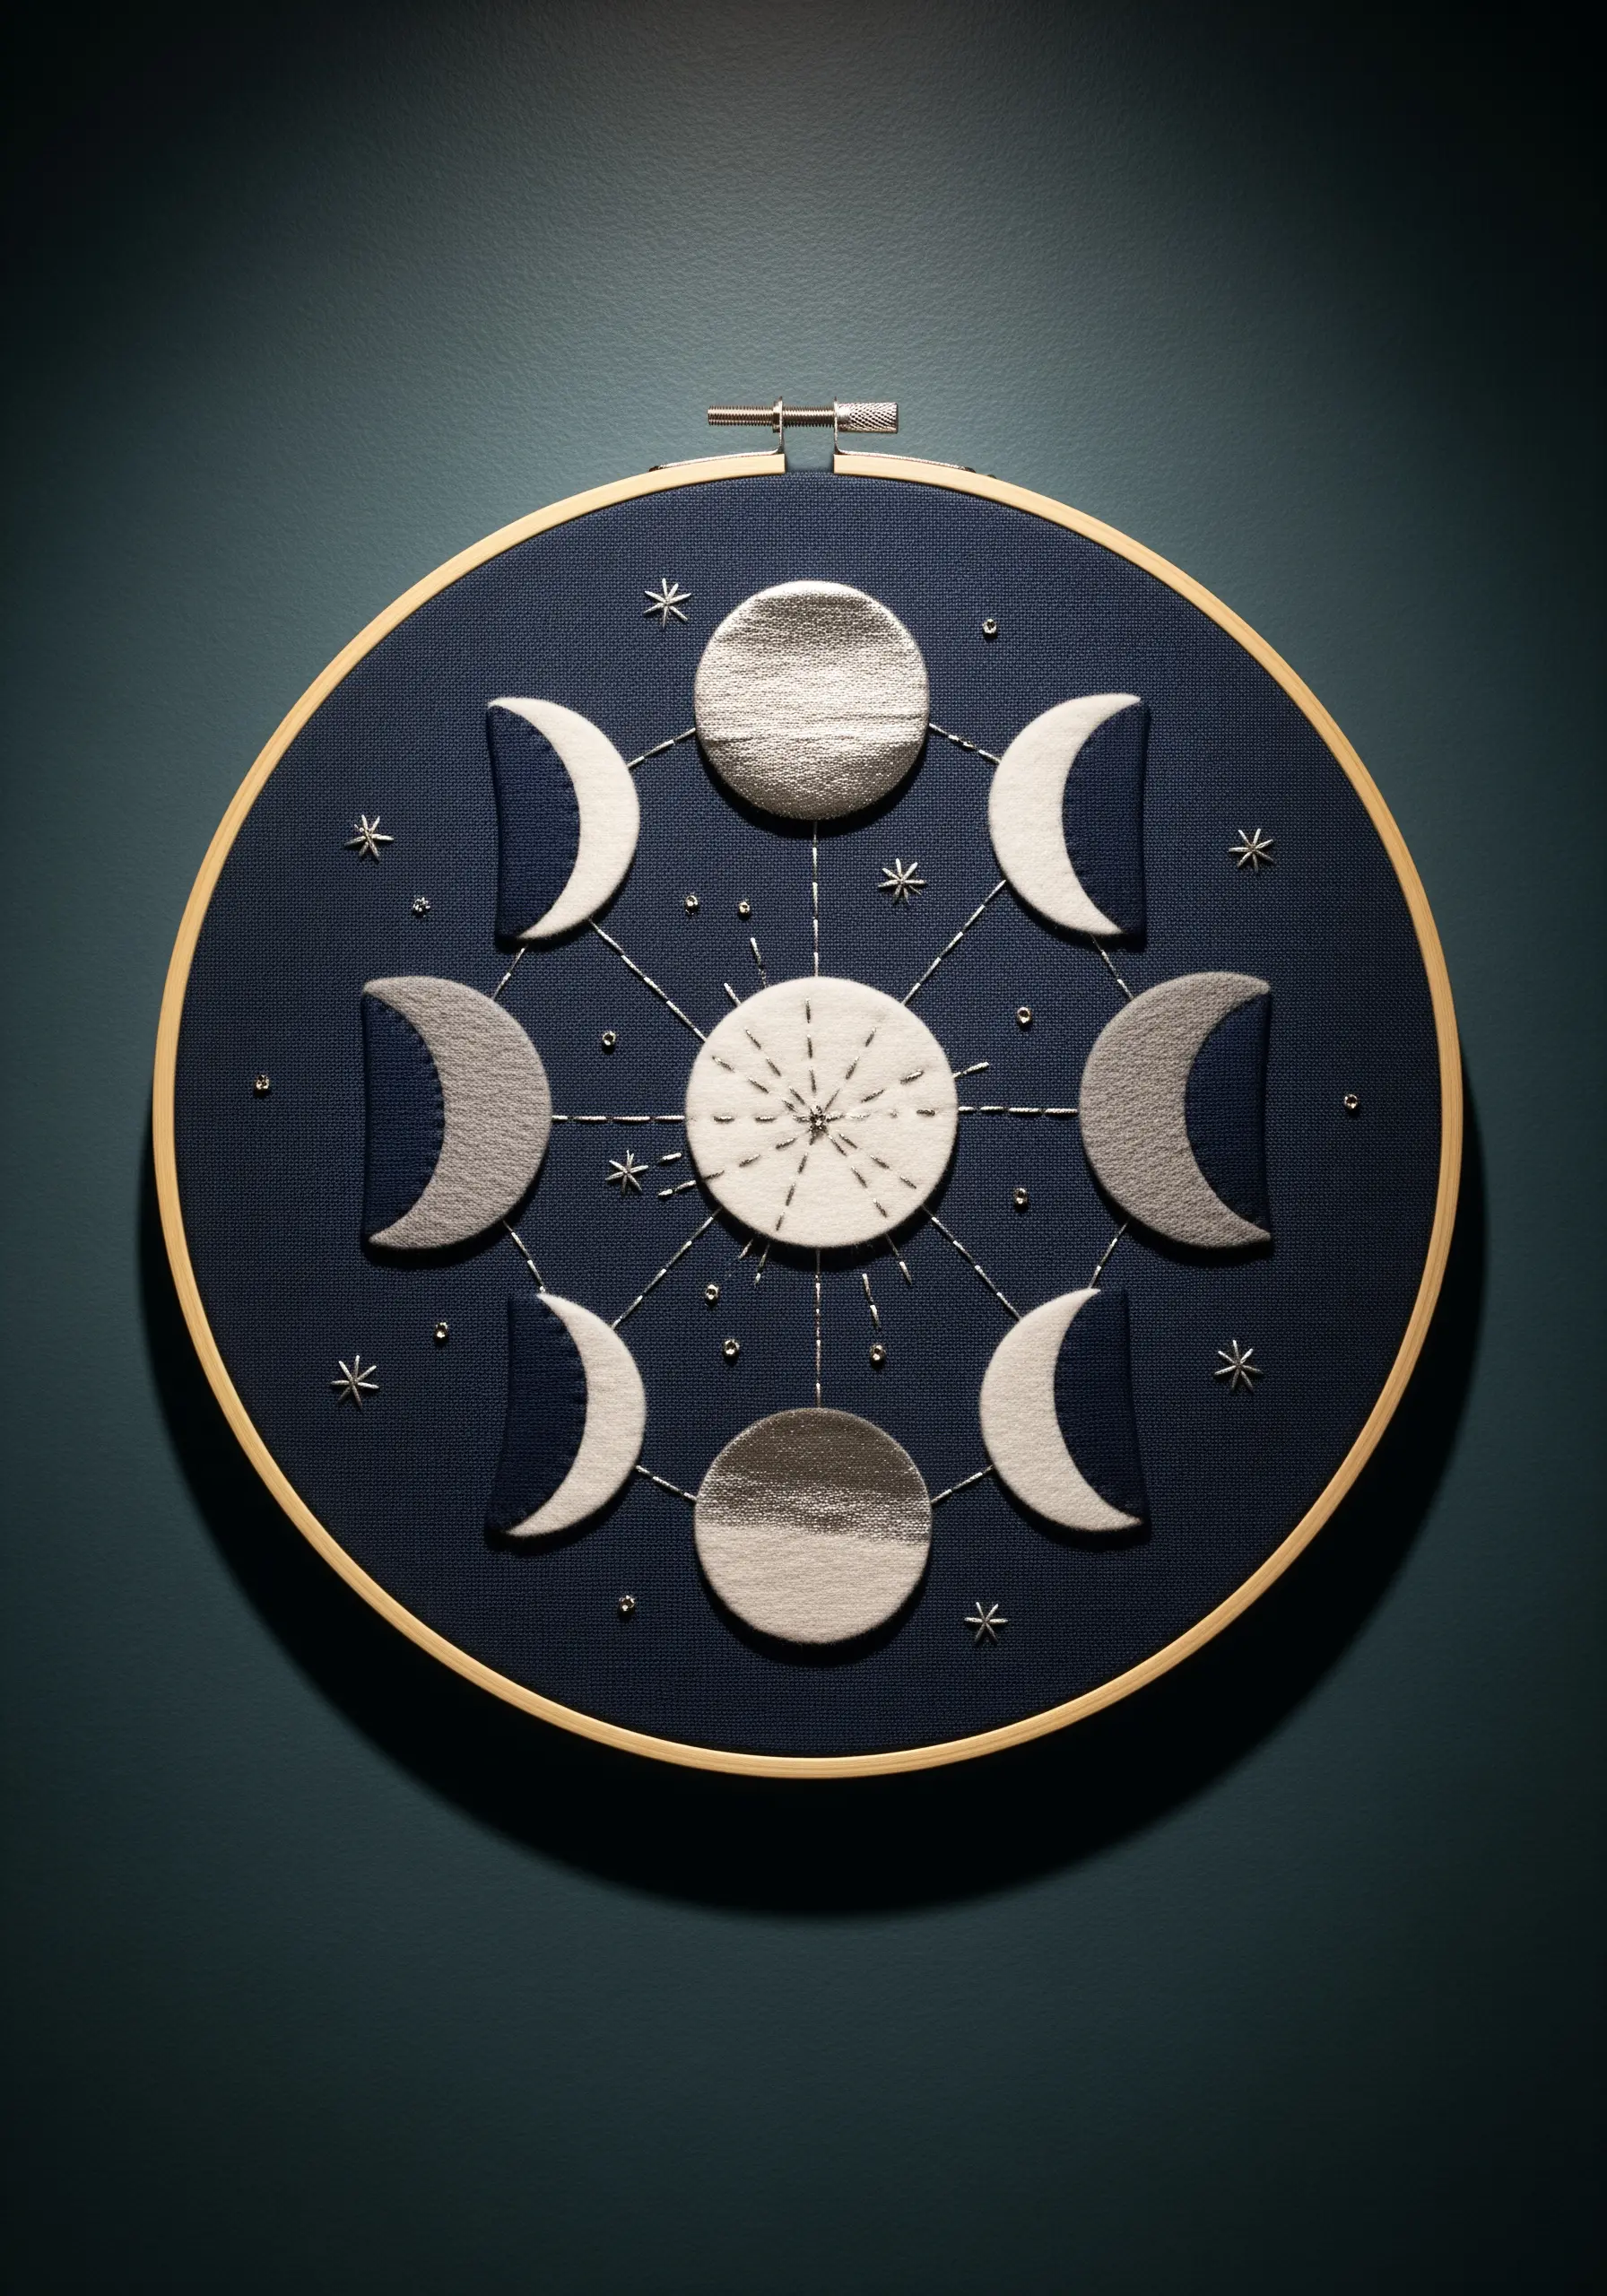
To depict the phases of the moon, use a combination of different fabrics to represent light and shadow.
Pair a matte grey or navy felt for the shadowed parts with a silver lamé or glittery fabric for the illuminated sections.
This contrast in texture and sheen creates a dynamic and realistic lunar effect.
Add radiating straight stitches from the central sun and tiny star stitches using a silver metallic thread to unify the composition.
This method is perfect for creating minimal sky and moon designs with a touch of magic.
19. Build a Tactile World with Mixed-Media Elements
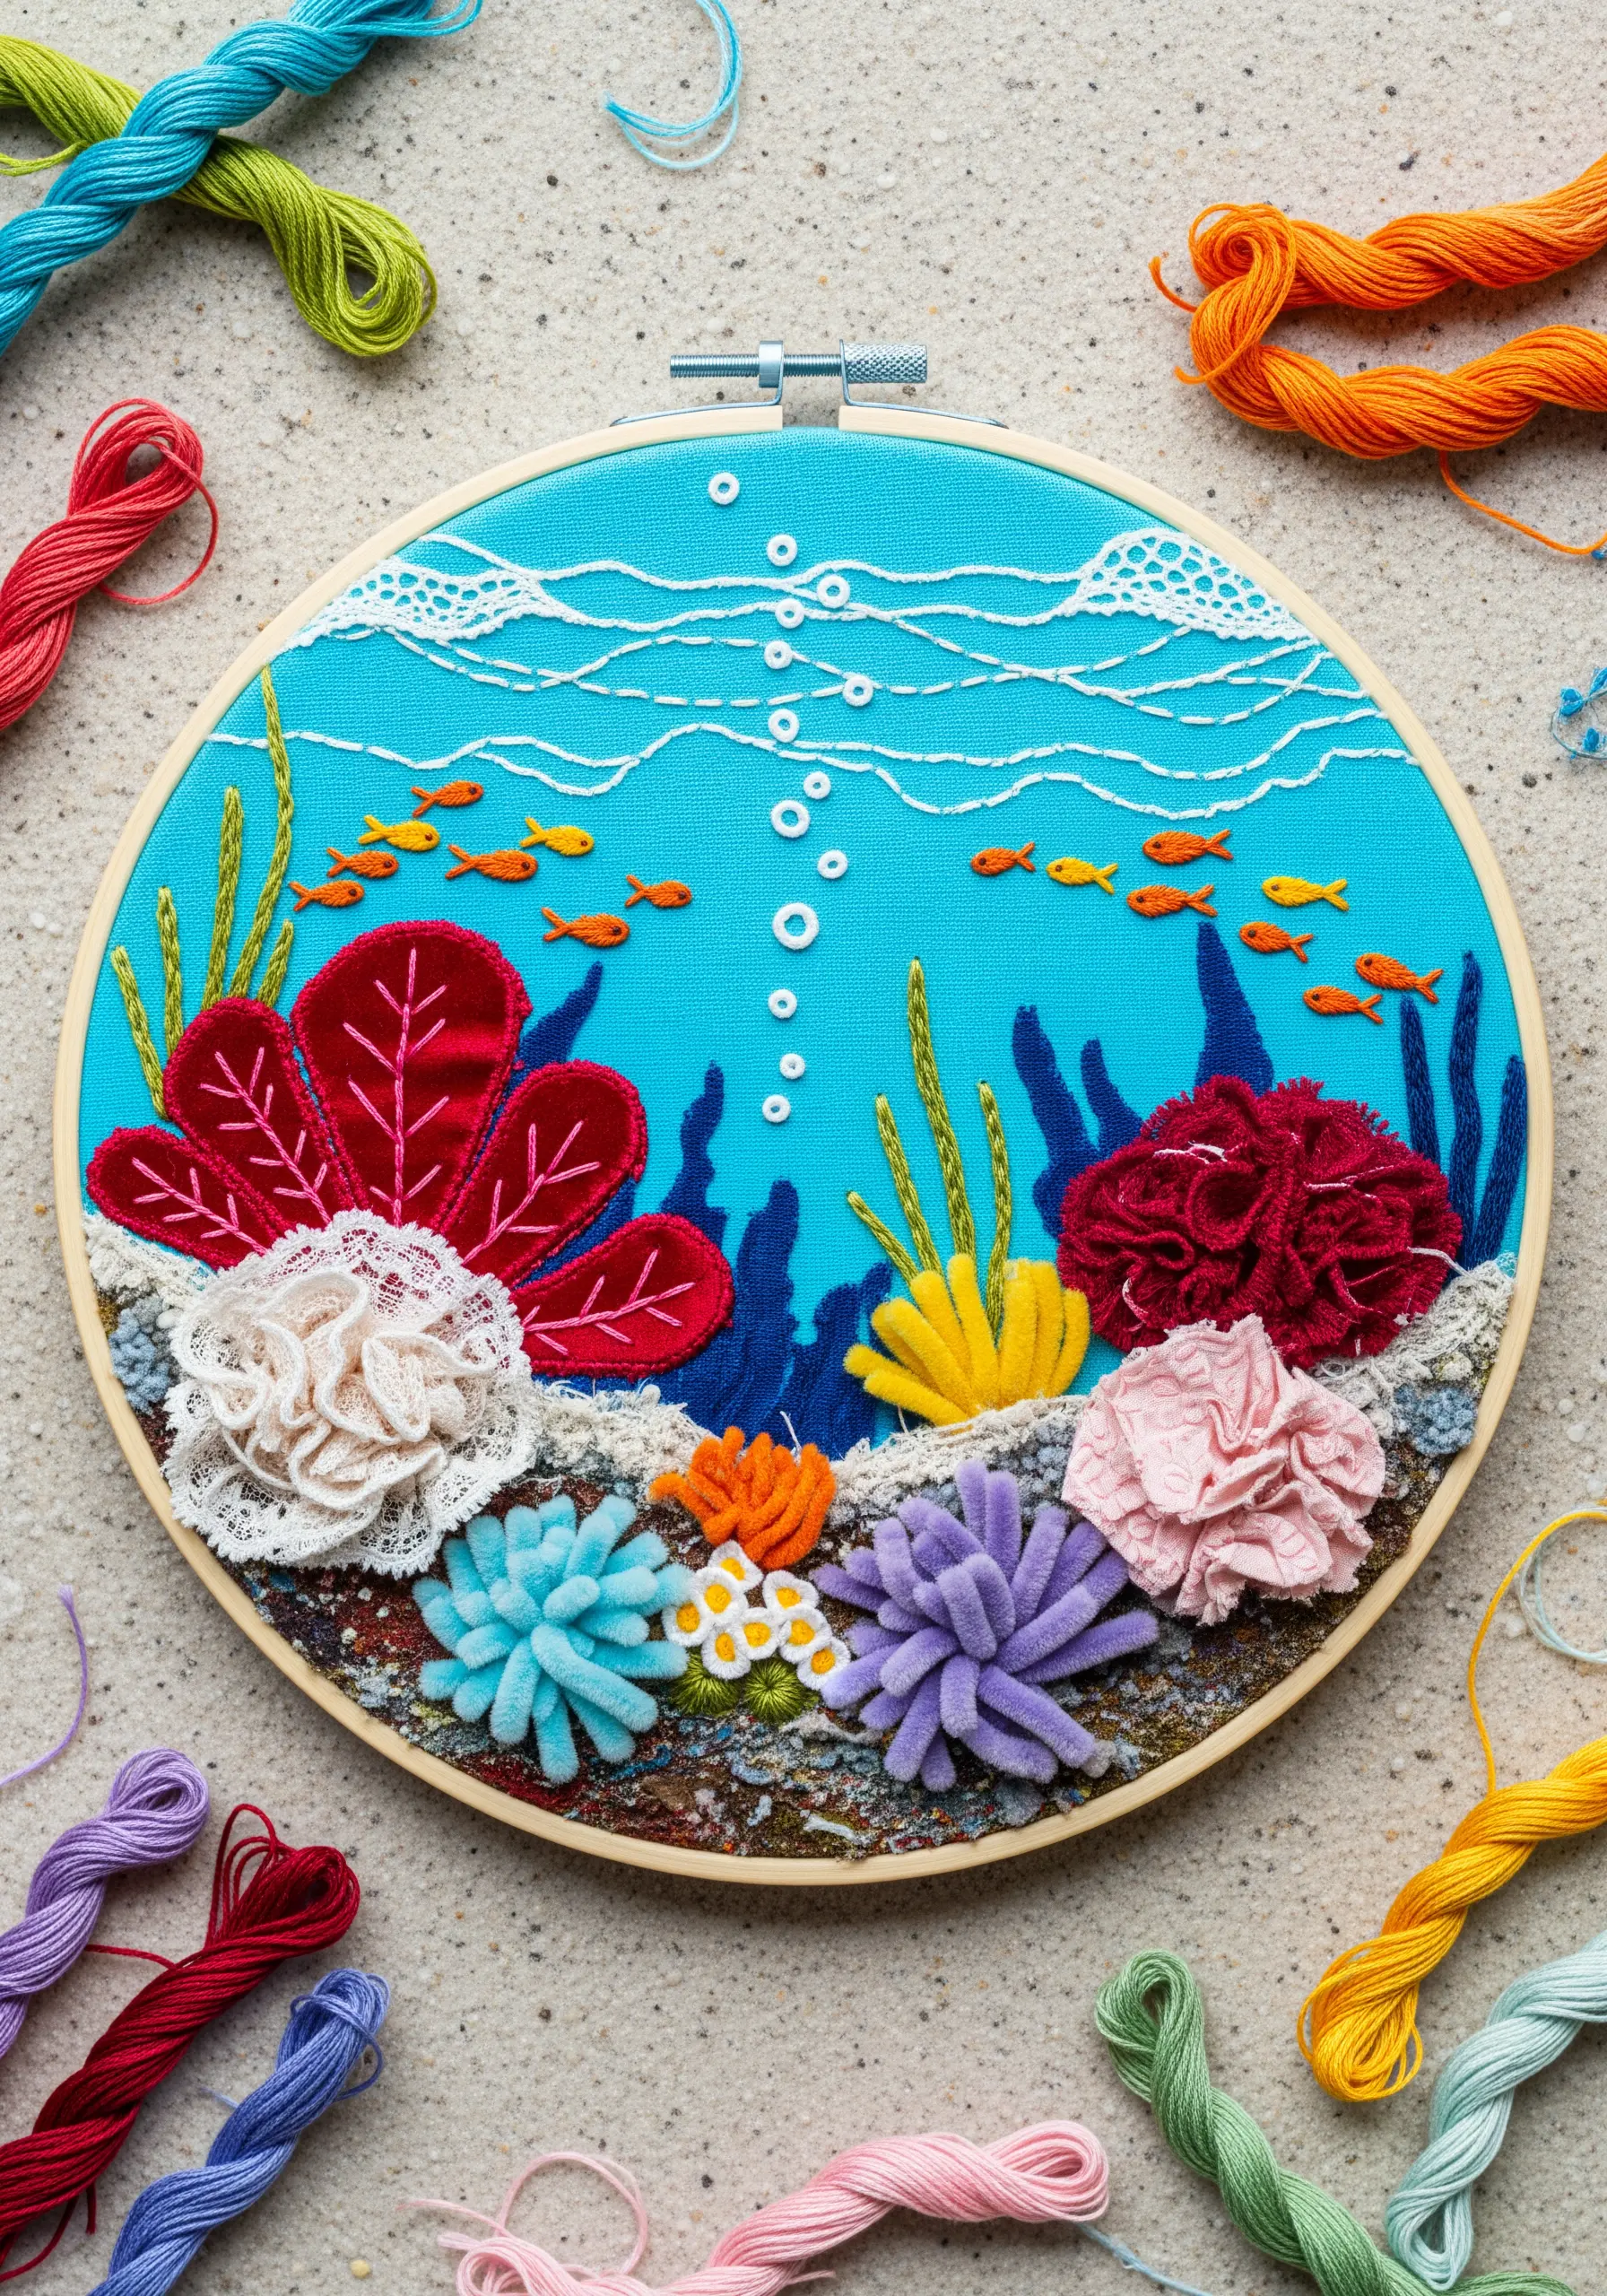
Go beyond fabric and incorporate unconventional materials like lace, tulle, felted wool, and textured yarns into your collage.
Manipulate your materials to create dimension: gather lace into a rosette for coral, or needle-felt wool for a soft anemone.
Secure larger elements with tacking stitches, then fill in the gaps with dense French knots, bullion knots, and couched threads to create a rich, layered environment.
This approach transforms your hoop into a sensory experience, perfect for creating vibrant, mixed fiber creations inspired by nature.
20. Feature a Natural Element as Your Centerpiece

Create a richly textured, abstract background by layering small scraps of fabric in earthy tones, securing them with random, expressive running stitches.
Instead of a stitched motif, select a delicate natural object, like a pressed skeleton leaf or a flattened feather, as your focal point.
Carefully attach it to the fabric collage using a few tiny, almost invisible couching stitches with a fine thread.
The contrast between the fragile, organic element and the stitched background makes for a compelling and serene mixed-media craft.


