

Your workspace is more than just a desk and a chair; it’s a place where ideas take root. Why not surround yourself with stitches that encourage them to grow? An embroidered quote, framed in a simple hoop, can serve as a quiet, constant reminder of your focus, your drive, or your simple need to breathe.
Here, we move beyond basic patterns. You’ll discover how a simple change—like using a single strand of thread instead of six, or choosing a woven wheel stitch over a satin stitch—can add professional polish and personal meaning to your work. These aren’t just projects; they are exercises in intention.
Each design is an invitation to translate a feeling into fabric and thread. Whether your style is minimalist and modern or lush and vibrant, these ideas provide the techniques you need to create a piece that not only looks beautiful but also resonates with the work you do and the person you are. Let’s begin.
1. Master the Art of Delicate Botanicals

To achieve this light, airy effect for eucalyptus and lavender, use a single strand of six-strand embroidery floss.
This simple adjustment creates finer lines and a more realistic, delicate appearance, preventing the design from looking bulky.
Stitch the eucalyptus leaves with a detached chain stitch (lazy daisy) and use simple straight stitches for the stems, allowing the minimalism of the technique to shine.
The tiny purple French knots add just enough texture to suggest lavender buds without overwhelming the composition.
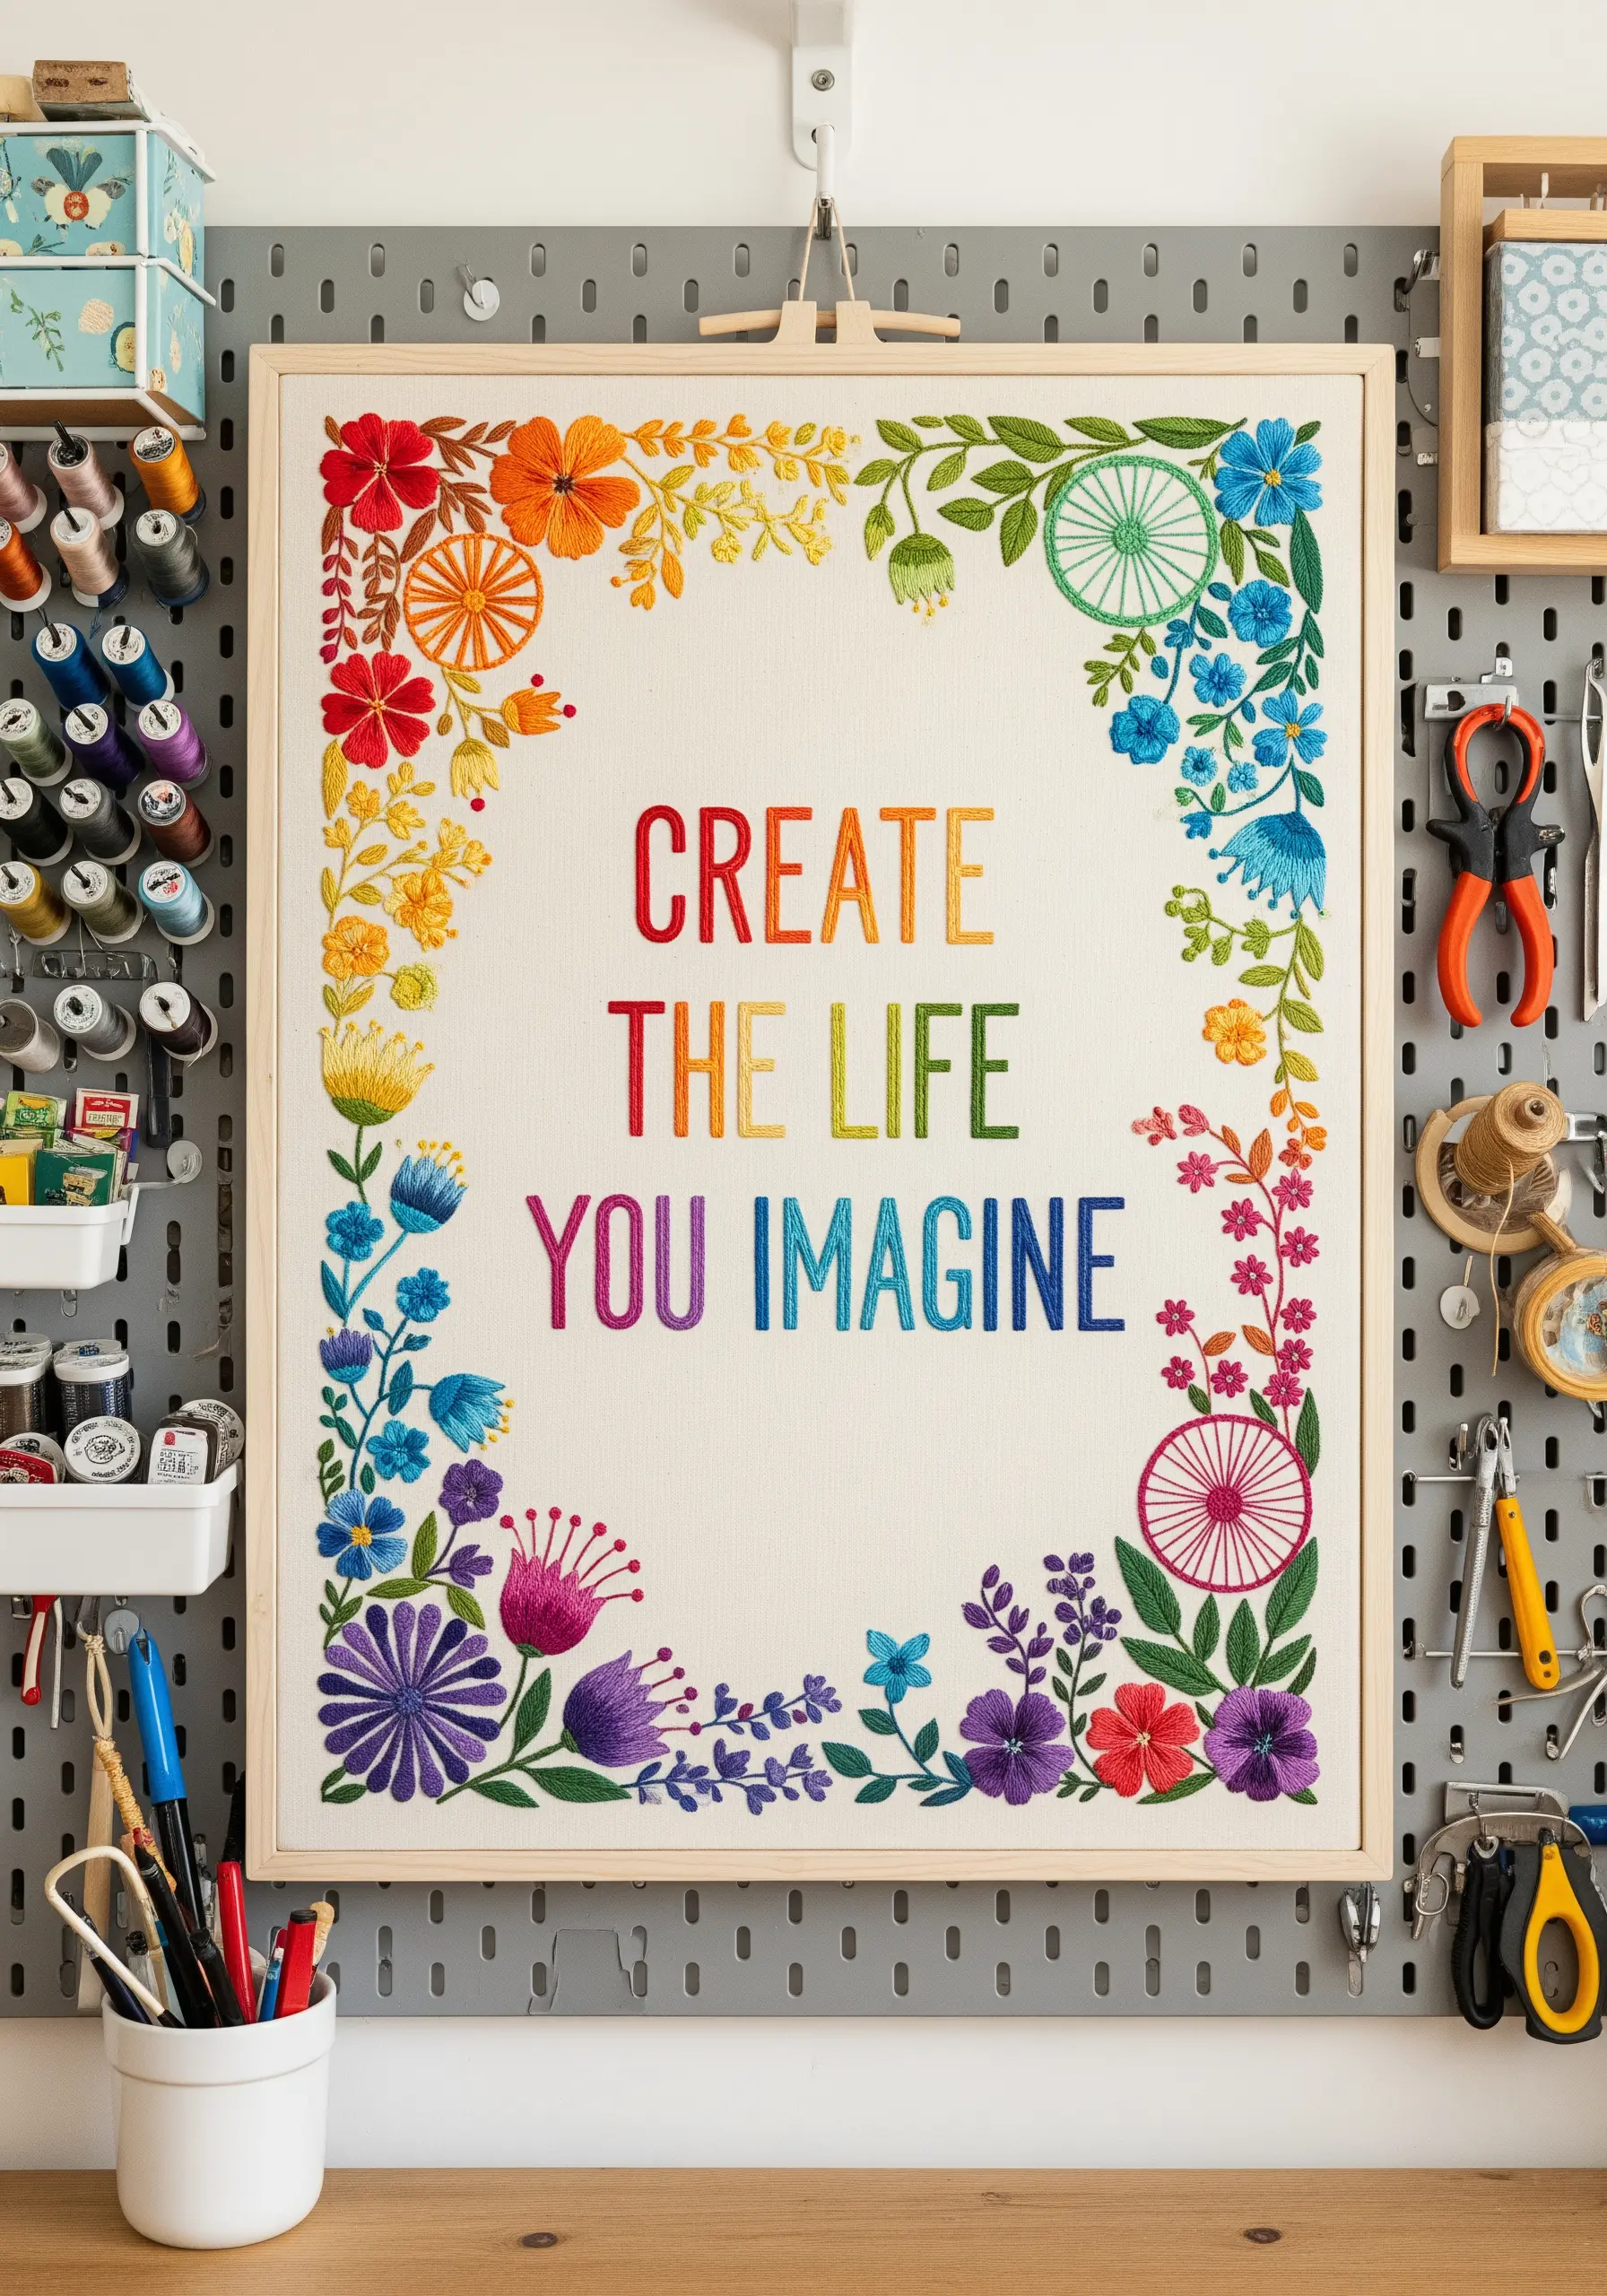
2. Create a Cohesive Hoop Art Gallery Wall

When grouping multiple hoops, establish visual harmony by using a consistent color palette and lettering style across all pieces.
This turns individual projects into a single, intentional art installation.
Vary the hoop sizes and the density of the floral arrangements to create a dynamic yet balanced rhythm on the wall.
Notice how the warm tones—red, orange, and gold—unify the collection, making it feel like a complete story rather than separate chapters.
This approach allows you to build hooped wall collage layouts that grow over time.
3. Amplify Color with High-Contrast Fabric

Stitching bright colors on a dark or unconventional background, like this charcoal gray linen, creates immediate visual impact.
The yellow and white threads appear more vibrant because the dark fabric absorbs light, making the stitched areas the focal point.
For the solid sunflower petals, use a satin stitch, ensuring your stitches lie flat and parallel for a smooth, light-reflecting finish.
Outline the leaves in a lighter gray or silver thread to define their shape without competing with the bold black outlines of the flowers.
4. Integrate Dimensional Stitches for Tactile Depth

To give your floral arrangements a sense of touchable reality, incorporate highly textural stitches alongside flat ones.
For the feathery, wheat-like elements, use Turkey work and trim the loops to create a soft, brush-like effect that adds dimension.
The larger flowers can be stitched with woven wheel roses, which stand up from the fabric and create natural shadows.
This contrast between the flat daisy petals (satin stitch) and the three-dimensional textures makes the entire composition more engaging and dynamic.
5. Break the Frame with Off-Hoop Embroidery

For a truly show-stopping piece, extend your design beyond the confines of the embroidery hoop.
Create the leaves and hibiscus petals separately using a stumpwork technique or by embroidering onto felt and cutting them out.
Attach these elements to the back of the finished hoop, layering them to build a lush, tropical frame that feels alive and unrestrained.
This method transforms the hoop from a simple frame into an integral part of a sculptural art piece.
6. Achieve Elegance with Monochromatic Thread Painting

On black fabric, a limited palette of whites, creams, and pale grays creates a sophisticated, high-impact design.
Use the long-and-short stitch to blend these neutral shades seamlessly within the magnolia petals, giving them a realistic, contoured appearance.
For the delicate leafy vines, use a single strand of metallic silver thread in a simple backstitch to add a subtle sparkle that catches the light.
This technique proves that you don’t need a full spectrum of color to create dramatic, dark thread embroidery designs.
7. Simplify Foliage with the Fishbone Stitch

When stitching leaves, especially ferns, the fishbone stitch is your most valuable tool for creating a natural, elegant shape.
It creates a central spine and angled sides in one fluid motion, resulting in a beautifully tapered leaf that looks far more organic than one filled with satin stitch.
Pair these structured ferns with tiny, scattered lazy daisy flowers to add a touch of softness and whimsy.
This combination of a structured stitch and a freeform floral is perfect for clean, plant-inspired embroidery that feels both polished and alive.
8. Build Atmosphere with a Moody, Academic Palette
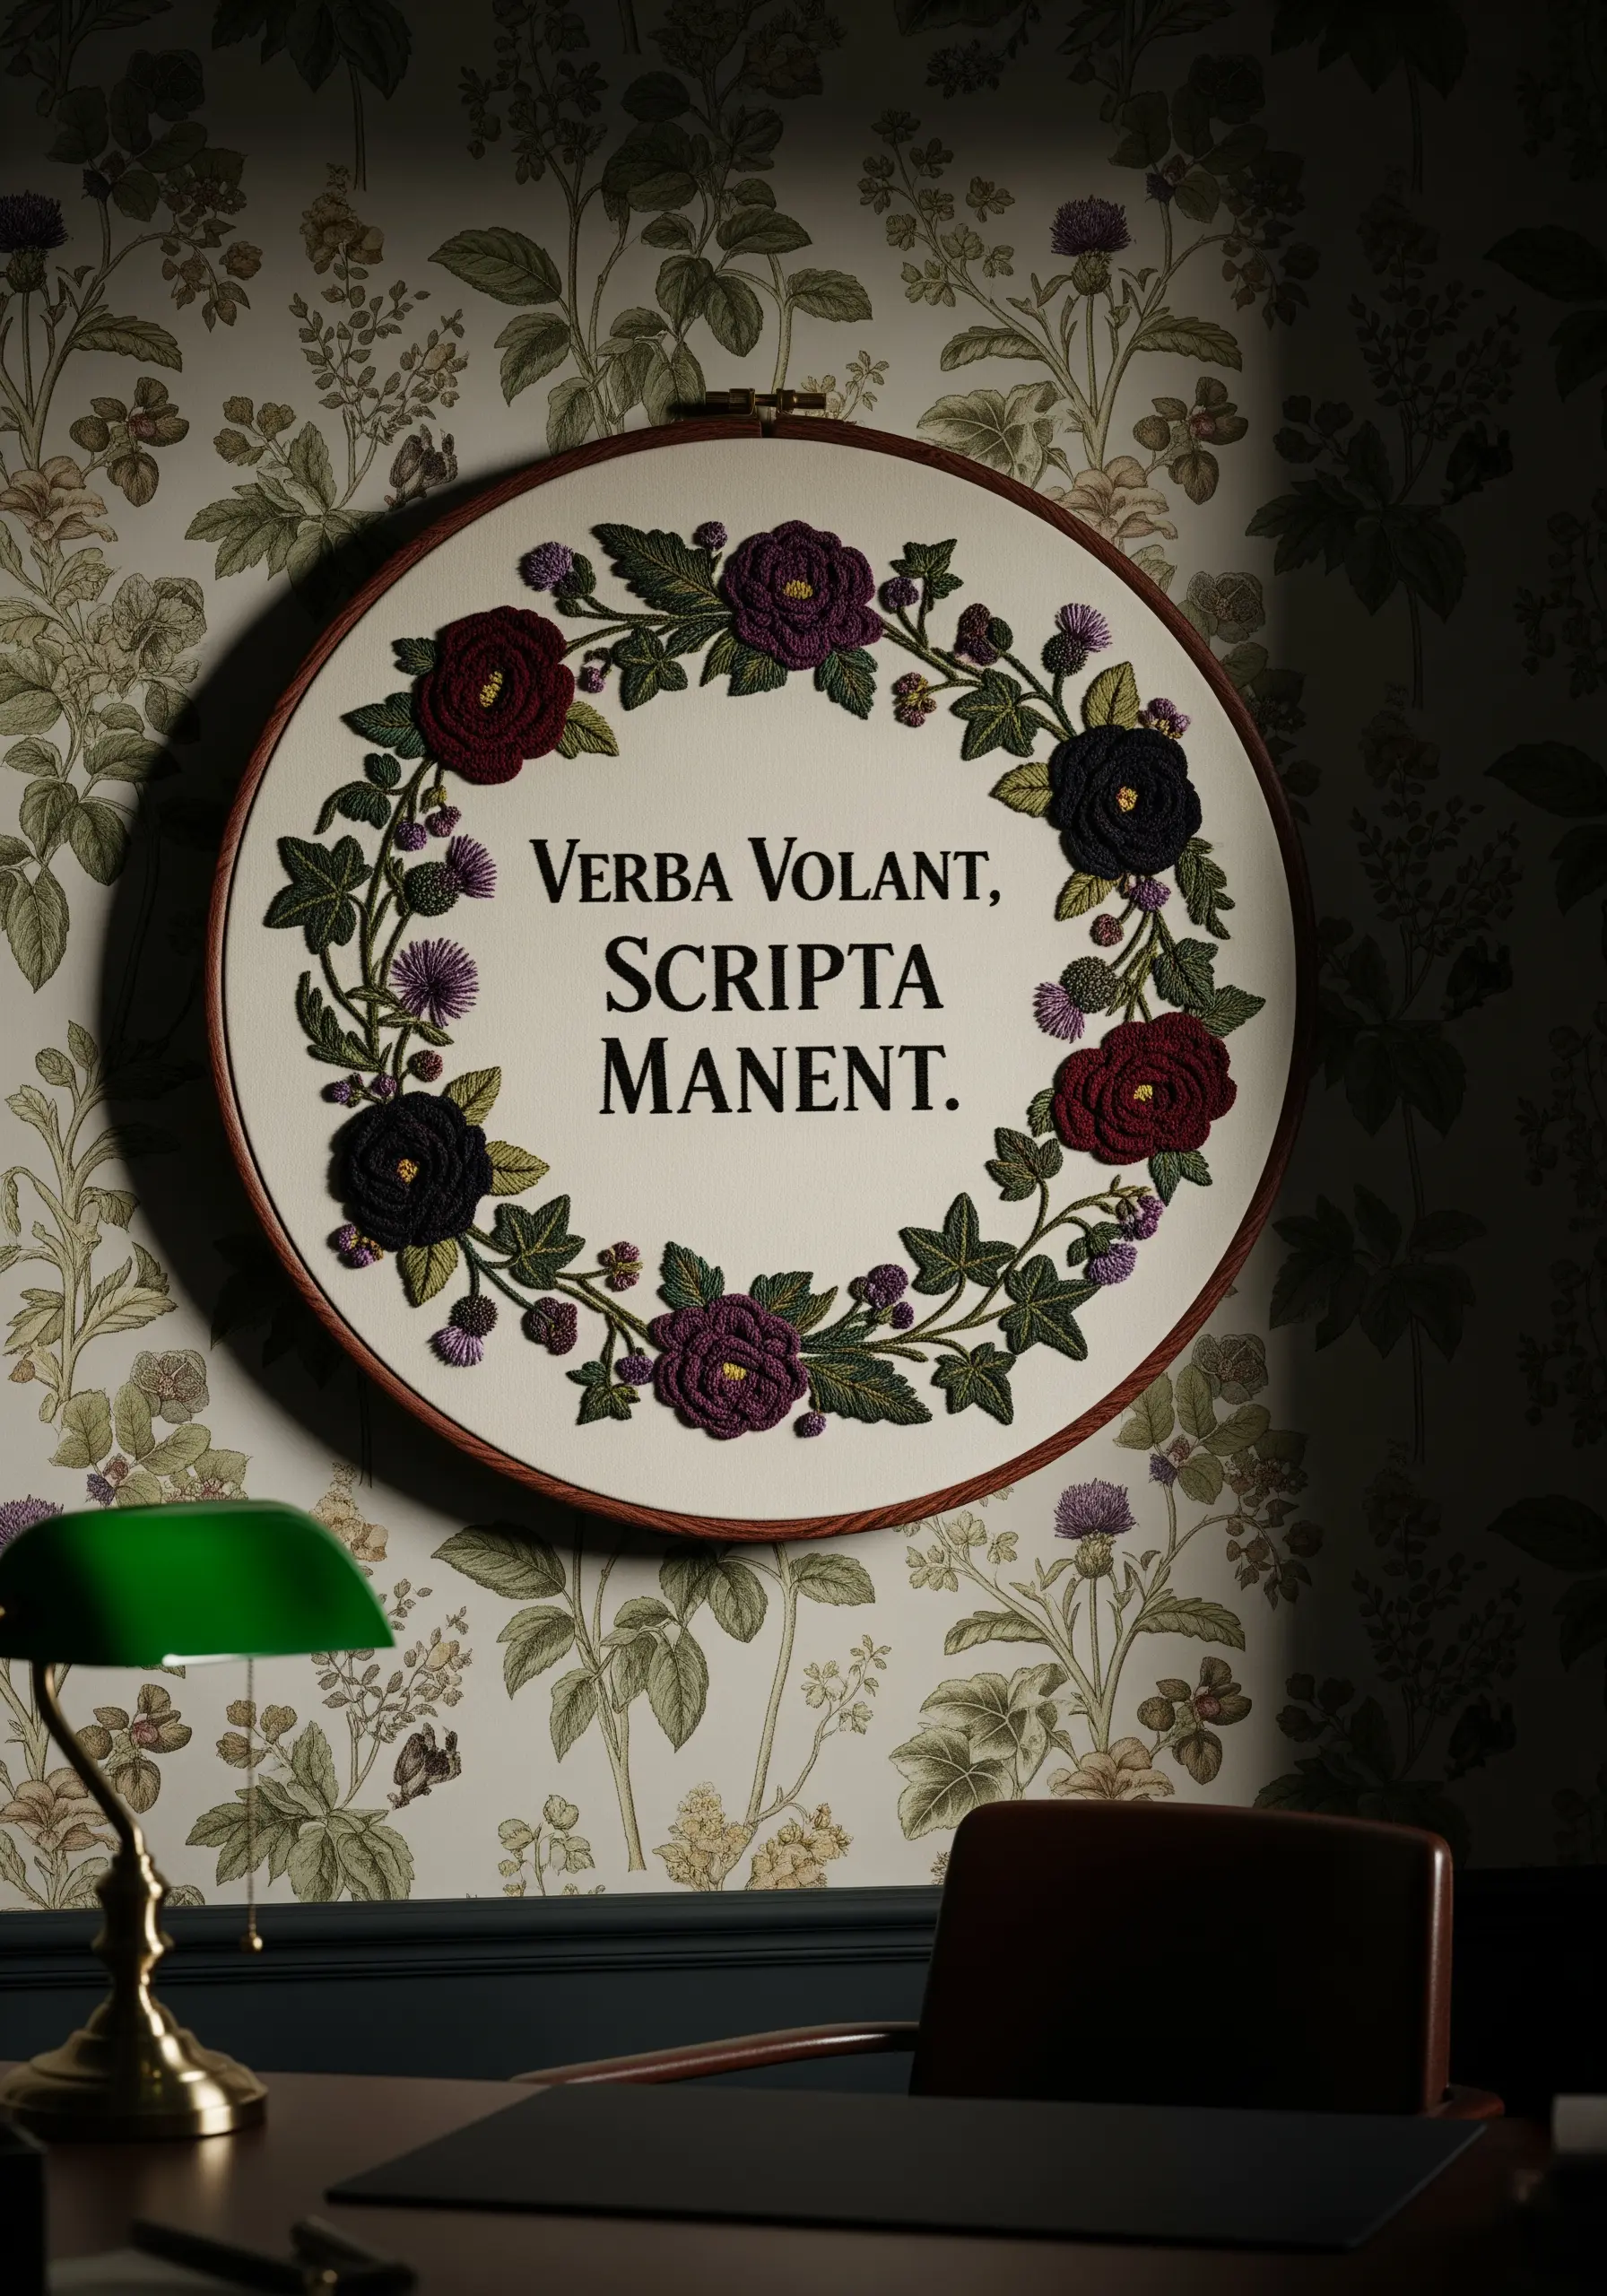
Set a scholarly tone by choosing a sophisticated color palette of deep burgundy, dark violet, and forest green.
For the roses, use a woven wheel stitch to create dense, textured petals that add a sense of weight and history to the design.
Incorporate spiky thistle elements using straight stitches and French knots in a contrasting lavender to provide a textural counterpoint to the smooth leaves.
The richness of these colors against an off-white linen evokes the feeling of a classic library or study.
9. Fuse Cross-Stitch with Modern Line Art

Create a striking graphic style by combining two distinct embroidery traditions in one piece.
Use cross-stitch to create pixelated, graphic roses, focusing on bold color blocking rather than subtle shading.
Contrast this with sharp, linear details for the leaves, using a simple backstitch in an electric blue to outline and add hash marks for texture.
The dripping threads at the bottom add an intentional, deconstructed element that reinforces the “outside the box” theme and pushes creative boundaries.
10. Introduce Softness with Ribbon and 3D Florals
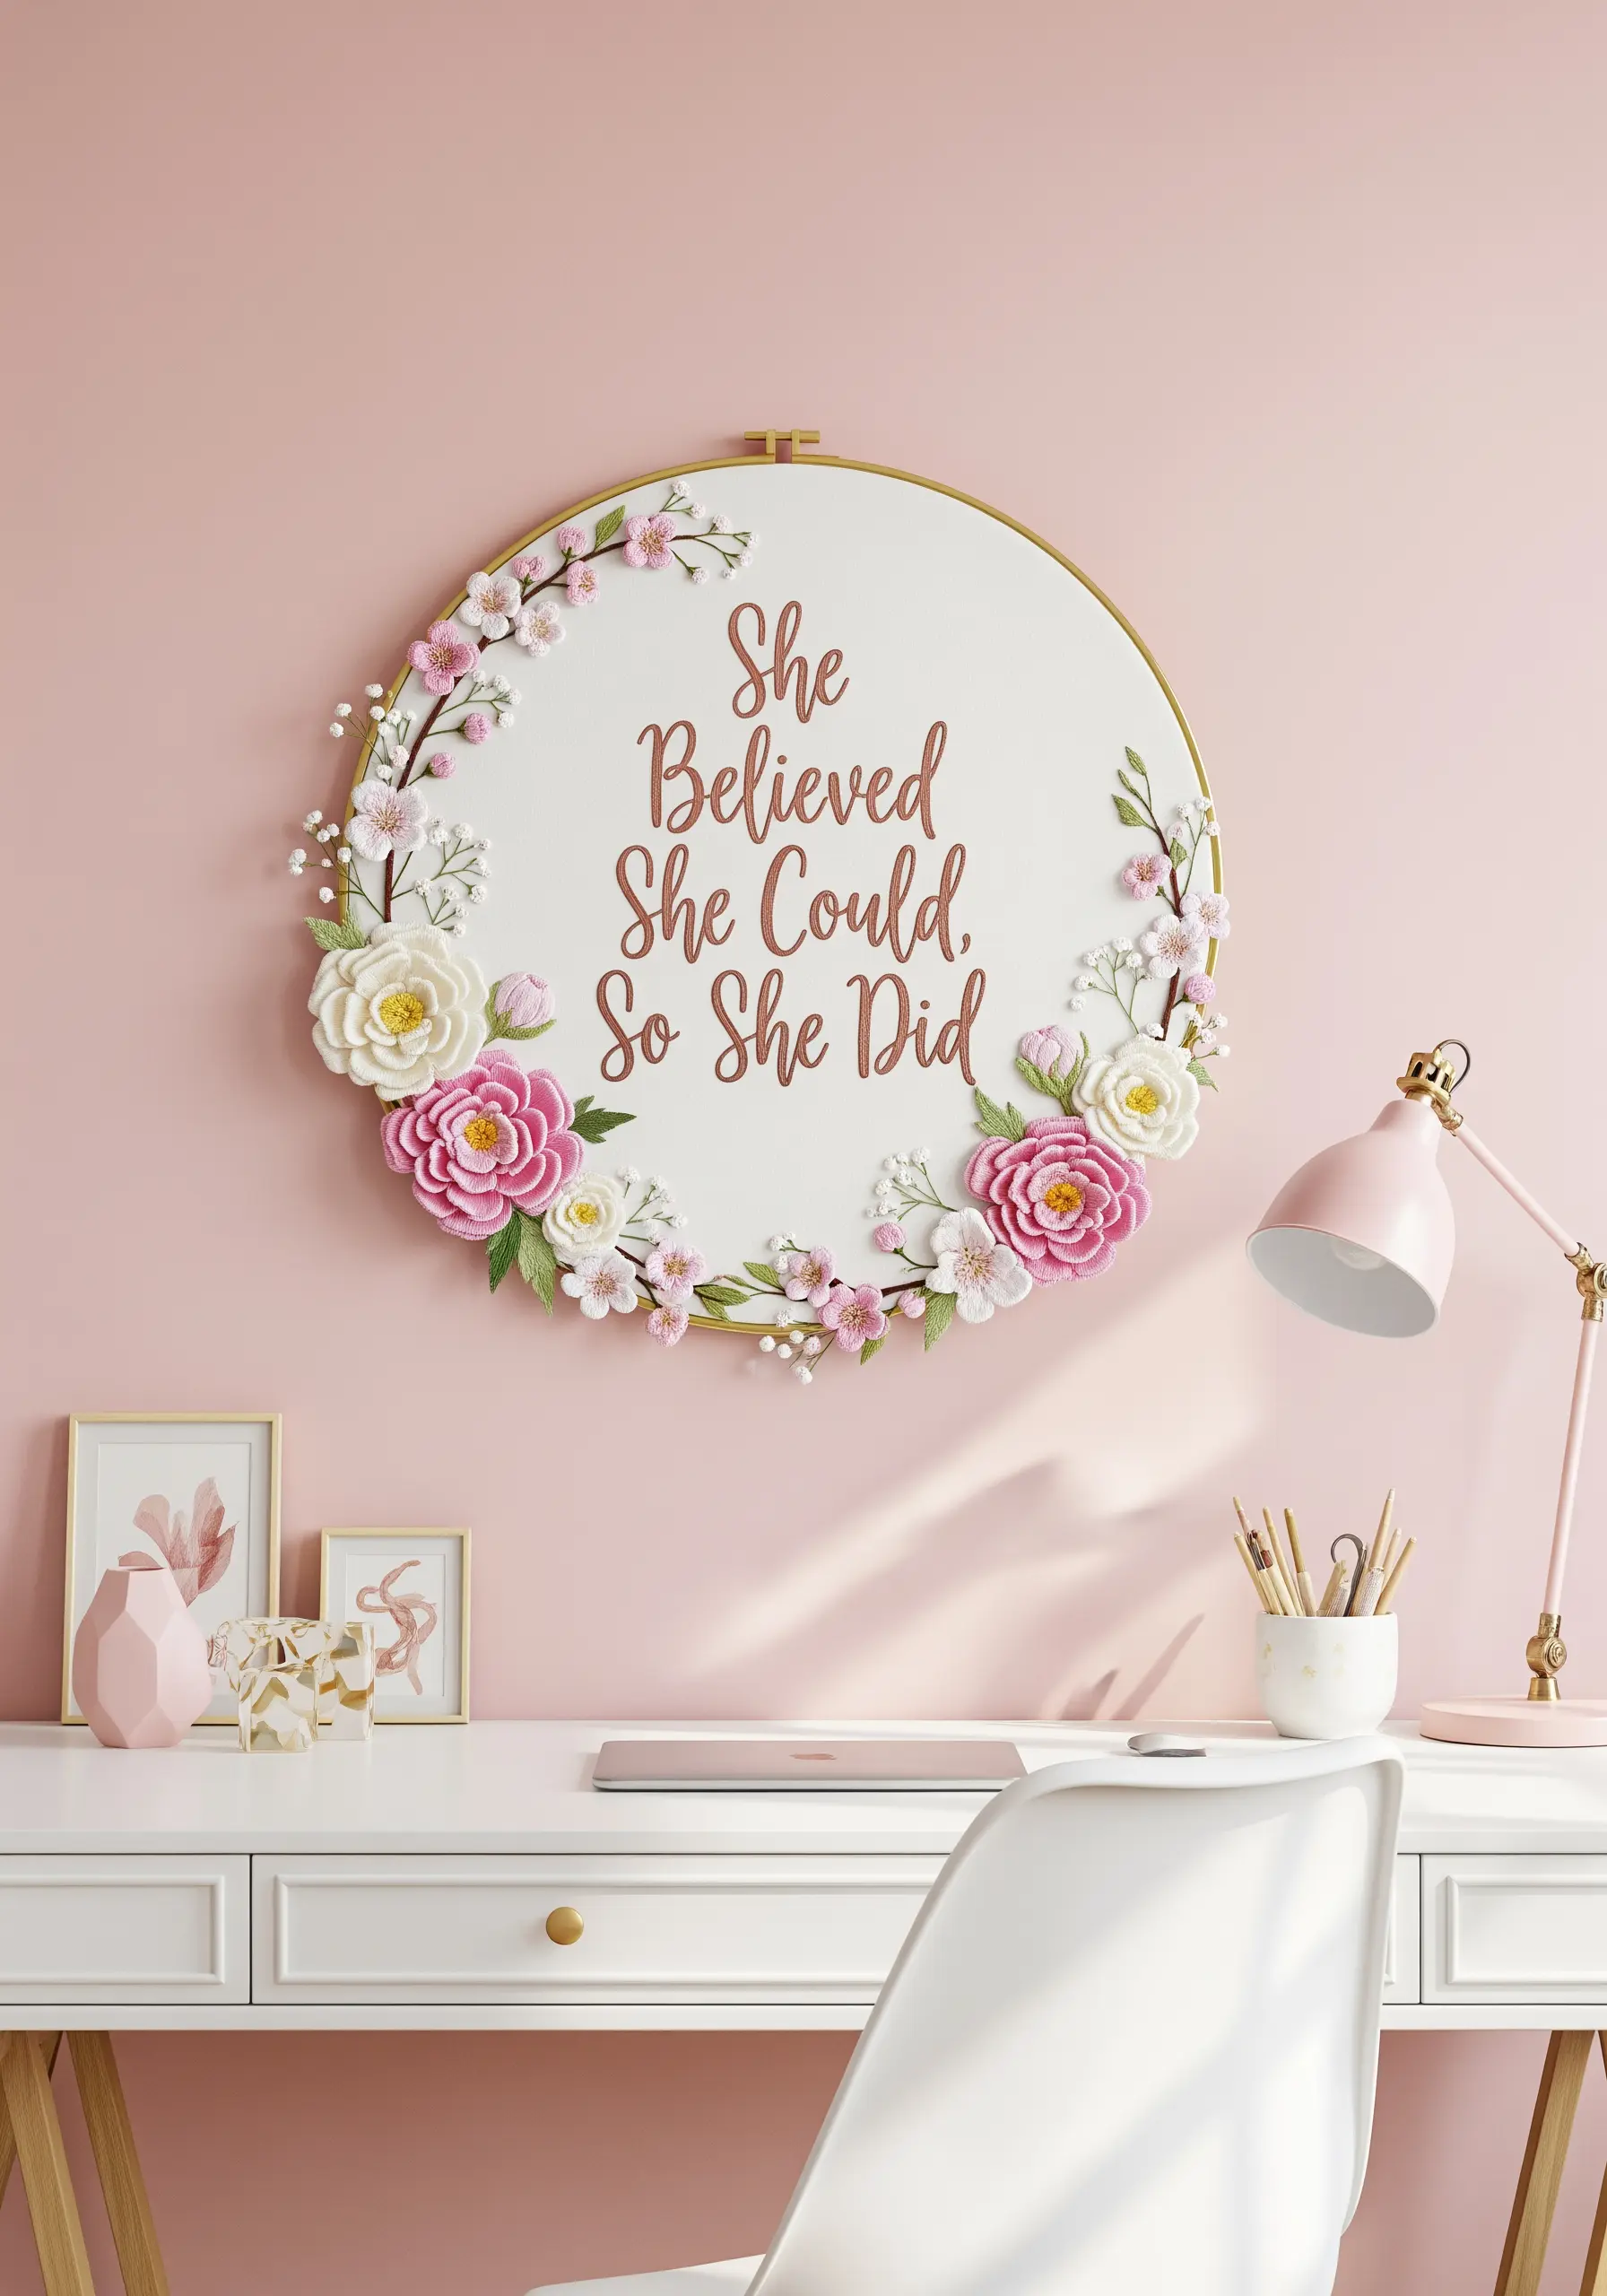
Elevate your floral embroidery by incorporating different materials and dimensions for a lush, romantic effect.
Use silk ribbon for the large white roses; the ribbon’s width creates soft, folded petals with just a few simple stitches, adding a luxurious sheen.
For the smaller pink flowers, use traditional floss with woven wheel stitches for a tight, textured look.
Layering these different textures—from delicate cherry blossoms to full ribbon roses—creates a 3D embroidery wall art piece with incredible depth.
11. Create Bold Lettering with Felt Appliqué
For text that truly stands out, move beyond thread and use felt appliqué.
Cut your letters from thick, high-quality felt and secure them to the background fabric with a few anchoring stitches or fabric glue.
Then, outline each letter with a simple backstitch or stem stitch using a contrasting thread to give it a clean, polished, and dimensional edge.
This technique is perfect for large-scale pieces where you want the text to have physical presence and graphic impact.
12. Capture Wildflower Charm with Simple Stitches
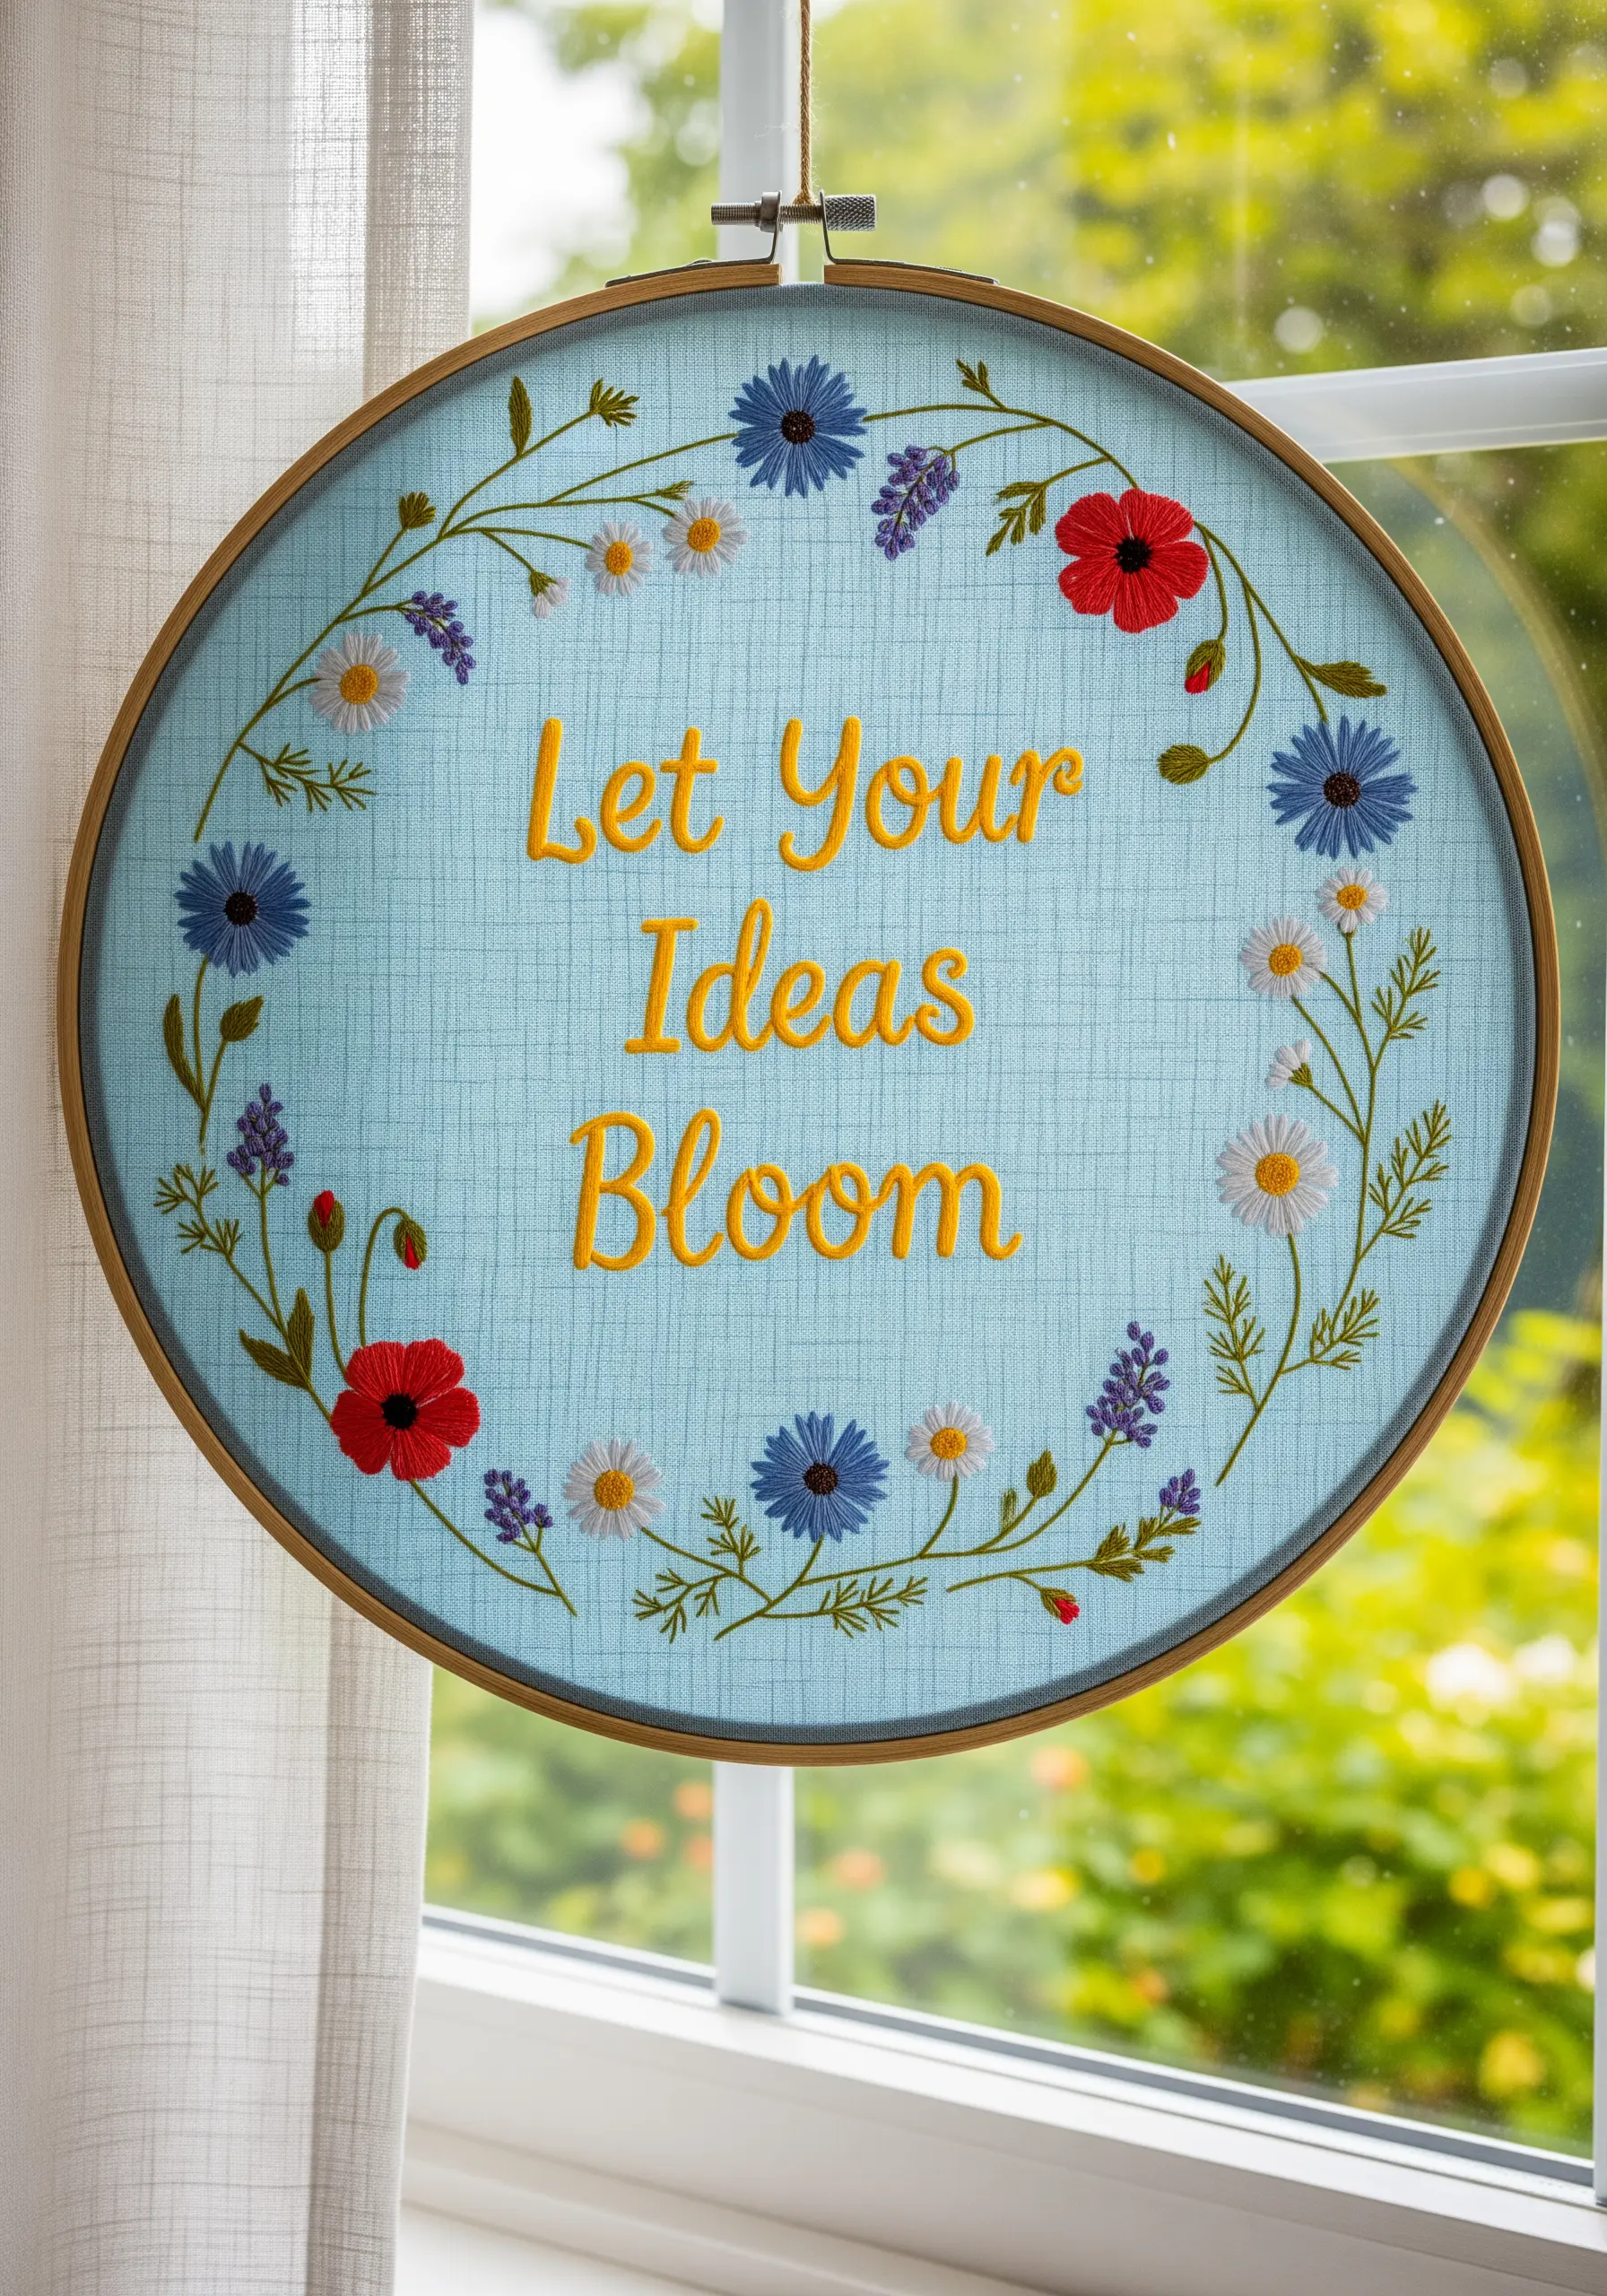
You don’t need complex techniques to create a beautiful wildflower meadow aesthetic.
Rely on a curated combination of foundational stitches: lazy daisy for petals, French knots for flower centers and lavender buds, and stem stitch for vines.
The key to a natural look is to vary the spacing, direction, and scale of the flowers, and to use a bright, cheerful color palette.
This approach makes for wonderfully wildflower hoop art projects that are both relaxing to stitch and beautiful to display.
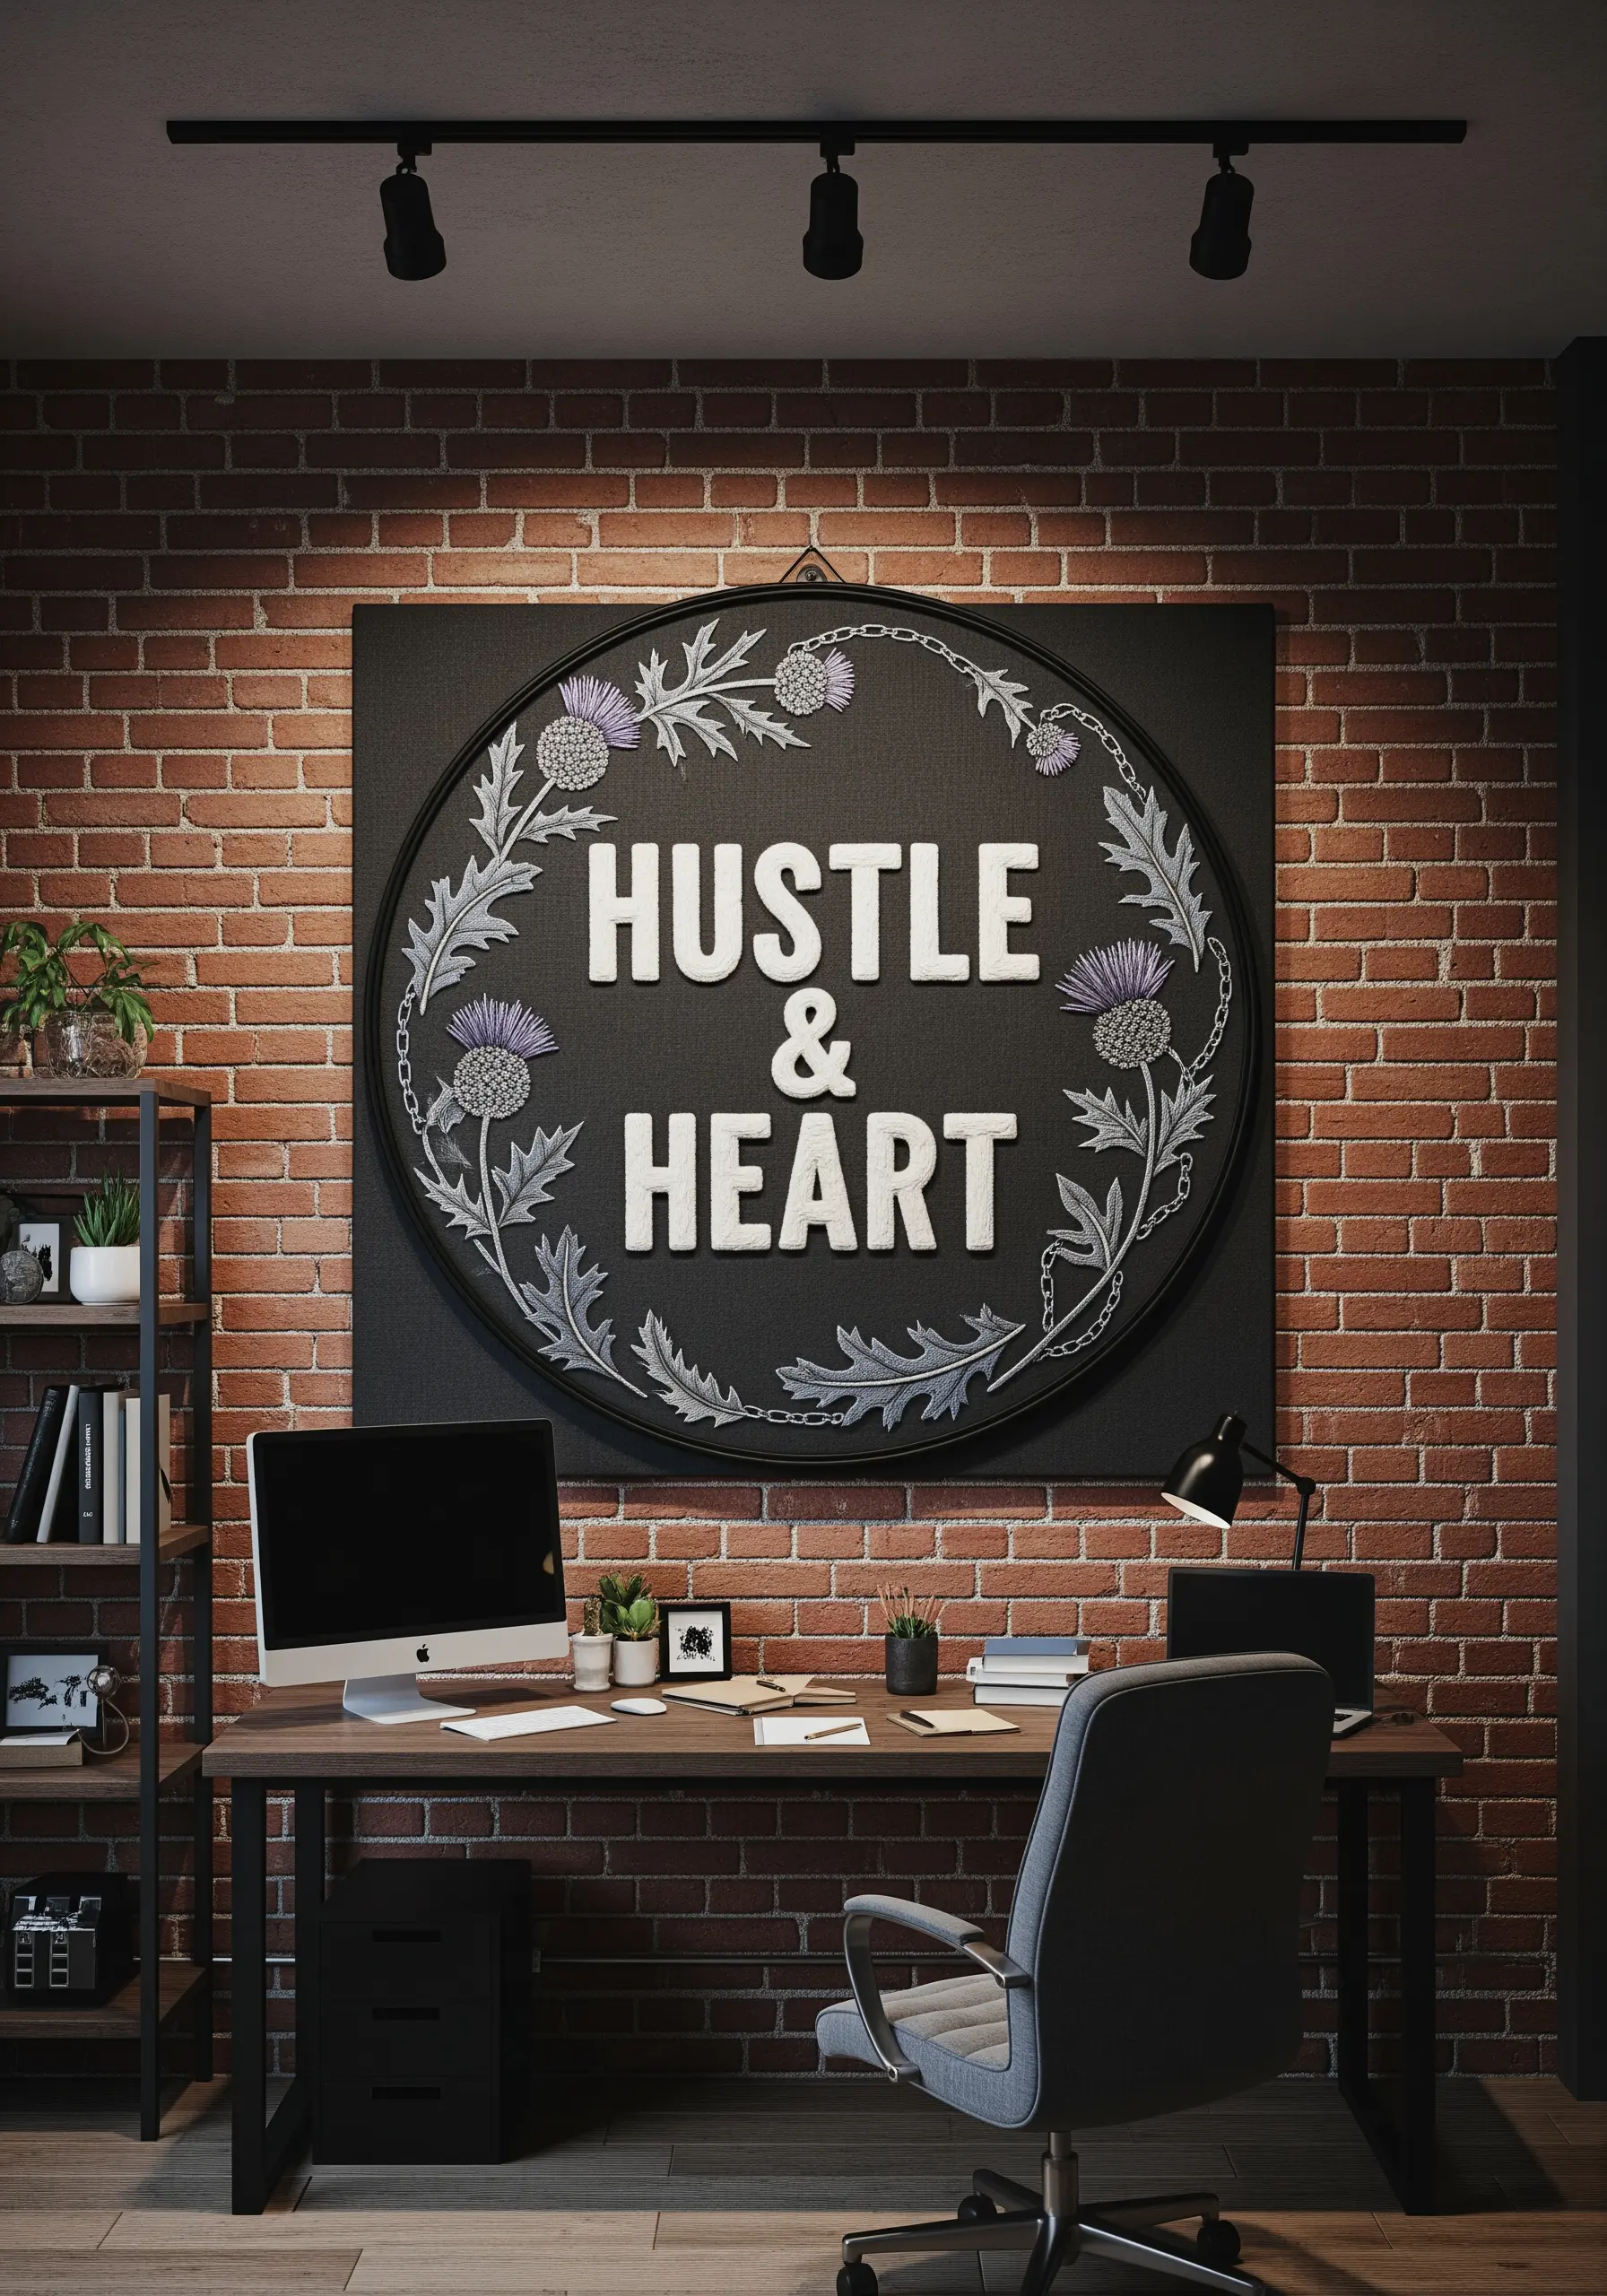
13. Design Minimalist Motifs for Corporate Spaces

To create embroidery that fits a professional office environment, focus on clean lines, simple geometry, and a restricted color palette.
For each word, choose a single color family and create a small, abstract or geometric motif beneath it—no complex florals needed.
Use a crisp backstitch for the lettering to ensure readability from a distance.
This minimalist approach feels modern, intentional, and aligns with a professional aesthetic without sacrificing the handmade touch.
14. Frame Your Quote with a Rainbow Gradient
Transform a simple quote into a vibrant masterpiece by framing it with a full-spectrum floral border.
Plan your design by arranging your floss colors in rainbow order before you begin stitching.
Transition smoothly from one color to the next by slightly overlapping the motifs, allowing reds to blend into oranges, oranges into yellows, and so on.
This creates a visually stunning ombre gradient embroidery effect that is both joyful and meticulously organized.
15. Embrace Negative Space for Zen-Like Calm

In minimalist designs, the unstitched fabric is just as important as the thread.
To create this tranquil cherry blossom branch, focus on a single, elegant motif and leave ample negative space around it.
Use a whipped backstitch for the branch to give it a smooth, rounded quality, and place your French knot blossoms sparsely to mimic the delicate nature of a real branch.
This thoughtful composition, inspired by Japanese aesthetics, turns a simple design into a meditative statement piece, perfect for a calm workspace.
16. Add Regal Authority with Metallic and Goldwork
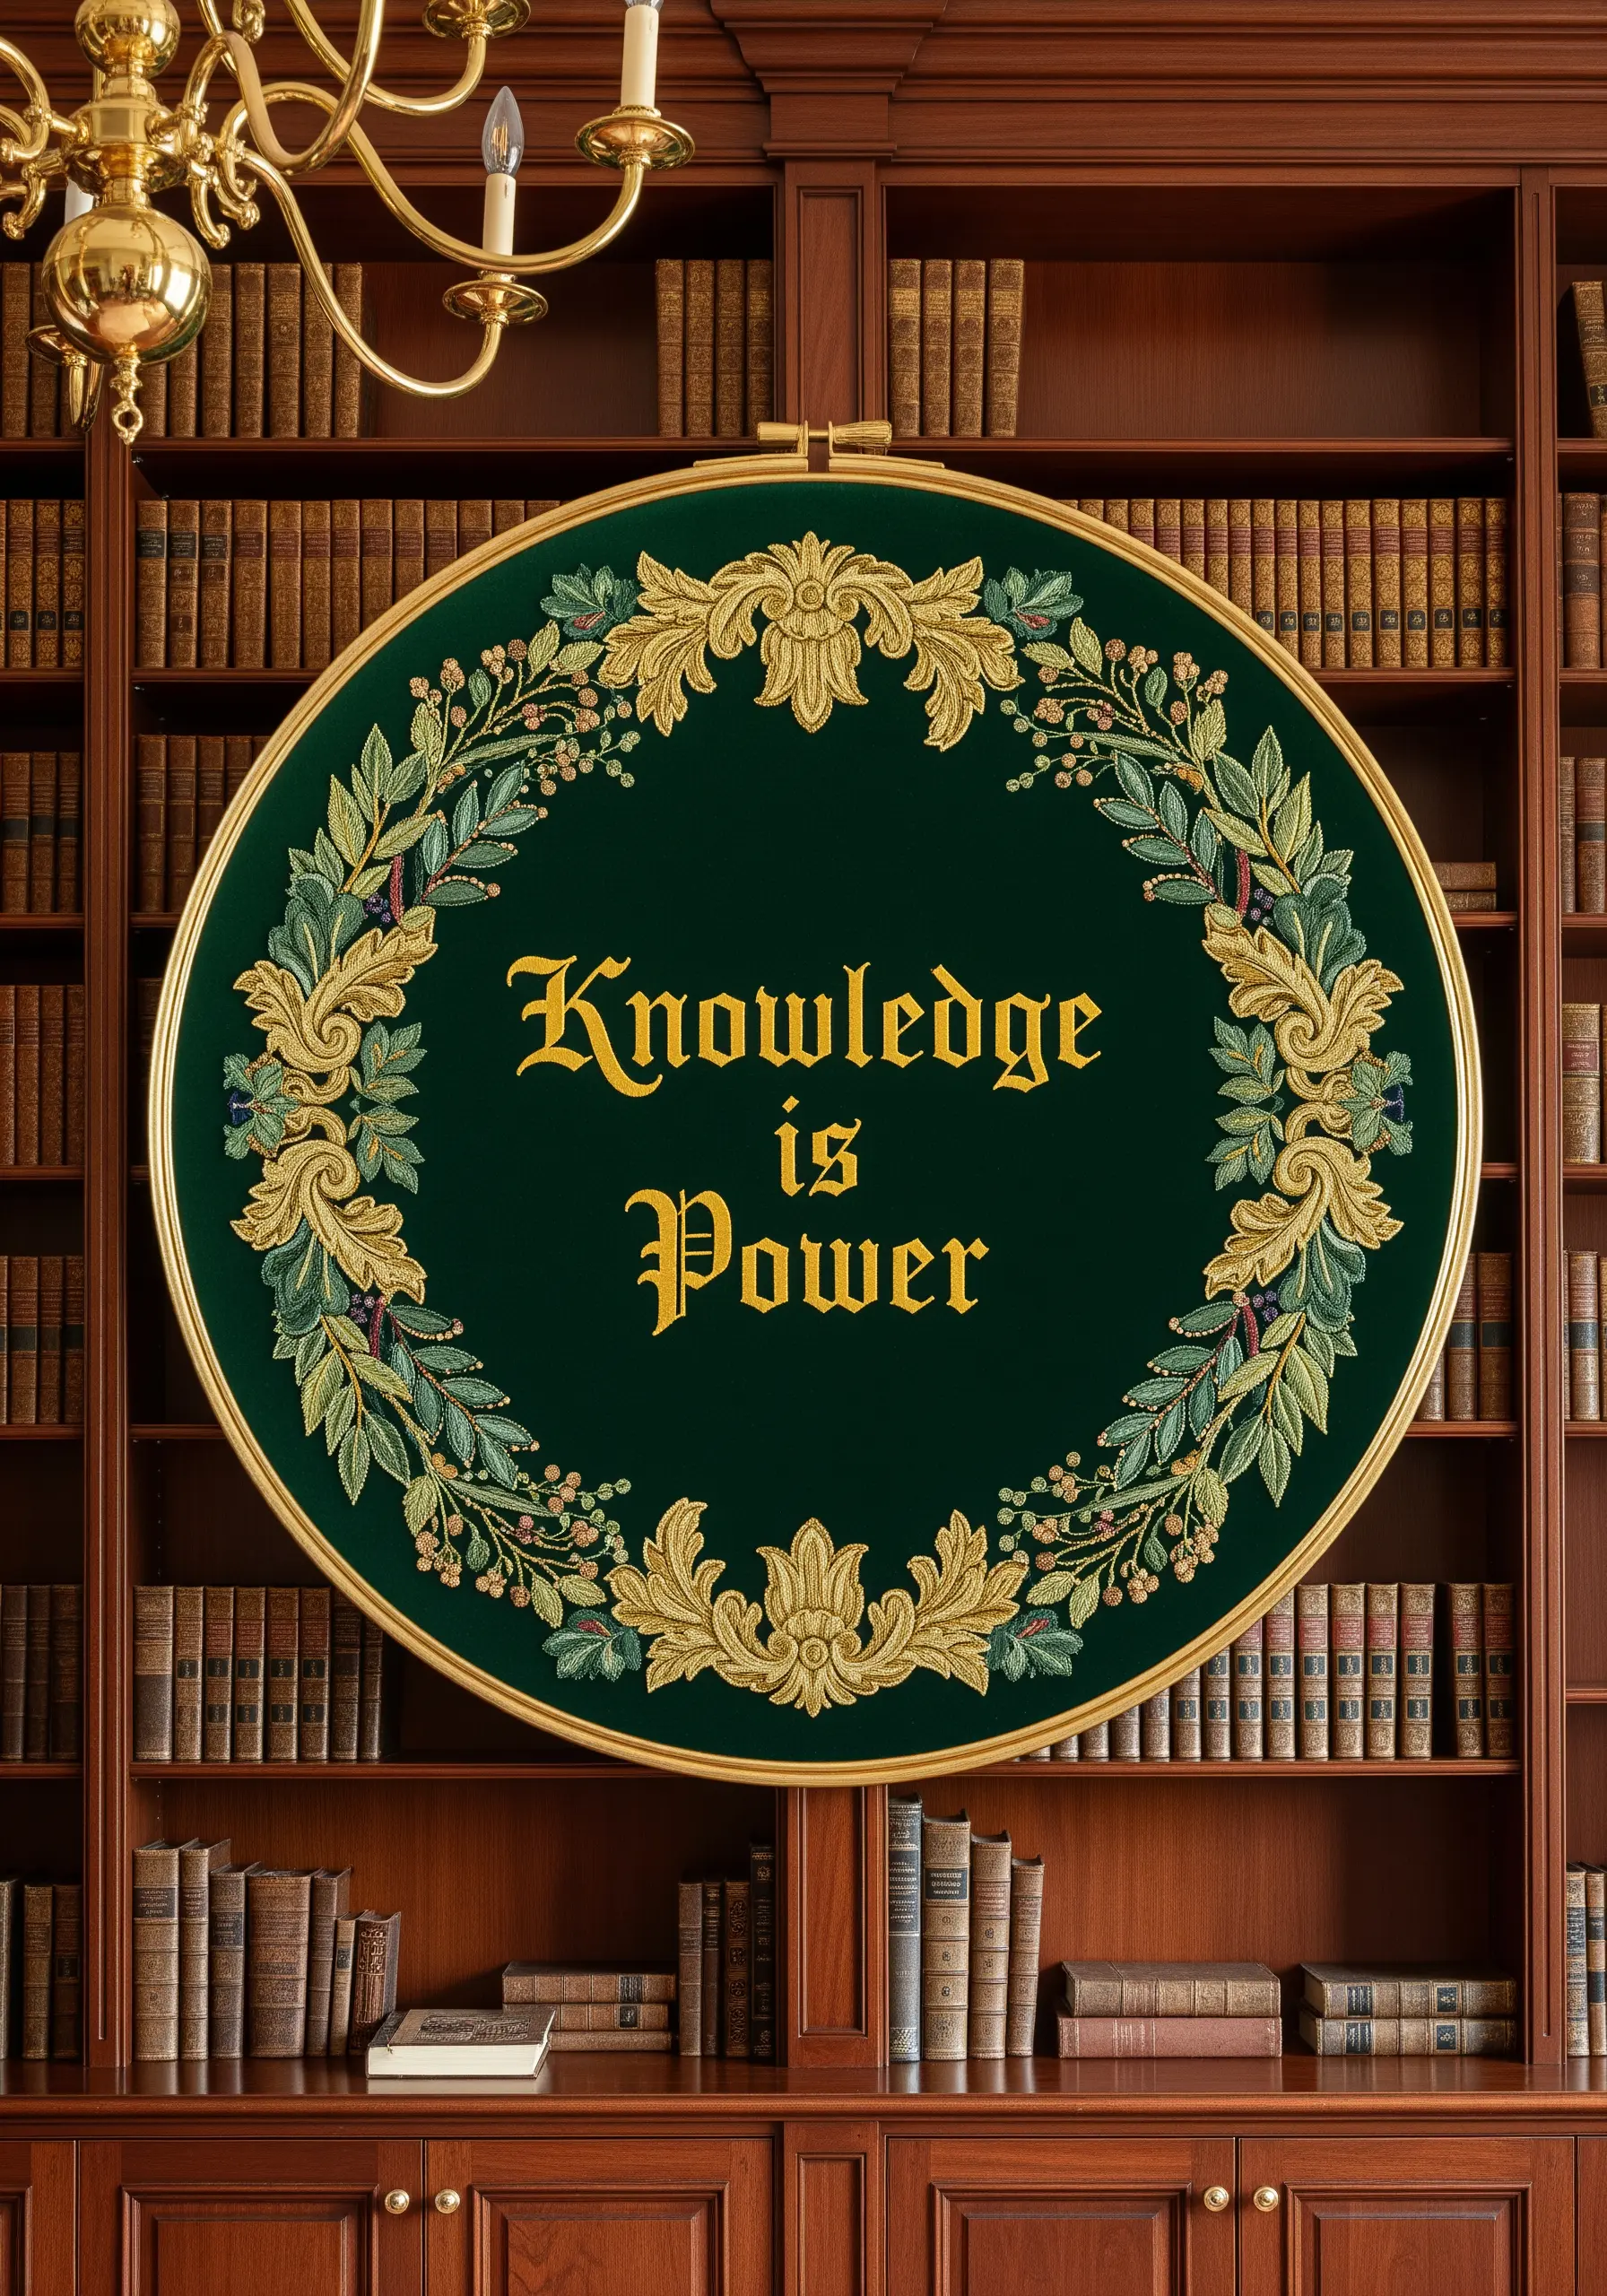
Evoke a sense of tradition and importance by incorporating classical motifs and metallic threads.
Use a rich, dark green fabric as your base to make gold and champagne-colored threads stand out.
For the ornate acanthus leaves, try couching—laying down a thicker metallic thread and tacking it into place with a finer, matching thread. This creates perfectly smooth, shimmering curves.
This technique adds a touch of luxury and gravitas, ideal for a traditional study or library.
17. Create Floating Illusions on Tulle
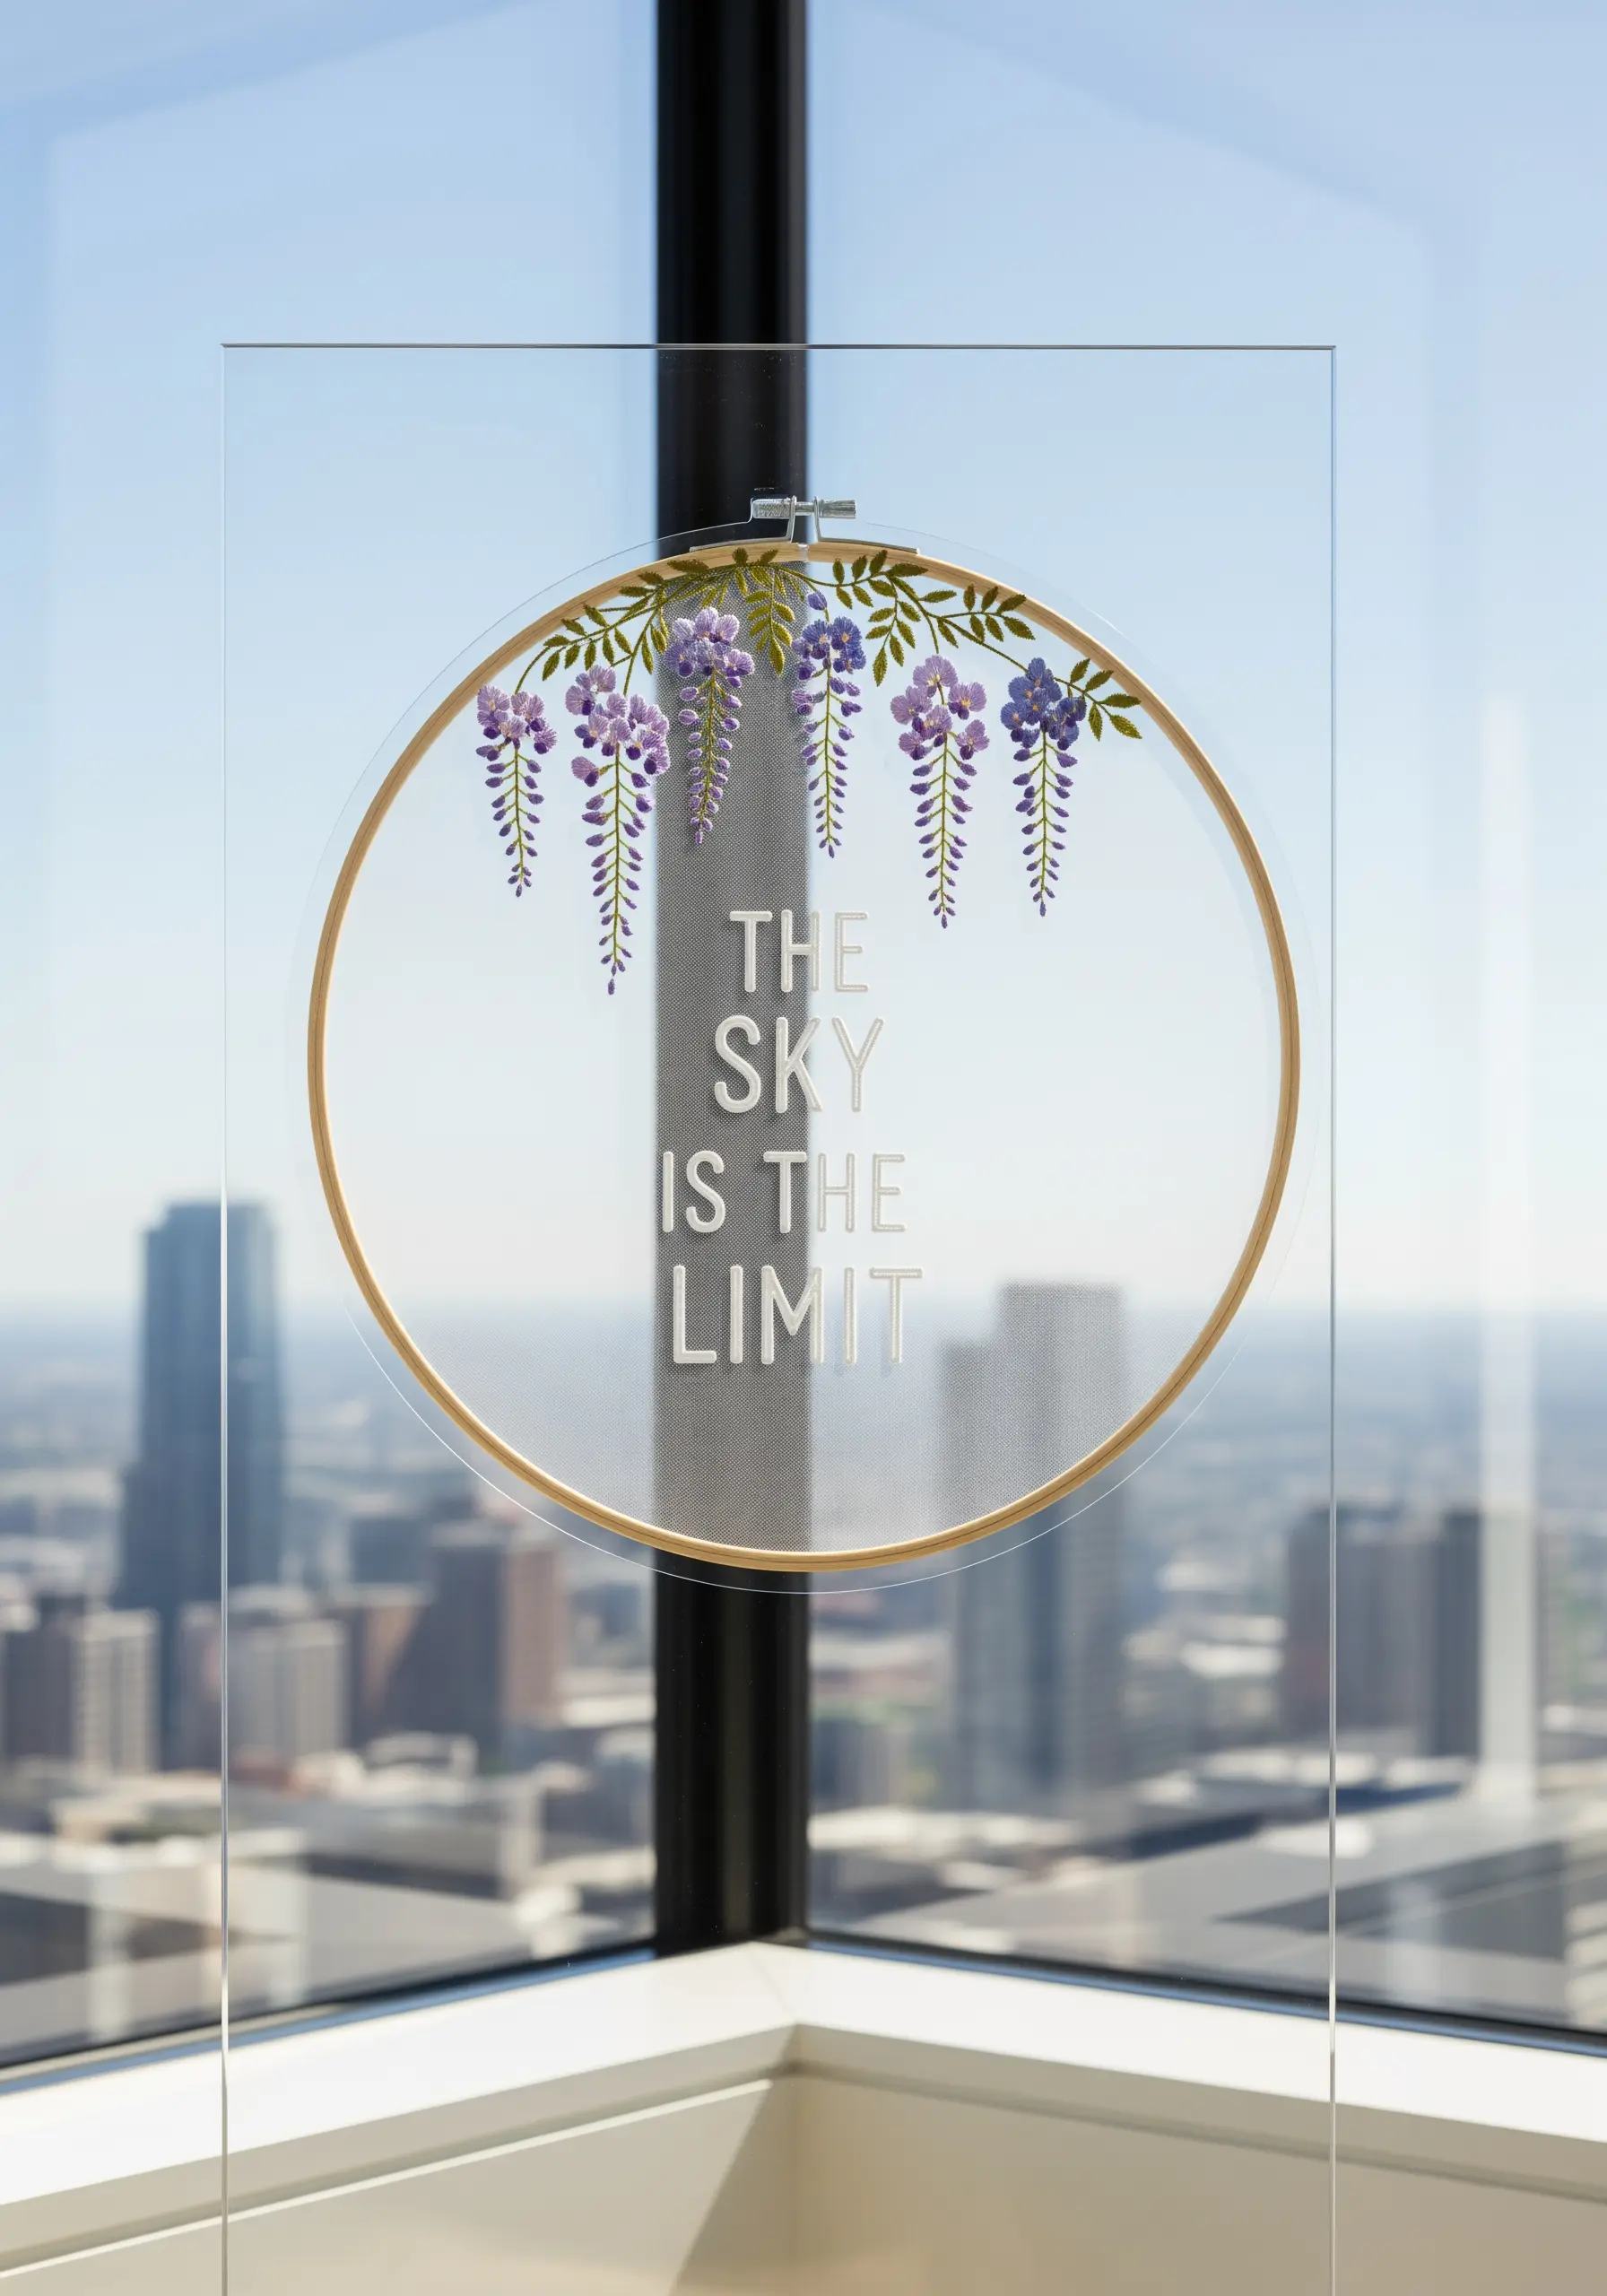
Stitching on sheer fabric like tulle or organza creates a magical, ethereal effect where your embroidery appears to float in mid-air.
To do this successfully, hoop your tulle with a layer of water-soluble stabilizer. Stitch your design as usual, piercing through both layers.
When you are finished, simply rinse the piece in warm water to dissolve the stabilizer, leaving only your threadwork behind.
The resulting transparency is perfect for hanging in a window where light can pass through the design.
18. Craft a Dense Meadow with Micro-Florals

To create a lush, miniature garden border, the key is variety and density.
Use a wide assortment of tiny stitches—single lazy daisies for petals, French knots for buds, and tiny straight stitches for leaves—and pack them closely together.
Vary the height and color of each tiny flower to build layers of texture and create the illusion of a deep, sprawling meadow.
This technique requires patience, but the result is an incredibly detailed and charming piece that invites closer inspection.
19. Frame Your Work with Unexpected Embellishments
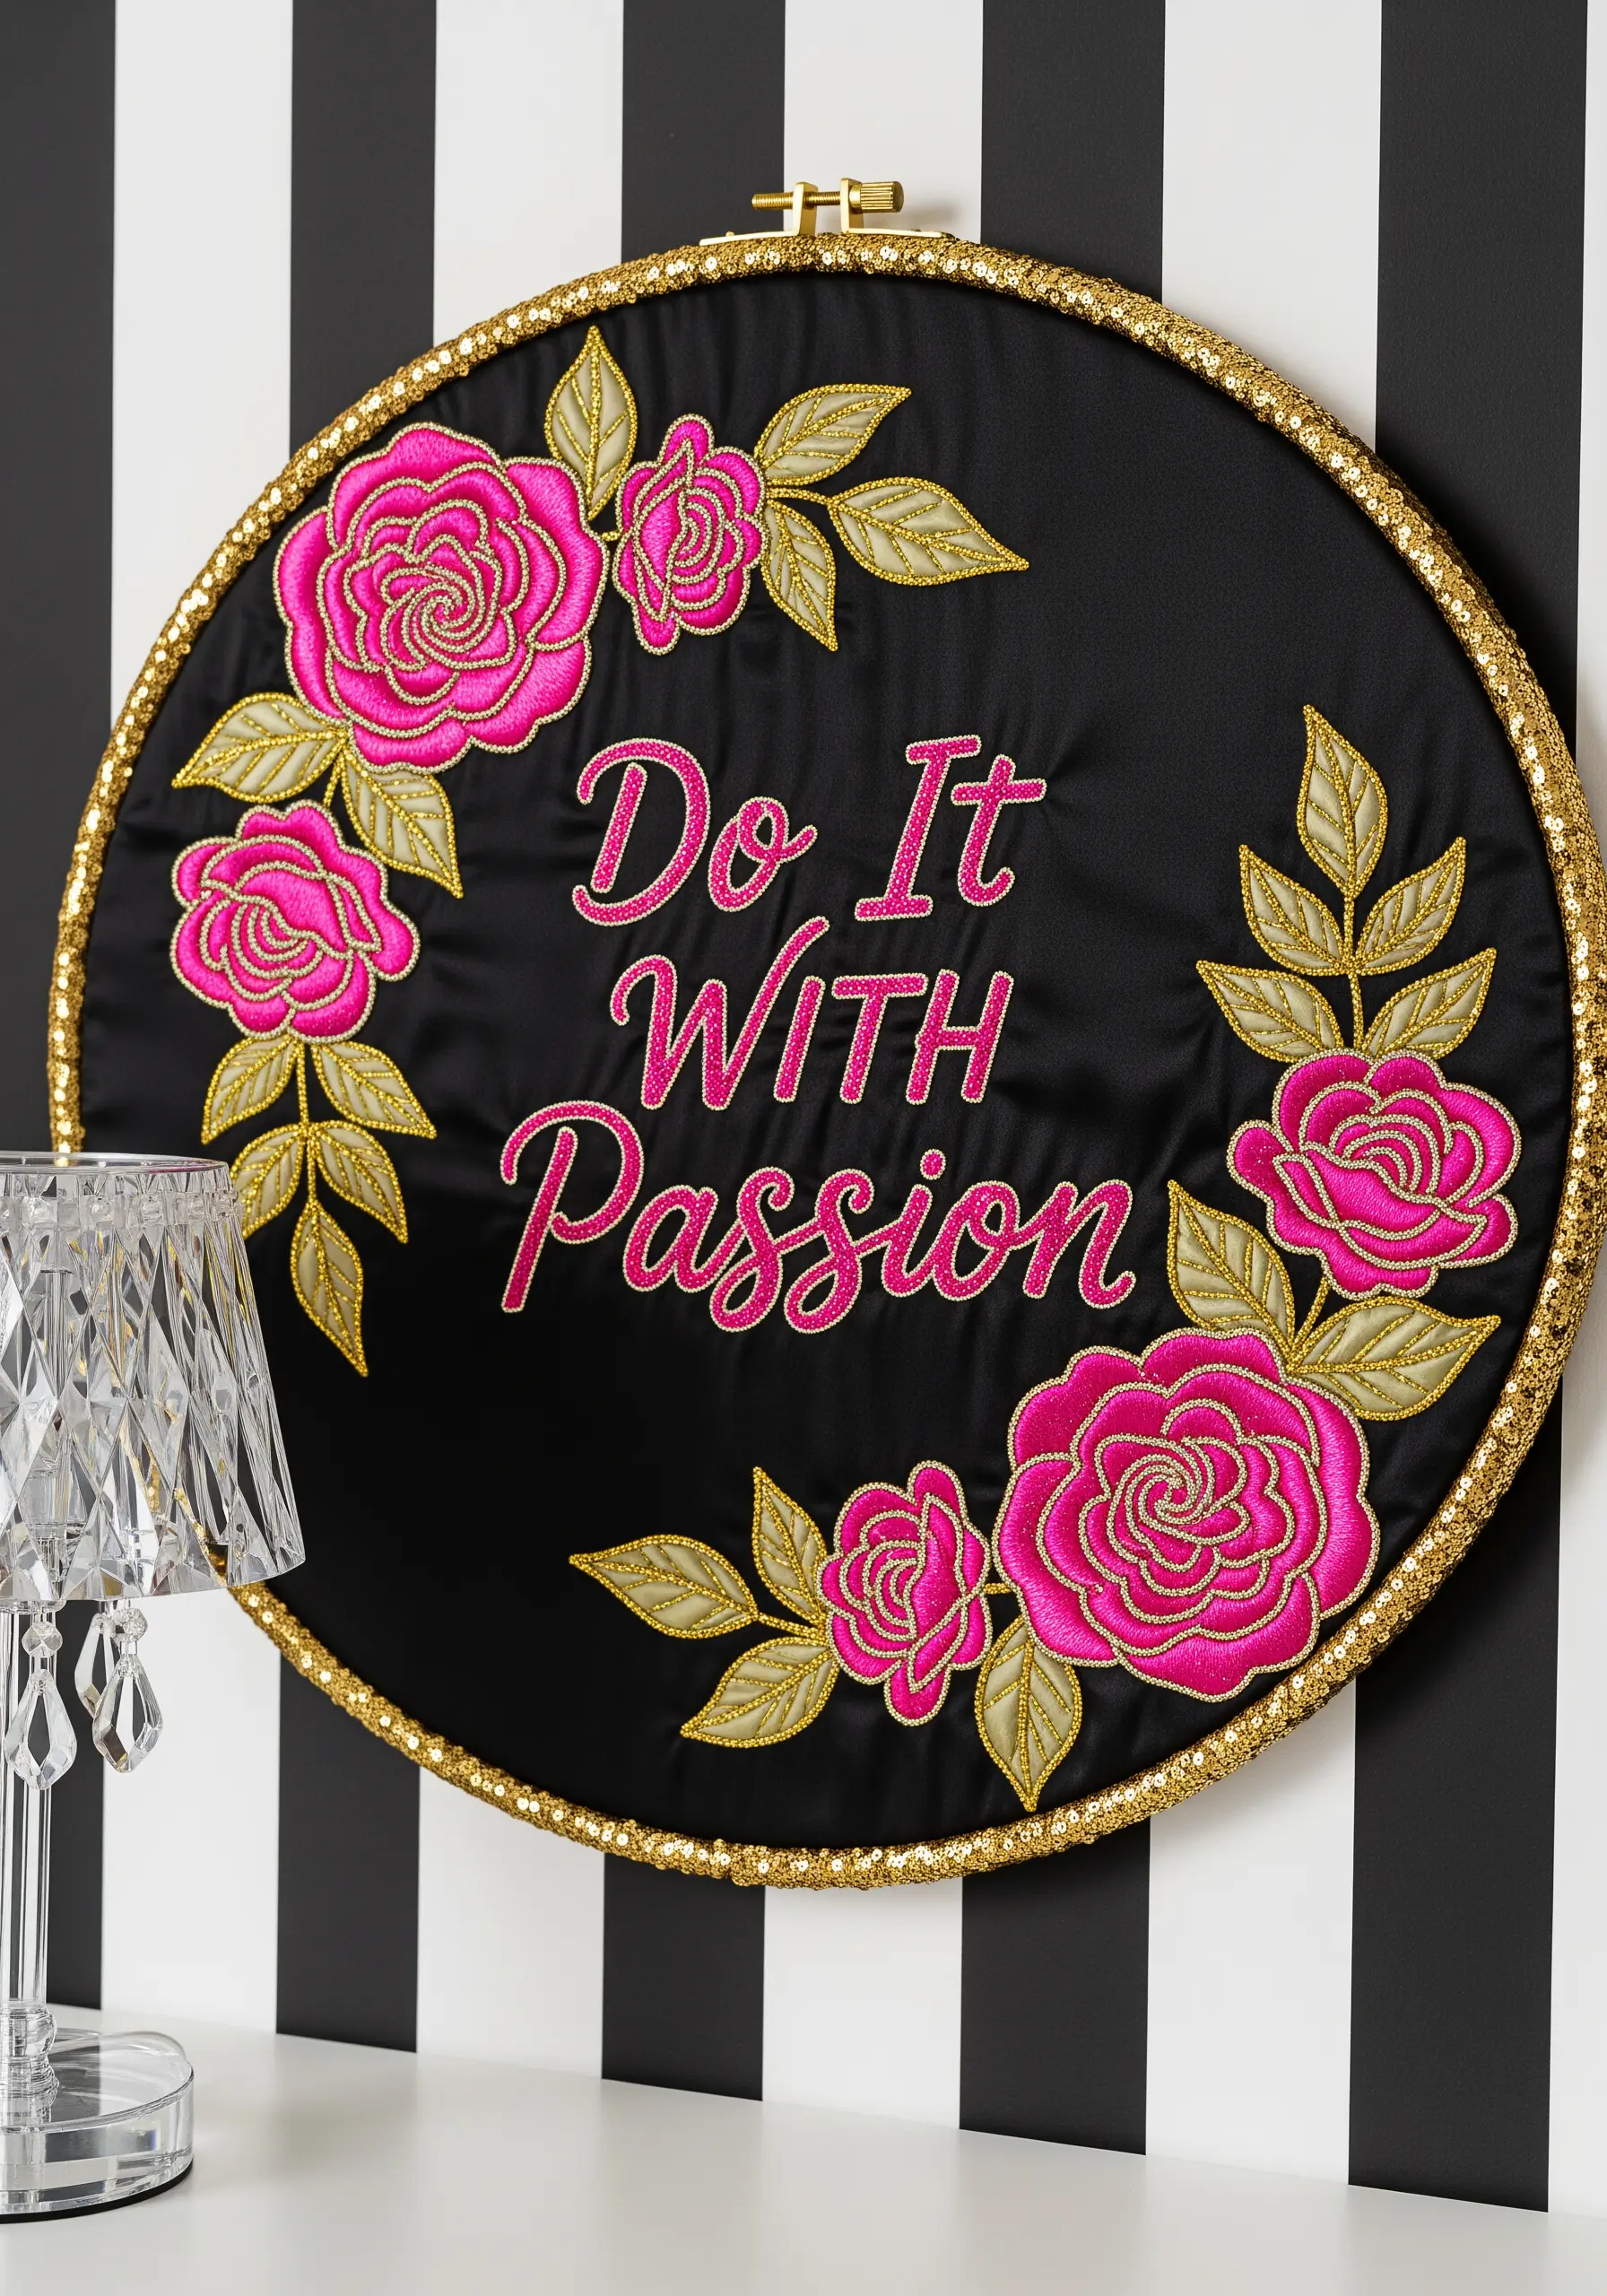
Elevate a finished piece by adding a final, glamorous touch directly to the hoop itself.
After your embroidery is complete and secured in the hoop, apply a trim of sequined ribbon around the outer edge using a strong fabric glue.
This not only adds sparkle and a high-fashion feel but also conceals the wooden frame, transforming the entire object into a more cohesive and polished art piece.
It’s a simple, no-sew way to add a touch of maximalist glamour.
20. Paint with Thread to Illustrate a Pun

Bring a clever phrase to life by using thread to visually interpret the words.
For “Seas the Day,” use a variegated blue thread to stitch the word “Seas” in a wavy, water-like font, emphasizing the pun.
Create texture in the lettering by using a whipped backstitch or a heavy chain stitch to give it body and movement.
Anchor the design with subtle coastal elements like tiny shell motifs stitched with seed beads or single-strand floss.
21. Embrace Retro Textures with Chunky Yarn

Capture a vintage 1970s vibe by swapping fine embroidery floss for chunky yarn or macrame cord.
Create a thick, braided border using a plaited braid stitch, which works beautifully with thicker fibers.
For the lettering, use a padded satin stitch with yarn to create puffy, dimensional letters that have a soft, tactile quality.
Working on aida or burlap fabric provides a sturdy grid that can support the weight and thickness of the yarn.
22. Stitch with Architectural Precision
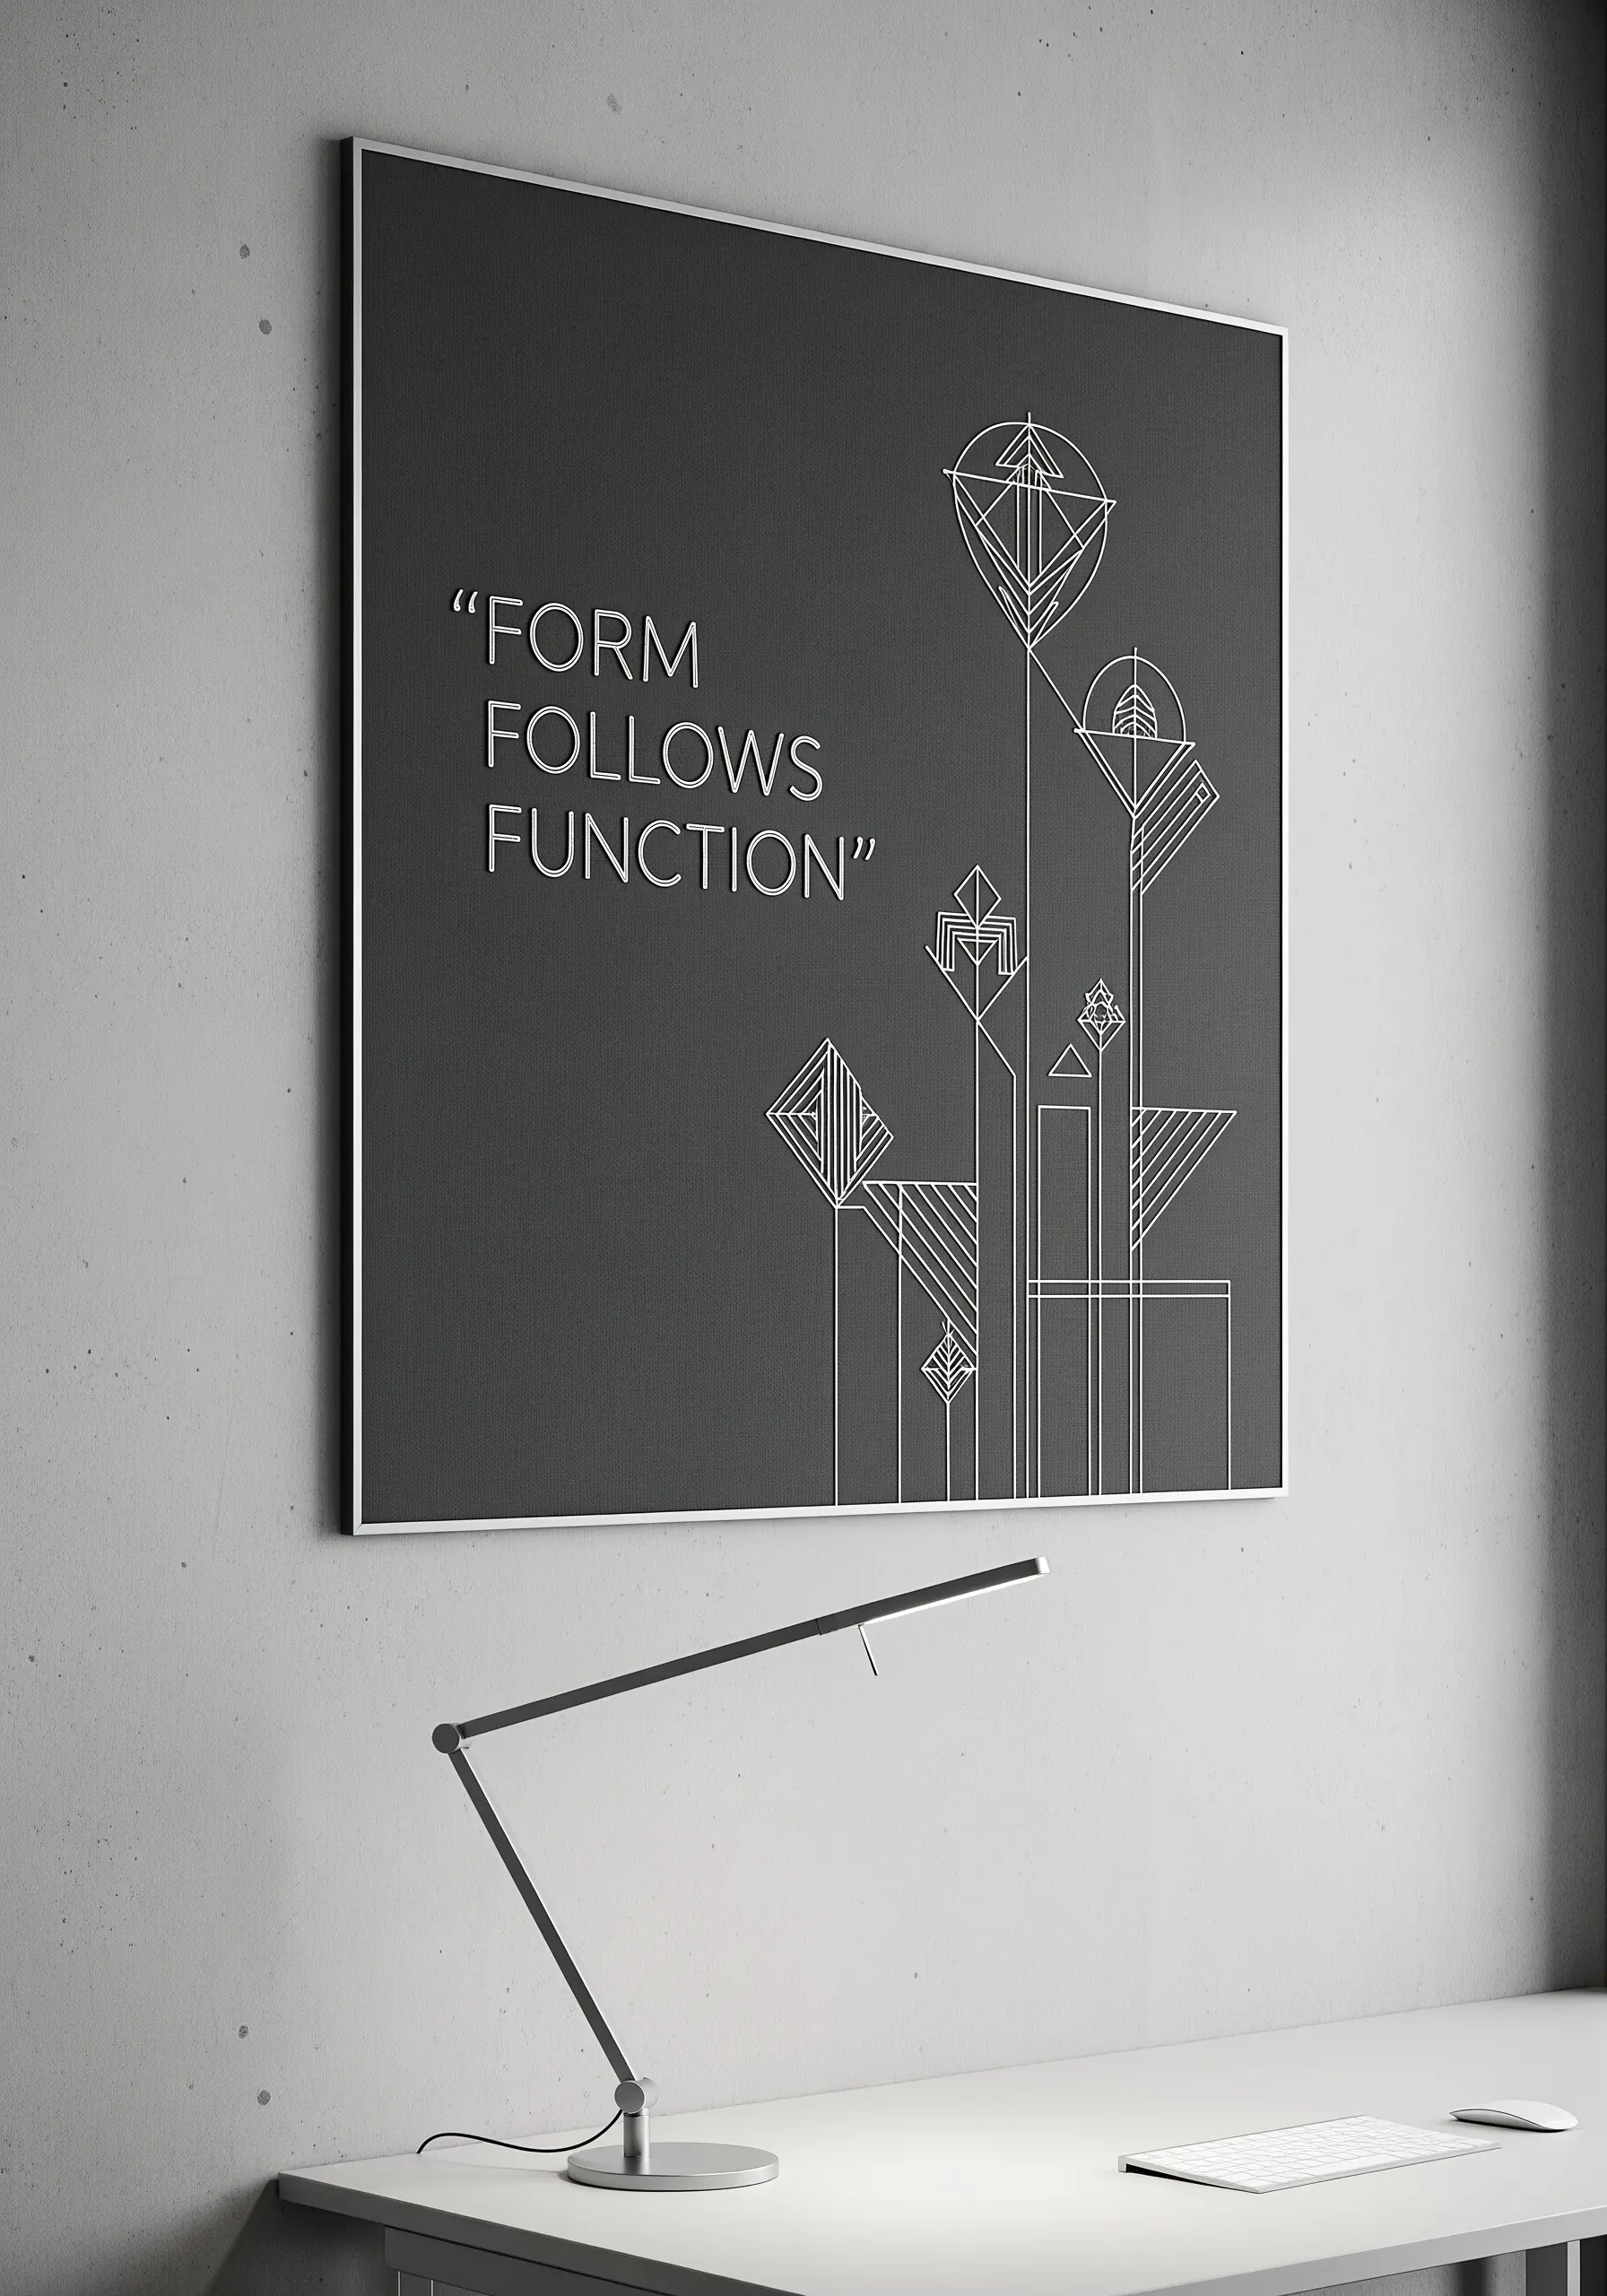
Translate the principles of design and architecture into your embroidery by focusing on clean lines and geometric forms.
Use a single color of thread on a contrasting background to emphasize shape and structure over color.
To achieve perfectly straight, crisp lines, use a stem stitch or a split stitch, which creates a more solid line than a standard backstitch.
This minimalist, deconstructed floral motif is perfect for a modern office or a designer’s workspace.
23. Add Dimension to Holiday Greenery

Make classic holiday motifs like holly and pine feel more dynamic by focusing on texture.
Create plump, three-dimensional holly berries by using bullion knots. The more you wrap the thread around the needle, the larger the berry will be.
For the pine needles, use slightly overlapping straight stitches in various shades of green to build up realistic layers and depth.
This combination of 3D and layered flat stitches makes the wreath feel lush and festive.
24. Go Maximalist with Mixed Media Layers

Embrace a “more is more” philosophy by combining embroidery, appliqué, and fabric embellishments in one vibrant piece.
Start with a boldly printed fabric as your canvas, and then layer on top of it. Create dimensional flowers from folded ribbon, fabric yo-yos, and beads.
Use gold chain stitch to add shimmering outlines that help define shapes against the busy background.
The key to successful maximalism is to vary textures and sheens, creating a rich visual feast.
25. Convey Calm with Minimalist Lavender Sprigs

Sometimes, the most powerful statement is the most simple.
To create a design that genuinely feels calming, use a light touch and an uncluttered composition.
For these lavender sprigs, stitch the stems with a delicate stem stitch and form the buds with a series of tiny, angled straight stitches or French knots.
Using a serene color palette of soft violet and sage green on a clean, white background enhances the tranquil mood. This is one of the most calm, cozy stitching ideas for a peaceful space.
26. Recreate the Look of a Botanical Sketch
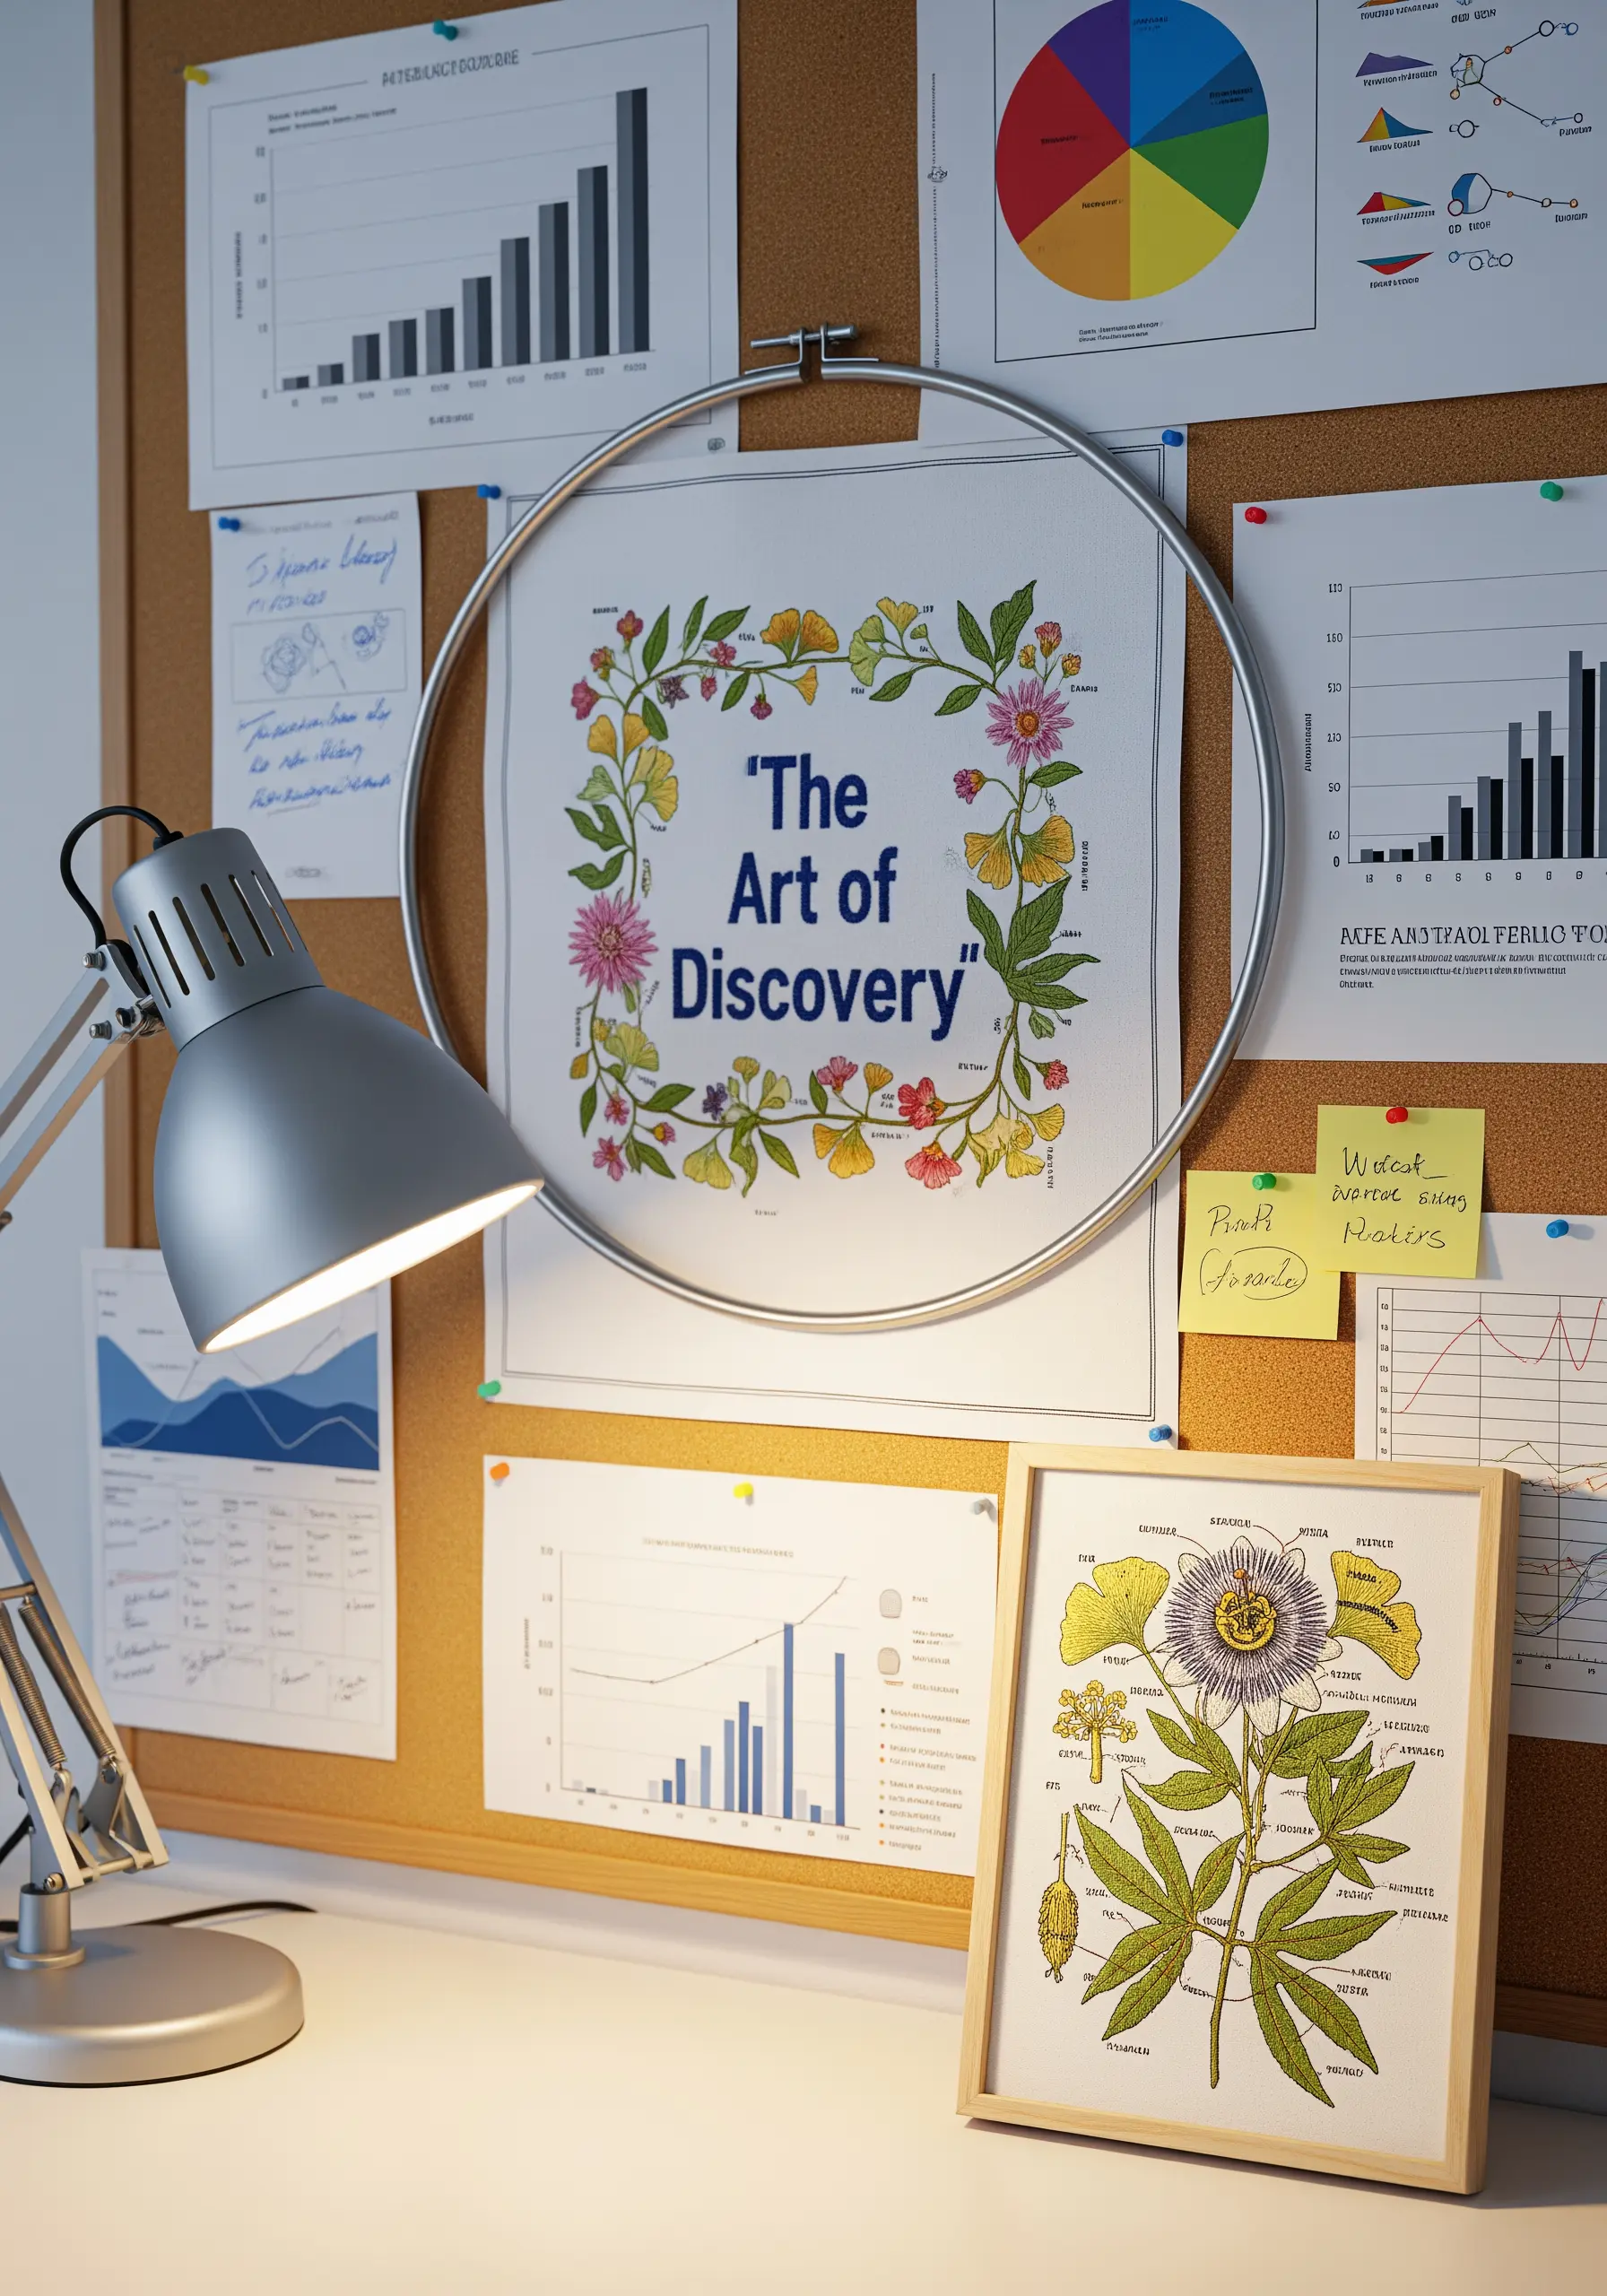
Capture the precise, scientific beauty of a botanical illustration in thread.
Use a single strand of dark thread (black or sepia) to outline your floral and leaf shapes with a fine split stitch. This mimics the look of an ink pen.
Then, fill in areas with color using sparse, directional seed stitches or long-and-short stitches, as if you were adding a watercolor wash.
Adding small, handwritten labels completes the aesthetic, turning your hoop into a page from a naturalist’s journal.
27. Make Lettering Pop on Patterned Fabric
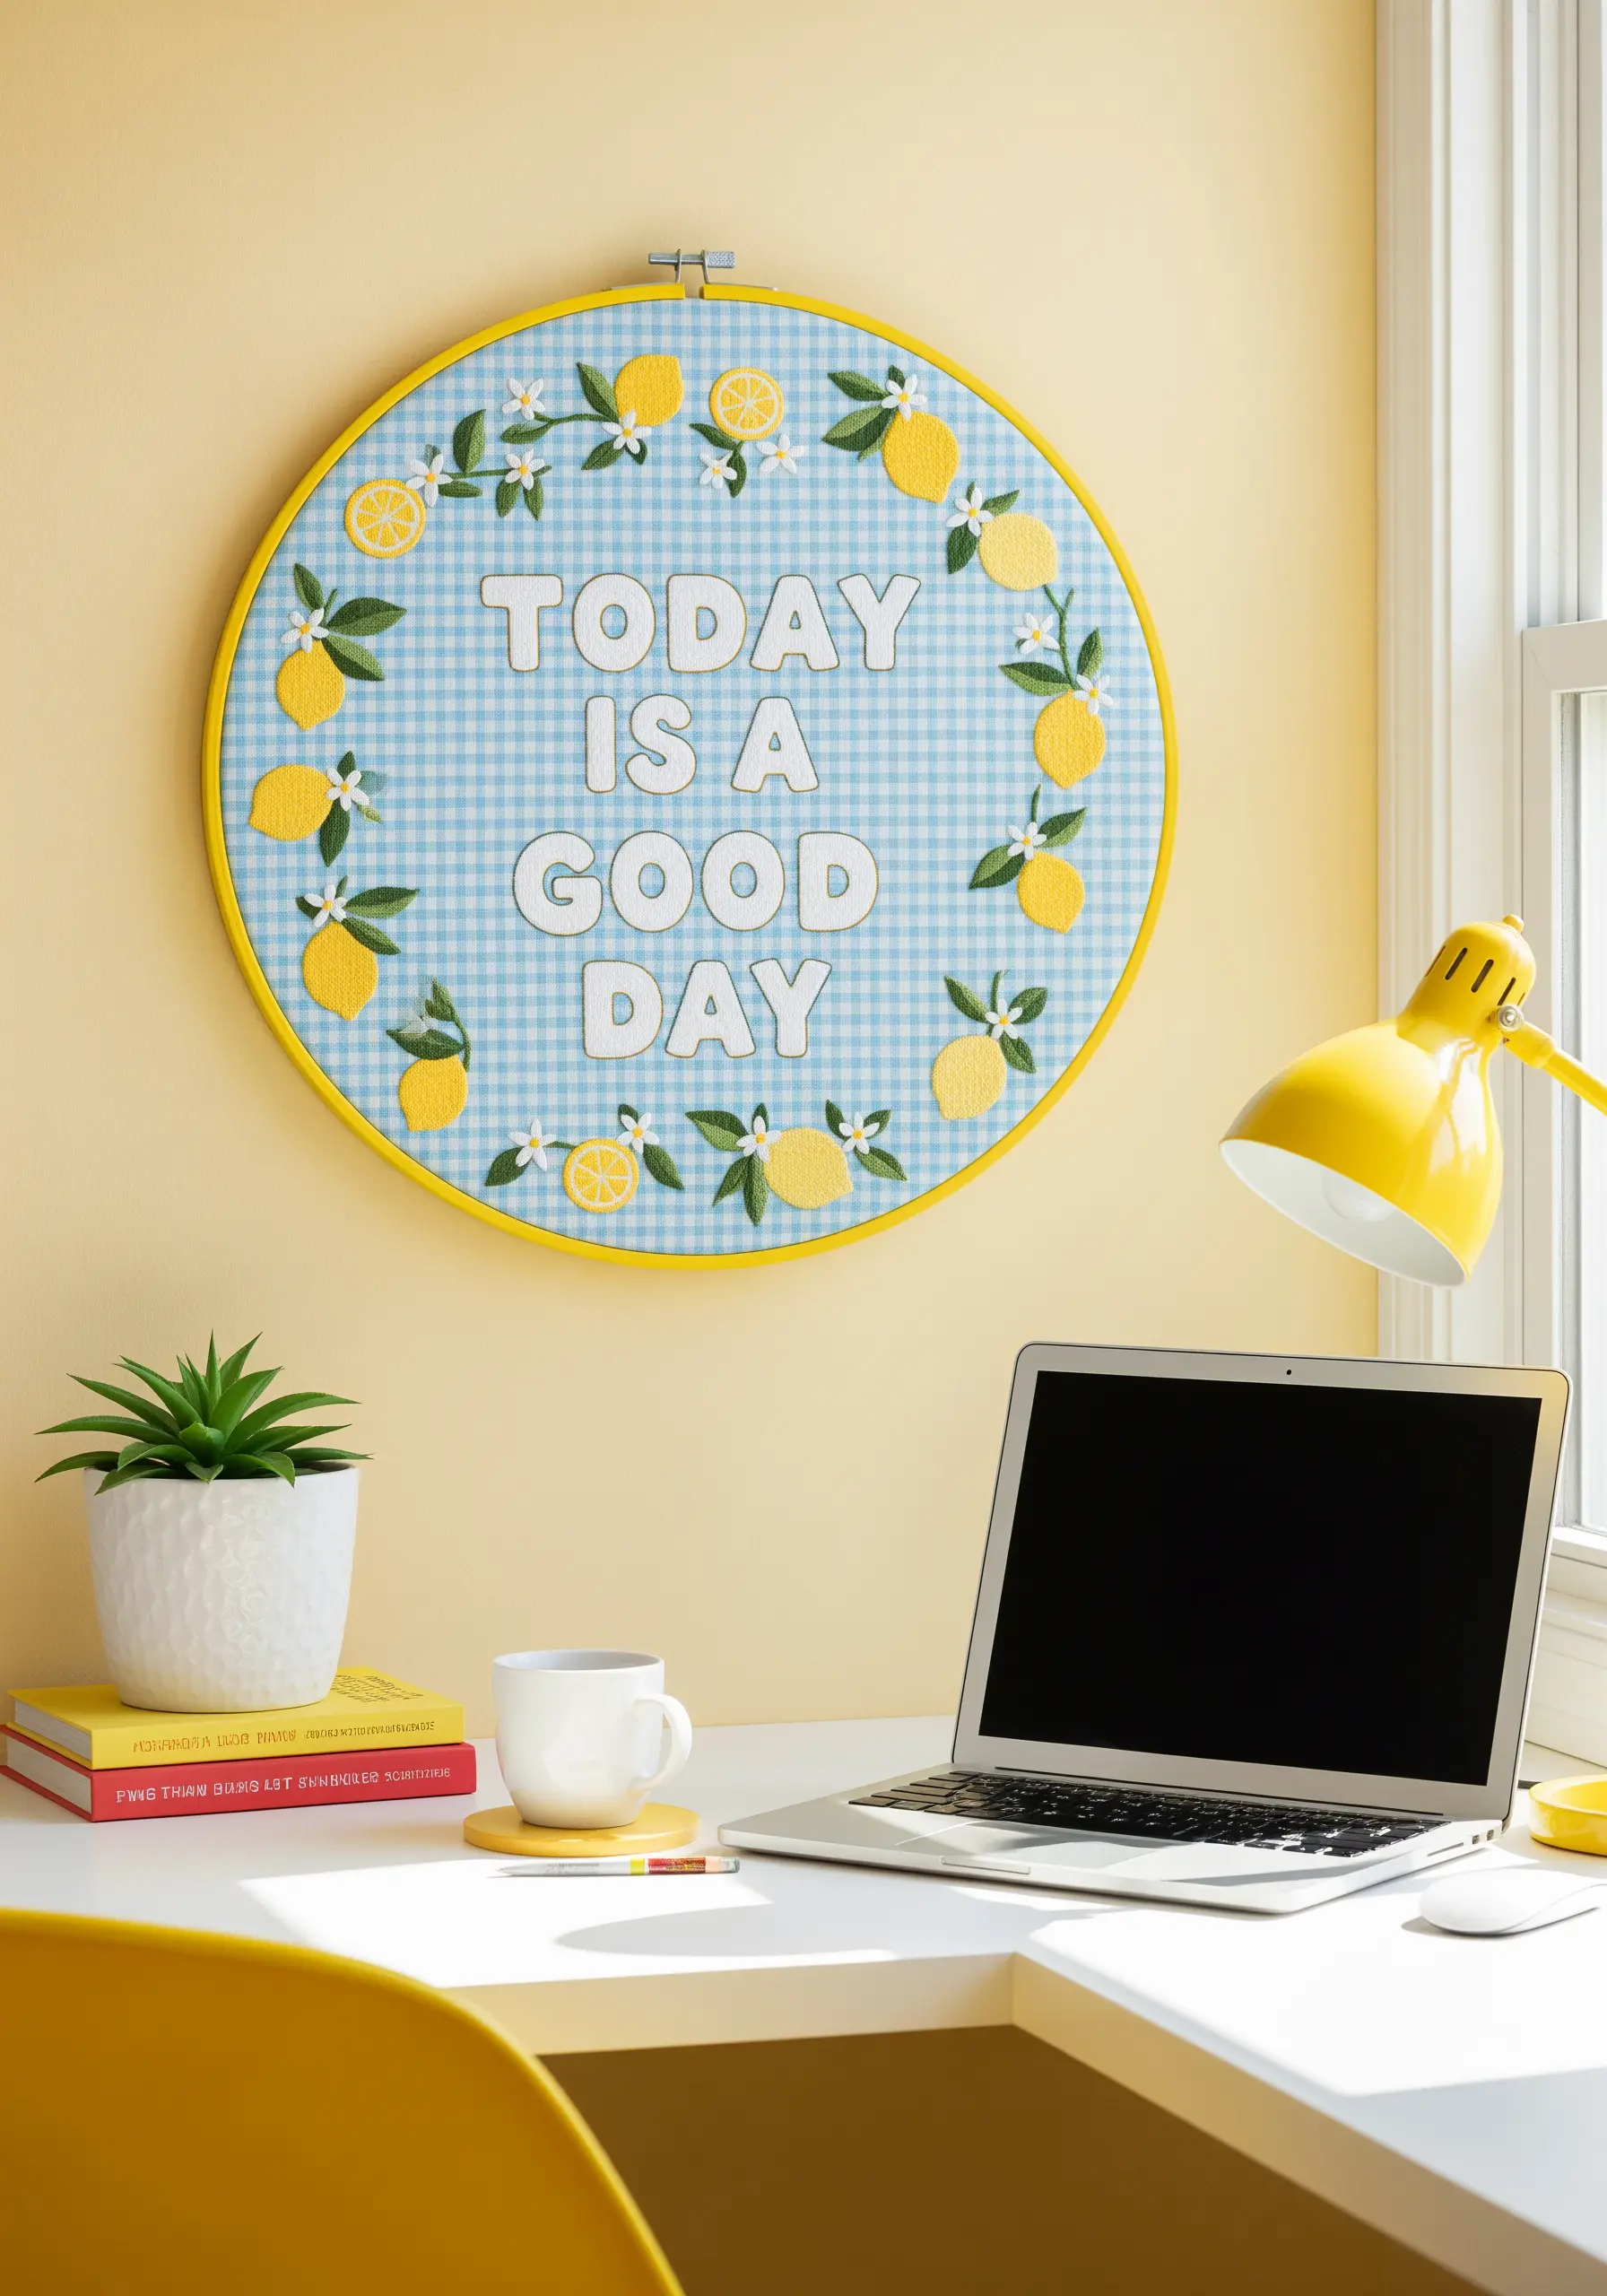
Stitching on a busy background like gingham can be challenging, but it adds incredible charm when done correctly.
To ensure your letters are readable, use a padded satin stitch. First, create an underlayer of small straight stitches within the outline of your letters, then cover it with your final satin stitch.
This padding raises the letters off the fabric, giving them dimension and preventing the pattern from showing through.
Outlining the padded letters in a dark color further enhances their definition.
28. Design Dramatic, Asymmetrical Compositions

Create a sense of movement and organic elegance by breaking away from perfectly symmetrical wreaths.
Concentrate your most detailed and colorful flowers—like these deep purple irises—in specific clusters, and let lighter, airier foliage trail off asymmetrically.
Incorporate hanging elements like a fuchsia or wisteria that physically drip down from the main composition, adding a dramatic, cascading effect.
This approach makes the design feel less like a static frame and more like a living, growing arrangement.
29. Use Heavy Chain Stitch for Textured Lettering

For bold, dimensional text that feels playful and substantial, the heavy chain stitch is an ideal choice.
Instead of filling your letters with satin stitch, work rows of heavy chain stitch back and forth. This creates a beautifully braided texture that is both tactile and visually interesting.
It fills space much faster than satin stitch and is more forgiving of imperfections.
Using a variegated or multi-toned thread can further enhance the braided, interwoven effect, adding subtle color depth to each letter.


