
Embroidery is more than a craft; it’s a way to hold a moment still. When you introduce pressed flowers into your work, you’re not just adding color or texture—you are preserving a piece of a season, a memory from a garden, or a walk you once took.
This is where your embroidery transforms. The delicate, paper-thin quality of a dried petal against the soft, raised line of a thread creates a conversation in texture. It asks you to slow down, to handle these natural elements with care, and to think like a curator as much as a stitcher.
Here, you’ll find techniques that honor both the flower and the thread. You’ll learn how to secure fragile botanicals with stitches so fine they disappear, how to build compositions that feel both intentional and wild, and how to turn a simple hoop into a piece of art that feels deeply personal and alive.
1. Create a Pansy Wreath with Couching Stitches
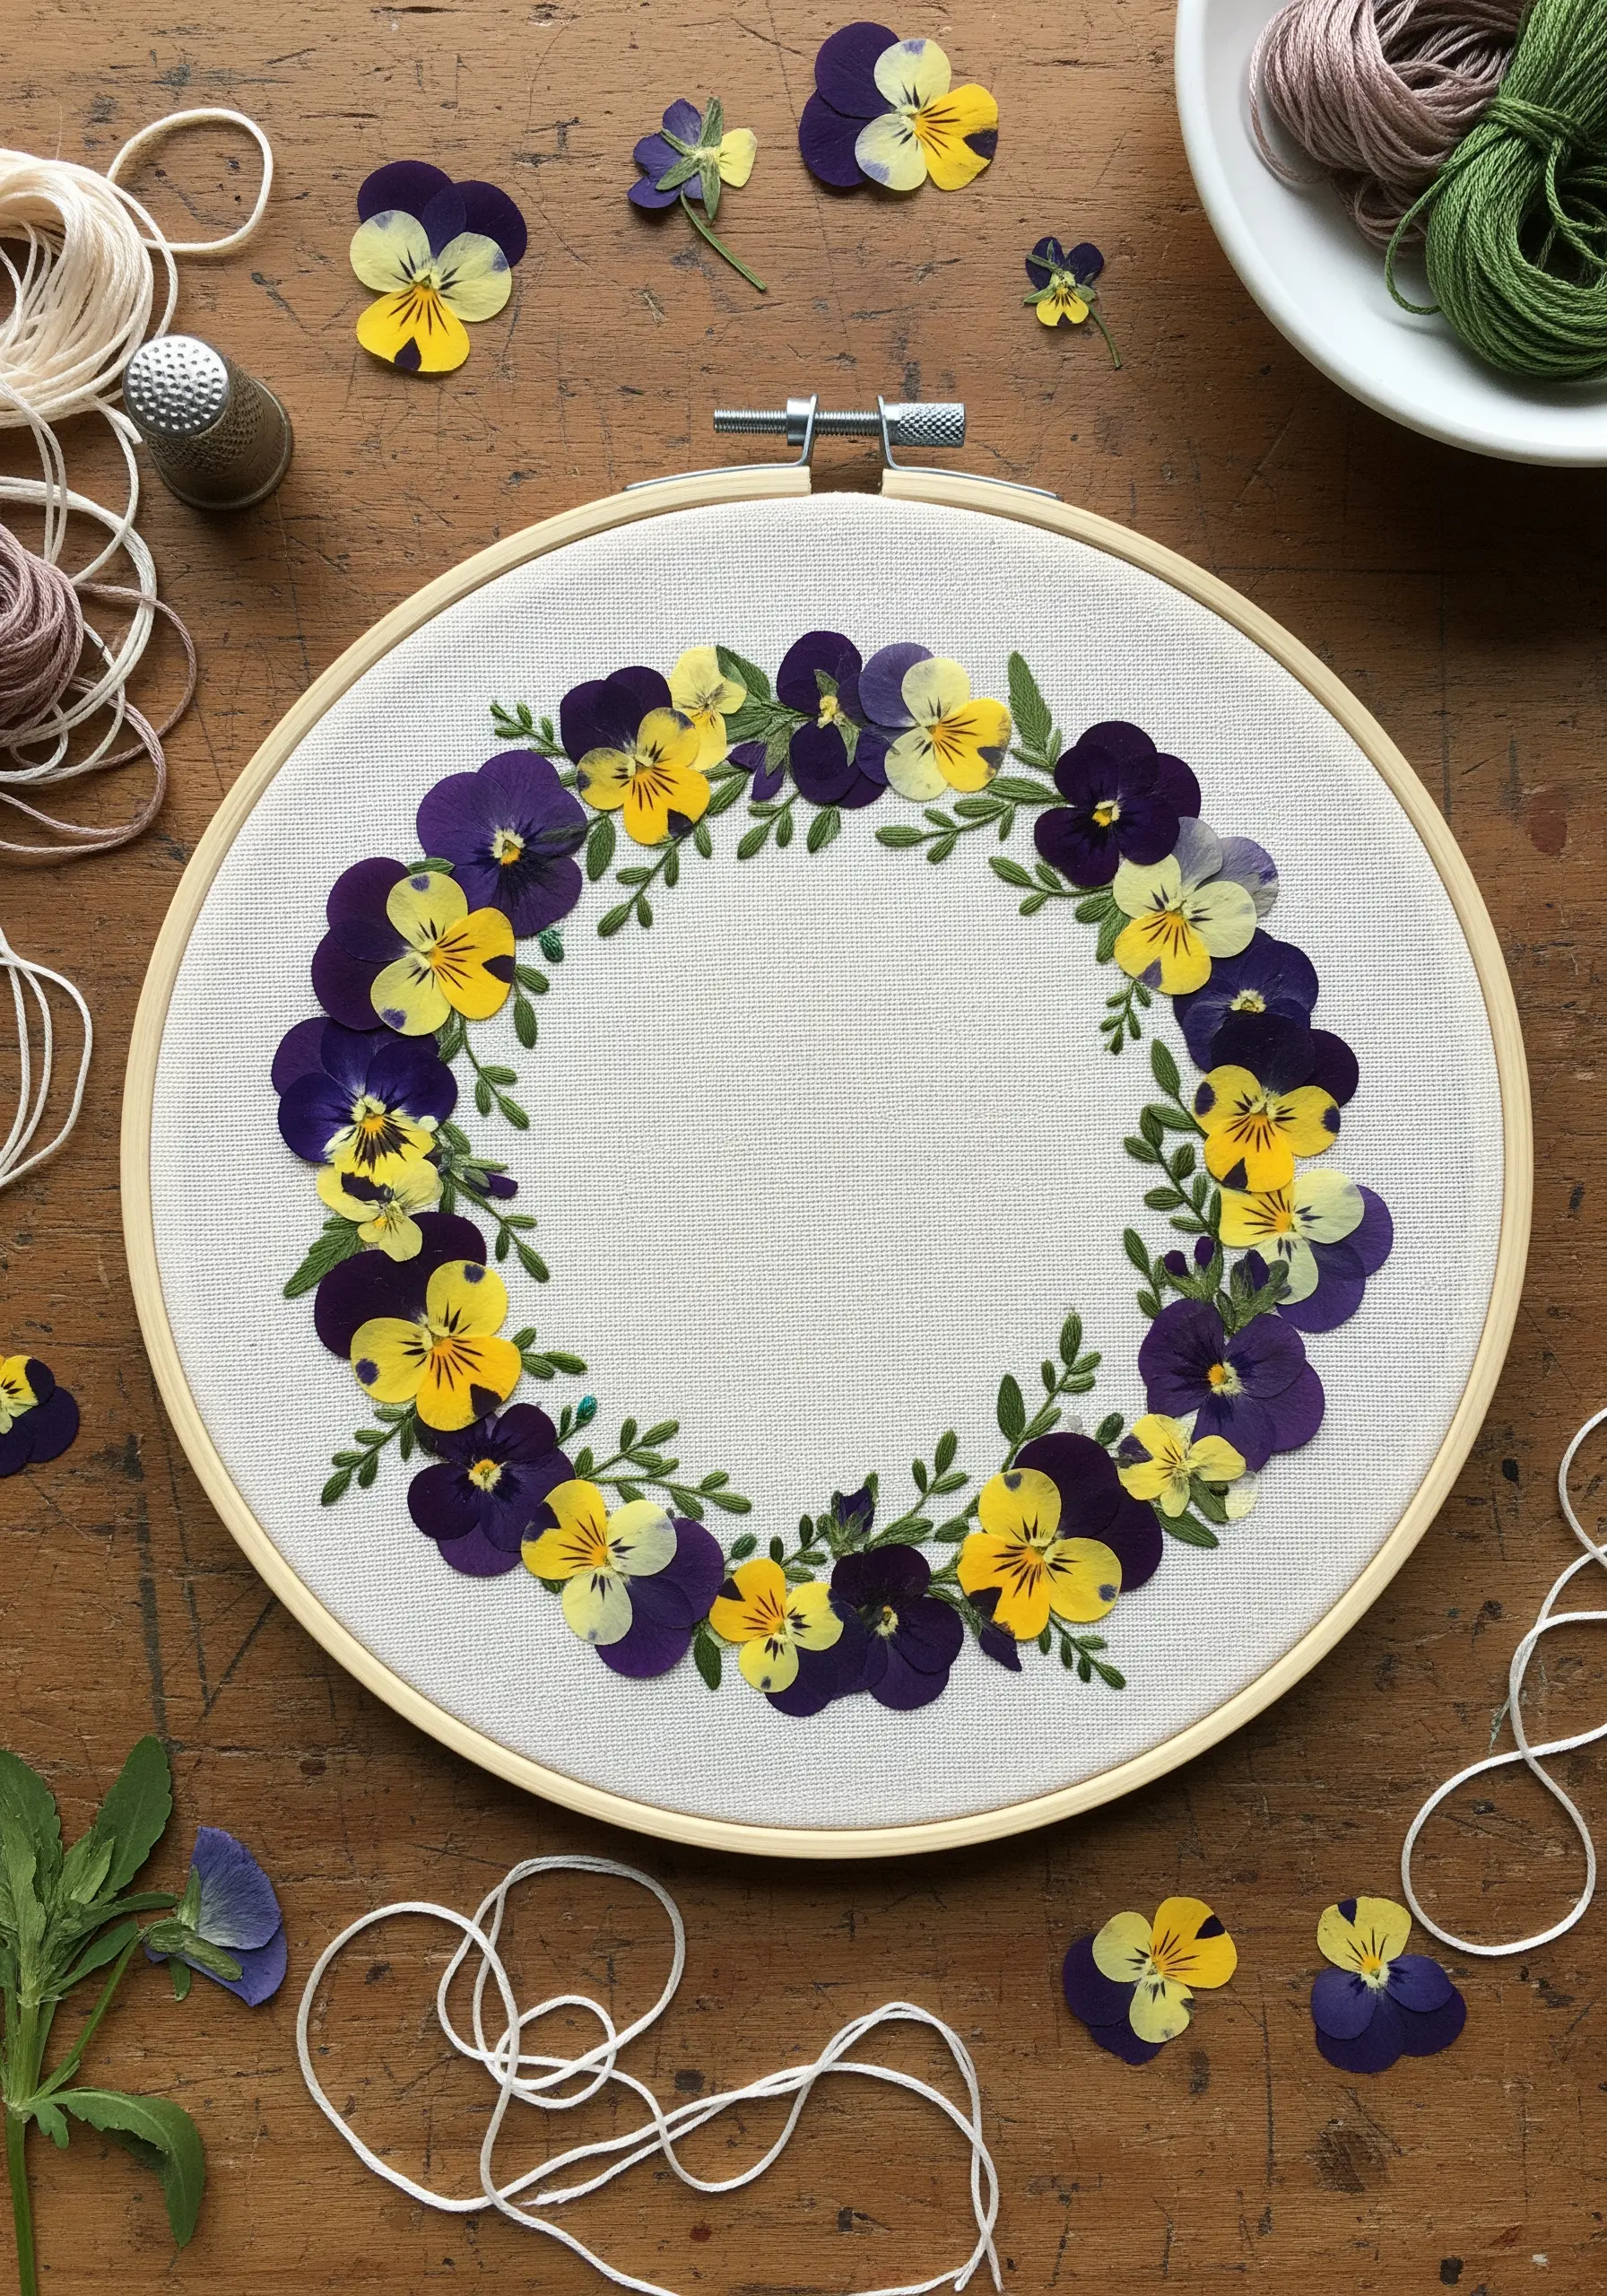
To secure delicate, paper-thin petals like pansies without piercing them, use a couching technique.
Lay your pressed flowers on the fabric first, arranging them into a wreath.
Then, take a single strand of thread that matches the petal’s edge and make tiny, almost invisible stitches over the flower to tack it down.
This method preserves the flower’s integrity and creates a more professional, secure finish than glue, making it perfect for handmade gifts.
Alternate the direction of the flowers to give the wreath a natural, dynamic sense of movement.
2. Suspend Botanicals in a Floating Frame
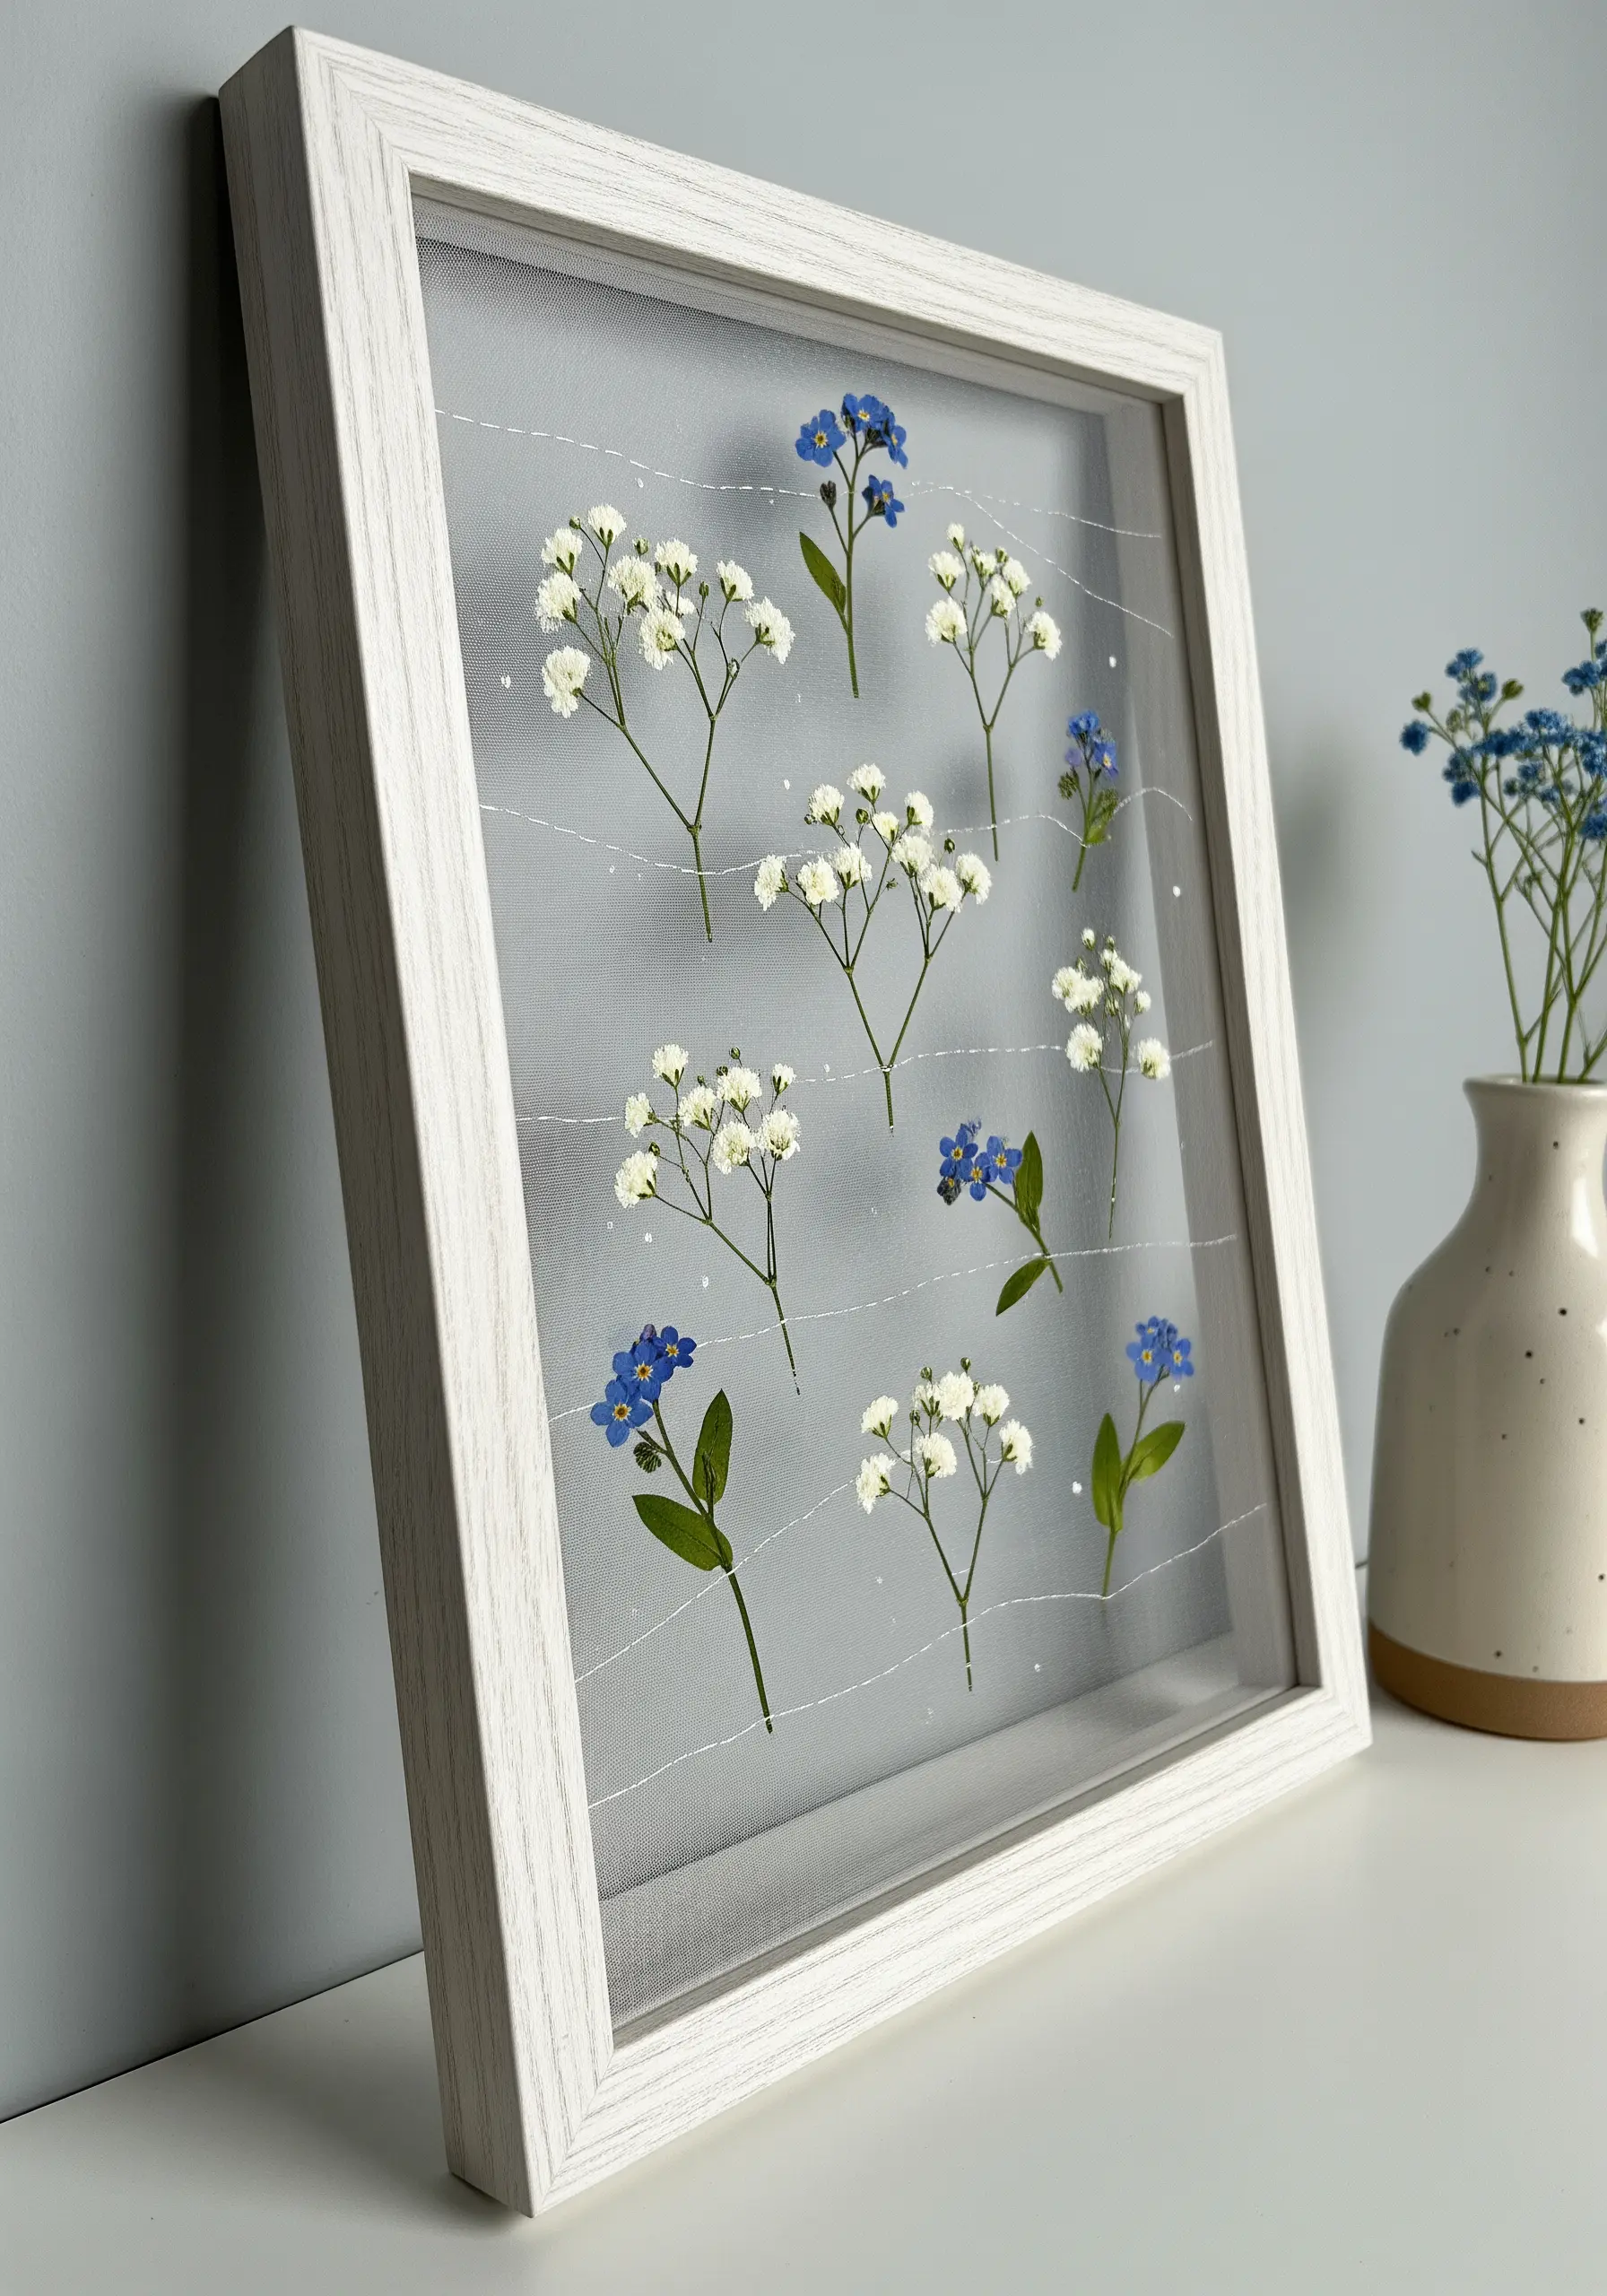
Achieve a modern, airy display by stitching pressed flowers onto a sheer fabric like tulle or organza.
Stretch the tulle tightly in the hoop, then carefully attach the stems with a few small stitches in a matching green thread.
For the delicate baby’s breath, use a single strand of white or translucent thread to secure the clusters.
When placed in a shadow box frame, the transparent background makes the flowers appear to float, turning your work into one of those minimalist embroidery art pieces you’ll want to display forever.
3. Build Texture with Layered Stitches

Combine different stitching techniques to create a landscape with incredible depth and texture.
For the sky, use long, layered satin stitches with variegated thread to mimic clouds and light.
In the lavender field, create the purple flower heads with dense French knots, varying their size for realism.
The contrast between the smooth, flowing sky and the bumpy, tactile flowers elevates the piece from a simple floral scene to one of your most engaging Organic texture embroidery designs.
4. Use High Contrast for Dramatic Impact
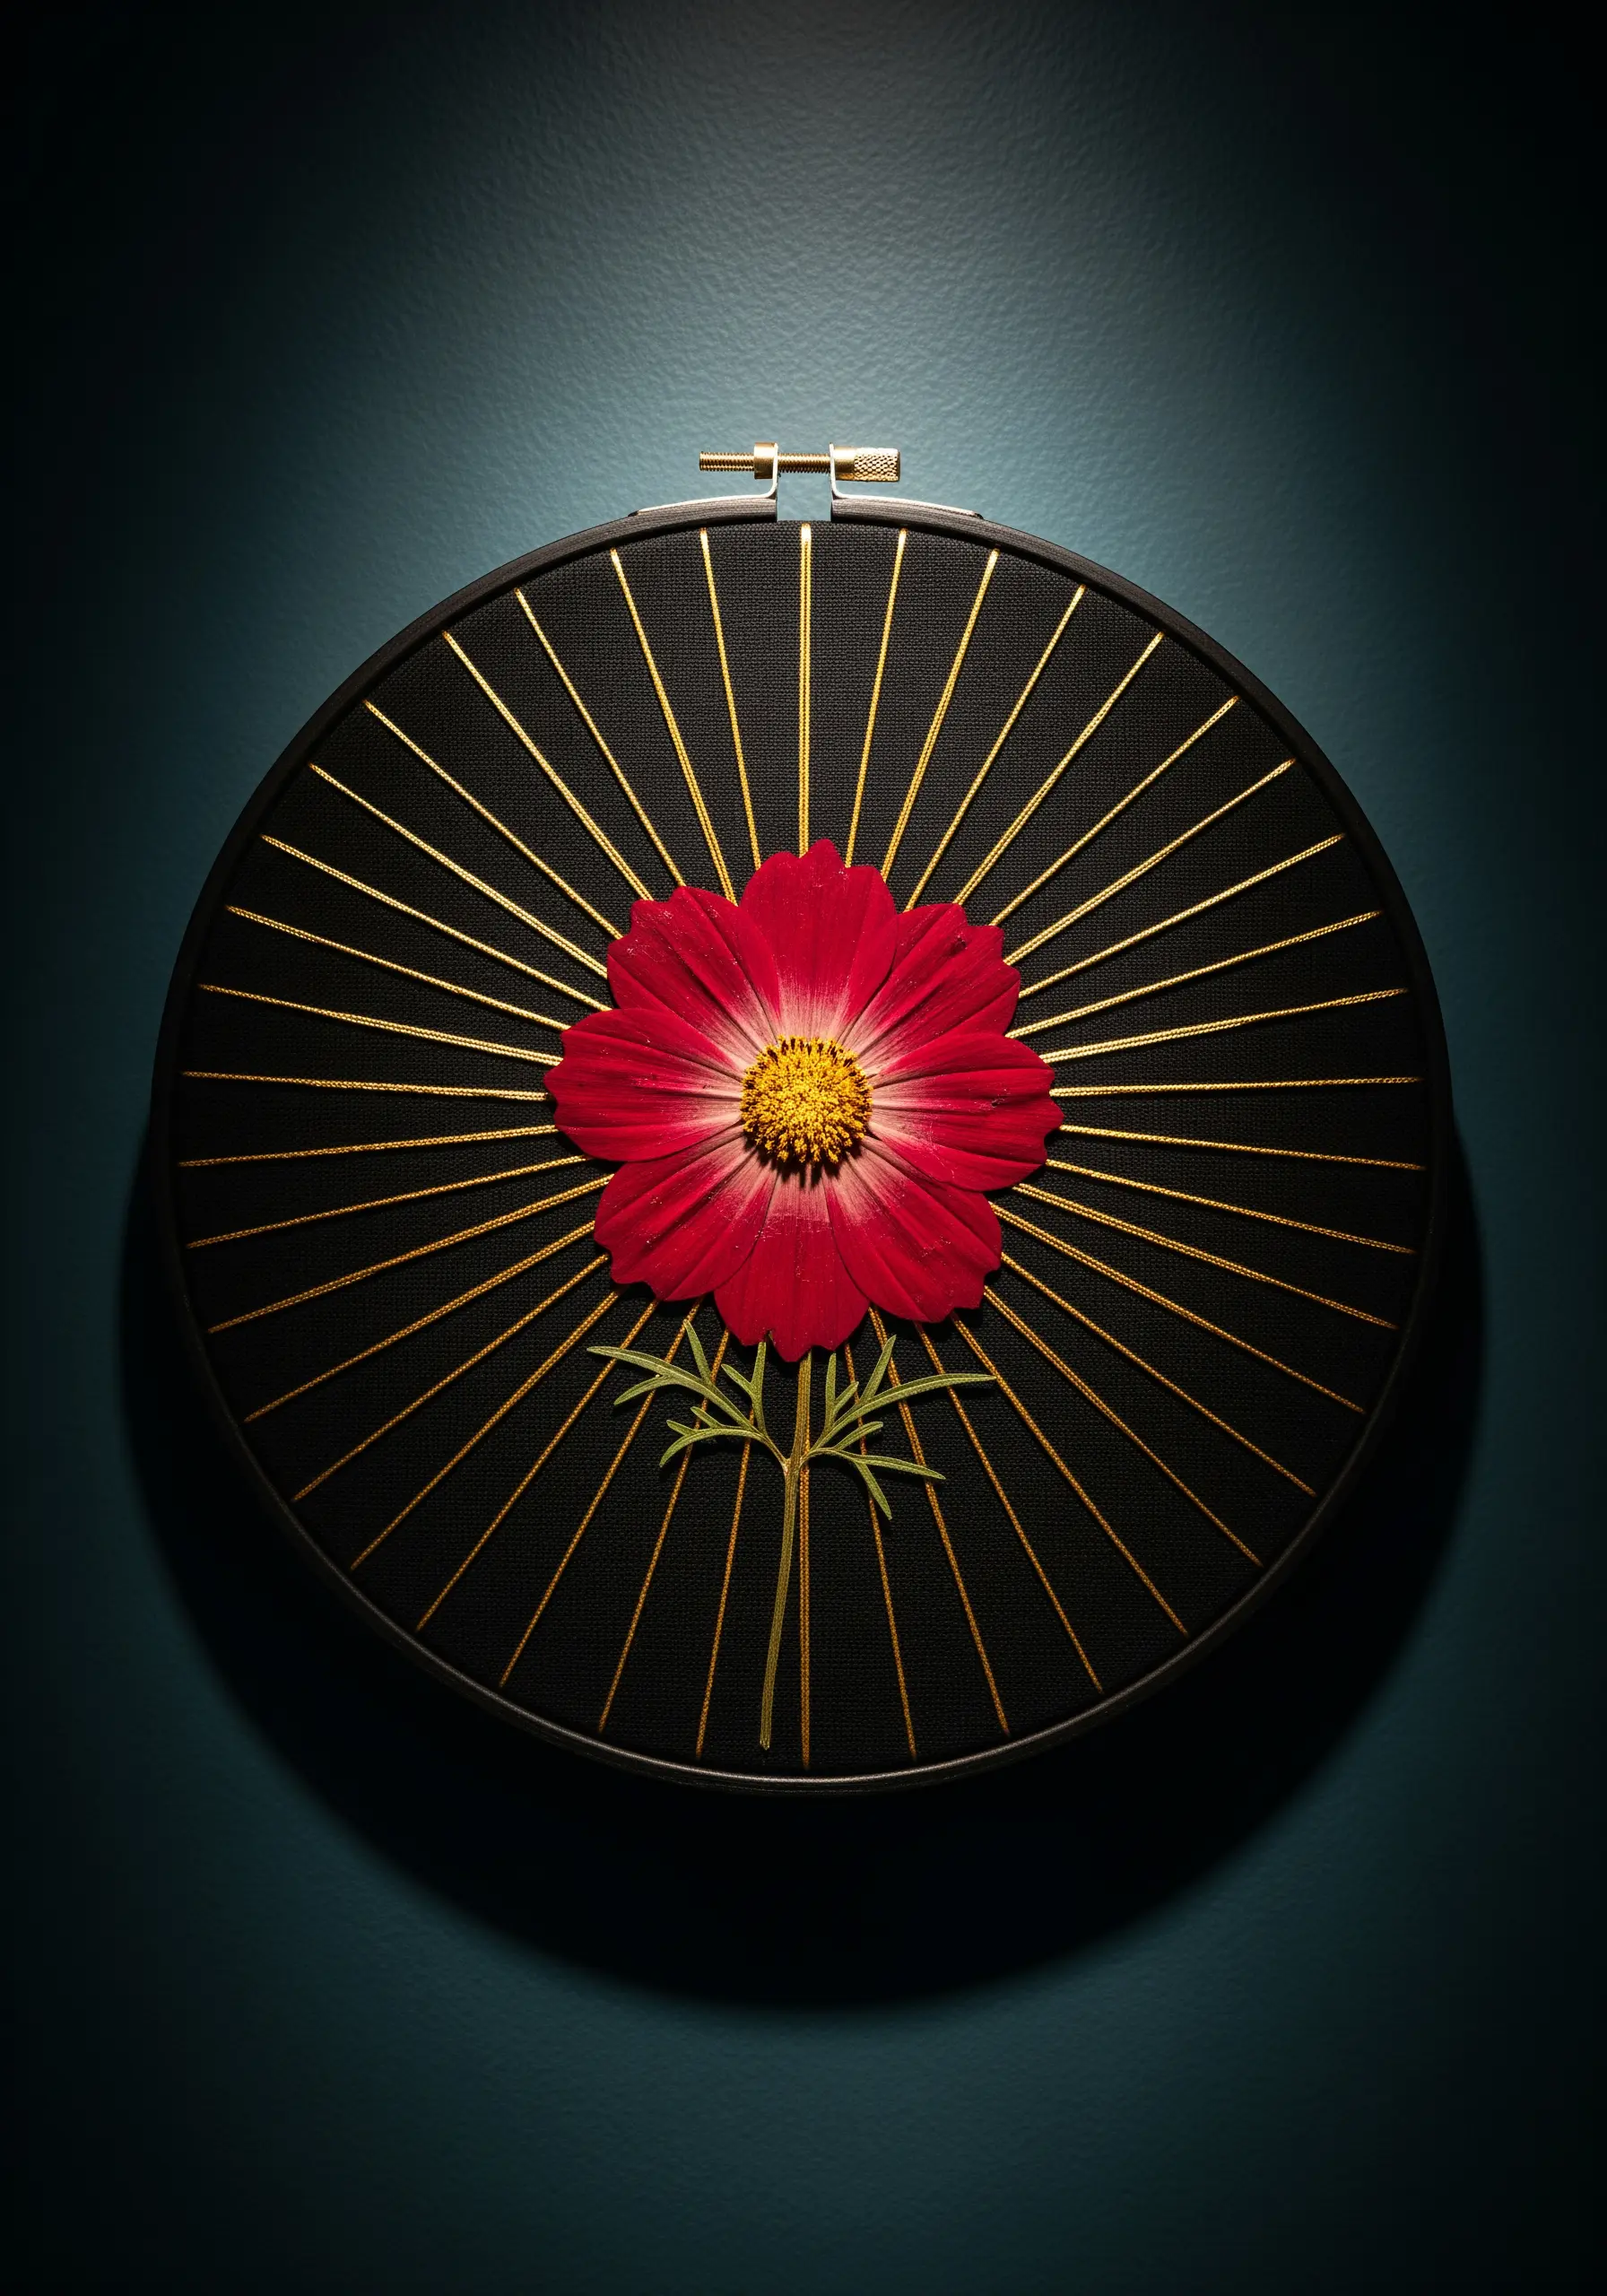
Make a single pressed flower the hero of your piece by pairing it with a dramatic background.
Choose a dark, tightly woven fabric like black linen or cotton twill to ensure your stitches are crisp.
Use a bright metallic thread for modern artwork that radiates from the center, creating a sunburst effect that draws the eye inward.
Maintain even tension on your straight stitches to prevent the fabric from puckering, which is key when working with high-contrast, linear designs.
5. Explore a Botanical Triptych

Instead of one large piece, tell a story with a series of smaller hoops.
A triptych allows you to explore different ways of integrating thread with botanicals.
Try outlining a leaf with a simple backstitch, creating a graphic sunburst behind a blossom, and using French knots to mimic the texture of a flower head.
This approach is perfect for practicing new techniques without committing to a large project and results in cohesive DIY wall hoop projects that look stunning when displayed together.
6. Pair Delicate Stems with Modern Lines
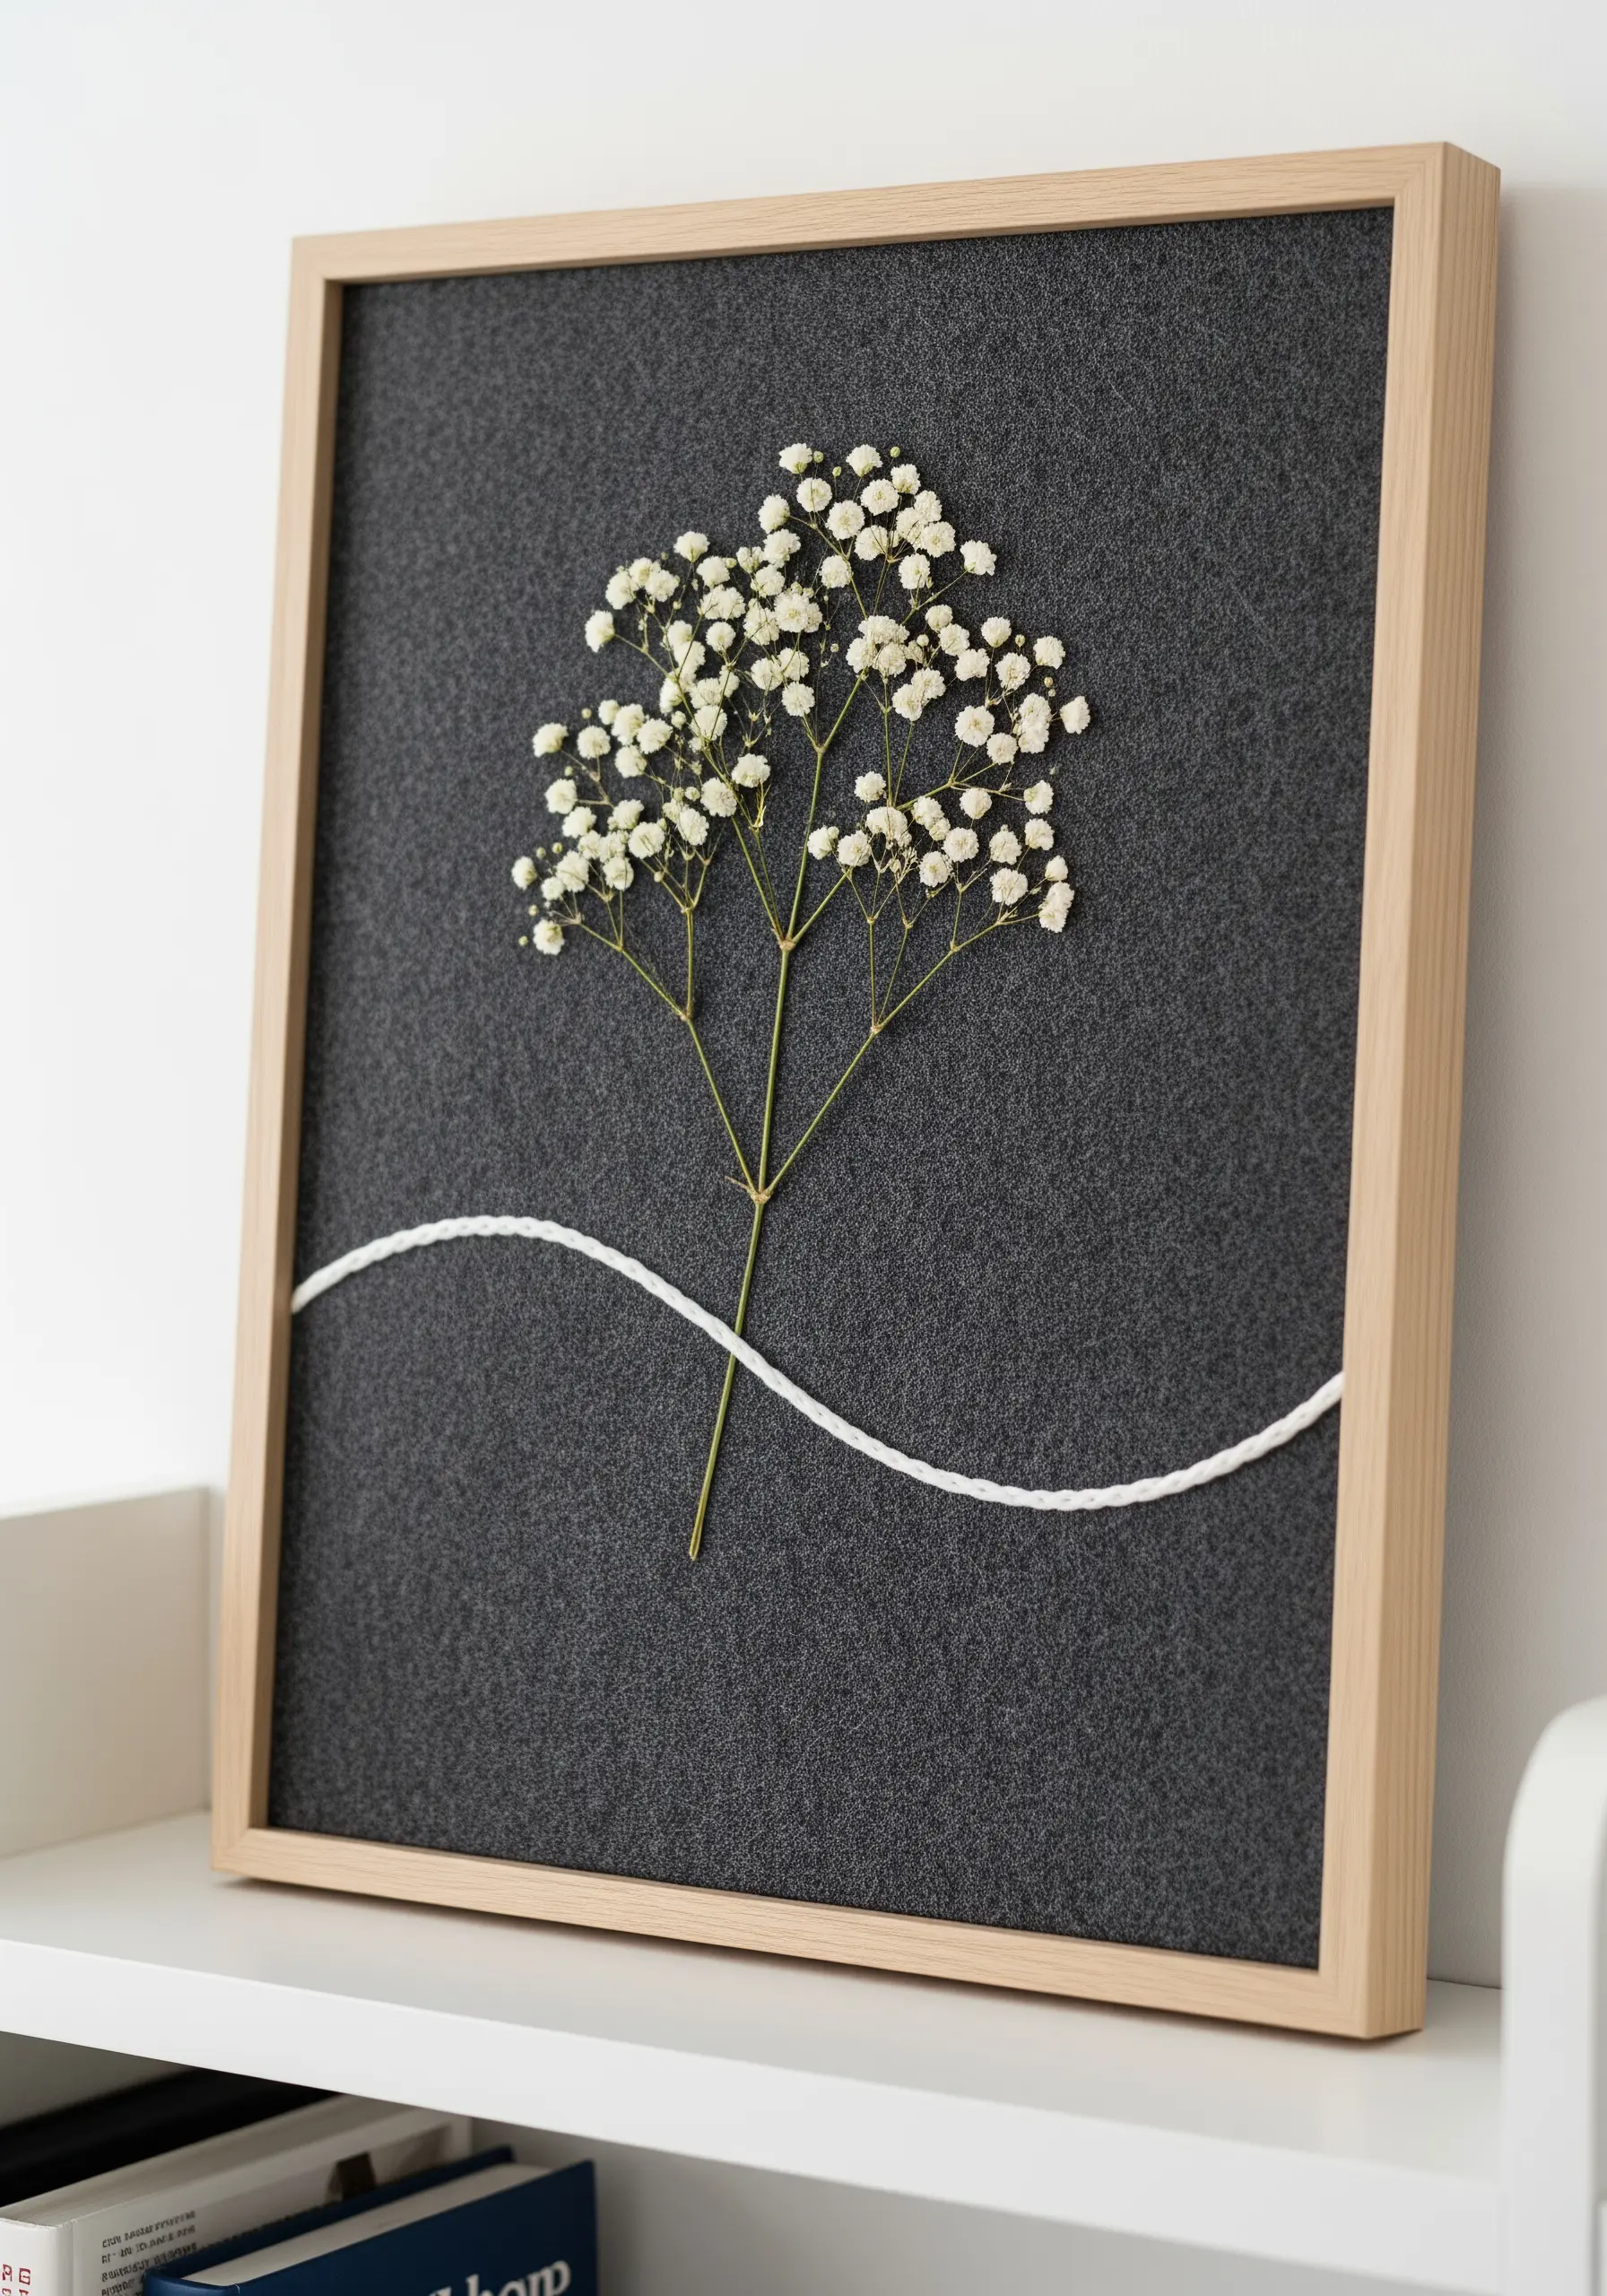
Elevate a simple sprig of baby’s breath by mounting it on a textured, unexpected surface like charcoal felt.
The soft, dense fabric provides a strong background that makes the delicate white flowers pop.
Instead of complex embroidery, introduce a single, bold line using a thick cotton cord or yarn.
This minimalist composition balances organic fragility with modern graphic design, proving that the most effective simple embroidery decor ideas often rely on restraint.
7. Compose a Wildflower Meadow Scatter
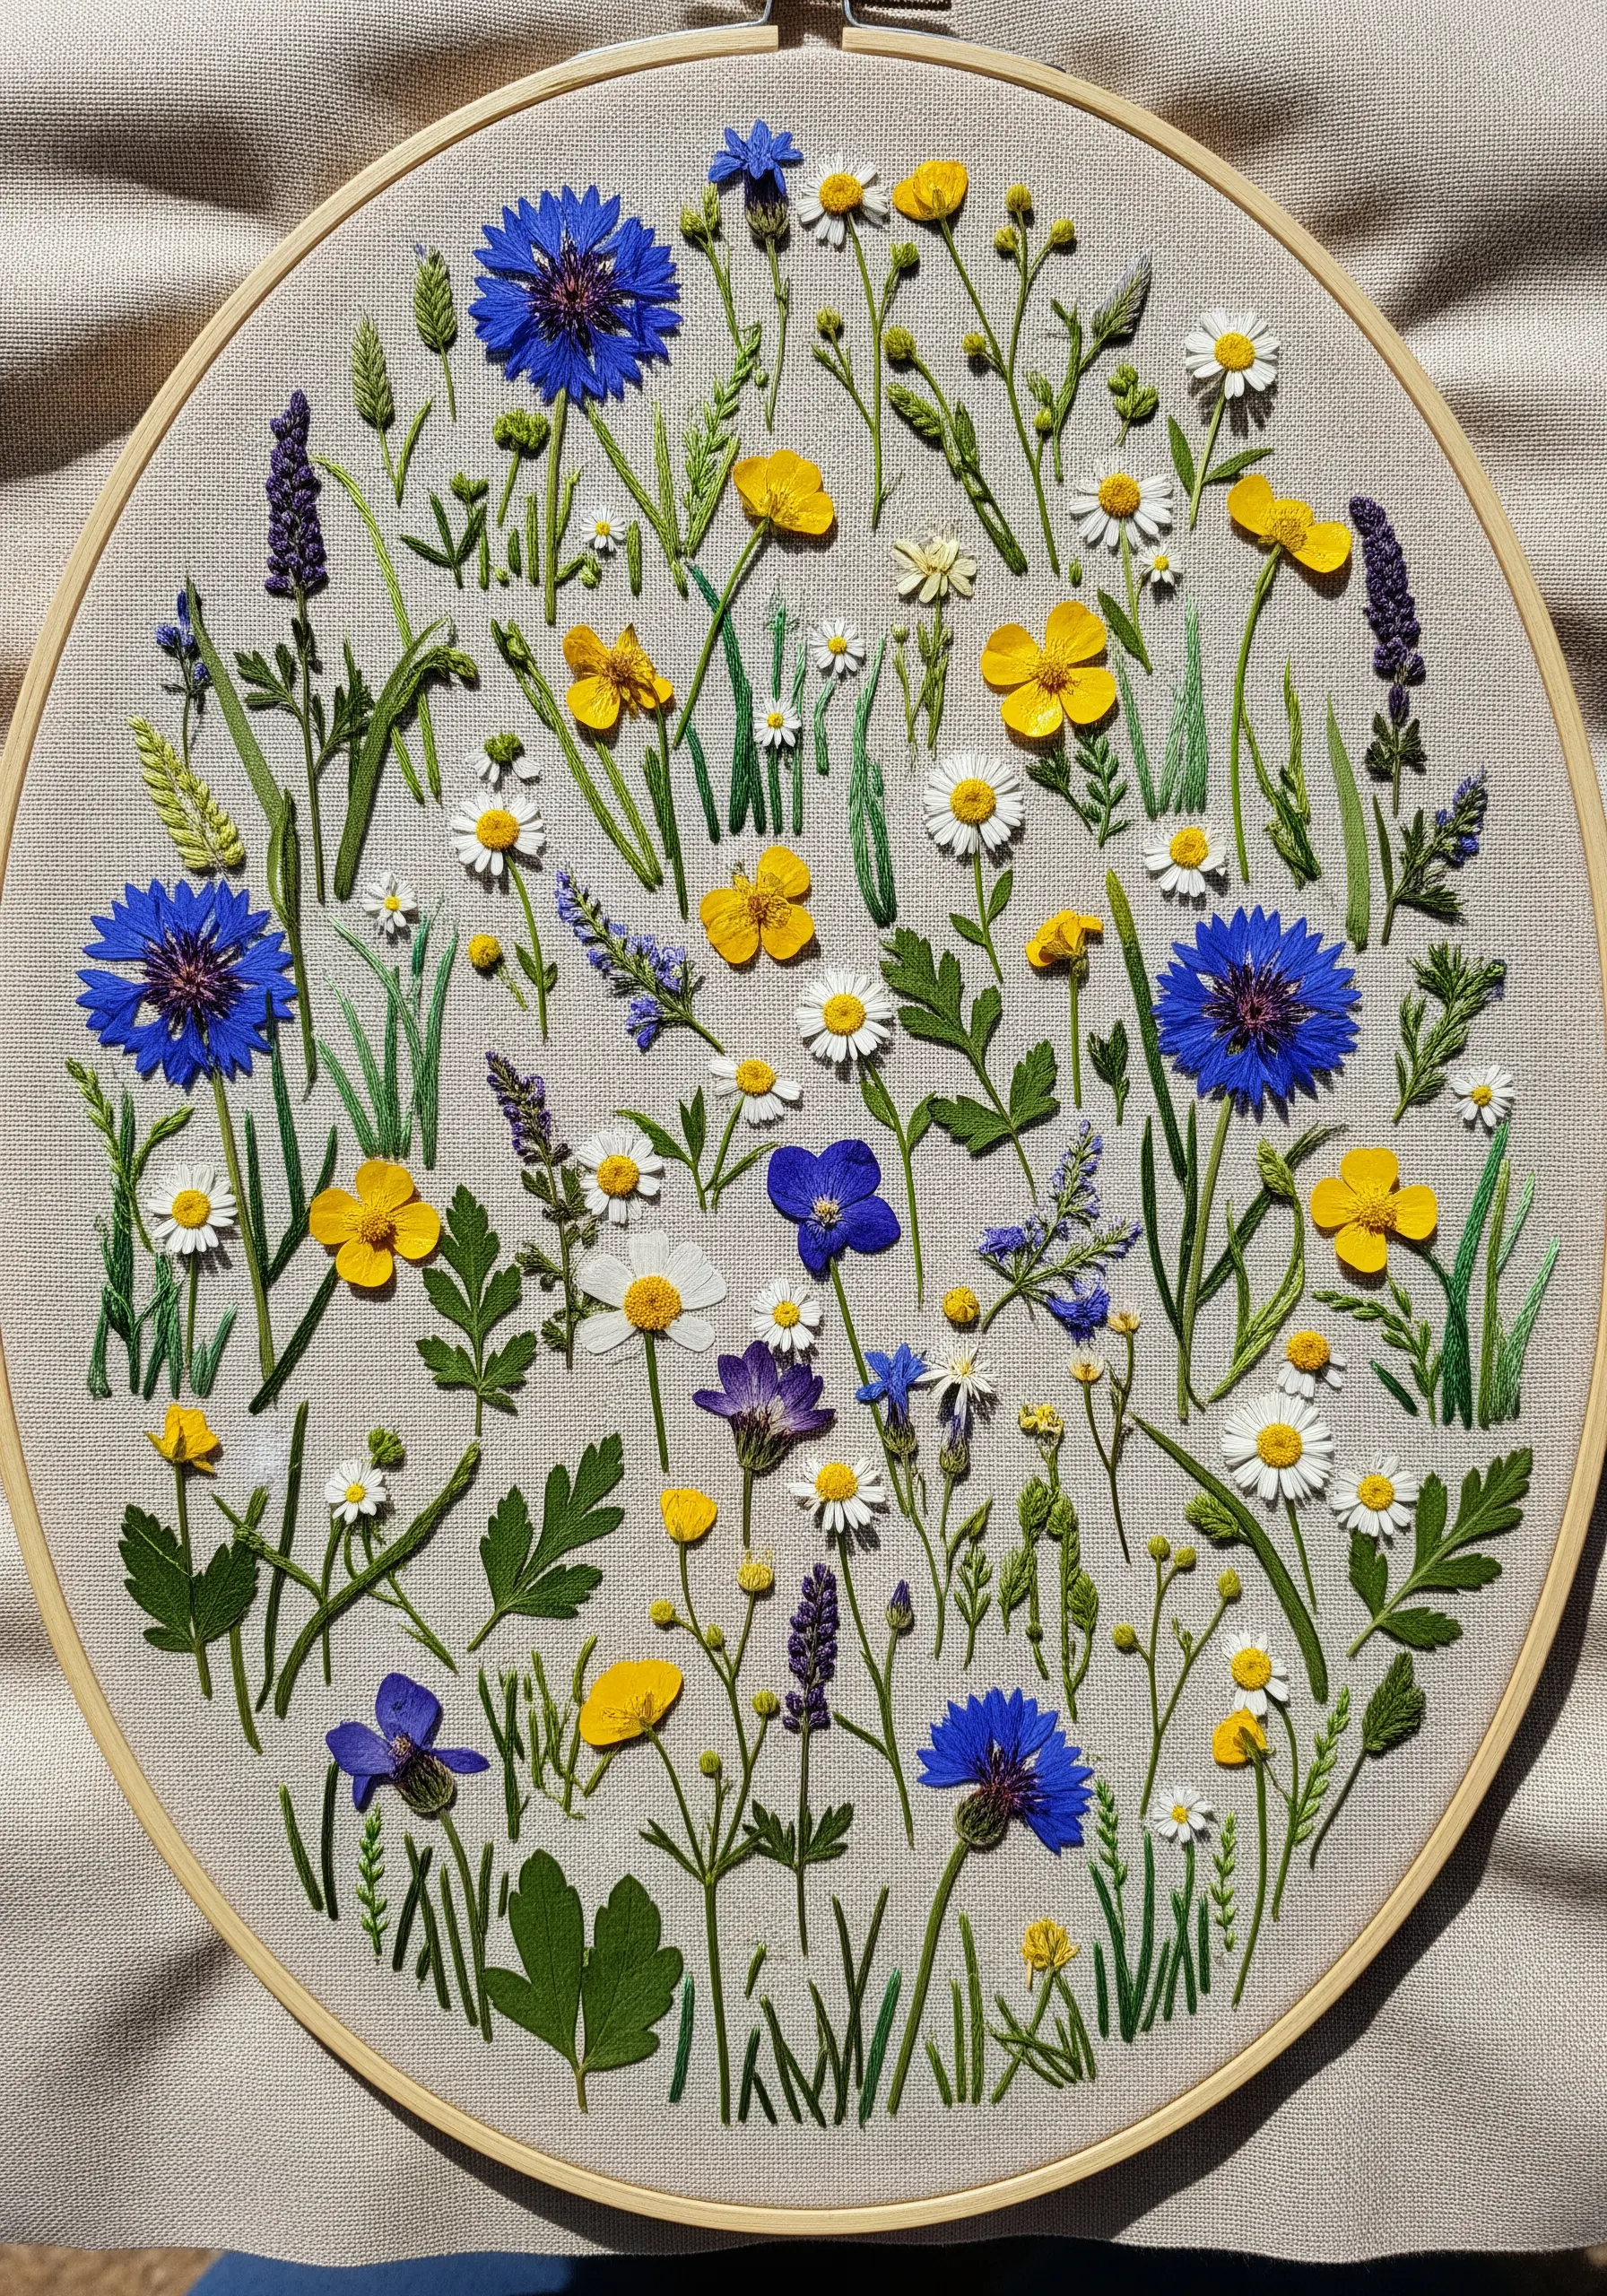
Create the feeling of a natural, untamed meadow by varying the placement, height, and type of your stitched stems.
Use single straight stitches for grass, detached chain stitches for leaves, and simple French knots for tiny buds.
Secure your pressed flowers at different angles and avoid creating perfect rows or symmetrical patterns.
This controlled chaos is the secret behind believable Wildflower thread painting techniques that feel alive and spontaneous.
8. Integrate Organic Leaves with Geometric Blocks
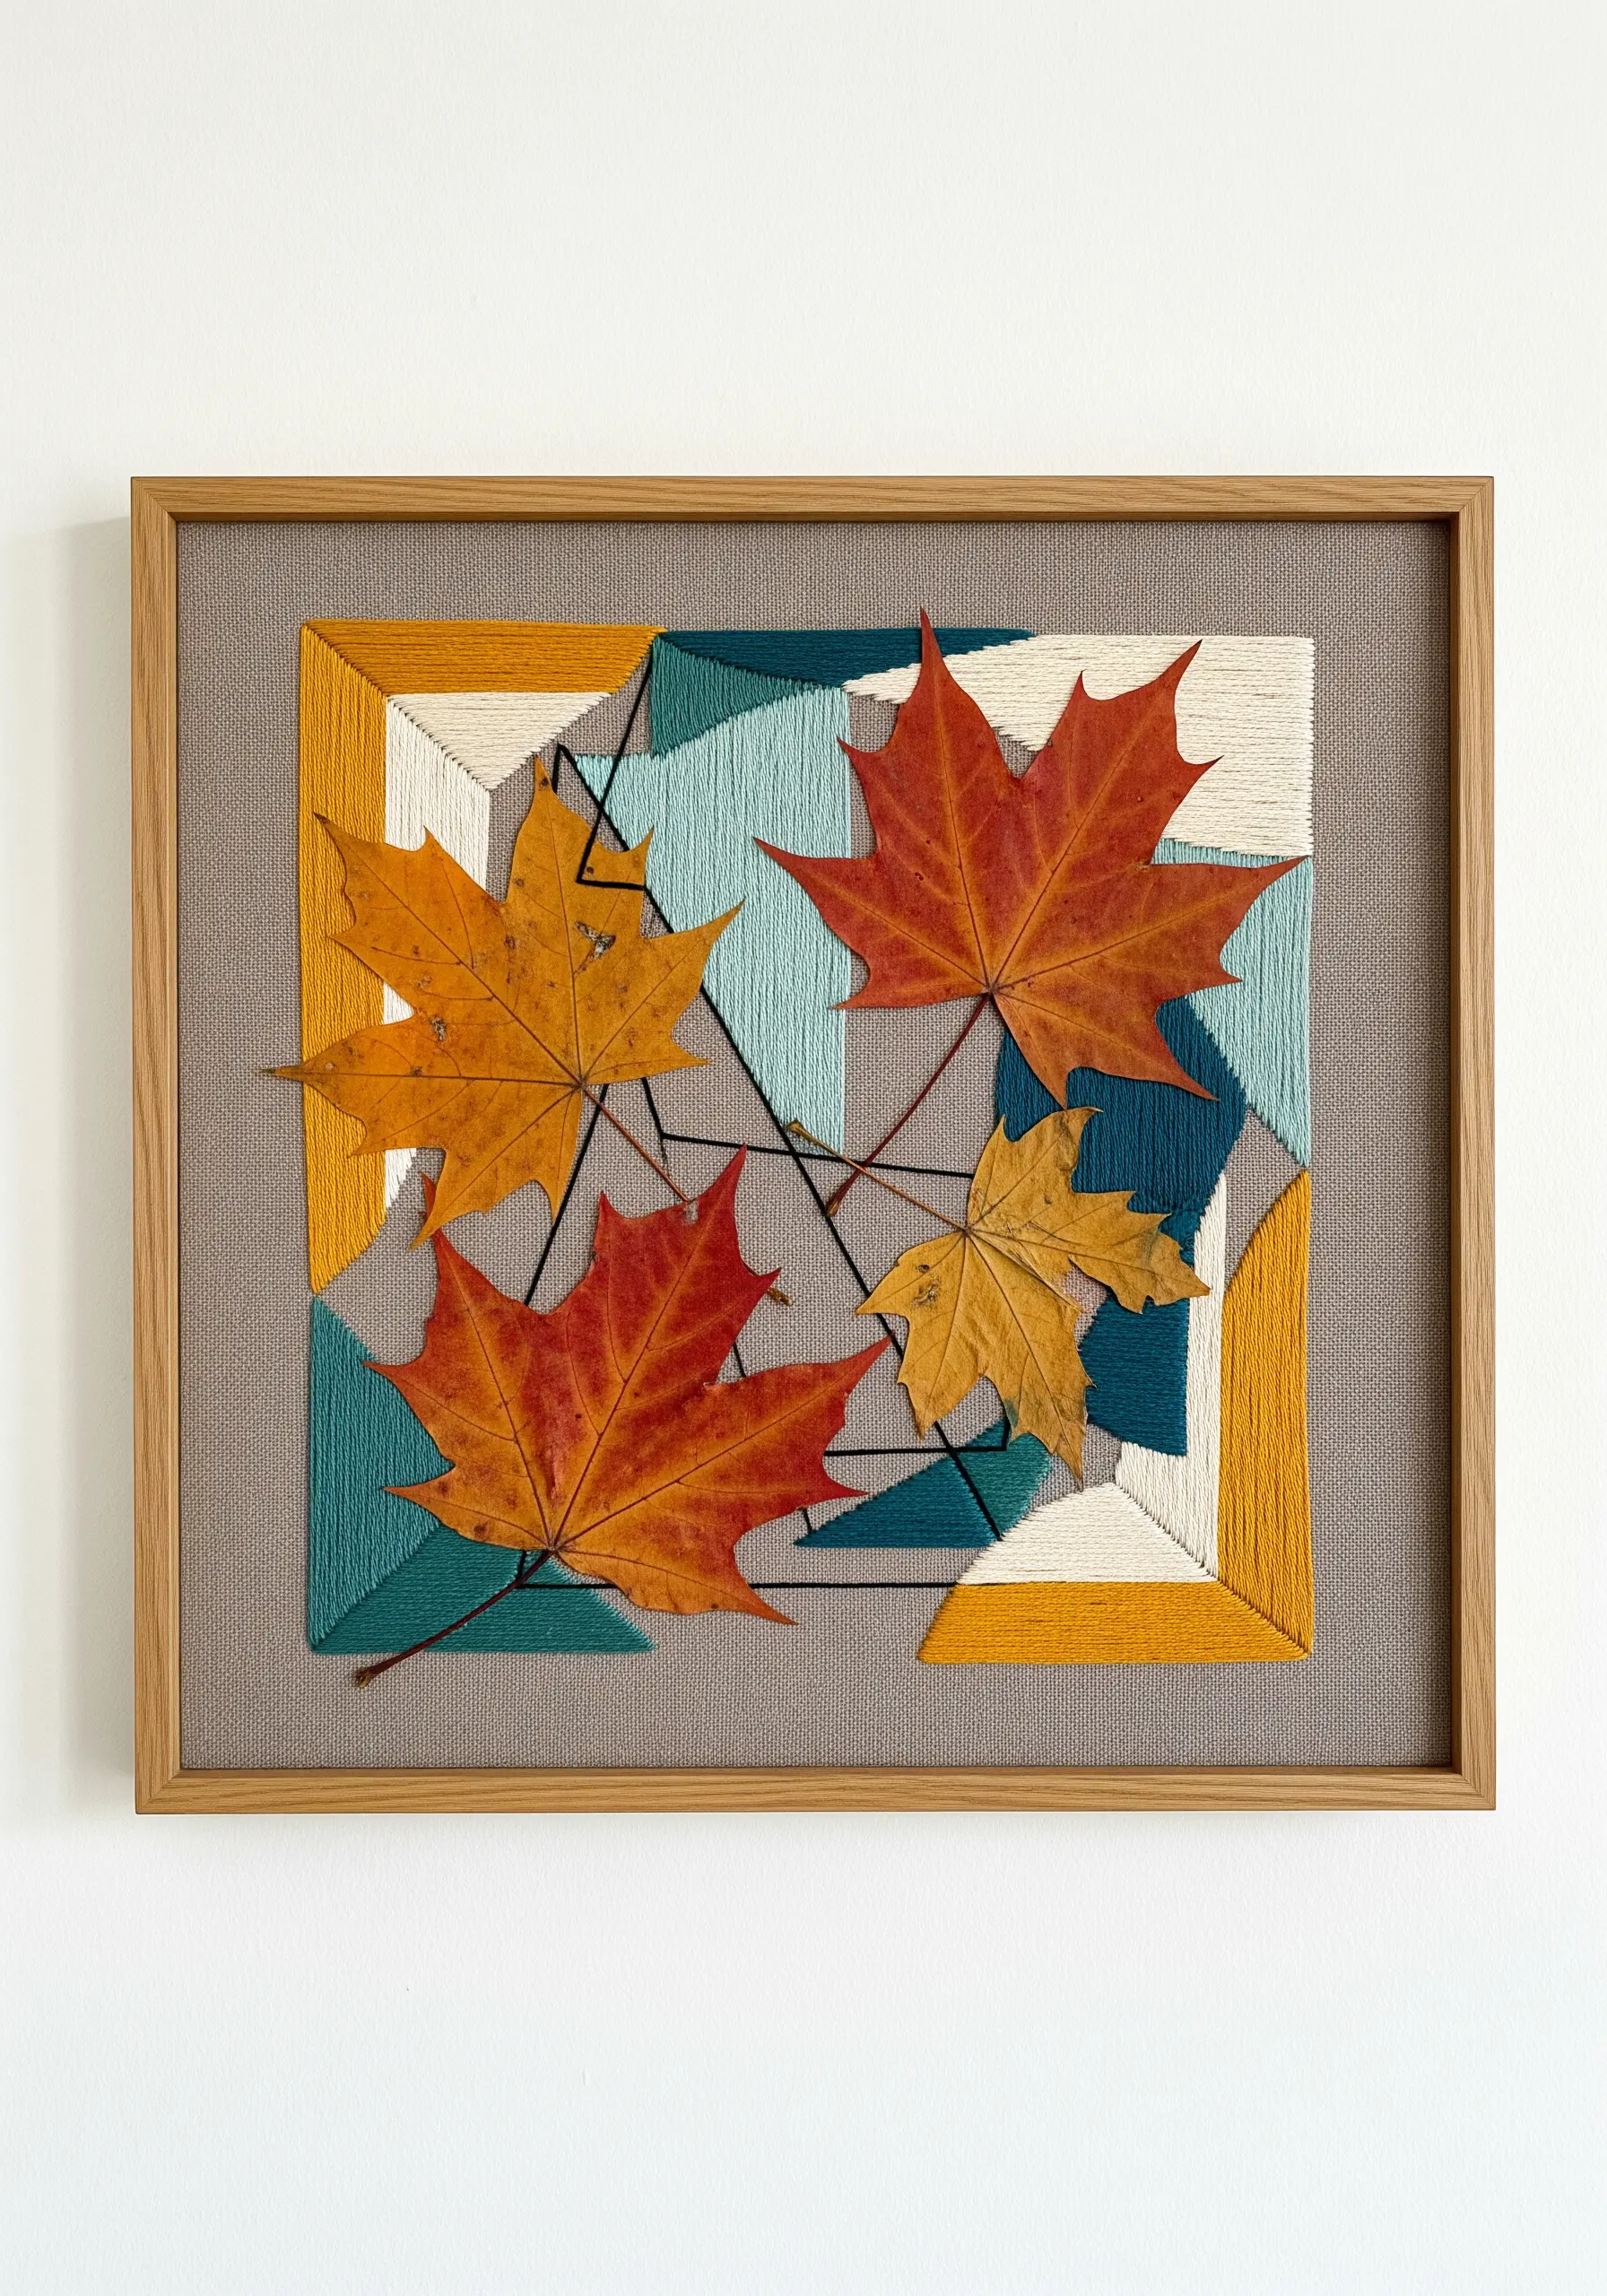
Create a dynamic composition by contrasting the soft, organic shapes of pressed autumn leaves with crisp, geometric color blocking.
Map out your geometric shapes first and fill them with satin stitch, alternating the direction of your stitches for each block to create texture.
Once the embroidery is complete, arrange and couch the pressed leaves on top.
This layering of hard and soft elements turns a simple seasonal theme into one of your most sophisticated abstract geometric hoops.
9. Stitch a Celestial Flower Constellation
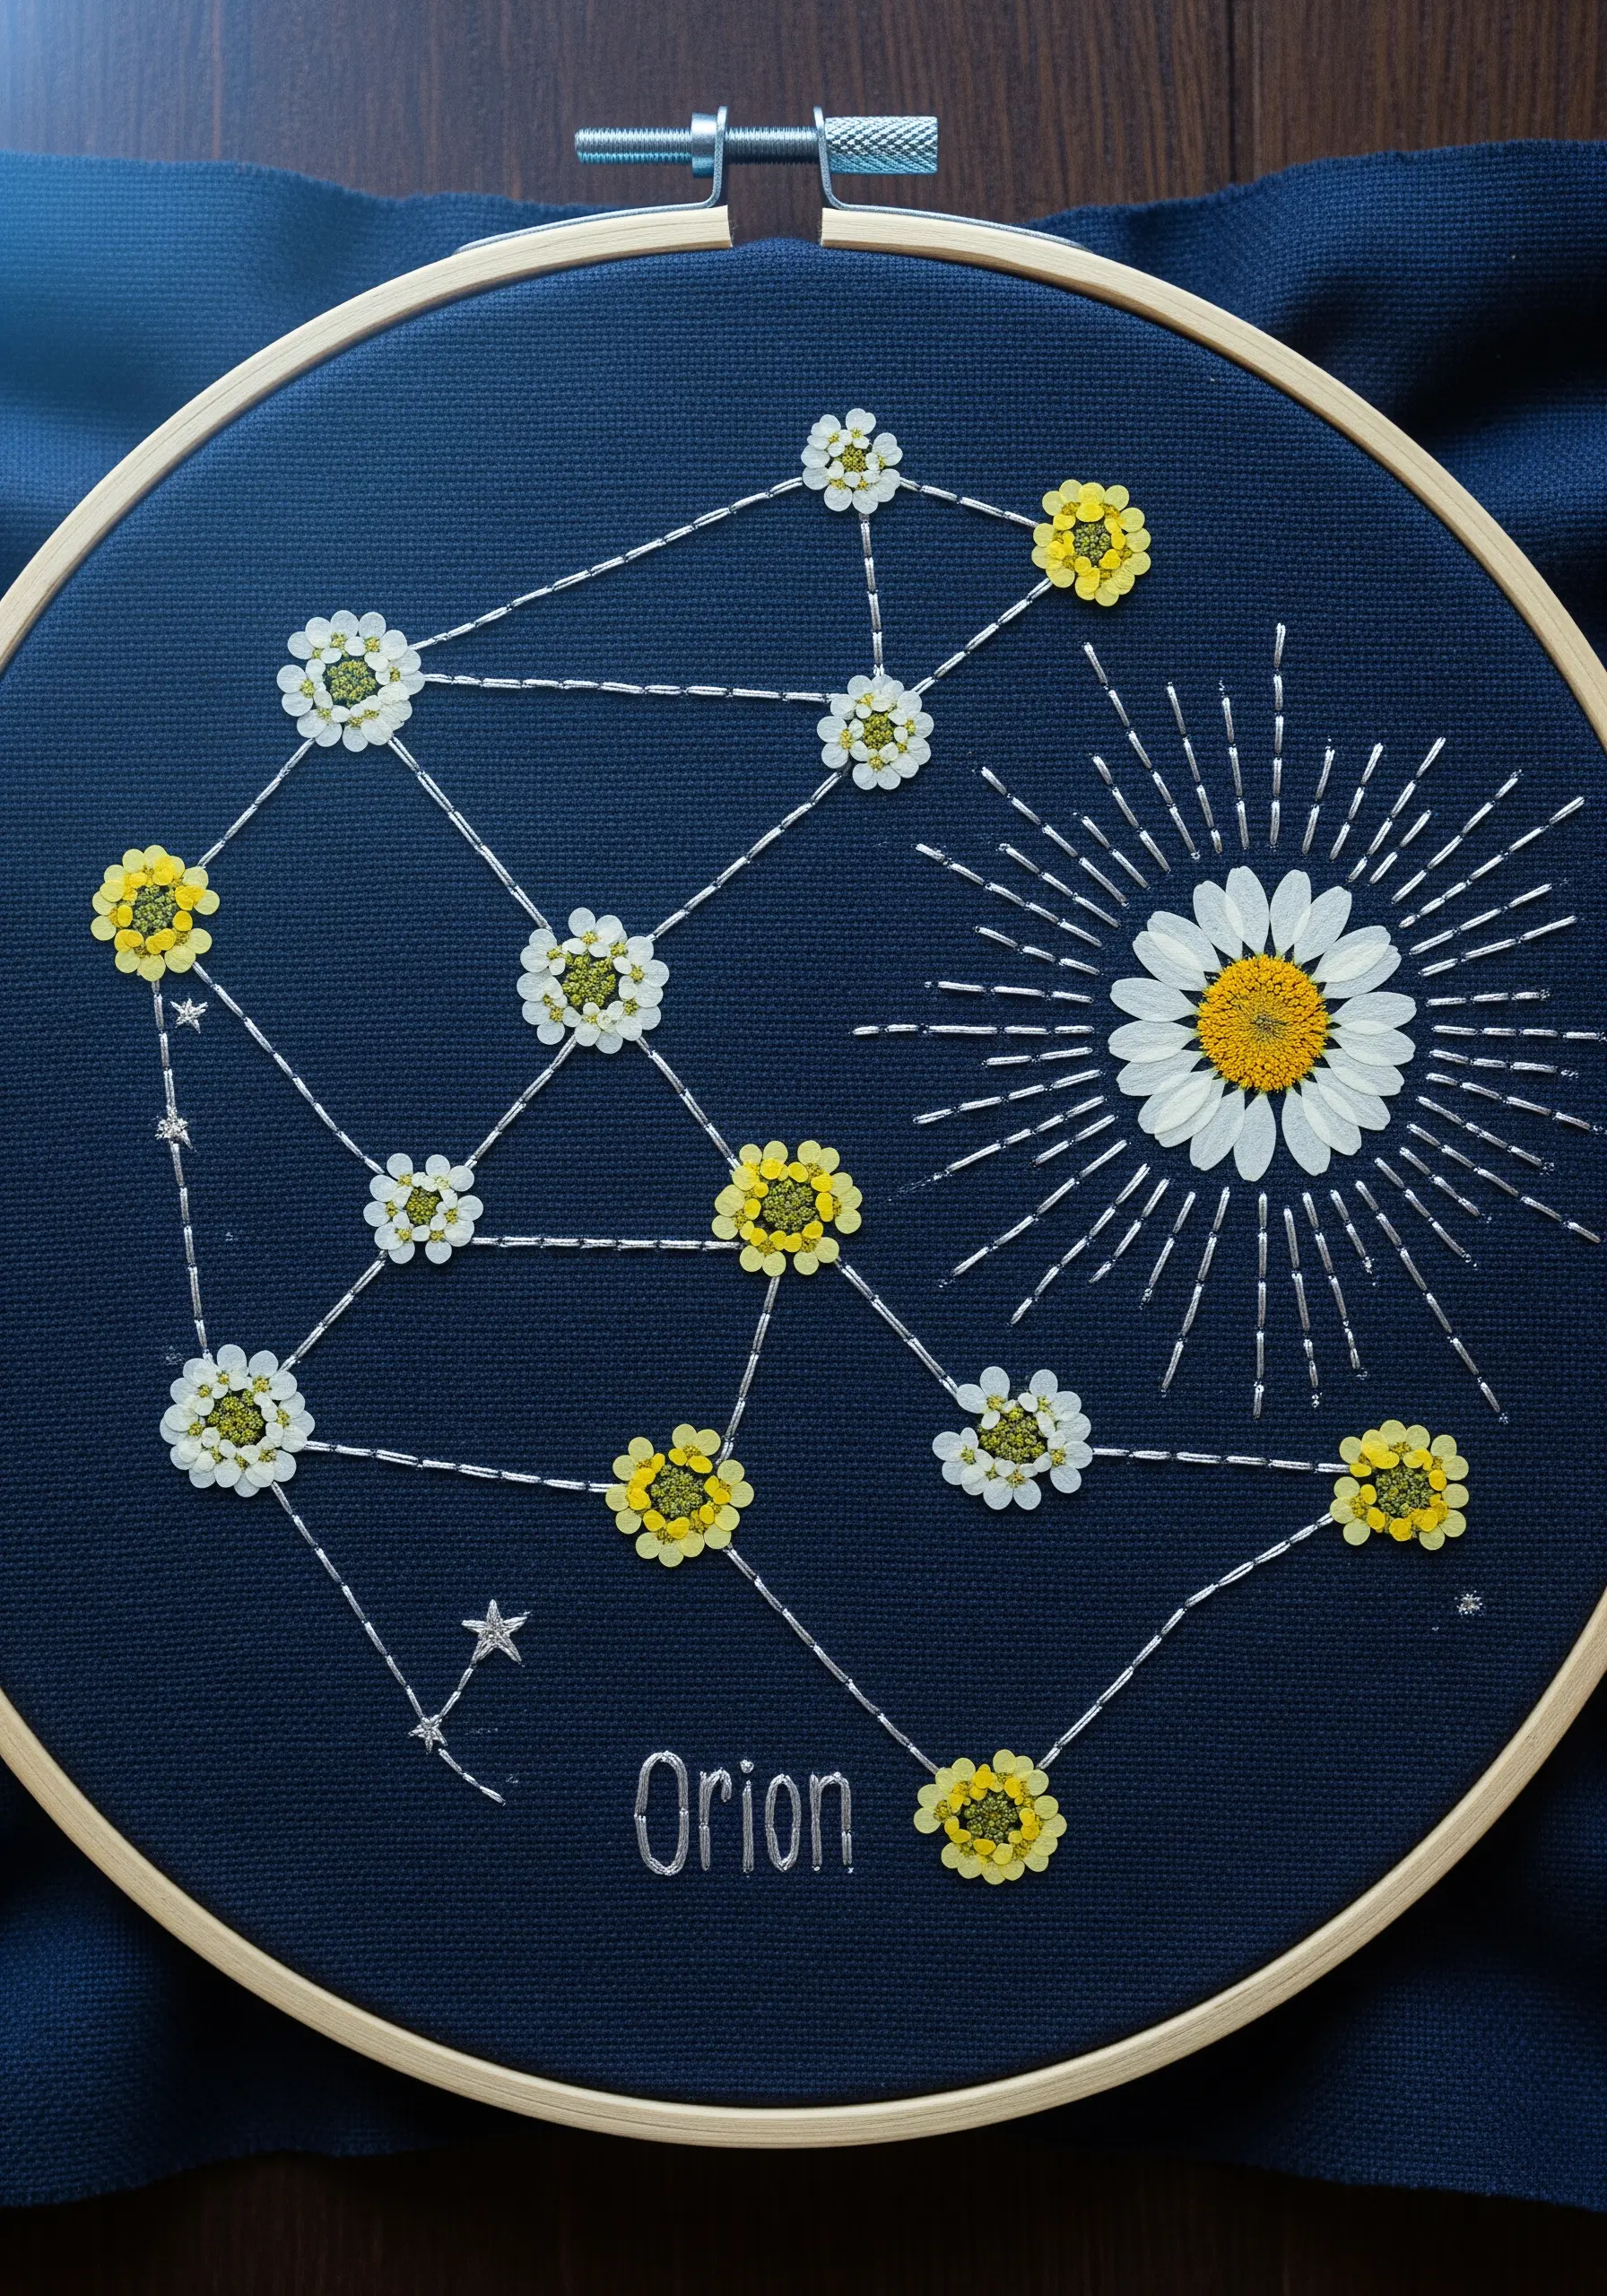
Transform tiny pressed flowers into stars by using them to map out a constellation.
Use a light-colored transfer pen to draw your pattern onto dark blue fabric.
Stitch the connecting lines with a fine, shimmering metallic or silk thread for a celestial glow.
Anchor each intersection point with a pressed daisy or buttercup, making your Moon and stars embroidery ideas both personal and botanical.
Add a few isolated French knots to represent distant stars and complete the cosmic scene.
10. Create Functional Art on a Throw Pillow

Yes, you can use pressed flowers on functional items, but the key is preparation and placement.
Choose a durable fabric like a cotton-linen blend. Before stitching, lightly coat your pressed flowers with a flexible sealant like Mod Podge to protect them from humidity and friction.
Arrange the flowers in a corner, where they are less likely to be disturbed.
Use discreet couching stitches to secure them, turning basic plant-inspired embroidery patterns to transform blank pillows into heirloom-quality decor.
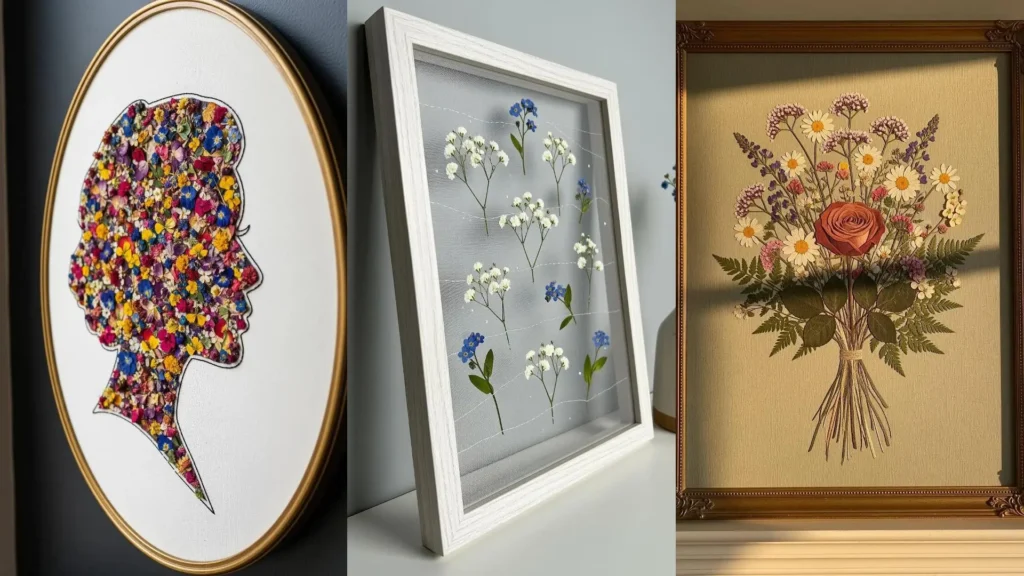
11. Construct a Classic Bouquet with Depth
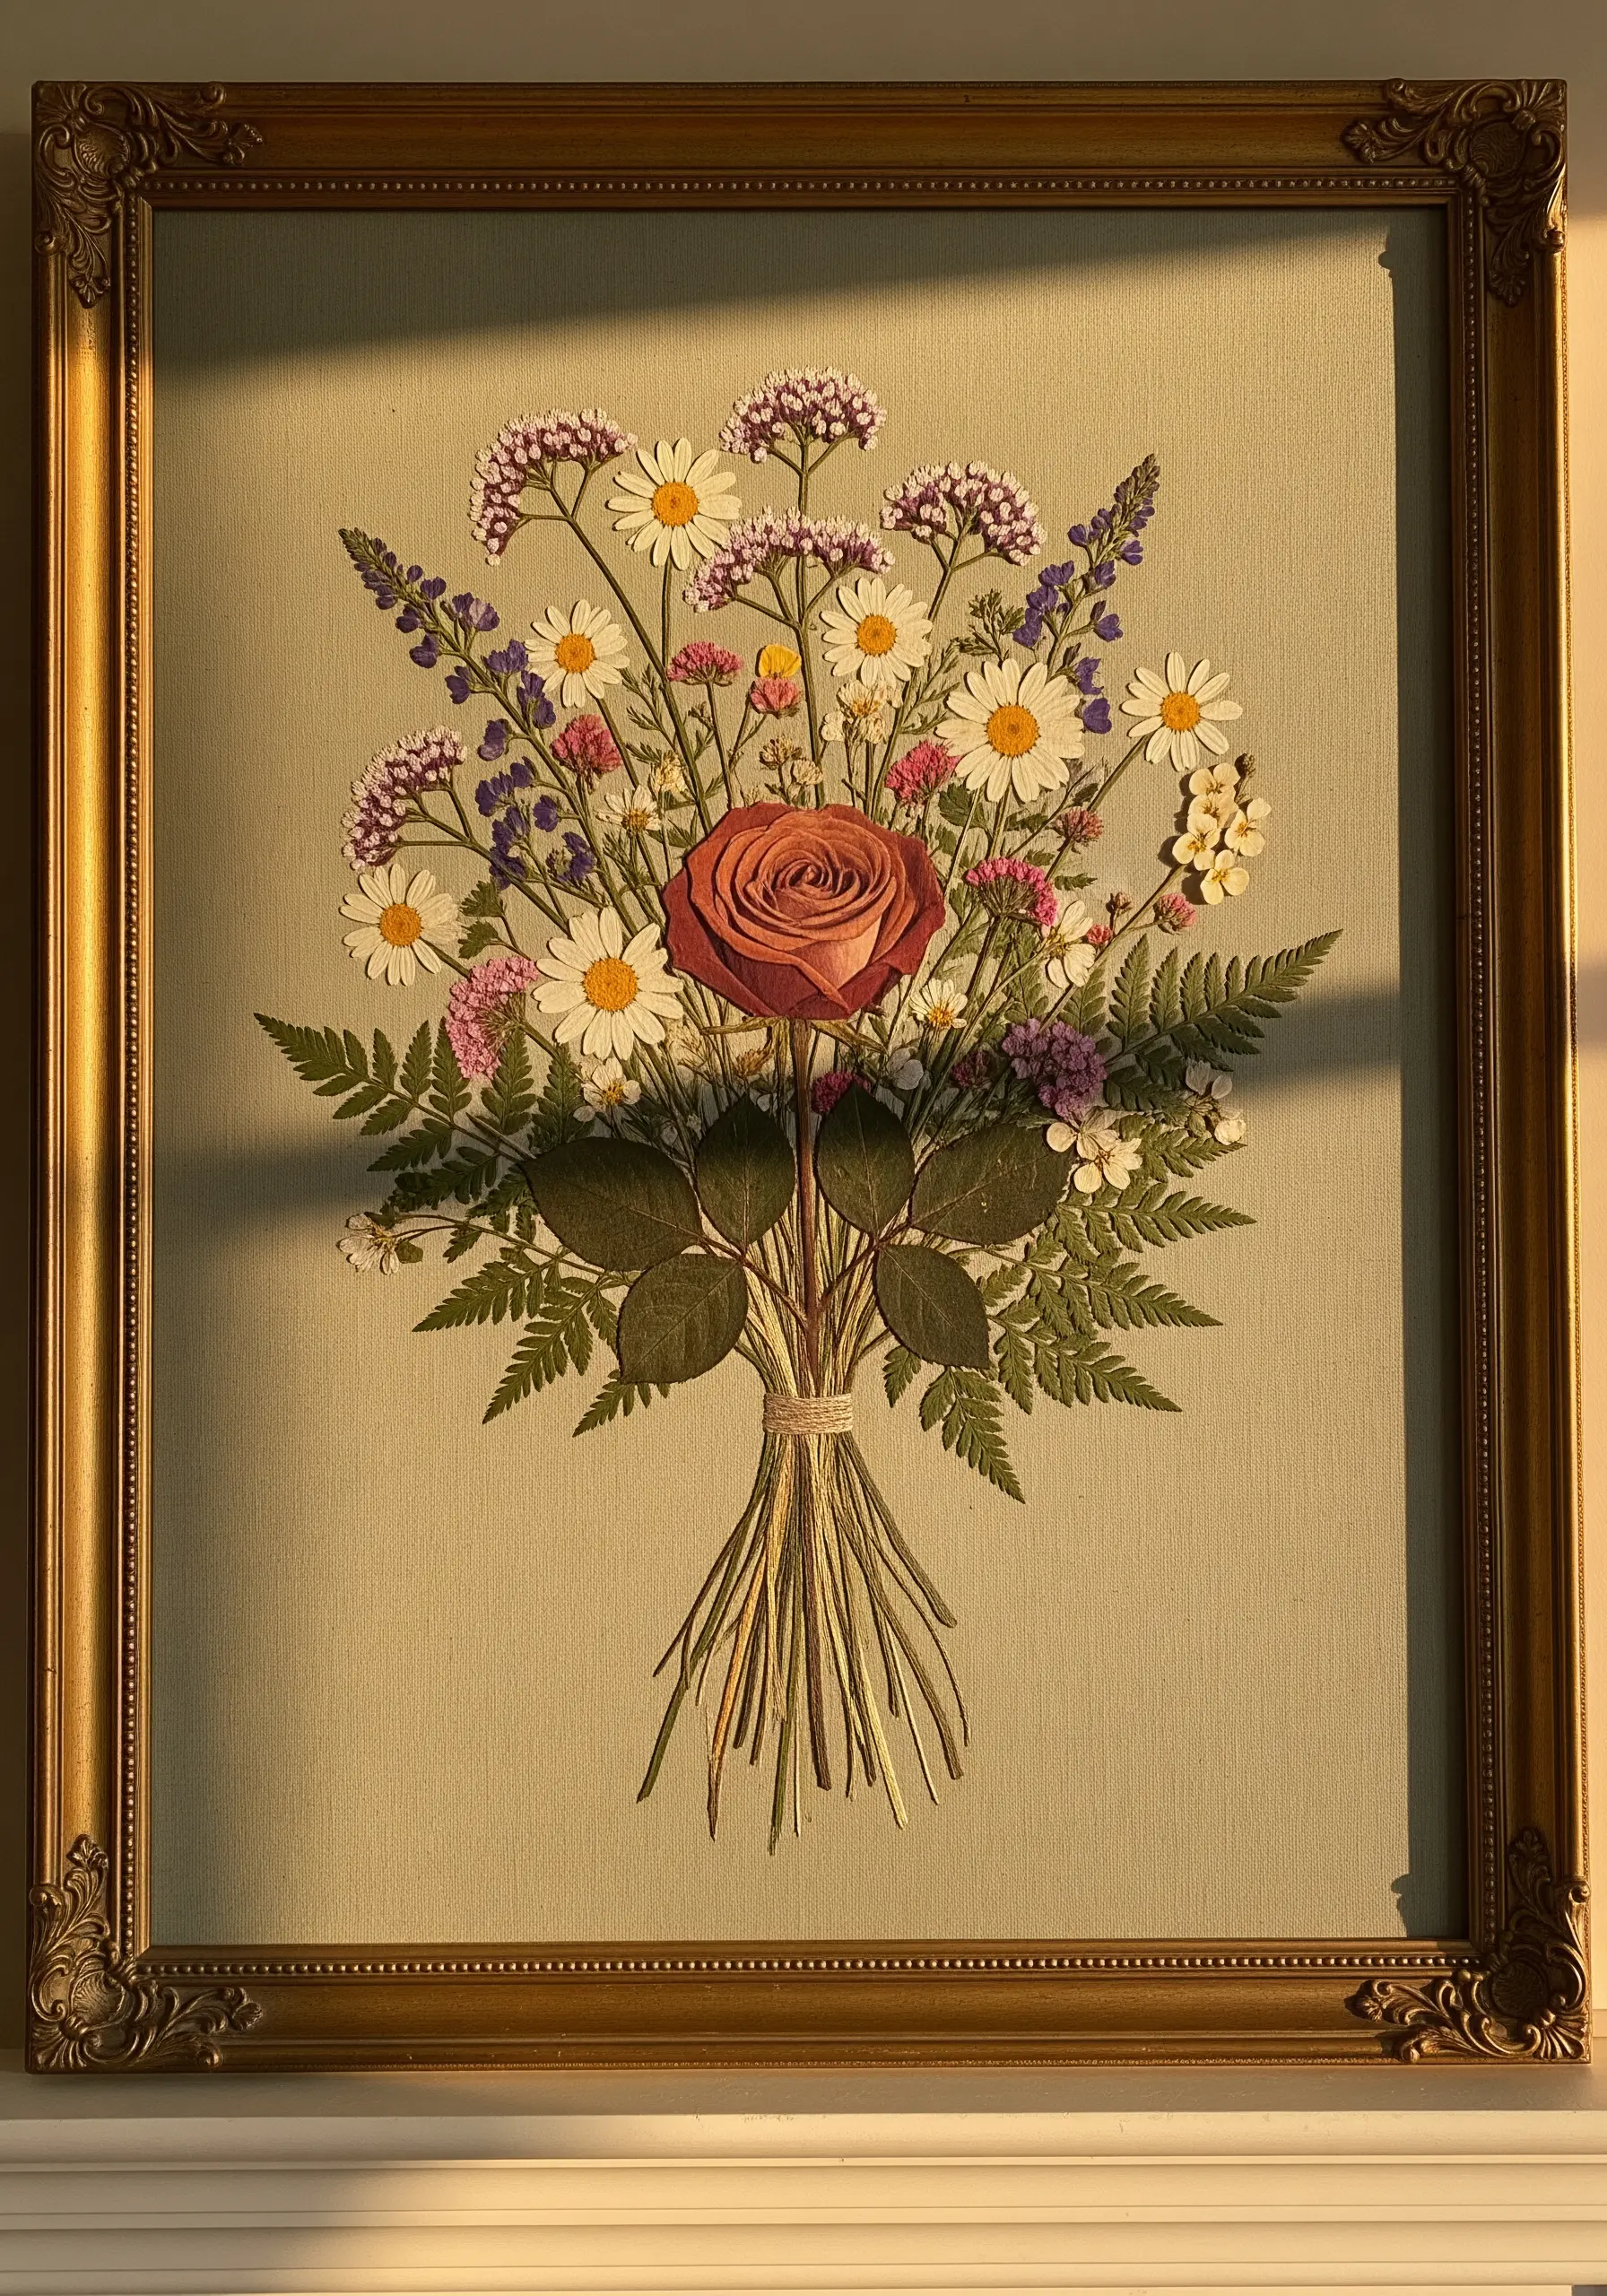
To create a realistic bouquet, think in layers just as a florist would.
Start by stitching down the background elements first, like wispy ferns and smaller filler flowers.
Place your focal flower, like a pressed rose, on top. Finally, add the stems, using a series of tightly wrapped straight stitches to create the illusion of a hand-tied bundle.
This layering technique gives your composition a natural depth often seen in vintage floral bouquet patterns.
12. Design a Monochrome Foliage Study
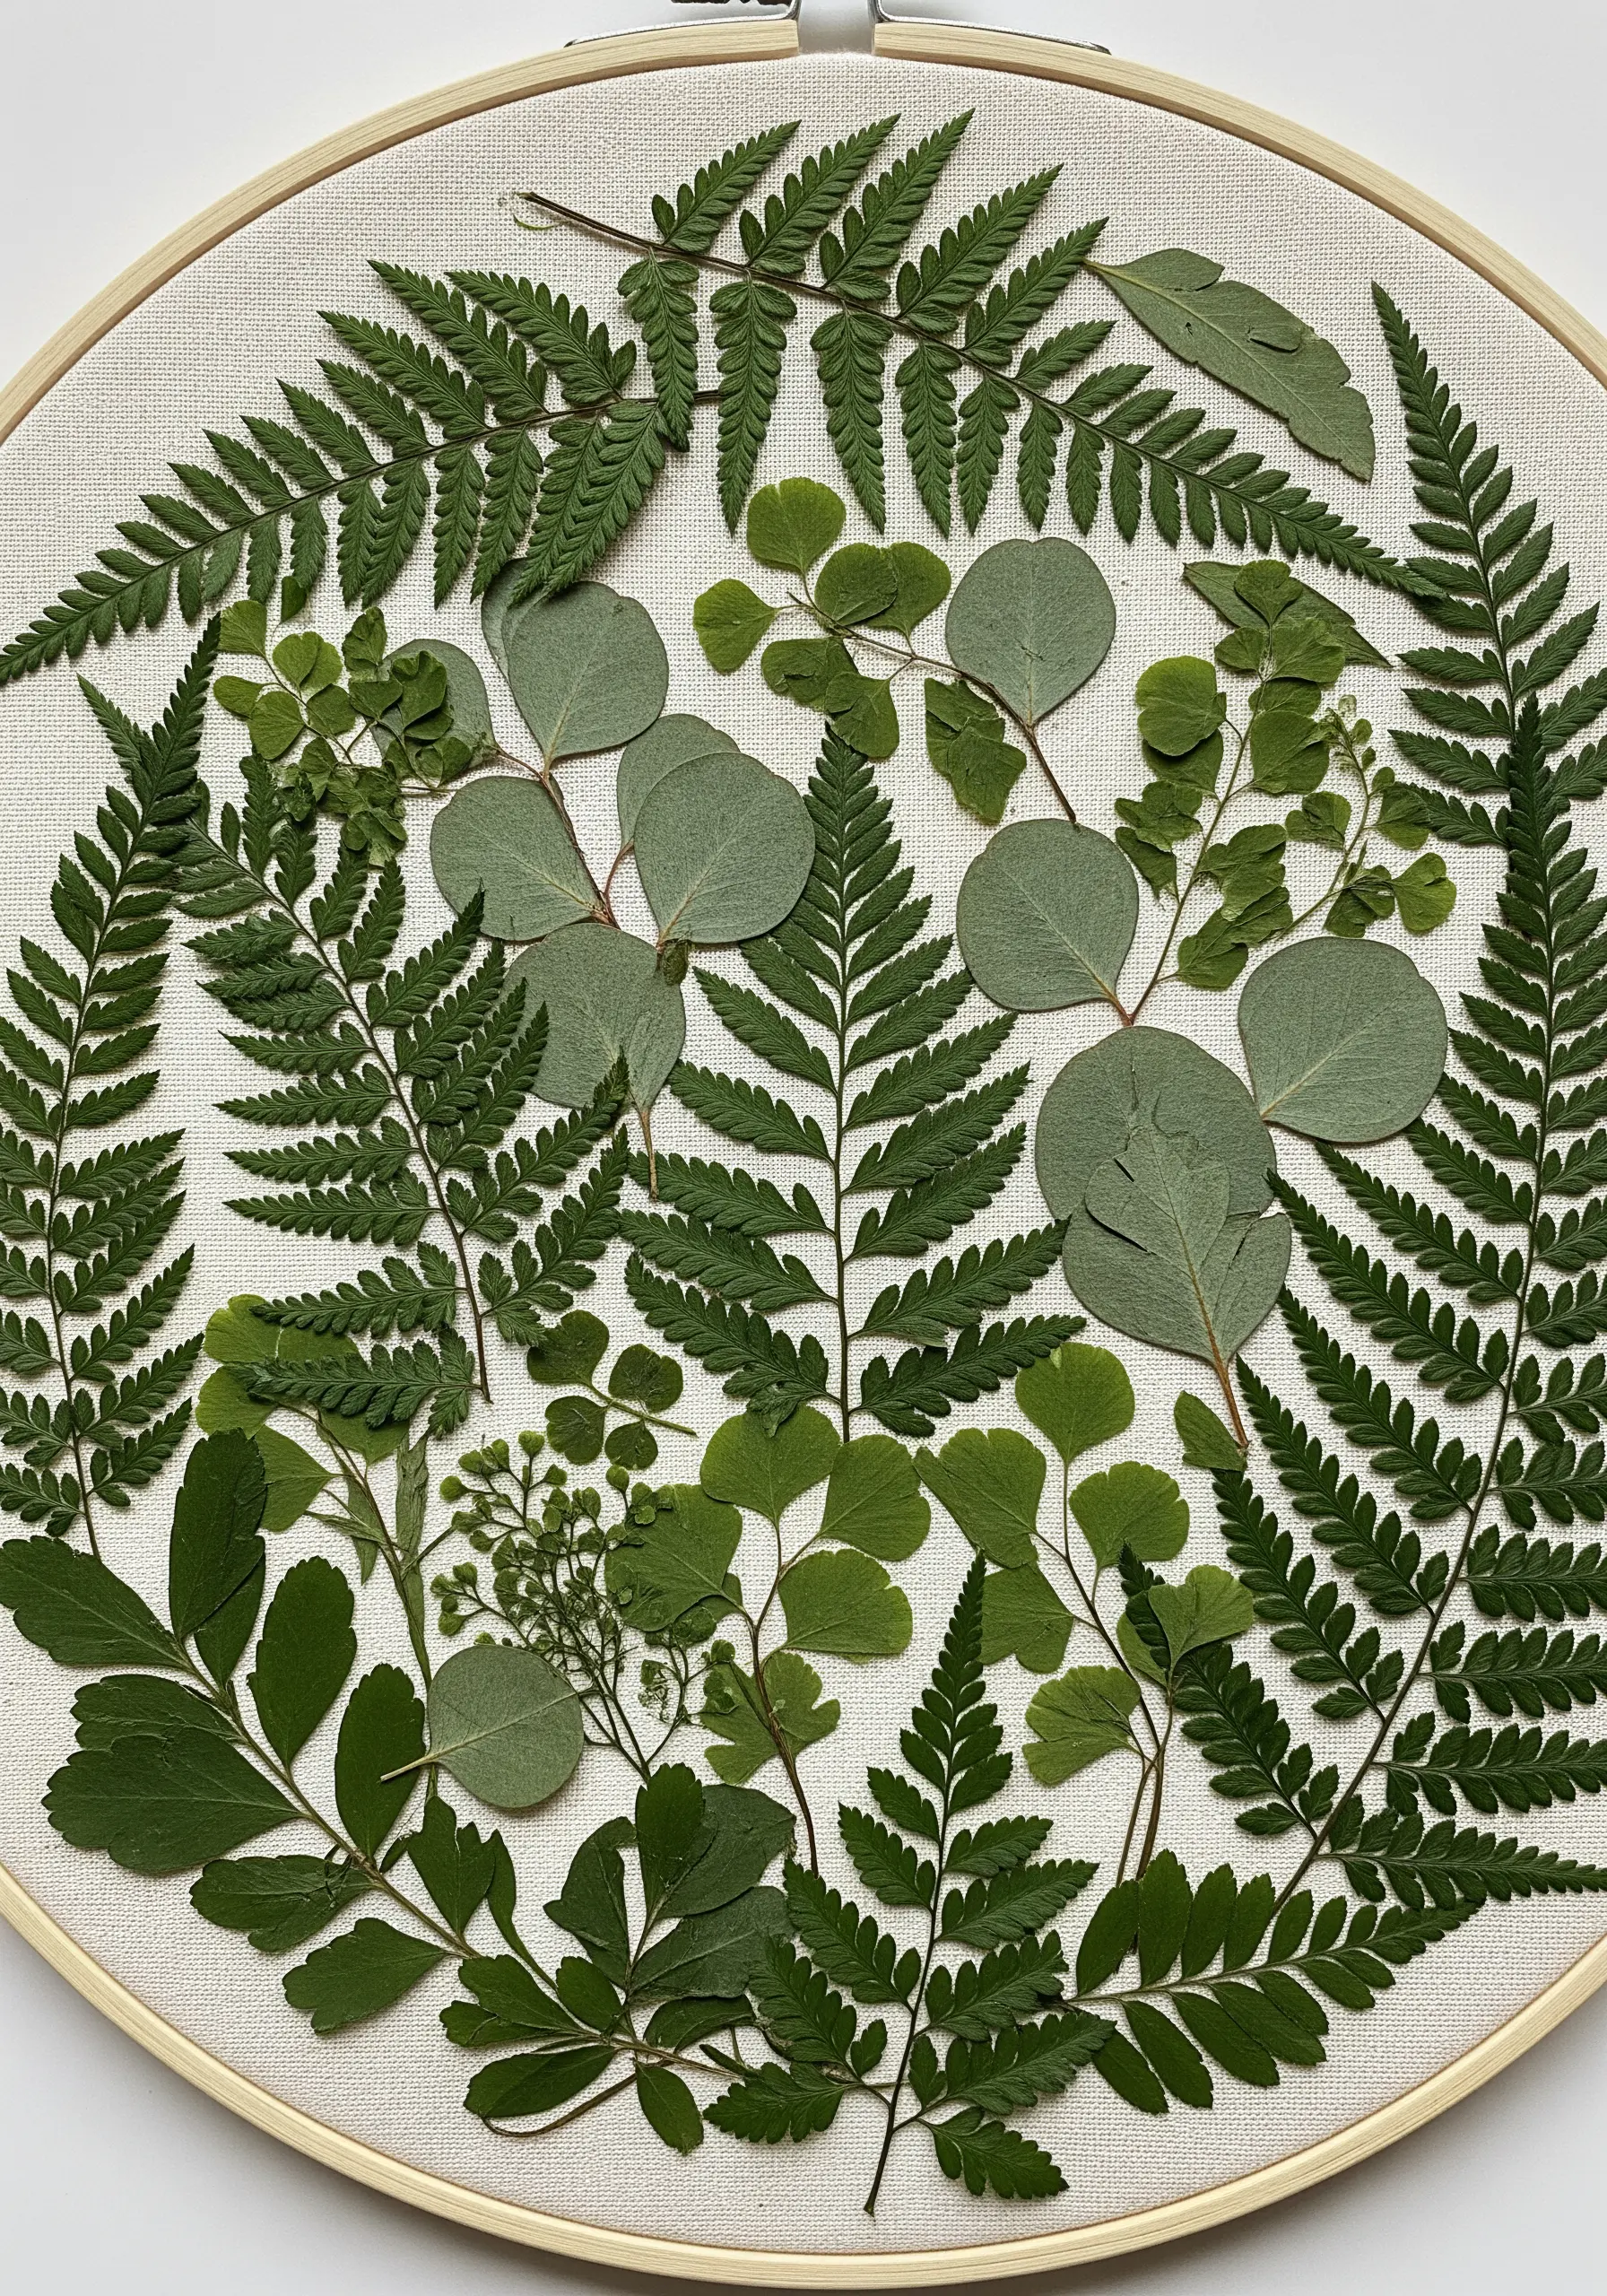
Explore the beauty of shape and texture by limiting your palette to a single color: green.
Gather a variety of pressed leaves—ferns for delicacy, eucalyptus for roundness, and ginkgo for its unique fan shape.
Arrange them in a dense, overlapping composition, letting the different forms create visual interest without the need for thread.
This exercise sharpens your eye for composition and is a beautiful way to create Plant silhouette embroidery ideas using the real thing.
13. Capture Cascading Wisteria on a Wall Hanging

To capture the graceful drape of wisteria, choose a long, vertical format for your fabric.
Lightly sketch the cascading flower clusters and use a mix of satin stitch and French knots in shades of purple and lilac to build up texture.
Intertwine stitched vines and leaves throughout the design. Finally, apply pressed wisteria blossoms over your stitching to add a layer of lifelike detail.
This mixed-media approach is perfect for large-scale hand-embroidery textile wall art ideas.
14. Tell a Story with an Unfinished Stem
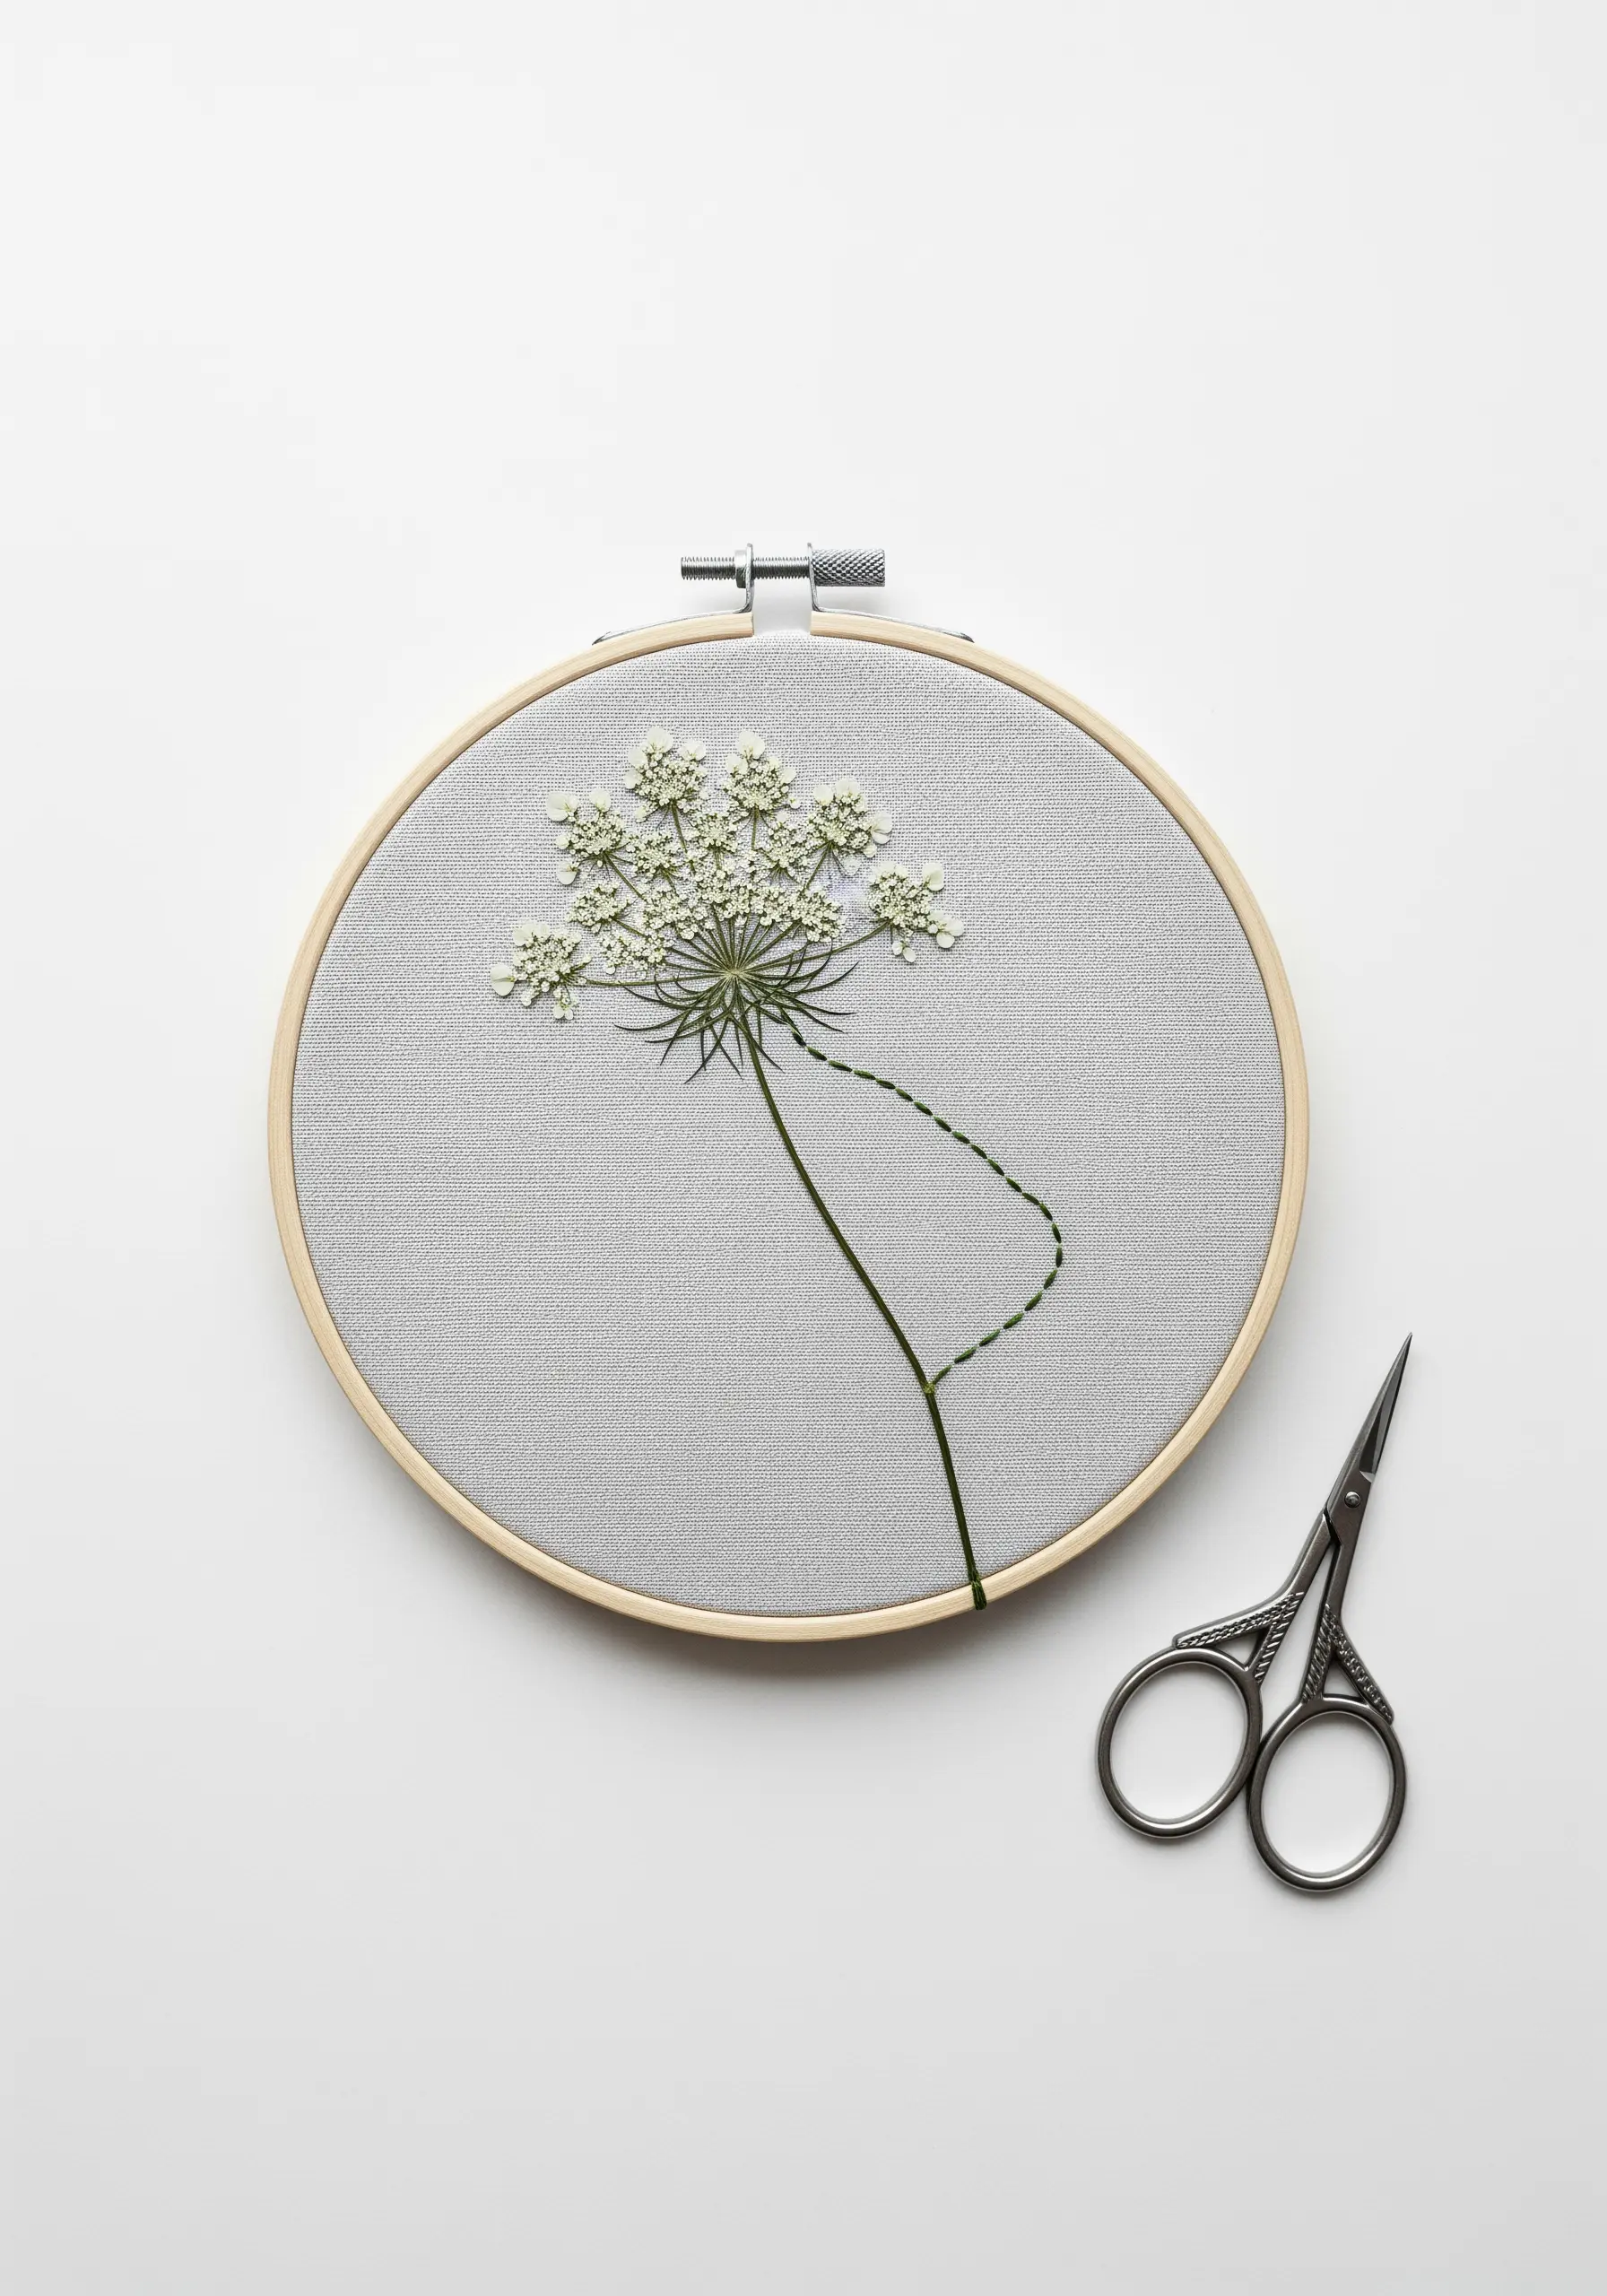
Suggest movement and process by leaving a piece intentionally “unfinished.”
Secure a pressed flower head, like Queen Anne’s Lace, to your fabric.
Begin stitching the stem using a simple stem stitch or backstitch, then let the thread trail off, as if the embroidery itself is still growing.
This thoughtful detail transforms a simple study into a compelling narrative, adding an artistic touch to your one-line embroidery wall arts.
15. Arrange Flowers in a Vivid Crescent Moon
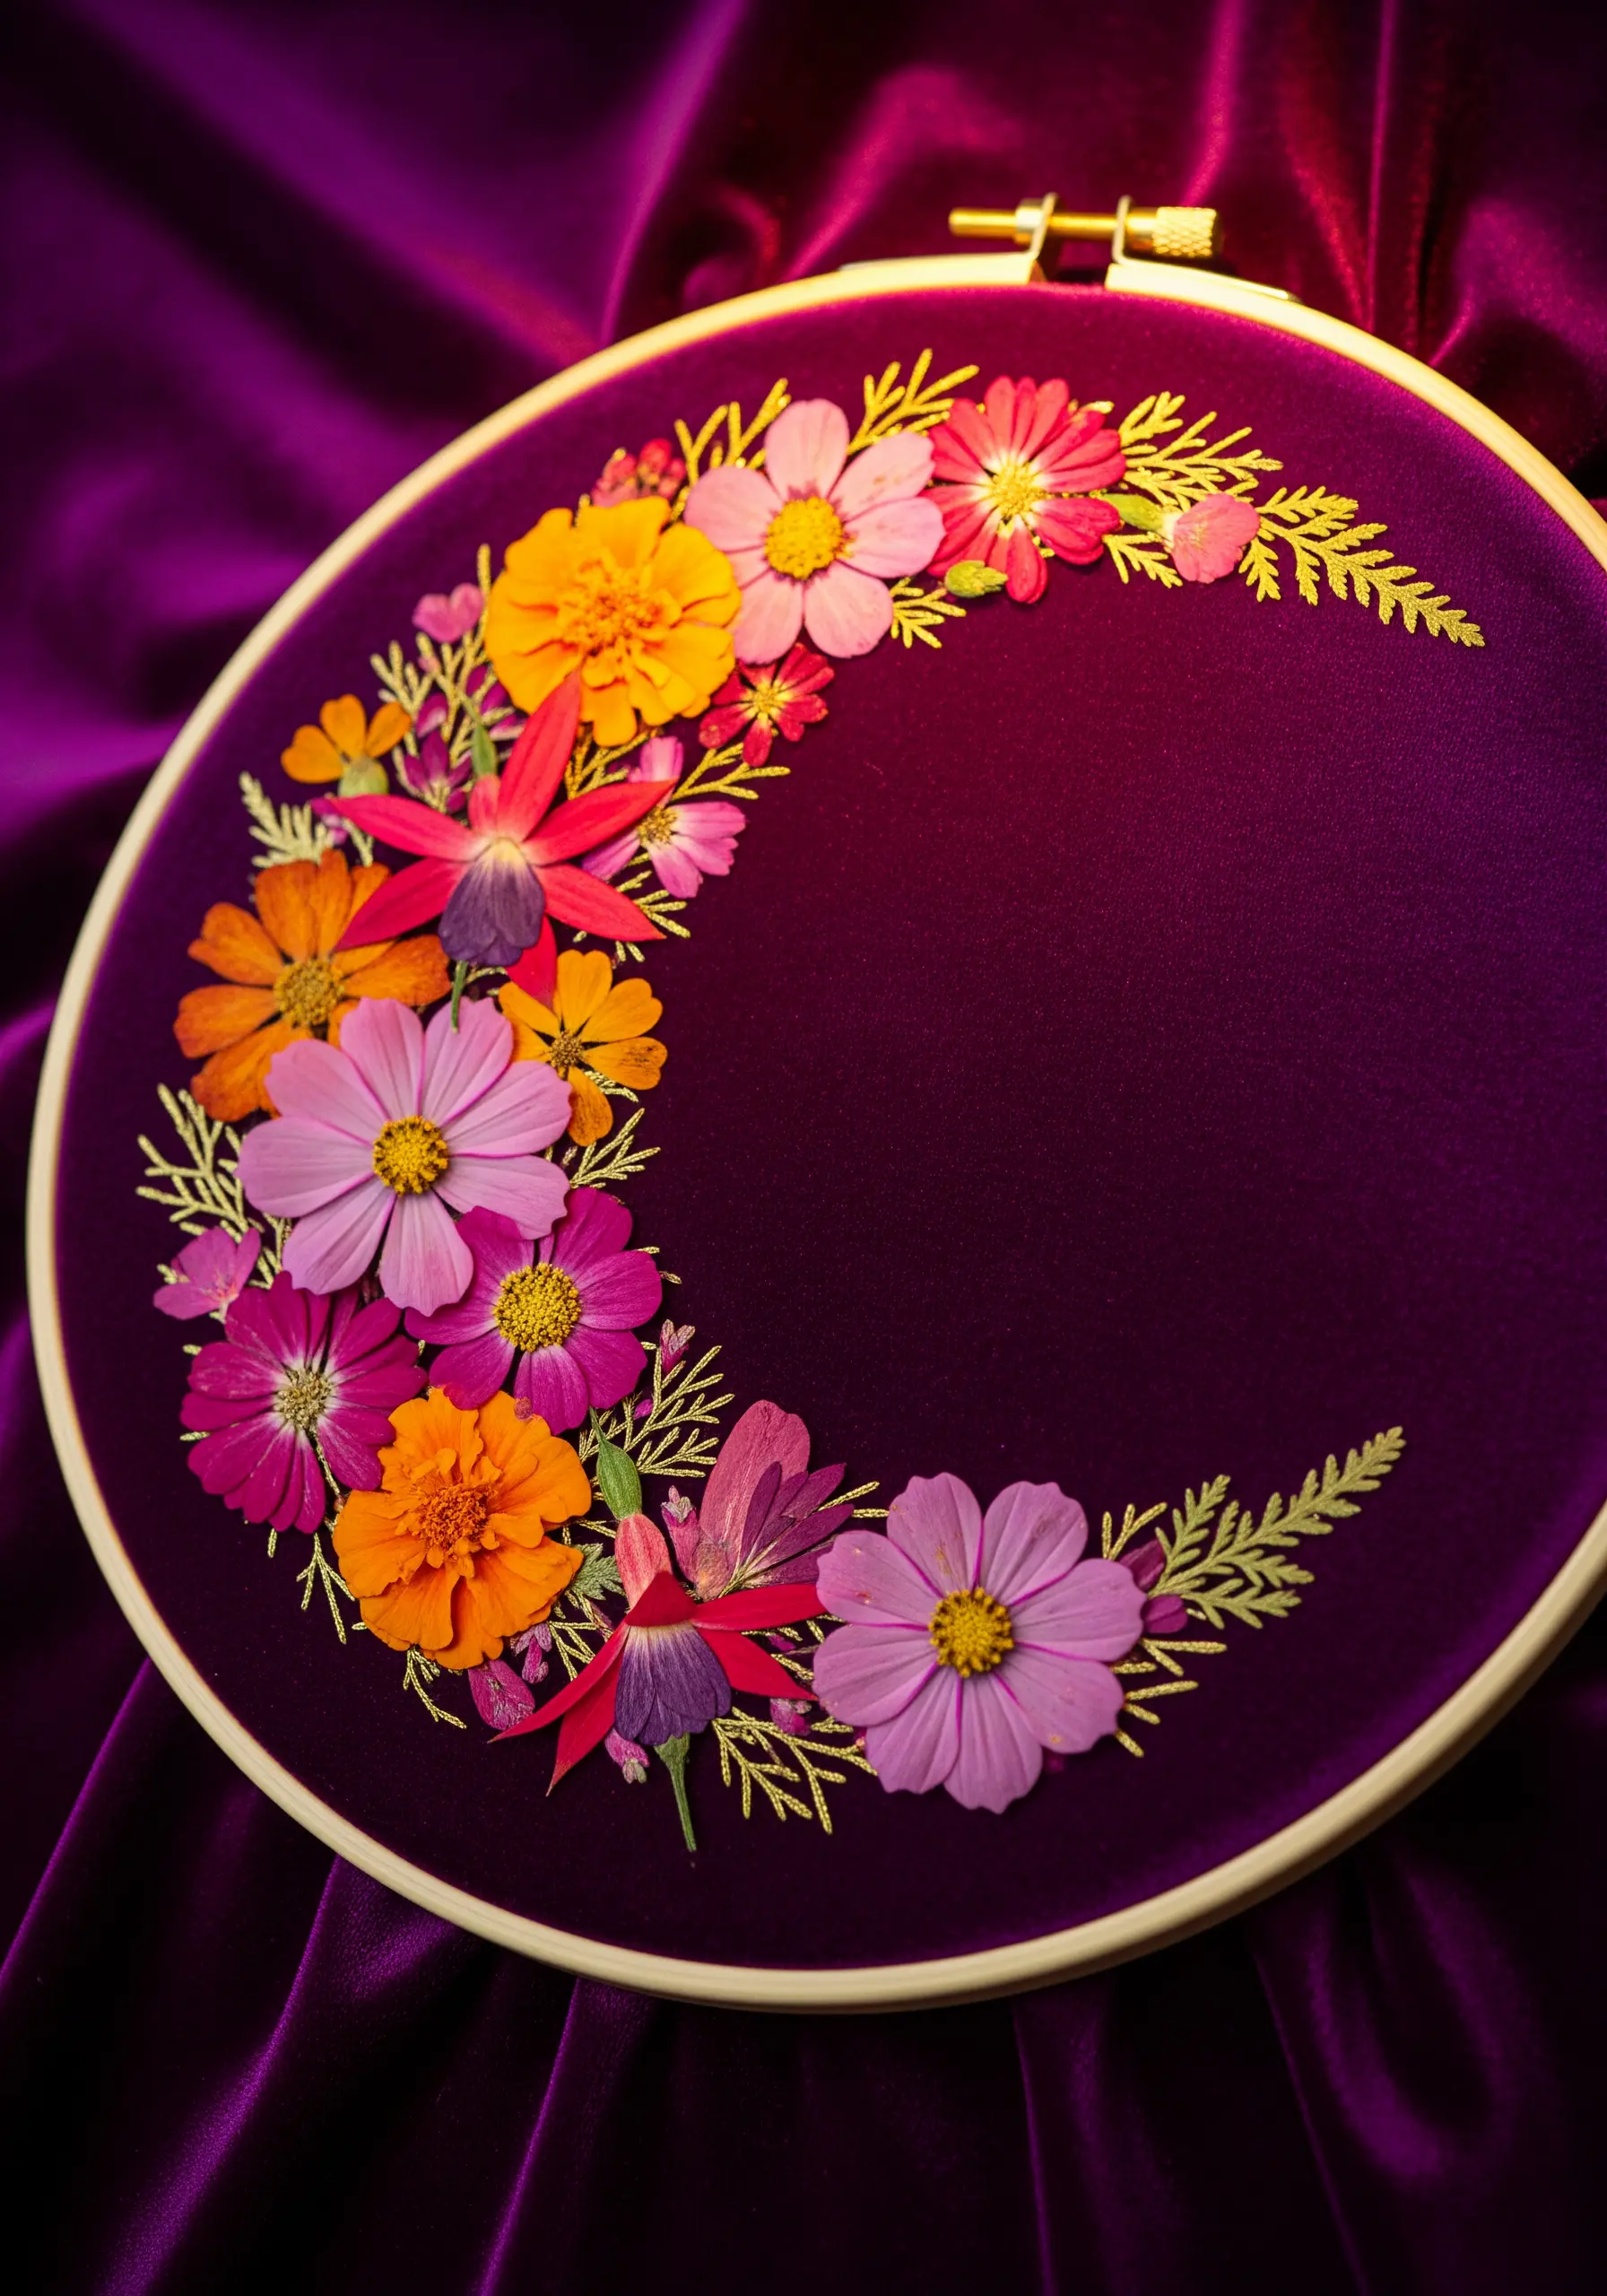
Create a stunning focal point by arranging your pressed flowers in a crescent moon shape.
To make the colors truly sing, choose a rich, dark background fabric like velvet or satin, which absorbs light and makes brights appear more saturated.
Group your flowers by color, creating a subtle gradient from oranges and yellows to pinks and magentas.
This technique turns a simple floral arrangement into one of your most vibrant and bold and colorful framed embroidery patterns.
16. Craft a Botanical Herbarium Chart
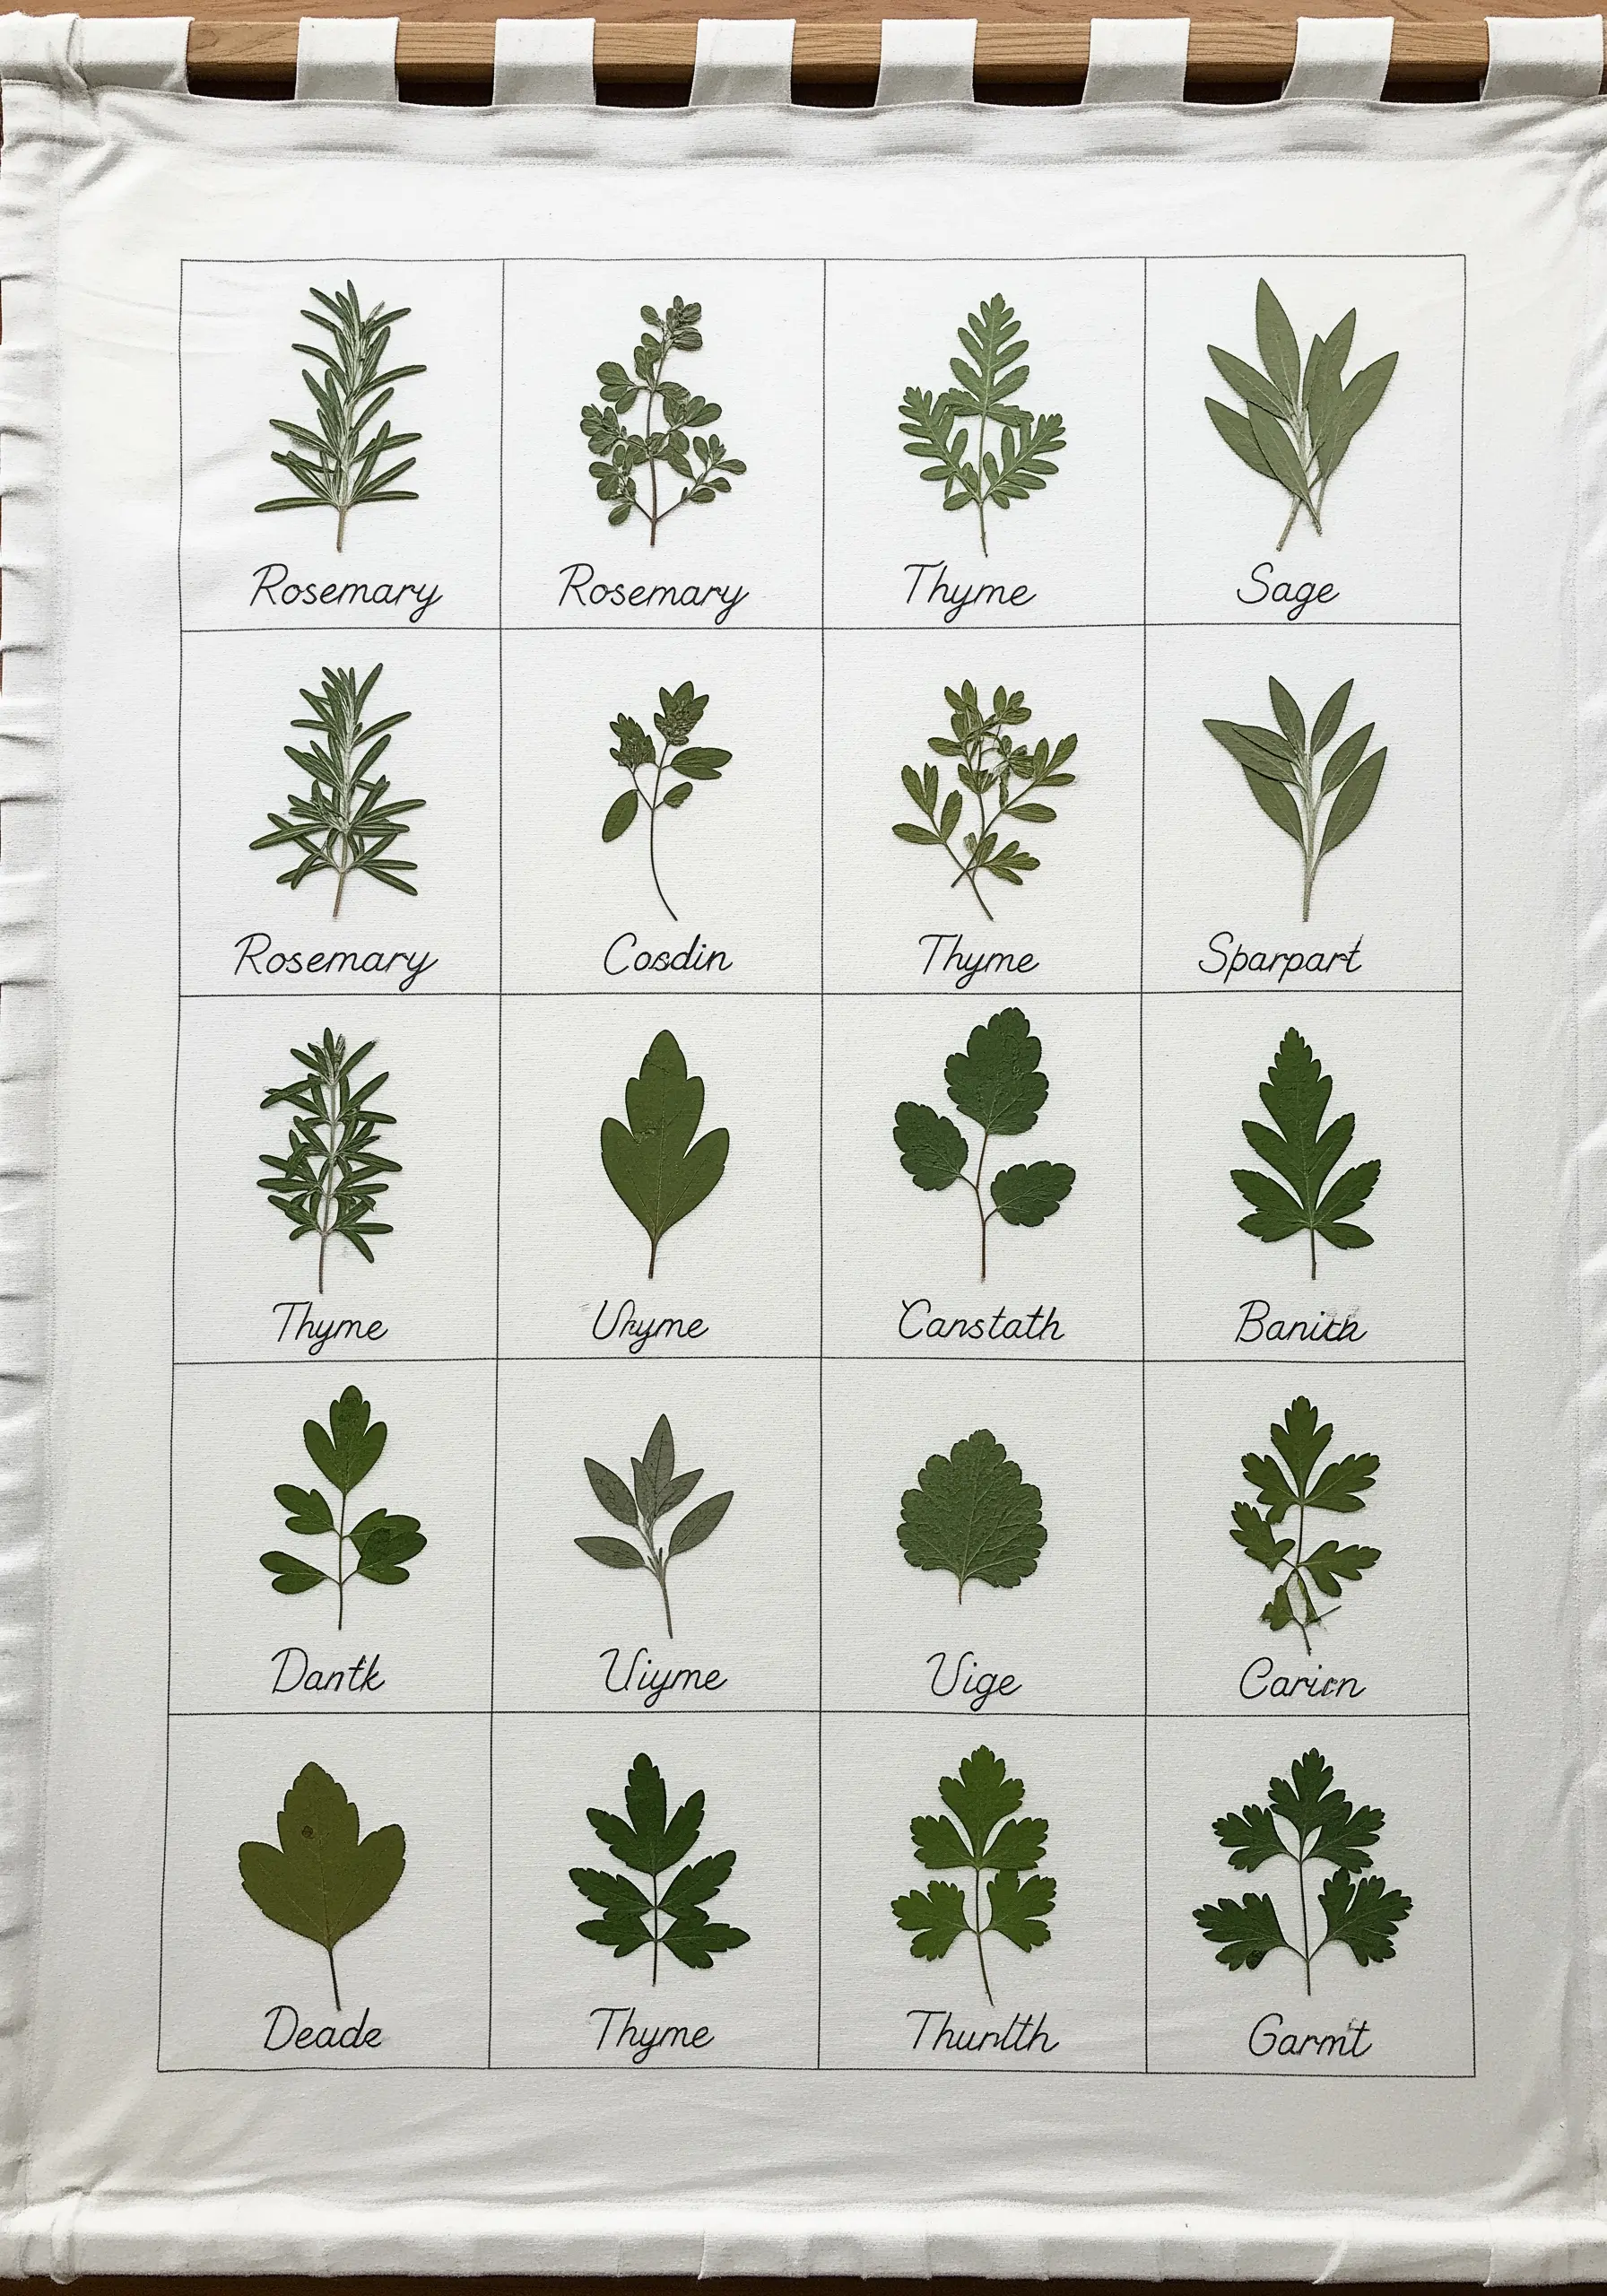
Embrace a scientific aesthetic by creating a gridded herbarium-style sampler.
Use a ruler and a water-soluble marker to draw a precise grid on your fabric.
Secure a different pressed herb in each square, then add the labels using a tiny backstitch with a single strand of black thread for clarity.
This project not only looks stunning but also serves as a beautiful way to practice your tiny lettering and learn about different garden herb embroidery patterns.
17. Construct a Mosaic with Flower Petals
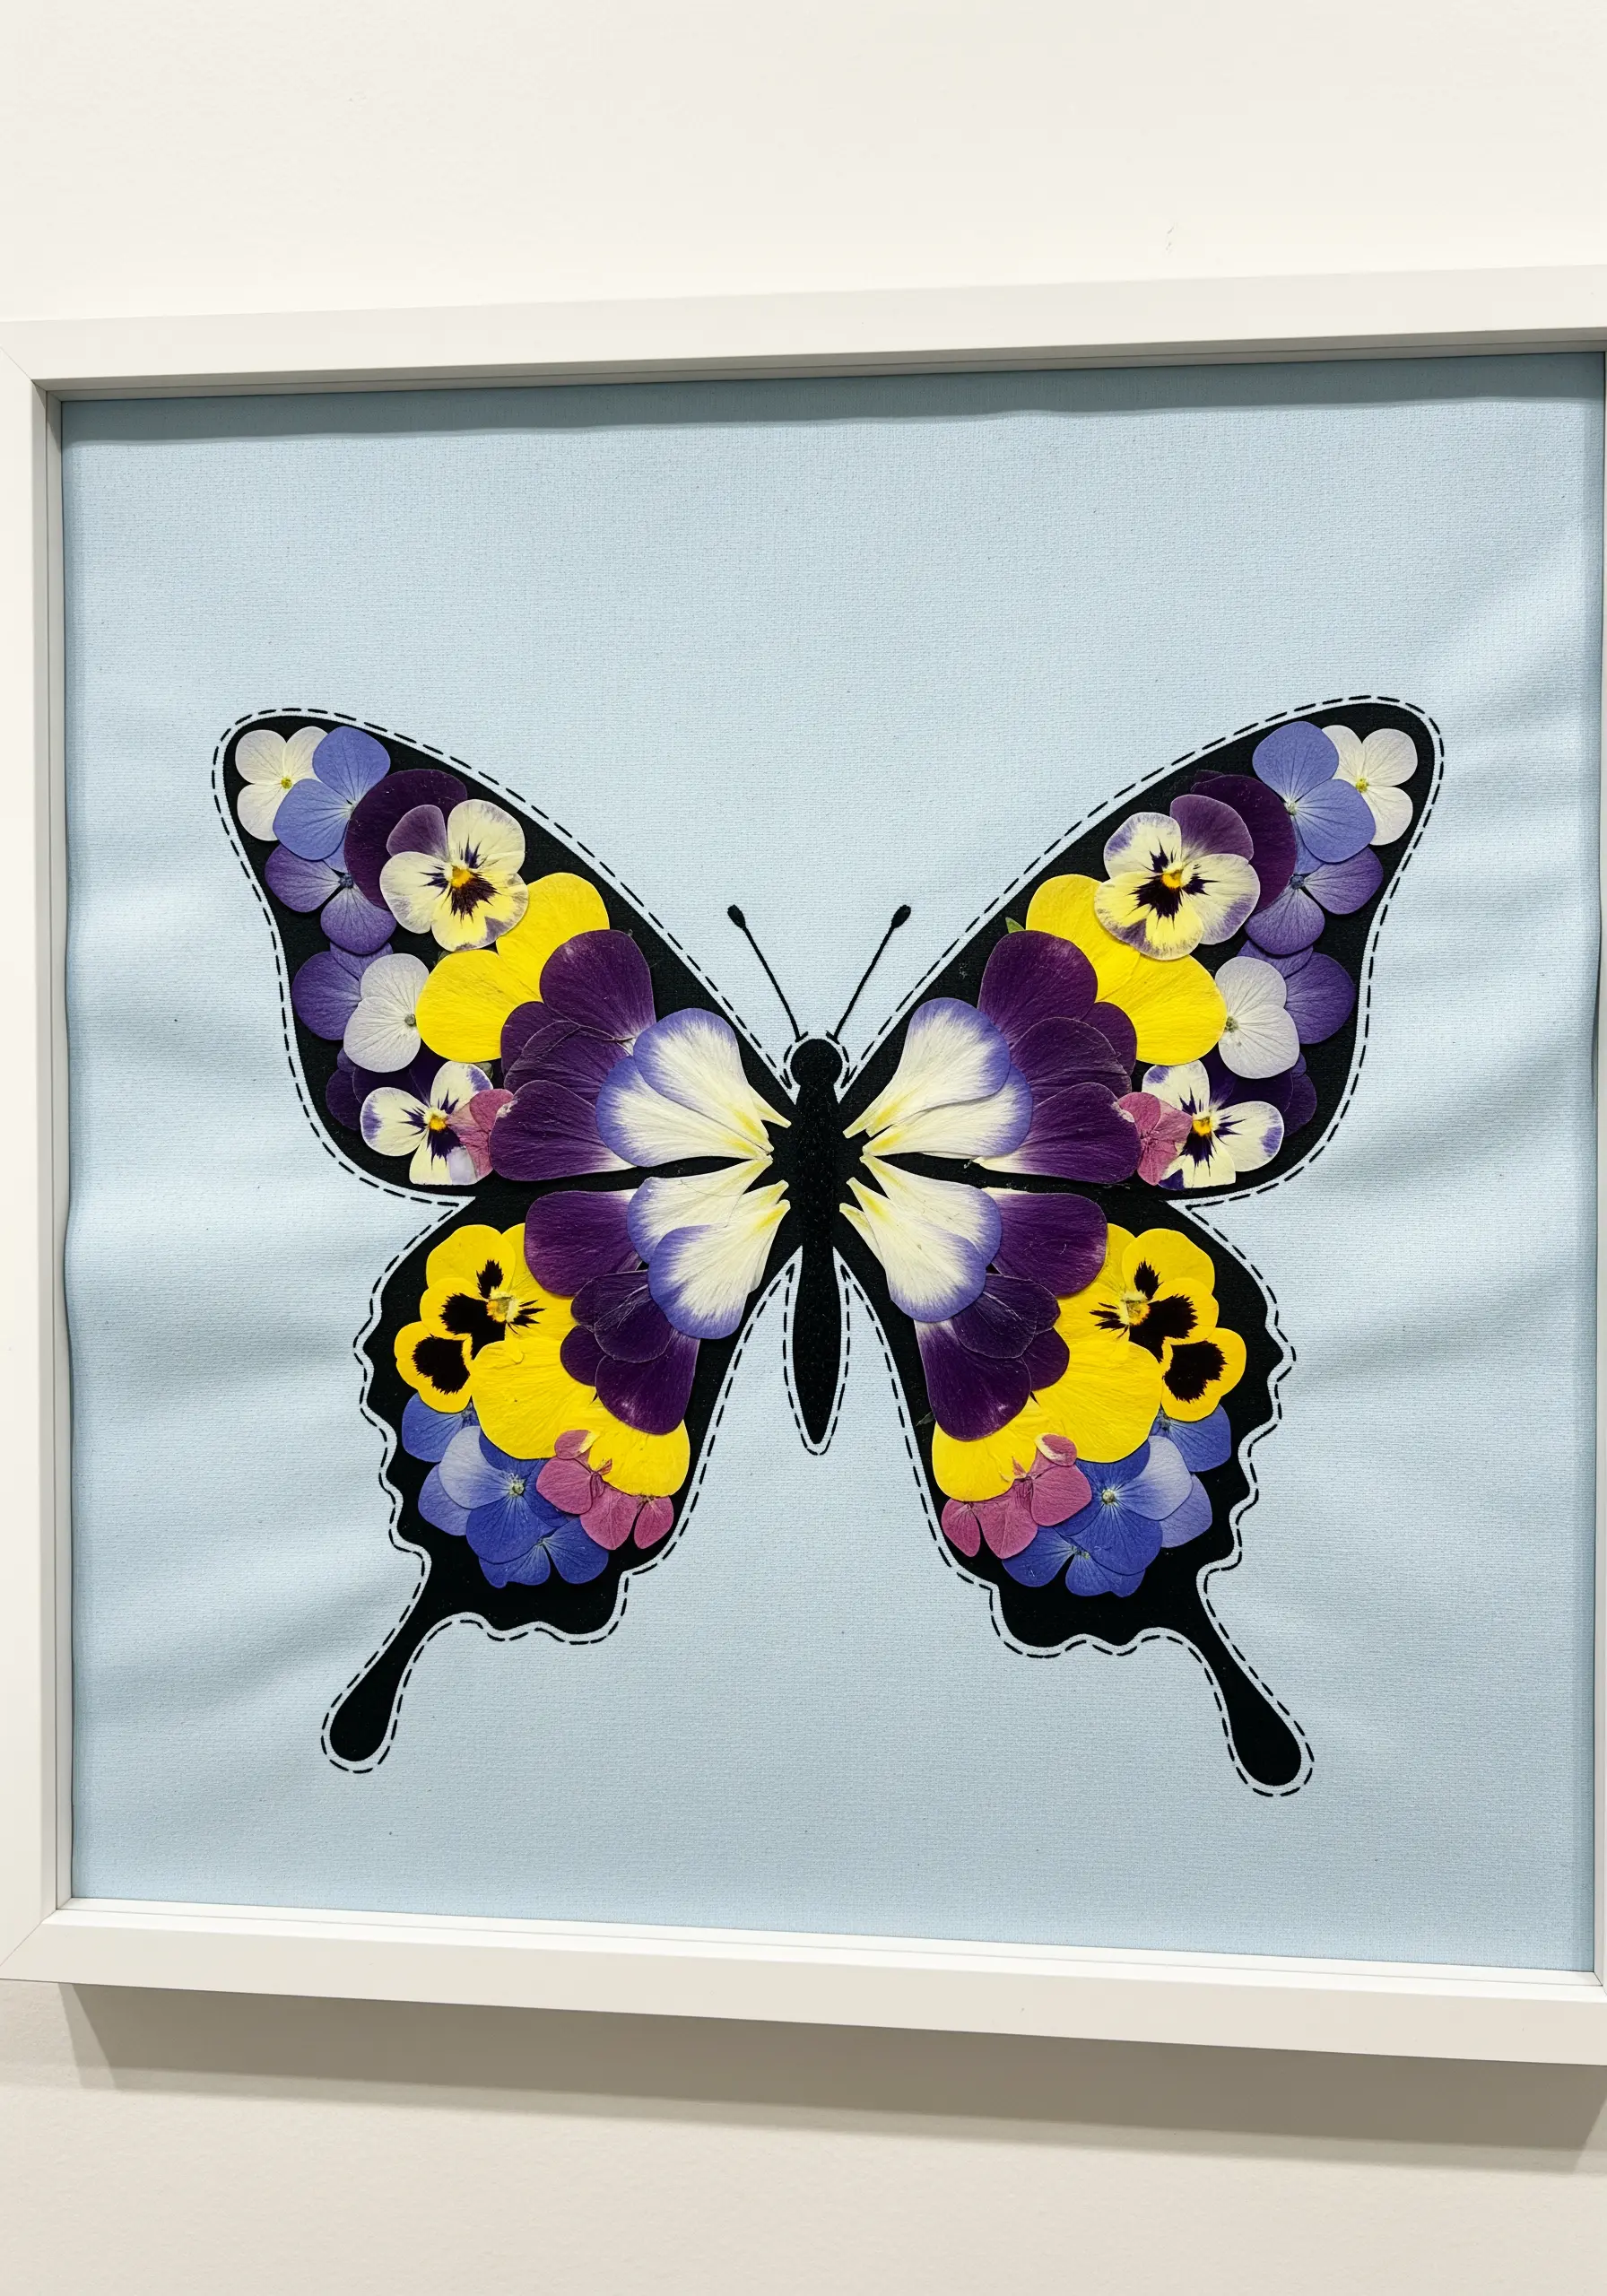
Instead of using whole flowers, use individual petals to create a mosaic effect.
Draw your desired shape—like a butterfly—onto your fabric and outline it with a sharp split stitch or backstitch.
Then, carefully arrange and secure single petals within the outline, overlapping them to fill the space with color and pattern.
This technique allows for incredible detail and transforms simple flowers into intricate Butterfly moth embroidery patterns with a stained-glass quality.
18. Weave a Threaded Wreath Base
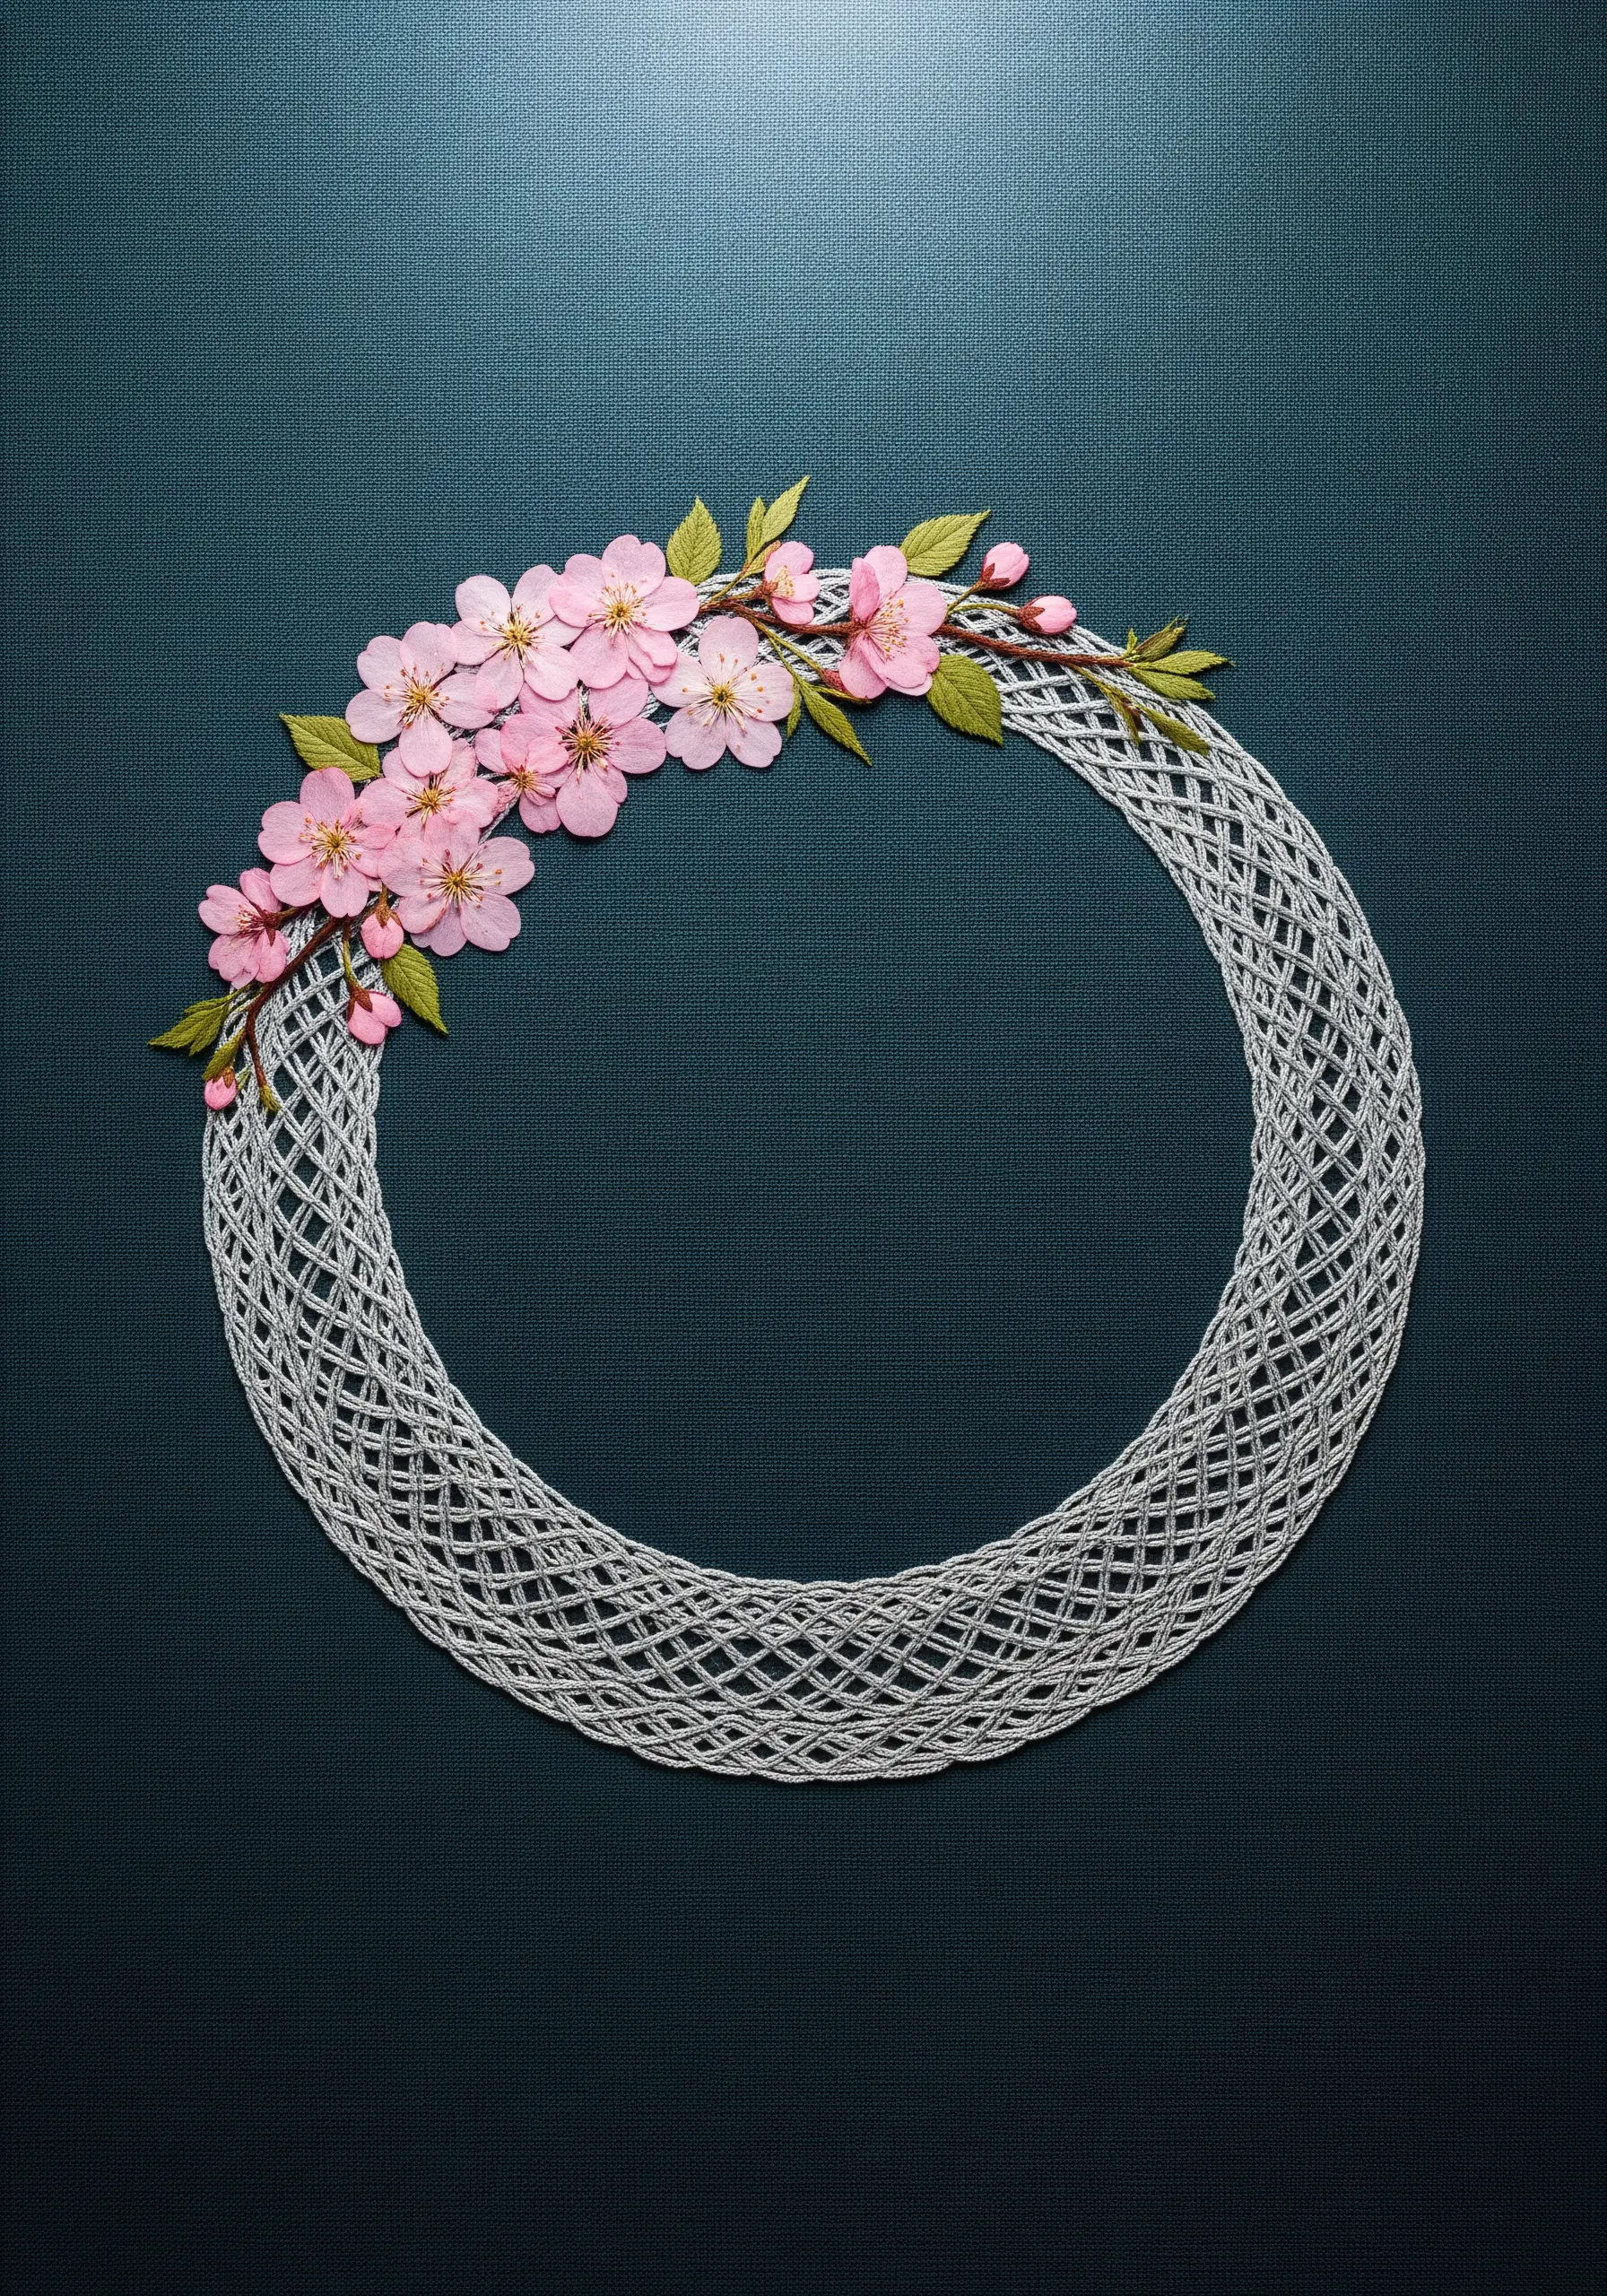
For a truly unique piece, move beyond the fabric and create a woven structure with thread alone.
Wrap thread tightly around a sturdy wire hoop to create warp threads, then weave another thread in and out to form a delicate, web-like base.
This intricate foundation becomes part of the art itself.
Once complete, attach a small spray of pressed or silk flowers to one side for an elegant, asymmetrical finish. This is one of those modern thread illusion techniques that will awe everyone.
19. Mix Real Leaves with Stitched Botanicals

Create a rich, autumnal piece by blending the textures of real pressed leaves with embroidered elements.
Secure the real leaves first, then stitch complementary motifs around them.
Use French knots for berries, satin stitch for smaller leaves, and stem stitch for branches. This combination of flat, real texture with raised, stitched texture adds a lovely dimensional quality.
It’s an ideal way to design seasonal framed embroidery pieces that capture the essence of the season.
20. Design a Detachable Botanical Patch
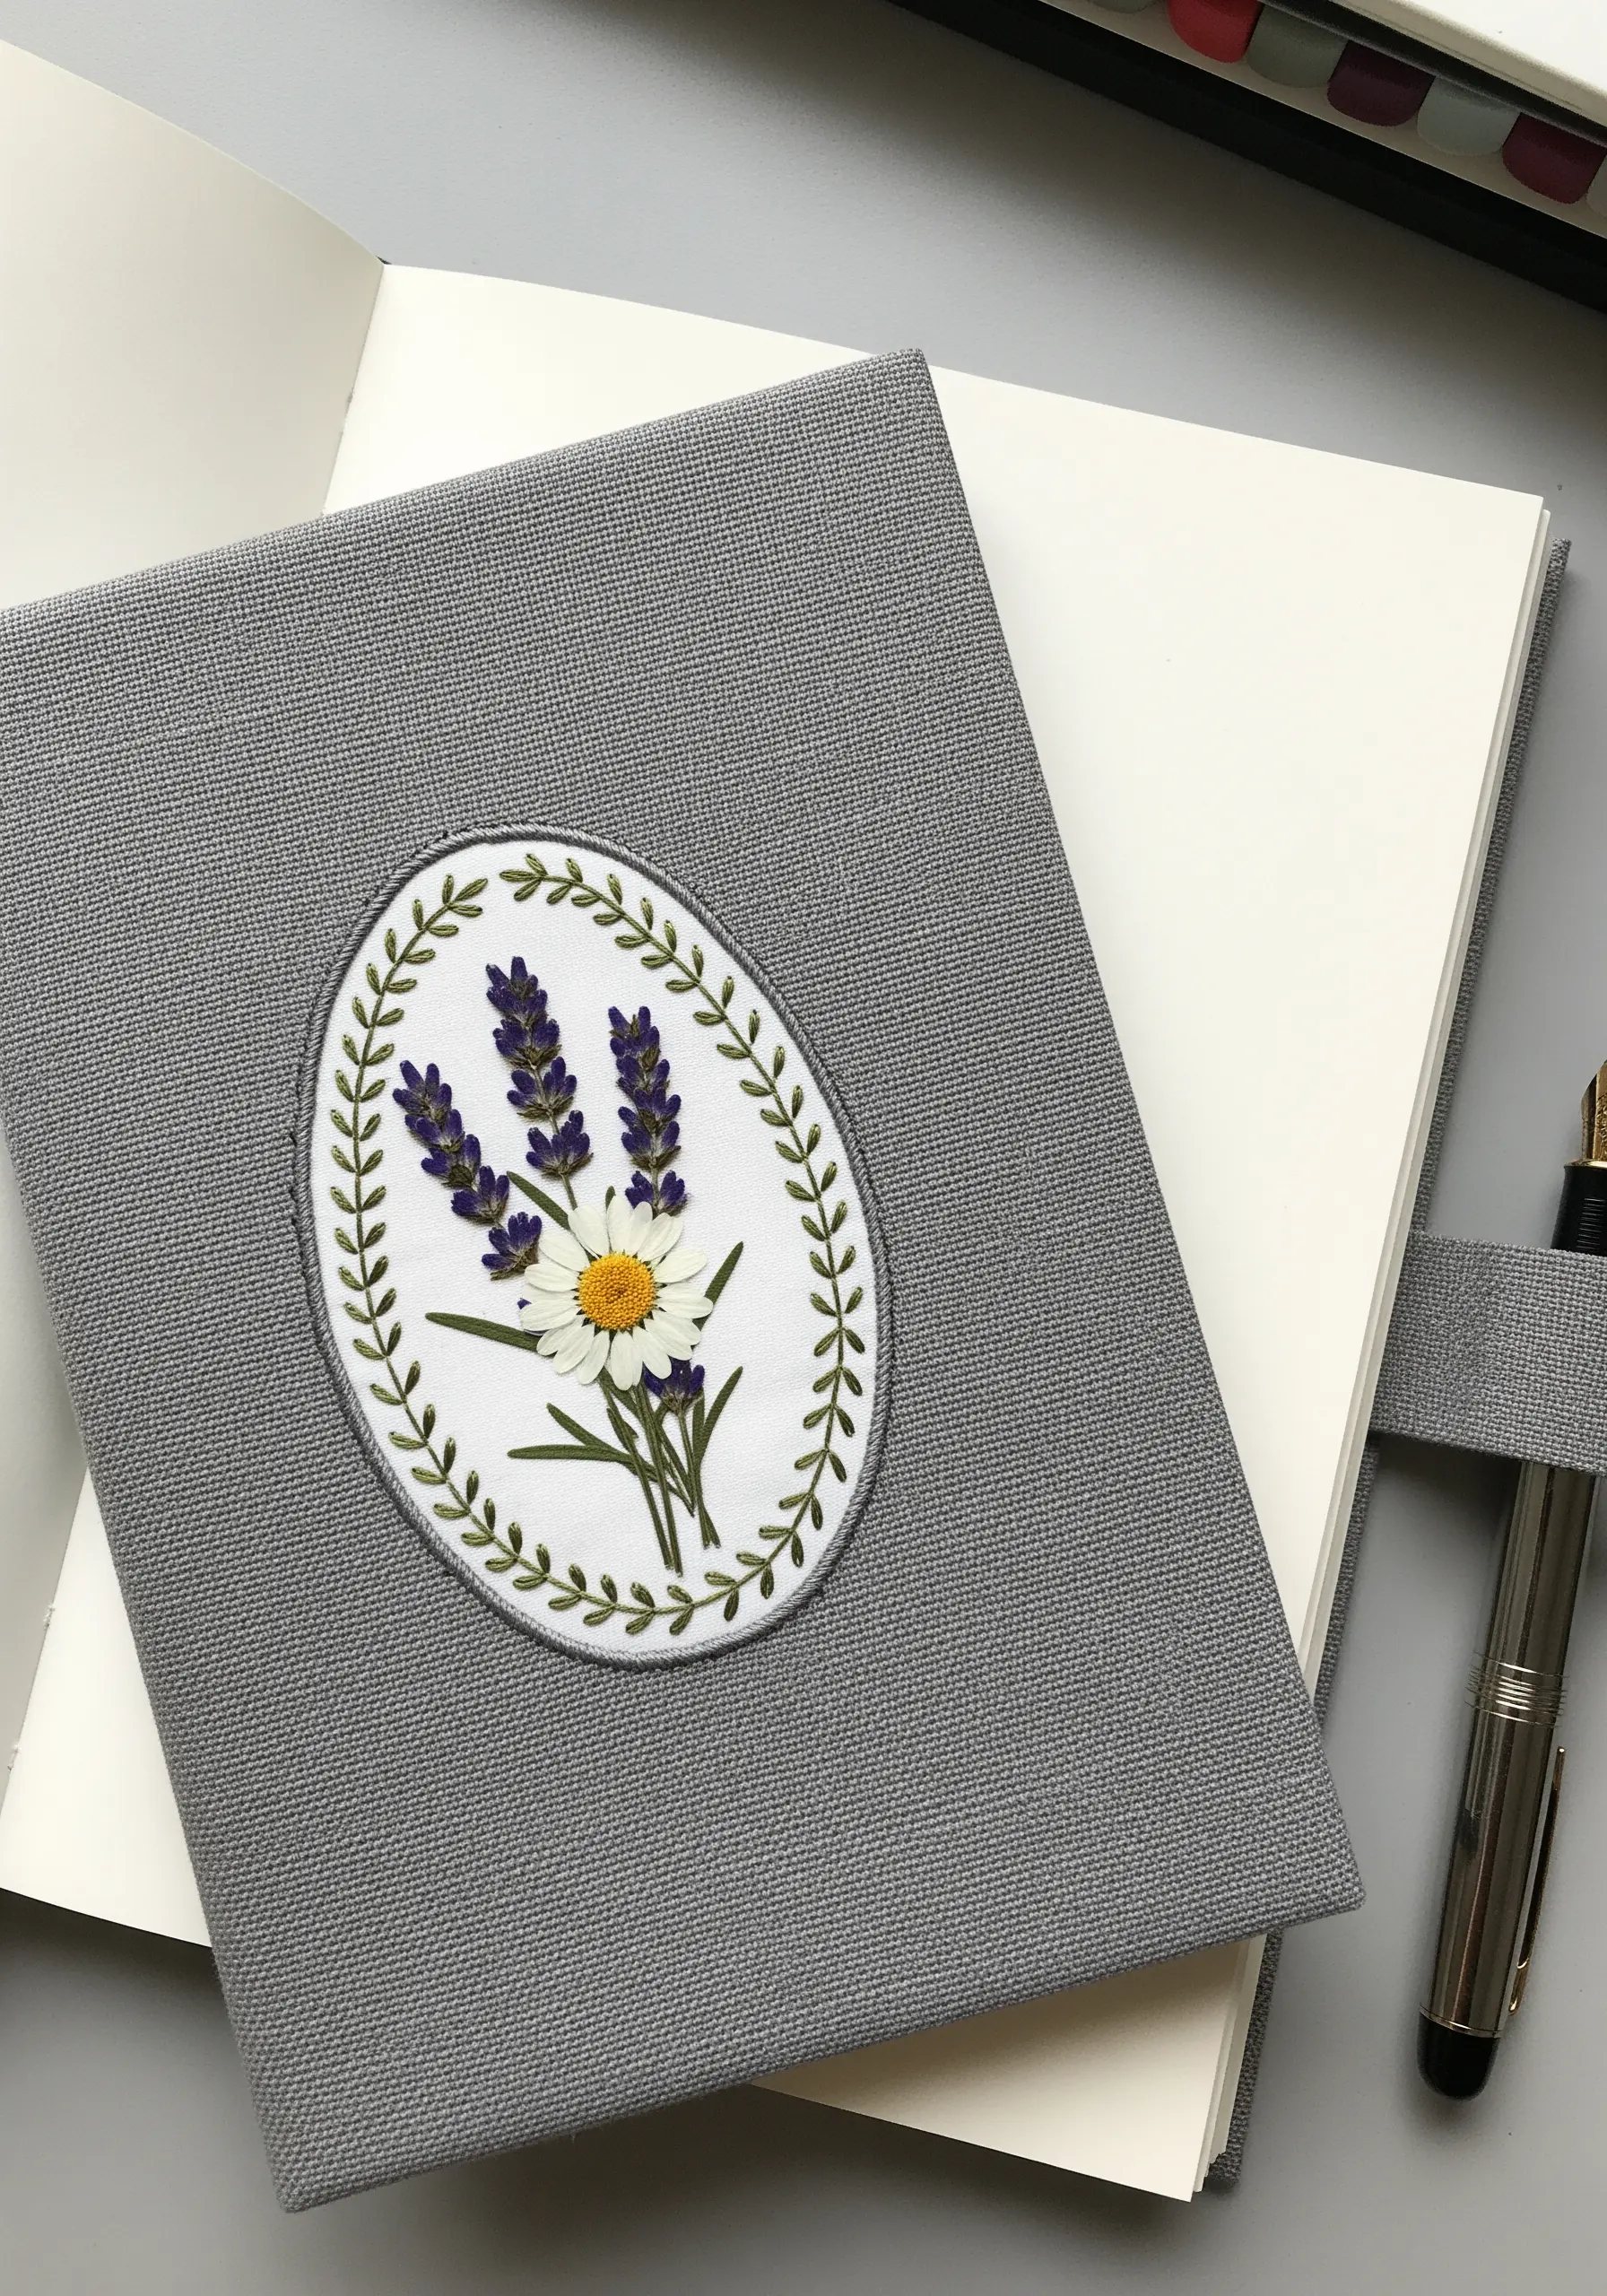
To add pressed flower embroidery to items you need to wash, create a detachable patch.
Embroider your design on a sturdy piece of felt or canvas, securing your pressed flowers within a stitched border.
Cut the patch out, leaving a small fabric margin, and either add a pin-back or simply tack it onto your journal, bag, or jacket with a few stitches you can easily remove.
This is a clever way to apply delicate mixed-media crafts with embroidery to transform old journals without risking damage.
21. Build a 3D Stitched Terrarium
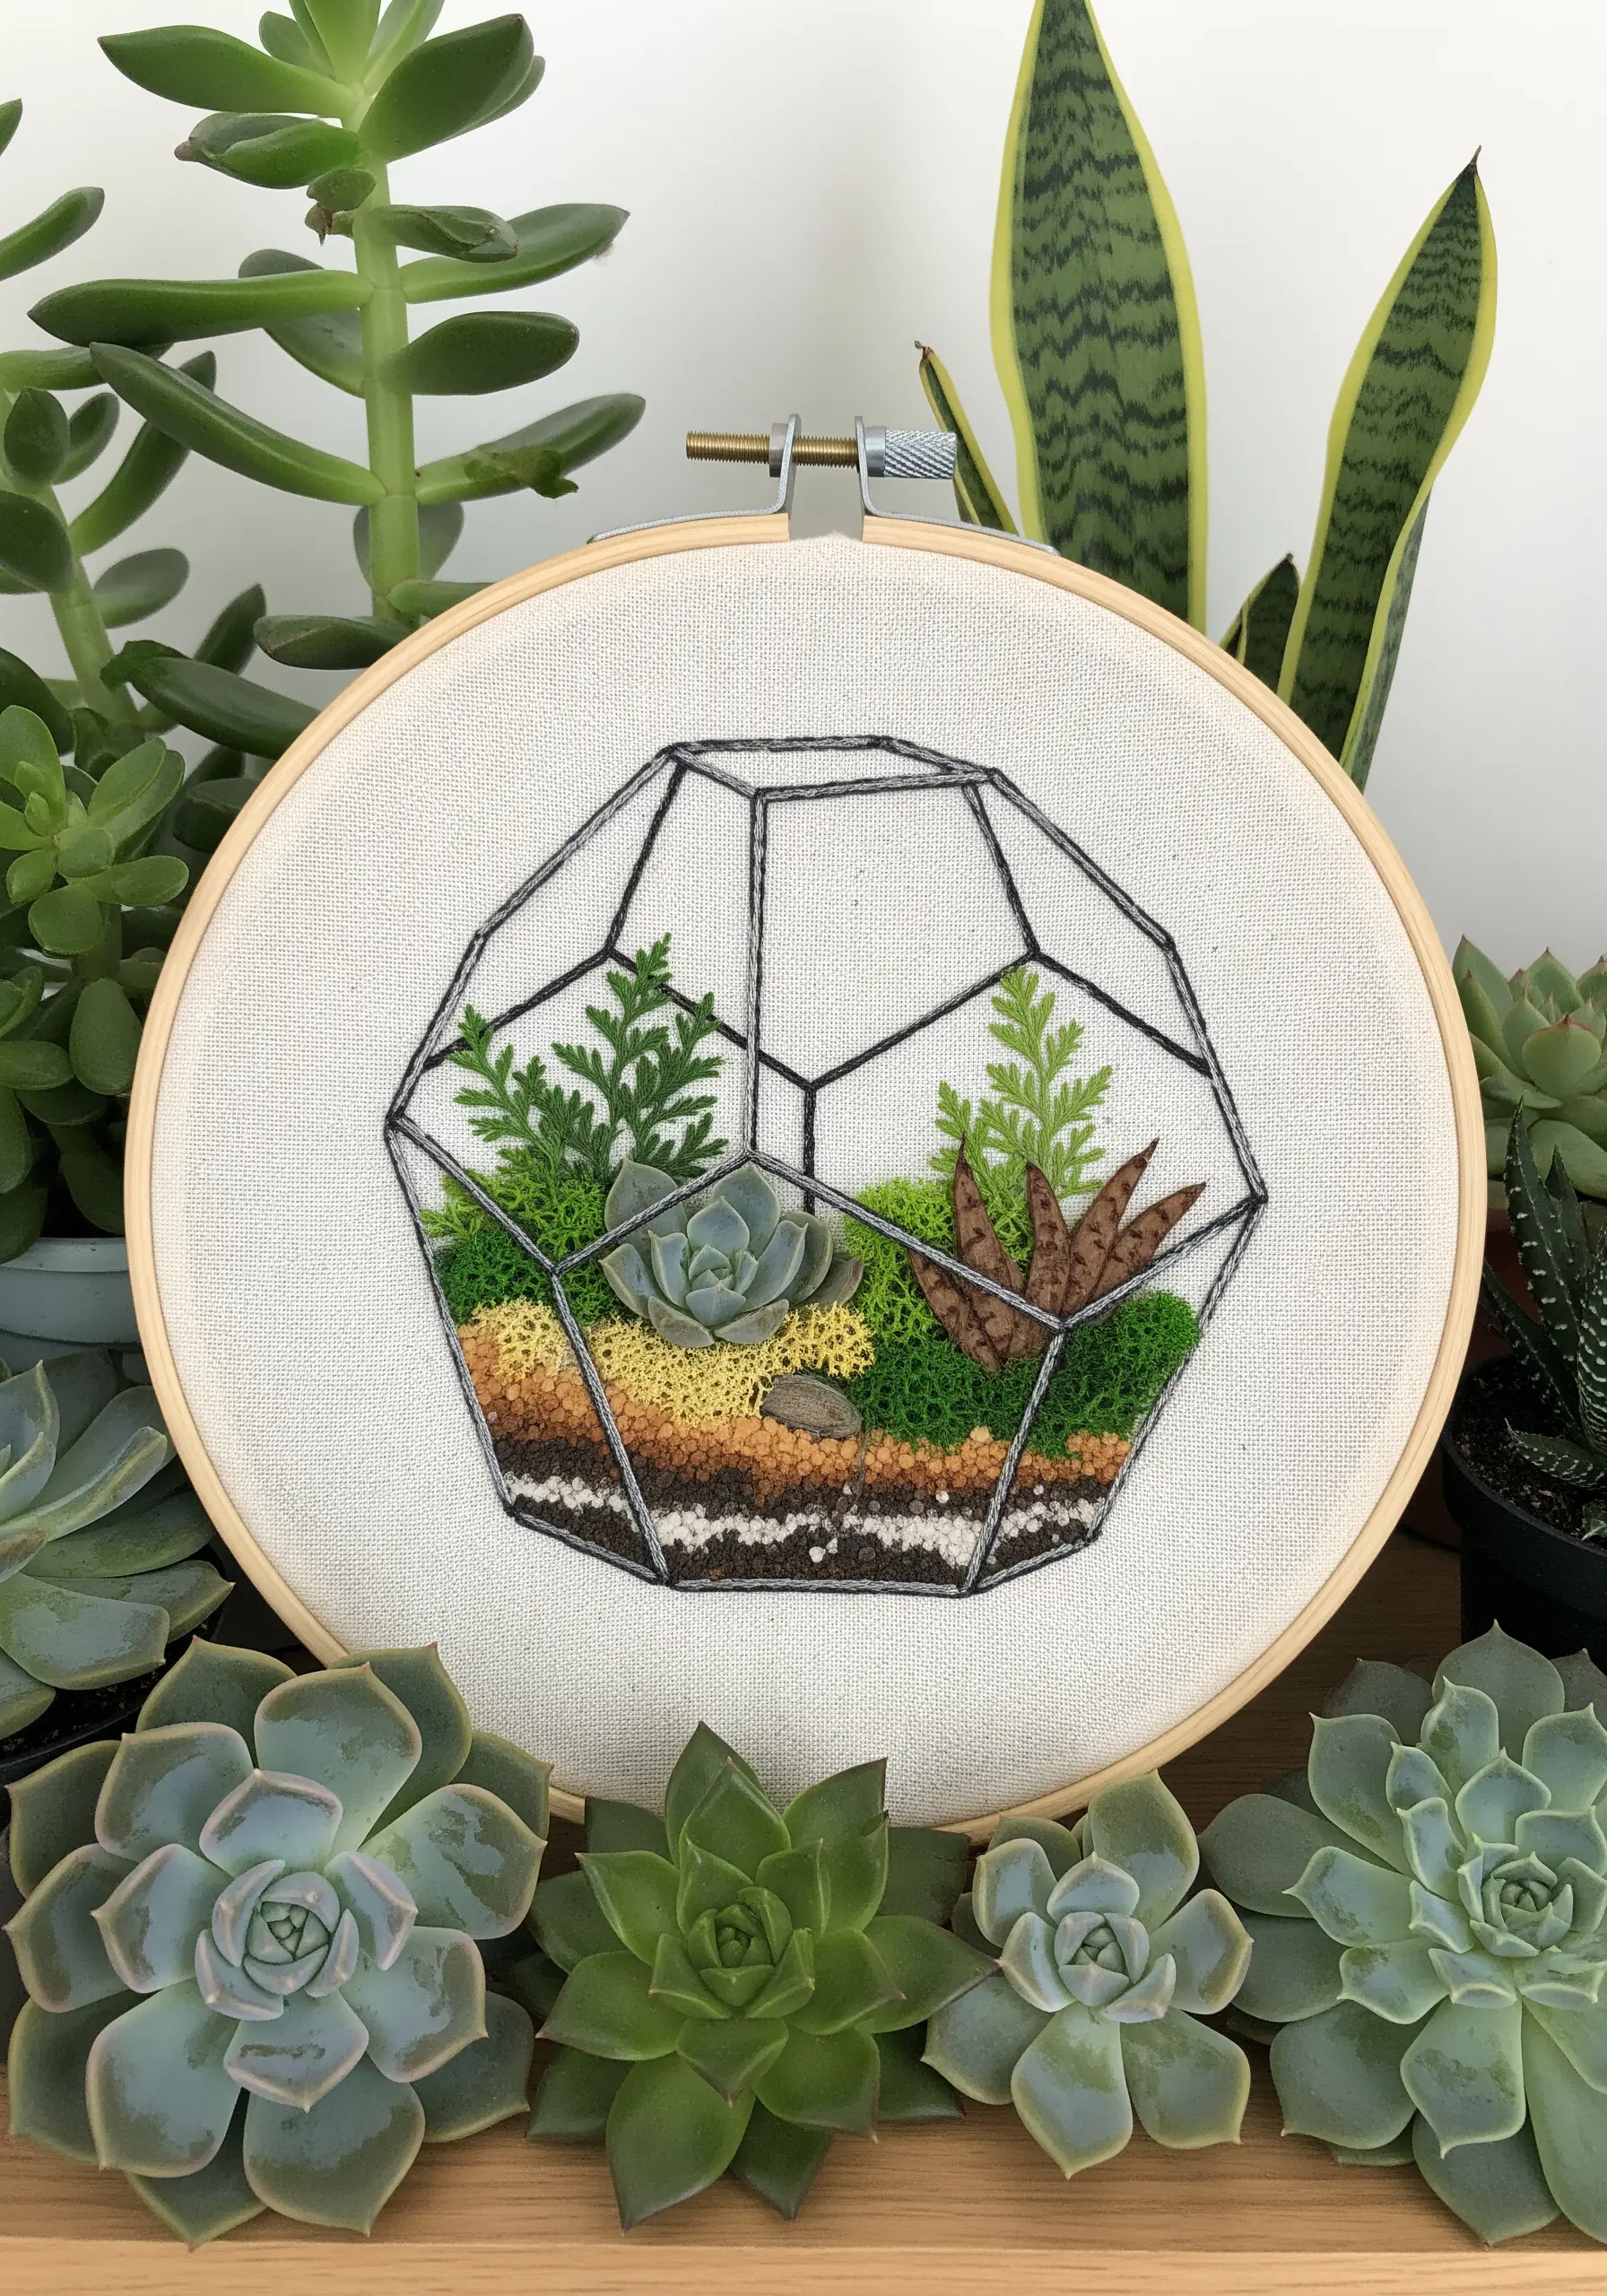
Recreate a miniature world by using dimensional stitches to build a terrarium.
Use layers of straight stitches for the soil and sand. Create texture for moss and succulents with a combination of French knots, bullion knots, and turkey work.
Once your stitched landscape is complete, add a few delicate pressed ferns to represent the larger plants.
The sharp, black outline of the terrarium container provides a strong graphic frame for your lush, textured botanical terrarium embroidery ideas.
22. Blend Embroidery with a Watercolor Wash
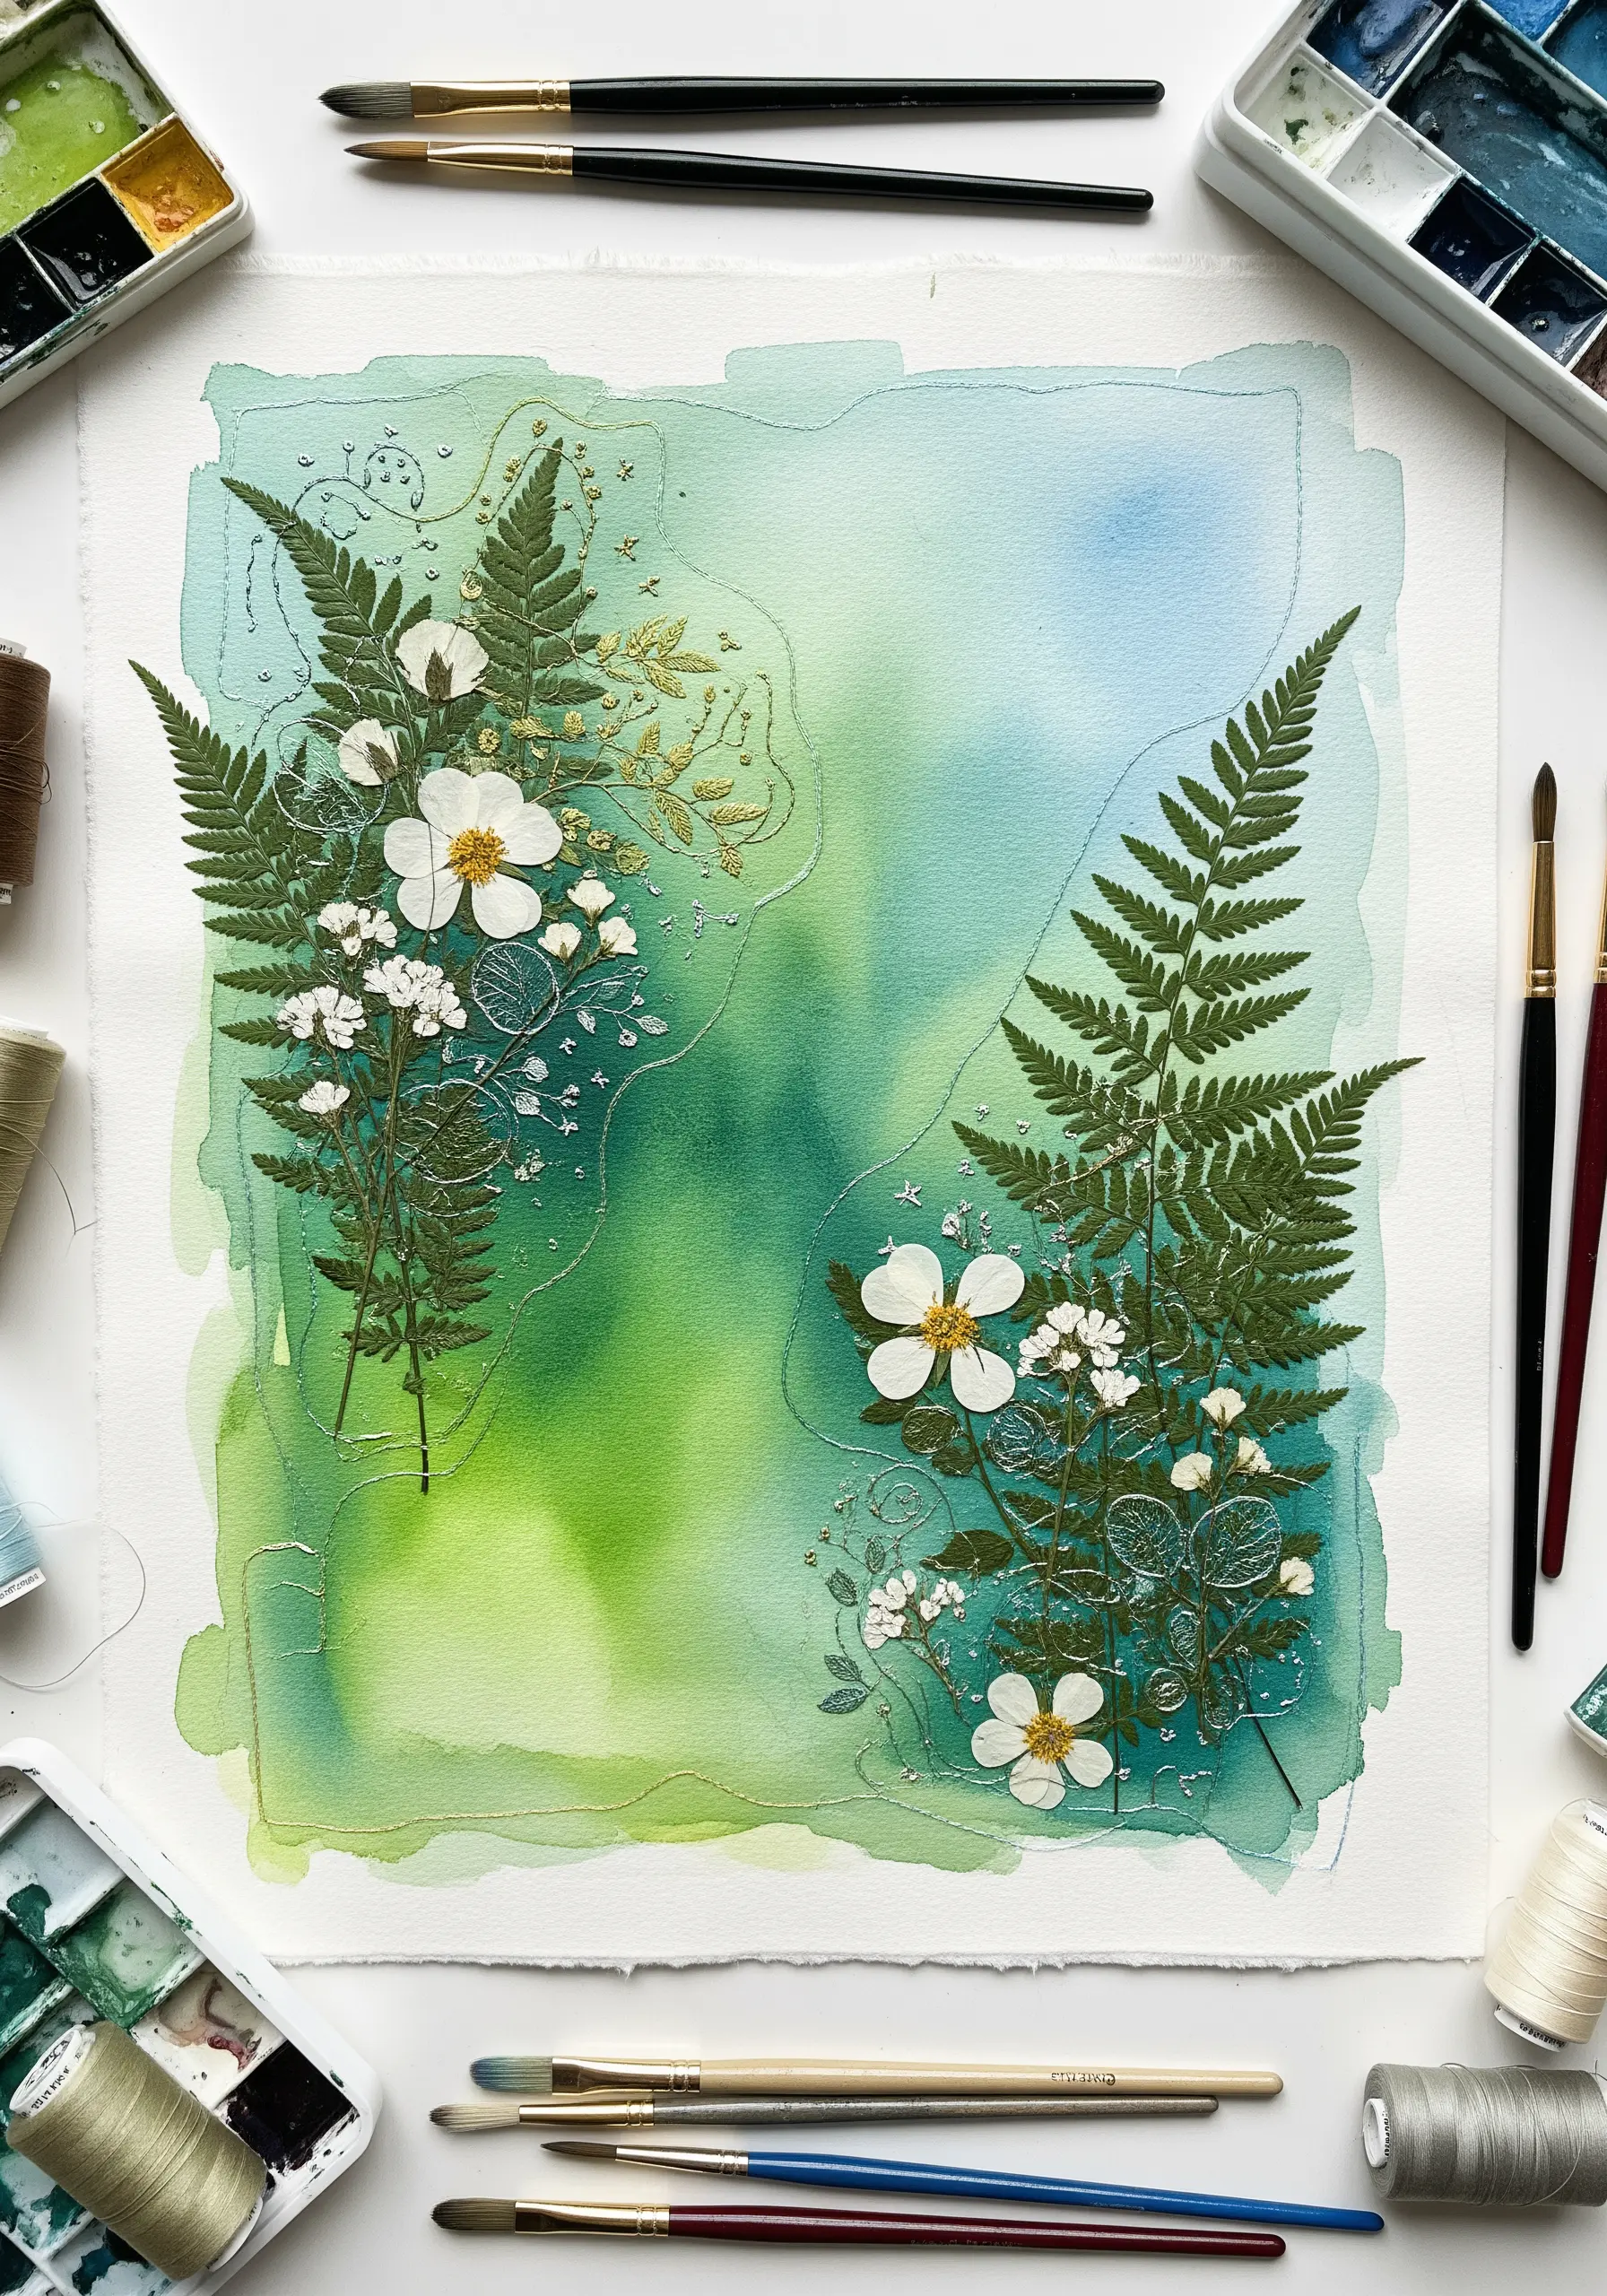
Add an ethereal, atmospheric quality to your work by combining it with watercolor paint.
Start by creating a soft color wash on a piece of heavy watercolor paper or pre-treated fabric.
Once it’s completely dry, you can stitch directly through the paper, adding fine details with thread.
Finally, attach your pressed botanicals. This layering of media creates a piece with incredible depth and is a fantastic way to approach mixed-media embroidery crafts that turn paper into stunning wall art.
23. Fill a Silhouette with Floral Confetti
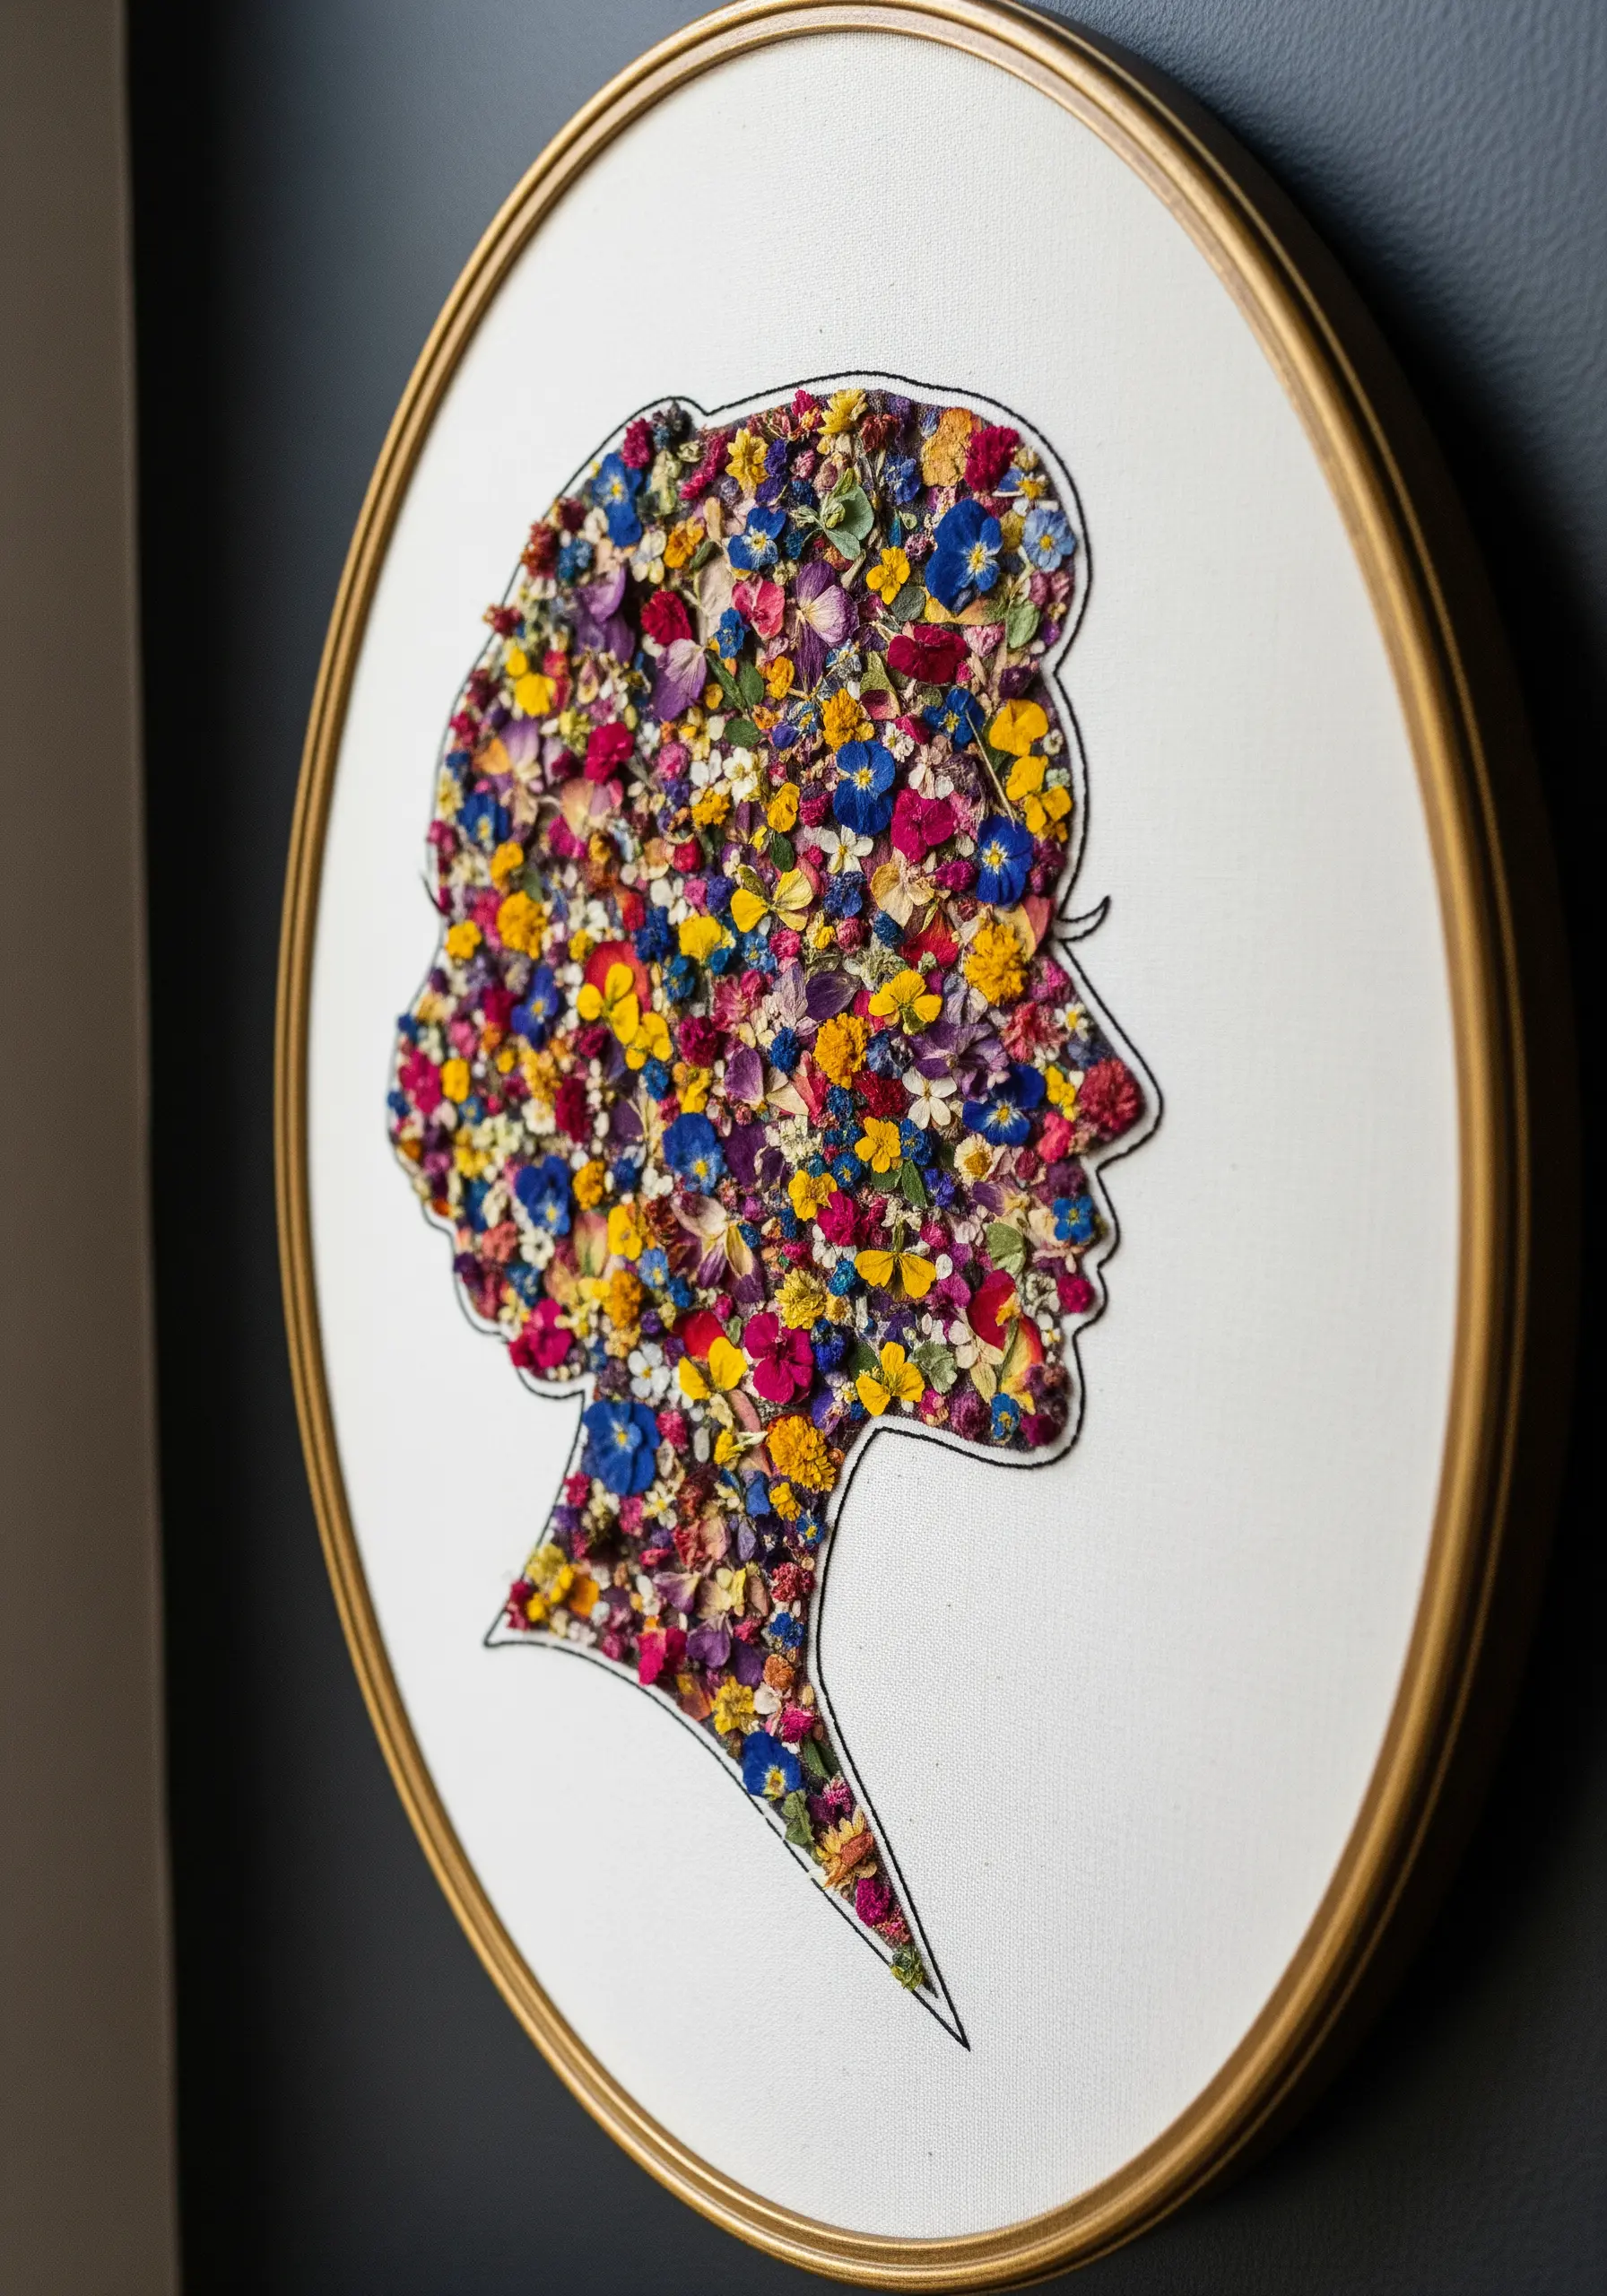
This technique uses negative space to create a powerful and personal piece of art.
Begin by stitching a simple outline of a profile or any shape you love using a clean backstitch.
The magic comes from what you place inside: a dense collage of tiny, colorful pressed flowers and petals.
Tack them down carefully with tiny dots of acid-free glue or single, discreet stitches. Negative space flower embroidery patterns like this make the viewer do the work, filling in the details and creating a stunning effect.


