
Have you ever finished a piece and felt that something was missing? You’ve followed the pattern, used the right colors, but it doesn’t quite have that spark—that professional, intentional quality you admire in other artists’ work.
The secret isn’t necessarily more complex designs or more expensive threads. Instead, it lies in the tiny, deliberate details—the choice of a particular stitch to create texture, the subtle shift in thread weight to create depth, or the unexpected placement of a single bead.
Here, we’ll move beyond the basics and explore the small adjustments that make a significant impact. Think of these ideas not as strict rules, but as gentle suggestions to help you refine your eye, trust your instincts, and transform your fabric crafts into true works of art.
1. Introduce Stumpwork for 3D Realism

Move beyond flat surfaces by exploring stumpwork, a technique that uses wire and padding to create three-dimensional motifs.
For wings, carefully shape fine-gauge wire into your desired form and use delicate buttonhole stitches to secure it, then fill the shape with a sheer fabric or gossamer stitches.
The body can be built up with layers of felt or dense Turkey work stitches, which you can trim to create a fuzzy, realistic texture that contrasts beautifully with the delicate wings.
2. Replicate Iridescence with Thread Painting

Capture the shimmering effect of a beetle’s shell by using thread painting with metallic or rayon floss.
Select at least three adjacent shades of a single color—like teal, peacock blue, and deep green—and blend them with tiny long-and-short stitches to create a smooth, iridescent gradient.
Always stitch in the direction that light would naturally reflect off the curved surface to enhance the illusion of shine and dimension.
3. Embellish Cuffs with Dimensional Florals
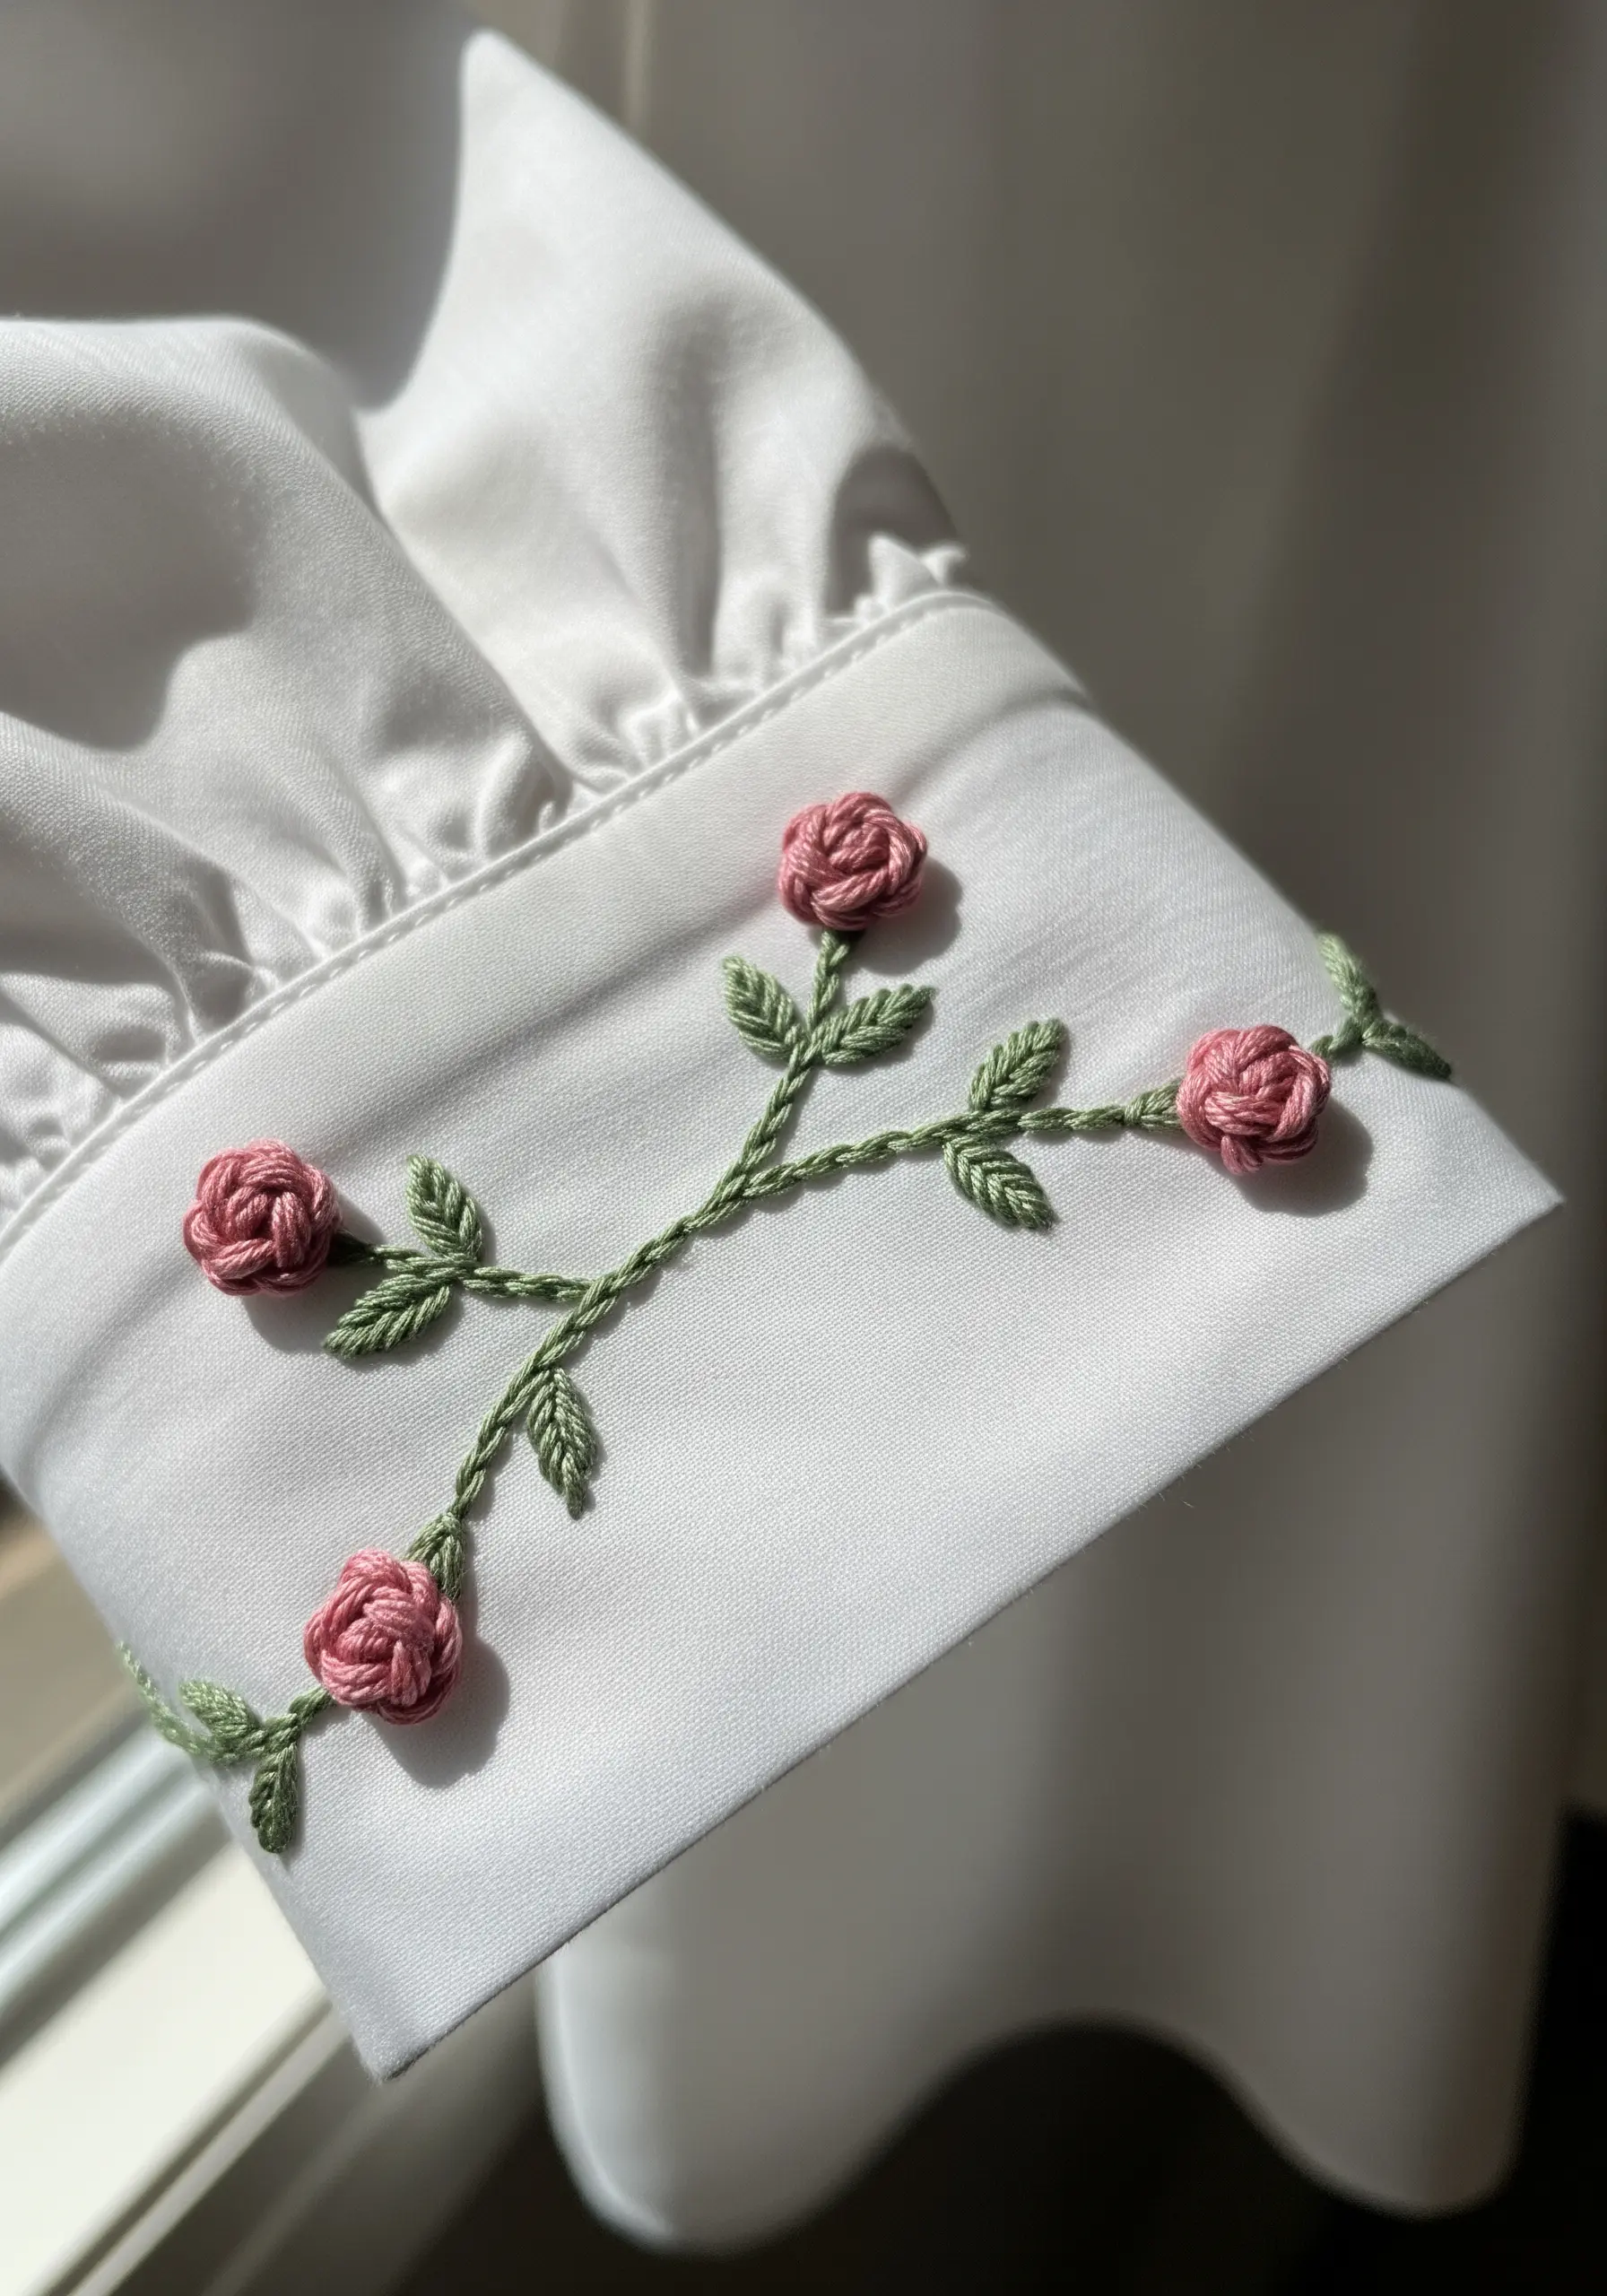
Transform a simple shirt cuff into a statement piece with raised floral stitches that add texture and elegance.
Instead of flat satin stitch, use the woven wheel stitch for roses; this involves creating a star of straight stitches as a base and weaving your thread over and under each spoke until the rose is formed.
For leaves, a fly stitch or fishbone stitch adds a central vein, giving them a more naturalistic shape than a simple satin fill. This is one of the most effective aesthetic embroidery ideas to turn your old clothes into art.
4. Frame Your Stitches with Metallic Thread
Give your motifs a clean, jewel-like finish by outlining them with a fine metallic thread.
After filling a shape with satin stitch, use a single strand of gold or silver thread and a sharp couching stitch or a precise backstitch to trace the perimeter.
This technique not only hides any minor imperfections in the satin stitch edge but also adds a sophisticated contrast, making the colors appear richer and more contained. These abstract metallic thread projects that sparkle against dark backgrounds really pop.
5. Create a ‘Confetti’ Effect with Scattered Knots
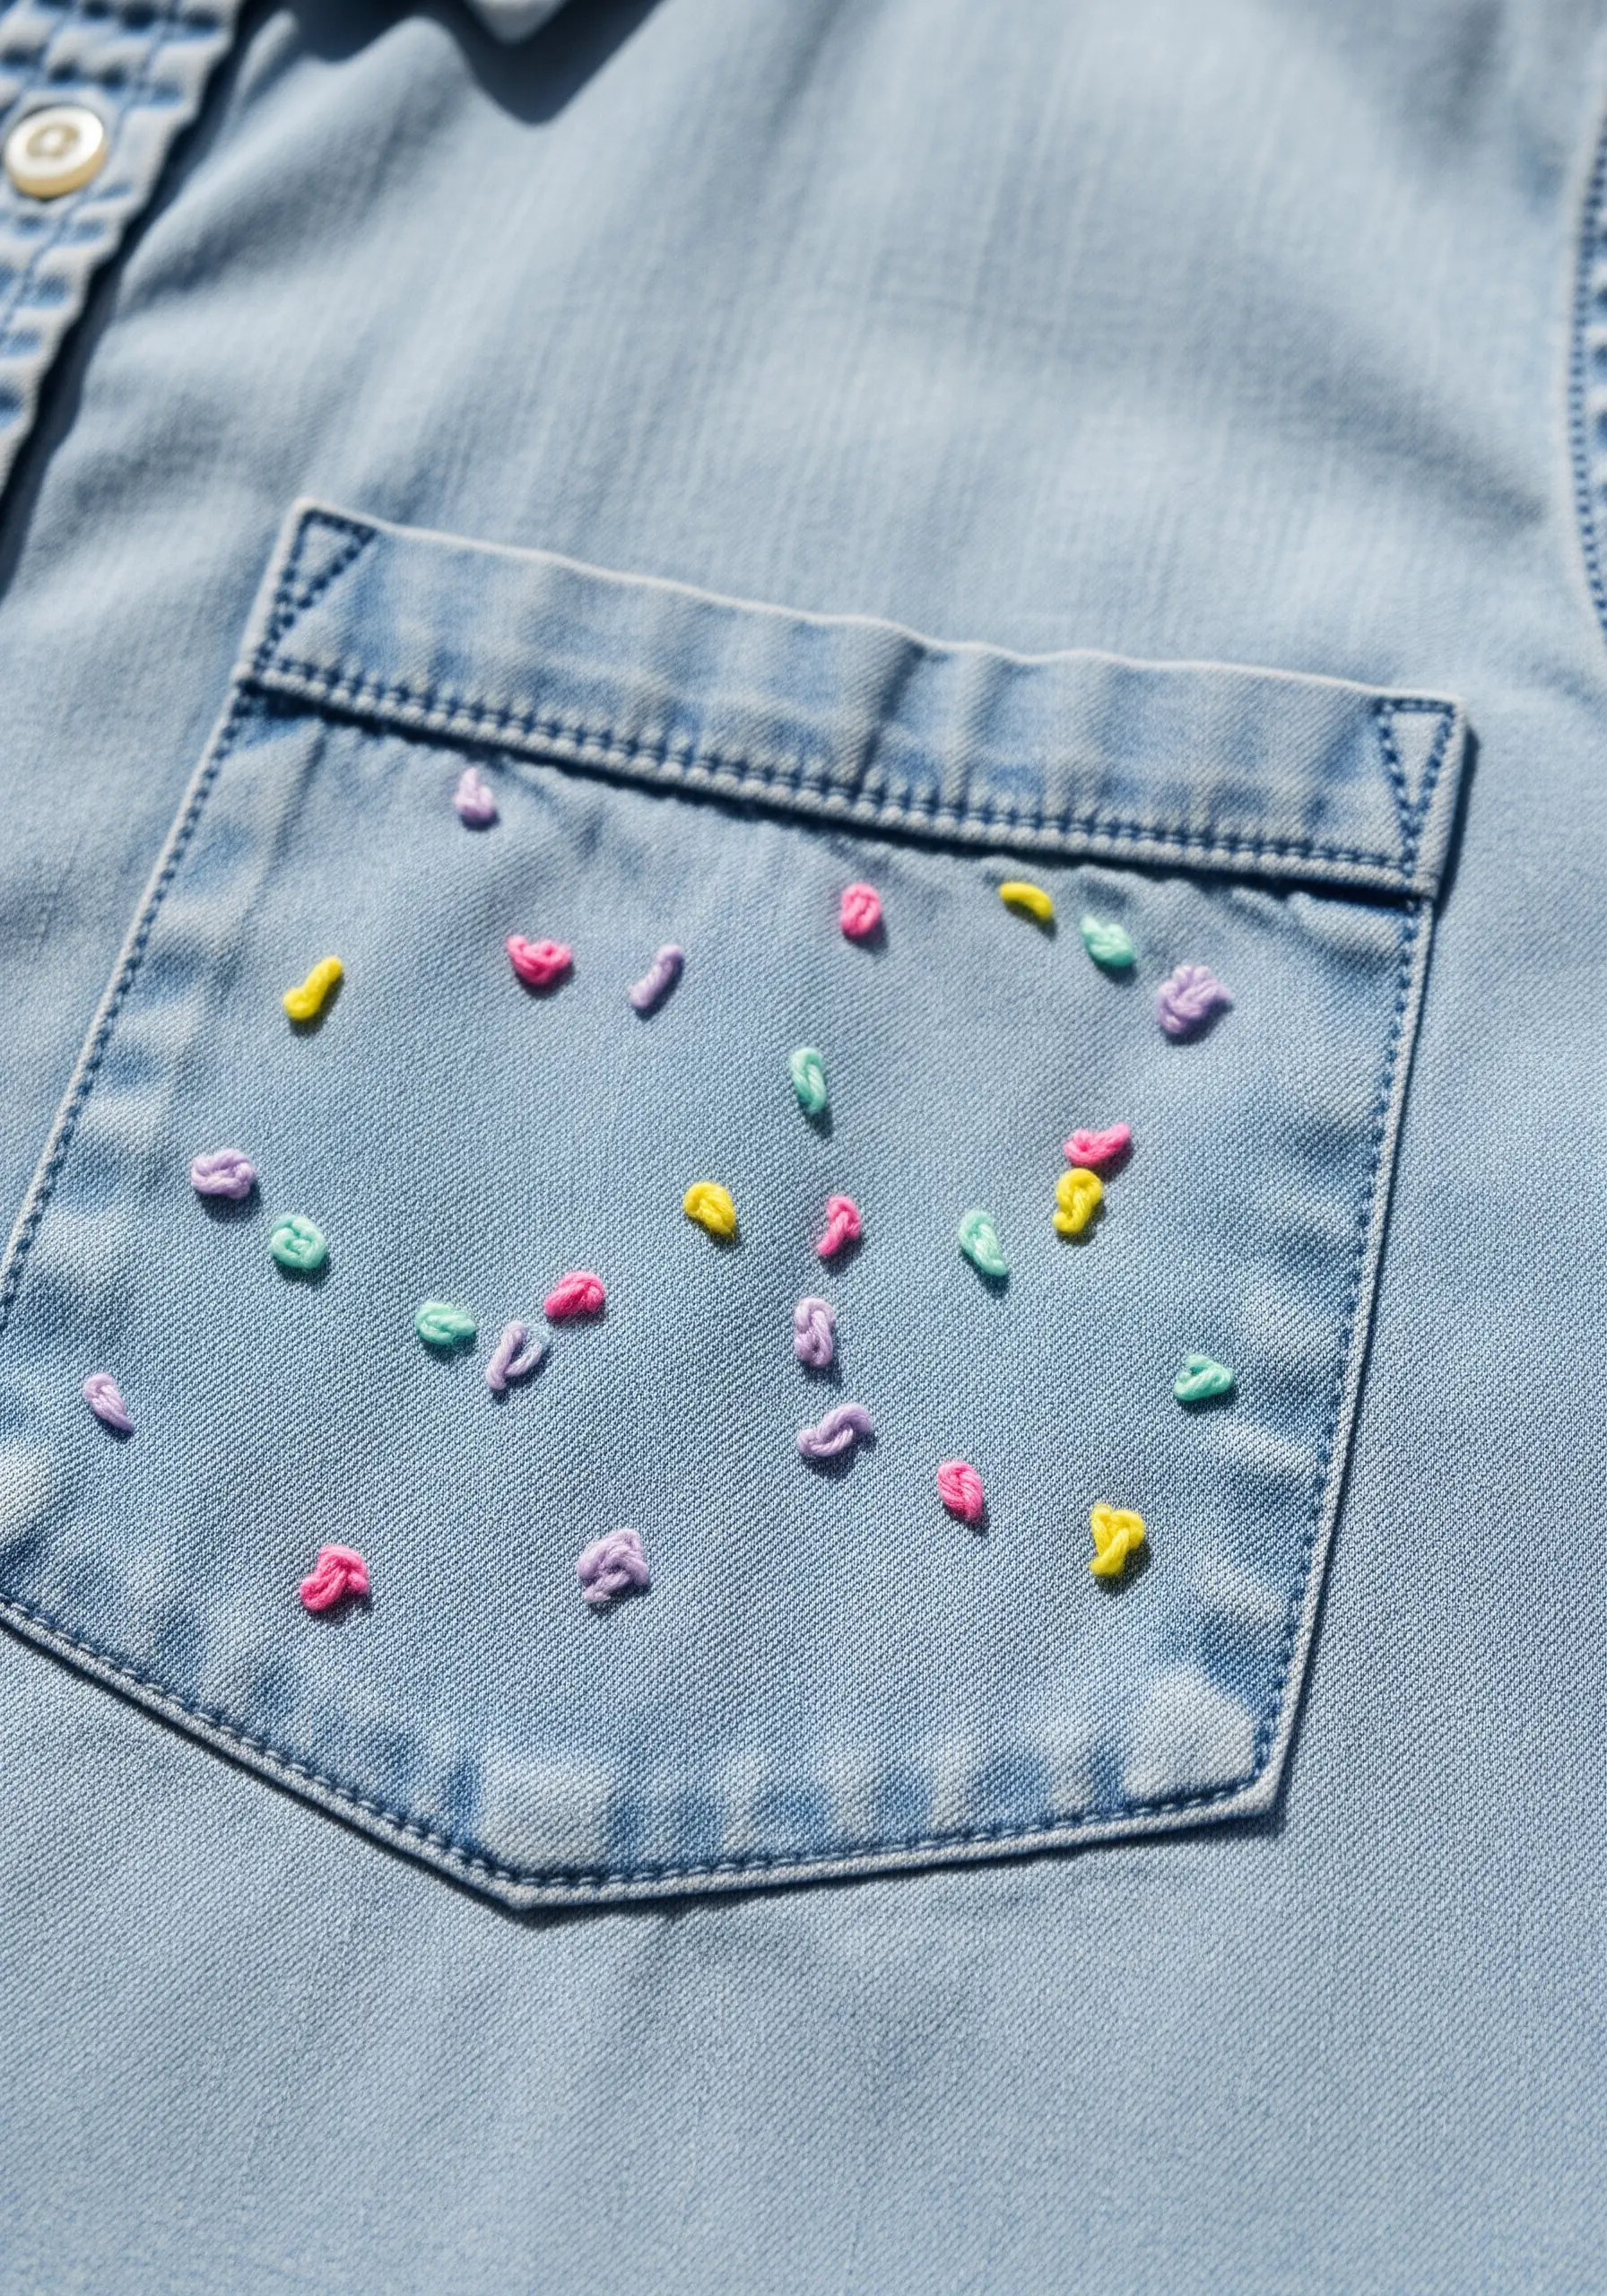
Embrace minimalist texture by scattering small, detached stitches across a surface like a shirt pocket or canvas.
Use French knots, colonial knots, or single detached chain stitches in a playful, random pattern to create a ‘sprinkle’ or ‘confetti’ look.
Vary the colors and the spacing to control the density of the design. This technique is powerful because it uses negative space to draw attention to the texture of each individual stitch.
6. Use Directional Stitching for Botanical Realism

Make leaves look more dynamic by paying close attention to the direction of your stitches.
Instead of filling the entire leaf with uniform vertical stitches, angle your satin or long-and-short stitches to follow the natural growth lines and veins of the leaf.
Work from the outer edge inward toward the central vein, slightly overlapping the shades of green to create depth and a subtle, realistic color gradient.
7. Incorporate Heavier Fibers for Bold Texture

Introduce dramatic texture and dimension by swapping standard embroidery floss for thicker materials like yarn or tapestry wool.
Stitches like the chain stitch or Palestrina knot become much more prominent, creating a chunky, sculptural effect that is both visual and tactile.
This type of mixed-fiber embroidery is ideal for statement pieces, as the thicker fibers fill space quickly and create a high-impact design with minimal effort.
8. Master the Satin Stitch for a Flawless Fill

Achieve a perfectly smooth, solid shape by mastering the satin stitch, a fundamental technique for a polished look.
To keep your stitches perfectly parallel and avoid gaps, work on tightly stretched fabric and use a laying tool (or the shaft of a larger needle) to smooth each strand of floss before it enters the fabric.
For crisp edges, first outline your shape with a split stitch; this creates a slightly raised border that your satin stitches can tuck up against neatly. You can add these tiny secret embroidery ideas to almost anything.
9. Explore Negative Space with Pattern Darning
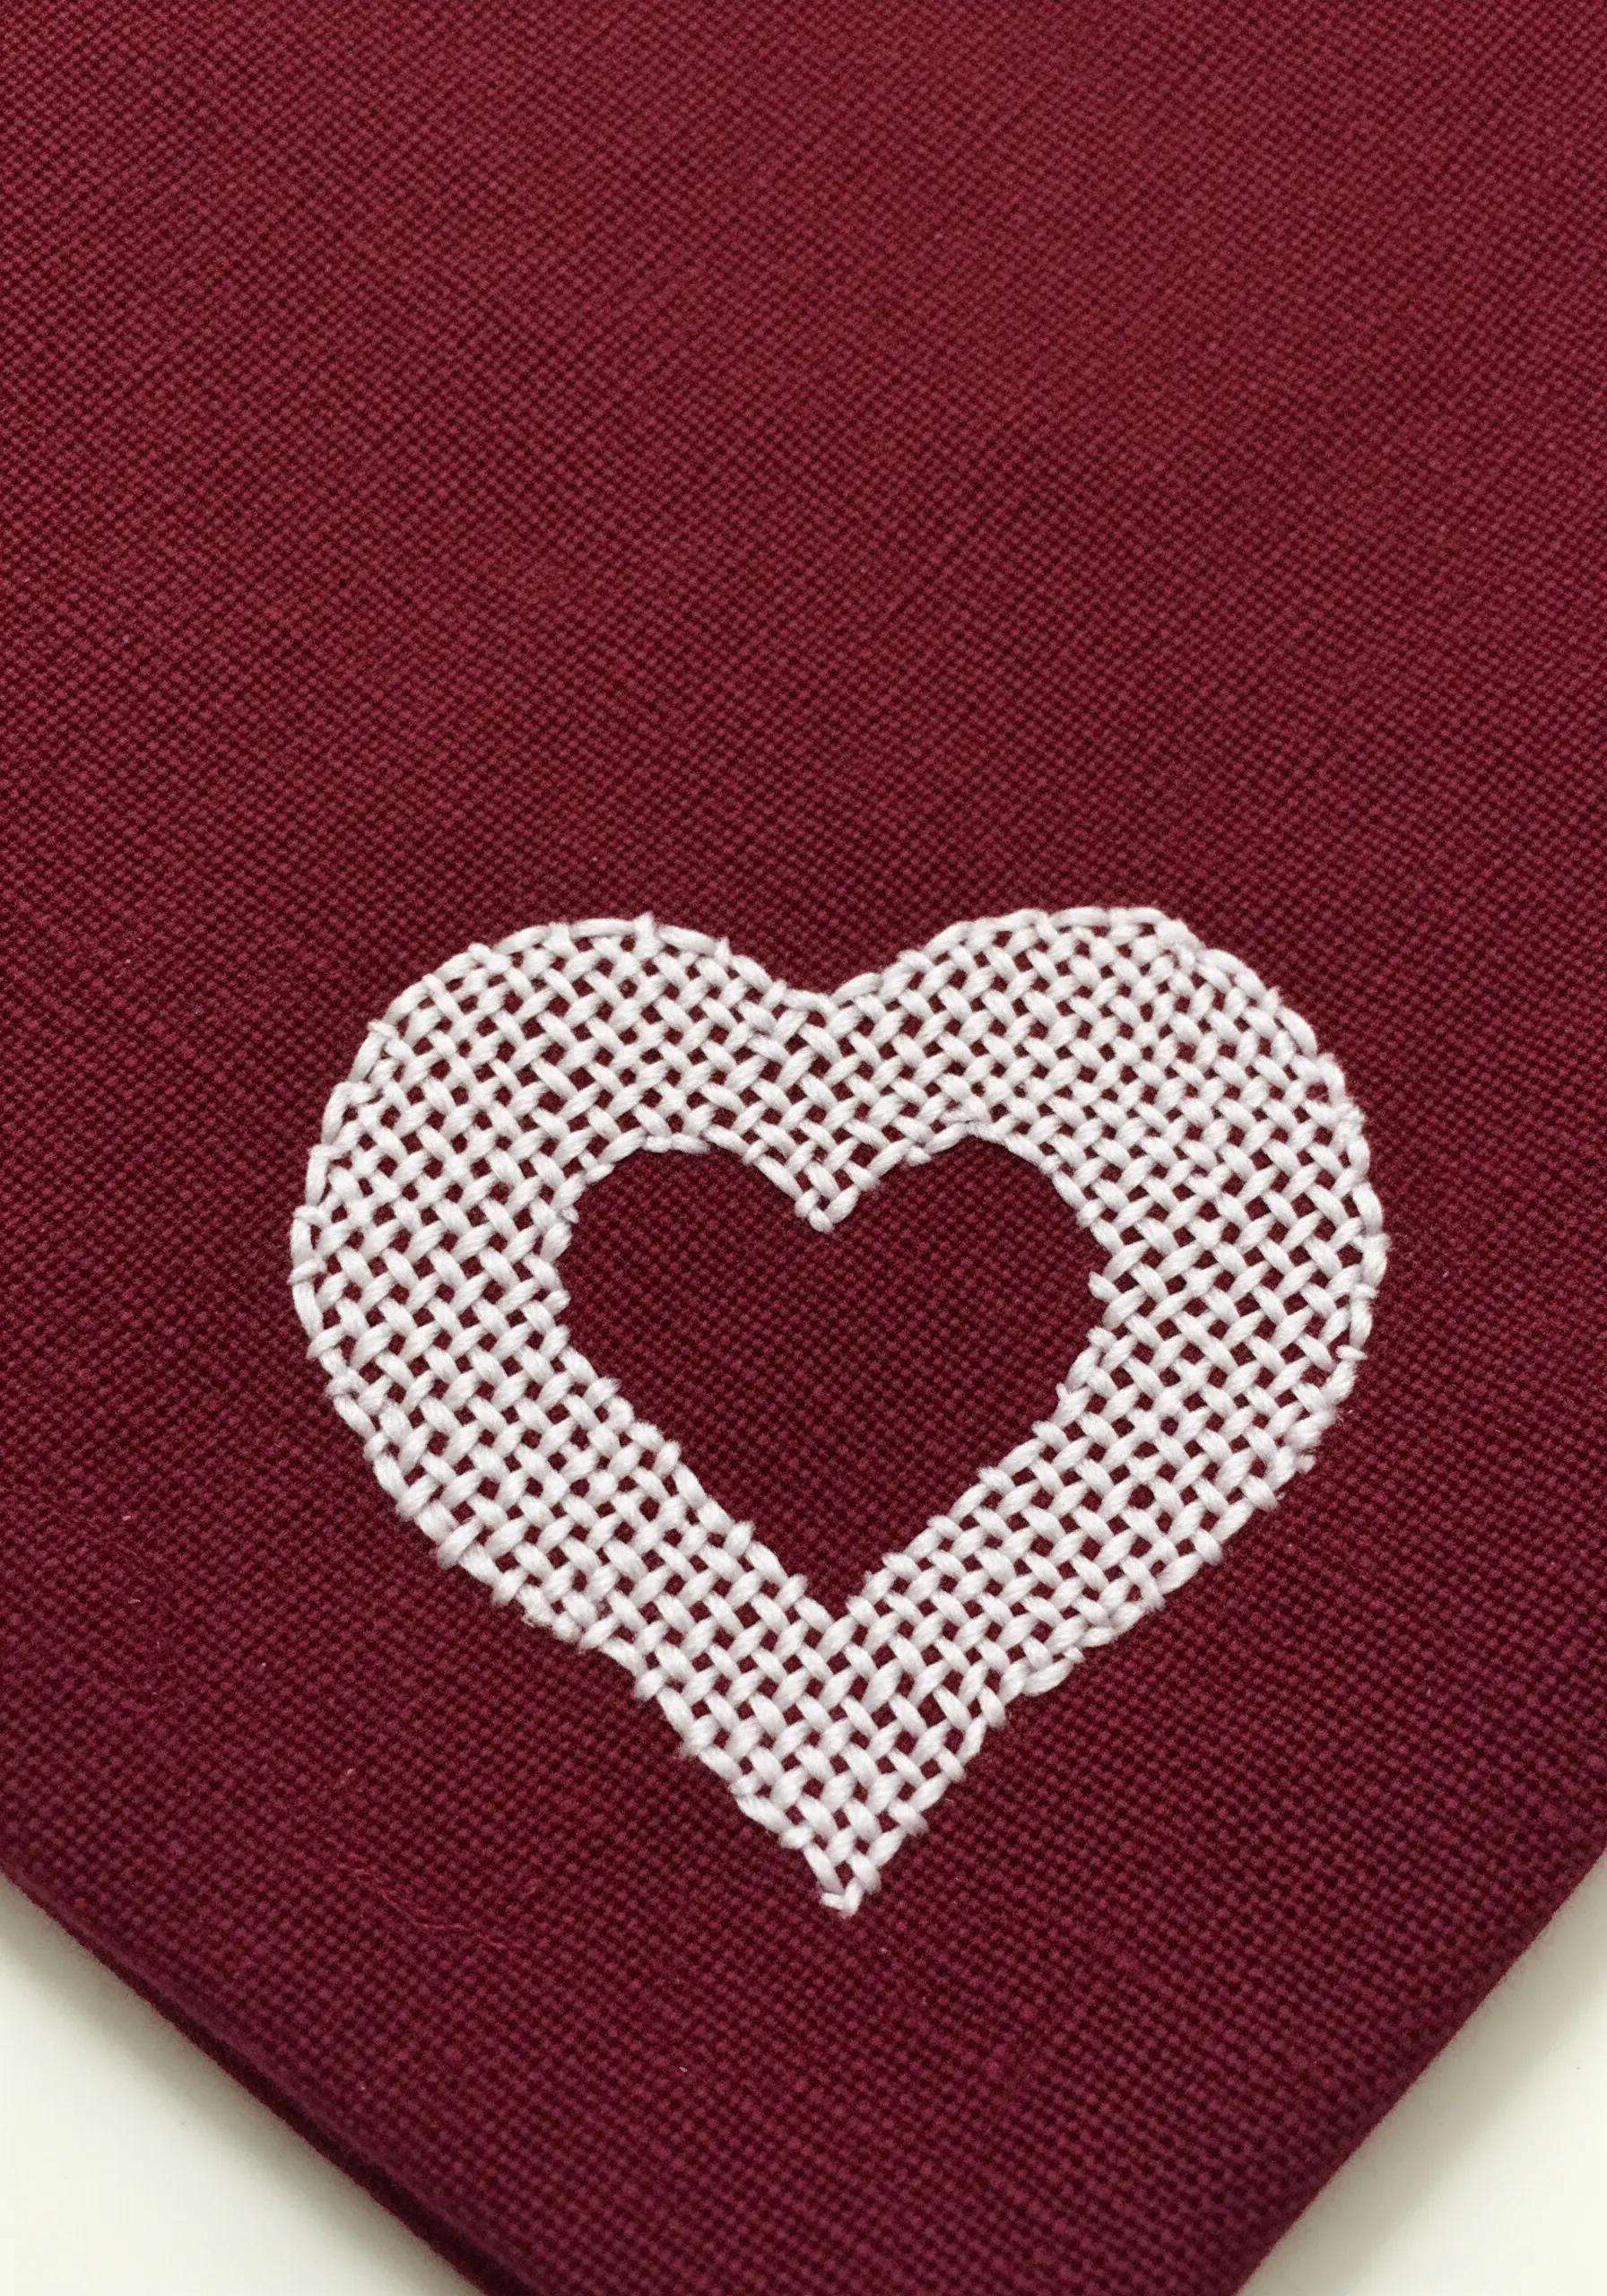
Create your design not with stitches, but with the empty space you leave behind.
Pattern darning involves weaving thread through the fabric in a grid-like formation, filling the background and leaving the central motif—like this heart—unstitched.
This technique works best on even-weave fabrics like linen or Aida cloth, where you can count the threads to ensure your pattern is symmetrical and your lines are straight.
10. Create a Faceted Gem Effect with Thread

Mimic the look of a cut gemstone by using precise blocks of color and sharp angles.
Divide your gem shape into smaller, geometric facets. Fill each facet with long-and-short stitch using a distinct shade of floss—light, medium, and dark tones of the same color.
The key is to keep the dividing lines between each facet razor-sharp. Outlining the entire gem with a fine metallic thread will enhance the illusion of a gold setting and make the ‘gem’ pop.
11. Build Rhythmic Patterns with Sashiko Stitching

Create a clean, modern aesthetic using the principles of Sashiko, a traditional Japanese technique that uses a simple running stitch.
Use a thicker, non-divisible thread, like Sashiko thread or pearl cotton, to make each stitch stand out against the fabric.
The beauty of this technique lies in its uniformity. Mark your grid with a water-soluble pen and focus on keeping your stitch length and the gaps between them perfectly consistent for a meditative, rhythmic effect. These modern grid dot stitch concepts are perfect for contemporary decor.
12. Stitch on Challenging Textures like Felted Wool

Don’t be intimidated by fuzzy or stretchy fabrics like wool mittens; a stabilizer is your key to success.
Apply a stick-on, water-soluble stabilizer to the surface, draw your design directly onto it, and stitch through both layers. This prevents the fabric from stretching and provides a smooth surface for your needle.
Once you are finished, the stabilizer dissolves in water, leaving your crisp stitches behind. It’s an ideal method for creating realistic mushroom forest-floor projects on cozy apparel.
13. Create Perfect Spirals with Directional Satin Stitch

A spiral motif requires meticulous control over your stitch direction to look smooth and continuous.
Start from the outermost point and work your way inward, angling each satin stitch slightly toward the center point of the spiral.
Think of each stitch as a radius of a circle. By ensuring each one points directly to the center, you will create a seamless, swirling effect that draws the eye inward.
14. Define Motifs with a Contrasting Outline

Make your embroidered shapes stand out by framing them with a crisp backstitch or stem stitch outline.
First, fill your shape using a stitch like satin stitch or fishbone stitch. Then, using a slightly darker shade or a contrasting color, carefully stitch around the entire perimeter.
This simple addition creates a clean, illustrative look that contains the shape and prevents it from blending into the background fabric. It’s a lovely technique for coastal theme tiny embroidery art.
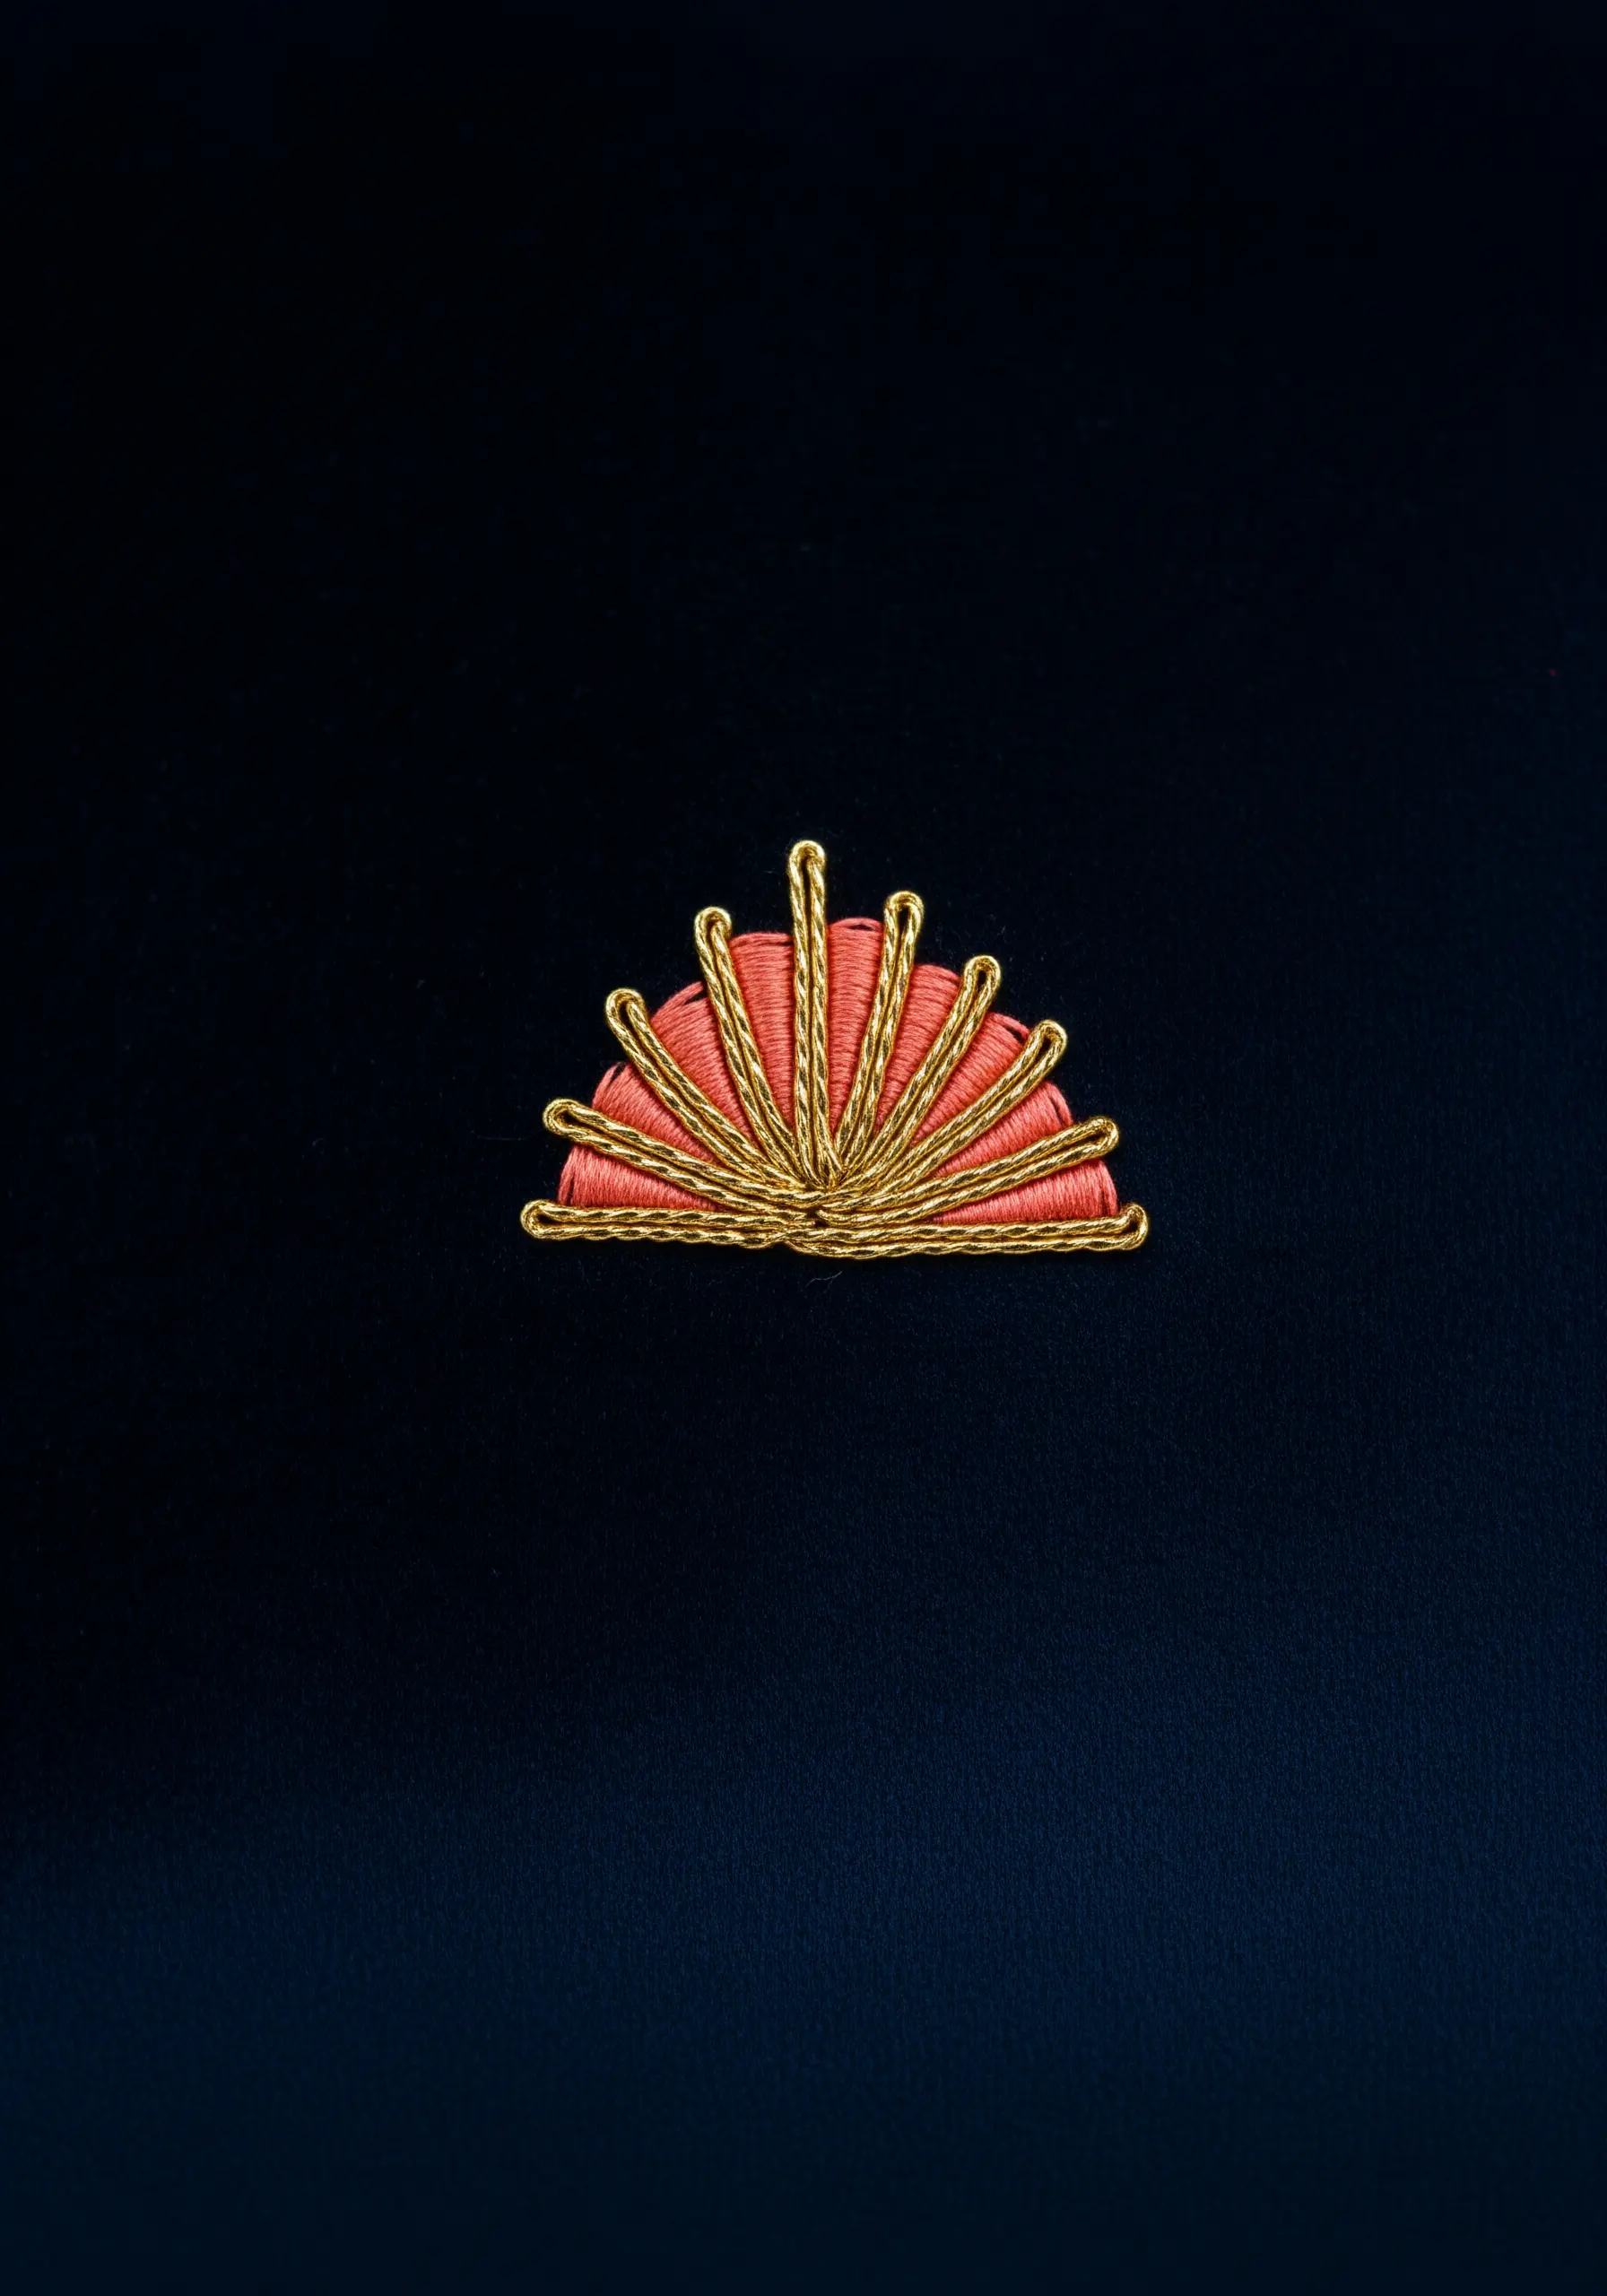
15. Integrate Sequins and Beads for a Hint of Sparkle

Elevate a simple design by incorporating non-thread elements for a touch of light and texture.
Instead of stitching an entire motif, use a single, well-placed sequin or bead as a focal point. Secure it with a tiny seed bead or a small cross stitch in a contrasting thread.
Combine this with simple line stitches, like the radiating straight stitches here, to create an elegant balance between the matte thread and the reflective embellishment in your mixed-media crafts with embroidery.
16. Use Padded Satin Stitch for Raised Dots

Create highly dimensional, smooth dots by using padding underneath your satin stitch.
First, create a small foundation of tiny straight stitches or seed stitches within the shape of your dot. Then, work your satin stitches directly over this padding.
The underlying stitches push the top layer up, creating a raised, dome-like effect that has a satisfying tactile quality and catches the light beautifully.
17. Mimic Textures Like Chains with Coiled Stitches
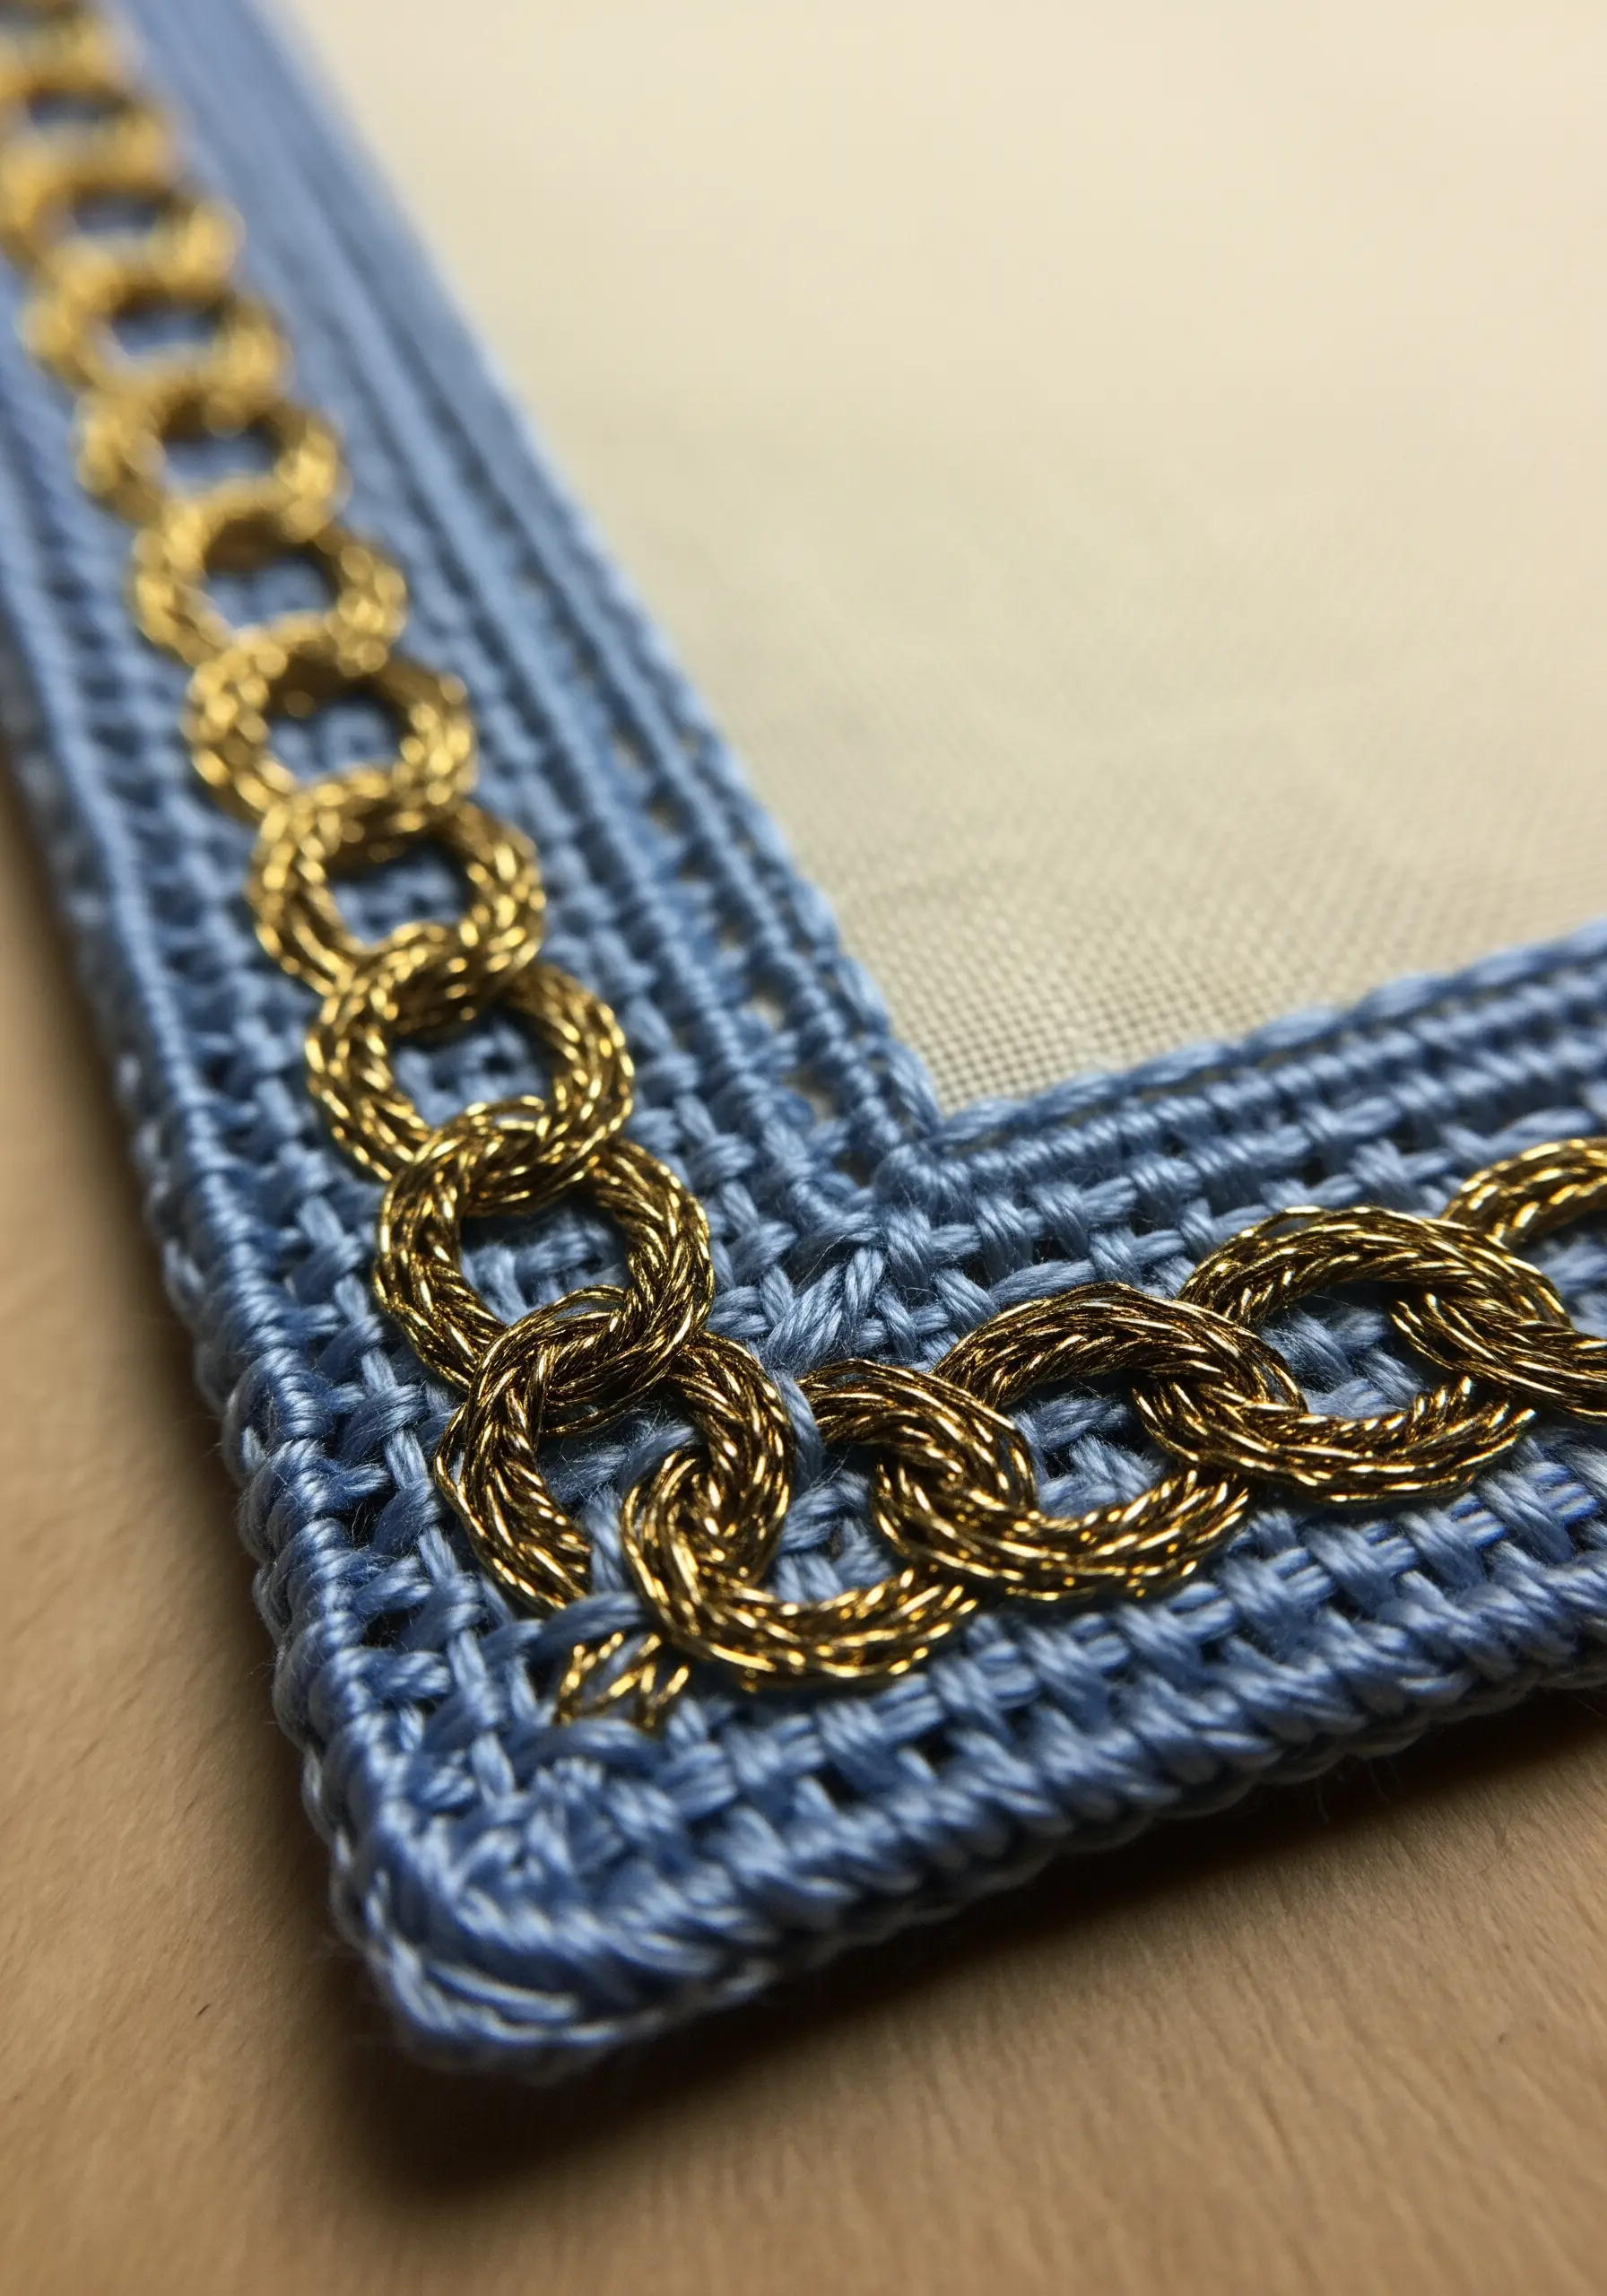
Recreate the look of complex objects like a metal chain by choosing the right dimensional stitch.
The bullion knot is perfect for this. It involves wrapping the thread multiple times around the needle before passing it through the fabric, creating a small, tight coil.
By arranging these bullion knots end-to-end and interlocking them, you can build a realistic, textured chain border that has a surprisingly sculptural quality.
18. Emphasize Thread with High-Contrast Textures

Make your thread the star of the show by pairing a shiny, twisted stitch with a flat, matte fabric.
Use a rope stitch or a tightly-worked stem stitch with a high-sheen thread, like silk or rayon, on a non-reflective surface like felt or matte cotton.
This contrast in texture makes the thread’s natural twist and luster stand out dramatically, creating a design that is all about the quality of the line itself.
19. Achieve Crisp Edges in Color Blocking
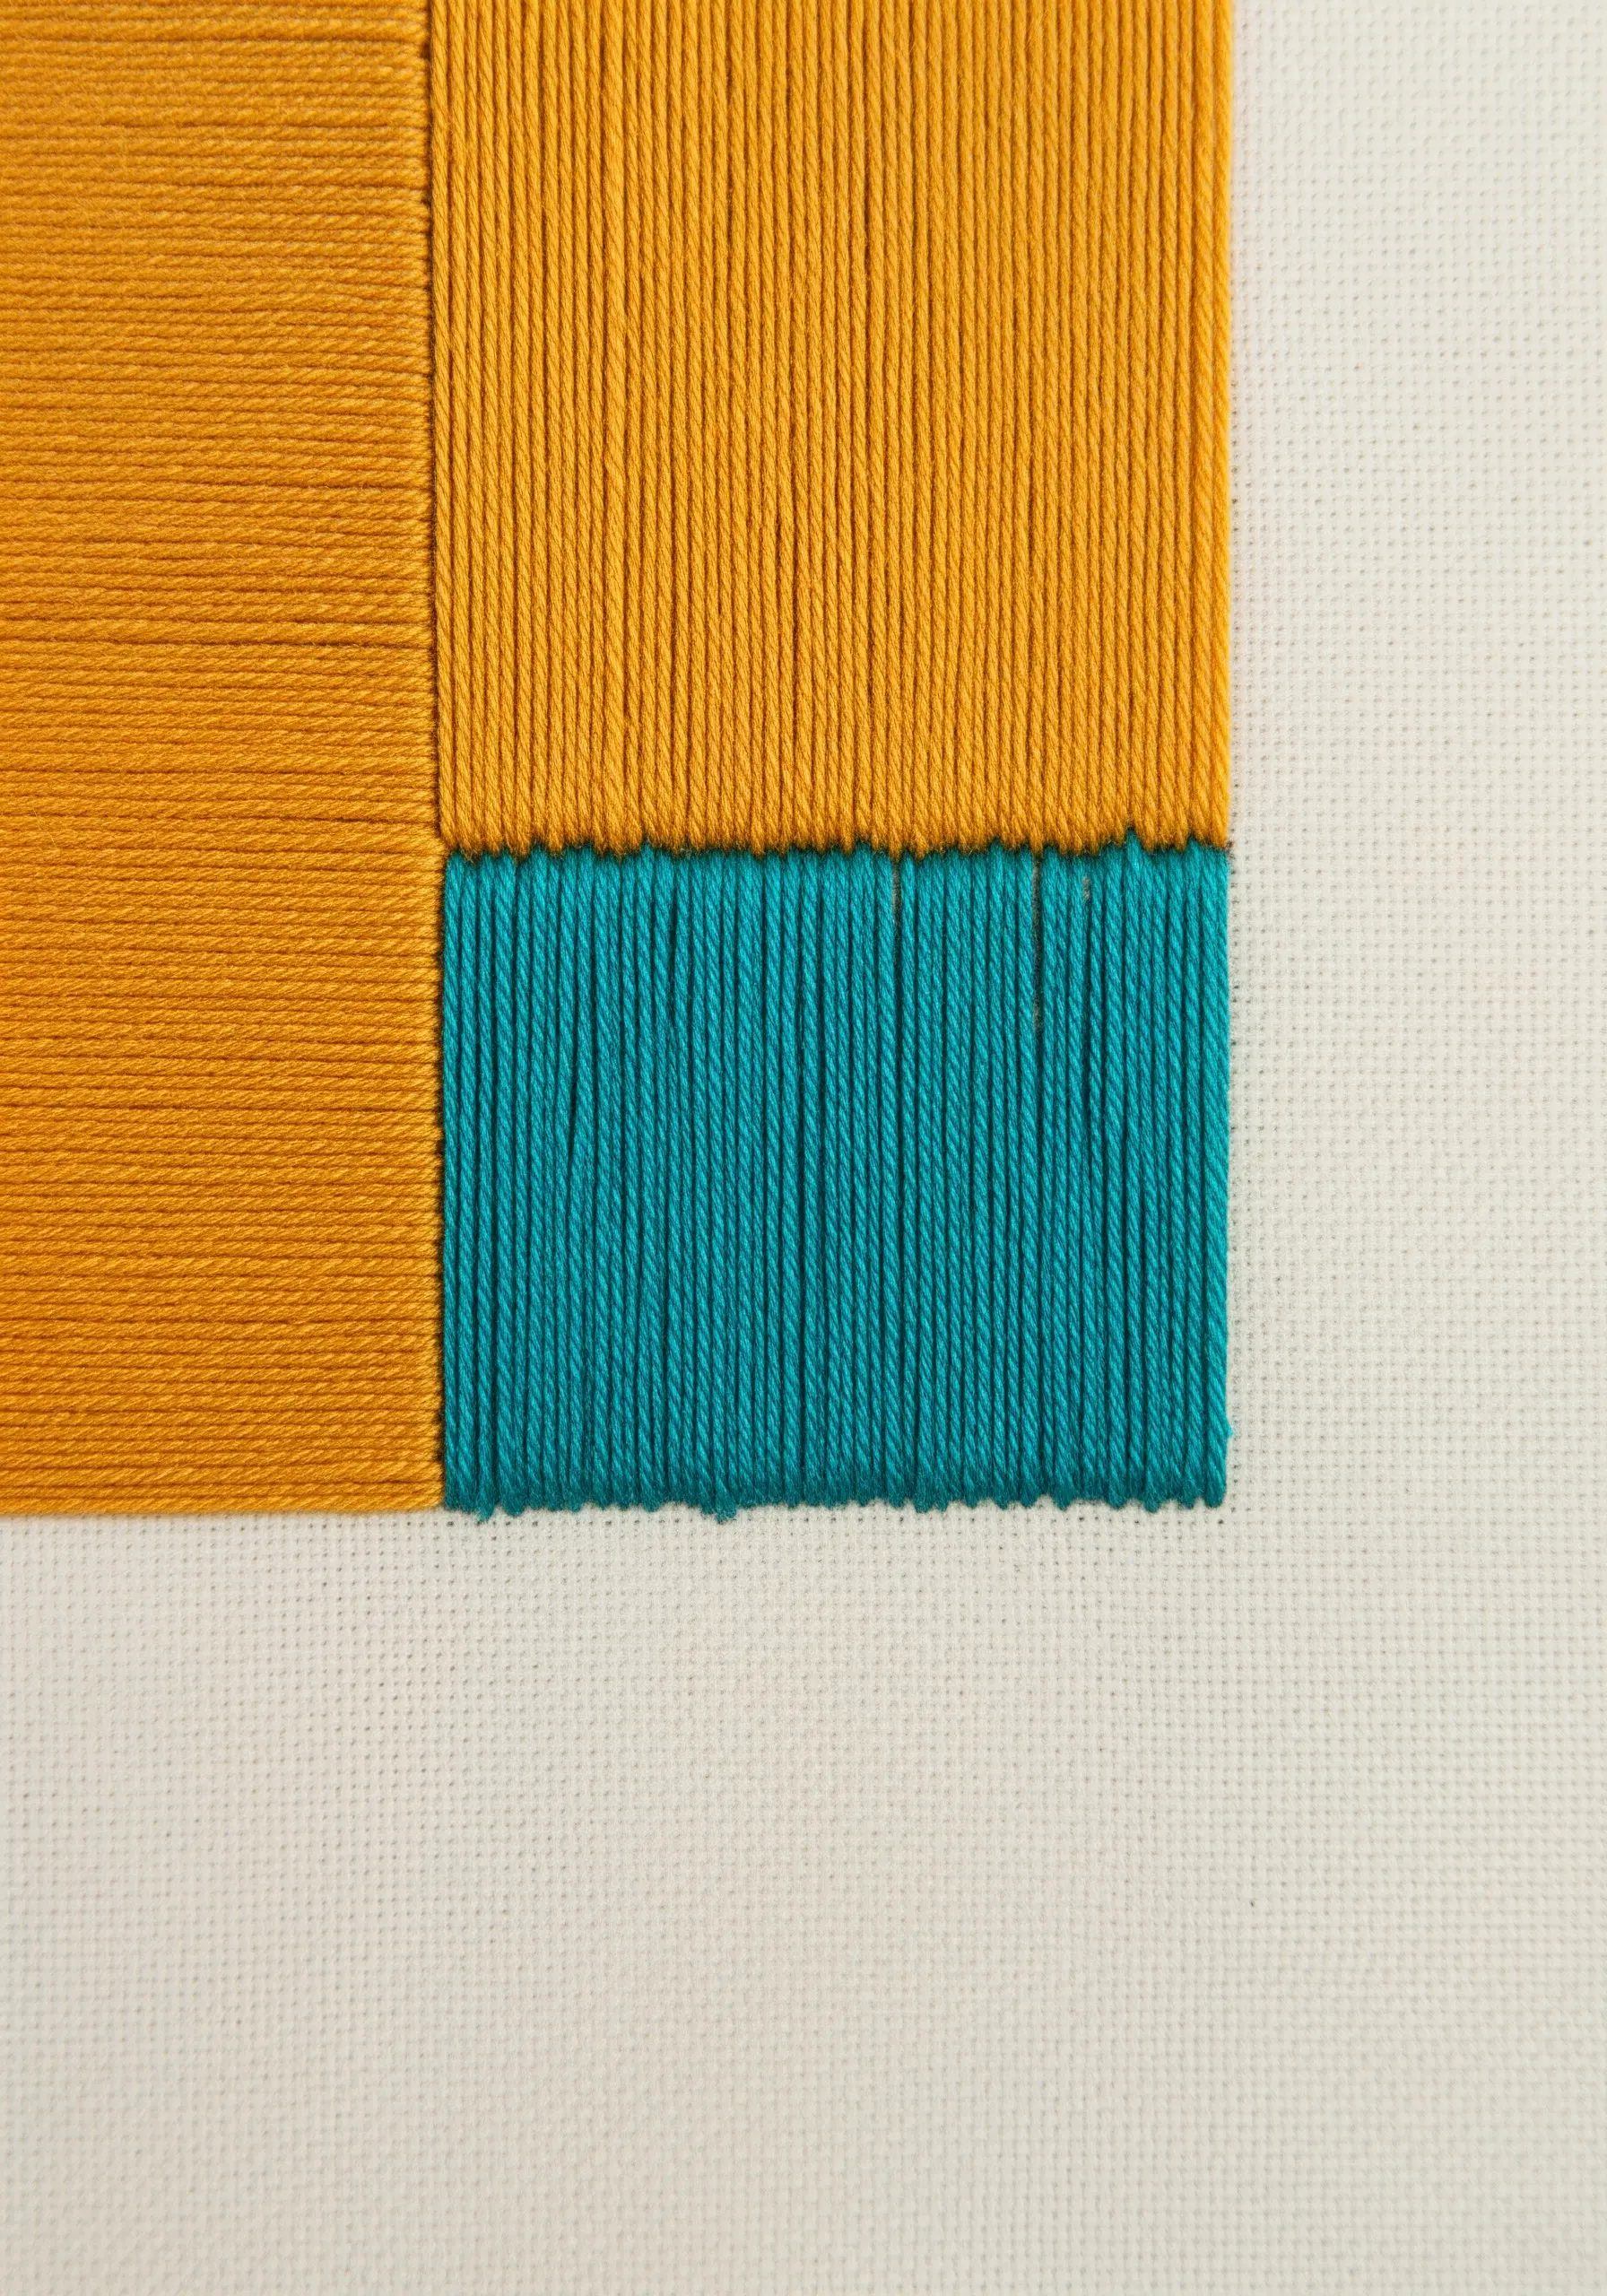
For modern, graphic designs, the most important detail is the clean line where two colors meet.
When filling adjacent blocks of color with satin stitch, always complete one full color block before starting the next.
Bring your needle up for the new color *precisely* on the outer edge of the last stitch of the previous color. This ensures there are no gaps or overlaps, creating a perfectly sharp, seamless transition that defines these simple embroidery patterns that make statement wall art.
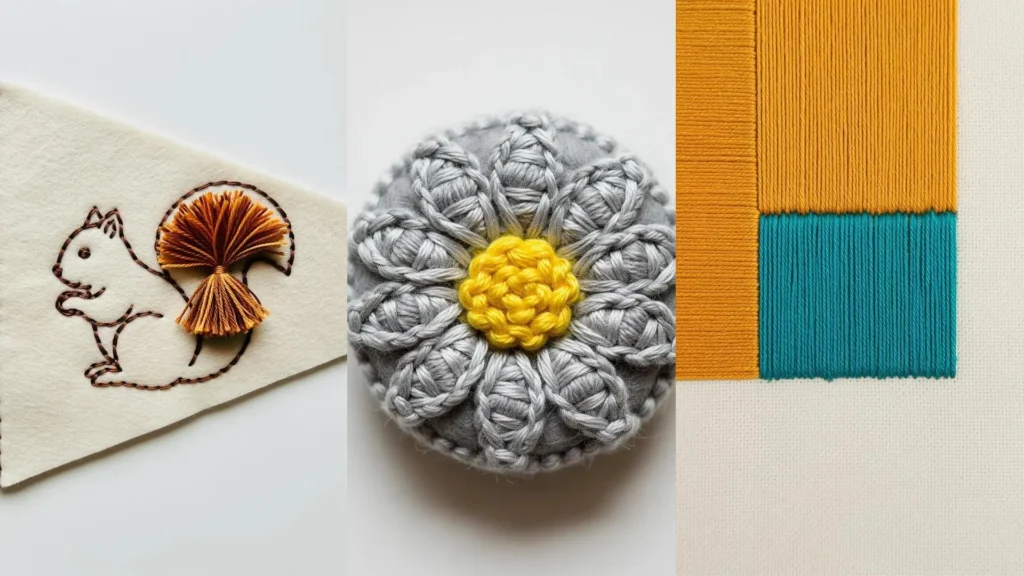
20. Add a Playful 3D Element with a Tassel

Combine flat embroidery with a three-dimensional element for a surprising and whimsical touch.
After completing your line work—like this simple squirrel outline—create a small, fluffy tassel from matching floss or yarn. To attach it, simply pass the top loop of the tassel through the fabric from back to front and secure it with a few discreet tacking stitches.
This is a delightful technique for adding tails, hair, or flower centers to your designs, making them some of the most playful yarn wall art crafts you can make.
21. Substitute Thread with Beads for New Textures
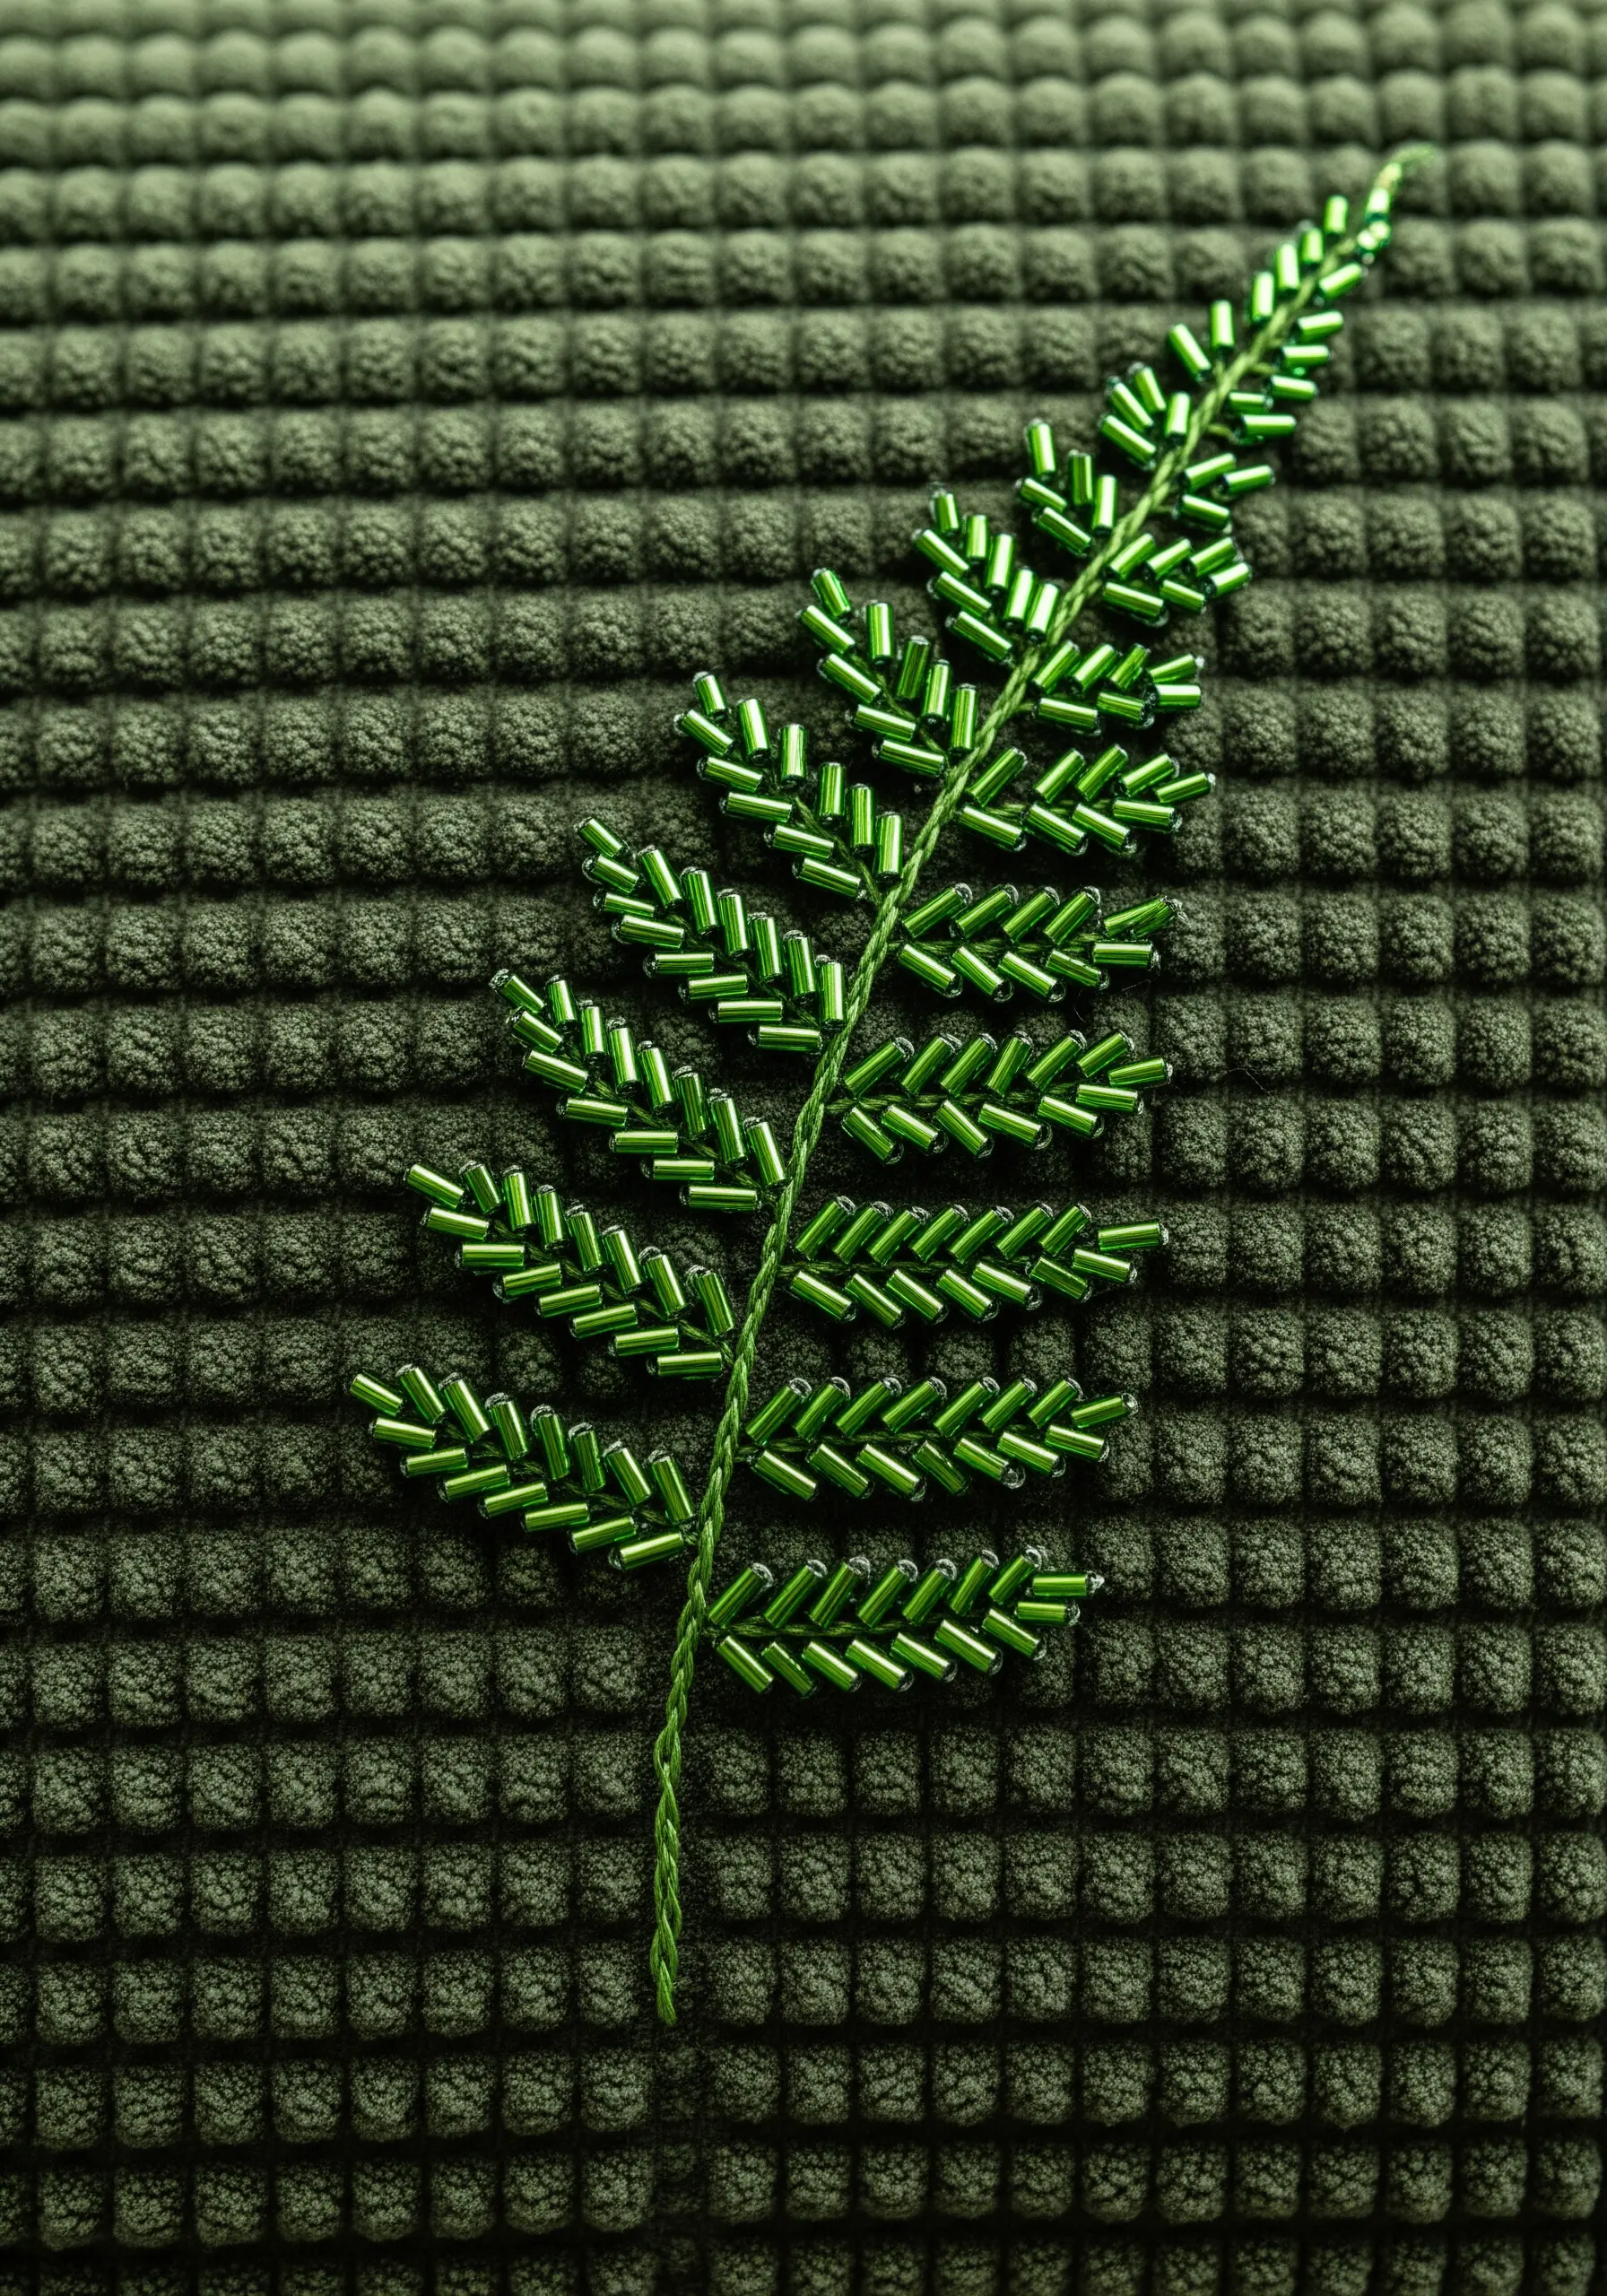
Explore beading to introduce a completely different texture and light-reflecting quality to your embroidery.
Instead of using satin stitch to fill a leaf shape, use short bugle beads for the fronds and tiny seed beads for the stem. Attach each bead with a single, matching-colored thread and a small stitch.
This method adds a delicate structure and a subtle glimmer that thread alone cannot replicate, perfect for embellishing textured fabrics like this waffle-knit cushion.
22. Create Fluffy Textures with Dense French Knots

To create a soft, cloud-like effect, fill a shape with a dense cluster of French knots.
For a uniform texture, wrap the thread around your needle the same number of times for each knot. For a more organic, varied feel, alternate between one, two, and three wraps.
Place the knots as close together as possible so they press against one another, creating a plush, highly tactile surface that is perfect for flower heads, clouds, or animal fur.
23. Enhance Printed Fabric with Selective Stitching
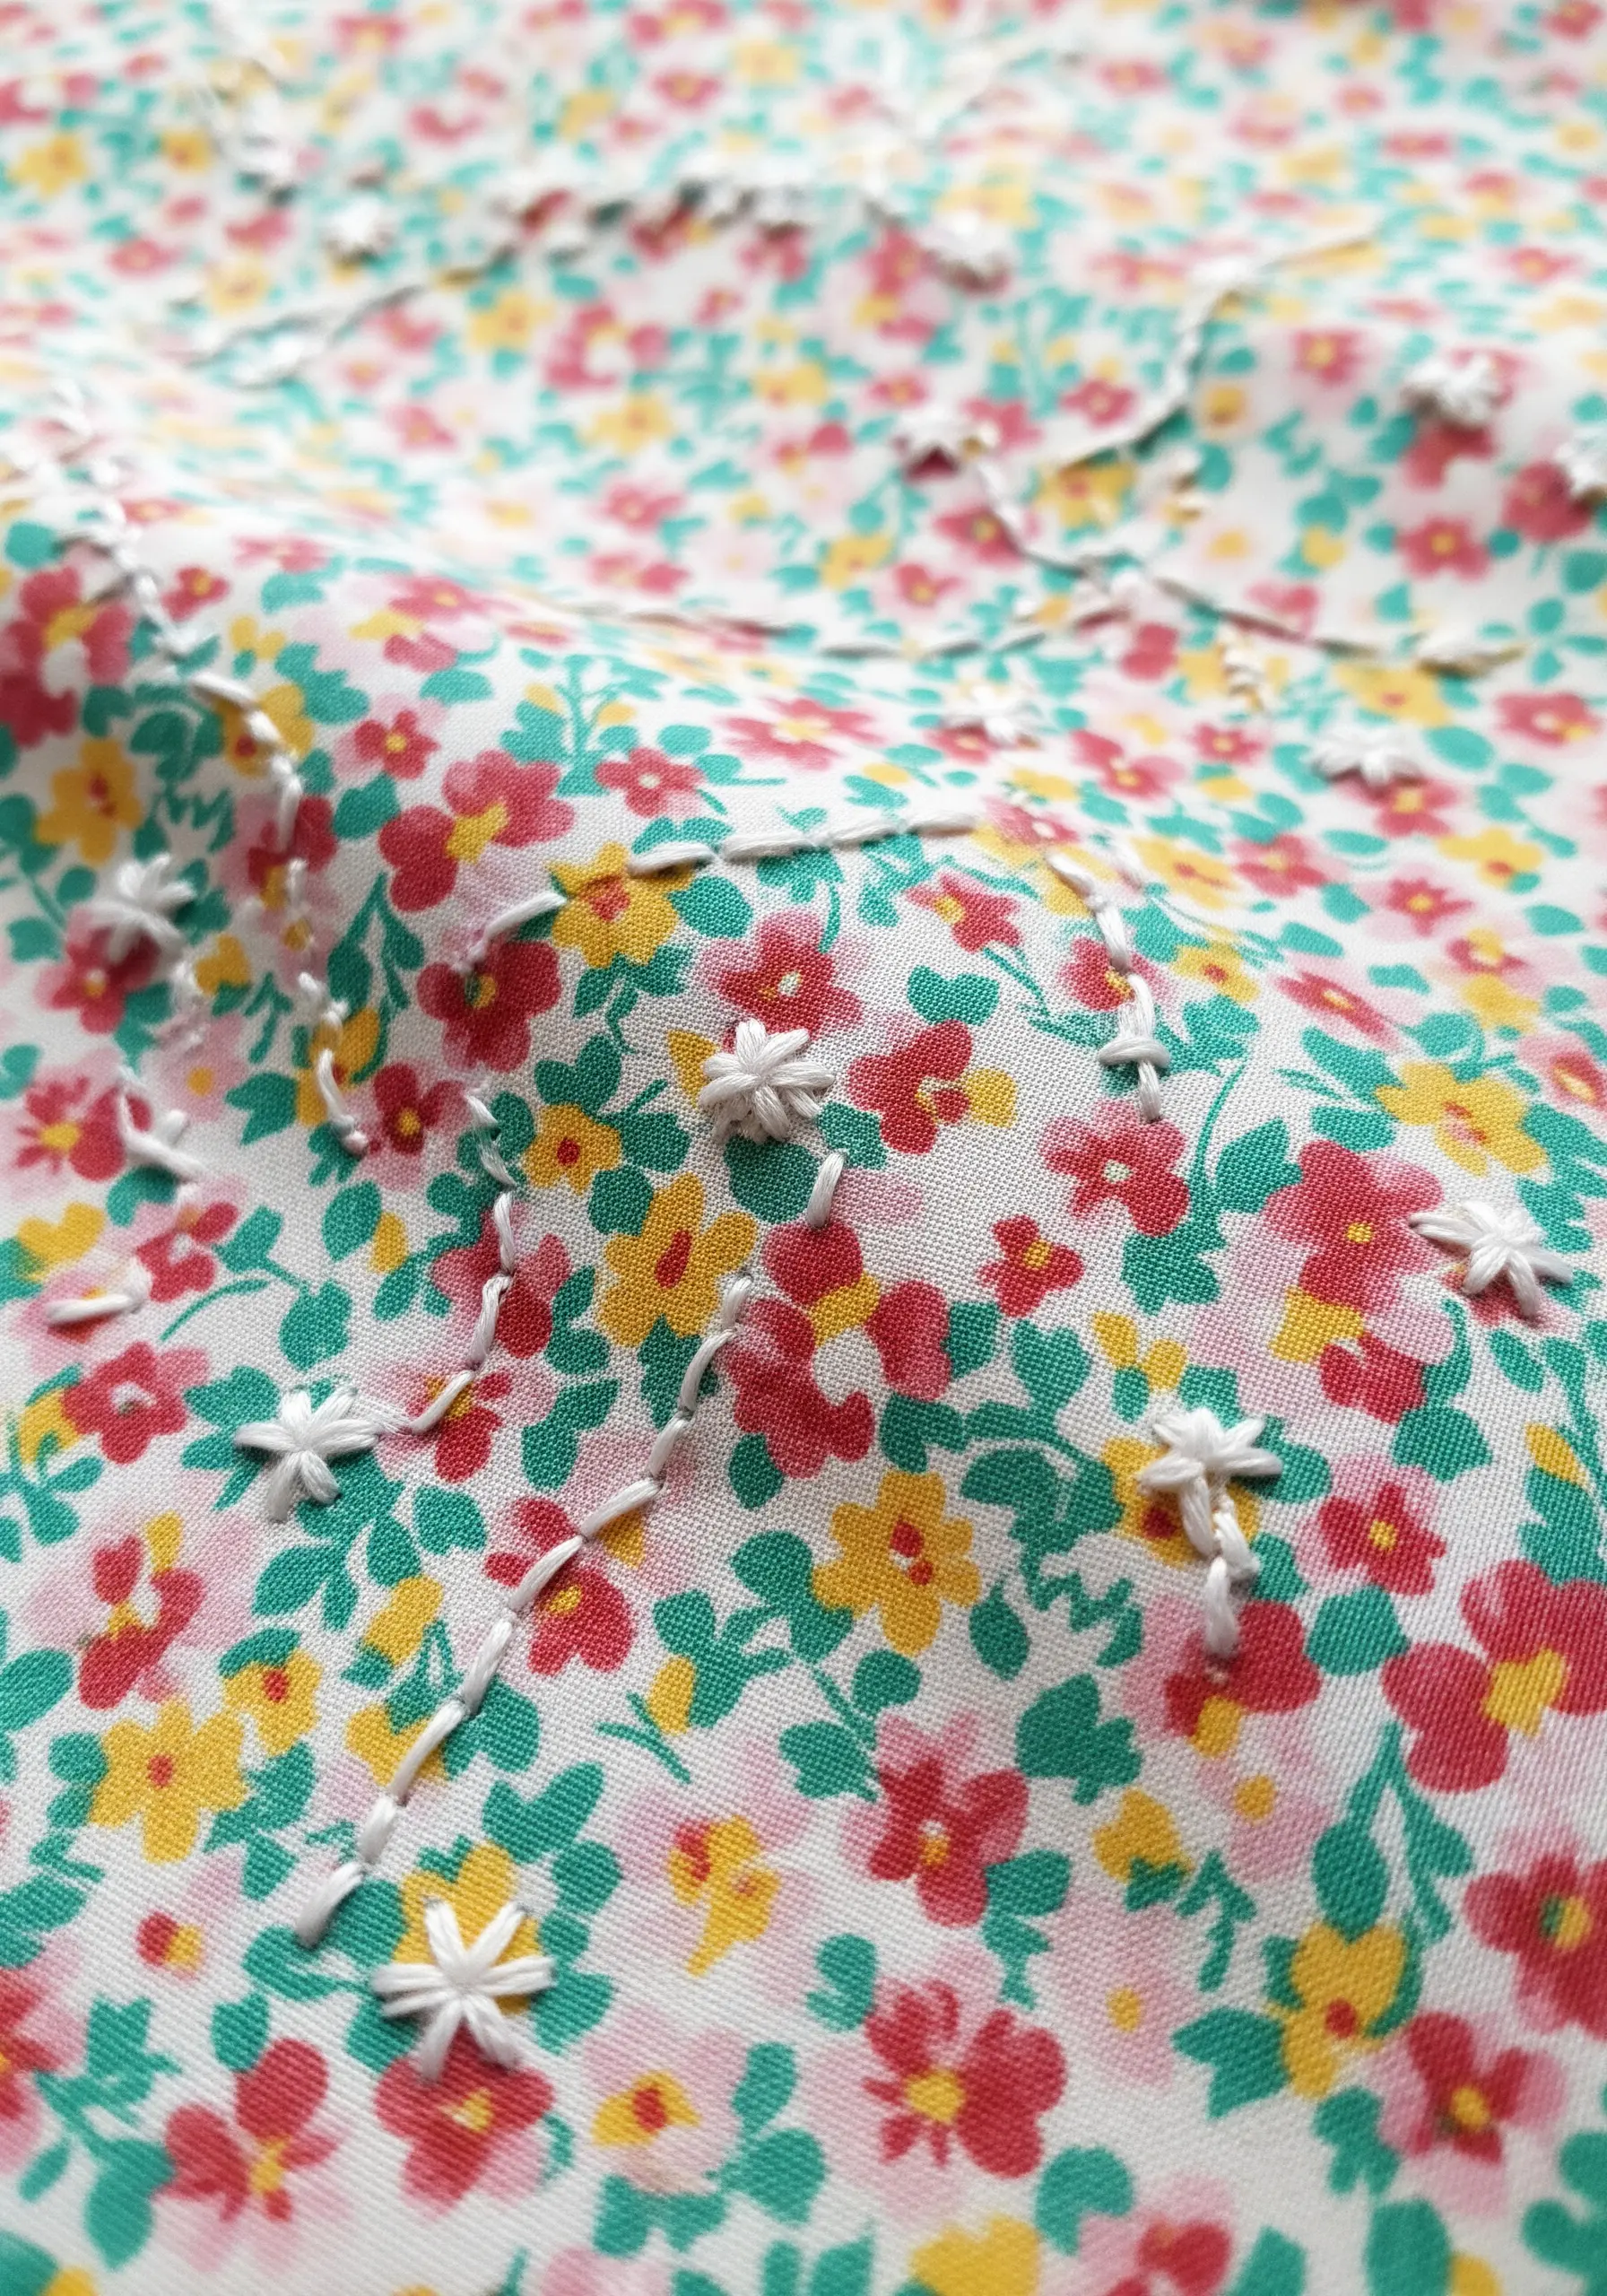
Add a layer of handmade artistry to patterned fabric by tracing elements of the print with simple stitches.
You don’t need to outline everything. Choose a single color or shape from the pattern to highlight—here, small white lazy daisy stitches are added over some of the printed flowers.
This technique adds subtle texture and dimension, merging the printed design with your handiwork to create truly unique embroidery crafts that make every fabric piece special.
24. Use Tiny Stitches to Convey Personality
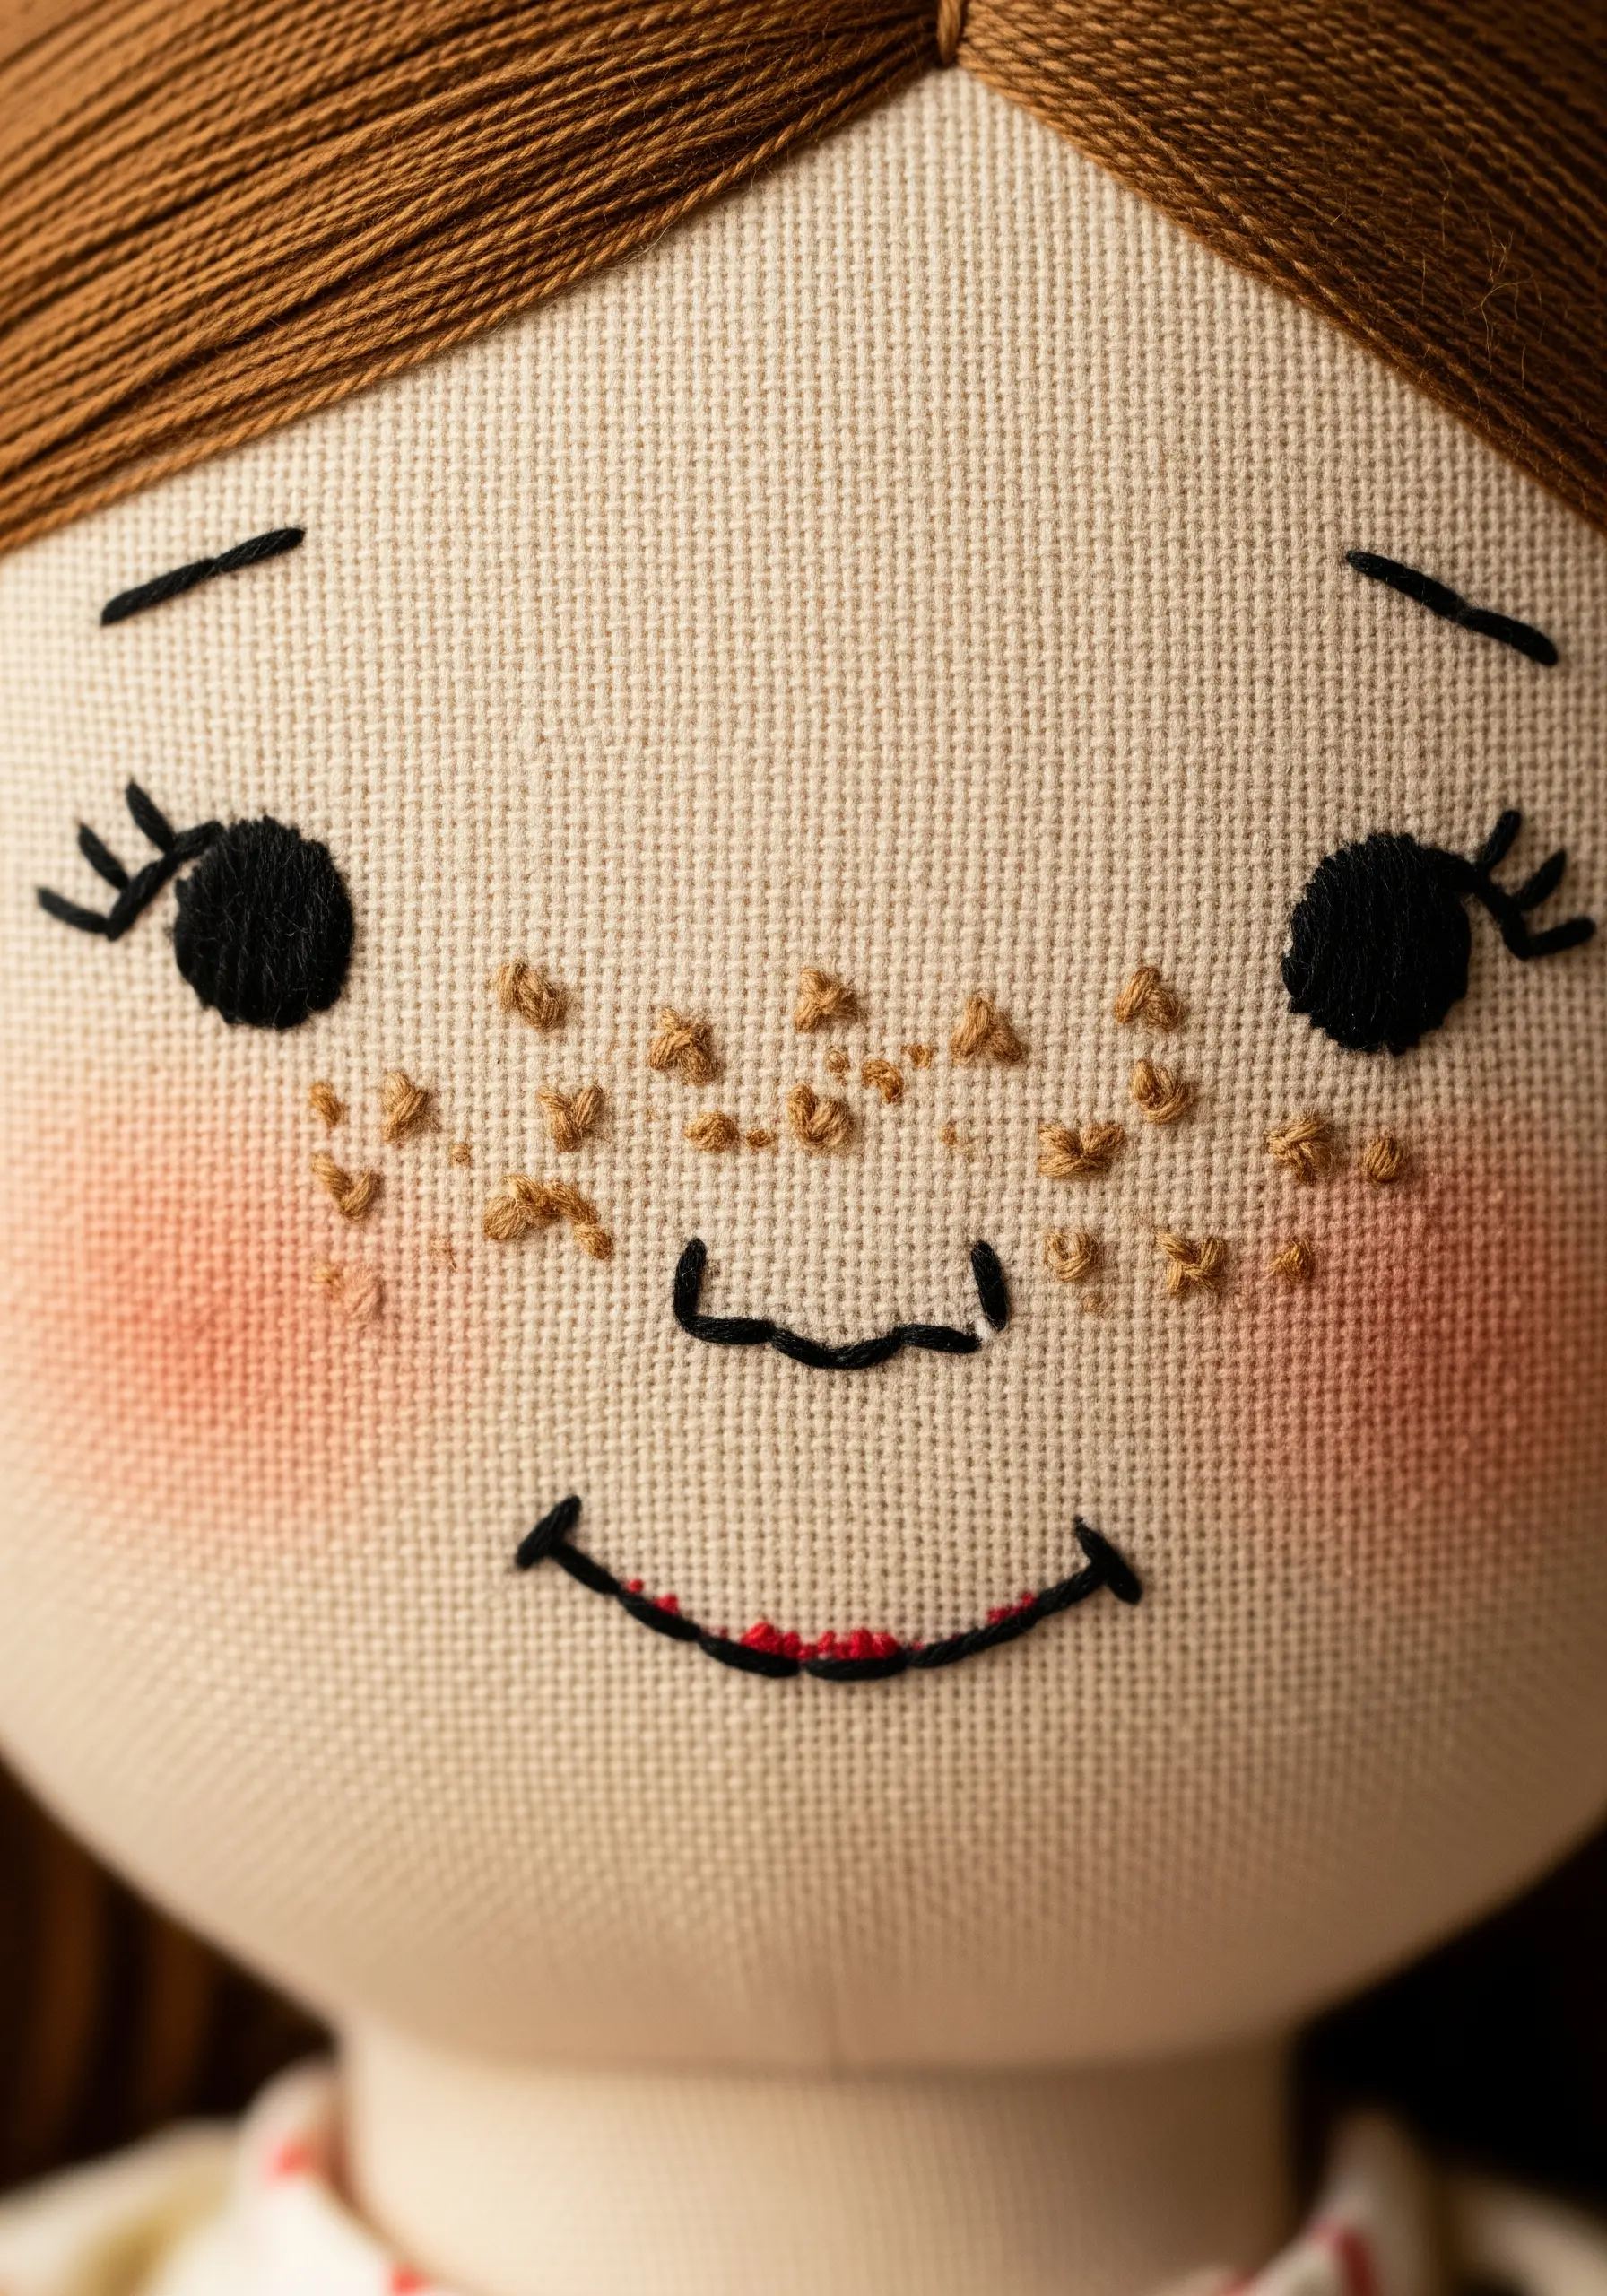
Sometimes, the smallest stitches carry the most character. Use them to add subtle, defining features to figures and portraits.
A scattering of tiny, single-strand seed stitches or French knots creates wonderfully realistic freckles. A single, curved backstitch can form a gentle smile or a thoughtful brow.
The key is restraint; these minimal marks are more powerful when used sparingly. This approach works wonderfully for embroidered nursery decor ideas.
25. Create Gradients with Chain Stitch Spirals
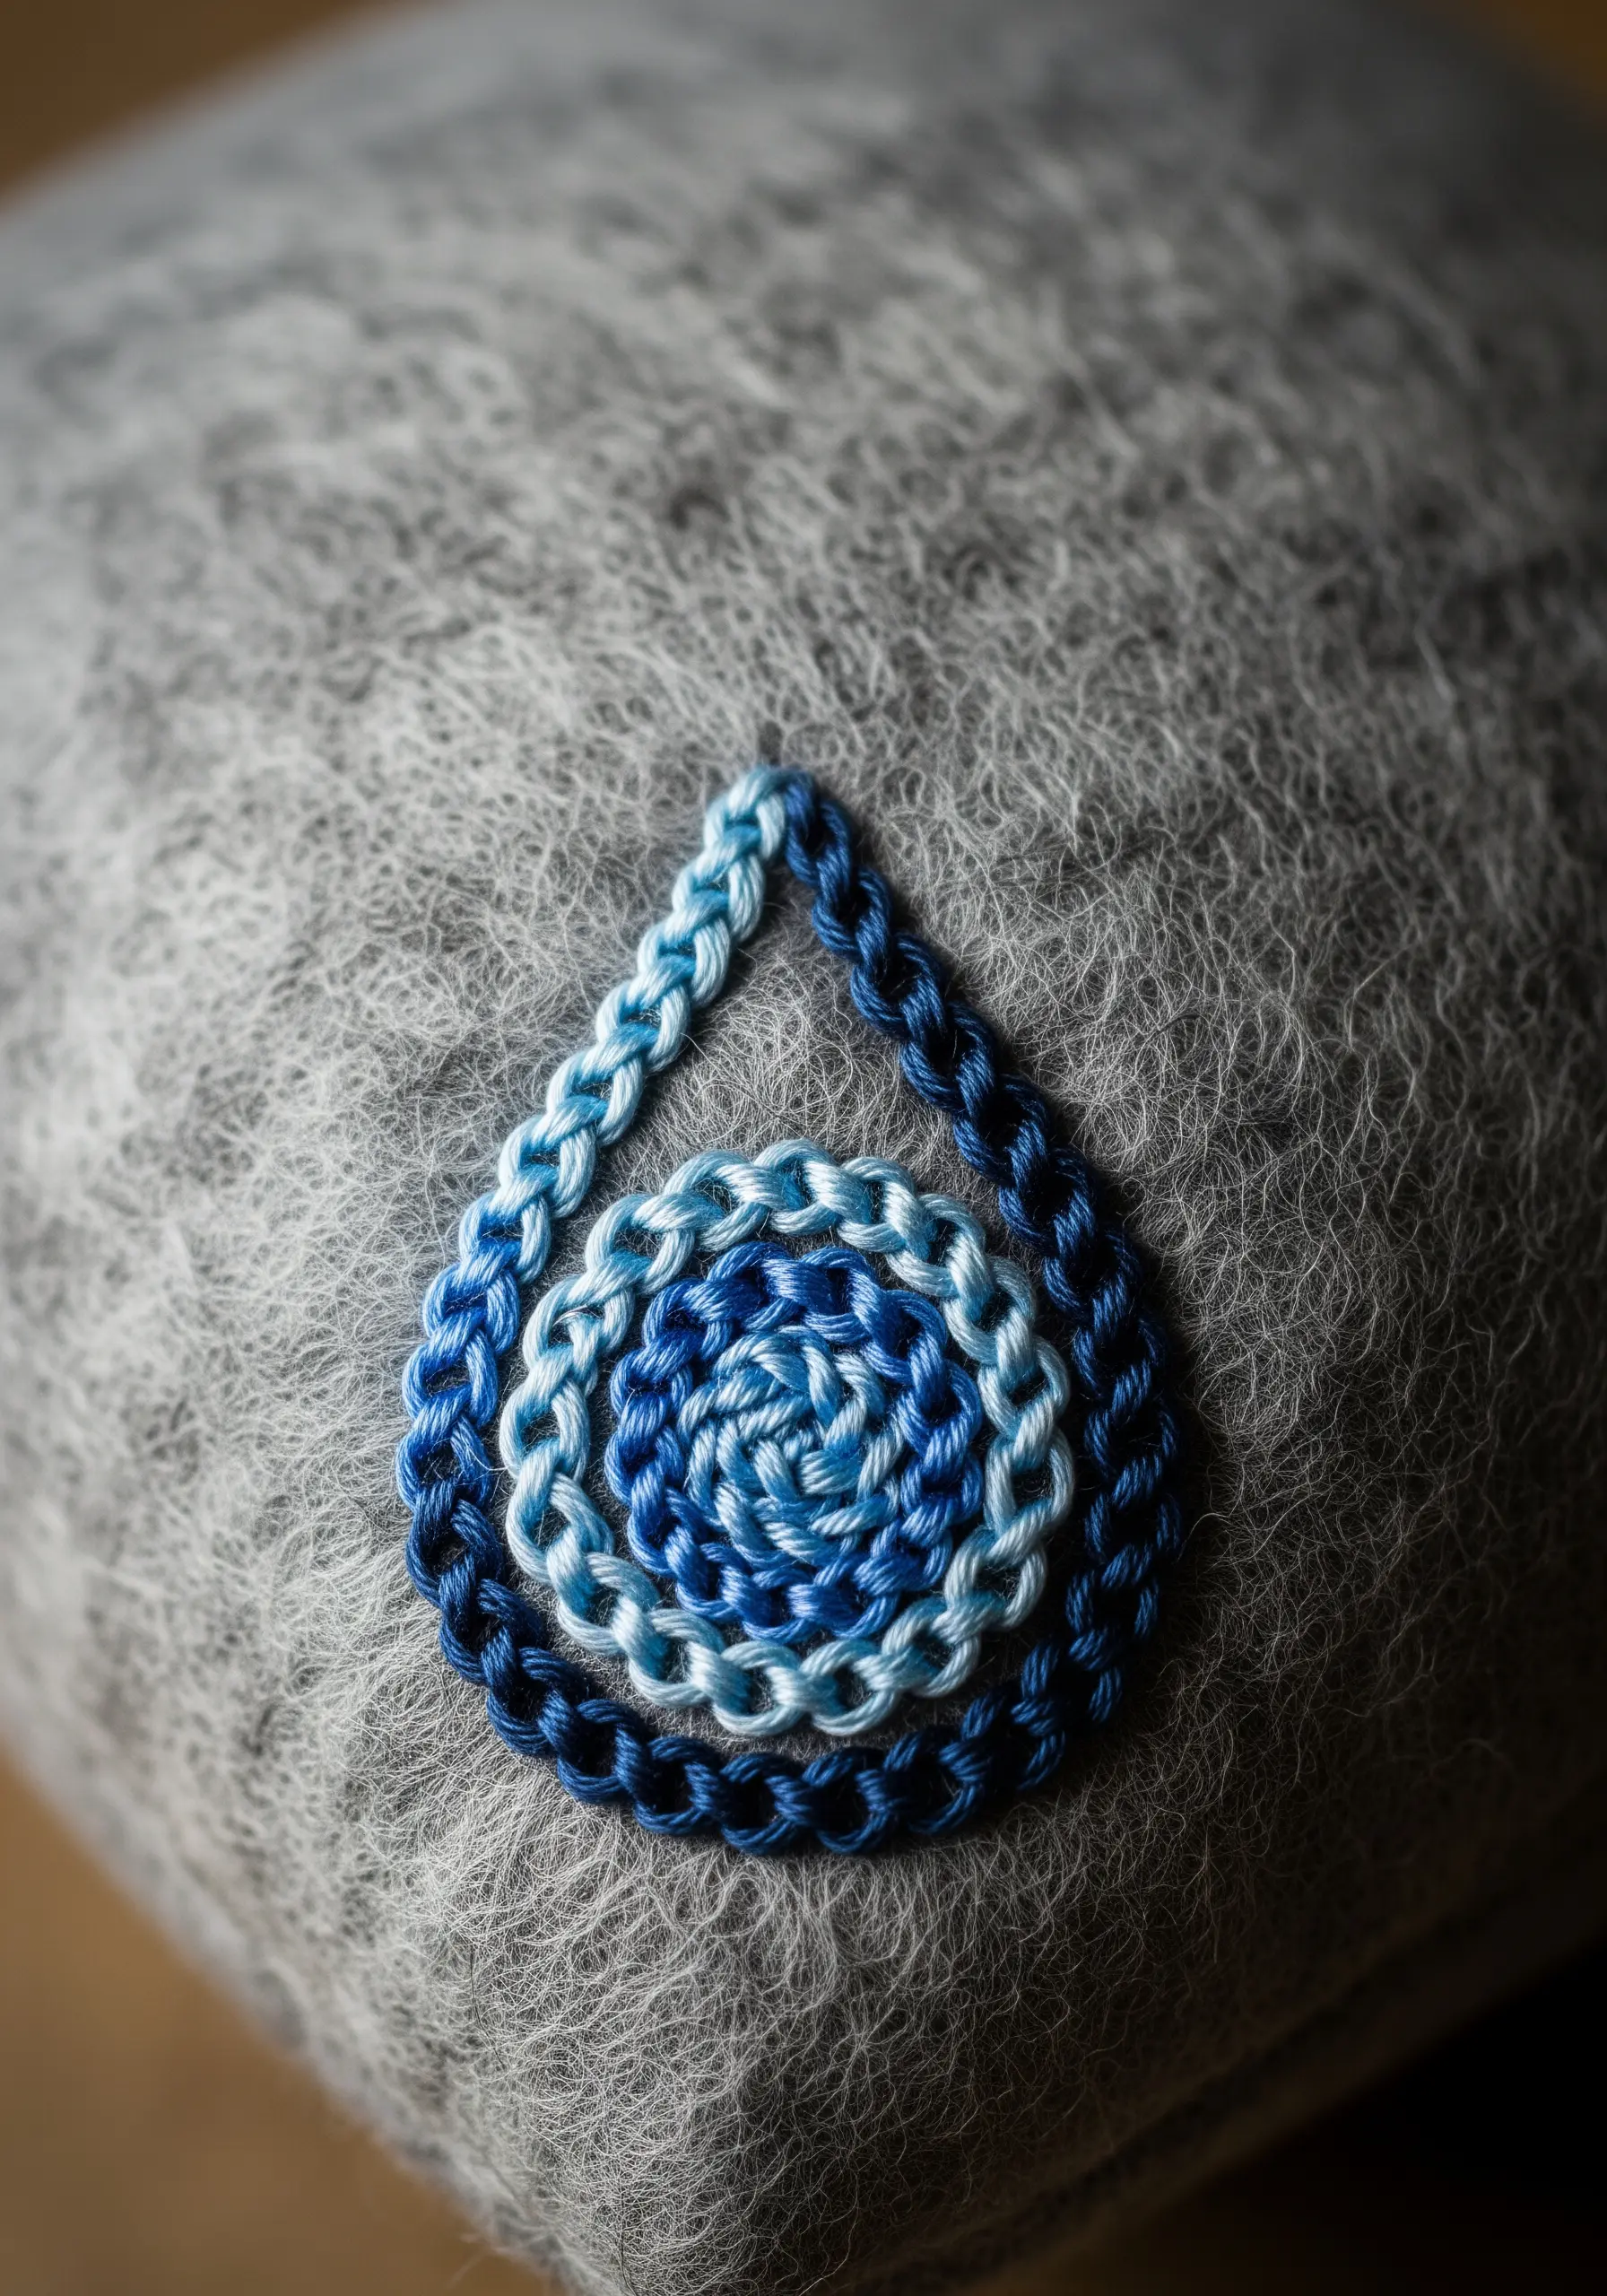
The chain stitch is perfect for creating smooth, concentric lines that can be used to build beautiful gradients.
To create a teardrop or spiral shape, begin at the center and work your way outward in a continuous line. Switch thread colors every one or two rows to create a gentle transition from one shade to the next.
This technique creates a braided, textured appearance that highlights the color flow, ideal for depicting abstract thread waves & swirls or creating mandala-like patterns.
26. Achieve a Clean Look with Counted-Thread Work
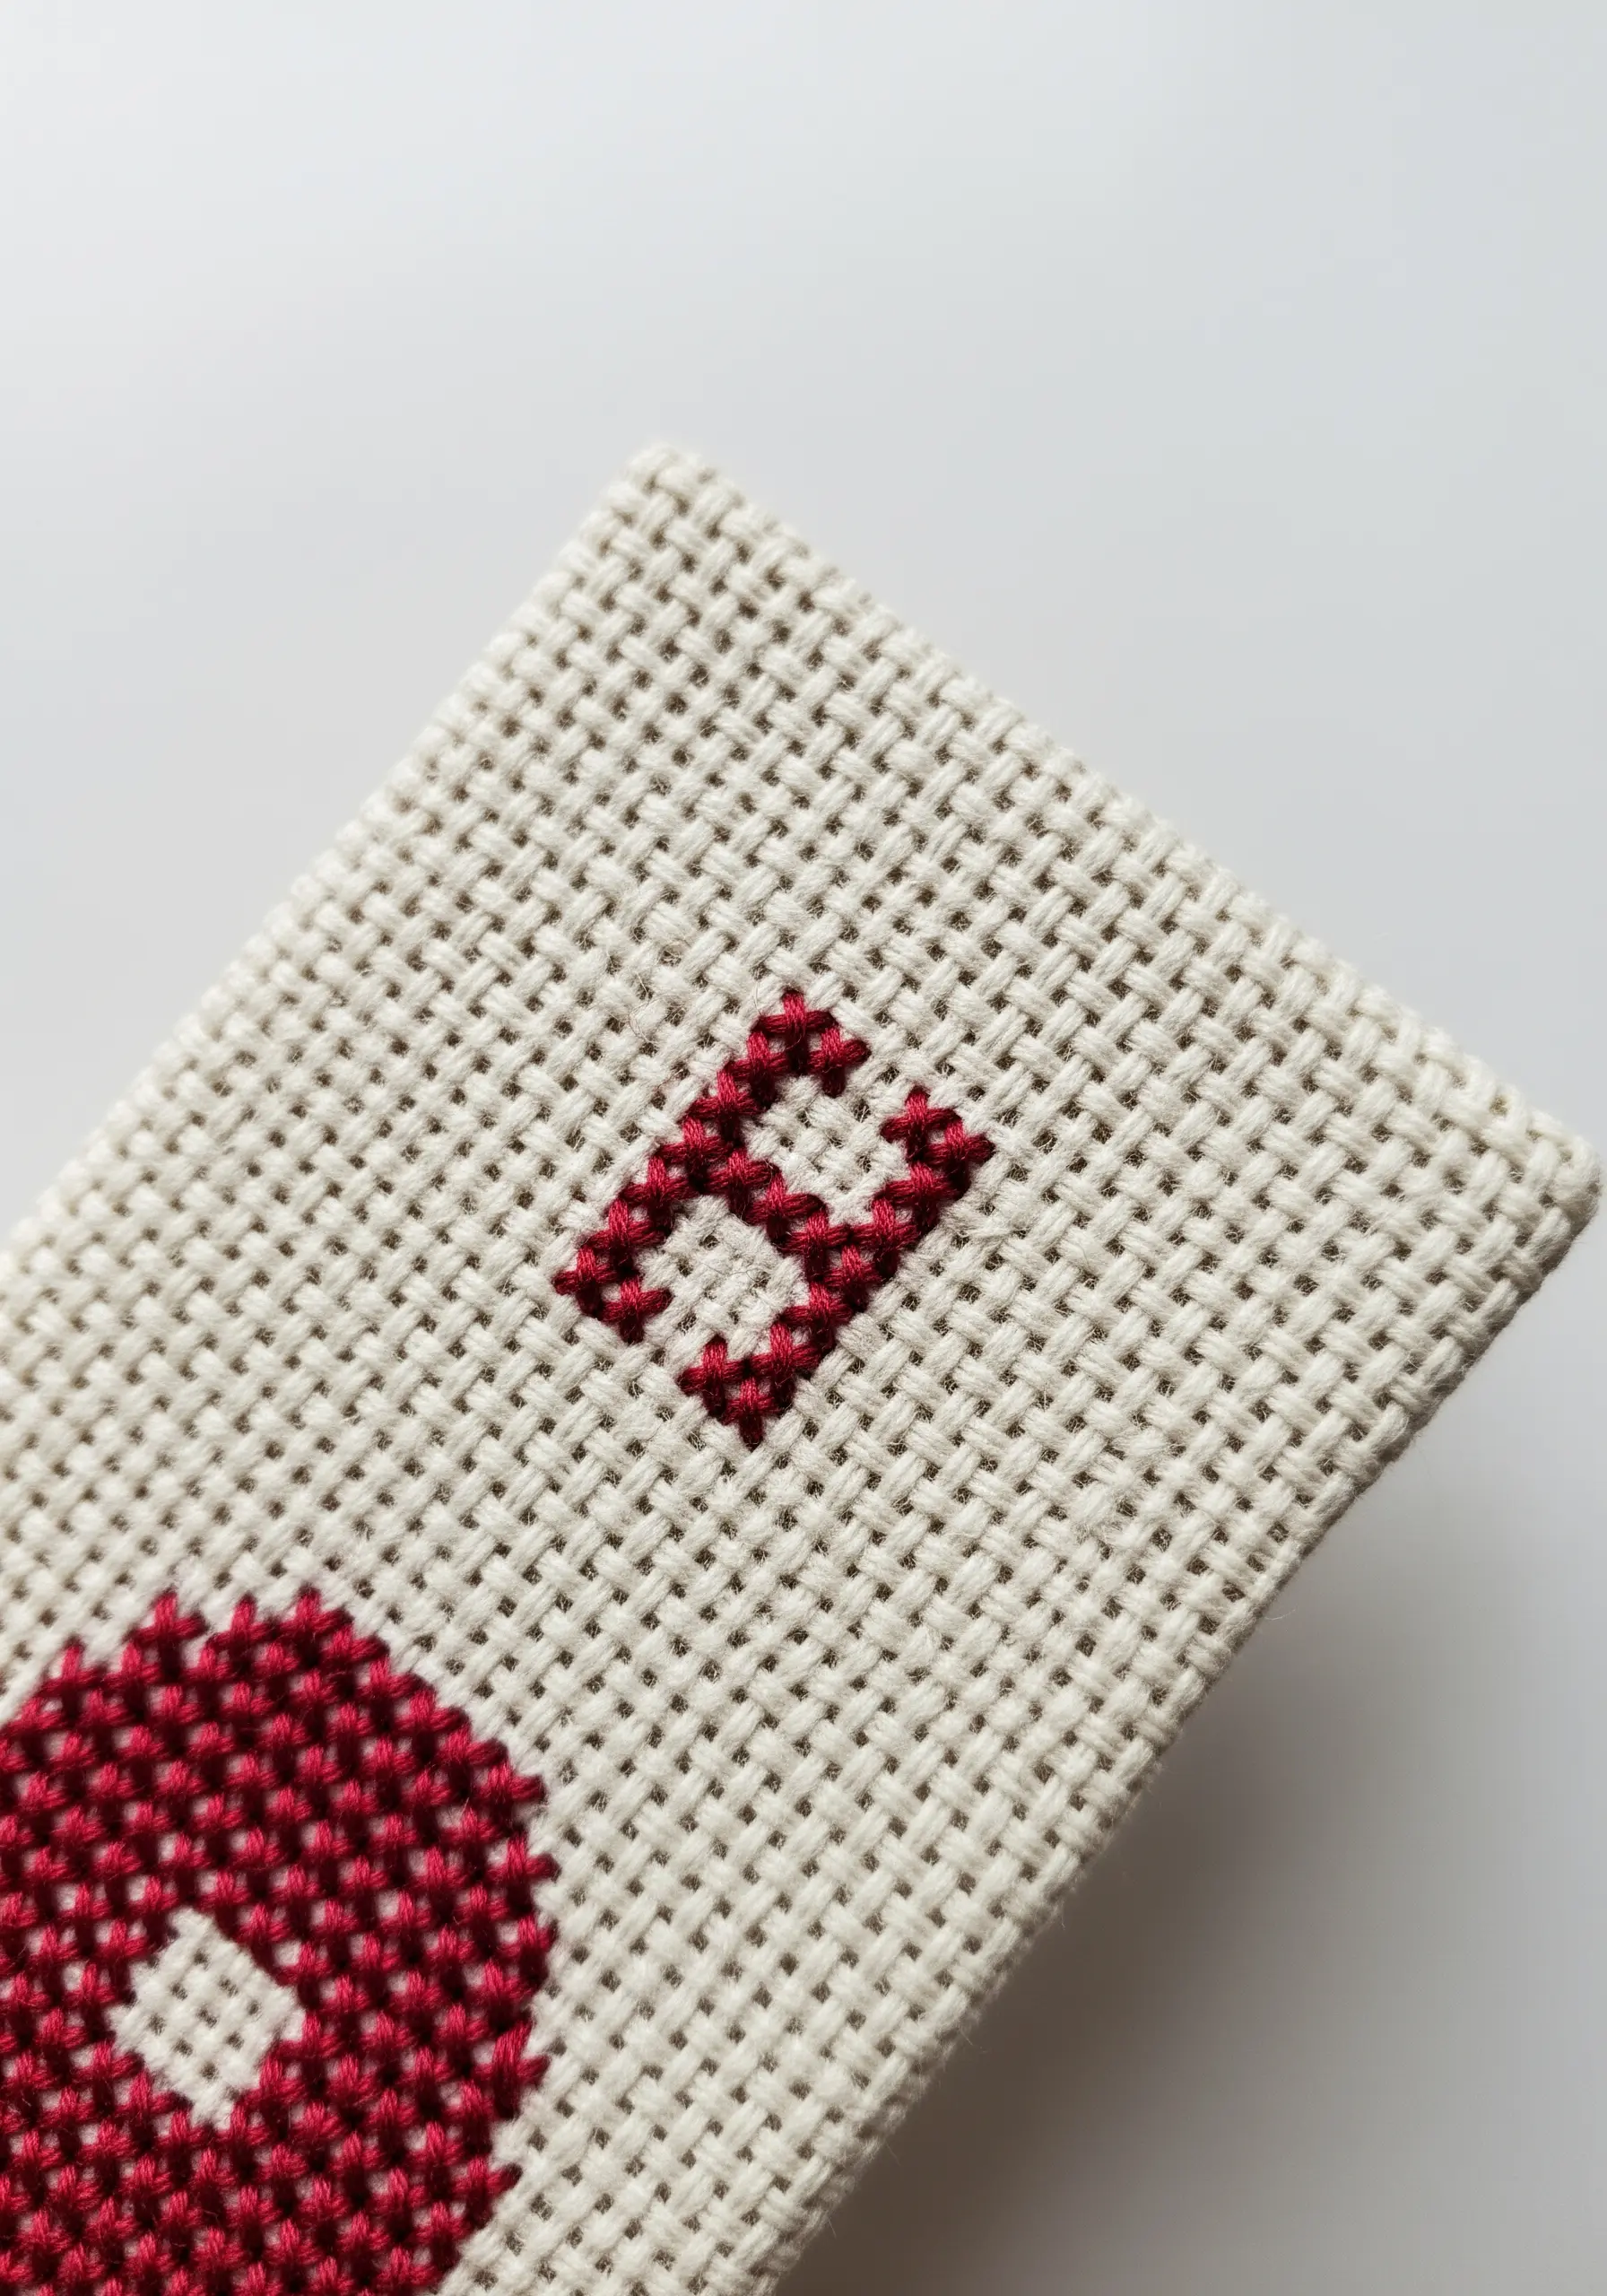
For crisp, geometric letters and patterns, turn to counted-thread embroidery on an even-weave fabric like Aida or canvas.
Stitches like the cross-stitch or tent stitch rely on the fabric’s grid structure, ensuring every stitch is uniform in size and placement. This removes guesswork and results in an incredibly neat, structured finish.
This precision is perfect for monograms and graphic designs, allowing you to create flawless shapes. Use it to make mini monogram embroidery frames with a classic, tidy appearance.


