

You have the thread, the fabric, and the desire to create something beautiful. But perhaps you feel that your finished pieces don’t quite capture the elegance you envision. It’s a common feeling, but the solution isn’t about learning dozens of complex stitches.
The secret to polished, professional-looking embroidery lies in intention. It’s about choosing the *right* simple stitch for the job and executing it with care. It’s about understanding how a change in thread direction can create shadow, or how a single, well-placed highlight can bring a flat shape to life.
These beginner-friendly designs are more than just quick projects; they are focused lessons. Each one is a chance to master a small, powerful technique that will elevate everything you stitch from this day forward. You can create something you’re proud of, tonight.
1. The Art of the Wish: A Modern Dandelion
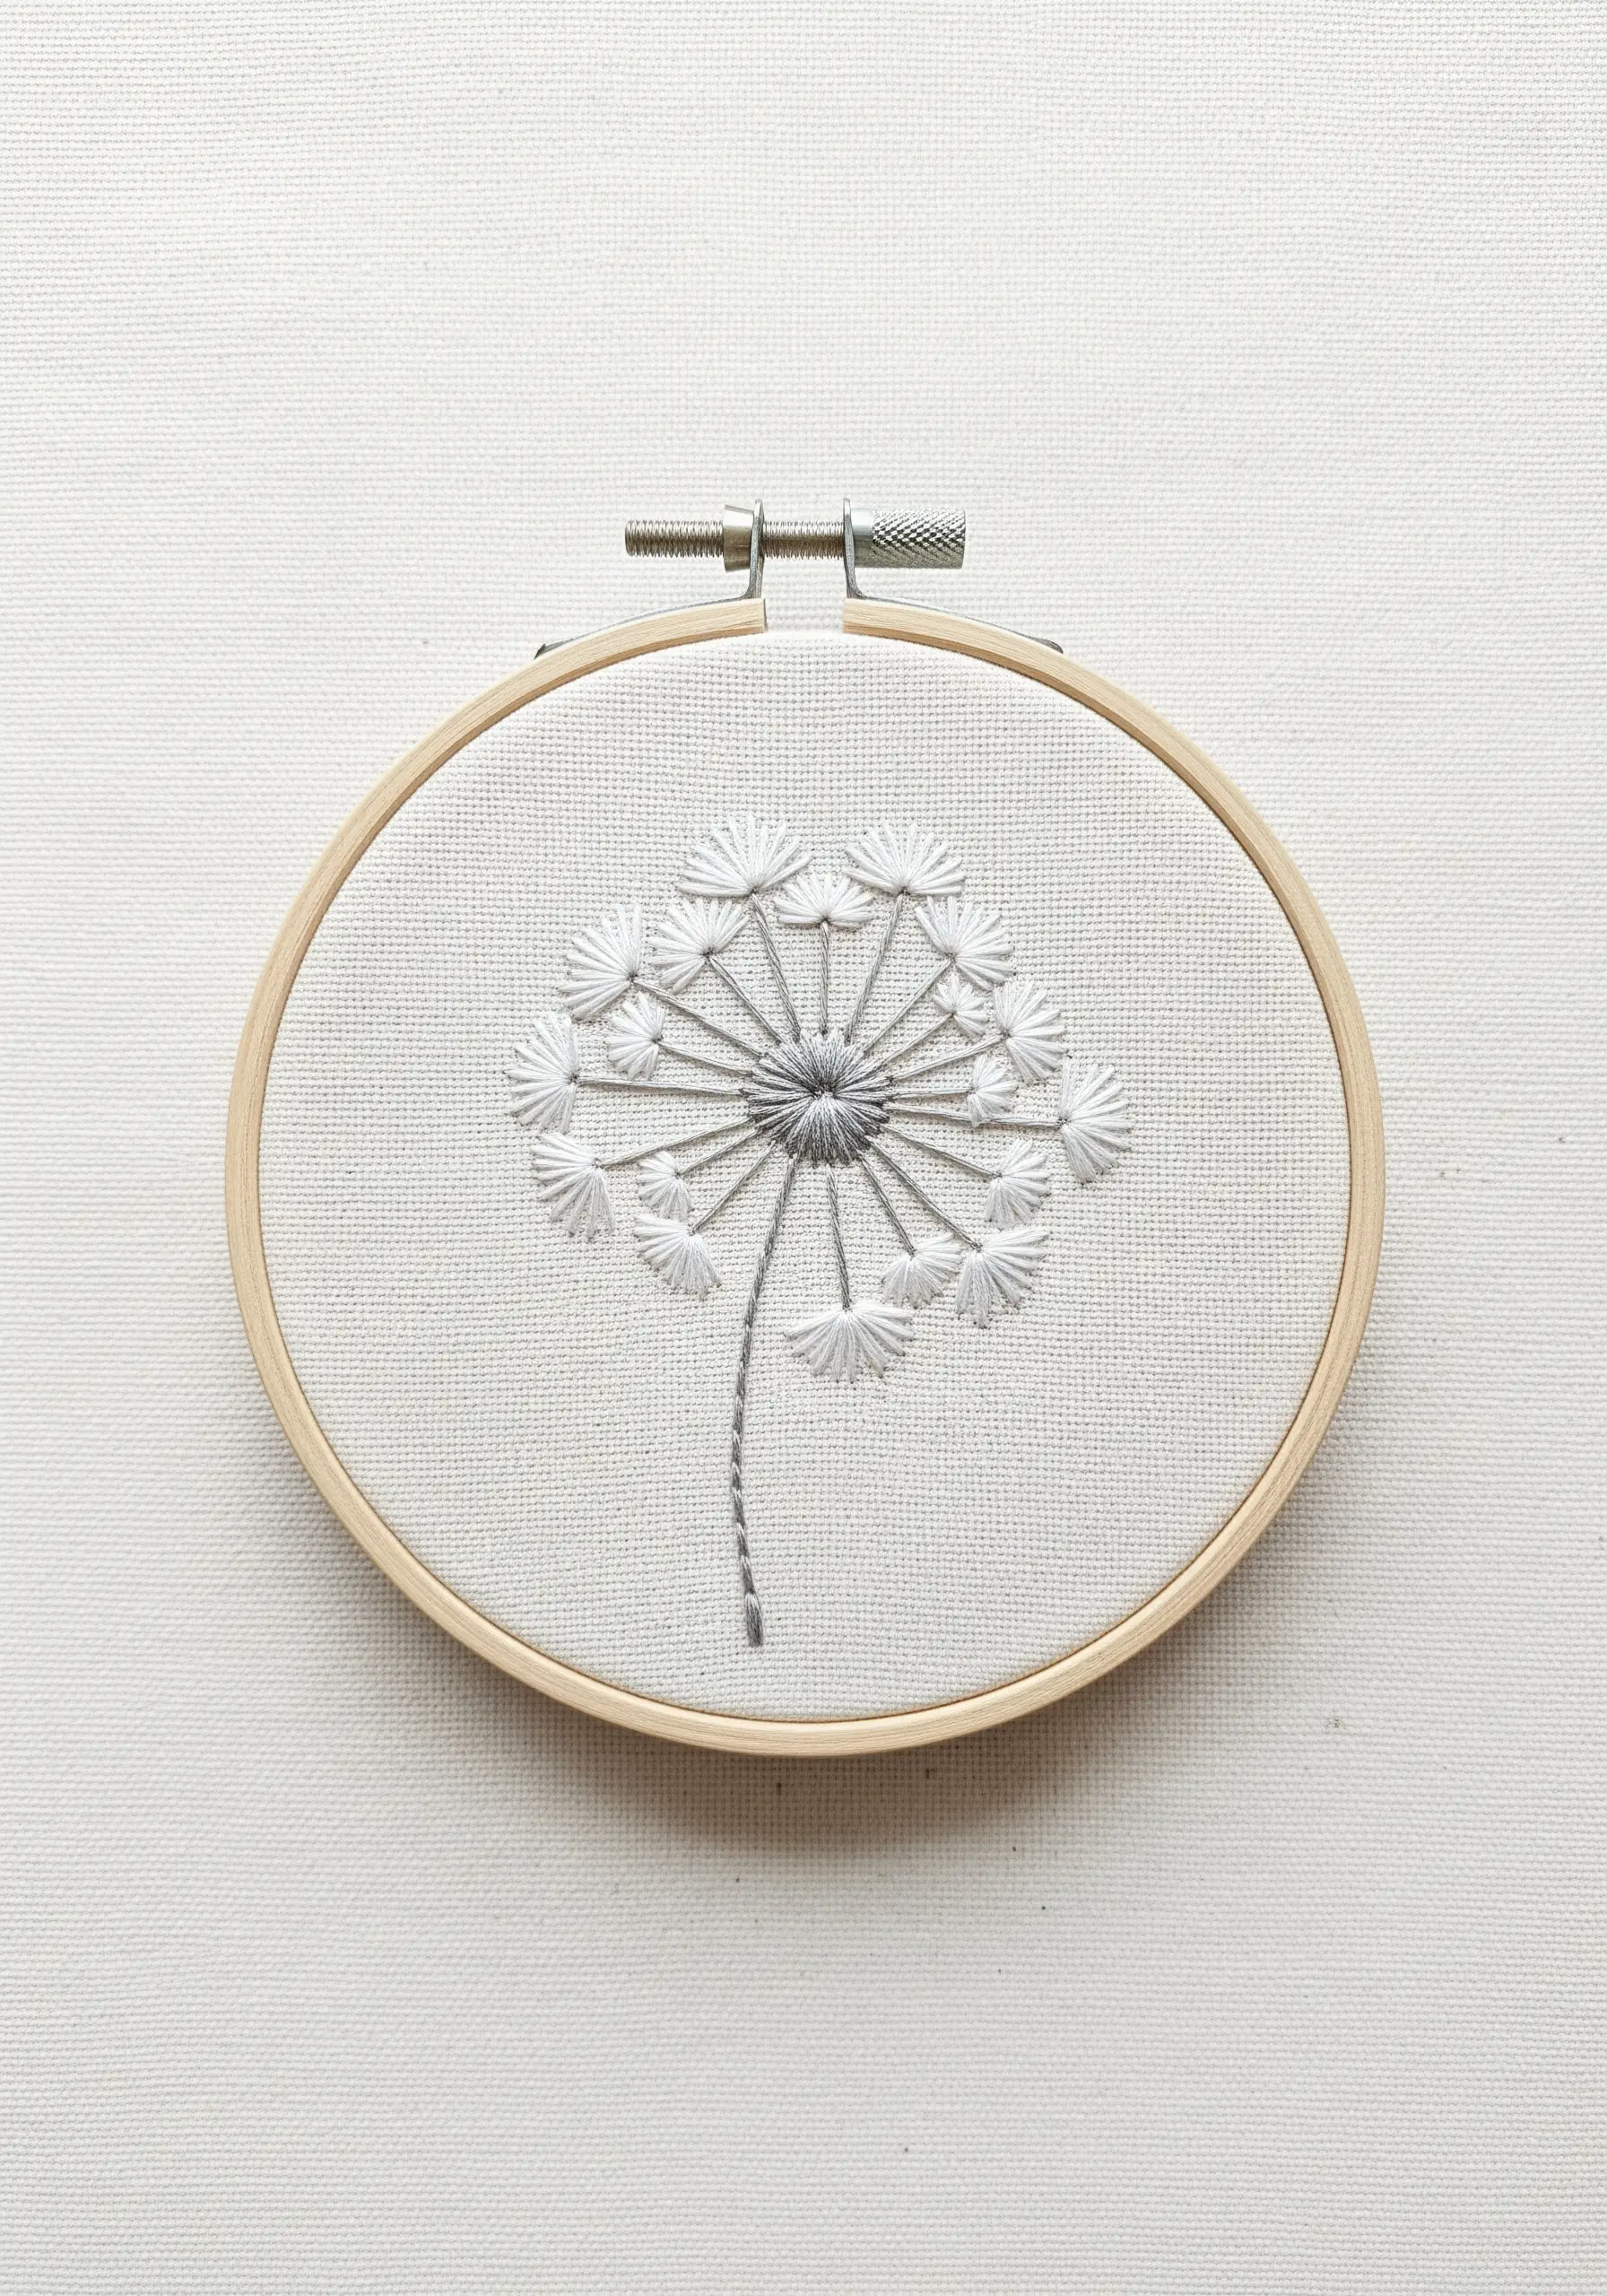
Create the illusion of delicate, floating seeds by mastering the detached chain stitch.
First, use a single strand of grey thread to stitch the central hub and the radiating stems with a simple backstitch.
Then, switch to a brighter white thread and add a single detached chain stitch (or lazy daisy) to the end of each stem.
This two-tone approach adds visual depth, while the open loop of the stitch gives each seed head an airy, three-dimensional quality.
It’s one of those beautiful dandelion and wildgrass stitch projects that feels both simple and sophisticated.
2. Sculpted Succulent: Mastering Directional Fill
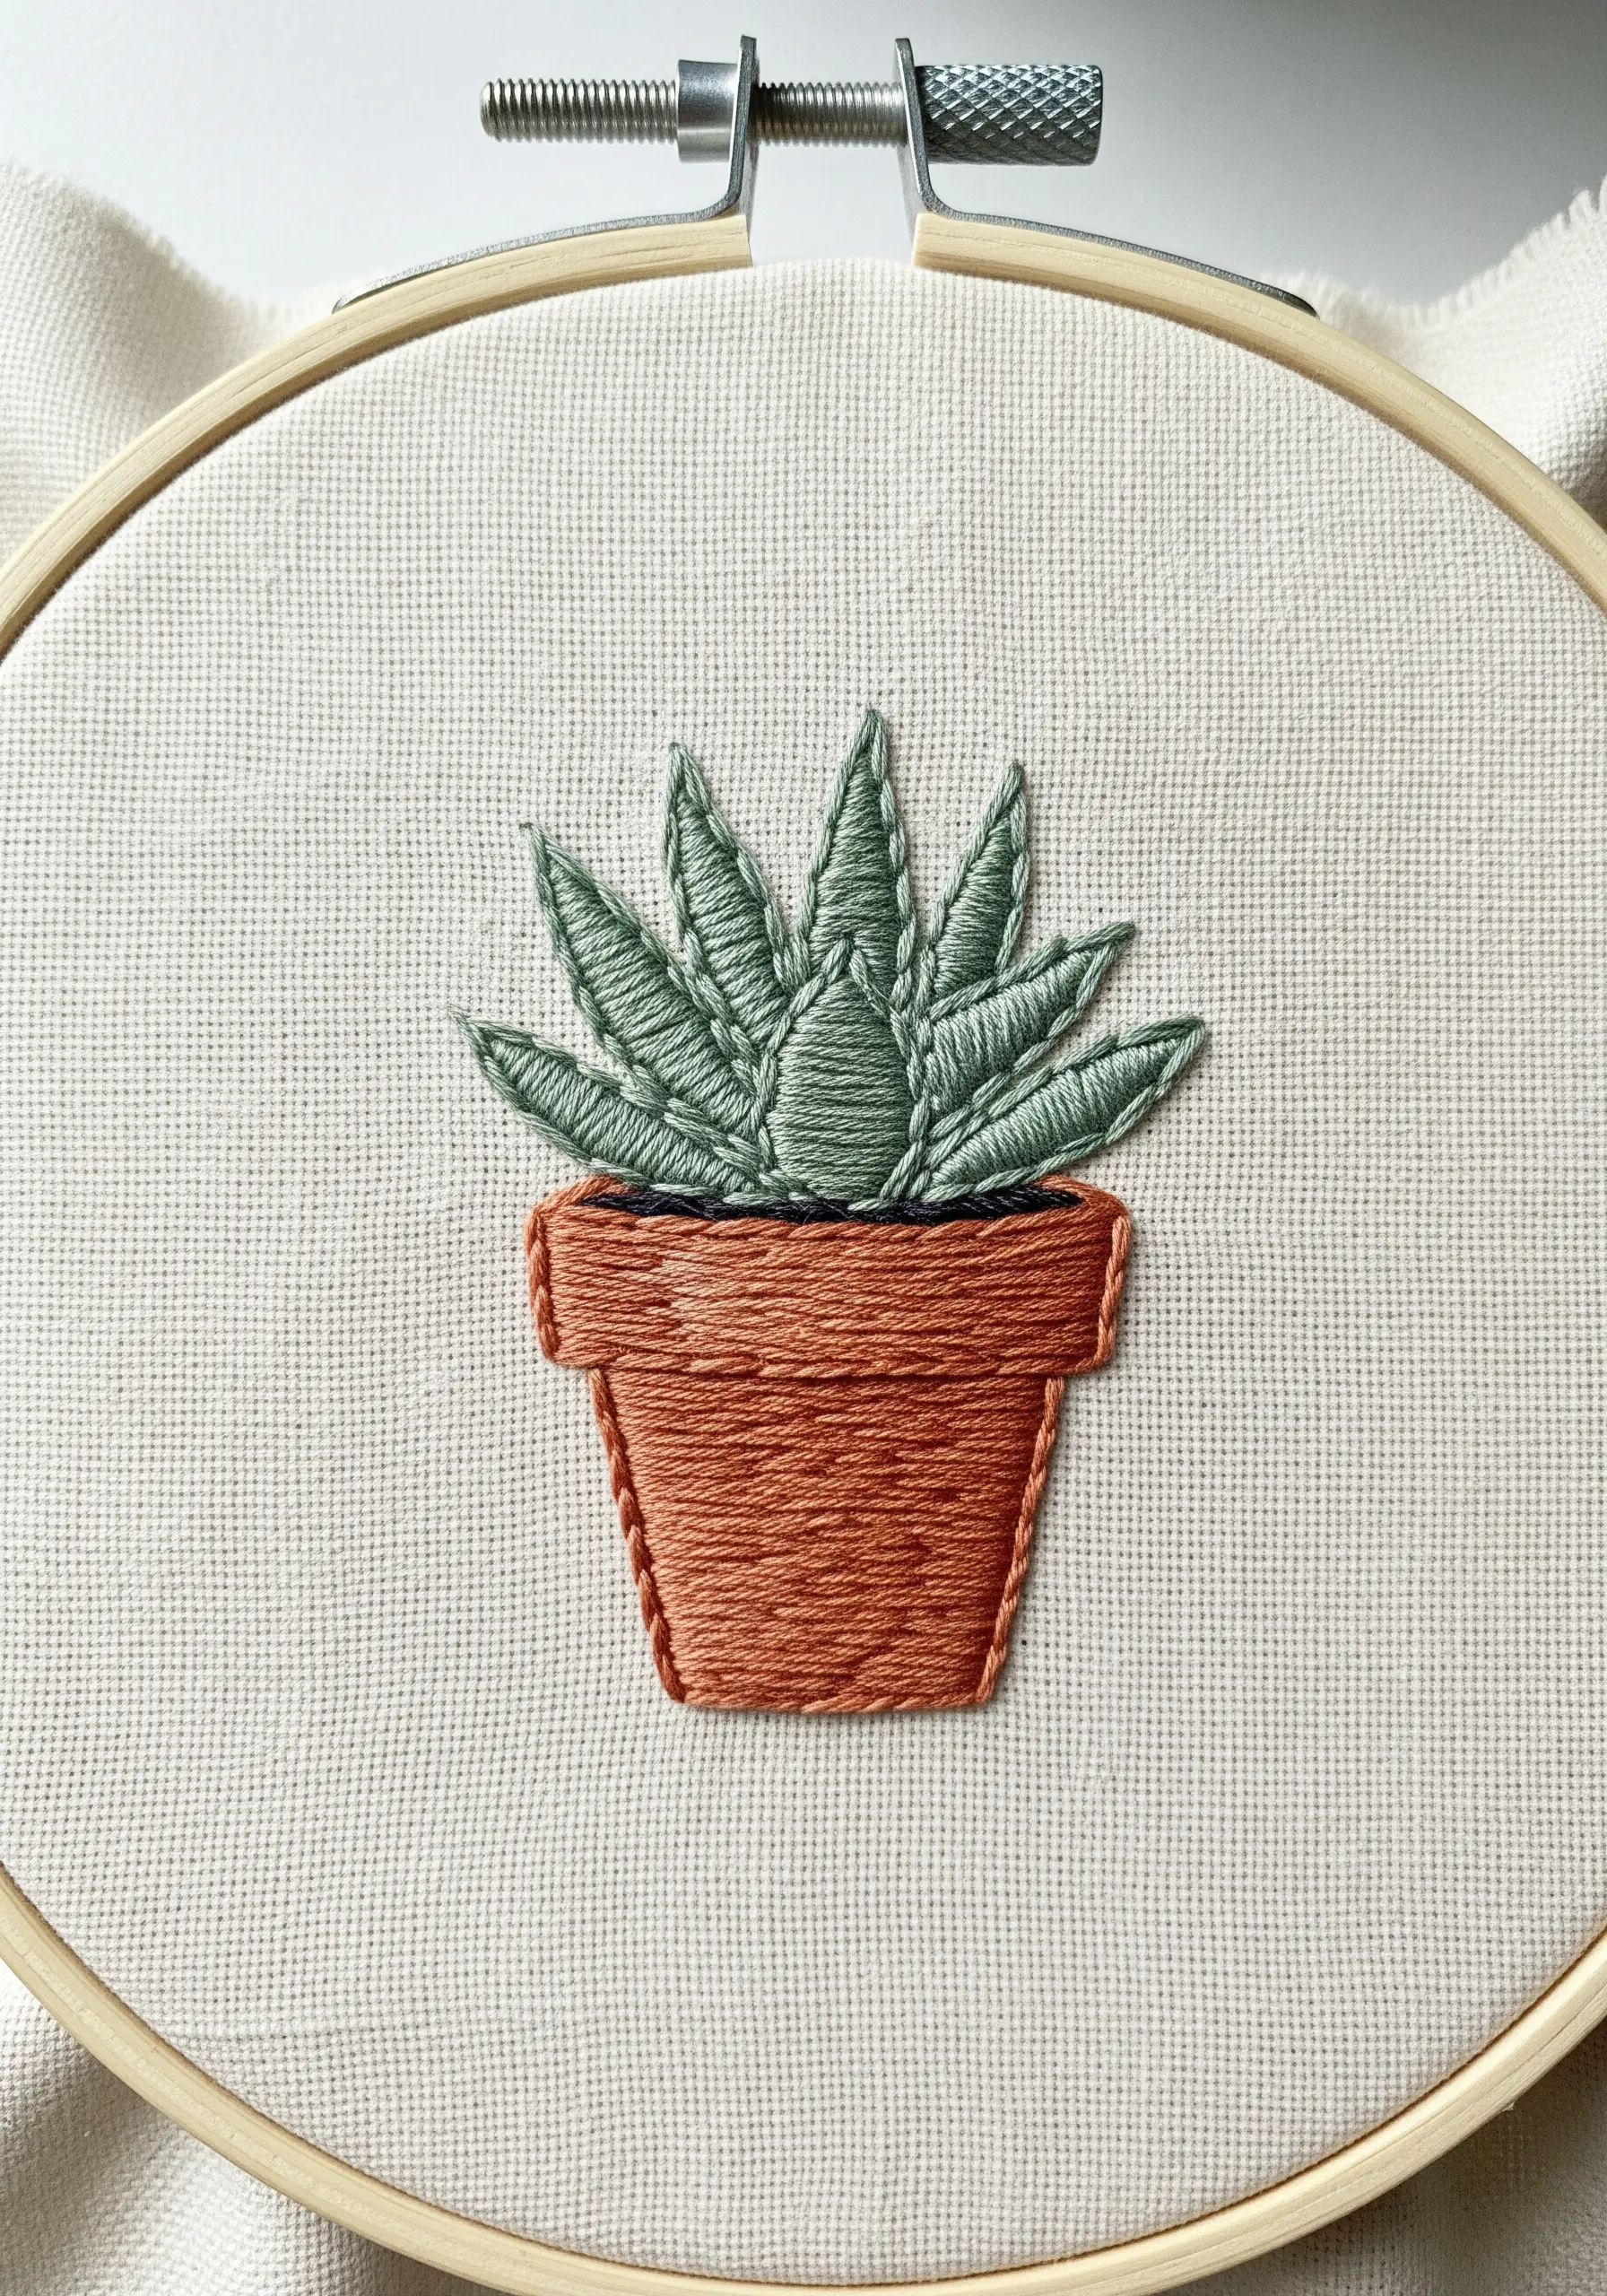
Give your botanicals a realistic, structured form by choosing the right fill stitch.
Instead of a flat satin stitch for the leaves, use the fishbone stitch.
This technique creates a central spine, with your stitches angling outwards just like the leaves of a real plant.
For the pot, use horizontal satin stitches to create a smooth, ceramic-like texture, and finish with a fine backstitch outline to add definition.
3. Mountainscape in Thread: Painting with Color Blocks

You don’t need complex blending to create depth—all you need is color and direction.
Fill each facet of the mountain with directional satin stitch, ensuring all stitches within one block are parallel.
By changing the angle of your stitches for an adjacent block, you create the illusion of light and shadow, even with flat color.
Use a crisp white satin stitch for the snow caps to create a clean, graphic finish that makes the blues feel even richer.
4. Stitching the Stars: Minimalist Constellations

The power of this design lies in its high contrast and delicate execution.
Choose a tightly woven, dark fabric like navy or black to serve as your night sky.
For each star, create a small woven wheel by making five tiny straight stitches radiating from a central point.
Connect your stars with a light, airy dashed backstitch using a single strand of thread—this keeps the design from feeling heavy.
Using a metallic or bright white thread makes the constellation truly shine.
5. The Textured Bumblebee: Layering for Dimension

Achieve that signature fuzzy look by swapping satin stitch for the more versatile long-and-short stitch.
This technique allows you to softly blend colors and create a texture that mimics fine hairs.
For the wings, use a single strand of a very light blue or silver thread in an open fishbone stitch—this creates a delicate, veined appearance that feels translucent.
These tiny adjustments in stitch choice are what elevate a simple motif into a lifelike piece of art.
6. Mindful Lettering: The Calming Power of Script
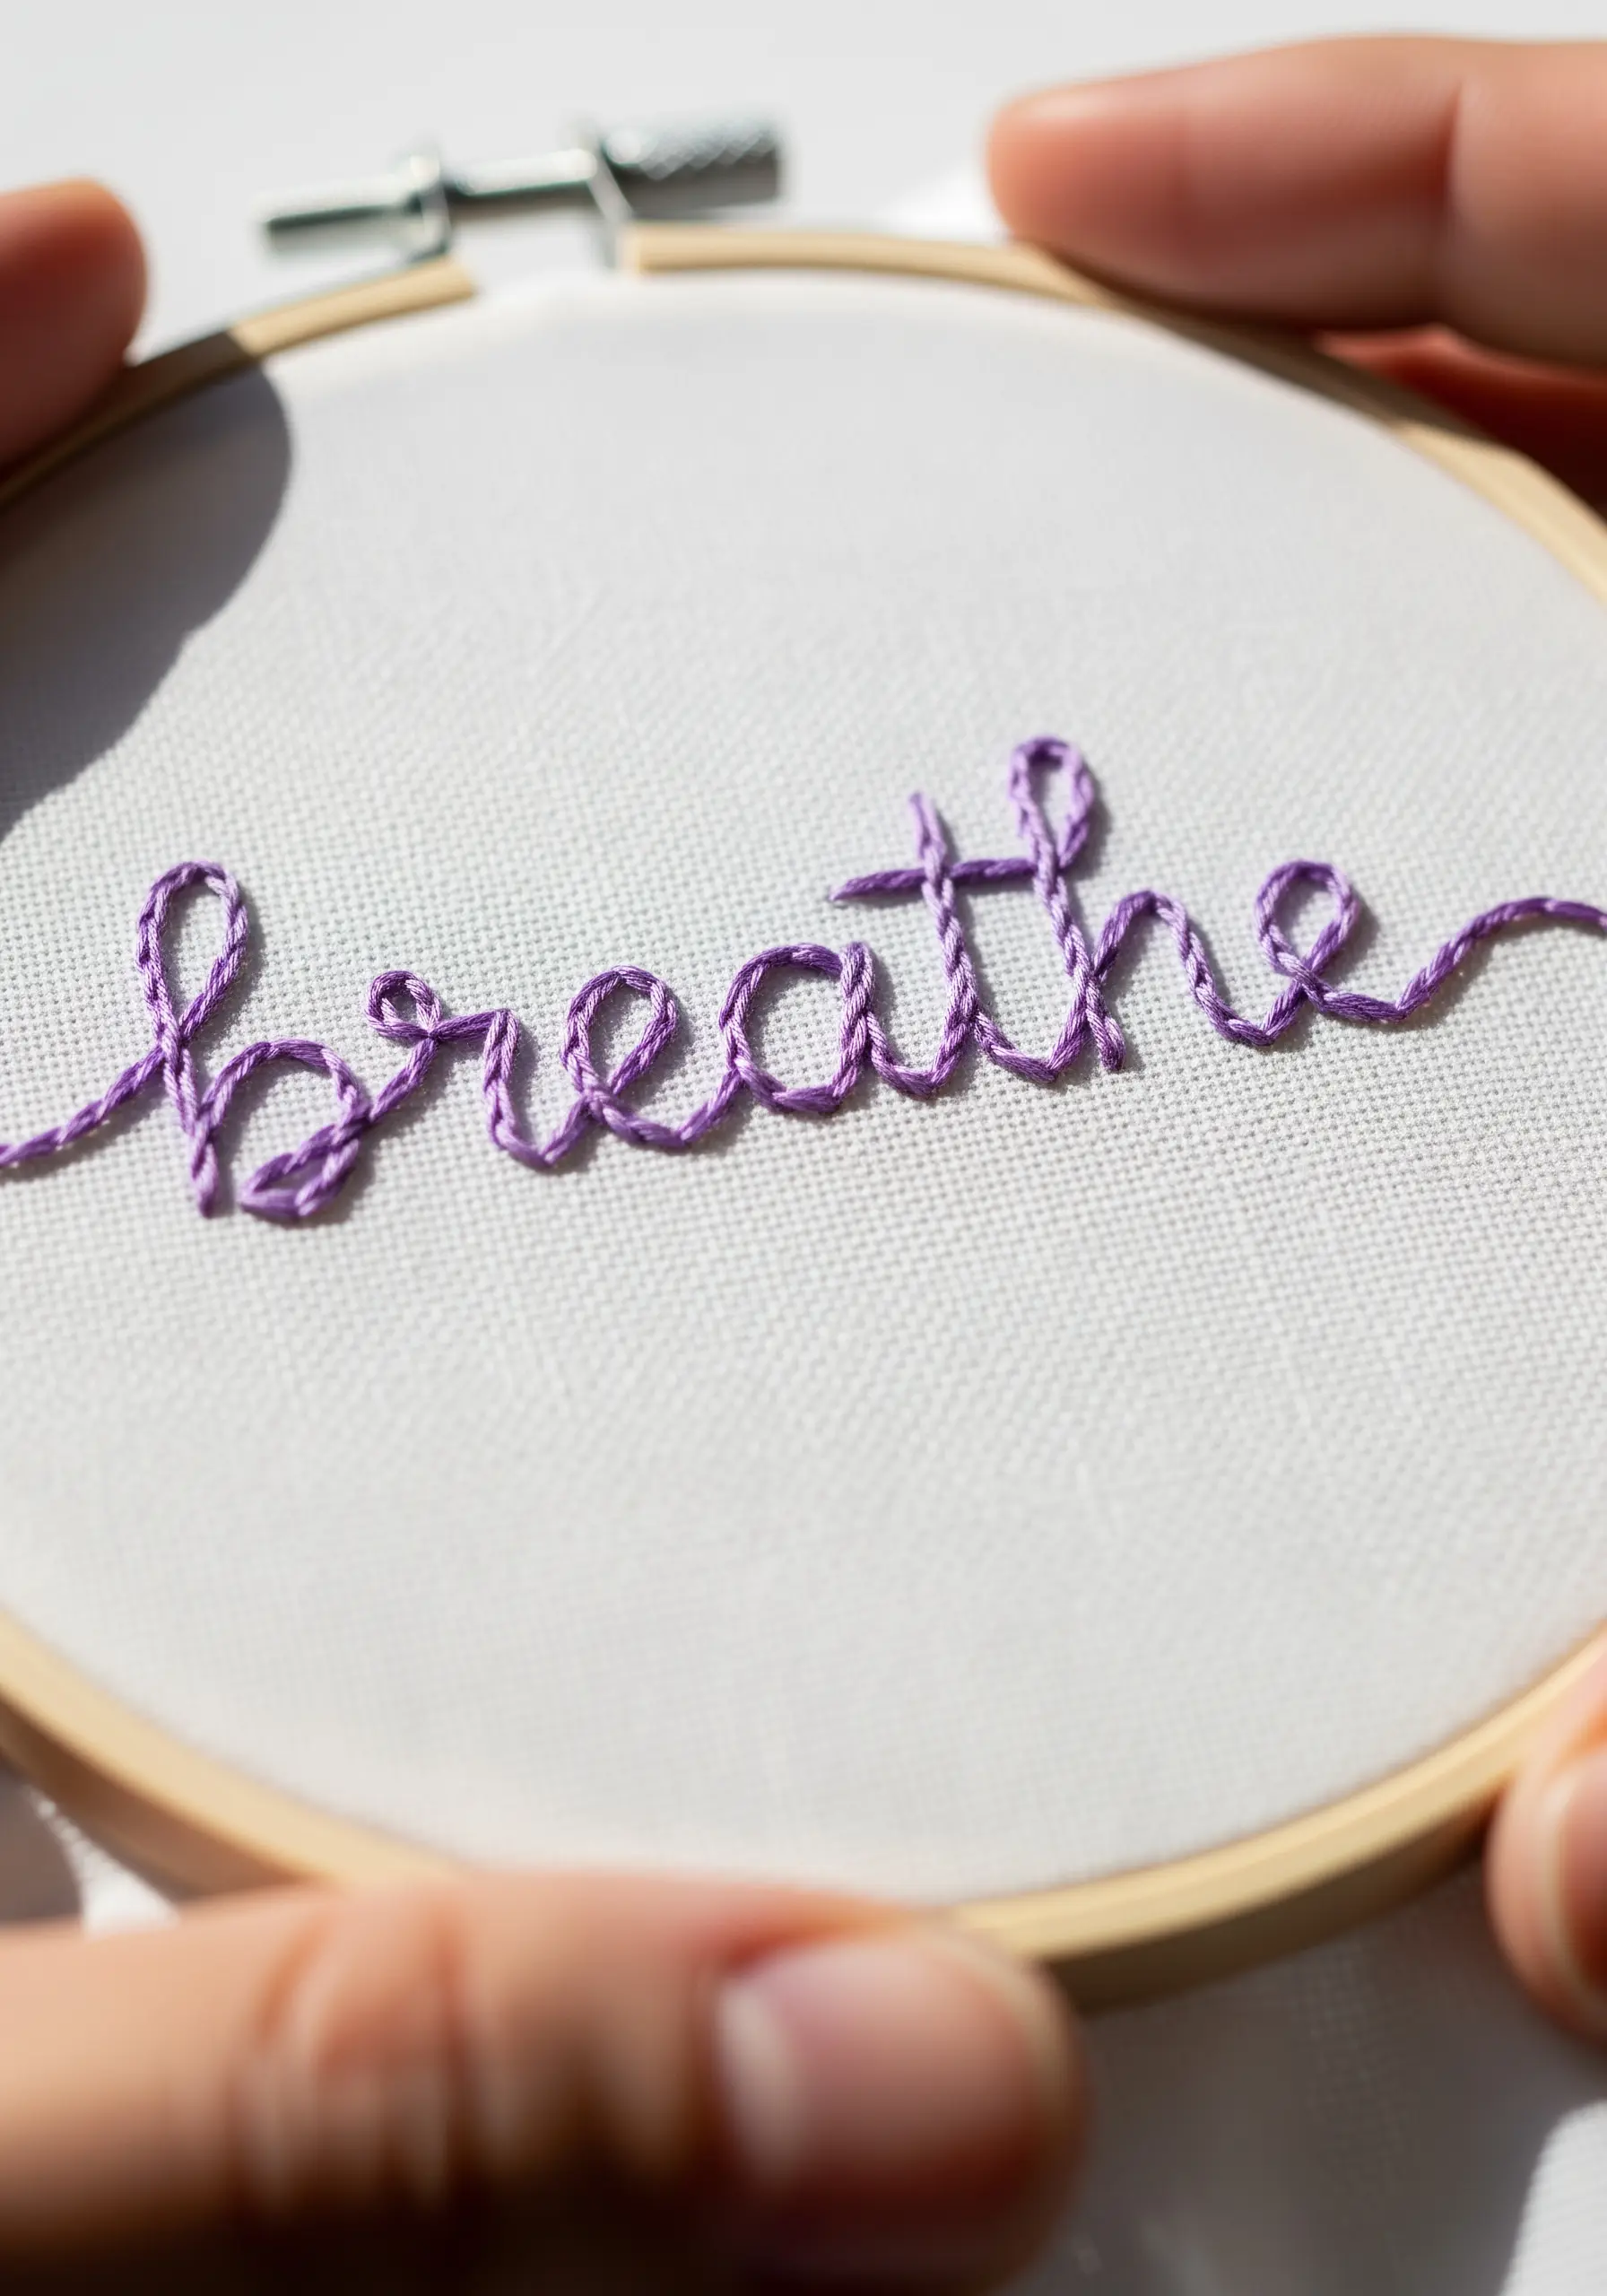
To transform simple text into a polished statement, you need a stitch that offers substance and smoothness.
First, create your word using a standard backstitch.
Then, take a second length of the same thread and “whip” it around each backstitch without piercing the fabric.
This technique, known as whipped backstitch, conceals the gaps between stitches, resulting in a bold, cord-like line perfect for inspirational quote embroidery.
7. Lavender Sprigs: Texture in Miniature
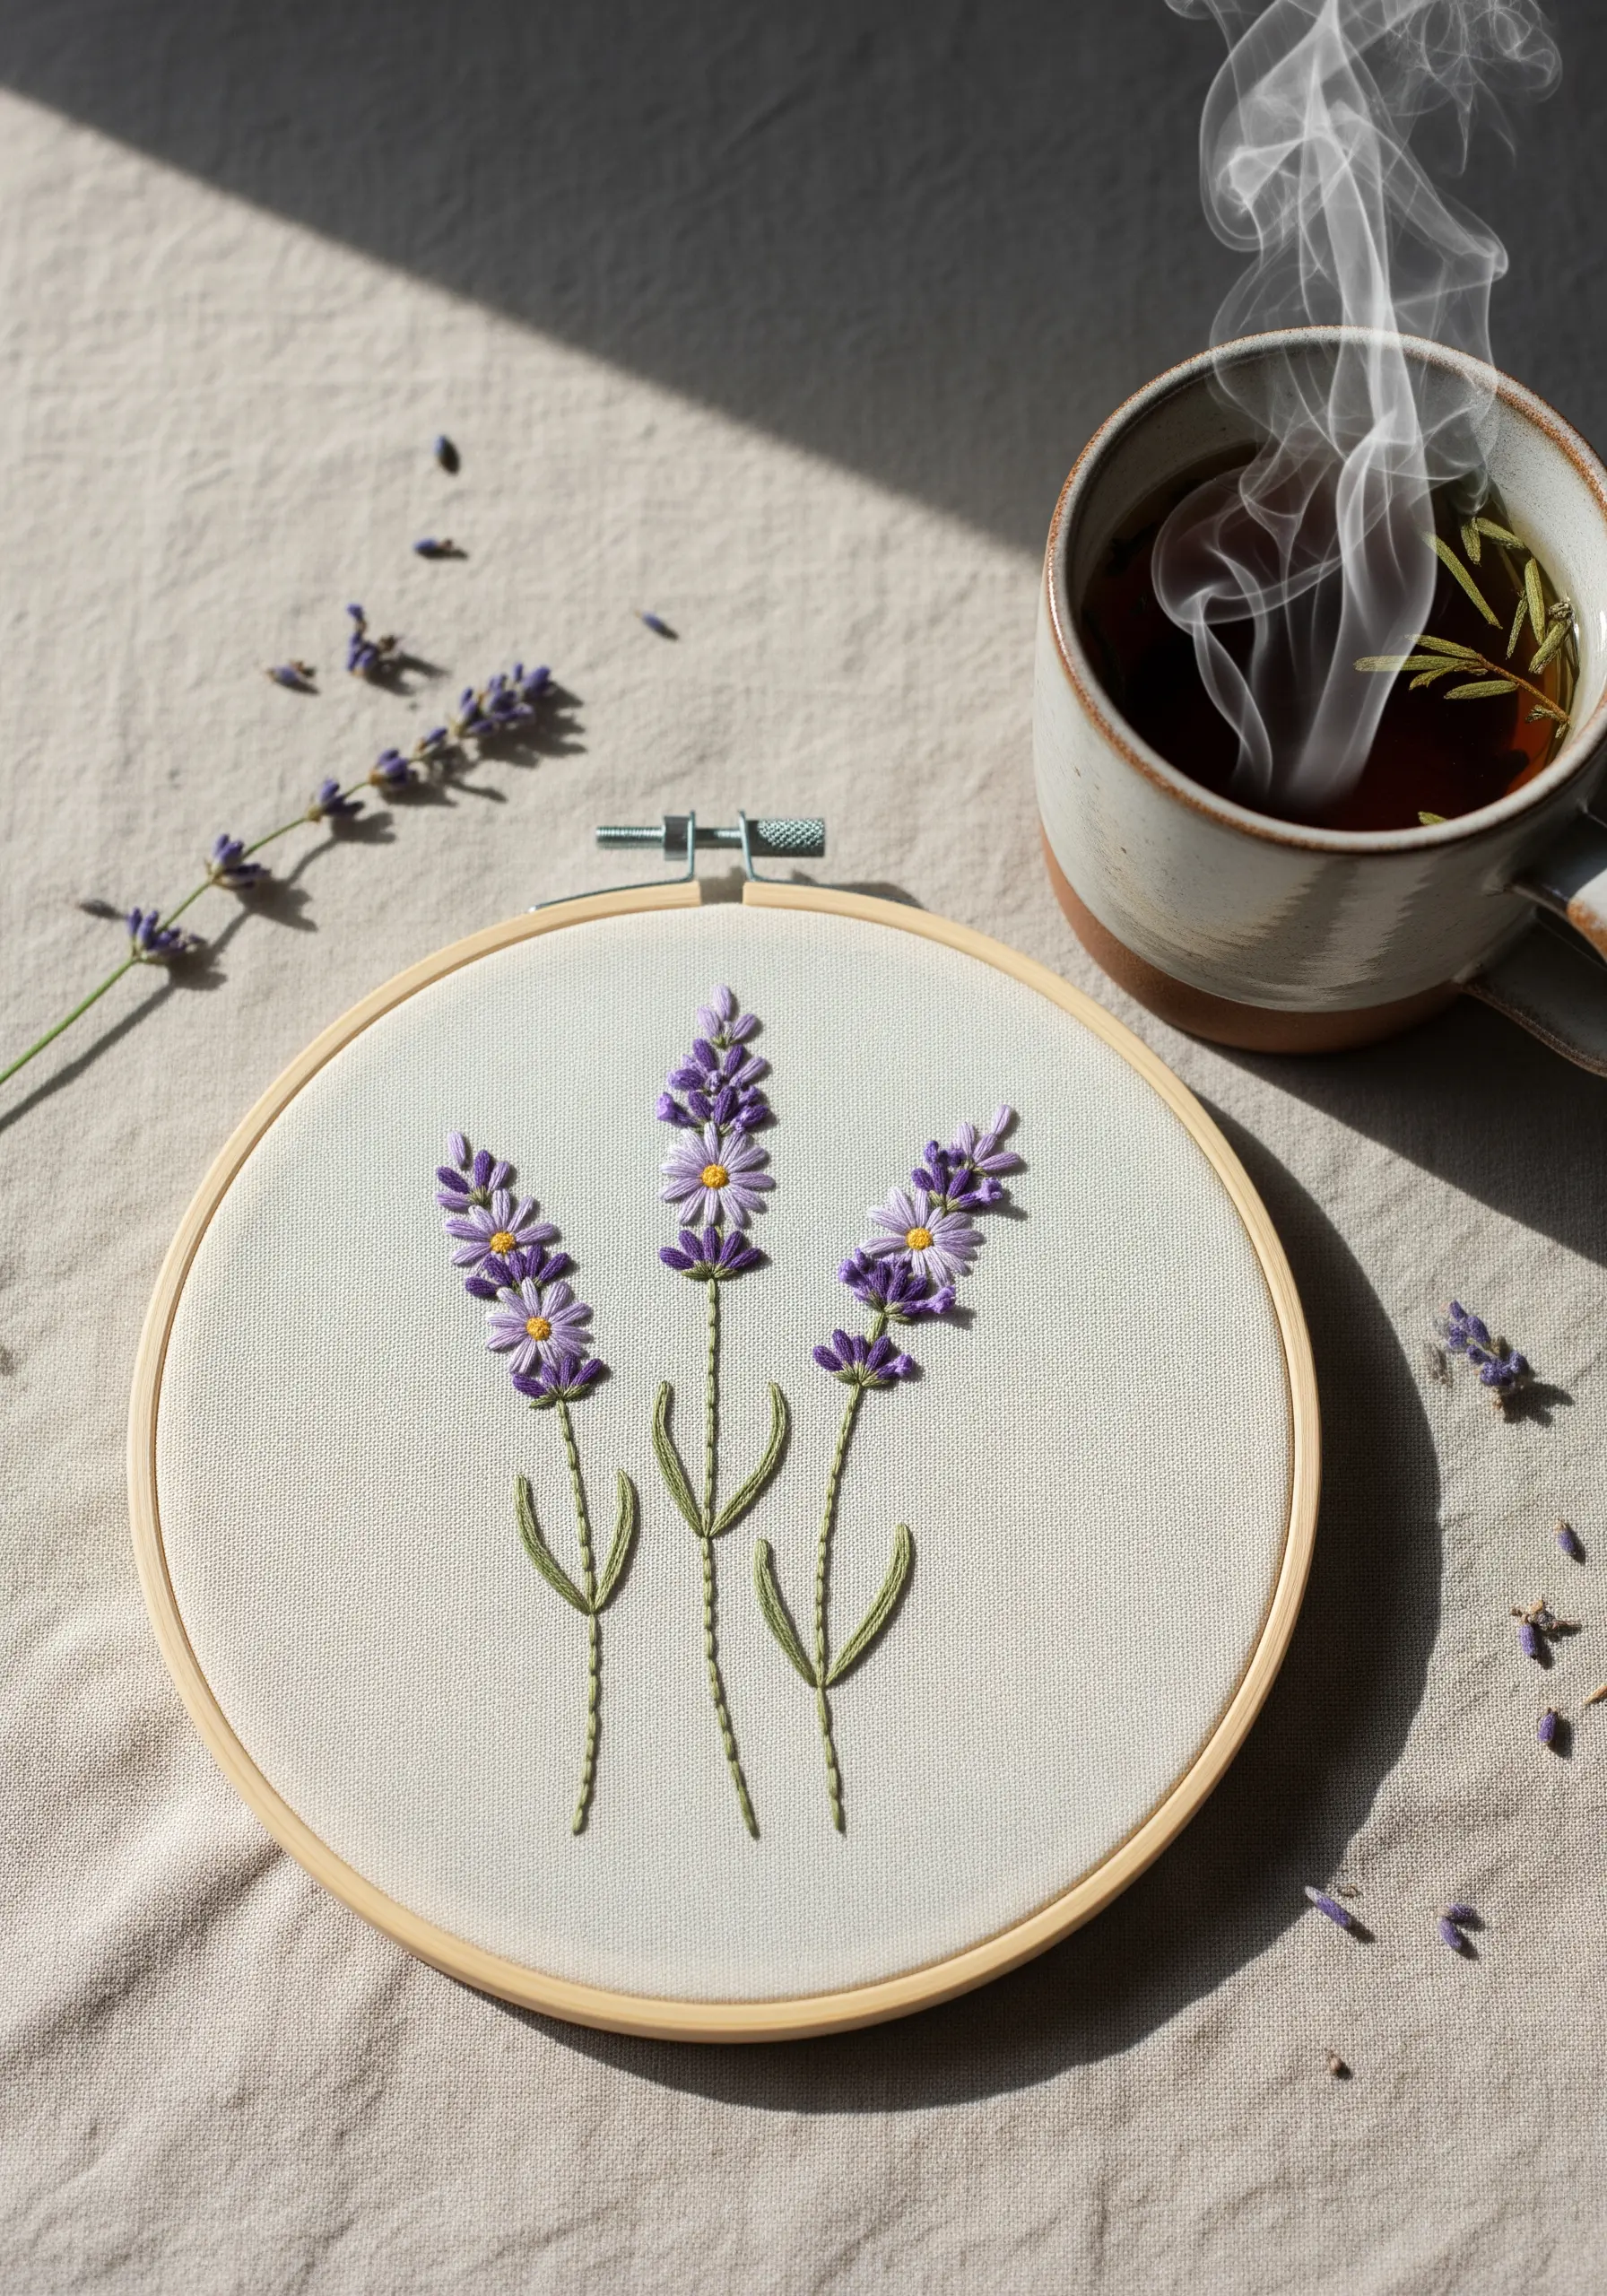
The secret to these plush, three-dimensional lavender buds is the woven wheel stitch.
Start by creating a small star with five straight stitches to act as spokes.
Then, simply weave your working thread over and under each spoke until the entire area is filled.
This builds a raised, textural blossom that looks far more intricate than it is. Pair it with a simple stem stitch for a beautifully balanced botanical design perfect for lavender-inspired embroidery designs.
8. A Simple Voyage: Graphic Line and Fill
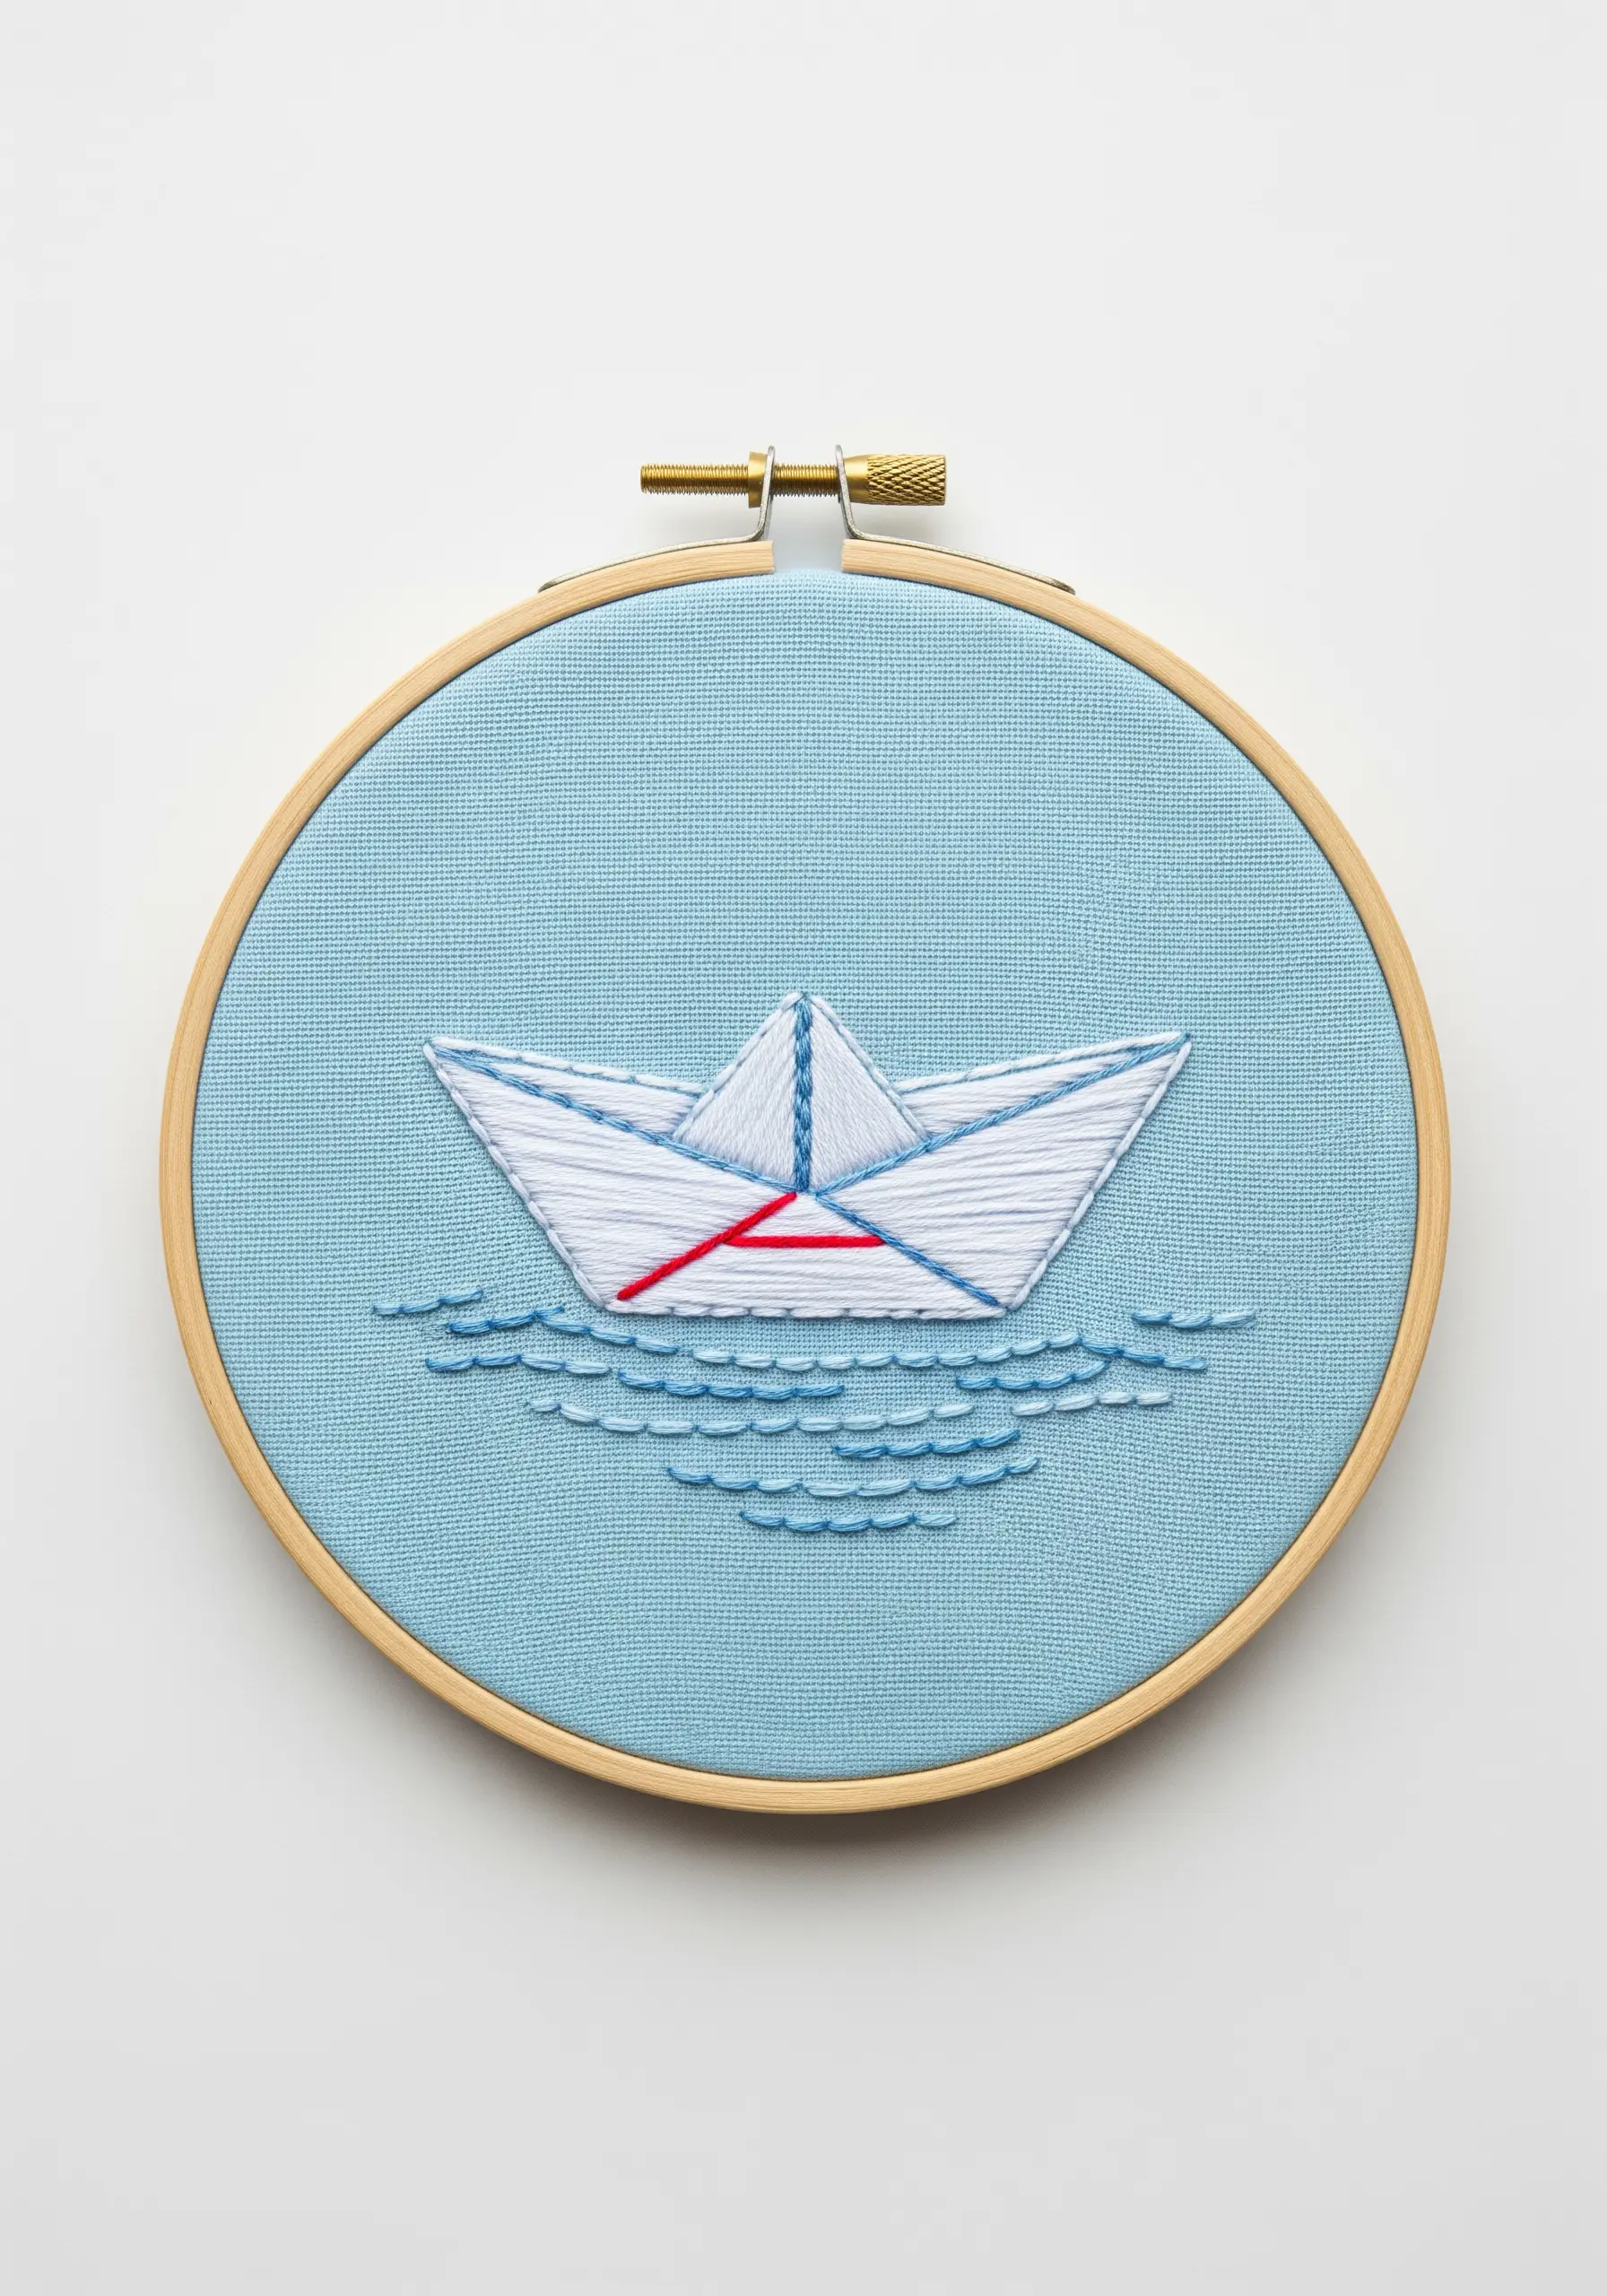
This design demonstrates that you can tell a story with just a few carefully placed lines.
Use a crisp backstitch for the boat’s outline, focusing on clean execution and sharp corners.
The single pop of red thread draws the eye and gives the piece a clear focal point.
For the water, use rows of simple running stitch. By keeping the stitches short and staggering their placement, you create an impression of gentle movement that supports, rather than distracts from, the main object.
9. Abstract Sunshine: Playing with Radiancy
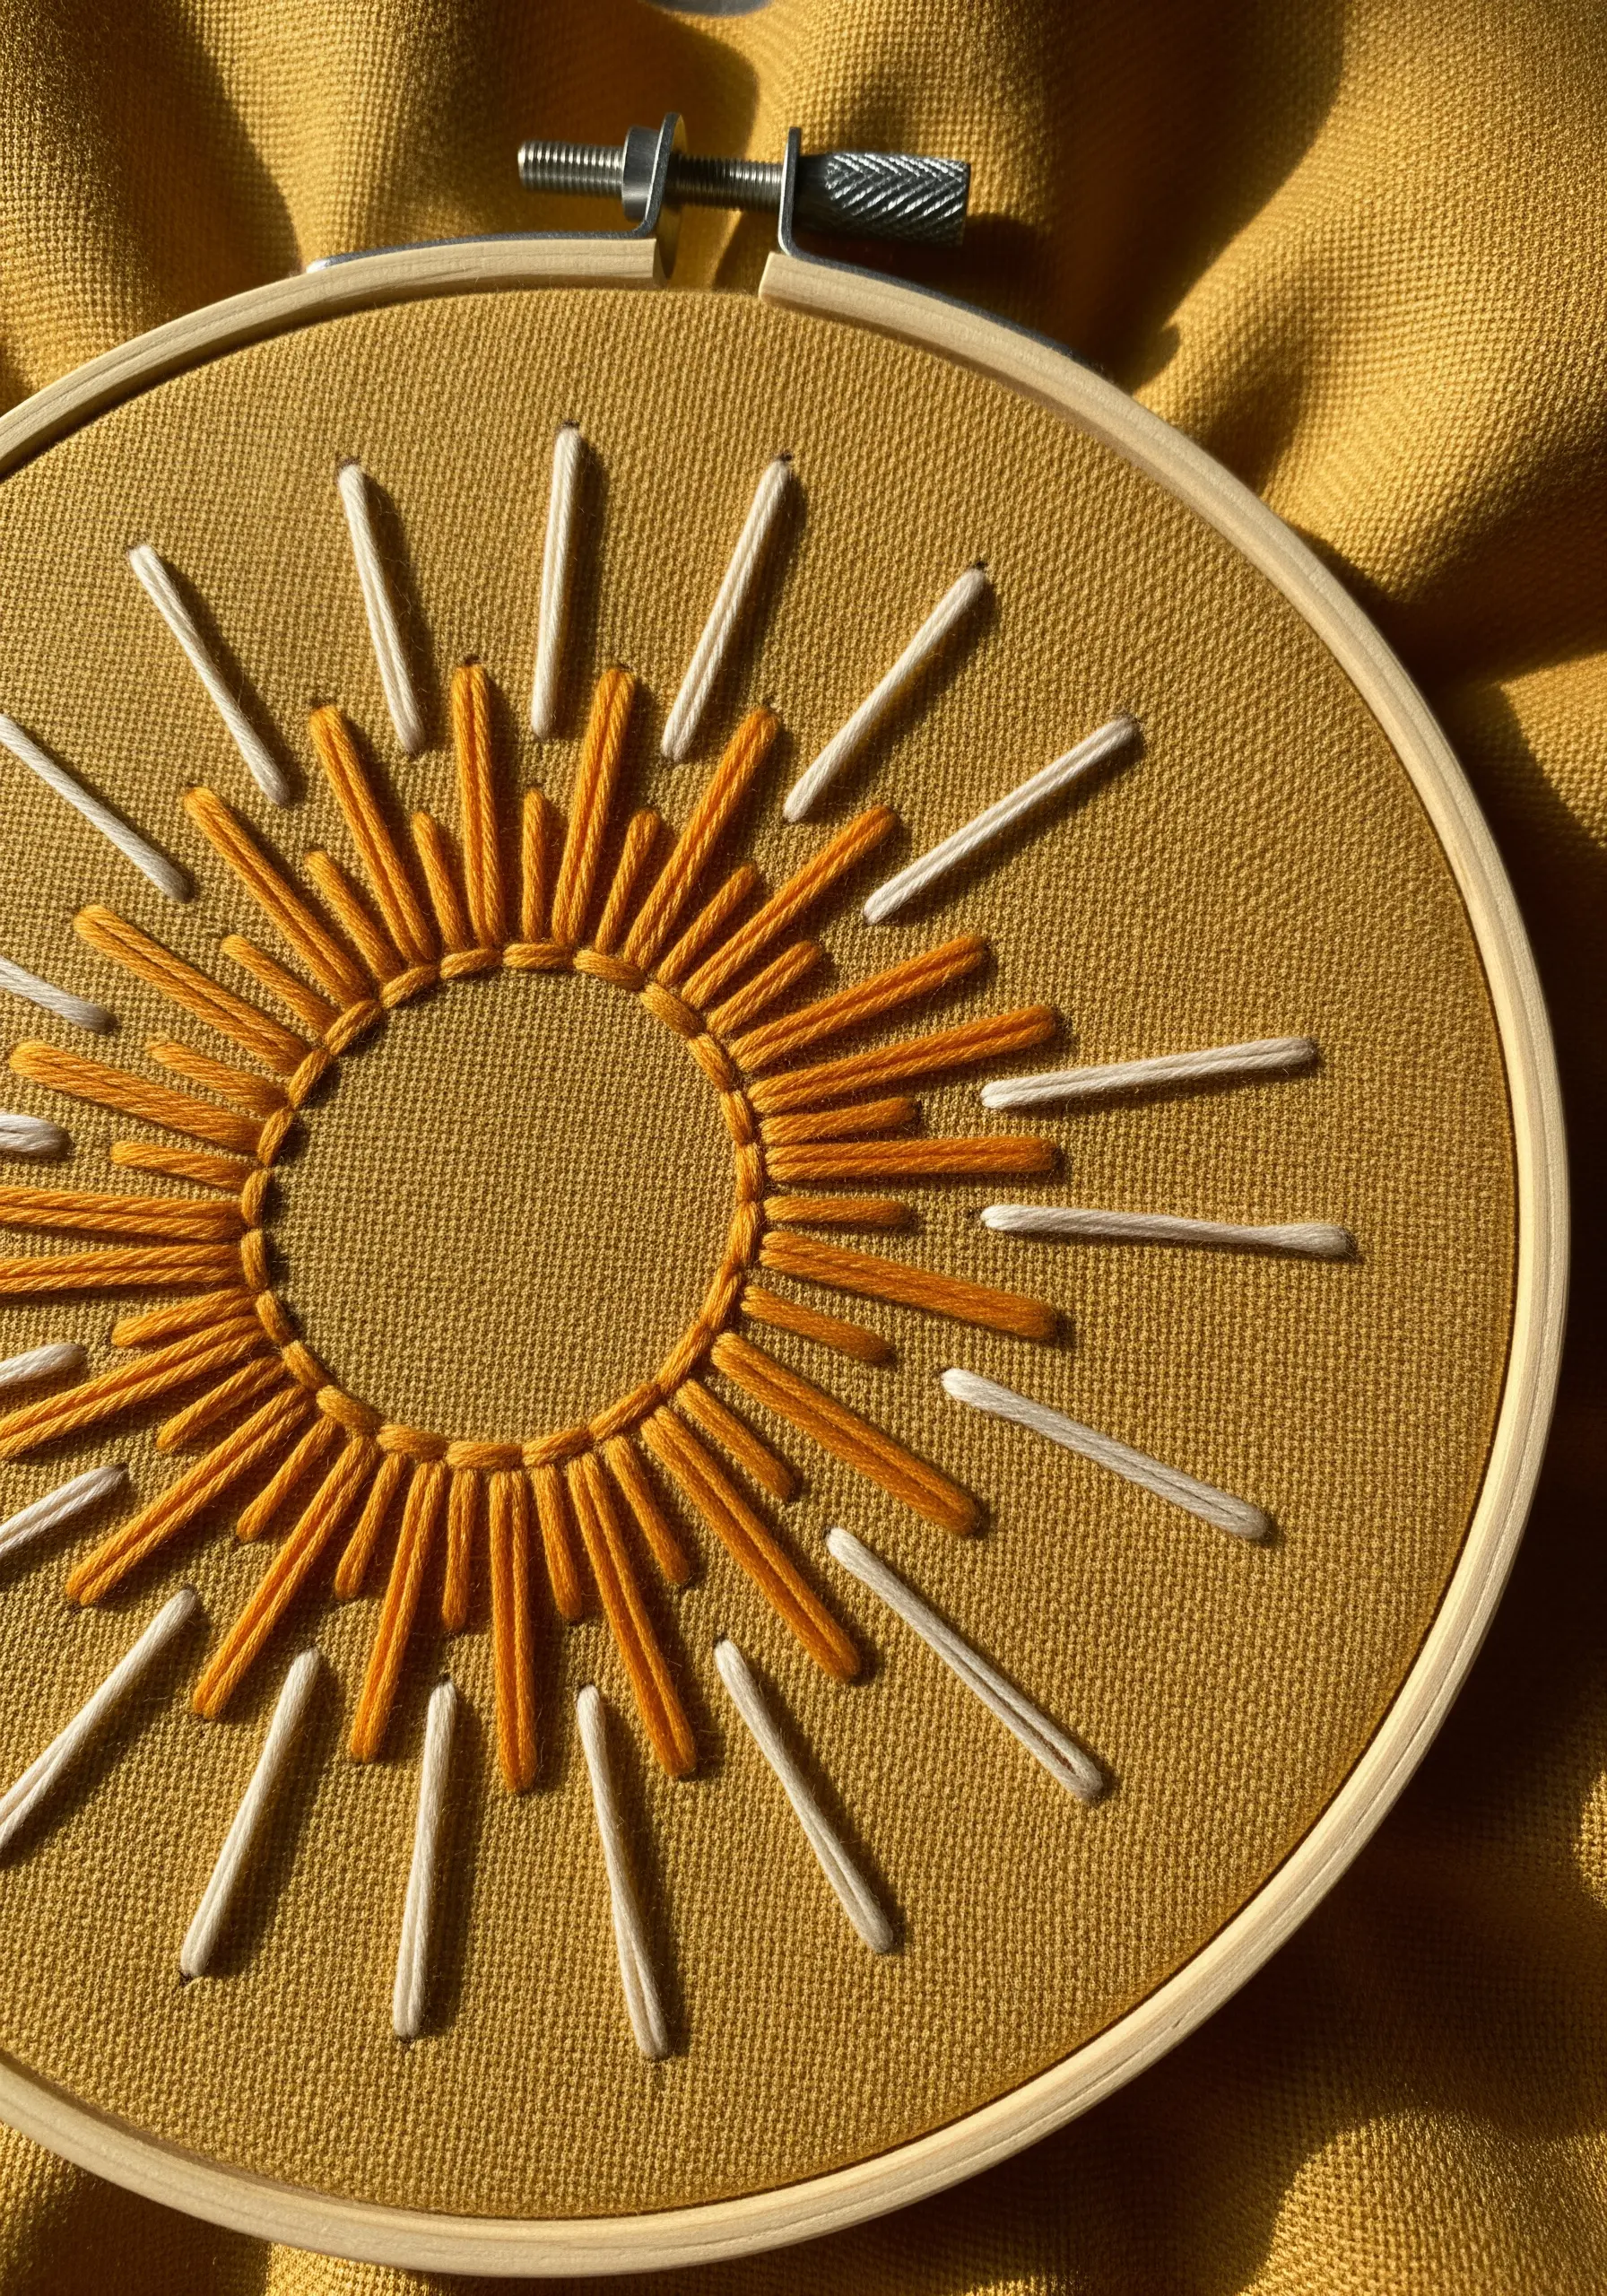
This design is a perfect exercise in creating energy and movement with the simplest of stitches.
The entire effect comes from the strategic placement and length of basic straight stitches.
Cluster shorter, denser stitches in a darker shade near the center, then radiate longer, lighter stitches outward.
This gradient in color and length produces a powerful sense of a glowing center. Allow for slight imperfections—it enhances the design’s modern, organic character.
10. Autumn Simplicity: The Perfect Outline

When a design relies solely on its outline, the stitch must be flawless.
For crisp, clean lines like this, choose a split stitch. By piercing the previous stitch, you create a solid, chain-like line that handles curves beautifully.
Alternatively, a backstitch works well if you keep your stitch length very consistent.
Using two or three strands of floss gives the line enough weight to stand alone, turning a simple sketch into a finished piece of minimal thread painting.
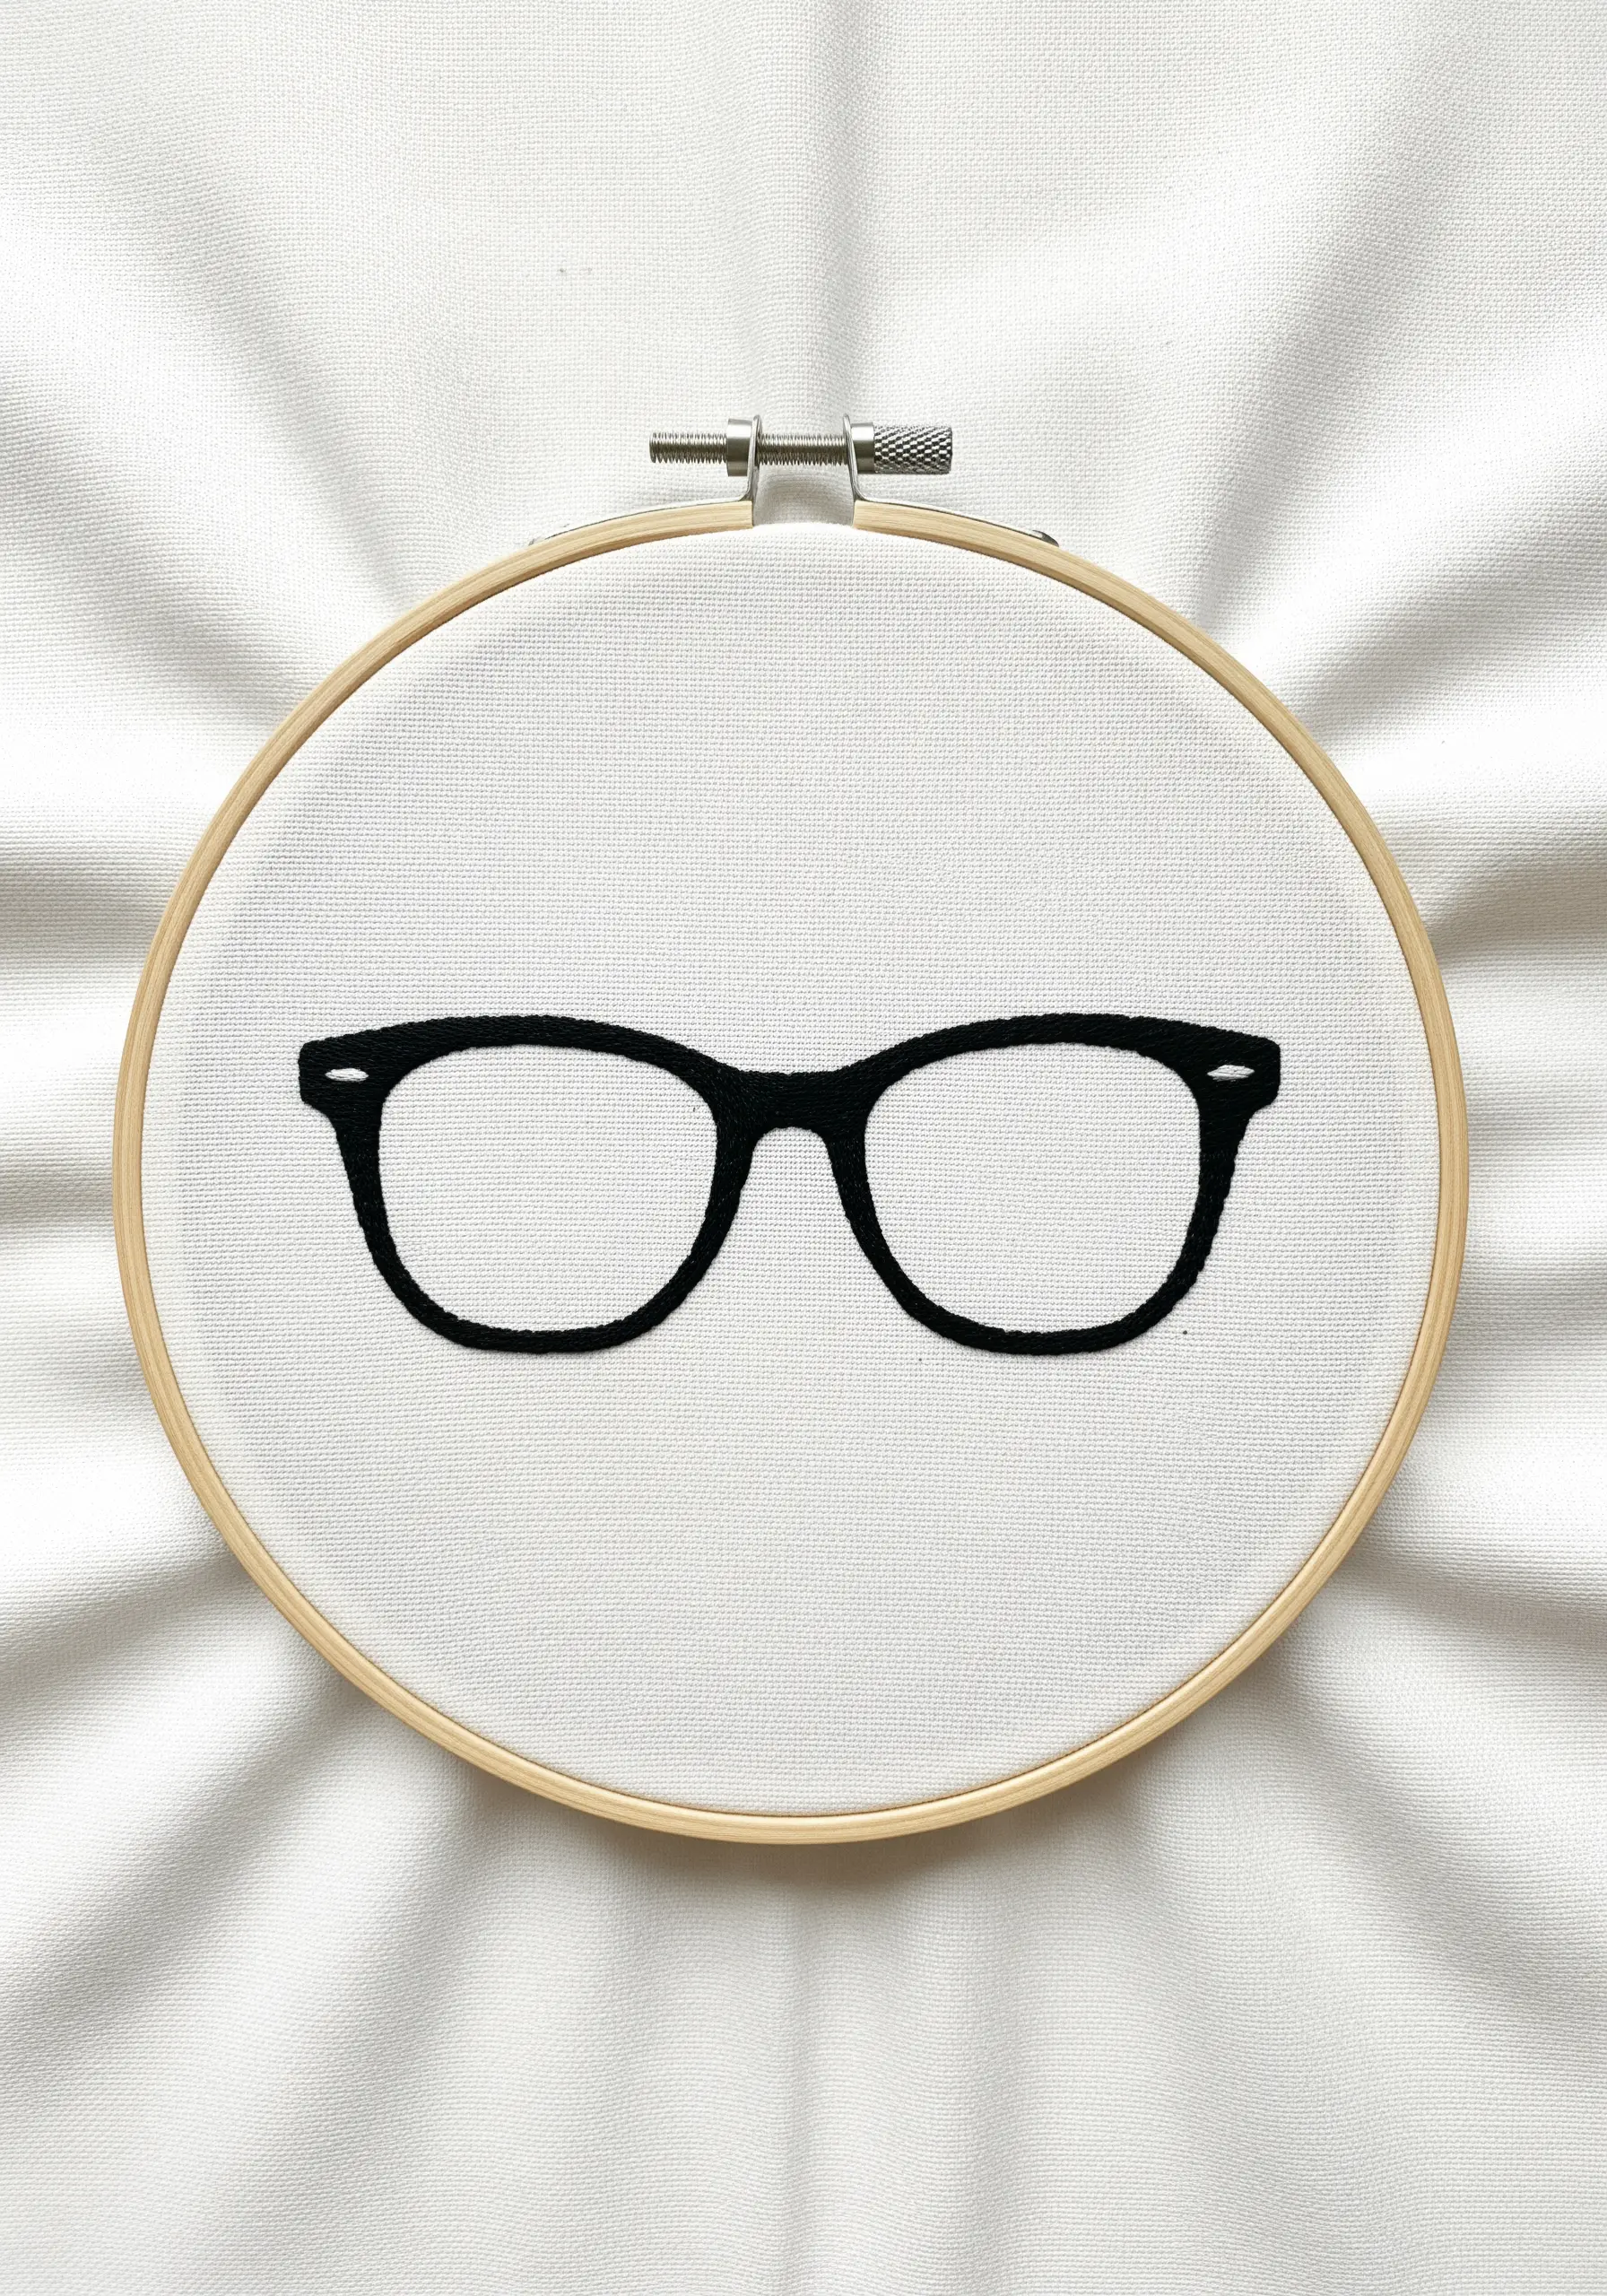
11. The Elegant Silhouette: A Study in Form

To make a simple silhouette feel intentional and artistic, the outline must be bold and uniform.
The chain stitch is a perfect choice here, as it builds a thick, textured line with a single pass, ideal for creating strong shapes.
For a smoother finish, a whipped backstitch also works beautifully.
The key is selecting a stitch that provides visual weight, transforming a basic outline into a piece of graphic art. It’s a great introduction to creating simple cat & kitten embroidery designs.
12. A Cozy Cup: Blending Neutral Tones
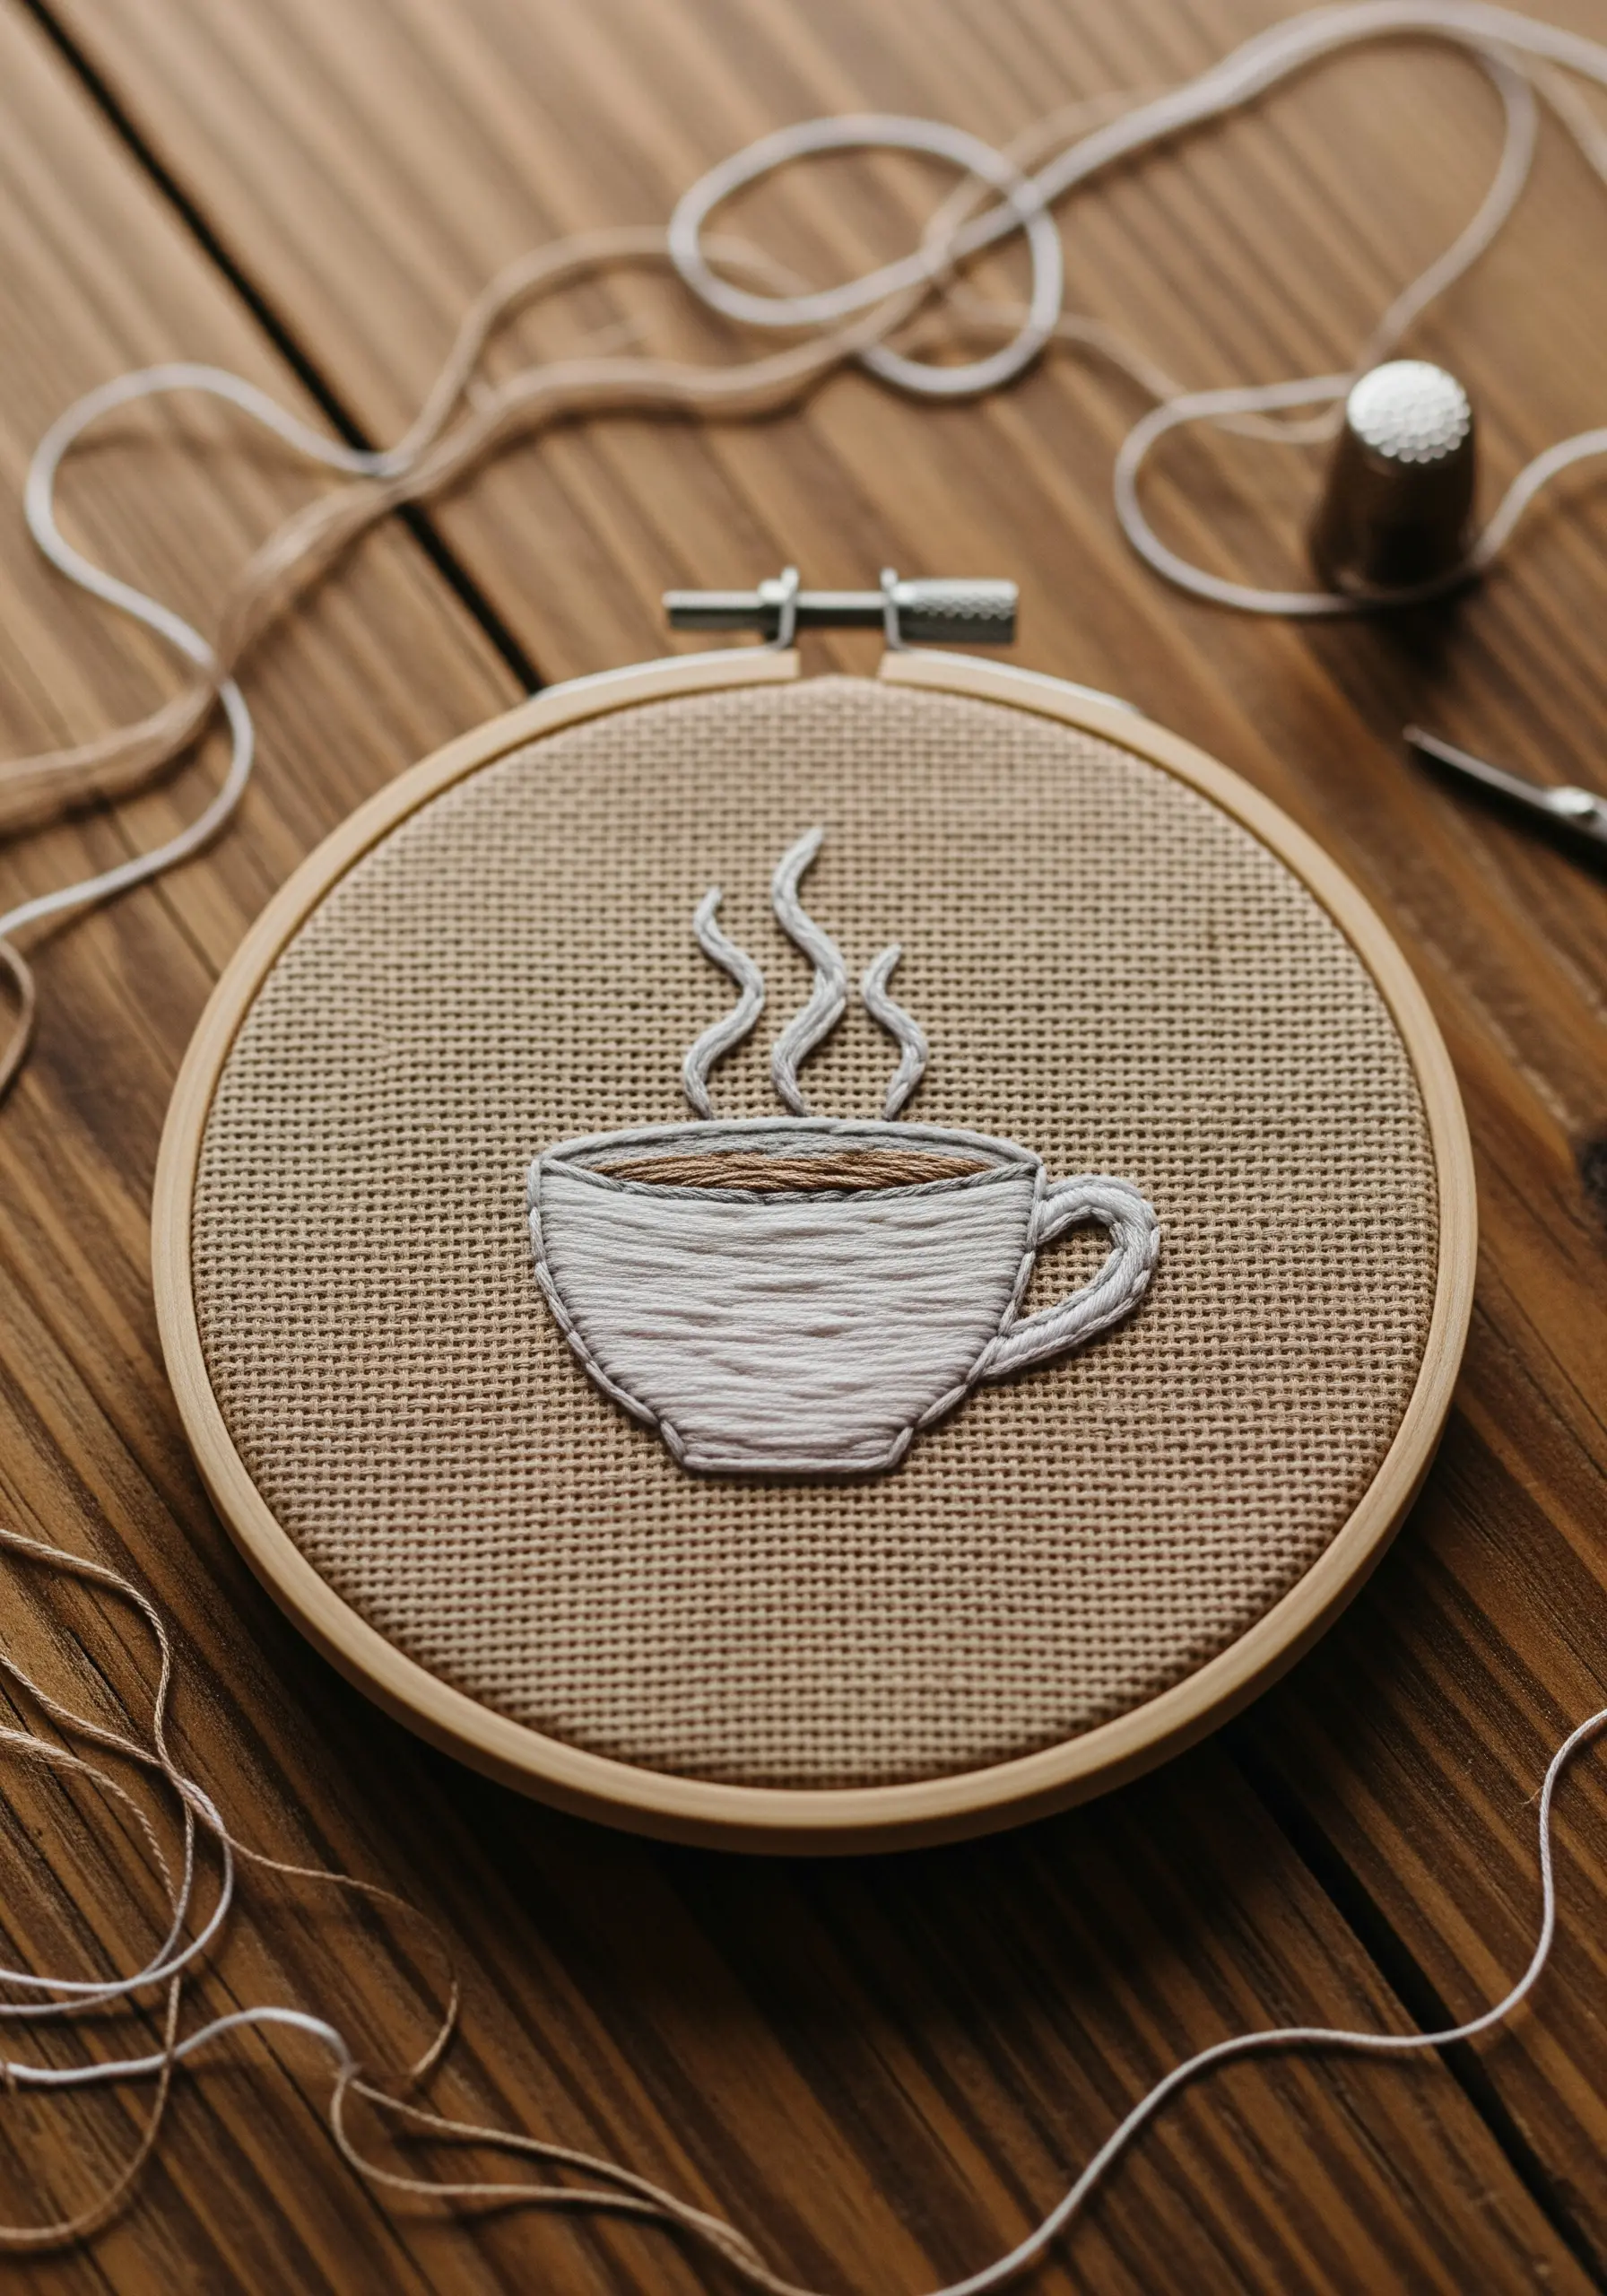
Achieve a soft, painterly effect by layering your satin stitches with different neutral tones.
Instead of filling the cup with a single color, use two or three shades of brown and cream.
Lay down long satin stitches with one color, then come back and add stitches of another color in between them.
This simple technique creates the illusion of blended, swirling liquid. Outline the cup with a single strand of dark thread to give it a clean, defined edge.
13. Botanical Realism: The Structured Fern
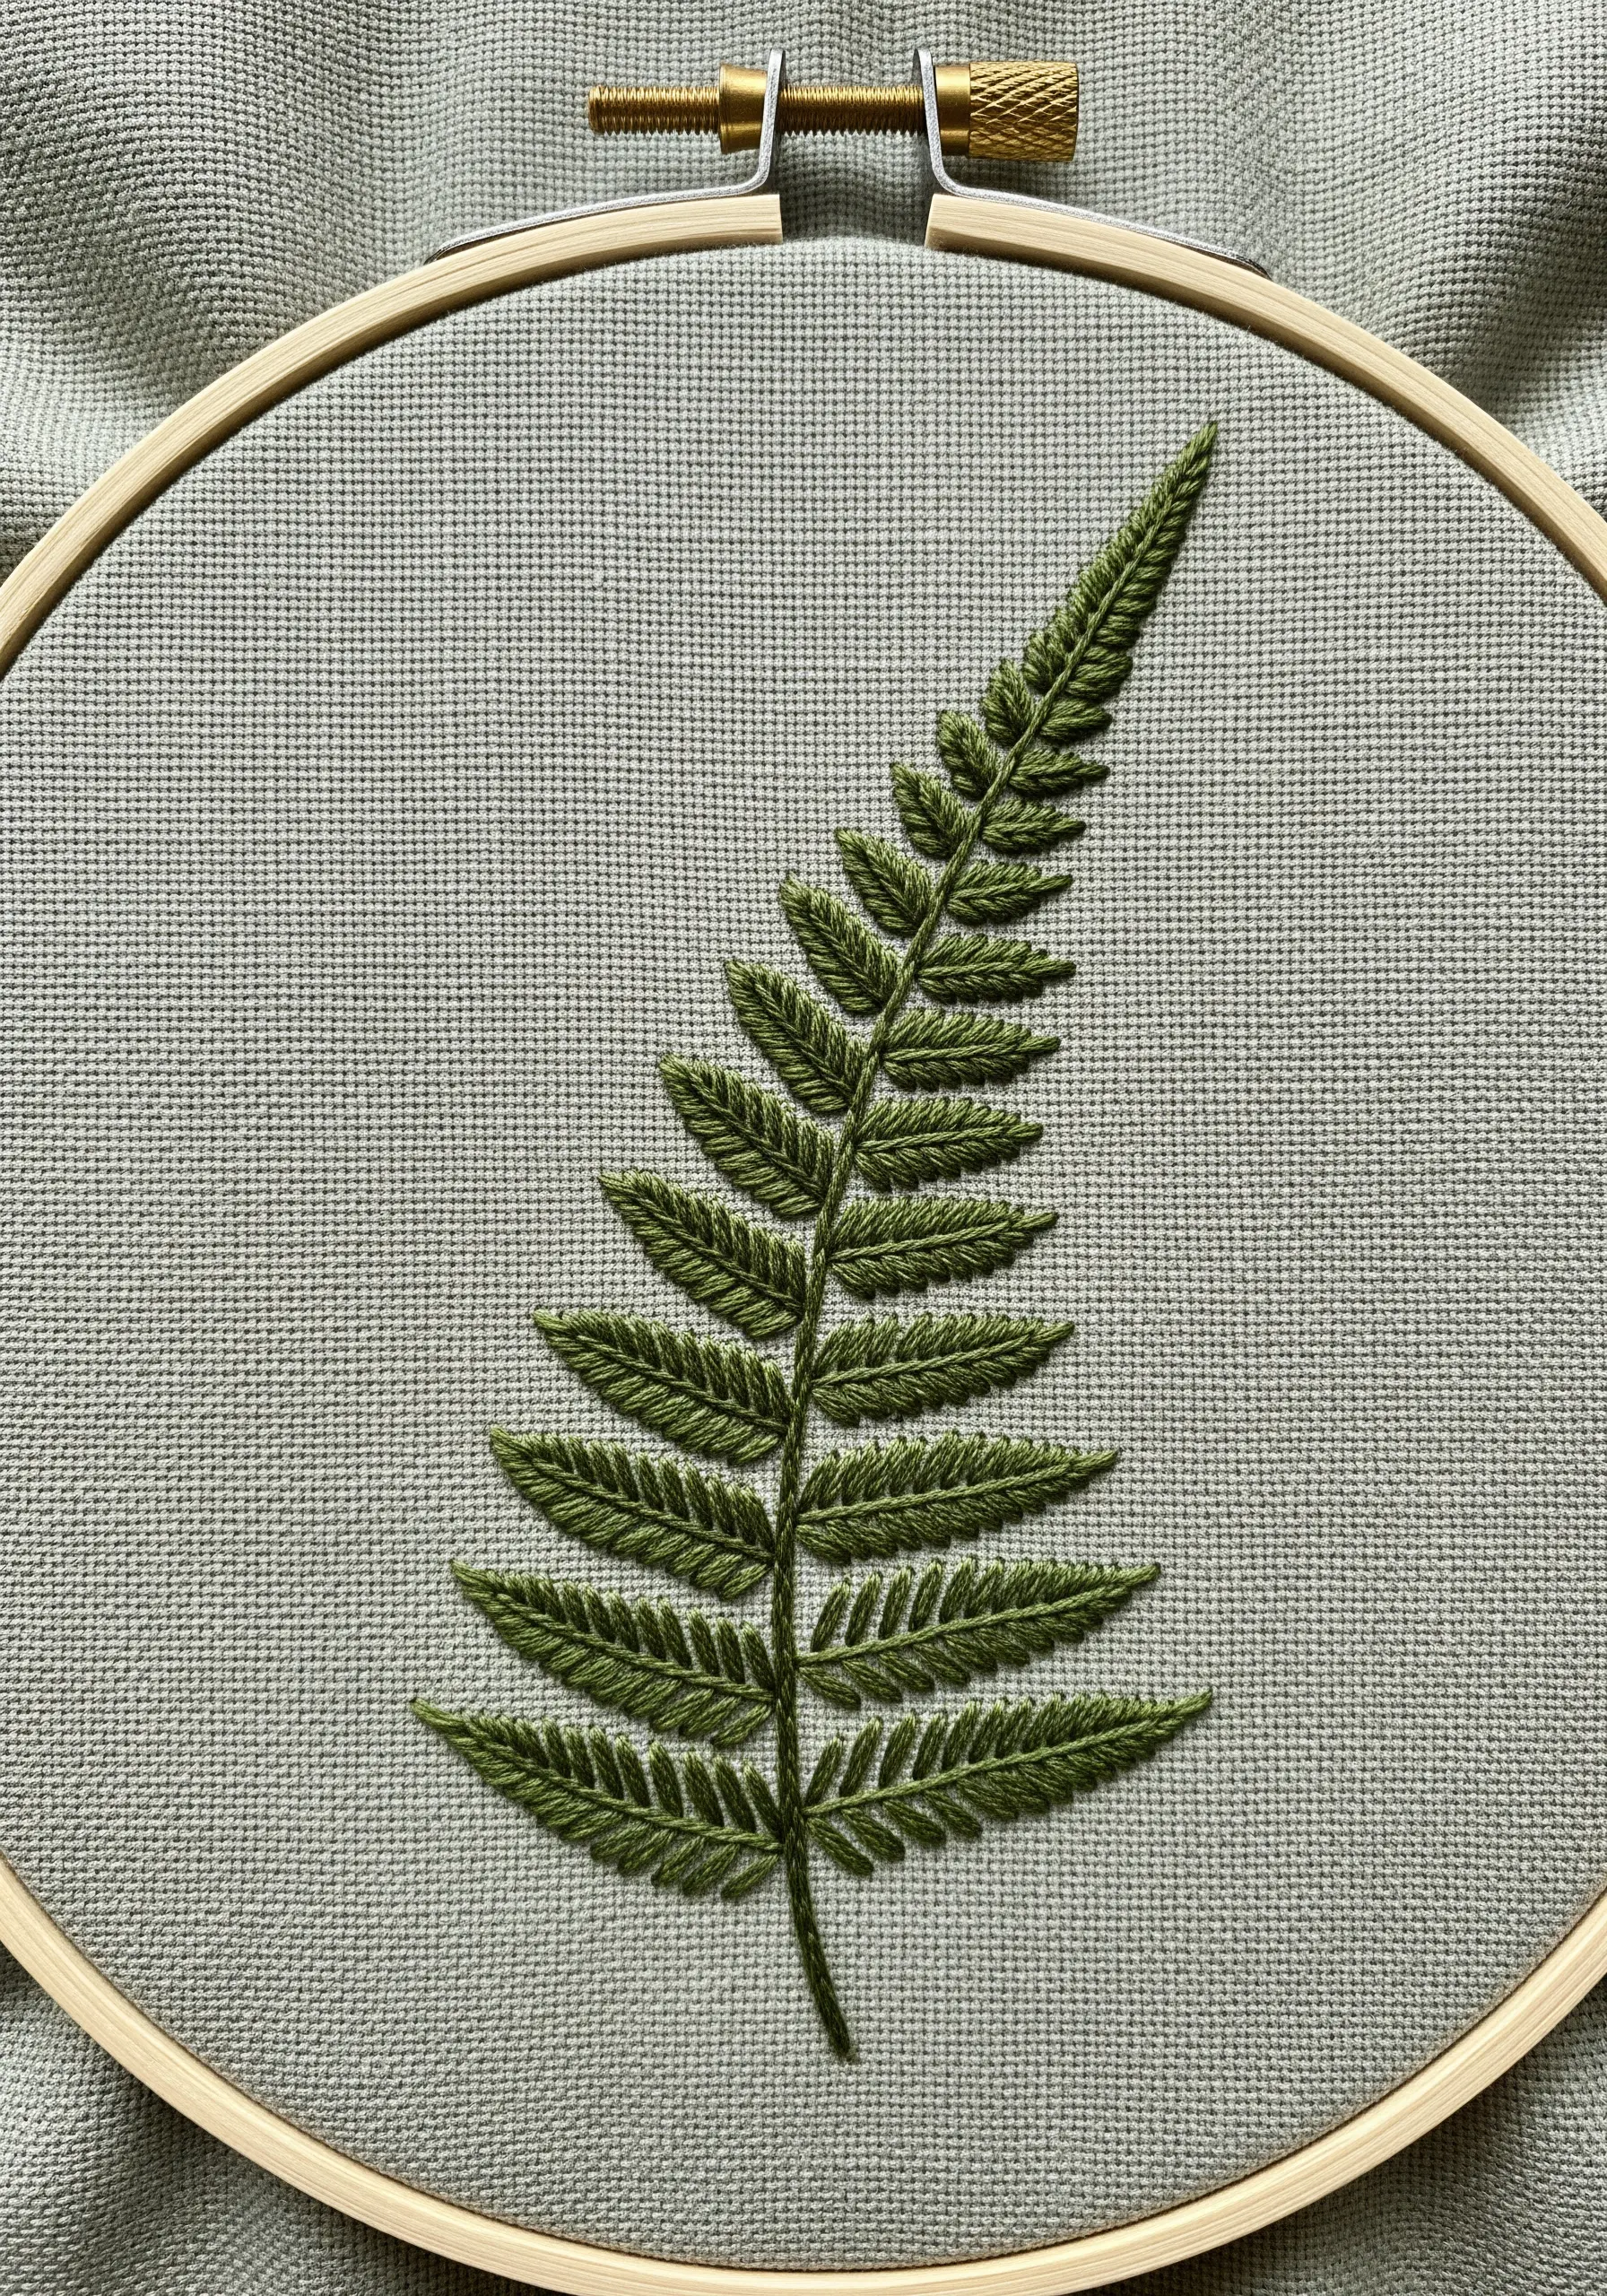
The fishbone stitch is your best tool for creating leaves that have a natural, central vein.
For each leaflet, start your stitch at the very tip and work downwards, alternating your stitches from left to right over a central guideline.
This technique automatically builds the shape and texture of a real leaf without any complex shading.
Use a stem stitch for the main stalk to give it a sturdy, rounded appearance, making it one of the easiest ways to embroider natural textures beautifully.
14. Celestial Glow: Mastering the Curved Fill
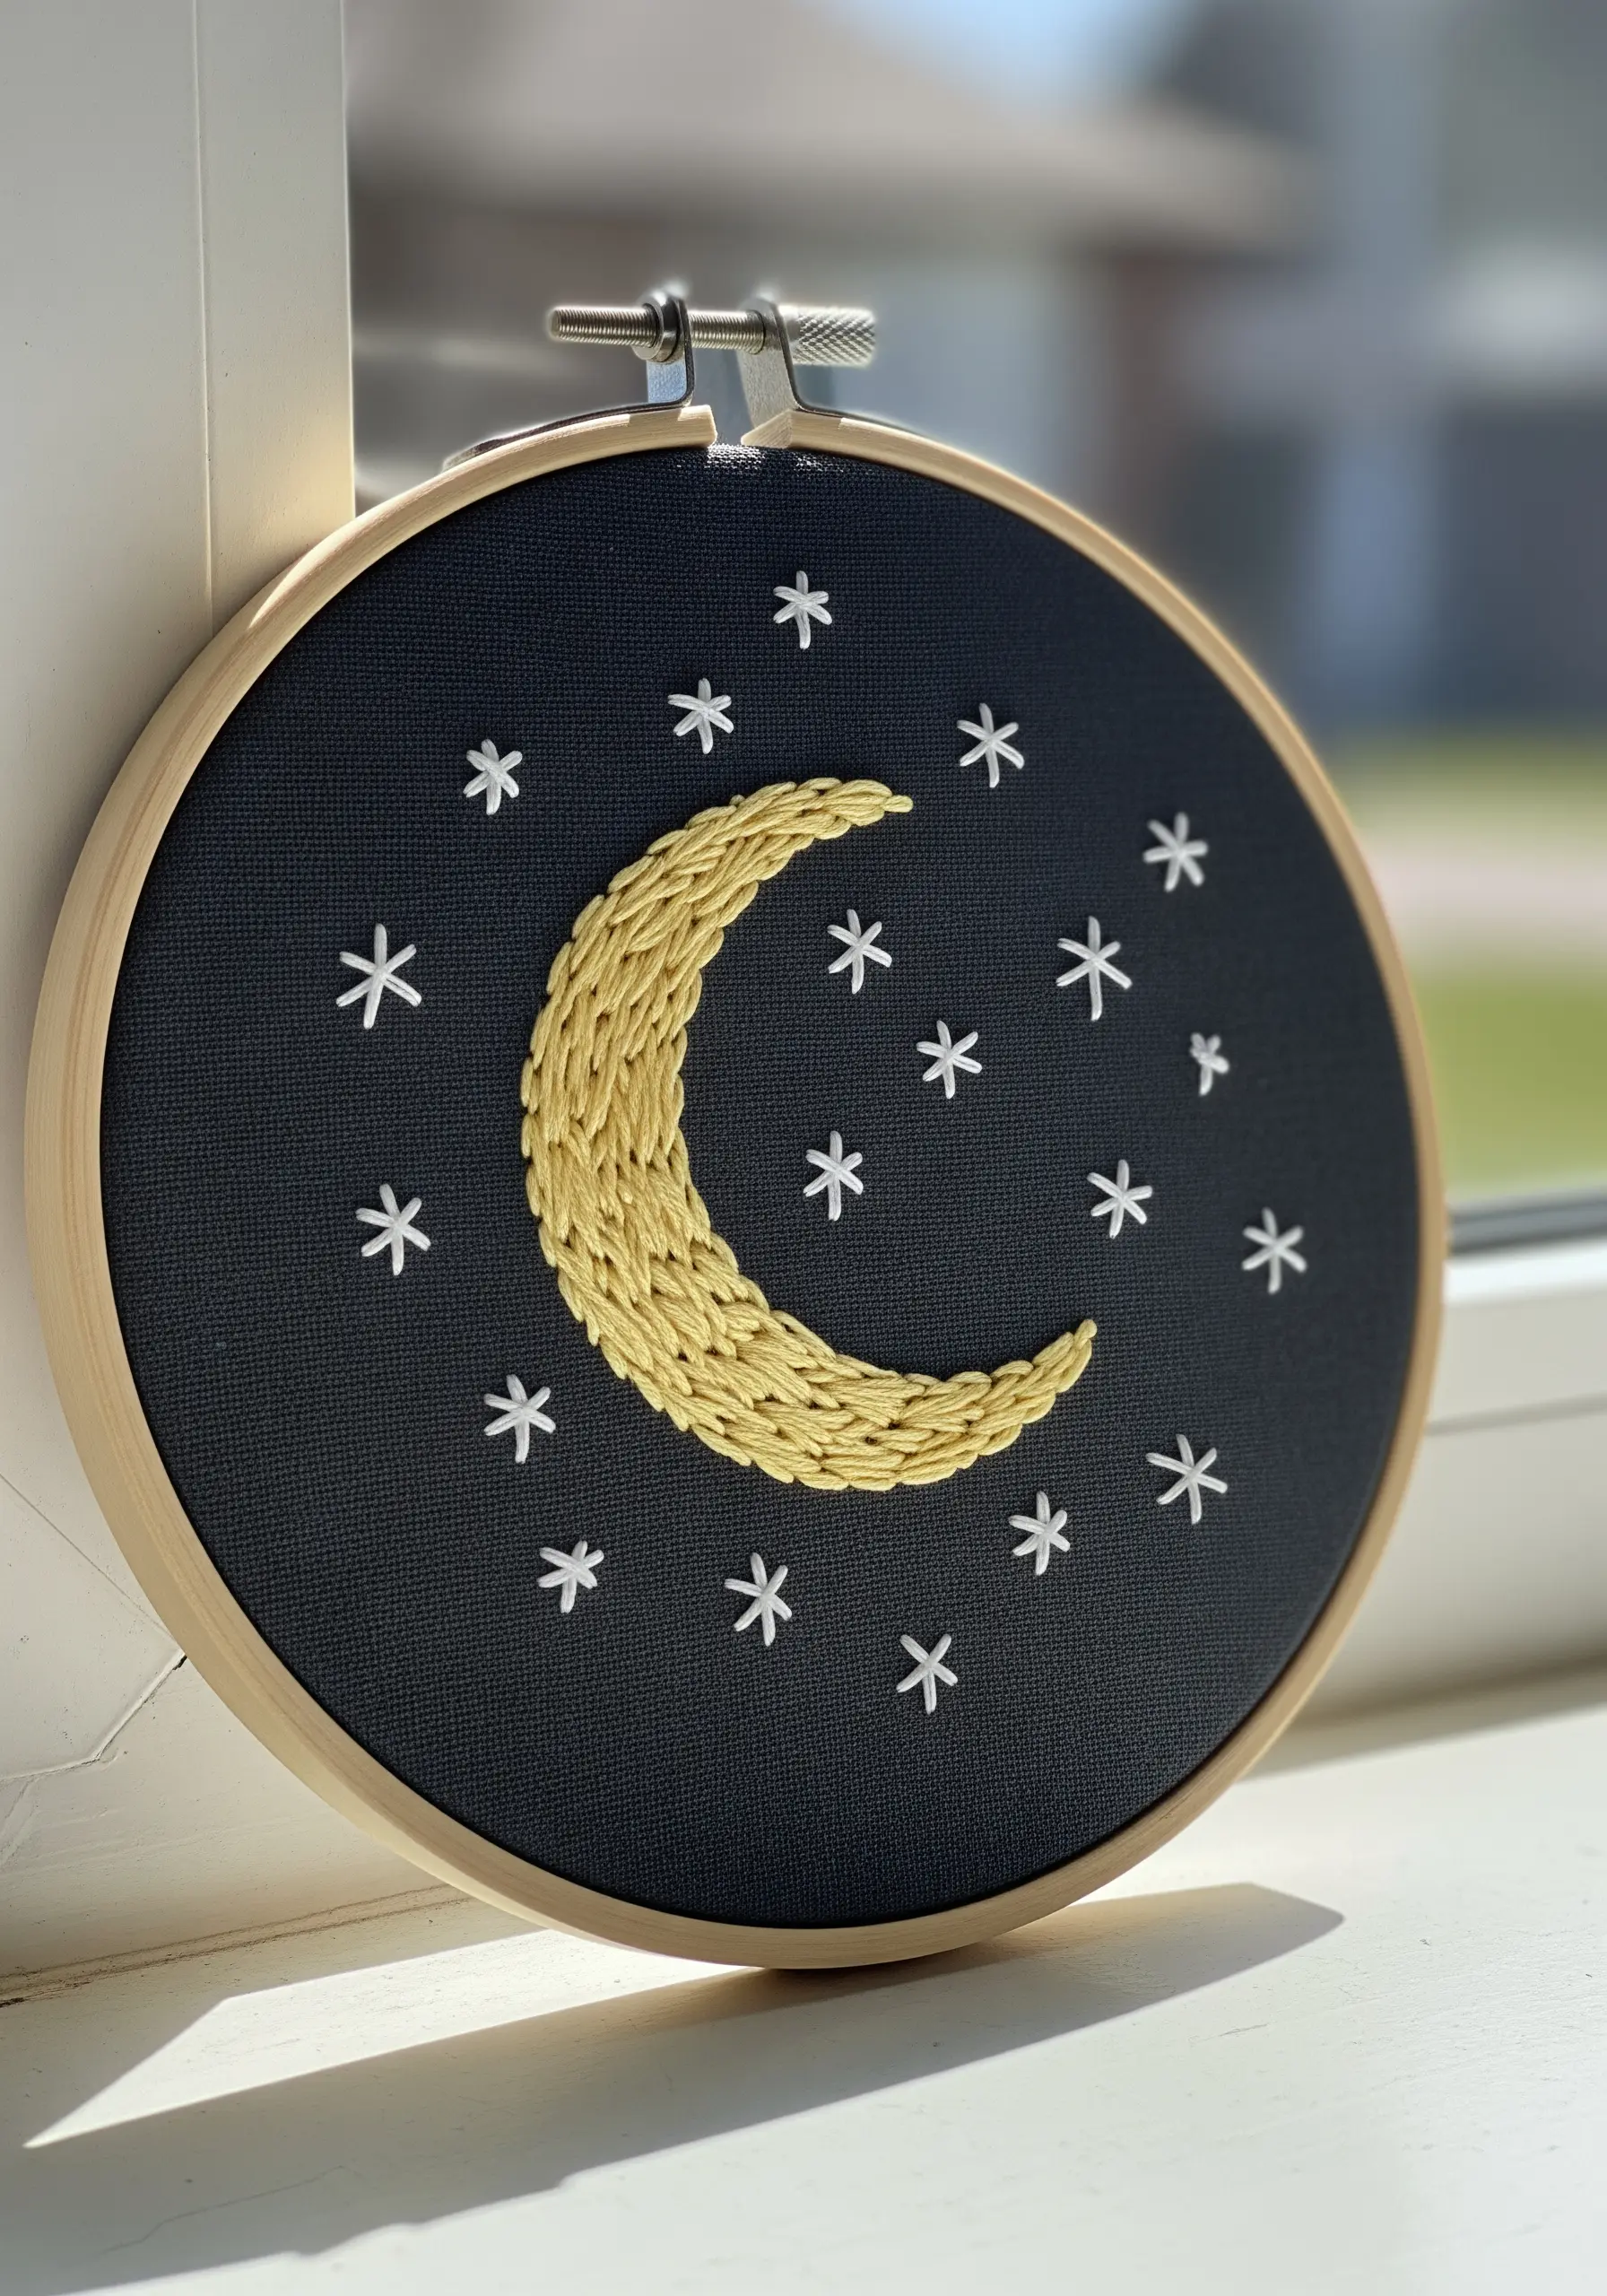
Filling a curved shape smoothly with satin stitch requires a plan.
Start by making a few short, straight stitches as guides: one at the top point, one at the bottom, and one in the middle, all fanning out from the inner curve.
Then, simply fill in the sections between these guides, keeping your stitches parallel to them.
This ensures your stitches follow the curve naturally, creating a smooth, glowing effect for your moon and stars embroidery.
15. The Red Bicycle: Details in Line Art
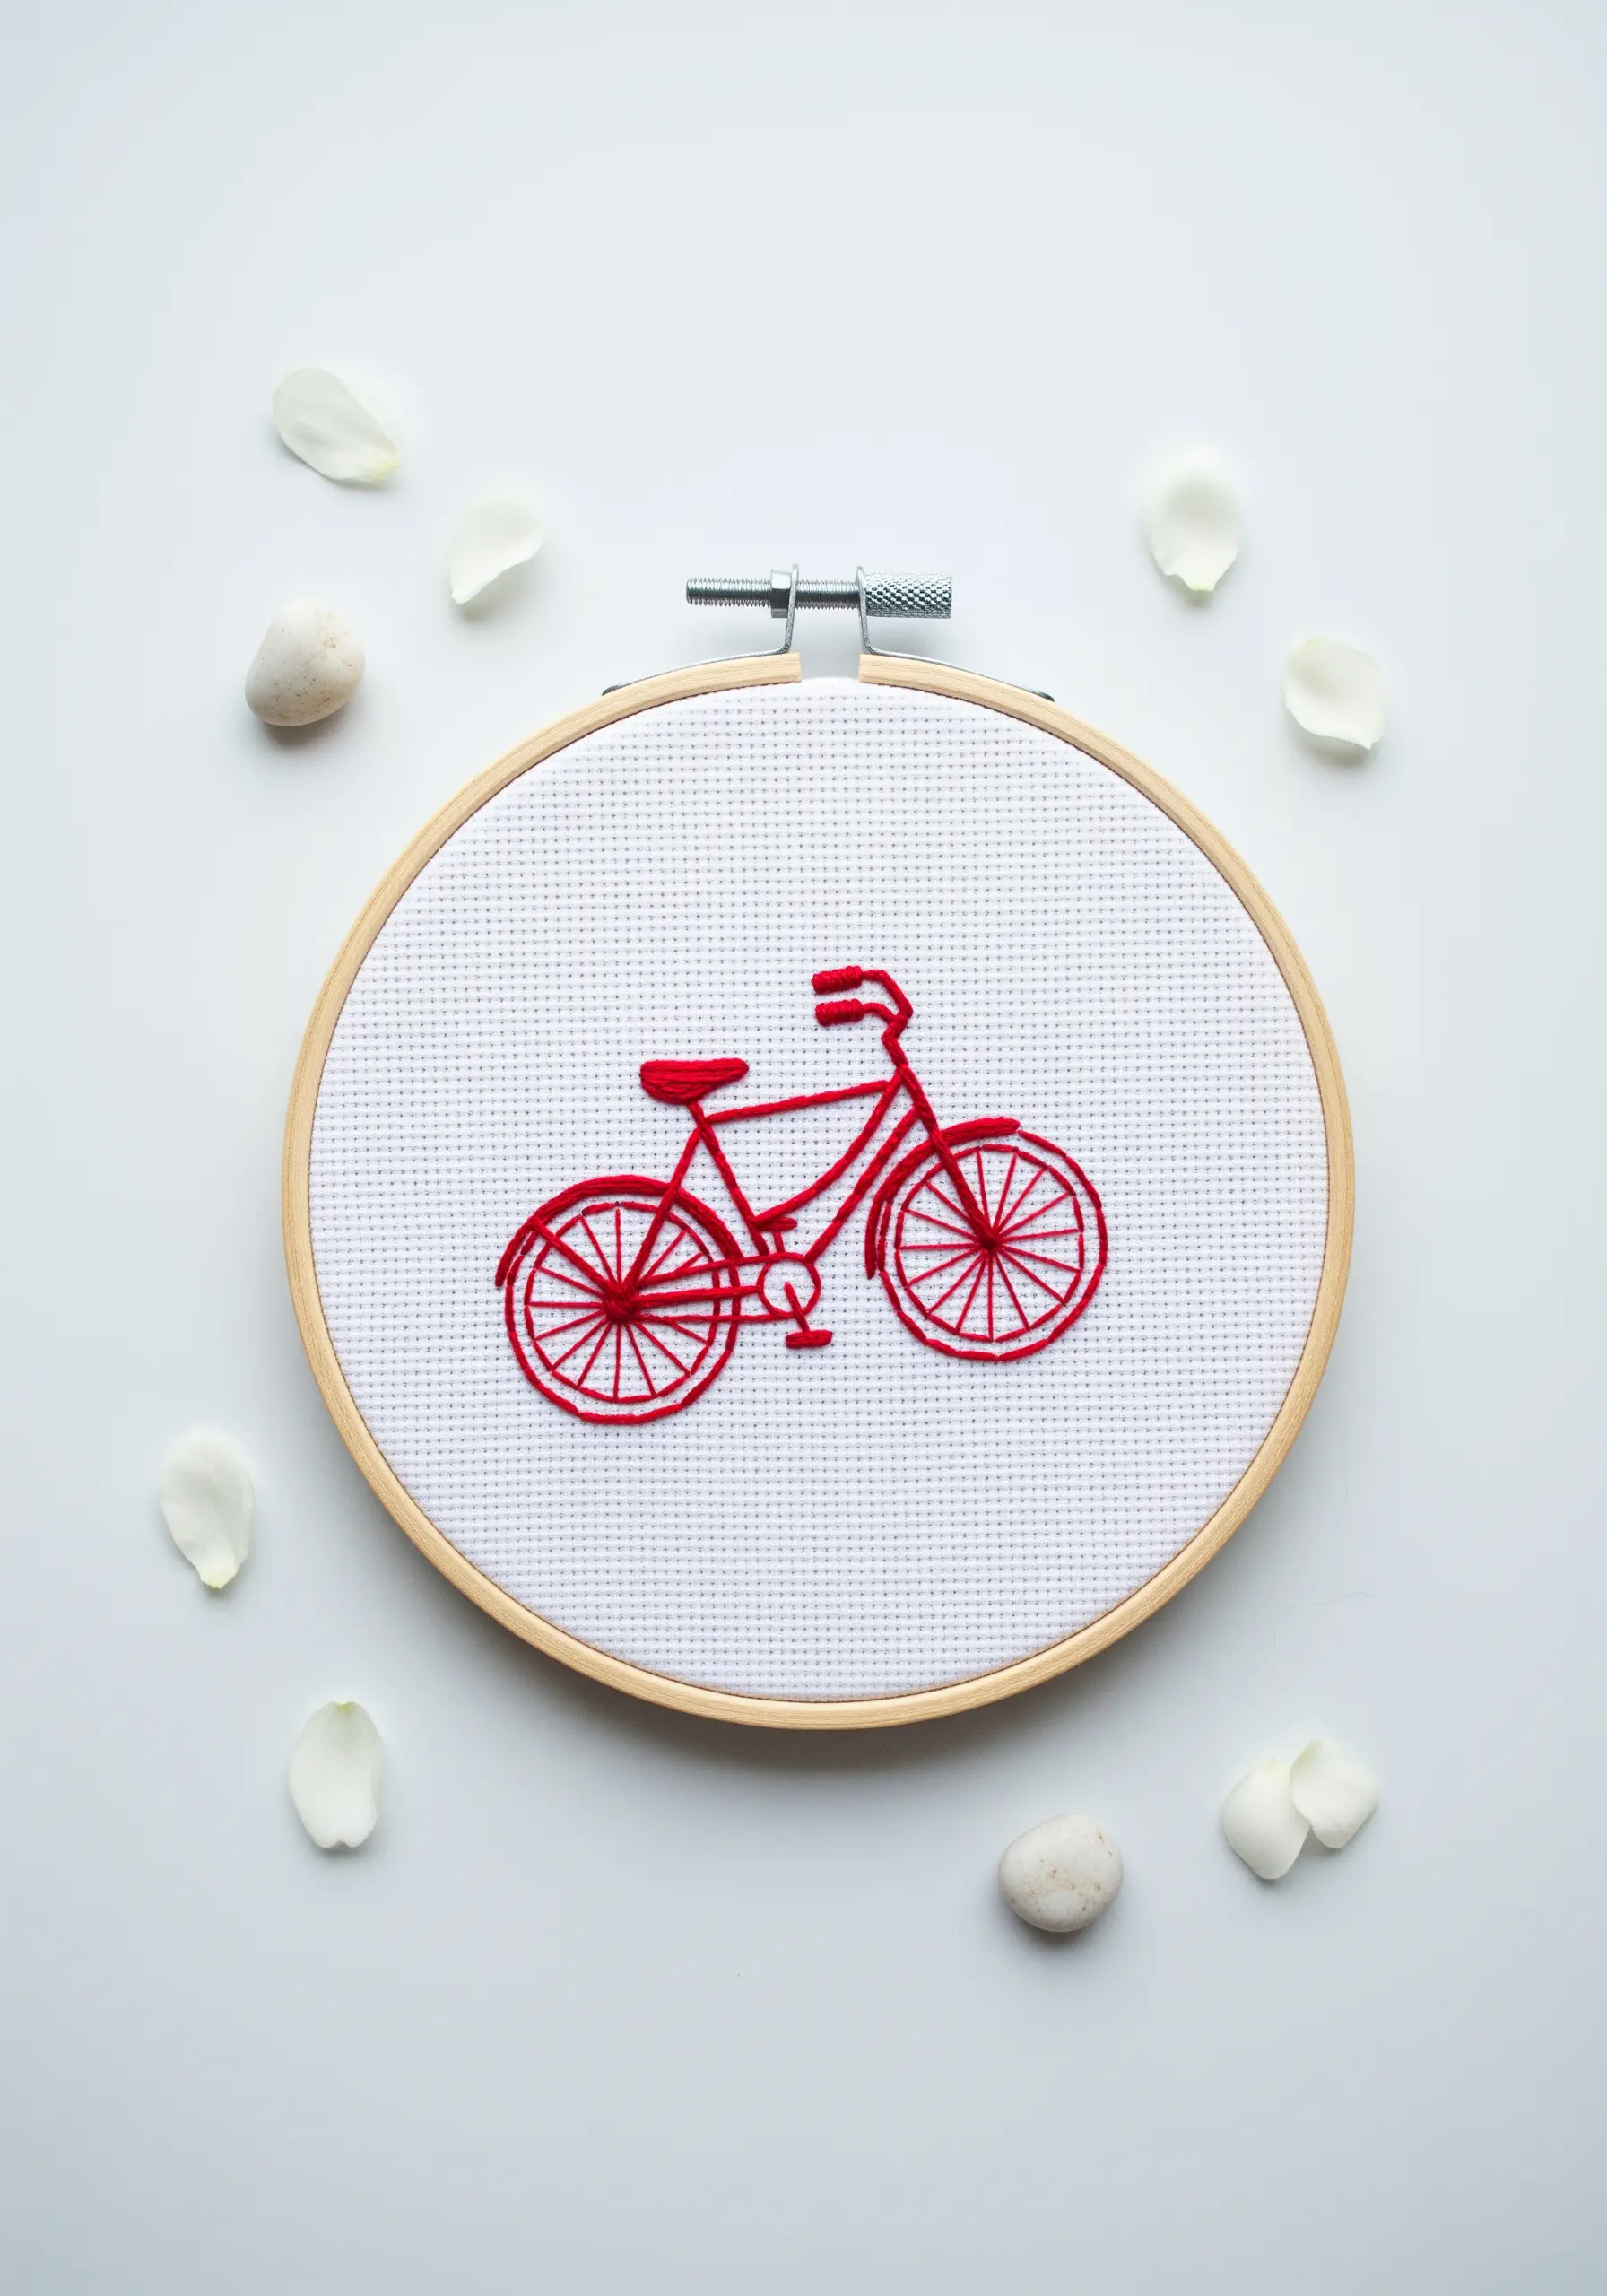
This charming project proves that you can create complex images using only the most basic stitches.
Use a simple backstitch for the entire frame, keeping your stitch length short and consistent to navigate the curves smoothly.
For the wheels, create the spokes with straight stitches radiating from the center.
The key to success is focusing on the neatness of your line work, transforming a simple drawing into a crisp, embroidered illustration.
16. Sweet and Simple: Adding a Pop of Light
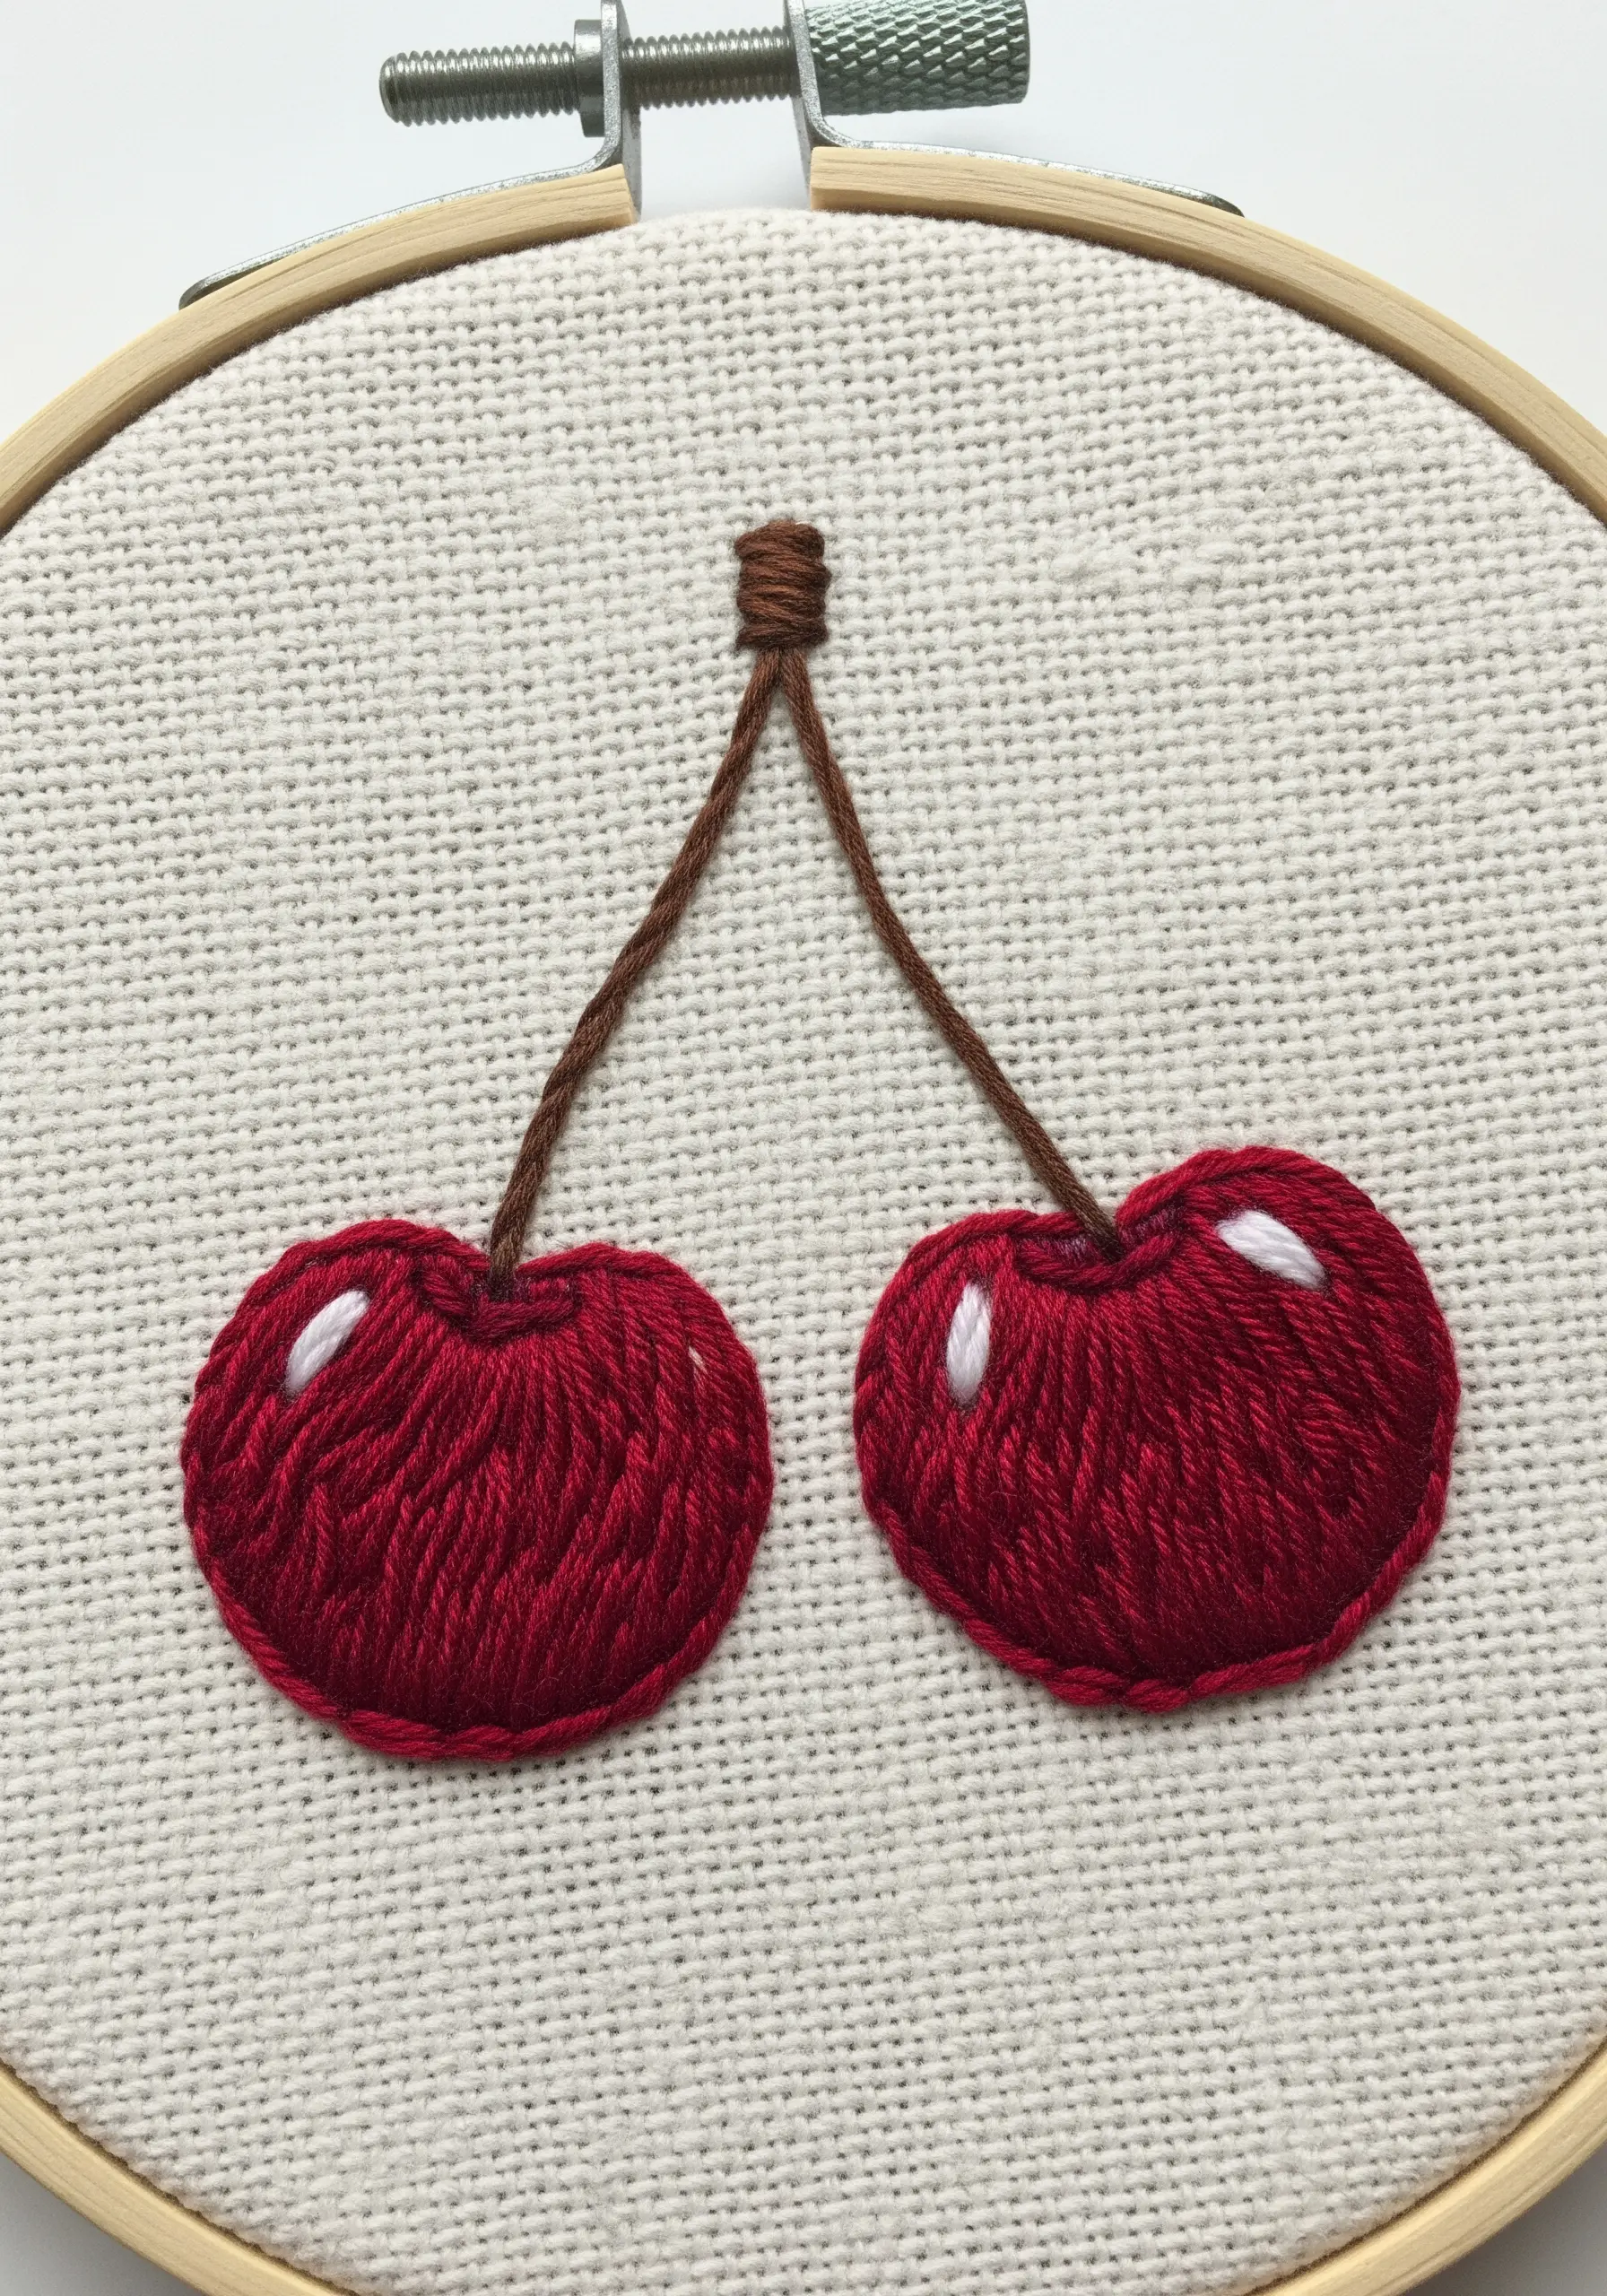
Instantly elevate your satin stitch from flat to dimensional with a simple highlight.
First, fill the entire cherry shape with your main red color, keeping your stitches neat and angled in the same direction.
Then, take a single strand of white floss and add just two or three small straight stitches where the light would naturally hit.
This tiny detail creates the illusion of a glossy, rounded surface, and it’s a technique you can apply to almost any filled shape.
17. The Textural Rainbow: Filling with Chain Stitch

For a faster, more textural alternative to satin stitch, fill your shapes with rows of chain stitch.
Begin by stitching a row of chain stitch along the outer edge of the first arch.
Then, stitch the next row directly beside it, continuing until the shape is completely filled.
The result is a beautiful, braided texture that gives the piece a cozy, bohemian feel. This is a hallmark of boho fabric collage embroidery pieces that feel both handmade and high-end.
18. The Ornate Key: Precision in Outlining
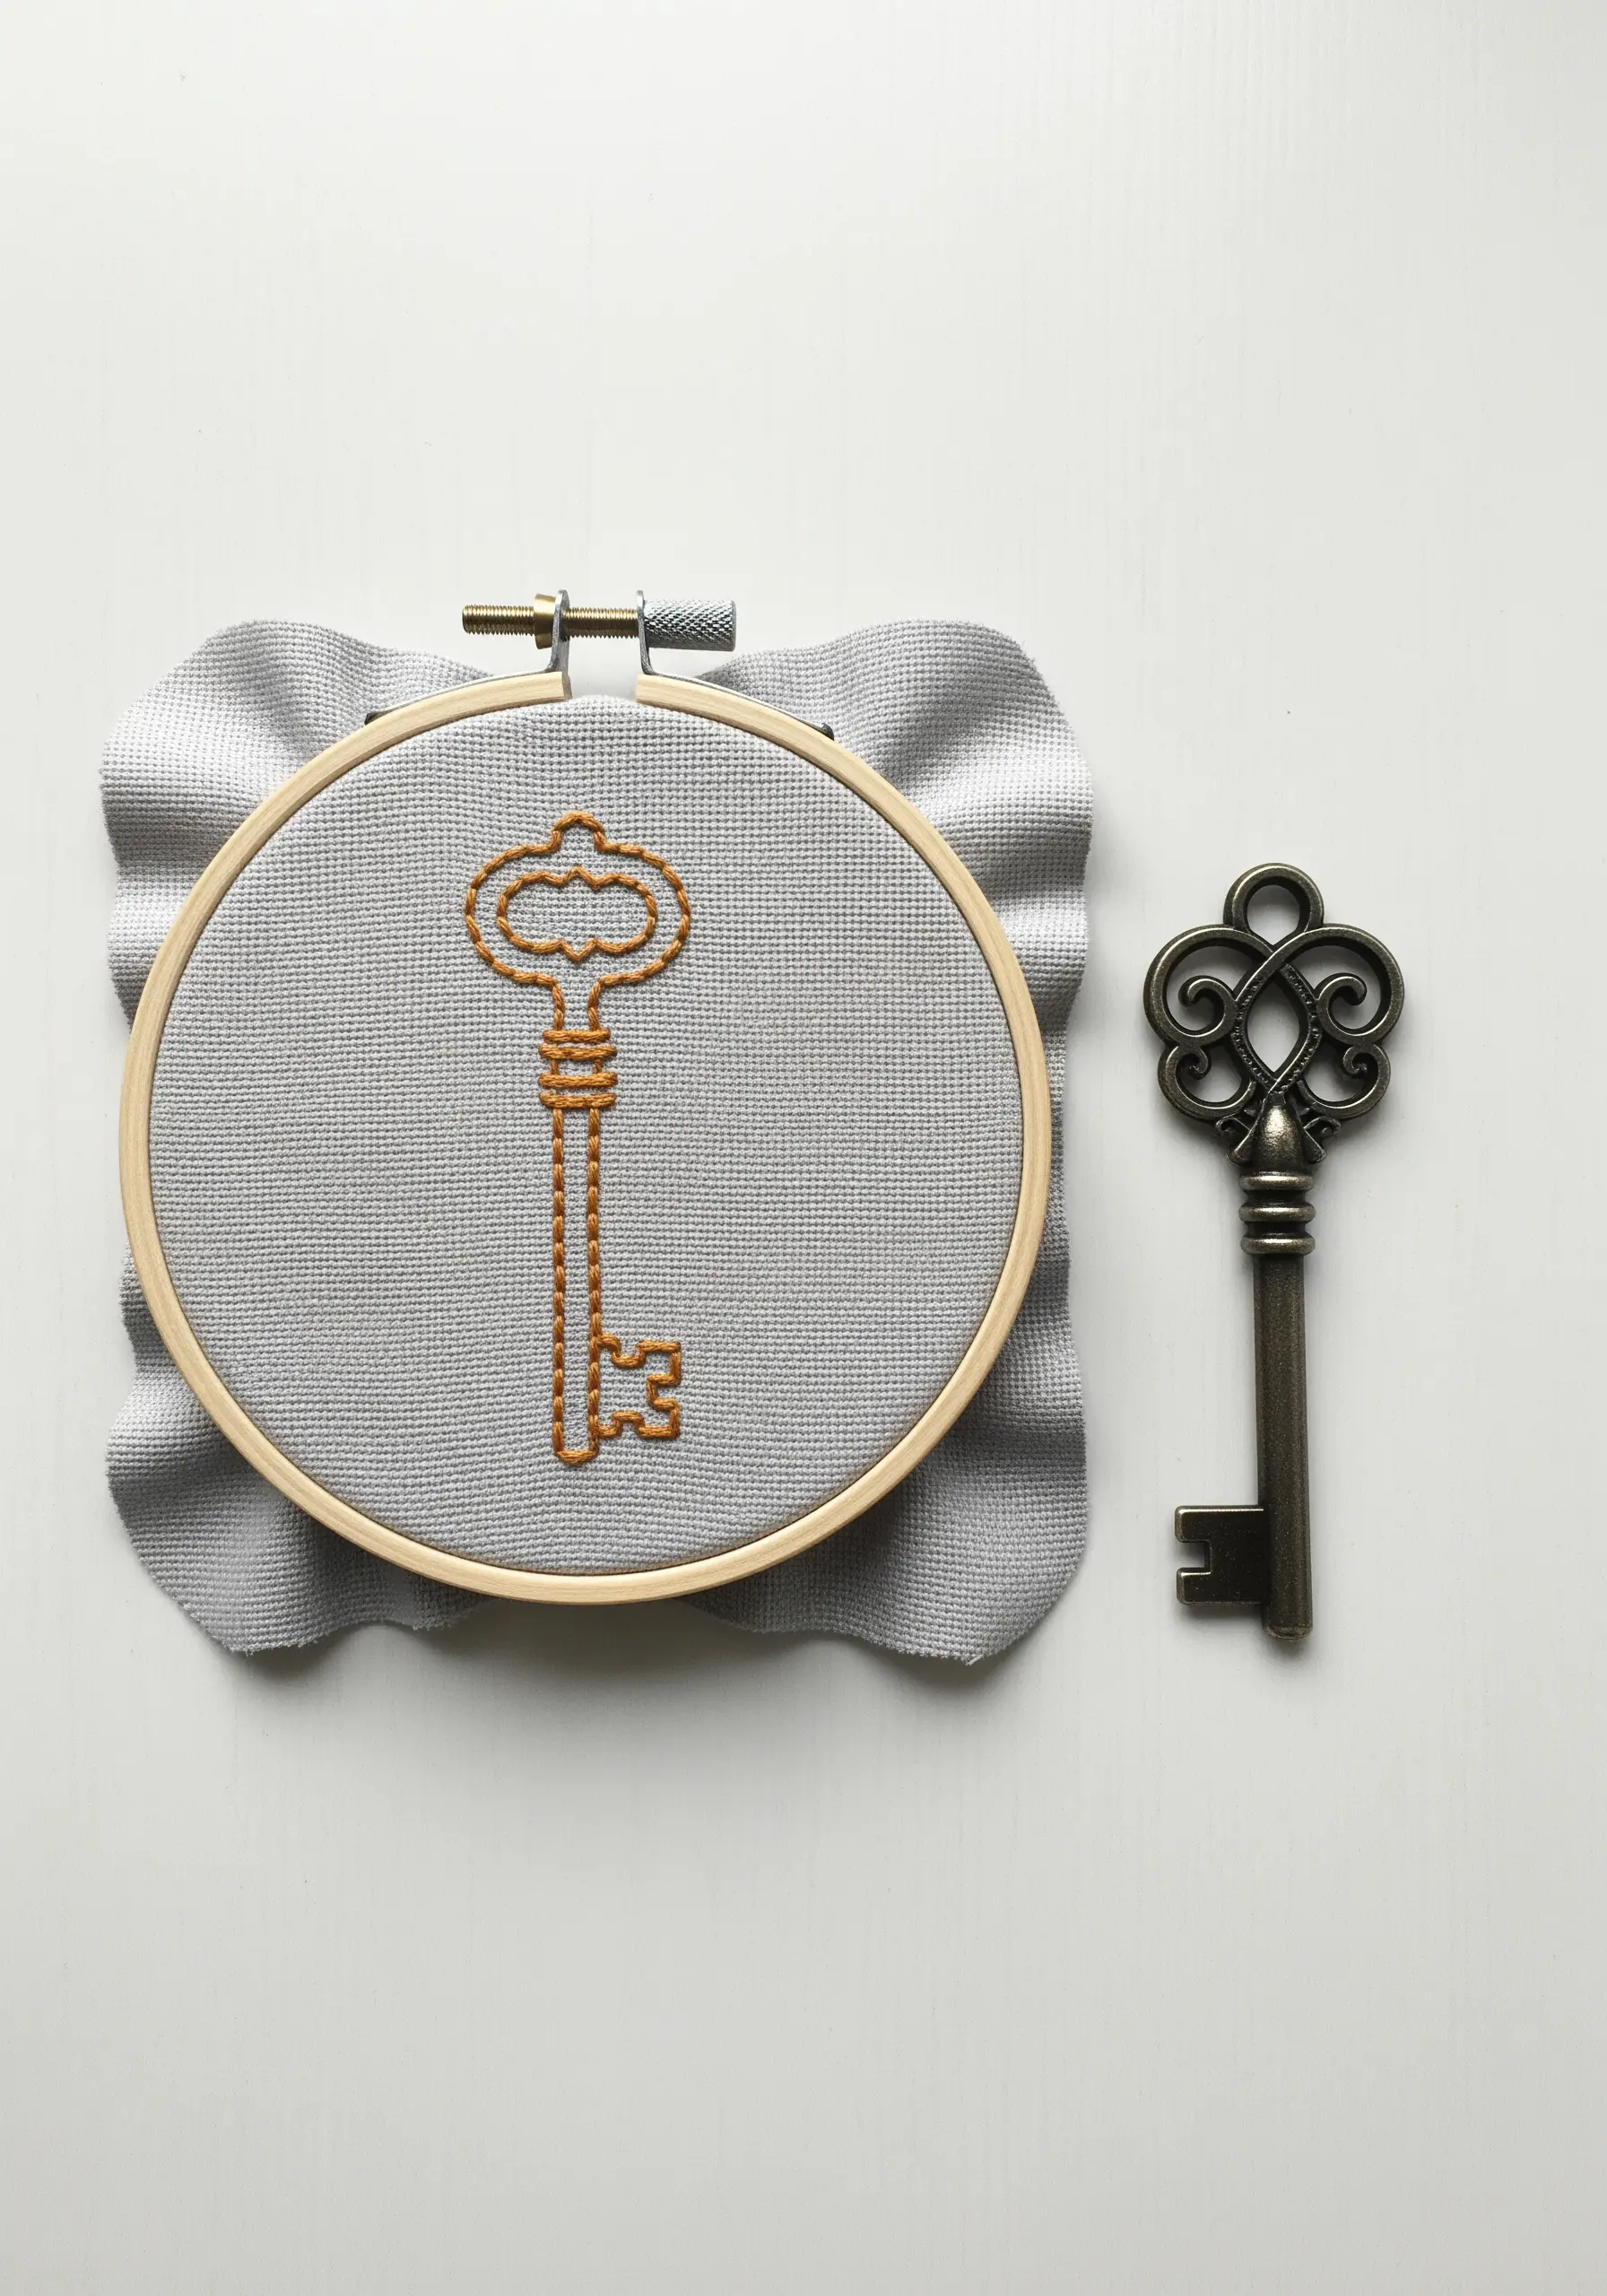
When your design is all about intricate details, a precise and continuous outline stitch is crucial.
Split stitch is the perfect choice for this, as piercing the thread of the previous stitch creates a solid, uninterrupted line that can handle tight curves and sharp corners flawlessly.
Using two strands of floss gives the line enough visual weight to stand on its own.
This transforms the key from a simple sketch into a sophisticated, illustrative piece of vintage-inspired embroidery wall decor.
19. Whimsical Balloons: Reimagining a Classic Stitch
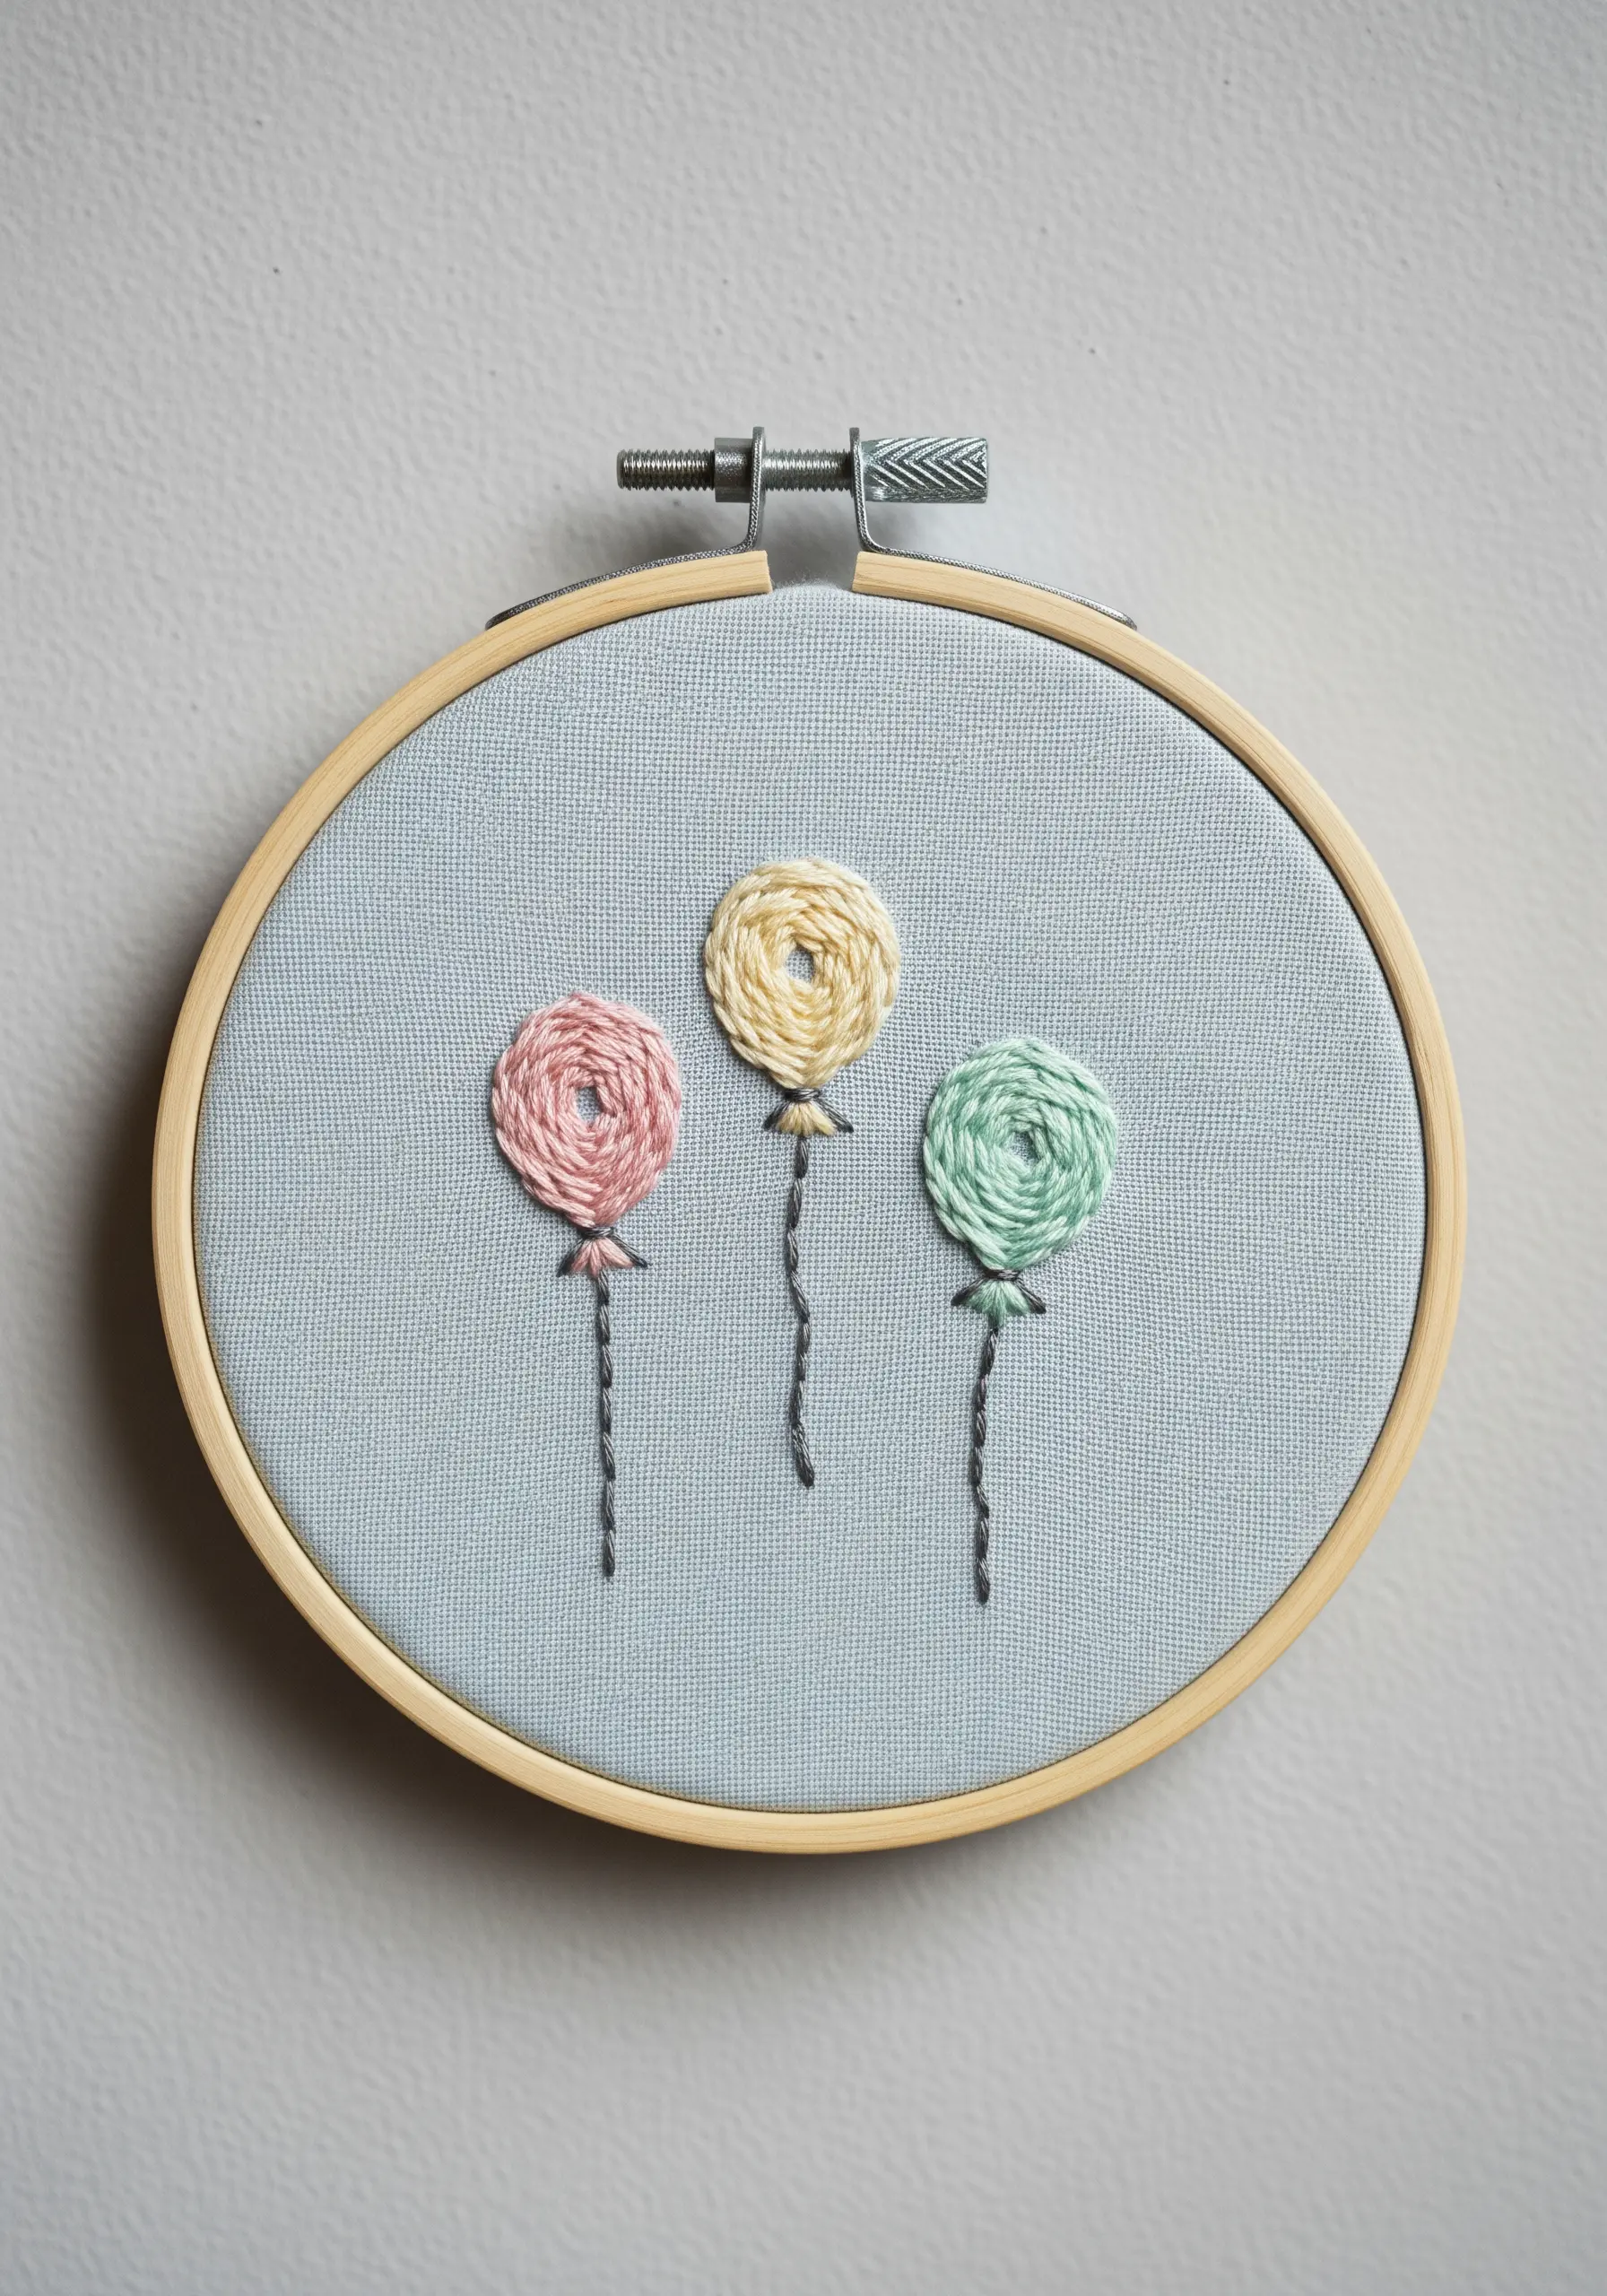
This design brilliantly showcases how one stitch can be completely transformed by context.
The woven wheel stitch, typically used for flowers, becomes a stylized, whimsical balloon when stitched in soft pastels and given a simple stem stitch string.
The raised, circular texture is playful and immediately draws the eye.
This is a perfect example of how rethinking the application of your basic stitches can unlock endless creative possibilities and become one of your favorite tiny artistic home touches.
20. Home Sweet Hoop: Combining Line and Form
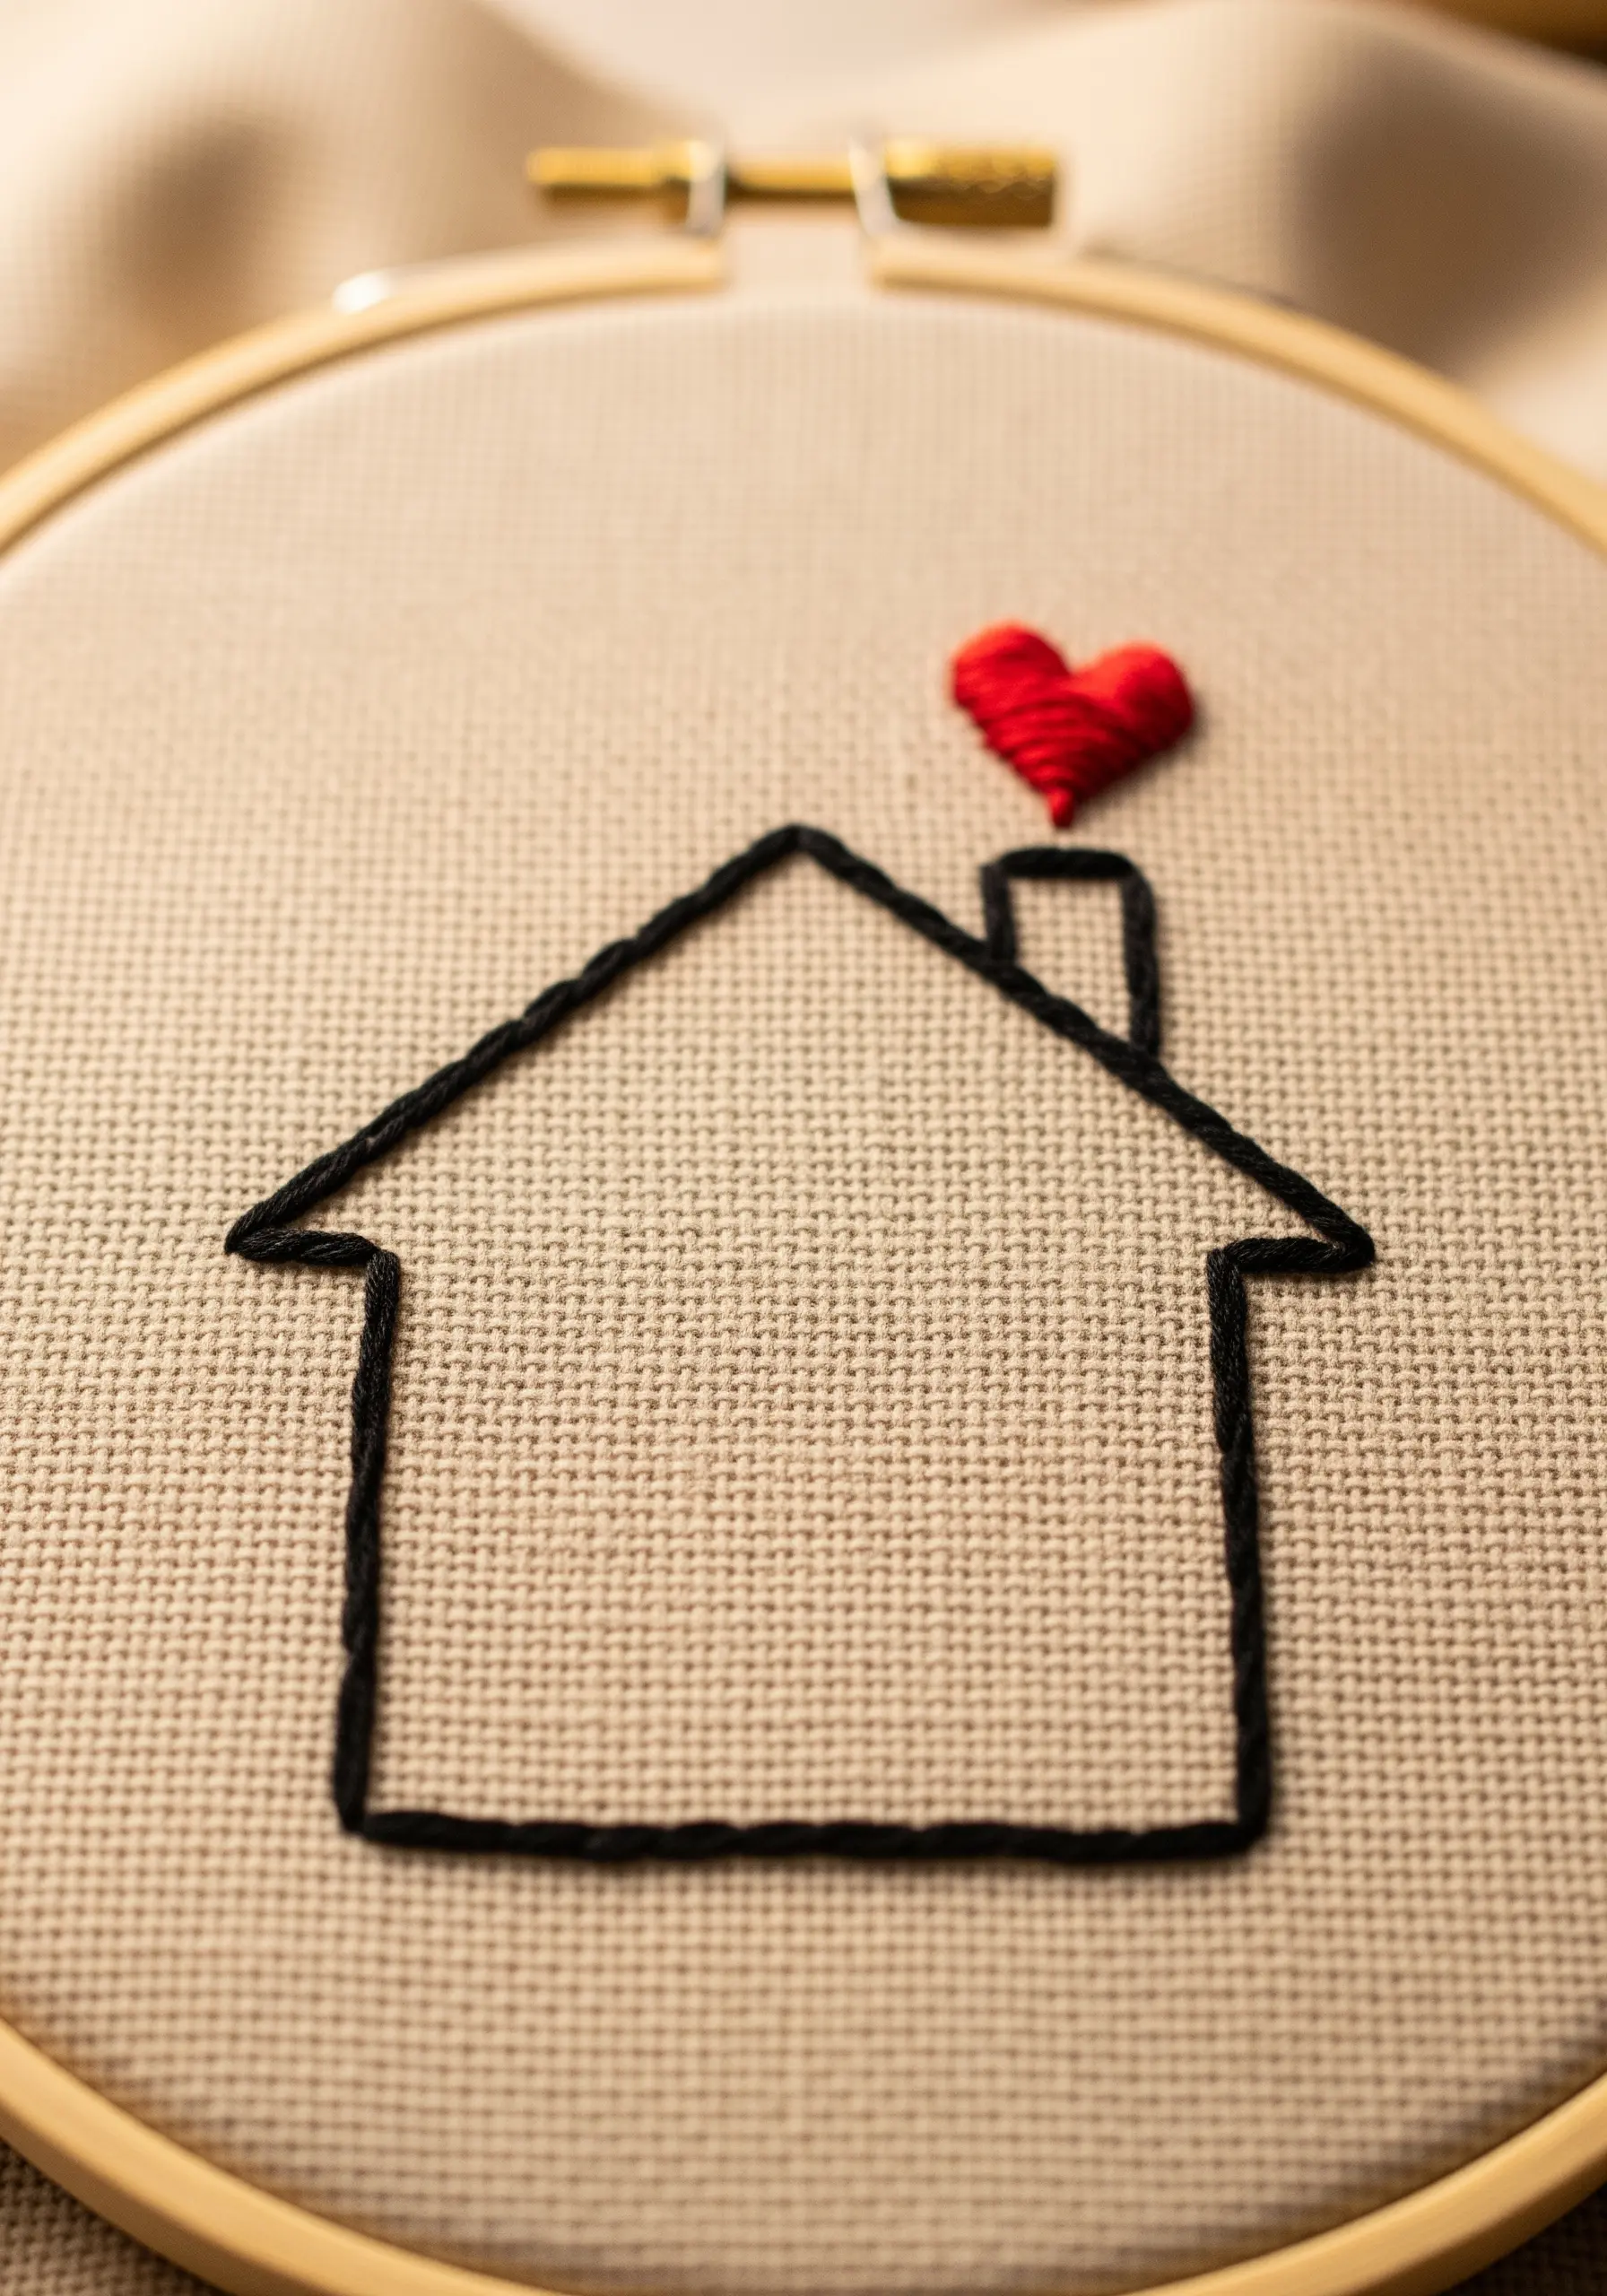
This piece creates emotional impact by contrasting simple line work with a single, dimensional element.
Use a clean, crisp backstitch for the house outline—its power is in its simplicity.
To make the tiny heart the focal point, give it dimension with a padded satin stitch.
First, create a small satin-stitched base layer, then stitch your final, visible layer directly on top, perpendicular to the first.
This technique physically raises the heart from the fabric, making it impossible to miss.
21. A Graphic Vision: The Perfect Satin Stitch Edge
For a bold, graphic design with a solid fill, the crispness of your edge is everything.
The secret to a flawless satin stitch is to first outline the entire shape with a split stitch.
Then, fill the area with your satin stitch, using the split stitch outline as a raised “wall” to tuck your needle against.
This simple preparation prevents gaps and wobbly edges, giving your work an incredibly sharp, clean, and professional finish.


