

I want you to rethink what embroidery can be. Move past the idea that intricacy requires a riot of color. True luxury in textile art often comes from something quieter: the confident use of texture, the deliberate direction of a stitch, and the subtle harmony of a limited palette.
This is where your work transforms from a pleasant craft into a piece of intentional art. It’s not about adding more, but about making each element you do add more meaningful. When you focus on how thread can create shadow, imply movement, or build dimension, you begin to speak a more sophisticated visual language.
Here, you will find techniques and compositions that embrace this philosophy. They are designed to help you create pieces that feel calm, curated, and deeply personal—artwork that doesn’t shout for attention, but quietly commands it. Let’s begin.
1. Create Architectural Depth with Thread Direction

You can build a dramatic, large-scale landscape using only monochrome threads by focusing on stitch direction.
Use long-and-short stitch to fill each mountain plane, but alter the angle of your stitches for each distinct section.
This simple change creates the illusion of shadow and light, defining peaks and valleys without needing a single new color.
For the sharpest ridges, use a heavier weight pearl cotton to create a bold, graphic line that stands out against the softer fills.
This technique transforms simple stitching into a sculptural, textile wall art that commands attention.
2. Capture Botanical Lightness with a Triptych Layout

To give pampas grass its signature airy texture, use a looped turkey stitch and carefully trim the ends to create a soft, fluffy plume.
Contrast this high texture with a simple, delicate stem stitch for the stalk, using just a single strand of thread.
Using a silk or rayon thread for the plume will add a subtle sheen that mimics how natural light catches the fibers.
Arranging your work in a triptych of narrow panels creates a sense of rhythm and elegance, guiding the eye across the wall in a calming, deliberate way.
3. Curate Cohesion in a Geometric Gallery Wall

To create a sophisticated gallery wall, limit yourself to a palette of three to five harmonious colors and use them across all your pieces.
For cleanly filled shapes on dark fabric, first outline your motif with a single row of split stitch.
This tiny stitched border acts as a stable edge, preventing your fill stitches from becoming uneven and ensuring your geometric forms are crisp and intentional.
Experiment with fill stitches like satin stitch, brick stitch, or darning stitch to introduce subtle textural variations within your geometric hoop art collection.
4. Sculpt Portraits with Contouring Stitches
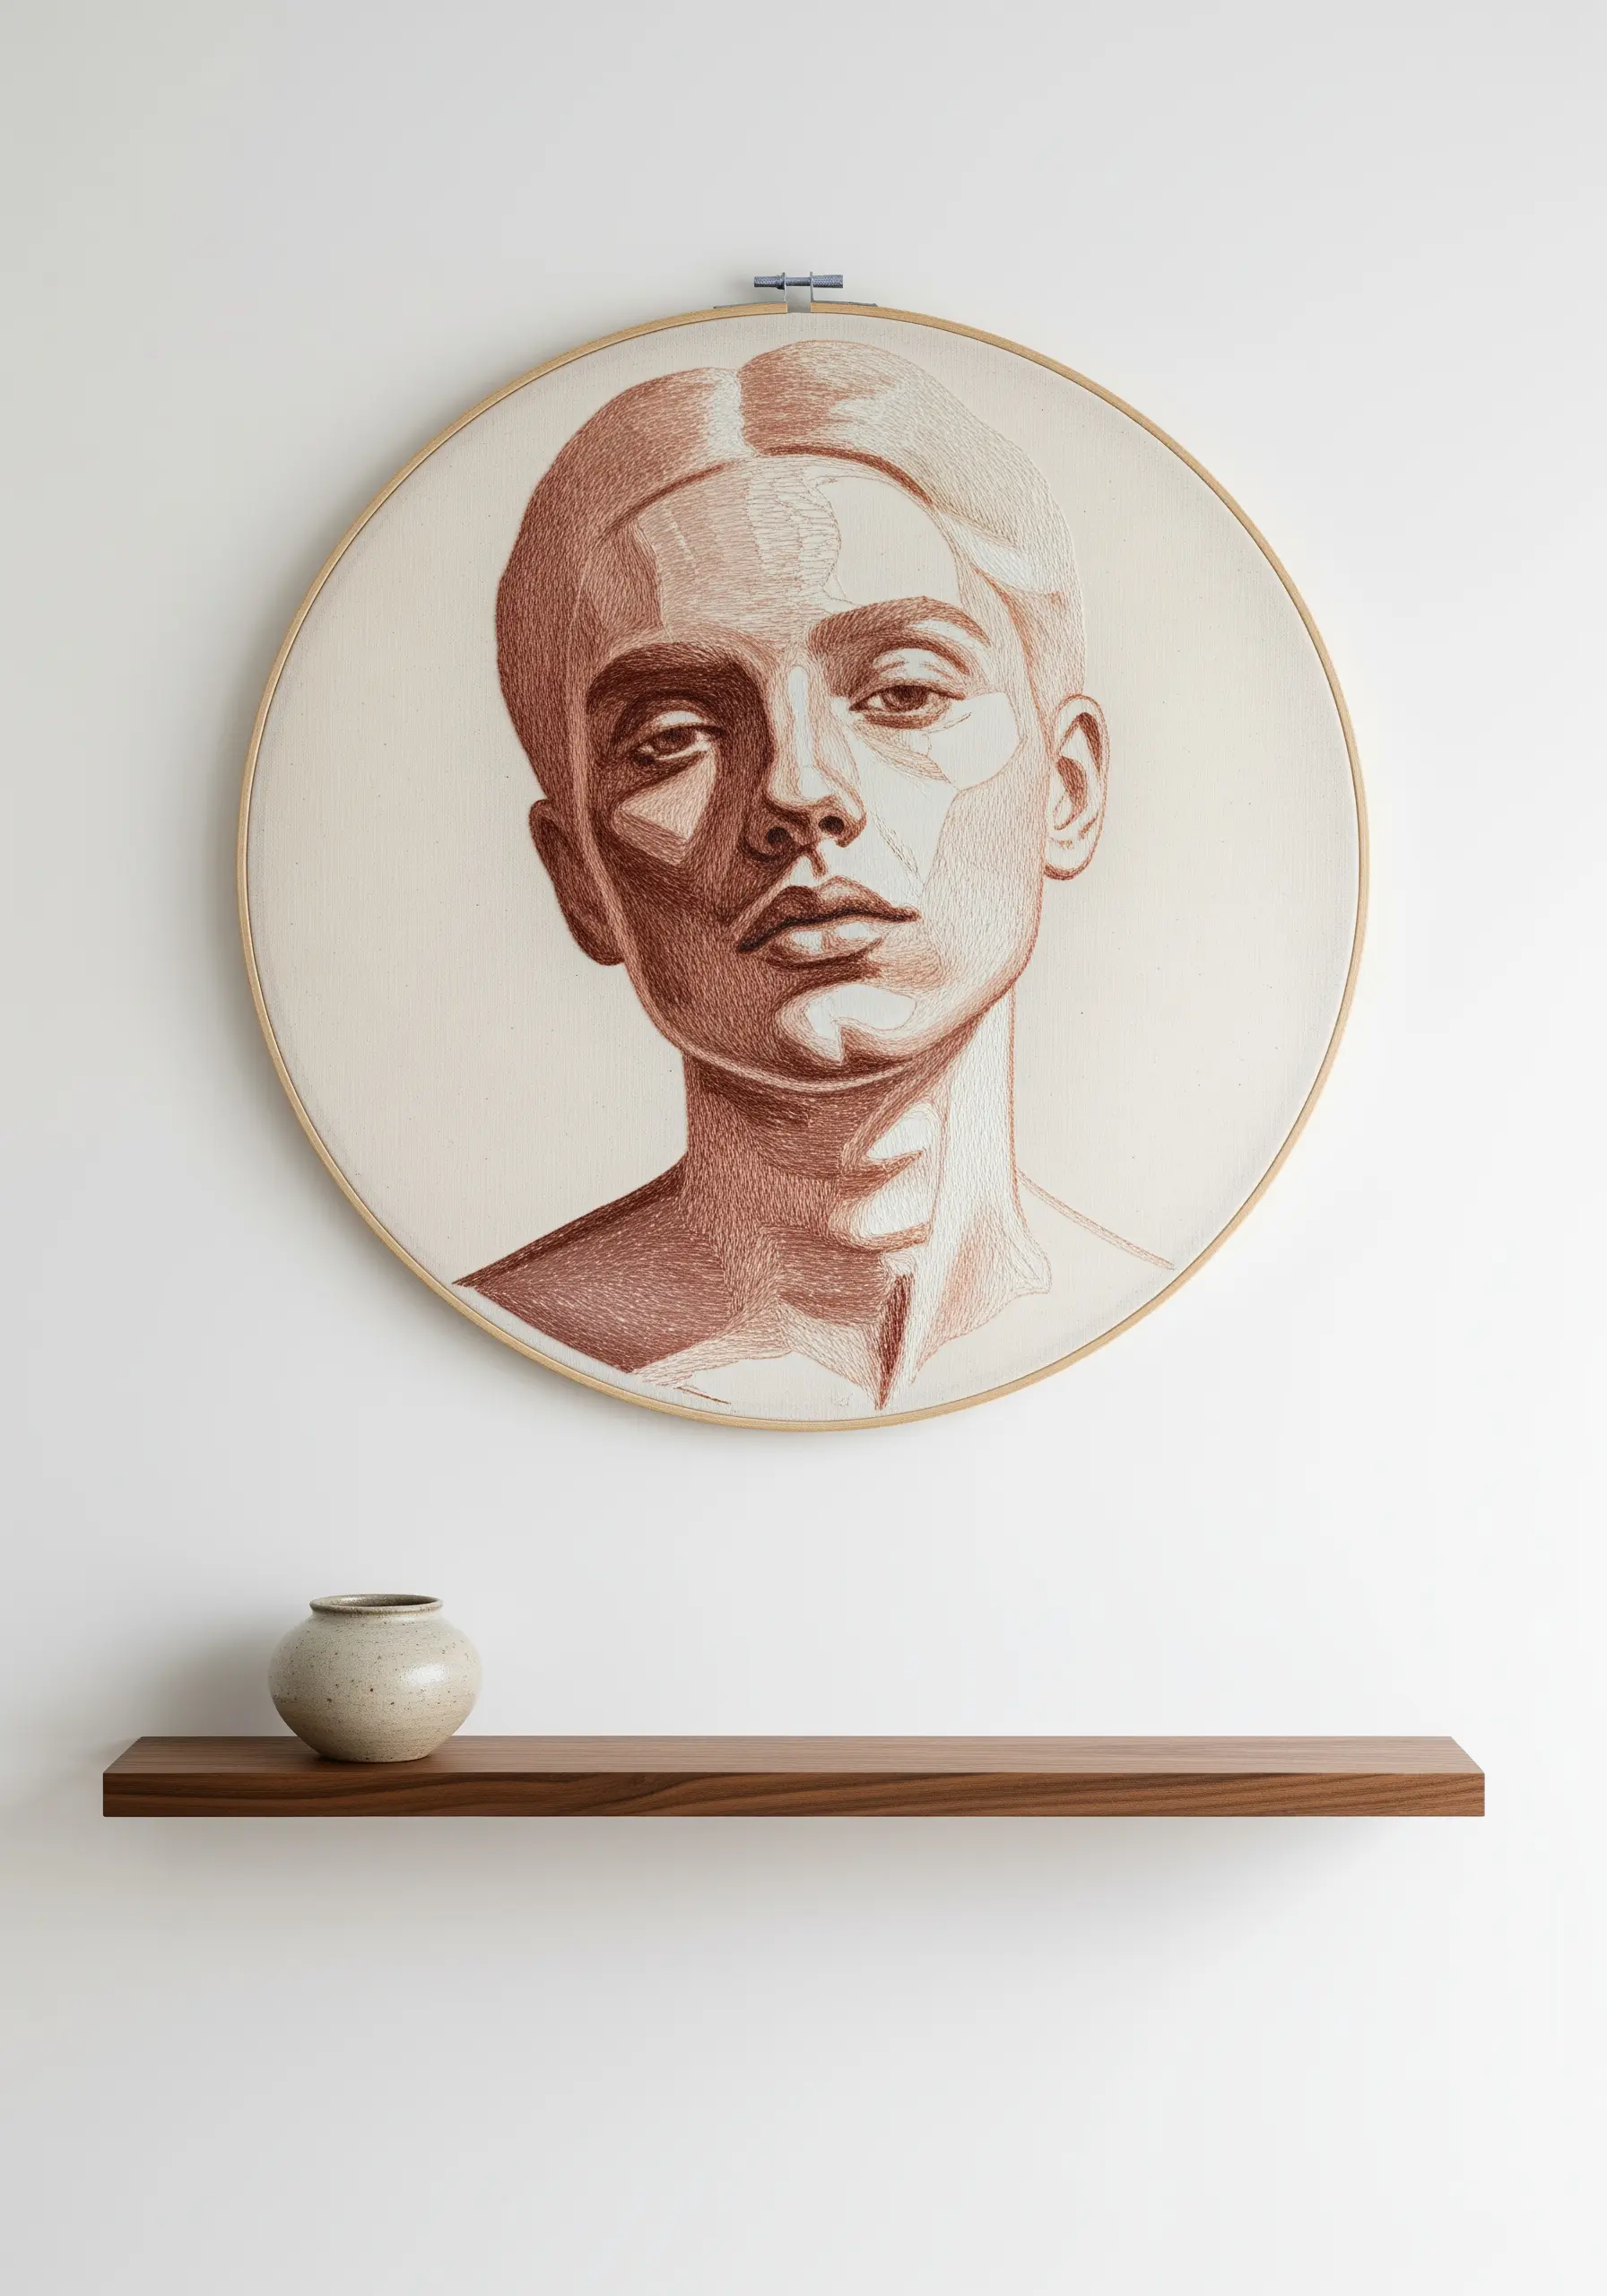
Elevate your portraits from flat fills to dimensional forms by using thread to contour the face.
Work with a single strand of floss and use long-and-short stitches that follow the natural curves of your subject’s features.
Think like a sculptor: your stitches should wrap around a cheekbone, recede into the shadow of a jawline, and highlight the bridge of the nose.
This directional stitching technique creates incredible depth and realism with only a few shades of thread, transforming your hoop into a piece of modern line art.
5. Weave an Impressionistic Seascape

Create a painterly, woven effect by layering long, horizontal straight stitches in varying lengths and colors.
Forget perfect satin stitch; instead, allow the colors to blend organically, overlapping slightly to mimic a soft, watercolor wash.
To build visual depth, vary the number of strands you use—from a single, delicate strand for distant highlights to three strands for bolder, closer waves.
This method gives your textile a rich, atmospheric quality that feels both abstract and deeply familiar.
6. Blend Threads for a Subtle, Metallic Sheen
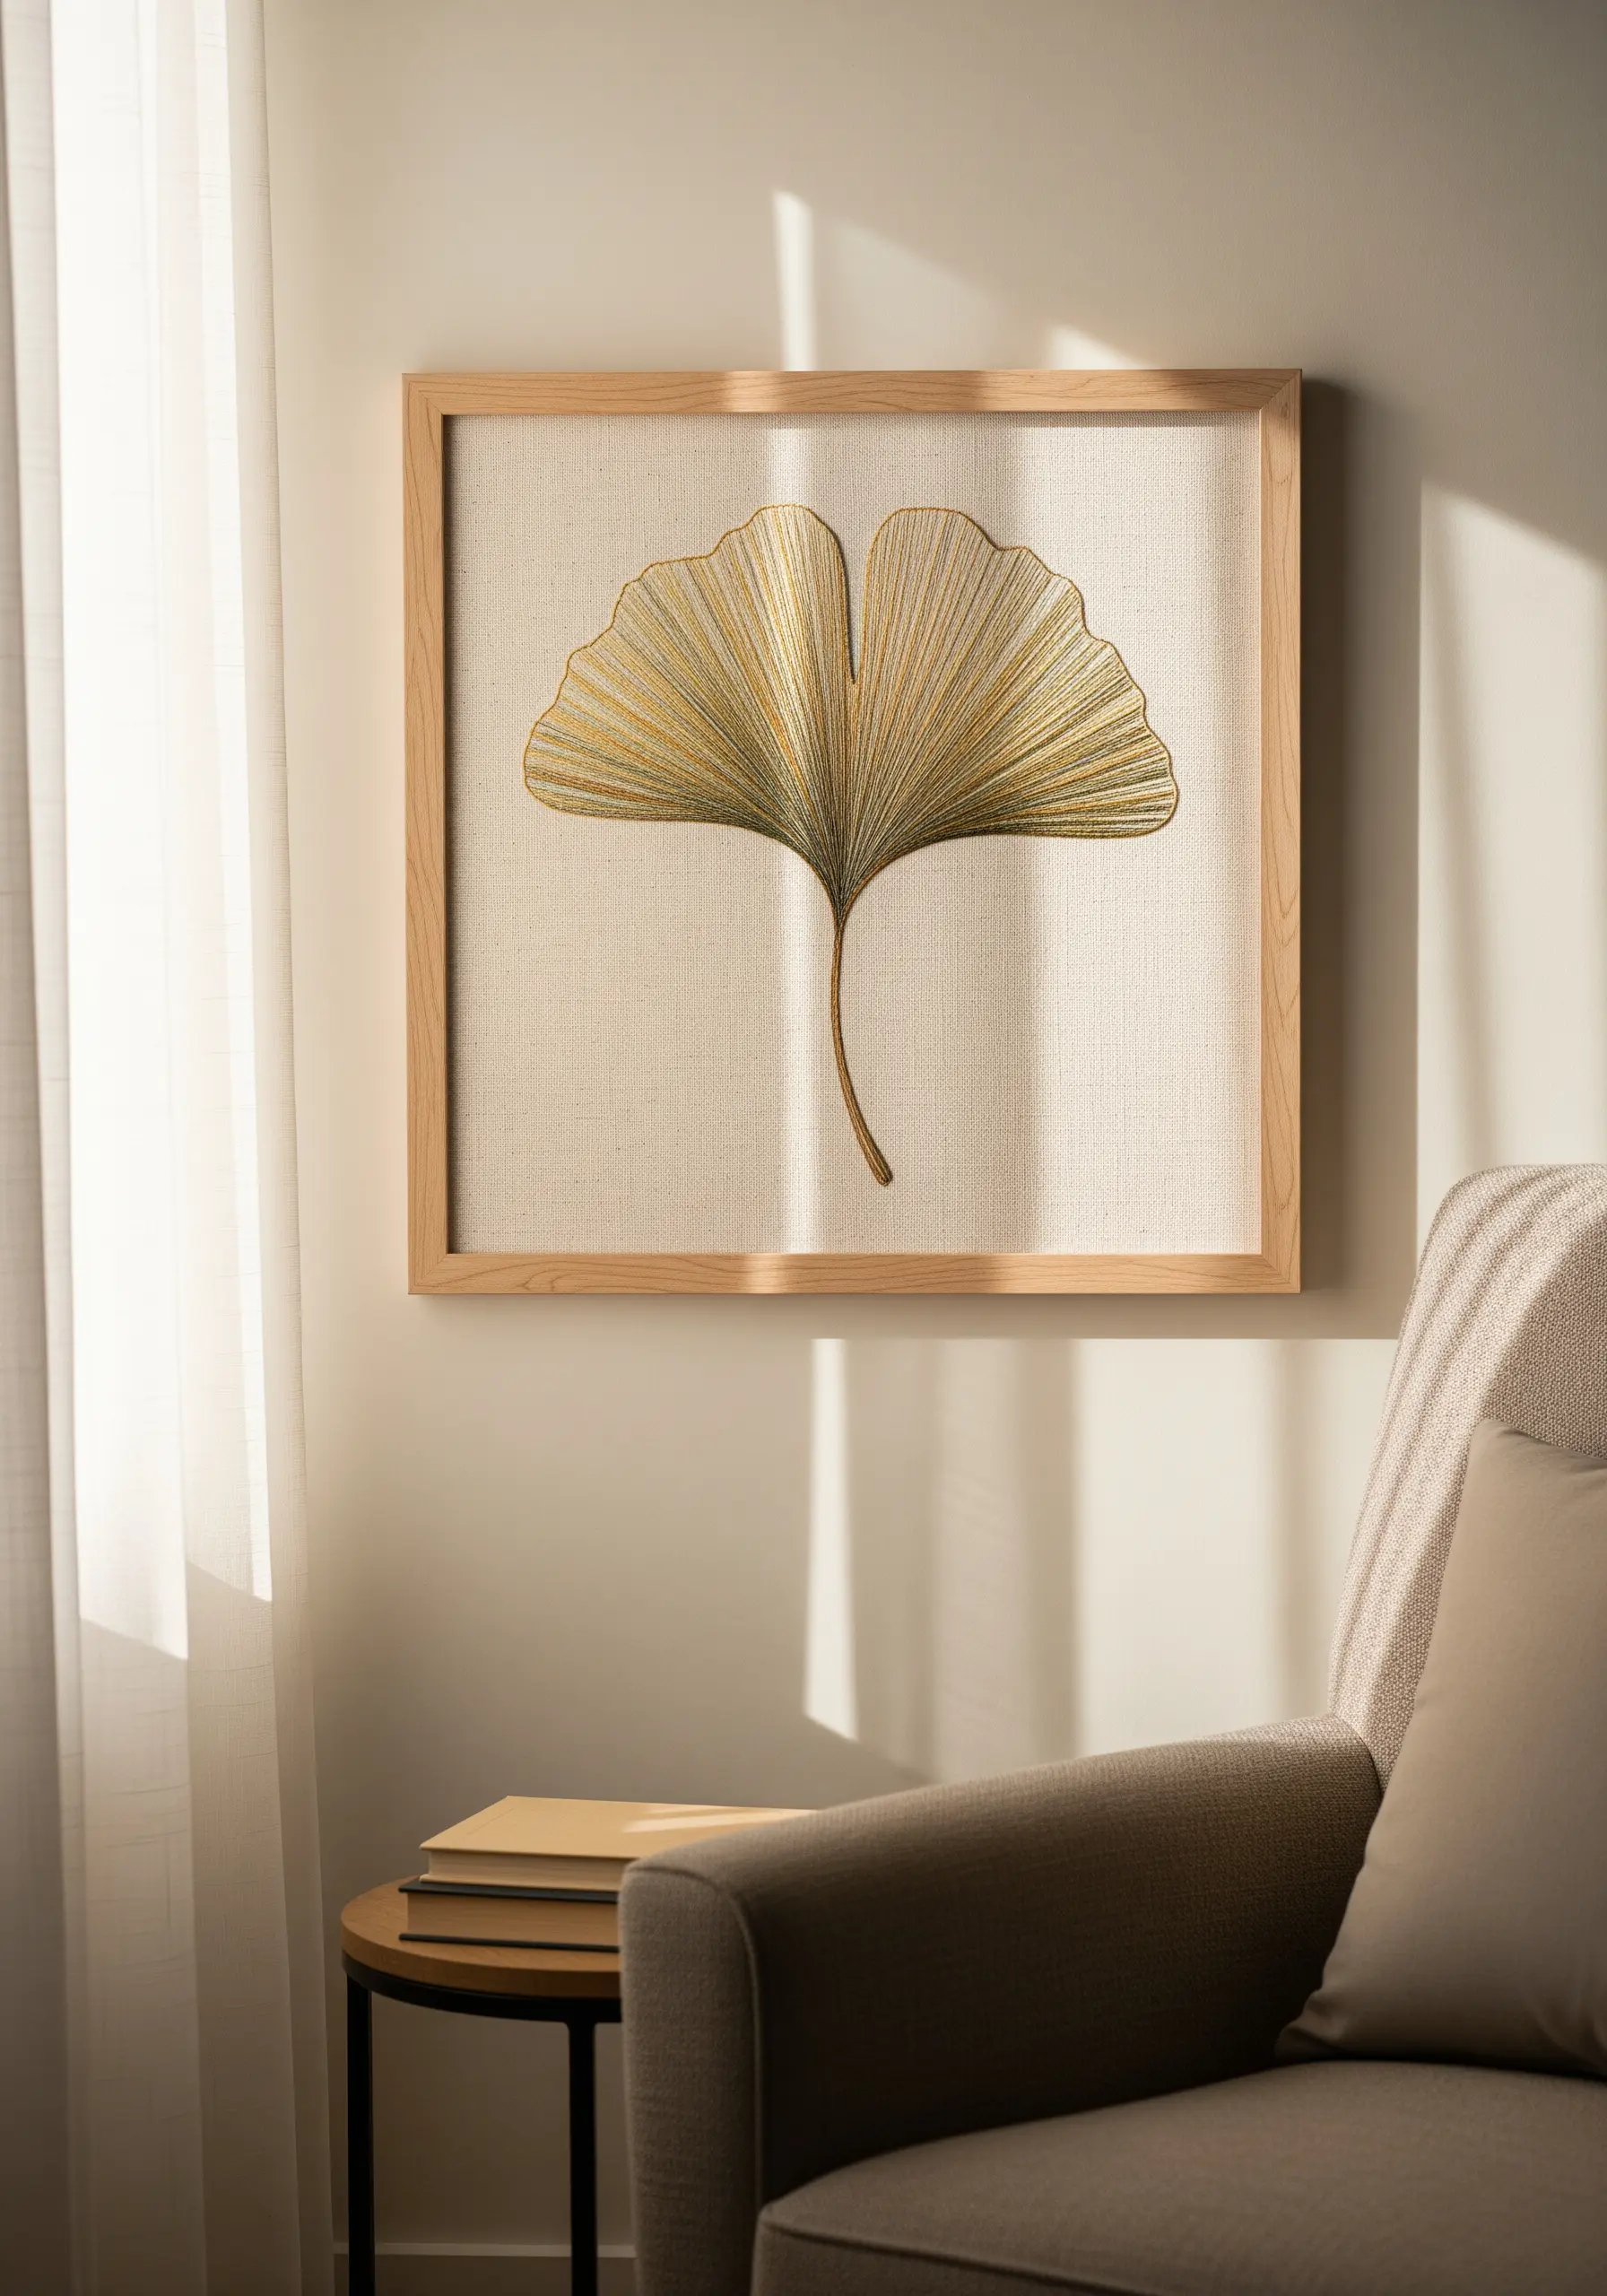
The elegance of this ginkgo leaf comes from precise, radiating straight stitches that all originate from a single point at the stem.
To achieve the soft, shimmering color gradient, use a technique called color mingling.
Thread your needle with one strand of metallic gold thread and one strand of matte green floss together.
This simple combination creates a subtle, complex color that shifts in the light, adding a touch of luxury metallic thread without being overwhelming.
7. Capture a Lunar Glow with Textured Knots
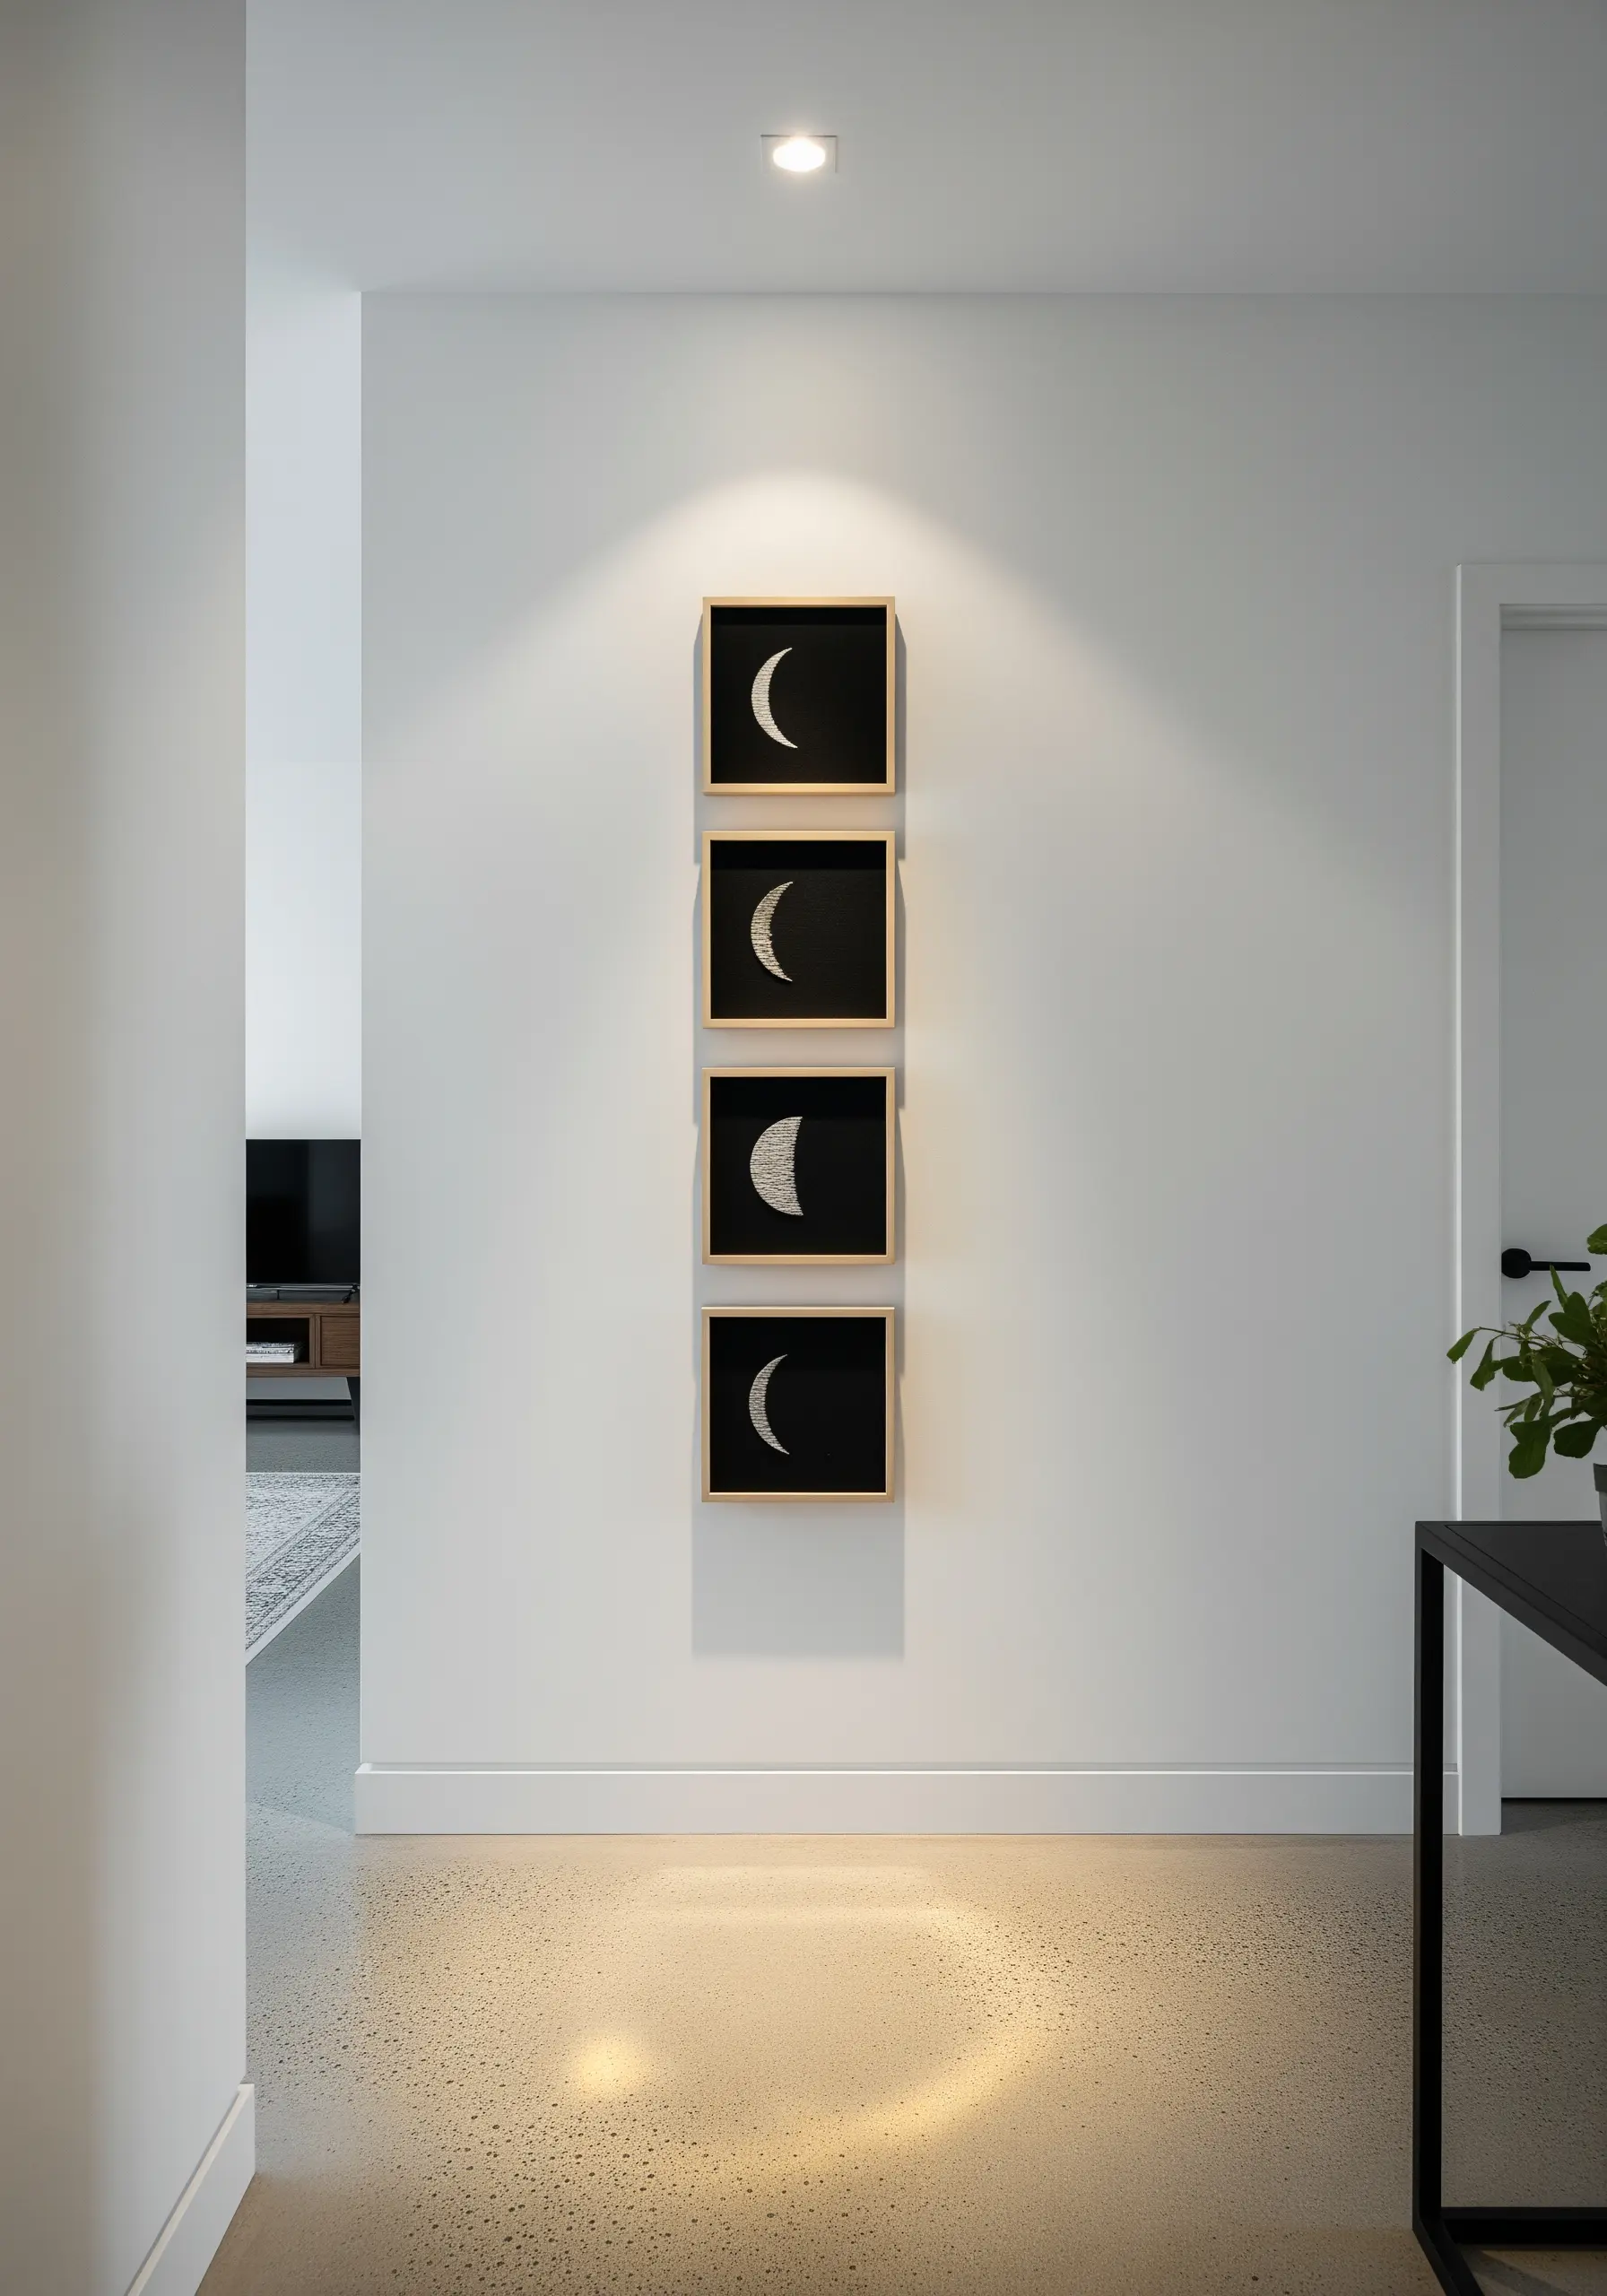
High contrast is your greatest tool for celestial designs.
On black linen or cotton, fill the shape of the moon with French knots packed tightly together for a dense, crater-like surface.
Using an off-white or silvery-grey thread instead of pure white will give your moon a softer, more realistic luminescence.
Varying the tightness and size of your knots will add another layer of texture, making your piece even more captivating up close.
8. Embody Calligraphic Energy with Expressive Stitches
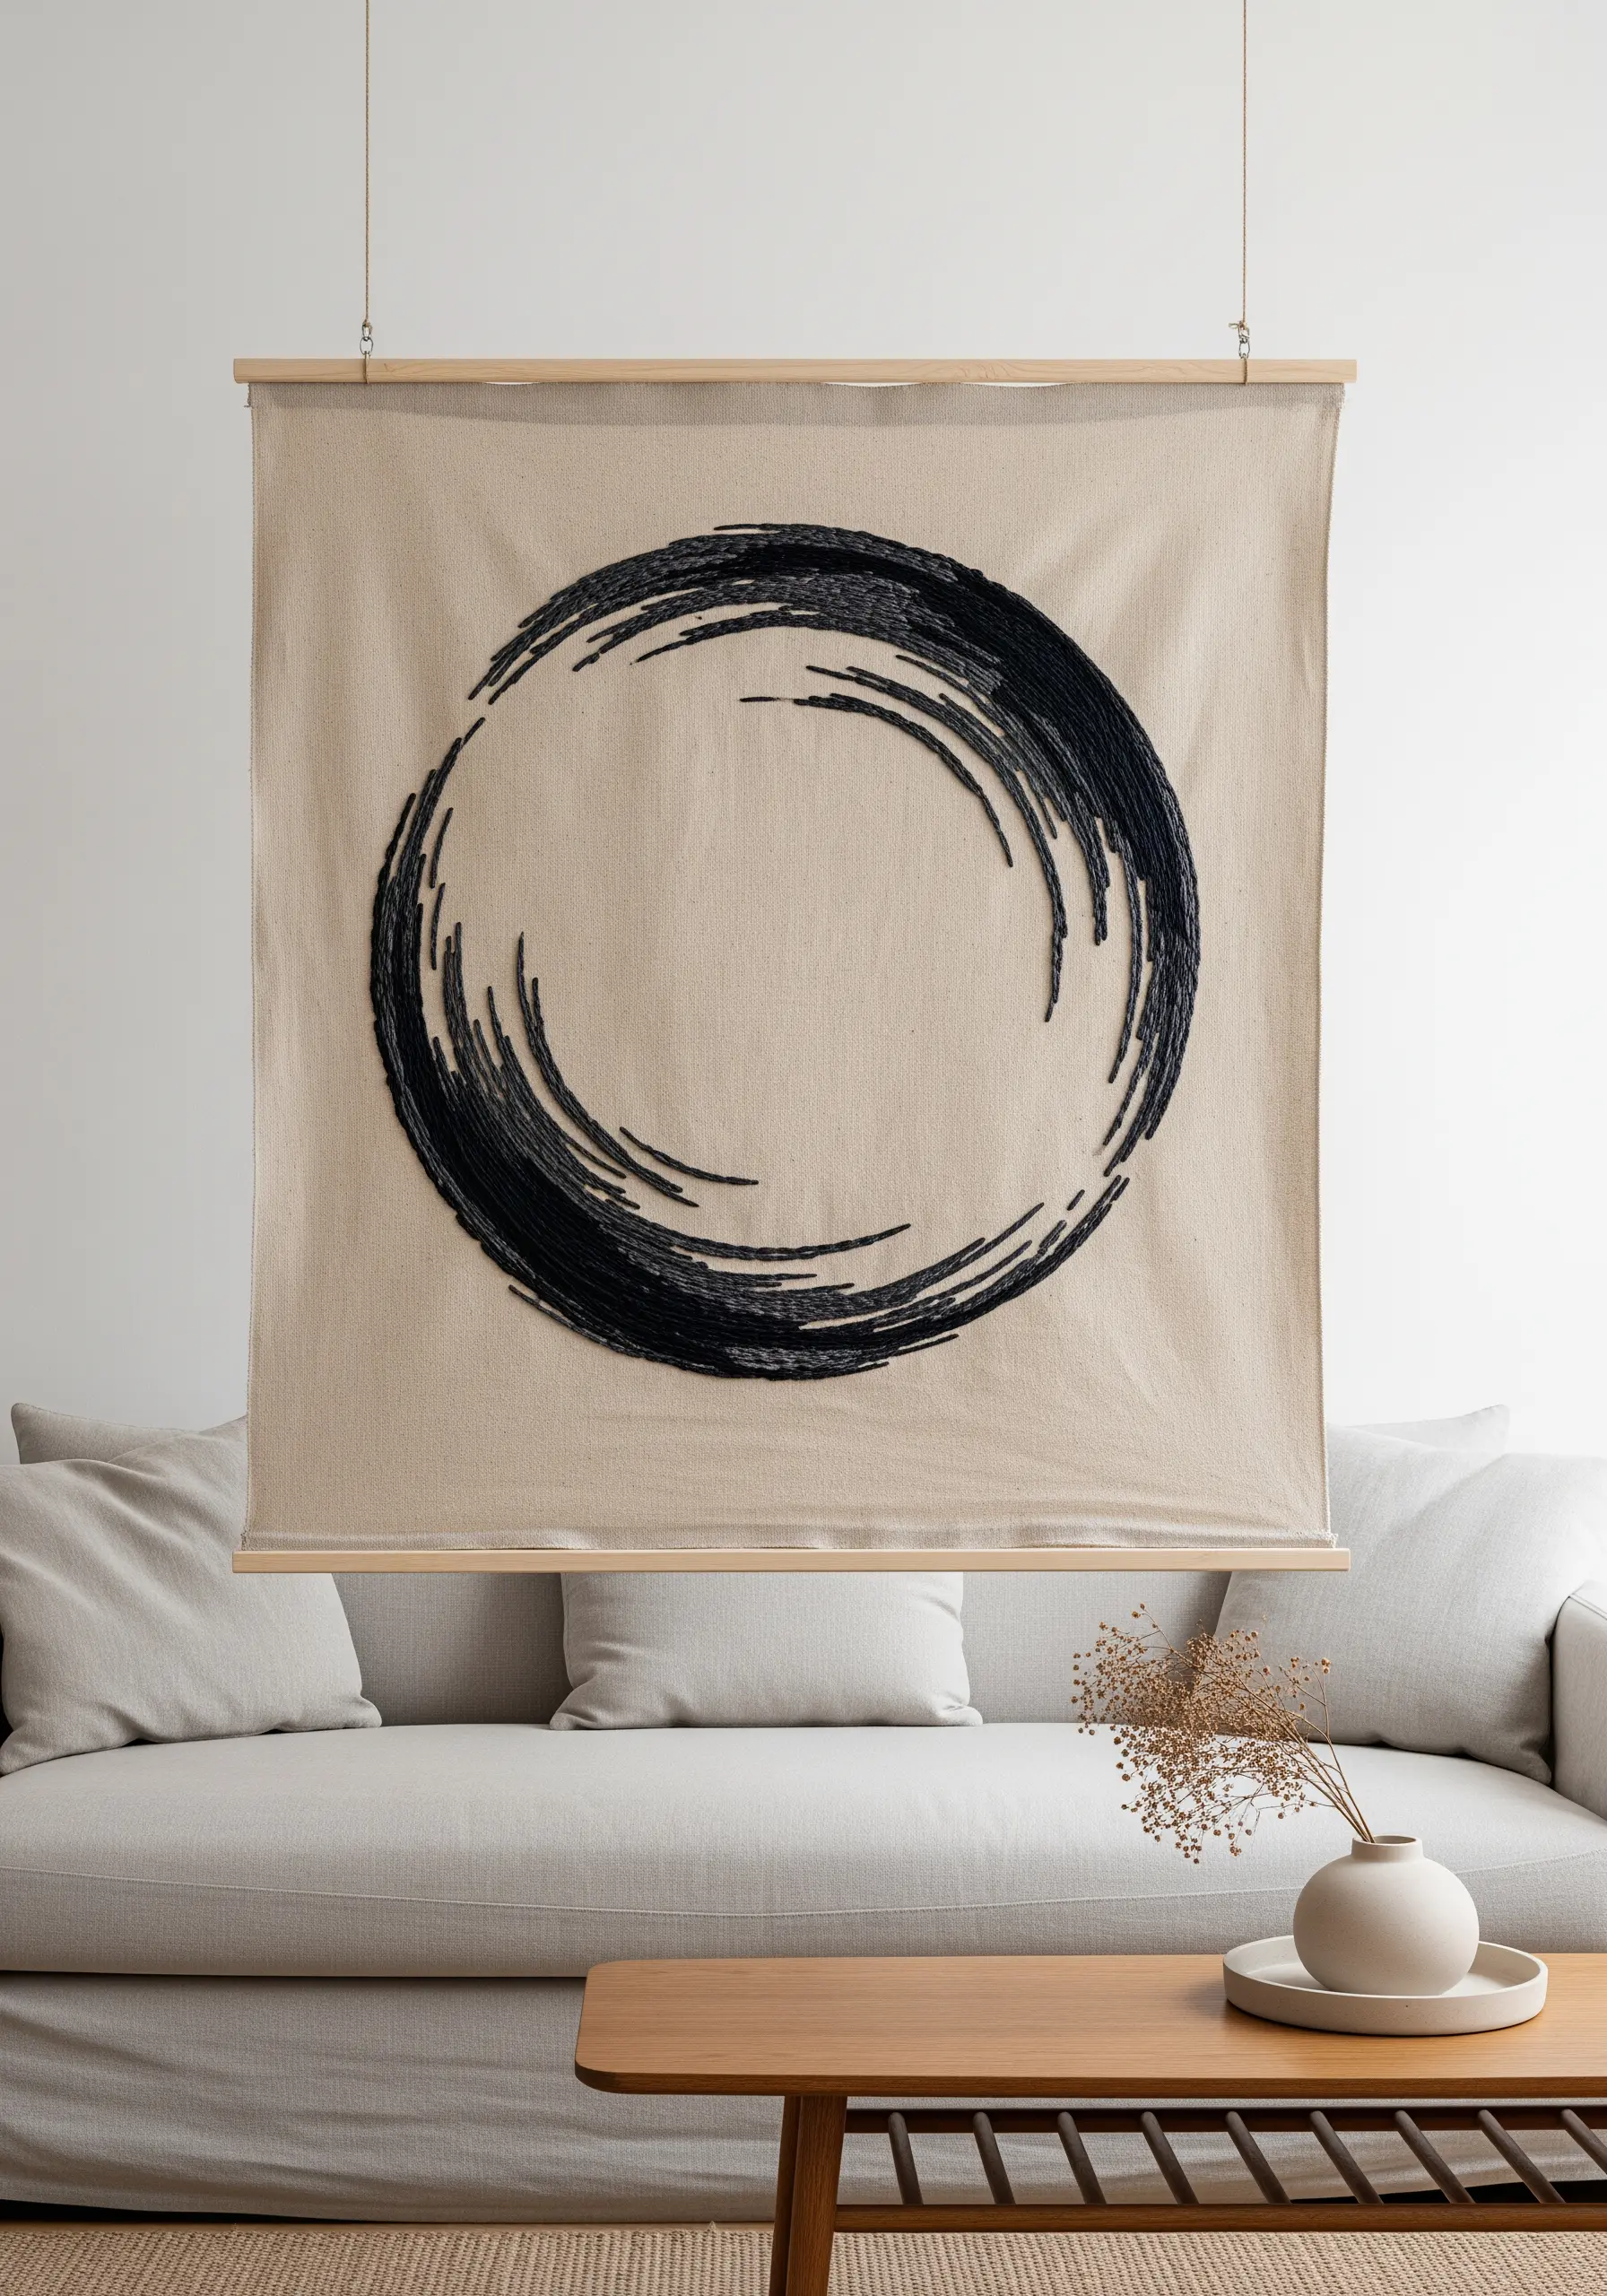
To capture the dynamic energy of a calligraphic brushstroke, abandon uniform fill stitches.
Instead, layer multi-directional straight stitches of varying lengths, allowing them to cross over one another to build texture and movement.
Use a thick thread, like a #5 pearl cotton, to mimic the bold weight of an ink-loaded brush.
This design is a meditative practice in capturing gesture, not achieving perfection, making it a powerful Japanese zen-inspired embroidery piece.
9. Sculpt Soft Cloudscapes with Layered Textures
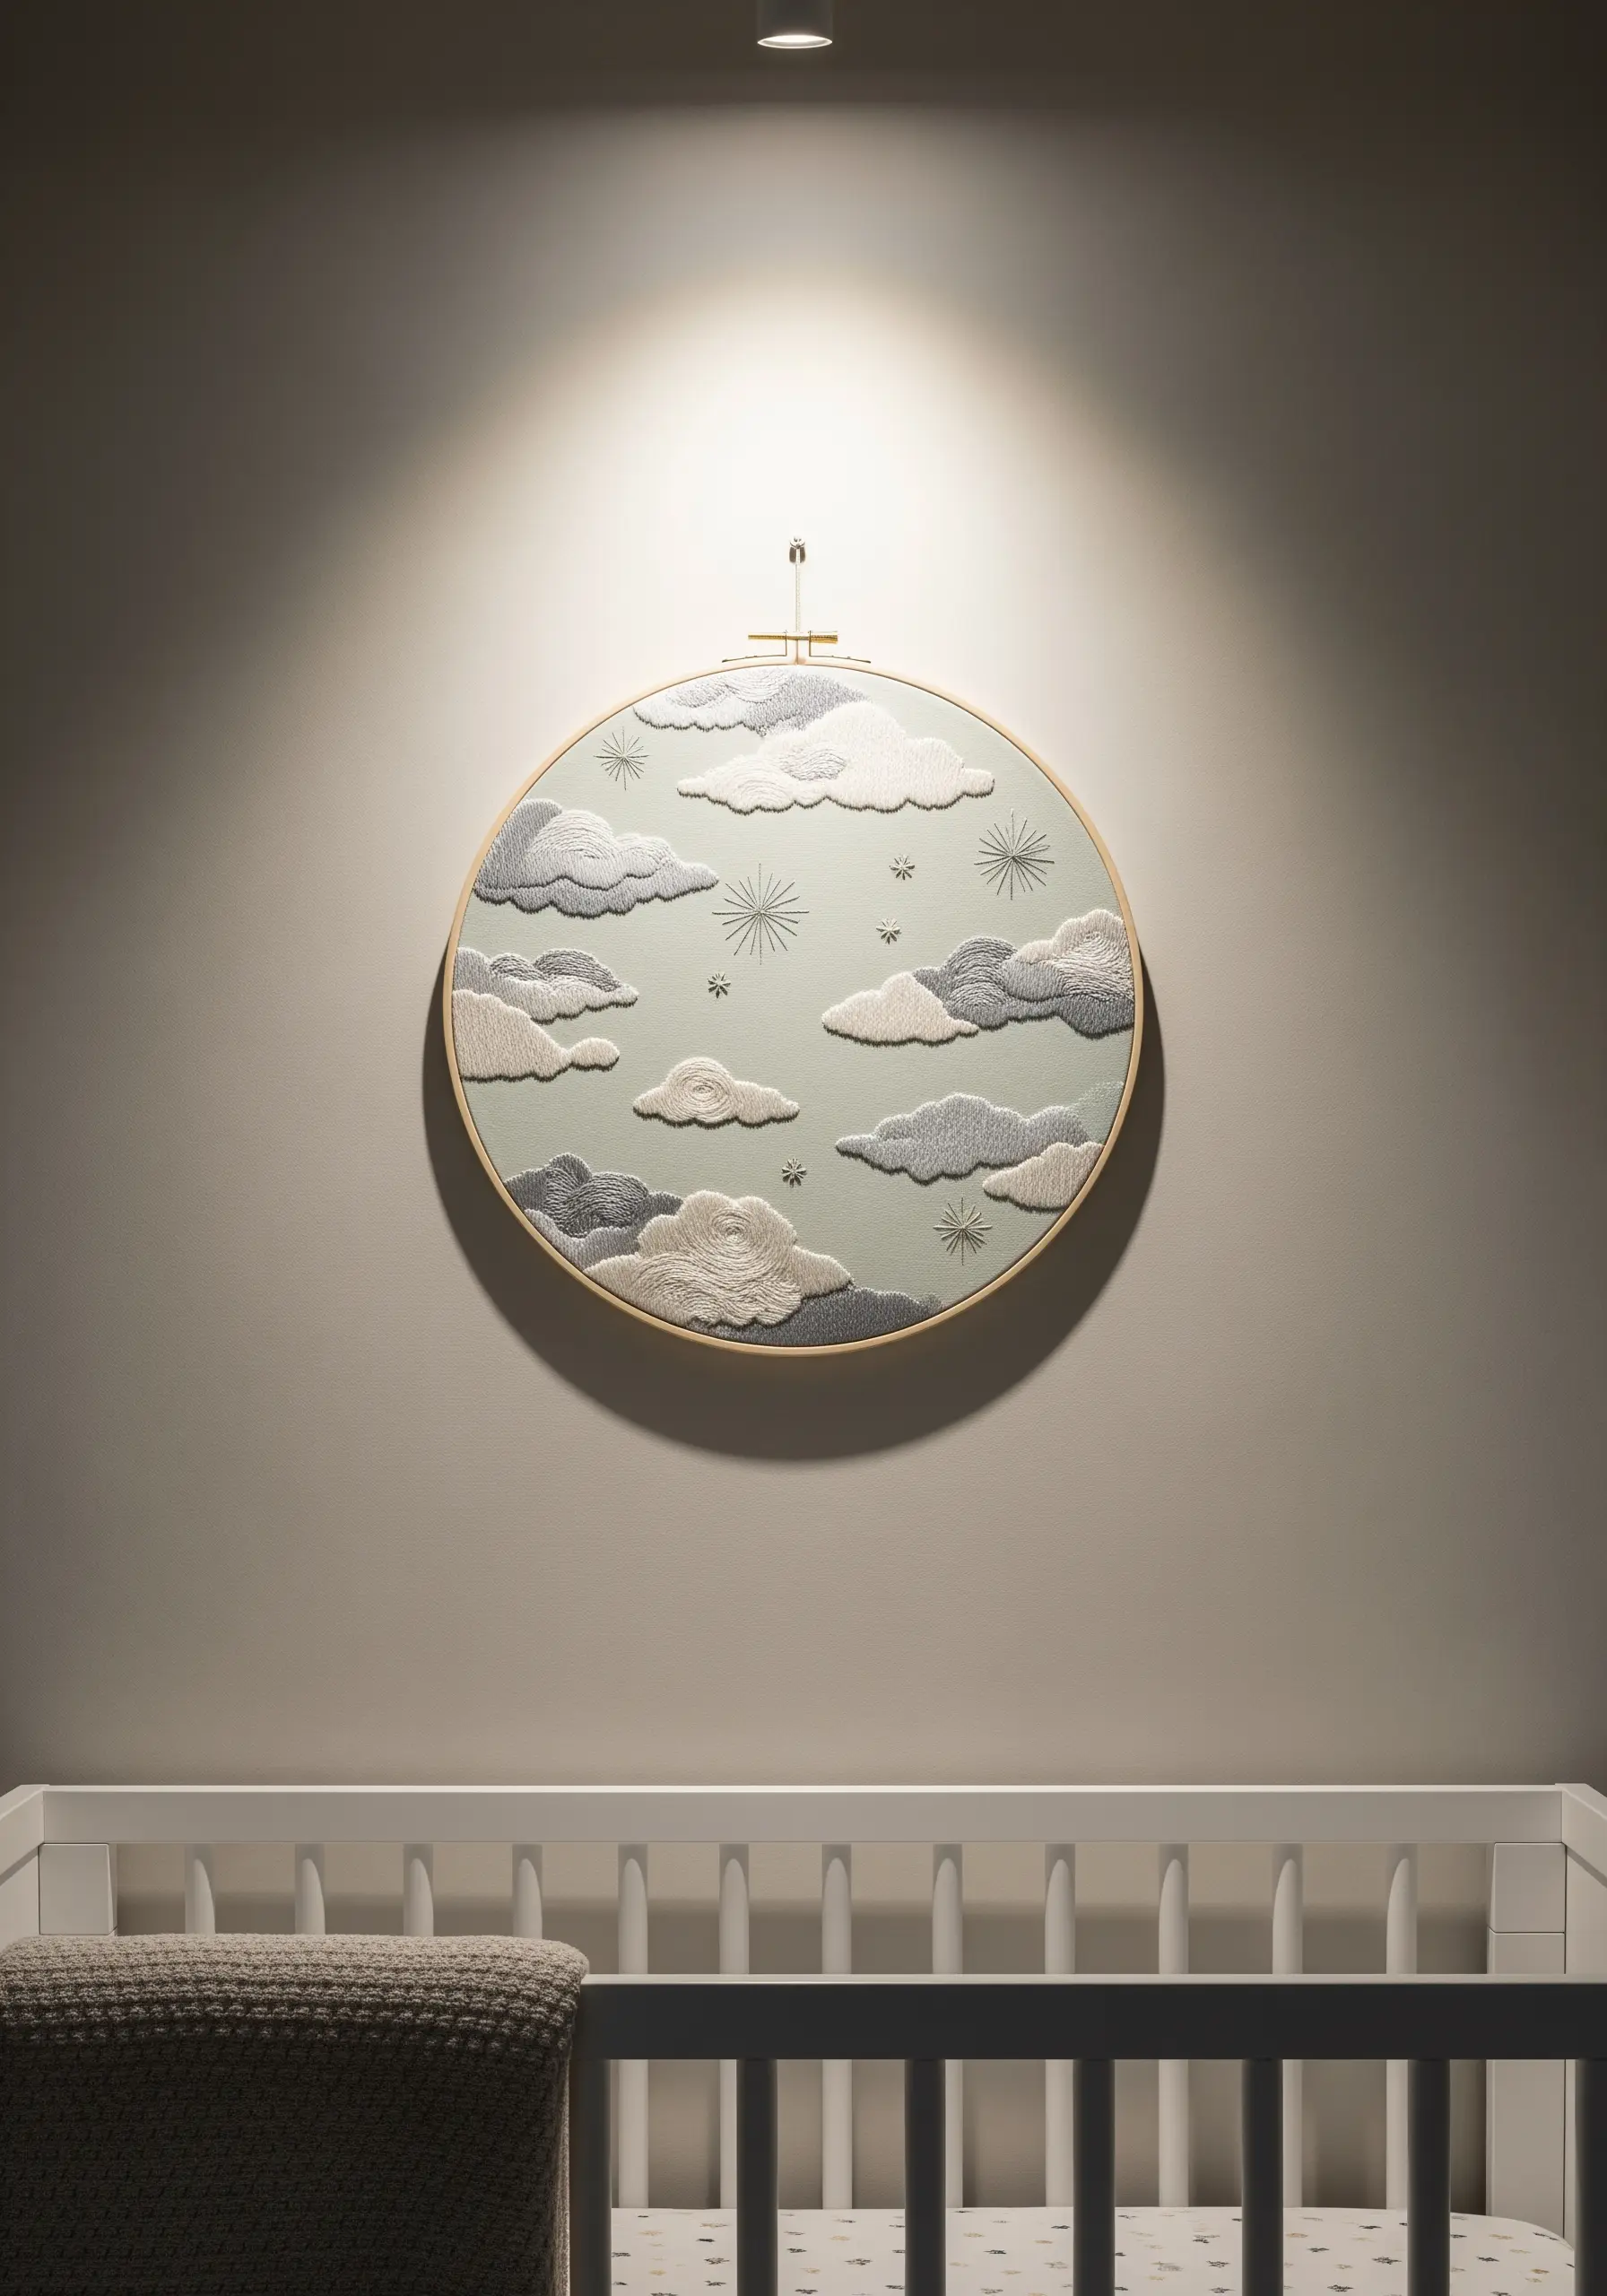
You can create wonderfully soft, dimensional clouds by combining different stitches and thread types.
Use a padded satin stitch for the smooth, rounded outlines of the clouds—this involves laying down a foundation of straight stitches before covering them with satin stitch for a raised effect.
Fill the centers with tightly packed French knots for a puffy, cumulus texture that invites touch.
This combination of smooth and dense textures makes for beautiful nursery stitch art.
10. Build Botanical Realism with Overlapping Layers
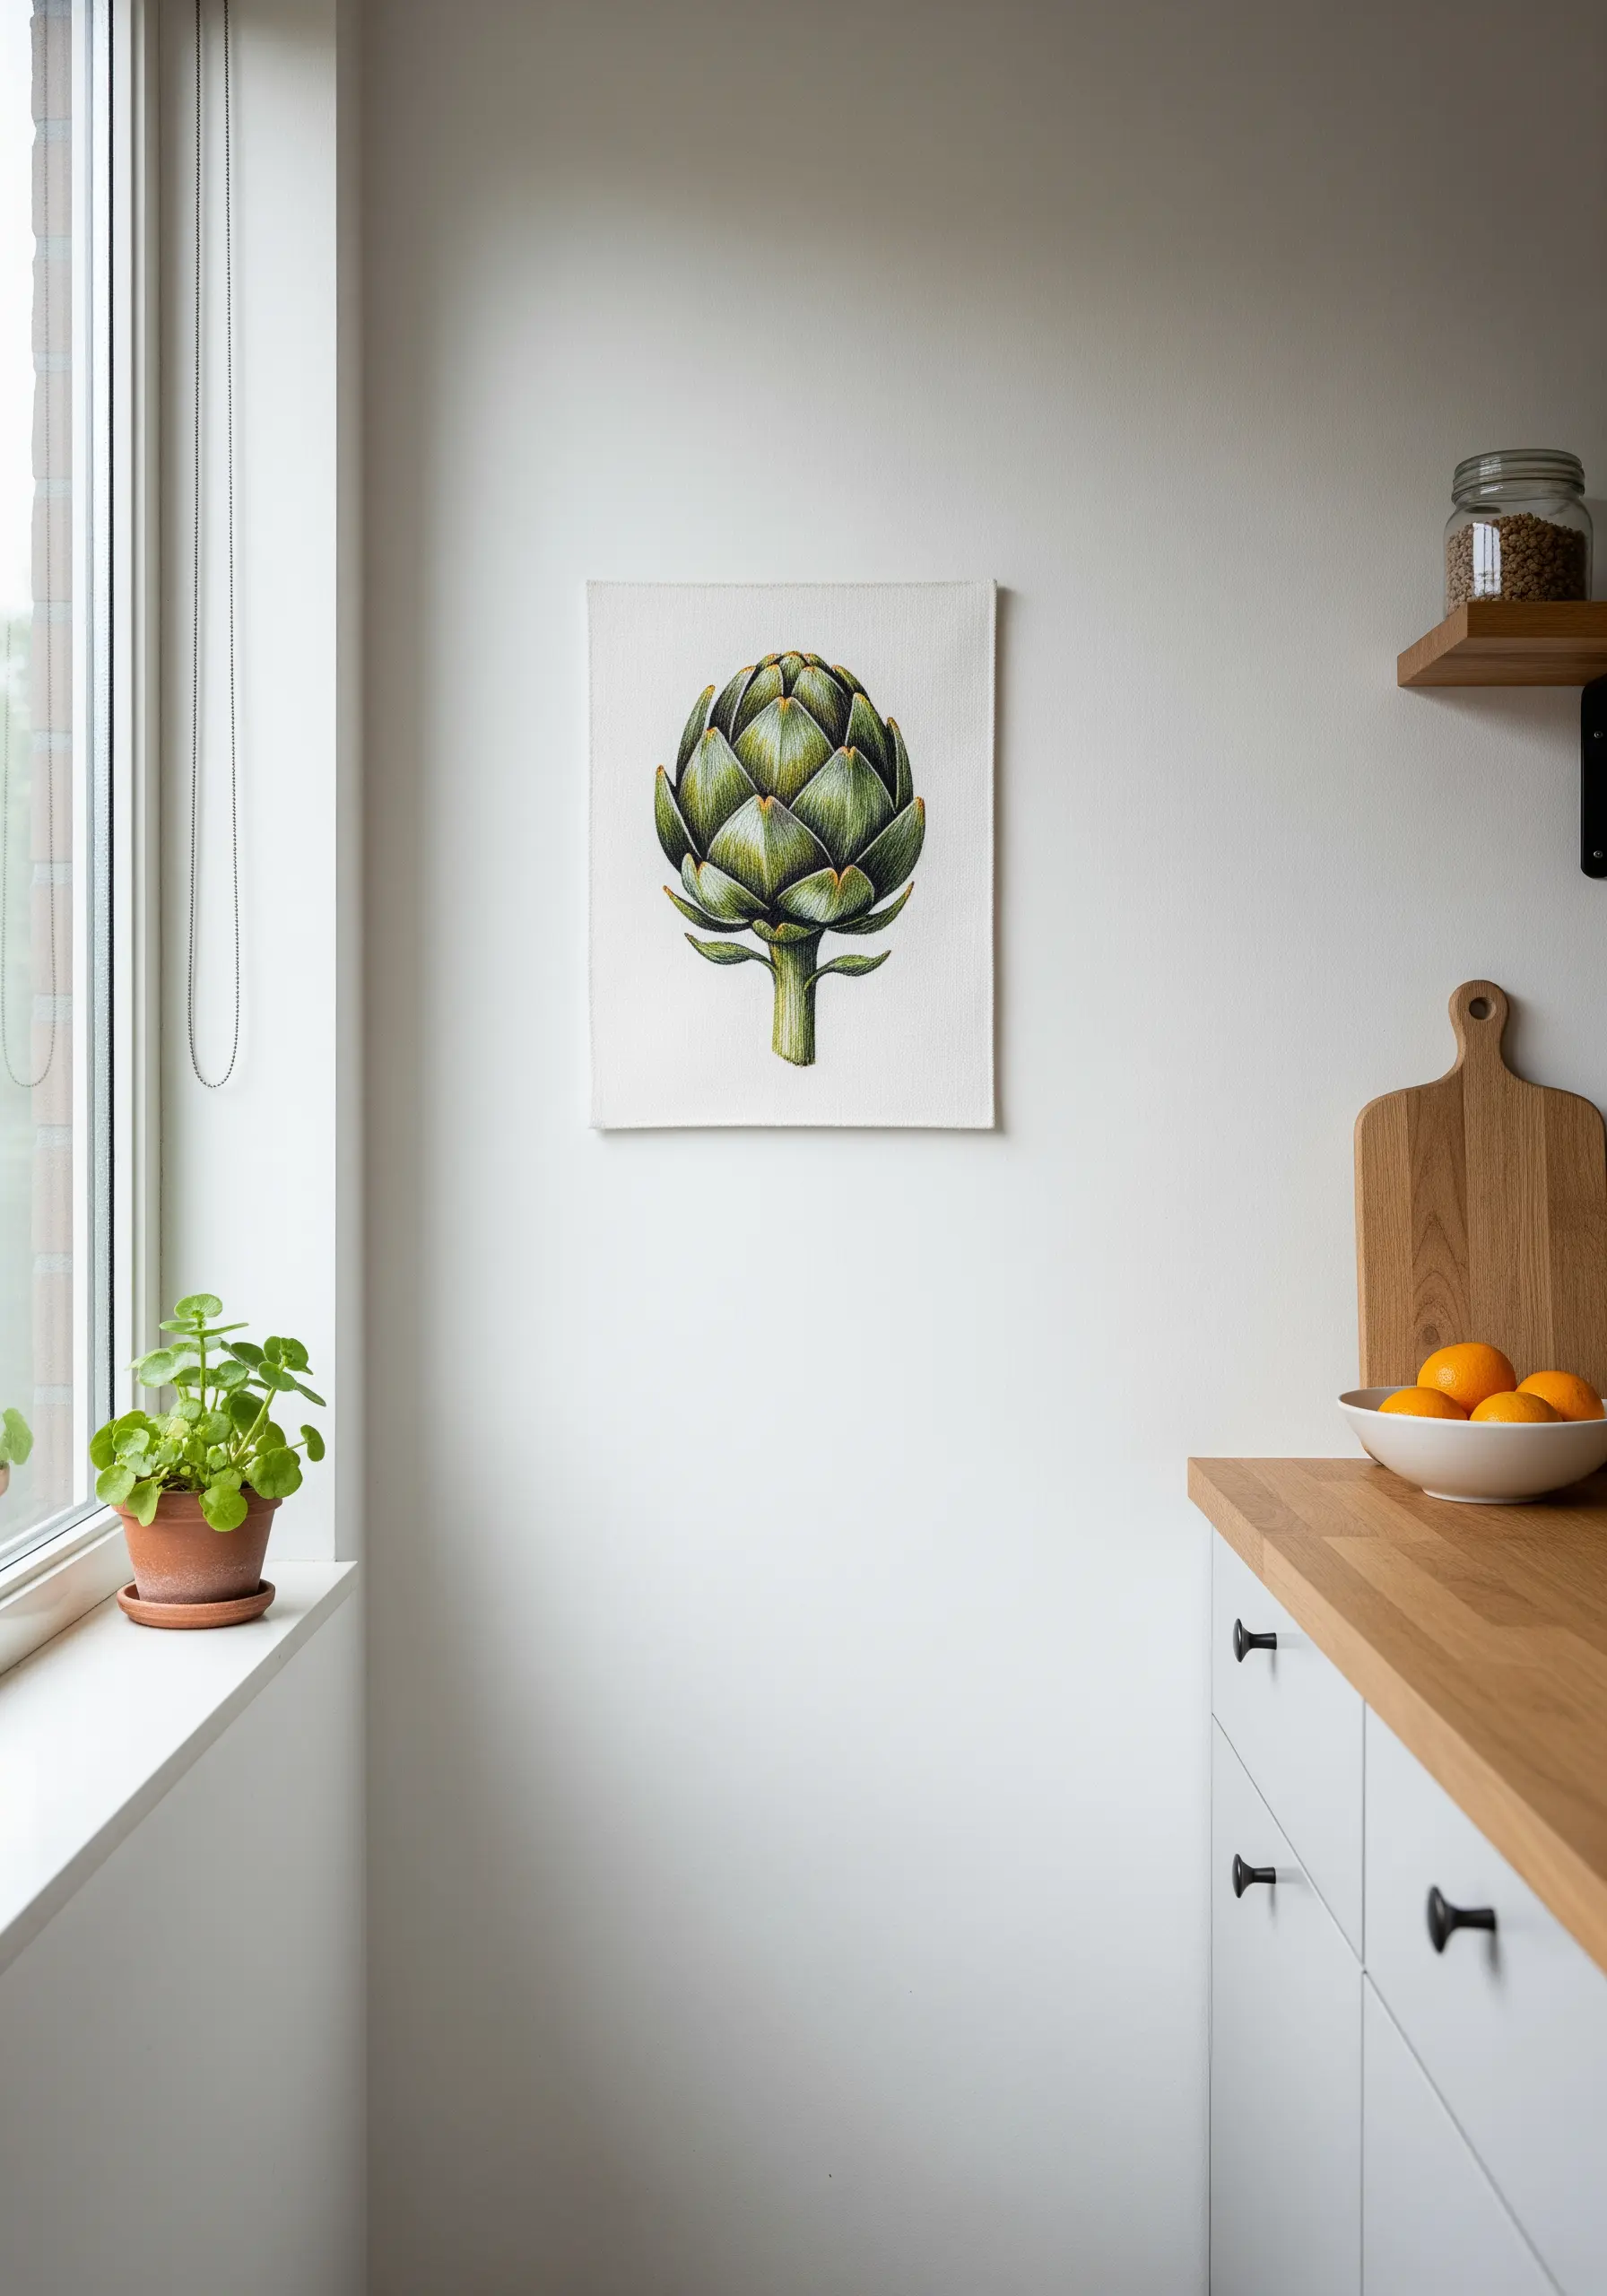
The secret to embroidering a complex subject like an artichoke is to stitch it in overlapping layers, just as it grows in nature.
Each ‘petal’ is its own small section of directional long-and-short stitch.
Begin with the innermost petals and work your way outwards, slightly overlapping each new layer on top of the previous one.
This simple method of construction creates convincing depth and shadow, turning a flat pattern into a three-dimensional study.
11. Stitch Architectural Illusion with Shading
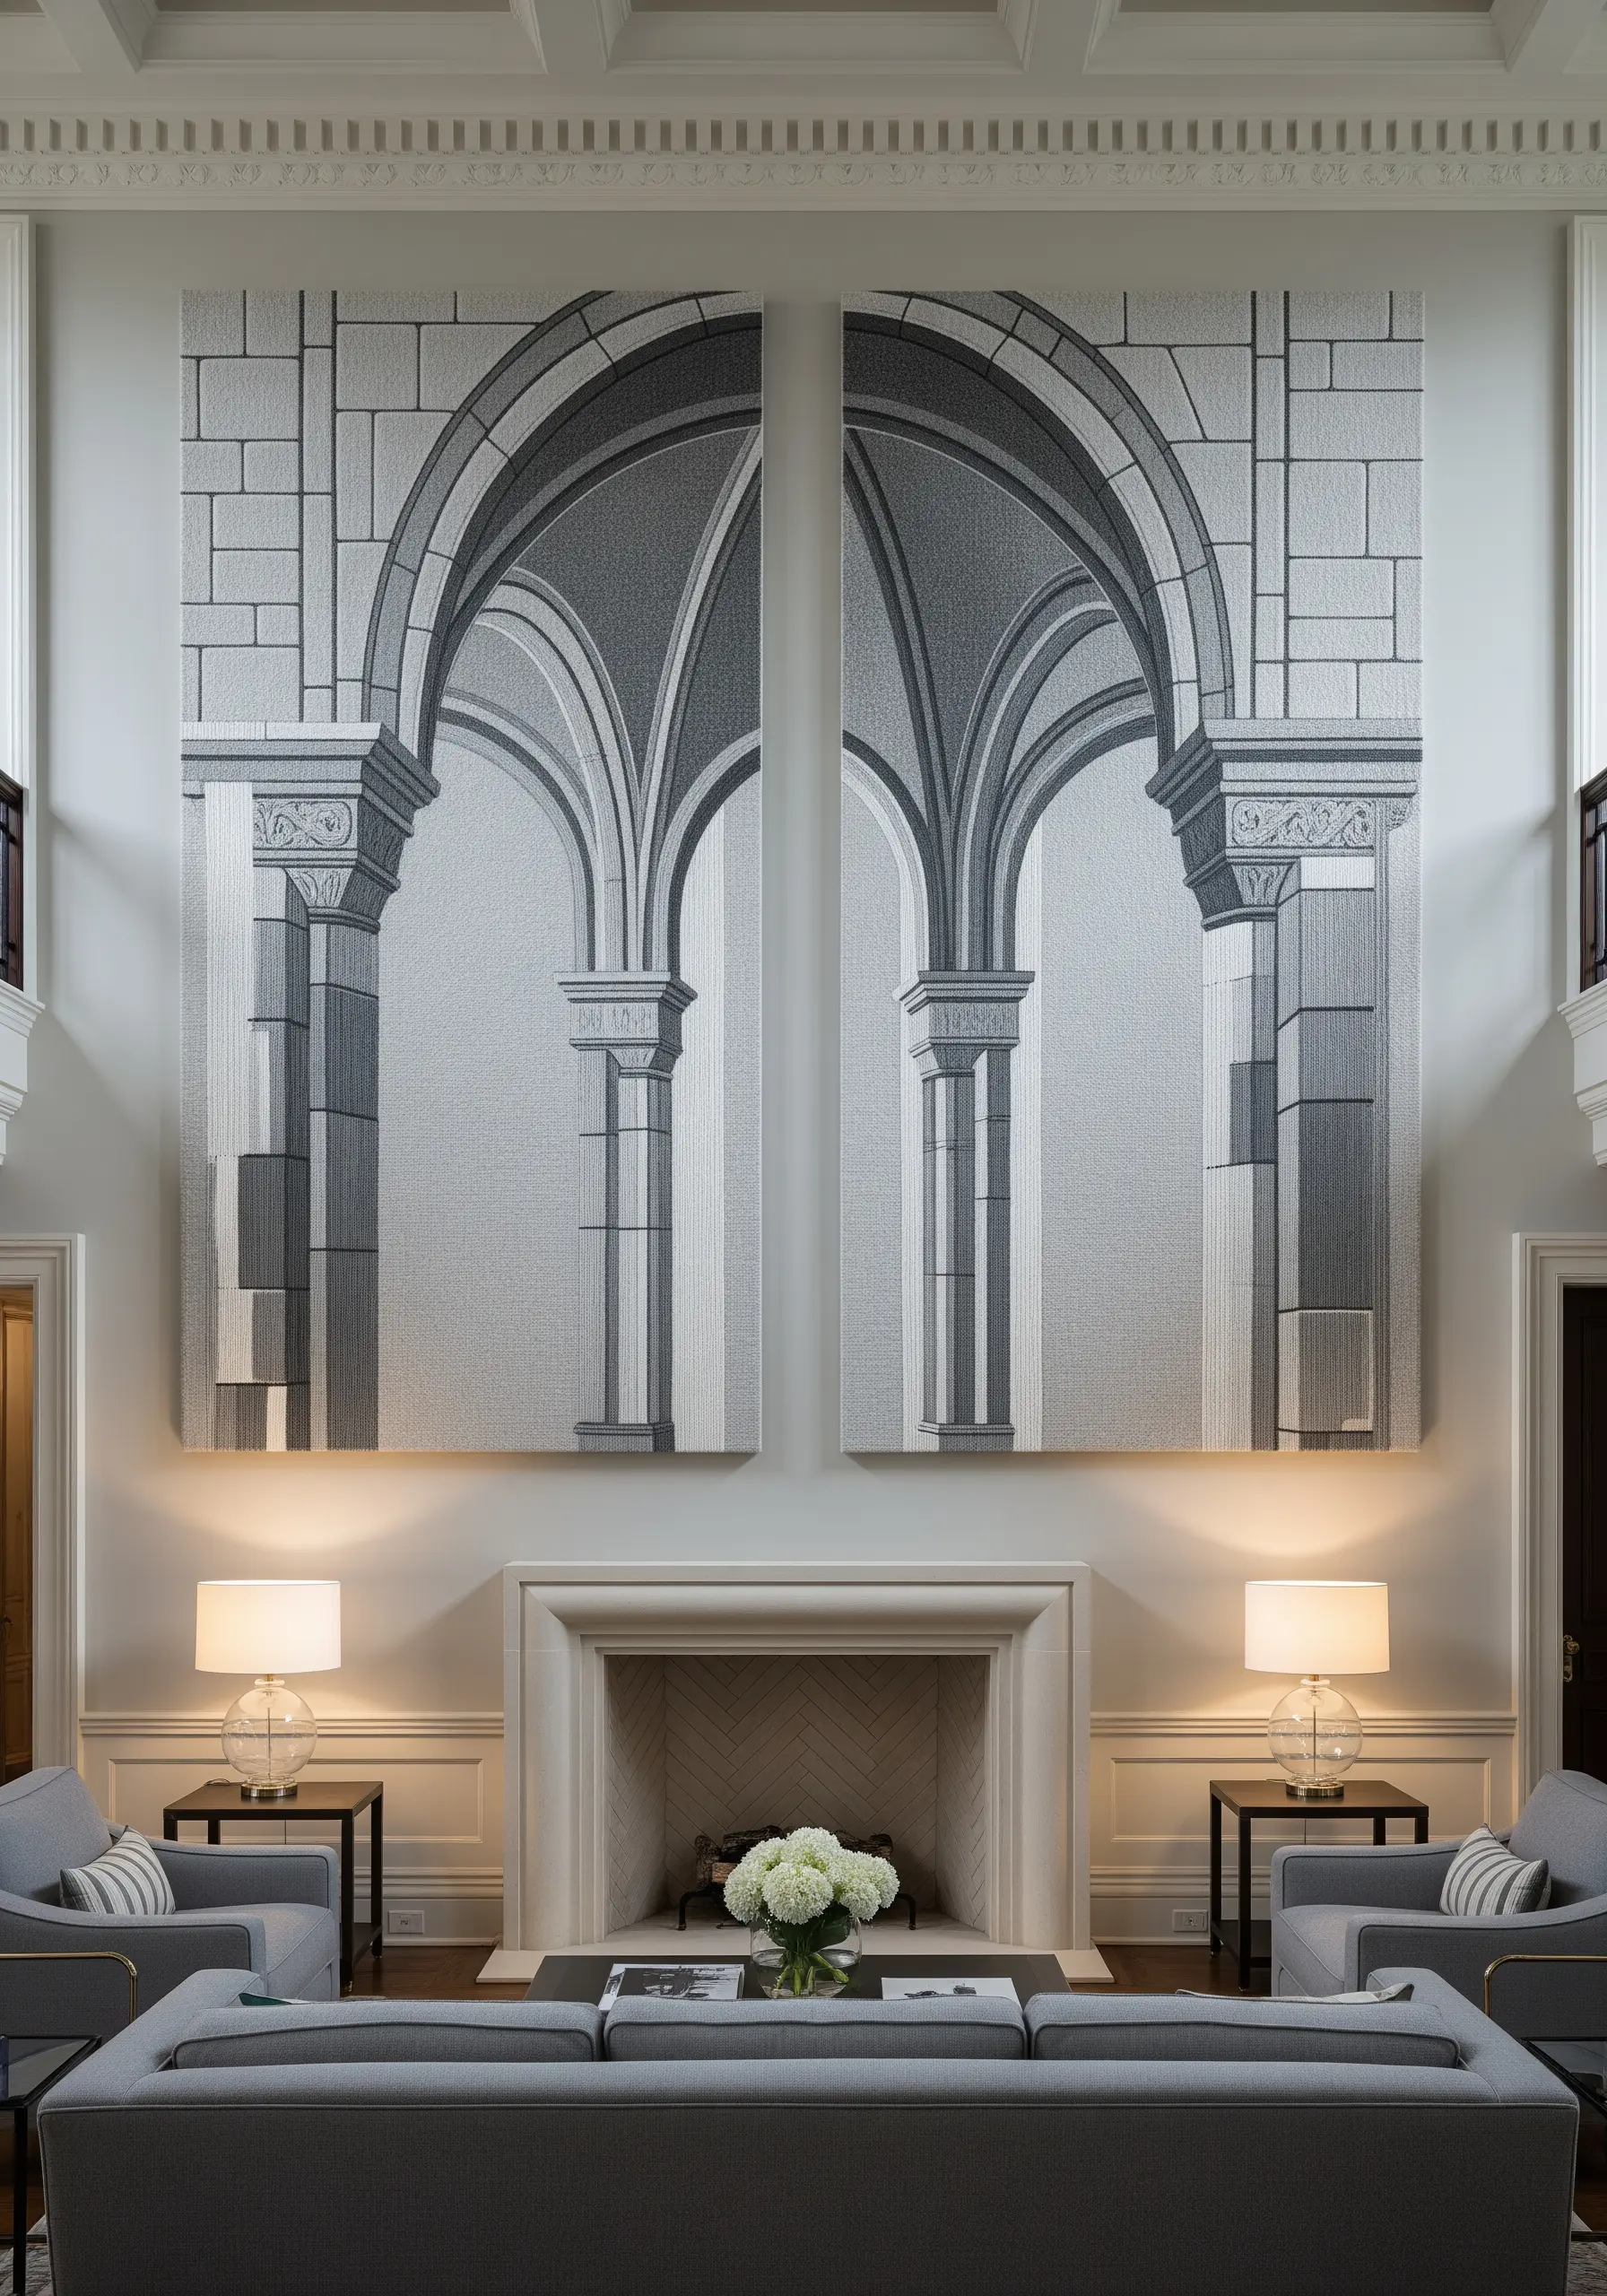
Create a stunning architectural illusion, or trompe-l’œil, using methodical color blocking and directional stitches.
For the stone blocks, use perfectly parallel horizontal and vertical satin stitches.
For the arches, define the edges with a sharp split stitch, then fill with satin stitches that follow the curve.
The entire illusion of depth comes from a well-chosen palette of 4-5 shades of grey, applied in blocks to mimic light and shadow on carved stone.
12. Create Serene Rhythm with Concentric Stitches
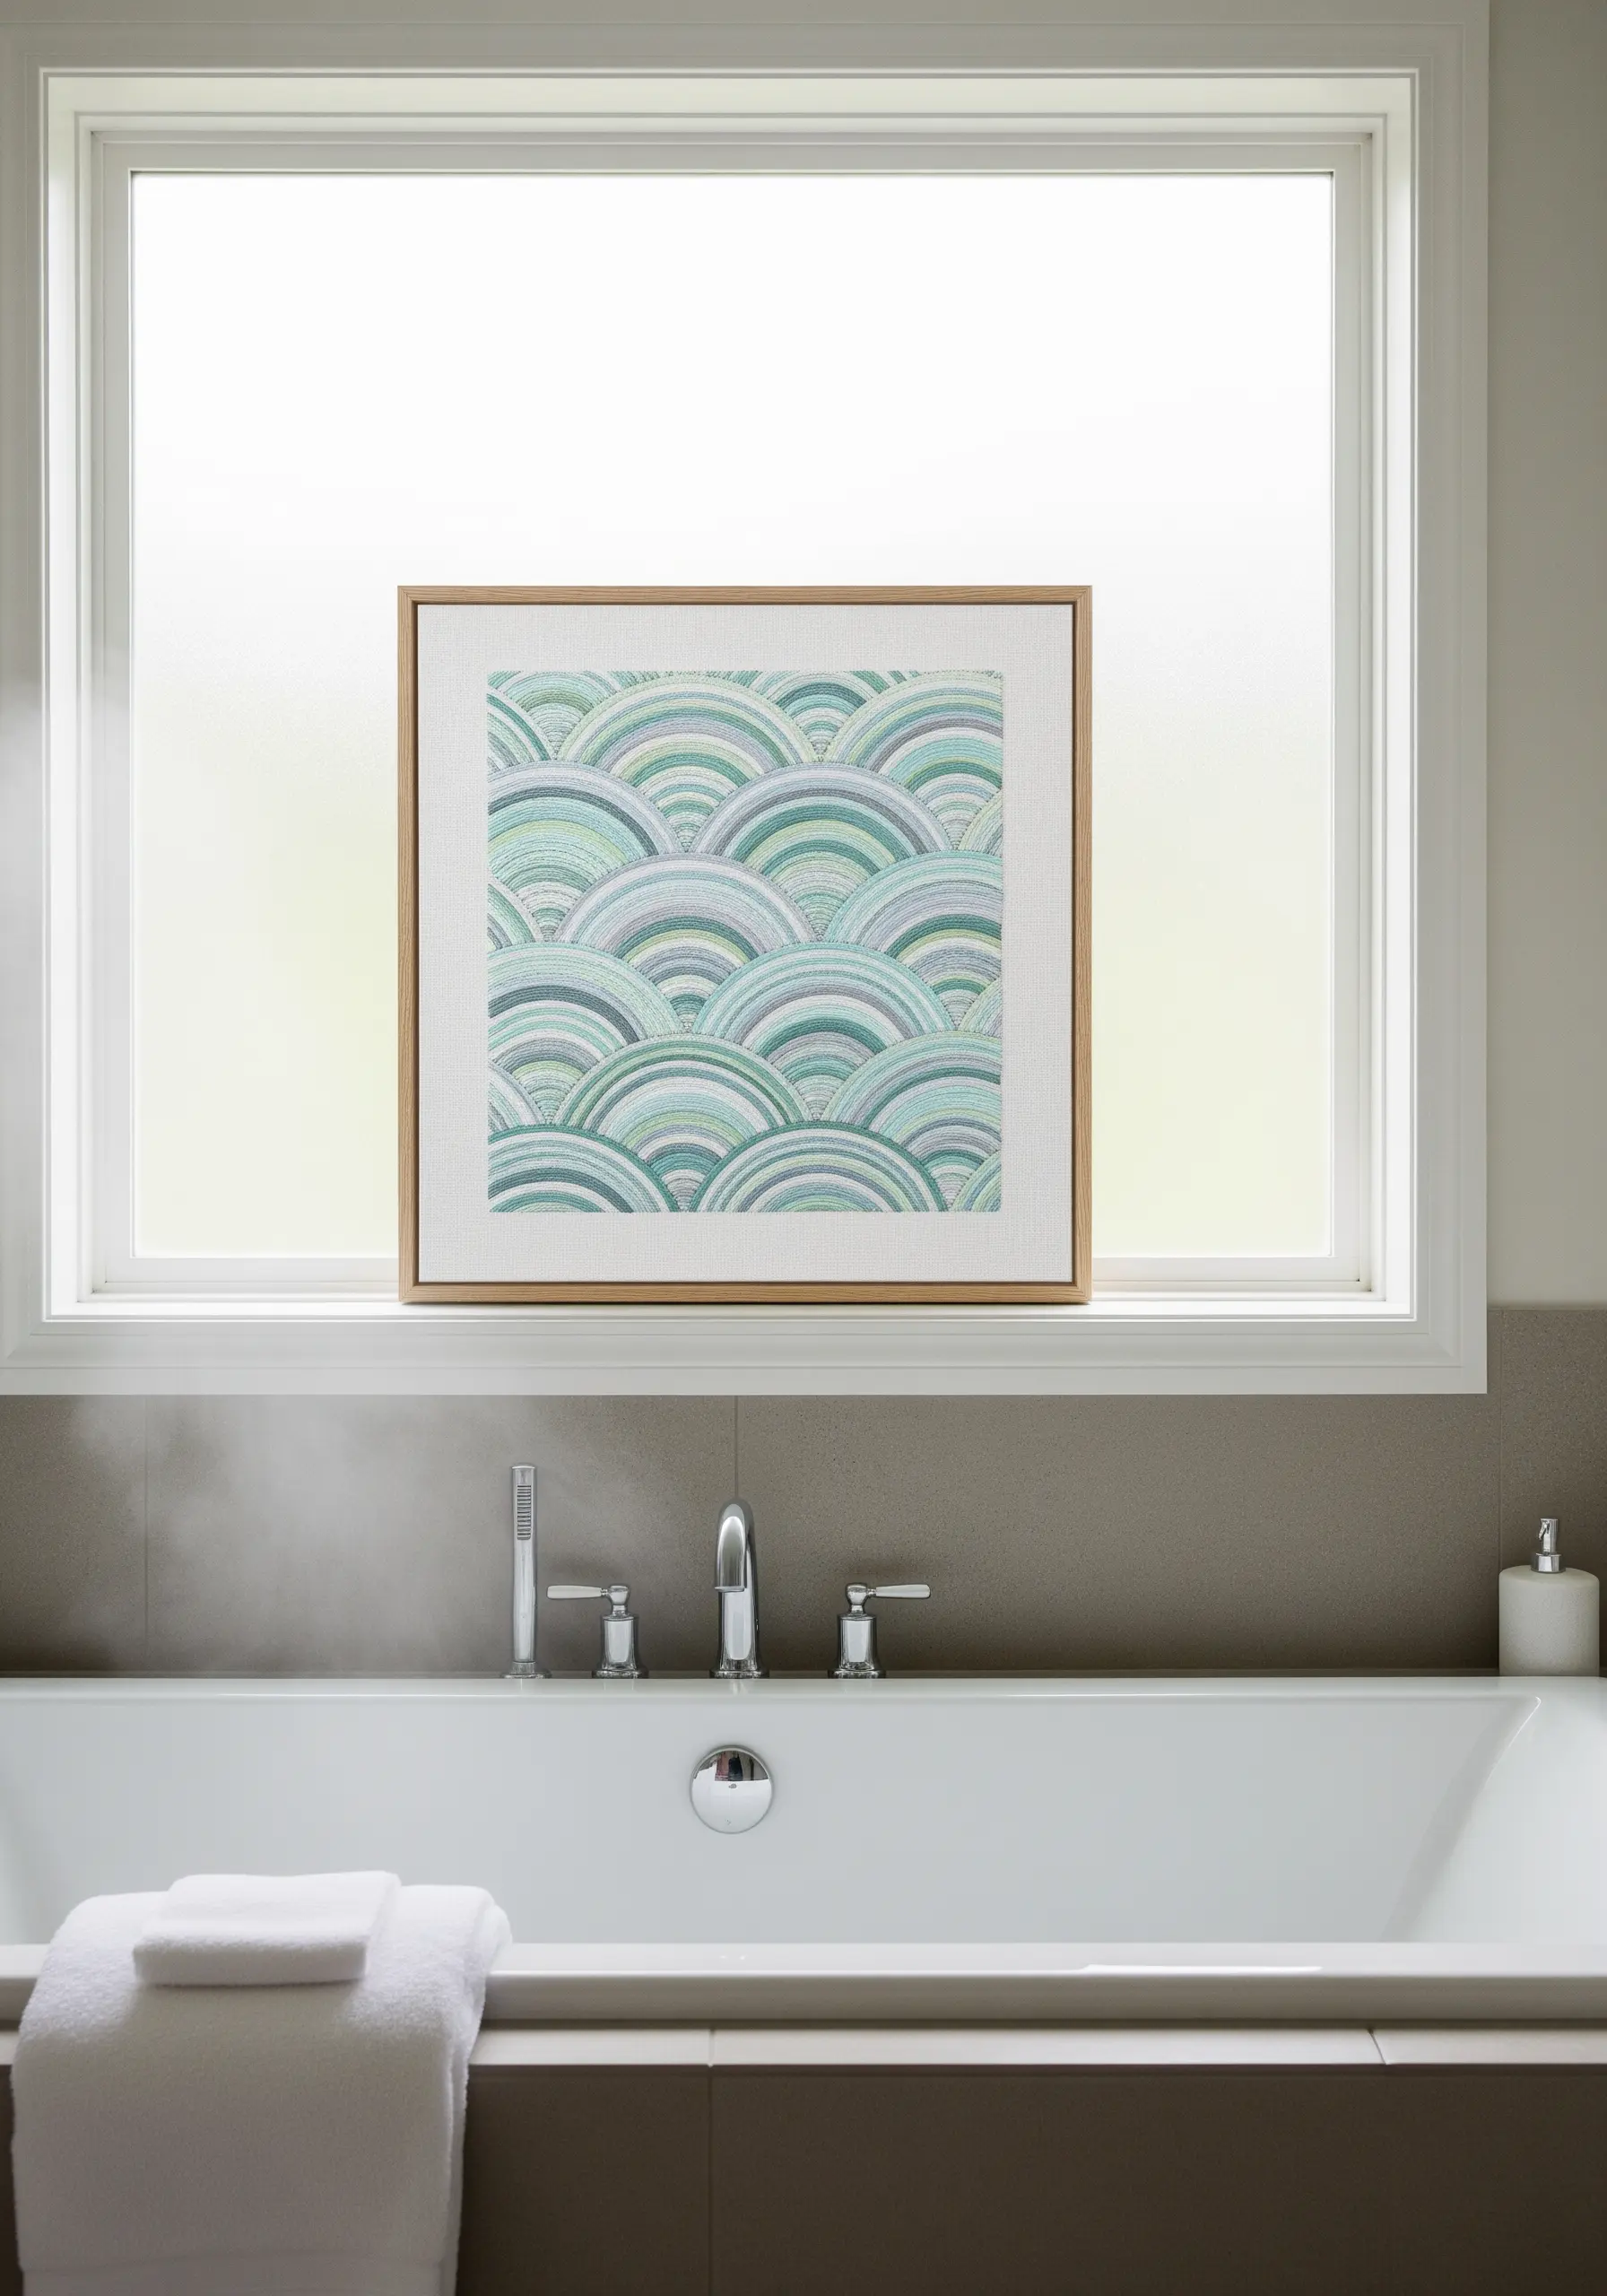
This calming pattern achieves its effect through repetition and subtle texture.
First, establish a clean edge for each scallop with a split stitch outline.
Instead of a flat fill, work inwards with concentric rows of backstitch or chain stitch.
This approach builds a gentle, grooved texture that catches the light beautifully and adds a sense of quiet movement, perfect for creating peaceful abstract embroidery patterns.
13. Design Cascading Foliage with Fishbone Stitch
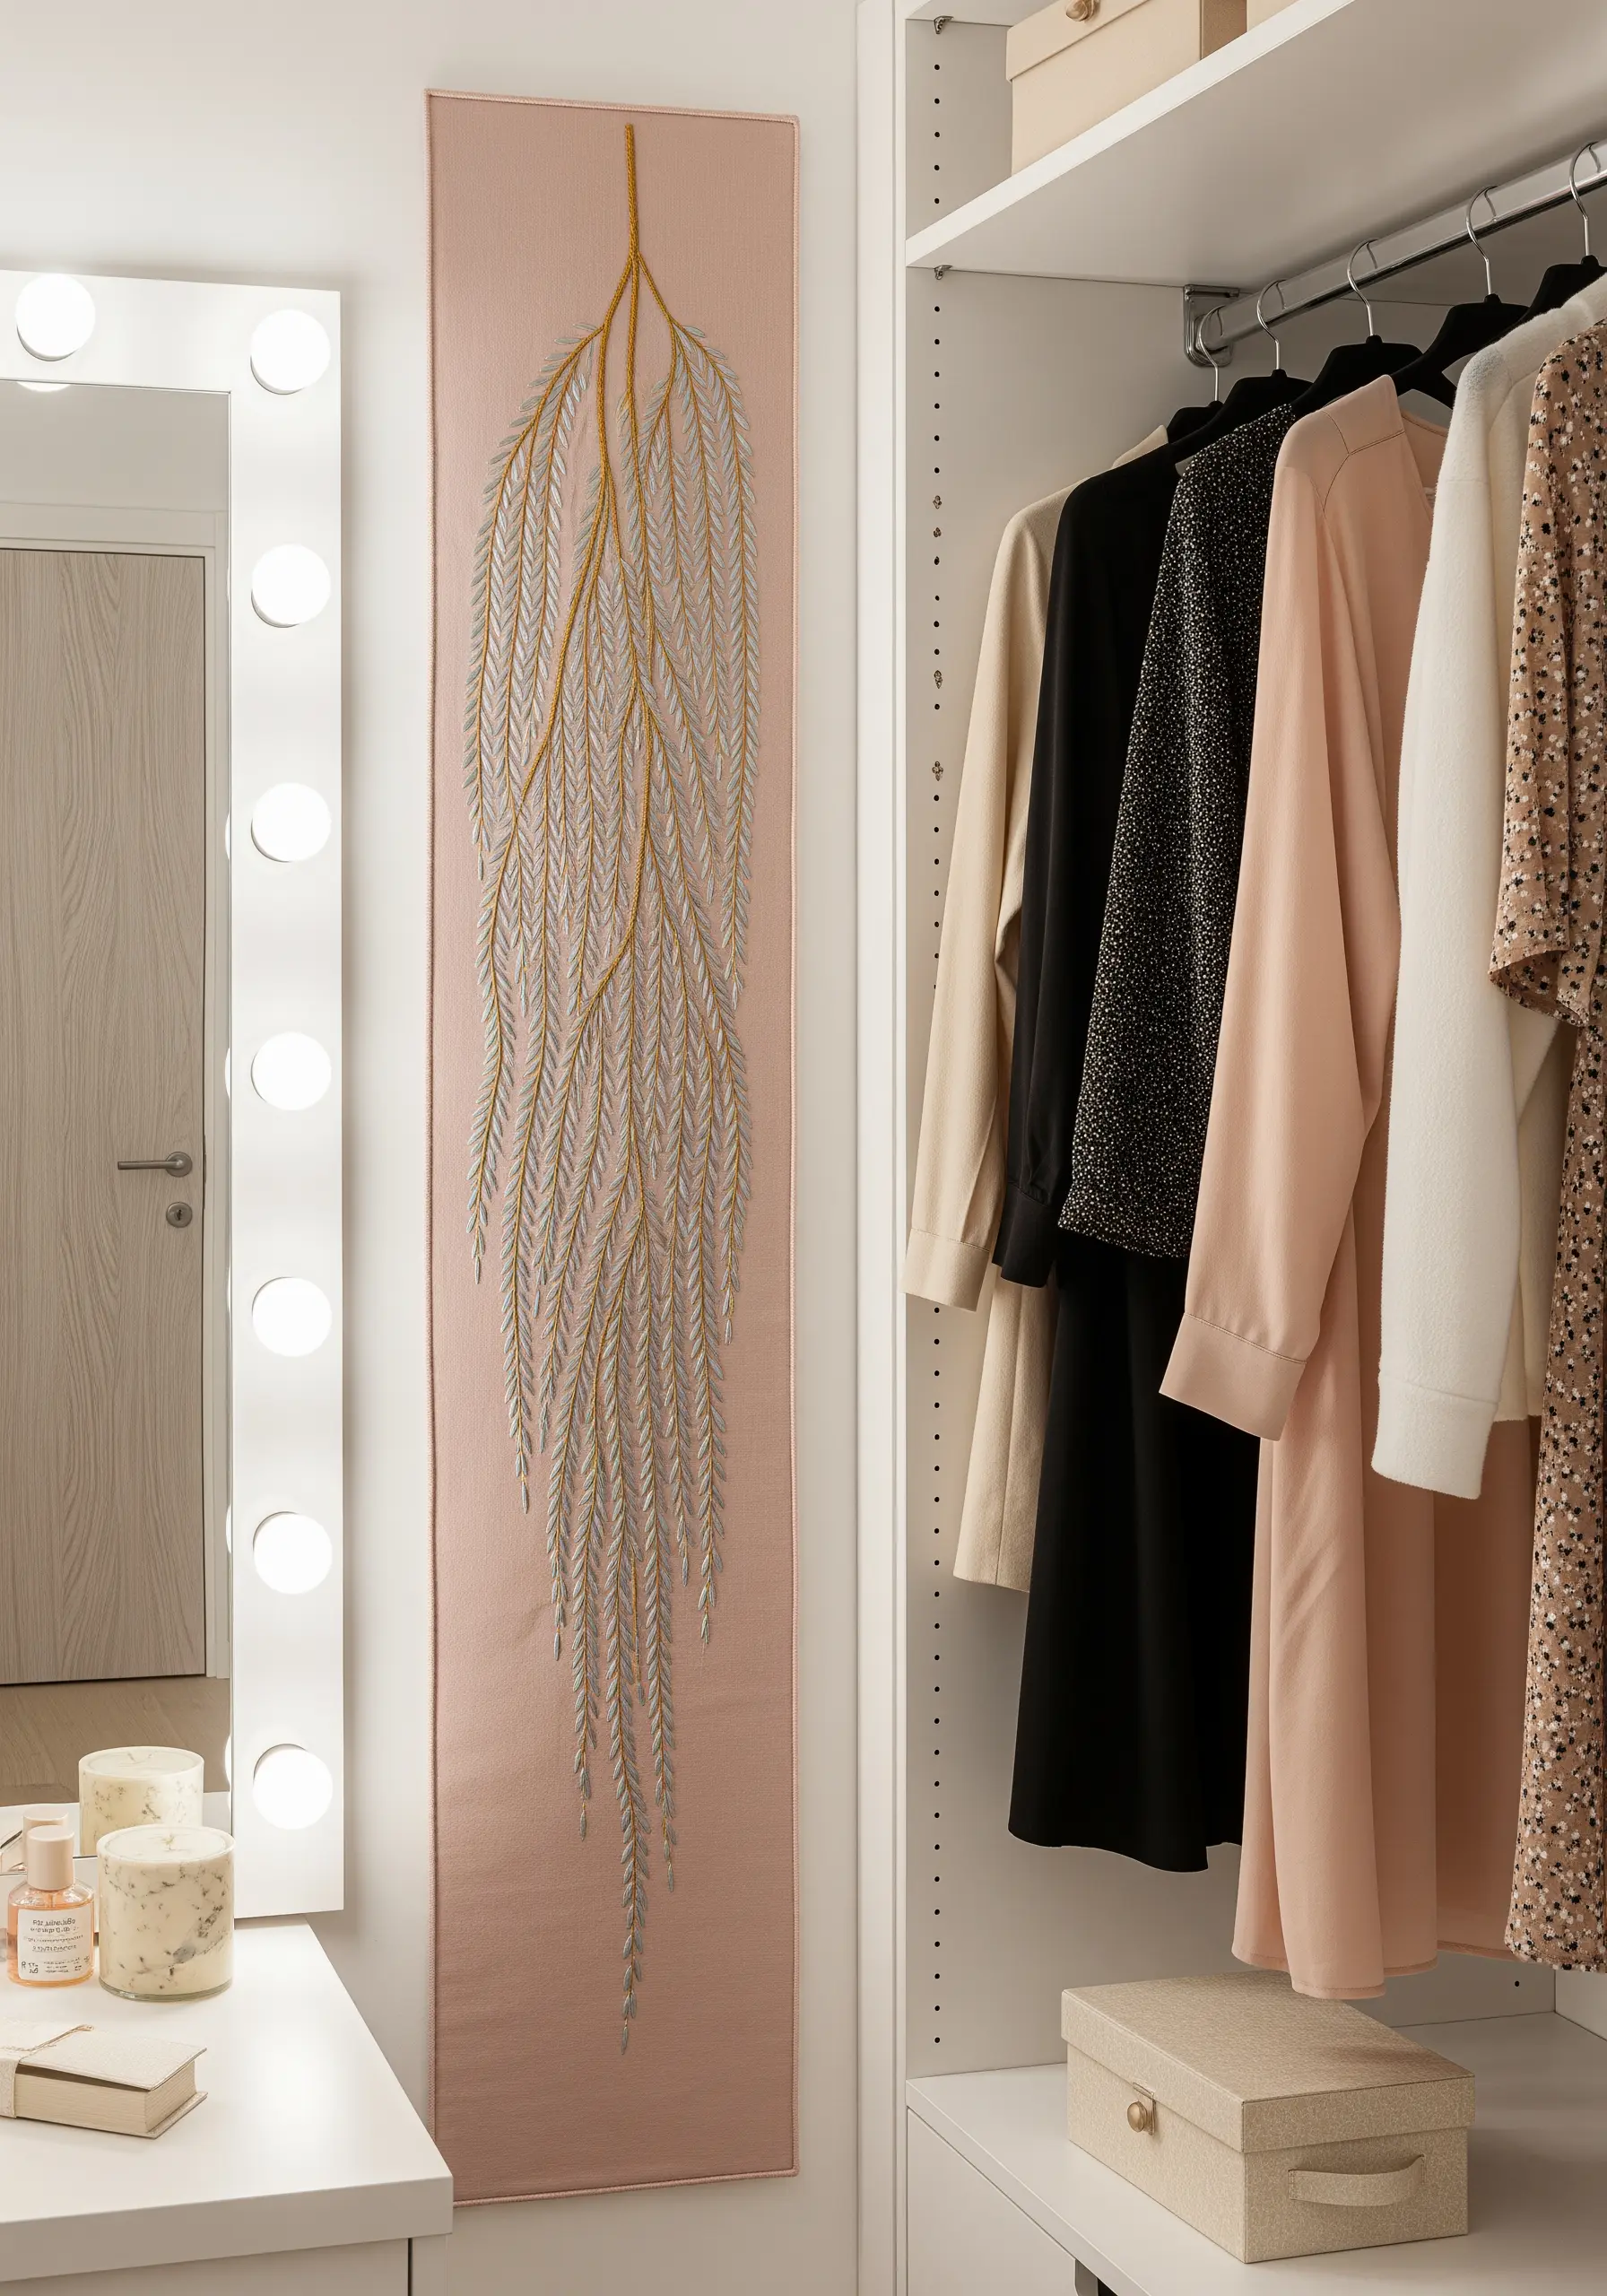
The elegant drape of a weeping willow is perfectly captured with the fishbone stitch.
Begin with a central spine using stem stitch, then work your angled leaf stitches off either side, creating a beautiful, organic herringbone effect.
For a touch of quiet luxury, combine one strand of metallic silver floss with one strand of matte grey.
This pairing adds a delicate shimmer that elevates the entire piece, turning a simple branch into a sophisticated work of art.
14. Map Topographic Contours with Simple Stitches
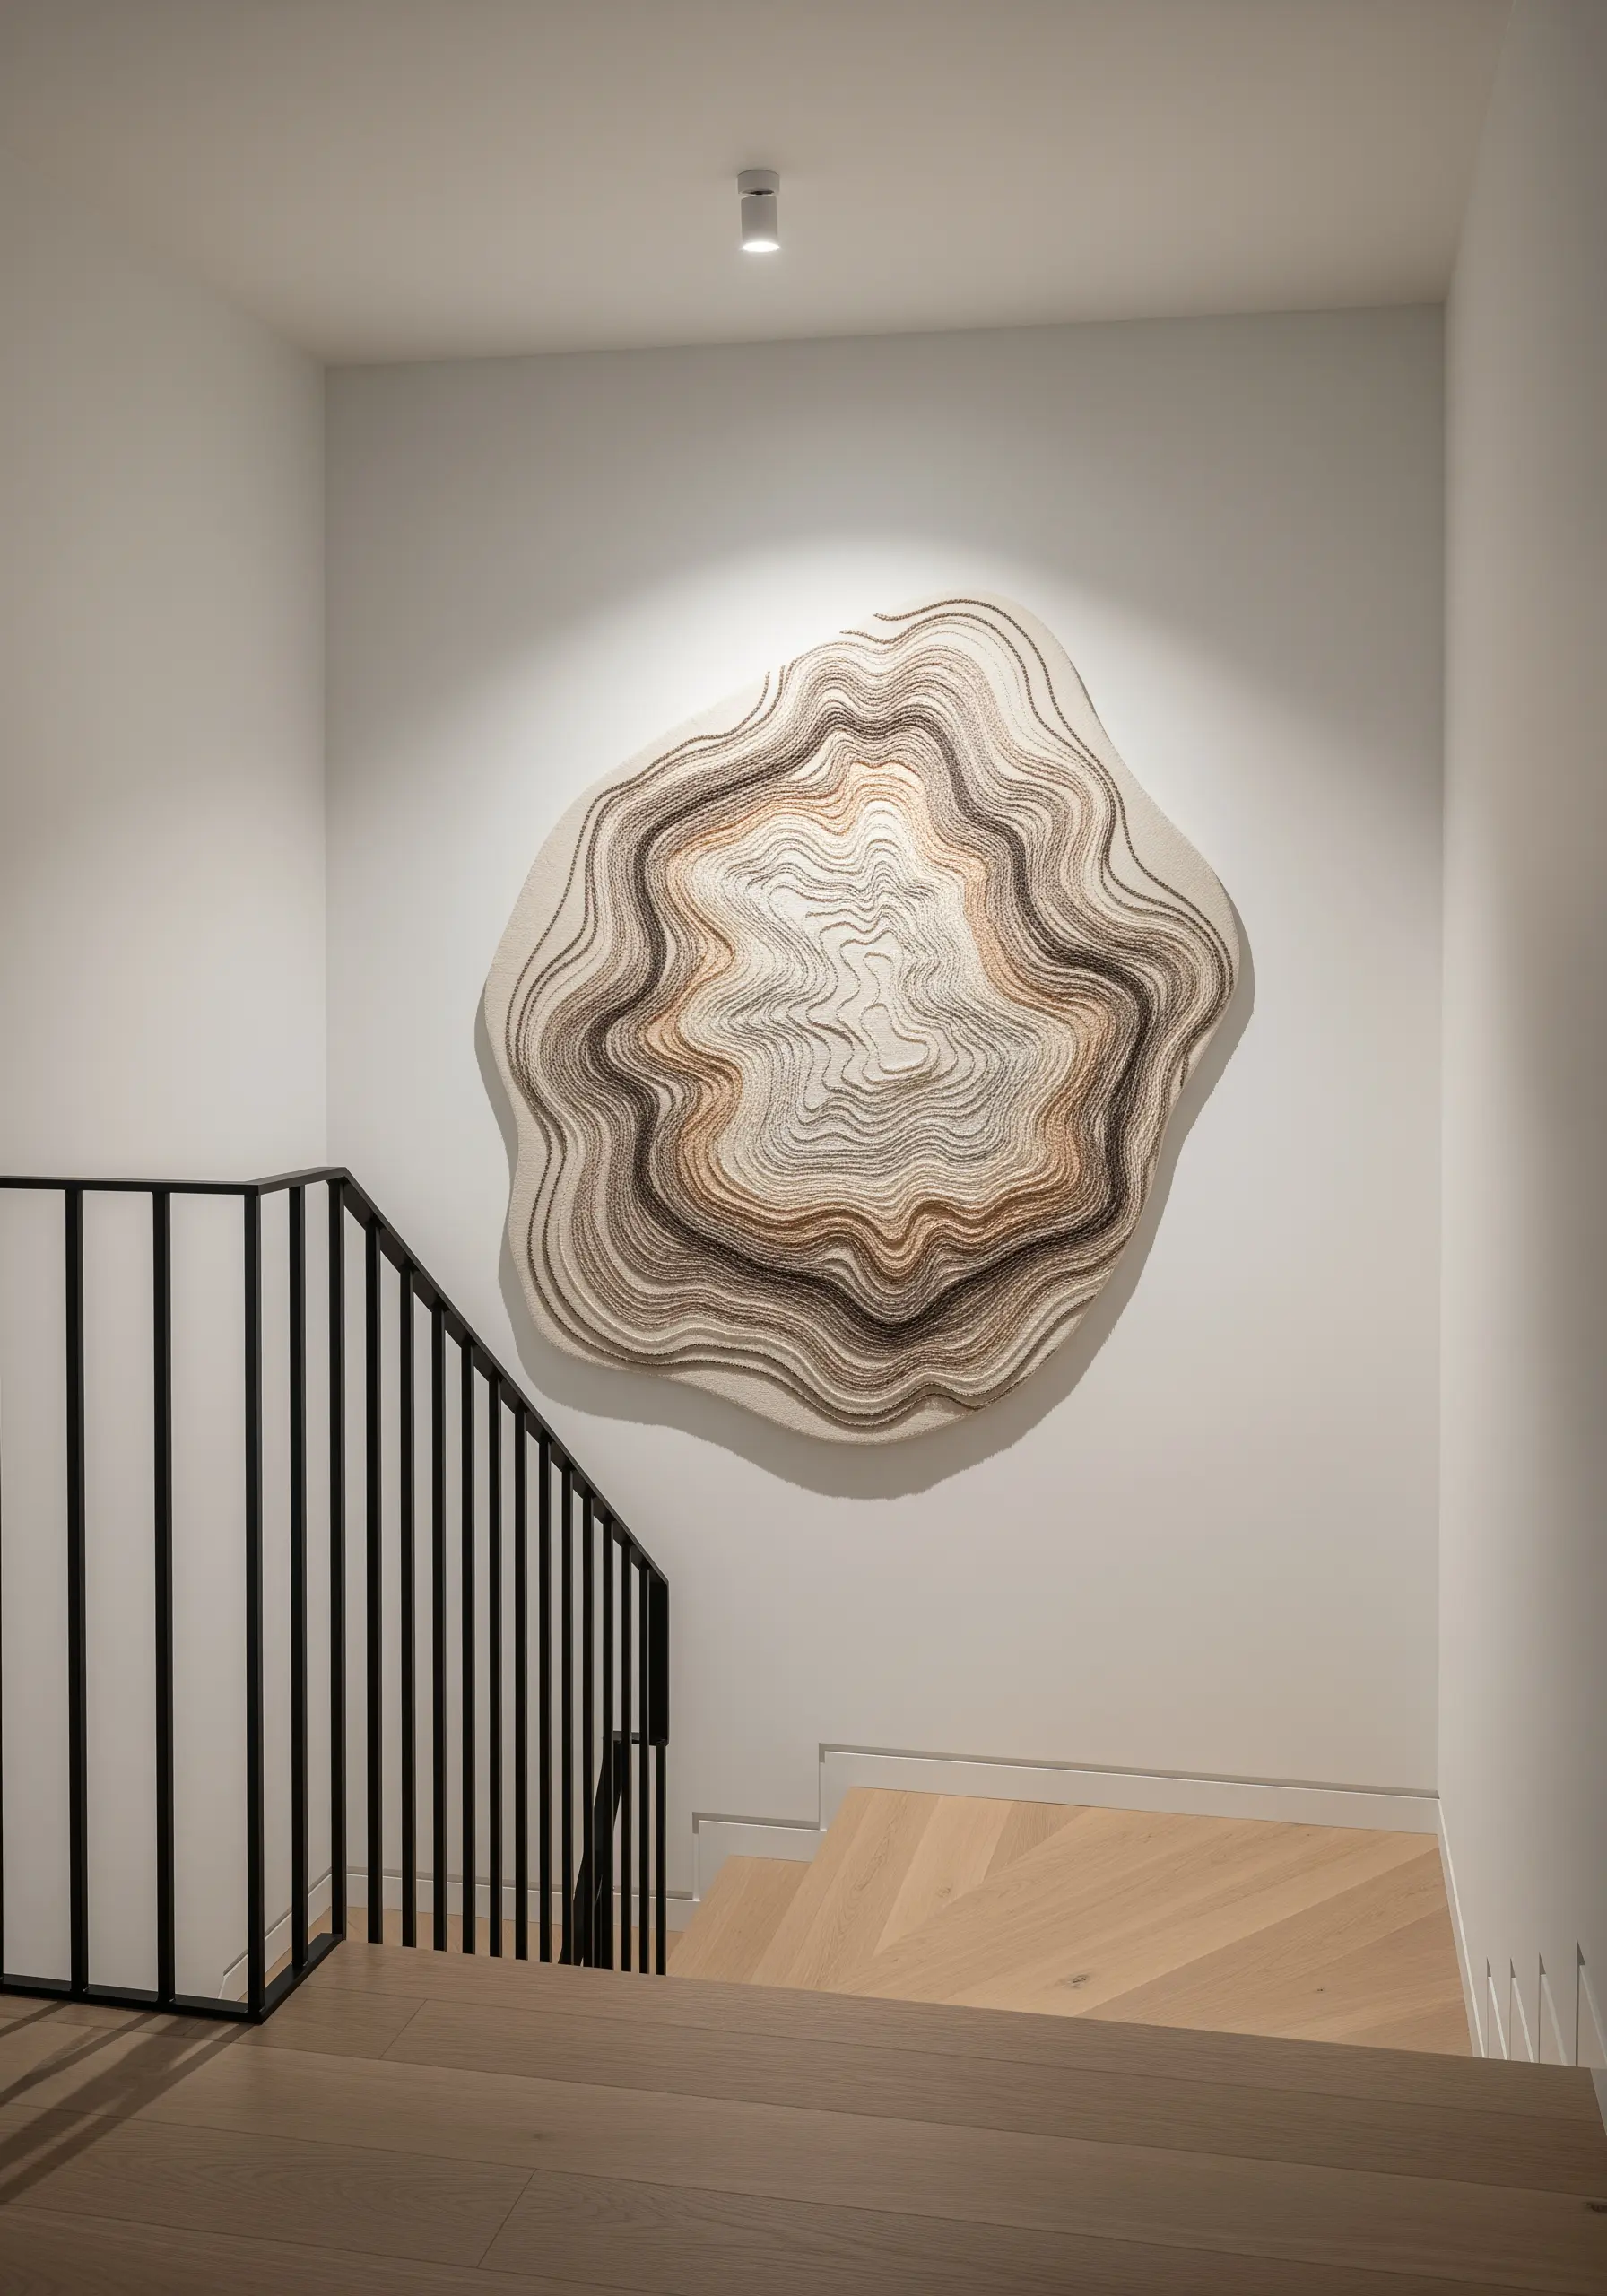
This organic piece is a masterclass in building texture with the simplest of stitches.
Instead of a hoop, work on a sturdy piece of felt that you can later cut into a free-form shape.
Use rows of backstitch or running stitch to create irregular, concentric lines, mimicking the patterns of wood grain or an agate slice.
By varying the spacing between rows and alternating between 3-4 neutral colors, you can create your own unique tree ring and bark texture embroidery.
15. Achieve a Graphic Botanical with Color Blocking
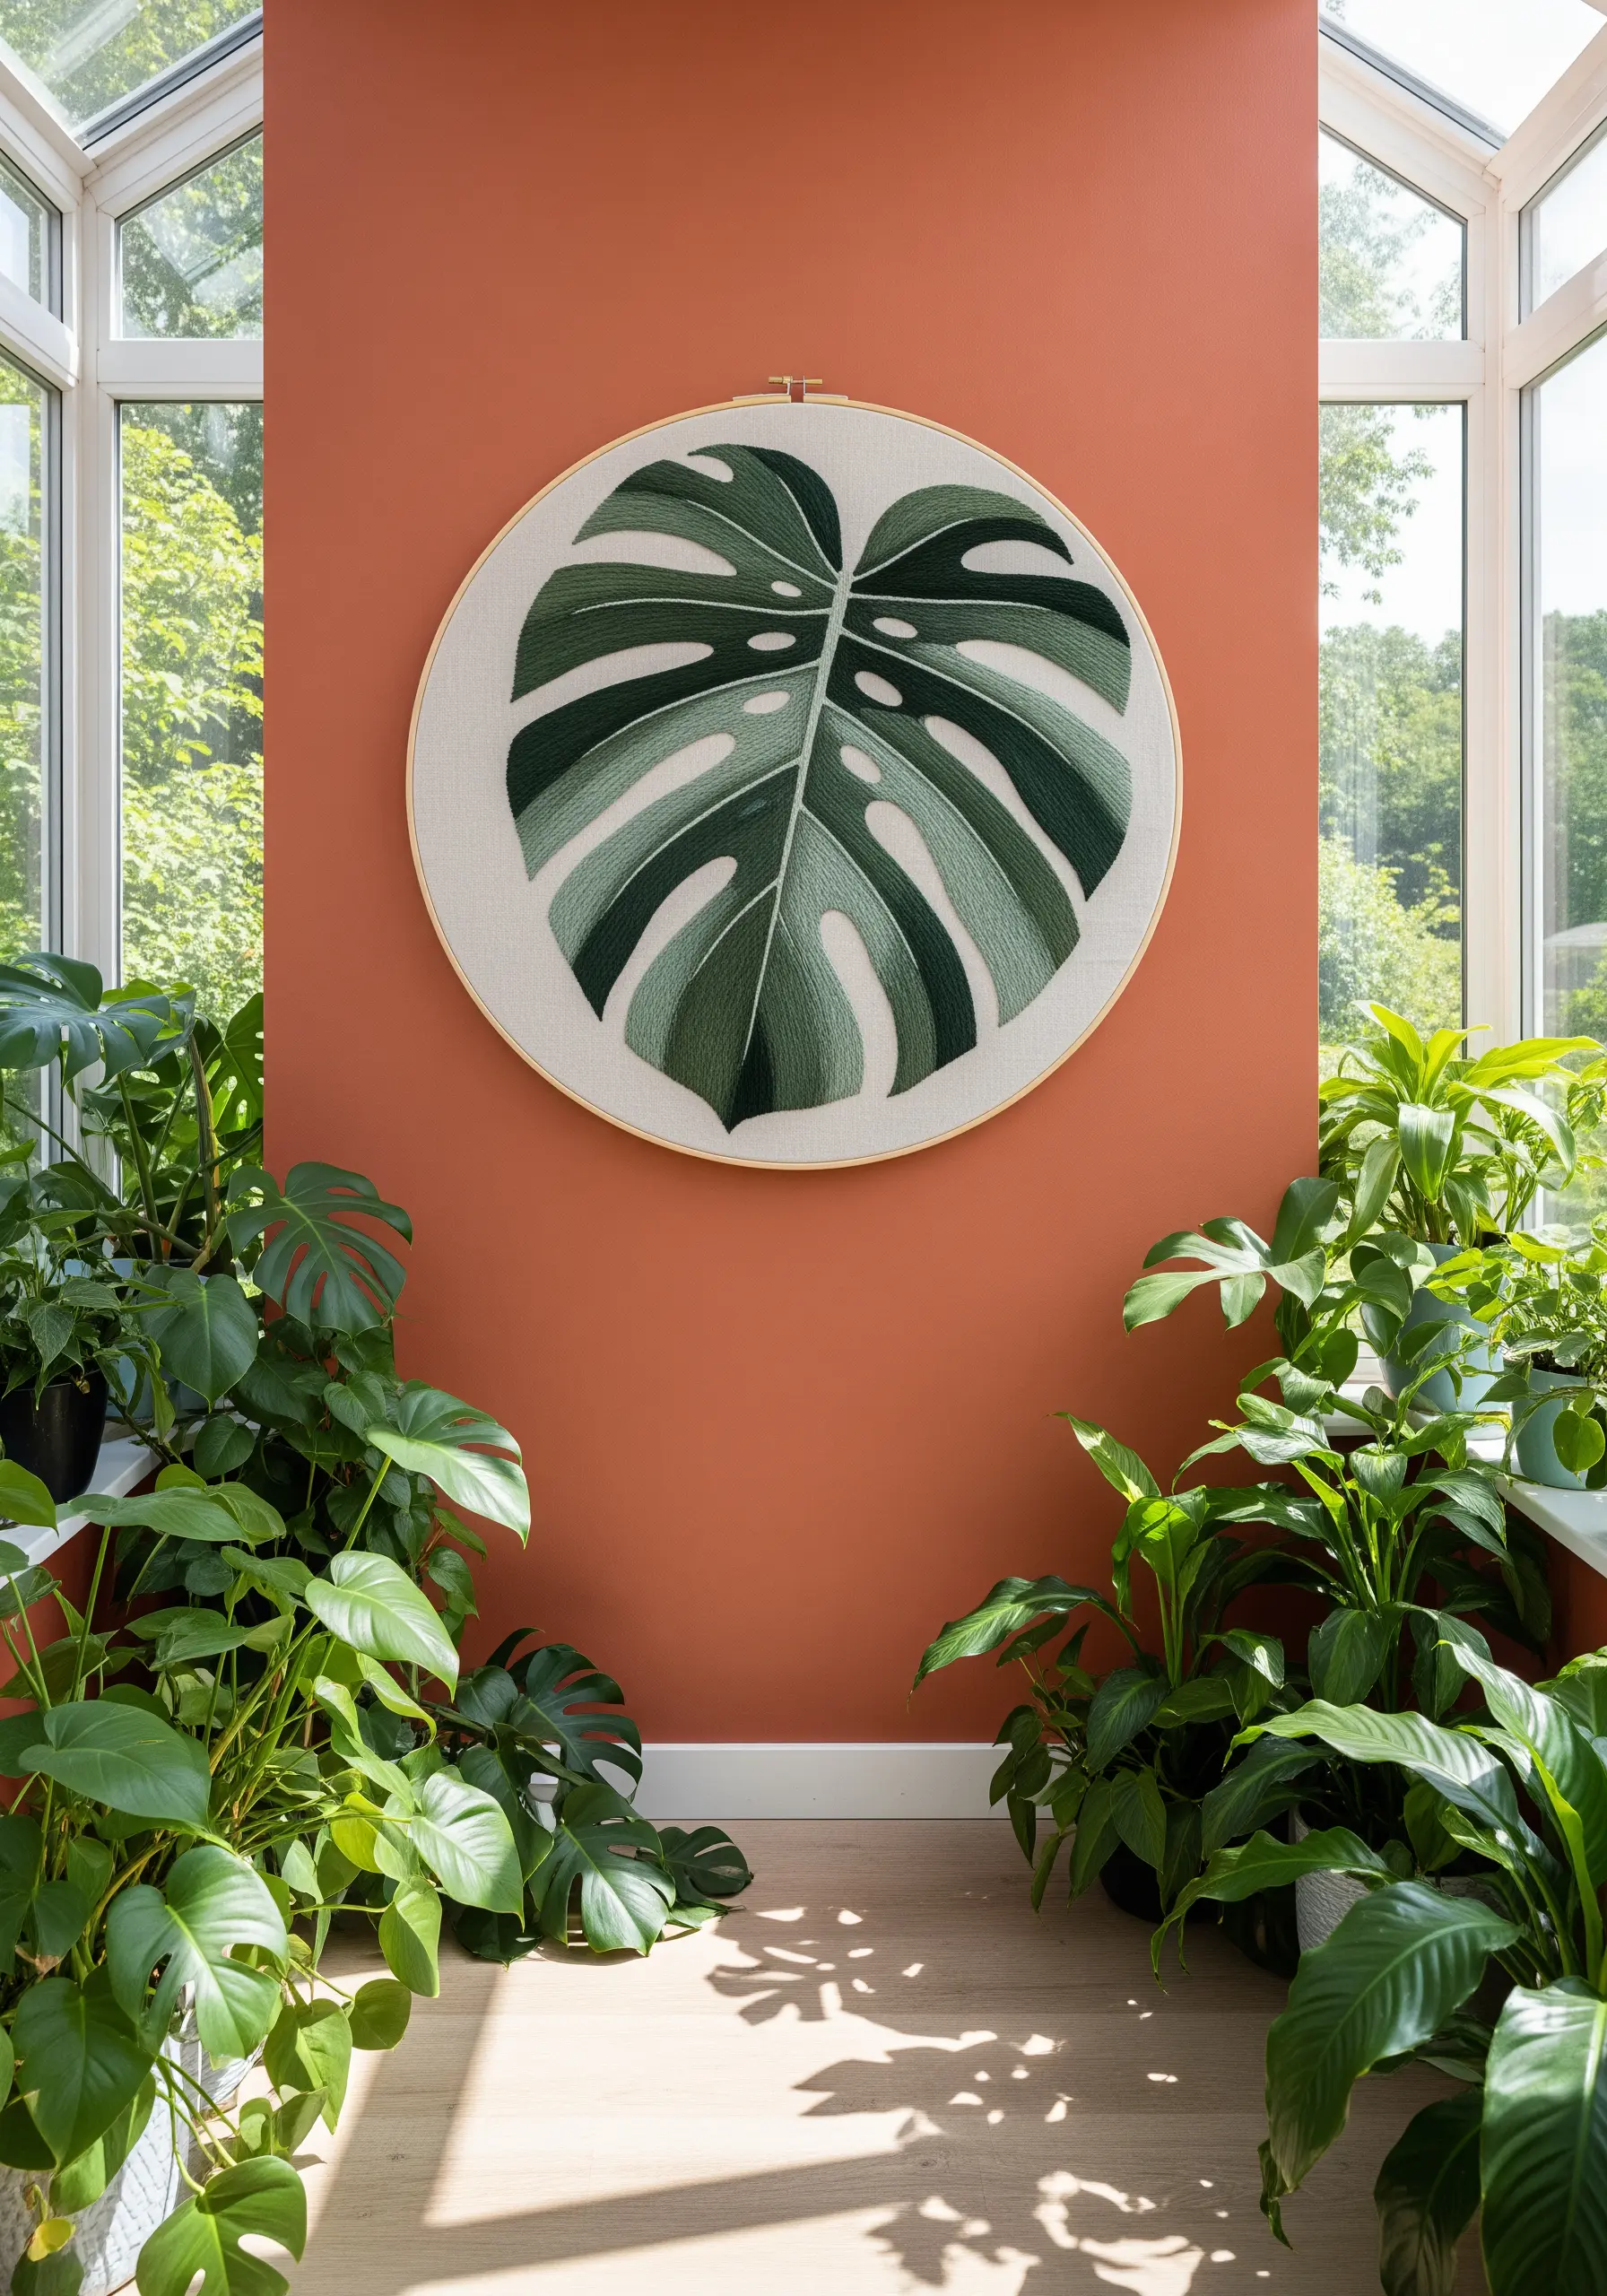
This bold, modern monstera leaf is achieved by treating each segment of color as a distinct, graphic block.
To get the sharpest possible lines between colors, first outline each section with a neat split stitch in the corresponding floss.
This stitched outline acts as a containing wall for your satin fill stitches, ensuring your edges are clean and your color blocks are perfectly defined.
Keep all the satin stitches within a single block running in the same direction for a smooth, cohesive finish.
16. Build Atmospheric Depth with Forest Silhouettes
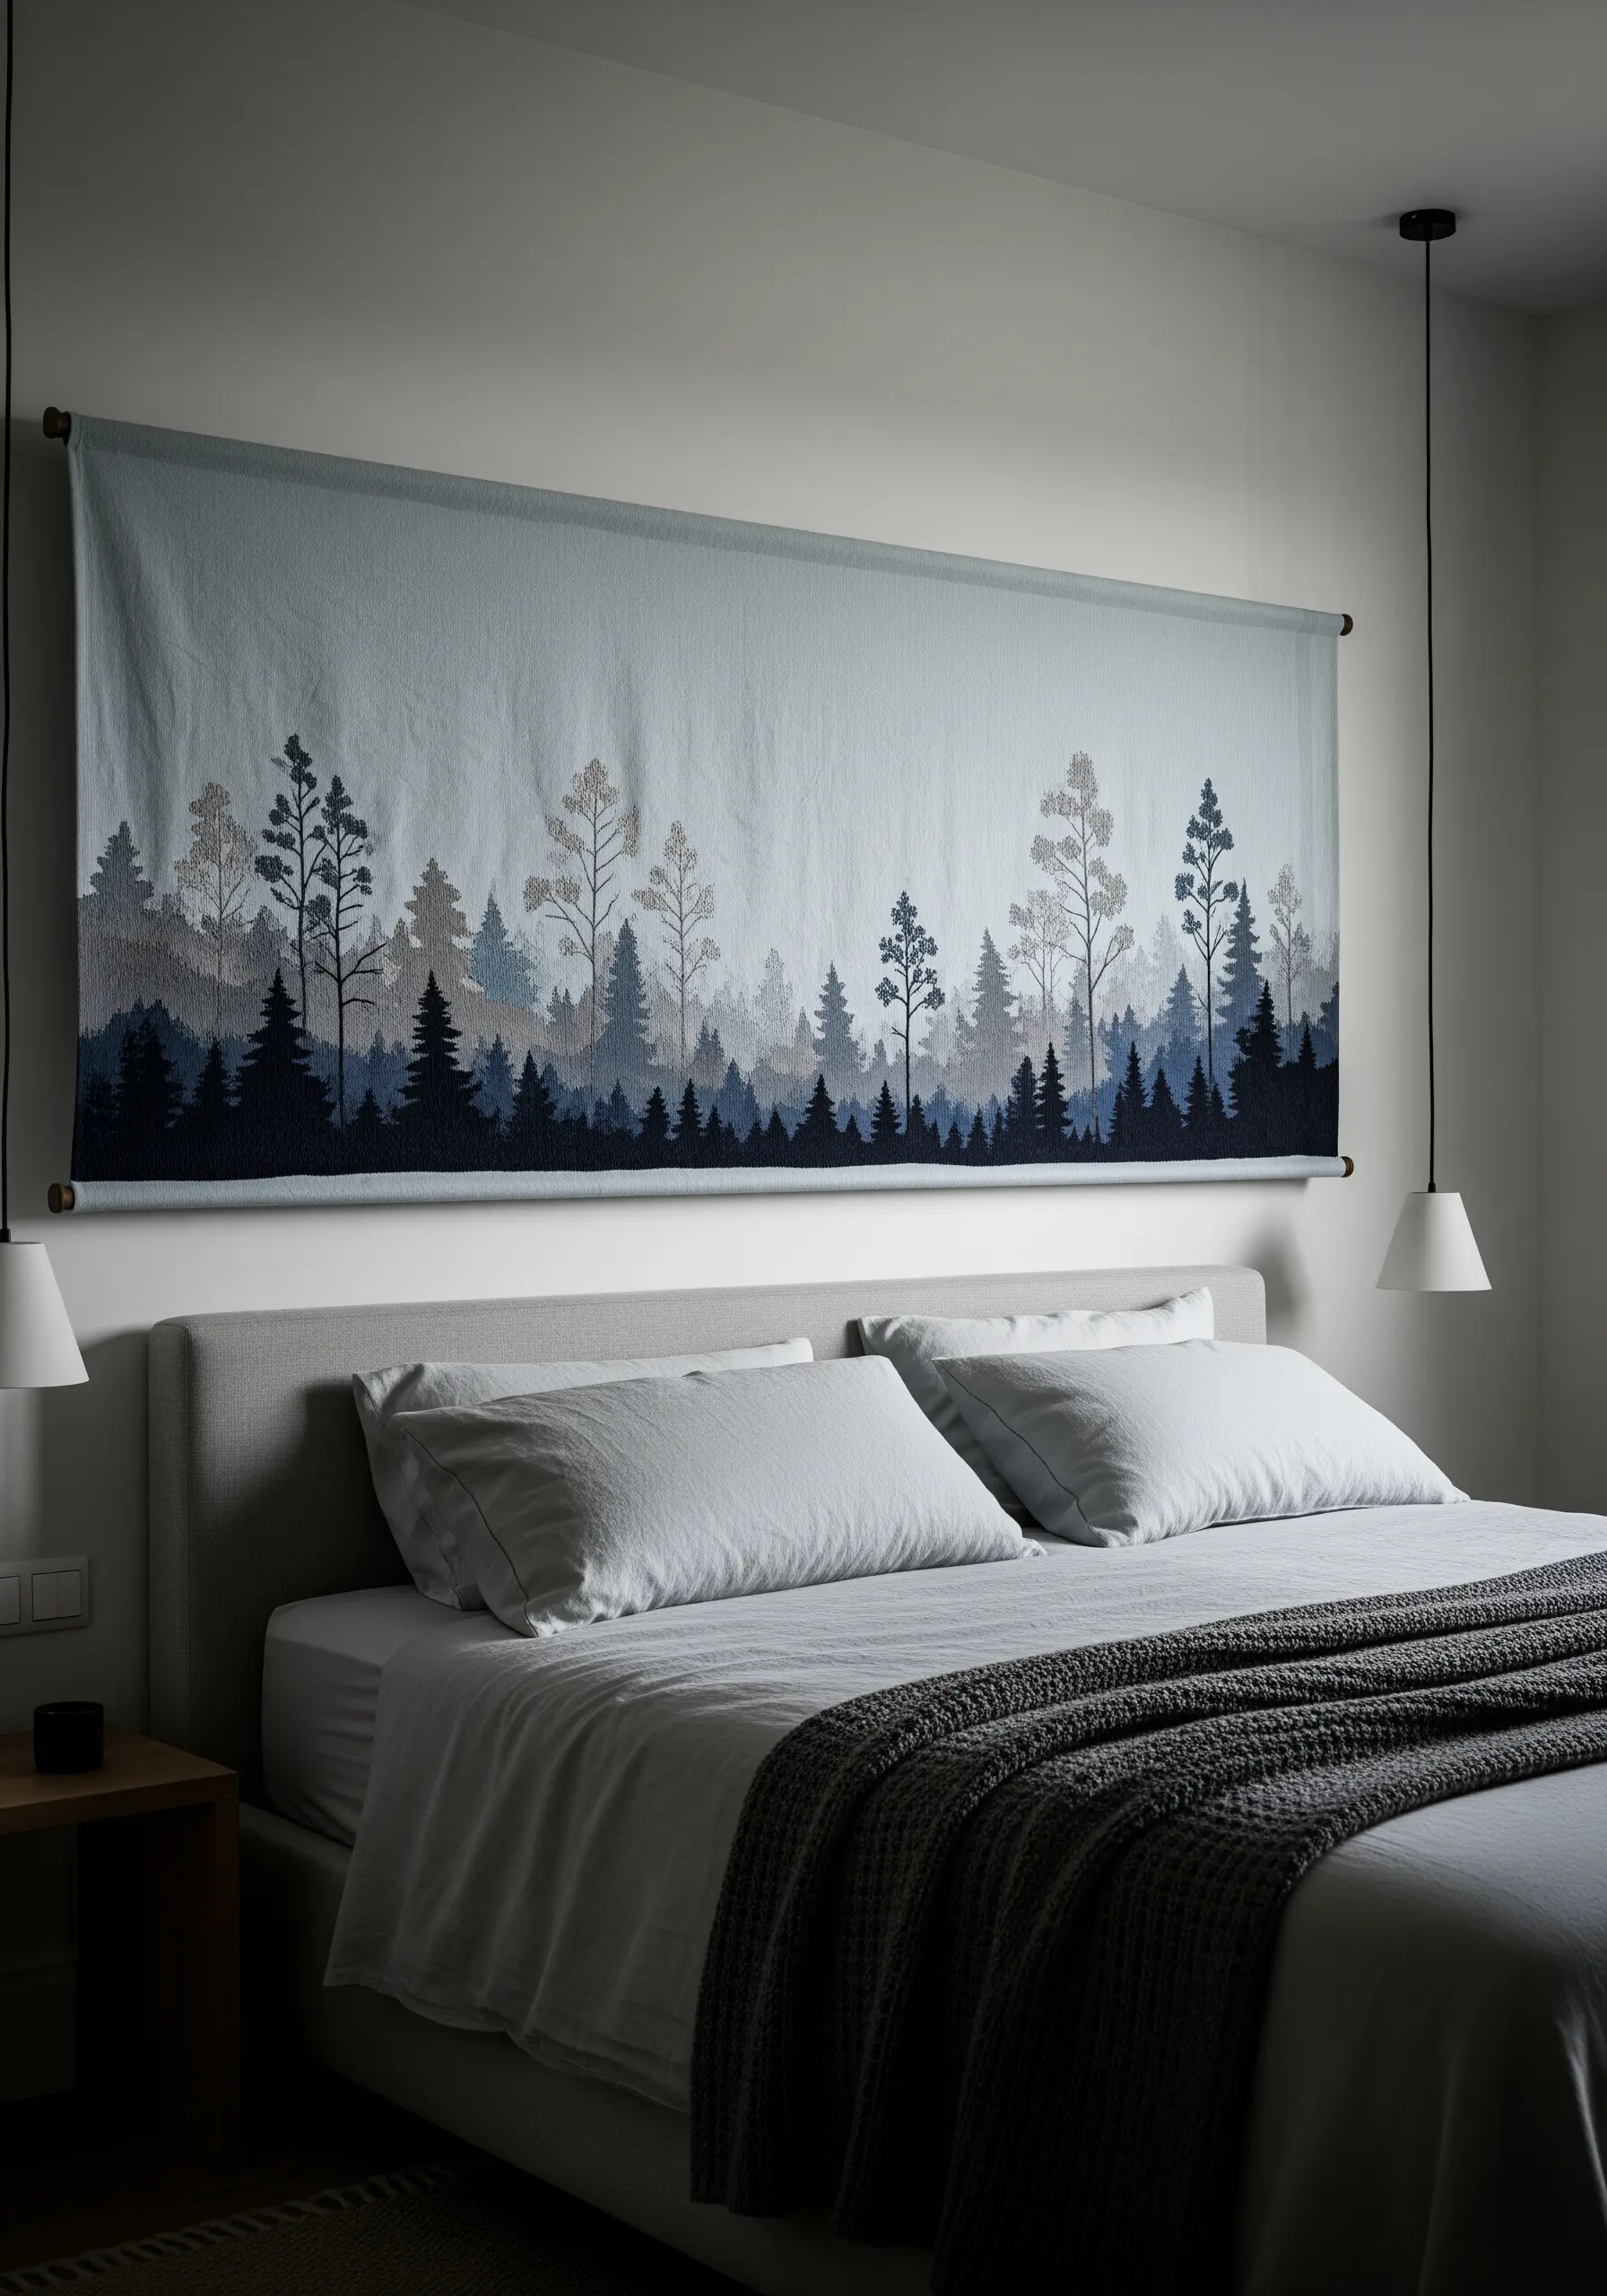
You can create an incredible illusion of distance in a forest scene by layering silhouettes.
Start with the farthest trees in the background, using a single strand of the lightest grey thread and a simple backstitch outline.
As you stitch the layers moving forward, use progressively darker thread and add slightly more detail—thicker trunks, more branches.
This technique mimics atmospheric perspective, giving your nature scene embroidery a deep, almost misty quality.
17. Tell a Story with Minimalist Graphic Lines

This powerful design proves that you don’t need dense fills for a striking result.
The key is the quality of your line. Use a whipped backstitch—a simple backstitch wrapped with a second thread—to create a smooth, raised, and unbroken line for the book’s cover.
For the fanned pages, use precise, radiating straight stitches.
To ensure they are perfectly even, draw faint guidelines with a heat- or water-erasable pen before you start stitching.
18. Create Hyper-Realism with Single-Strand Detail
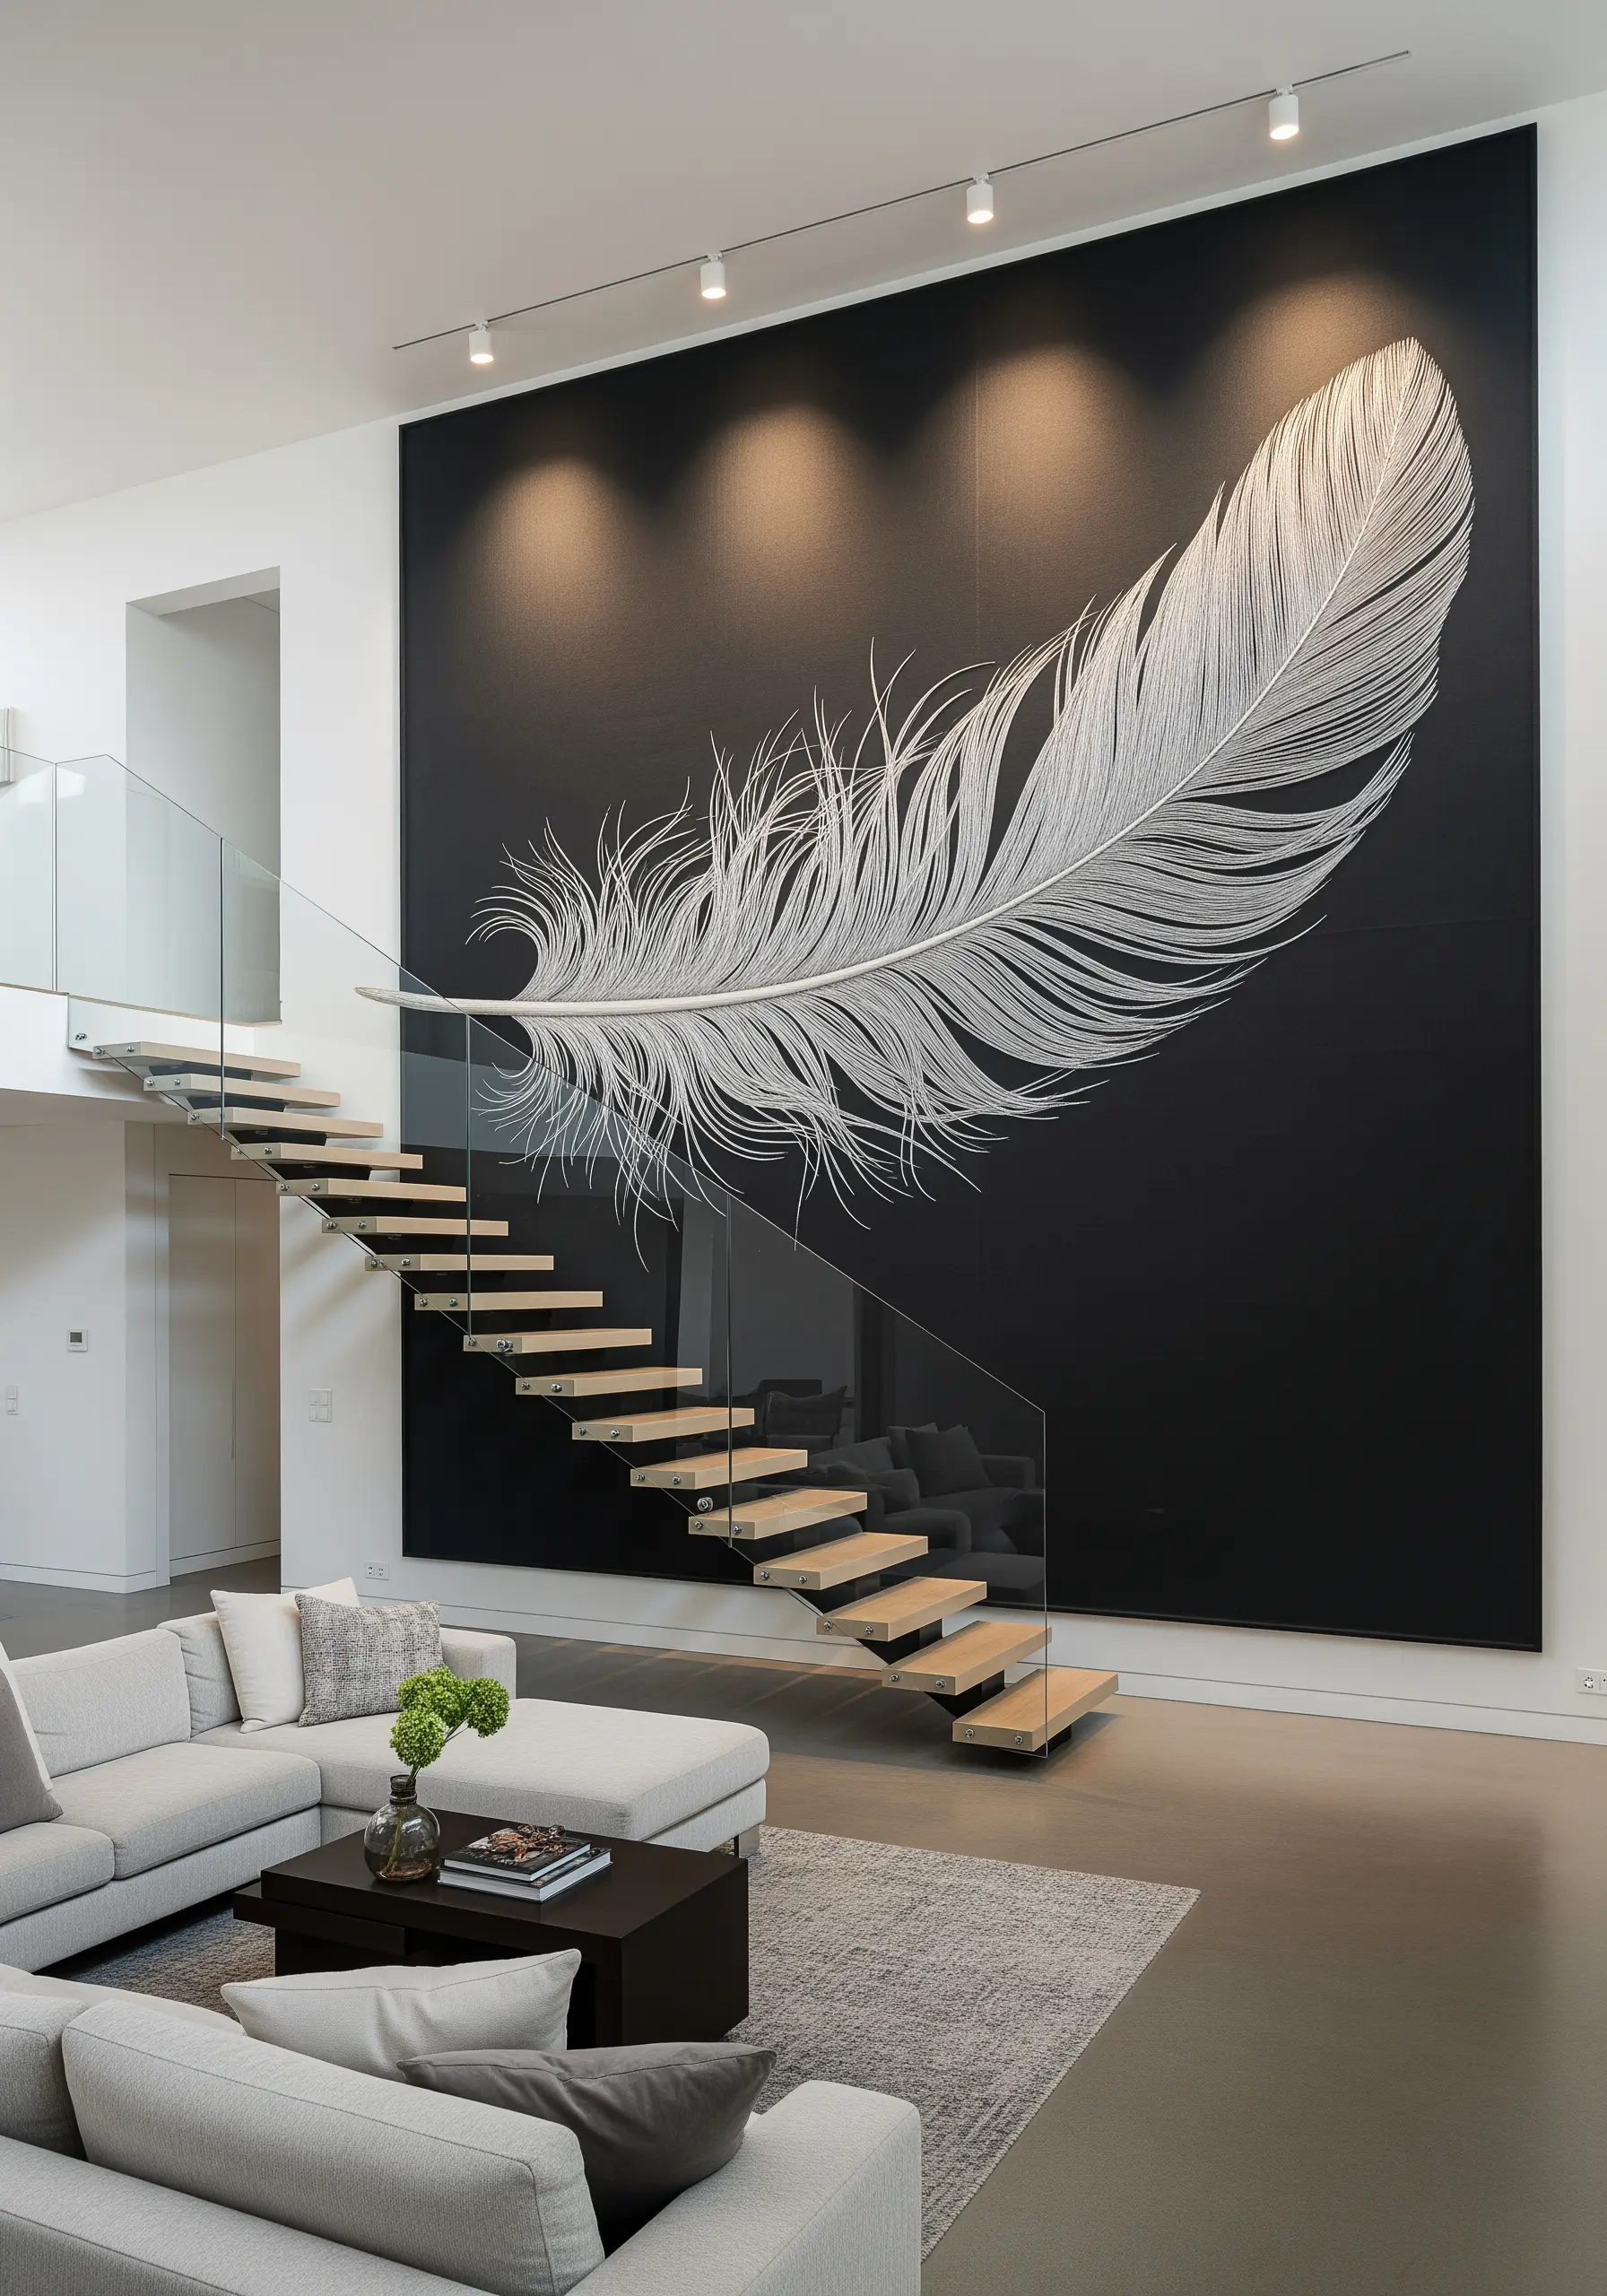
The breathtaking delicacy of this feather is achieved by working patiently with a single strand of floss.
Create the central quill with a raised stem stitch band for solidity.
For the feather’s barbs, use long, angled straight stitches, allowing them to overlap and separate slightly to mimic the wispy, imperfect nature of a real feather.
This high-contrast piece is a testament to how detail, not color, creates realism in dramatic dark thread embroidery.
19. Imply Tranquility with Meditative Stitches
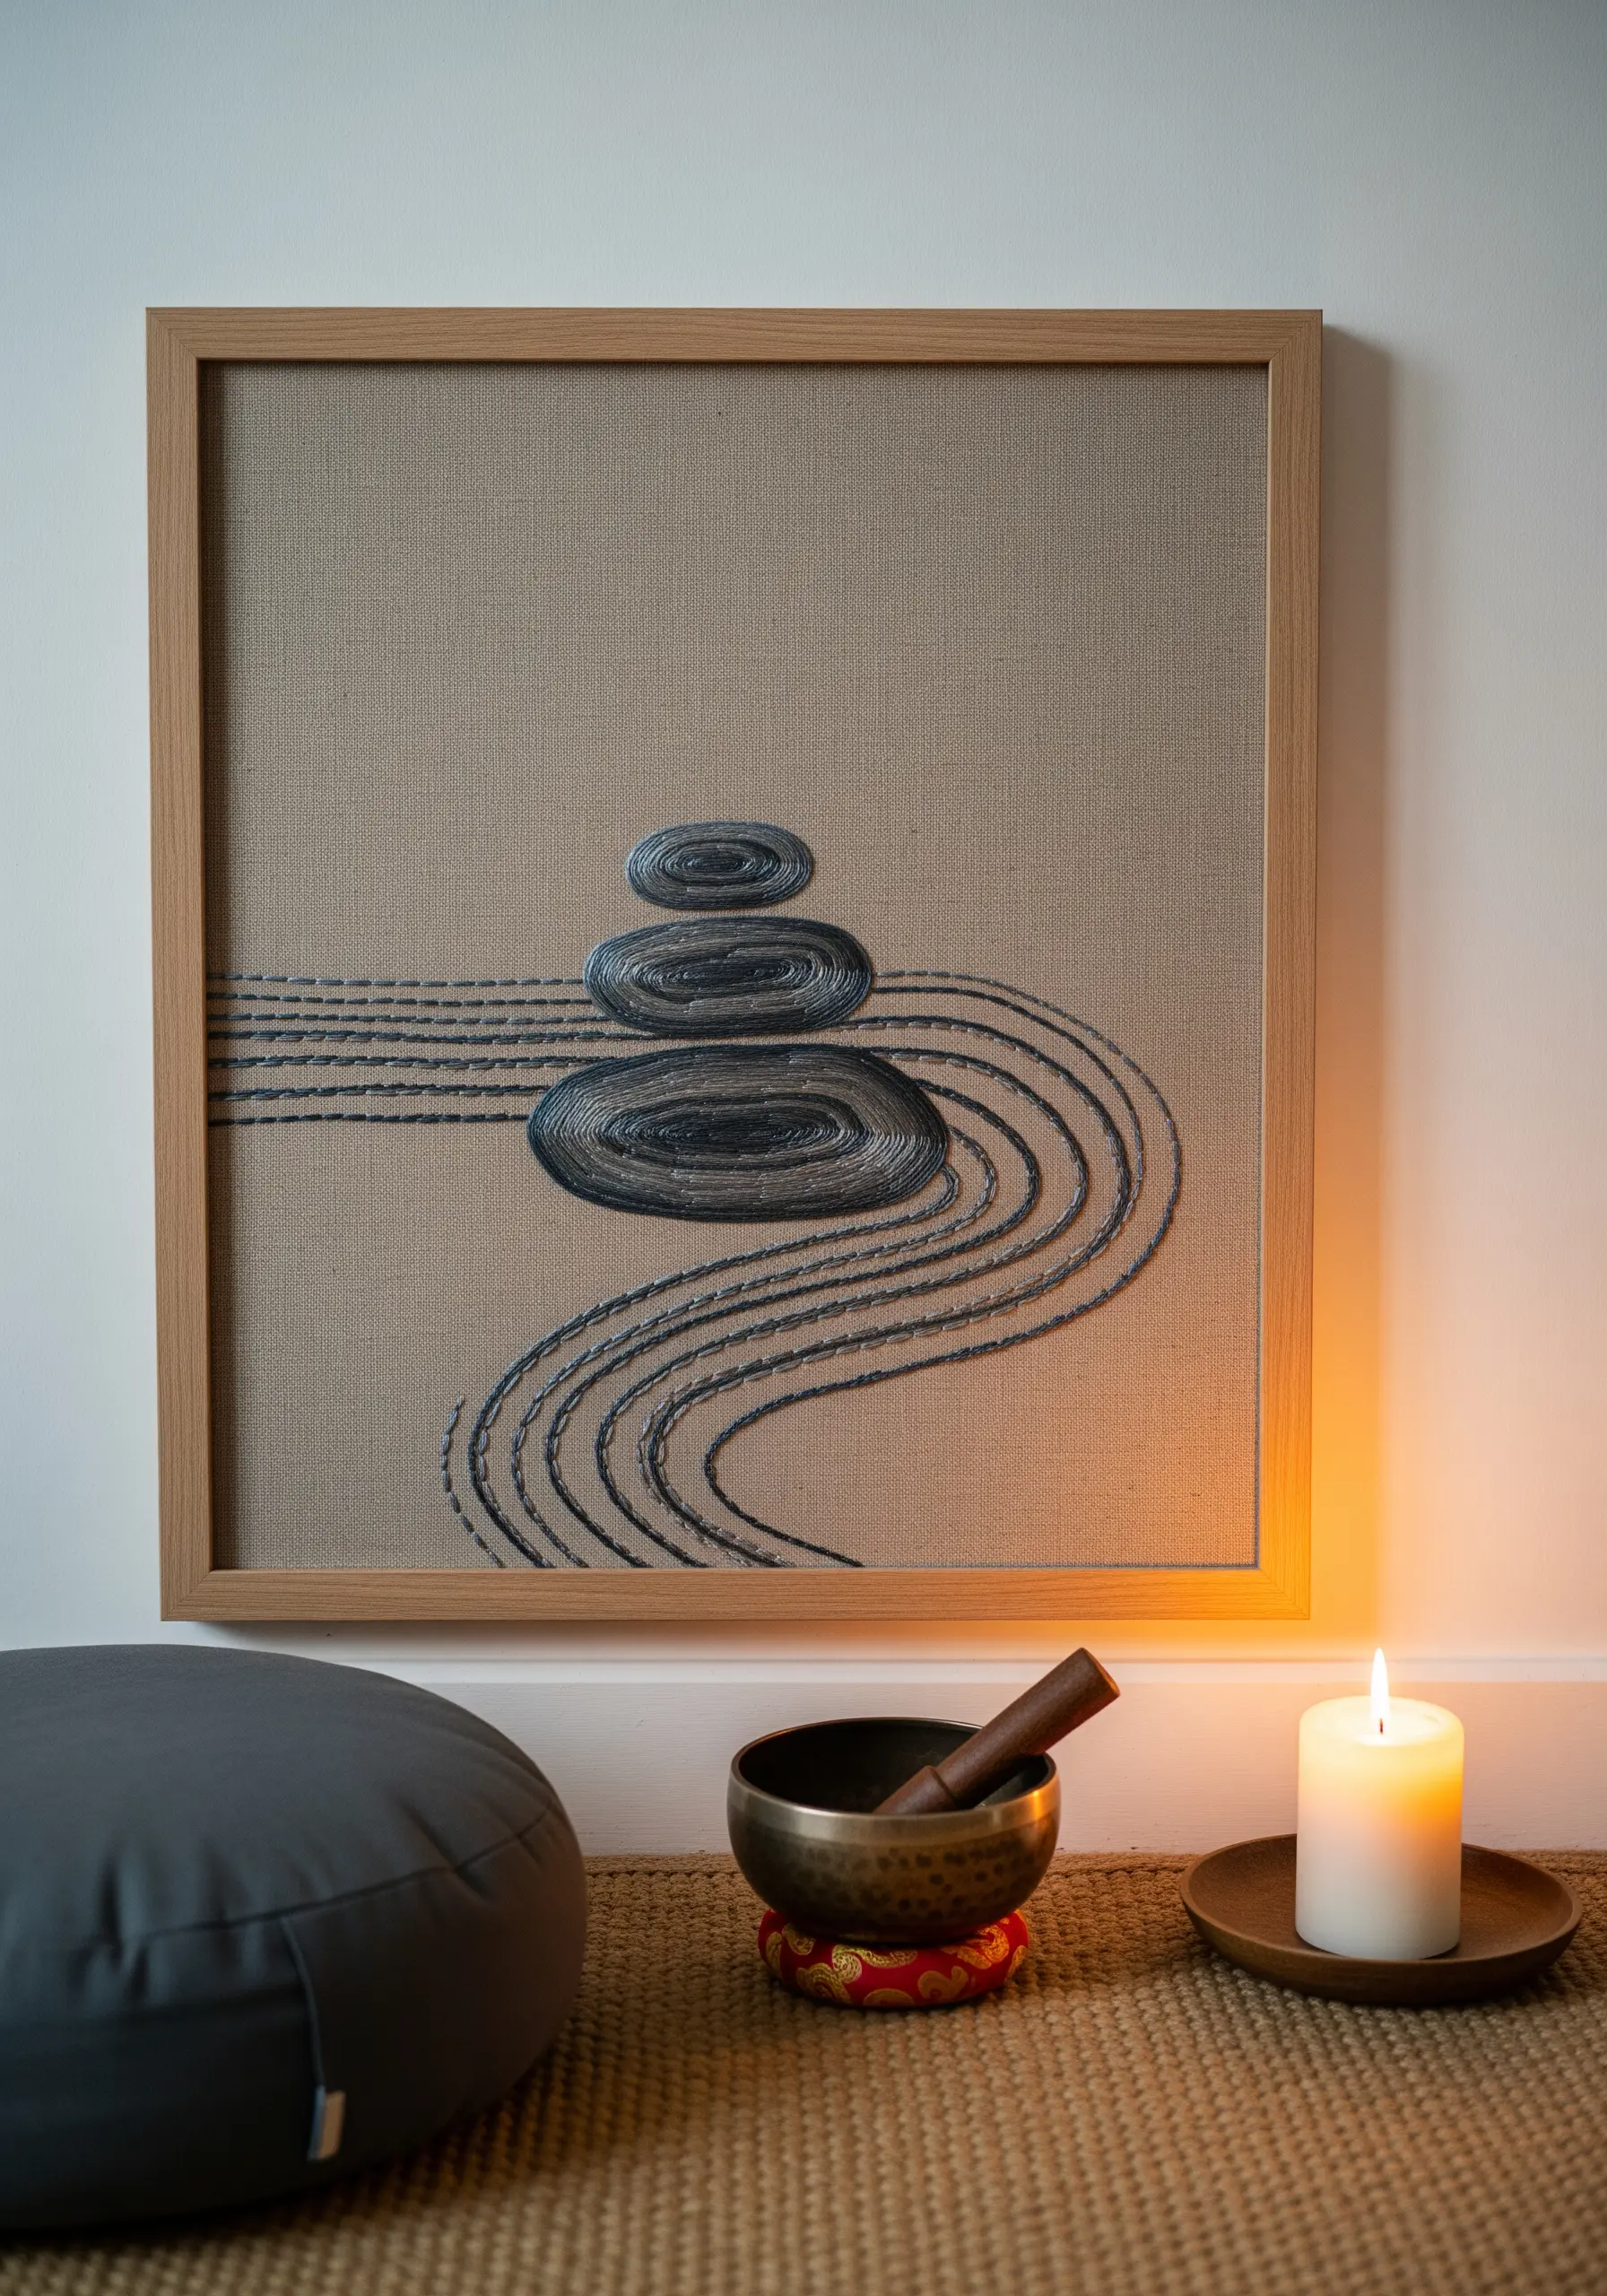
This design communicates calm through deliberate stitch choices.
Outline the zen stones with a backstitch, then whip the line with a second thread to create a smooth, solid, cord-like effect.
For the raked sand, use parallel rows of simple running stitch, but intentionally vary the length of your stitches and the space between them to create a more organic, hand-drawn feel.
The contrast between the smooth stones and the textured sand creates a beautiful sense of balance.
20. Stitch with Light Using French Knot Pointillism

You can create a sparkling, textured effect that mimics light on glass by filling your shape with hundreds of tiny French knots.
Use a high-sheen or metallic thread in white or silver to enhance the illusion of glistening bubbles or reflections.
Keep your knots small, tight, and densely packed.
The contrast between the rich texture of the knot-filled glass and the clean, simple backstitch outline is what makes these modern embroidery ideas so visually compelling.
21. A Modern Farmhouse Herb Collection
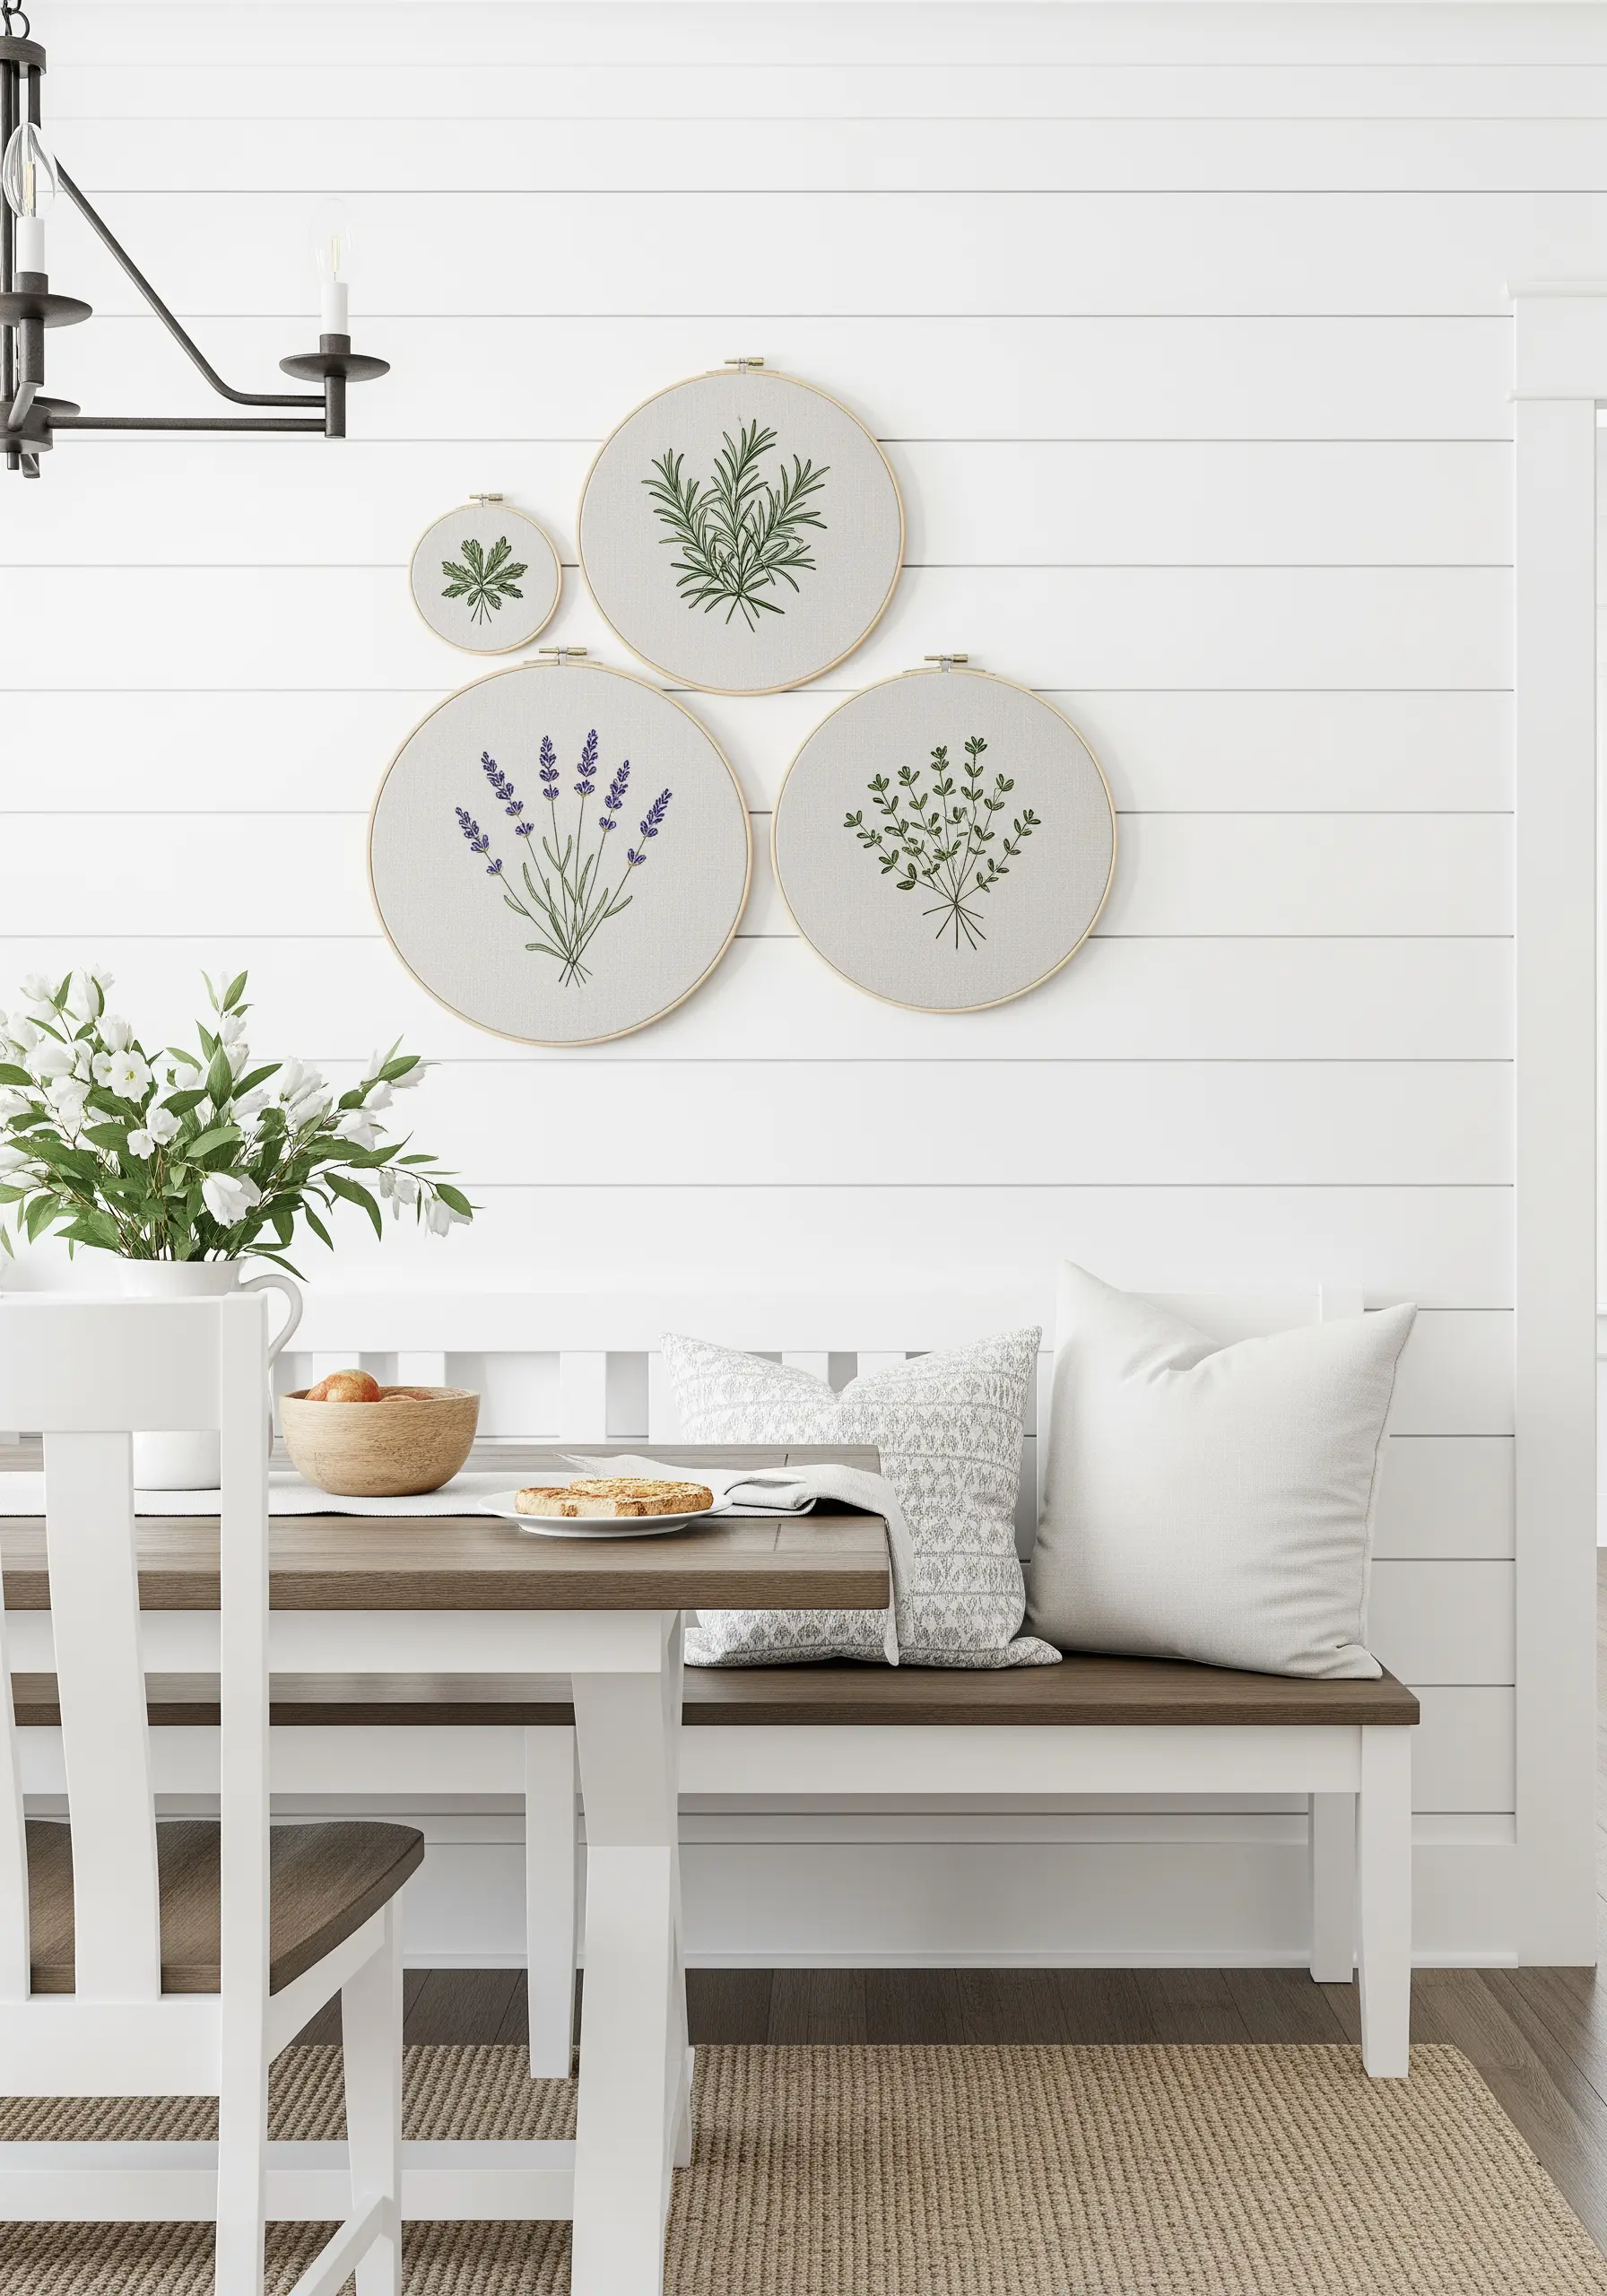
Capture the unique character of different herbs by assigning them specific, delicate stitches.
Use detached chain stitches for the tiny leaves of thyme, fishbone stitch for the needle-like structure of rosemary, and fly stitch for the buds of a lavender stalk.
To elevate your display, create a gallery wall using hoops of varying sizes.
This simple curatorial choice creates a more dynamic and visually interesting composition than using hoops of a uniform size, perfect for garden herb embroidery patterns.
22. Capture Fluid Motion with Vertical Stitches
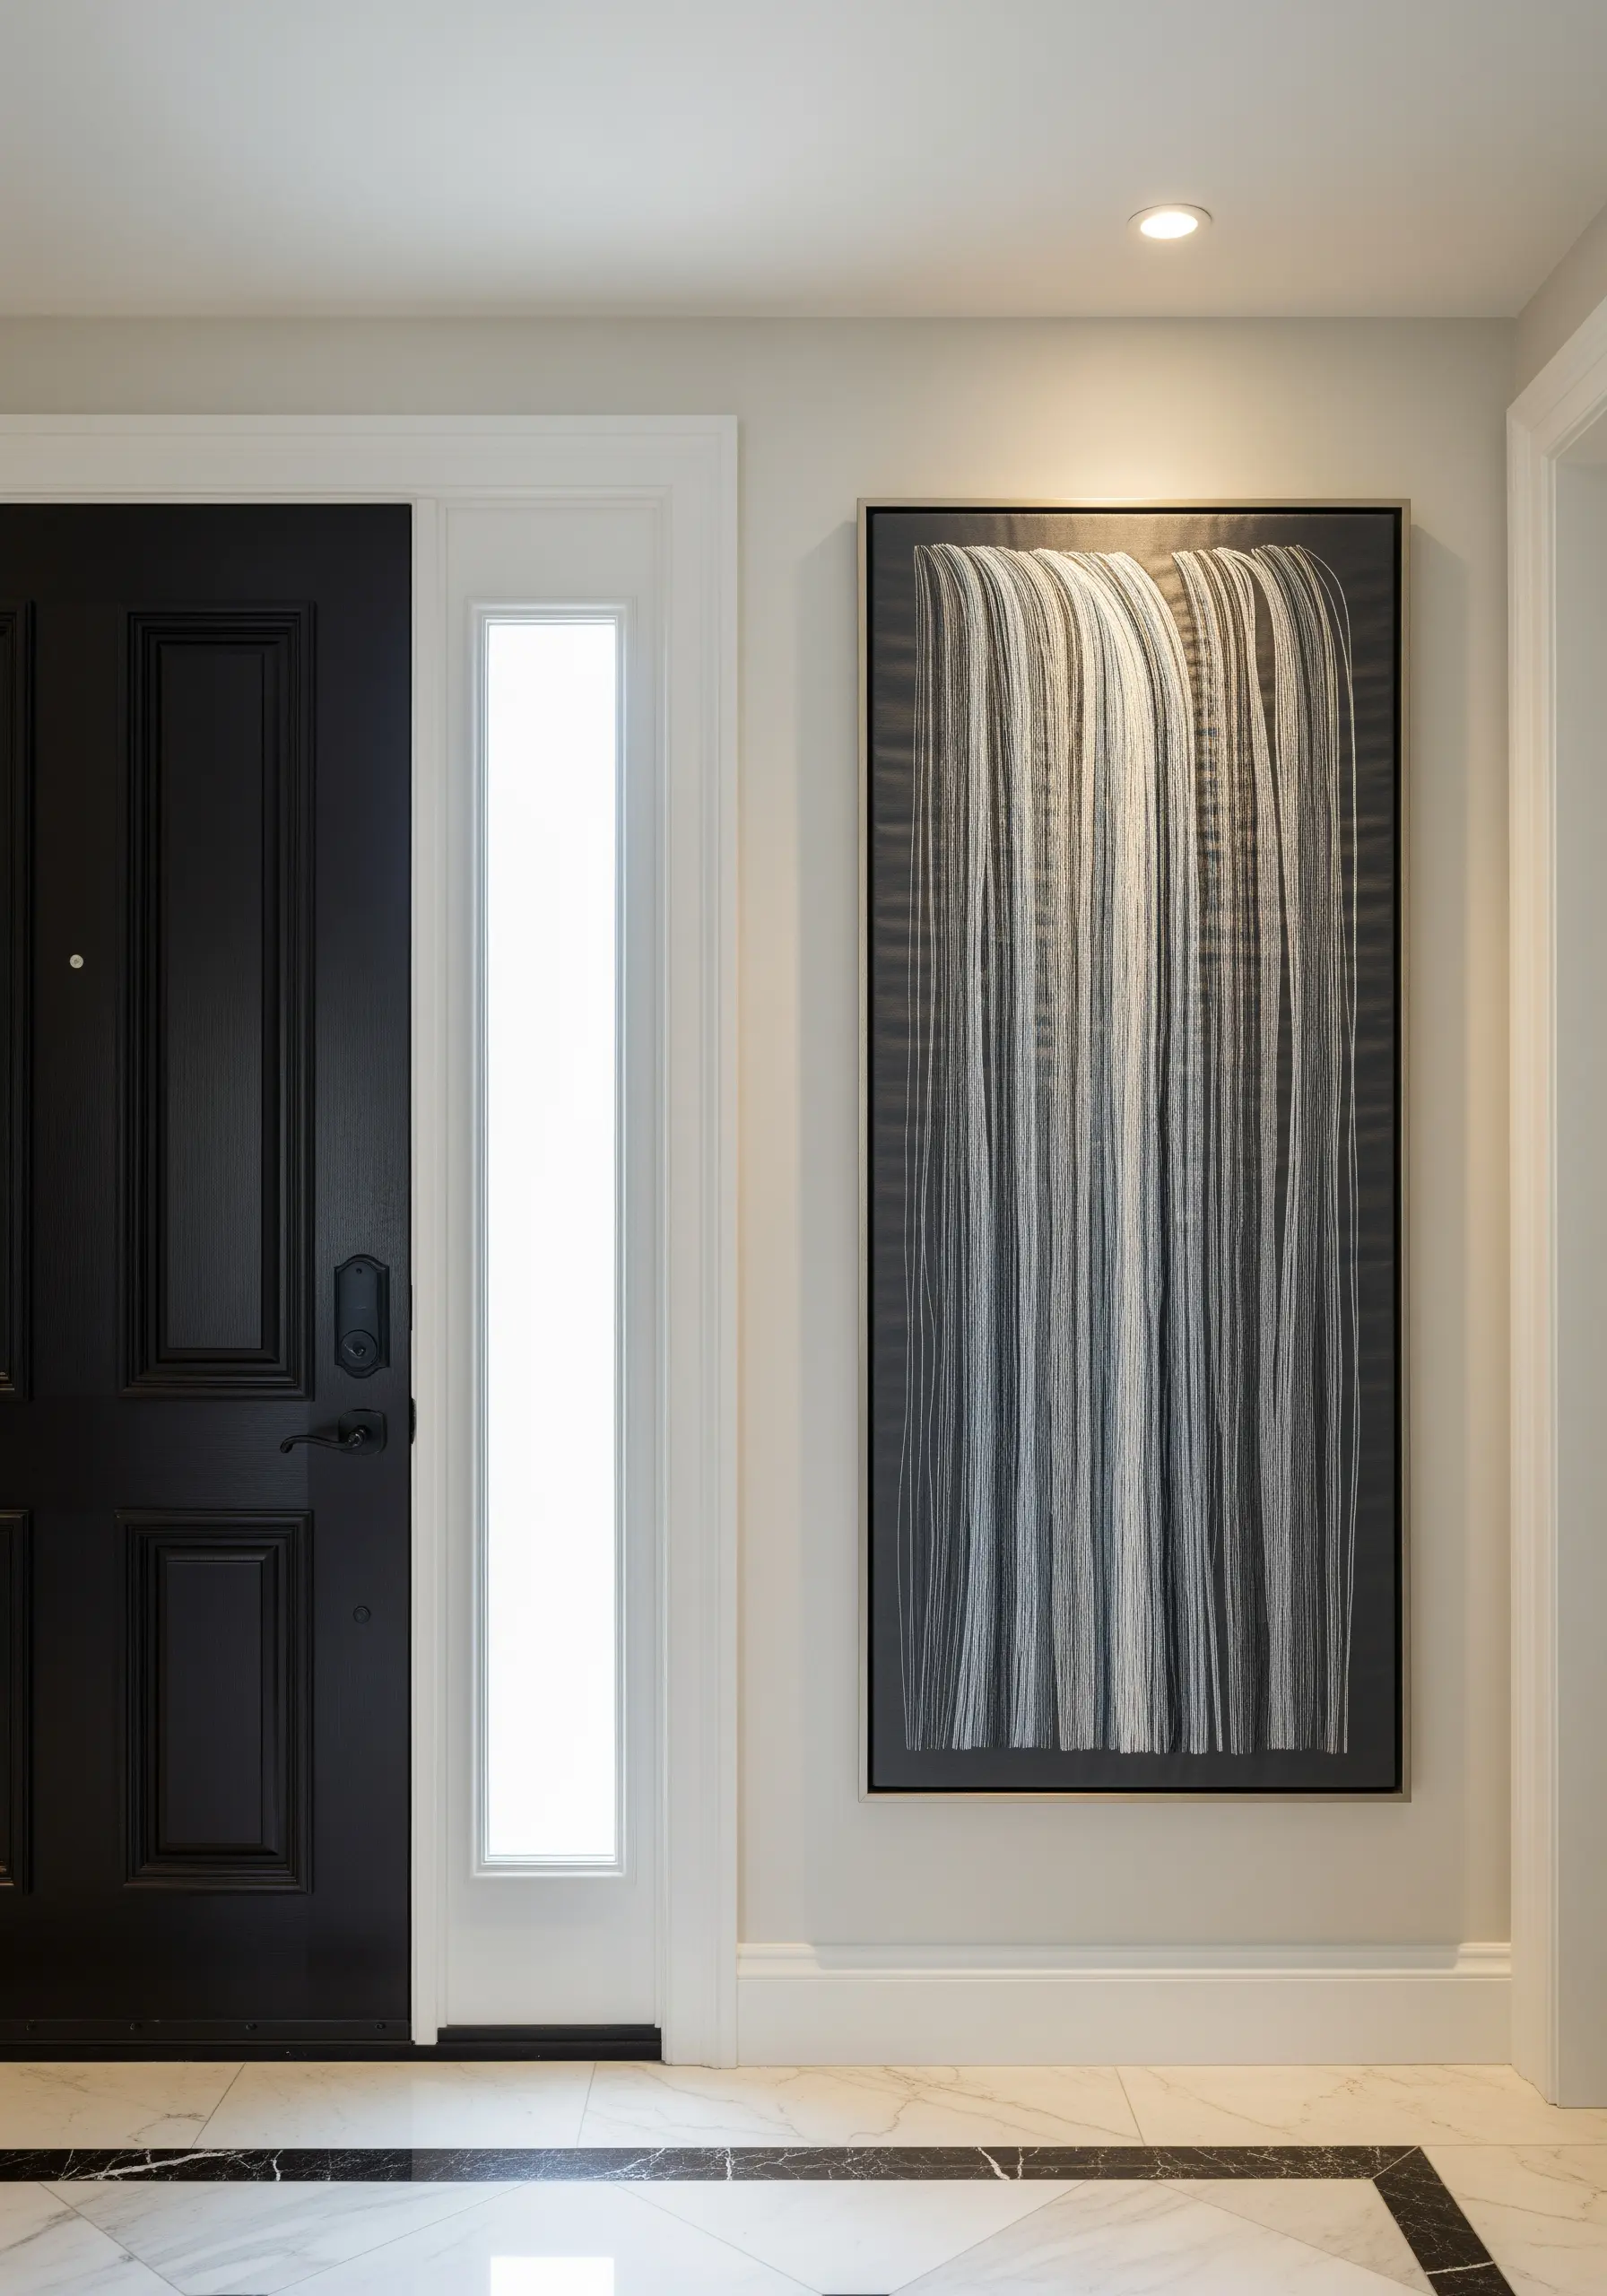
Create the powerful illusion of a waterfall by filling your canvas with thousands of vertical straight stitches.
Use a blend of white, silver, and light grey threads to mimic highlights and shadows in the moving water.
Vary the number of strands in your needle—from one to four—to create subtle shifts in texture and density.
For added effect, you can let some threads hang loose at the bottom before securing them, creating a fringe that enhances the sense of flow in these abstract thread motions.
23. Visualize Sound with Precision Line Work
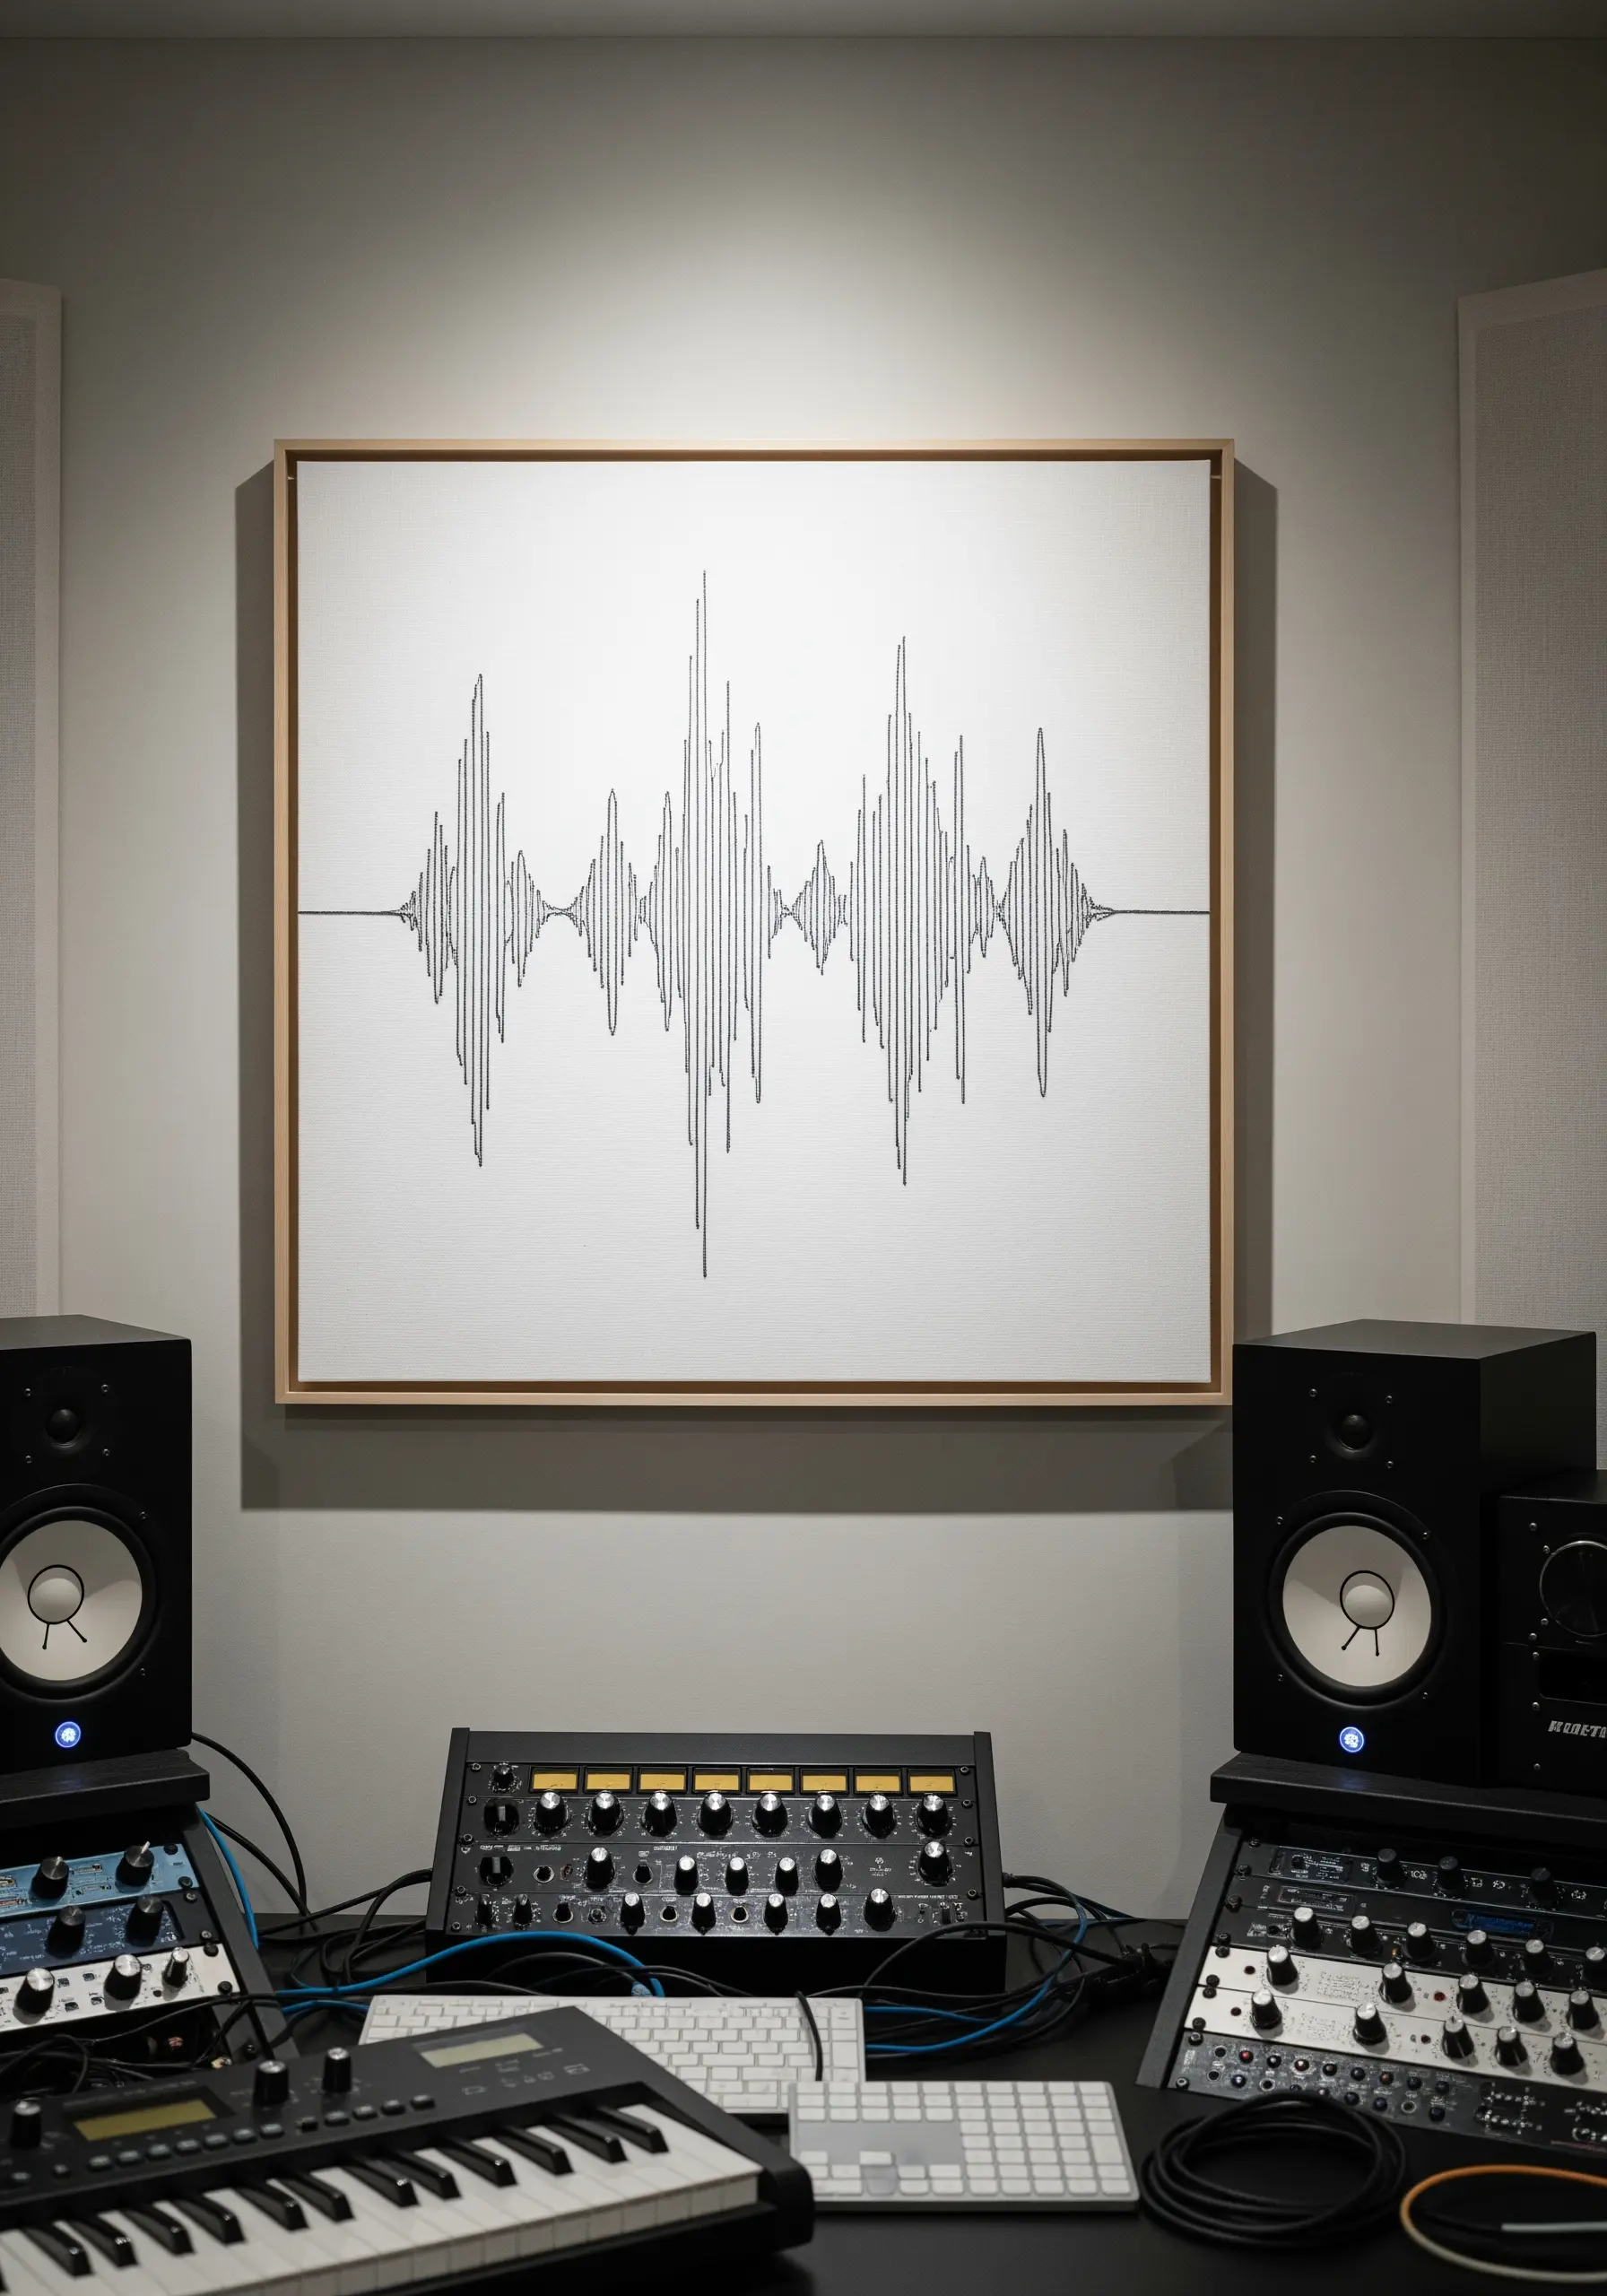
This deeply personal art form is an exercise in precision.
After carefully transferring your chosen soundwave pattern, use a single, continuous line of split stitch to create the central axis for a smooth, solid foundation.
Then, add the waveform’s peaks and troughs using single straight stitches, ensuring each one is perfectly perpendicular to the axis line.
The beauty of these one-line embroidery wall arts lies in its clean, graphic execution and the hidden meaning it holds.
24. A Curated Triptych of Natural Textures

Isolate and celebrate the beauty of patterns found in nature.
For wood grain, use long, slightly wavy backstitches in a few shades of brown.
To capture the veins of a leaf, use a central stem stitch with angled satin stitches branching off.
For cracked earth, create an irregular network of intersecting straight stitches.
Mounting these small studies together on a single linen-covered board unifies them into one cohesive piece of organic texture embroidery.
25. Create a Storybook Feel with Appliqué
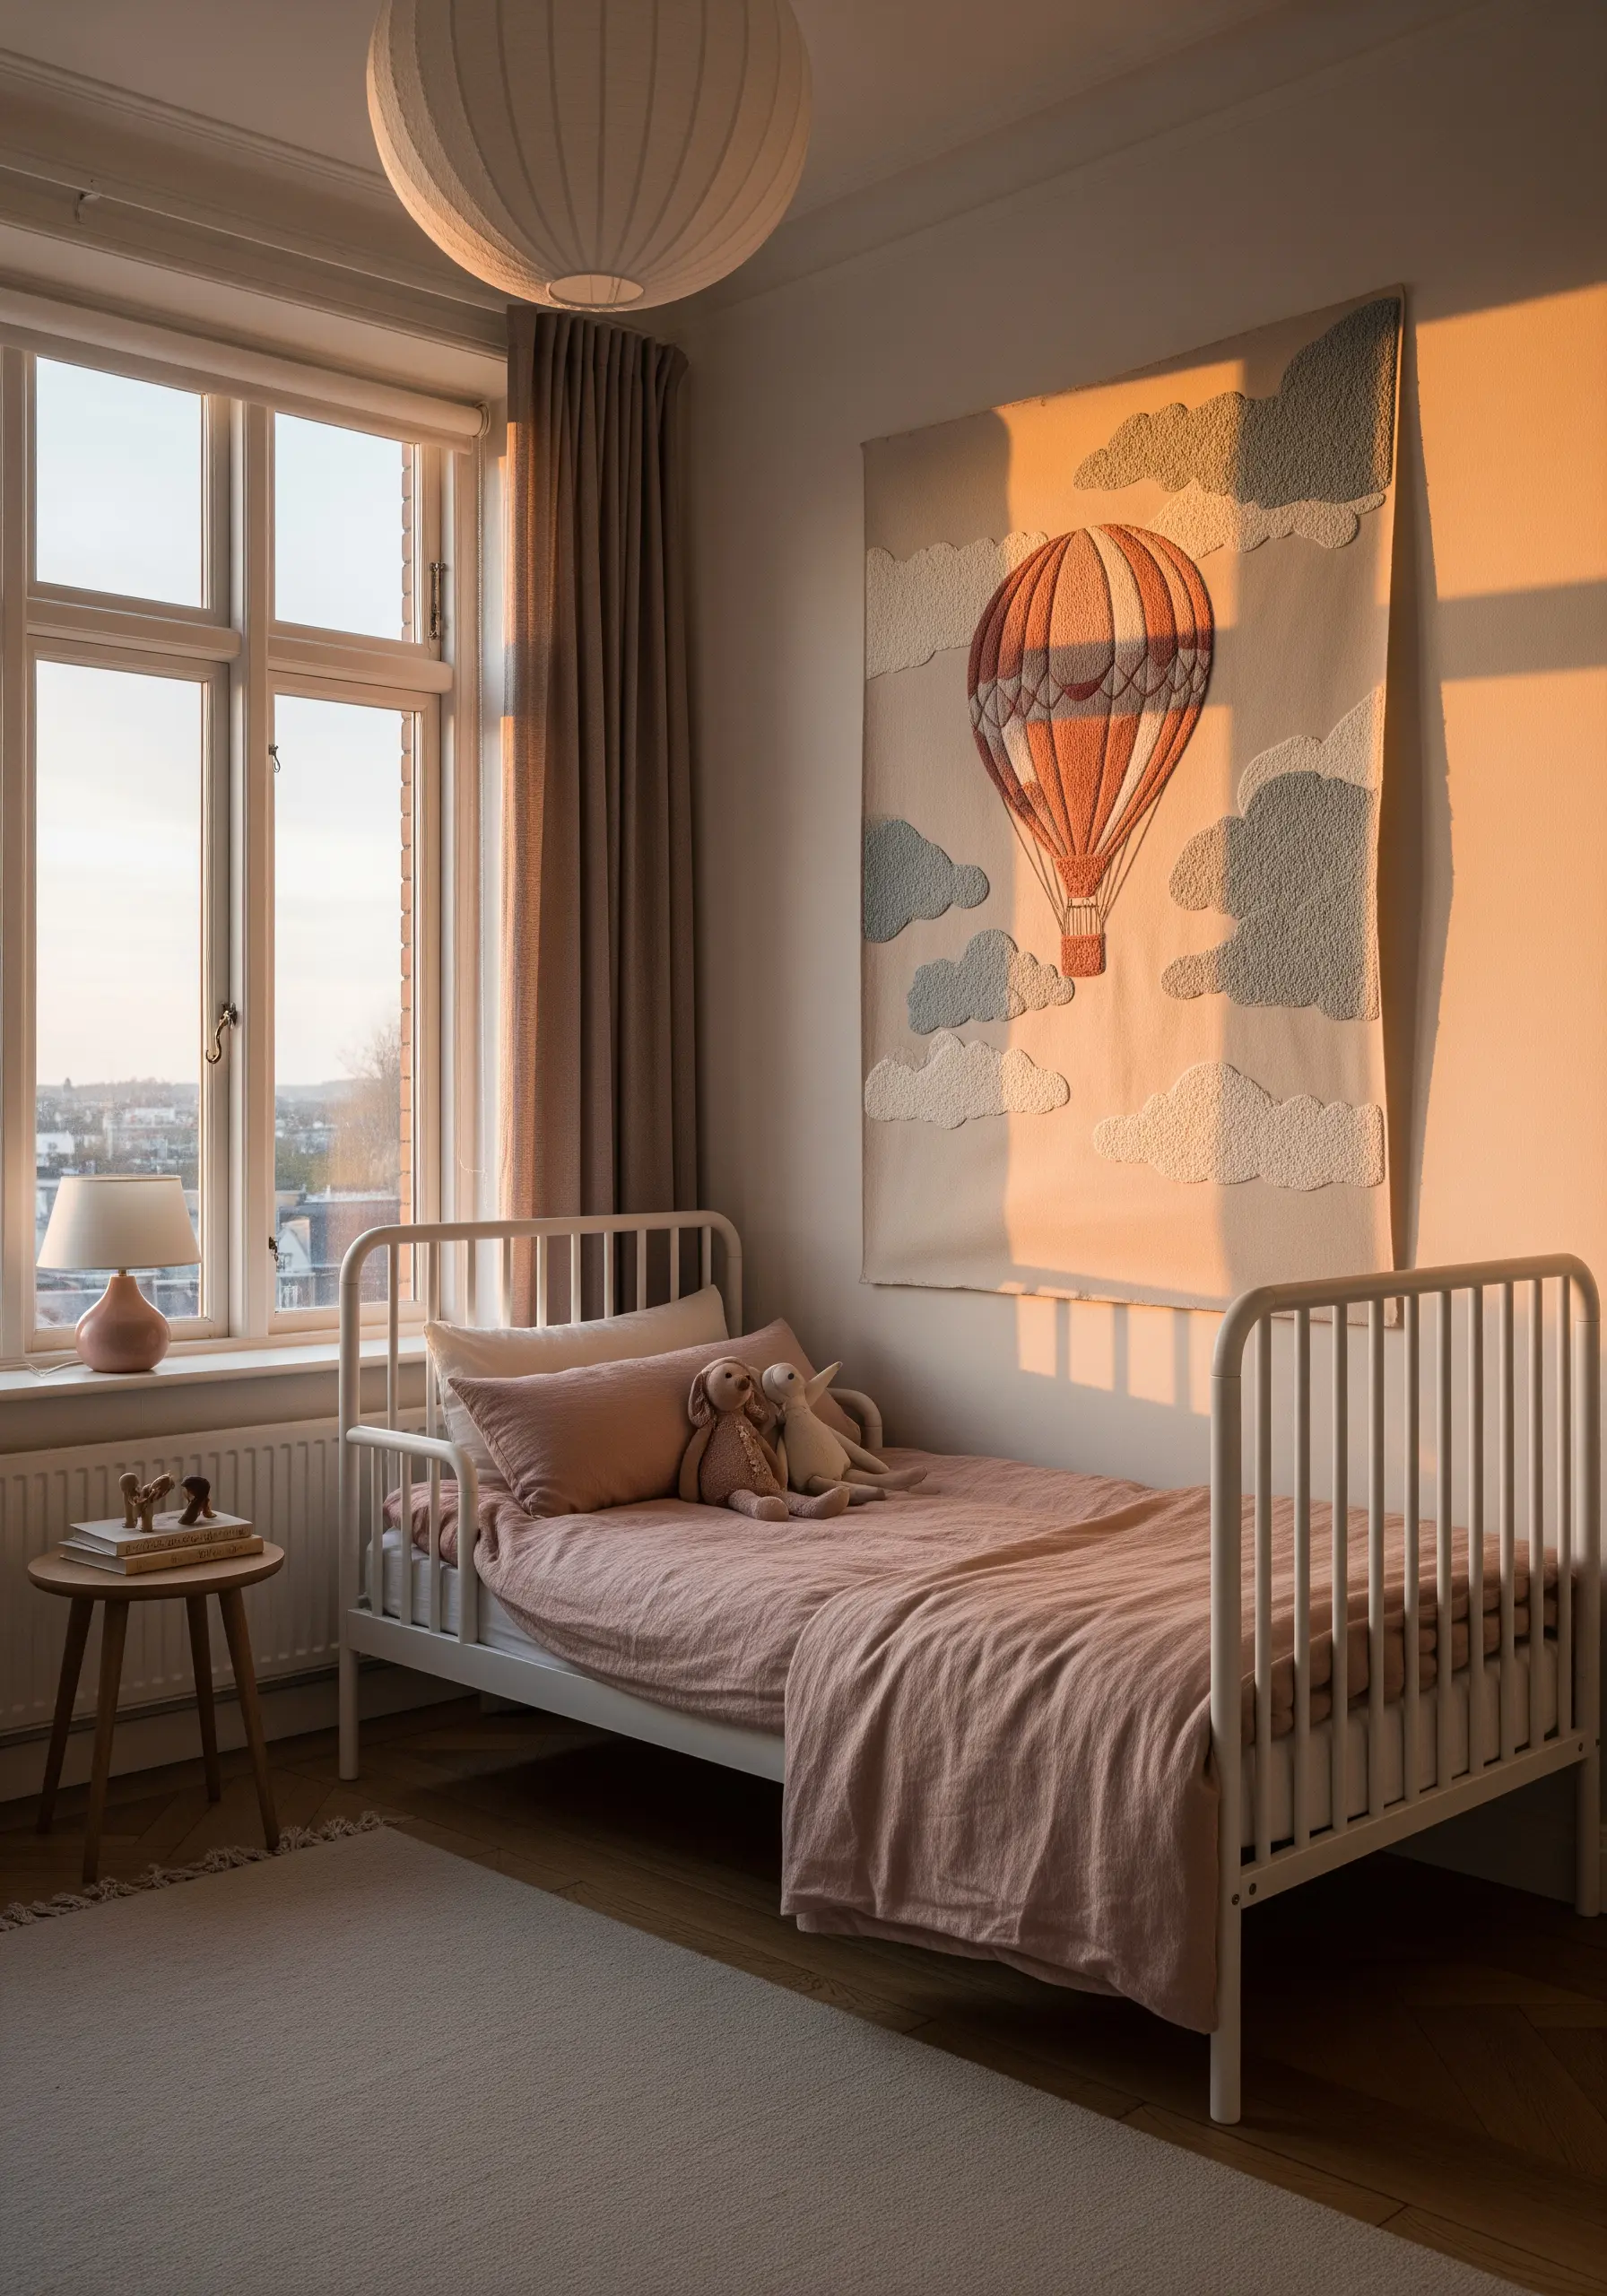
For a soft, dimensional effect perfect for a child’s room, combine simple appliqué with embroidery.
Cut your main shapes, like the balloon and clouds, from felt or another fabric that won’t fray.
Tack them onto your background fabric with a simple running stitch around the edges.
Then, add all the fine details—the basket, the shading, the ropes—with embroidery stitches like satin stitch and backstitch, creating charming nursery-friendly textile wall art.
26. Evoke Landscapes with Minimalist Color Blocking

Suggest a serene landscape with nothing more than blocks of color and texture.
This powerful technique relies on dense, horizontal satin stitches.
The key to its success is absolute precision: ensure every stitch within a color block is perfectly parallel to the others.
The subtle sheen of the thread and the clean, straight lines are all that’s needed to evoke the feeling of a calm horizon, proving the power of modern minimalist textile wall art.
27. Sculpt a Pinecone with Layered Scales
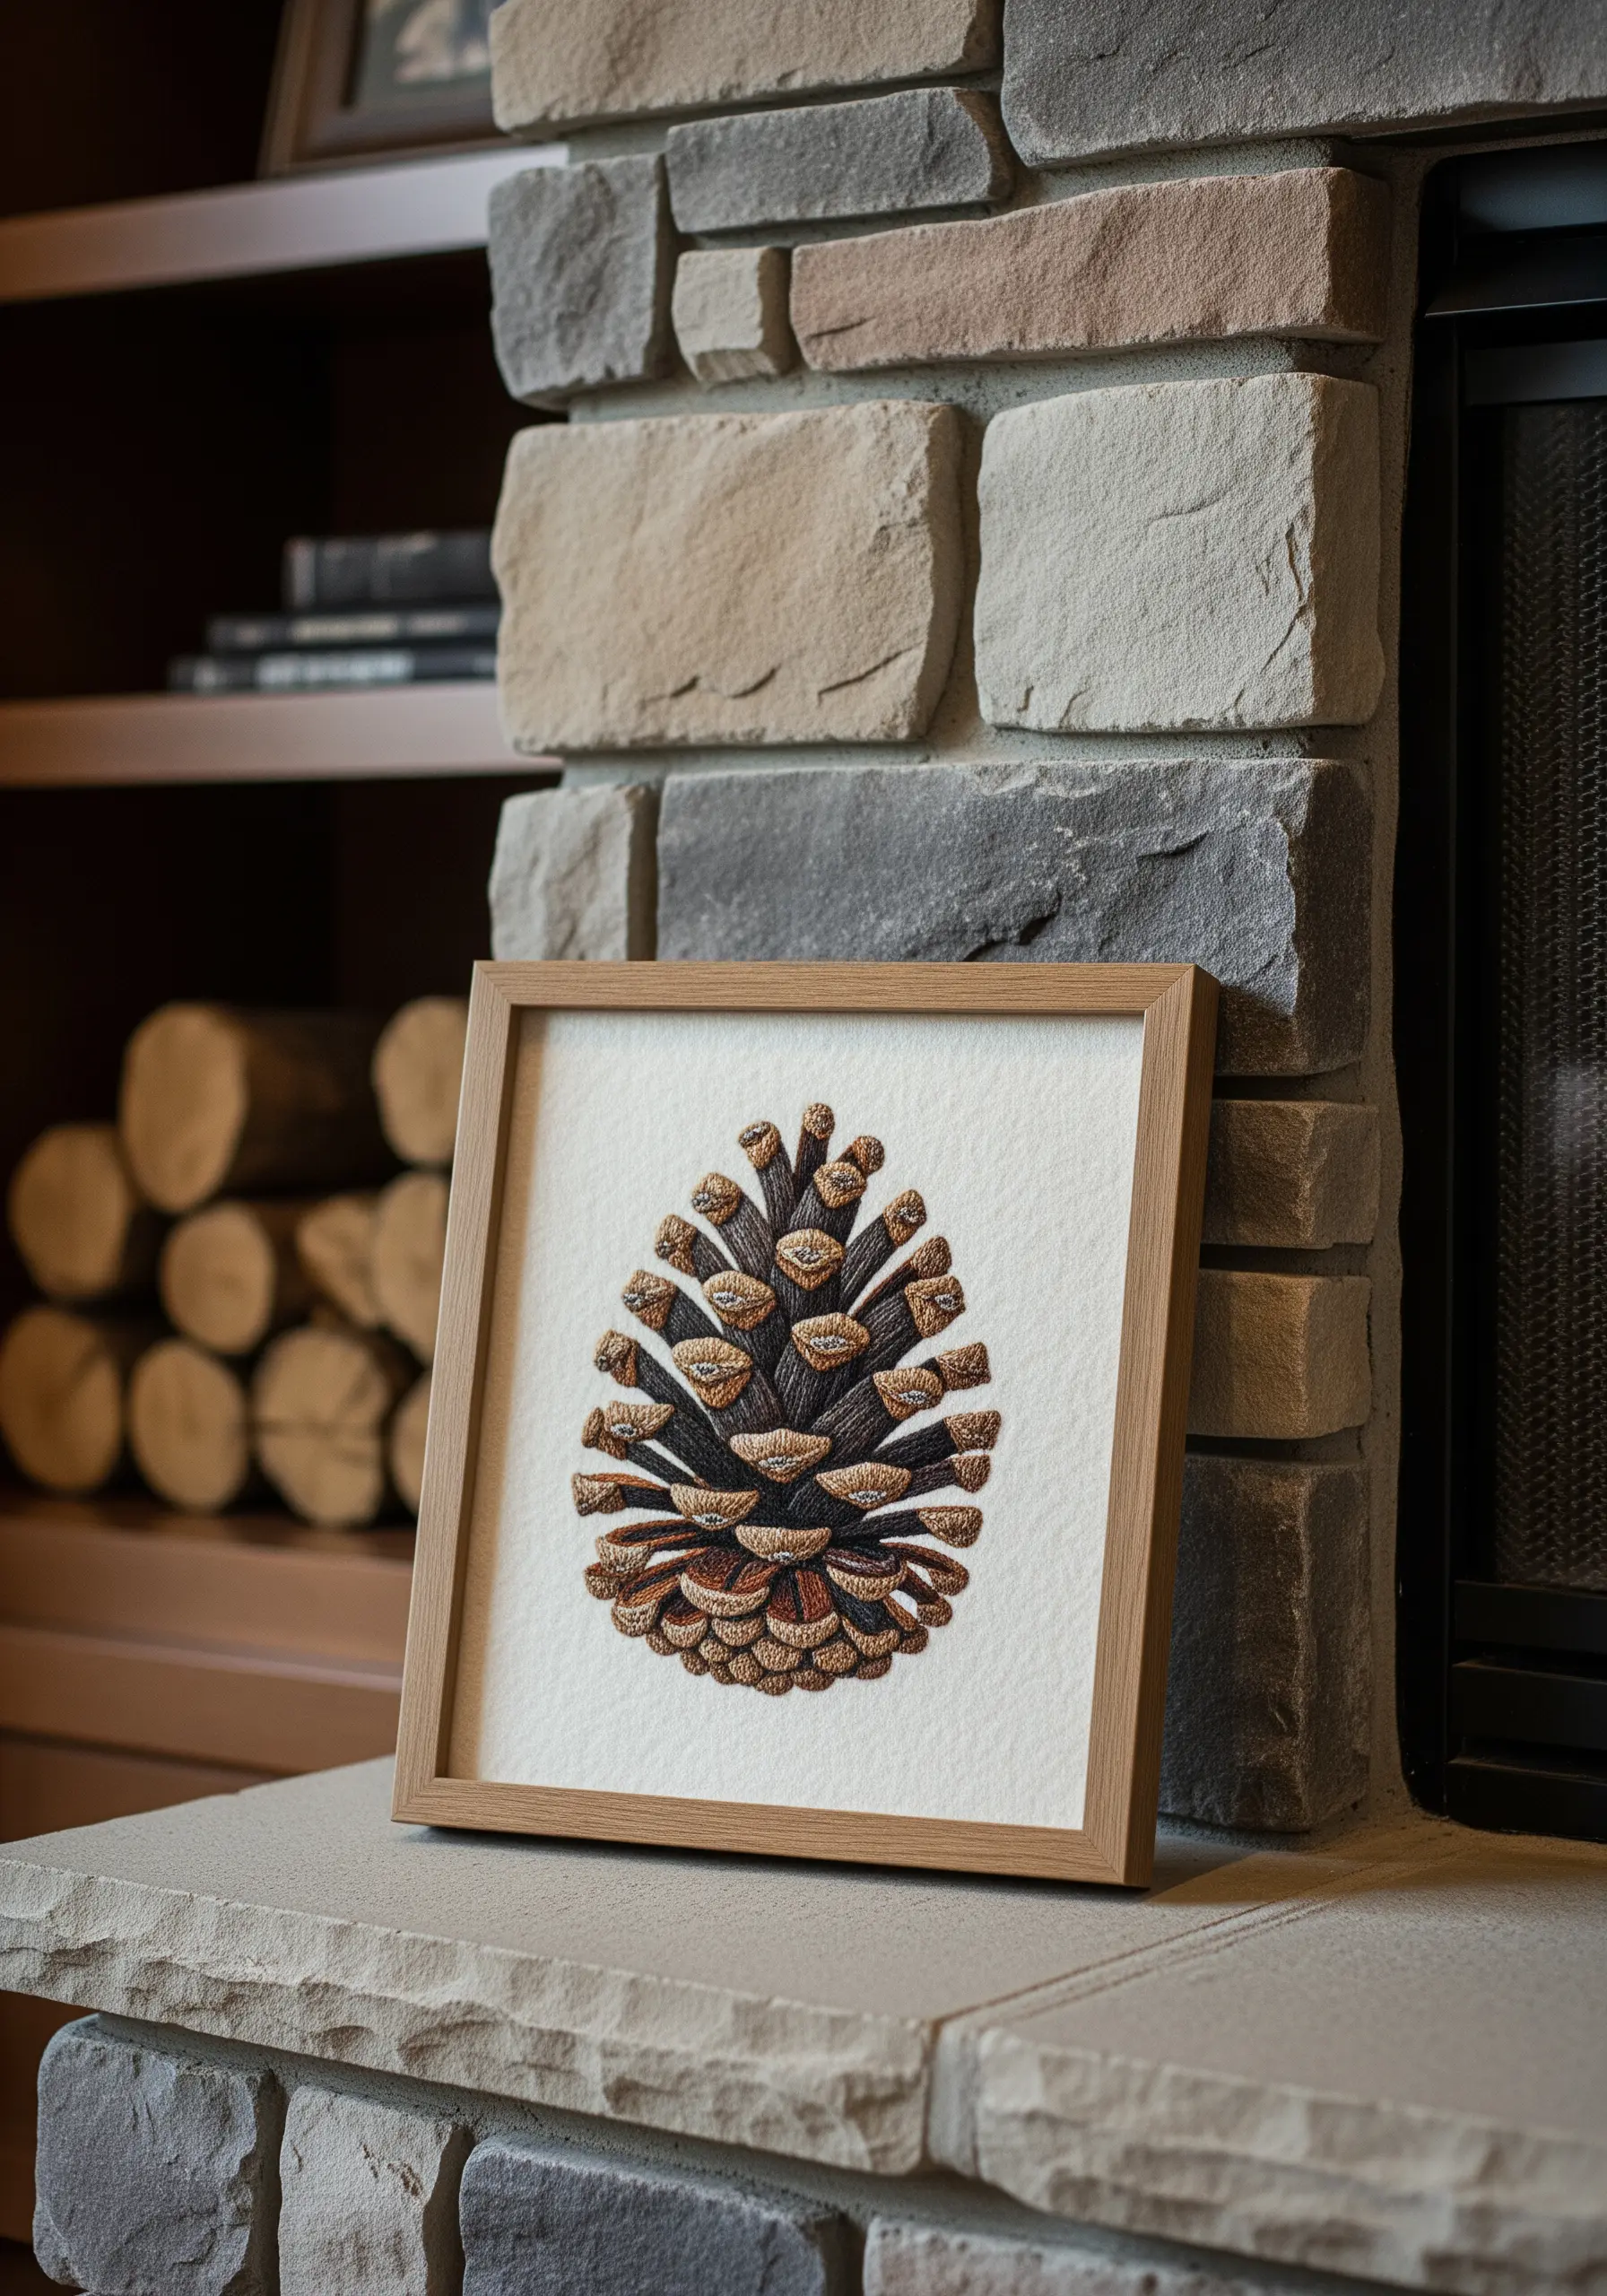
To achieve a convincing three-dimensional effect, you must build your pinecone from the back to the front.
Begin by stitching the scales that are farthest away, at the top of the cone.
As you work your way down and forward, slightly overlap the stitches of each new scale over the ones behind it.
Use a directional satin stitch for each individual scale, angling your stitches outward from the center to create a realistic, fanned-out appearance for your nature-inspired framed embroidery.
28. Capture Gestural Energy with Couching
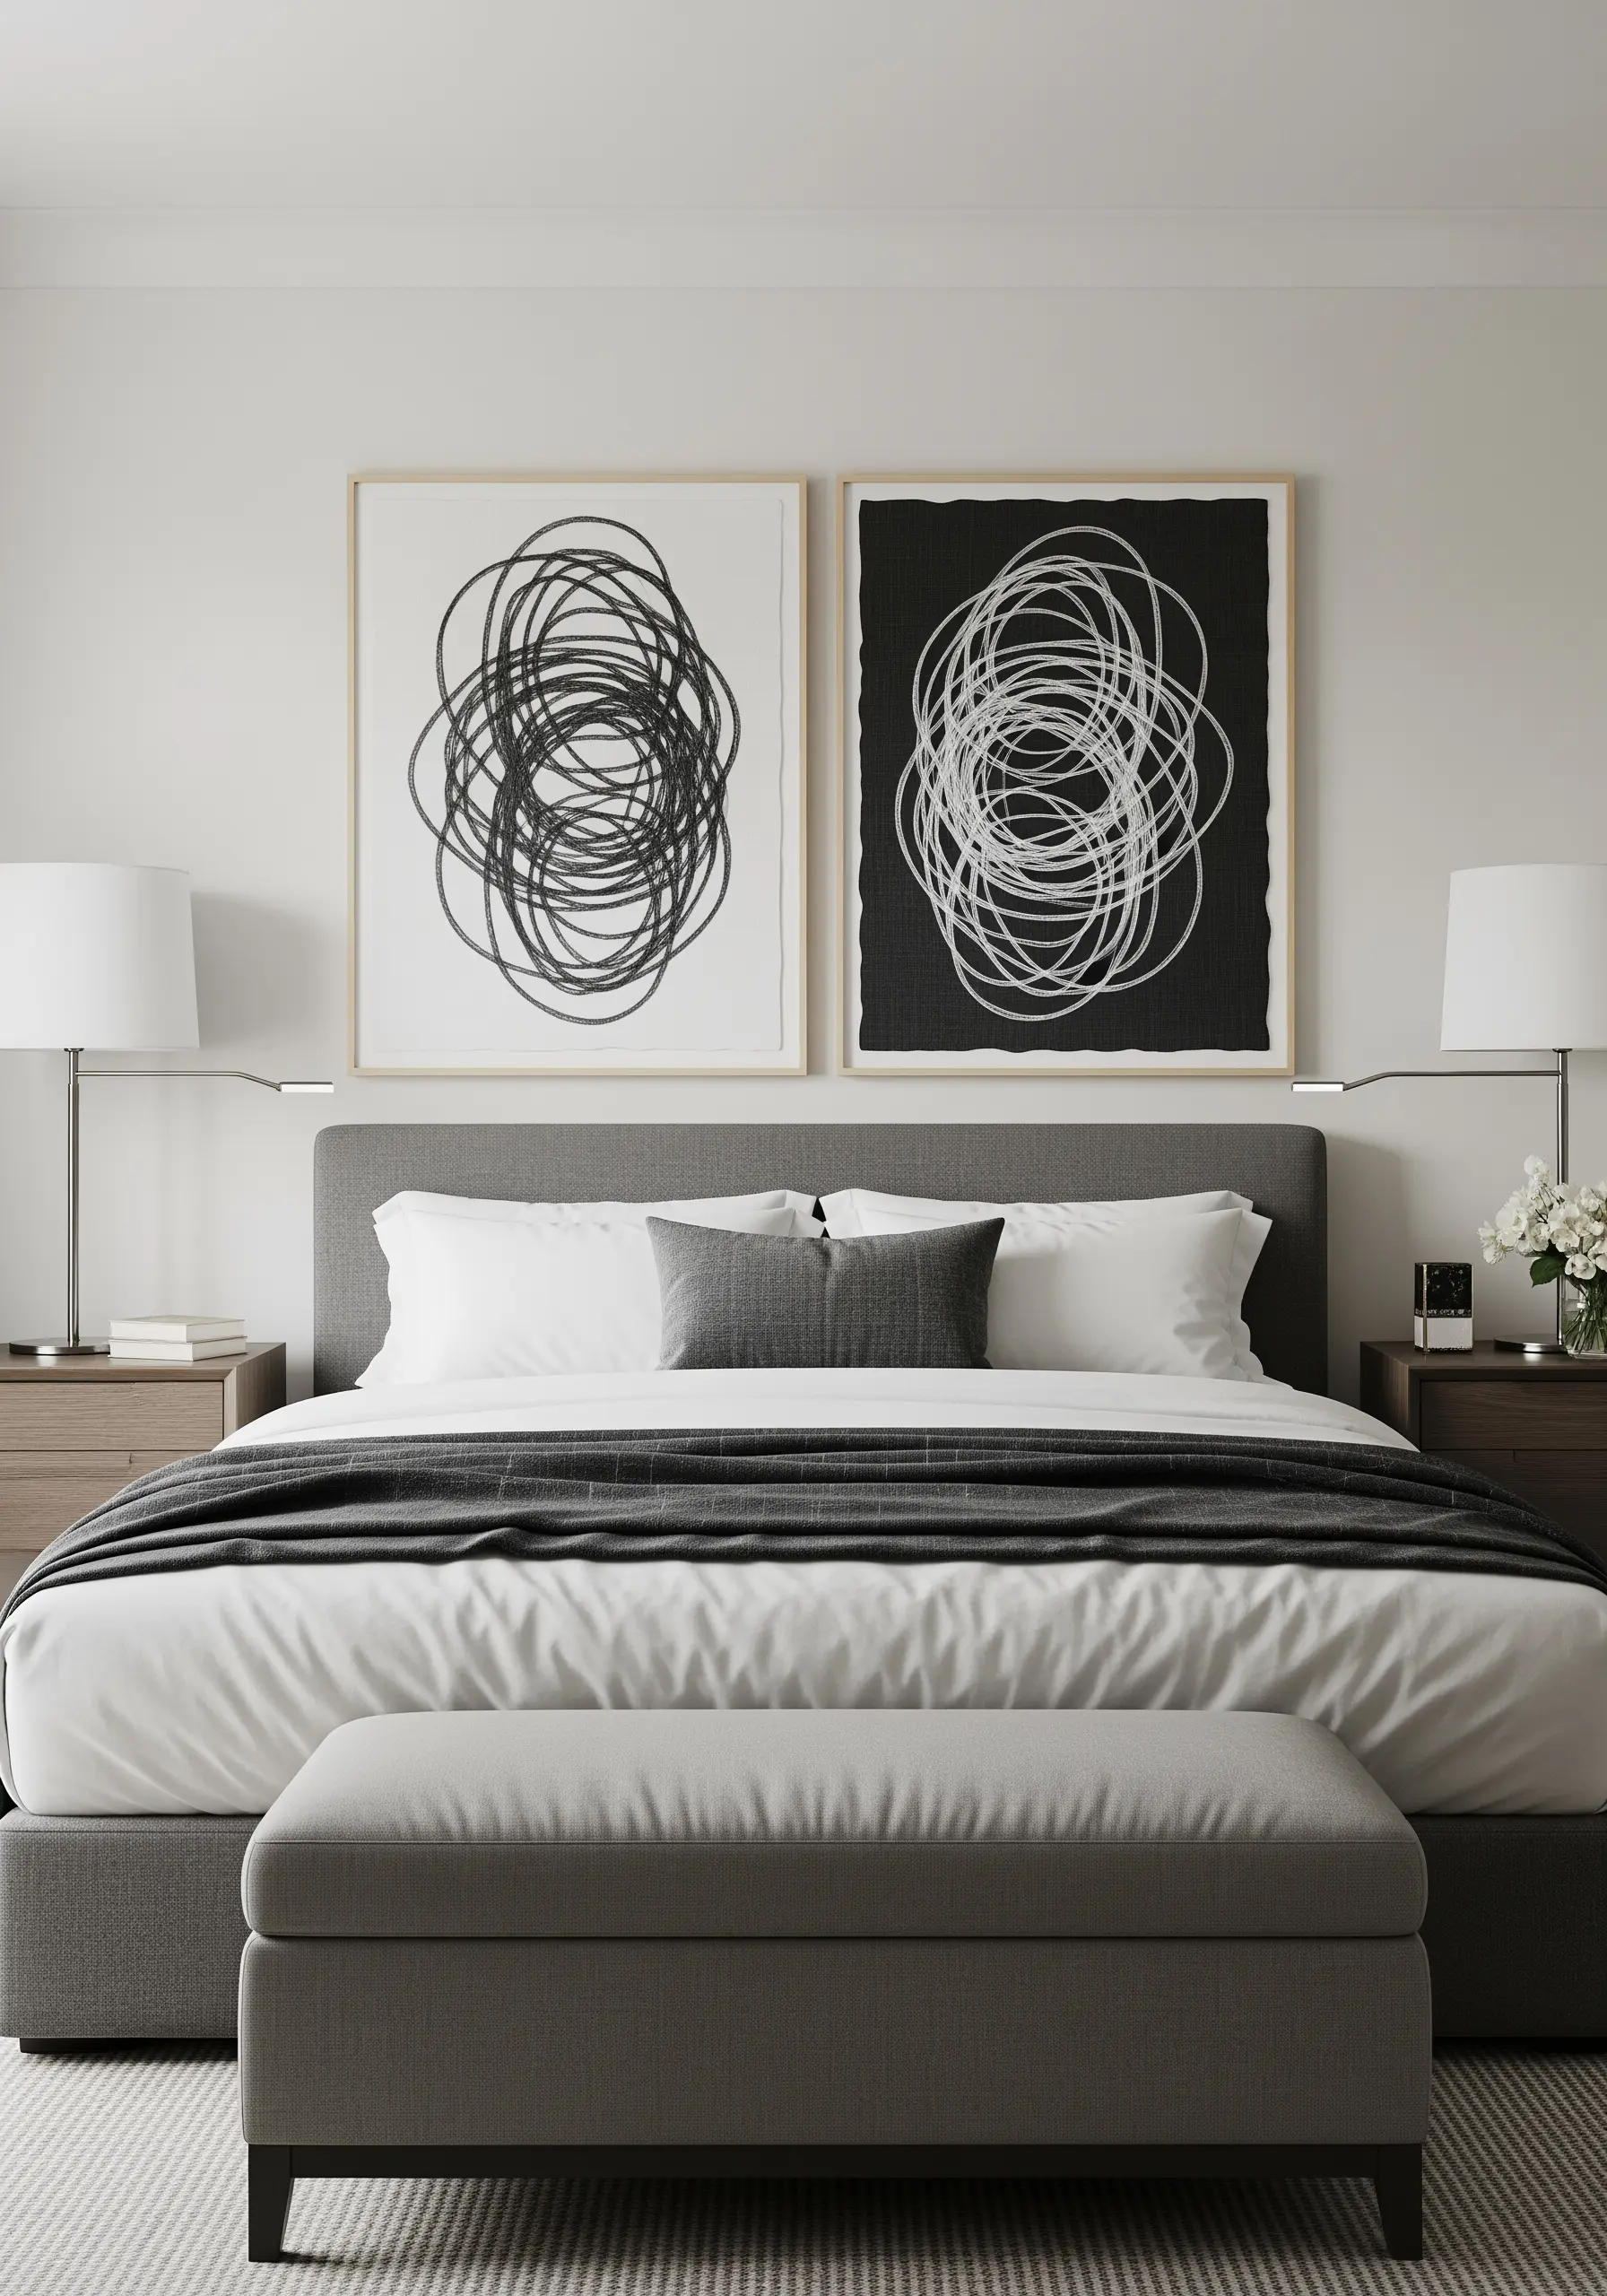
To create the free-flowing energy of a scribble sketch, use couching.
Instead of making individual stitches, lay a thick yarn or multiple strands of floss on your fabric in a continuous, looping line.
Then, use a second, finer thread to tack the yarn down with tiny, perpendicular stitches.
This technique allows you to create fluid, uninterrupted lines that cross over themselves, perfect for abstract thread sculpting with a dynamic sense of motion.
29. Stitch Delicate Seeds with Detached Stitches
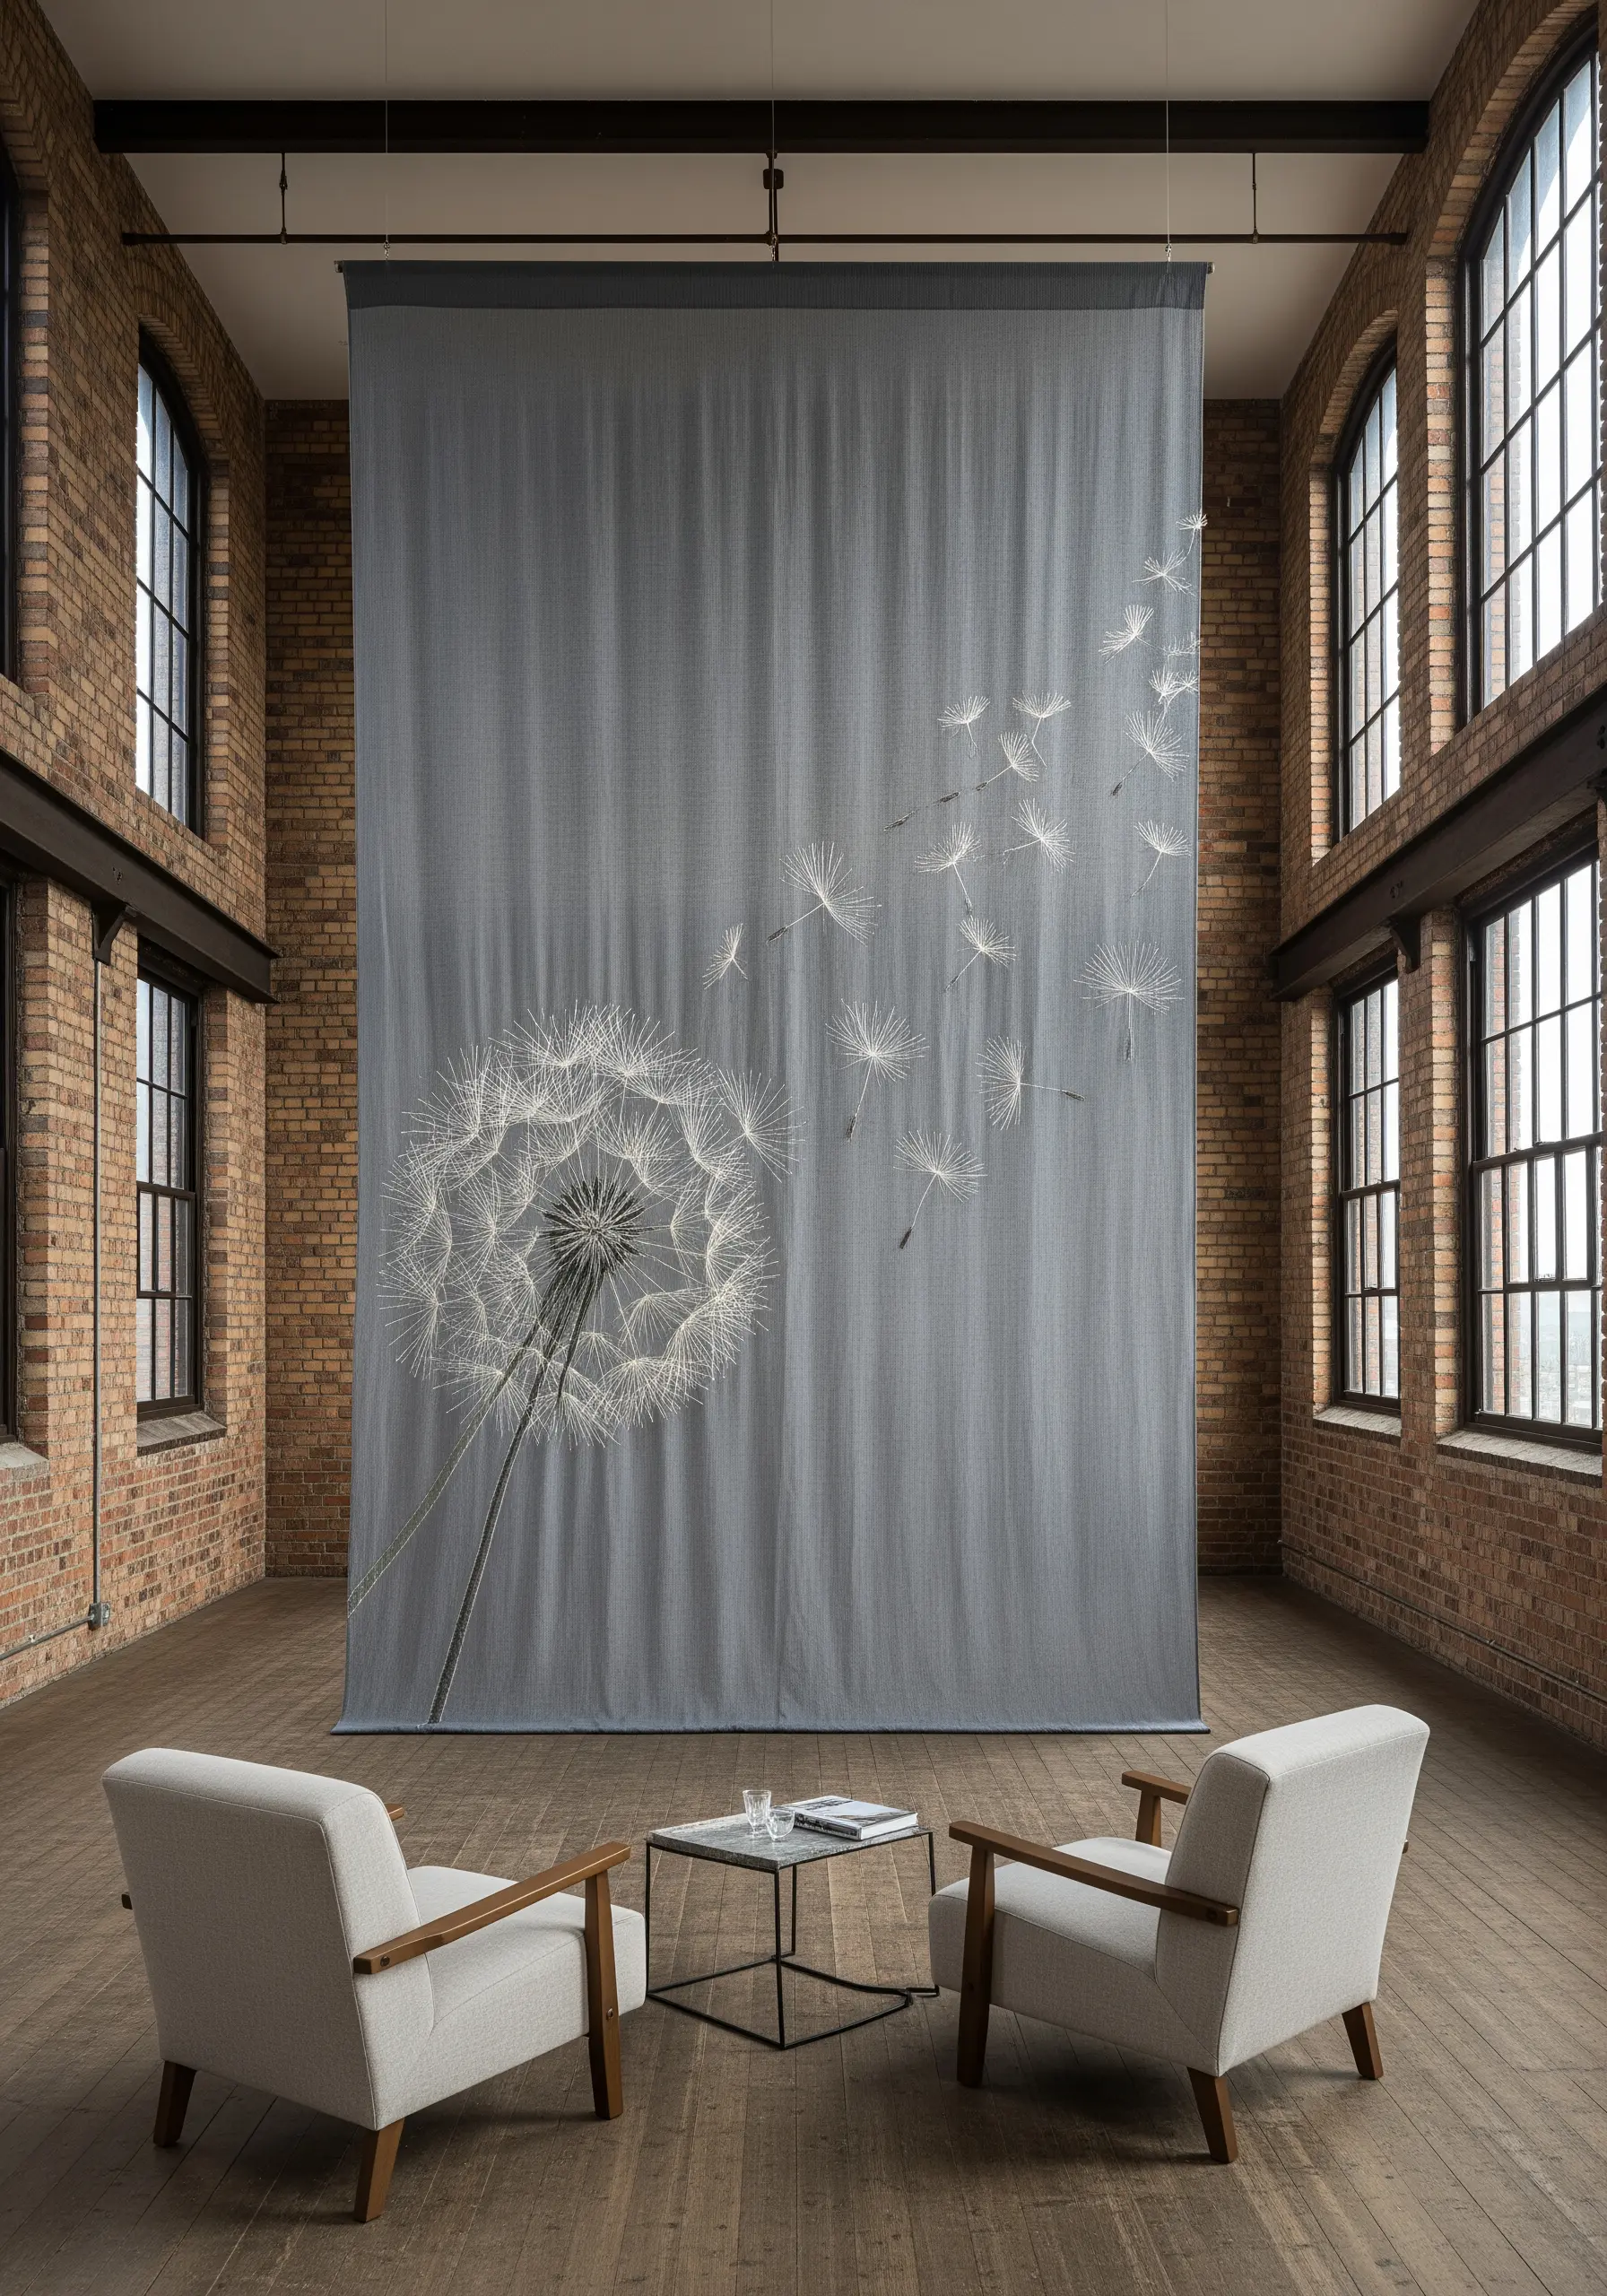
The airy, ephemeral quality of a dandelion seed head can be beautifully rendered with a few simple stitches.
For each seed, use a single straight stitch for the long stem.
At the top, create the fluffy pappus with a small cluster of tiny detached chain stitches (also known as lazy daisies).
This combination perfectly captures the delicate structure, making the seeds in your dandelion stitch project look as if they could float away at any moment.
30. Paint with Light Using Impressionistic Stitches
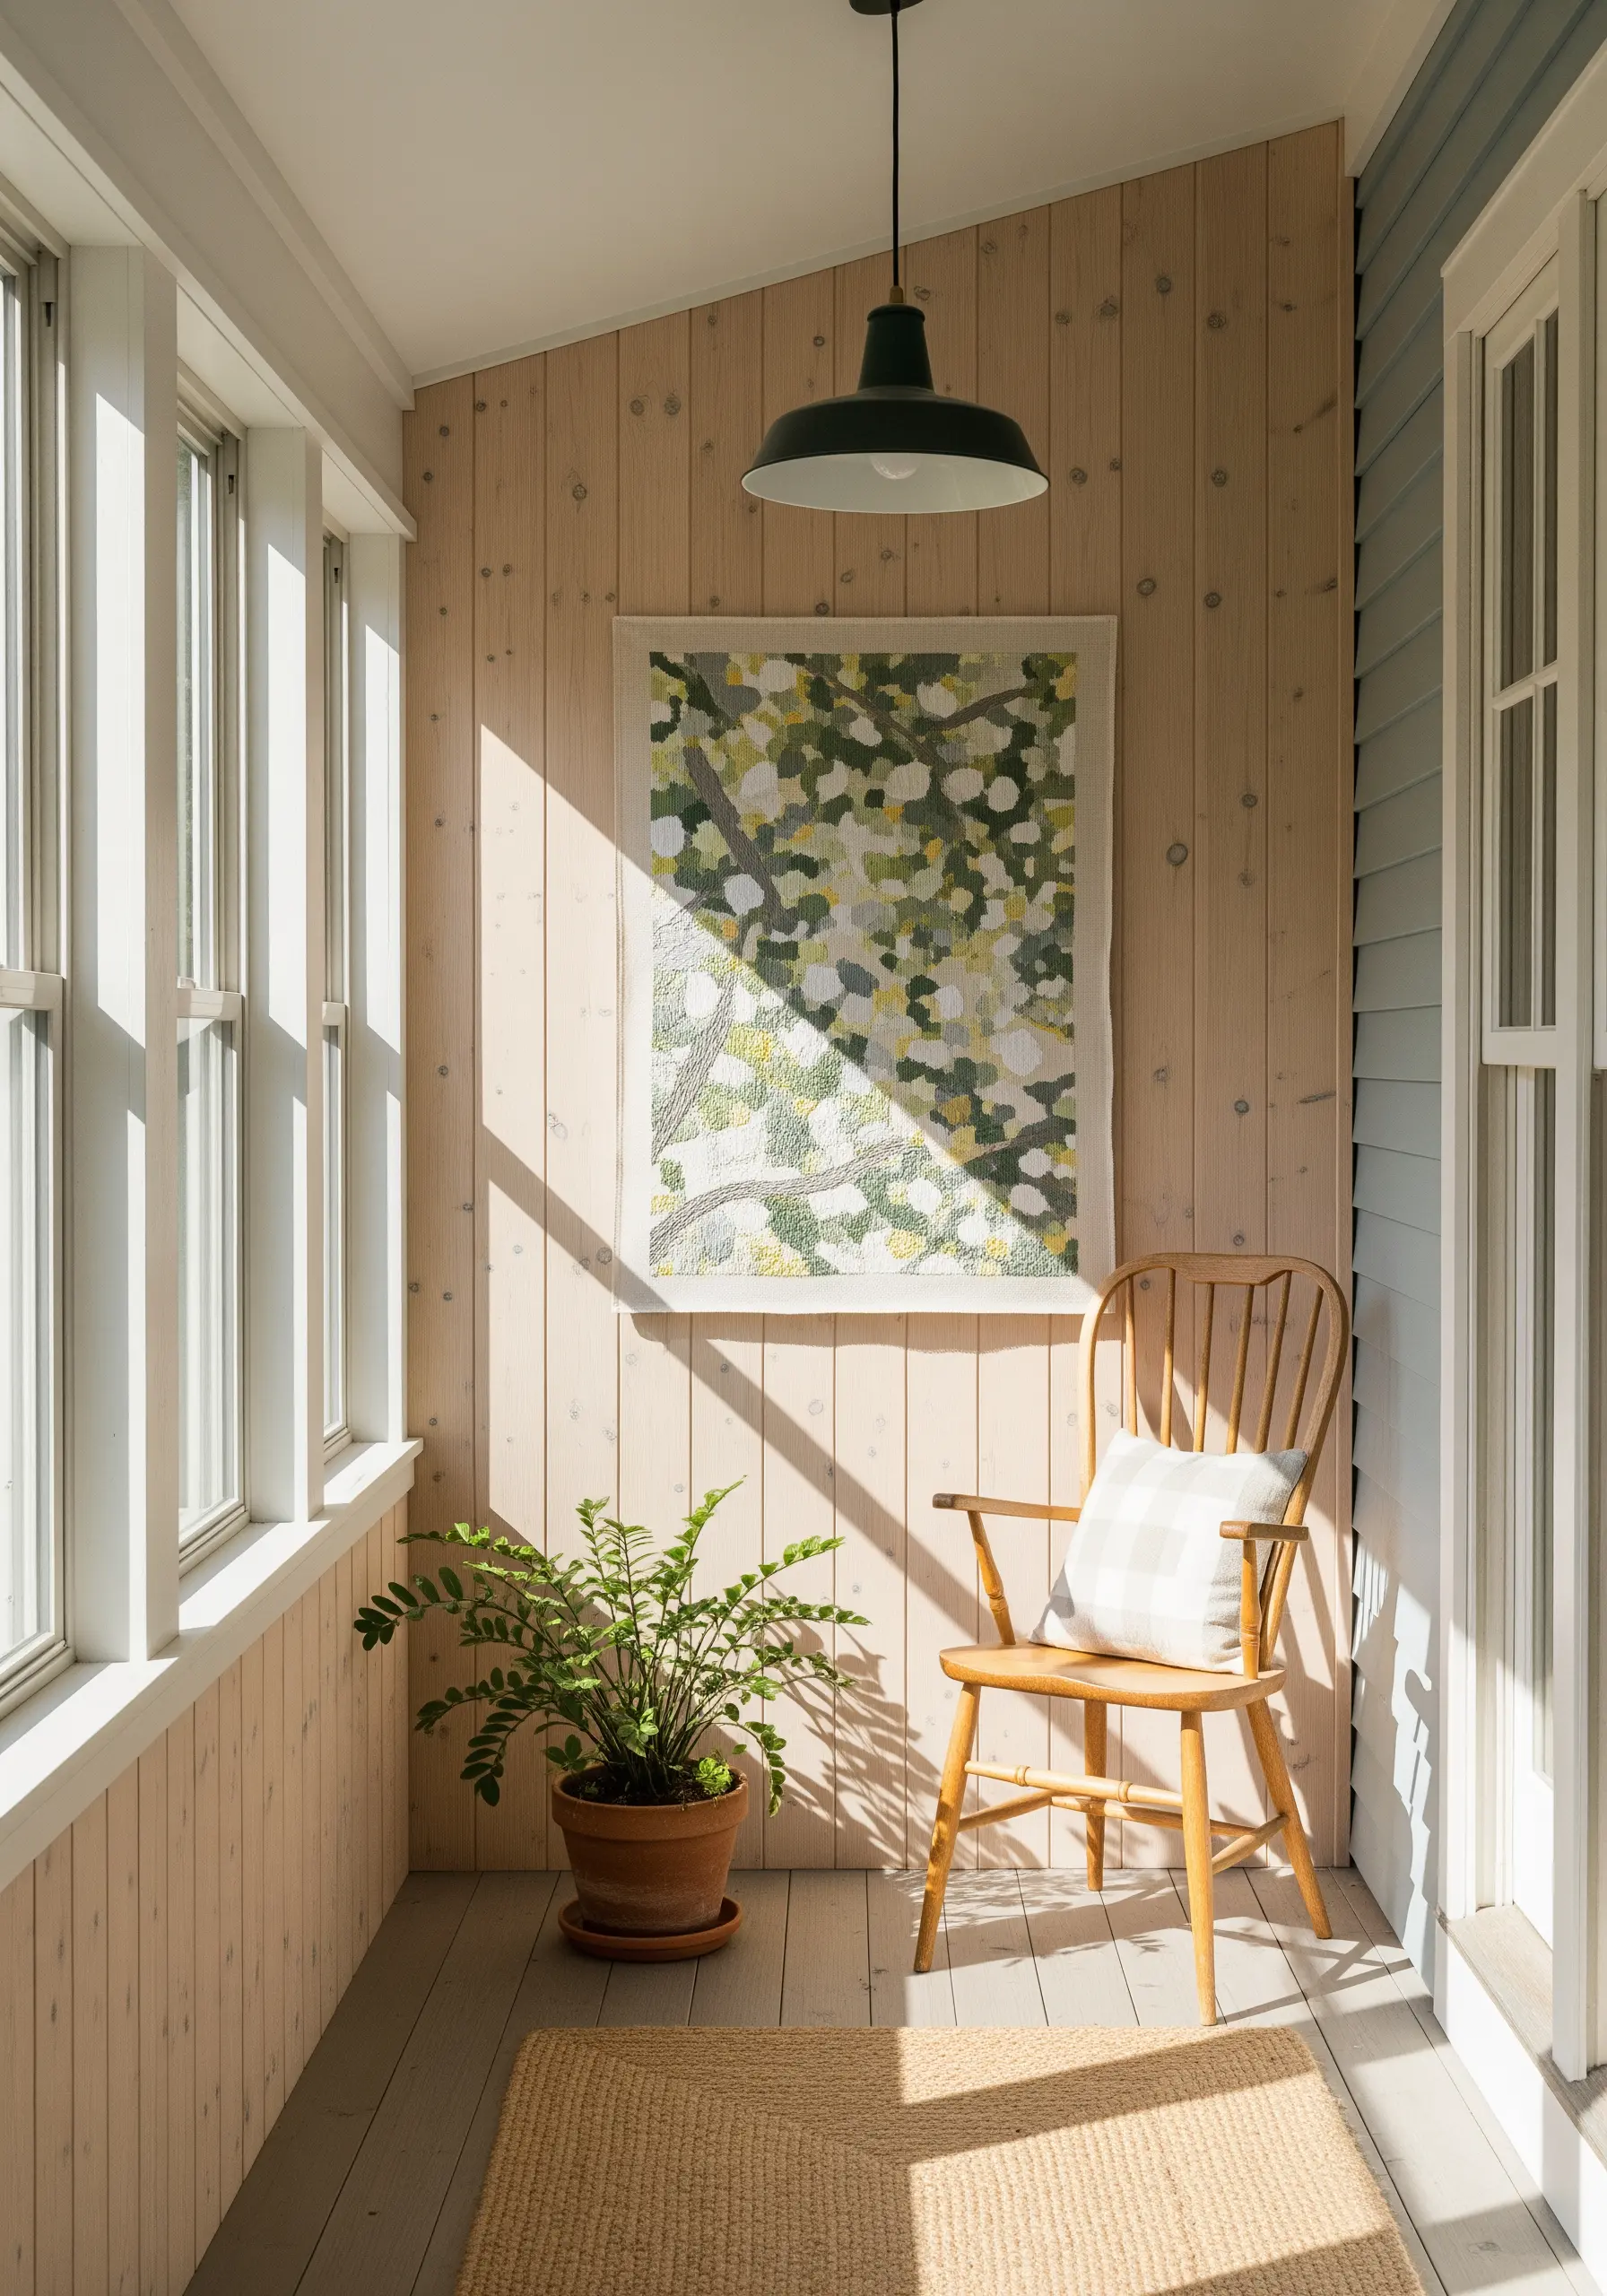
You can recreate the effect of sunlight filtering through leaves with small, confetti-like stitches.
Use short, multi-directional straight stitches or seed stitches in a palette of greens, yellows, and creams.
Instead of trying to blend them smoothly, place them in distinct but close-knit patches.
This impressionistic approach allows the viewer’s eye to mix the colors optically, creating a vibrant illusion of dappled light and proving the power of color blending thread patterns.


