

Have you ever finished a piece of embroidery and felt that, while technically correct, it was missing a certain life or polish? You have the patience, you know the stitches, but translating the image in your mind into thread feels just out of reach.
This isn’t about learning a hundred new stitches. It’s about refining how you use the ones you already know. It’s about understanding that the direction of a single stitch can create shadow, that combining two different thread textures can mimic nature, and that sometimes, the most powerful element is the space you intentionally leave empty.
Here, we will move past simply filling in shapes and begin to think like an artist. You’ll learn to see thread as a medium for sculpting, painting, and storytelling. Let’s start transforming your stitching from a craft into an art form, one thoughtful thread at a time.
1. Render Autumnal Depth with Layered Stitches

Give your embroidered leaves a realistic, papery texture by varying the direction of your satin stitch within each section.
Instead of a uniform fill, angle your stitches to follow the natural veins of the leaf, which adds movement and dimension.
Introduce a single strand of metallic gold or copper thread alongside your regular floss for the vein details.
This subtle highlight catches the light and elevates the entire composition, making the colors feel richer and more dynamic.
Choosing a neutral, textured fabric like grey felt or linen makes the warm tones of your leaf-bark-and-stone-inspired embroidery designs appear more vibrant.
2. Sculpt Monumental Waves with Tufted Textures

For large-scale fiber art, move beyond simple stitches and explore punch needle or tufting techniques to create dramatic, flowing textures.
Build dimension by varying the loop height—use taller loops for the crests of the waves and shorter, denser loops for the troughs.
This physical difference in height creates shadows and enhances the illusion of movement.
Work with a limited color palette of five to seven shades of the same color family to maintain a modern, graphic feel.
The cohesion in color allows the texture to become the primary focus of your statement-size embroidered textile hangings.
3. Create Atmospheric Clouds with Dense French Knots
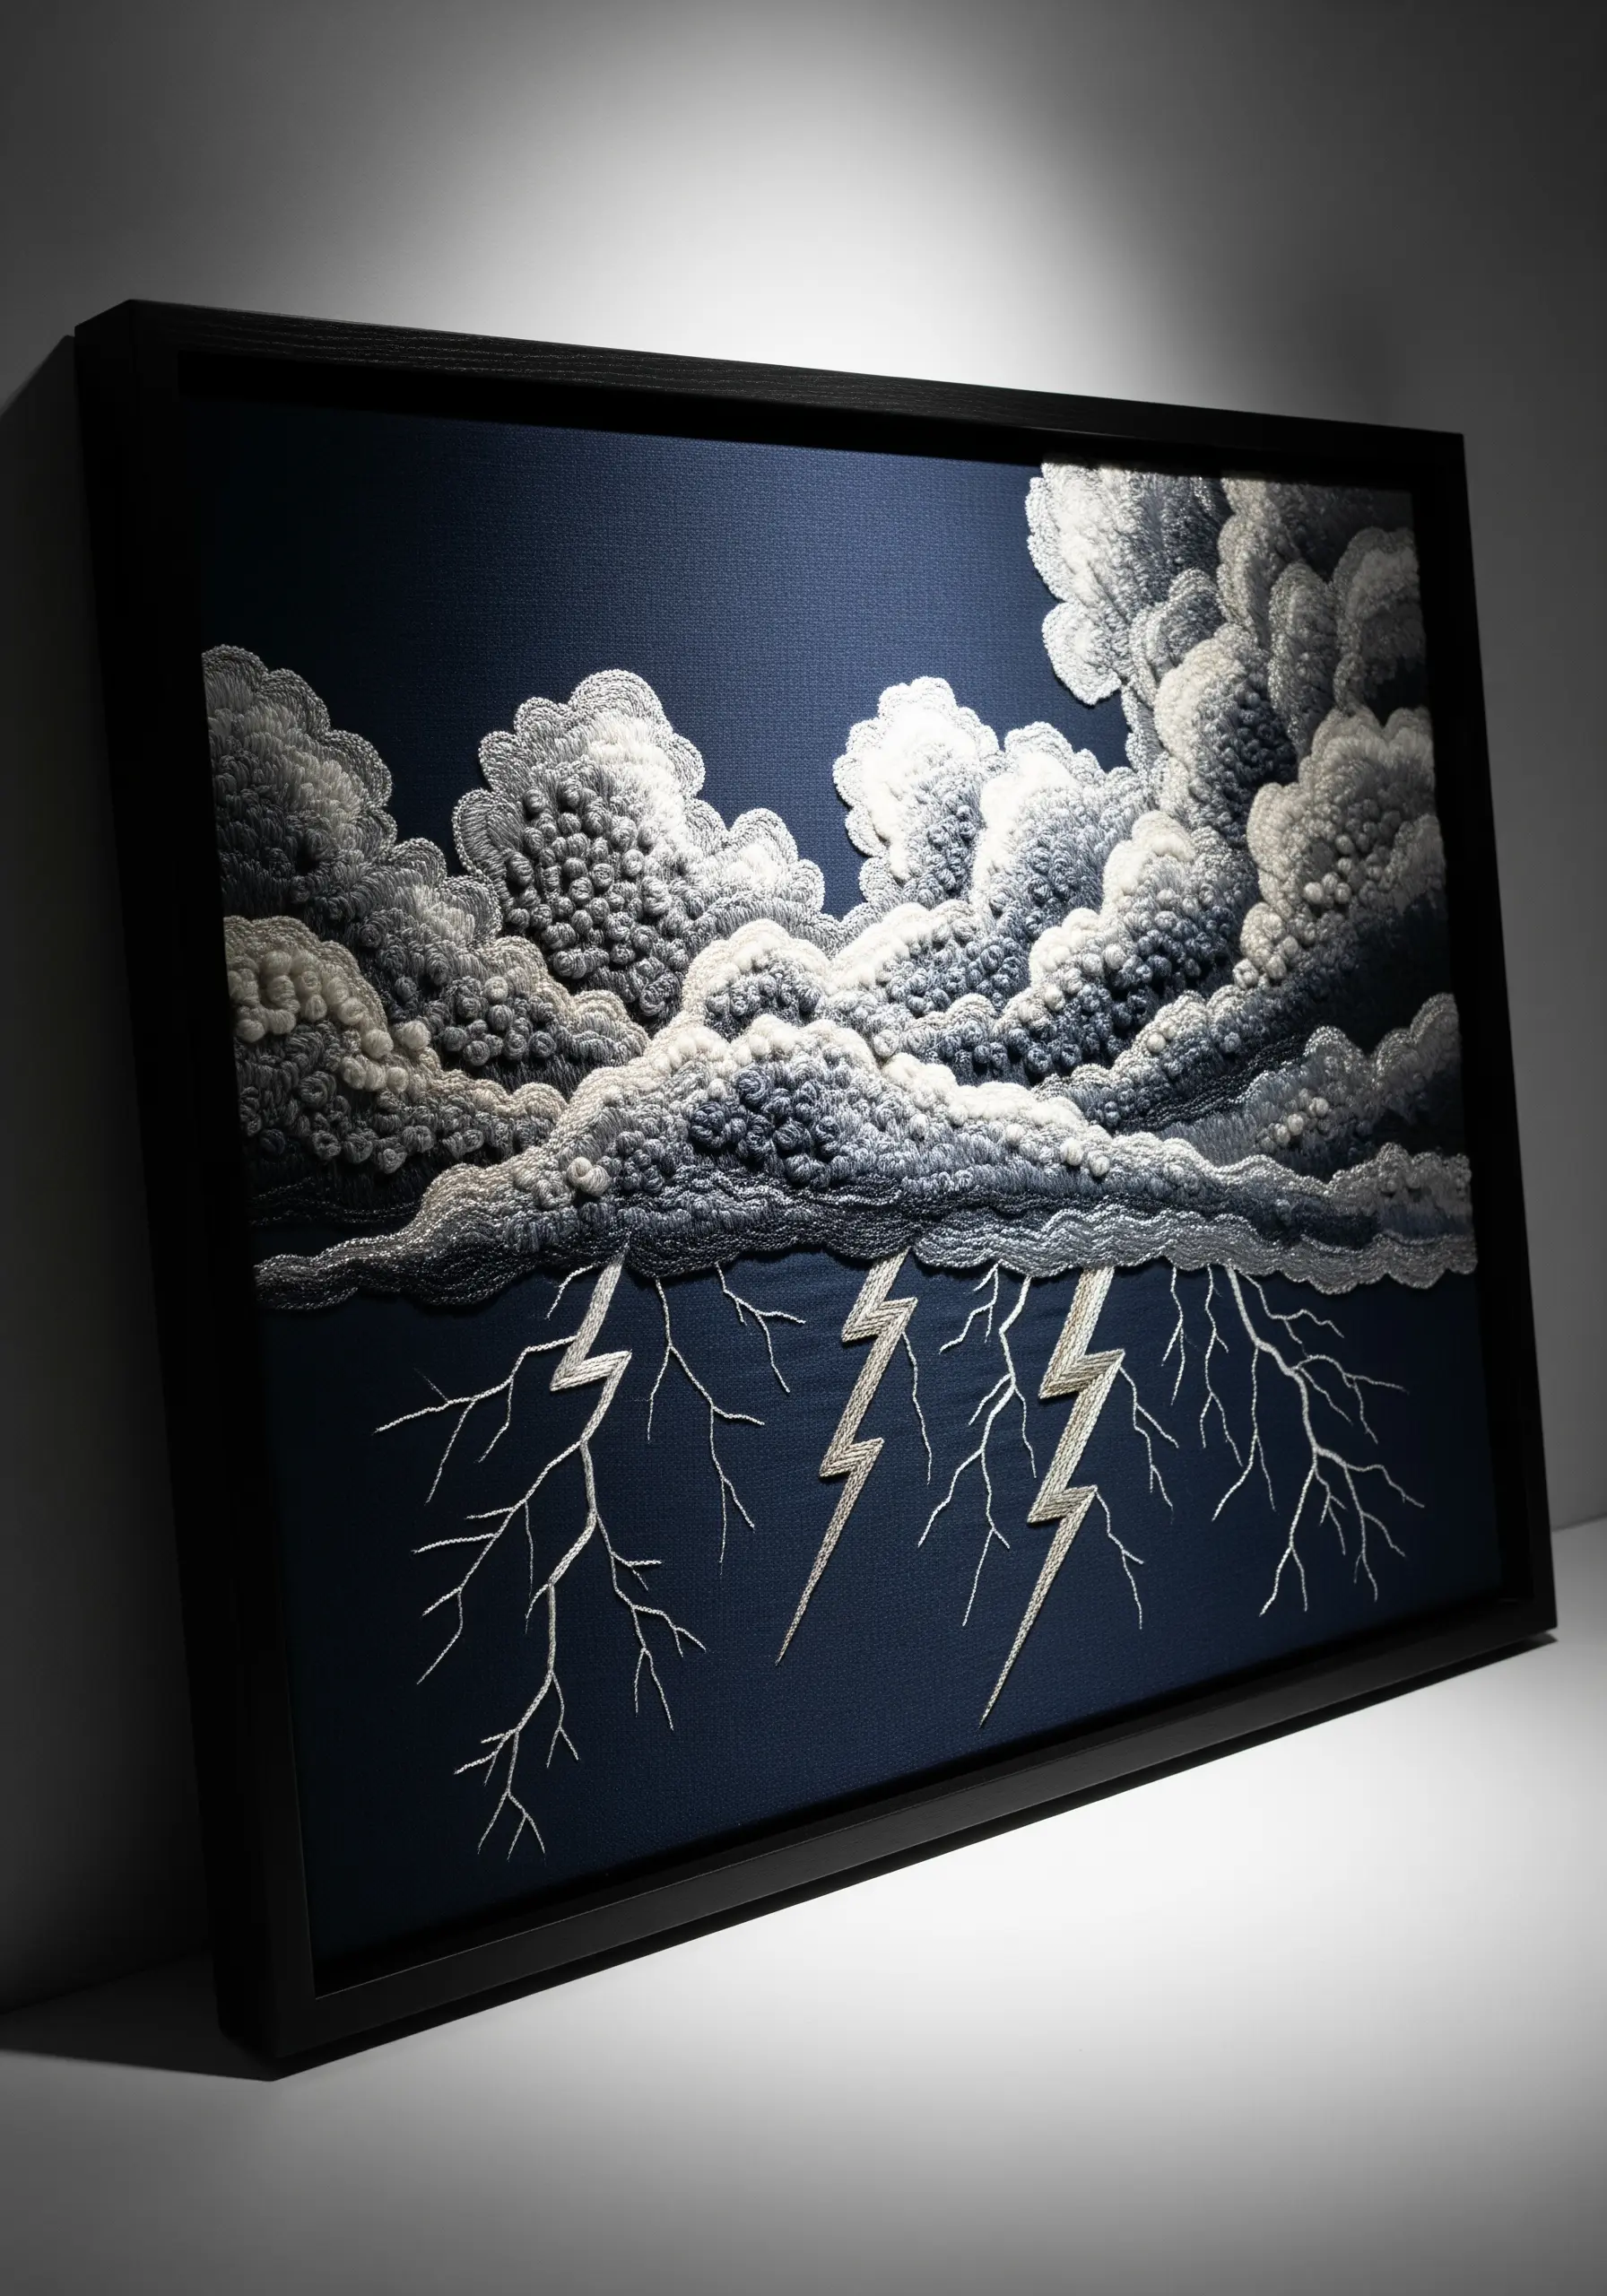
Capture the turbulent volume of storm clouds by abandoning flat stitches in favor of densely packed French or colonial knots.
Use a variegated grey or white thread, or blend two different shades in your needle at once, to give the clouds a natural, multi-tonal appearance without extra effort.
Contrast the soft, pillowy texture of the clouds with sharp, decisive stitches for the lightning.
A bright silver metallic thread stitched in a jagged backstitch or couched down will create a brilliant flash against a dark navy or black fabric background.
4. Achieve Graphic Elegance with Precision Satin Stitch
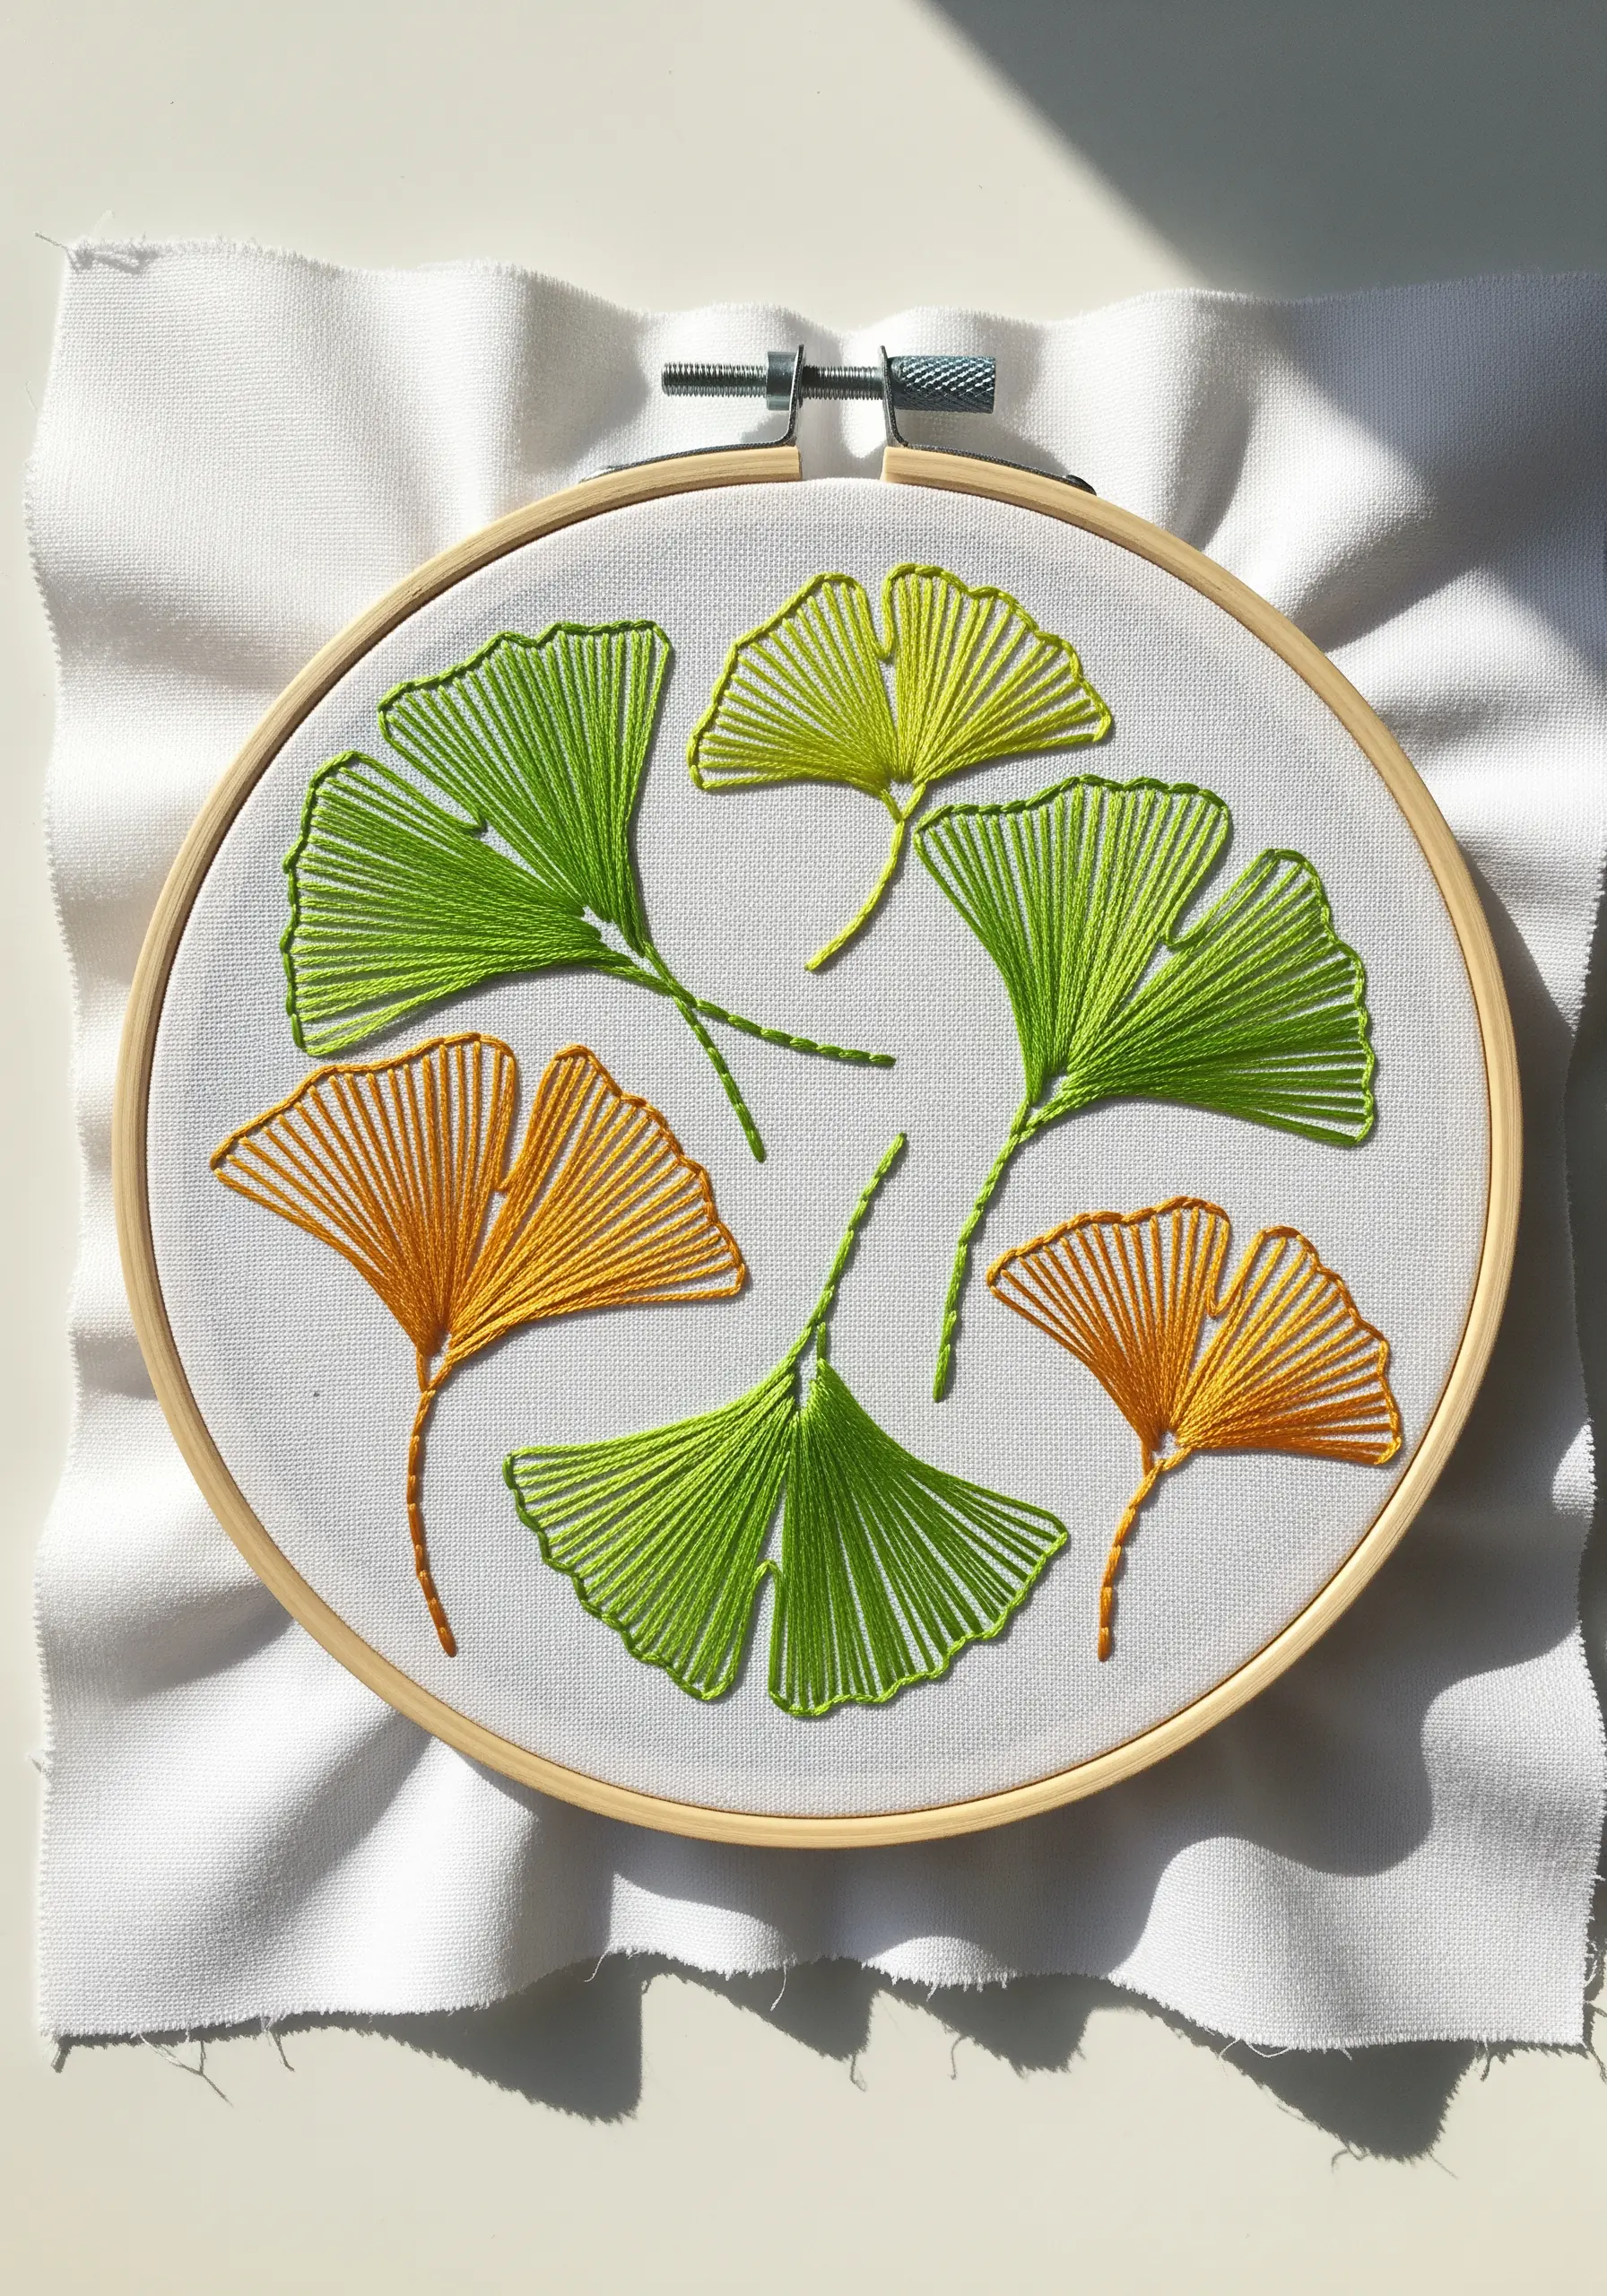
To create clean, modern botanicals like these ginkgo leaves, focus entirely on the perfection of your satin stitch.
Outline each leaf section with a single line of split stitch first; this creates a raised, sharp edge for your satin stitches to rest against, resulting in a much neater finish.
Ensure every stitch lies perfectly parallel to the last, fanning out from the stem.
The beauty of this style lies in its flawless execution and the glossy sheen created by uniform thread direction, turning simple shapes into minimalist embroidery hoops.
5. Paint with Thread for Lifelike Landscapes

Move beyond outlining and filling to achieve the painterly effect of a realistic landscape through thread painting.
Use a single strand of embroidery floss and long-and-short stitches to blend colors seamlessly, creating soft gradients in the water and foliage.
To create the illusion of water, keep your stitches predominantly horizontal, using shades of blue, green, and white to mimic reflections.
For the trees and grasses, use shorter, more varied stitch directions to build texture. This contrast in stitch style is what separates static scenes from threaded landscapes that feel alive.
6. Define Form with Minimalist Line and Texture

Convey a powerful scene using the absolute minimum of stitches by focusing on clean lines and a single textural accent.
Use a whipped backstitch or a heavy chain stitch with six-strand floss to create bold, graphic mountain outlines.
The thickness of the line does the work, eliminating the need for any fill stitches.
For the moon, switch to a more complex, textural stitch like a woven picot or a cluster of French knots with a silver metallic thread.
This single point of detailed texture provides a sophisticated focal point in an otherwise minimalist line art design.
7. Build a Tactile Underwater World

Create a vibrant, sculptural coral reef by combining a wide array of highly textured stitches.
Use bullion knots for worm-like corals, layered Turkey work for sea anemones, and dense clusters of French knots for rounded coral forms.
Don’t be afraid to mix different fibers; incorporate thicker wool yarn alongside standard cotton floss to create even more variation in surface texture.
This stitch diversity is what transforms the piece from a flat image into a tactile, explorable organic texture embroidery design.
8. Explore Dimension with 3D Embroidery

Bring your botanical art to life by moving beyond the canvas with three-dimensional elements.
Create the dandelion seeds separately by stitching them onto water-soluble stabilizer. Once the stabilizer is dissolved, you’ll have delicate, freestanding thread objects.
Attach these seeds to your main artwork and even directly onto the wall, creating a dynamic sense of movement as they appear to float away.
This technique, known as stumpwork, adds a layer of narrative and whimsy that flat embroidery cannot achieve, resulting in framed embroidery art pieces with true depth.
9. Create Radiance with Beading and Sequins

Amplify a simple sun motif by incorporating beads and sequins for texture and light-play.
Use bugle beads for the sun’s rays, their elongated shape naturally creating strong directional lines.
Fill the center with a dense spiral of seed beads, and nestle a few flat sequins within the cluster to act as unexpected points of high shine.
Stitching with a dedicated beading thread and needle will make the process smoother and more secure. The combination of different reflective surfaces creates a design that shifts and glimmers as the viewer moves.
10. Embellish Denim with Bold Botanical Designs

Transform a simple denim jacket into a statement piece with large-scale botanical embroidery.
Always use a medium-weight cut-away stabilizer on the inside of the jacket to prevent the fabric from puckering under the tension of dense stitching.
Use a long-and-short stitch to create smooth color gradients on the monstera leaves, which gives them a more realistic, dimensional look.
For the finer palm leaves, a simple fishbone stitch provides texture and direction without overwhelming the composition. This balance makes denim jackets into boho fashion statements.
11. Stitch Delicate, Wispy Cloud Textures
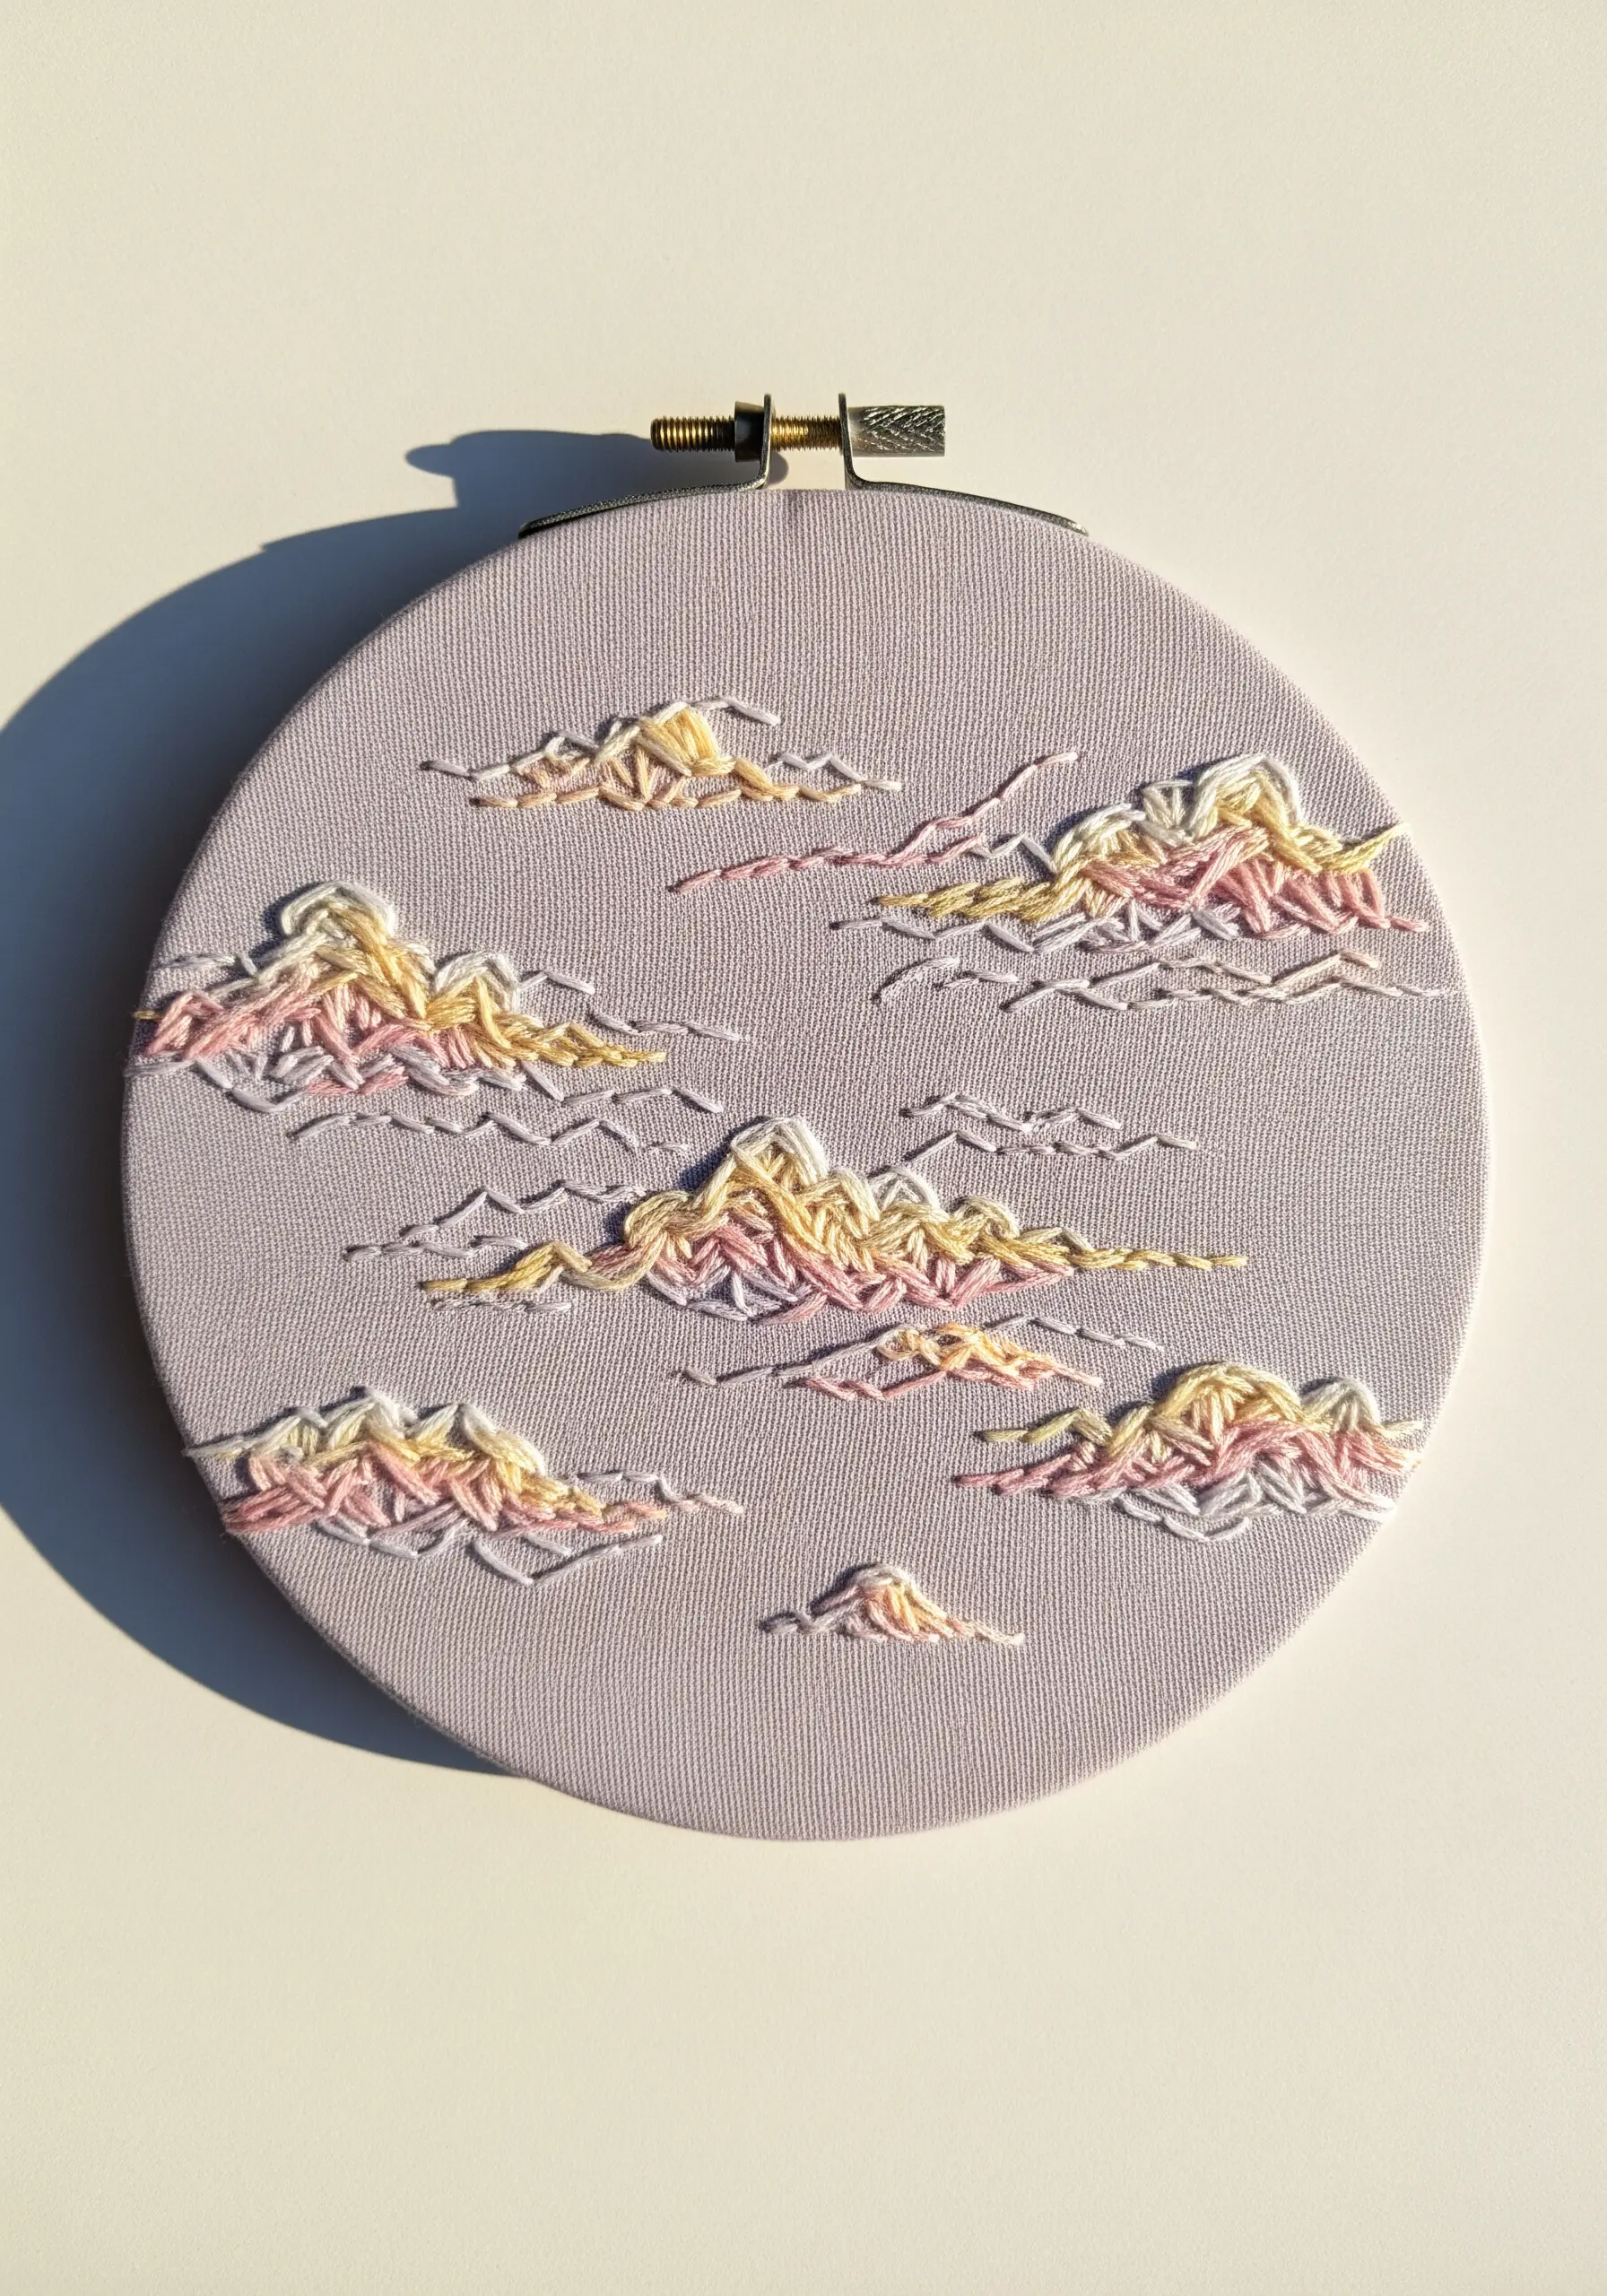
Capture the soft, ethereal quality of sunset clouds with a light-handed stitching approach.
Use just one or two strands of floss at a time, and blend multiple pastel colors in your needle to create a soft, painterly effect.
Instead of dense fill stitches, use loose, open turkey work loops or clusters of seed stitches that are randomly placed and angled.
This creates an airy, transparent feeling that mimics the way light filters through clouds. The key is to embrace imperfection and avoid solid, heavy shapes.
12. Create Meditative Art with Coiled Rope

Explore fiber art beyond the needle by creating a sculptural piece with coiled rope or jute.
Begin by securing the center of the rope to a stretched canvas with a strong adhesive or a few anchoring stitches from the back.
Slowly coil the rope outwards, applying a thin line of fabric glue as you go to hold it in place.
The subtle imperfections in the rope and the meditative process of coiling create a powerful, organic form reminiscent of a tree’s growth rings. This method turns simple materials into organic handmade pieces of minimalist art.
13. Use Negative Space to Define Your Forest
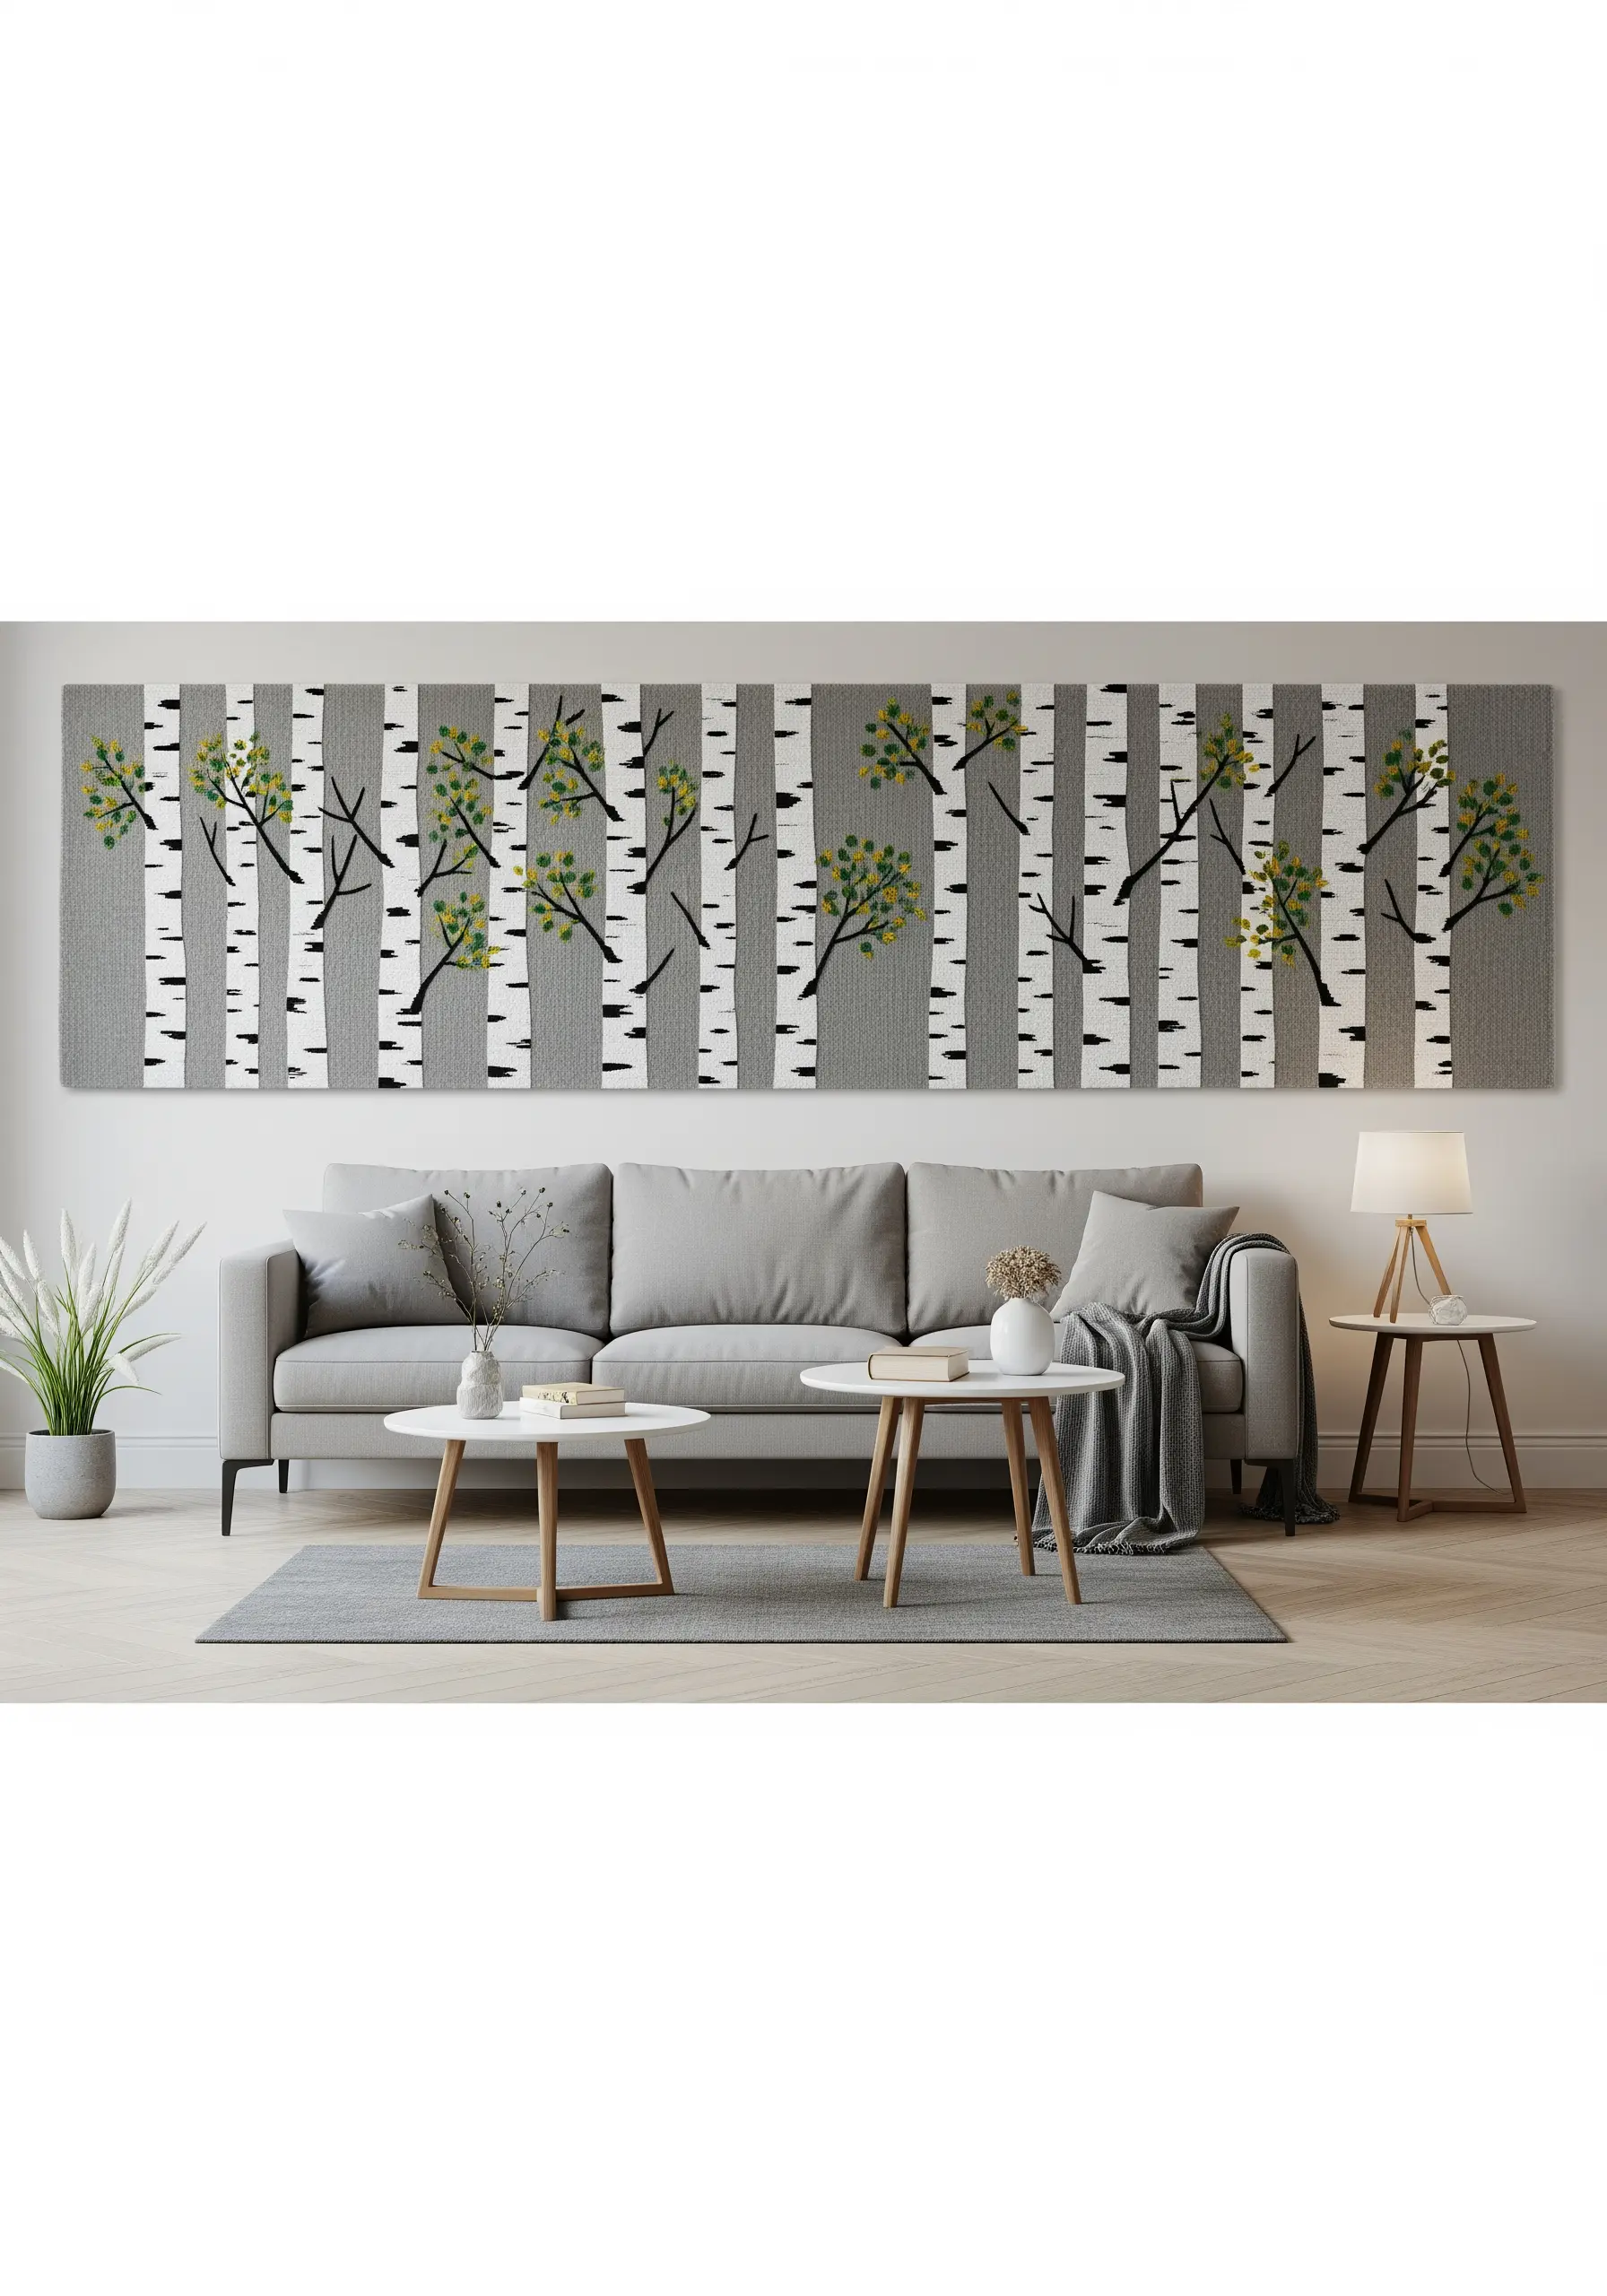
Instead of stitching the trees, stitch the space around them to create a modern, graphic birch forest.
Use vertical stripes of white or light grey fabric appliquéd onto a darker background to serve as the tree trunks.
Then, add minimal details—small black satin stitch bars for the bark texture and clusters of French knots for leaves.
This clever use of negative space is visually striking and allows you to create a large-scale, impactful piece of nature-themed wall hoop project without hours of dense fill stitching.
14. Emulate Geodes with Thread and Beads

Capture the crystalline structure of a geode by combining thick thread with delicate beadwork.
Use a couching stitch to lay down thick, vibrant yarns, creating the concentric rings of the agate.
This technique allows you to use fibers that are too thick to pass through the fabric, adding bold texture.
Fill the center and outline the yarn rings with rows of shimmering seed beads.
The contrast between the soft, matte yarn and the hard, reflective beads perfectly mimics the natural texture of a sliced stone, making your hoop an earth-inspired embroidery texture to explore.
15. Sculpt Thread into Three-Dimensional Forms

Take your thread art off the wall by creating a freestanding wave sculpture.
This advanced technique involves stitching onto layers of organza or tulle that have been treated with a stiffening agent, or by using a wire armature as a base.
Build up layers of machine or hand stitching to create density and form, then add textural details like tufts of wool roving or frayed threads for the sea foam.
This method transforms thread from a two-dimensional medium into a sculptural one, creating breathtaking fiber art installations.
16. Chronicle the Seasons in a Stitch Sampler

Create a sophisticated seasonal collection by focusing on a single motif—the leaf—and altering its execution for each season.
For Spring, use a light fishbone stitch with bright green.
For Summer, switch to a dense, lush satin stitch in a deeper green.
In Autumn, blend reds and oranges with a long-and-short stitch.
For Winter, use only a simple backstitch outline in brown to represent the bare branches.
This exercise in variation not only looks elegant but also sharpens your ability to convey a concept through technique, not just color, making for thoughtful seasonal wall art projects.
17. Create Depth in a Wildflower Meadow

To prevent your embroidered meadow from looking flat, you must create layers of depth.
Begin by stitching the elements that are furthest away, like the sky and distant grasses, using lighter threads and less detailed stitches.
Work your way forward, stitching the mid-ground elements next.
Finally, stitch the foreground flowers like poppies and daisies using bolder colors, thicker threads, and more dimensional stitches like padded satin stitch or French knots.
This simple layering technique instantly adds perspective and realism to your wildflower hoop art projects.
18. Illustrate a Shimmering Moon with Beads

Give your celestial embroidery a dynamic, cratered texture by incorporating bugle beads among your stitches.
Fill the crescent moon shape with satin stitches using a blend of white, grey, and silver threads.
Then, stitch over the top with short, straight bugle beads, angling them in different directions to mimic the rough, reflective surface of the moon.
Adding a few tiny silver seed beads provides another layer of texture. Set against black velvet, this technique creates a piece that genuinely sparkles.
19. Carve Sand Dunes with Strategic Stitches

Achieve the flowing, graphic look of desert dunes using long straight stitches arranged in blocks.
Map out the distinct color sections of your design first.
Within each section, fill the area with straight stitches that all run in the same direction, creating a smooth, satin-like finish.
Define the crest of each dune with a contrasting, textural line, like a bold chain stitch. This sharp, raised line against the flat fill is what gives the composition its sense of shape and shadow.
20. Craft a Floating Leaf Installation

Take your embroidery into the third dimension by creating an installation of freestanding leaves.
To make each leaf, stitch your design onto a layer of water-soluble stabilizer. Use a dense fill stitch, like a tight satin stitch or thread painting, ensuring all stitches are connected.
Once you rinse away the stabilizer, you’re left with a delicate but sturdy thread structure.
Suspend dozens of these leaves from the ceiling with clear filament for a magical, immersive art experience that transforms an entire room.
21. Capture Iridescence with Blended Threads

Recreate the shimmering, color-shifting quality of a peacock feather by blending different types of thread in your needle.
Combine one strand of standard cotton floss with one strand of metallic or silky rayon thread.
The cotton grounds the color, while the rayon or metallic thread adds a brilliant sheen that changes with the light.
Use long, elegant satin stitches that curve outward from the central shaft to mimic the natural flow of the feather’s barbs, enhancing the play of light across your majestic peacock embroidery designs.
22. Unleash Energy with Expressive Textures

Portray a volcanic eruption by embracing chaotic, three-dimensional stitch techniques.
For the billowing smoke, use un-brushed turkey work with wool or chunky thread to create dense, voluminous loops that stand far off the canvas.
To represent the flowing lava and fiery sparks, use long, loose straight stitches that you don’t anchor at the ends.
Allowing these threads to hang freely creates a powerful sense of dynamic, untamed movement, turning your canvas into a piece of sculptural embroidery.
23. Add Dimension with Padded Satin Stitch
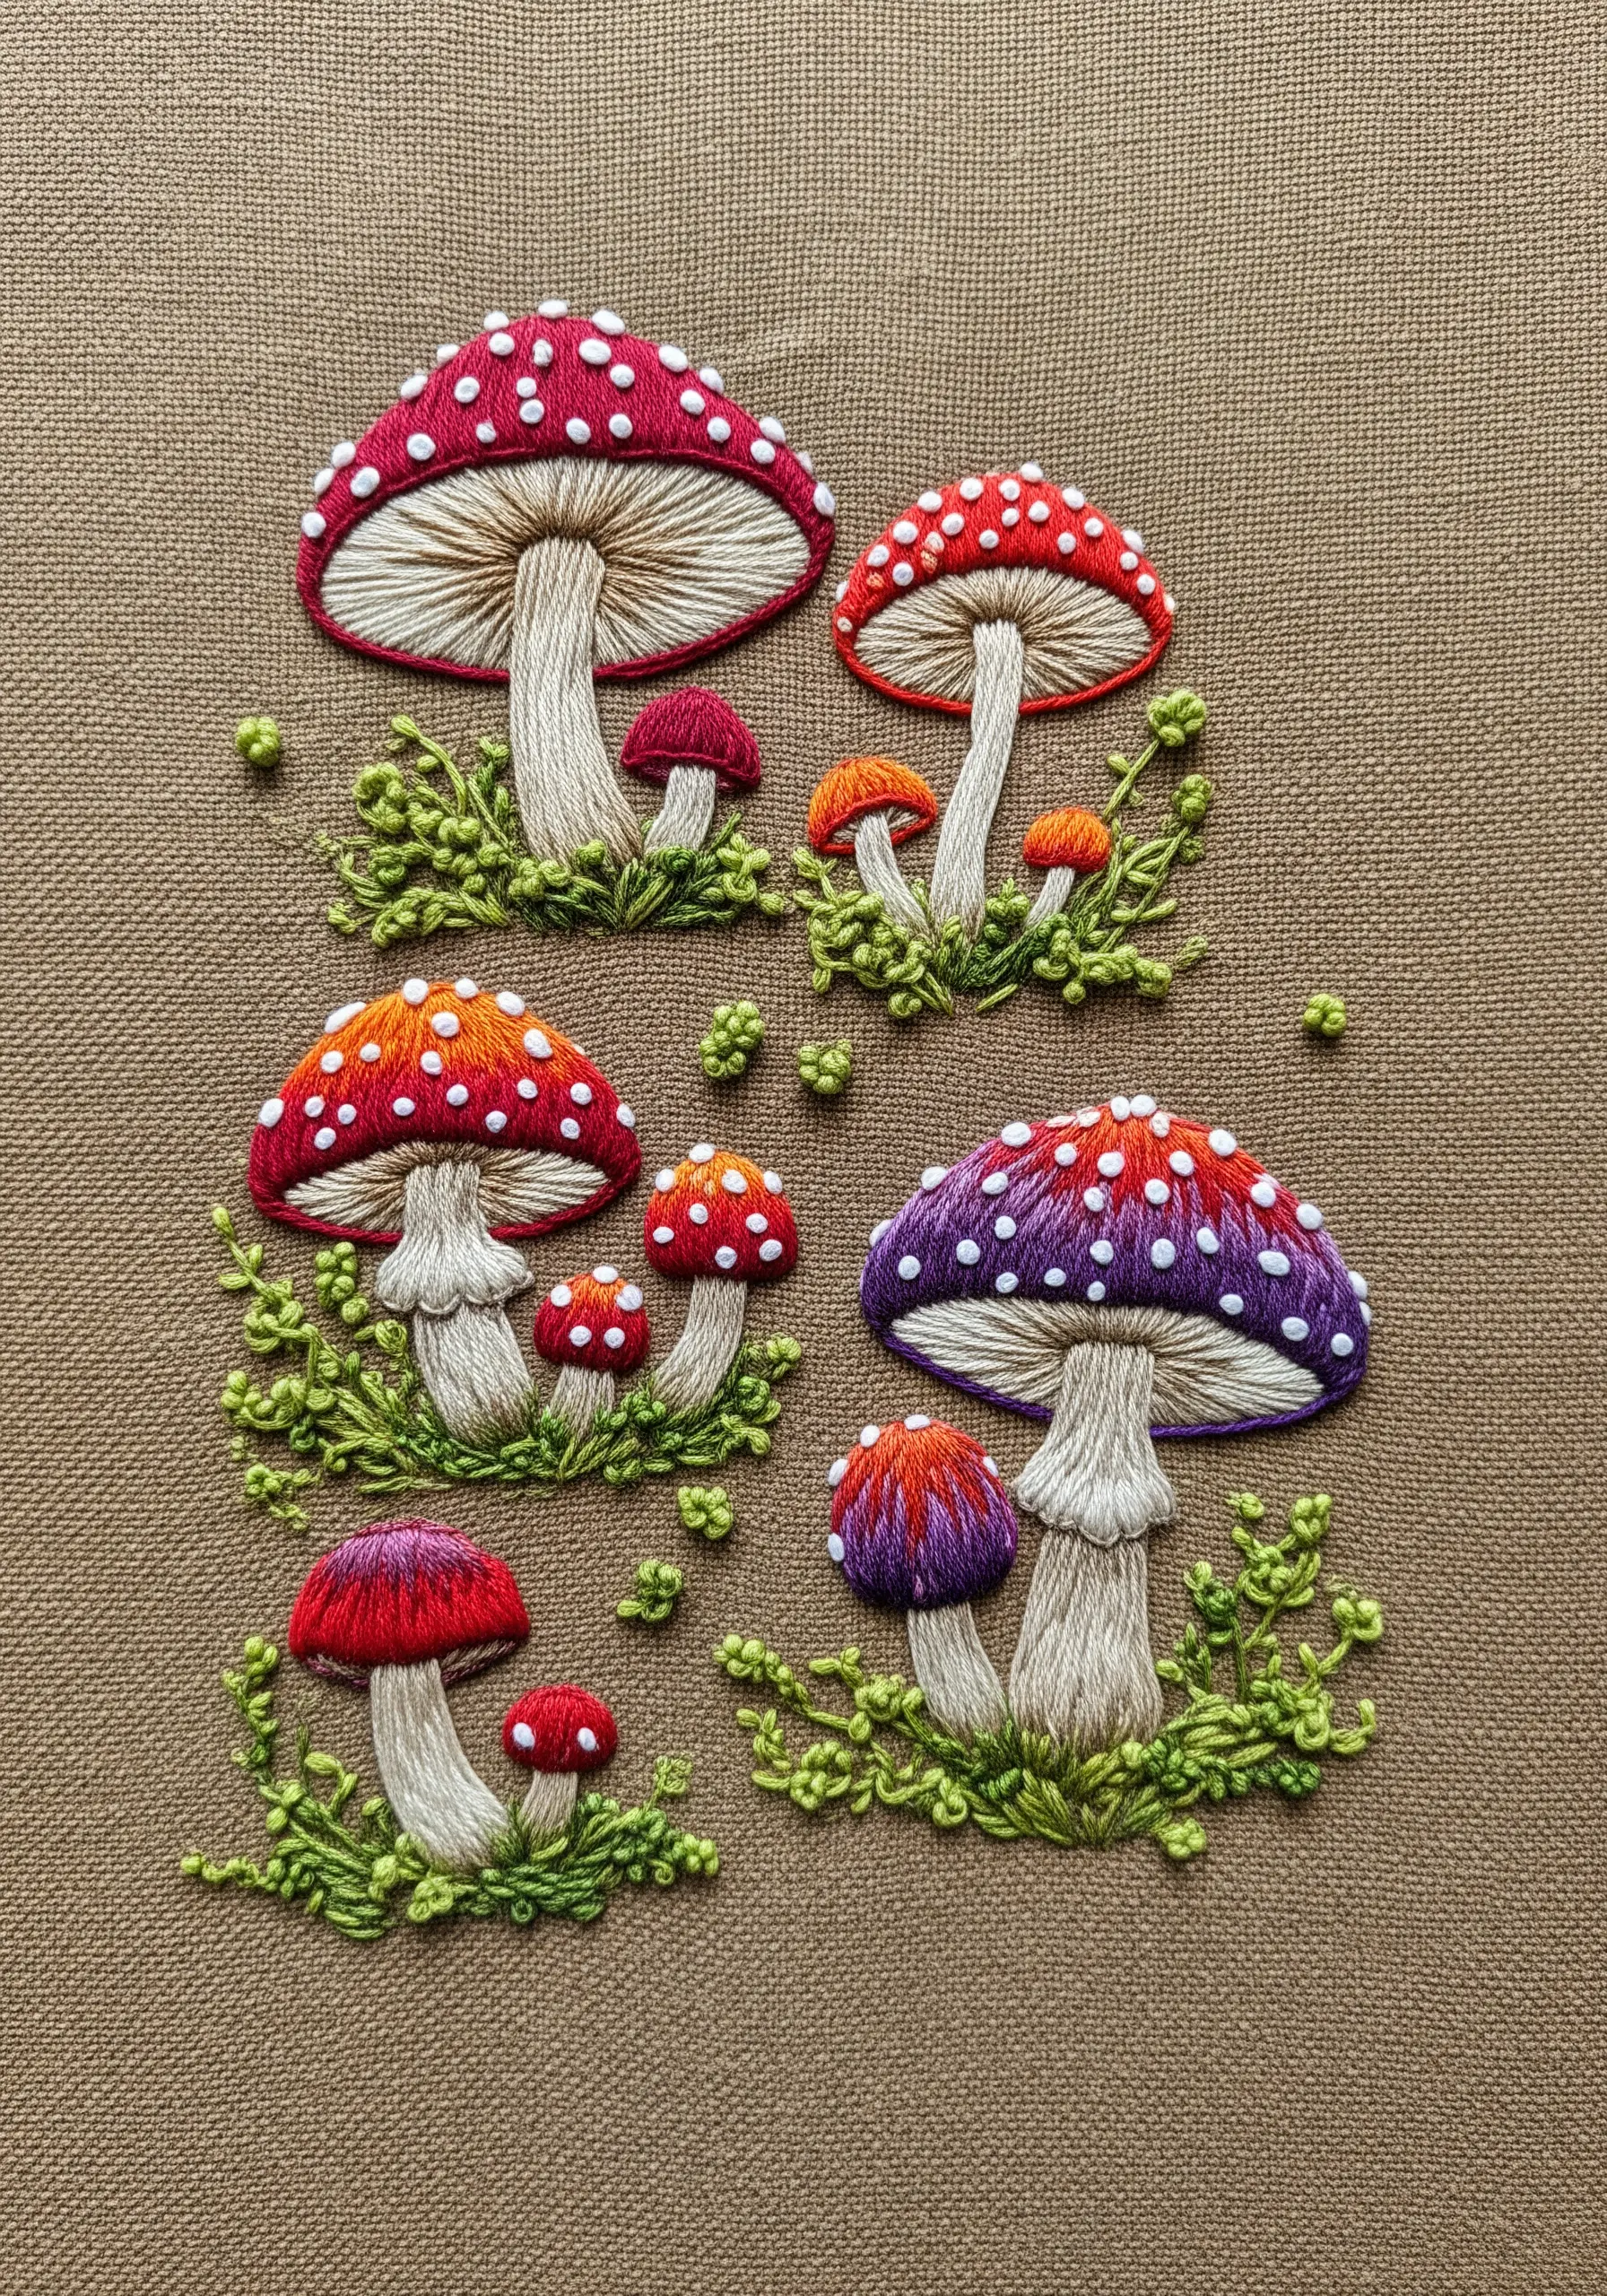
Make your mushroom motifs look plump and three-dimensional with the simple technique of padded satin stitch.
Before stitching the final layer, fill the area of the mushroom cap with a base of small, underlying stitches (like seed stitches or a lattice of straight stitches).
Then, work your final satin stitch layer over this padding.
The raised surface catches more light and creates subtle shadows, giving your subjects a satisfyingly rounded and realistic form without complex shading.
24. Command Attention with a Triptych Design
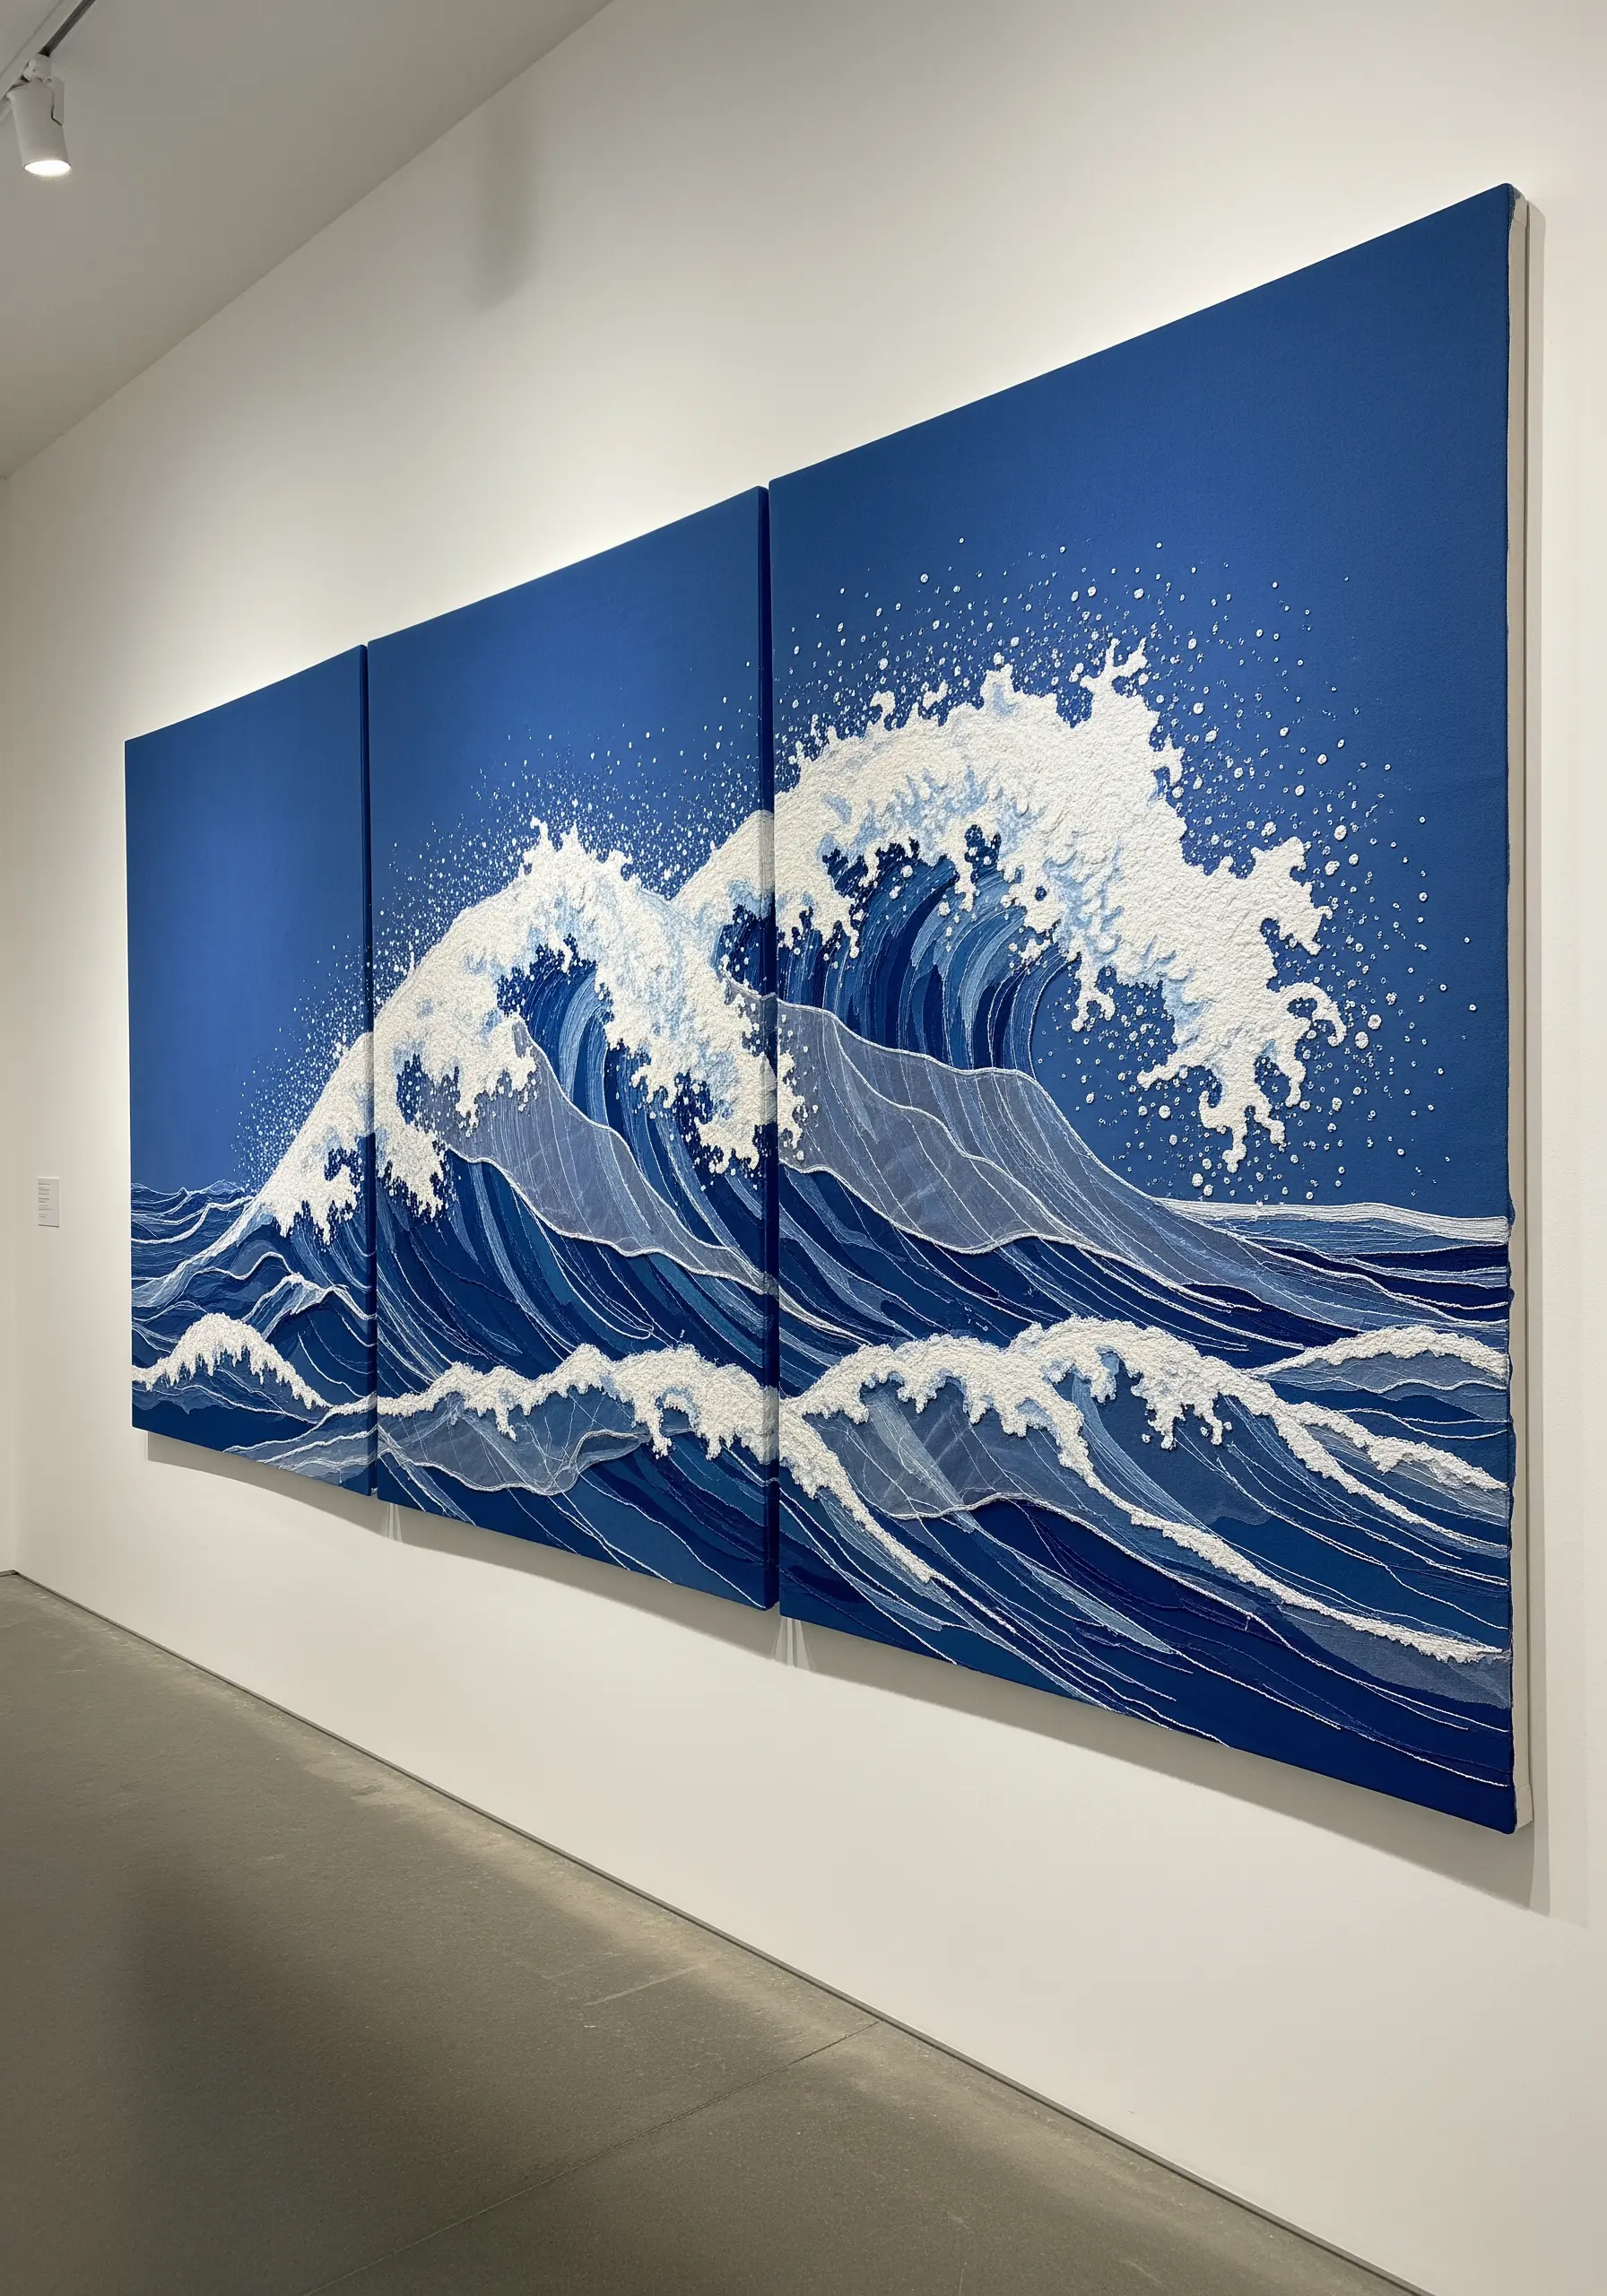
For a truly monumental piece, break your design into three separate panels, or a triptych.
This approach makes a large, overwhelming project more manageable to stitch.
It also creates a sophisticated, gallery-like feel when displayed.
To create the texture of sea spray, use thousands of tiny, tightly packed white French knots. Their raised, dot-like texture provides a perfect contrast to the smoother, directional stitches of the main wave.
25. Make an Impact with Minimalist Couching

Create a bold, graphic lightning bolt without a single fill stitch by using the couching technique.
Lay a thicker thread, cord, or even a bundle of several floss strands onto the fabric surface along your design line.
Then, use a second, finer thread to tack it down with small, perpendicular stitches.
This method allows you to create strong, defined lines with interesting textures. Contrast a couched main bolt with delicate, branching split stitches for a visually balanced composition.
26. Construct Geometric Forms with Color Blocking

Capture the crystalline, faceted nature of an iceberg by using blocks of solid color.
Divide your design into sharp, geometric shapes, and fill each one with a perfectly smooth satin stitch.
The key is to keep the stitch direction consistent within each shape but change it for adjacent shapes.
This slight shift in direction causes the light to reflect differently, creating the illusion of distinct planes and angles—even when using very similar shades of blue. It’s a simple way to build complex, geometric framed embroidery patterns.
27. Create Ethereal Botanicals on Sheer Fabric

Stitching on a sheer fabric like organza or tulle allows you to create designs that seem to float in mid-air.
Use a stabilizer to keep the delicate fabric from stretching as you work—a sticky, self-adhesive type is often easiest.
For the cherry blossoms, use small, delicate stitches like single detached chain stitches or tiny French knots to keep the design light and airy.
When framed, the transparency of the fabric allows the wall color and light behind it to become part of the artwork, adding a unique layer of depth.


