

Sometimes, the most fulfilling moments are the quiet ones—a warm cup of tea, a slow morning, and a needle and thread in hand. Embroidery doesn’t have to be about producing a masterpiece every time. Think of it instead as a gentle, mindful practice that allows you to slow down and create something beautiful with your own two hands.
The difference between a project you like and a project you love often comes down to small, intentional choices. It’s in the way you blend two shades of green to make a leaf look real, the decision to use a single strand of thread for a delicate outline, or the satisfying texture of a perfectly placed French knot. These details are not difficult to master, but they transform your work from simple stitching into personal art.
Let these ideas be a starting point. See them not as strict rules, but as gentle suggestions to inspire your own creativity this weekend. Whether you’re adding a tiny detail to a shirt collar or beginning a large, meditative landscape, the goal is the same: to enjoy the simple, satisfying process of making something that feels uniquely yours.
1. Create a Delicate Wildflower Meadow

To give your wildflowers a sense of depth, vary your thread weight.
Use a single strand of floss for delicate stems and wispy grasses, and switch to two or three strands for the main flower petals to make them stand out.
Incorporate a mix of French knots and detached chain stitches (lazy daisies) for the blossoms.
This creates a varied, natural texture that mimics a real meadow more effectively than using a single stitch type.
2. Add Celestial Shine to Denim

When embroidering on heavy fabric like denim, always use an iron-on or stick-on stabilizer on the inside of the jacket.
This prevents the fabric from puckering and provides a smooth surface for your stitches.
For the moon, use a metallic silver thread and fill it with a tightly packed satin stitch, ensuring your stitches all lie in the same direction for a uniform sheen.
Contrast this with a bright gold satin stitch for the stars to create a dynamic, eye-catching design.
3. Stitch a Meditative Thread Landscape

To build rich texture in a landscape, think in layers.
Use dense French knots or bullion stitches for the clouds, creating a fluffy, raised effect that contrasts with the flatter ground.
For the rolling hills, use thousands of tiny seed stitches or a smooth long-and-short stitch, blending multiple shades of green to create shadows and highlights.
This technique, known as thread painting, turns a simple landscape into a captivating statement textured embroidery piece.
4. Elevate Kitchen Linens with Herbal Motifs
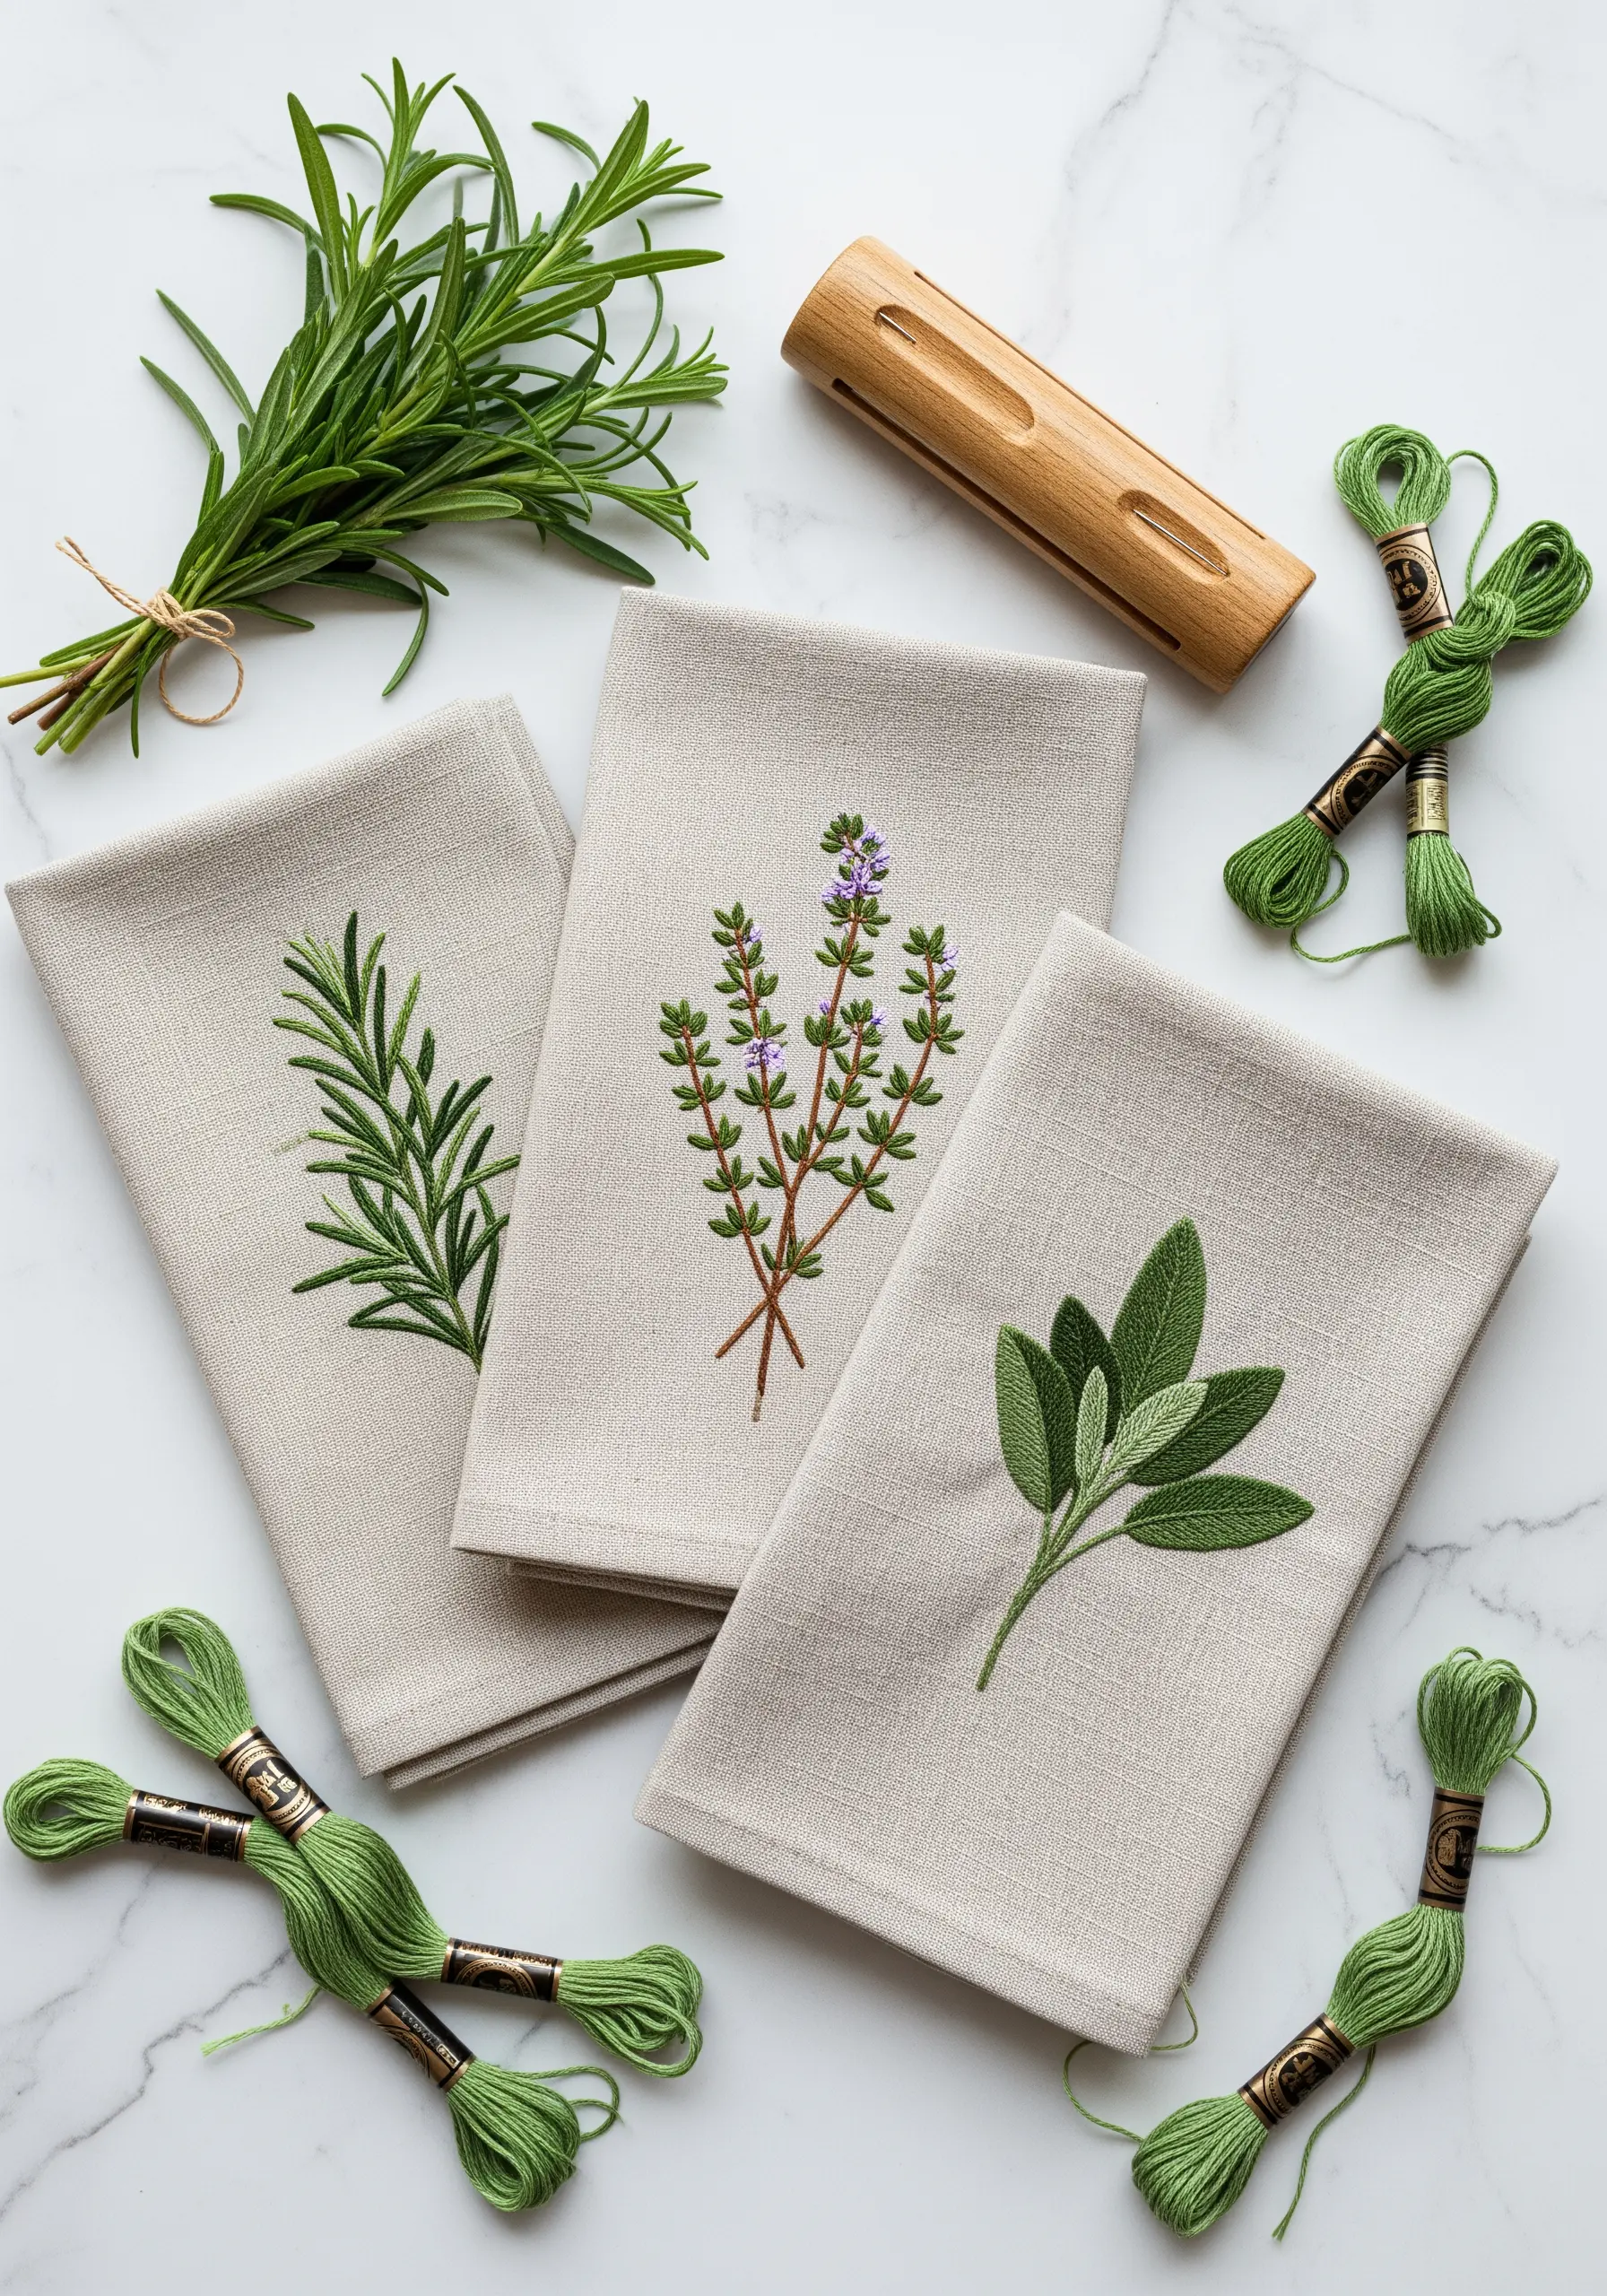
For functional items like tea towels, choose a high-quality linen or cotton fabric that can withstand washing.
Use a fishbone stitch to fill the sage leaves; this technique naturally creates the central vein for a realistic look.
For the rosemary and thyme, a simple stem stitch for the branches provides structure, while tiny straight stitches or French knots add delicate detail.
These herbal plant embroidery motifs add a touch of handmade elegance to everyday items.
5. Master Bold Texture with Yarn Couching

For a quick project with massive visual impact, try couching thick yarn onto a pillow cover.
Simply lay the chunky yarn on your fabric in the desired shape and use a thinner, matching sewing thread to tack it down with small, evenly spaced stitches.
This method allows you to create bold, graphic lines and shapes without having to pull a thick fiber through the fabric.
It’s one of the most satisfying cozy embroidery projects for a fast and modern update.
6. Construct a Polished Felt Ornament

When working with felt, the finishing is everything.
Use a blanket stitch around the edges to join your pieces; it creates a decorative, clean border that looks far more professional than a simple running stitch.
For facial features, use two strands of black floss and a simple backstitch for the closed eyes and a satin stitch for the nose.
The precision of these minimal details is what brings the character to life.
7. Personalize Canvas Shoes with Florals

To embroider on sturdy canvas sneakers, transfer your design using a water-soluble stabilizer pen or sticker.
Use a strong, sharp needle (like a chenille needle) that can pierce the canvas without bending.
Keep your stitches slightly loose to prevent the fabric from puckering, especially when working on curved areas.
A vibrant satin stitch for the sunflower petals creates a bold statement that stands up to the casual style of the shoe.
8. Craft Delicate Lavender Sachets
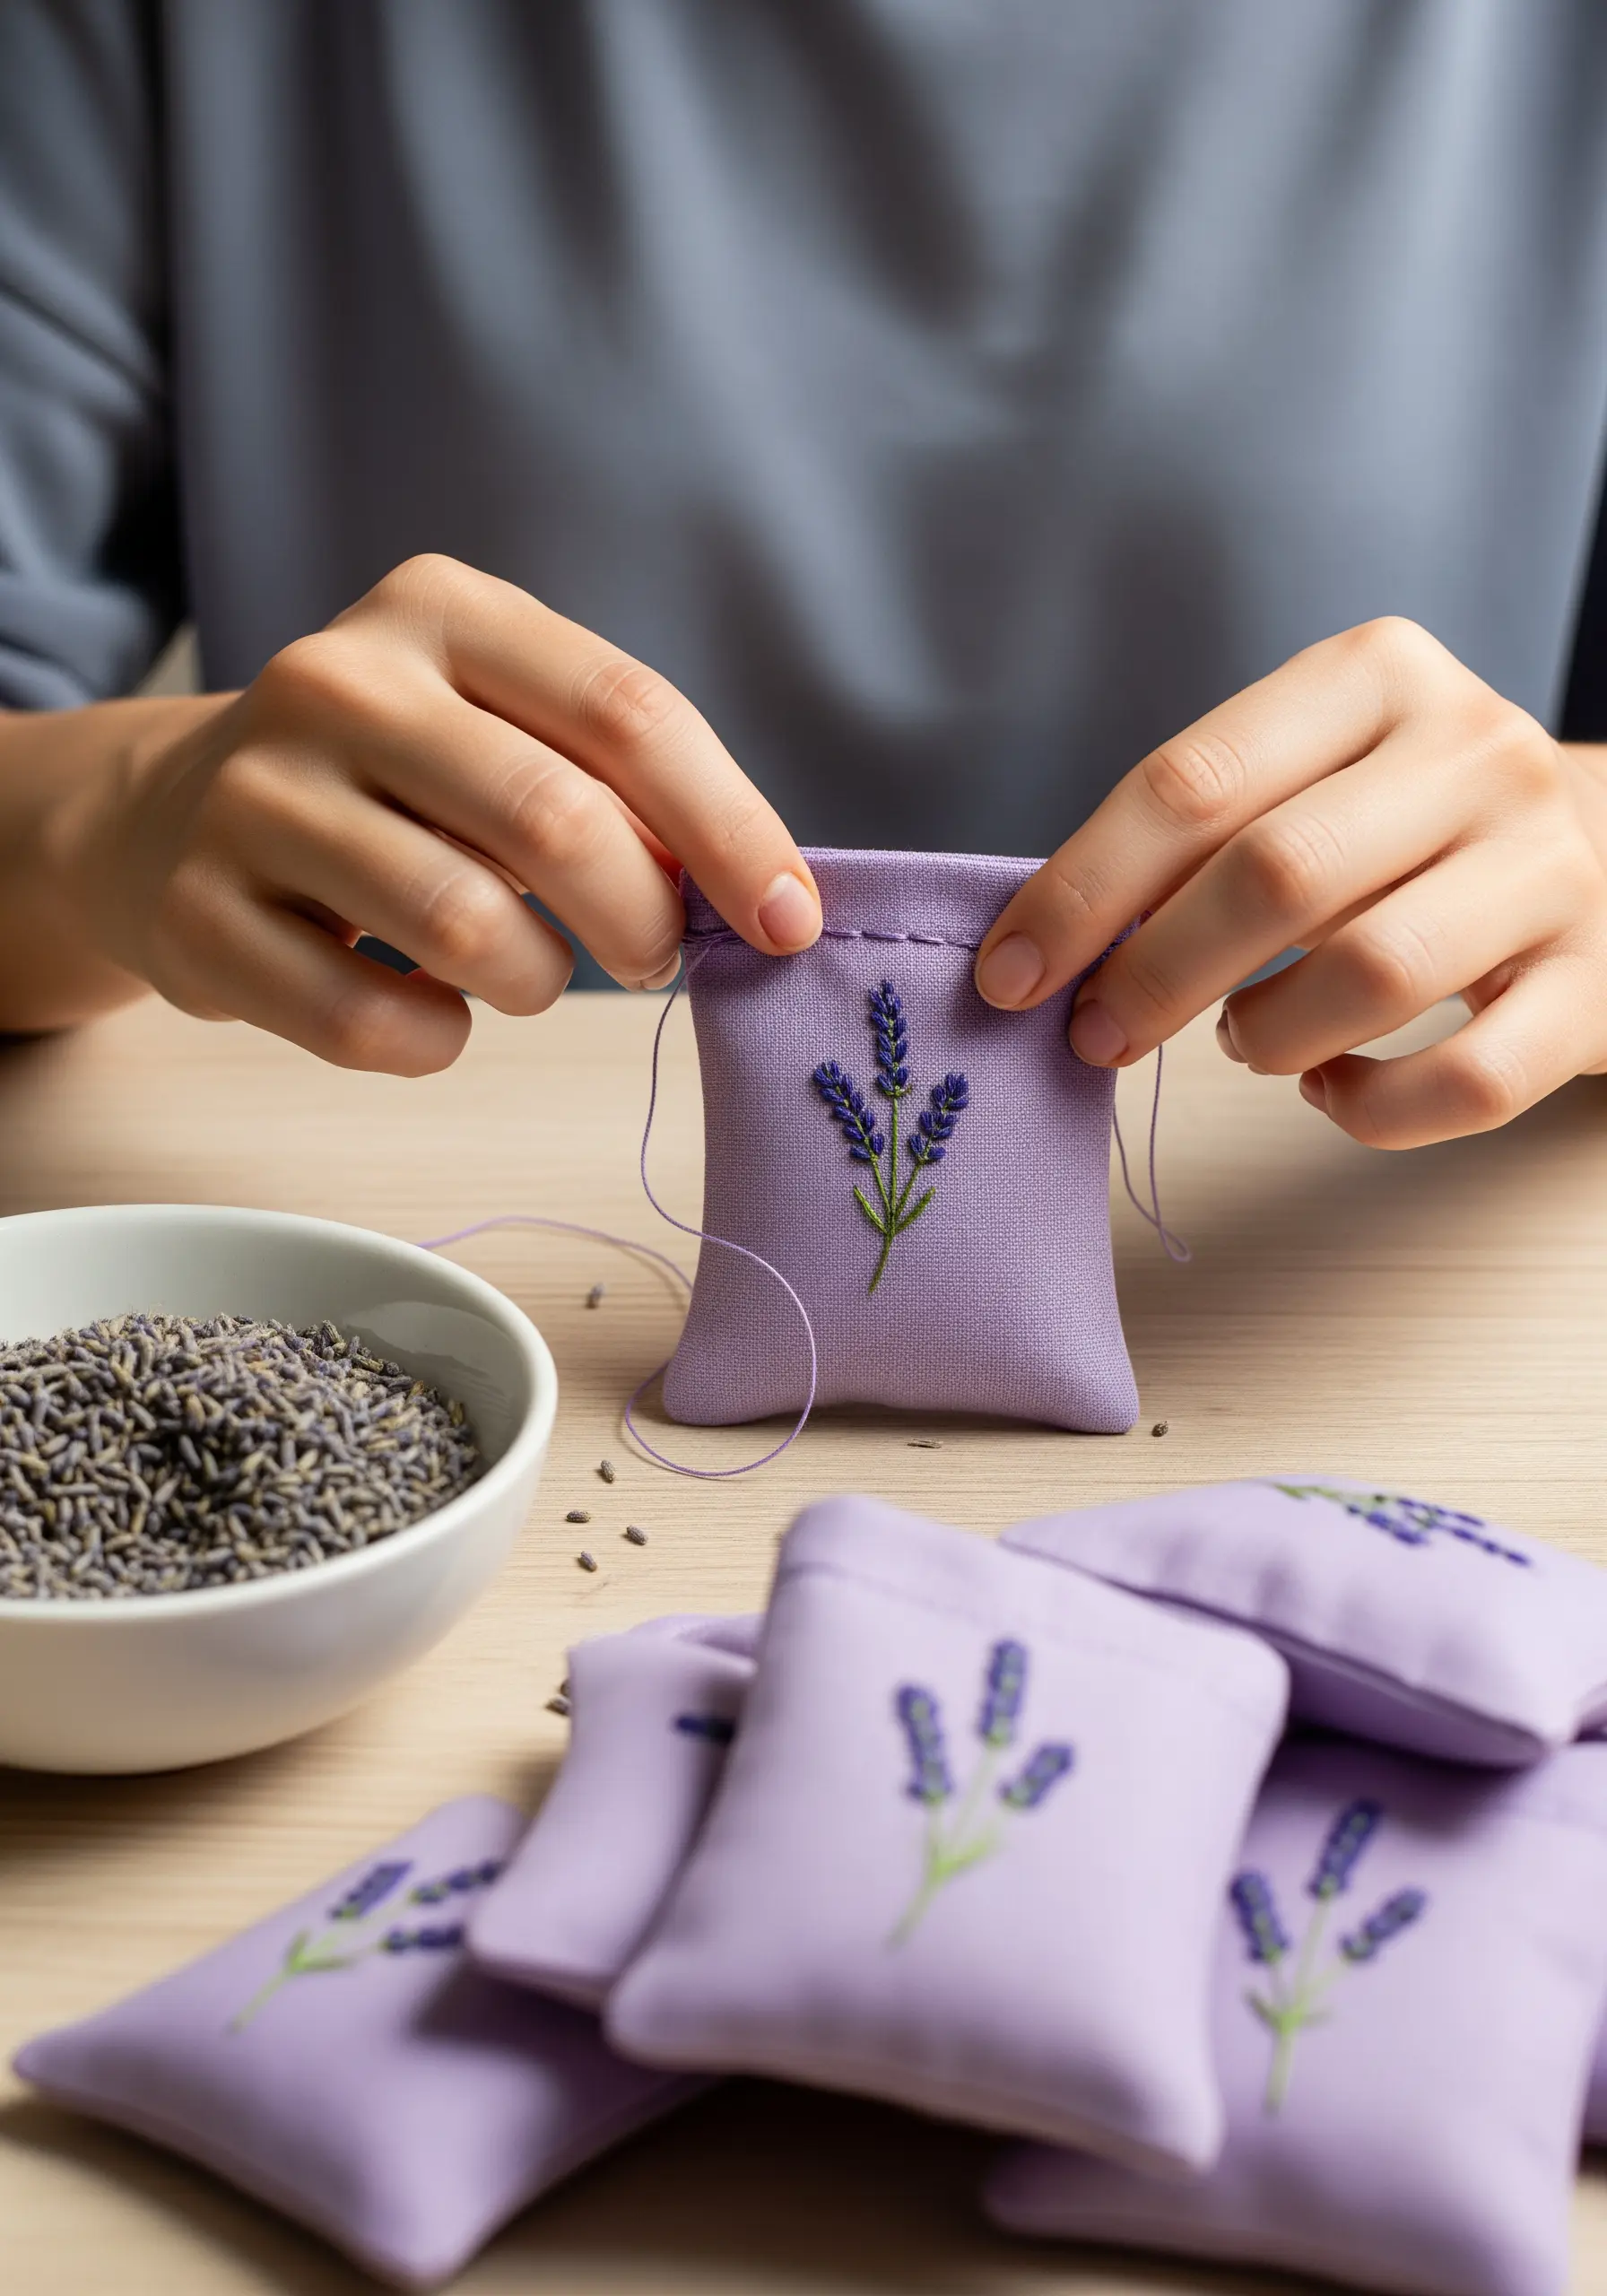
The key to elegant miniature embroidery is simplicity and scale.
For these lavender sprigs, use a single strand of green floss in a stem stitch for the stalks to keep them looking graceful.
Use two strands for the purple French knot blossoms to give them just enough volume to stand out against the fabric.
This subtle shift in thread count creates a balanced and refined motif perfect for small embroidery projects.
9. Create Large-Scale Botanical Art

When tackling a large design like this monstera leaf, success lies in stitch direction and color blending.
Use a long-and-short stitch, angling your stitches to follow the natural curves and veins of the leaf. This creates a sense of movement and realism.
Blend at least three shades of green—a light, mid, and dark tone—to create highlights and shadows that give the leaf a three-dimensional feel.
Using a scroll frame instead of a hoop will help maintain even tension across the large piece.
10. Stitch Modern Geometric Coasters

Felt is the perfect base for minimalist designs because it doesn’t fray and provides a soft, matte backdrop.
Use a contrasting thread, like a white pearl cotton, to make your stitches pop against the grey felt.
Focus on maintaining perfectly even stitch length with a simple running stitch or backstitch.
The beauty of this project isn’t in complexity, but in the precision and rhythm of your stitching, making it a meditative practice.
11. Design a Lush Floral Monogram

To create a balanced floral letter, start by stitching the largest flowers first to act as focal points.
Use woven wheel stitches for the roses and satin stitch for the fuller blooms.
Then, fill in the surrounding space with smaller elements like lazy daisy flowers, French knot berries, and fishbone stitch leaves.
This layered approach ensures the letter’s shape remains clear while creating a rich, textured composition ideal for personalized DIY embroidery ideas.
12. Embellish a Collar with a Daisy Chain

Transform a simple shirt by adding a dense pattern to the collar.
To ensure your daisies are uniform and evenly spaced, create a small paper template to mark the center point of each flower before you begin.
Use a detached chain stitch (lazy daisy) with three strands of white floss for the petals and a single, bold French knot in yellow for the center.
This is one of the most charming small embroidery ideas that turn ordinary clothes into art.
13. Construct a Functional Needle Book

A needle book is a perfect project for combining utility with creativity.
Use felt for the interior pages, as it grips needles securely without dulling their points.
For the embroidered lettering, elevate a simple backstitch by whipping it with a matching thread. This creates a smoother, more solid line that looks professionally finished.
A simple snap closure keeps everything secure, making it a practical and personal tool.
14. Add a Subtle Constellation to a Throw

Embroidery on a chunky knit or fleece requires a different approach.
Instead of stitching directly onto the blanket, embroider your design onto a separate piece of sturdy cotton or felt and apply it as a patch.
Use a simple backstitch with a thicker thread, like pearl cotton, to give the constellation lines definition.
The negative space is just as important as the stitches, creating a minimalist design that feels both cozy and modern.
15. Create a Sweet Set of Bee-Themed Napkins
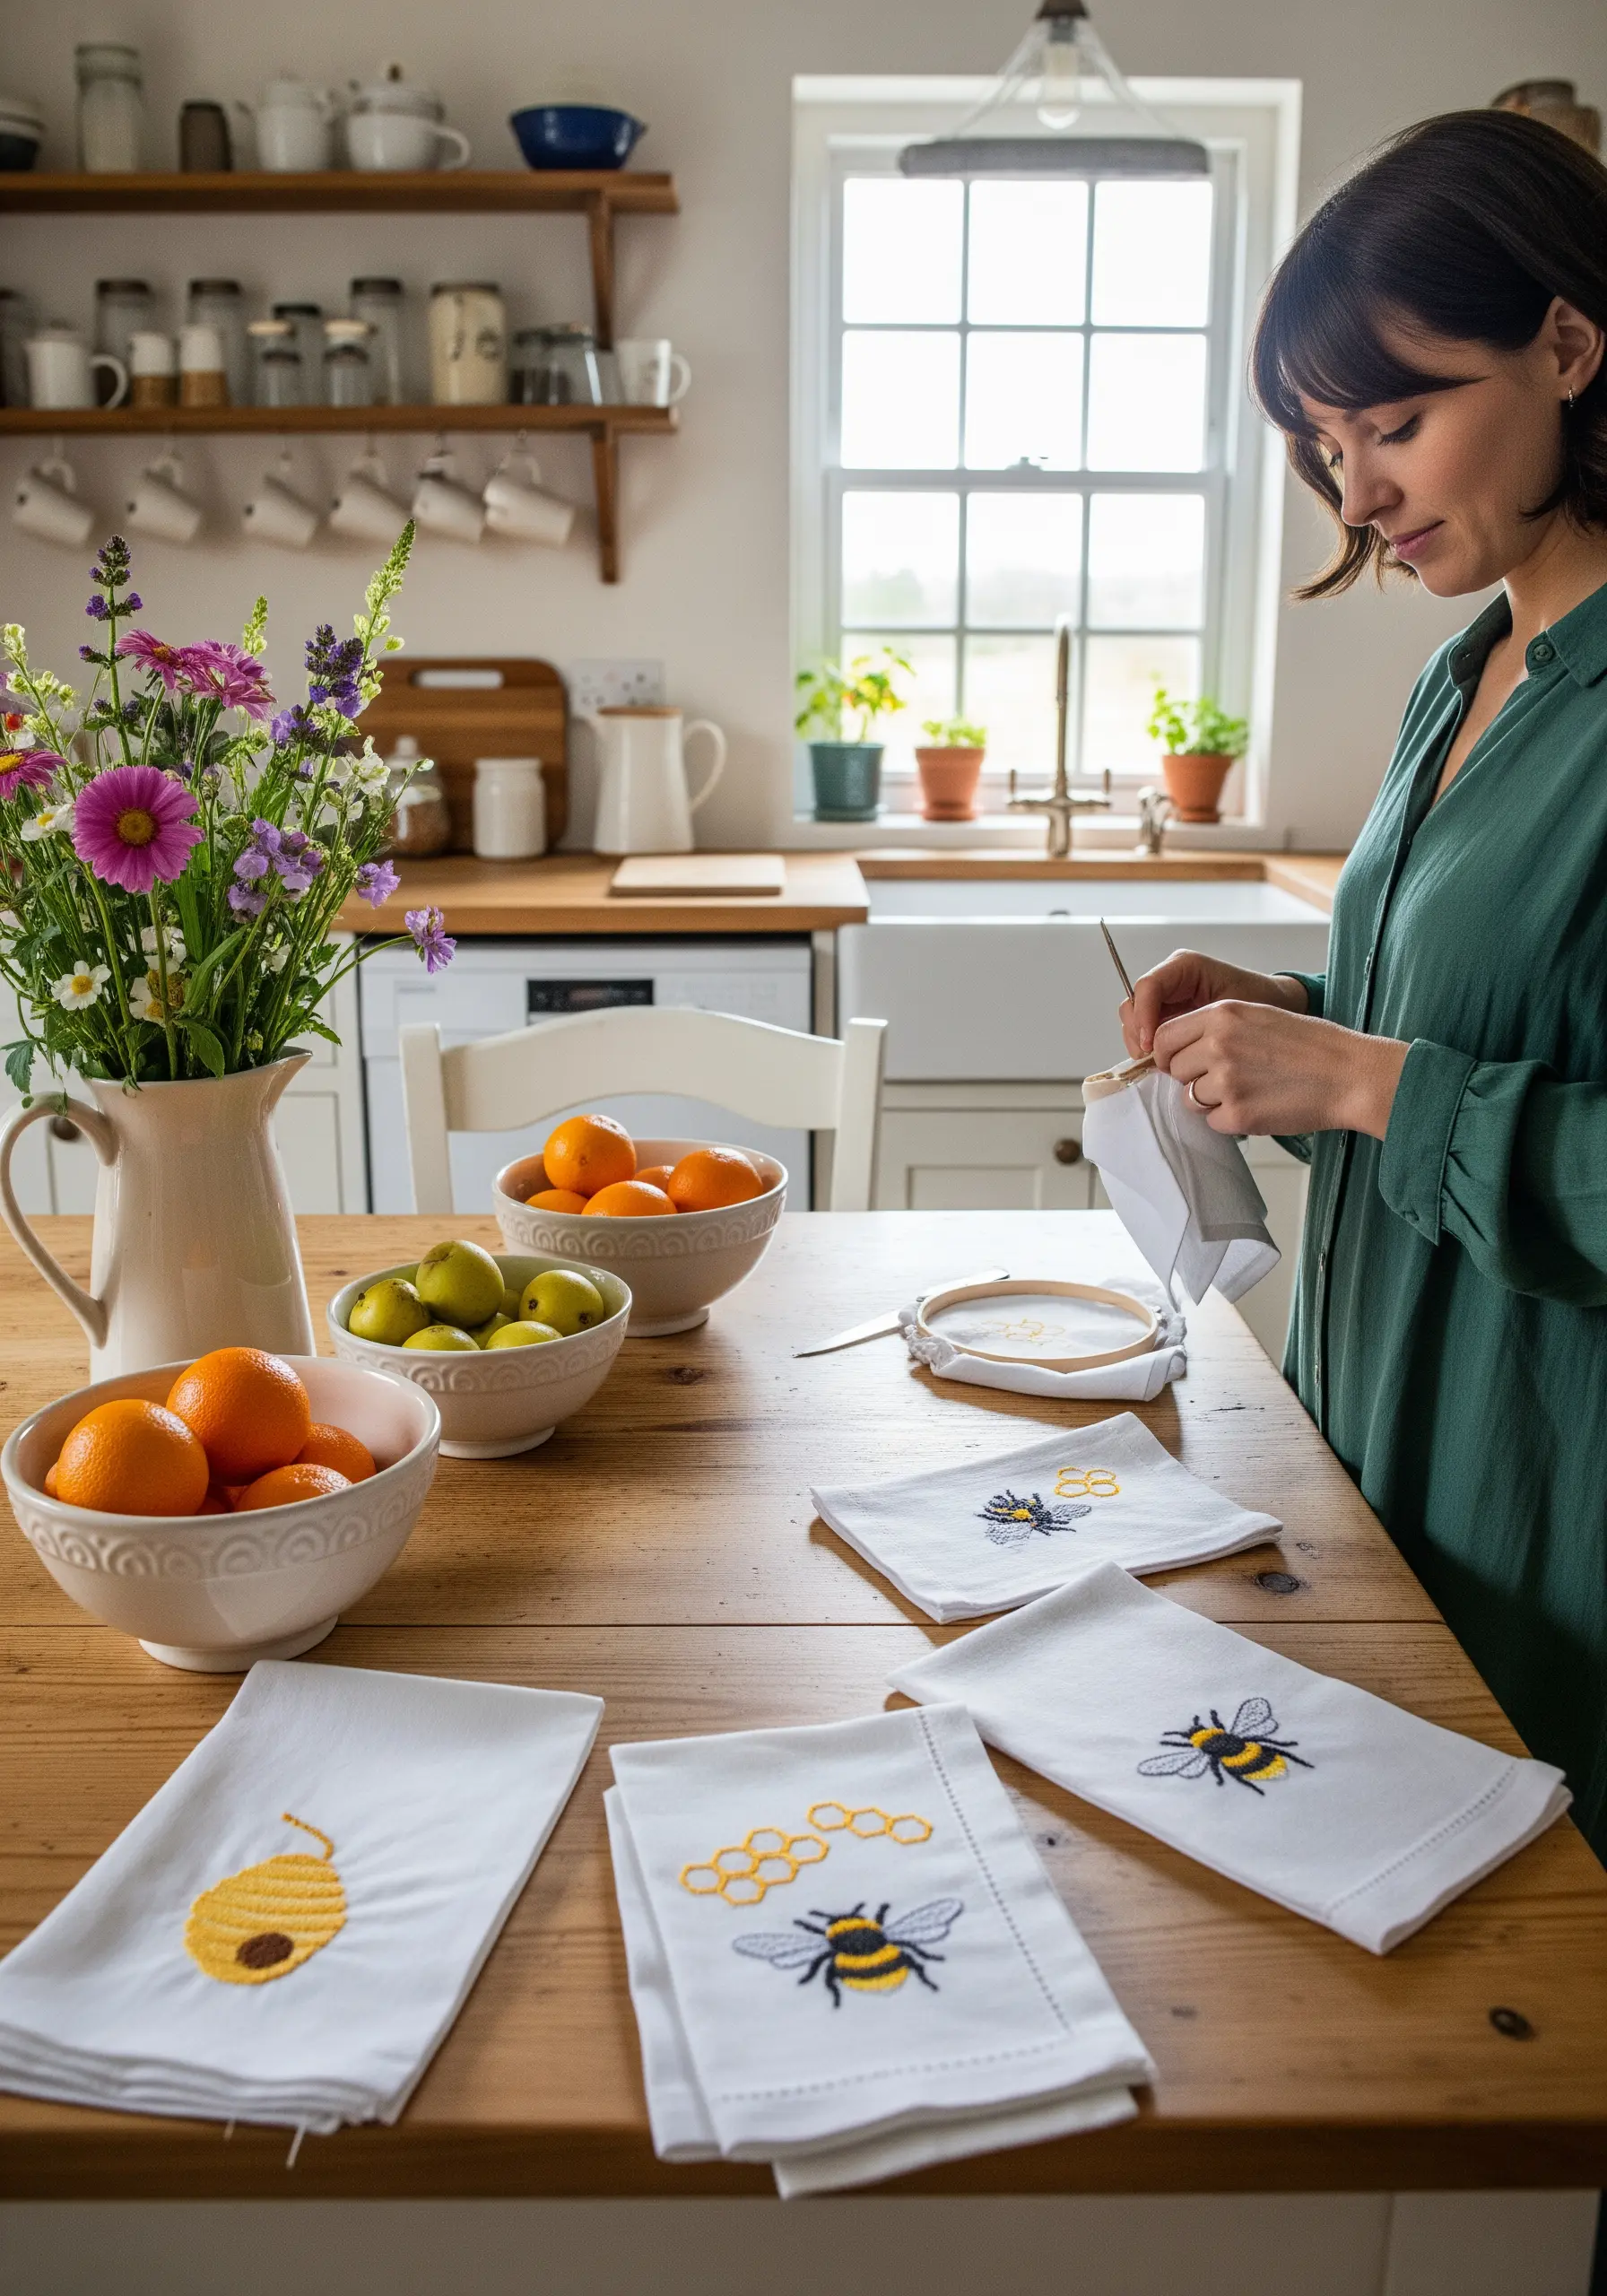
When creating a themed set, consistency is key.
For the bee’s body, use a padded satin stitch—a few straight stitches underneath—to give it a plump, three-dimensional look.
For the delicate wings, outline them with a single strand of light grey or blue in a split stitch to give them a sheer appearance.
Stitching simple hexagonal outlines for the honeycomb connects the designs and completes the charming theme.
16. Capture a Pet’s Spirit with Thread Painting
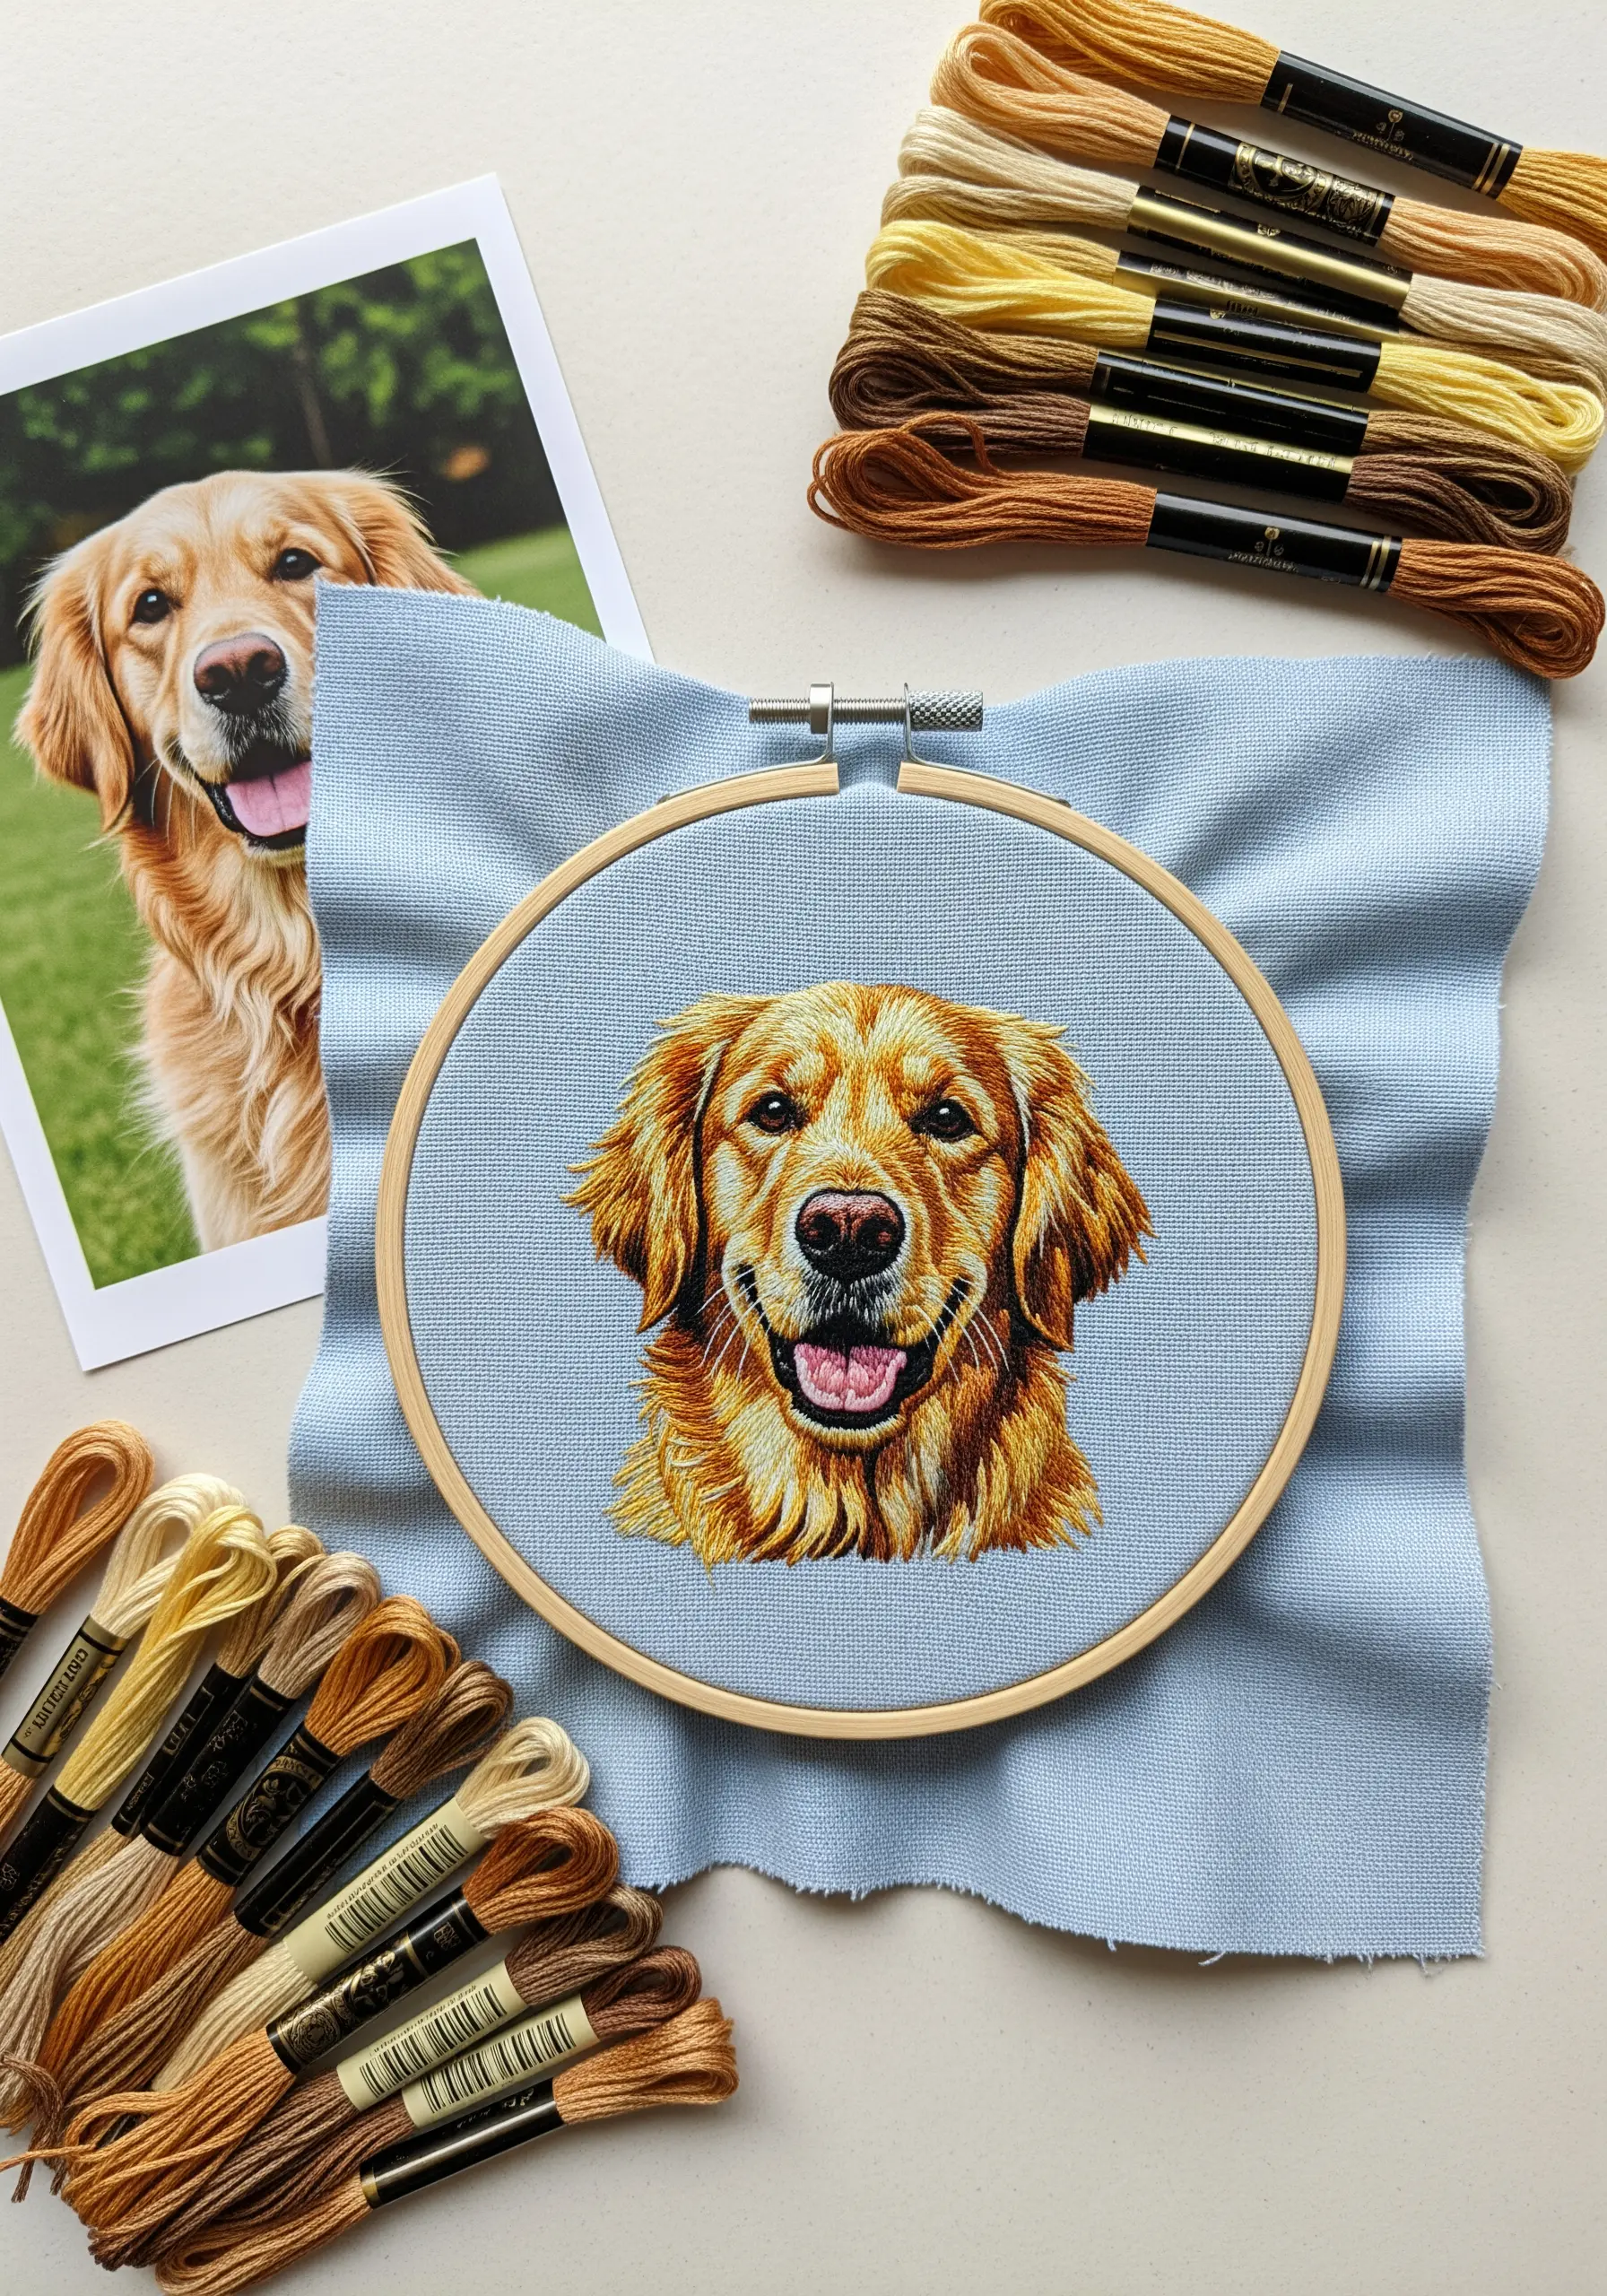
The secret to realistic pet portrait embroidery is meticulous color blending with the long-and-short stitch.
Work from a high-quality photo and select at least five to seven shades for each color area to create depth.
Pay close attention to the direction of the fur and angle your stitches to match its natural flow.
Use single strands of floss for the finest details around the eyes and nose, as this is where the personality of the animal truly emerges.
17. Turn a Repair into a Statement with Visible Mending

Visible mending transforms a flaw into a feature.
First, secure the patch over the tear with small, discreet stitches around the edge, hidden under where your final stitches will go.
Then, fill the floral design with bold, vibrant satin stitches.
Using a variegated or ombré thread can create beautiful color gradients within each petal without the effort of changing your floss, resulting in a dynamic and joyful repair.
18. Detail a Sleep Mask with Lunar Phases
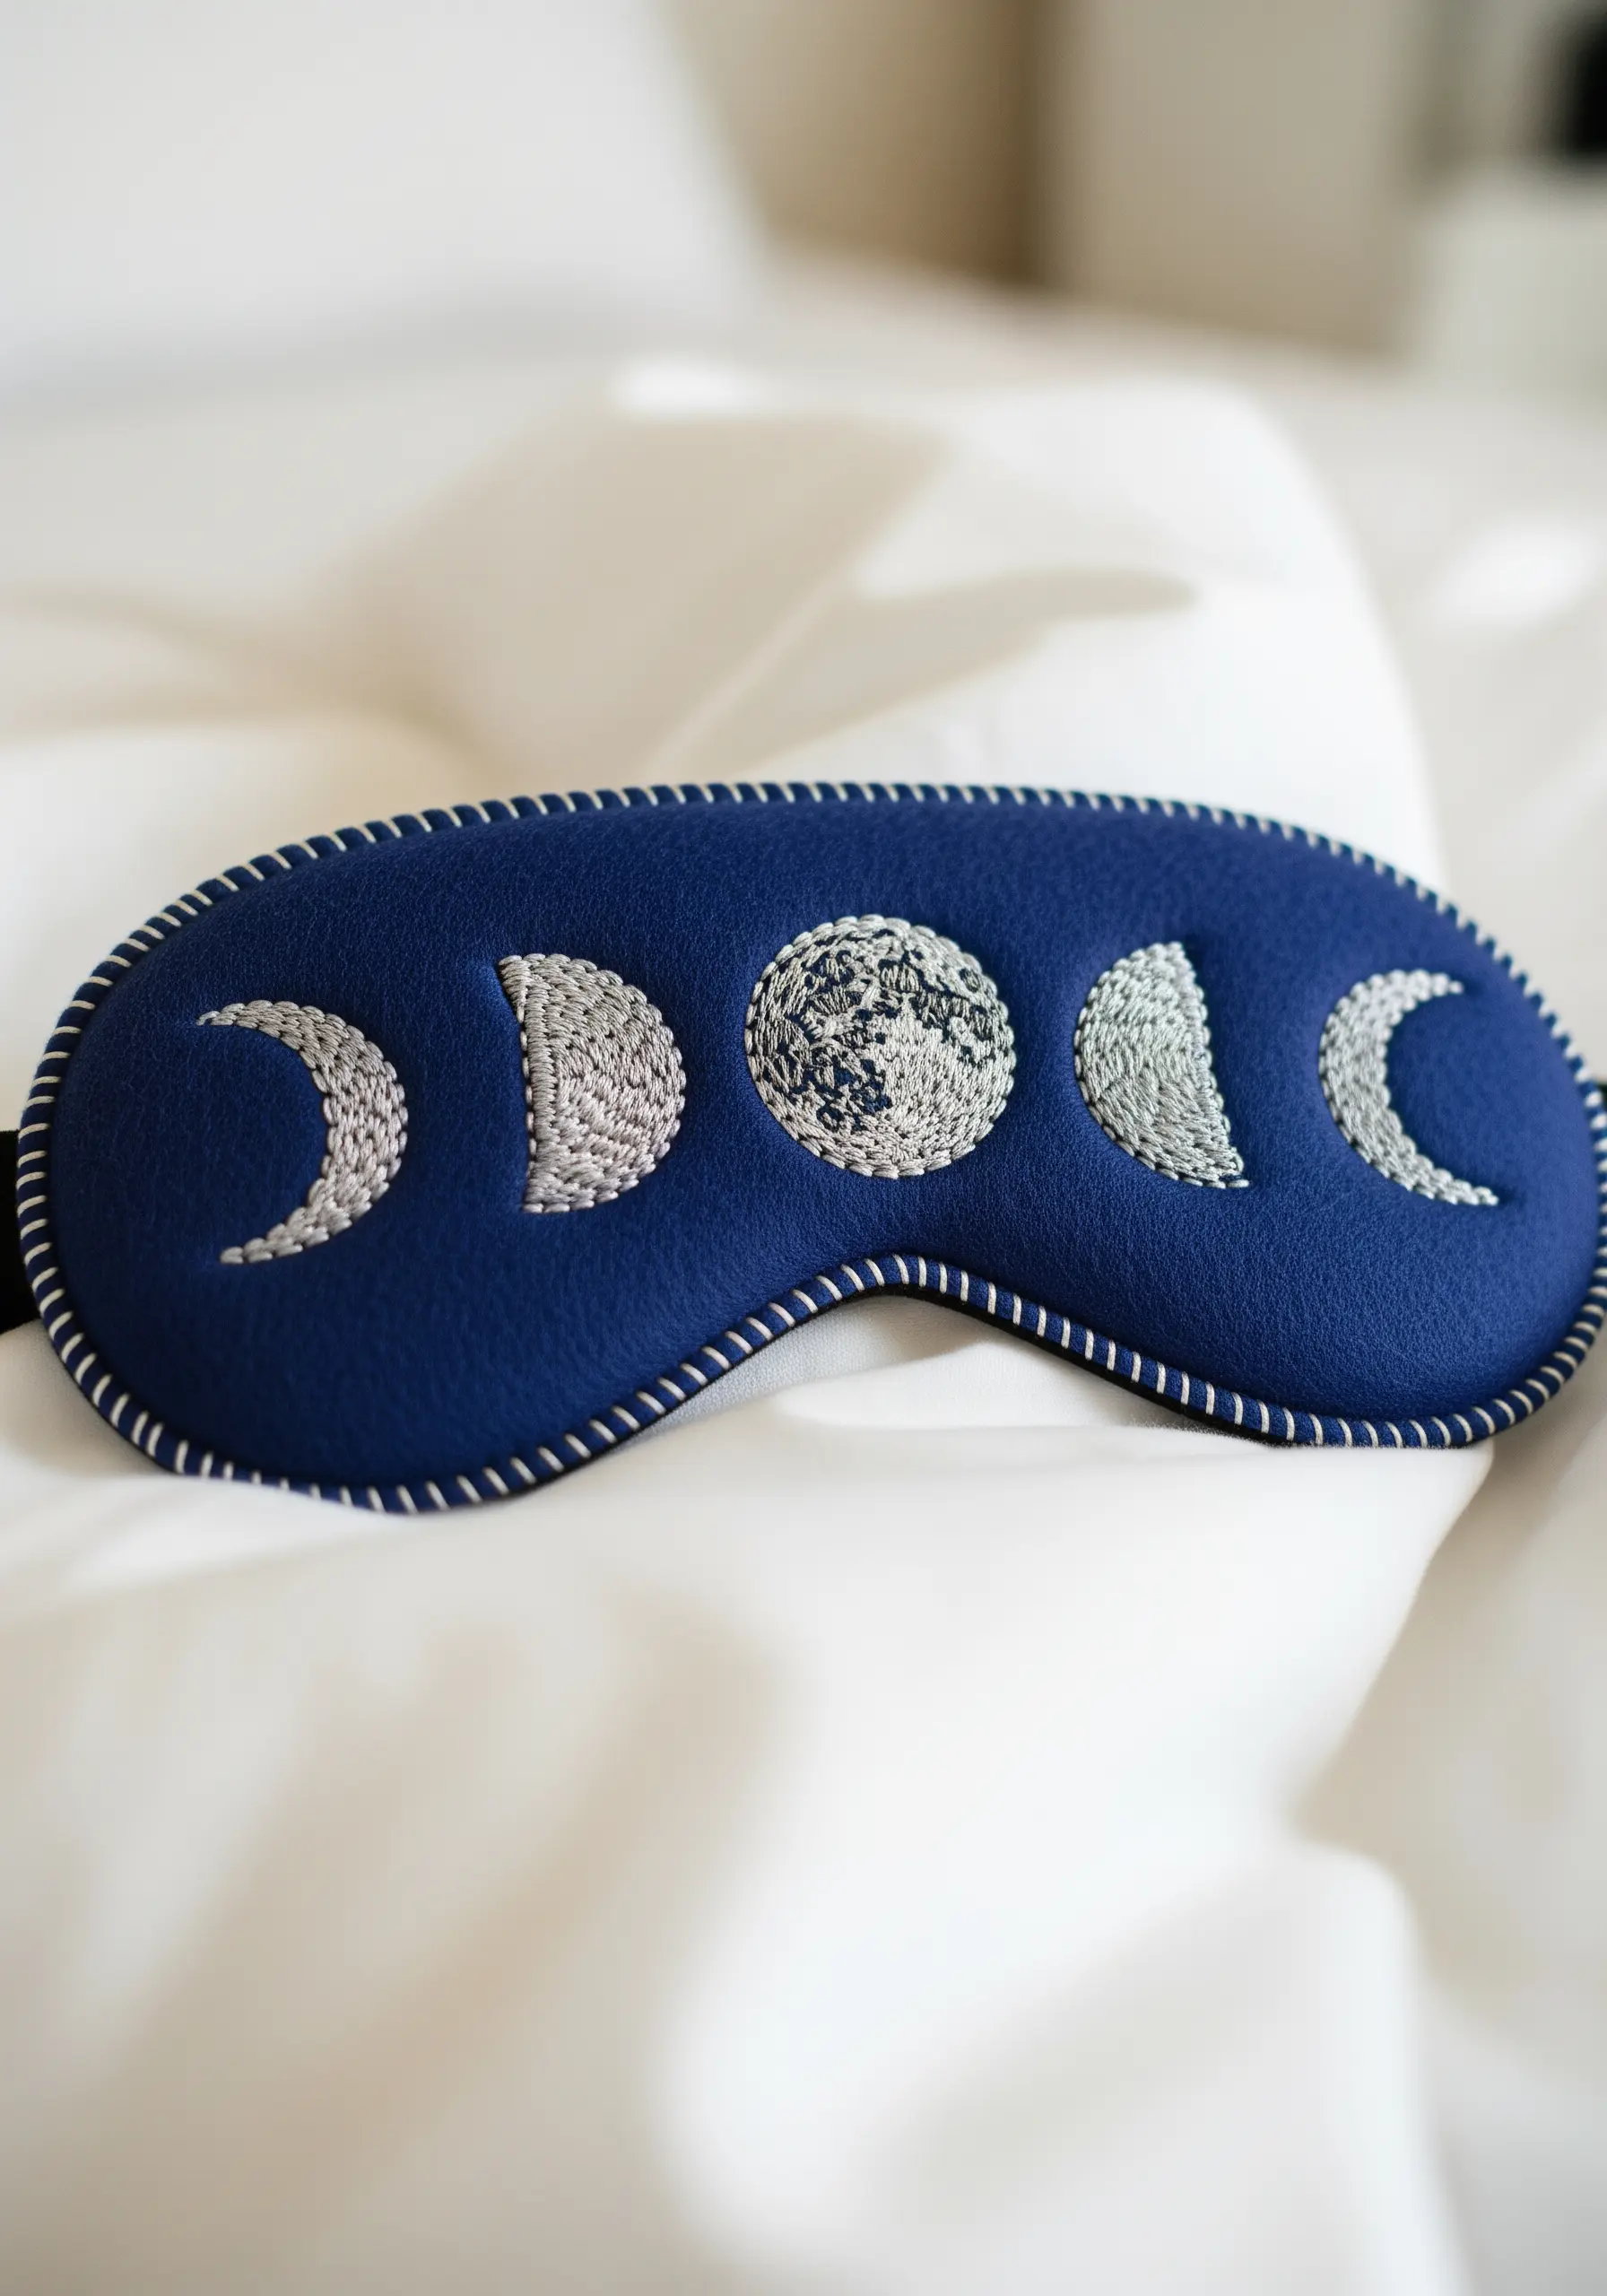
Elevate a simple sleep mask by adding texture to your embroidery.
Instead of filling the moon phases with flat satin stitch, use a dense pattern of seed stitches or tiny French knots.
This mimics the cratered, uneven surface of the moon, adding tactile interest and a more sophisticated look.
Frame the entire mask with a clean, contrasting blanket stitch for a durable and professional finish.
19. Embellish a Journal Cover with a Mountainscape

To embroider on a journal, choose one with a fabric or textured paper cover that can hold stitches.
Use a sharp, sturdy needle and a thimble to protect your fingers.
Create dimension in the mountains by angling your satin stitches differently for each peak and slope, which suggests light and shadow.
A few simple straight stitches for birds in the sky adds a sense of scale and completes the serene scene.
20. Add Botanical Details to a Lampshade

You can stitch directly onto most fabric lampshades, but you must work with care.
Use a small, sharp needle and a lightweight thread (one or two strands) to avoid creating large holes.
Keep your tension gentle and even, never pulling the thread tight, which could cause the shade to dent or pucker.
A simple backstitch for the vines and a fishbone stitch for the fern leaves creates an elegant, airy design that comes alive when the lamp is lit.
21. Handcraft a Serene Nursery Mobile

For a handmade nursery mobile, focus on simple shapes, soft textures, and secure construction.
Create the woodland animals from high-quality wool felt and use minimal embroidery for the details—just a few French knots for eyes or a simple backstitch for a mouth.
The charm lies in the soft, sculptural forms rather than intricate stitching.
This makes it a perfect project for a relaxing afternoon, resulting in a beautiful piece of nursery stitch art.
22. Embroider on Knitwear with Confidence

Stitching on a stretchy knit beanie requires a stabilizer to prevent the fabric from distorting.
Iron a lightweight, tear-away stabilizer onto the inside of the hat before you begin stitching. This provides a solid foundation for your embroidery.
Choose stitches that have some natural flexibility, like the detached chain stitch and straight stitch.
Avoid tight, dense stitches like satin stitch, which can restrict the stretch of the knit fabric and cause puckering.


