

This year, let’s transform the humble gift bag into a gift in itself. A thoughtful, hand-stitched tote bag is more than just wrapping; it’s a reusable piece of art that carries a story long after the holidays are over.
But making something feel special isn’t about complexity. It’s about intention—choosing the right stitch to create texture, the right thread to catch the light, or the right placement to make a simple design feel effortlessly elegant.
Here, you’ll find not just ideas, but the techniques behind them. You’ll learn how to make your satin stitches smoother, your metallics behave, and your compositions feel balanced and polished. This is your guide to creating festive totes that are as joyful to make as they are to give.
1. The Classic Holly Wreath with Polished Dimension
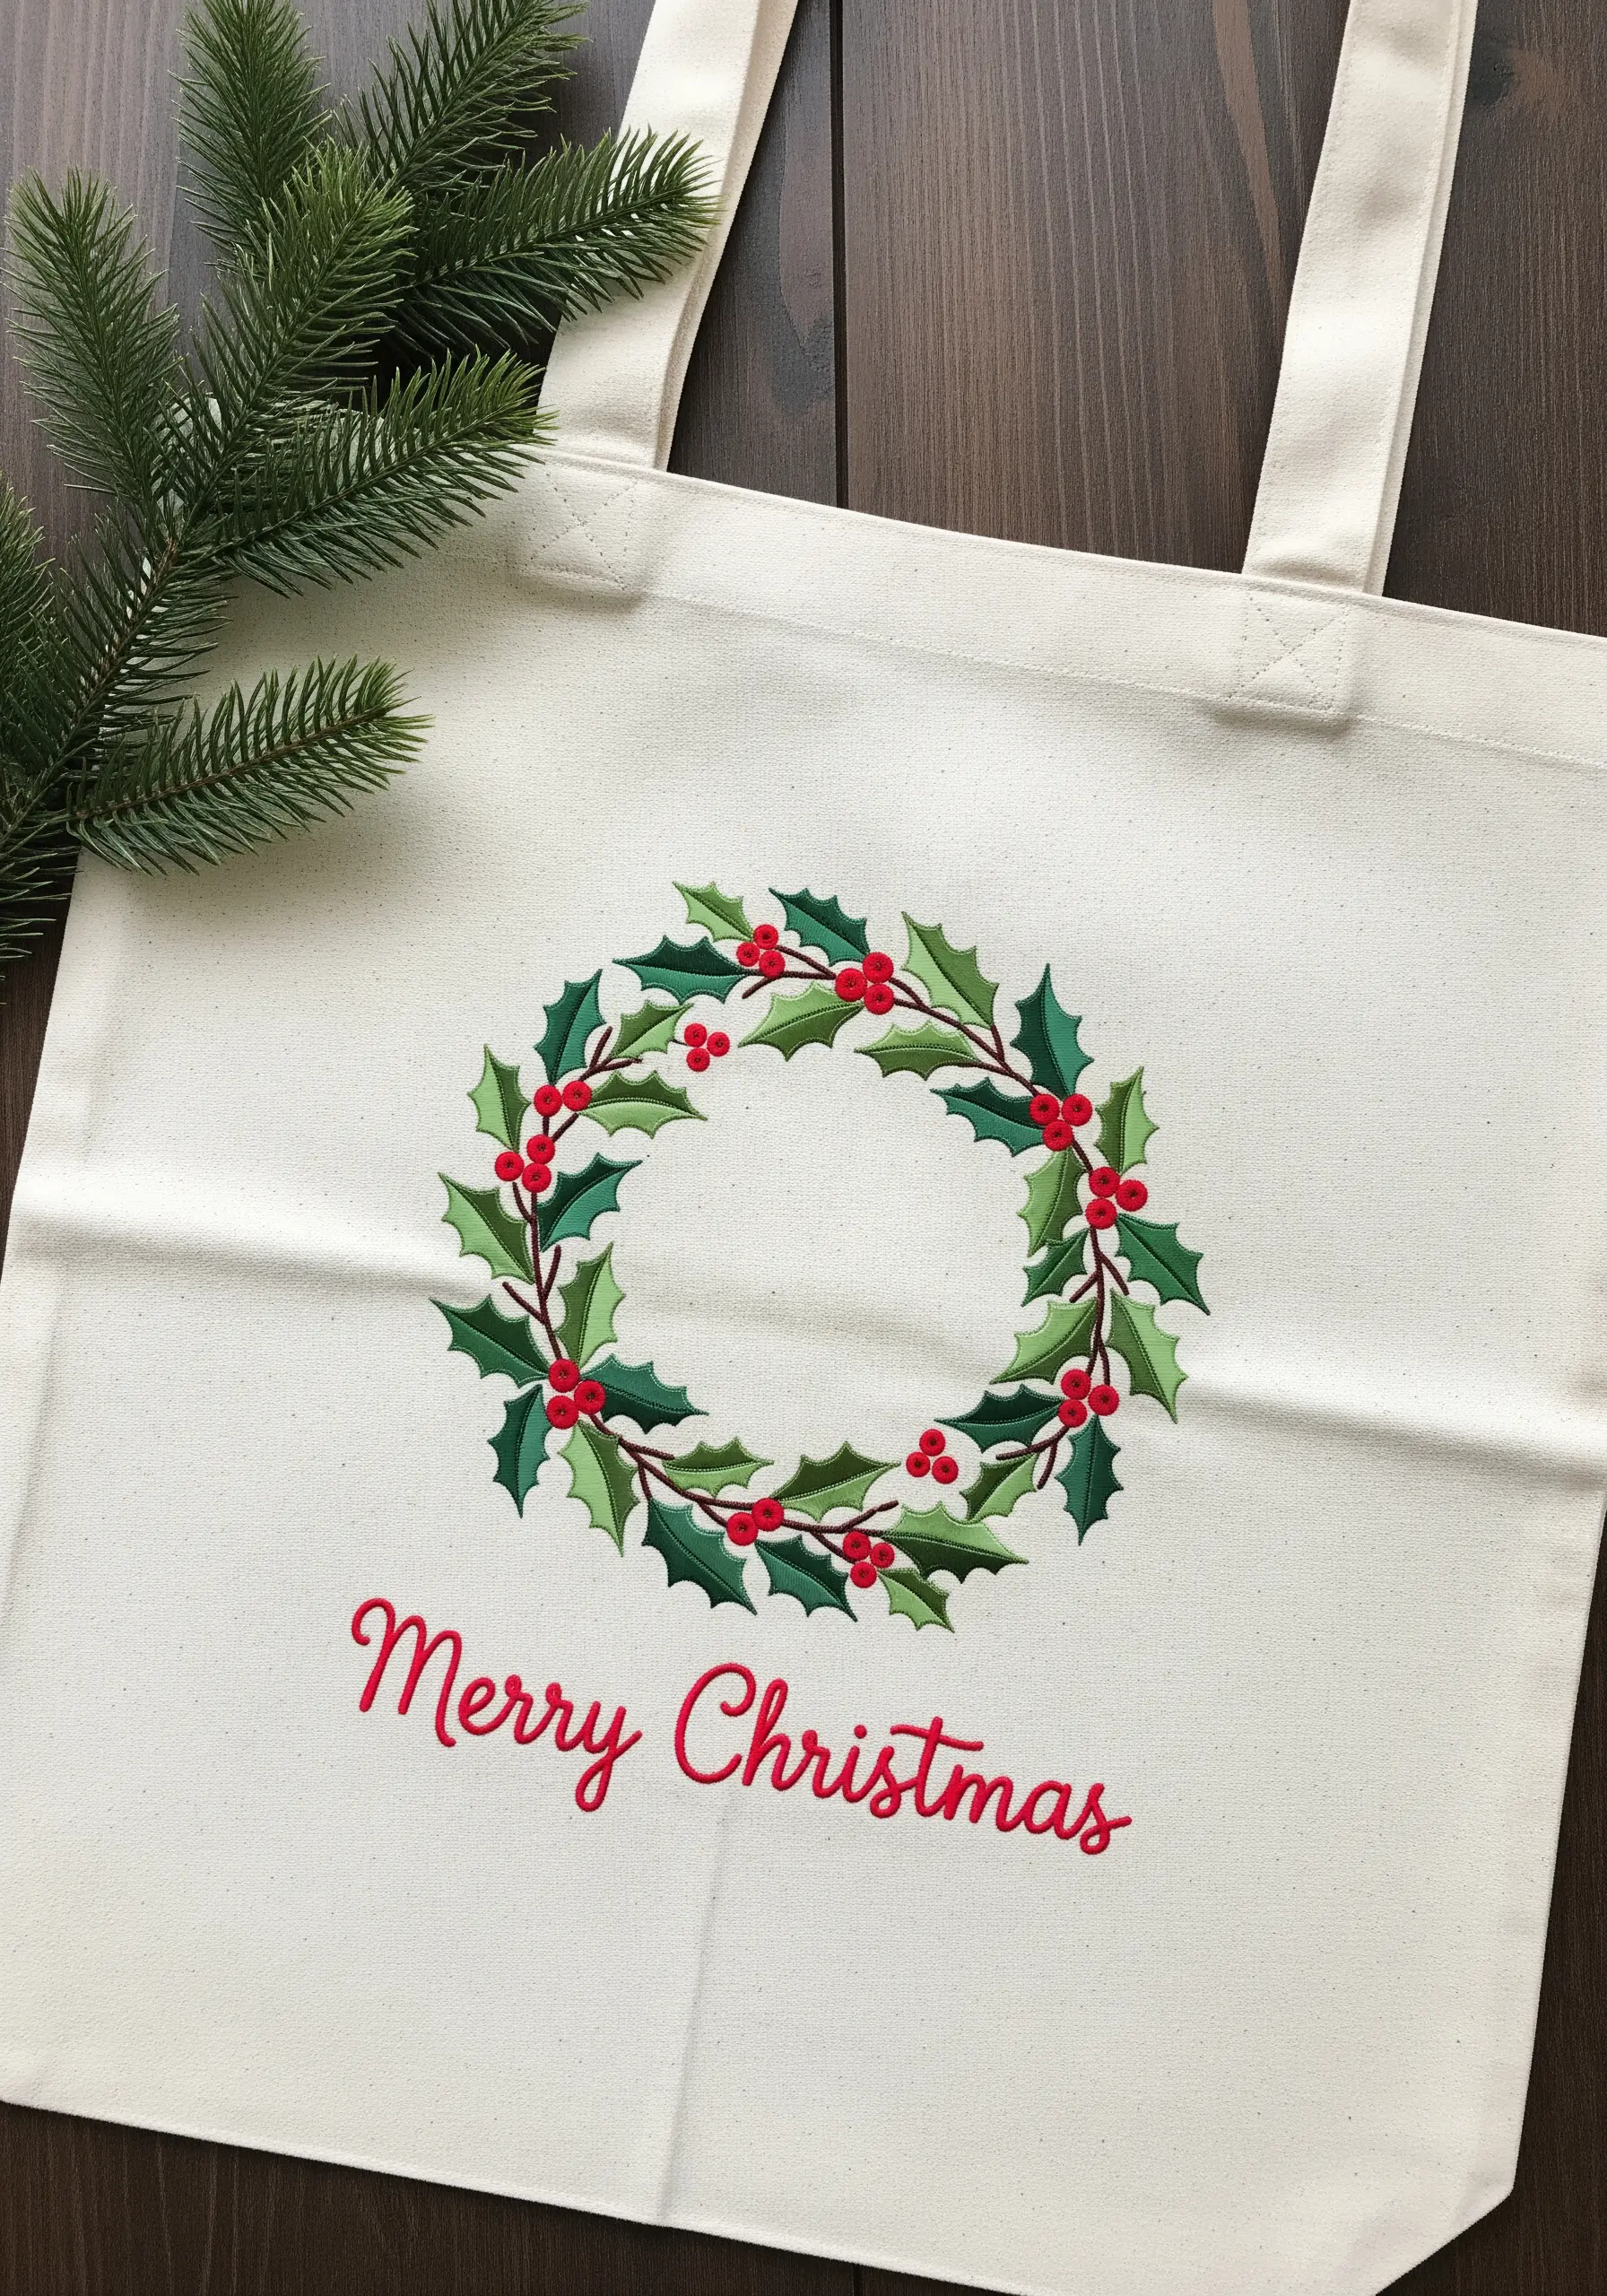
To prevent your holly leaves from looking flat, use a directional satin stitch, angling the stitches from the outer edge toward the central vein.
For the berries, create a padded effect by first stitching a small satin stitch base and then working your final red stitches over it; this gives them a plump, 3D appearance.
Always use a tear-away stabilizer on the back of a canvas tote to prevent the fabric from puckering under the dense stitches.
For the text, a crisp split backstitch in a contrasting color ensures legibility and adds a refined finish.
2. A High-Contrast Winter Night Scene
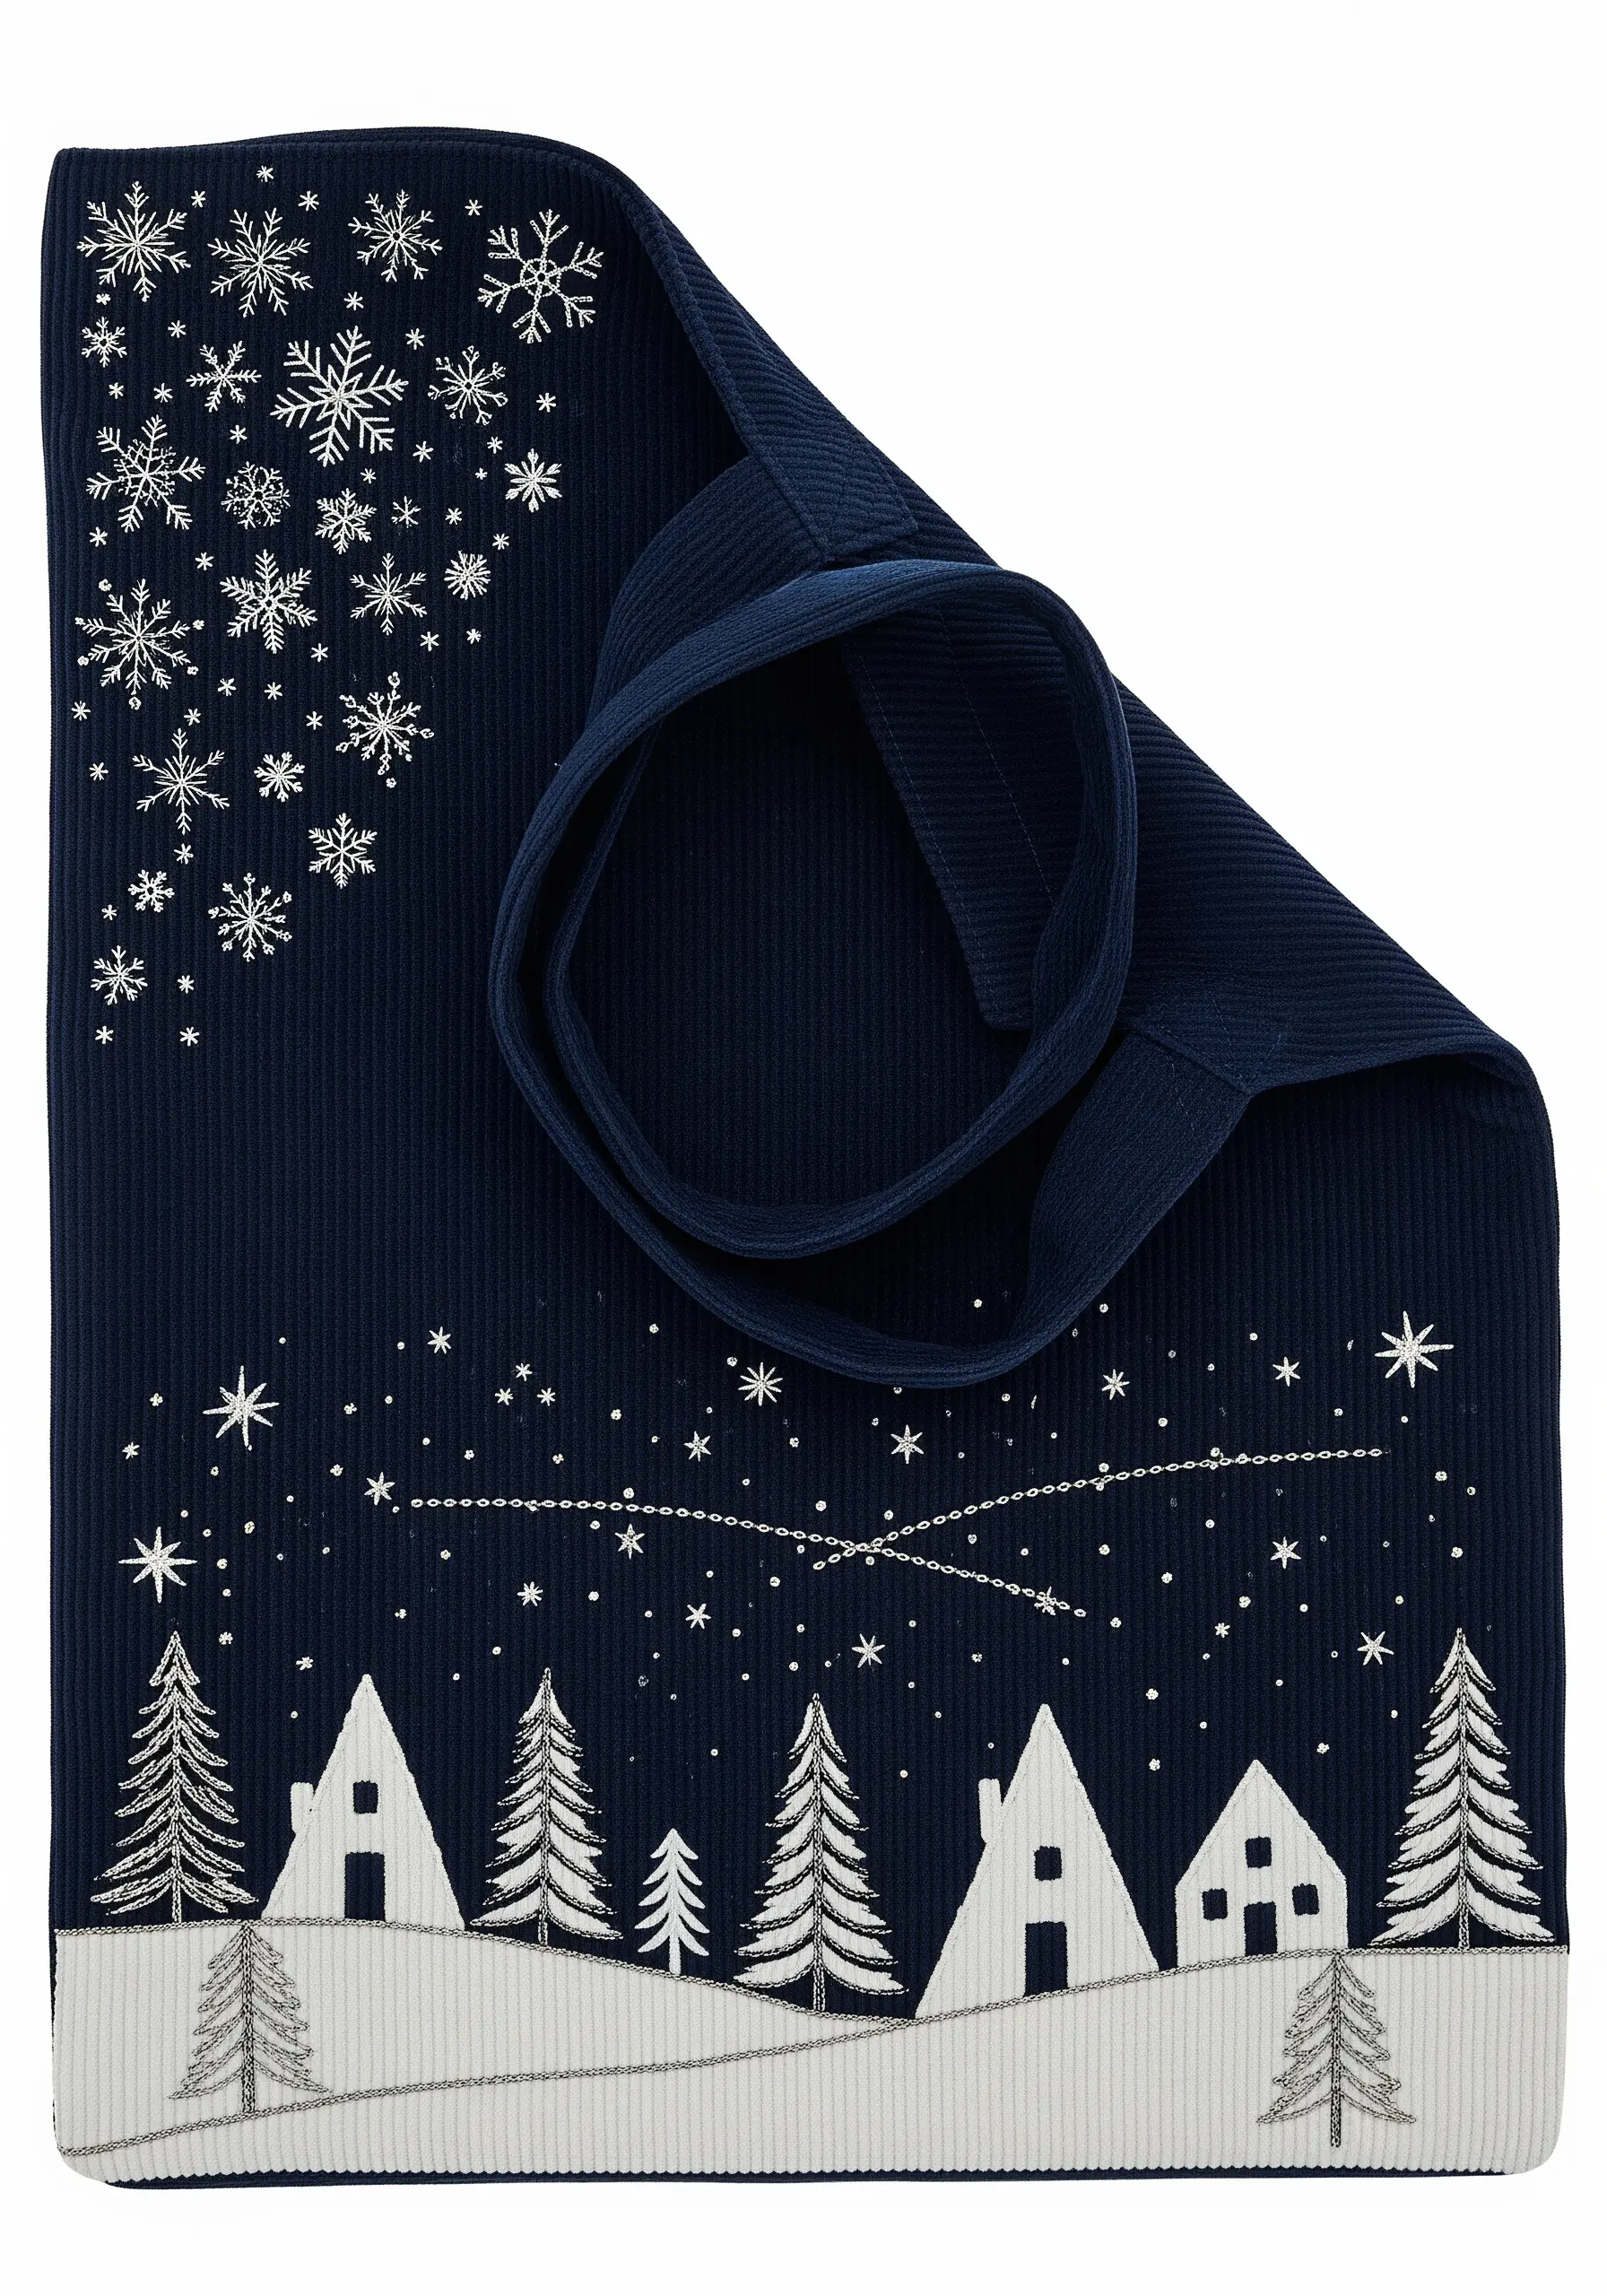
When embroidering on a dark, textured fabric like corduroy, choose a high-sheen thread, like a rayon or silver metallic, to catch the light and create contrast.
Simplify the snowy ground by using long, horizontal satin stitches that follow the fabric’s ribbing, which integrates the design into the textile.
For the delicate snowflakes and stars, use a single strand of thread and a combination of straight stitches and tiny French knots to avoid overwhelming the composition.
The shooting star’s trail is achieved by couching a shimmering metallic thread, which creates a clean, unbroken line that’s difficult to get with a standard stitch.
3. Geometric Motifs on Luxe Velvet

Embroidering on velvet requires a light touch to avoid crushing the pile; use a sharp needle and a topper stabilizer (like a water-soluble one) to keep your stitches sitting cleanly on the surface.
Create the faceted, geometric look by breaking the design into small, manageable satin-stitched sections.
Stitch each section in a different direction to catch the light differently, enhancing the illusion of 3D planes.
A high-quality gold metallic thread gives this design its necessary opulence, but ensure your tension is even to prevent looping or snapping.
4. Sparkling Ornaments with Metallic Threads

To make metallic thread easier to work with, use shorter lengths (no more than 12-14 inches) and a thread conditioner to reduce friction and fraying.
For the ornament strings, a single, taut strand of thread stitched down at intervals (couching) creates a more delicate and realistic drape than a simple backstitch.
Vary the stitch fills for each ornament—like a checked pattern with satin stitch, a paisley outline with stem stitch, and bold stripes with glitter thread—to create visual interest.
This composition works because it balances intricate patterns with simple shapes, letting each ornament stand on its own while feeling cohesive.
5. A Personalized Botanical Monogram
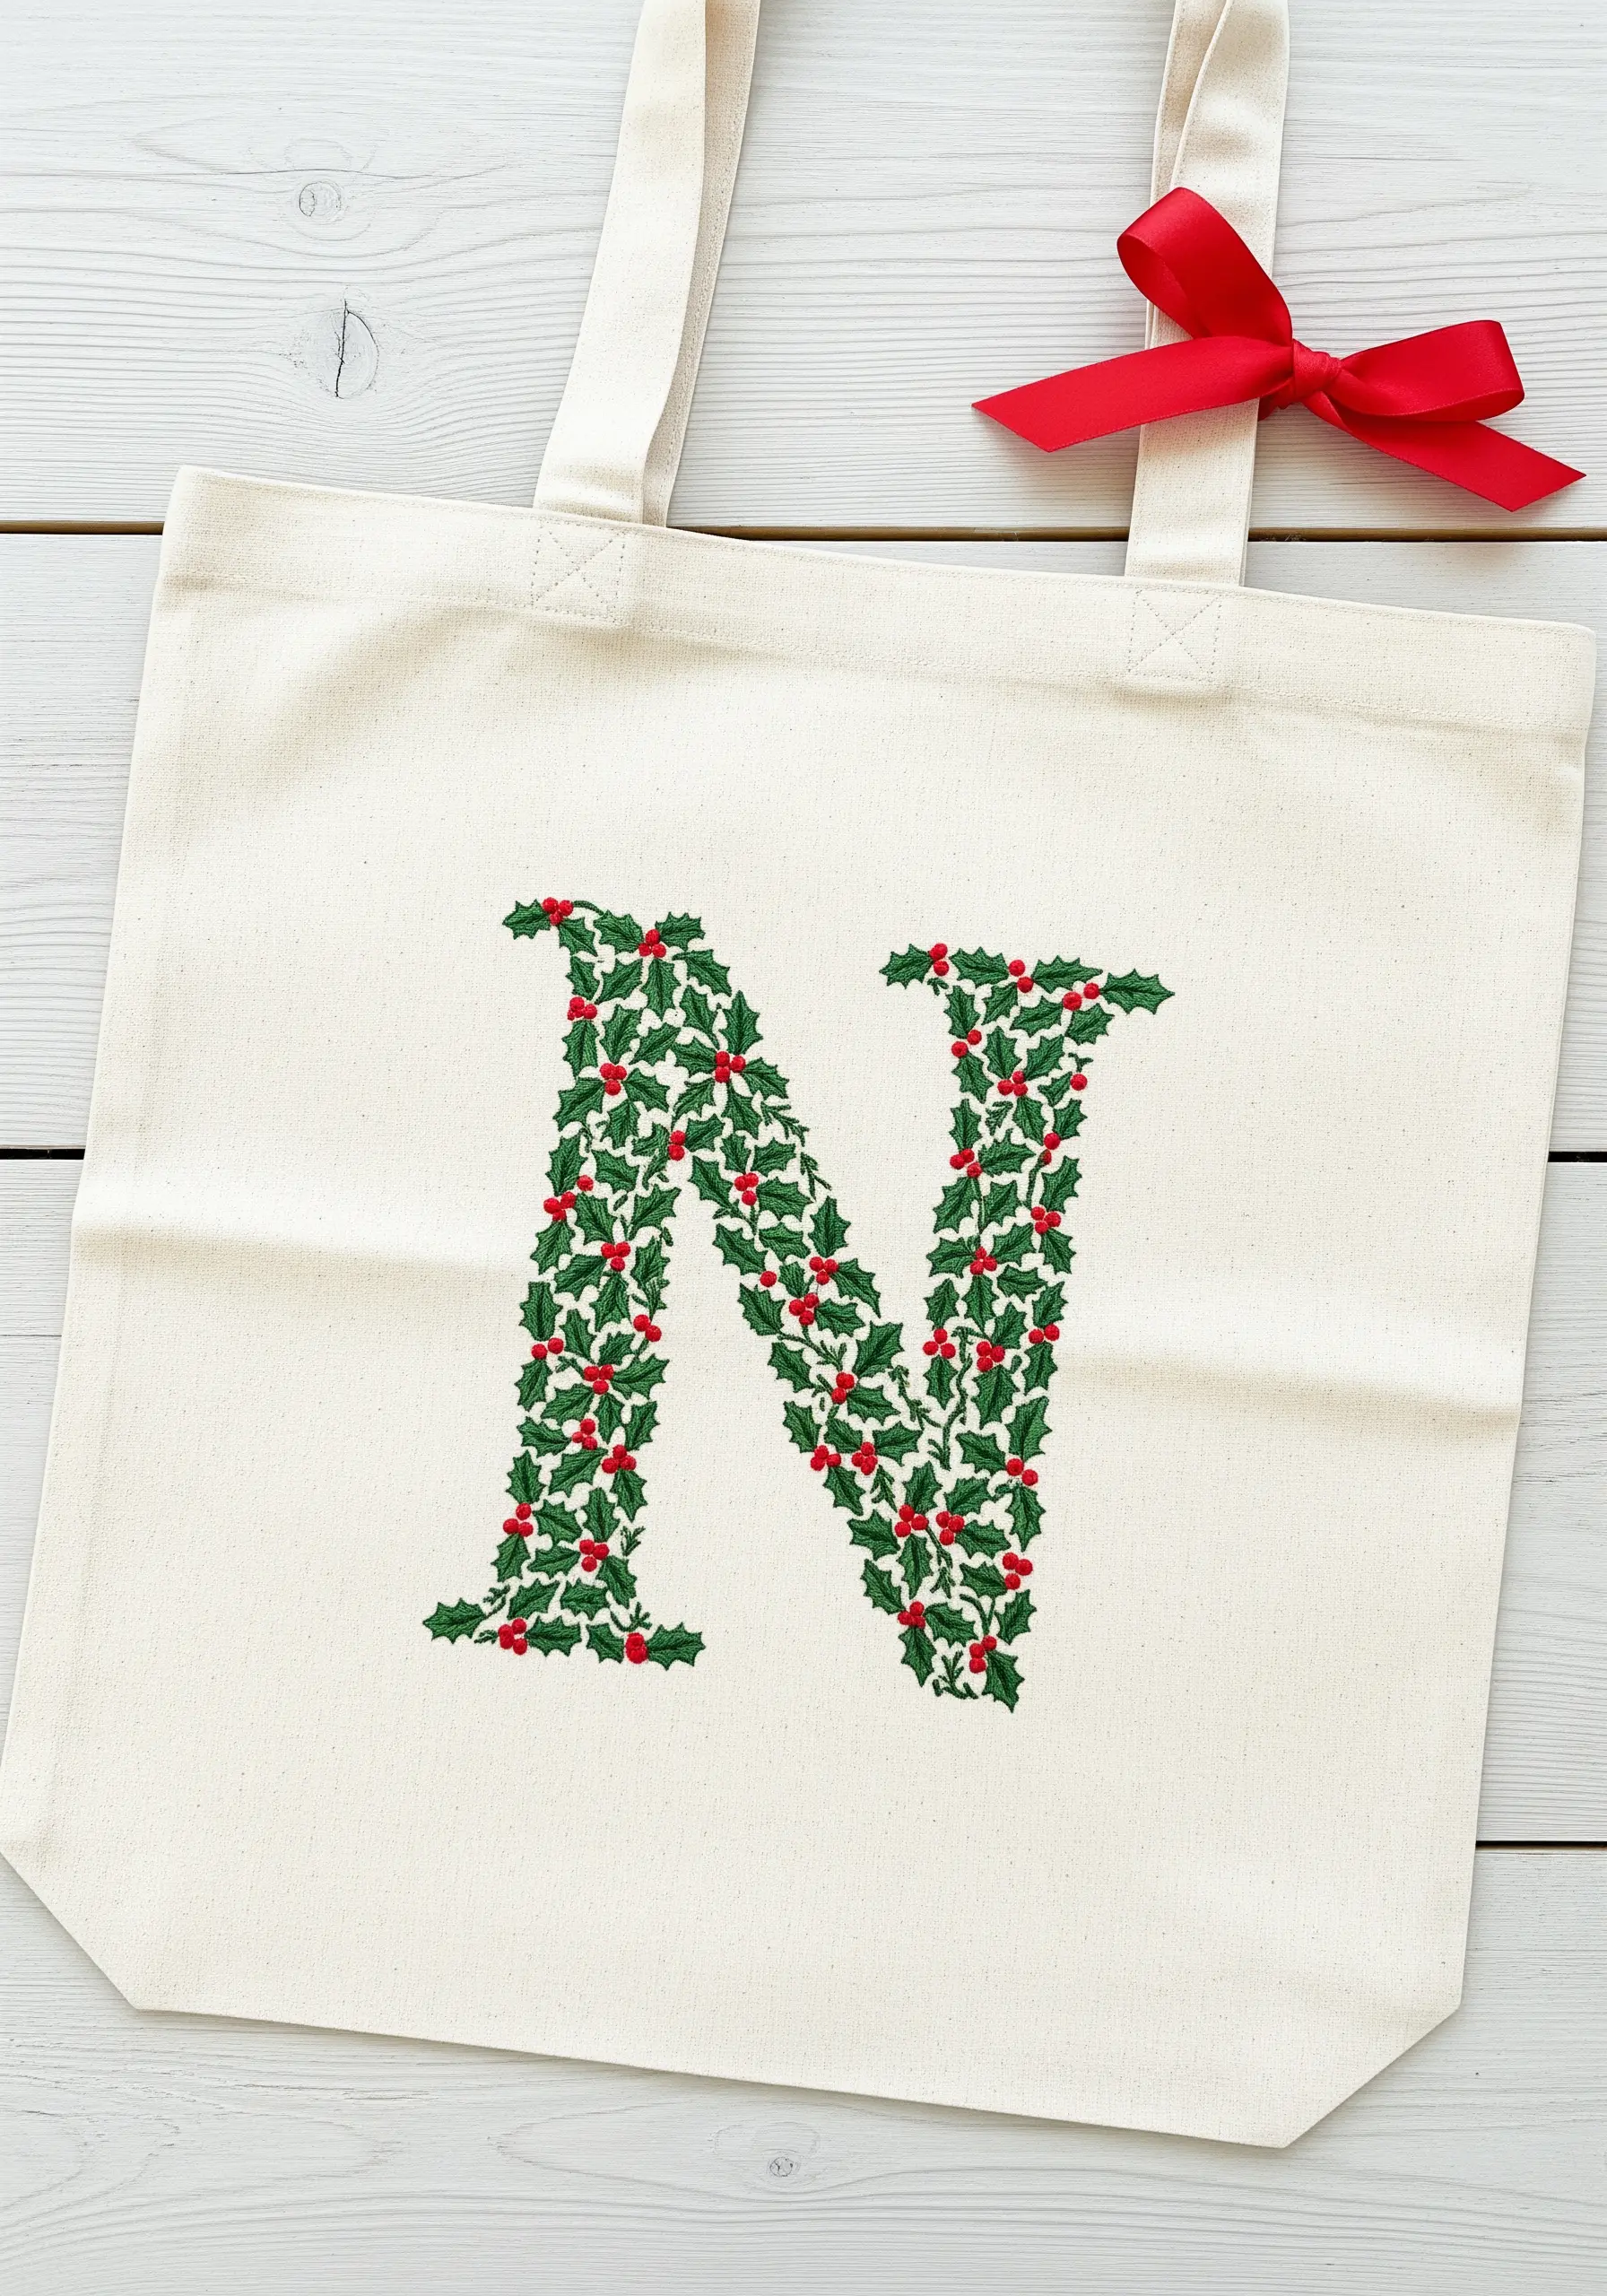
To create a dense pattern-fill like this, use a smaller-scale motif of holly leaves and berries stitched with just two or three strands of floss.
Outline the letter shape first with a split stitch; this gives you a firm edge to stitch against and ensures the final monogram is crisp and legible.
Work from the center of the letter outwards, randomly scattering the tiny leaves and French knot berries to create an organic, non-repeating texture.
This is one of those personalized embroidery ideas that feels intricate but is built from very simple stitches, making it accessible yet impressive.
6. The Iconic Nutcracker Figure
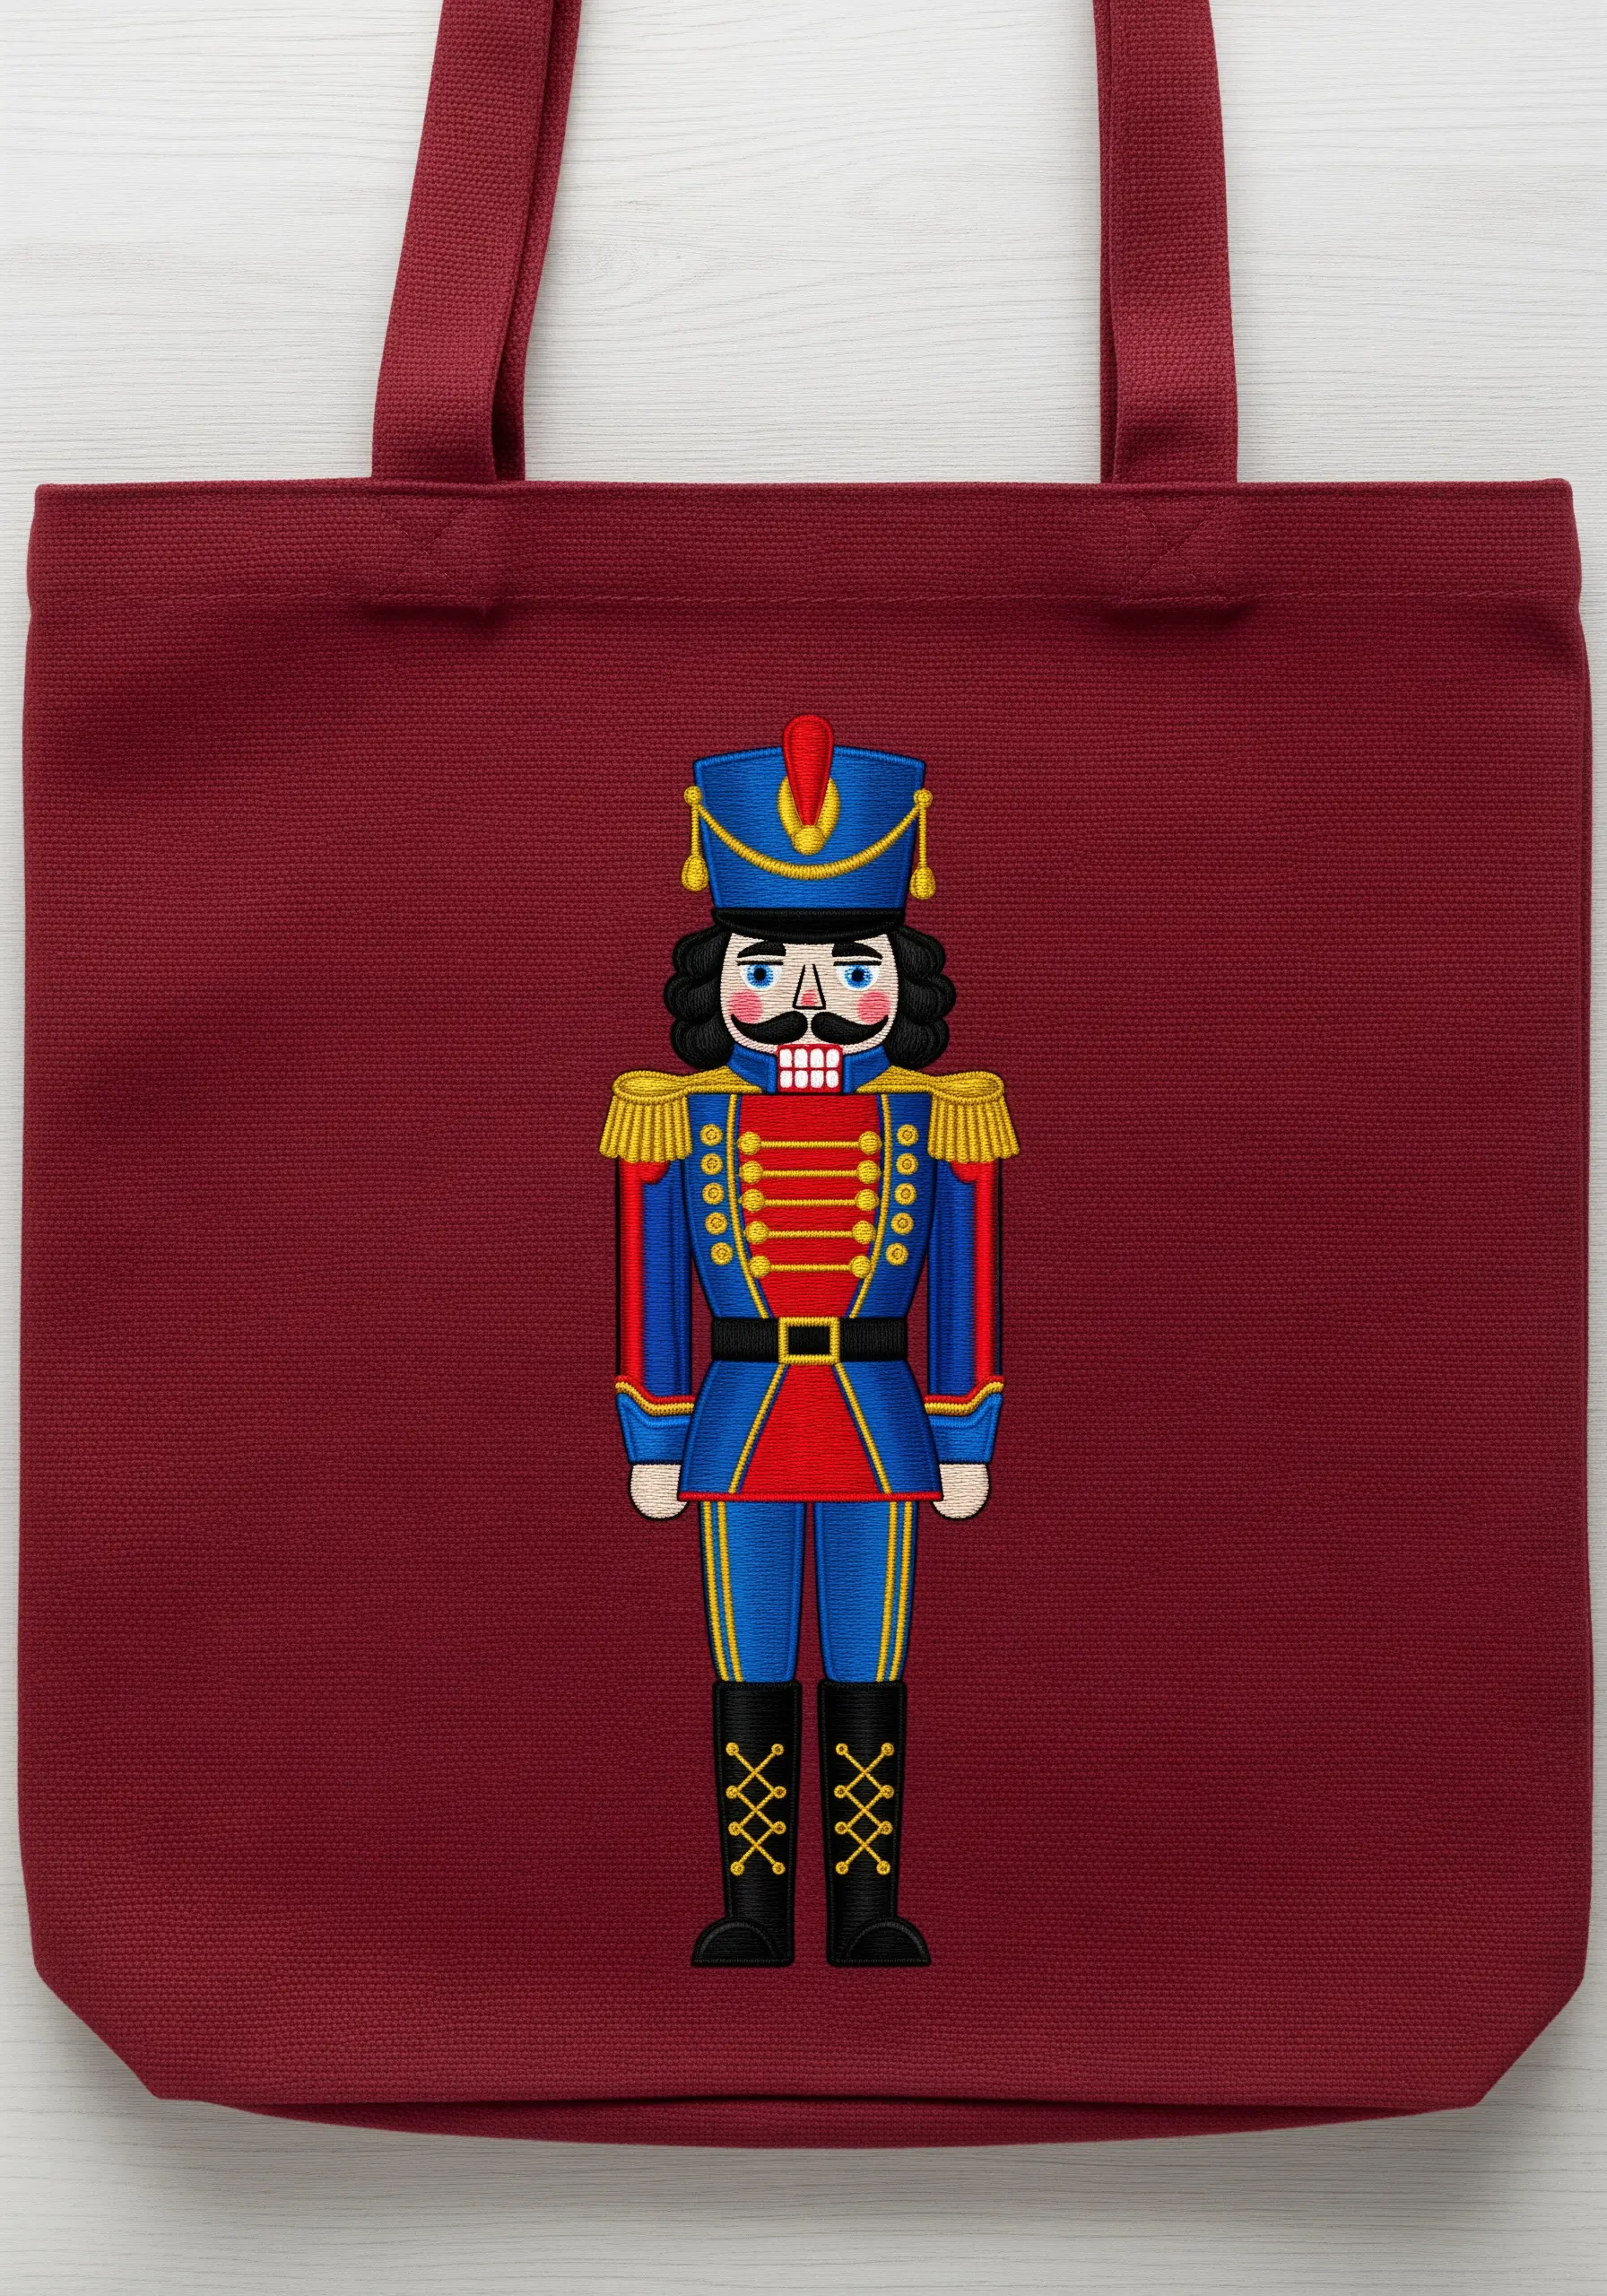
For a detailed character, tackle one color at a time, filling in the largest areas of satin stitch first, like the blue jacket and red trousers.
Use a single strand of black thread for outlines and facial features; this creates sharp definition without adding bulk.
To create the illusion of gold trim and buttons, use a metallic gold thread for small details like French knots and straight stitches, which adds a festive glimmer.
The key to a clean finish is ensuring all your satin stitches lie flat and parallel within each colored section, giving the figure a smooth, polished look.
7. Folk-Art Inspired Cross-Stitch
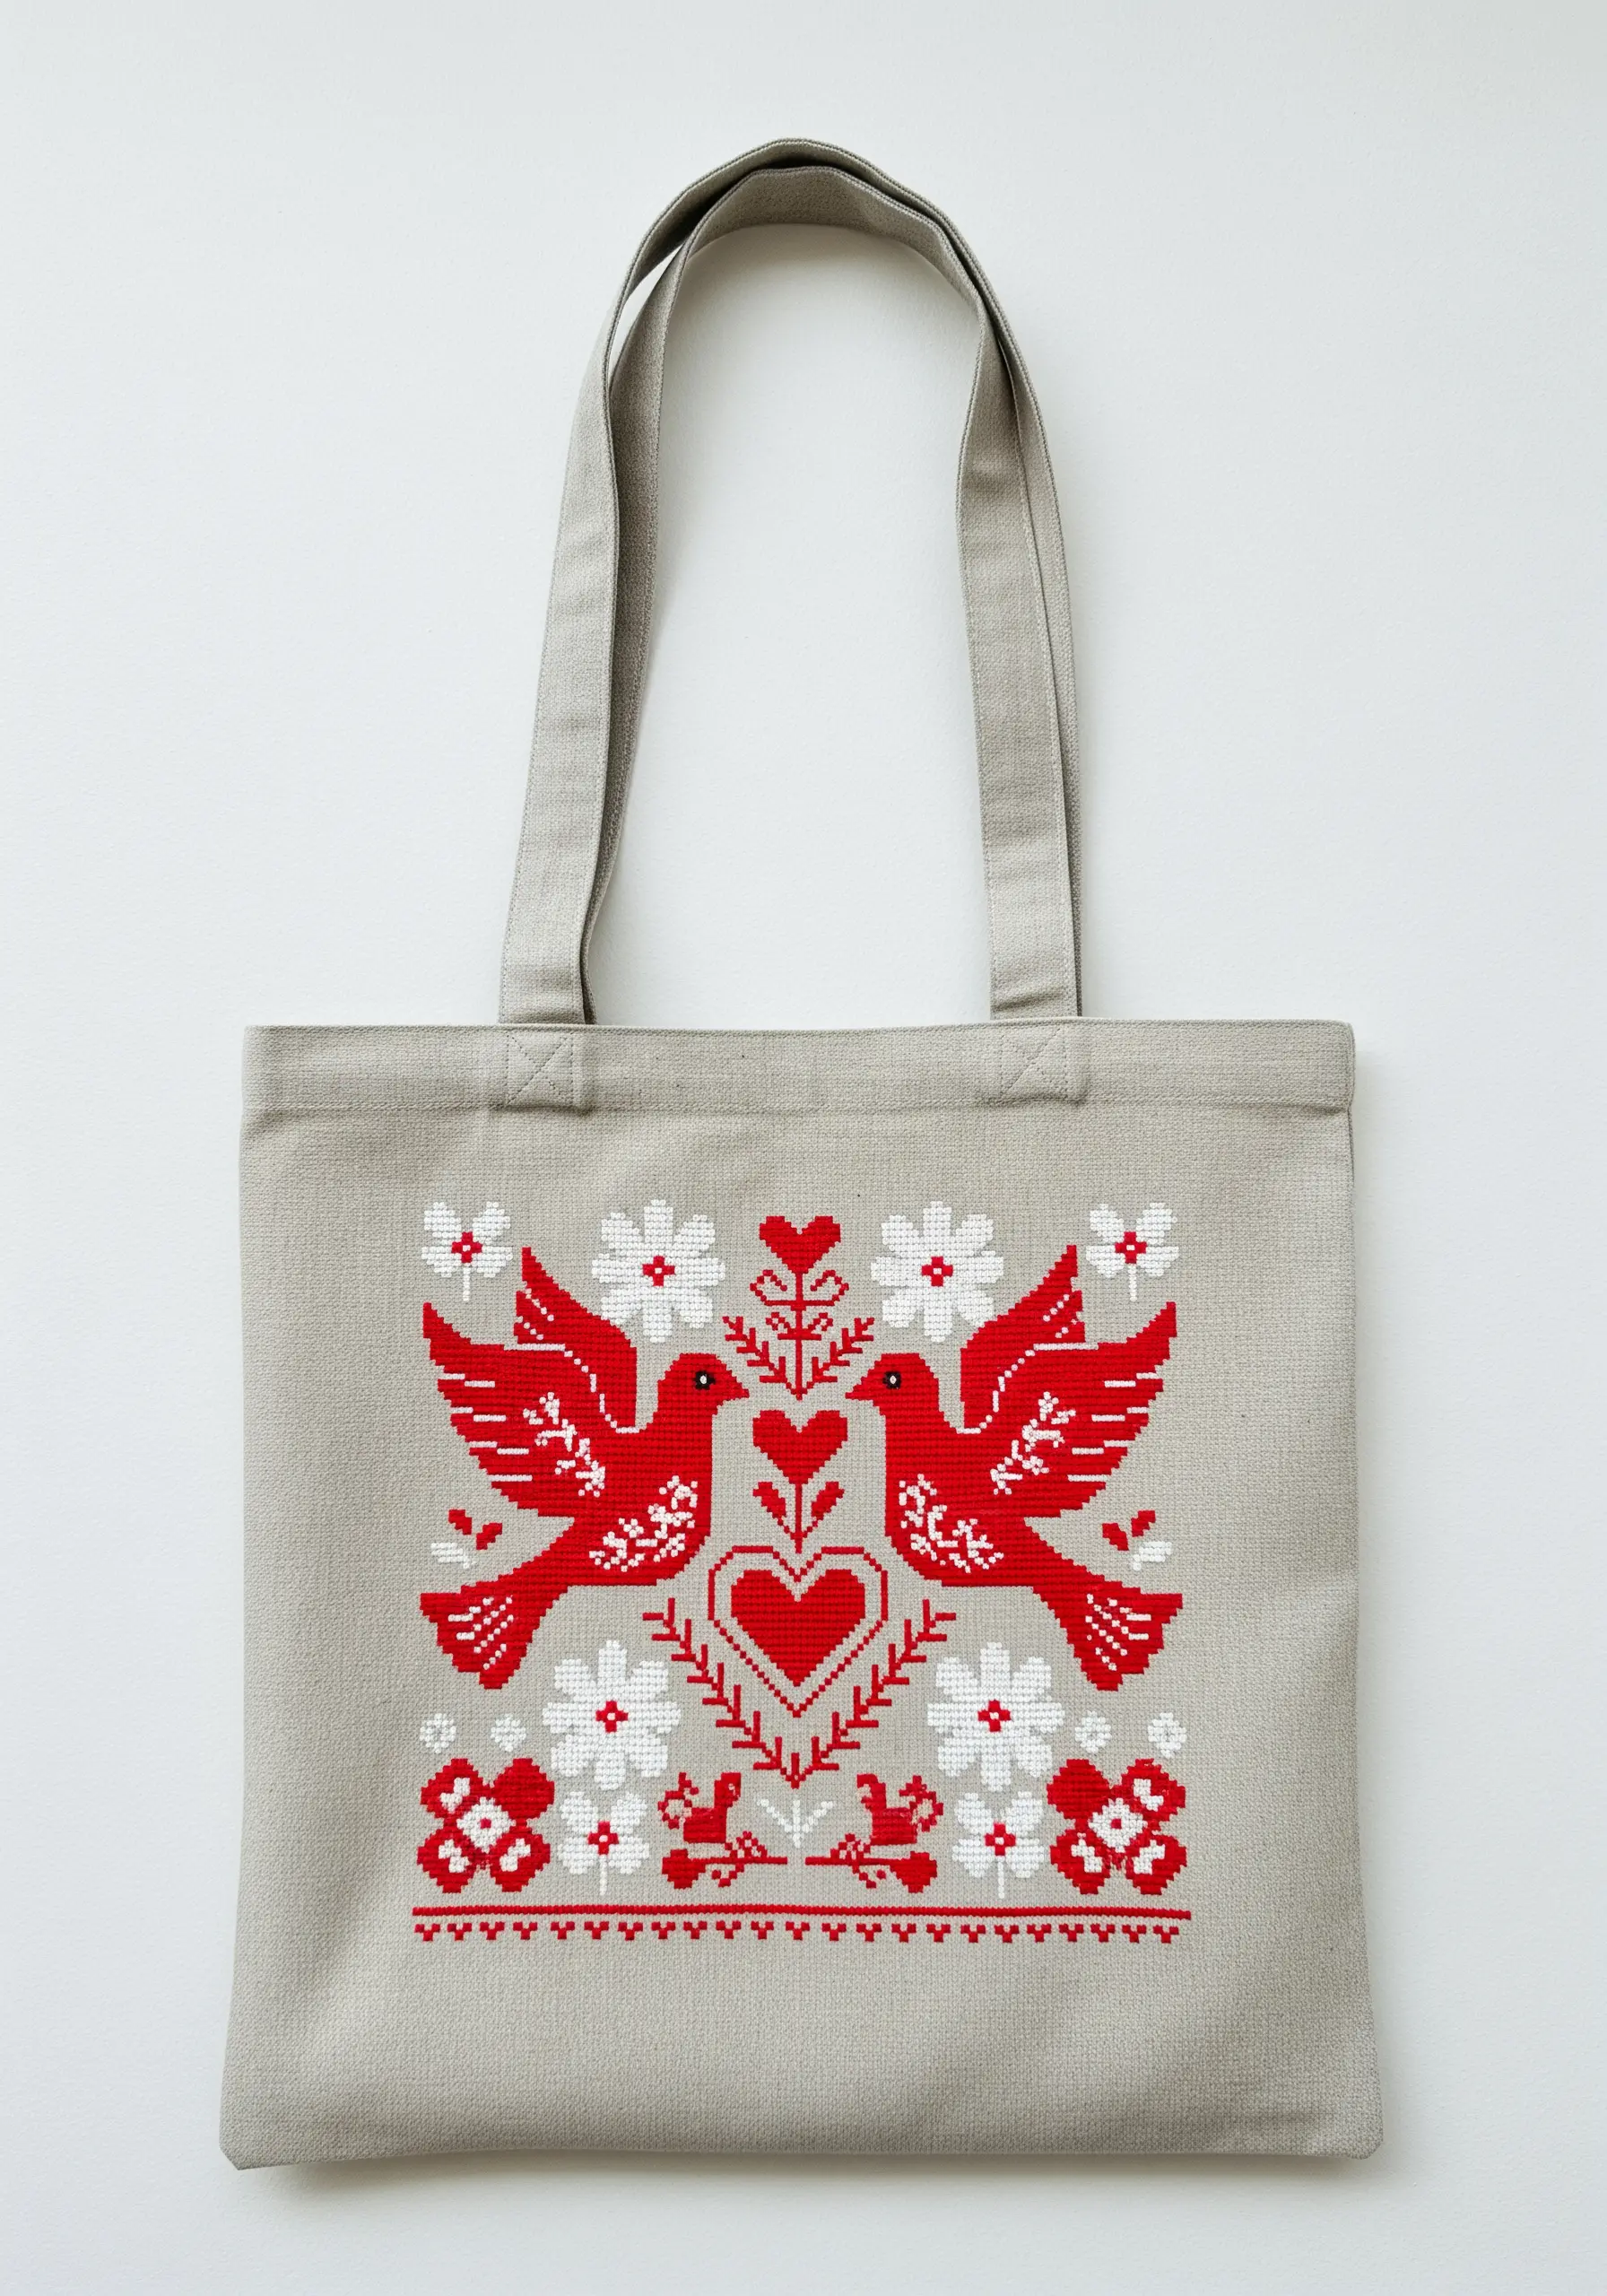
To achieve this clean, graphic look on a tote bag, use waste canvas or a water-soluble canvas to create a temporary grid for your cross-stitches.
The beauty of this style lies in its symmetry and simplicity; choose a limited color palette of two or three high-contrast colors, like red and white on a neutral linen bag.
Vary the density of the design—mixing solid-filled shapes with delicate outlines—to create a balanced composition that doesn’t feel heavy.
This technique transforms simple cross-stitches into a striking piece of wearable folk art, perfect for a handmade, heartfelt gift.
8. Whimsical Tangled Holiday Lights

Create the tangled wire with a whipped backstitch or stem stitch in a light gray or silver thread to give it a smooth, cord-like appearance.
For the colorful bulbs, use a dense satin stitch with a high-sheen rayon floss to mimic the reflective quality of glass.
Add a tiny white straight stitch or French knot on each bulb as a highlight; this small detail instantly makes them look more dimensional and realistic.
The chaotic, overlapping layout is part of the charm, so embrace the free-form nature of the design without worrying about perfect loops.
9. Sculptural ‘Let It Snow’ Typography

Achieve this stunning 3D effect with padded satin stitch, also known as trapunto embroidery.
First, stitch the outline of your letters using a backstitch. Then, cut a piece of felt or fleece batting just inside the stitched lines and lay it on top.
Work your satin stitches over the padding, pulling the thread taut enough to sculpt the fabric around the raised shape.
This technique turns simple lettering into a tactile, high-impact design that stands out, especially in a crisp white against a cool blue background.
10. An All-Over Celestial Pattern
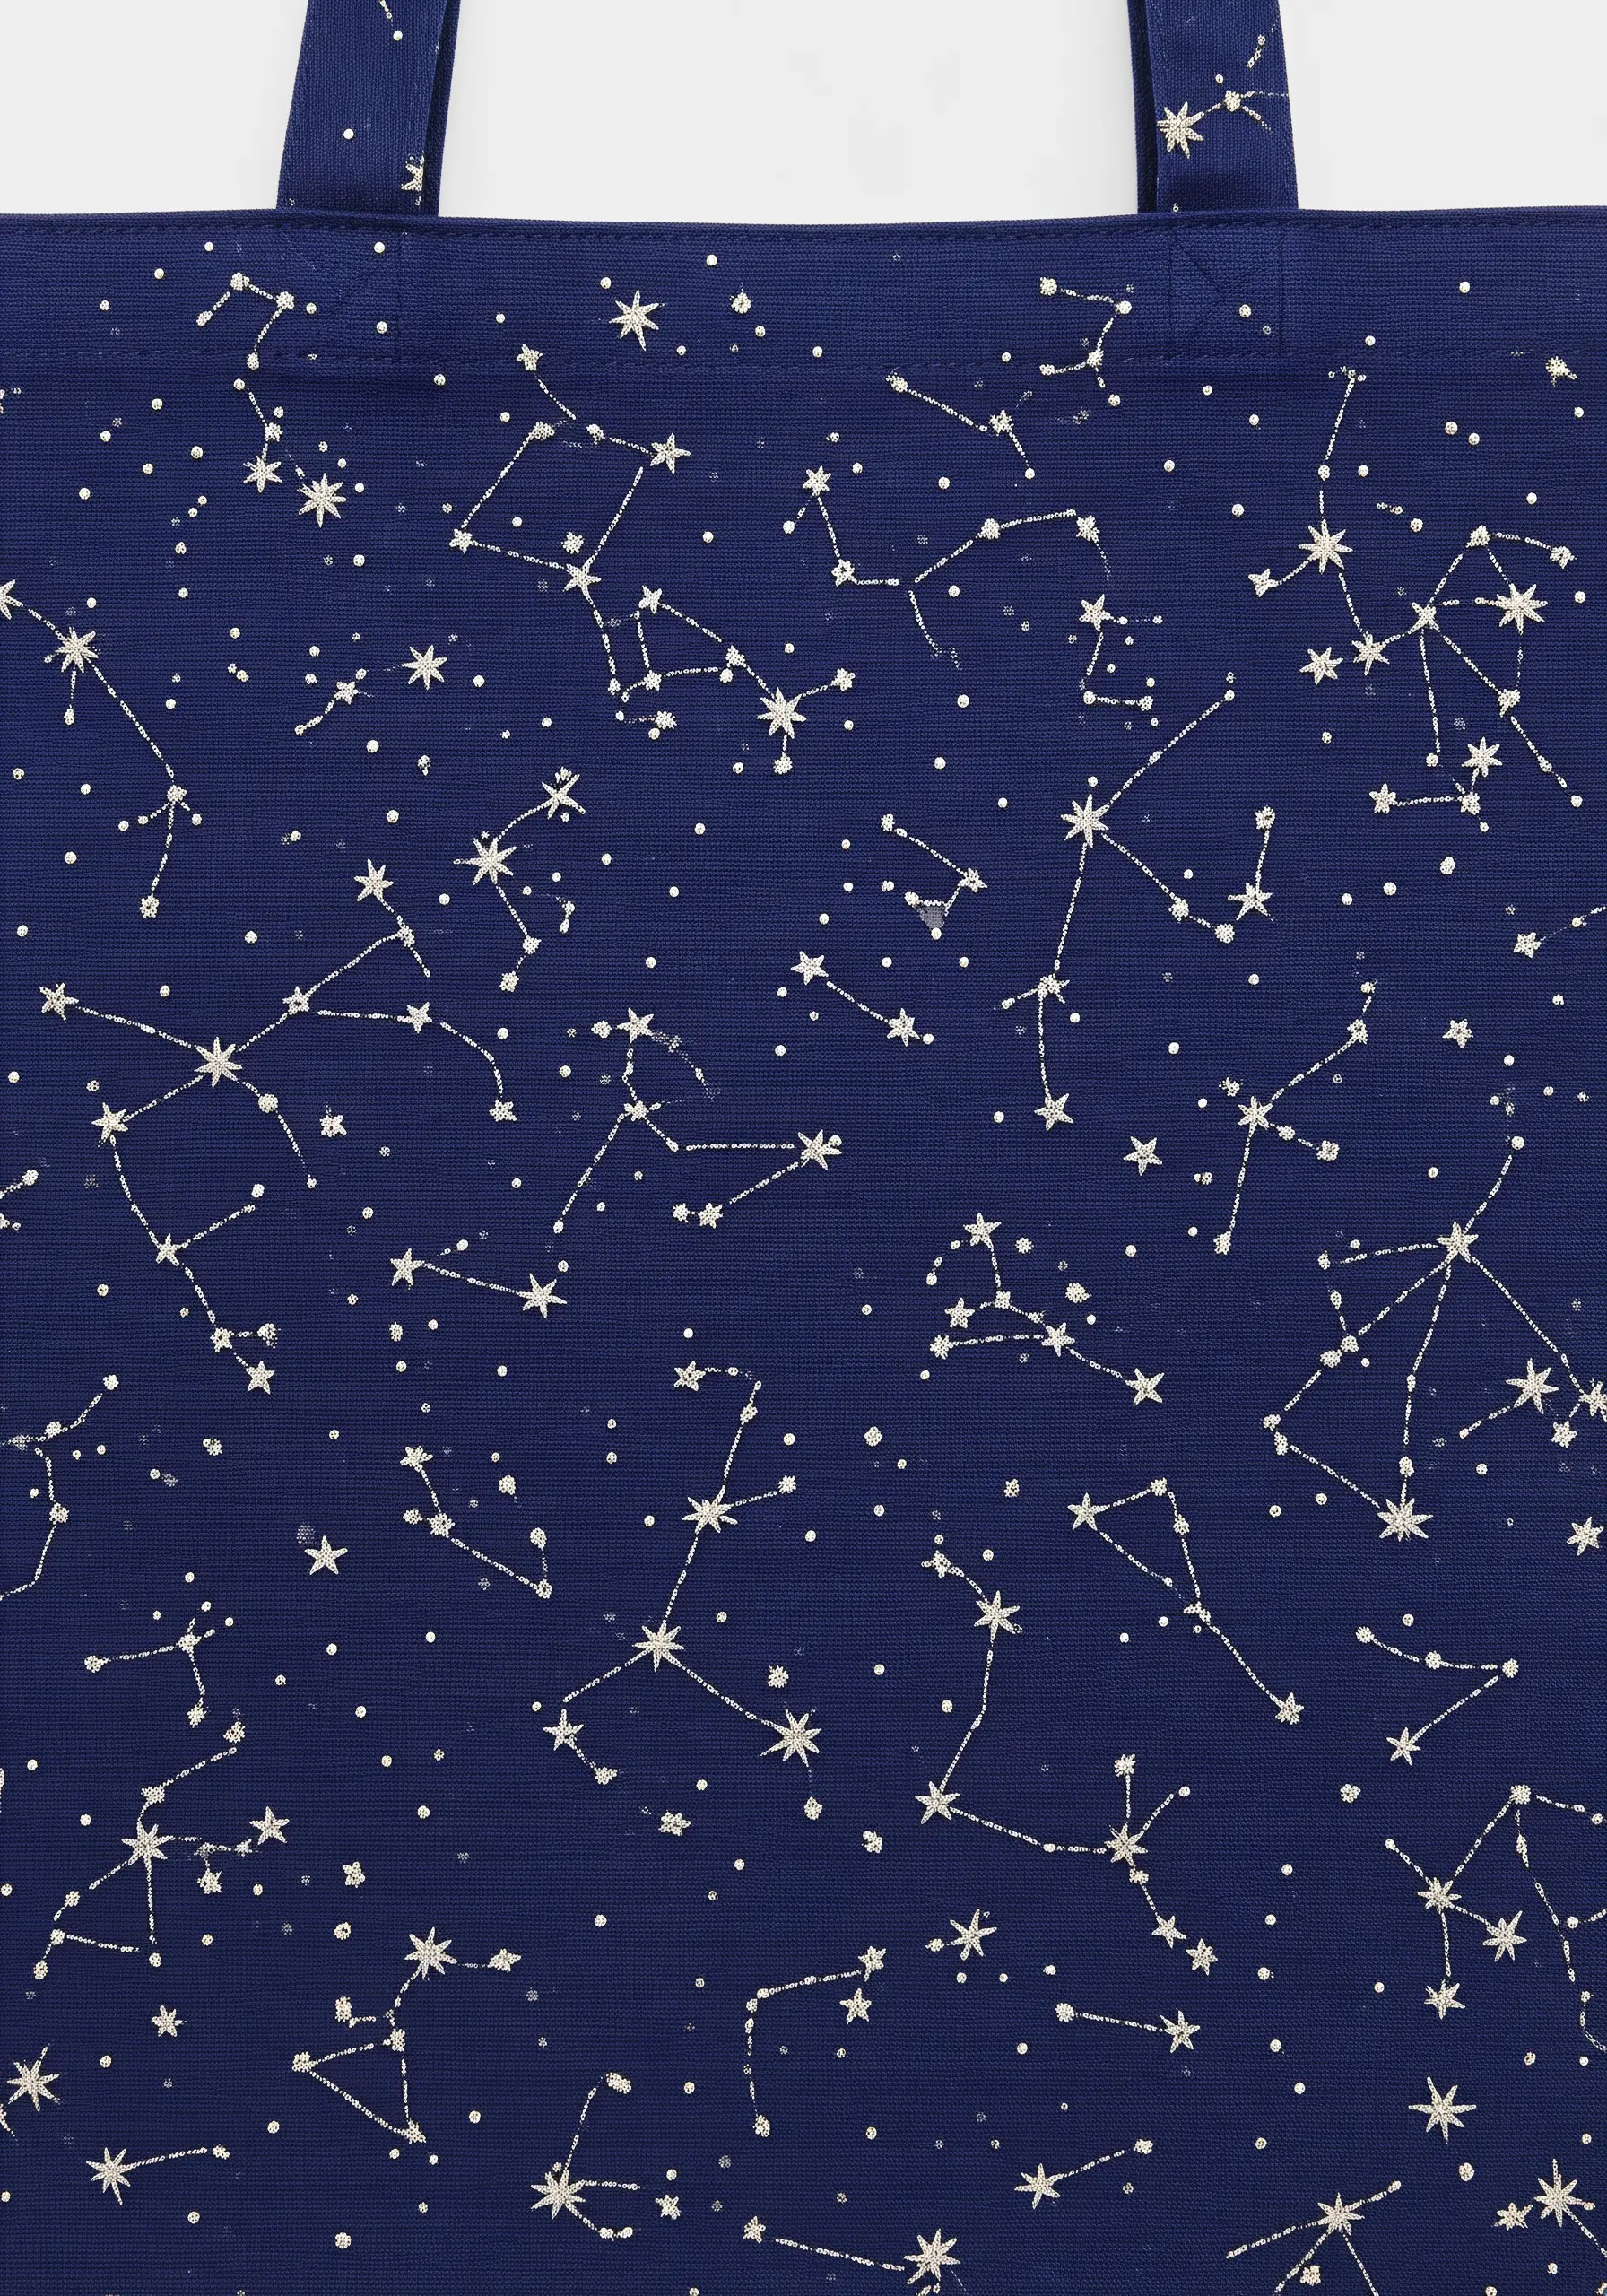
To create a delicate, scattered pattern of constellations, use just one or two strands of a light-colored or metallic thread against a dark navy fabric.
Map out major constellations with a water-soluble pen, then connect the stars using a simple backstitch for the lines.
Vary the size of the stars by using either single French knots or small star stitches (made from several overlapping straight stitches) for the brighter points.
The beauty of this design is its understated elegance; it transforms the entire surface of the tote bag into a canvas without a single, overwhelming focal point.
11. The Cheerful Gingerbread House

Give the white icing dimension by using a thicker thread, like a pearl cotton, or by working a line of chain stitch for the outlines.
The gumdrop candies on the roof are perfect candidates for chunky French knots or colonial knots, using bright, contrasting colors to make them pop.
For the candy cane pillars, alternate your red and white satin stitches at a slight angle to create the illusion of a spiral.
A wisp of smoke from the chimney, stitched with a few flowing lines of stem stitch in a light gray, adds a final touch of cozy charm.
12. Minimalist Mistletoe with Beaded Berries
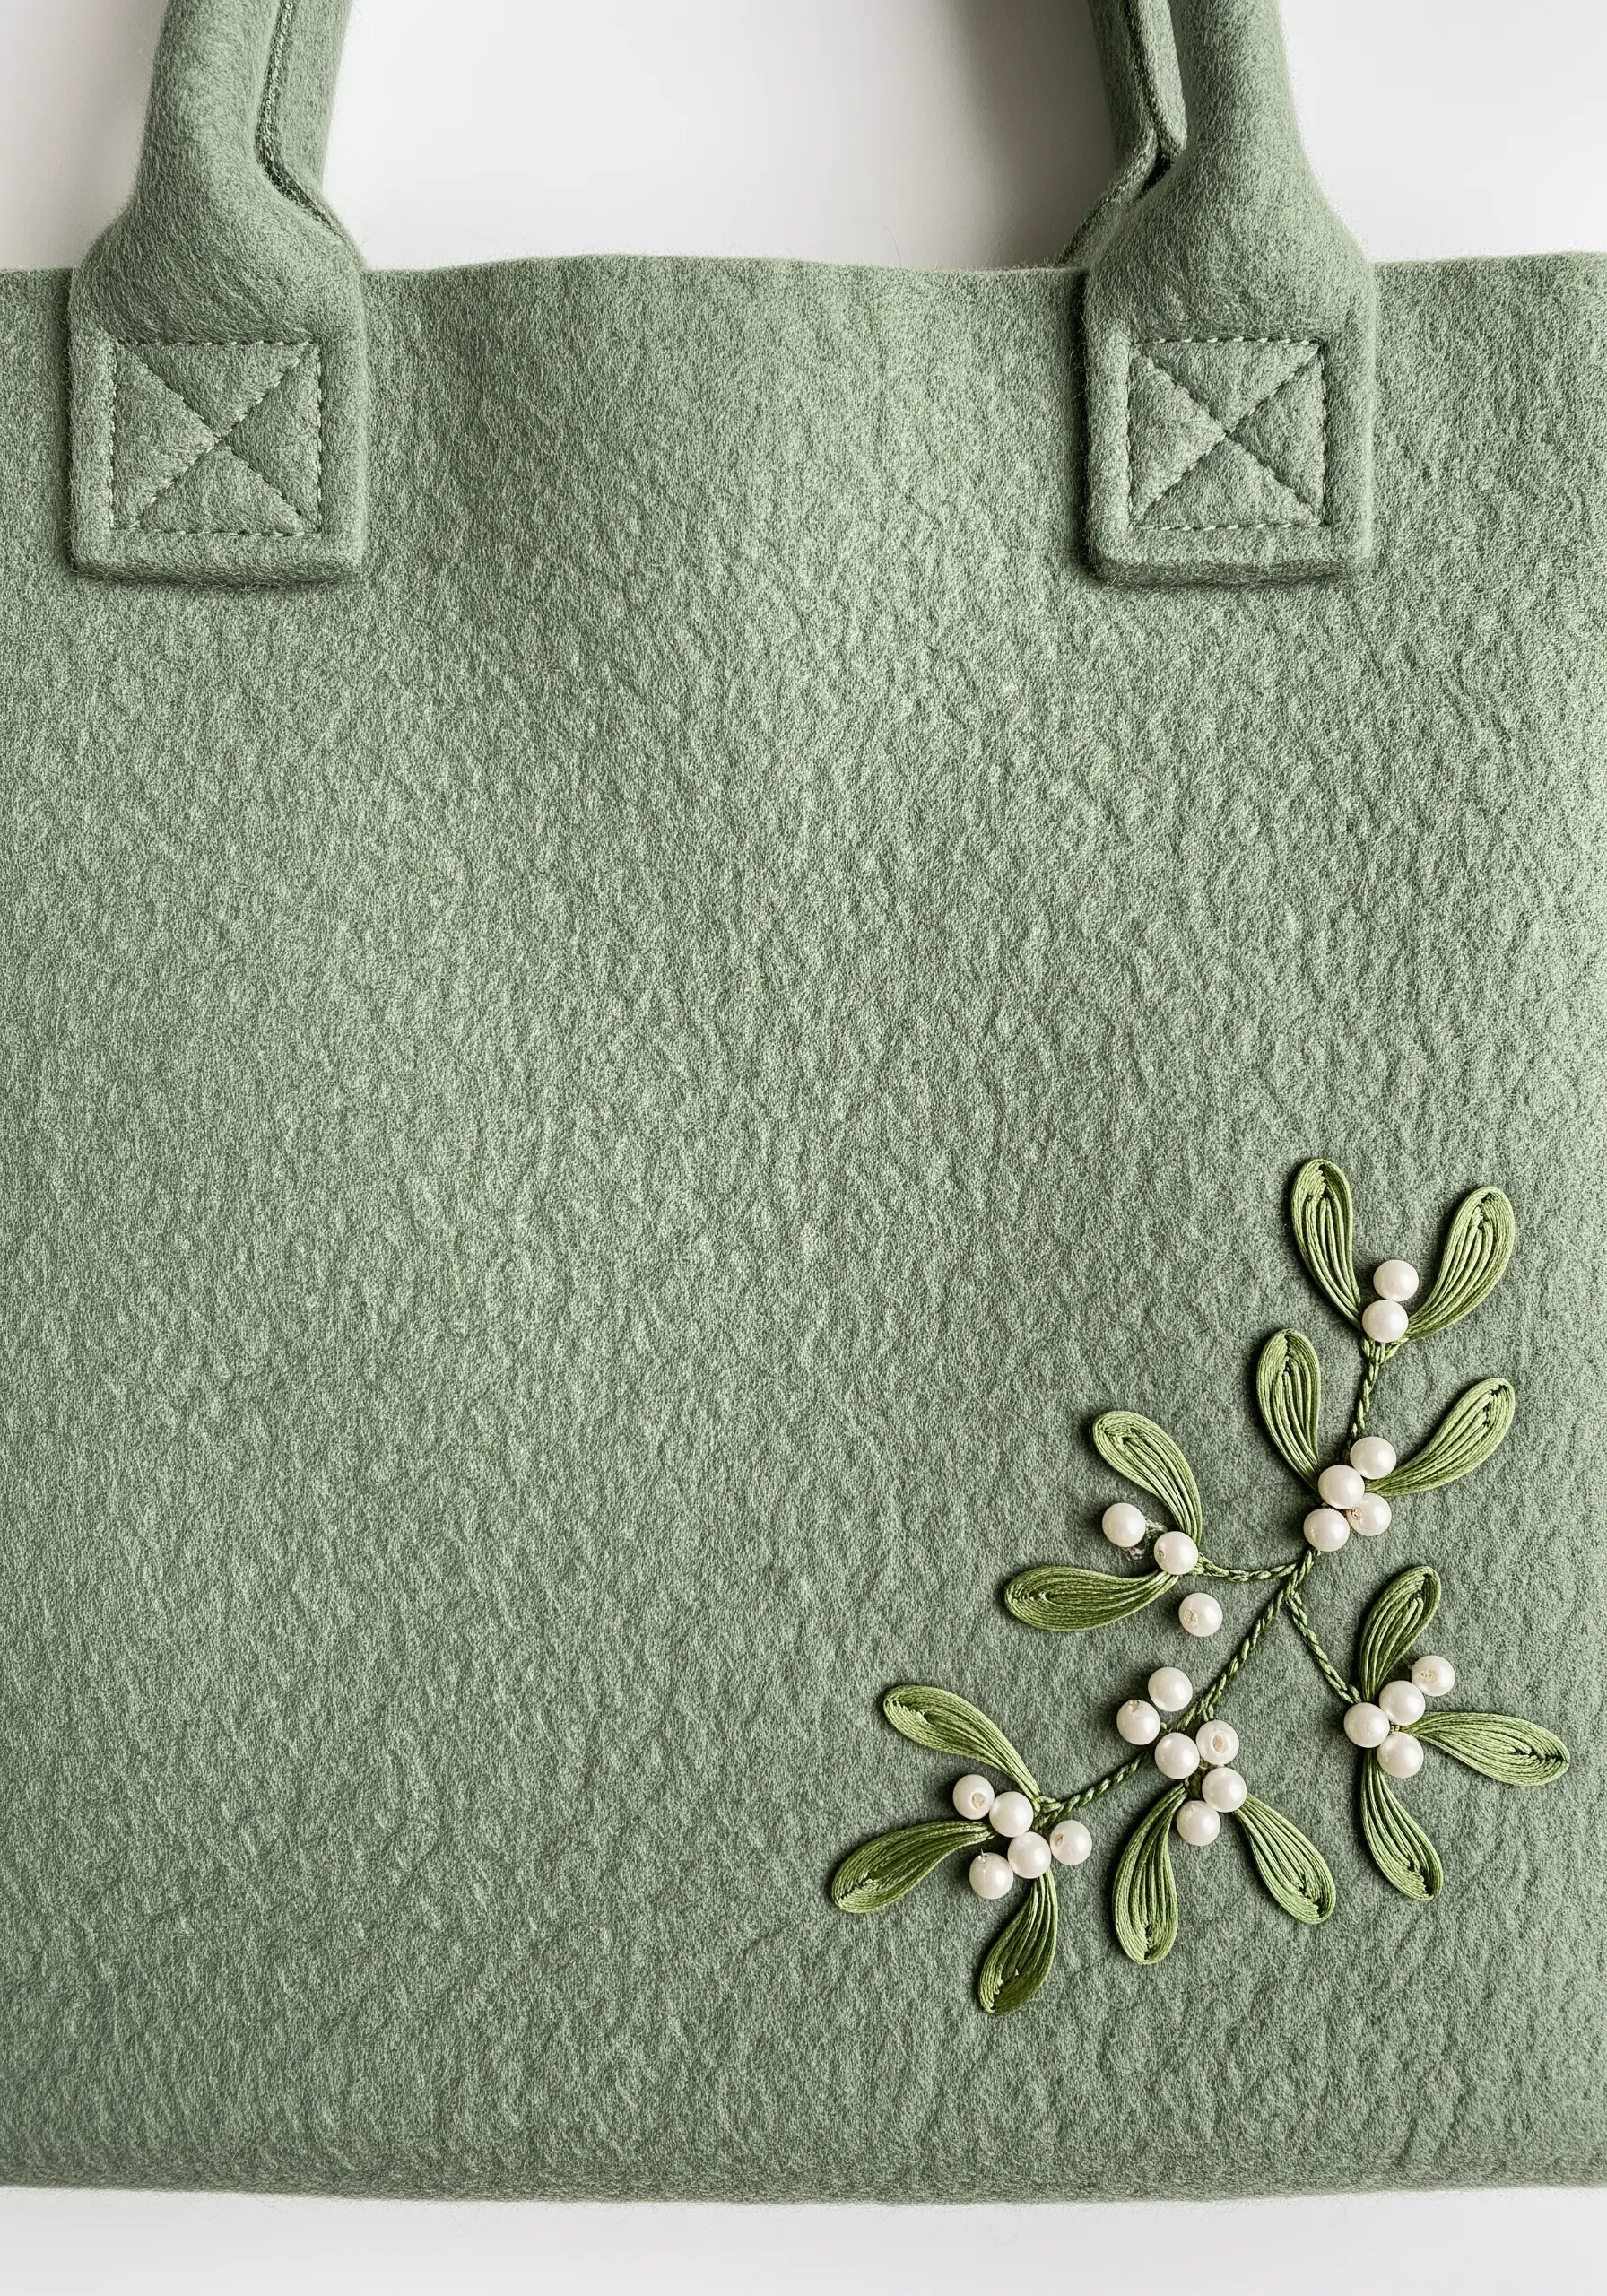
This elegant design works beautifully on a felt tote because the fabric’s texture provides a soft, matte backdrop for the stitches.
Create the leaves with ribbon stitch using a fine silk ribbon; the natural twist of the ribbon gives the leaves a lifelike shape and sheen.
Use a delicate, branching stem stitch for the twigs, connecting the leaves in a graceful, organic arrangement.
Instead of French knots, stitch on small white or pearlescent beads for the berries. This adds a subtle luster and a touch of sophisticated dimension.
13. Art Deco ‘NOEL’ Typography
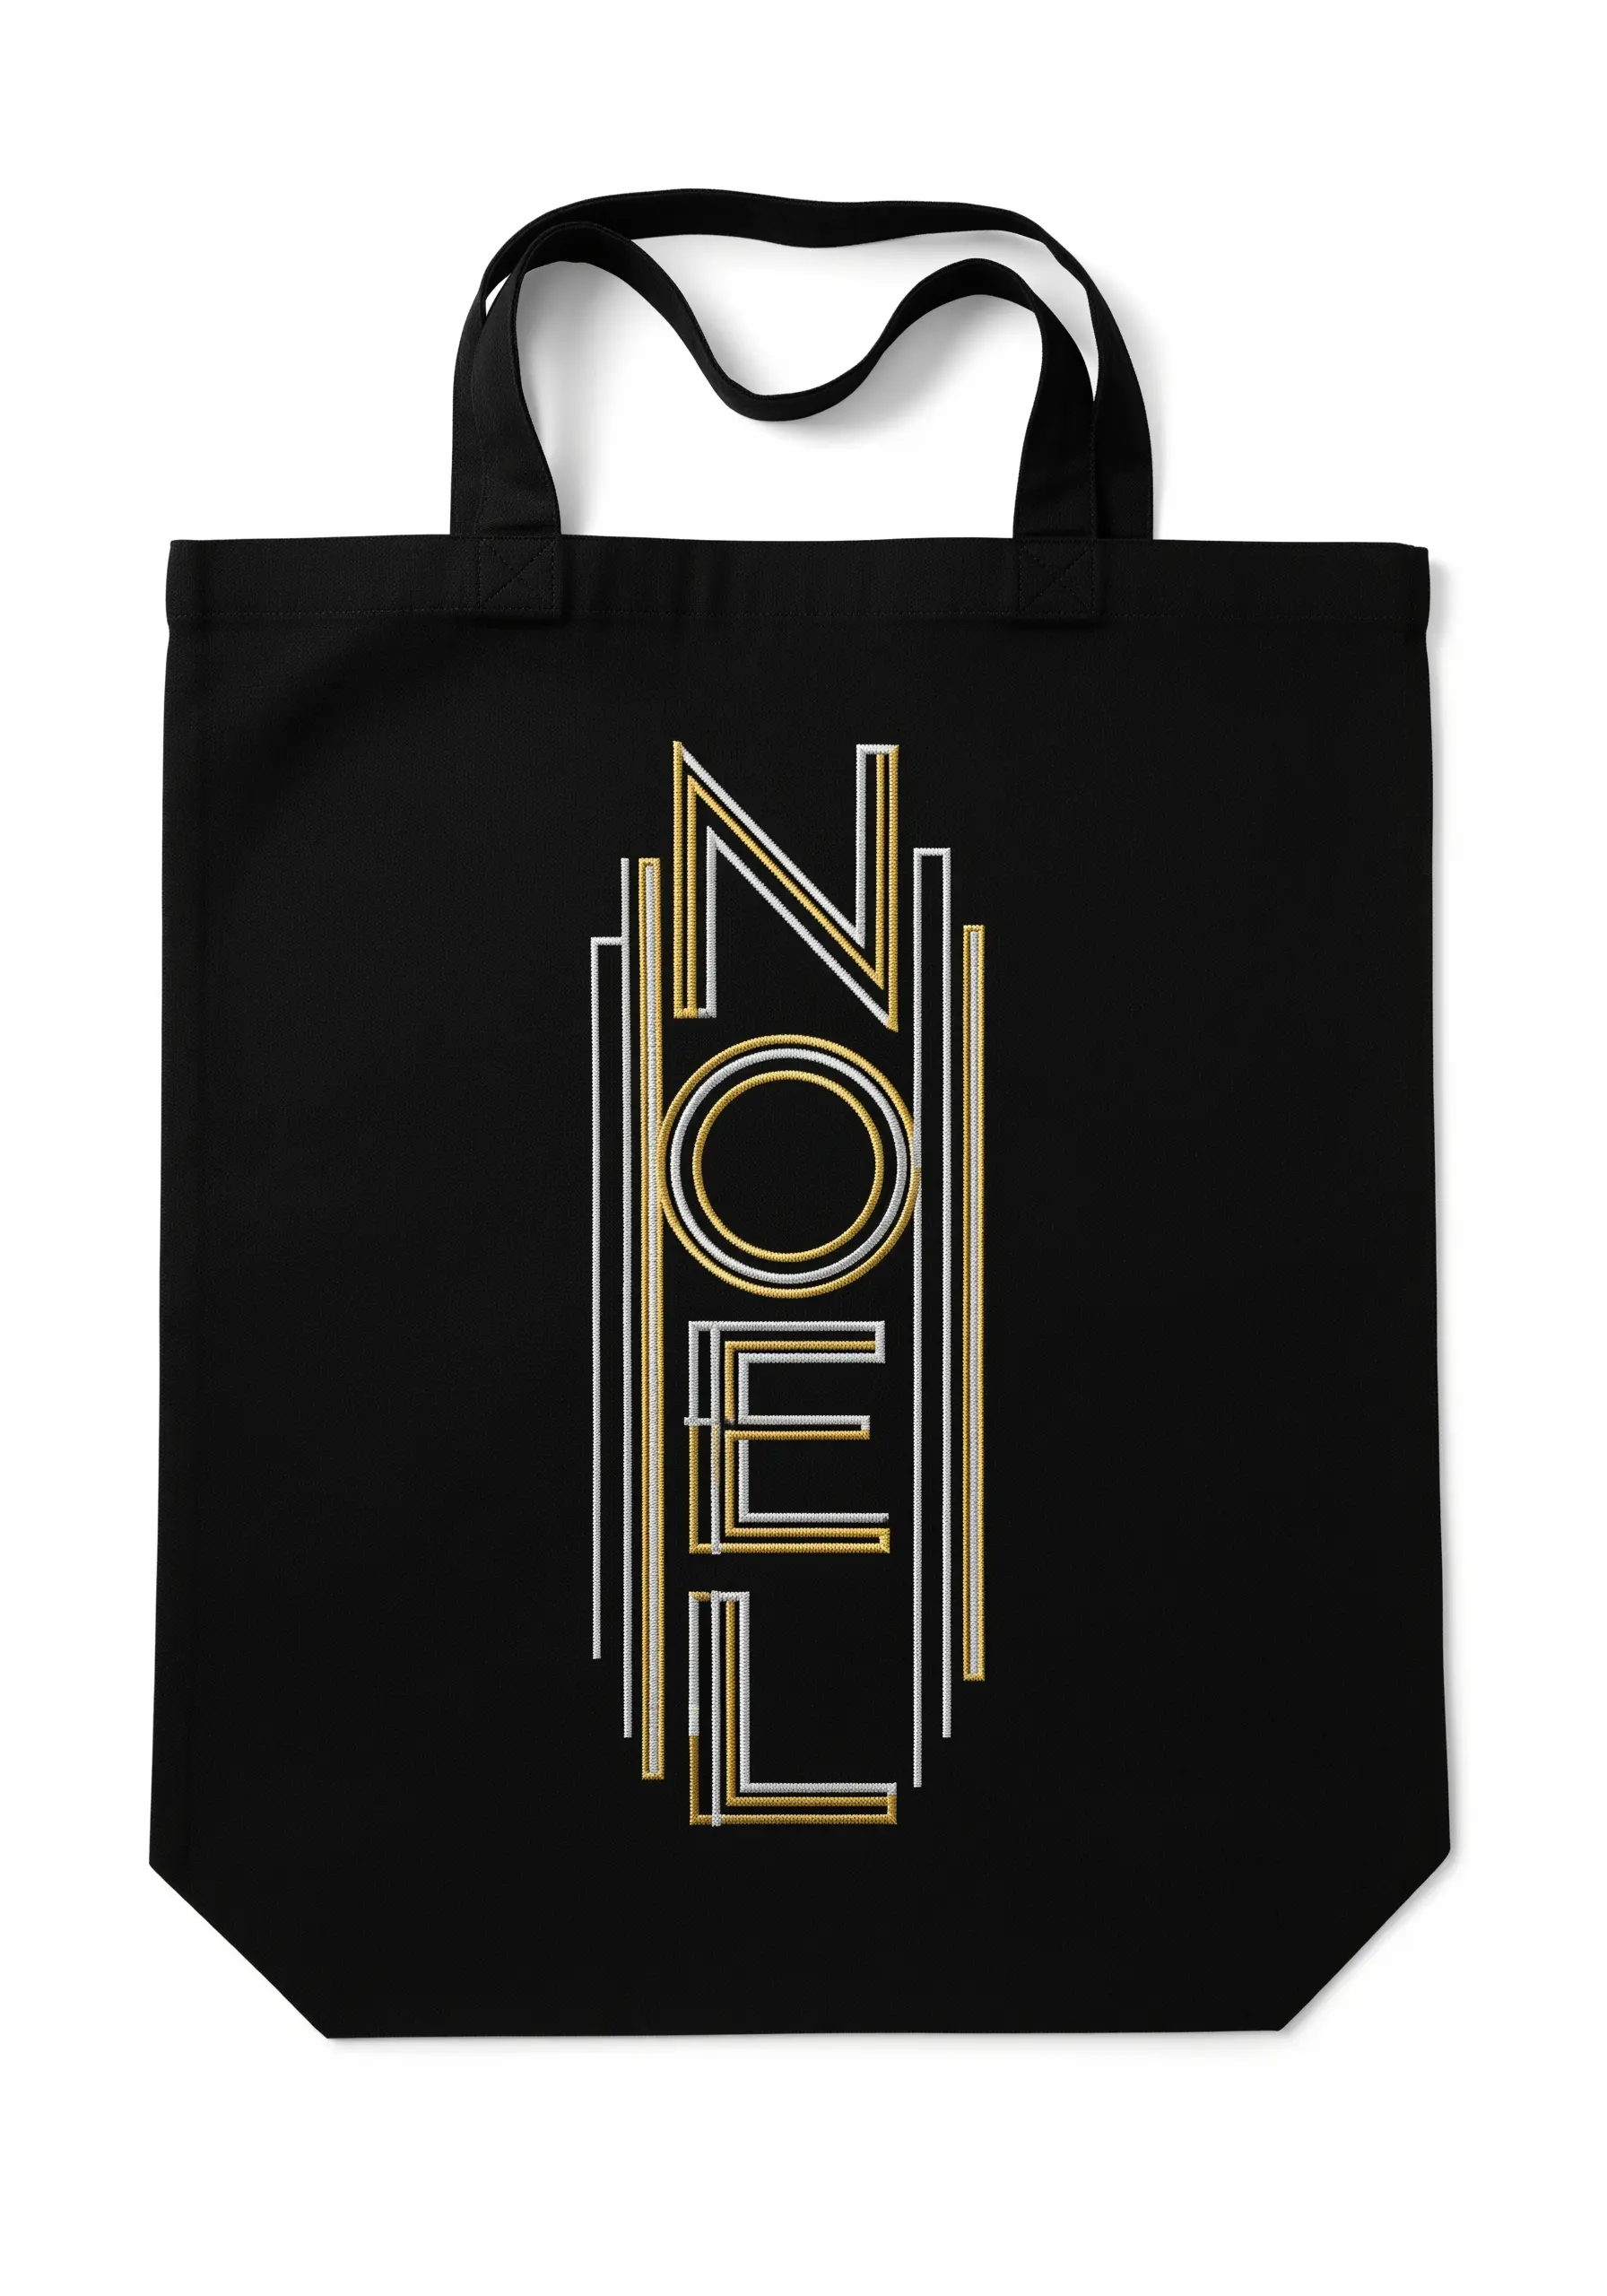
The key to this crisp, Art Deco look is precision. Use a fine-tipped, heat-erasable pen to draw your guidelines directly onto the fabric.
For the clean, parallel lines, a simple backstitch or stem stitch worked with two strands of floss is ideal. For thicker lines, use four strands.
Introduce metallic gold and silver threads alongside a matte white to create a play of light and texture that defines the Art Deco style.
This is one of those minimal line drawing embroidery ideas where the composition’s strength comes from its perfect geometry and restrained color palette.
14. A Partridge with Dimensional Pears
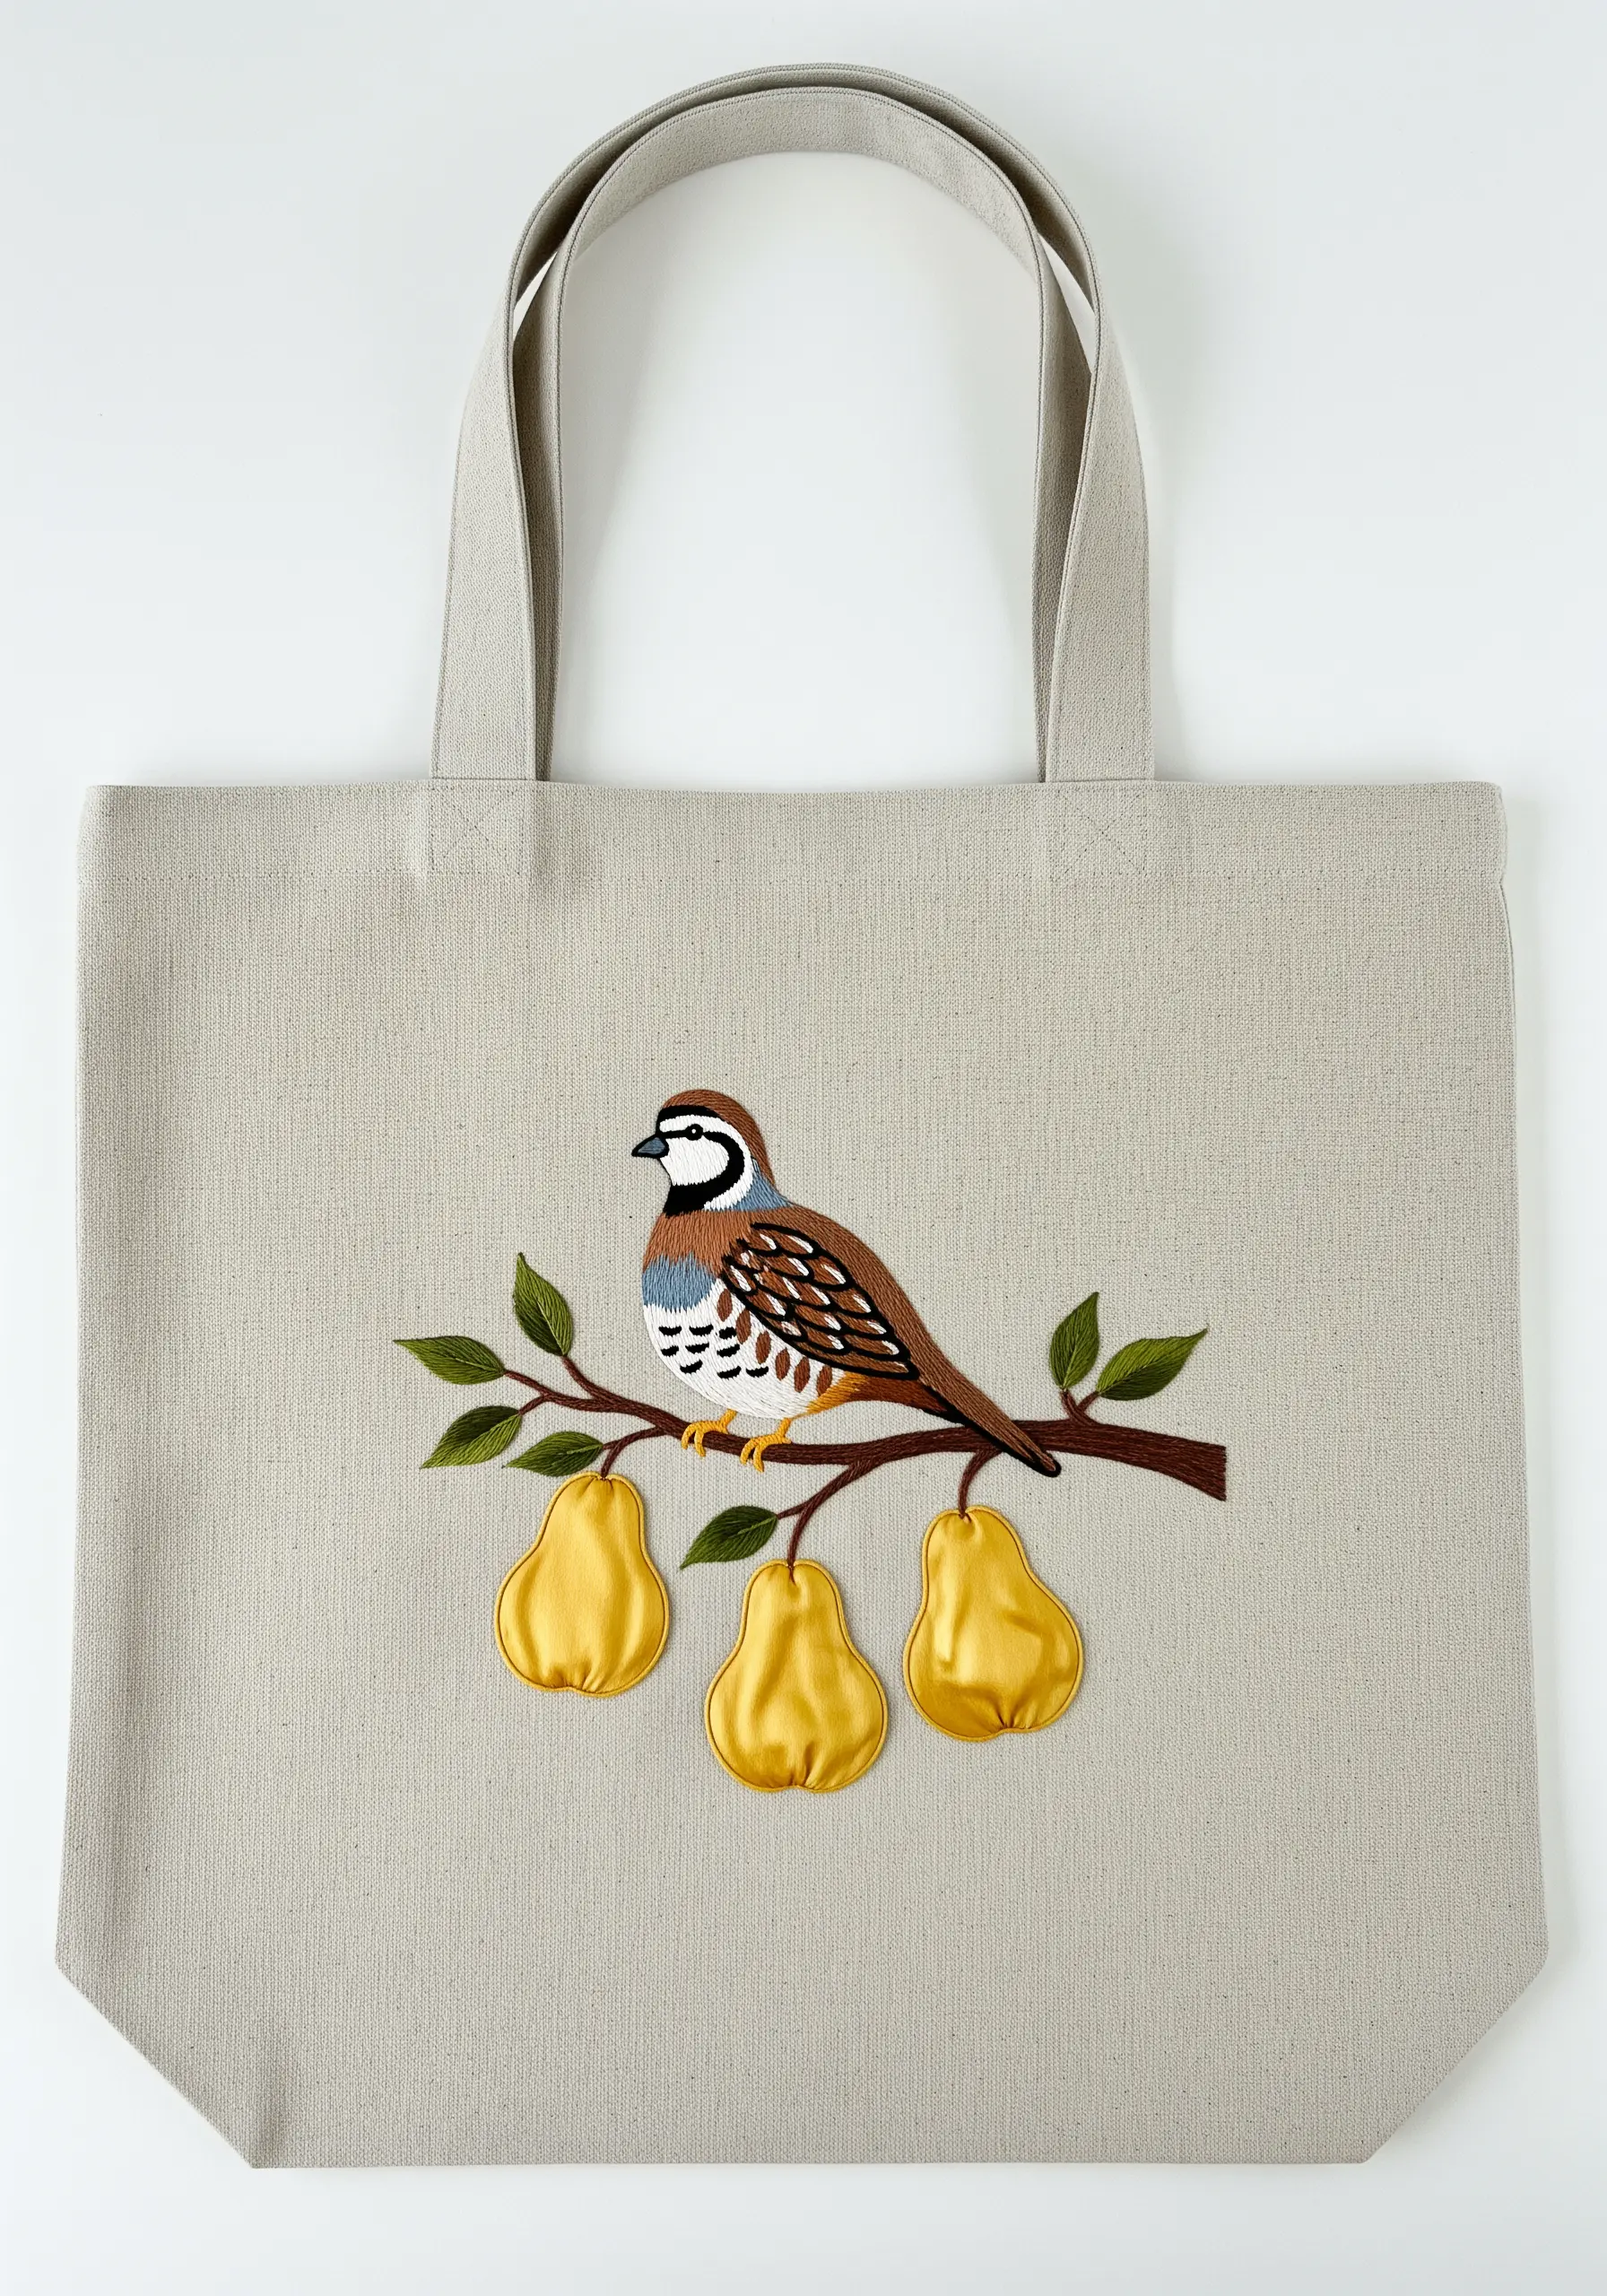
This design beautifully mixes different embroidery styles for a rich, textural effect. Stitch the bird and branches using traditional long-and-short stitch for a smooth, blended finish.
Create the three-dimensional pears using a detached buttonhole stitch or by appliquéing pieces of satin fabric and embroidering the edges.
Using a high-sheen golden yellow thread or fabric for the pears makes them the focal point, adding a surprising pop of light and shape.
This combination of flat thread painting and raised elements creates a dynamic scene, turning the tote into a piece of mixed media embroidery.
15. The Cozy Thread-Painted Fox
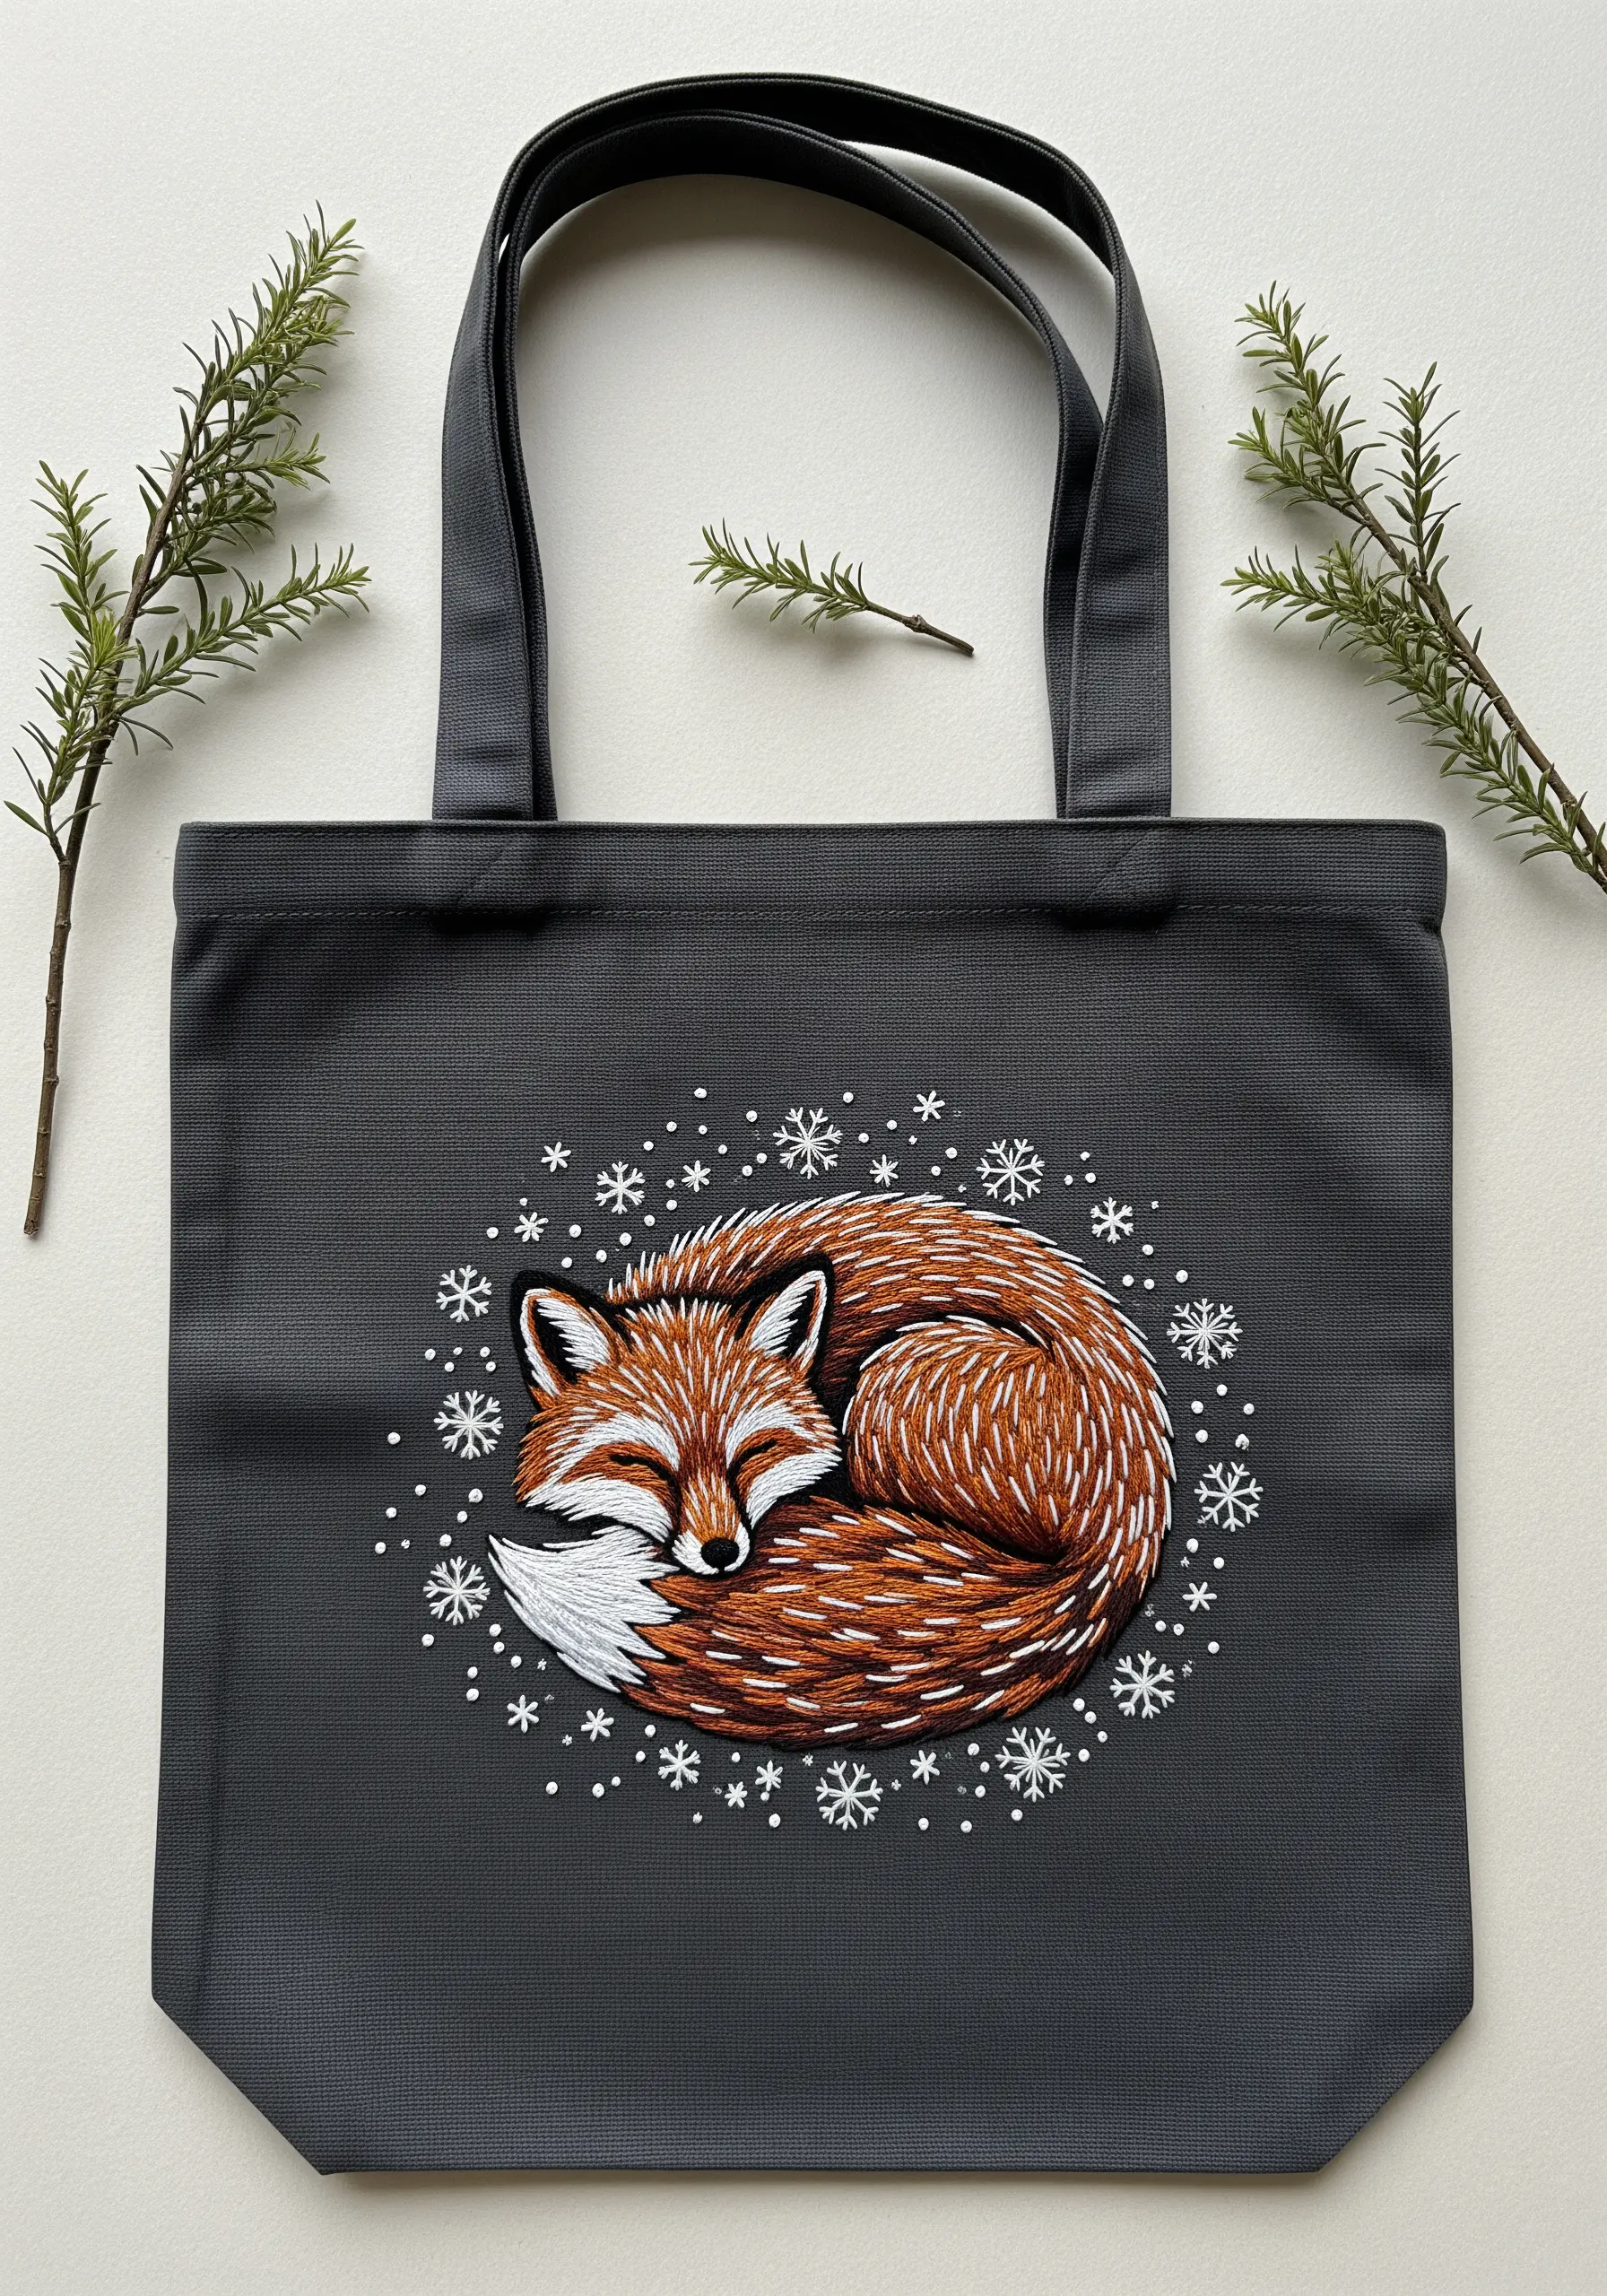
Create realistic fur texture by using long-and-short stitch, layering shades of rust, orange, and brown thread.
Always direct your stitches in the natural direction of fur growth; this simple step is the key to bringing an embroidered animal to life.
For the fluffy white sections on the tail and chest, use a slightly thicker, less tightly twisted thread to give it a softer, fuller appearance.
Frame the fox with a delicate ring of white snowflakes, using simple straight stitches, to place it in a wintery scene without distracting from the central figure.
16. A Layered and Luminous Poinsettia

To give the poinsettia petals depth, work them in sections using at least three different shades of red—a dark, a medium, and a light tone.
Use a directional satin stitch or long-and-short stitch, angling your threads from the outer edge of each petal toward the center.
Stitch the back petals first, then the front ones on top. This physical layering enhances the illusion of depth and makes the flower look more realistic.
A cluster of bright yellow French knots at the center provides a necessary point of contrast and completes the classic poinsettia look.
17. Candy Cane Stripe Illusion Pocket

To create the illusion of a textured candy cane stripe, stitch an appliqué pocket using alternating bands of satin stitch in red, white, and a neutral beige.
Vary the direction of your satin stitches slightly in each band to mimic the weave of fabric and create a subtle play of light.
Use a single, fine line of a darker red or beige between the main stripes to create the look of a pinstripe, adding another layer of realistic detail.
This is a clever way to turn a simple pocket into the main design element, creating one of the most effective tote bag embroidery projects using scrap fabric and thread.
18. Realistic Pine Cones and Needles
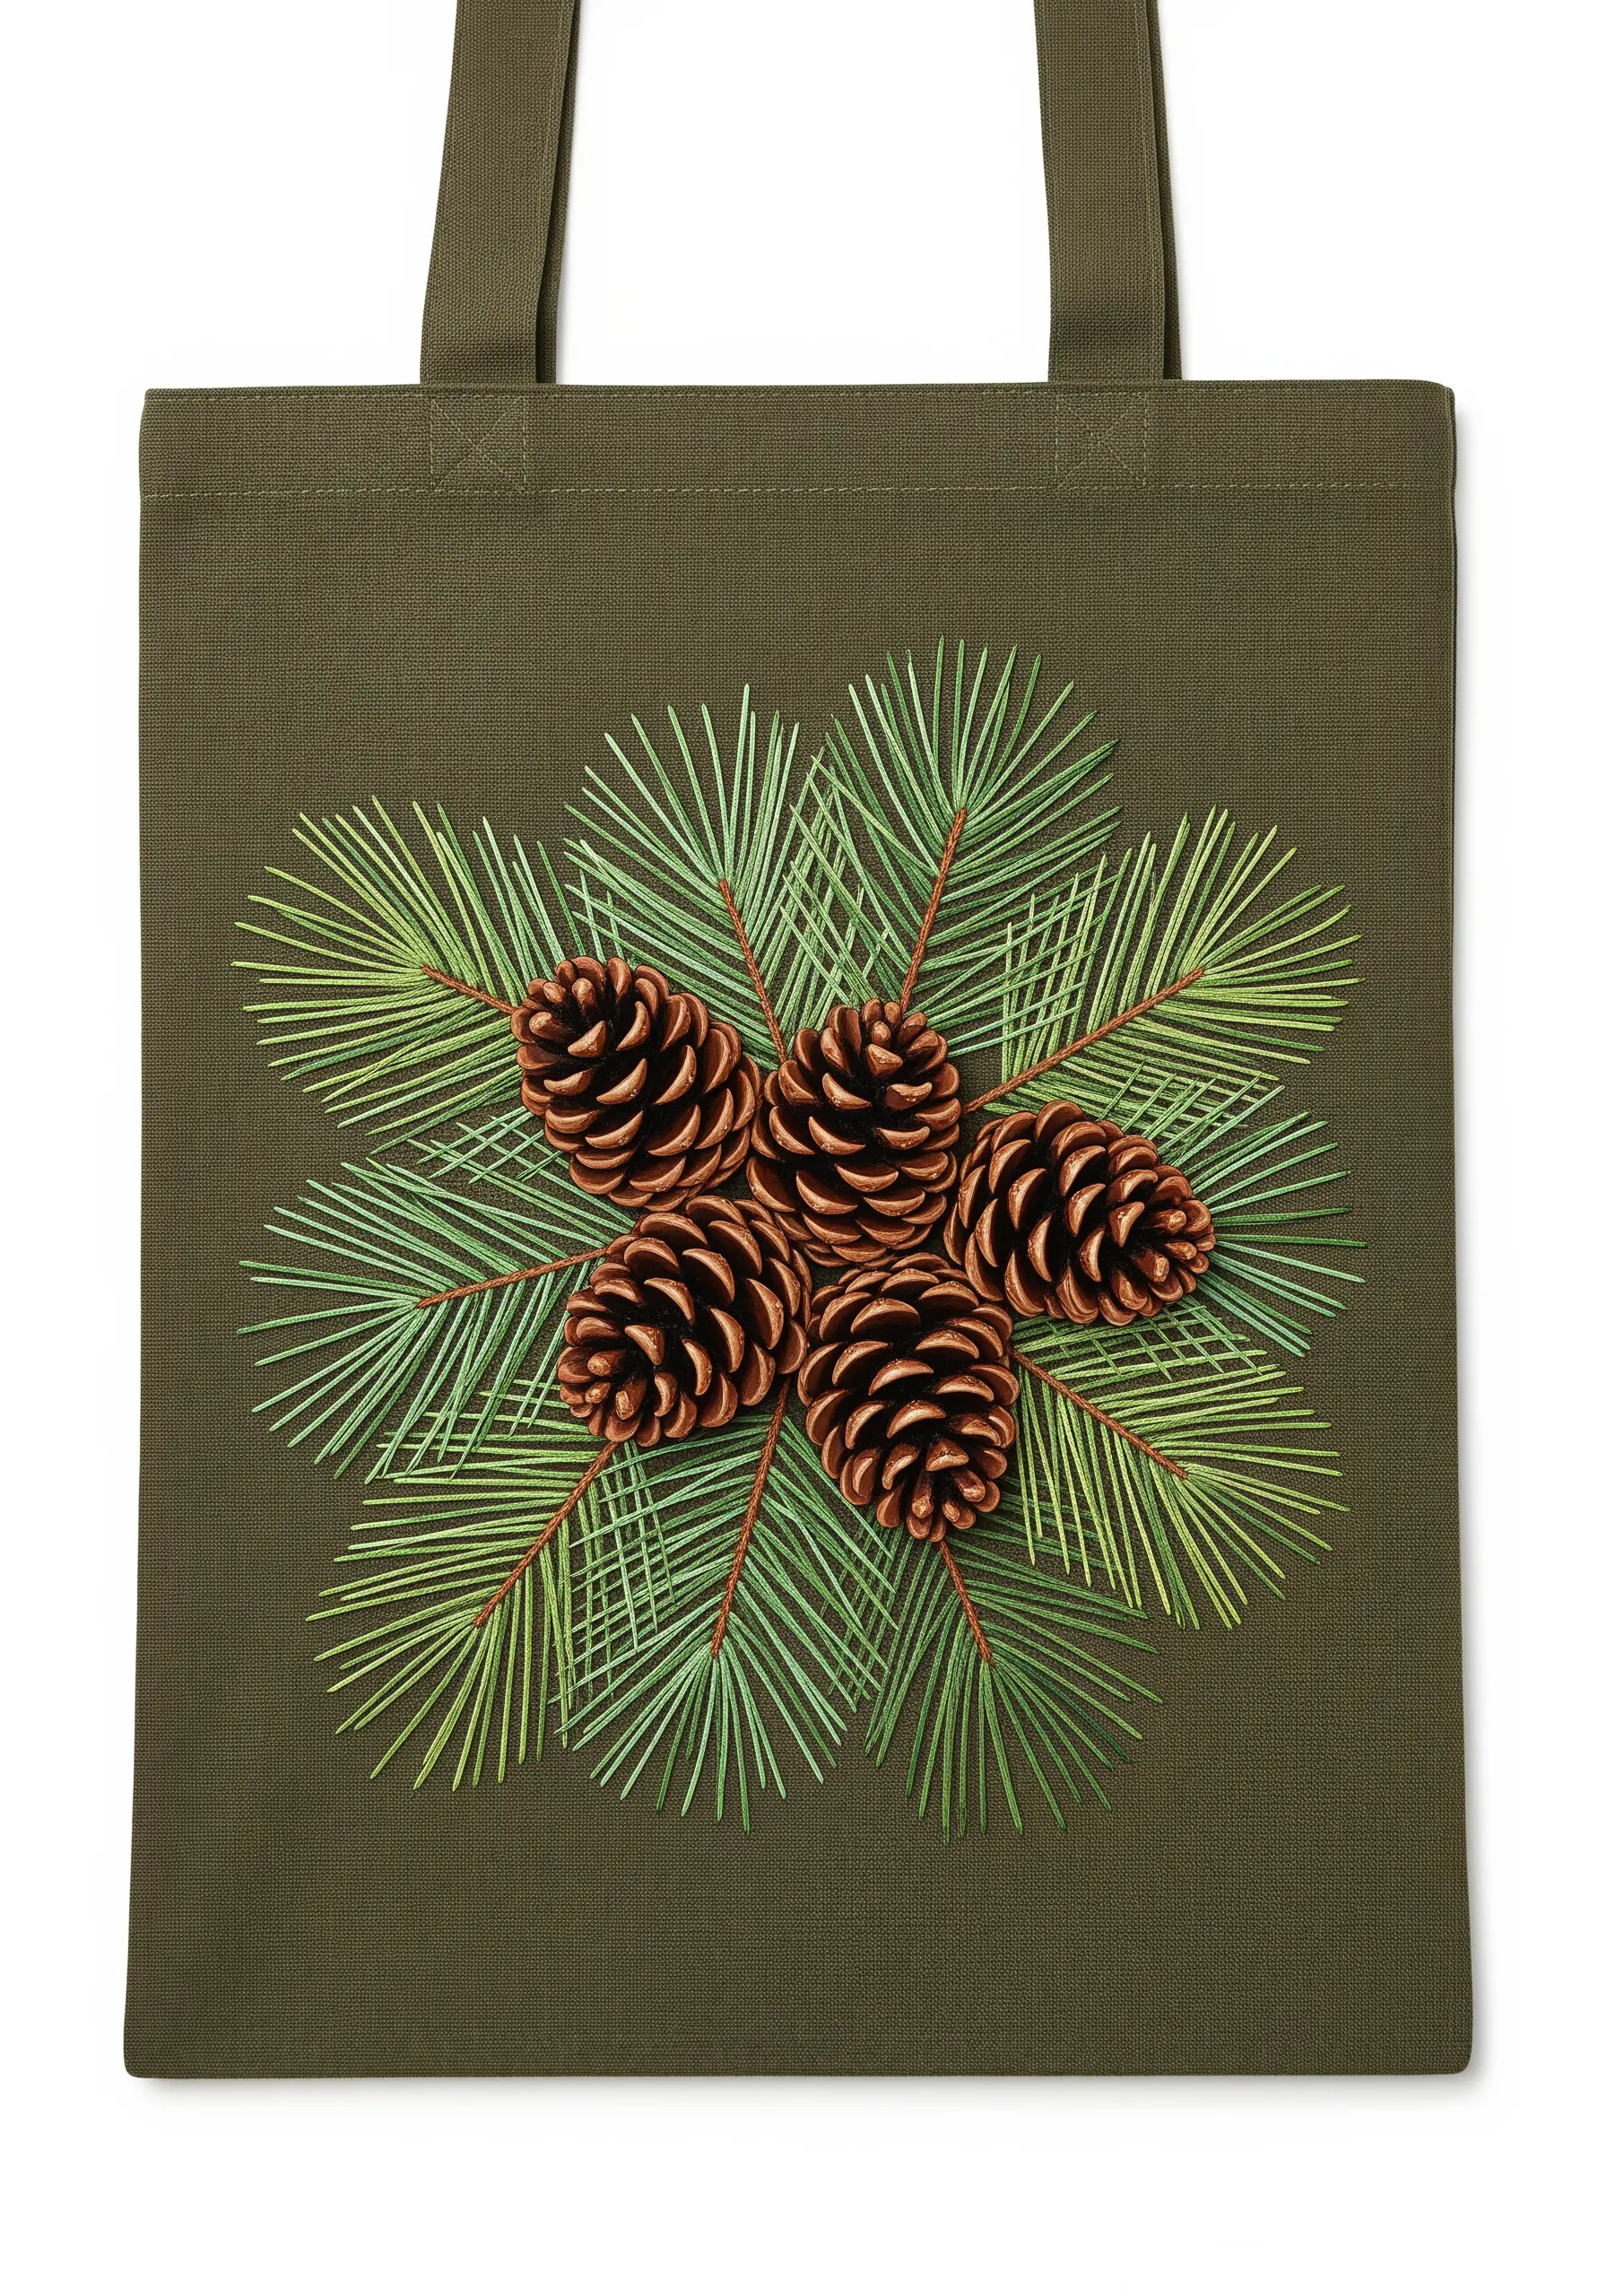
For the pine needles, use long, fine straight stitches in varying shades of green, radiating out from a central point to create a full, layered look.
Create the pine cone scales with small, overlapping satin stitches or fishbone stitches in dark brown, adding highlights with a lighter tan thread on the edges.
Stitching the scales in a slightly curved direction, following the rounded shape of the cone, is crucial for achieving a three-dimensional effect.
This botanical study is a perfect example of how observing and replicating natural textures can elevate your embroidery from a simple motif to a work of art.
19. The Classic Fair Isle Knit Pattern
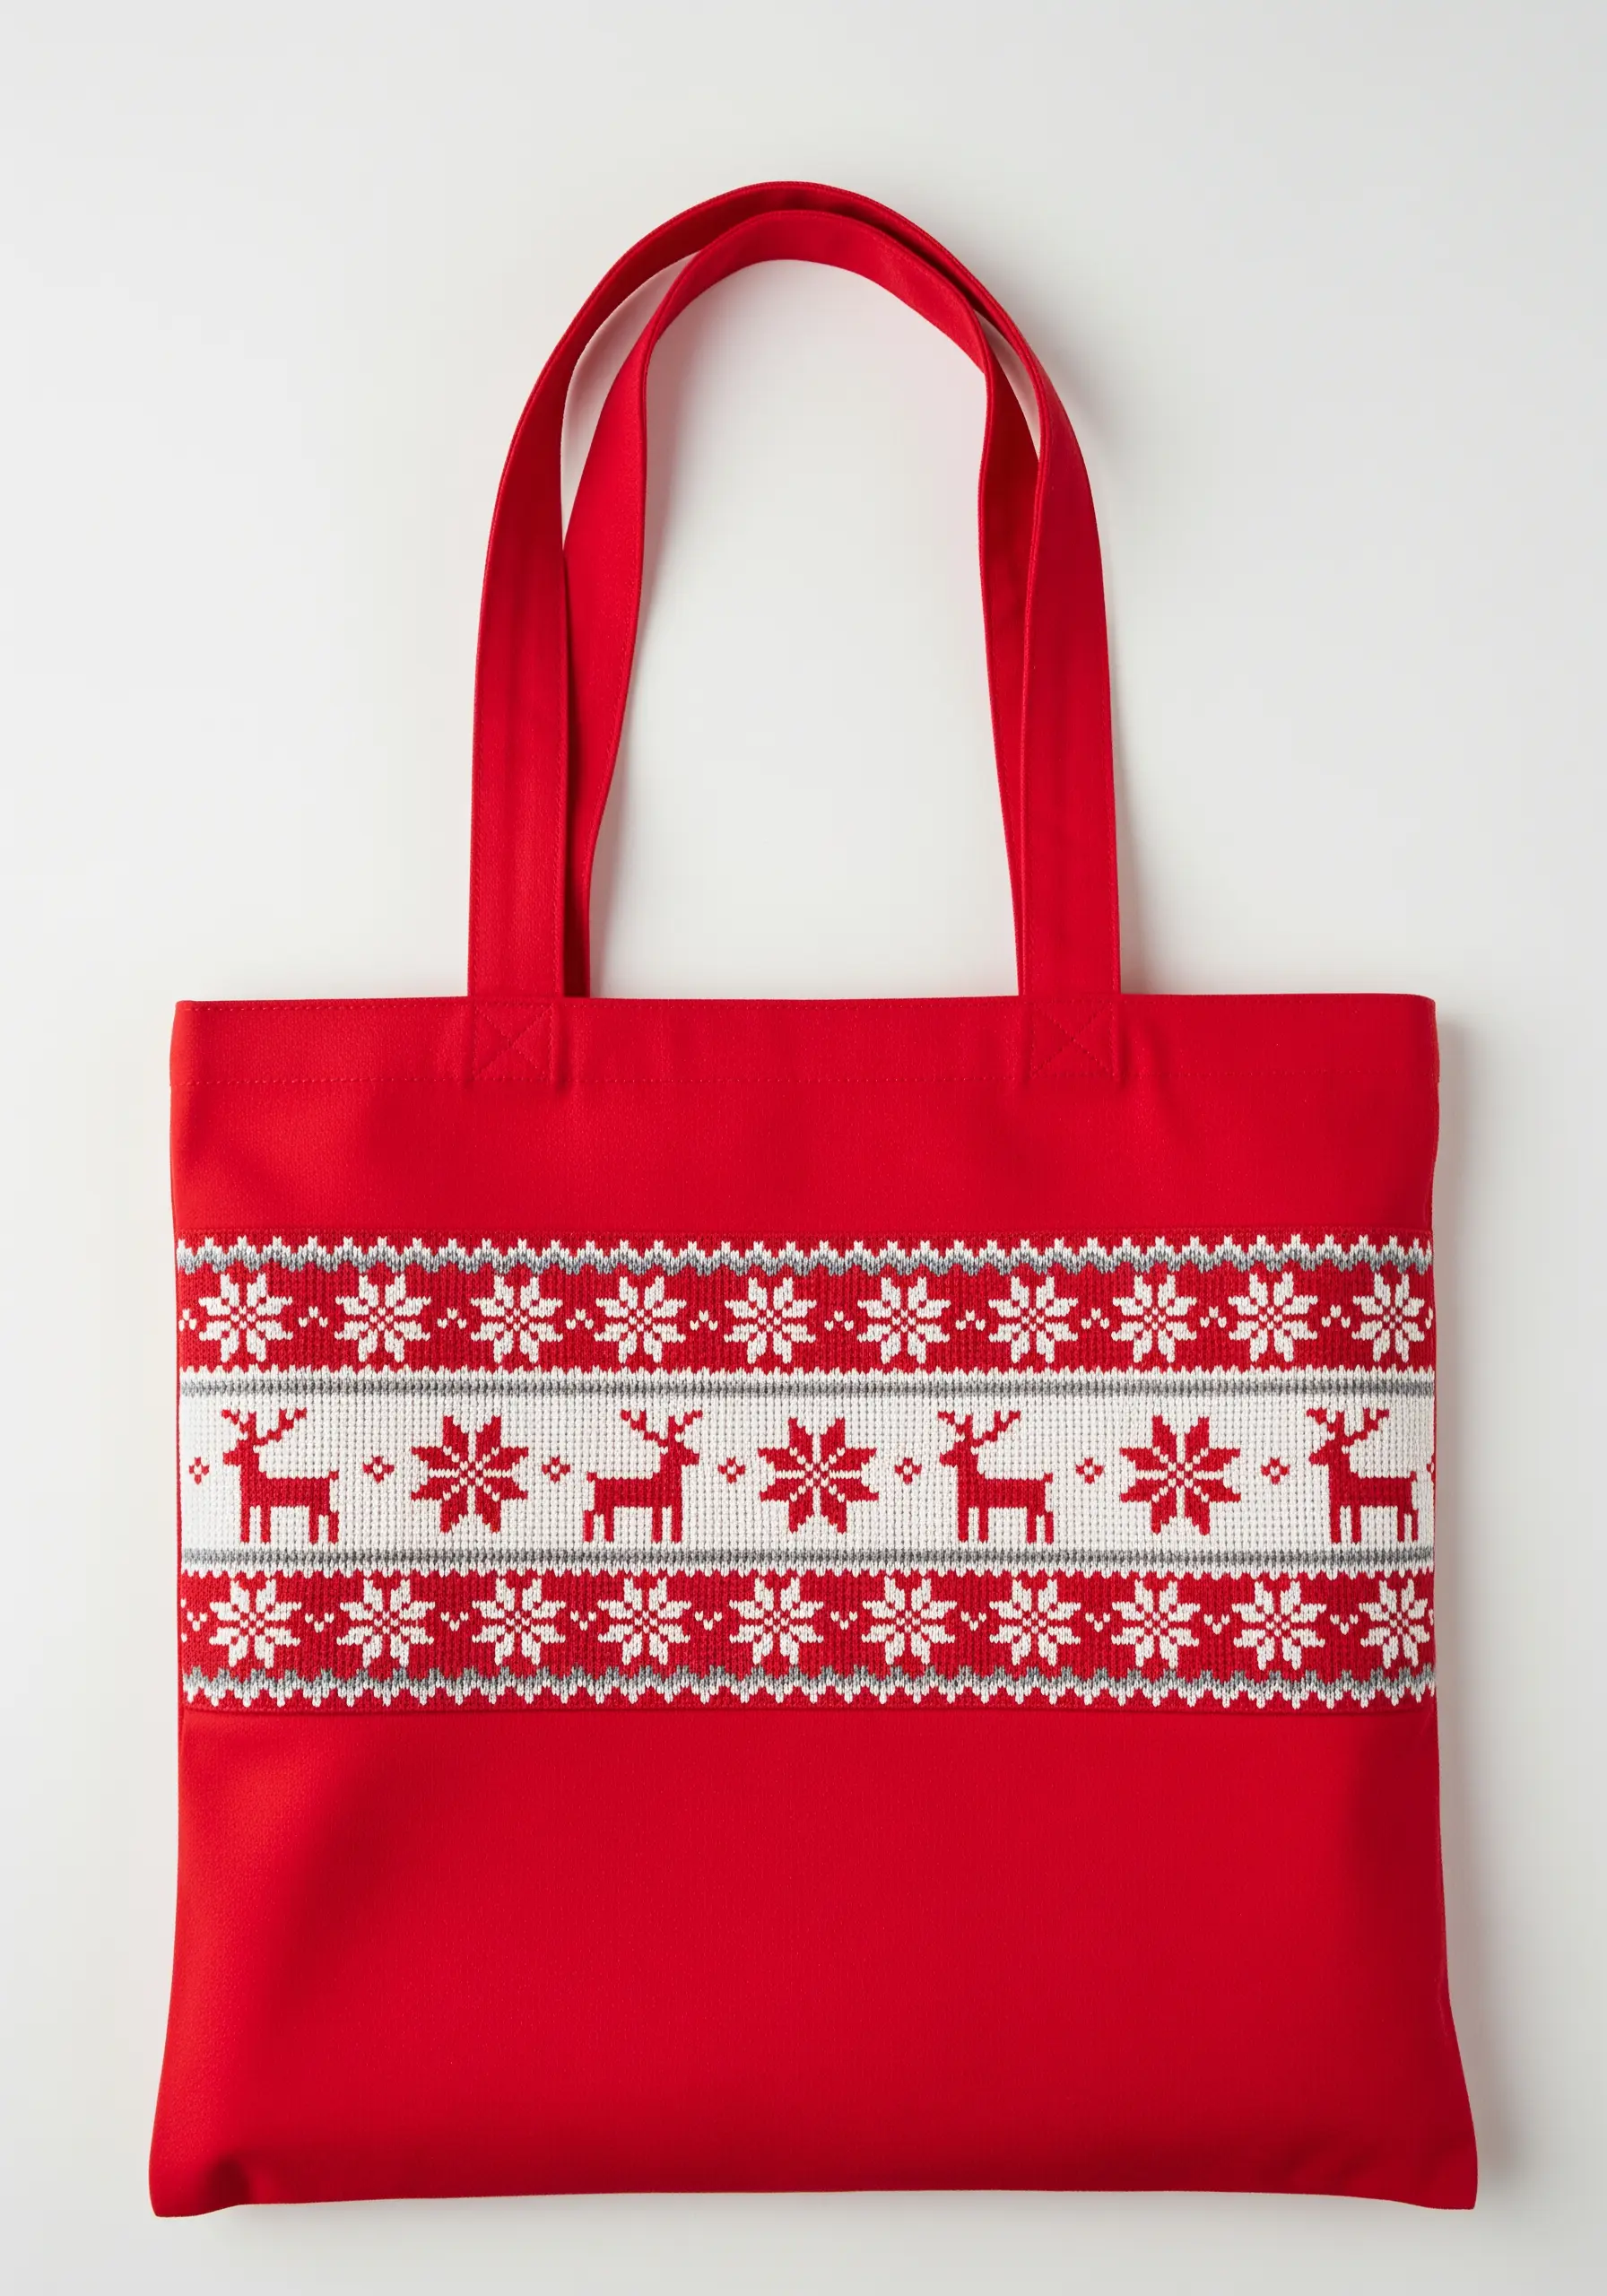
Recreate the look of a cozy holiday sweater by using a combination of cross-stitch and simple geometric satin stitches on your tote bag.
Use a temporary grid like waste canvas to ensure your stitches are even and the repeating pattern of snowflakes and reindeer remains uniform.
A classic color palette of red, white, and gray is all you need to evoke that traditional Fair Isle feeling.
The band-like composition across the center of the tote reinforces the sweater aesthetic, making the bag feel like a wearable piece of comfort.
20. An Abstract Appliqué Landscape

Build this modern winter scene by first layering and stitching down curved pieces of fabric for the snowy hills. This is a great use for fabric scraps.
Add texture and detail with simple embroidery: use vertical satin stitches for the trees and scattered French knots for falling snow.
The limited, serene color palette of sage green, cream, and soft blue gives the design a calm, contemporary feel.
This fabric collage embroidery technique is perfect for creating stylized landscapes with beautiful depth and texture.
21. Chic and Minimalist Holiday Greeting
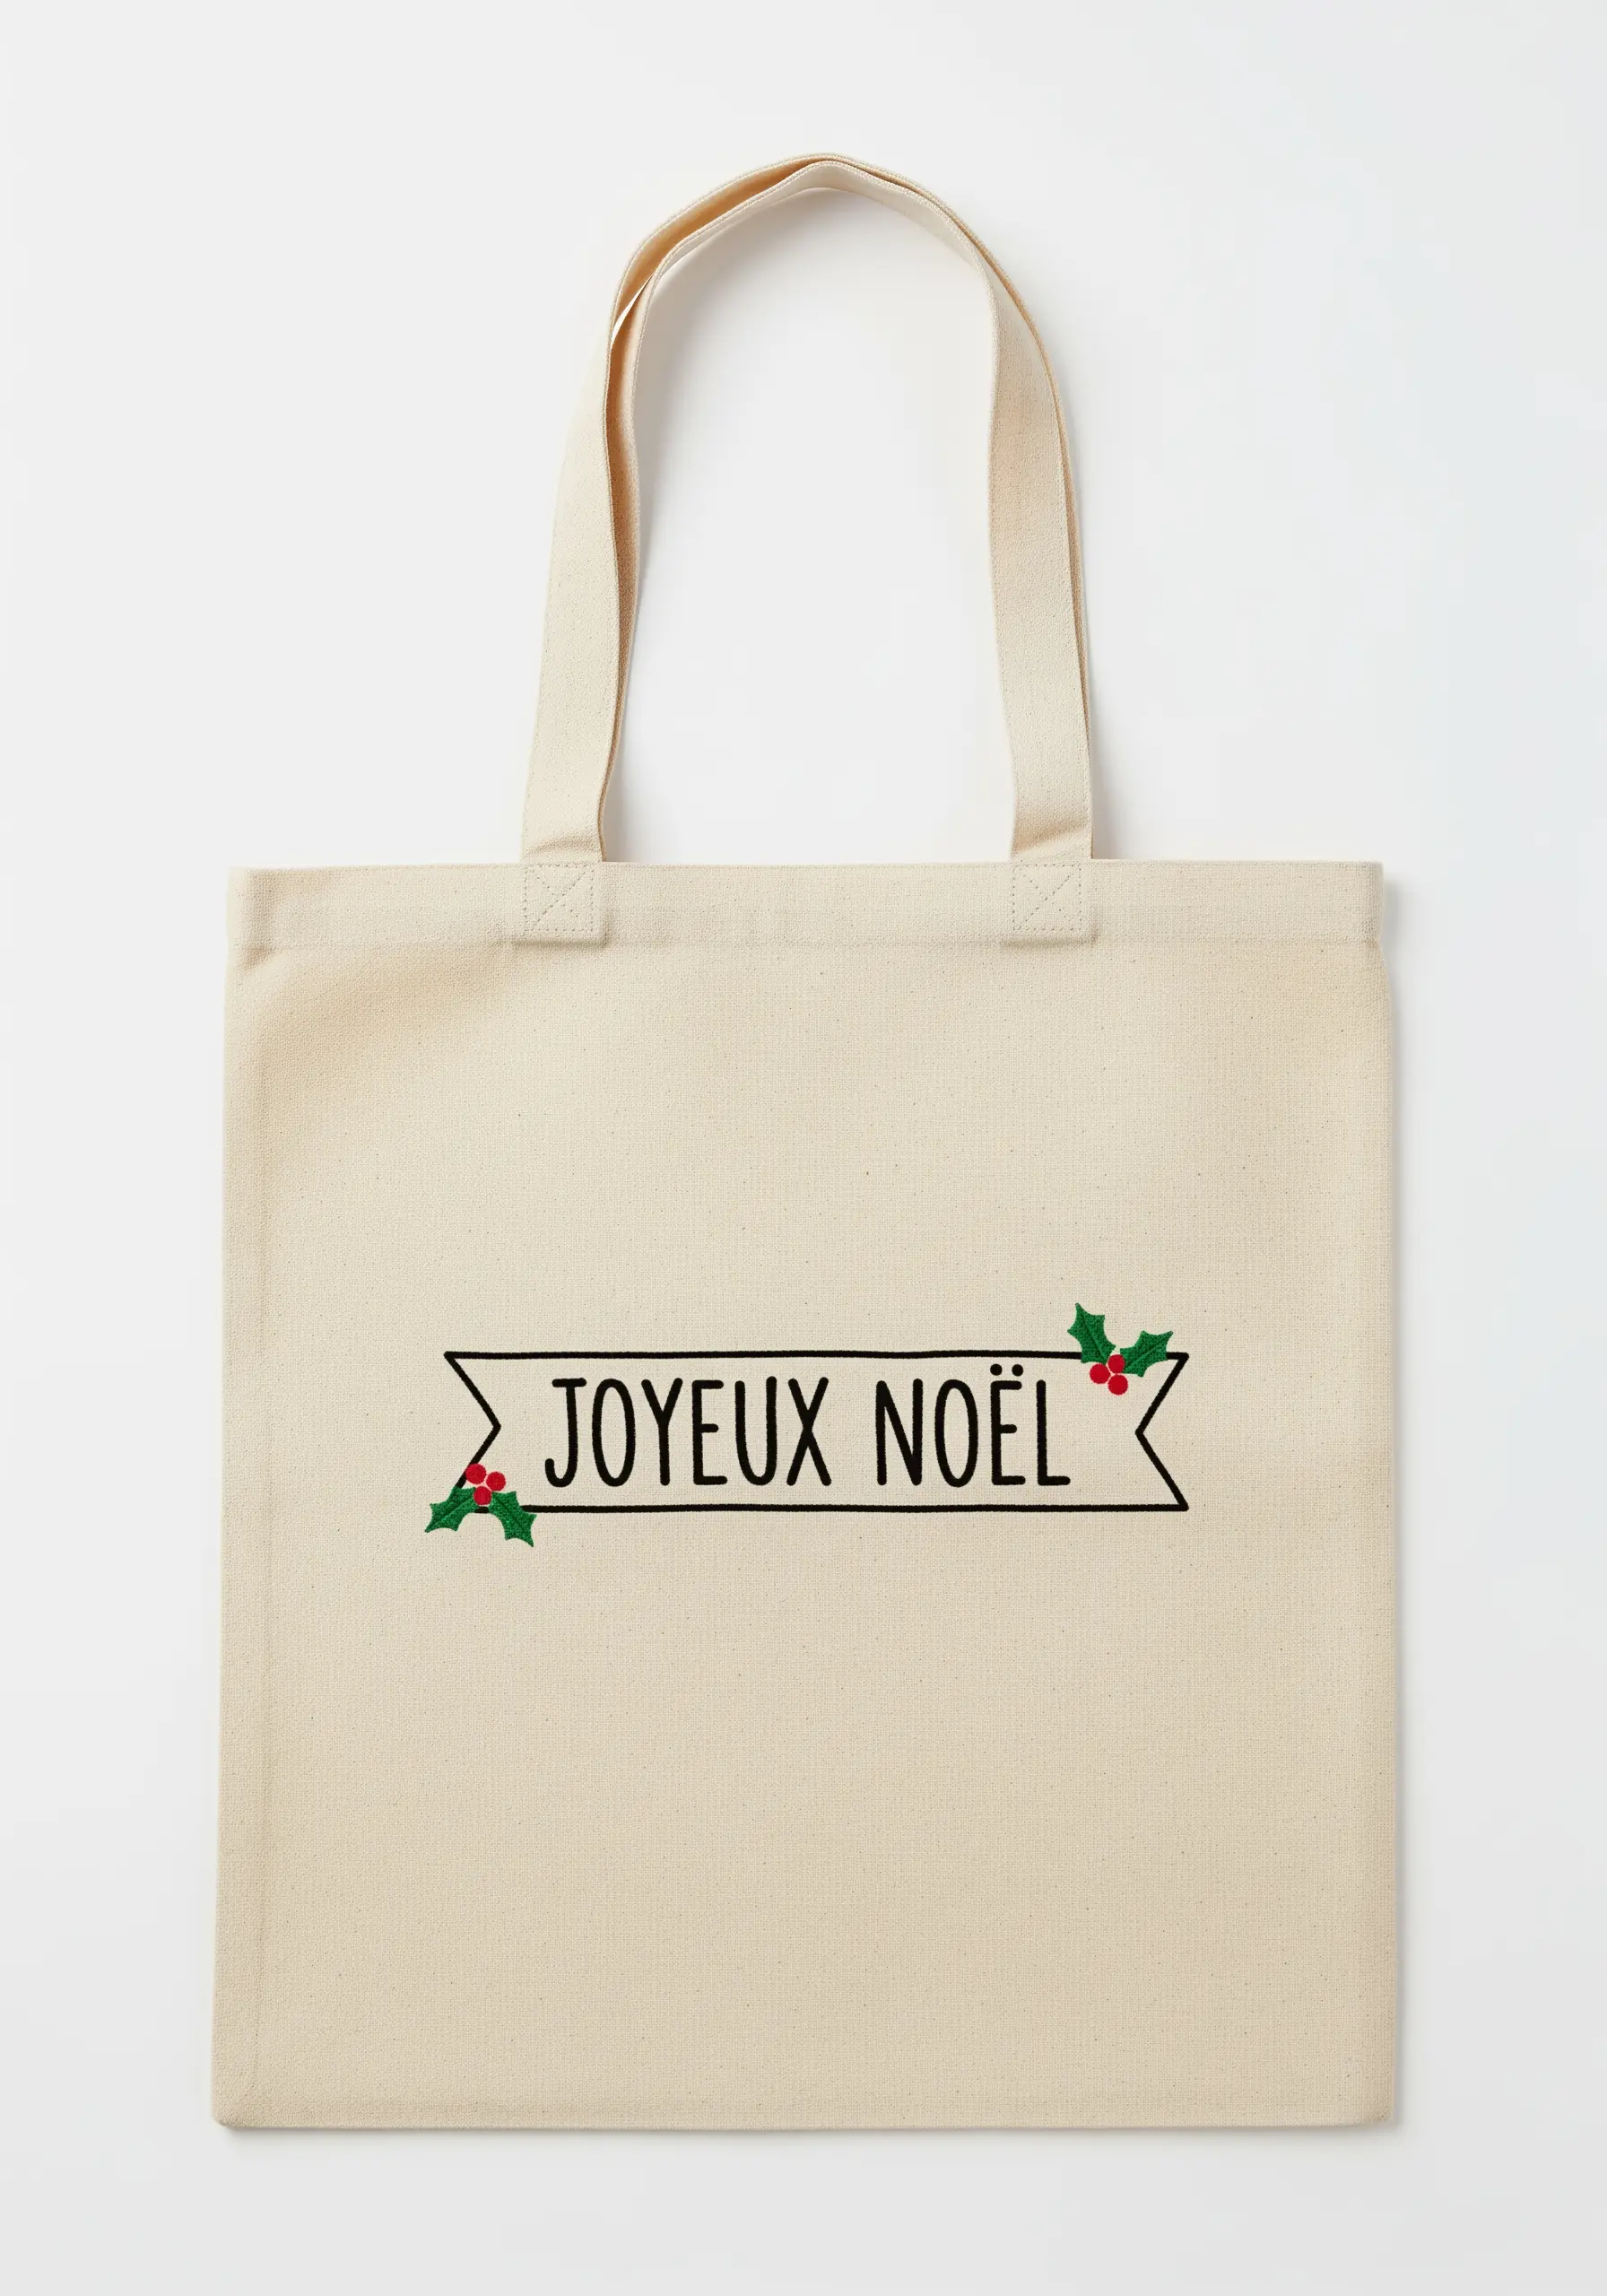
For a design this simple, precision is everything. Use a very fine backstitch or split stitch with only two strands of floss for the banner and lettering.
The power of this design is in its negative space; by keeping the motif small and centered, you create an understated, modern elegance.
Tiny details, like the holly leaves and French knot berries, add just enough festive color without compromising the minimalist aesthetic.
This is a perfect project for a beginner who wants to create something tasteful and refined, proving that simple stitches can have a big impact.
22. Opulent Goldwork on Velvet
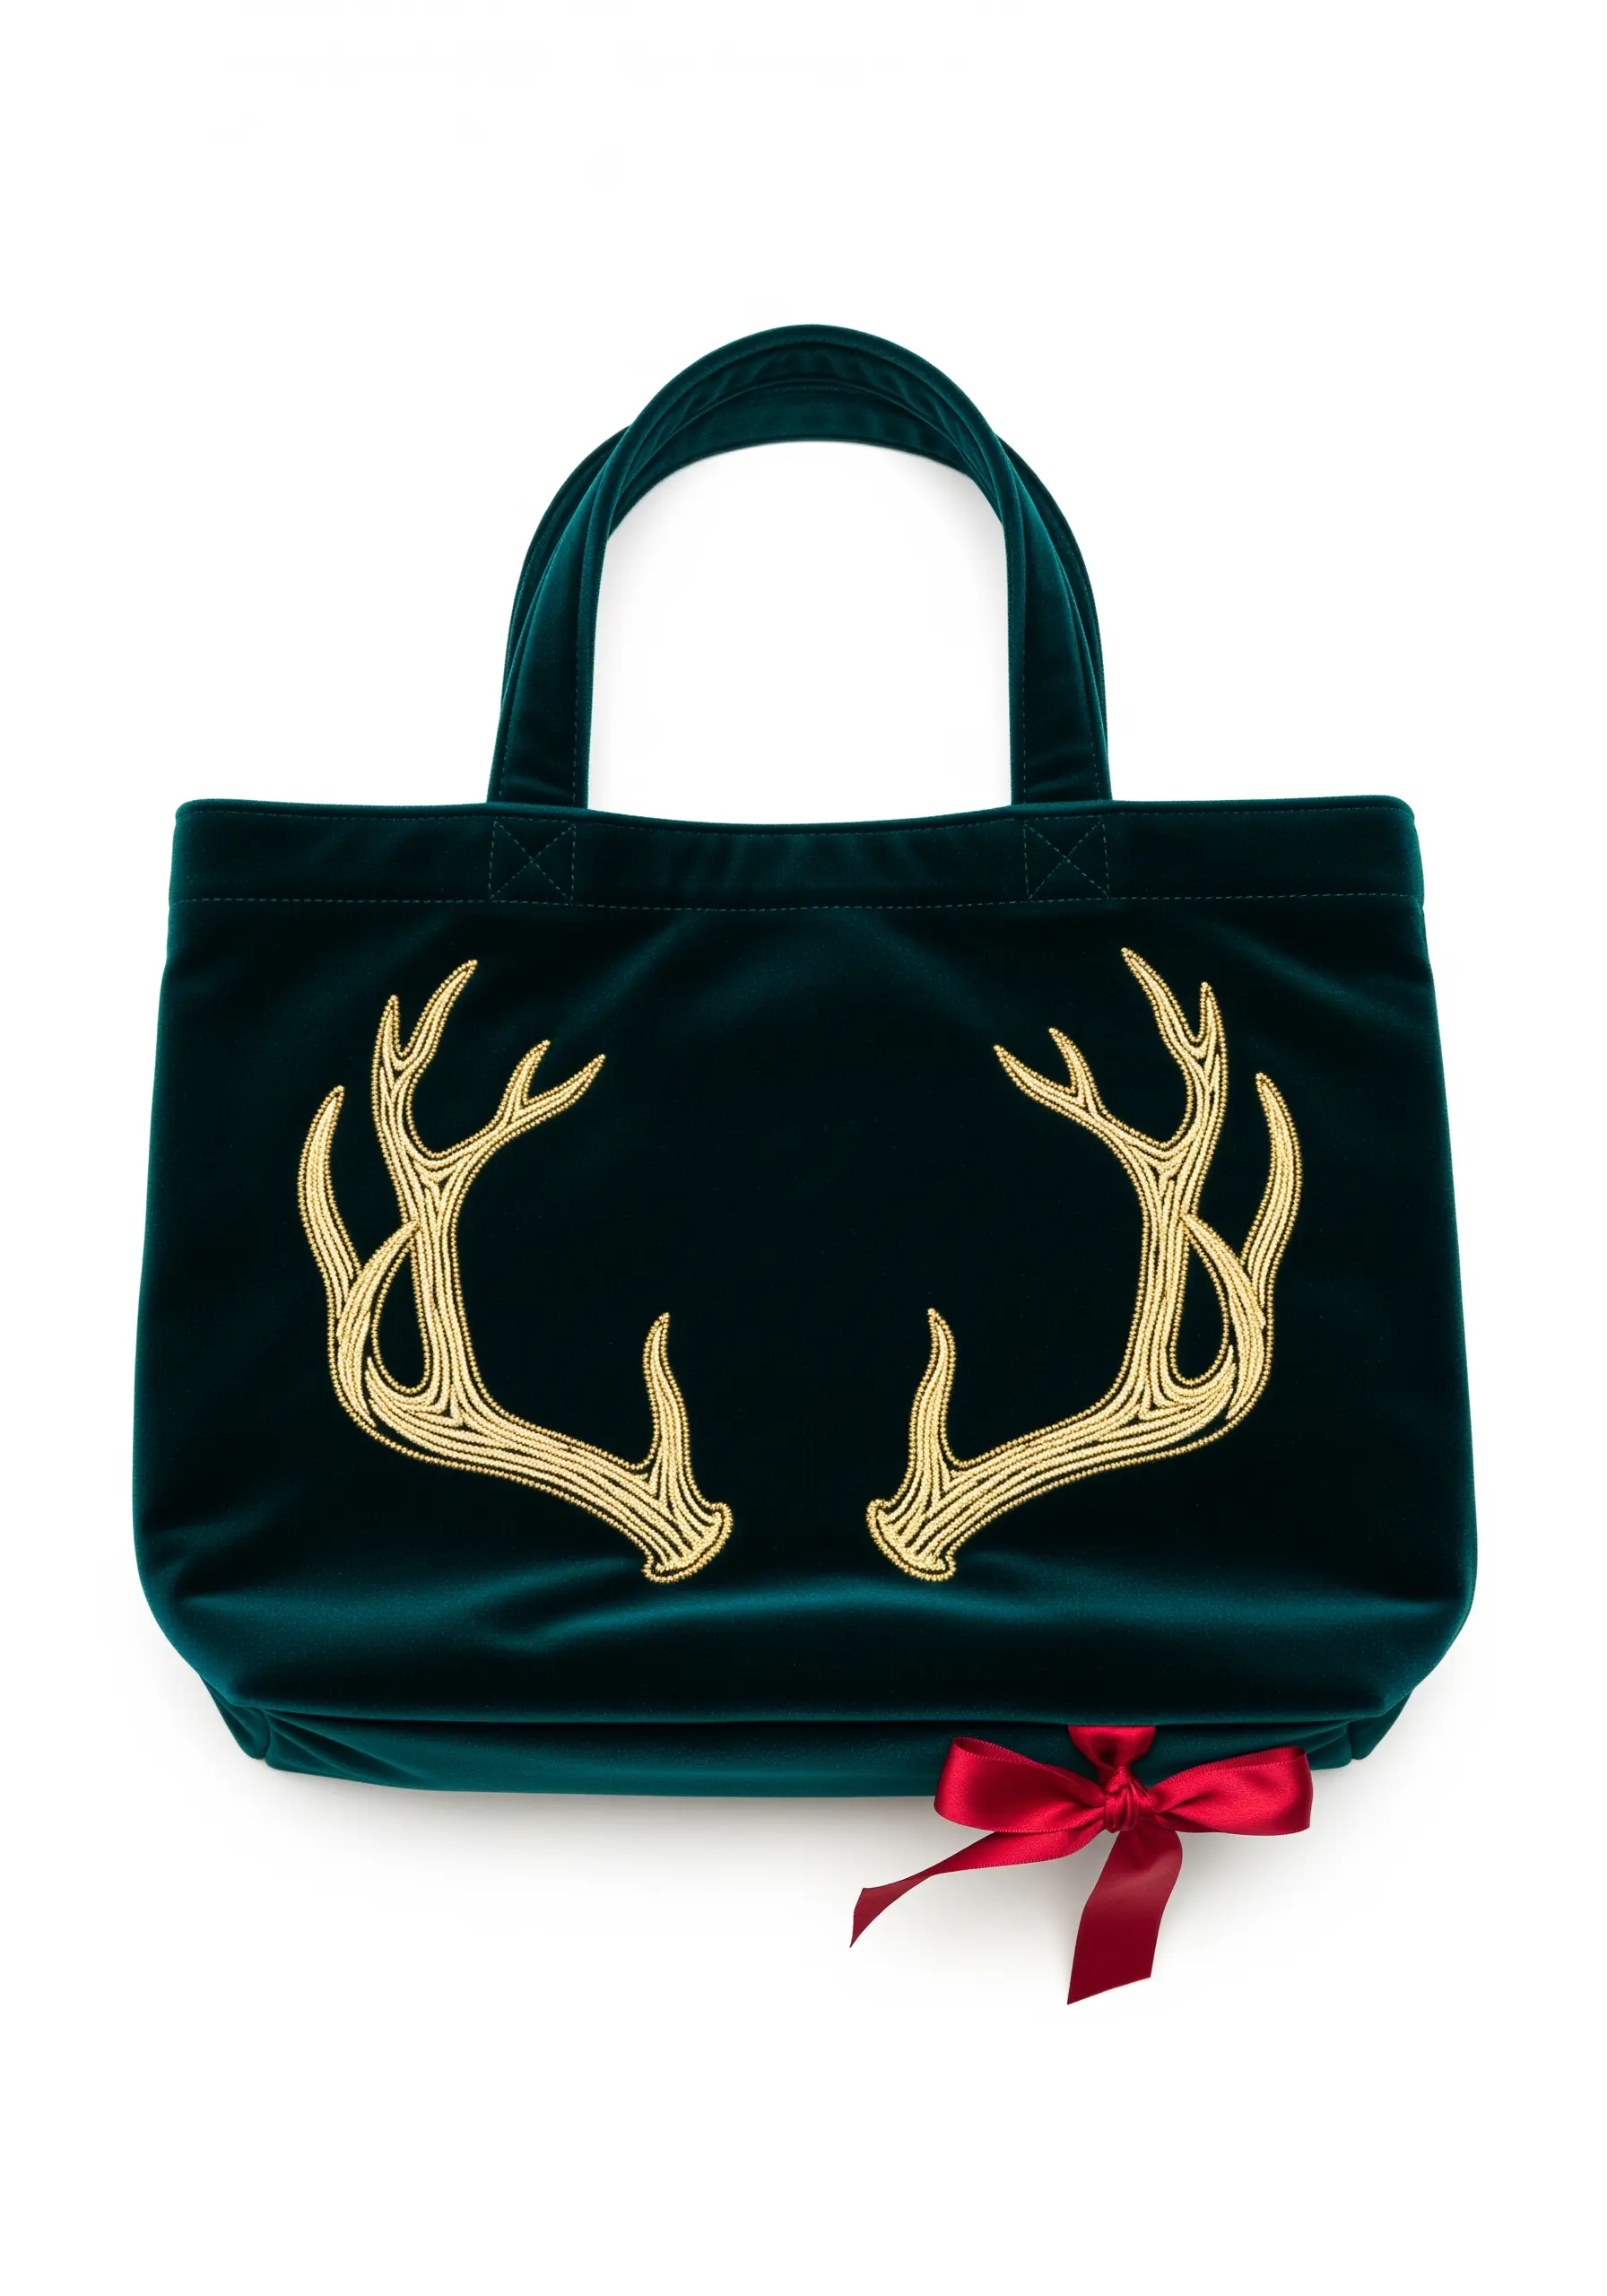
Create these bold, dimensional antlers using a technique called couching, where you lay down a thick metallic cord and tack it in place with a thinner, matching thread.
Alternatively, create a padded satin stitch base by first covering the shape with felt, then stitching over it with a high-shine gold thread.
The deep green velvet background is essential; its soft, light-absorbing texture makes the metallic gold appear even more luminous and luxurious.
This design makes one of the most powerful statement tote bag embroidery patterns, turning a simple accessory into a piece of regal art.
23. Shimmering Sequin and Bead Lights
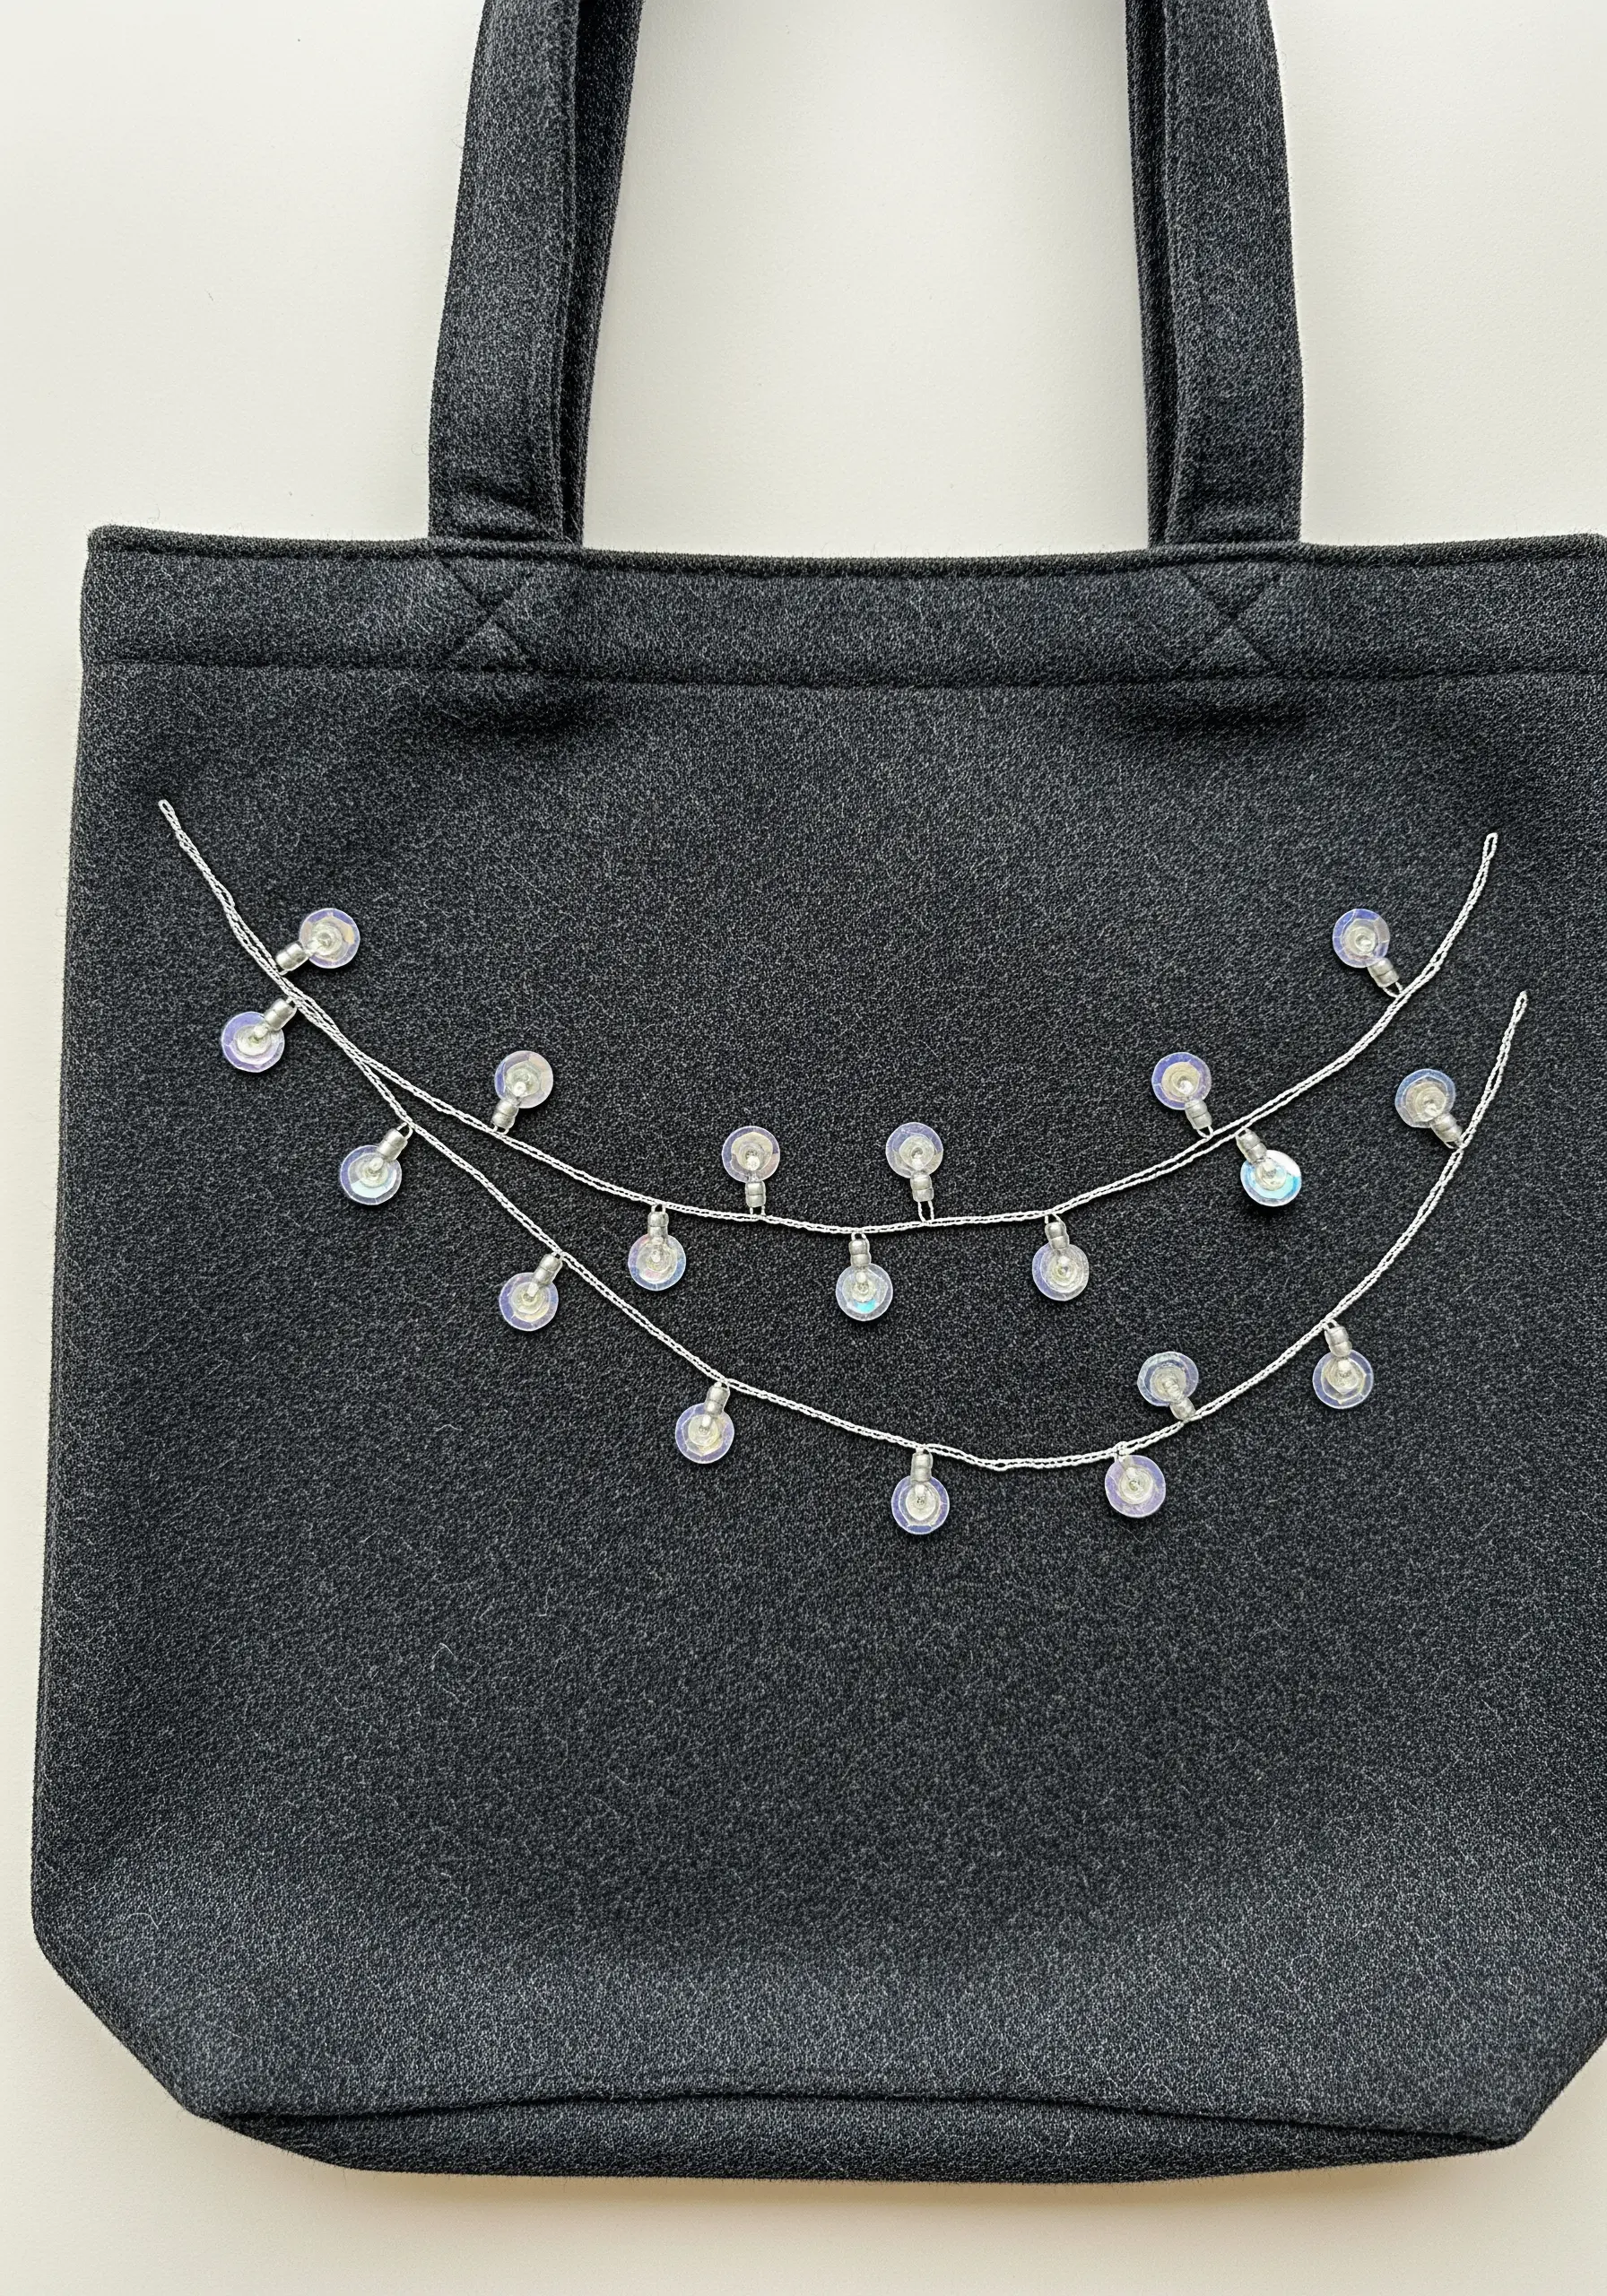
For an extra touch of sparkle, swap embroidered bulbs for sequins and beads. First, stitch the draped wire using a thin silver thread and a simple backstitch or stem stitch.
At intervals along the wire, attach iridescent or colored sequins. Secure each one with a tiny seed bead stitched through the center for a professional finish.
The magic of this design is how it catches the light and moves, creating a delicate glimmer that thread alone cannot replicate.
It’s a perfect example of mixed-fiber embroidery that is fast, fun, and incredibly festive.
24. A Frosty Woven Wheel Bouquet

Create these textural, circular flowers using a woven wheel stitch (or spider web stitch). Start with a star of straight stitches and weave your floss over and under them until the shape is filled.
Use a variegated blue thread or switch colors as you weave to give each flower a beautiful gradient effect, from icy light blue to deep navy.
A silver bead stitched into the center of each woven wheel adds a frosty, festive sparkle and a polished focal point.
Complete the bouquet with simple brown stem stitches for the branches and tiny French knots for the buds, balancing the bold flowers with delicate details.


