
You’ve mastered the basic stitches, and your hoops are looking lovely, but you feel a disconnect. Why don’t your embroidered flowers have the life, the texture, the *feeling* of the ones you admire? It’s a quiet frustration, the sense that a secret language of thread exists just beyond your reach.
The secret isn’t in buying more supplies or learning dozens of impossibly complex stitches. It lies in small, intentional adjustments: changing the direction of a stitch to mimic a petal’s curve, choosing a variegated thread to create effortless gradients, or packing French knots so tightly they build a three-dimensional form. This is where craft transforms into art.
This collection is your guide to that transformation. Think of each flower not as a rigid pattern to be copied, but as a lesson in technique. See how a simple lazy daisy becomes a lilac, how a straight stitch captures the sharpness of a thistle, and how long-and-short stitches can paint with thread. It’s time to stitch the flowers you see in your mind’s eye.
1. Render Lavender with Variegated Thread
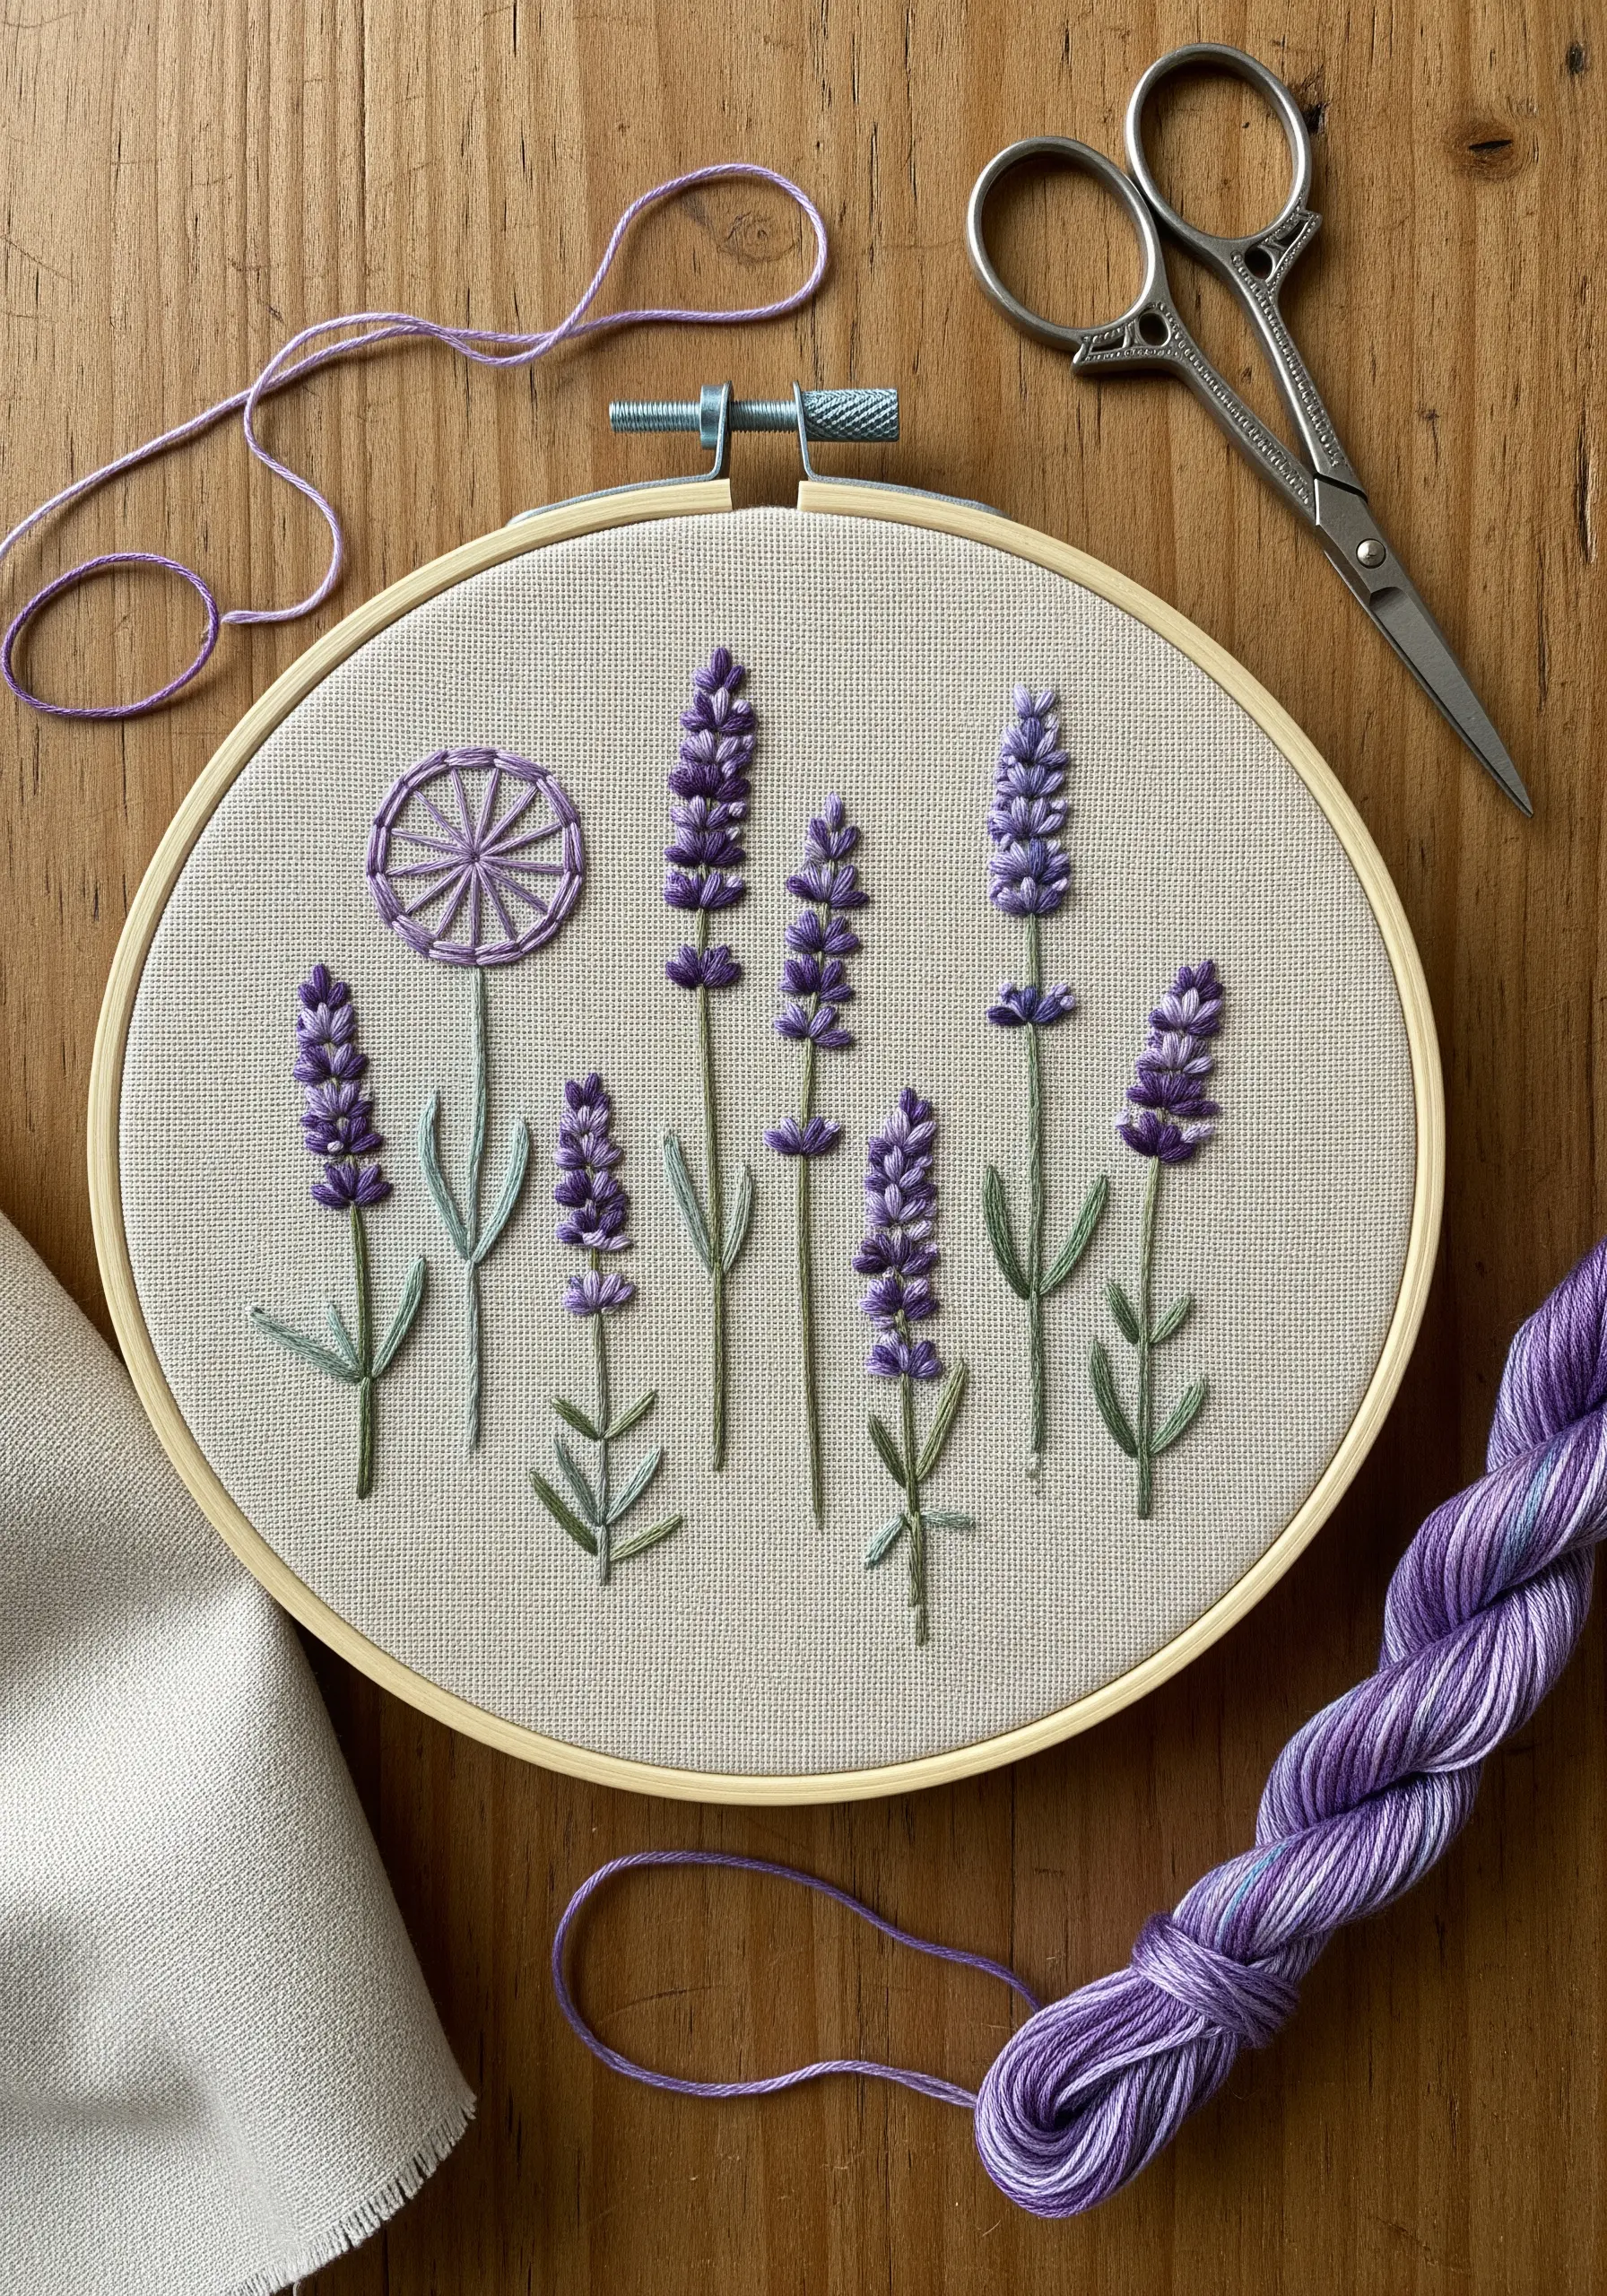
To capture the clustered, delicate look of lavender buds, use French knots or tiny, straight satin stitches.
Instead of switching between multiple shades of purple, choose a single variegated floss.
This thread does the color-blending work for you, creating subtle, natural shifts in tone that mimic how light hits the plant.
For the stems, a simple backstitch or stem stitch in a soft green keeps the focus on the vibrant purple blossoms.
2. Add Dimension to Daisy Petals

For crisp, clean daisy petals on a functional item like a pillow, the fishbone stitch offers more structure than a simple satin stitch.
Stitch each petal from the outer tip inward, creating a subtle central line that adds a touch of realism and dimension.
Pack the center with dense French knots in a vibrant yellow or gold to create a raised, pollen-dusted texture that contrasts beautifully with the smooth petals.
Using a durable linen or cotton canvas ensures your work holds up to everyday use.
3. Paint with Knots for a Textured Rose
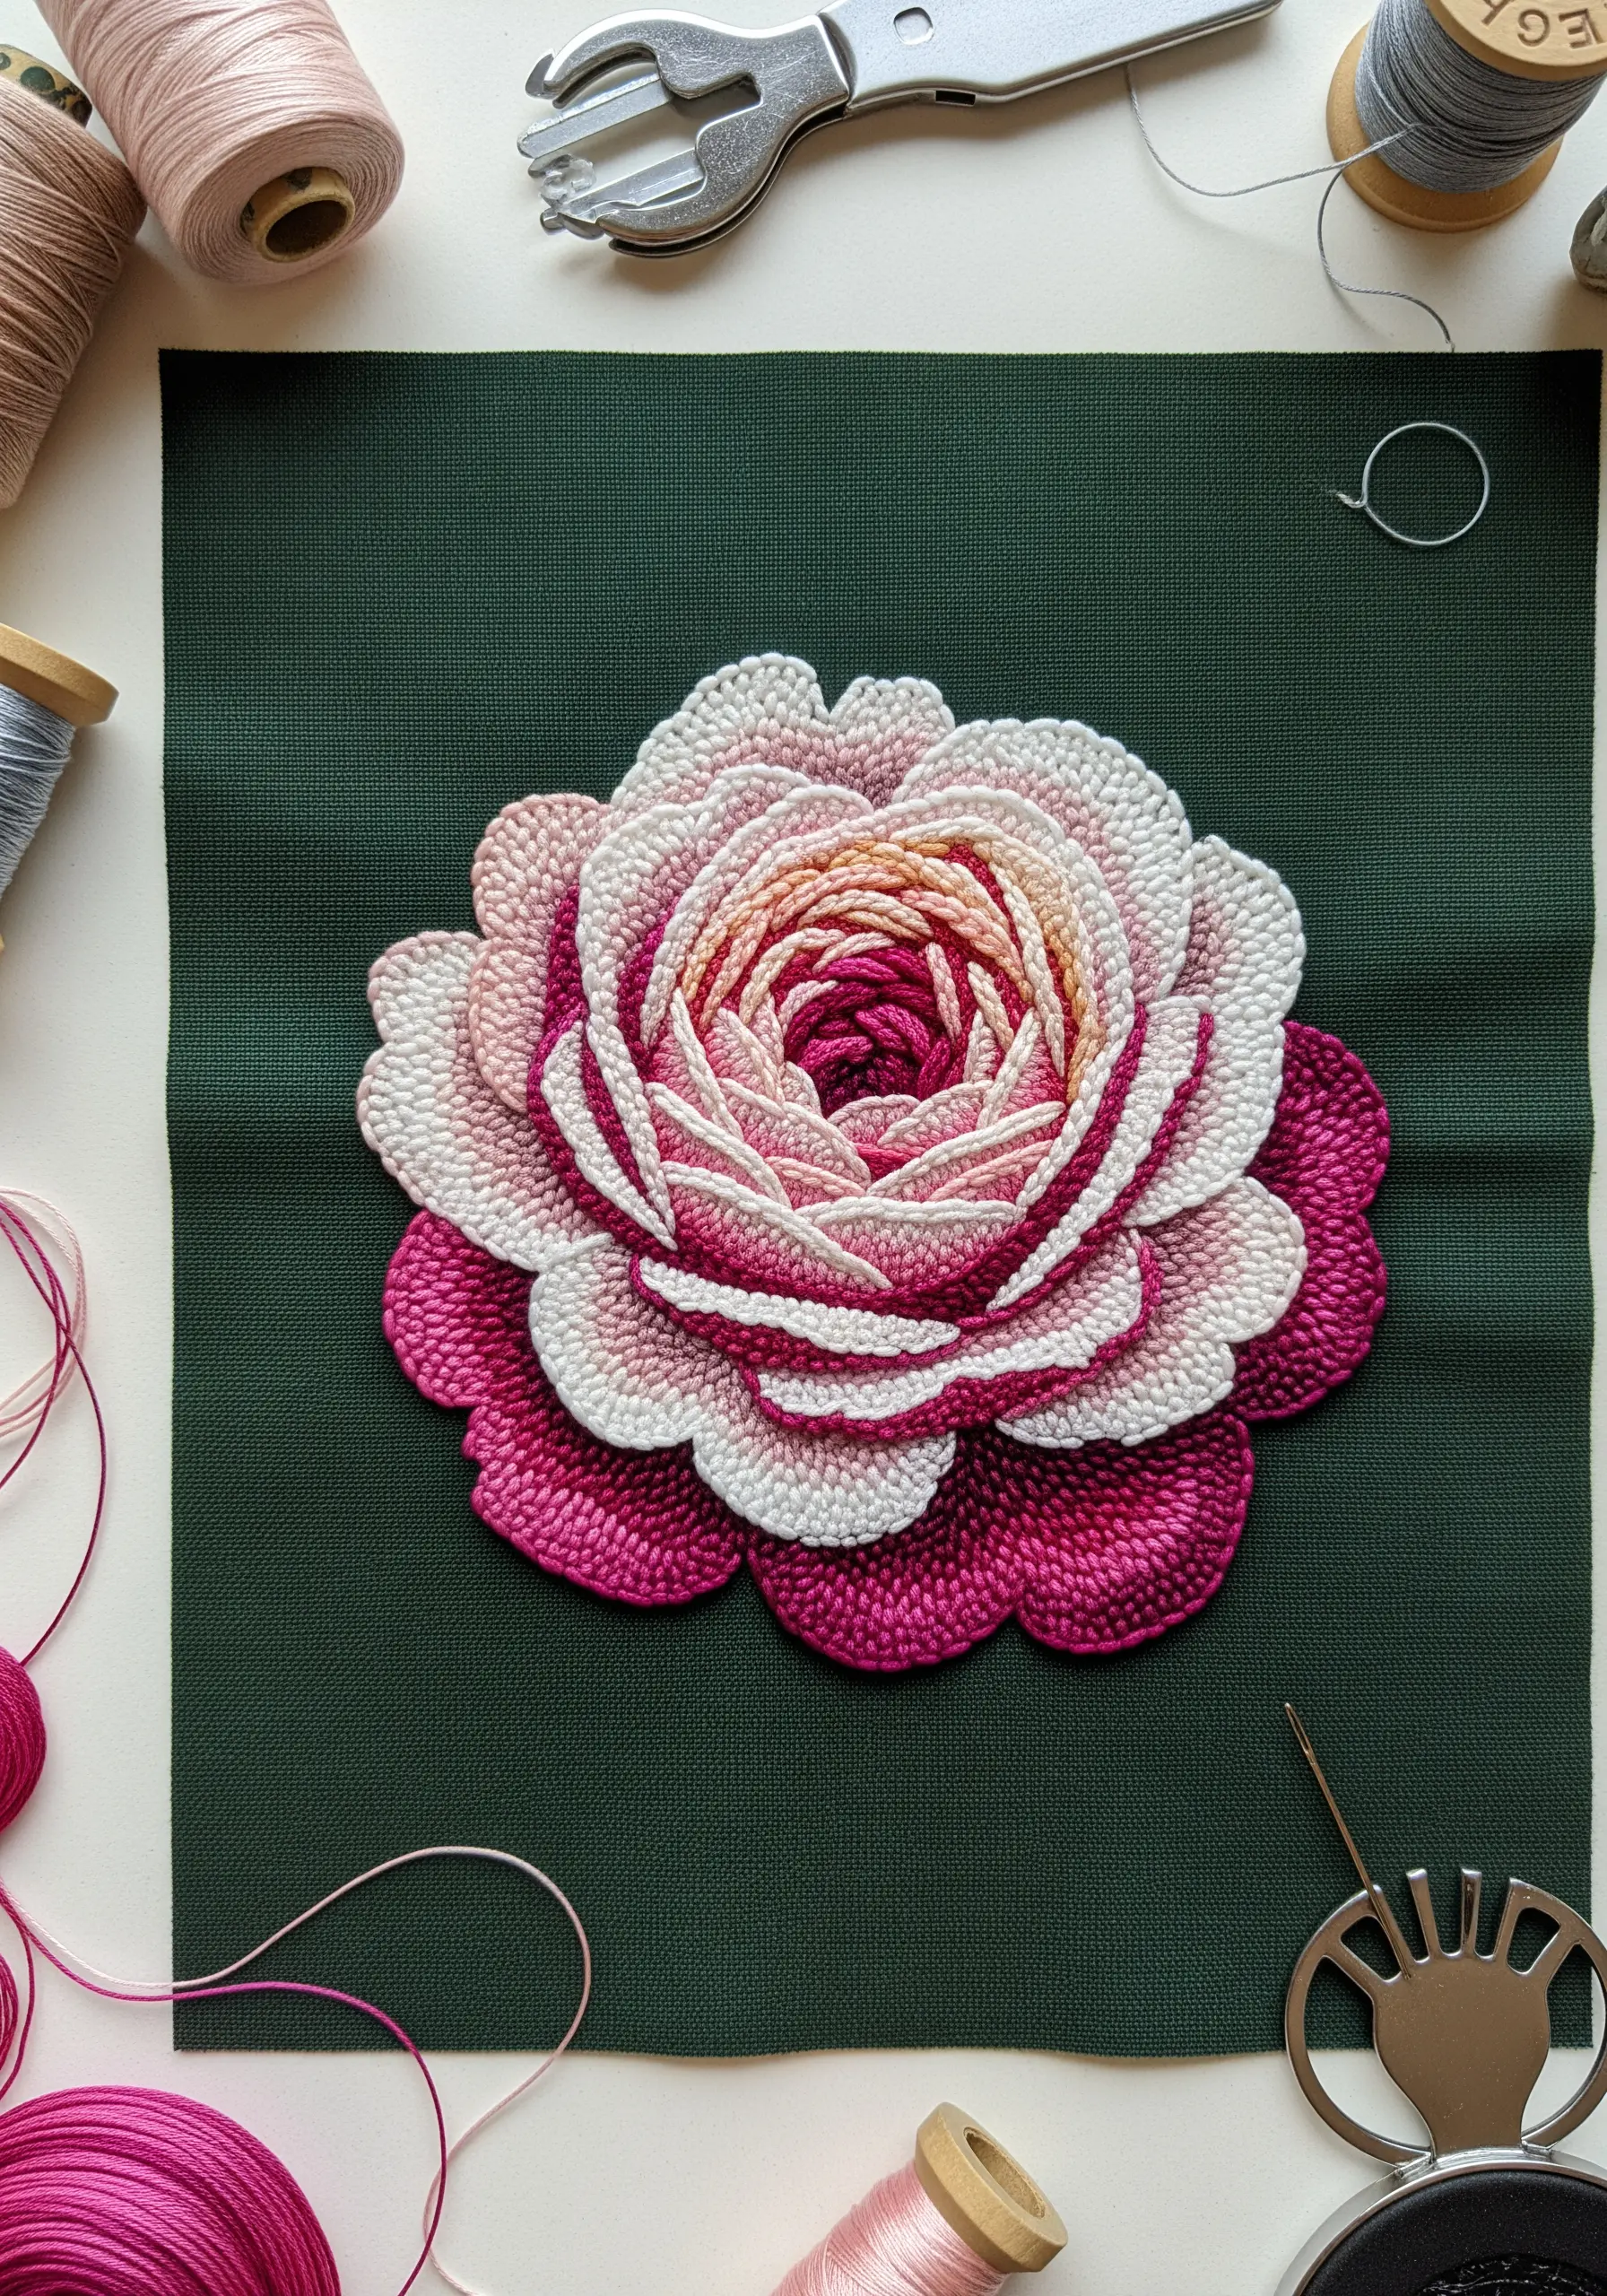
Build a deeply textural rose by filling the entire design with tightly packed French or colonial knots.
Map out your color zones first, starting with the darkest shade in the center and gradually moving to lighter tones for the outer petals.
This technique, a form of pointillism with thread, creates a stunning, three-dimensional gradient that feels incredibly lush and complex.
The deep green background fabric makes the pink and white tones appear even more vibrant through contrast.
4. Capture Movement with Minimalist Dandelions

To give your dandelion seeds a sense of floating across the fabric, focus on spacing and direction.
Use a delicate combination of a single detached chain stitch for the parachute and a straight stitch for the stem and seed.
Vary the angle of each seed slightly to create a natural, windswept effect.
This minimalist approach on a canvas tote bag demonstrates how negative space can be just as powerful as the stitching itself, resulting in an elegant, modern tote bag embroidery design.
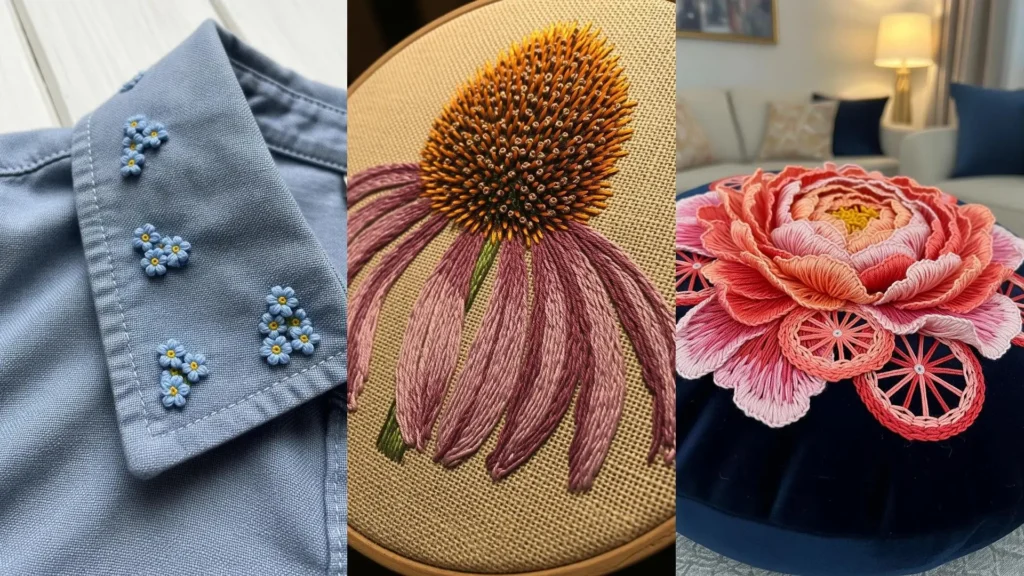
5. Embellish a Collar with Tiny Forget-Me-Nots

When adding embroidery to clothing, scale is everything.
Create these forget-me-nots with five simple lazy daisy stitches arranged in a circle, securing the center with a single yellow French knot.
Group them in small, asymmetrical clusters on a collar or cuff for a subtle, bespoke detail.
Always use a stabilizer on the back of the fabric to prevent puckering and ensure your stitches remain secure through washing and wear.
These tiny embroidery patterns can make your clothes look custom-made.
6. Master Bold Texture with Ribbon Embroidery

For a flower that commands attention like a sunflower, switch from floss to silk ribbon.
Use a simple straight stitch, but allow the ribbon to twist slightly as you pull it through the fabric to create natural folds and highlights in the petals.
The ribbon’s width fills space quickly, and its inherent sheen creates a lustrous, dimensional effect that standard six-strand cotton simply cannot match.
A dense cluster of French knots in brown and black thread grounds the vibrant petals with rich texture.
7. Define Sharp Edges on a Scottish Thistle

To capture the spiky character of a thistle, use contrasting stitches for the flower and leaves.
Create the blossom with a dense layer of long, straight stitches in magenta and purple, fanning them out from the base to suggest a burst of fine needles.
For the sharp, serrated leaves, outline the shape with a split stitch, then fill with a fishbone stitch using two shades of green to create highlights and shadows along the edges.
Working on felt provides a stable, non-fraying base that enhances the sharp definition of your stitches.
8. Achieve Painterly Realism with Thread Painting
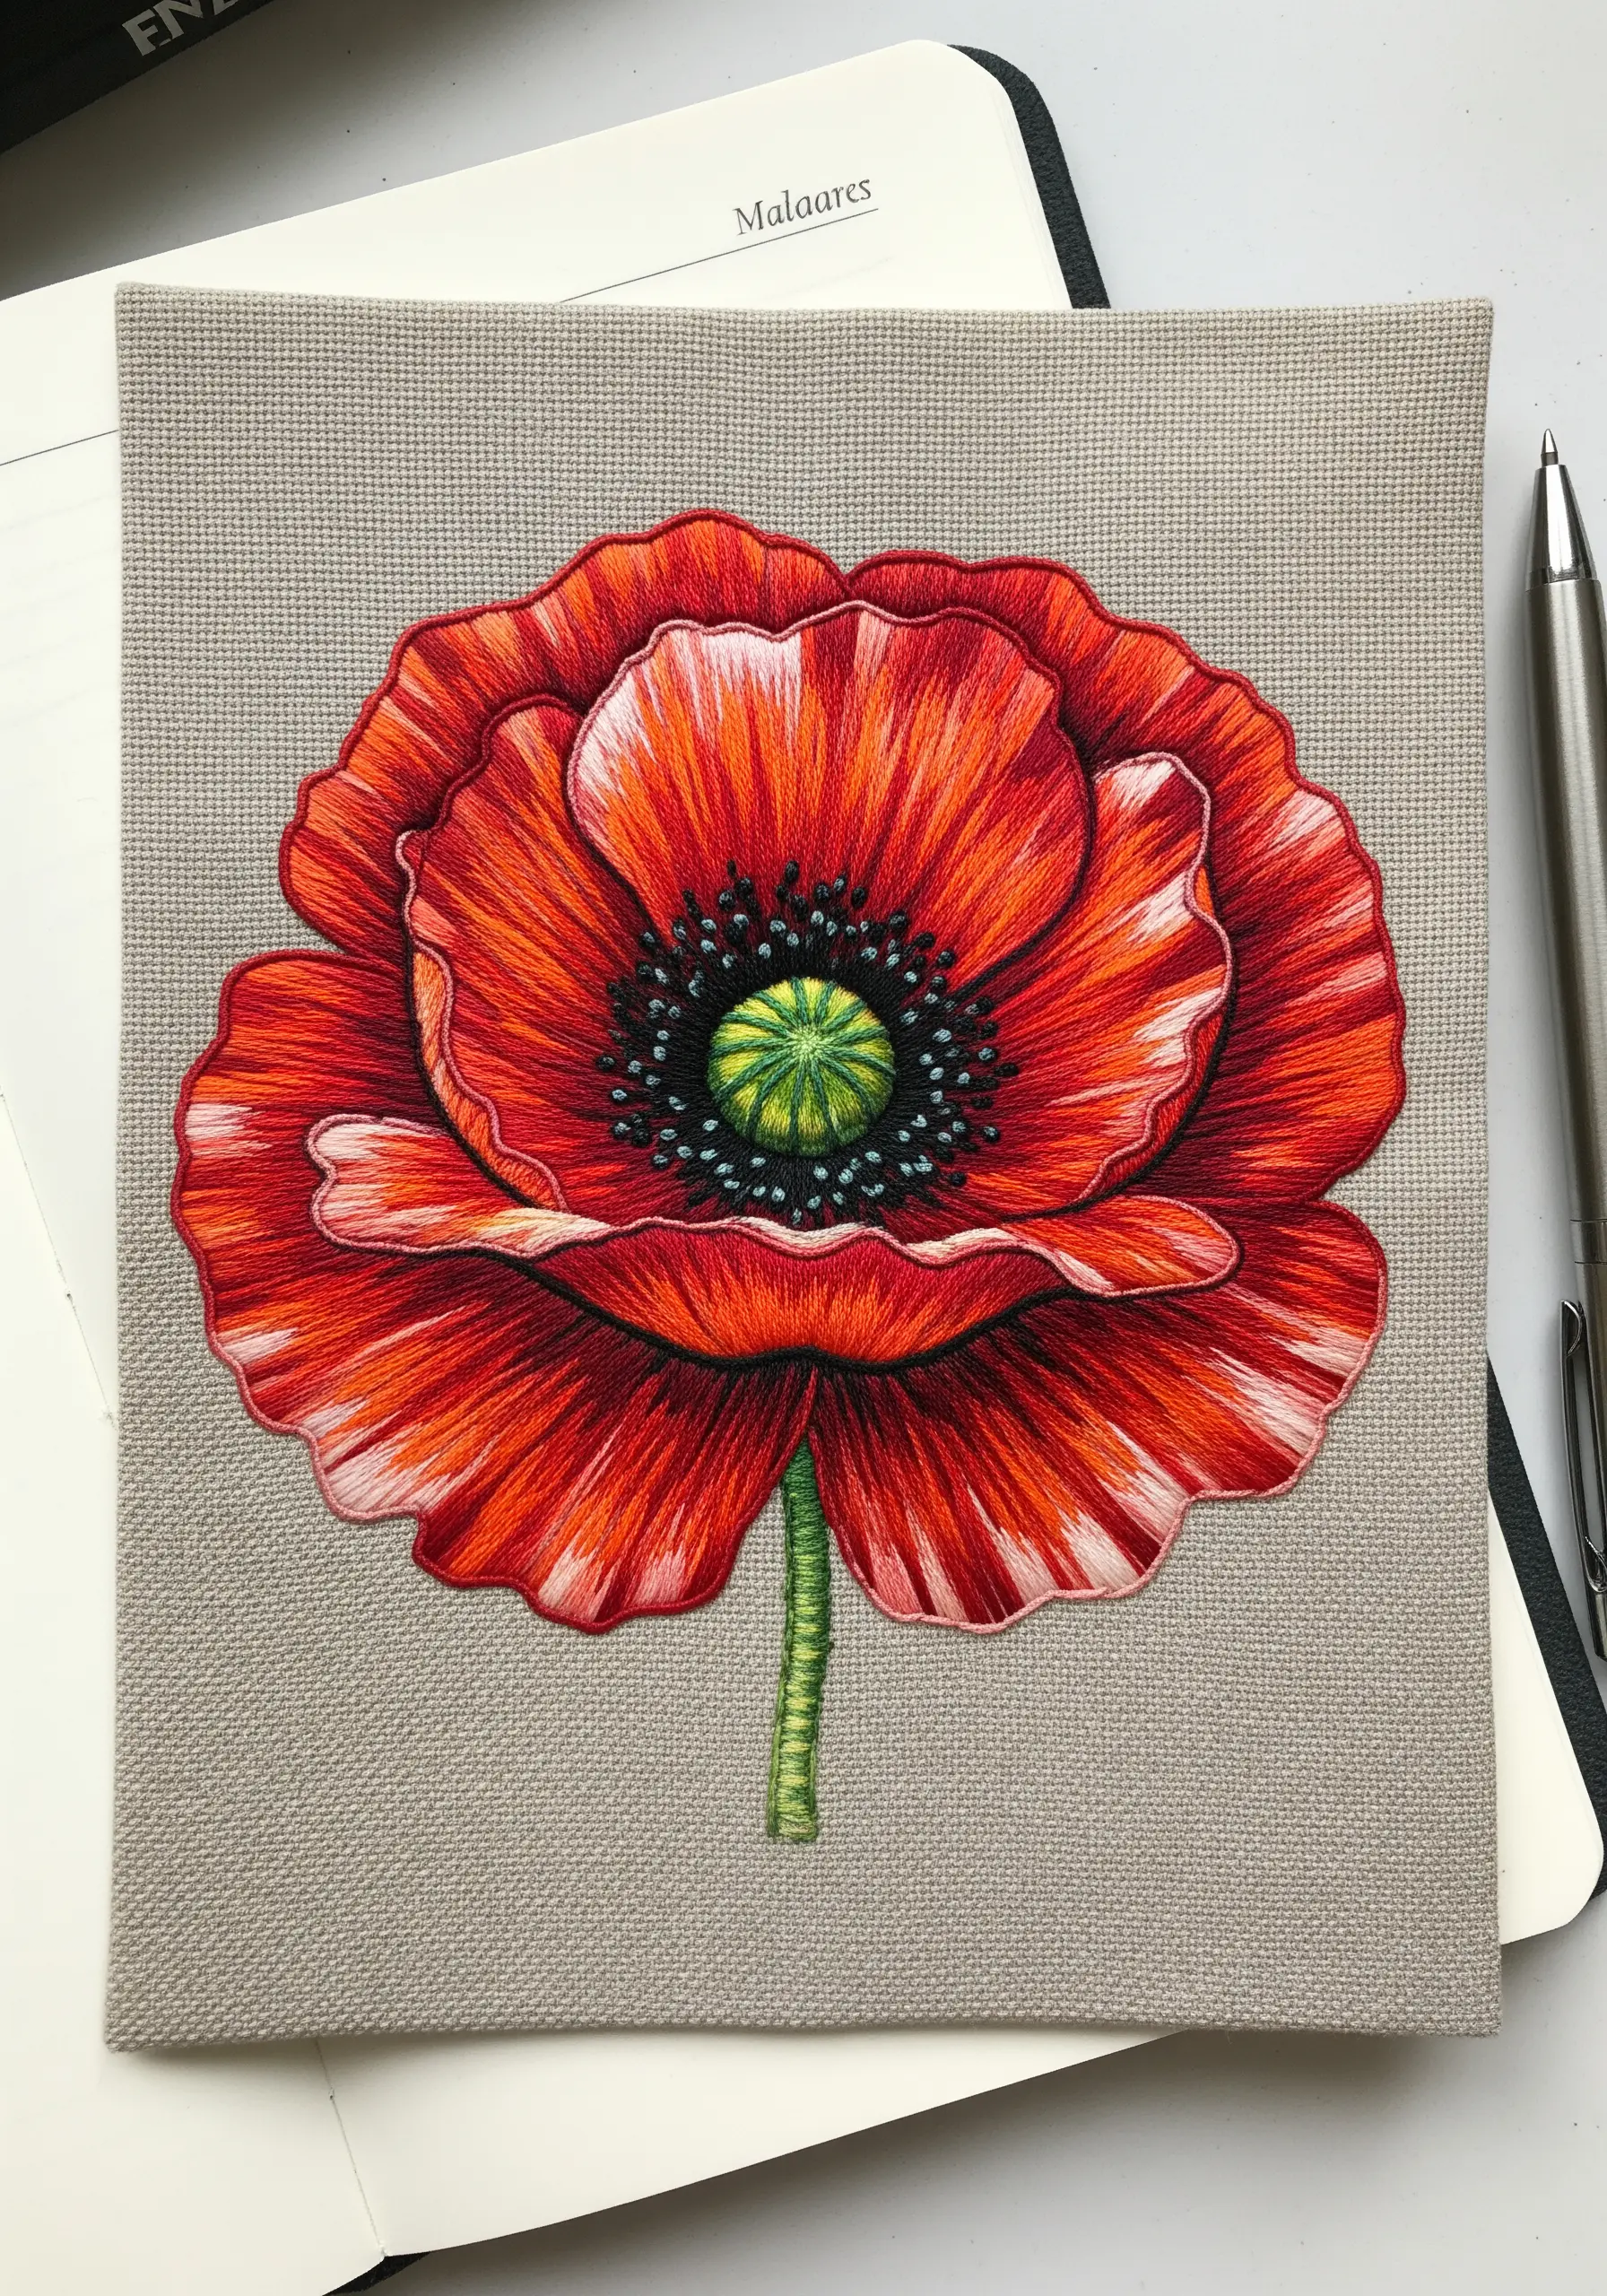
The long-and-short stitch is the key to creating photorealistic florals like this poppy.
Work in sections, blending shades of red, orange, and white to mimic the way light falls on delicate petals.
Overlap your stitches and vary their length and angle to create a seamless gradient, eliminating harsh lines between colors.
This technique transforms thread into paint, allowing you to build depth, shadow, and highlights with incredible control, creating embroidery ideas that feel like modern paintings.
9. Stitch Delicate Cherry Blossoms for Elegant Linens

To adorn fine table linens, choose stitches that are both beautiful and durable.
Form each cherry blossom using five detached chain stitches in a soft pink, anchored with a darker pink or brown French knot.
Use a couching stitch for the branches—laying down a thicker brown thread and tacking it with a thinner one—to create a clean, raised line that won’t snag easily.
This combination looks delicate but is practical for items that require occasional laundering.
10. Build Hydrangea Clusters with Layered Stitches

A hydrangea’s signature full-headed look comes from layering simple stitches.
Work hundreds of small lazy daisy stitches in a dense cluster, using at least three to five shades of a color family—like blue, periwinkle, and lavender—to create a natural, multi-tonal effect.
Tuck a tiny white French knot or a seed bead into the center of each floret for a hint of realism.
By overlapping the stitches, you build the volume and depth that make the flower head look lush and round.
11. Create Graphic Tulips with Cross-Stitch
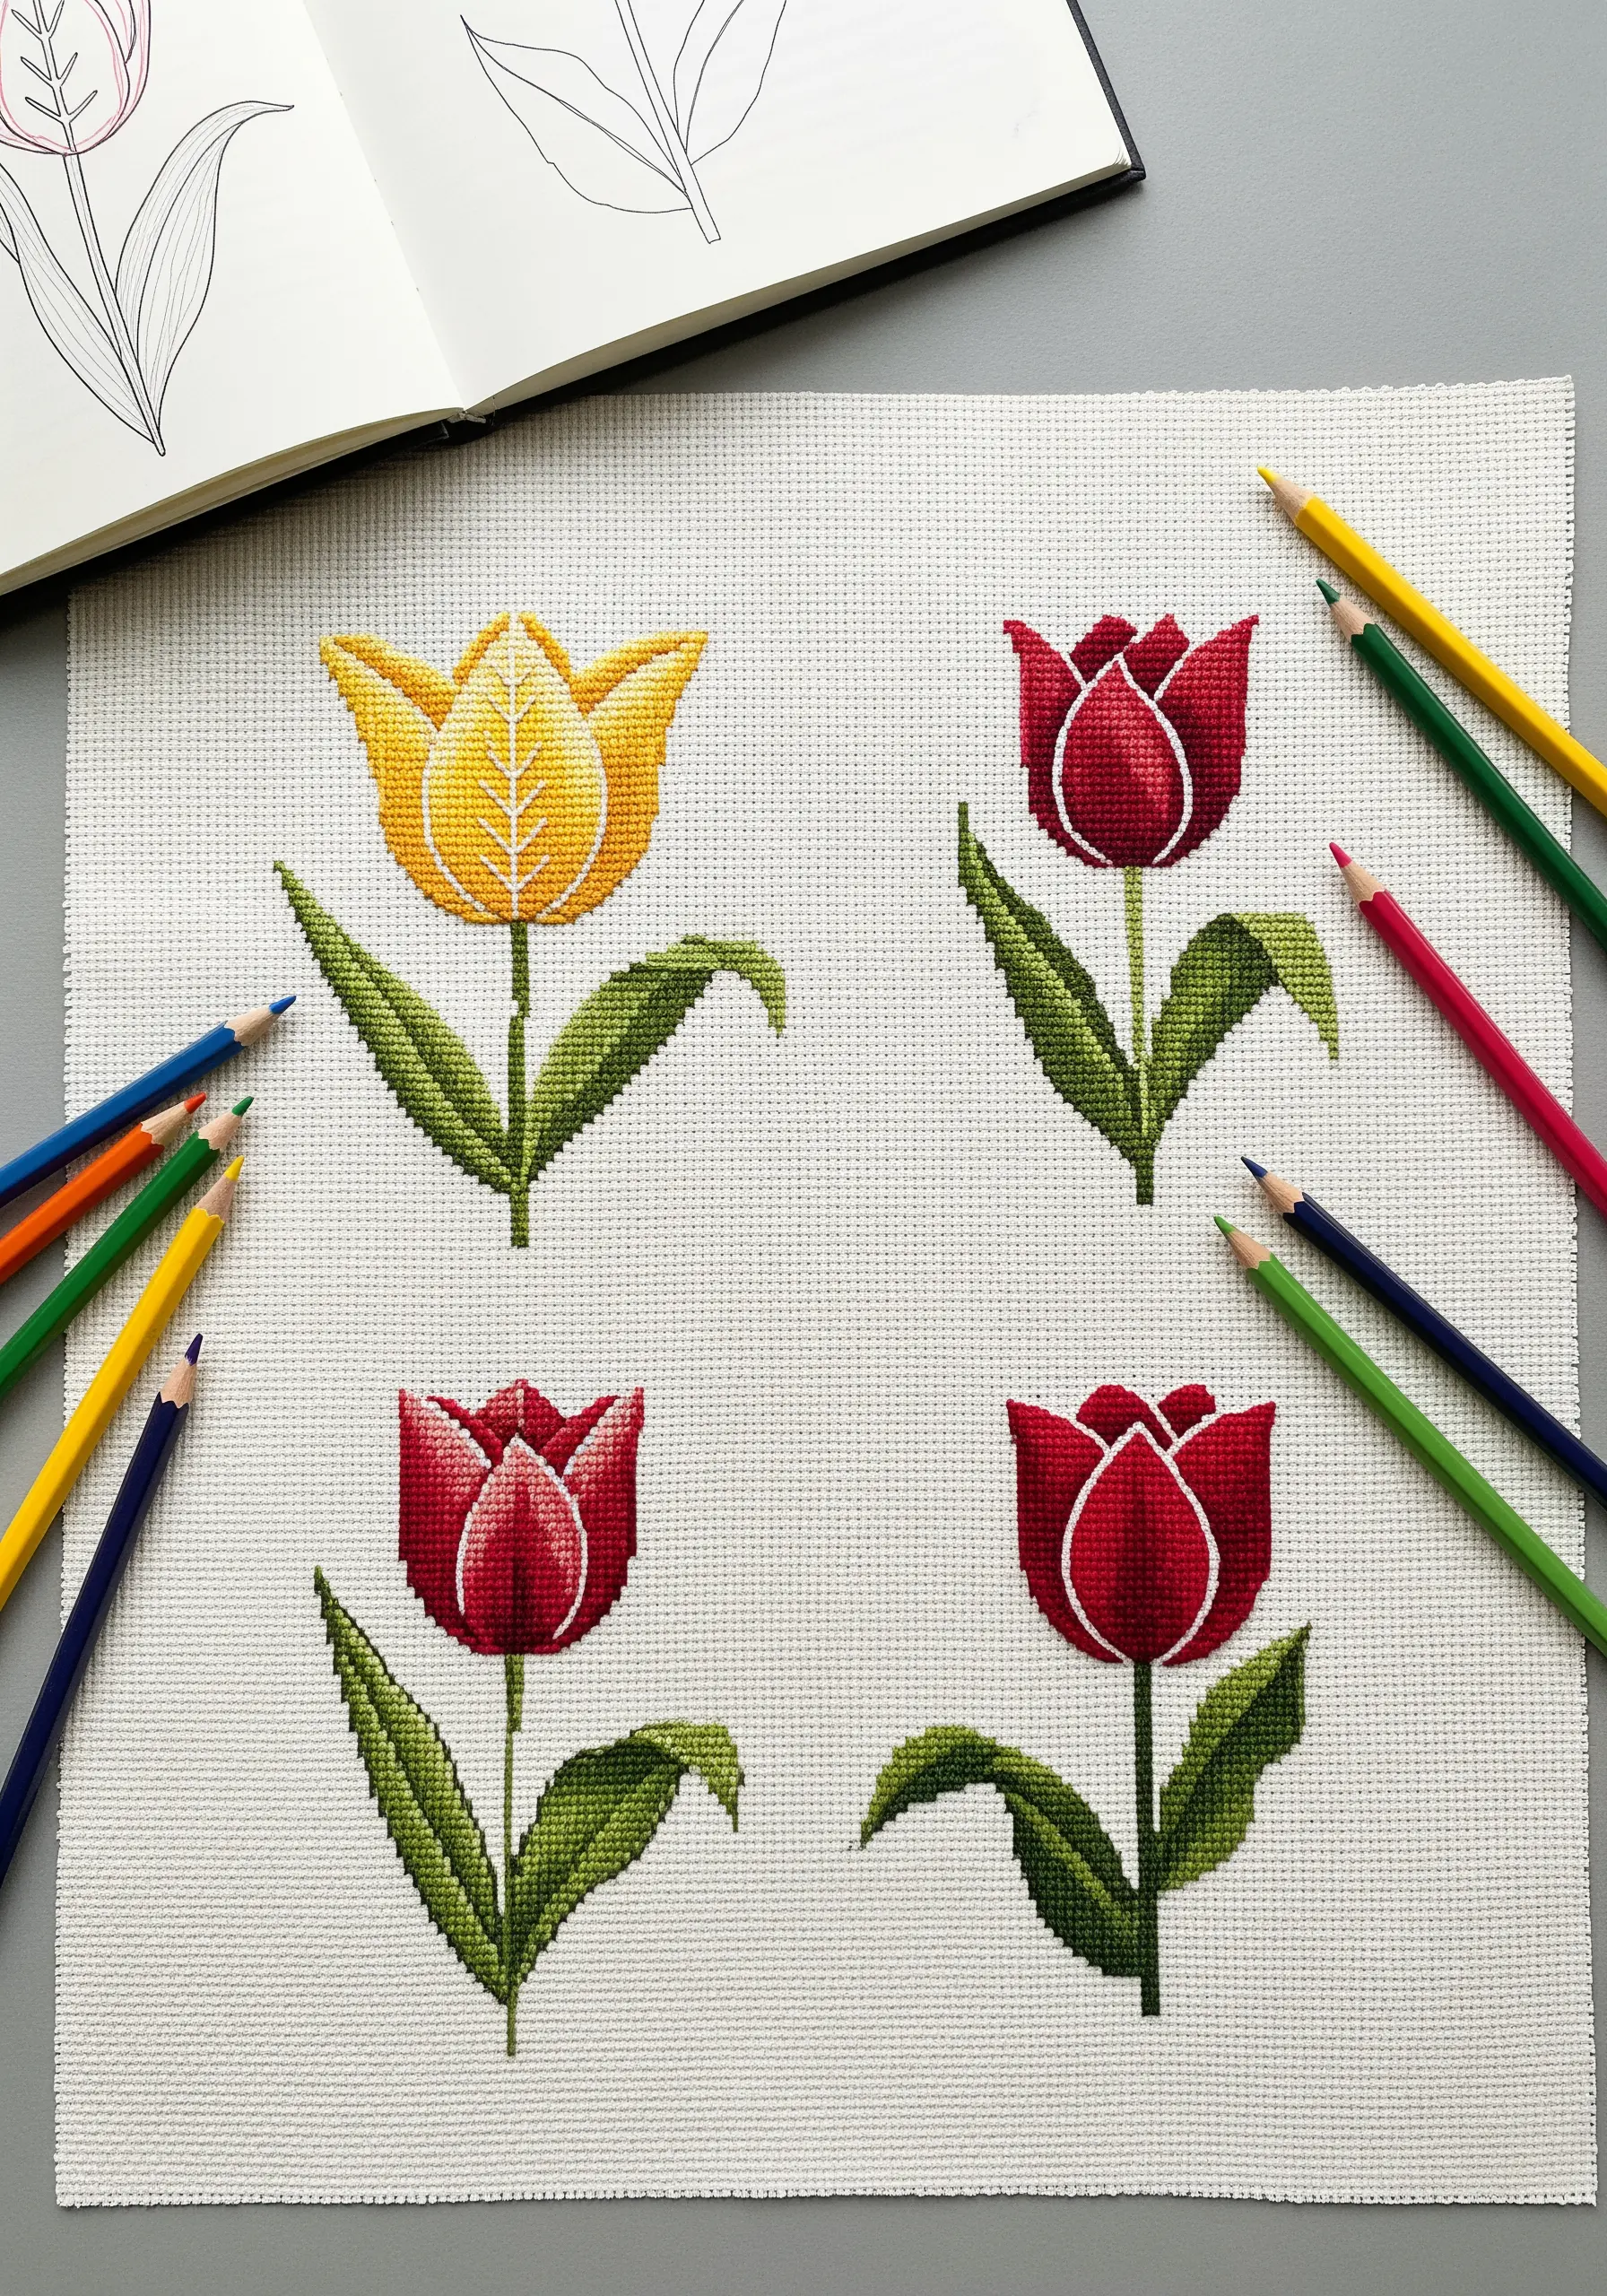
For a clean, stylized floral, embrace the geometric precision of cross-stitch.
Working on Aida cloth, you can create bold blocks of color that give these tulips a classic, almost illustrative quality.
Define the shape and add detail by outlining the petals and leaves with a single strand of black or dark-colored backstitch.
This final step is crucial; it transforms the pixelated blocks into a sharp, polished motif.
12. Shape Crocus Petals with Angled Satin Stitch

The success of a satin-stitched flower lies in the direction of your stitches.
For these crocus petals, angle your stitches to follow the natural, upward curve of the bloom.
Start each stitch at the outer edge and bring it down toward the center, keeping the threads smooth and parallel.
A sliver of white or a lighter shade of purple at the base of each petal adds a subtle highlight that creates the illusion of translucence and depth.
13. Use Contrast to Spotlight a Snowdrop

Make a delicate white flower command attention by stitching it on a dark background.
To prevent the dark fabric from showing through, first lay down a base layer of white split stitches, then cover it with a smooth top layer of satin stitch.
This technique, called padded satin stitch, raises the embroidery slightly and ensures your whites are opaque and brilliant.
The high contrast between the white thread and black fabric creates a dramatic, elegant composition.
14. Add Speckled Detail to a Hellebore
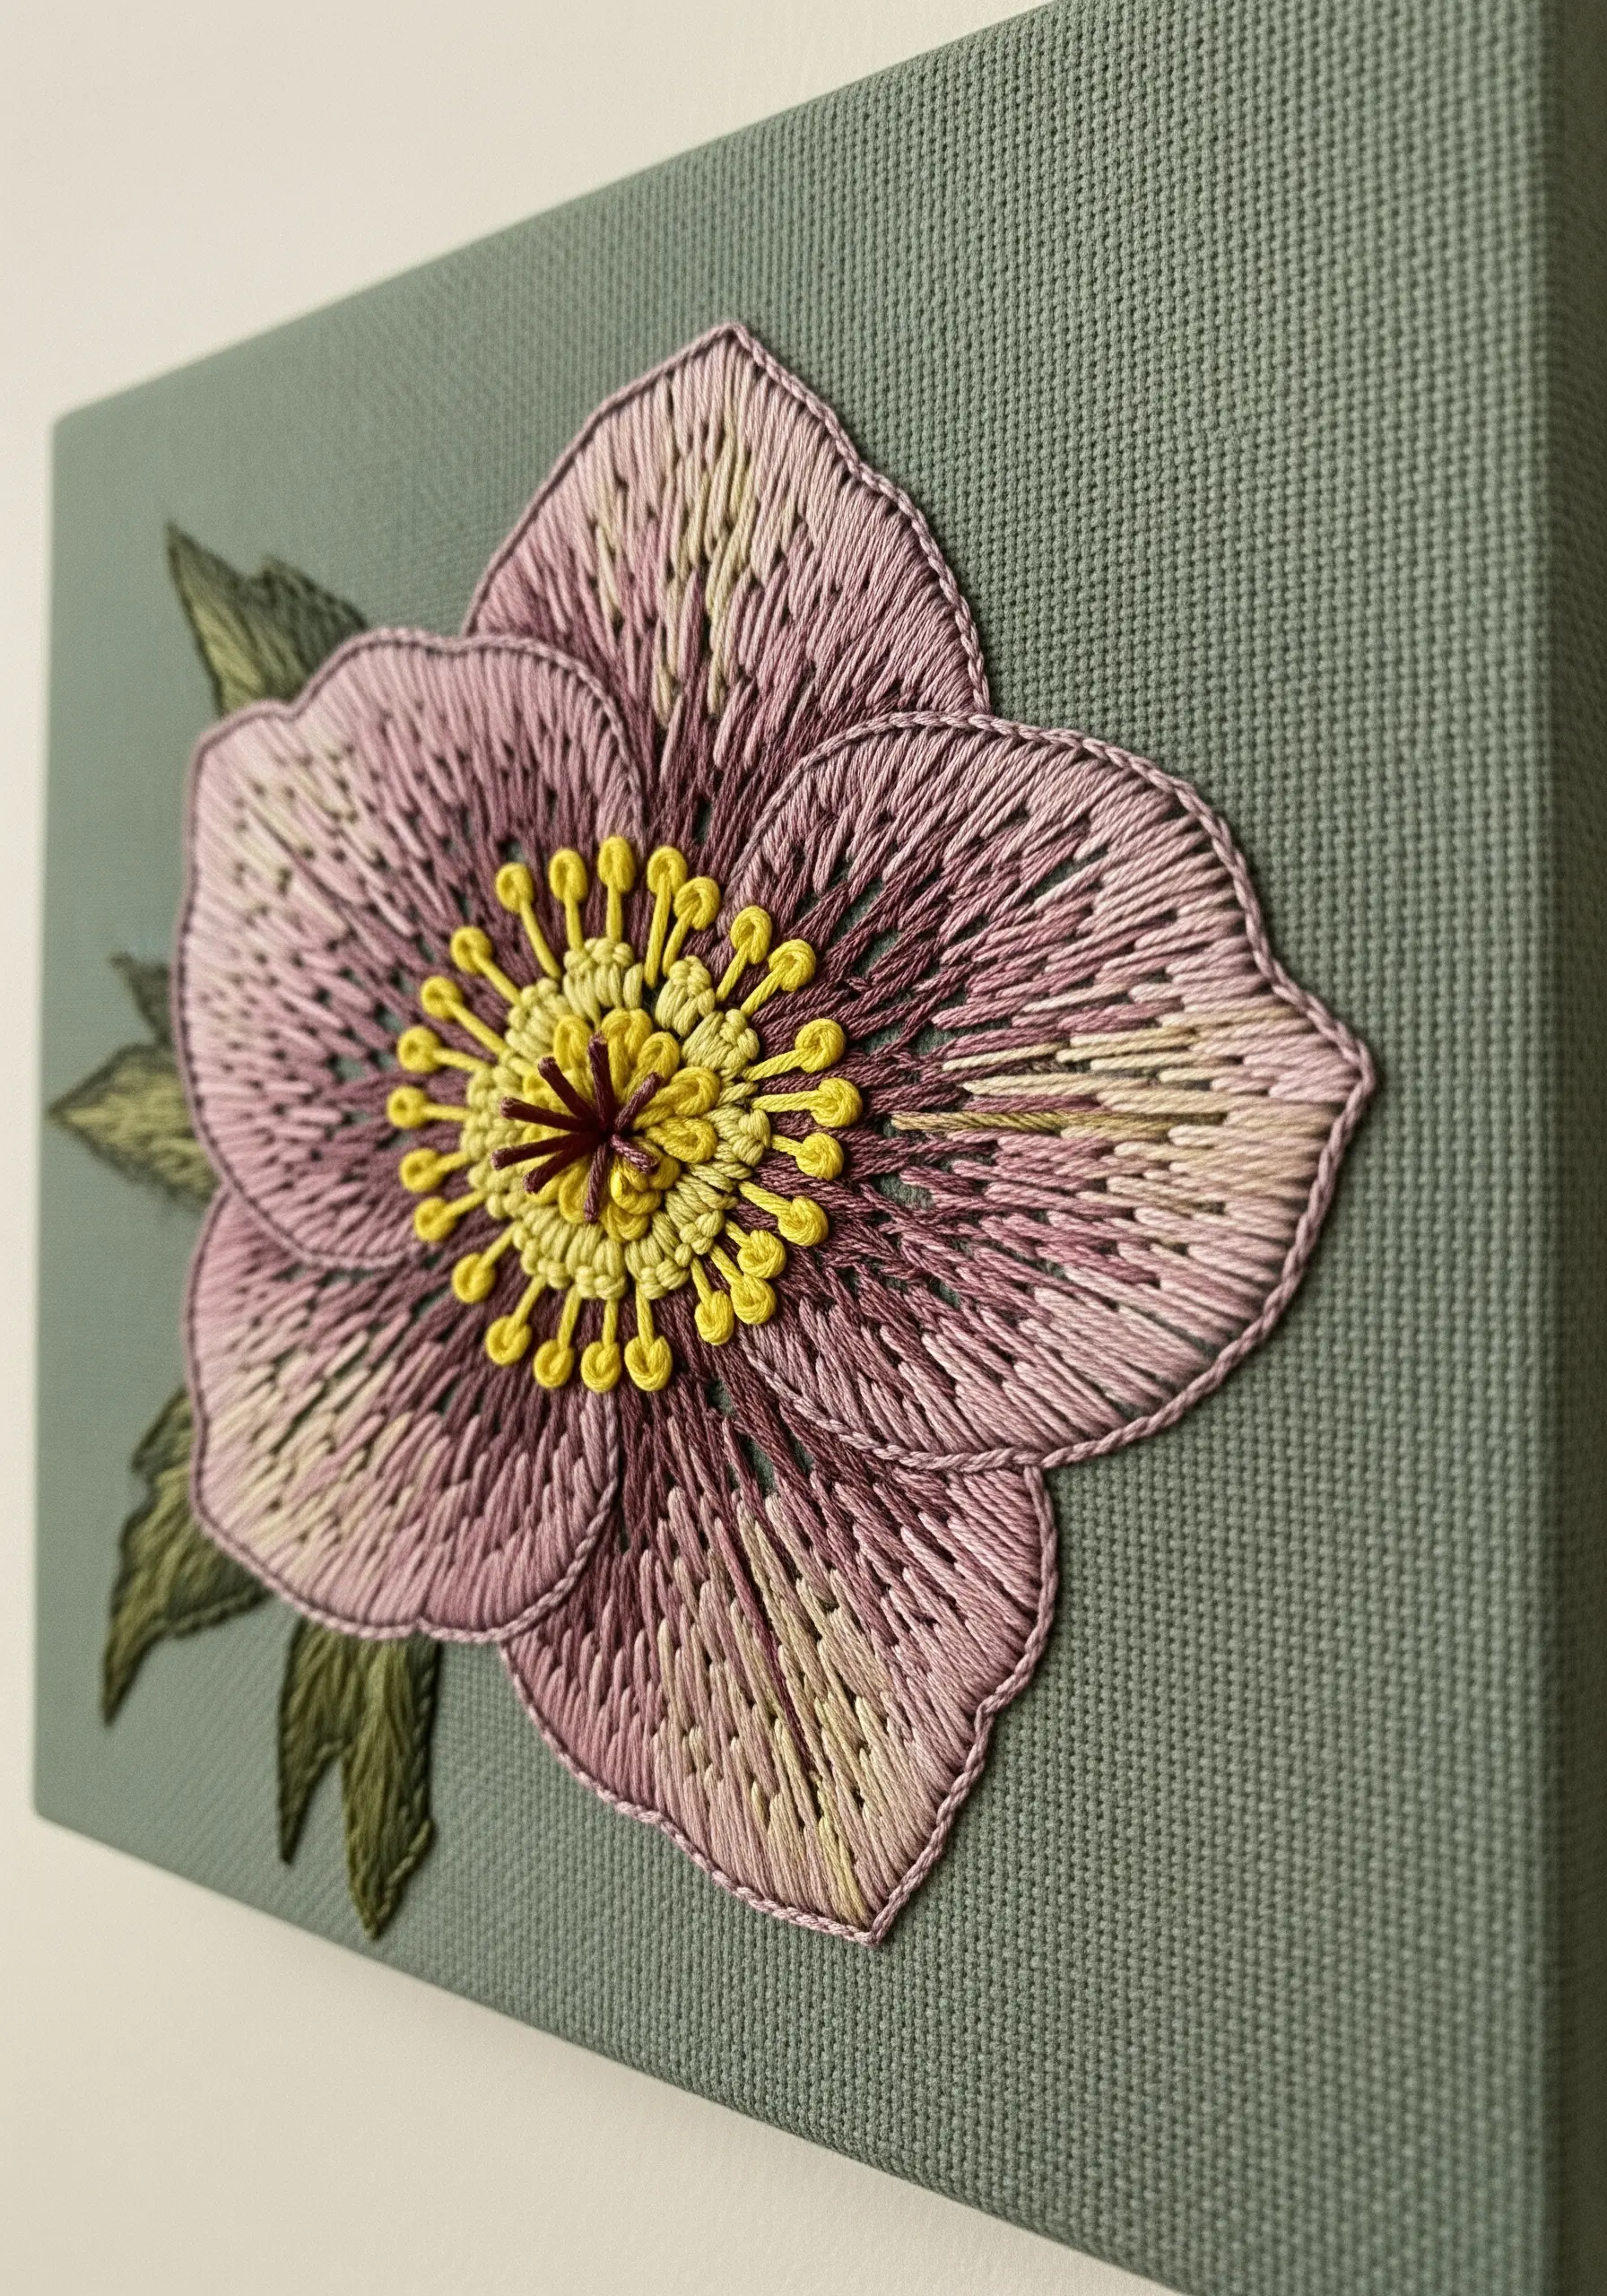
Capture the unique, freckled appearance of a hellebore by incorporating tiny seed stitches.
After filling the petals with a base of long-and-short stitch in dusty pink and cream, scatter tiny, single straight stitches of a darker maroon or purple across the surface.
This adds a layer of intricate detail that feels organic and true to the flower.
For the prominent stamens, use yellow French knots on top of short straight stitches to make them stand out.
15. Replicate Realistic Foliage with Precision

To embroider hyper-realistic ferns, focus on consistency and scale.
Use a single strand of thread and a fishbone stitch or tiny straight stitches to create each individual leaflet, ensuring they are uniform in size and angle.
Work from a reference image or even a pressed leaf to capture the exact tapering shape of the frond.
This meticulous approach transforms simple stitches into a breathtakingly accurate botanical study and is one of the best nature texture embroidery hacks every crafter needs to know.
16. Compose a Wildflower Meadow with Varied Stitches
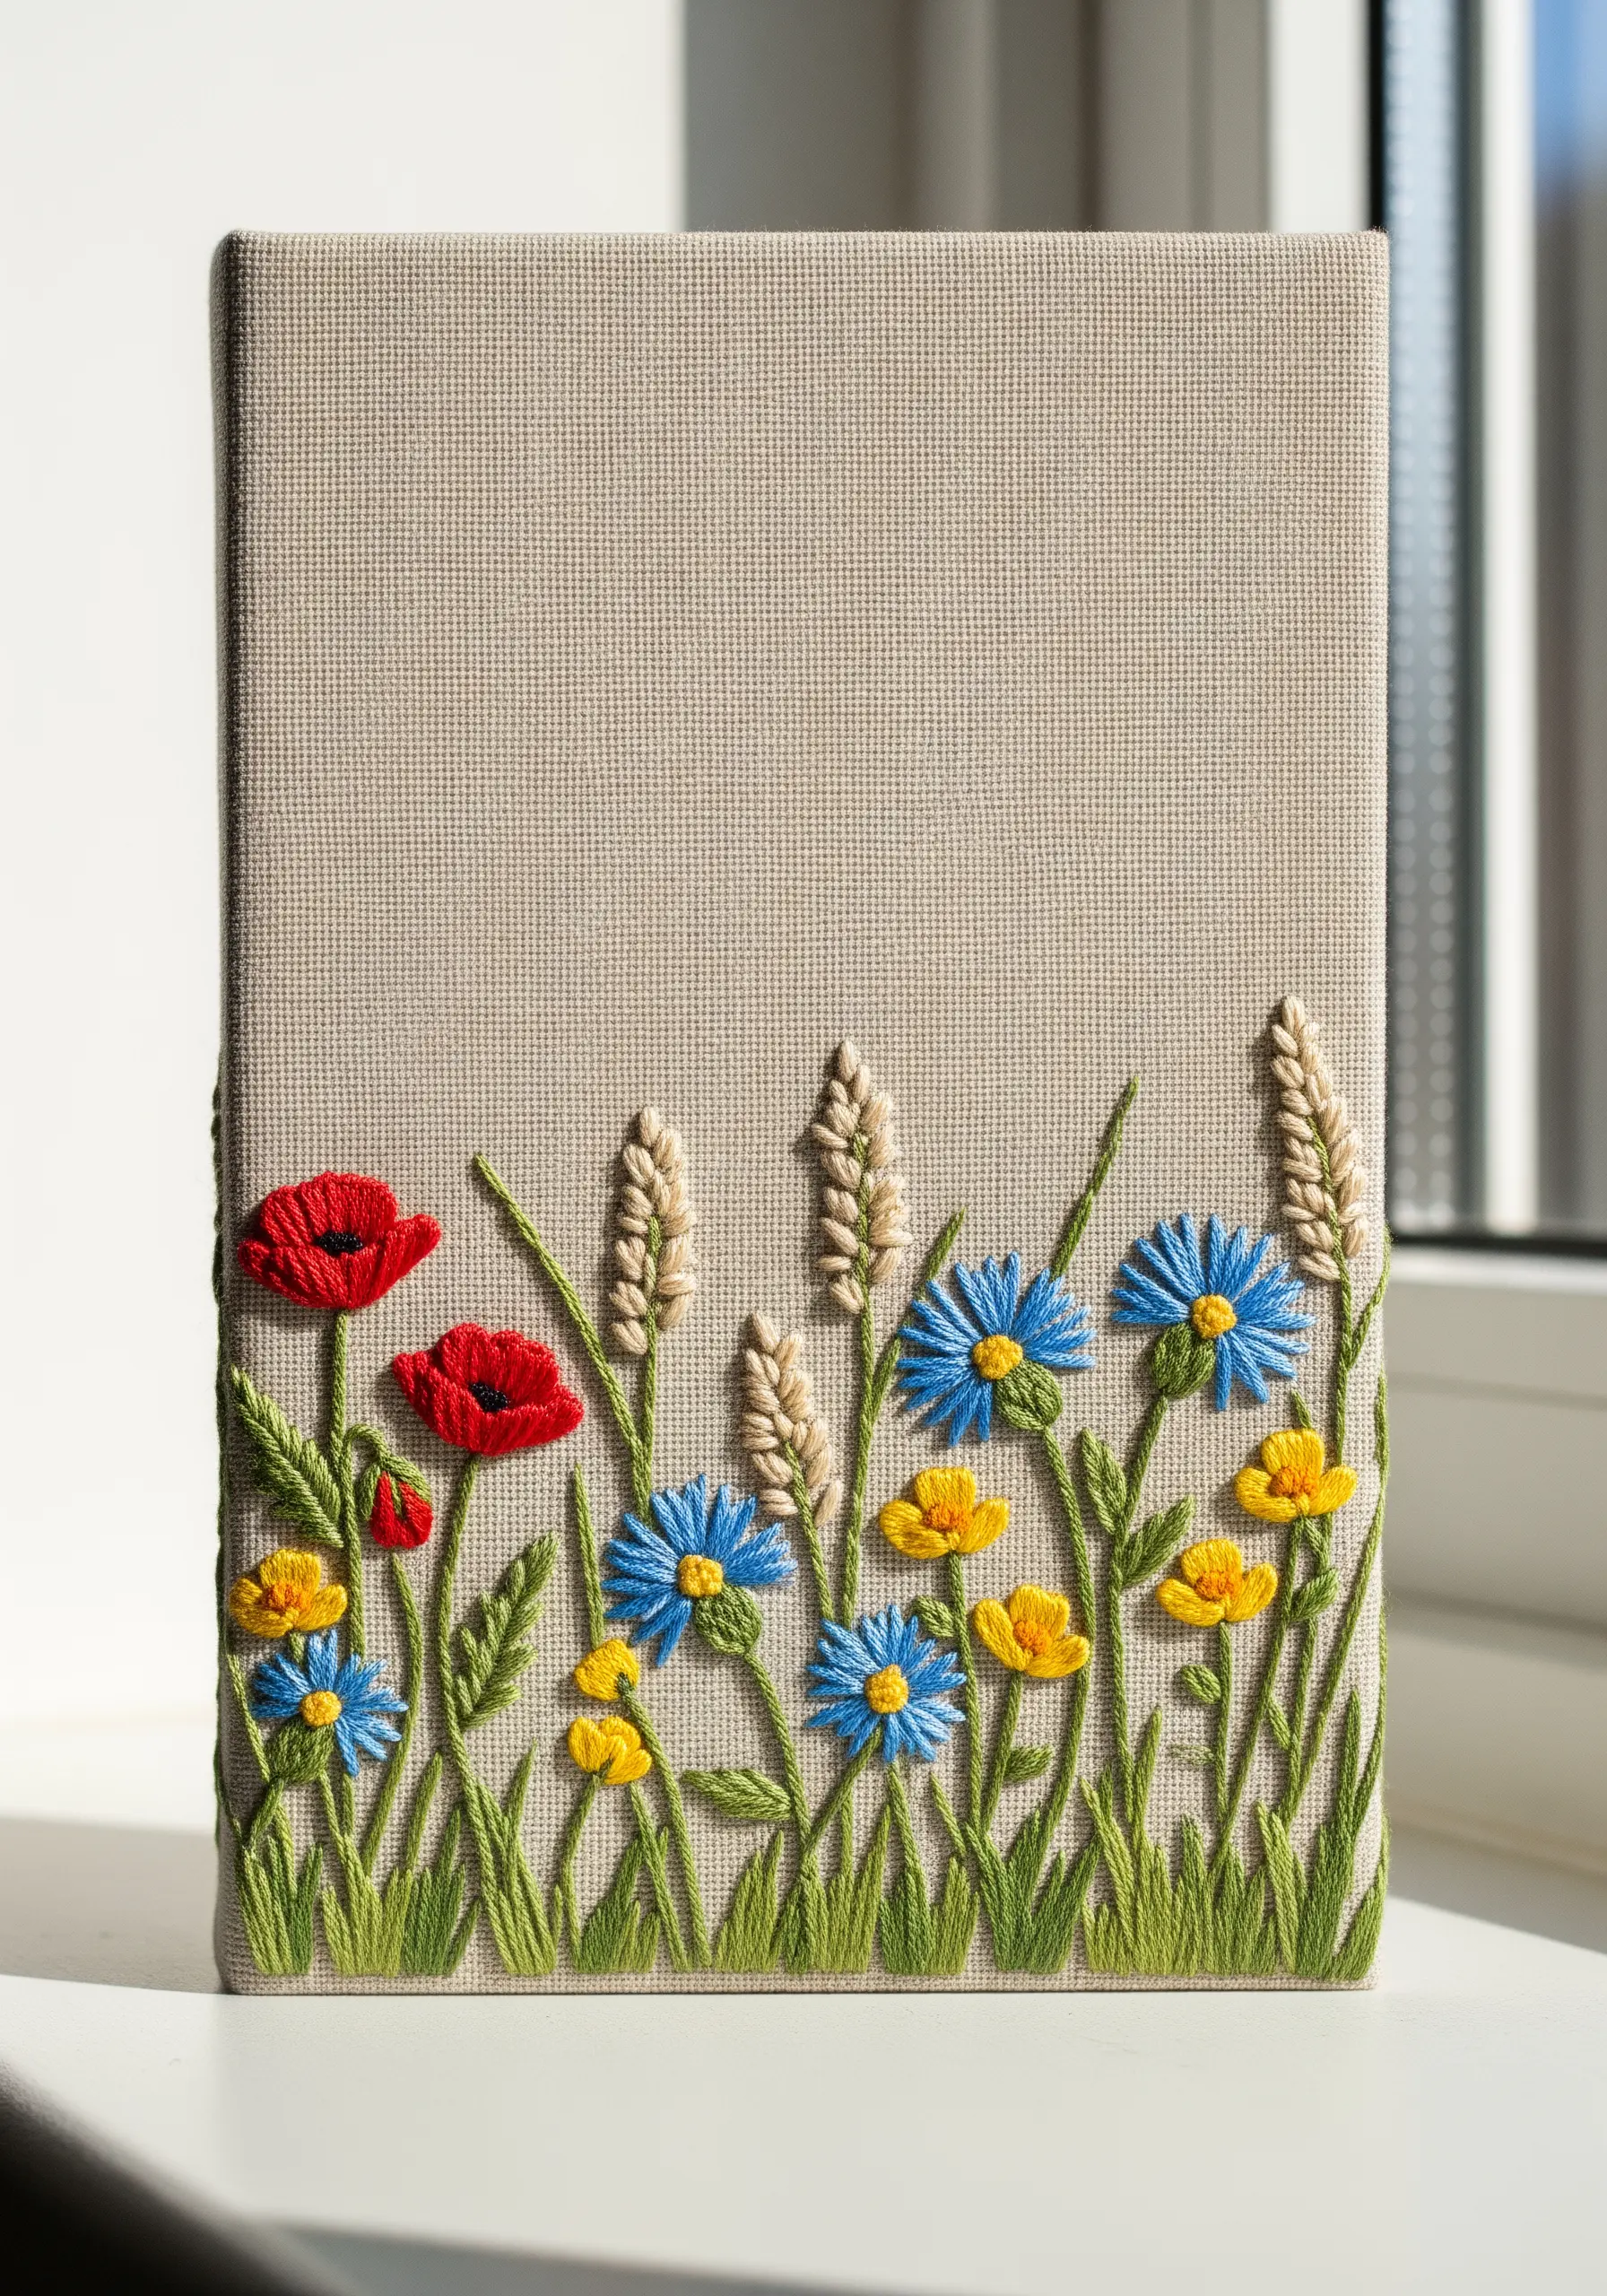
Create the feeling of a wildflower meadow by combining several simple, textural stitches in one composition.
Use woven wheel stitches for the round red poppies, lazy daisy stitches for the blue cornflowers, and satin-stitched wheat sheaves.
Vary the height and density of the flowers to create a sense of depth and natural, untamed growth.
This technique is less about realism for a single flower and more about capturing the collective energy of a field in bloom.
17. Create Dense Texture with Clustered Knots
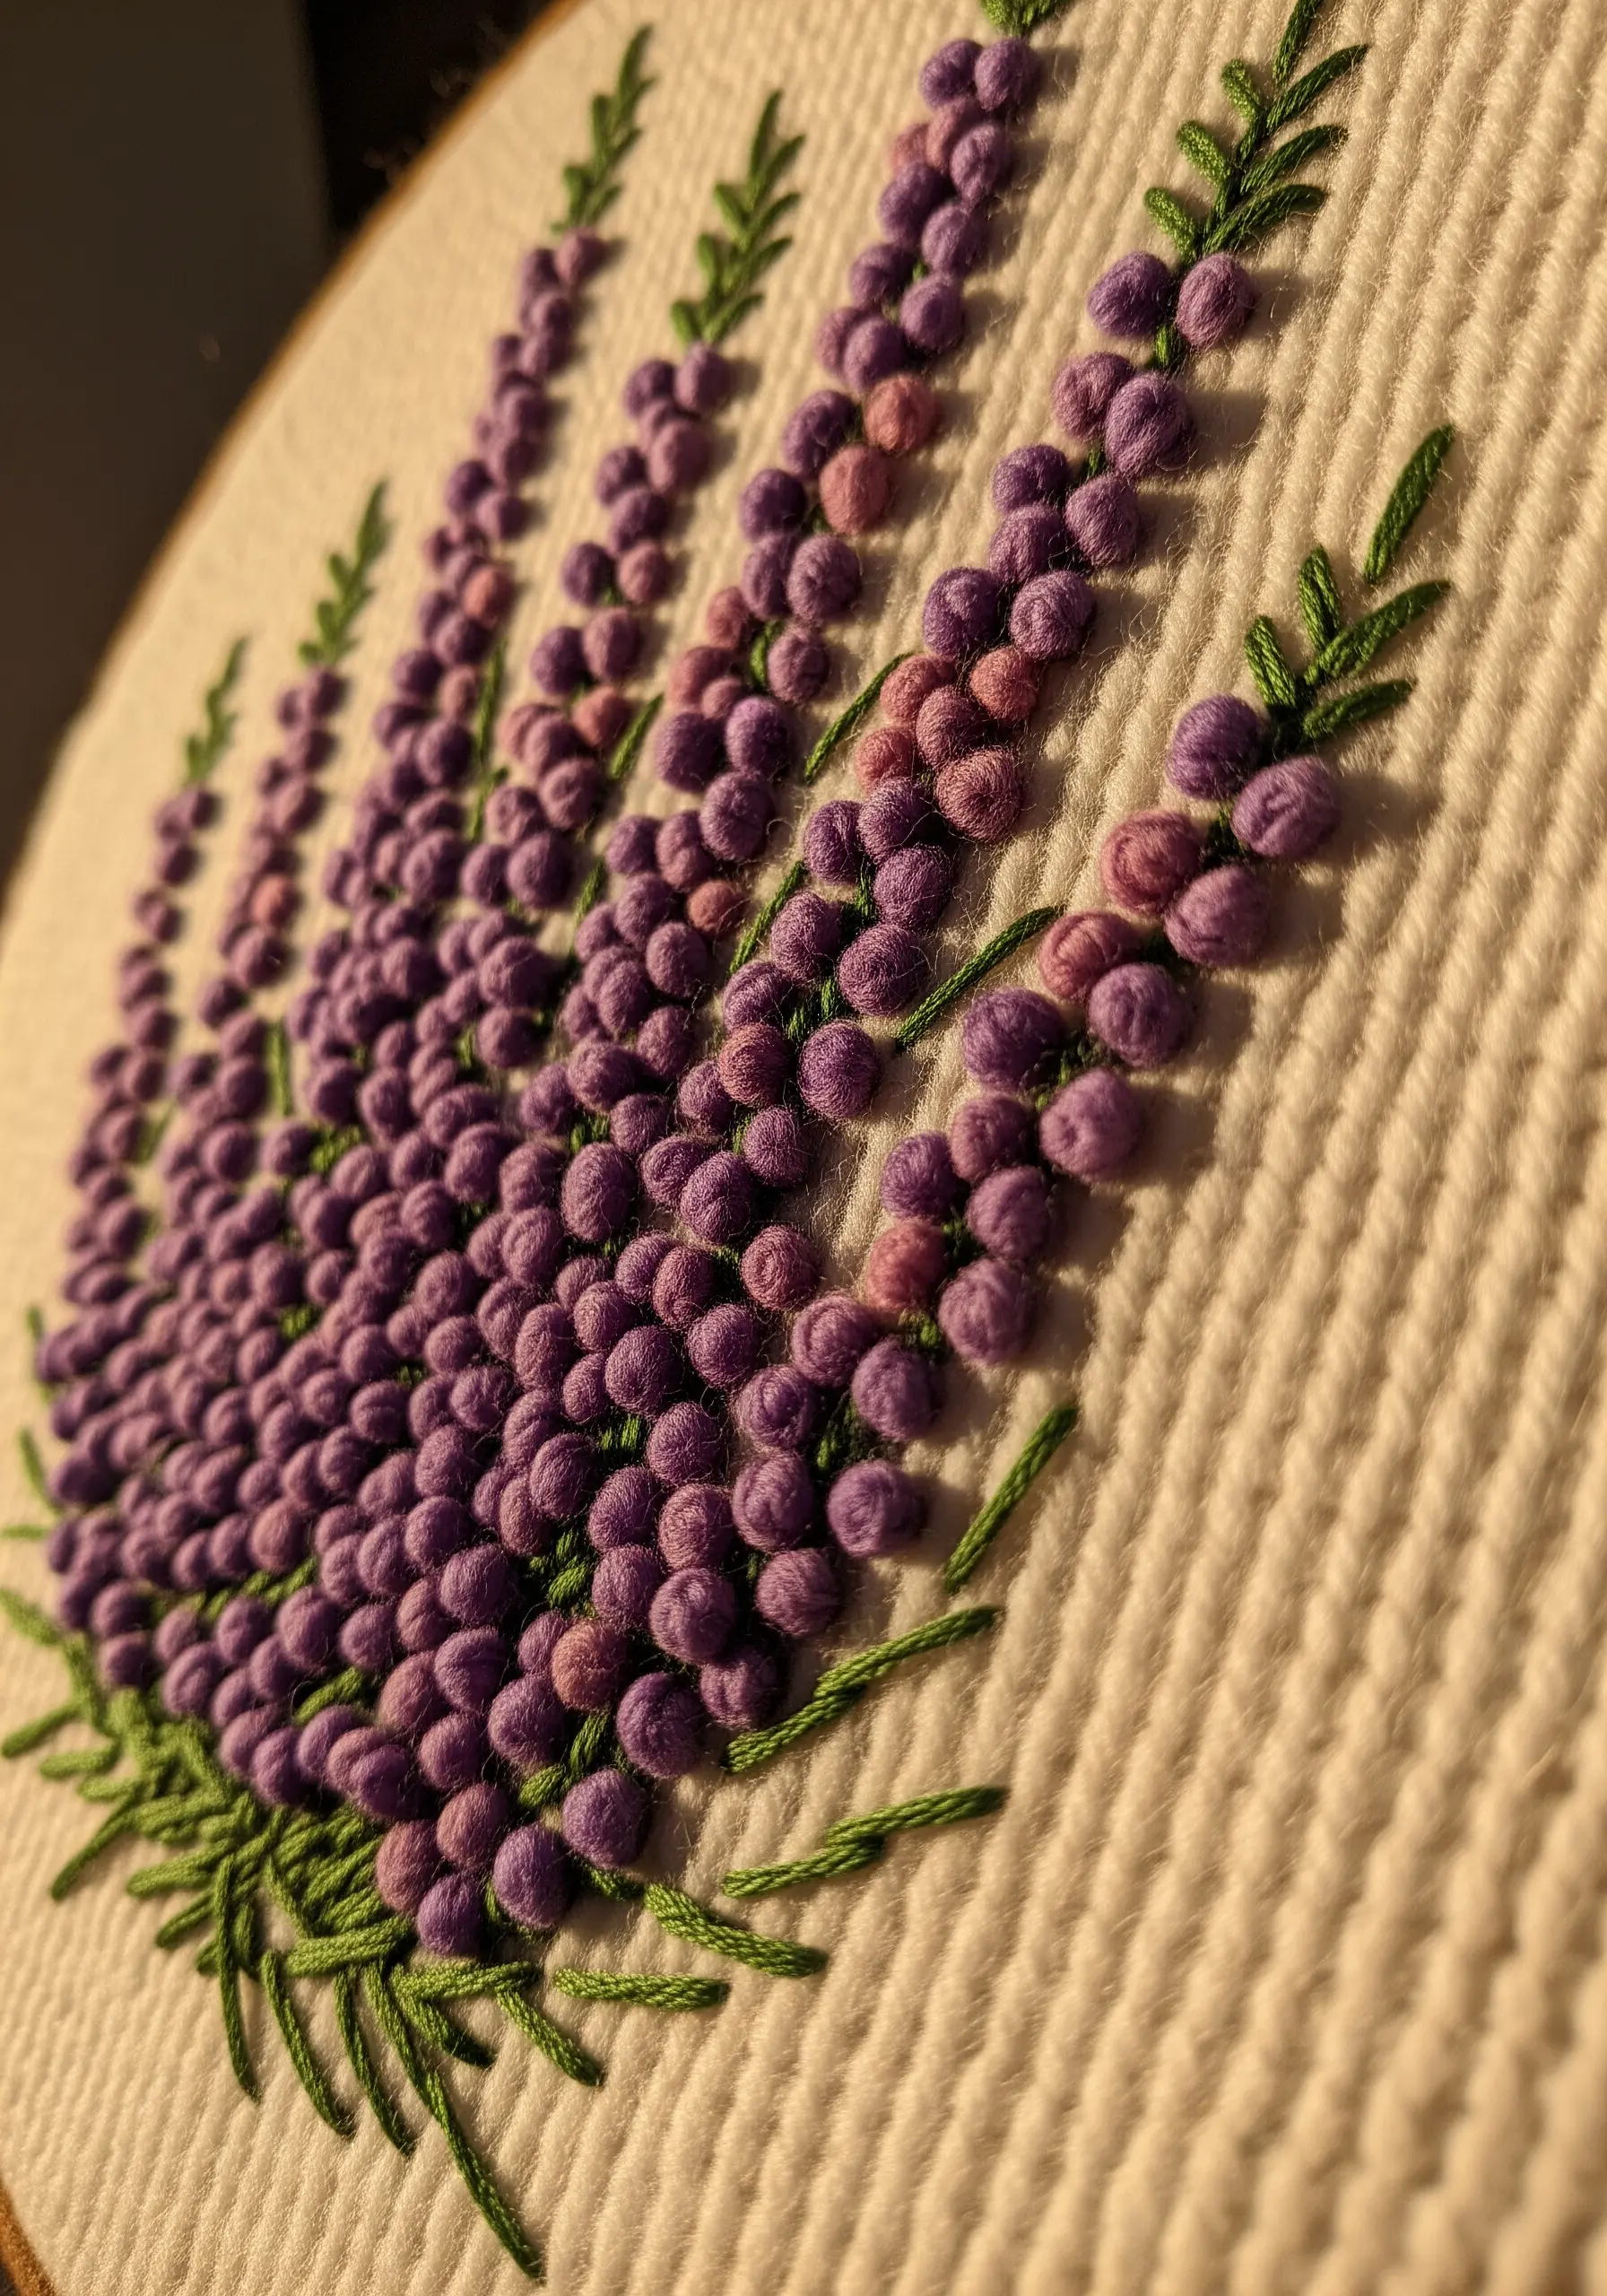
For flowers like lupine or heather, texture is paramount.
Instead of outlining and filling, build the flower’s form entirely with French knots.
Pack the knots tightly together, using a variegated thread or several similar shades to create a subtle gradient from the bottom to the top of the stalk.
This technique produces a rich, bumpy texture that perfectly mimics the look of hundreds of tiny, clustered blossoms.
18. Form Bell-Shaped Flowers with Curved Satin Stitch
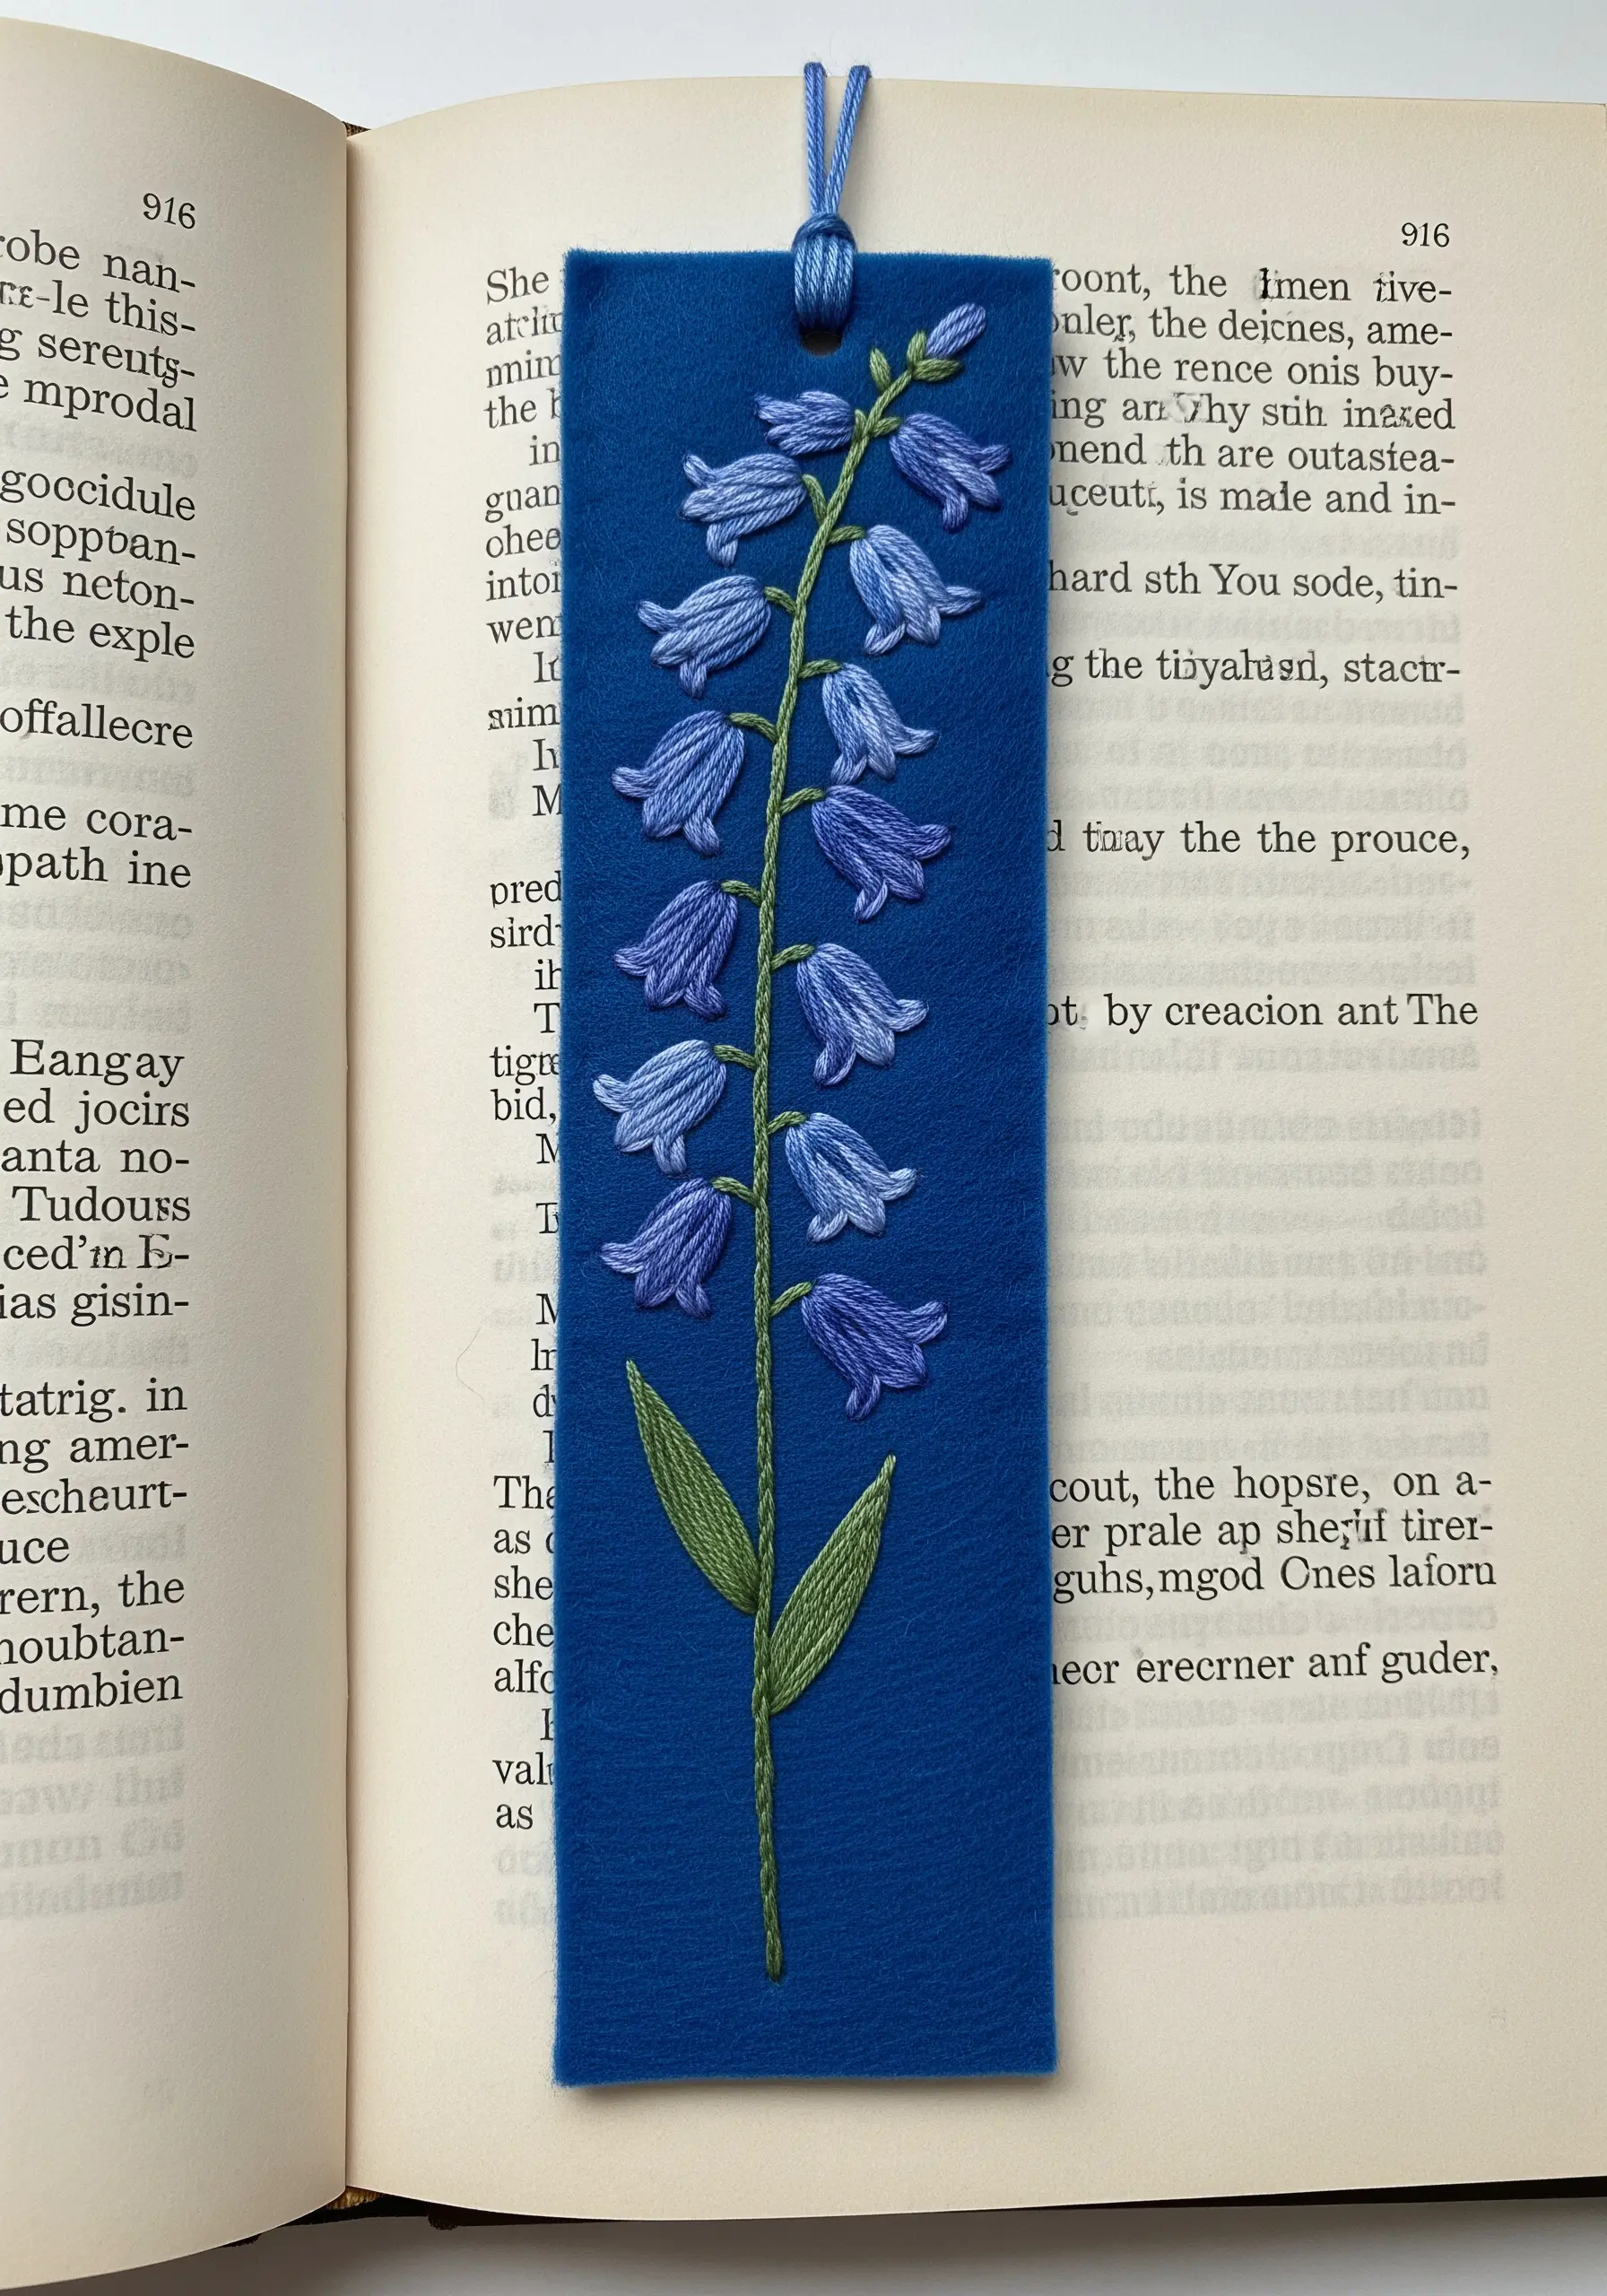
To create the delicate, drooping shape of a bluebell, your satin stitches must convey a curve.
Imagine the bell is a 3D object and direct your stitches to wrap around its form, using slightly longer stitches in the center and shorter ones at the edges.
A few subtle stitches in a lighter blue along one side can suggest a highlight, enhancing the illusion of a rounded shape.
Placing this on soft felt makes for a beautiful, tactile bookmark or appliqué.
19. Mix Abstract and Realism in a Modern Peony

Elevate a classic floral by combining different embroidery styles in one piece.
Render the central peony petals with realistic long-and-short stitch shading for a soft, painterly effect.
Then, introduce a graphic, abstract element by framing it with woven wheel stitches or detached woven picots for the outer petals.
This surprising fusion of techniques creates a dynamic, contemporary artwork that feels both familiar and unexpected.
20. Achieve a Clean Aesthetic with Chamomile

Sometimes, the most impactful embroidery is the most simple and precise.
For a clean, cheerful chamomile pattern, focus on perfect execution: uniform lazy daisy stitches for the petals and round, tight French knots for the centers.
Use a fern stitch for the delicate, feathery leaves, which adds a touch of lightness.
Arranging the flowers in a balanced, repeating pattern on a colored background creates a design that is both calming and graphically pleasing.
21. Stitch Tightly Packed Knots for Craspedia

To recreate the unique, spherical shape of Craspedia (or billy buttons), you need to build up significant texture.
Draw a perfect circle as your guide and fill it completely with dense French knots, ensuring they are packed so tightly that no fabric shows through.
For the long, slender stems, use a whipped backstitch or a stem stitch to create a smooth, solid line that contrasts with the bumpy flower heads.
Stitching on heavy denim requires a sharp, strong needle, but the result is a striking piece of wearable art.
22. Map Color Transitions in a Pansy

A pansy’s beauty lies in its distinct, velvety color patches.
Before you begin, lightly draw the color zones onto your fabric as a map.
Use the long-and-short stitch technique to fill each section, working from the outer edge inward.
Where colors meet, allow the stitches to interlock slightly to create a soft, blended transition, perfectly capturing the flower’s signature markings.
Framing your finished work turns it into a piece of fine art you can display, creating elegant framed embroidery artworks that will impress guests.
23. Create 3D Sweet Pea Petals with Stumpwork

Take your florals off the page by using stumpwork techniques to create detached, three-dimensional petals.
Embroider the petals separately on a spare piece of fabric using a buttonhole stitch over a foundation of straight stitches or a thin wire outline.
Once complete, cut them out carefully and applique them onto your main design.
This method allows you to shape and layer the petals, creating a breathtakingly realistic and tactile sweet pea.
24. Cascade Lilacs Across a Garment

For an ambitious piece of wearable art, create an asymmetrical cascade of lilacs across the shoulder of a blouse.
Combine thousands of lazy daisy stitches, French knots, and straight stitches in a dozen shades of purple, lilac, and cream.
Work in clusters, overlapping colors and stitches to build incredible depth and the illusion of a heavy, fragrant bough.
This transforms a simple garment into a couture piece, full of texture and movement.
25. Design a Wisteria Tapestry with Gradient Clusters

To capture the dramatic, dripping form of wisteria on a large scale, think in color blocks.
For each hanging raceme, use clusters of detached chain stitches or dense satin stitches.
Create a distinct ombré effect by using the darkest purples at the top of each cluster, gradually transitioning to the palest lilac at the tip.
Stitching on a coarse fabric like burlap adds rustic texture that beautifully complements the delicate floral stitches, creating stunning embroidered textile wall hangings.
26. Stitch Delicate Queen Anne’s Lace

The key to capturing the airy, intricate structure of Queen Anne’s Lace is restraint.
First, create the framework of radiating stems with fine, single-strand straight stitches.
Then, place tiny, open lazy daisy stitches or single French knots at the end of each stem.
Avoid overcrowding the florets; the negative space between them is what gives the flower its signature delicate, lace-like appearance.
A dark fabric background makes the intricate white details stand out beautifully.
27. Build a Spiky Coneflower Center
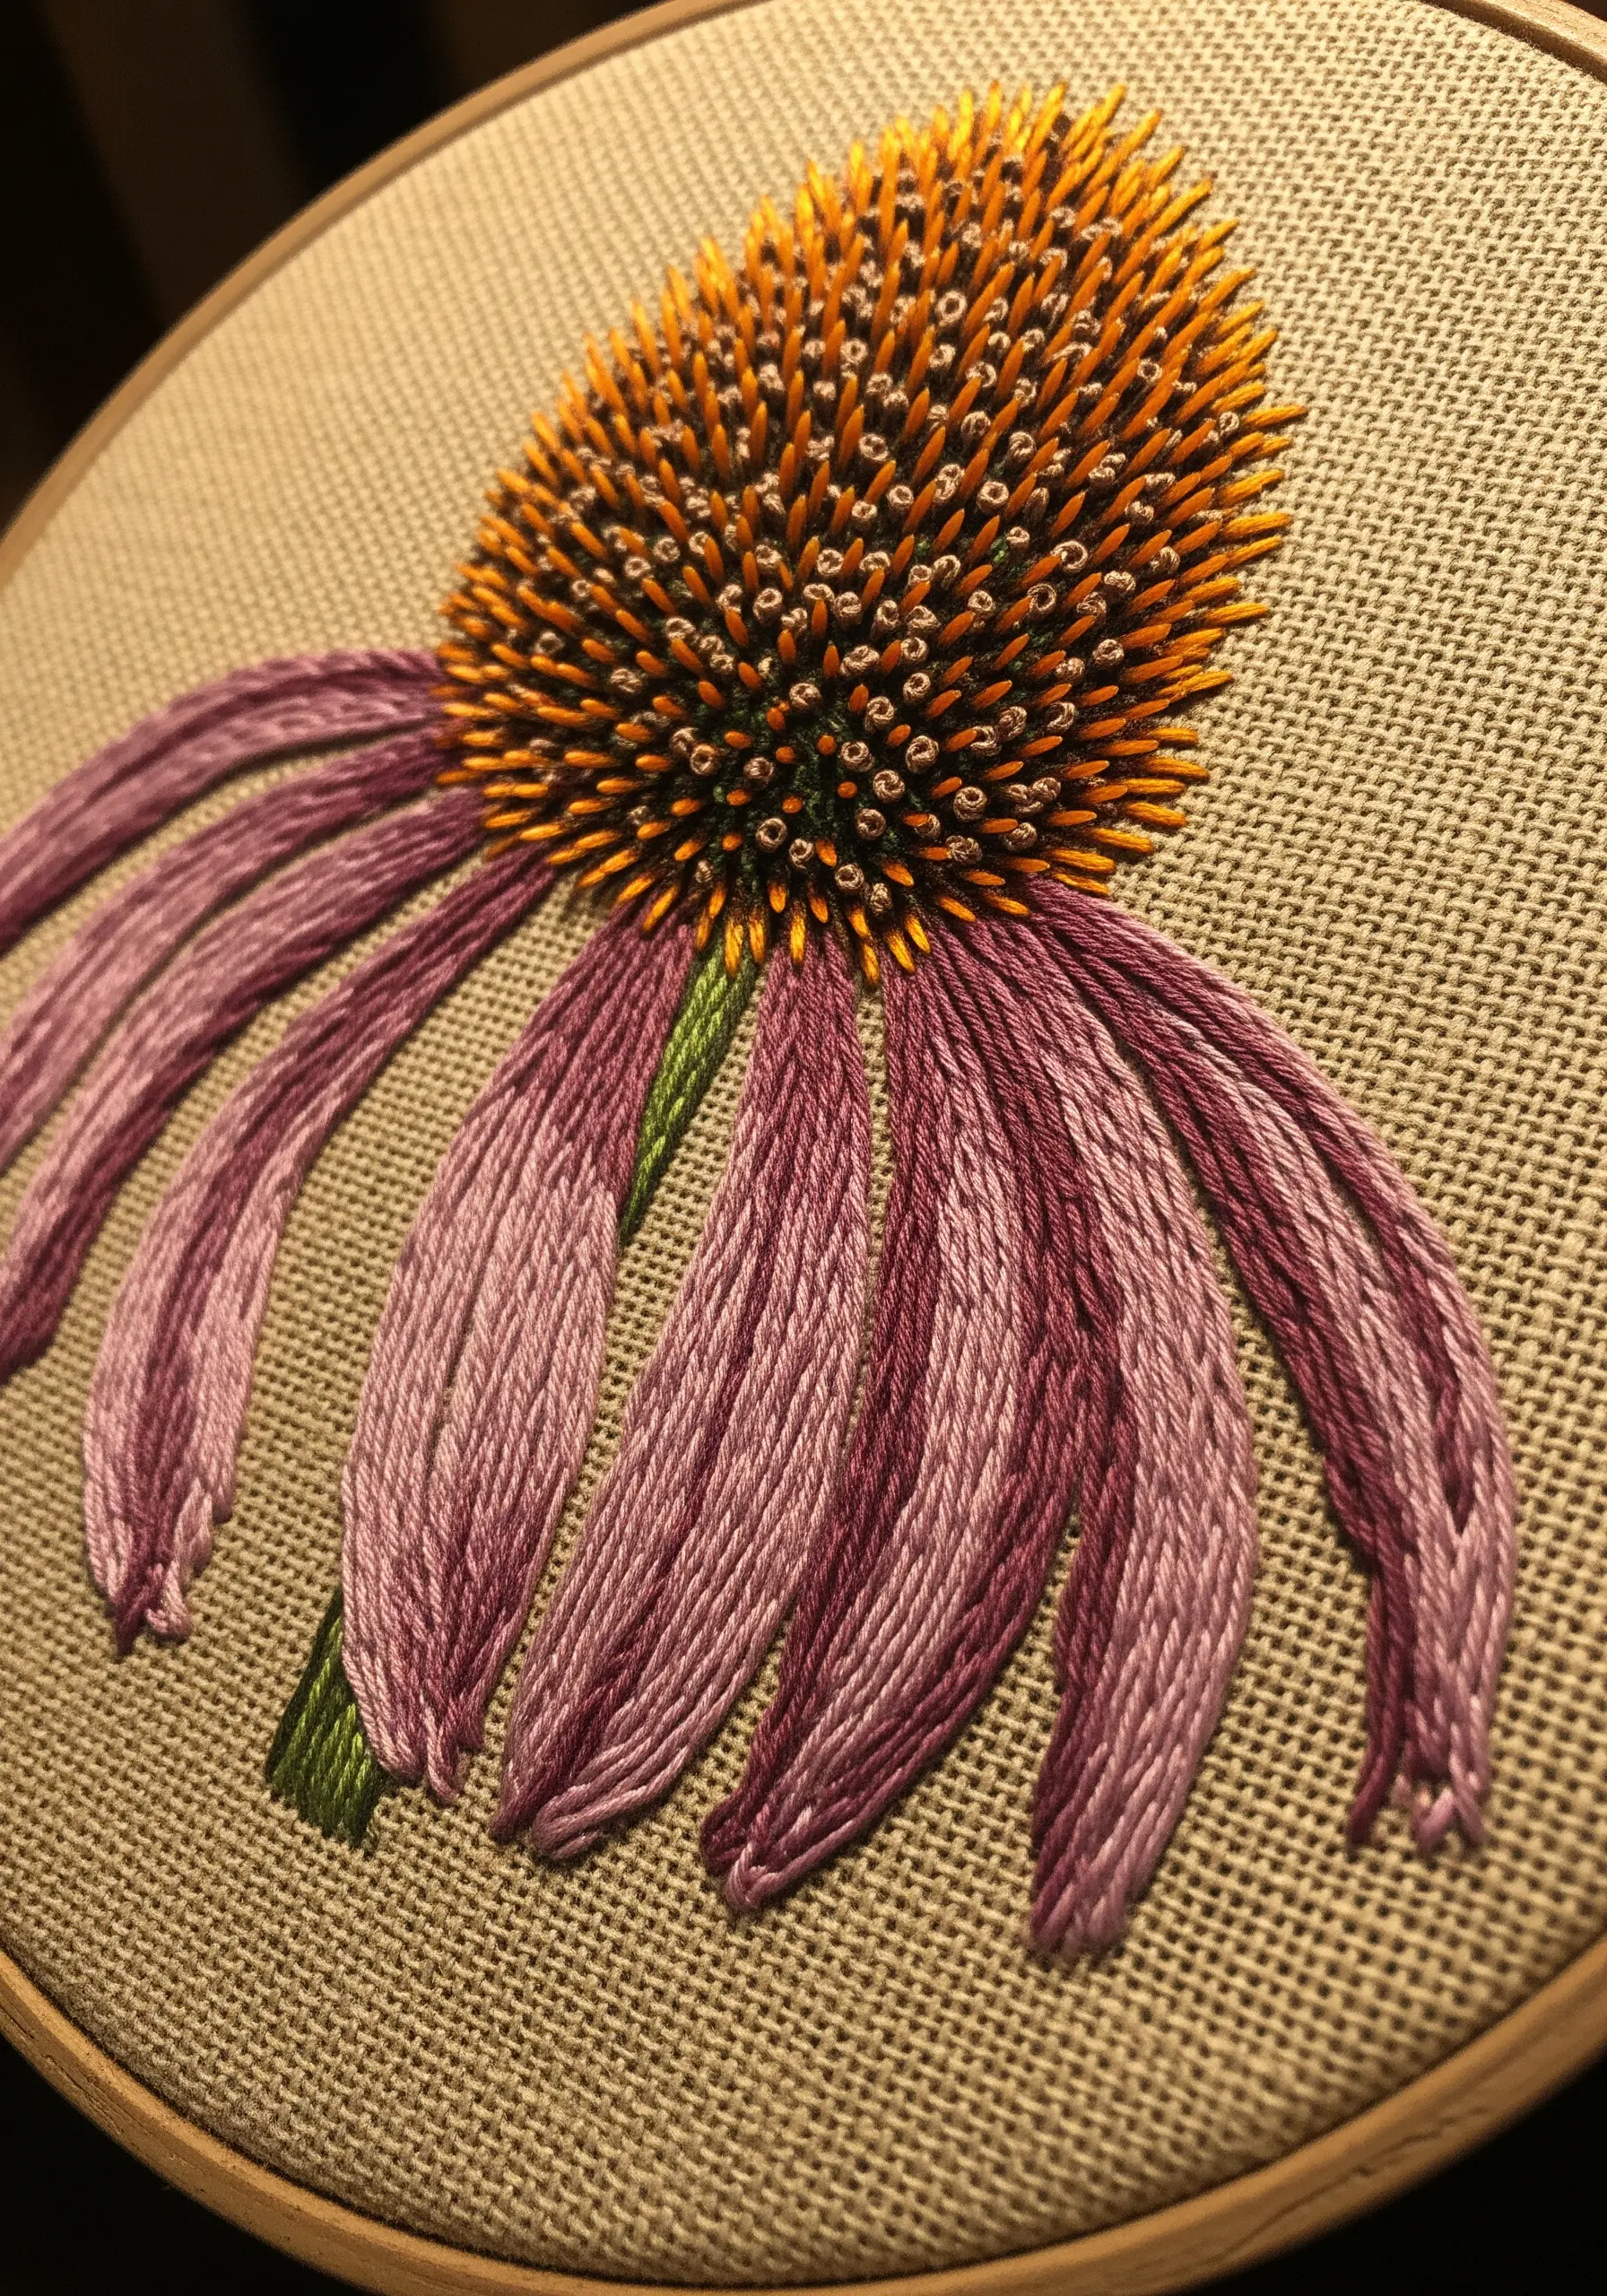
The echinacea’s cone is its most distinctive feature, so give it the most textural attention.
Create a dense base of brown and black French knots, then stitch directly through and over them with orange straight stitches, leaving the tails slightly raised to create a spiky, three-dimensional effect.
For the drooping petals, use long, layered straight stitches in a variegated purple floss, allowing them to lie loosely on the fabric to mimic their signature downward curve.
28. Explore Monochrome Shading with an Anemone

Challenge your understanding of light and shadow by rendering a flower using only black, white, and grey threads.
Use long-and-short stitch to create smooth gradients on the petals, placing white where the light would hit and darker greys in the recessed areas.
A crisp black outline using a split or backstitch will define the shape and make the white areas pop.
This exercise sharpens your thread painting skills and results in a strikingly graphic and modern piece of monochrome thread embroidery.
29. Add a Dimensional Accent to a Journal Cover
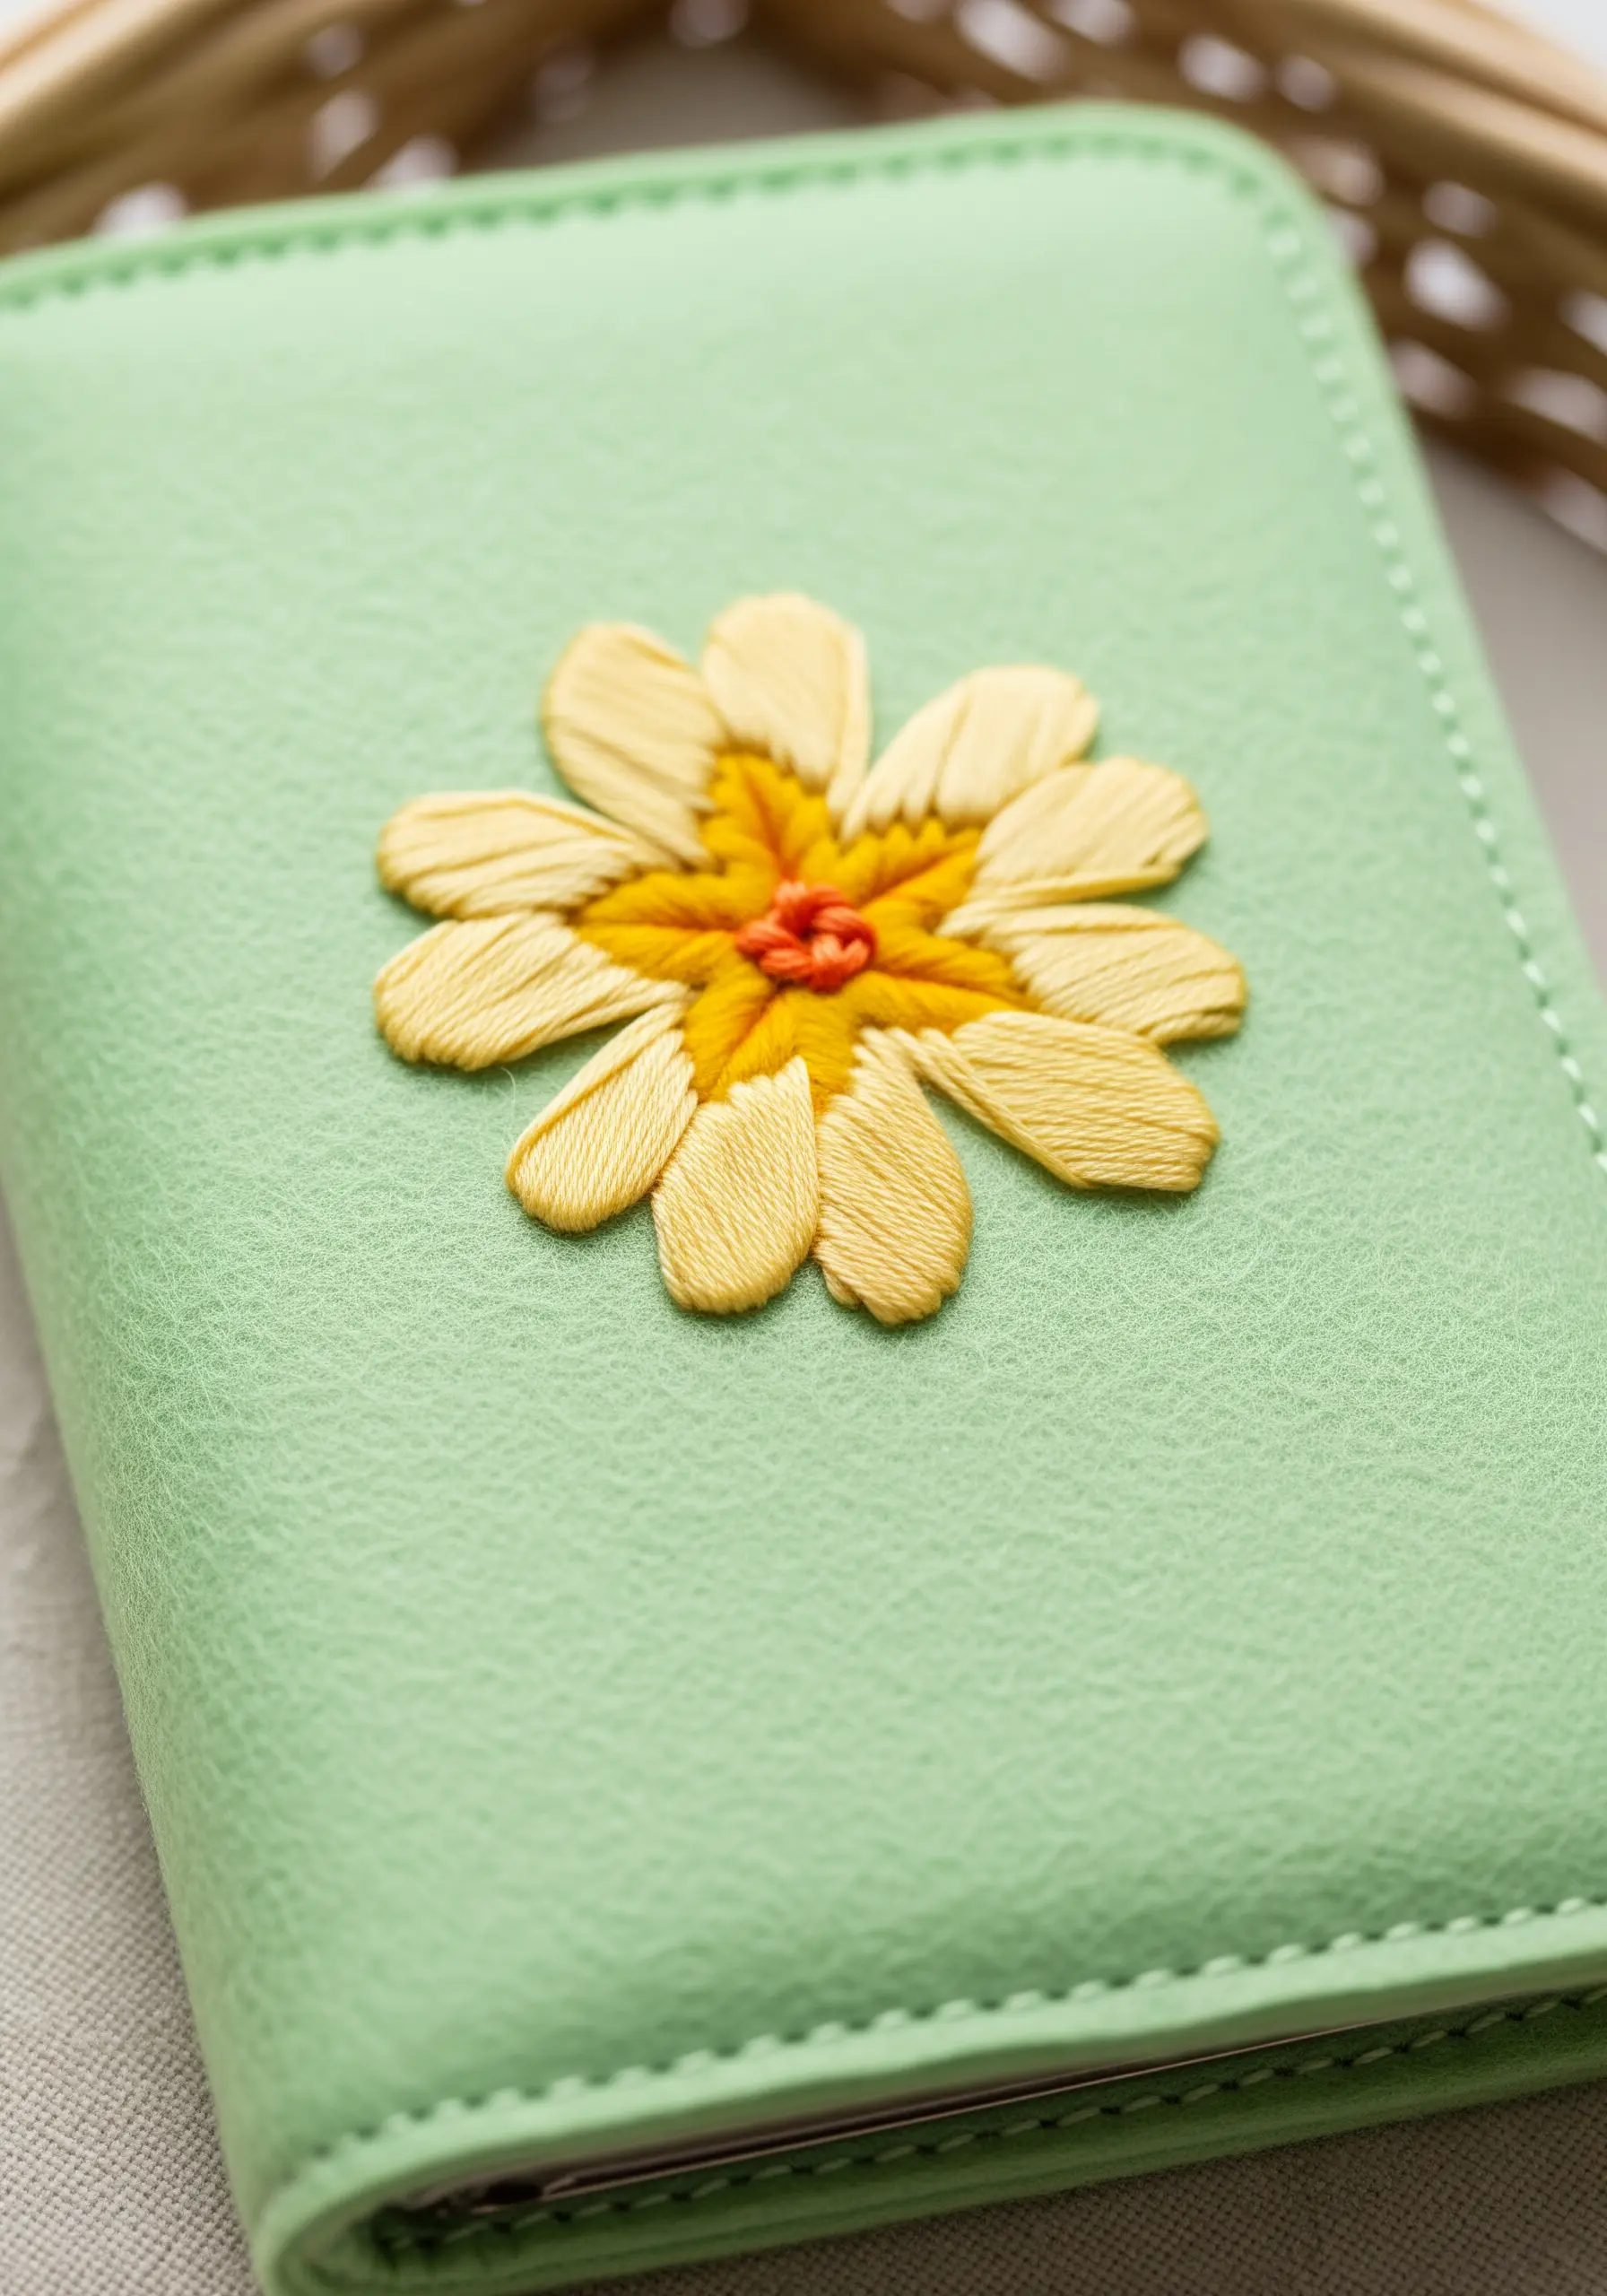
To embroider on a non-traditional surface like a faux-leather journal, you need a dimensional stitch that sits on top of the material.
The cast-on stitch or bullion knot works perfectly for creating raised, individual petals.
Stitch a ring of yellow cast-on stitches, then surround it with a starburst of orange French knots.
This technique minimizes the number of times you need to pierce the tough material and creates a beautiful, raised embellishment that stands out.


