
Have you ever finished a piece and felt that something was missing—that a spark of life hadn’t quite translated from your mind to the fabric? You’re not alone. The journey from a good stitcher to a true artist lies in the small, intentional decisions you make before the first thread is even pulled.
It’s not about mastering hundreds of complex stitches. Instead, it’s about understanding how changing the number of threads can create depth, how angling your satin stitch can mimic light, and how choosing the right fabric can make your colors sing. It’s about learning to see your needle as a brush and your floss as a palette of infinite possibility.
These houseplant motifs are more than just patterns; they are invitations to observe. They are your chance to study the curve of a leaf, the texture of a succulent’s petal, and the way a vine finds its path. Let’s move beyond merely copying shapes and begin to embroider with feeling, intention, and the quiet confidence of an artist.
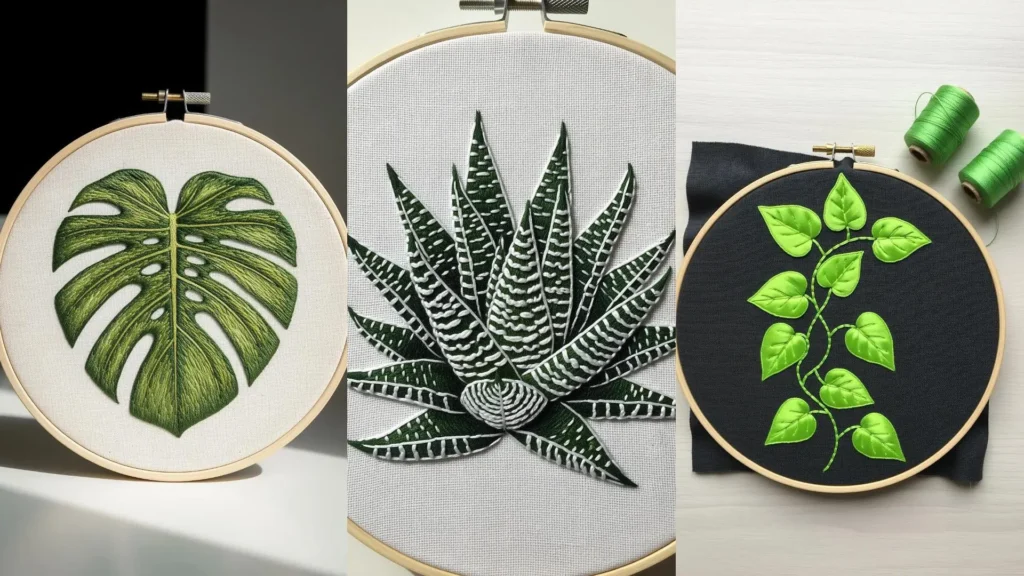
1. Master the Graphic Monstera Leaf
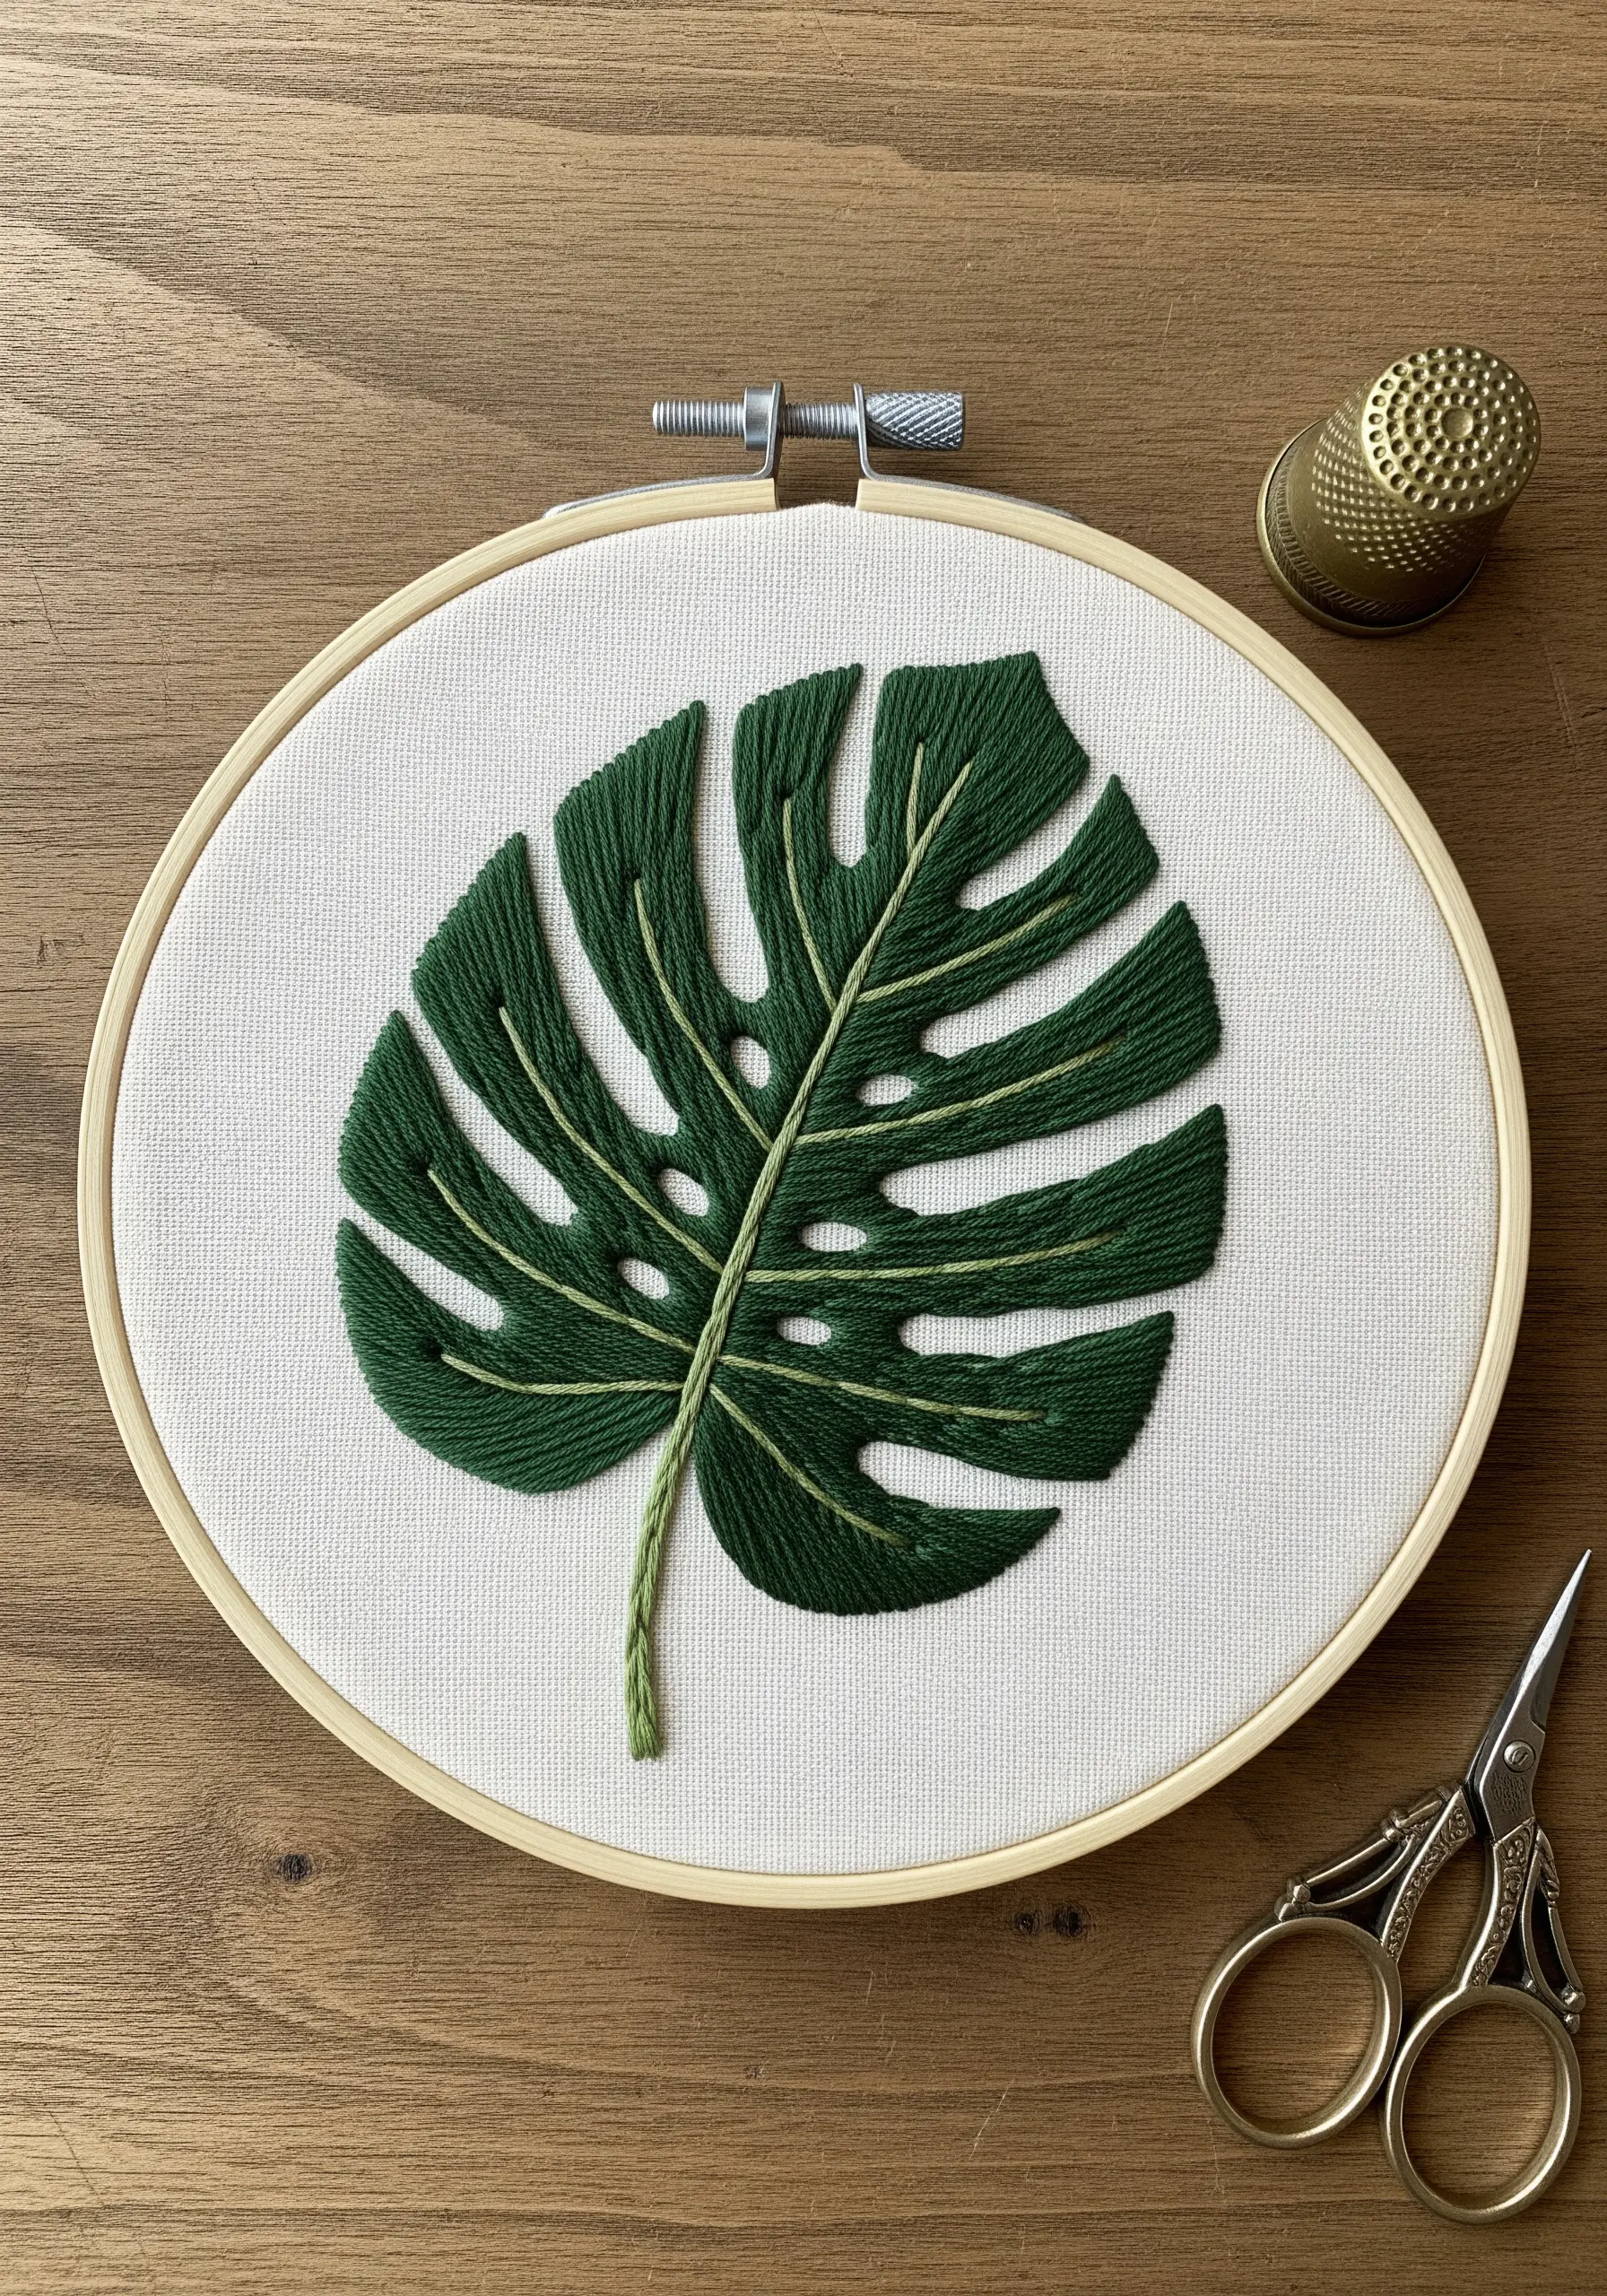
Create a clean, modern look by contrasting a full satin stitch with delicate backstitched veins.
Use all six strands of cotton floss for the leaf sections to achieve a smooth, dense coverage that feels bold and intentional.
For the veins, switch to just two strands of a slightly lighter green.
This subtle difference in thread weight creates a sophisticated visual hierarchy, allowing the veins to define the form without overpowering it.
This technique works best on a tightly woven fabric like cotton twill, which prevents puckering under the dense stitches.
2. Variegated Leaves on an Unconventional Frame

You can achieve an organic, painterly effect by threading your needle with two complementary colors at once—such as a golden yellow and a leaf green.
As you create each satin stitch, allow the threads to twist naturally; this variation is what produces the beautiful, unpredictable variegation.
For the trailing stems, use a whipped backstitch to create a smooth, raised line that mimics a real vine.
Presenting the design on an unconventional crescent frame elevates it from a simple study into a piece of narrative art.
3. Sculptural Succulents with Layered Stitches
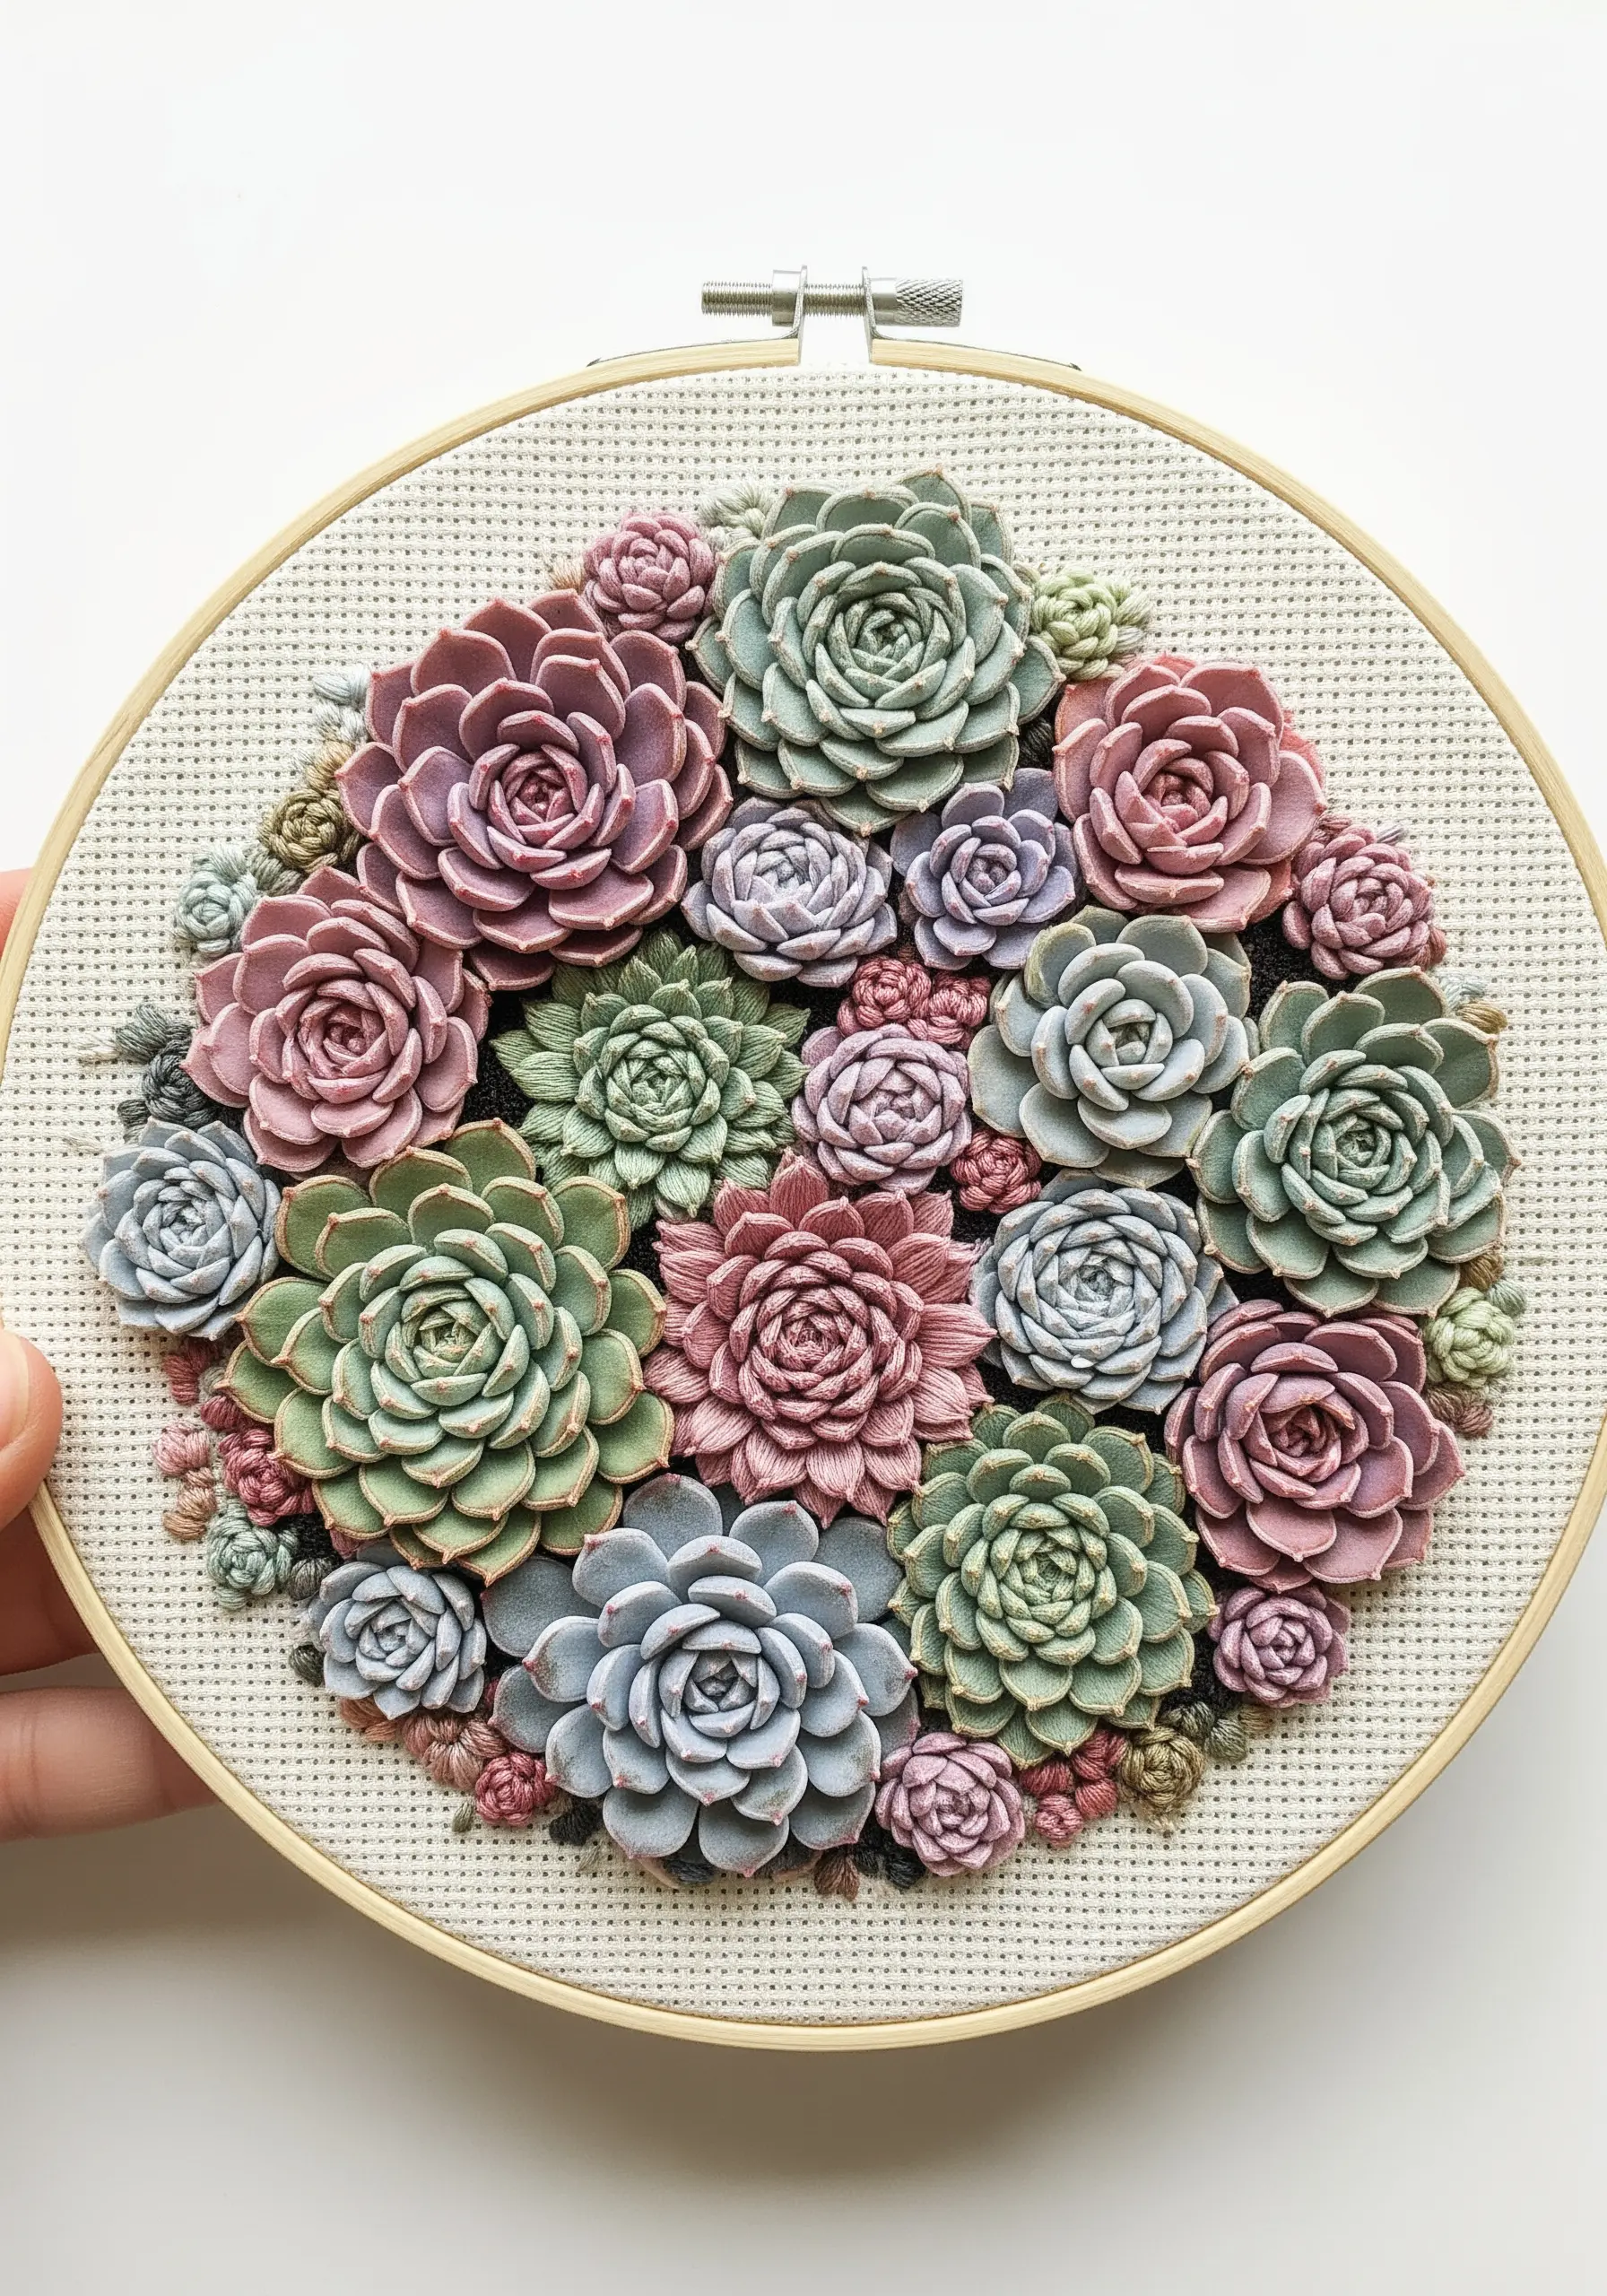
To achieve this stunning 3D effect, you’ll need to build your succulents with dimensional stitches.
Use the woven picot stitch or cast-on bullion stitch for the individual petals, starting from the outer layers and working your way inward to build density.
For the tight rosette at the center, use shorter, more compact cast-on stitches to mimic the plant’s spiral growth.
This method requires a sturdy, even-weave fabric like linen or Aida cloth to support the weight and tension of the raised stitches without distortion.
4. Achieving Botanical Depth with Thread Painting
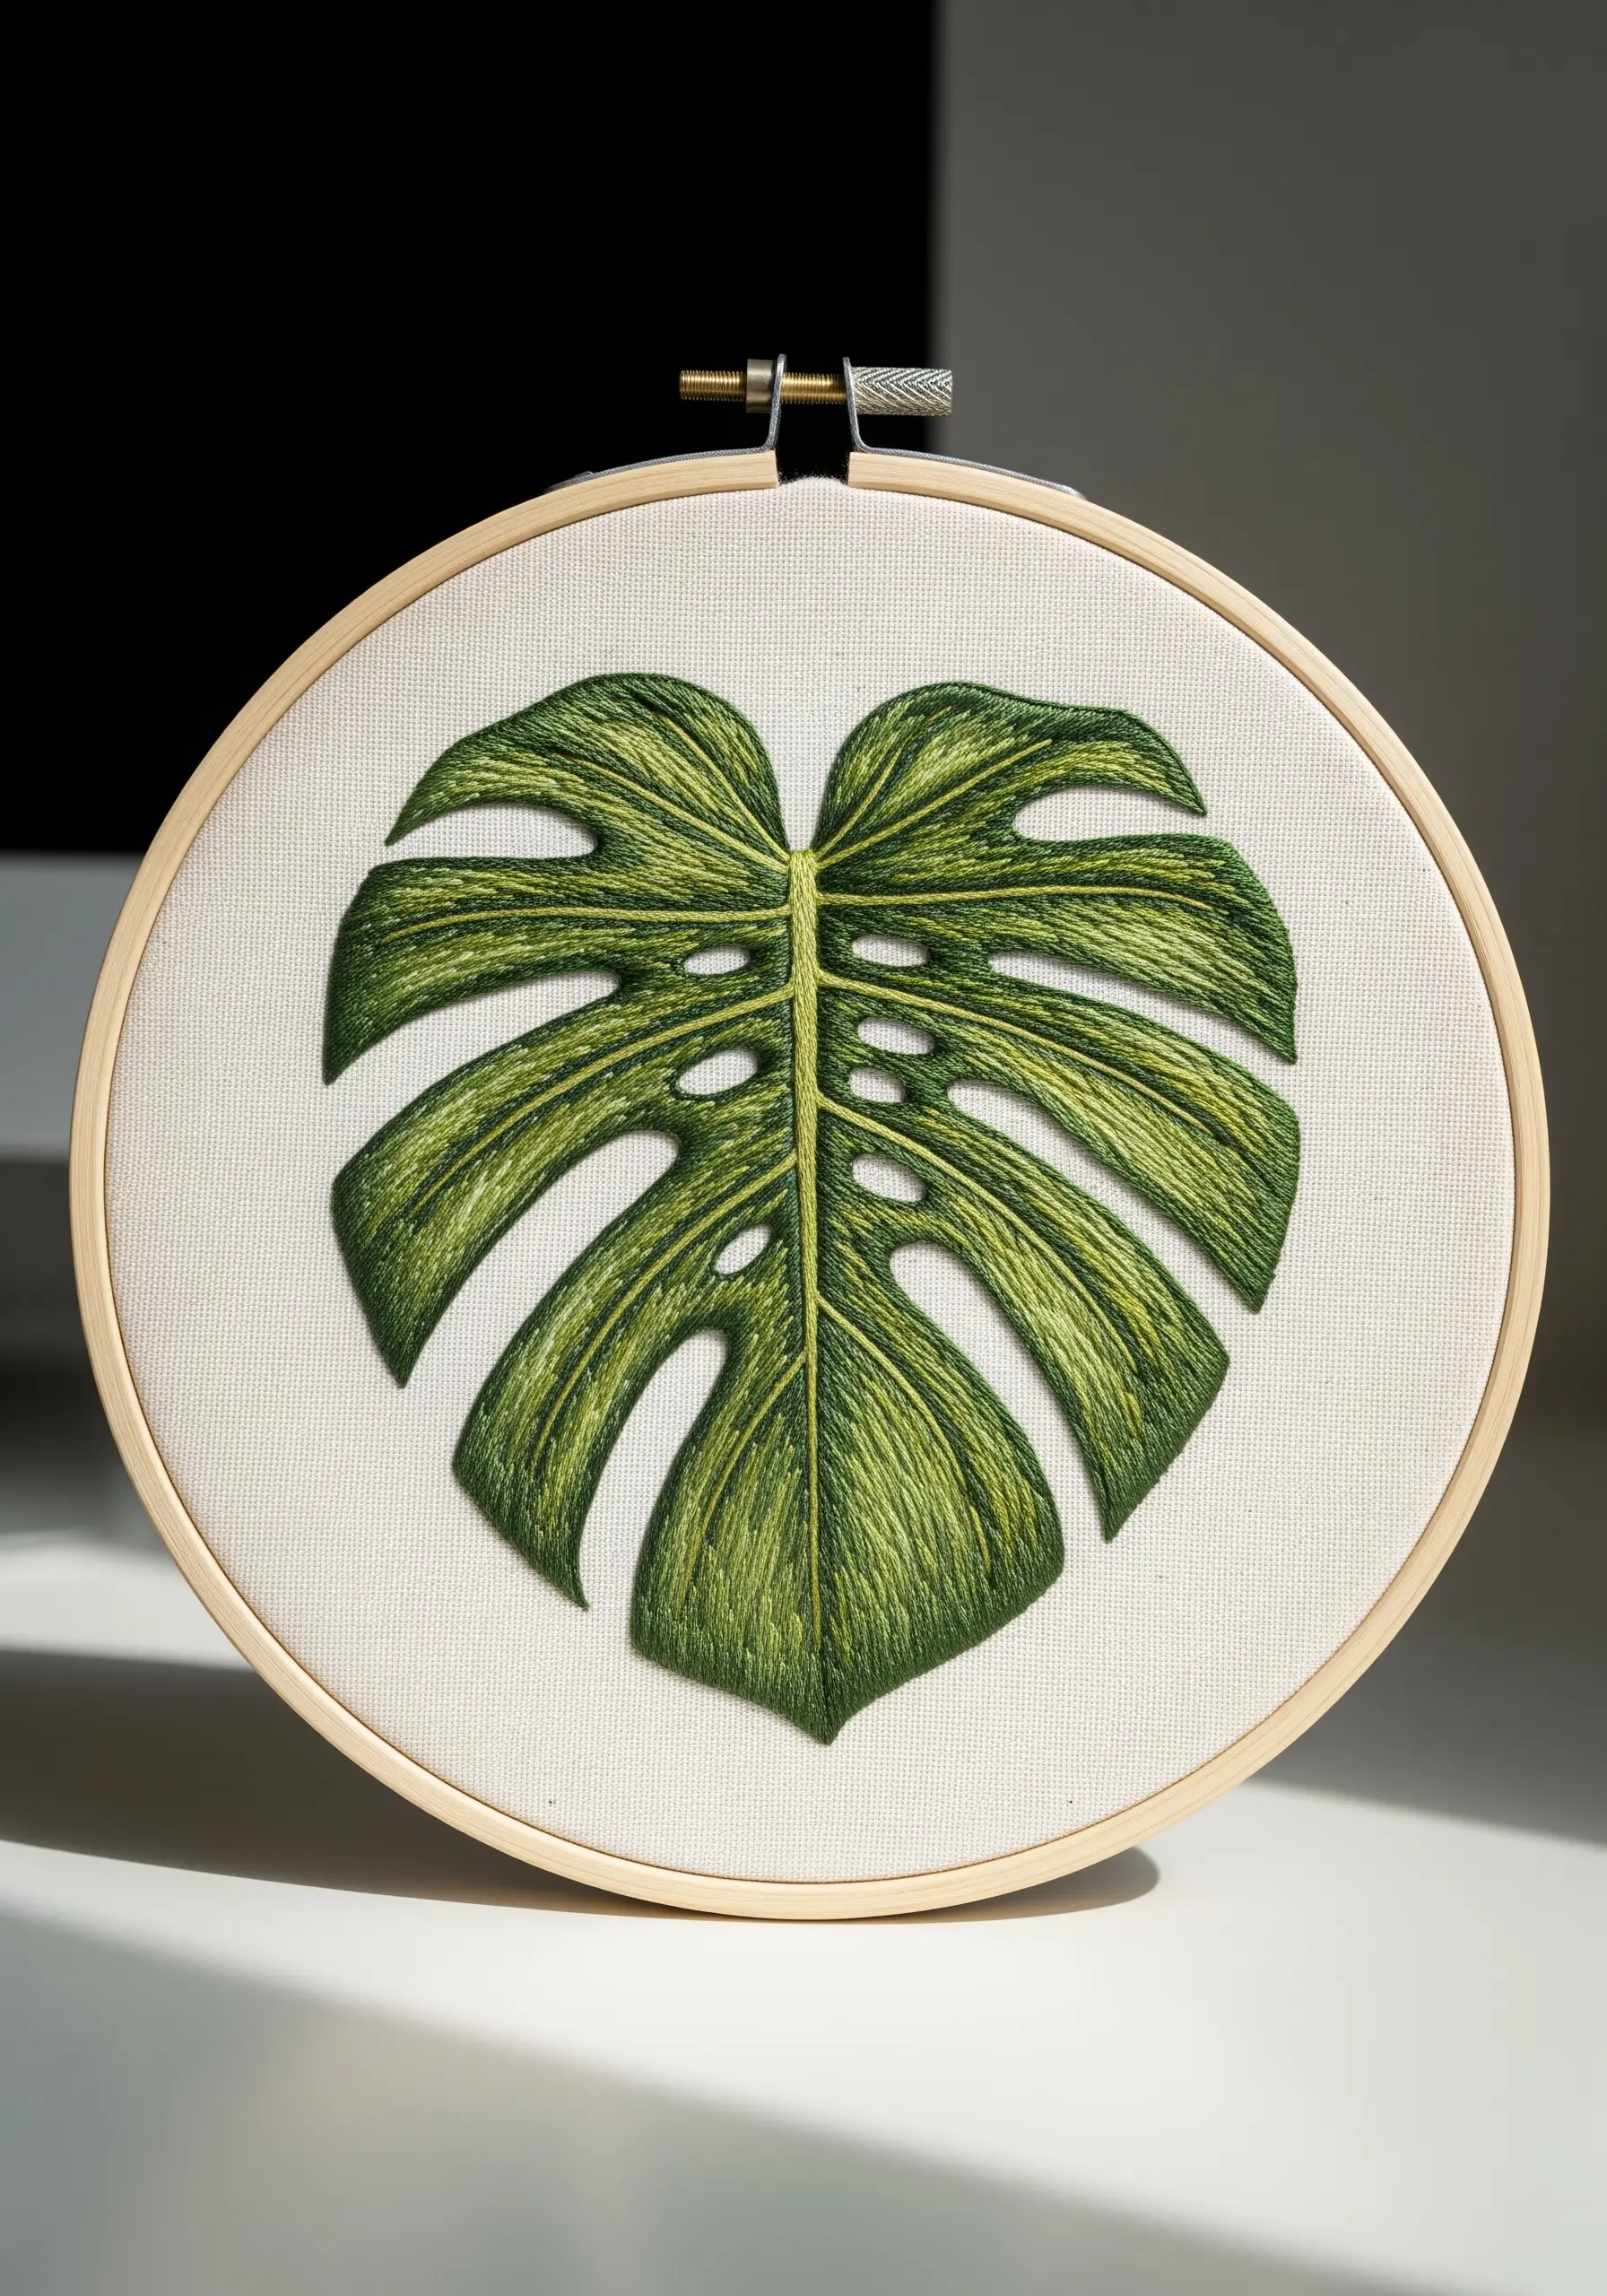
Move beyond flat color fills by using the long-and-short stitch to create realistic gradients of light and shadow.
Select three or four shades of green, from a pale lime to a deep forest green, to give your Monstera leaf lifelike dimension.
Begin with your lightest color where the light would naturally hit the leaf, then blend outwards into the darker tones.
Ensure your stitches follow the natural, curved direction of each leaf section—this is the key to realism.
This method, often called floral thread painting, transforms a simple motif into a dynamic botanical study.
5. Dimensional Texture with French Knots
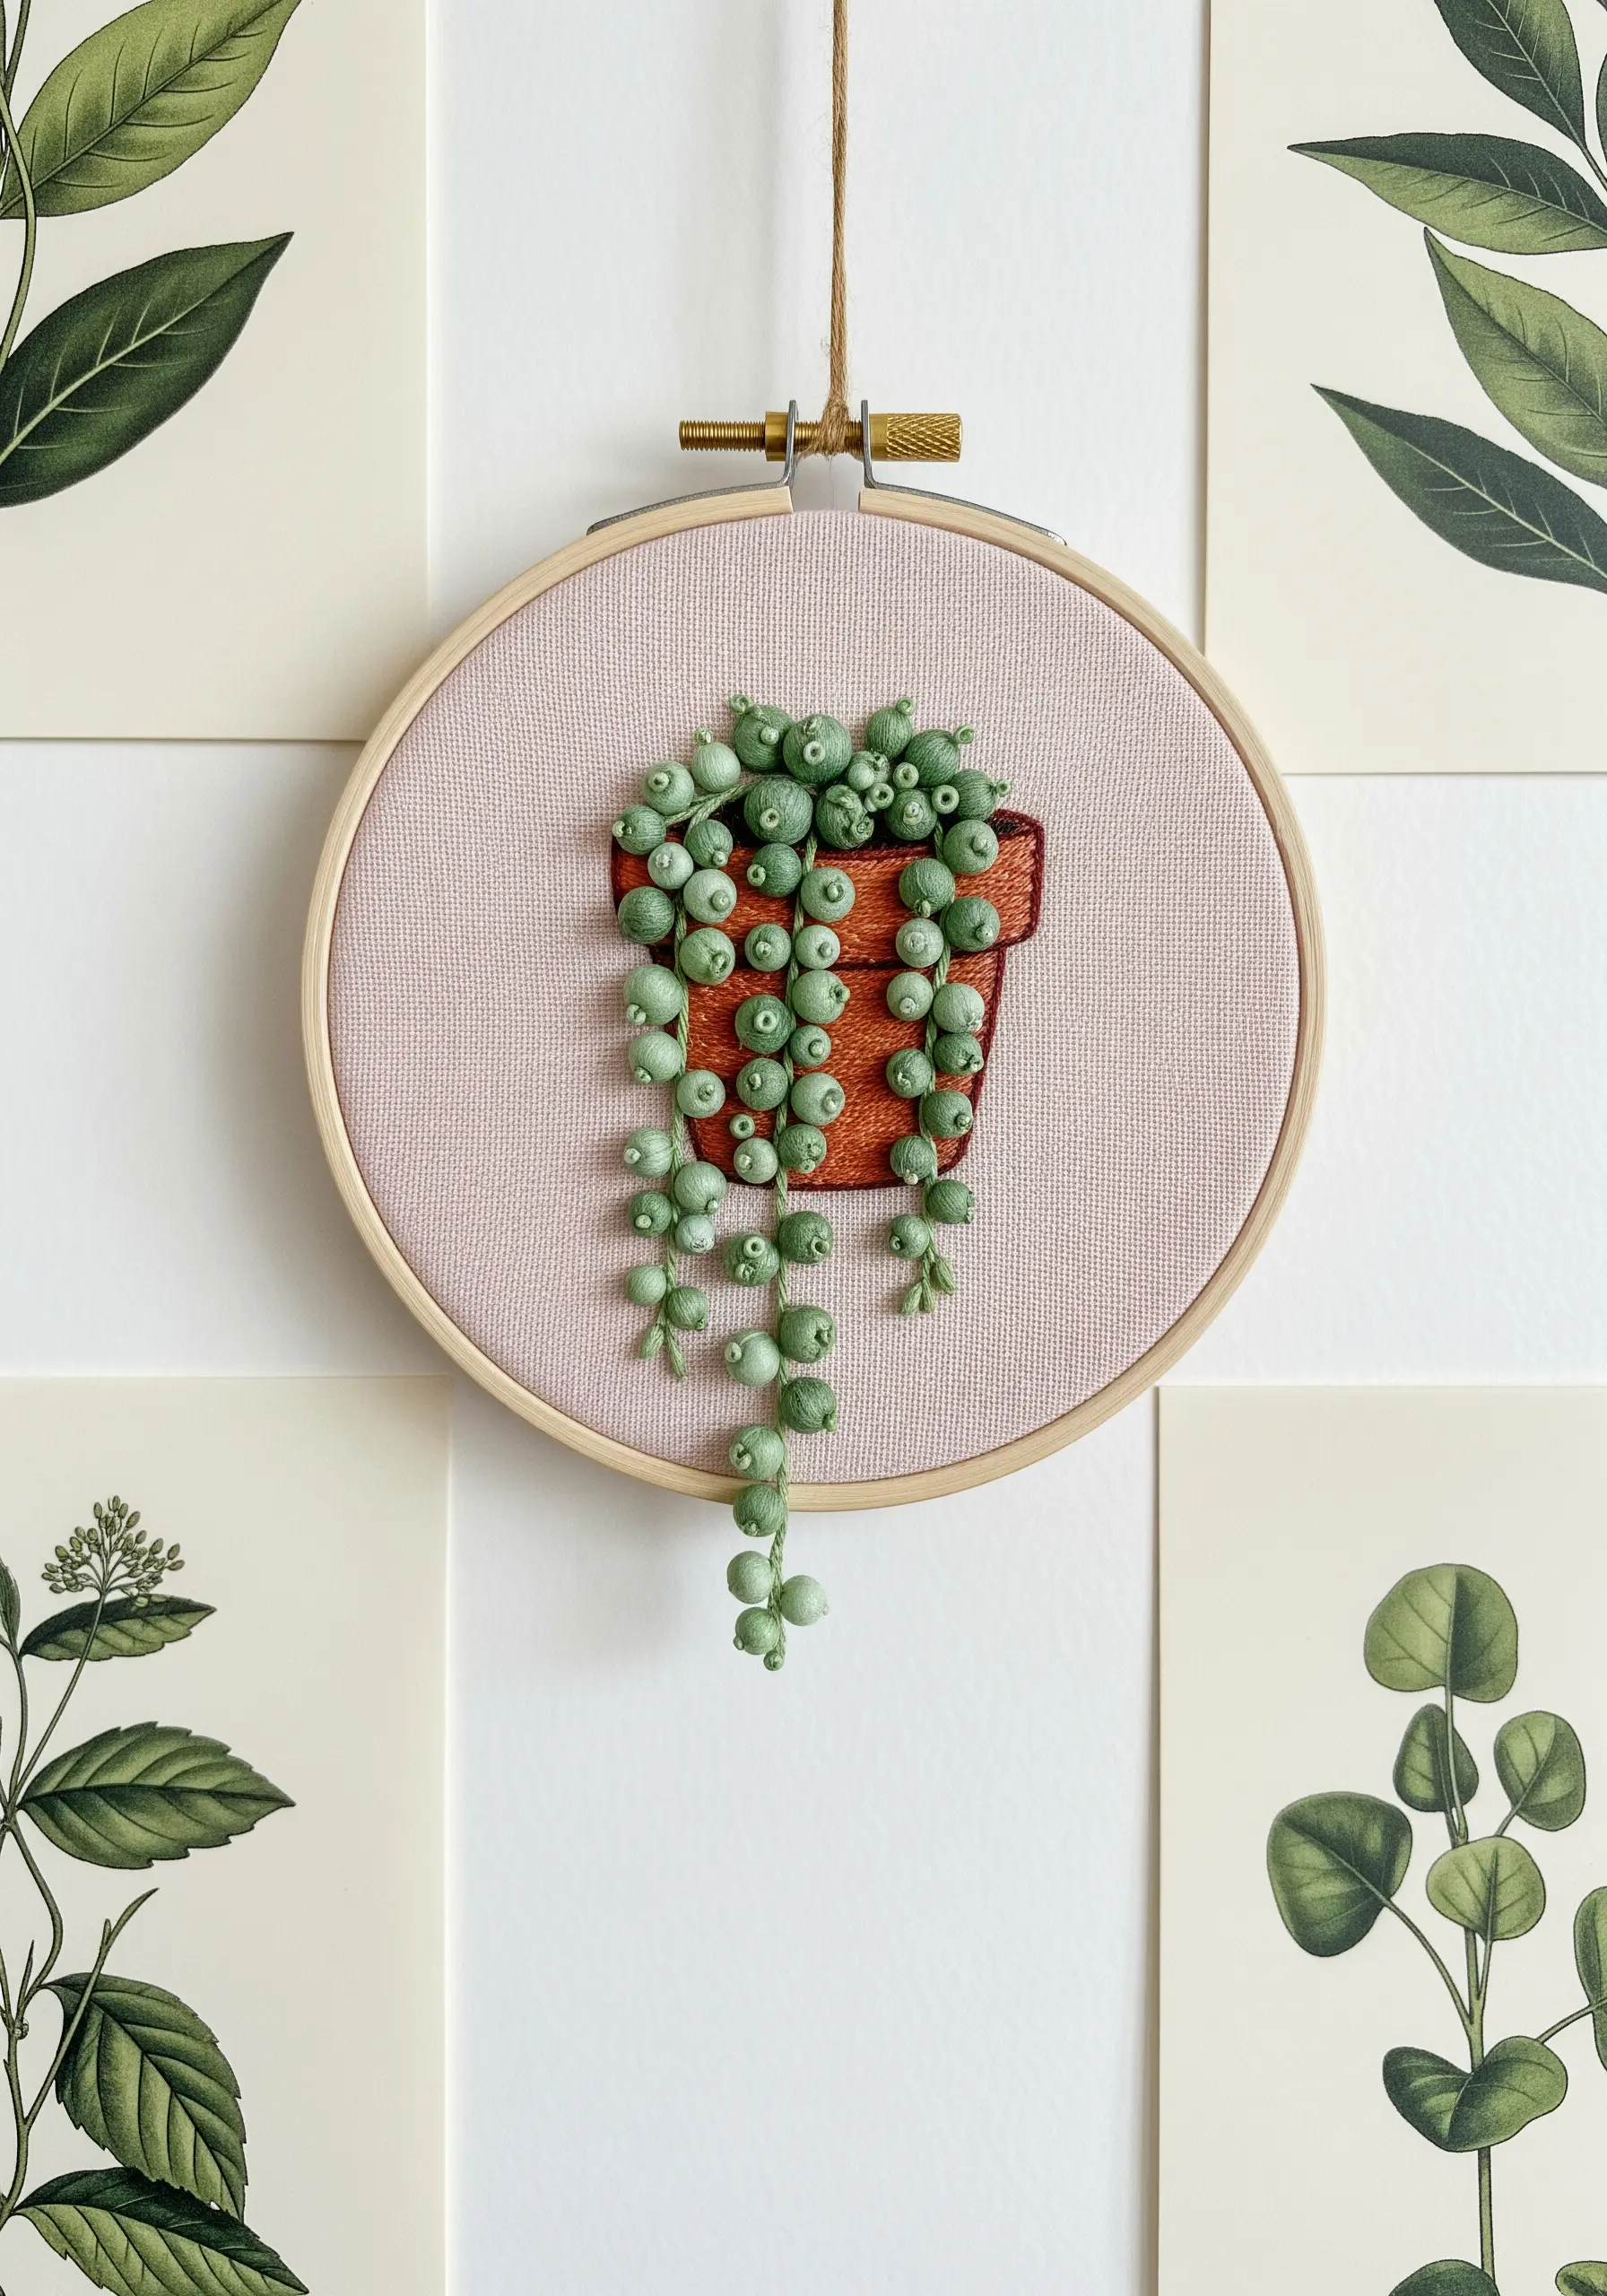
To replicate the unique, beaded shape of a String of Pearls plant, the French knot is your most valuable tool.
For a perfectly round, plump effect, use all six strands of your cotton floss and wrap the needle three or even four times before pulling it through.
Vary the tension slightly as you work to create knots of different sizes, which enhances the natural, organic look.
To create the cascading effect, stitch the knots closely together, allowing them to pile up and spill gracefully over the edge of the stitched pot.
6. High-Contrast Botanicals on Dark Fabric

Make your foliage feel luminous by stitching it on a dark background fabric, such as black or navy blue cotton.
This high contrast instantly intensifies the vibrancy of your thread colors, making even simple greens look electric.
For an extra-polished finish, first outline each leaf with a split stitch using the same color you’ll use for the fill.
This simple preparation step defines the edges sharply and gives the final satin stitch a slightly raised, professional look, making it one of the most effective night garden embroidery ideas.
7. The Visual Power of a Bold Outline

You can instantly elevate a simple satin stitch fill by framing it with a thick, contrasting outline.
Use a stem stitch or chain stitch with a dark, heavy thread—like a #5 pearl cotton—to create a clean, graphic novel effect.
This technique not only defines the shape with authority but also masterfully conceals any minor imperfections along your satin stitch edges.
It’s a fantastic way to give your botanical art a modern, illustrative feel that commands attention.
8. Capturing Variegation with Free-Form Stitches
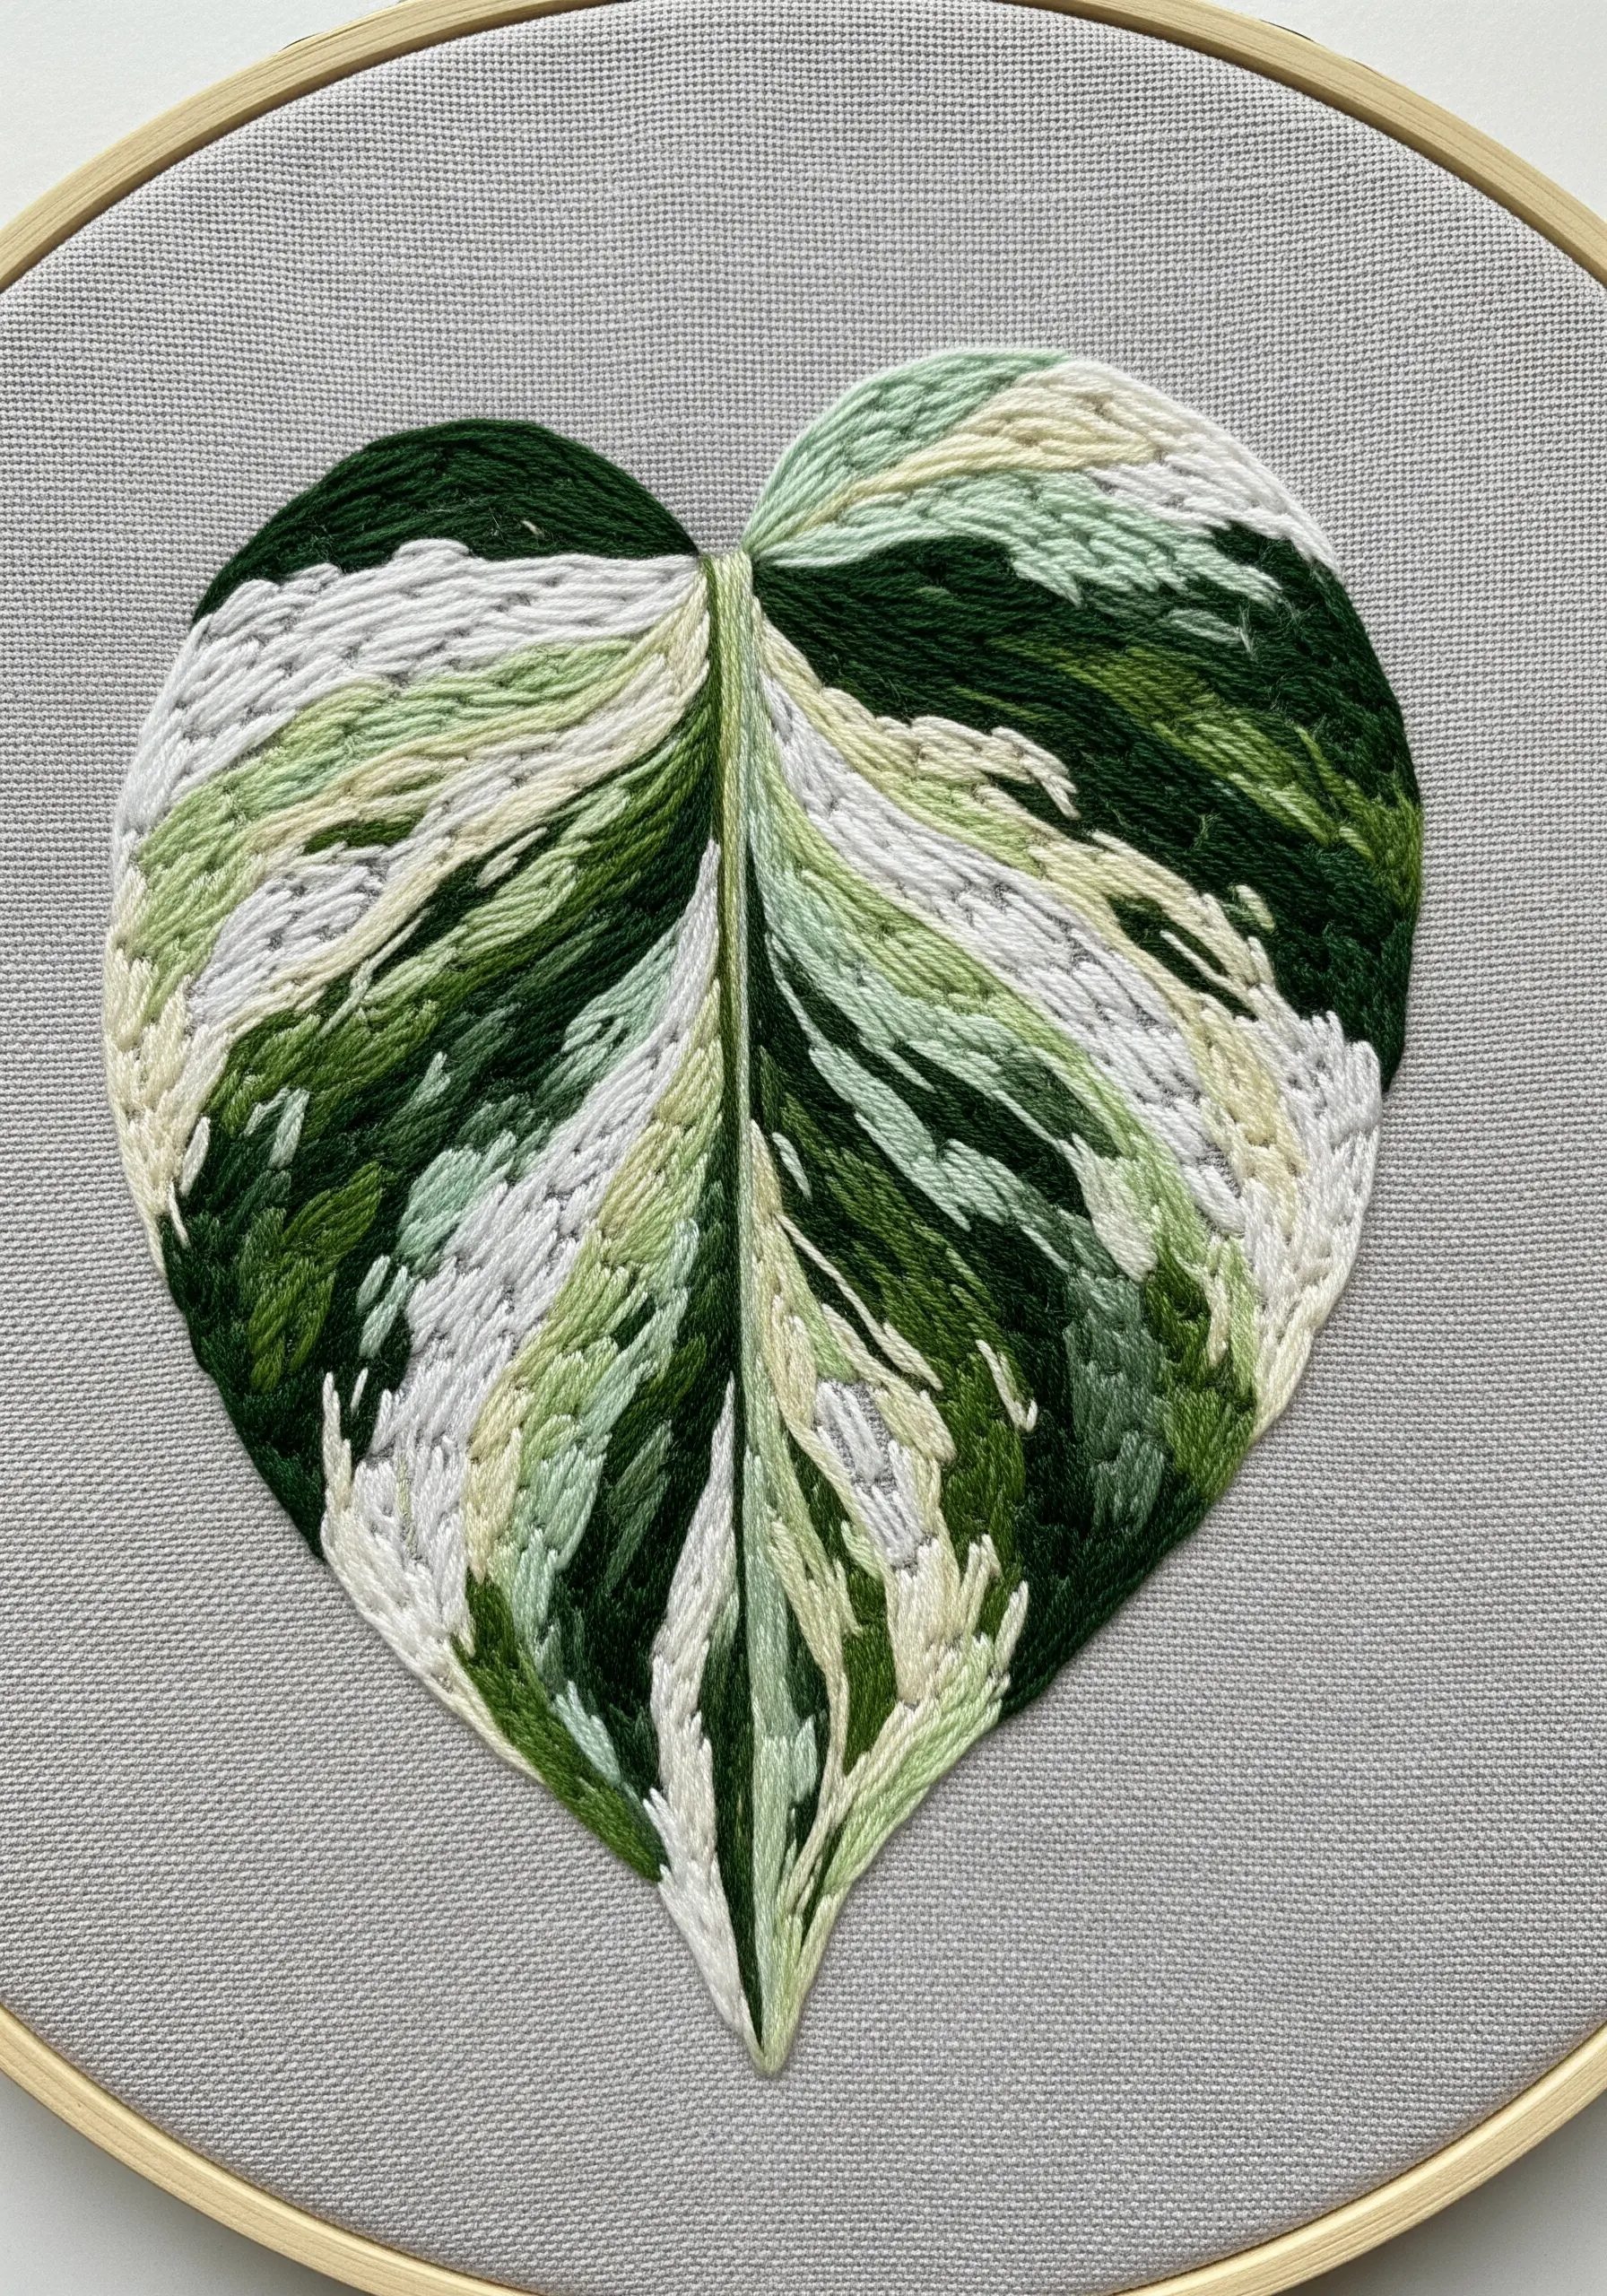
Instead of meticulously blended rows, capture the organic patterns of a variegated leaf using scattered, directional seed stitches.
Allow your stitches to overlap and change direction to mimic the plant’s natural color breaks, creating a beautifully imperfect texture.
Use three to four colors—a deep green, a lighter green, cream, and white—and work with just one or two strands of floss at a time for a delicate, painterly look.
This technique is less about precision and more about capturing the fluid, unpredictable soul of the foliage.
9. Composing a Miniature Stitched Garden

When creating a collection of plants within a single hoop, think like a landscape designer to achieve a harmonious composition.
Vary the height, texture, and shape of each succulent to create dynamic visual interest.
Combine dimensional stitches like woven wheels for the rosettes with flatter satin stitches for spiky aloe leaves.
The simple brown straight stitches of the planter box act as a frame within the frame, grounding the entire arrangement and turning individual motifs into a cohesive, charming scene.
10. Balancing Color on a Toned Background
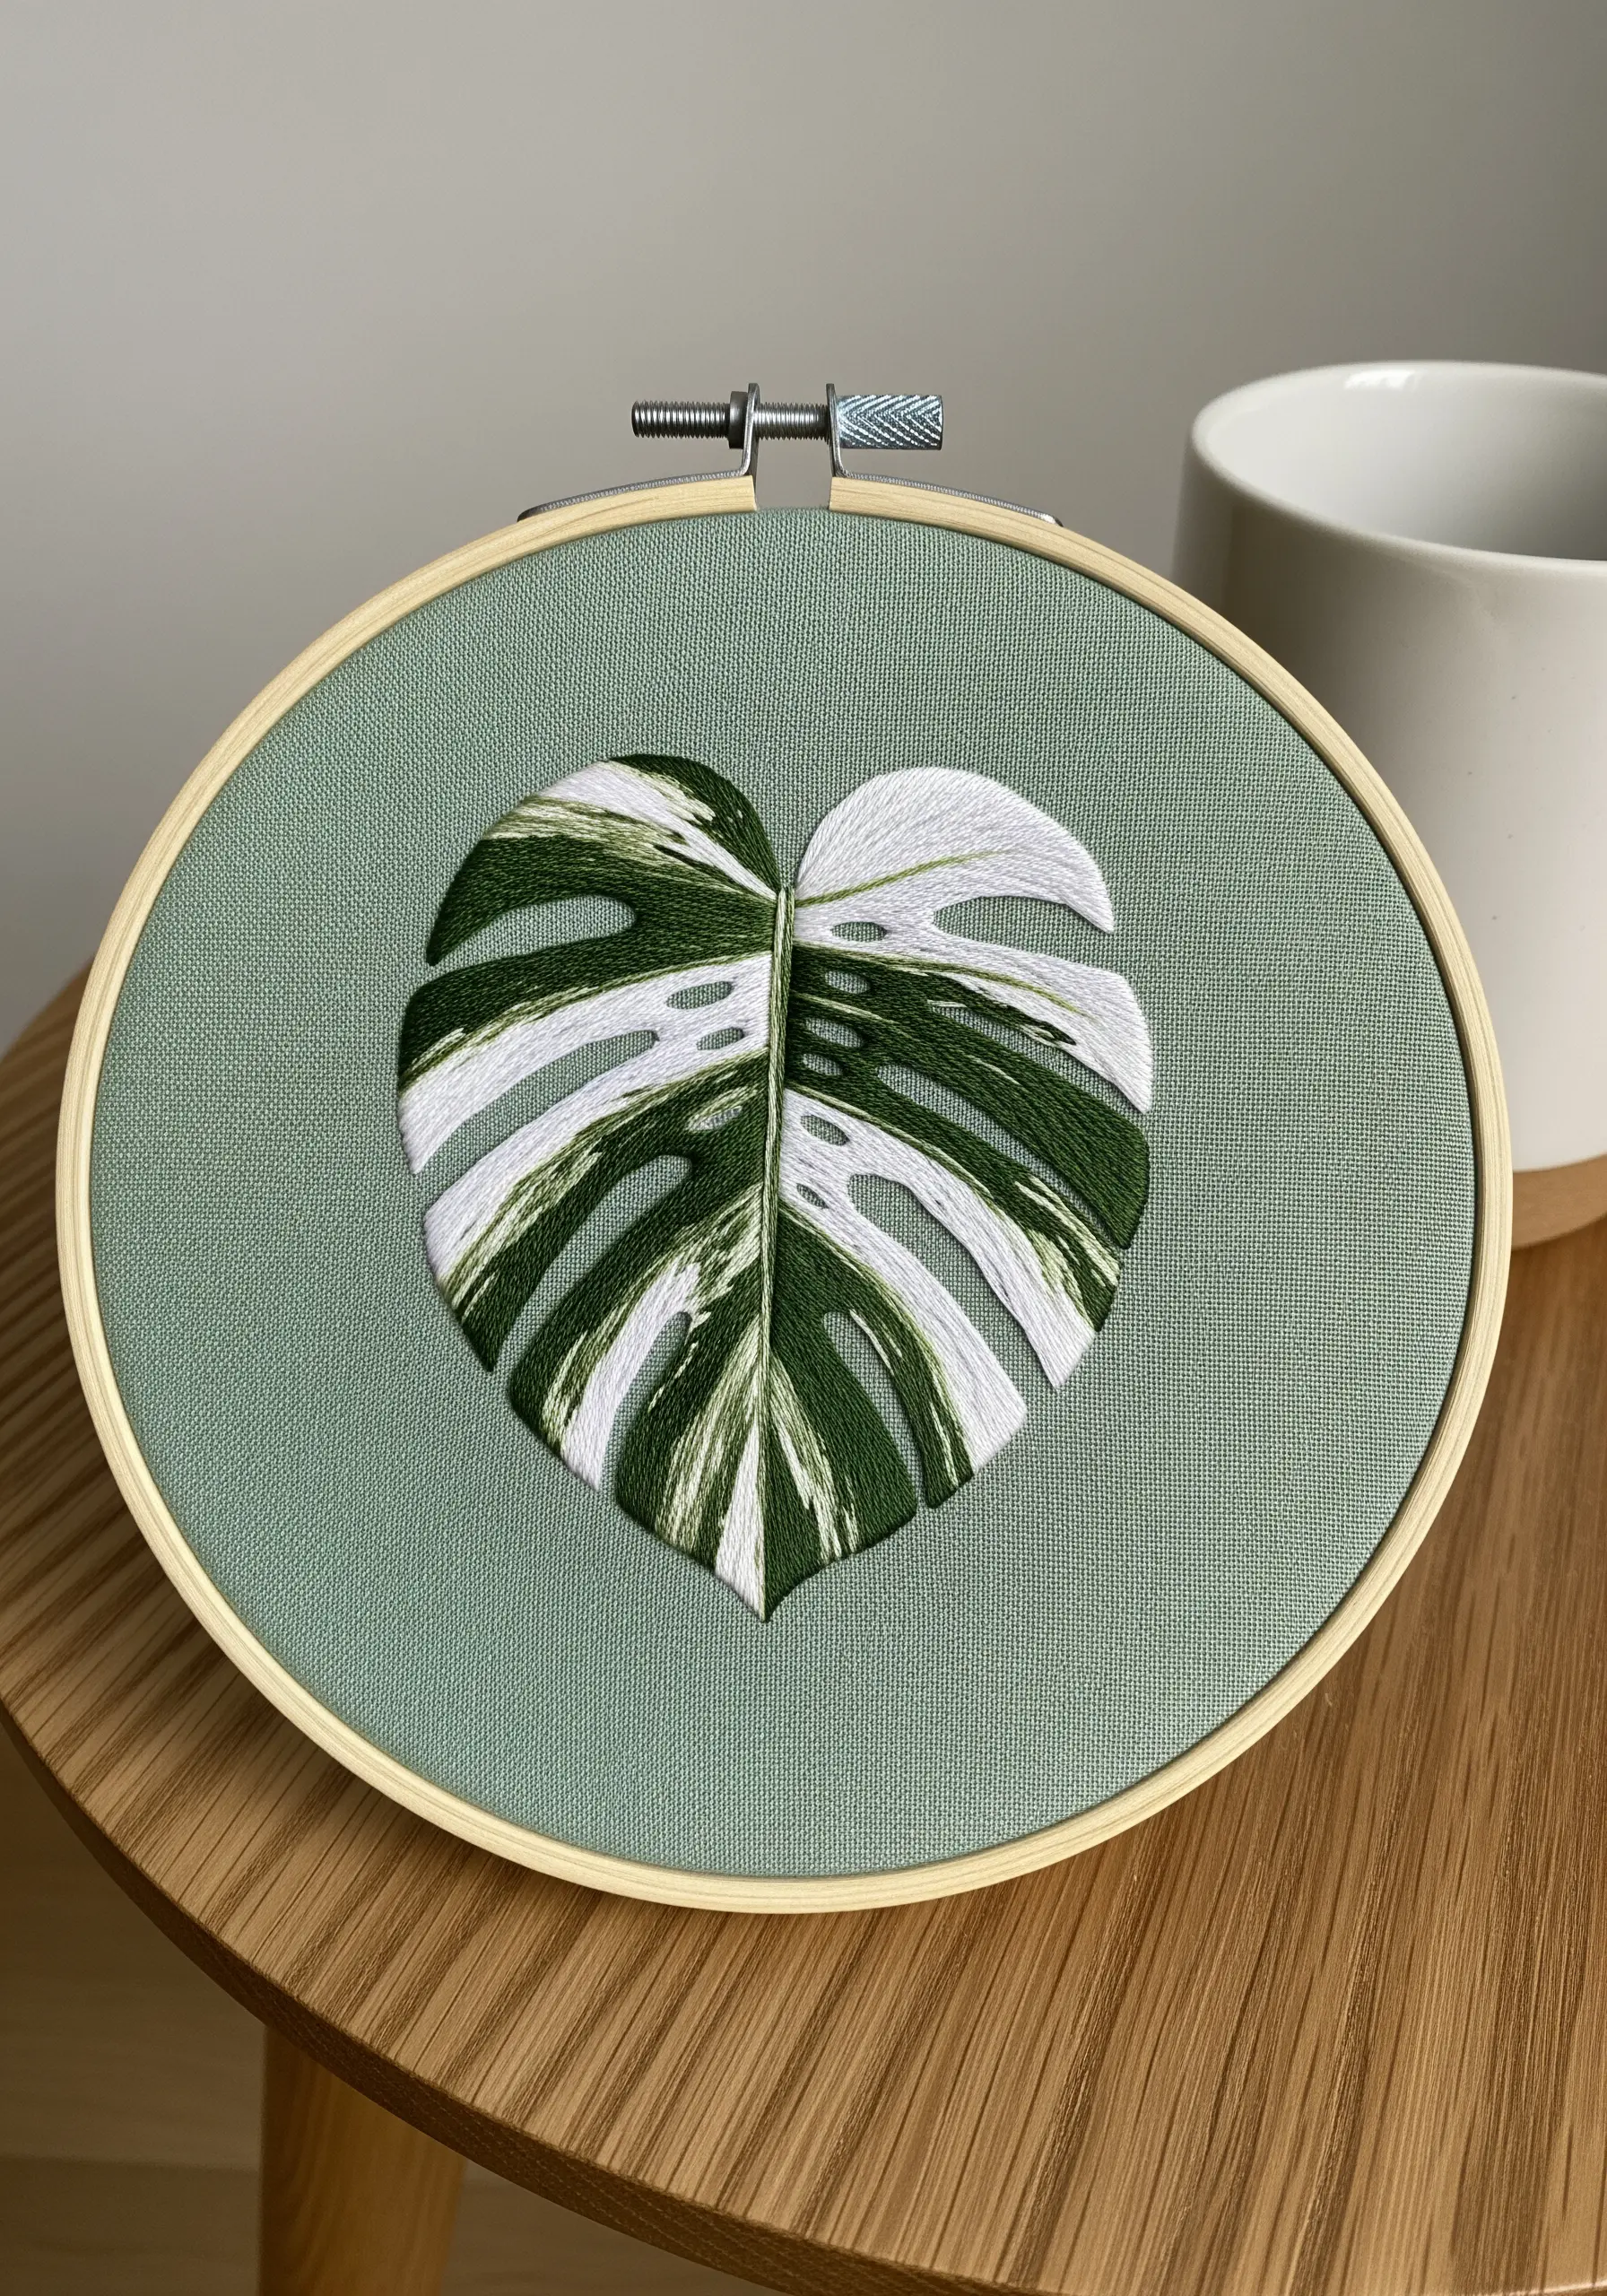
When you work on a colored fabric, that background becomes an active participant in your color palette.
Here, the crisp white and rich green of the variegated Monstera stand out beautifully against the muted, earthy sage green linen.
The fabric color adds a layer of warmth and sophistication that plain white canvas couldn’t achieve.
To ensure your whites remain vibrant, choose a bright, cool white thread (like DMC B5200) to prevent it from looking dull against the toned ground.
11. Embellishing Textiles with Cascading Vines
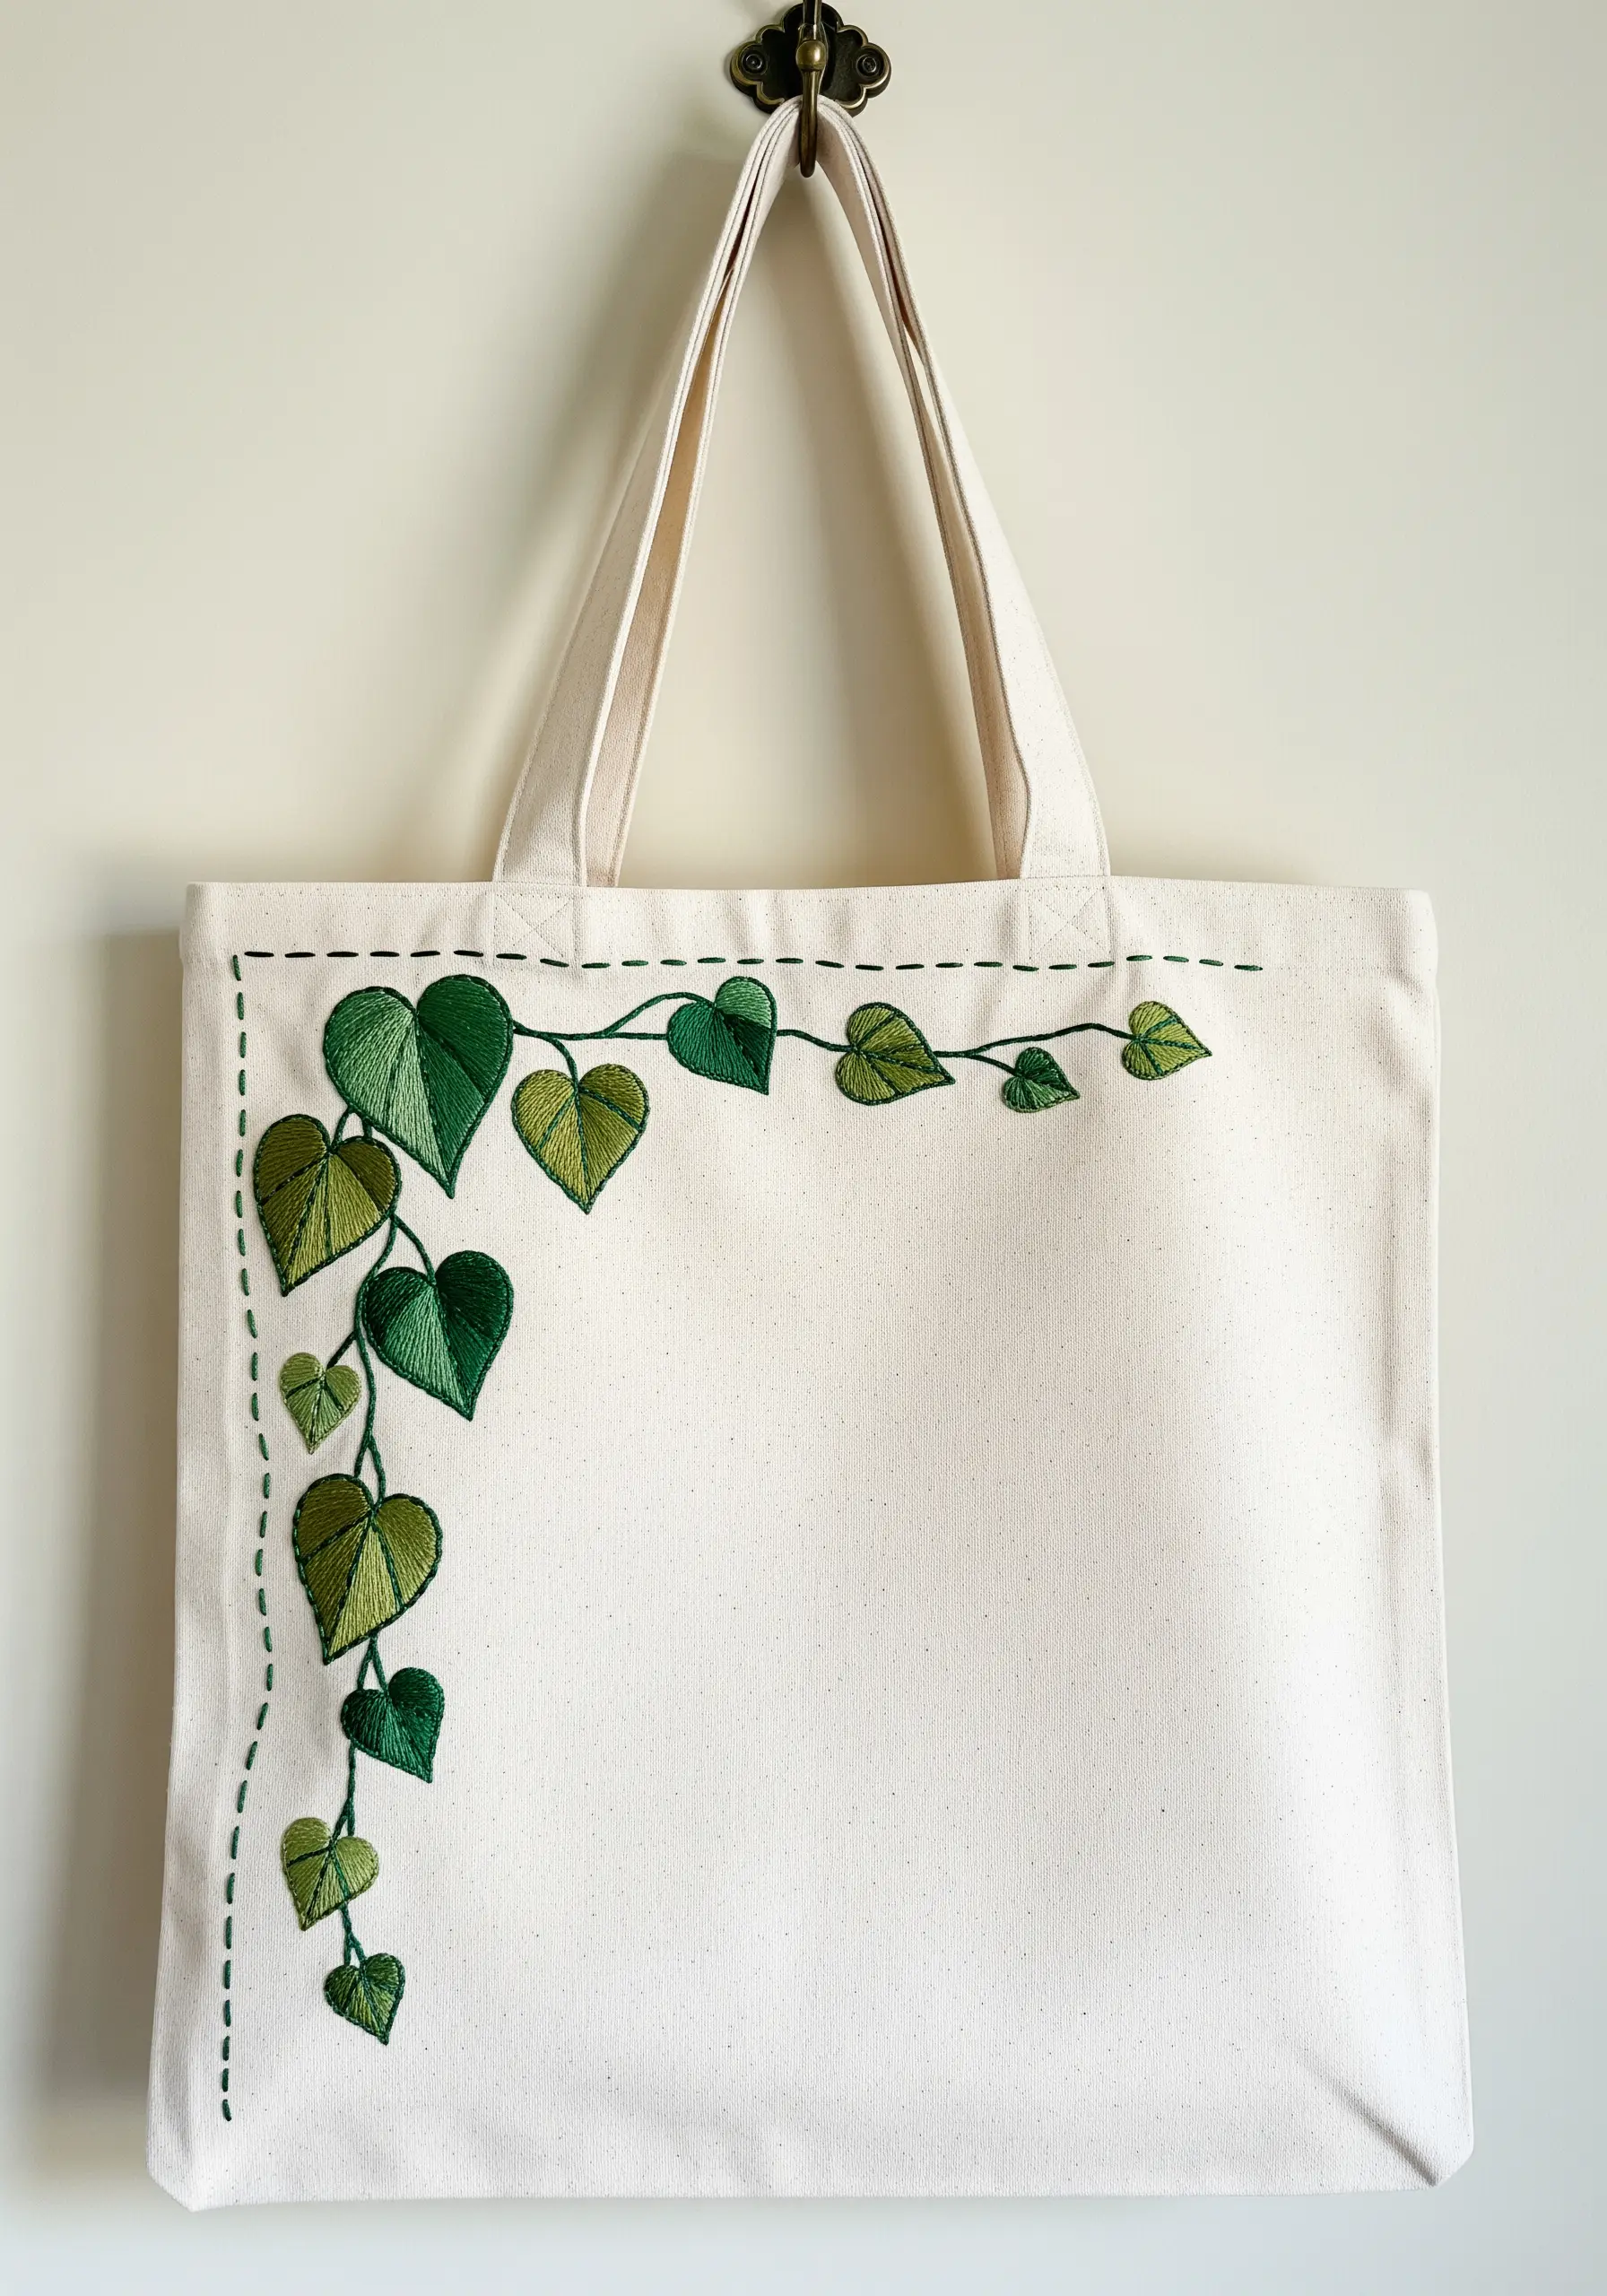
Transform a plain canvas tote by stitching a vine that appears to grow organically around the corner.
This asymmetrical placement is far more dynamic than a centered motif and invites the eye to move across the surface.
While satin stitch creates a lovely fill for the leaves, be sure to secure the edges with a backstitch outline to ensure the design withstands daily wear and tear.
These are some of the best leaf embroidery stitches that turn ordinary tote bags into botanical art you’ll want to show off.
12. Creating a Dynamic Wreath Composition
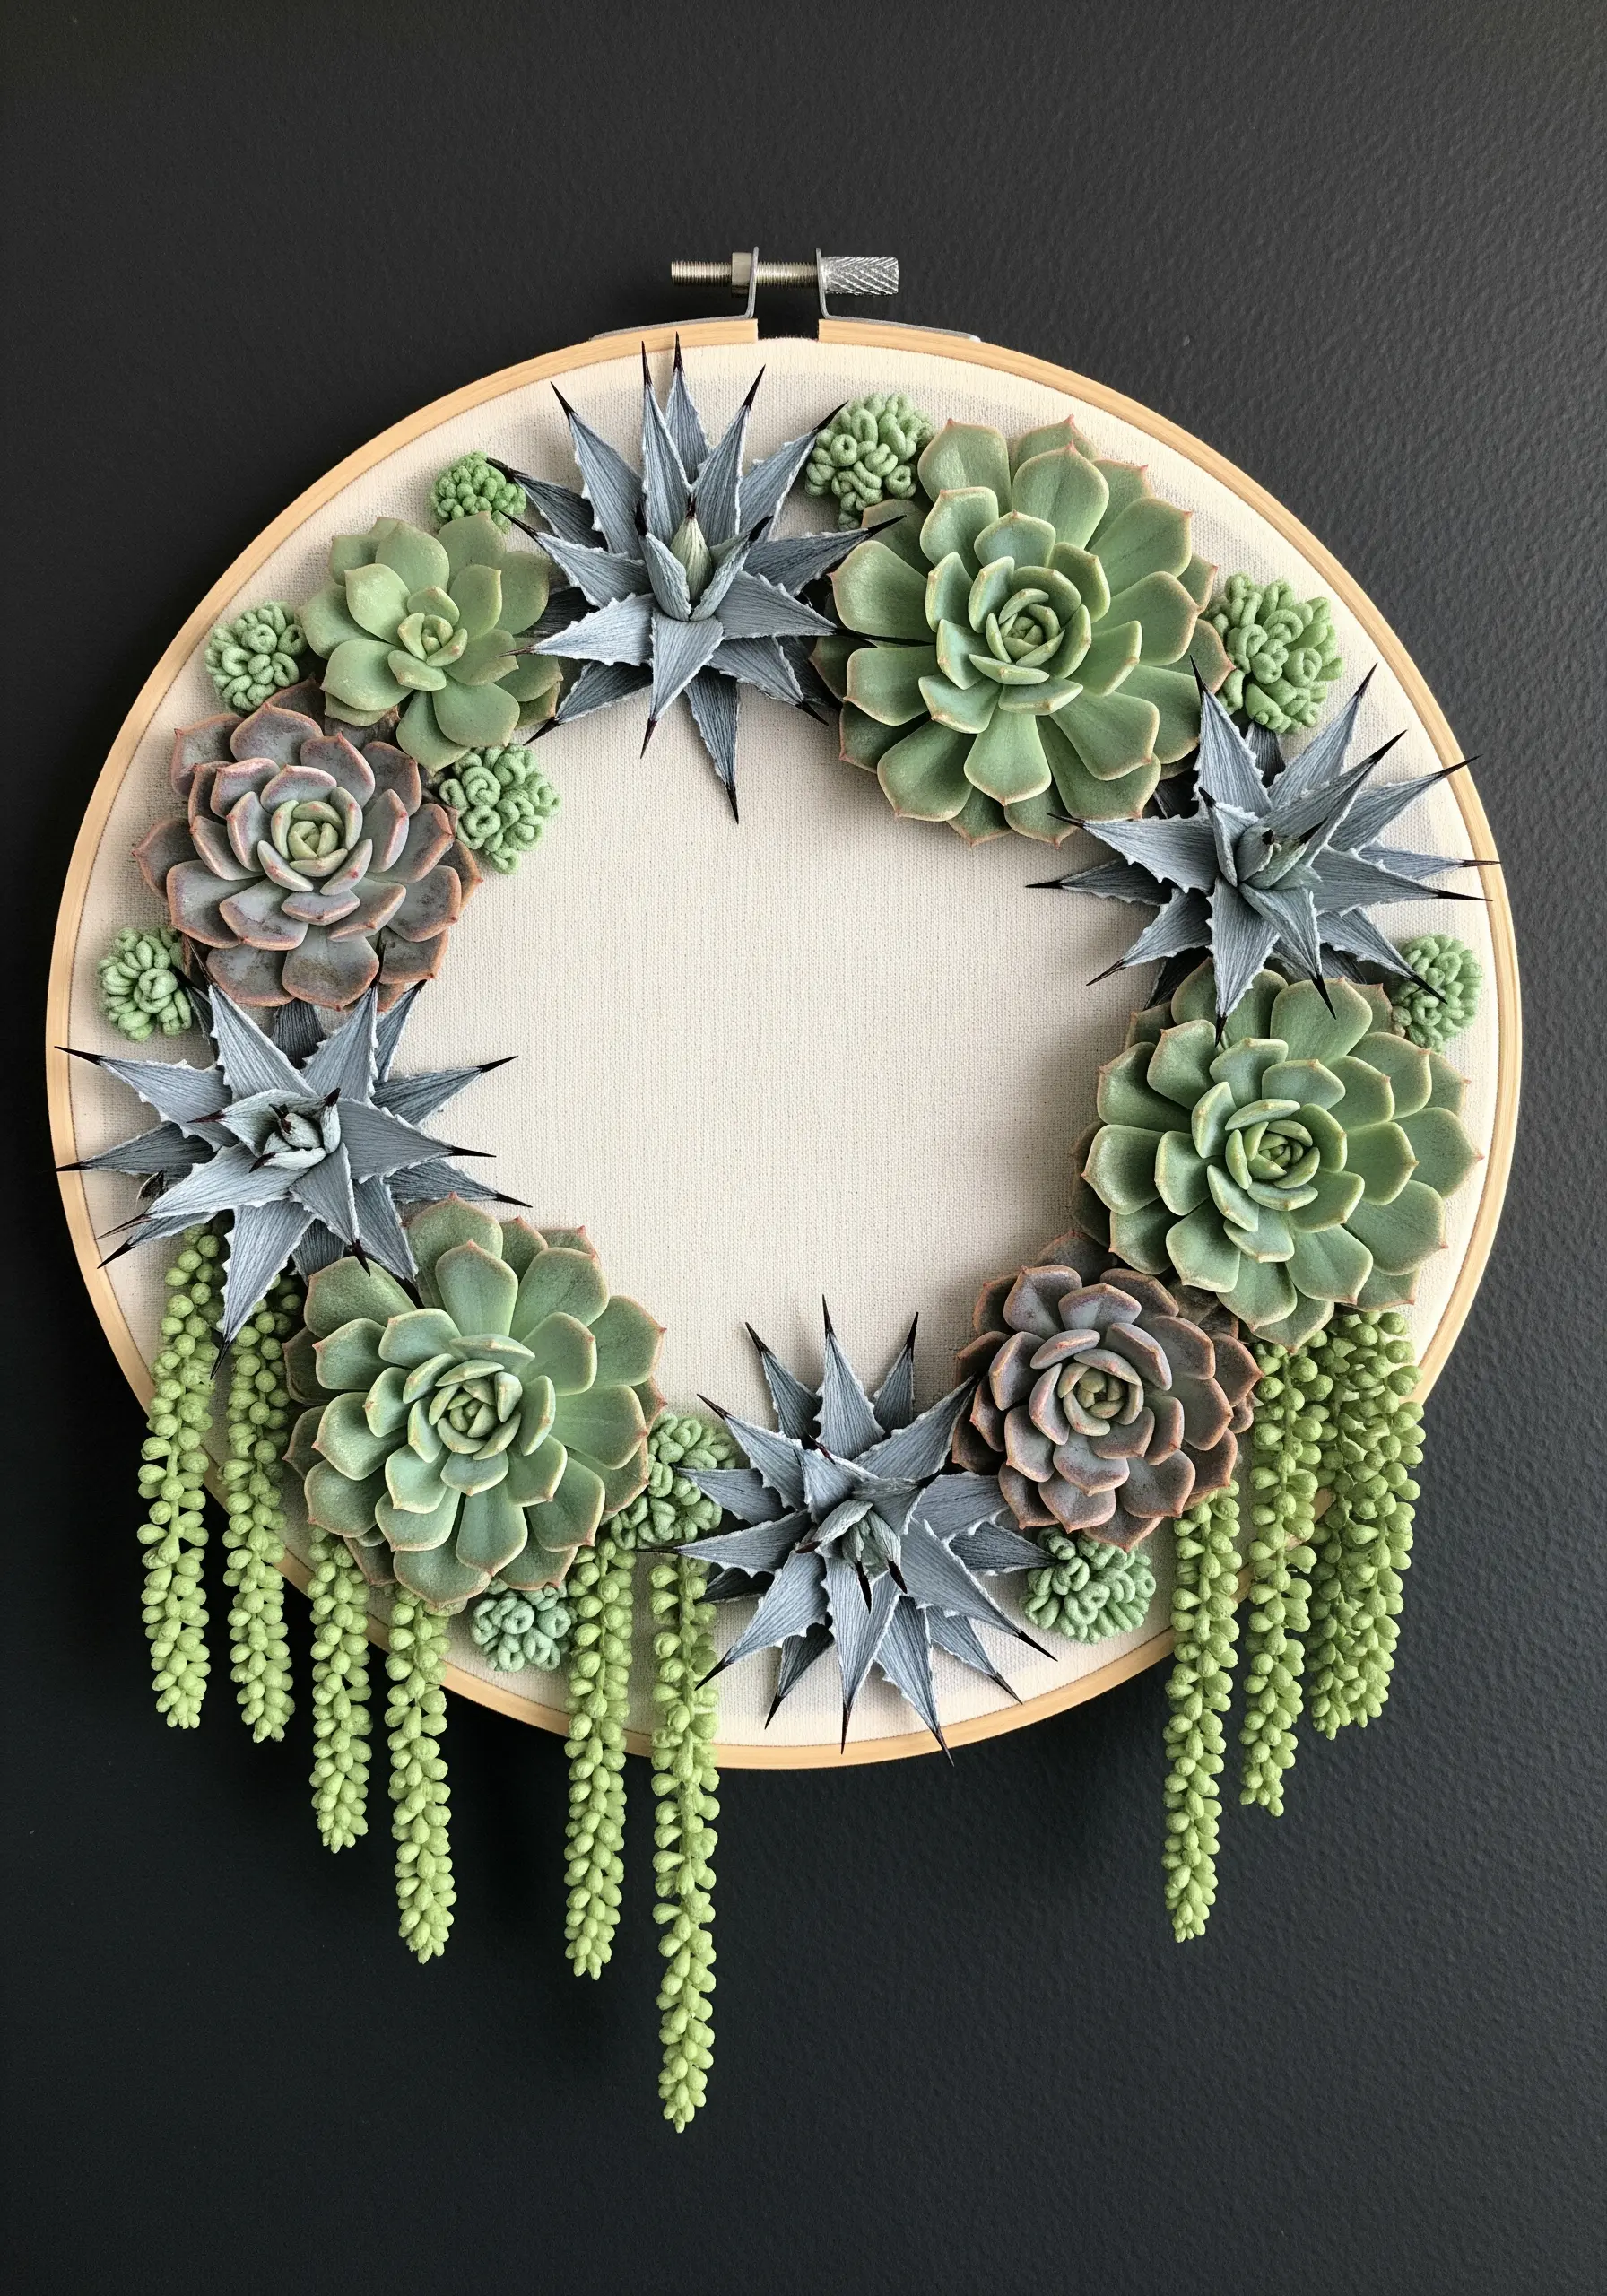
To create a botanical wreath that feels alive, break the boundaries of a perfect circle.
By adding cascading elements like the String of Pearls, you introduce a sense of movement and gravity that draws the eye downward.
Mix different succulent forms—spiky agaves, classic rosettes, and clustered sedums—to build a rich, varied texture.
The key to a balanced design is repeating certain forms at different points around the hoop, creating a visual rhythm that guides the viewer’s gaze.
13. The Understated Elegance of Botanical Line Art

Sometimes, the most powerful statement is the simplest one. You can convey the full essence of a plant with just its outline.
A clean backstitch or a smooth stem stitch is all you need to create a sophisticated, minimalist design that celebrates form and negative space.
Use two or three strands of floss for a line that is delicate yet clearly defined.
Explore other minimalist line art nature embroidery to see how this technique can beautifully render any natural subject.
14. Stitching a Narrative “Shelfie” Scene

Create a charming and personal vignette by arranging several of your favorite potted plants on stitched shelves.
The key to a successful scene is variation: use different pot shapes, plant textures, and leaf sizes to tell a visual story.
Employ French knots for bushy foliage, satin stitch for broad leaves, and sharp straight stitches for spiky succulents.
The tiny leaves scattered around the shelves add a whimsical touch of life and movement, making the composition feel inhabited and loved.
15. Expressive Color with Fishbone Stitch
For small, elegant leaves, the fishbone stitch offers unparalleled grace.
It simultaneously creates a central vein and fills both halves of the leaf in one fluid, directional motion, giving it a natural shape and gentle texture.
By using a variegated thread or switching colors partway through, you can introduce subtle gradients with minimal effort.
This is a wonderful way to practice minimal embroidery patterns that look harder than they are, as the result is always impressive.
16. Luminous Metallics for Dramatic Effect

For a truly show-stopping piece, use a high-quality metallic gold thread against a stark black background.
To make metallic floss easier to work with, remember to use shorter lengths (no more than 12 inches) and a thread conditioner like beeswax to reduce friction and prevent fraying.
A smooth, dense satin stitch will maximize the thread’s ability to catch and reflect light, making your leaves seem to glow from within.
This high-contrast, luxurious approach turns a simple botanical motif into a treasured statement piece.
17. Building Extreme Texture with Padded Knots
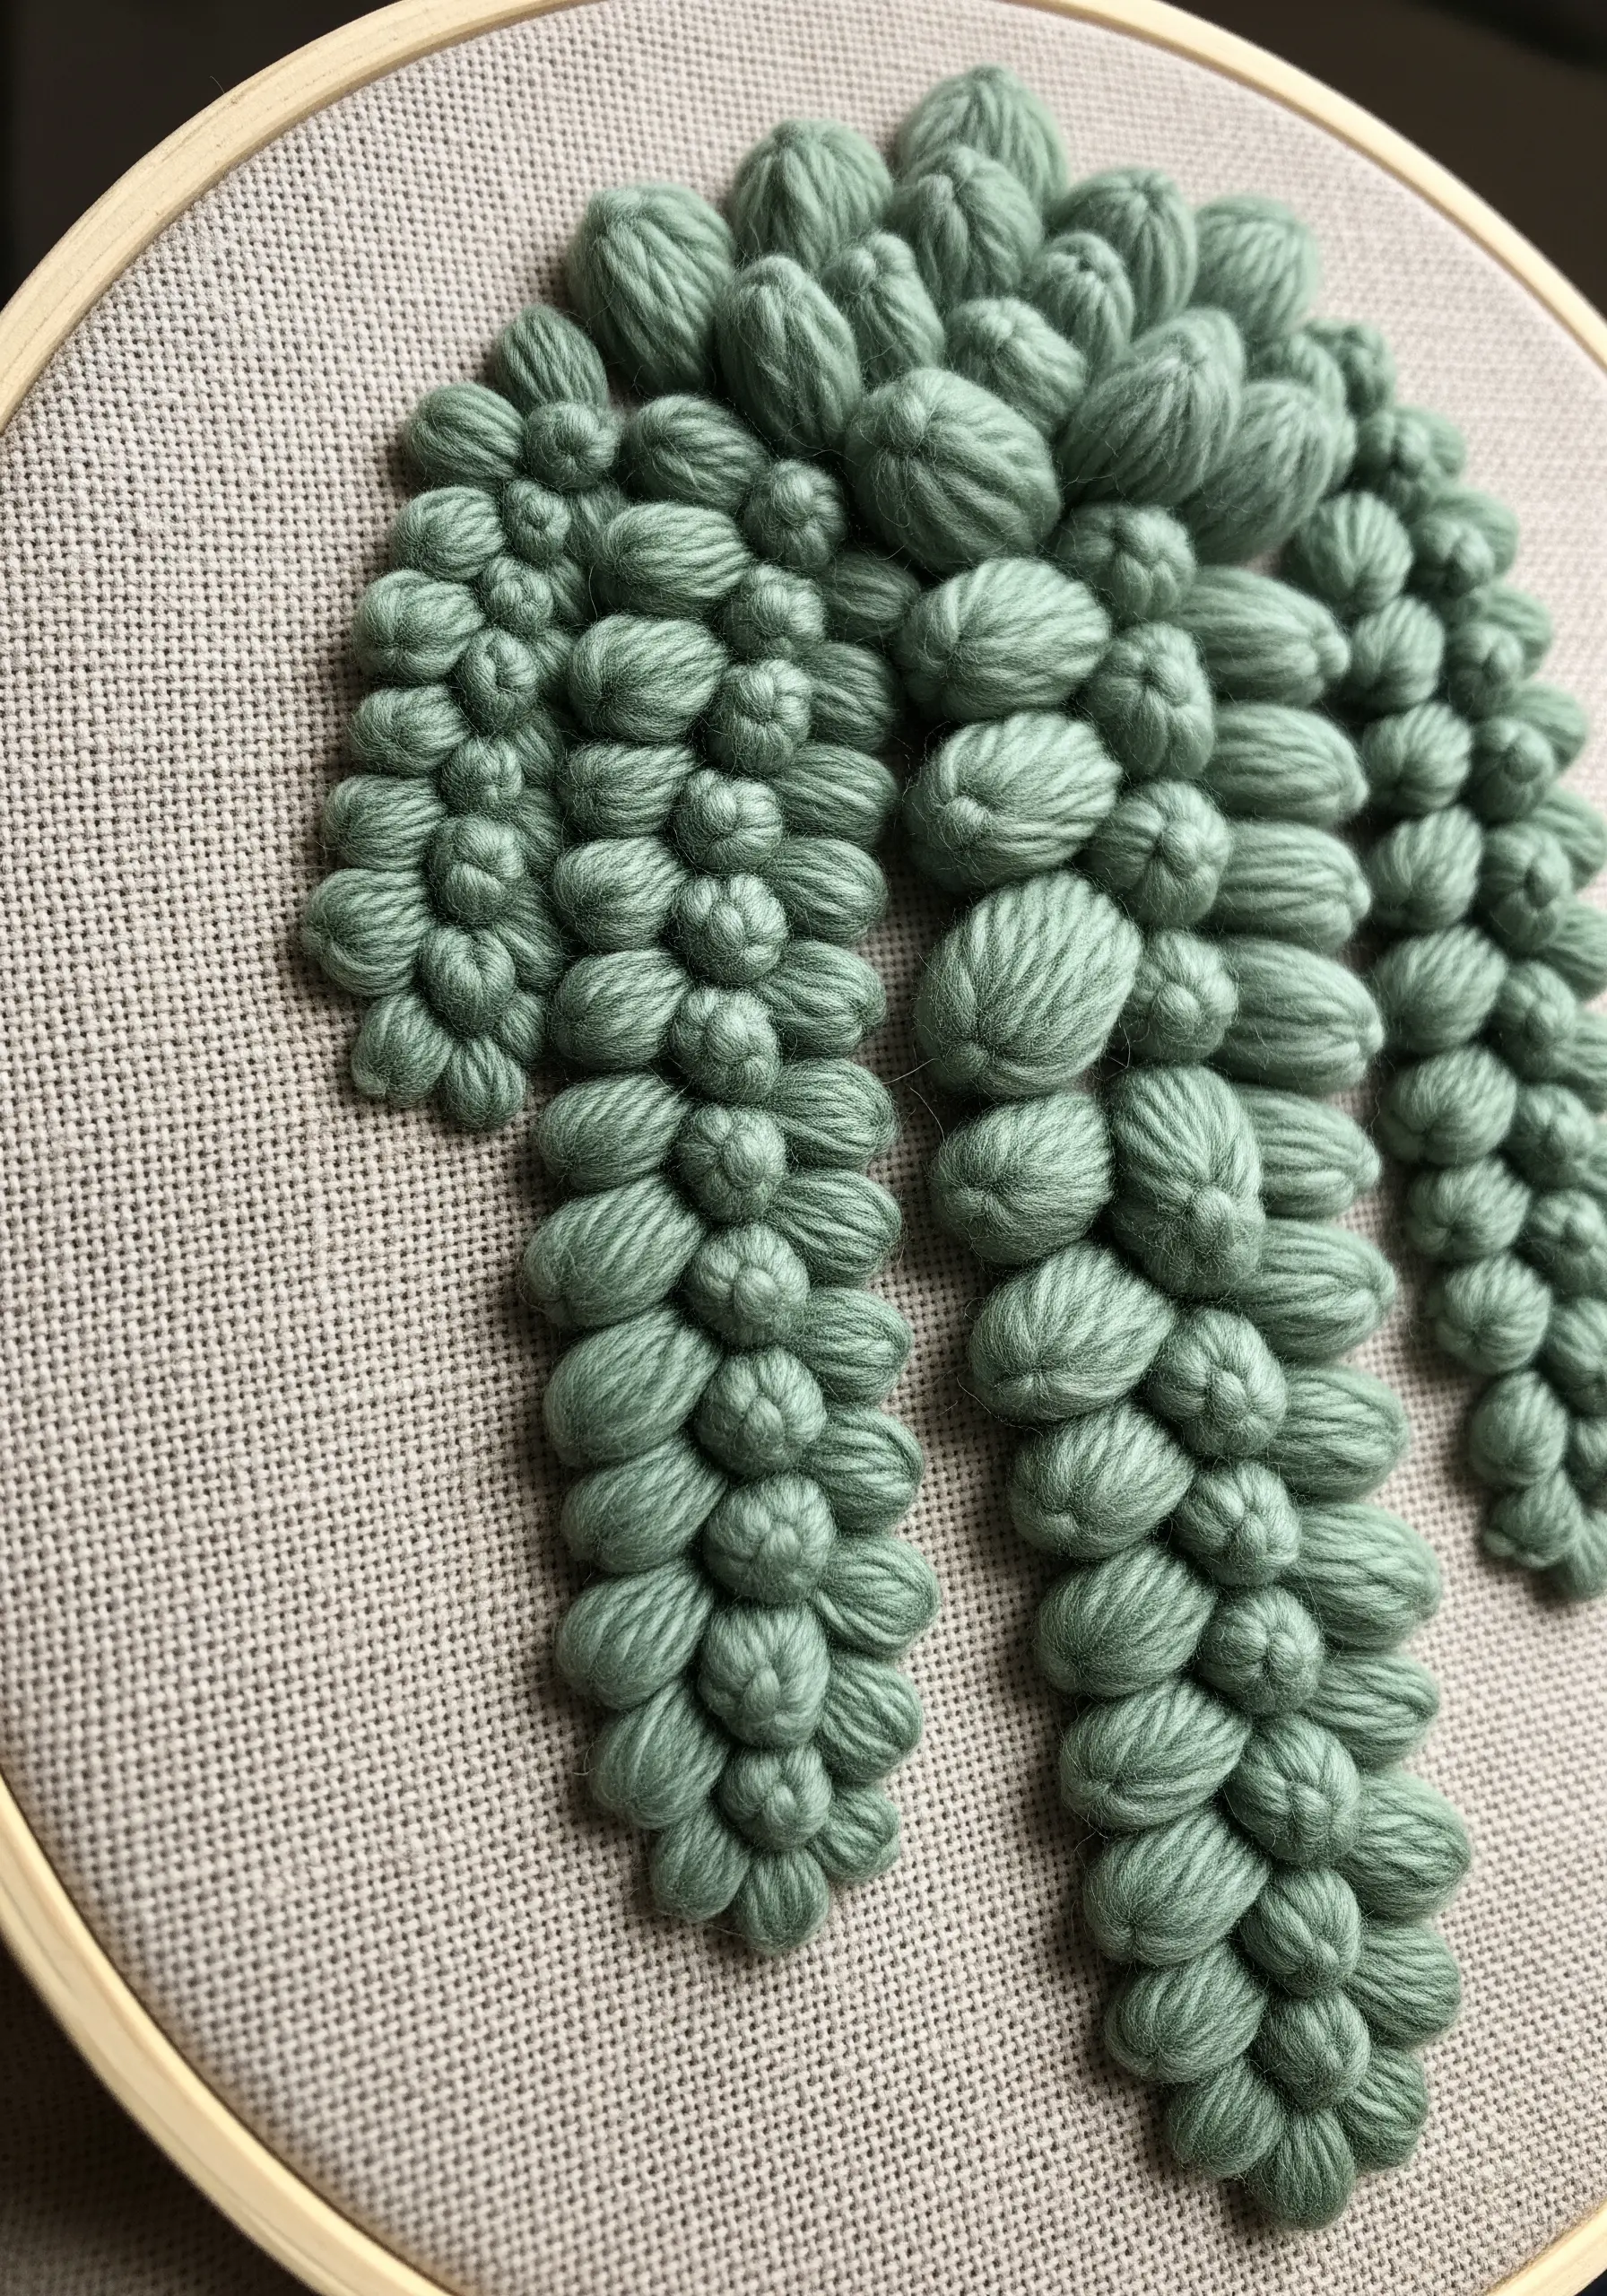
For plants like the Donkey Tail succulent, where texture is the main event, you need to build sculptural dimension.
You can achieve this plush, 3D effect by clustering bullion knots very tightly together, or by using a padded satin stitch.
To create padded stitches, first lay down a foundation of straight stitches within your shape, then cover them completely with satin stitches going in the opposite direction.
This raises the surface of the embroidery, giving it a tactile quality that begs to be touched.
18. Creating the Illusion of Transparency
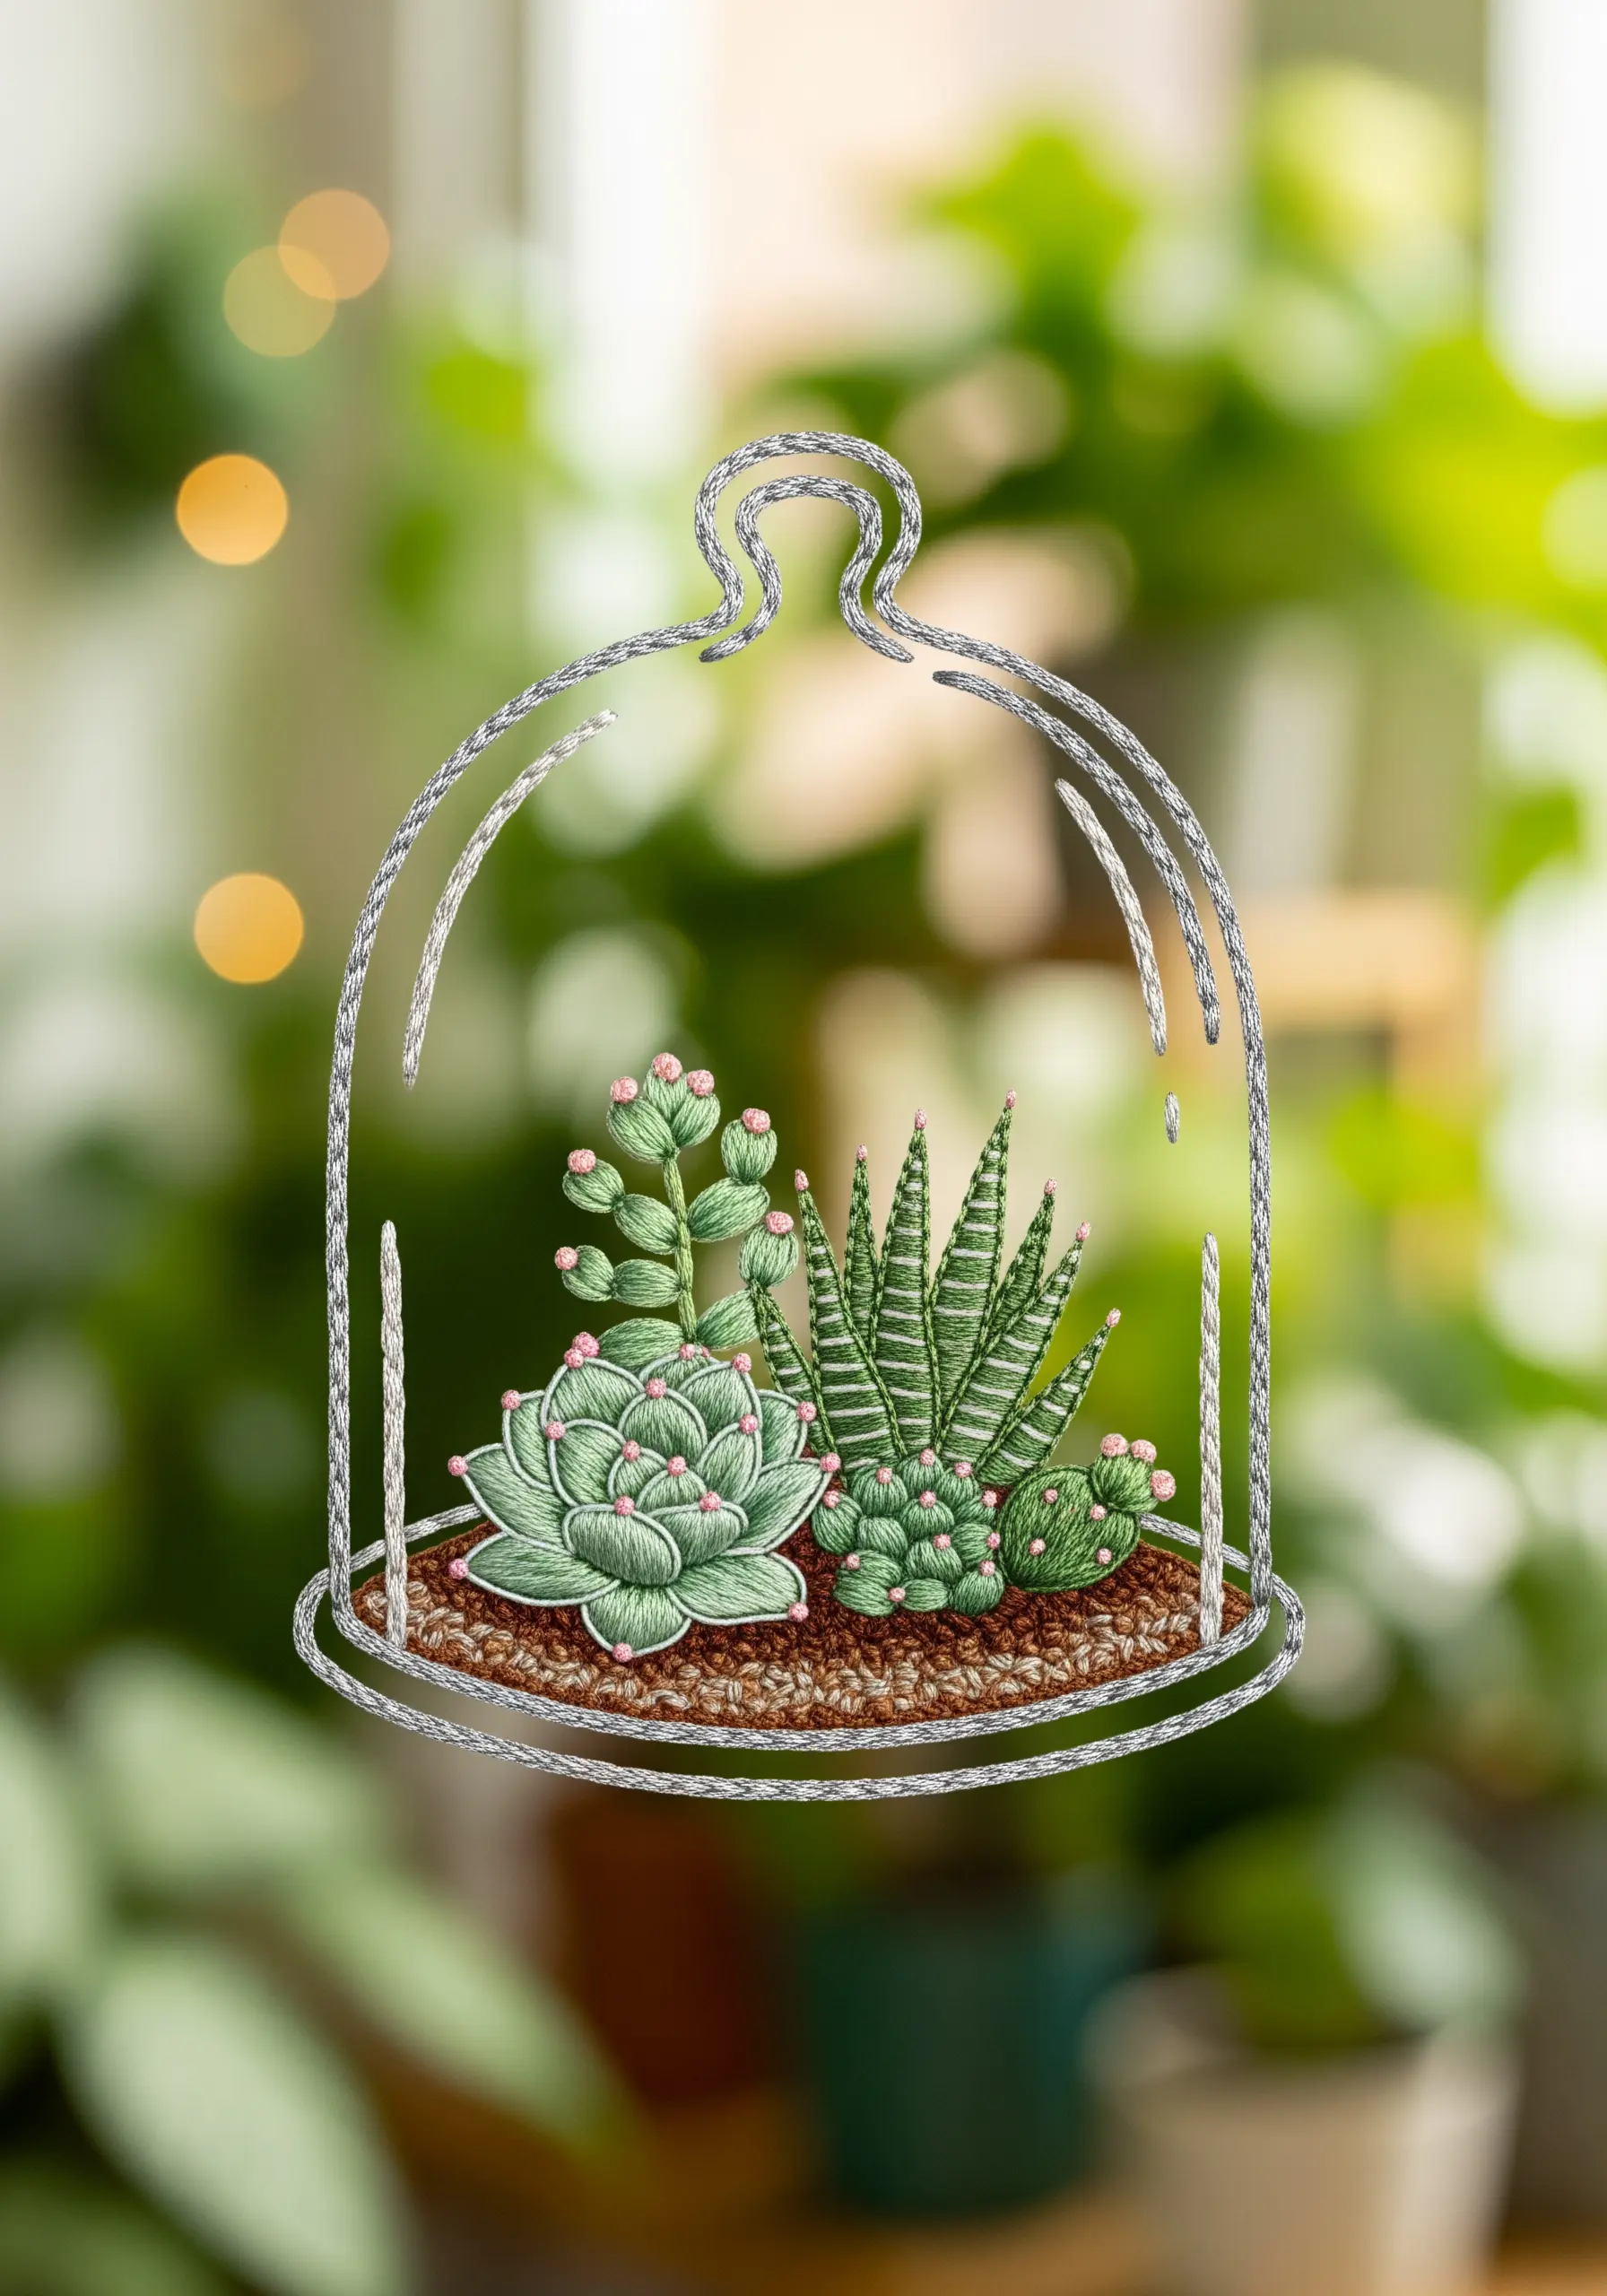
You can suggest the delicate look of glass by outlining your terrarium shape with a light, reflective thread.
A silver metallic floss, a silky gray rayon, or even a twisted cord will work beautifully.
Use a smooth, continuous stitch like a whipped backstitch or a chain stitch to create an unbroken line.
The key is to keep this outline delicate and fine, so it suggests transparency rather than a solid object, allowing the vibrant plants inside to remain the undisputed focal point.
19. A Sampler of Textural Fill Stitches
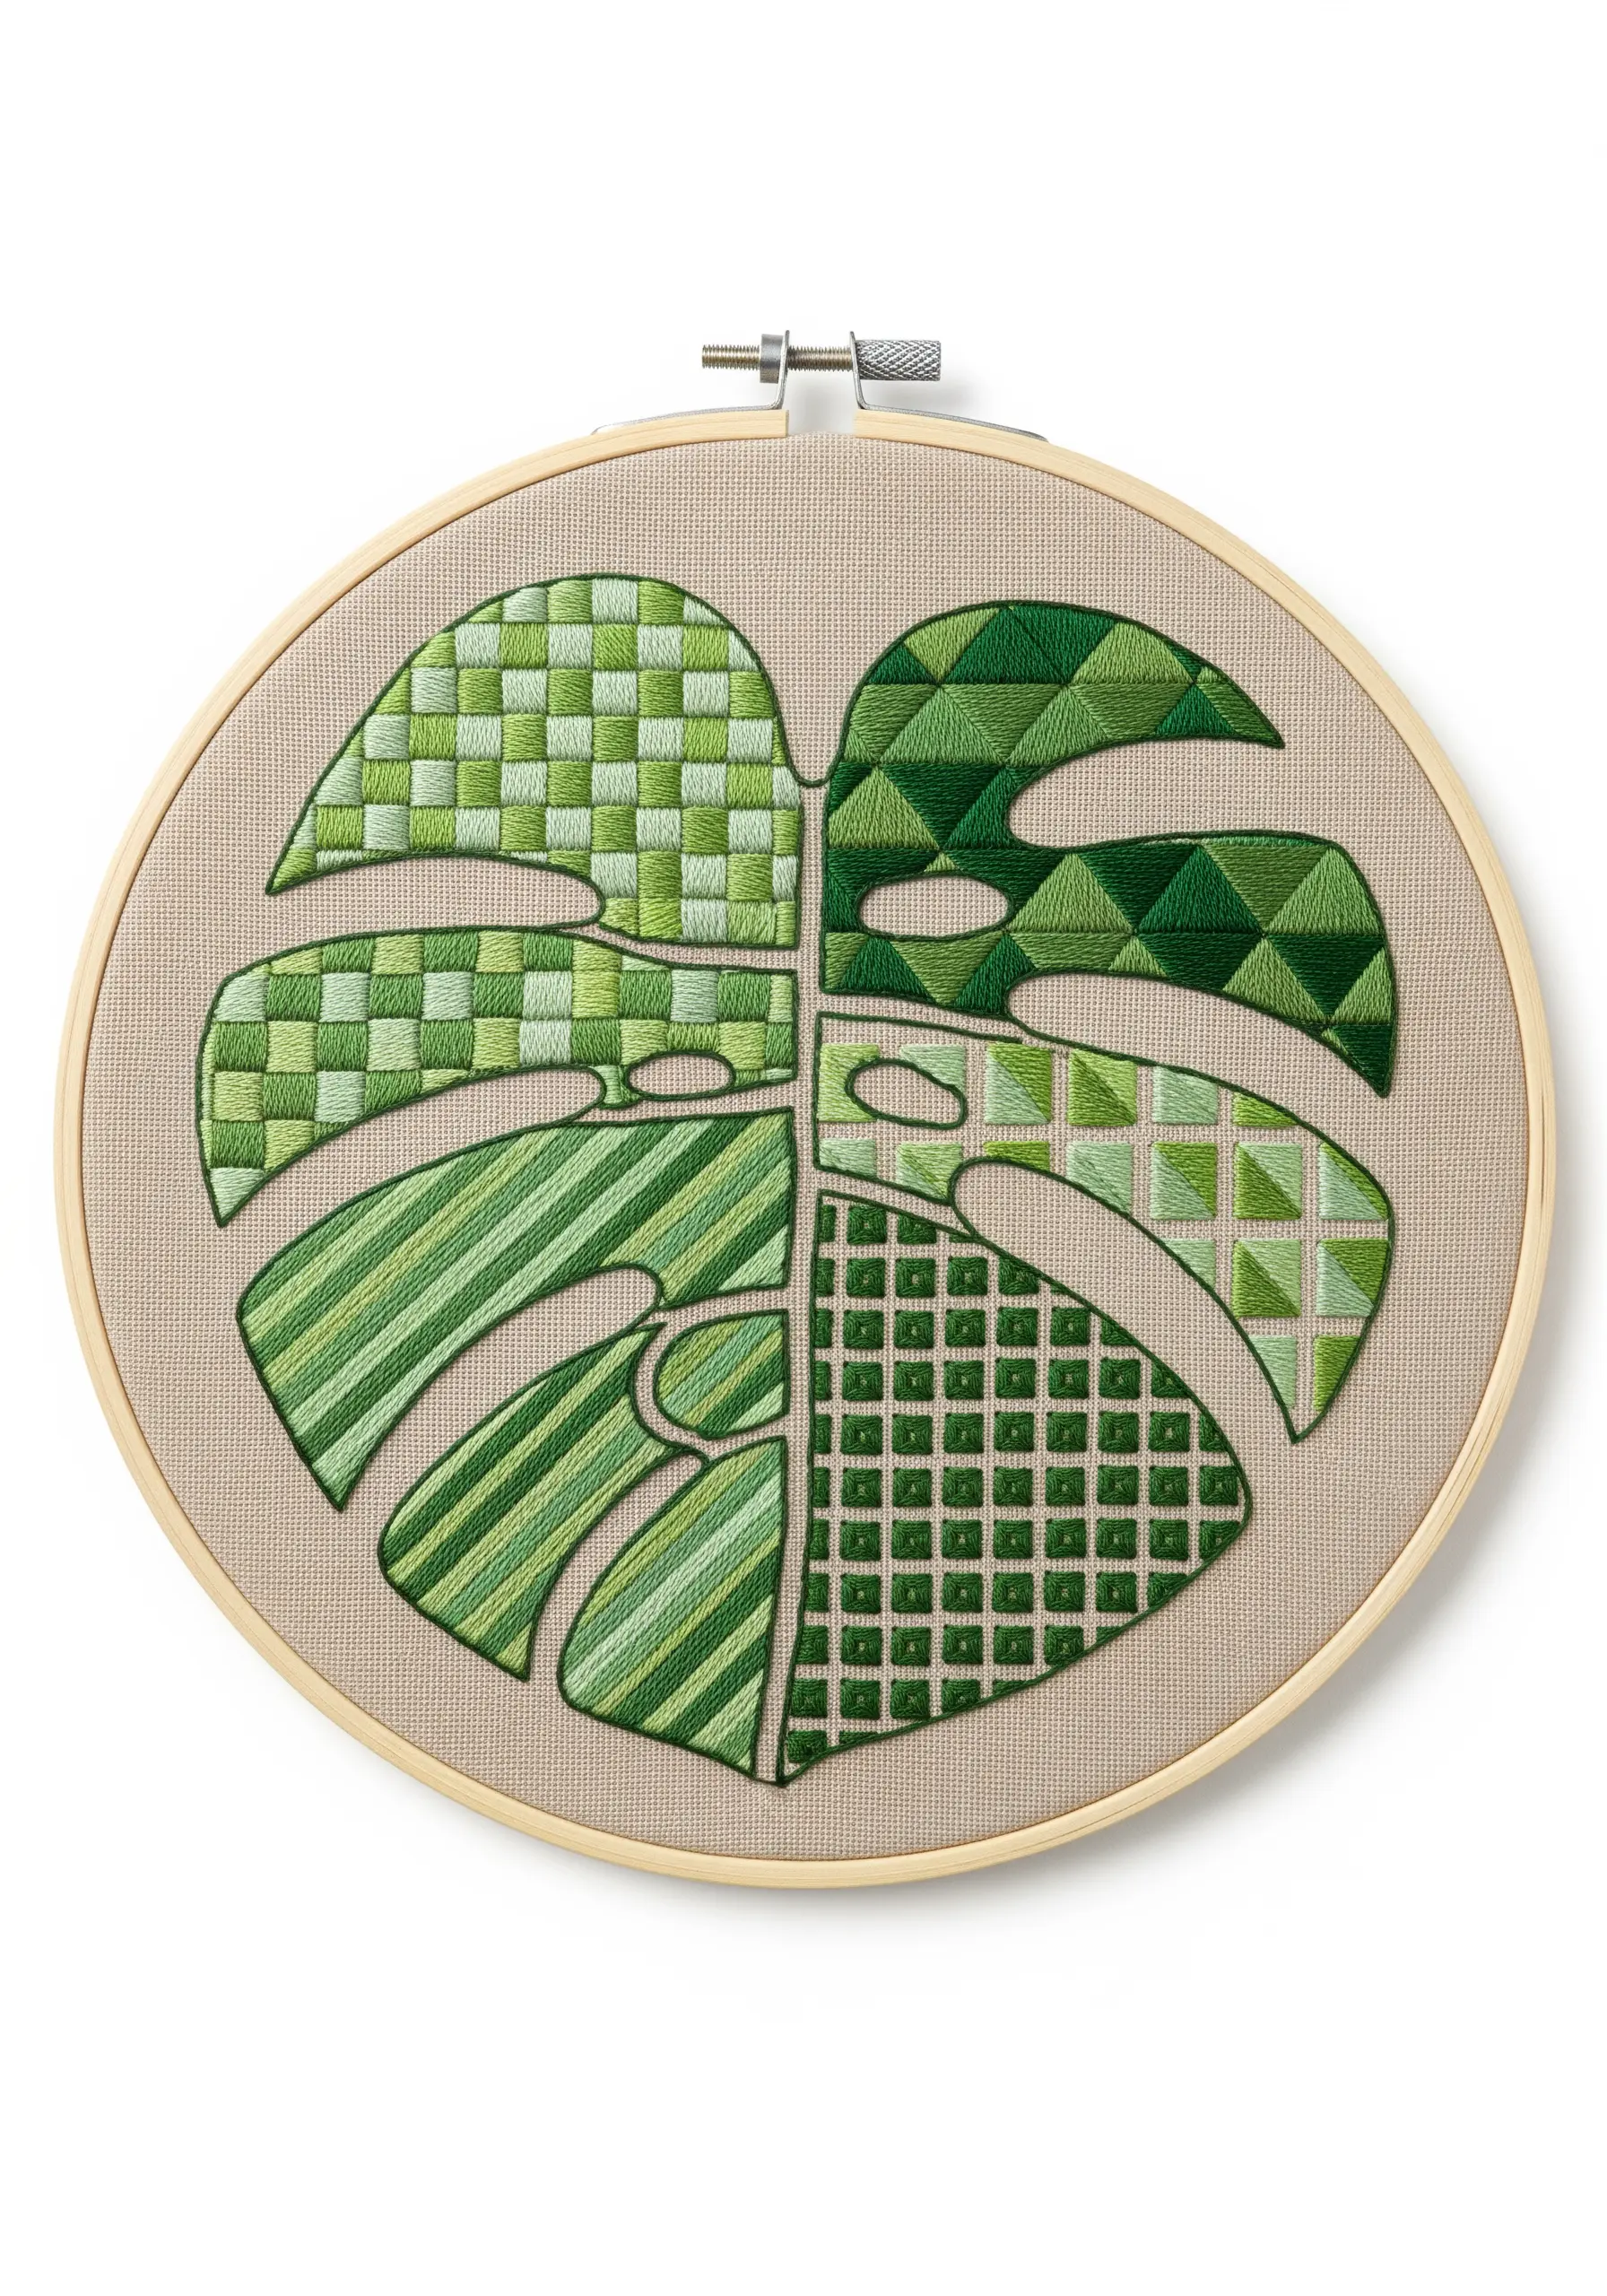
Turn a single leaf outline into a creative playground for practicing new techniques.
Divide the Monstera shape into distinct sections and challenge yourself to fill each one with a different textural stitch: basketweave, checkerboard fill, diagonal satin stitches, or even dense French knots.
To ensure the piece feels cohesive rather than chaotic, stick to a limited color palette, such as varying shades of green.
This approach transforms a simple botanical into a fascinating study of texture and pattern.
20. Designing for Home Decor Textiles

When you embroider on functional items like pillows, thoughtful design and placement are essential for longevity.
A vine creeping in from a corner is not only visually elegant but is also less likely to be distorted or snagged by daily use than a large, central design.
Always use a stabilizer on the back of your fabric to prevent puckering and provide support for your stitches.
This helps create beautiful and durable cottage garden embroidery themes that will last.
21. Unconventional Color for Fantasy Botanicals
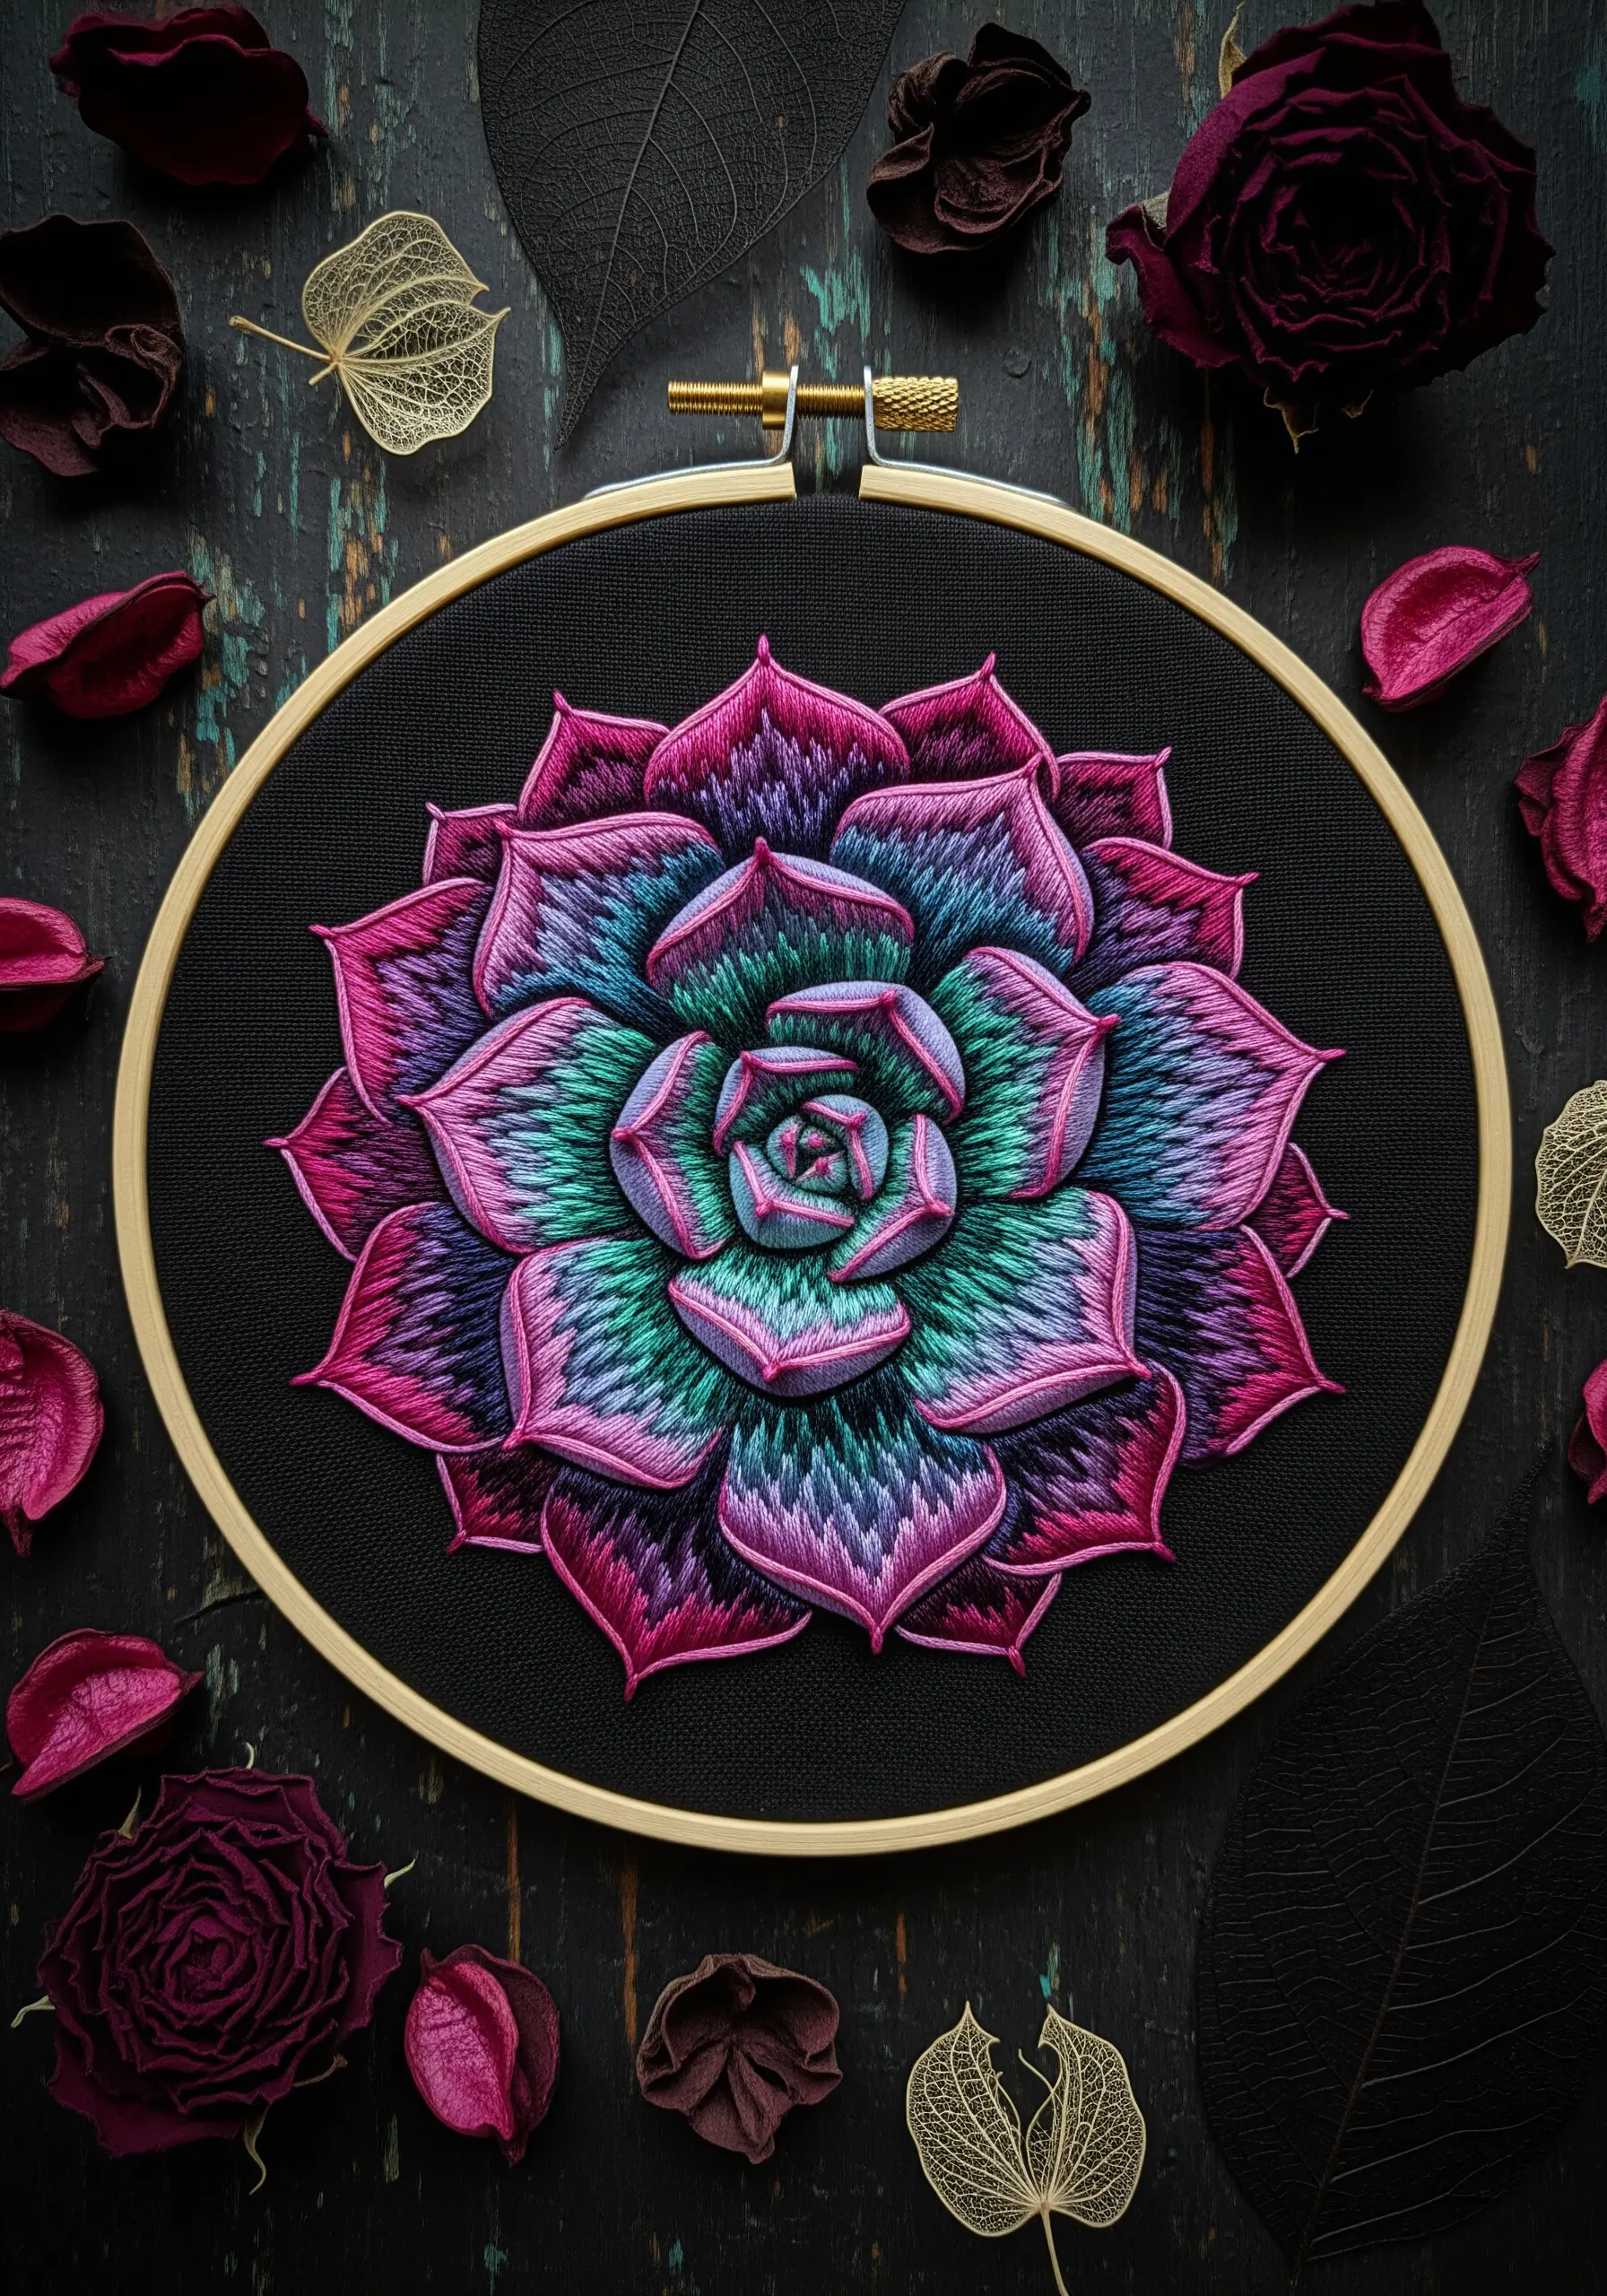
Give yourself permission to step away from realistic color palettes and explore the artistic potential of fantasy botanicals.
This succulent uses a mesmerizing blend of vibrant pinks, purples, and teals to create an otherworldly effect that is utterly captivating.
The magic is in the smooth long-and-short stitch blending, which allows the unexpected colors to flow into one another seamlessly.
Outlining each petal in a slightly darker shade adds crucial definition and prevents the vibrant hues from becoming visually muddy.
22. Capturing Texture in Minimalist Line Art

Even within the constraints of simple line art, you can suggest different textures through clever stitch choices.
Use a few well-placed French knots to represent the knots of a macrame hanger, and employ tightly spaced parallel straight stitches for the tassel’s fringe.
These small details add just enough information to differentiate the soft rope from the smooth leaf outlines.
Maintaining a consistent line weight by using the same number of floss strands throughout keeps the overall design feeling clean, modern, and cohesive.
23. Defining Form with Negative Space
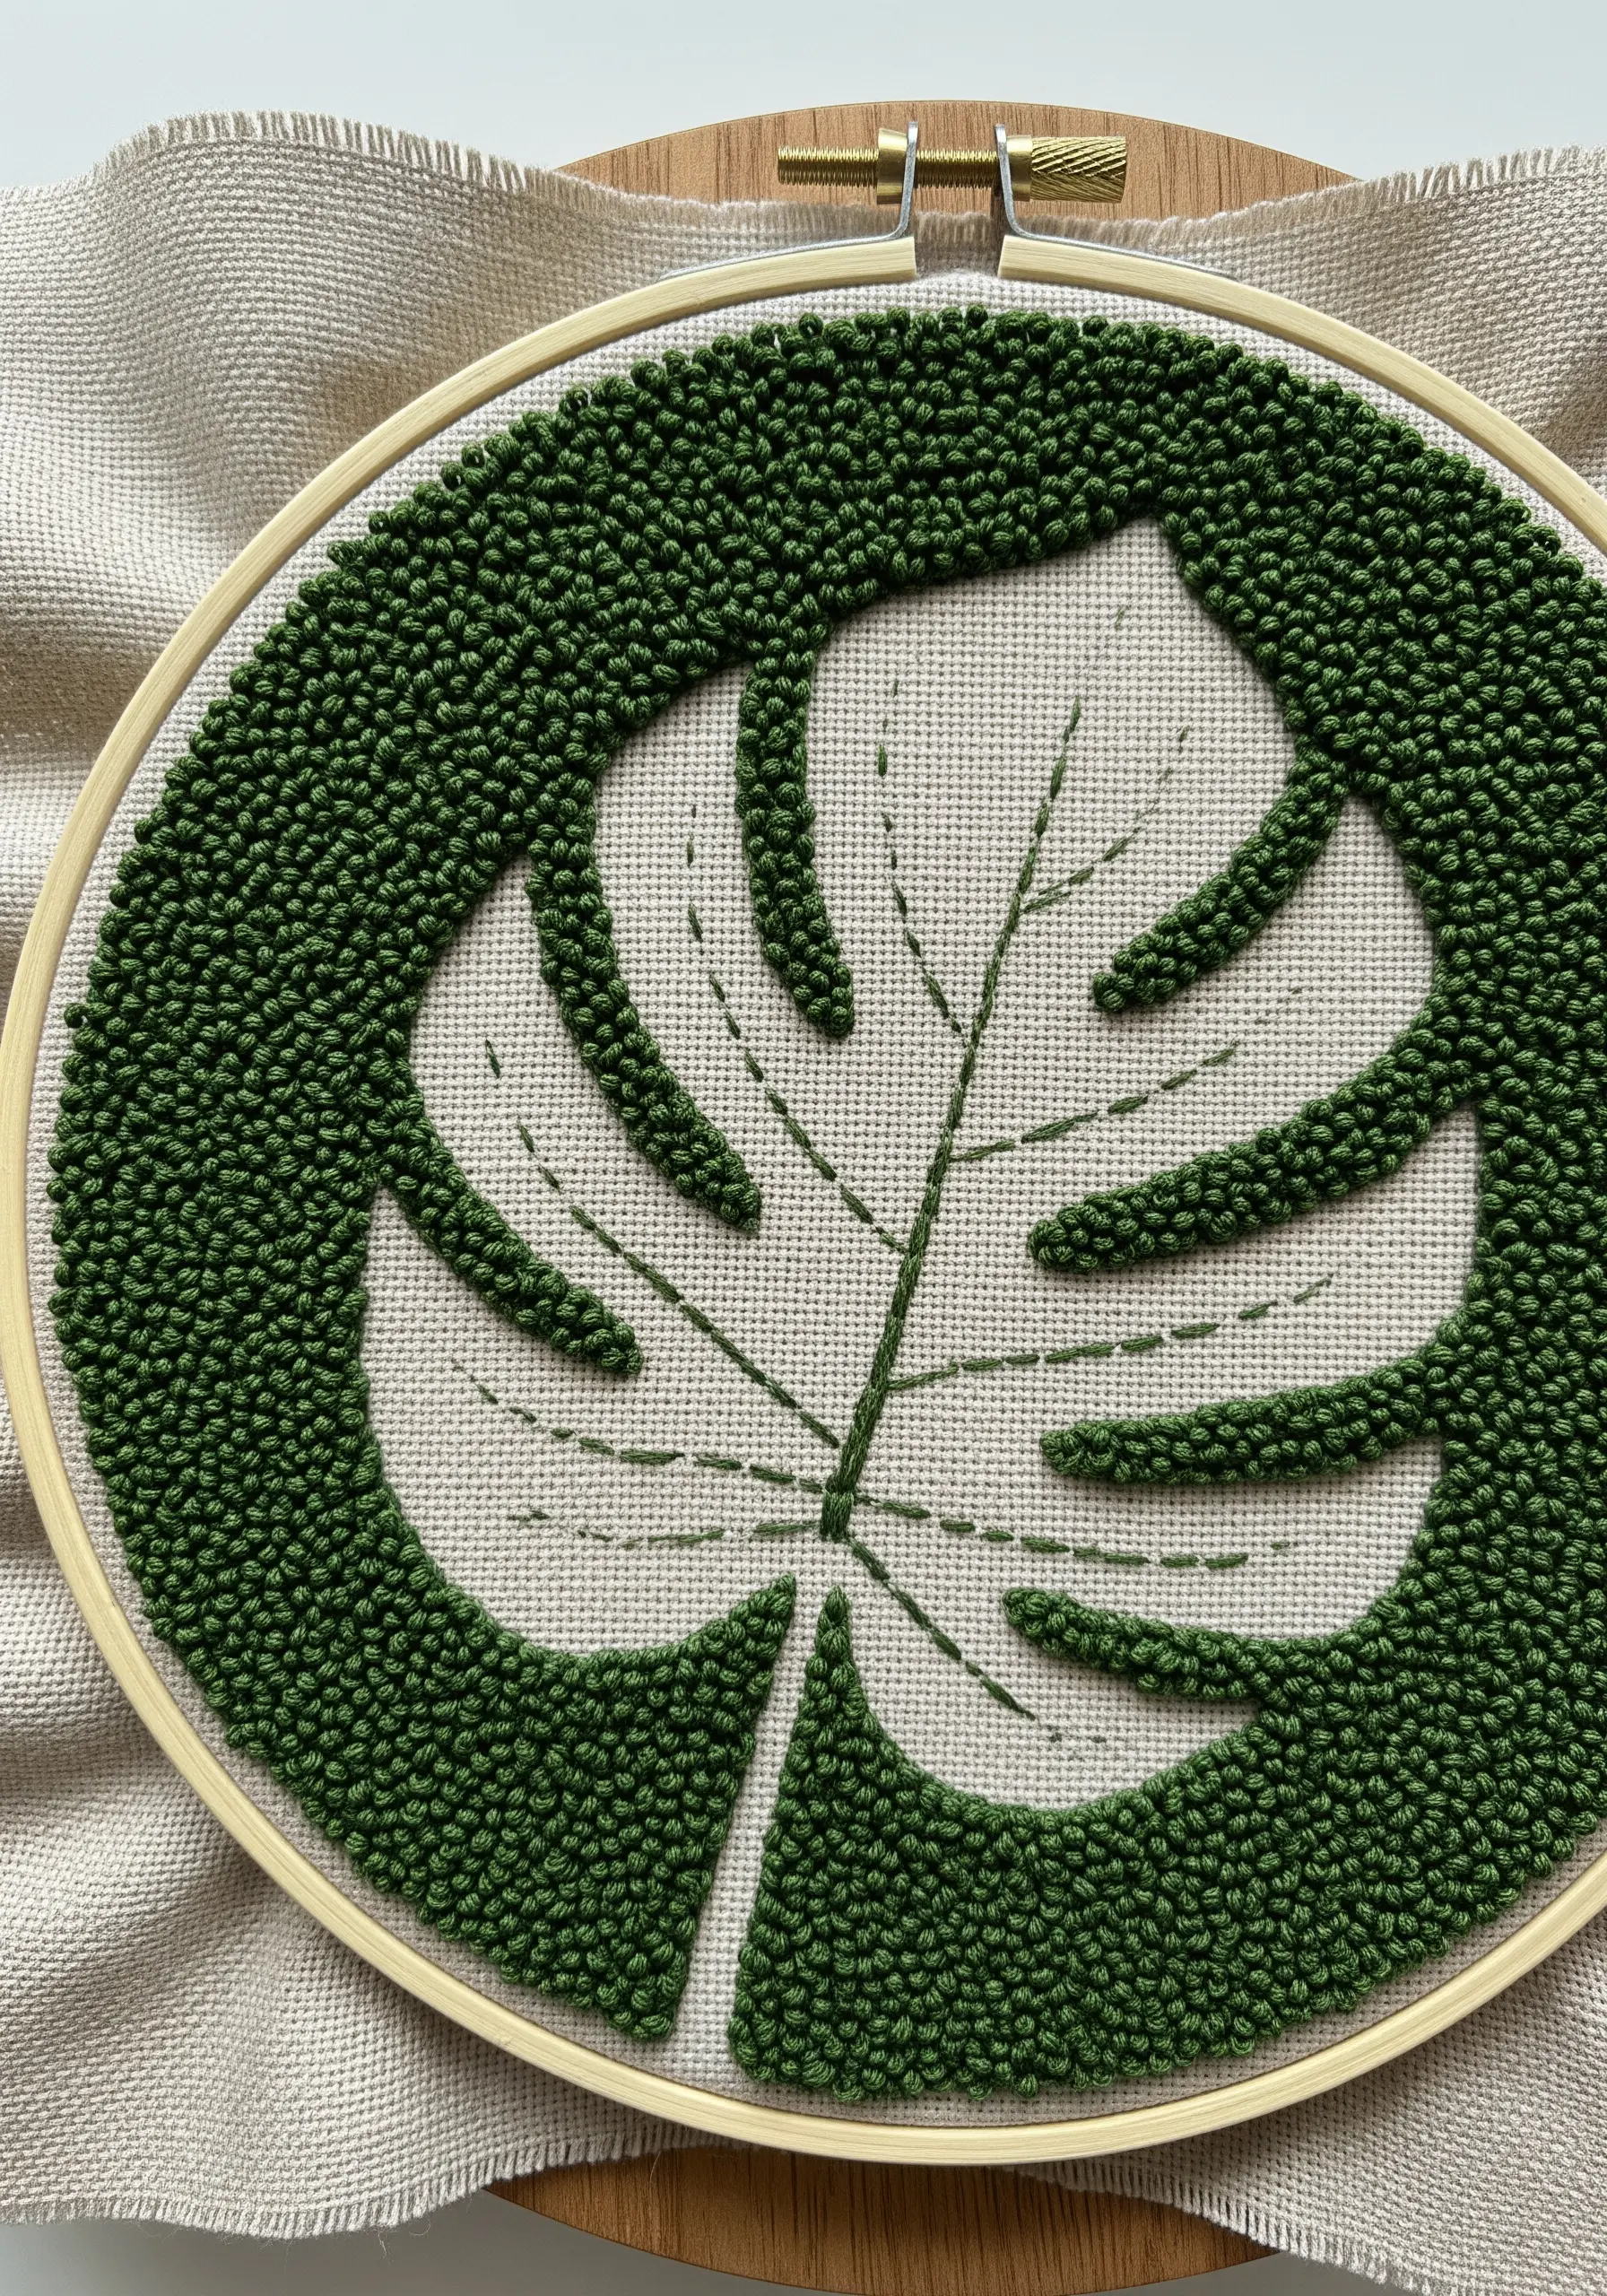
Create a visually arresting design by reversing your typical process: stitch the background, not the subject.
Carefully outline your Monstera leaf and then fill the entire area around it with a dense texture, like French knots or seed stitches.
This powerful technique makes the unstitched fabric of the leaf shape the true focal point.
The rich texture of the stitched background adds incredible depth and makes the clean, simple lines of the leaf stand out with graphic intensity.
24. Recreating Patterns with Directional Stitching
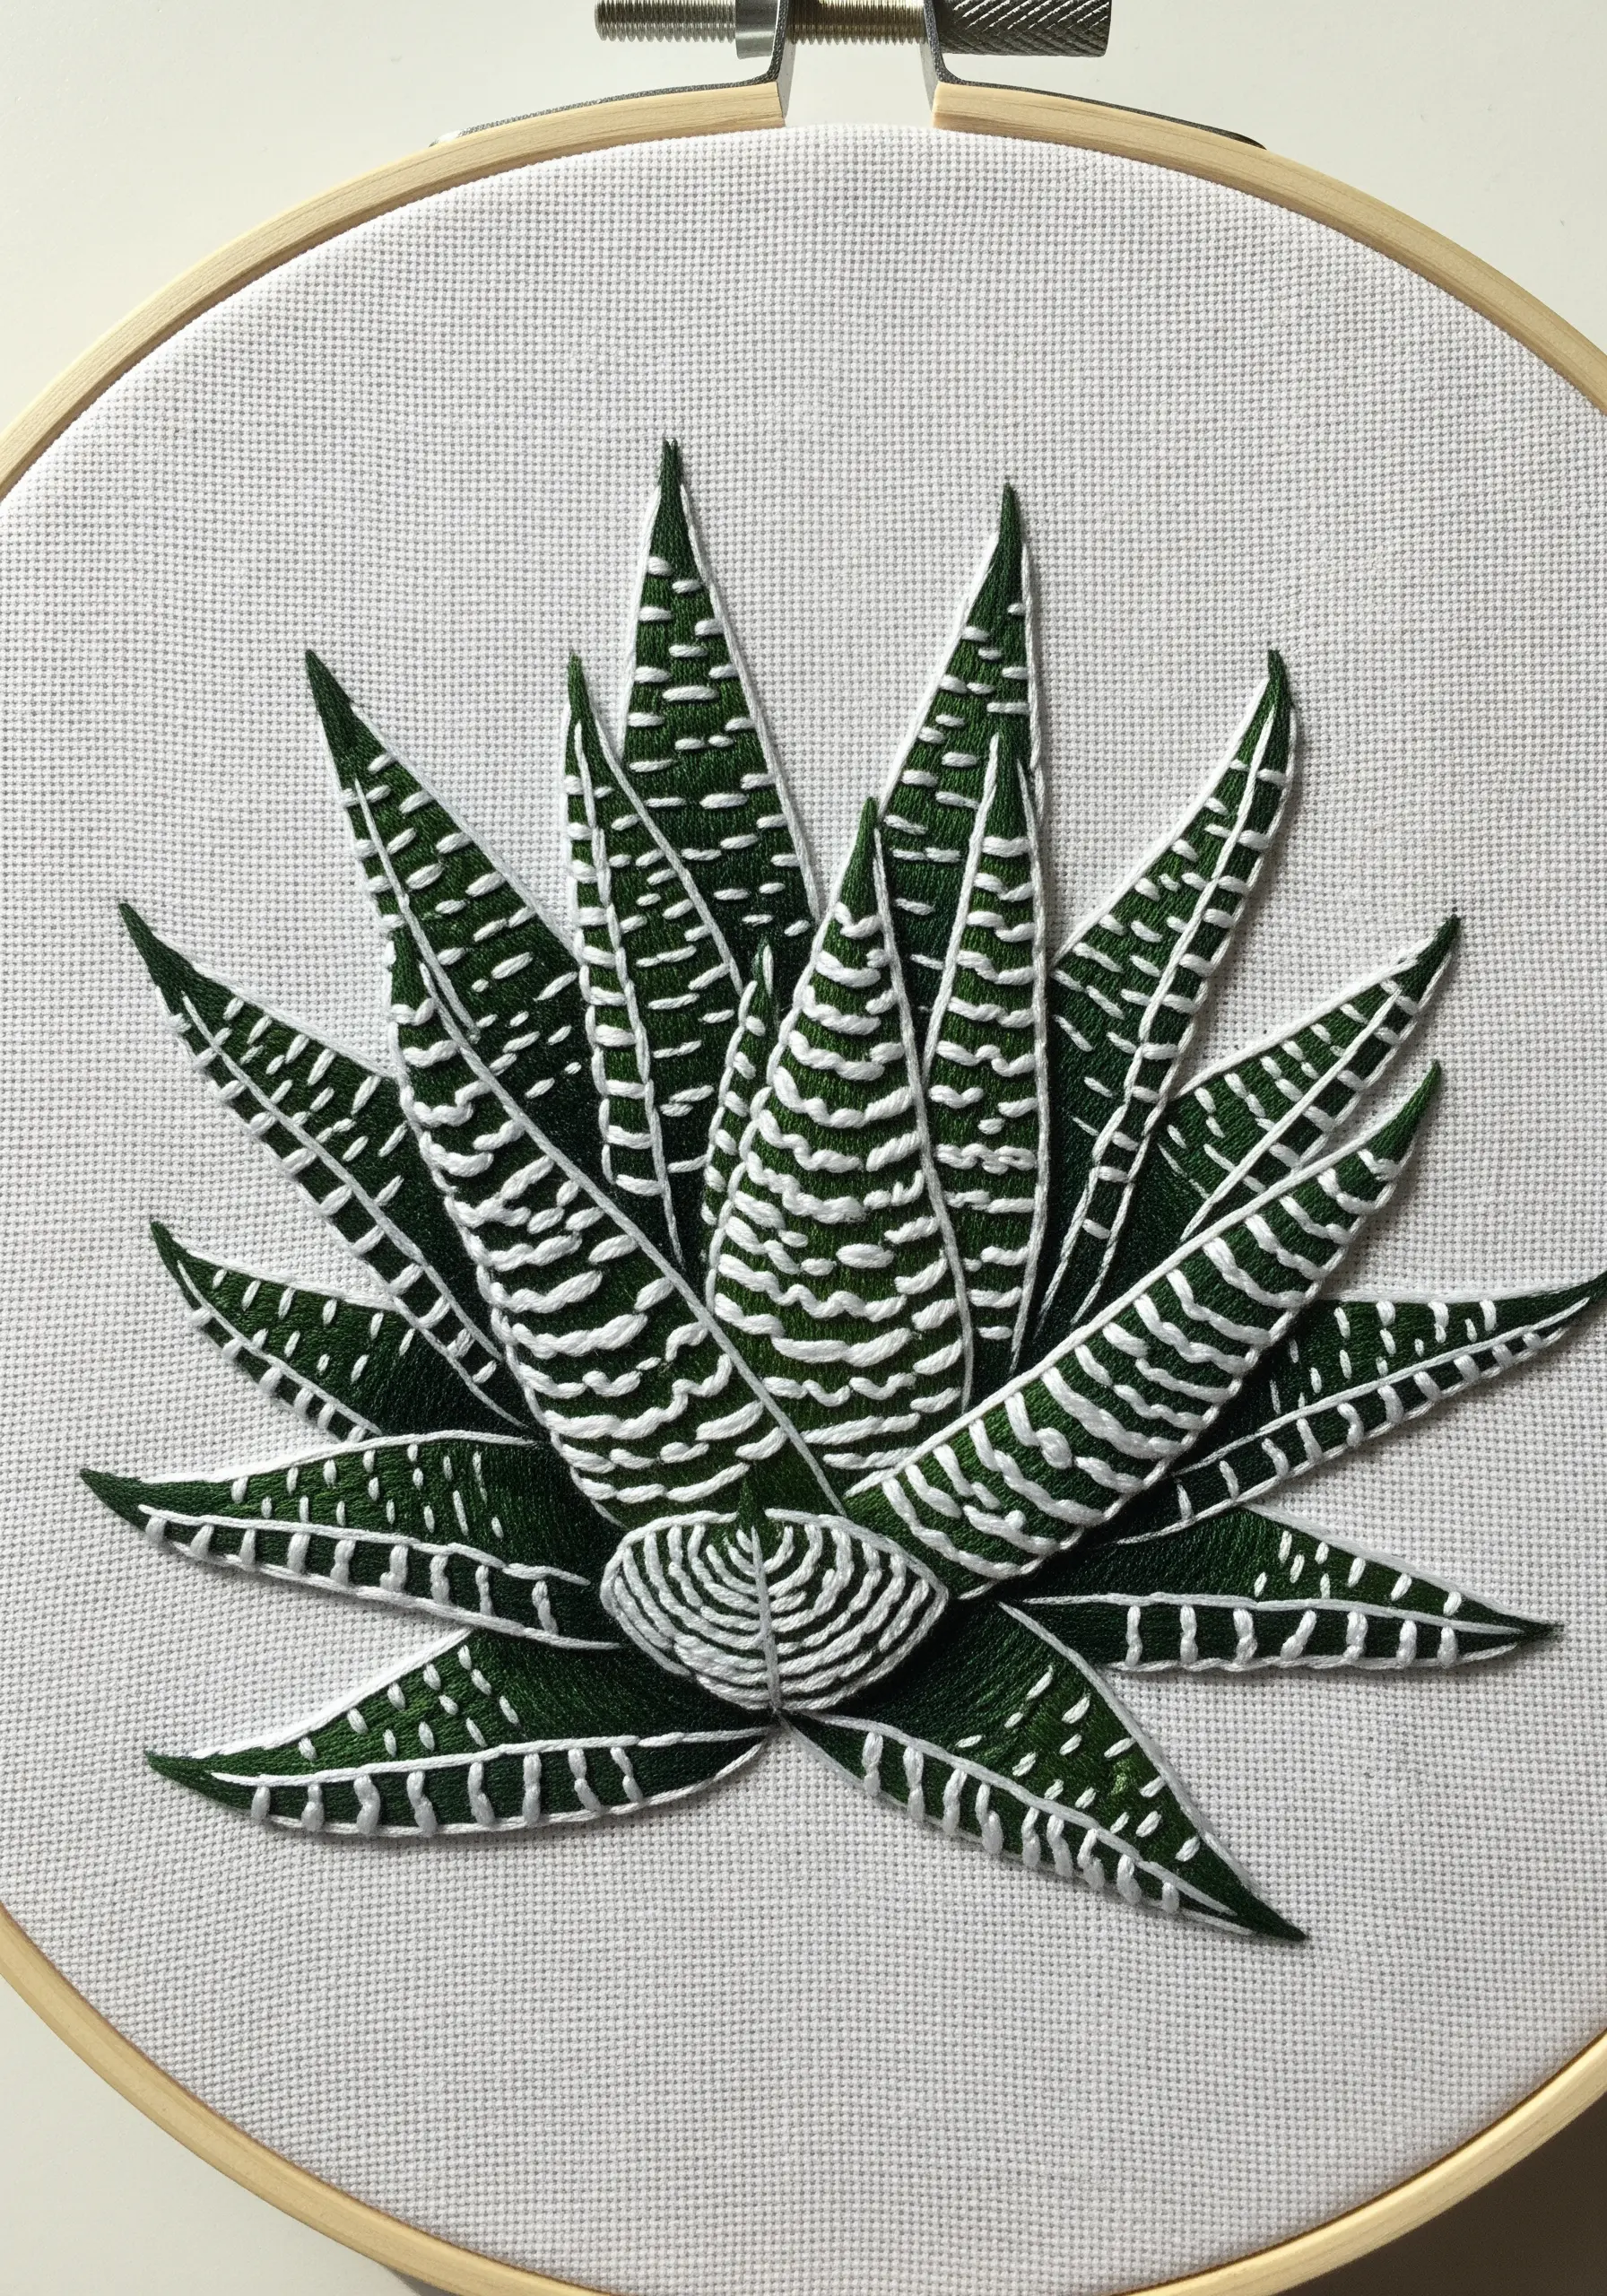
For plants with distinct markings like the Haworthia, precision and stitch direction are everything.
Recreate the iconic white “zebra” stripes using small, carefully placed horizontal satin stitches.
To keep the edges of these stripes perfectly crisp, first outline each one with a single strand of white thread before filling it in.
The contrast between the horizontal white stitches and the vertical satin stitches used for the green body of the leaf adds a subtle but effective layer of texture.
25. Modern Framing for Botanical Sets
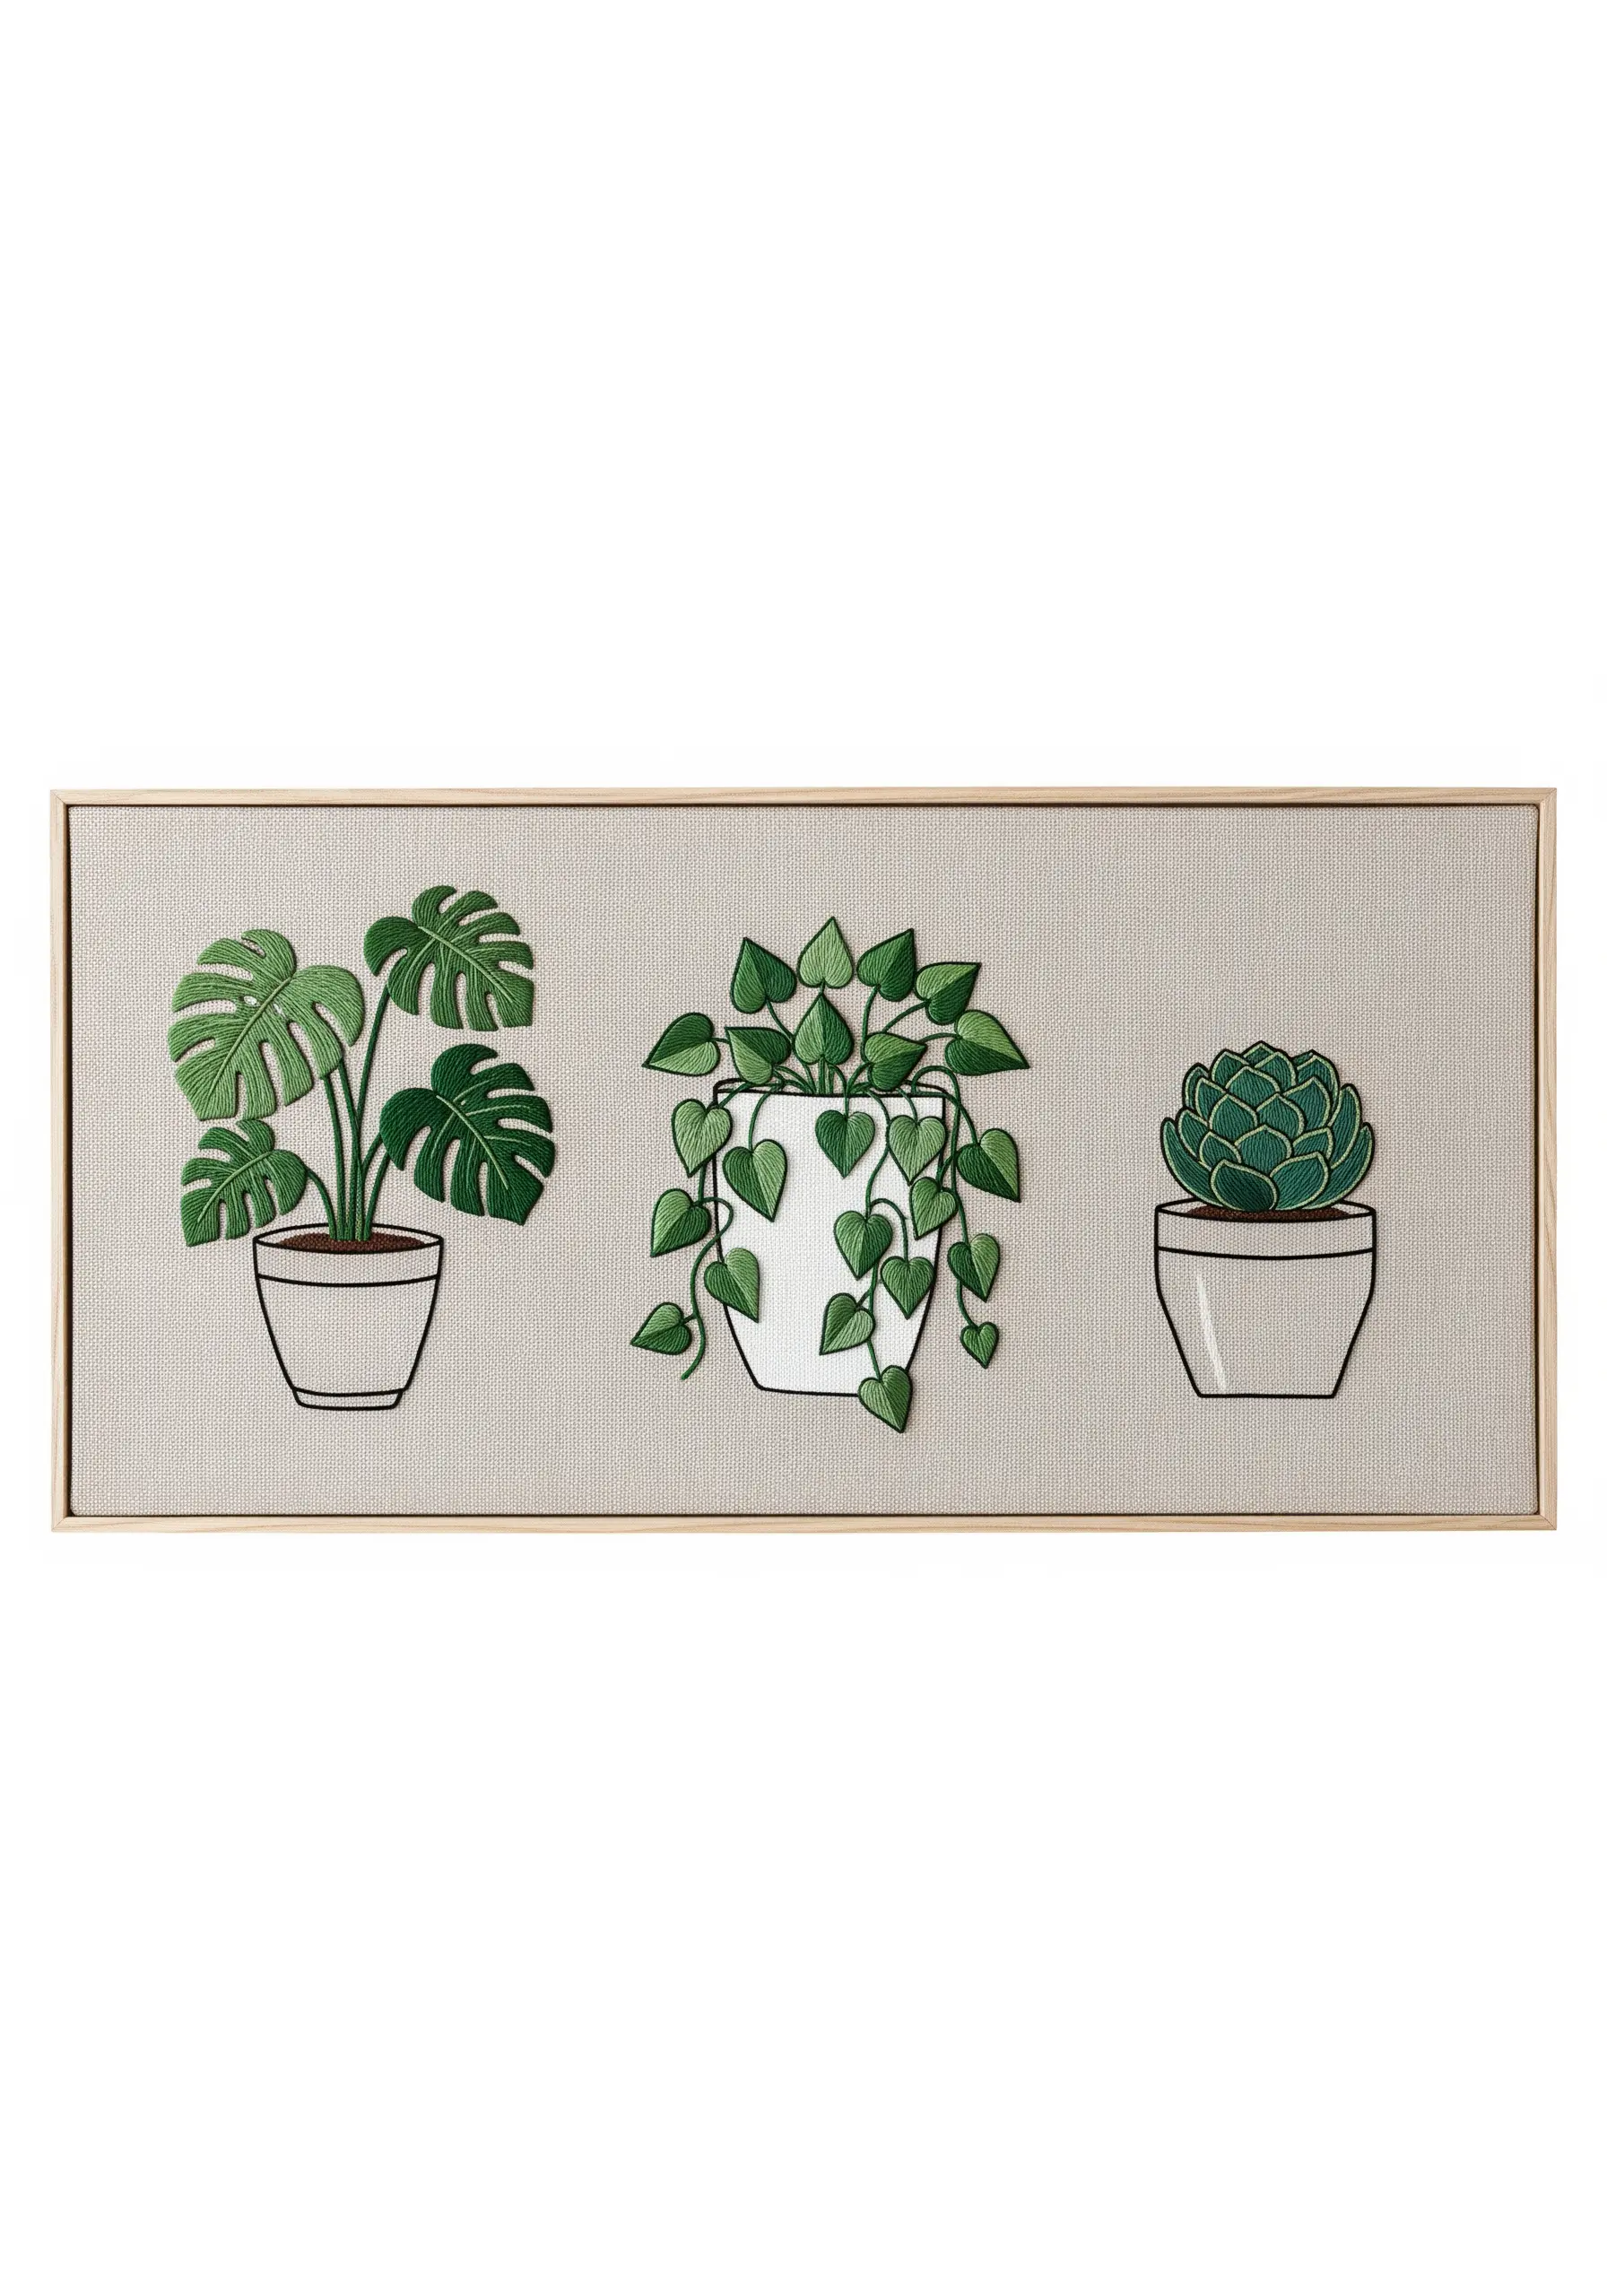
Grouping several individual plant motifs into a single, panoramic frame creates a clean, modern gallery look that feels intentional and curated.
To ensure the designs feel like a cohesive set, use a consistent artistic style—such as the simple black outlines for the pots—and a harmonious color palette for the foliage.
This triptych format is perfect for decorating a mantelpiece or a narrow wall, transforming individual studies into sophisticated minimal embroidery wall pieces.
26. Capturing the Drama of Vibrant Variegation

To do justice to the stunning pink of a Philodendron Pink Princess, you must be bold with your color choices.
Select a vibrant, almost neon pink floss and blend it confidently into a deep, moody green using directional long-and-short stitches.
Stitching on a dark navy or black fabric will make the pink pop with even more intensity, creating the same stunning contrast that makes the real plant so sought-after.
This approach celebrates the drama and beauty of rare plants.
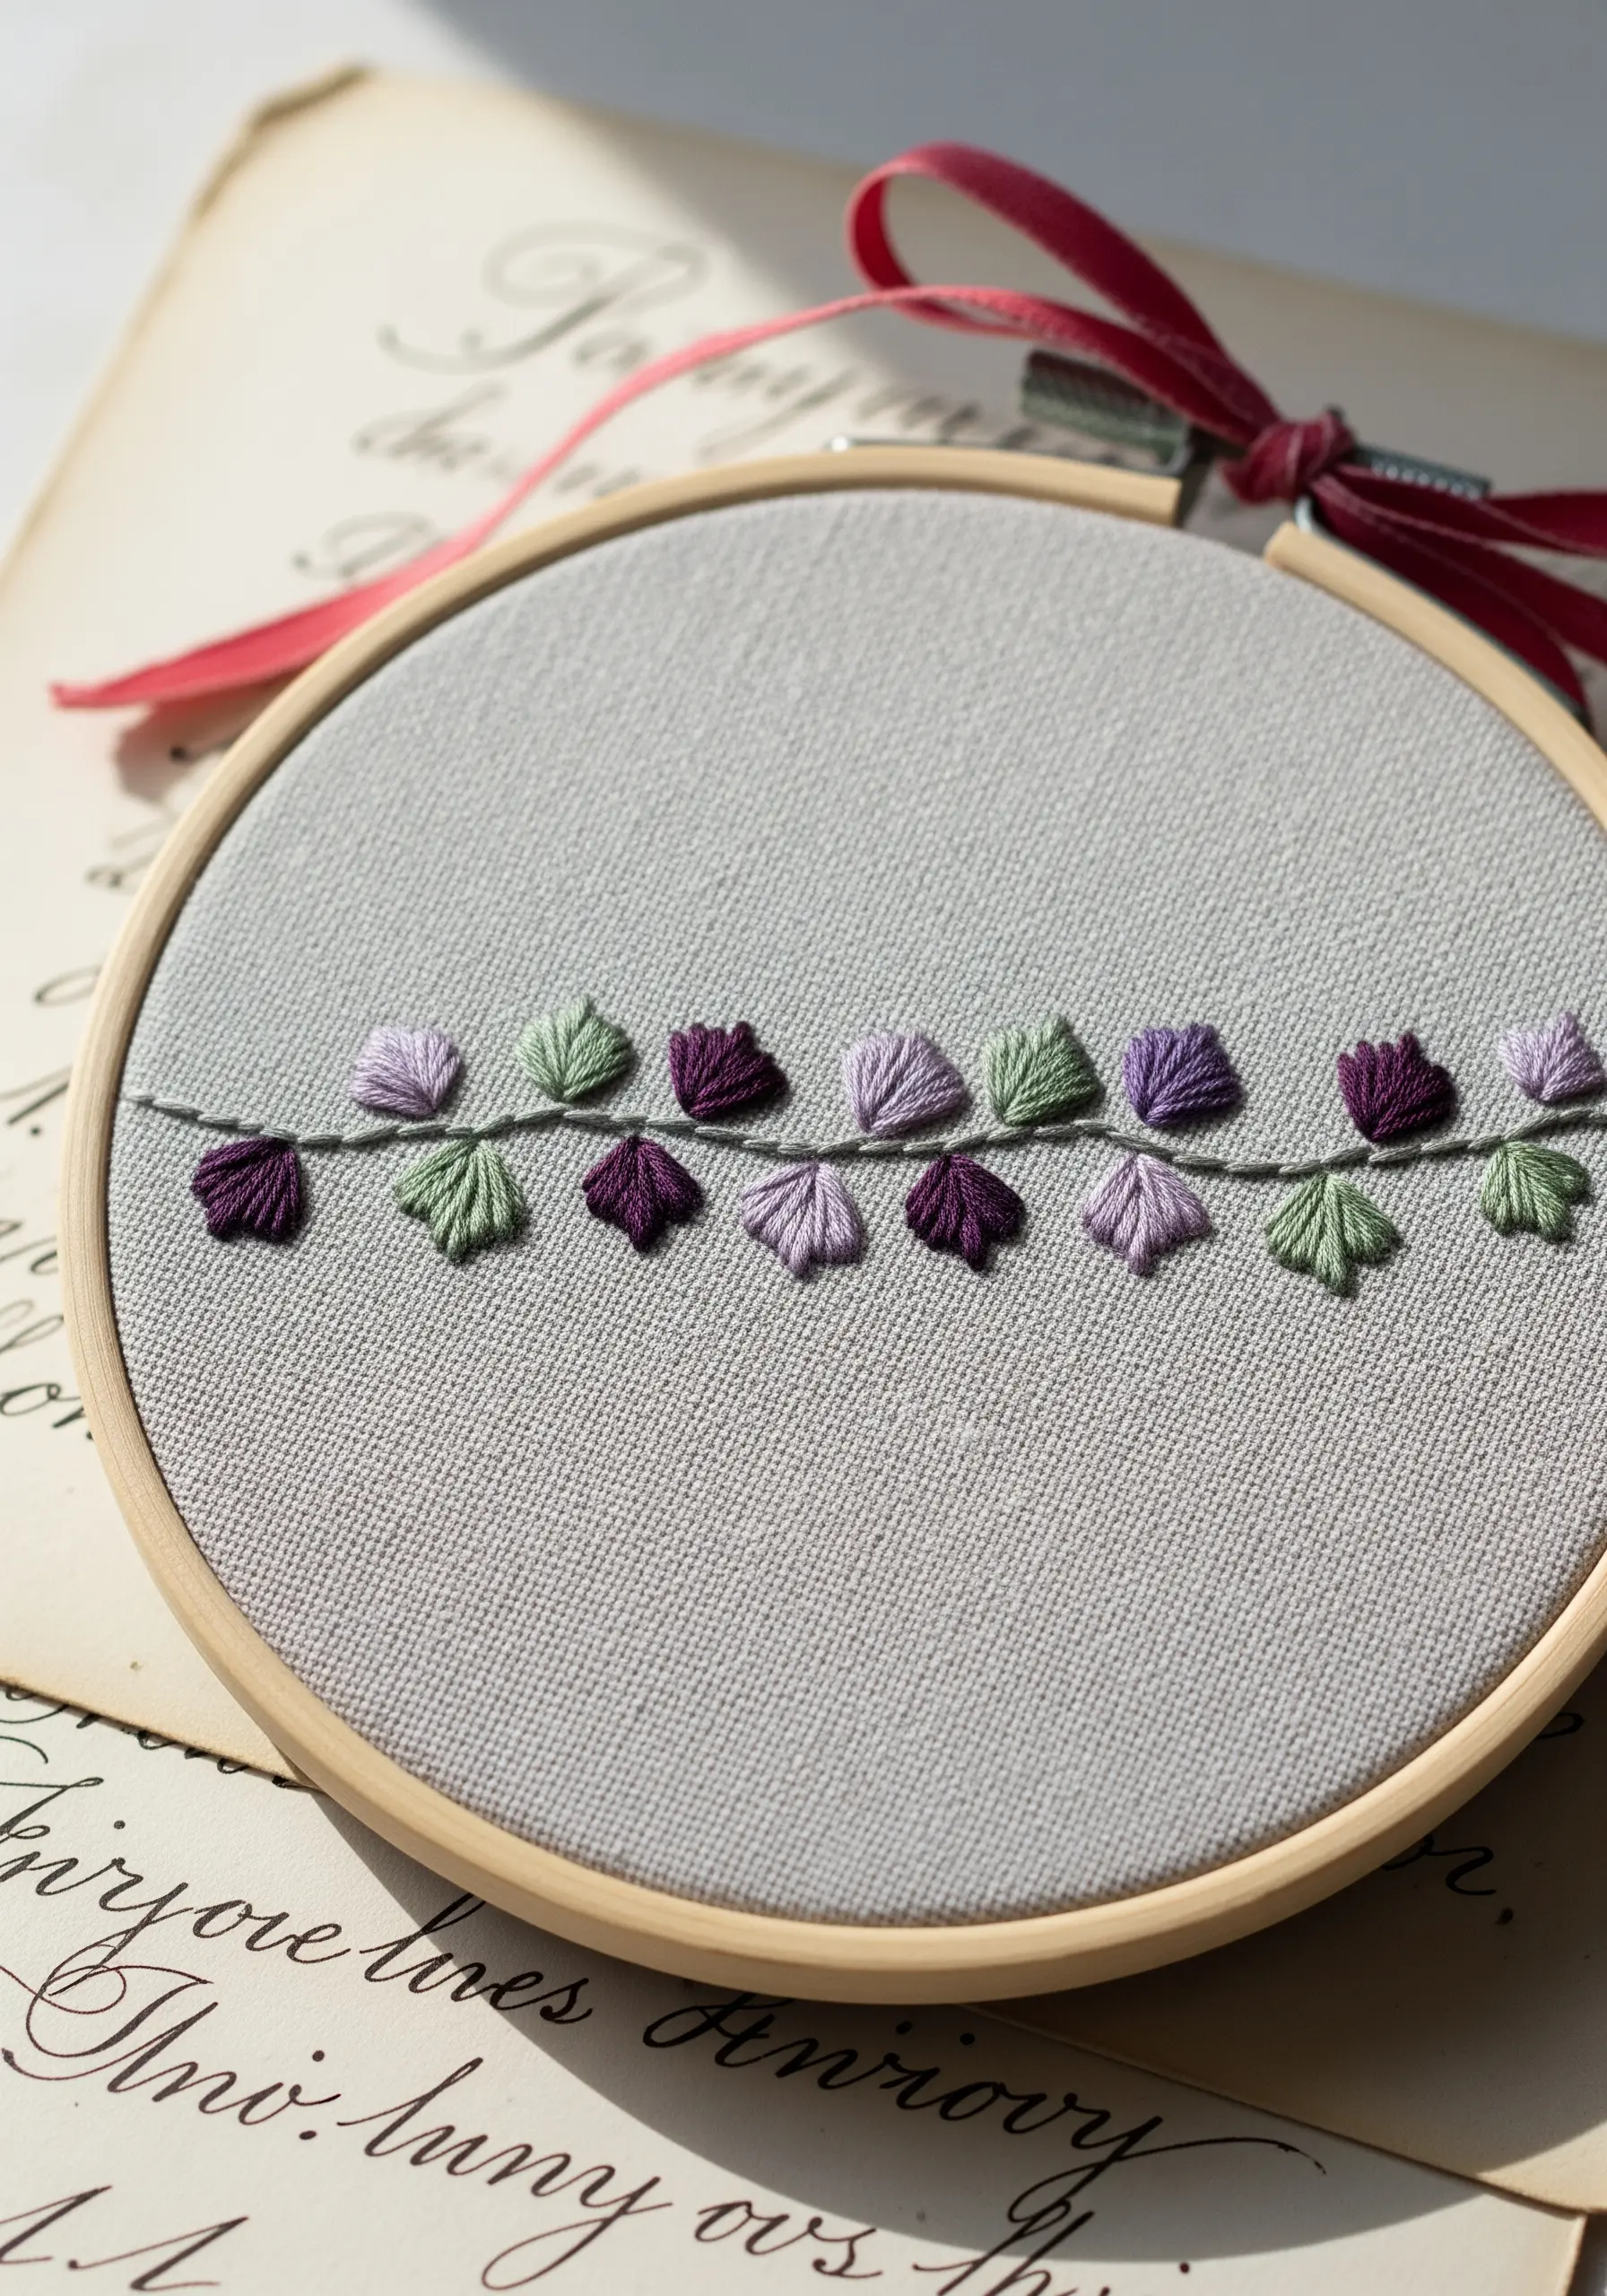
27. Designing a Bespoke Botanical Pattern
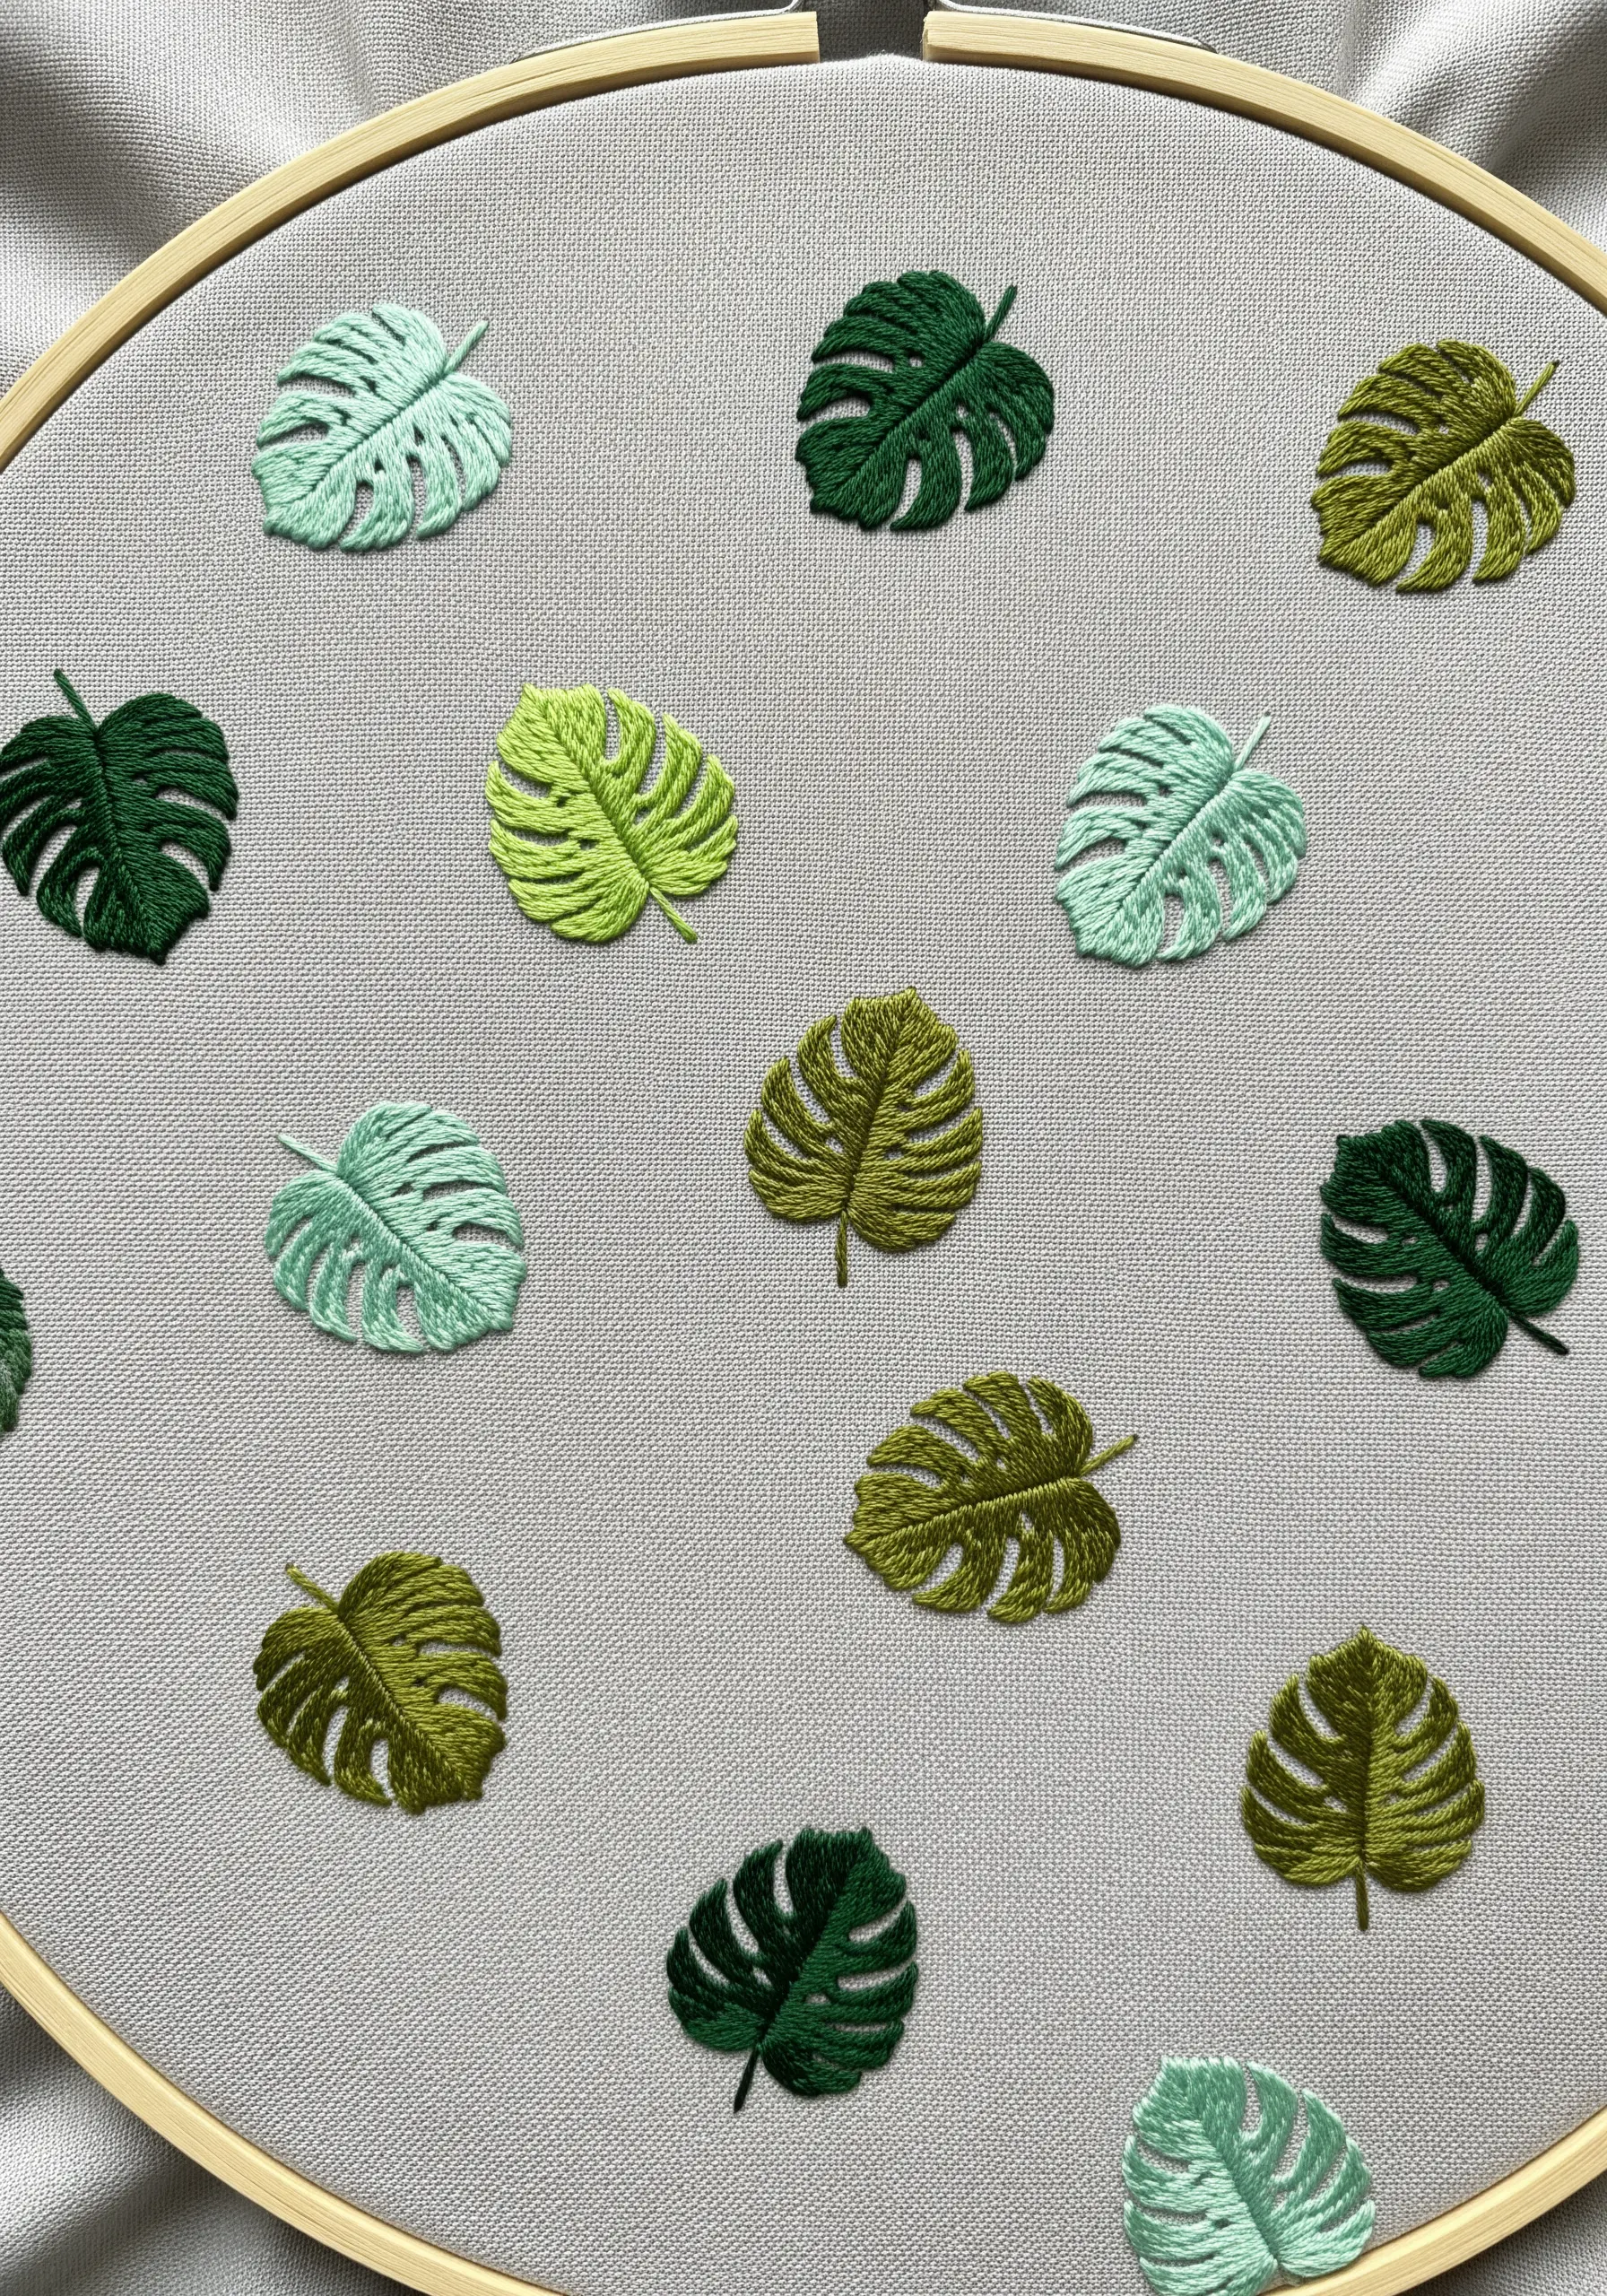
Move beyond a single, central motif and create your own repeating pattern of tiny leaves.
This is a wonderful way to use up scrap threads from other projects while practicing your stitch consistency.
To keep the pattern feeling organic and not too rigid, vary the orientation and shade of green for each leaf slightly.
This ‘scatter’ pattern is perfect for embellishing fabric that you can then use to create unique pouches, book covers, or even custom apparel.
28. Personalized Botanicals with Elegant Monograms

Combine the beauty of botanical elements with classic typography to create a truly meaningful and personalized piece.
Start by outlining a large initial, then allow a delicate vine to weave and wrap around its form.
Use a smooth satin stitch for the letter itself and a more textural stitch—like the fishbone stitch—for the leaves to create a pleasing contrast in surface quality.
This is a timeless way to create minimal monogram styles that make personalized gifts look high-end.
29. Adding Realism with Subtle Color Tipping

You can add a surprising amount of realism to your stitched succulents with one simple detail: color tipping.
After you’ve filled each petal with your main green color using a long-and-short stitch, add just a few tiny straight stitches of a contrasting color right at the very tip.
A touch of pink, magenta, or deep red mimics the ‘sun-stressed’ look of many real succulents and adds a beautiful, subtle layer of complexity to your work.
30. Illustrative Stitching for Kitchen Textiles

When embroidering items that need to be durable and washable, like tea towels, a simple outline stitch is your best choice.
A classic backstitch or a smooth stem stitch, worked with three strands of cotton floss, creates a line that is strong enough to stand out but won’t snag easily in the wash.
This graphic, illustrative style is perfect for functional decor, adding a touch of handmade charm to your home. It’s a great application for simple line art fruit & food motifs that are both chic and practical.


