

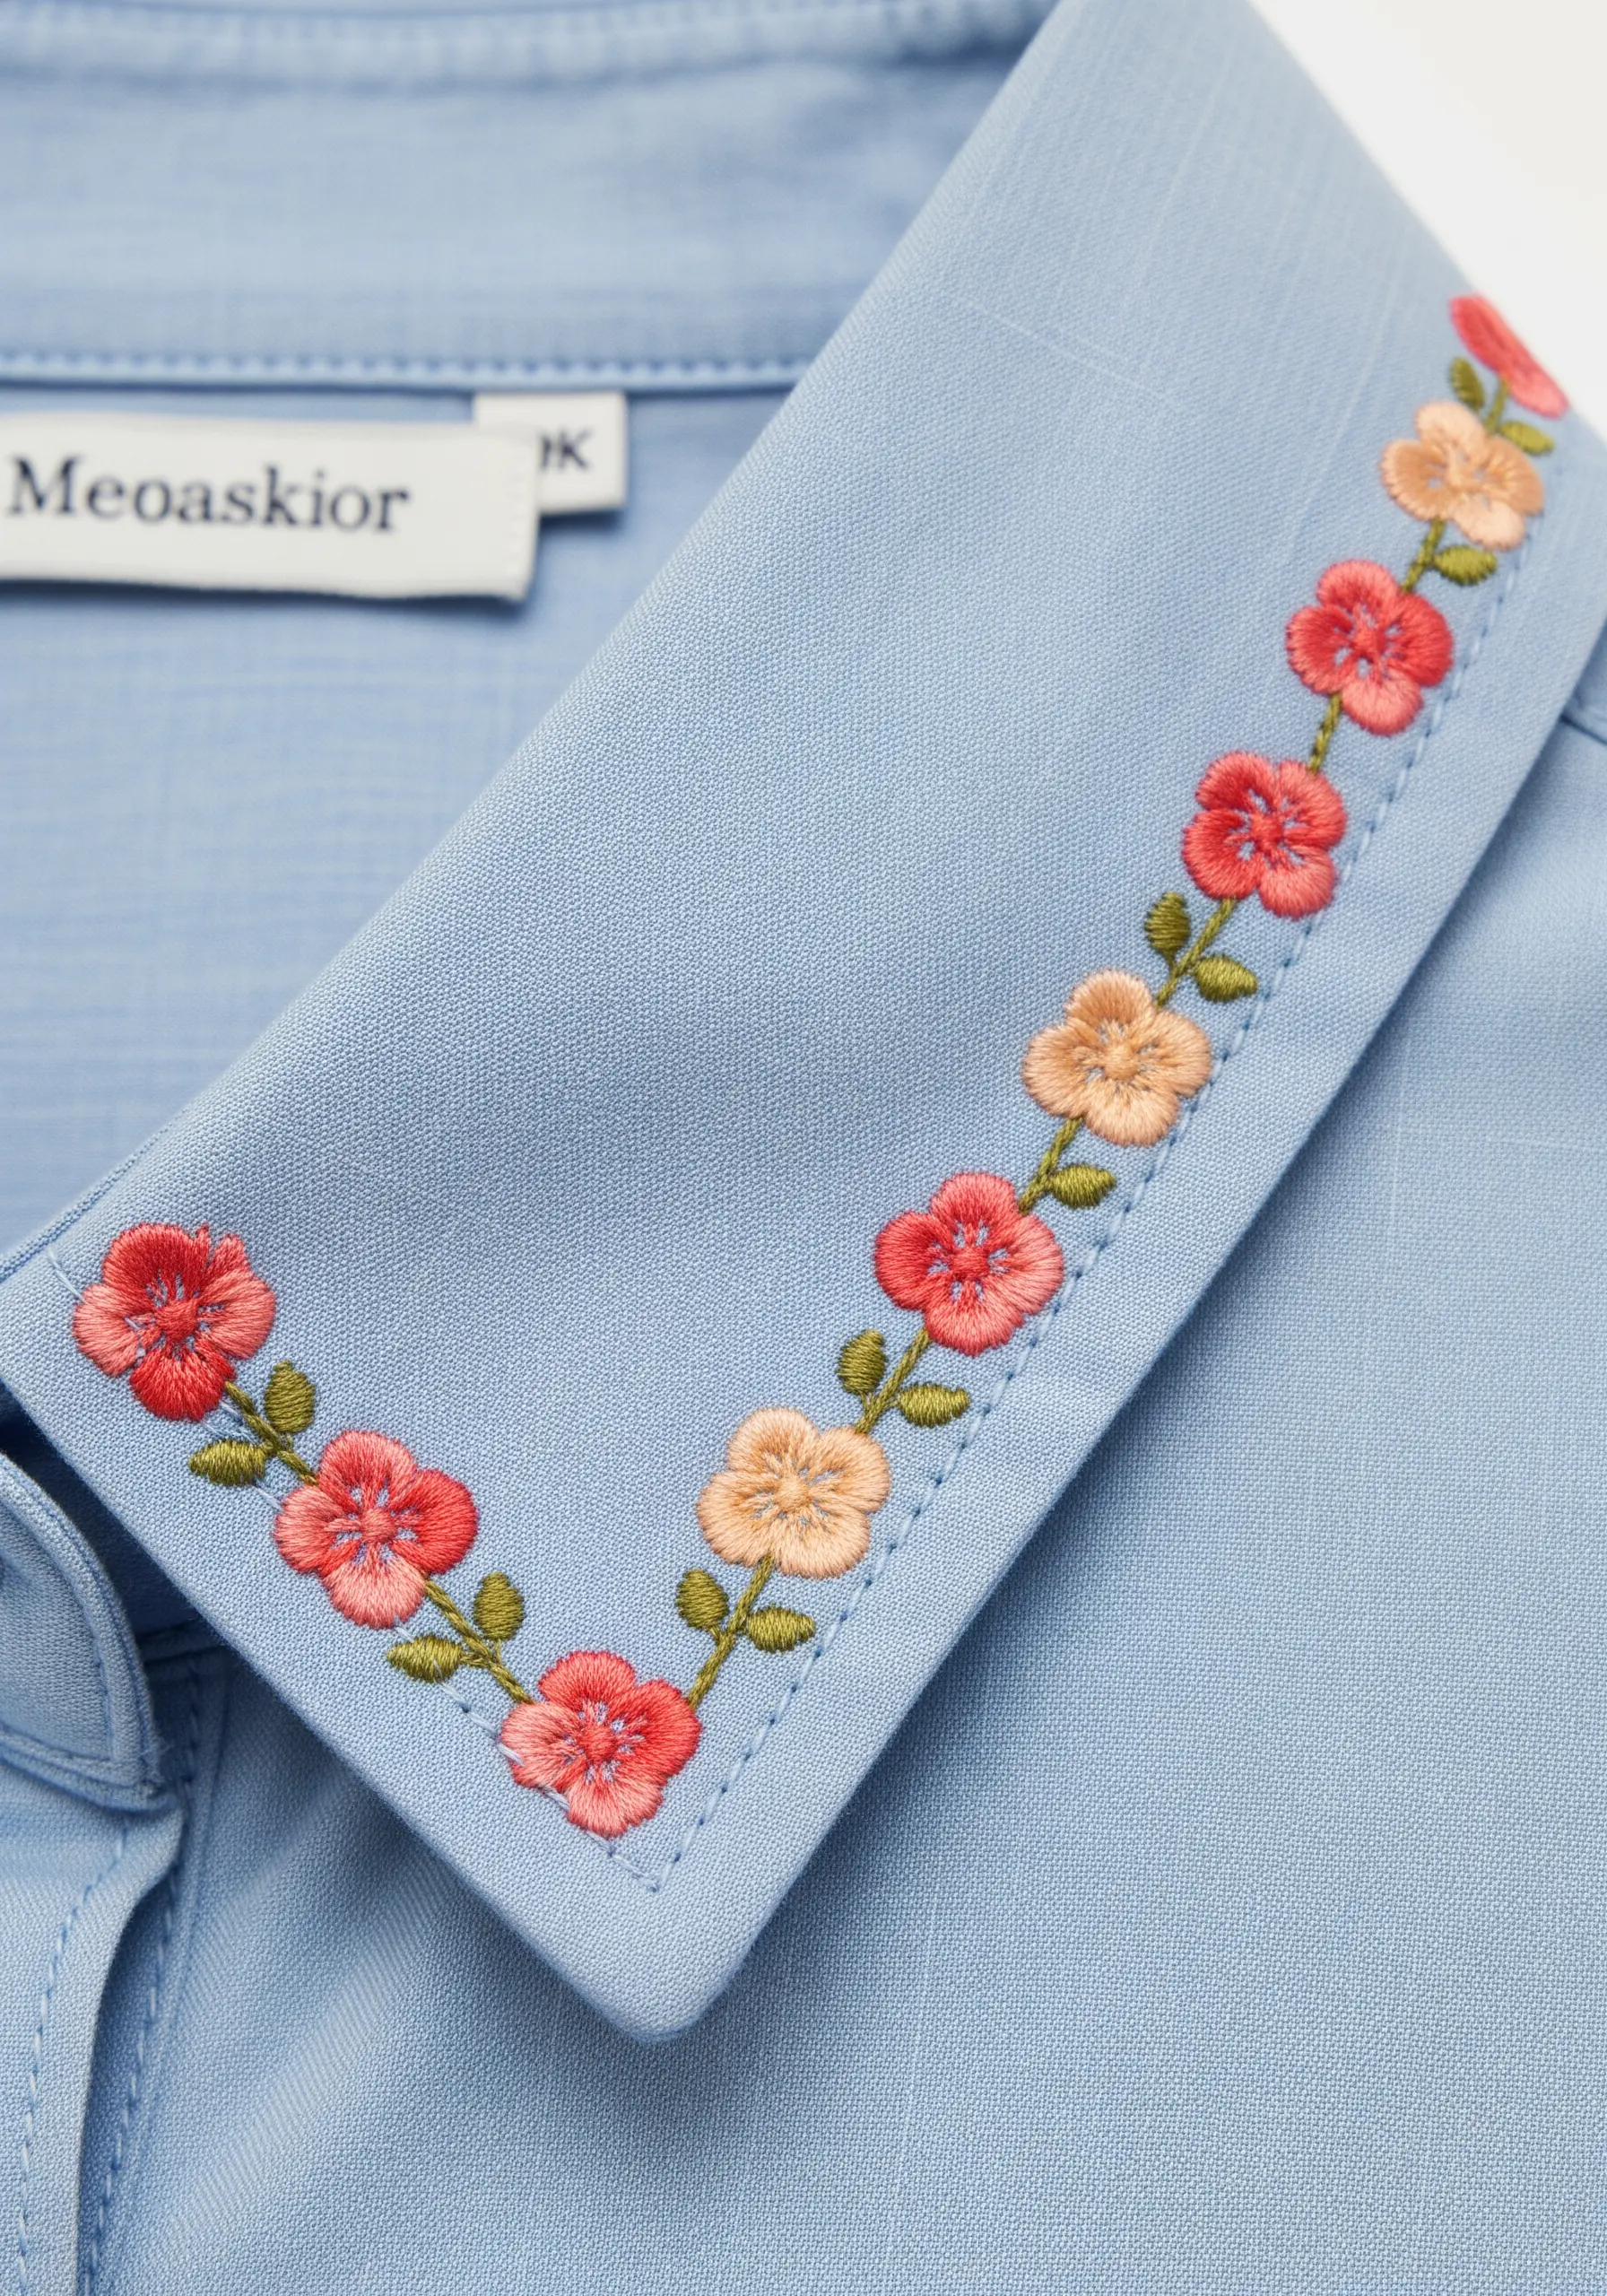
It’s a familiar feeling: you’ve spent hours on a floral piece, but the finished petals look flat, the colors feel disconnected, and the realism you imagined just isn’t there. You know your work can be better, more lifelike, more intentional—but how do you bridge that gap?
The secret isn’t in learning dozens of complicated new stitches. It lies in understanding how to blend color with purpose. The hydrangea, with its clusters of tiny petals, is the perfect canvas for mastering this skill. Each floret is a miniature study in light, shadow, and gradient.
Here, you won’t find vague advice. Instead, you’ll discover specific, actionable techniques for thread painting, color blocking, and creating texture. We’ll explore how to choose your palette, direct your stitches, and build depth, one petal at a time. Prepare to transform your hydrangeas from simple motifs into vibrant, dimensional works of art that feel truly alive.
1. Master Petal Depth with Strategic Shadowing

To make your hydrangea look truly three-dimensional, focus on placing the darkest shades deep between the petals, not just on the edges.
Use a single strand of your deepest blue or violet to add fine, directional stitches where petals overlap and recede.
This technique mimics natural light, creating shadows that give the entire flower head a realistic, rounded form.
Notice how the lightest shades are reserved for the very top surfaces, suggesting where sunlight would hit directly.
2. Block Your Colors for a Multi-Toned Bouquet
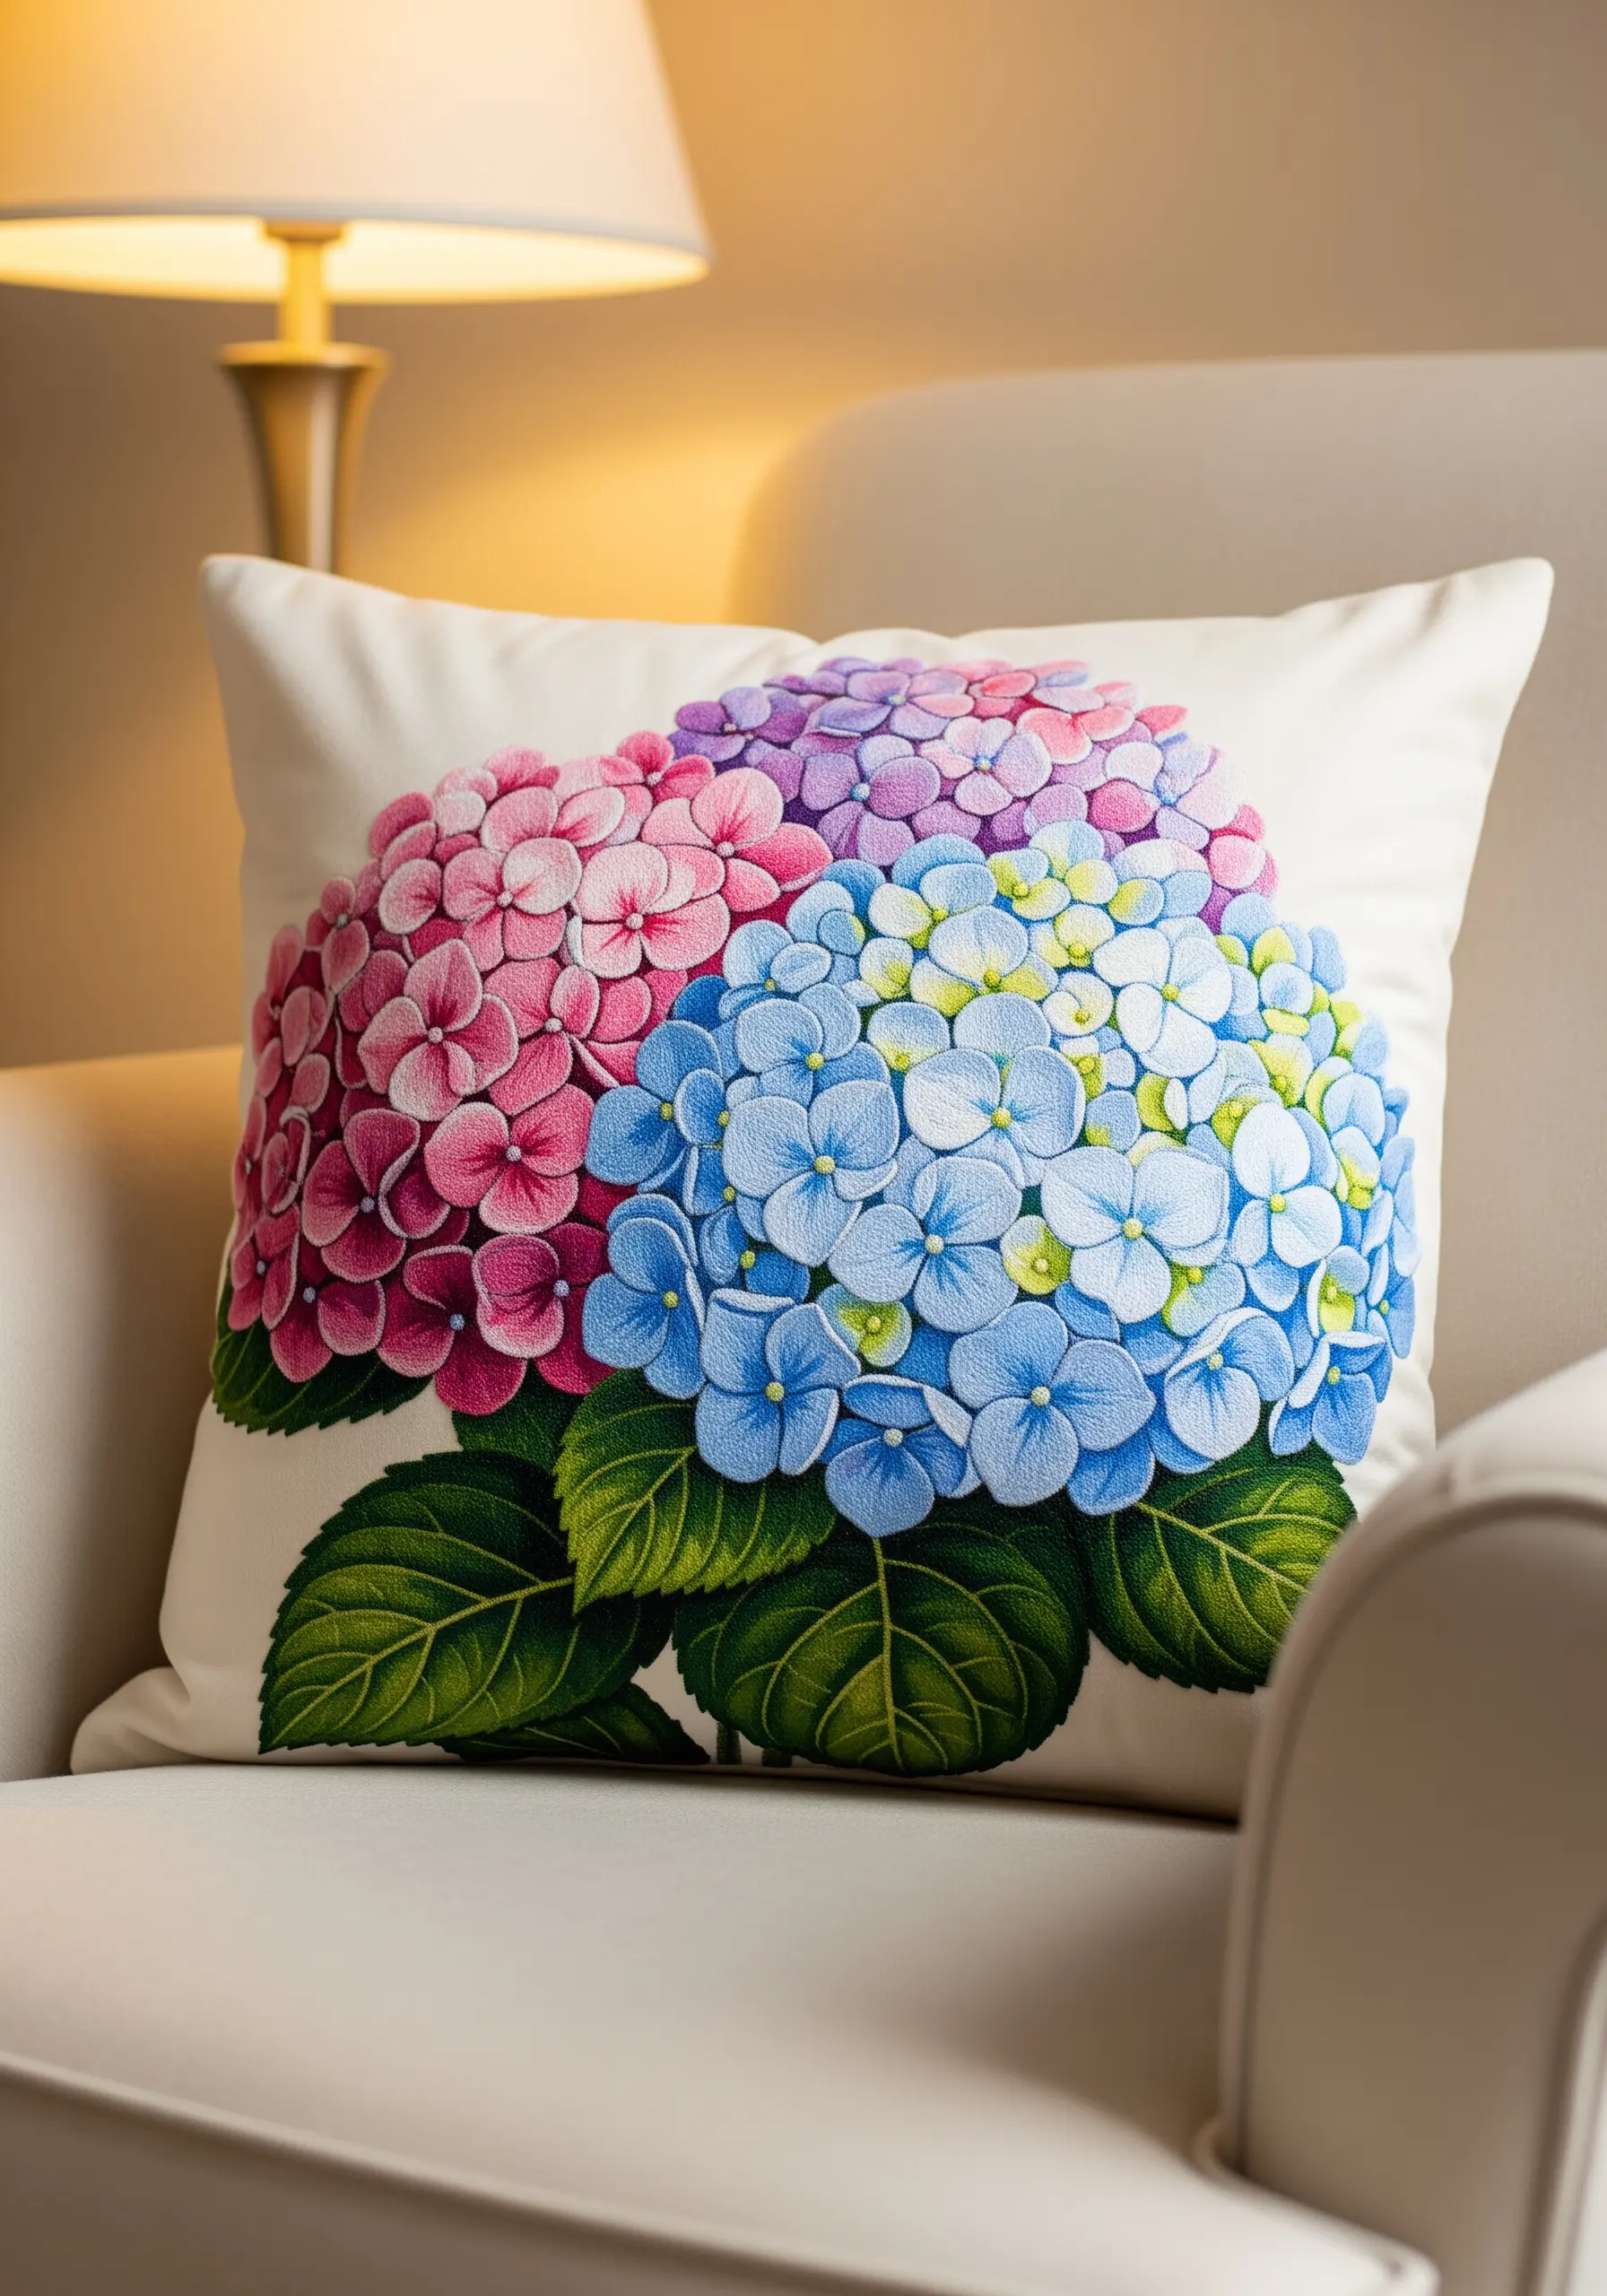
Instead of blending every color smoothly, dedicate entire sections of the hydrangea to a specific palette—one pink, one blue, one purple.
Within each color block, use three to four shades of that hue (e.g., sky blue, cornflower, and navy) to create depth.
This approach gives the impression of multiple flower heads clustered together, adding visual complexity and a vibrant, graphic quality perfect for home décor.
The key is to keep the stitch direction consistent across the entire piece for a cohesive finish.
3. Achieve an Antique Look with a Muted Palette
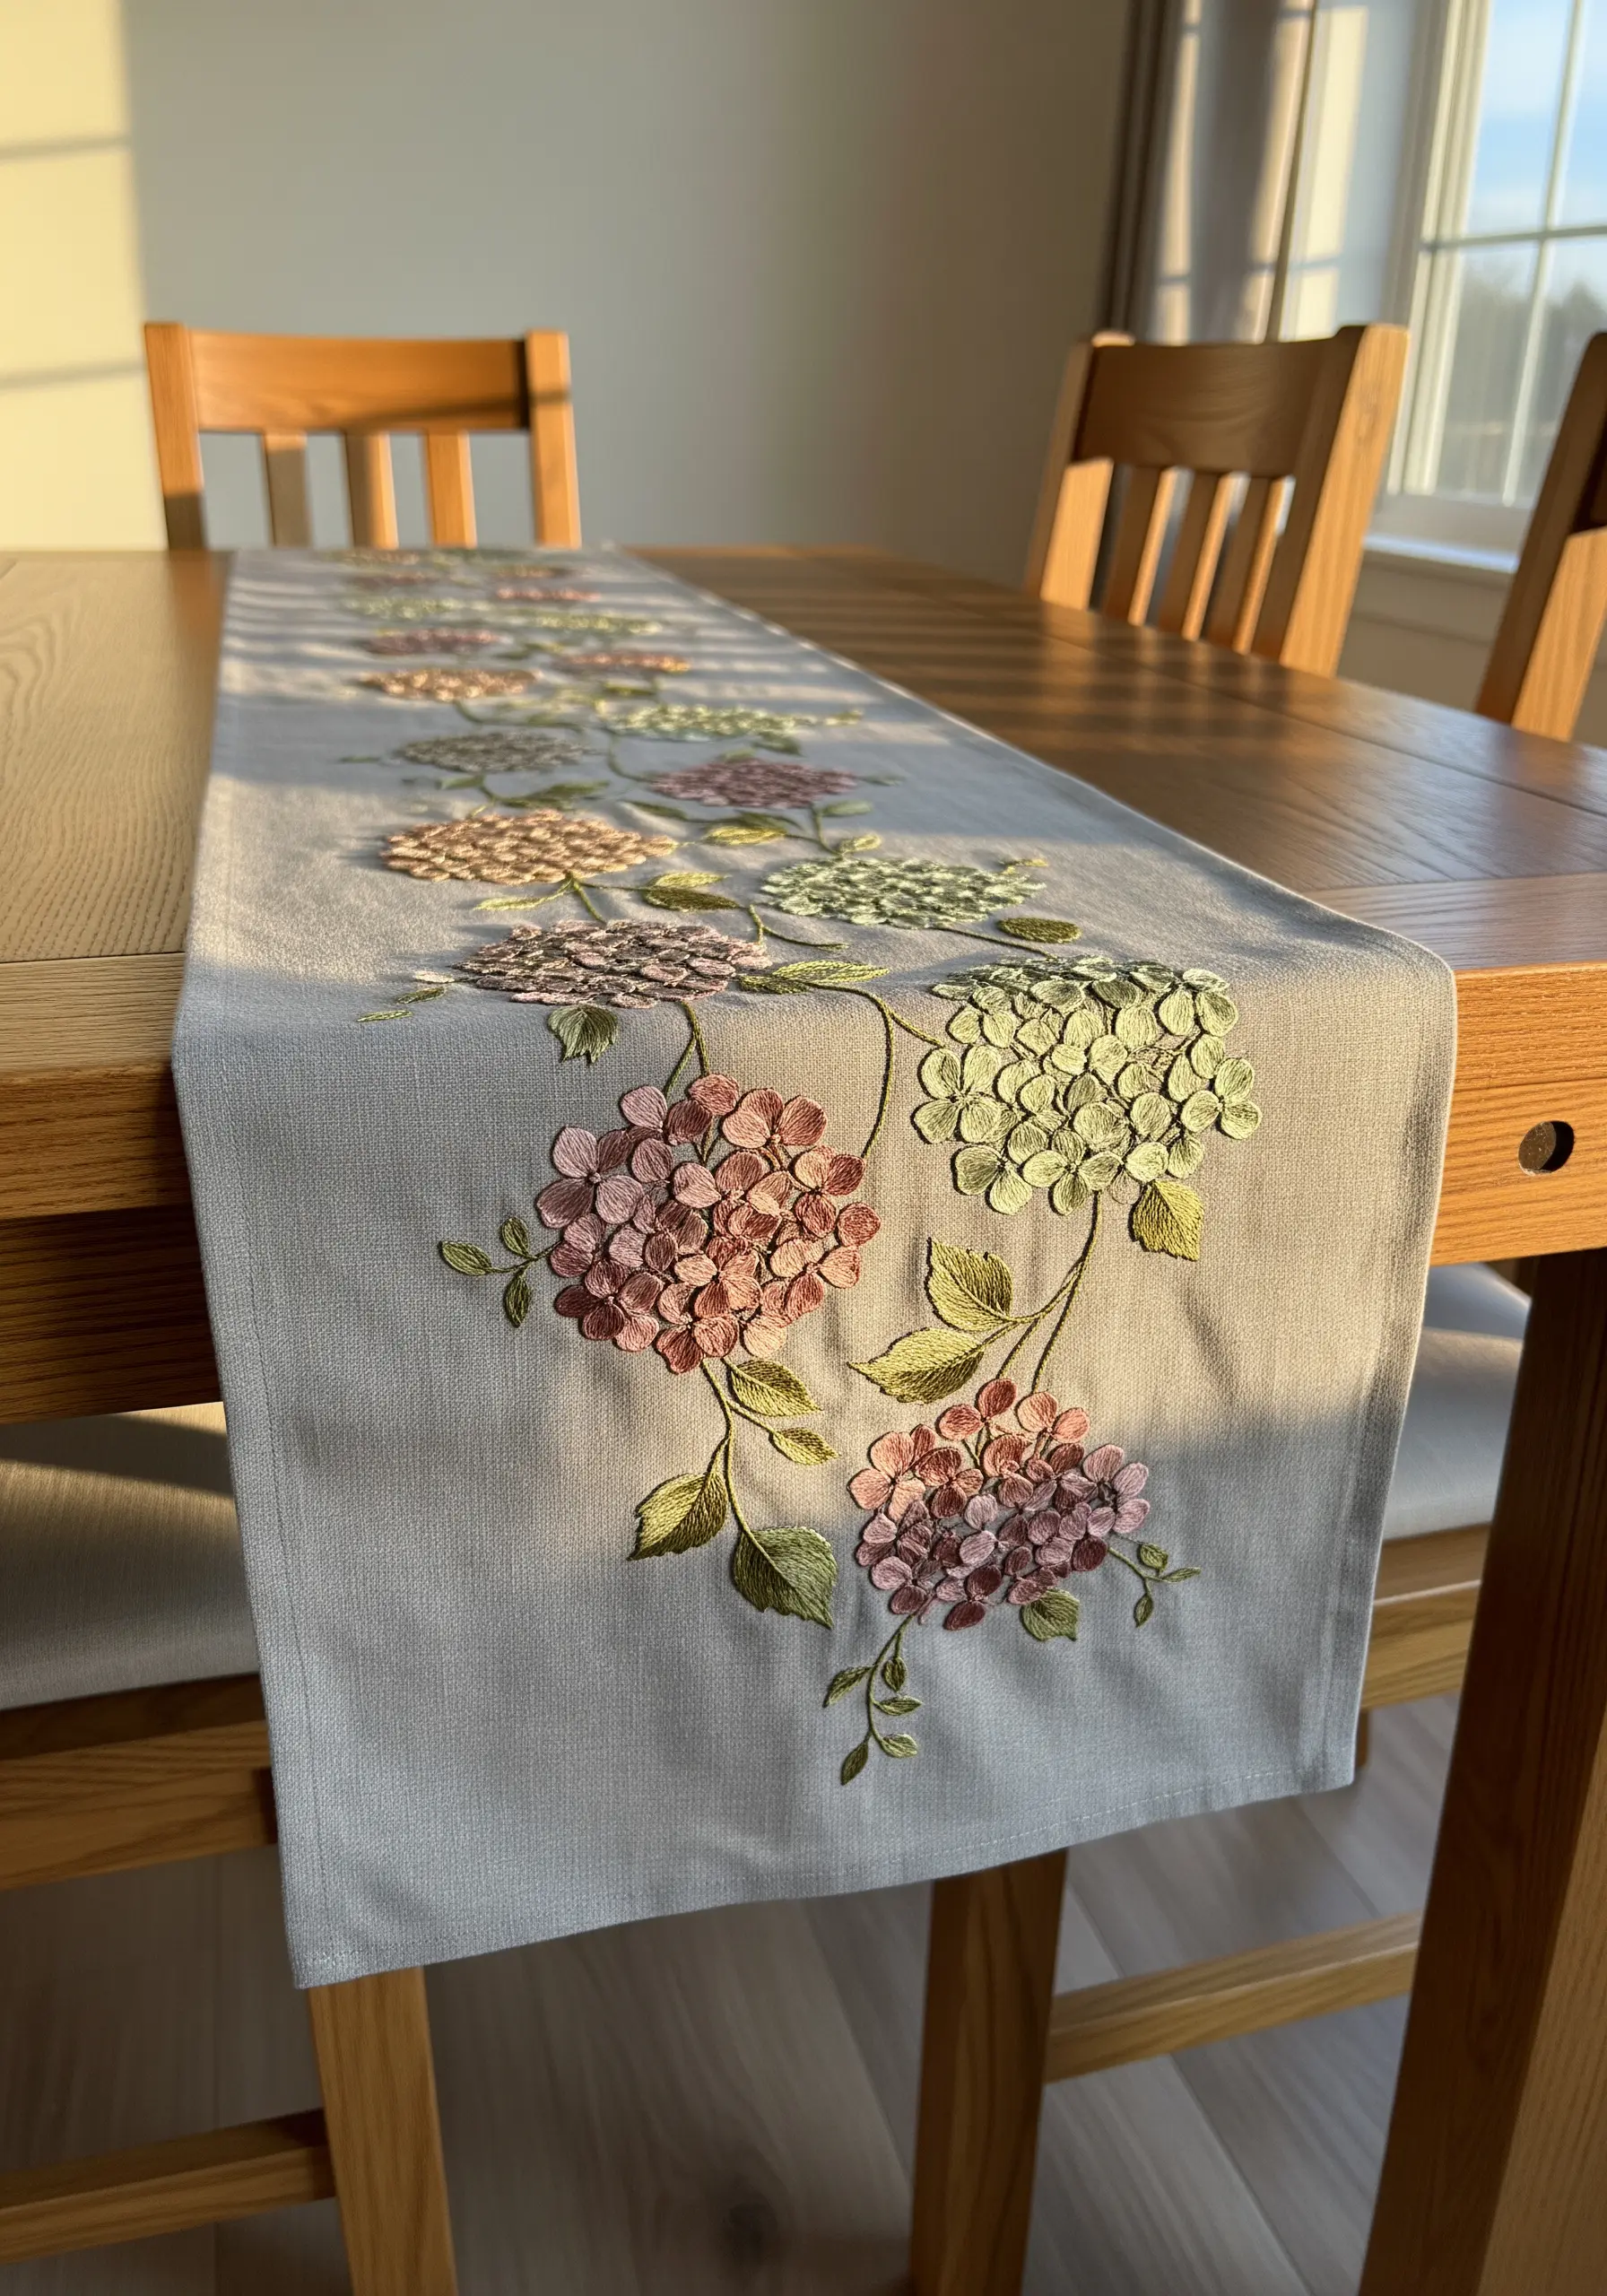
For an elegant, heirloom effect, step away from bright blues and pinks and choose a palette of dusty rose, sage green, and muted taupe.
Combine satin stitch for the petals with delicate French knots for the centers to add textural variety.
This desaturated color scheme works beautifully on natural linen, creating a timeless look for table runners and other home textiles.
The subtle color shifts feel more like a faded photograph than a bright bloom, lending a sophisticated, vintage air to your work.
4. Create High-Contrast Gradients on Dark Fabric
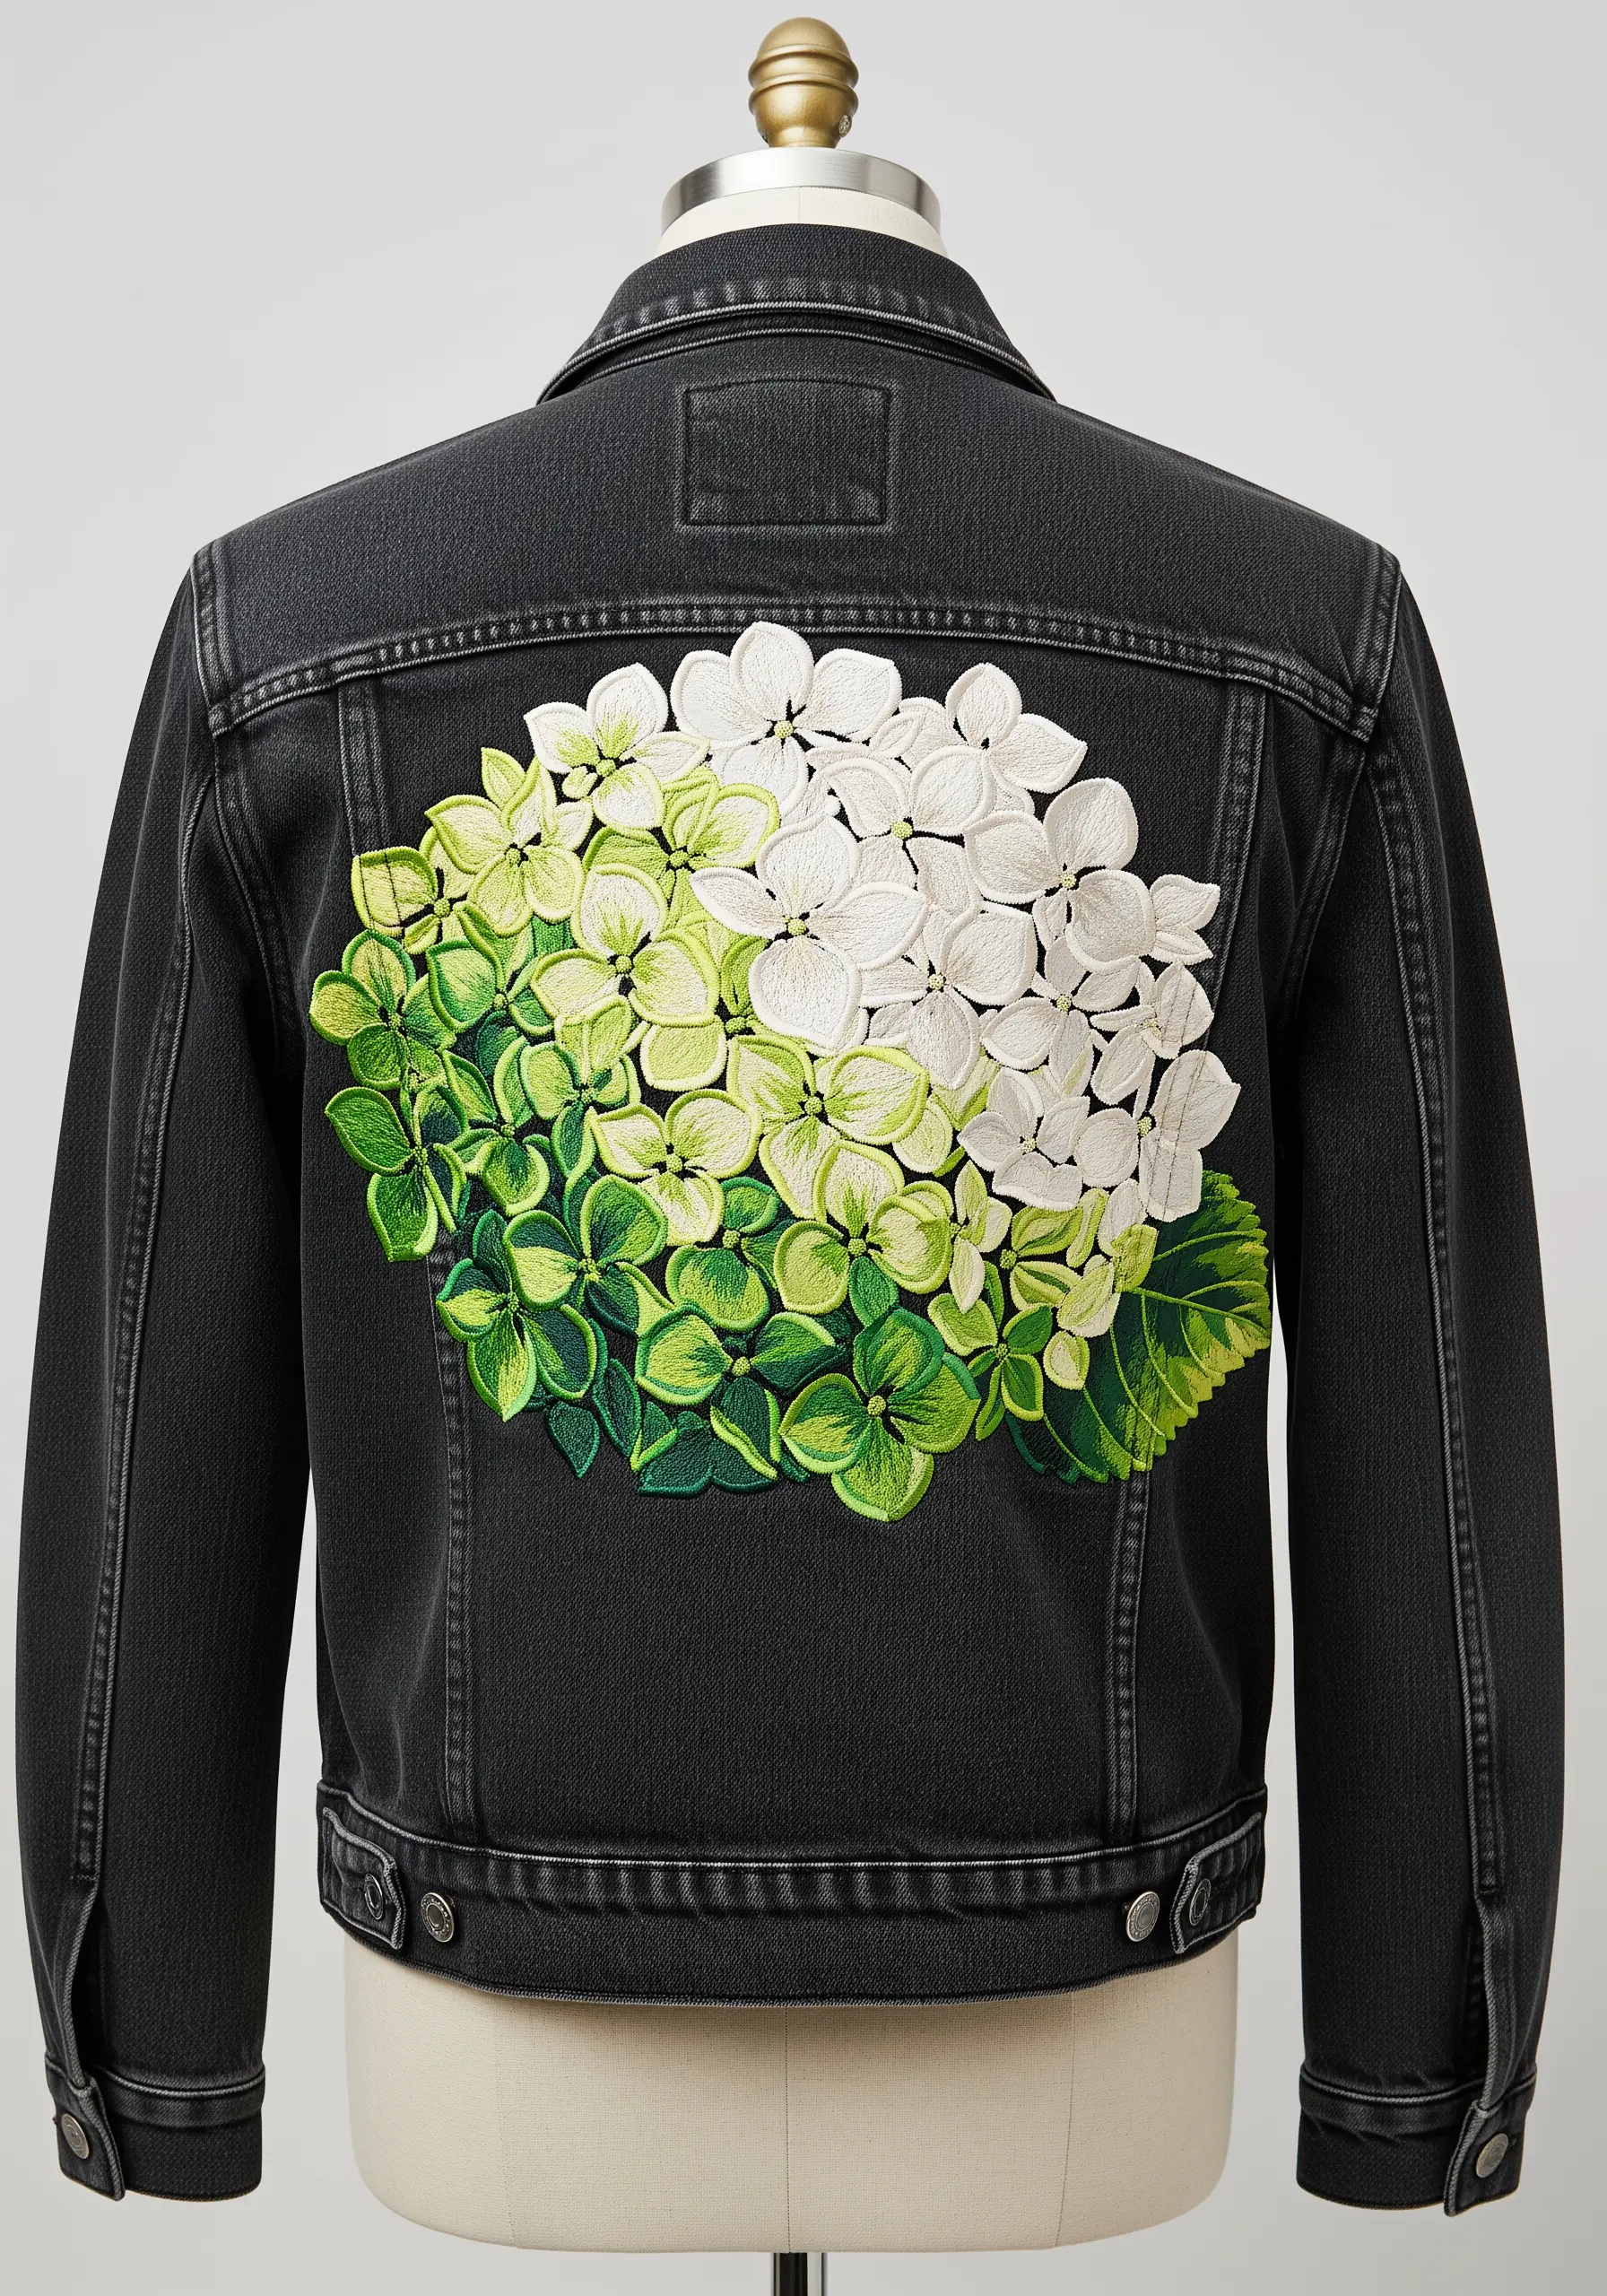
Make your hydrangeas pop on dark denim or canvas by starting with your lightest color, not your darkest.
Stitch your white and pale green petals first, ensuring dense, full coverage with a two-ply thread to prevent the dark fabric from showing through.
Then, blend your medium and dark greens into the lighter sections using long-and-short stitch.
This method ensures your brights stay crisp and luminous, creating a dramatic contrast that commands attention.
5. Blend Muted Greens and Creams for a Soft, Natural Bloom
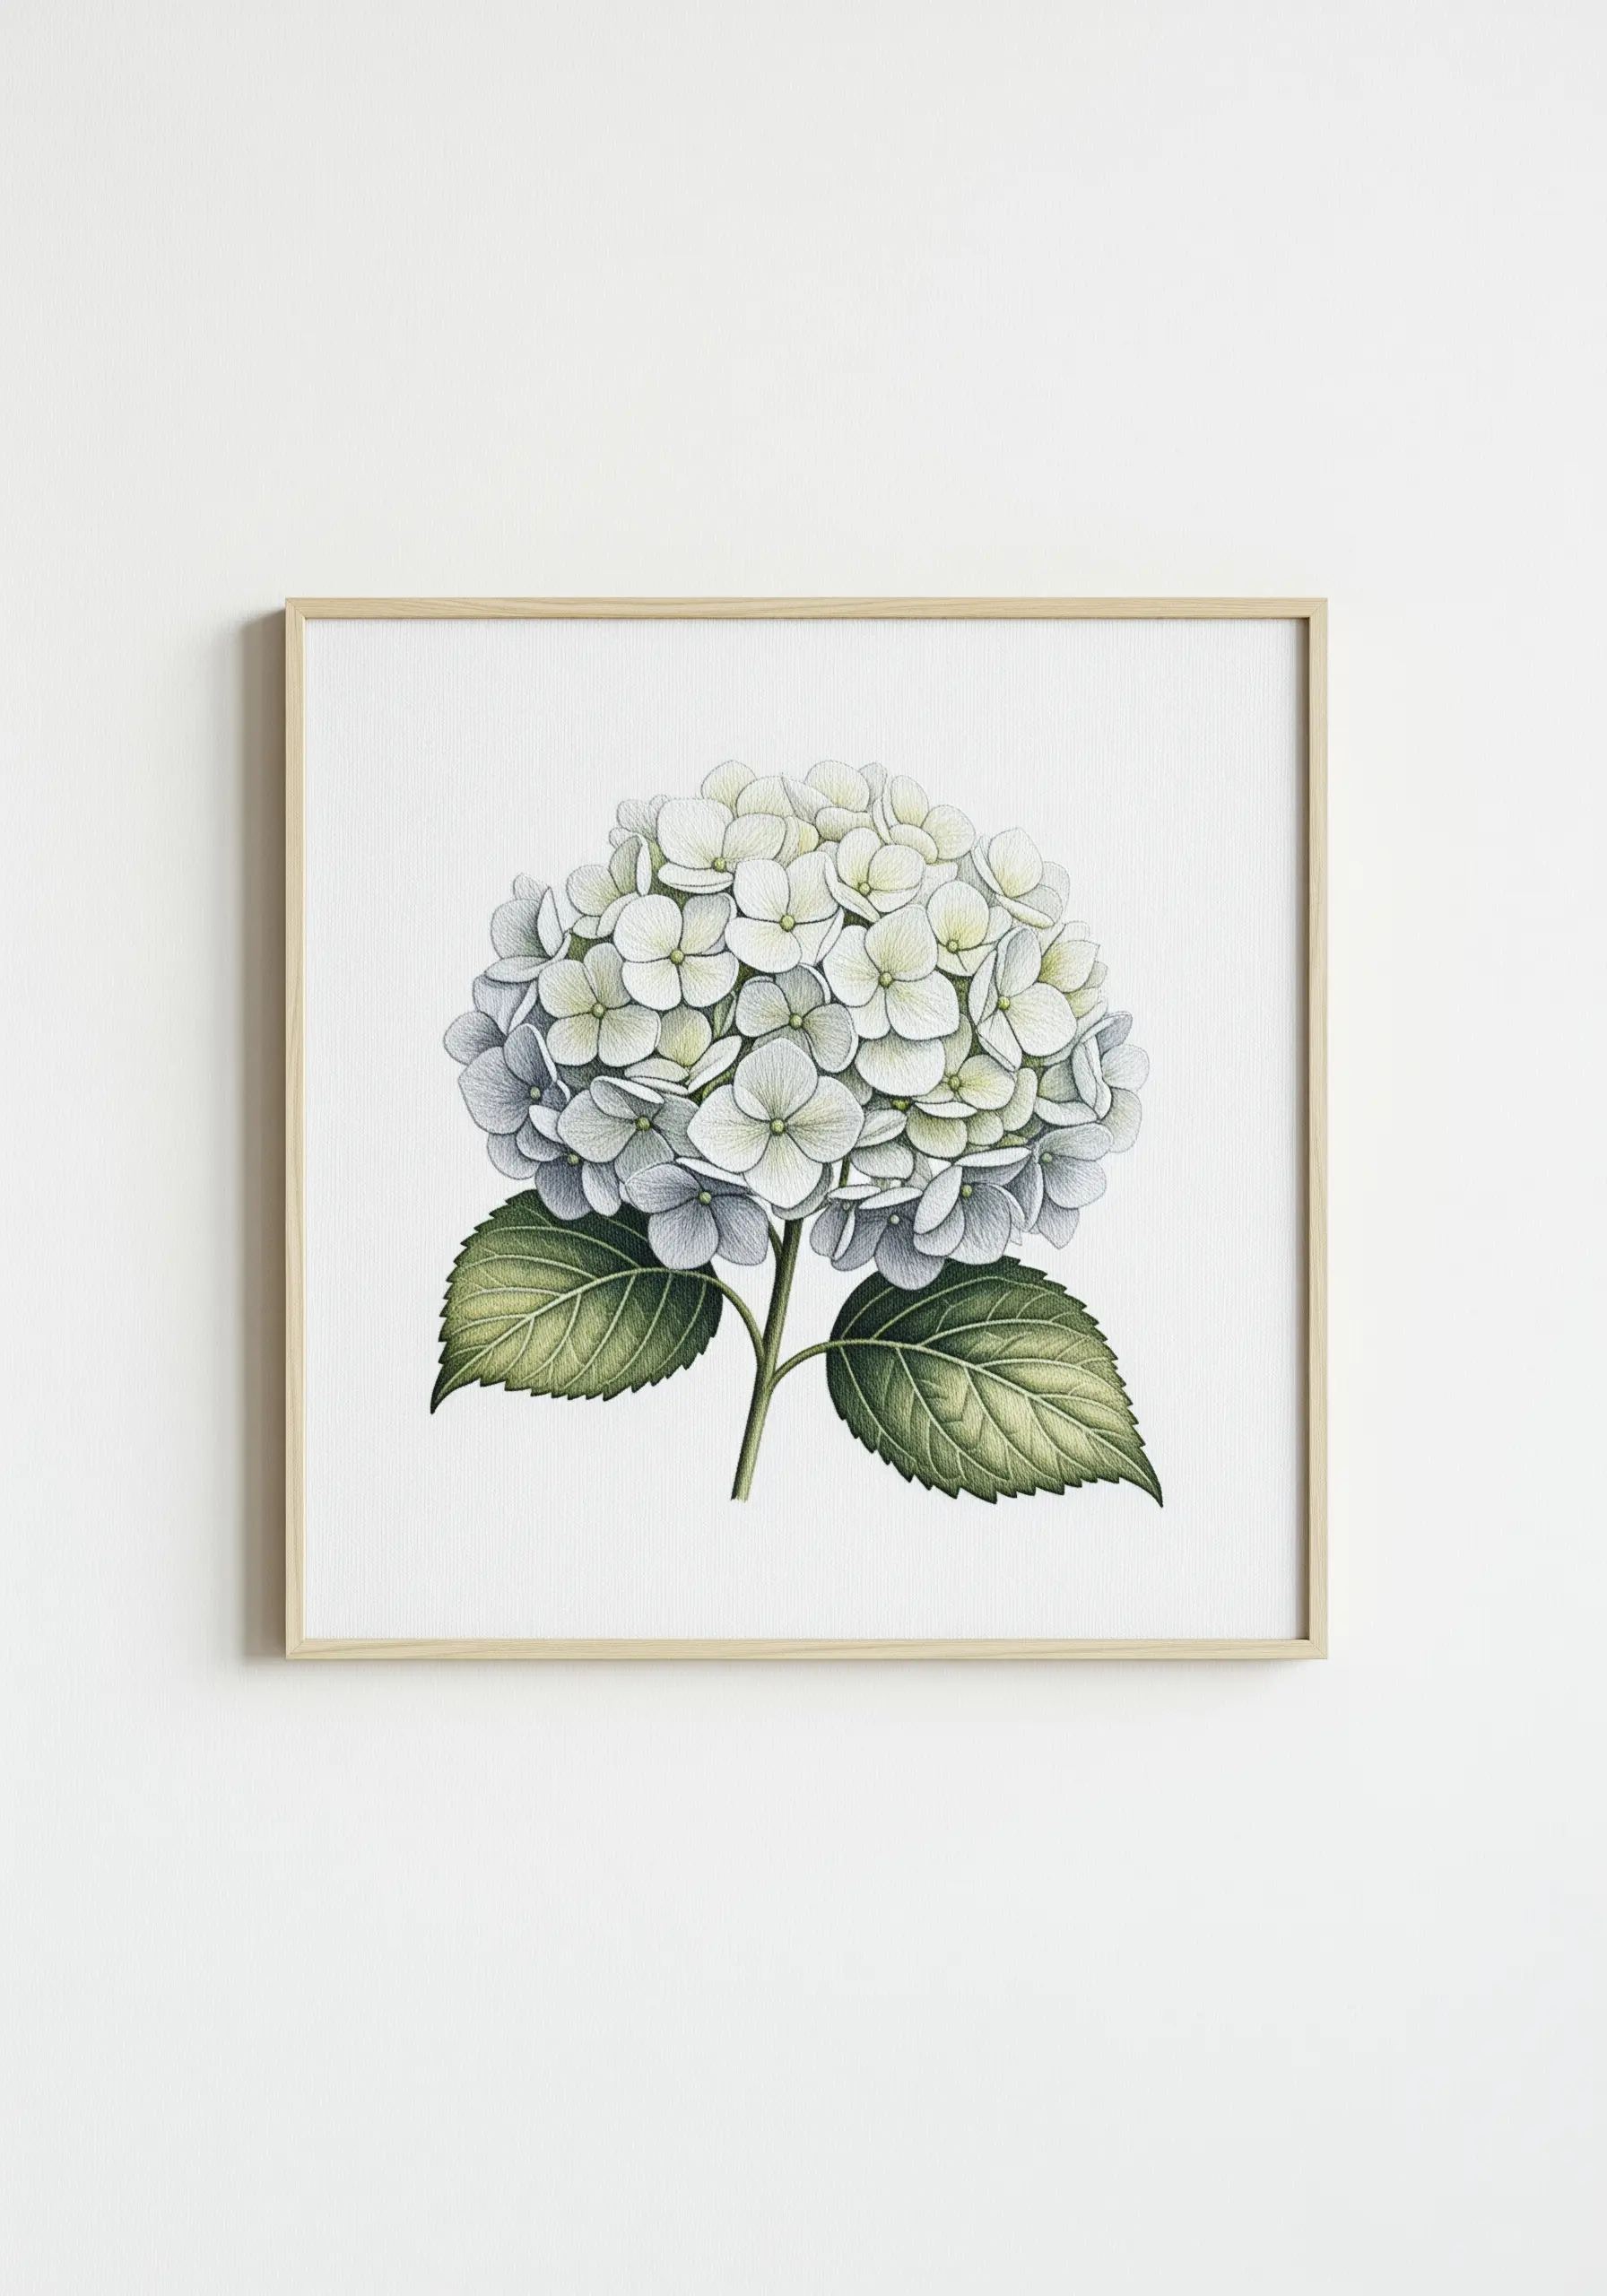
Capture the subtlety of a white hydrangea by blending off-white and pale celadon rather than using pure white thread.
Use single-strand long-and-short stitch to create almost imperceptible transitions from green at the base of the petals to cream at the tips.
Introduce a pale butter yellow for the flower centers to add warmth and prevent the design from looking flat or washed out.
This delicate approach is perfect for creating minimalist embroidery wall art ideas with a touch of botanical realism.
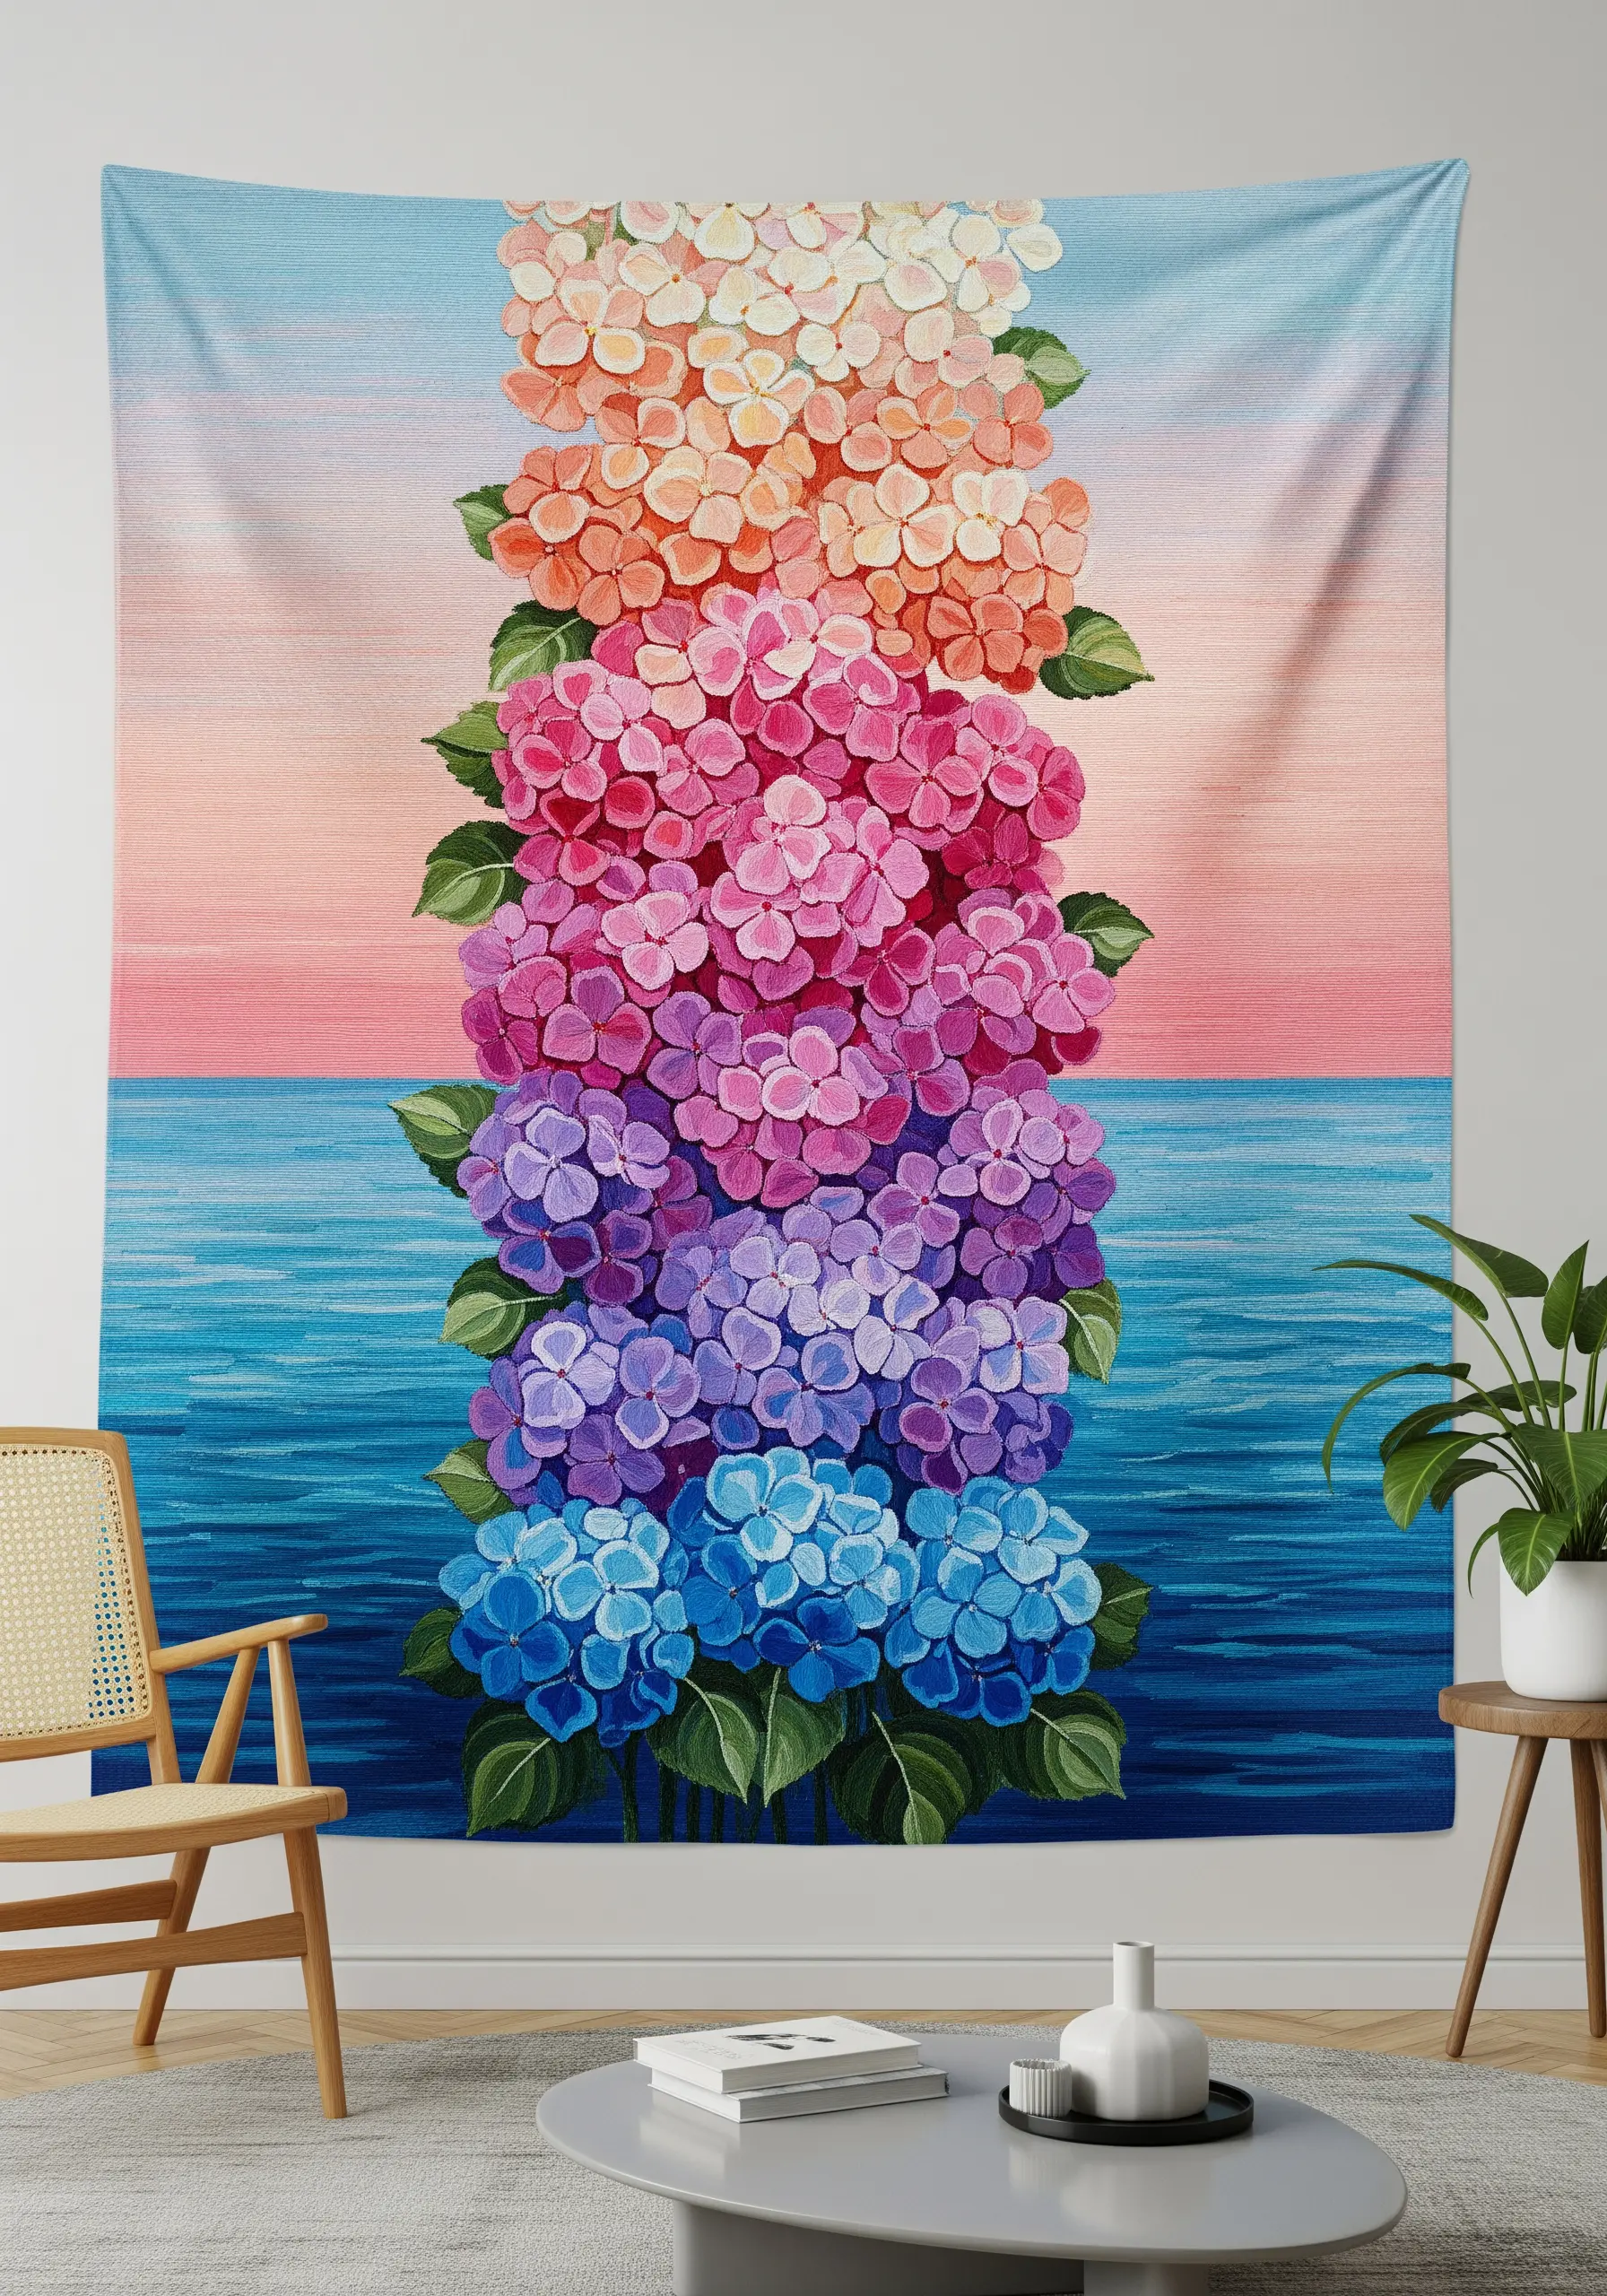
6. Design a Cascading Gradient for Large-Scale Art
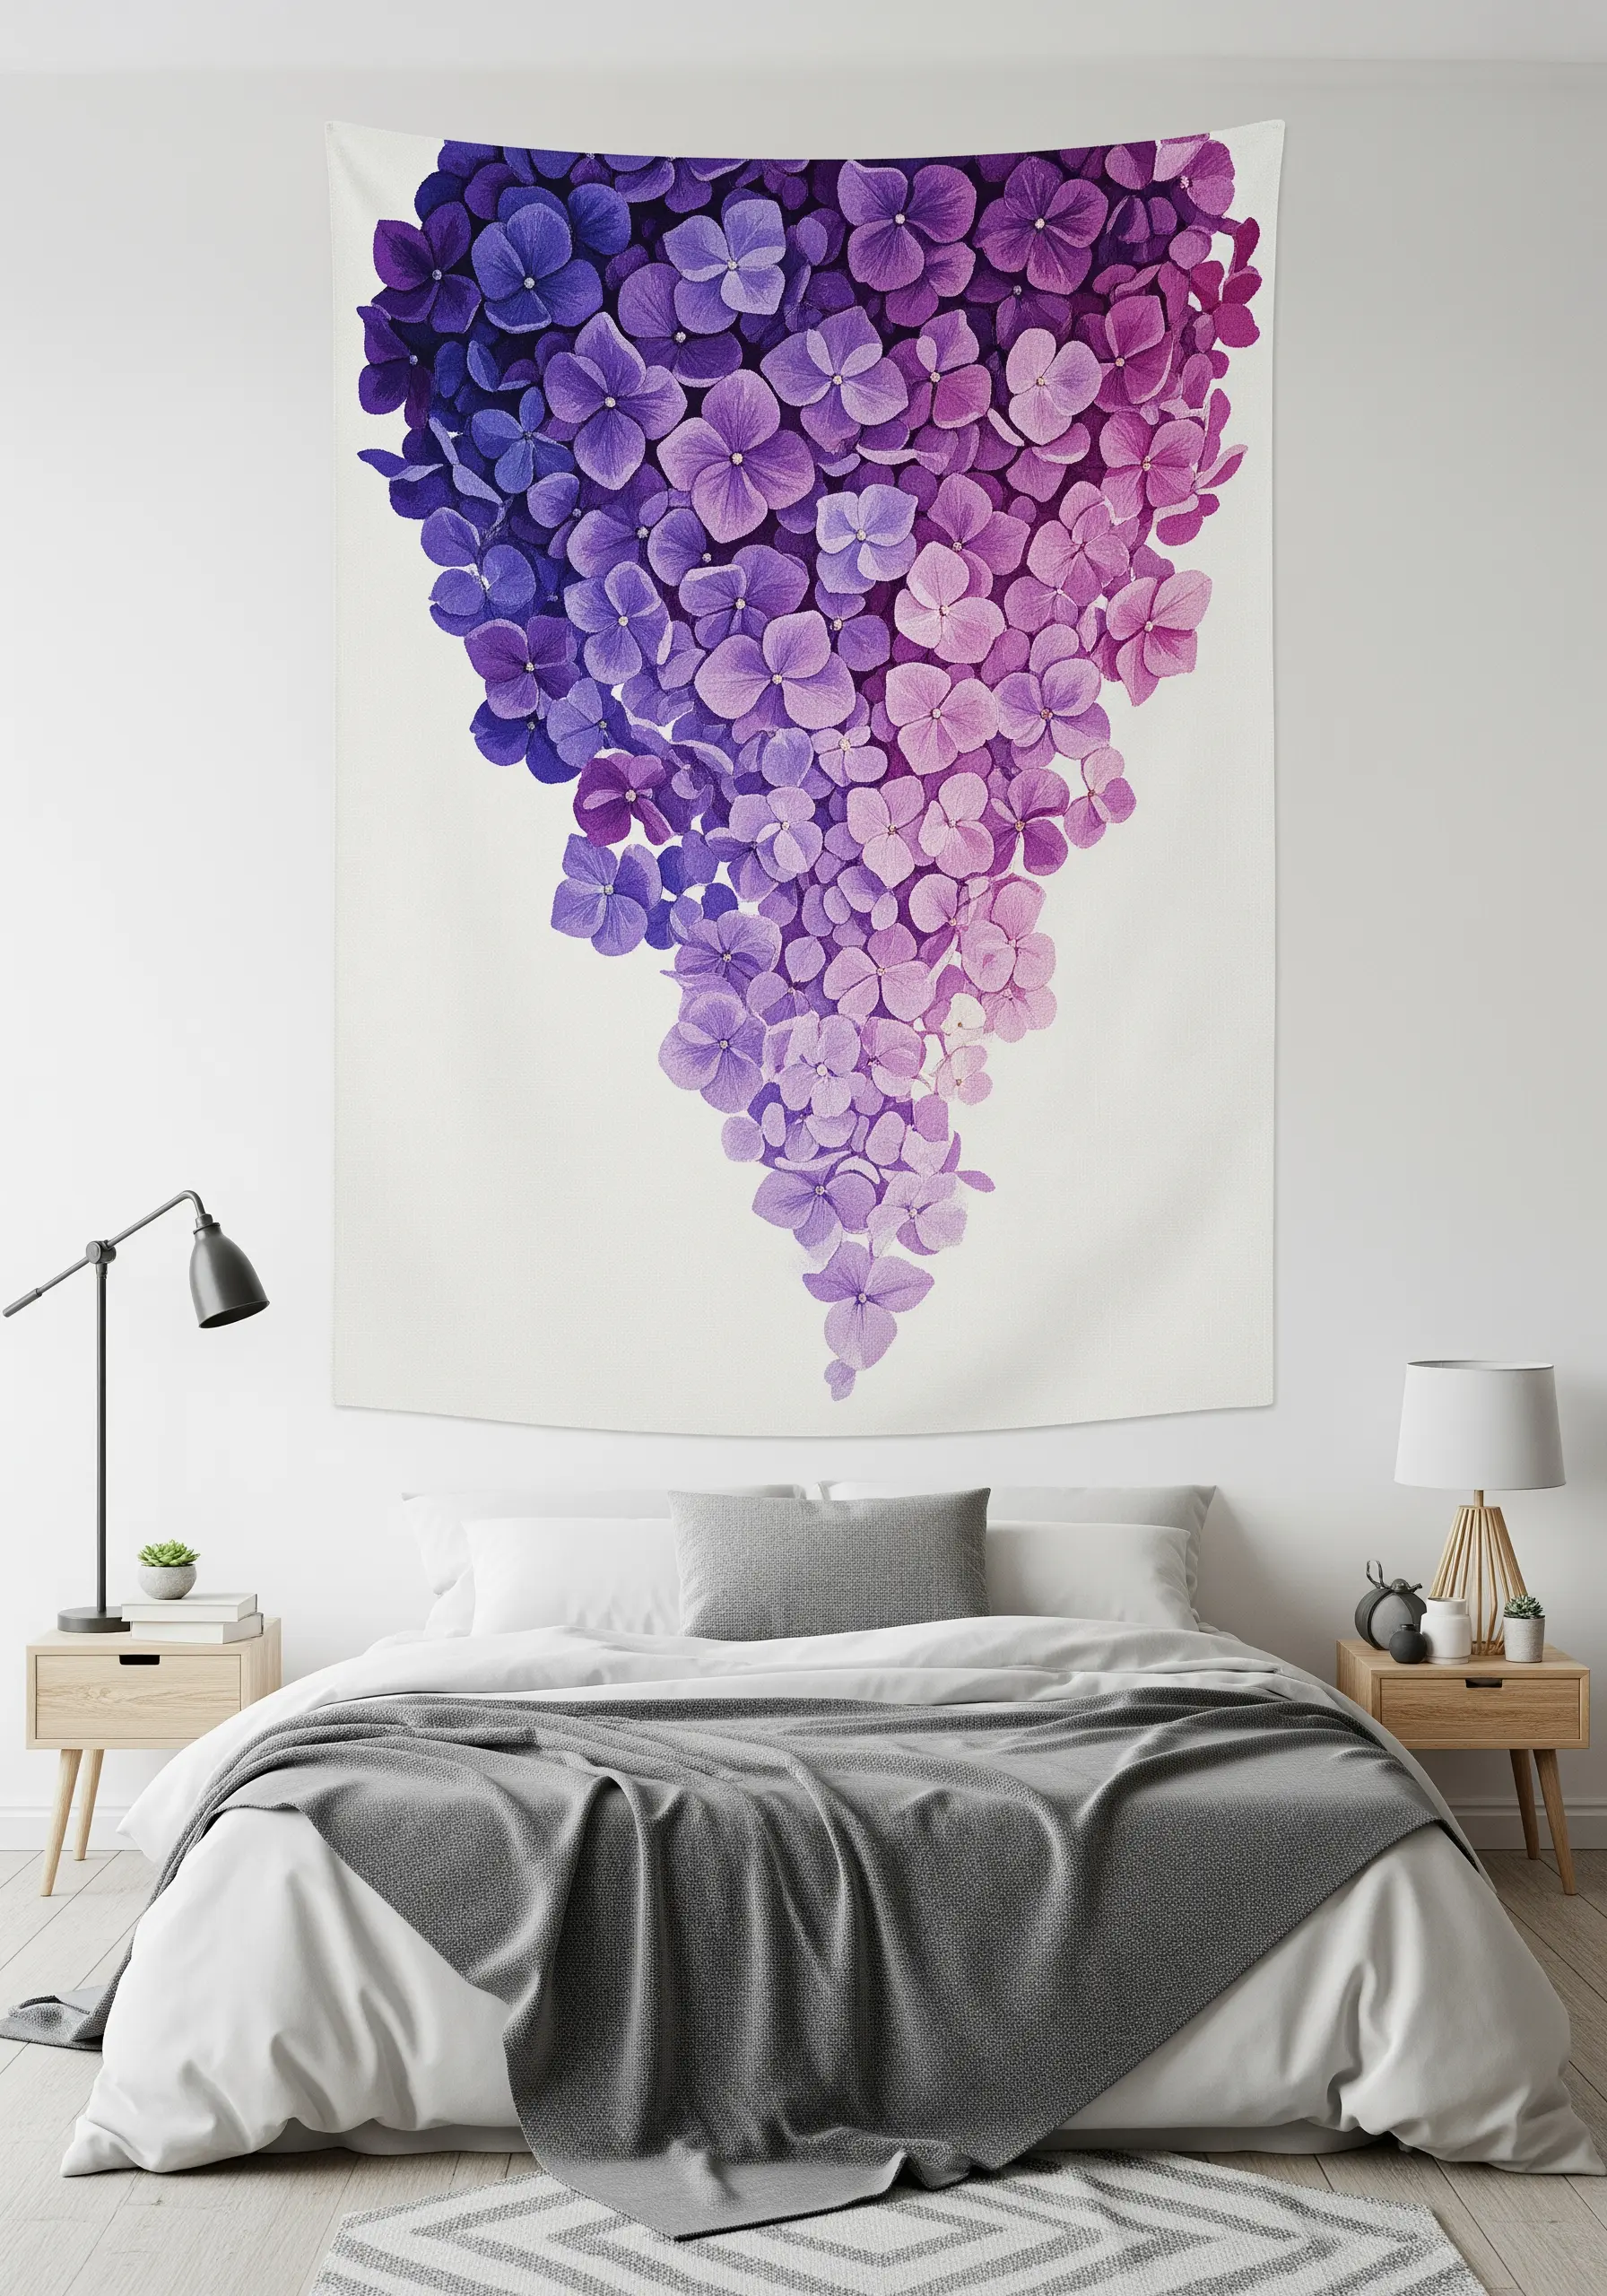
When working on a large piece like a wall tapestry, create a dramatic cascading effect by transitioning from deep violet at the top to pale lavender at the bottom.
Divide your design into horizontal bands, assigning a primary color to each, and then blend them softly where they meet.
This technique draws the eye downward and turns a simple floral motif into a dynamic, abstract piece of art.
Use a thicker cotton floss (all six strands) to fill the space more quickly while still allowing for soft blending.
7. Stitch a Sunset Gradient with Warm Tones
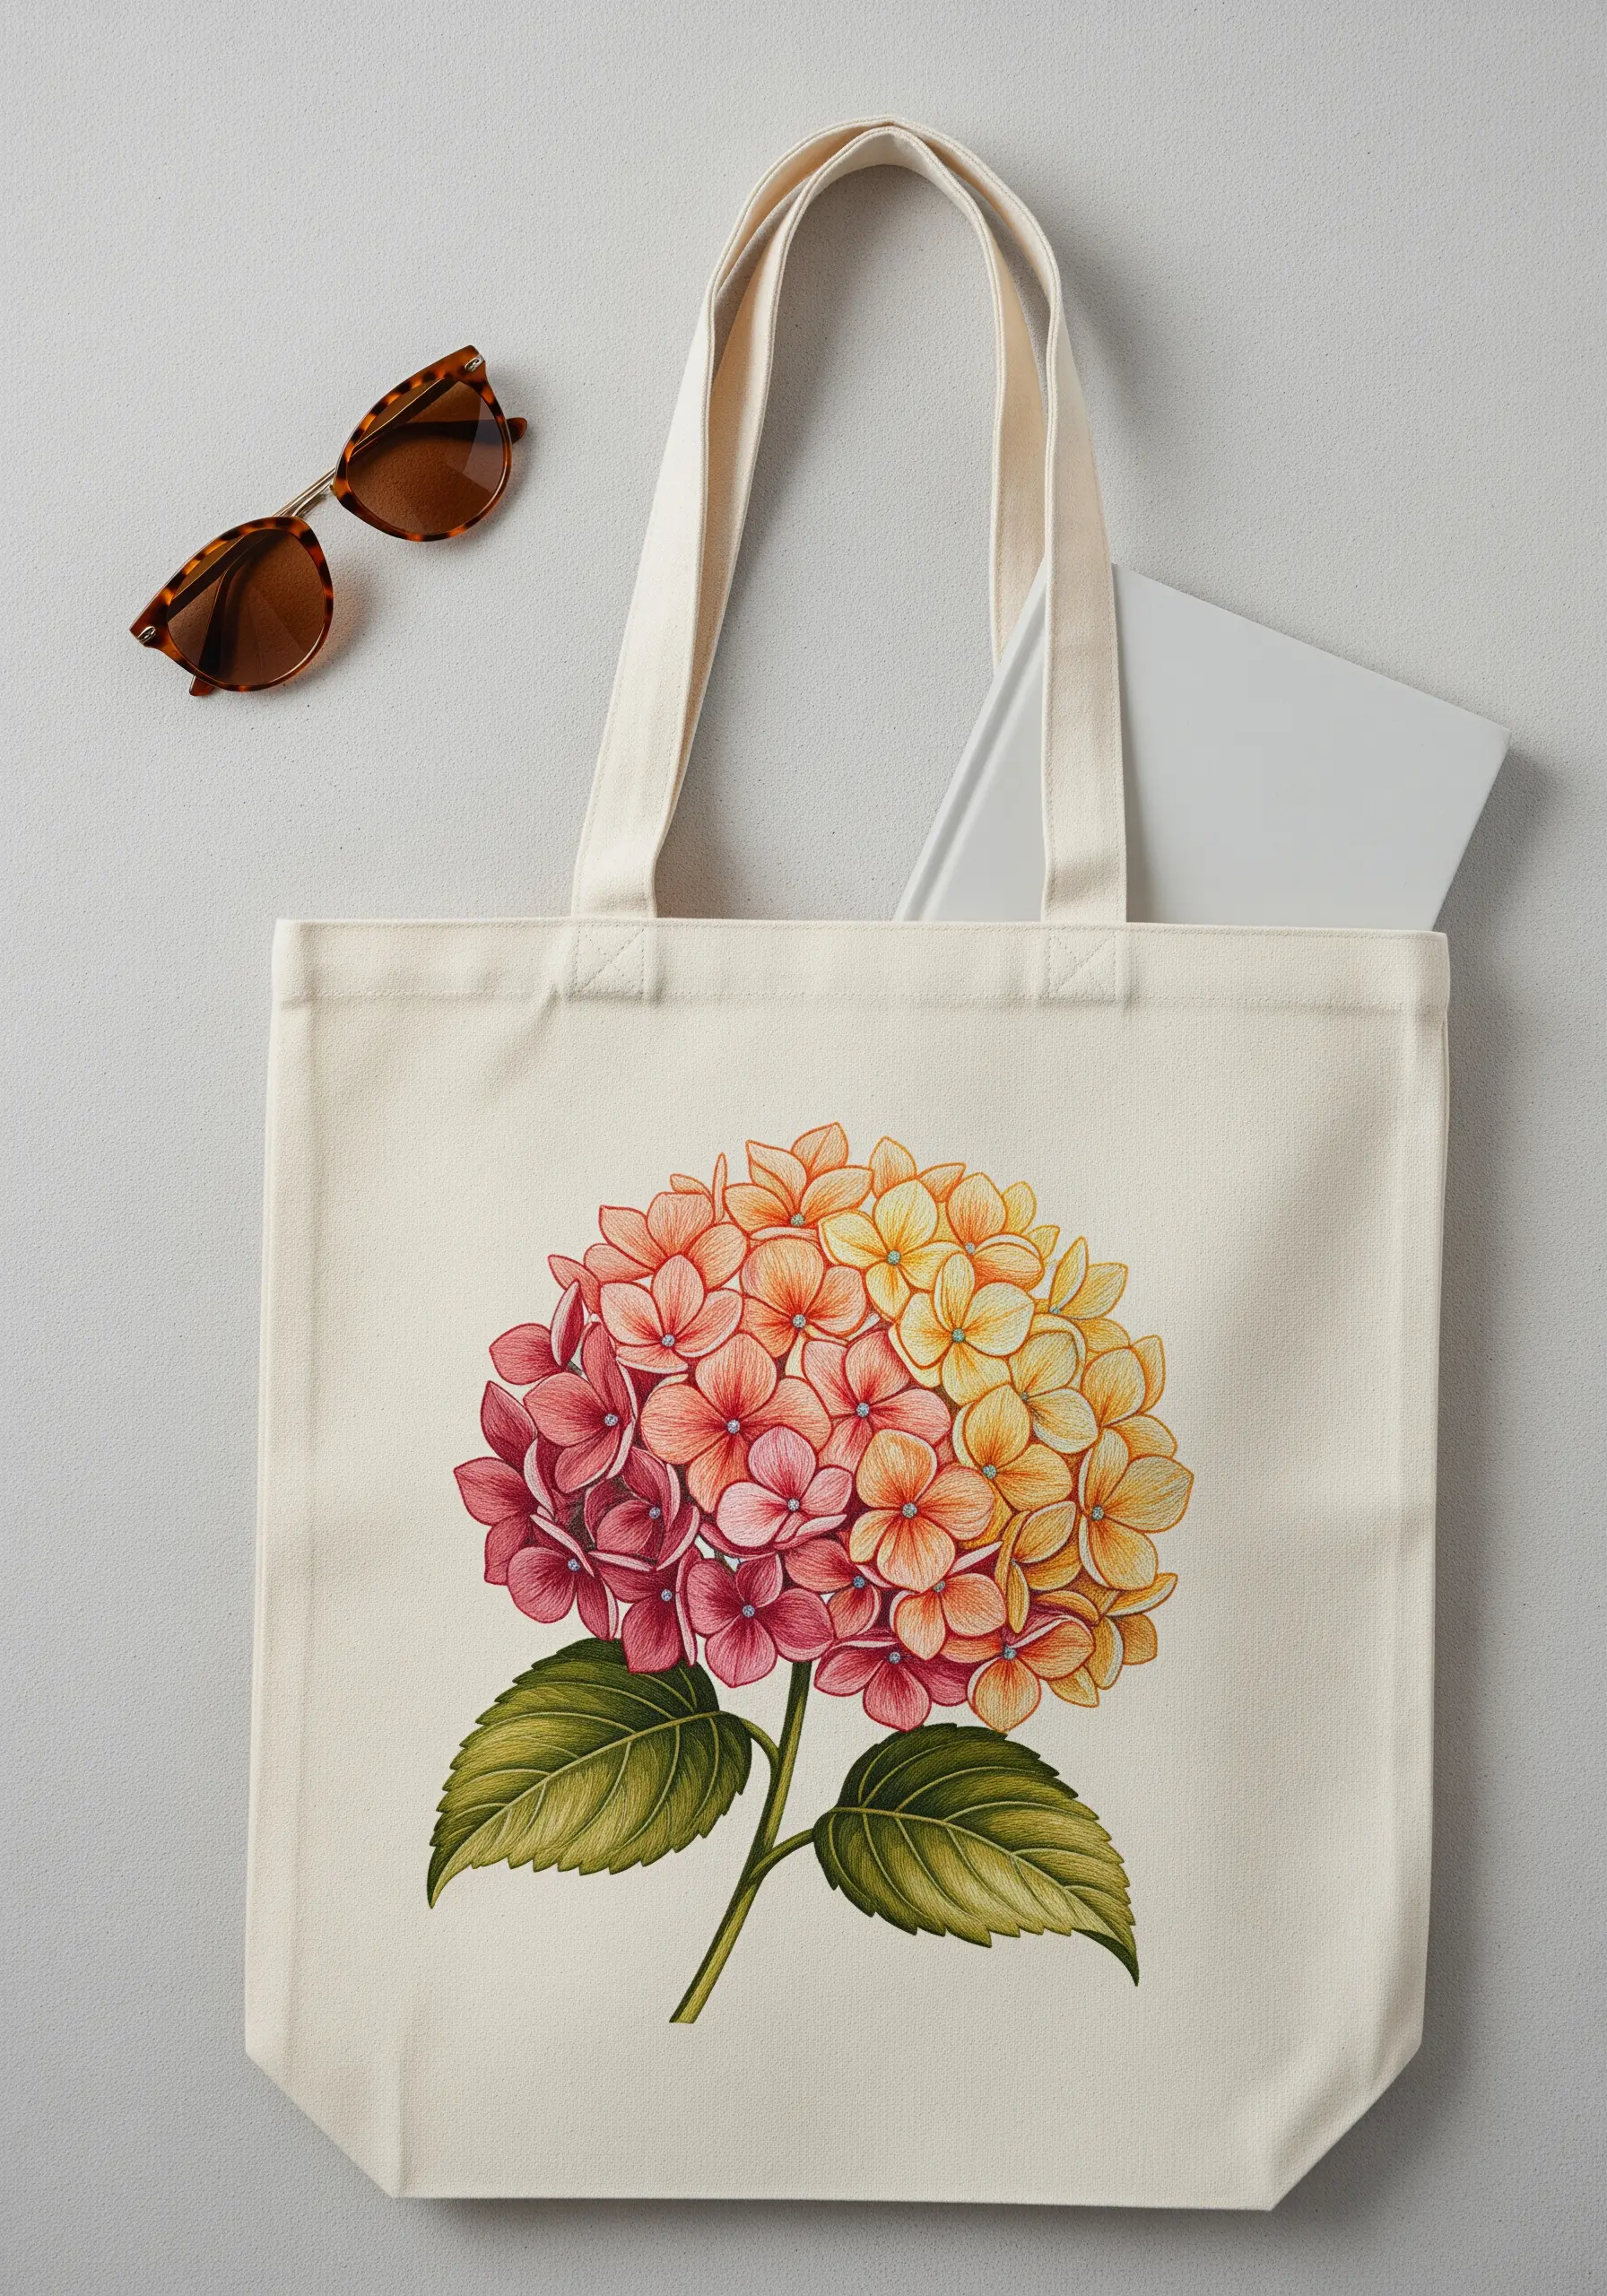
Recreate the look of a sunset by blending warm shades of deep pink, coral, peach, and golden yellow across the flower head.
Start with the yellows on one side and gradually introduce the pinks and reds on the other, using long-and-short stitch to create a seamless transition.
This palette feels vibrant and cheerful, making it ideal for accessories like tote bags or for brightening up kitchen textiles.
The key is to select shades with similar undertones to ensure a harmonious blend.
8. Add Dimension with Raised Stitches and Beads
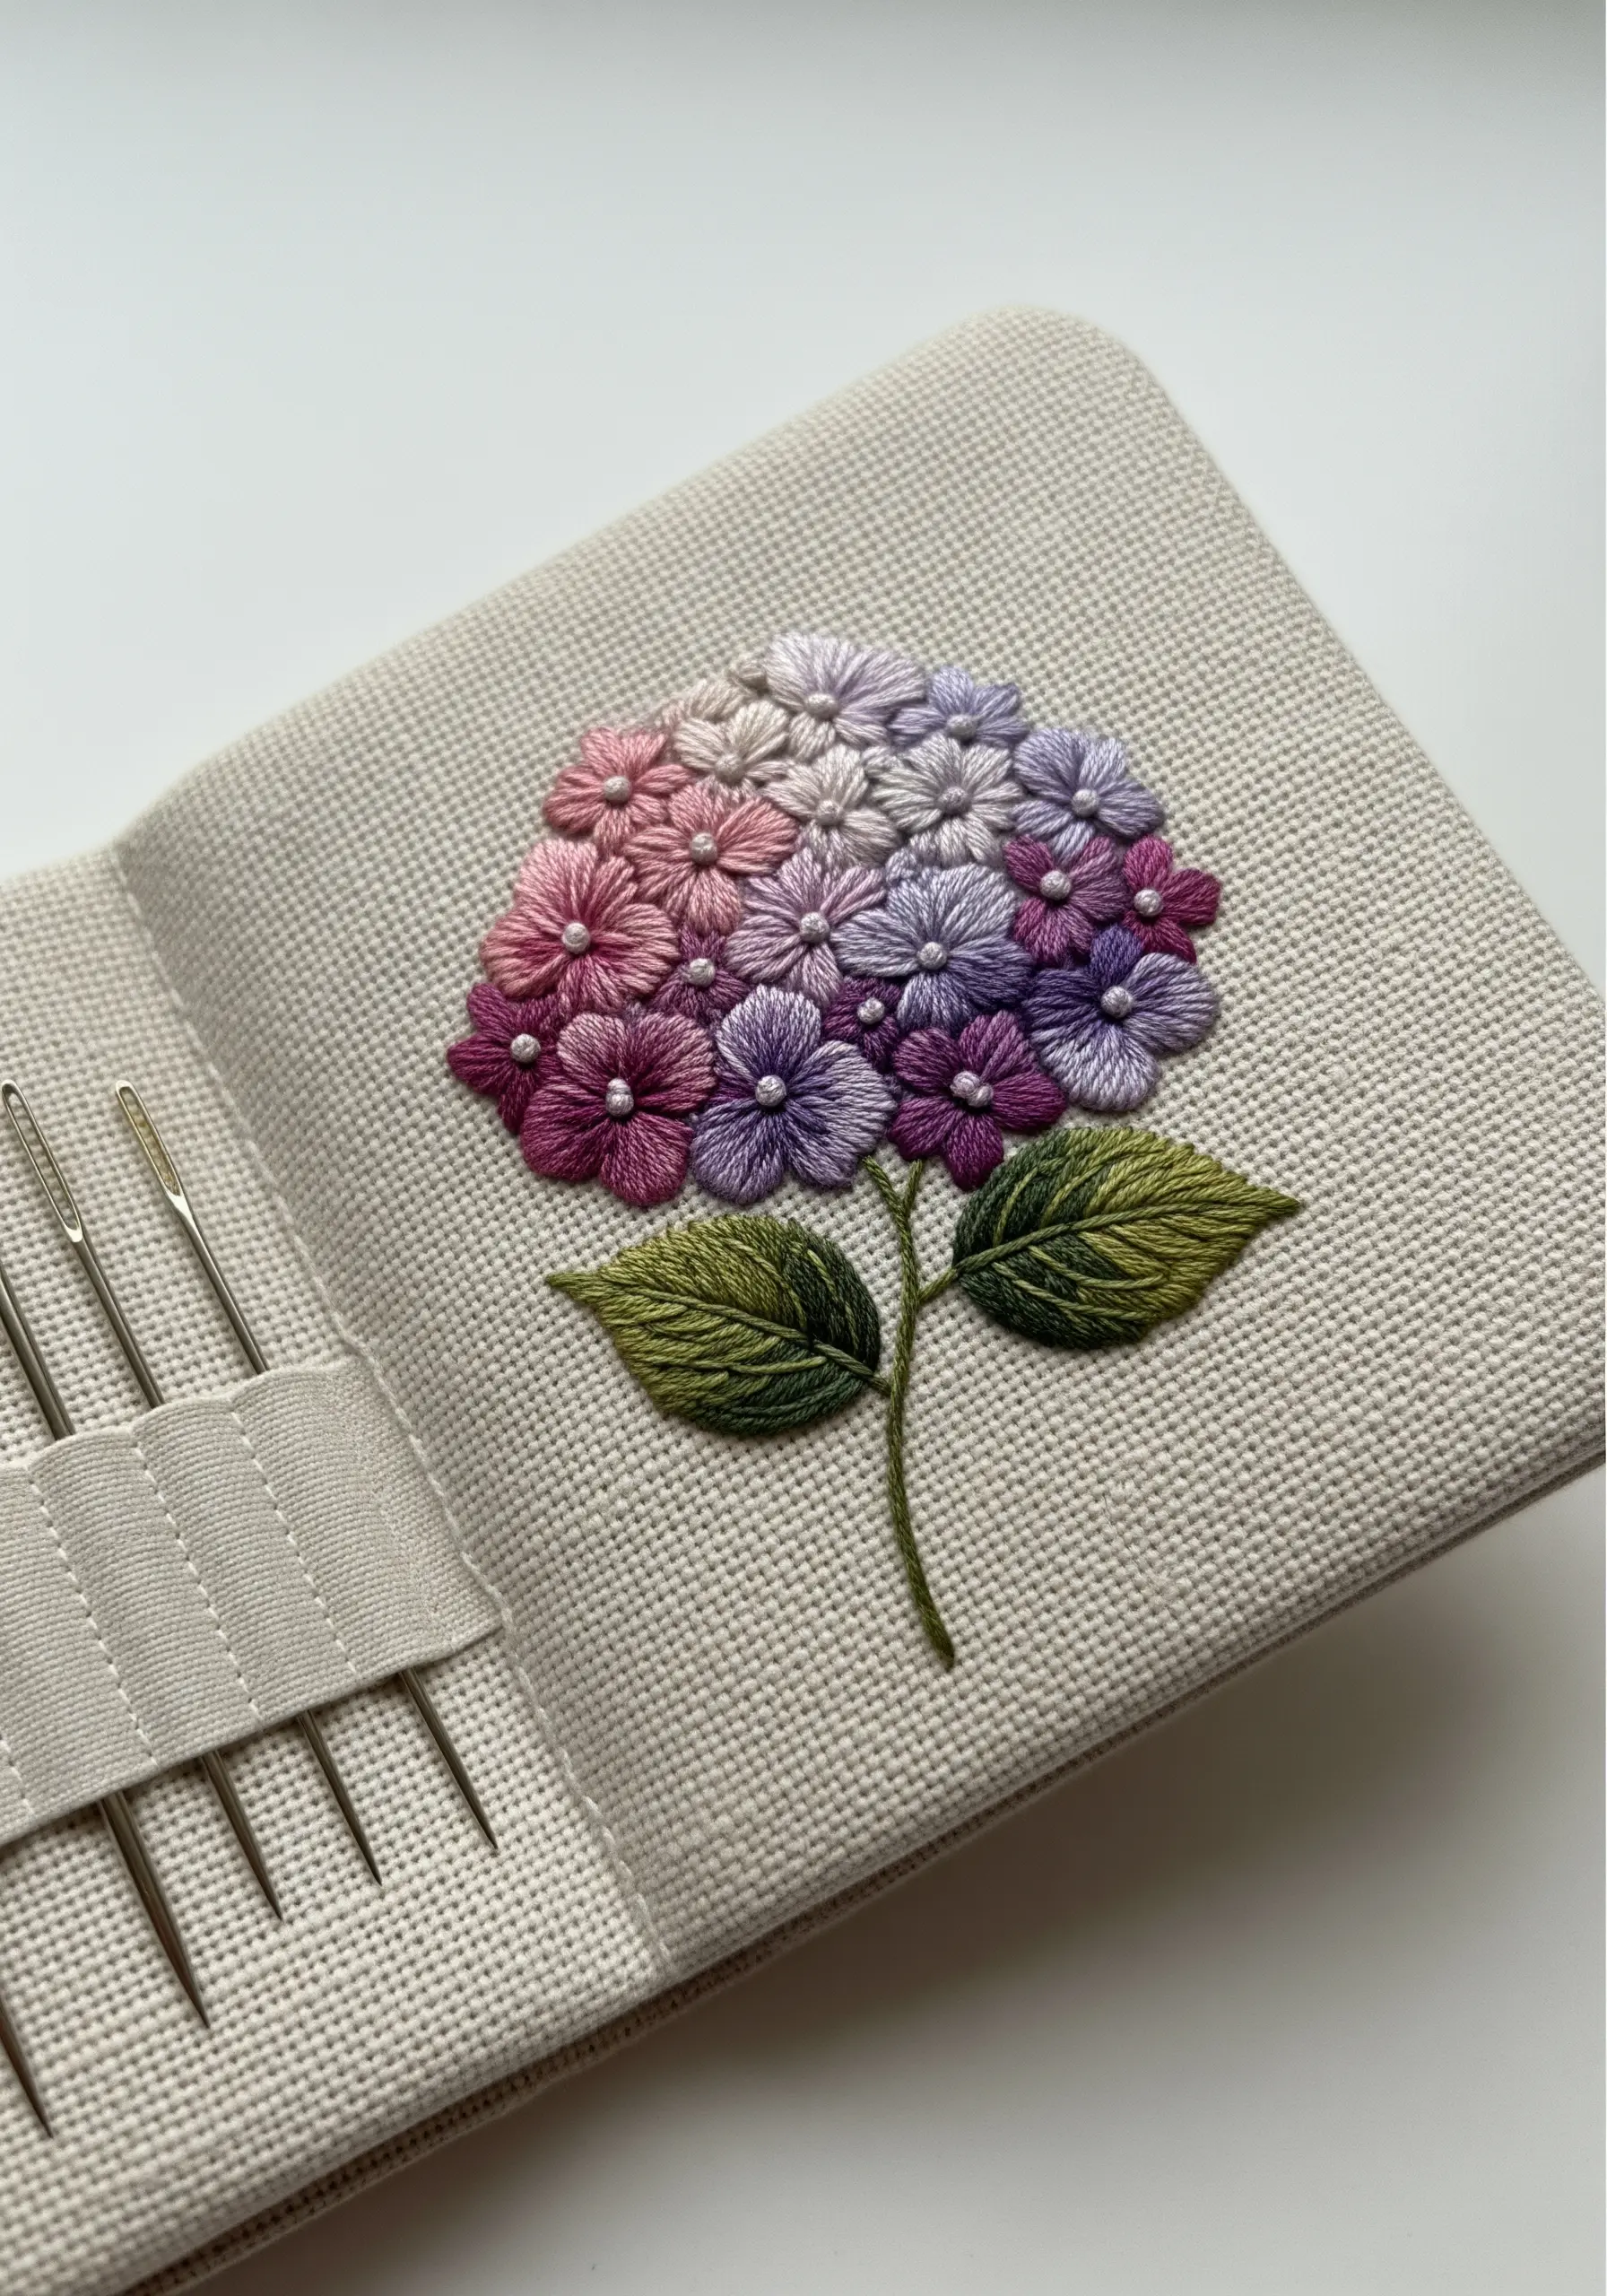
Elevate a simple satin stitch by incorporating dimensional elements. Use a padded satin stitch for some petals to make them physically stand out from the surface.
A tiny seed bead or a single French knot in a contrasting color at the center of each floret adds a delicate, realistic texture.
This combination of flat and raised techniques creates a rich tactile quality, turning a simple design into a more intricate, engaging piece.
9. Use Metallic Thread for a Touch of Moonlight
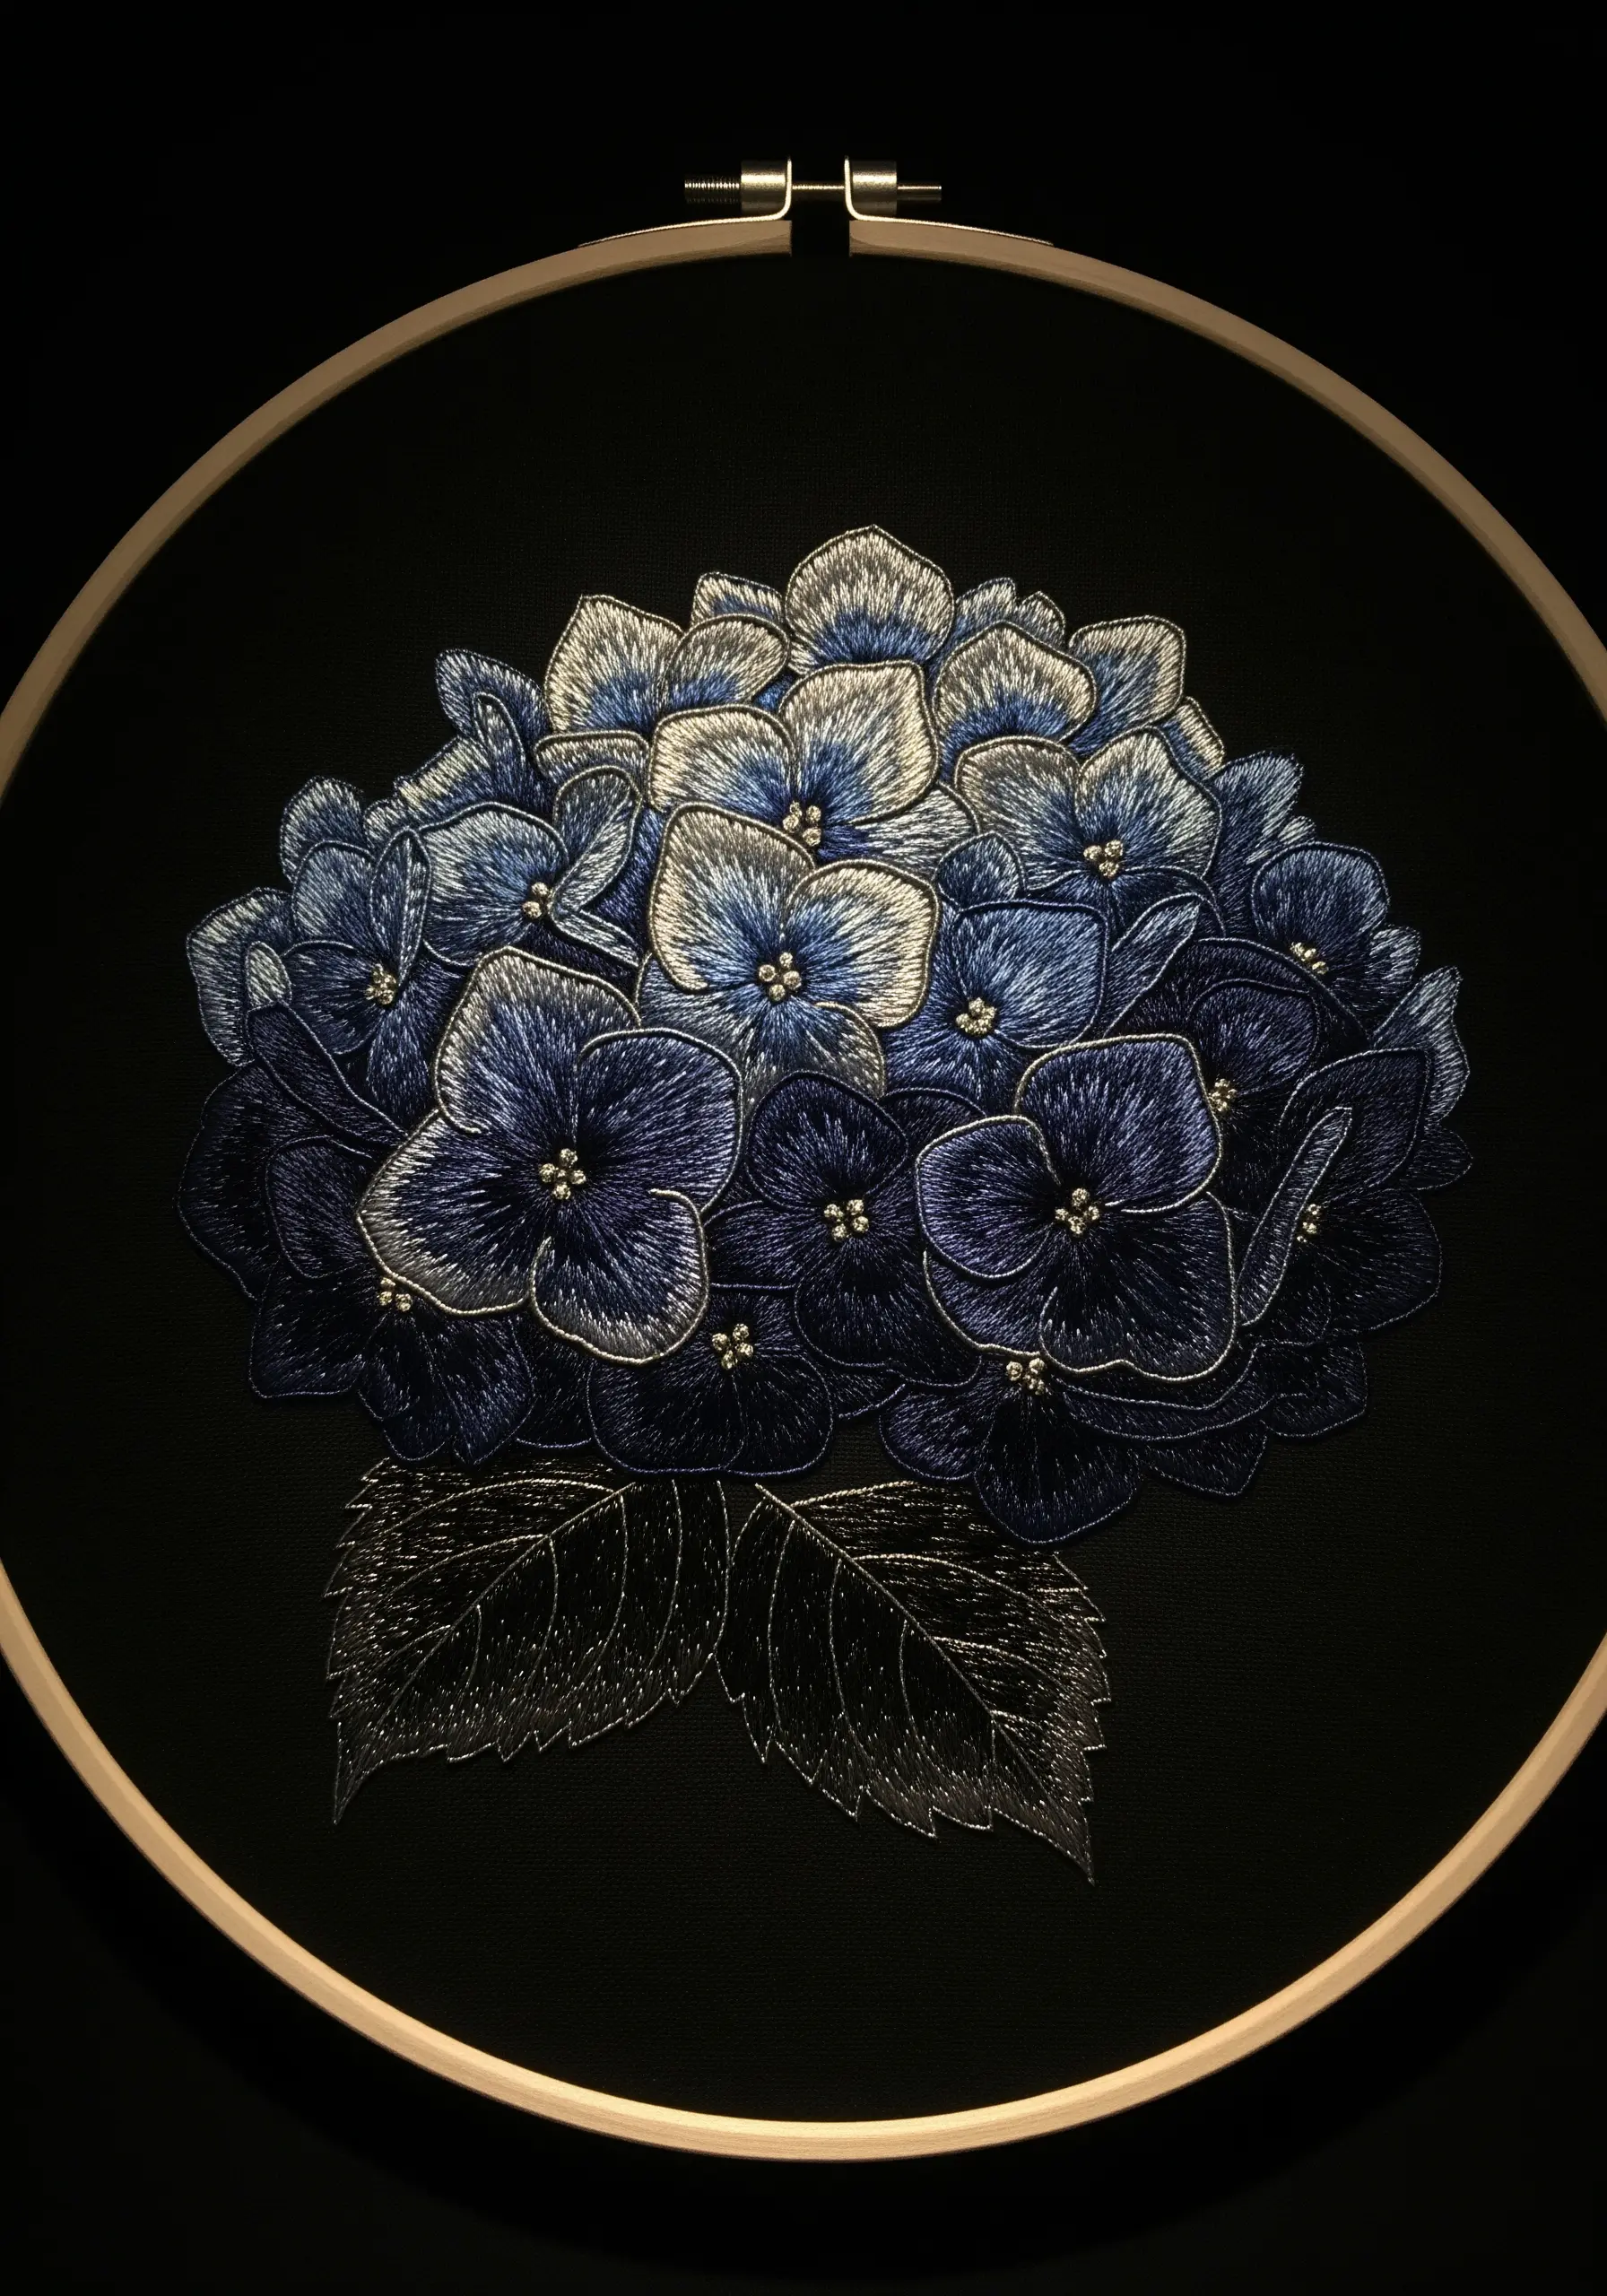
To give your hydrangeas a magical, moonlit glow, outline each petal with a single strand of silver or pale gold metallic thread.
Stitch the body of the petals in deep blues and purples on a black fabric background to maximize the contrast.
The metallic thread will catch the light, defining the shape of each petal and adding a sophisticated shimmer.
This is especially effective for night garden embroidery ideas where you want to evoke a sense of mystery and elegance.
10. Create 3D Petals with the Stumpwork Technique
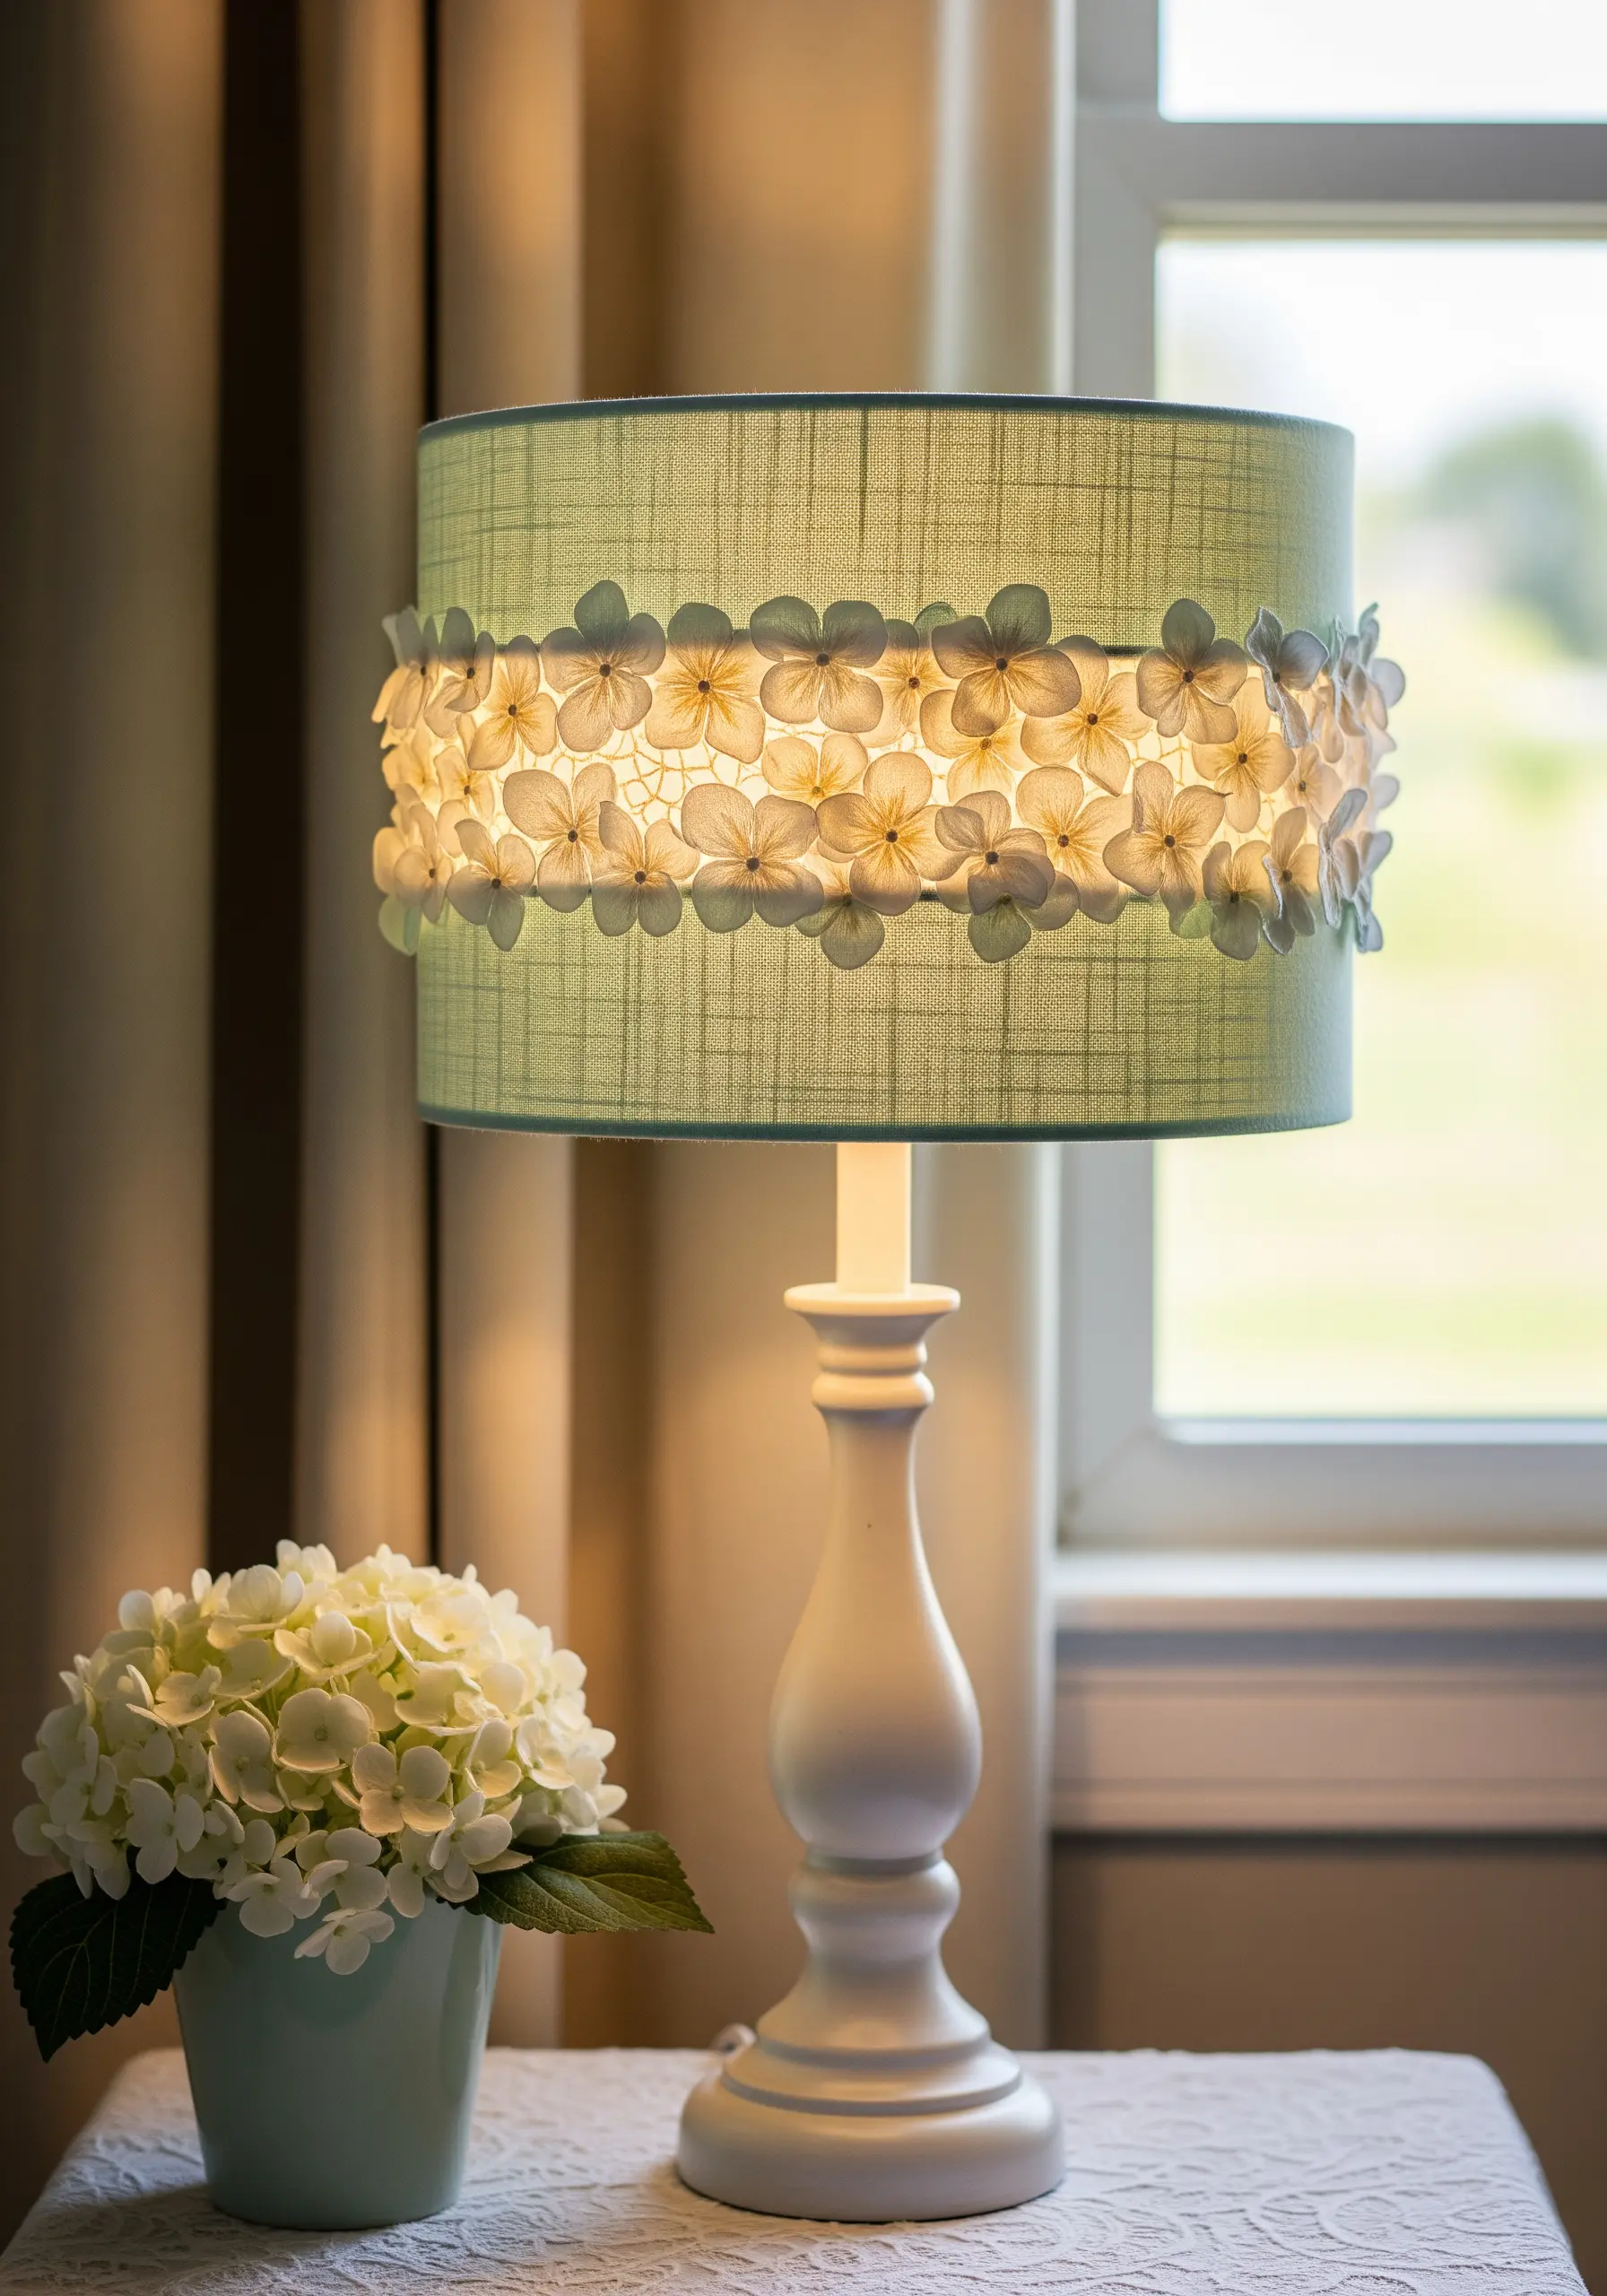
For a truly three-dimensional effect, move beyond the fabric surface with stumpwork.
Embroider individual petals onto a separate piece of fabric with a wire stitched along the edge.
Cut out each petal, bend the wire to create a natural curve, and then stitch them onto your main project, such as a lampshade or pillow.
This technique allows petals to lift away from the base, creating incredible depth and realistic shadows.
11. Compose a Wreath with Multiple Color Harmonies
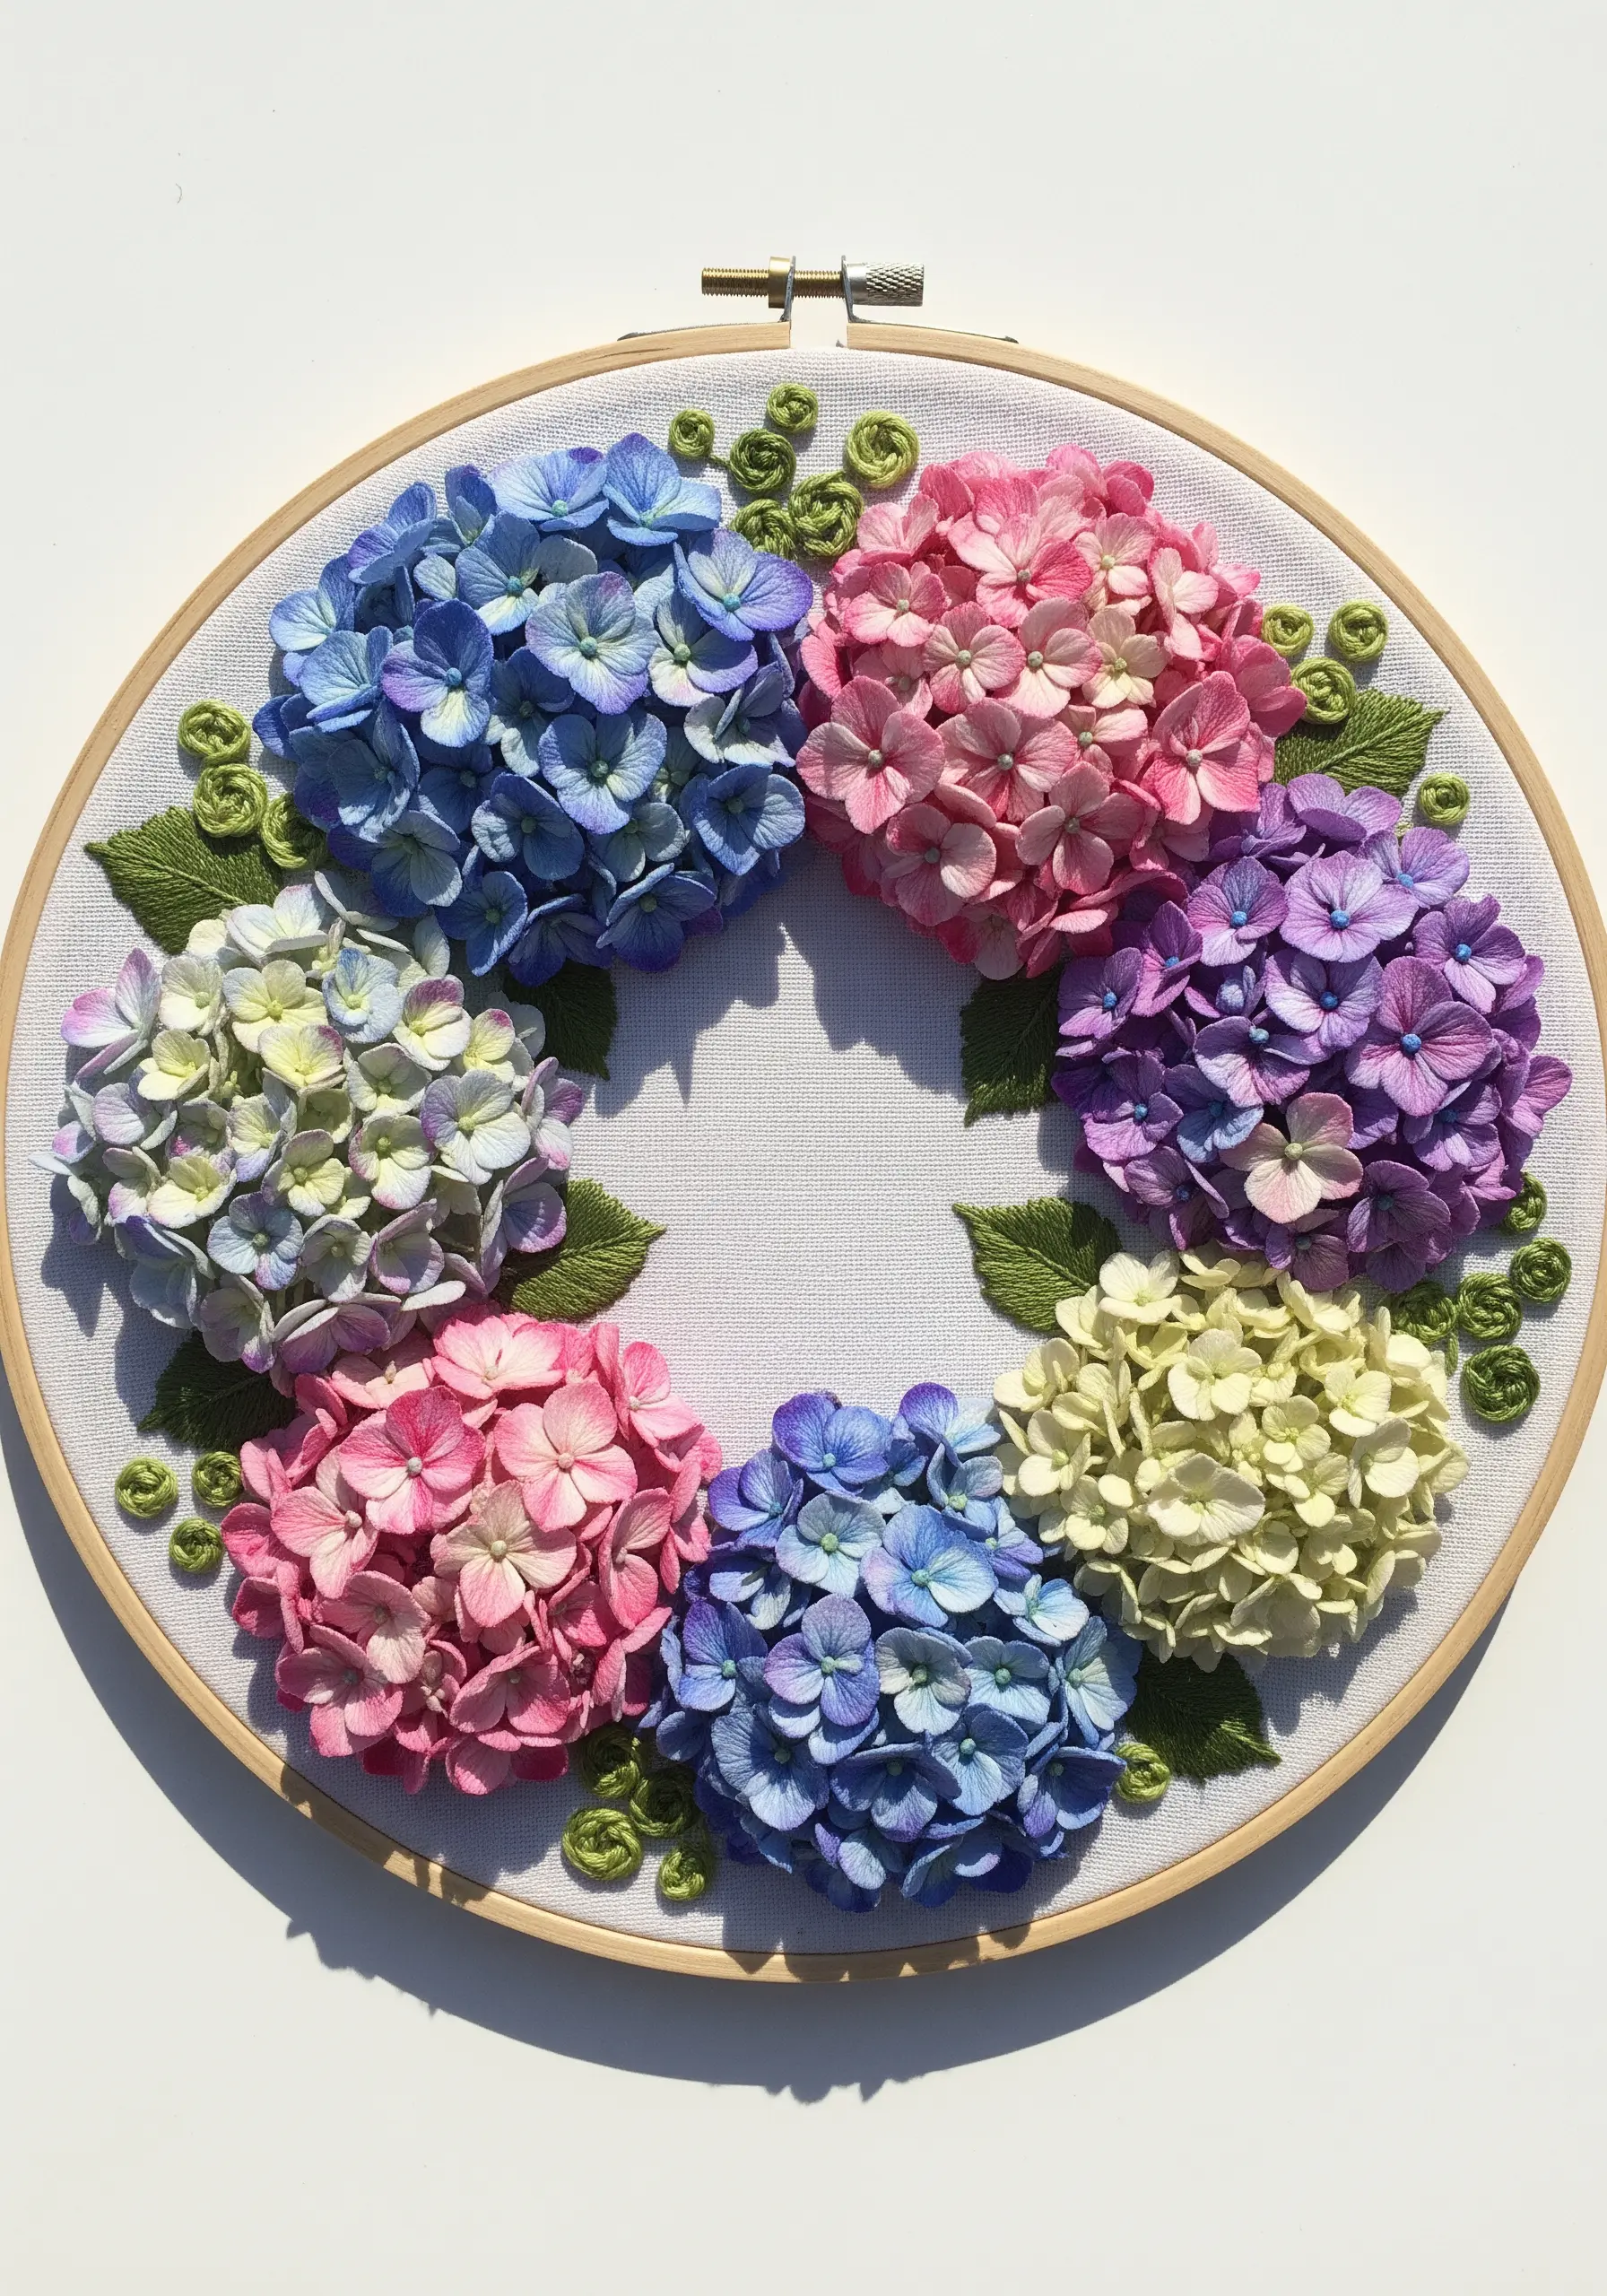
Instead of a single bloom, arrange several smaller hydrangea clusters into a circular wreath formation.
Assign a different color family to each cluster—one blue, one pink, one purple, one yellow-green—to showcase your blending skills.
Connect the clusters with gently curving stems and leaves stitched in a consistent shade of green to unify the design.
This composition allows you to play with a full spectrum of color while maintaining a balanced and cohesive piece.
12. Adapt Your Stitches for Delicate Fabrics Like Silk
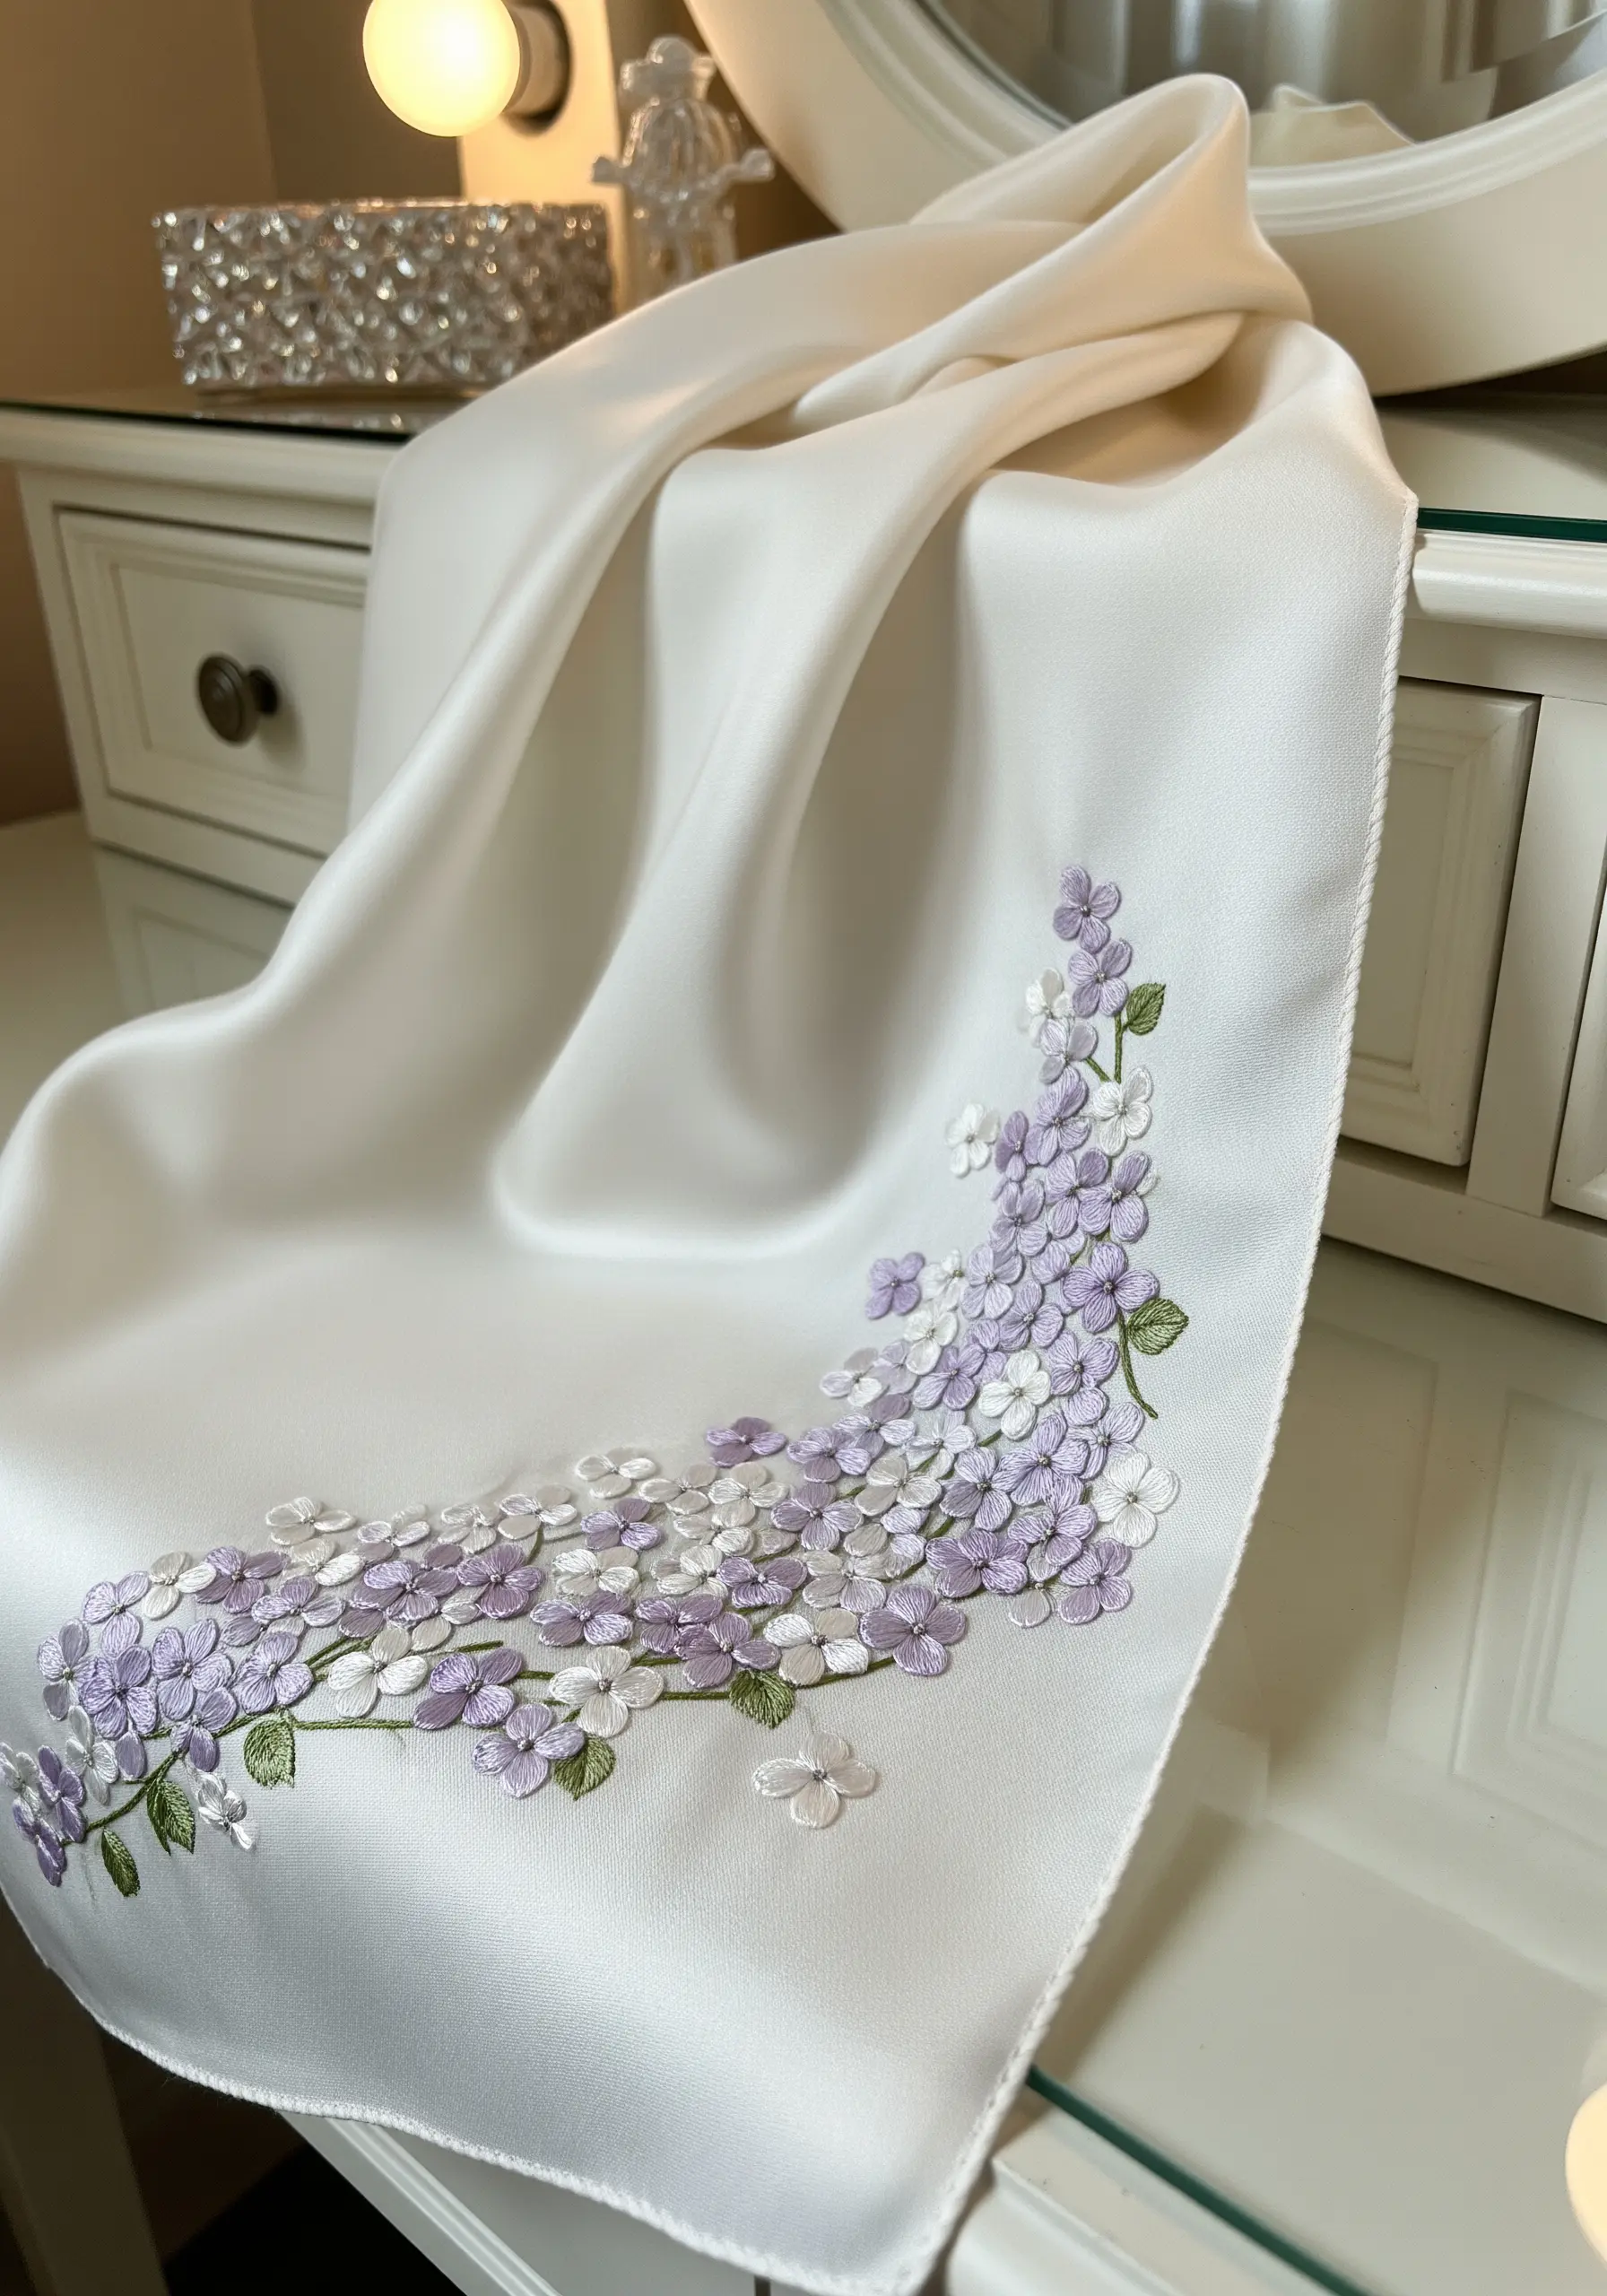
When embroidering on silk or satin, use a very fine needle and limit your thread to one or two strands to avoid puckering the fabric.
Choose smaller, delicate stitches like the lazy daisy or a short satin stitch for the petals.
A light hand is crucial. The goal is to let the luster of the silk shine through, with the embroidery acting as a graceful accent rather than a heavy embellishment.
This creates an ethereal, floating effect, perfect for scarves and lingerie.
13. Go Graphic with Bold Outlines and Color Blocking
For a modern, illustrative style, outline each individual petal with a single, dark line of backstitch or stem stitch.
Fill in the petals with solid fields of color using satin stitch, focusing on graphic shapes rather than smooth blending.
This technique trades photorealism for a bold, contemporary aesthetic that works incredibly well for statement-size wall art ideas.
Choose a limited palette of blues and greens to enhance the clean, graphic impact.
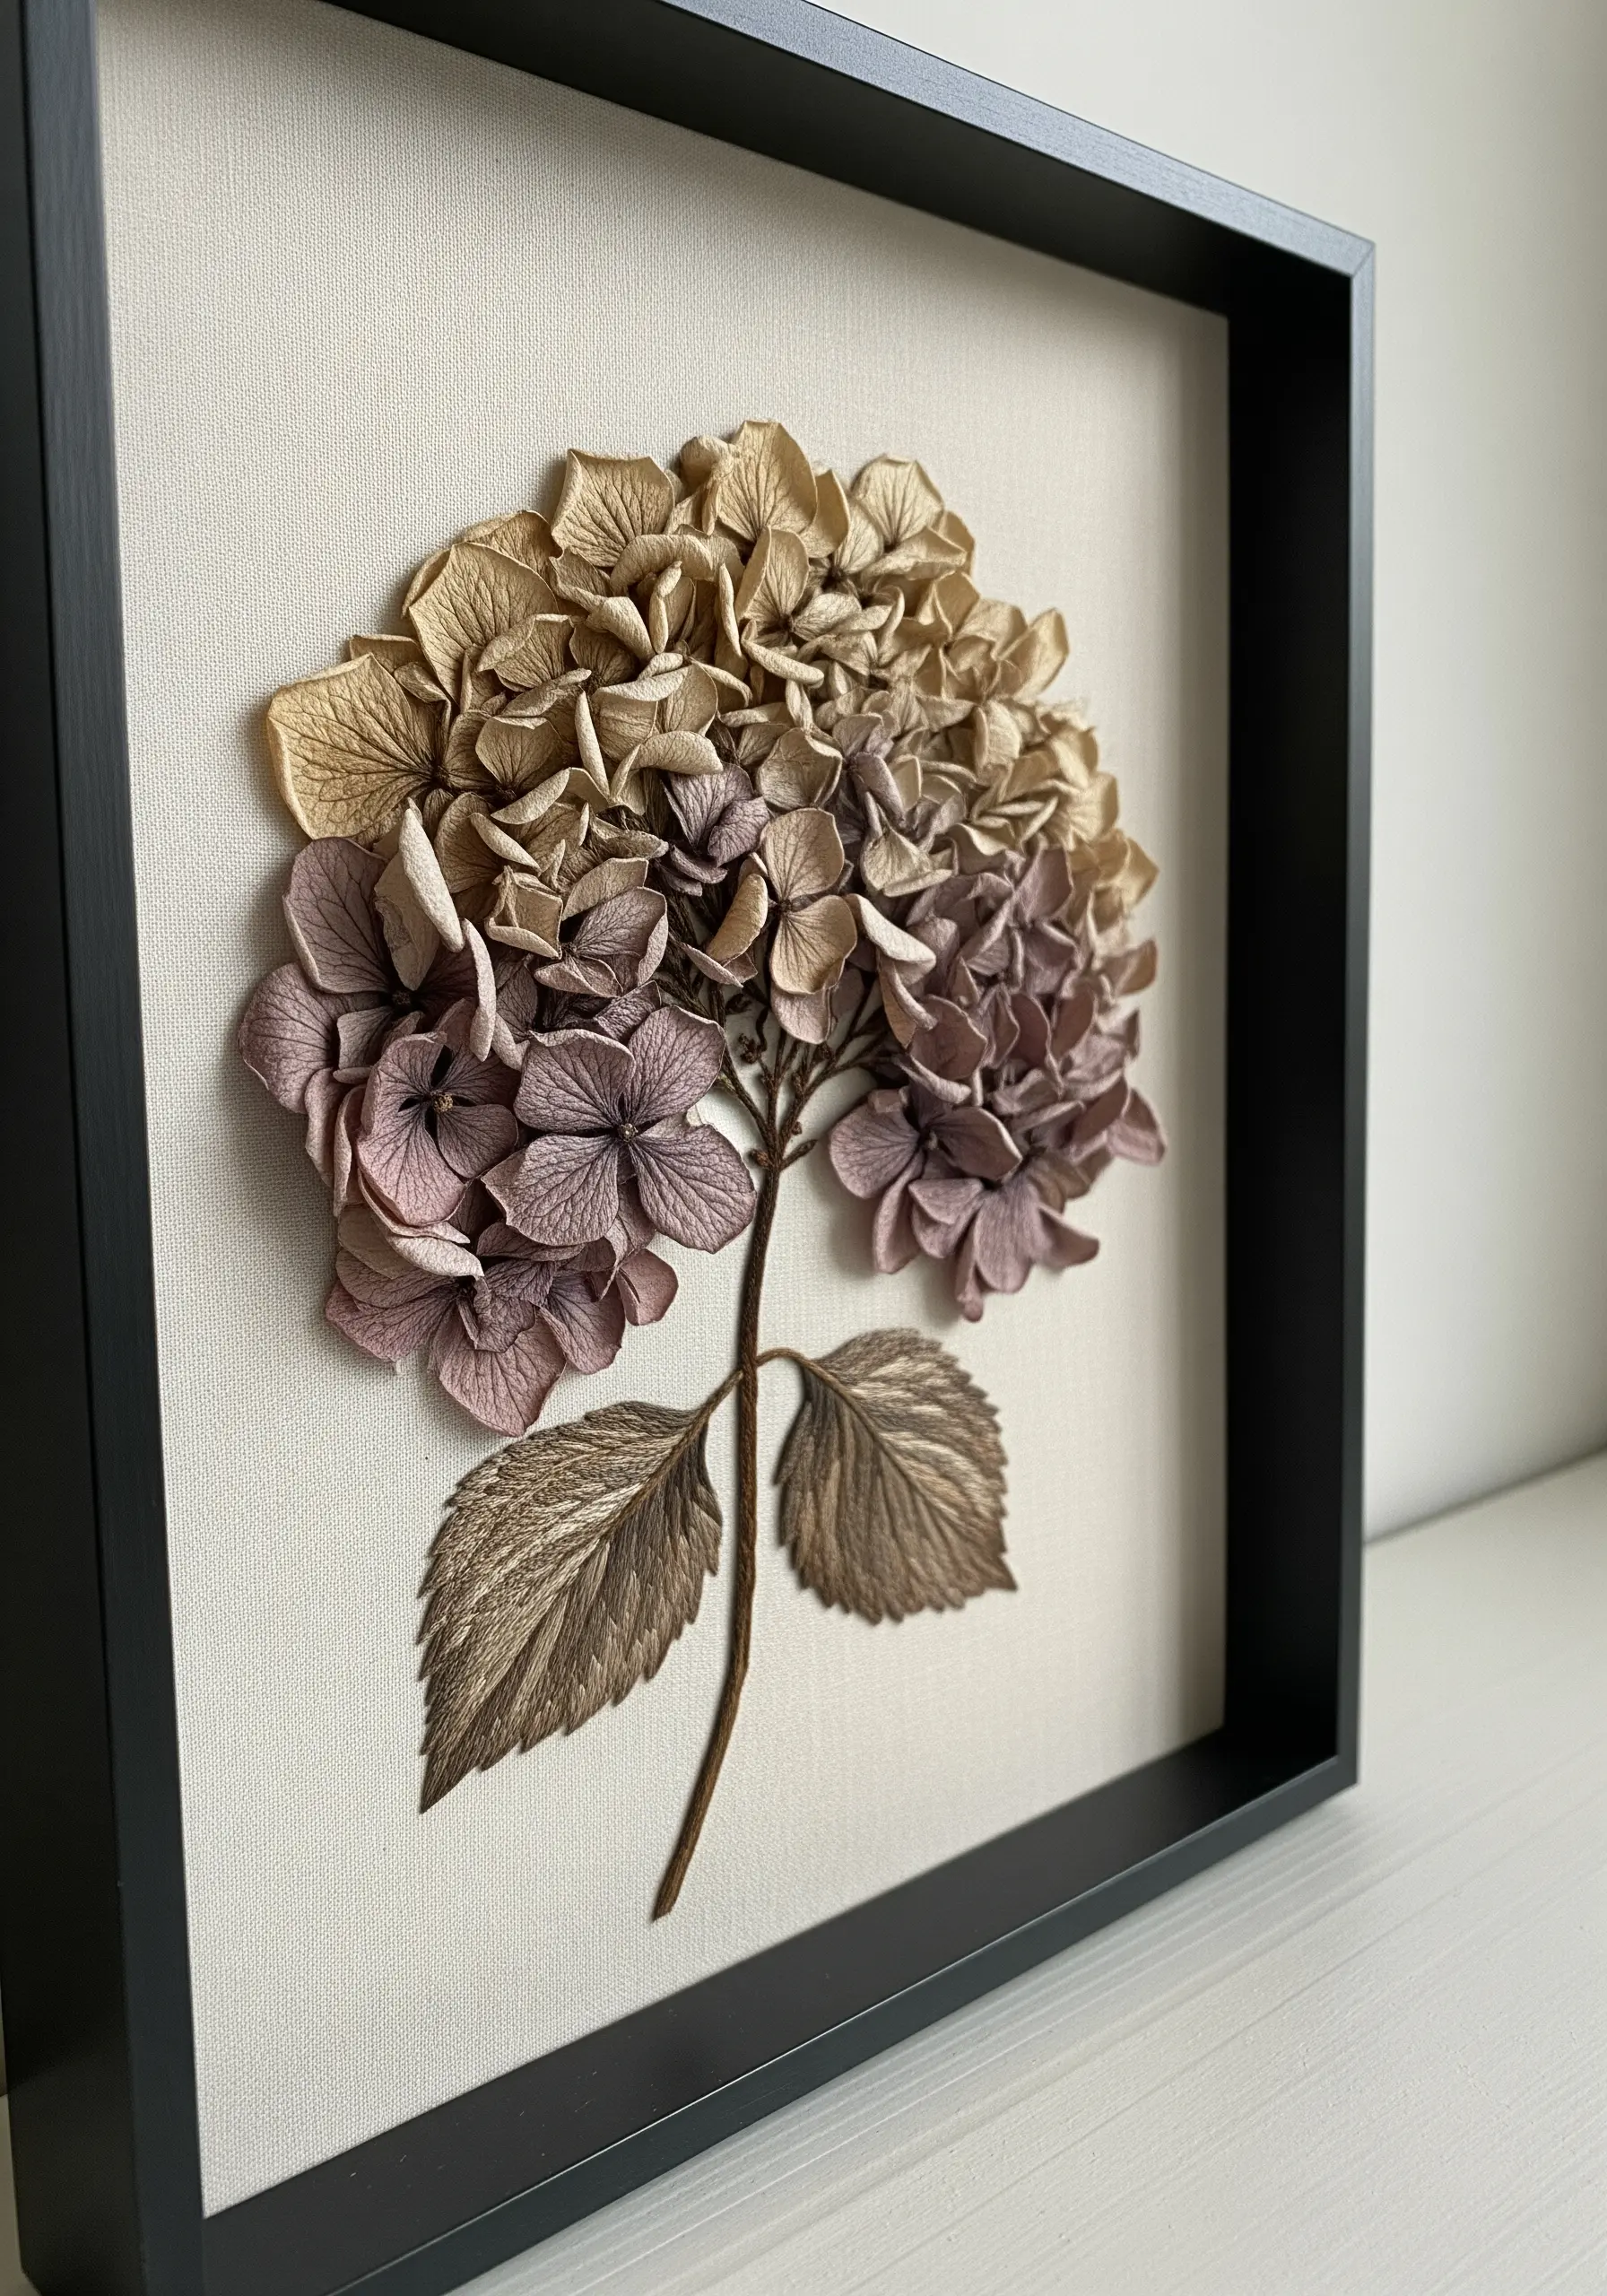
14. Evoke a Dried Hydrangea with Muted, Earthy Tones
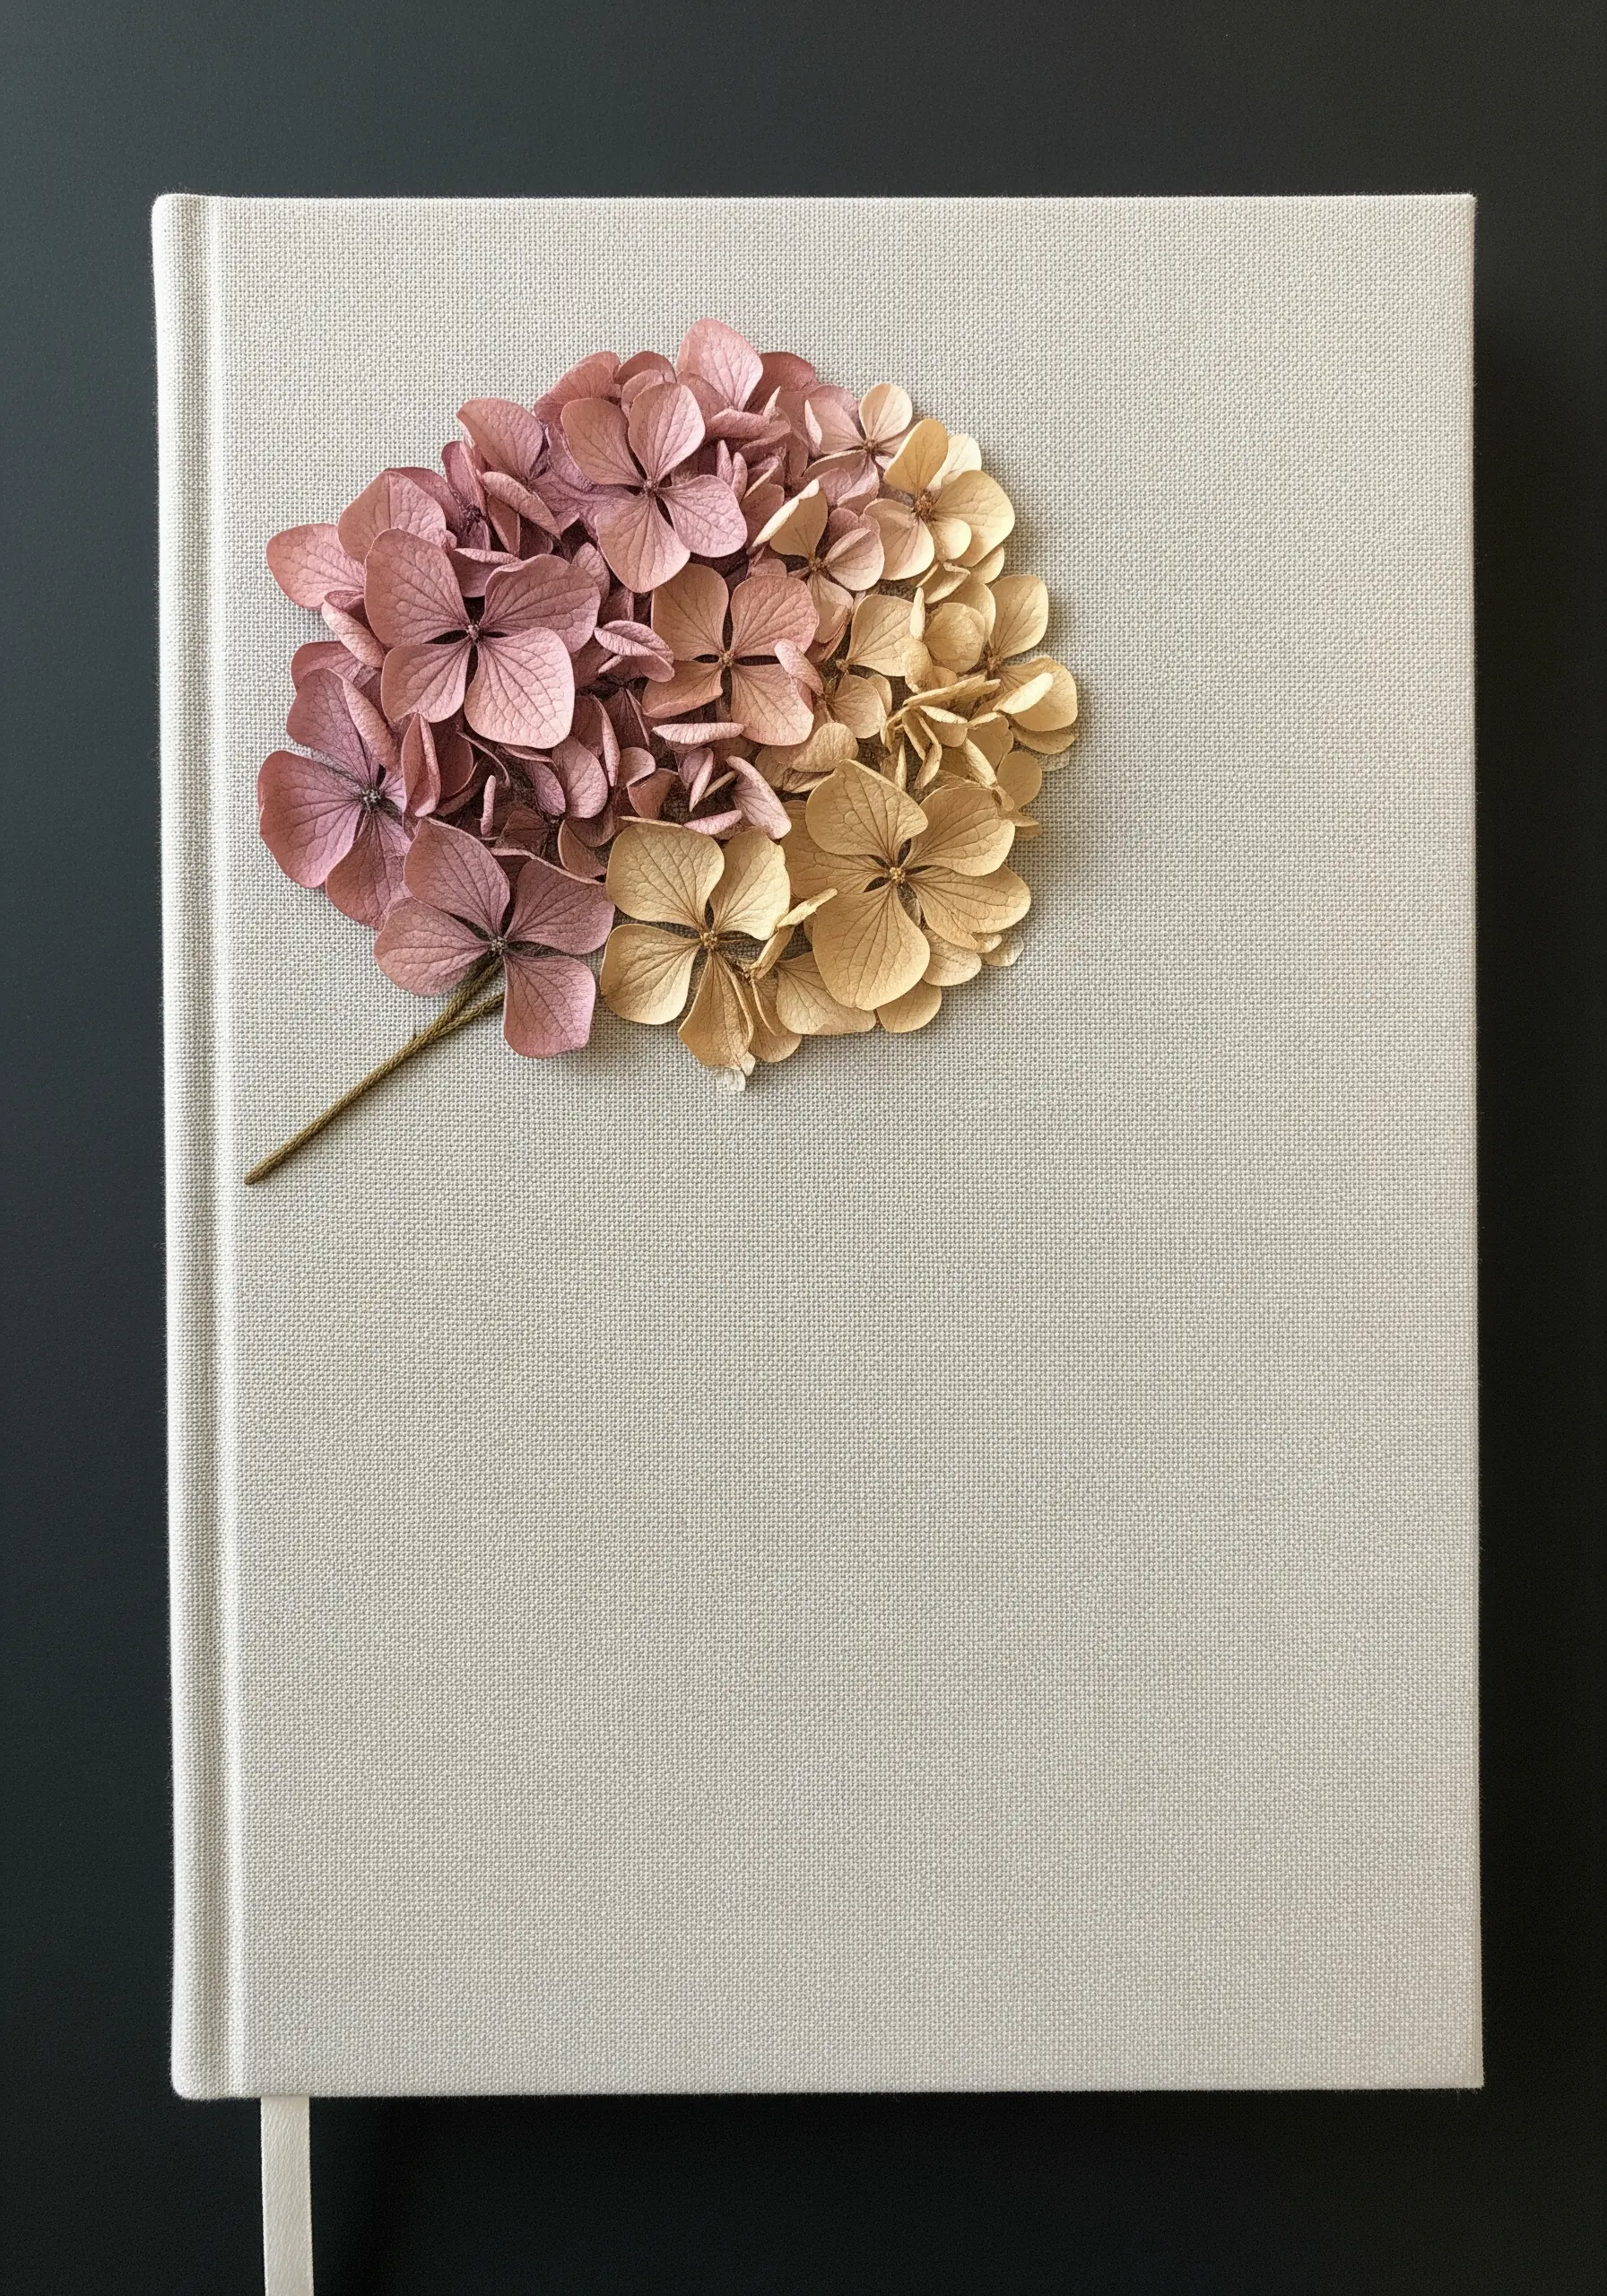
To capture the papery, delicate quality of a dried hydrangea, work with a palette of dusty mauve, beige, and muted gold.
Keep your stitches slightly looser and more varied in direction to mimic the texture of dried petals.
Use a matte cotton thread instead of a lustrous silk to enhance the dry, organic feel.
This technique is perfect for creating embroidery projects inspired by textures found in nature, adding a touch of rustic elegance to journal covers or framed art.
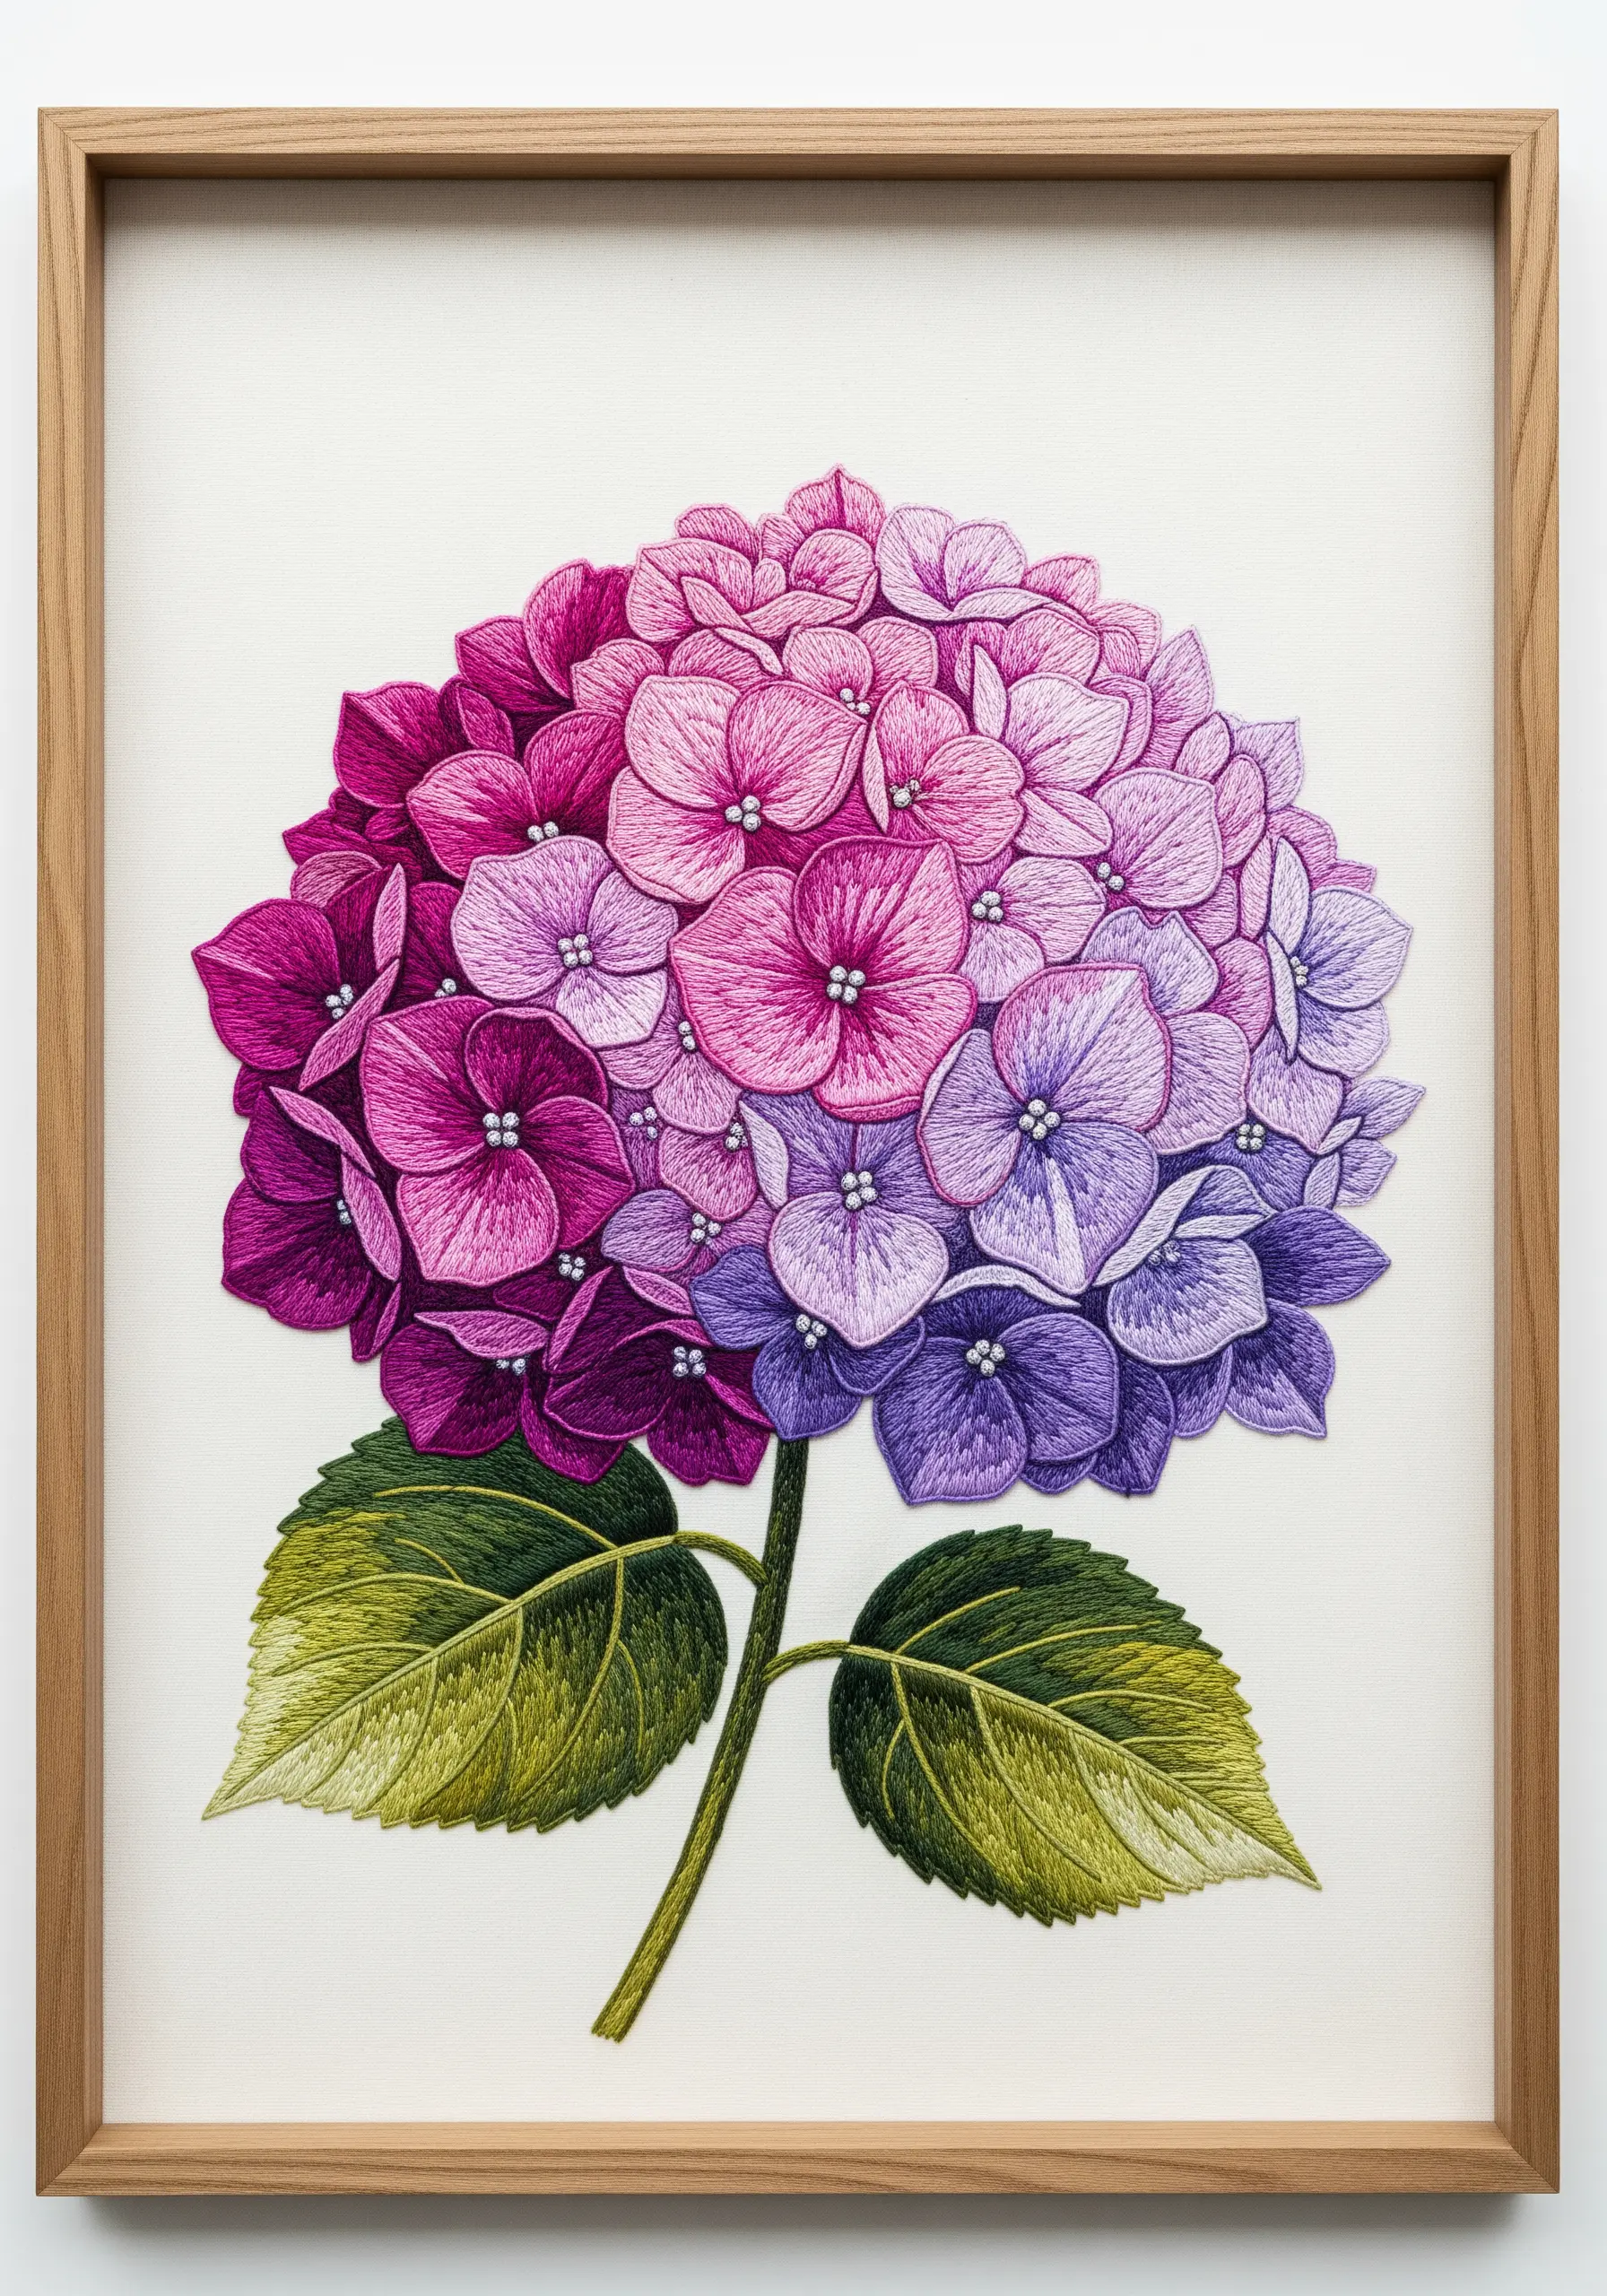
15. Build Vibrant Saturation with Analogous Colors
To achieve an intensely vibrant look, choose colors that sit next to each other on the color wheel, like magenta, fuchsia, and rose pink.
Layer these analogous colors using long-and-short stitch, allowing them to overlap and blend optically.
This creates a rich, luminous effect that appears more saturated than using just a single color.
Place your most intense, pure hue at the heart of the flower head for the greatest visual impact.
16. Contrast Smooth Stitches with Textured Fabric
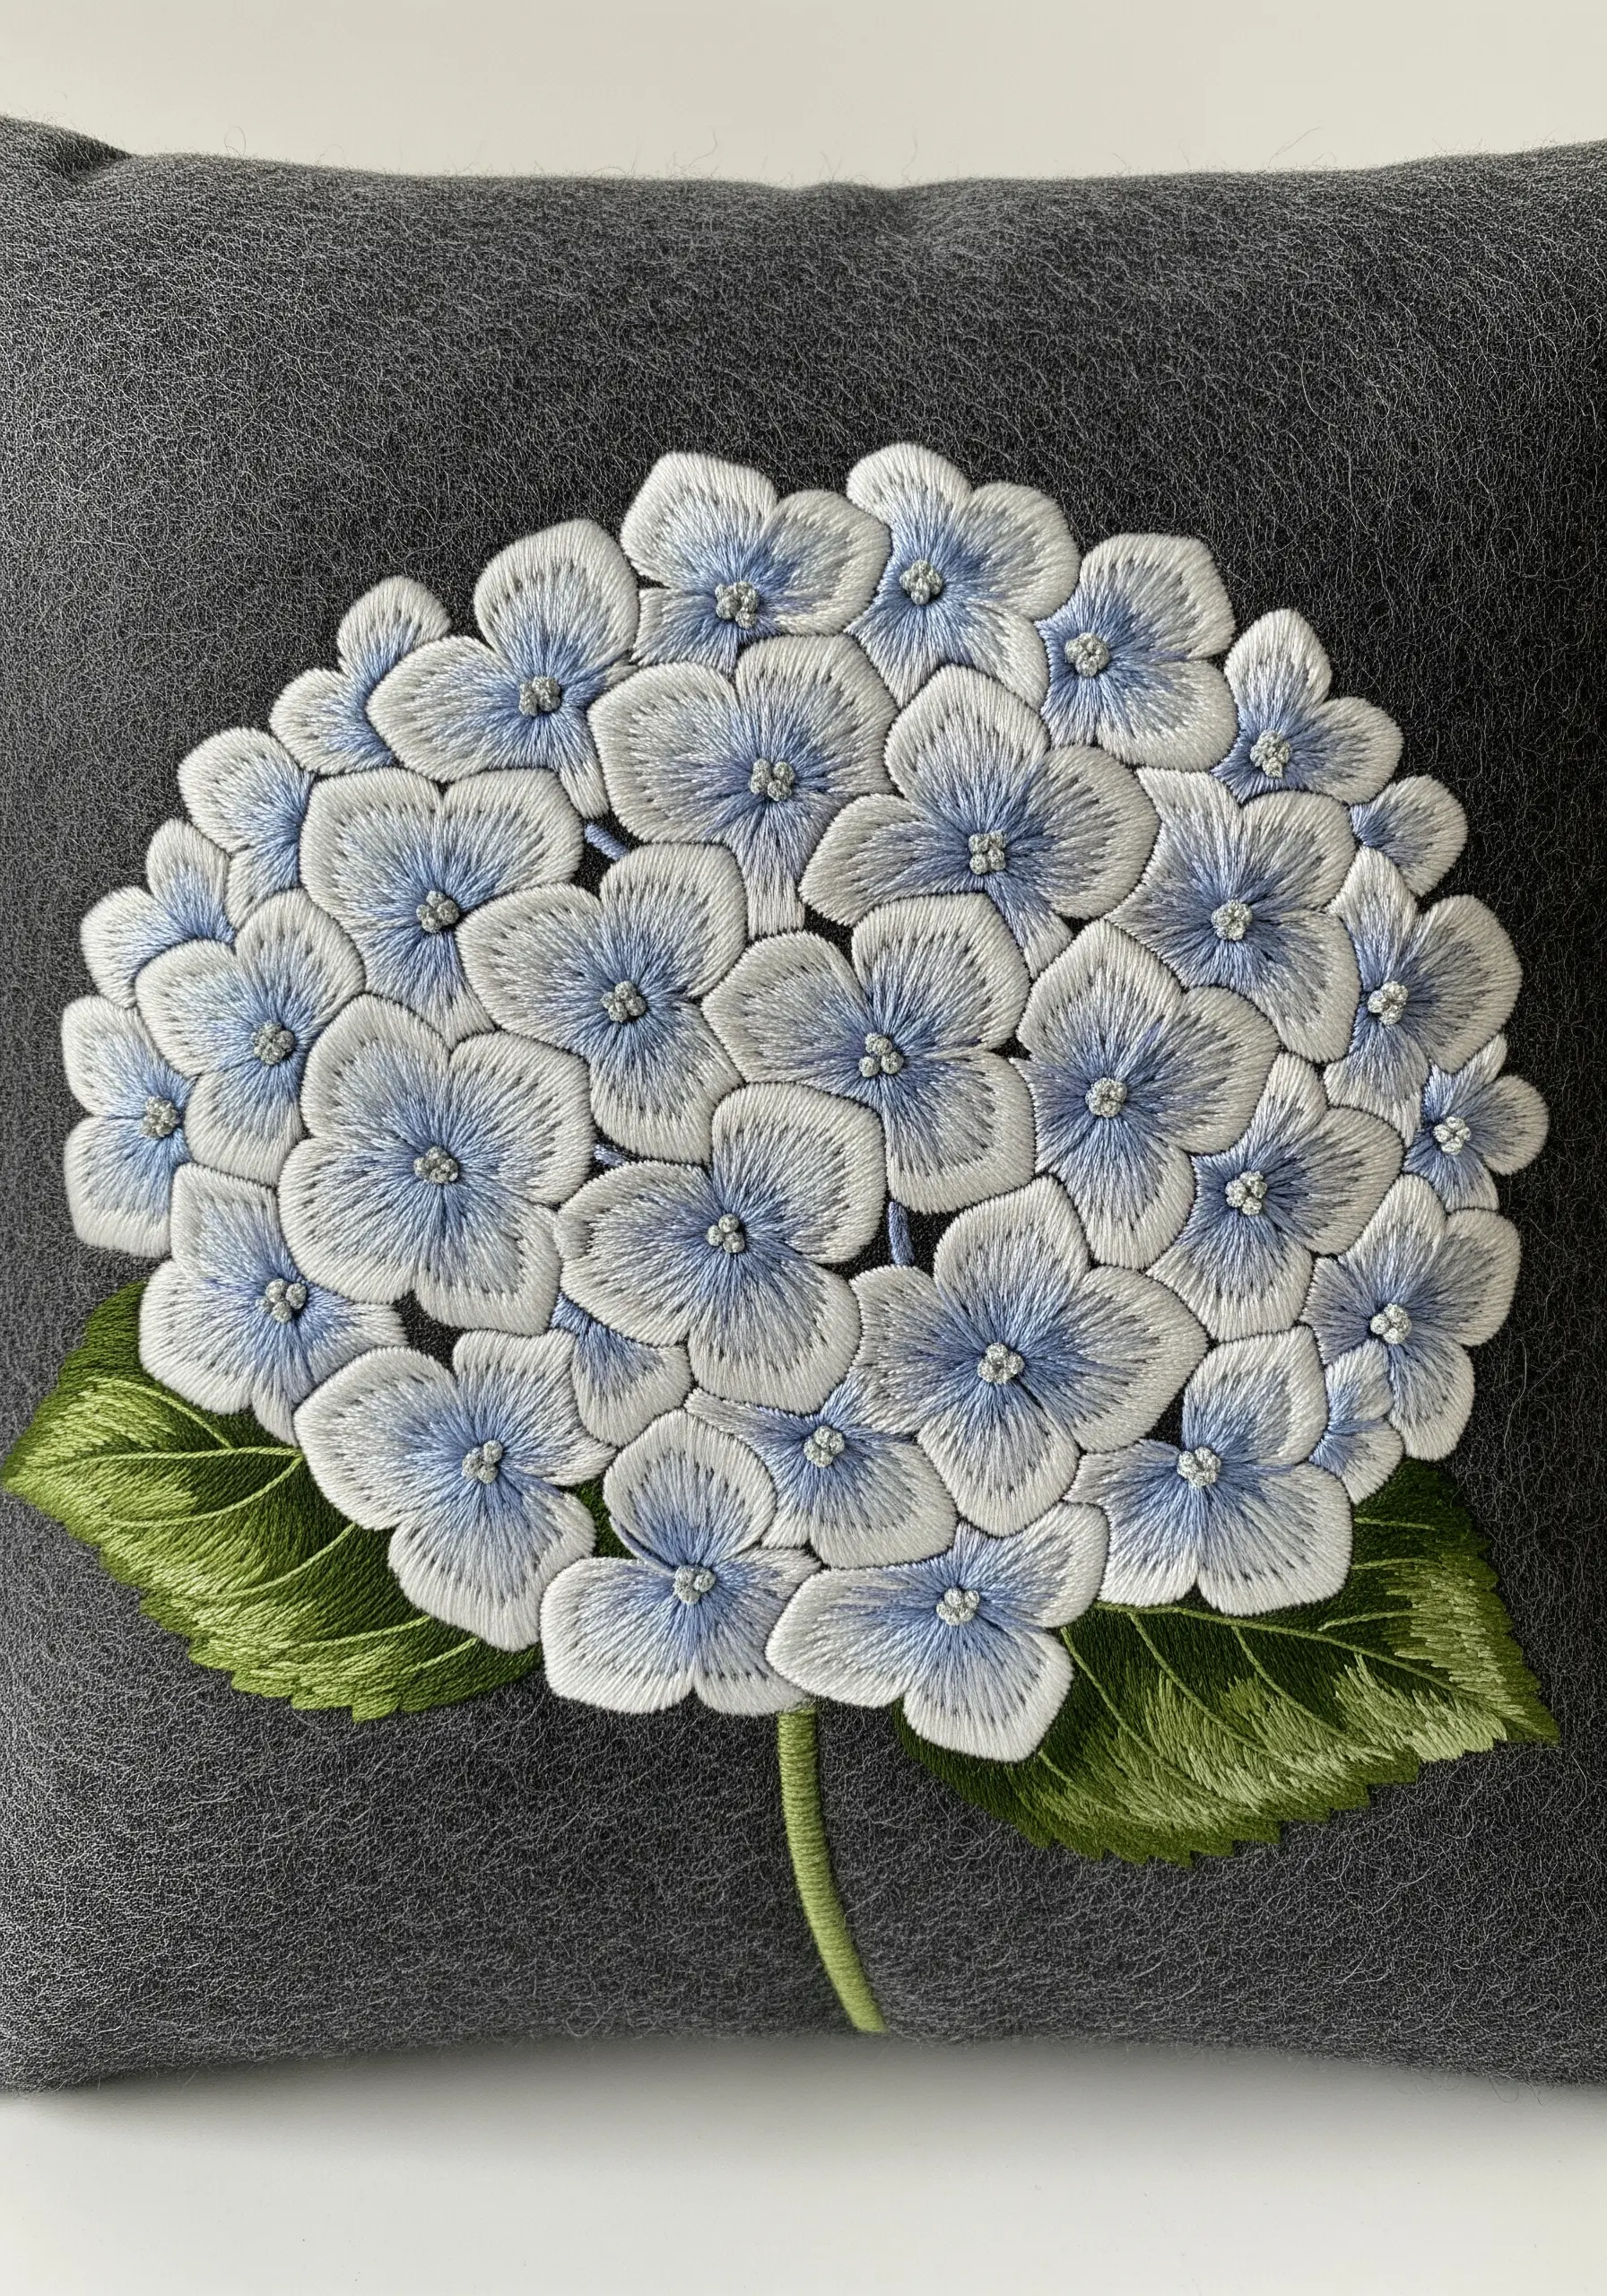
Create a compelling tactile experience by embroidering a smooth, tightly stitched hydrangea onto a textured base fabric like wool felt or tweed.
Use a satin stitch with a slight sheen, like rayon or silk floss, to fill the petals.
The contrast between the lustrous, flat surface of the embroidery and the soft, matte texture of the fabric makes the design stand out beautifully.
Adding a light blue shadow on the edges of the white petals helps lift them from the dark grey background.
17. Achieve Rich, Antiqued Tones with Variegated Thread

For a complex, painterly effect without constant color switching, use a single variegated thread that moves through shades of claret, rose, and cream.
Stitch each petal individually with this thread, allowing the colors to land randomly.
This creates subtle, unpredictable shifts in color that mimic the natural variations in an aging hydrangea bloom.
To add structure, outline a few key petals with a darker, solid color to define the overall shape.
18. Embellish a Curved Surface like a Hat Band
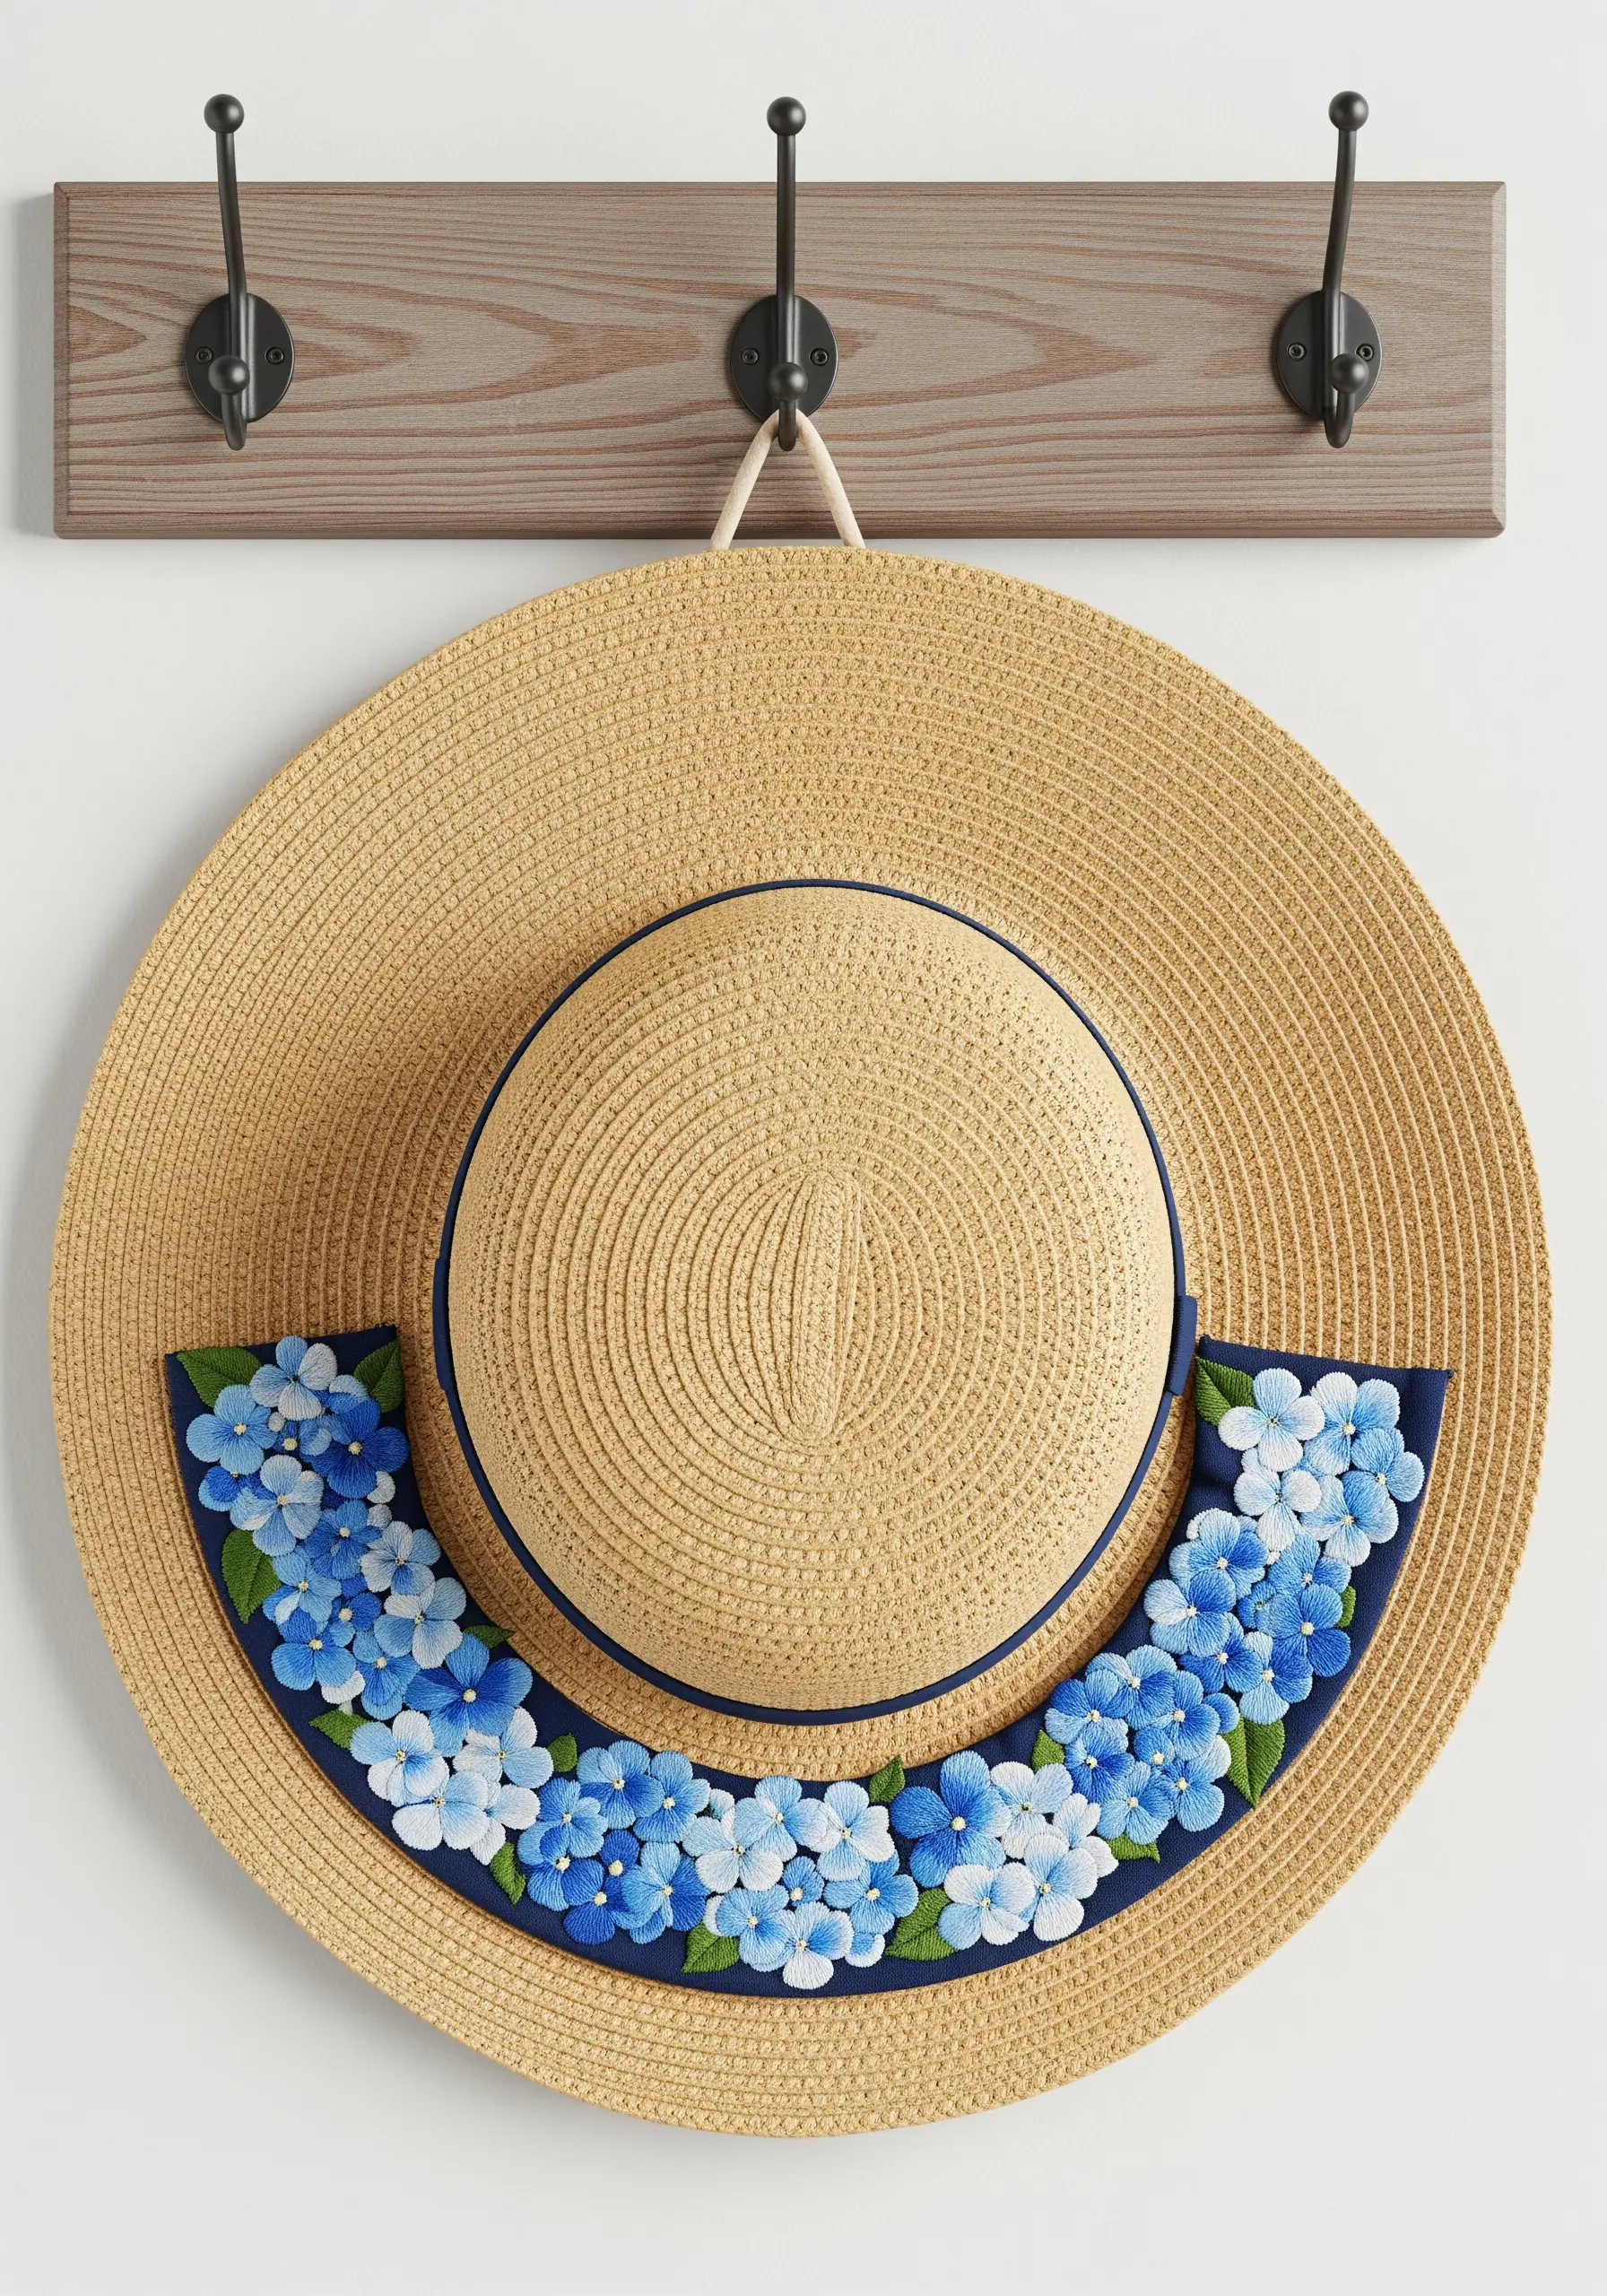
When embroidering on a curved or unconventional surface like a hat band, simplify your design and your color palette.
Work with a limited range of three to four blues, and use a consistent satin stitch angled towards the center of each floret.
Transfer your design carefully and consider using a sticky, water-soluble stabilizer to keep the fabric from shifting as you stitch around the curve.
This ensures your petals are uniform and the overall composition remains balanced.
19. Use Minimalist Gradients for Small Accents
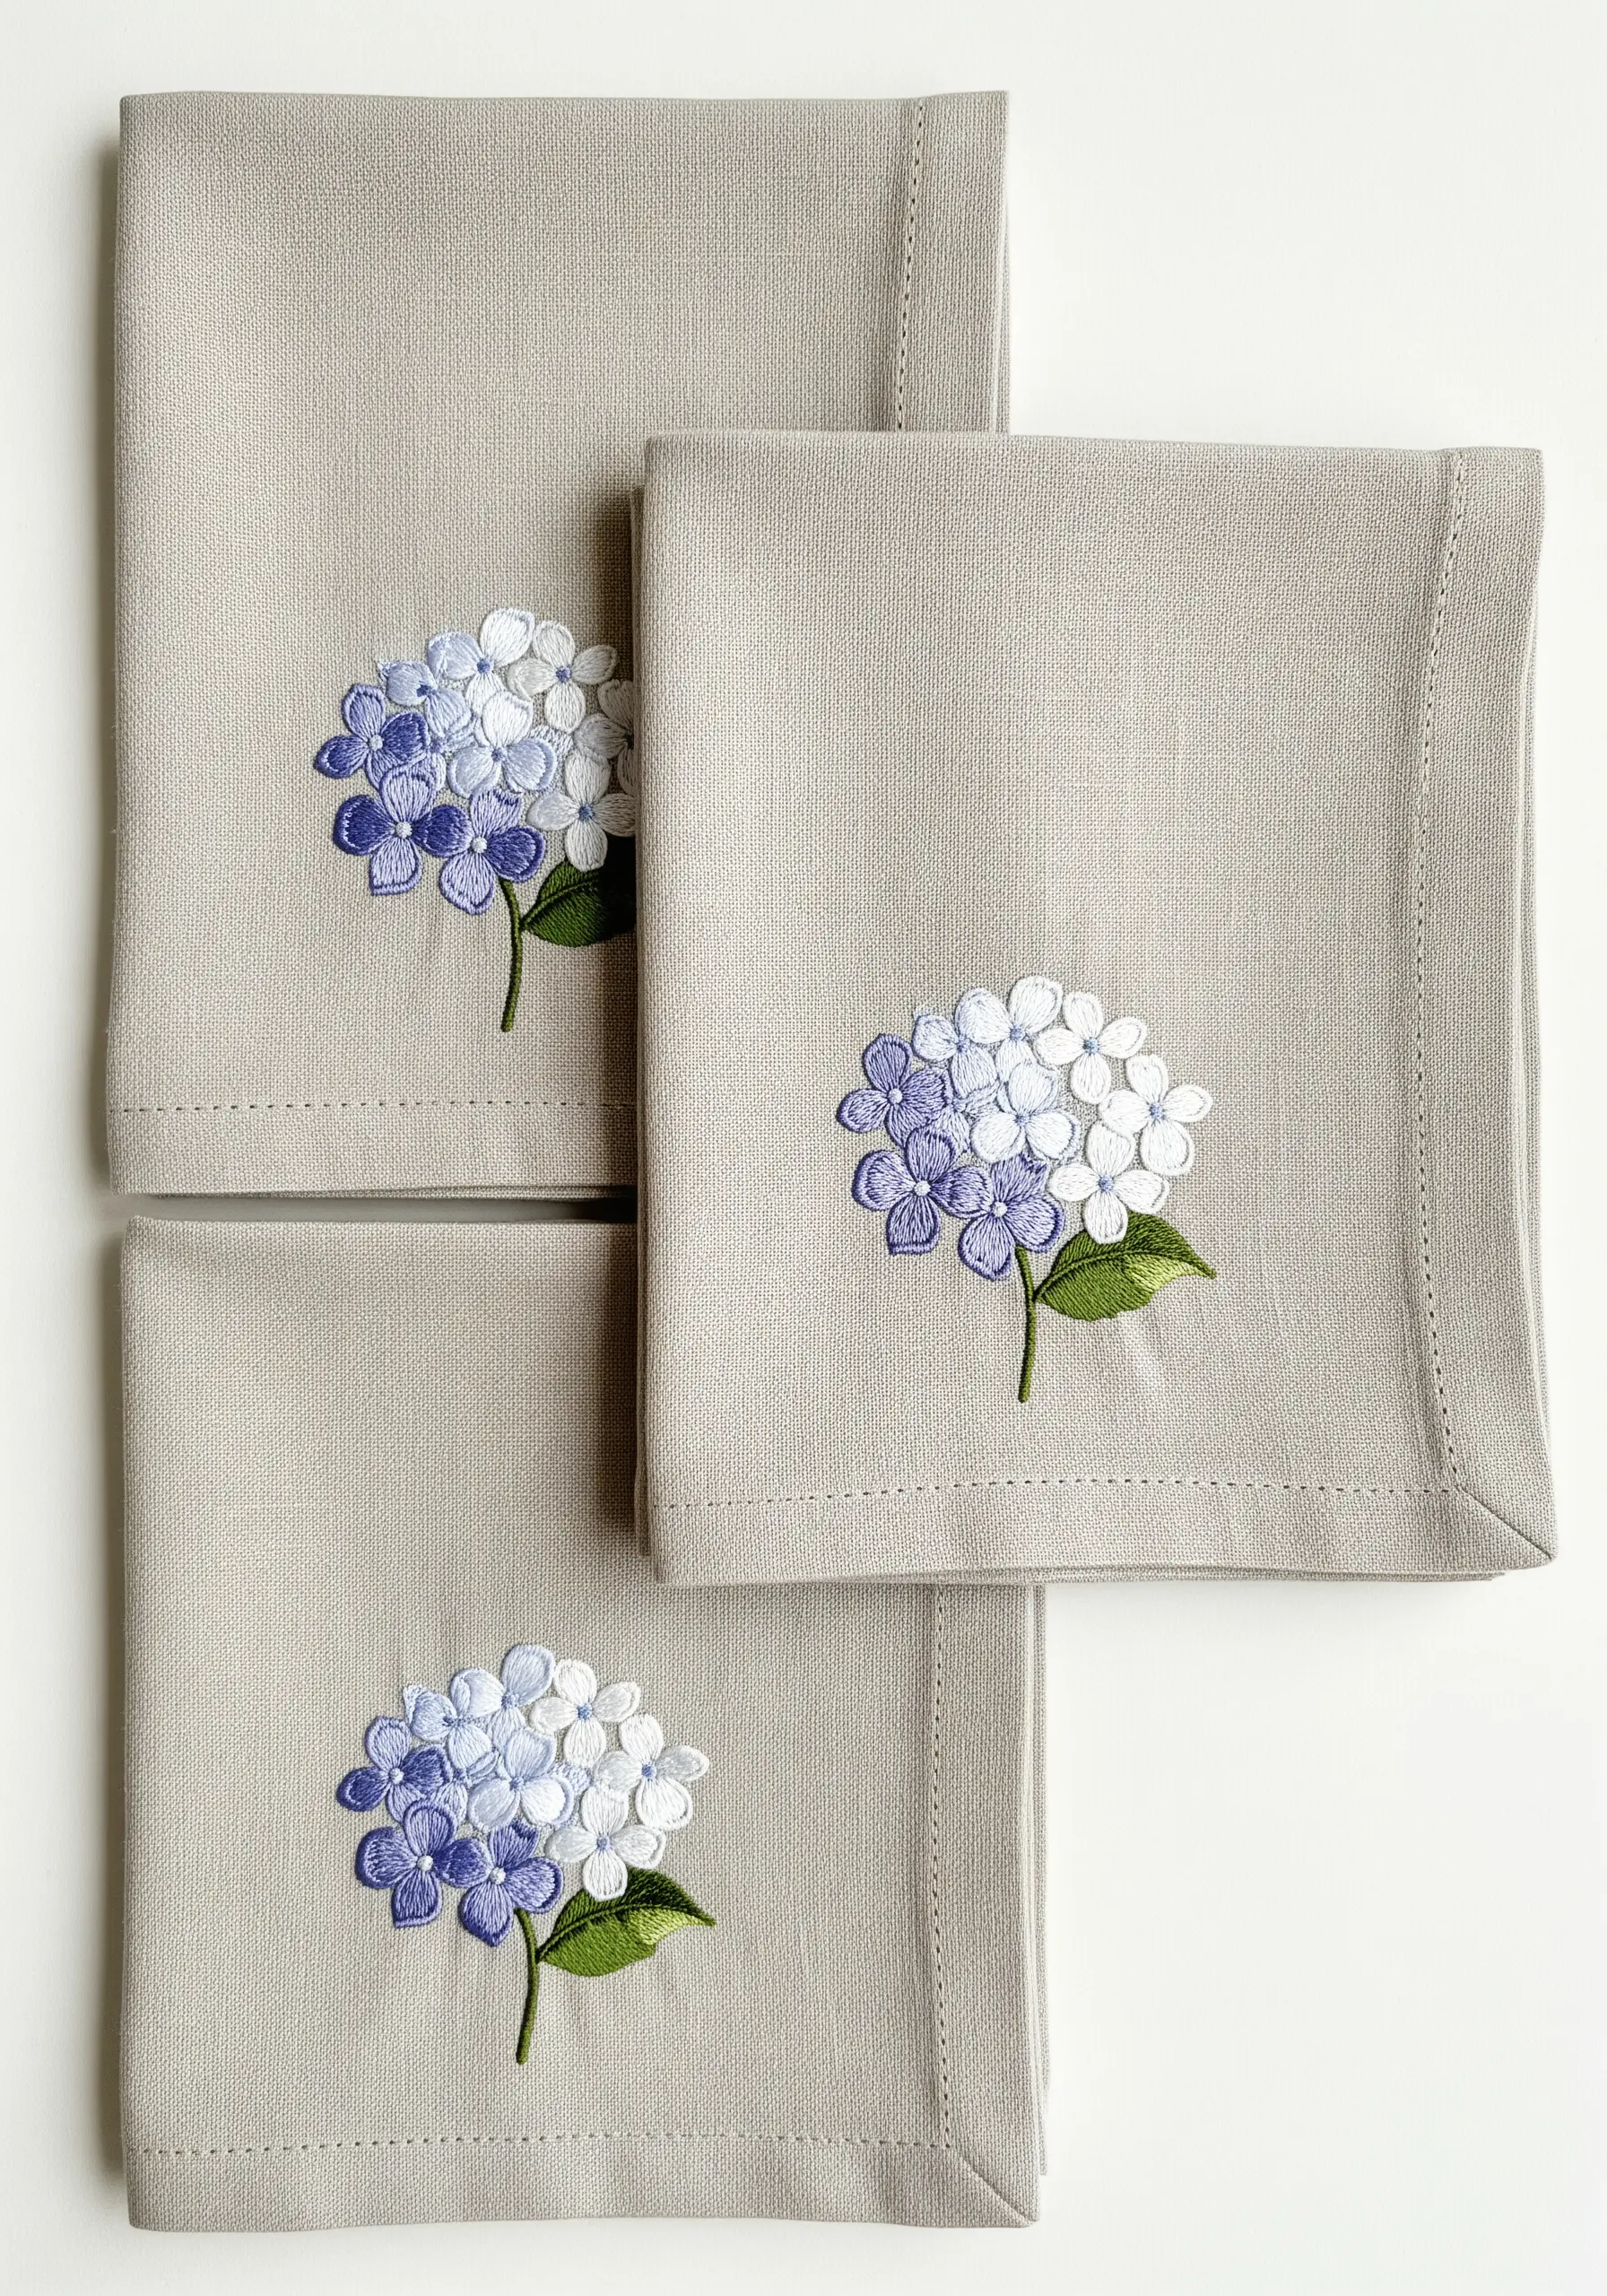
For small motifs on items like napkins, a full, complex gradient can look too busy. Instead, simplify the color transition.
Use just three shades: a dark violet for the bottom petals, a mid-tone lavender for the middle, and pure white for the top.
This creates a clean, modern ombre effect that is quick to stitch but still feels elegant and intentional.
It’s a perfect way to elevate modern, minimalist table linen.
20. Integrate Florals with a Stitched Background
Give your hydrangea composition context by stitching a simple, atmospheric background.
Use long, horizontal satin stitches in shades of pink and peach for a sunset sky, and blues and teals for water.
Keep the background stitches looser and less detailed than the flowers to ensure the hydrangea remains the focal point.
This technique transforms your embroidery from a simple motif into a complete scenic illustration.
21. Blend Cool Tones for a Fresh, Periwinkle Bloom
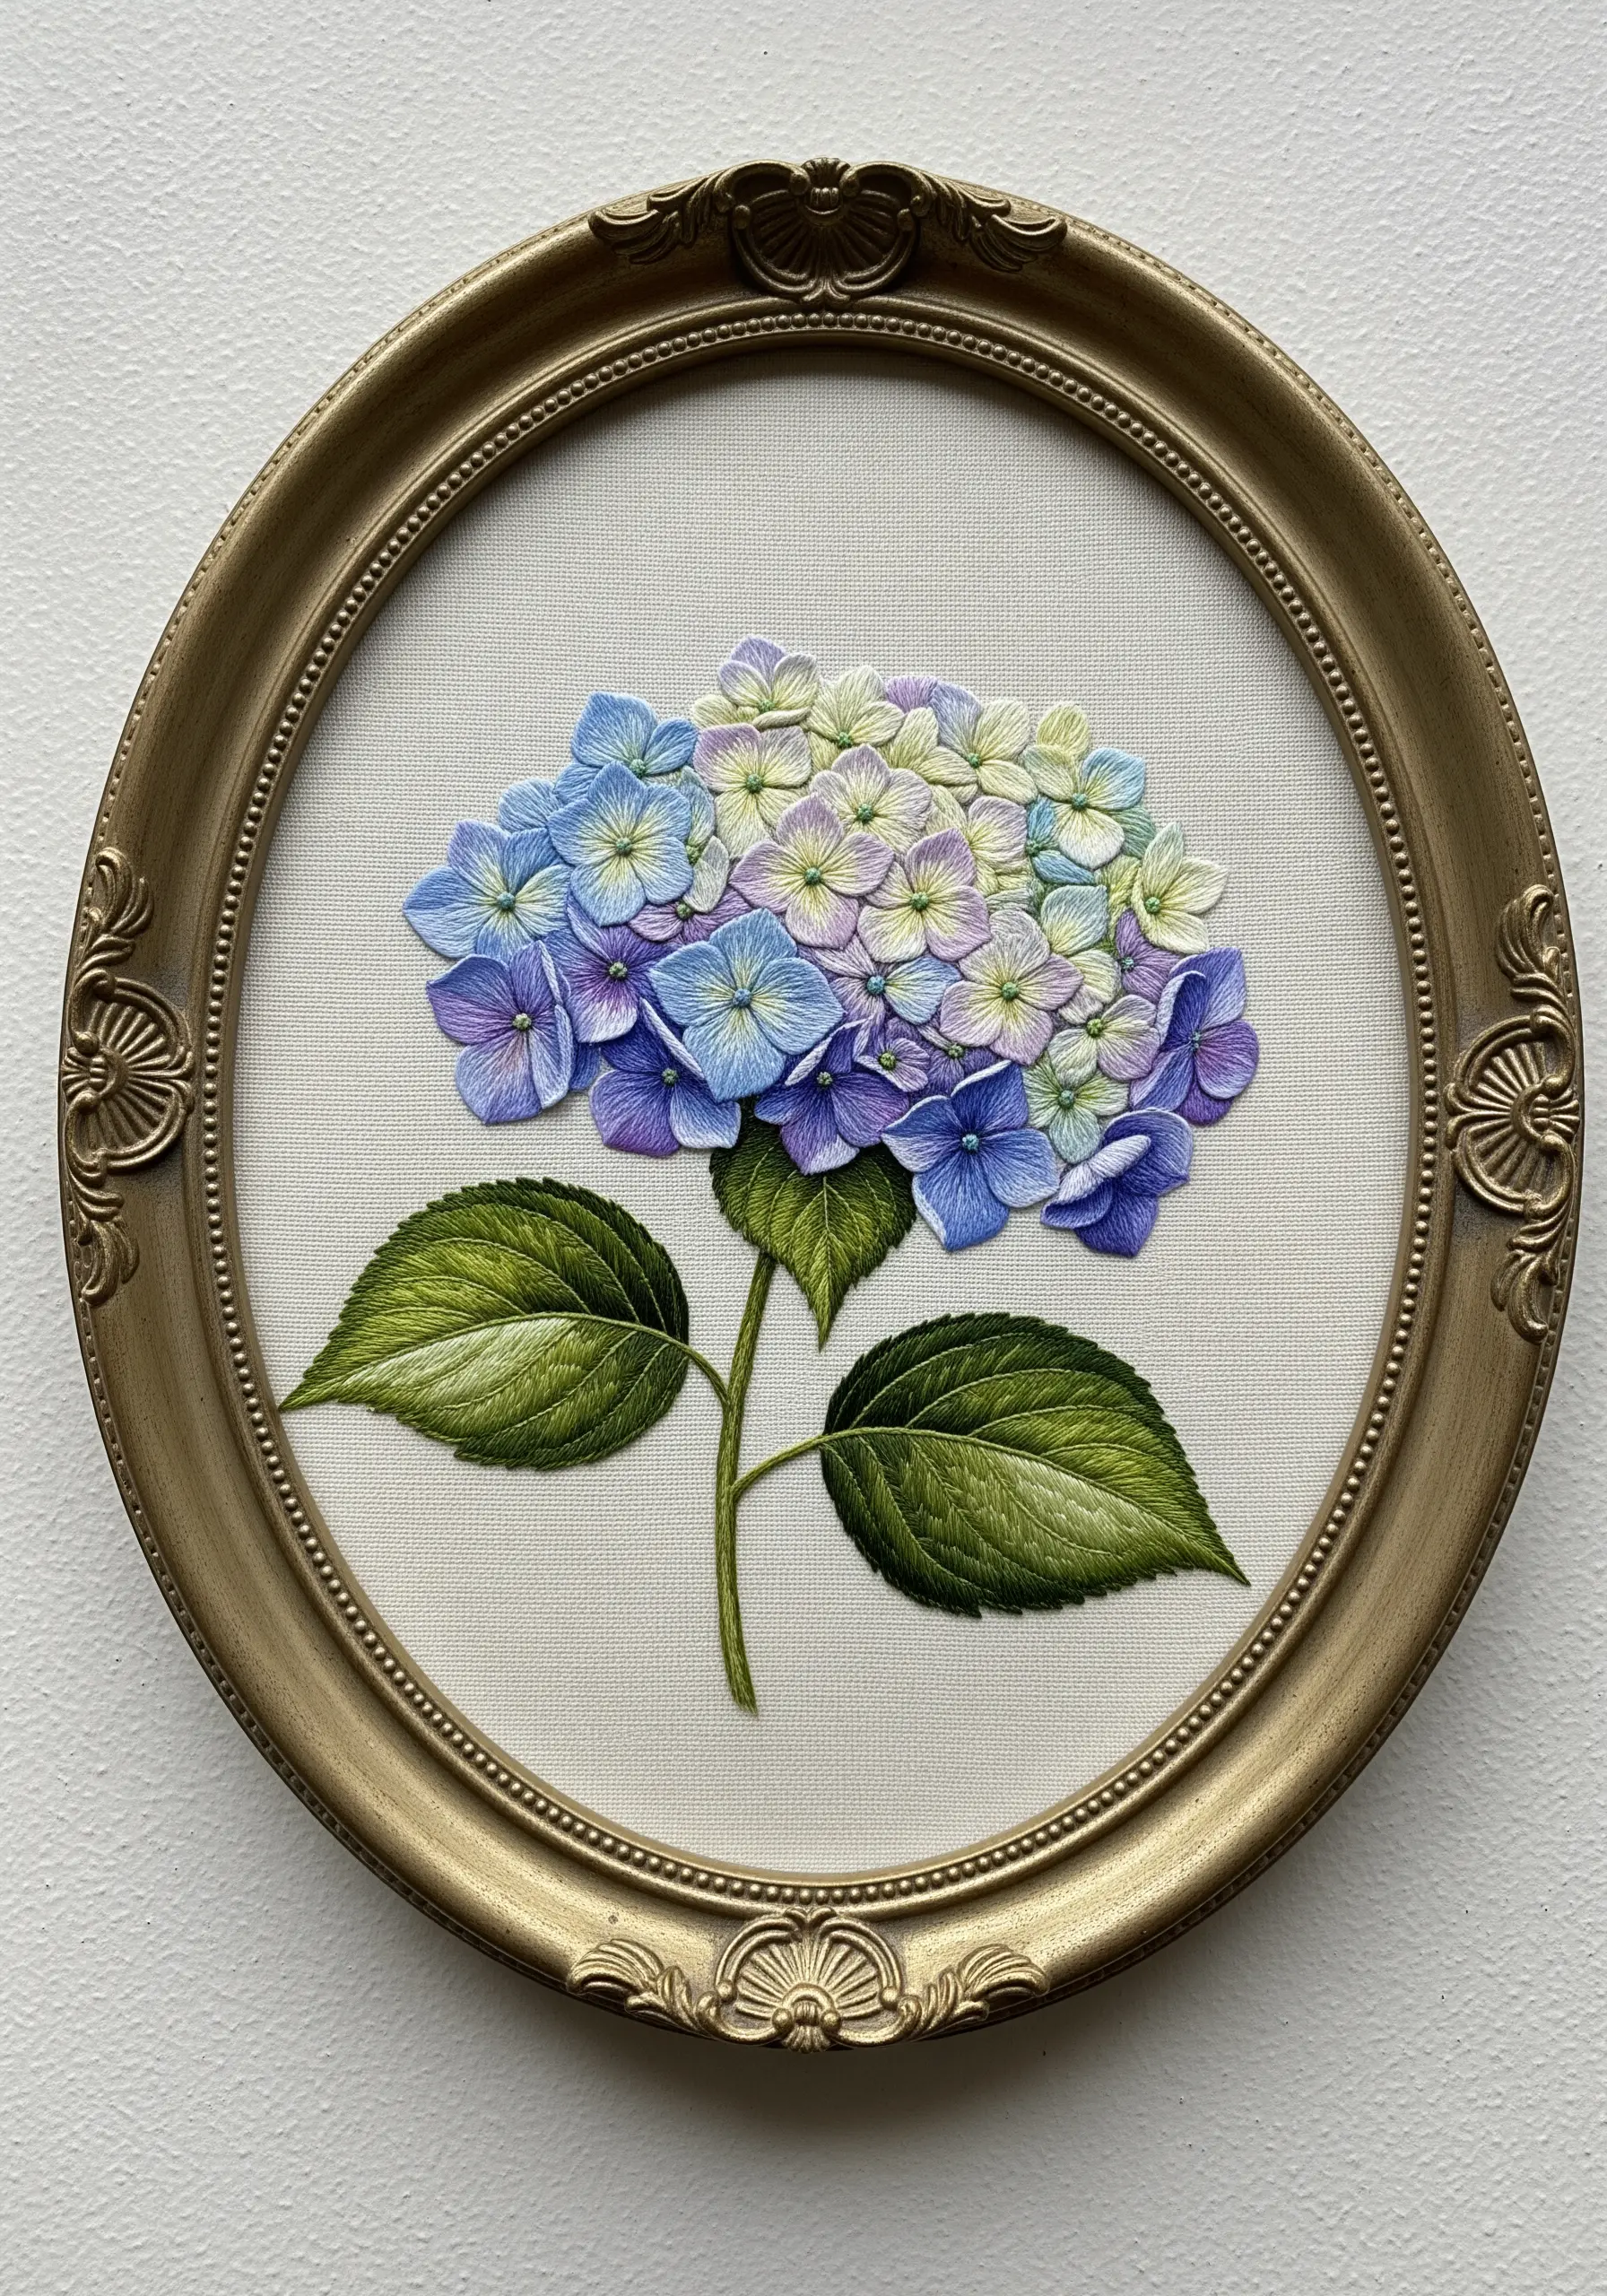
Capture the look of a freshly watered hydrangea by blending a cool-toned palette of periwinkle blue, lilac, and a touch of pale green-white.
Concentrate the greens and whites toward the center of the bloom, where new petals are unfurling, and transition to blues and purples at the outer edges.
This color story feels fresh and vibrant, mimicking the way these flowers often have multiple tones within a single head.
Frame it in an ornate gold frame to create a beautiful contrast between the cool colors and warm metal.
22. Explore a Monochromatic Green Gradient
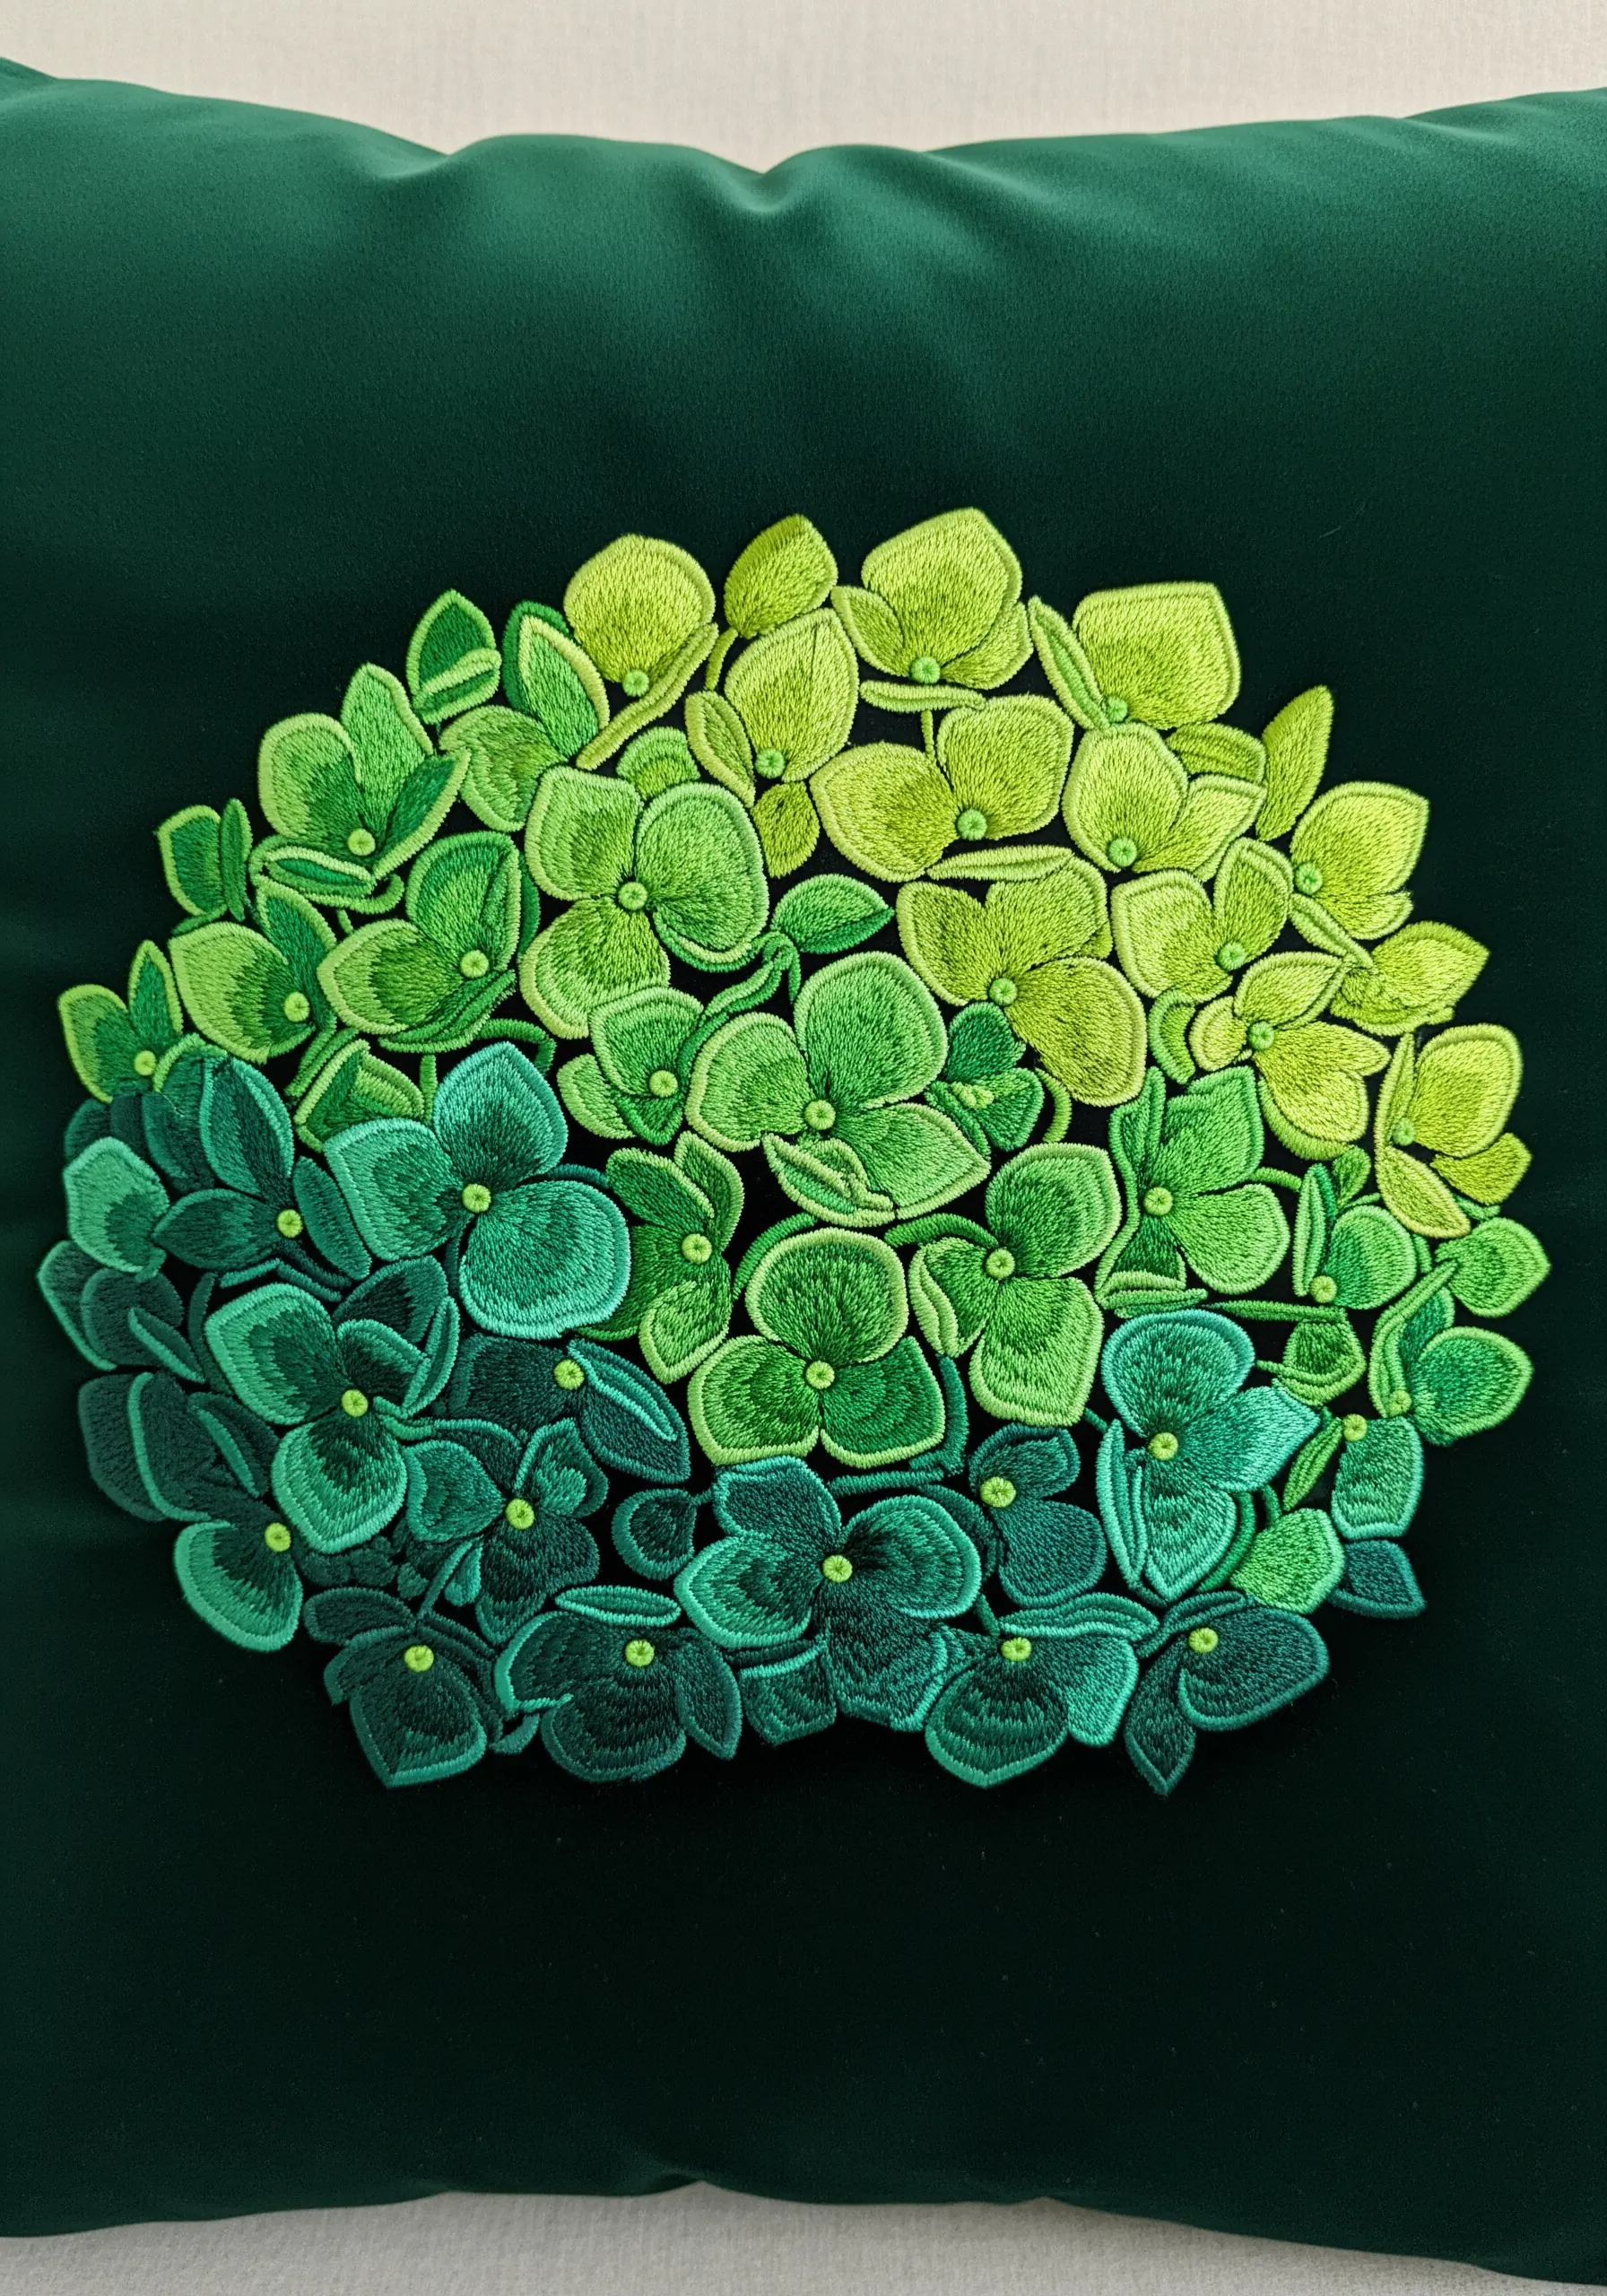
Challenge your blending skills by working entirely within one color family, like green.
Select at least five shades, from a dark forest green to a bright chartreuse, to create a smooth and dramatic transition.
Work from dark to light, using your darkest shade for the petals in the background and your lightest for the petals catching the most light.
This monochromatic approach emphasizes form and texture, making for a sophisticated and modern piece, especially on a rich velvet background.
23. Simplify Petals for a Dainty Collar Accent
When embroidering on a small scale like a shirt collar, simplify the hydrangea into individual, four-petaled florets.
Use a simple lazy daisy or detached chain stitch for each petal, with a French knot in the center.
Arrange these tiny florets in a gentle, meandering line, and use a simple color gradient of two or three shades along the border.
This creates a delicate, wearable piece of art that is understated yet charming.
24. Frame Your Embroidery with a Quilted Border
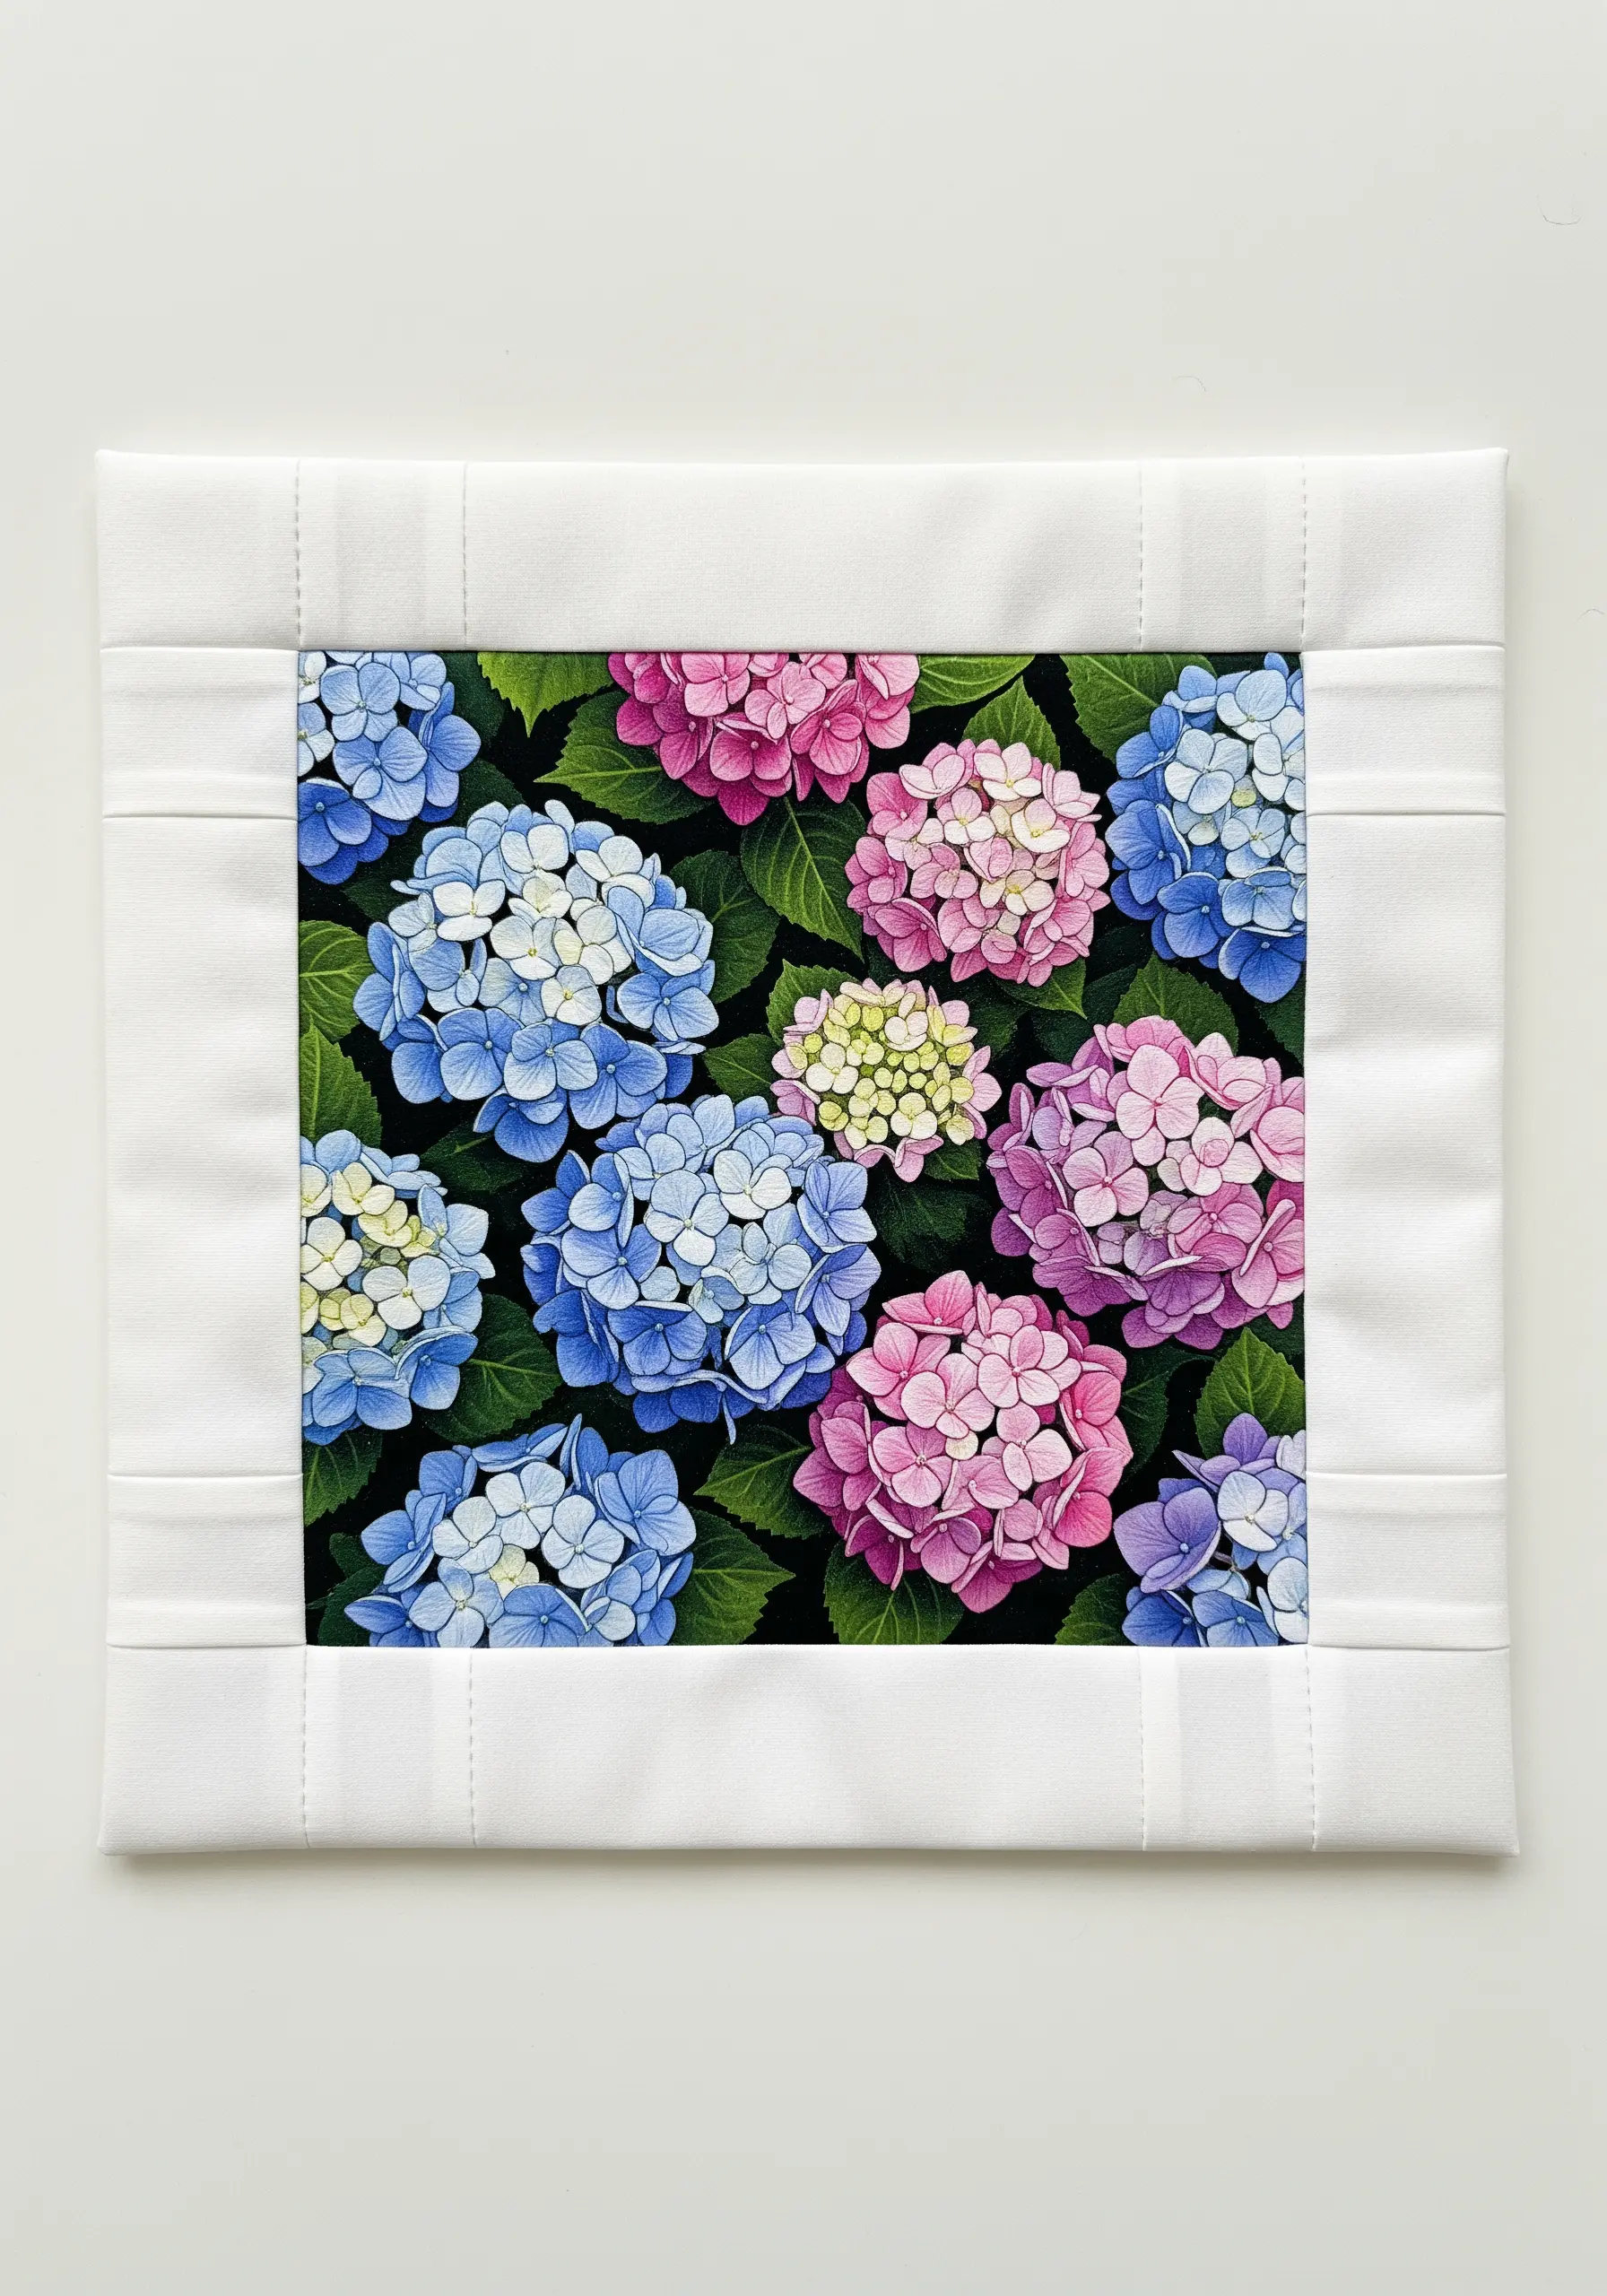
Combine your embroidery with quilting techniques to create a unique piece of textile art.
Complete your detailed, thread-painted hydrangea on a central panel of dark fabric, which will make the colors appear more luminous.
Then, frame this panel with a simple, padded border made from a contrasting fabric like white cotton.
The clean lines of the quilted border provide a beautiful structure that contains and elevates the intricate floral stitching within.
25. Define Petals with a Glimmering Silver Outline
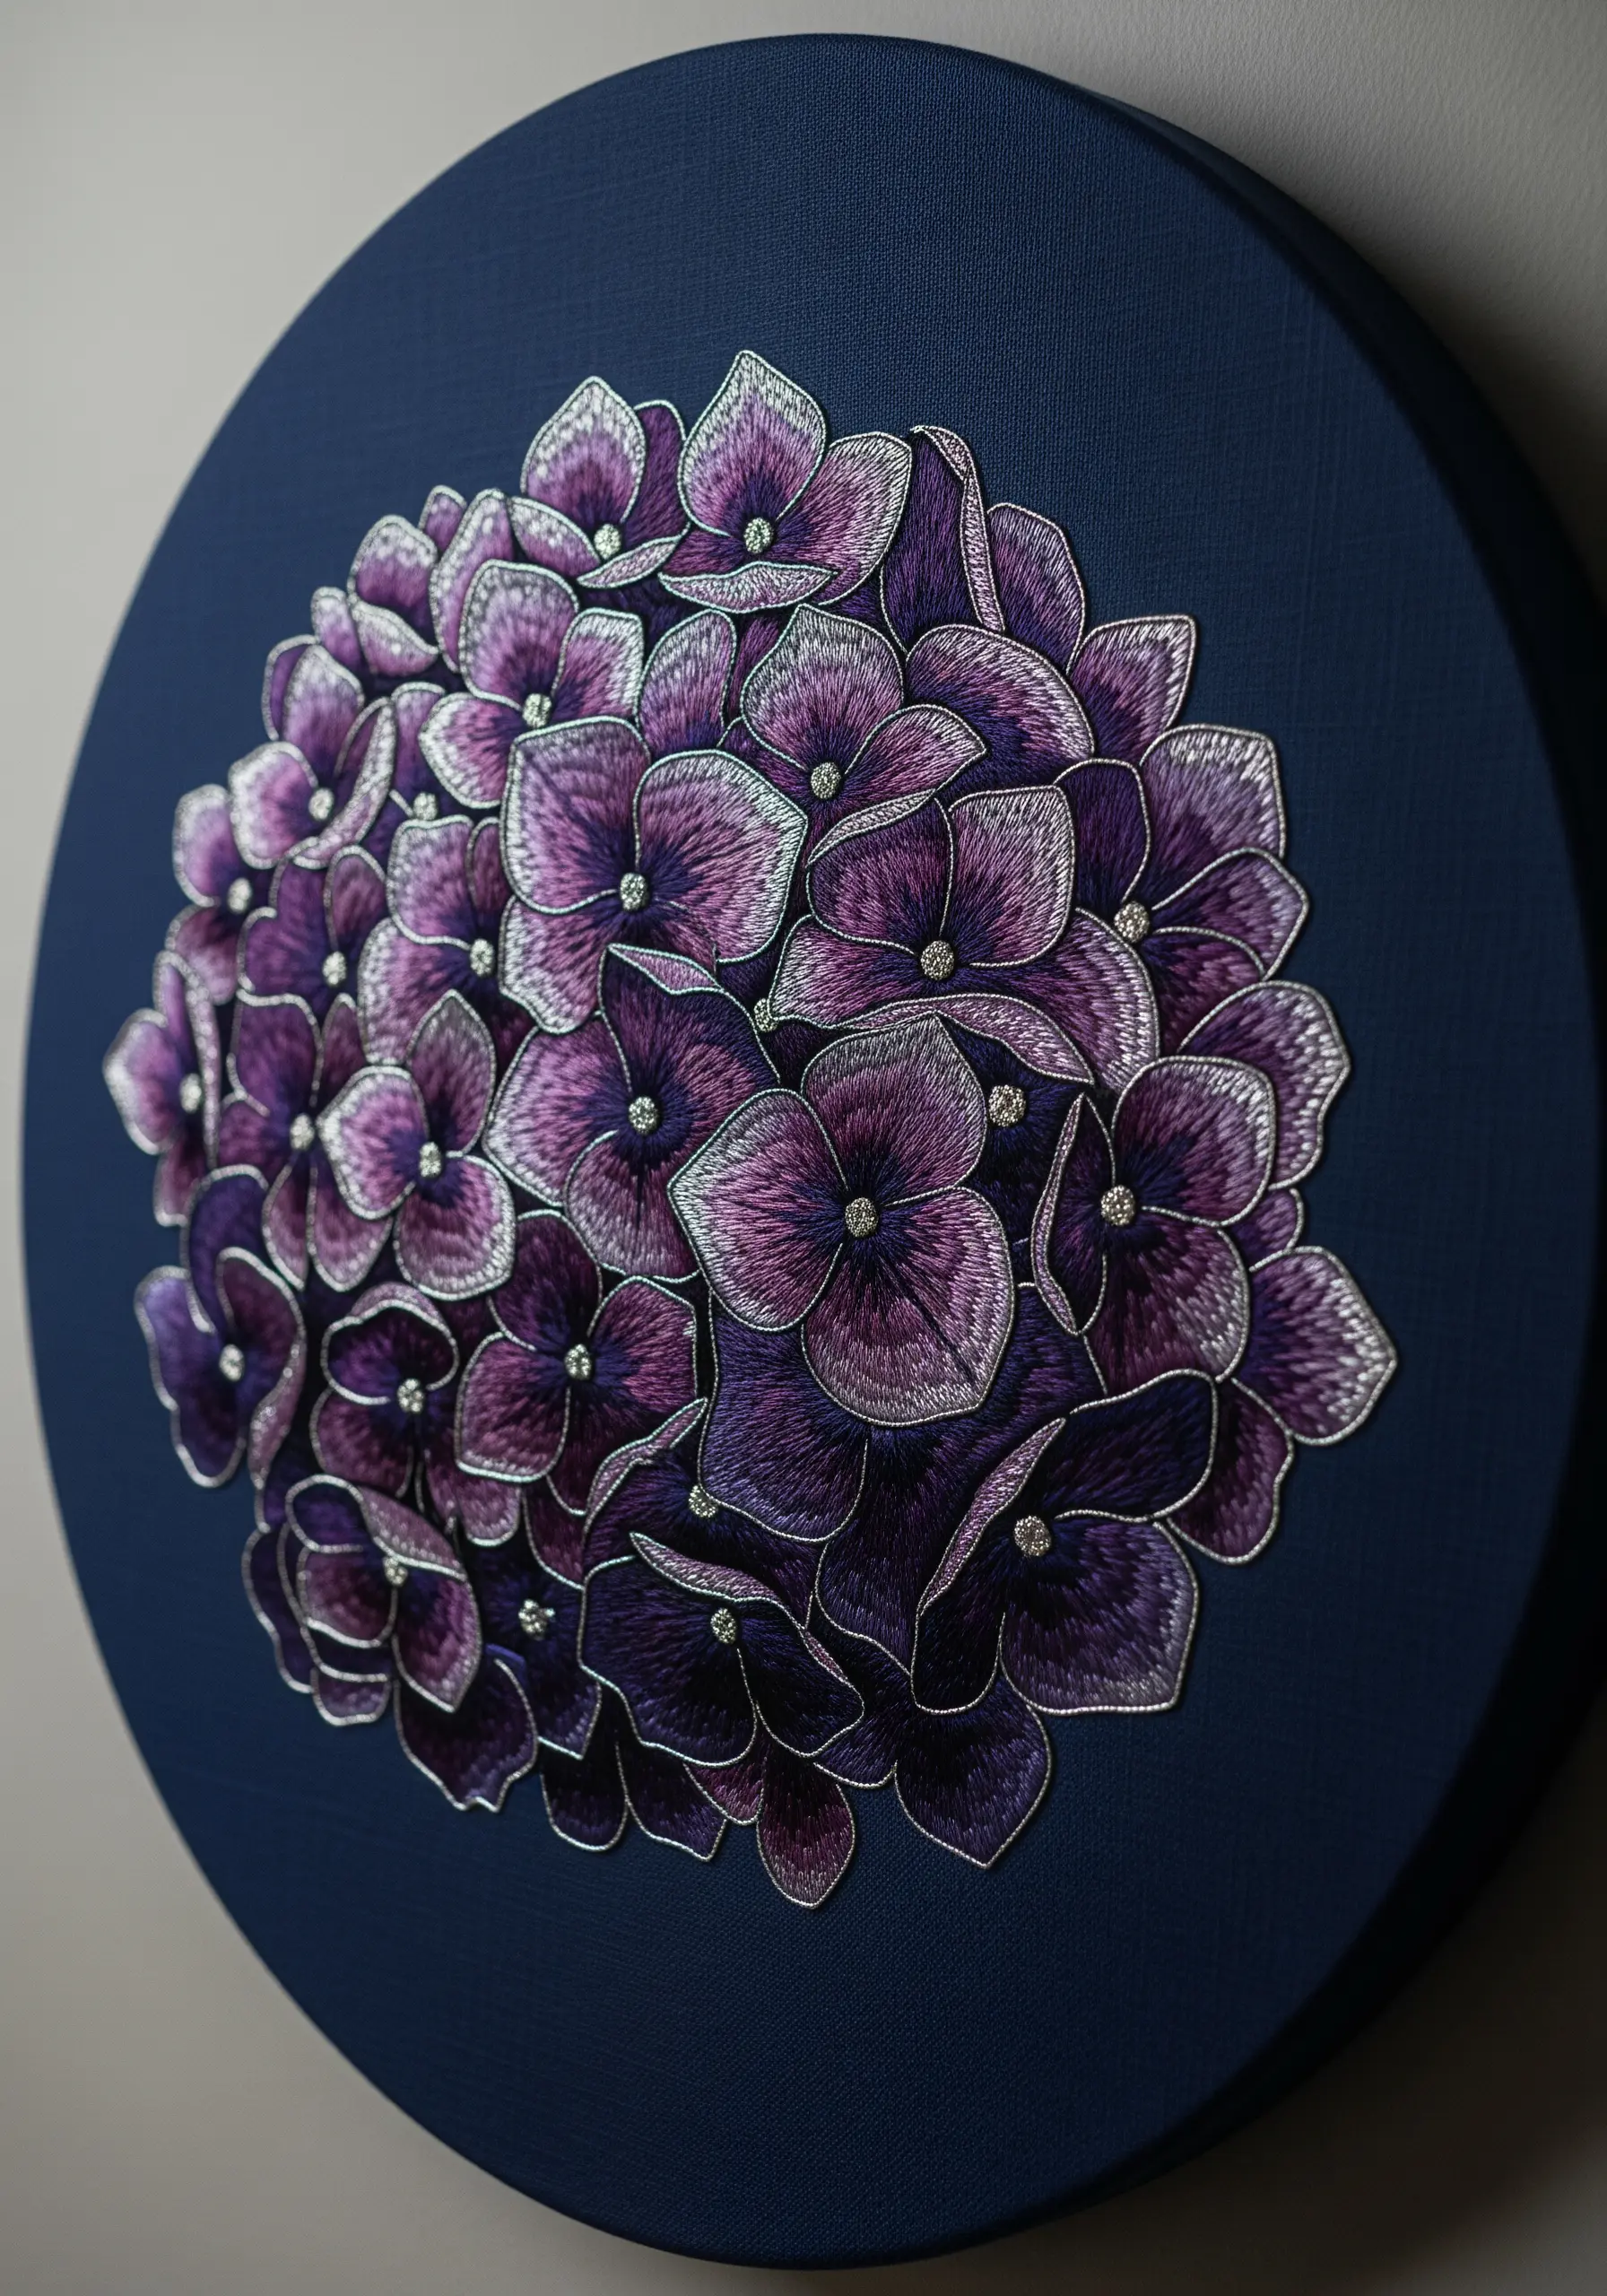
Instead of blending colors softly, give your hydrangea a contemporary, graphic edge by outlining each petal with a single strand of silver thread.
Fill the petals with rich purples using a directional satin stitch, making sure all stitches flow towards the center of the floret.
The metallic outline catches the light and clearly defines each shape, creating a stained-glass effect that looks stunning on a dark navy canvas.
This technique adds a touch of modern luxury to your floral work.
26. Experiment with Mixed-Media Petals
Push the boundaries of embroidery by combining thread with other materials, like painted paper or stiffened fabric.
Create individual petals from these materials, then layer and stitch them onto your background fabric to build the hydrangea head.
Use thread to add fine details like veins or colored edges, blending the two mediums together.
These paper art techniques result in a highly textural, sculptural piece that has incredible depth and a unique artistic presence.
27. Stitch on Silk for a Luxurious, Painted Effect
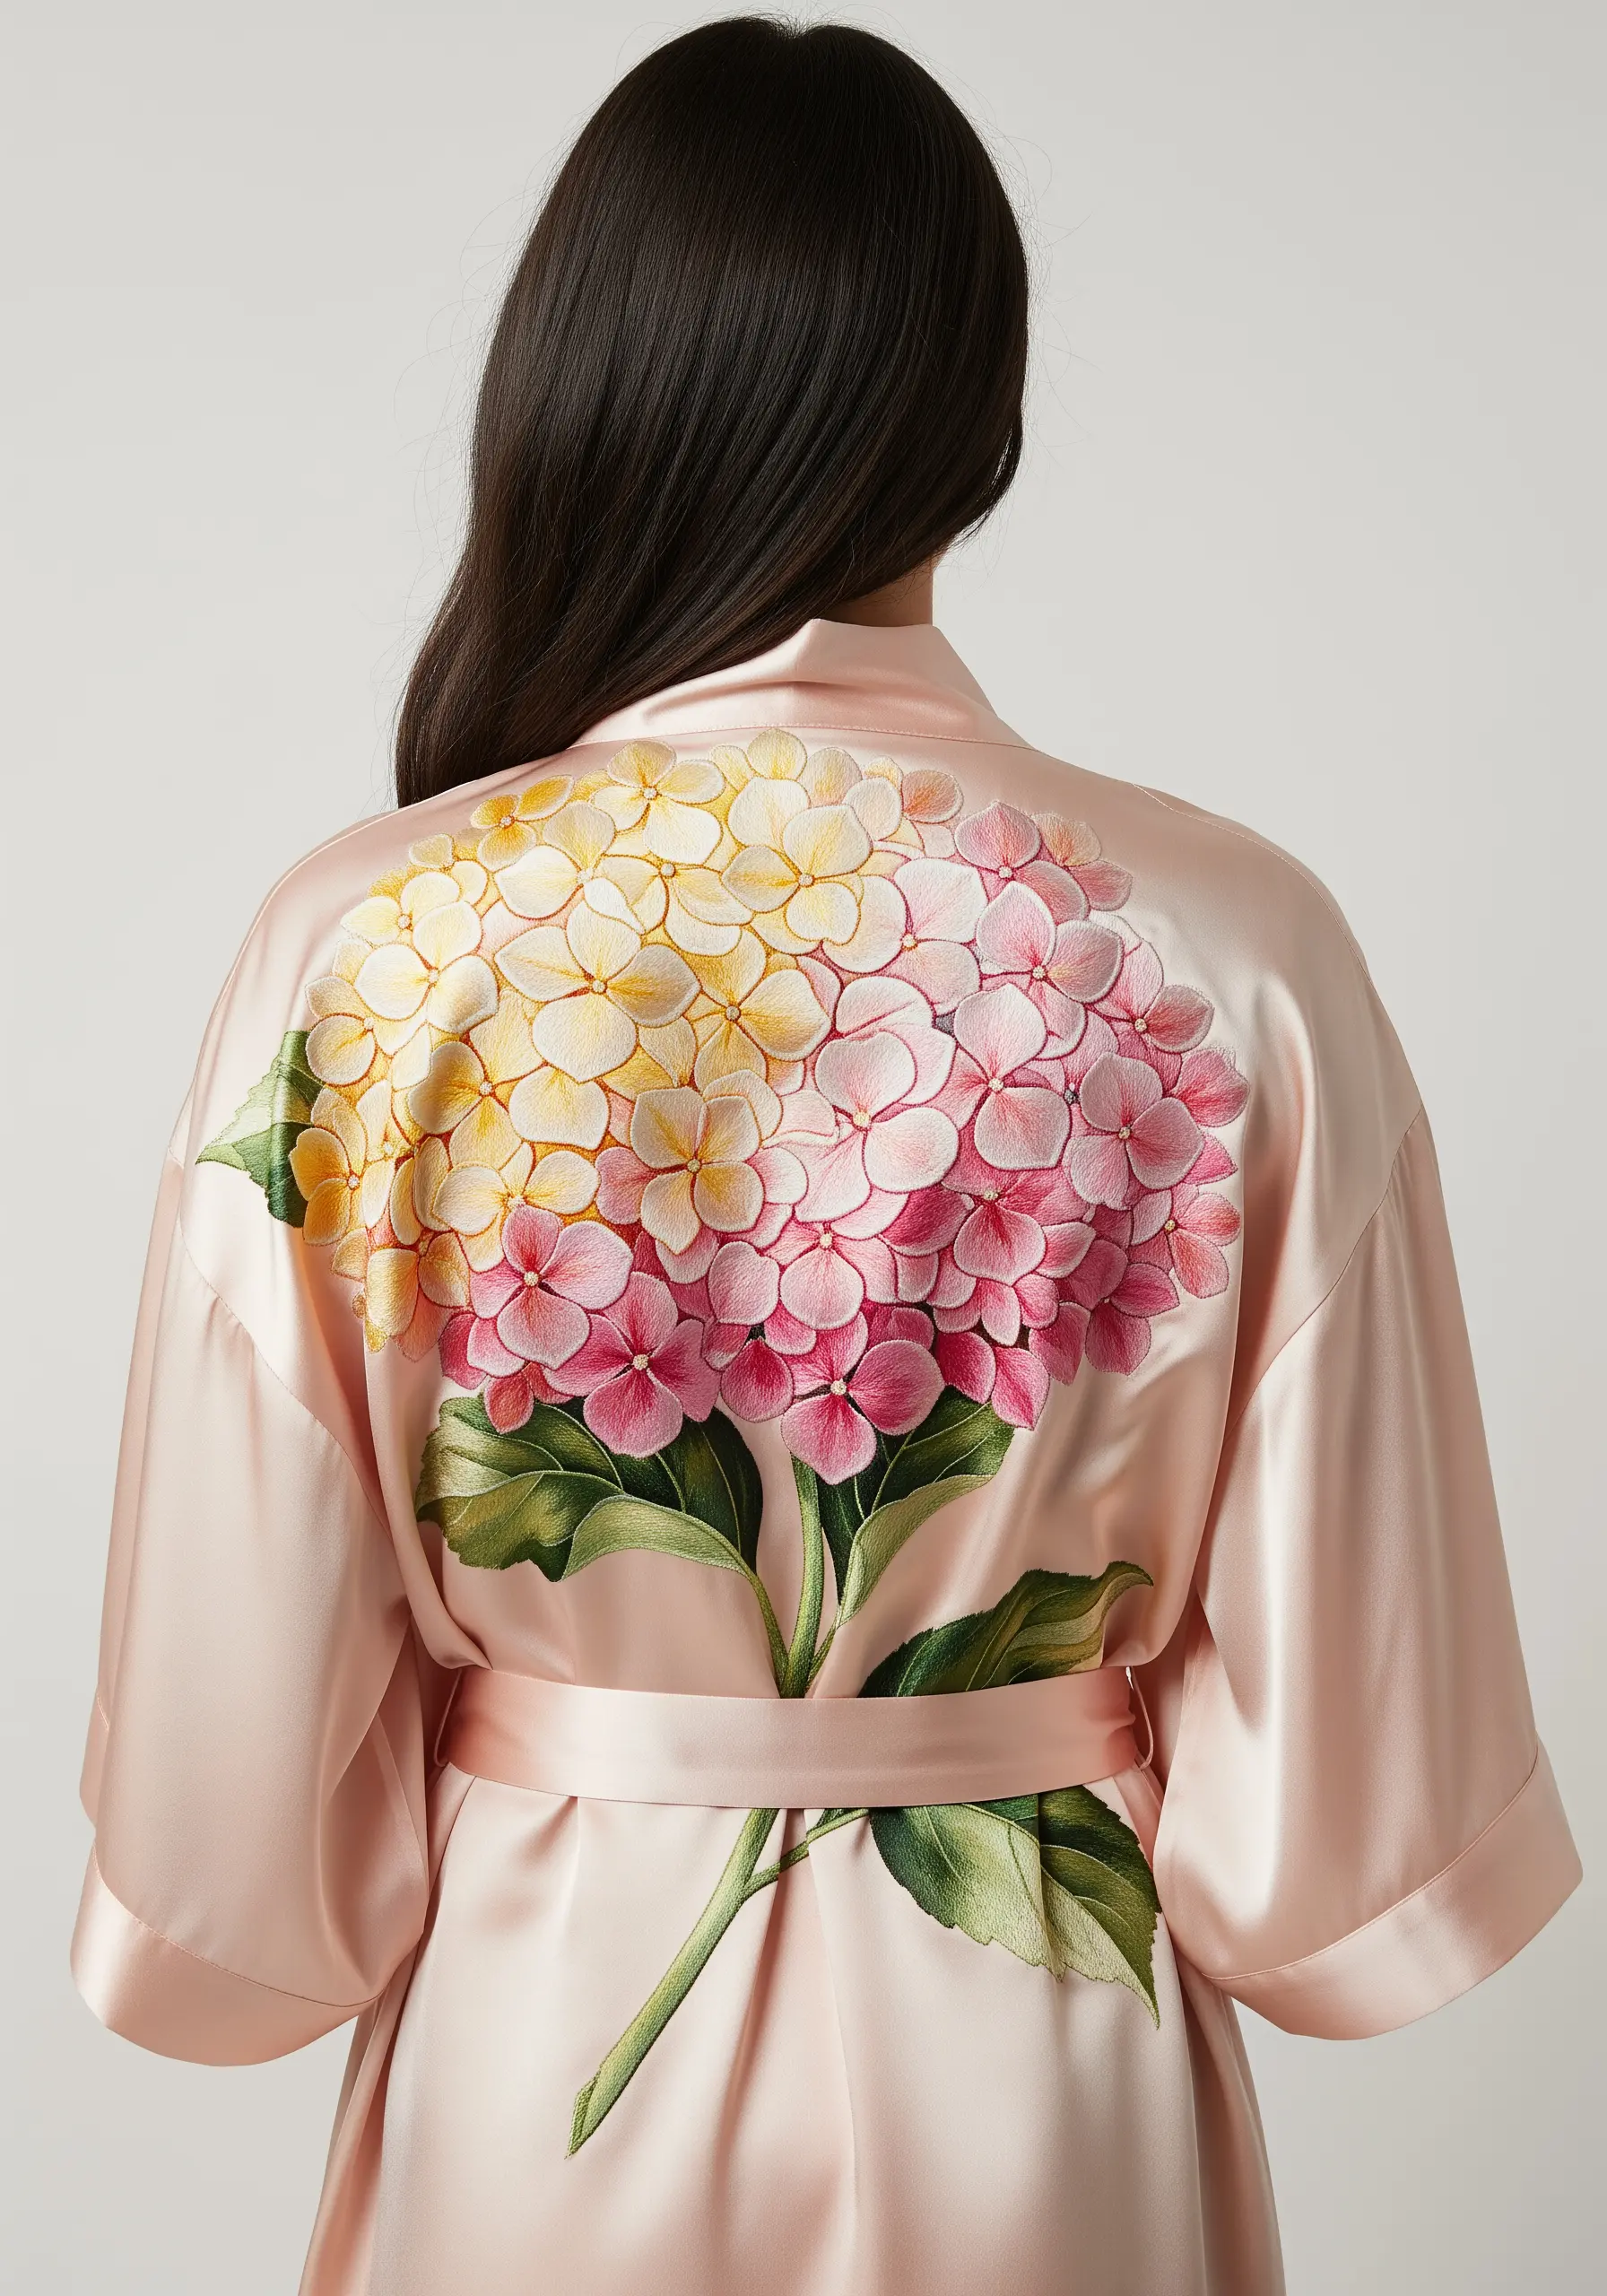
When working on a high-sheen fabric like a silk robe, your thread choice is key to achieving a smooth, painted look.
Opt for rayon or silk floss, which have a similar luster to the base fabric, helping the stitches blend seamlessly into the surface.
Use long-and-short stitch to create soft, gradient color floral embroidery ideas, and ensure your stitches lie flat and follow the drape of the garment.
The result is an embellishment that looks like it was woven directly into the silk itself.
28. Create a Dramatic Three-Part Color Transition
For a single bloom with maximum visual impact, divide the hydrangea into three distinct color zones: one magenta, one pink, and one lavender/purple.
Blend aggressively where the zones meet, using stitches that pull colors from one section into the next.
This creates a bold, unnatural, yet beautiful ombre effect that showcases your ability to control and merge different palettes within one cohesive shape.
Add white French knots to the centers to unify the entire piece.
29. Design a Functional, Sculptural Curtain Tie-Back

Turn your embroidery into a functional object by creating a dense, sculptural hydrangea for a curtain tie-back.
Stitch your design onto a sturdy fabric like felt or double-layered cotton, using tight, compact satin stitches to build a firm, three-dimensional bloom.
Cut out the finished shape, leaving a small fabric border, and attach it to a simple fabric band.
The density of the stitching gives it enough structure to hold its shape while in use, adding a handmade touch to your windows.
30. Map a Full Rainbow Gradient Across the Bloom
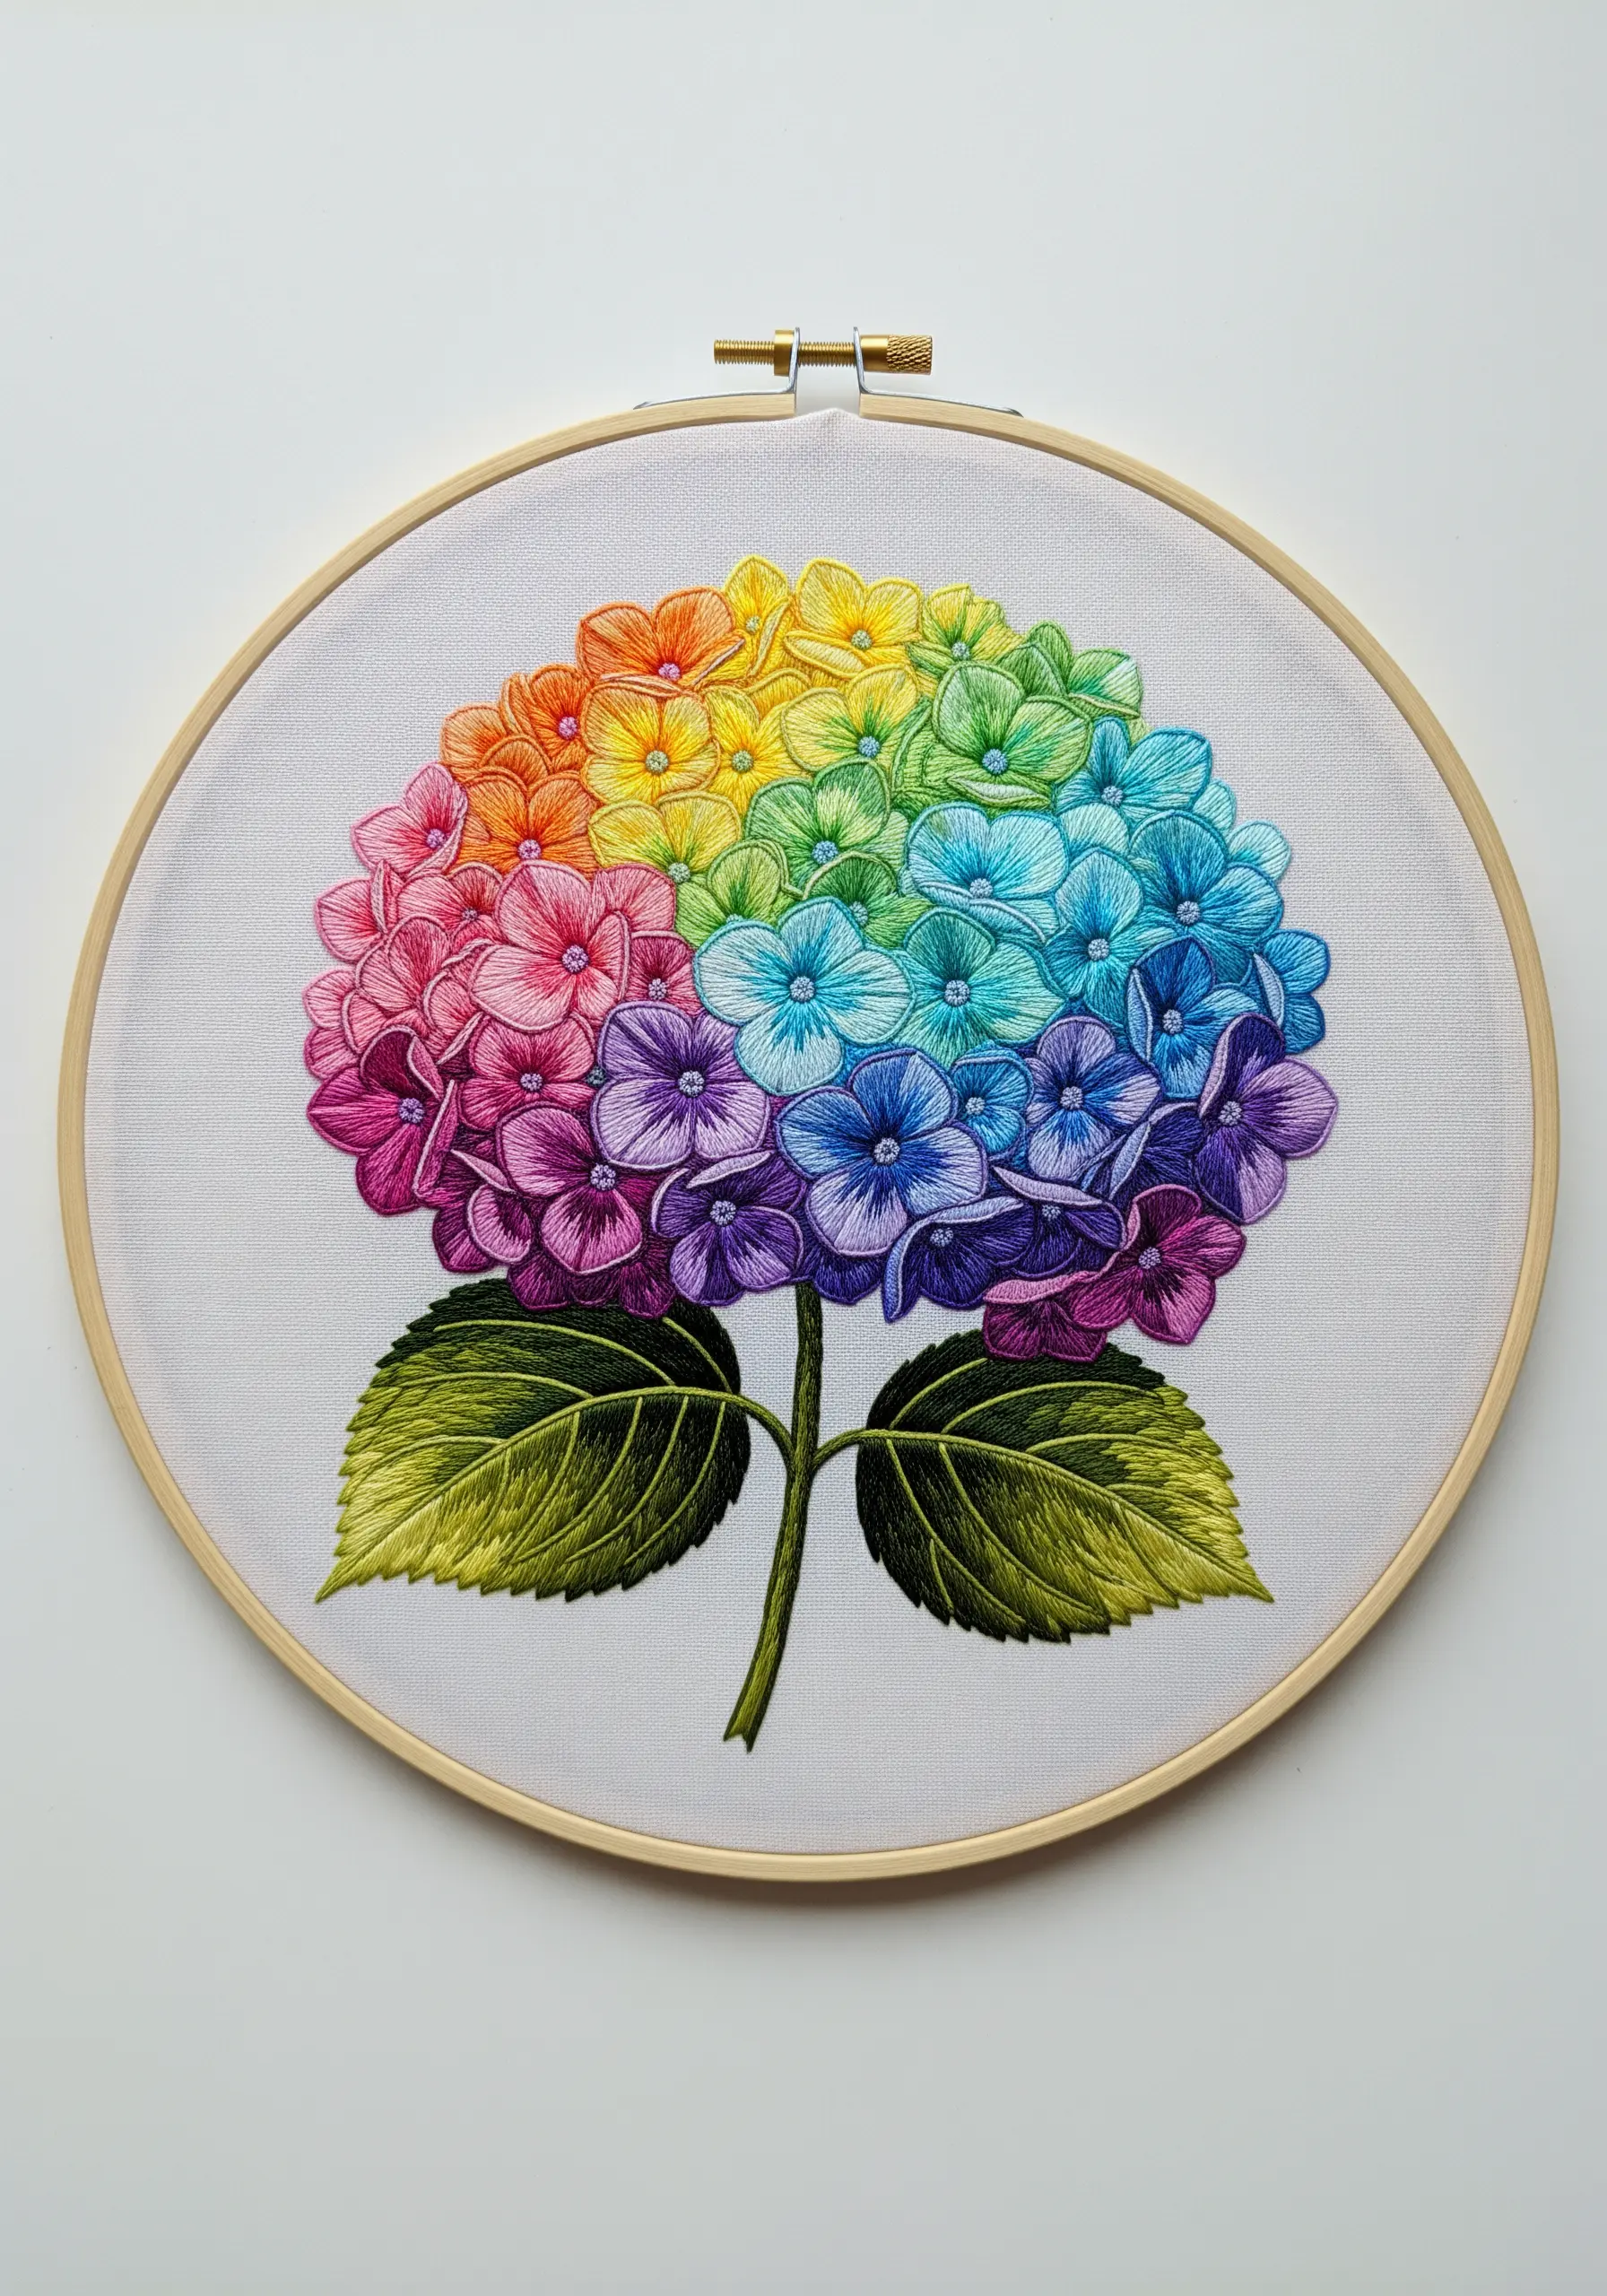
Arrange your colors in rainbow order around the hydrangea head for a truly spectacular effect.
Divide the circular shape into wedges, like a color wheel, and assign a color family to each (reds, oranges, yellows, etc.).
Use long-and-short stitch to softly blend the edge of one color section into the next, creating a continuous flow of color.
These contemporary rainbow blend stitches turn the flower into a vibrant celebration of your entire thread collection.
31. Master Shading and Value with a Monochromatic Design
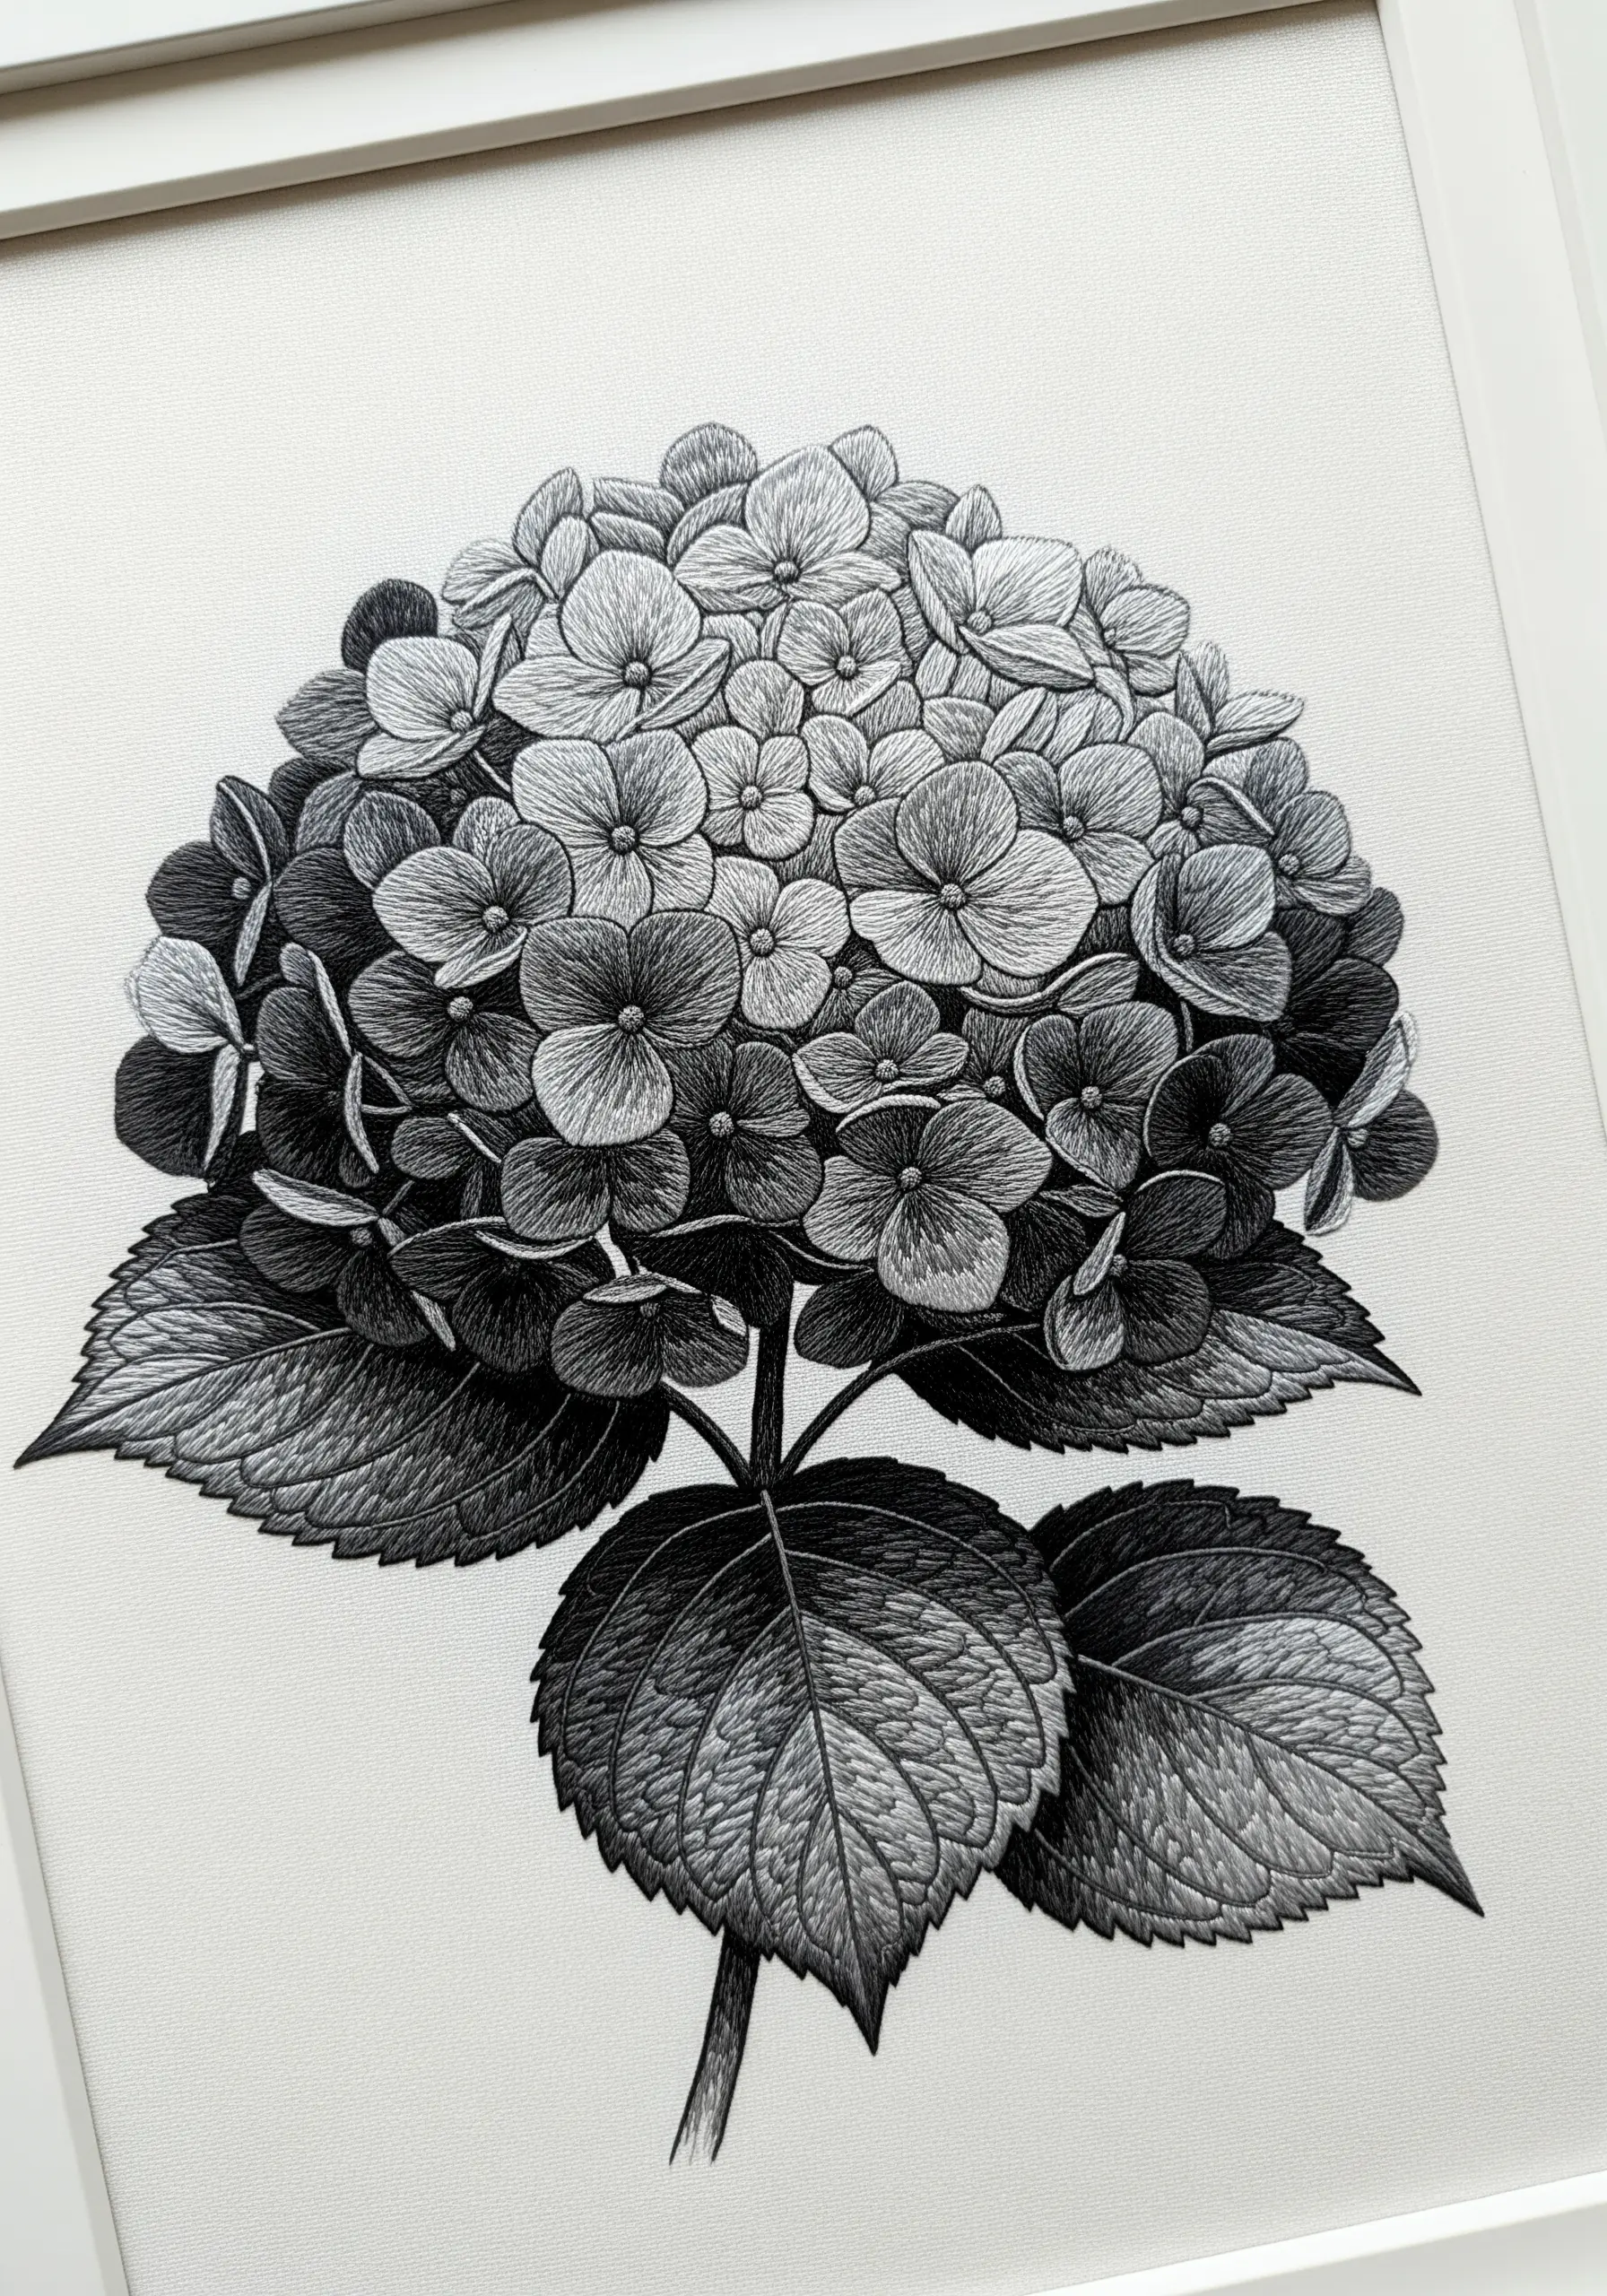
Remove color from the equation to focus purely on light, shadow, and form.
Select five to seven shades of a single color, from the darkest grey or black to the lightest grey or white.
Use your darkest tones to define the deepest recesses and the underside of petals, gradually transitioning to your lightest tones on the most prominent, light-facing surfaces.
This exercise in value is one of the best ways to train your eye to see dimension, dramatically improving all your future colorwork.


