

The words you choose for your reading nook are more than just decoration—they are a quiet promise of comfort, adventure, and reflection. Embroidering a favorite quote onto a pillow transforms it from a simple phrase into a tactile piece of art, one that invites you to settle in and stay awhile.
But a truly beautiful piece is about more than the words themselves. It’s in the texture of the thread, the character of the font, and the balance of the composition. Think of your fabric as the page and your needle as the pen. Will your lettering be bold and graphic, using chunky yarn to create a cozy, knitted feel? Or will it be a delicate, single-strand whisper on soft linen?
Here, you’ll discover techniques to elevate your lettering beyond a simple outline. Learn how padded satin stitch can give words a satisfying 3D effect, how tone-on-tone stitching creates understated elegance, and how combining simple stitches can add depth and personality to any phrase. Let these ideas guide you in creating not just a pillow, but a meaningful companion for your quiet moments.
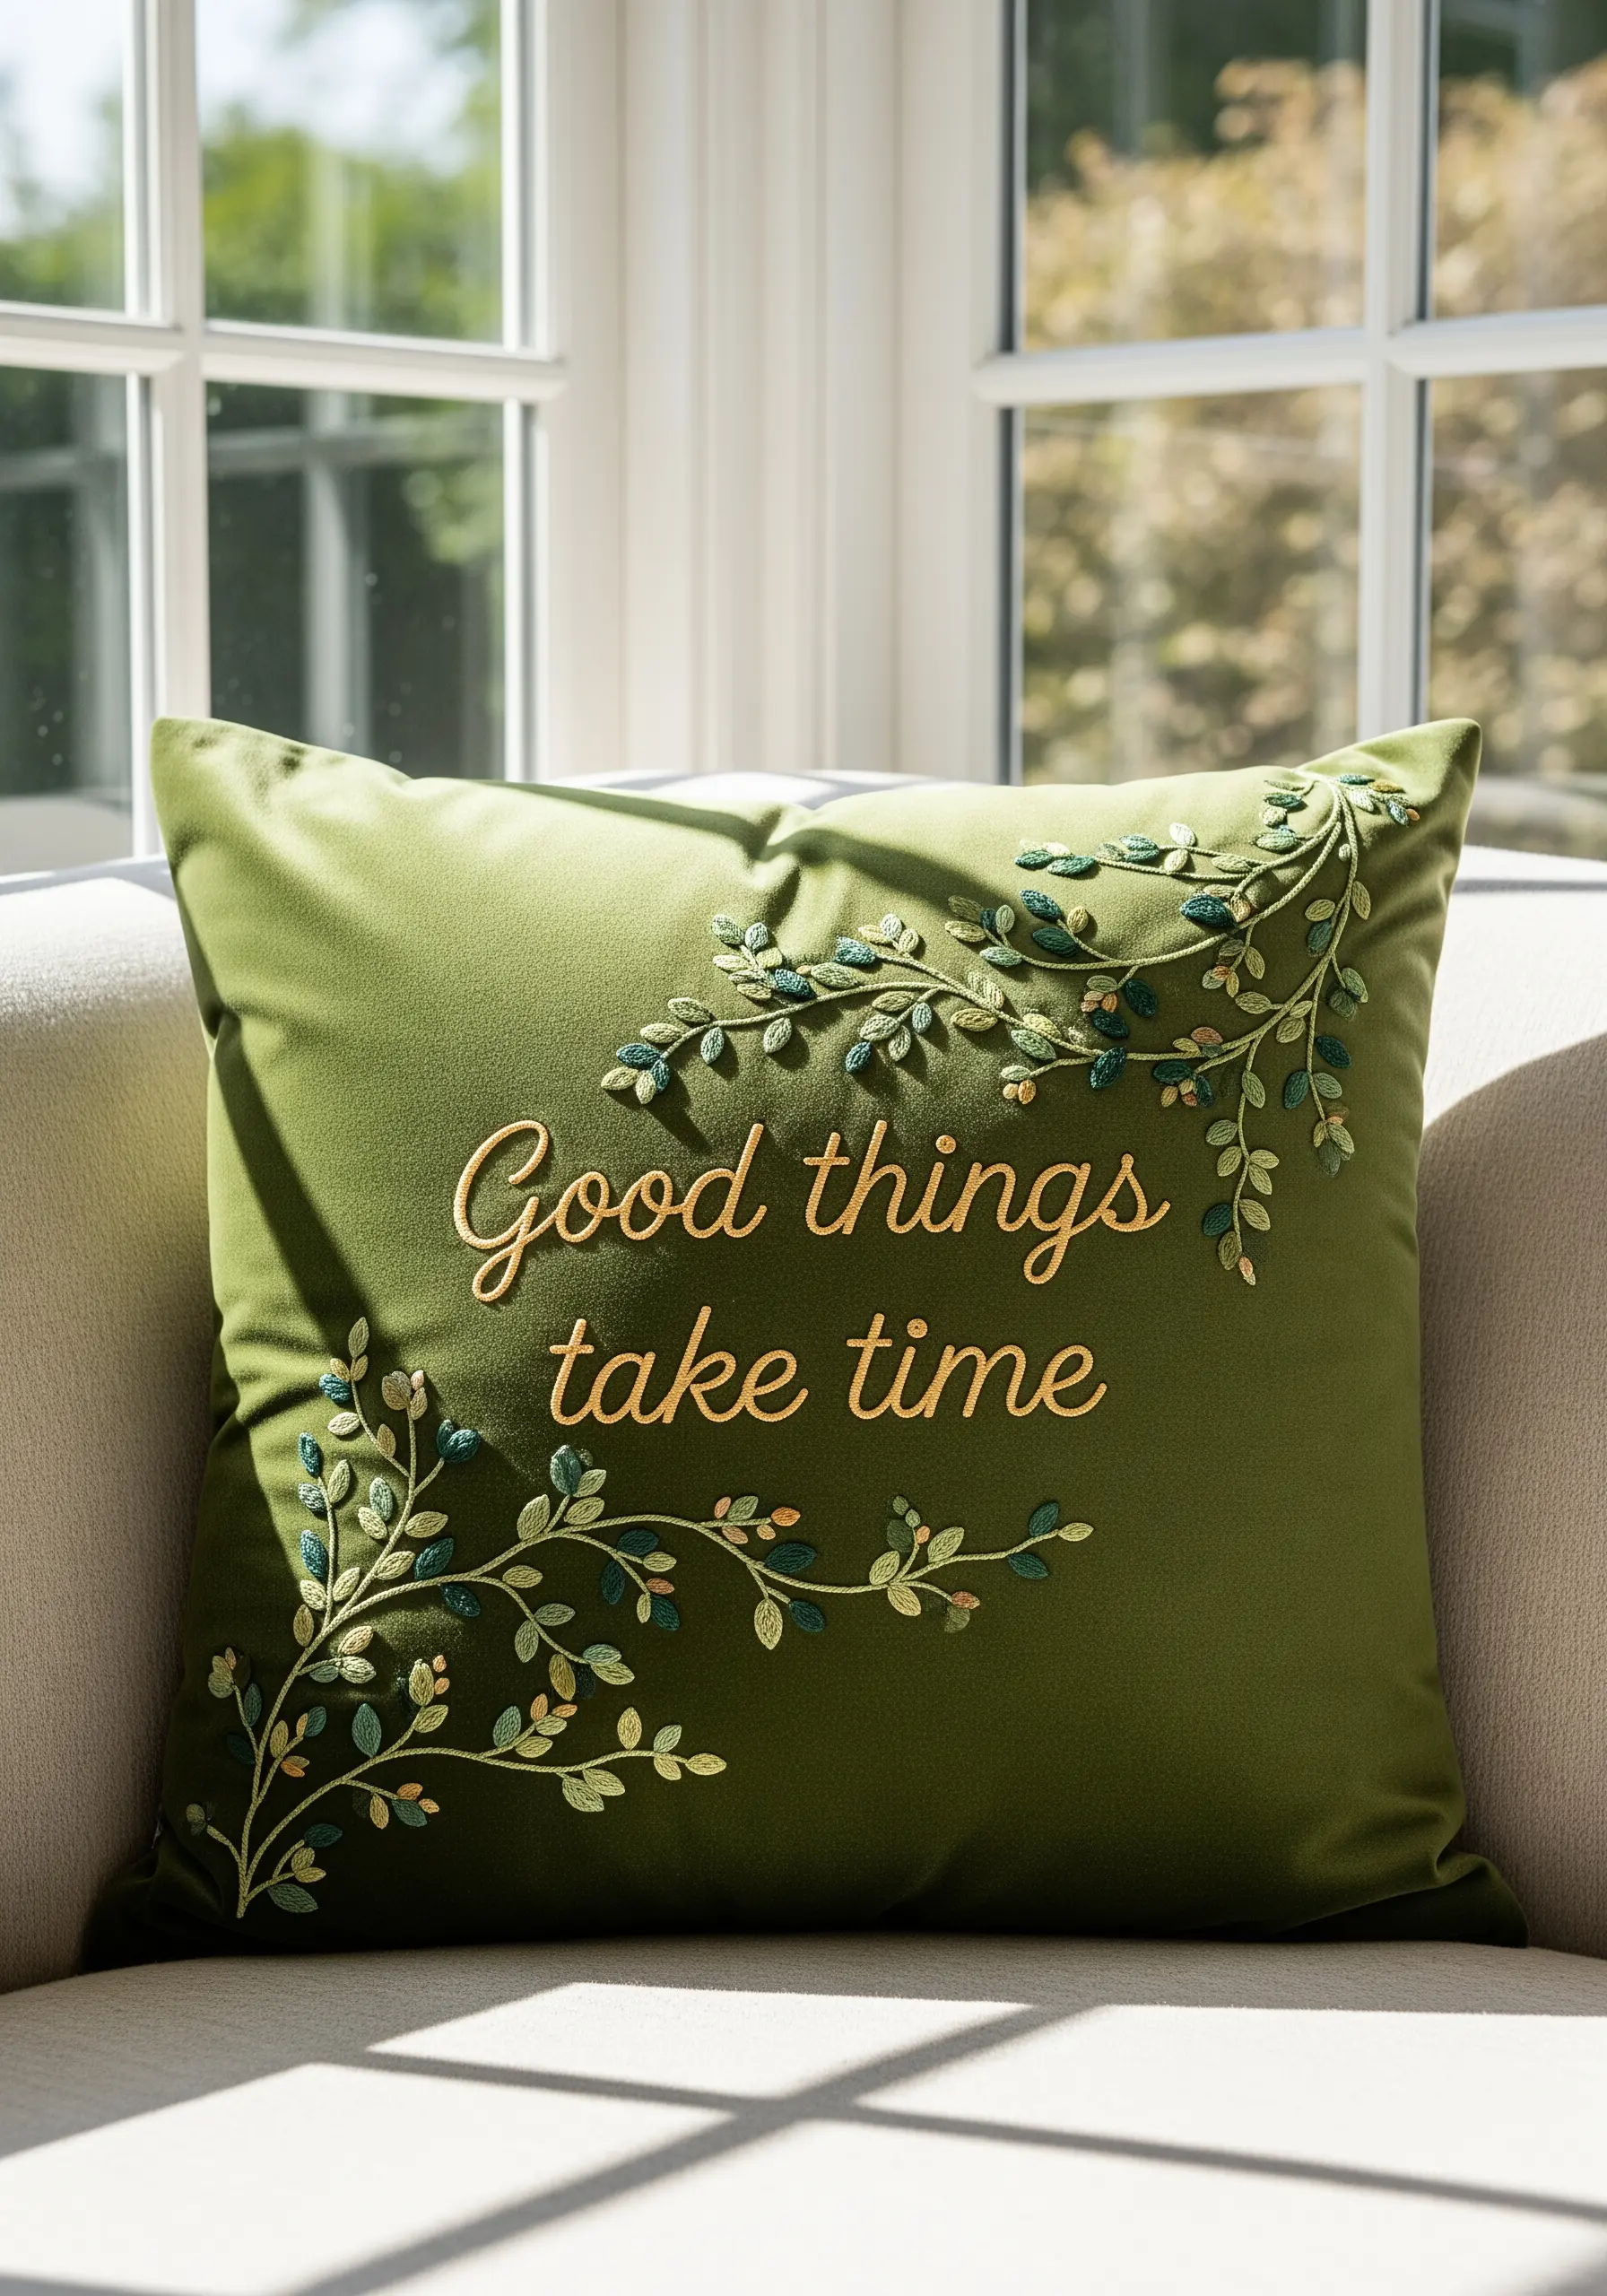
1. Achieve Dimensional Lettering with Padded Satin Stitch

To give your letters a raised, three-dimensional effect, first create a padding of small, underlying stitches (like split stitches or even layers of floss) within the shape of each letter.
Then, work your satin stitch over this padding, pulling the thread taut but not tight enough to pucker the fabric.
This technique lifts the letters from the surface, creating shadows and depth that make the text pop, contrasting beautifully with the delicate, free-flowing vine motifs stitched in a simple backstitch.
The contrast between the bold, structured letters and the organic, fine lines creates a balanced and professional composition.
2. Use Felt Appliqué for Bold, Graphic Typography
For clean, impactful lettering without dense stitching, turn to felt appliqué.
Cut your letters from a sheet of felt and secure them to the pillow fabric using a fabric-safe glue stick to prevent shifting.
Then, stitch around the edges with a neat whip stitch or a tiny, discreet backstitch using a single strand of matching thread.
This method is faster than filling large areas with satin stitch and achieves a crisp, modern aesthetic that stands out on neutral fabrics.
3. Combine Script Lettering with Dimensional Florals
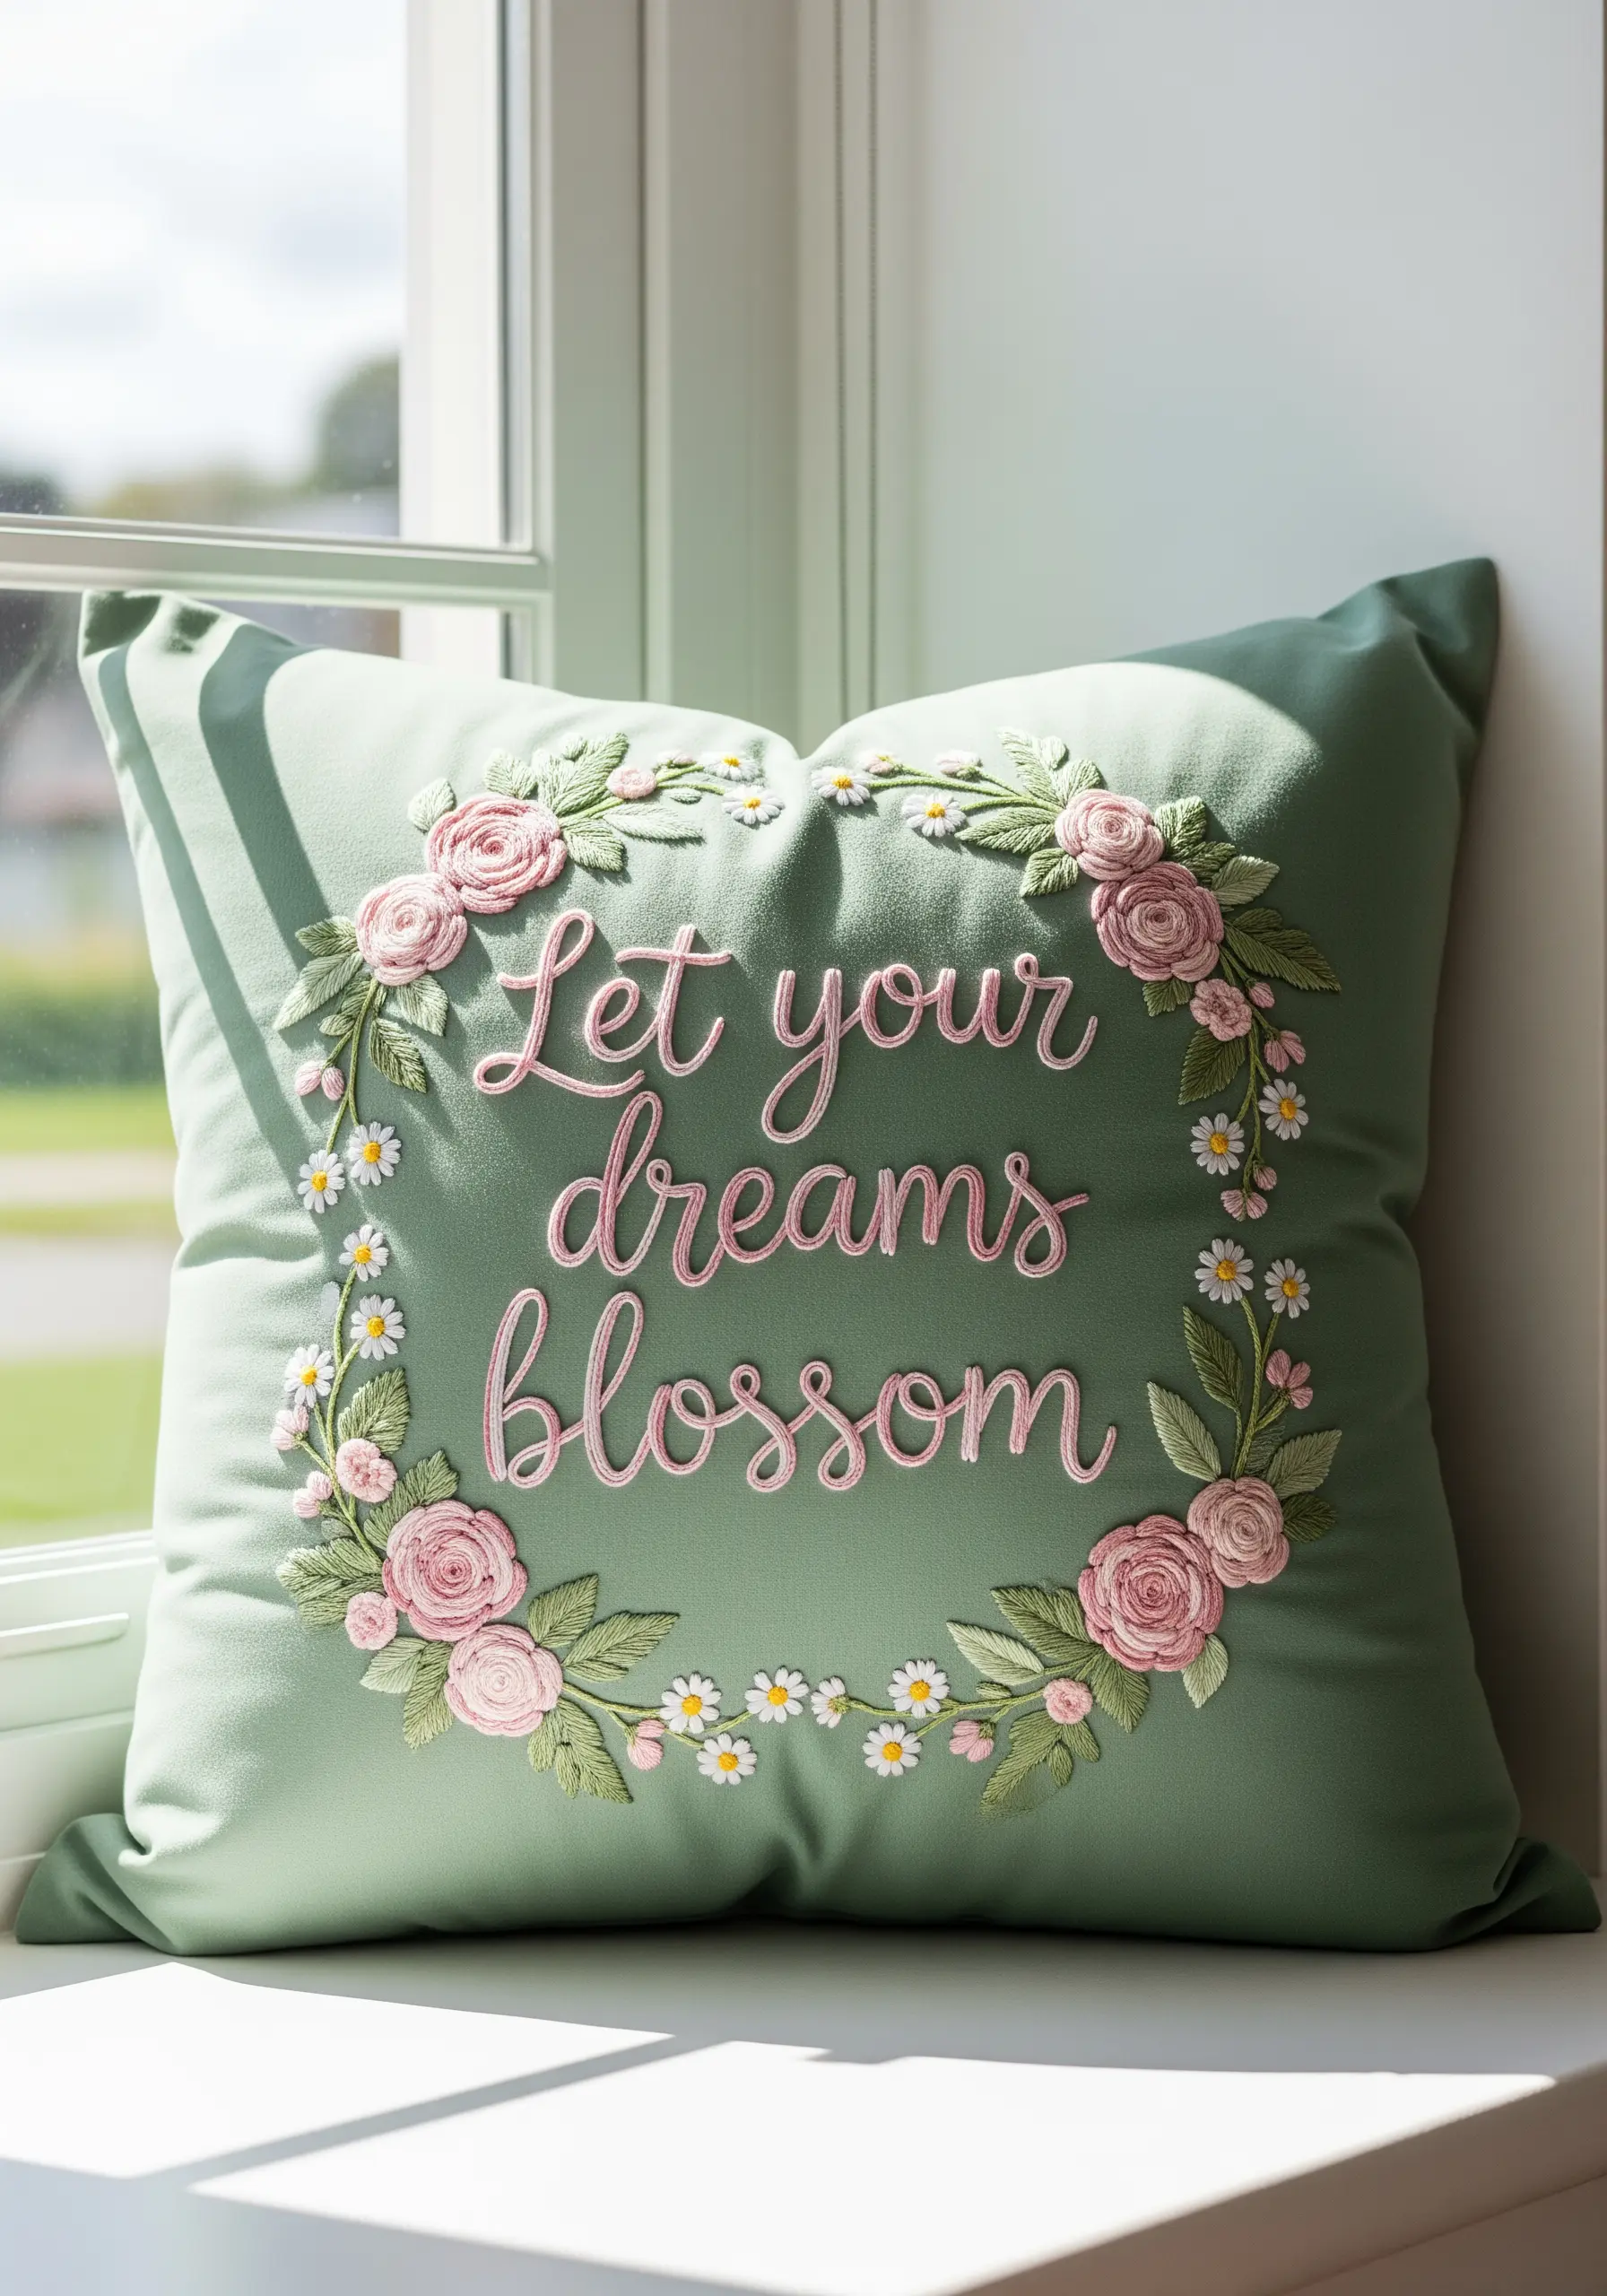
Create a soft, romantic feel by pairing elegant script with textured flowers.
Stitch the quote using a smooth, consistent whipped backstitch or stem stitch to mimic flowing handwriting.
For the roses, use the woven wheel stitch (or spider web rose stitch) to create dense, round blossoms with a beautiful spiral texture.
This combination works because the smooth lines of the script provide a visual anchor for the more complex, three-dimensional texture of the flowers, resulting in a balanced and inviting design.
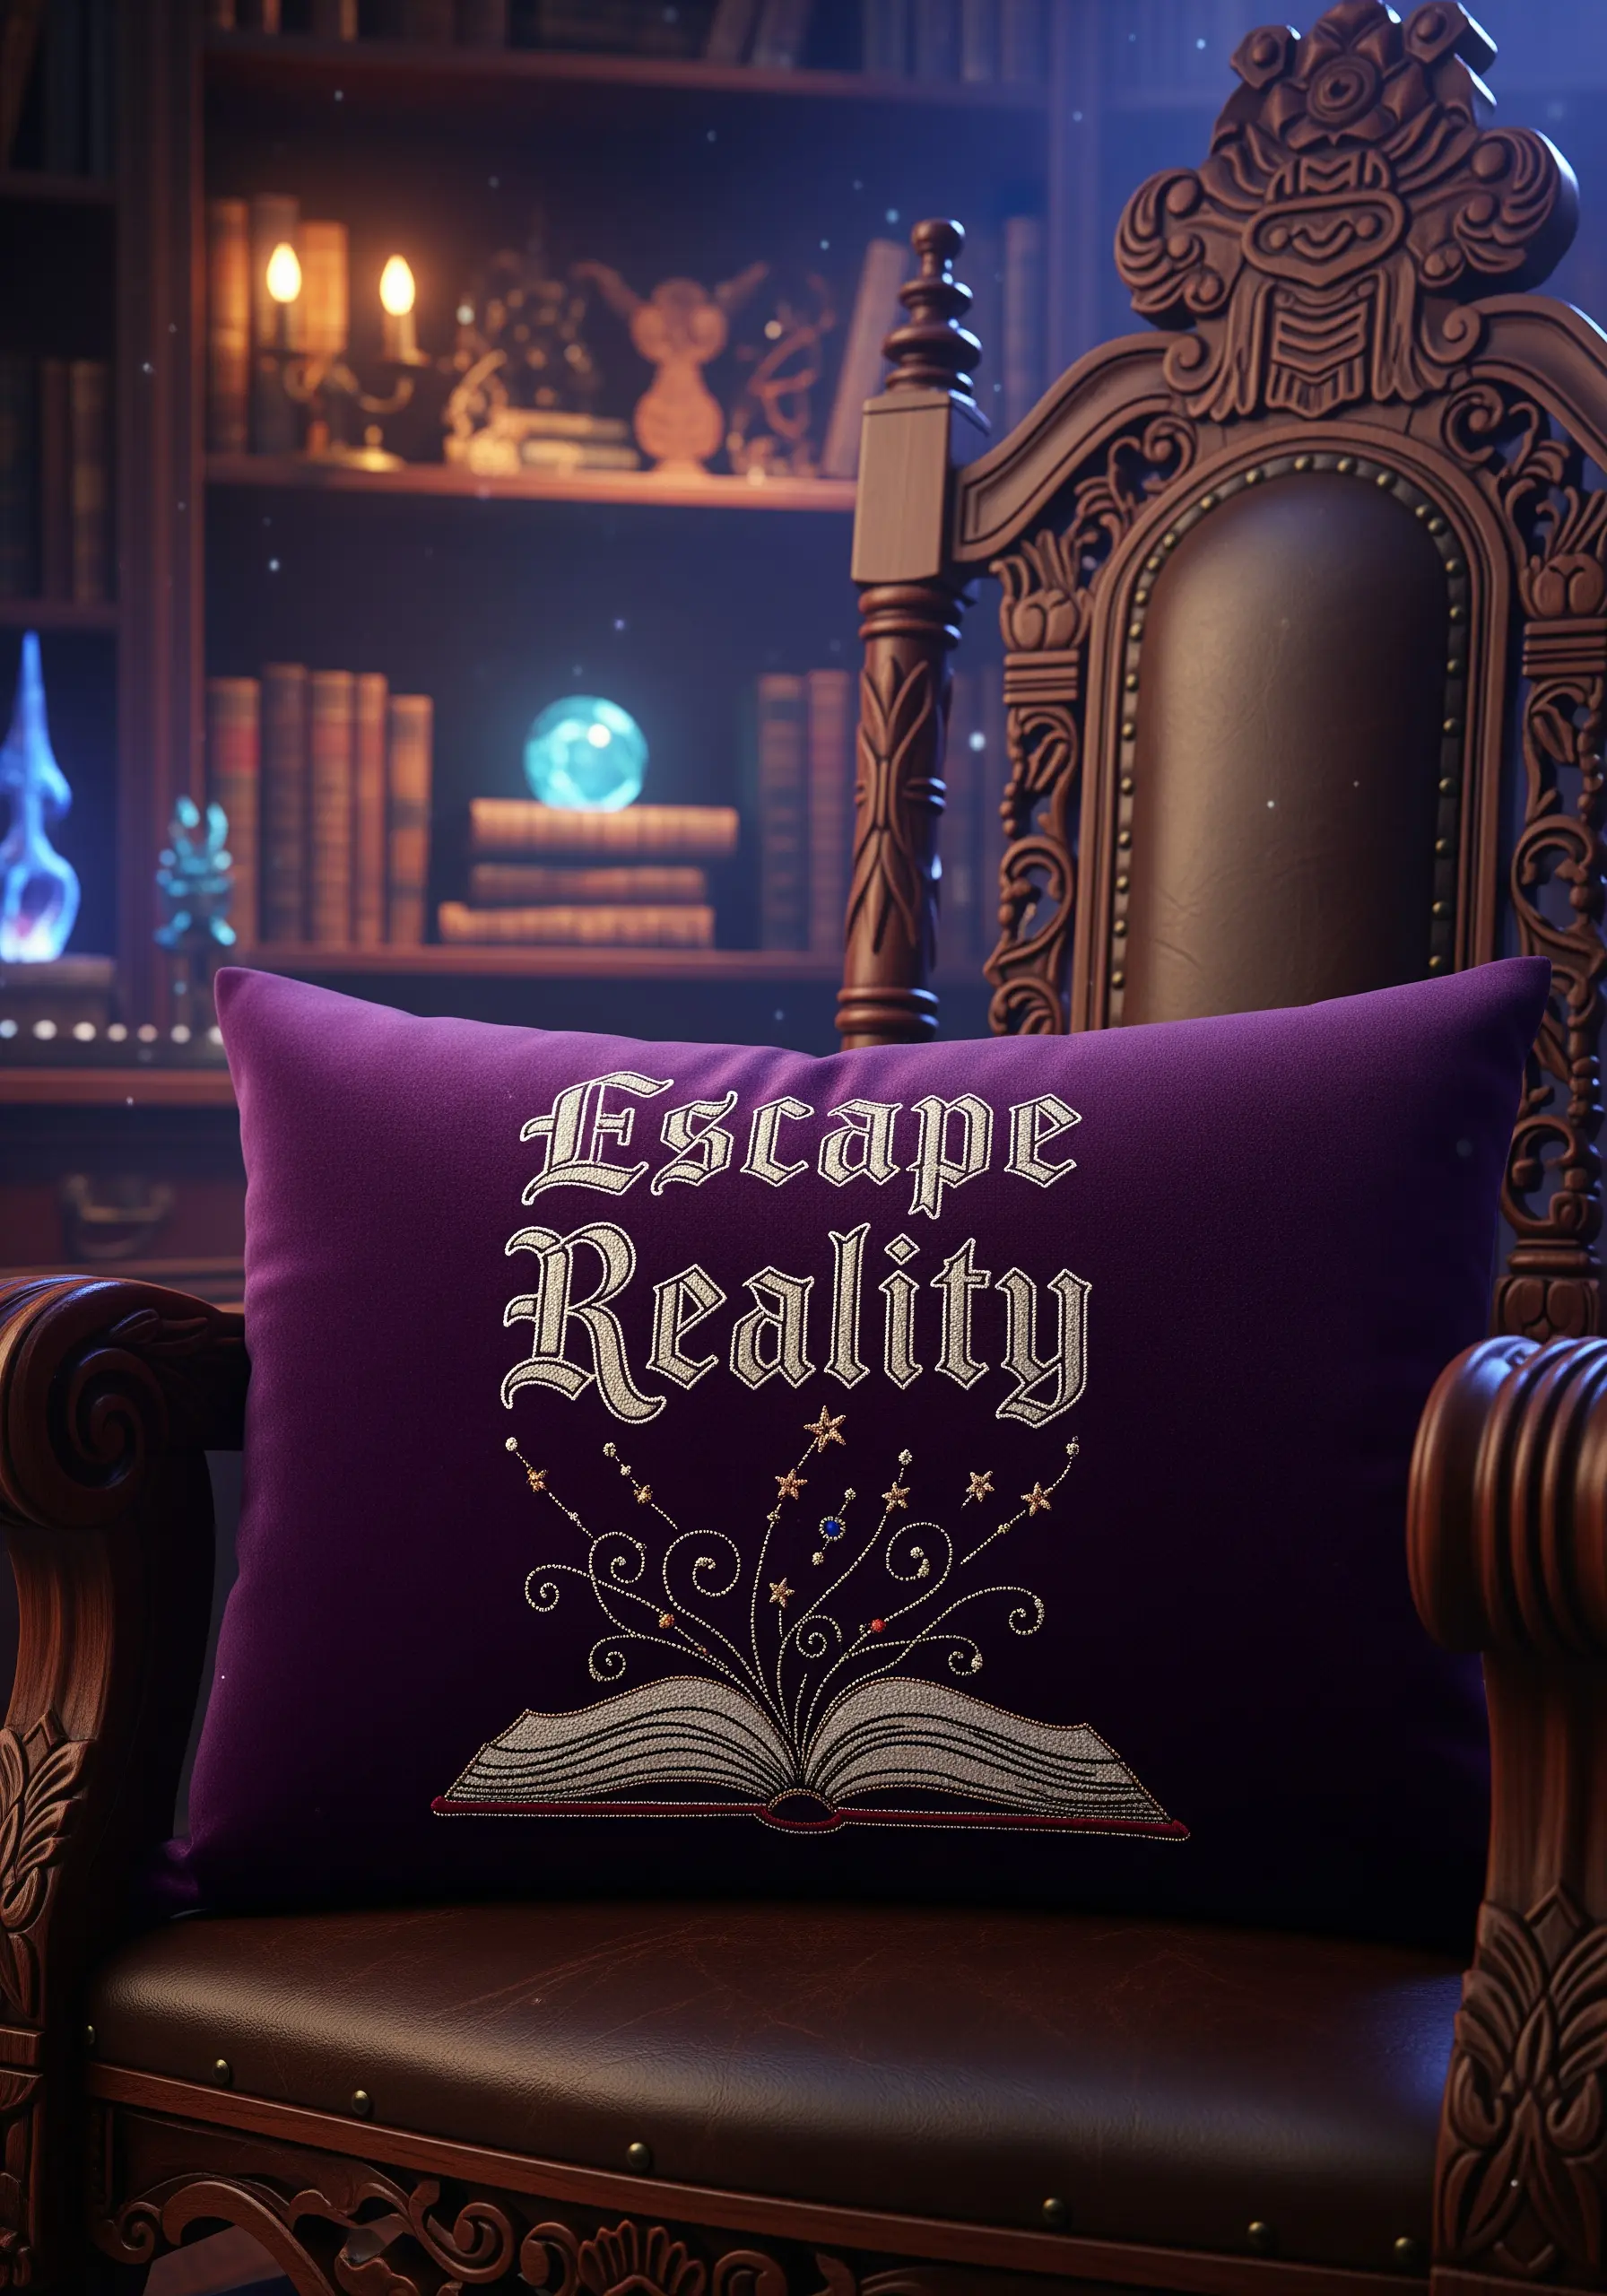
4. Add Celestial Sparkle with Beads and Metallic Thread

Stitching on dark, rich fabrics like velvet provides the perfect canvas for reflective materials.
Fill in the crescent moon with silver seed beads, stitching them on individually or in small clusters for a dense, pavé effect.
For the lettering and constellations, use a silver metallic thread, but couch it instead of using traditional stitches.
Lay the metallic thread on the surface and use a second, finer thread (in a matching color) to tack it down at regular intervals—this prevents the metallic thread from snagging or losing its shine.
5. Master Elegant Stitching on Faux Leather
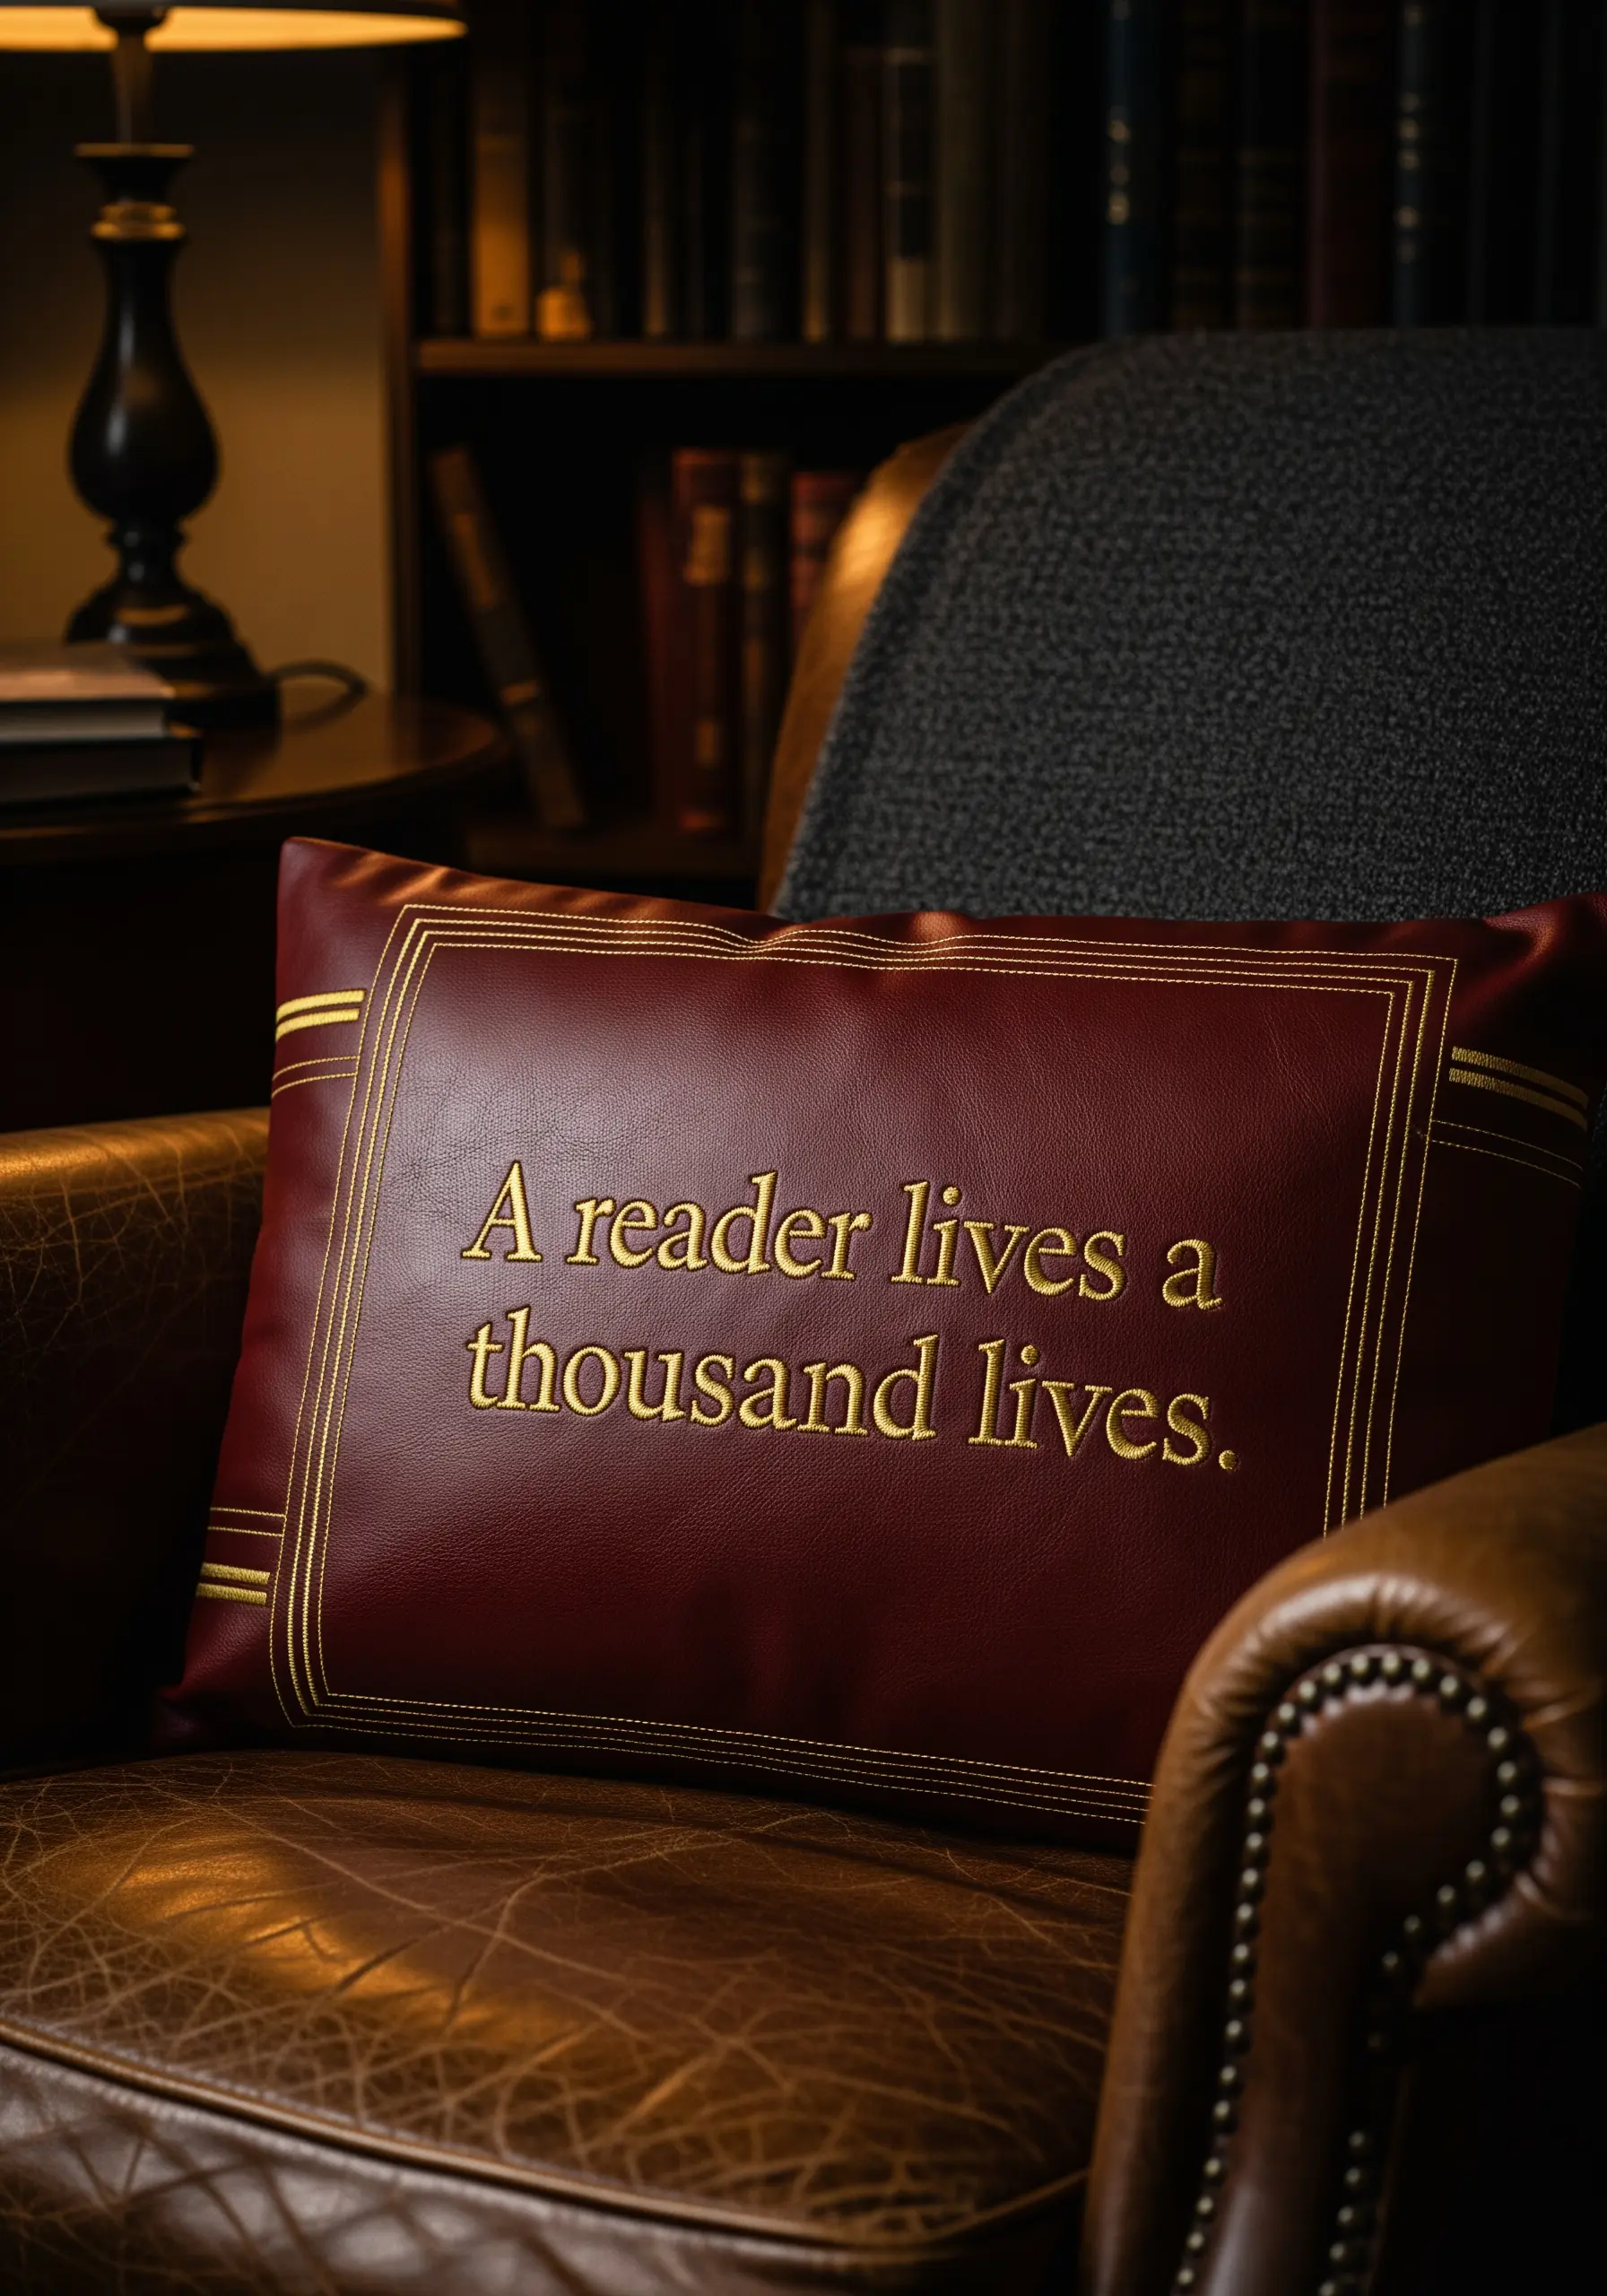
When embroidering on faux leather, your needle choice is critical; use a sharp, fresh needle to pierce the material cleanly without tearing it.
Keep the design simple and elegant—a clean backstitch or stem stitch using two or three strands of floss is perfect for serif fonts.
The holes you make are permanent, so stitch with confidence and avoid pulling your thread too tight, which can cause the material to stretch or warp.
This technique creates a sophisticated, embossed look reminiscent of classic bookbinding.
6. Embrace Understated Calm with Minimalist Lettering

Sometimes, the quietest statement has the most impact.
On a textured fabric like linen or a soft cotton blend, use just one or two strands of floss for your lettering.
A simple, neat backstitch will create a delicate, crisp line that allows the fabric’s natural texture to remain part of the design.
Choose a thread color that is only a few shades darker than your fabric to achieve a subtle, tone-on-tone effect that feels both modern and serene.
7. Create Art Deco Glamour with Couching and Beads

To achieve this bold, high-contrast look, outline your letters with couched gold cord.
Lay down a thick, metallic cord along your design lines and use a thinner, stronger thread to tack it in place with small, perpendicular stitches.
For the corner embellishments, fill the triangular areas with densely packed gold seed beads.
This combination of smooth, graphic lines and sparkling texture creates a luxurious, Art Deco-inspired piece that feels both vintage and contemporary.
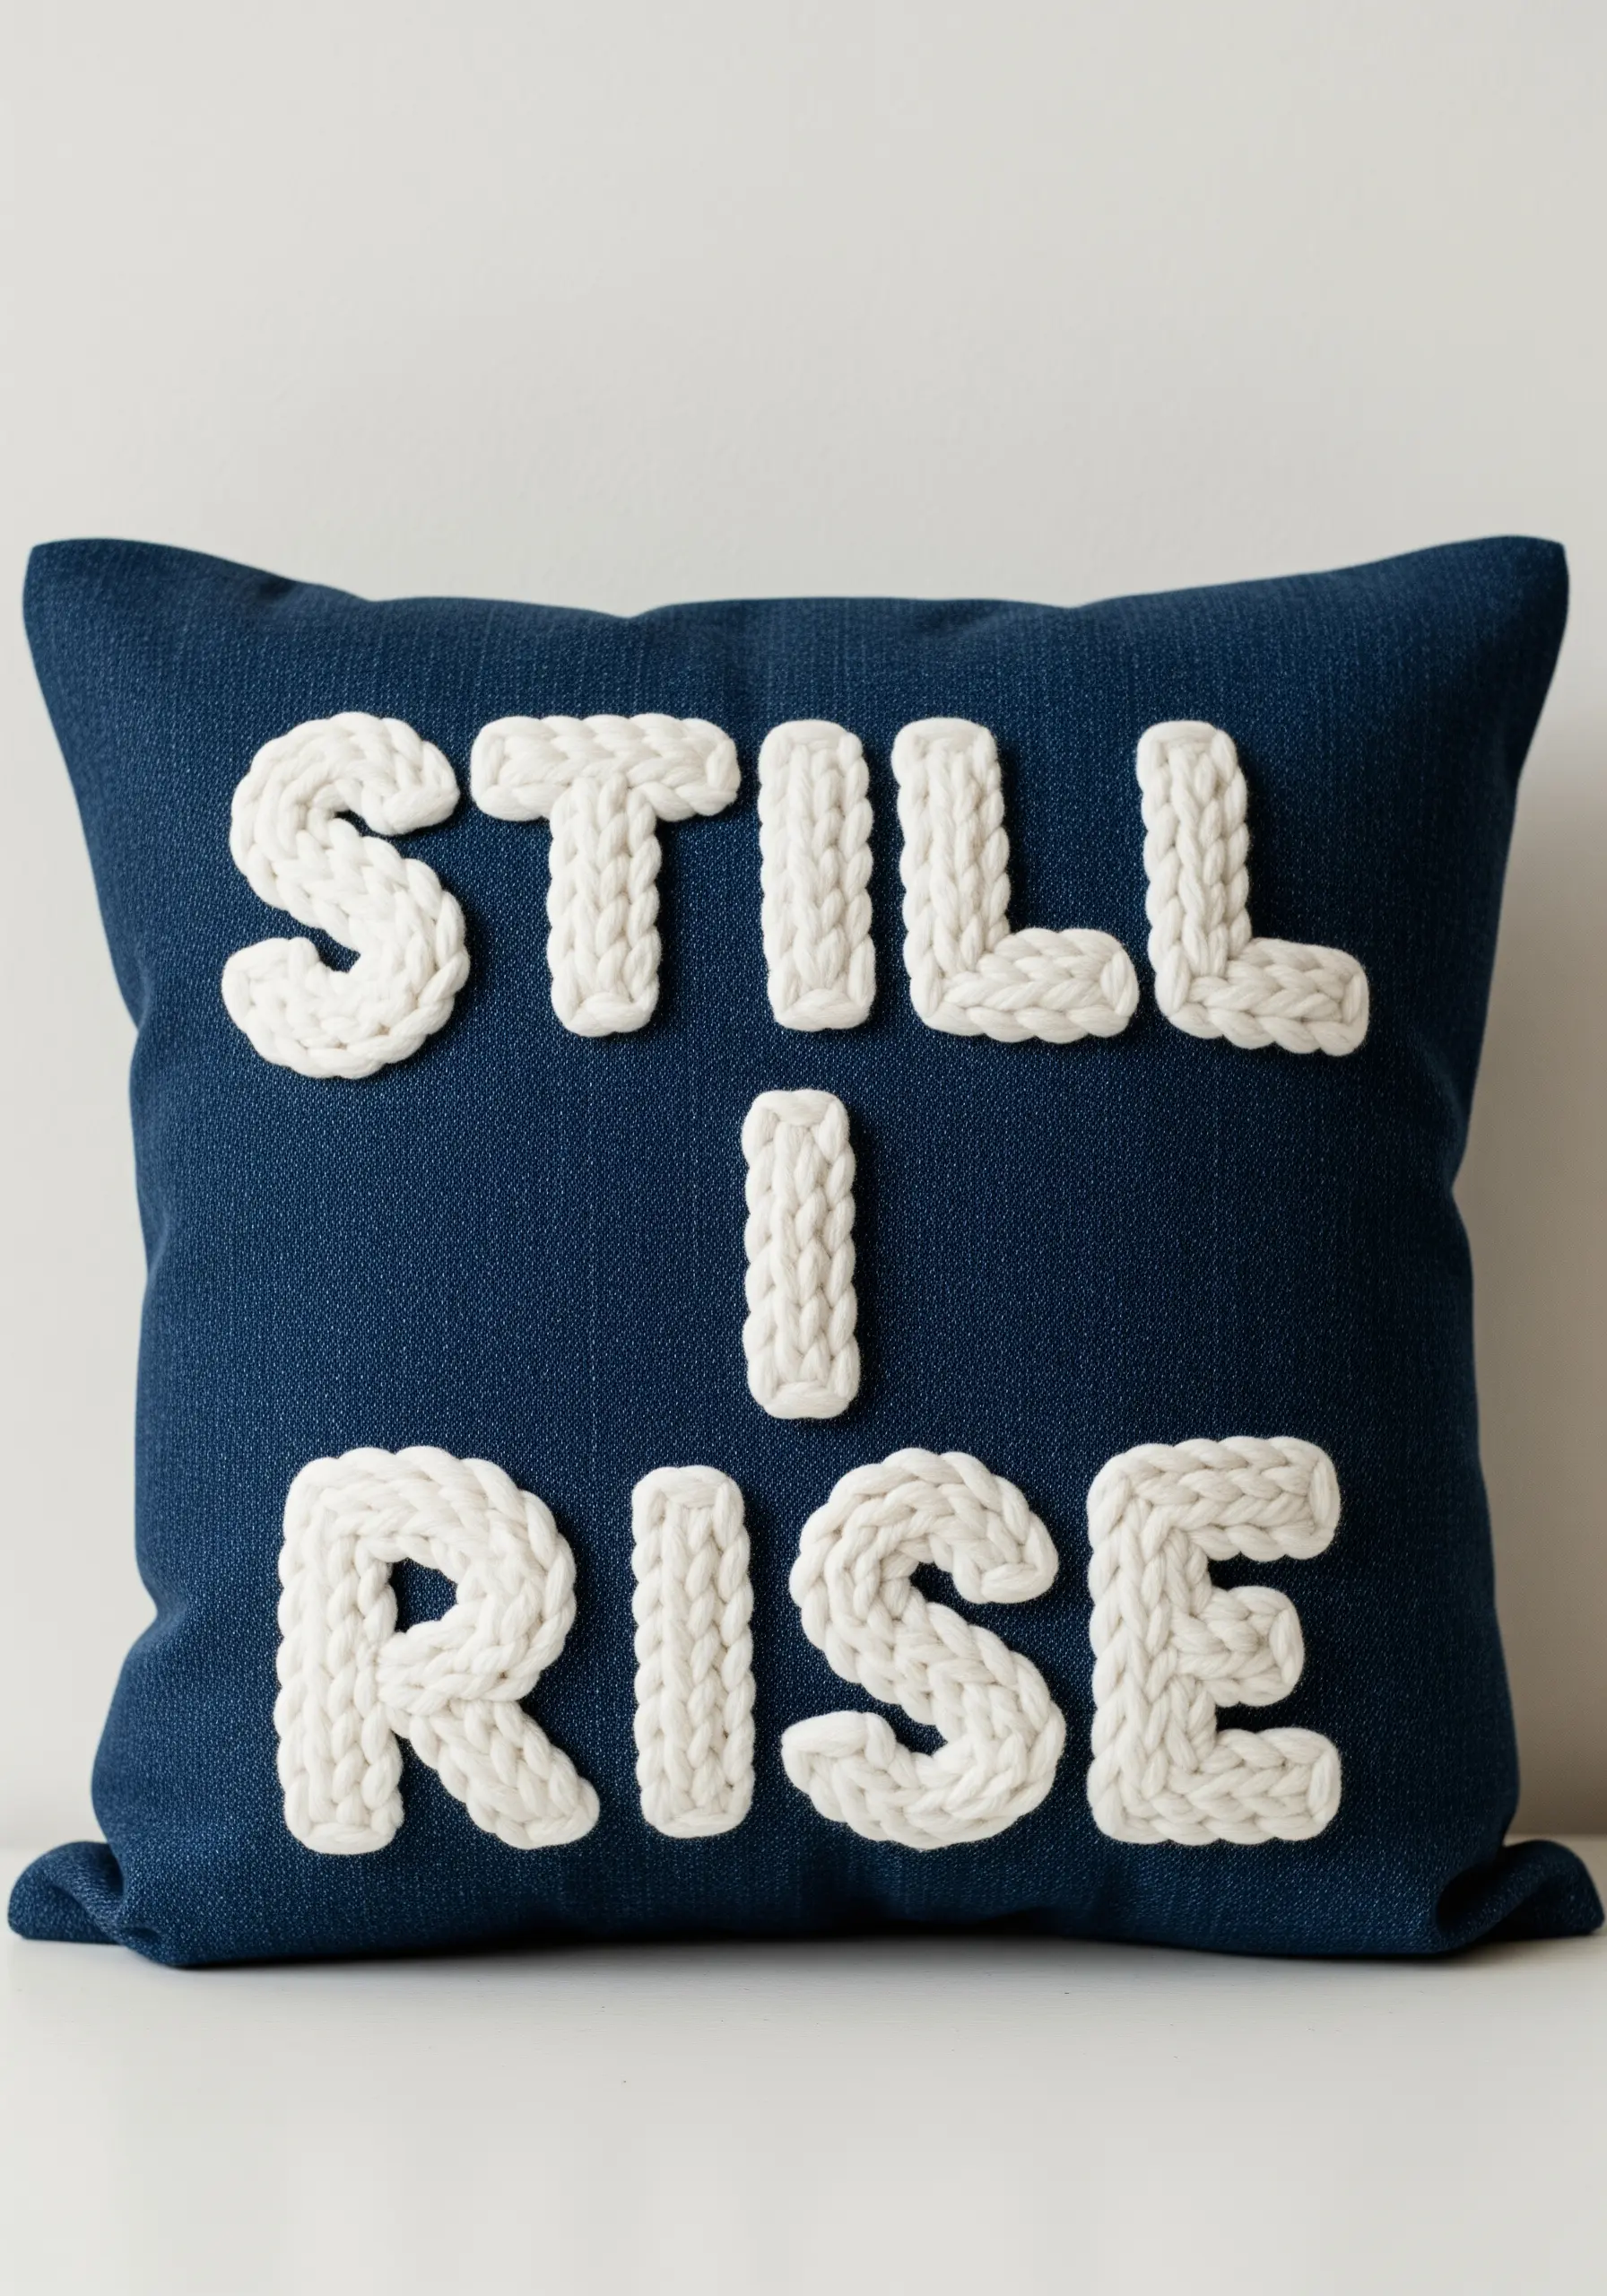
8. Achieve a Knitted Look with Chunky Yarn Couching
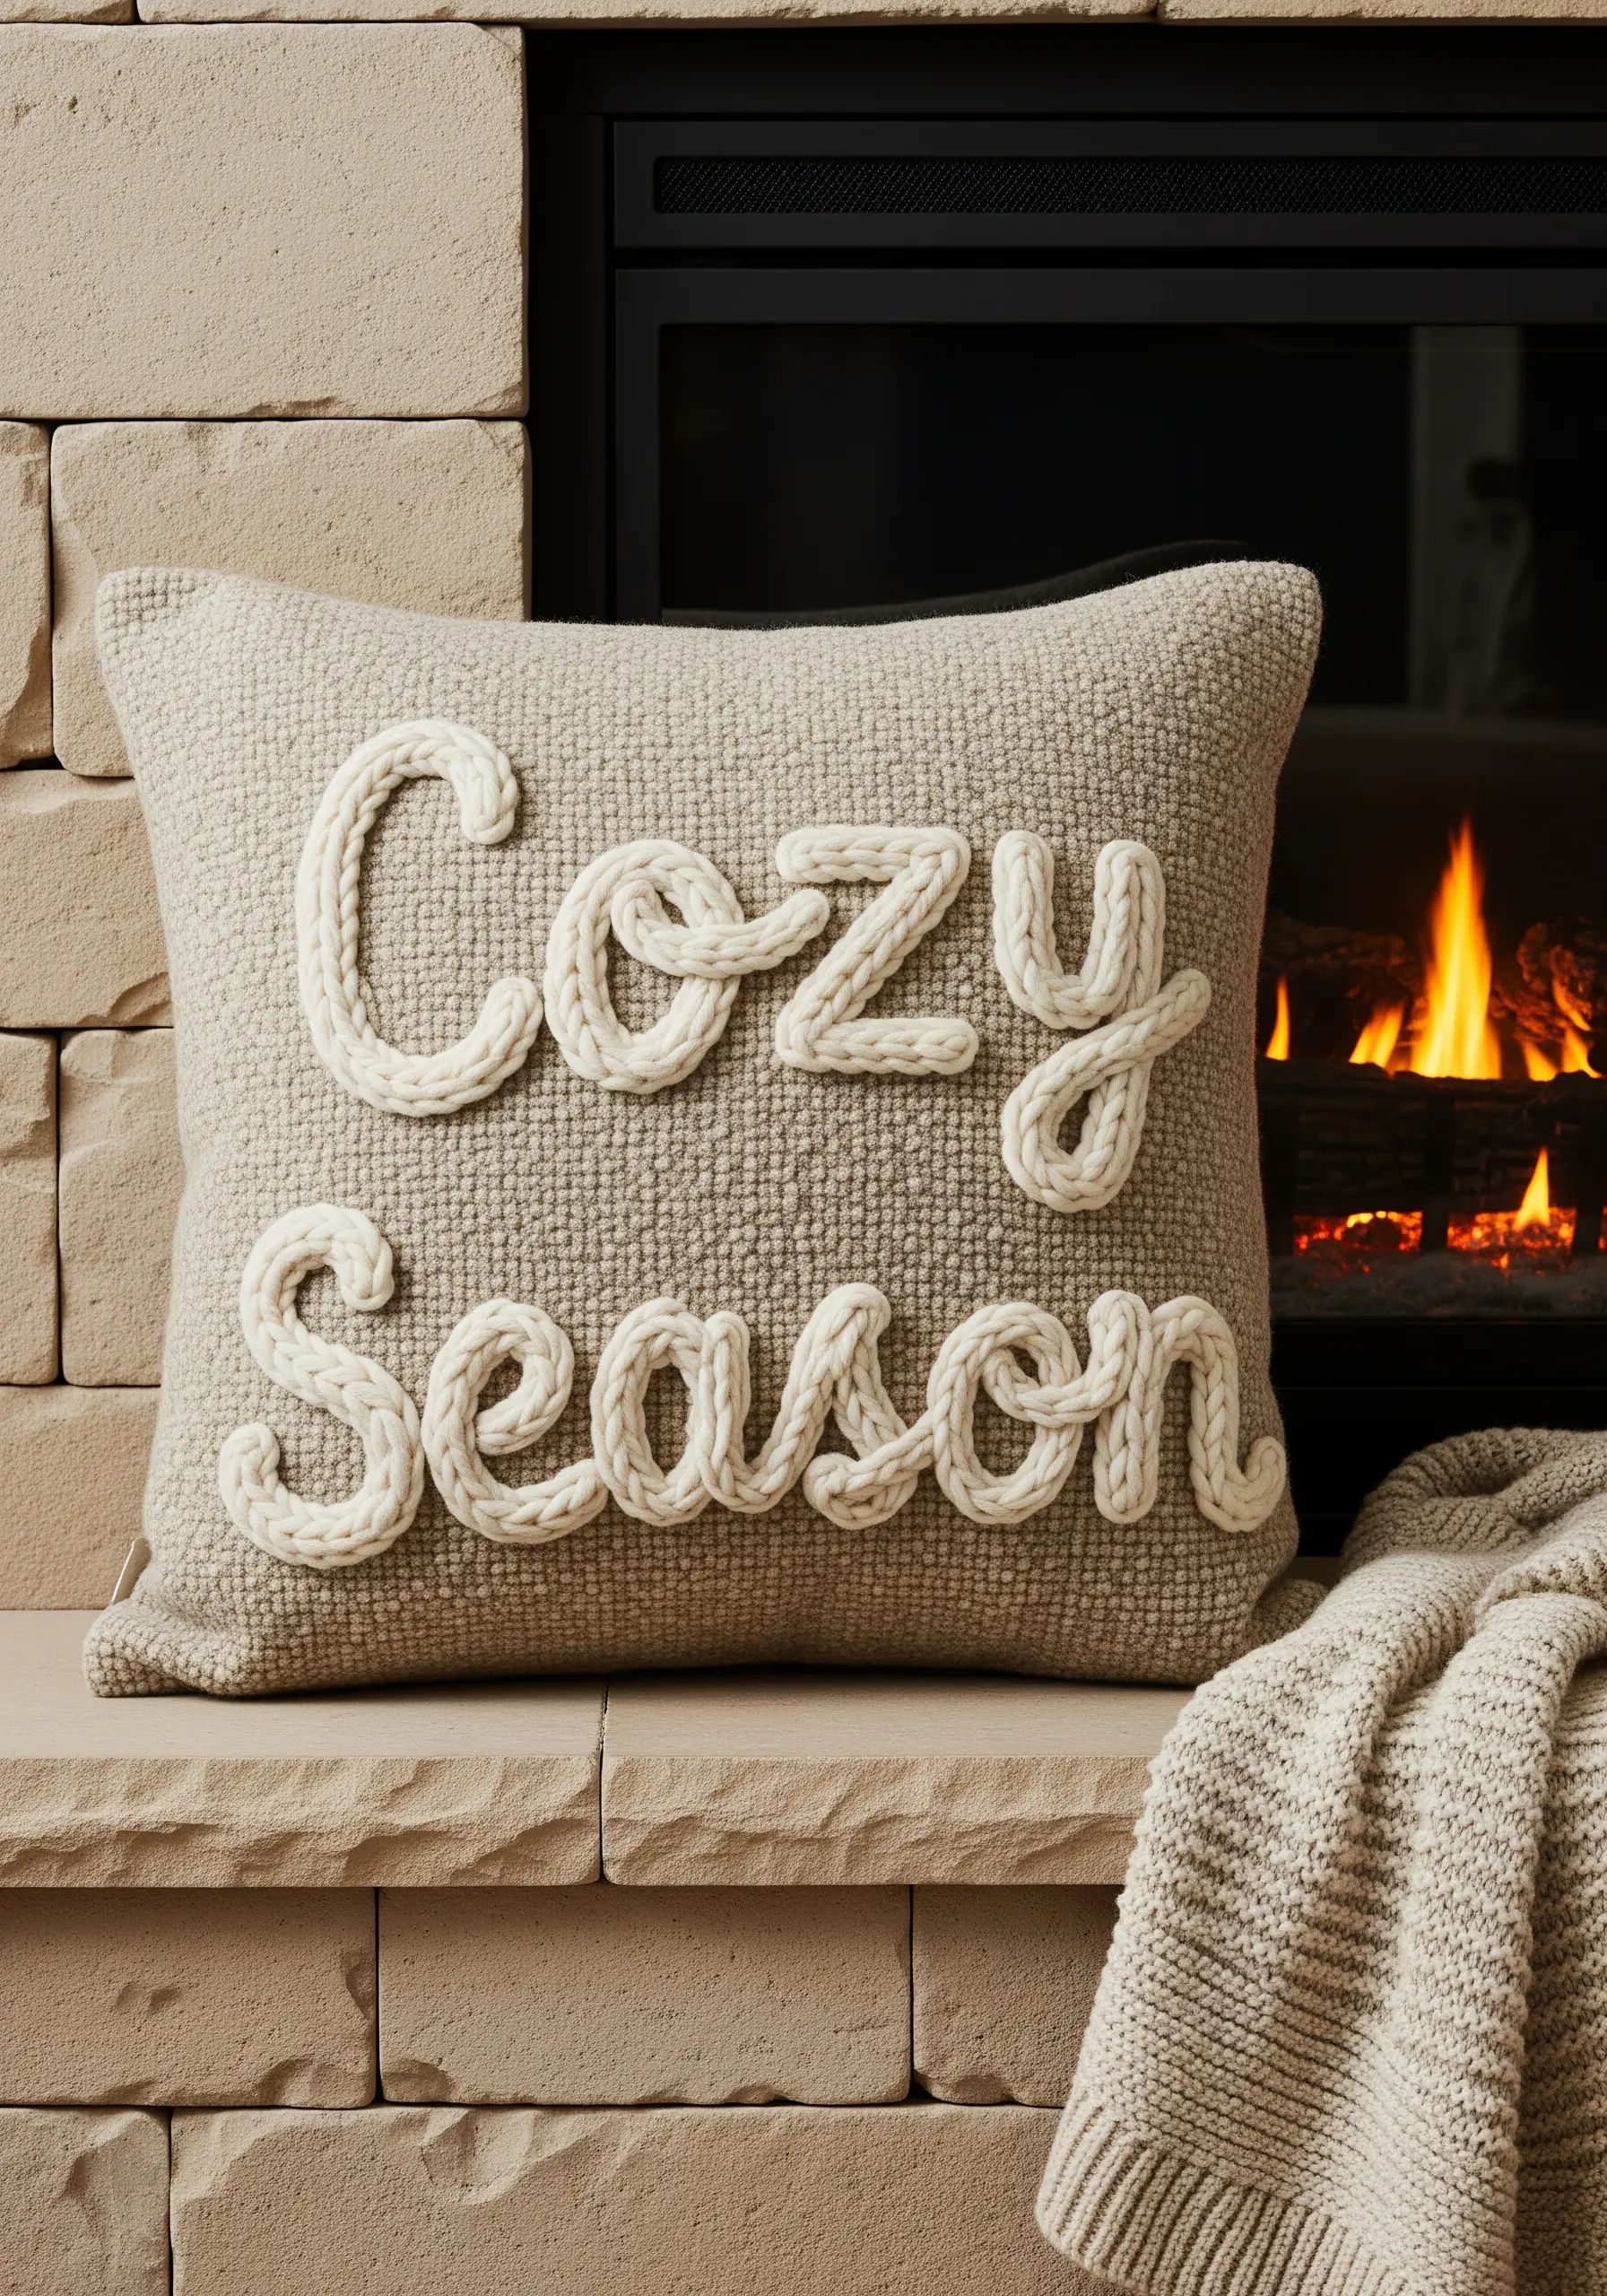
For an ultra-cozy, tactile effect, use chunky yarn to create your lettering.
Instead of trying to pull the thick yarn through the fabric, lay it on the surface and use a regular embroidery floss in a matching color to couch it down.
Make small, evenly spaced stitches over the yarn to secure it firmly in place, ensuring your tacking stitches sink into the yarn’s texture to become nearly invisible.
This technique is a fast and effective way to add significant dimension and a soft, handmade feel to your pillow.
9. Refine Your Space with Tone-on-Tone Script
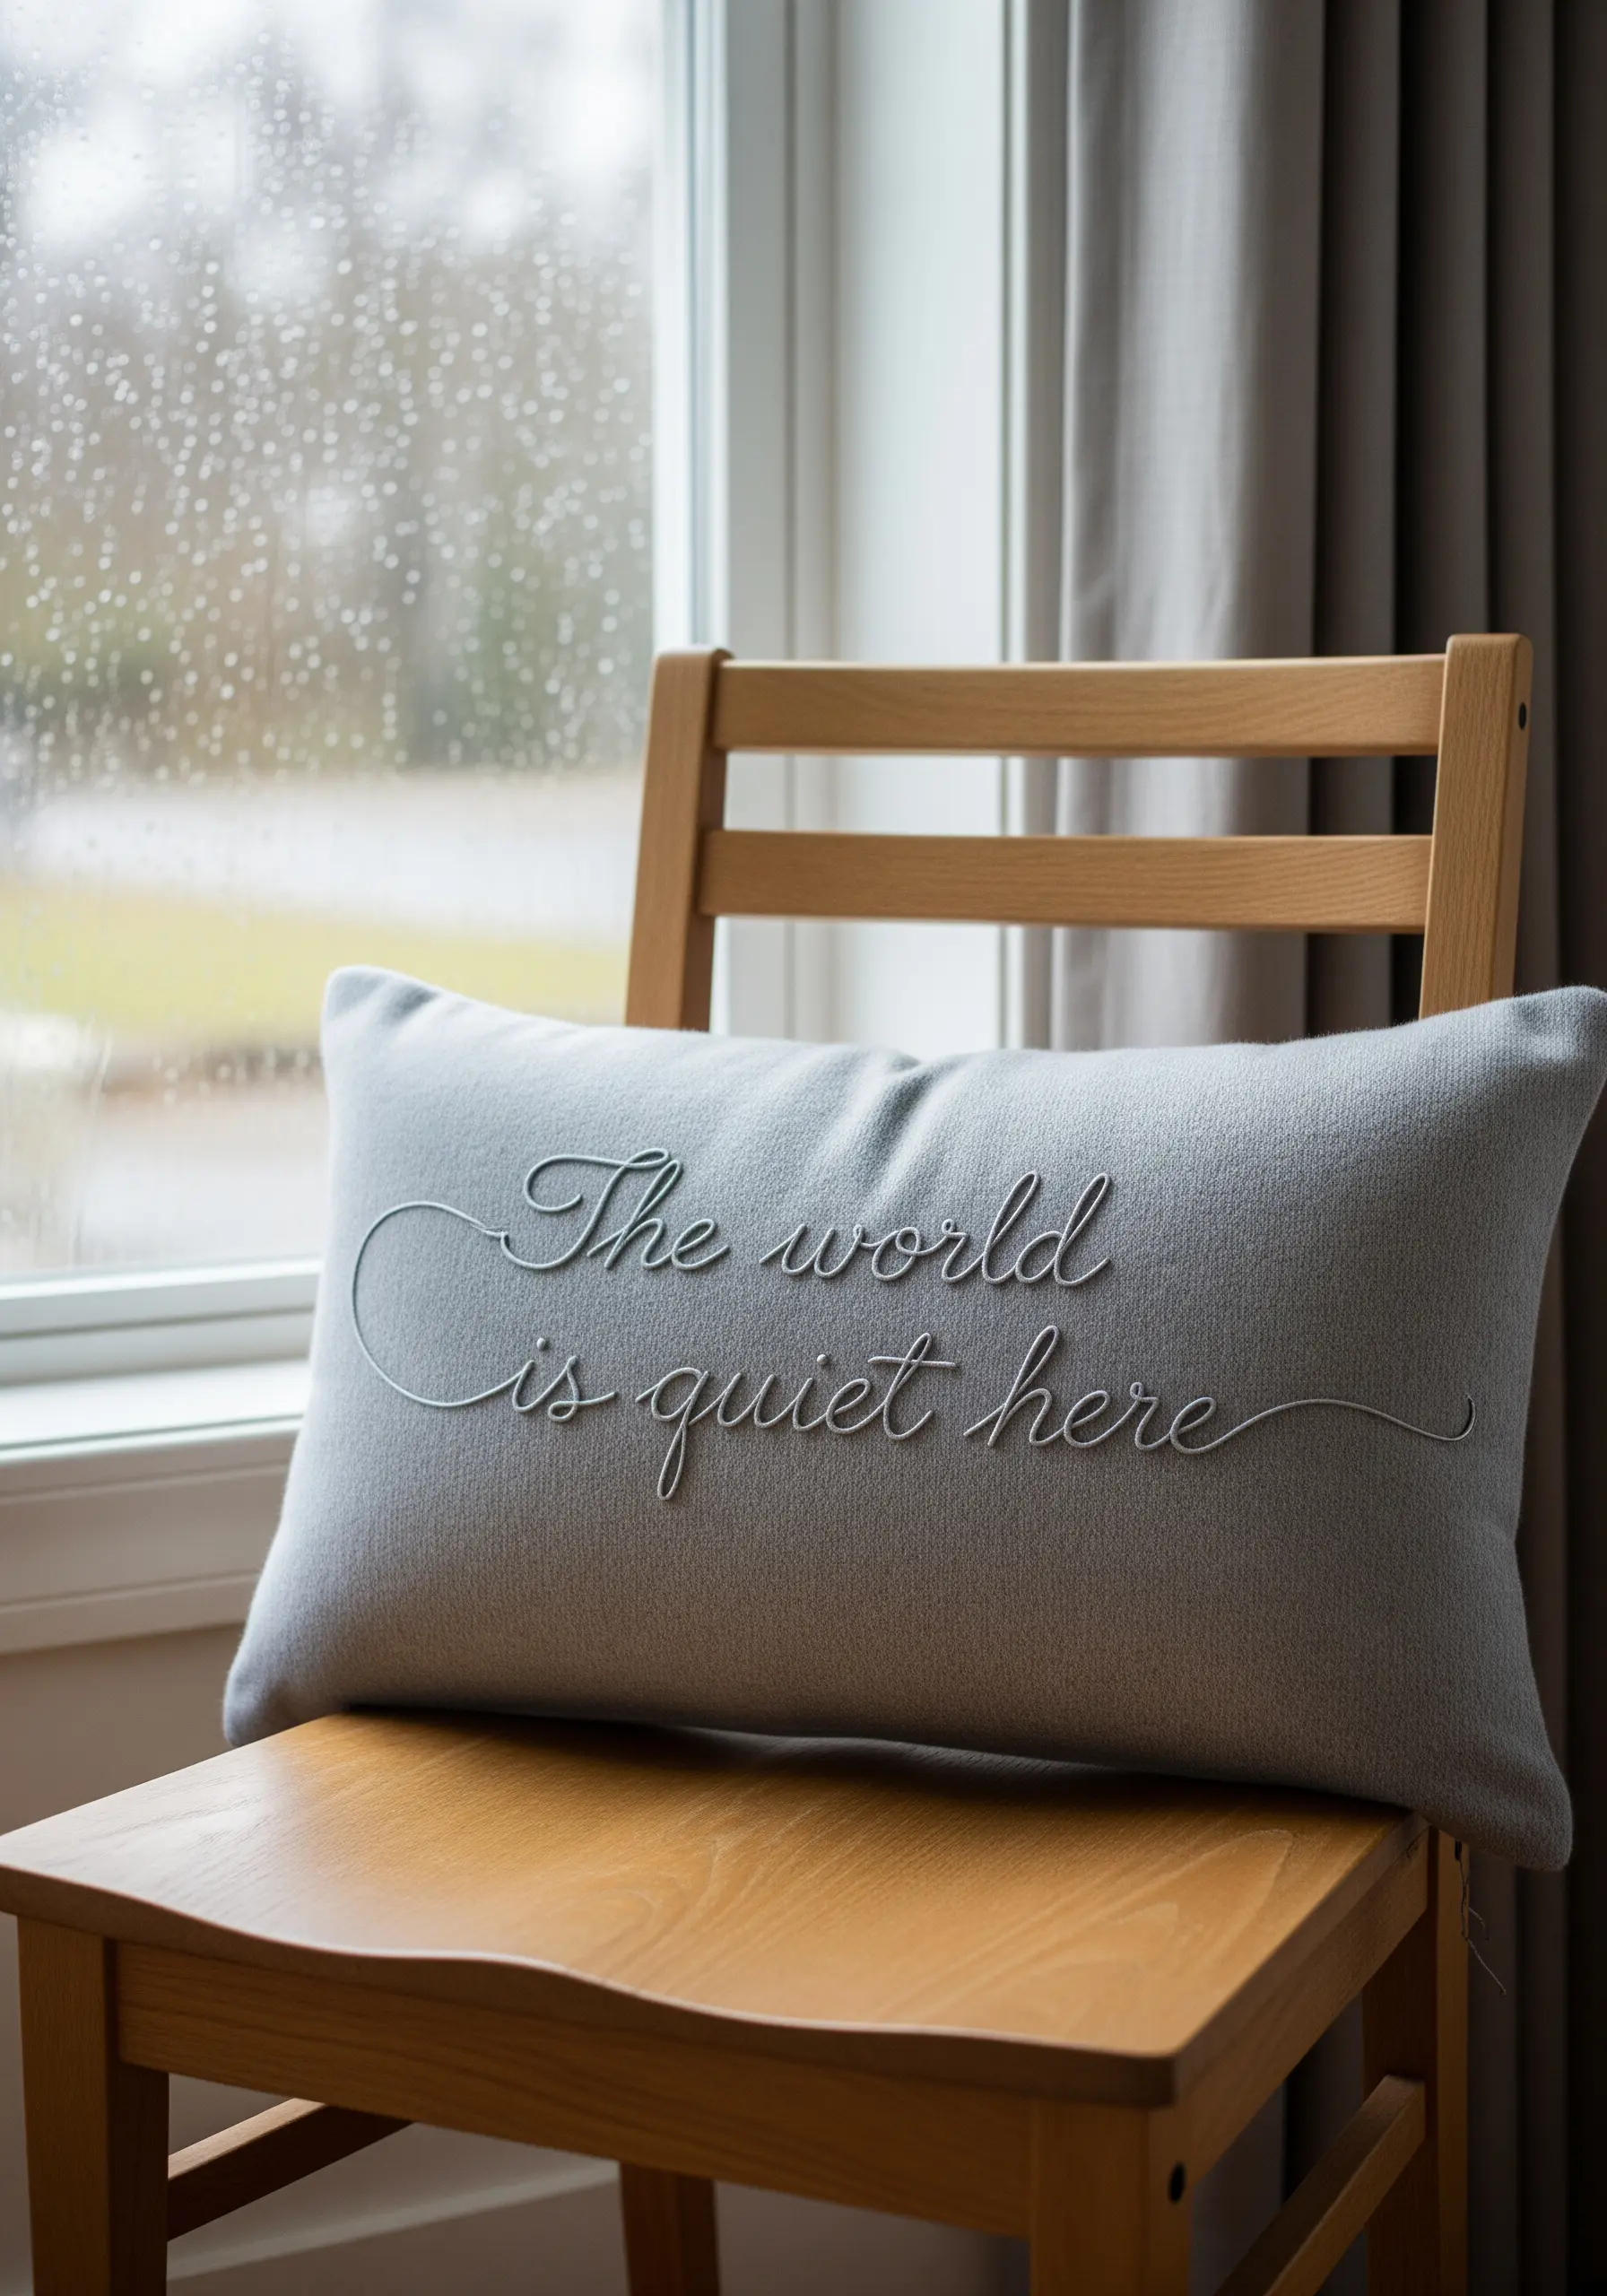
Create an atmosphere of quiet elegance by choosing an embroidery thread that is just a shade lighter or darker than your base fabric.
This subtle contrast ensures the message is legible up close but blends into the overall texture of the room from a distance.
Use a delicate, flowing stitch like a whipped backstitch to create a continuous, smooth line for your script.
This embroidery decor trick is perfect for creating a calming retreat where the details whisper rather than shout.
10. Stabilize Satin Stitch with a Split Stitch Outline

If your satin stitch edges look uneven, reinforce them with a split-stitch base.
First, outline the entire letter or shape with a precise split stitch. This creates a slightly raised and very firm edge for your satin stitches to butt up against.
When you fill the shape, bring your needle up just outside the split stitch line and go down on the inside, ensuring each stitch is snug against the next.
This technique gives your lettering a perfectly crisp, almost machine-embroidered finish.
11. Add Gentle Variation with Multi-Tonal Brick Stitch

Instead of a solid satin stitch, fill your letters with a brick stitch using several closely related shades of thread.
Work your stitches in a staggered, brick-like pattern, alternating colors randomly as you go.
This approach breaks up the solid block of color, creating a soft, variegated texture that adds visual interest and a handcrafted feel.
It’s a forgiving technique that’s perfect for adding subtle depth to simple, blocky fonts.
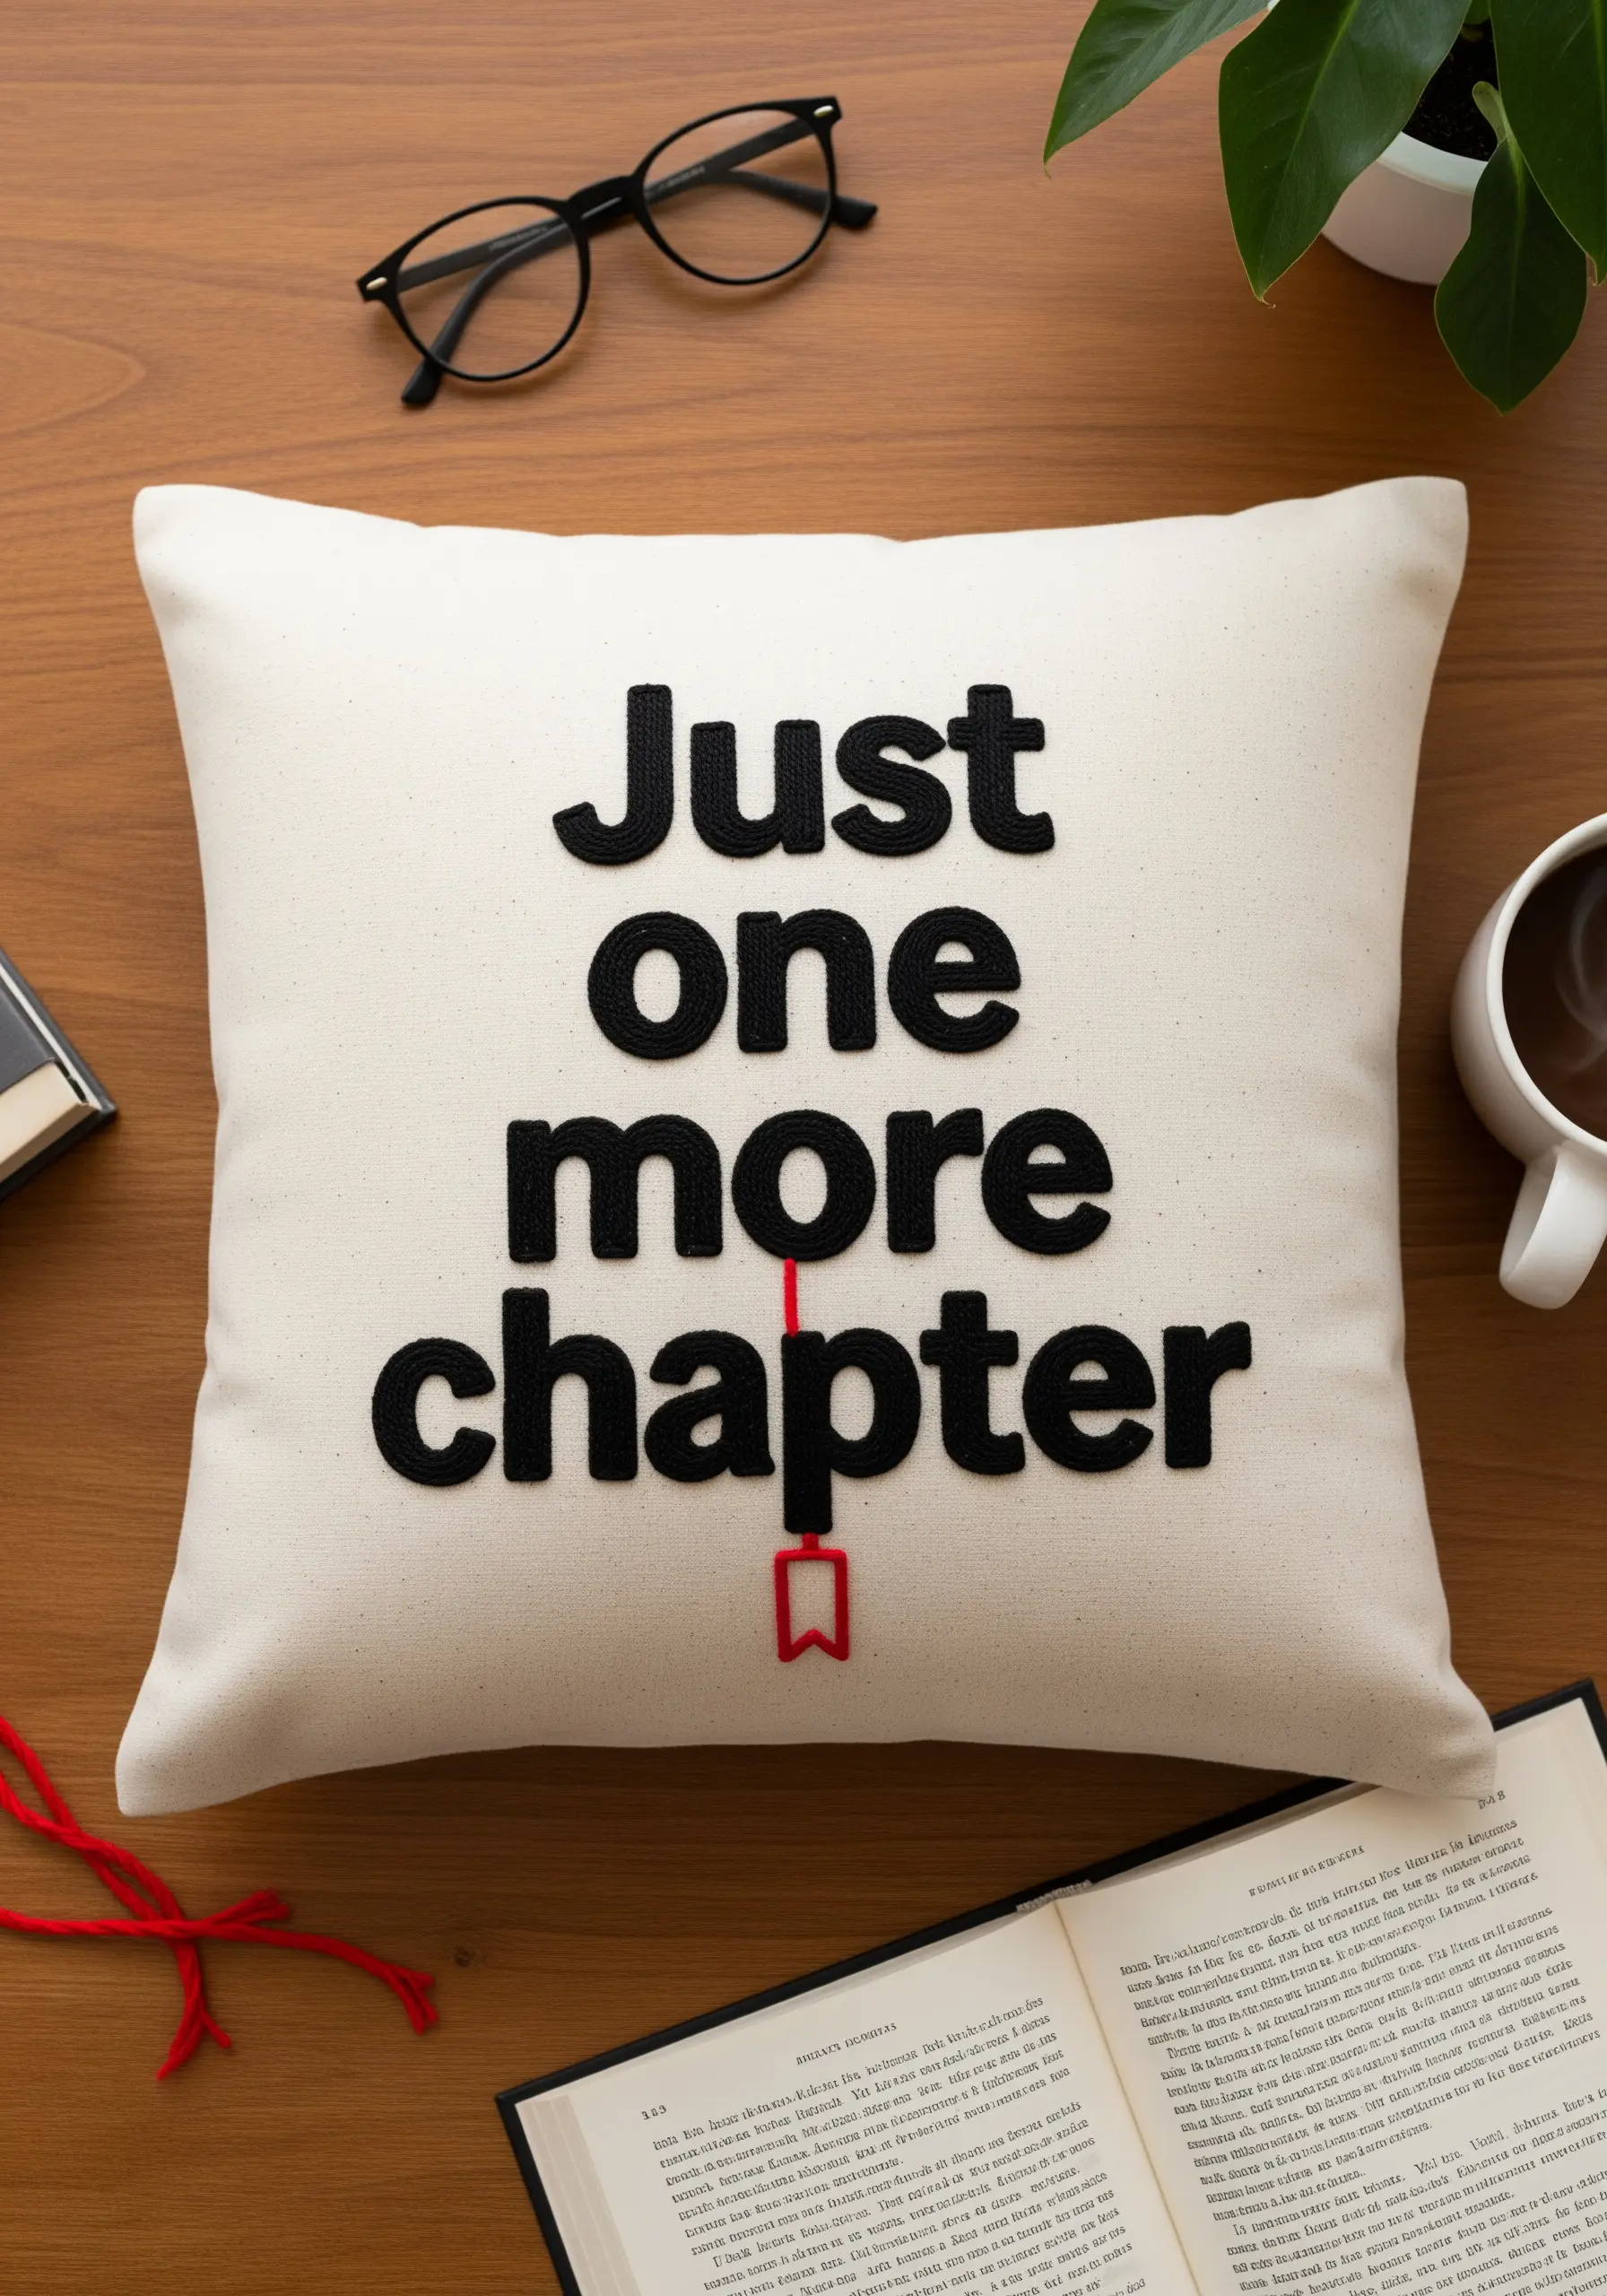
12. Embrace Modern Clarity with Graphic Split Stitch
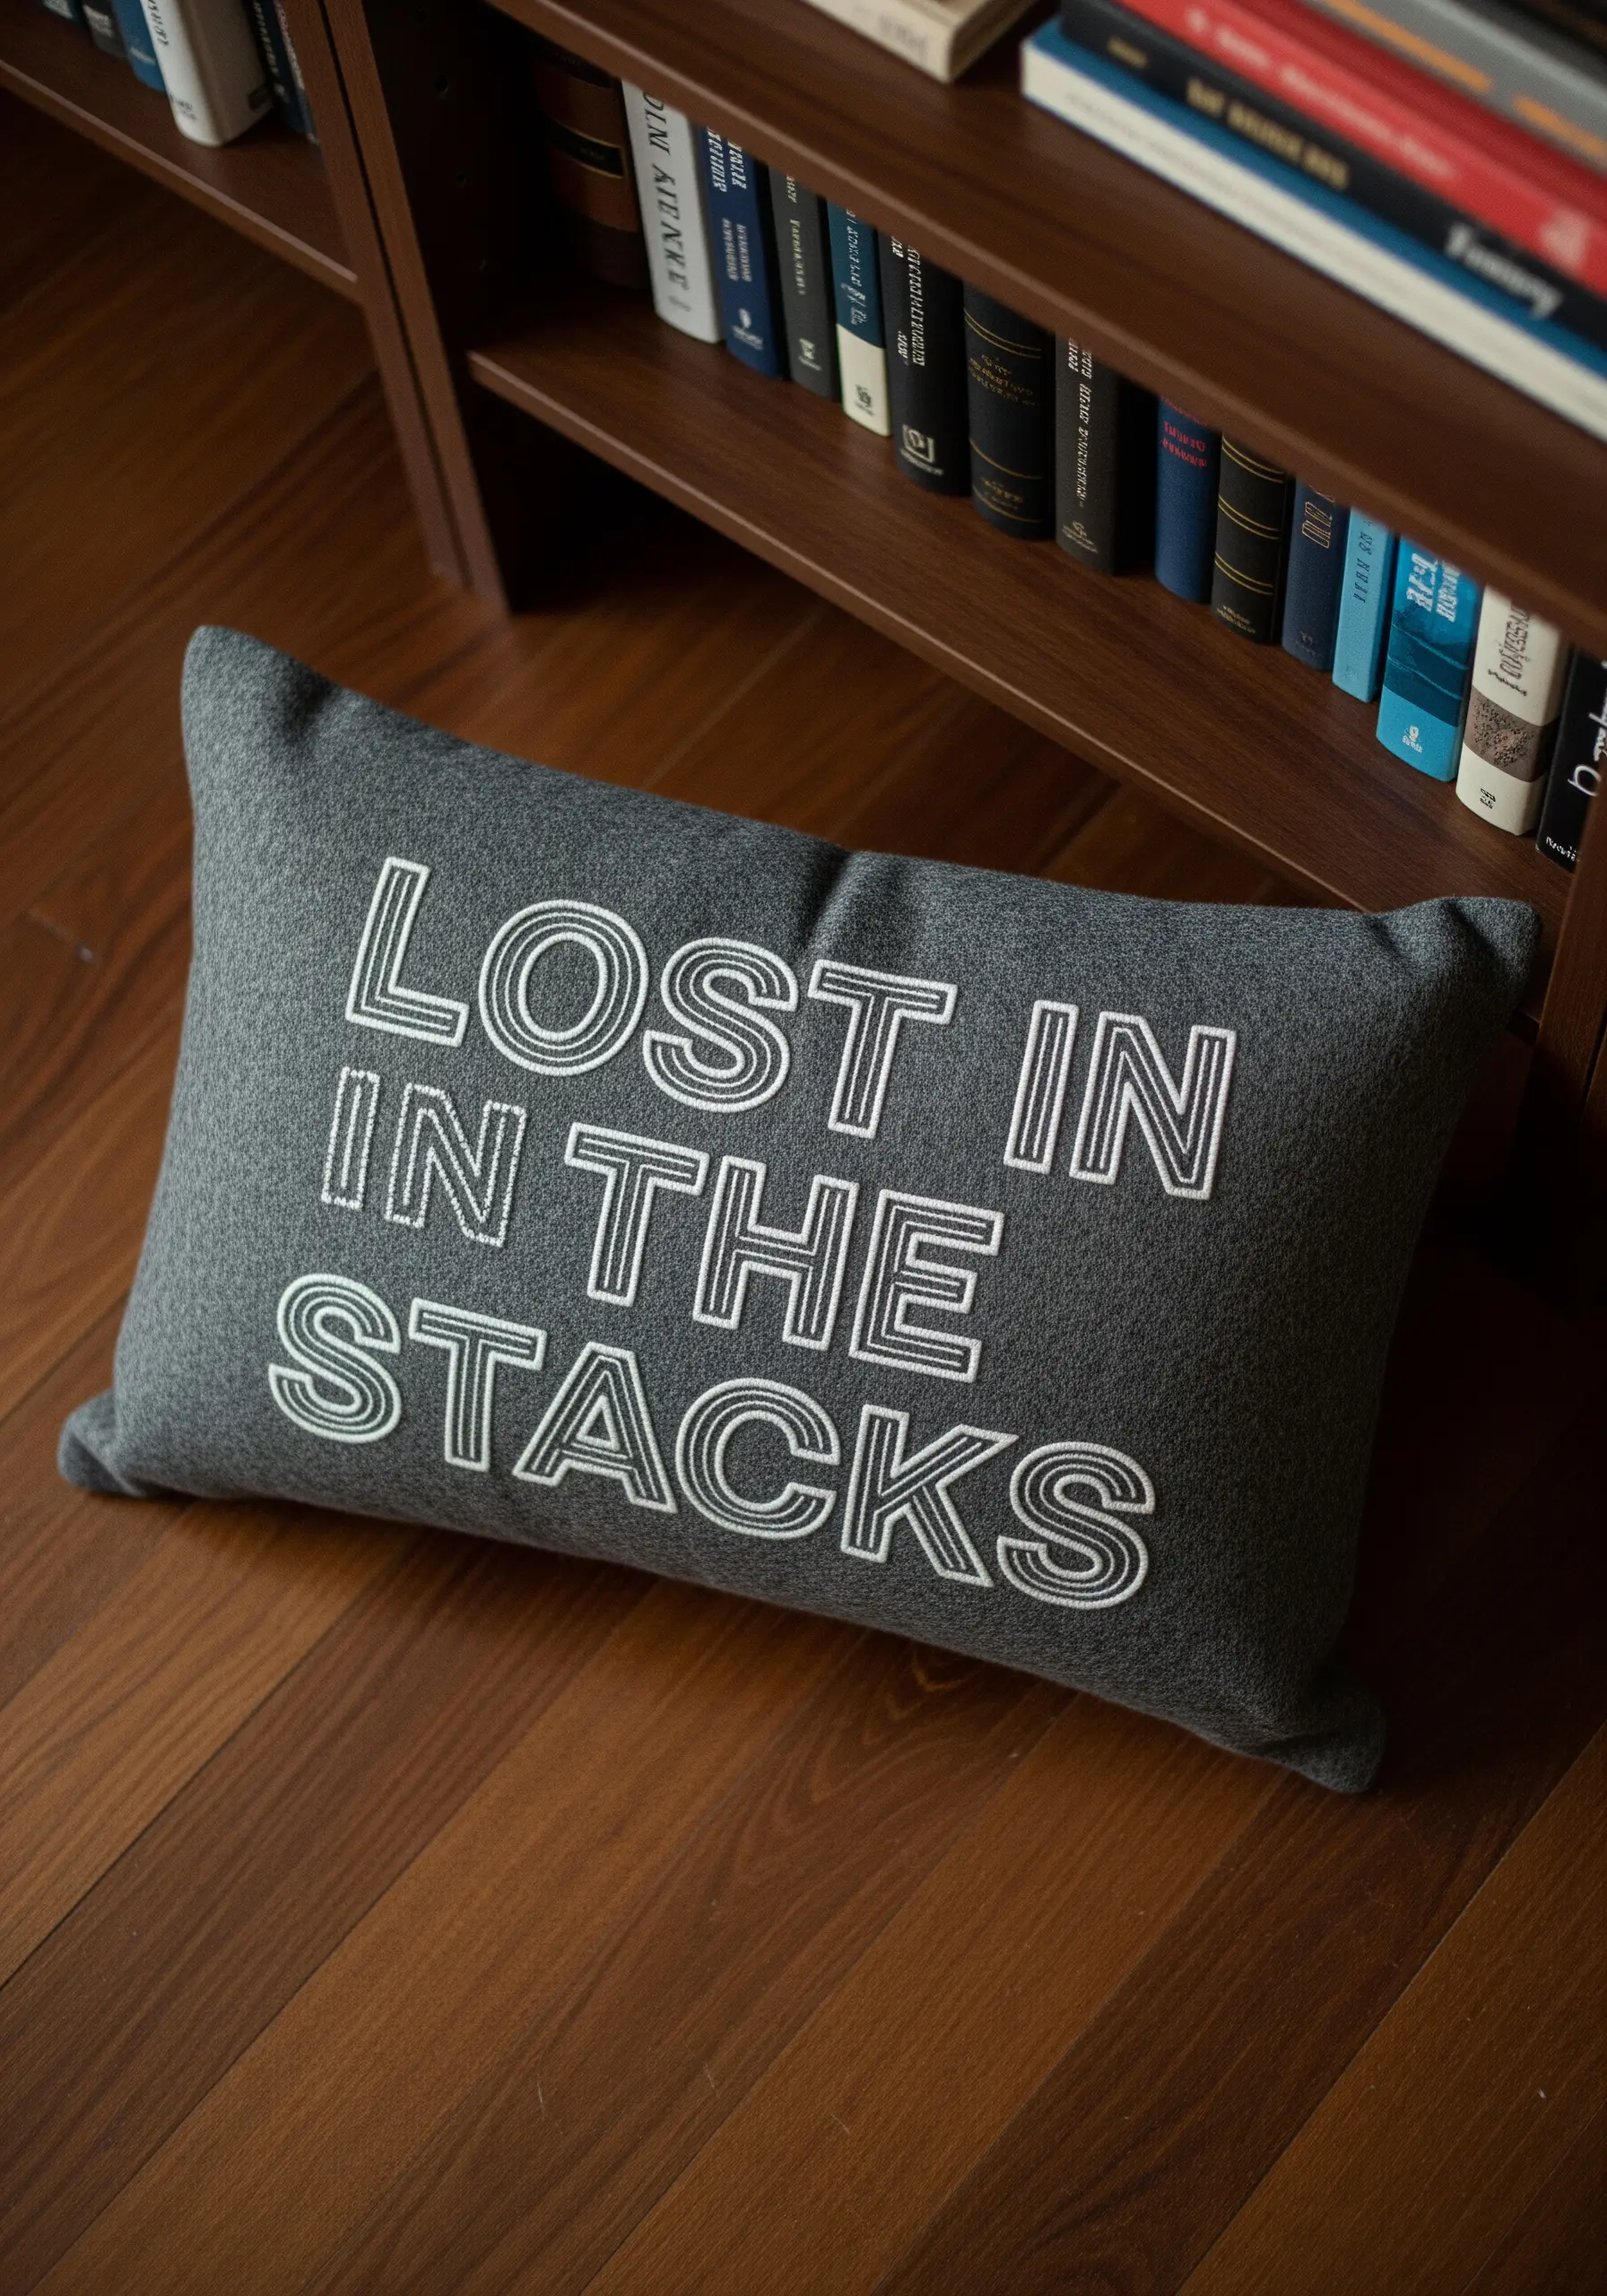
For a clean, contemporary look, use a simple split stitch to create your lettering.
Using all six strands of floss gives the lines a bold, rope-like texture that is both graphic and tactile.
To create the double-outline effect, stitch two parallel lines of split stitch very close together.
This technique is perfect for sans-serif fonts and provides excellent legibility on textured fabrics like felt or wool blends, where finer stitches might sink and disappear.
13. Appliqué for High Contrast on Textured Weaves

When working on a coarse, open-weave fabric like burlap, fine embroidery stitches can get lost in the texture.
Appliqué is the ideal solution. Cut your letters from a smooth, tightly woven cotton fabric and use a fusible web to iron them onto the burlap surface.
Finish the edges with a simple running stitch or backstitch just inside the appliqué’s border.
This creates a sharp, legible design that celebrates the contrast between the smooth letters and the rustic base.
14. Capture Energy with Scribble Stitch Thread Painting
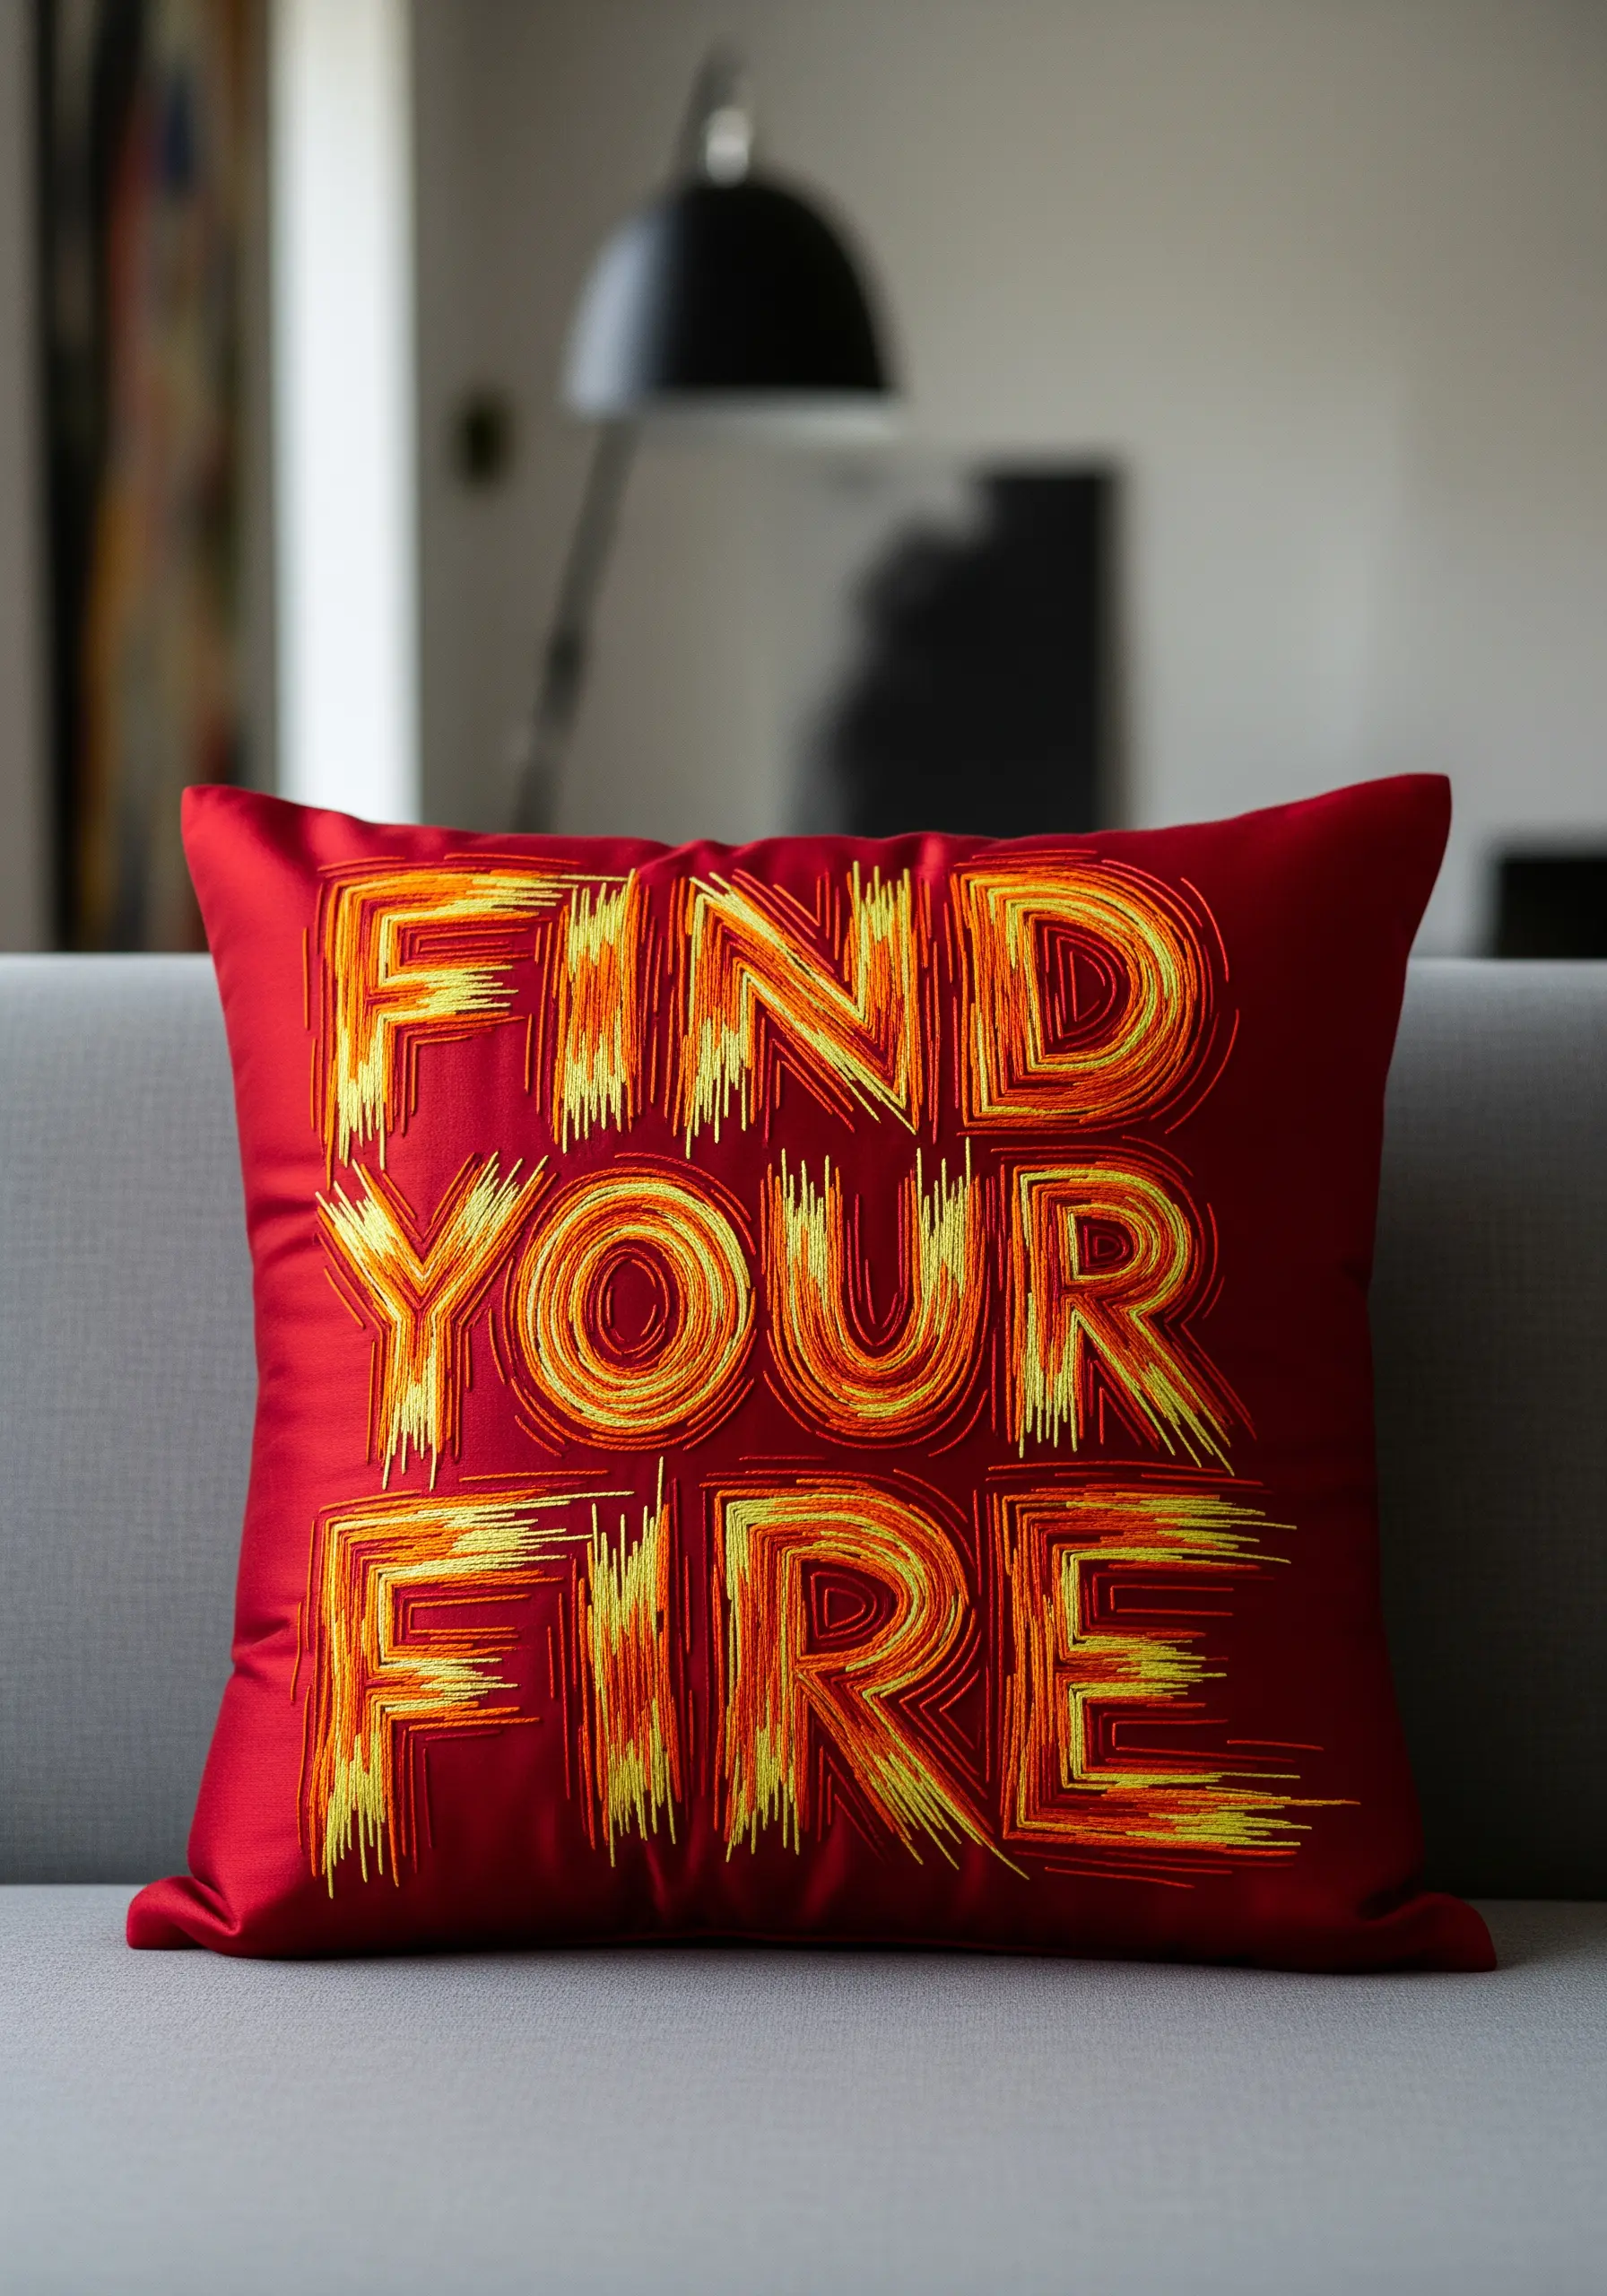
To create a dynamic, fiery effect, fill your letters with a ‘scribble stitch’ technique.
Use a blend of red, orange, and yellow threads, and fill the letters with dense, overlapping straight stitches going in multiple directions.
Don’t worry about perfect uniformity; the goal is to build up layers of color and texture that convey movement and energy.
This expressive style turns simple words into a vibrant piece of abstract textile art.
15. Make Lettering Pop on Patterned Fabric
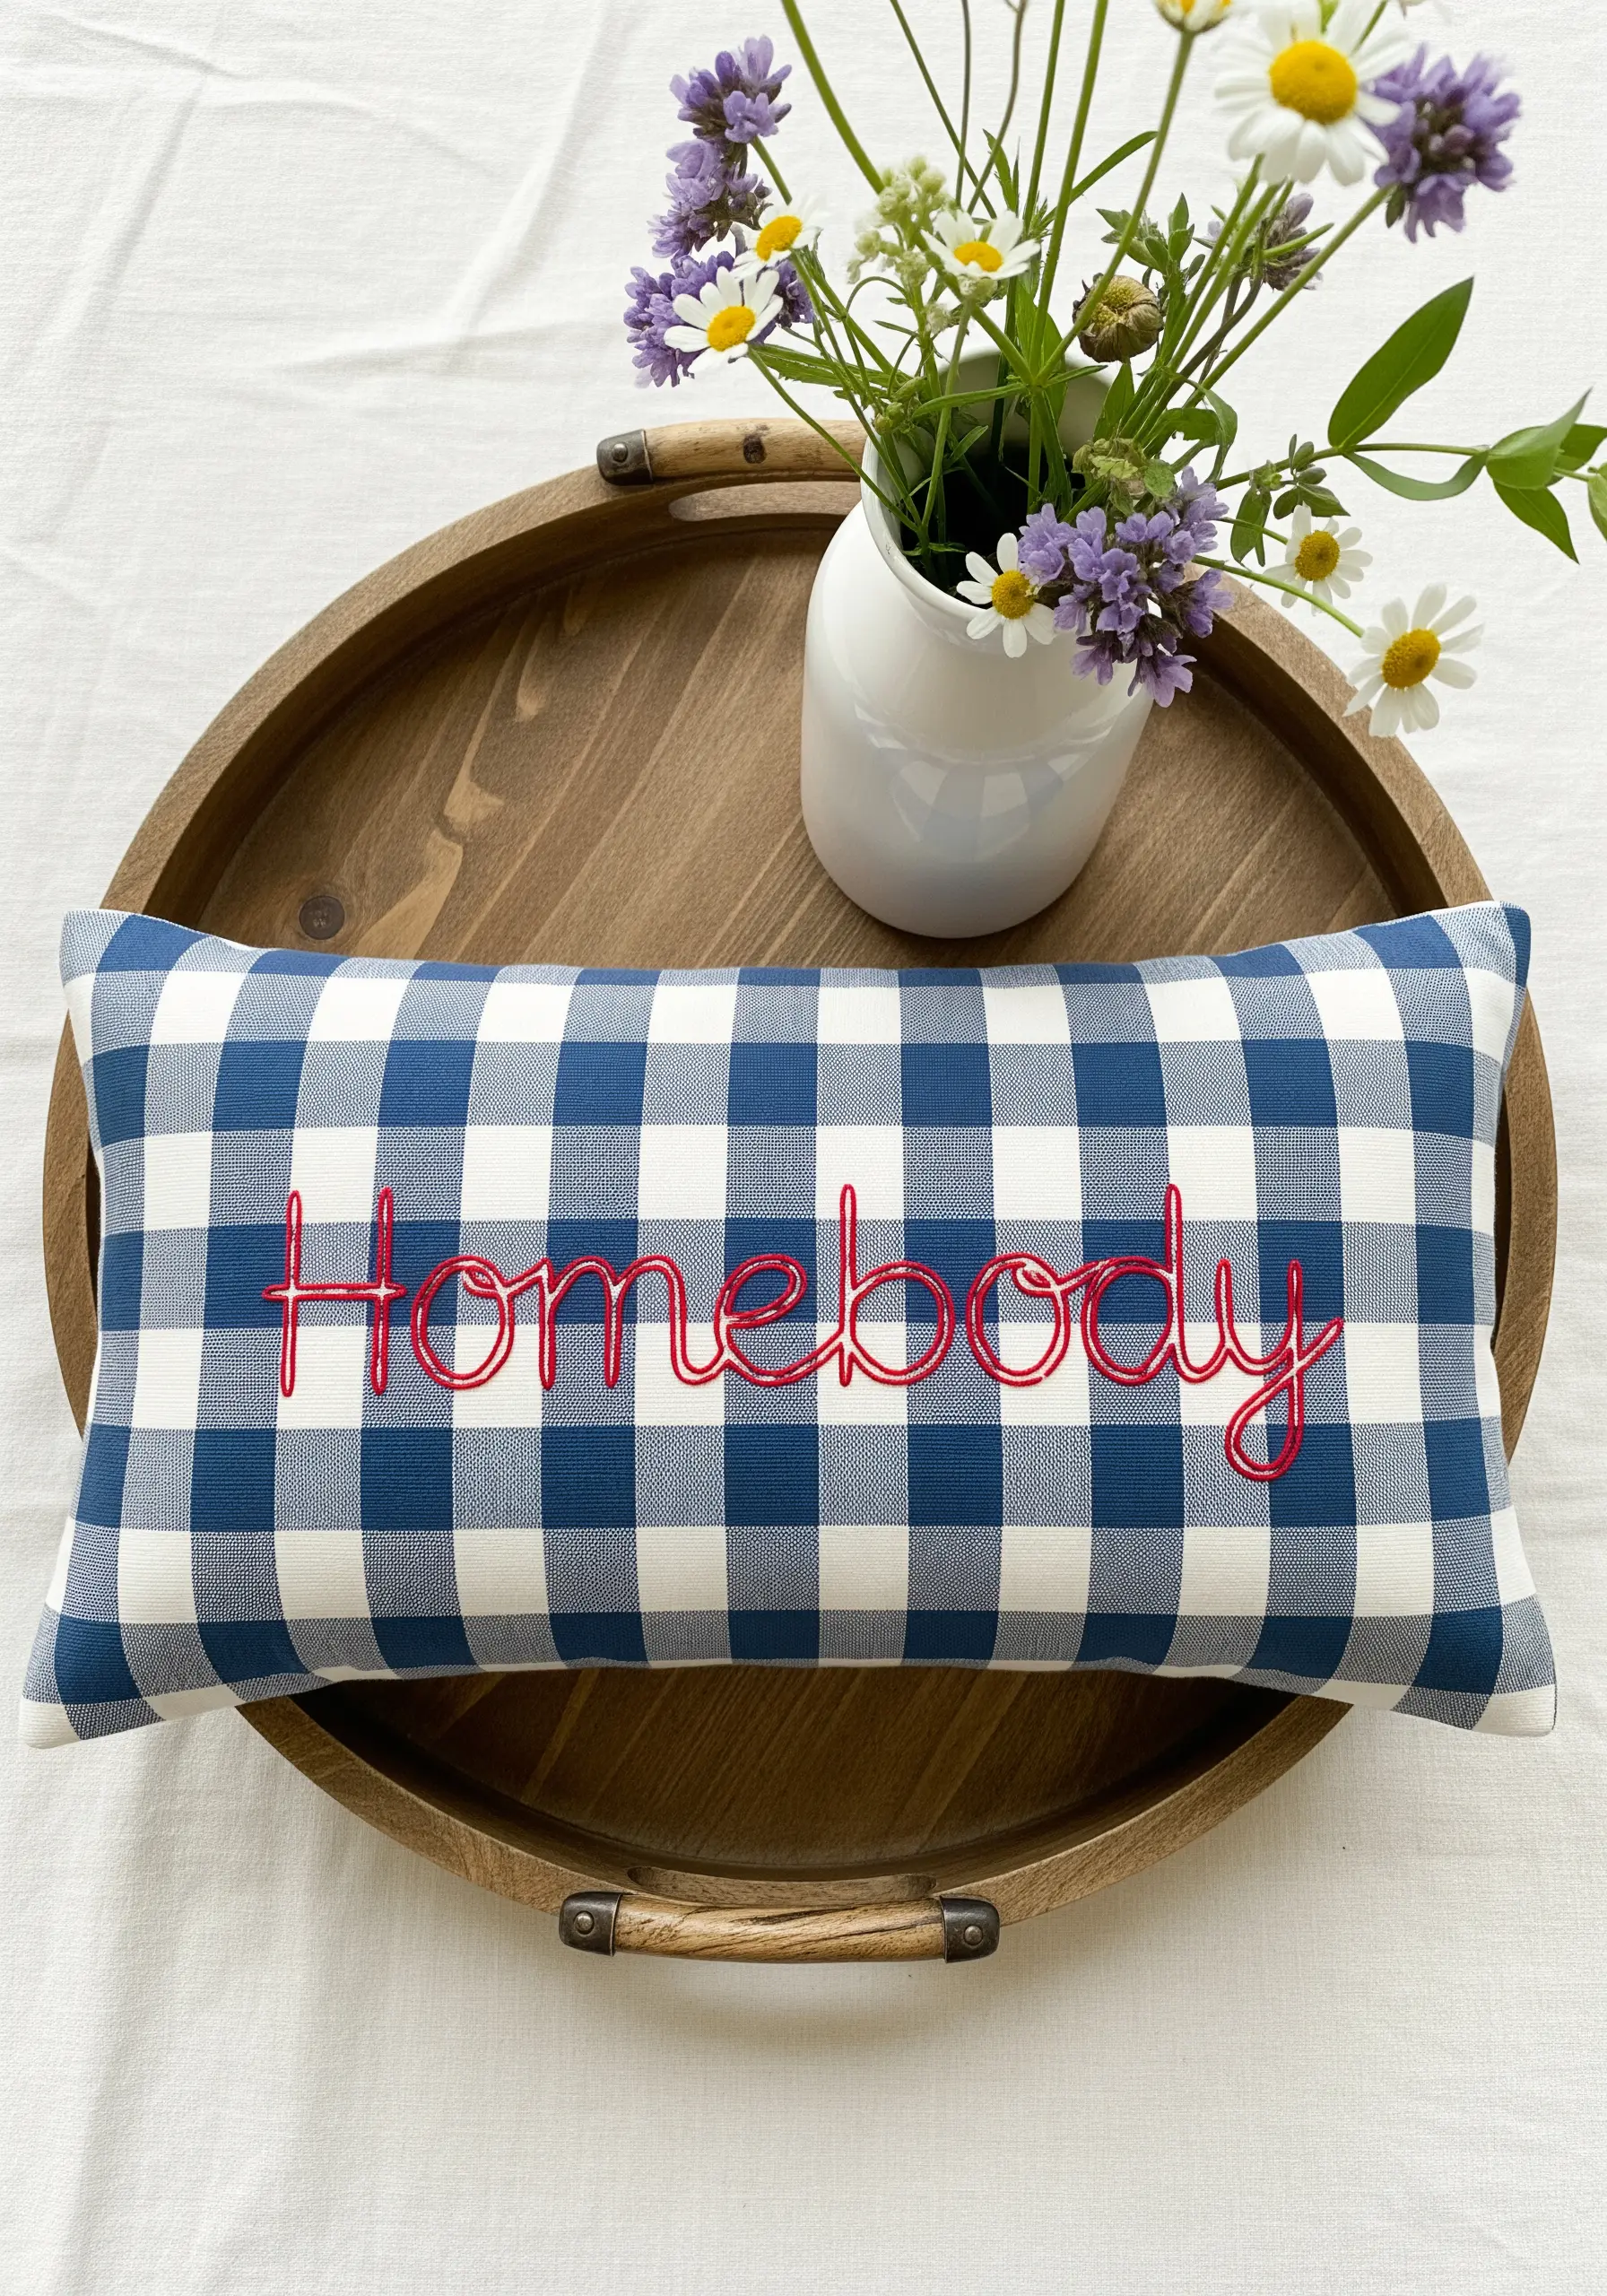
Embroidering on a busy pattern like gingham requires a bold approach to ensure your text is readable.
Choose a thread color with high contrast—like this vibrant red against blue and white.
Select a stitch that has good coverage and weight, such as a chain stitch. Its looped structure creates a thick, continuous line that stands out proudly against the background pattern.
This ensures your message is the clear focal point of the design.
16. Unify Patchwork with Over-Embroidery

Embroidering over a patchwork base can tie disparate fabrics together into a cohesive whole.
Use a simple but clear stitch like a backstitch or stem stitch, and choose a thread color palette that picks up tones from the various fabric scraps.
When stitching over seams, use a thimble to help push the needle through the thicker layers and focus on maintaining consistent stitch length for a clean, professional look.
This technique adds a personalized layer that makes the patchwork design uniquely yours.
17. Create Tactile Typography with Padded Chain Stitch
This ultra-textured lettering is created by first cutting the letter shapes from felt or fleece to act as padding.
Place the padded letter on your fabric and then work rows of chain stitch directly on top of it, covering the padding completely.
The underlying shape provides the loft, while the chain stitch adds a braided, knitted texture.
This statement textured embroidery technique is perfect for creating bold, graphic words that invite touch.
18. Achieve a Flawless Line with Whipped Backstitch

For elegant, continuous script that flows without interruption, the whipped backstitch is your best friend.
First, complete your entire phrase using a standard backstitch, keeping your stitches small and even.
Then, using a second length of the same thread and a tapestry needle, pass the needle under each backstitch without piercing the fabric.
This ‘whipping’ action covers the segmented look of the backstitch, resulting in a smooth, raised, and rope-like line perfect for cursive fonts.
19. Design a Harmonious Border with a Muted Palette
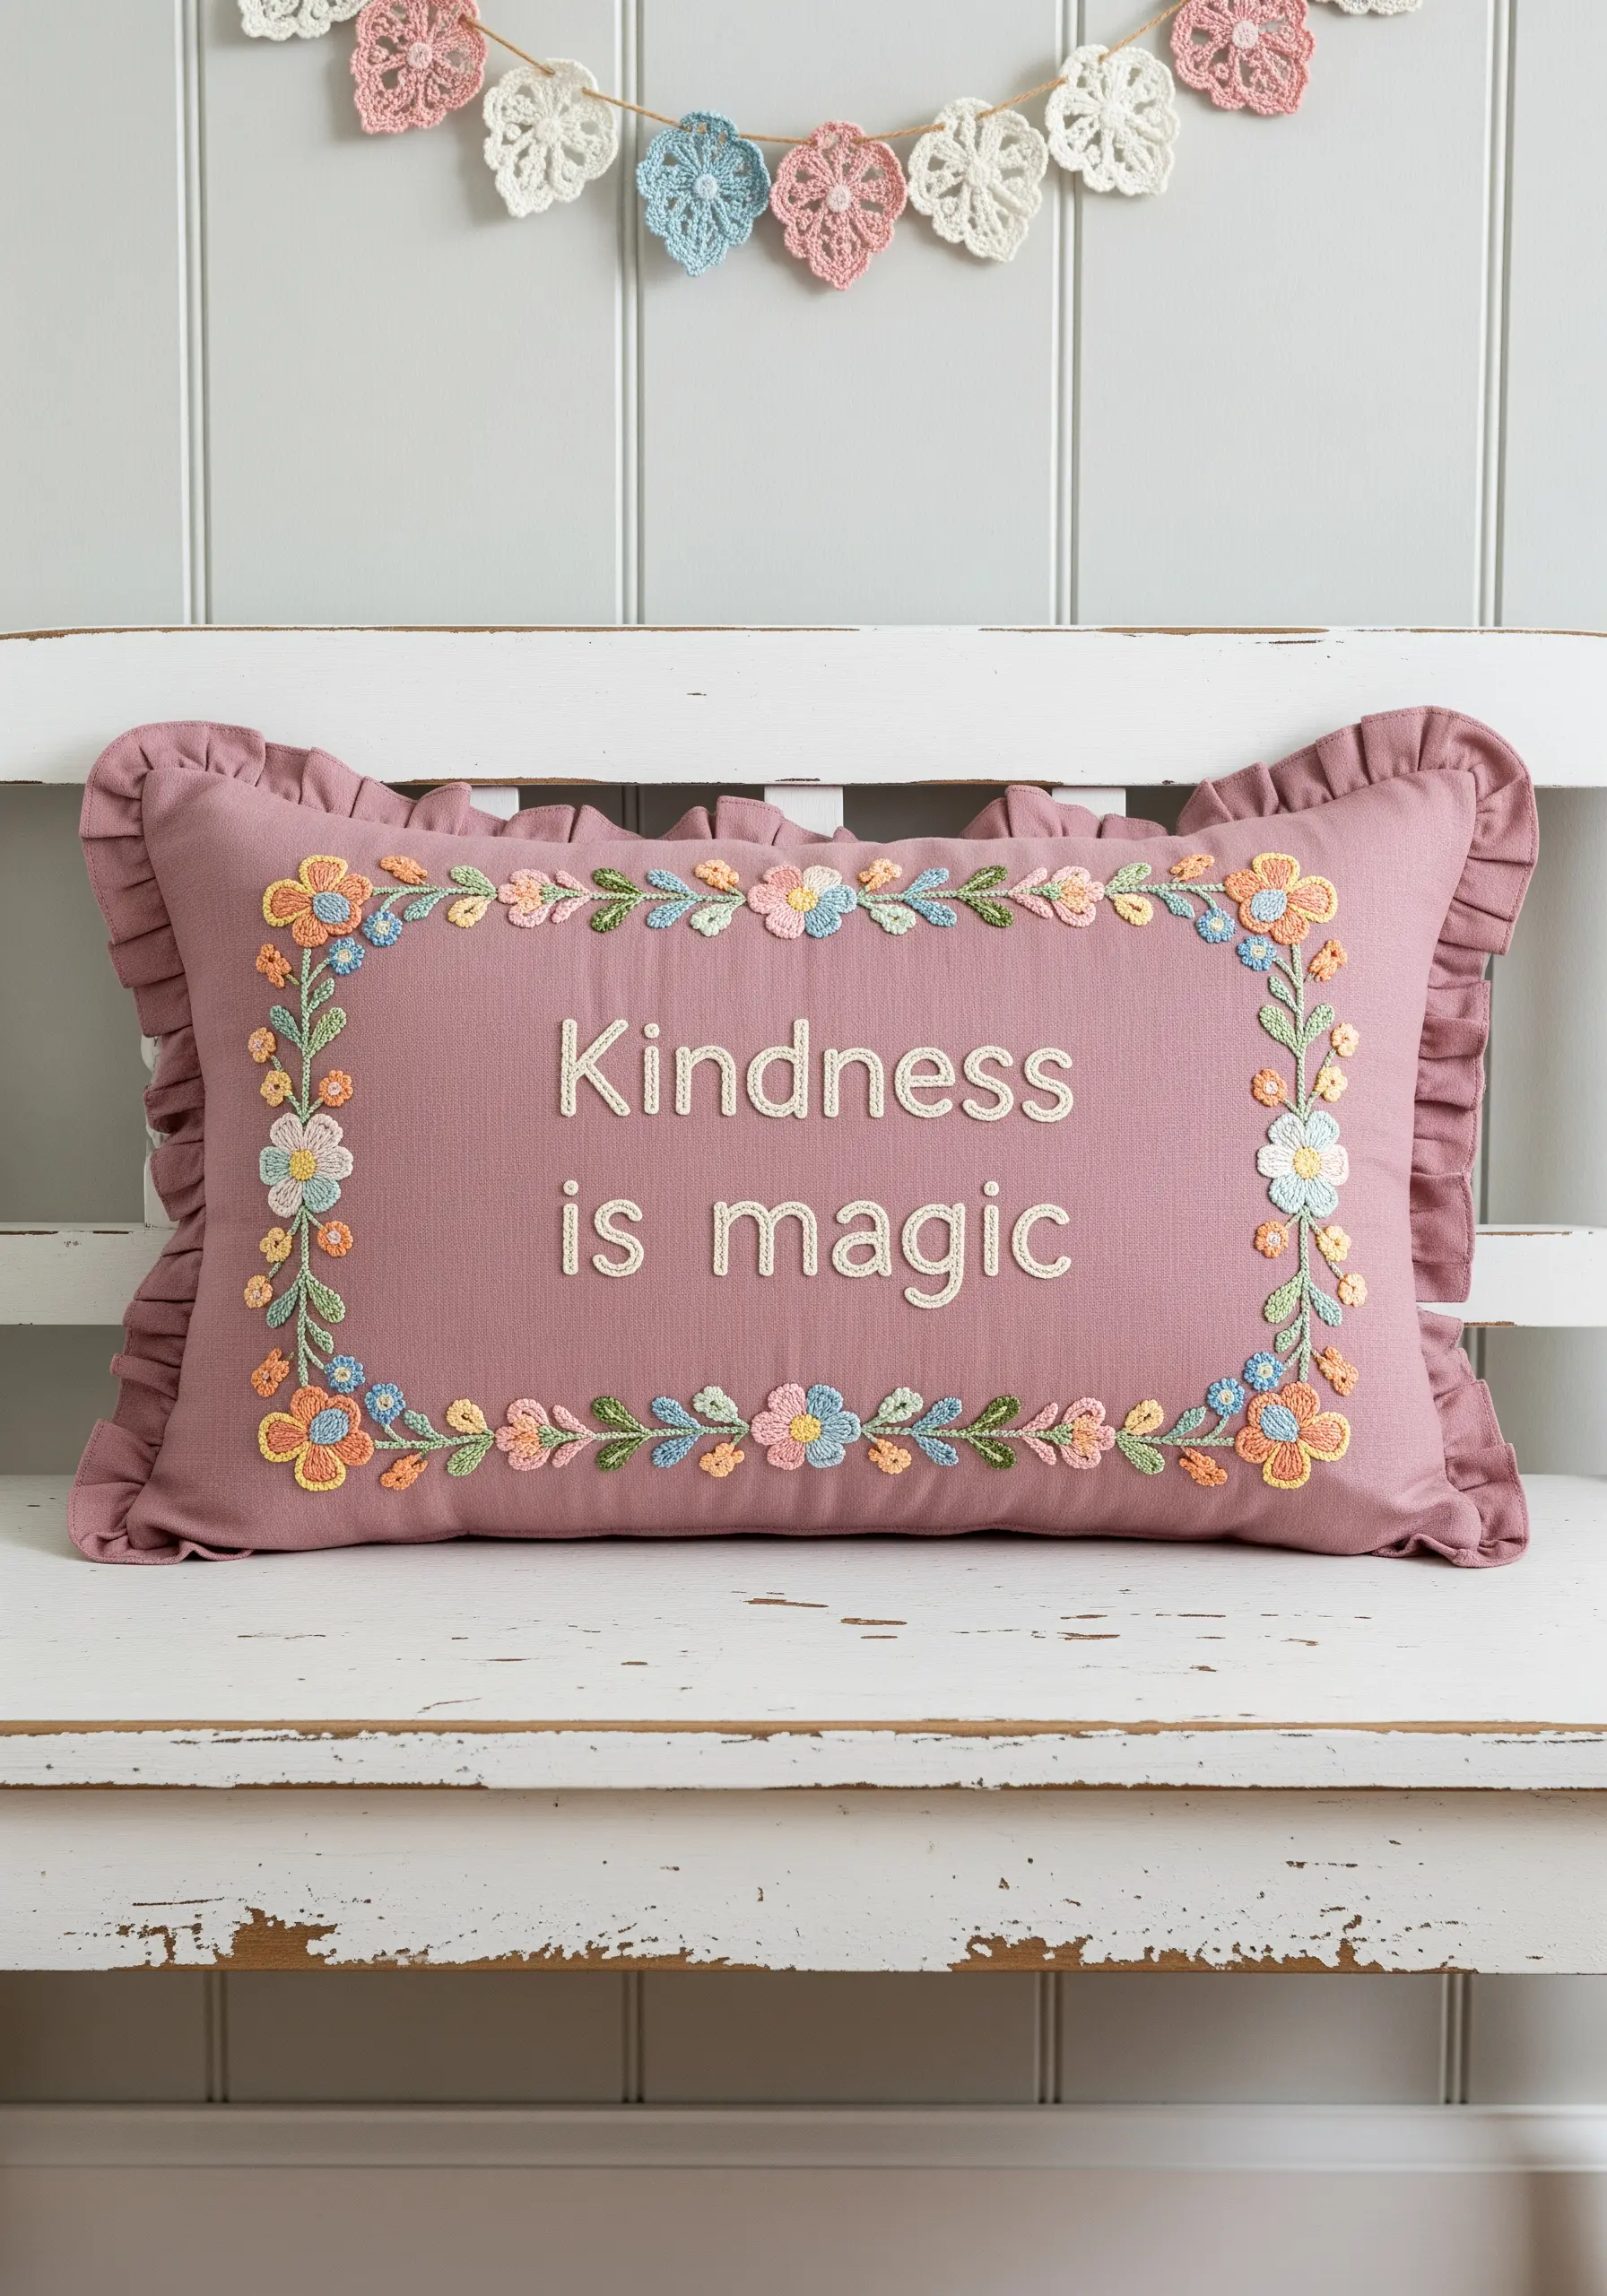
A beautiful floral border frames a quote and softens its message.
To create a cohesive, vintage feel, select a muted color palette with four or five complementary colors—here, dusty rose, cornflower blue, pale orange, and sage green work in harmony.
Use simple stitches for the flowers, like a lazy daisy for petals and satin stitch for centers, allowing the color placement to be the star.
A balanced but not perfectly symmetrical arrangement gives the design a natural, hand-drawn quality.
20. Convey Quiet Luxury with Micro-Lettering
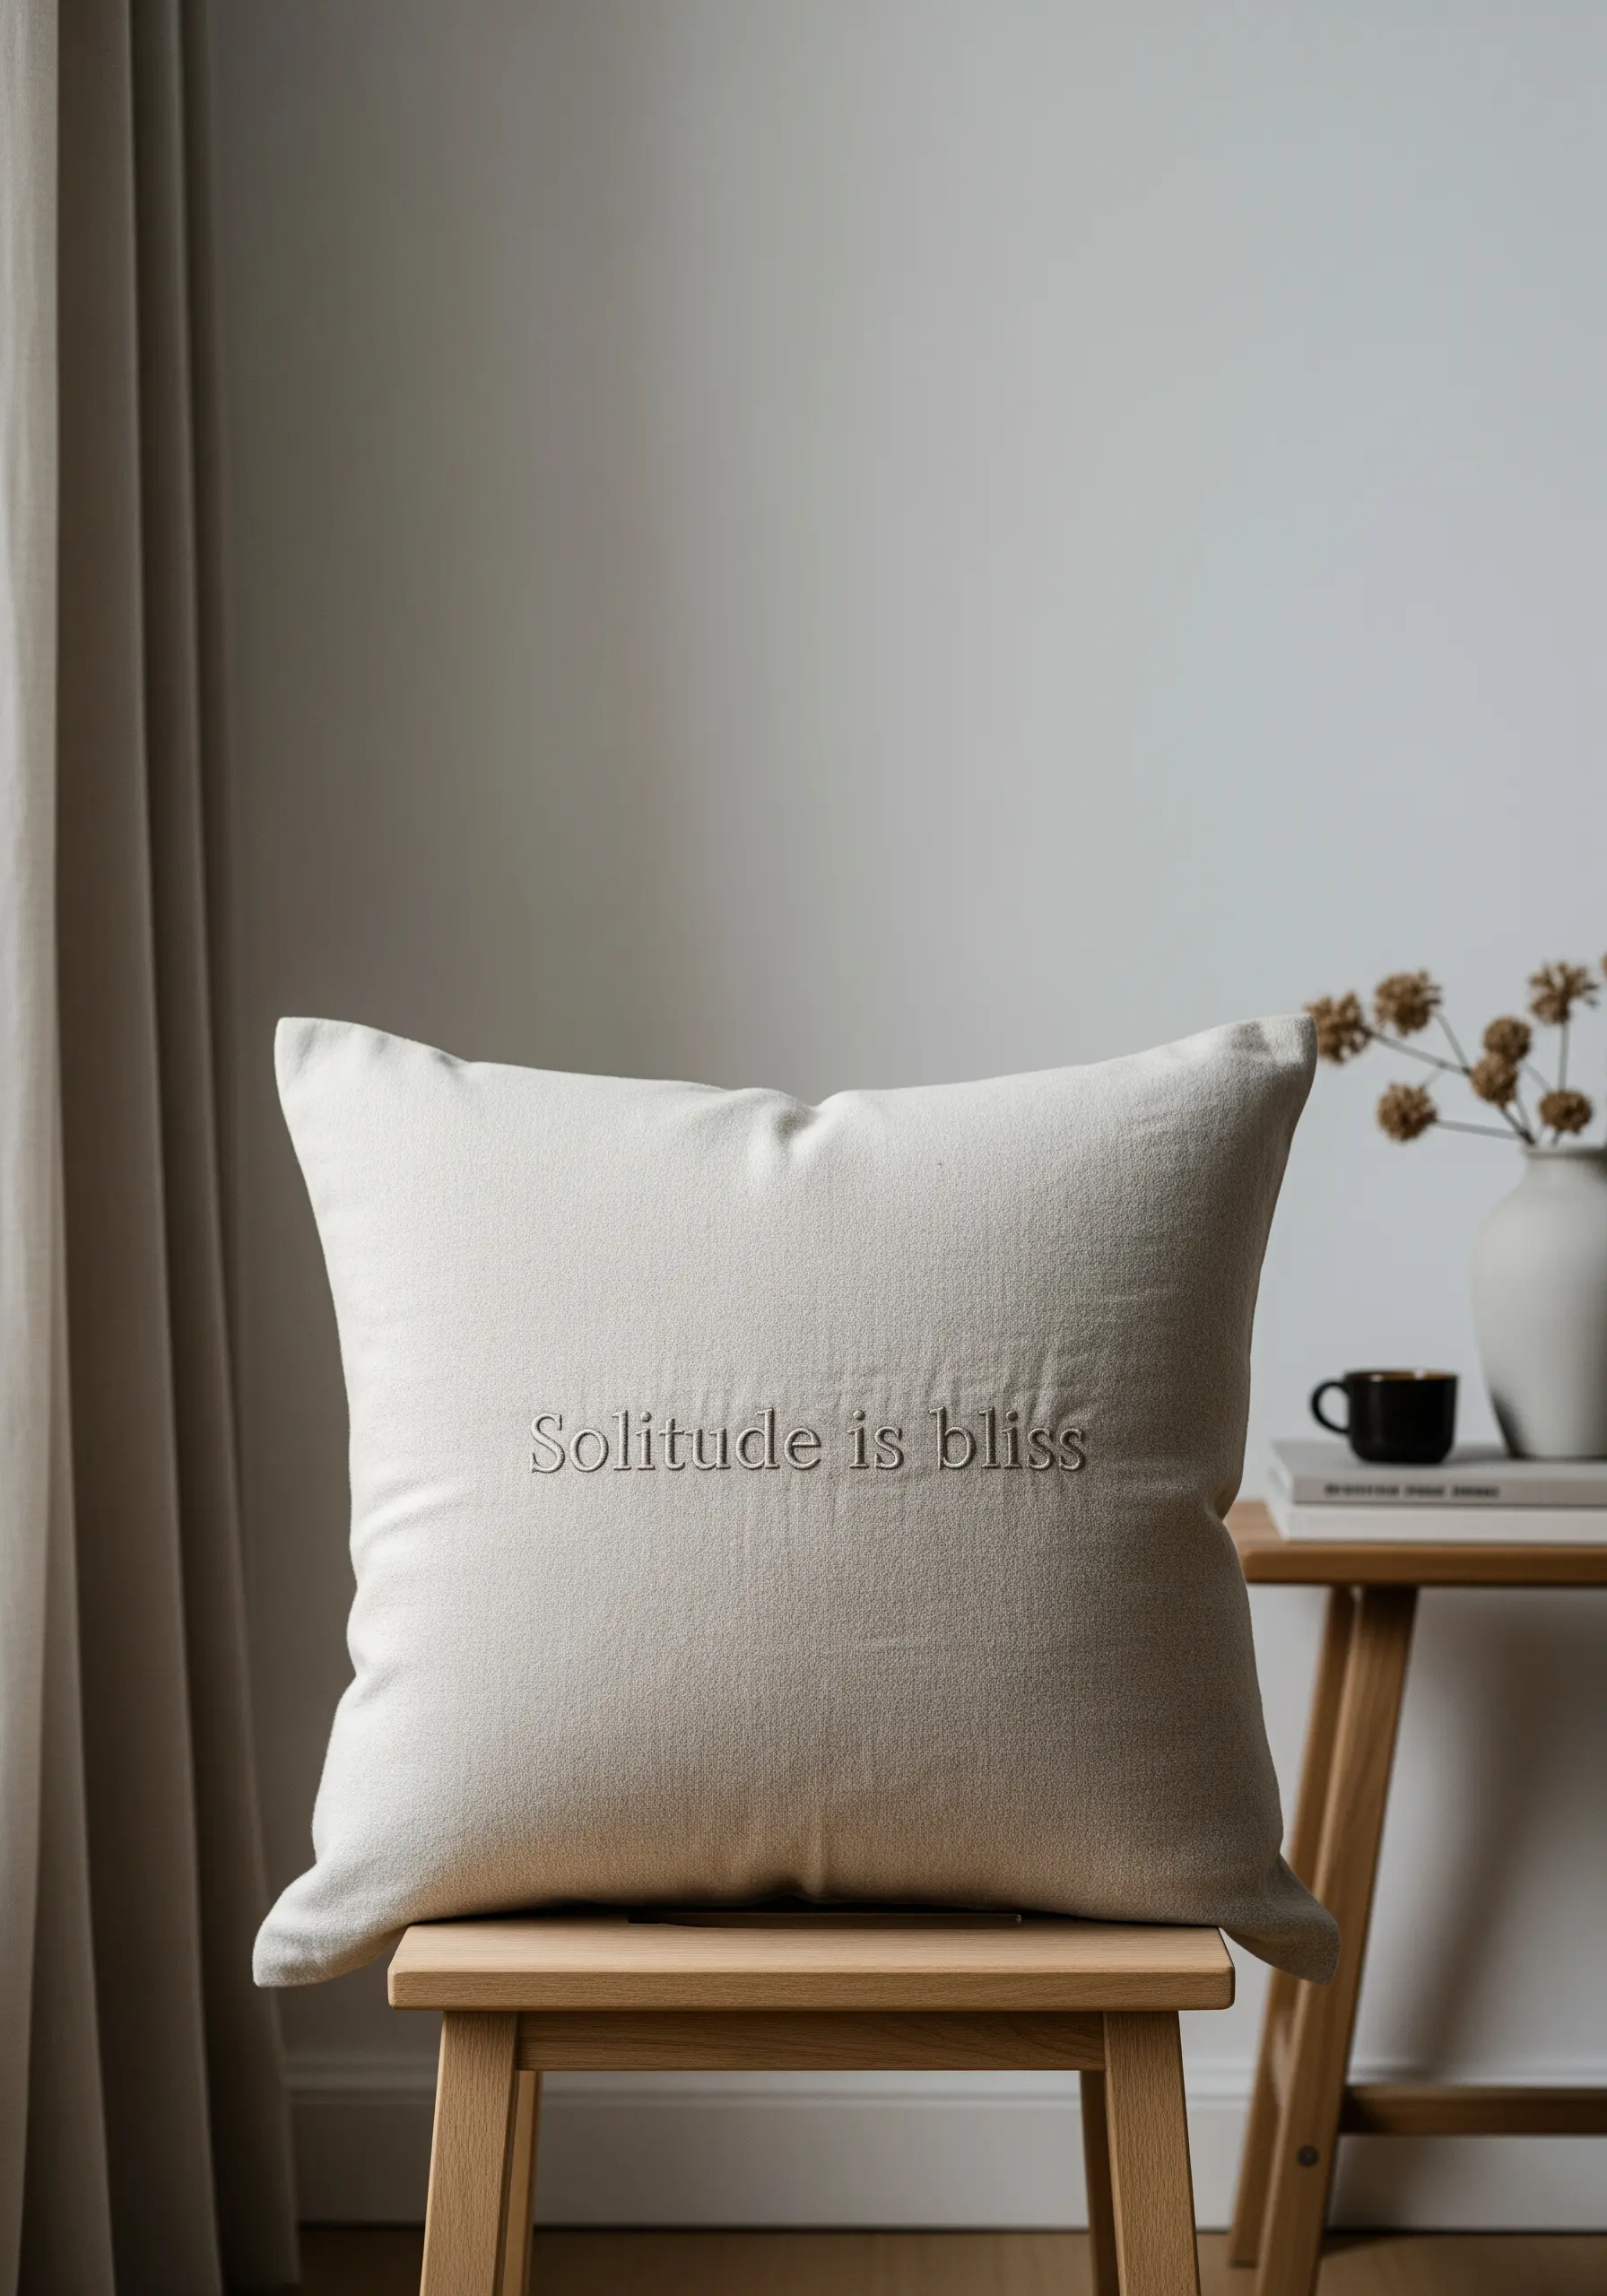
For an exceptionally subtle and sophisticated design, scale down your lettering and stitch it with just a single strand of floss.
This technique, known as micro-embroidery, requires small, precise backstitches and a steady hand.
The result is a phrase that feels like a whisper, encouraging a moment of quiet contemplation.
Placing it slightly off-center on a high-quality linen fabric enhances the minimalist, high-end aesthetic.
21. Layer Felt Appliqué for Playful Dimension

Create a fun, storybook feel by combining different textures and layers.
Use felt appliqué for the larger, simpler shapes like the clouds—the felt provides a soft, matte texture that contrasts with the sheen of the embroidery floss.
For the more detailed elements like the lettering and the hot air balloon, use a dense satin stitch.
This fabric collage technique creates a visually engaging piece with clear separation between background and foreground elements.
22. Command Attention with High-Relief Satin Stitch
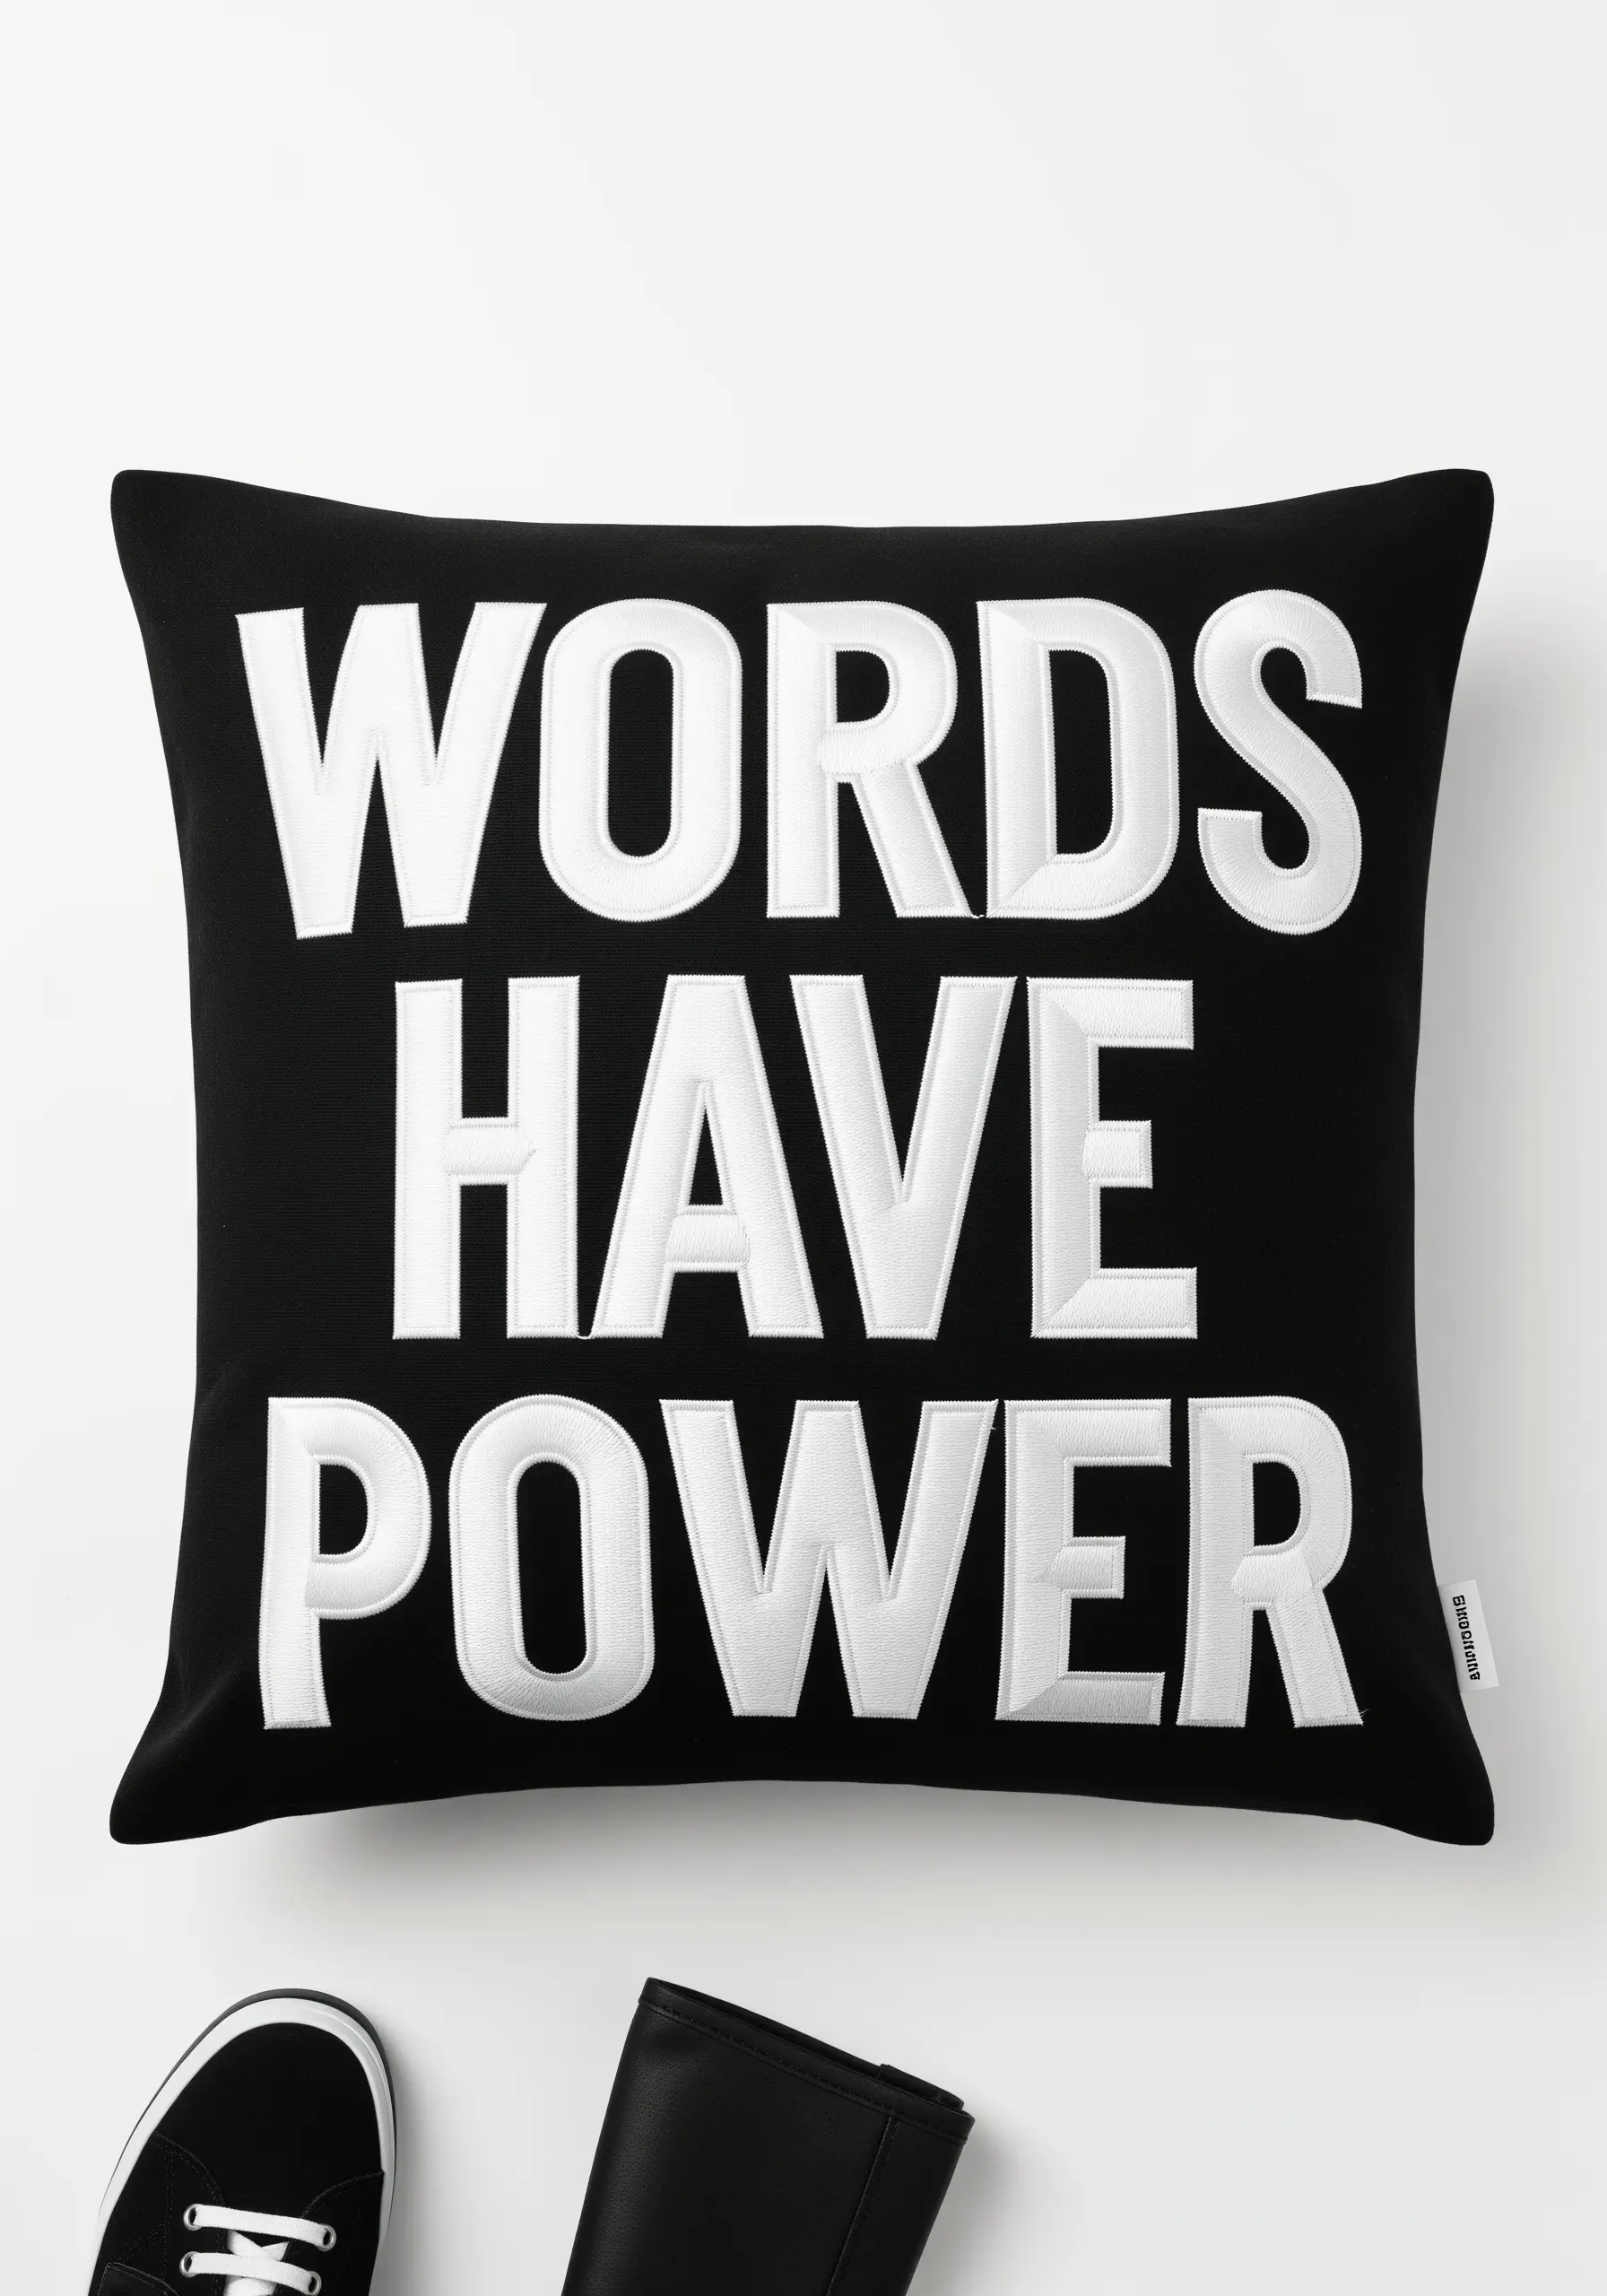
To make your letters stand out with dramatic height, use a heavy padding technique.
Cut each letter shape from two or three layers of felt and stack them on your fabric.
Then, work your satin stitch over this thick base, using a longer stitch length to completely cover the sides of the felt padding.
This creates a bold, blocky, and highly dimensional effect that gives your words undeniable presence and power.
23. Choose the Right Stitch for Soft, Fleecy Fabrics

Stitching on soft, plush fabrics like fleece or flannel requires a slightly different approach to prevent your stitches from getting lost in the nap.
Opt for a simple backstitch or stem stitch using at least two or three strands of floss.
These stitches sit neatly on the surface of the fabric without sinking in, ensuring your delicate lettering remains clear and legible.
The result is a design that feels integrated with the cozy texture of the pillow.
24. Construct a Narrative with Fabric Manipulation
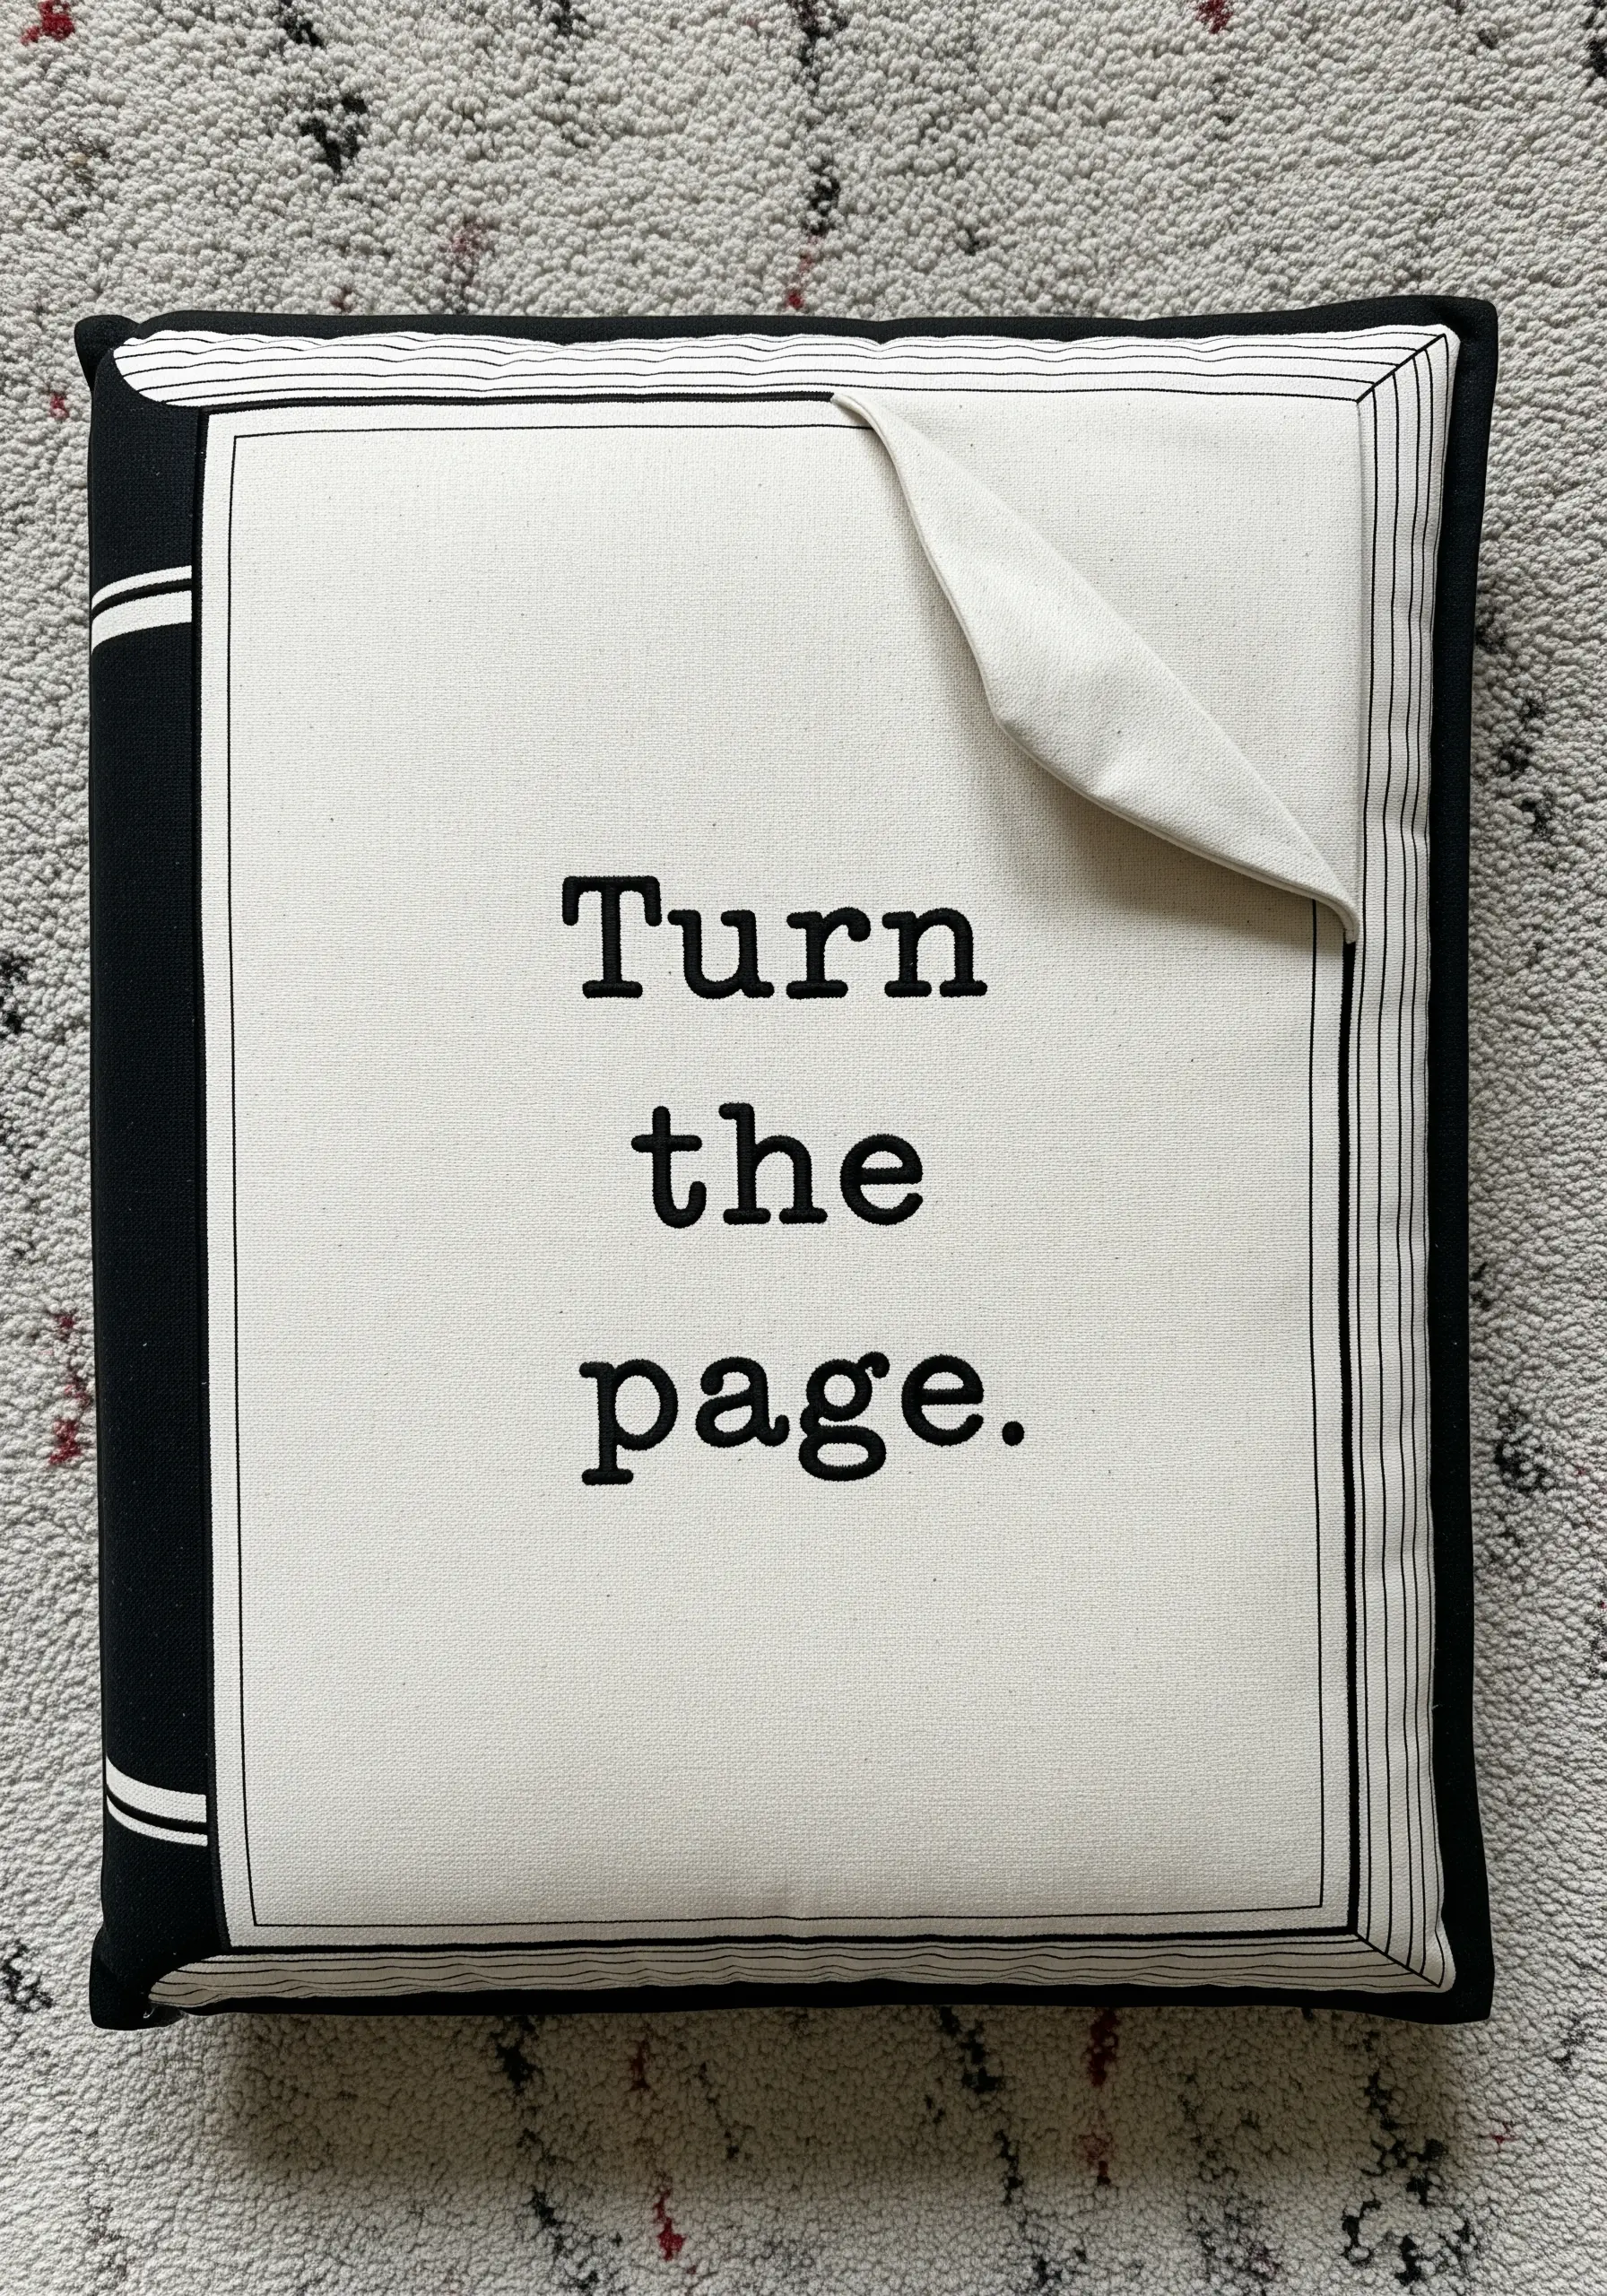
This clever design turns the pillow itself into a storybook.
Create the ‘page’ by appliquéing a rectangle of contrasting cream fabric onto the black base. Before stitching the final side down, insert a small piece of stiff interfacing into the corner to create the permanent ‘page turn’.
Embroider the thin border lines with a simple backstitch and use a heat-transfer paper or a permanent fabric marker for the clean, typewriter-style font, as stitching such fine serifs can be challenging.
25. Pair Textural Opposites for a Rich Sensory Experience
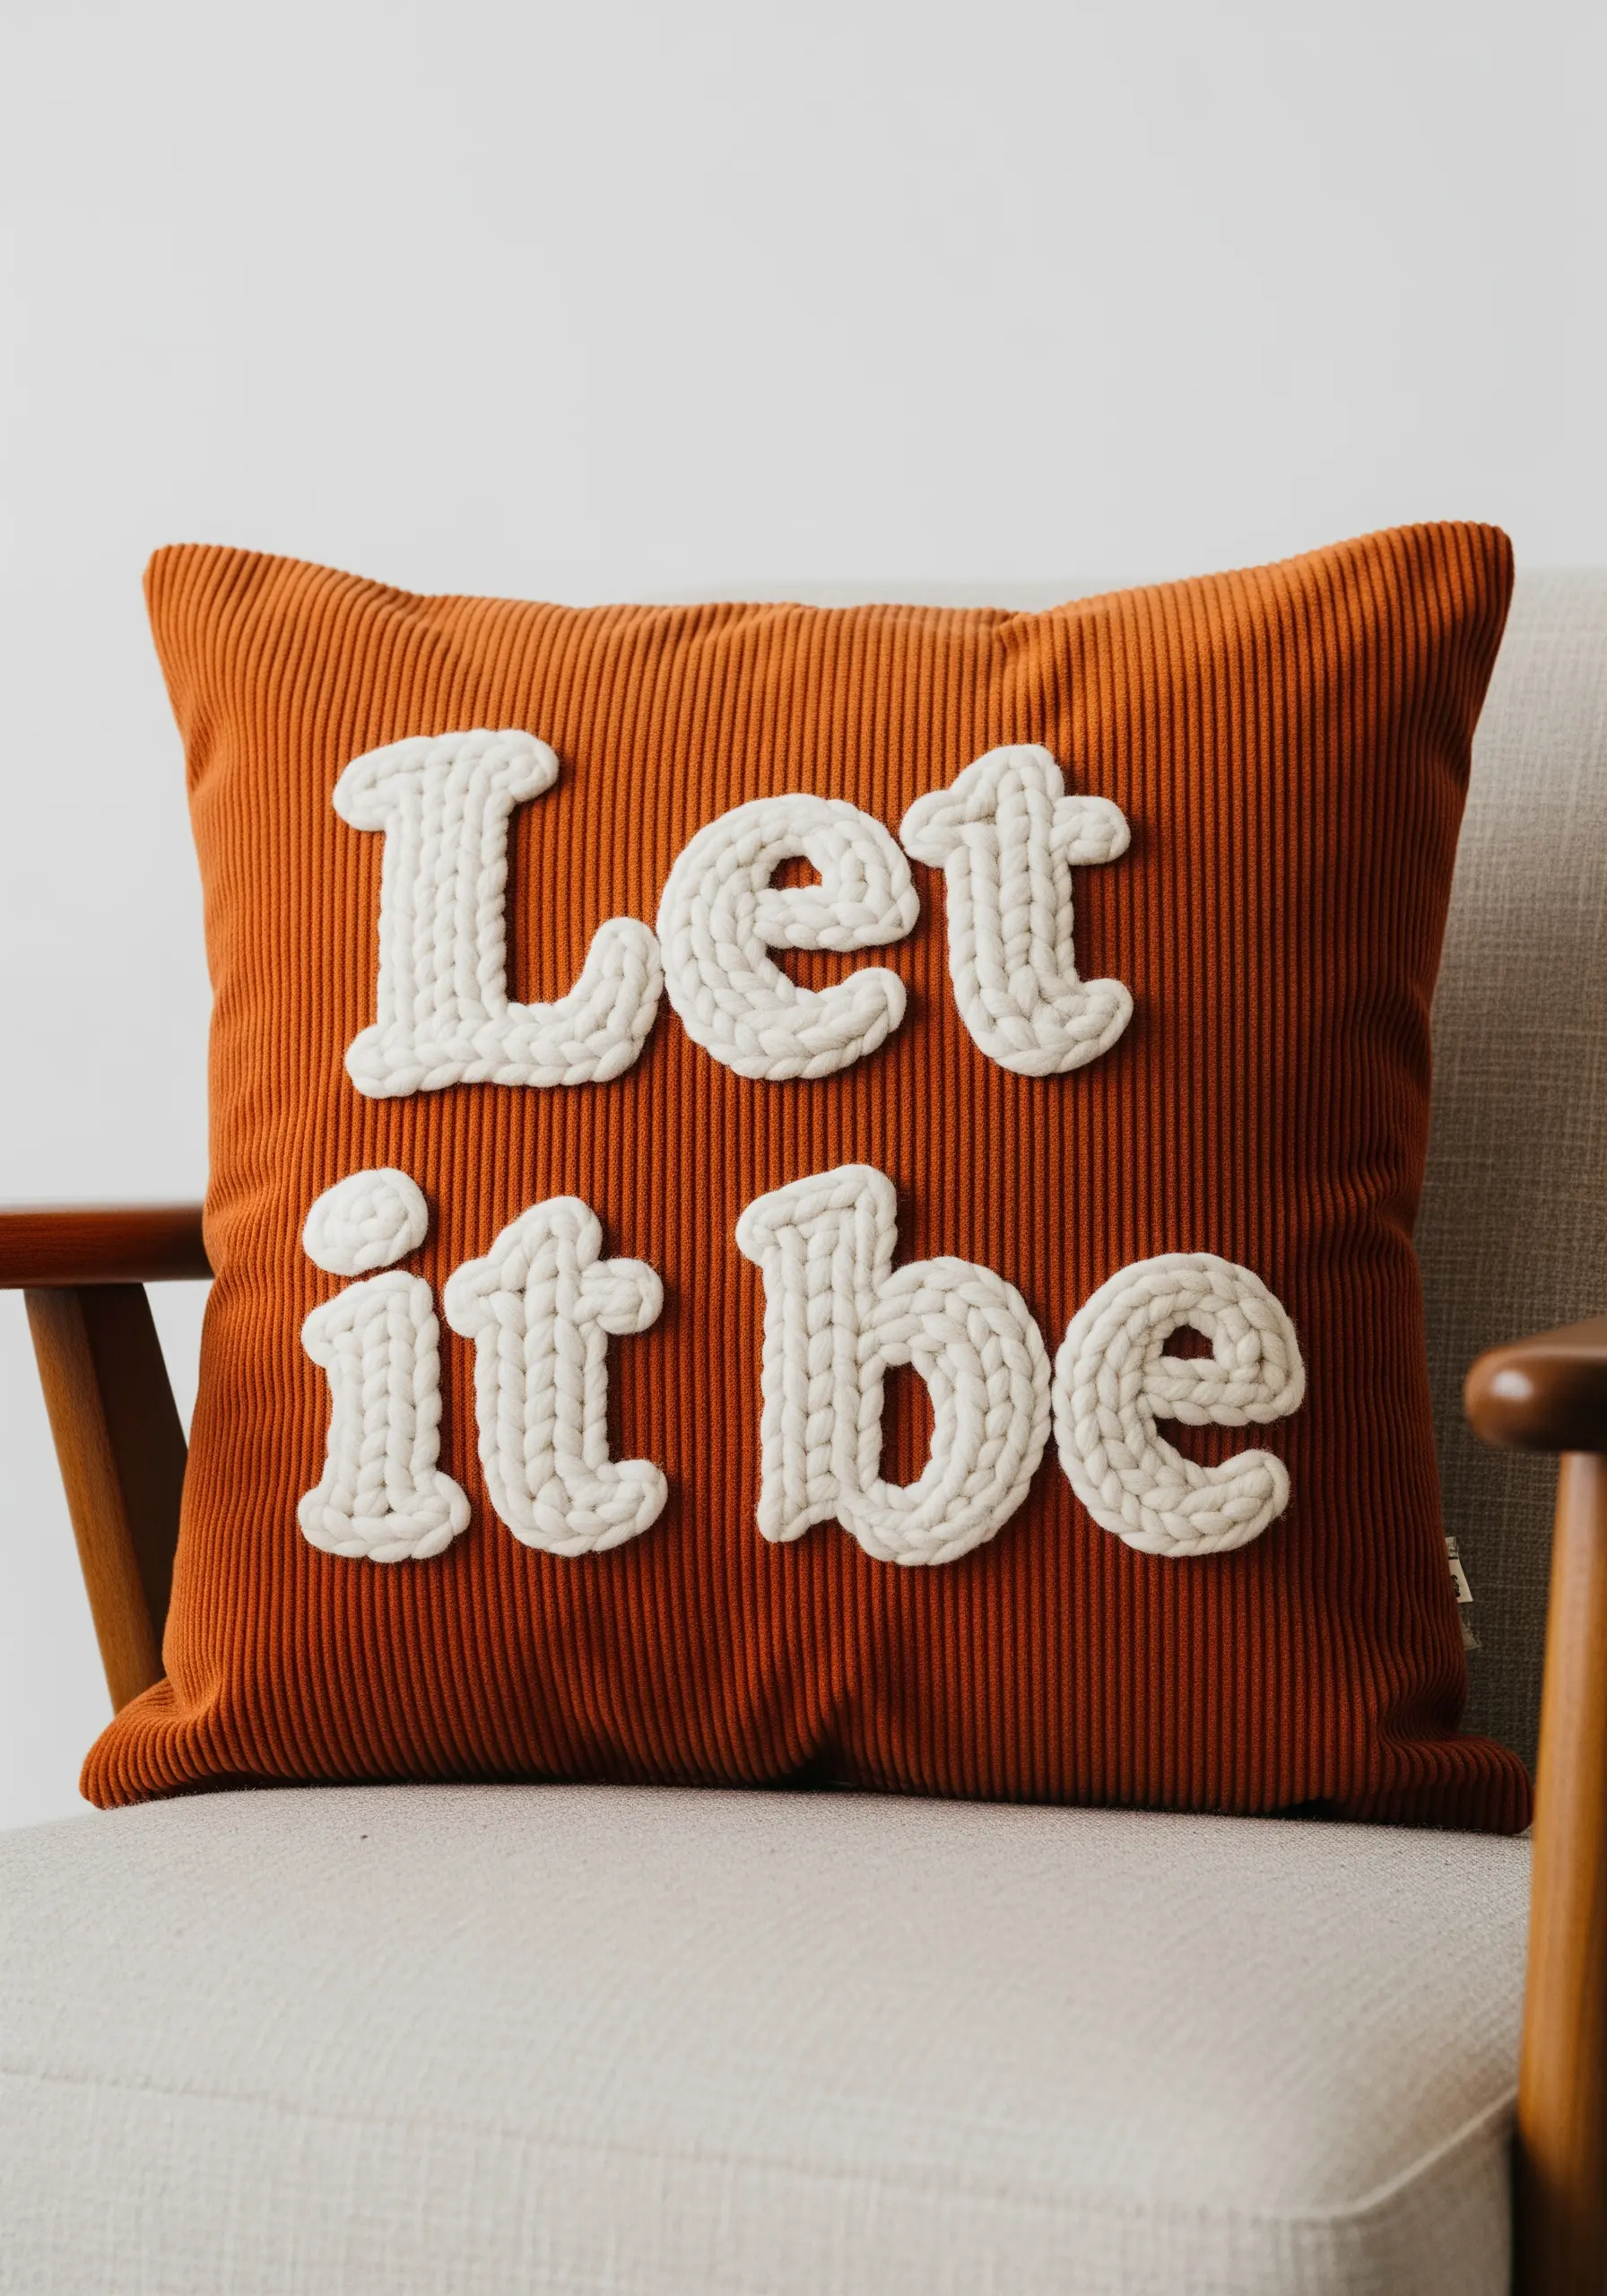
Create a design that is as delightful to touch as it is to see by contrasting different textures.
Here, the soft, looped texture of the padded chain stitch lettering stands in stark contrast to the linear, ribbed texture of the corduroy fabric.
This deliberate pairing enhances the unique qualities of each material—the softness of the yarn feels even softer against the structured background.
It’s a simple way to create a dynamic and engaging textile piece.
26. Scatter a Starfield with Seed Stitches and French Knots

To create a magical, starry background, use a random scattering of simple stitches.
Use a single strand of white or metallic silver floss to make tiny seed stitches (small, straight stitches) and French knots of varying sizes.
Concentrate the stitches more densely around the main word and then fade them out toward the edges of the pillow.
This creates a sense of depth and sparkle, transforming the background from plain fabric into a dreamy night sky.
27. Define Graphic Shapes with Clean Outlines

When embroidering illustrations, a clean outline is key to defining shapes and ensuring clarity.
Use a consistent backstitch or split stitch for all the outlines of the books, keeping the stitch length uniform.
Fill the larger areas with a smooth, even satin stitch, making sure your stitches all lie in the same direction within each block of color.
This combination of crisp outlines and flat color gives the design a polished, illustrative quality.
28. Select Fonts and Colors for Maximum Impact

This design’s power comes from a few smart choices: a high-contrast color scheme (electric blue on black) and a font with sharp, aggressive angles.
When working with a font that has many sharp points, a satin stitch can be tricky. Instead, outline the letters with a split stitch and then fill them with angled satin stitches to maintain the sharp corners.
The choice of faux leather adds a subtle sheen that enhances the edgy, modern vibe.
29. Let Your Fabric Be Your Guide
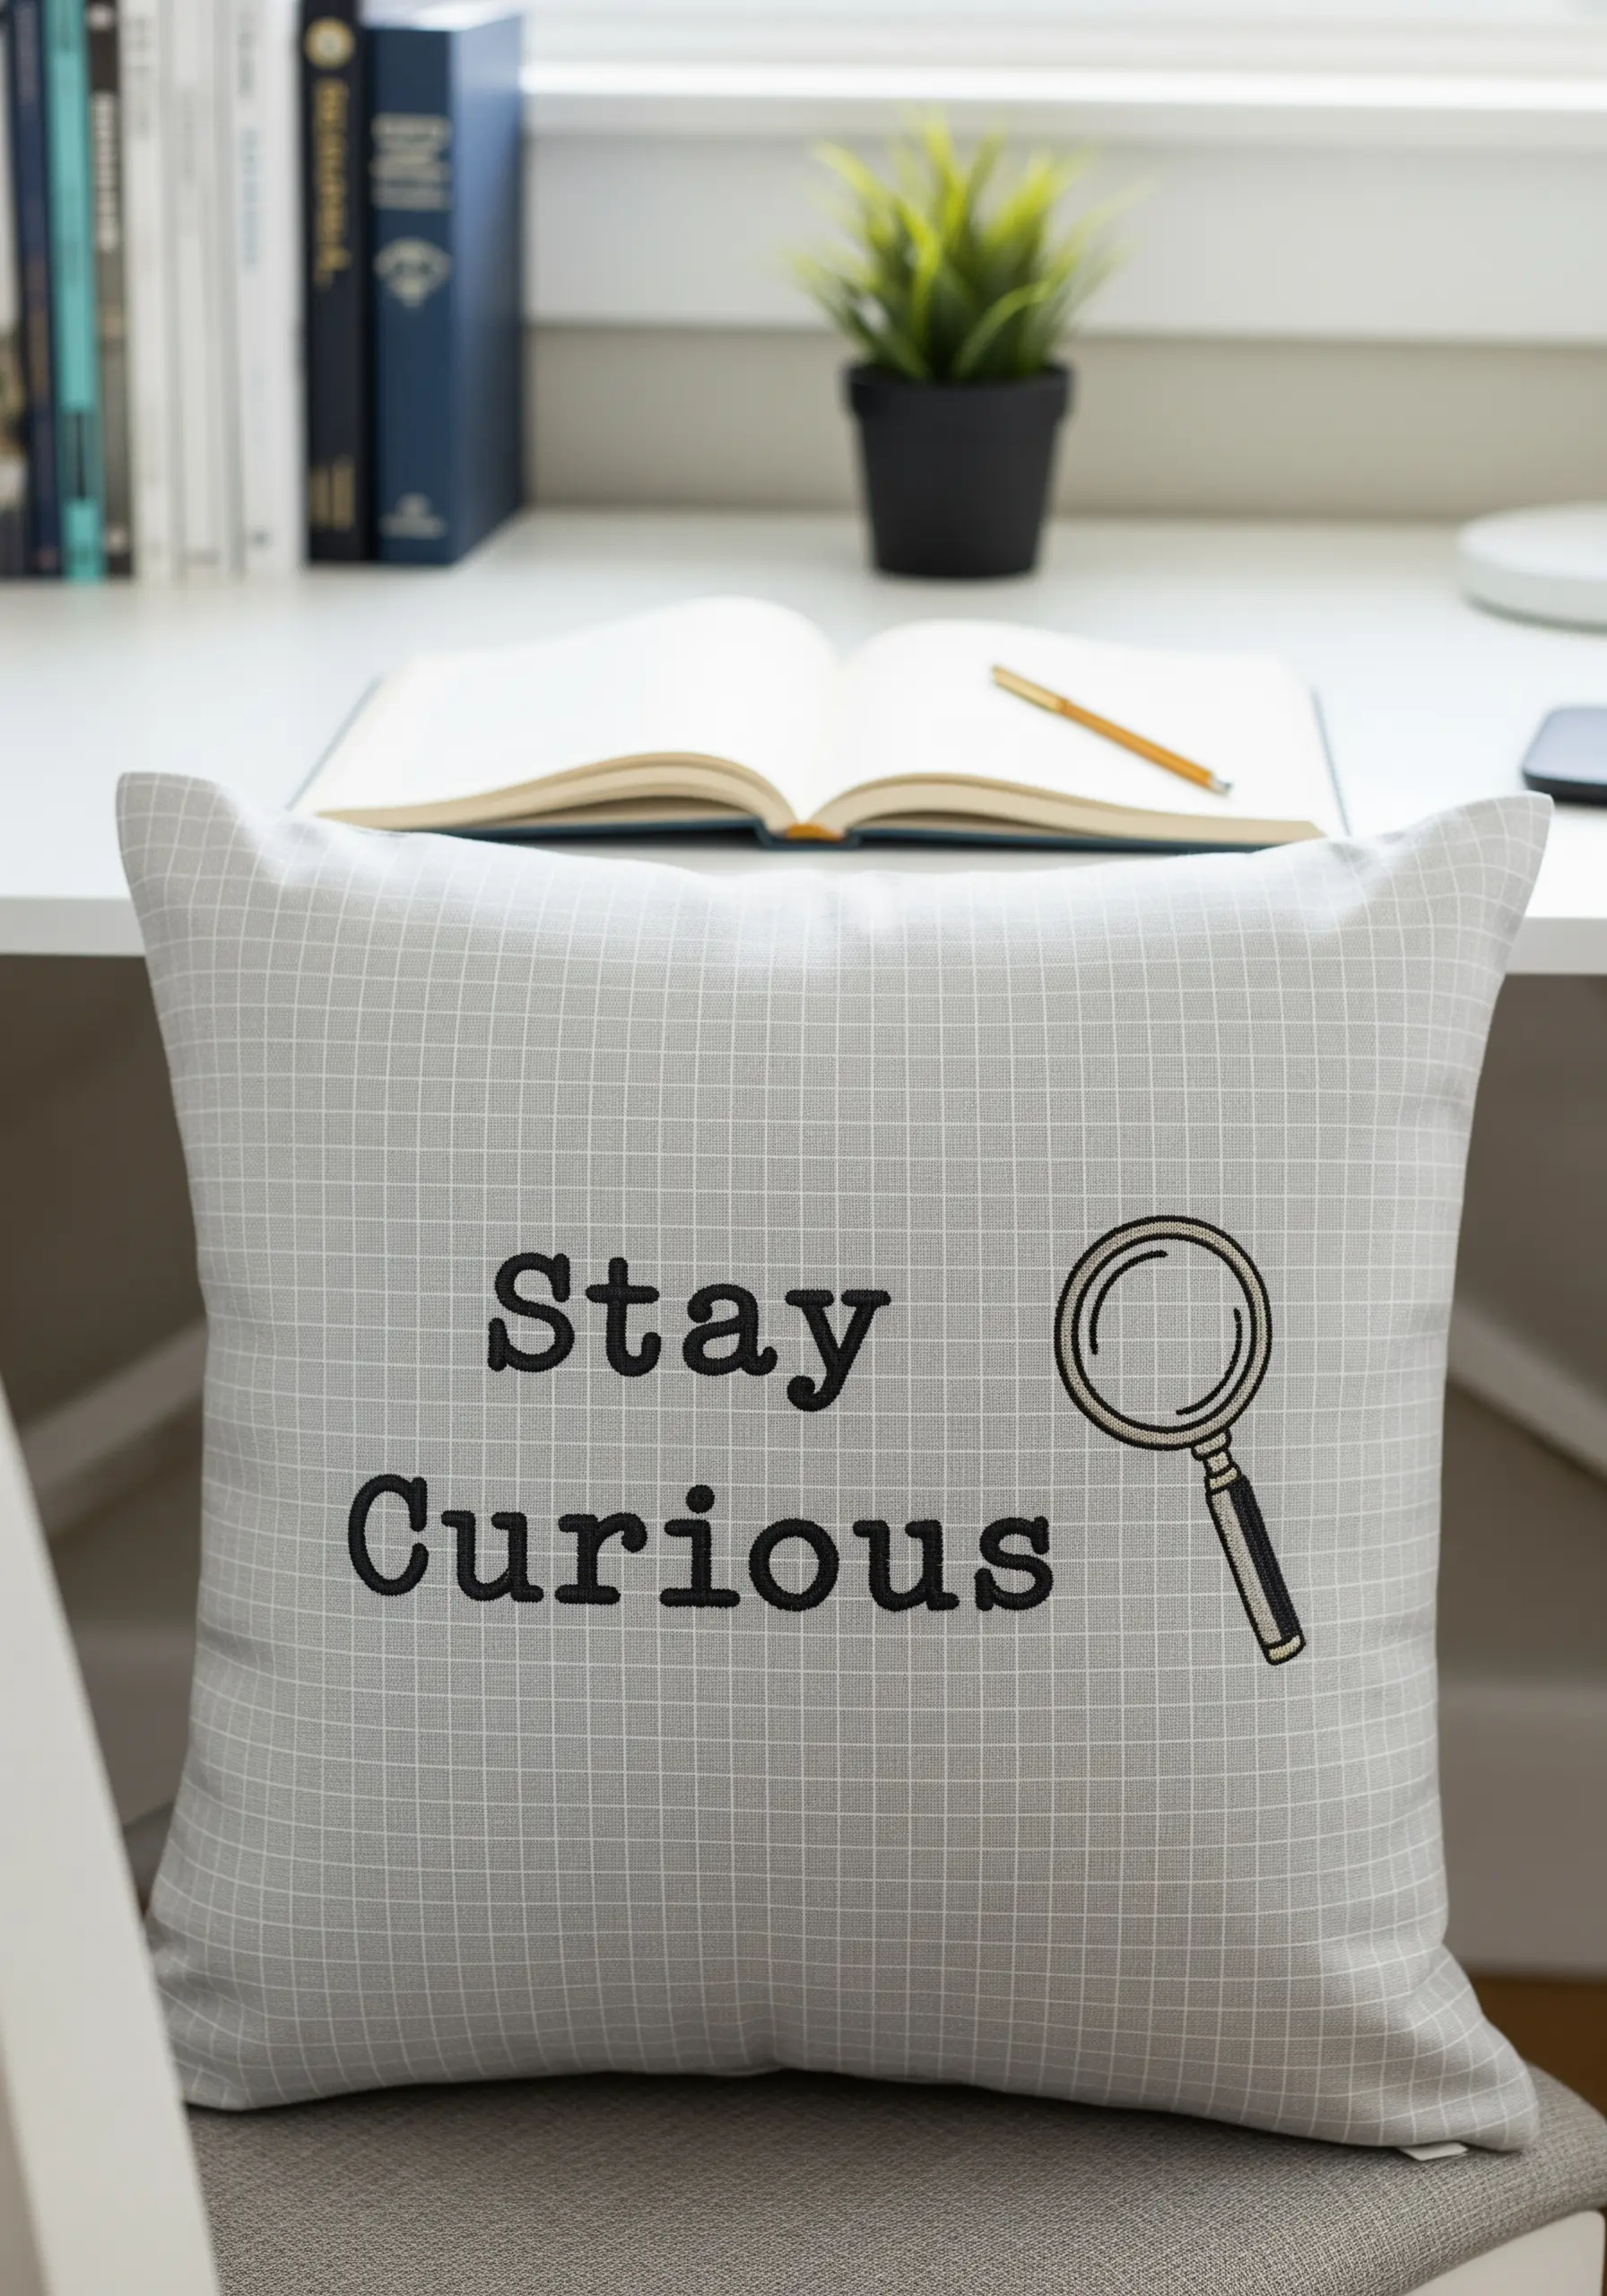
Using a fabric with a printed grid or check pattern is a fantastic hack for achieving perfectly aligned lettering.
Allow the grid lines to guide the placement and size of your stitches, which helps keep your letters uniform without having to draw detailed guidelines.
For the simple, sans-serif font, a basic backstitch is all you need. This technique is especially helpful for beginners who are still developing their stitch consistency.
30. Create Organic Flow with Asymmetrical Composition
A balanced design doesn’t have to be symmetrical.
Here, the quote is placed in the lower-left, while the botanical elements sweep in from the upper-right corner, creating a beautiful sense of movement and balance.
Stitch the vines and leaves using a combination of stem stitch for the branches, lazy daisy for the leaves, and French knots for subtle texture.
This organic design approach feels more natural and dynamic than a centered layout.
31. Tackle Complex Fonts with Metallic Thread
Ornate, gothic fonts can seem intimidating, but you can simplify the process by treating them like a coloring book.
First, outline the entire letter with a fine backstitch using a single strand of metallic thread. This defines the shape clearly.
Then, fill the interior with a satin stitch using a standard cotton floss that complements the metallic outline.
The metallic outline catches the light and adds a touch of magic, while the cotton fill provides smooth coverage.
32. Elevate Simple Text with a Stitched Frame
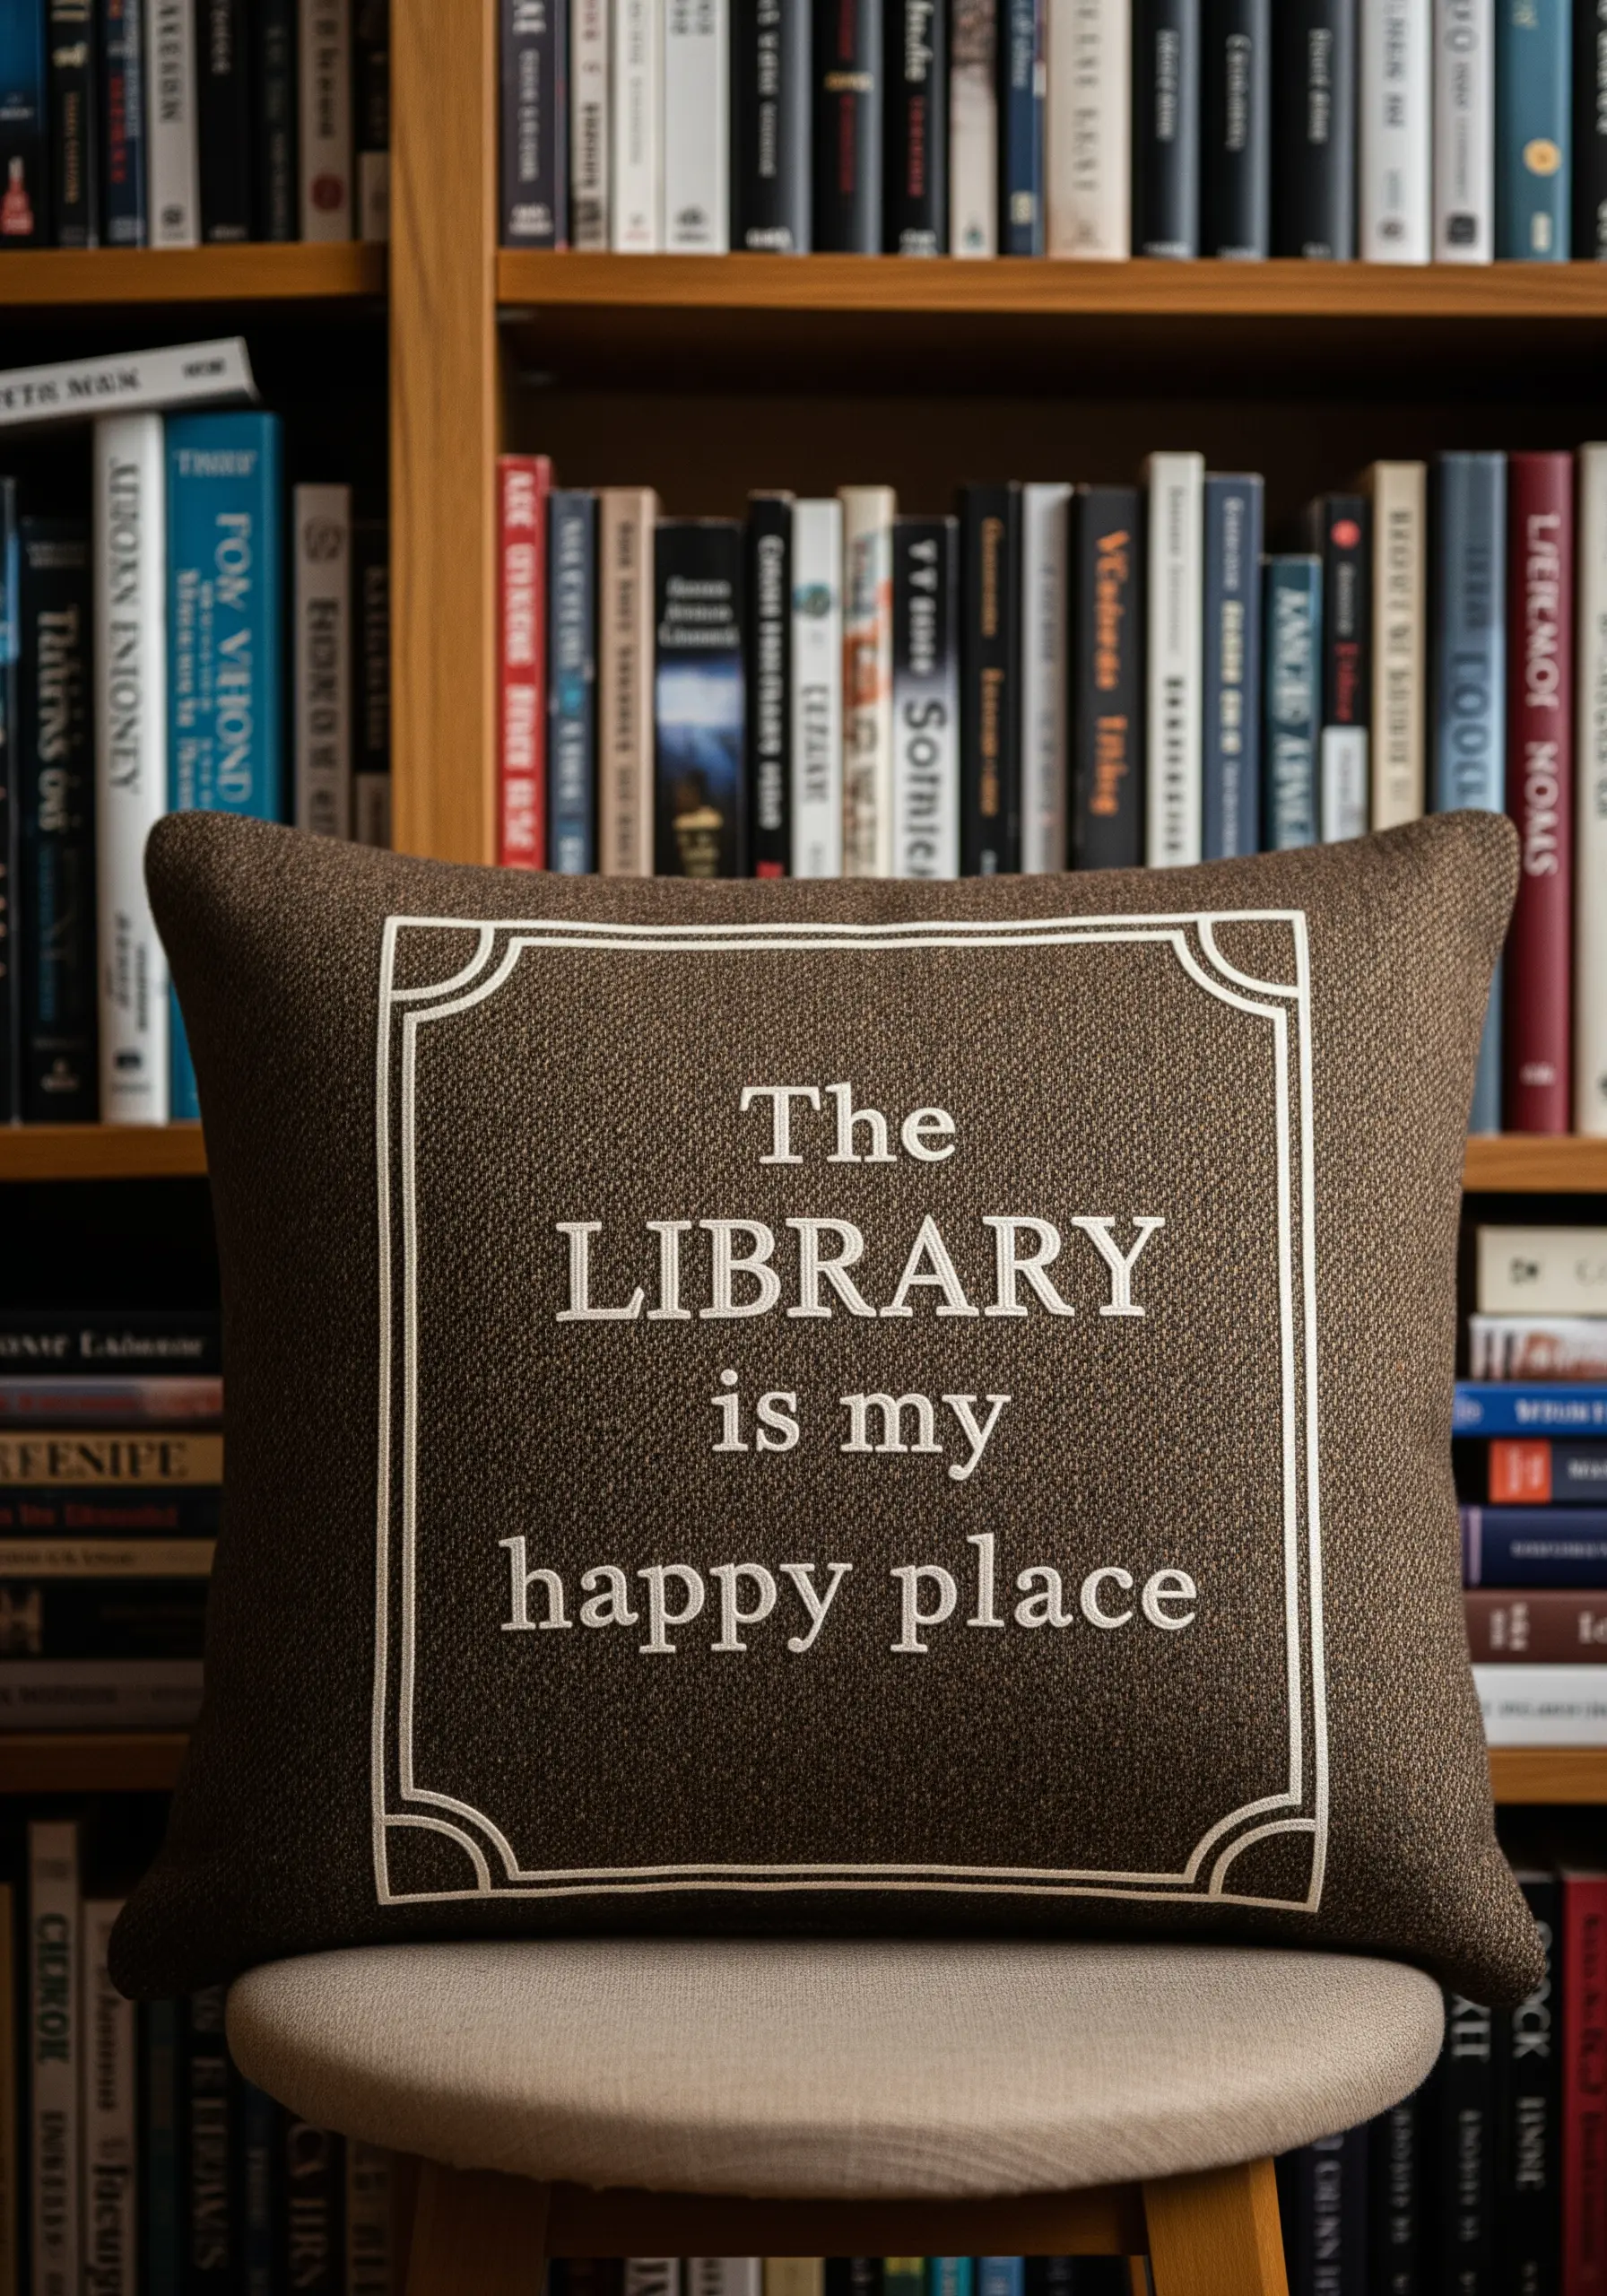
A simple embroidered border is a classic design tool that instantly makes a piece feel more polished and intentional.
Use a backstitch to create the clean, double-line frame, ensuring your corners are sharp and your lines are straight.
This technique draws the eye inward, focusing attention on the quote itself.
It works particularly well on textured, rustic fabrics, creating a pleasing contrast between the tailored frame and the organic weave of the material.
33. Capture Movement with Varied Stitch Lengths
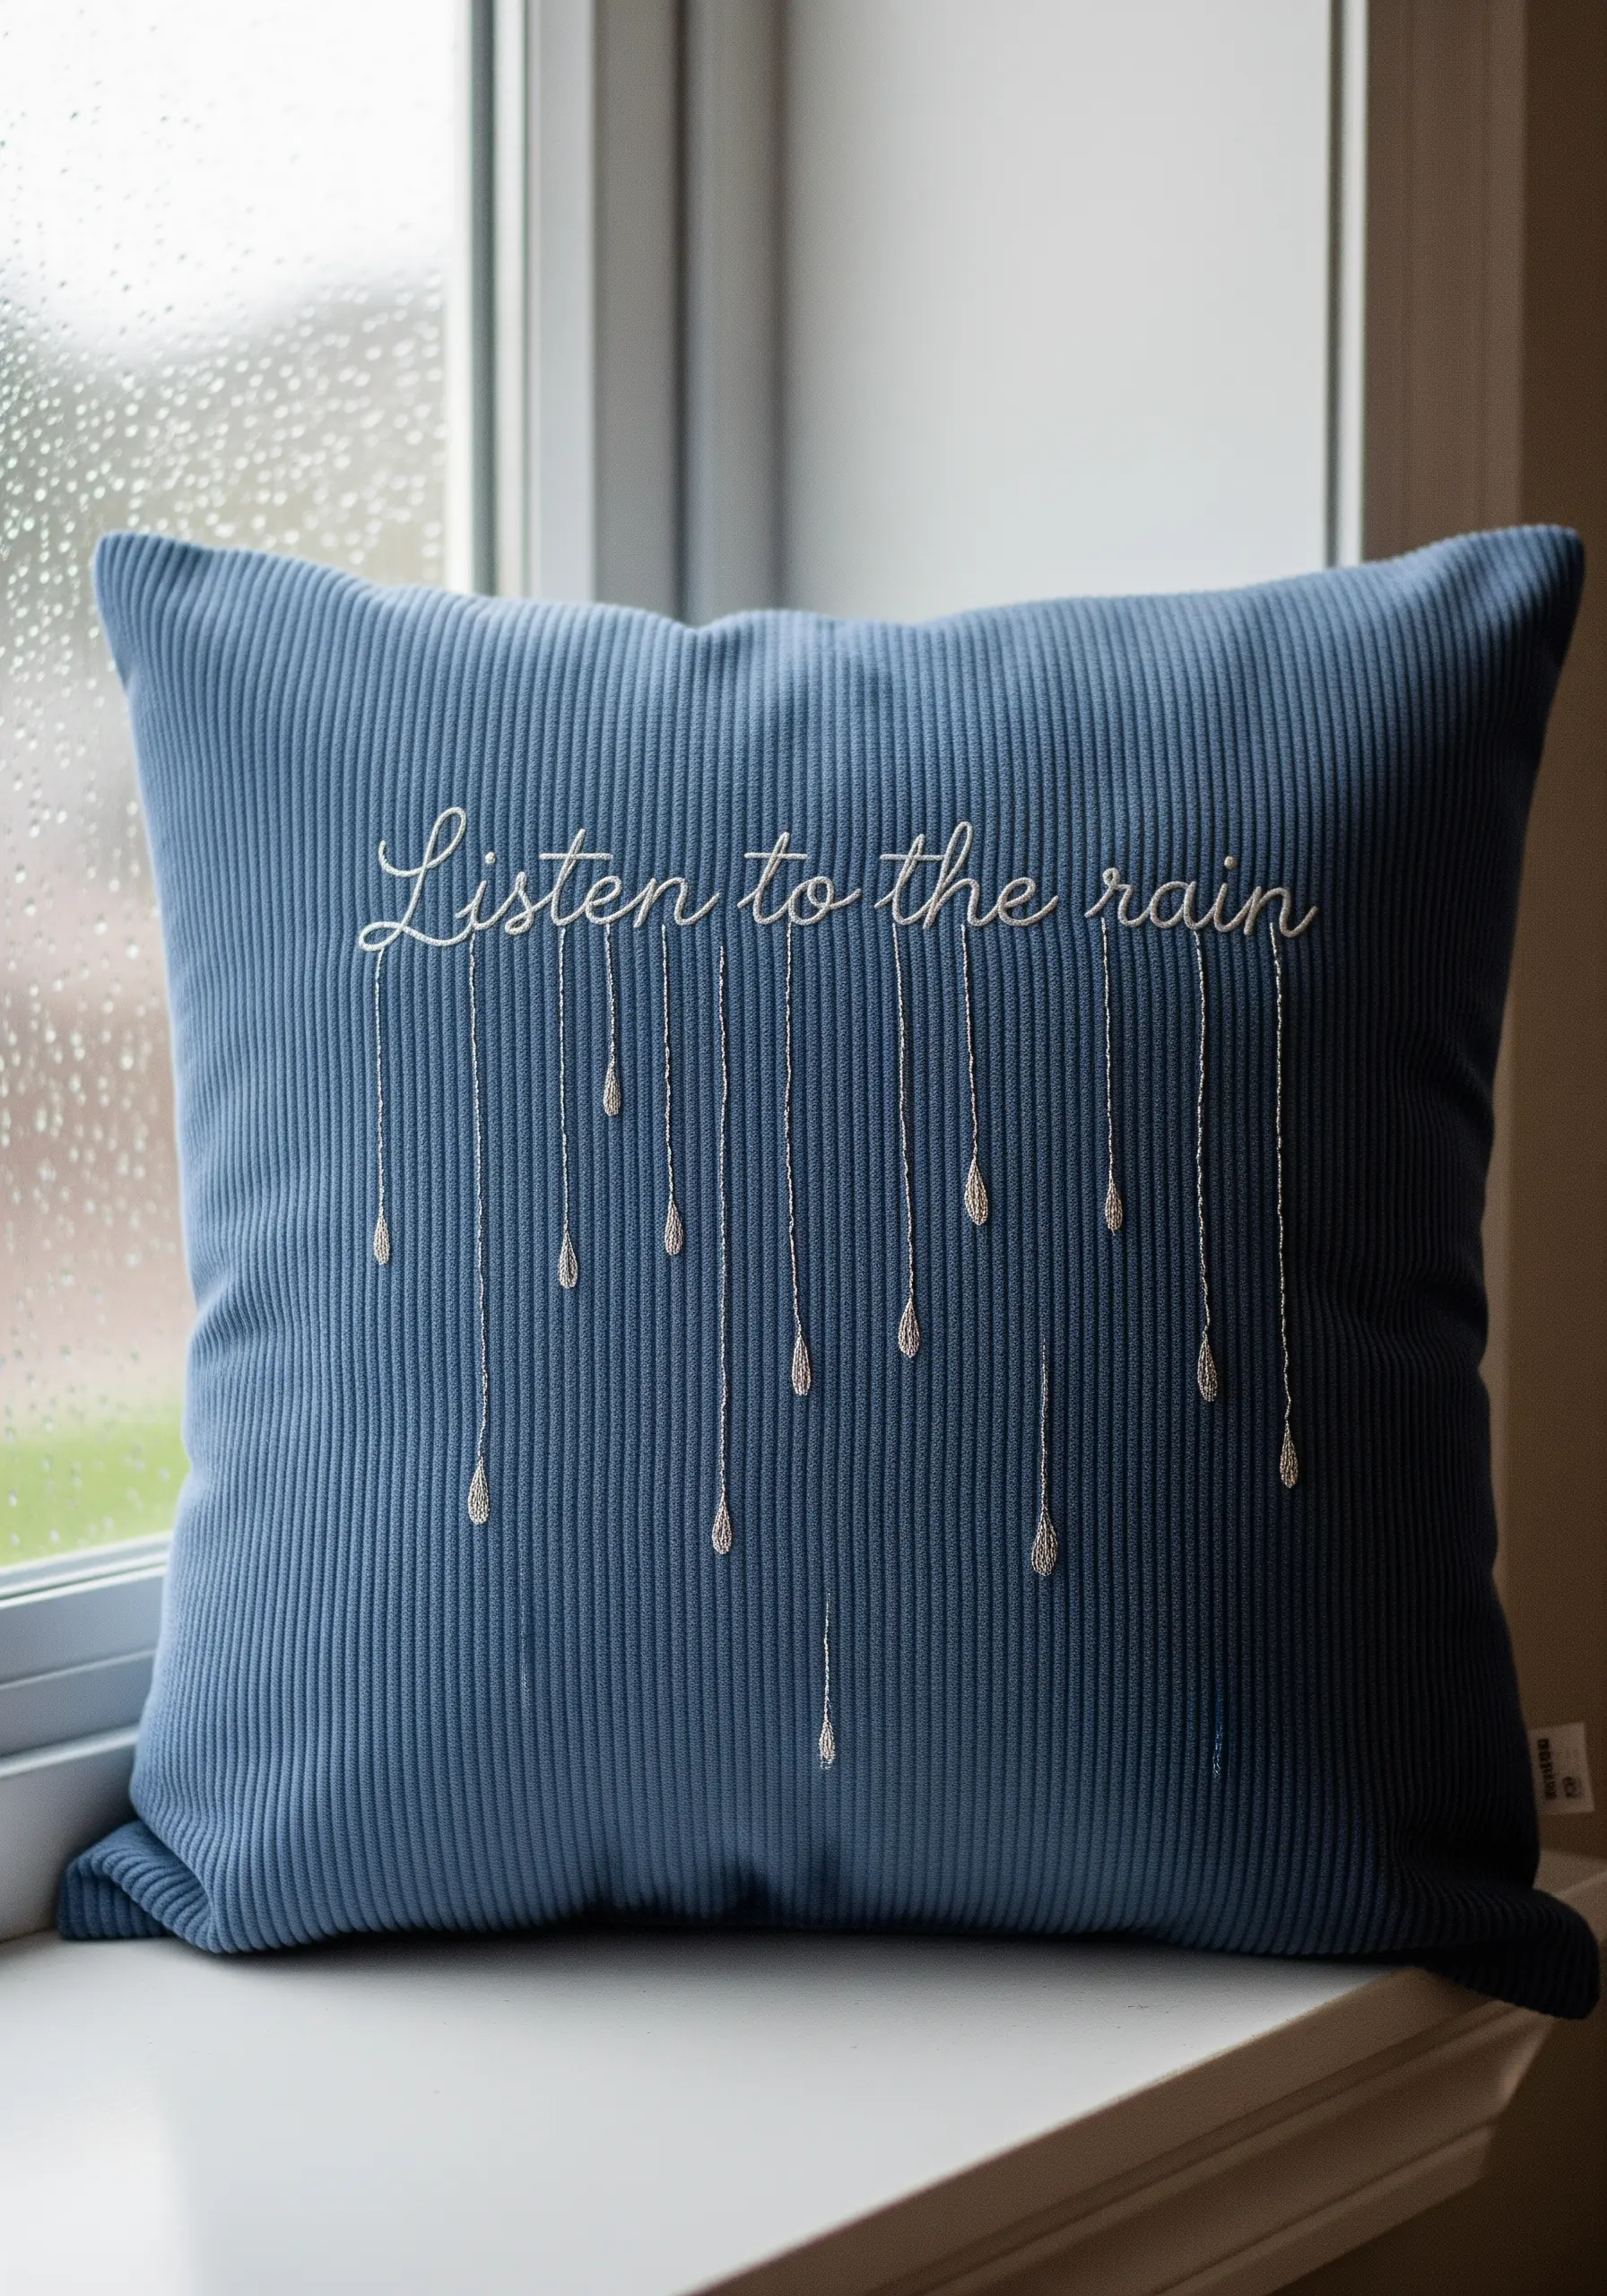
To create the illusion of falling rain, use long straight stitches of varying lengths and silver metallic thread.
Work the stitches vertically, scattering them randomly and allowing some to be long and others short to mimic a natural rain shower.
Anchor each raindrop with a small, satin-stitched teardrop shape at the bottom. This gives the delicate lines a sense of weight and direction.
This technique is a beautiful way to add a poetic, visual element to your chosen quote.
34. Emulate Illuminated Manuscripts with Color and Gold

To capture the richness of a medieval manuscript, focus on a jewel-toned color palette and incorporate gold accents.
For the large initial ‘A’, fill the different sections with smooth satin stitch in blues, greens, and reds.
Use a couched gold thread to outline the letter and create the delicate scrollwork. Couching is essential for metallic threads, as it allows them to lie flat and retain their high shine without twisting or fraying.
The result is a timeless piece that tells a story before you even read the words.


