

Your bedroom should be a sanctuary—a place where you can exhale. And the art on your walls plays a quiet but crucial role in shaping that atmosphere. Before you search for another print, consider picking up a needle and thread.
Embroidery is more than a craft; it’s a mindful practice that allows you to cultivate calm, one stitch at a time. The slow, rhythmic process of pulling thread through fabric can be deeply centering, and the result is a piece of art infused with your own intention and care.
These plant-inspired designs are created to do more than just decorate. They are an invitation to slow down, to focus on the simple beauty of a leaf or a stem, and to create something with your hands that brings a lasting sense of green serenity to your personal space.
1. Sculptural Satin Stitch for Monstera Leaves
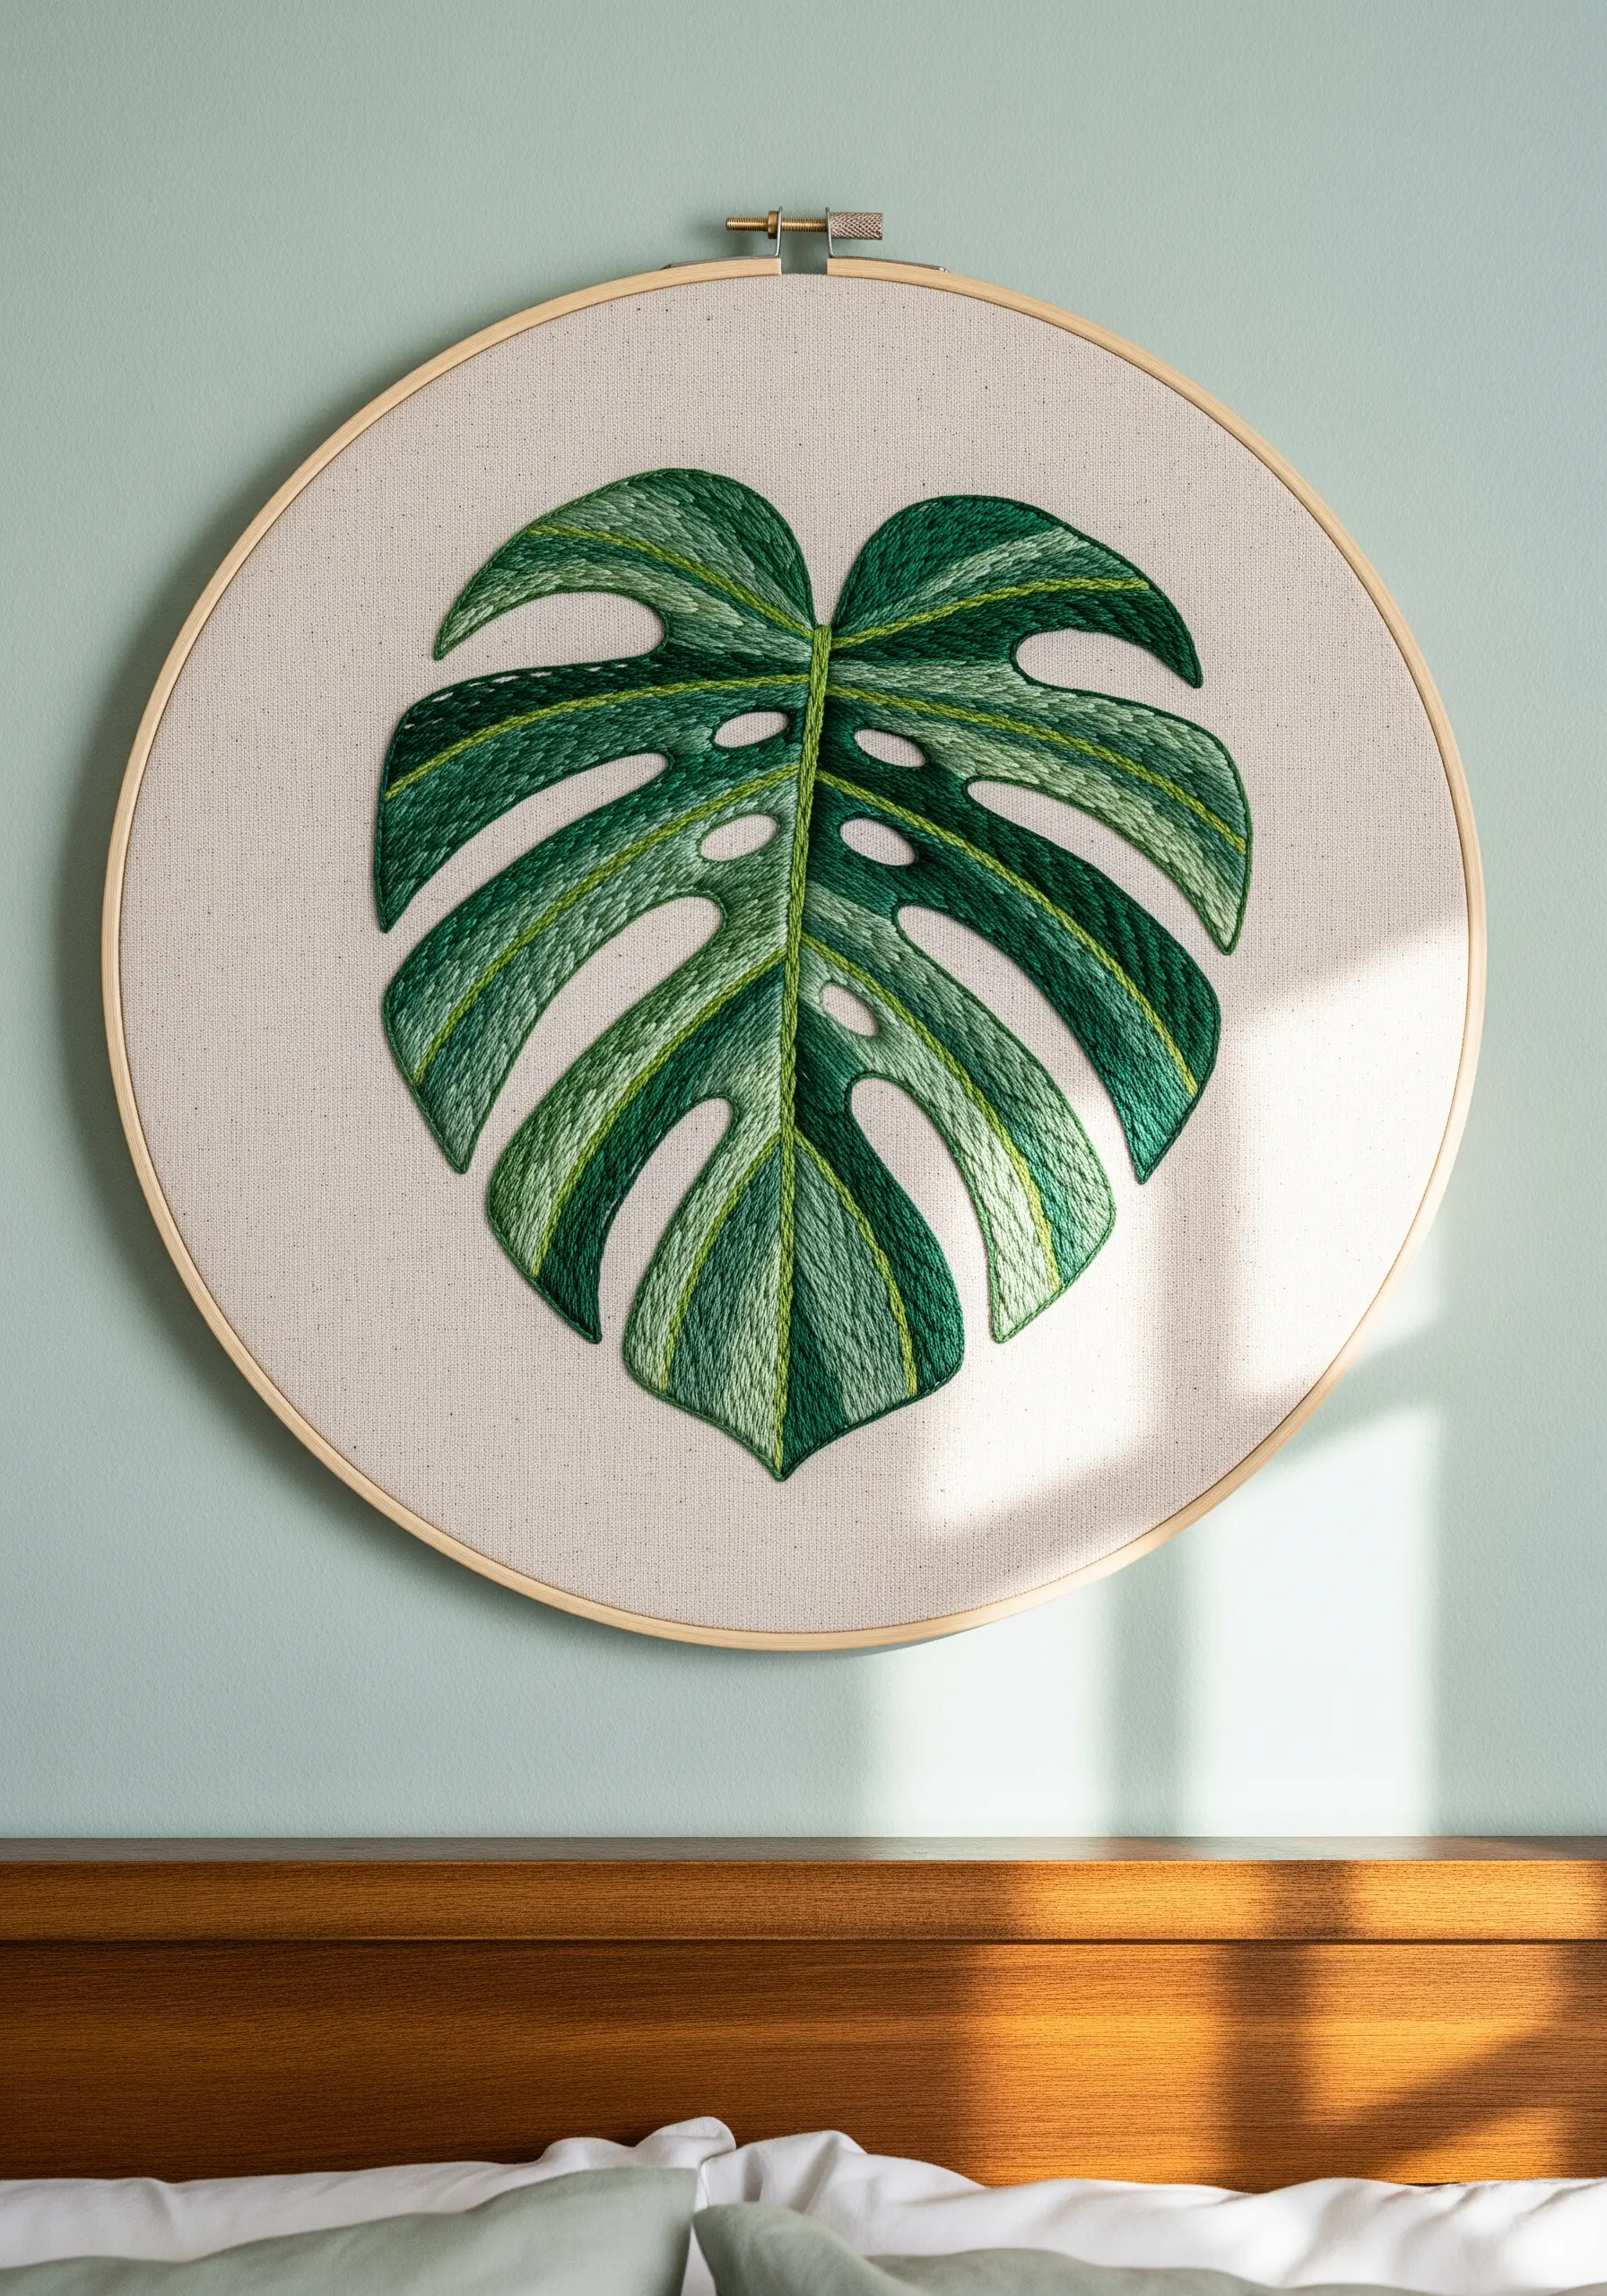
Create depth in a large leaf by varying the direction of your satin stitch to follow the natural contours of each segment.
Instead of stitching everything horizontally, angle your stitches from the central vein outwards, which mimics how light hits the surface.
Use at least three shades of green—a light, medium, and dark—and block them into distinct sections rather than trying to blend them perfectly.
This color-blocking technique adds graphic impact and makes the leaf feel more dimensional without the complexity of thread painting.
2. Curate a Botanical Gallery Wall

Group several small hoops together to create a cohesive collection with simple motifs like lavender, rosemary, and thyme.
The key to making this arrangement feel intentional is consistency—use the same size hoop and the same neutral background fabric for each piece.
Vary your stitches to add subtle texture: delicate French knots for lavender blossoms, and simple straight or fishbone stitches for herb leaves.
This approach transforms a few small embroidery projects into a sophisticated botanical gallery wall that you can easily expand over time.
3. Texture and Delicacy in a Eucalyptus Wreath
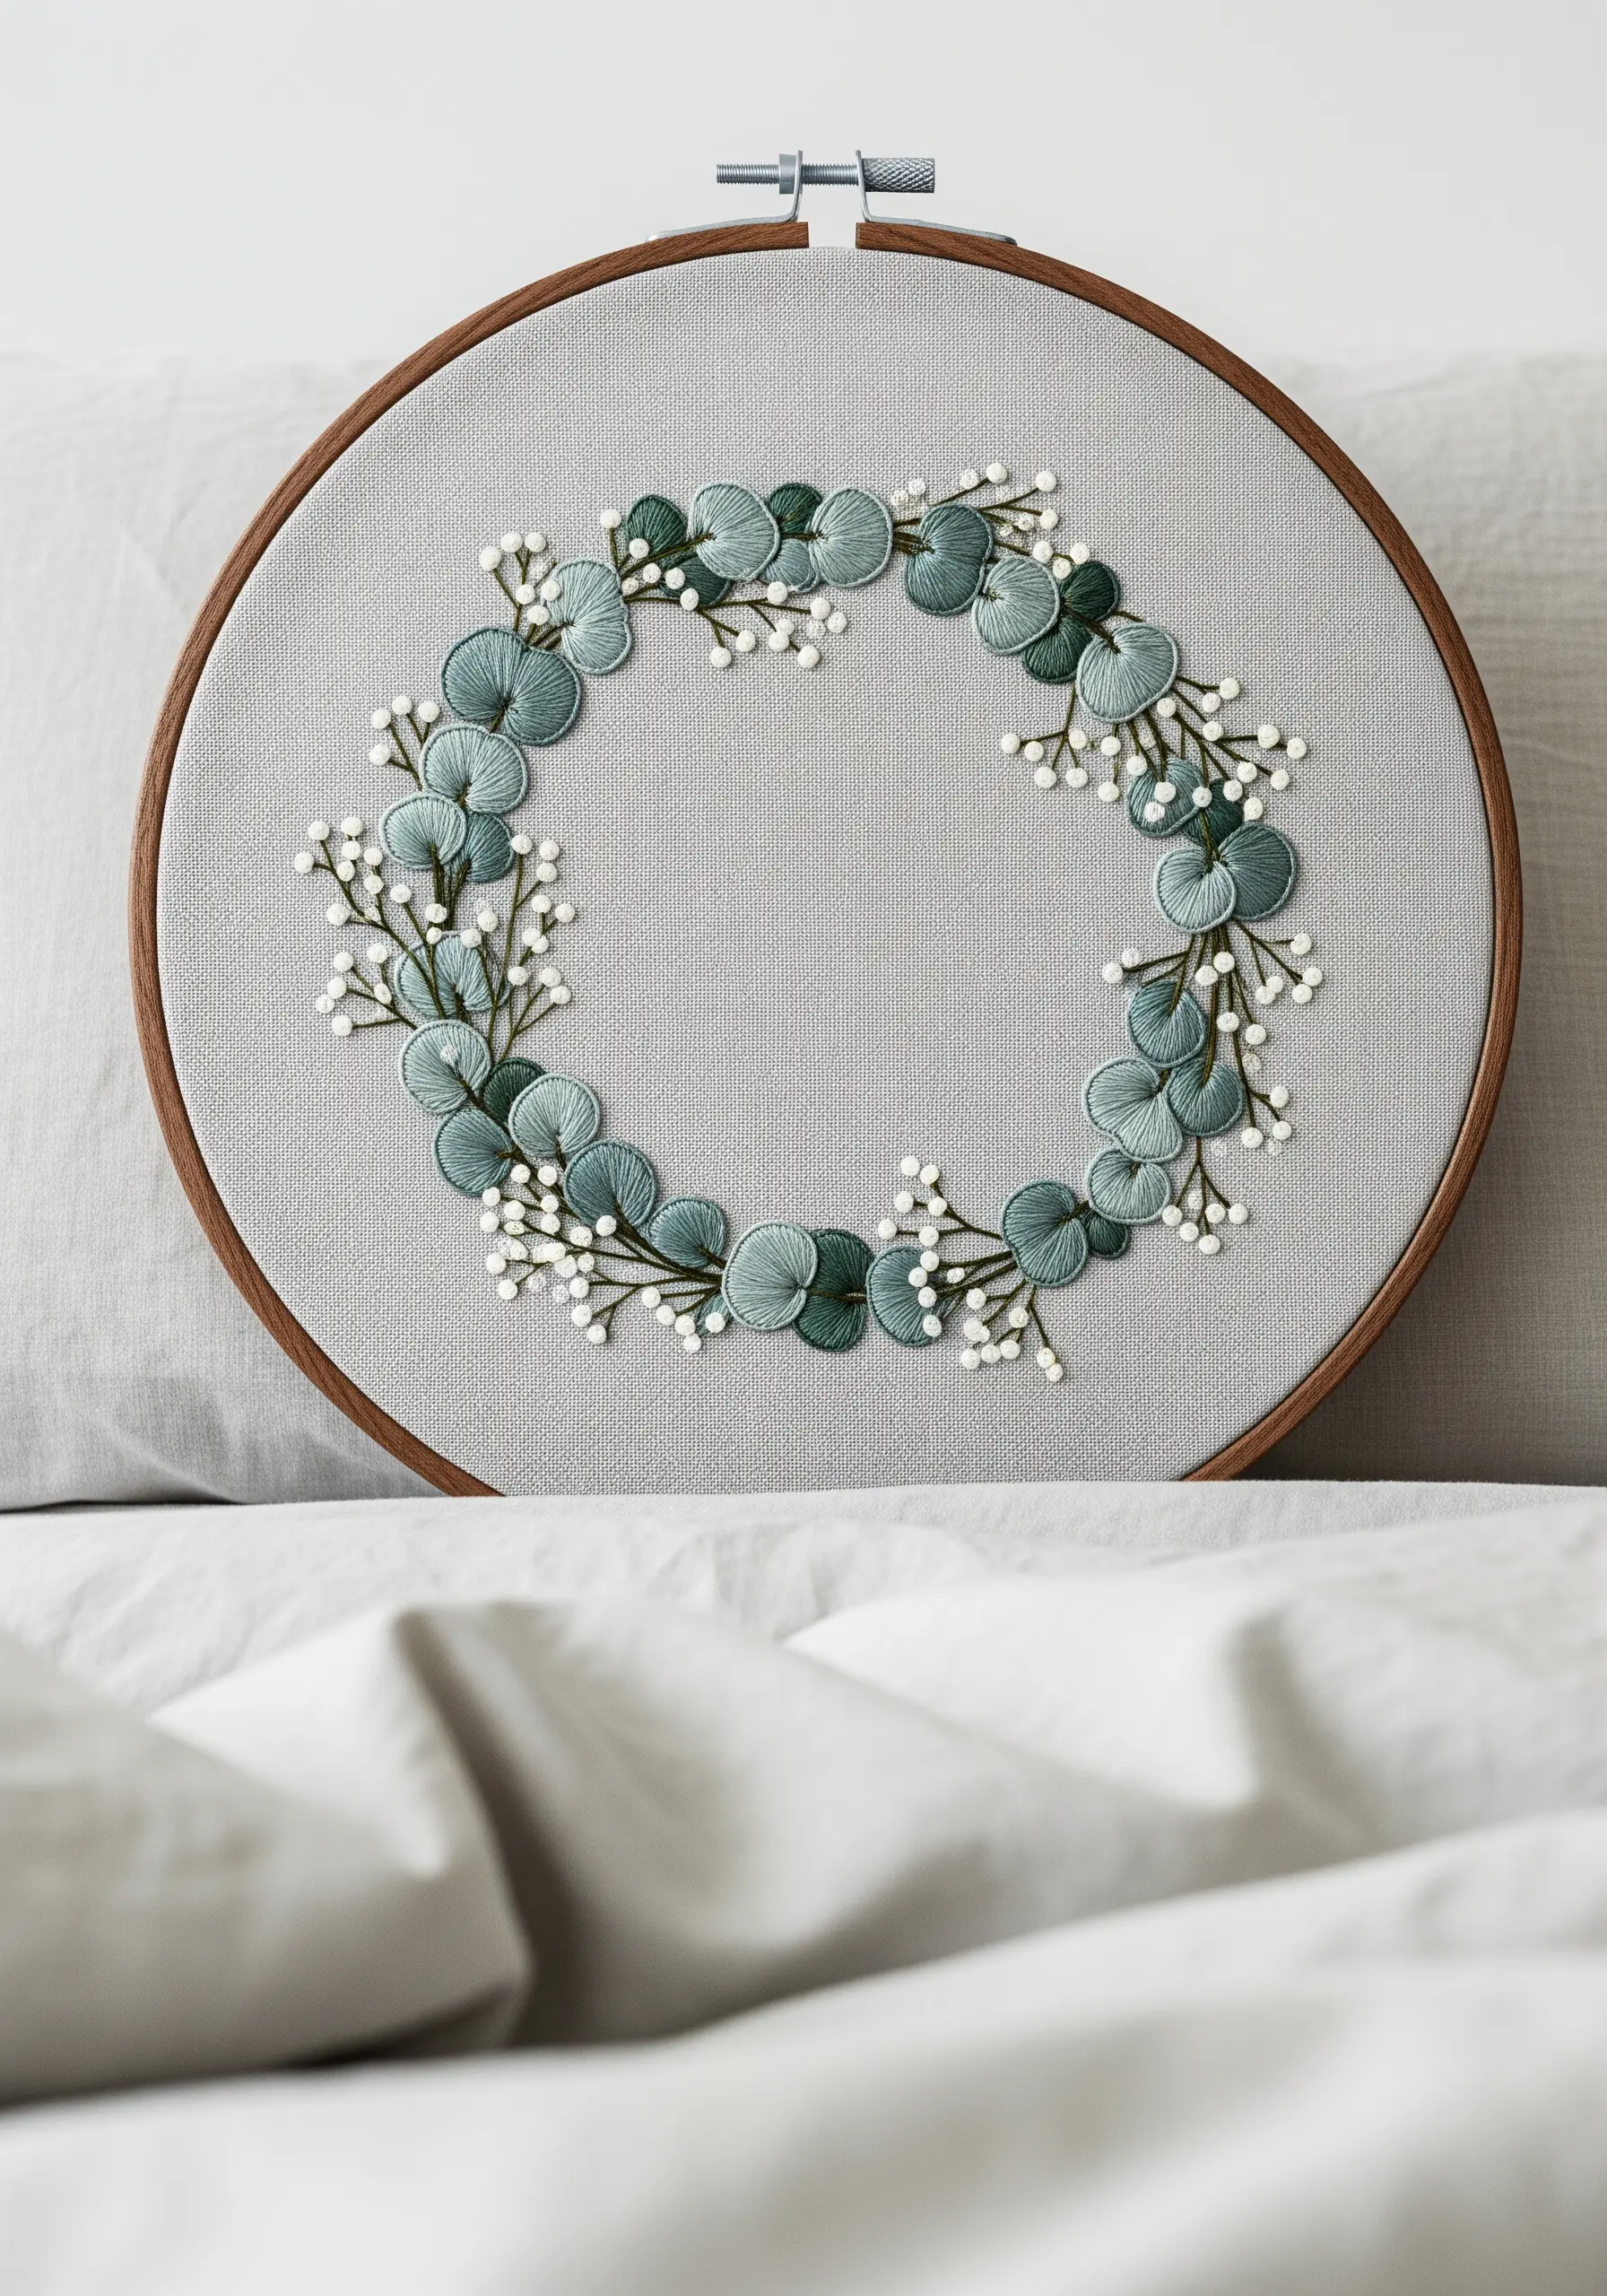
Combine two distinct textures to give a simple wreath design a professional, three-dimensional finish.
For the eucalyptus leaves, use a padded satin stitch by creating a small satin-stitched base layer before stitching your final layer on top; this gives each leaf a subtle lift.
Contrast the smooth leaves with tiny, scattered French knots to represent baby’s breath, using a bright white or cream thread.
Stitching on a colored fabric, like this soft grey linen, allows the muted green and bright white textures to stand out beautifully.
4. Build Dimension with Layered Stitches

To make your embroidered terrarium feel truly tactile, assign a specific dimensional stitch to each element.
Use woven wheel stitches or stacked bullion knots for the succulent petals, which creates a dense, rosette shape that rises off the fabric.
For the soil and pebbles, use tightly packed French knots in varying shades of brown, beige, and grey to create a granular texture.
Finally, suggest the glass container with a simple backstitch in a light grey thread, letting the highly textured plants remain the focal point.
5. Create Flow with an Elongated Vine

Use an oval or rectangular frame to complement the natural movement of a trailing plant like a pothos or philodendron.
A standard circular hoop can visually contain the design, whereas an elongated shape encourages the eye to follow the vine from one end to the other.
For variegated leaves, you can either use a variegated floss or switch between two similar shades of green within the same leaf using a long-and-short stitch.
Stitching on a dark, solid background like black or navy makes the vibrant greens appear more lush and dramatic.
6. The Elegance of a Single Fern Frond
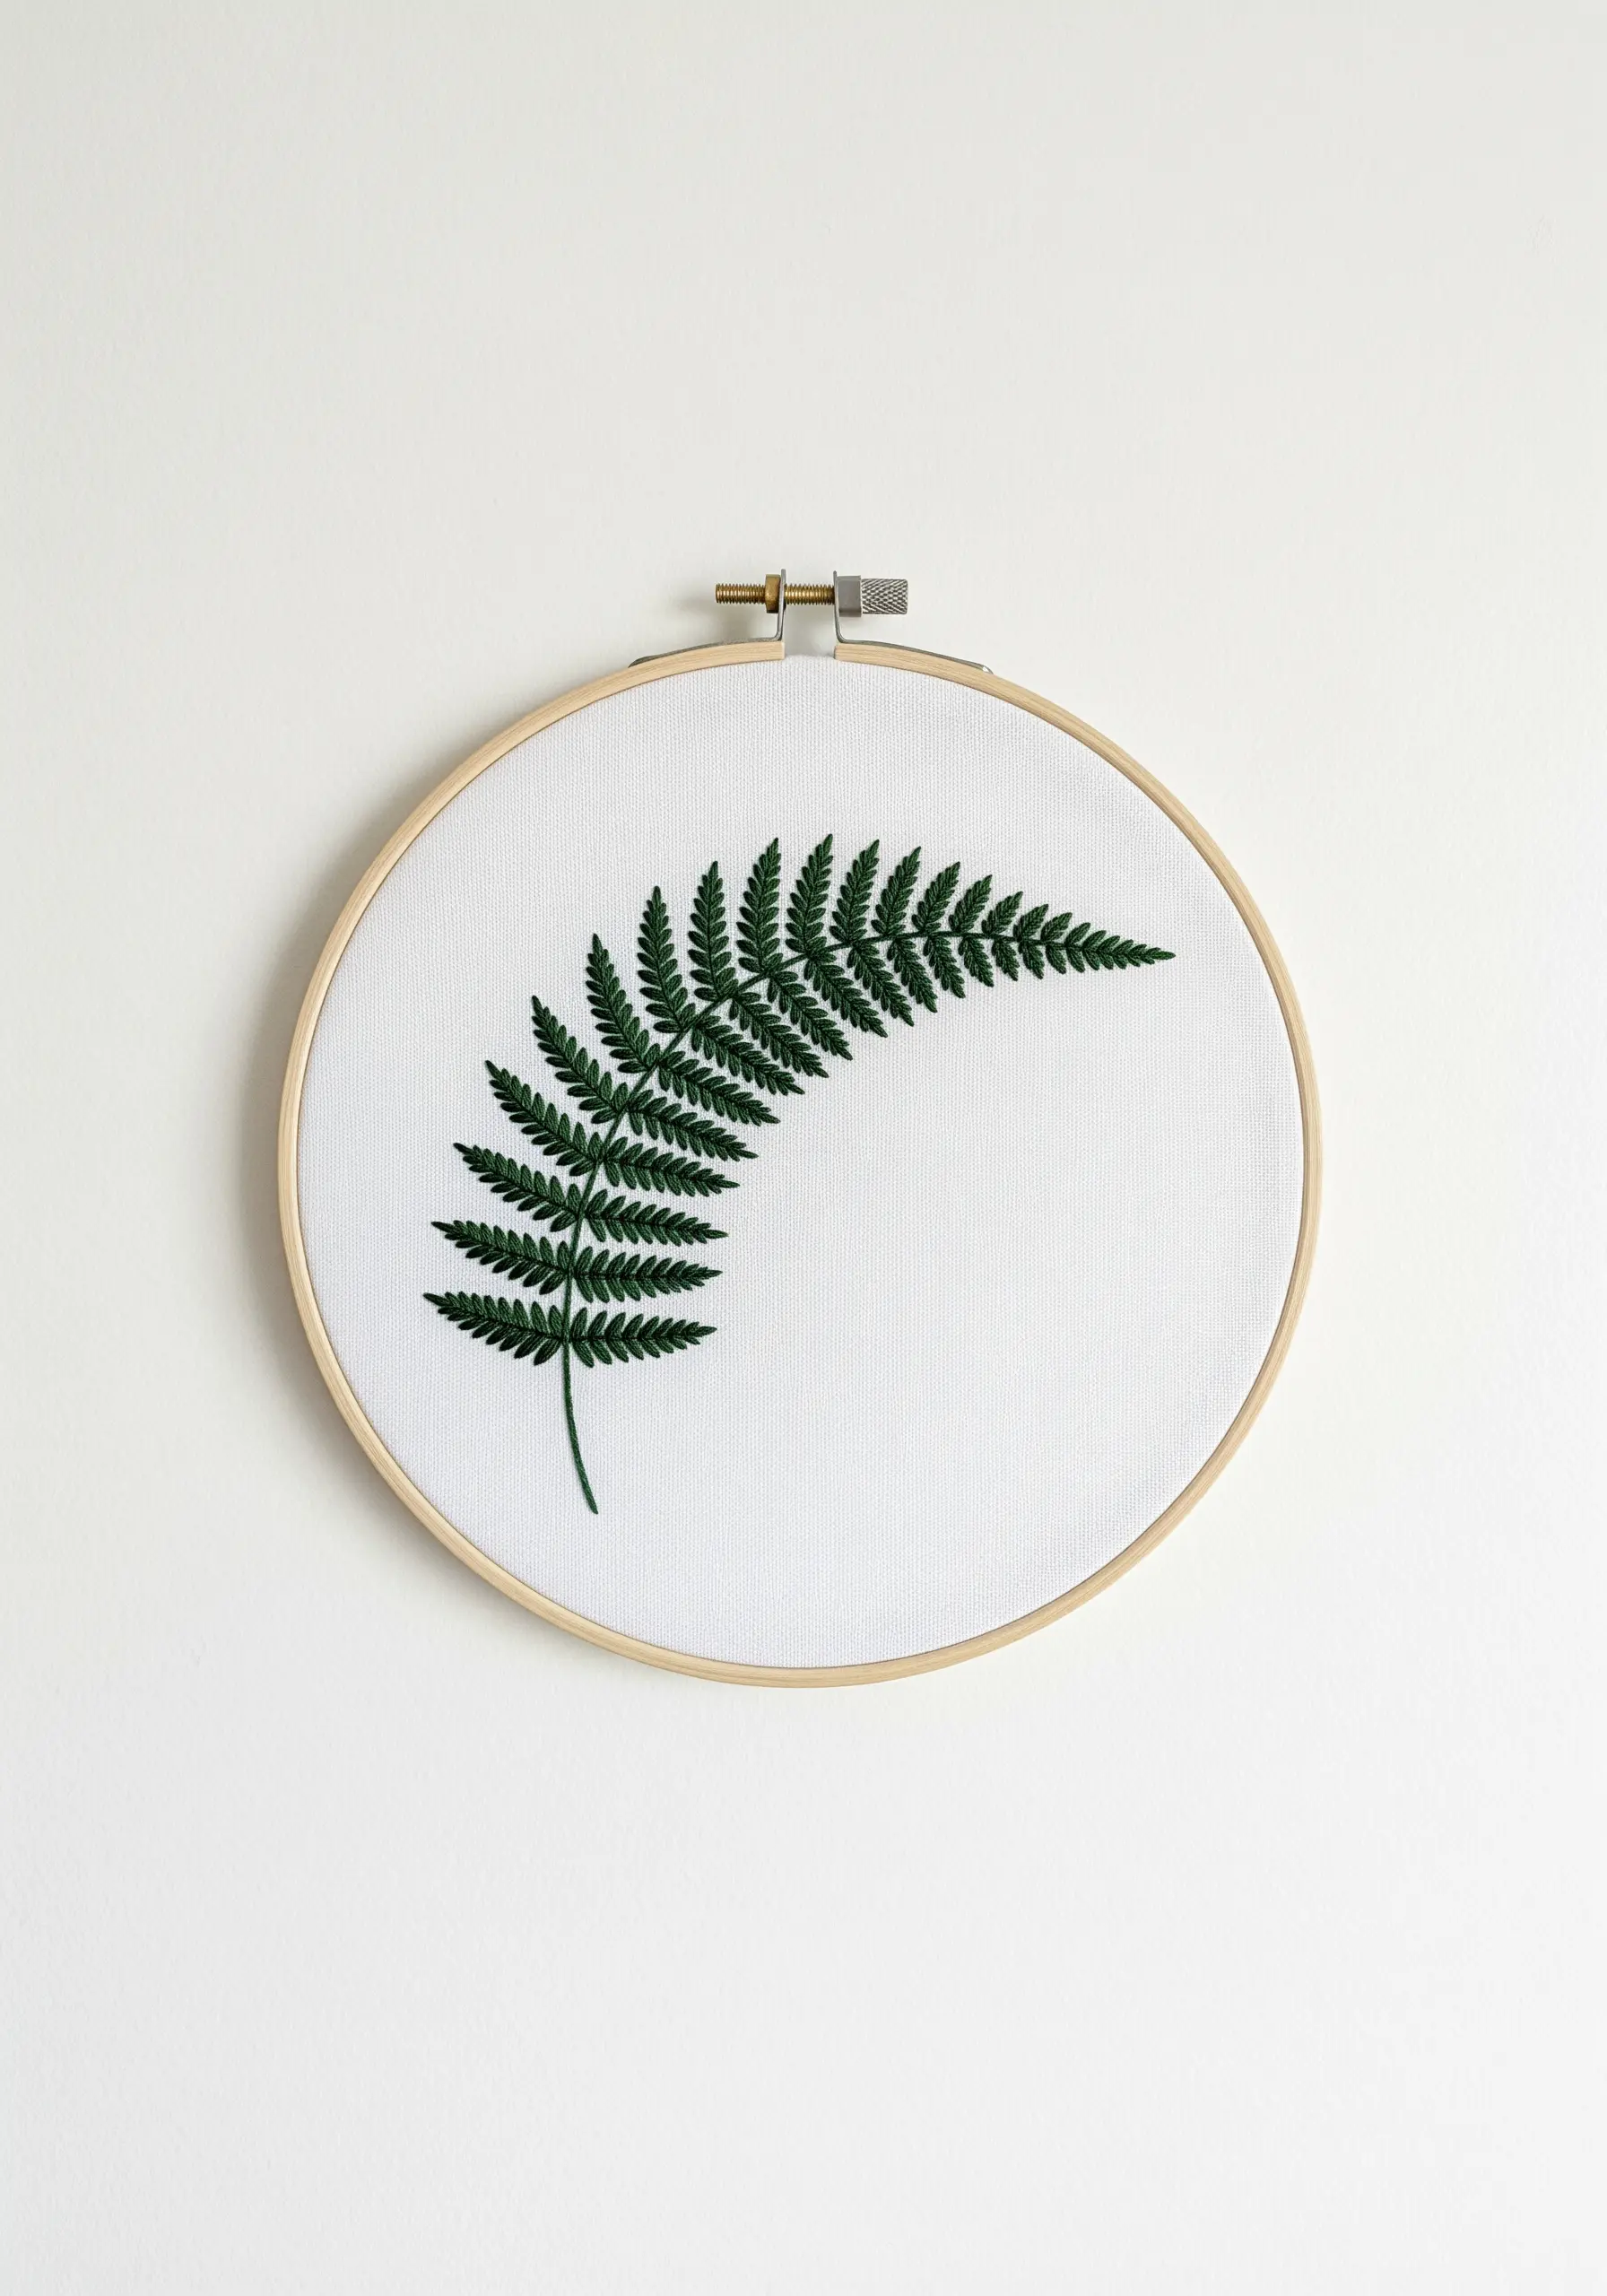
When your design is minimal, the precision of your stitches becomes the main focus.
To create a perfectly uniform fern, use fishbone stitch for each tiny leaflet, ensuring your entry and exit points are consistent every time.
Use a single, bold color on a crisp white fabric to emphasize the clean lines and intricate shape of the frond.
The generous use of negative space is a powerful design choice that gives the piece a modern, gallery-like feel and prevents it from looking unfinished.
7. Stitching on Sheer Fabric for a Floating Effect

Create a delicate, almost ethereal piece of art by embroidering on a sheer fabric like organza or tulle.
To do this successfully, you must use a water-soluble stabilizer; hoop the stabilizer and fabric together, stitch your design, and then gently rinse the stabilizer away.
This technique makes your potted plants appear to float in the air, creating beautiful shadows when hung in a window or against a wall.
Keep your stitches neat on the back, as they may be visible through the transparent material.
8. Dramatic Contrast with High-Impact Thread Painting

Amplify the visual energy of tropical botanicals by pairing vibrant, almost neon, threads with a dark, moody background fabric.
Use the long-and-short stitch technique to blend unexpected colors like chartreuse, deep teal, and olive green, creating a painterly effect that feels rich and complex.
Don’t be afraid to let your stitches be bold and directional, following the lines of the leaves to create texture and movement.
This high-contrast approach turns a simple hoop into a dramatic statement piece, perfect for a dark-painted feature wall.
9. Capture Movement with Weeping Willow Branches

Allow your embroidery to break free from the confines of the hoop to create a dynamic, sculptural effect.
Stitch the main branches within the hoop, but for the delicate weeping leaves, use long straight stitches or detached chain stitches that hang loosely below the frame.
This technique adds physical movement to the piece—the threads will gently sway with any air current, mimicking a real willow tree.
Using a silky rayon or satin floss will enhance the drape and give the hanging threads a beautiful, subtle sheen.
10. An Elegant Monogram with Botanical Detail
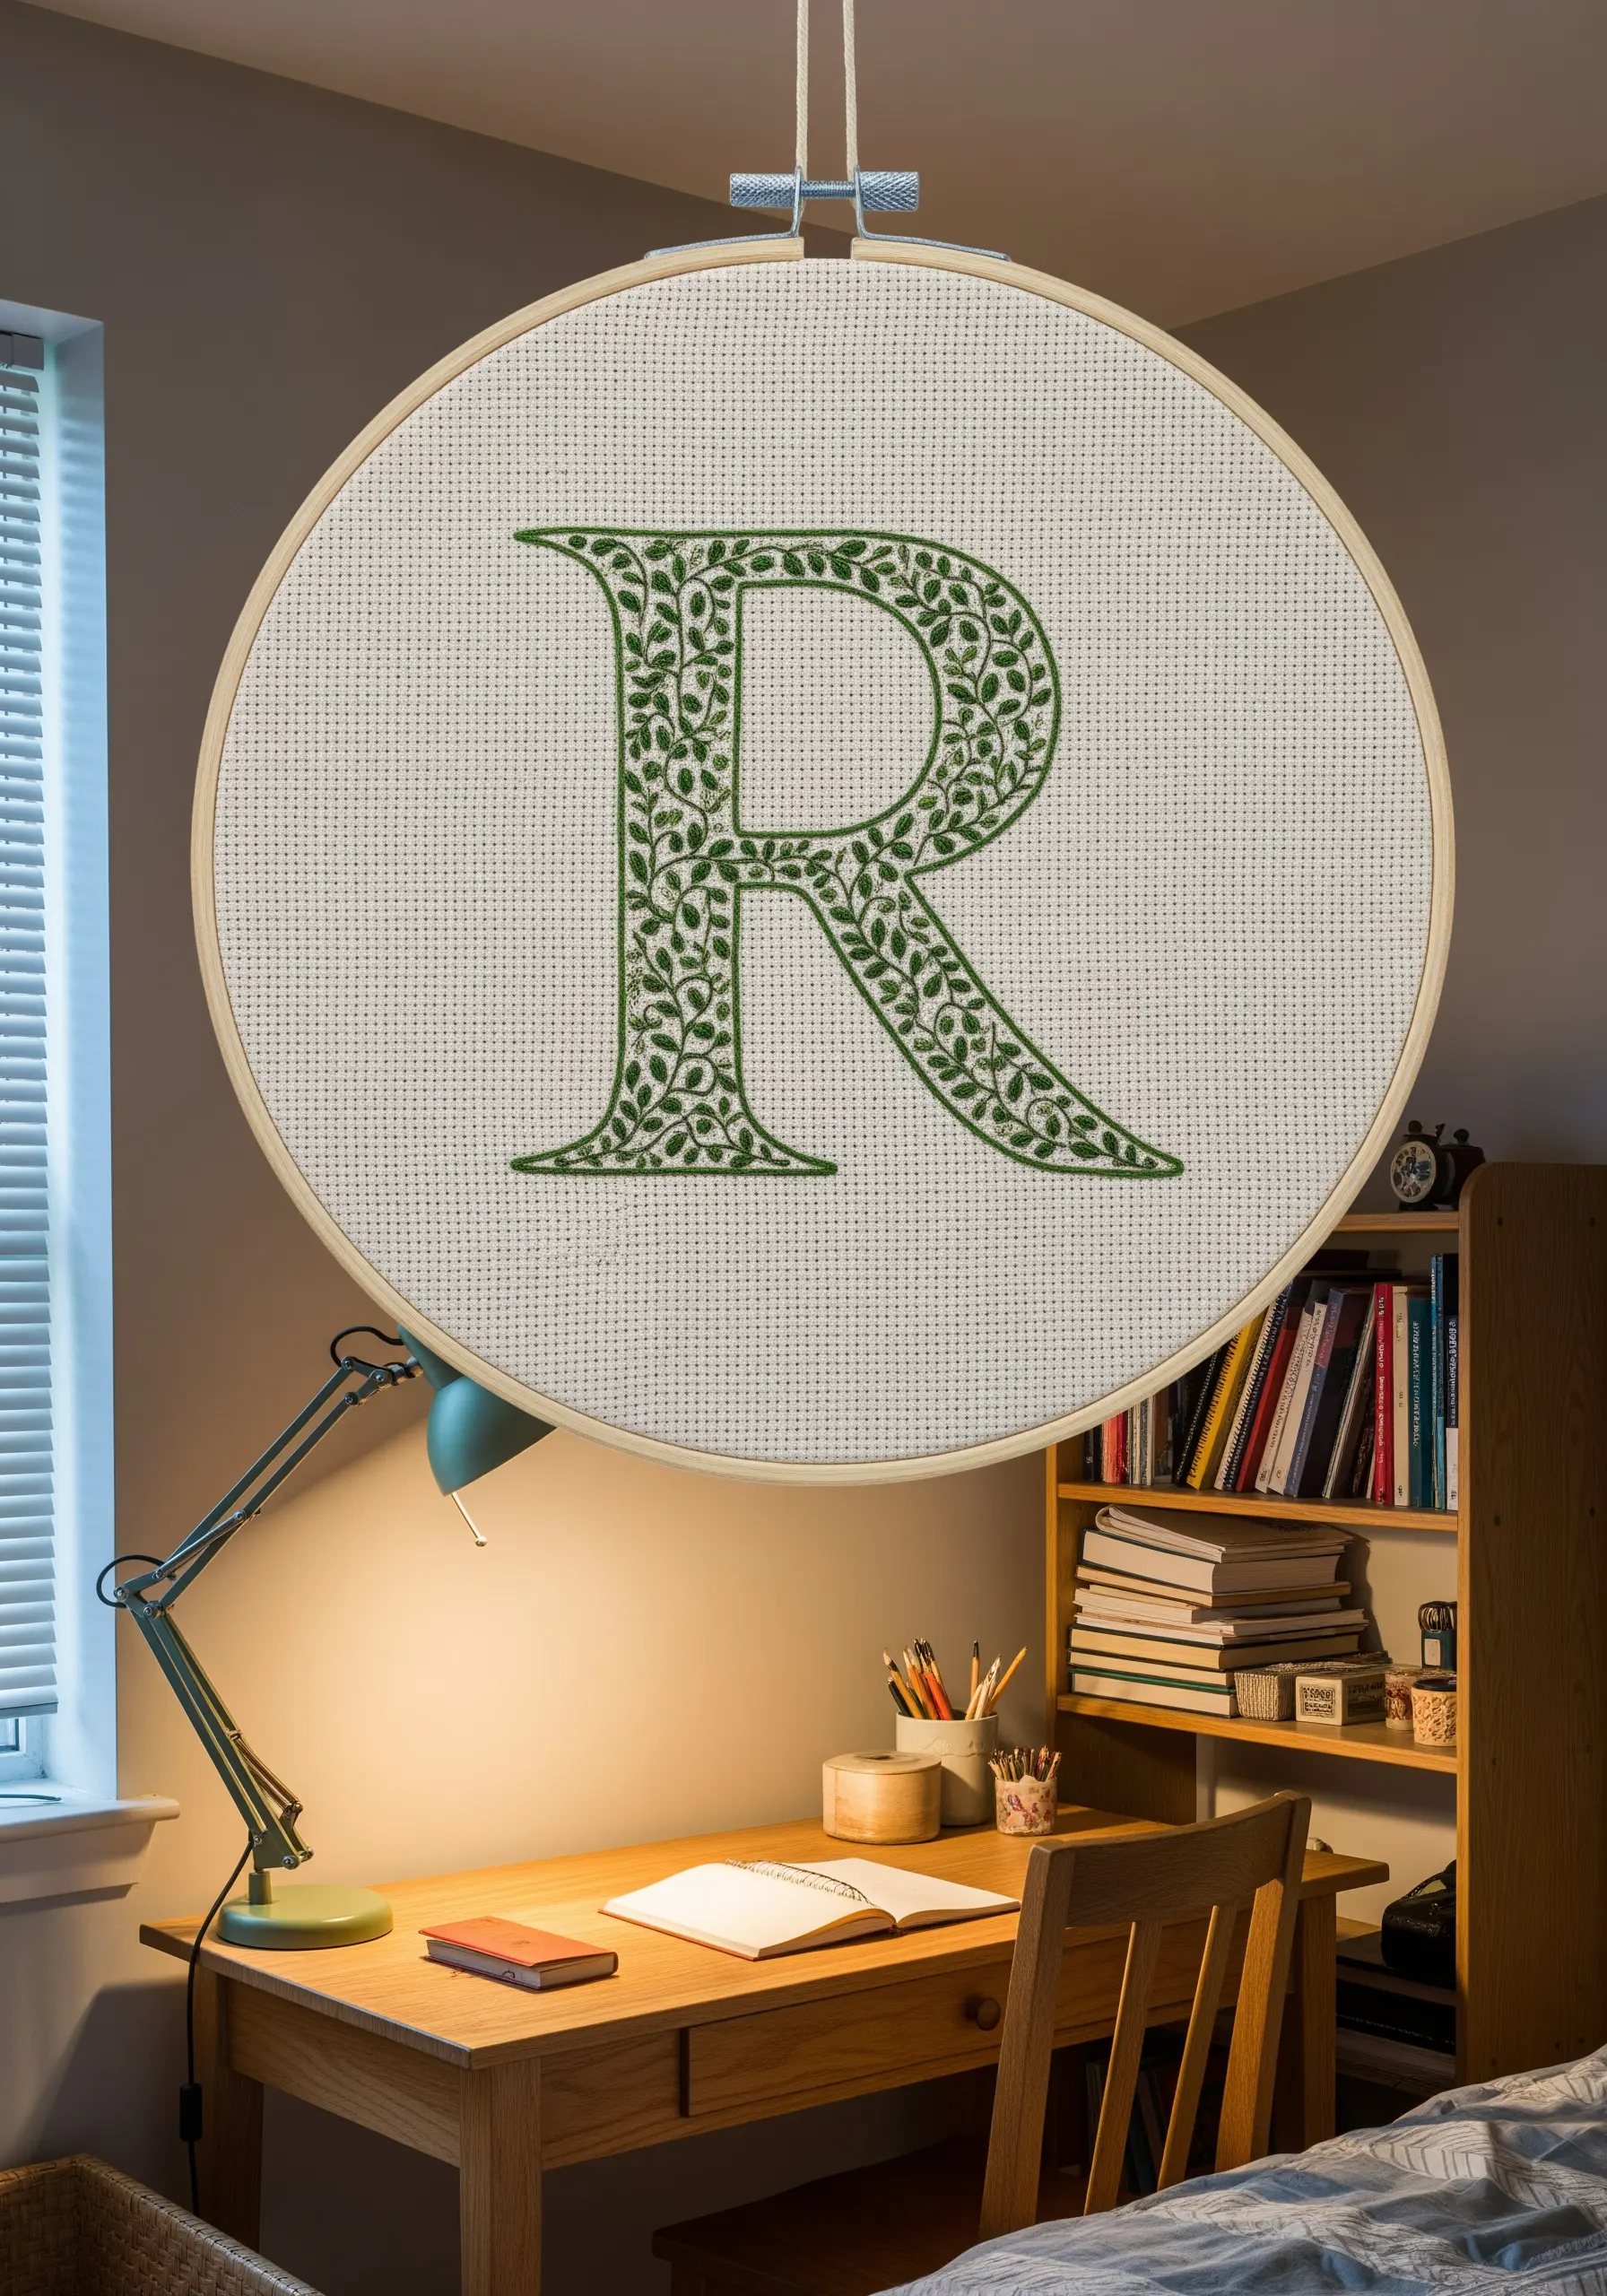
Transform a simple initial into a personal work of art by filling it with intricate, vining foliage.
First, trace the outline of your chosen letter lightly onto the fabric.
Then, use a fine, single strand of floss to fill the shape with tiny seed stitches, lazy daisy leaves, and delicate stem stitch vines.
Stitching on Aida cloth, as shown here, provides a natural grid that helps keep your tiny stitches neat and evenly spaced, resulting in a beautifully detailed, personalized piece of decor.
11. Combine Pressed Flowers with Delicate Stitches
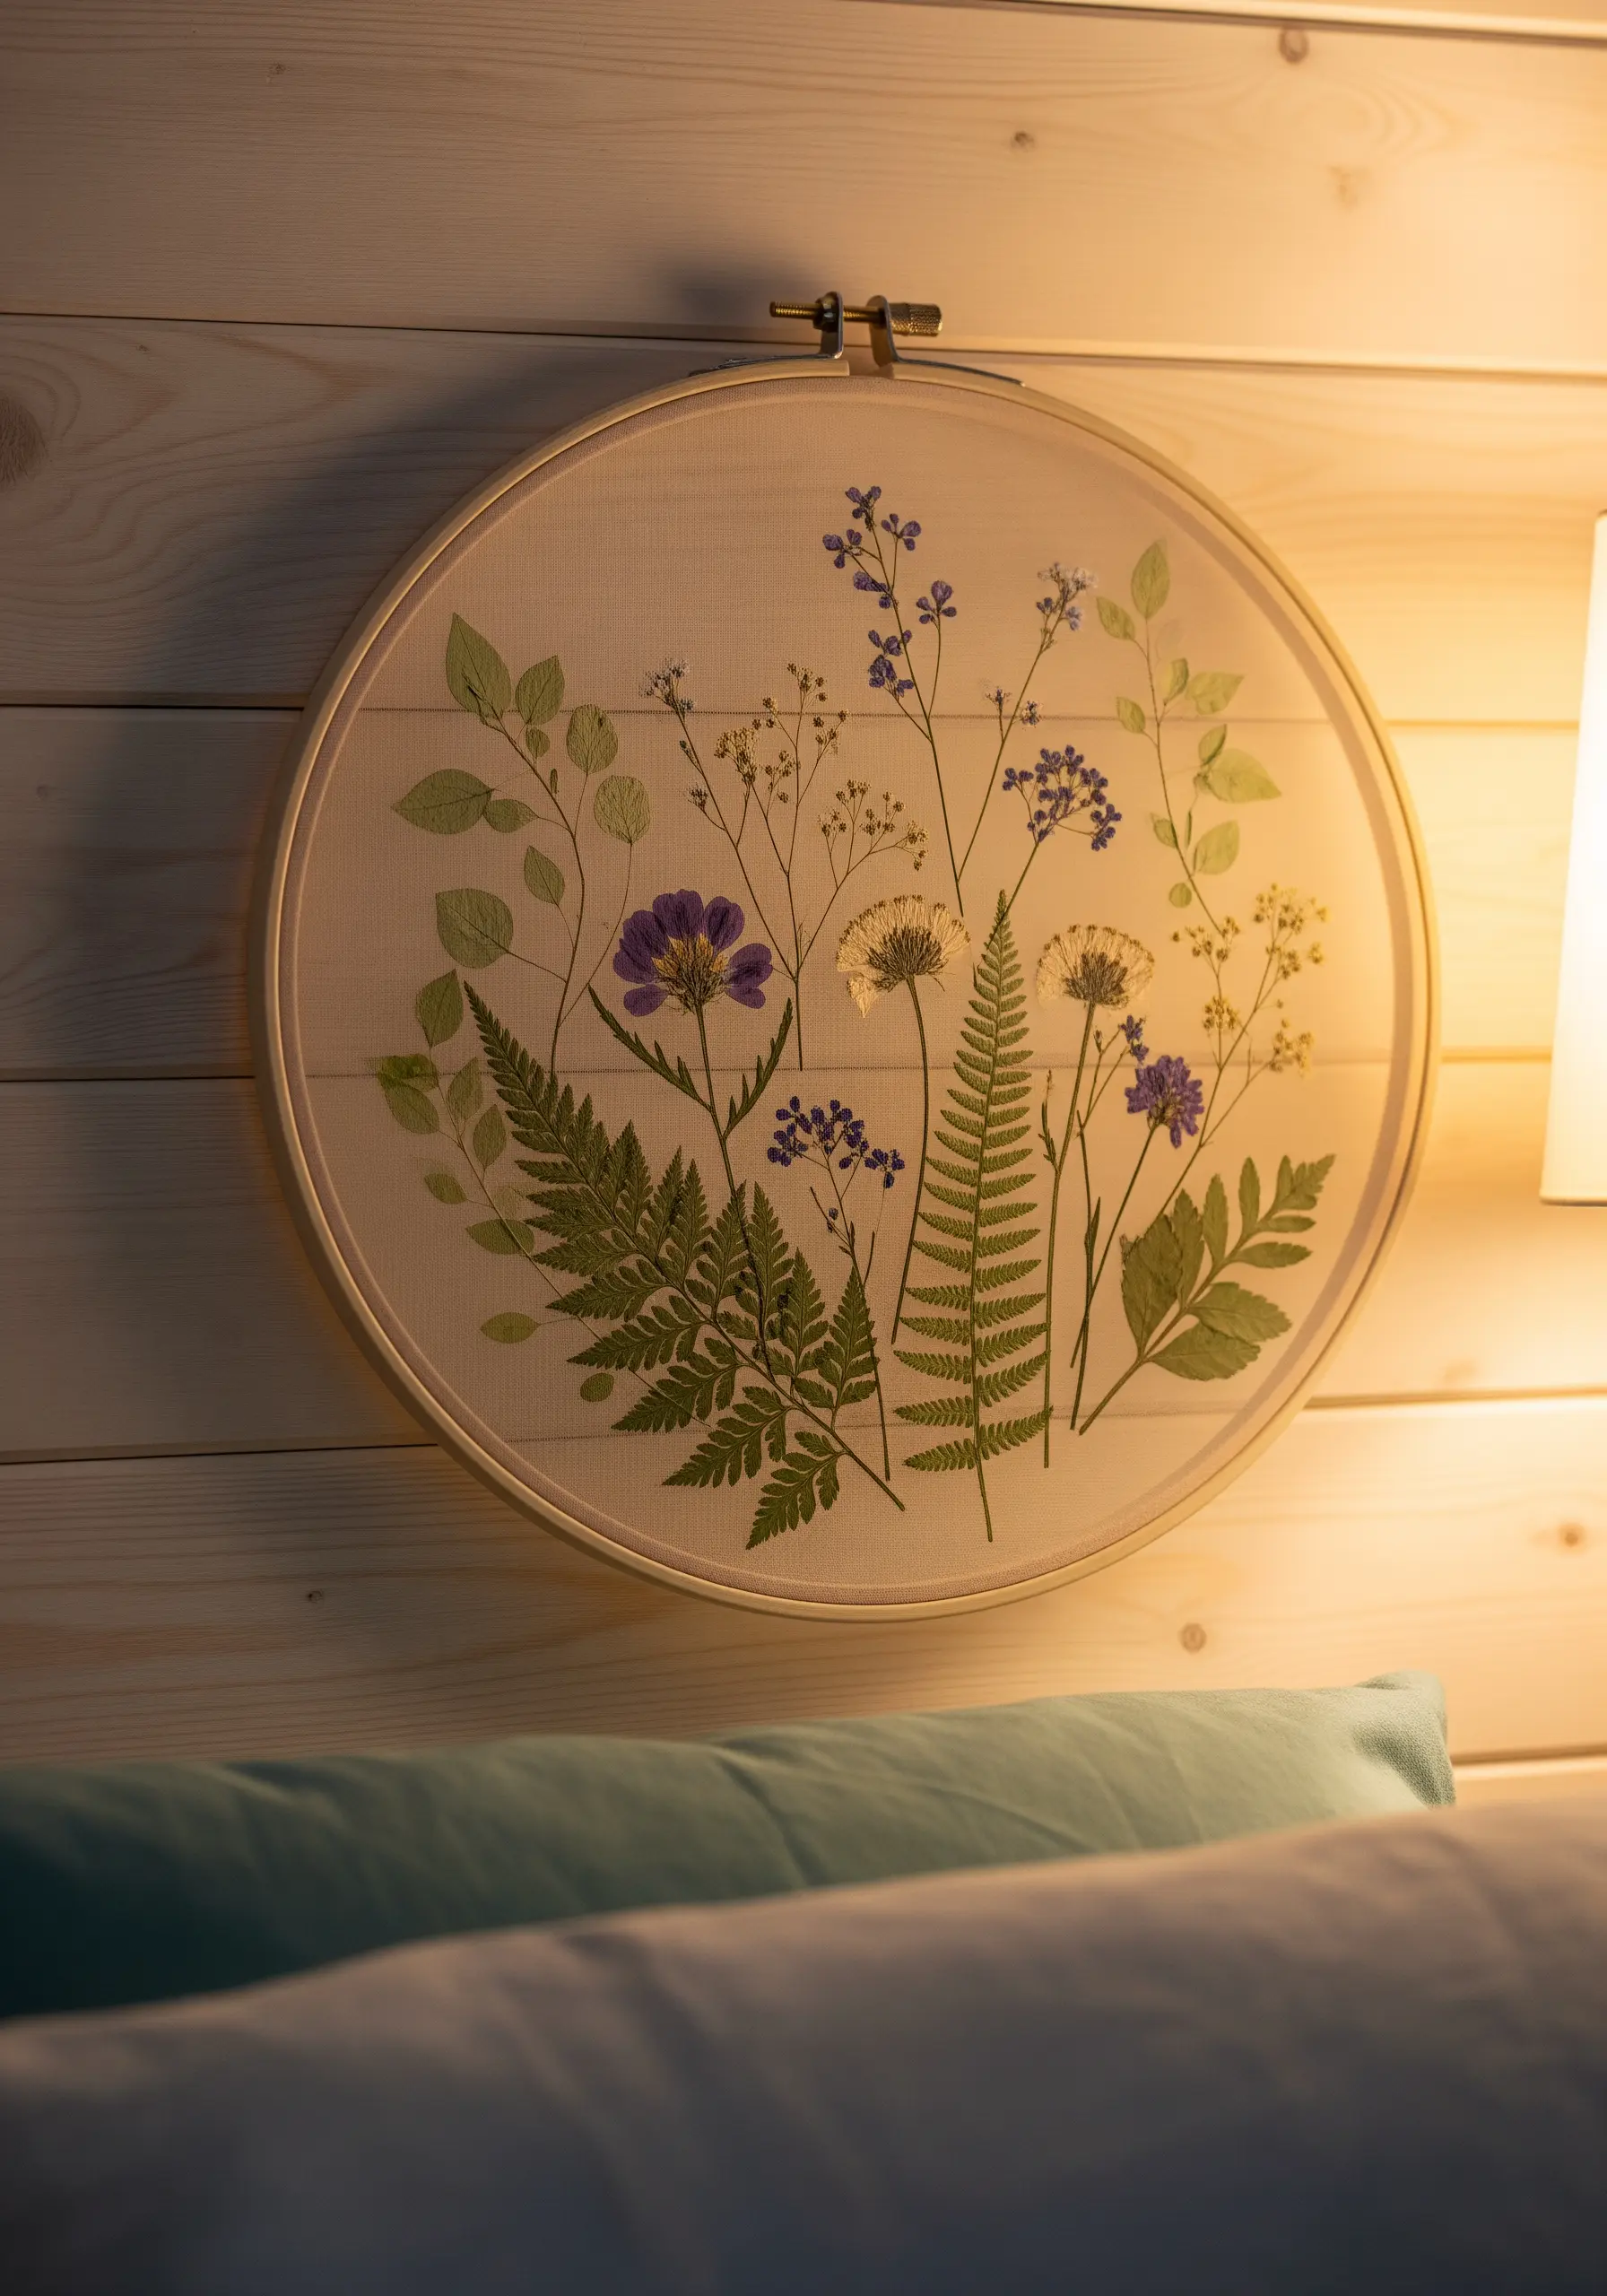
Merge your love for botanicals and embroidery by creating a mixed-media piece that incorporates real pressed flowers.
First, carefully arrange and secure your dried botanicals to the fabric using a tiny, archival-quality adhesive or a few discreet couching stitches.
Then, use embroidery to add stems, leaves, and smaller filler flowers, creating a seamless composition where it’s hard to tell where the real plant ends and the thread begins.
This technique results in a truly unique piece of art that celebrates the delicate textures of both natural and handmade elements.
12. Stitch a Sculptural Bonsai Tree
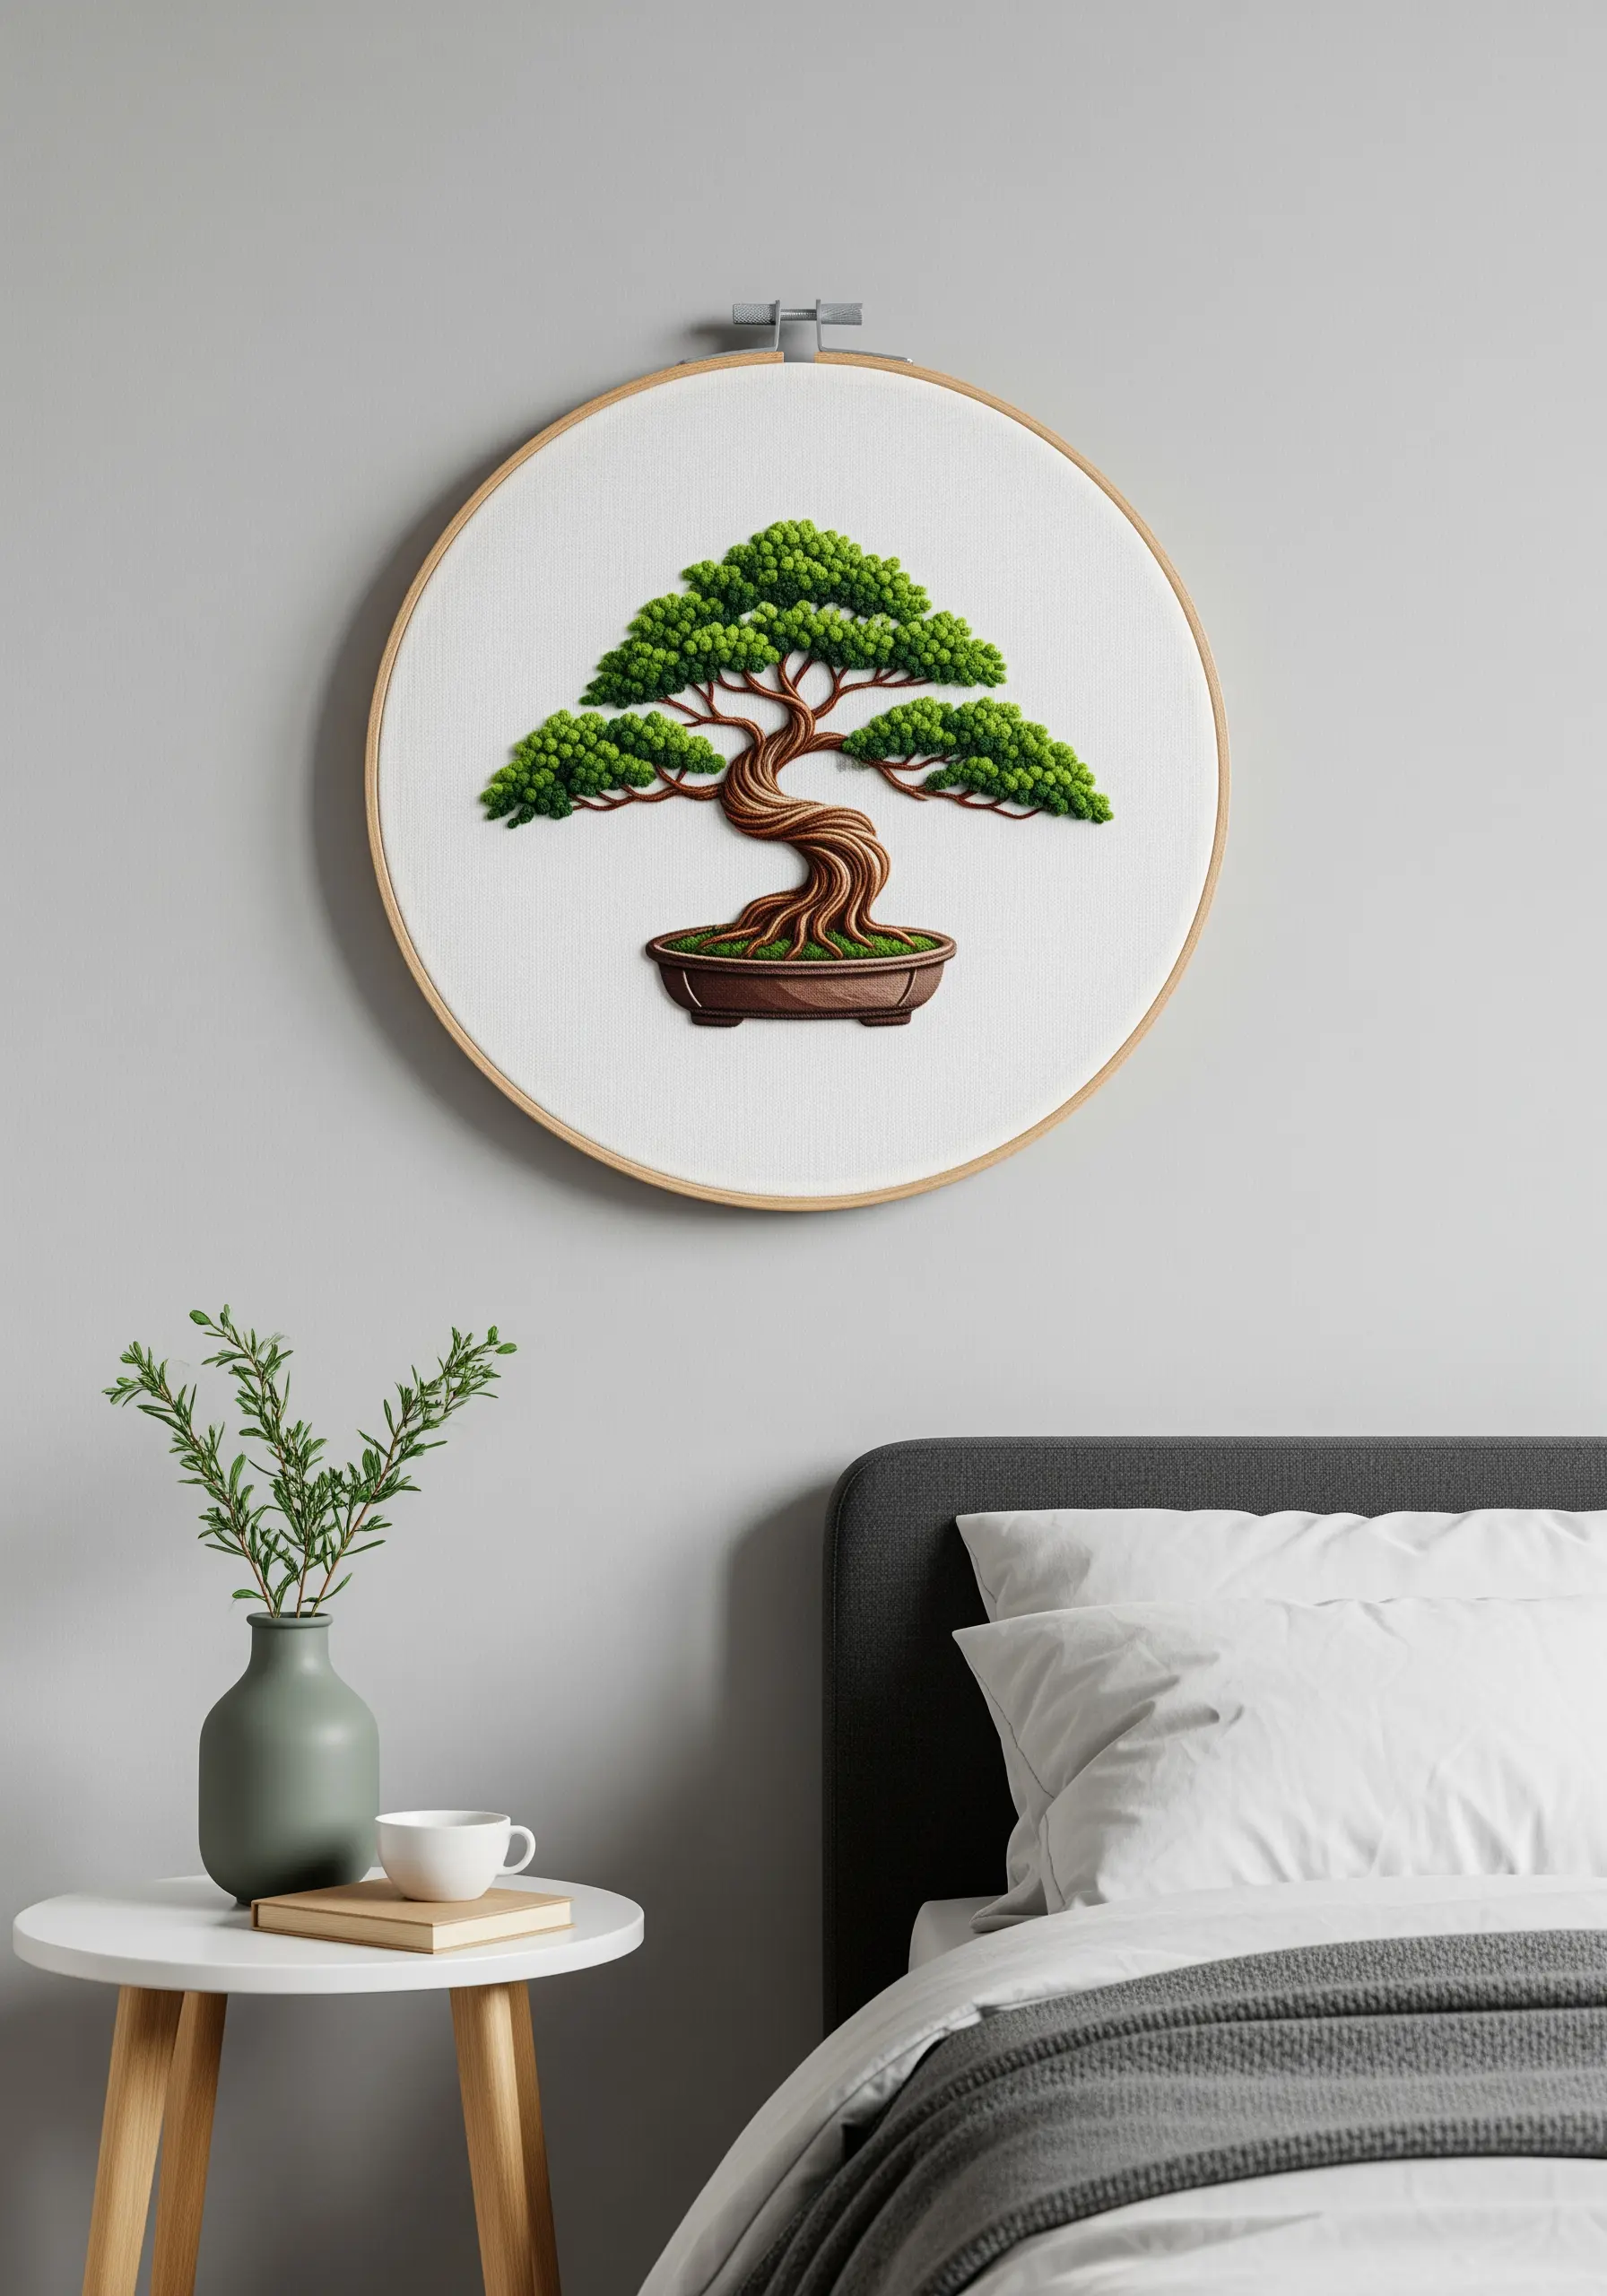
Capture the iconic form of a bonsai tree by focusing on creating distinct textures for its foliage and trunk.
Use hundreds of tightly packed French knots in several shades of green to build up the dense, cloud-like pads of leaves. Overlapping the knots gives them a wonderfully sculpted, three-dimensional quality.
For the twisted trunk, use a whipped backstitch or a thick stem stitch with a darker brown thread to create a solid, bark-like texture that contrasts with the airy foliage.
13. A Cascade of Ginkgo Leaves

For a large-scale statement piece, choose a simple, recognizable motif and repeat it in a dynamic composition.
The fan shape of a ginkgo leaf is perfect for this, as it can be easily rendered with a few straight stitches or a small satin stitch fan.
Create a sense of movement and depth by varying the colors—from bright yellow to deep green—and scattering the leaves as if they are tumbling in the wind.
Mounting the finished piece in a simple wooden frame elevates it from a craft project to sophisticated textile wall art.
14. Mastering Fine Detail in a Calathea Leaf

To capture the intricate, painterly patterns of a calathea leaf, you need to strategically vary the weight of your thread.
Use a full three strands of floss for the larger green areas, filled with a smooth satin stitch.
For the delicate white stripes, switch to a single strand of floss. This dramatic difference in thickness allows you to create crisp, fine lines that look painted on.
Using a dark background fabric makes these contrasting details even more pronounced and visually striking.
15. Moon Phases with Botanical Textures

Create a celestial design with an earthy twist by combining delicate thread work with unexpected natural materials.
Stitch the intricate patterns of the crescent moons using a fine white or silver thread.
Then, fill the void of the new moons with textural elements like preserved moss, tiny fern leaves, or lichen, which you can secure with discreet couching stitches.
This fusion of precise stitching with the organic texture of real botanicals creates a magical, multi-layered piece that invites closer inspection.
16. Understated Elegance with an Olive Branch
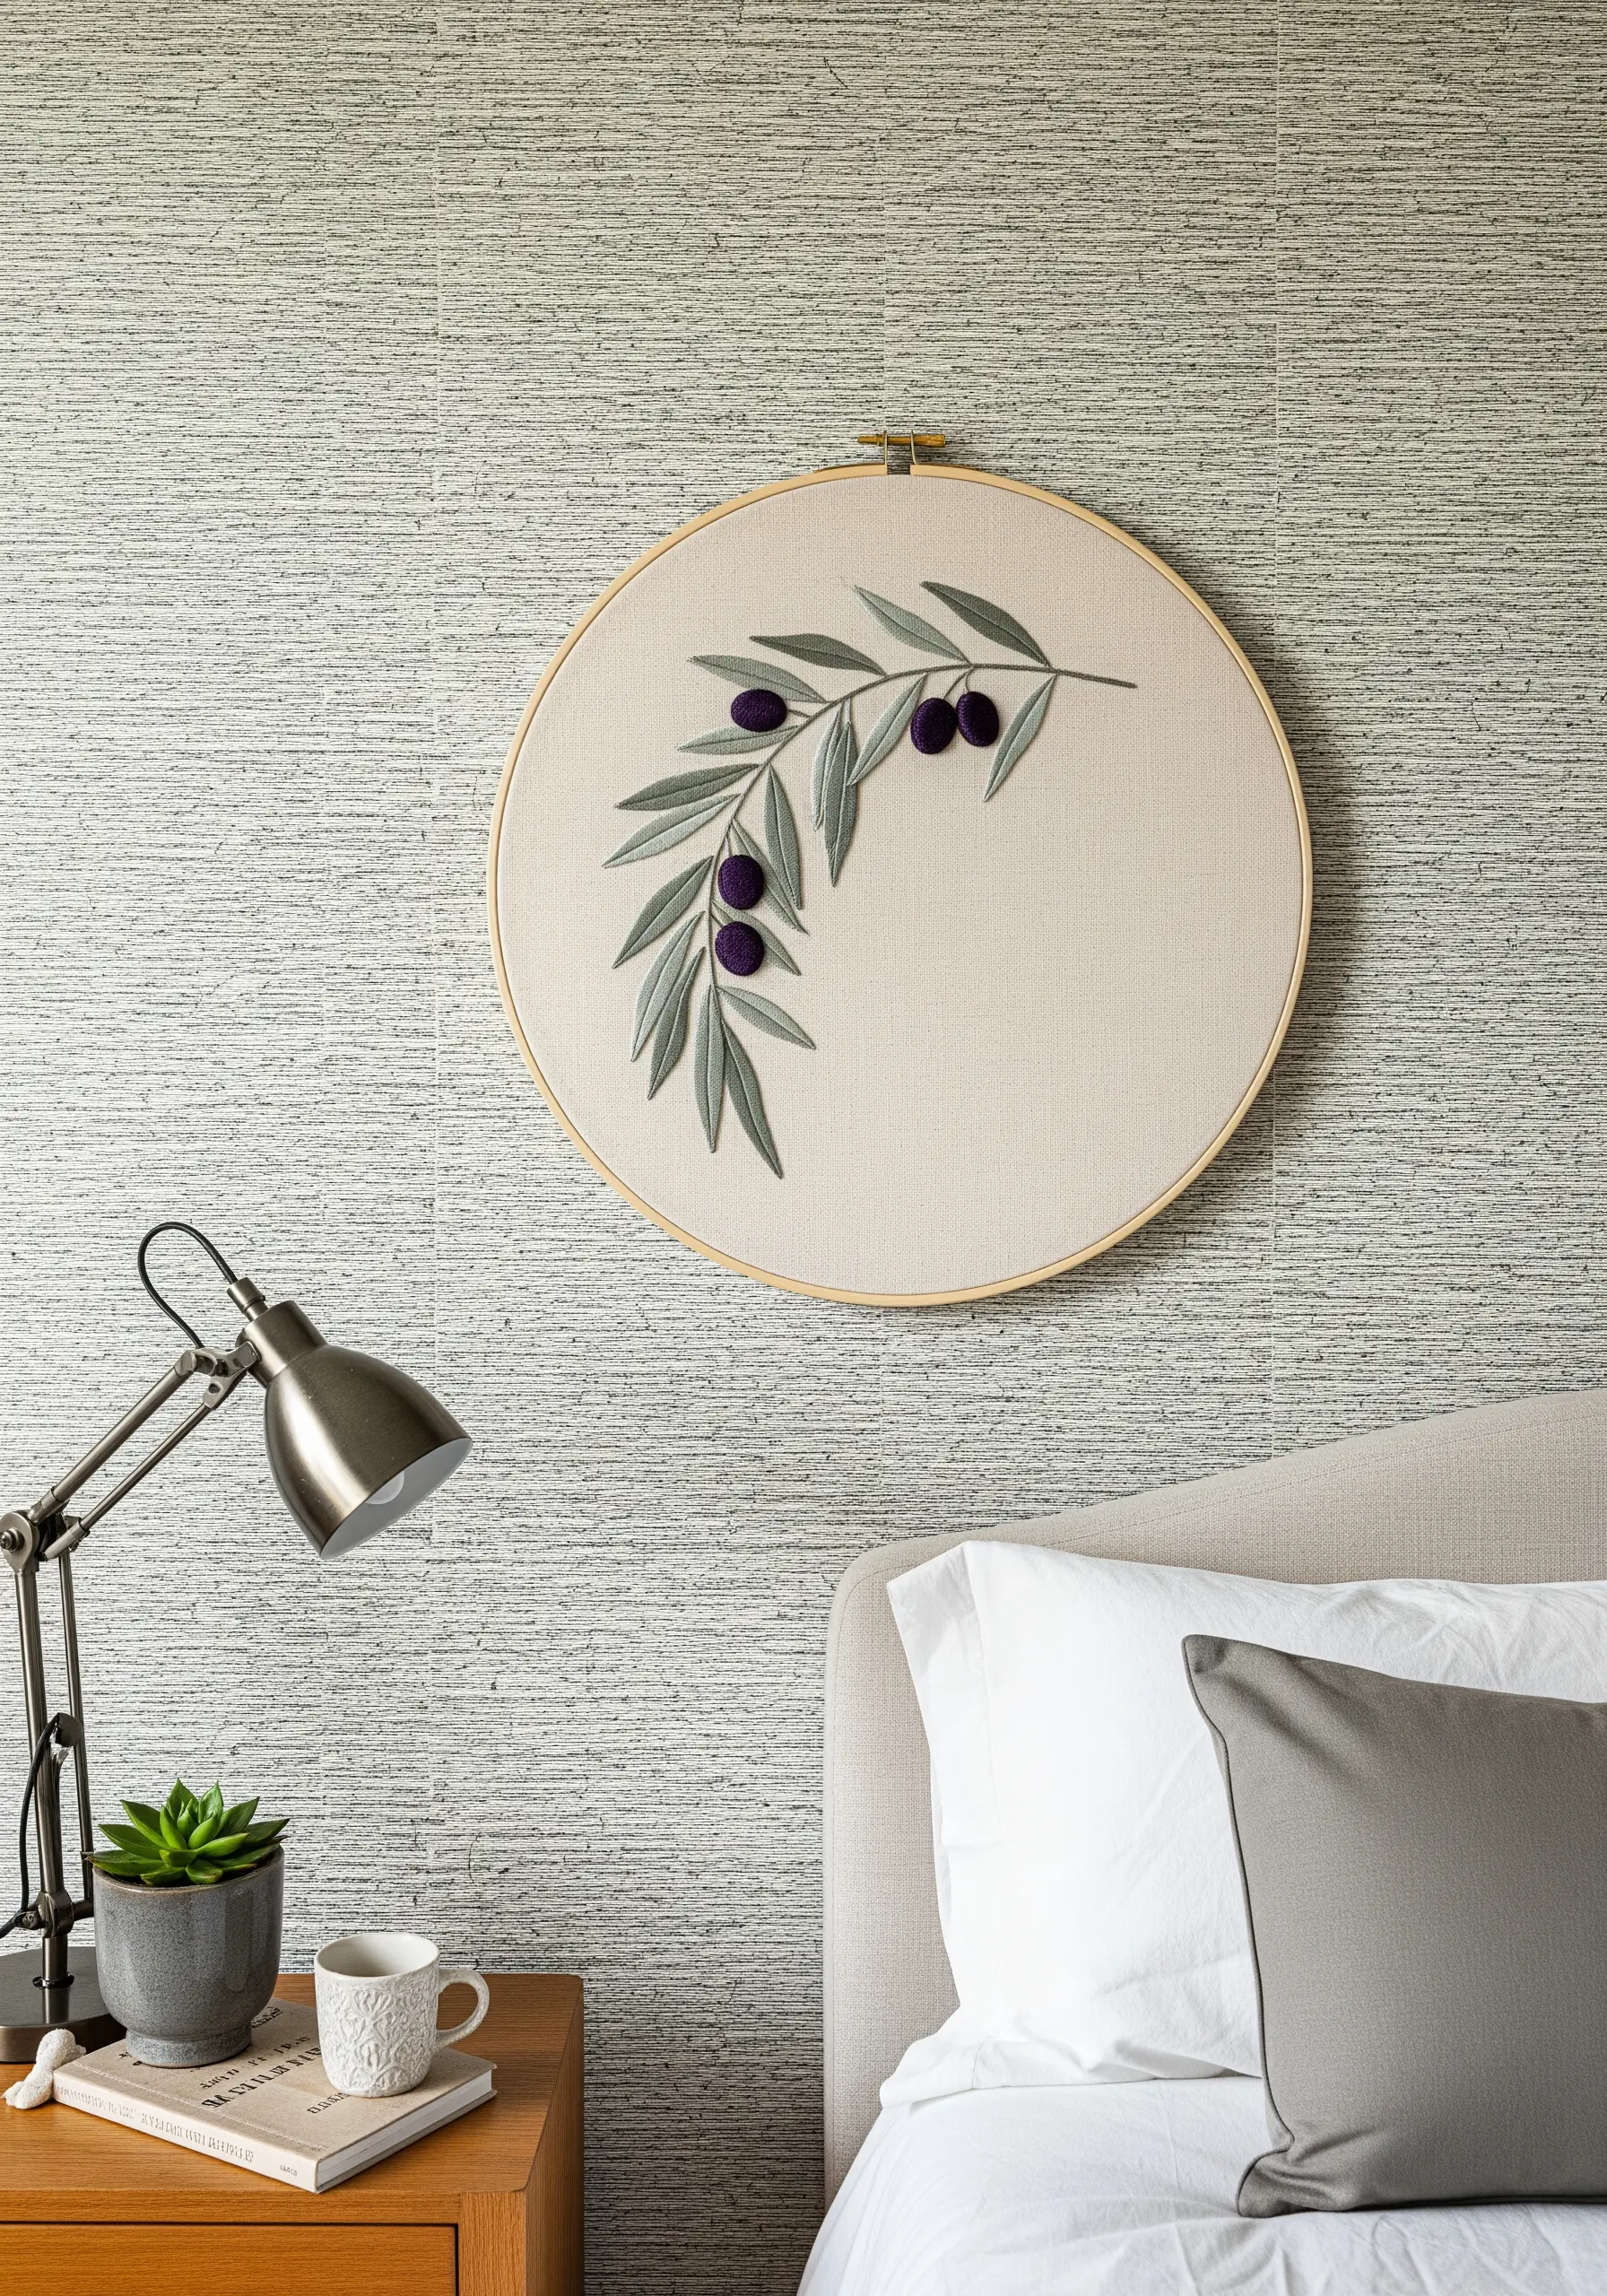
You can achieve a deeply calming and sophisticated look by committing to a muted, tonal color palette.
Choose a high-quality neutral fabric, like oatmeal linen or unbleached cotton, as your base.
Select soft, dusty shades for your thread—like sage green, muted grey, and deep, desaturated purple—to create a composition that feels harmonious and serene.
The simplicity of the design, combined with the refined color choices, results in a piece that feels both modern and timeless.
17. Weave a Landscape with Varied Textures

Translate the depth of a rolling landscape into thread by assigning different stitches and fibers to each layer of hills.
Use chunky French knots or tufted stitches with thick wool yarn for the foreground, creating a plush, highly tactile area that appears closest to the viewer.
For the middle ground, switch to smoother satin stitches or couched cords with standard cotton floss.
In the far distance, use simple backstitches in the finest thread to suggest mountains, creating a sense of atmospheric perspective through texture alone.
18. Defining Form with Vein Stitching

Add a layer of striking realism to your embroidered houseplants by stitching the veins on top of your fill stitches.
First, fill each leaf completely using a long-and-short or satin stitch in your chosen shades of green.
Then, using a single strand of a contrasting color—like the rust-red seen here—add the central and secondary veins with a simple backstitch or stem stitch.
This simple, layered technique instantly provides structure and definition, making the leaves look far more lifelike.


