

If you feel your embroidery has reached a plateau, the solution often isn’t a more complicated stitch. It’s about how you combine what you already know with a new sense of intention. It’s about layering—not just thread, but texture, fabric, and perspective.
Fabric collage is your path to creating work that feels richer, more personal, and undeniably professional. It invites you to think like an artist, blending color and texture before you even make the first stitch. Each piece of scrap fabric becomes a brushstroke, and every thread a defining line.
Here, you will find 17 tangible ways to layer fabric and stitches. These are not just ideas; they are professional techniques that build depth, create focus, and transform a simple surface into a story. Let’s begin.
1. Define Collage Shapes With Corded Outlines
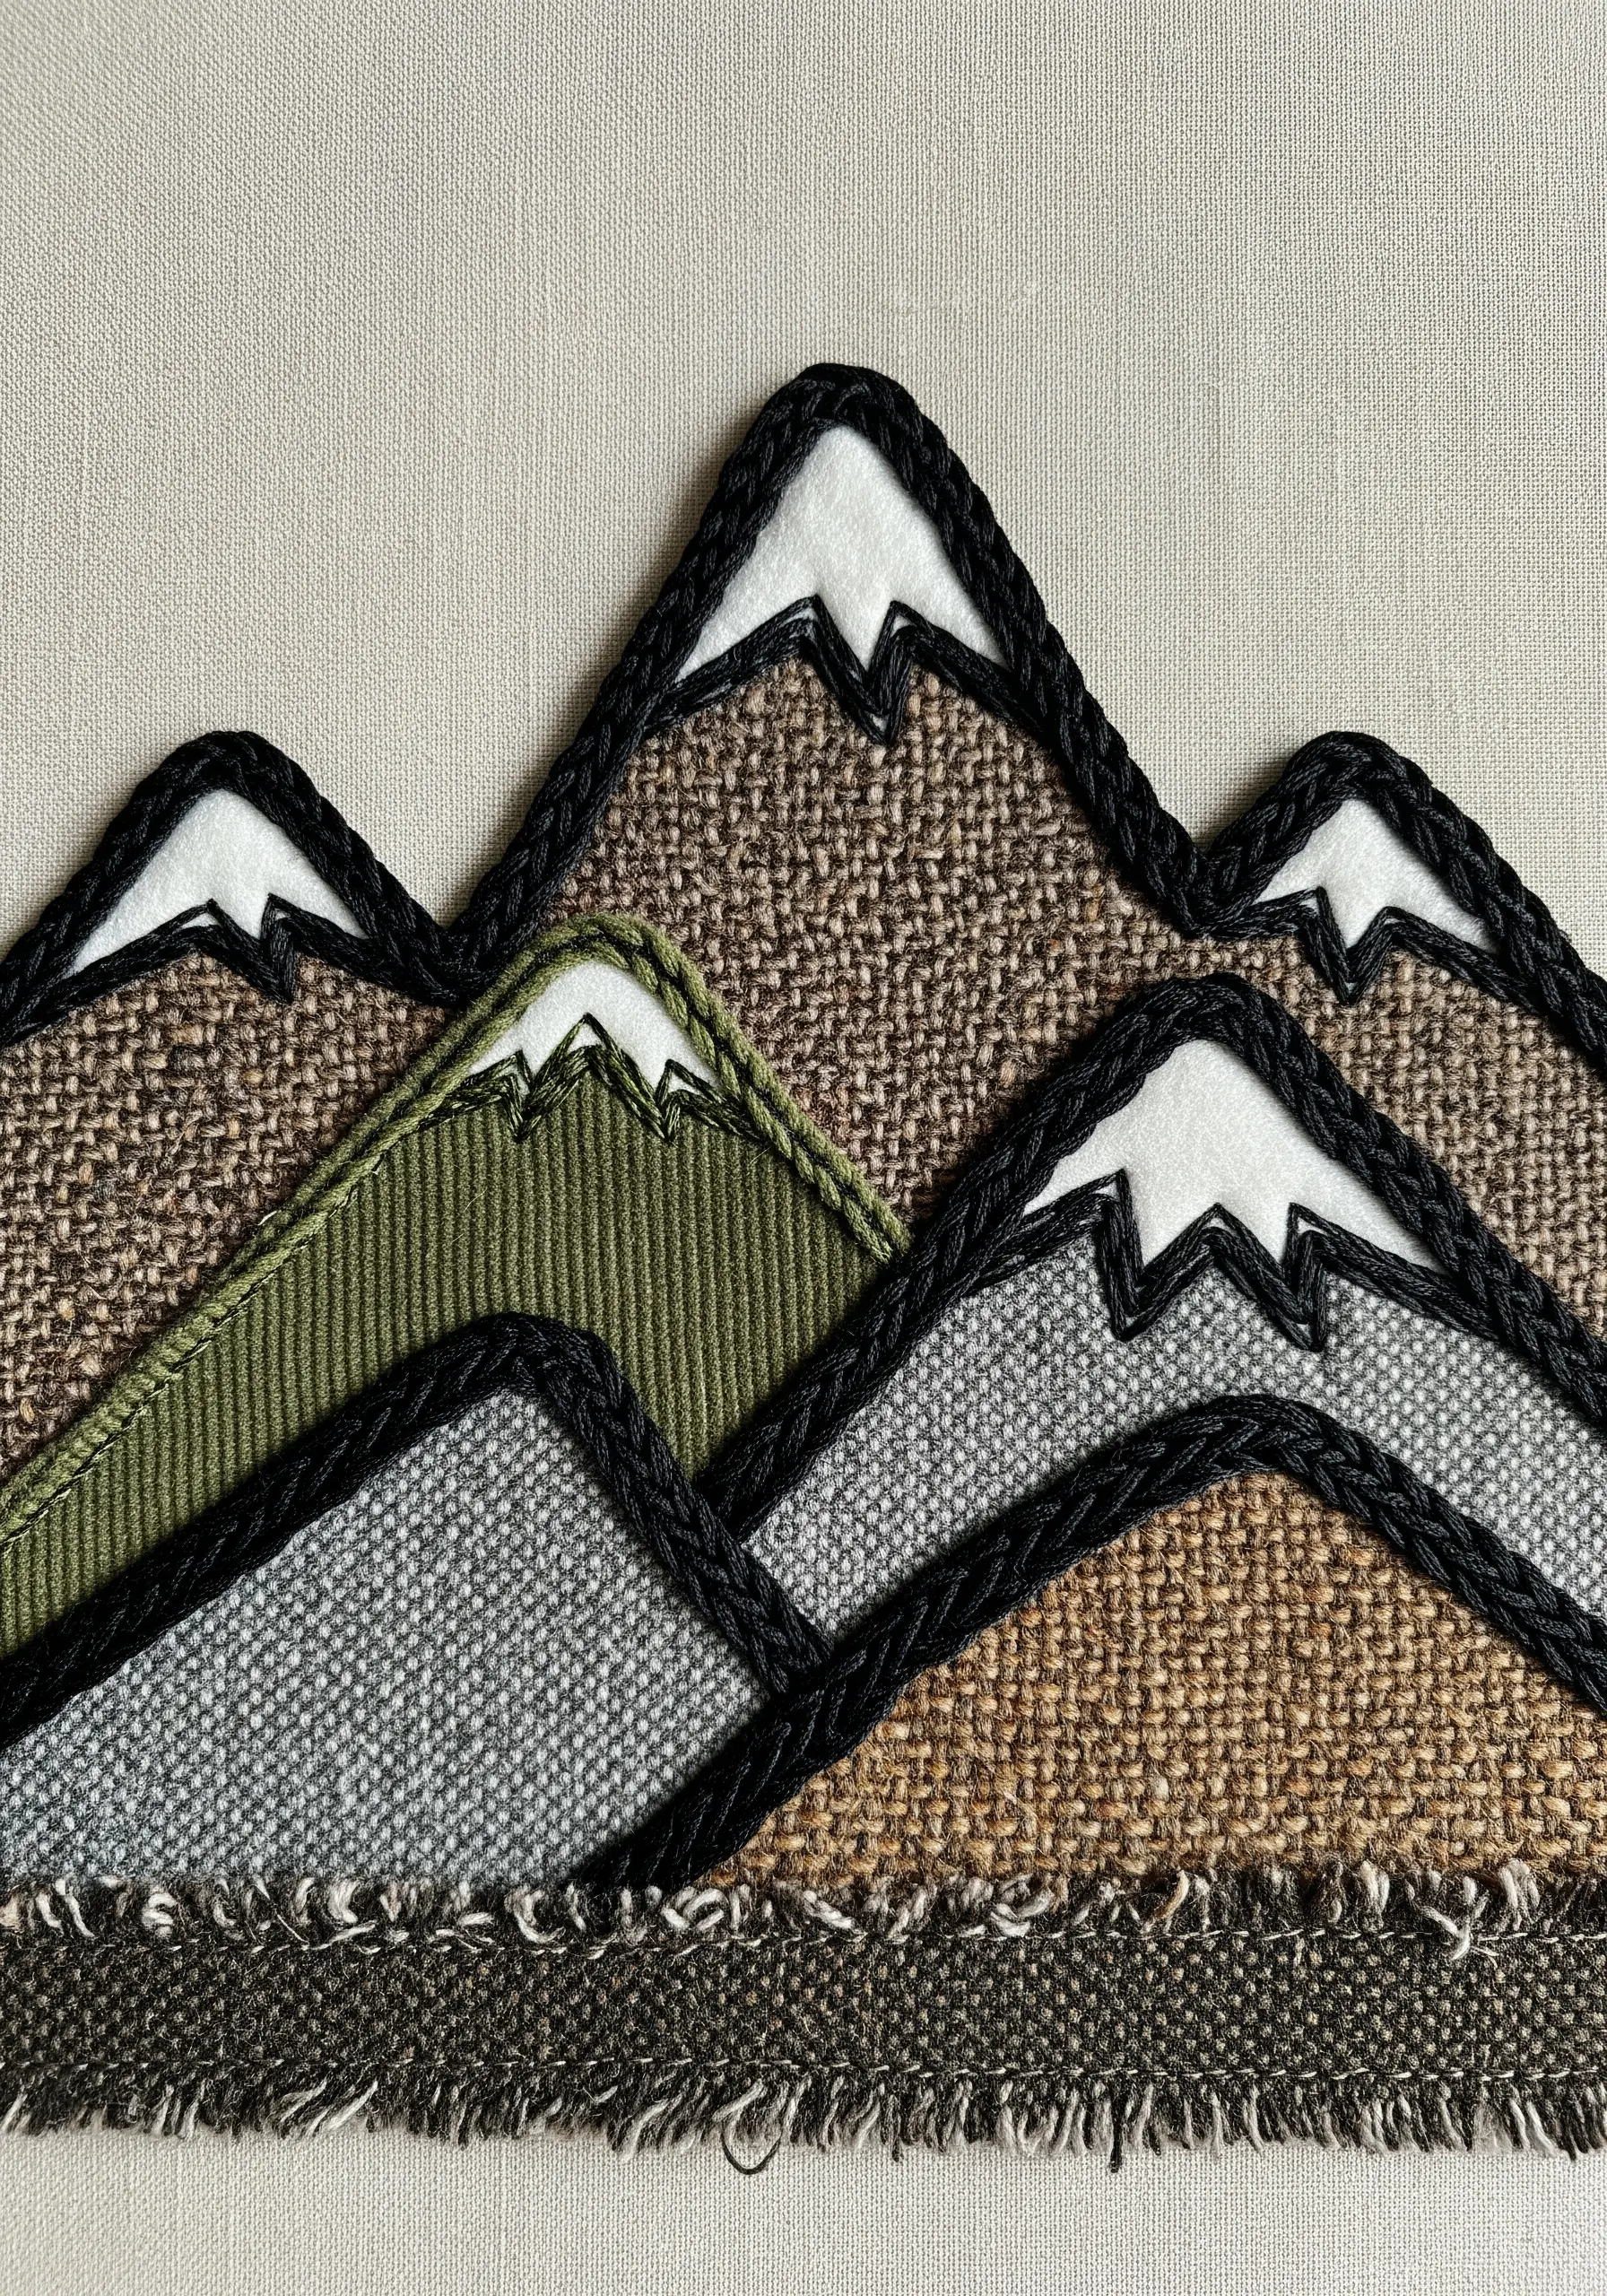
Instead of a simple backstitch, frame your fabric pieces with a thick, dimensional line to create a bold, graphic look.
Use a couching stitch to tack down a thick yarn or cord along the edges of your appliqué fabric.
This technique adds visual weight, cleanly separates the different textured fabrics, and makes your composition feel deliberate and contained.
For the base, choose a loosely woven fabric and fray its edge to introduce a soft, organic contrast to the piece’s crisp outlines.
2. Layer Sheer Organza for a Watercolor Effect

Create ethereal, transparent layers by stitching cut pieces of silk organza onto a sheer tulle or voilé background.
Instead of filling shapes with thread, let the overlapping fabric create delicate color blends and soft gradients, much like watercolor paint.
Keep your stitches minimal—a simple backstitch or stem stitch in a single, fine thread is enough to define the stems and leaf veins.
This approach emphasizes light and delicacy, turning the fabric itself into the primary medium for color and form.
3. Combine Paper and Thread for Graphic Precision
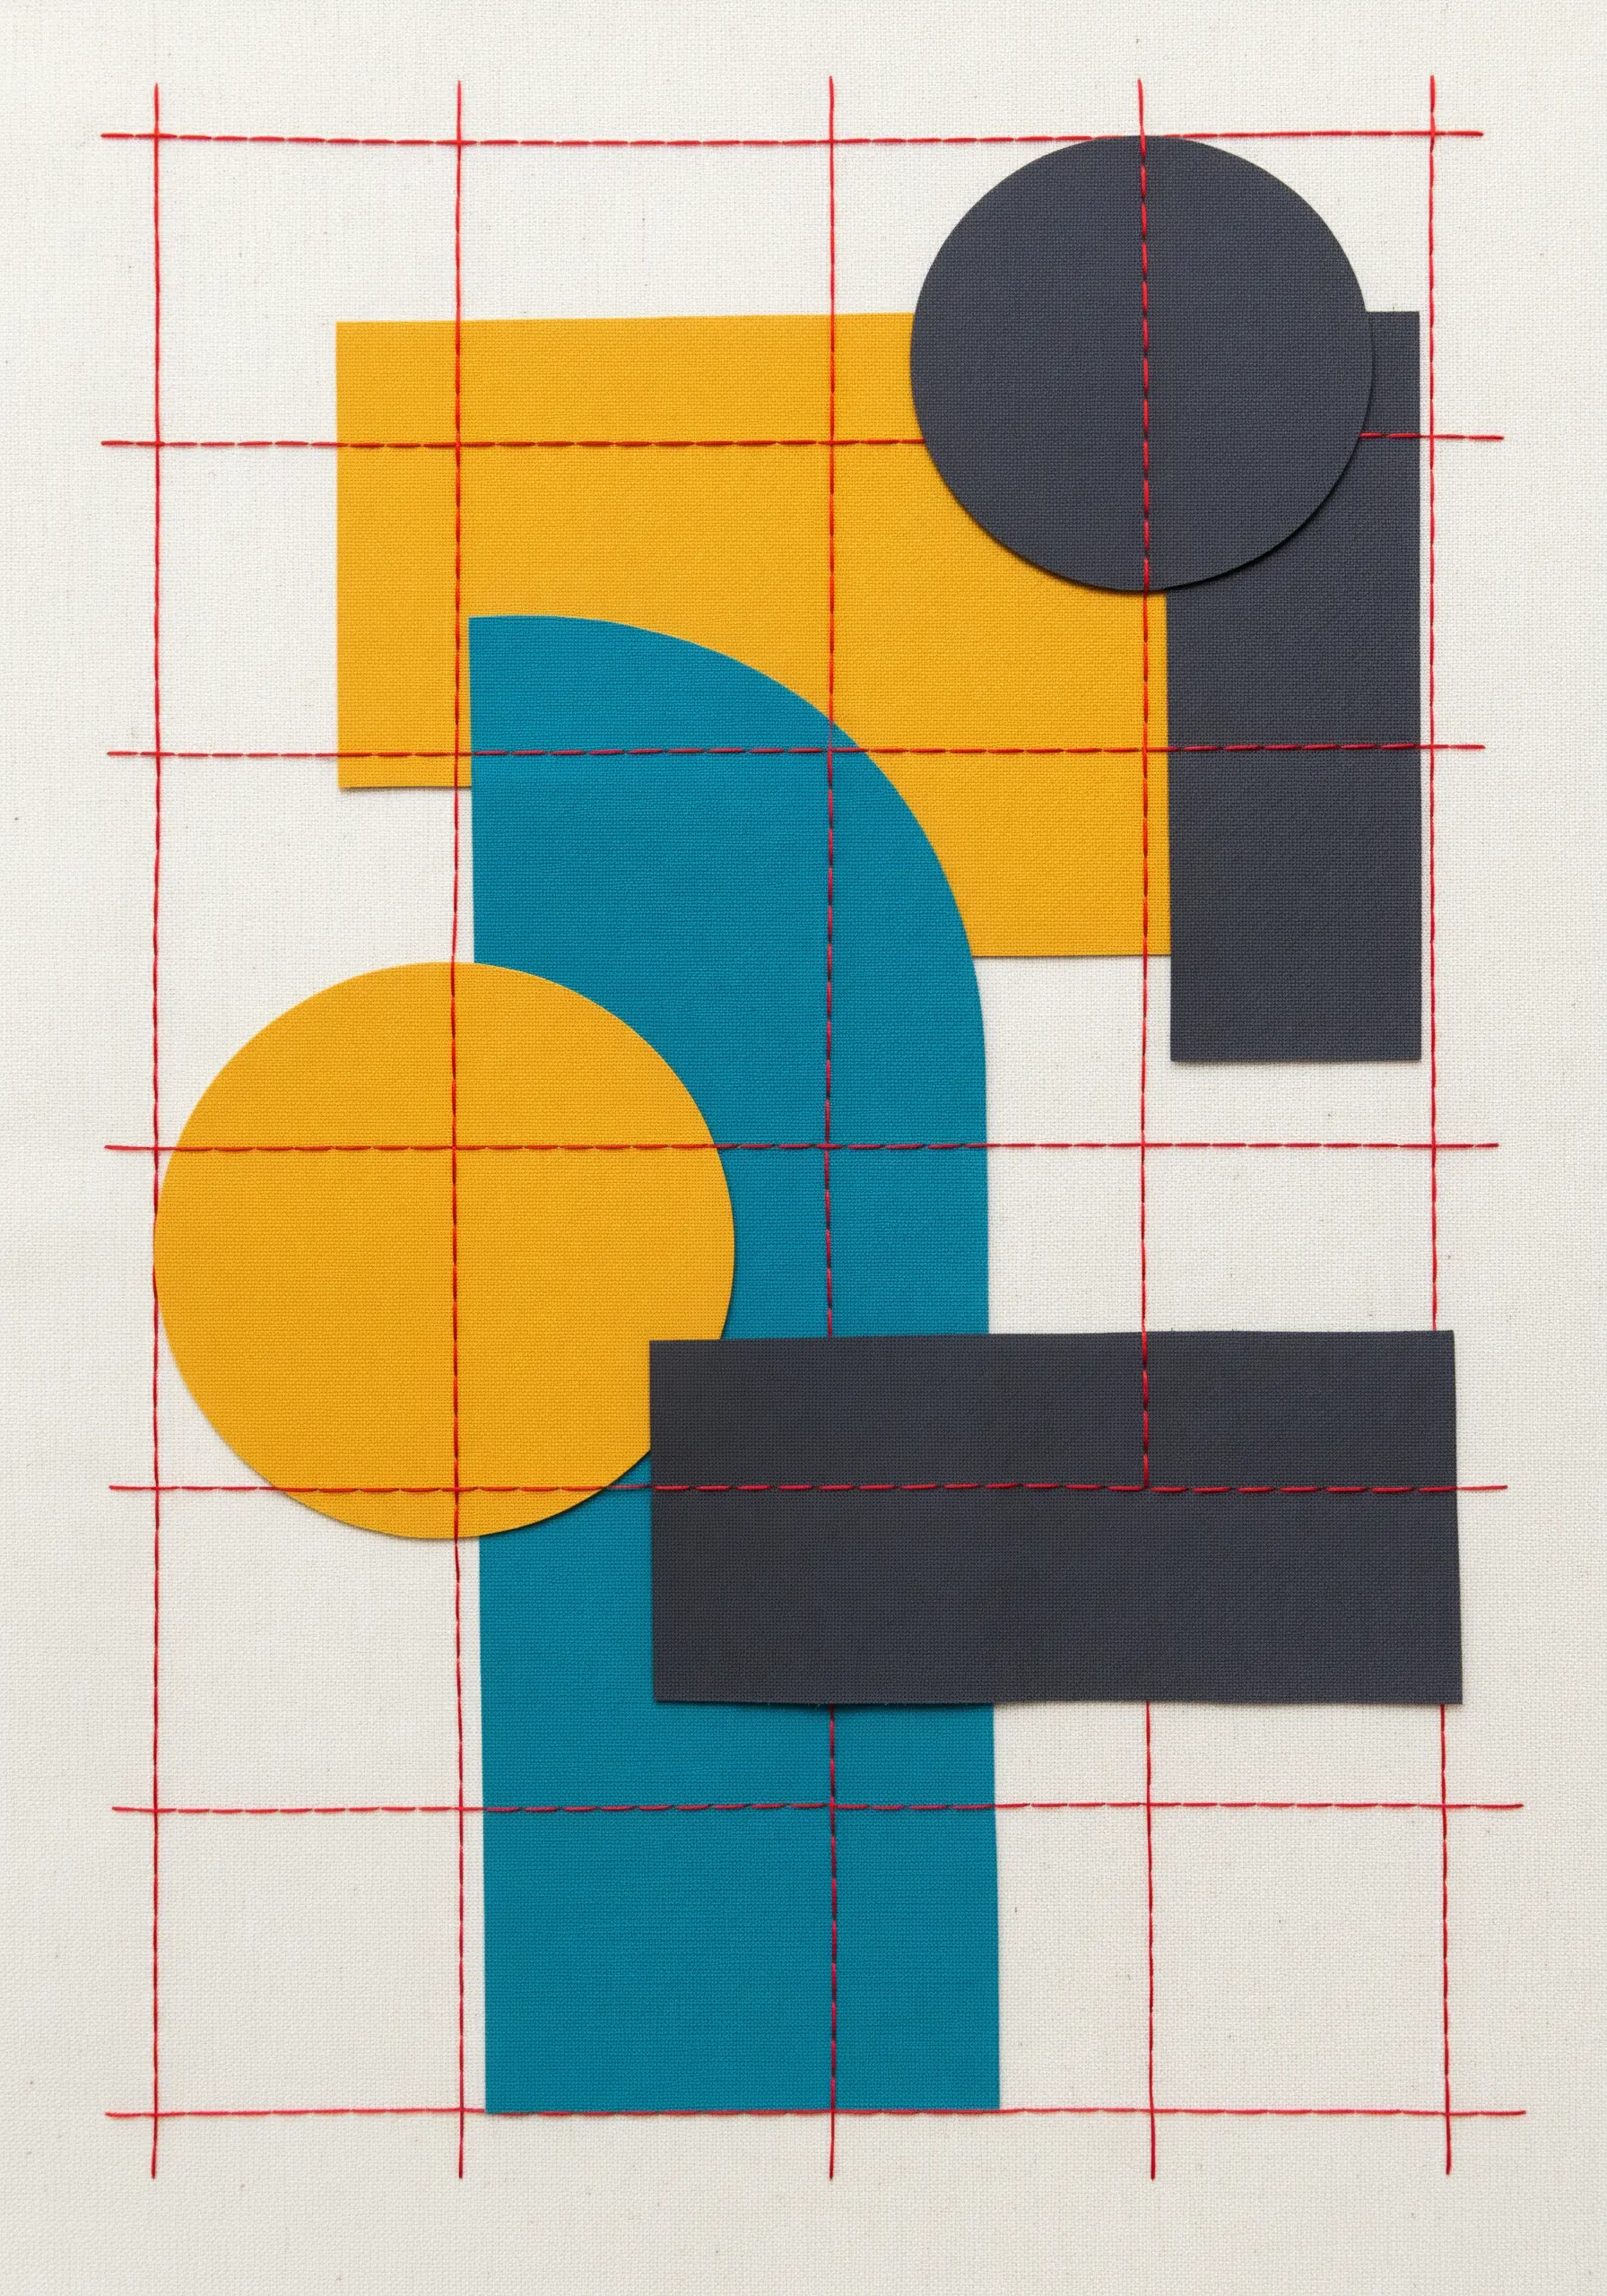
Introduce the clean, sharp edges of paper into your fabric work for a modern, architectural feel.
Use acid-free cardstock for your shapes and secure them to the background fabric with a sparse, intentional grid of running stitches.
This mixed-media embroidery technique creates a striking contrast between the soft textile and the rigid paper elements.
Ensure your stitch tension is even to avoid buckling the paper; a thimble can help you push the needle through cleanly.
4. Build Textural Gradients Over a Painted Base
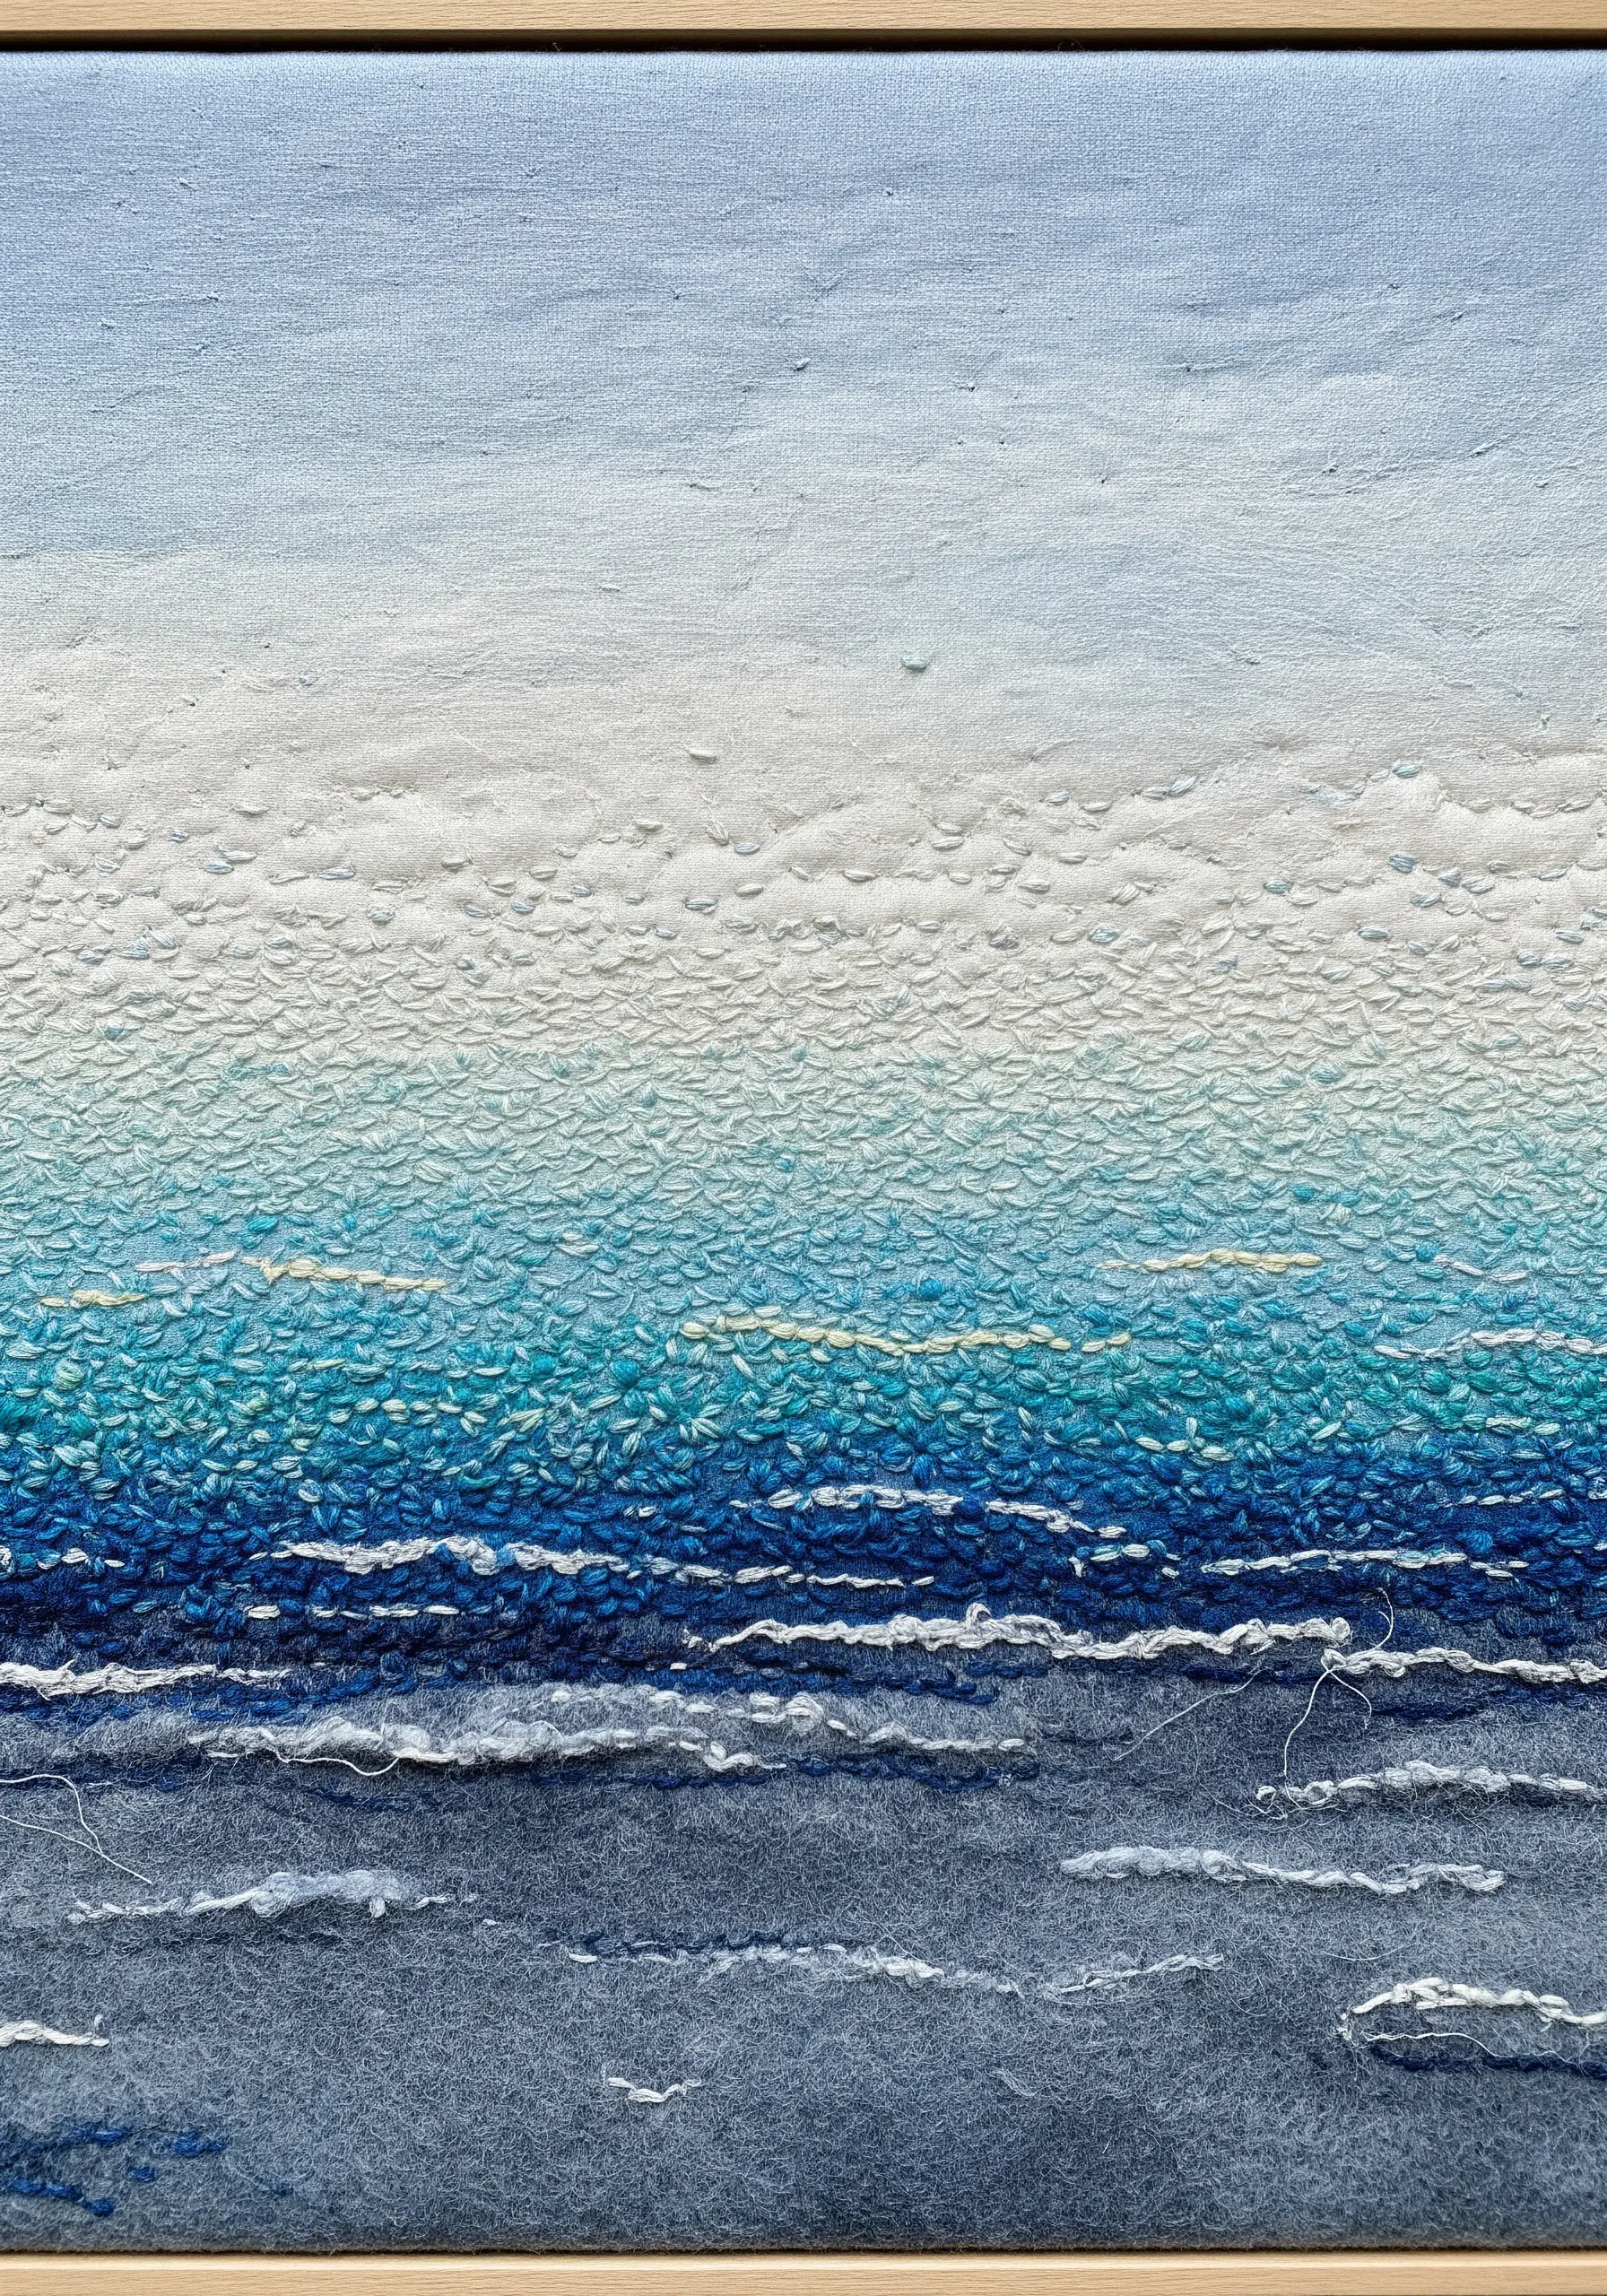
To create atmospheric depth, begin by painting a simple color gradient onto your canvas fabric with diluted acrylics or fabric paint.
Once dry, stitch over the painted areas using dense clusters of seed stitch or French knots, matching your thread color to the underlying paint.
Gradually decrease the density of your stitches as you move into lighter areas, allowing the painted background to show through.
This method builds a rich, tactile surface that transitions from heavily textured to smooth, perfectly mimicking natural landscapes like water or sky.
5. Sculpt a Surface with High-Density Knots
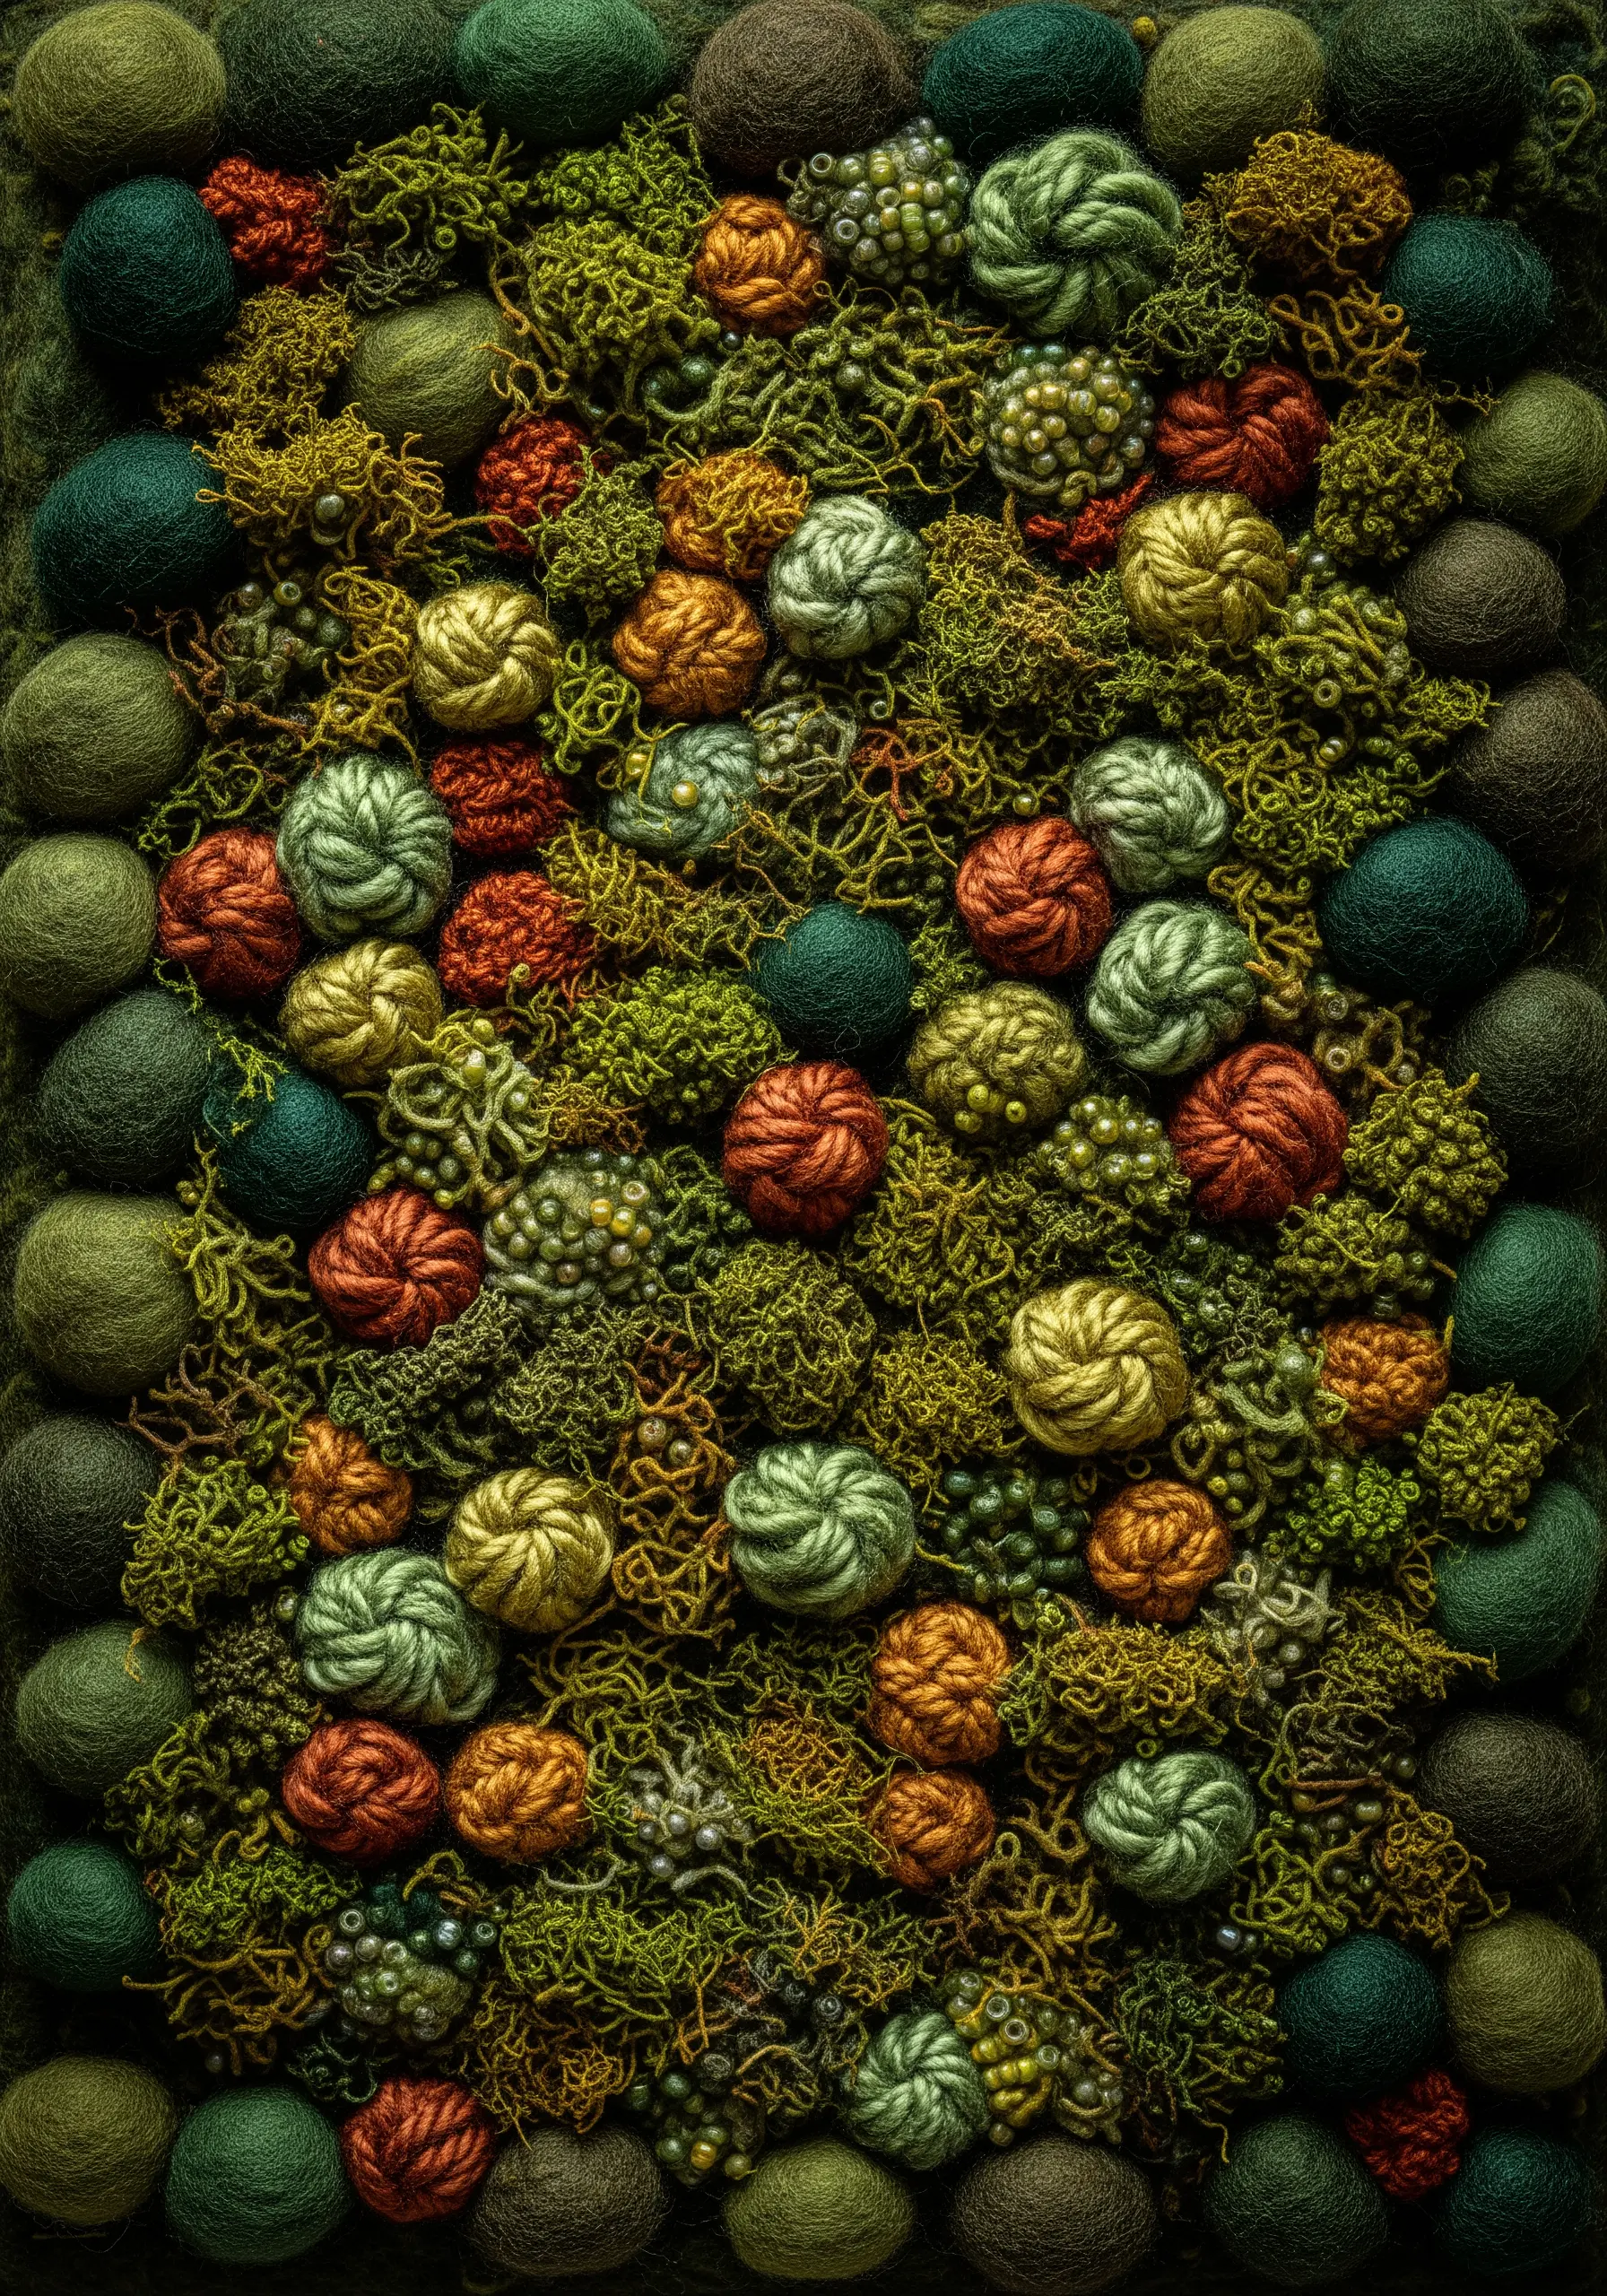
Move beyond flat stitching by creating a completely sculptural surface using a variety of knotted stitches and textures.
Combine French knots, bullion knots, and woven wheel stitches using thick wool or tapestry yarn to build a dense, mossy pile.
Vary the tightness, height, and color of your knots to create an organic, uneven surface that invites touch.
This technique turns the entire piece into a 3D object, where texture, not just color, tells the story.
6. Use Linear Stitches for Architectural Detail

When creating cityscapes or geometric designs, use the direction of your stitches to define form and add detail.
Apply simple fabric shapes for the buildings, then use straight stitches or long running stitches to represent windows, siding, and structural lines.
Vary the stitch direction—horizontal, vertical, diagonal—to differentiate between buildings and create a sense of perspective and texture.
This approach is more efficient than satin stitch and gives the final piece a clean, illustrative quality.
7. Integrate Found Objects with Wrapping Stitches
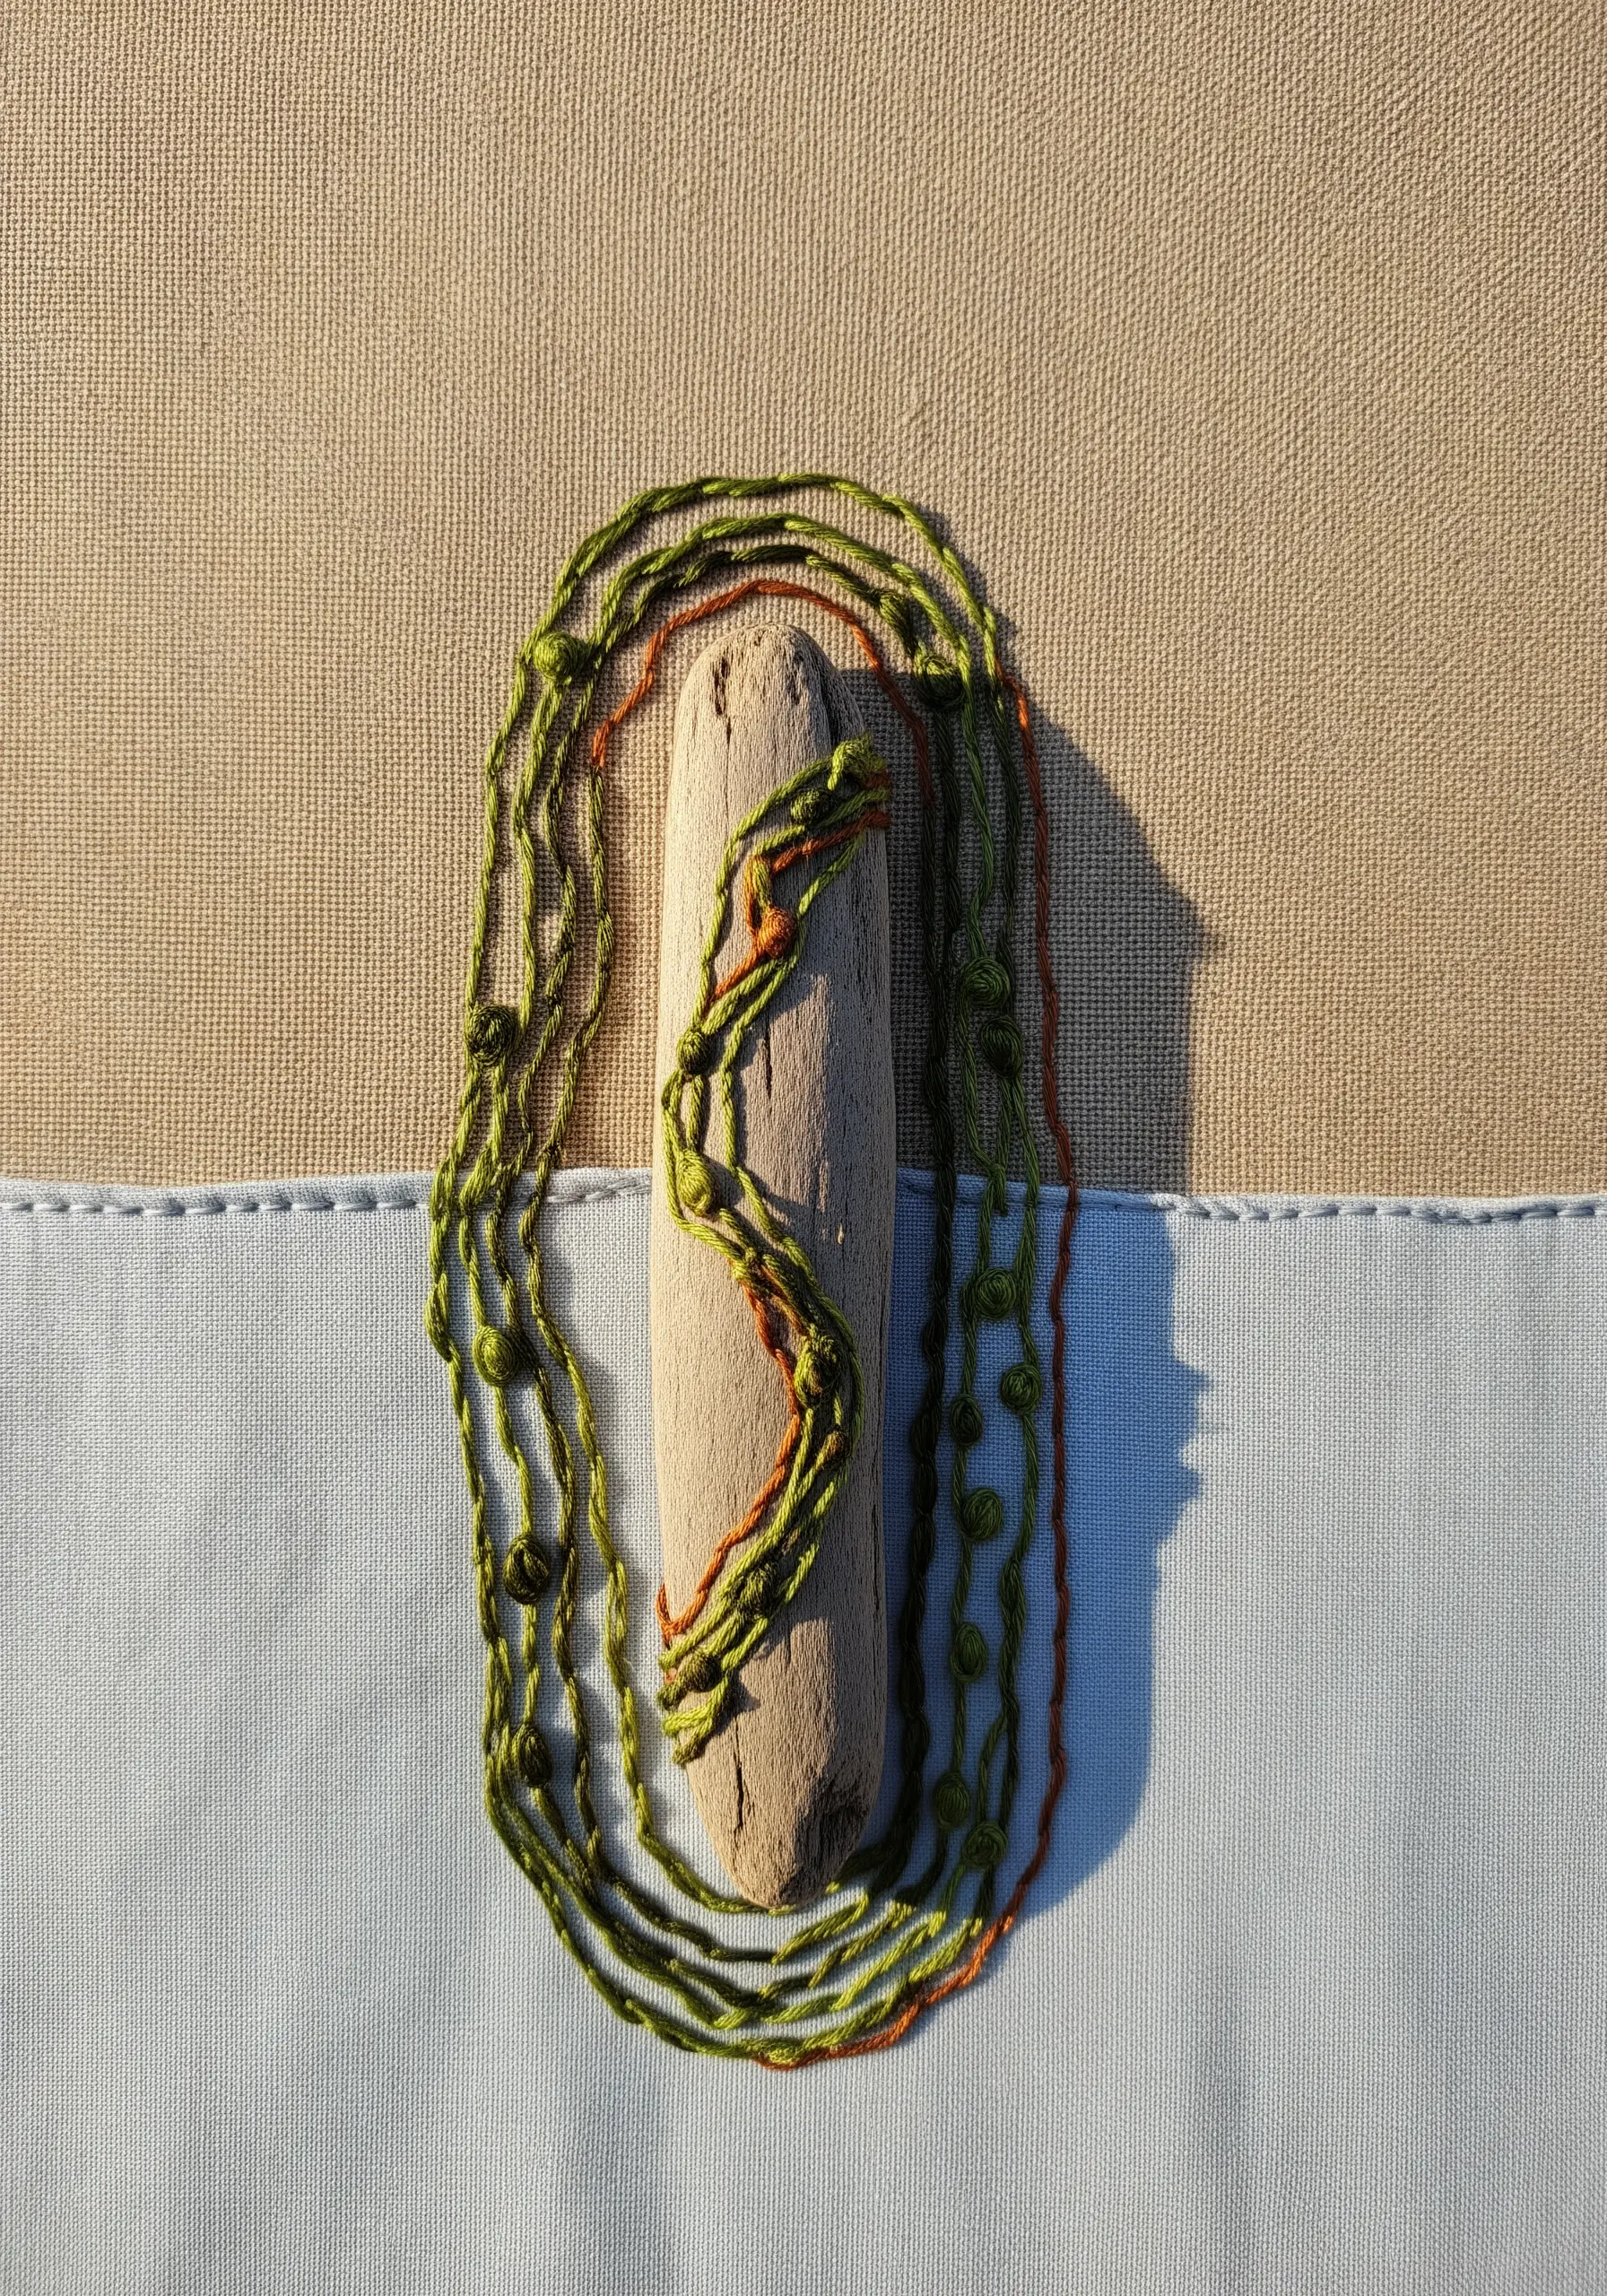
Incorporate natural elements like driftwood, stones, or pressed leaves directly into your embroidery for an organic, mixed-media composition.
Secure the object to your background fabric first with a strong, clear adhesive or by drilling small holes for anchor stitches.
Then, use couching or wrapping techniques to integrate it visually, allowing your threads to climb over and around the object.
This adds an unexpected sculptural element and connects your textile art to the natural world.
8. Isolate a Motif from a Patterned Background
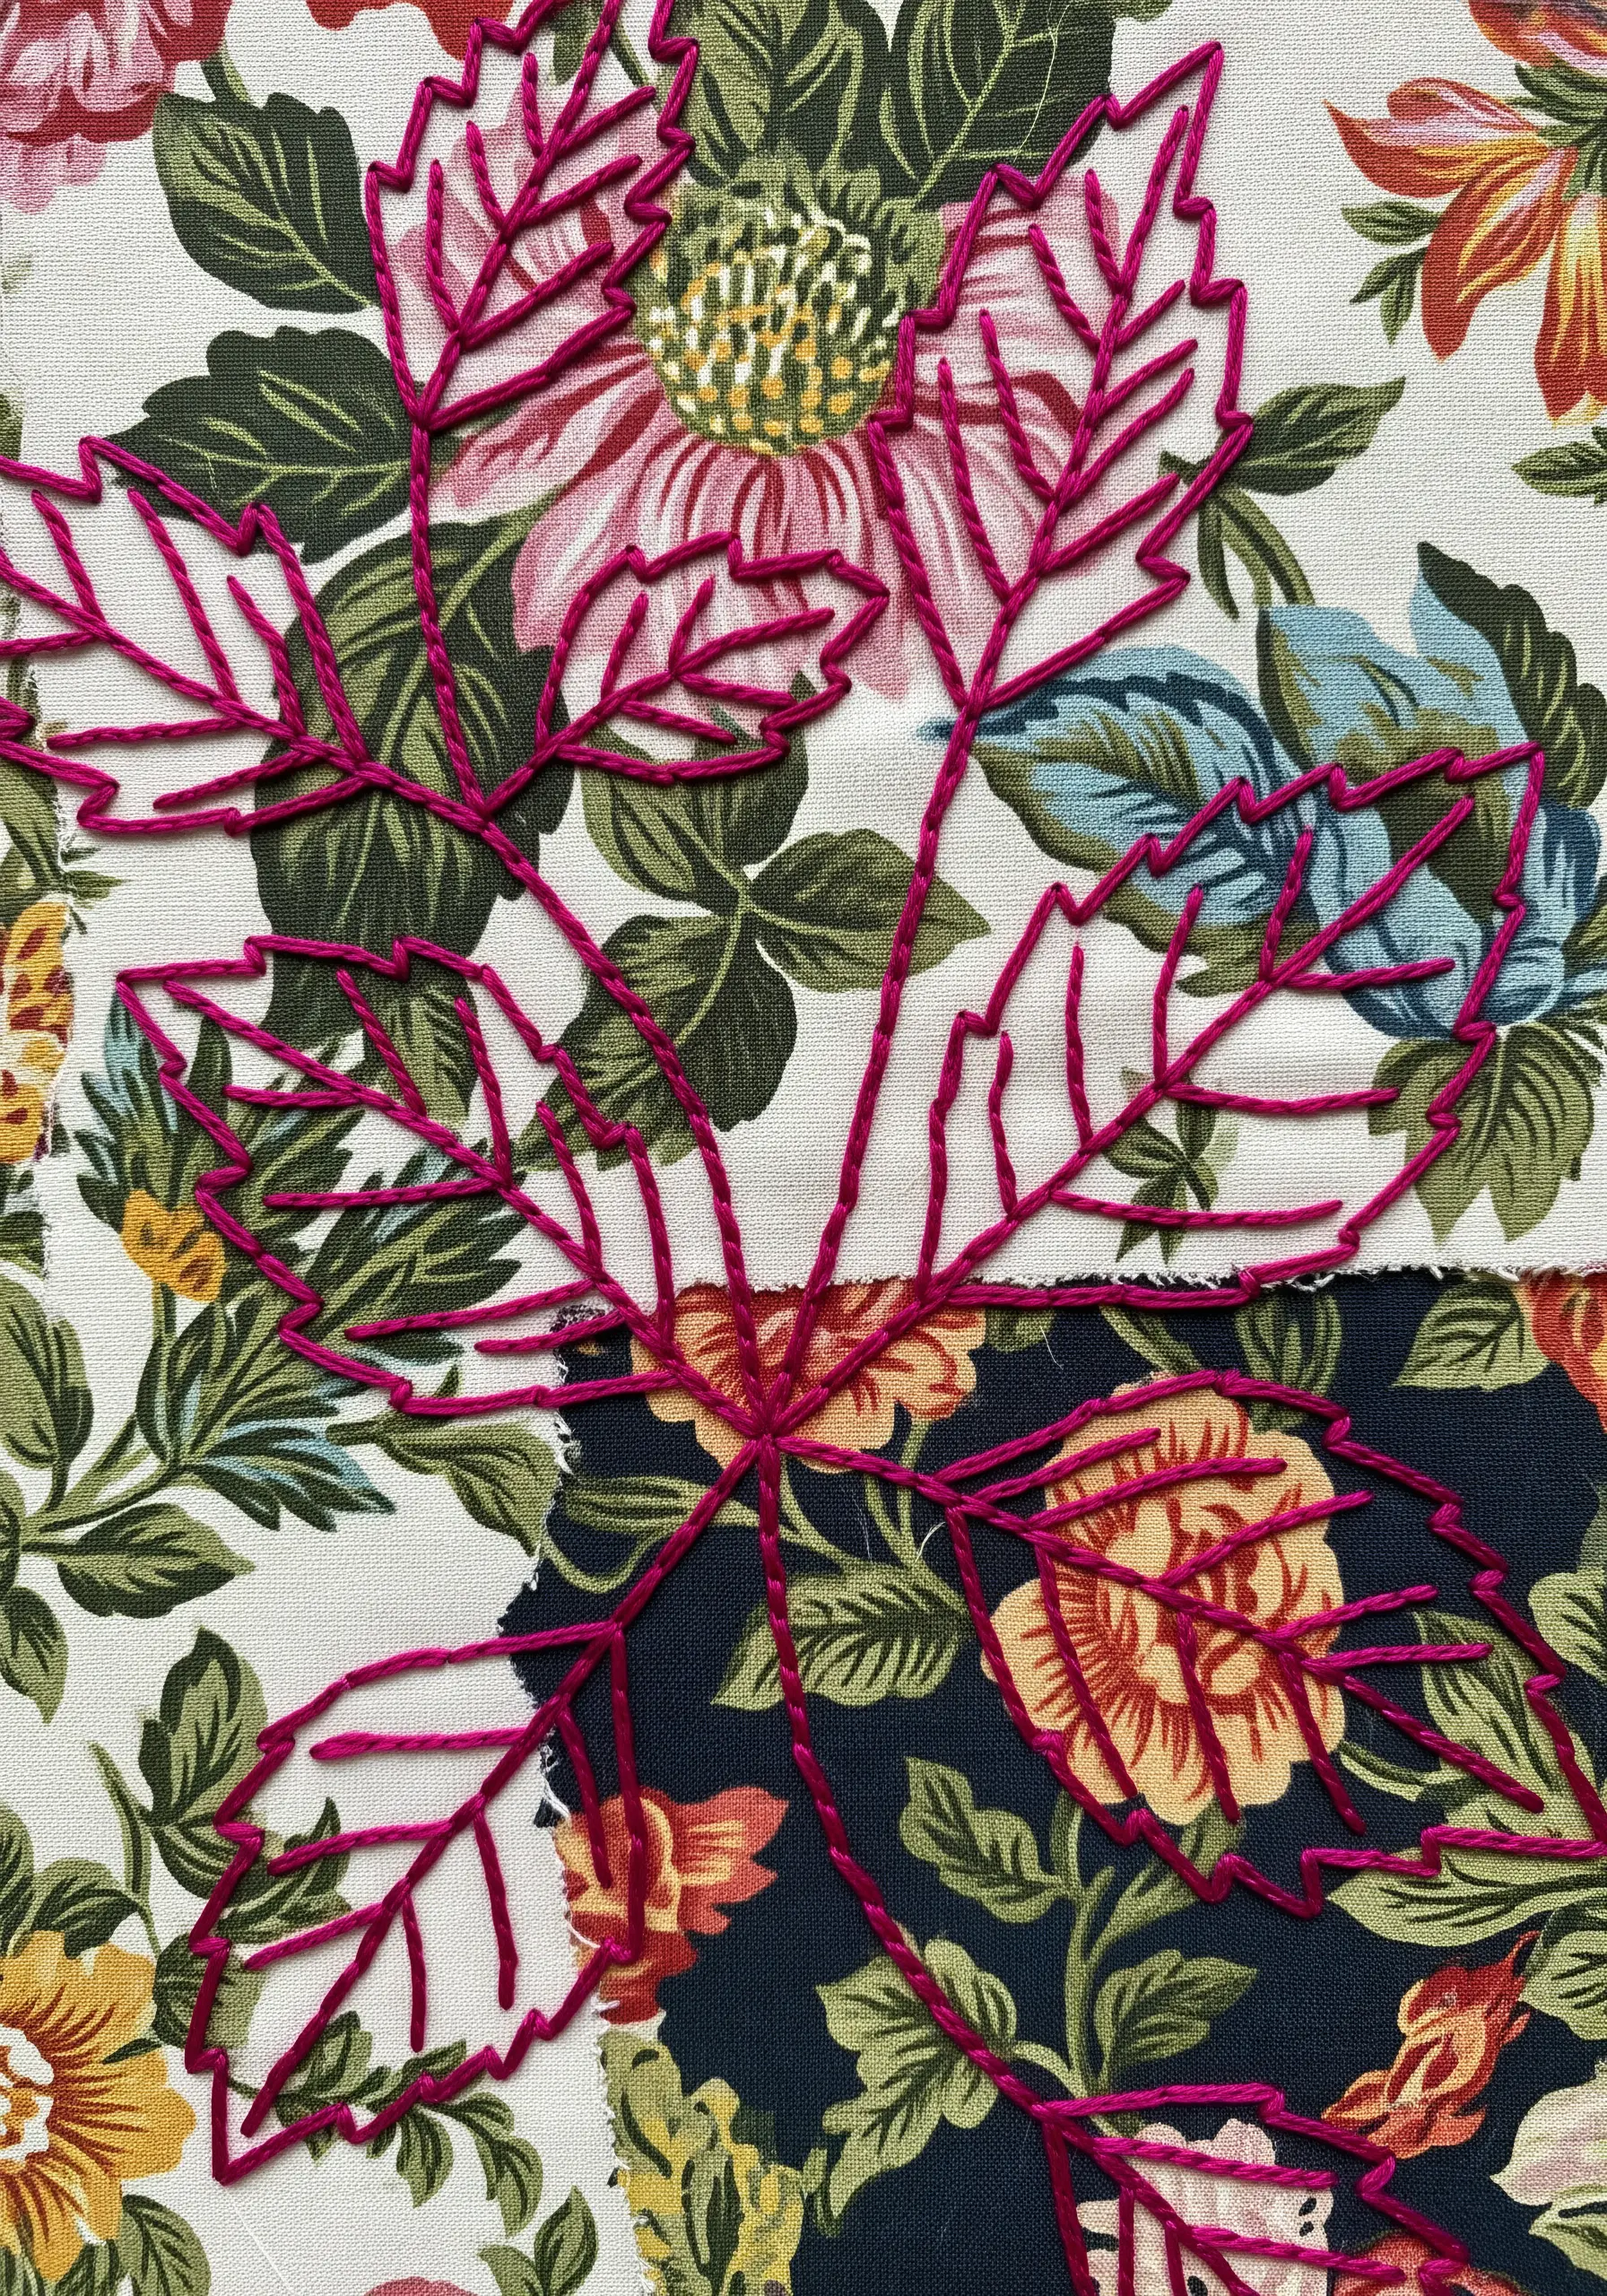
Instead of starting with a blank canvas, use a patterned fabric as your base and create a new design by stitching over it.
Choose a bold, contrasting thread color and use a simple outline stitch, like a stem or split stitch, to trace a new shape that ignores the underlying pattern.
This technique creates a fascinating visual tension between the printed background and your embroidered overlay.
It’s an excellent way to breathe new life into fabric scraps and create complex-looking art with minimal effort.
9. Map Facial Contours with Sheer Appliqué
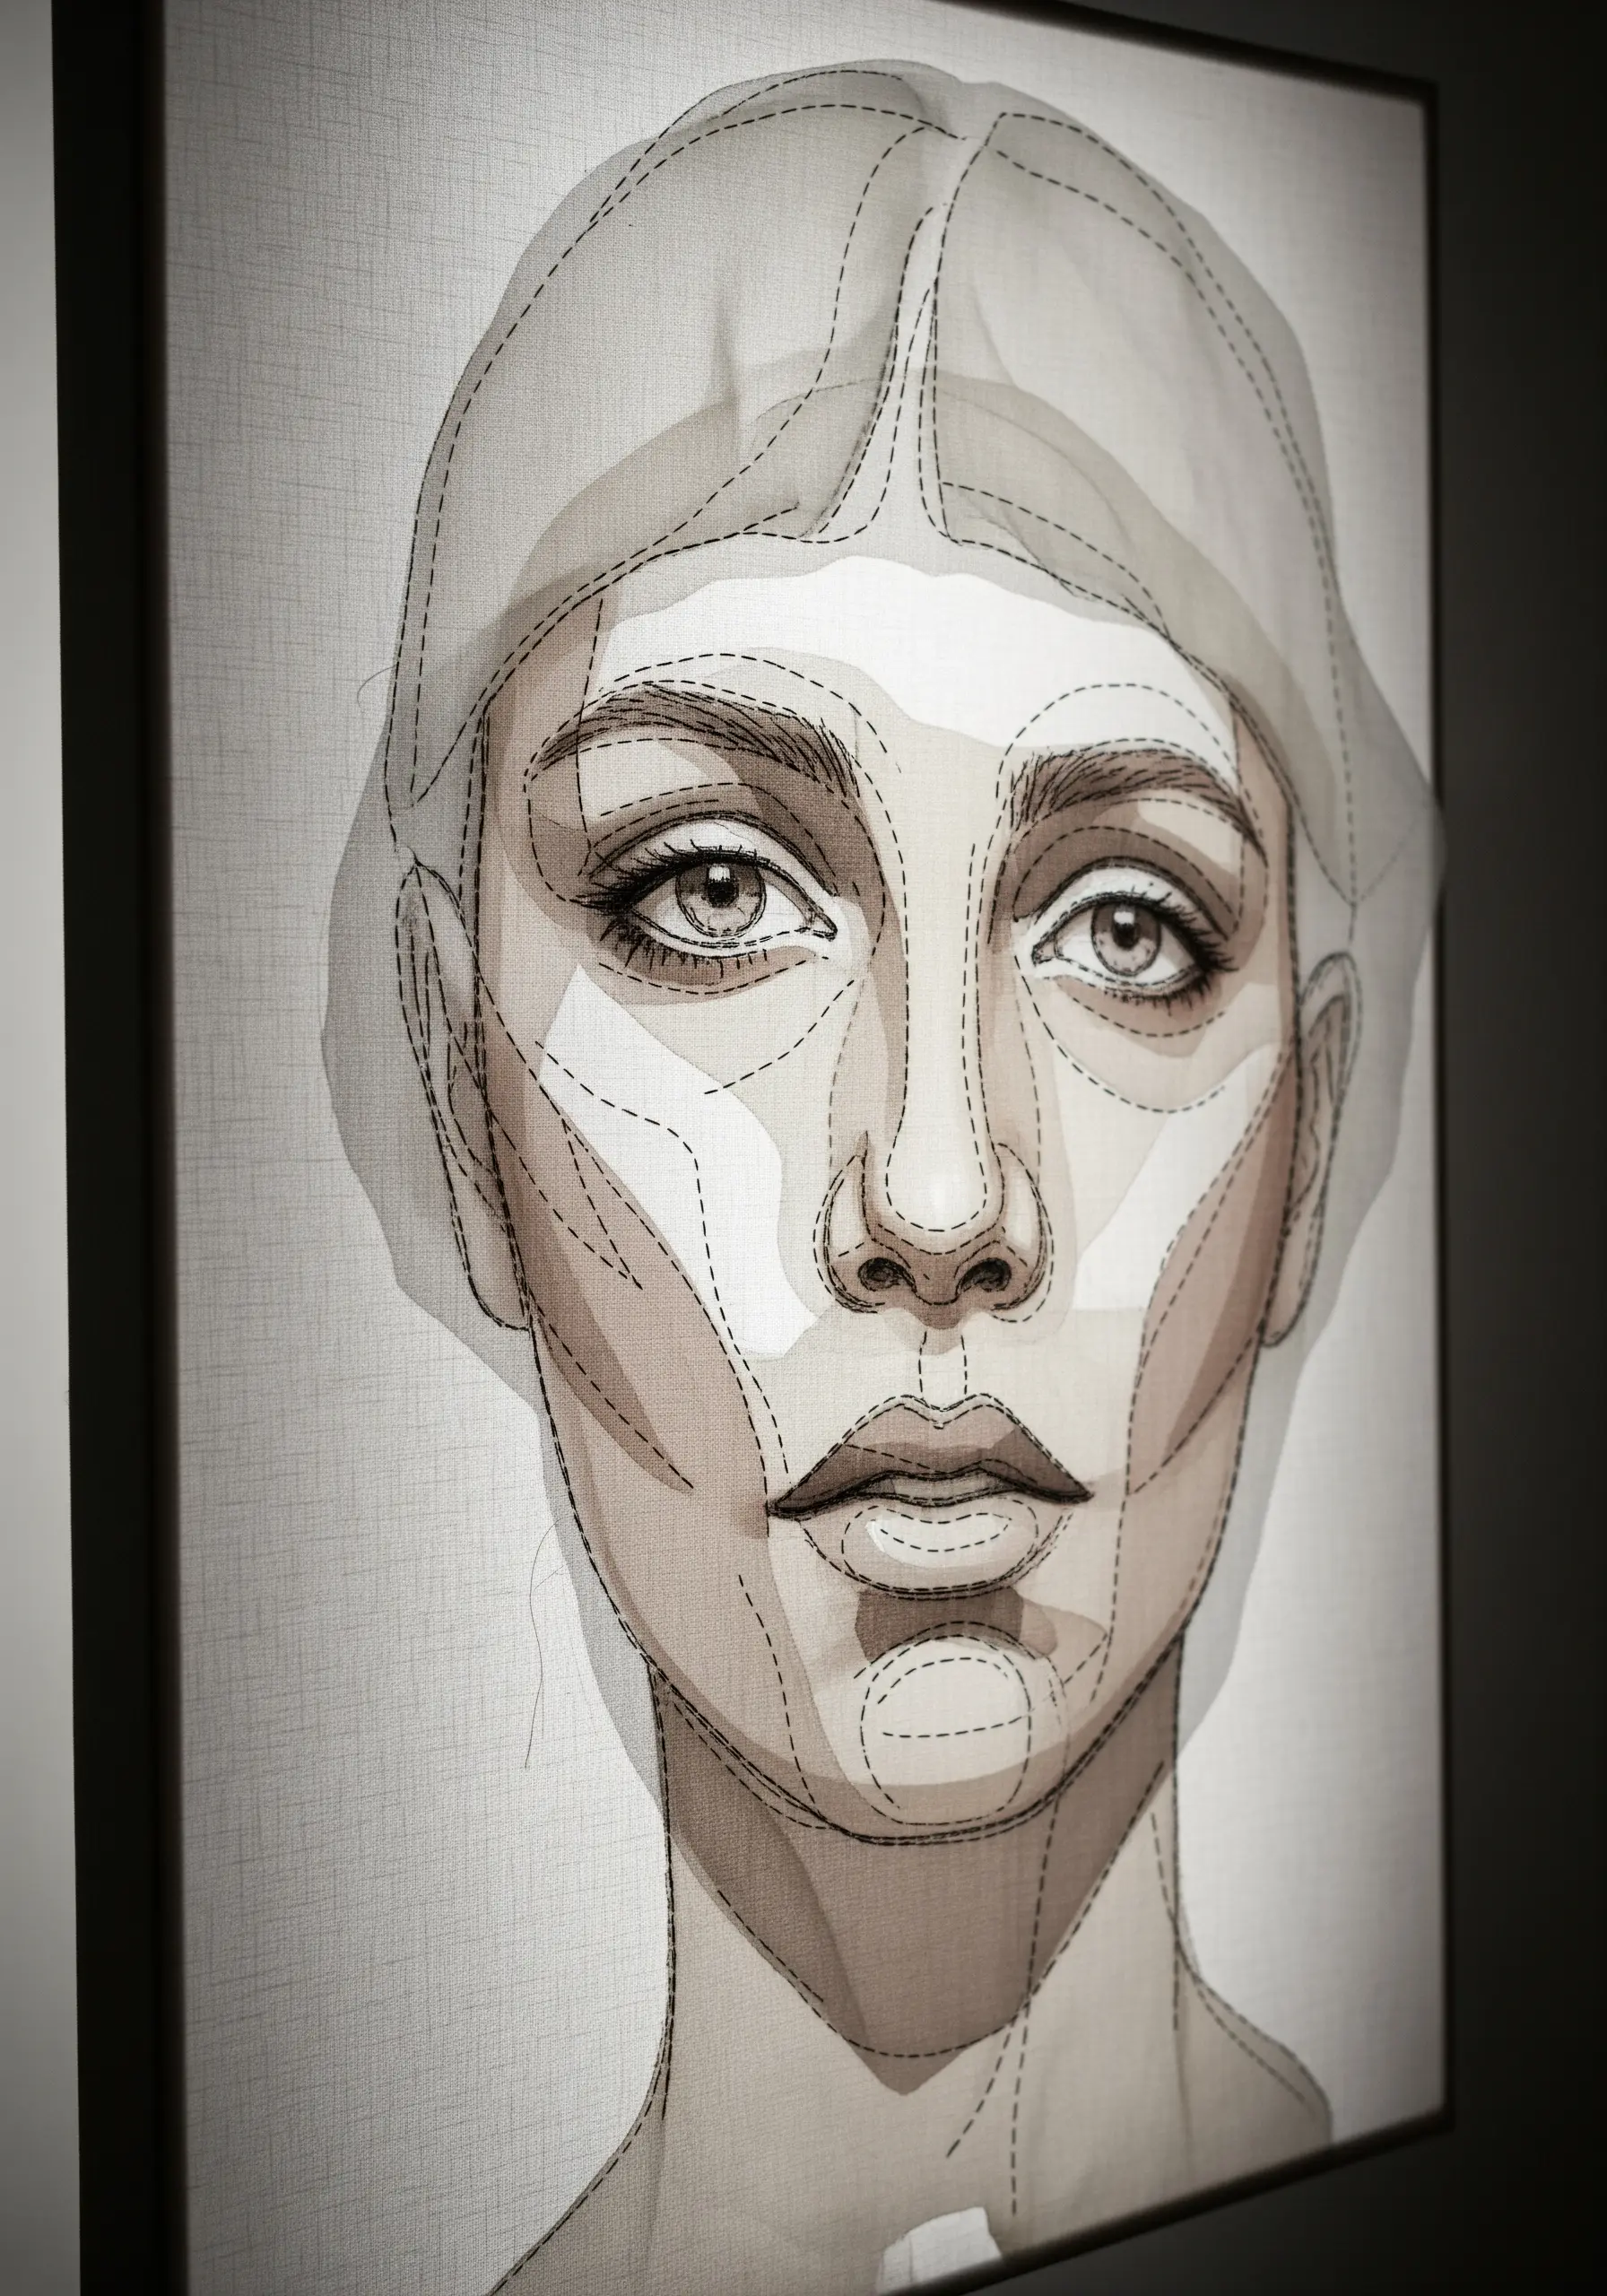
For nuanced portraits, use layers of semi-transparent fabric to build highlights and shadows instead of relying on dense thread painting.
Cut pieces of light-colored organza or chiffon to represent the high planes of the face and tack them down with minimal, discreet stitches.
Use a single dark thread in a simple running stitch to act as a contour line, defining the features and the edges of the sheer layers.
This technique results in a soft, ethereal portrait that feels both delicate and structurally sound.
10. Unify Patchwork with Expressive Over-Stitching
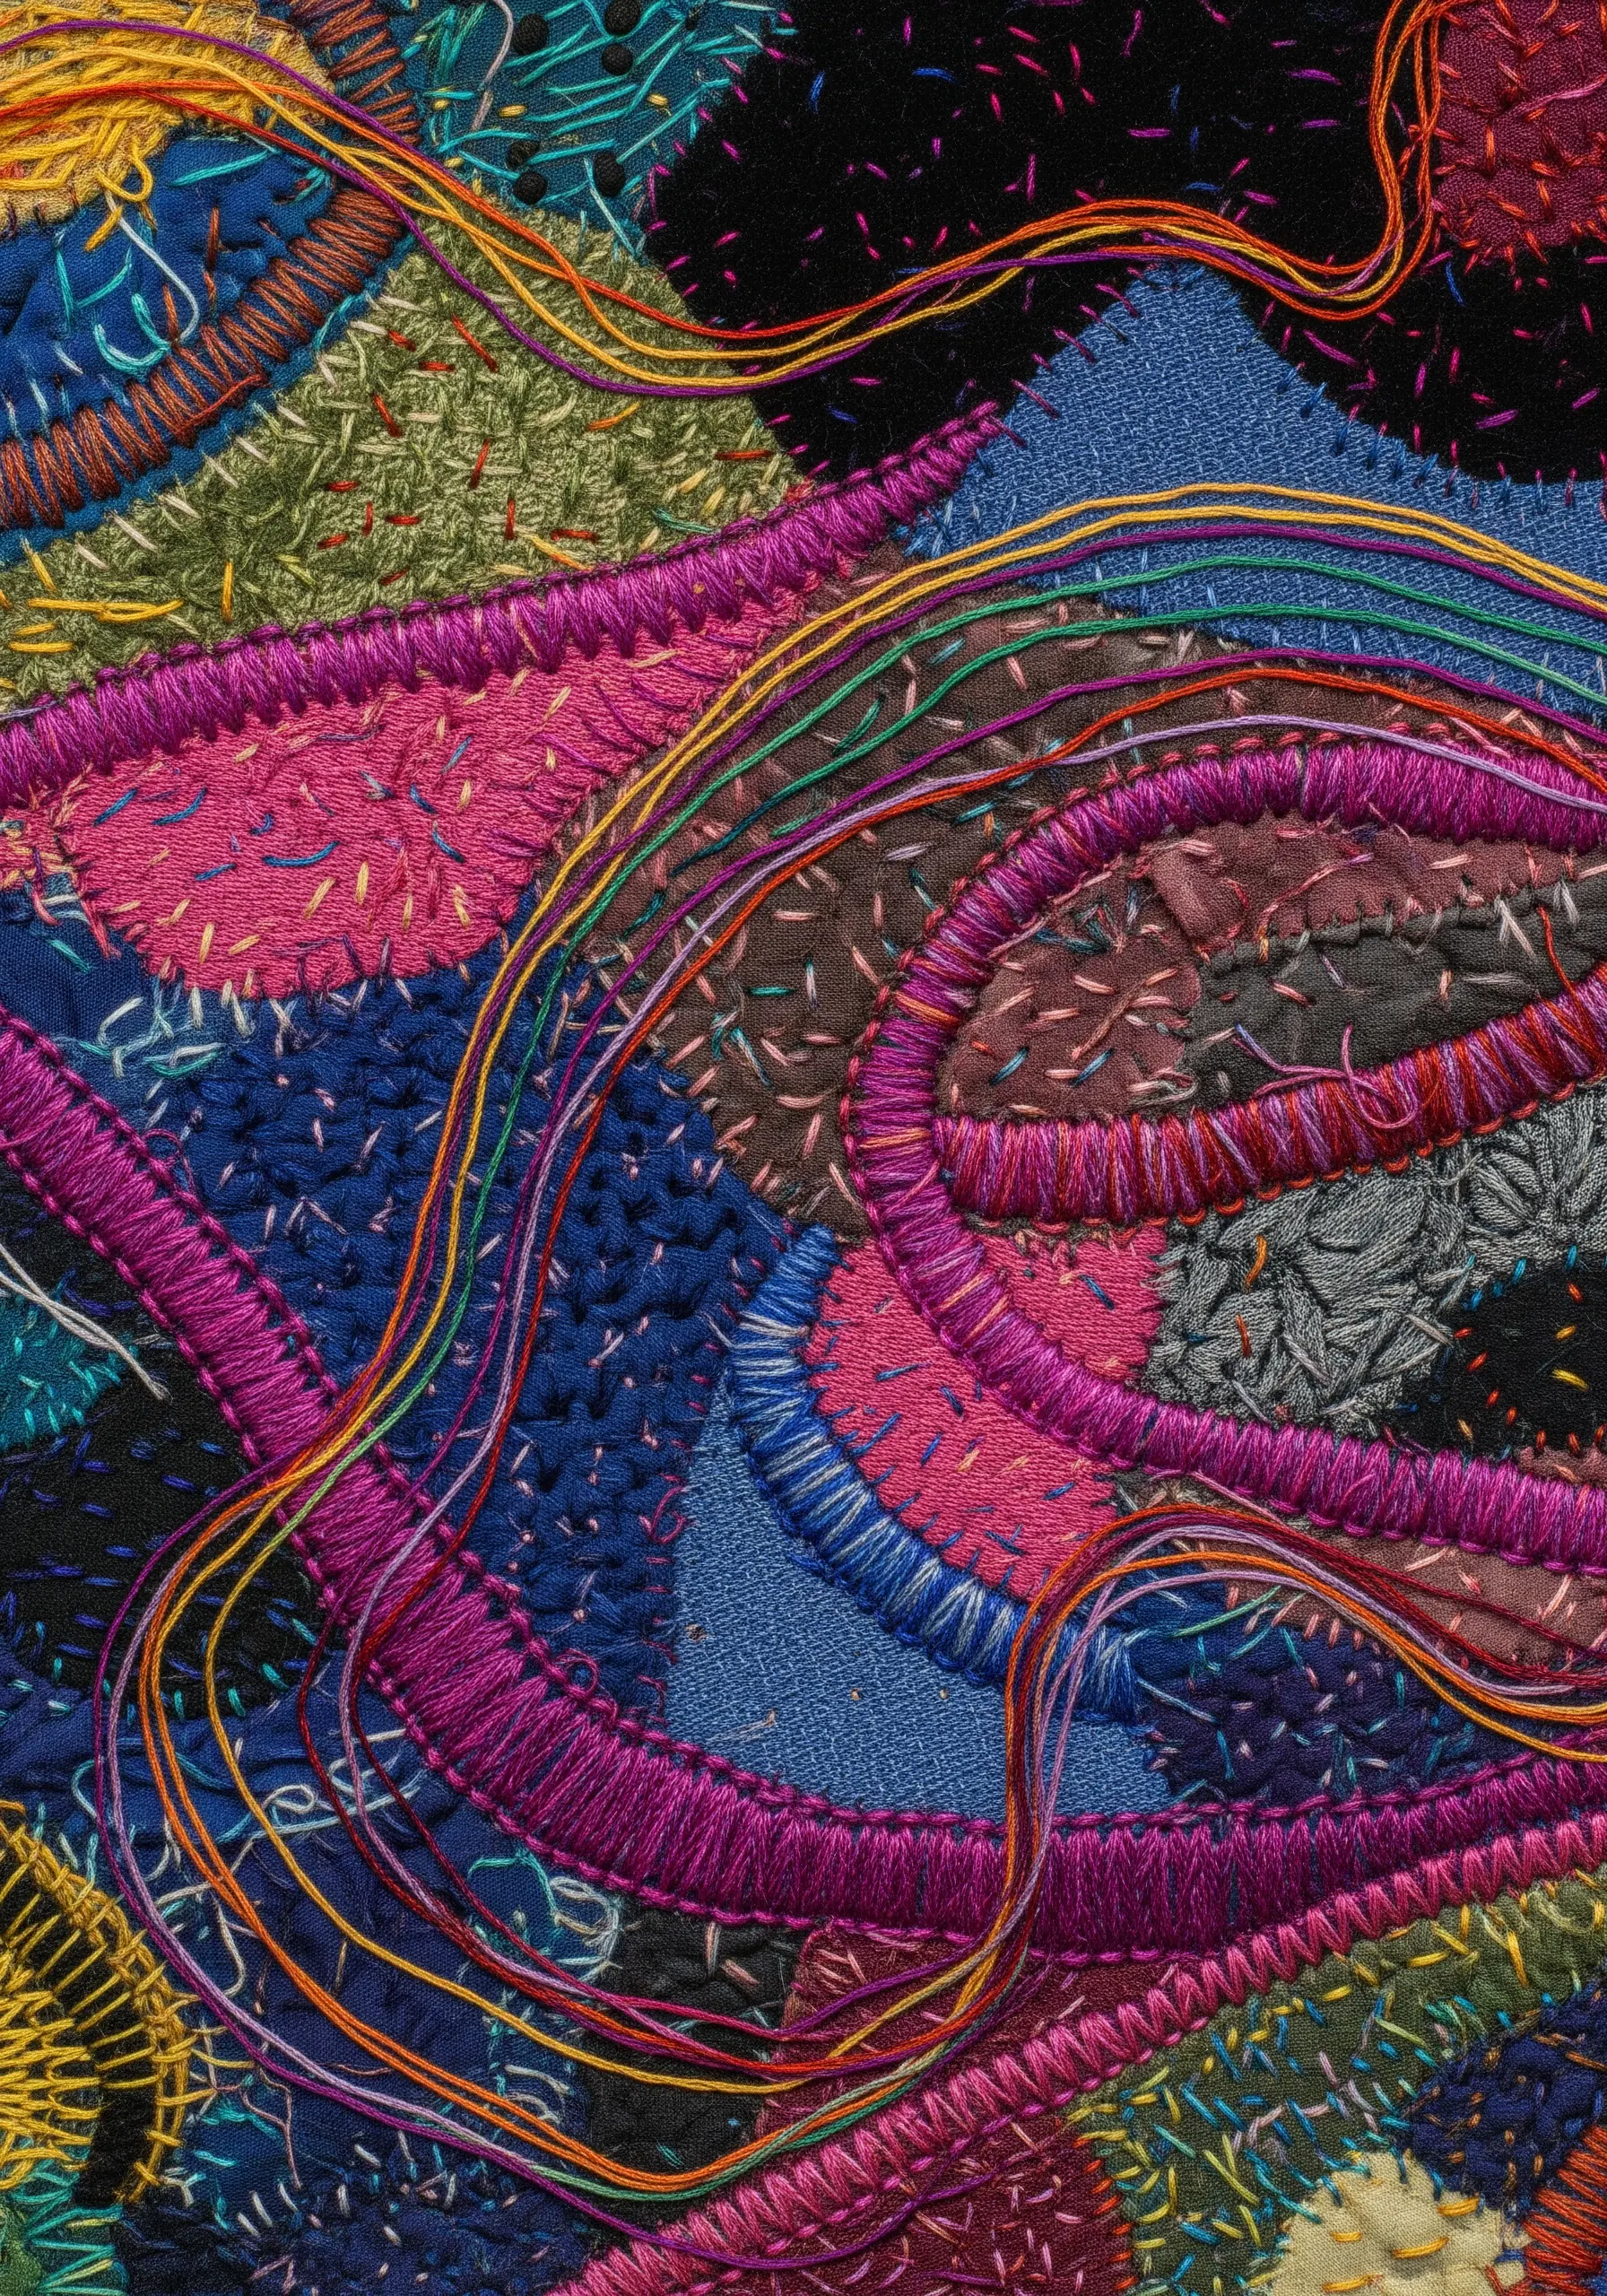
Transform a collage of random fabric scraps into a cohesive artwork by connecting them with decorative stitches.
Arrange your fabric pieces and secure them with a simple whipstitch, then embroider over the seams and into the patches themselves.
Use a variety of stitches like herringbone, fly stitch, and cross stitch to add texture and a unifying rhythm to the composition.
This method celebrates imperfection and turns the act of mending into a vibrant design element.
11. Create Depth with Reverse Appliqué
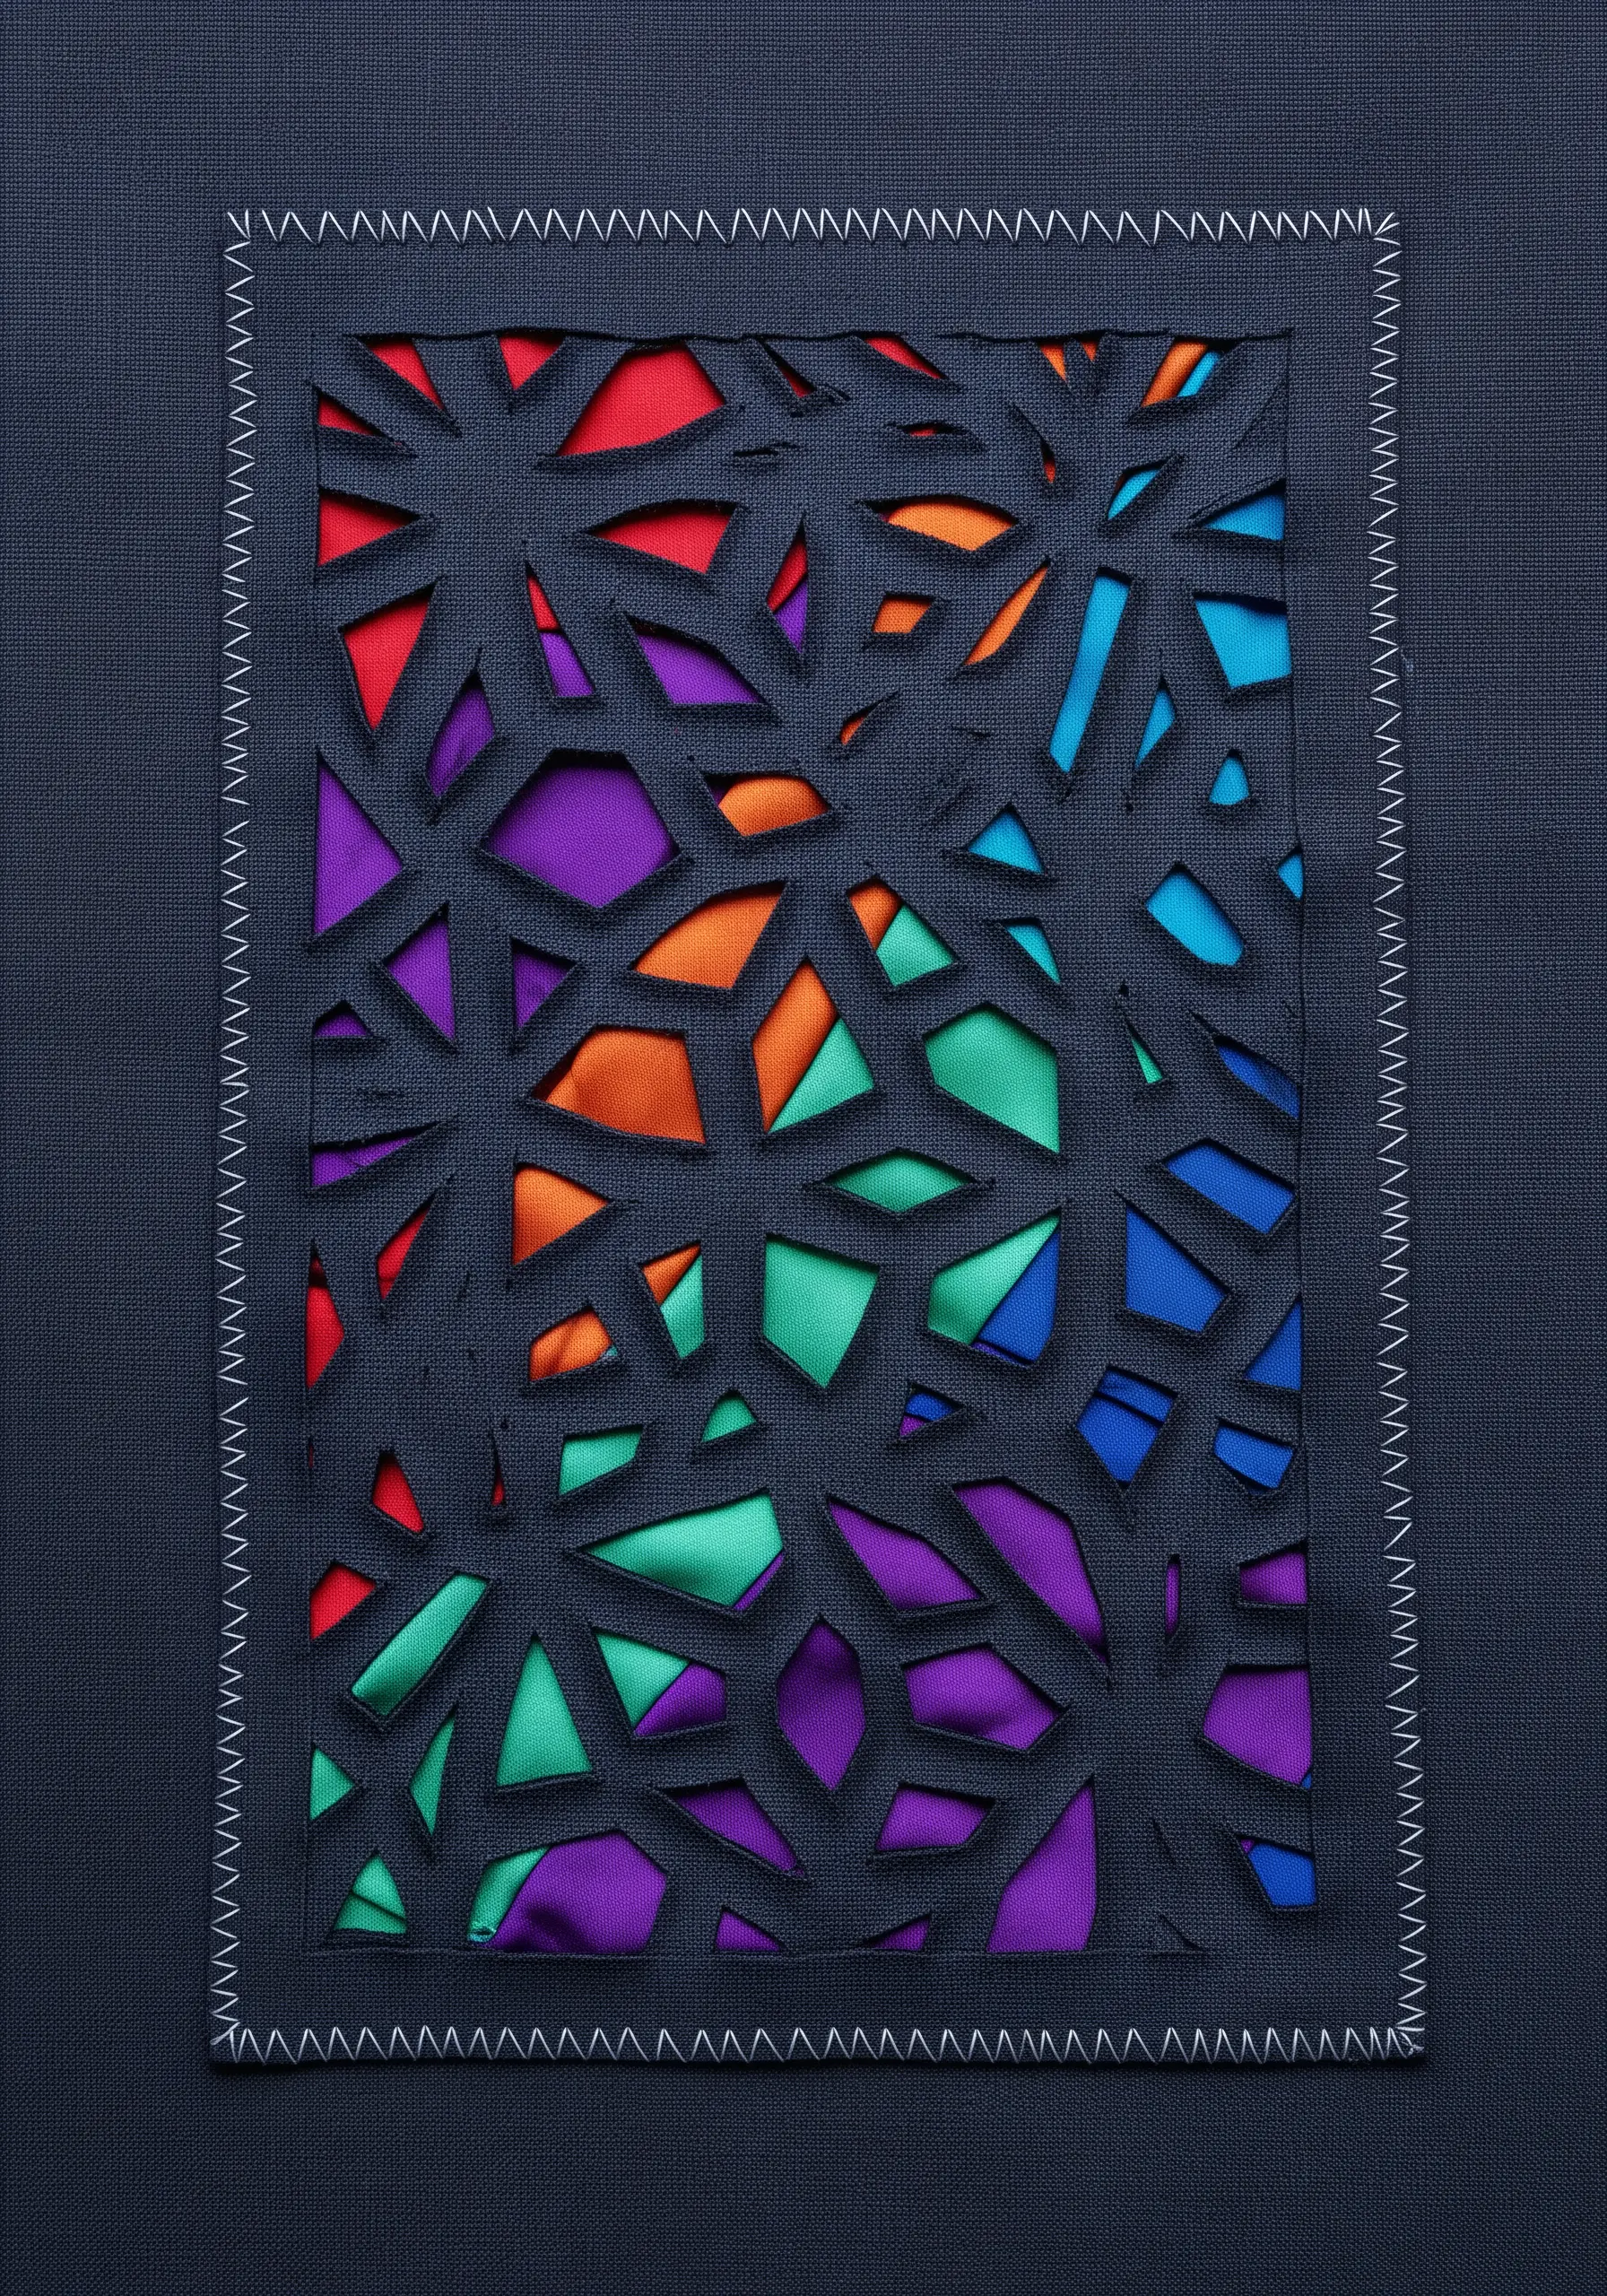
Instead of adding fabric on top, create your design by cutting it away. This reverse appliqué technique produces crisp, clean shapes with built-in depth.
Layer your main fabric over a collage of colorful scraps. Stitch your design outline, then carefully cut away the interior of the shape from the top layer only, revealing the colors beneath.
Finish by tucking the raw edges under and securing them with a whipstitch for a professional finish.
The result is a striking stained-glass effect where the background becomes the star.
12. Juxtapose Velvet and Metallics for Cosmic Drama

Combine light-absorbing and light-reflecting materials to create dramatic, high-contrast scenes.
Use deep blue and black velvet for your background collage; its plush texture absorbs light and creates a sense of infinite depth.
Then, stitch your celestial details using a high-shine metallic thread. The contrast makes the gold or silver stitches appear to glow against the dark, matte fabric.
This material pairing is perfect for moody, high-contrast designs that need a touch of luxury.
13. Use Ribbon Stitches for Realistic Movement
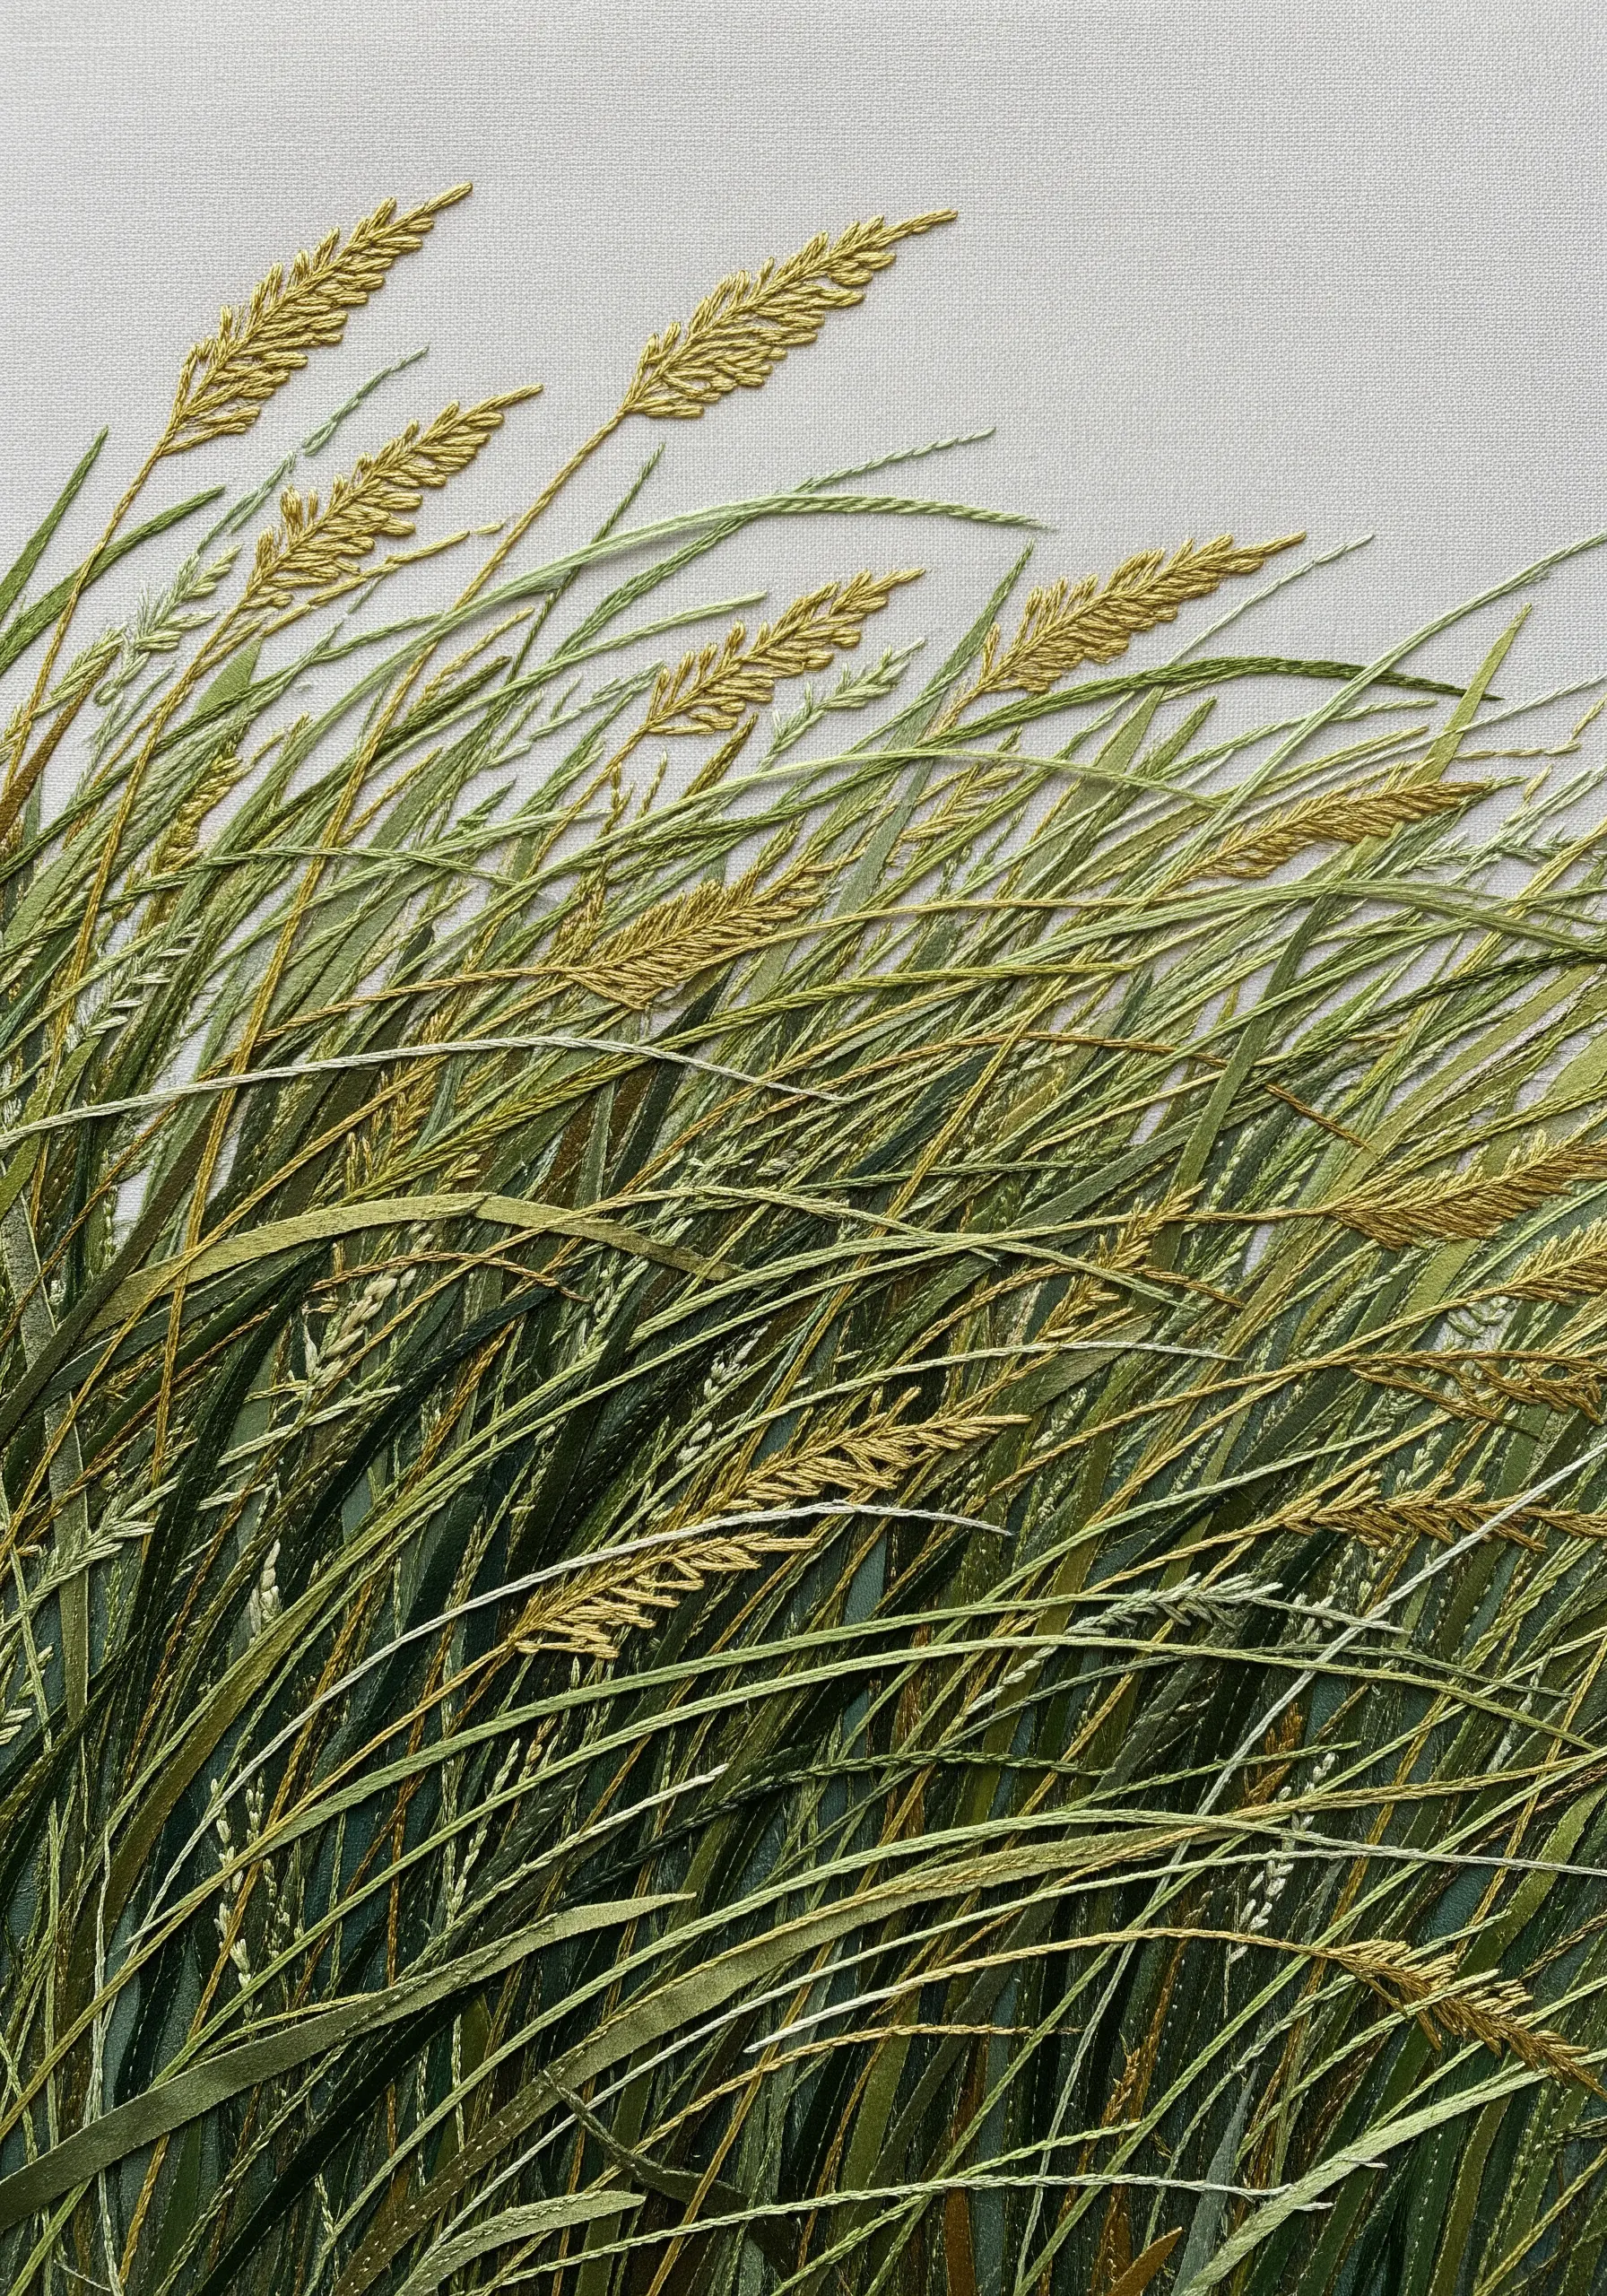
To capture the fluid, sweeping motion of elements like grass, waves, or hair, switch from standard floss to silk ribbon.
Use long, straight stitches, allowing the ribbon to lie flat and catch the light. Gently twist the ribbon for some stitches to create variation in width and shadow.
Layering your ribbon stitches in varying directions and tones builds a sense of depth and realistic movement that is difficult to achieve with thread alone.
This technique adds a subtle, elegant sheen and a soft, three-dimensional quality to your work.
14. Fill Appliqué Shapes with Contoured Stitches

Elevate simple appliqué by filling the fabric shapes with dense, textural stitches that follow their natural curves.
After securing your fabric piece, fill the entire area with a single stitch, like seed stitch, French knots, or even a simple backstitch worked in concentric circles.
This technique adds a low-relief, sculptural quality, making the object feel solid and three-dimensional.
It also unifies the piece, integrating the appliqué fabric seamlessly into the embroidered artwork.
15. Add Beaded Texture to Fabric Collage
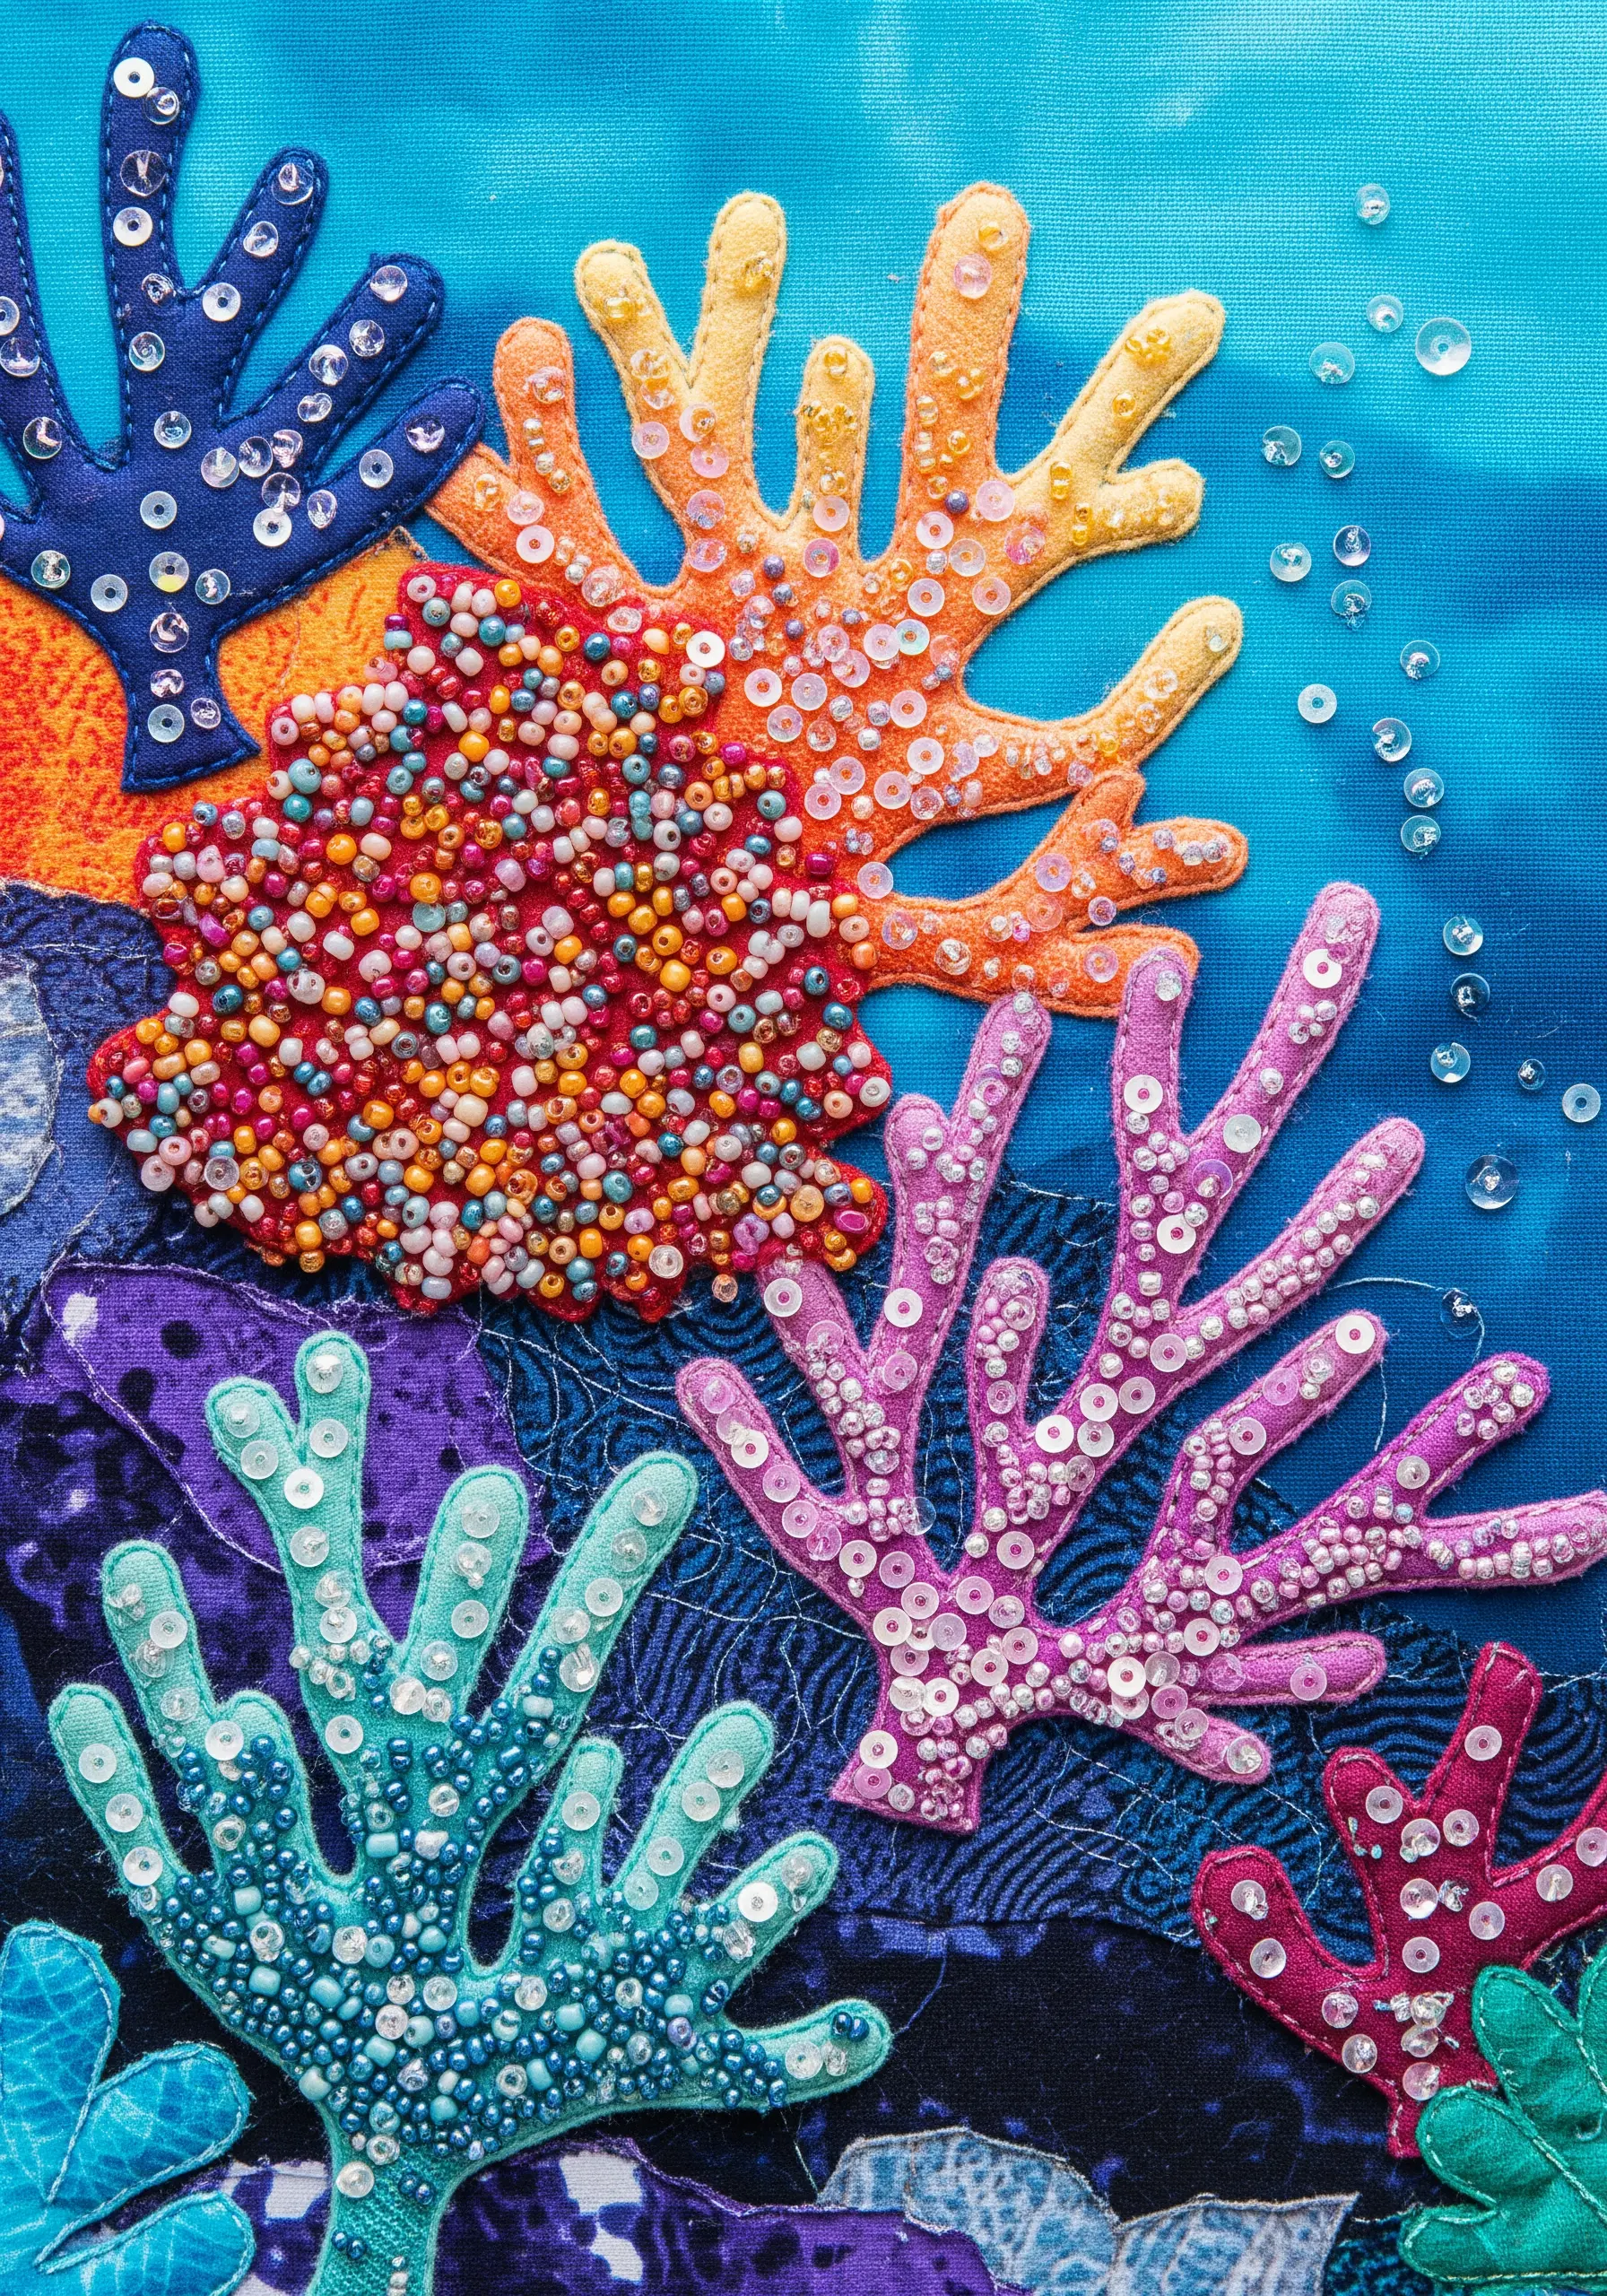
Introduce a focal point of intense texture and sparkle by embellishing specific areas of your fabric collage with beadwork.
Instead of scattering beads evenly, concentrate them in dense clusters to create a rich, tactile surface that contrasts with the flat fabric.
Use a mix of seed beads, bugle beads, and sequins in a complementary color palette to add complexity and light-catching dimension.
This mixed-media textile technique turns a simple collage into a luxurious, multi-sensory piece.
16. Create Controlled Fraying for Minimalist Texture

Incorporate texture in a clean, minimalist way by layering strips of fabric and securing them with a decorative edge stitch.
Cut strips of linen or canvas, pull away a few weft threads to create a short, even fringe, and then stitch them onto your base fabric.
Use a contrasting thread for a simple blanket stitch or fly stitch along the top edge of the fringe to hold it in place.
This method adds rhythm and a soft, tactile element without overwhelming a modern, neutral composition.
17. Construct Portraits with Fabric Shading

Create hyper-realistic portraits by using precisely cut fabric pieces as you would use paint, a technique known as fabric collage painting.
Instead of thread, use dozens of tiny fabric fragments in various skin tones to build up areas of light, mid-tone, and shadow.
Secure each piece with a nearly invisible appliqué stitch, allowing the fabric edges themselves to define the facial planes.
This advanced method produces stunningly detailed and lifelike results, turning fabric into a painterly medium.


