
Have you ever finished a piece and felt that something was missing? That your stitches, while neat, didn’t quite capture the life and movement you envisioned? The secret to transforming your work from simply ‘stitched’ to truly ‘artistic’ often lies in two things: texture and blending.
It’s not about learning dozens of complex stitches. Instead, it’s about understanding how to use simple stitches—like the satin stitch, the French knot, and the straight stitch—with more intention. It’s about seeing thread not just as a line of color, but as a tool for creating shadow, light, and dimension.
In these projects, I’ll show you how to think like a painter, but with a needle and thread. You’ll learn how to group colors to create depth, how to vary your stitch direction to mimic natural forms, and how to combine textures to make your embroidery feel as real as it looks. Let’s begin.
1. Render Lavender with Layered Color Blocks
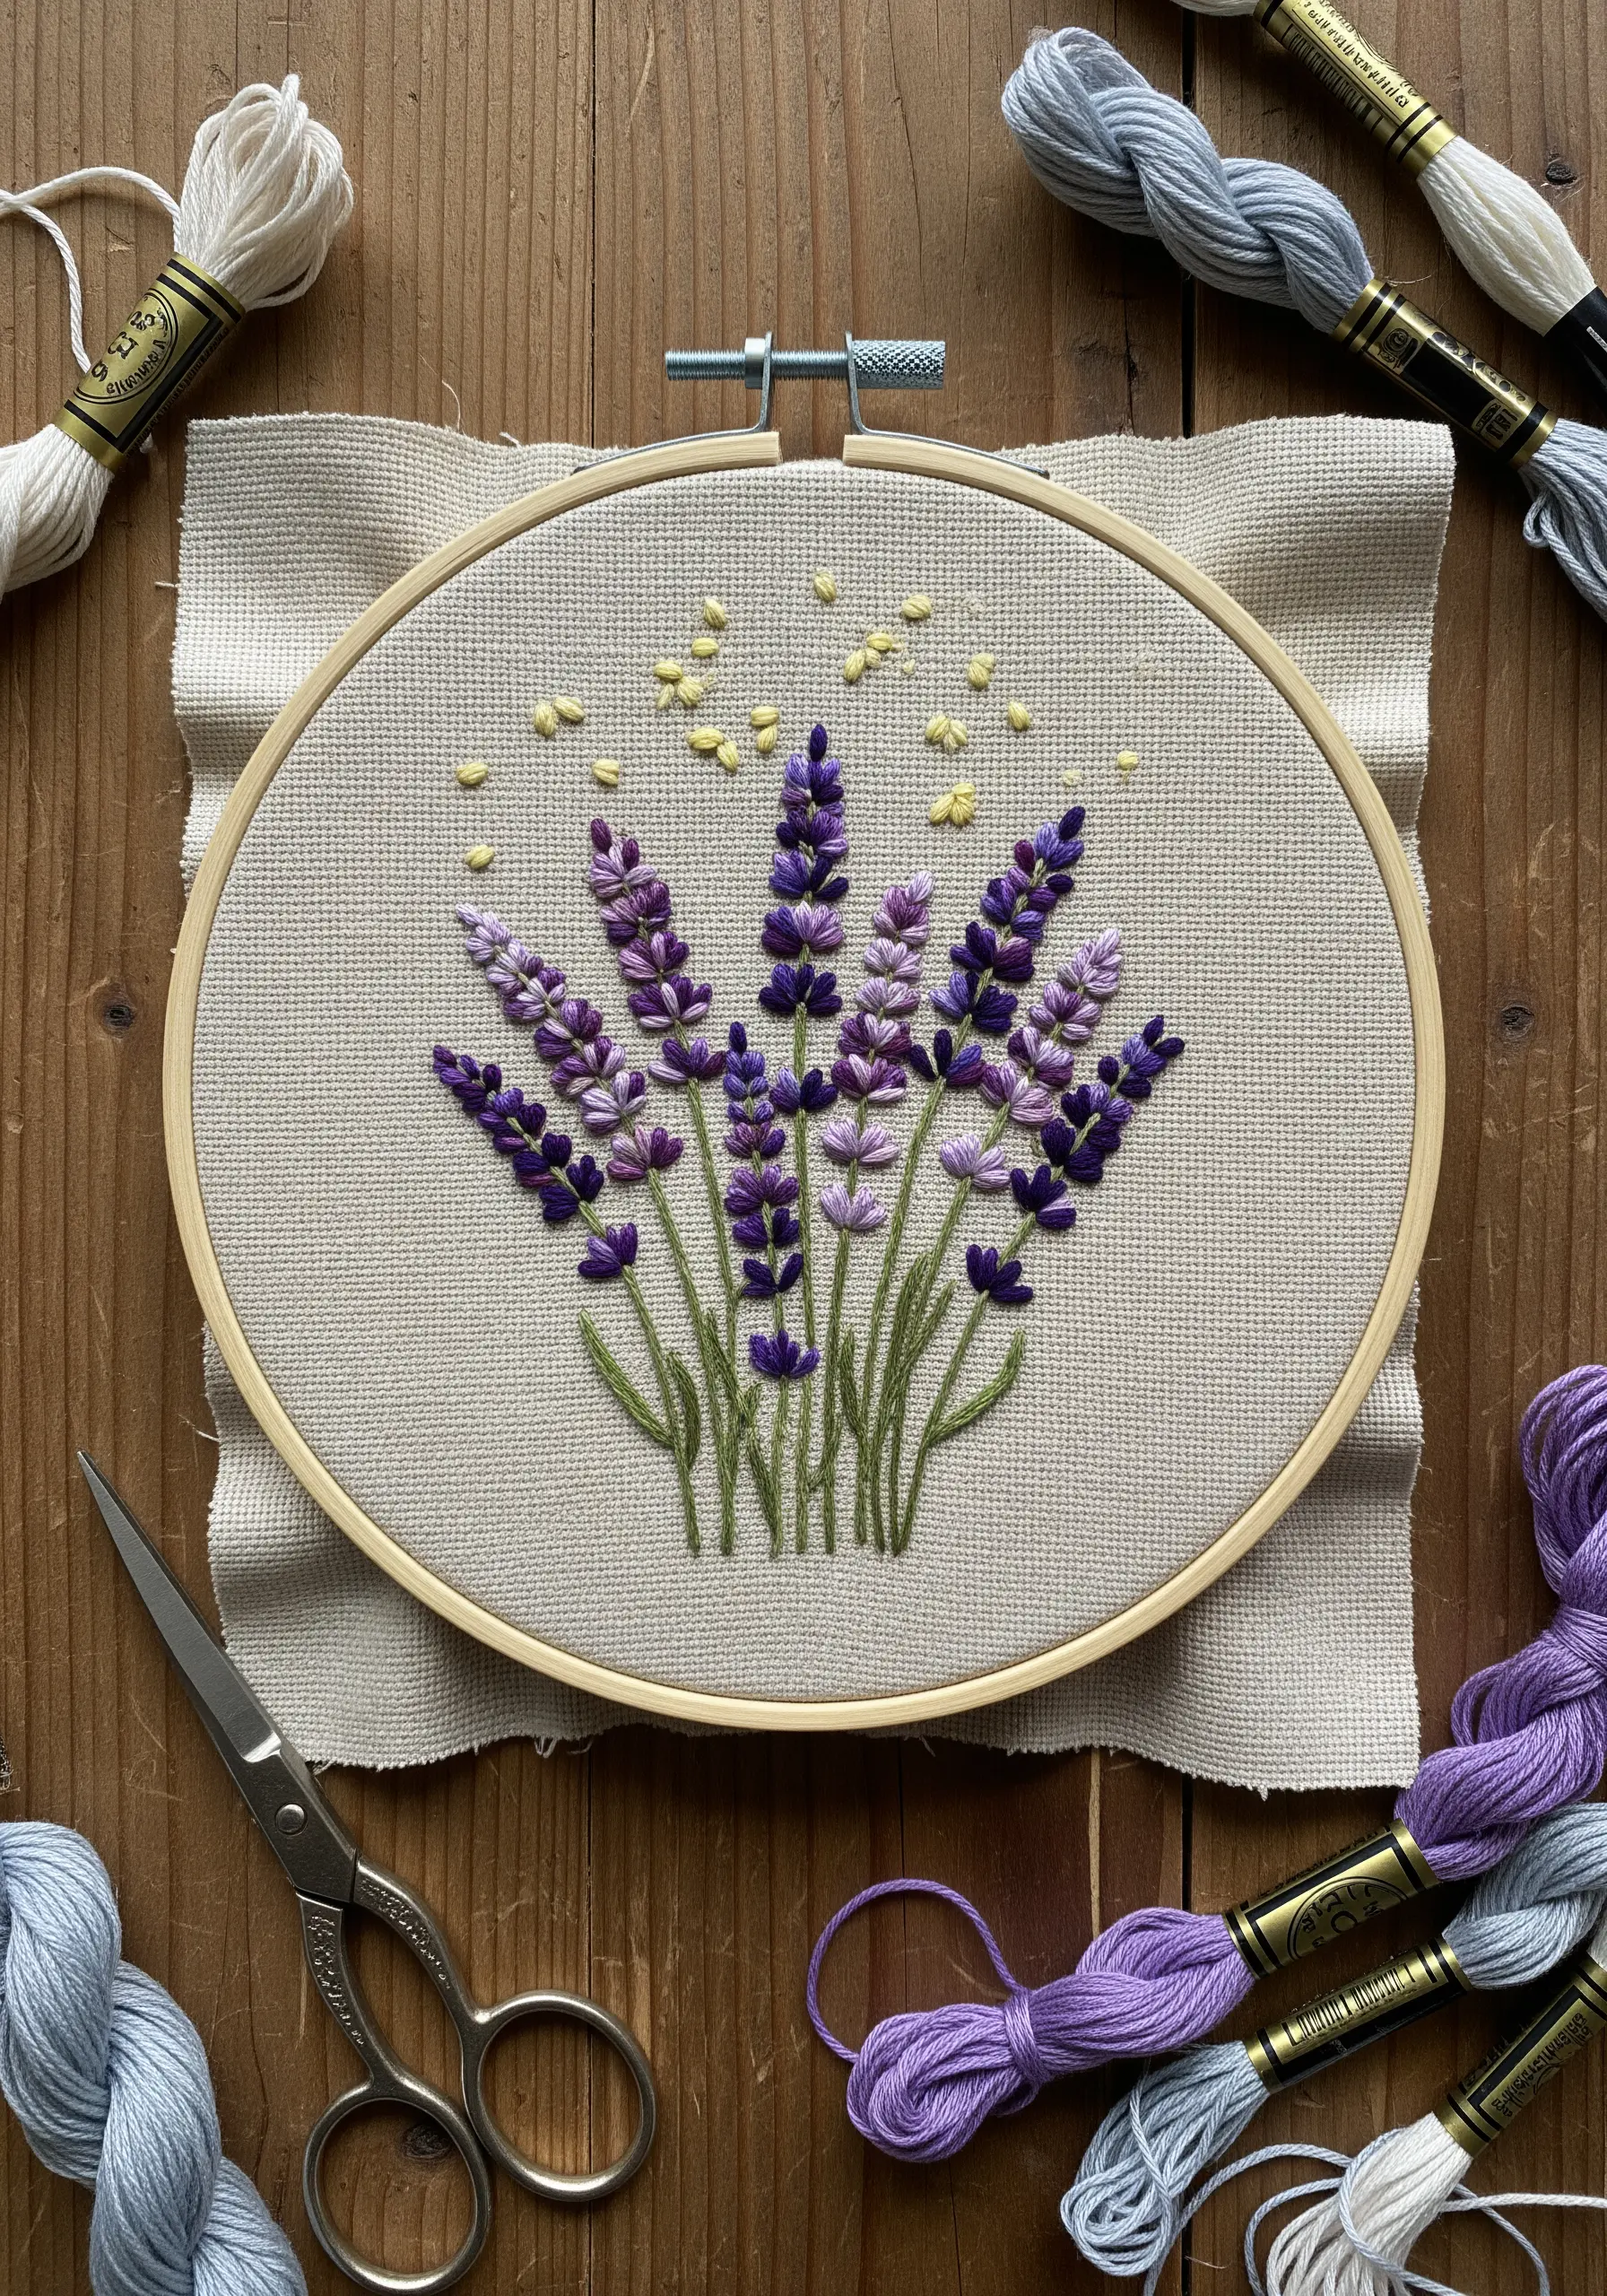
Instead of single stitches for each lavender floret, group your satin stitches into small, angled blocks of color.
Use three or four shades of purple—a deep violet for the base, a mid-tone for the body, and a pale lilac for the top highlights.
This technique creates visual depth and structure, making the lavender appear fuller and more realistic than randomly placed stitches.
Finish with a scatter of yellow French knots above the blooms to suggest movement and draw the eye upward, balancing the composition.
Try these delicate lavender stitch ideas to create calming bedroom art and relaxation gifts for more inspiration.
2. Combine Textures for Lifelike Dandelions
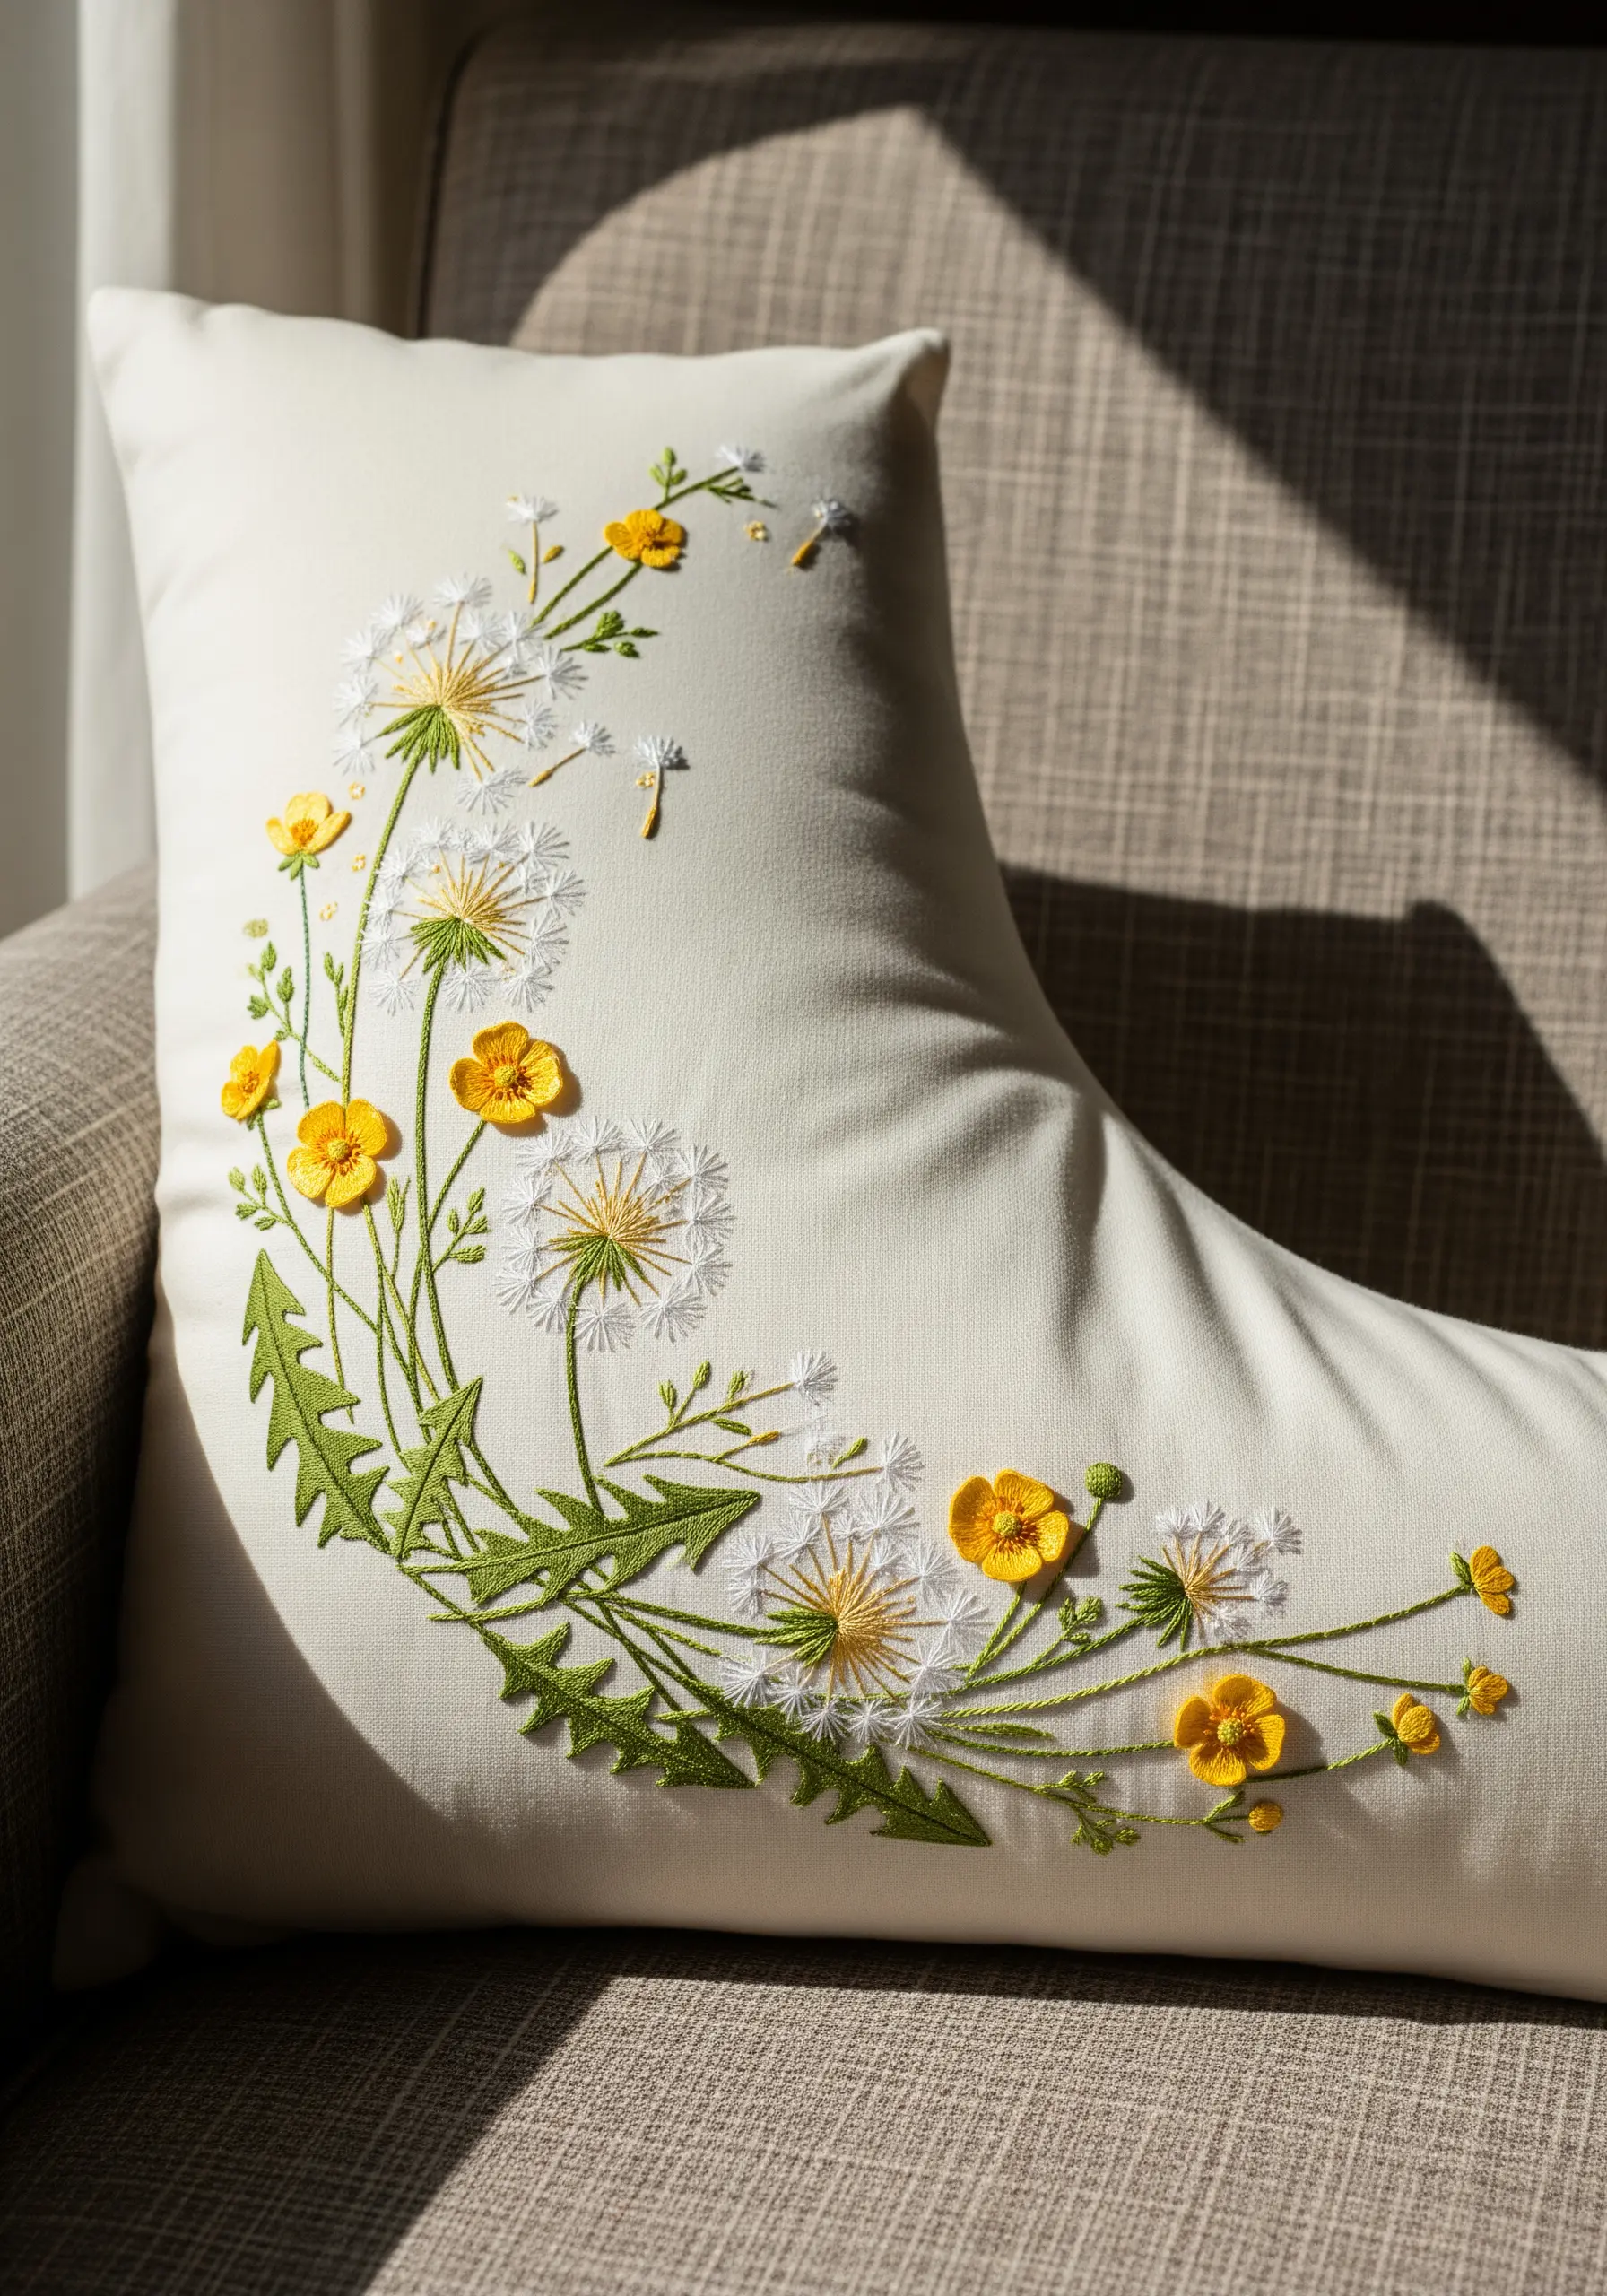
Give your dandelions a dynamic, airy quality by mixing stitch types within a single motif.
Use long, straight stitches radiating from a central point for the delicate seed heads, varying their length and density to create a sense of lightness.
For the yellow buttercups, switch to a padded satin stitch to give them a raised, plush appearance that contrasts beautifully with the wispy dandelions.
This textural interplay is what makes the design feel alive, turning a simple pillow into a piece of botanical art.
Explore more ideas with these embroidered pillow covers that promote softness, calm, and better sleep.
3. Build Sculptural Queen Anne’s Lace with French Knots
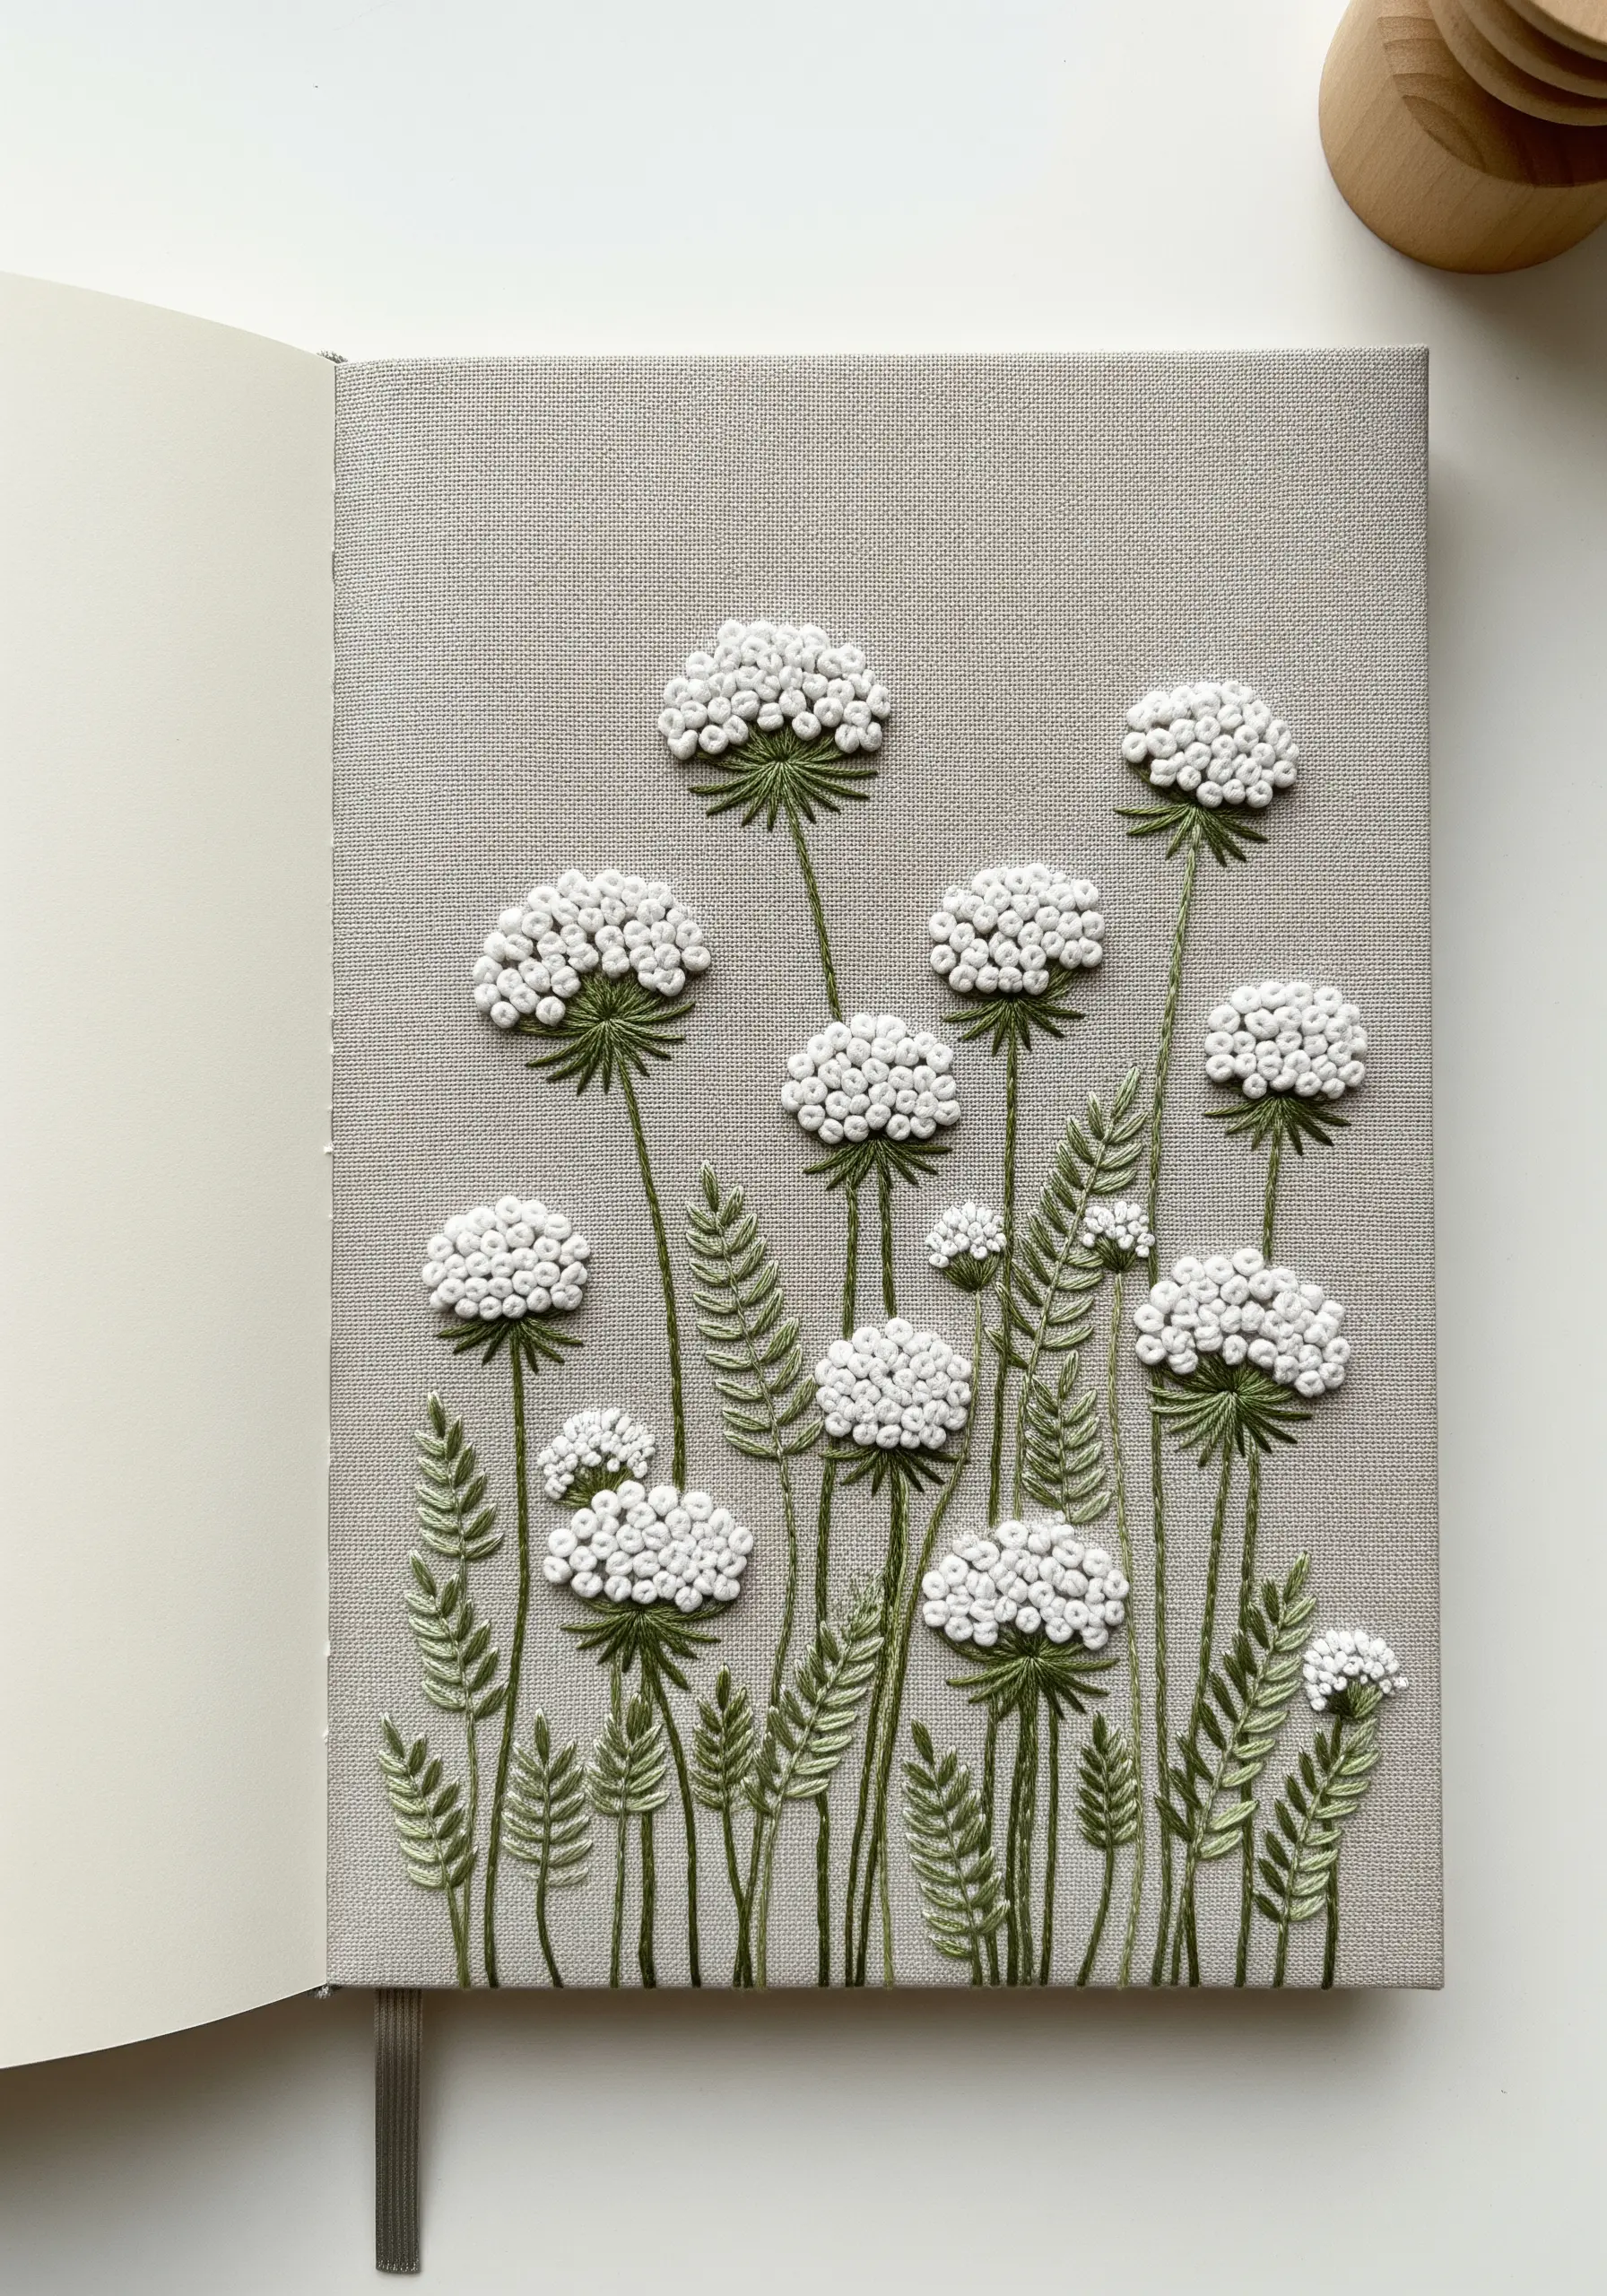
To achieve the clustered, three-dimensional look of Queen Anne’s Lace, rely on densely packed French knots.
Vary the number of wraps around your needle (one for smaller knots, two for larger ones) to create an uneven, organic surface.
Work the knots in a tight circle, stitching a few just outside the main cluster to mimic the flower’s natural irregularity.
This method is far more effective than satin stitch for capturing the frothy texture, offering a tactile quality that invites touch.
Learn more about the ways to create depth in your embroidery using natural textures.
4. Master Petal Gradients with Thread Painting
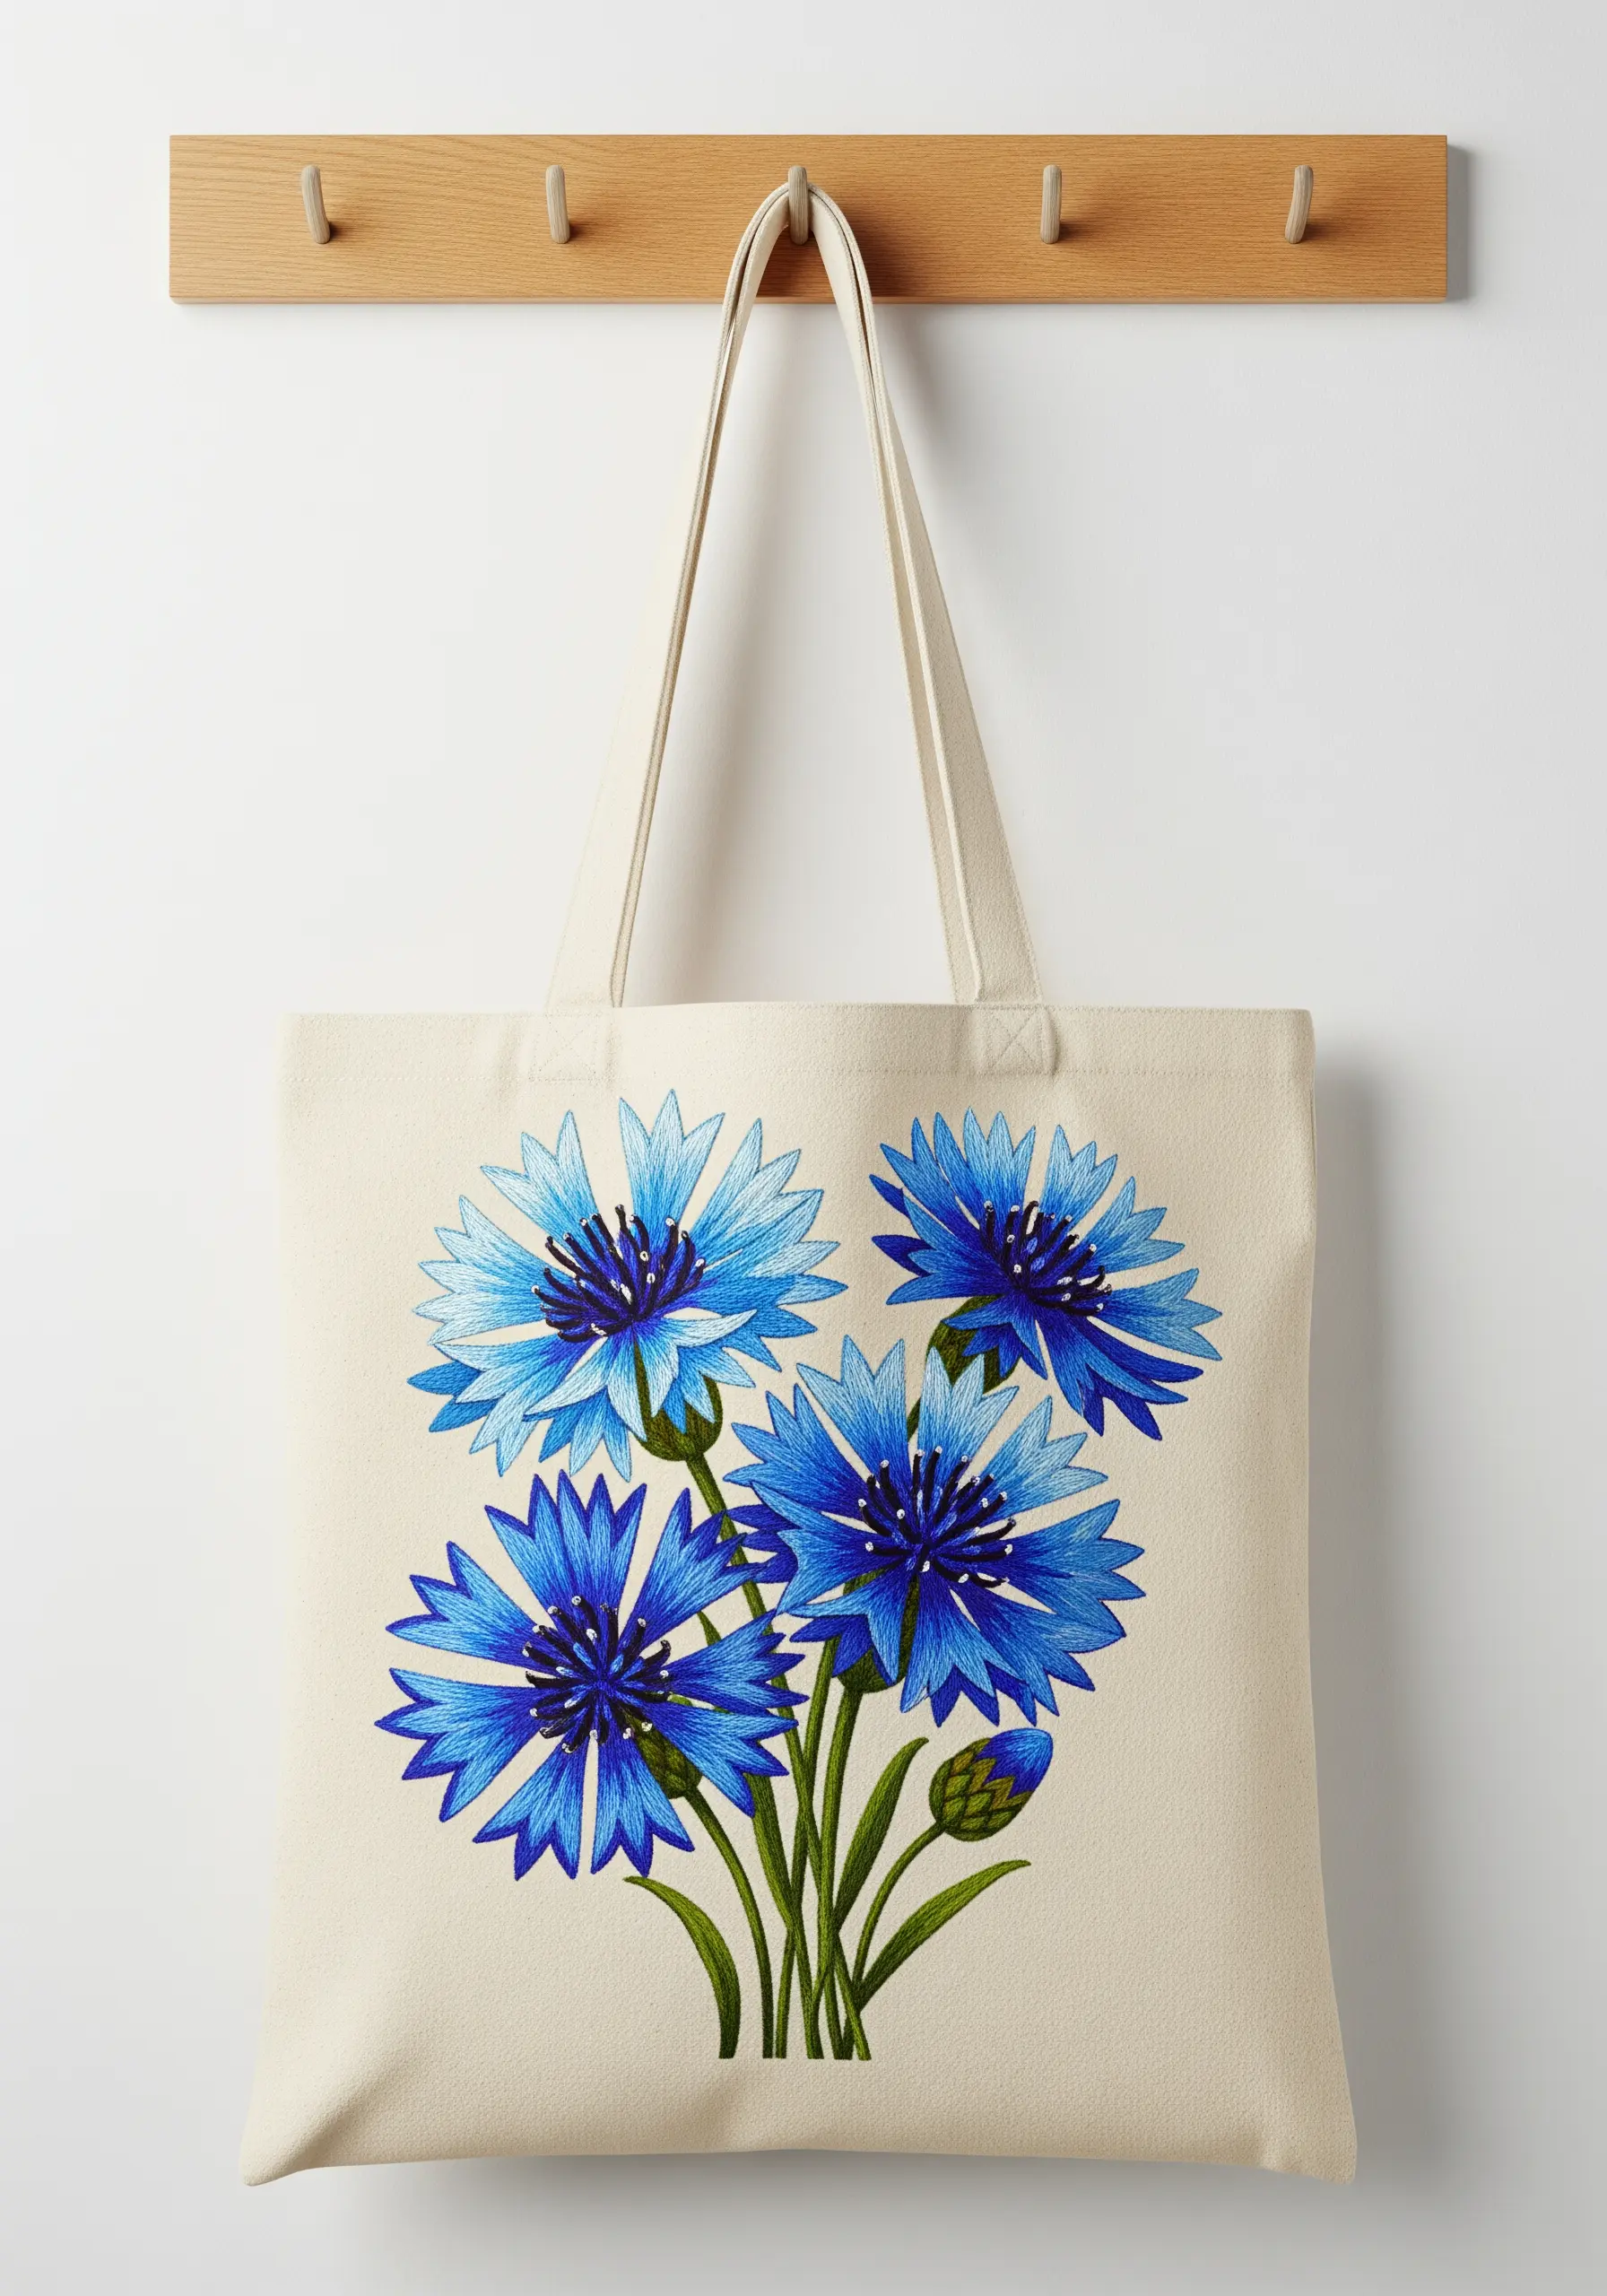
Create vibrant cornflower petals by using the long-and-short stitch technique, also known as thread painting.
Start with your darkest blue at the center and work outwards, blending in progressively lighter shades of blue and periwinkle toward the tips.
Ensure your stitches follow the natural curve of the petal to create realistic movement and shape.
This blending method eliminates harsh lines, giving the flowers a soft, watercolor-like appearance that elevates a simple tote bag into a wearable piece of art.
Get inspired by these floral tote bag embroidery motifs inspired by cottagecore spring walks.
5. Shape Foxgloves with Directional Satin Stitch

Capture the iconic bell shape of foxglove flowers by paying close attention to the direction of your satin stitches.
For each bloom, angle your stitches to follow the flower’s curve, starting from the outer edge and working inward to create a sense of roundness.
Use a darker thread on the inside of the bell and a lighter one on the highlighted edge to enhance the three-dimensional illusion.
Add tiny, scattered French knots inside the blooms for the signature speckles, a final detail that brings the entire composition to life.
6. Weave a Landscape with Thread Wrapping
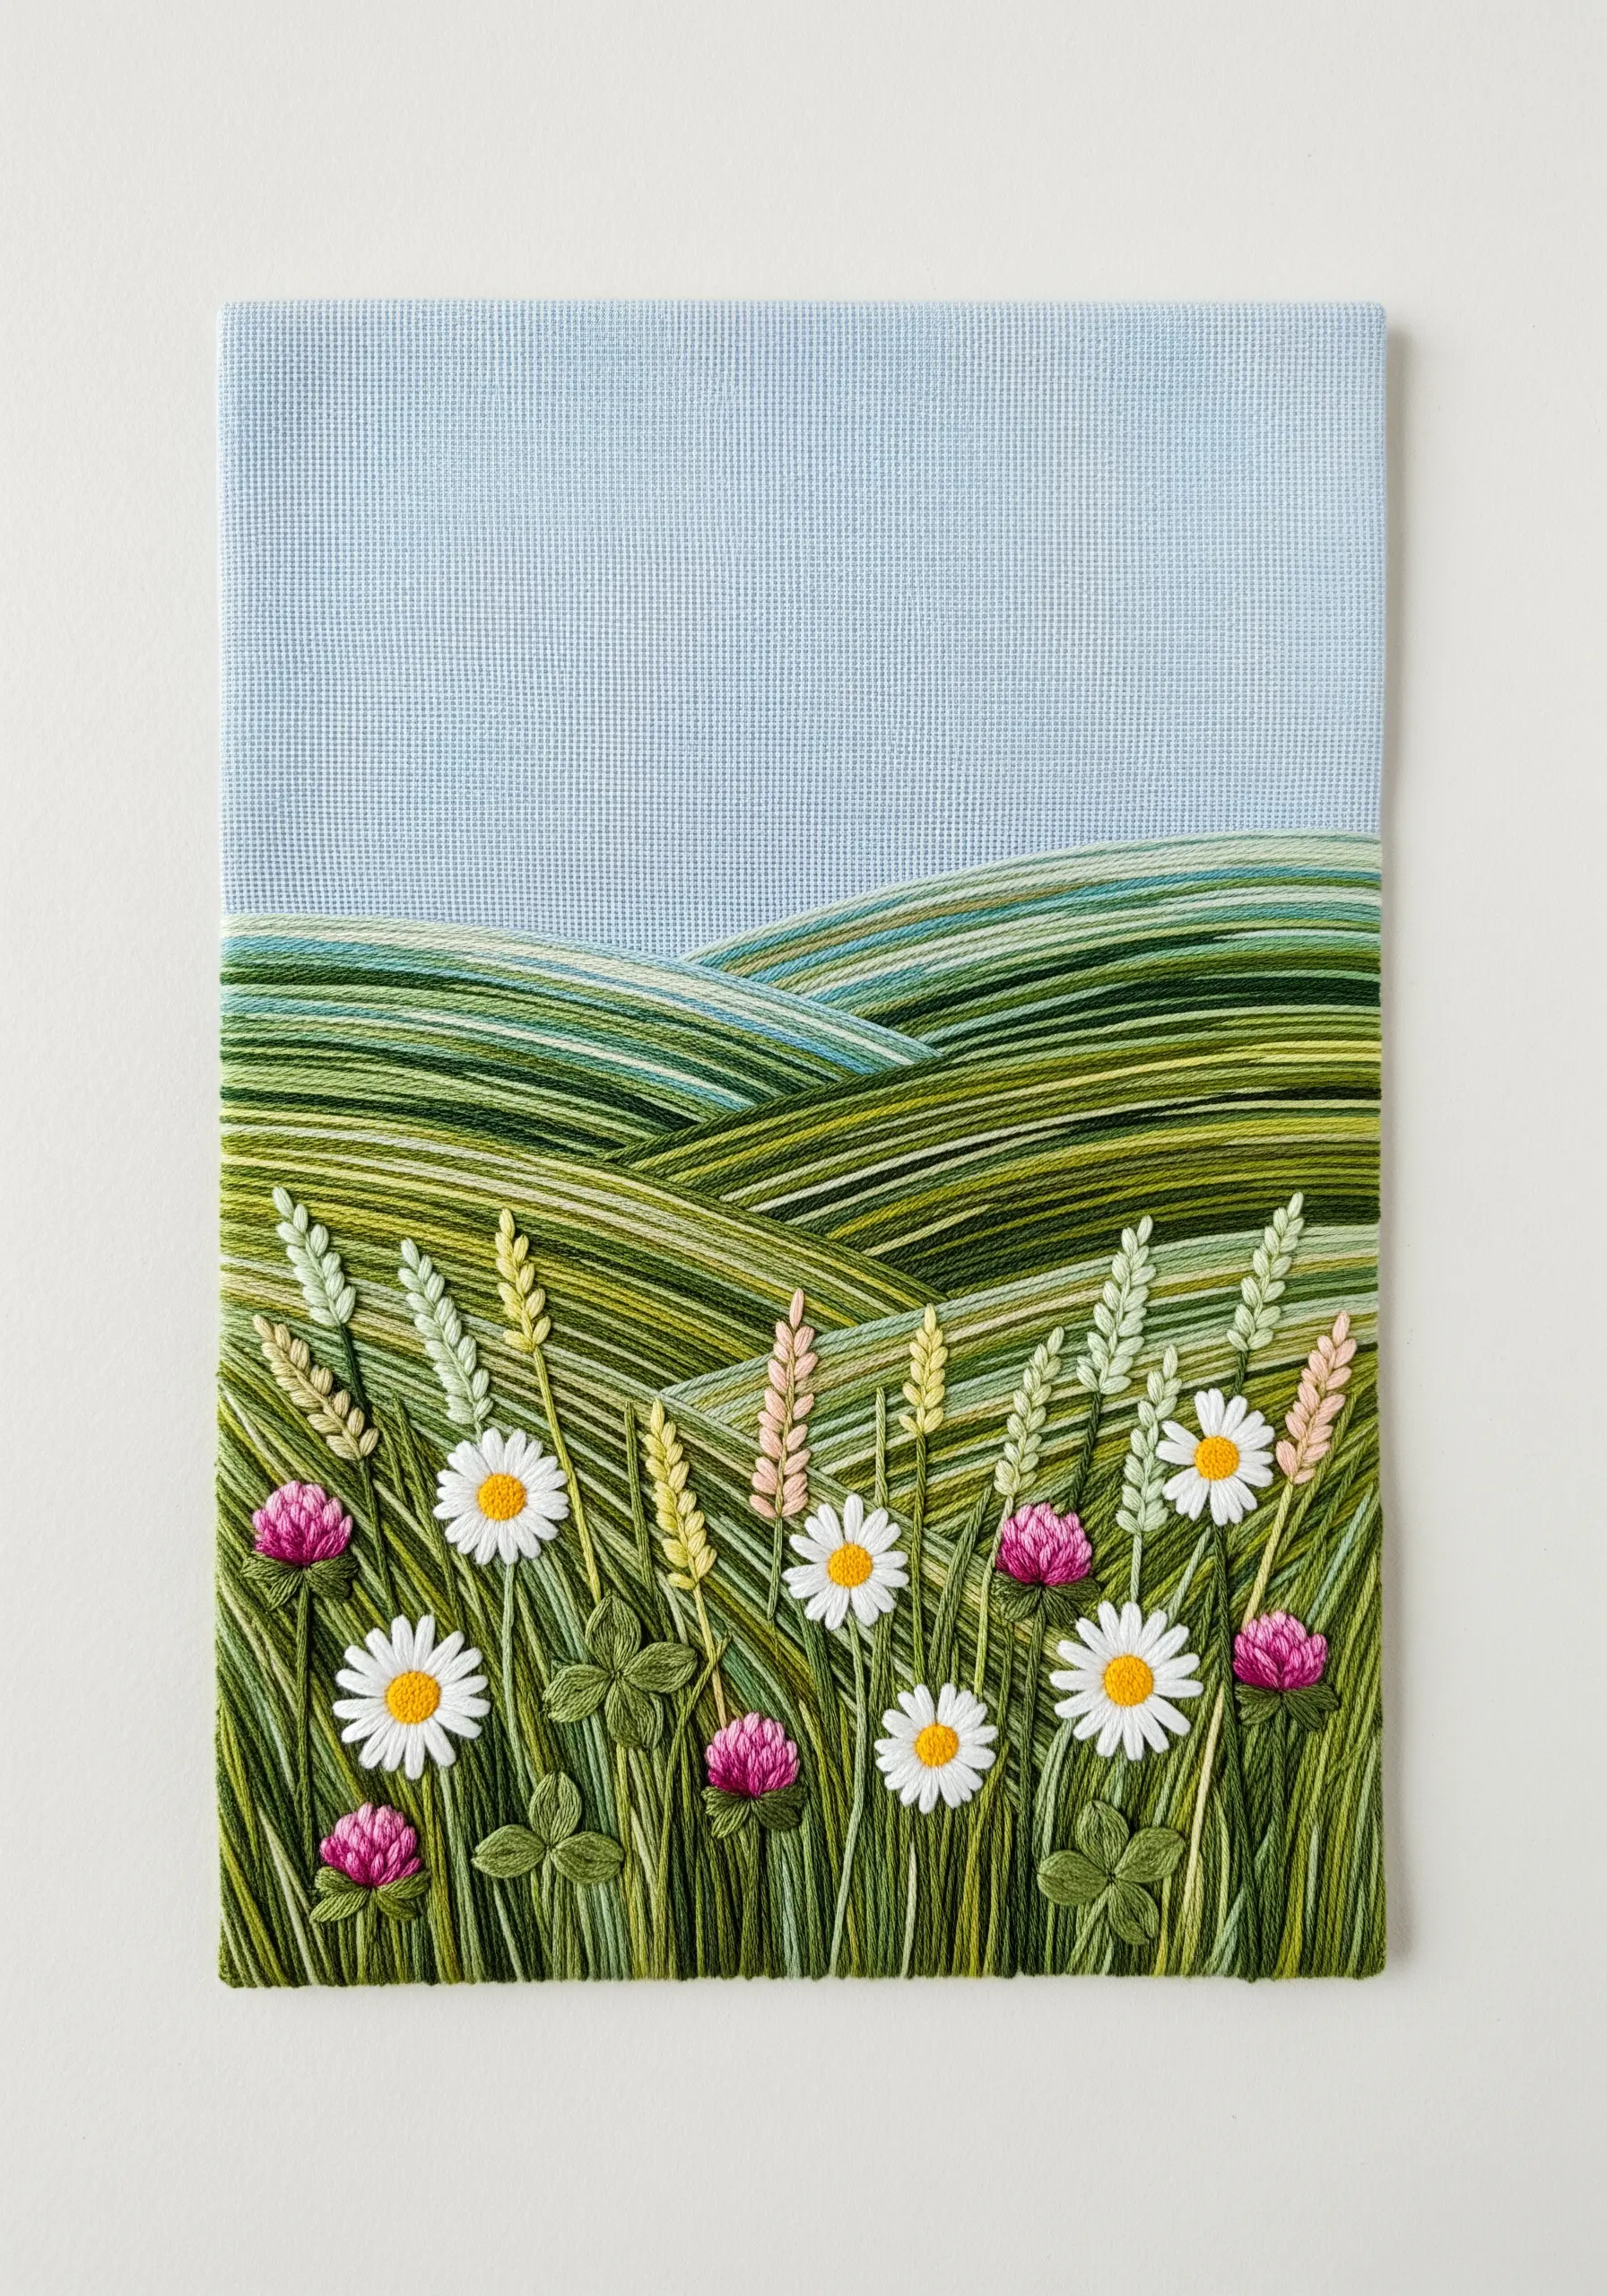
Build rolling hills and a textured sky not with individual stitches, but by wrapping floss across the fabric surface.
Work with multiple strands of thread in variegated greens and blues, laying them down in long, horizontal lines and securing them with tiny couching stitches on the sides.
Overlap the colors slightly to create soft, blended transitions that mimic the distant landscape.
This technique is faster than traditional fill stitches for large areas and results in a smooth, woven texture that contrasts beautifully with the embroidered flowers in the foreground.
Perfect this technique with these mountain landscape thread painting techniques for nature scenes.
7. Anchor Bold Motifs on Denim Fabric
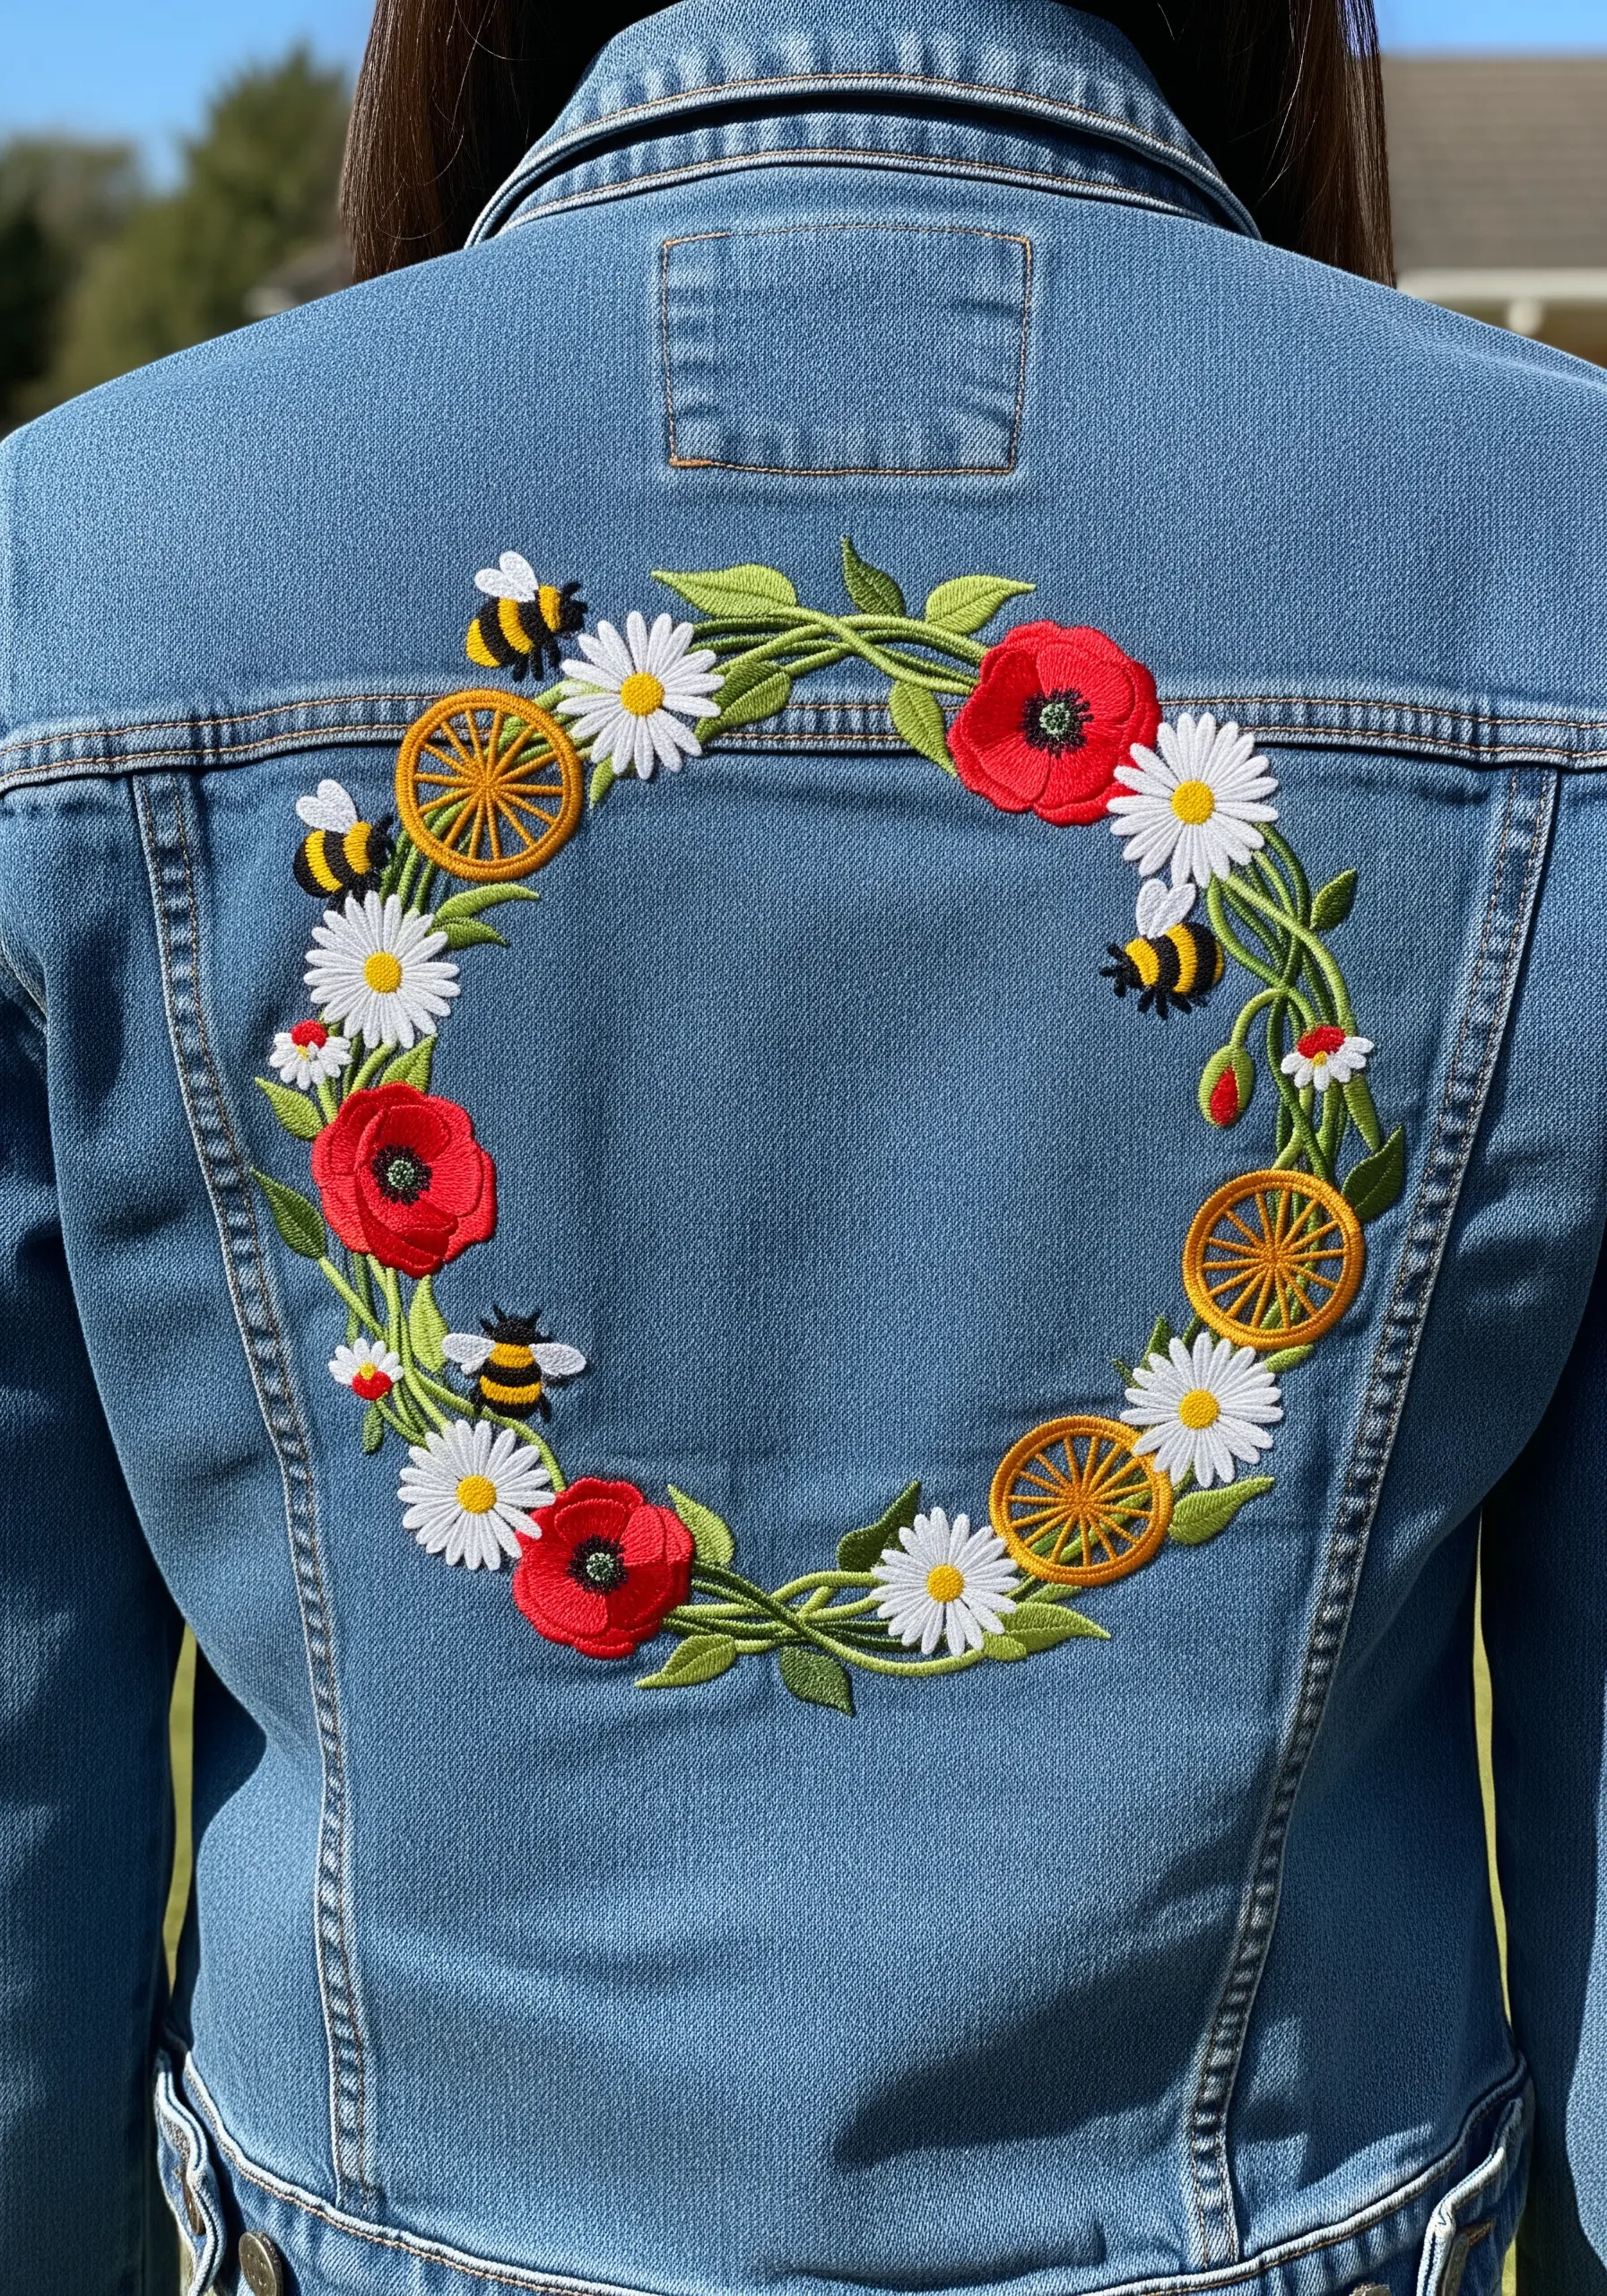
When embroidering on a heavy fabric like denim, choose designs with bold, clean shapes that won’t get lost in the texture.
Use a stabilizer on the back of the fabric to prevent puckering and ensure your stitches remain smooth and even.
Opt for high-contrast colors like bright reds, whites, and yellows to make the floral wreath pop against the blue denim.
A satin stitch outline before filling in the shapes will give your embroidery a clean, patch-like finish that looks professional and durable. Find more inspiration in these easy stitches that bring your plain denim jackets to life.
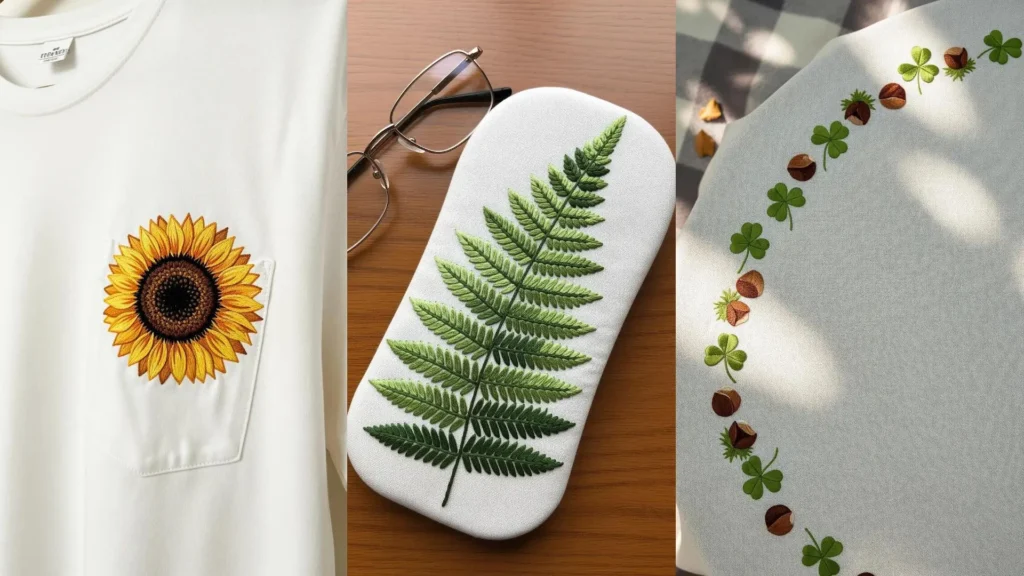
8. Add Subtle Texture to Leaves and Berries
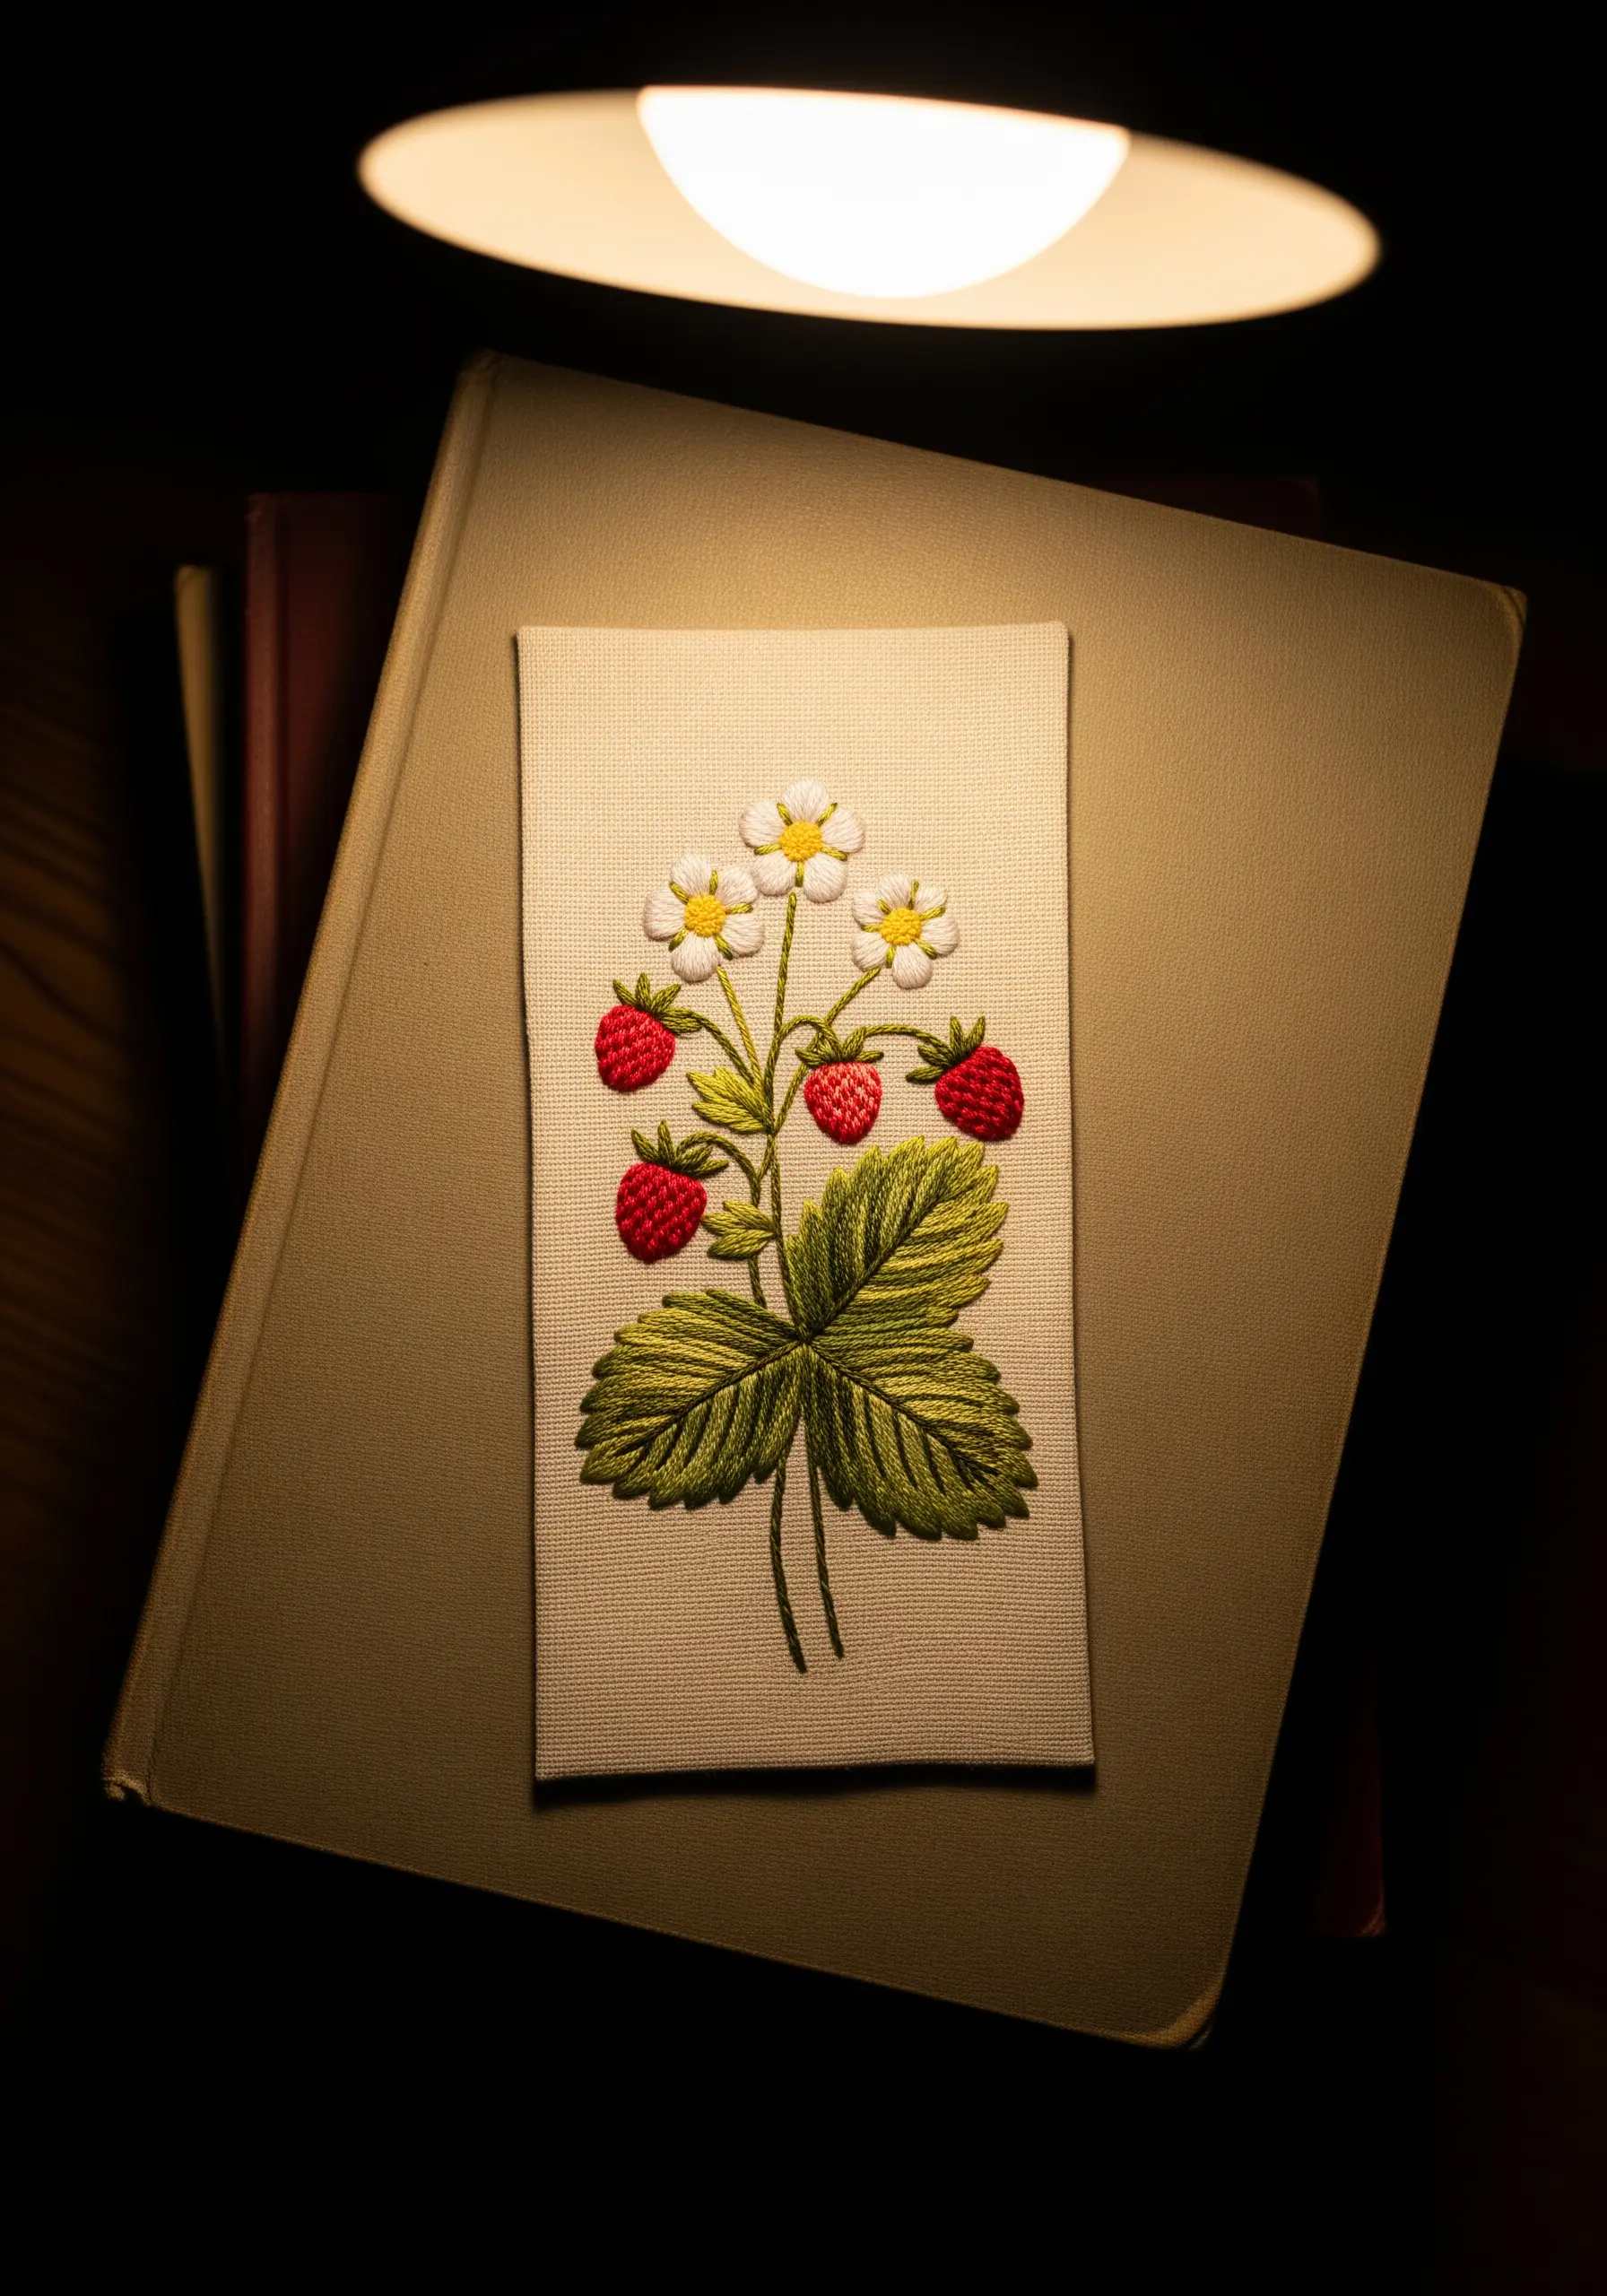
Elevate simple botanical designs by focusing on subtle textural details that mimic nature.
For the strawberry leaves, use a fishbone stitch to create a defined central vein and angle the stitches to suggest natural growth.
Instead of a flat satin stitch for the strawberries, add a few tiny, scattered seed stitches on top in a slightly lighter red to create the illusion of seeds and surface texture.
This combination of structured leaf stitches and delicate berry details creates a balanced and refined composition.
9. Design with Delicacy on Table Linens
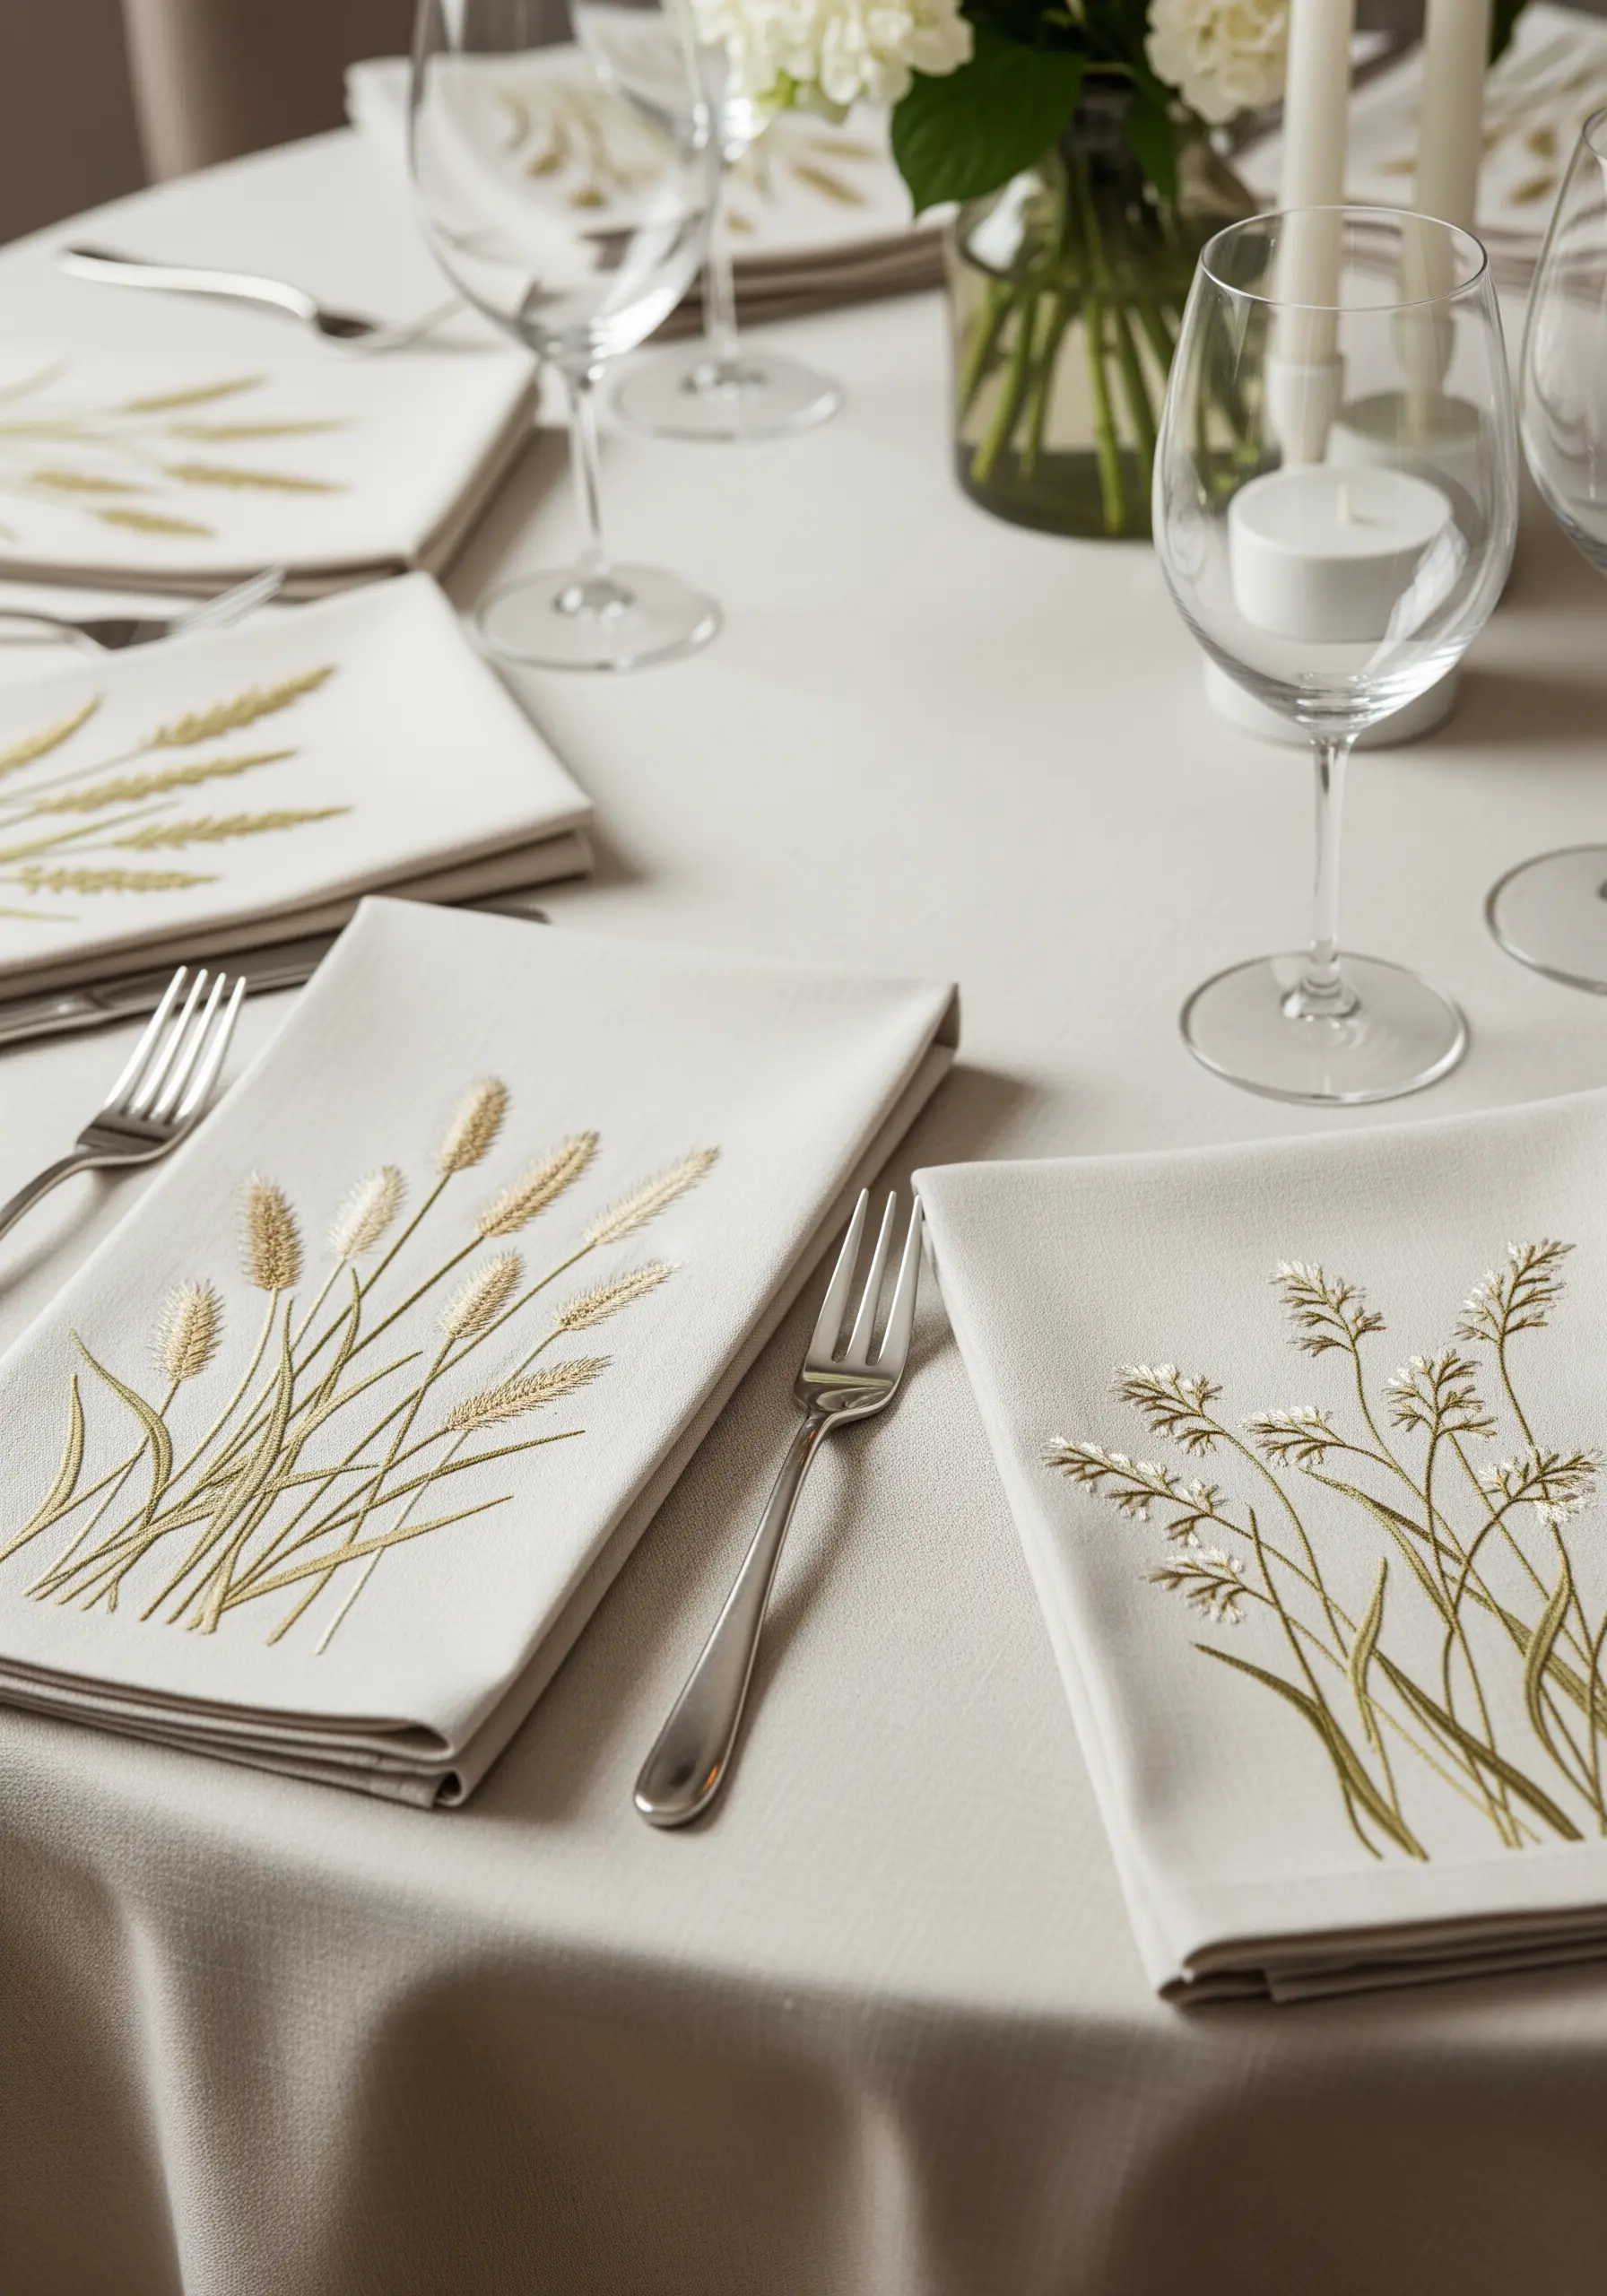
For elegant home décor like table napkins, choose minimalist designs that enhance the fabric rather than overwhelm it.
Select just two or three complementary shades of thread—like soft golds and muted greens—to maintain a sophisticated and cohesive look.
Use open, airy stitches like the fly stitch or single straight stitches for the grasses, allowing the fabric’s natural texture to show through.
This approach, focusing on negative space and delicate lines, ensures your table linen embroidery motifs look timeless and expensive.
10. Blend Vibrant Colors on Felt
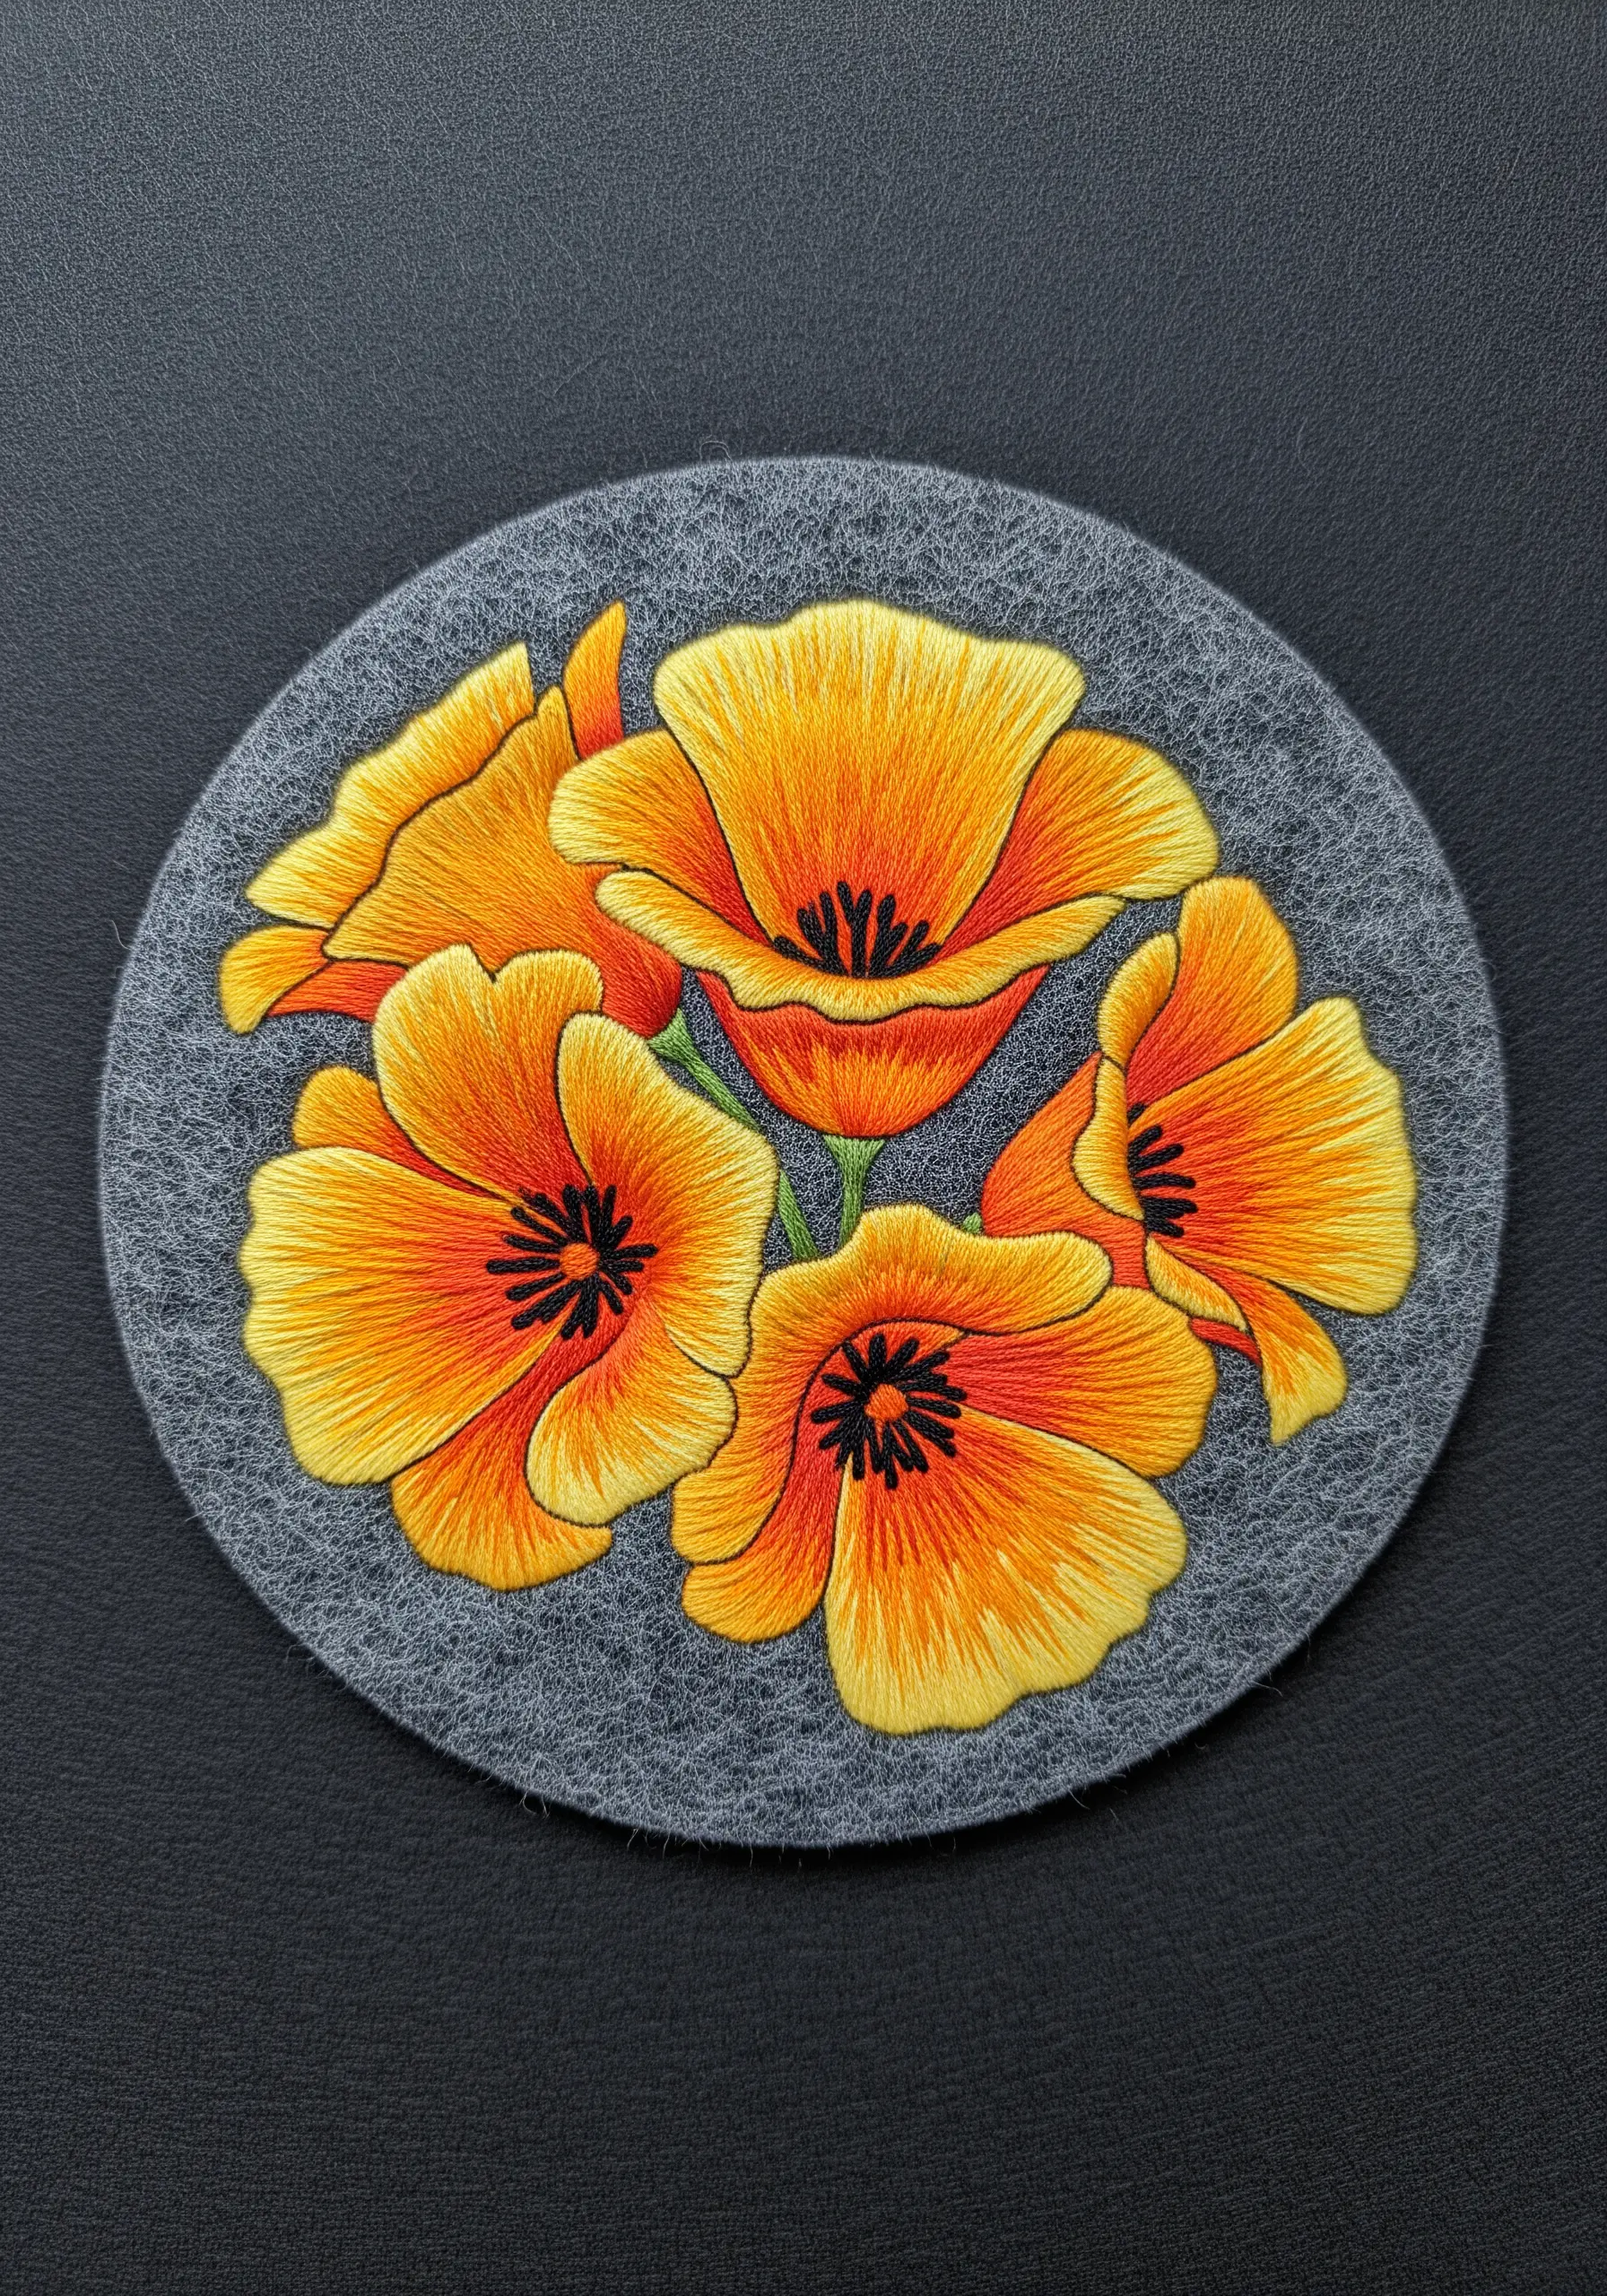
Felt provides a stable, non-fraying base that is perfect for practicing smooth color blending with long-and-short stitch.
To create the fiery California poppies, use at least three shades of orange and yellow, starting with the deepest hue at the petal’s base.
Work your stitches outward, overlapping each new color into the previous one to create a seamless gradient.
The slightly fuzzy texture of the felt softens the stitches, making your abstract color blend stitch ideas look even more painterly and vibrant.
11. Craft Dainty Forget-Me-Nots with Detached Chain Stitches
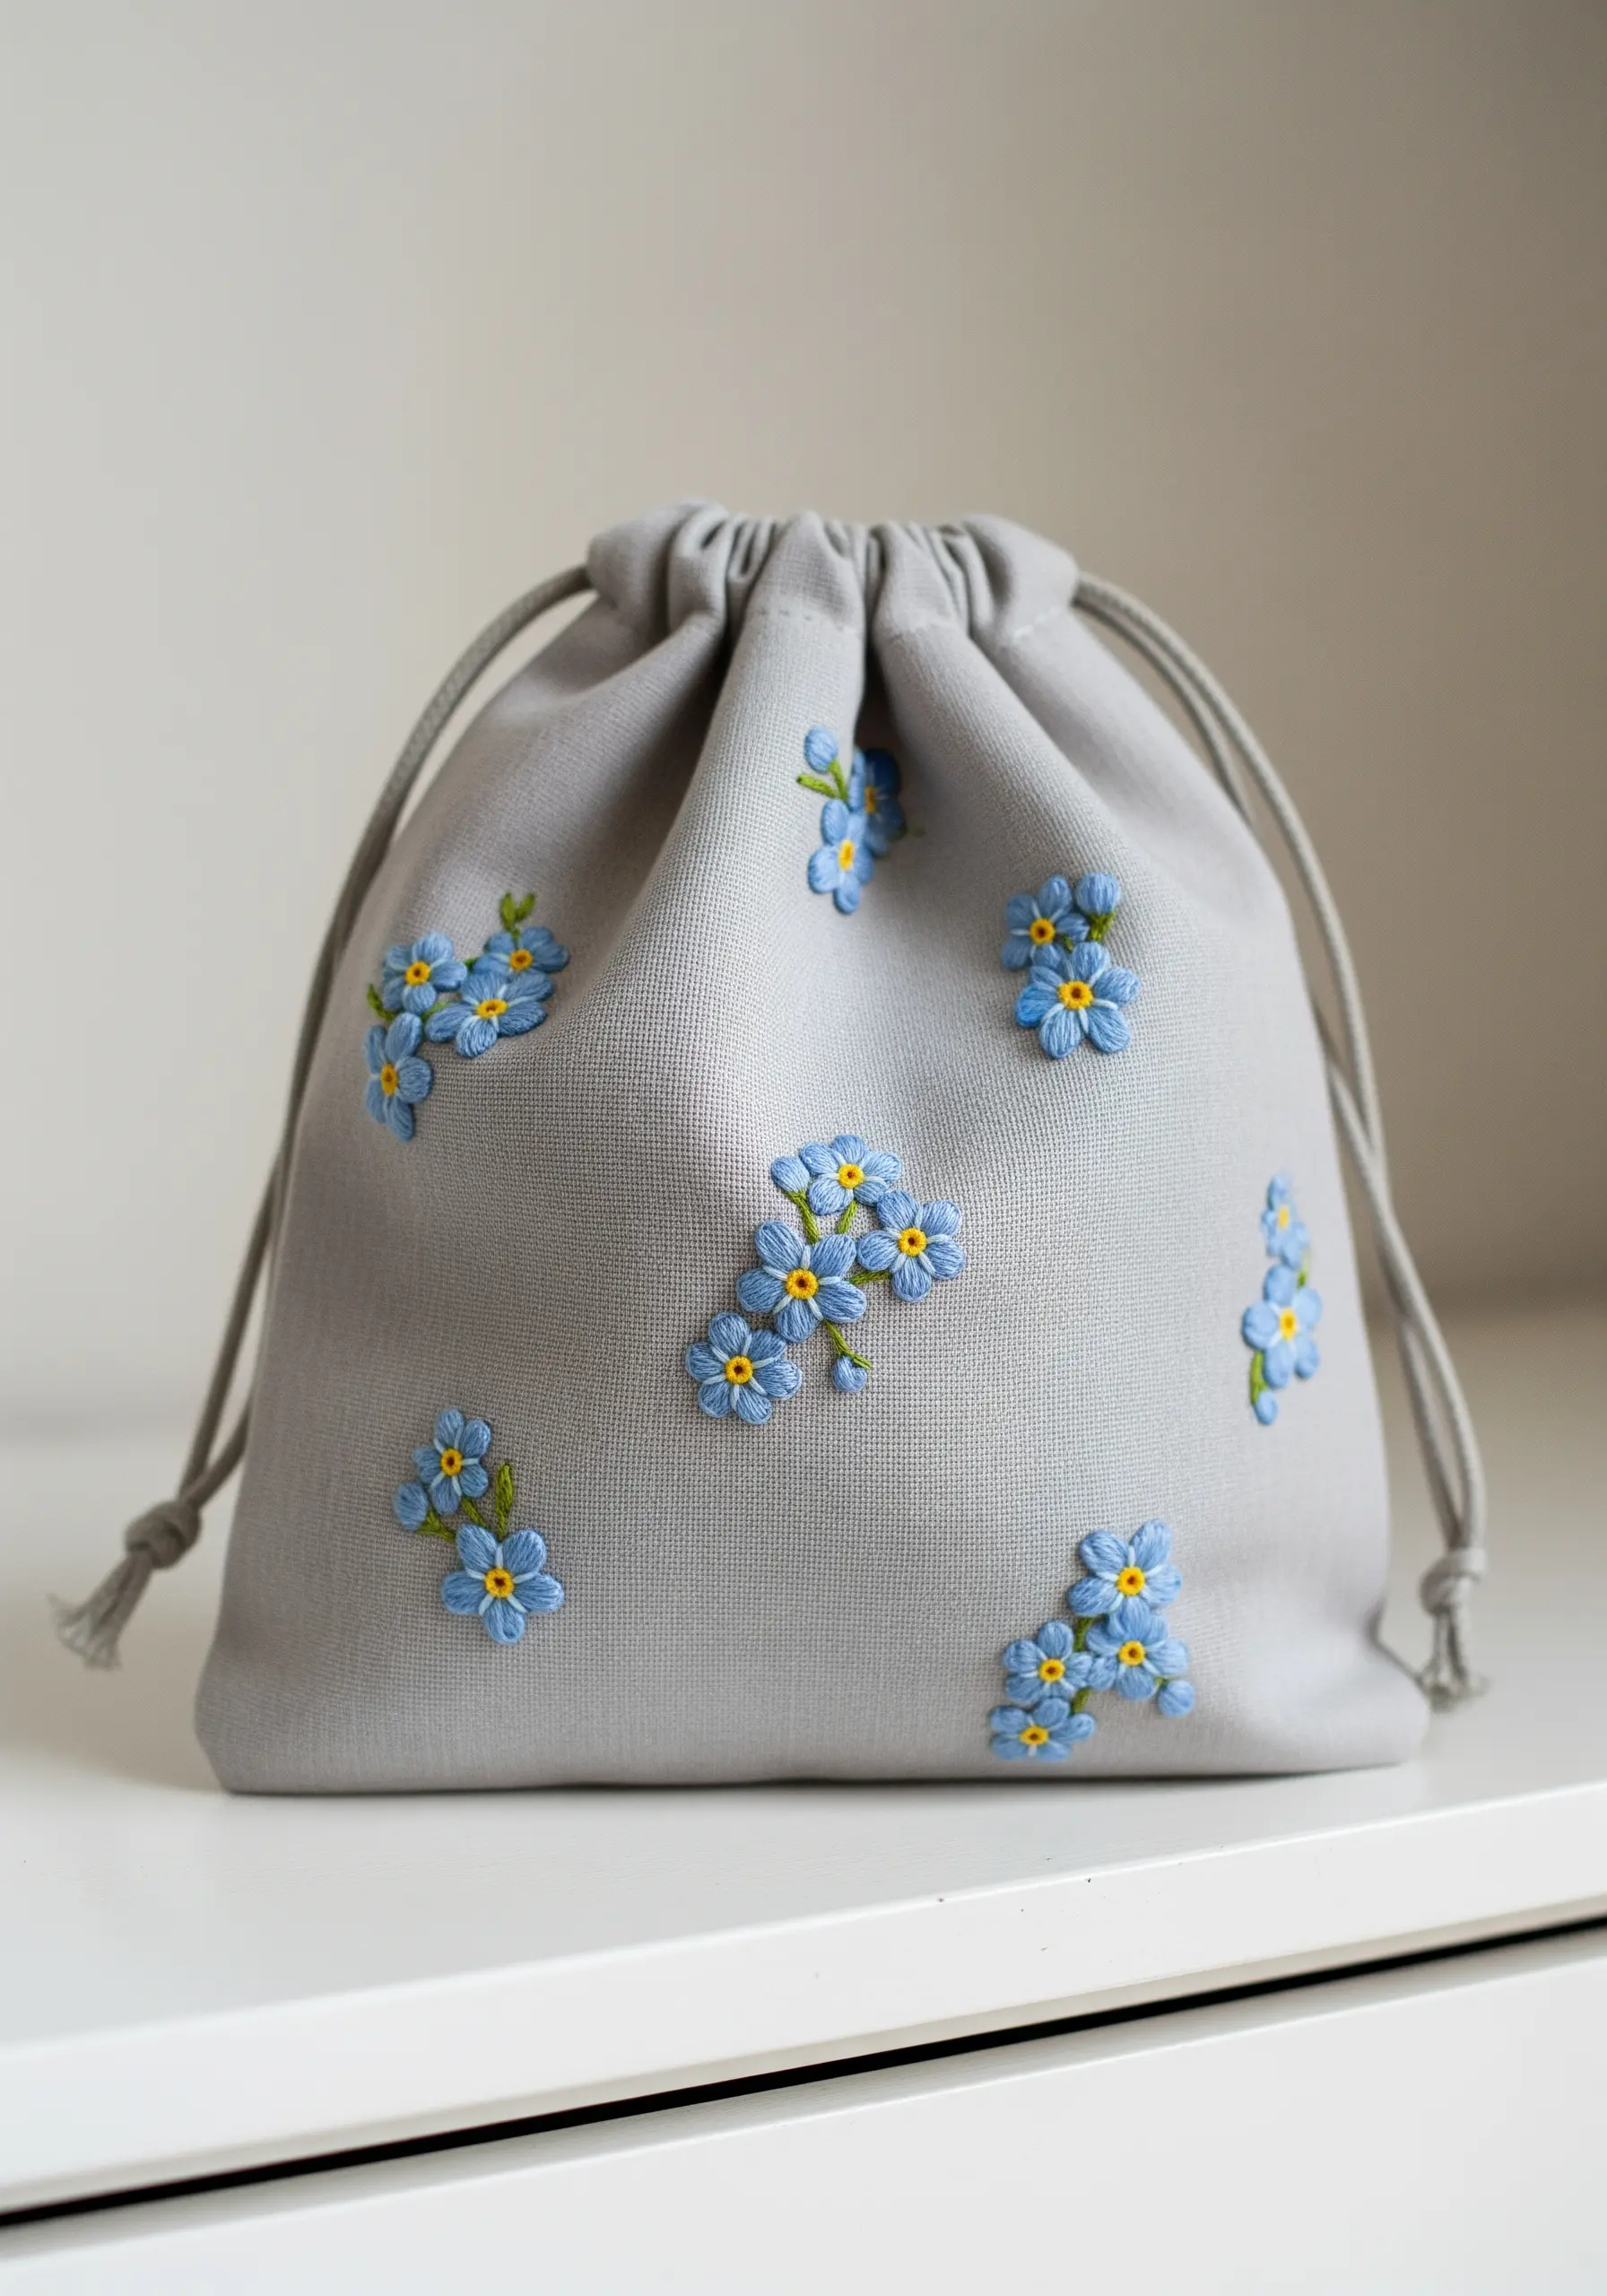
Capture the delicate nature of forget-me-nots by using single detached chain stitches (lazy daisies) for each petal.
This stitch perfectly mimics the flower’s small, rounded shape and is much quicker than using satin stitch for such tiny elements.
Arrange five stitches in a circle and place a single French knot in the center with yellow floss to complete the bloom.
Scatter these tiny floral clusters across the fabric to create a charming, effortless pattern on pouches, collars, or handkerchiefs. Discover more tiny floral embroidery ideas for pocket corners.
12. Create Dense Herbal Textures with Colonial Knots
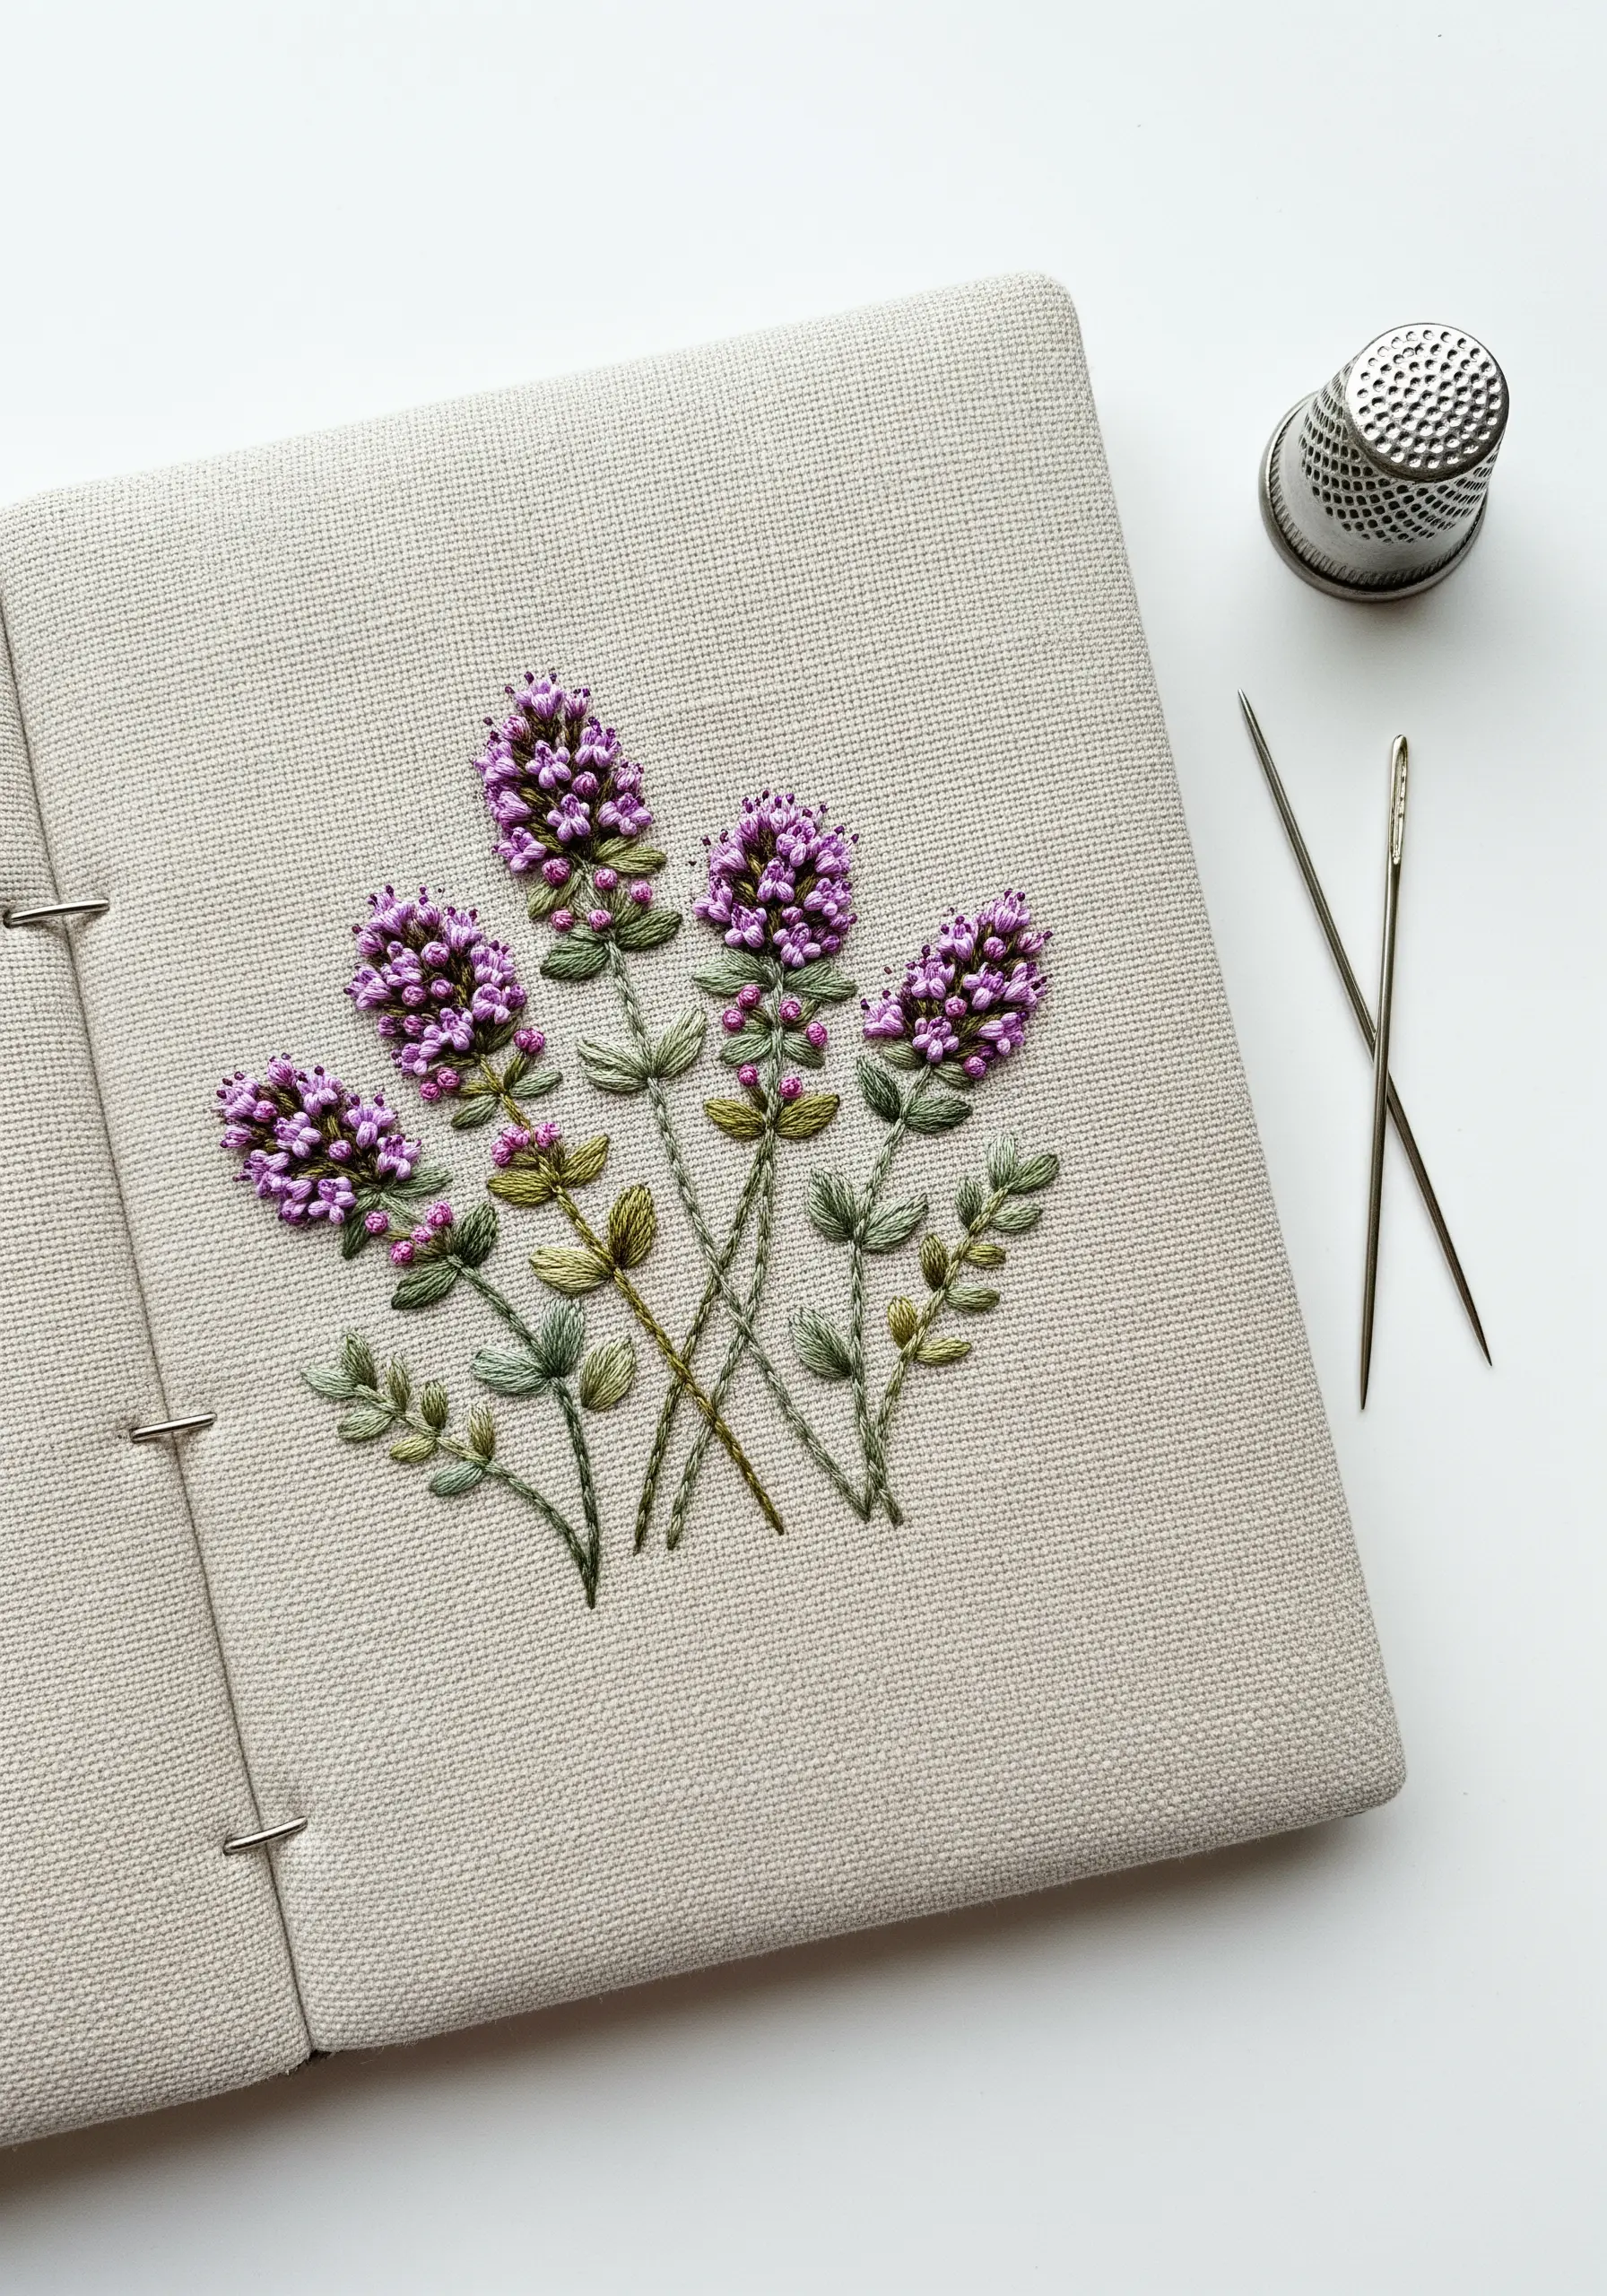
For florals like thyme or oregano, where texture is key, opt for colonial knots instead of French knots.
Colonial knots are sturdier and create a slightly rounder, more raised nub of thread, perfect for mimicking dense flower heads.
Group the knots tightly together, using a few different shades of pink and purple to give the clusters natural dimension.
This technique creates a wonderfully tactile surface that stands out against the flat linen, making your herbal embroidery both visually and texturally engaging.
13. Achieve Realistic Sunflower Petals Through Layering
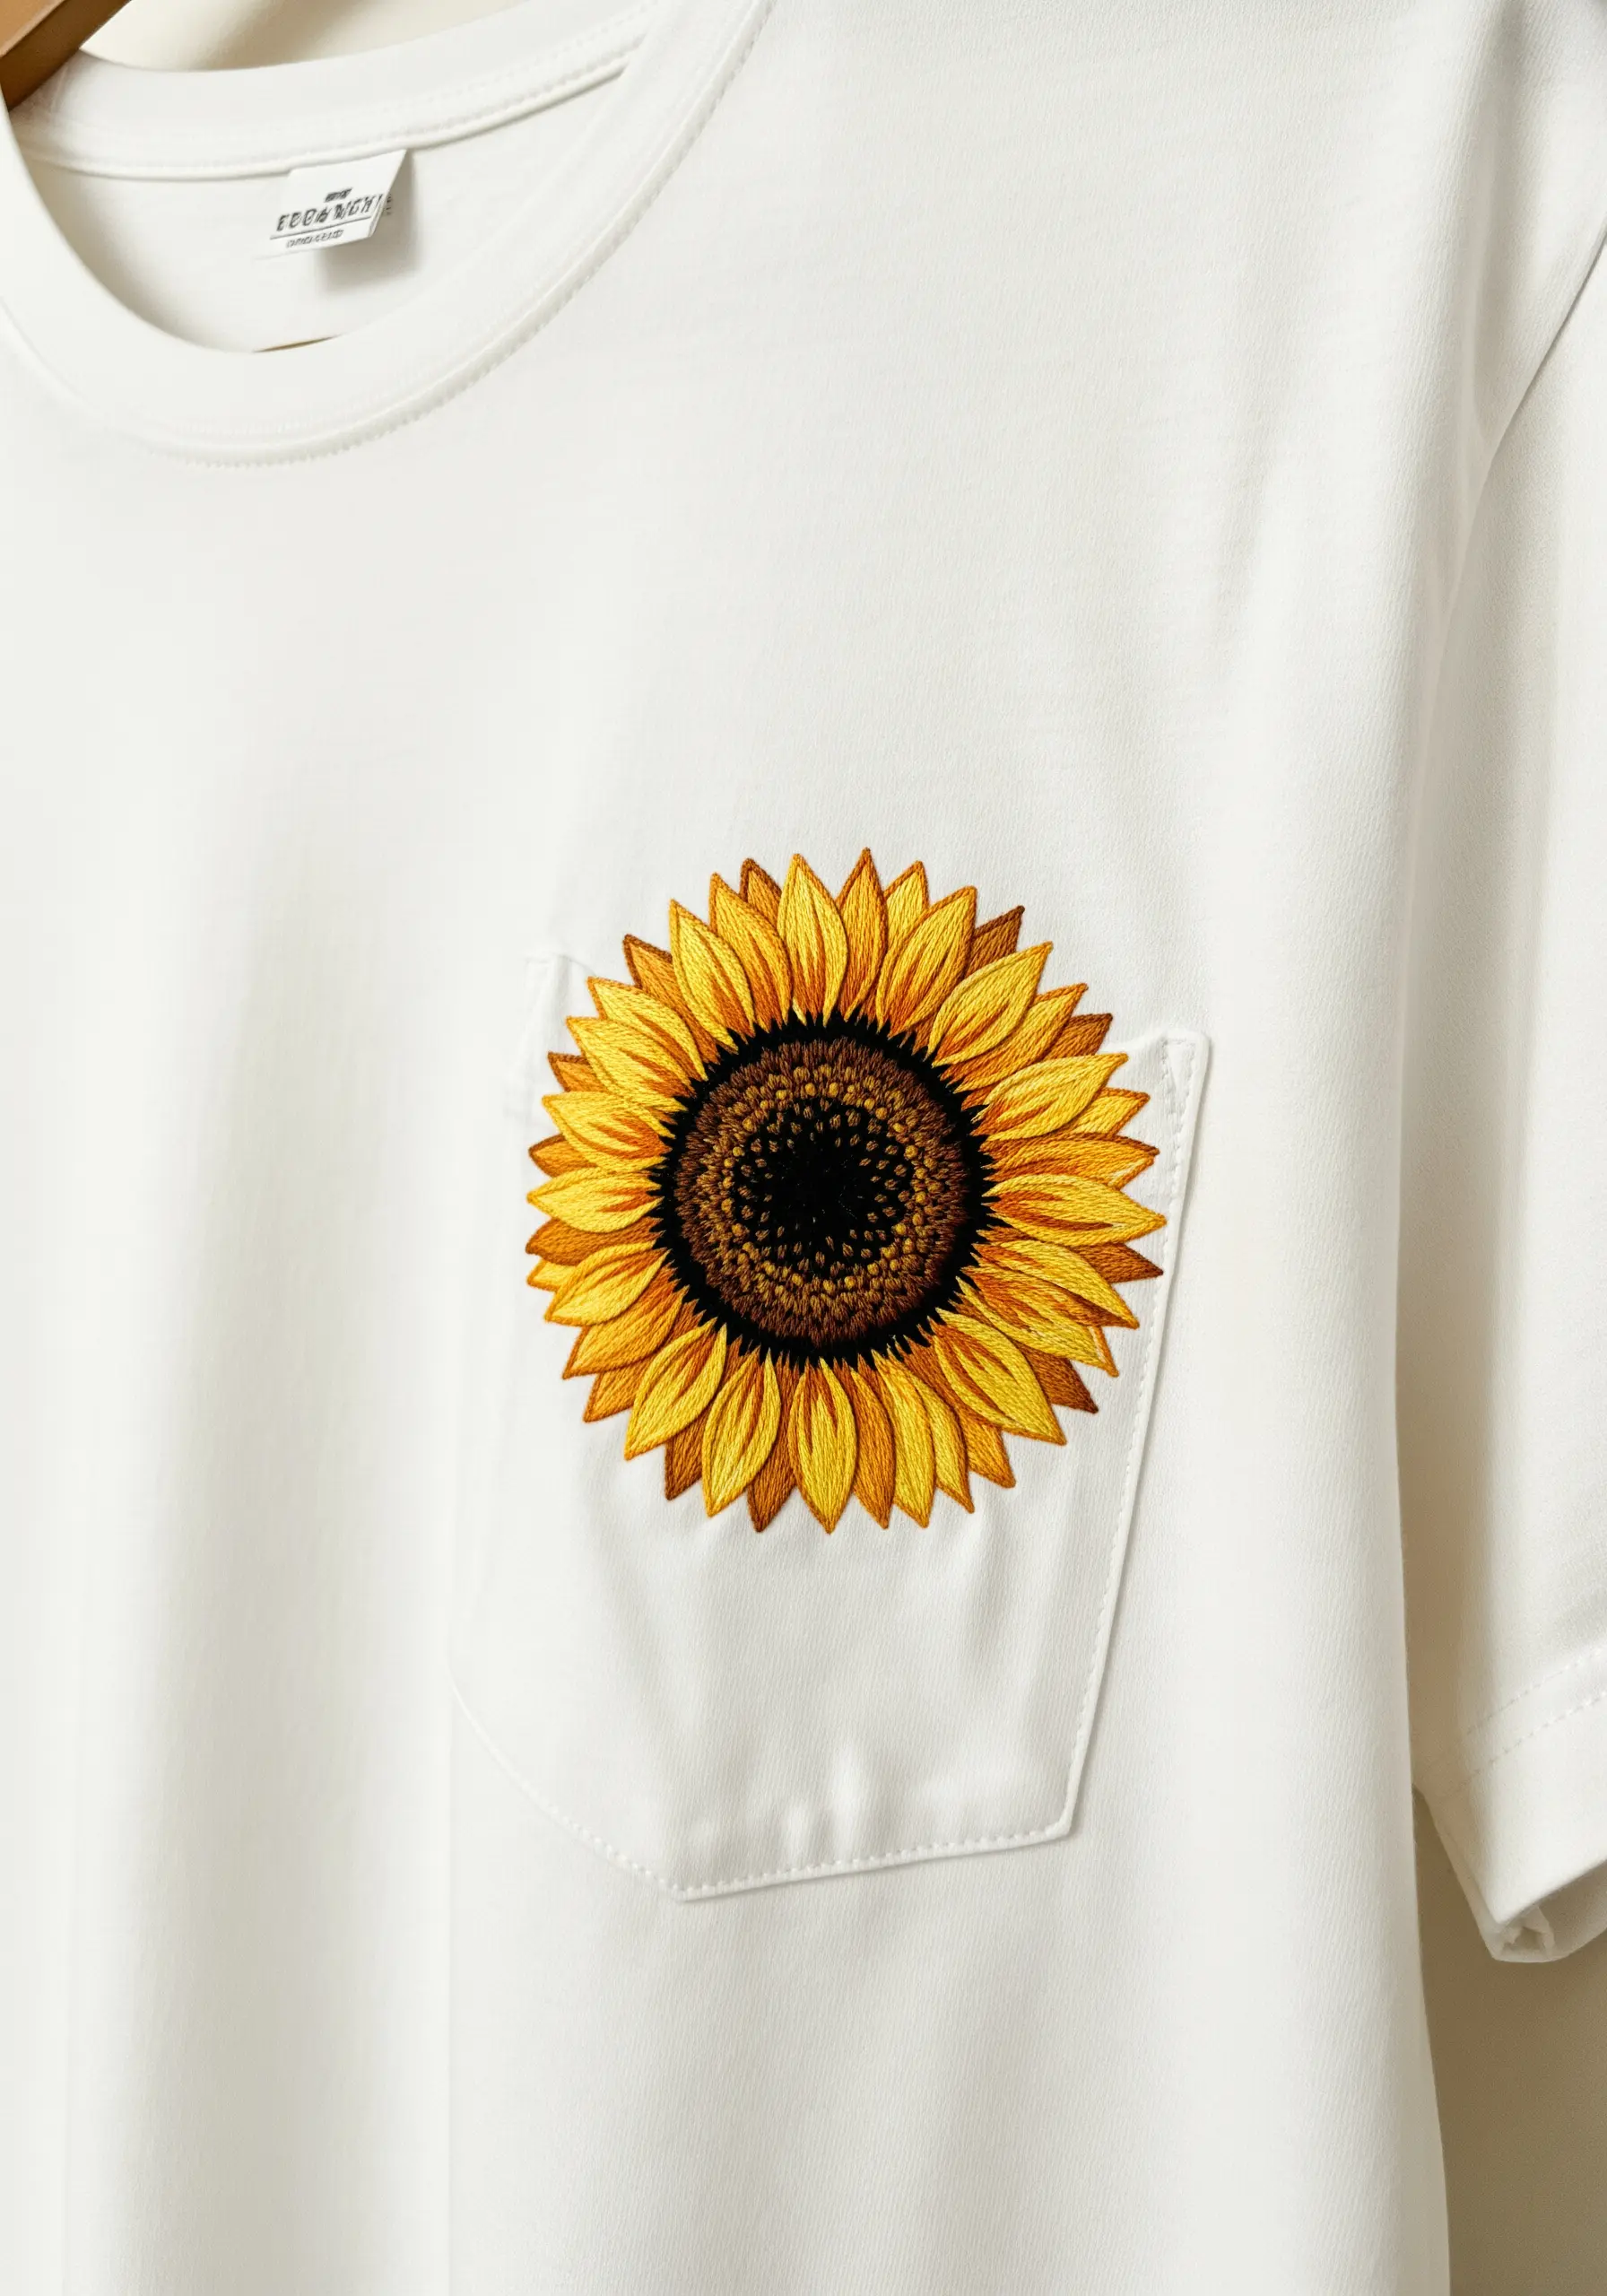
To prevent your sunflower from looking flat, stitch the petals in at least two distinct layers.
First, stitch a back layer of petals using a slightly darker gold or ochre thread.
Then, stitch the front petals on top using a brighter yellow, making sure to overlap them slightly to create realistic depth.
For the center, fill the area with a dense field of French knots in dark brown and black, which adds convincing texture and contrast.
Try these sunflower-to-daisy gradient petal techniques for more stunning results.
14. Explore Contrast with a Split Composition
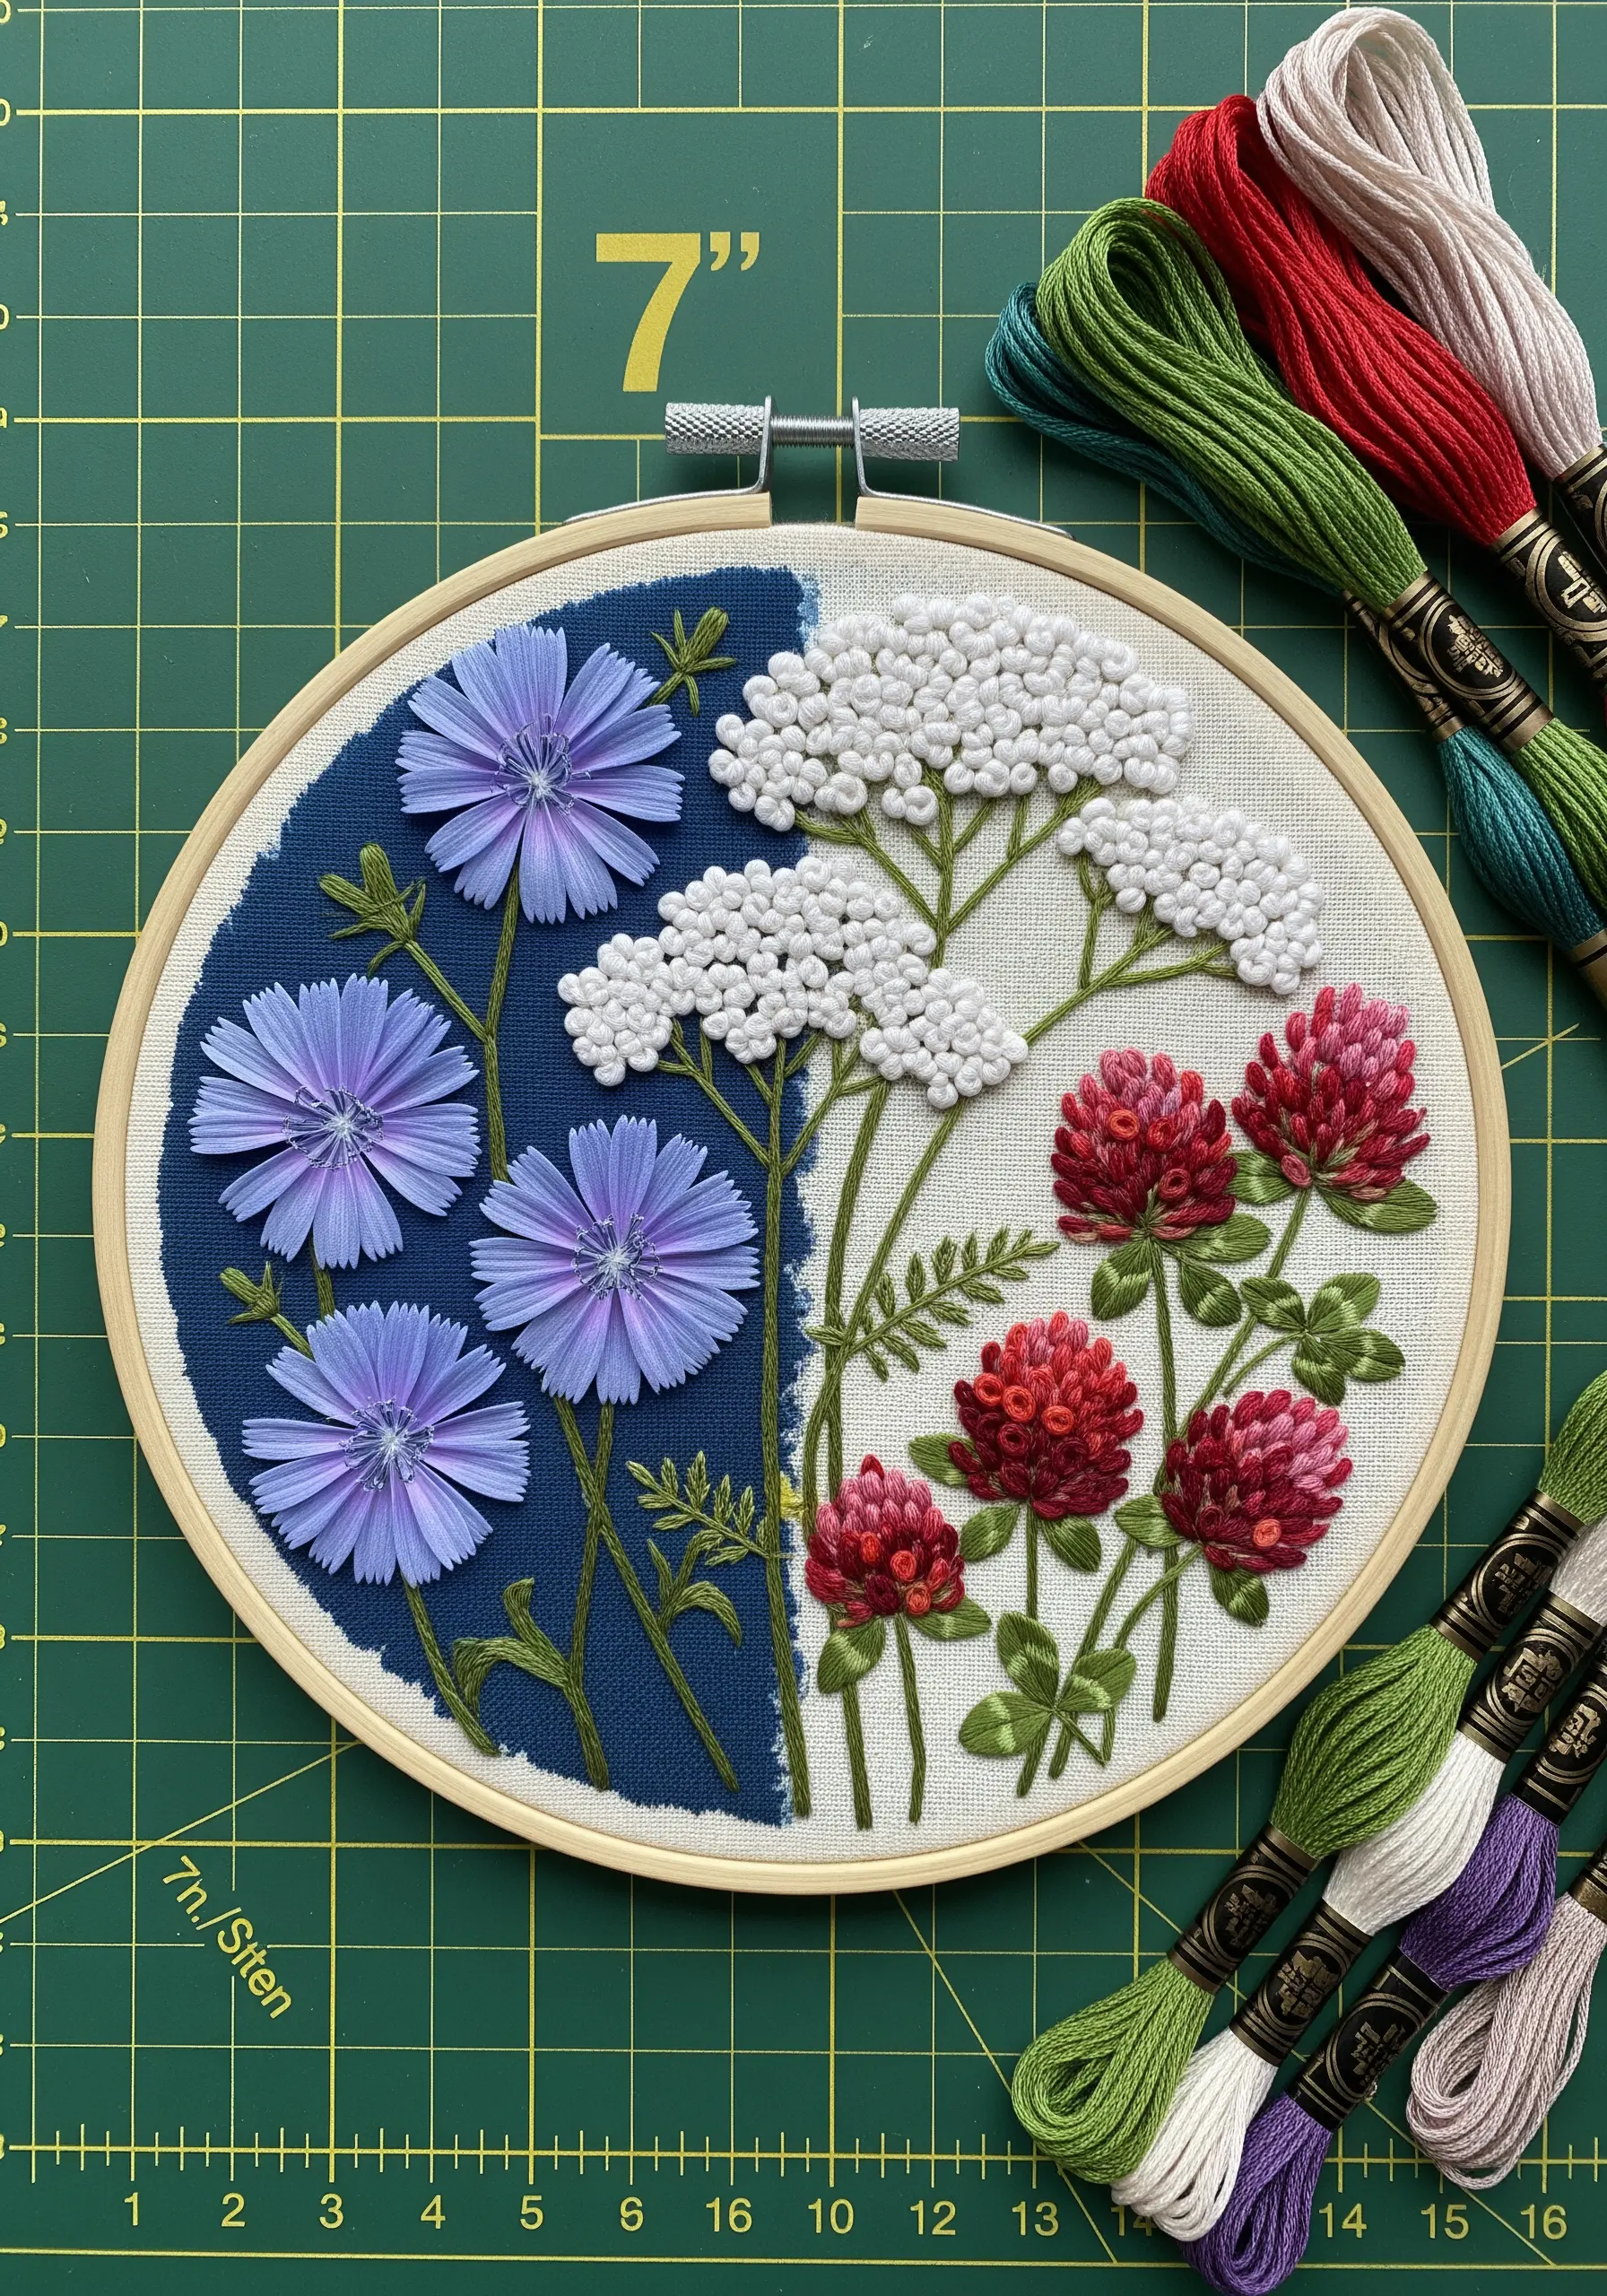
Challenge your design skills by dividing your hoop into two contrasting sections.
On one side, use a dark fabric background and stitch light-colored flowers; on the other, reverse it with a light background and darker blooms.
Play with textures as well: pair the smooth, flat petals of chicory with the bumpy, raised French knots of Queen Anne’s Lace.
This exercise in contrast not only creates a visually striking piece but also sharpens your understanding of how color, texture, and negative space interact.
15. Illuminate Dark Fabric with High-Contrast Stitches
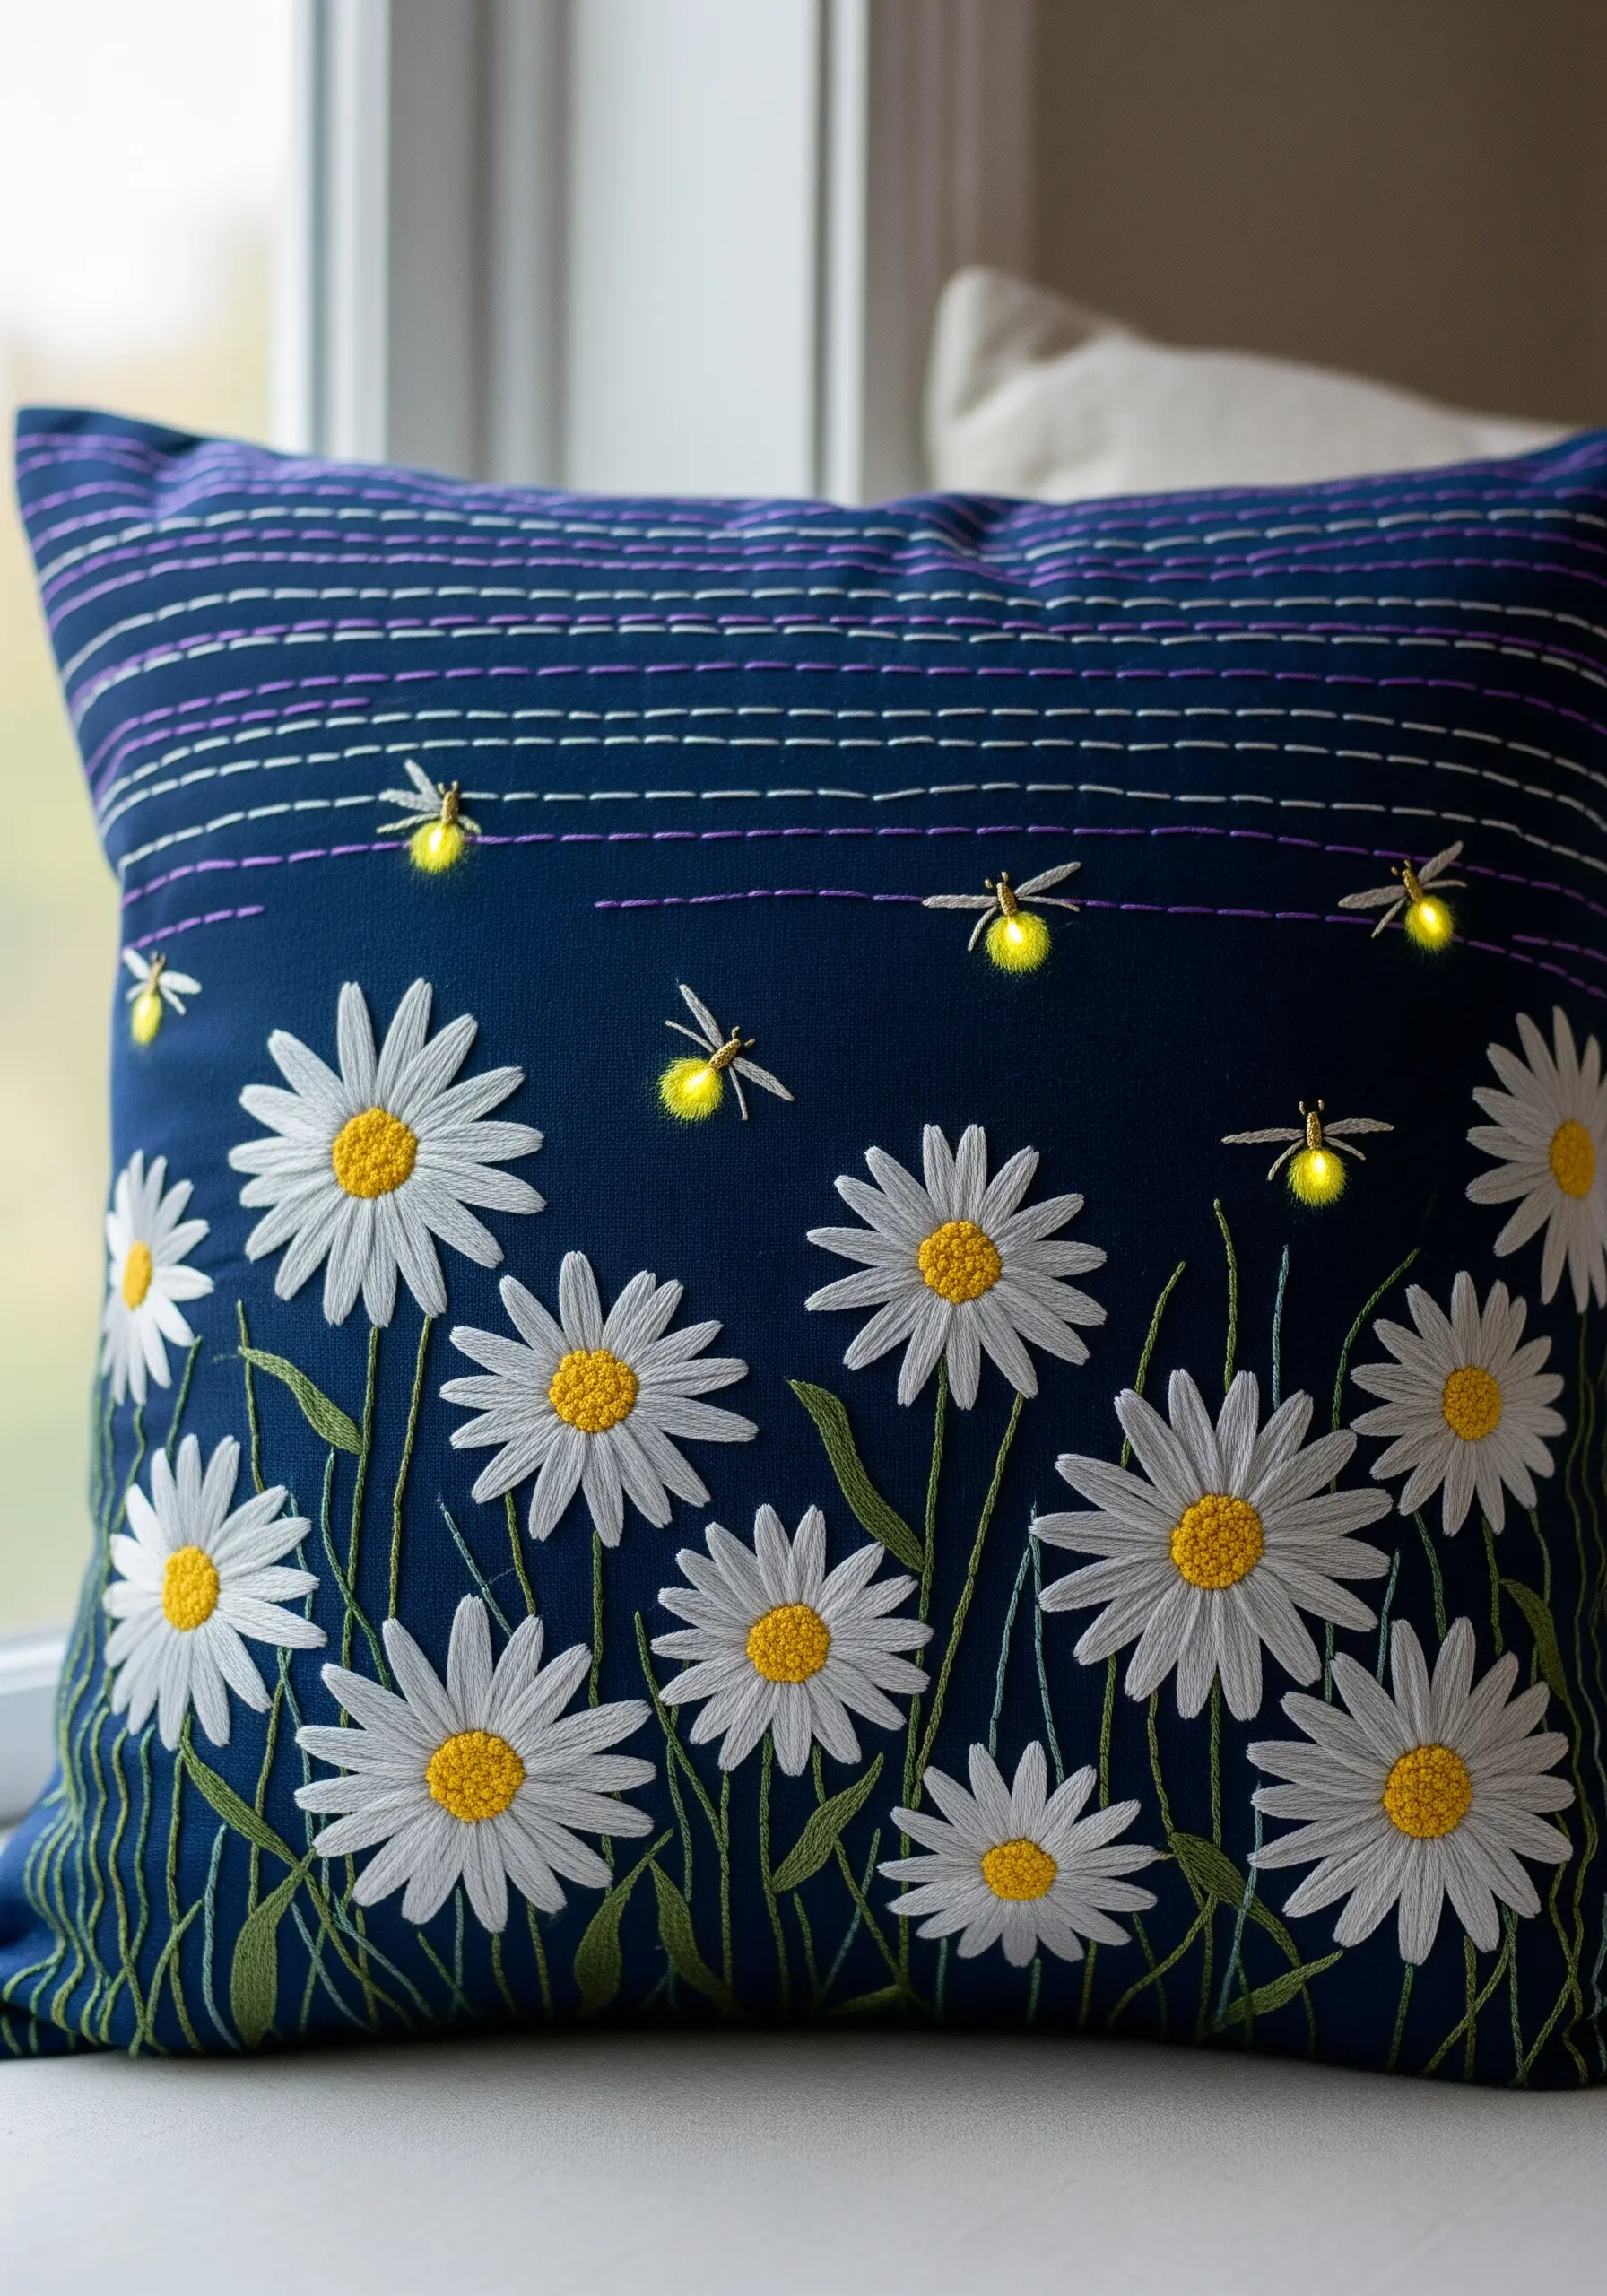
Make your embroidery pop on dark backgrounds by choosing threads that create maximum contrast.
Bright white and sunny yellow floss will stand out dramatically against navy blue fabric, making simple daisy shapes look bold and graphic.
To add a touch of magic, incorporate a few strands of glow-in-the-dark or metallic thread for the fireflies.
This simple addition transforms a daytime meadow scene into a captivating twilight moment. It’s a key technique in night garden embroidery ideas.
16. Define Prickly Textures with Precise Stitching
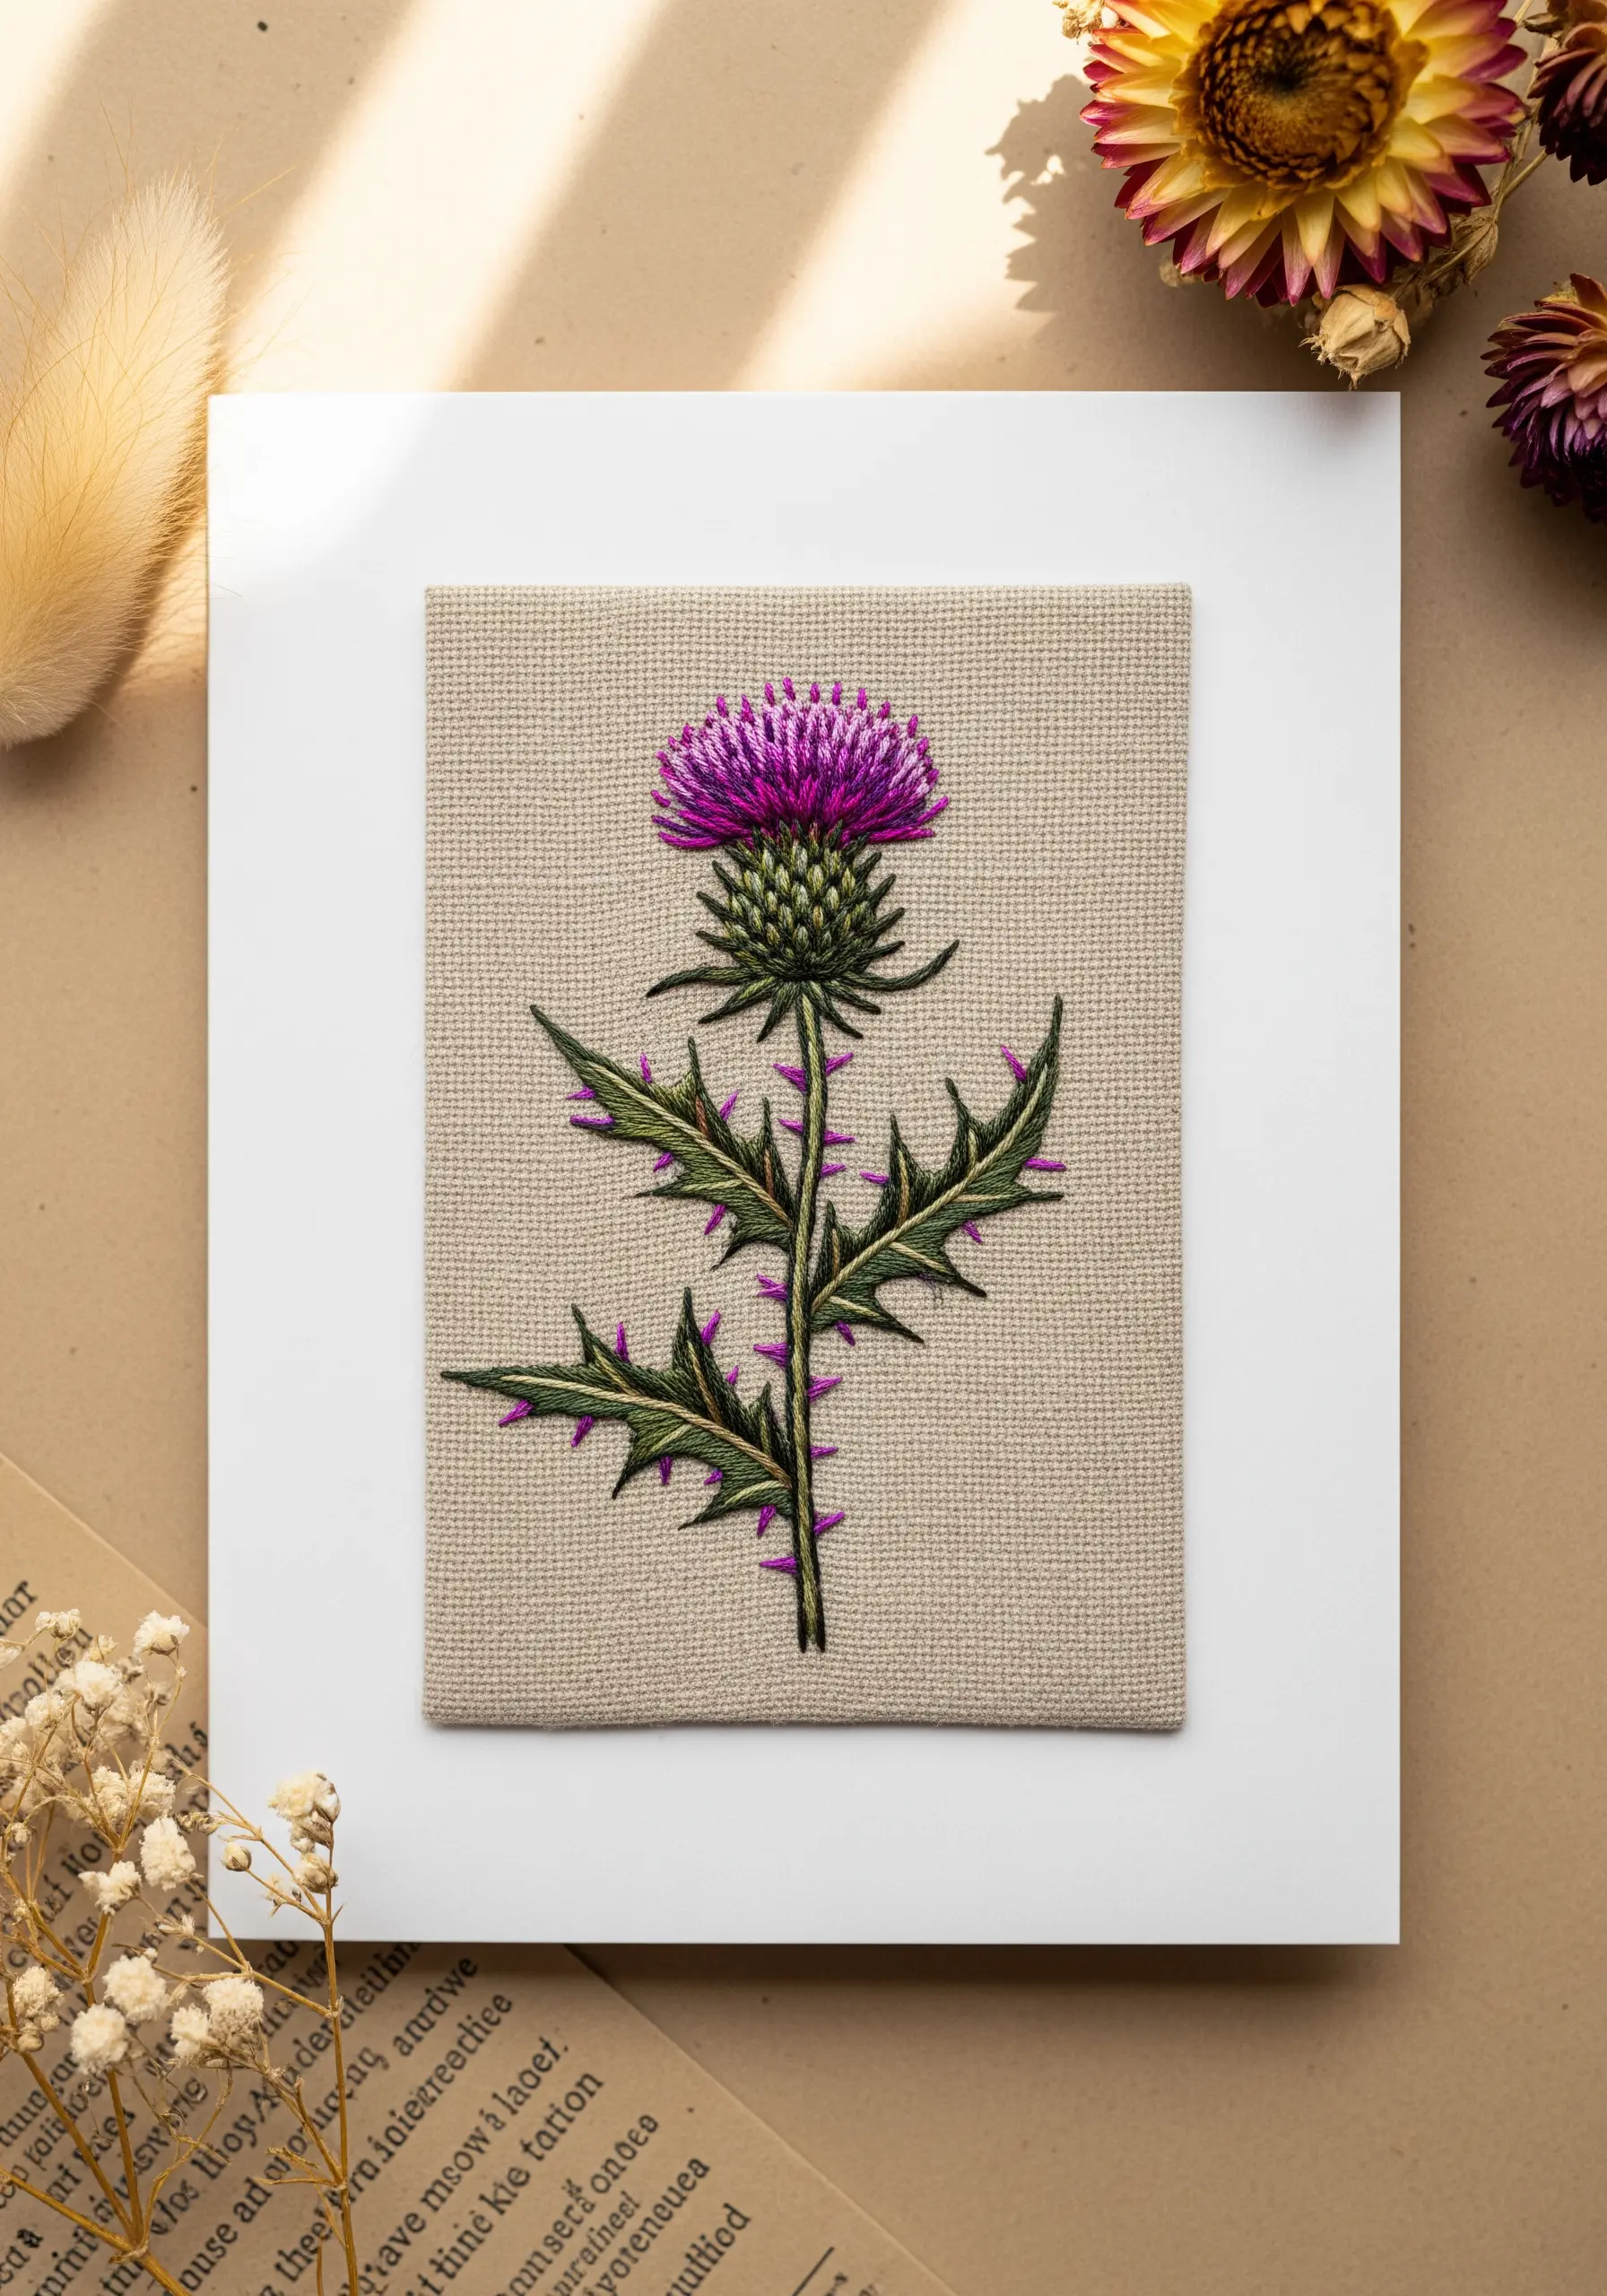
To capture the sharp, spiky nature of a thistle, use a combination of precise outlines and varied fill stitches.
Outline the leaves with a sharp split stitch to create a clean, defined edge.
For the thorns, use single, sharp straight stitches pulled taut, extending them past the leaf outline for a prickly effect.
The flower head itself can be rendered with a dense tuft of straight stitches in magenta, contrasting with the tightly woven satin stitch of the green base.
17. Elevate a Cuff with Raised Satin Stitch
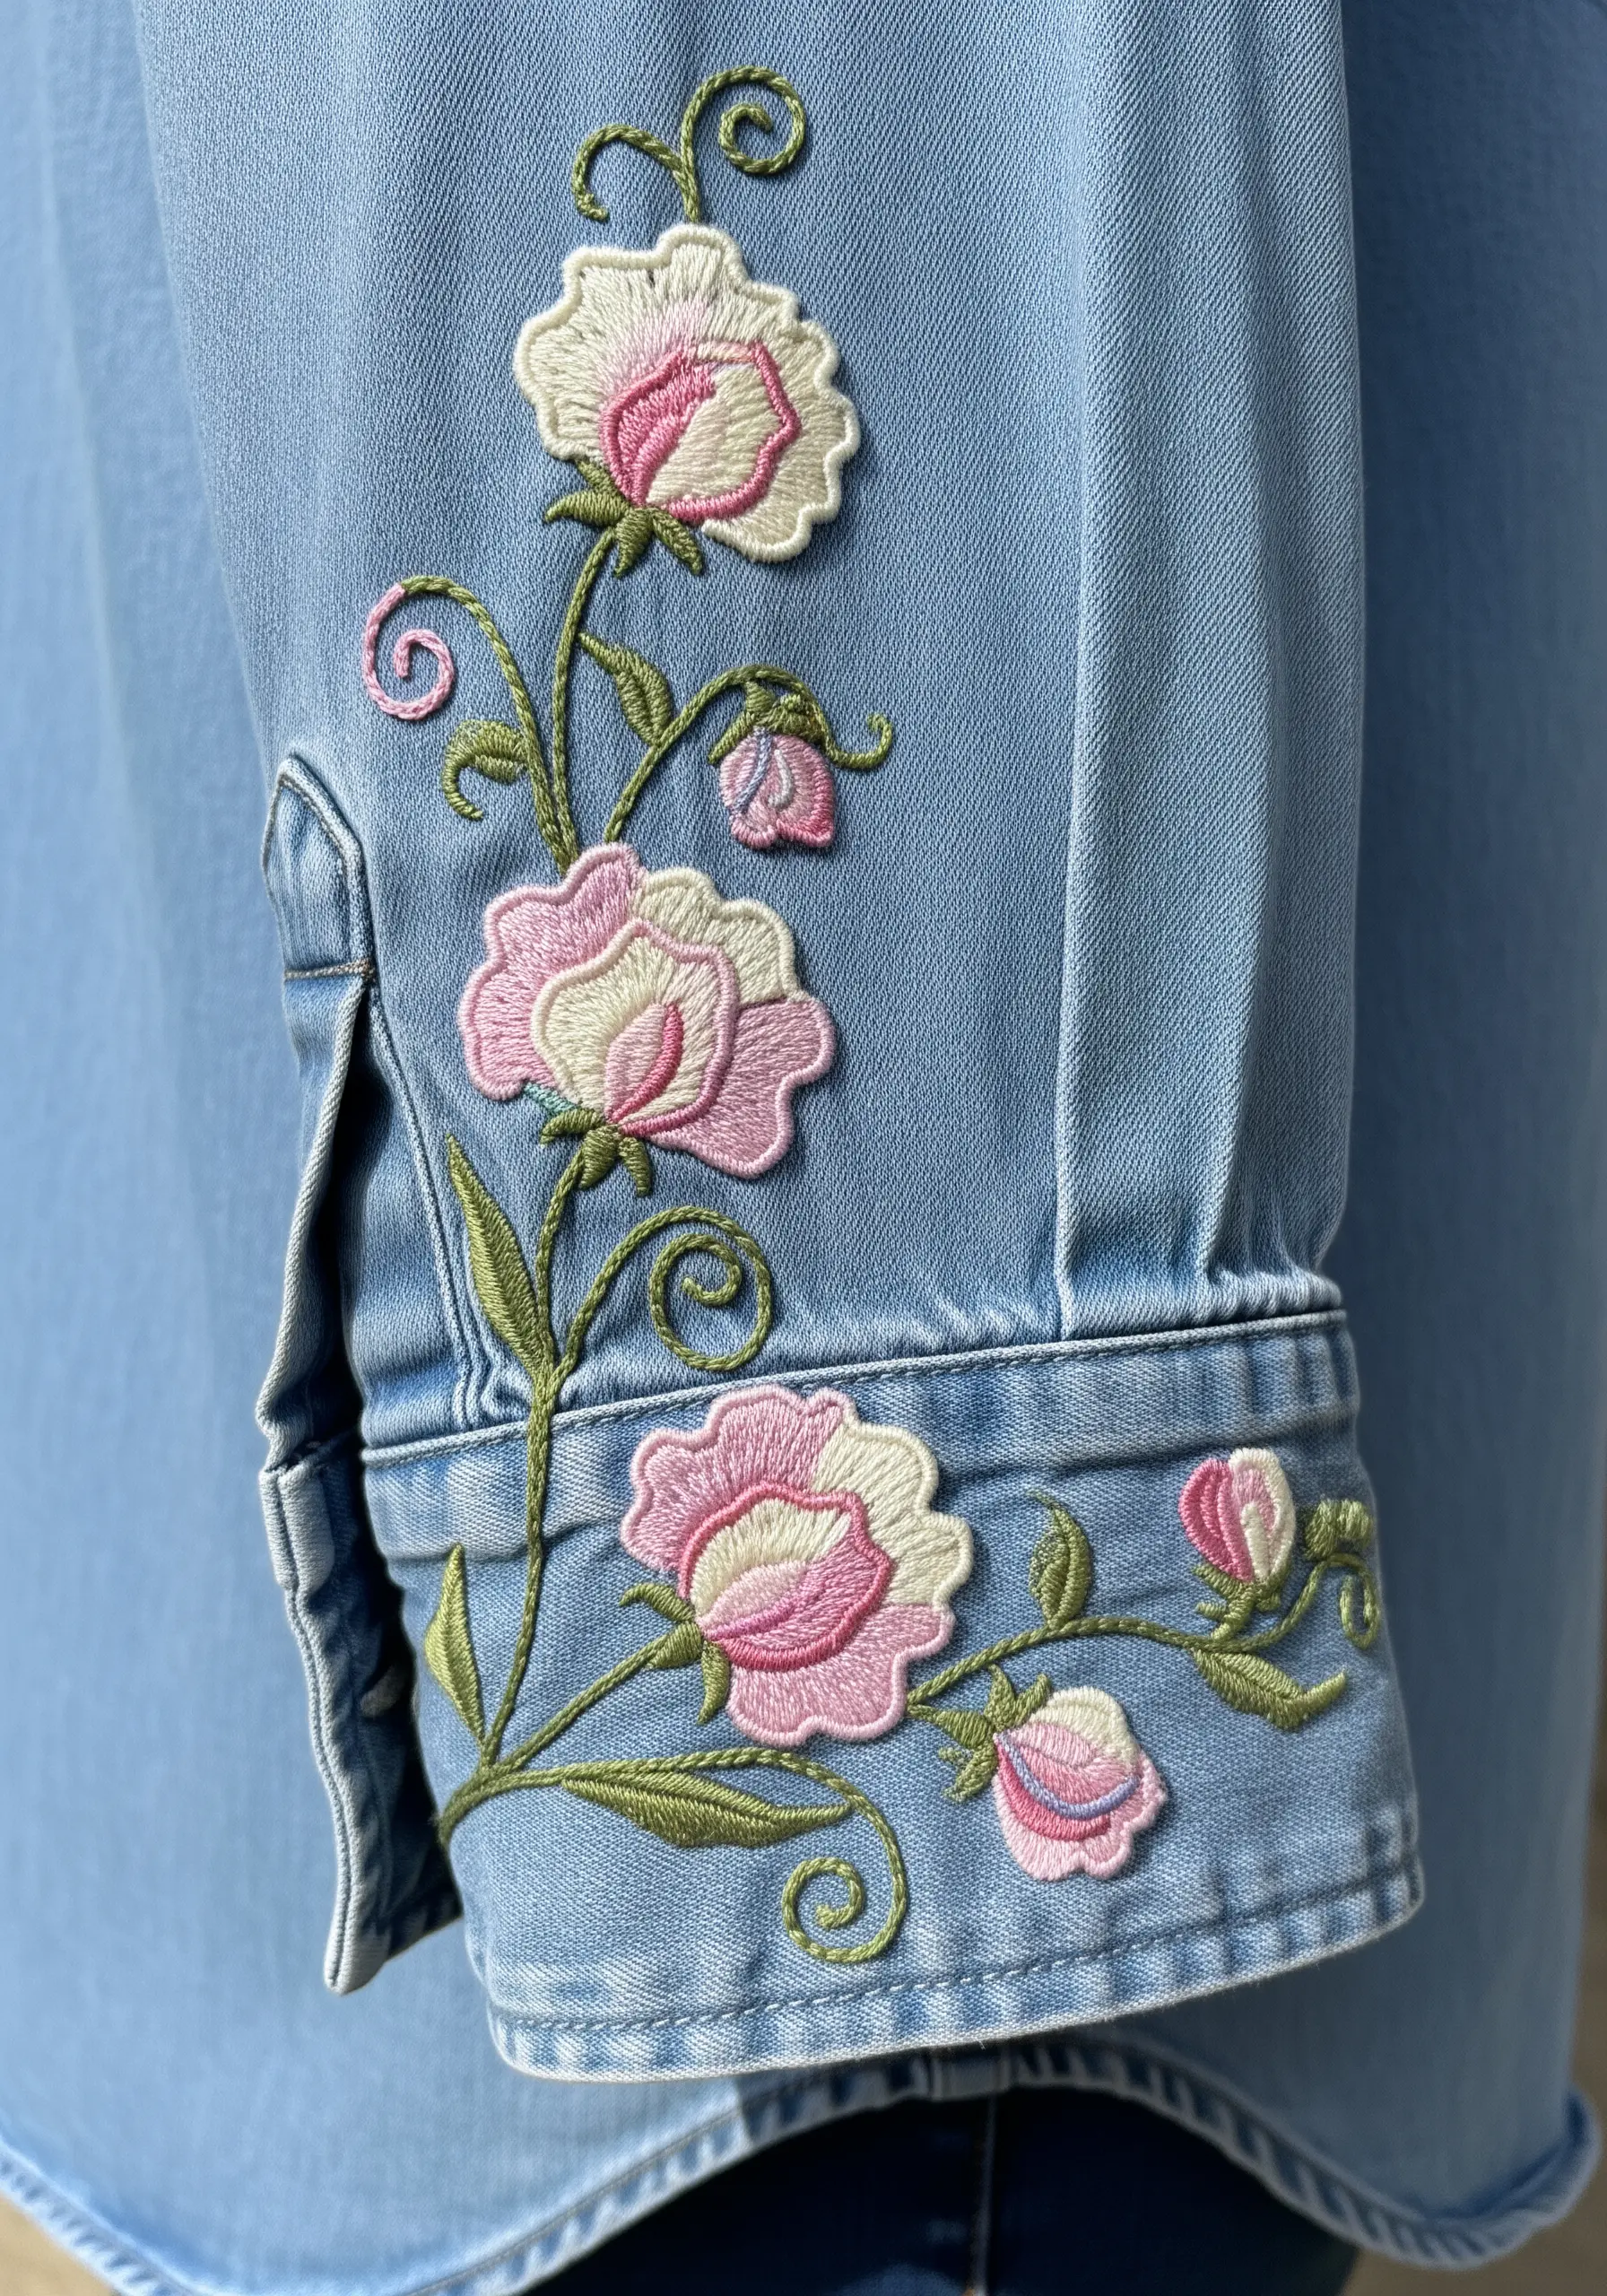
Add dimension to clothing embellishments by using a padded or raised satin stitch.
Before you begin your satin stitch, lay down a foundation of small, straight stitches within the shape you want to fill.
Then, work your final satin stitches over this padding, perpendicular to the foundation stitches.
This technique lifts the embroidery off the fabric surface, creating a subtle, three-dimensional effect that makes the floral design look luxurious and professionally finished. It’s perfect for floral border stitch concepts for clothing.
18. Sculpt Realistic Moss with Clustered Knots
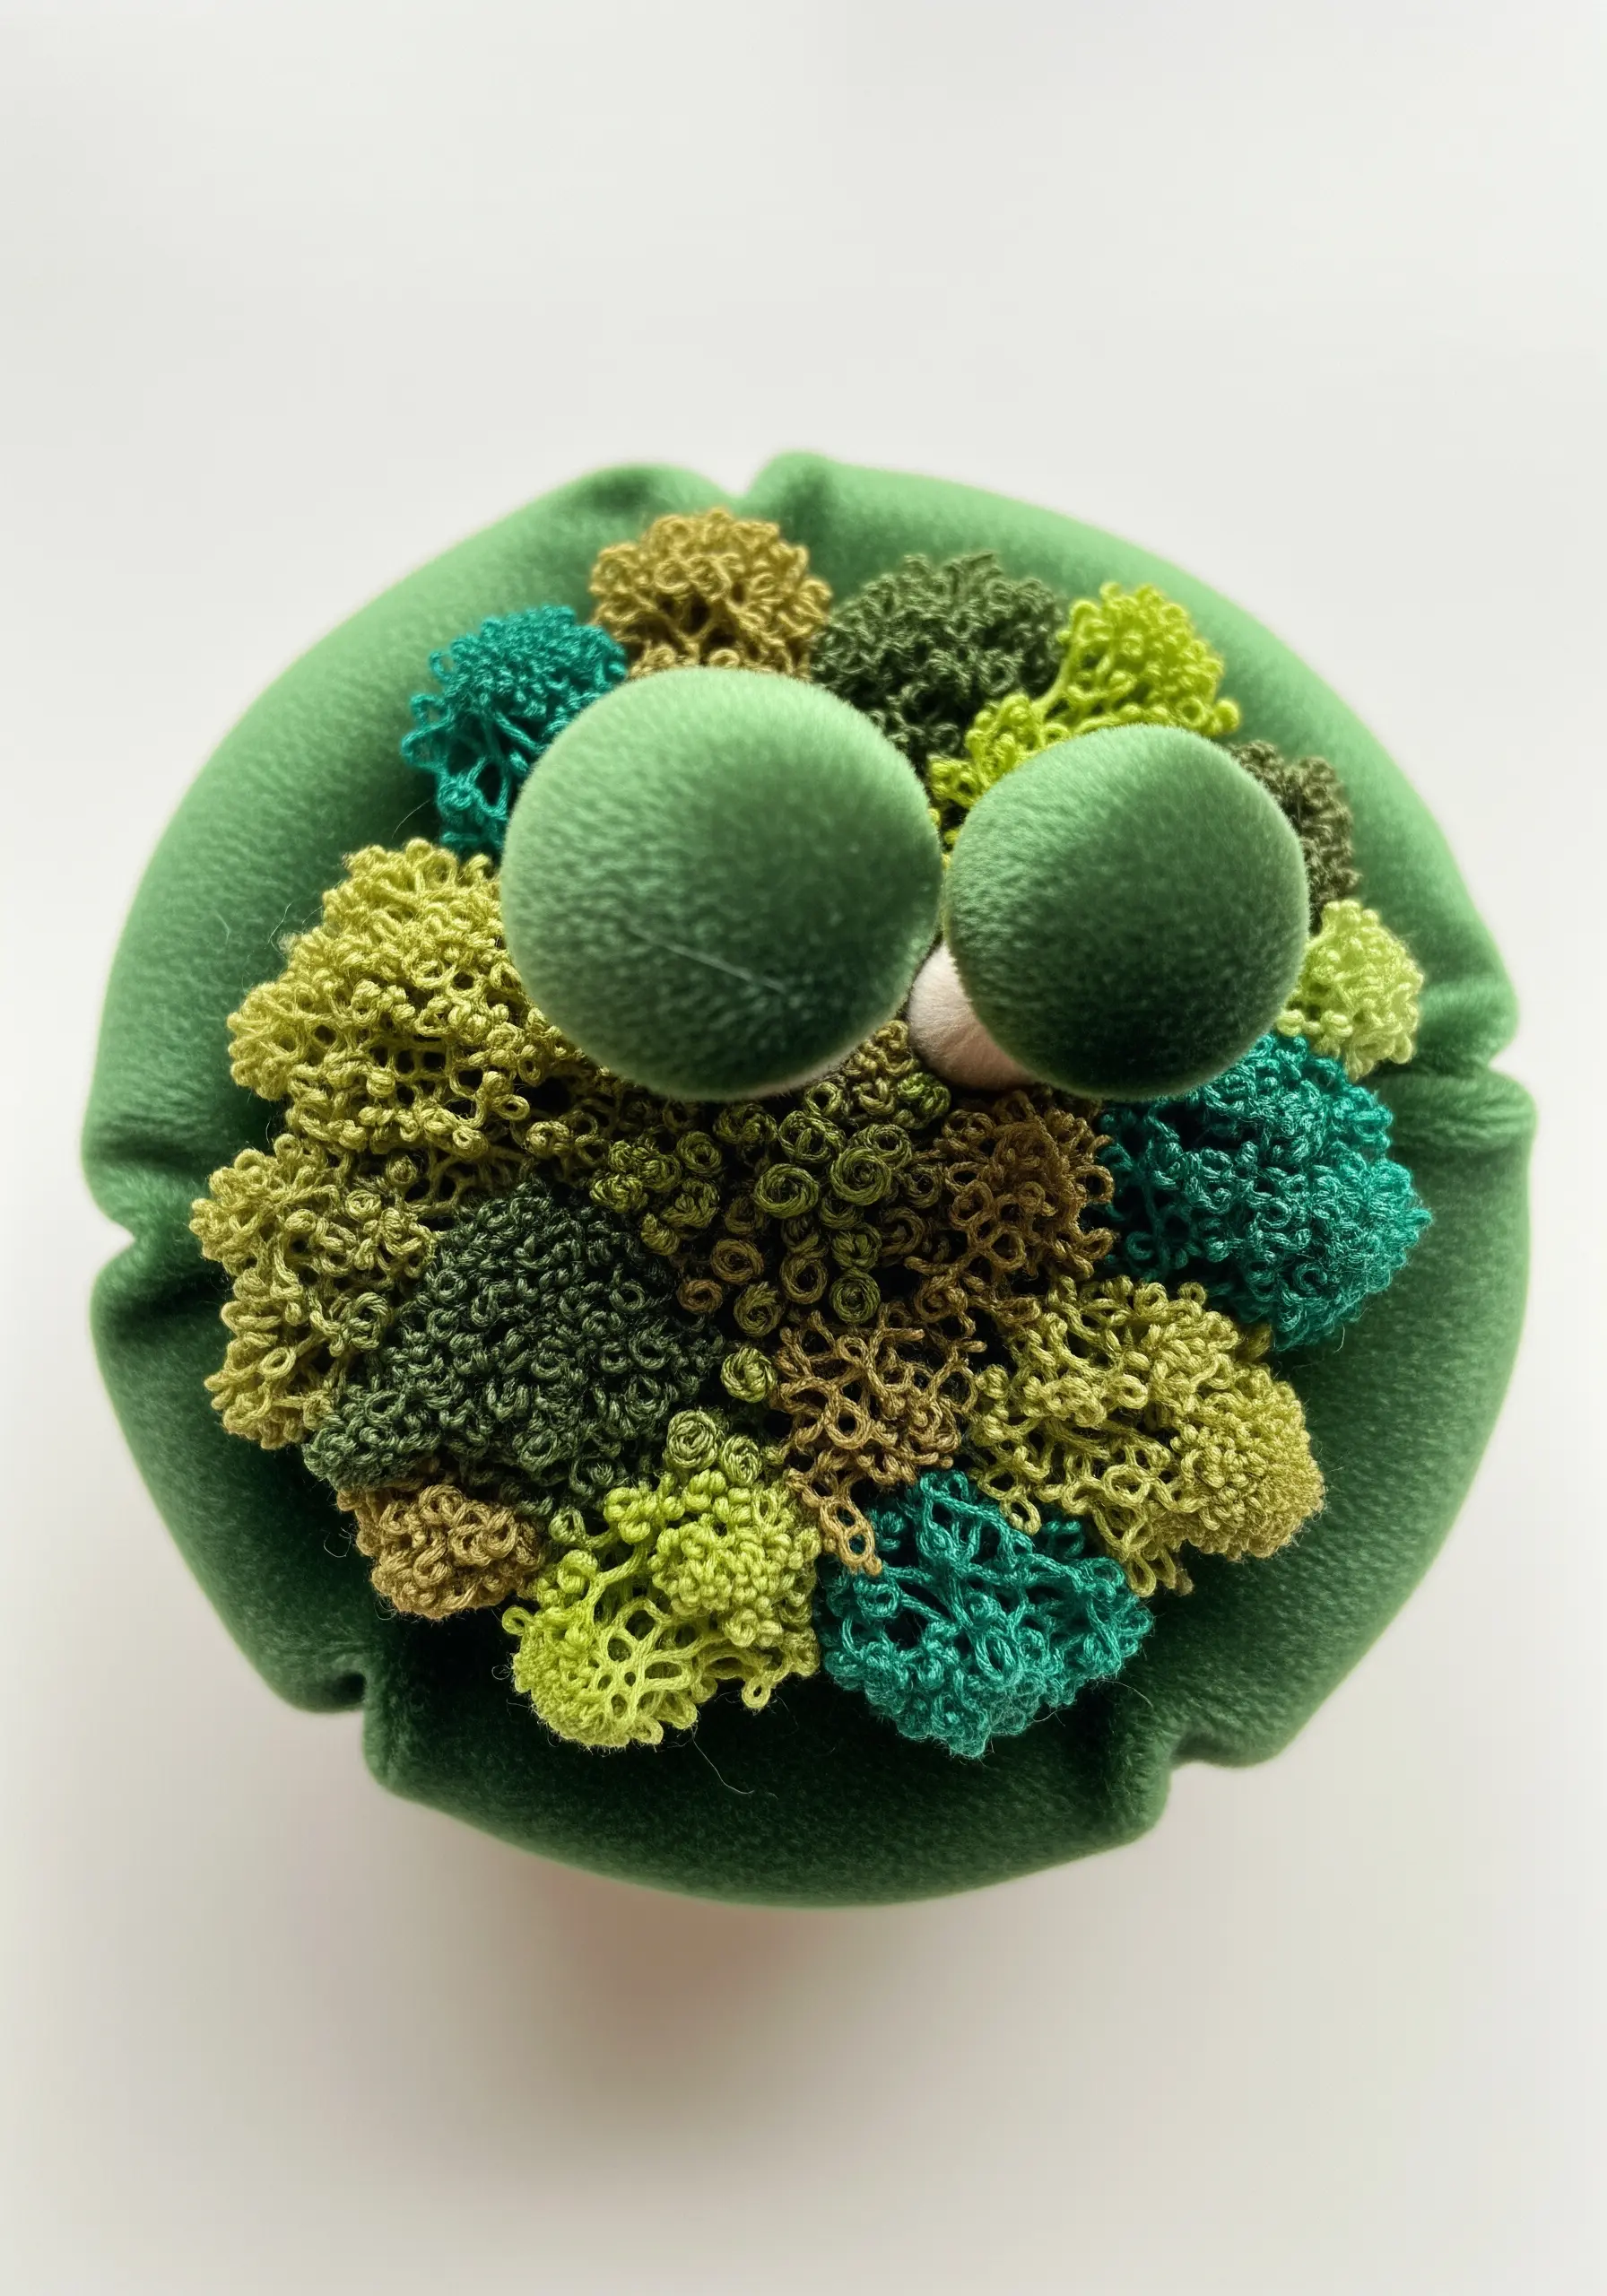
Recreate the dense, clumping texture of moss by using a mix of French knots, colonial knots, and bullion knots.
Work in tight clusters with several shades of green, olive, and chartreuse to mimic the color variations found in nature.
Don’t be afraid to stitch knots on top of each other to build up height and create a truly three-dimensional, sculptural piece.
This technique moves beyond simple surface embroidery, turning thread into a tactile representation of organic growth. Master these moss and fern embroidery textures for your home.
19. Tell a Story with Minimalist Line Work
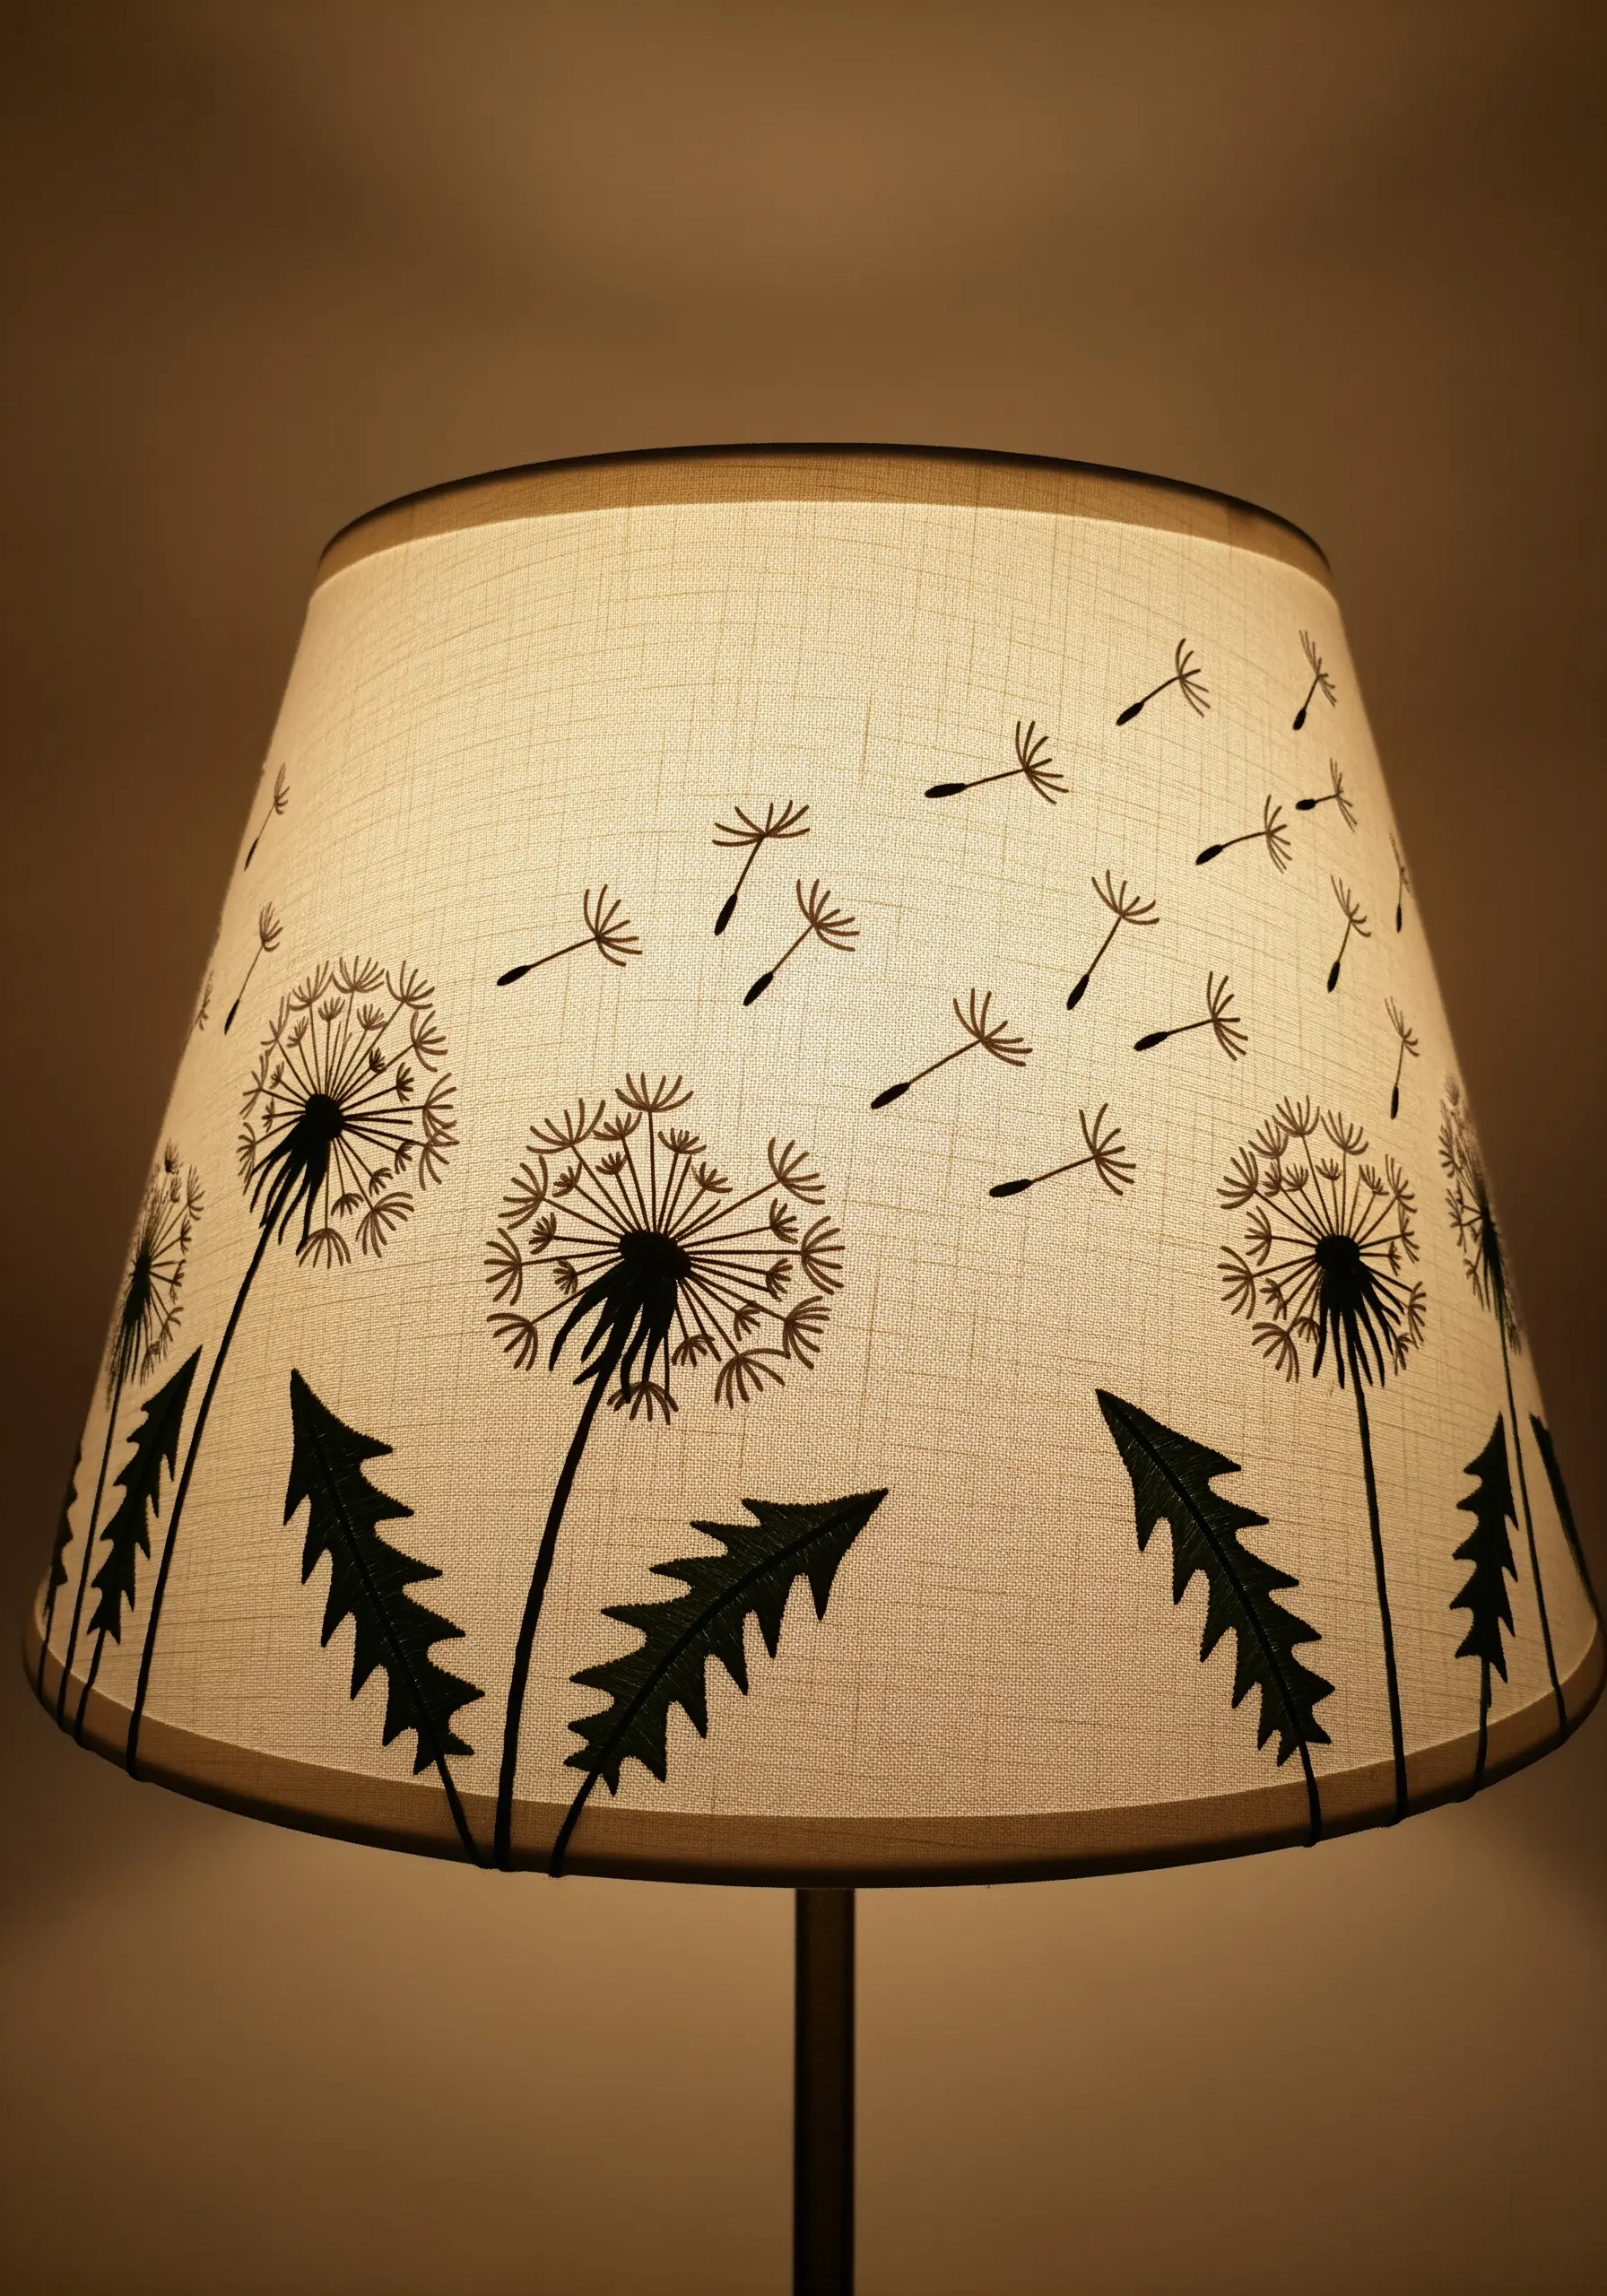
You don’t need complex fill stitches to create an impactful design. A simple backstitch or stem stitch can convey movement and elegance.
When stitching on a textured surface like a lampshade, keep your lines clean and your thread tension consistent.
Focus on the composition: the graceful arc of the dandelion stems and the scattered seeds create a sense of wind and motion.
This minimalist approach proves that thoughtful placement and clean execution are often more powerful than dense detail. It’s a core principle of minimalist line art nature embroidery.
20. Build Earthen Textures from the Ground Up
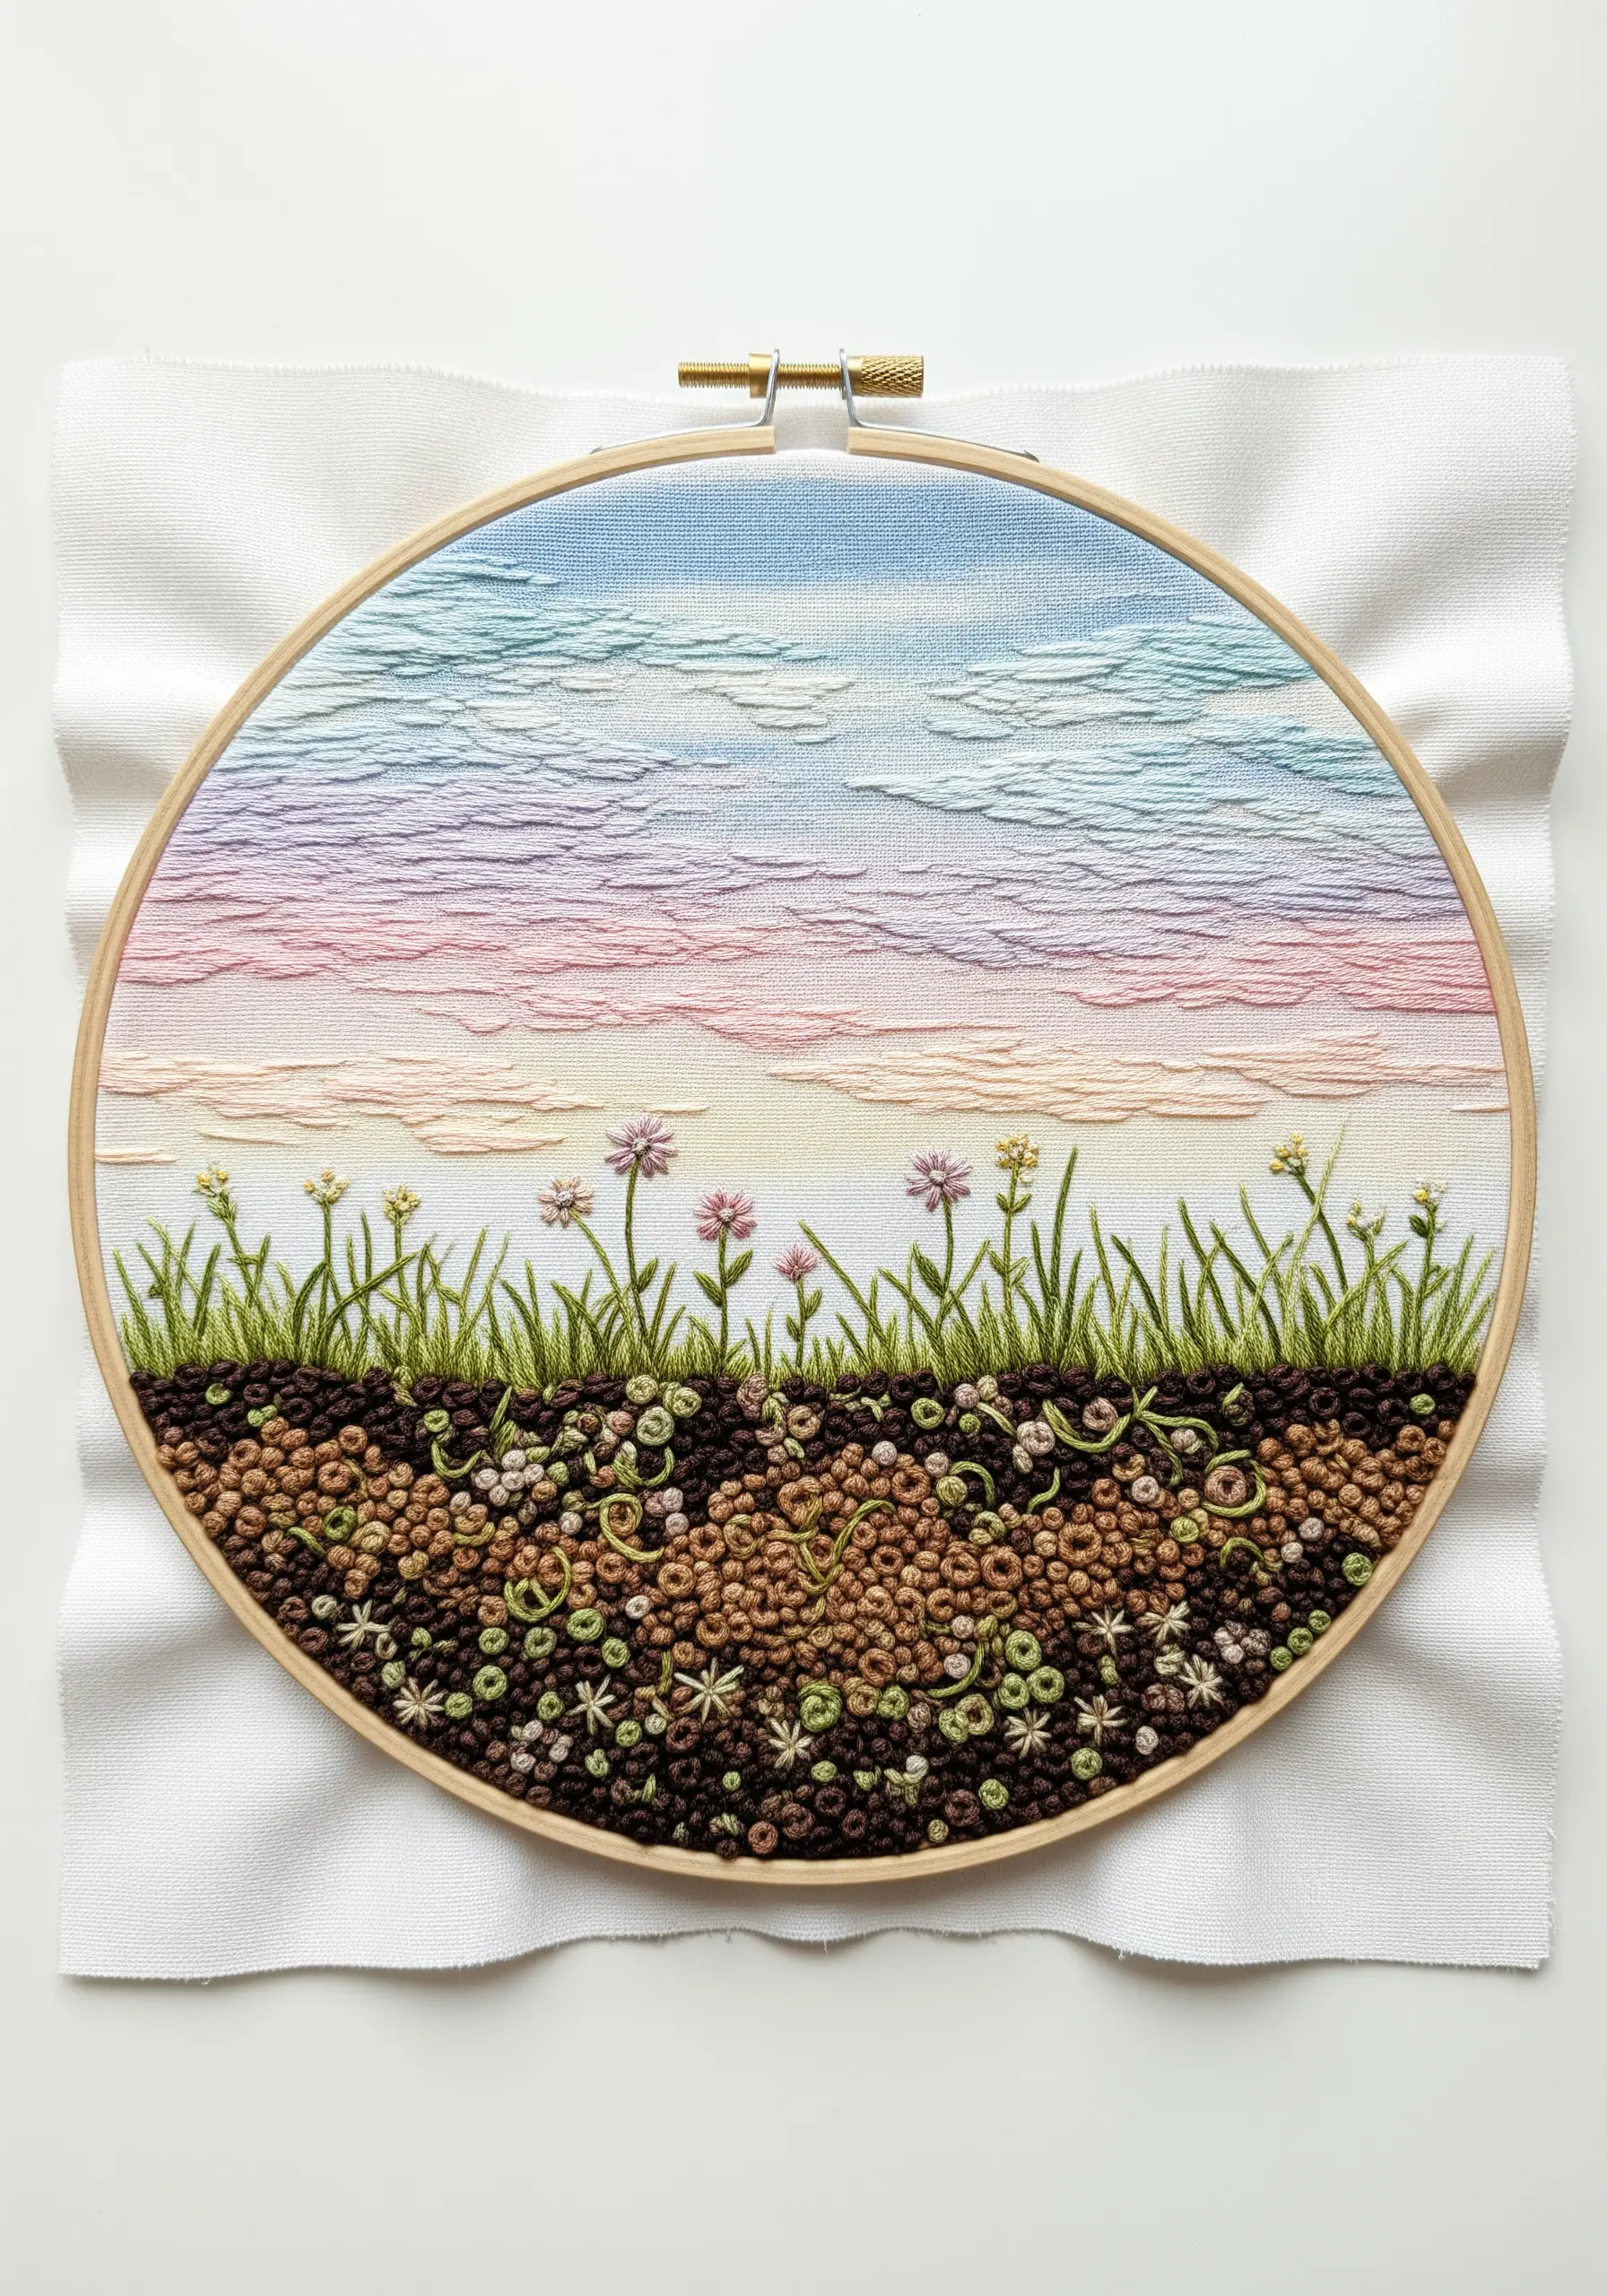
Create a convincing cross-section of soil by layering a variety of textural stitches.
Use a dense field of French and colonial knots in multiple shades of brown and taupe for the main soil layer.
Incorporate small, straight stitches to represent grassroots and sprinkle in a few bullion knots to look like pebbles or worms.
This layered, multi-stitch approach results in a rich, tactile foreground that makes the delicate flowers and soft sky above it stand out even more.
21. Create a Heather Gradient with Tiny Knots
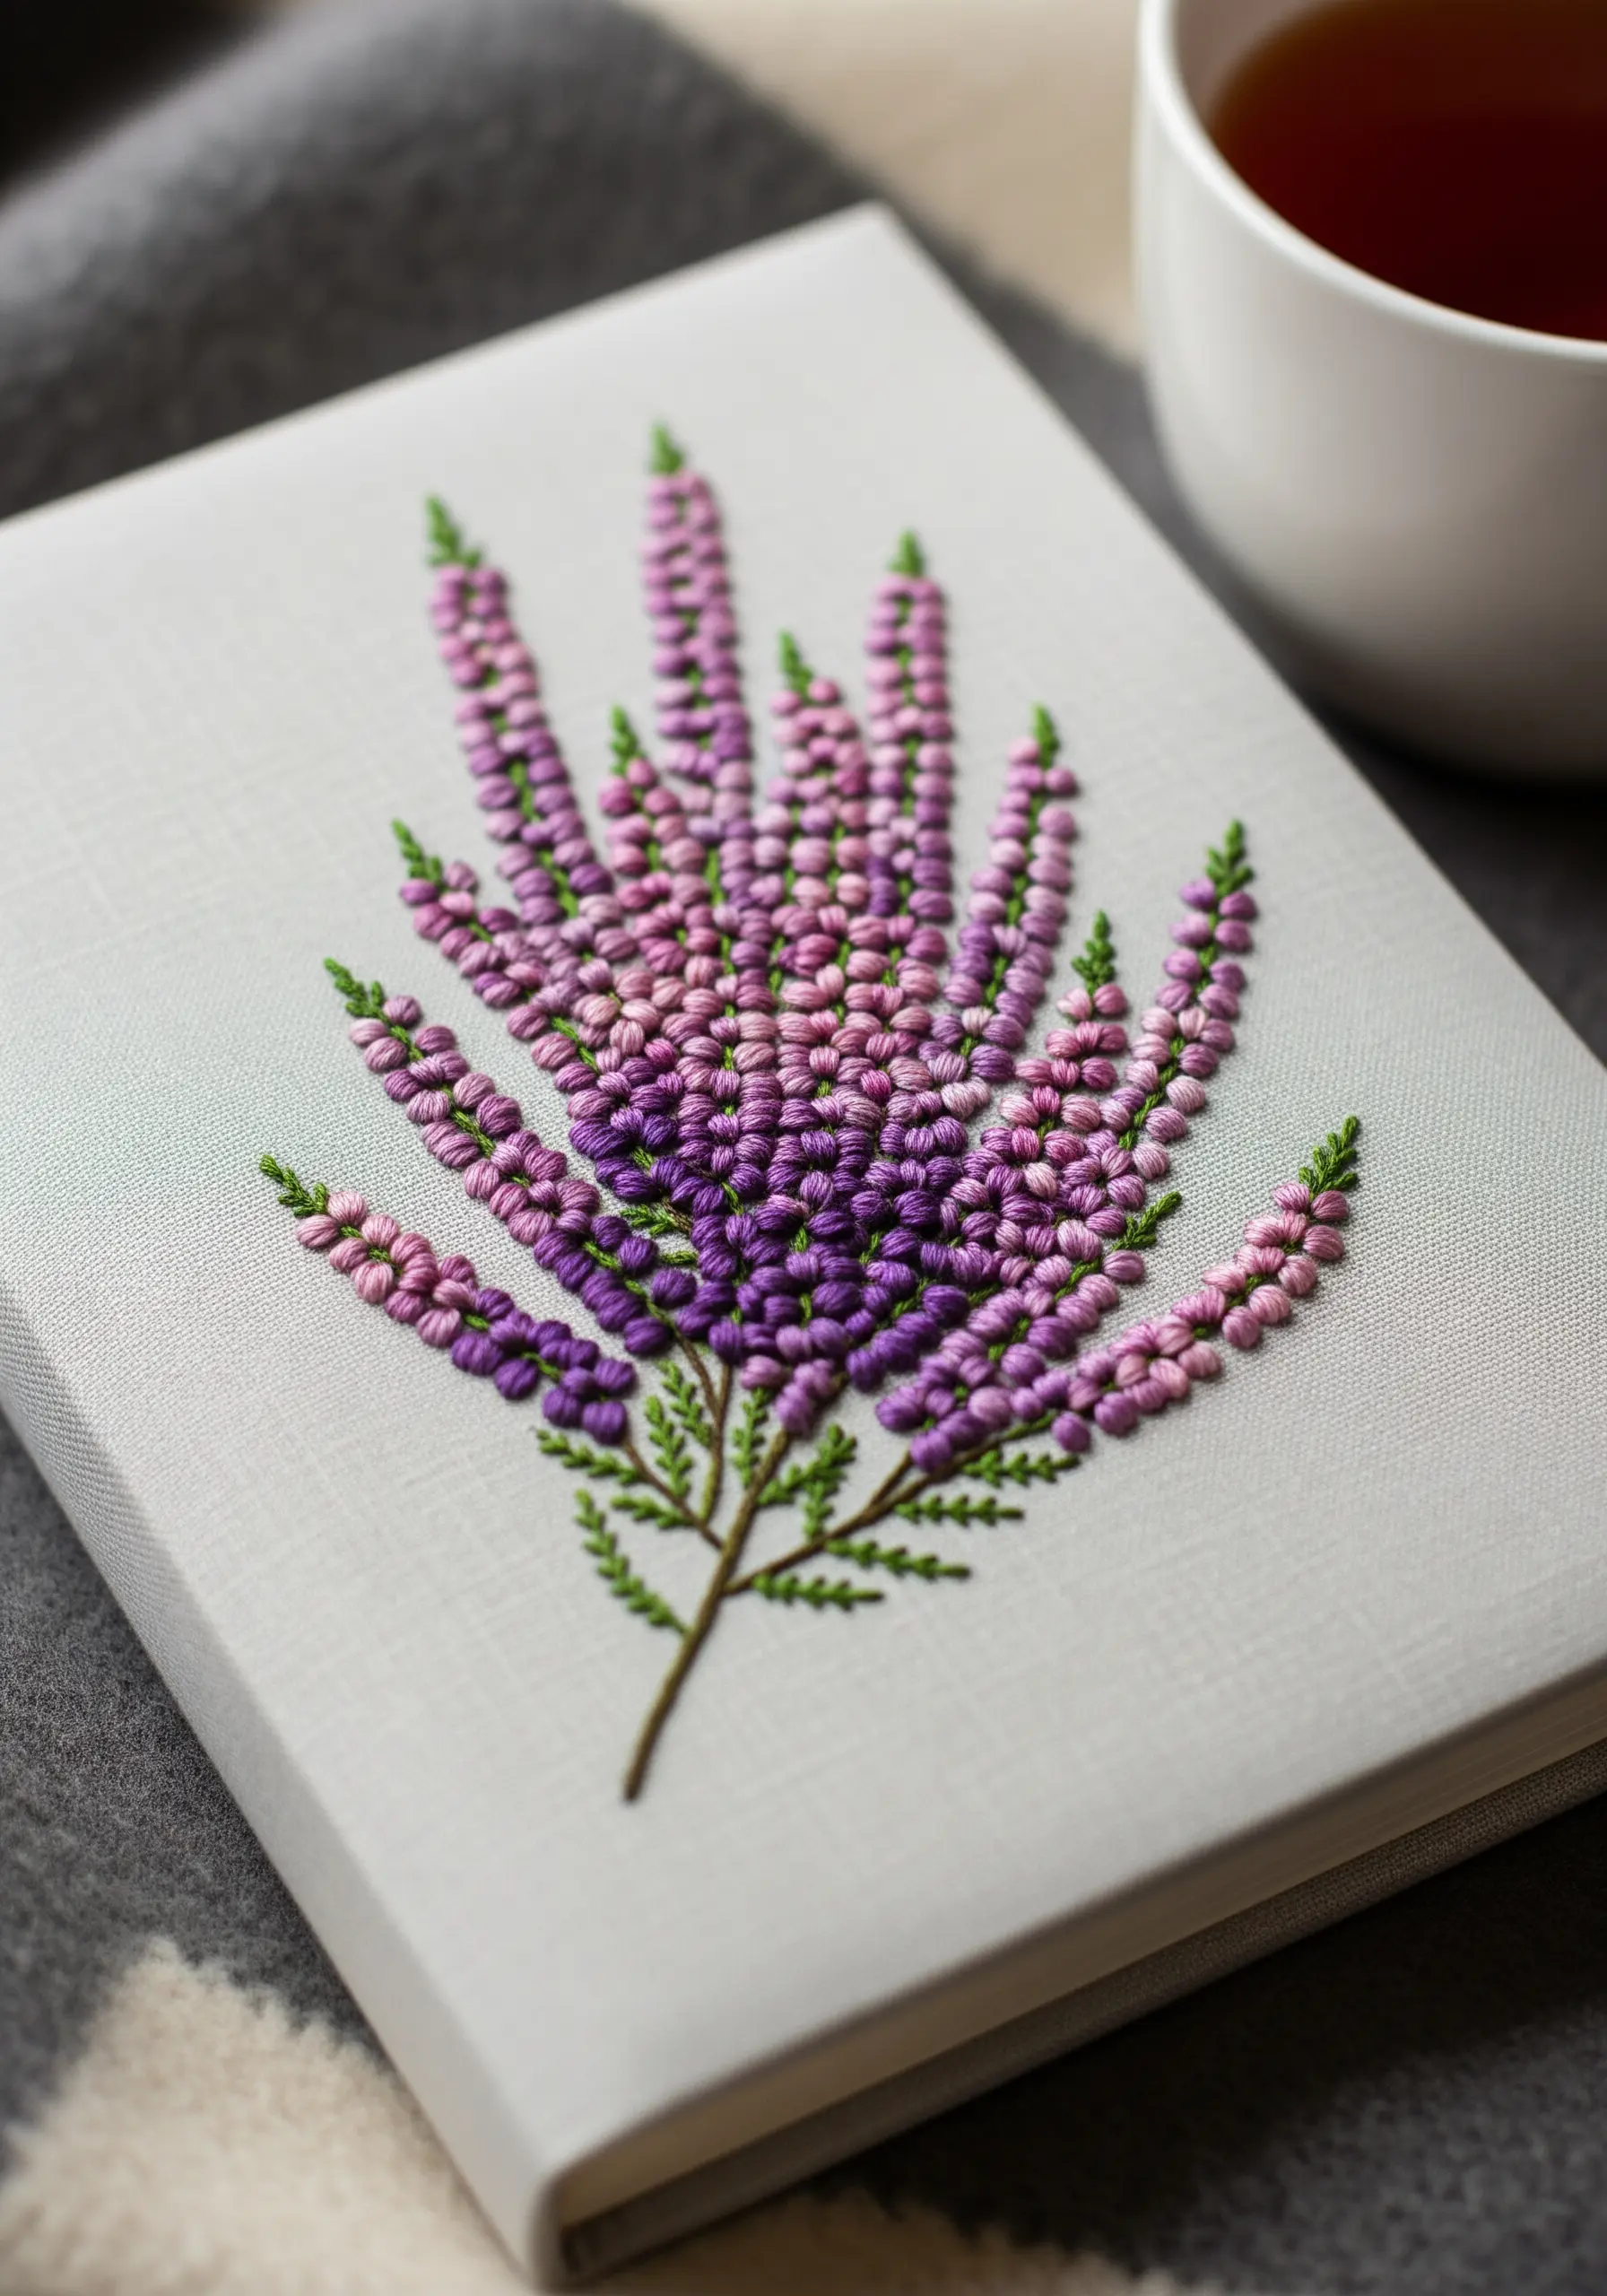
Capture the delicate, bell-shaped flowers of a heather sprig by arranging tiny knots in a color gradient.
Start with a deep purple at the base of each stalk, gradually transitioning to magenta, then pale pink at the very tips.
Using single-strand floss for your French or colonial knots will keep them small and delicate, resembling the tiny individual blossoms.
The key to this design is the smooth color transition, which gives the plant its characteristic ombre look and a sense of realism.
22. Prioritize Simplicity and Washability for Baby Items
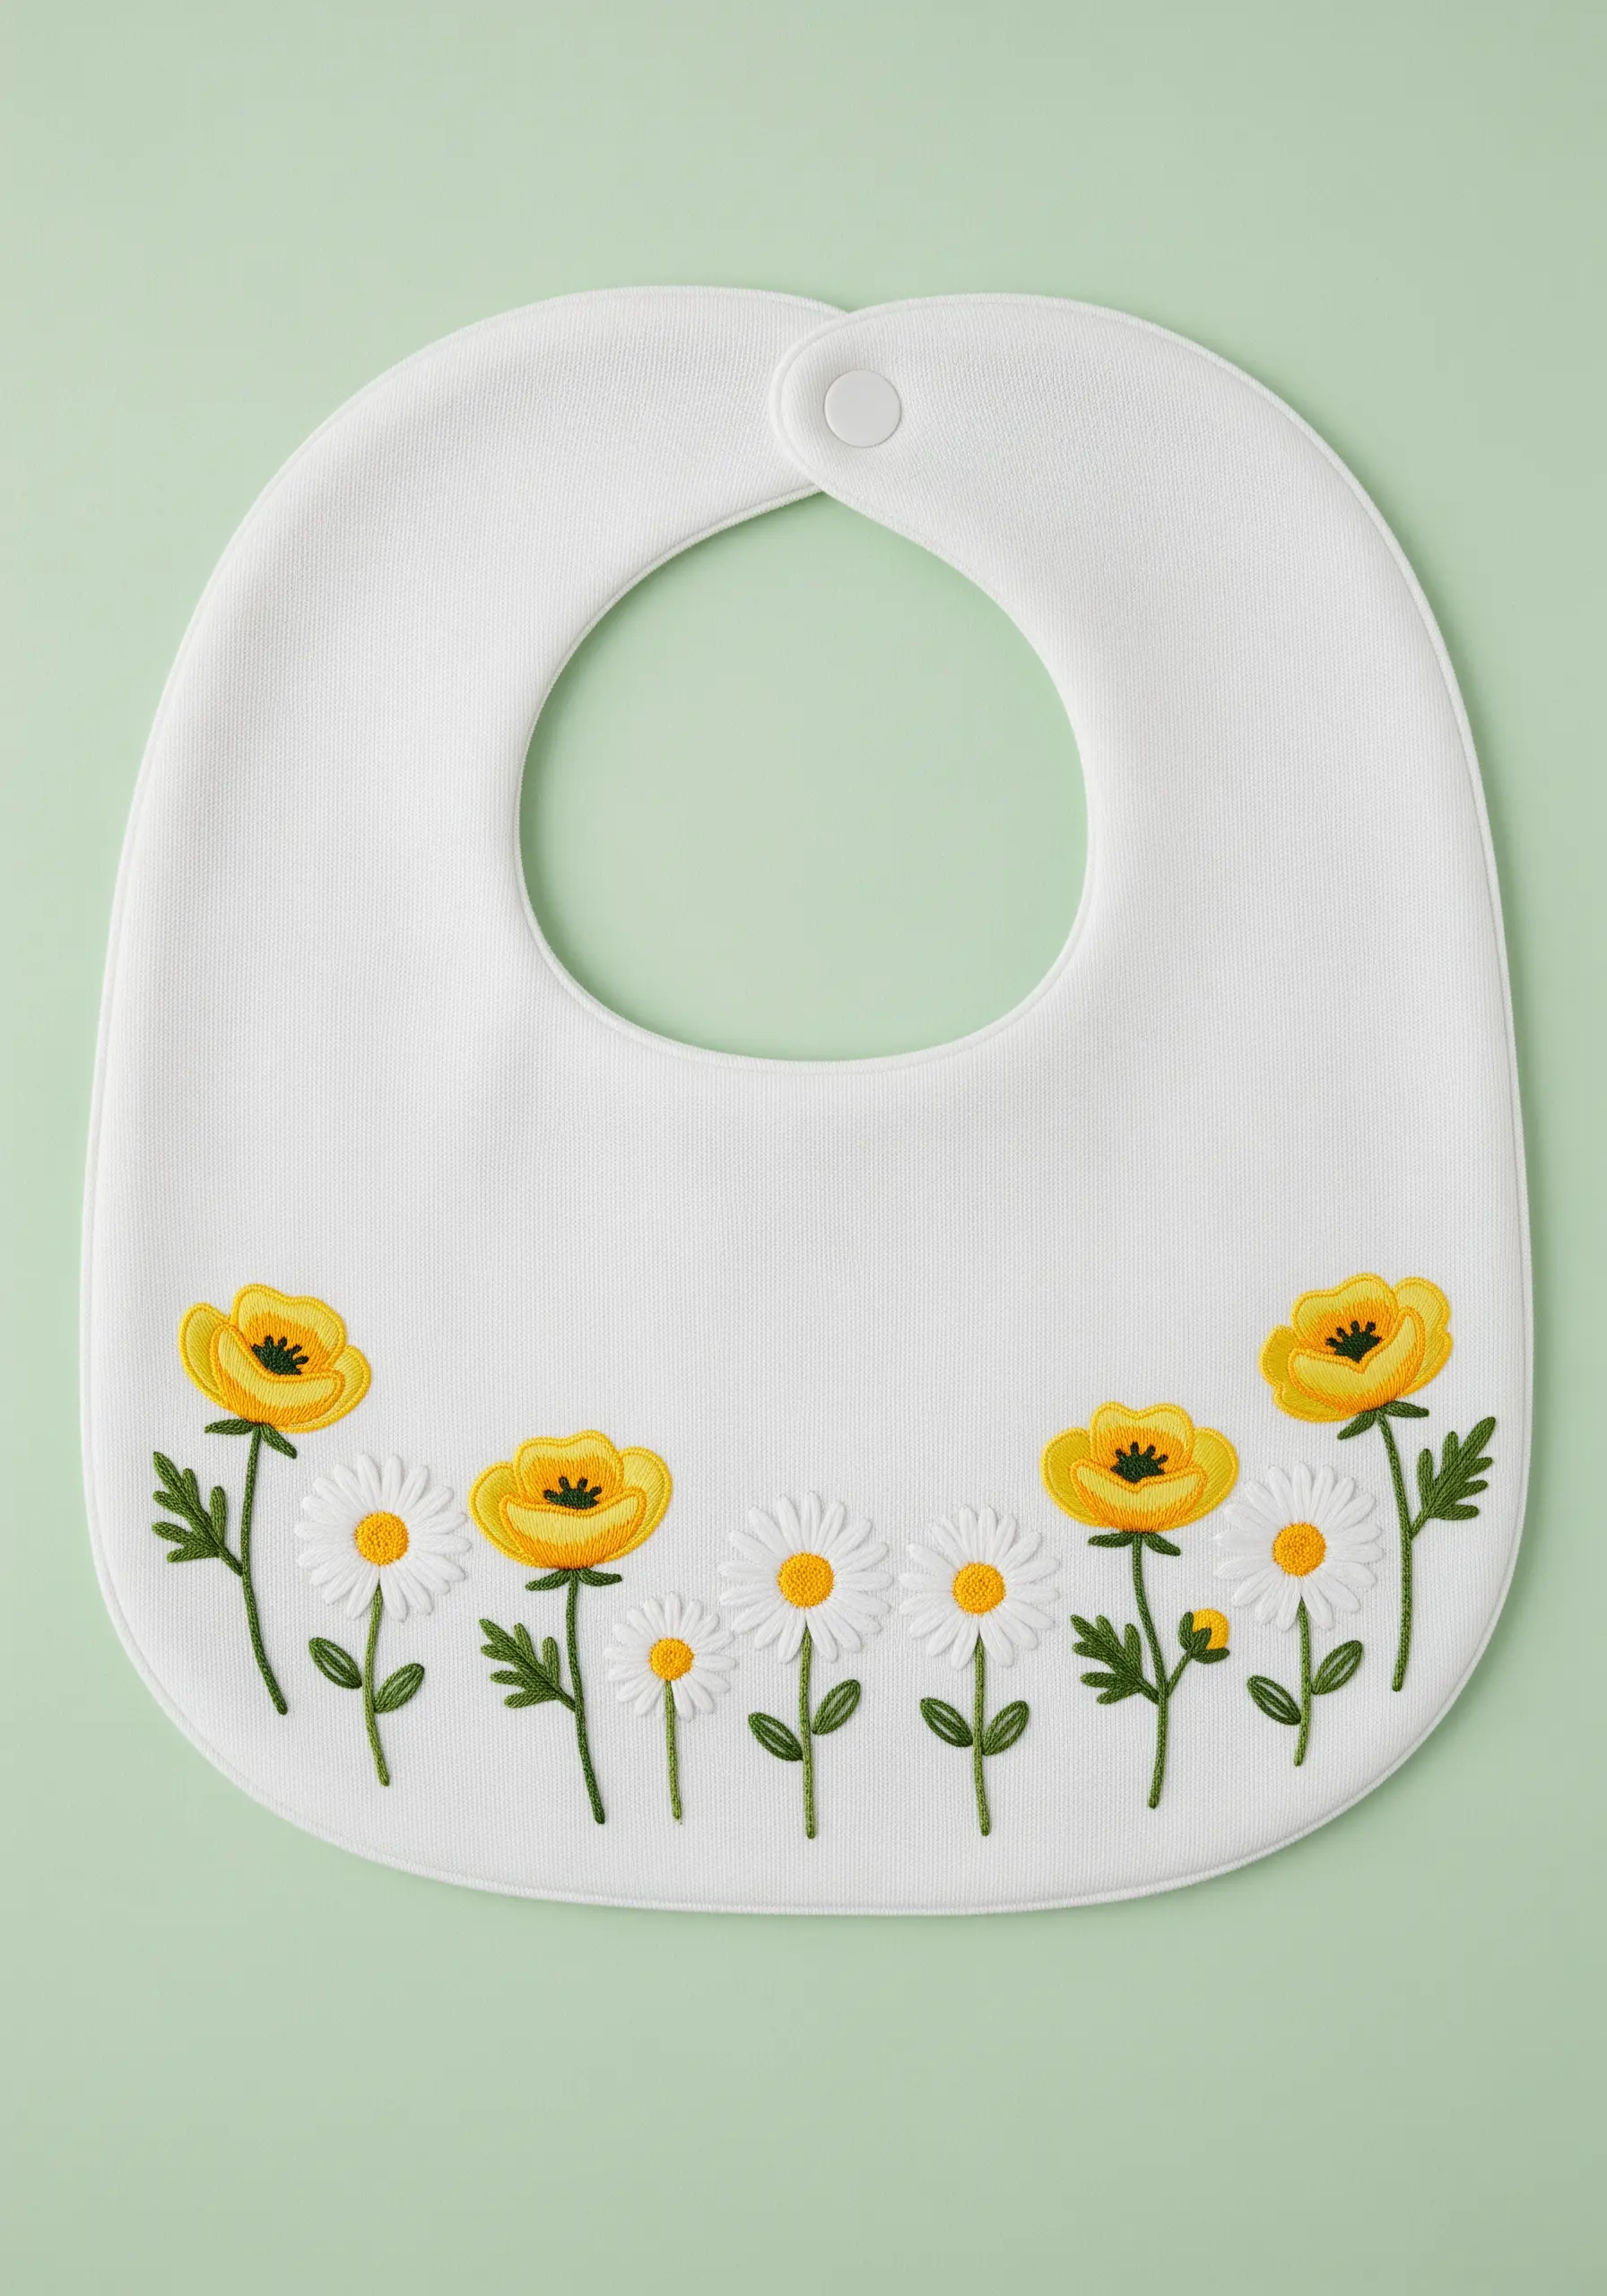
When embroidering items for babies, like this bib, choose simple, flat stitches that will be comfortable against the skin and withstand frequent washing.
Satin stitch for petals and stem stitch for stems are excellent choices as they are secure and have a low profile.
Use high-quality, colorfast cotton floss to prevent bleeding in the wash.
The charm of this design comes from its clean lines, cheerful colors, and flawless execution rather than complex, raised textures. Check out more dreamy baby clothing embroidery ideas for inspiration.
23. Achieve a Smooth Fern Gradient with Satin Stitch
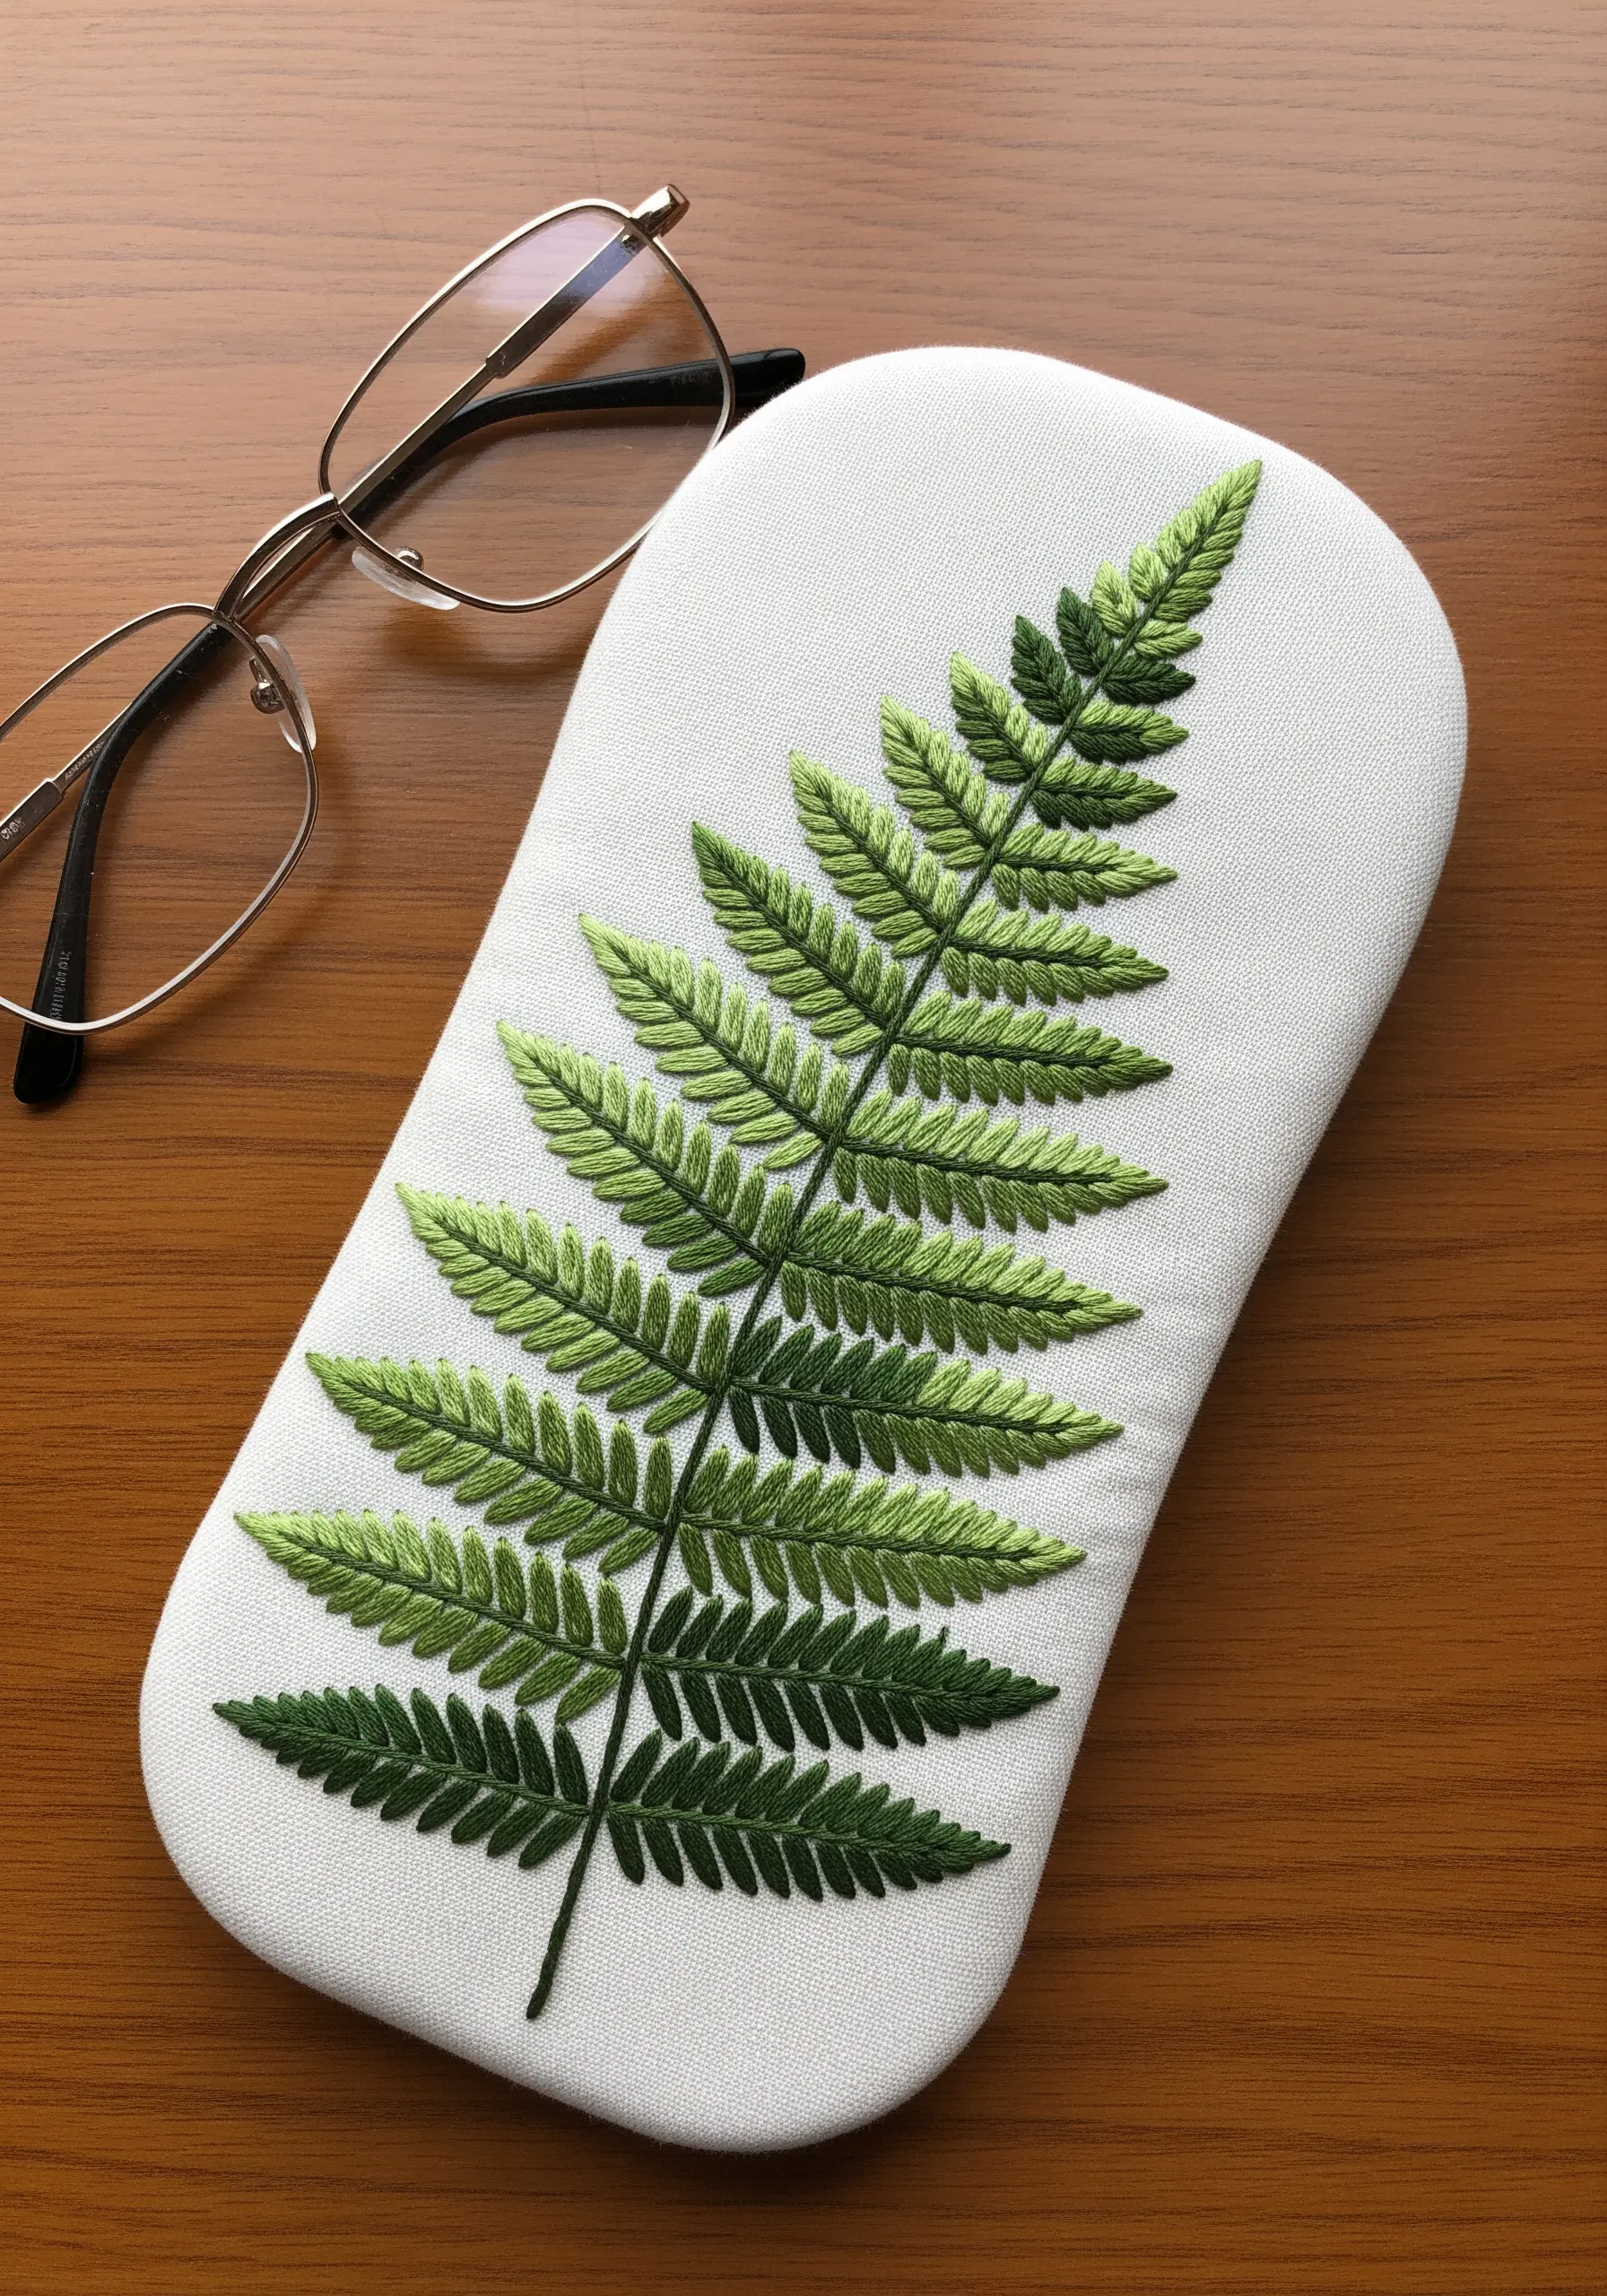
The key to a realistic fern is creating a seamless color transition along each frond.
Divide each leaflet into two or three sections and use a different shade of green for each one, from dark near the stem to light at the tip.
Use a satin stitch, ensuring your stitches are parallel and lie flat against the fabric for a smooth, almost glossy finish.
This meticulous blending technique creates a beautiful illusion of light hitting the leaves, giving the entire piece a vibrant, lifelike quality.
24. Integrate Your Design with the Object’s Form
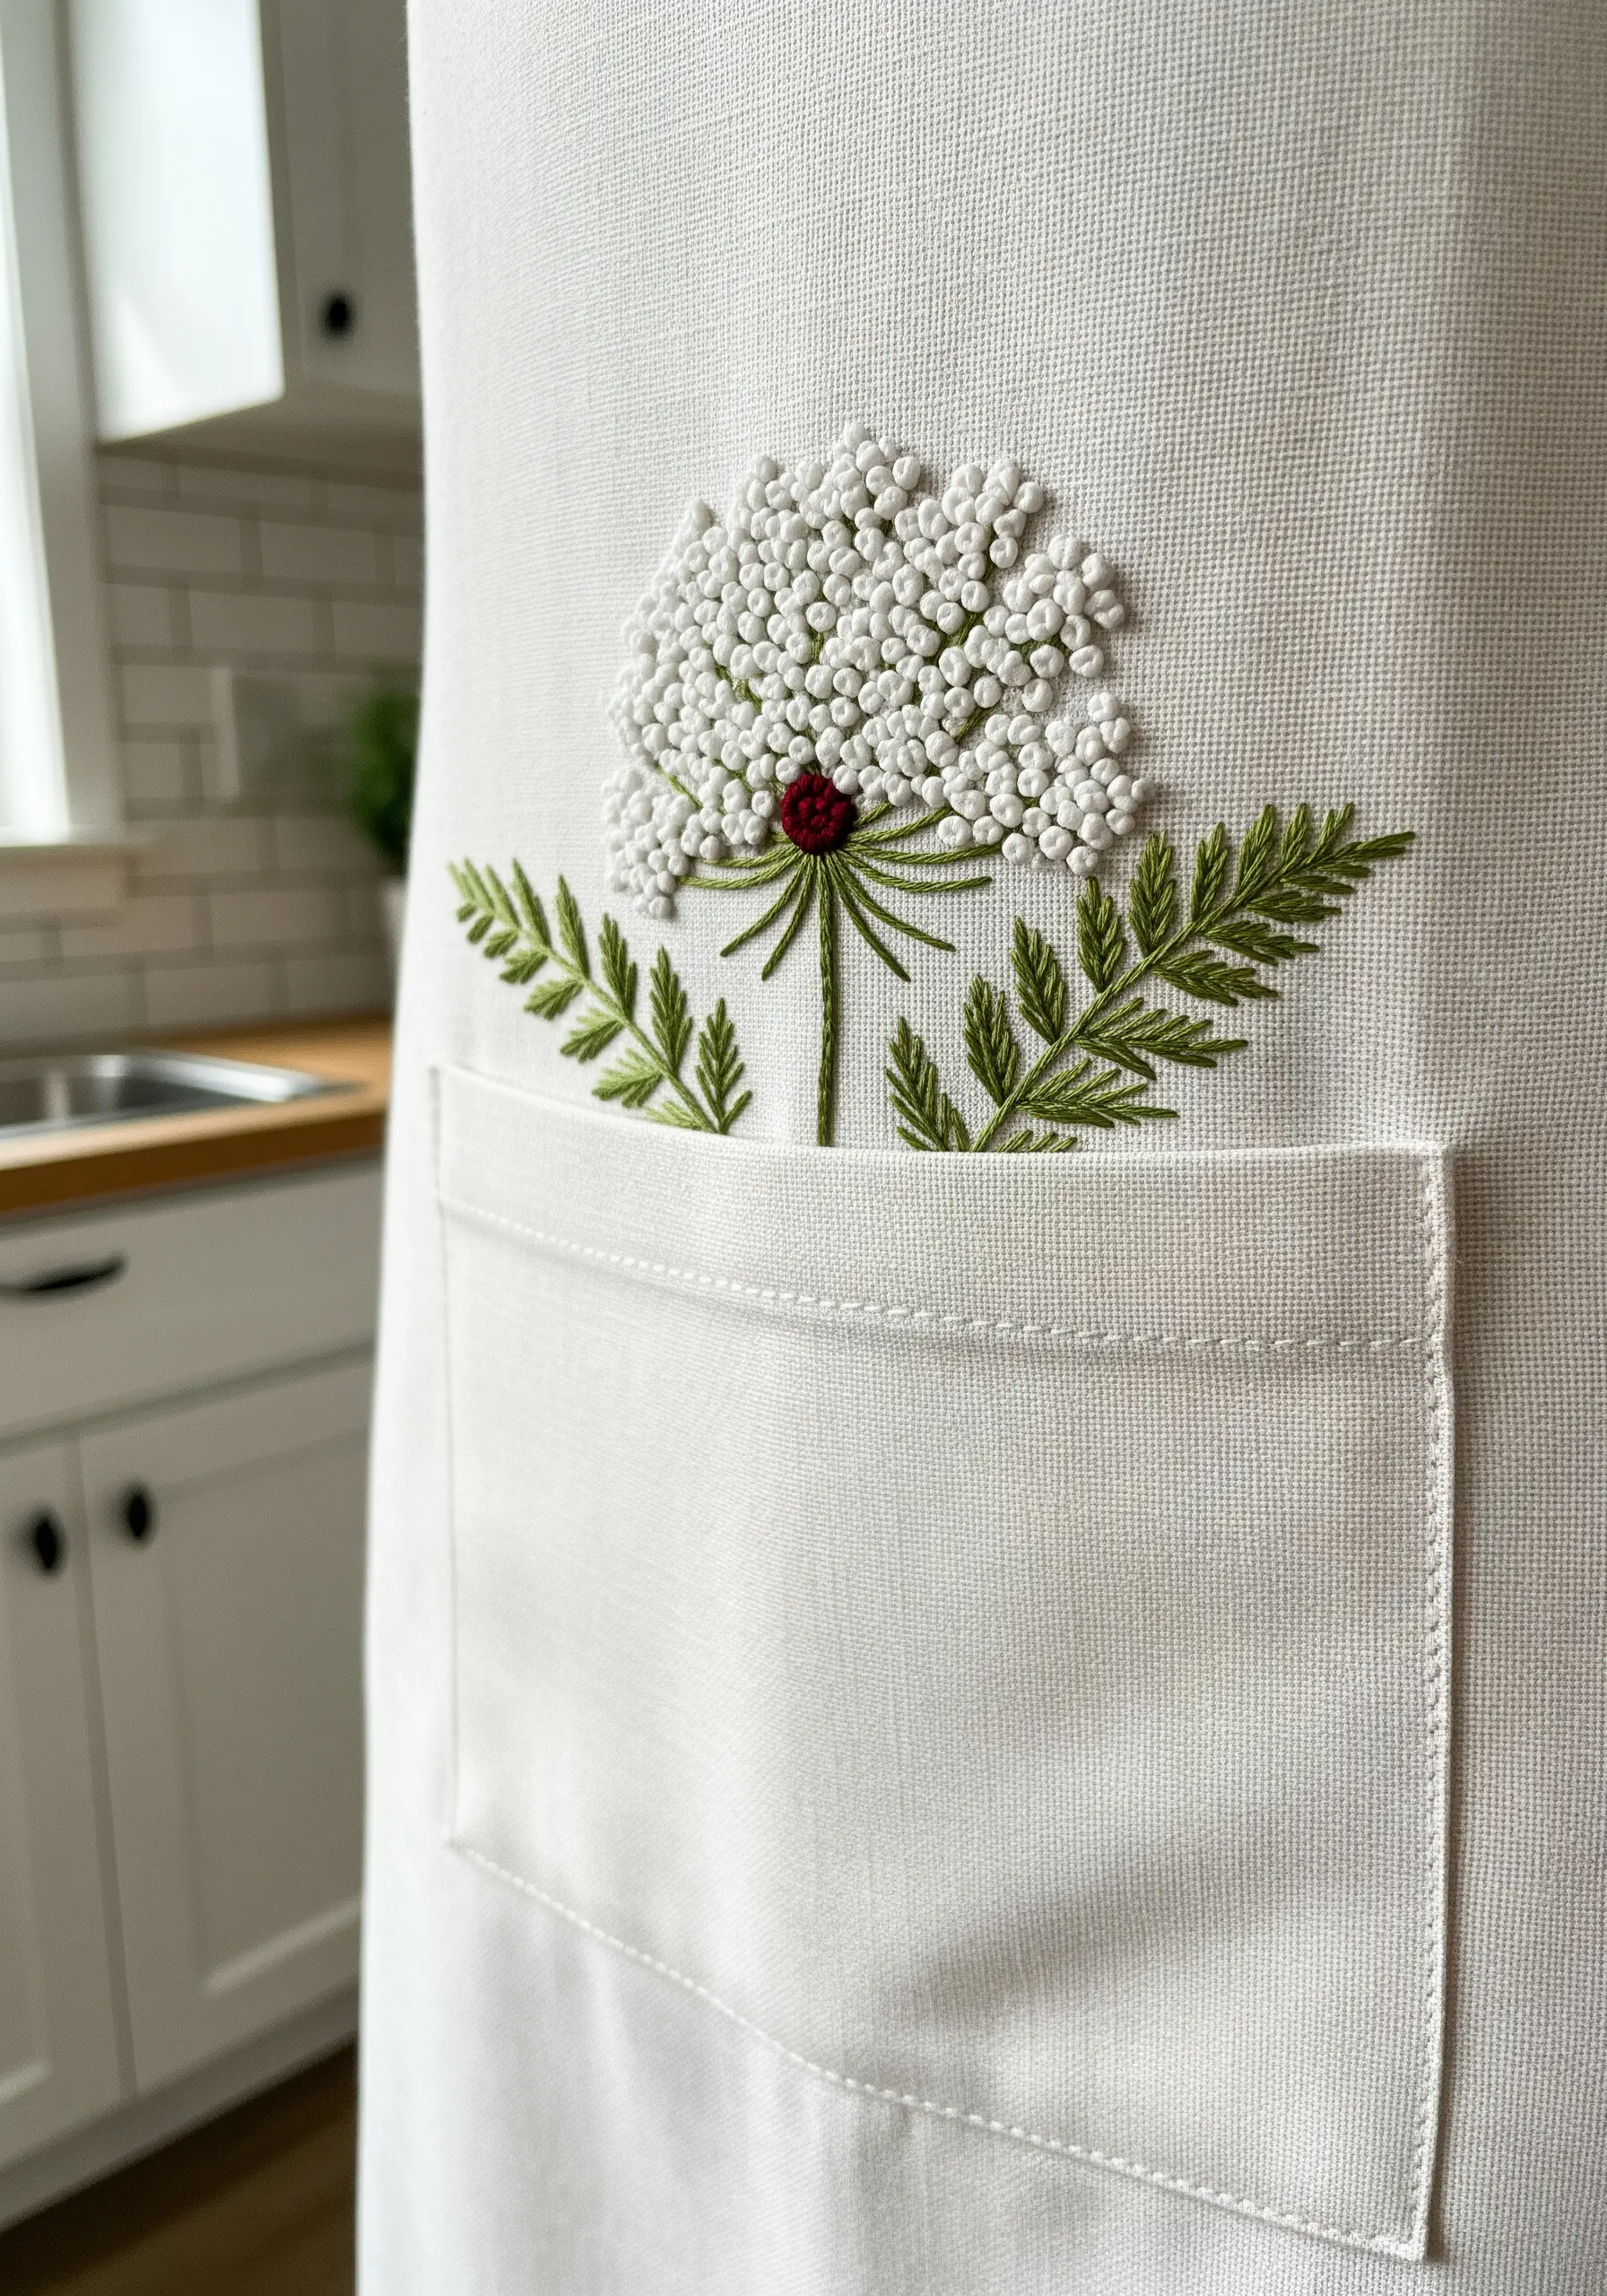
Make your embroidery feel intentional by designing it to interact with the object it’s on.
Here, the Queen Anne’s Lace appears to be growing right out of the apron pocket, turning a simple embellishment into a clever, whimsical detail.
This thoughtful placement creates a small story and shows a higher level of design thinking.
Consider how your motifs can curve around a collar, peek out of a seam, or climb up a sleeve to make your work feel more integrated and dynamic.
Find more ways to add these elegant embroidery accents that instantly upgrade your home decor.
25. Mimic Cattails with Dense, Velvety Knots
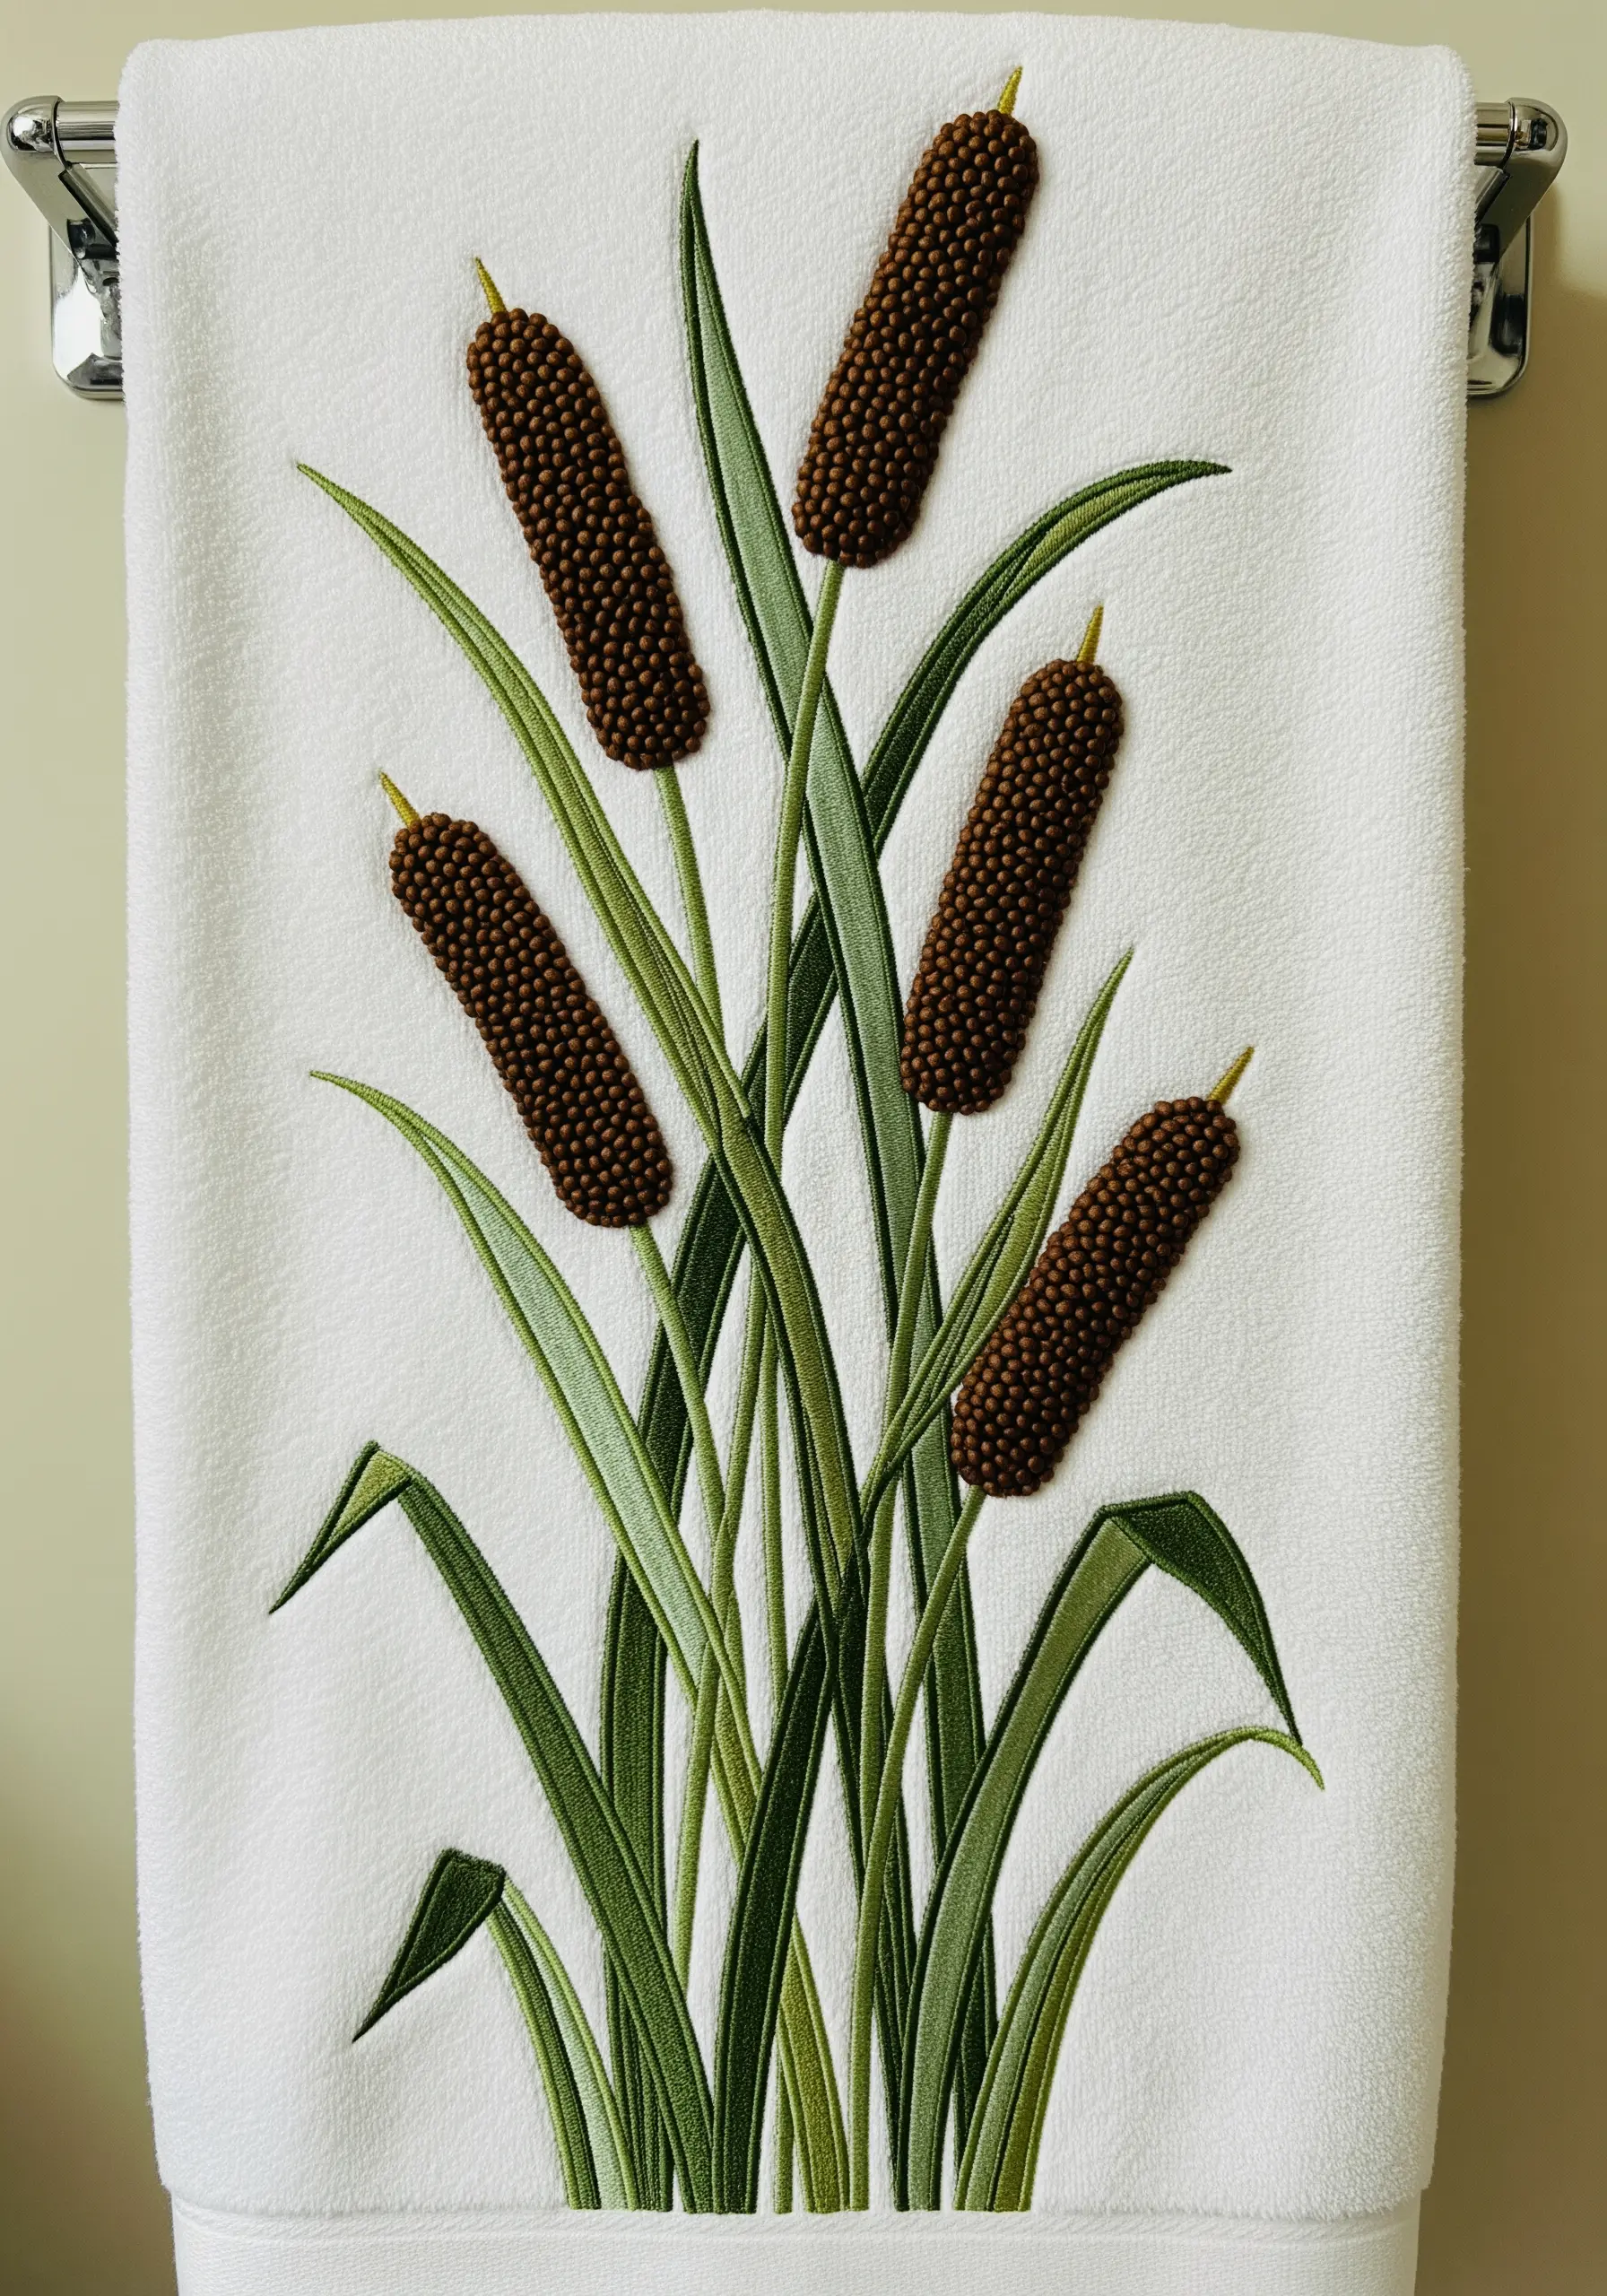
To capture the unique, plush texture of cattails, use a foundation of vertical satin stitches and then cover it completely with dense French knots.
Work with three or four strands of brown floss to make the knots thick and substantial.
Pack them as tightly as possible to create a raised, velvety surface that you can’t help but touch.
This layering technique provides a solid base and ensures the final texture is uniformly dense and dimensional, making these nature texture embroidery projects truly stand out.
26. Create a Rhythmic Border with Repeating Motifs
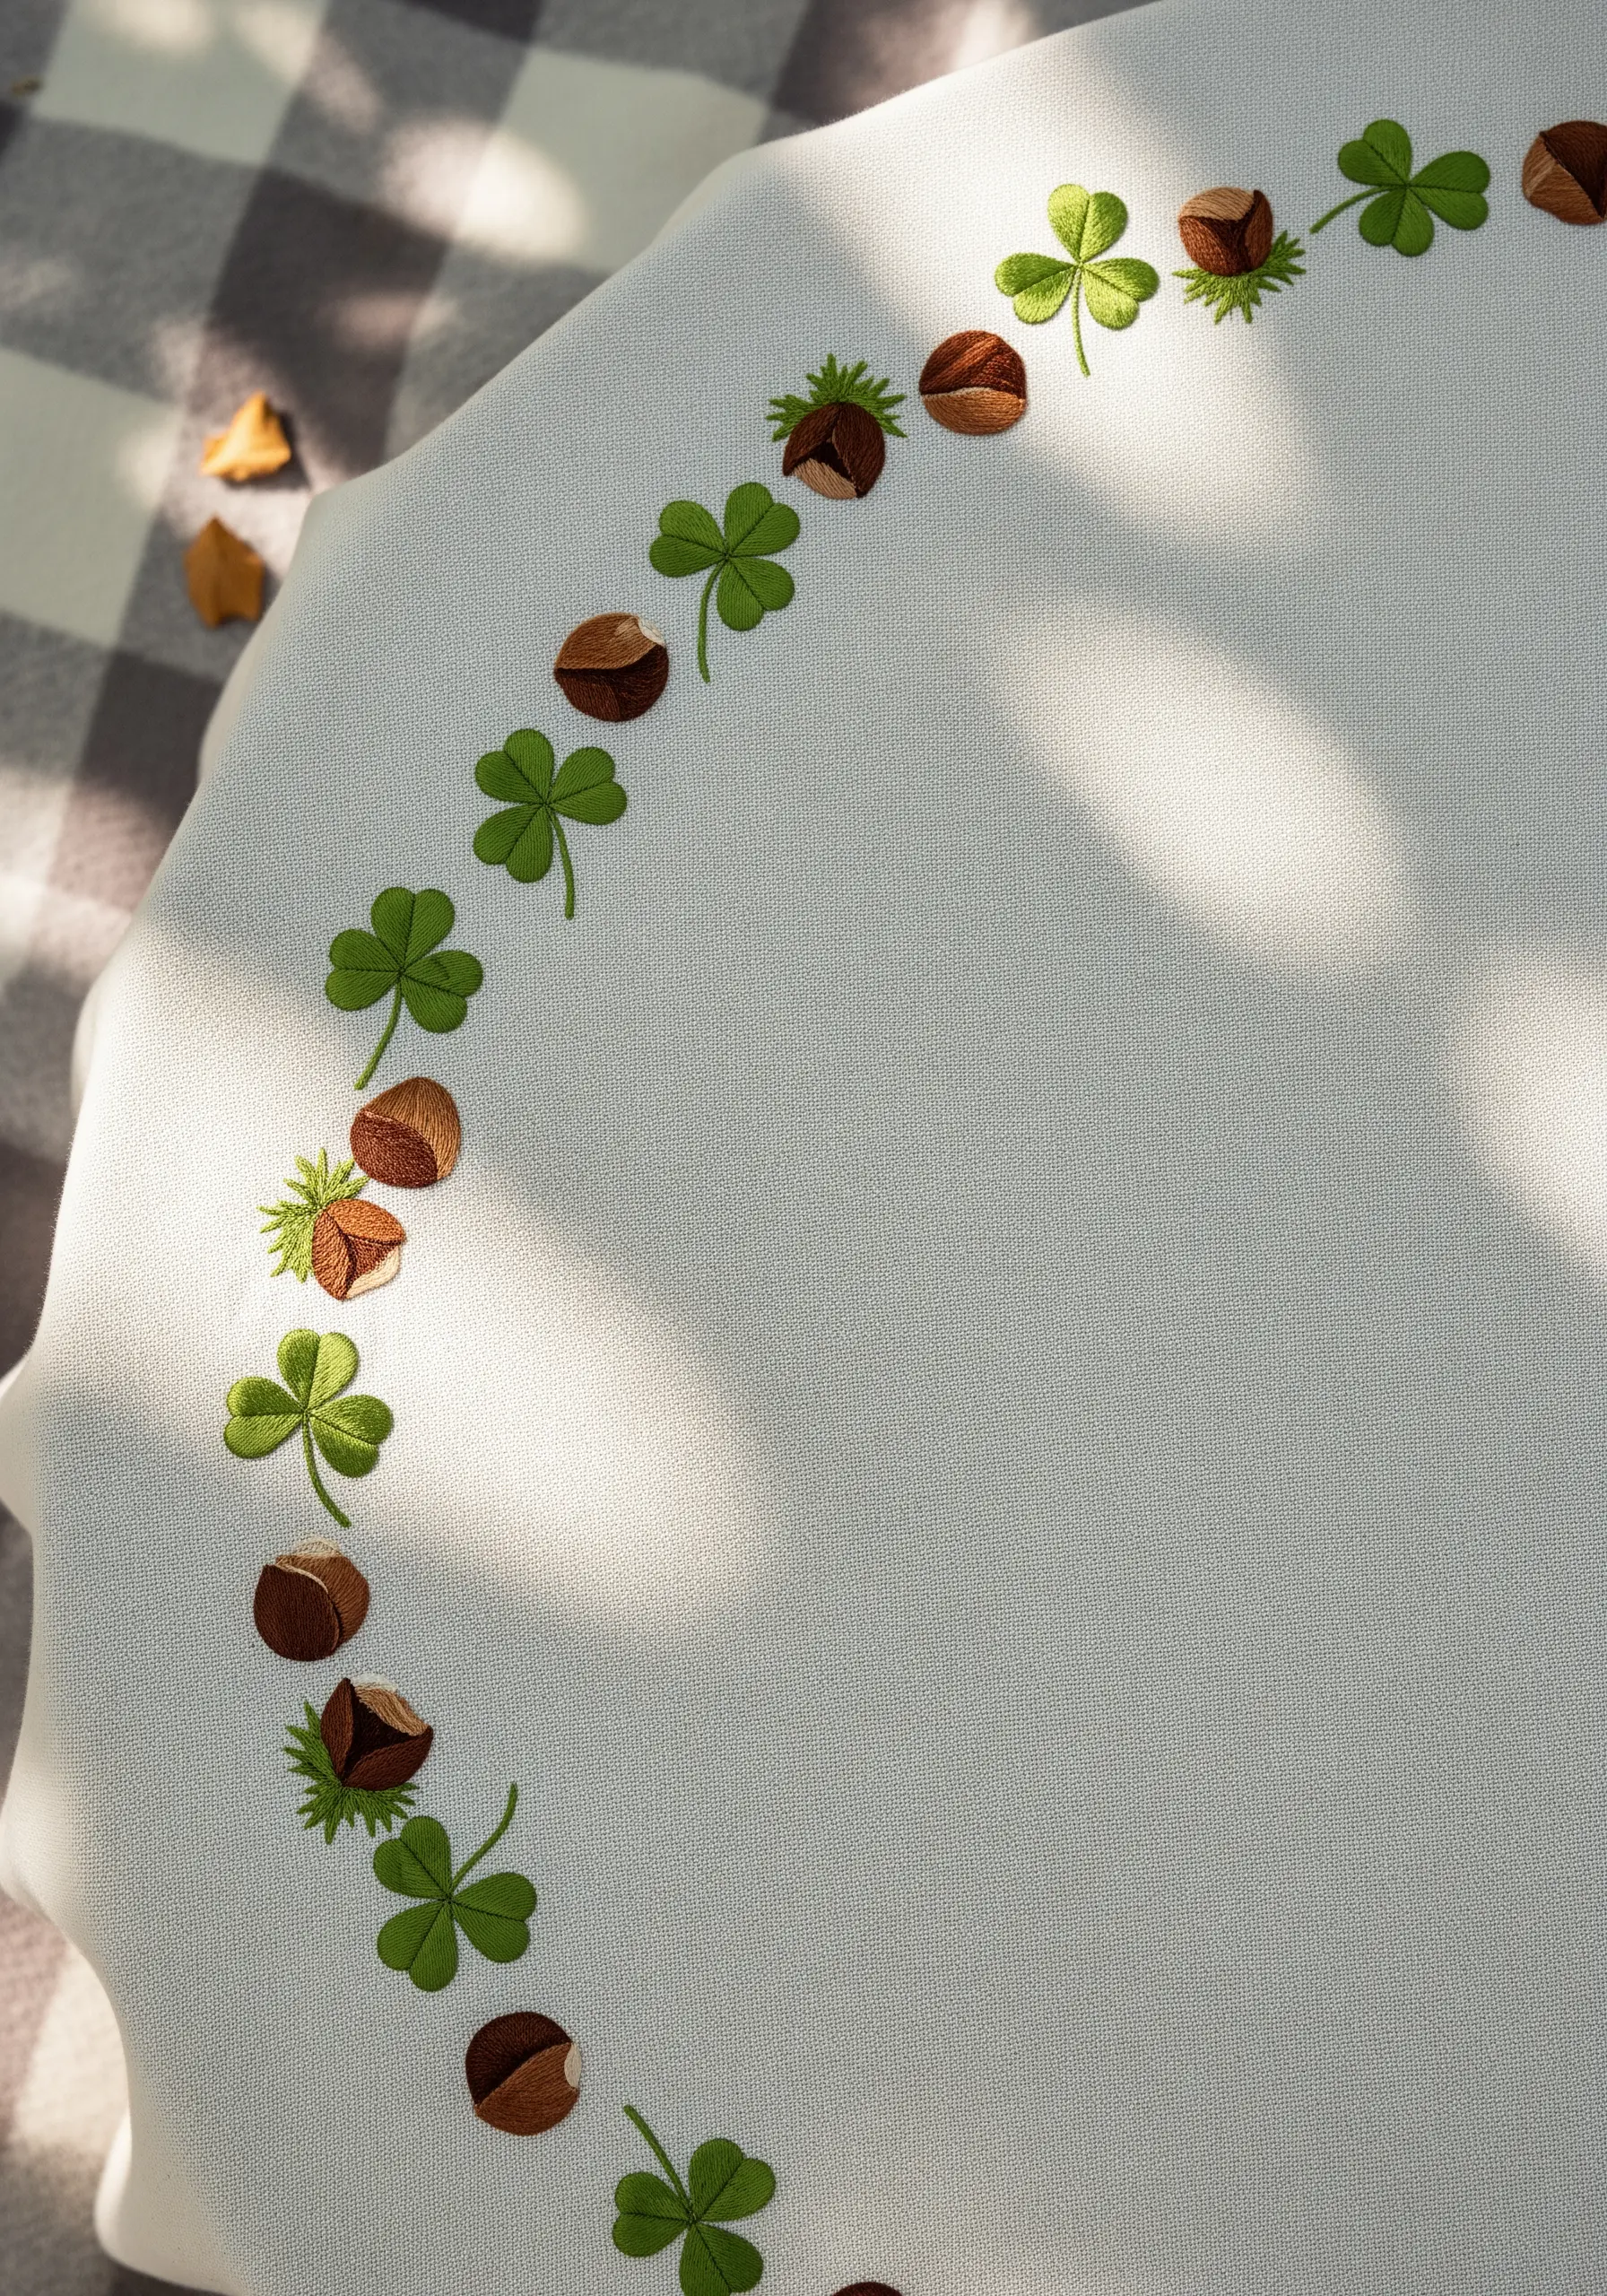
Design a sophisticated border by alternating two simple motifs, like clovers and chestnuts.
The key to a successful repeating pattern is consistent spacing and flawless stitch execution.
Use a template or a water-soluble marker to ensure your motifs are evenly placed around the curve of the tablecloth.
Subtle shading on the chestnuts, achieved with just two tones of brown, adds just enough detail to keep the simple pattern interesting and elegant. Discover more botanical border designs to frame table linens.
27. Scale Down Thread Painting for Miniature Accessories
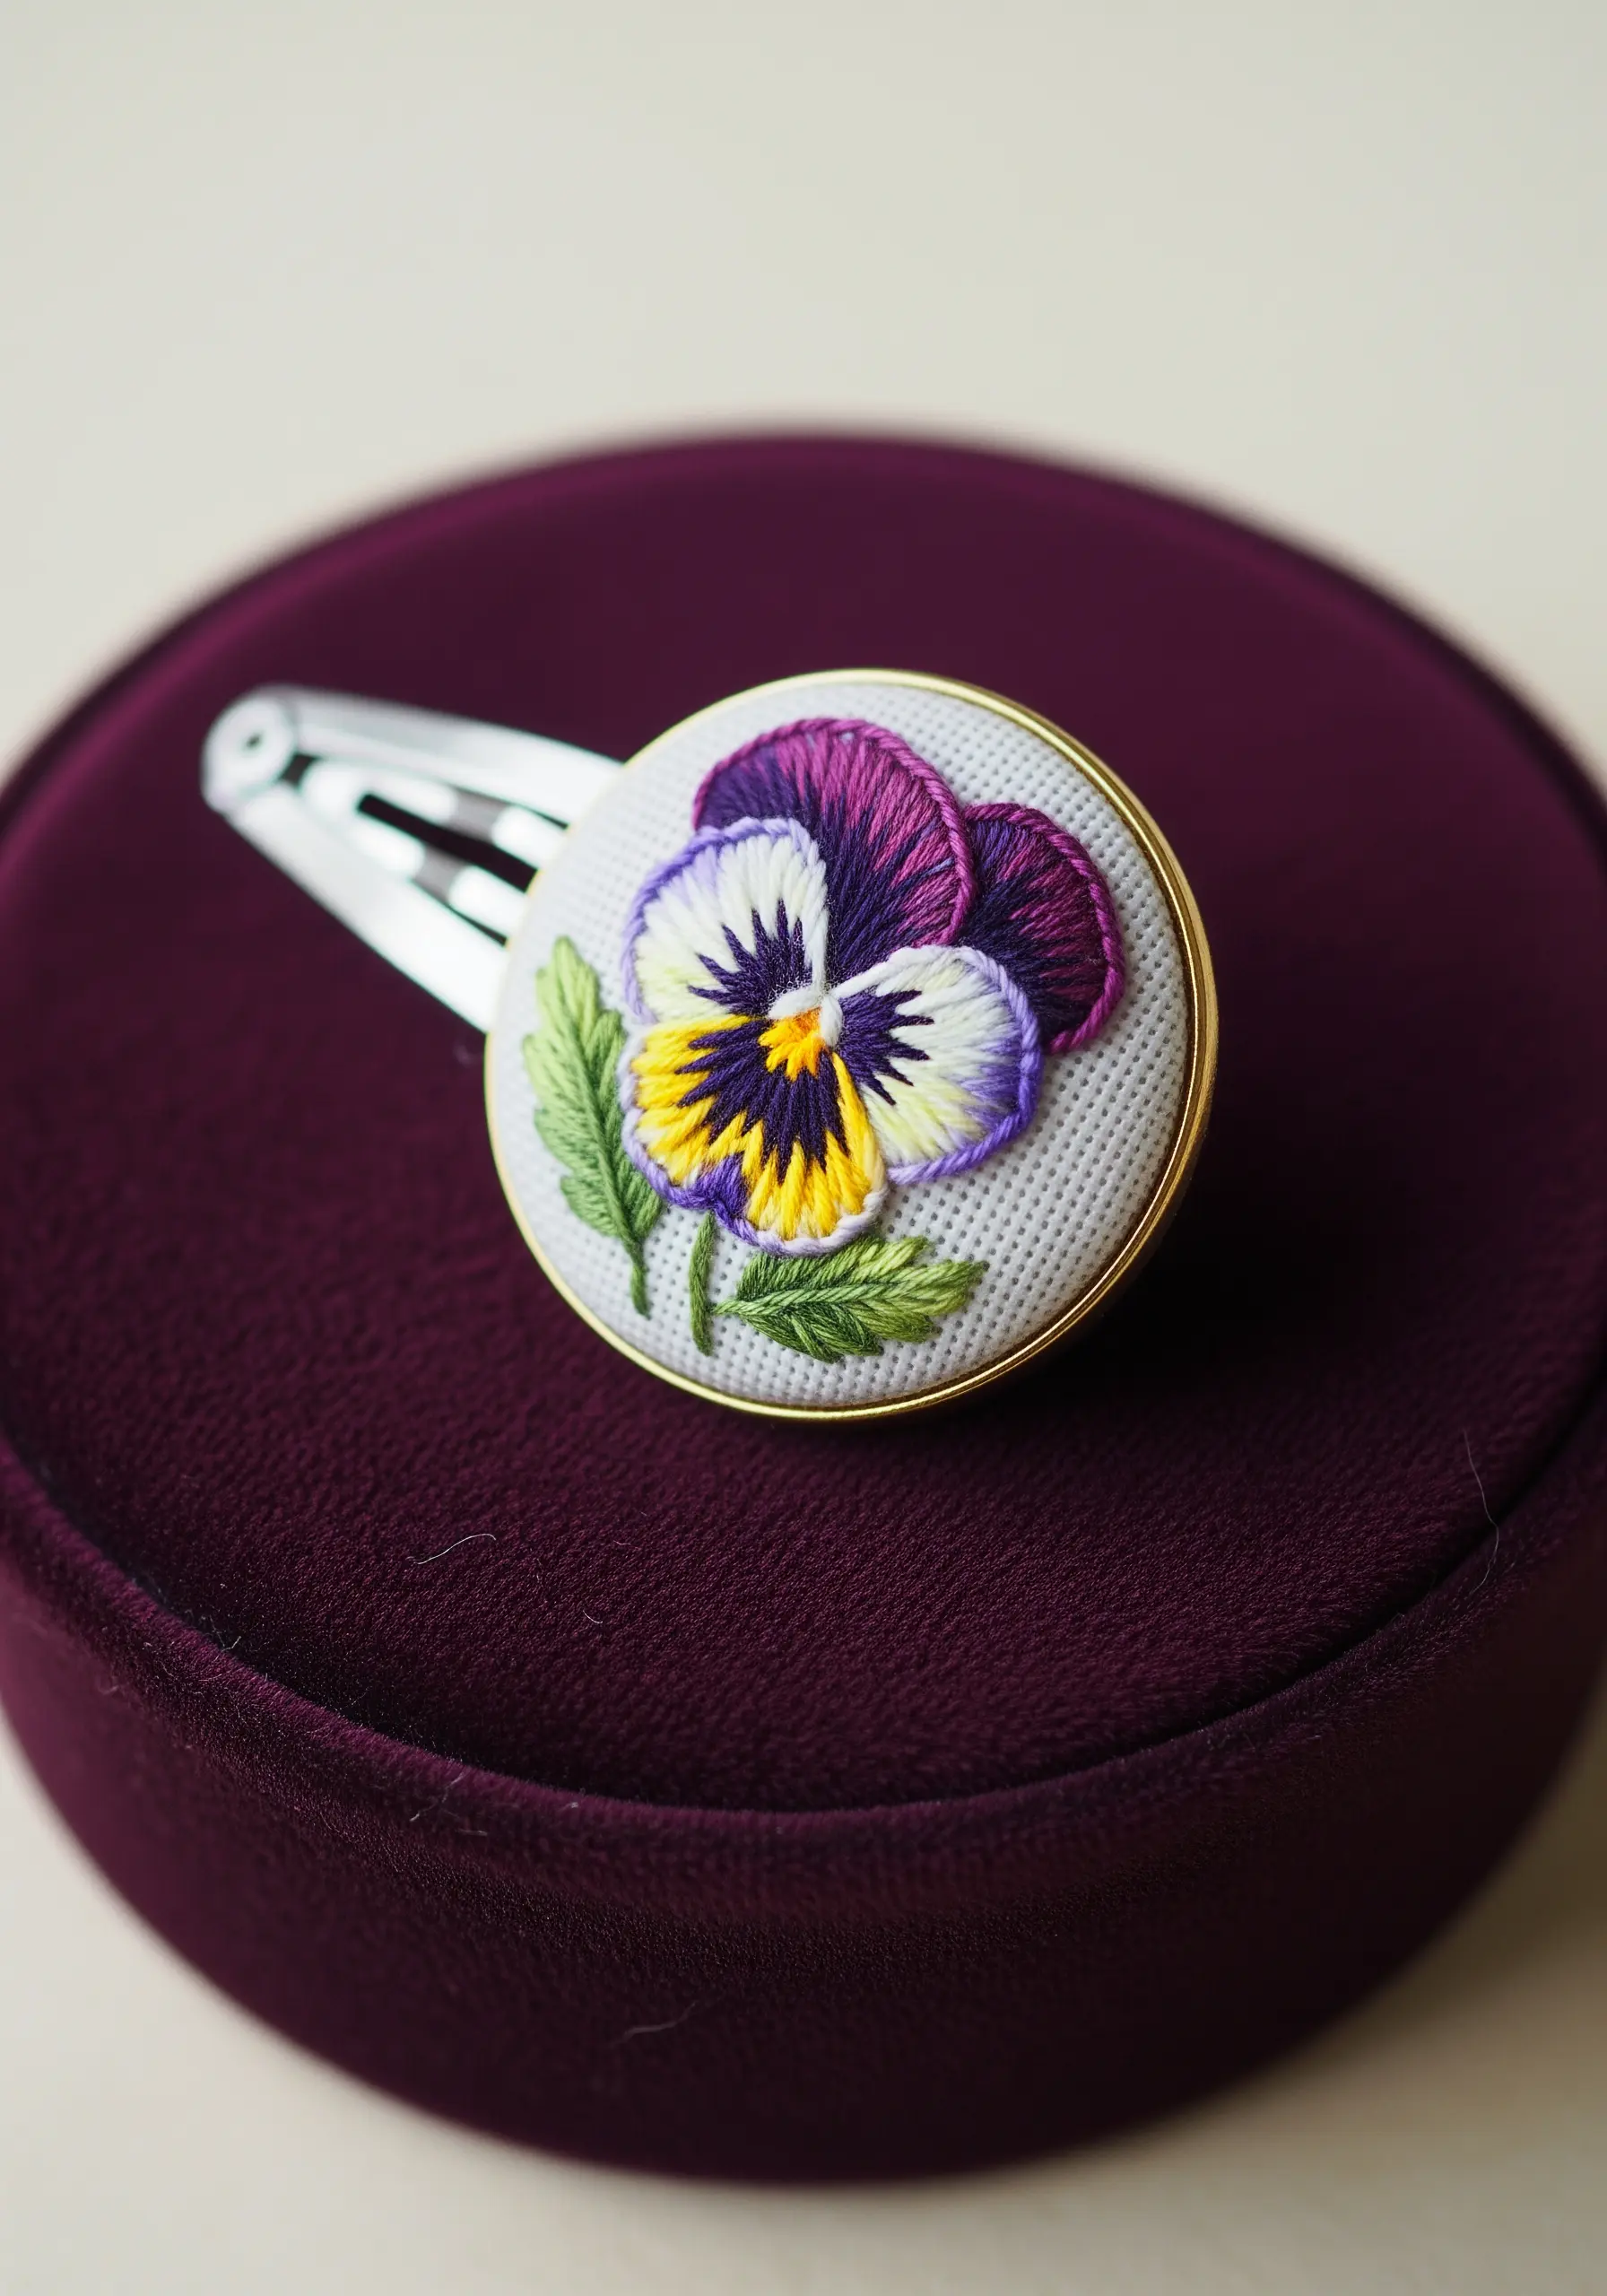
Creating a detailed pansy on a tiny surface like a hair clip requires precision and a light touch.
Switch to a single strand of floss to allow for finer detail and smoother blending with the long-and-short stitch.
Use a sharp, small needle (like a size 10) for better control.
Even at this small scale, don’t skip the color blending—it’s what makes the pansy recognizable and gives it a professional, artistic finish, turning it into one of those adorable mini stitch ideas that make perfect gifts.
28. Balance Bold and Delicate Elements in a Composition
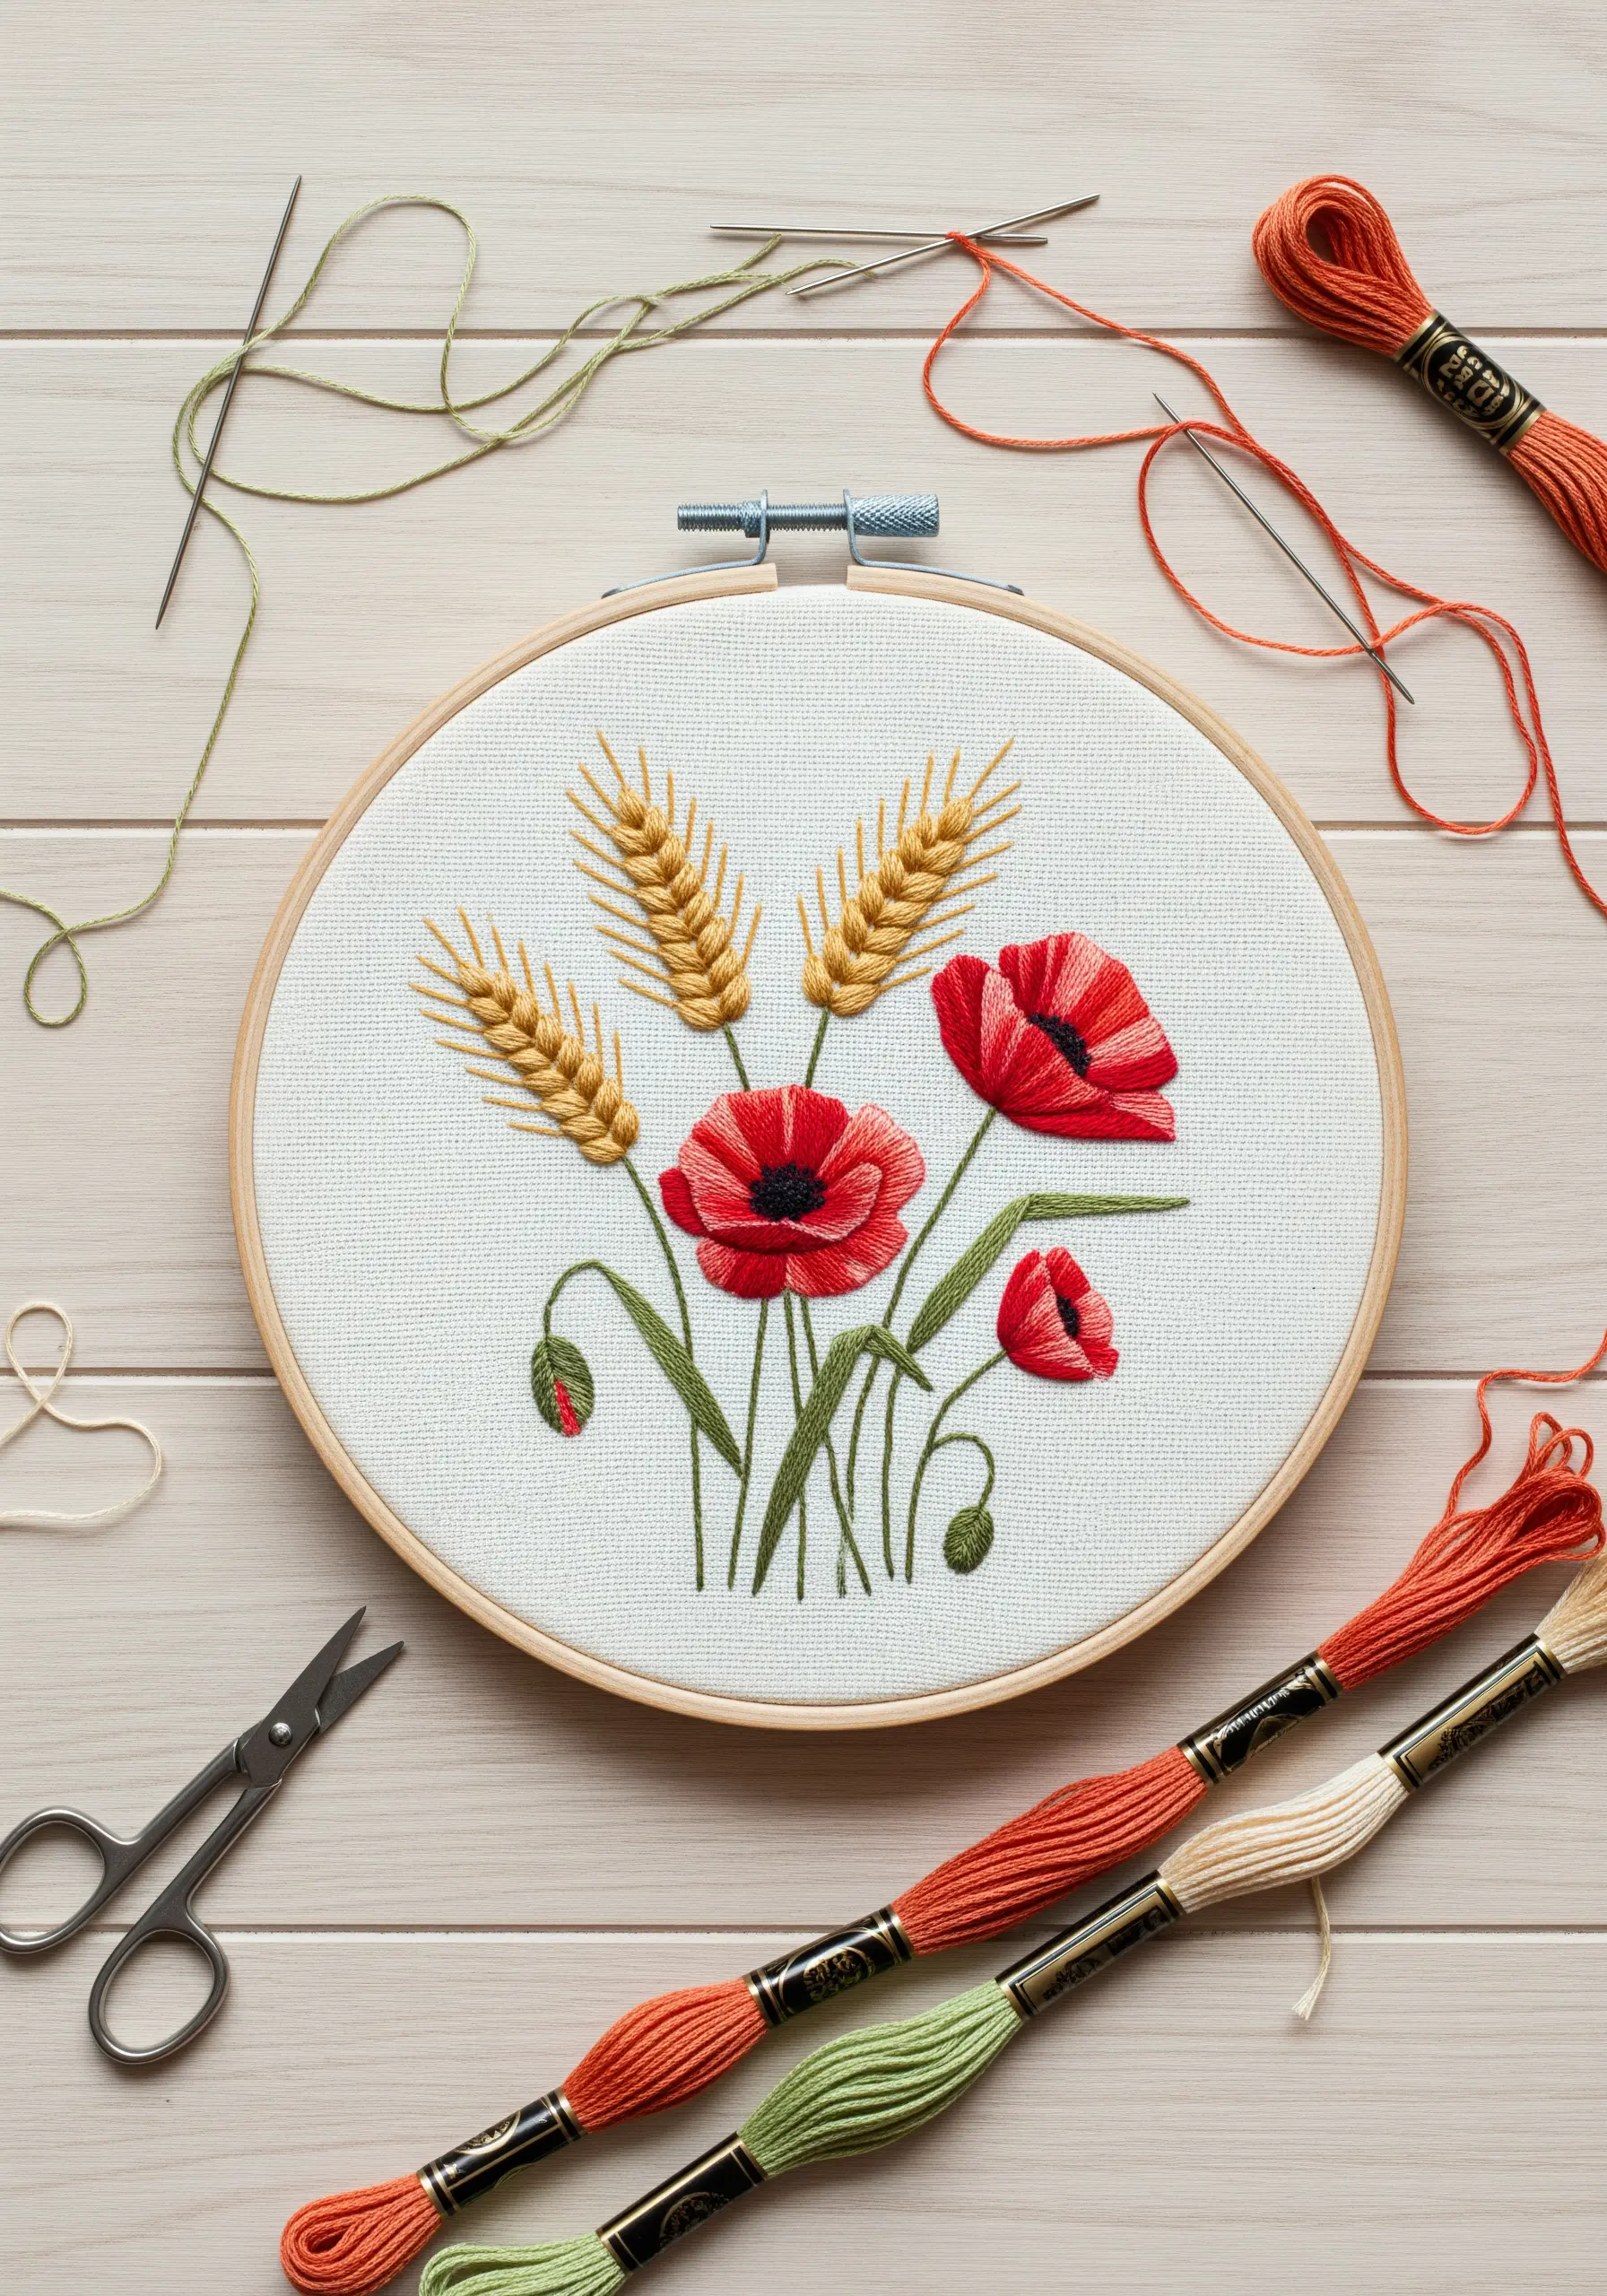
Create a visually harmonious design by balancing bold, vibrant flowers with more delicate, neutral elements.
The bright red poppies, with their dense satin stitch and dark centers, serve as the focal point of the composition.
To complement them without competing, the wheat stalks are stitched in a soft, golden-brown using a more open fishbone stitch.
This contrast in color, shape, and stitch density creates a balanced and dynamic piece that feels complete. It’s all about choosing the right wildflower thread palettes that make your hoop look like an actual meadow.


