

Before you pick up a needle, I want you to look closer at a wildflower. Notice how the color isn’t flat—it’s a dozen shades blended by the sun. See how the texture changes from a soft petal to a sturdy stem. This is what we’re going to capture in thread.
Forget thinking about embroidery as just filling in shapes. Instead, think of your thread as a painter’s brush and your needle as the tool that creates light, shadow, and form. The key to breathtaking botanical art isn’t about using the most complicated stitches; it’s about using the right stitches with intention.
Here, you’ll find palettes pulled directly from mountain meadows and techniques that will help you translate that wild, natural beauty into every piece you create. It’s time to stitch with more confidence and create work that feels truly alive.
1. Layer Texture for Dramatic Landscapes

Create a sense of depth in your mountain scenes by assigning a different texture to each element.
Use wide silk ribbon for the clouds to capture their soft, reflective volume, contrasting it with the dense, directional satin stitch of the mountain faces.
For the foreground, keep the wildflowers delicate with long-and-short stitch, and use varied shades of green in straight stitches for the meadow grasses.
This textural hierarchy guides the eye from the soft sky to the sharp peaks and finally to the detailed botanicals, making the entire composition feel more immersive.
2. Unify a Set with a Shared Palette
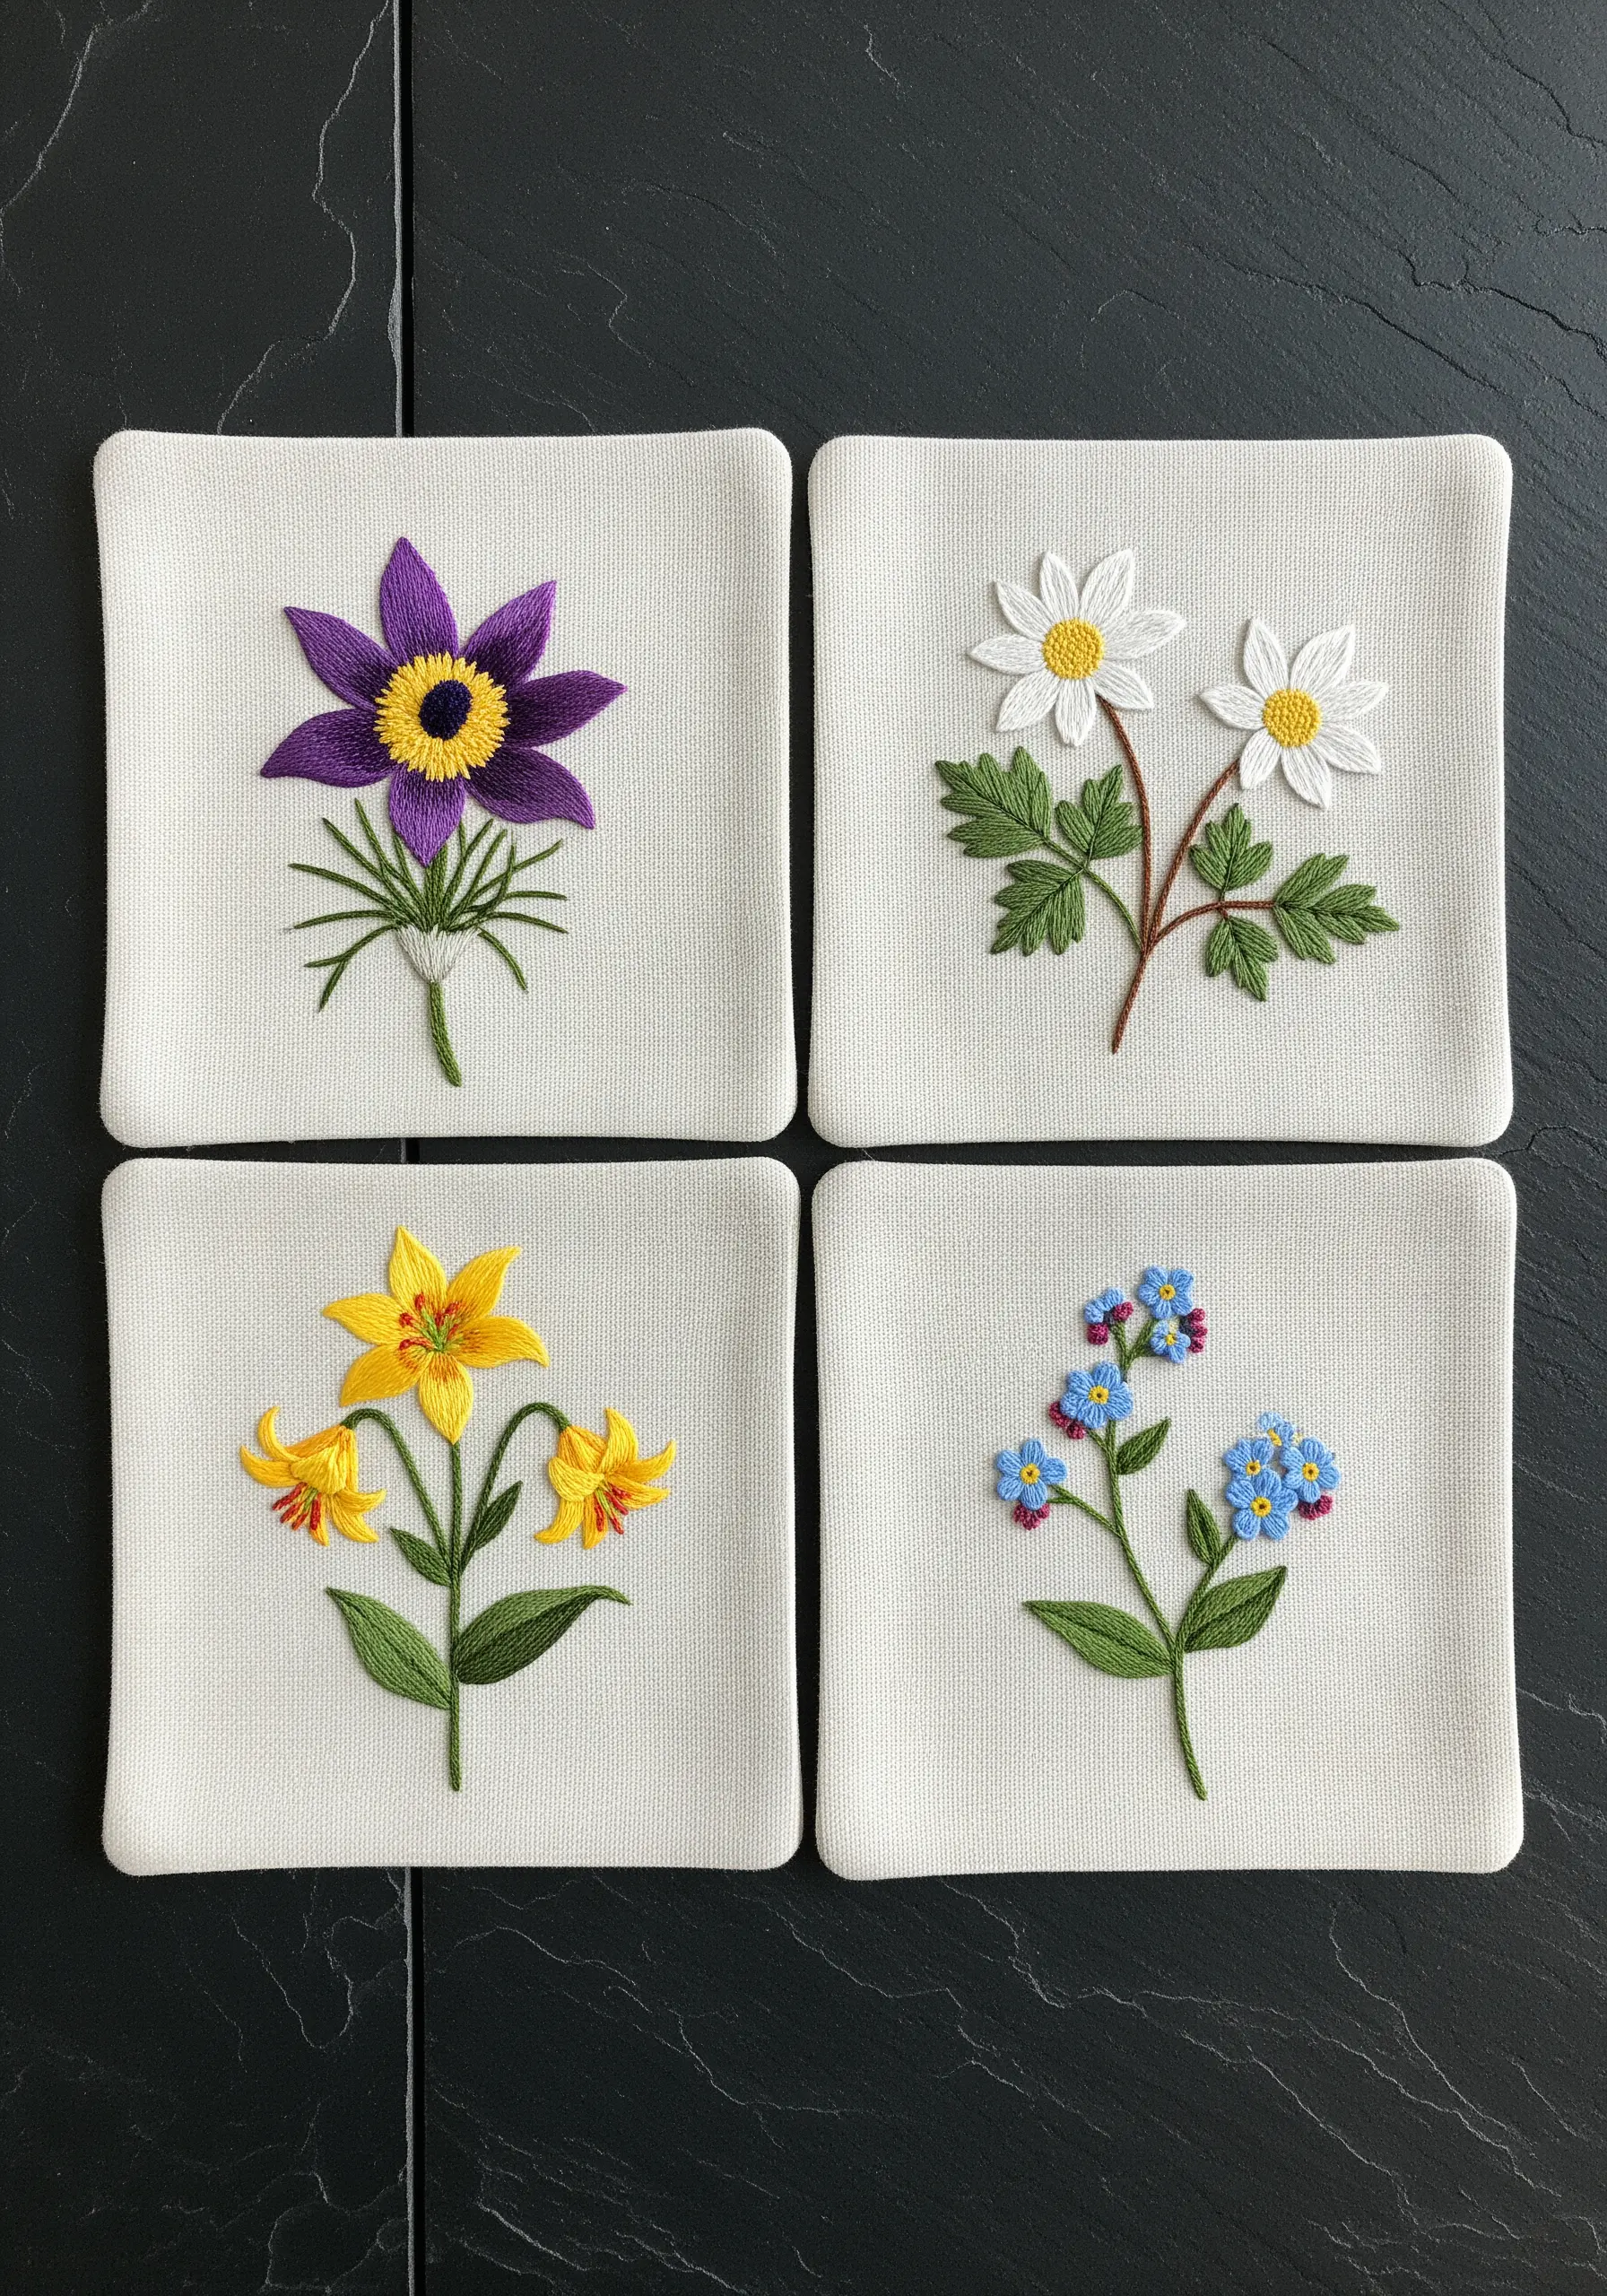
When creating a collection of small pieces like coasters, maintain a cohesive look by using a consistent, high-contrast color story.
Select four distinct wildflower motifs, but render them all using the same set of vibrant floss colors against a clean, neutral background fabric like linen or cotton canvas.
Focus on perfect execution—crisp satin stitches for petals and delicate split stitches for stems—to give the set a professional, polished finish.
This approach allows each flower’s unique shape to stand out while ensuring the pieces work together as an elegant, unified whole.
3. Build a Dense Meadow with Varied Stitches

To achieve a lush, wild meadow effect on a pillow or cushion cover, think in layers and textures rather than individual stems.
Start with a base of background foliage using simple seed stitches and straight stitches in several shades of green.
Next, add your main floral elements using satin stitch for bold petals and bullion knots for taller, textured blooms like lupine.
Fill in any gaps with clusters of French knots in whites, yellows, and lavenders to mimic smaller blossoms and add density.
This layering technique creates a rich, dynamic surface that invites touch and looks genuinely abundant, perfect for cottagecore floral embroidery ideas.
4. Master Bold Florals on Denim

When embroidering on a durable, heavy fabric like denim, you can afford to be bold with your scale and color choices.
Choose a large, striking floral like fireweed and use a vibrant, contrasting palette—such as magenta and fuchsia—to make the design pop against the blue fabric.
Always use a tear-away or wash-away stabilizer on the back to prevent the denim’s stretch from warping your stitches.
Use long-and-short stitch to create smooth color gradients in the petals, giving the large-scale motif a realistic, painterly quality that transforms a simple jacket into wearable art.
5. Achieve Elegance with Monochrome on Velvet

Create a truly luxurious effect by pairing a limited, tonal color palette with a rich fabric like velvet.
On a dark navy or black velvet runner, use shades of silver, icy blue, and white to stitch an elegant floral garland.
The velvet’s pile will absorb light, making the sheen of your satin stitches even more luminous and creating dramatic contrast.
Vary your stitch direction within leaves and petals to manipulate how they catch the light, adding dimension and sophistication without introducing new colors.
This technique is perfect for creating impactful monochrome designs that feel both modern and timeless.
6. Ground Abstract Color Fields with Minimal Motifs
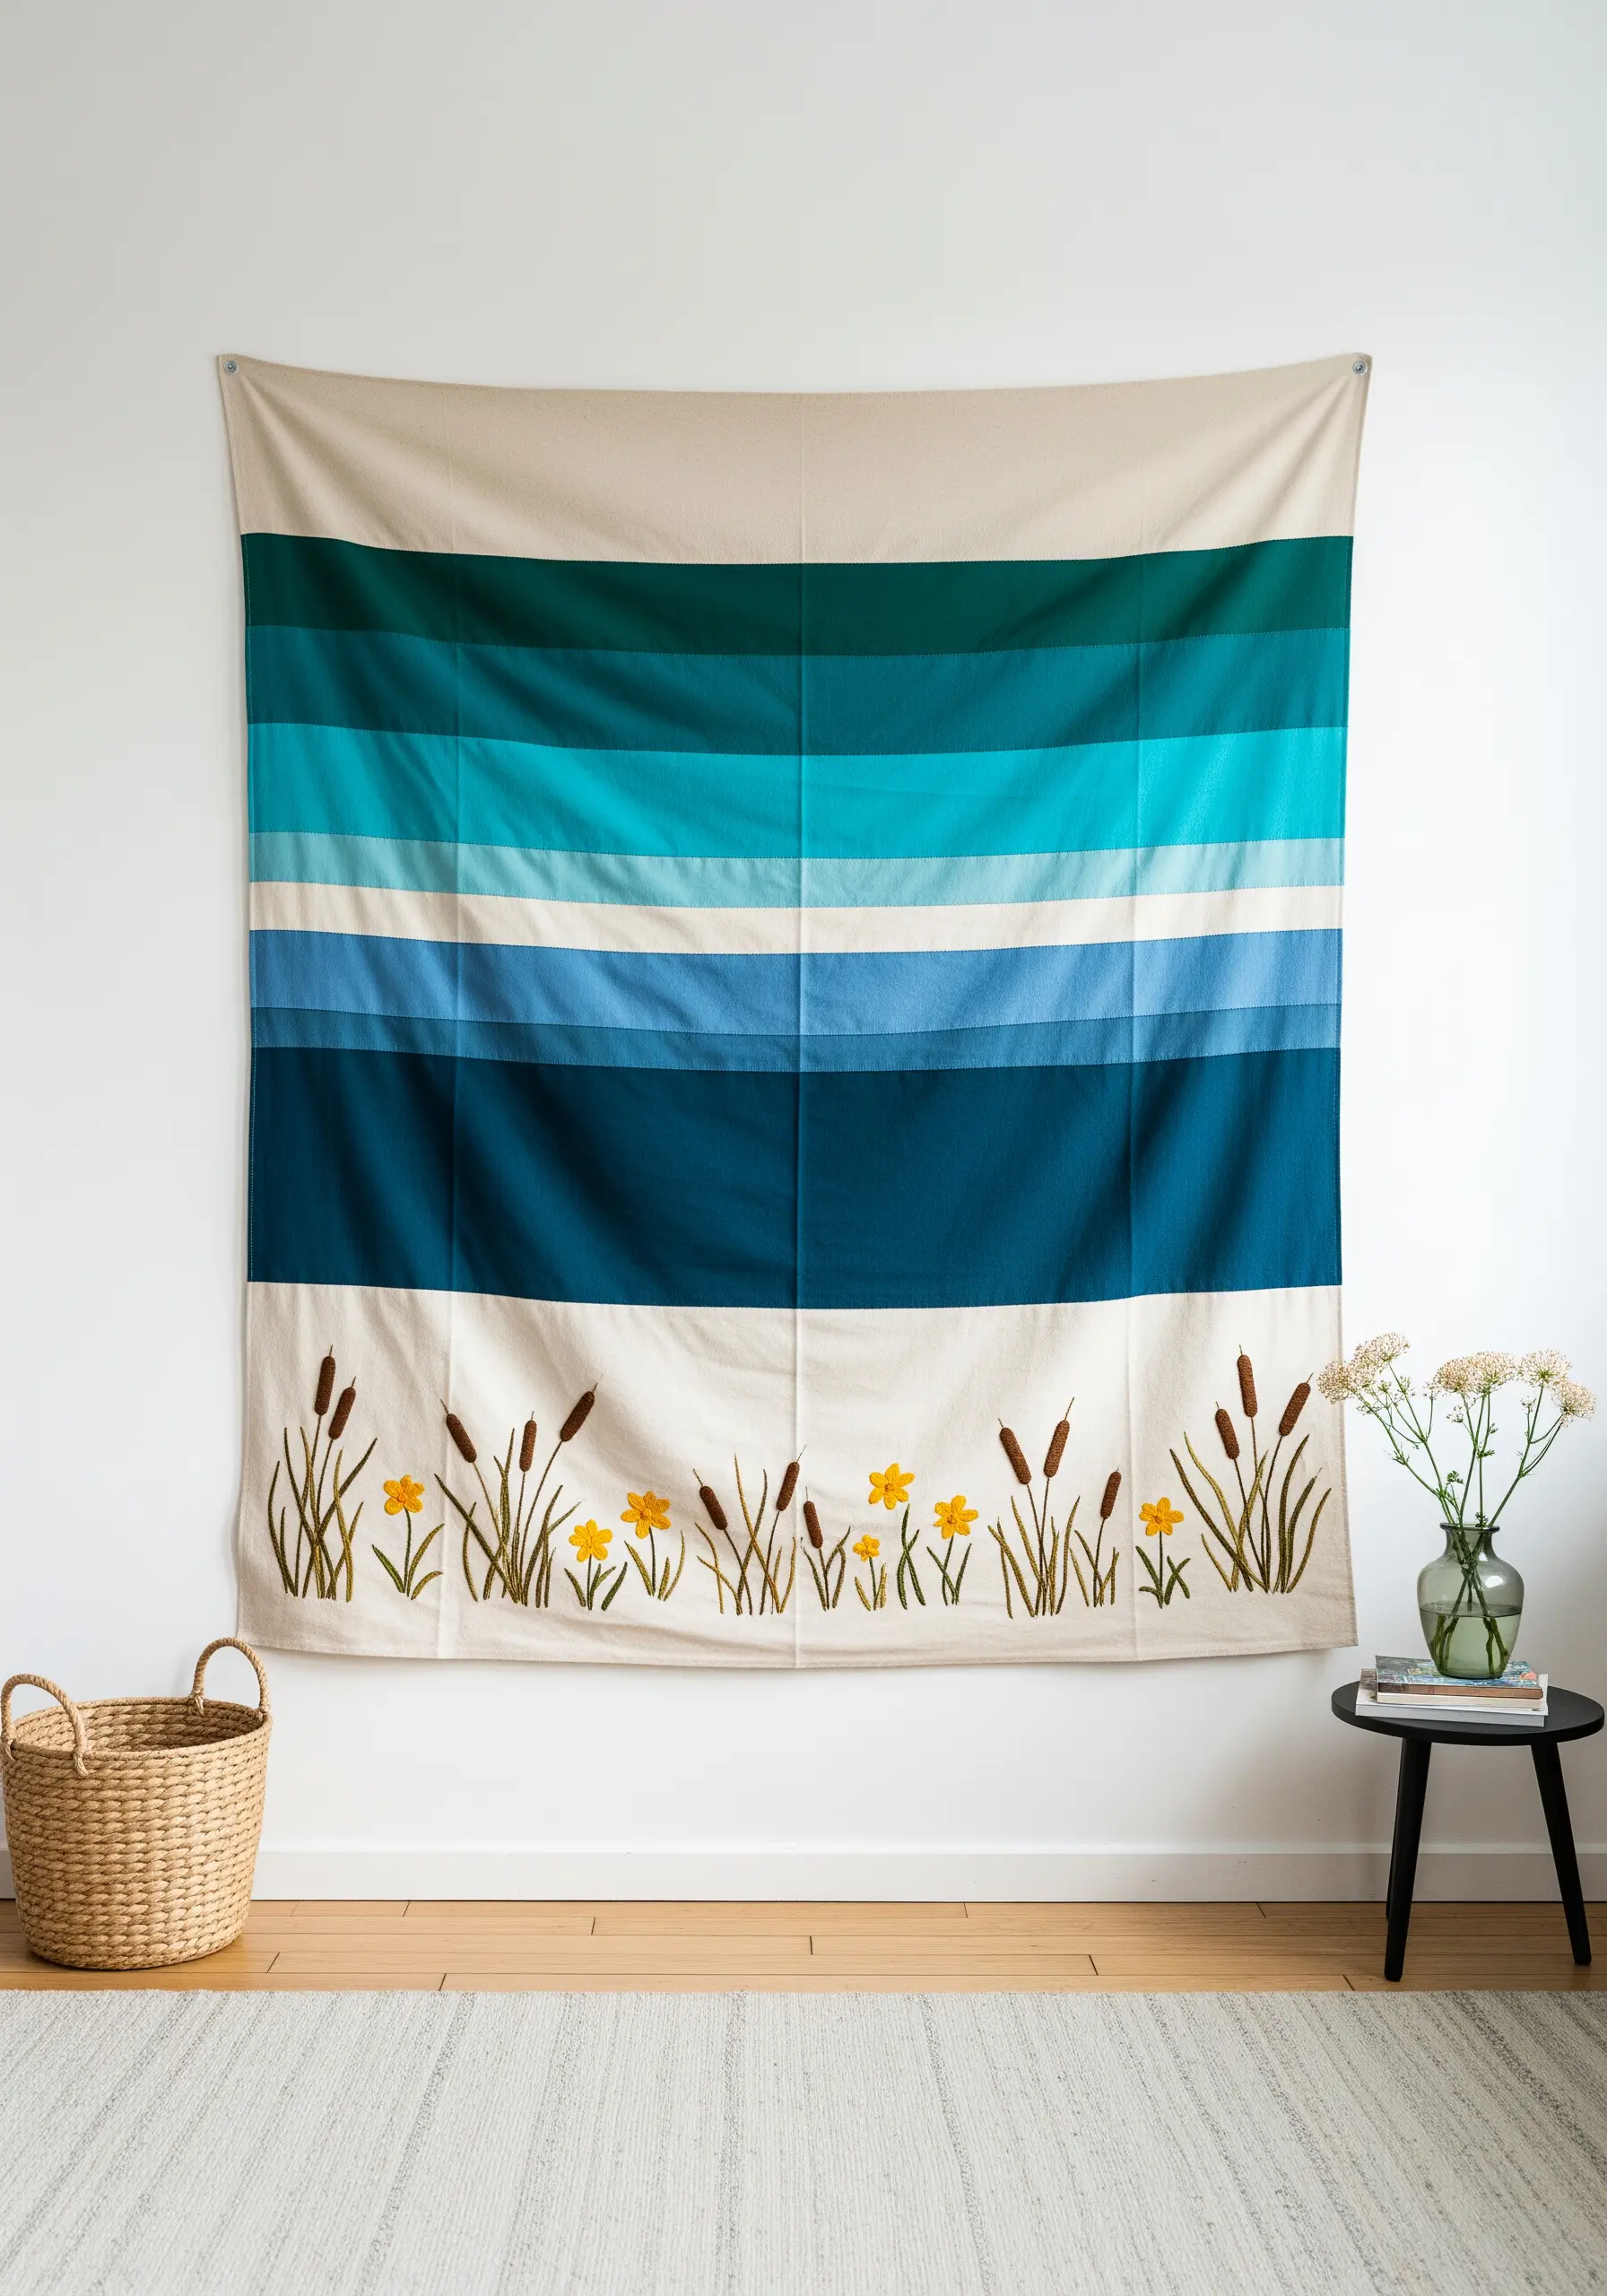
If you’re working with a pre-patterned or color-blocked fabric, use embroidery to add a delicate, grounding focal point.
On this striped tapestry, a simple line of cattails and wildflowers stitched along the bottom edge provides a natural anchor to the abstract bands of color above it.
Keep the embroidery minimal and use a palette drawn from nature—earthy browns, greens, and a pop of yellow—to contrast with the cooler blues and teals of the background.
This thoughtful placement turns a simple textile into a piece of intentional large-scale embroidery art.
7. Add Dimension to Florals with Stumpwork
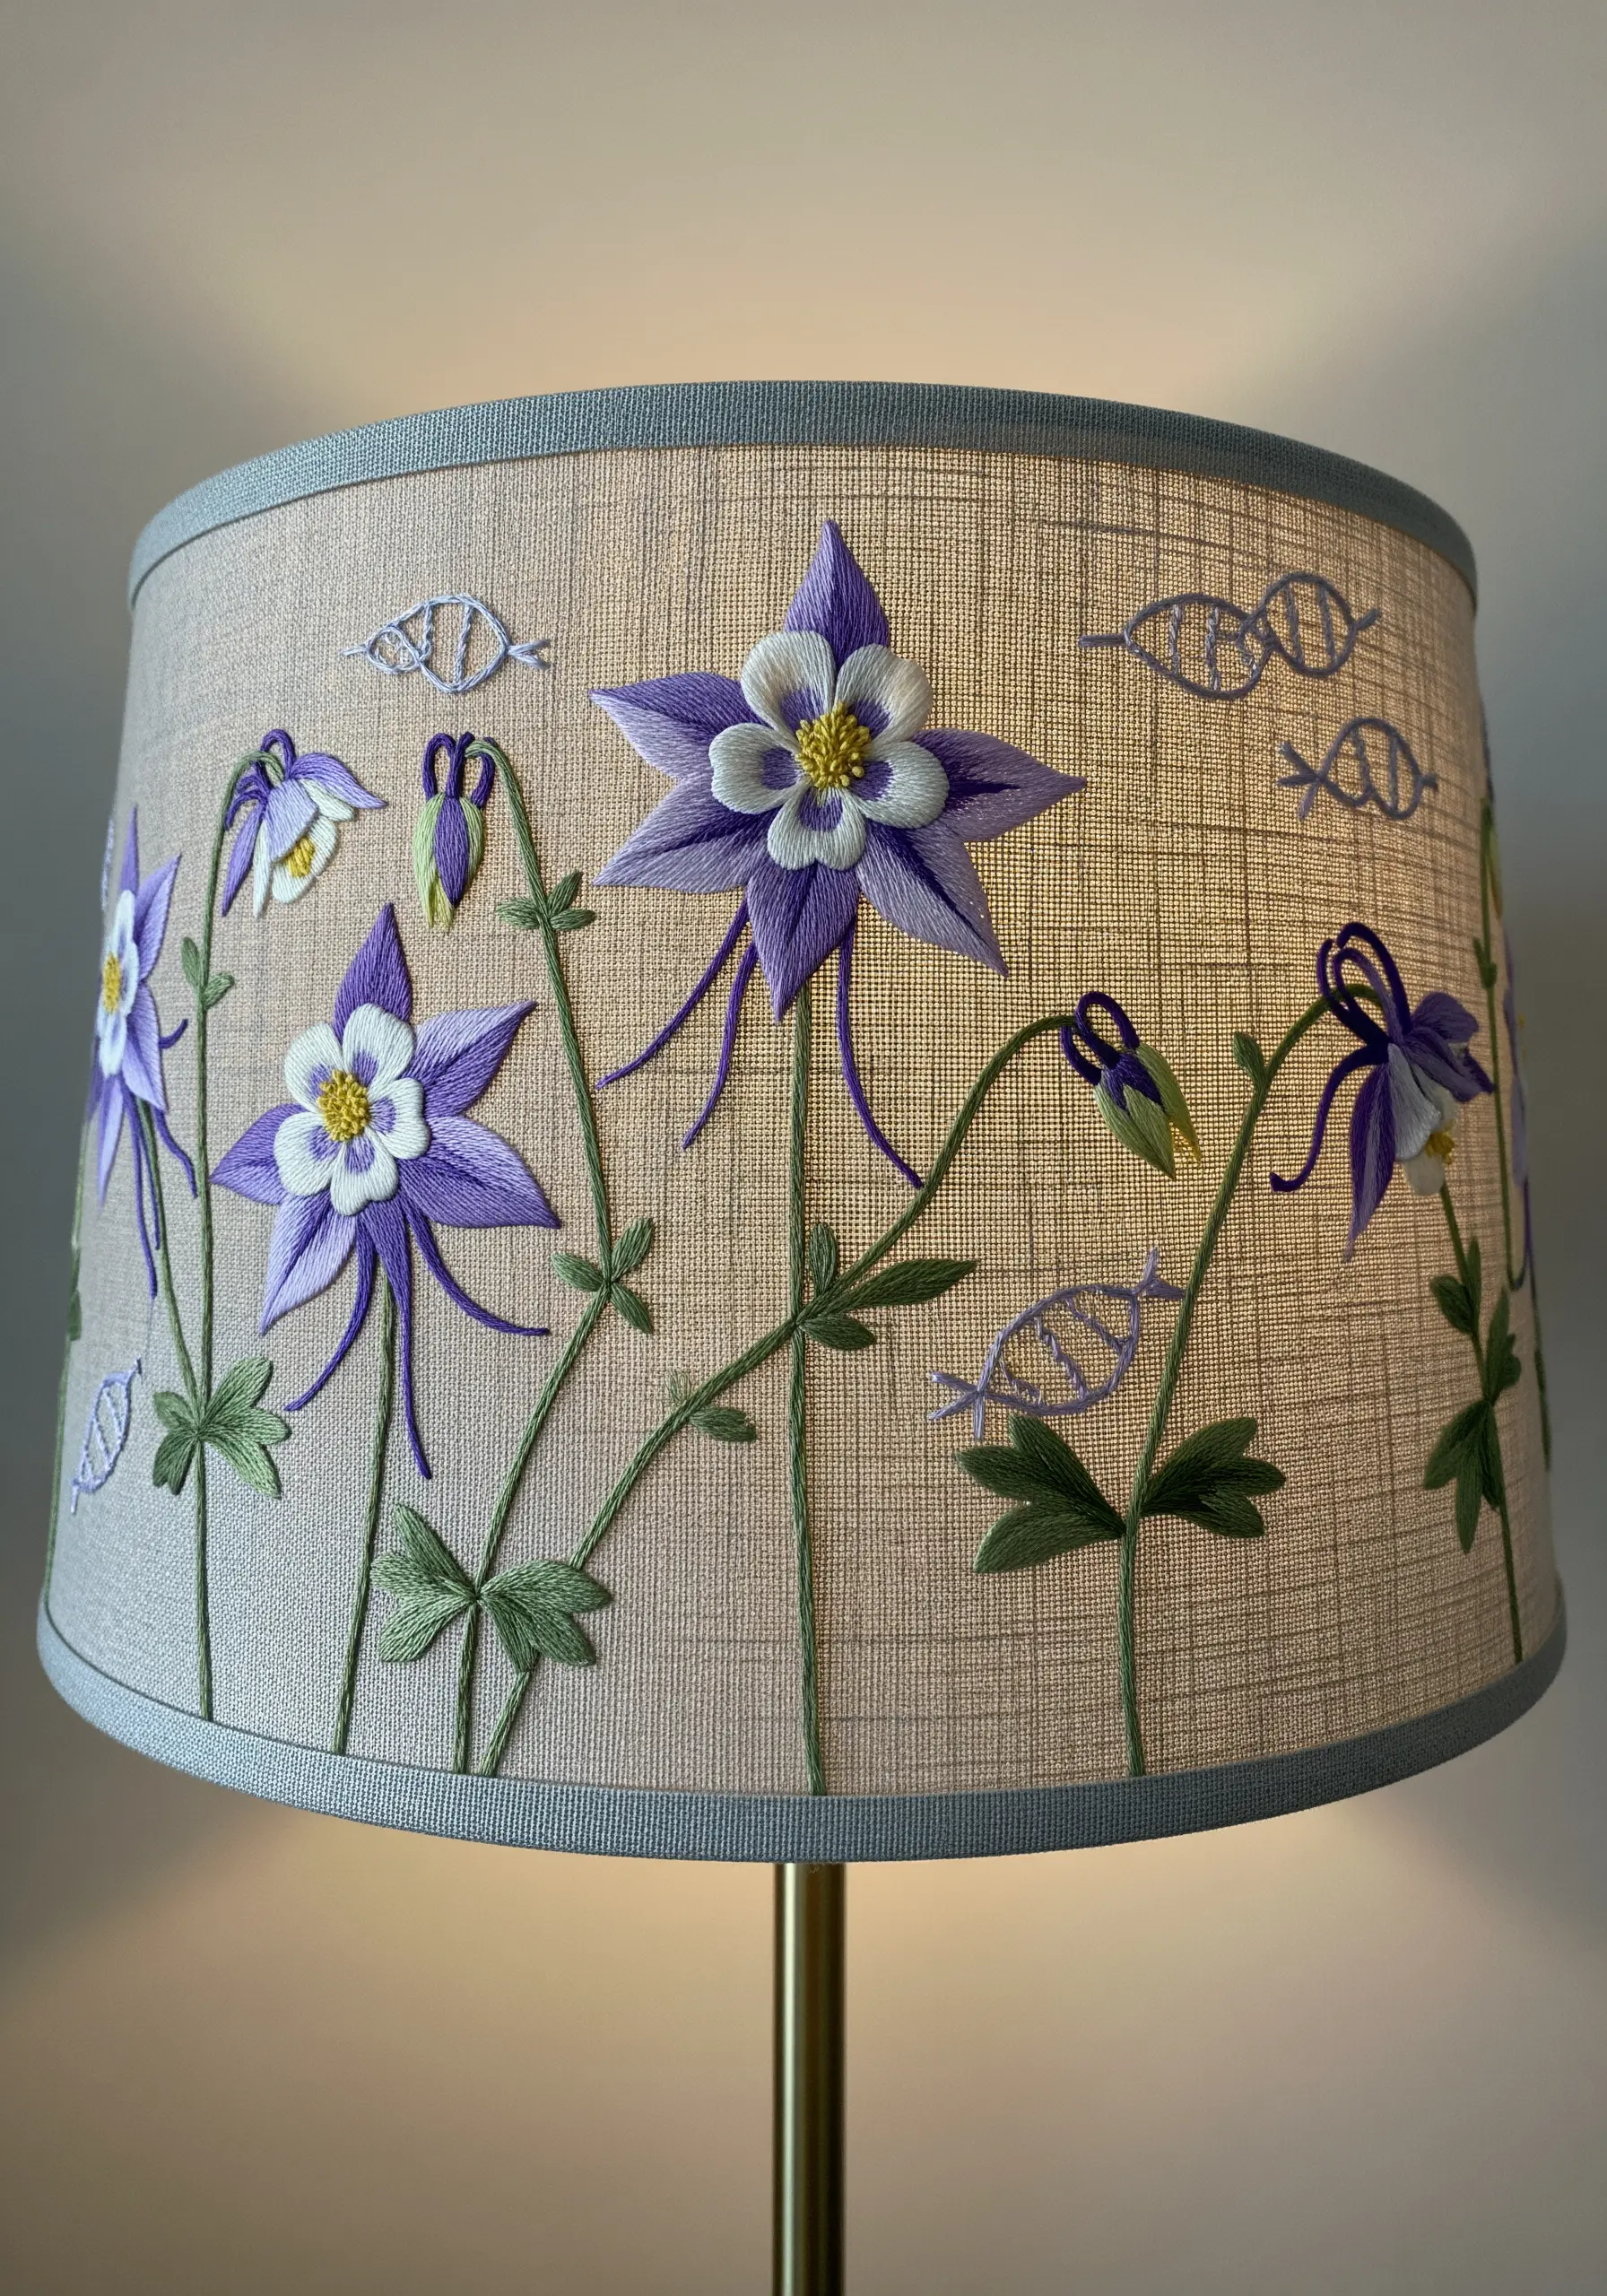
Elevate your floral embroidery by incorporating stumpwork techniques to make certain elements lift off the fabric surface.
For these columbine flowers, stitch the outer purple petals flat against the lampshade using satin stitch.
Then, stitch the inner white petals separately on a spare piece of fabric over a thin wire frame, cut them out, and attach them to the center of each flower.
This simple dimensional trick creates realistic depth and shadow, turning a flat design into a dynamic, sculptural piece.
8. Combine Quilting and Embroidery for Textured Botanicals

Integrate machine embroidery and free-motion quilting to create quilt blocks with incredible texture and definition.
First, use your embroidery machine to stitch the clean outlines and details of the lilies and their stamens.
Then, use a contrasting quilting stitch in the background to make the embroidered floral motifs pop forward.
The dense quilting compresses the batting around the flowers, giving them a subtle, raised appearance known as trapunto, which adds depth and dimension to the finished piece.
9. Use Shading for Delicate Bell-Shaped Flowers

When embroidering bell-shaped flowers like bluebells, use two or three shades of the same color to create a sense of roundness and volume.
Fill the main body of each bell with a mid-tone purple using satin stitch or long-and-short stitch.
Then, add a few stitches of a darker shade along one edge and a lighter shade along the other to mimic light and shadow.
This subtle shading technique prevents small floral elements from looking flat and adds a touch of realism to your tote bag embroidery.
10. Create Abstract Landscapes on Sheer Fabric

Embrace minimalism when working on sheer or semi-sheer fabrics like curtains to avoid weighing them down.
Use simple, open stitches like running stitch and seed stitch to create the impression of a landscape without dense blocks of color.
Choose a palette of soft greens, grays, and charcoal to build layers of misty hillsides, and use a contrasting running stitch to suggest distant ridgelines.
This light-handed approach preserves the fabric’s drape and allows light to filter through, creating an ethereal, atmospheric effect.
11. Mimic Natural Bark with Directional Stitches

To capture the gnarled, twisted texture of an old pine tree trunk, pay close attention to the direction of your stitches.
Instead of a uniform fill, use a mix of long-and-short stitches and split stitches that follow the curves and contours of the bark.
Blend several shades of brown, gray, and tan within the trunk to create highlights and shadows, enhancing the sense of rugged texture.
For the snow, use dense clusters of white French knots, which provide a soft, fluffy contrast to the rough bark.
12. Design a Cohesive Botanical Triptych
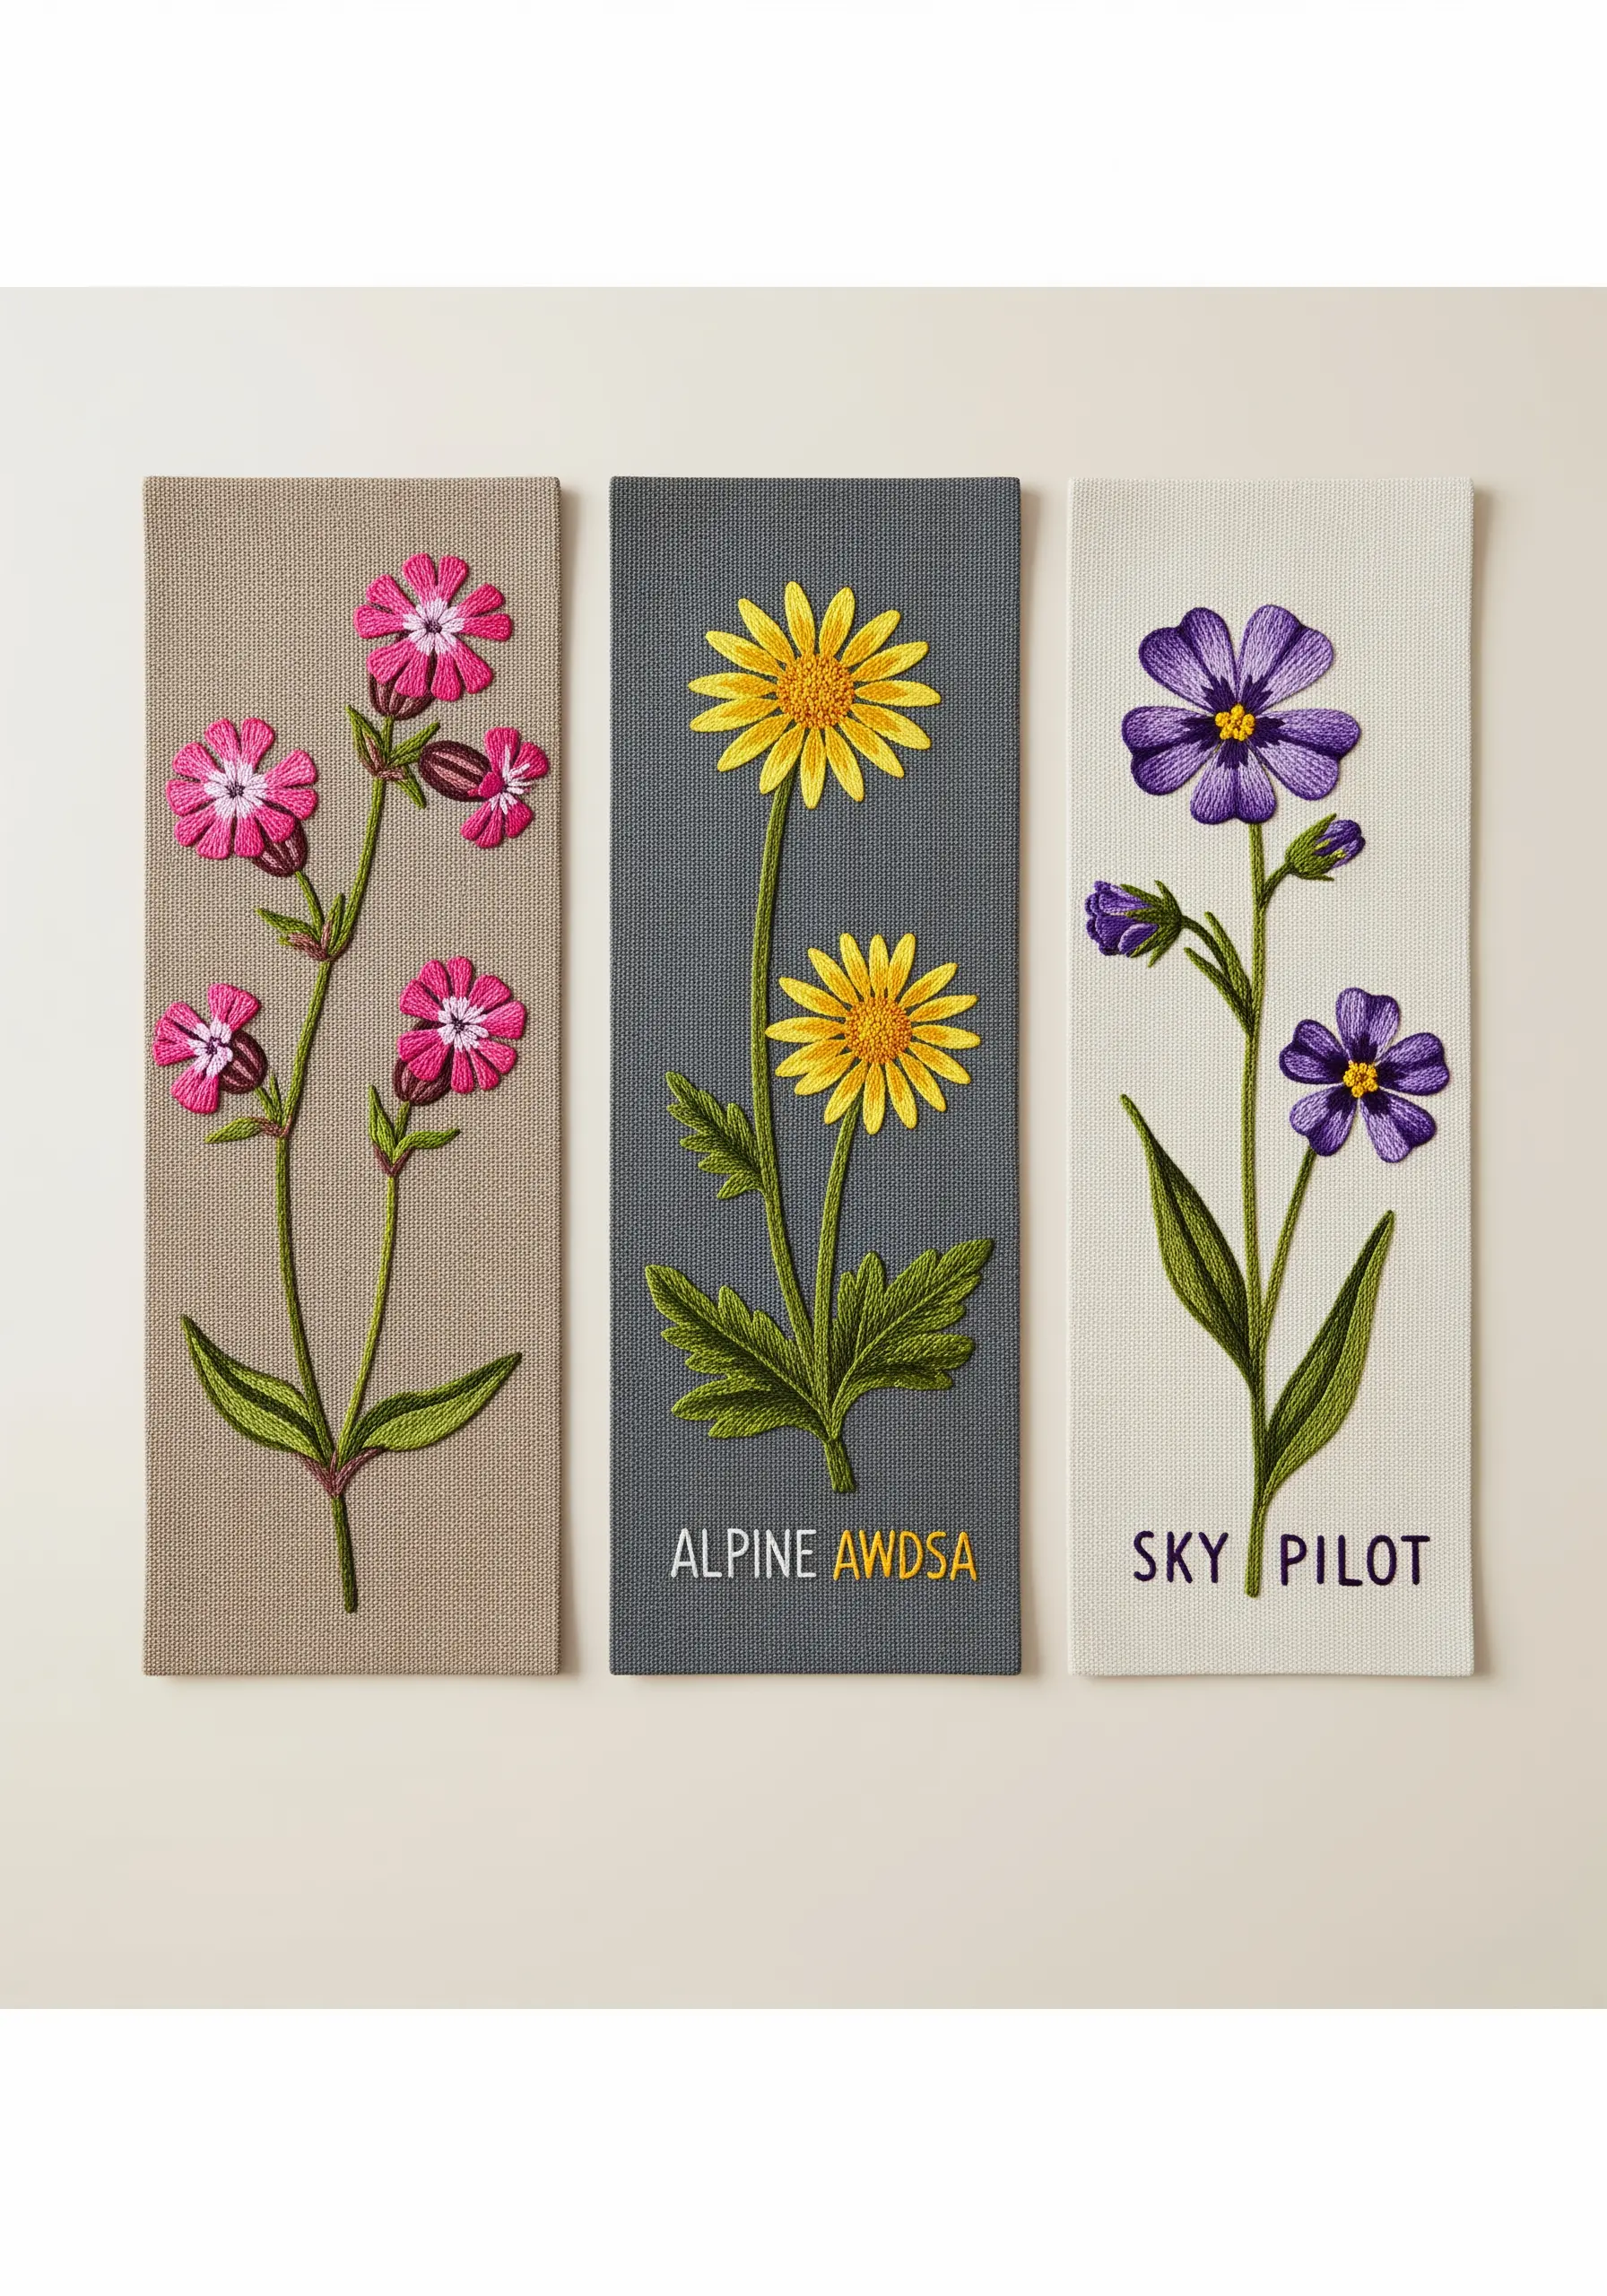
Create a sophisticated trio of botanical panels by unifying them with a consistent artistic style, even if the subjects and colors differ.
Mount each piece on the same type of fabric and maintain the same scale and composition—a single stem centered vertically.
Use a consistent stitch vocabulary across all three, focusing on clean long-and-short stitch for petals and delicate backstitch for stems.
By keeping the style uniform, you create a connected series that feels like a deliberate, curated collection rather than three separate pieces.
13. Frame Functional Spaces with a Floral Border

Transform a simple piece of furniture, like an entryway bench, into a custom statement piece with an embroidered border.
Choose a repeating pattern of simple, graphic wildflowers and use it to frame the edges of the upholstered cushion and the wall behind it.
A bright, cheerful palette of yellow, purple, and white keeps the mood welcoming and fresh.
Using durable thread and simple, sturdy stitches like satin stitch and lazy daisy ensures the design will hold up to daily use in a high-traffic area.
14. Tell a Story with Topographical Stitching
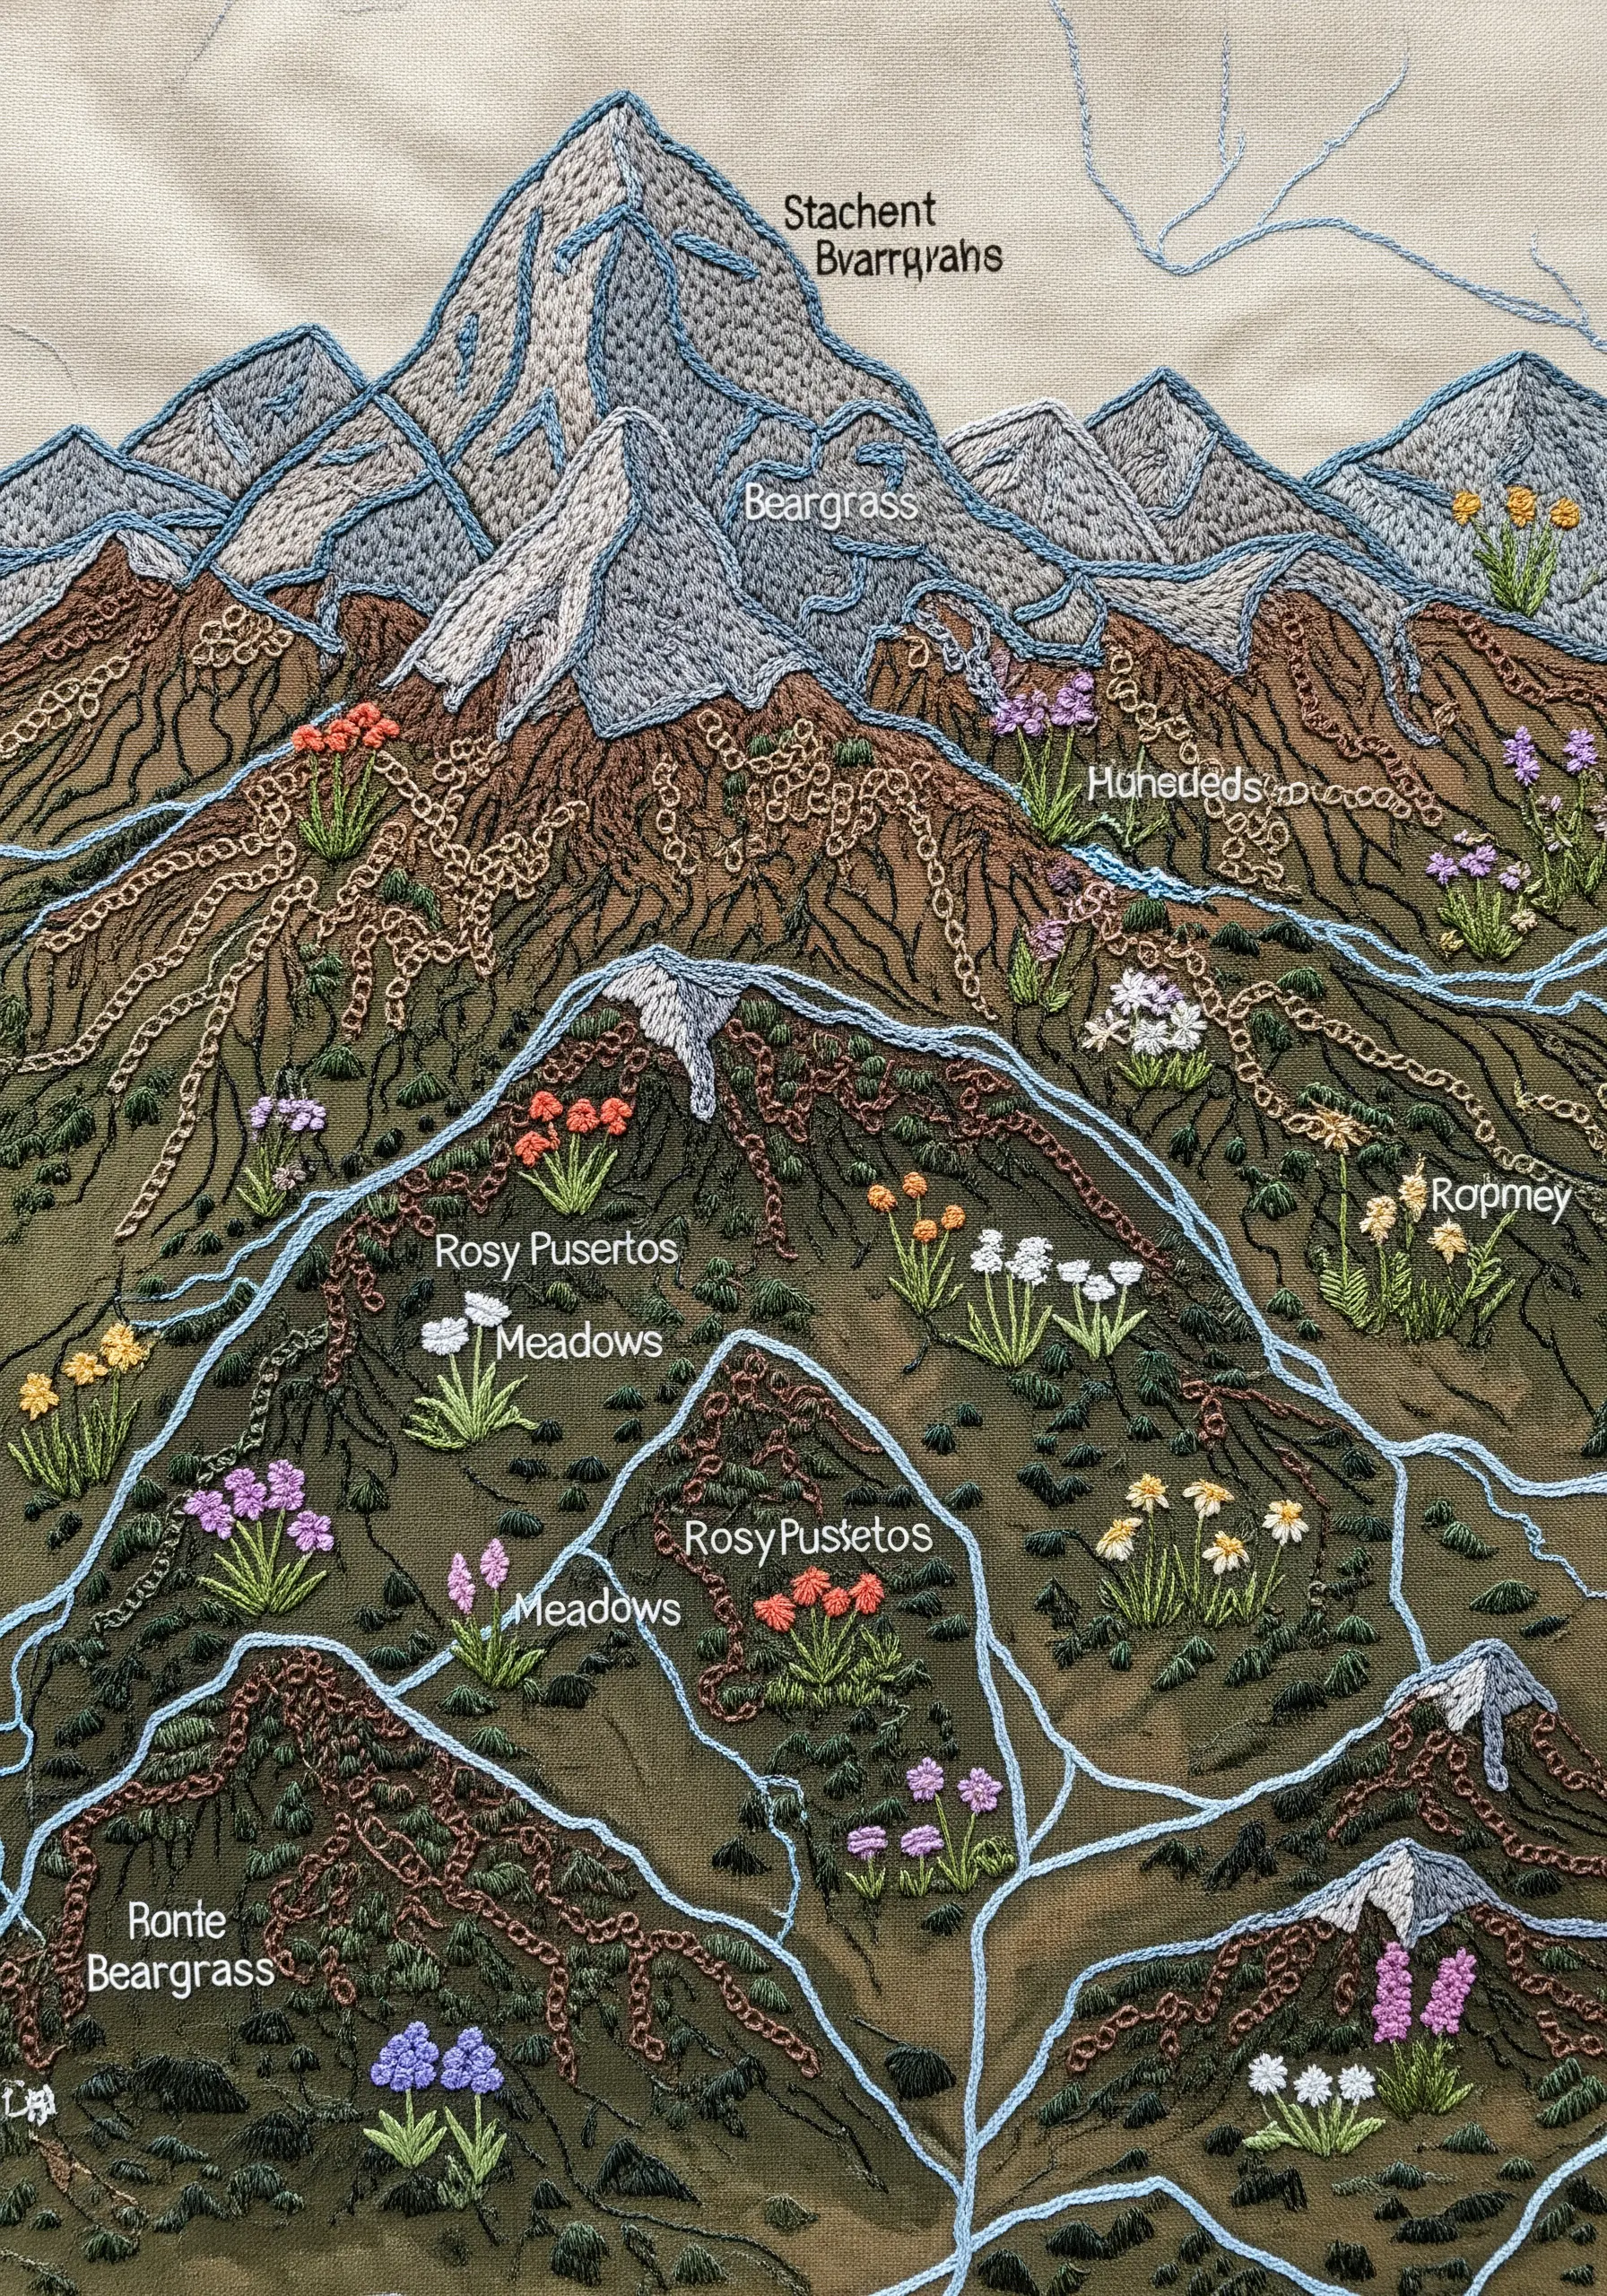
Move beyond simple motifs and use embroidery to create a narrative piece, like this topographical map of wildflowers.
Assign different stitches to represent different natural features: use chain stitch for winding rivers or trails, tight seed stitch for rocky mountain peaks, and loose French knots for flowering meadows.
This technique turns your fabric into a canvas for storytelling, where each stitch has a purpose and contributes to the overall map.
Adding stitched labels completes the effect, blending scientific illustration with textile art.
15. Embellish Knitwear with Open, Abstract Florals

When stitching on chunky knitwear, choose designs that are open and graphic rather than dense and detailed.
The loose weave of a sweater requires stitches that won’t get lost or pull the fabric.
Use bold straight stitches for graphic leaves and stems, and fill flower heads with textural stitches like French knots or woven wheels.
An analogous color palette—like these shades of teal and sky blue—creates a sophisticated, modern look that complements the cozy texture of the knit.
Always use a stabilizer and avoid pulling your stitches too tight to maintain the sweater’s natural drape and stretch.
16. Elevate Table Linens with Delicate Herbal Motifs

For sophisticated table linen embroidery, focus on realism and fine detail by choosing delicate subjects like herbs.
On a muted fabric like this sage green cotton, use a limited number of thread strands—just one or two—to achieve crisp, detailed lavender, thyme, and chamomile.
Pay close attention to the unique leaf shapes and growth patterns of each herb, using a mix of satin stitch, fishbone stitch, and tiny French knots.
This refined approach results in linens that feel elegant, timeless, and thoughtfully crafted.
17. Create Graphic Impact with Thread Painting
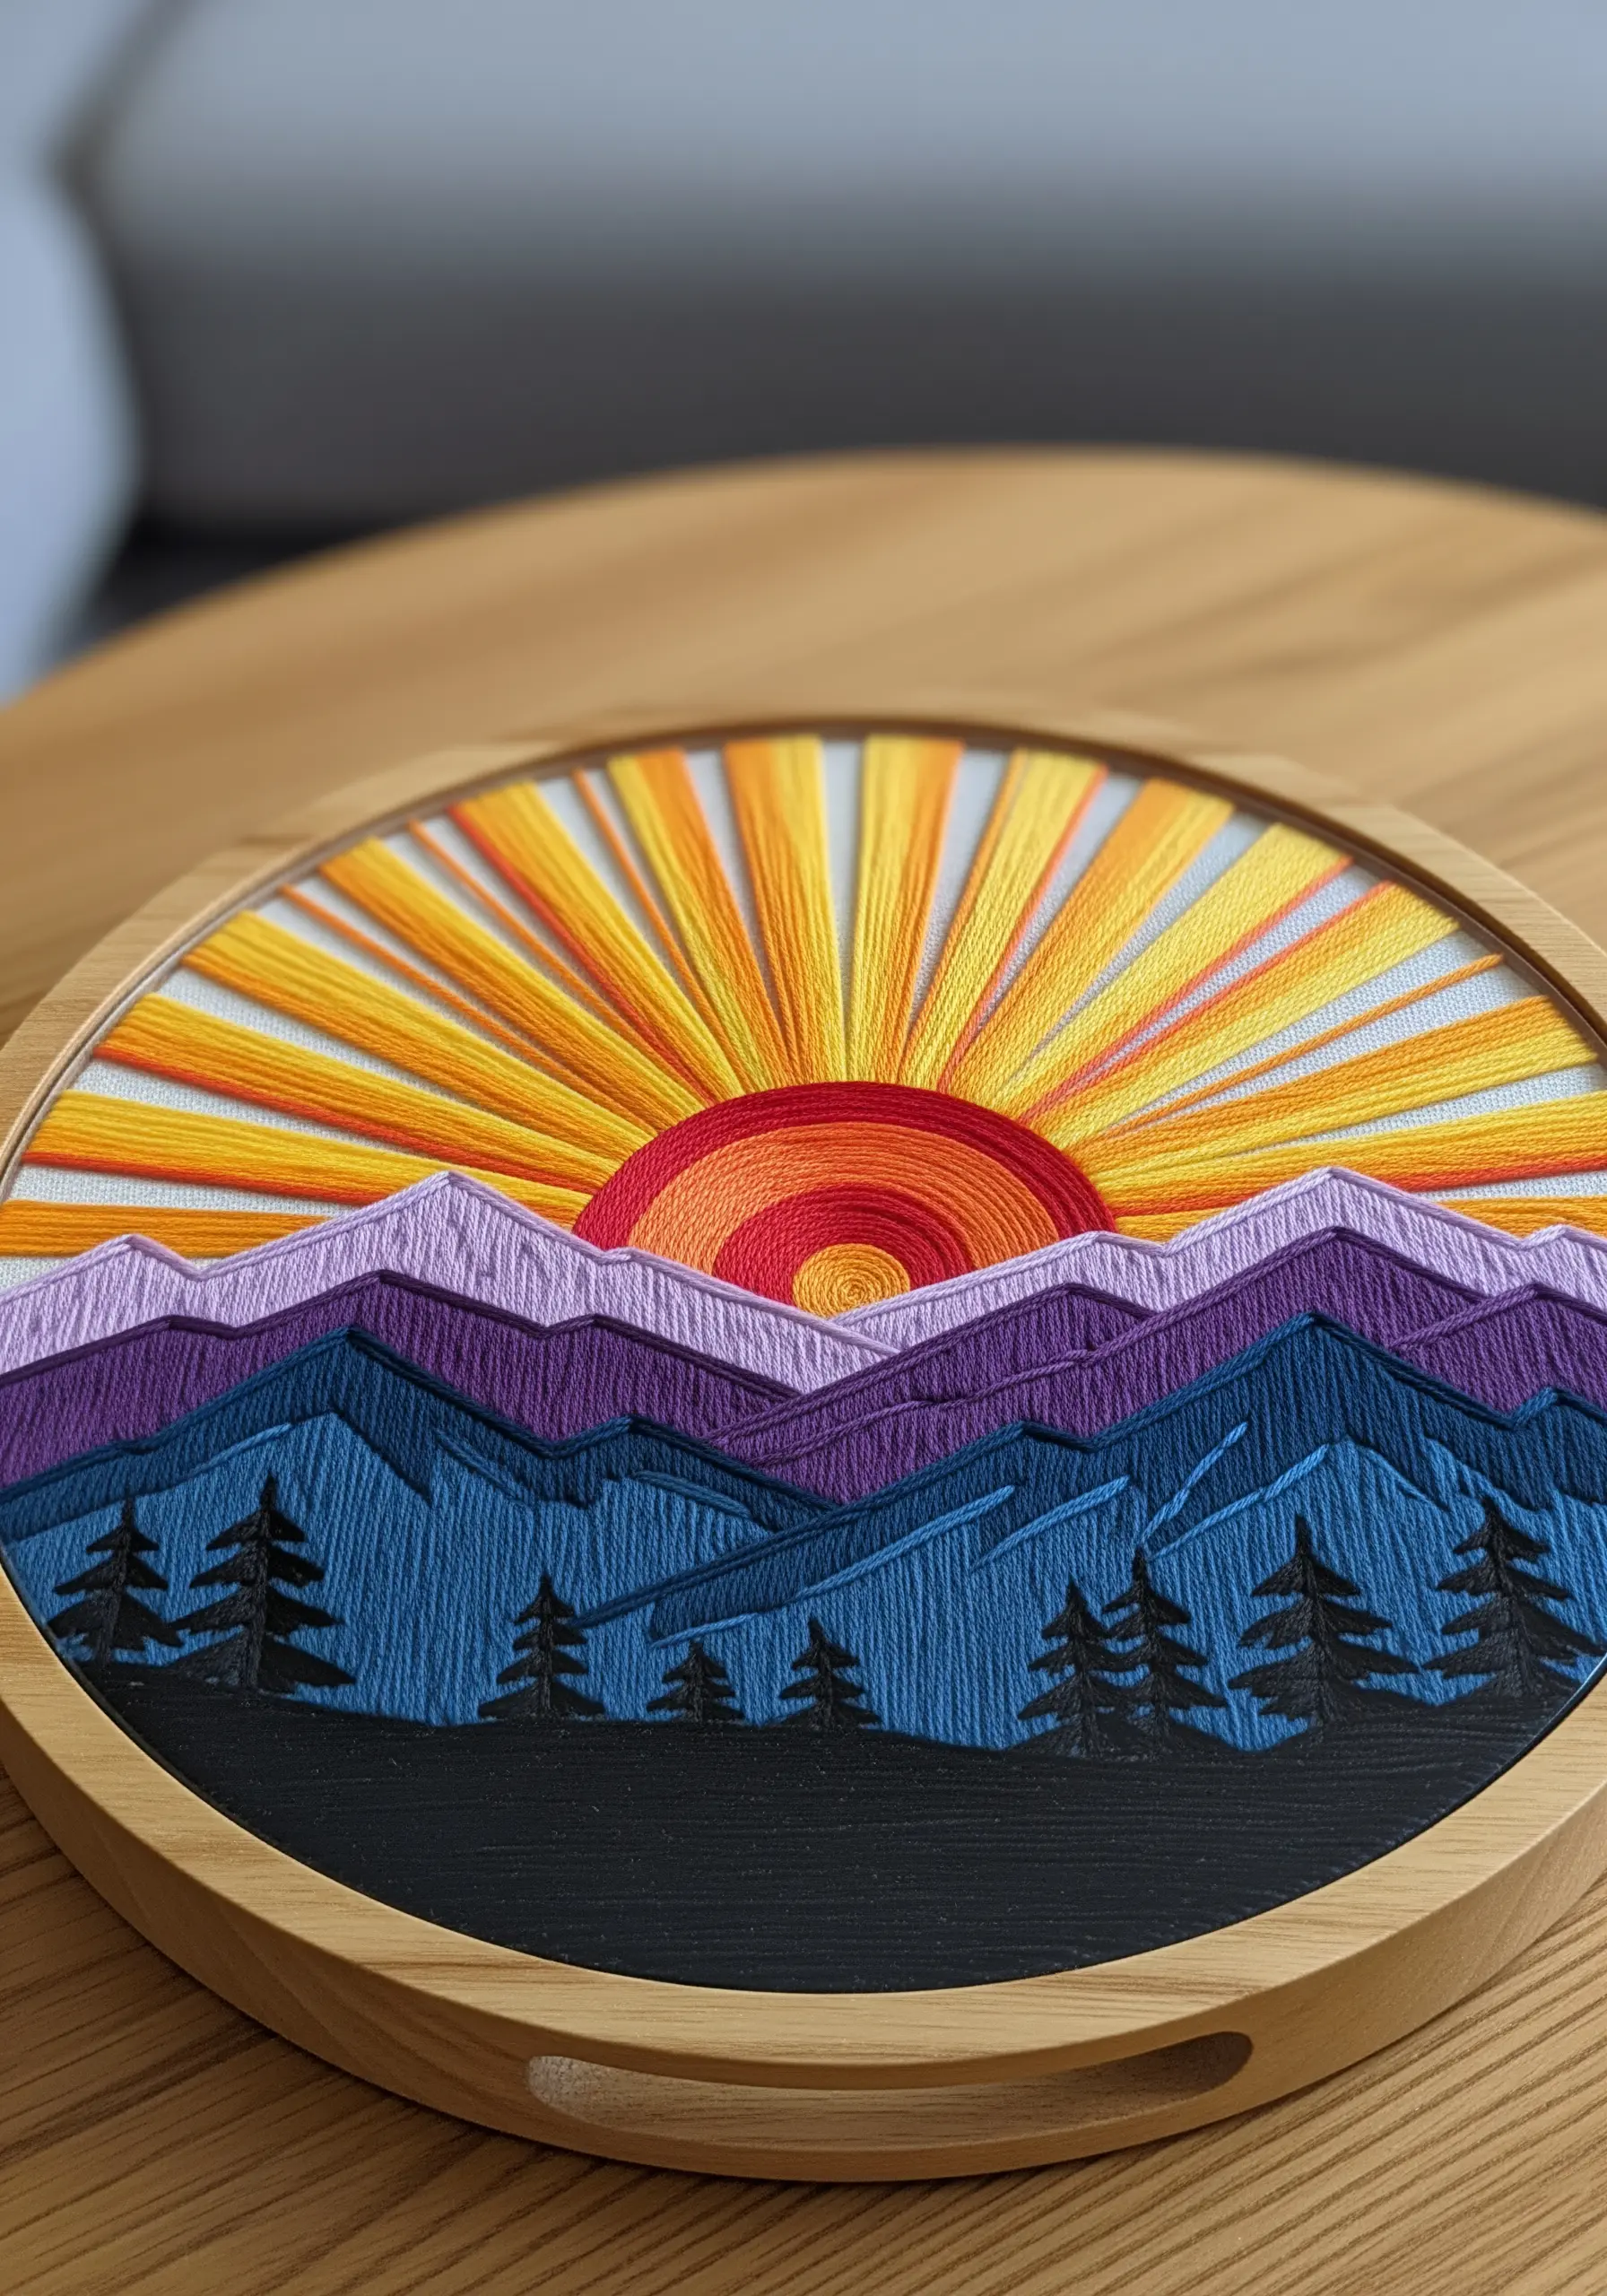
Achieve a bold, graphic style by treating your thread like paint and your hoop like a canvas.
Use long, straight stitches pulled taut across your hoop to create blocks of solid color, mimicking the look of string art.
Arrange your colors in clean, defined shapes to build a stylized landscape of mountains and a radiating sun.
This technique relies on precise tension and a logical layering of colors to create a clean, modern composition with immense visual impact, making it perfect for statement wall art.
18. Build Dense Texture with Bullion Knots

To create the iconic, densely packed spires of lupine flowers, the bullion knot is your most powerful tool.
Work in rows from the bottom up, tightly packing the bullion knots together and slightly overlapping each new row over the one below it.
Incorporate several shades of purple, lavender, and pink, placing them randomly to mimic the natural variegation of the flowers.
A few tiny white or pale yellow French knots at the top of each spire add a final touch of realism to this highly textural and impressive design.
19. Blend Colors for a Painterly Effect

For flowers with natural color gradients, like the Indian Paintbrush, use the long-and-short stitch to blend your threads seamlessly.
Start with one color at the base of a petal, then bring in the next color by staggering the lengths of your stitches, creating a soft transition rather than a hard line.
Work with a single strand of floss for the most subtle and painterly blends, allowing you to transition smoothly from deep magenta to fiery red and bright orange.
This technique, often called needle painting, gives your botanical work incredible realism and depth.
20. Combine Felt and Embroidery for Soft Sculptures

Create charming, tactile nursery decor by using simple embroidery to add detail to soft felt shapes.
Cut your mountain and cloud shapes from felt, lightly stuff them, and stitch them closed.
Then, use basic stitches like lazy daisy for petals, satin stitch for flower centers, and backstitch for sleepy eyes to add personality and detail.
The combination of soft felt and delicate thread creates a piece that is both visually sweet and wonderfully tactile, perfect for a baby’s mobile.
21. Frame Embroidery with a Beaded Border

Add a luxurious finish to a small embroidered piece by framing it with a dense, textured border of seed beads.
First, complete your central embroidery—here, a crystalline motif stitched in metallic and pale lavender threads.
Then, working from the inside out, stitch concentric rings of seed beads in a coordinated color palette, packing them tightly together to create a solid, tactile frame.
This mixed-media approach adds weight, texture, and a beautiful shimmer that elevates the entire piece.
22. Design Embroidery for Wearable Art
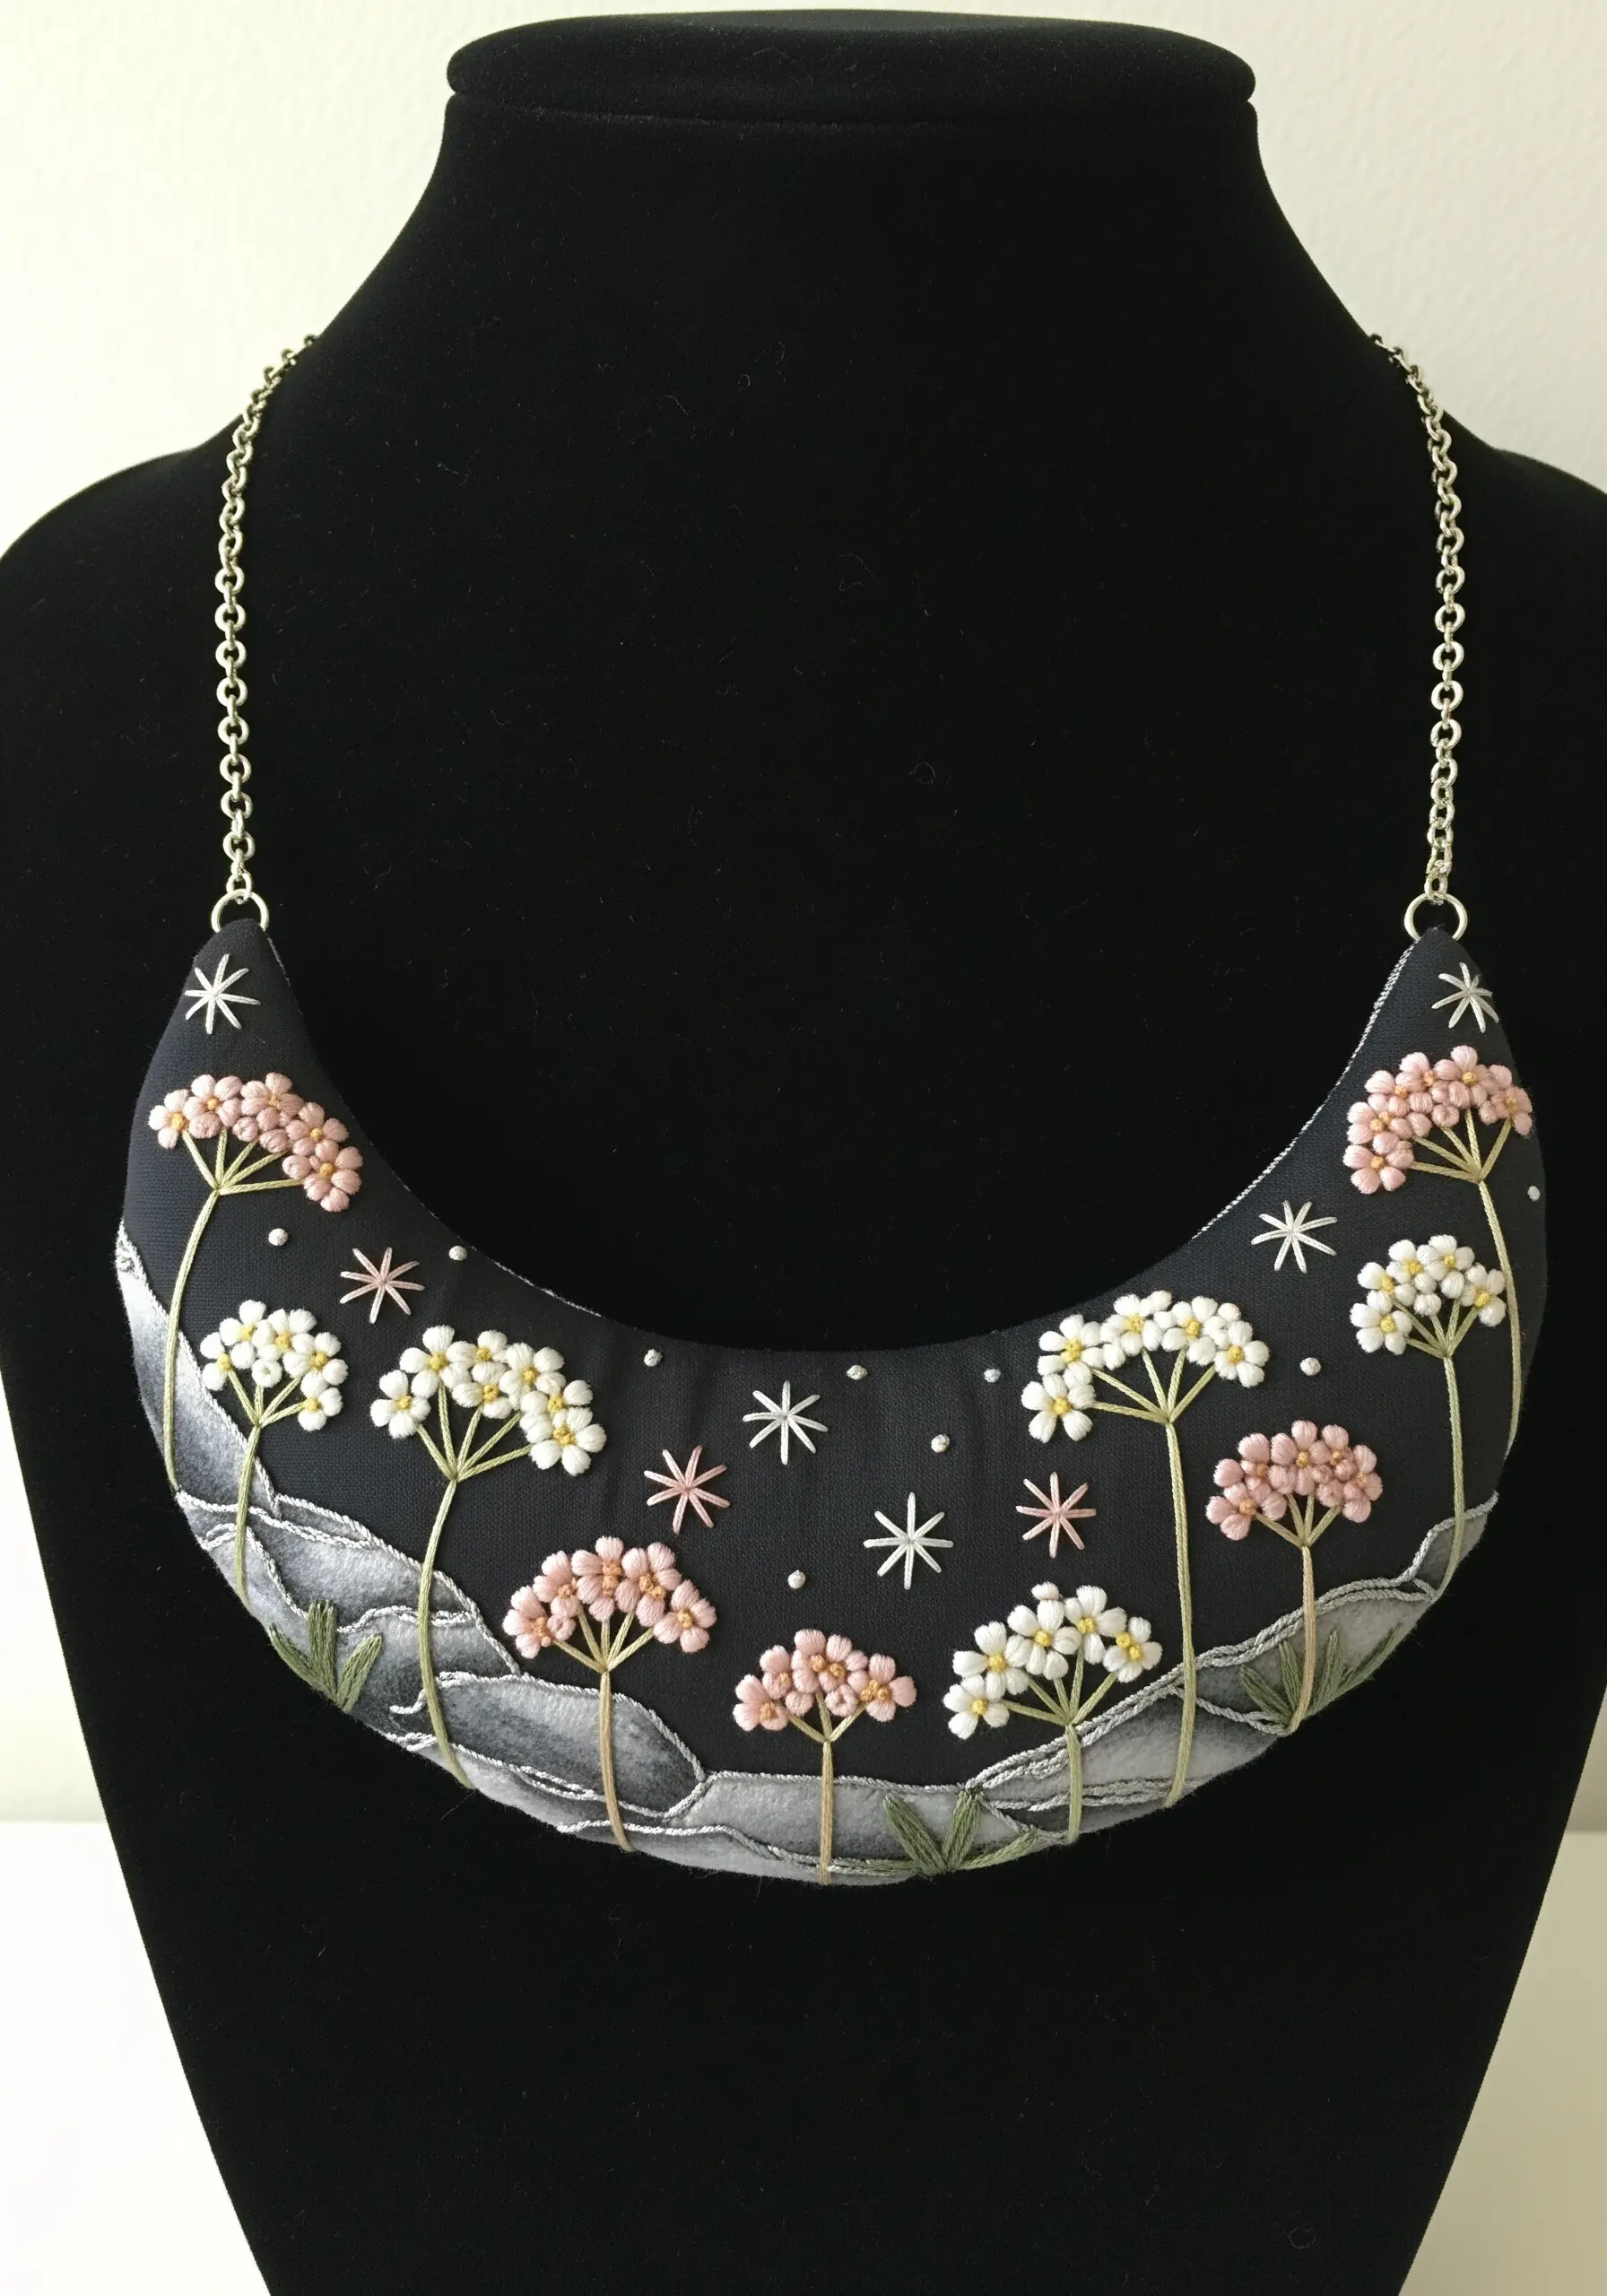
When creating embroidered jewelry, composition is everything. Plan your design to fit the unique shape of the jewelry blank.
For this crescent necklace, the flowers are clustered at the ends while the stems flow gracefully toward the center, following the curve of the piece.
Use tiny, precise stitches—French knots for flower heads and single straight stitches for tiny starbursts—to achieve fine detail in a small space.
Using a dark background fabric makes the pastel pinks and whites of the Queen Anne’s Lace pop, creating a striking piece of wearable art.
23. Capture the Seasons with Four Palettes

Tell a year-long story on a single quilt by dividing it into four quadrants, each with a distinct seasonal color palette.
Use fresh pinks and bright greens for spring, deep reds and forest greens for summer, rich golds and purples for autumn, and icy blues and whites for winter.
While the colors change dramatically, unifying elements like the mountain skyline and consistent stitch techniques tie the four seasons together into a cohesive whole.
This approach allows you to explore a wide range of colors while creating a unified, narrative piece.
24. Enhance Thread Painting with a Watercolor Wash

For a soft, atmospheric background that won’t compete with your detailed stitching, apply a light watercolor wash to your fabric before you begin.
Use fabric paints or diluted acrylics to brush on soft clouds of blue and green, letting them dry completely before hooping your fabric.
Then, use intricate thread painting for your focal points—the hummingbird and the foxglove flowers—allowing their sharp detail and rich color to stand out against the dreamy, soft-focus background.
This technique adds depth and context without the time commitment of a fully stitched background.
25. Design for Function with Radial Symmetry
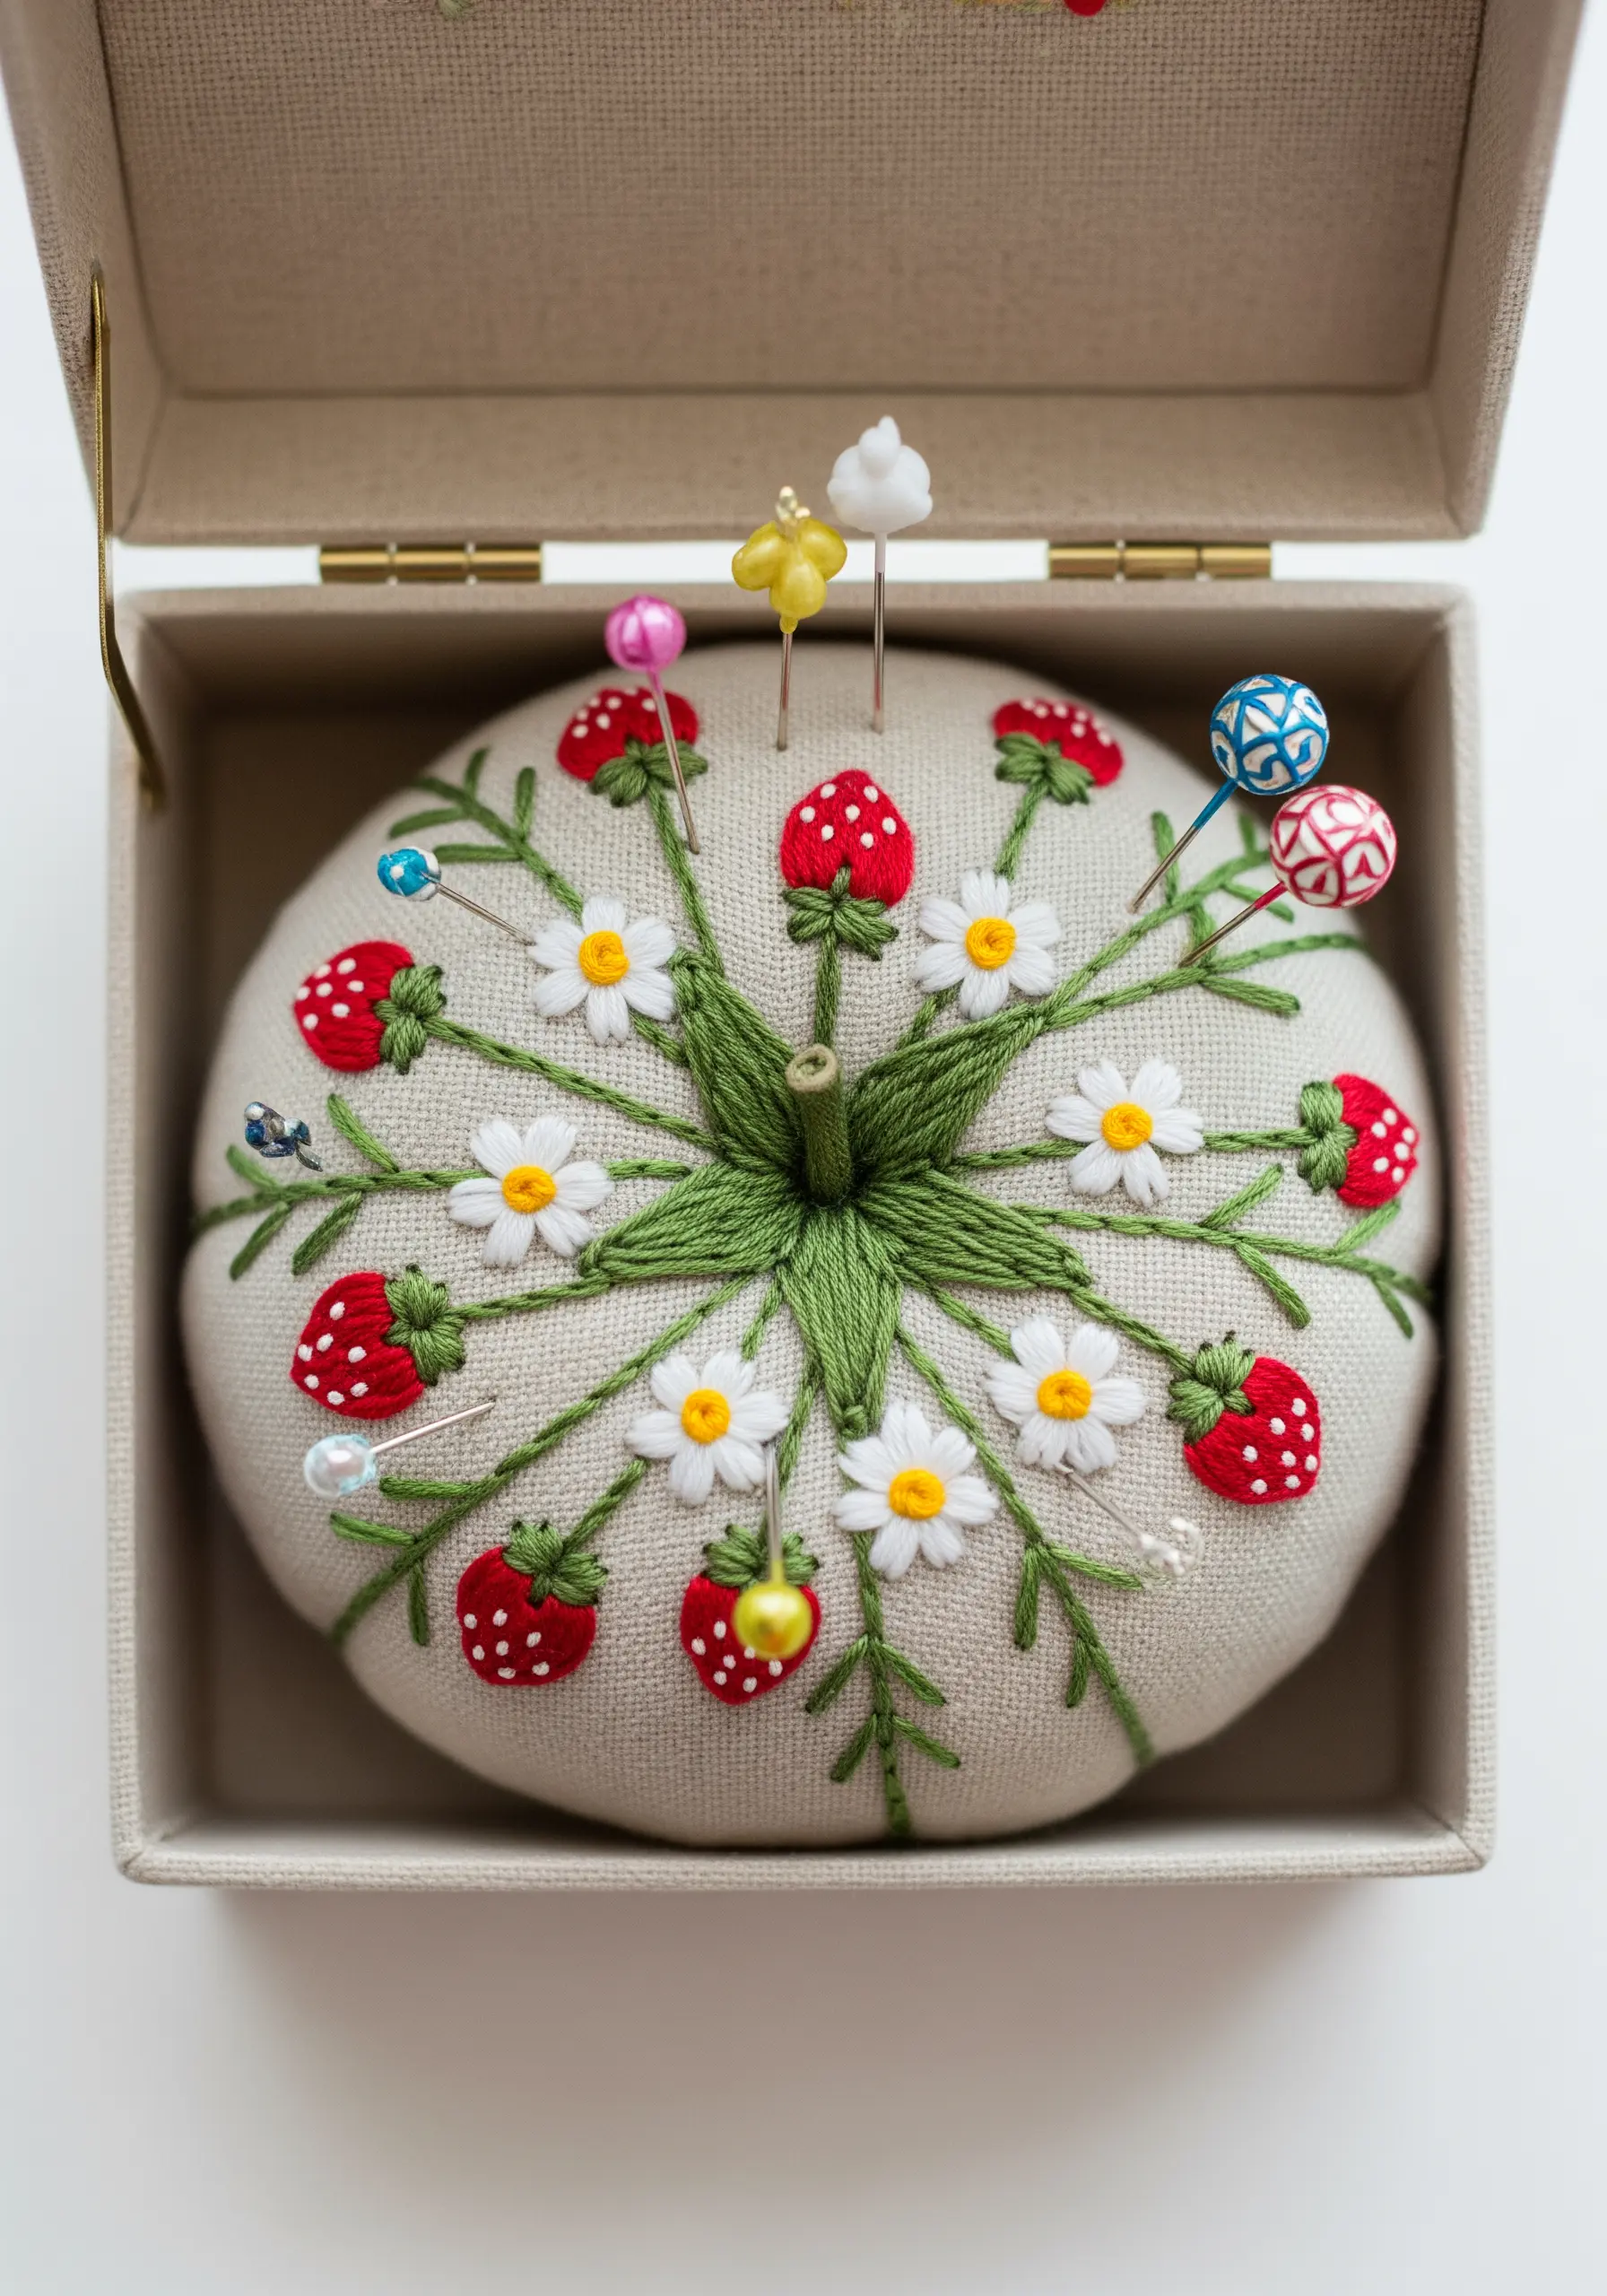
When creating a functional object like a pincushion, use the shape of the object to guide your design.
A round pincushion is perfectly suited for a radial design, where motifs radiate out from a central point.
Here, a central stem spirals outward, with daisies, strawberries, and leaves arranged in a circular, repeating pattern.
This creates a sense of balance and harmony, resulting in a tool that is not only useful but also a beautiful, thoughtfully designed object.
26. Translate Ceramic Relief into 3D Stitches

Draw inspiration from other art forms, like ceramic tile, to add dimension to your embroidery.
To replicate the raised effect of these tile blossoms, use padded satin stitch: first, create a small pad of foundation stitches (like seed stitches) in the shape of the petal, then cover it with smooth, perpendicular satin stitches.
This technique, a form of stumpwork, physically raises the element from the fabric surface, mimicking the relief of carved tile and adding stunning tactile dimension to your work.
27. Make an Impact with High-Contrast Line Art

You don’t need a full spectrum of colors to create a striking design. Sometimes, a single, high-contrast choice is the most effective.
The delicate, lace-like structure of Queen Anne’s Lace is perfectly captured with clean white thread against a dark charcoal gray towel.
Use simple backstitch for the fine stems and tiny, clustered French knots for the flower heads.
When stitching on a high-pile fabric like terrycloth, always use a water-soluble topping stabilizer to ensure your stitches sit on top of the loops rather than sinking into them.
28. Energize Your Palette with Complementary Colors

Create a composition that feels vibrant and alive by pairing colors that sit opposite each other on the color wheel.
The combination of golden yellow (Goldenrod) and rich violet (Asters) is a classic complementary pairing found in nature that translates beautifully to thread.
The contrast makes each color appear brighter and more intense. Use textural French knots for the goldenrod and smooth satin stitch for the aster petals to add another layer of contrast and interest.
29. Embellish Accessories with 3D Ribbon Stitches
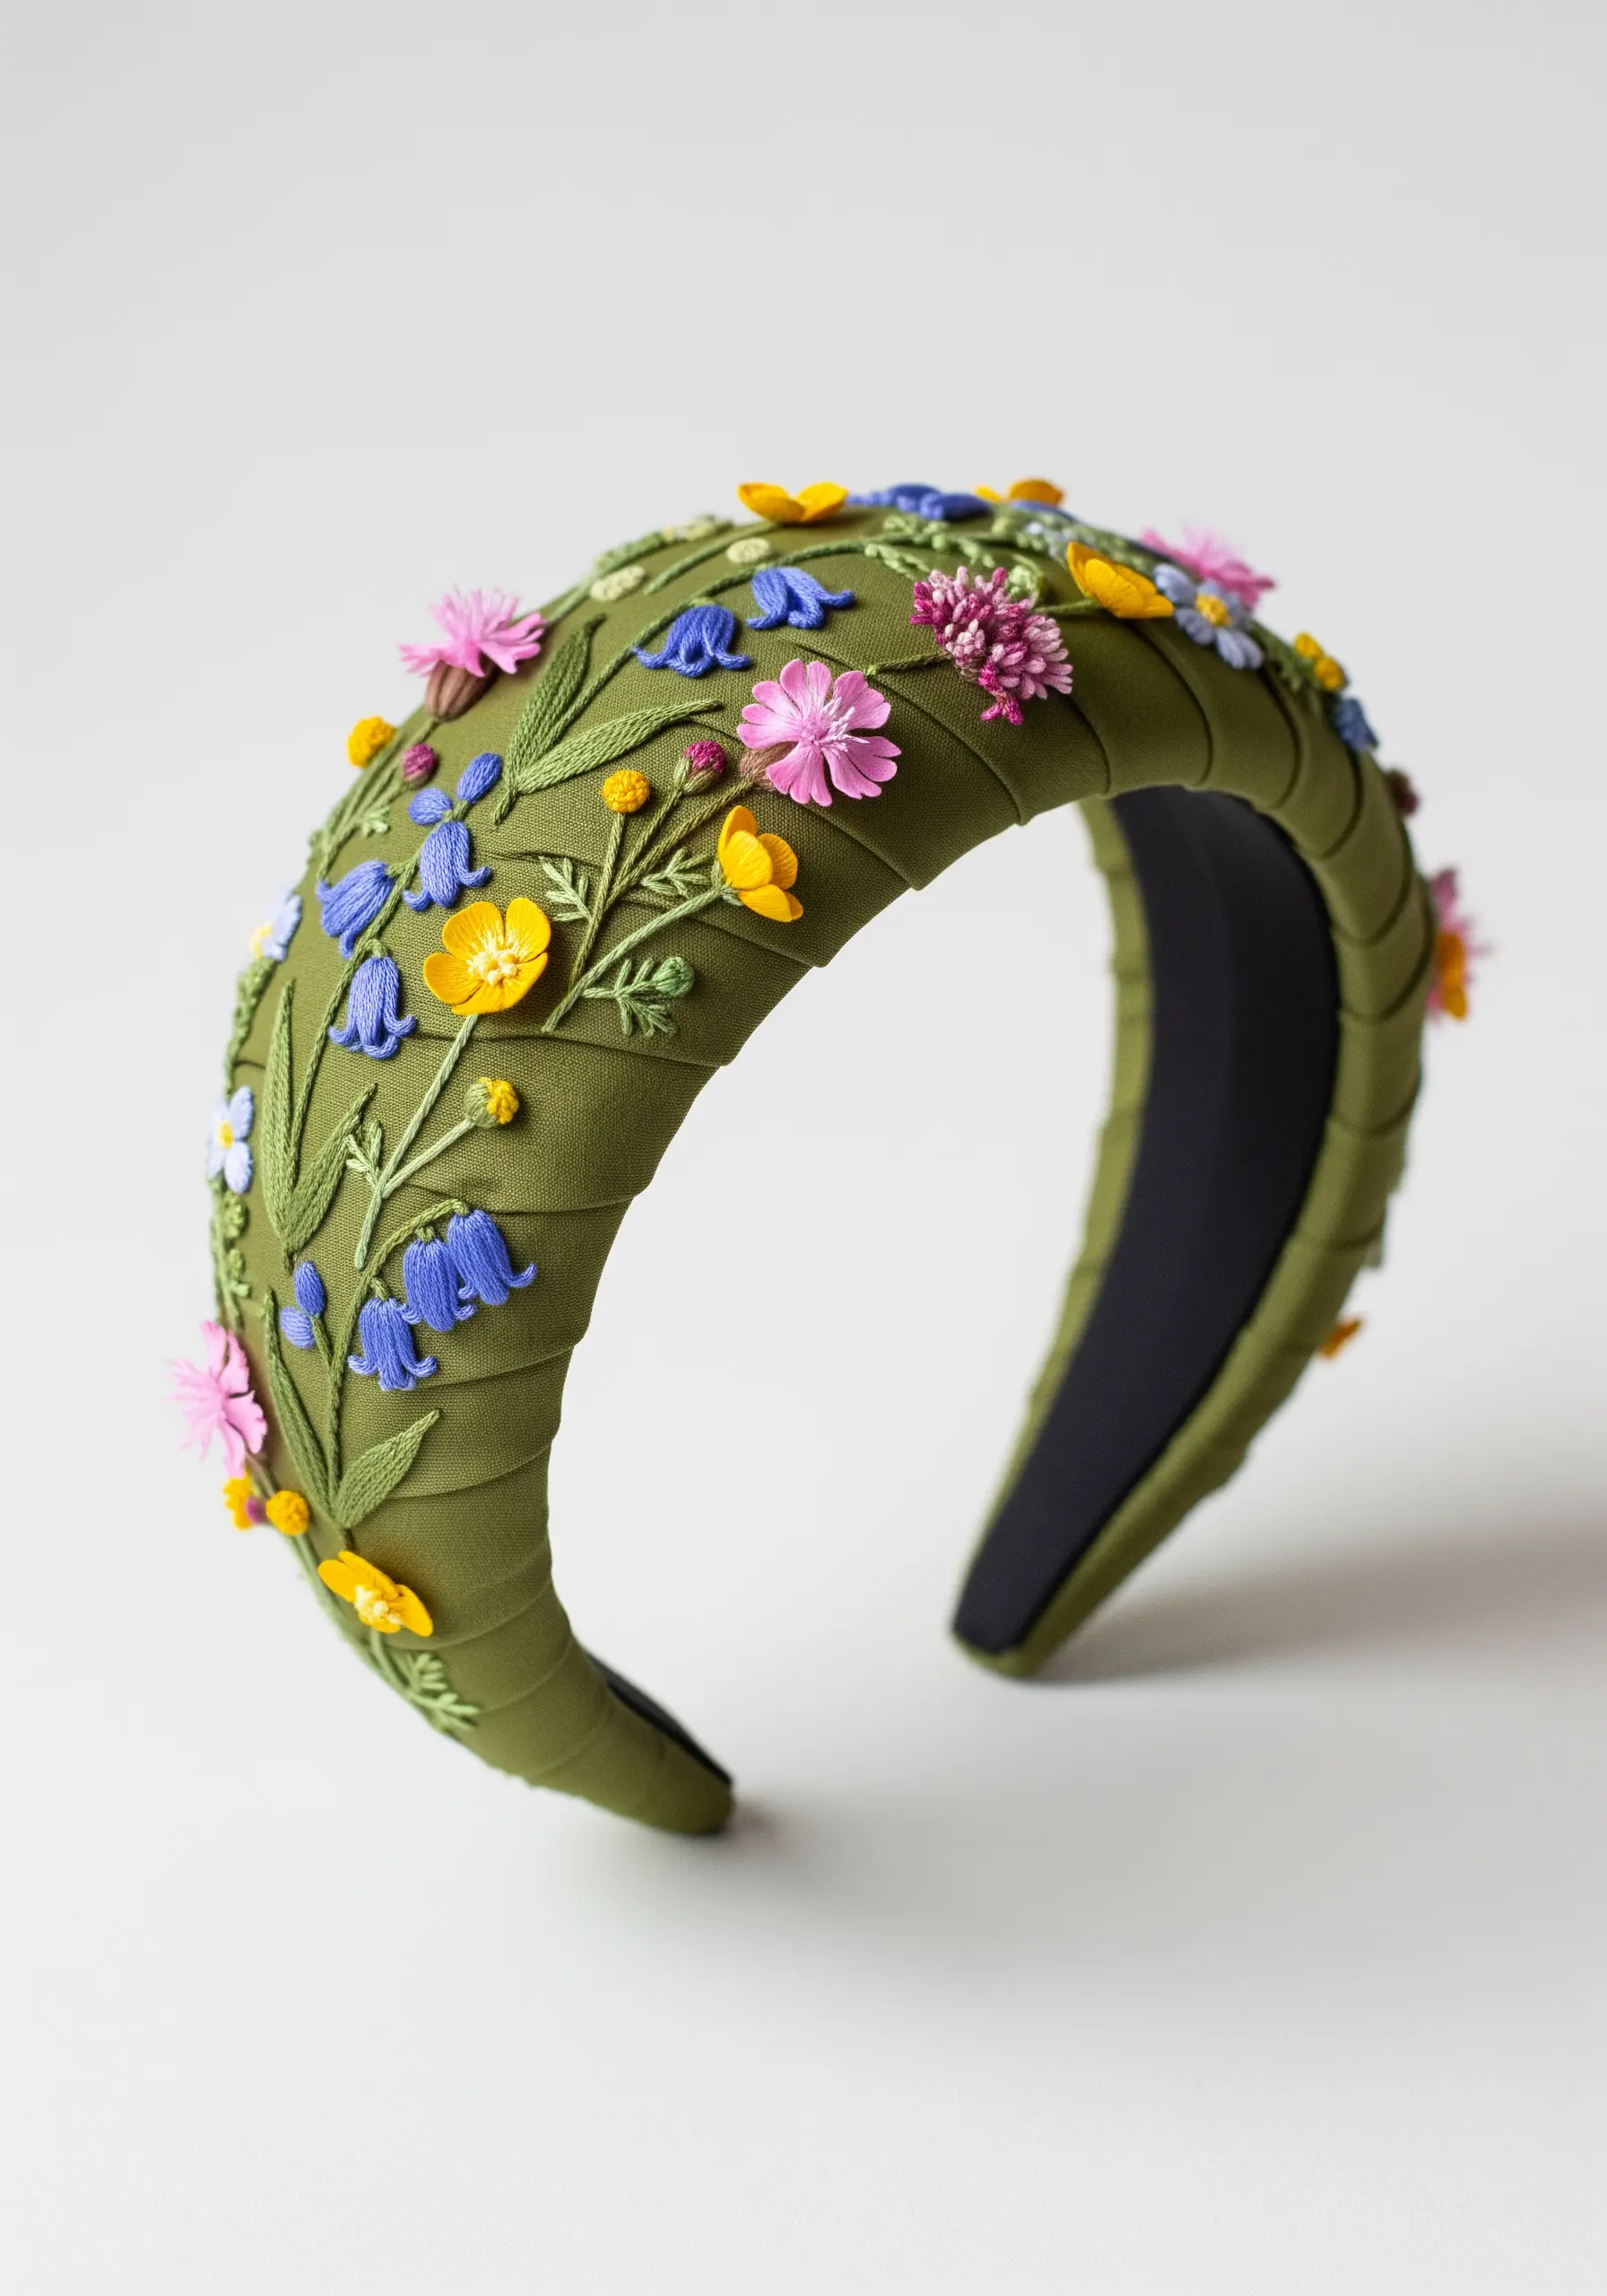
For embellishments that need to stand out on an accessory, incorporate 3D stitches and materials like silk ribbon.
Create delicate, dimensional flowers using ribbon stitch or by crafting detached woven picot petals that lift away from the surface.
Combine these with traditional floss embroidery, using French knots for flower centers and stem stitch for vines.
The mix of flat and dimensional elements, along with the varied sheens of ribbon and floss, creates a rich, boutique-quality finish on this padded headband.
30. Create a Narrative with a Continuous Line

Guide the viewer’s eye and tell a story in a tall, narrow composition by using a strong continuous line.
On this growth chart, a winding path serves as a visual anchor, leading from the purple flowers at the base up to the daisies and edelweiss near the mountain peak.
This narrative device unifies the different floral elements and reinforces the theme of growth and ascent.
It’s an effective compositional tool for any vertical format, from wall hangings to bookmarks.
31. Combine Lettering and Botanicals on Felt
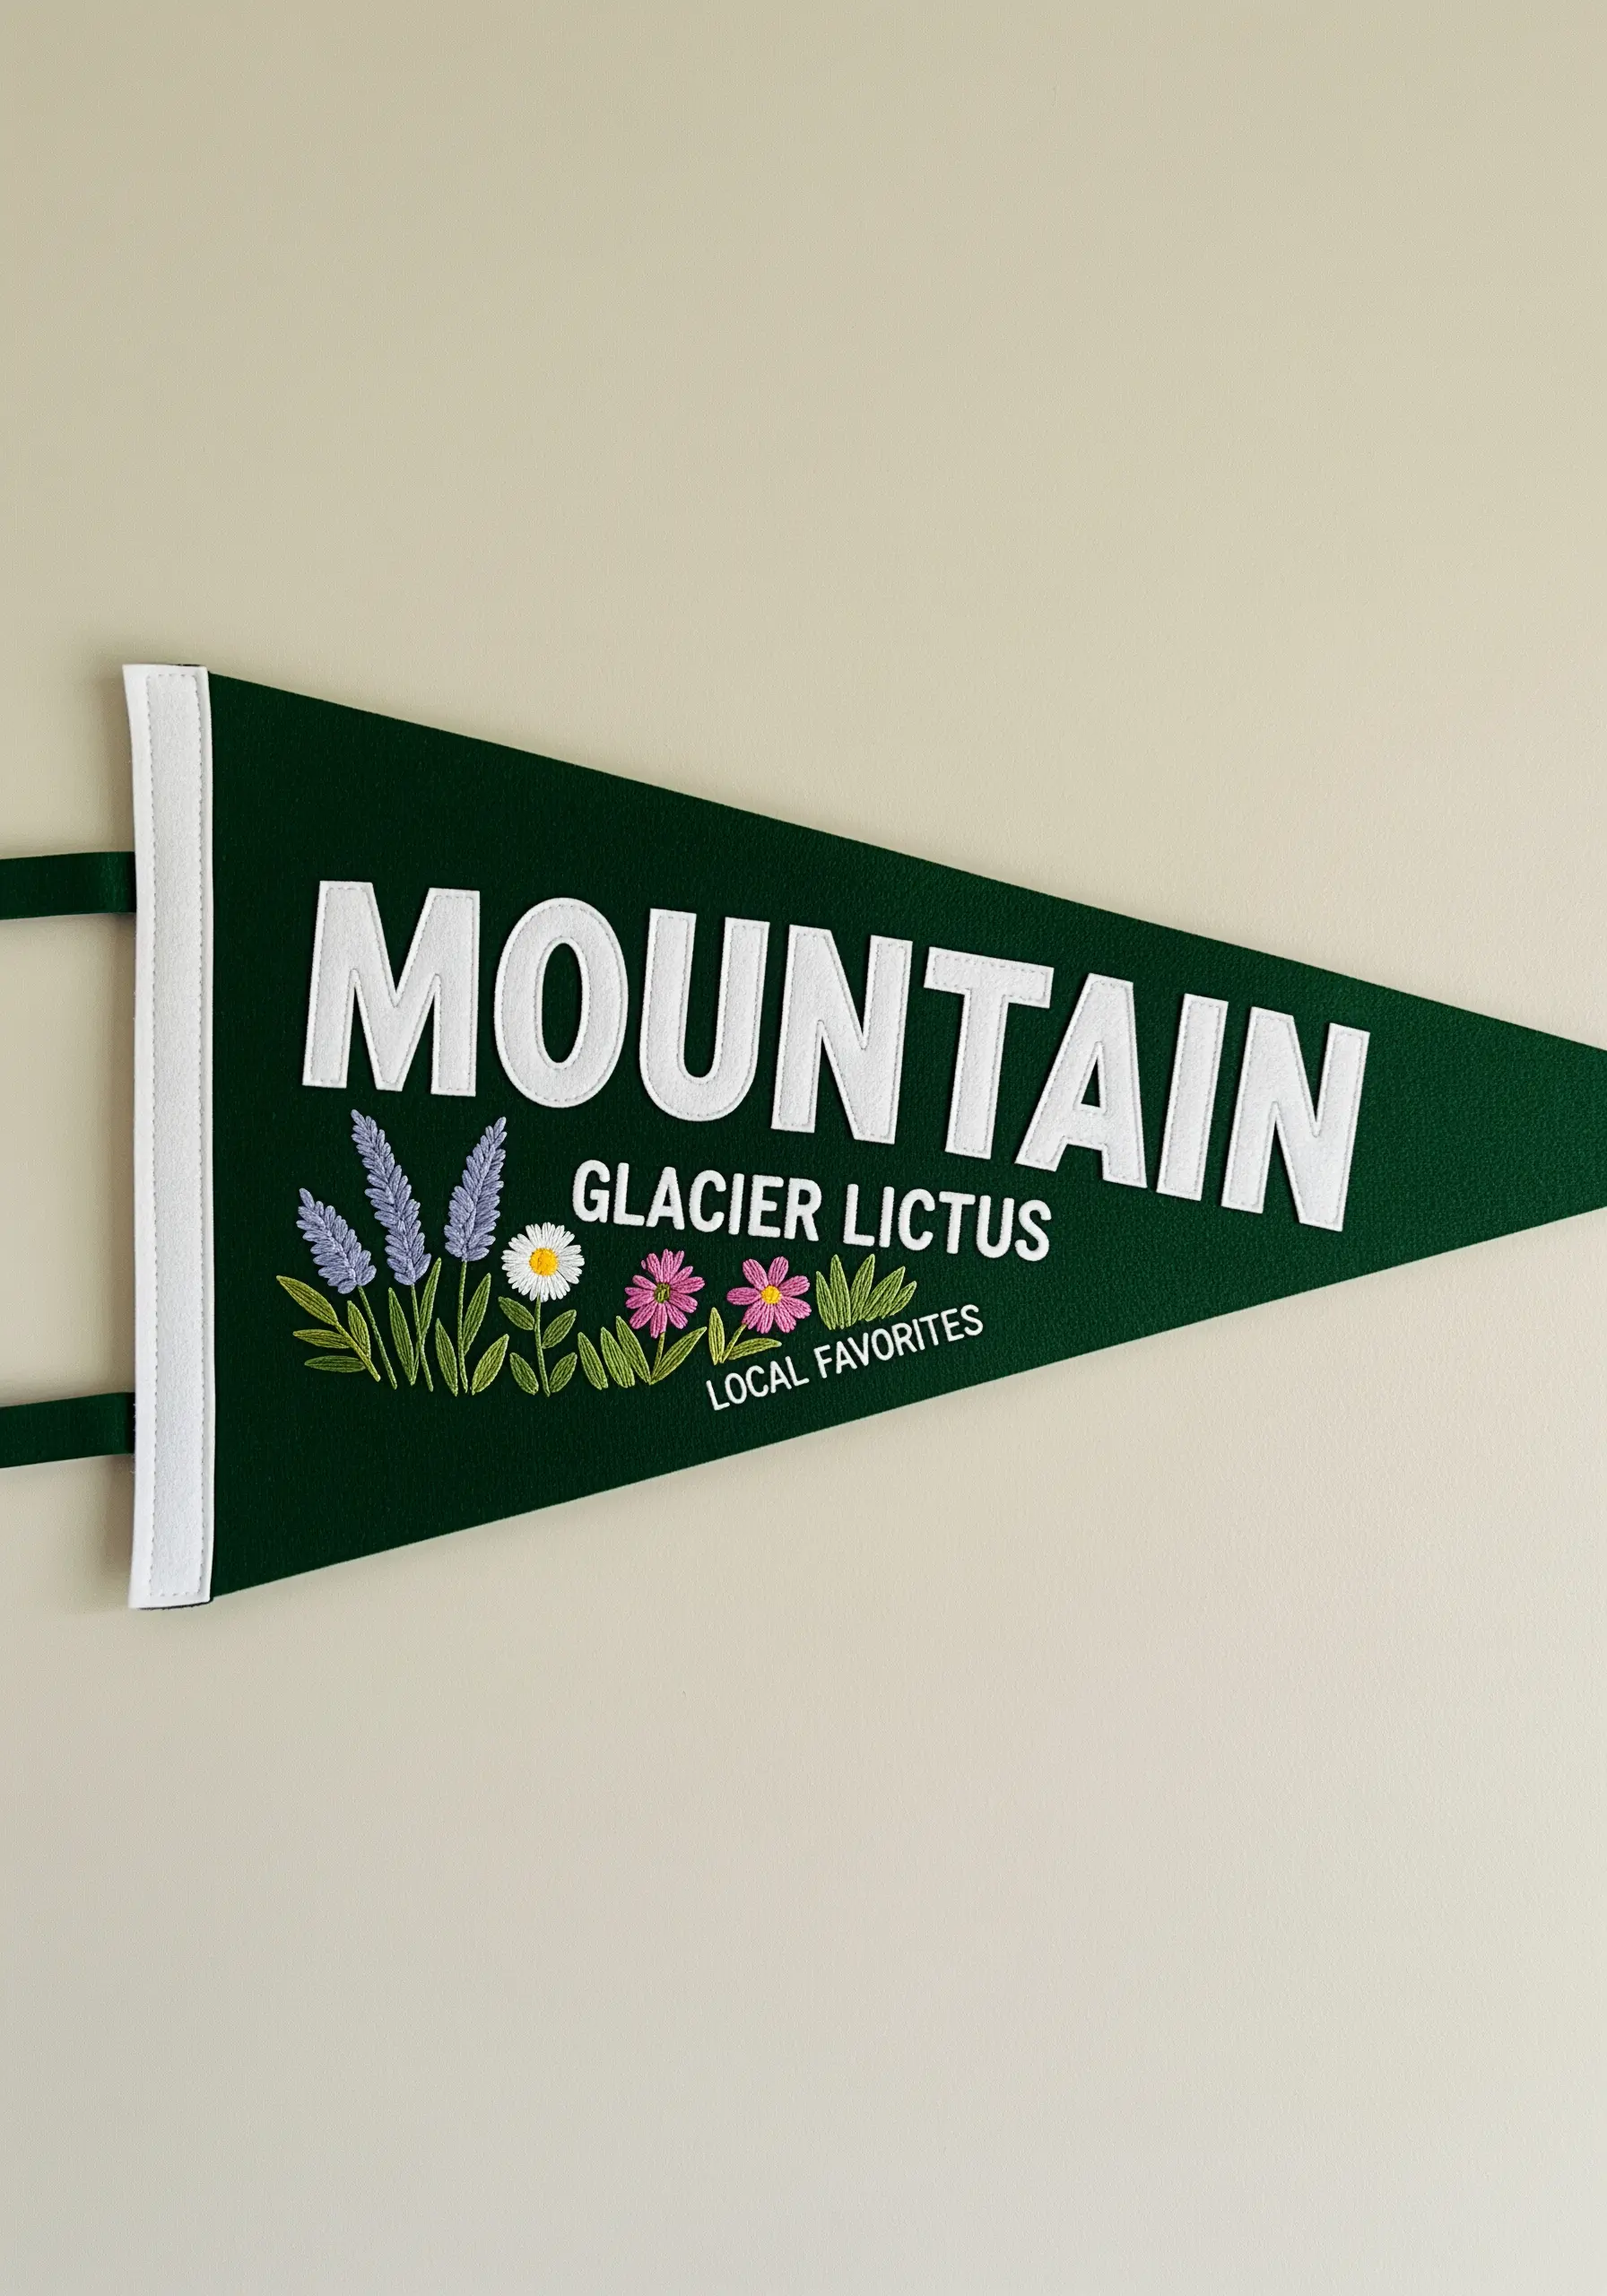
When combining text and imagery on a non-woven fabric like felt, simplicity and precision are key.
Use a crisp, bold font and stitch it with a simple split stitch or backstitch for maximum legibility. The felt surface is forgiving and prevents puckering.
Pair the lettering with a small, understated floral spray that complements the text without overwhelming it.
A limited palette keeps the classic pennant design feeling clean, graphic, and timeless.
32. Design Cohesive Sets of Embroidered Patches

Create a professional-looking set of embroidered patches by using a consistent design template.
Use the same circular shape, background fabric color, and bold satin stitch border for every patch in the collection.
Vary the wildflower and mountain motifs within this framework, but maintain a shared color palette and typographic style for any text.
This consistency makes the individual patches feel like part of a larger, cohesive set, perfect for decorating a backpack or jacket.
33. Use Negative Space in Large-Scale Pieces
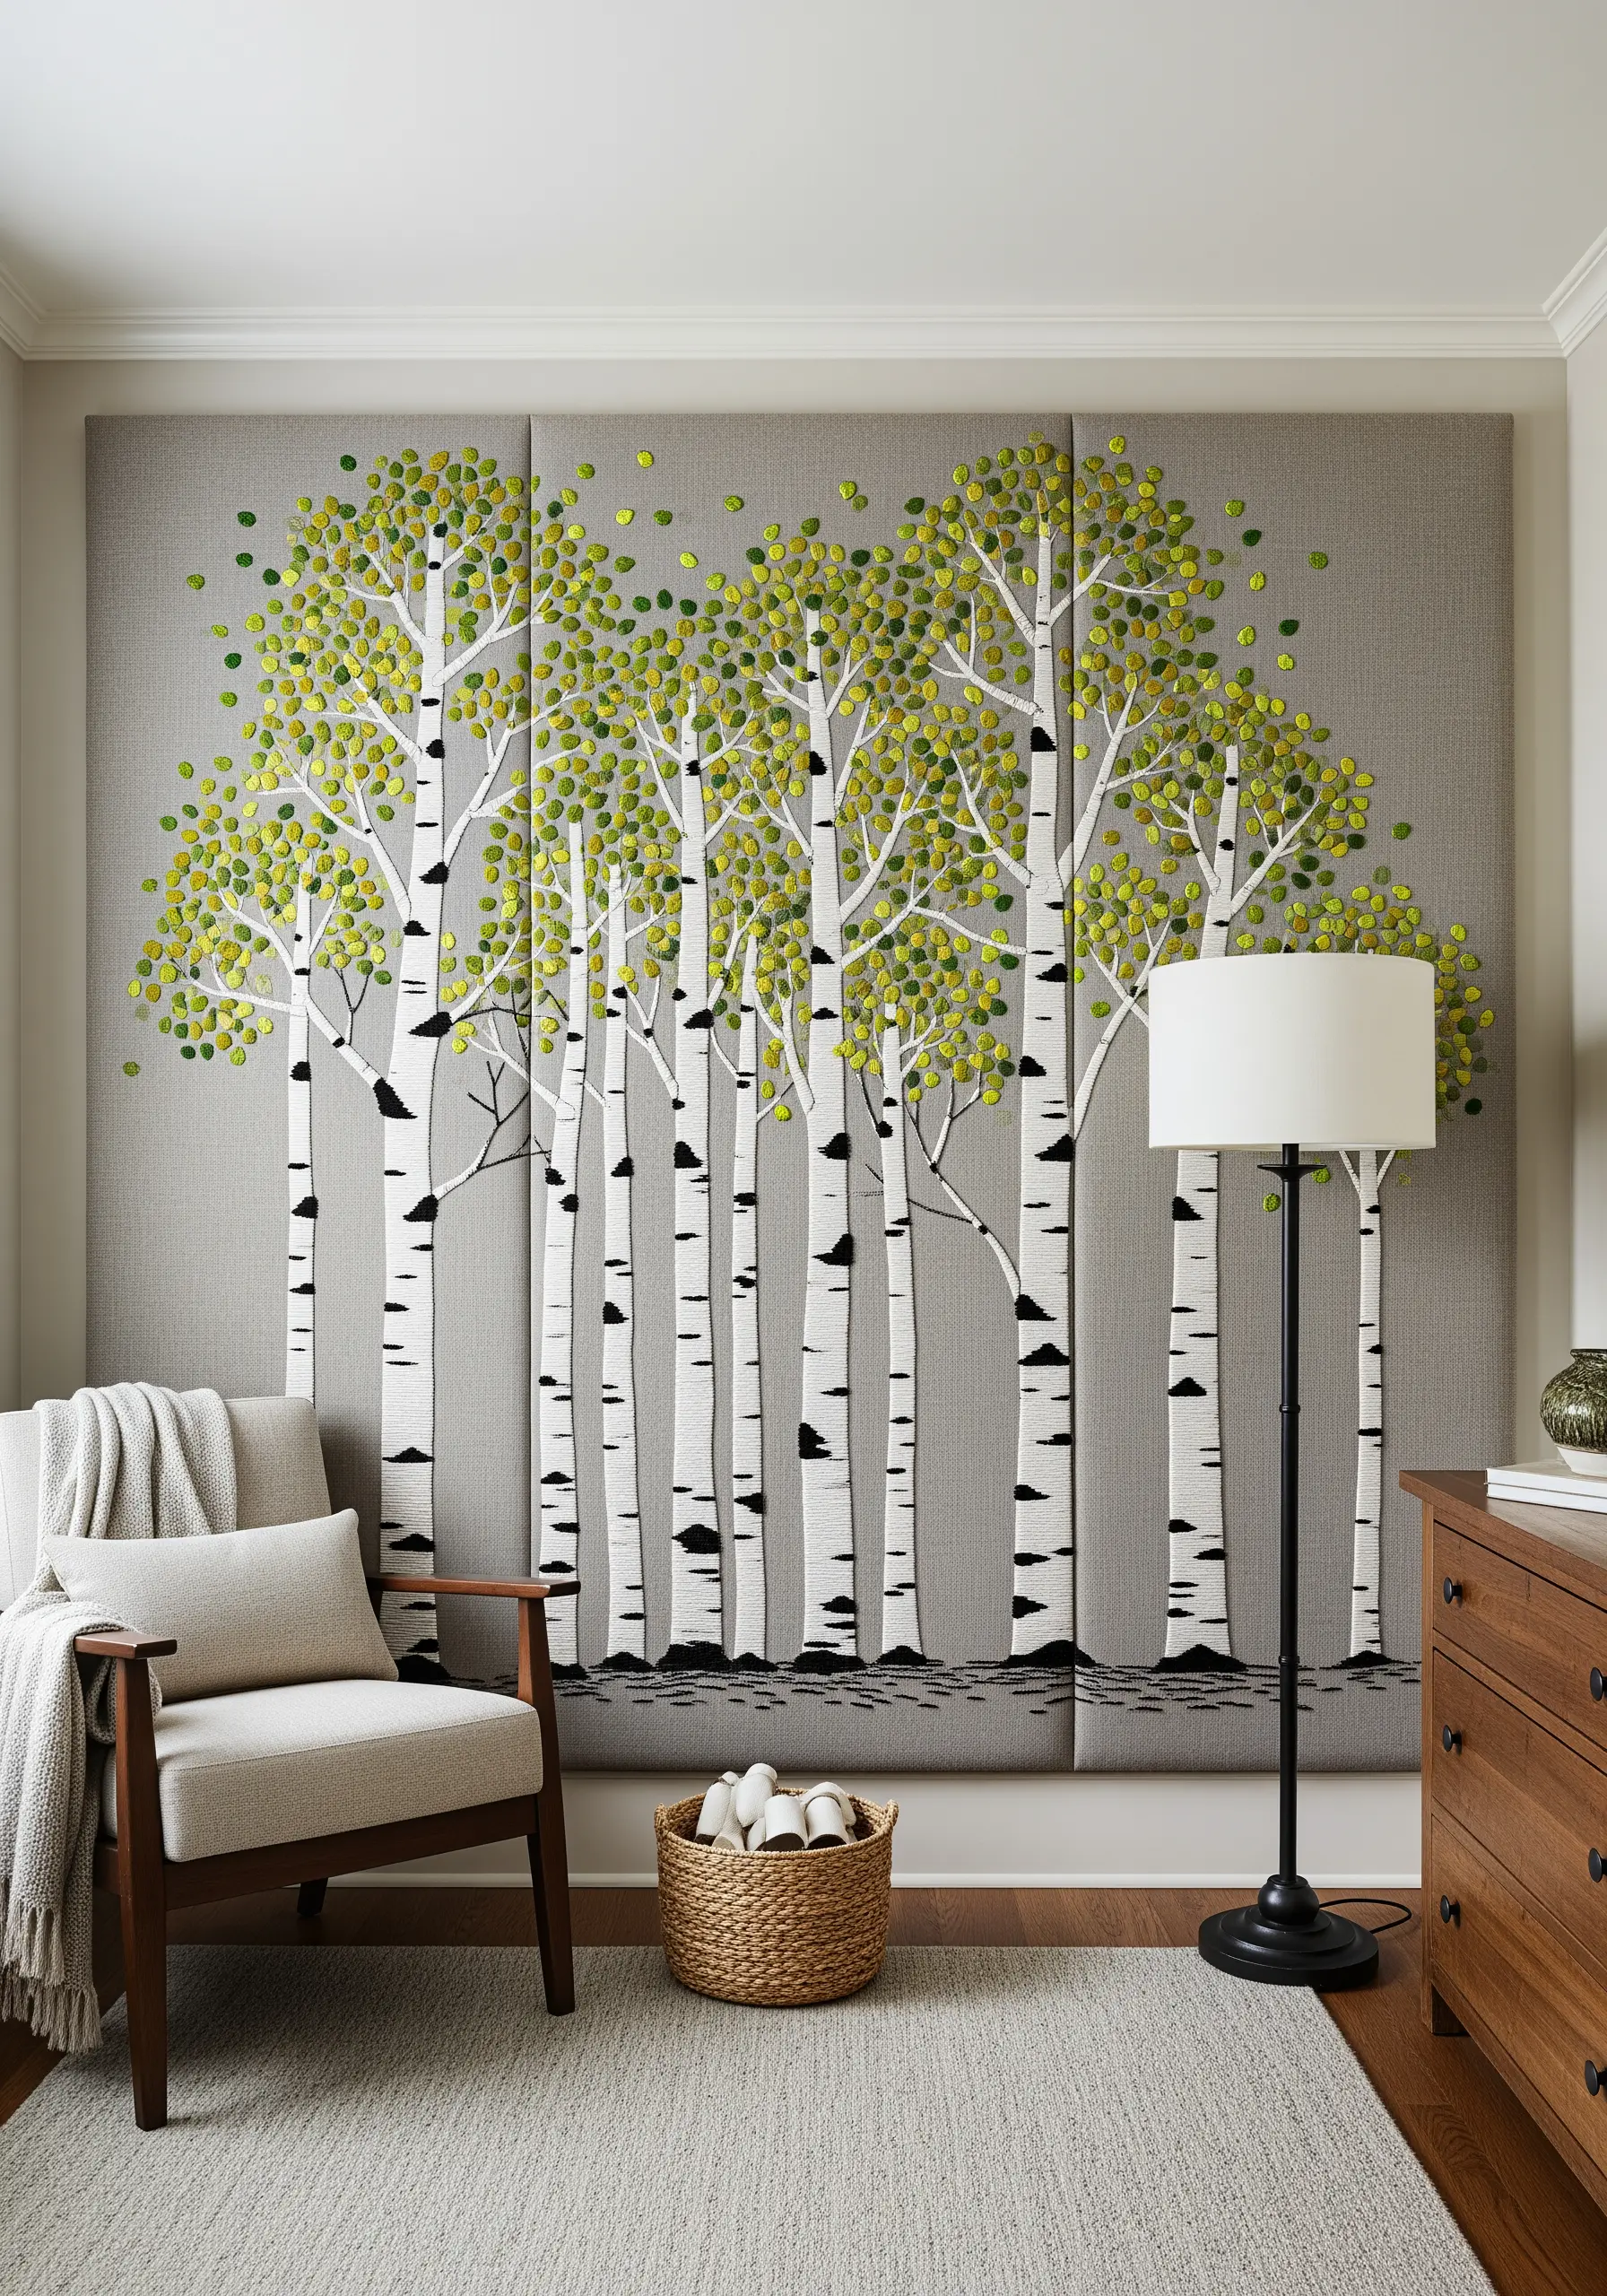
When creating embroidered wall art on a large scale, let the background fabric do some of the work.
For these birch trees, the white trunks are simply the unstitched gray linen of the panels.
Embroidery is used strategically to add detail: short, horizontal satin stitches create the bark texture, and clusters of French knots in shades of chartreuse form the leaves.
This intelligent use of negative space makes the project more manageable and creates a modern, airy composition.
34. Create Functional Art with Dimensional Stitches

Turn a practical item like a curtain tie-back into a decorative highlight with dimensional embroidery.
Use stitches that create lush, dense texture, like the turkey stitch, to make fluffy, three-dimensional flower heads that resemble prairie smoke or clematis seed heads.
Combine these with classic satin-stitched leaves and flowers on a custom-shaped fabric piece.
This transforms a purely functional object into a piece of sculptural art that enhances your home decor.


