

If you’ve ever wished you could capture the delicate texture of a feather or the soft depth of an animal’s fur, you already understand the soul of embroidery. It’s not just about making a picture with thread; it’s about translating the living world into a tactile, intimate form.
But achieving that realism can feel intimidating. The secret isn’t in mastering hundreds of complex stitches. Instead, it lies in learning how a few key techniques—like the direction of a single stitch, the sheen of a specific thread, or the subtle shift between two colors—can create form, light, and life.
Here, you’ll discover how to think like a painter, using thread as your medium. You will learn to build texture, blend color with intention, and use contrast to make your subjects feel as if they could breathe. This is your guide to moving beyond patterns and into artistry, one stitch at a time.
1. Render a Fox’s Fur with Directional Thread Painting
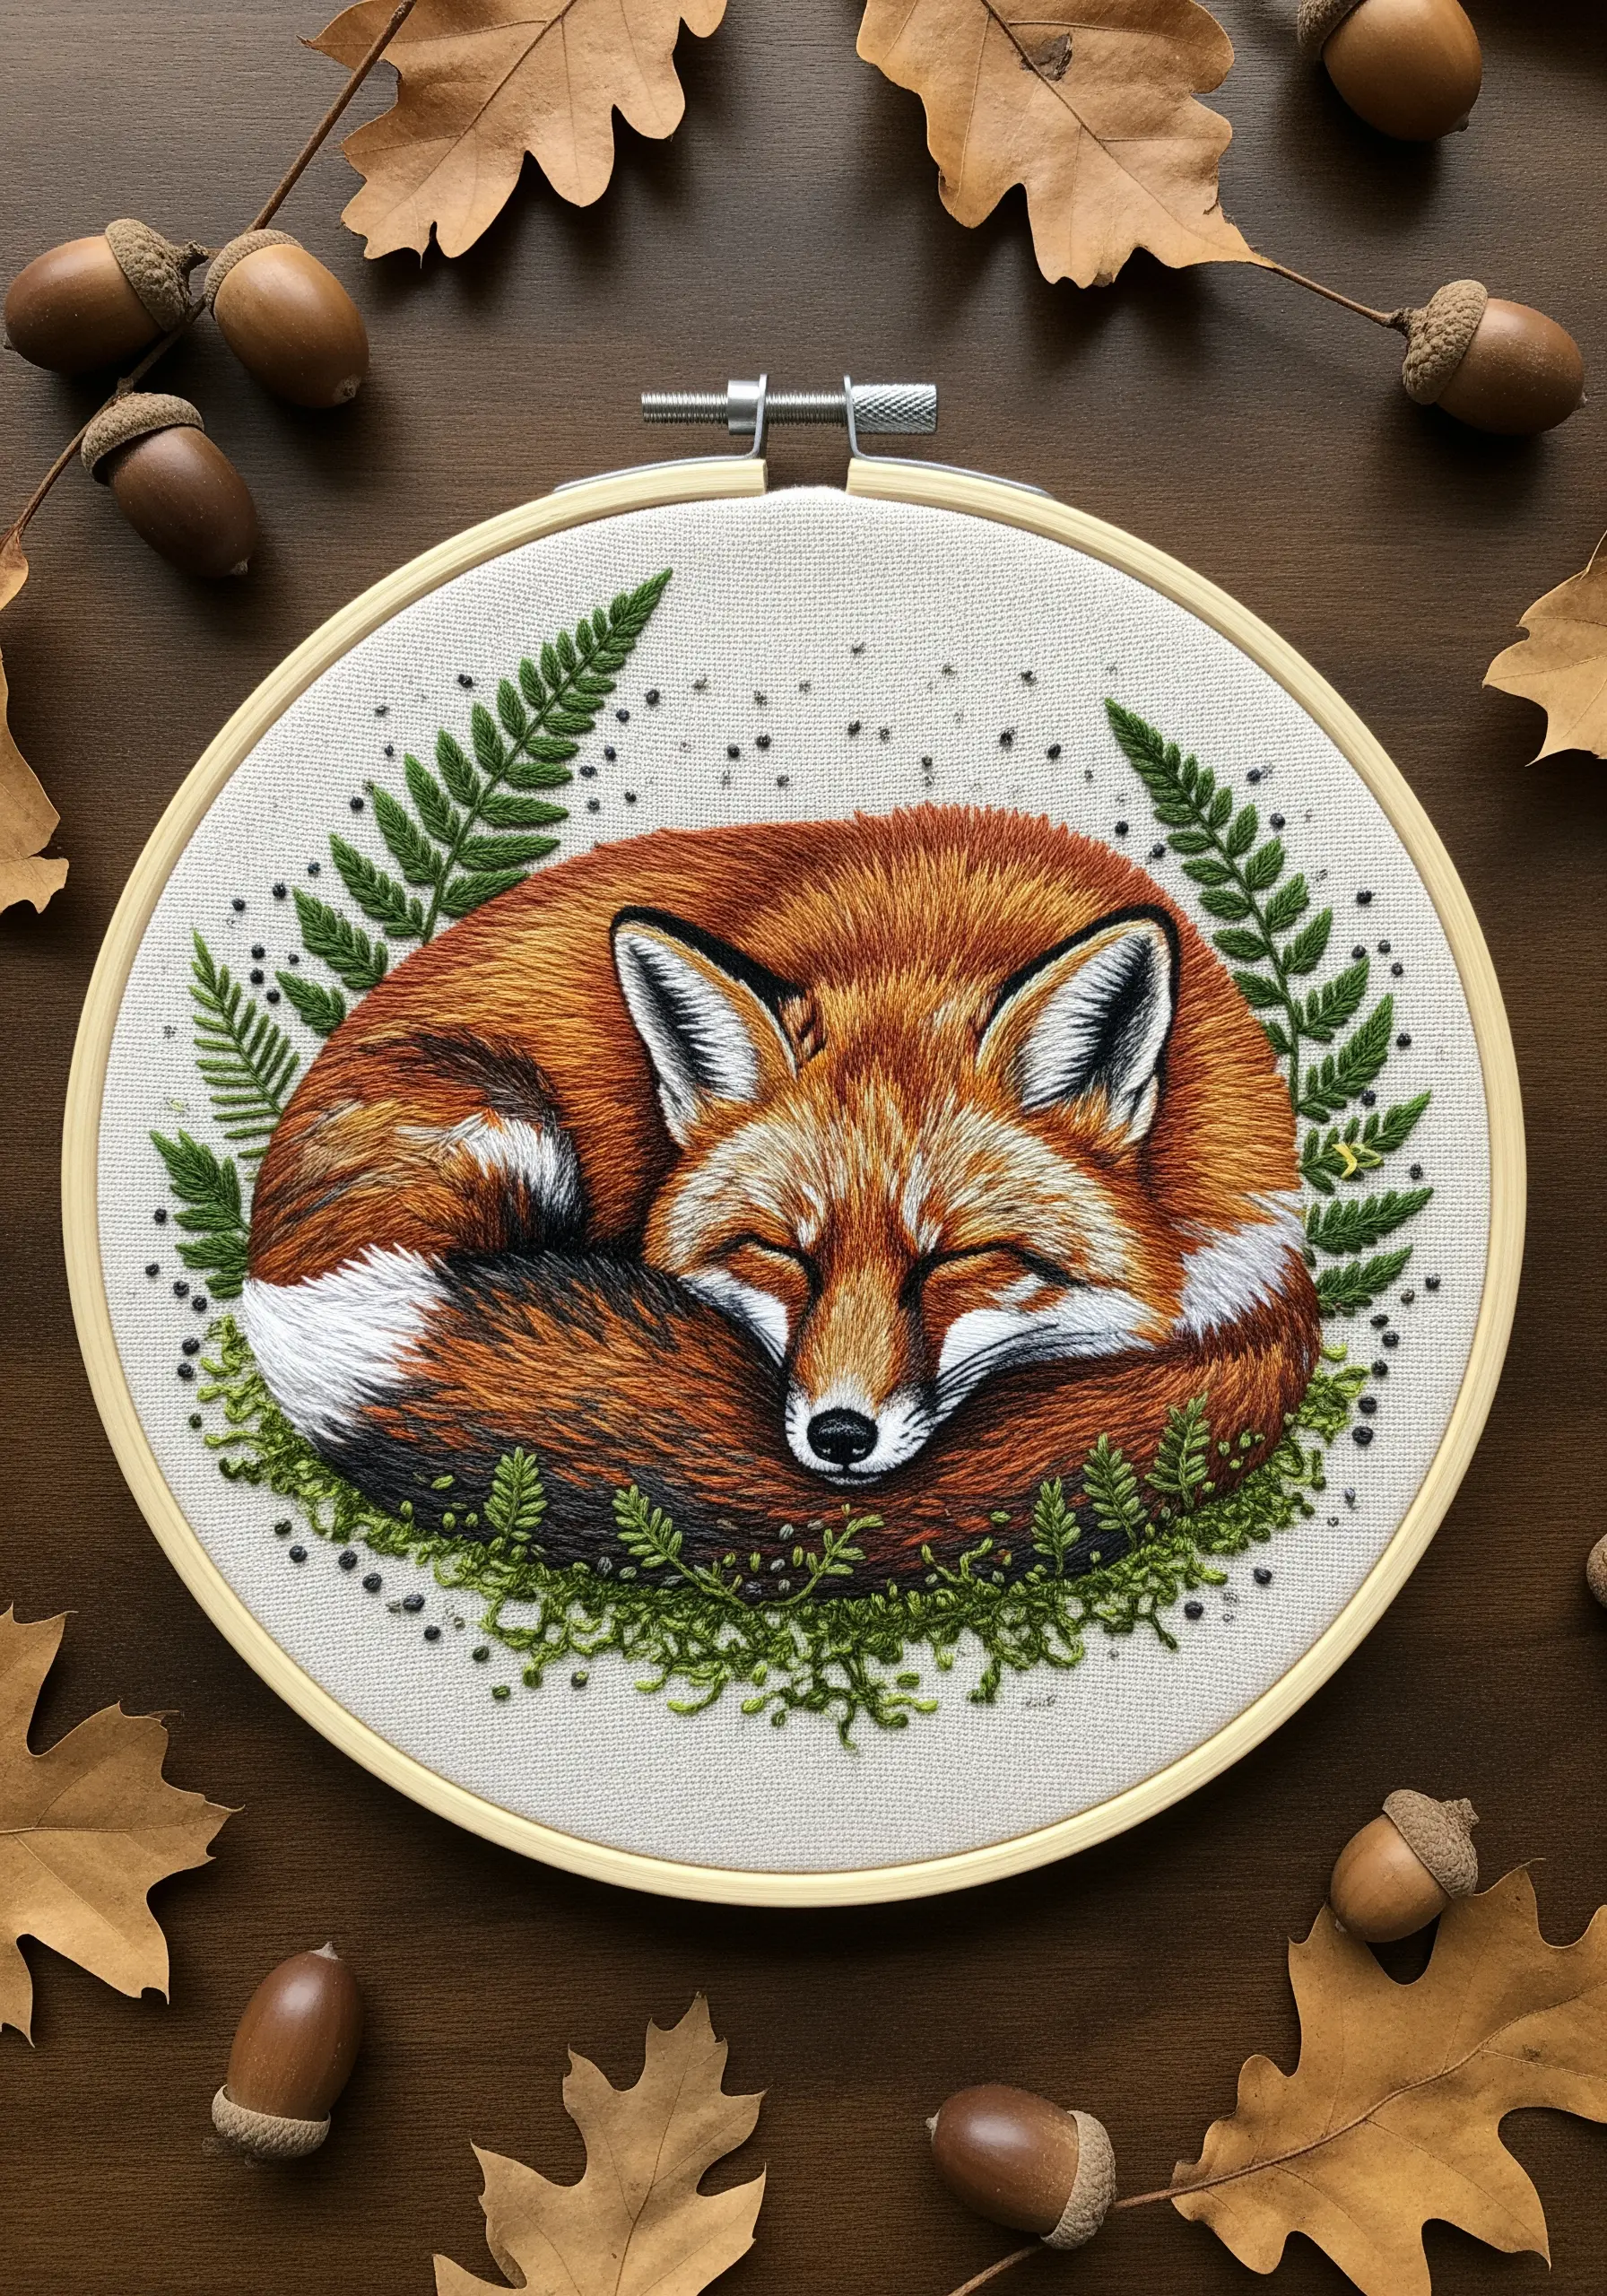
To create the soft, dense fur of a sleeping fox, rely on the long-and-short stitch using single strands of floss.
Vary your stitch direction to follow the curve of the body, which gives the form a natural, three-dimensional quality.
Blend at least four shades of orange, from deep rust to pale apricot, to build realistic depth, and use pure white for the tail tip and ear highlights.
For the mossy ground, use French knots with variegated green thread to create an organic, uneven texture that contrasts with the smooth fur.
2. Combine Turkey Work and Appliqué for a Tactile Bumblebee
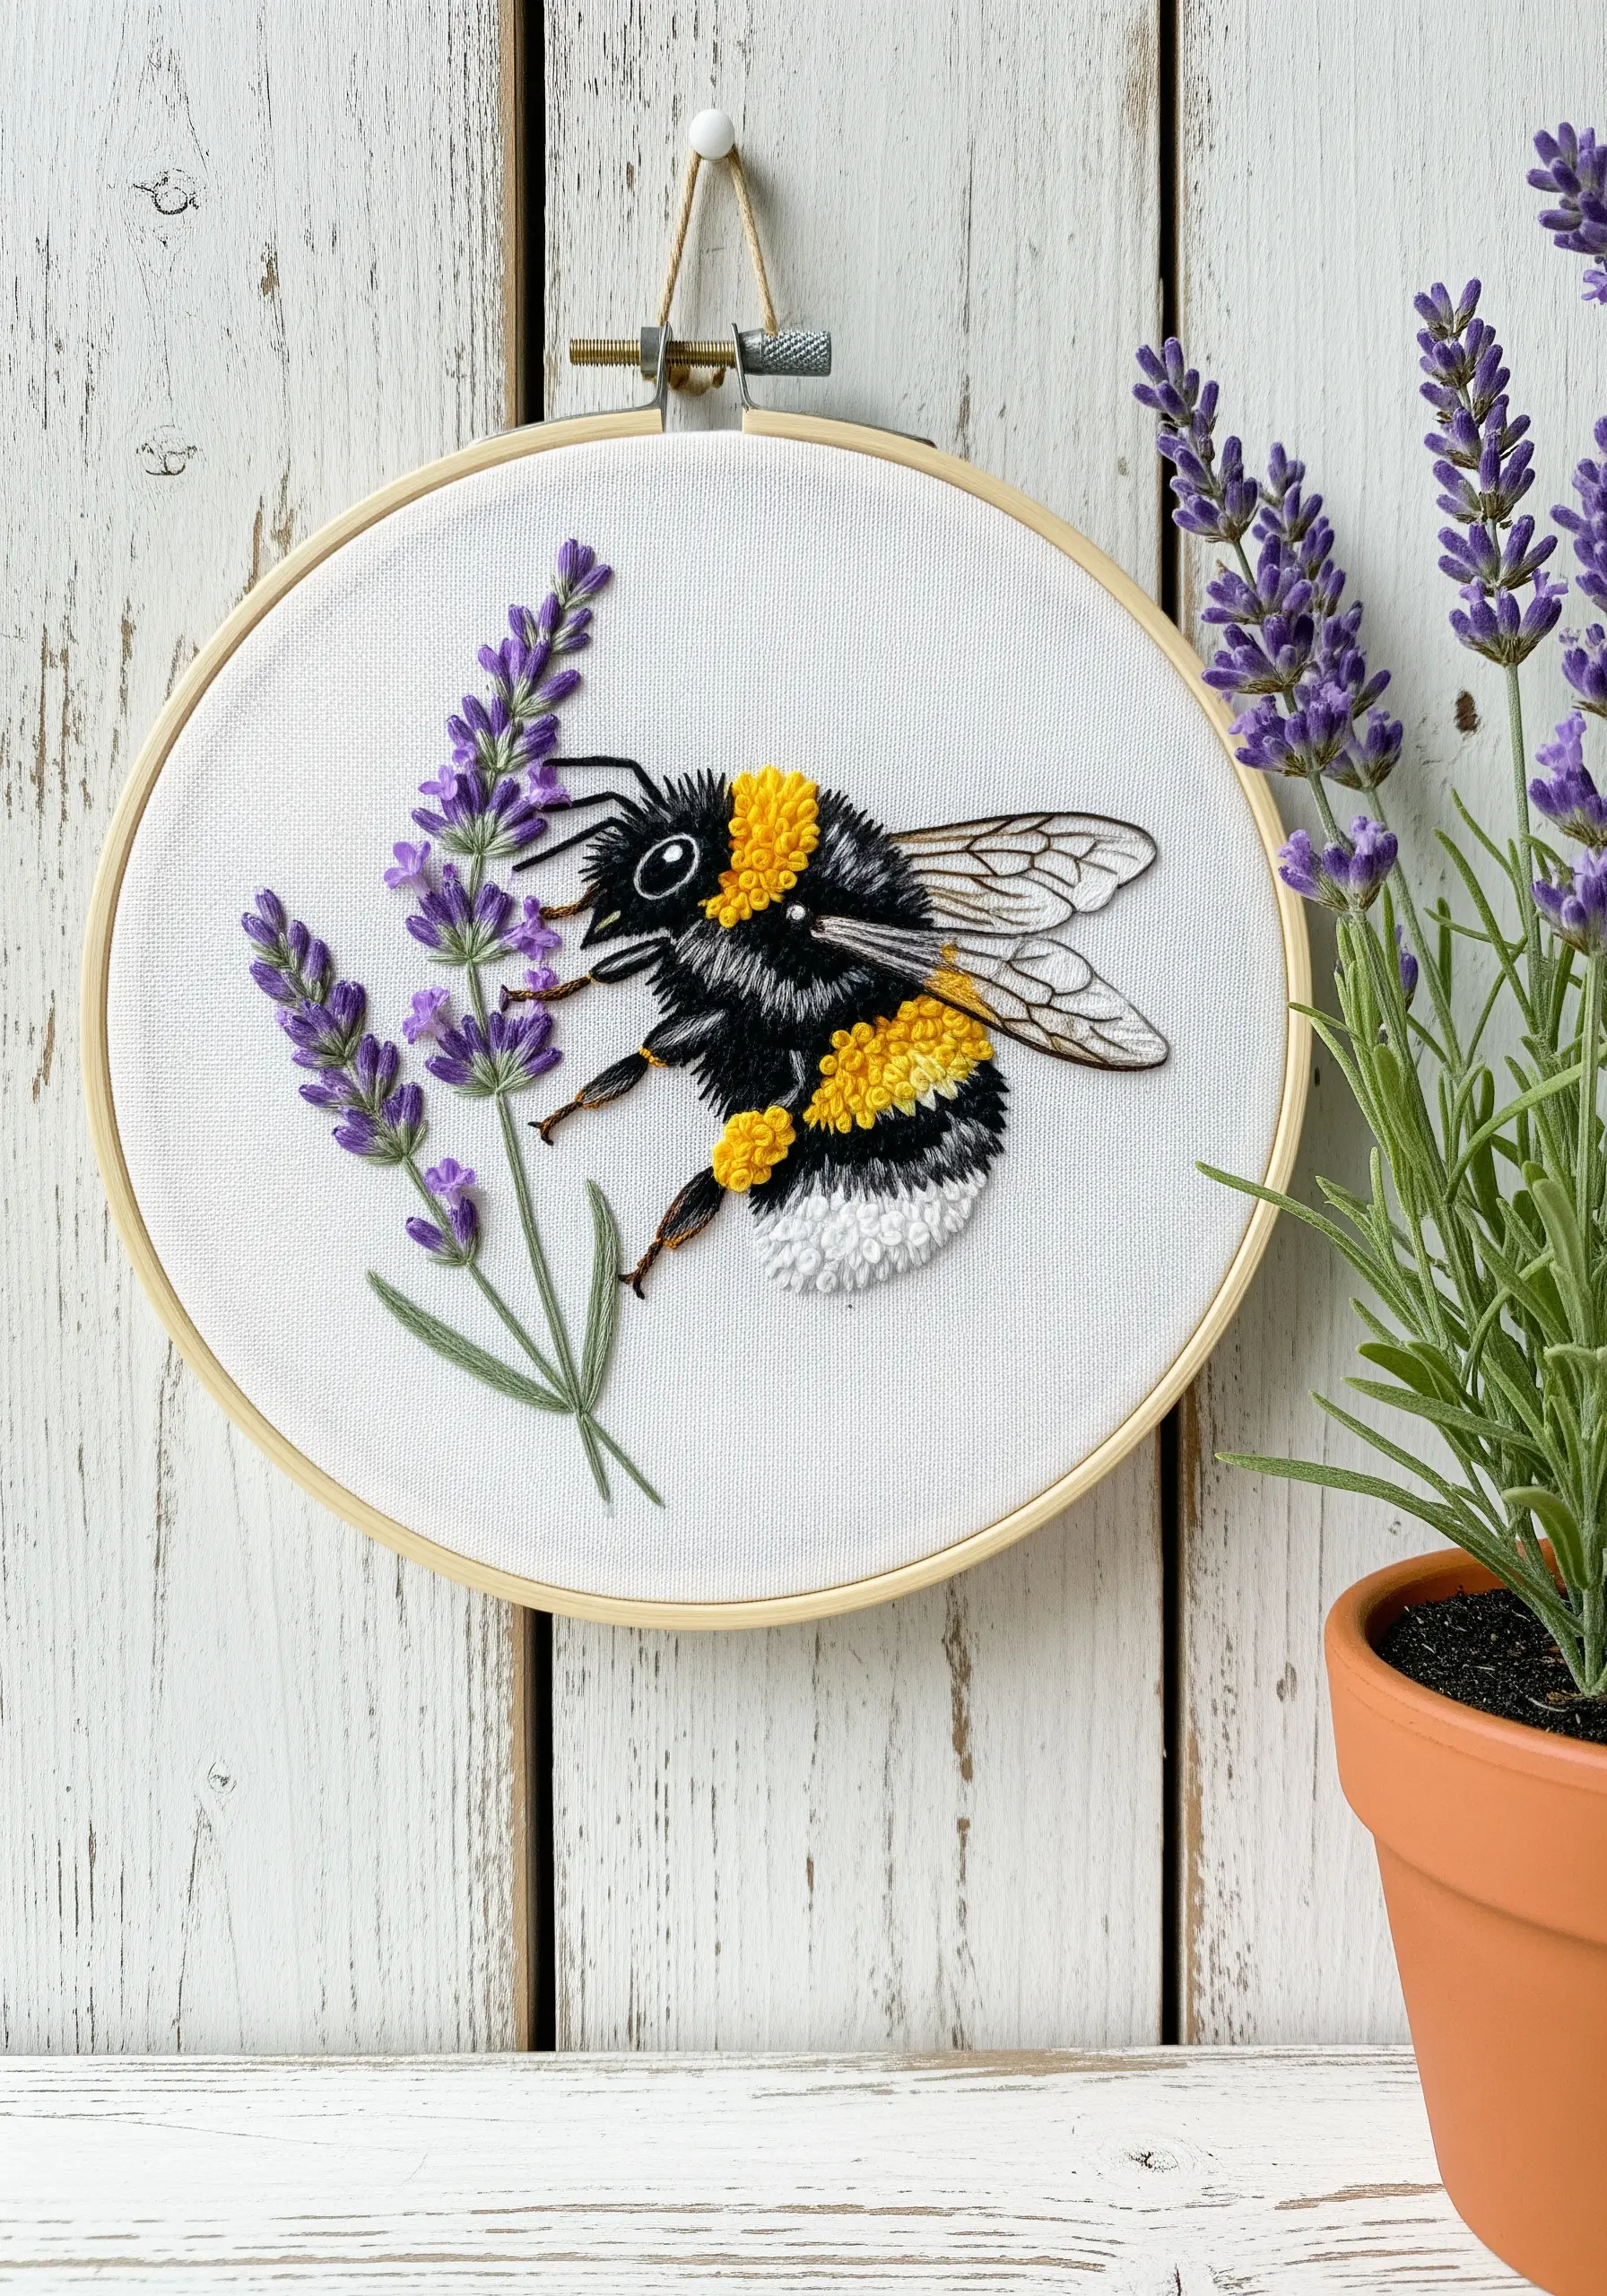
Capture a bumblebee’s fuzzy texture by using turkey work for the yellow and black stripes on its body.
After creating the loops, trim them at slightly different lengths to enhance the fluffy, natural appearance.
For the delicate wings, stitch the outlines onto a small piece of sheer organza, cut it out, and carefully appliqué it onto your main fabric.
This combination of high-texture stitches and translucent fabric gives your insect a stunningly lifelike quality.
3. Use a Dark Canvas to Intensify Thread-Painted Portraits
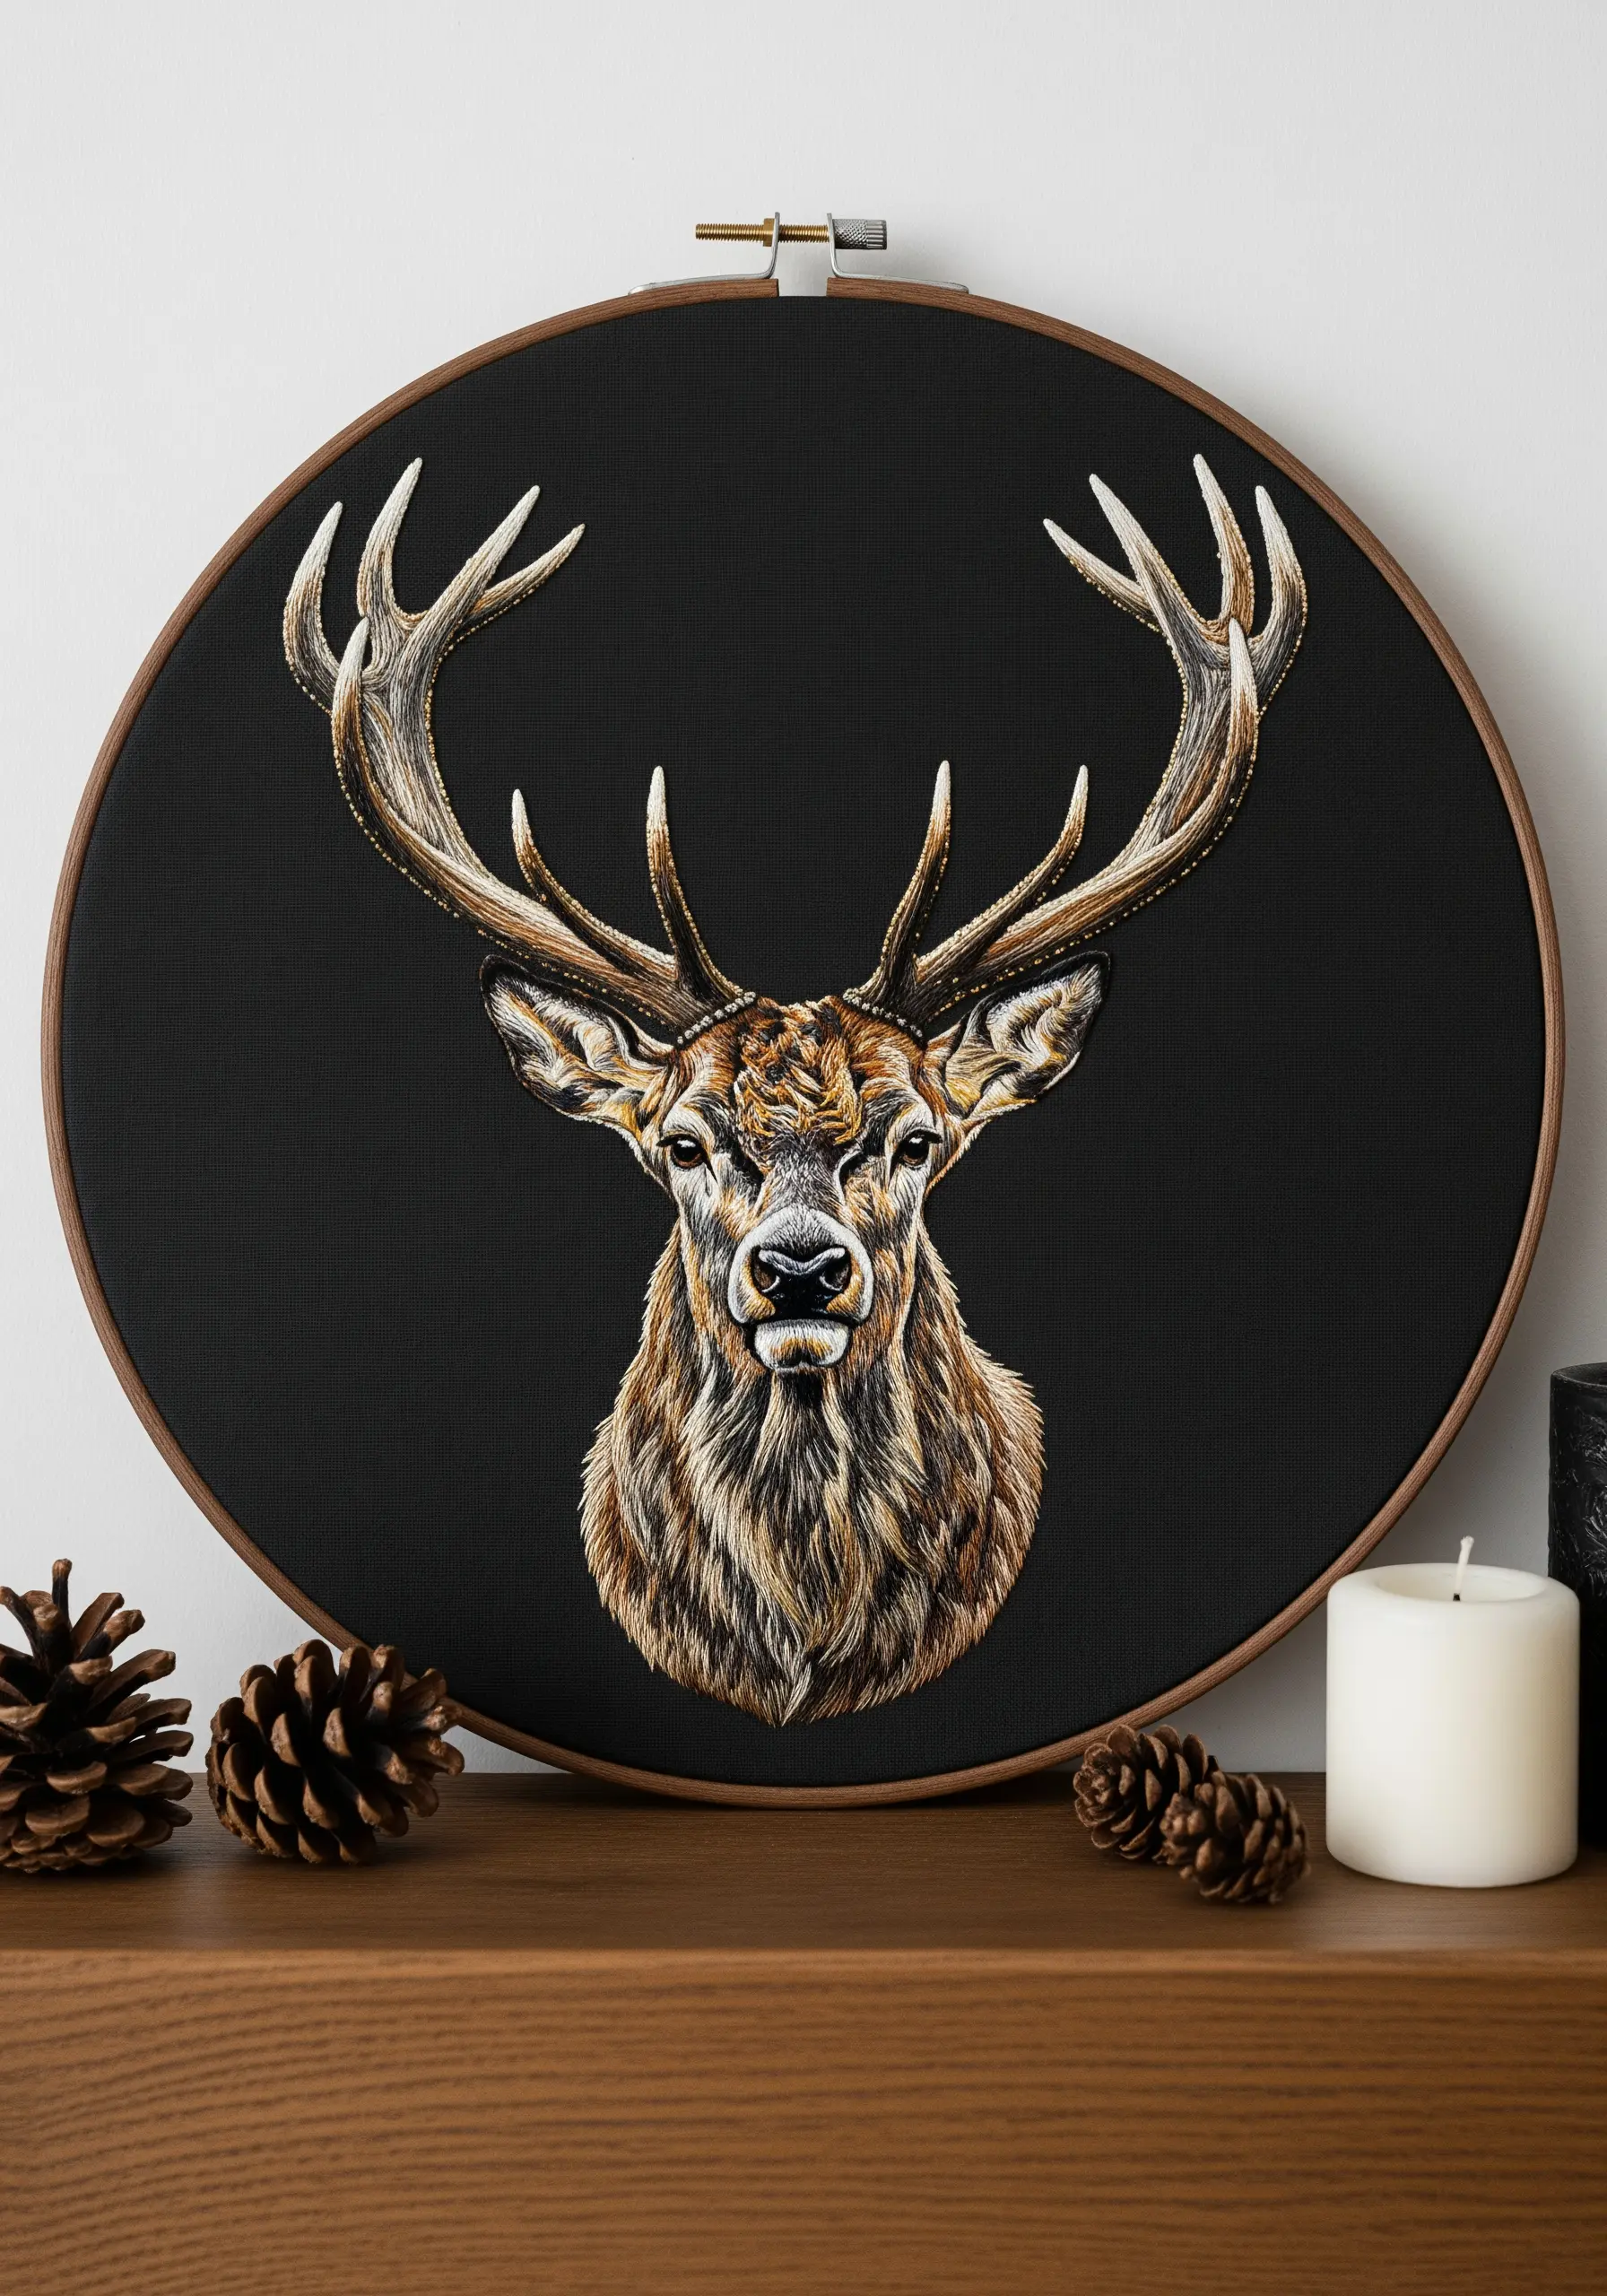
Stitching a detailed animal portrait on black or navy fabric eliminates the need to fill the background, making your subject the undisputed focus.
The dark canvas makes lighter thread colors appear more vibrant and saturated, creating dramatic contrast.
For the stag’s fur, use single-strand long-and-short stitches, blending tones from dark brown to pale beige to sculpt the facial features and define muscle.
This technique turns your embroidery into a striking piece of stunning framed embroidery.
4. Master Feather Textures with Precise Stitch Direction
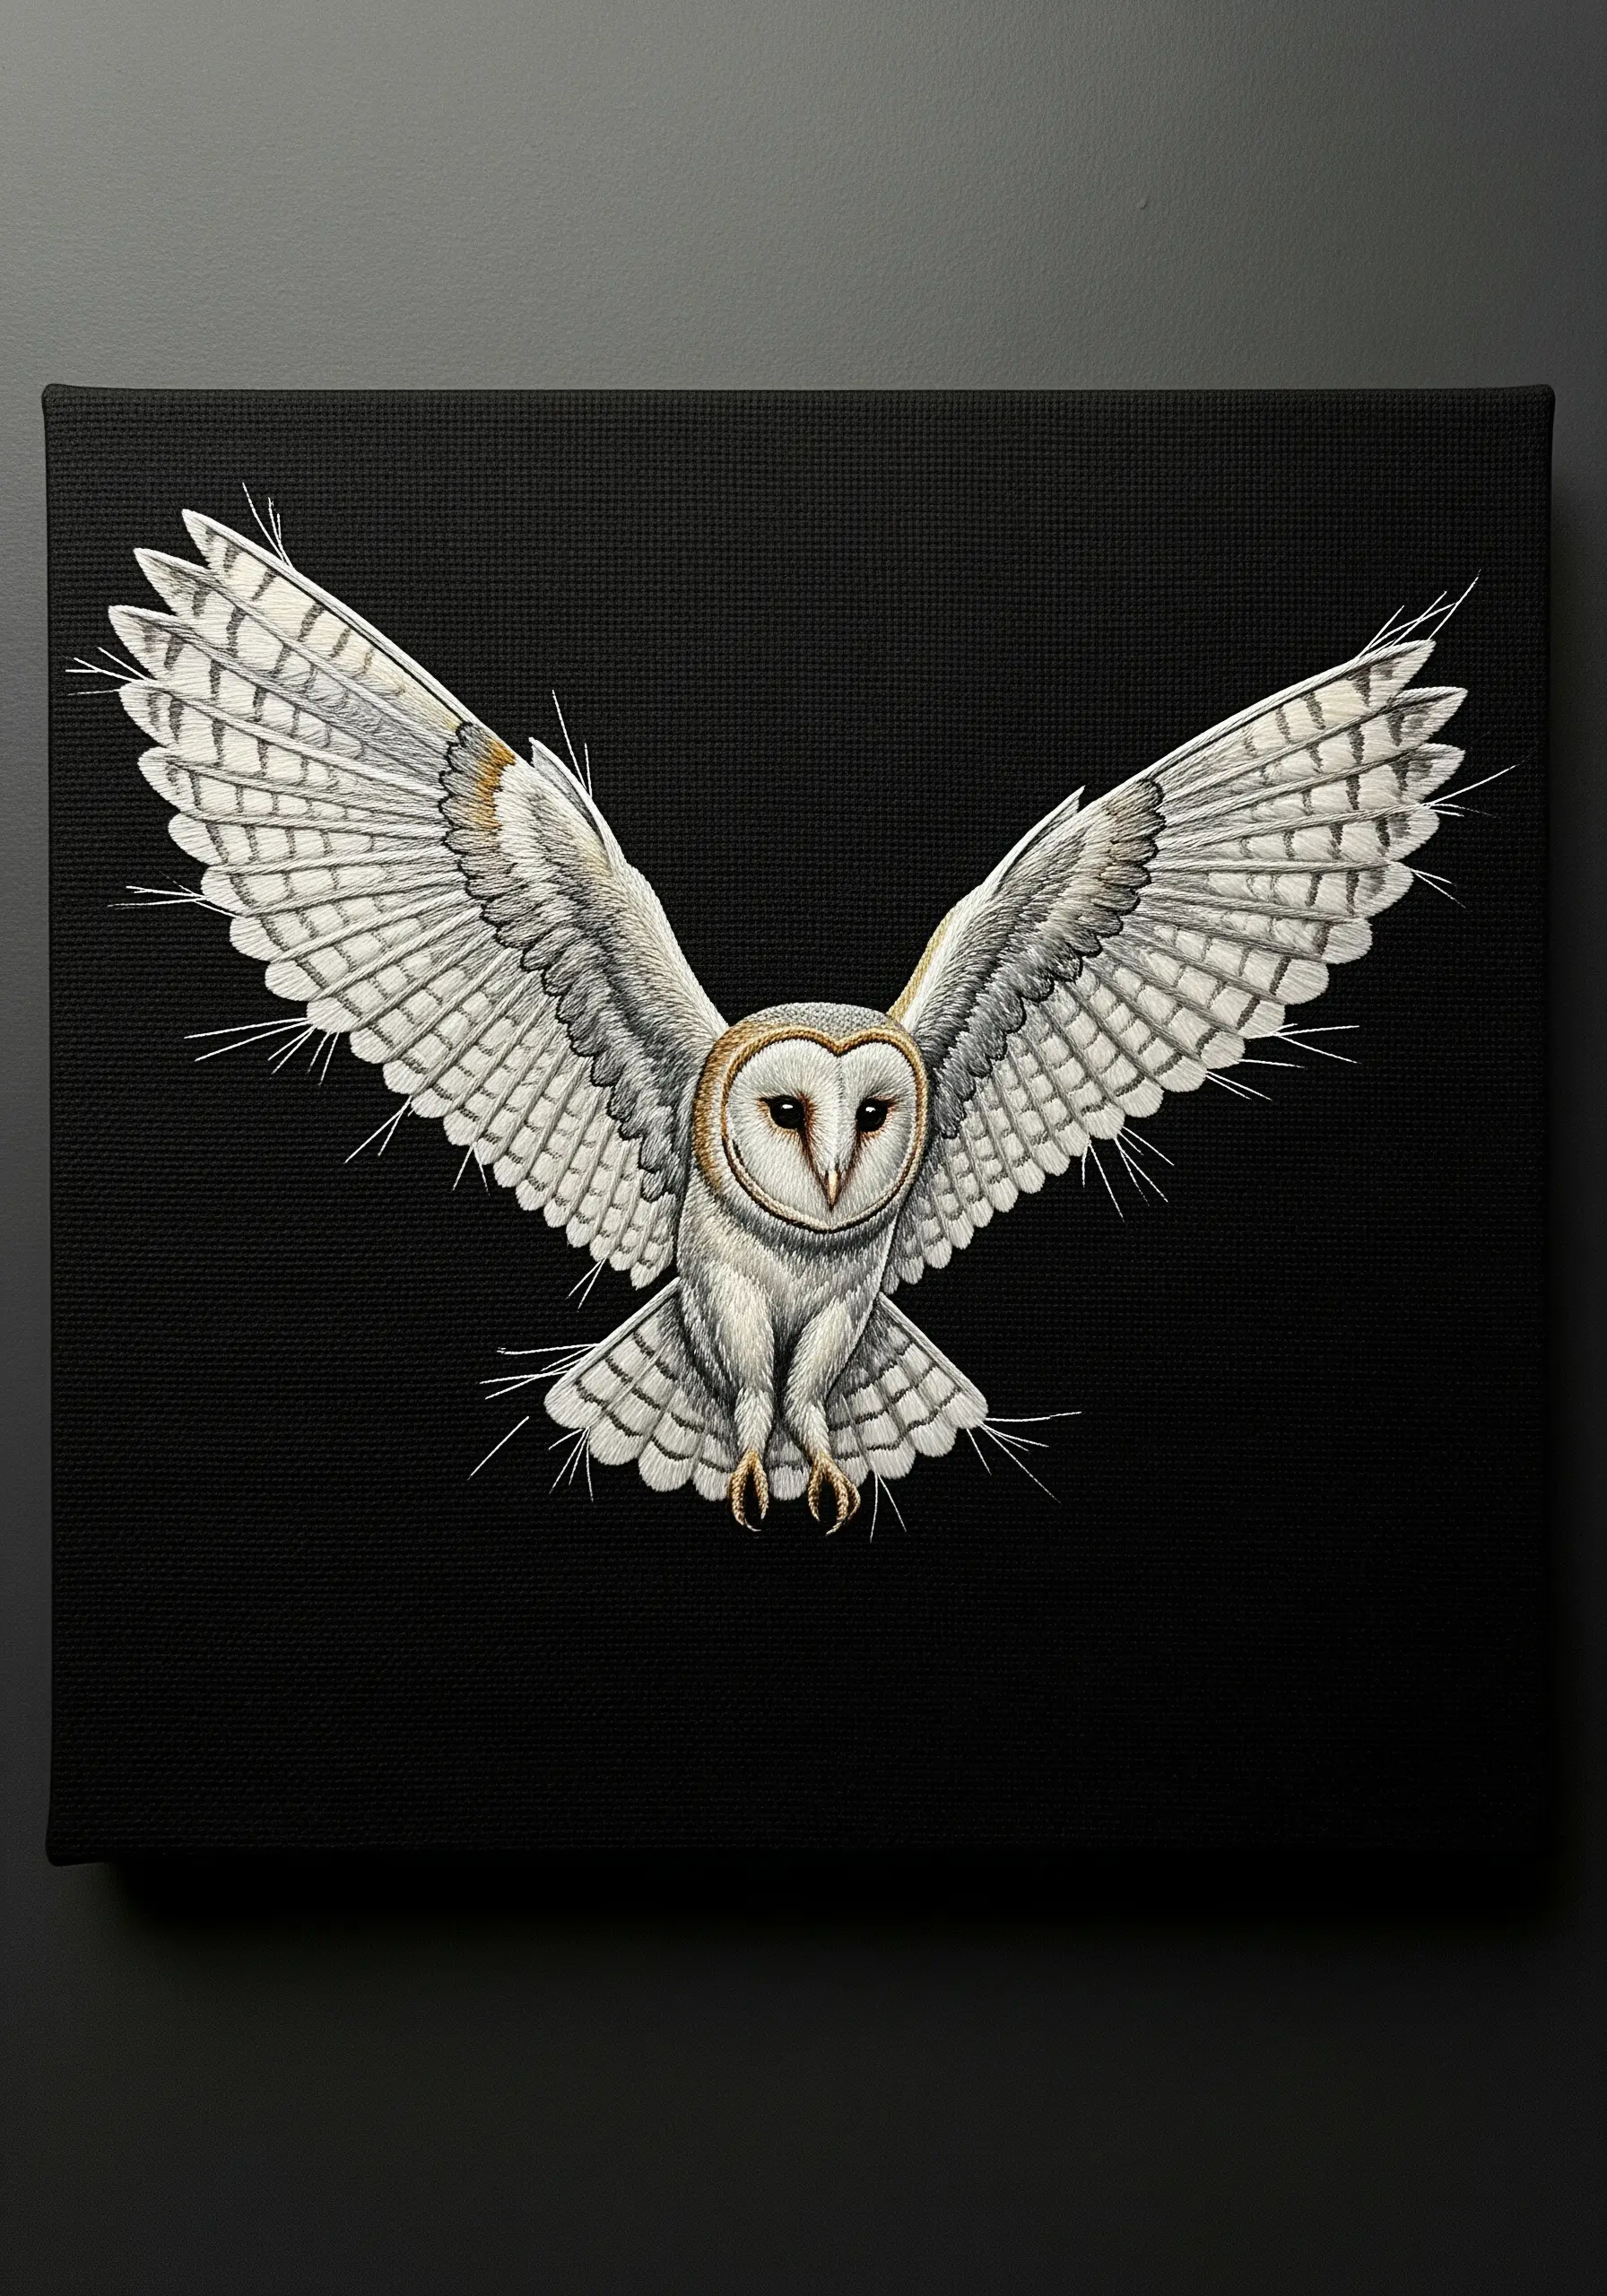
To embroider realistic owl feathers, map out the different feather groups first.
Use long-and-short stitch for the soft body feathers, ensuring your stitches follow the direction of growth.
For the larger wing and tail feathers, use a smooth satin stitch, outlined with a single strand of dark gray split stitch to create sharp definition.
Adding a few errant, long straight stitches at the wing tips suggests movement and breaks the perfect symmetry, adding a touch of wildness.
5. Achieve Symmetrical Wing Patterns with Satin Stitch Blocks
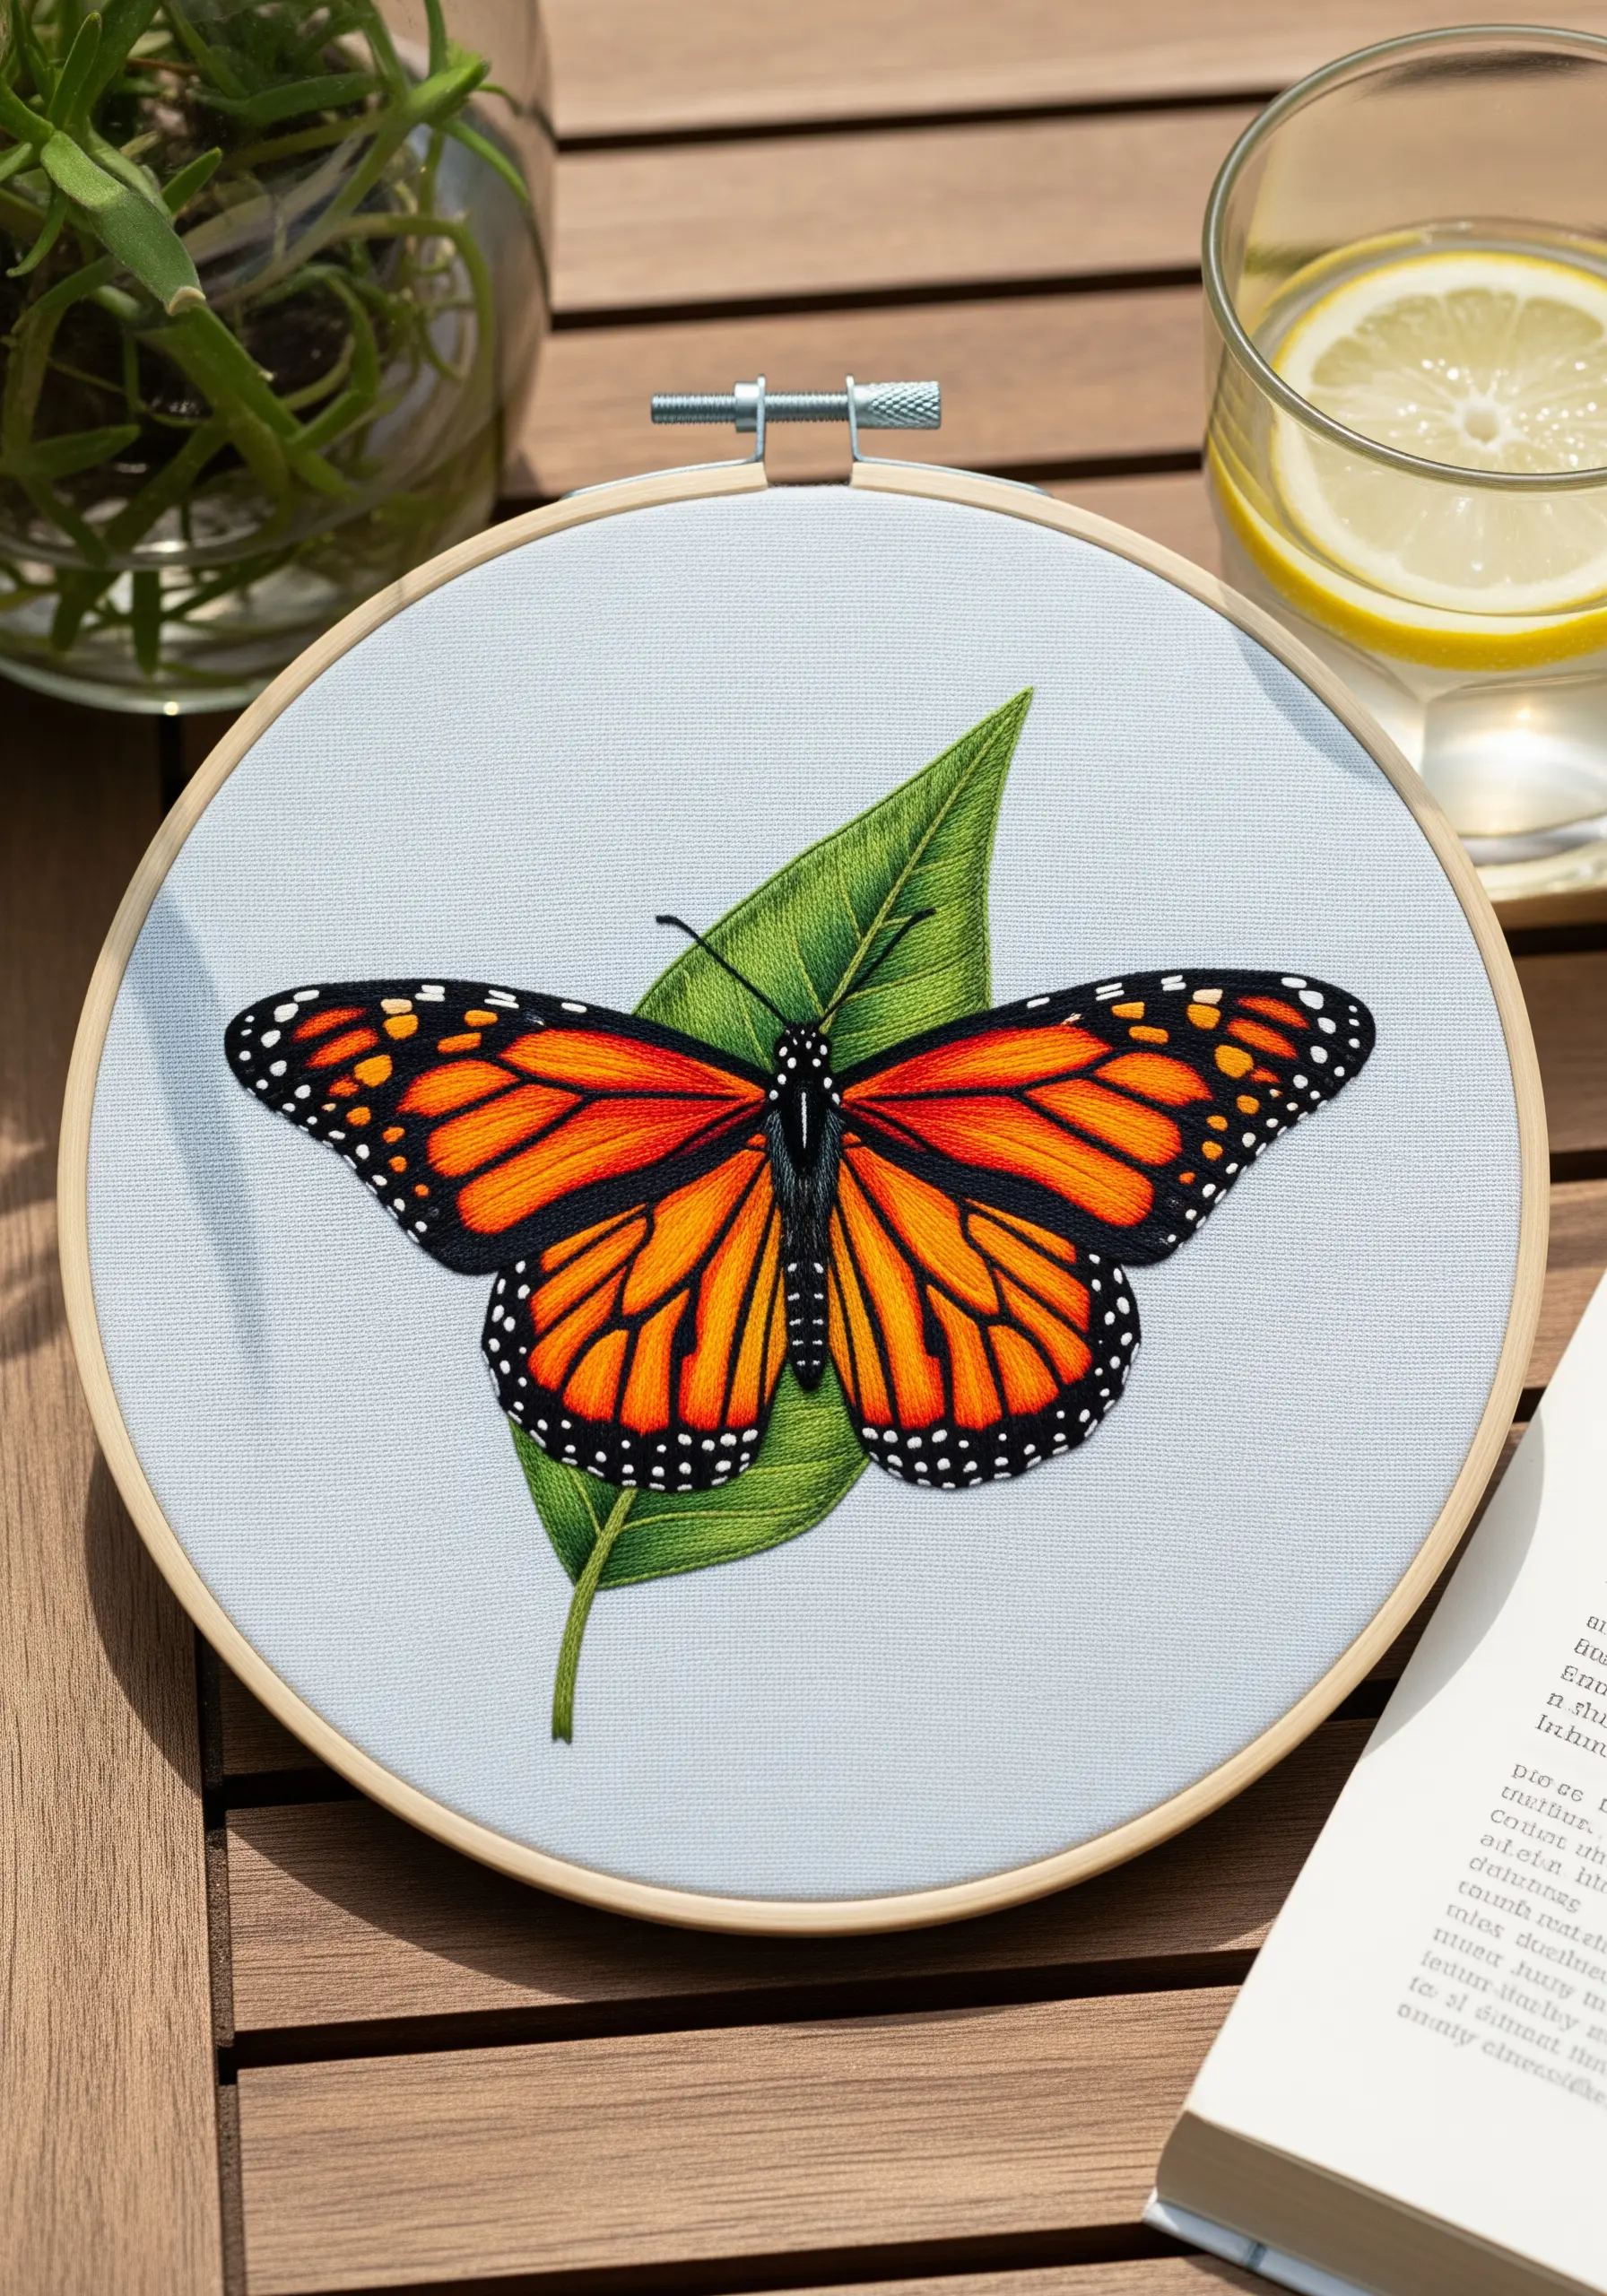
For the bold, graphic pattern of a monarch butterfly, divide the wings into small, manageable sections.
Fill the black areas with a dense, smooth satin stitch, ensuring all stitches lie in the same direction for a uniform sheen.
For the vibrant orange, use long-and-short stitch to create a subtle gradient from deep orange near the body to a lighter, almost yellow tone at the edges.
Use tiny, precise French knots or single straight stitches for the white spots to ensure they are crisp and clean.
6. Create Soft, Touchably Realistic Rabbit Fur
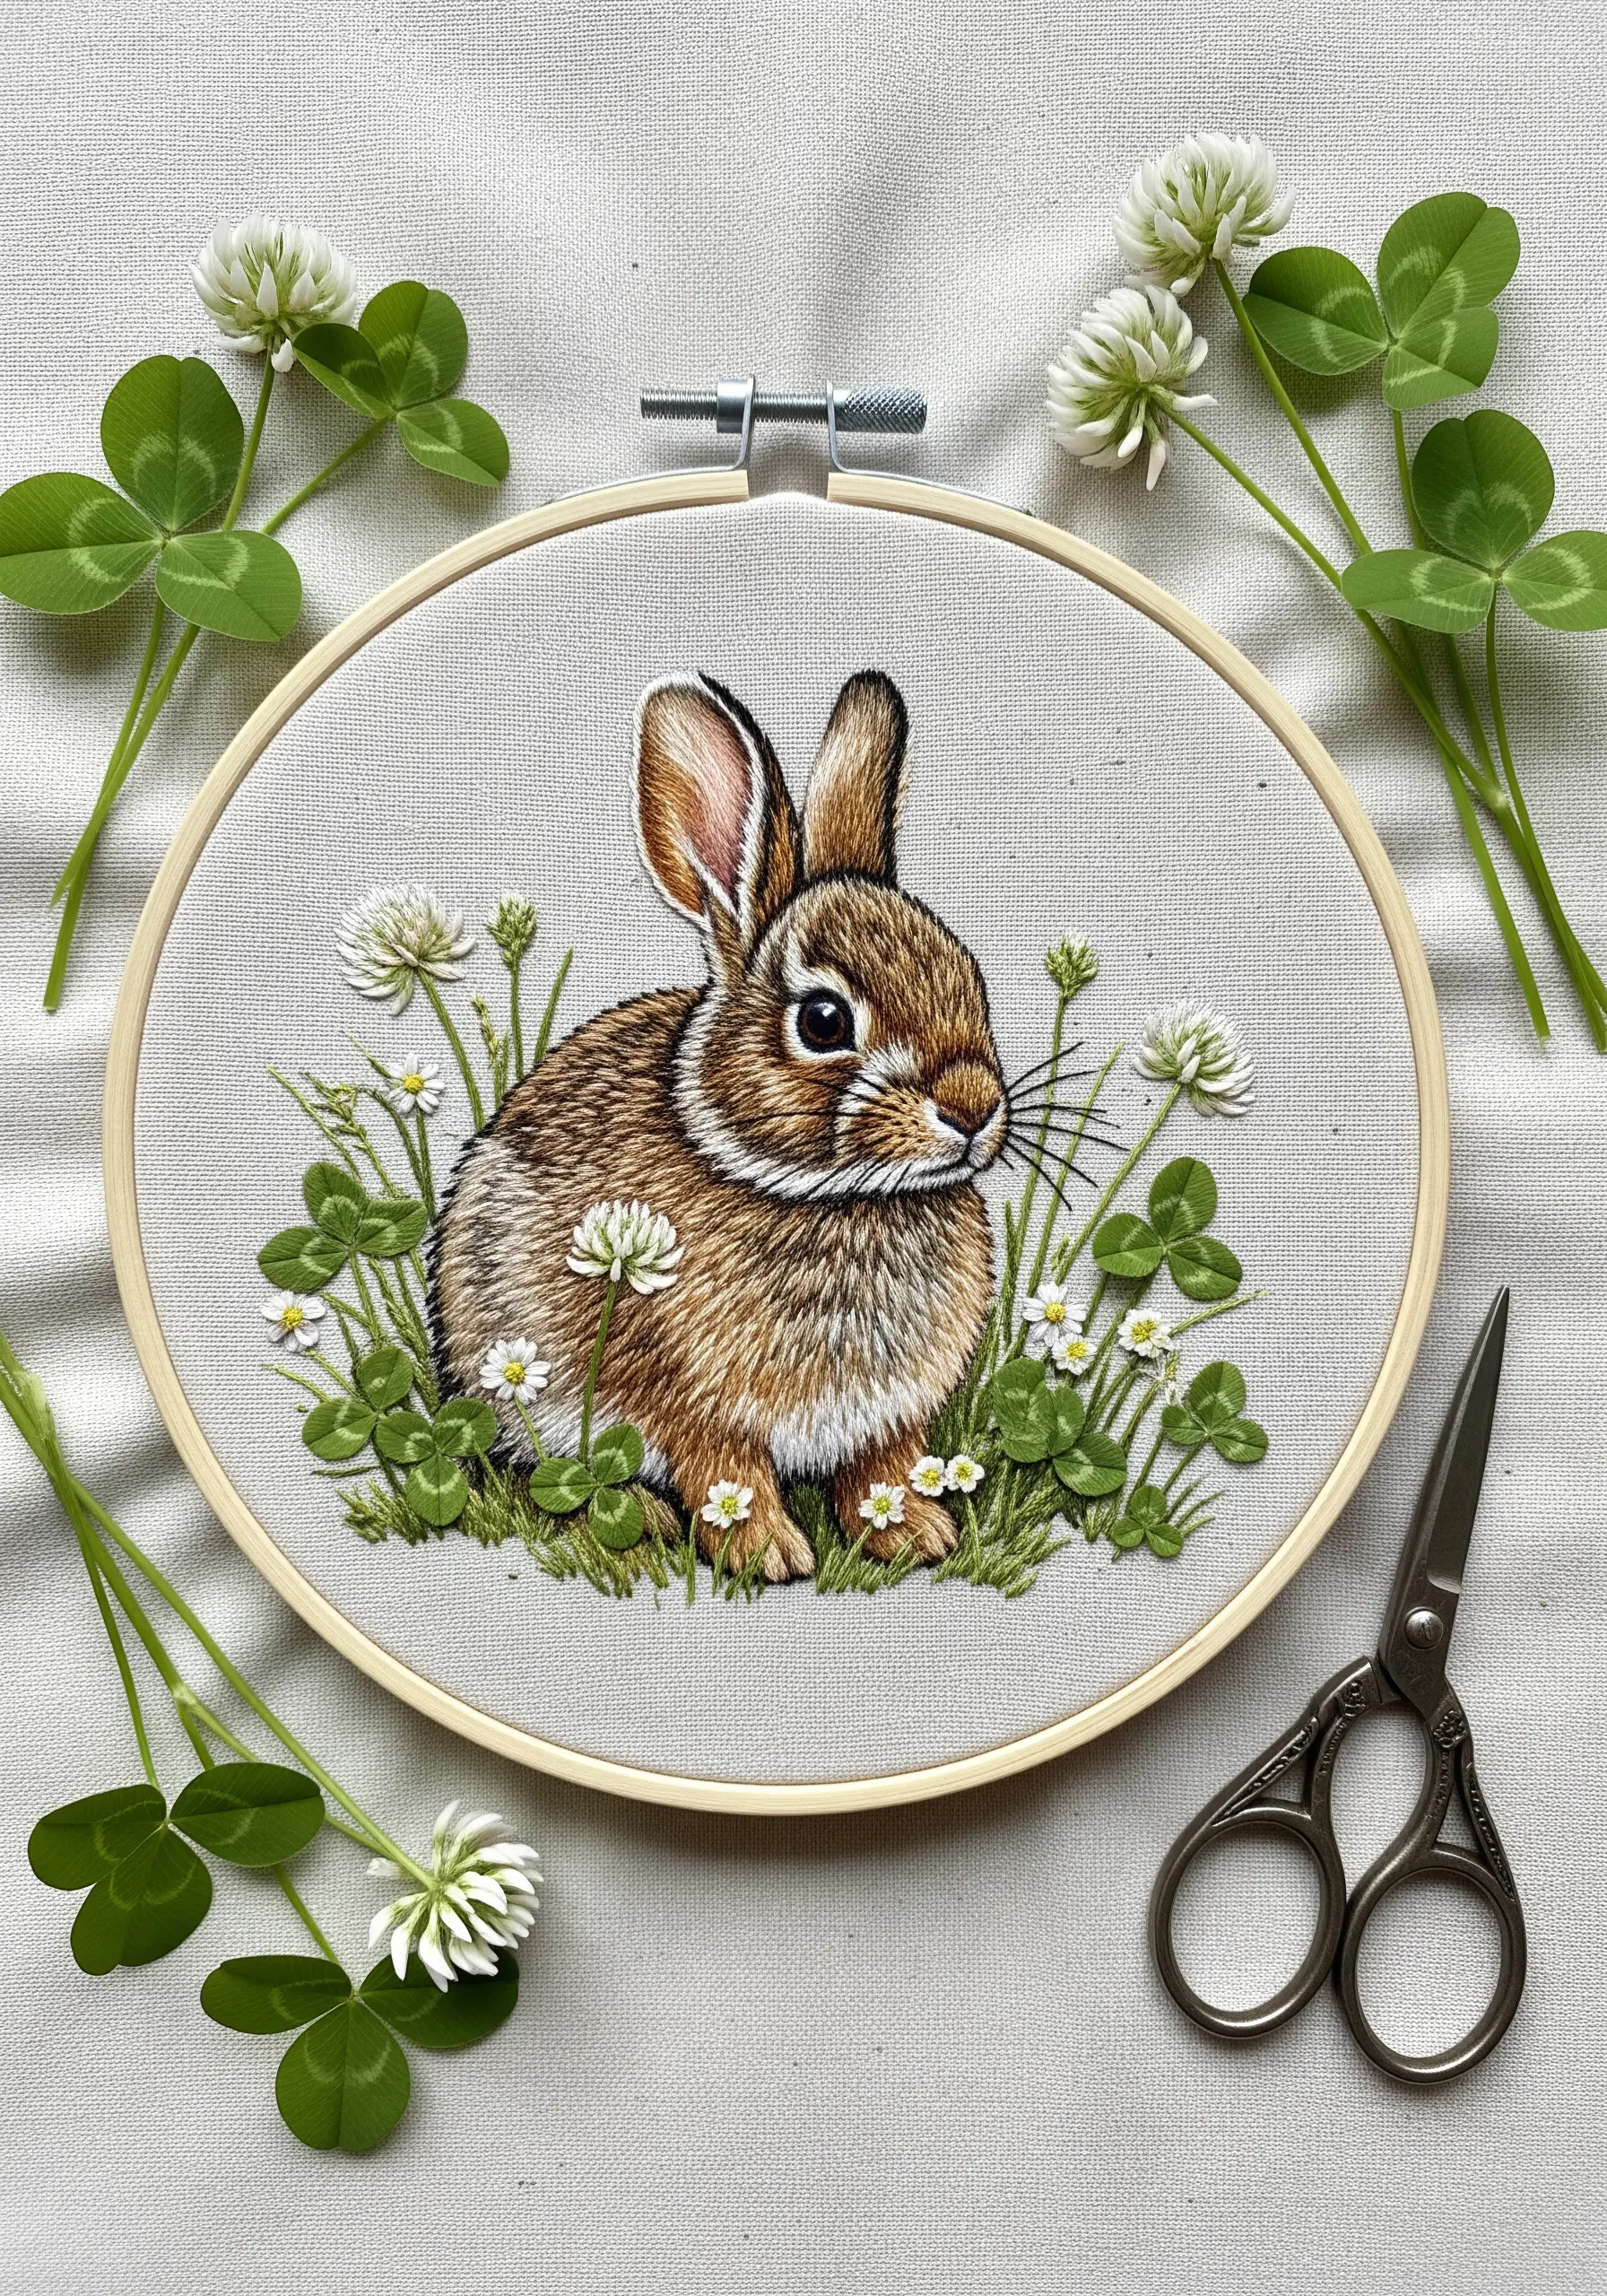
The key to soft-looking fur is using a single strand of embroidery floss and a rich palette of neutral colors.
Work with at least five shades of brown and gray, using short long-and-short stitches that mimic the direction of fur growth.
Concentrate darker tones in the shadowed areas, like under the chin and between the ears, to create contour and depth.
A tiny white French knot in the eye provides a focal point and brings your rabbit to life, making it perfect for embroidered nursery decor.
7. Mimic Iridescence with Silk Thread and Color Blending

To capture the shimmering throat of a hummingbird, swap standard cotton floss for silk or high-sheen rayon threads.
The natural luster of these threads catches the light, creating an iridescent effect that cotton cannot replicate.
Use a long-and-short stitch to seamlessly blend jewel tones like magenta, emerald, and violet.
Keep your stitches small and tight to create a smooth surface that maximizes the thread’s reflective quality, perfect for colorful tropical bird embroidery stitches.
8. Stitch Translucent Wings on a Sheer Organza Layer
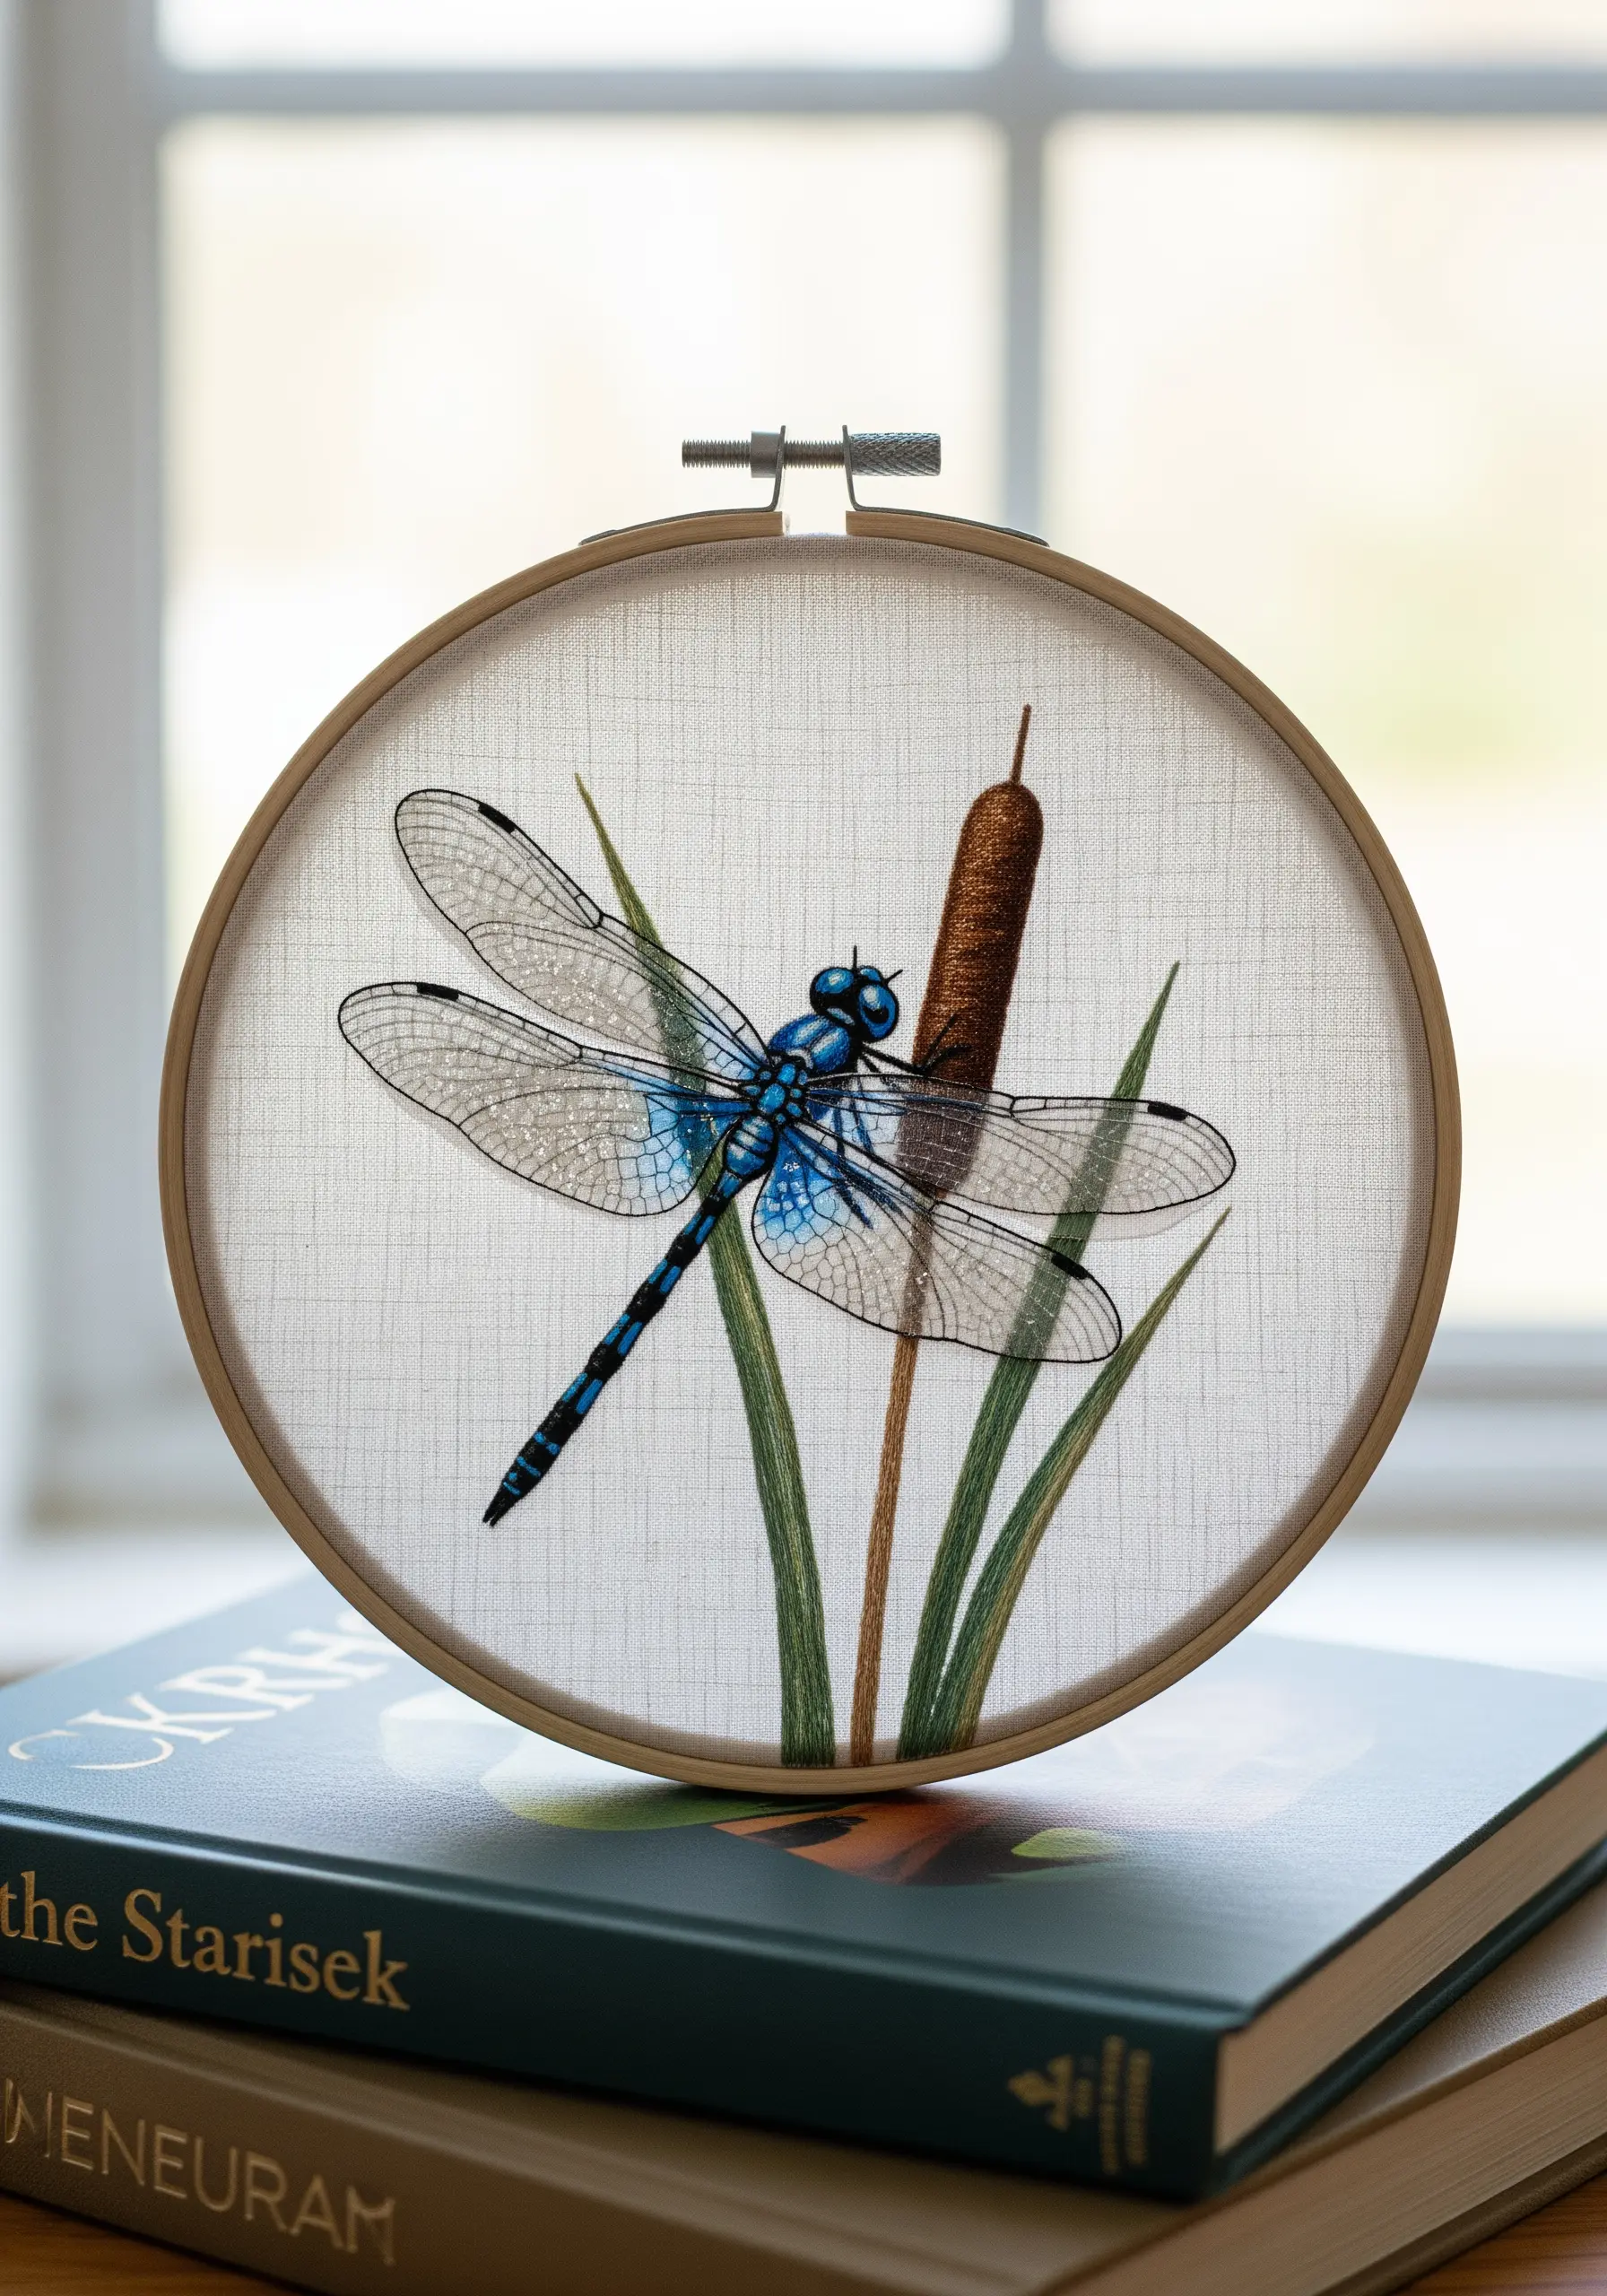
Create the illusion of a dragonfly’s transparent wings by stitching on a layer of silk organza hooped over your base fabric.
Use a fine, single strand of dark thread and a simple backstitch to trace the delicate veins of the wings.
Once the embroidery is complete, carefully trim away the excess organza from around the wing shape.
This technique adds a layer of delicate realism that makes your insect appear as if it could fly right off the fabric.
9. Build Dramatic Texture with High-Contrast Thread
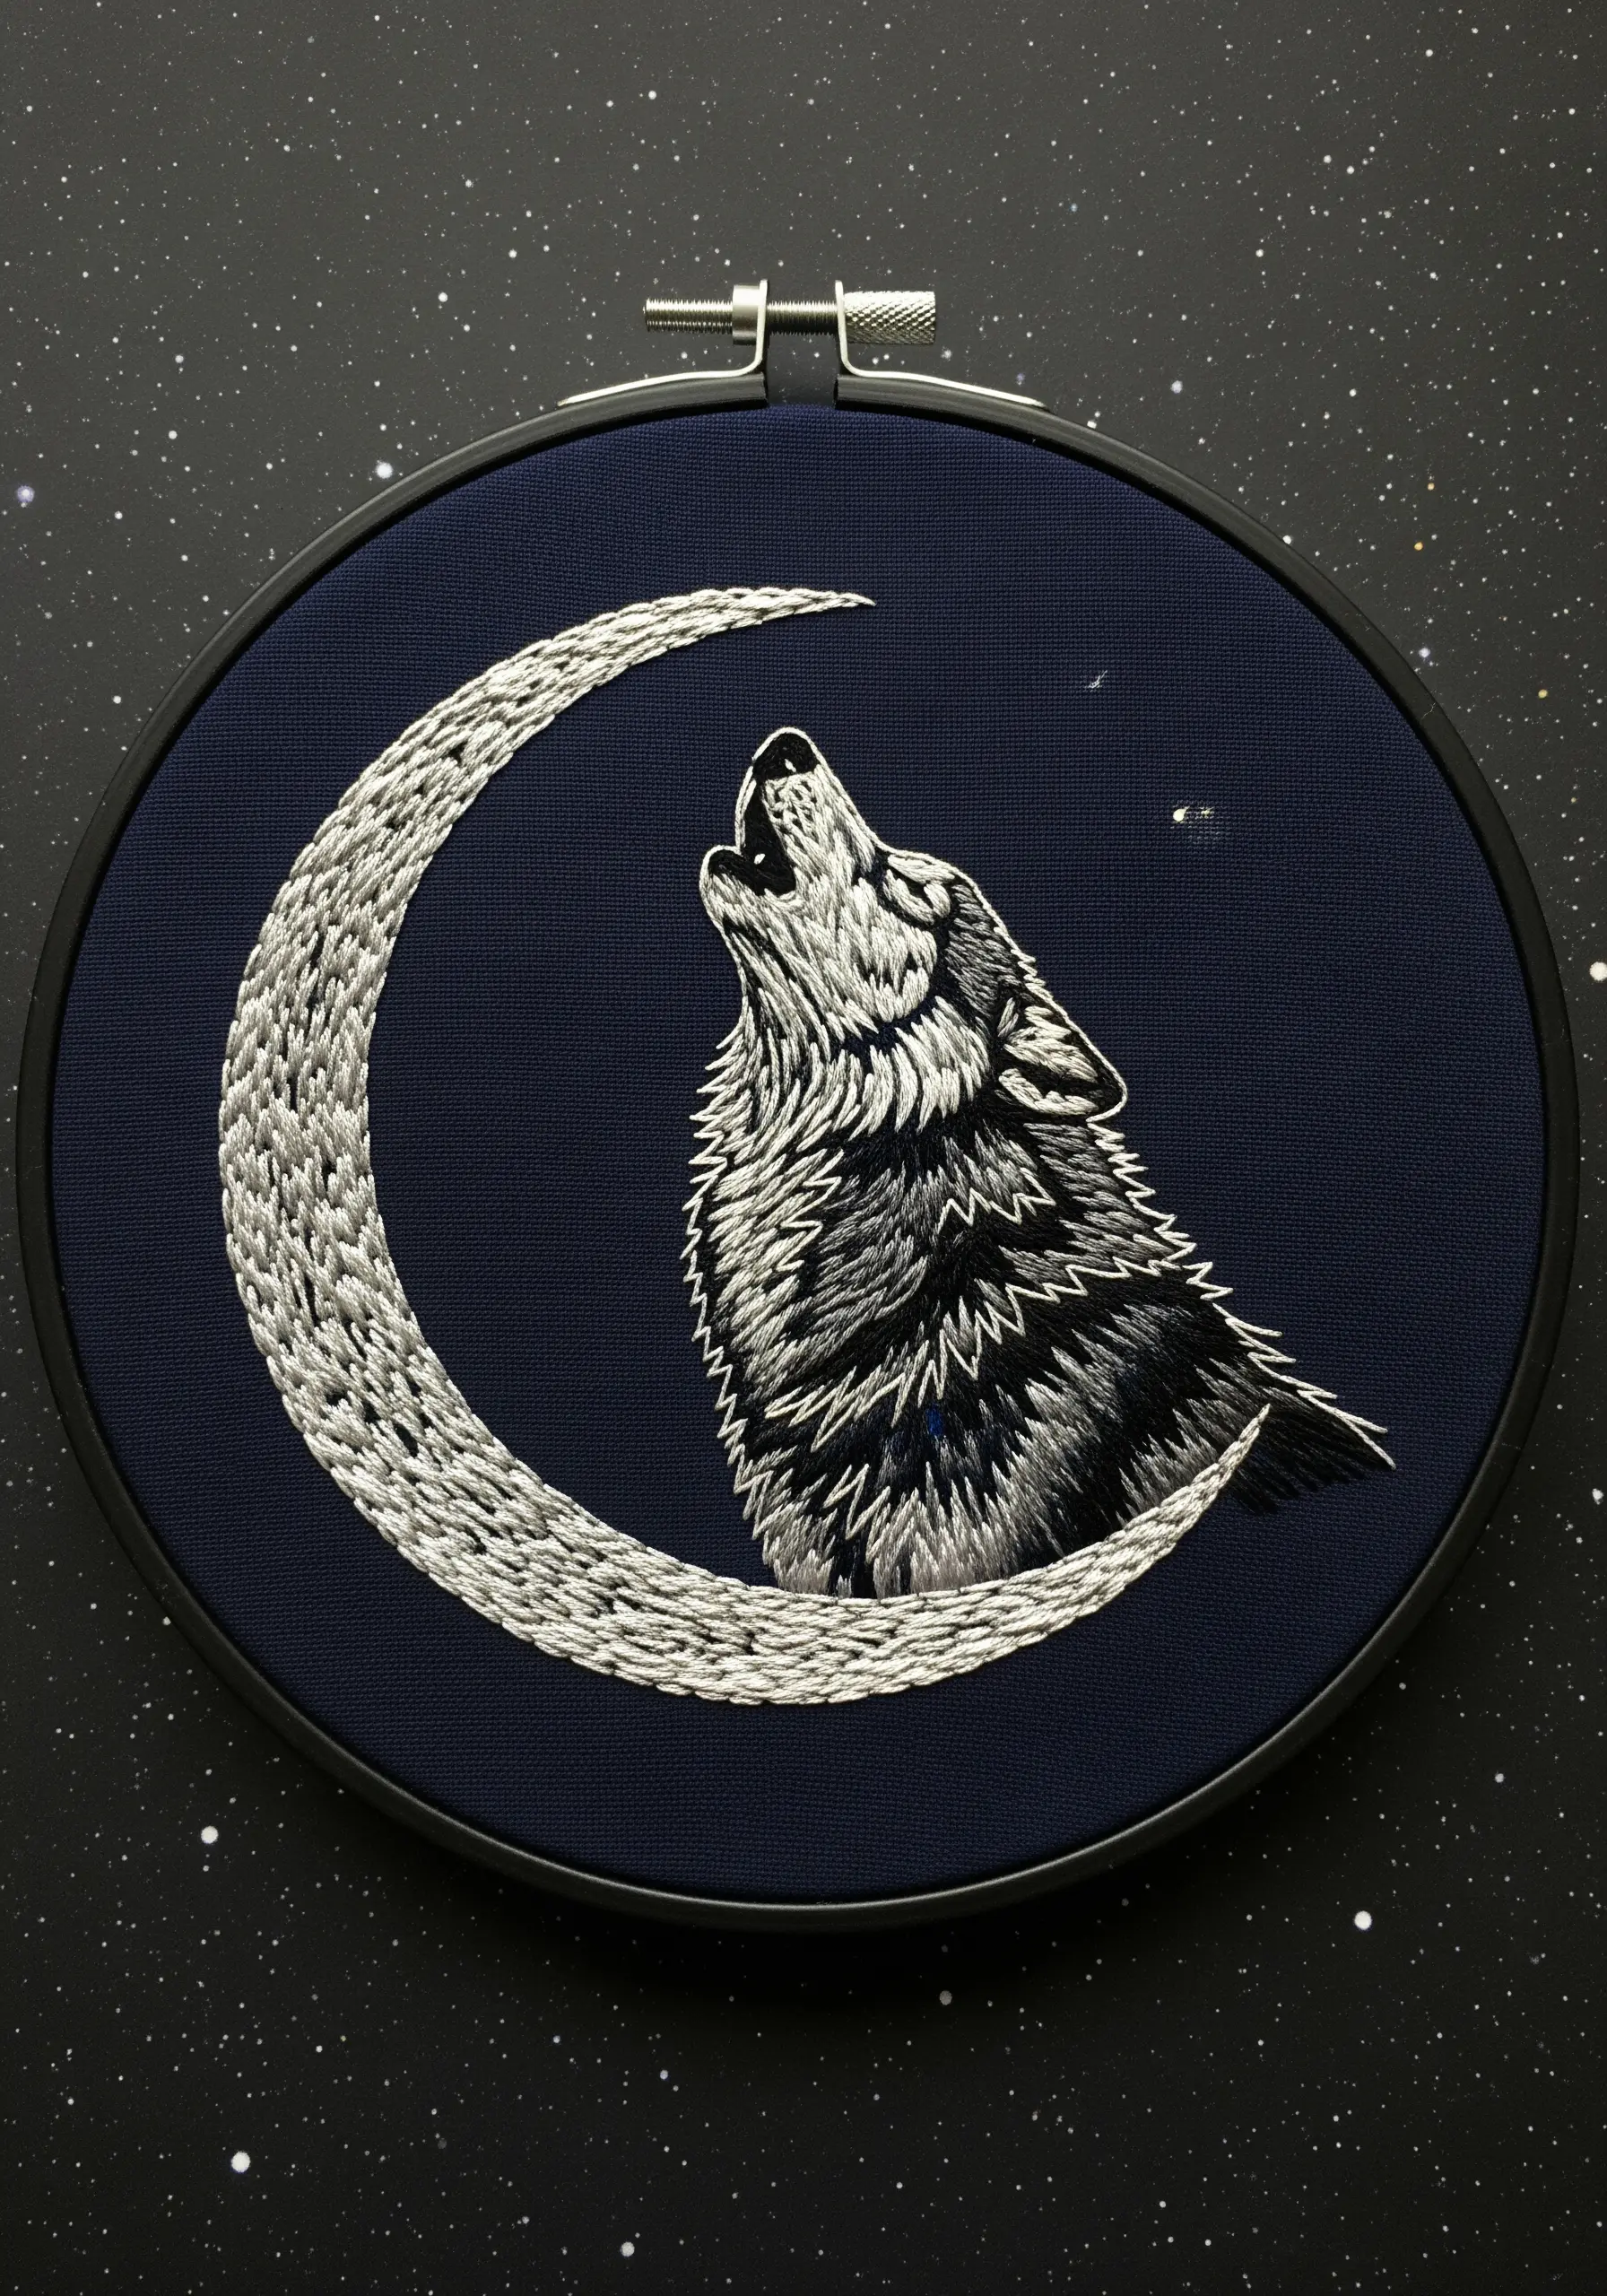
On a dark navy or black background, use shades of white, silver, and gray to create a powerful, graphic image of a howling wolf.
Vary the thickness of your thread—use three strands for the dense fur on the back and a single strand for the finer hairs around the muzzle.
For the moon, fill the crescent shape with a dense field of French knots or seed stitches in white and pale gray to evoke a cratered, tactile surface.
This design is ideal for creating minimalist embroidery wall art with maximum impact.
10. Define a Turtle’s Shell with Outlines and Fill
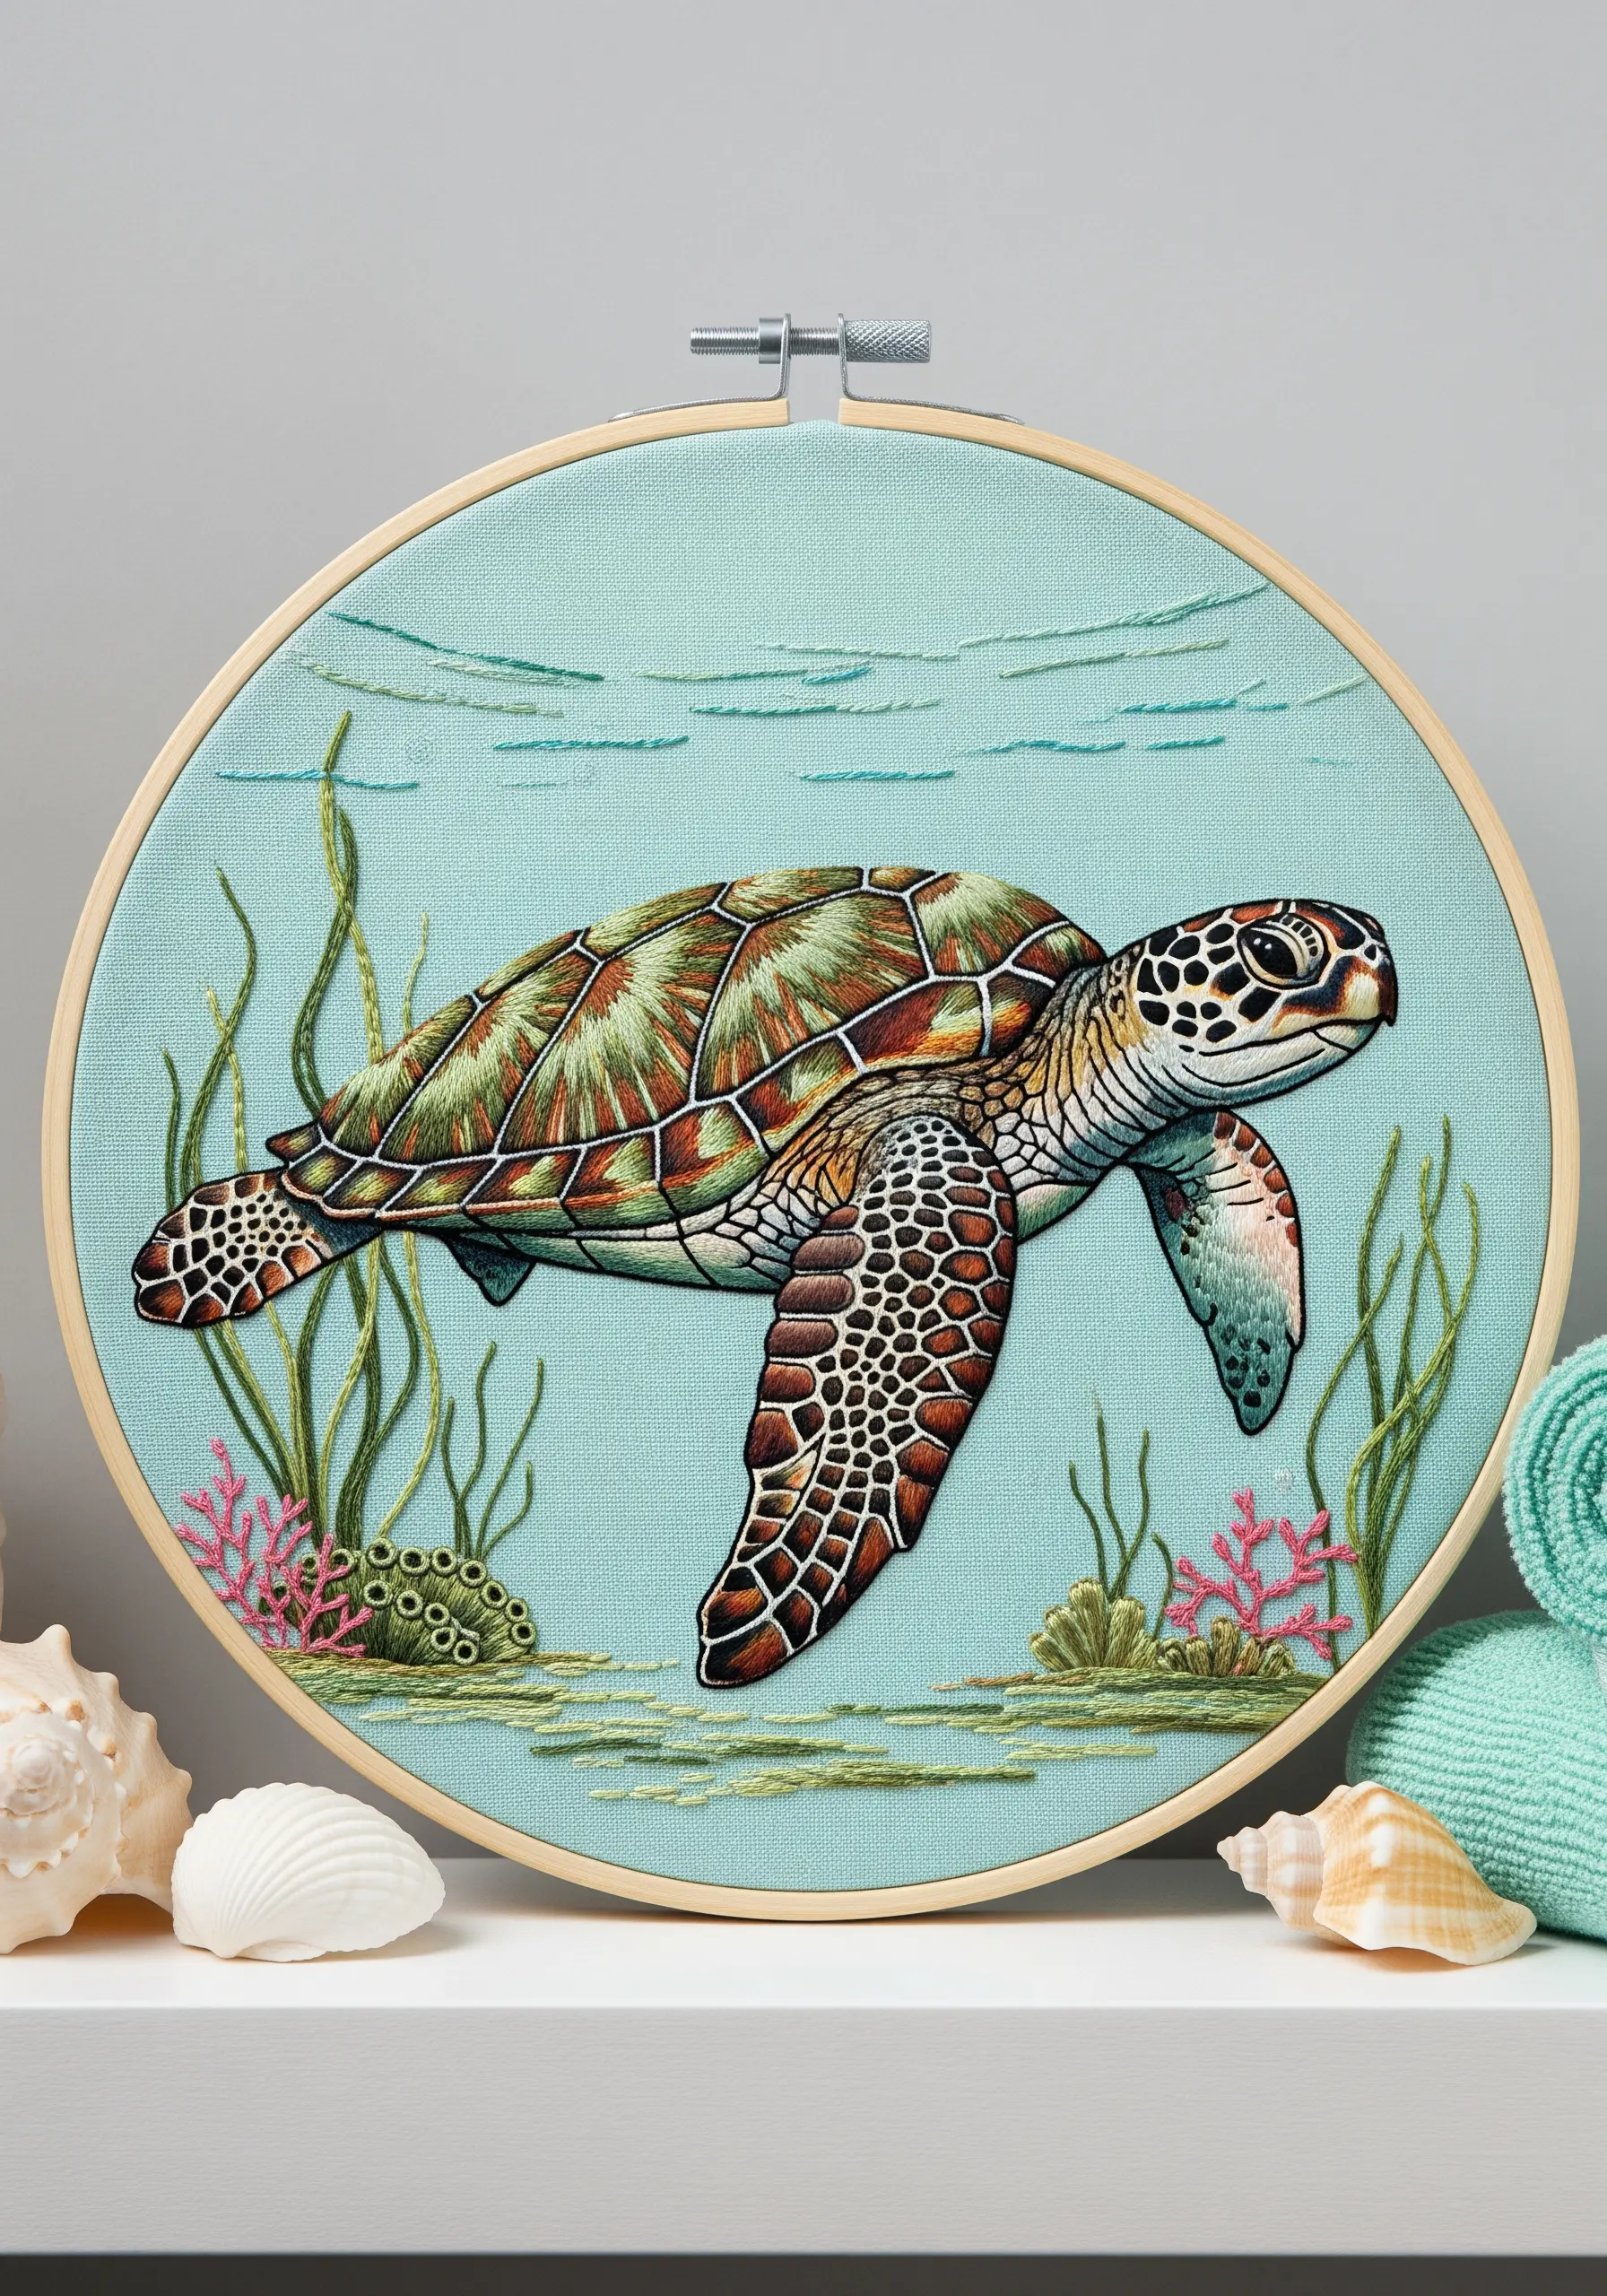
To give a sea turtle’s shell structure and dimension, first outline each scute (the individual plates of the shell) with a dark brown or black split stitch.
Fill these outlined sections using thread painting, blending greens, golds, and browns to create a mottled, natural pattern.
This outline-and-fill method keeps the pattern clean and defined while still allowing for realistic color blending.
Finish with simple straight stitches in light blue to suggest underwater light filtering through the water.
11. Use Thread Sheen to Replicate Feather Gloss
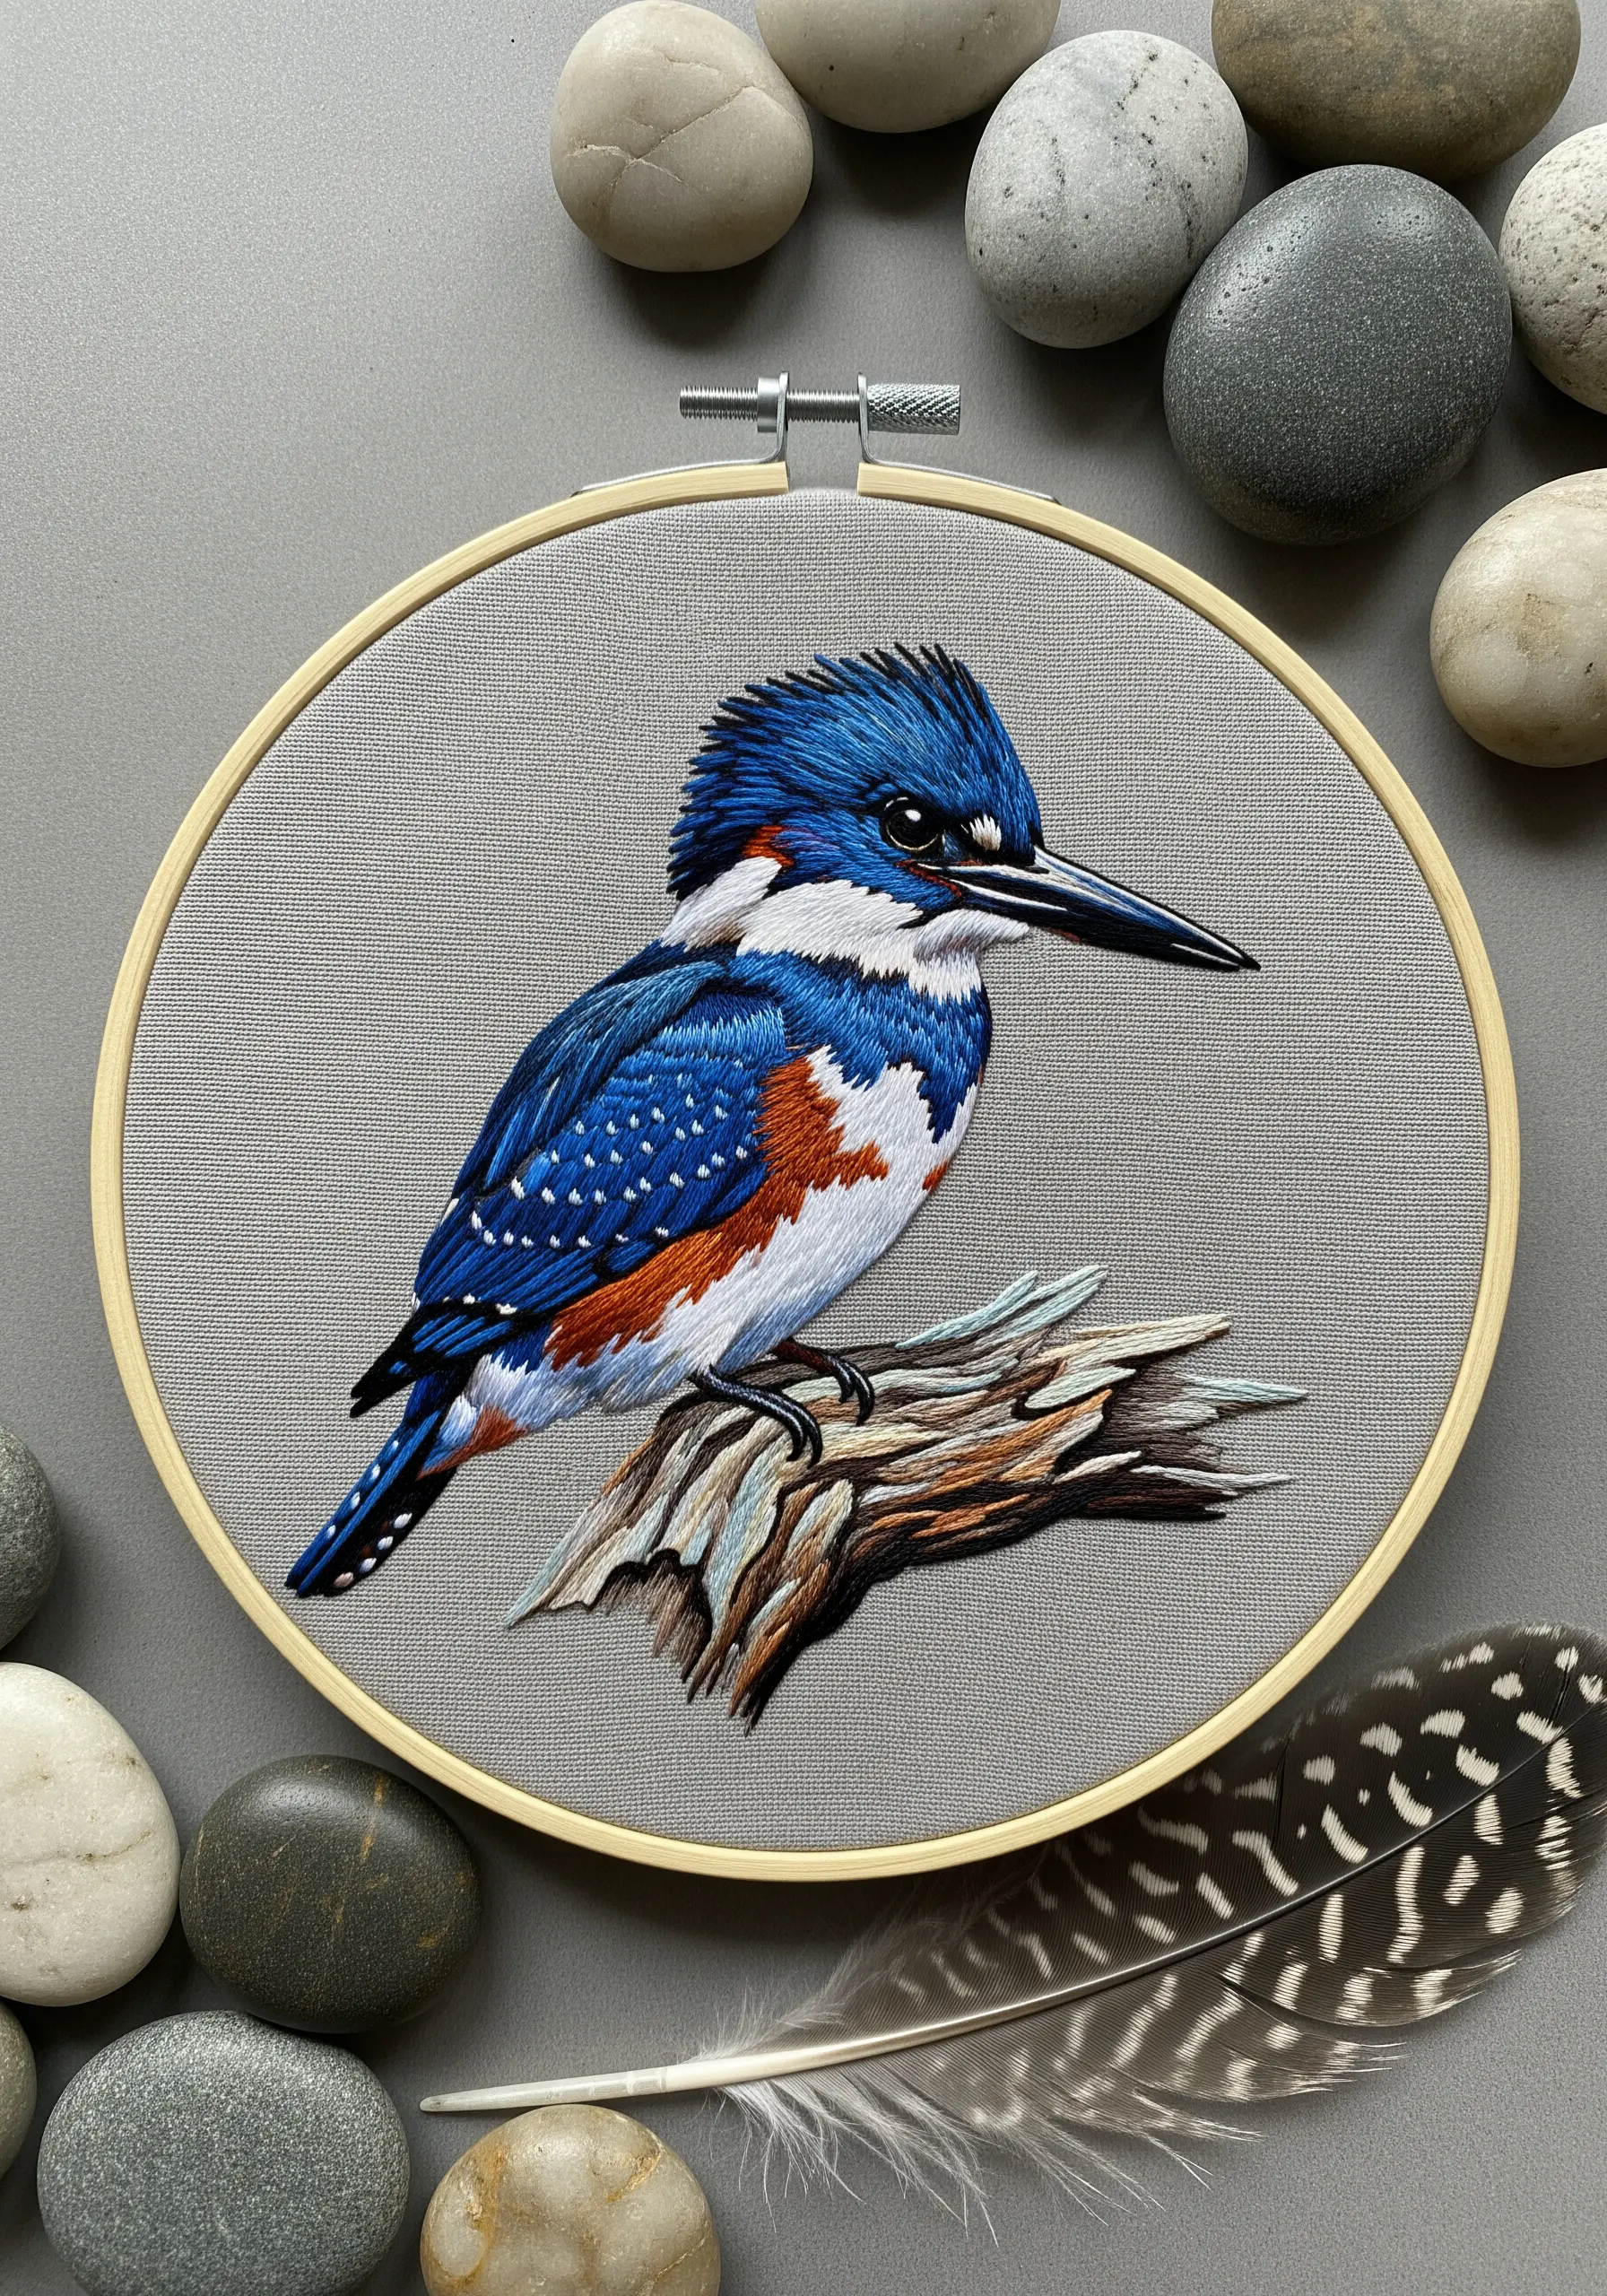
A kingfisher’s brilliant blue feathers have a unique, almost metallic sheen that you can replicate with the right thread choice.
Use a rayon or silk floss for the blue and turquoise sections, as its high luster will catch the light.
Contrast this by using matte cotton floss for the white and rust-colored feathers on the bird’s chest.
This subtle shift in material creates a sophisticated, lifelike effect, adding stitched details that make plain walls pop elegantly.
12. Create a 3D Ladybug with Padded Satin Stitch

Give your ladybug a raised, three-dimensional body using padded satin stitch.
First, fill the shape of the red shell with a base layer of small, underlying stitches (like seed stitches), then cover this padding with smooth, vertical satin stitches.
This simple technique lifts the embroidery off the fabric surface, creating a realistic, convex shape.
For an extra touch of realism, use a high-sheen thread for the final layer to mimic a glossy shell, one of many tiny embroidery designs that pack a punch.
13. Convey Motion with Dynamic Stitches and a Textured Fabric
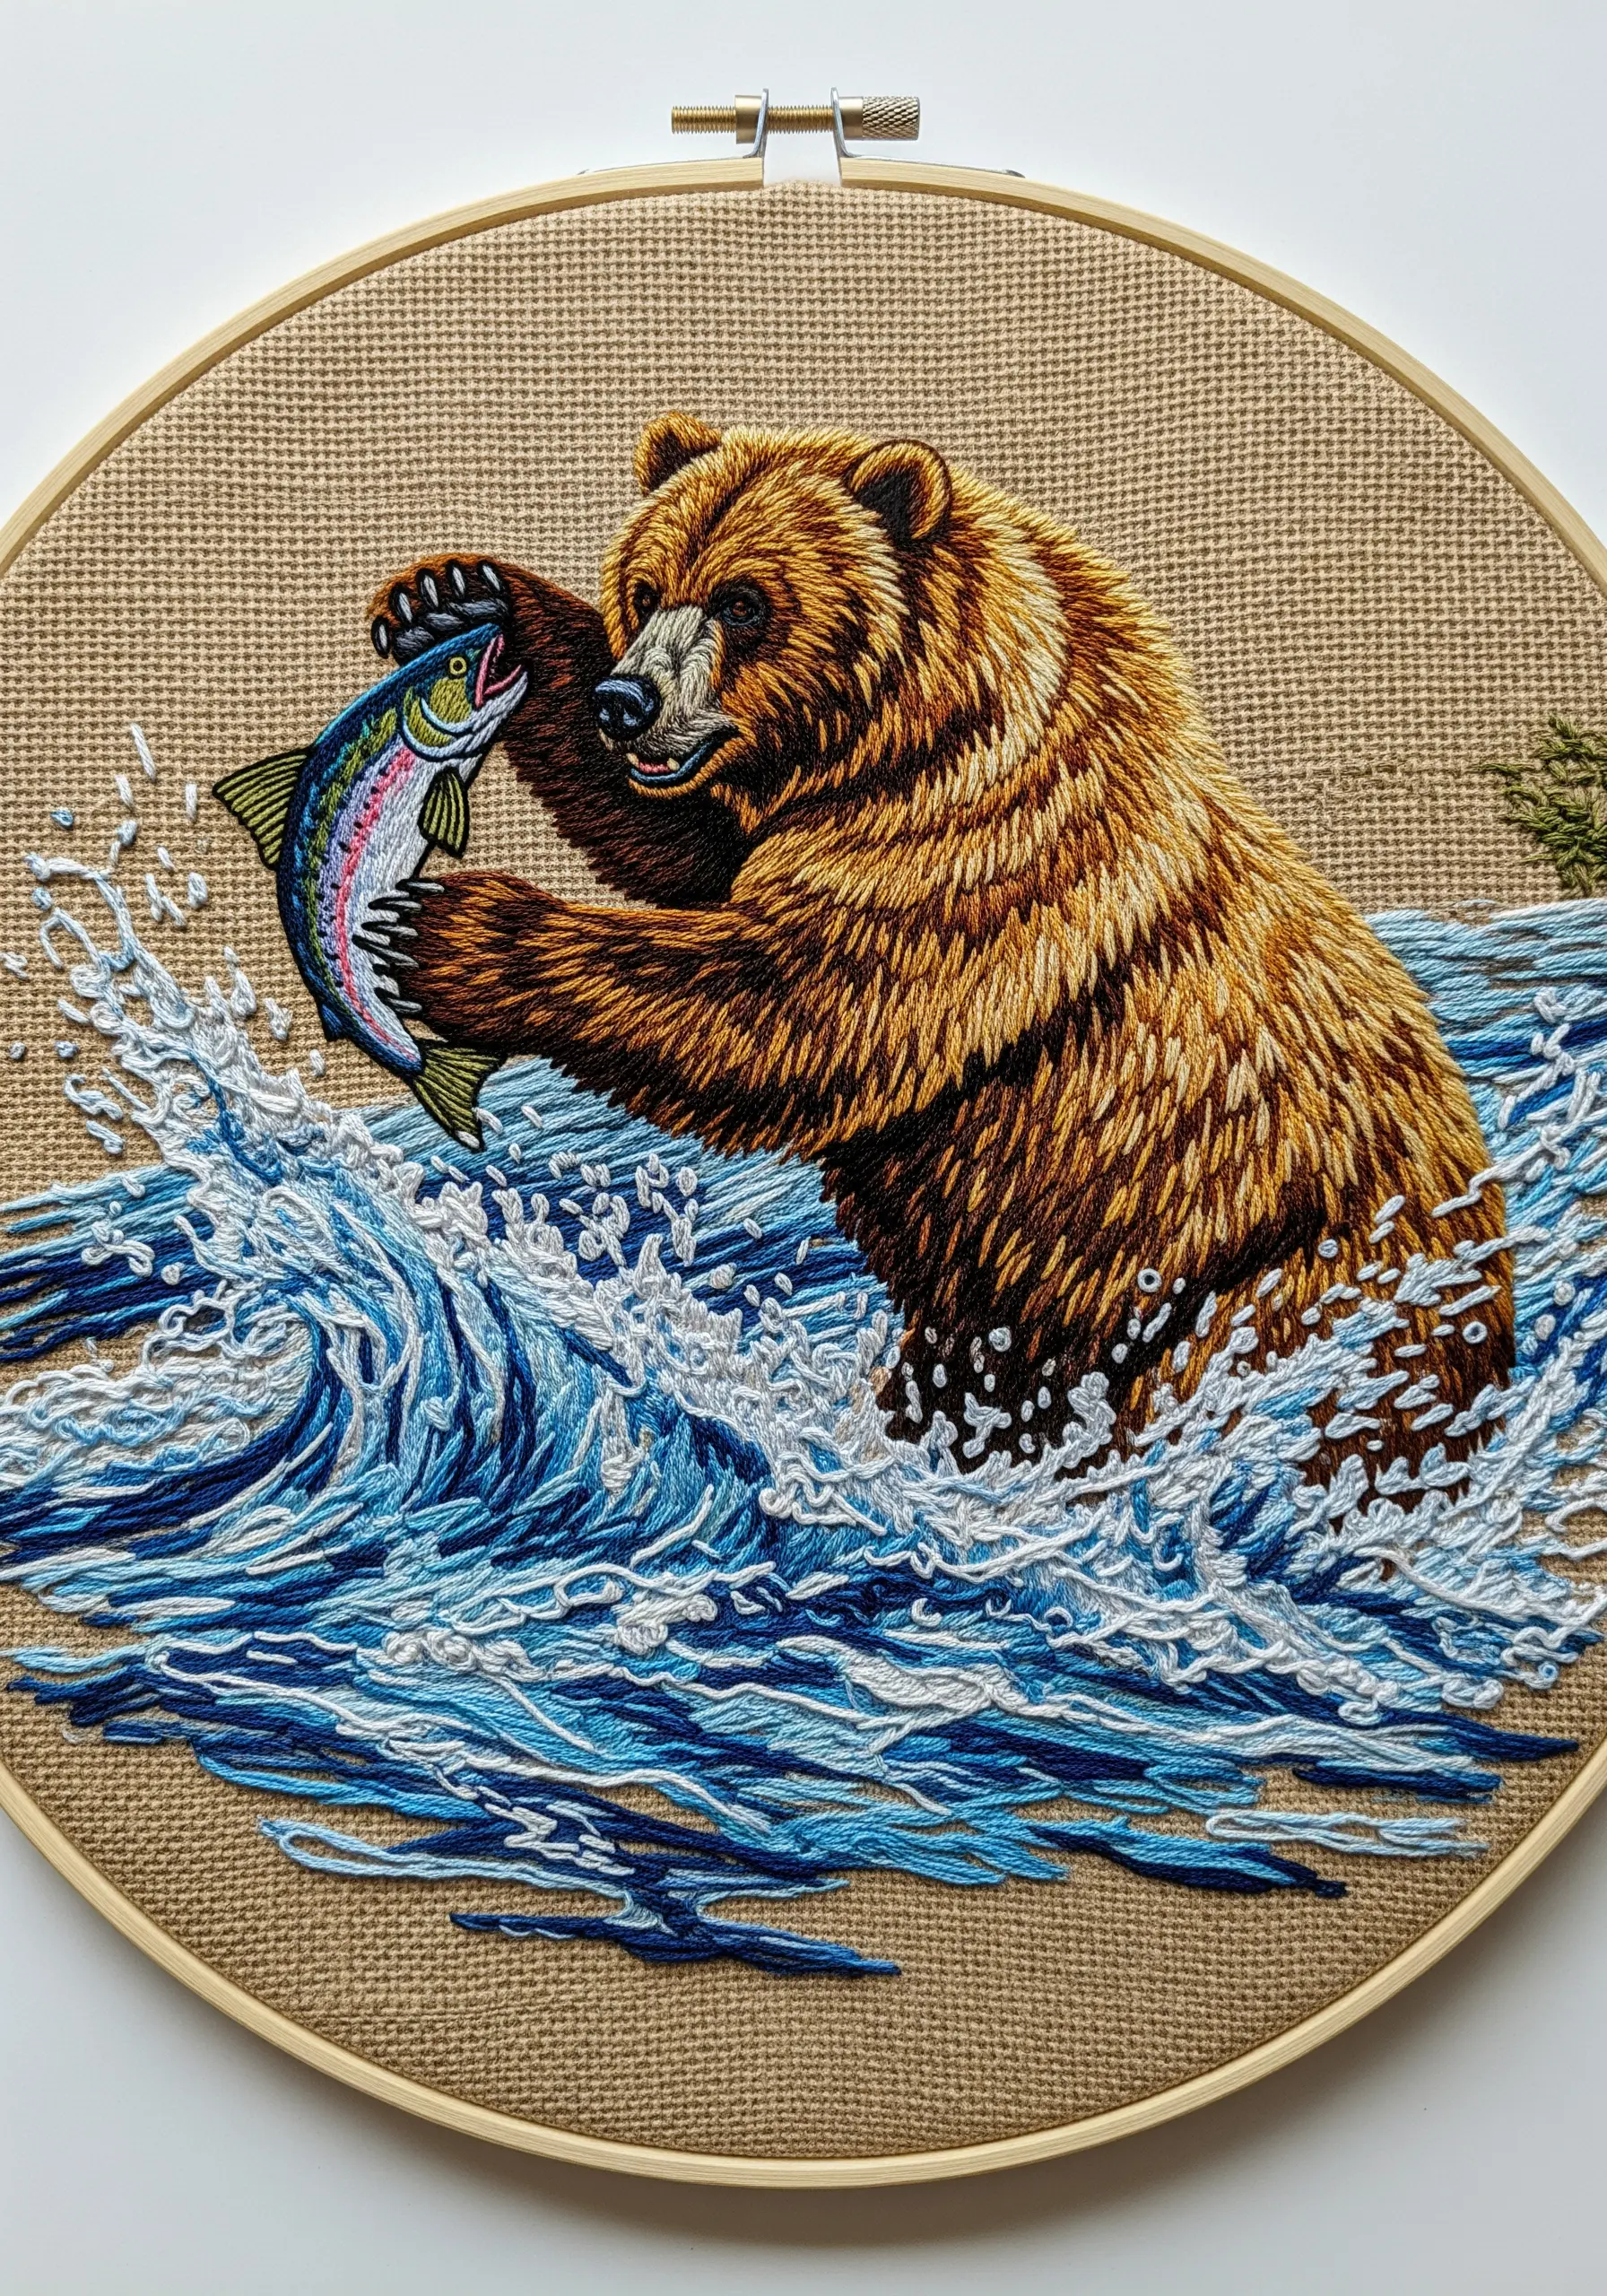
To capture the energy of a bear splashing in water, choose your fabric and stitches to enhance the sense of movement.
Stitching on a coarse fabric like burlap or Aida cloth adds an immediate rustic texture.
For the water, use a chaotic mix of stem stitches, split stitches, and French knots in various blues and white to create the look of churning foam.
These are great nature texture embroidery hacks for dynamic scenes.
14. Craft a Fluffy Squirrel Tail with the Turkey Work Stitch
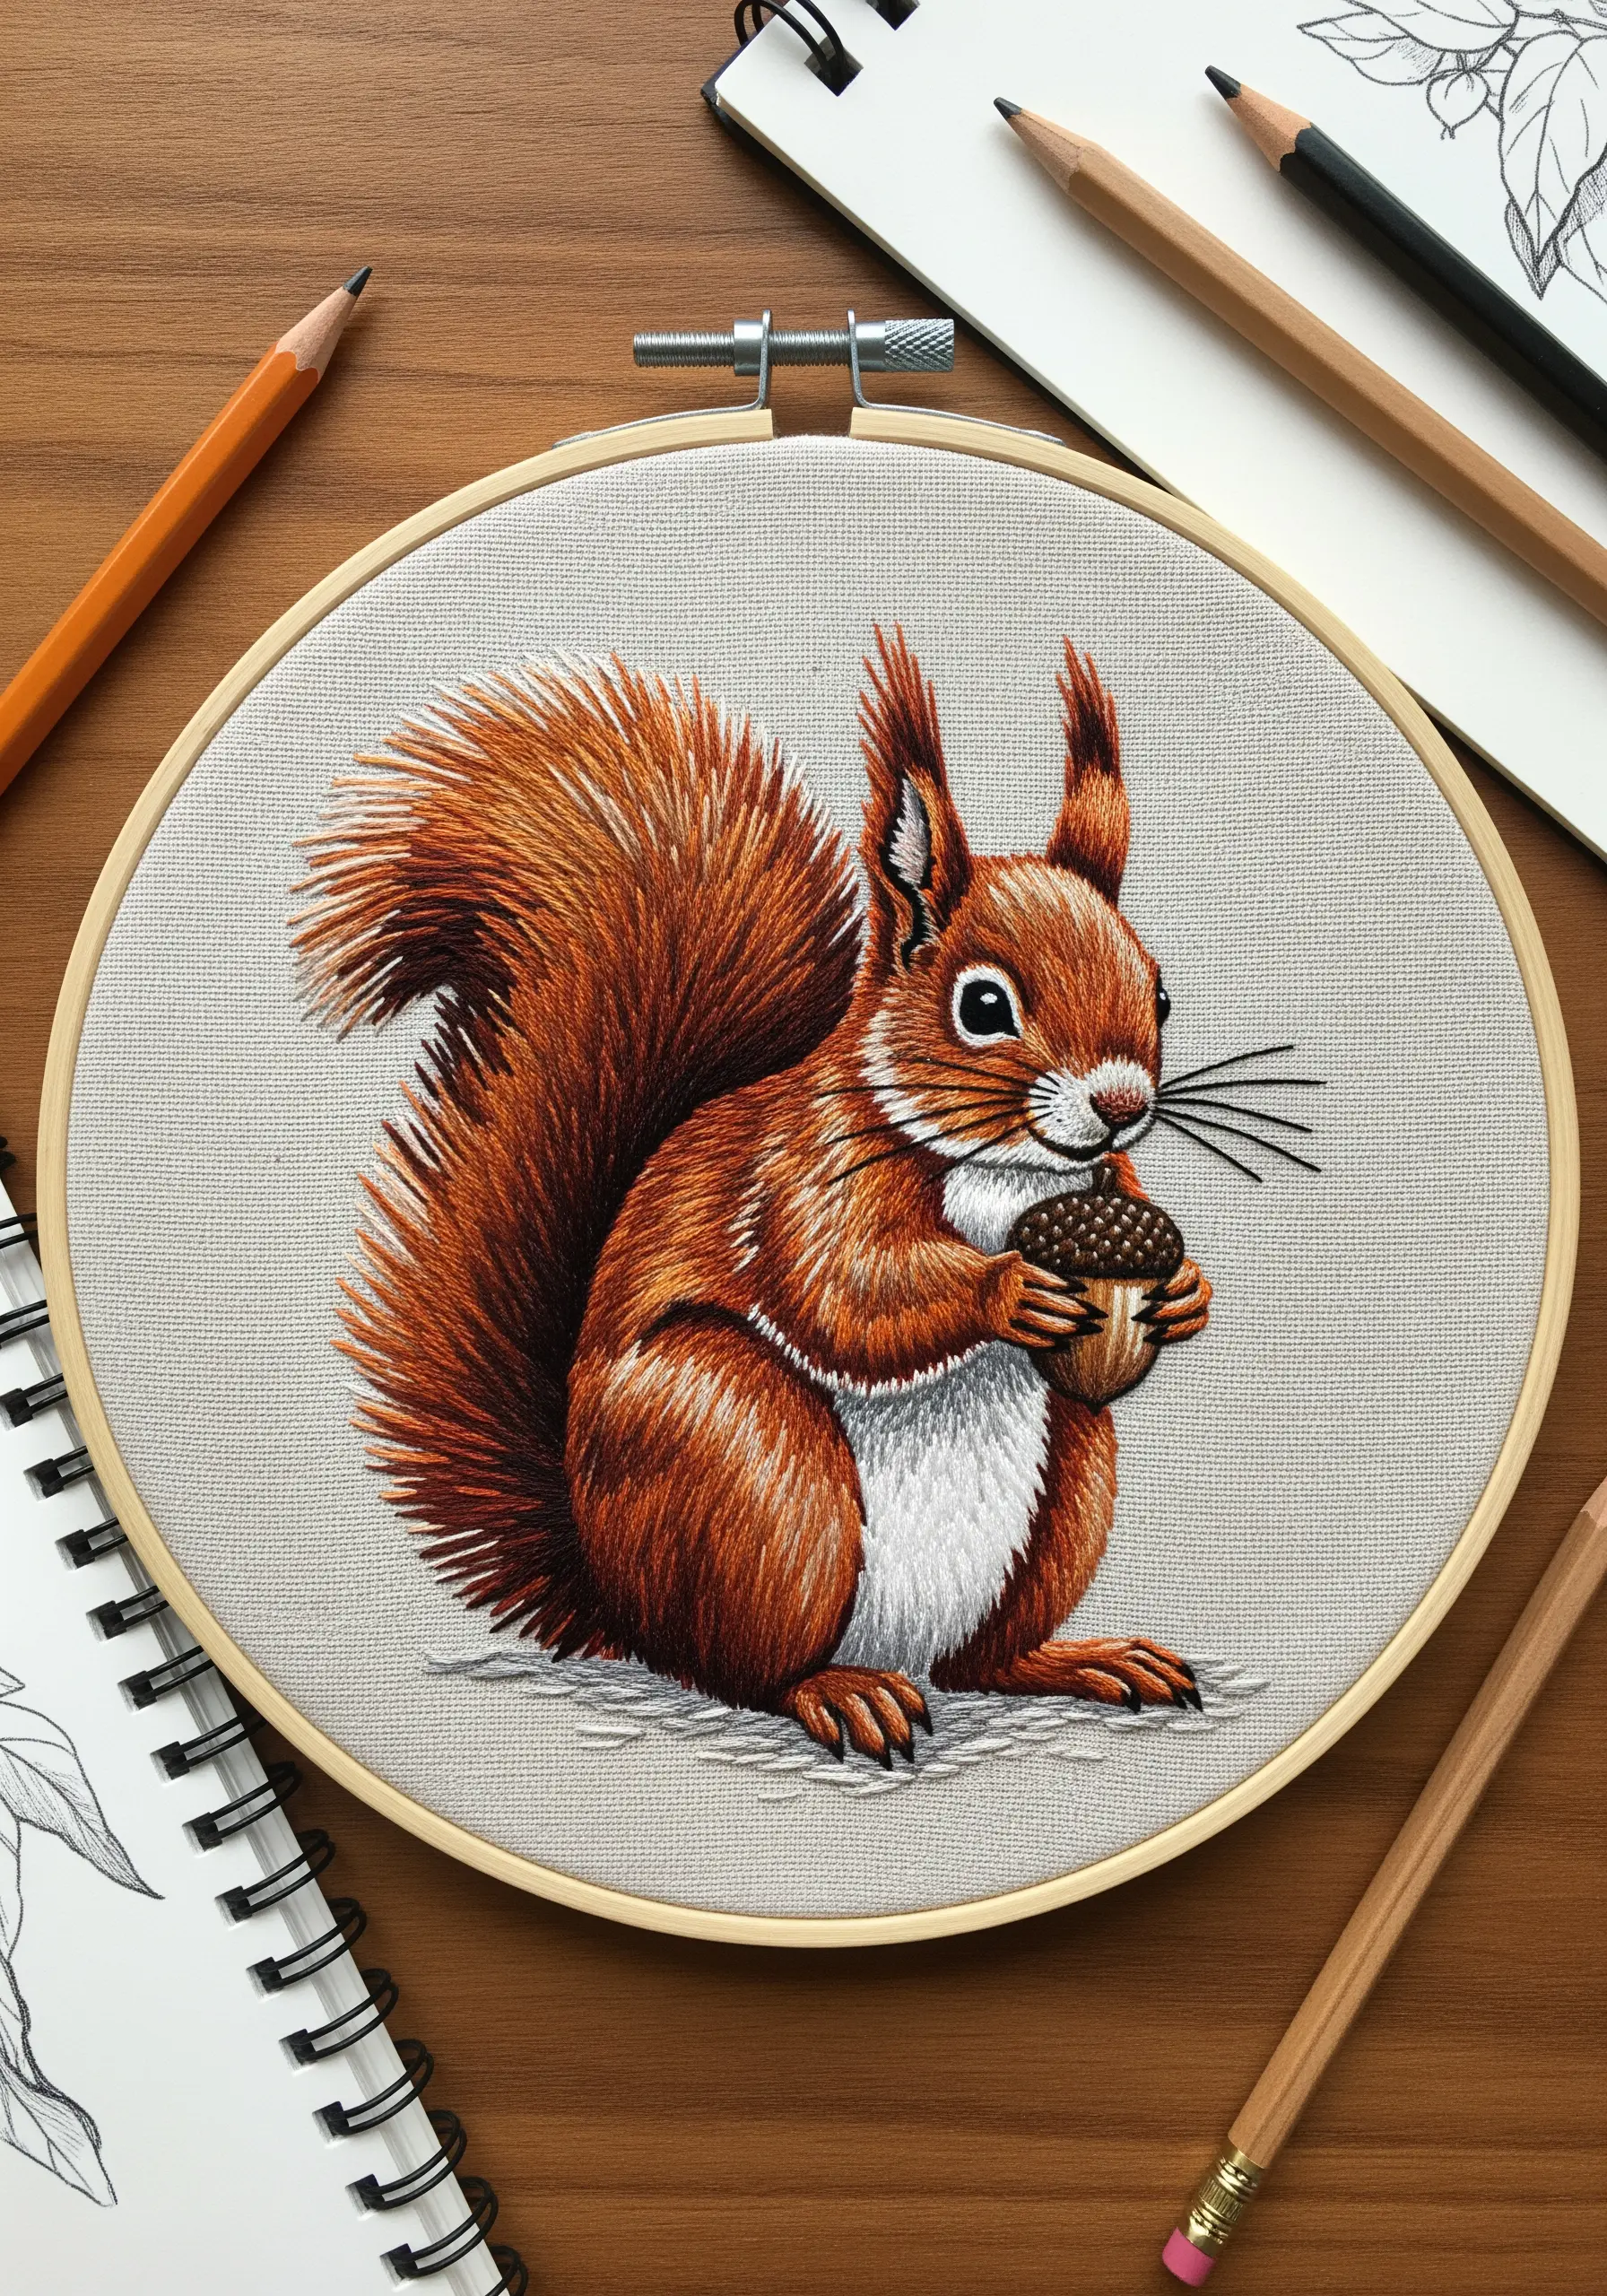
The signature bushy tail of a squirrel is the perfect opportunity to use the turkey work stitch for a three-dimensional, tactile effect.
Create rows of loops with multiple shades of rust, brown, and black thread, then snip them open and fluff them with your needle.
Trim the ends to shape the tail, making it denser near the body and wispier at the tip.
Contrast this high-pile texture with smooth, flat thread painting on the squirrel’s body for a professional finish.
15. Suggest Slick Skin with Directional Satin Stitches
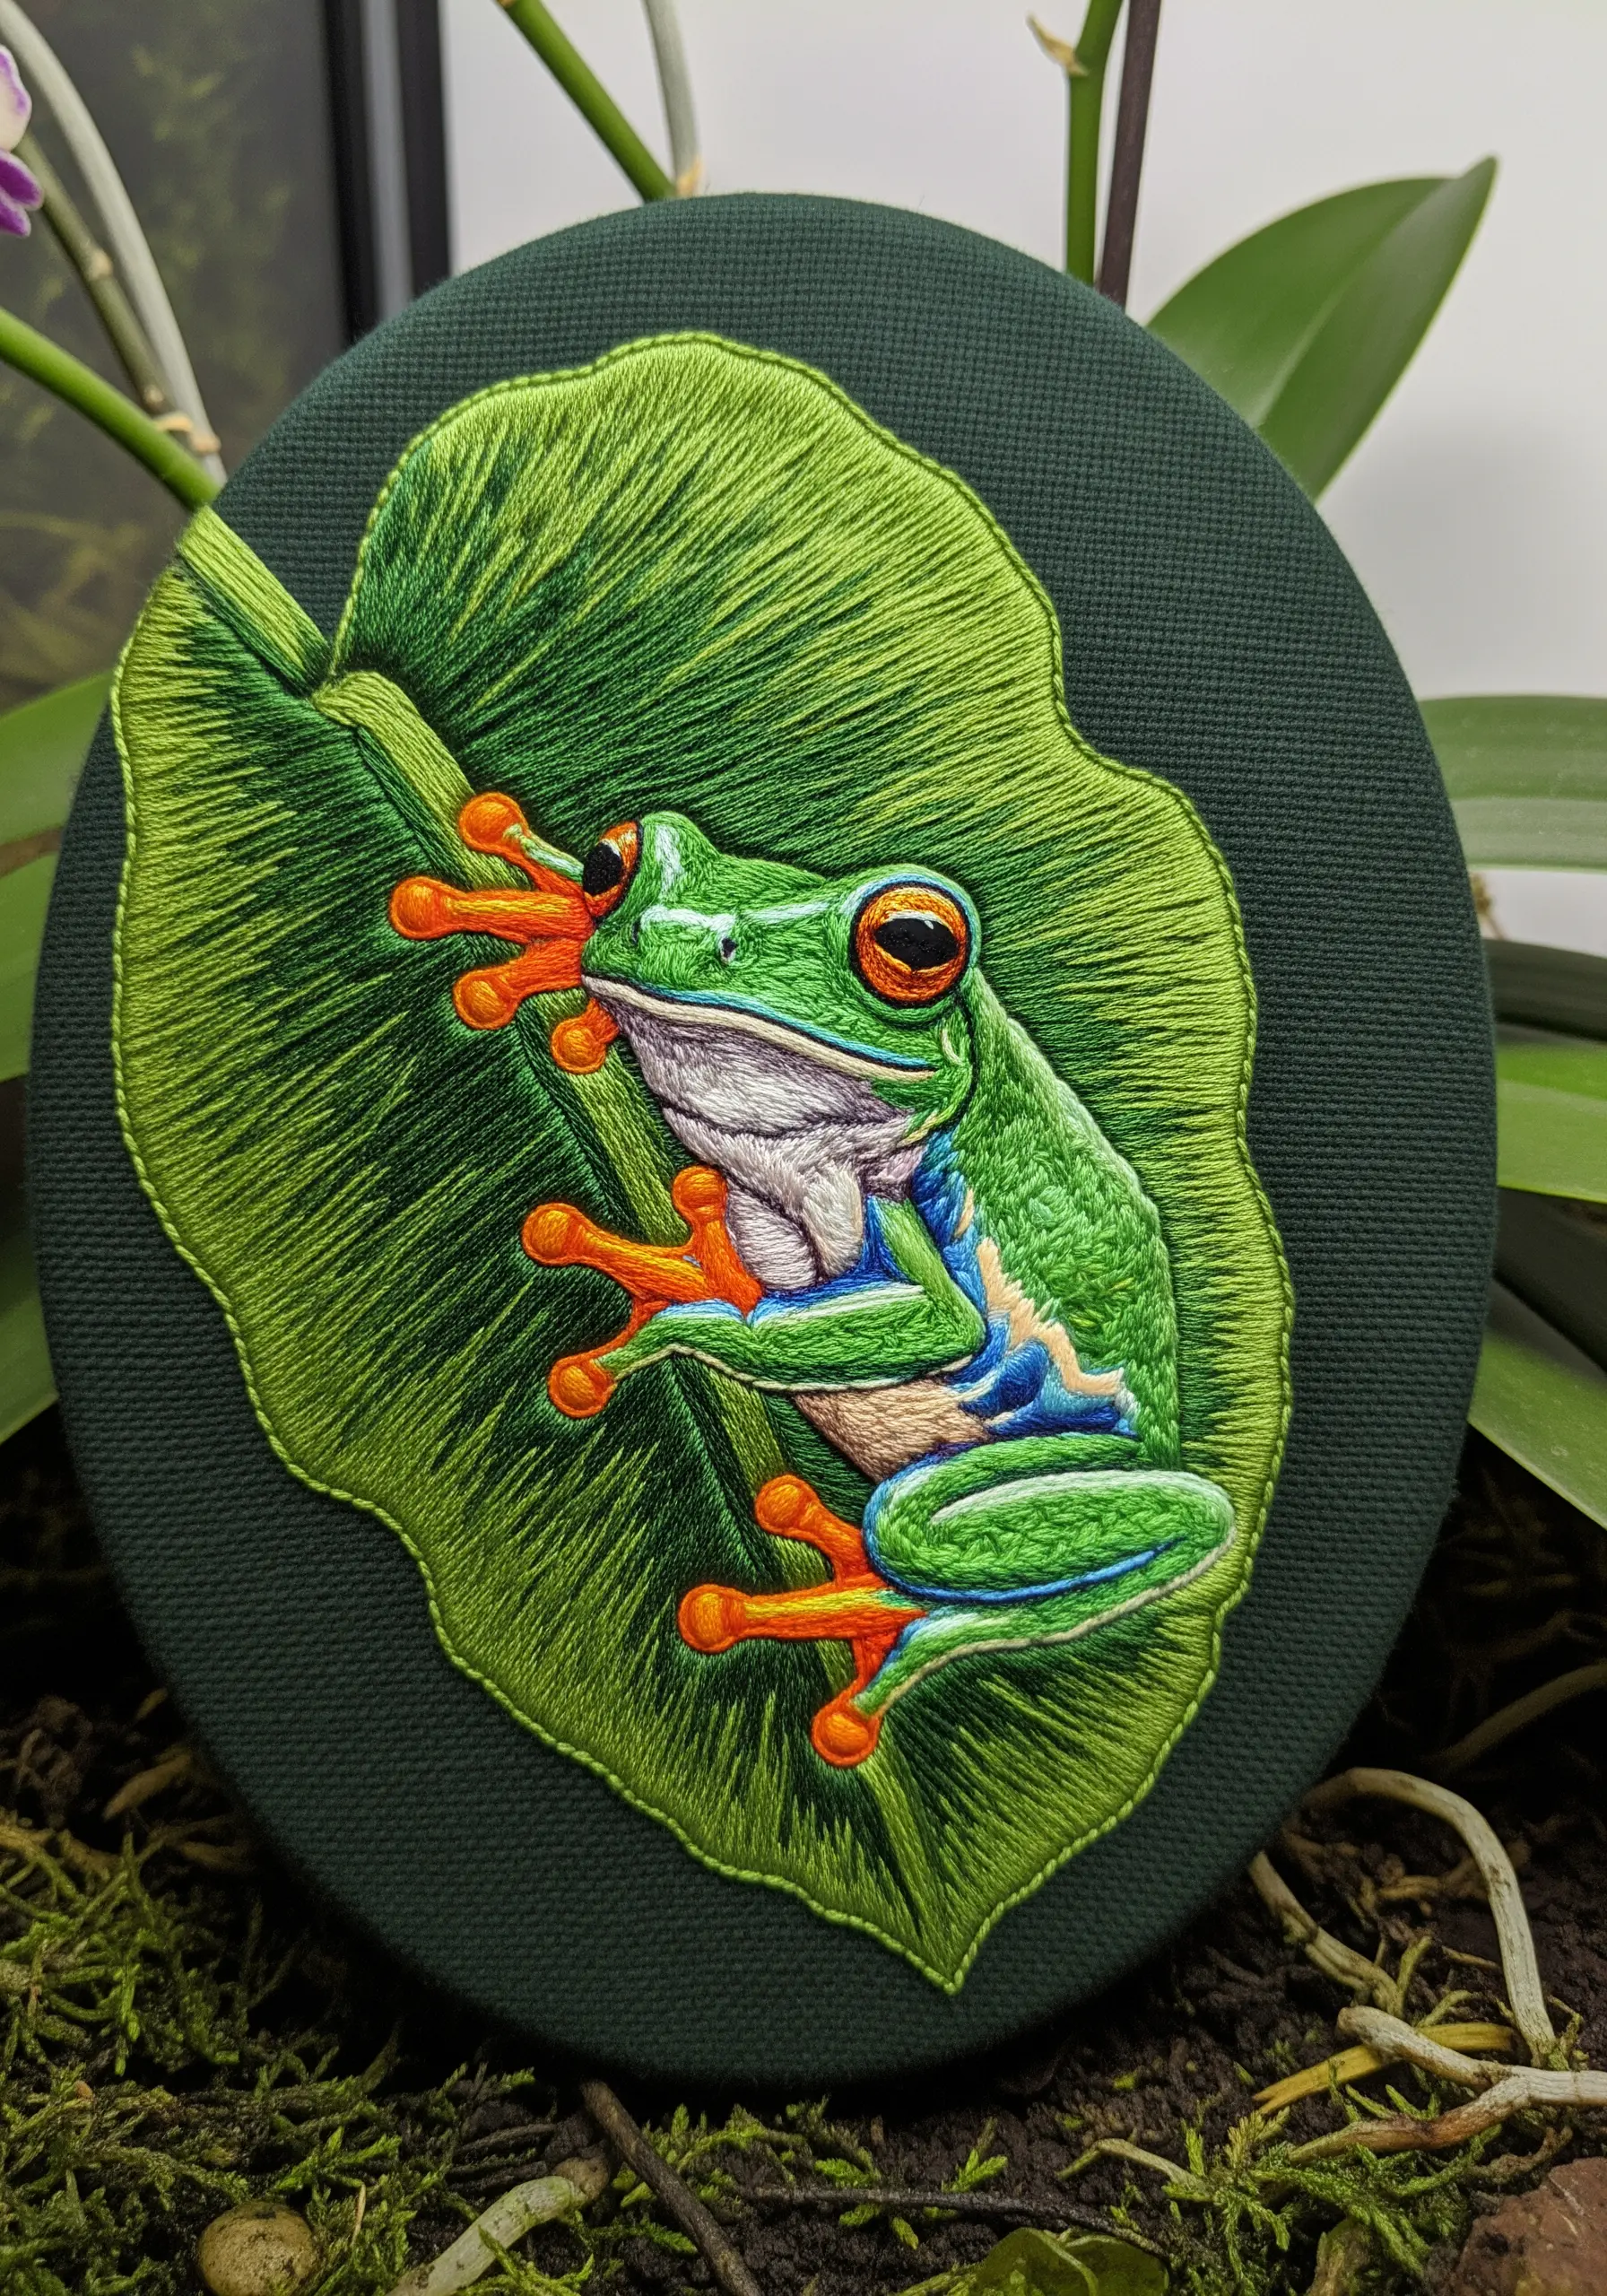
To give a tree frog’s skin a slick, wet appearance, use long, smooth satin stitches that follow the contours of its body.
The uninterrupted sheen of the satin stitch reflects light, creating the illusion of a smooth, moist surface.
Stitch a vibrant subject like this on a dark, matte background fabric, such as deep green cotton, to make the bright colors and glossy texture stand out even more.
16. Achieve Precision with Metallic Thread Accents
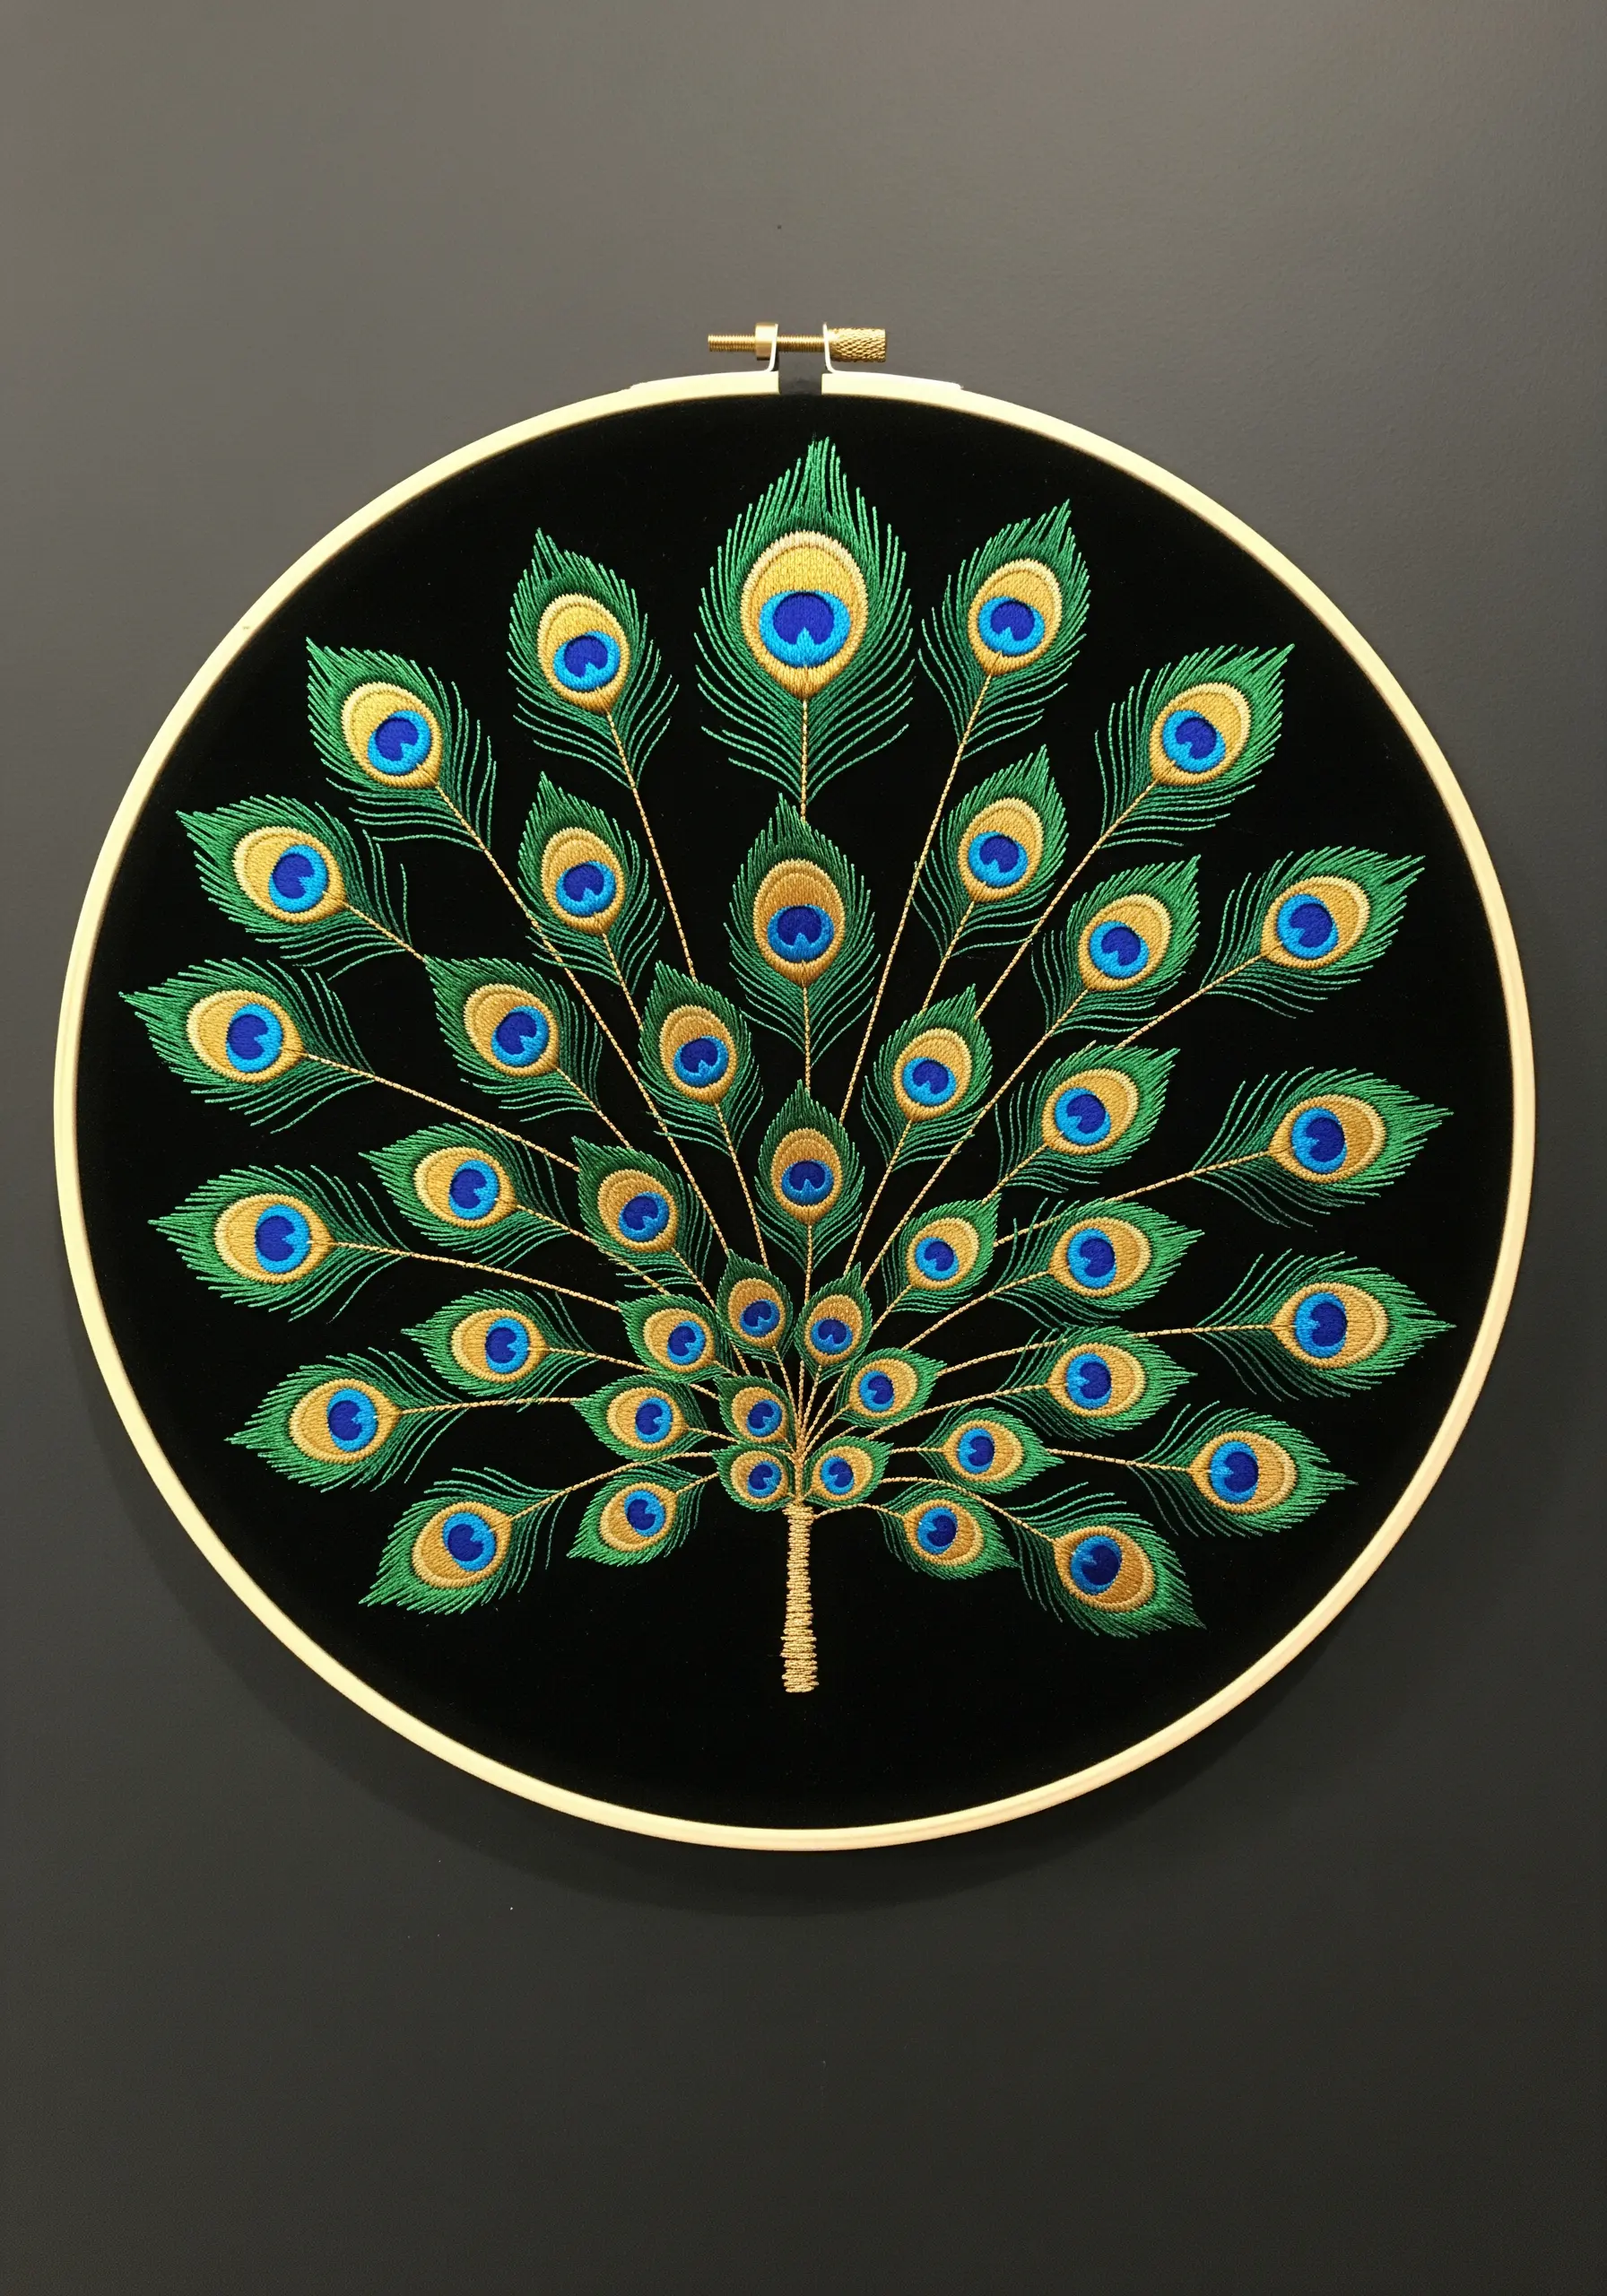
The intricate eyespots of a peacock’s tail demand precision and a touch of glamour.
Use a single strand of metallic gold thread for the centers, working carefully to keep the stitches neat as metallic floss can be tricky.
Surround the gold with a bold ring of turquoise or blue satin stitch, followed by radiating fishbone stitches in green.
Stitching on black velvet makes the jewel tones and metallic accents feel exceptionally luxurious, resulting in framed embroidery ideas that truly shine.
17. Form Spiky Hedgehog Quills with Layered Straight Stitches
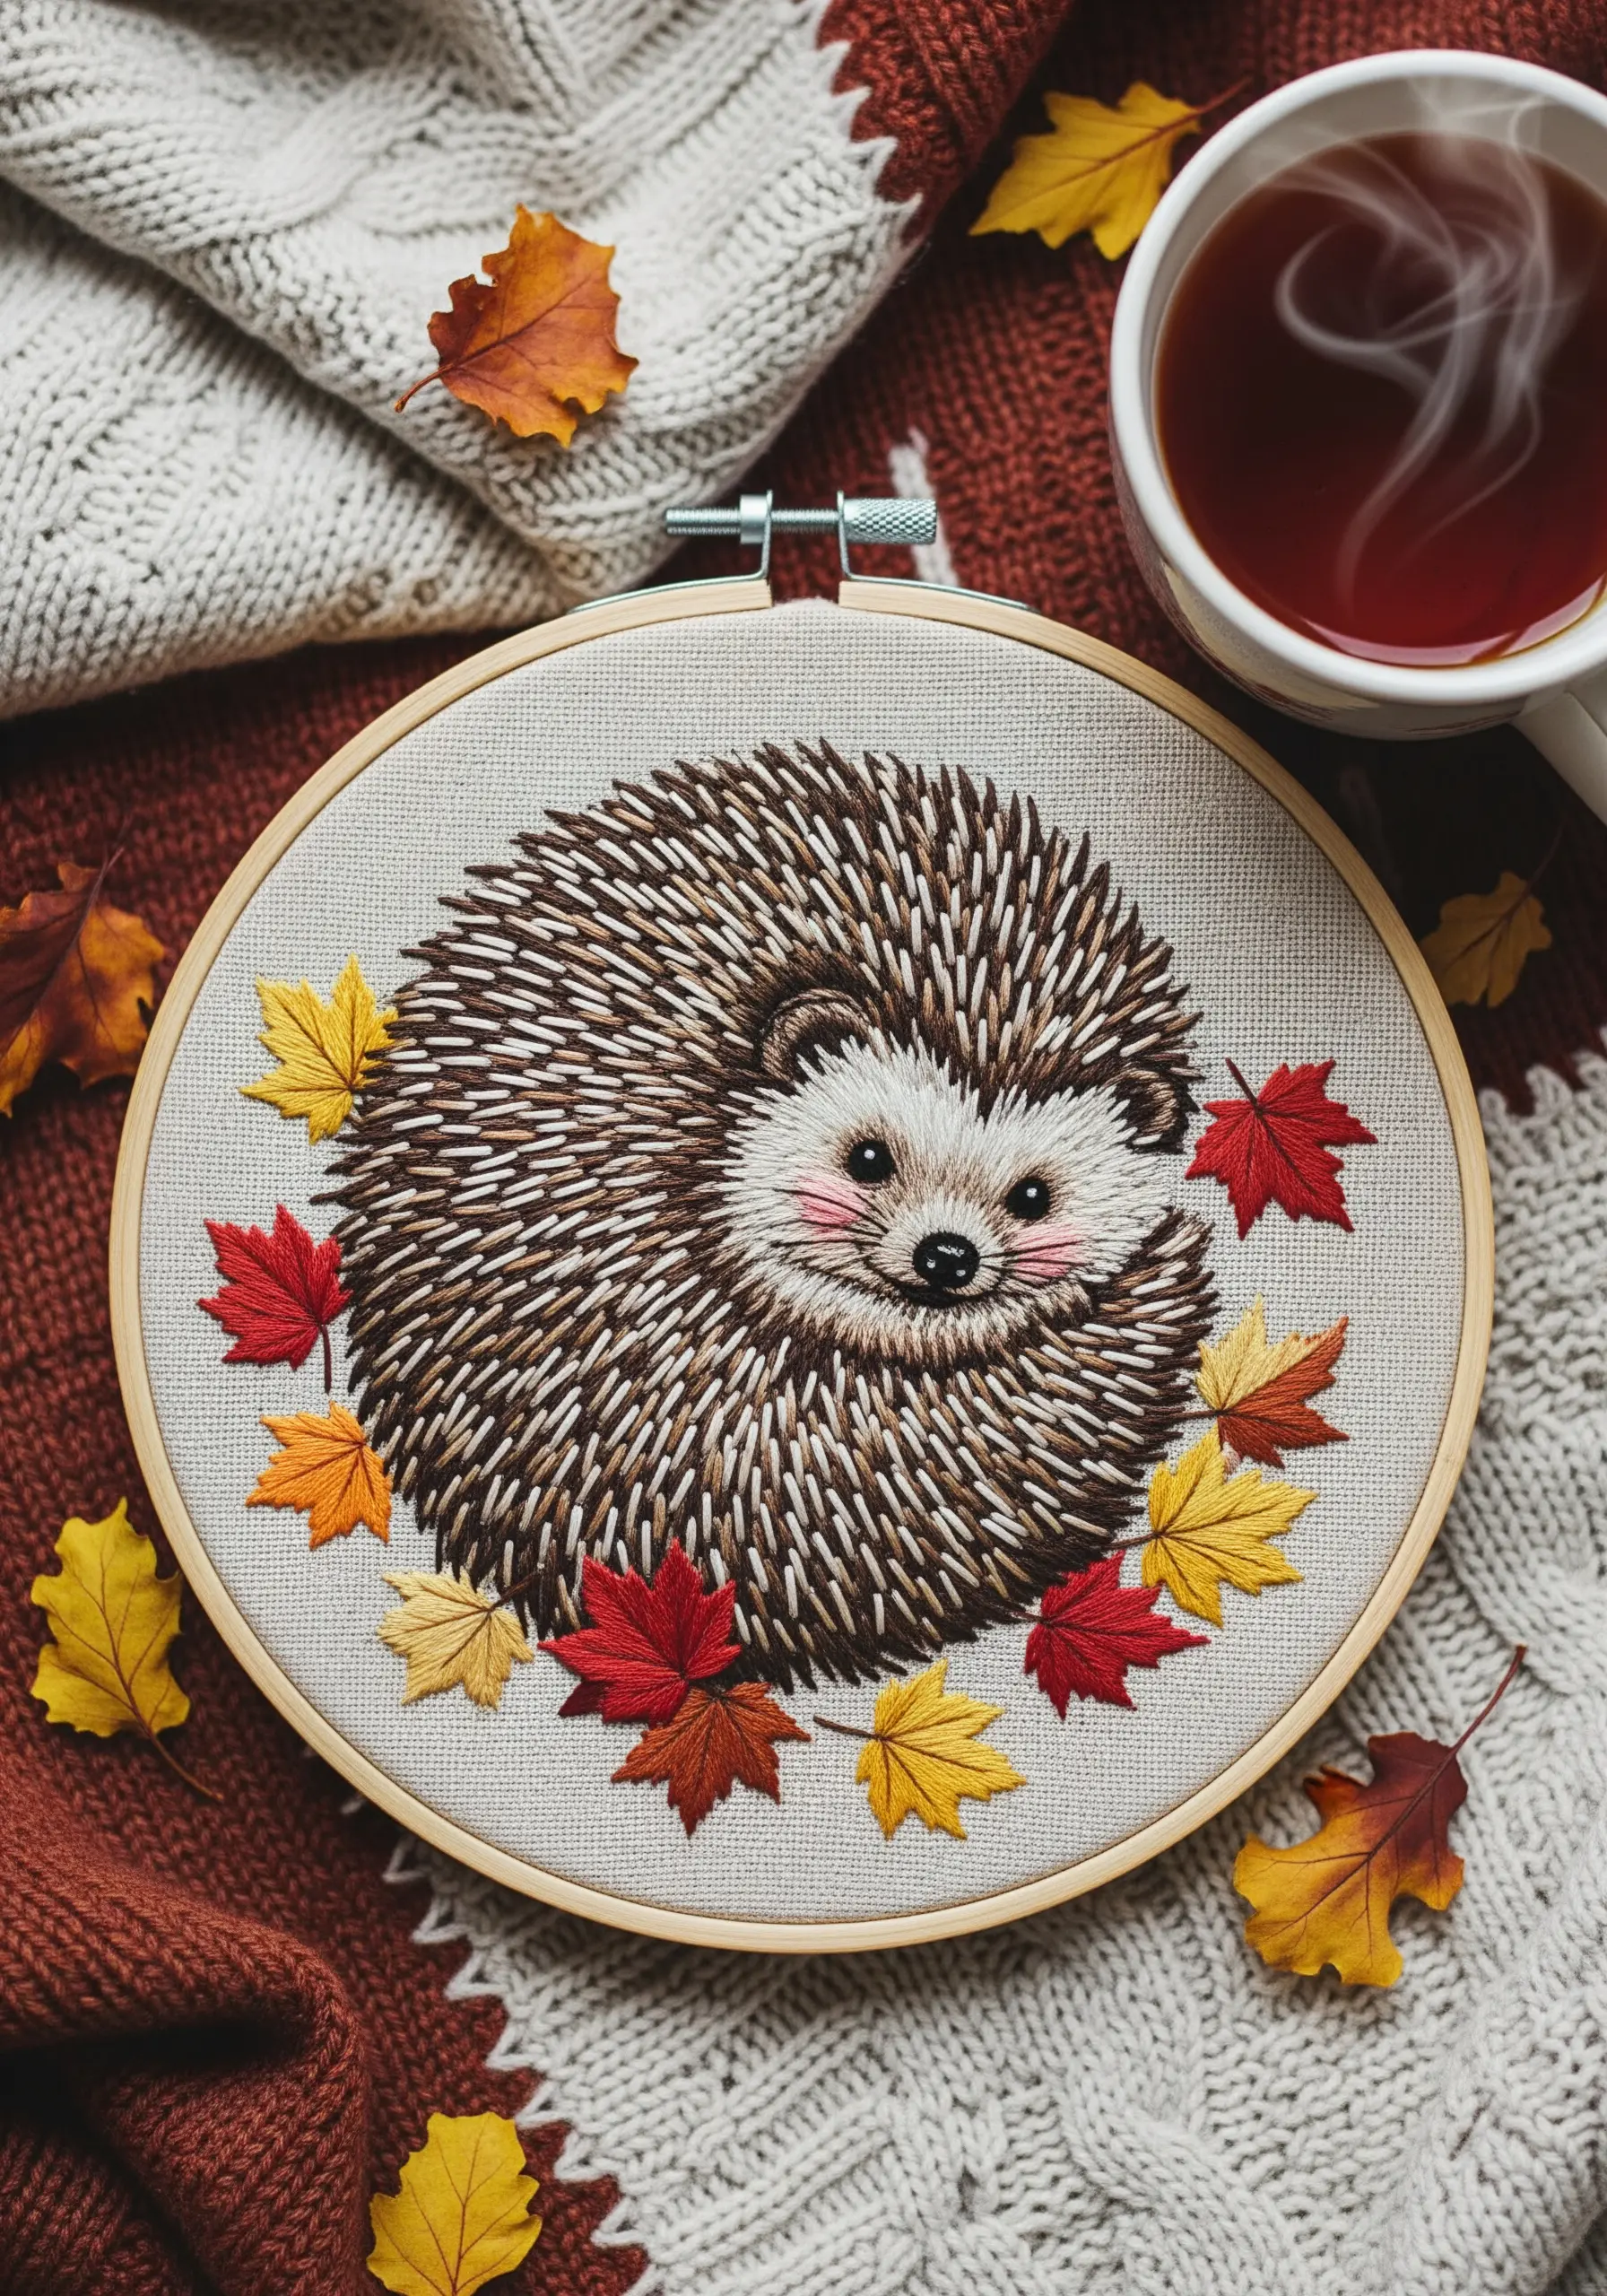
To create the dense, spiky texture of a hedgehog, use layered straight stitches radiating from the face outwards.
Work in sections, using a palette of dark brown, beige, and cream threads to build up layers of color and texture.
Vary the length and angle of your stitches slightly to avoid a perfectly uniform look, which makes the quills feel more natural.
This technique is a perfect fit for cozy mixed-fiber projects, offering a tactile result.
18. Emphasize Form with Couching and Directional Fill
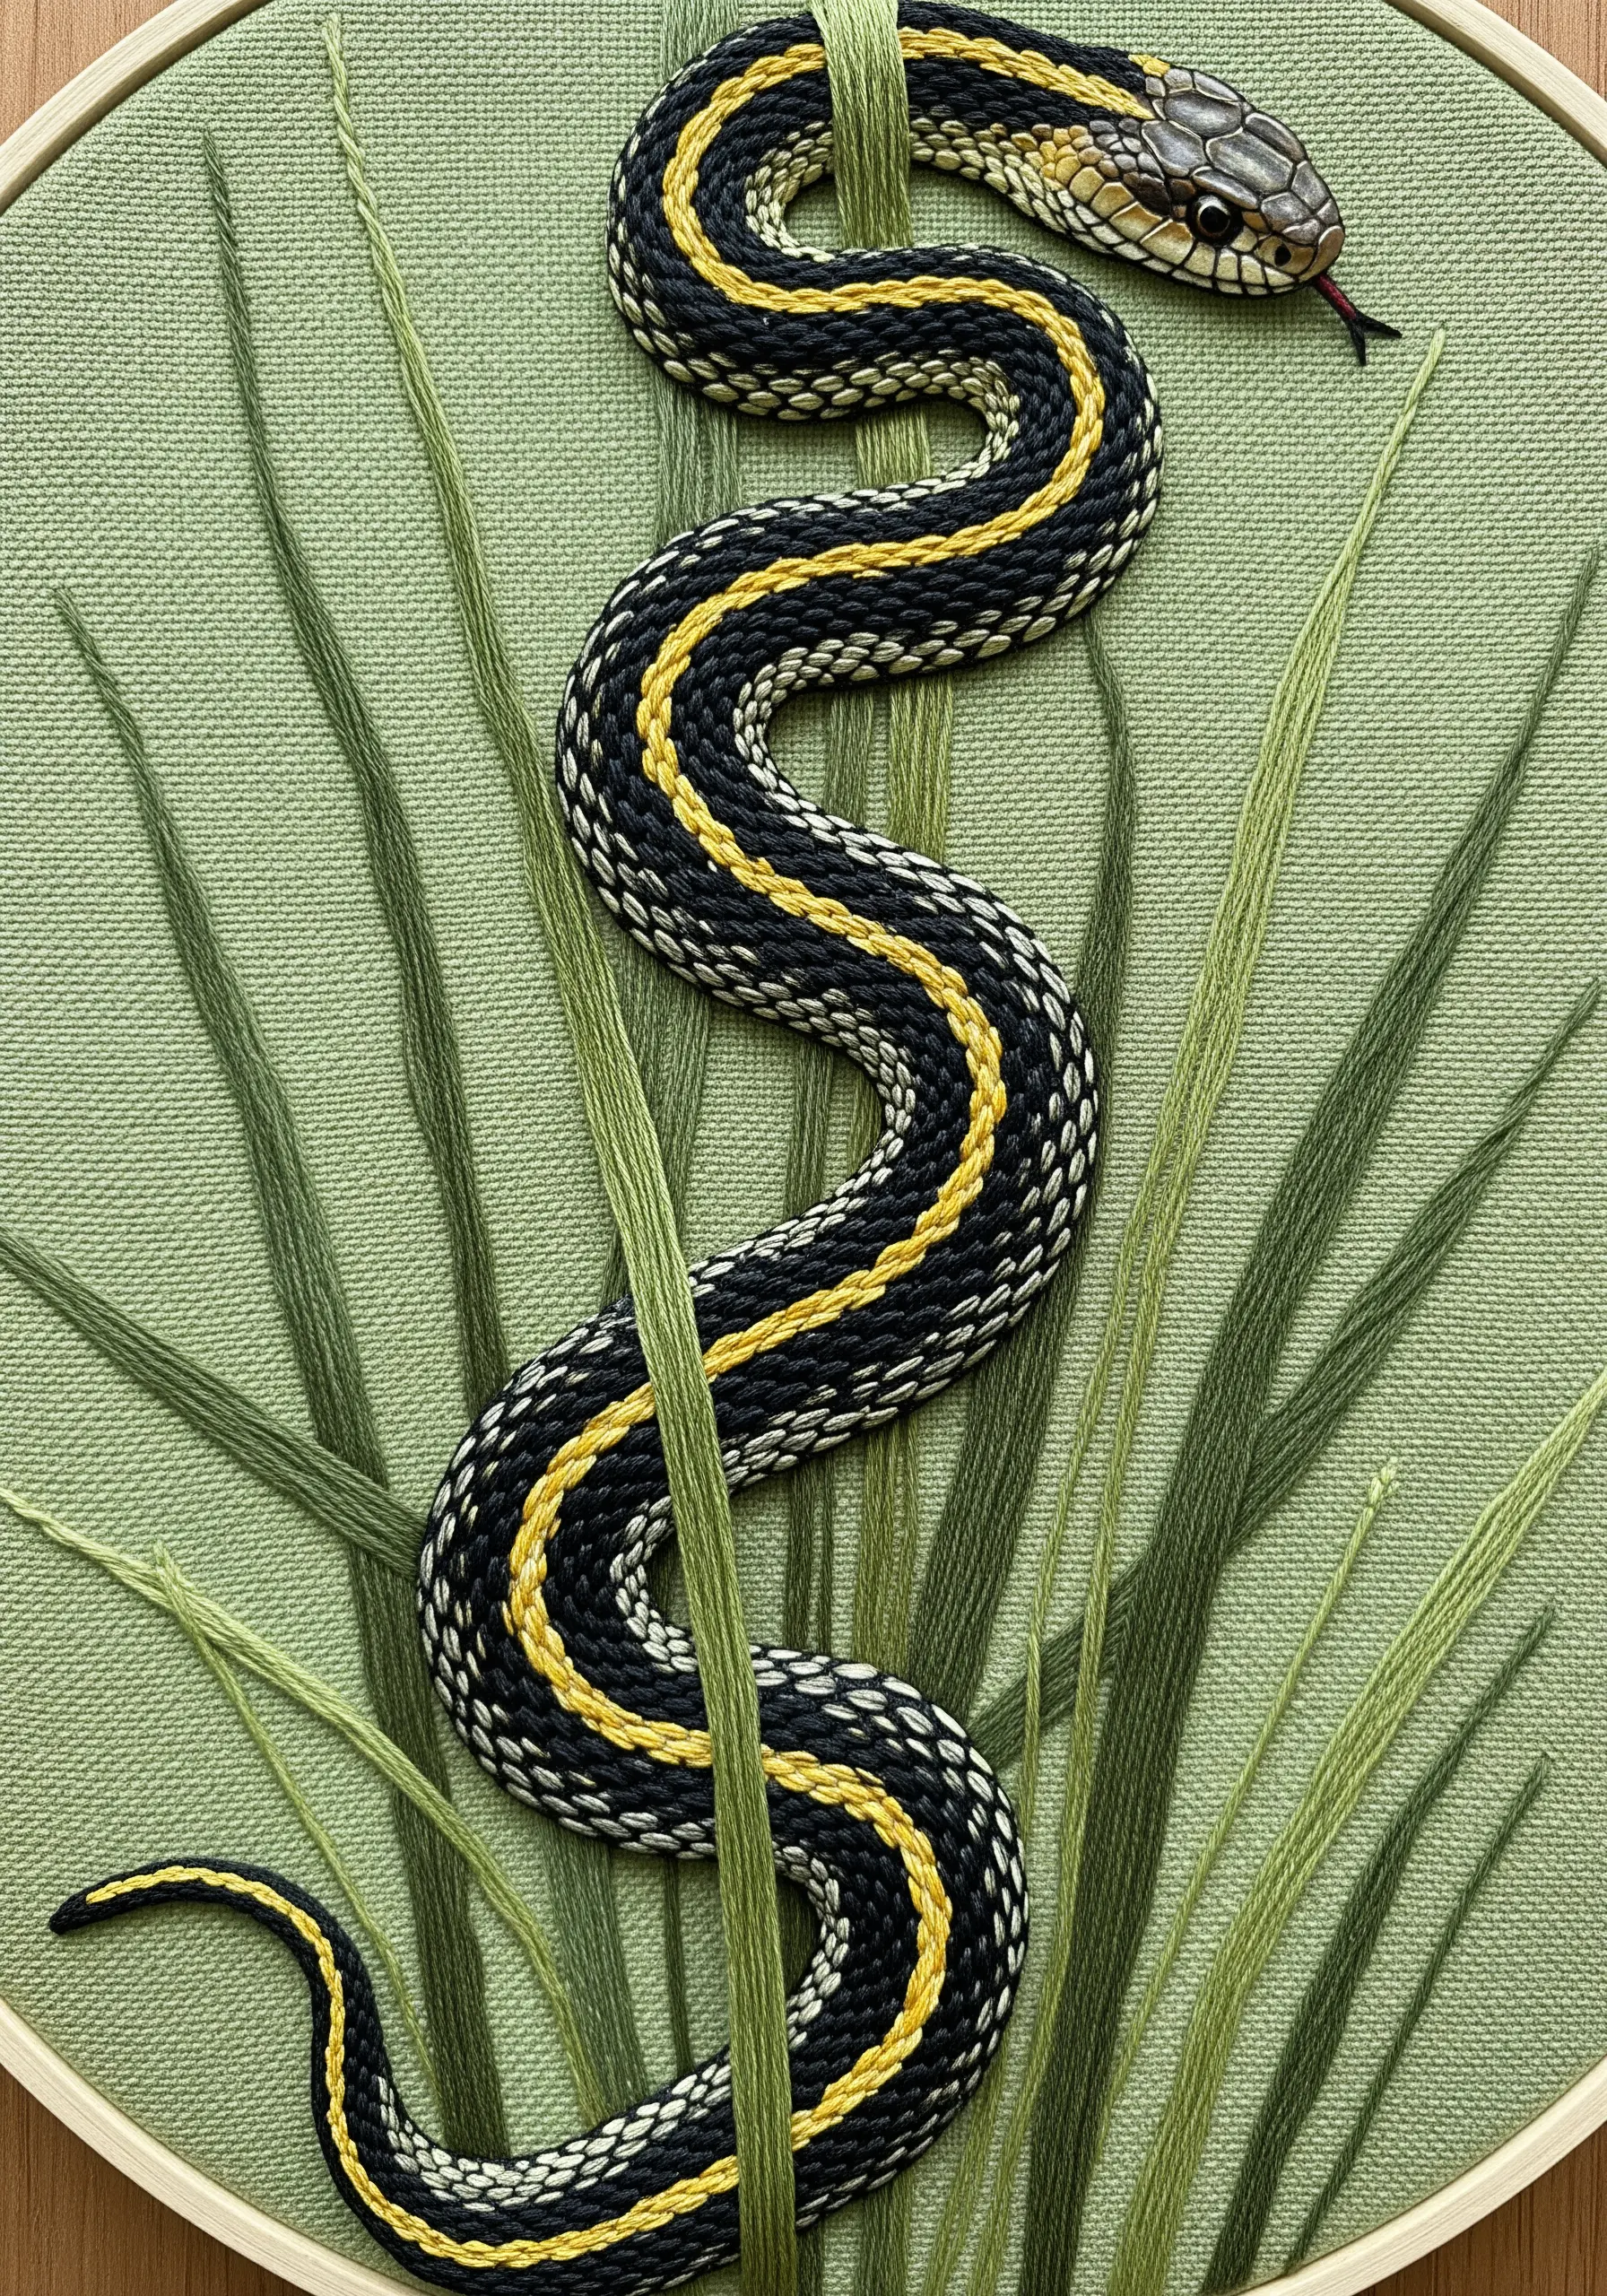
For a snake’s sinuous body, couch a thicker yellow cord or multiple strands of floss onto the fabric to create the bold, raised stripes.
Fill the adjacent black and white sections with satin stitches angled at 45 degrees to the body’s curve.
This consistent angle creates a subtle pattern that suggests scales without needing to stitch each one individually.
This method is one of many texture-rich thread art ideas that adds dimension.
19. Use Silk Ribbon for Delicate, Flowing Details
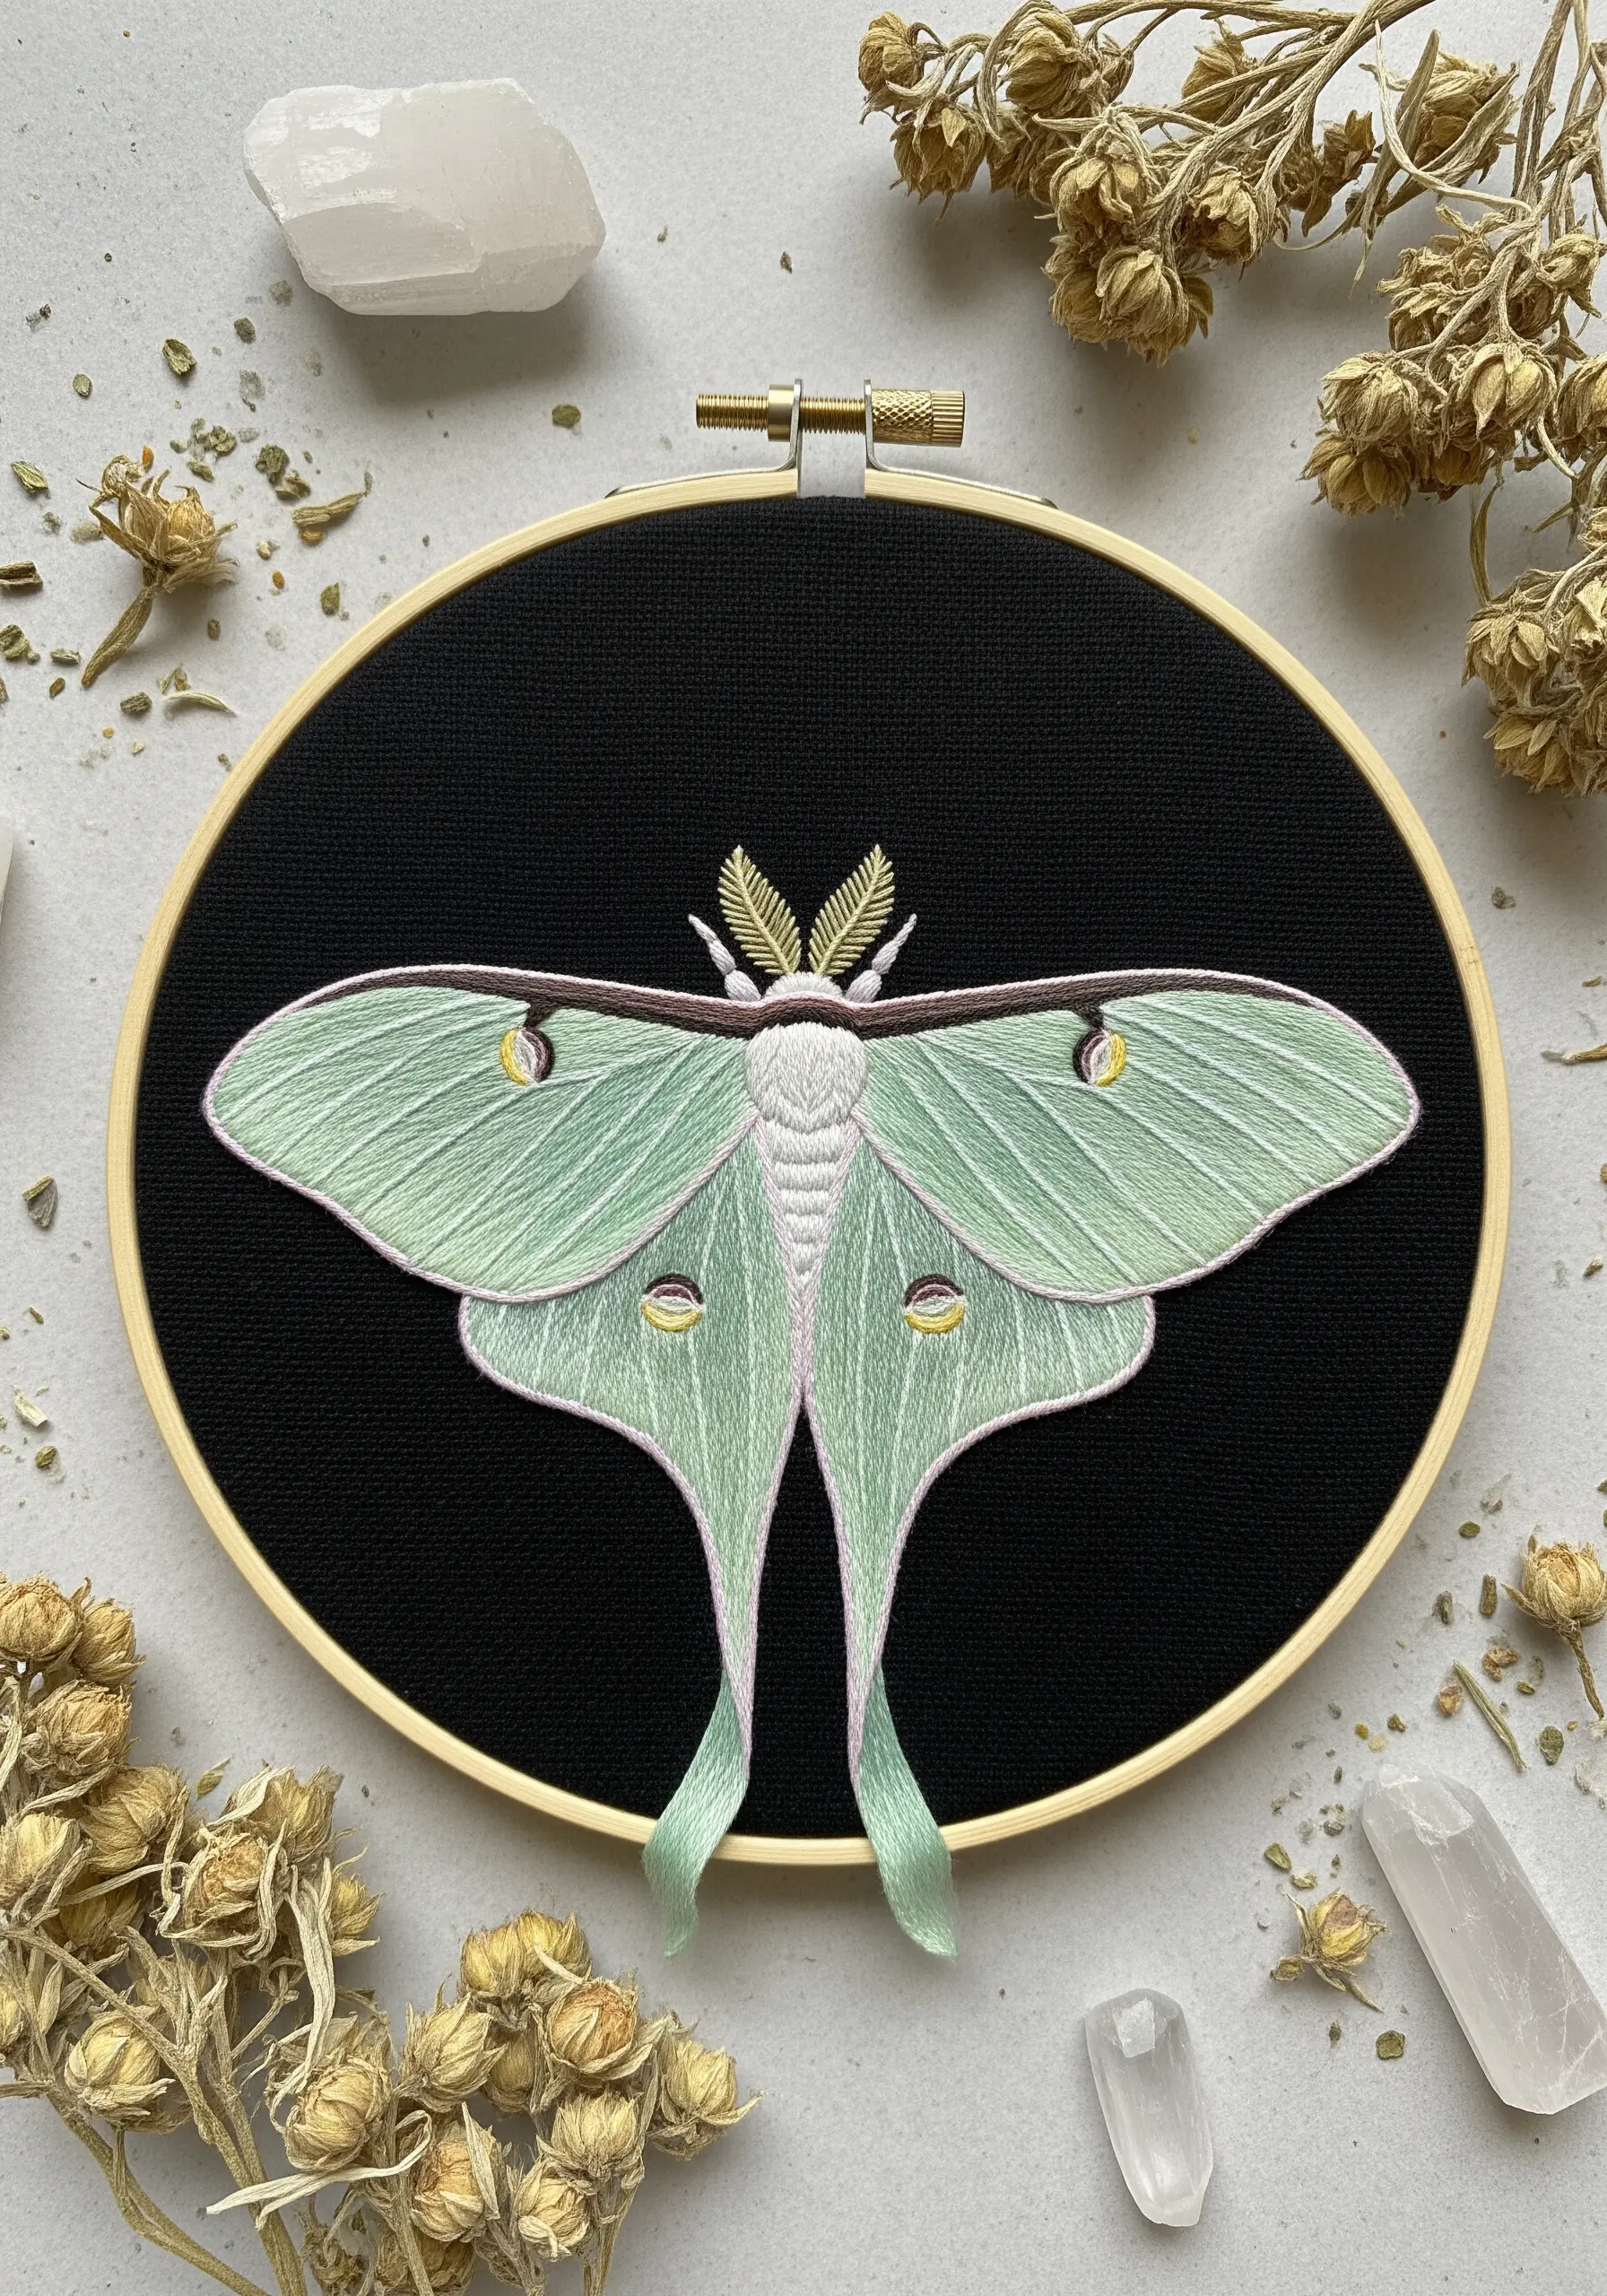
The long, curved tails of a luna moth’s wings can be beautifully rendered with thin silk ribbon.
Instead of stitching them flat, secure the ribbon at the top and add a few subtle tacking stitches along its length, allowing it to curve and lift slightly from the fabric.
This adds a graceful, three-dimensional element that contrasts beautifully with the soft, flat thread painting of the main wings.
For the wings themselves, use single strands of pale green for a delicate, powdery finish.
20. Create Realistic Scales and Water Ripples
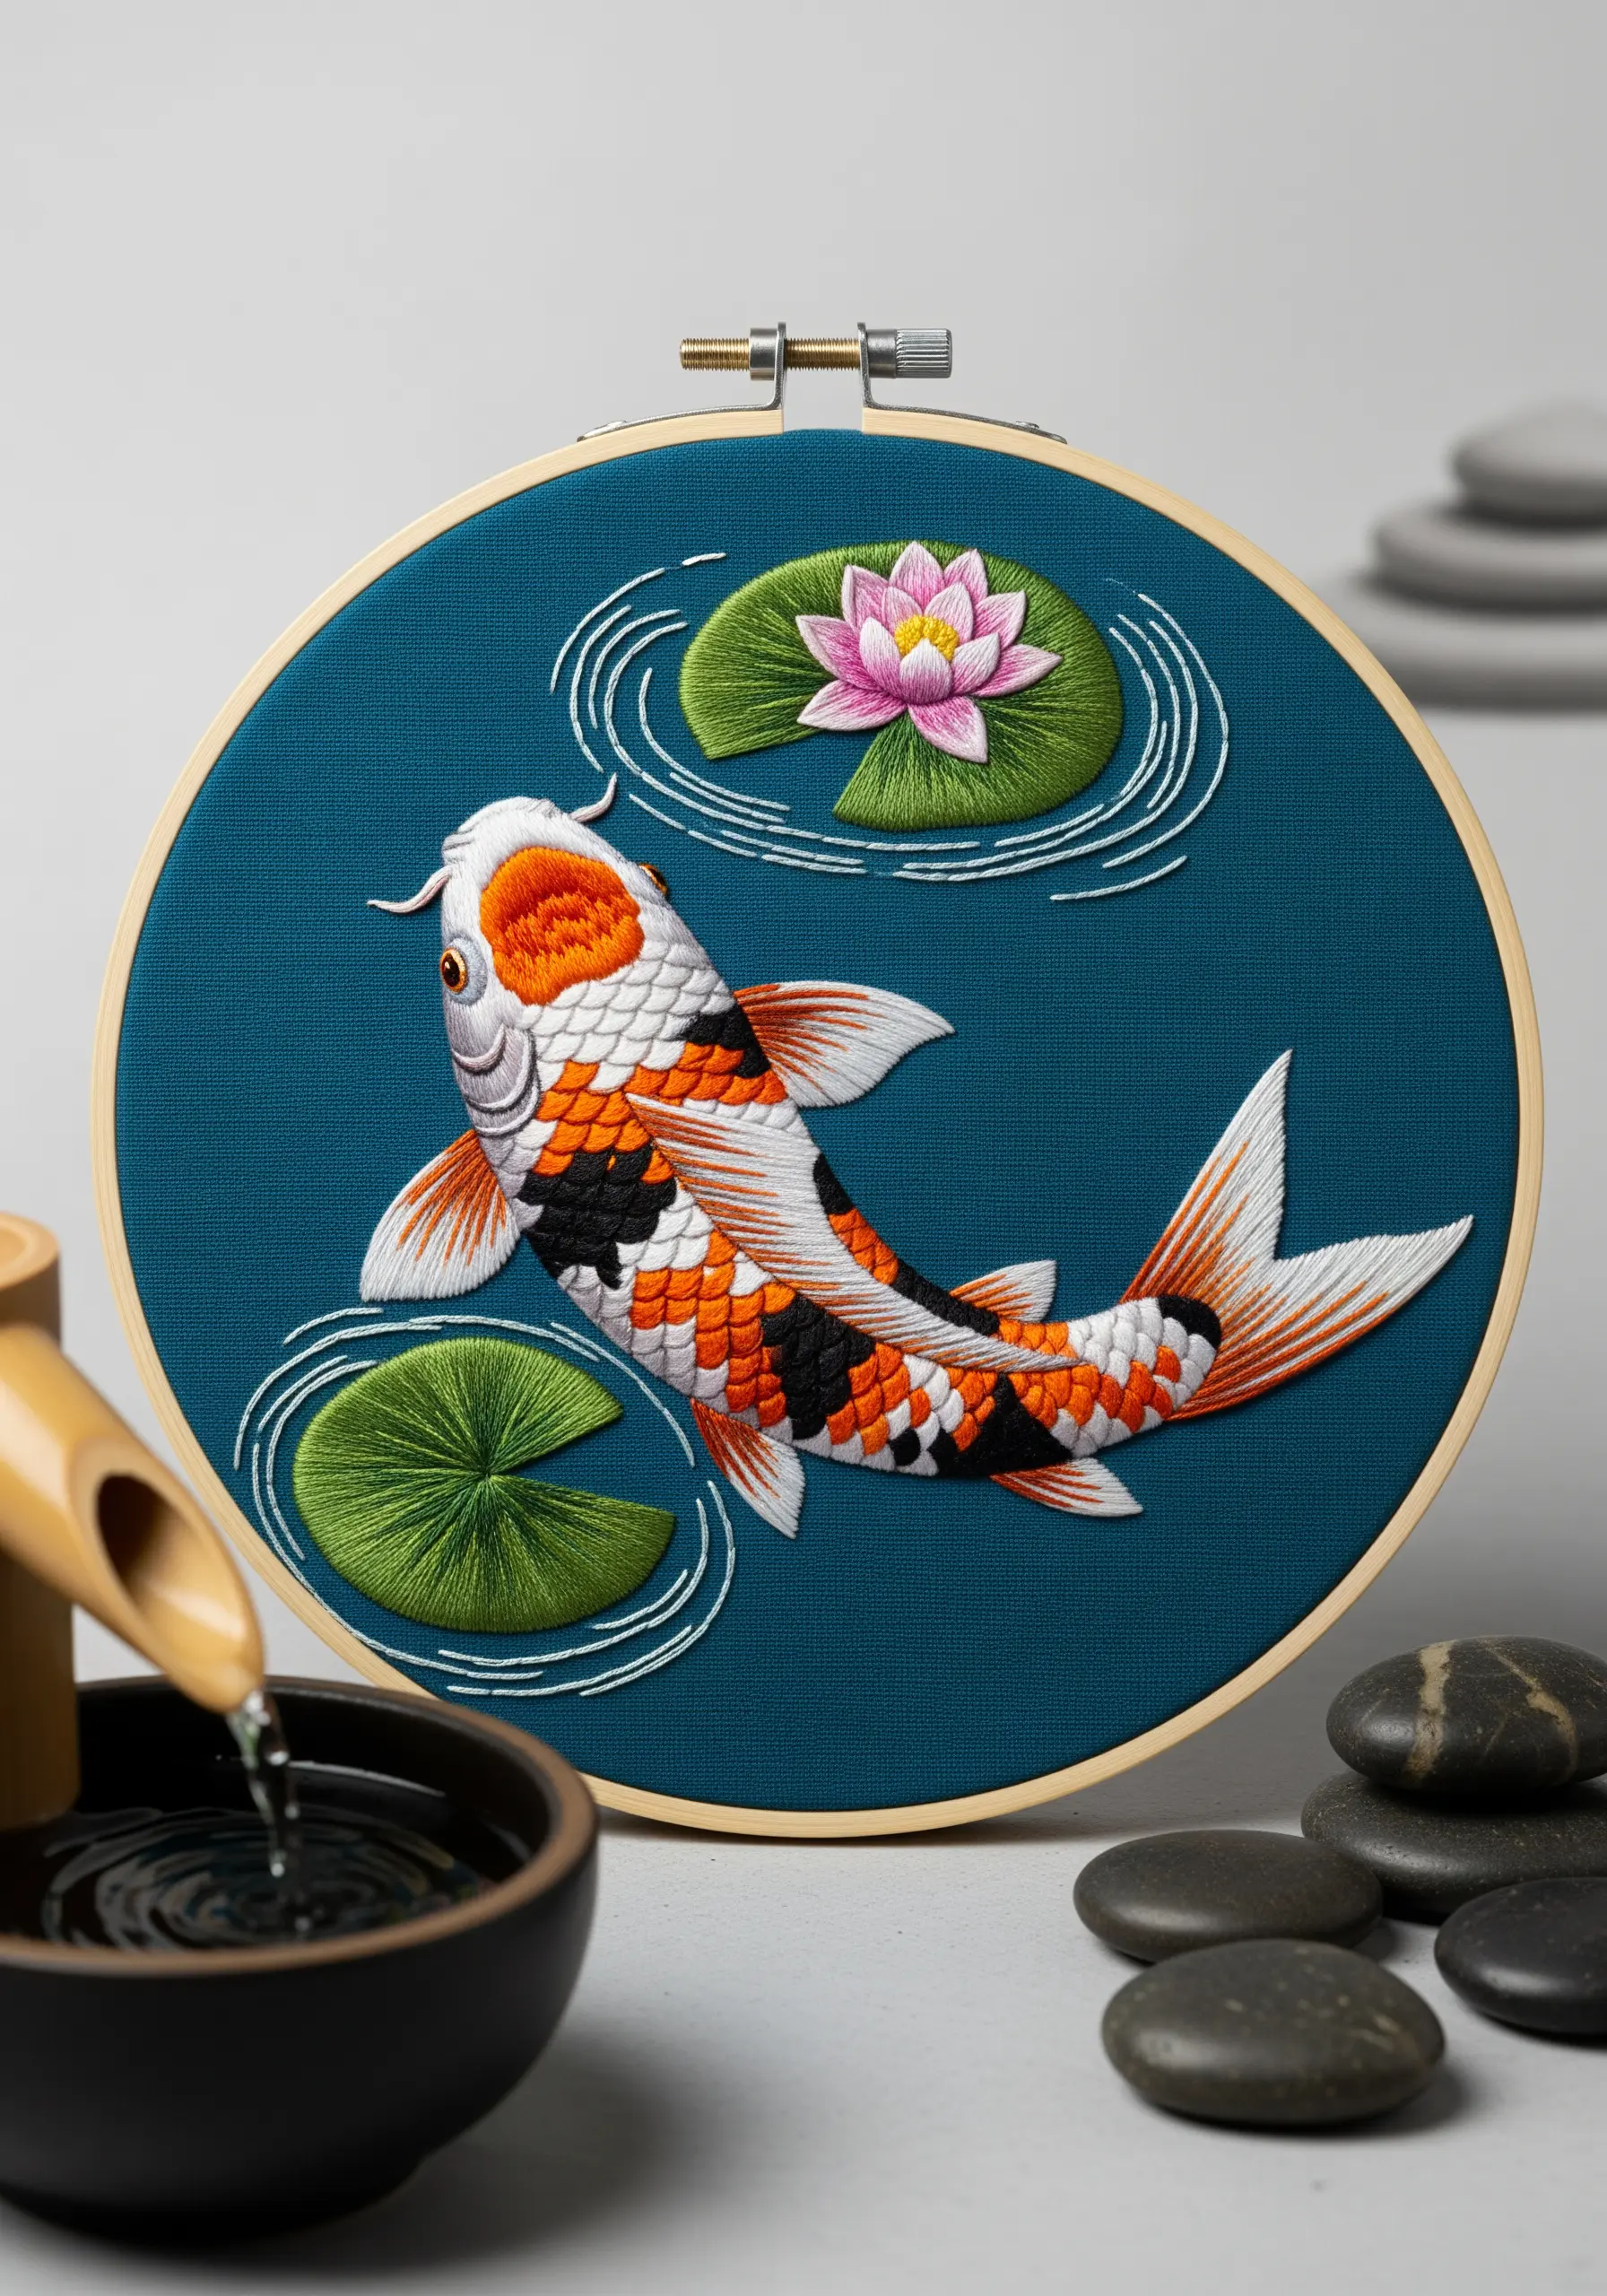
To give a koi fish a scaly texture, use a series of overlapping, scallop-shaped satin stitches, working in rows from tail to head.
This layered approach, known as brick stitch, perfectly mimics the look of real scales.
For the water ripples, use a simple backstitch in a contrasting color like white or light gray.
Stitch concentric, imperfect circles around the lily pads to create a sense of calm movement, perfect for mindful stitching & zen decor.
21. Stitch Black Fur with Nuance and Depth
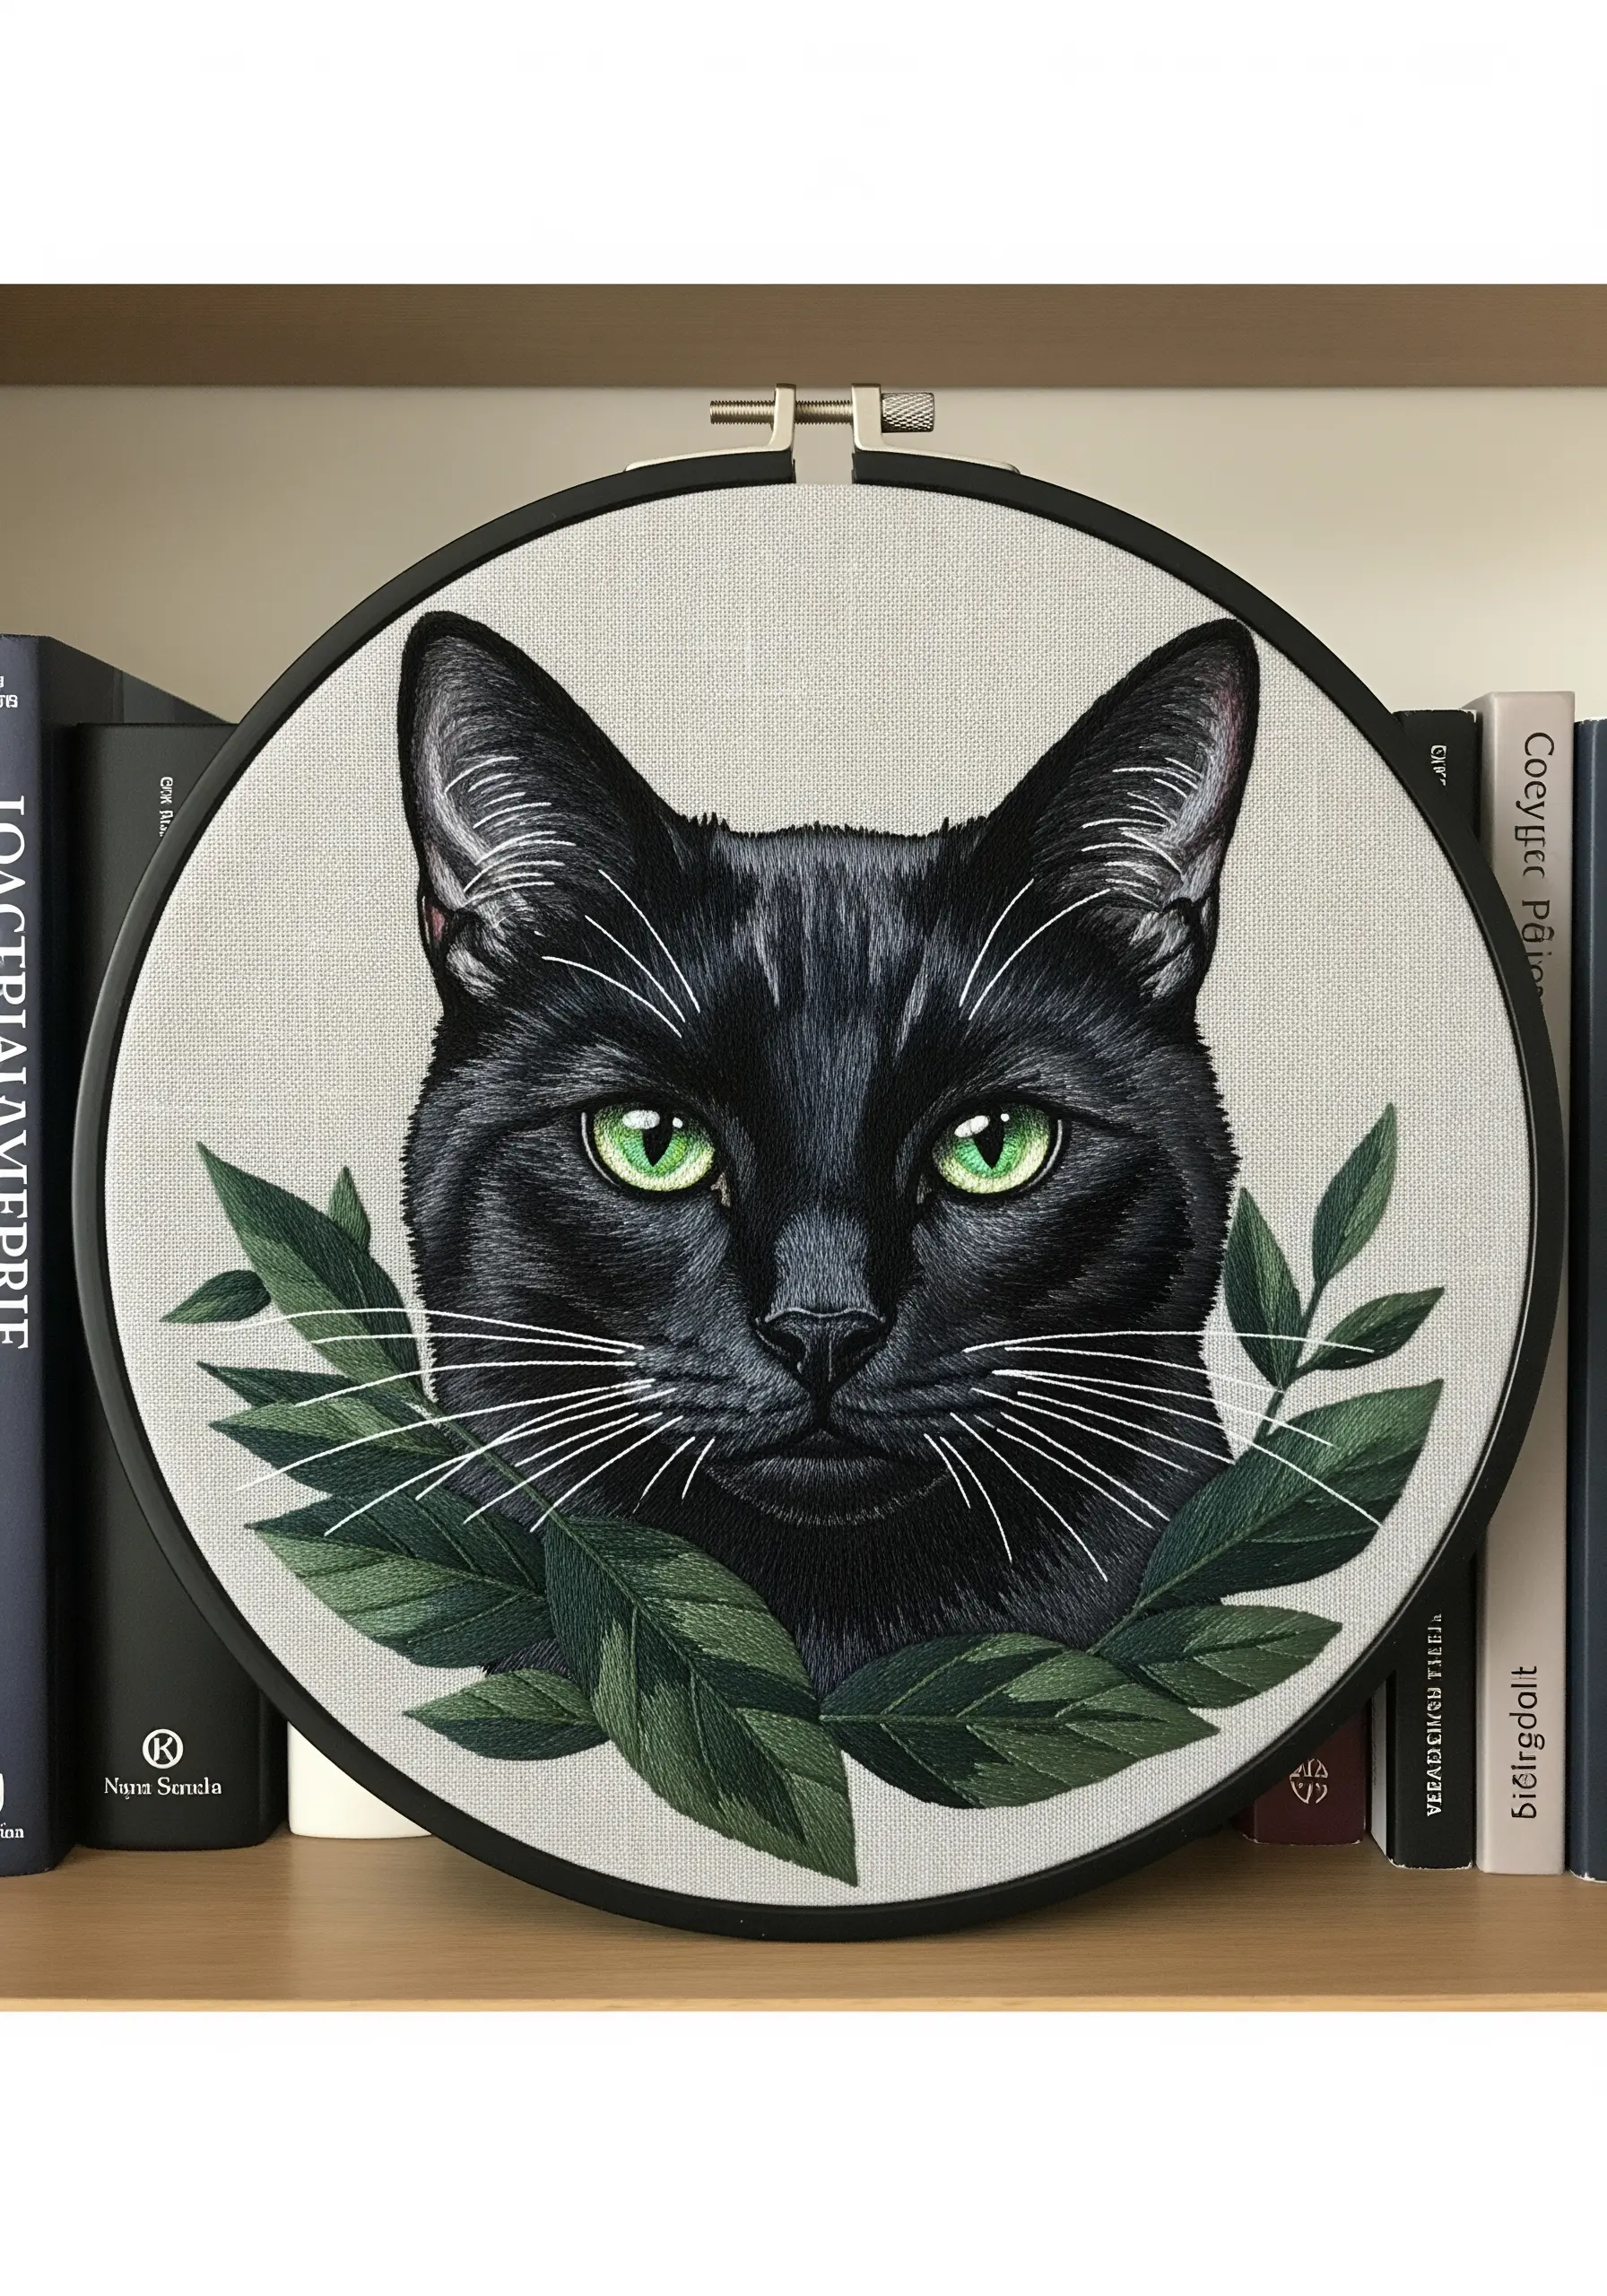
Embroidering black fur effectively is not about using solid black thread, but about creating highlights and shadows.
Use a palette of dark grays, deep blues, and off-black threads to thread paint the fur.
Place the darkest tones in the shadows (like under the chin) and use the lighter grays to pick out highlights where the light would hit, such as on the forehead and bridge of the nose.
This gives the fur shape and a subtle sheen, an elegant way to honor your pet in a modern aesthetic frame.
22. Define Facial Markings with Sharp Outlines
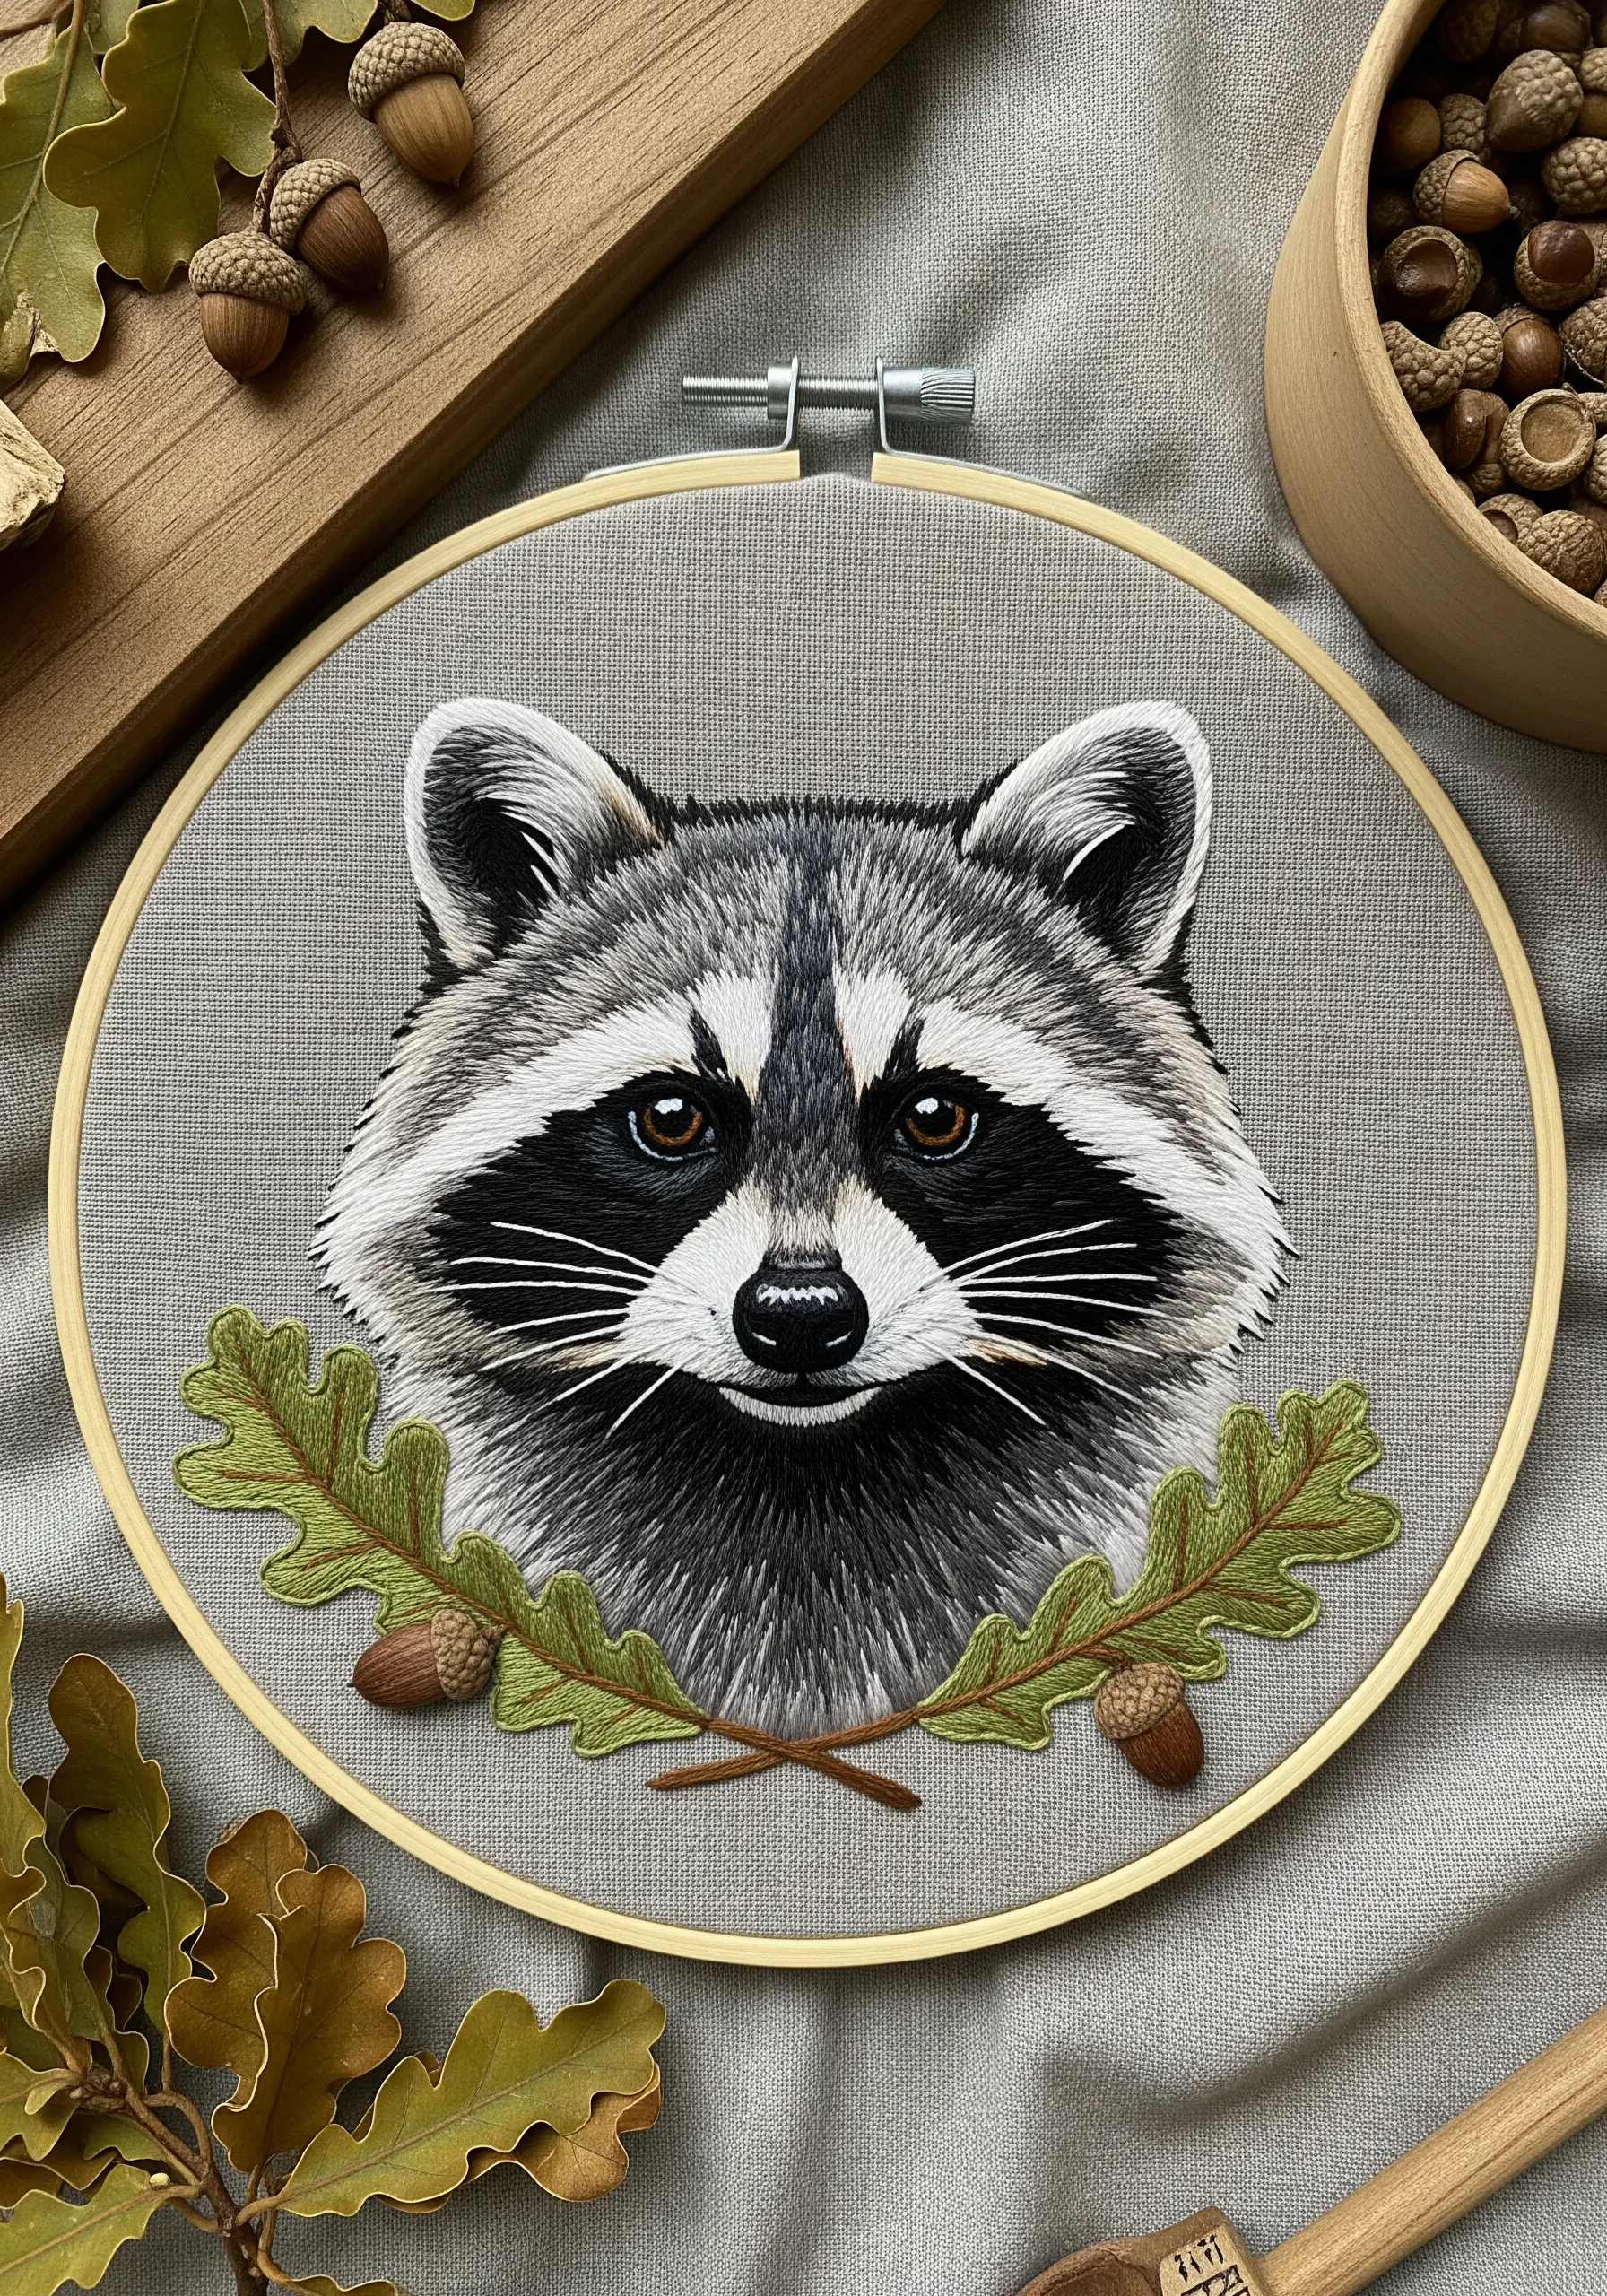
A raccoon’s distinctive mask requires crisp, clean edges to be effective.
Before you begin filling, outline the black and white markings with a single strand of split stitch.
This creates a subtle, raised border that will keep your subsequent fill stitches (like satin or long-and-short) contained and neat.
For the gray fur, use a softer, blended approach to contrast with the sharp graphic quality of the mask, creating perfect animal-themed pillow stitching ideas.
23. Blend a Robin’s Breast with Single-Strand Gradients
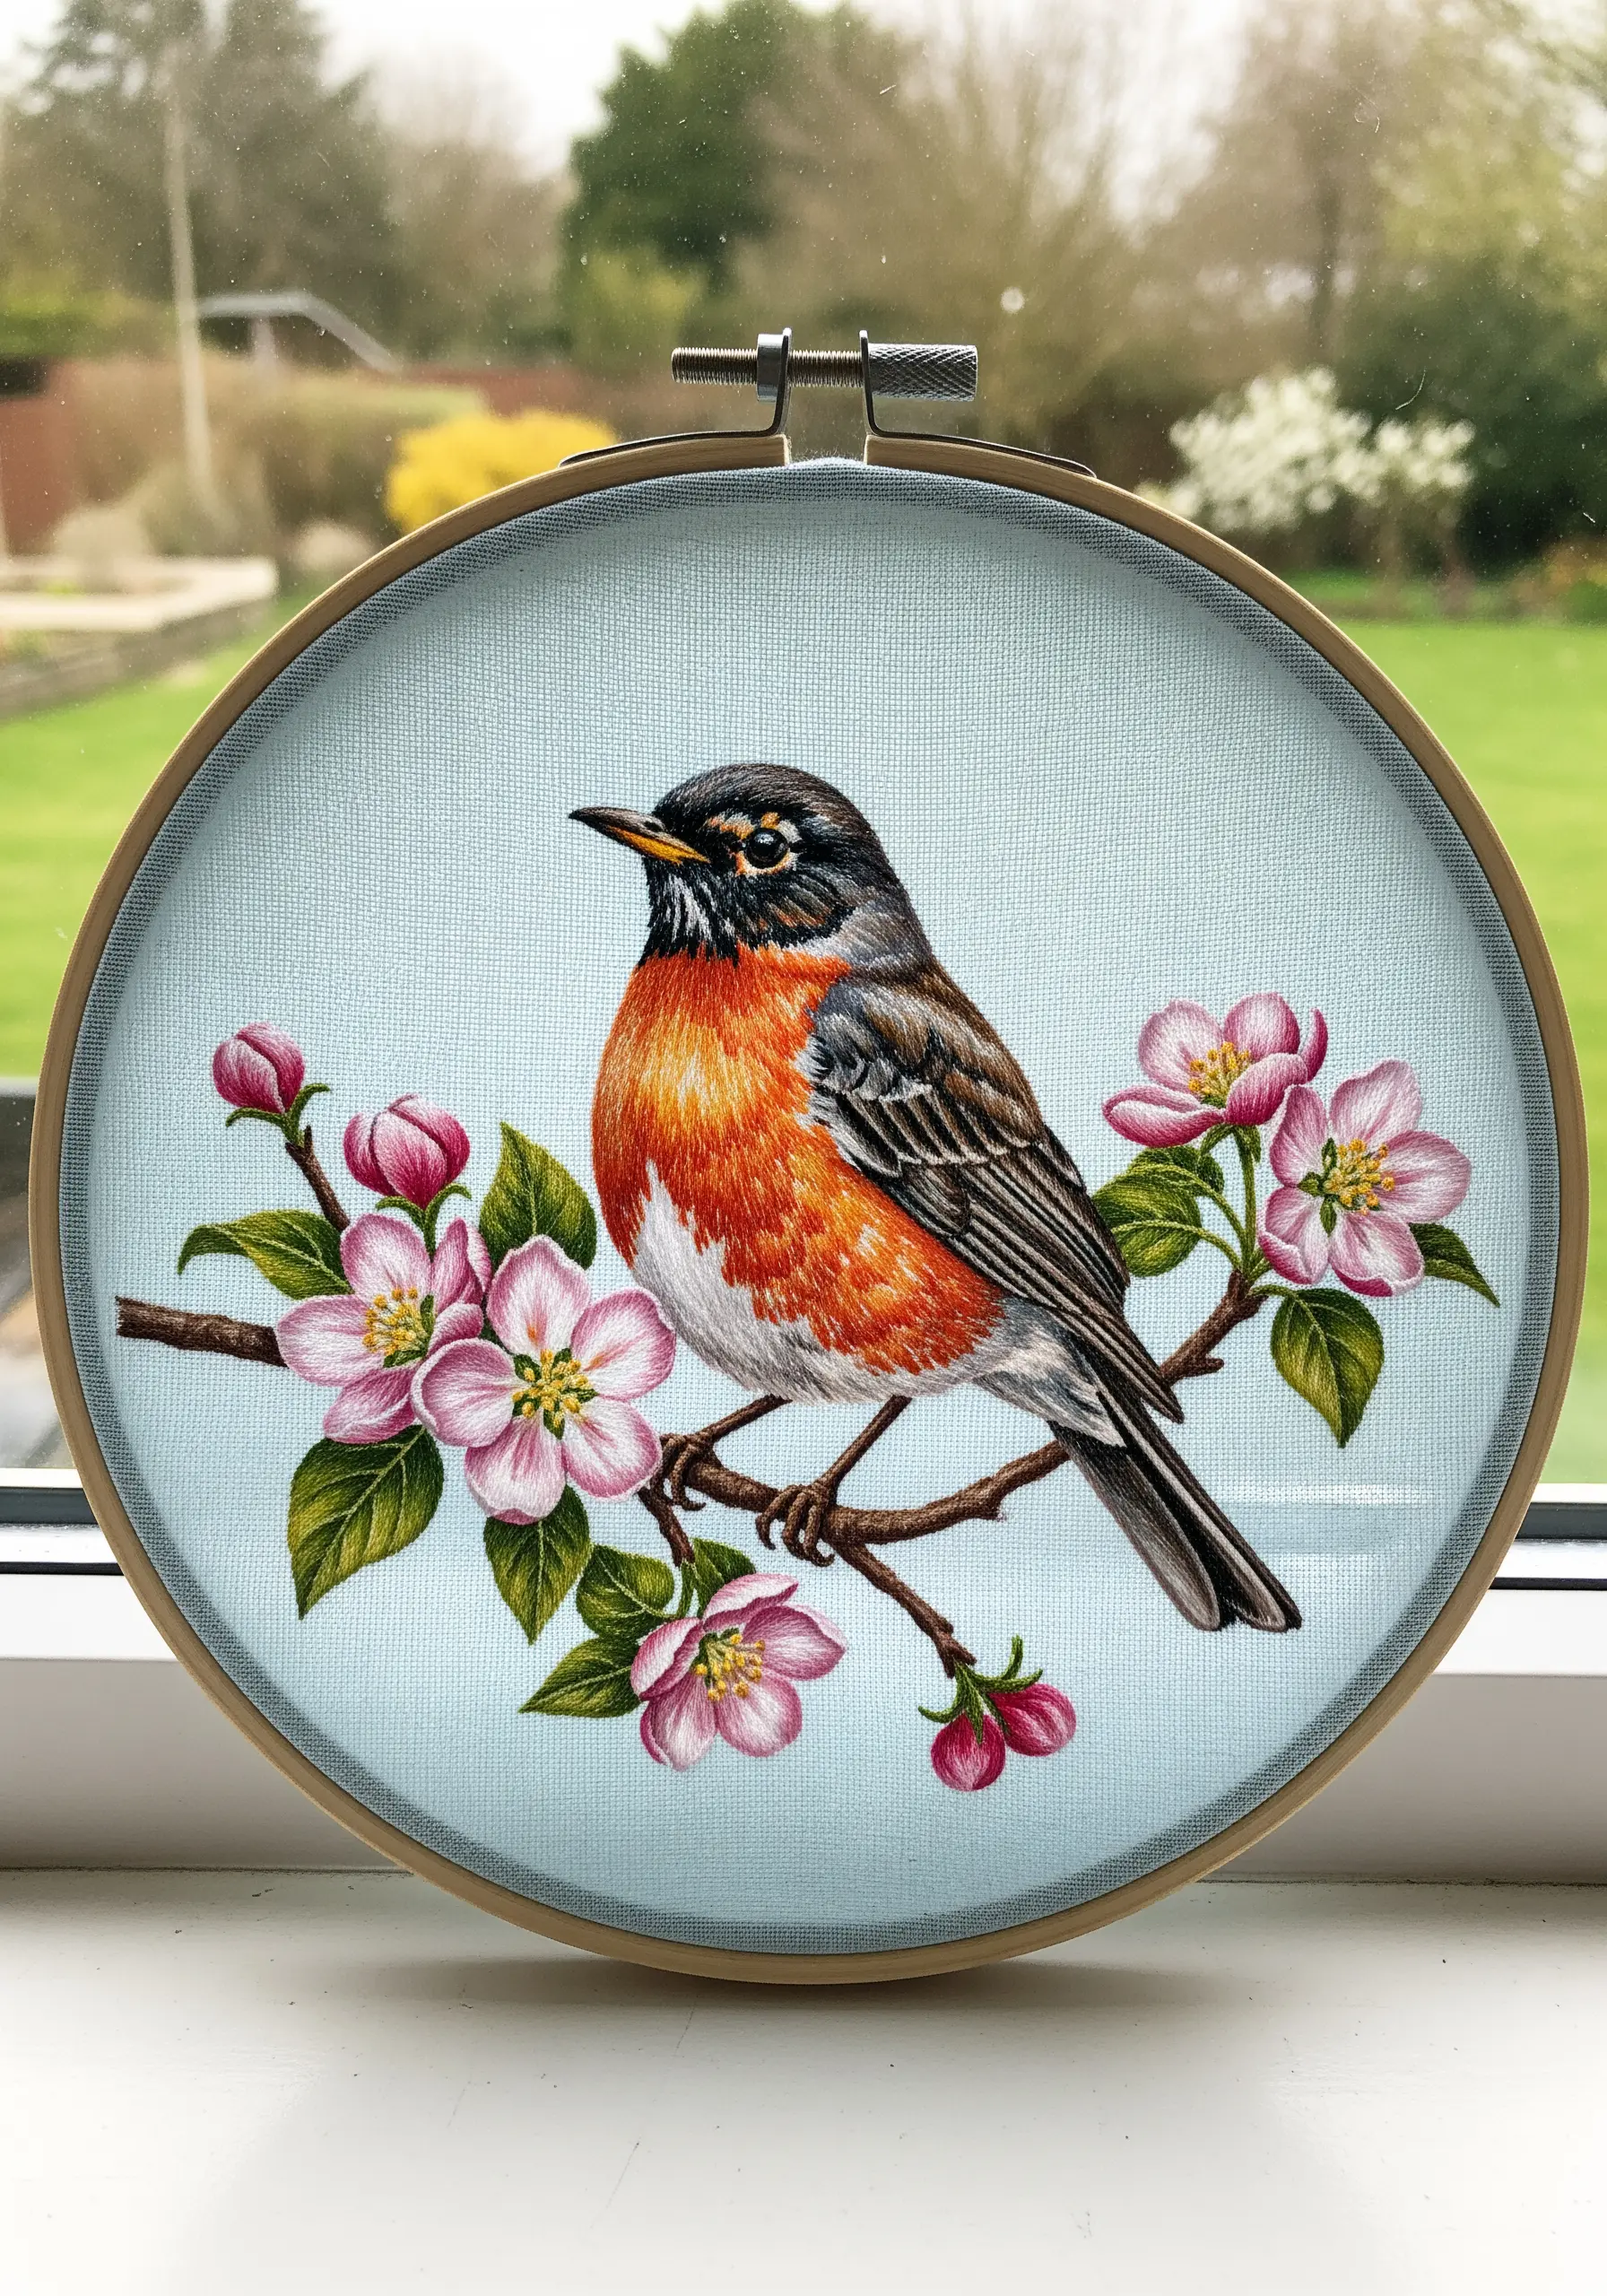
The soft, airbrushed look of a robin’s breast is best achieved by thread painting with a single strand of floss.
Use a long-and-short stitch and blend your colors meticulously, moving from deep rust to bright orange and finally to soft white.
Because you’re using only one strand, the transition between colors will be almost seamless.
Contrast this soft area with the more defined, darker stitches of the wings and back to make the chest pop, creating beautiful botanical stitch ideas.
24. Add Dimension and Texture with Beads and Metallics
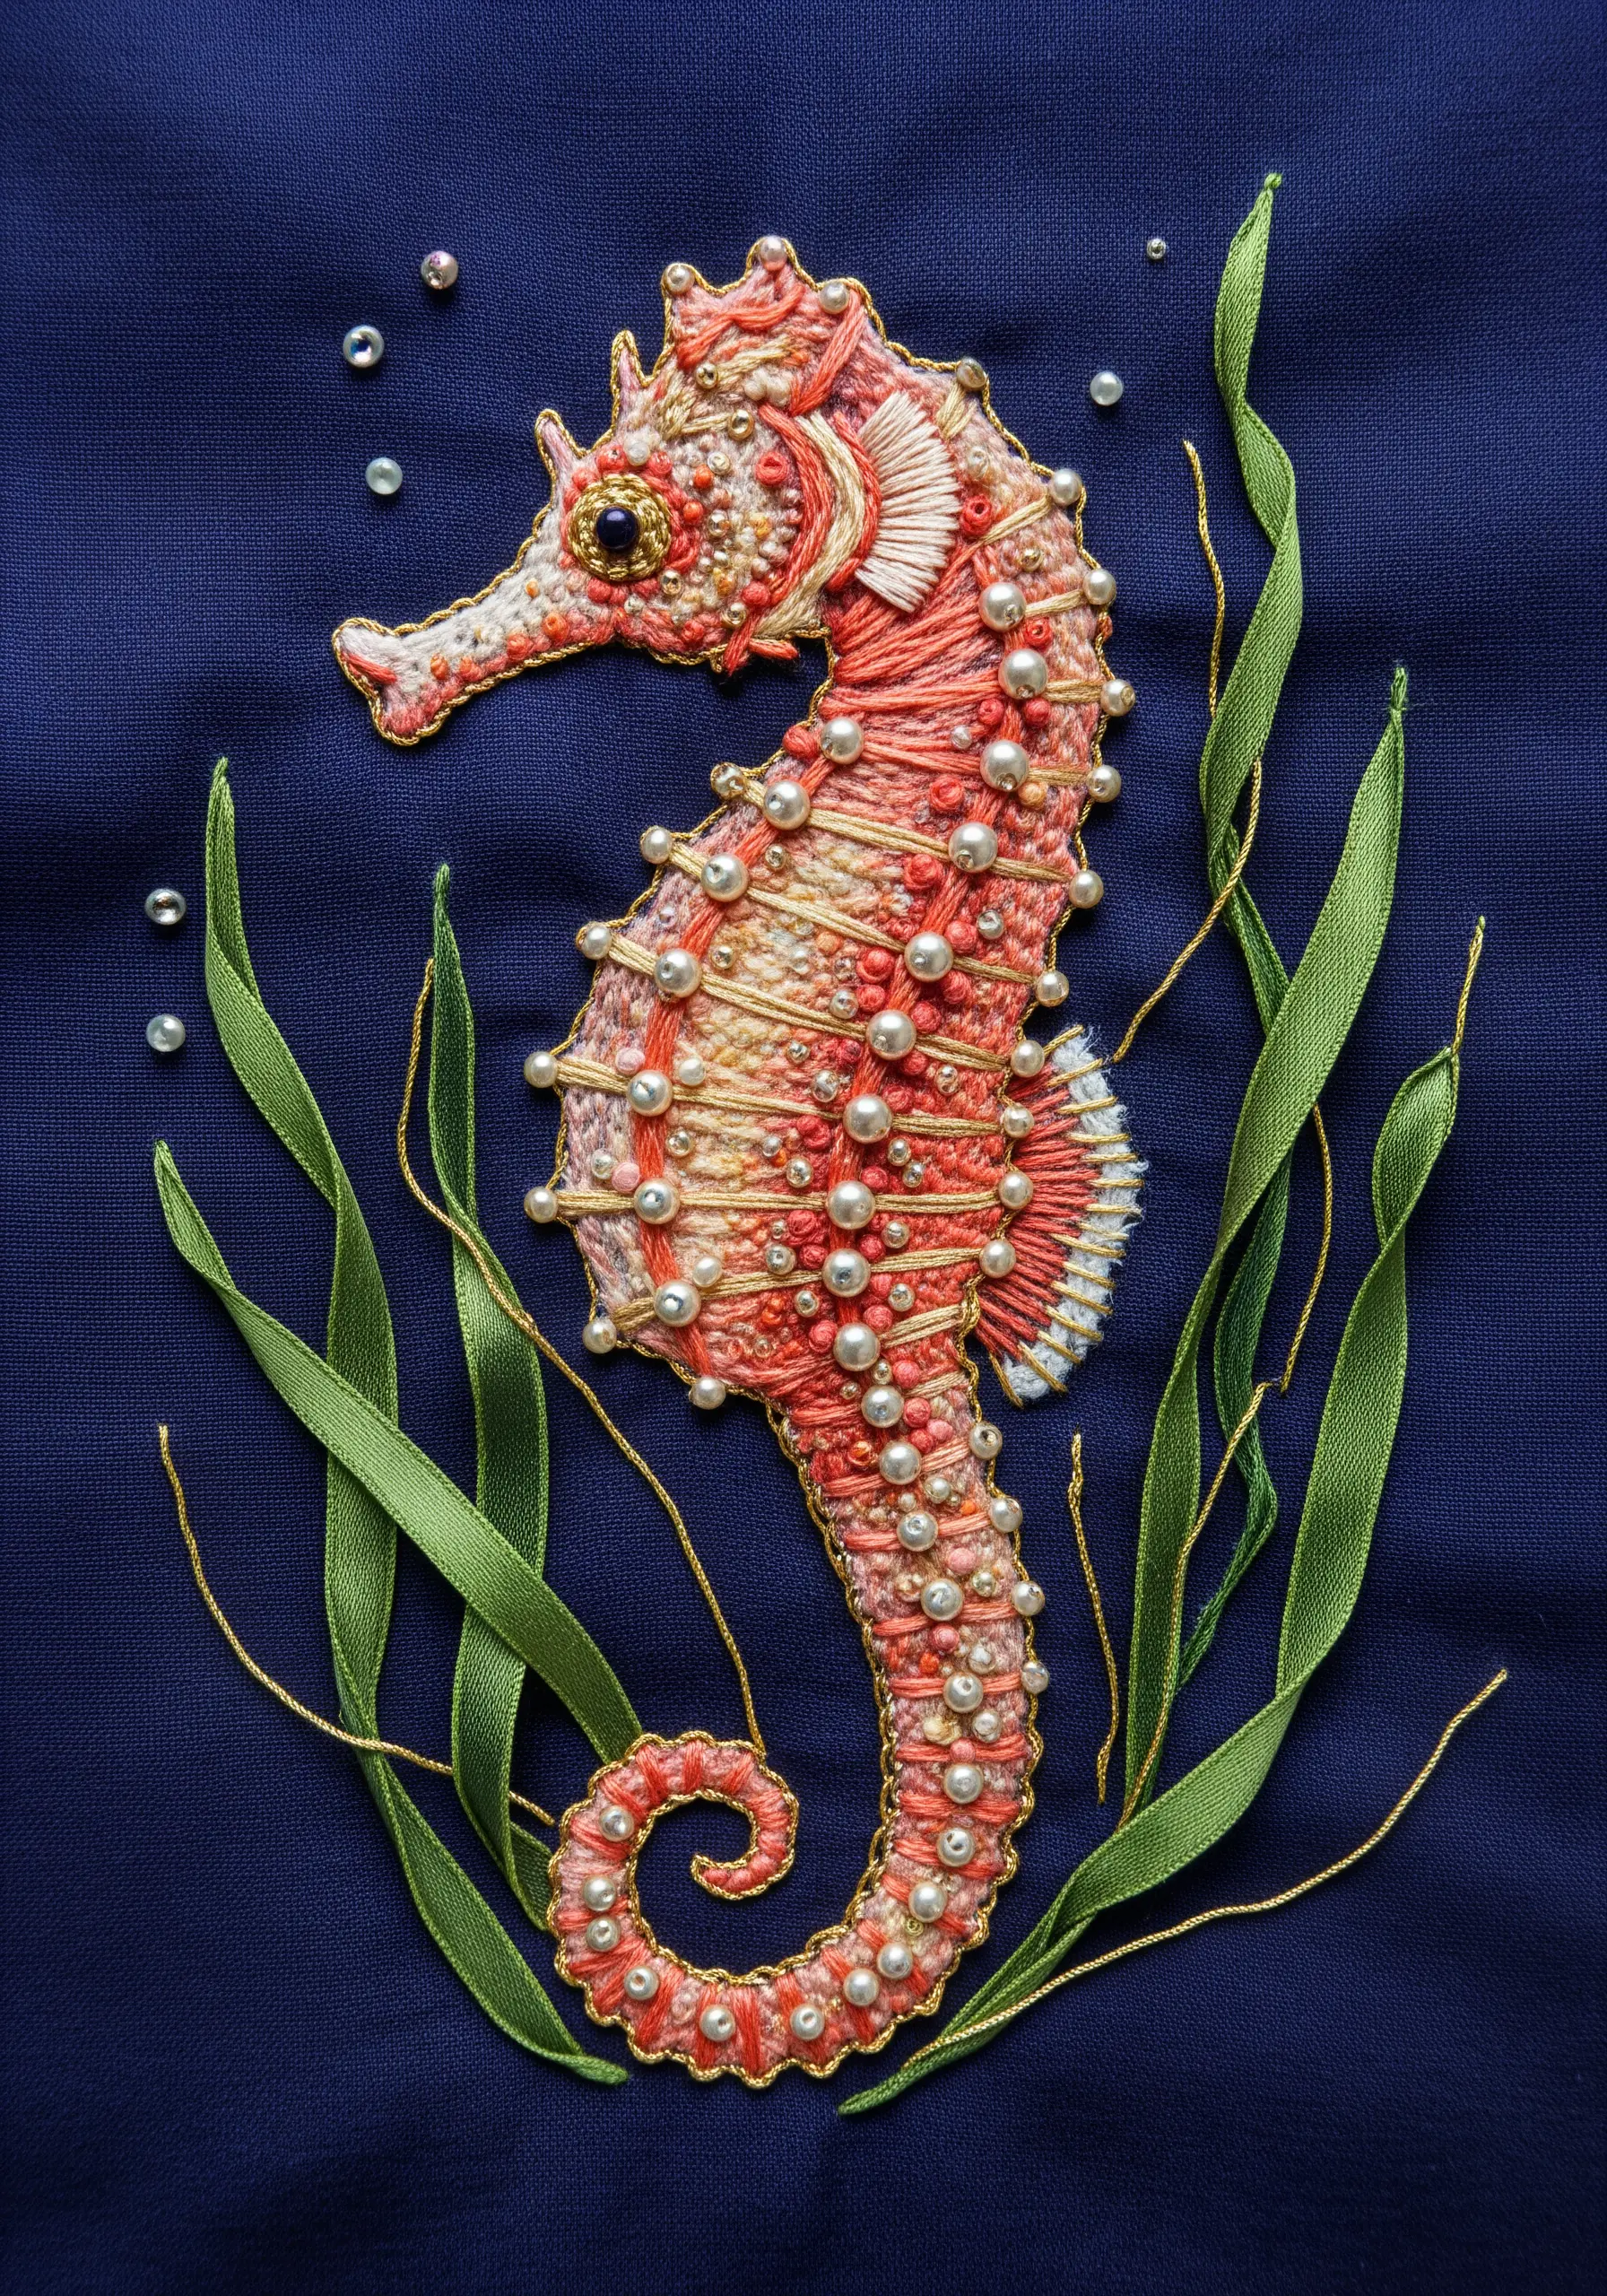
Elevate a simple embroidery by incorporating beads and metallic threads, as seen in this ornate seahorse.
After stitching the base body, scatter tiny seed beads and small pearls across the surface, securing them with a single stitch.
Use a fine metallic thread to couch down lines that follow the creature’s curves, mimicking its bony rings.
These mixed media crafts with embroidery add a layer of texture and light-catching sparkle that thread alone cannot achieve.
25. Imply Translucence with Appliqué and Minimal Stitching
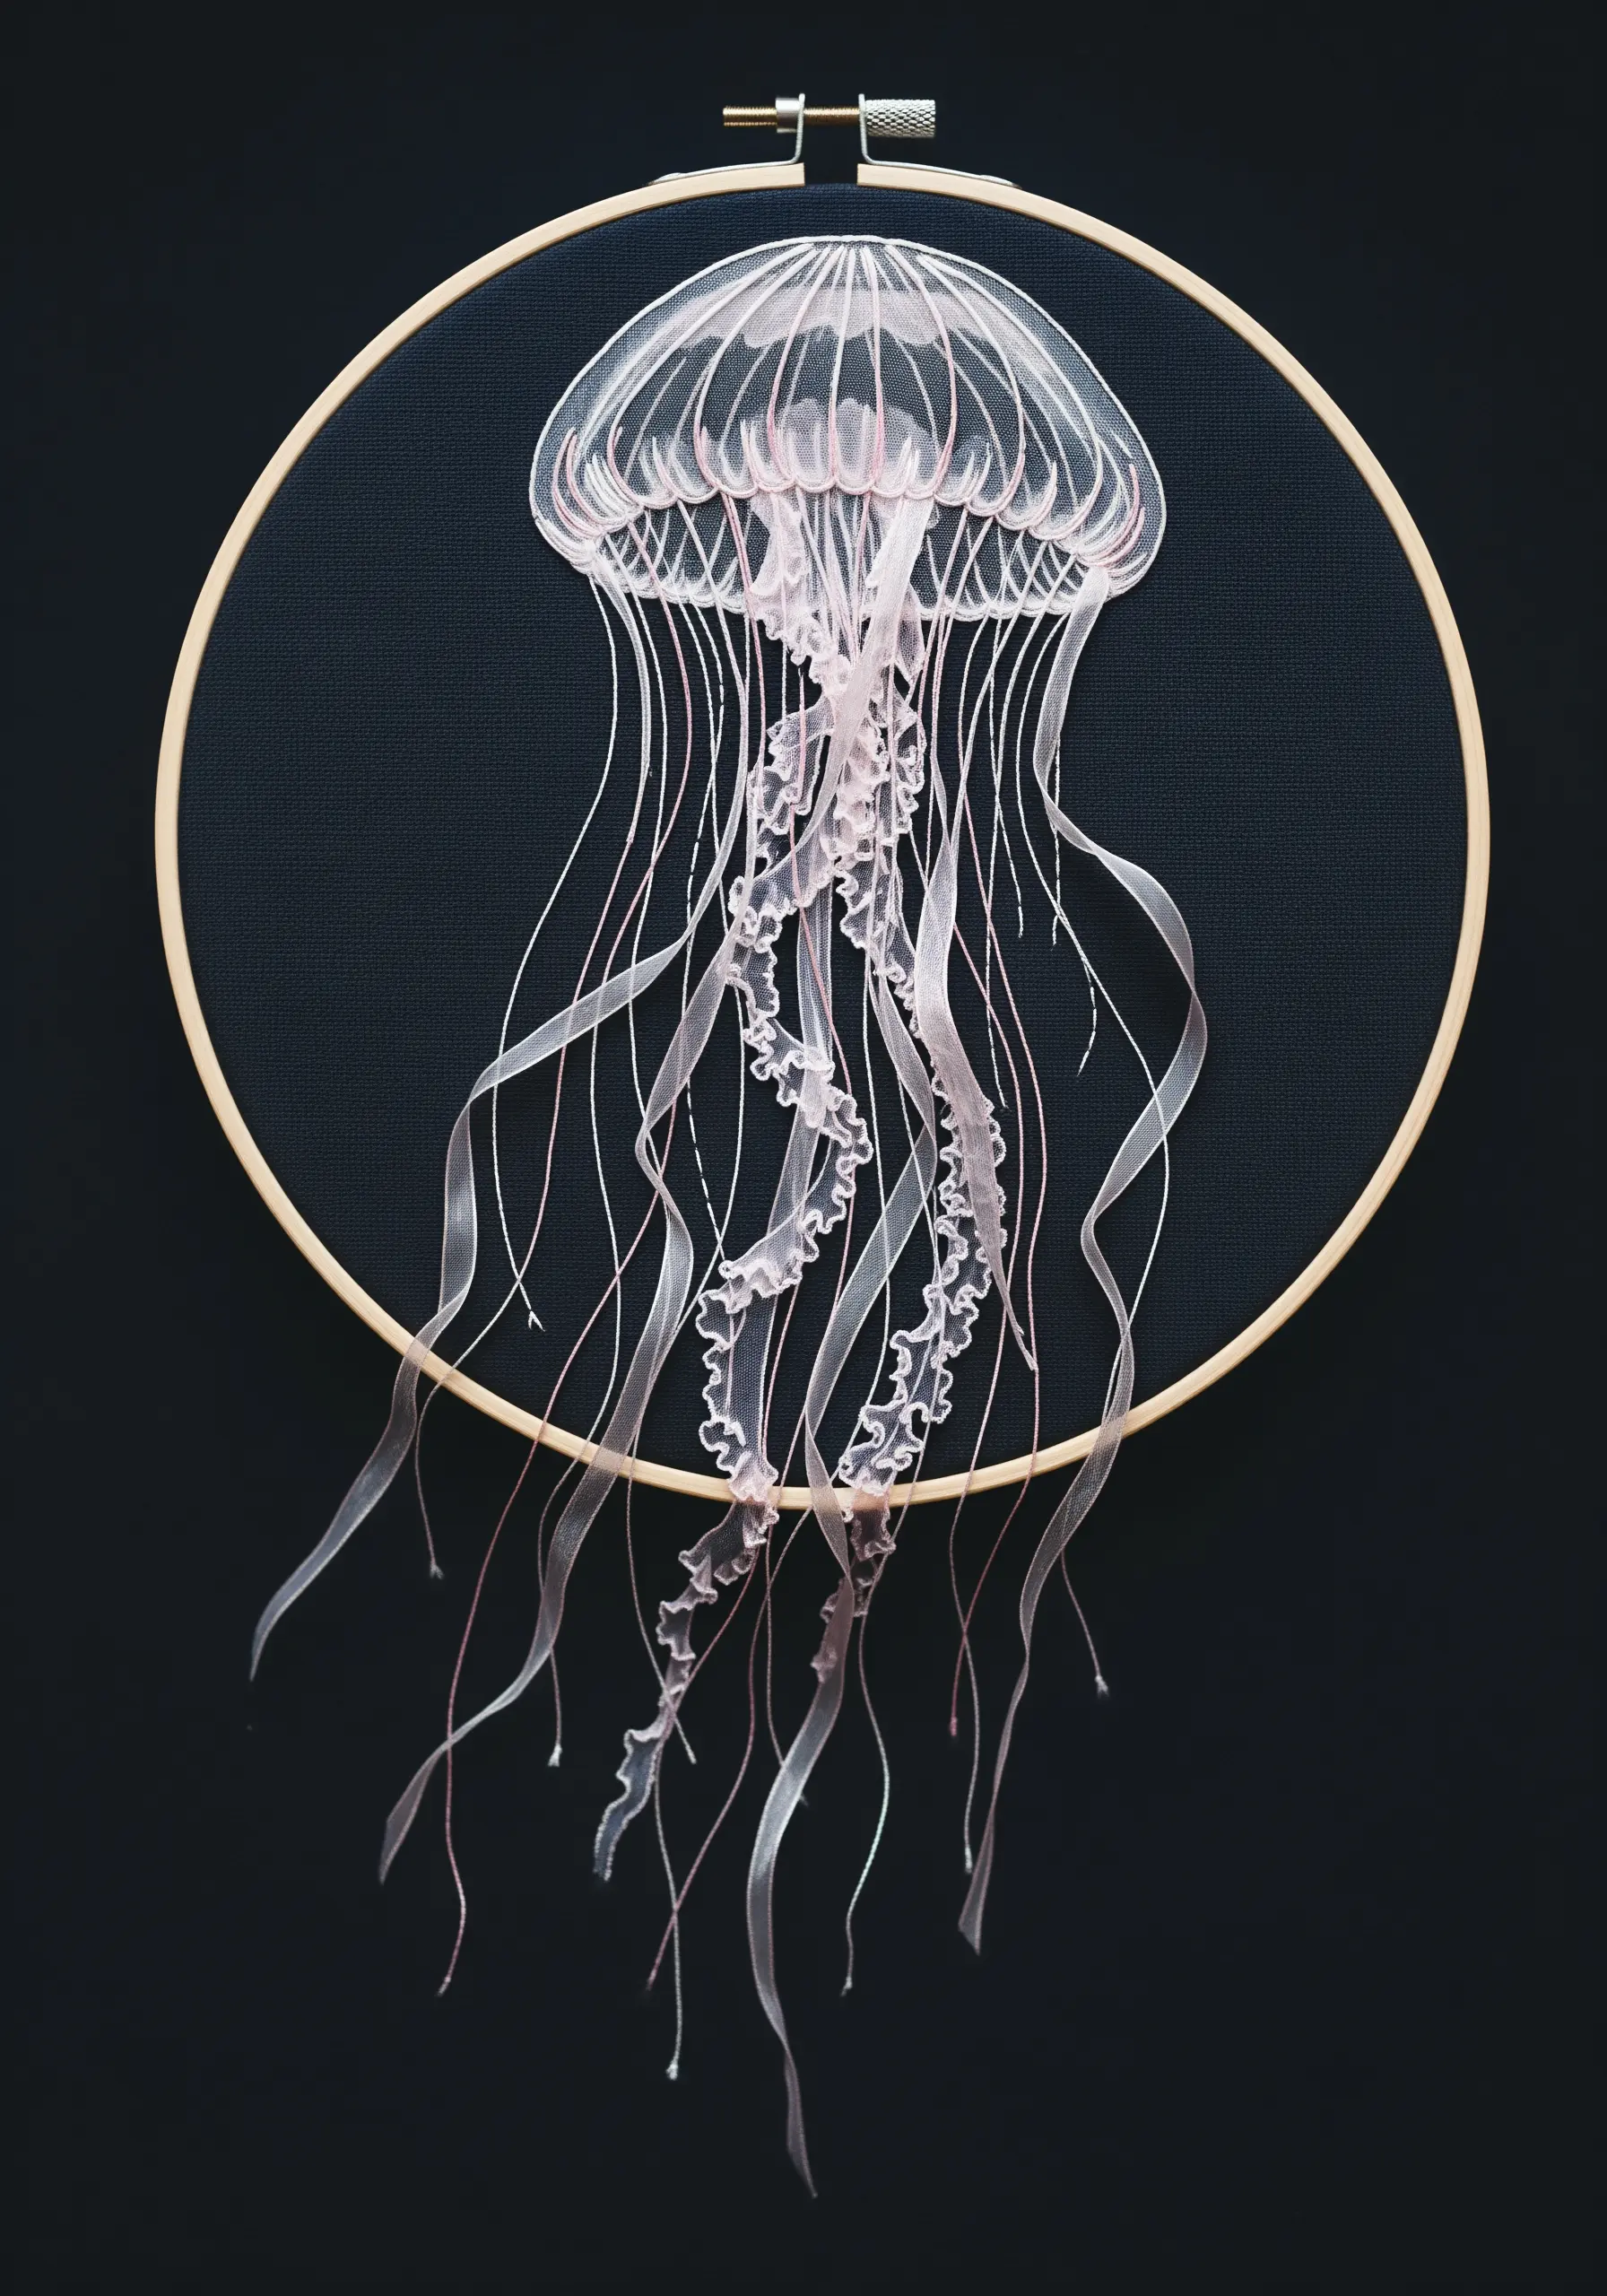
To create an ethereal, translucent jellyfish, cut the bell shape from several layers of fine, pale pink organza or tulle.
Lay the sheer fabric on your dark background and secure it with minimal, radiating straight stitches to suggest the internal structure.
For the tentacles, let thin silk ribbons and threads trail down, securing them only at the top to allow for natural movement.
This technique is perfect for creating ambitious fiber art installations.
26. Build a Bristly Caterpillar with Turkey Work and Knots
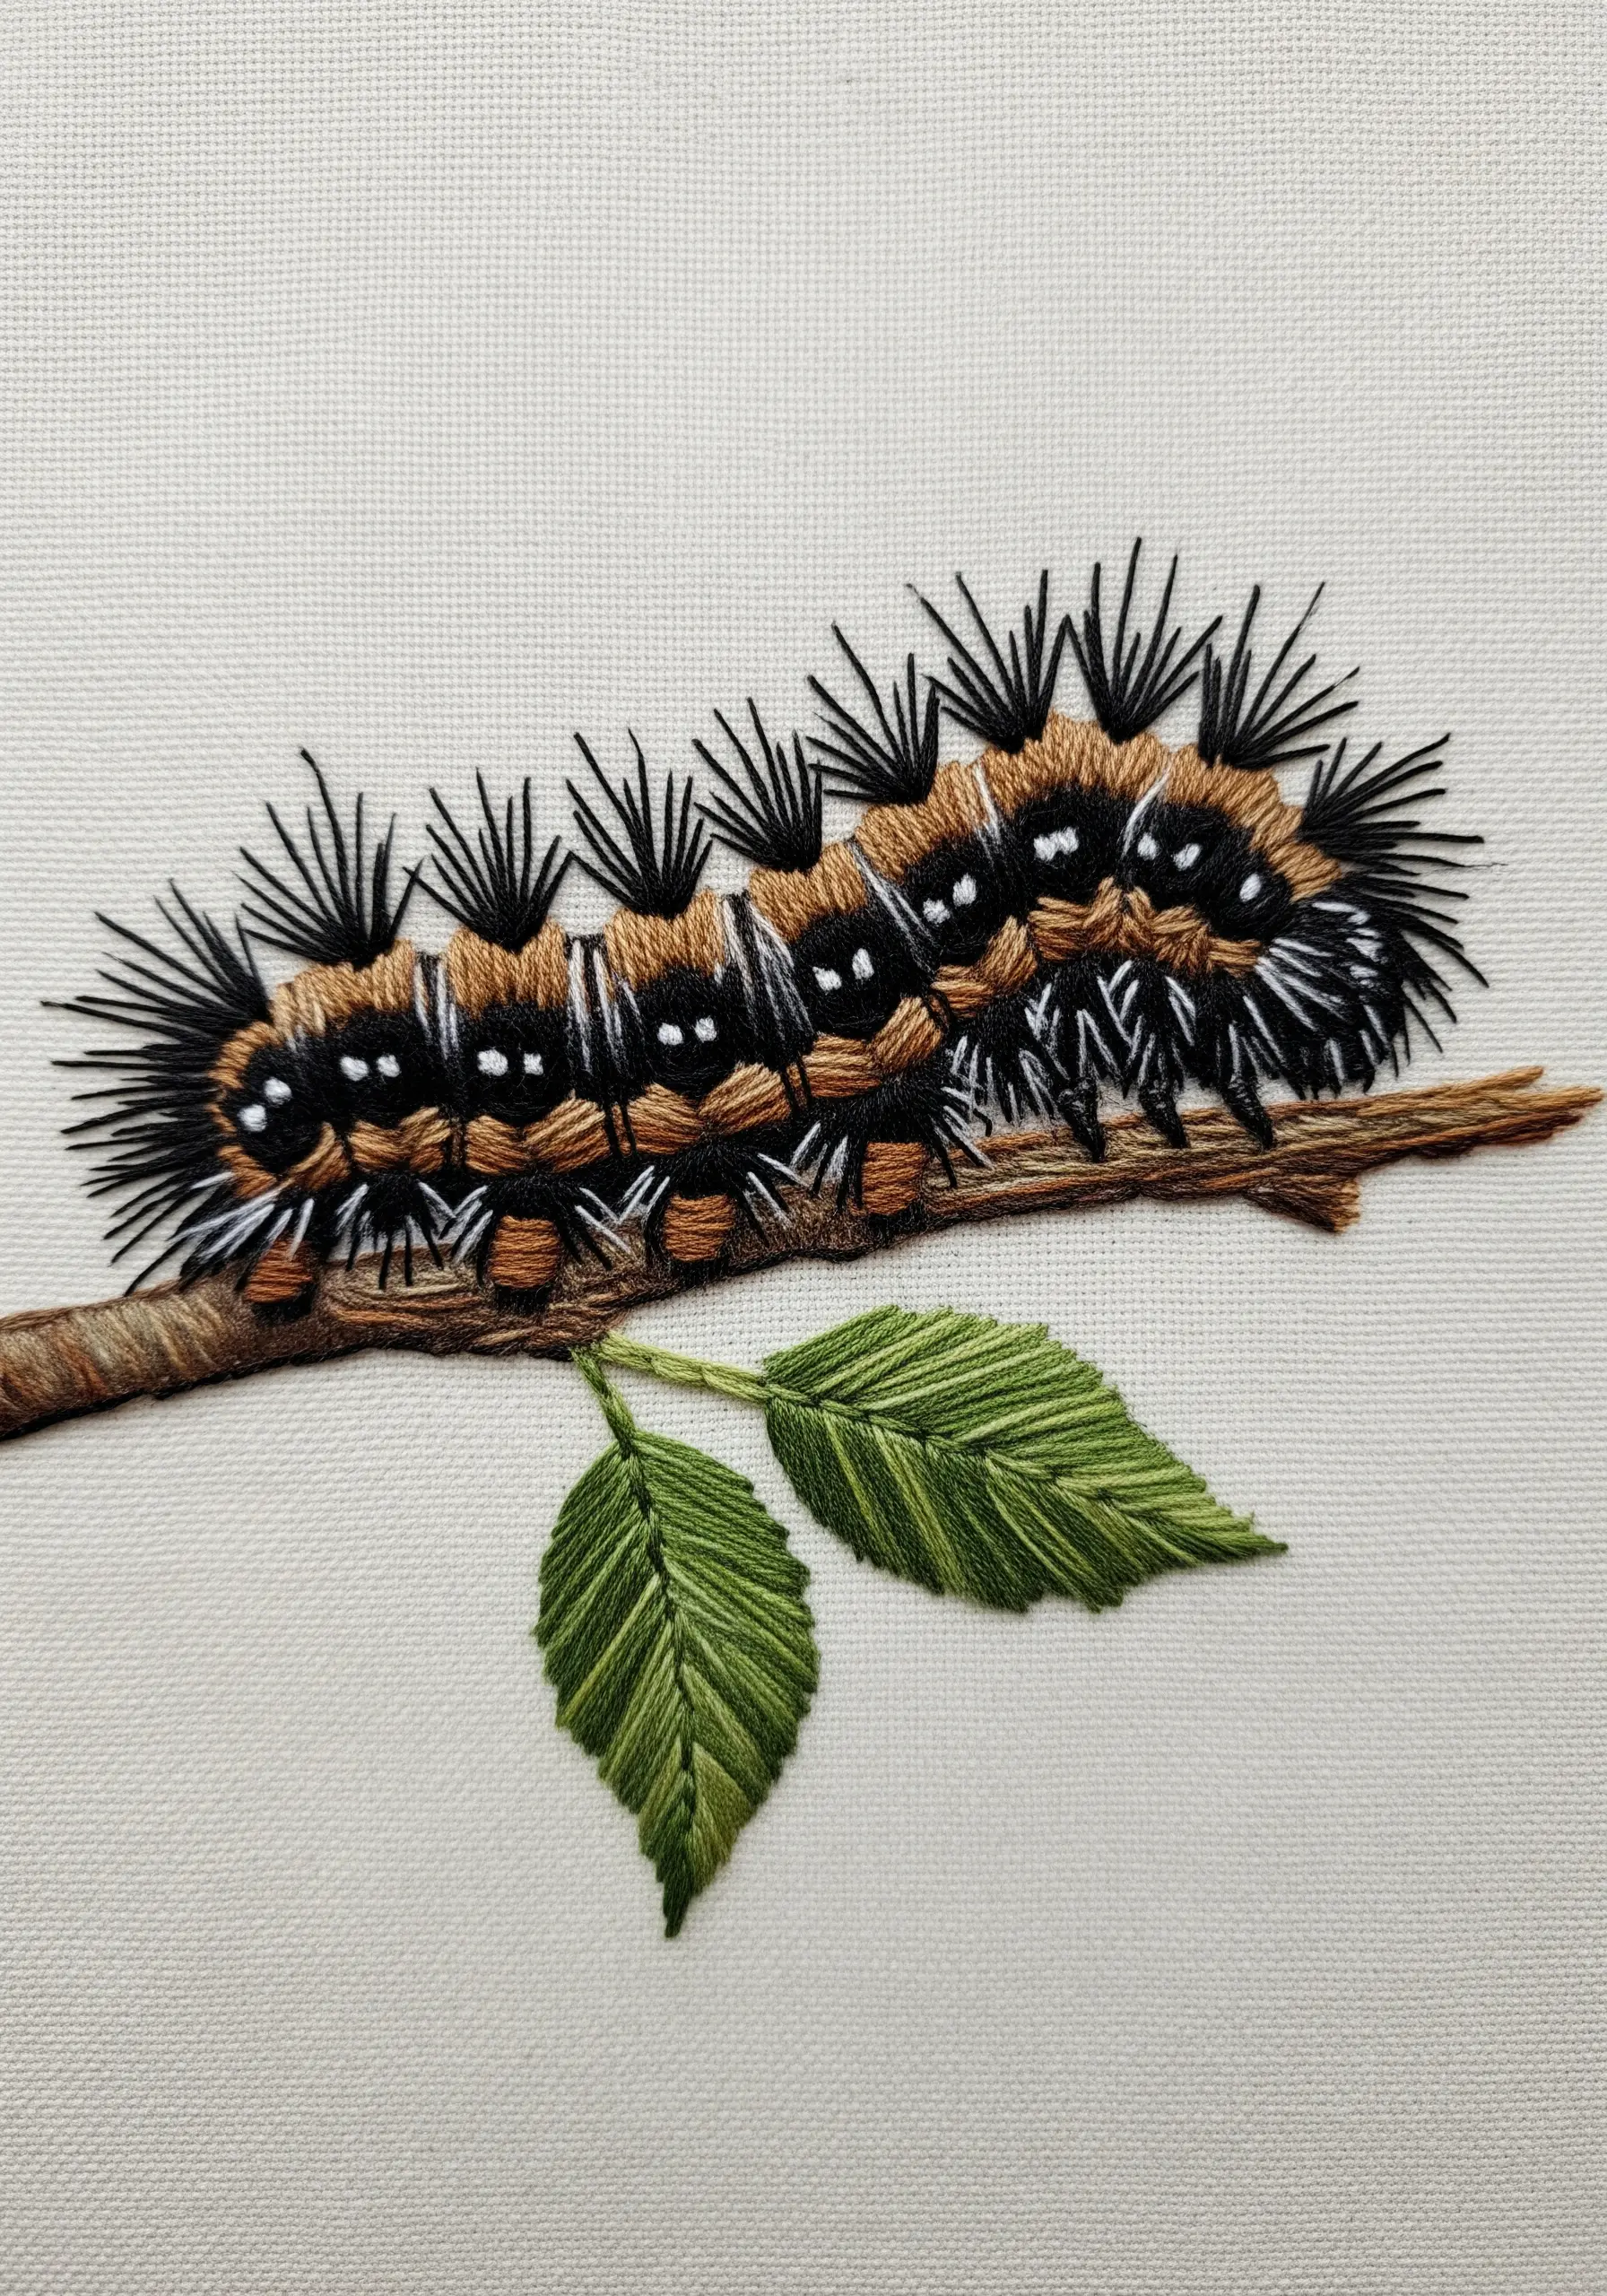
A fuzzy caterpillar offers a fantastic opportunity to play with high-texture stitches.
Use dense French knots for the soft body segments, then add tufts of long black bristles using the turkey work stitch.
Once you’ve made the turkey work loops, trim them to sharp points to create a spiky, defensive appearance.
This is a great example of high-texture fabric collage embroidery, where the feel is as important as the look.
27. Stitch a Perfect Spiderweb with Whipped Backstitch
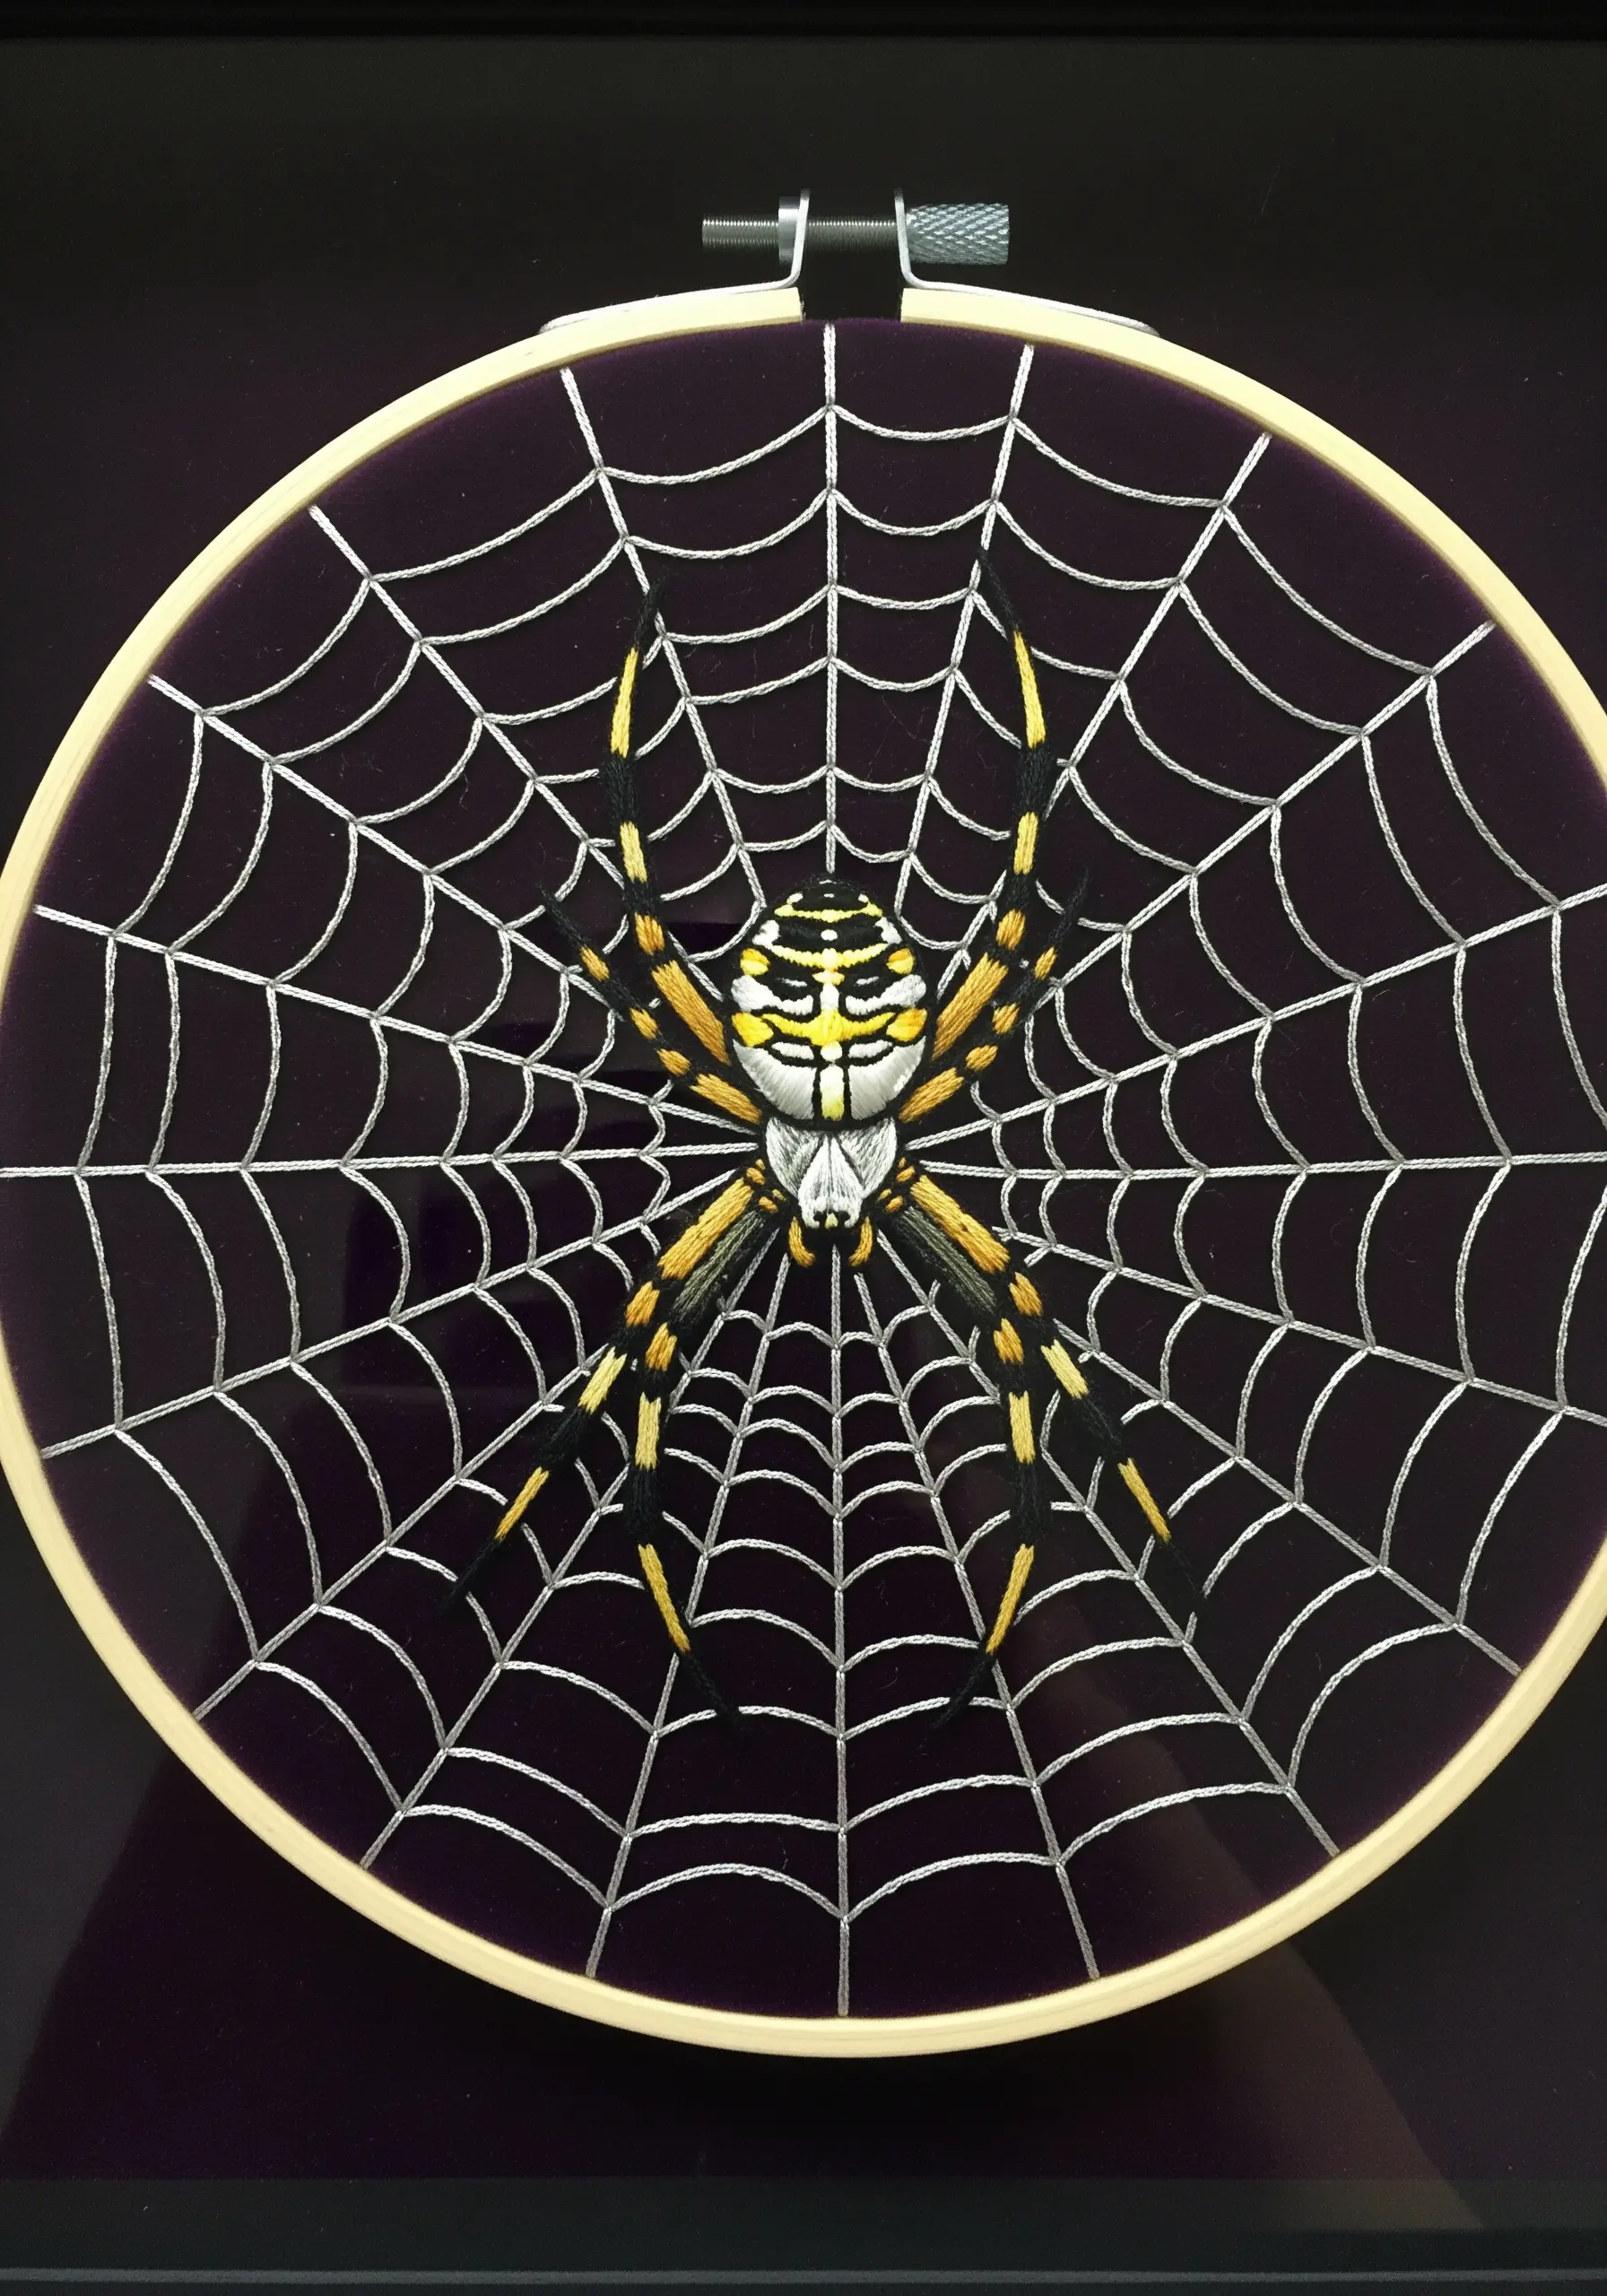
For the clean, geometric lines of a spiderweb, a simple backstitch can sometimes look disjointed.
Instead, use a whipped backstitch. First, create a standard backstitch outline, then weave a second thread through the stitches without piercing the fabric.
This covers the gaps, creating a smooth, uninterrupted line that is perfect for the web’s structure.
Use a single strand of bright white or silver thread on a dark velvet background for maximum impact.
28. Capture a Horse’s Coat with Meticulous Thread Painting
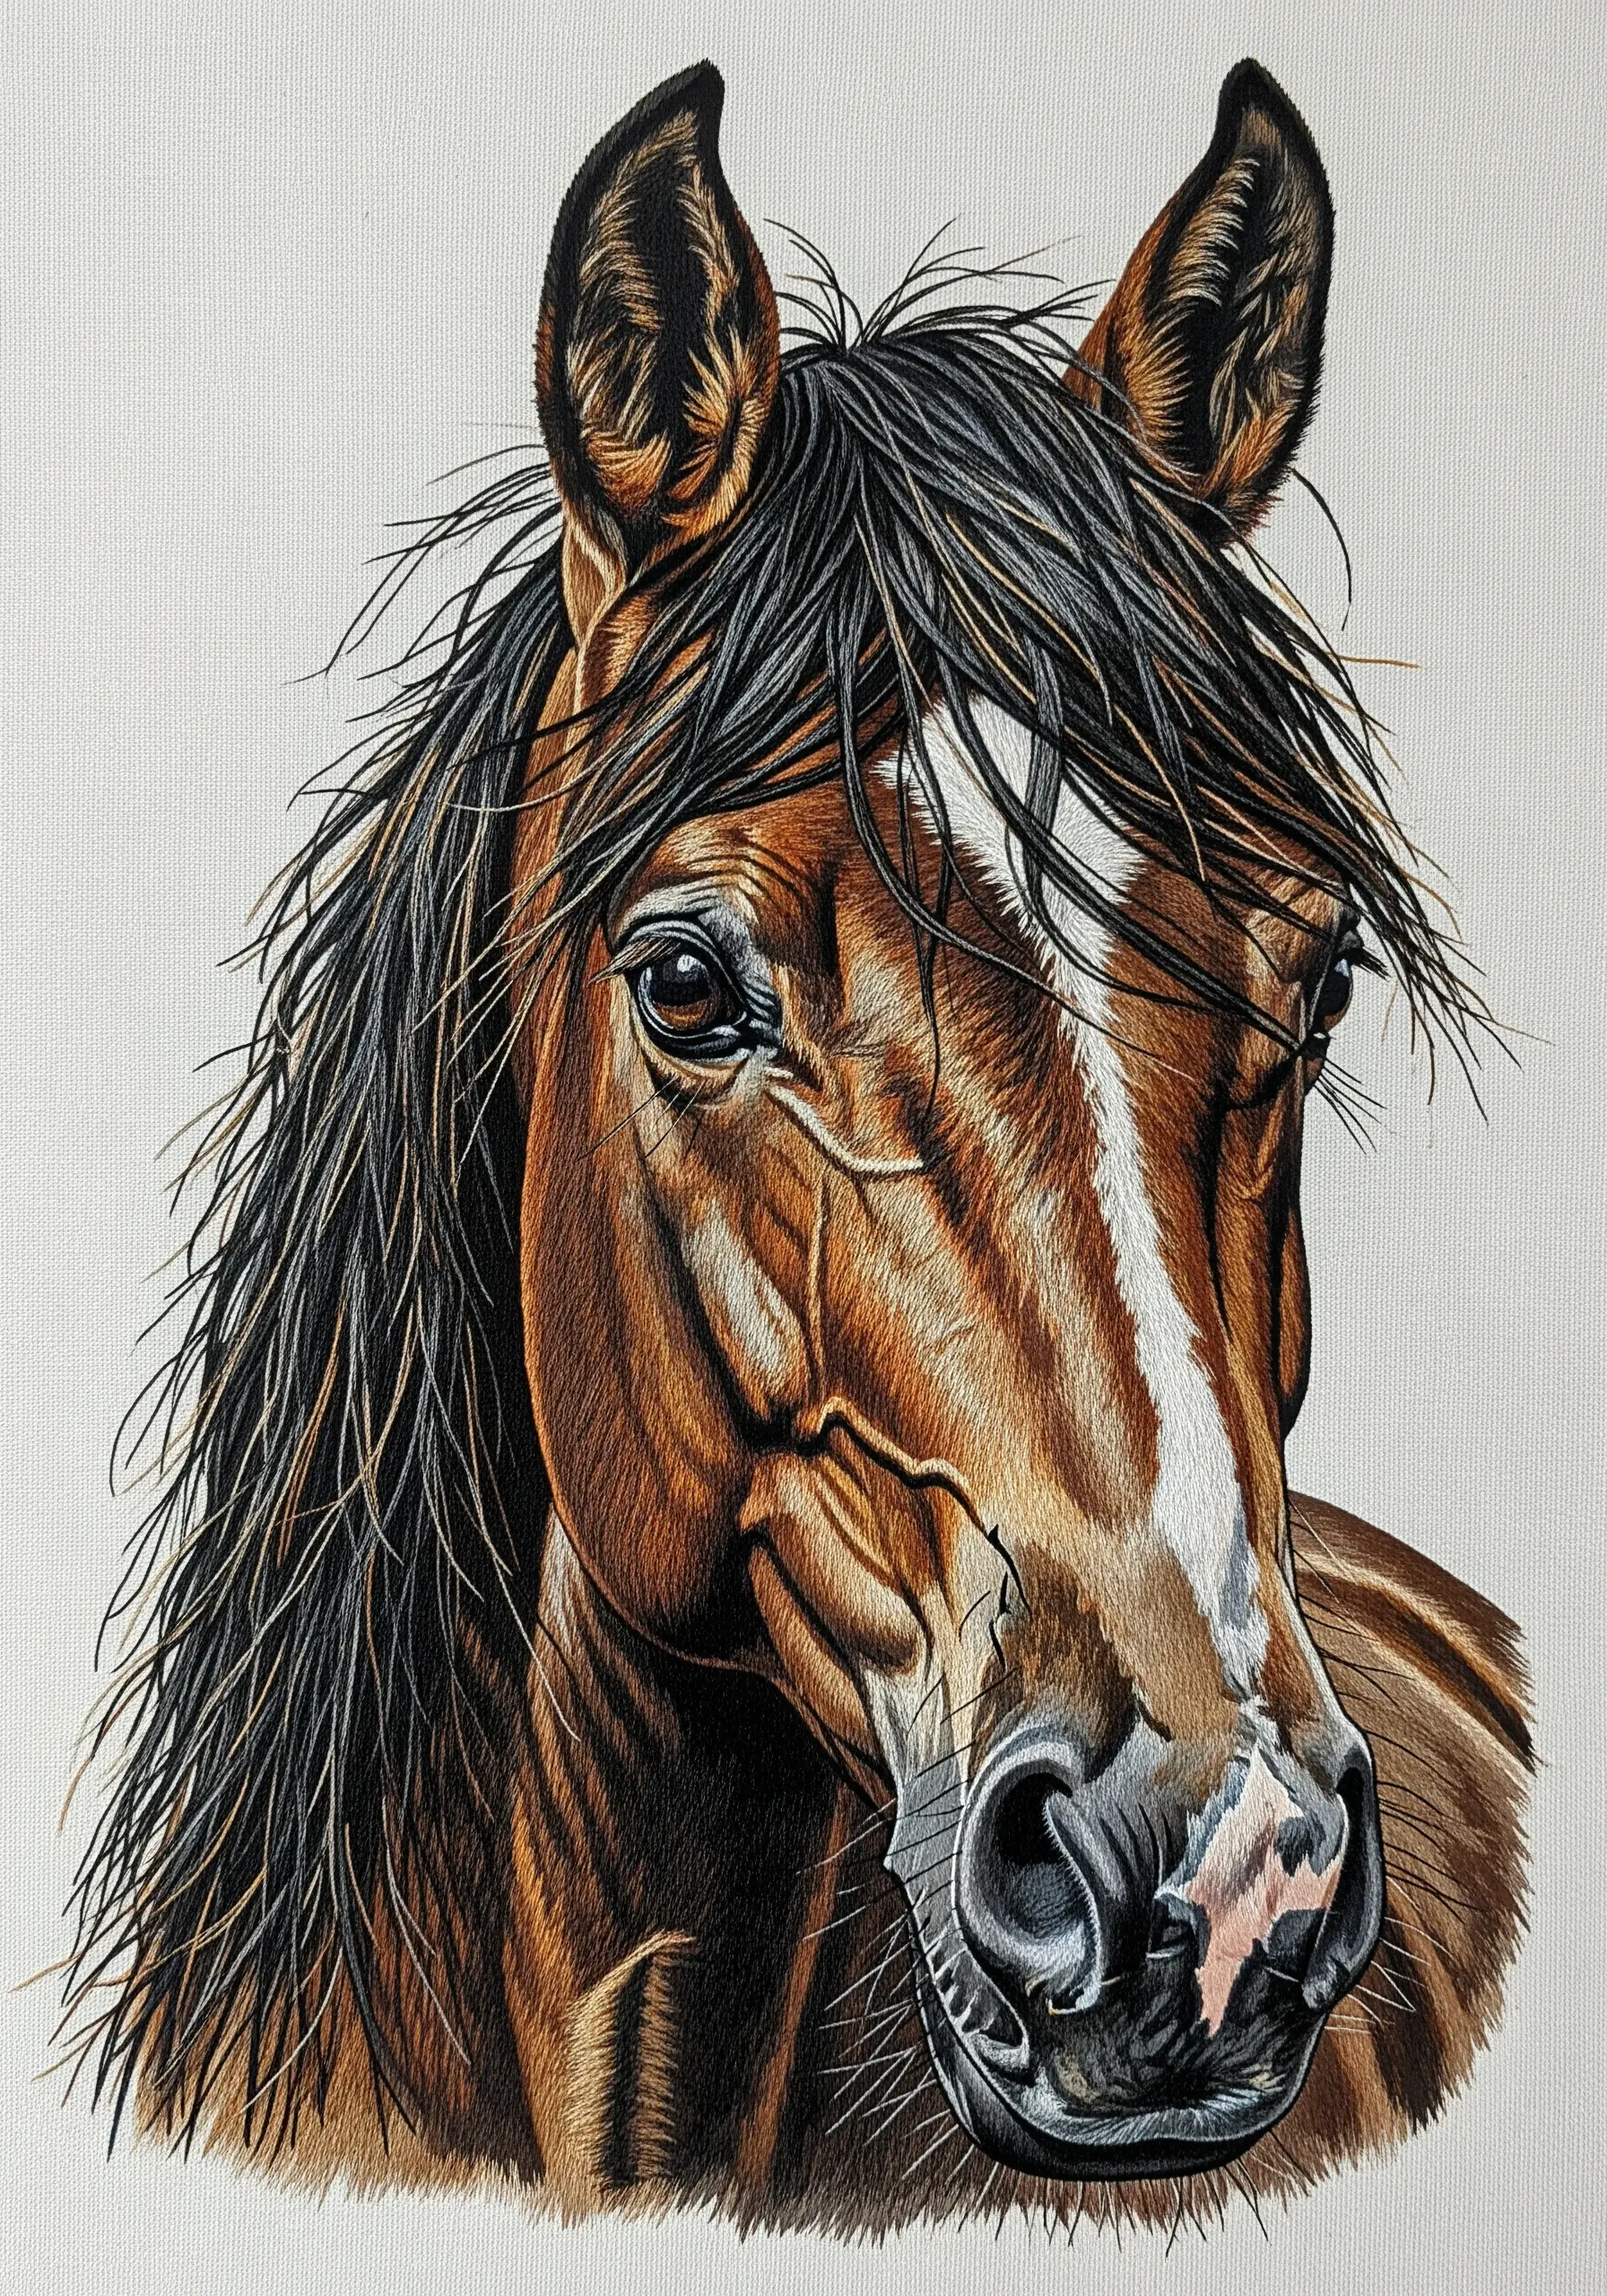
Realistic animal portraiture is the ultimate expression of thread painting, requiring patience and a keen eye for color.
Work with single strands of floss and dozens of shades to capture the subtle shifts in the horse’s coat.
Pay close attention to stitch direction, ensuring your threads follow the contours of the muscles and the flow of the hair.
Leave a few threads for the mane long and loose, trimming them only after the piece is finished to create a sense of life and movement.
29. Create a Lion’s Mane with Layered, Directional Stitches

To build the volume and depth of a lion’s mane, think in layers.
Start with the shorter, darker hairs closest to the face, using a dense long-and-short stitch.
As you move outwards, use progressively longer stitches and lighter colors (golds, yellows, and creams) to create highlights and a sense of radiating energy.
This layering technique creates incredible depth and turns the mane into the powerful focal point it should be, ideal for oversized hoop wall displays.
30. Suggest Elephant Skin with Contoured Line Work

Instead of filling the entire shape, you can create the texture of an elephant’s skin with strategic line work.
Use a dark gray split stitch or stem stitch to draw the intricate network of wrinkles and folds.
Keep your stitches dense in shadowed areas and sparse on highlighted planes, like the top of the head and trunk.
This stylized approach is less time-consuming than full thread painting but equally effective at conveying texture, creating beautiful embroidery ideas inspired by the subtle textures of nature.
31. Contrast Fur and Wing Textures with Different Stitches

To embroider a bat realistically, differentiate between its fur and its leathery wings.
Use short, dense long-and-short stitches with a mix of brown threads to create a soft, furry body.
For the wings, switch to a flat, smooth satin stitch using gray and black floss. The uniform surface will look like smooth skin.
Outline the wing bones with a fine split stitch to add structural detail and complete the illusion, an excellent example of abstract mixed-media embroidery principles in realistic work.
32. Create a Pointillist Effect with Dense French Knots
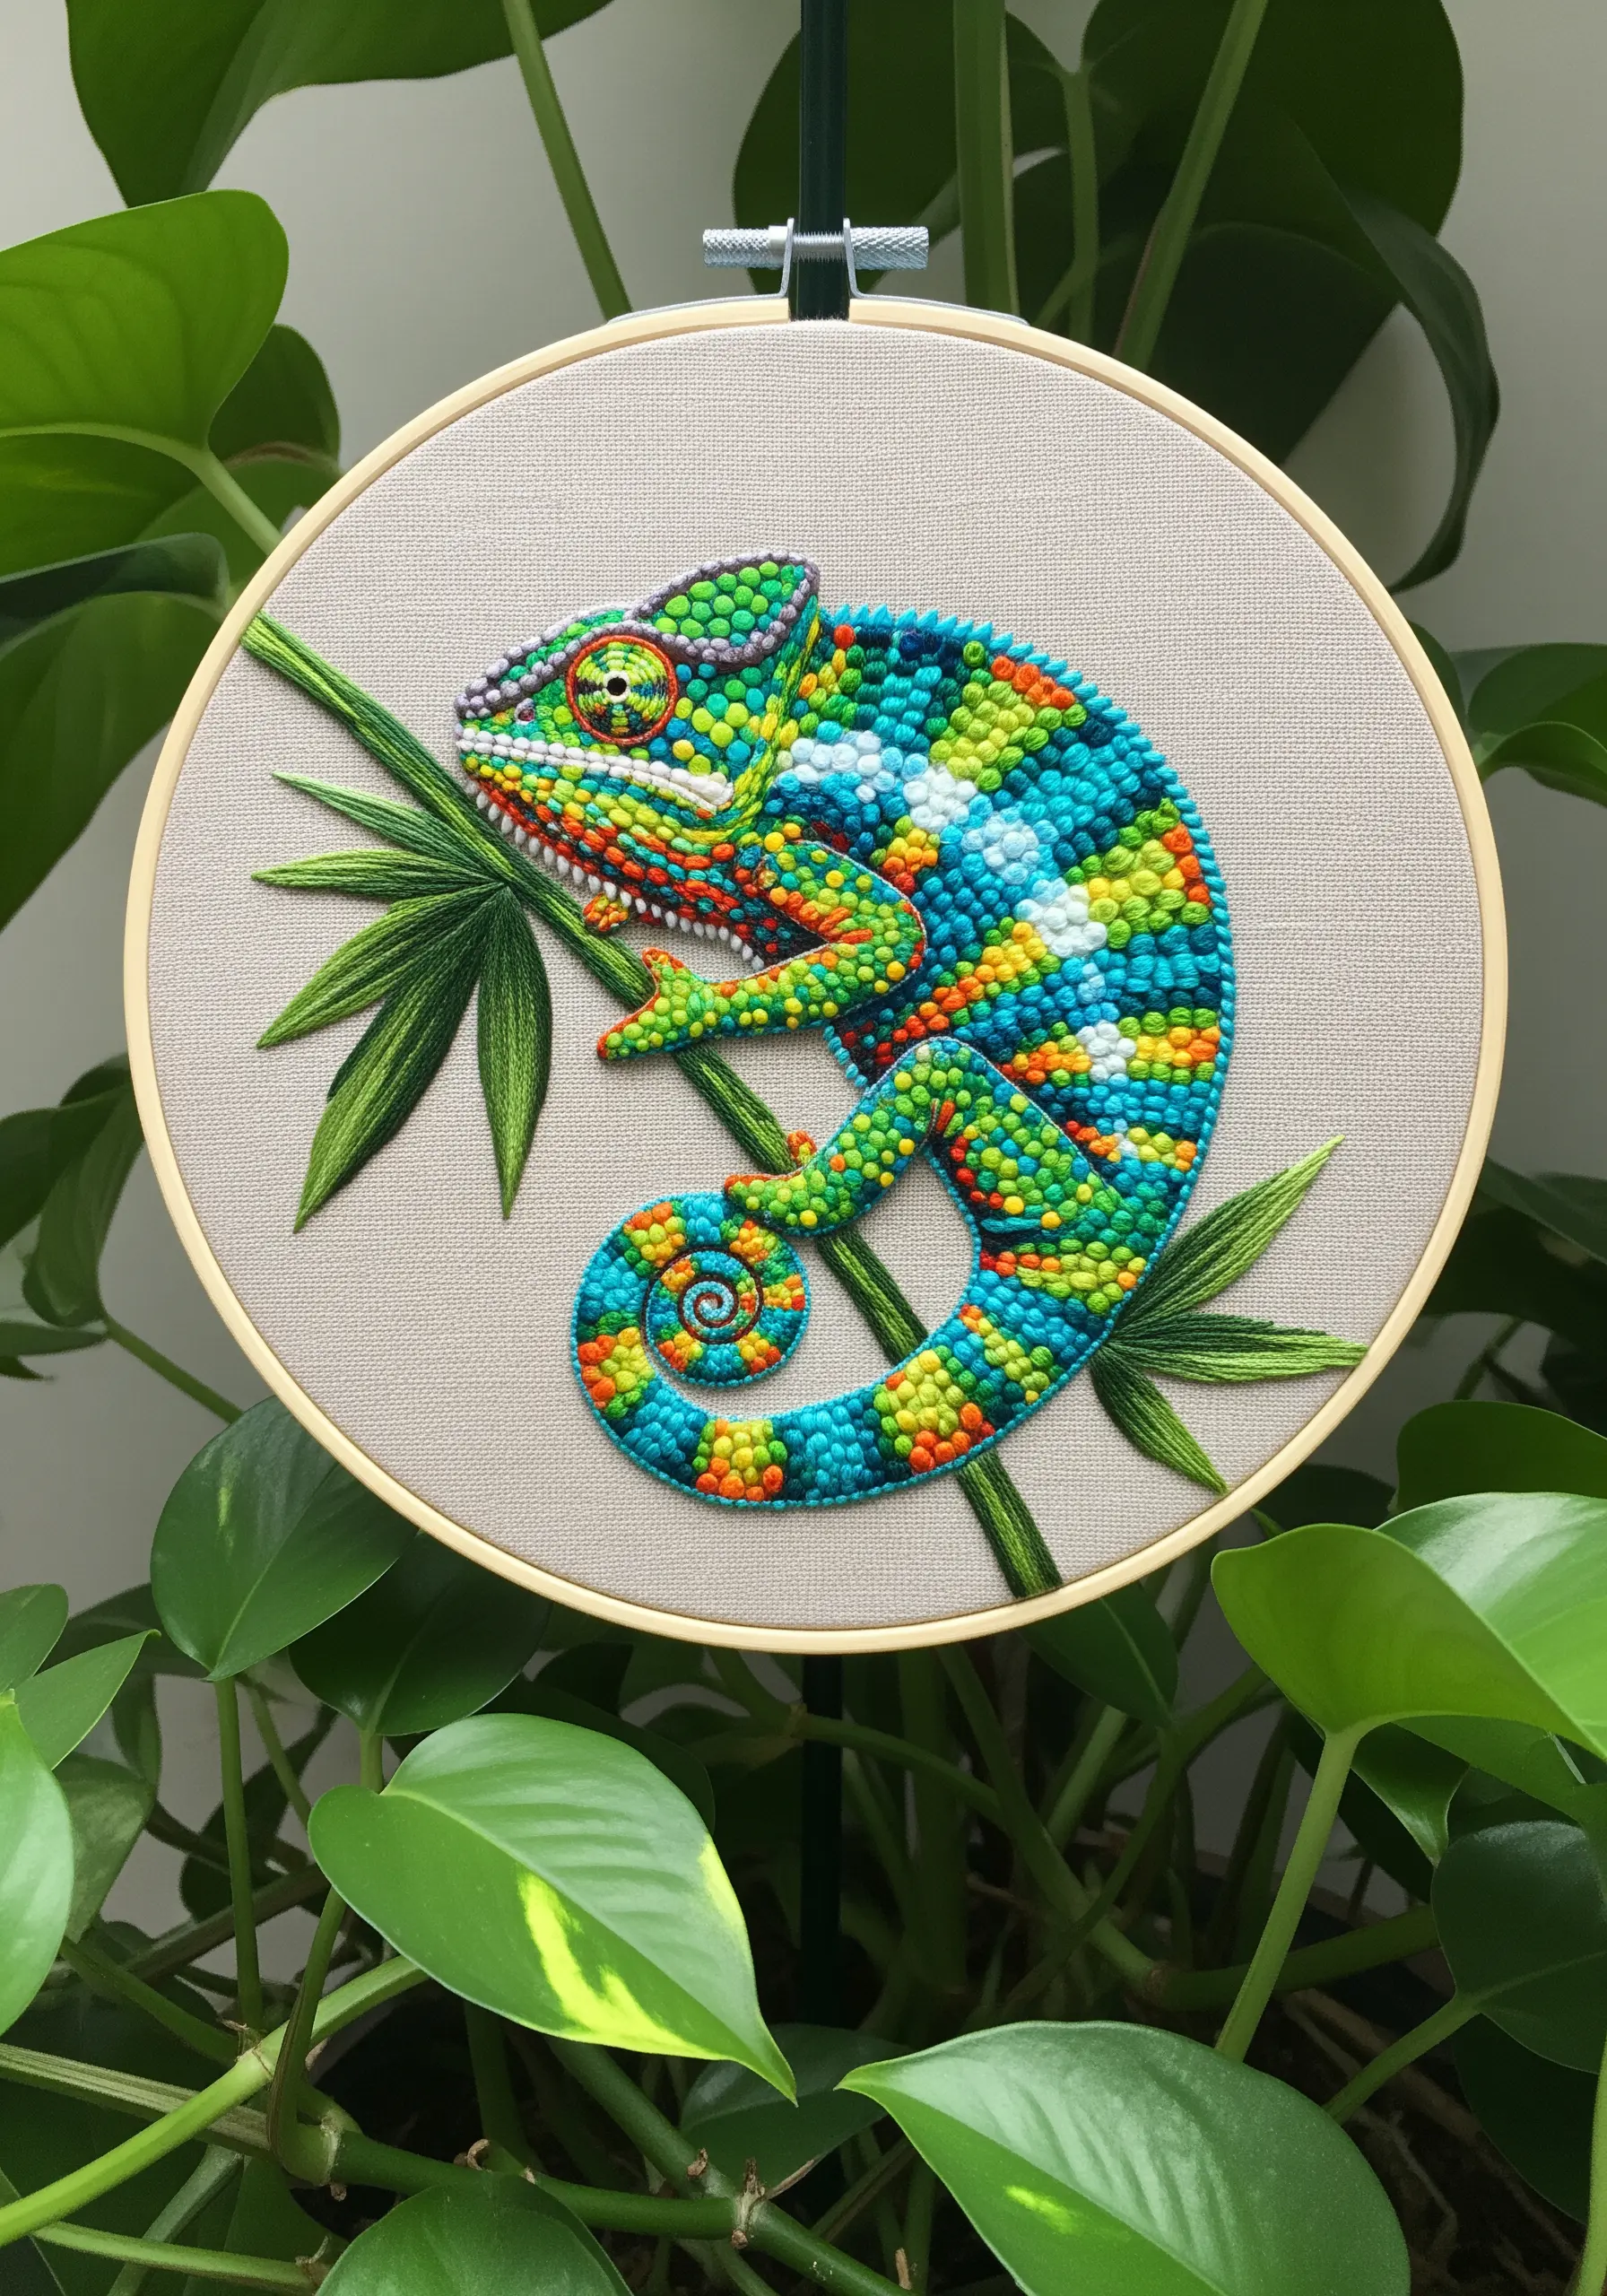
A chameleon’s vibrant, multi-colored skin is the perfect subject for a pointillist approach using French knots.
Fill the entire body with tightly packed knots, randomly placing colors next to each other to create a pixelated, textured effect.
This technique is incredibly forgiving and allows for organic color blending without the precision of thread painting.
The resulting bumpy texture is both visually and tactilely engaging, a fun way to try contemporary rainbow blend stitches.
33. Replicate an Iridescent Shell with Directional Satin Stitch
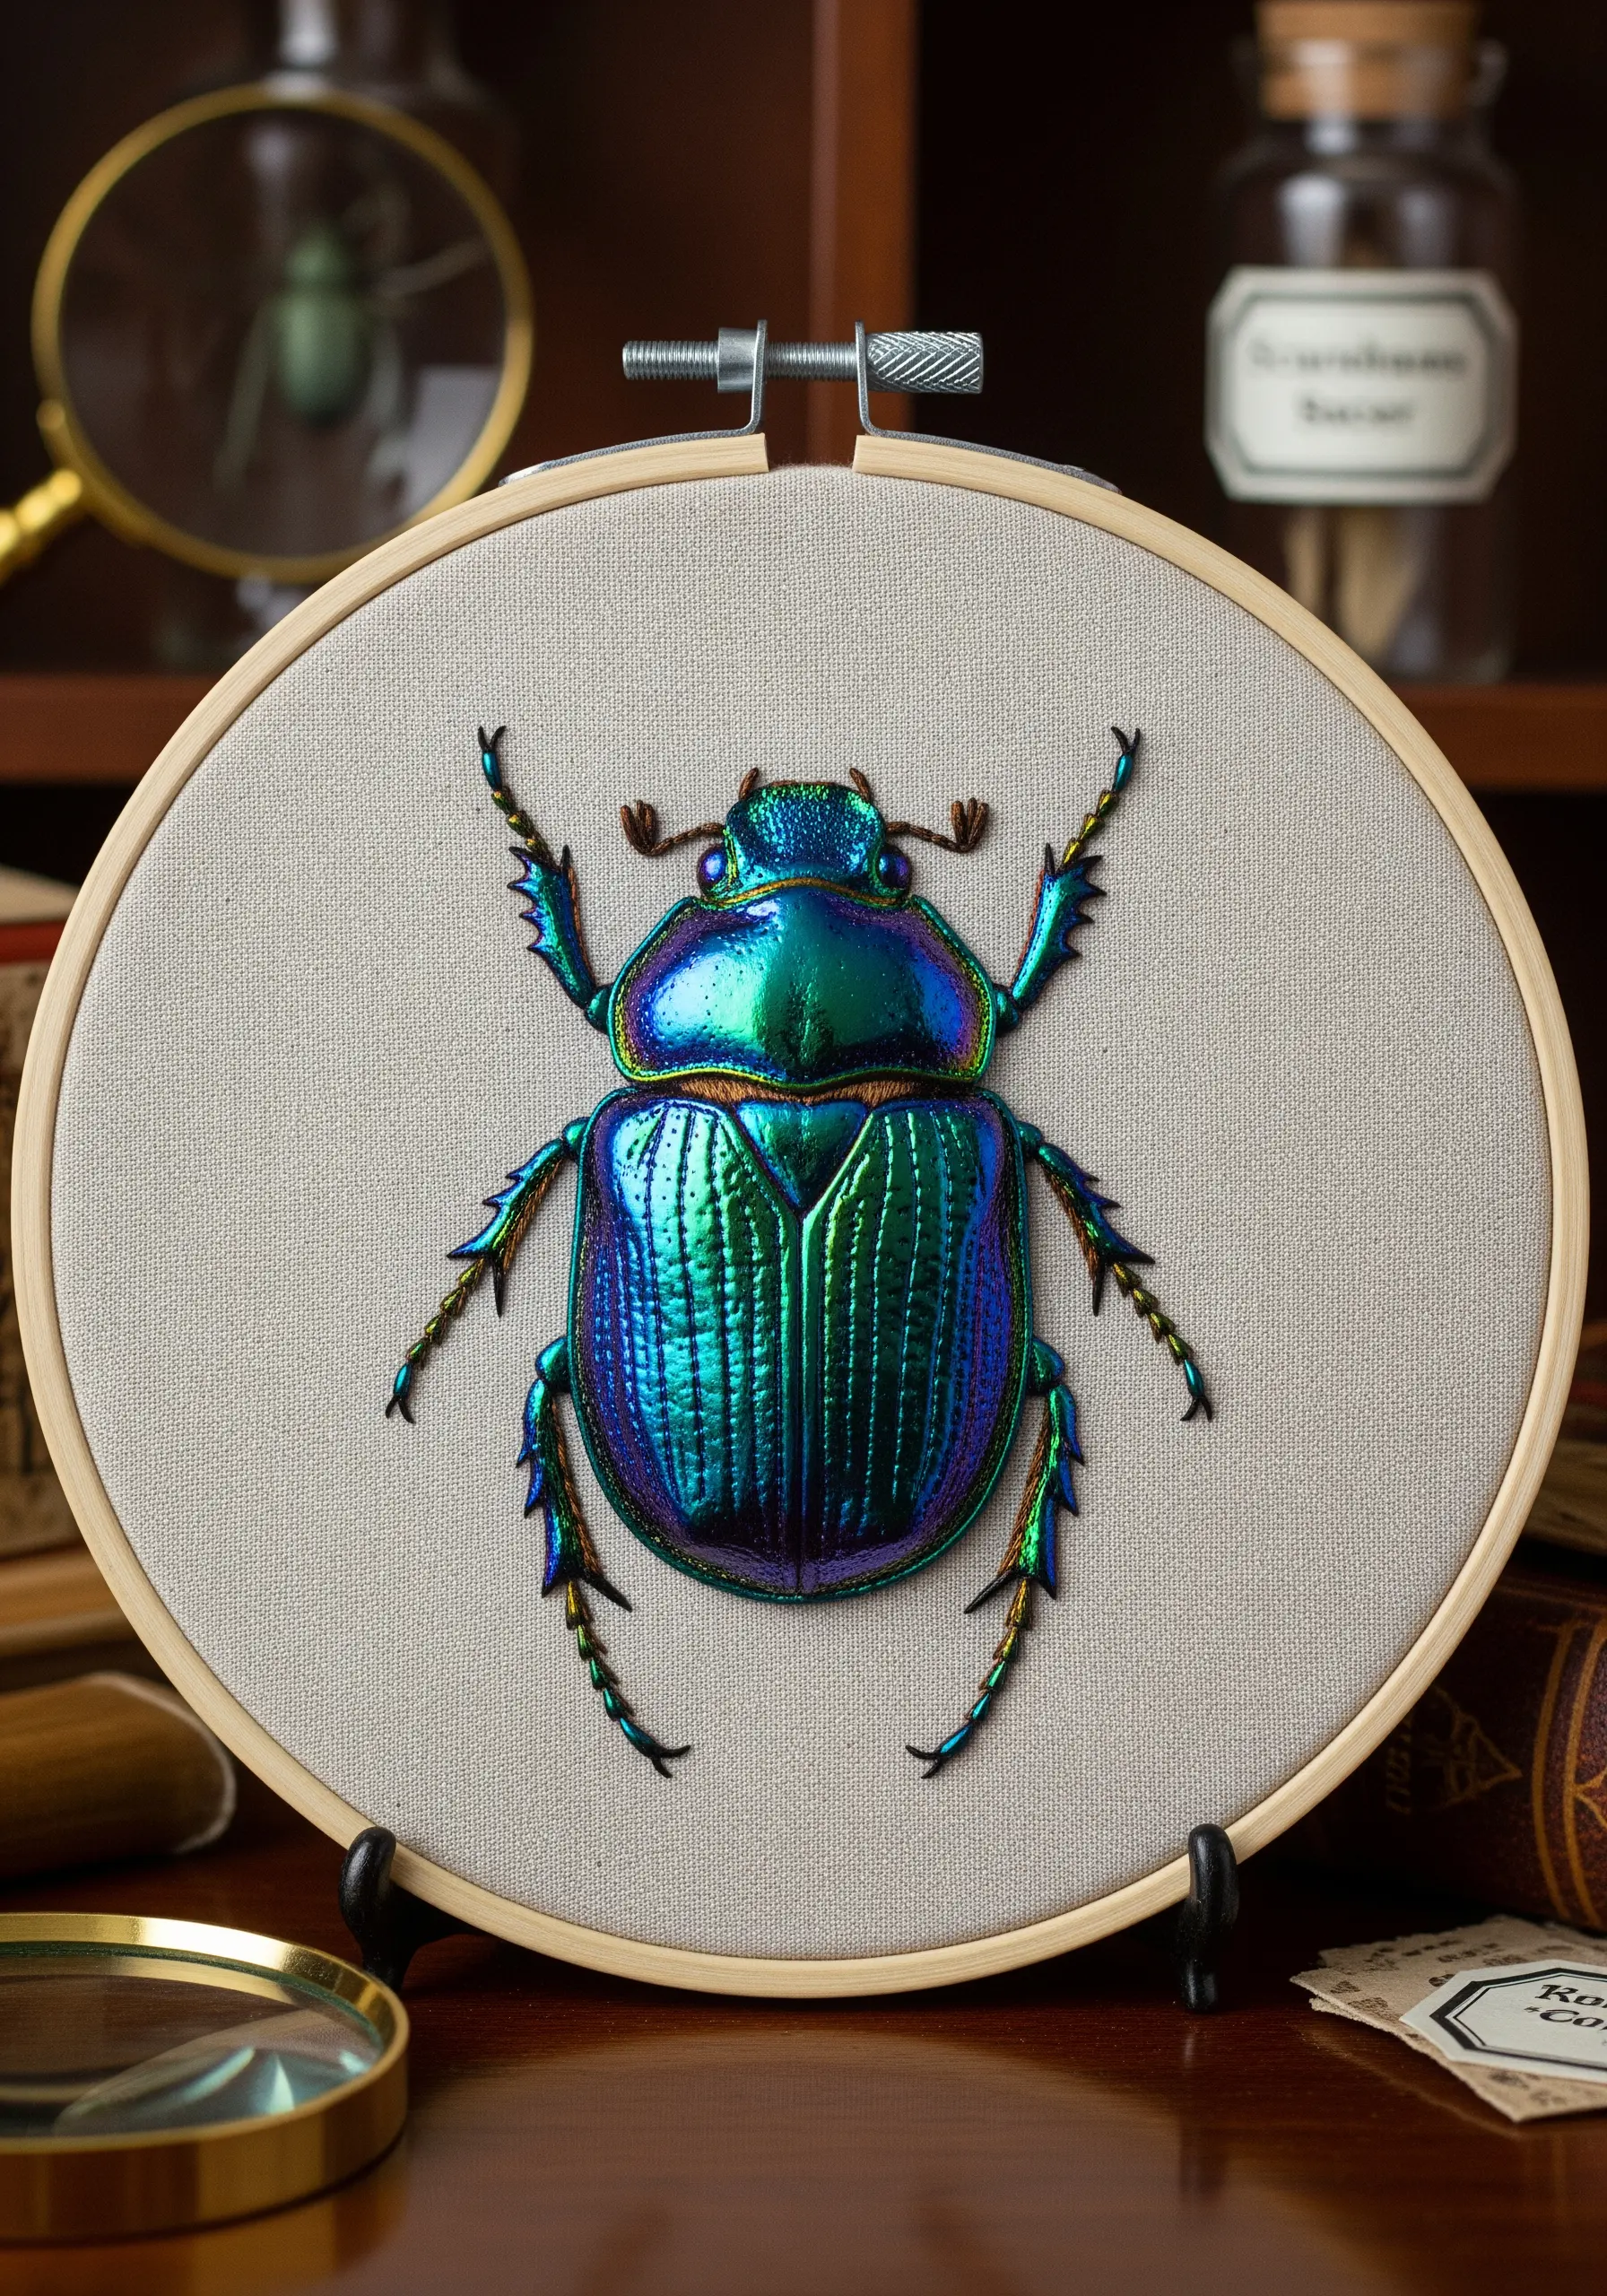
The key to creating a metallic, iridescent sheen is the careful placement of long, smooth satin stitches.
Use high-sheen silk or rayon threads in shades of blue, green, and purple.
As you fill the beetle’s shell, ensure your stitches follow the curved surface. The way the light reflects off these uninterrupted threads is what creates the shimmering, color-shifting illusion.
This turns simple stitches into tiny handmade decor ideas with a huge visual impact.
34. Contrast Fluffy Down and Sleek Feathers
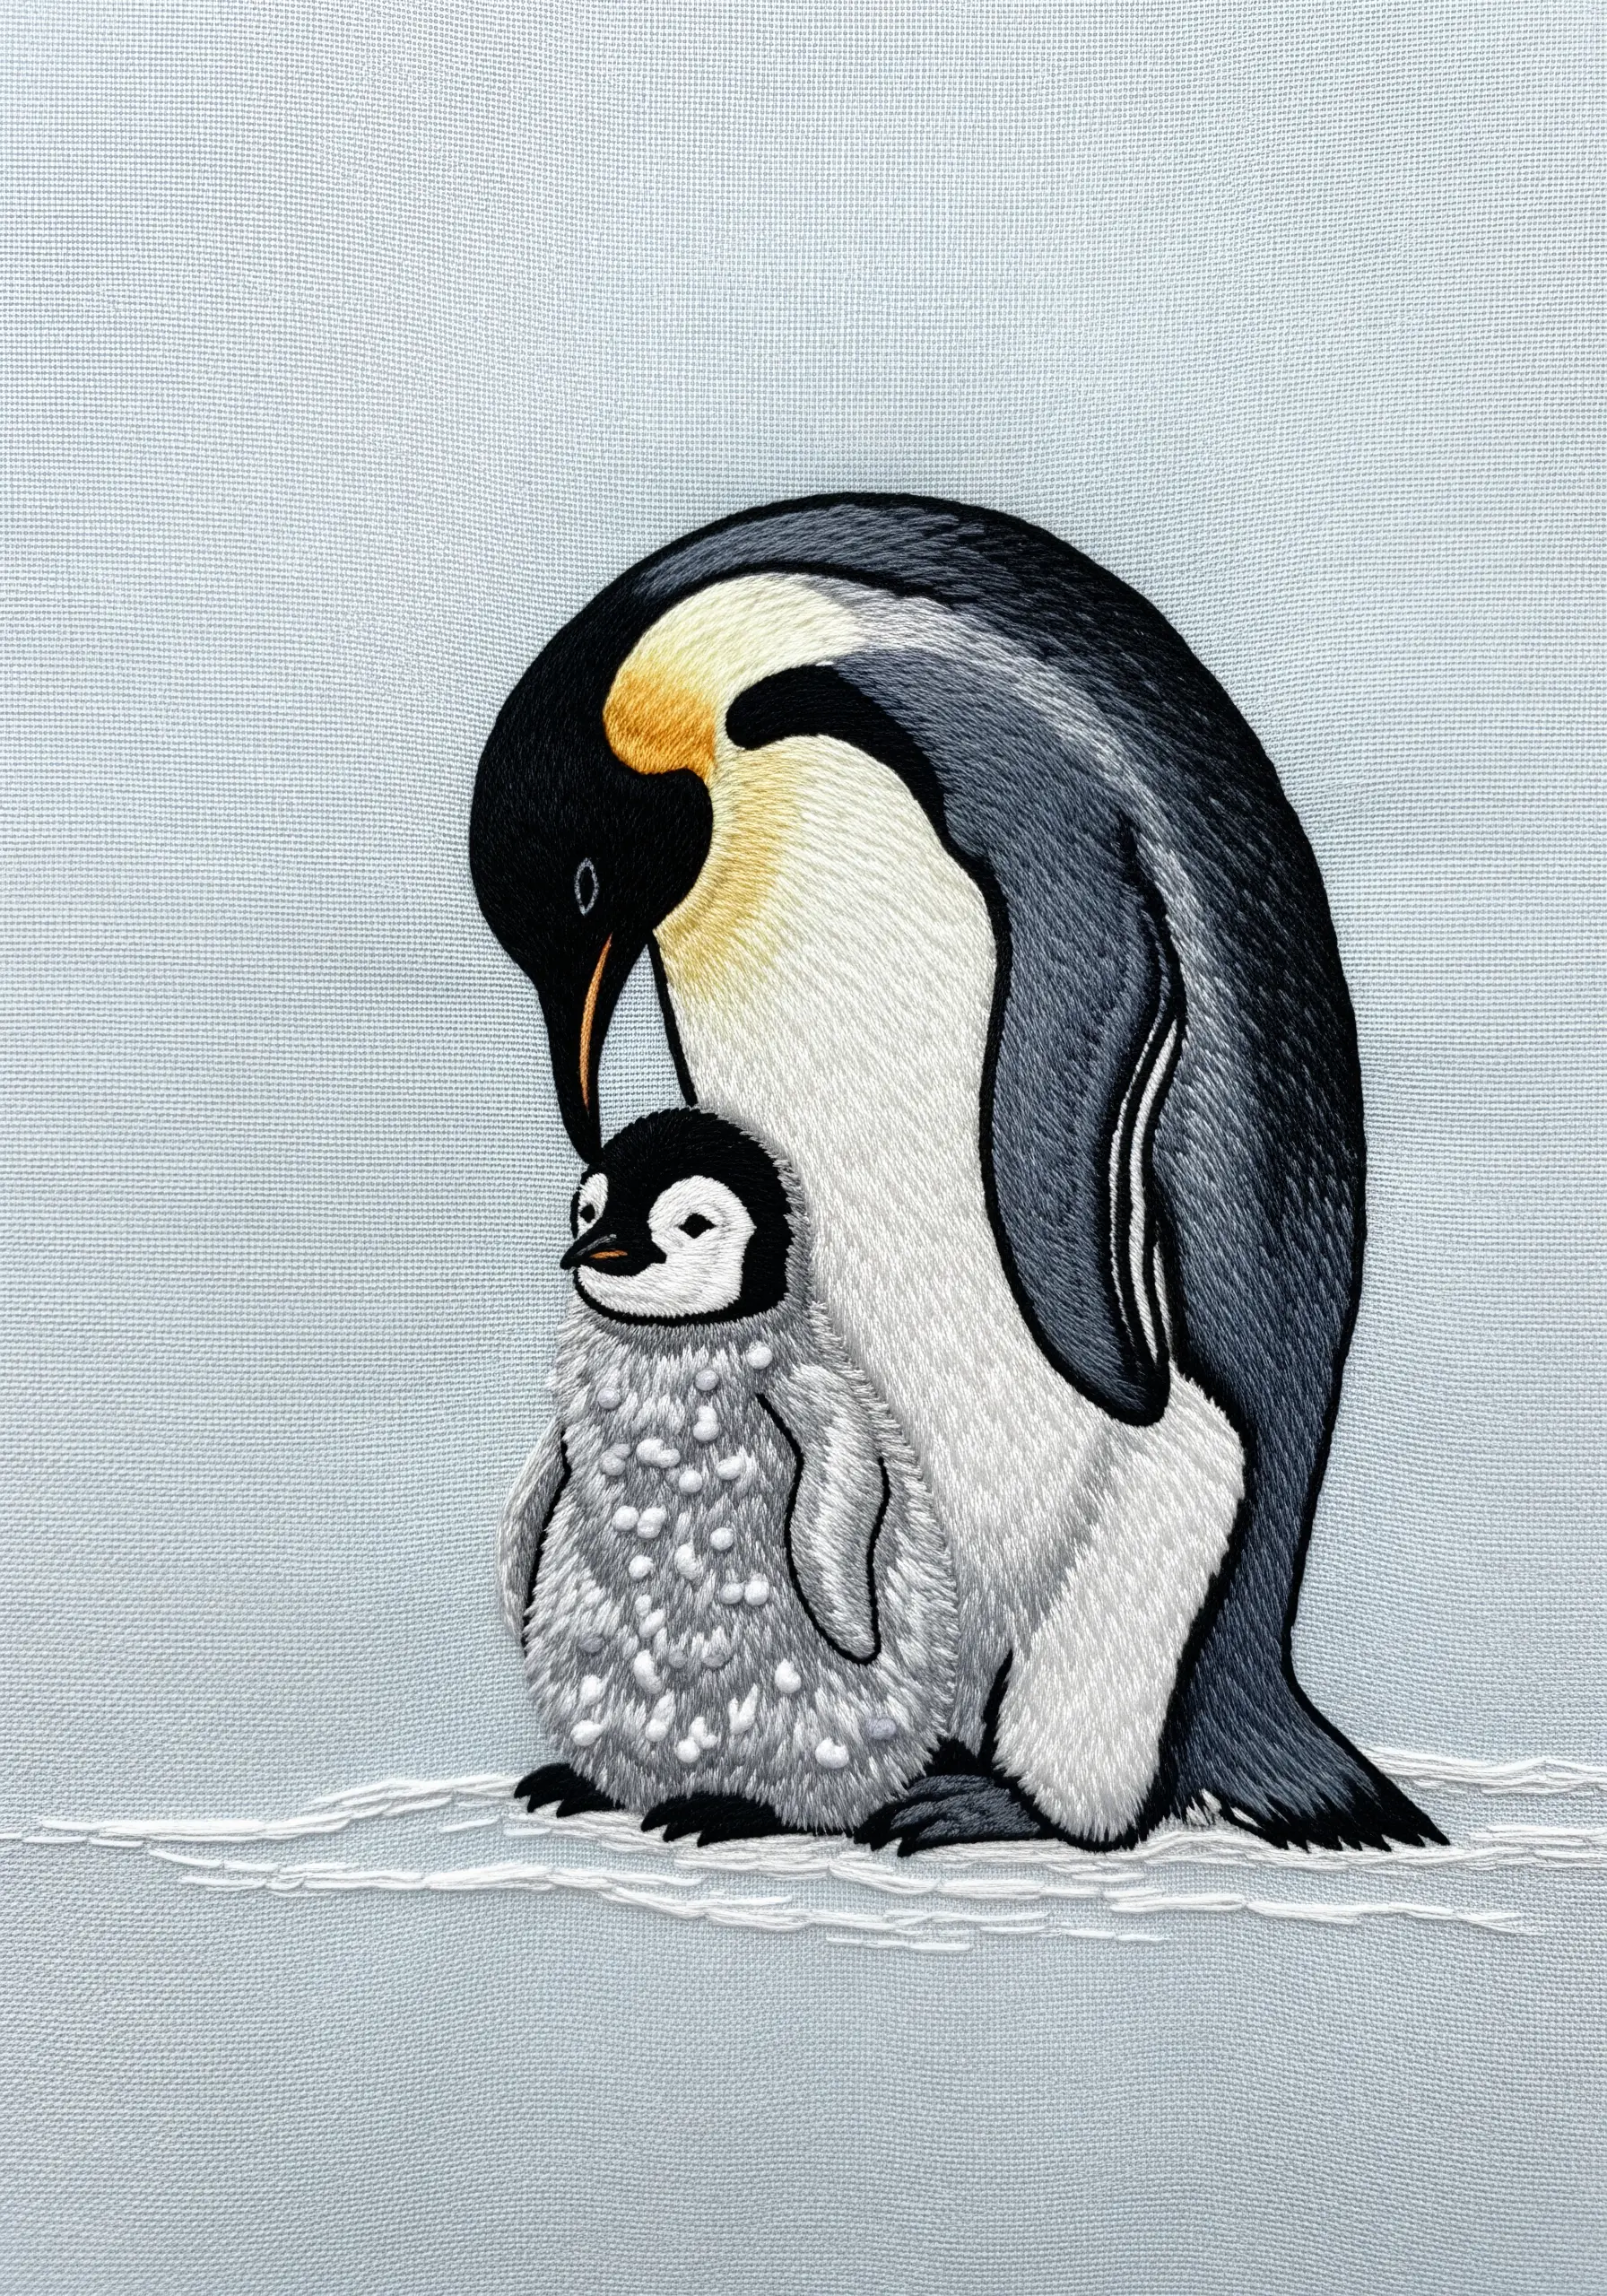
To capture the tenderness of a penguin parent and chick, focus on the contrasting textures of their coats.
For the adult’s sleek feathers, use a smooth, dense satin stitch that follows the contours of its body.
For the chick’s downy coat, use a scattering of fluffy French knots in white and gray, leaving some space between them to enhance the speckled, soft appearance.
This juxtaposition of textures beautifully illustrates their different life stages, creating emotional mother-child motifs.
35. Bring Eyes to Life with a Single Highlight Stitch
After you’ve meticulously blended the colors of an animal’s face, the final step to creating life is in the eyes.
Fill the iris with several shades of brown and black, then add the pupil.
The crucial finishing touch is a single, tiny straight stitch of pure white floss, placed strategically to look like a catchlight.
This one stitch instantly gives the eye depth, moisture, and a spark of personality, making your portrait feel truly alive.


